modelcarcrazy
-
Posts
126 -
Joined
-
Last visited
Content Type
Profiles
Forums
Events
Gallery
Everything posted by modelcarcrazy
-
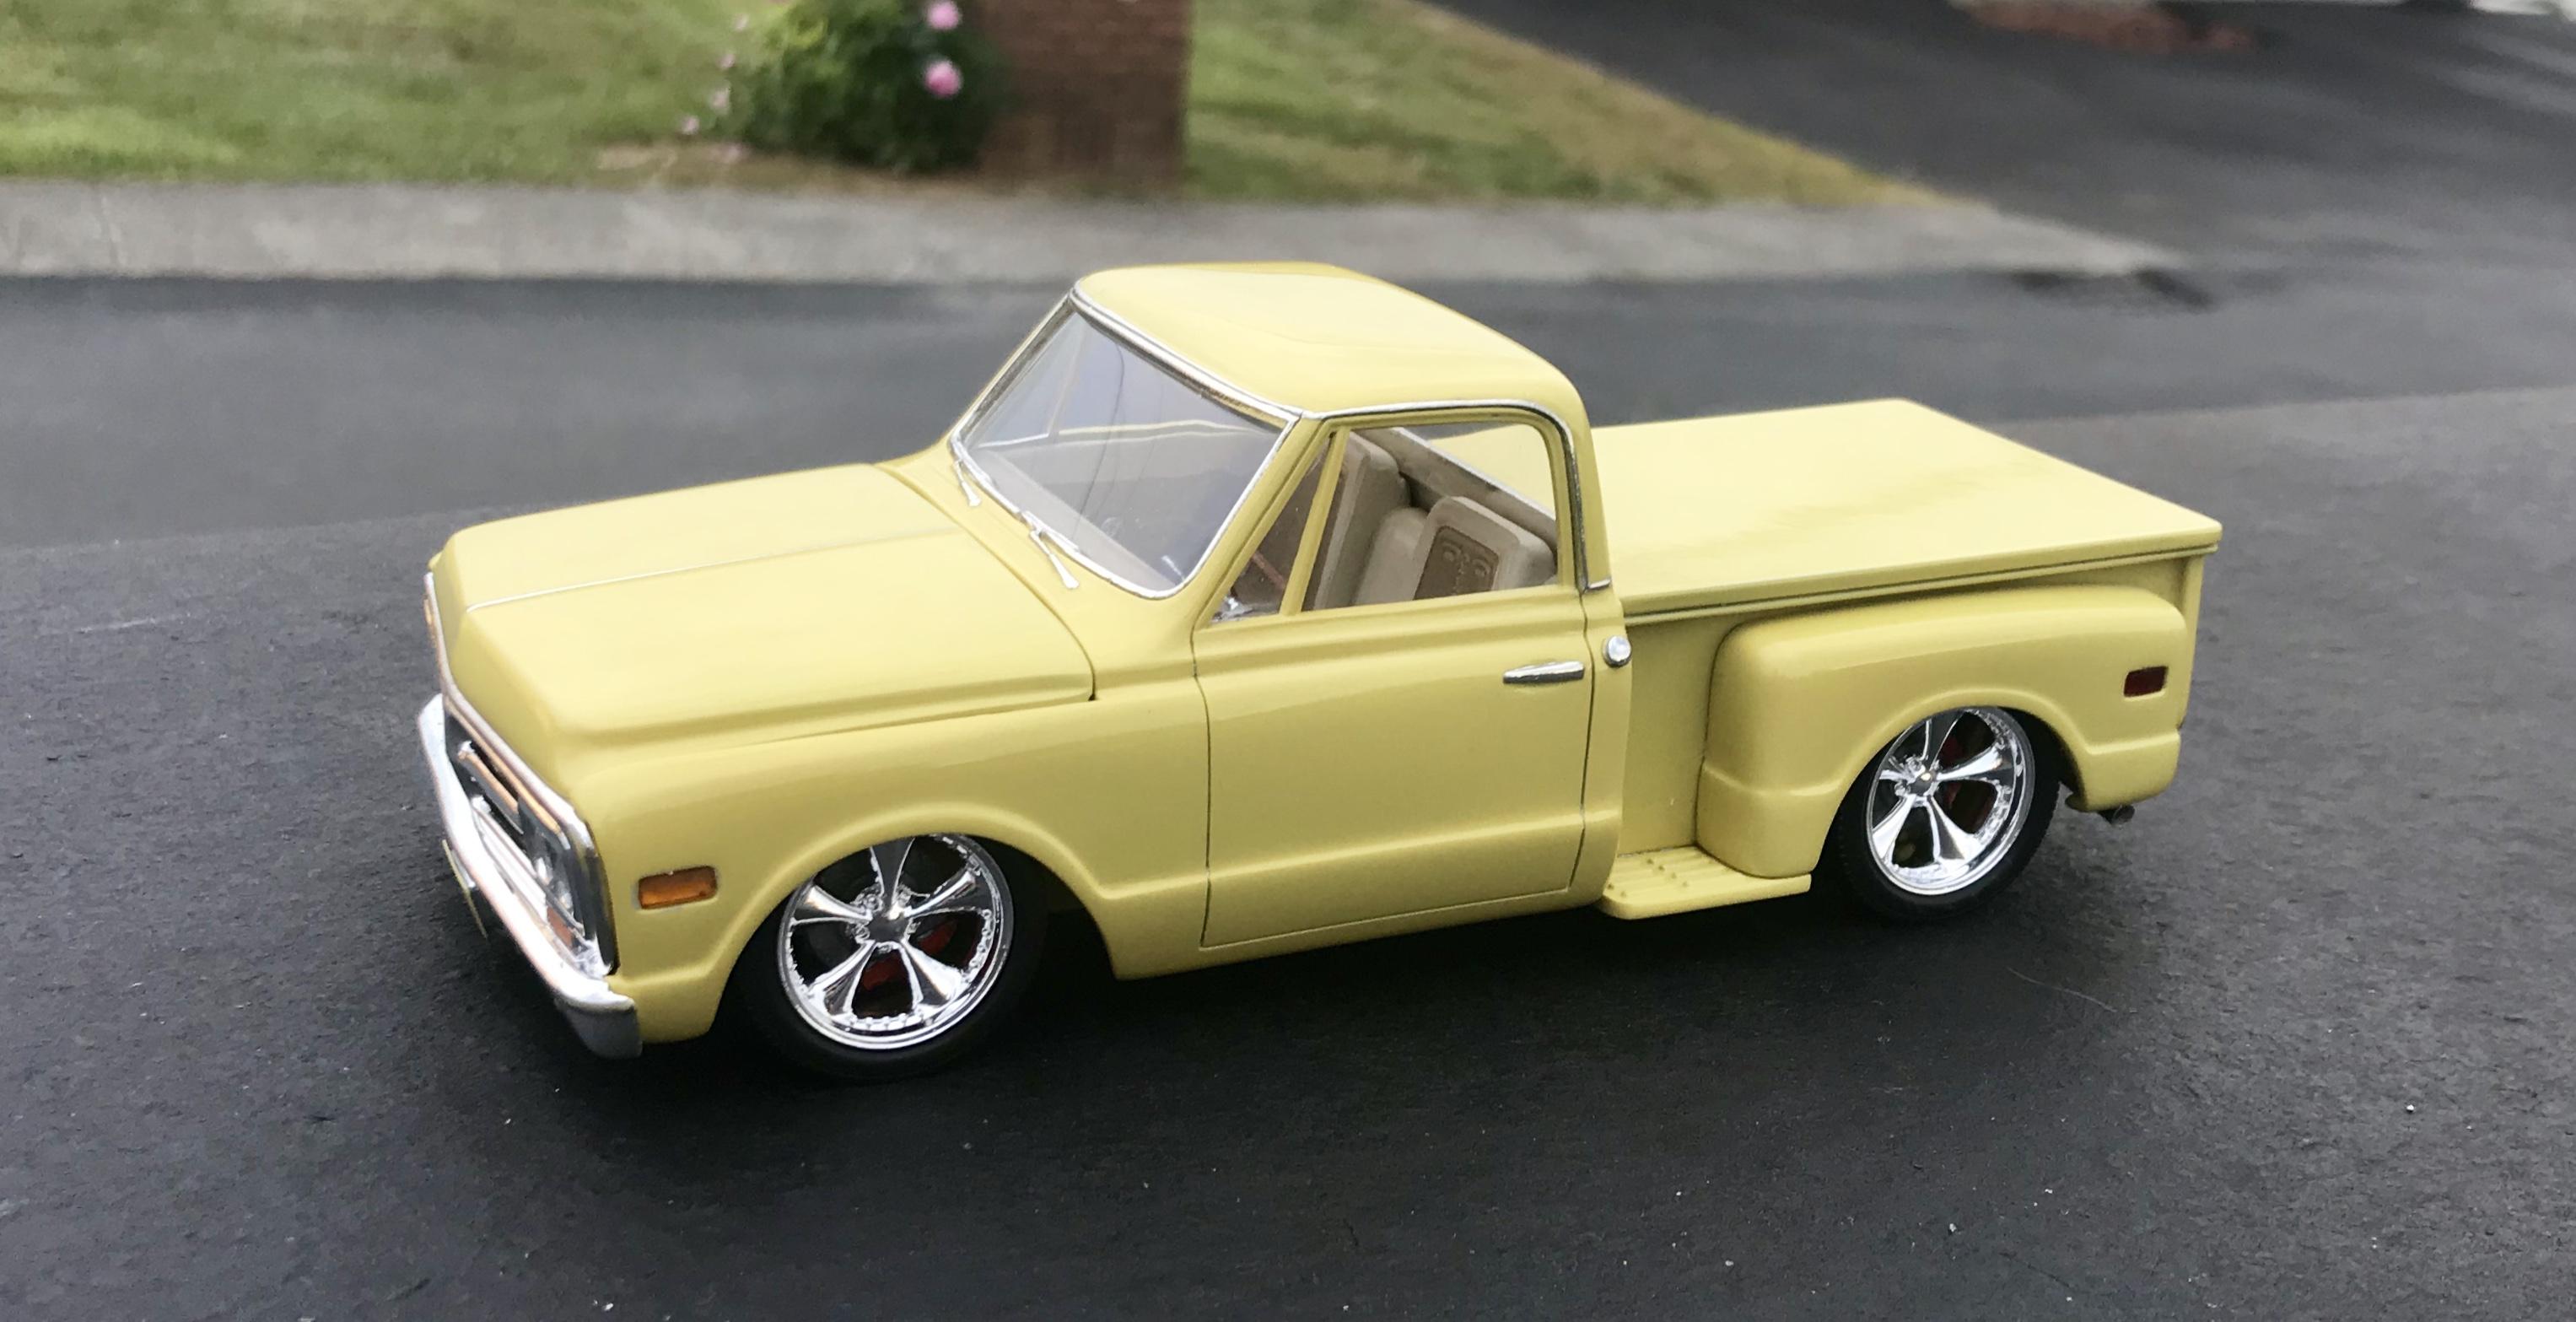
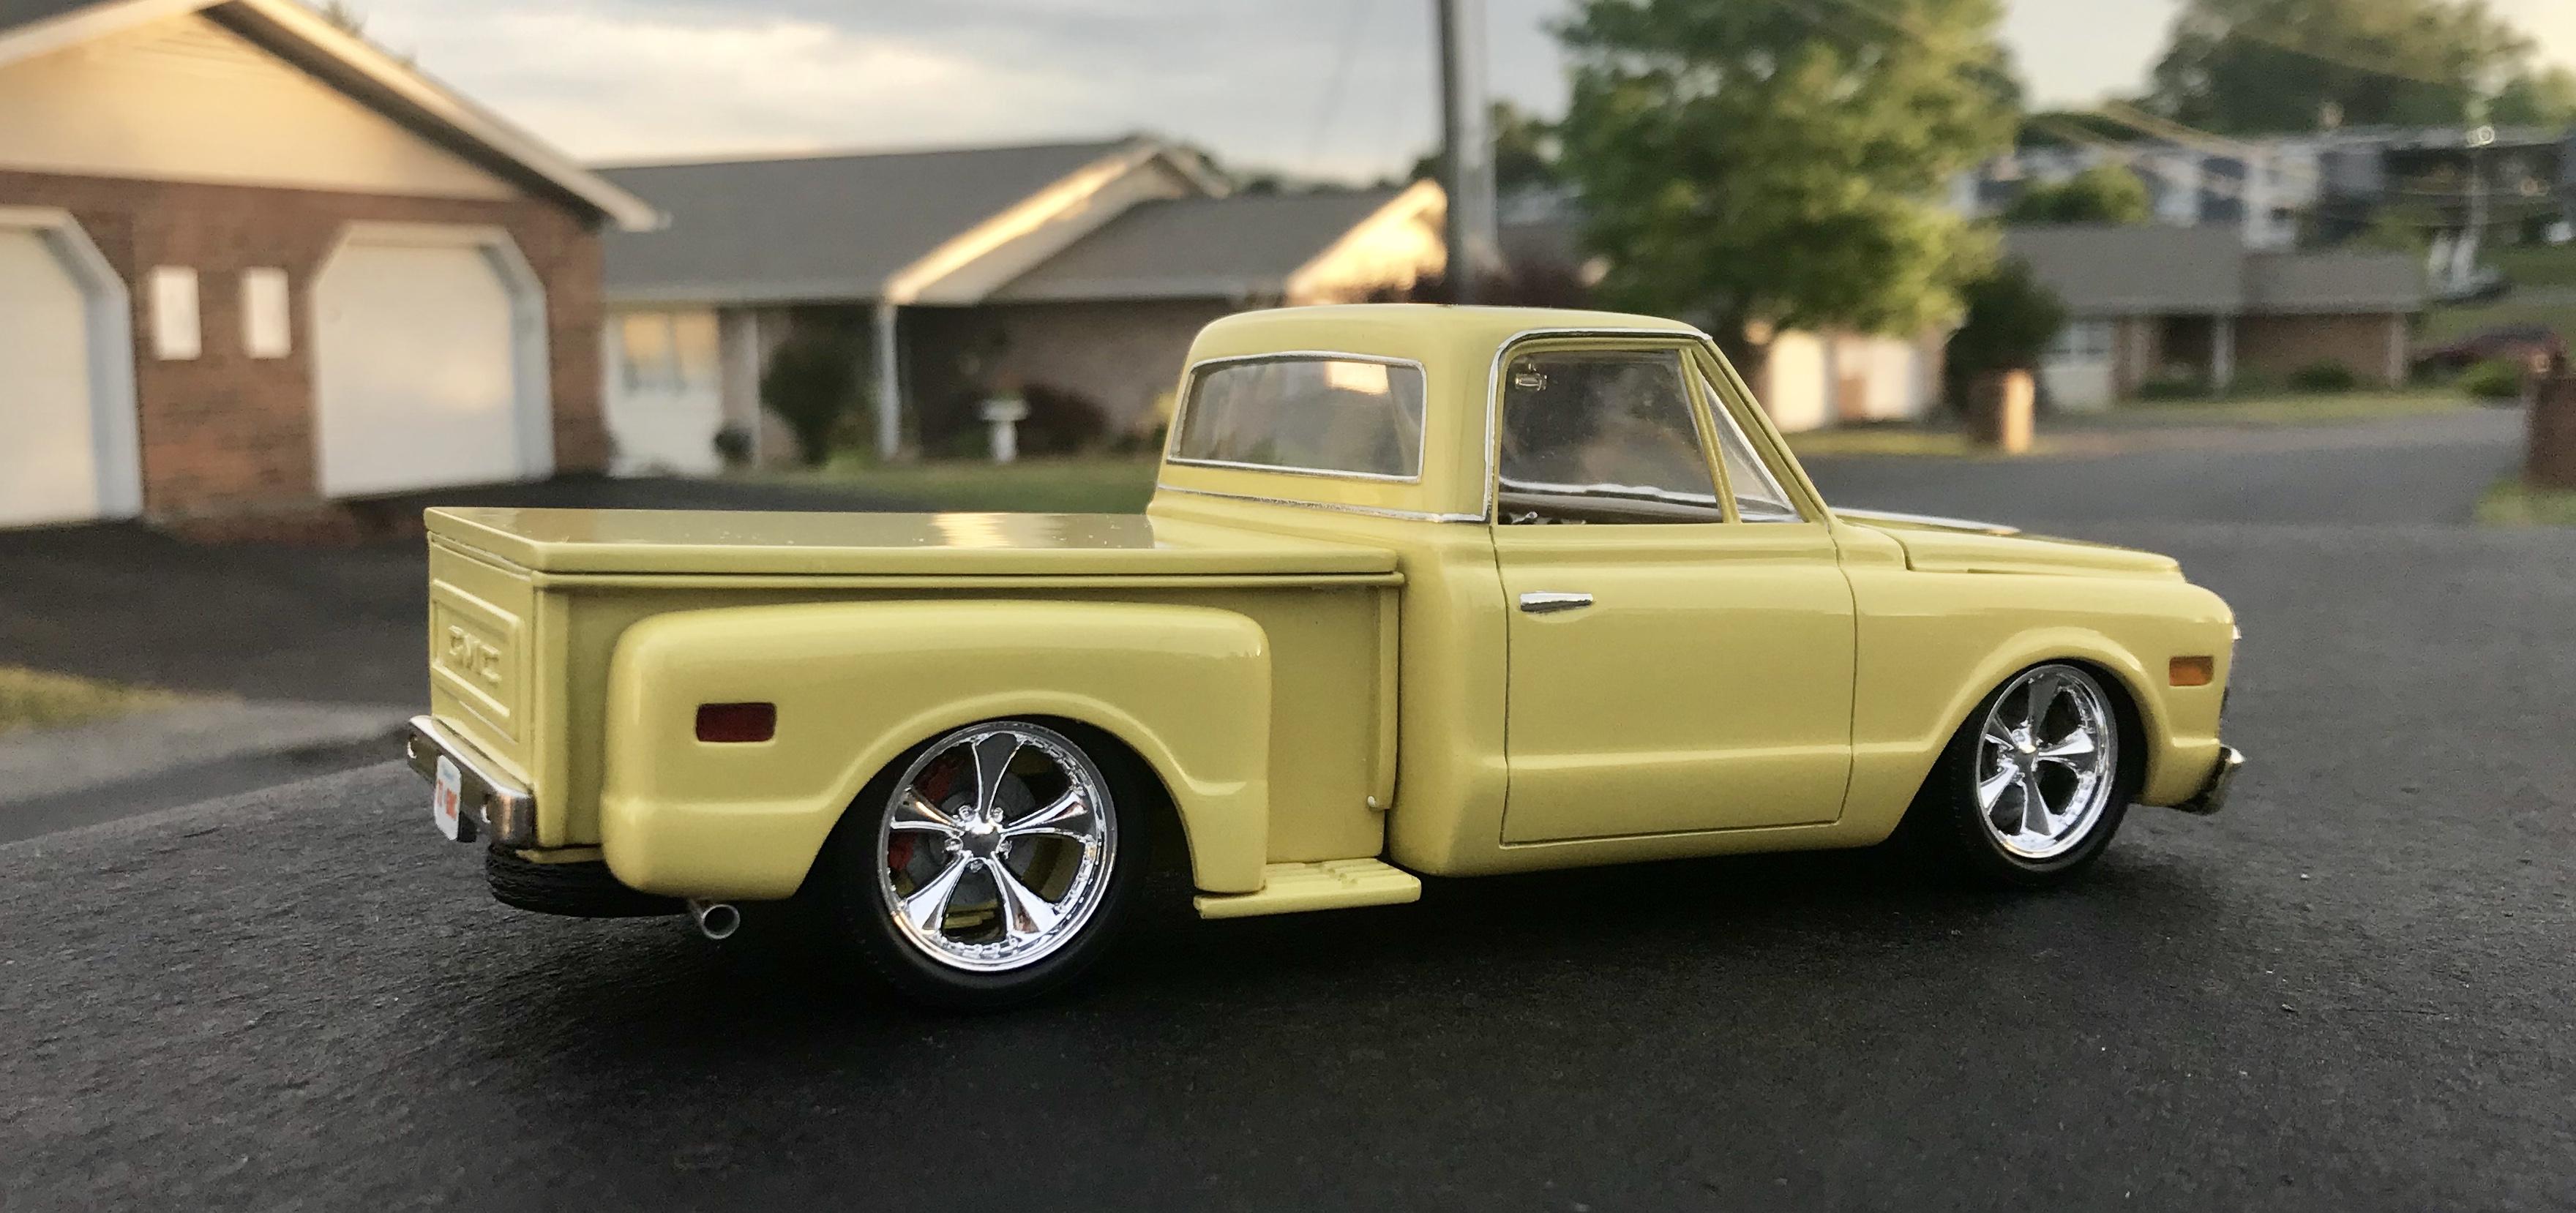
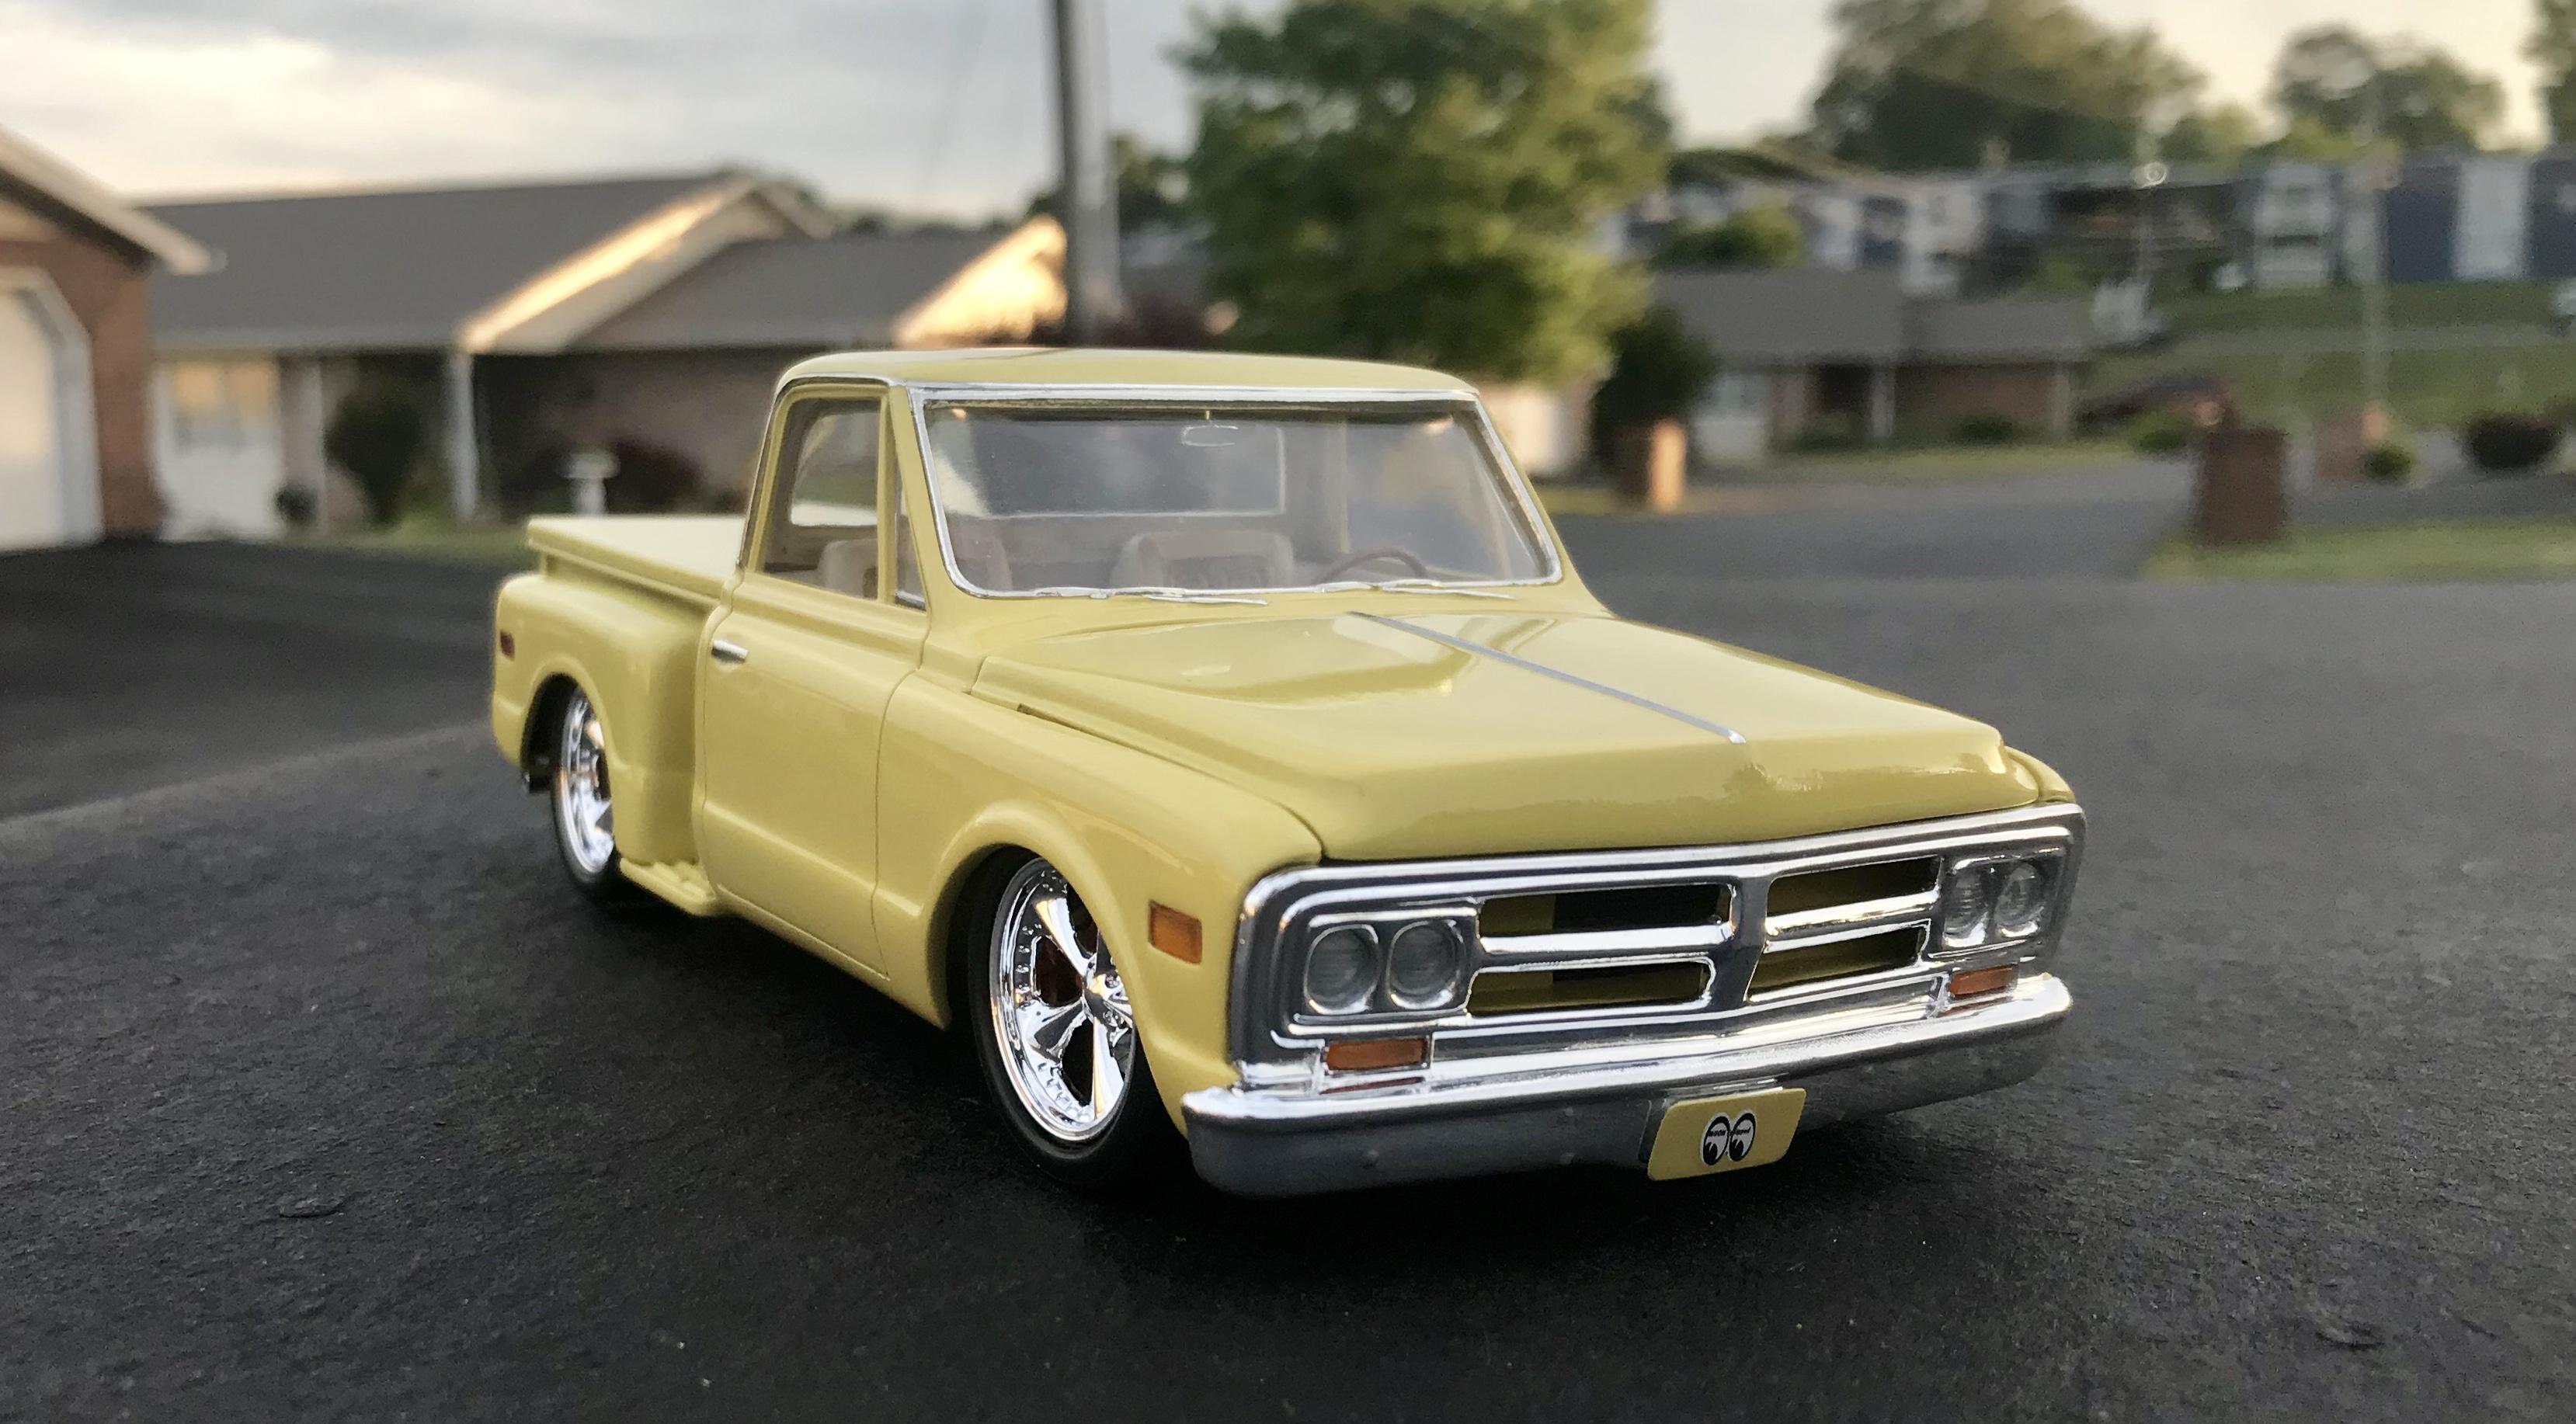
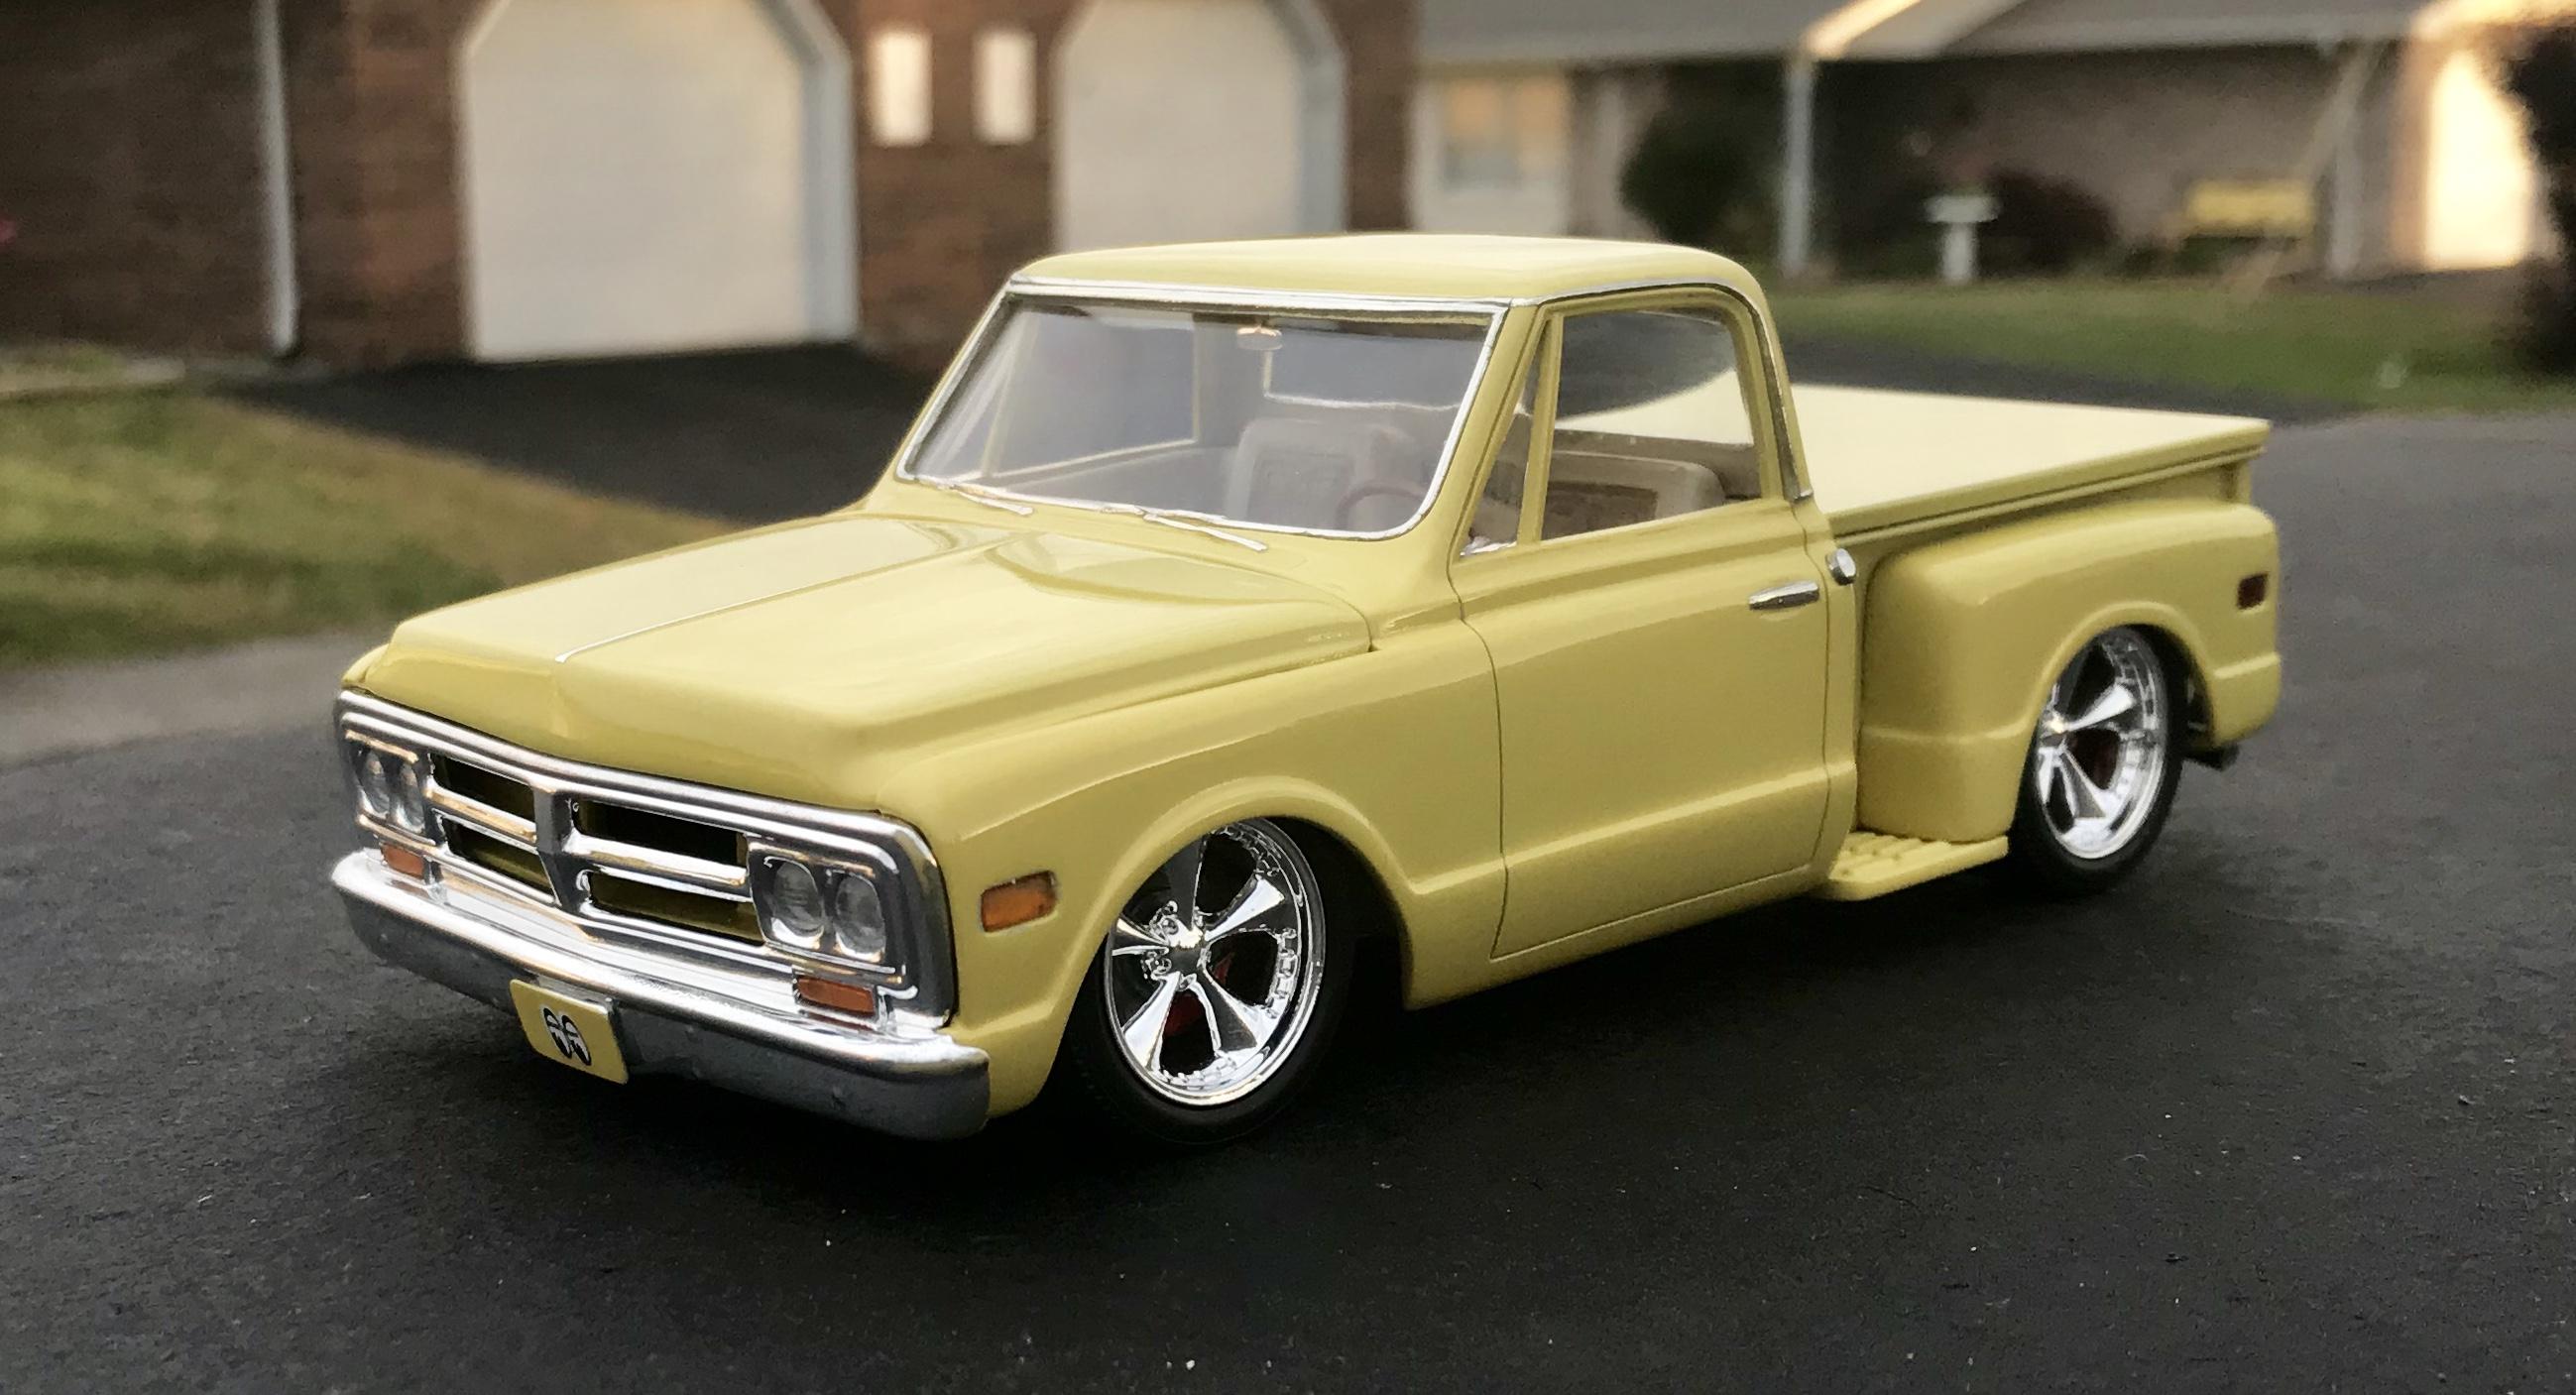
AMT 1972 GMC Stepside
modelcarcrazy replied to modelcarcrazy's topic in Model Trucks: Pickups, Vans, SUVs, Light Commercial
Thank you for the compliment. I didn’t decant the paint, I just sprayed it with the rattle cans. -
AMT 1932 Ford Victoria (My WWTBD build)
modelcarcrazy replied to modelcarcrazy's topic in Drag Racing
Thank you for the compliment. The headlights were in the Li’l Viky kit, but I believe the headlights are all the same in all the old AMT 32 Ford kits. -
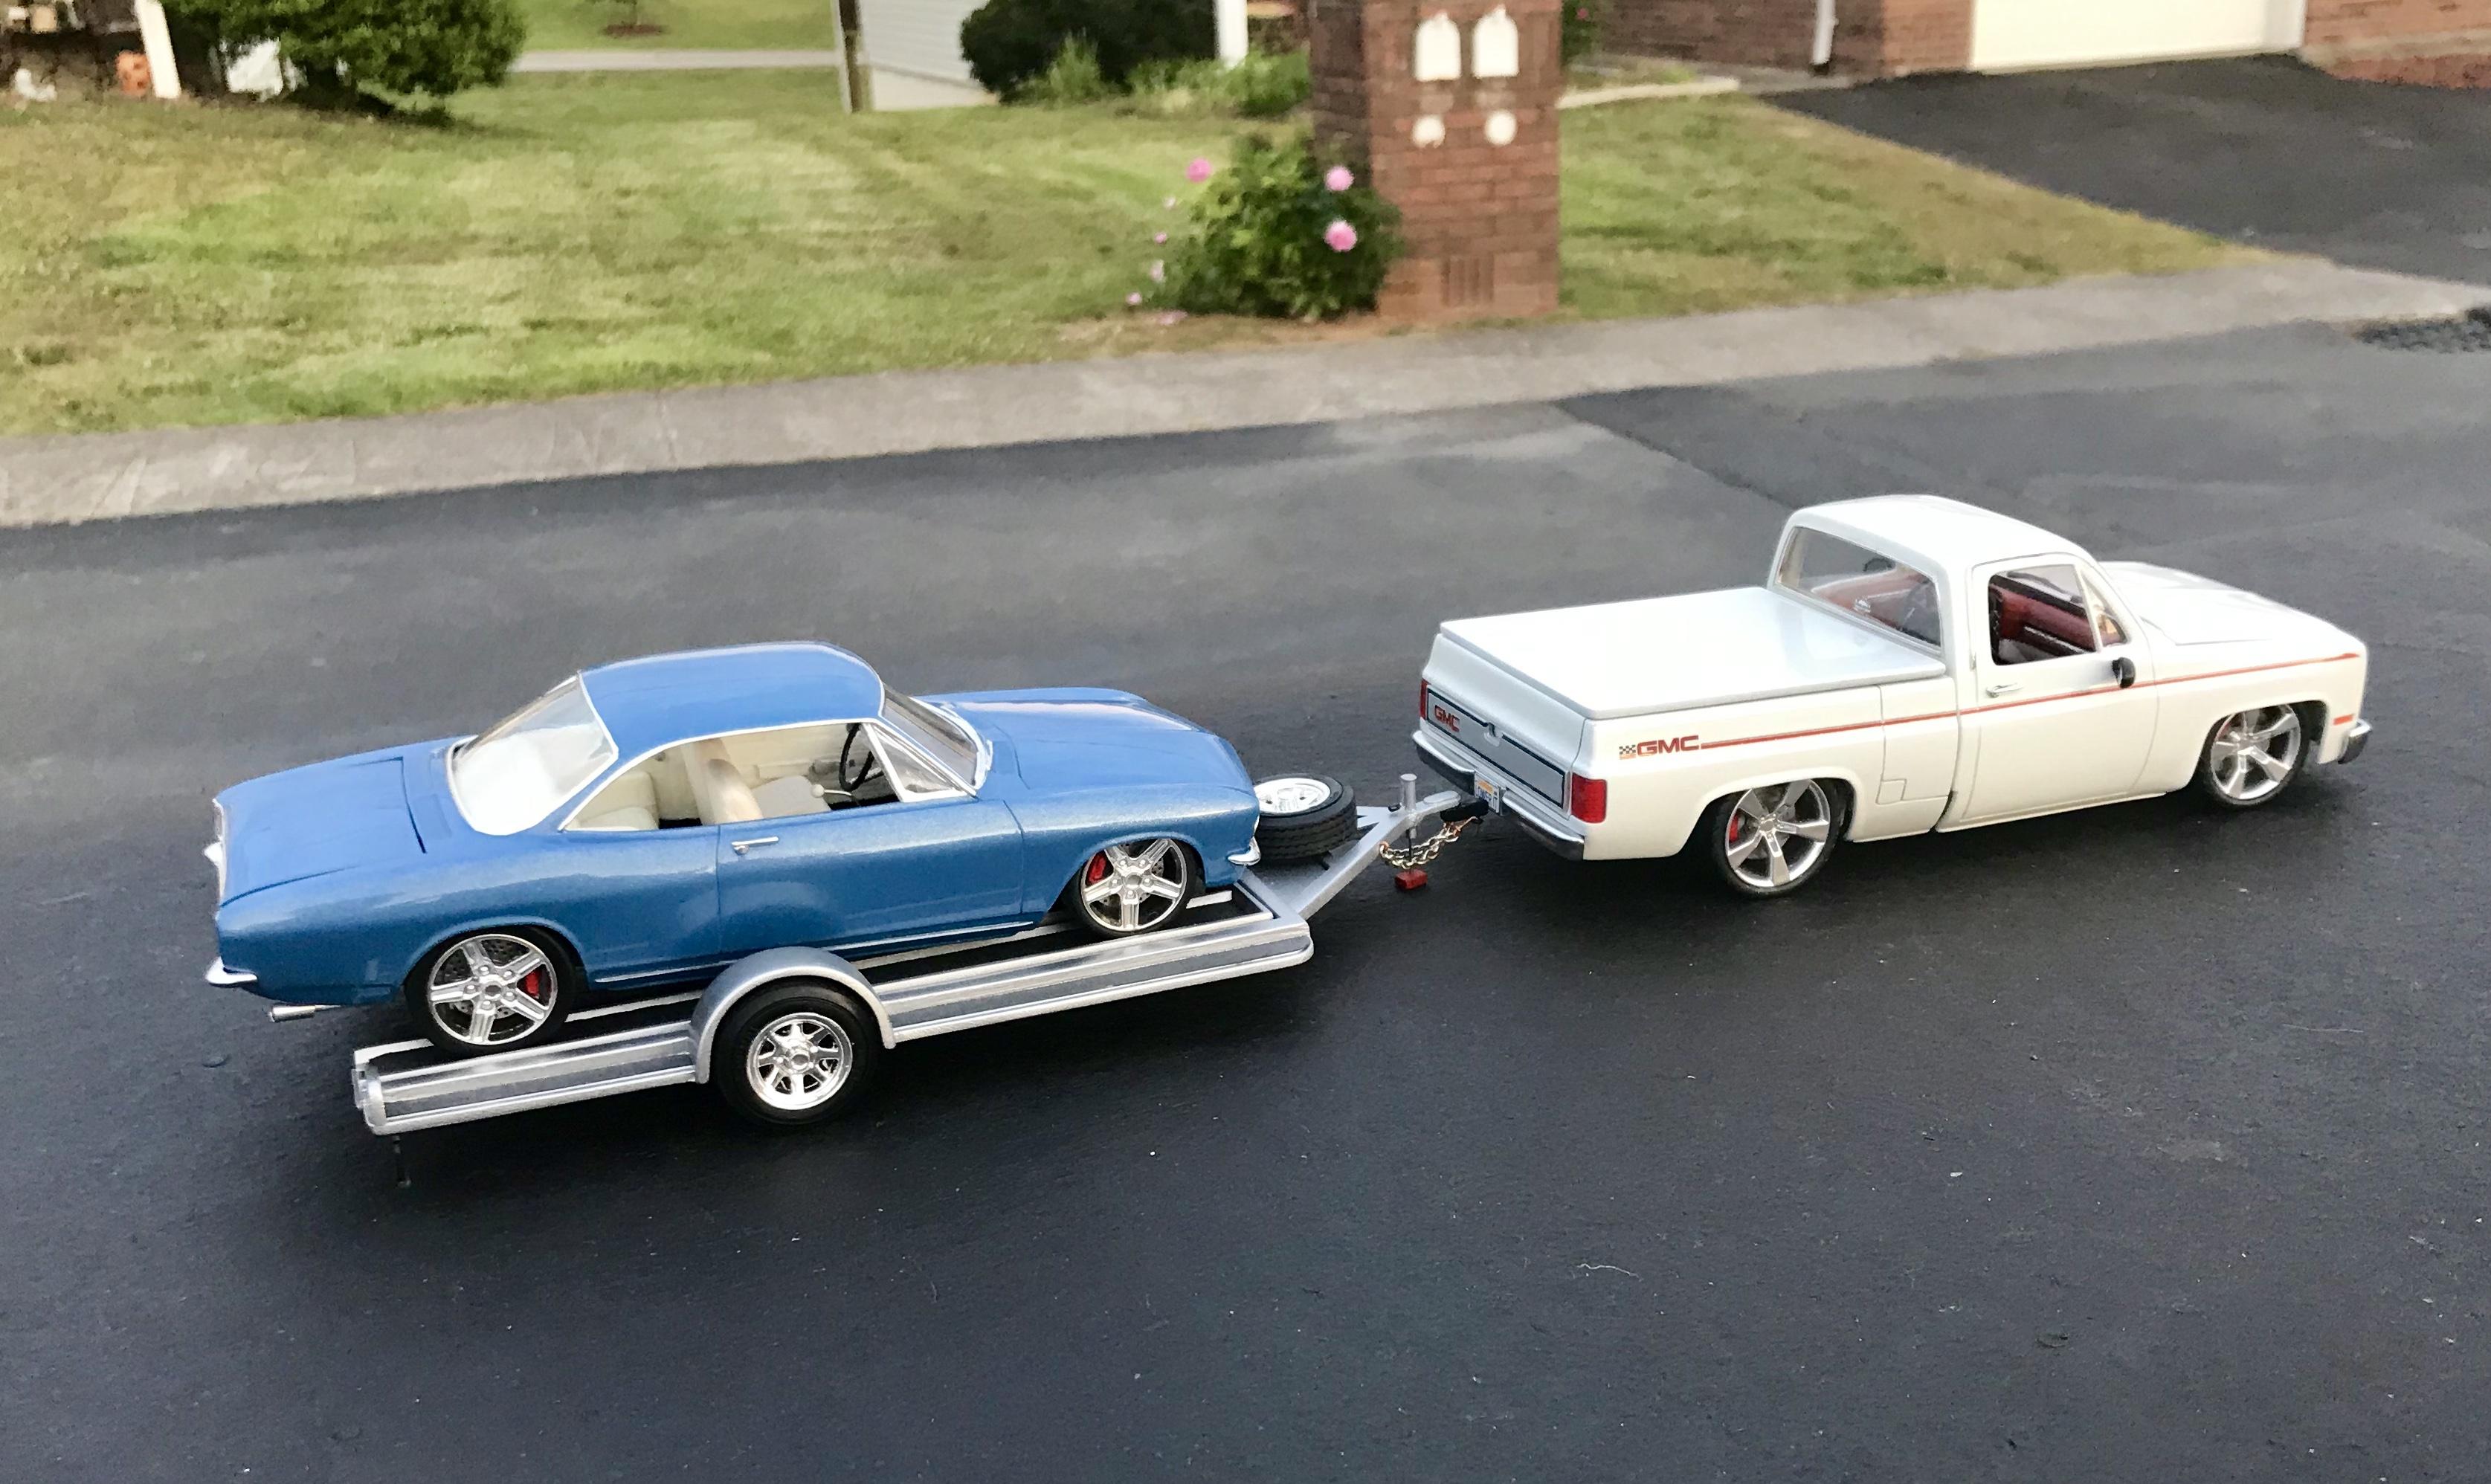
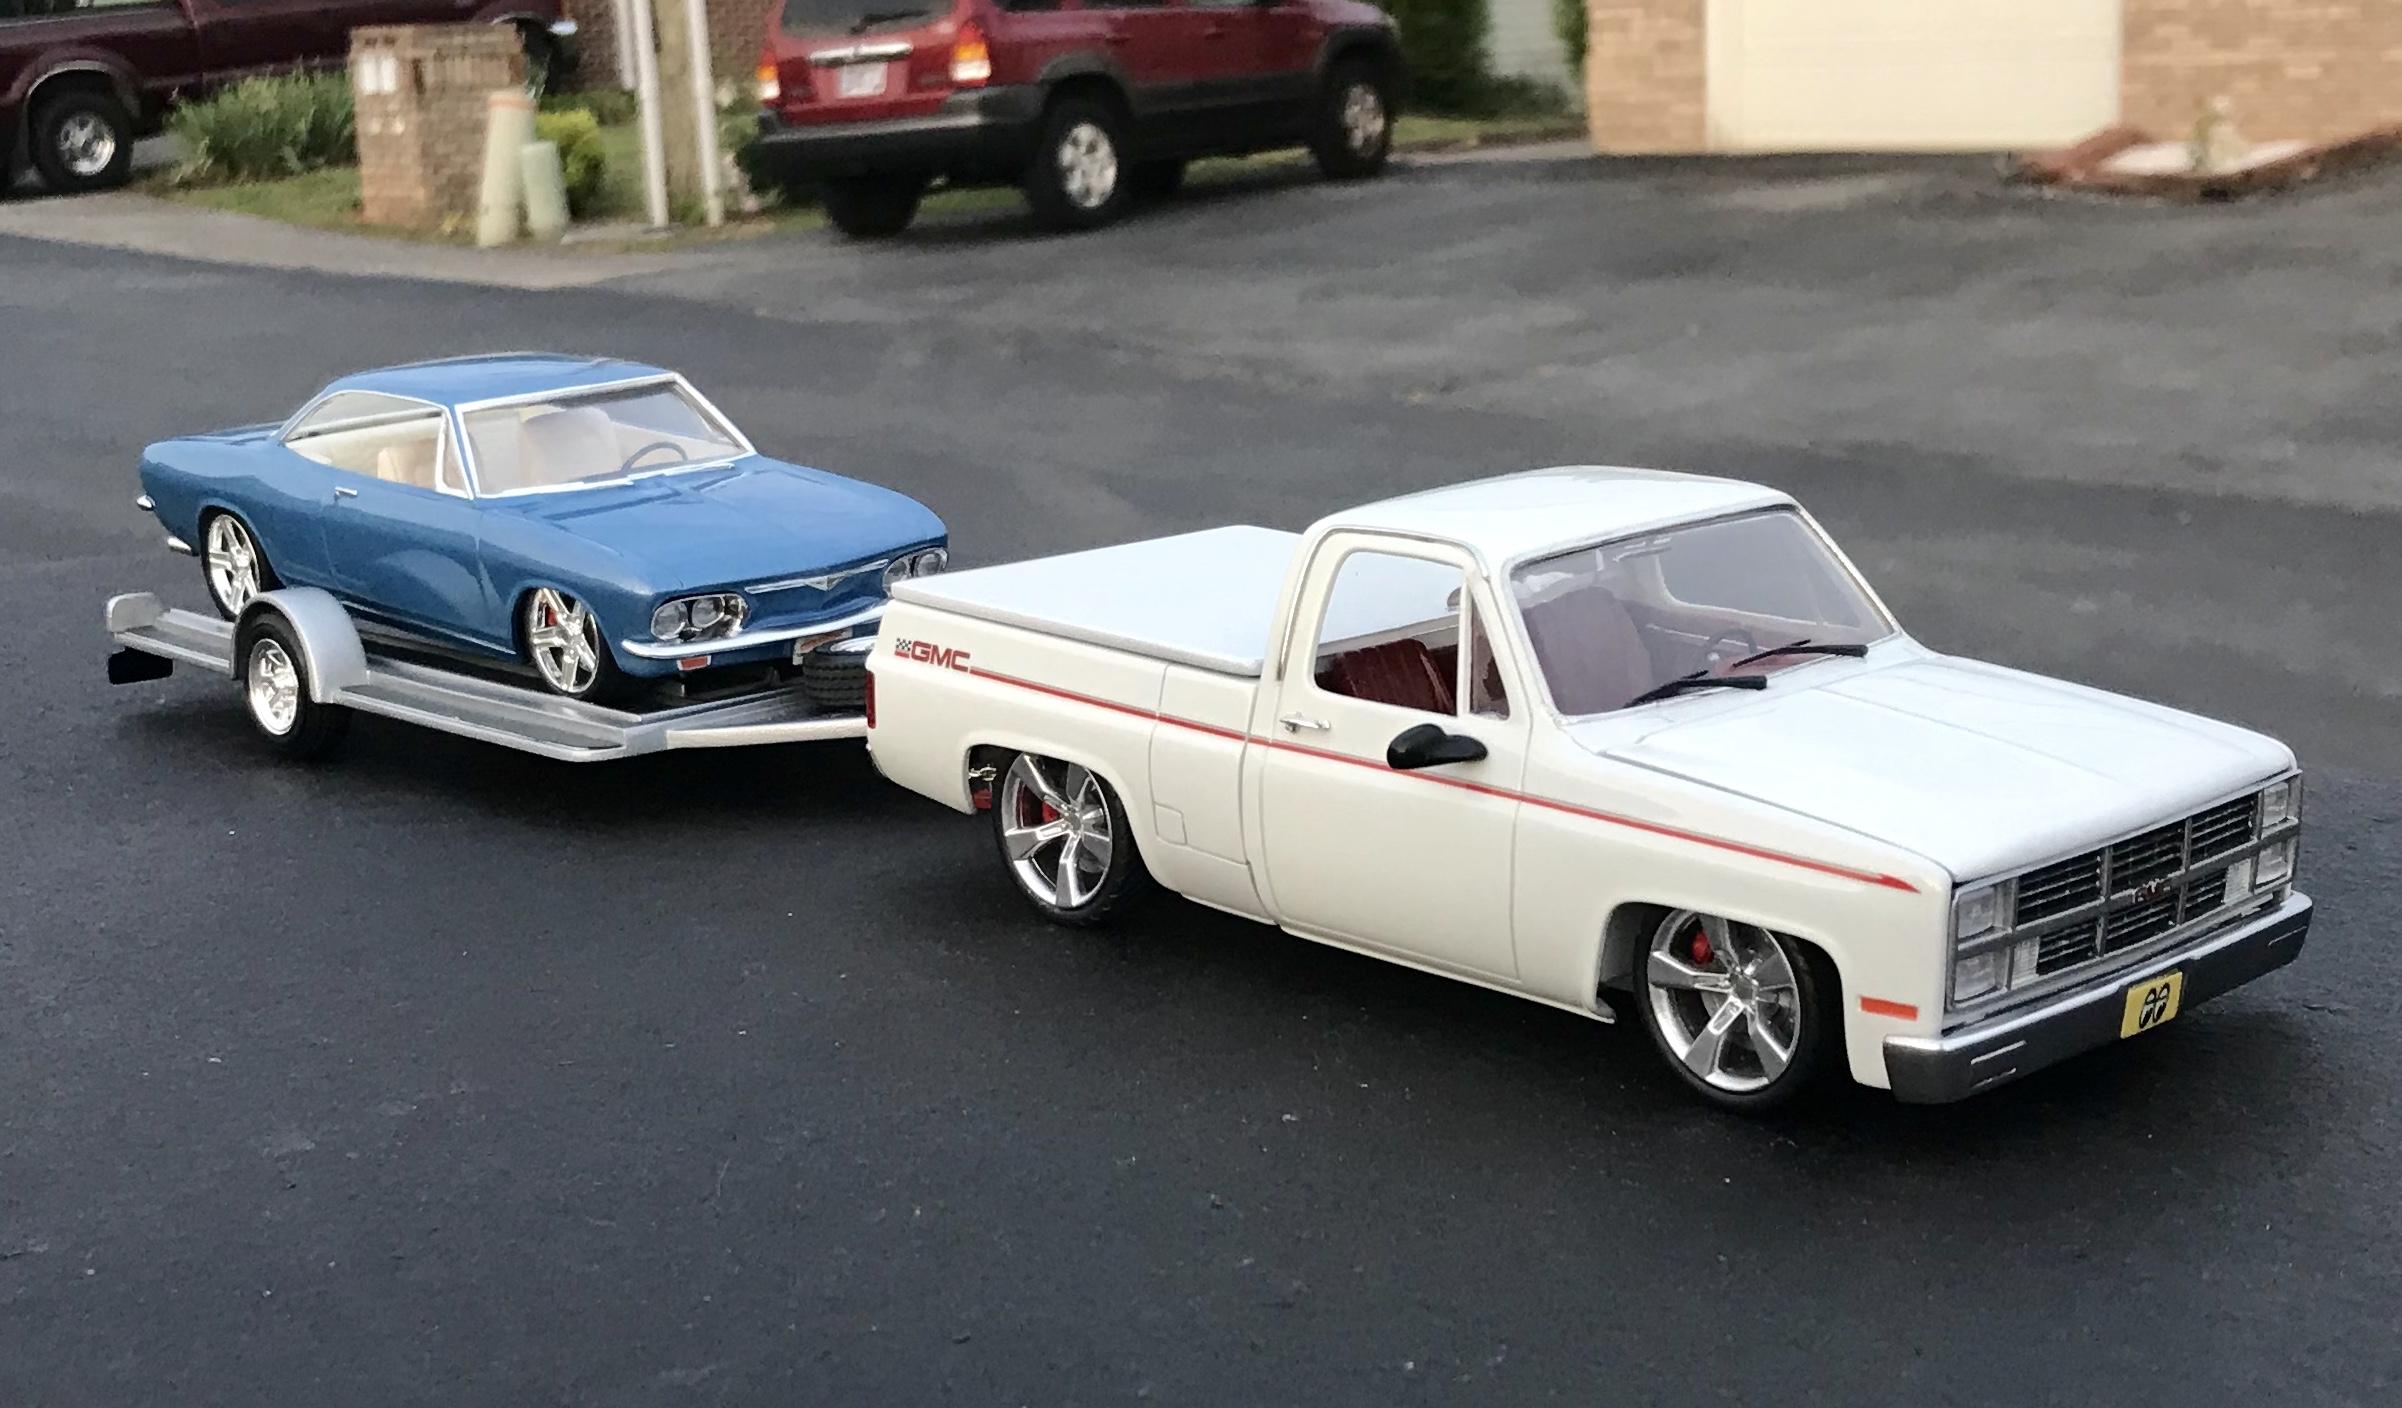
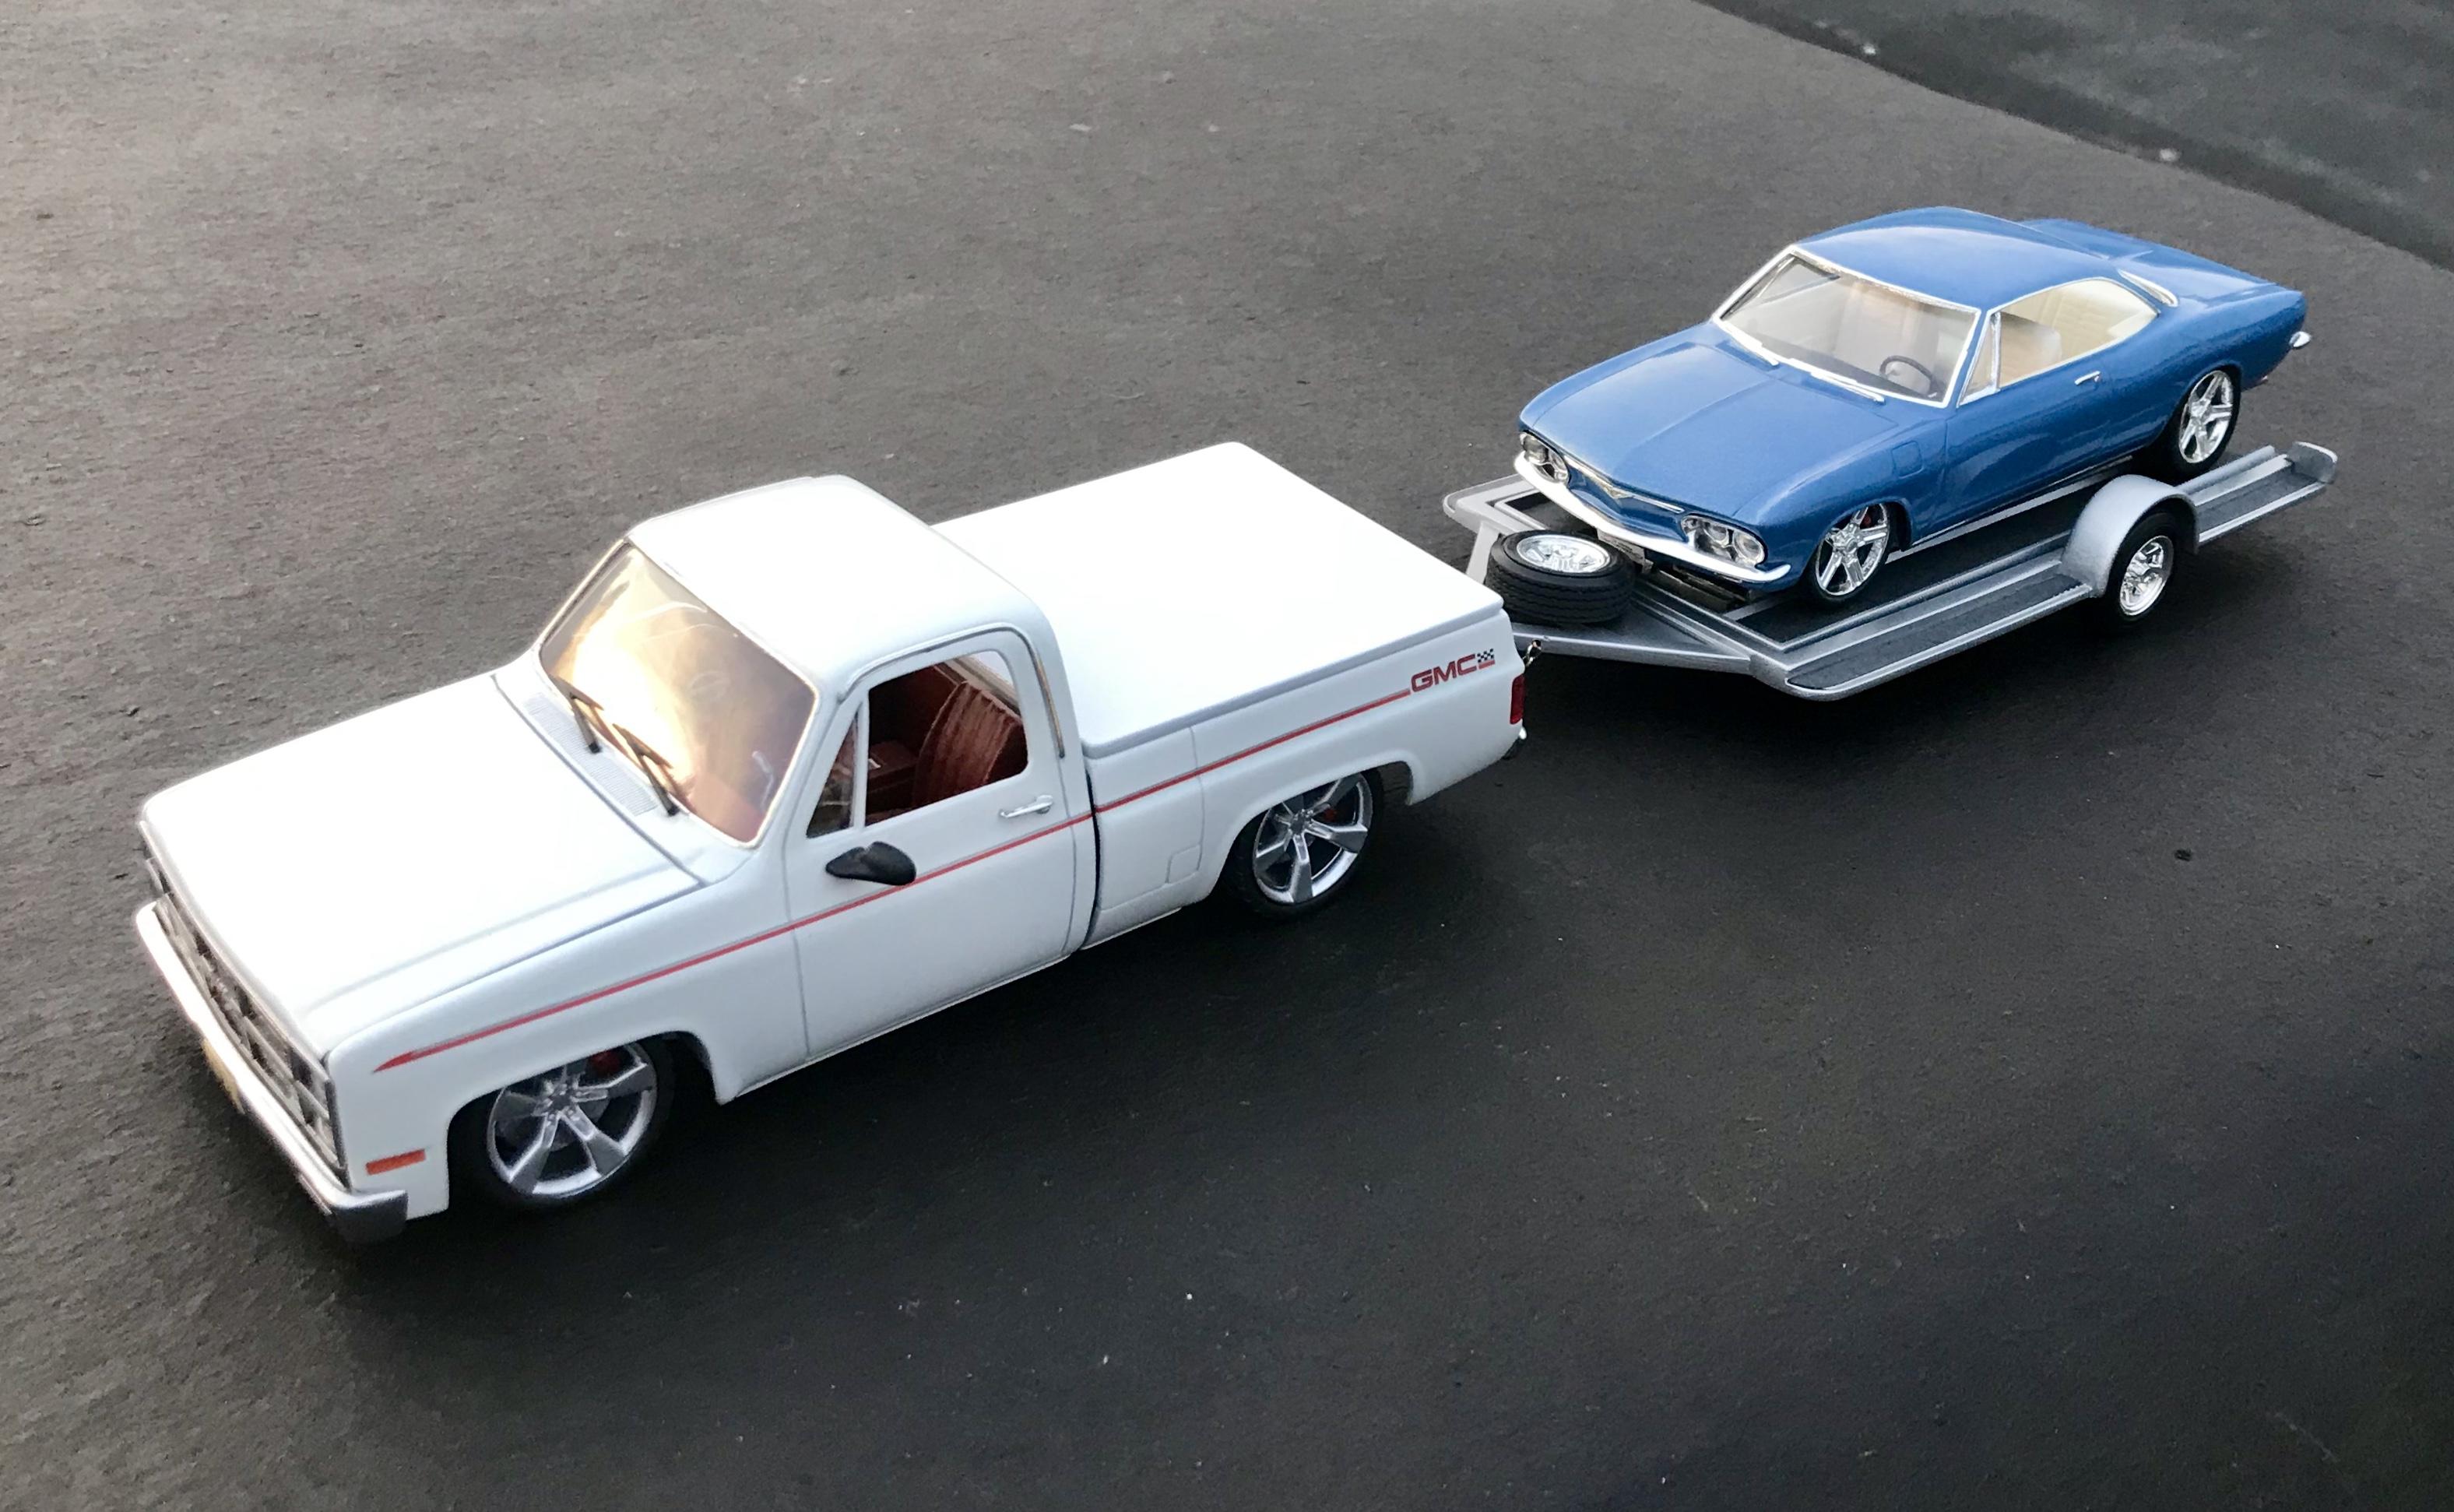
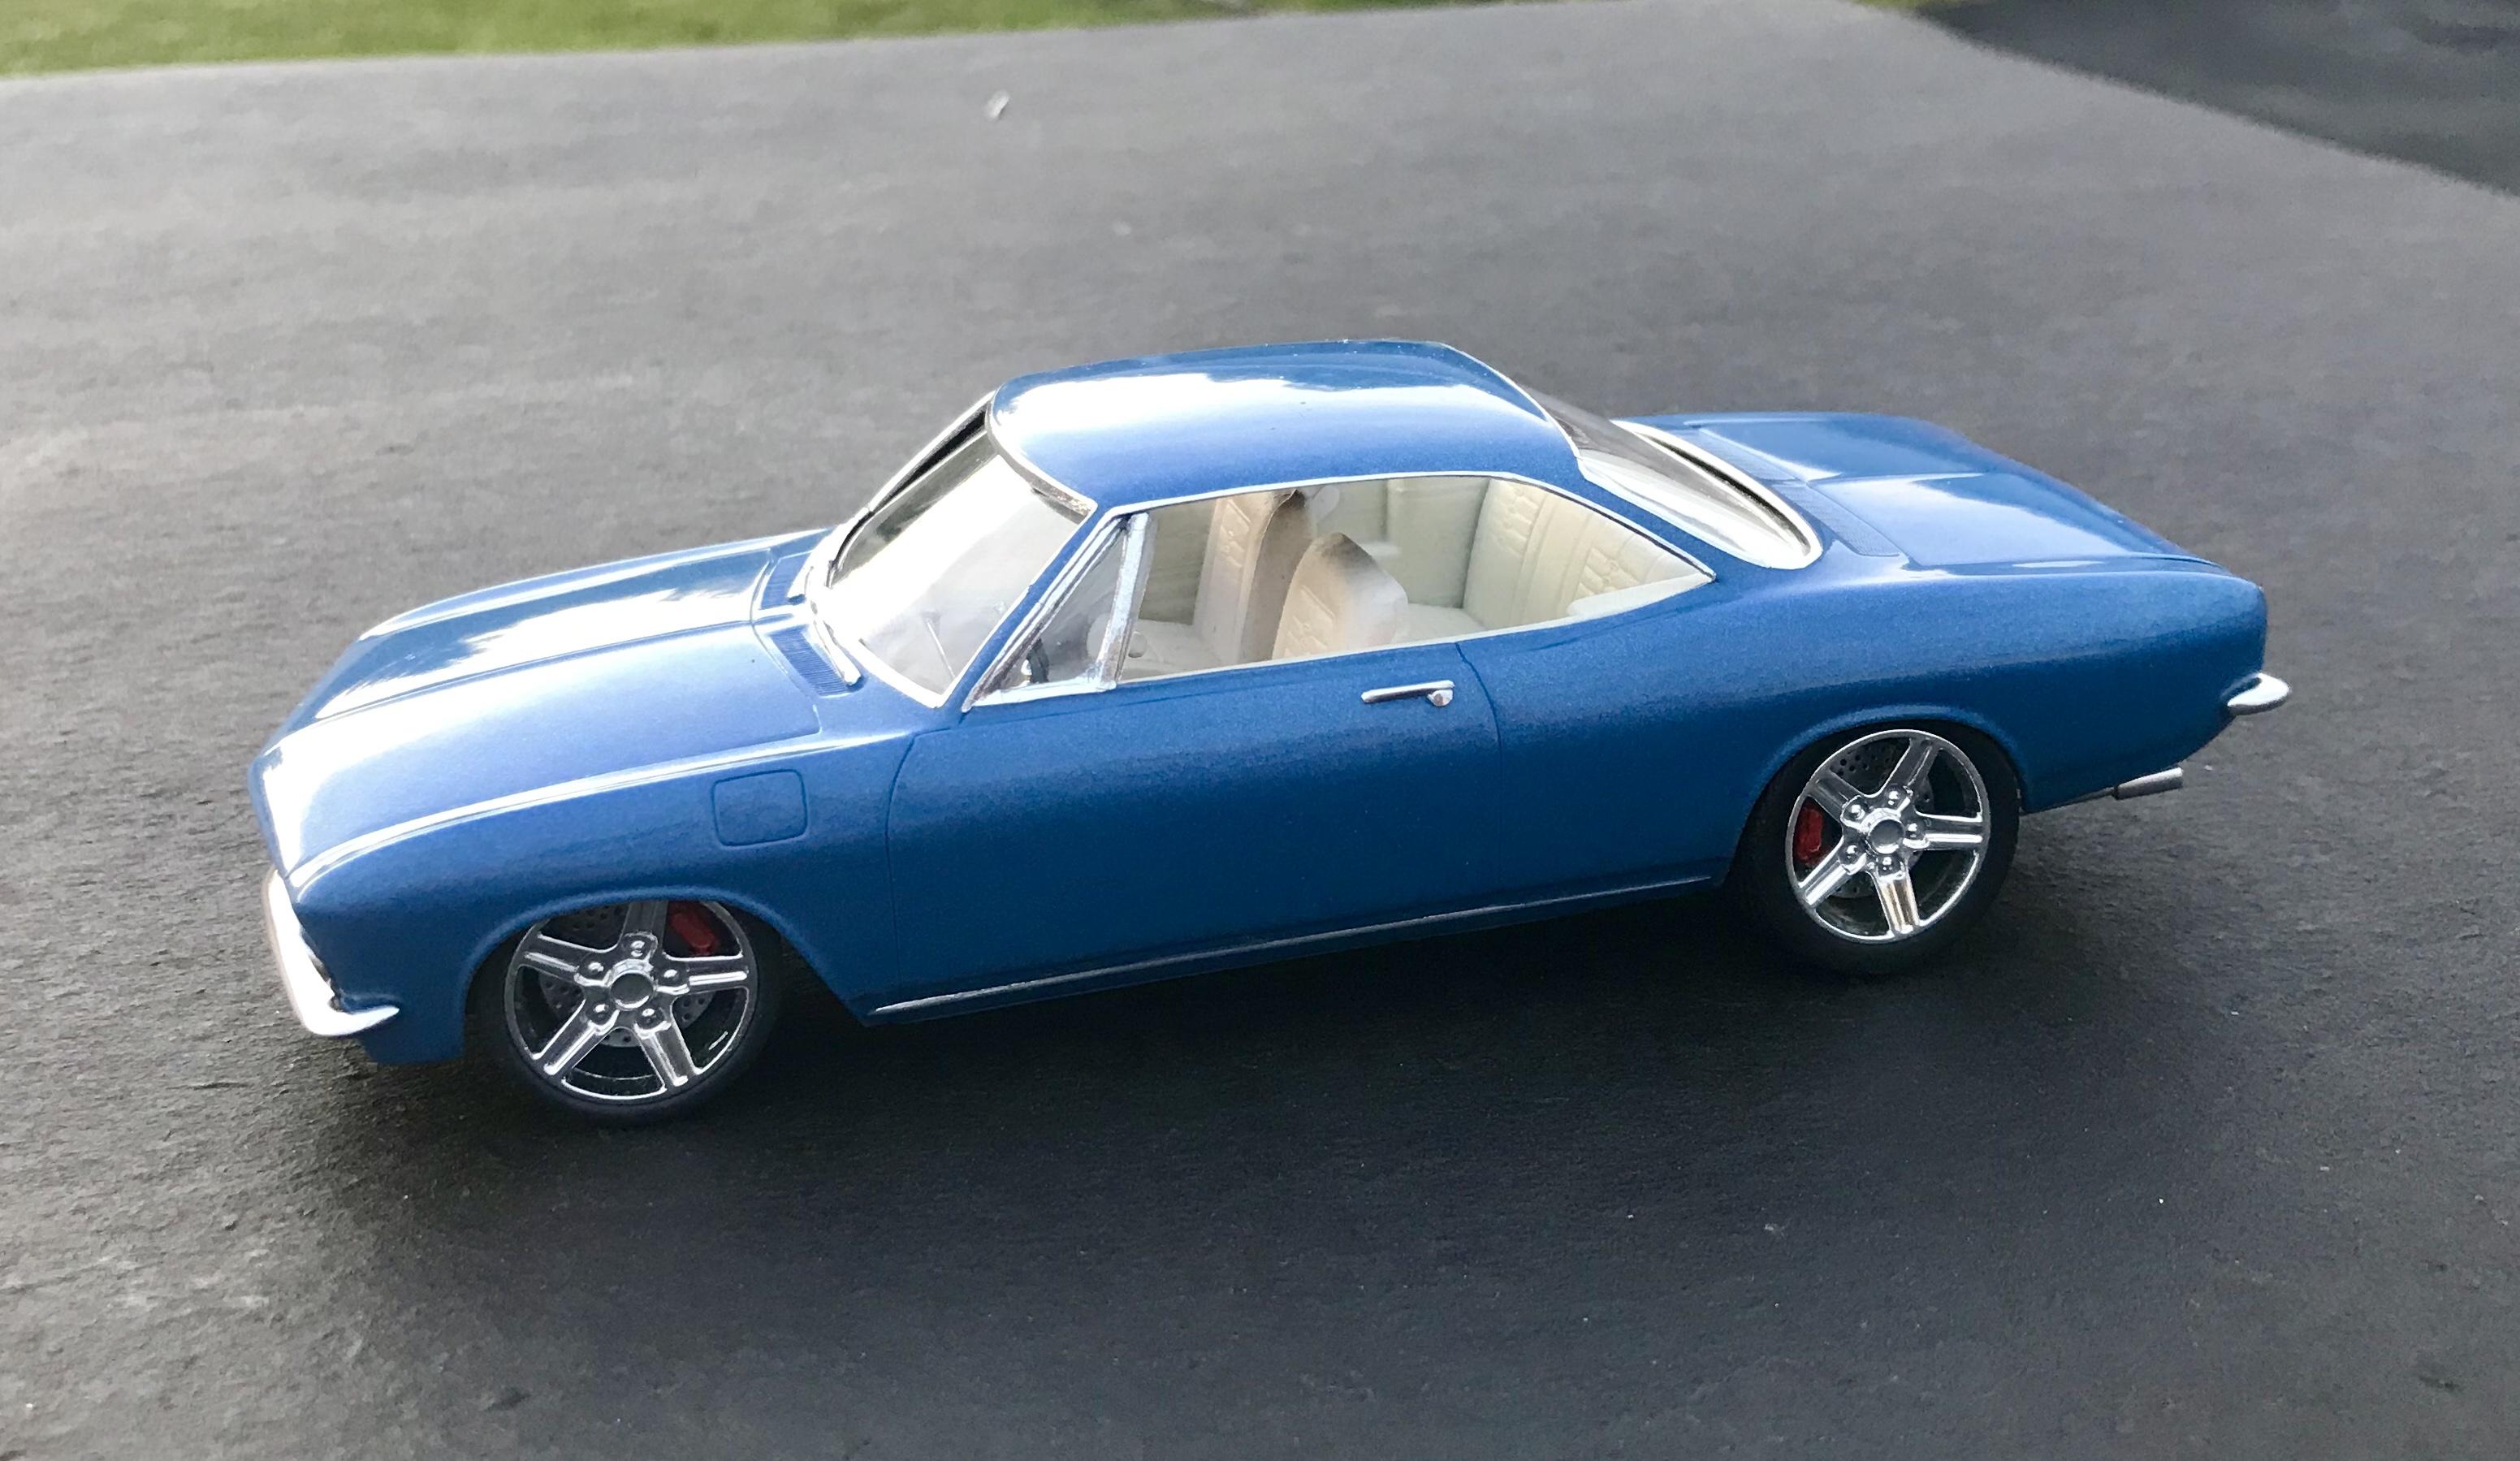
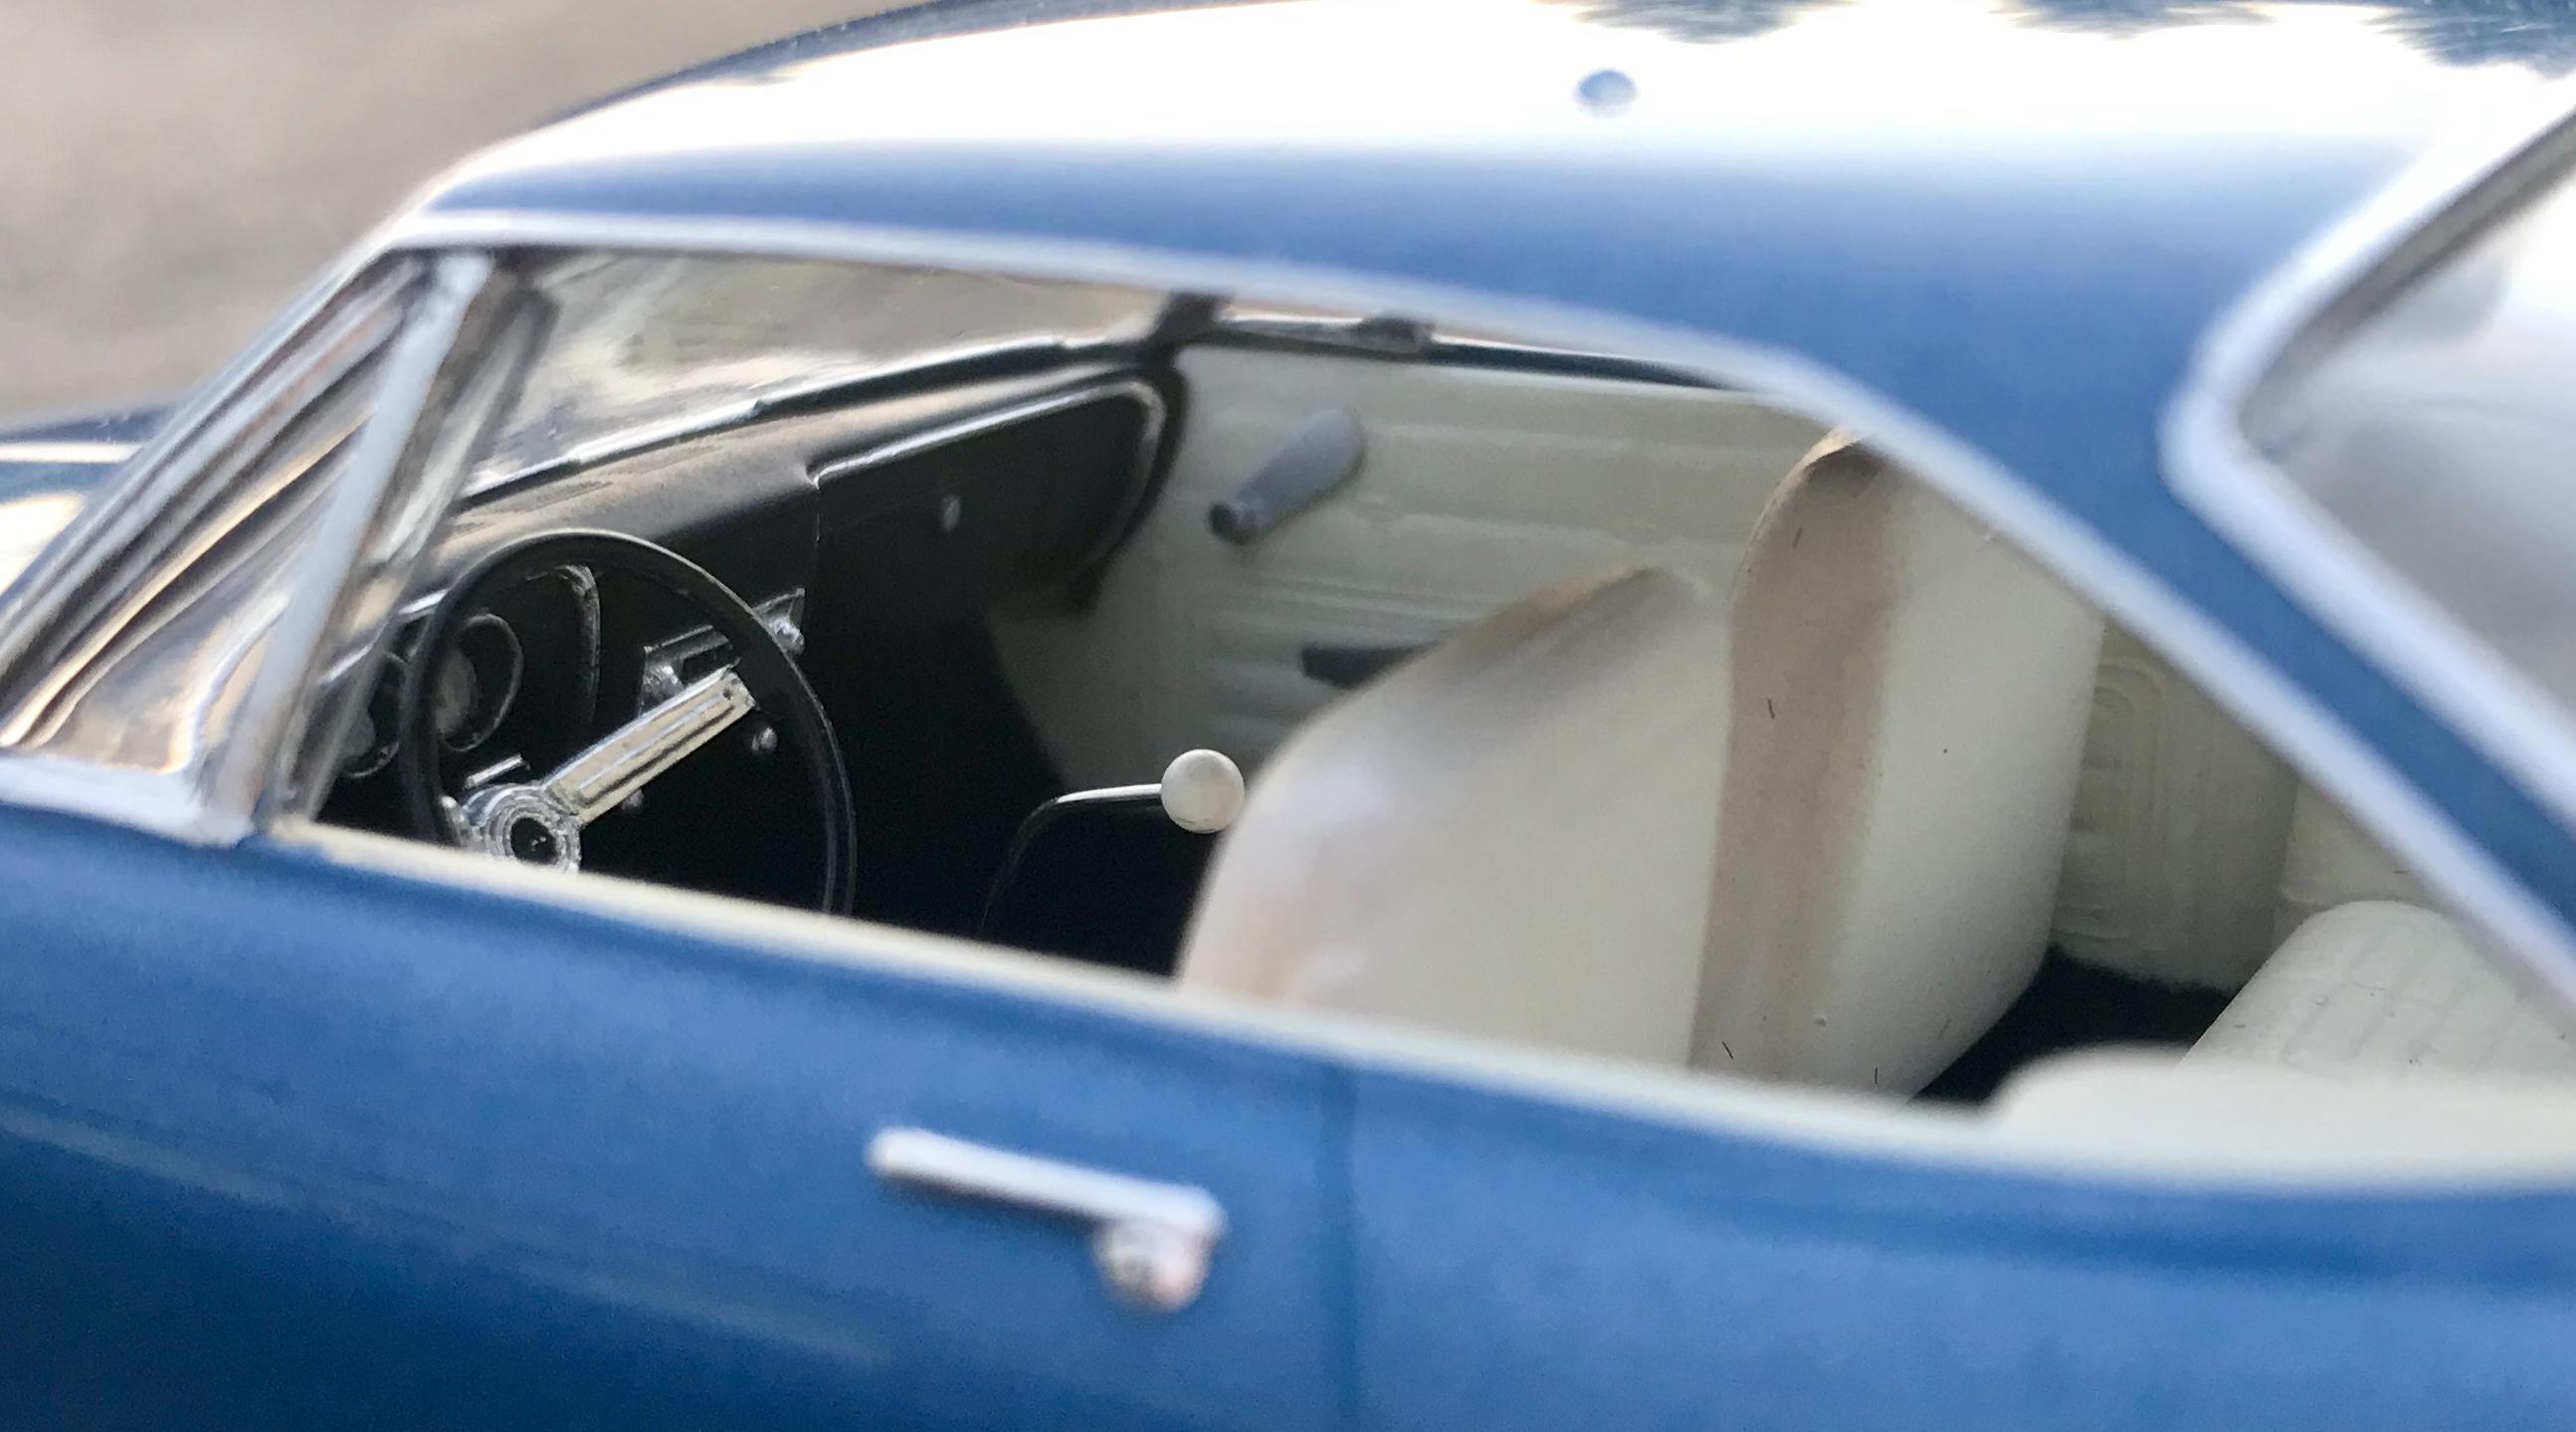
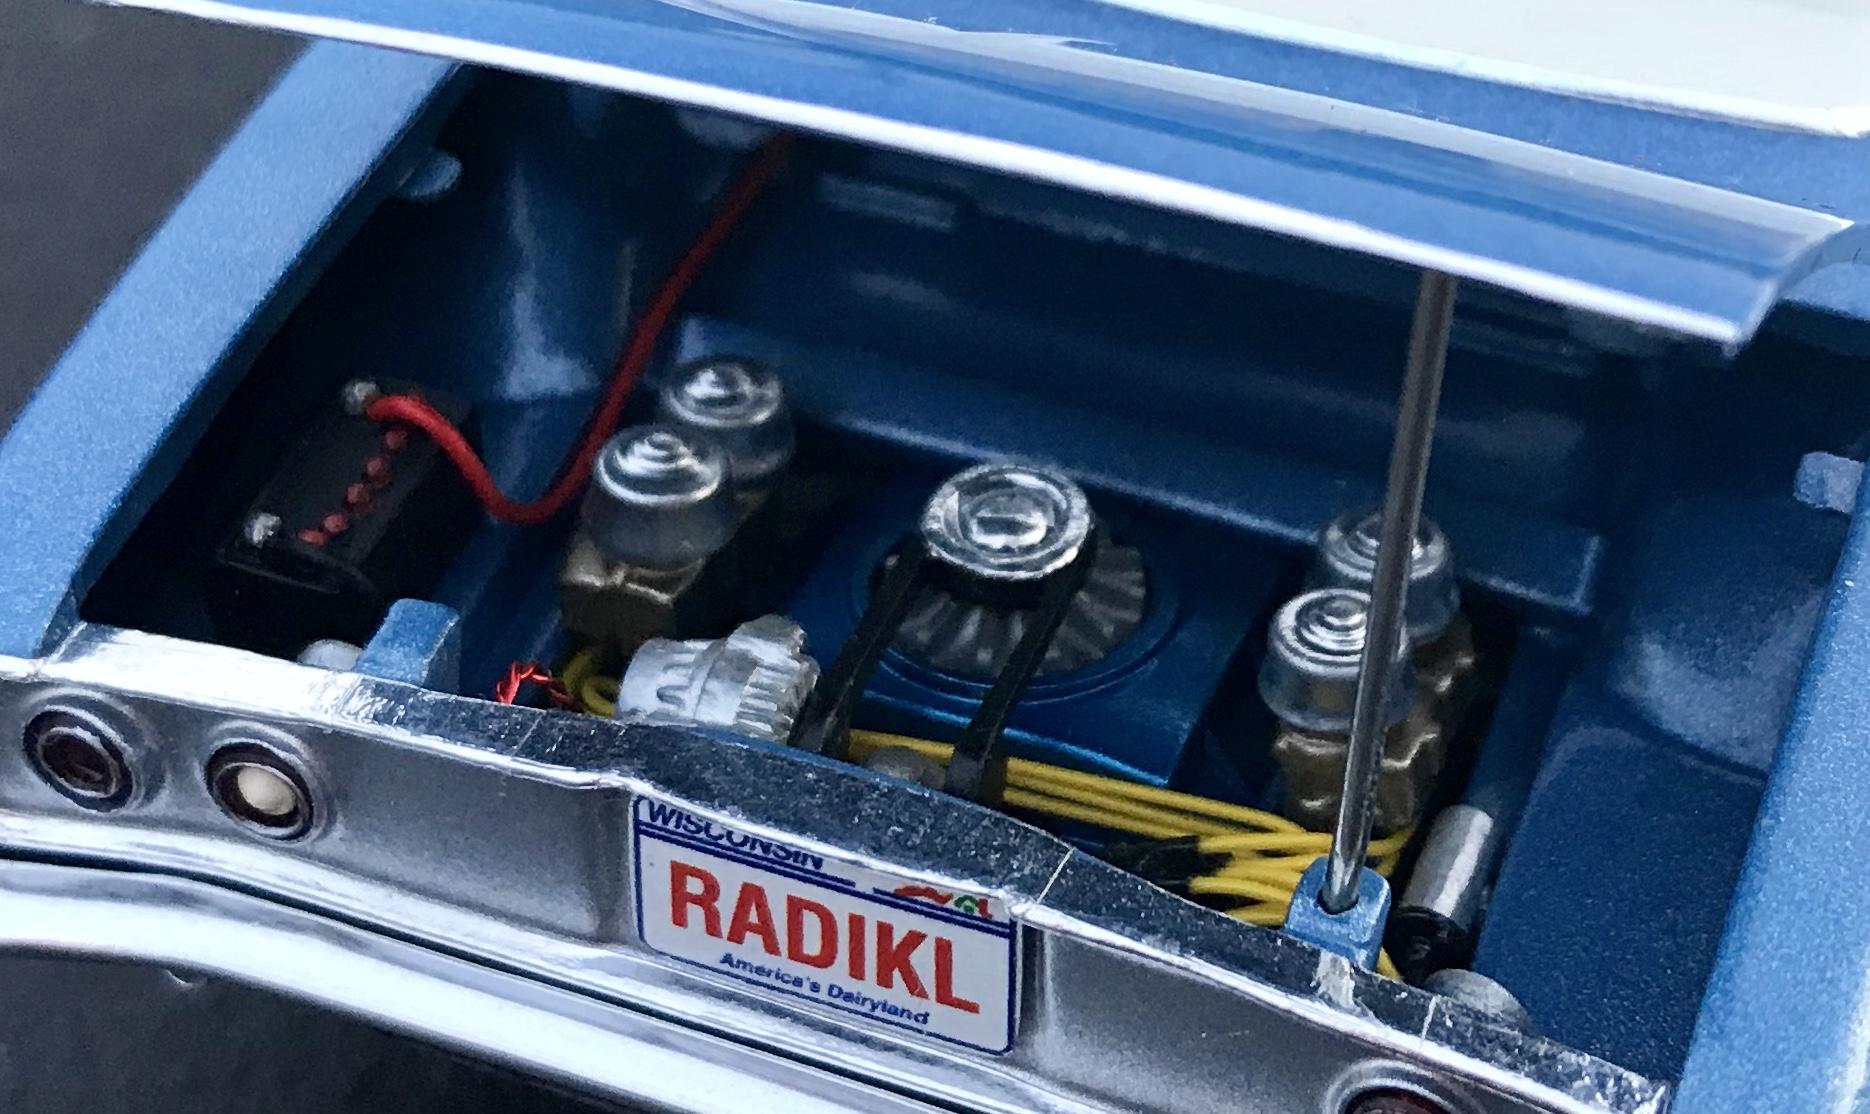
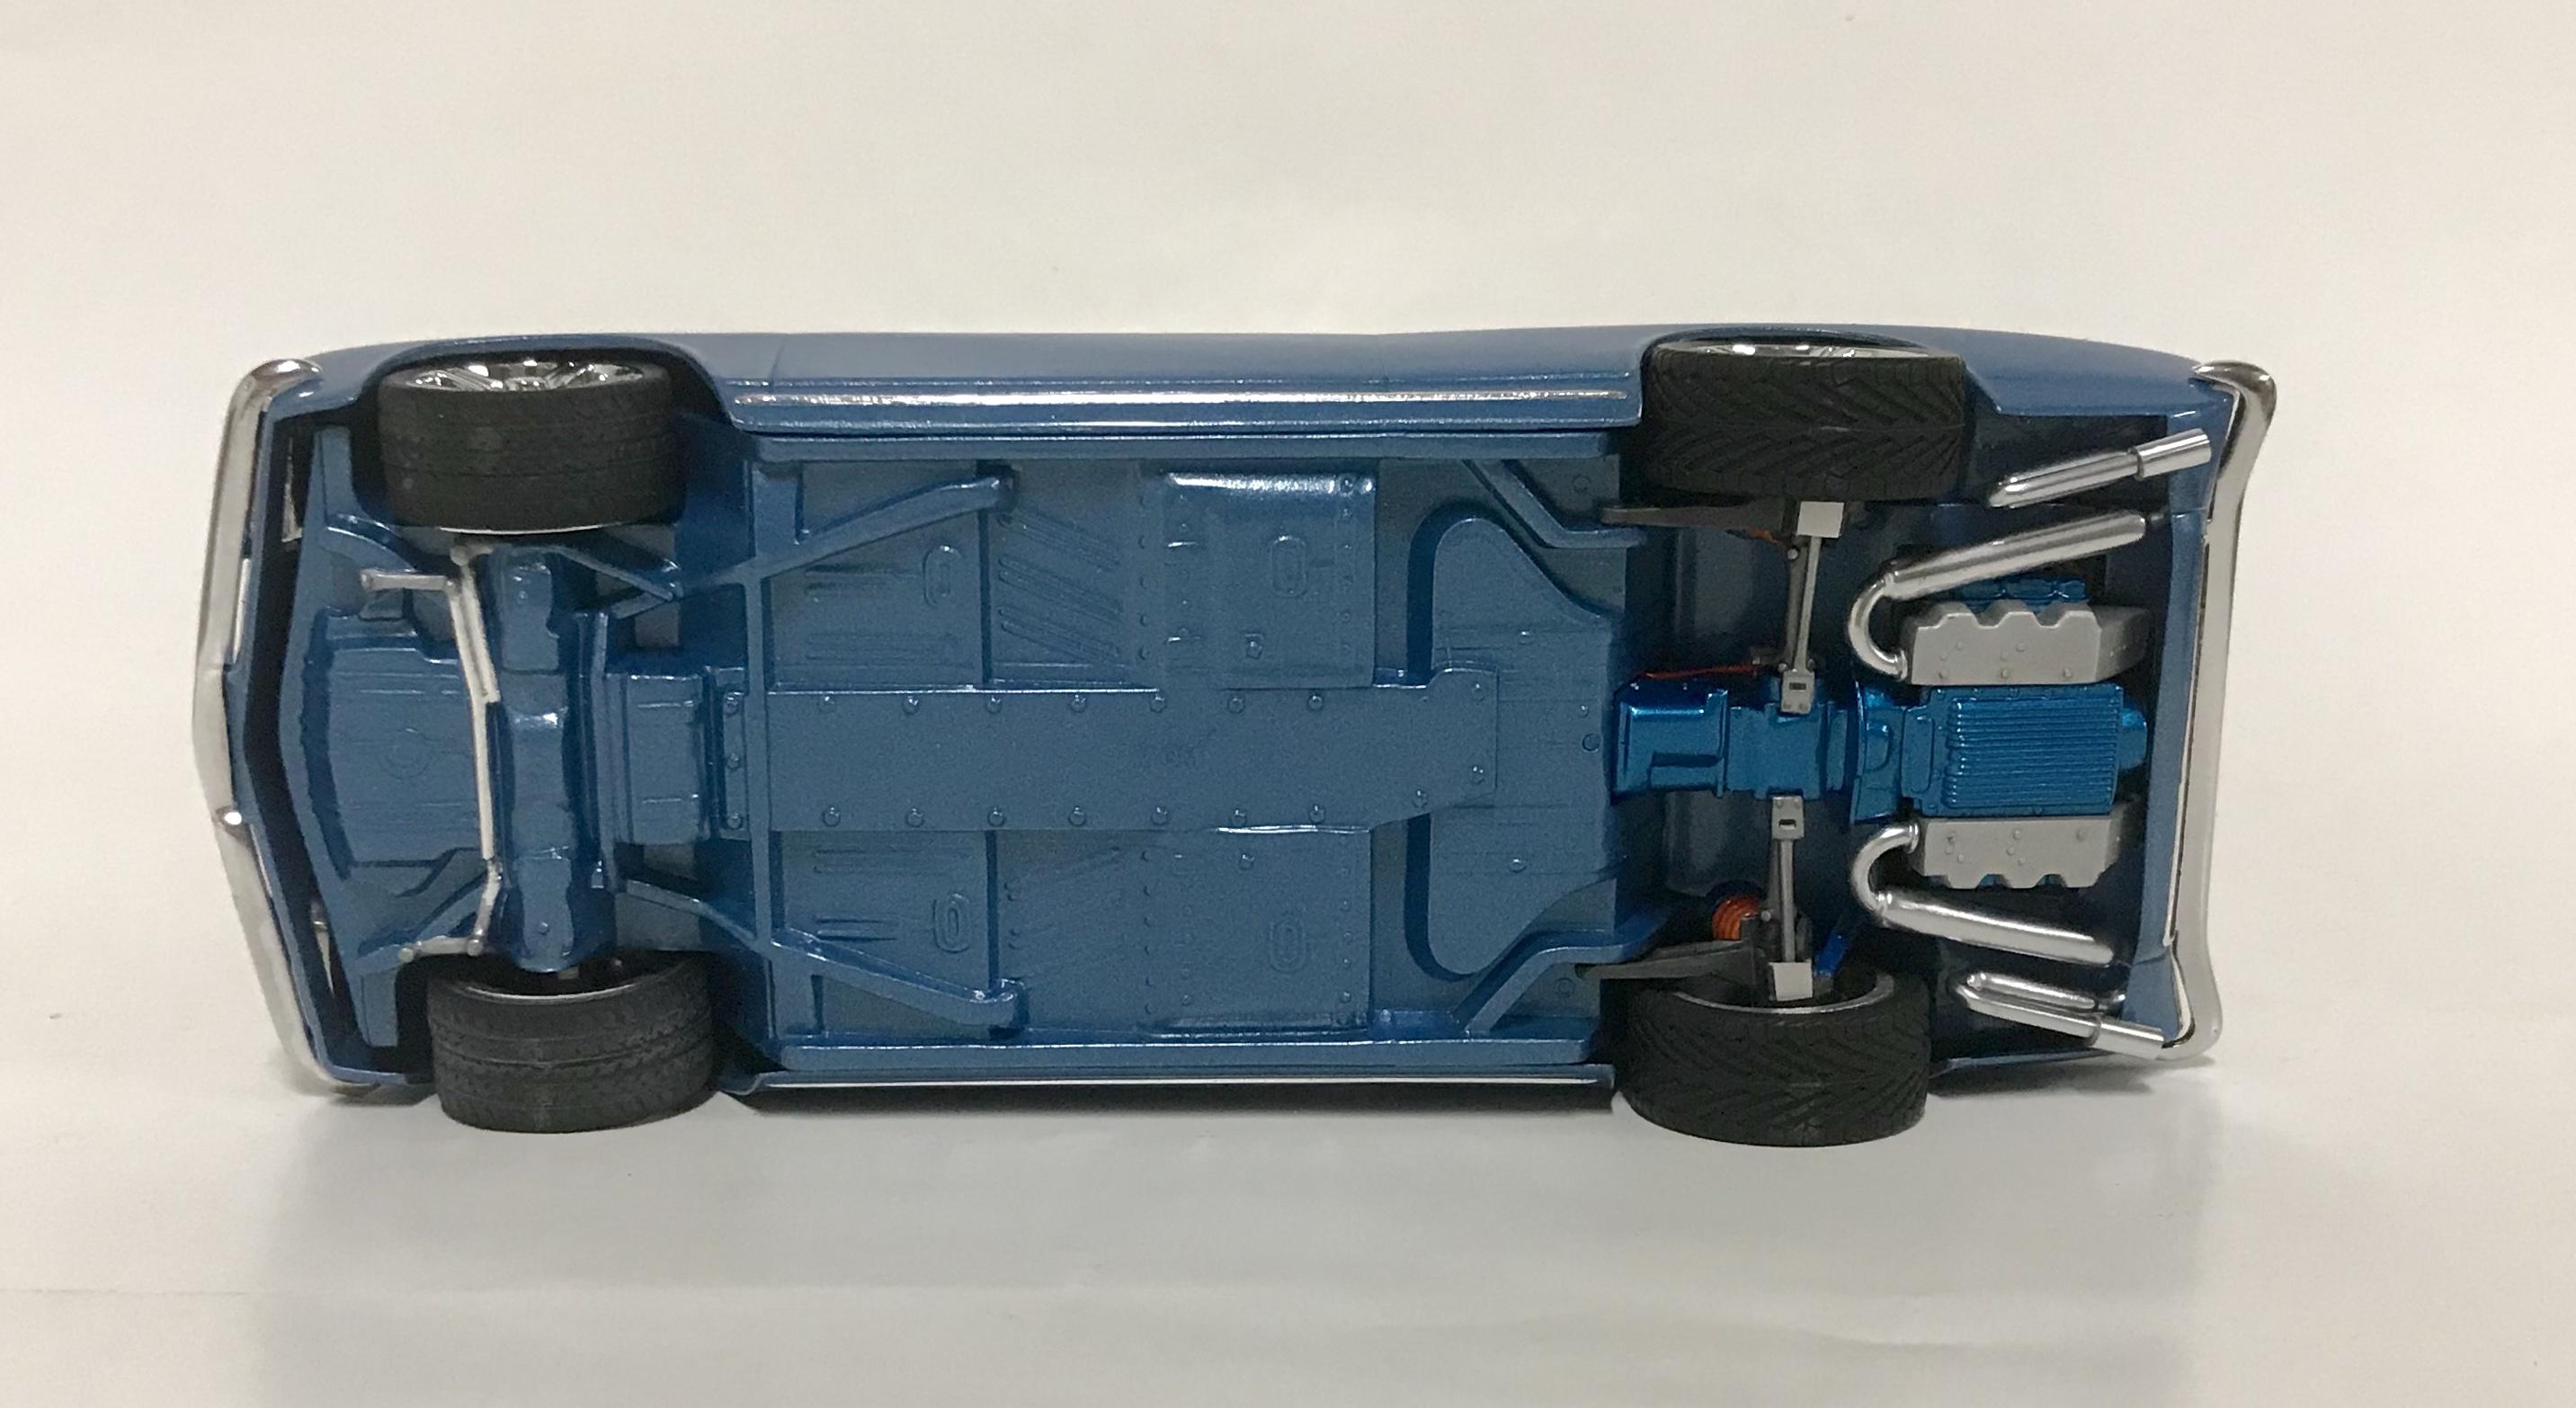
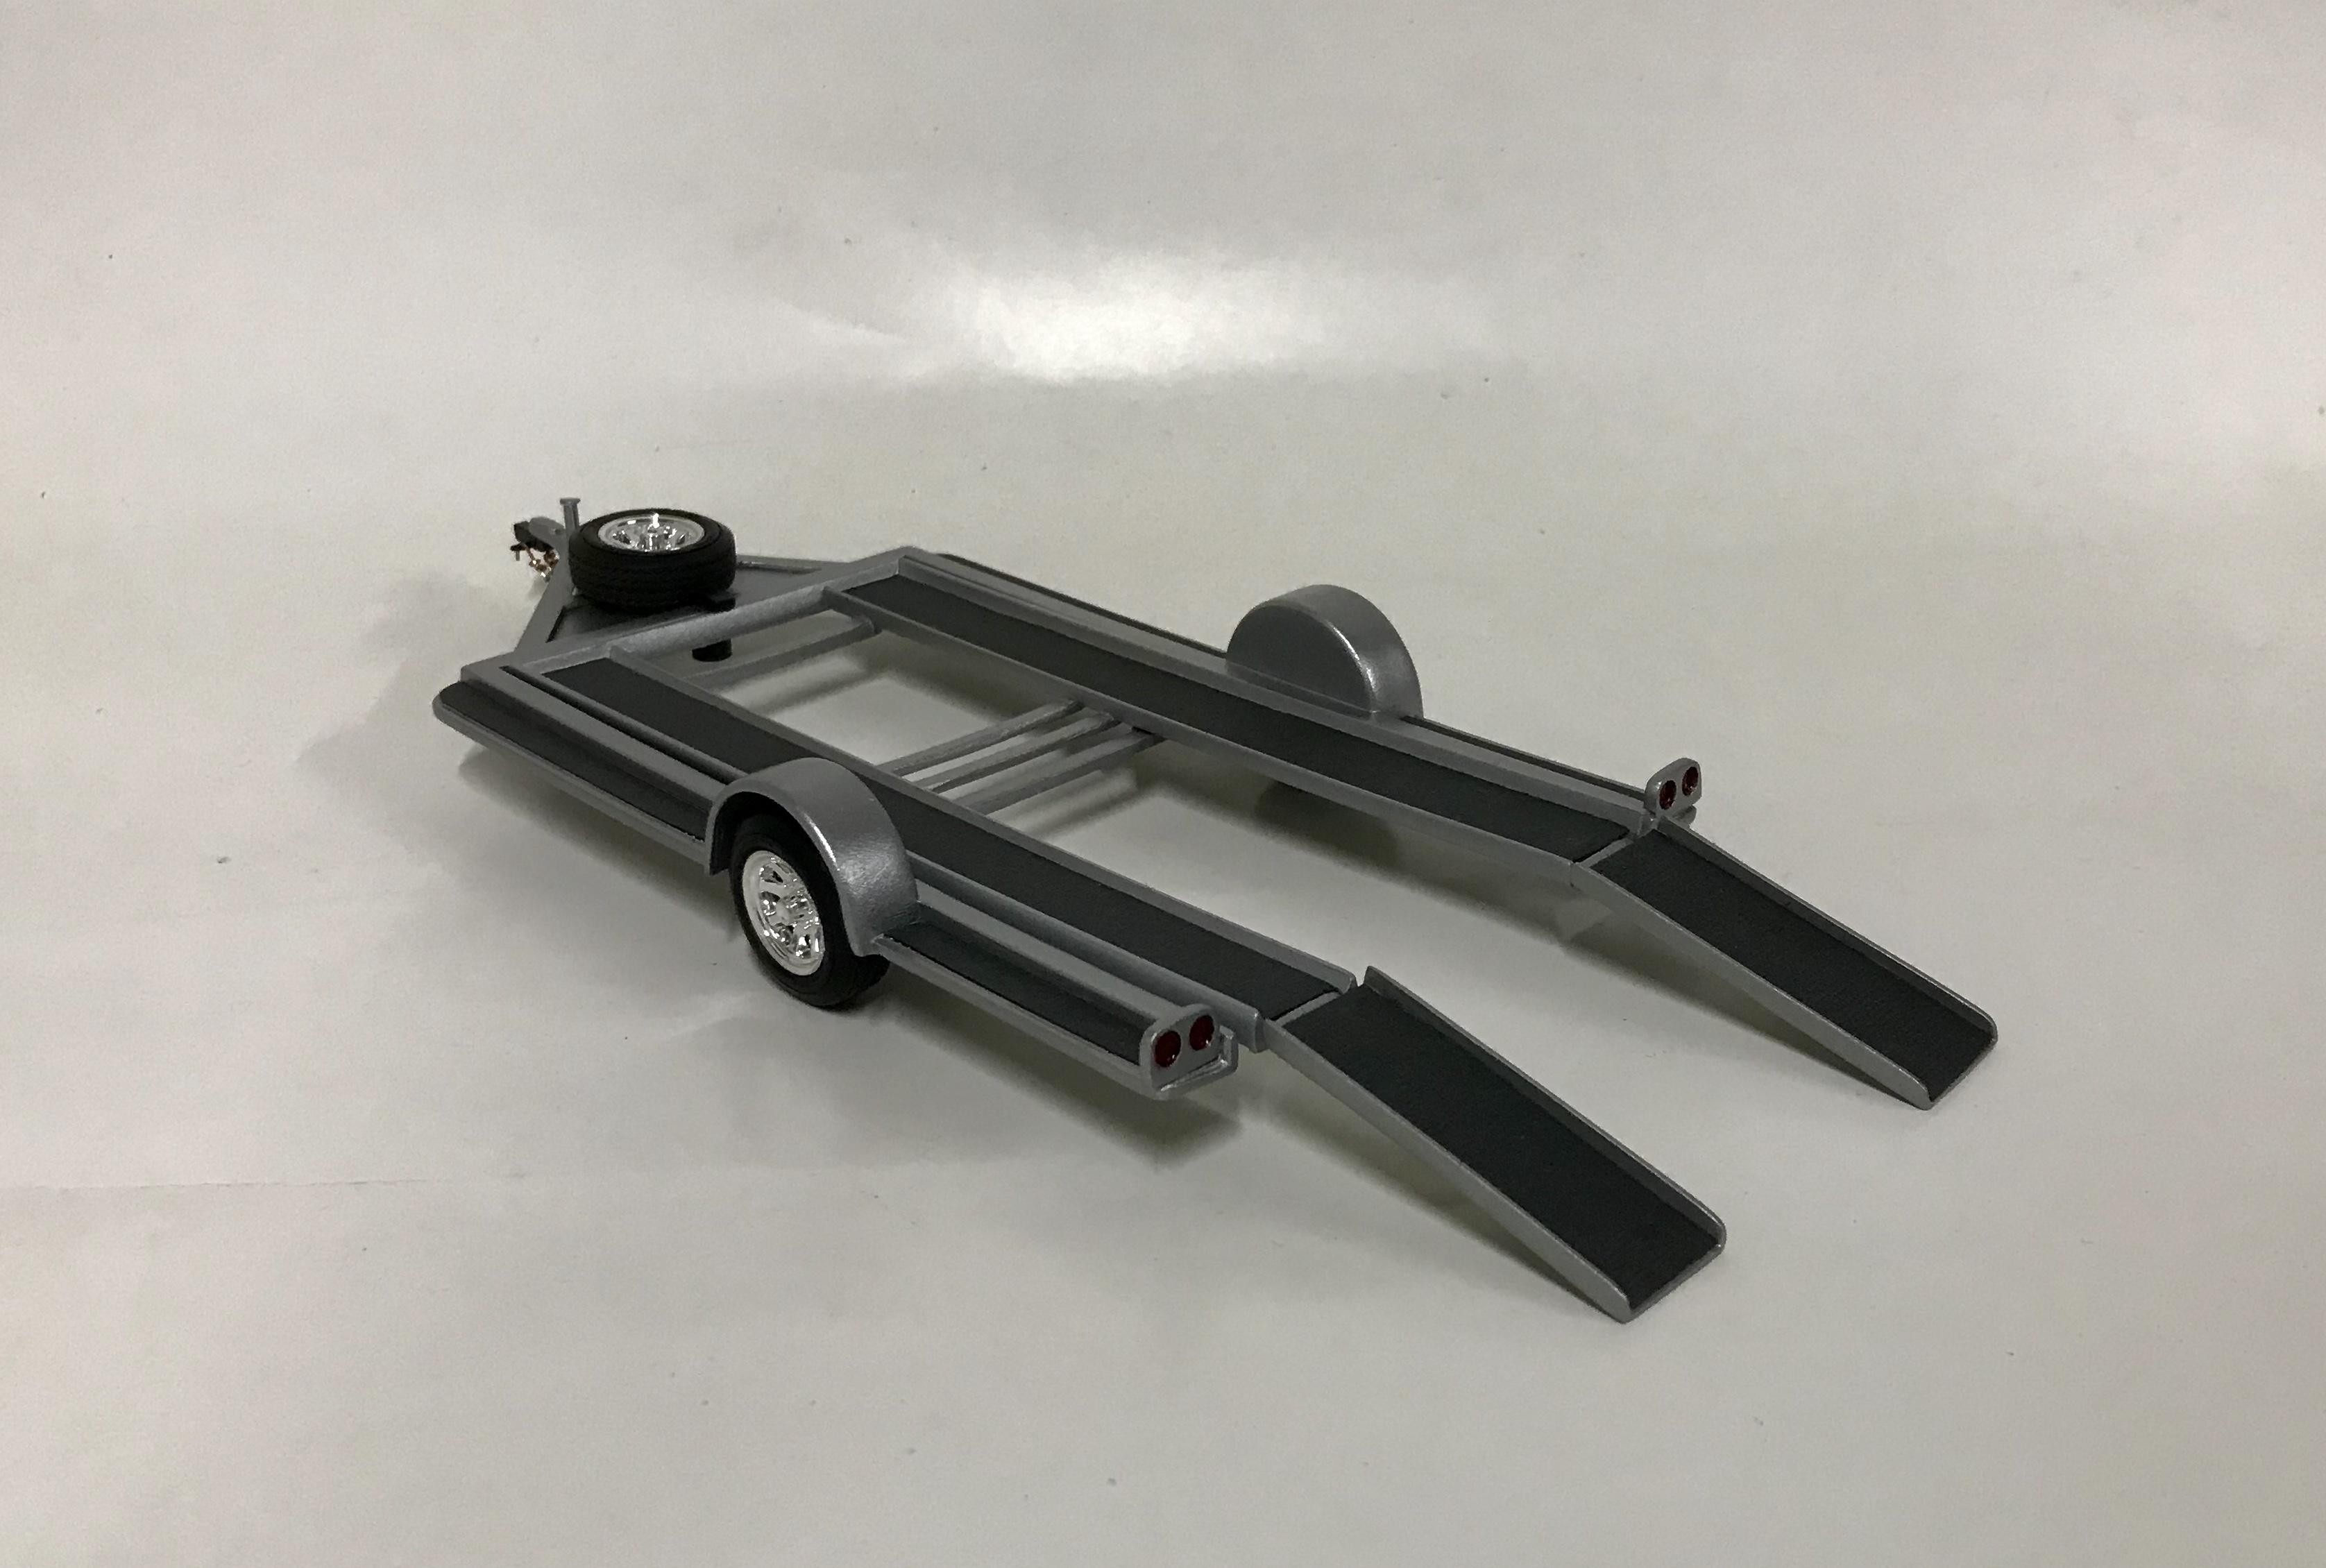
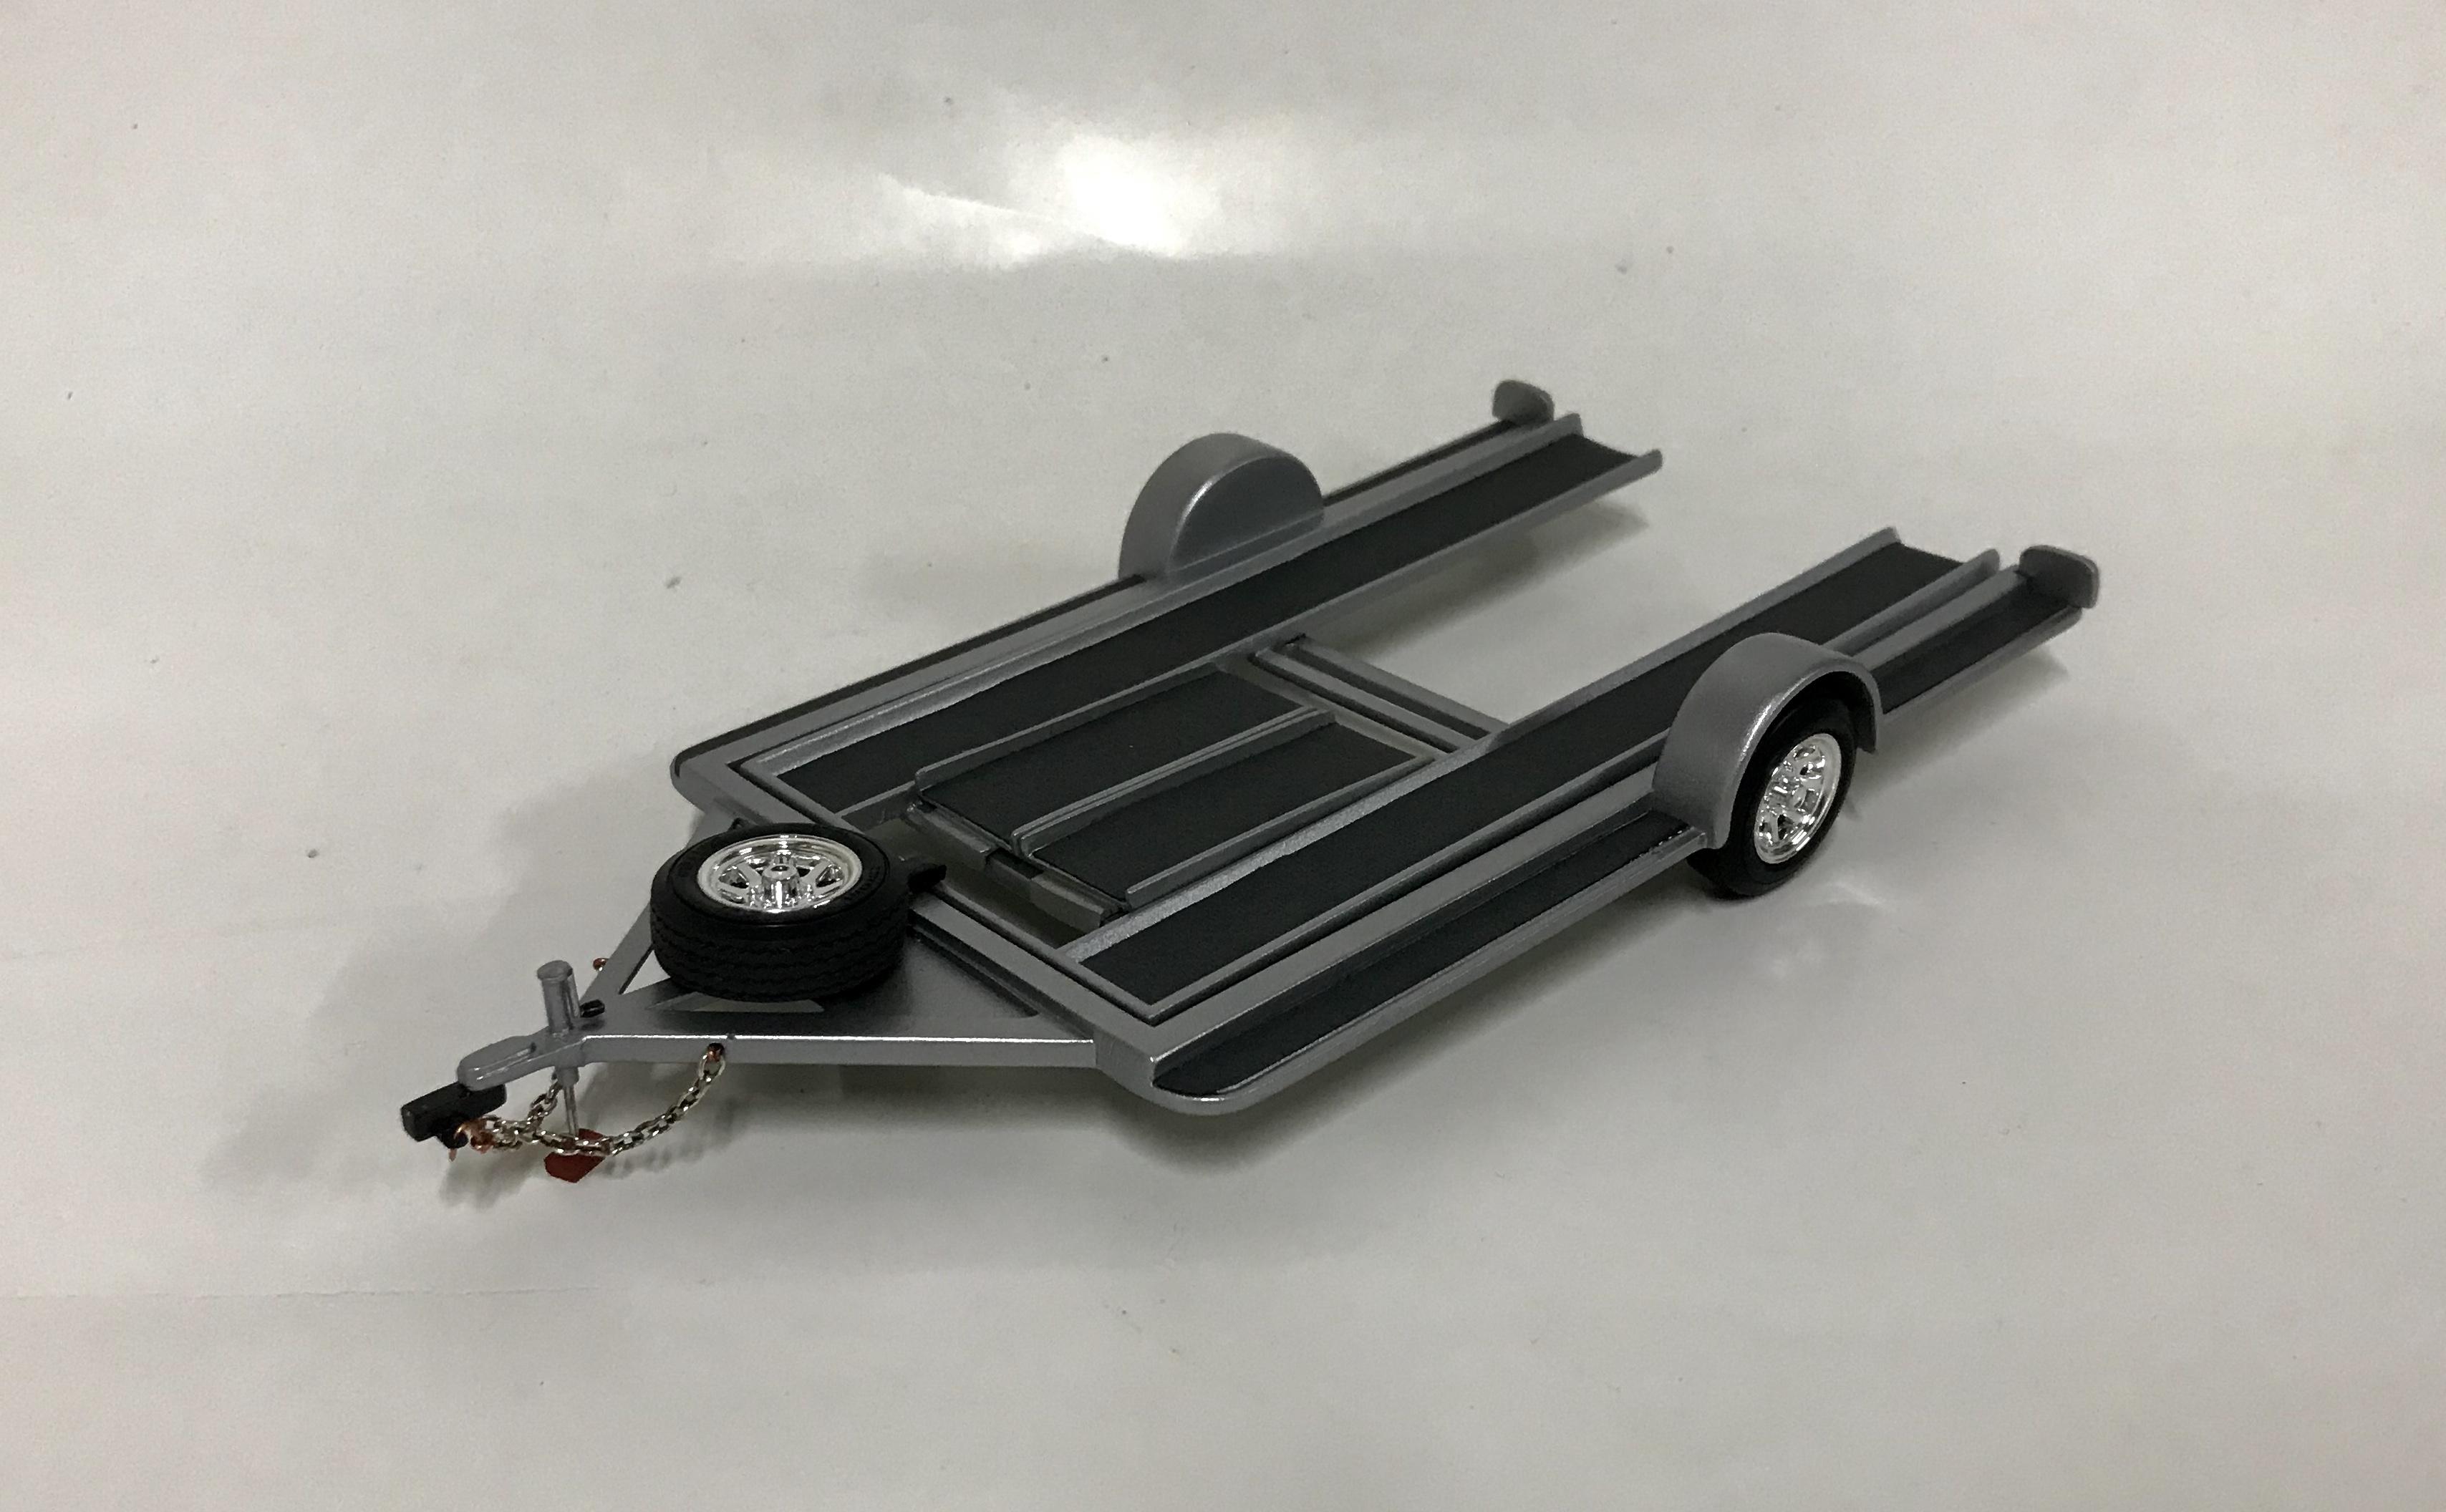
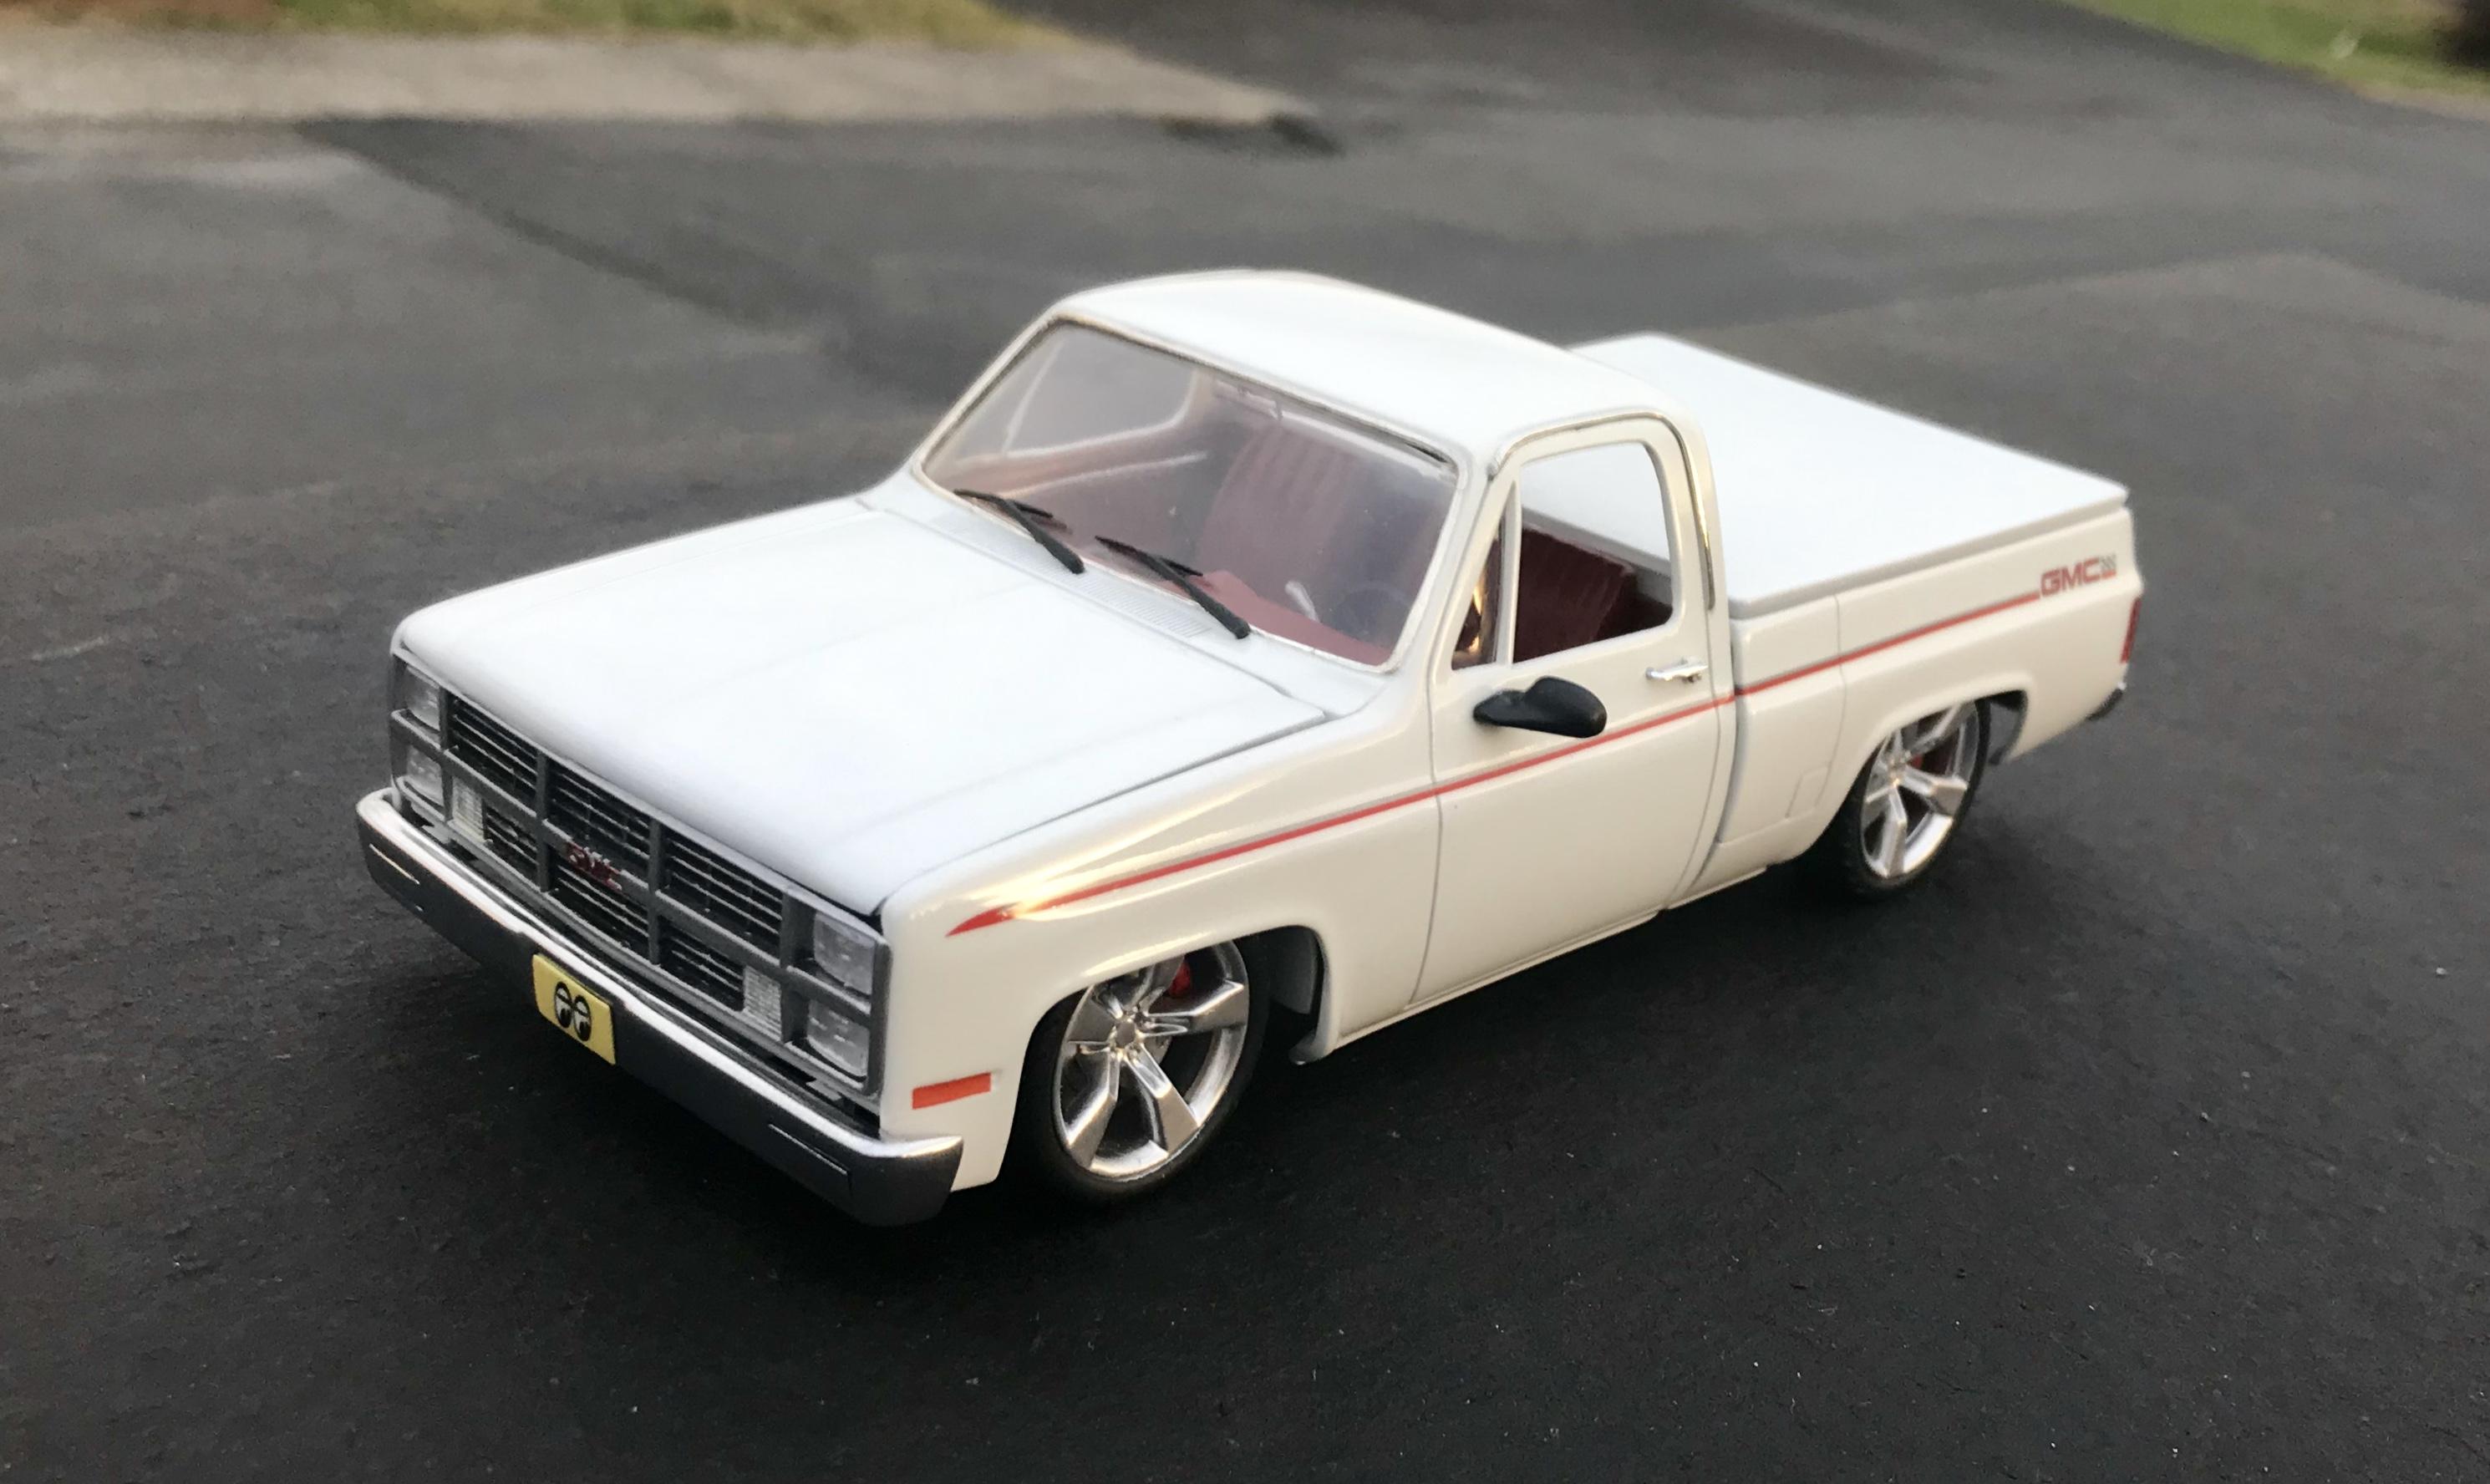
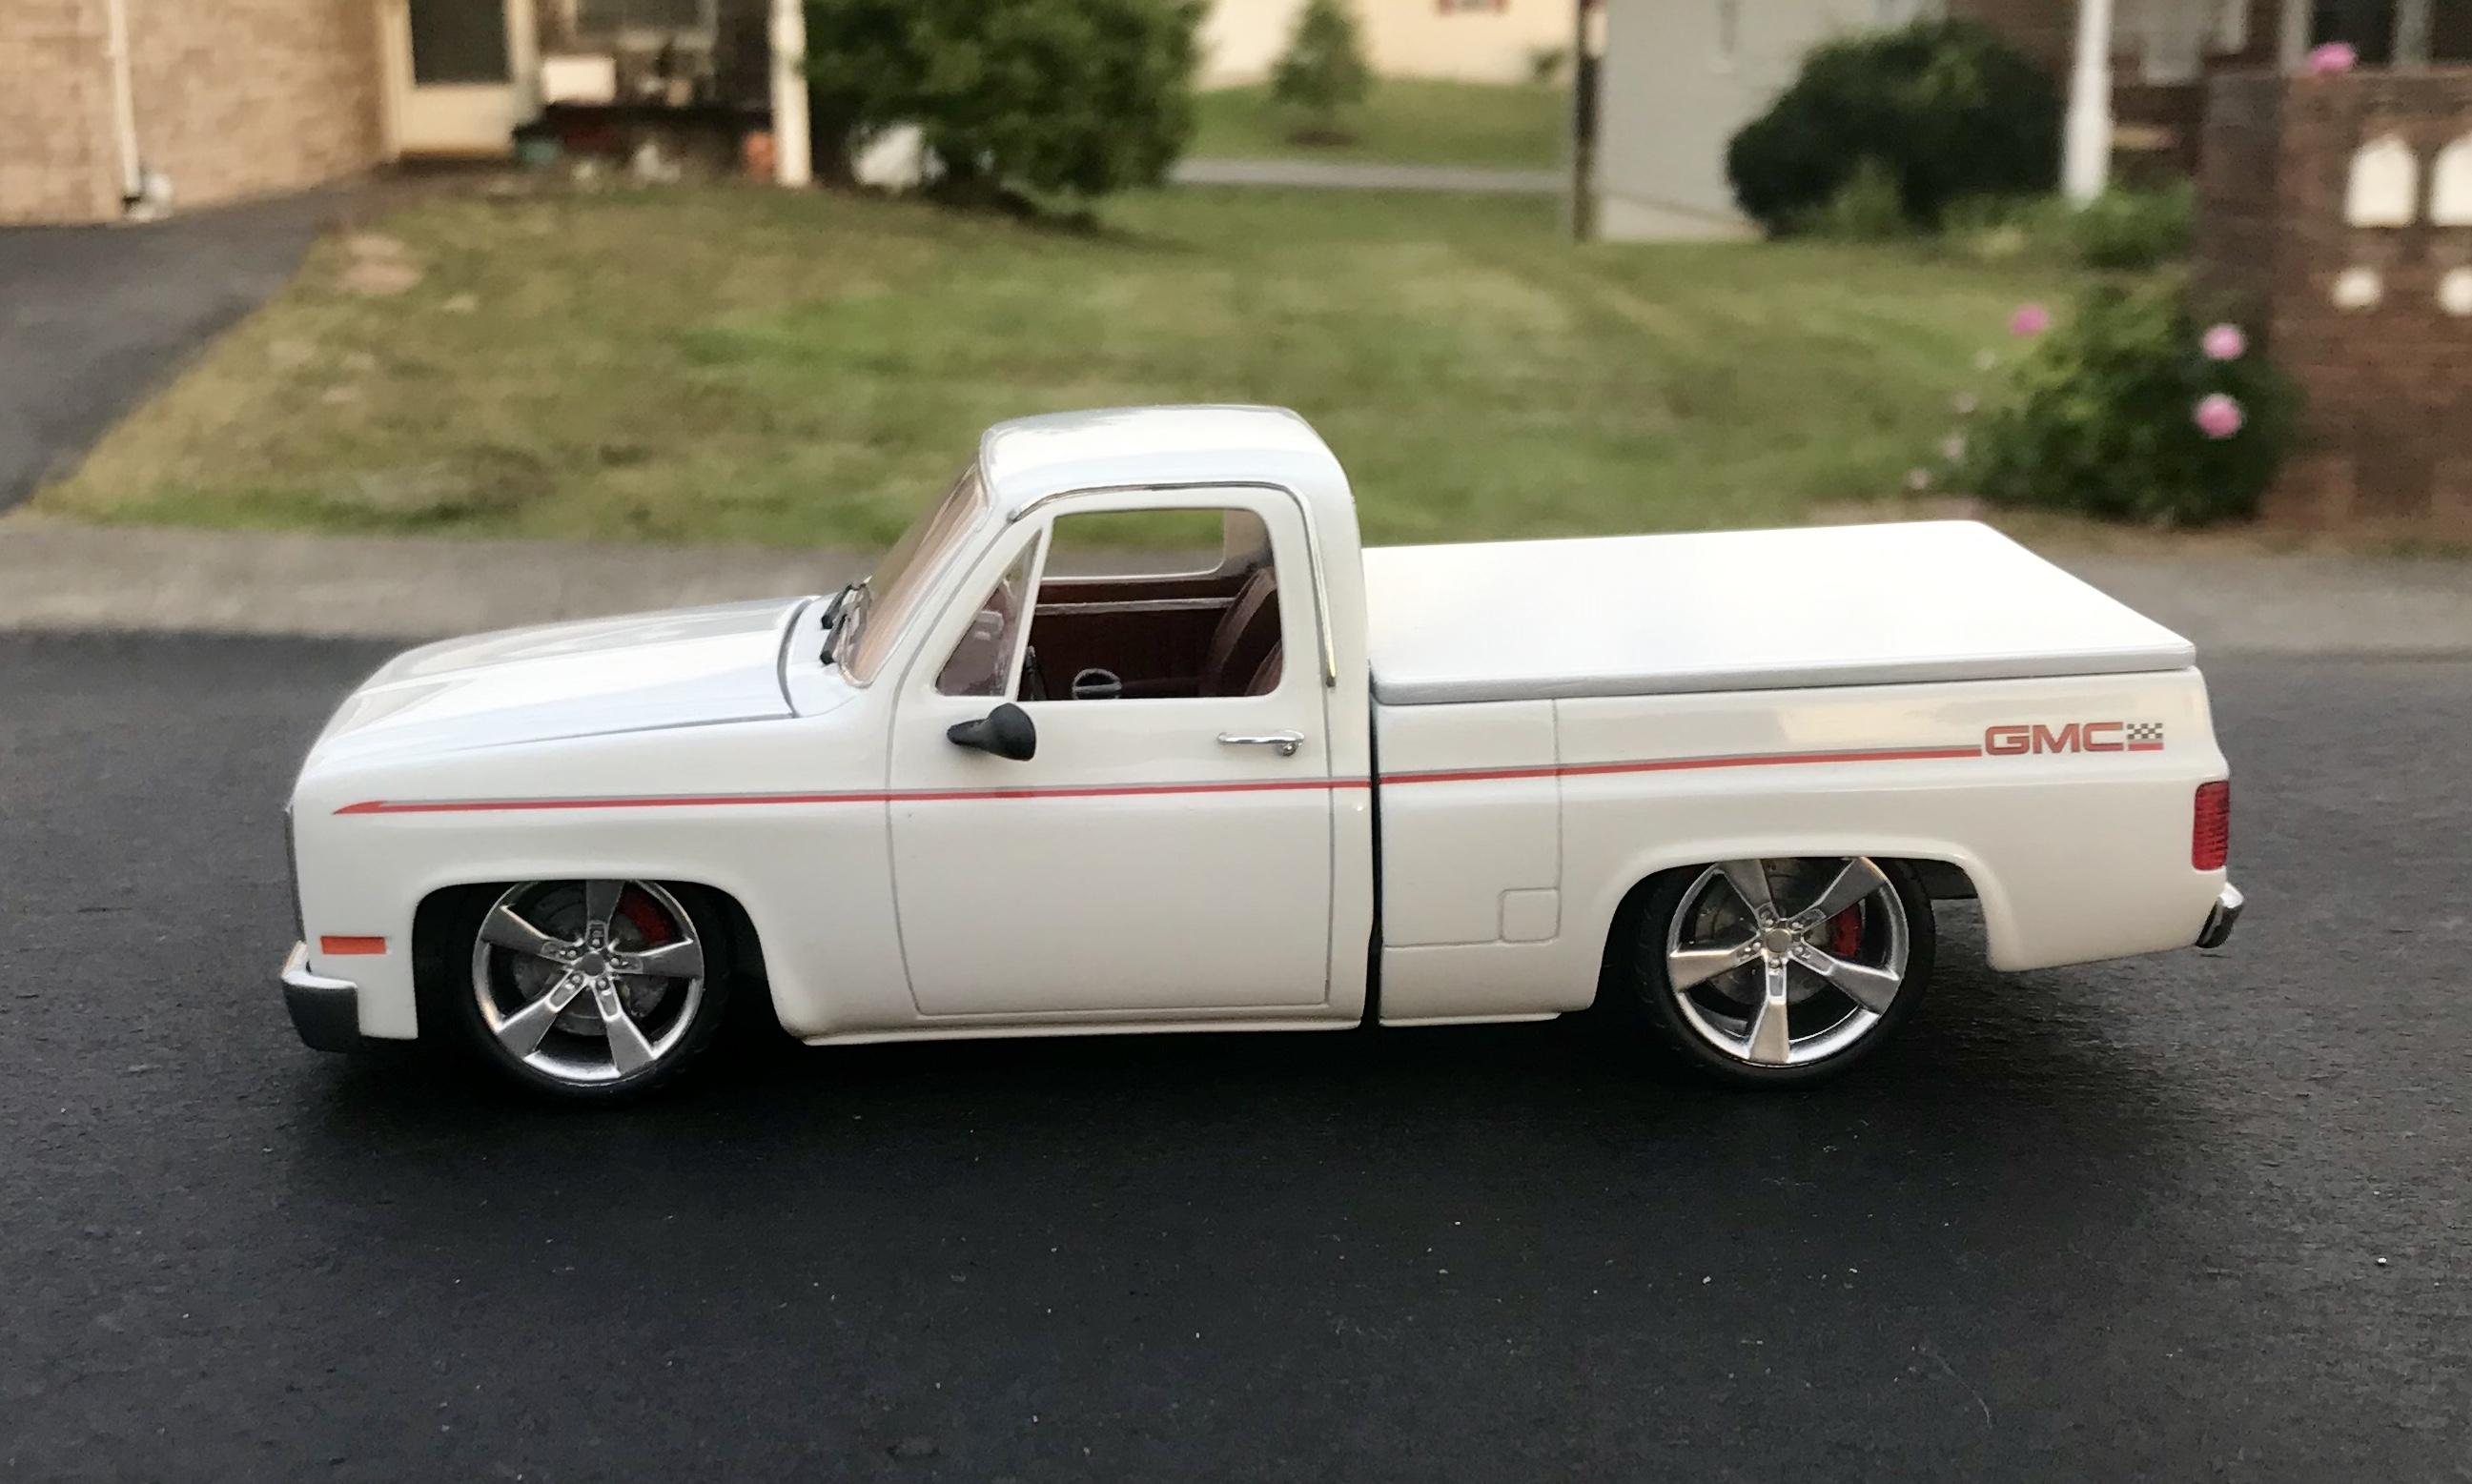
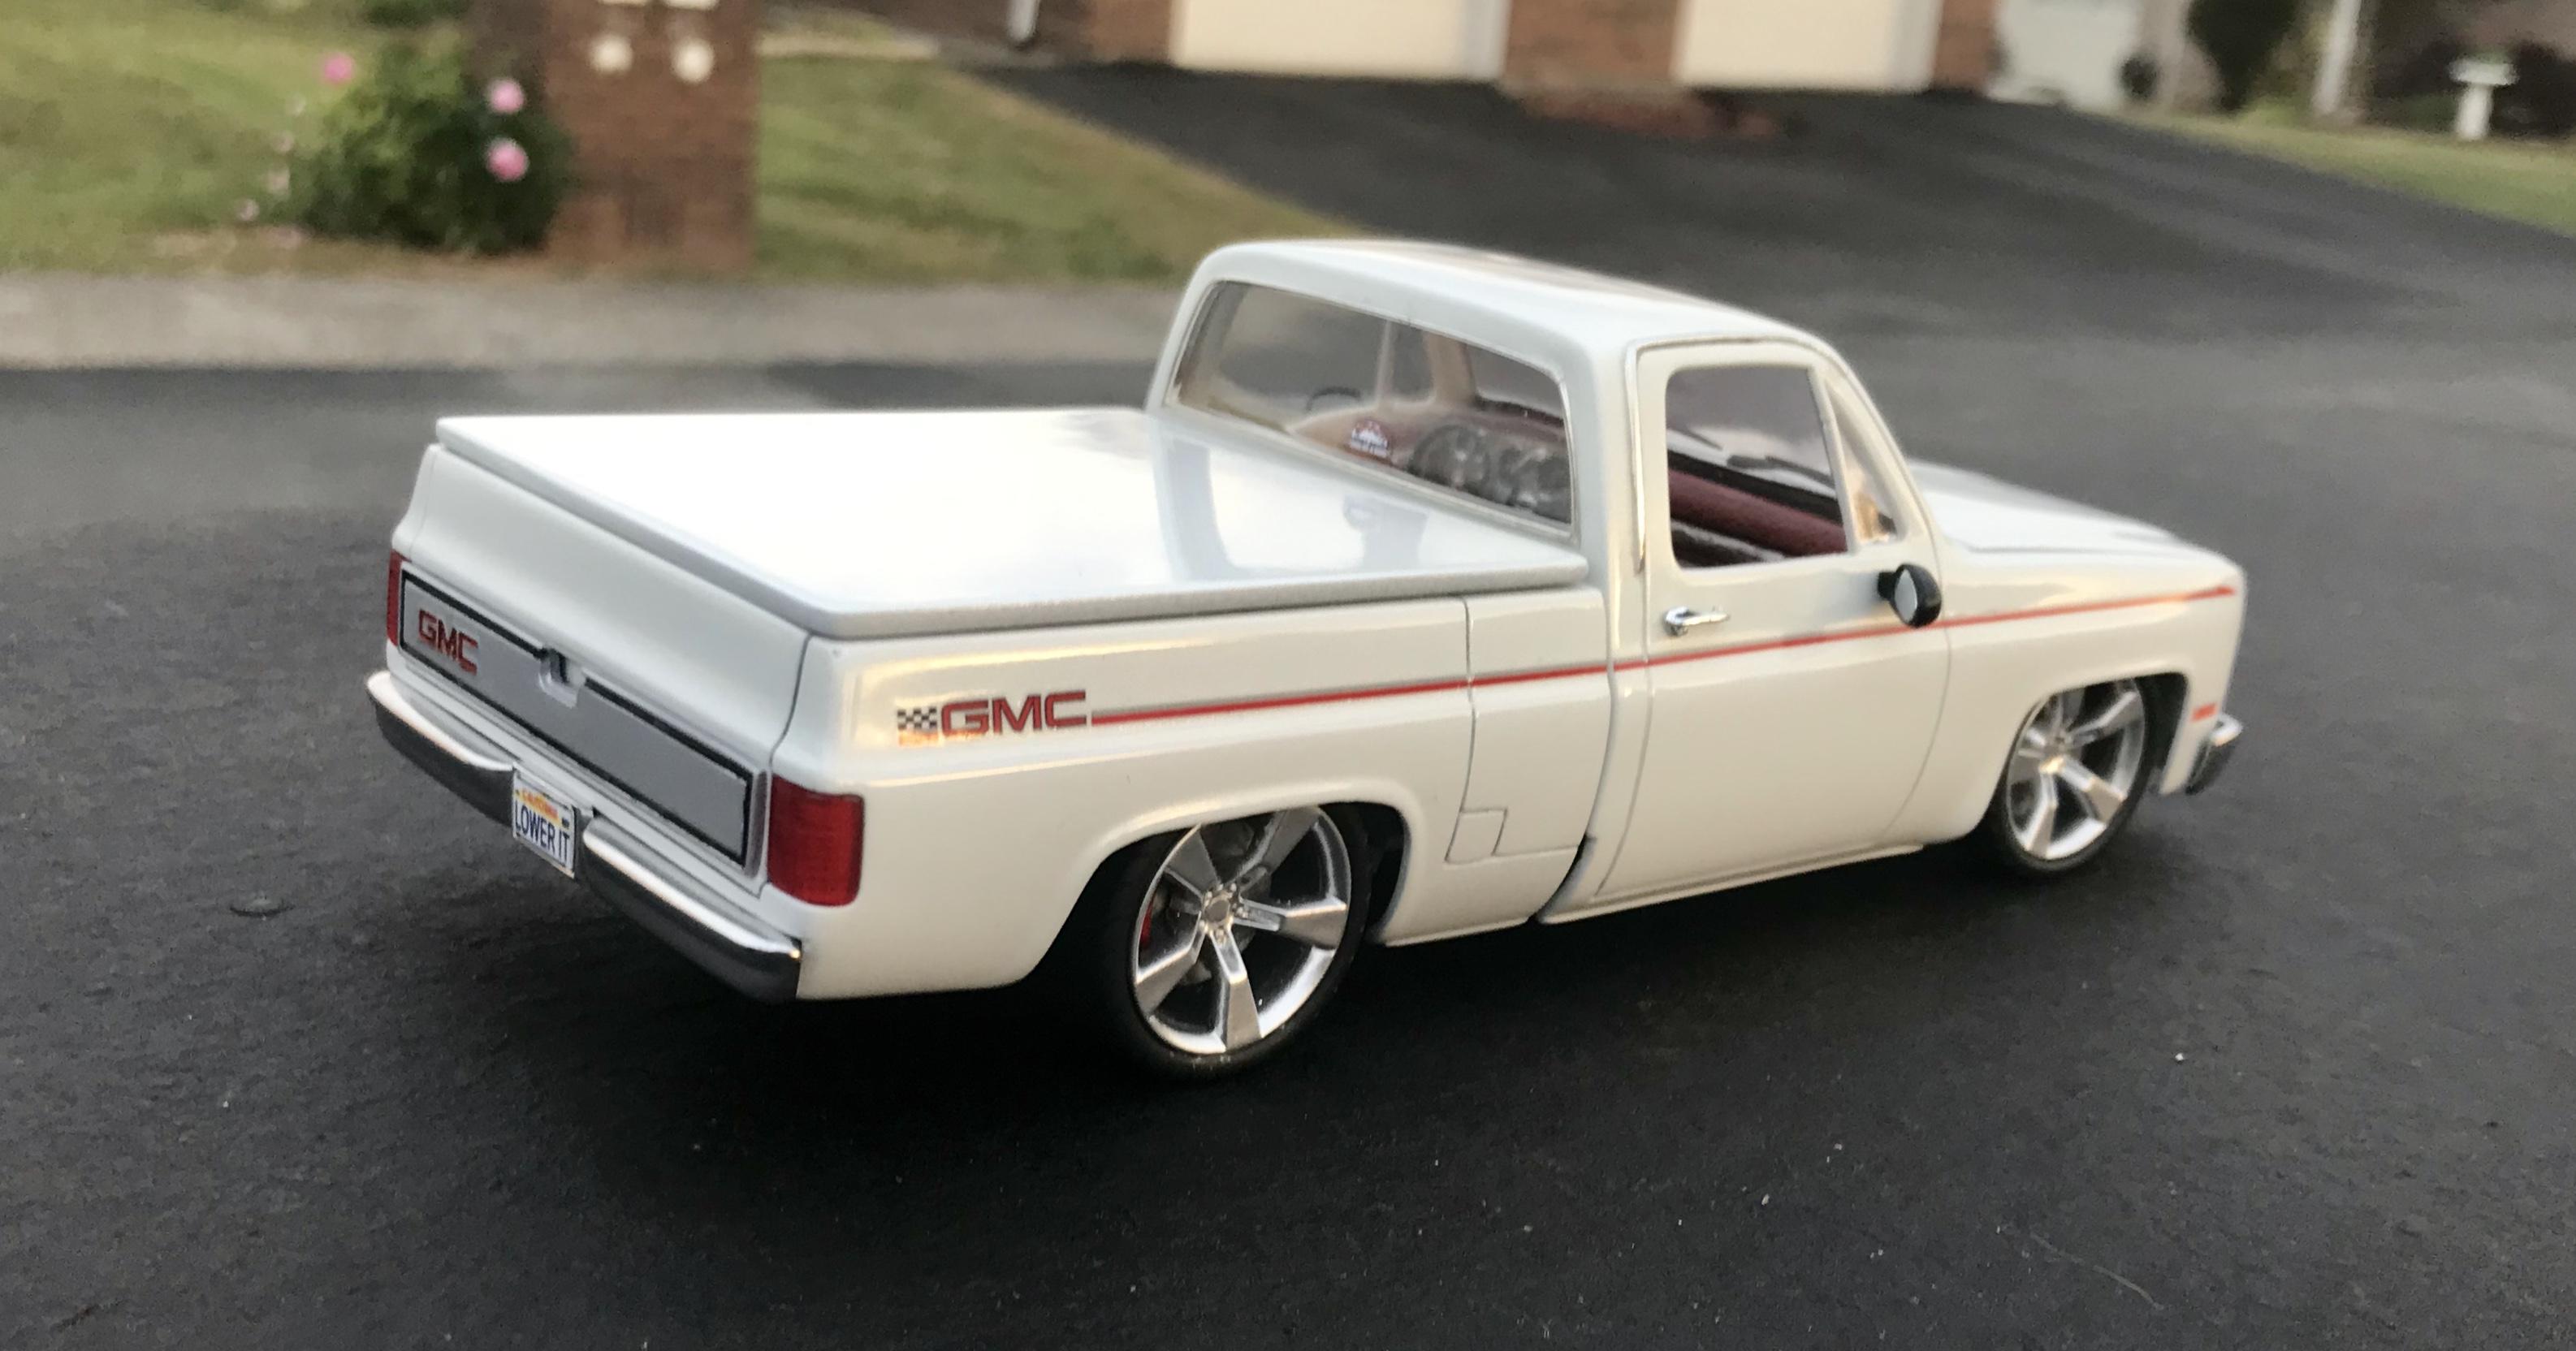
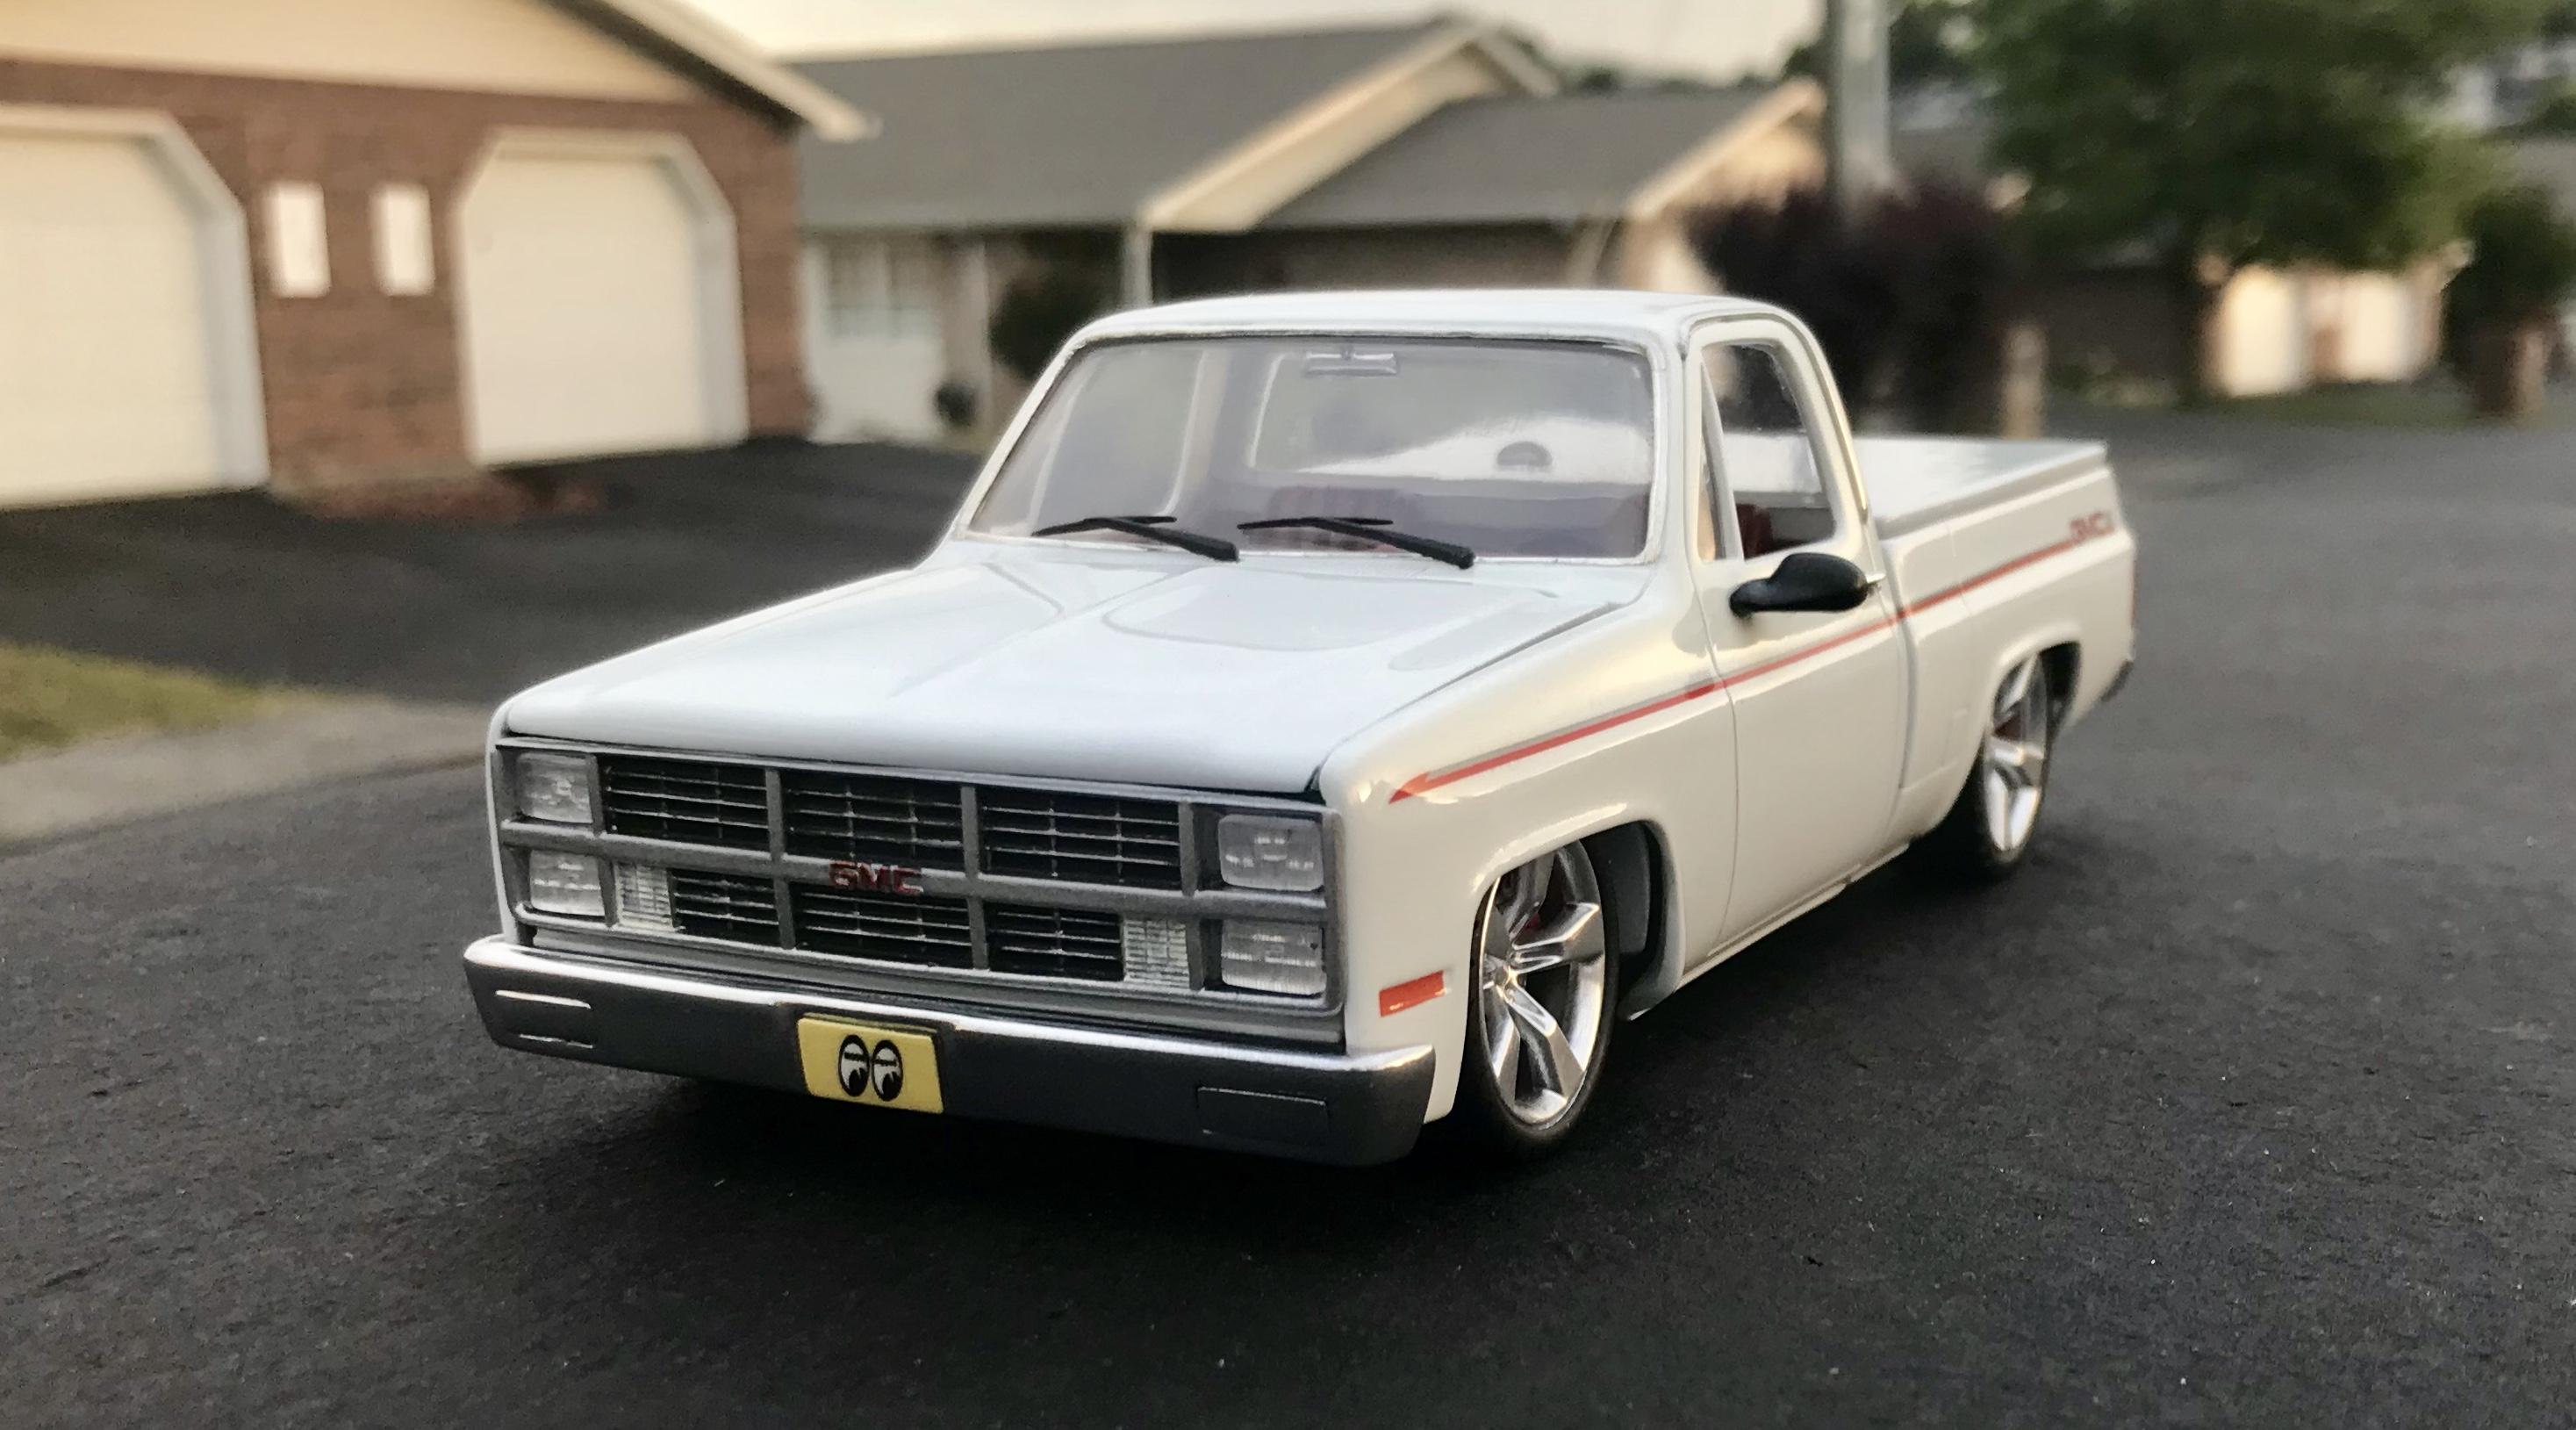
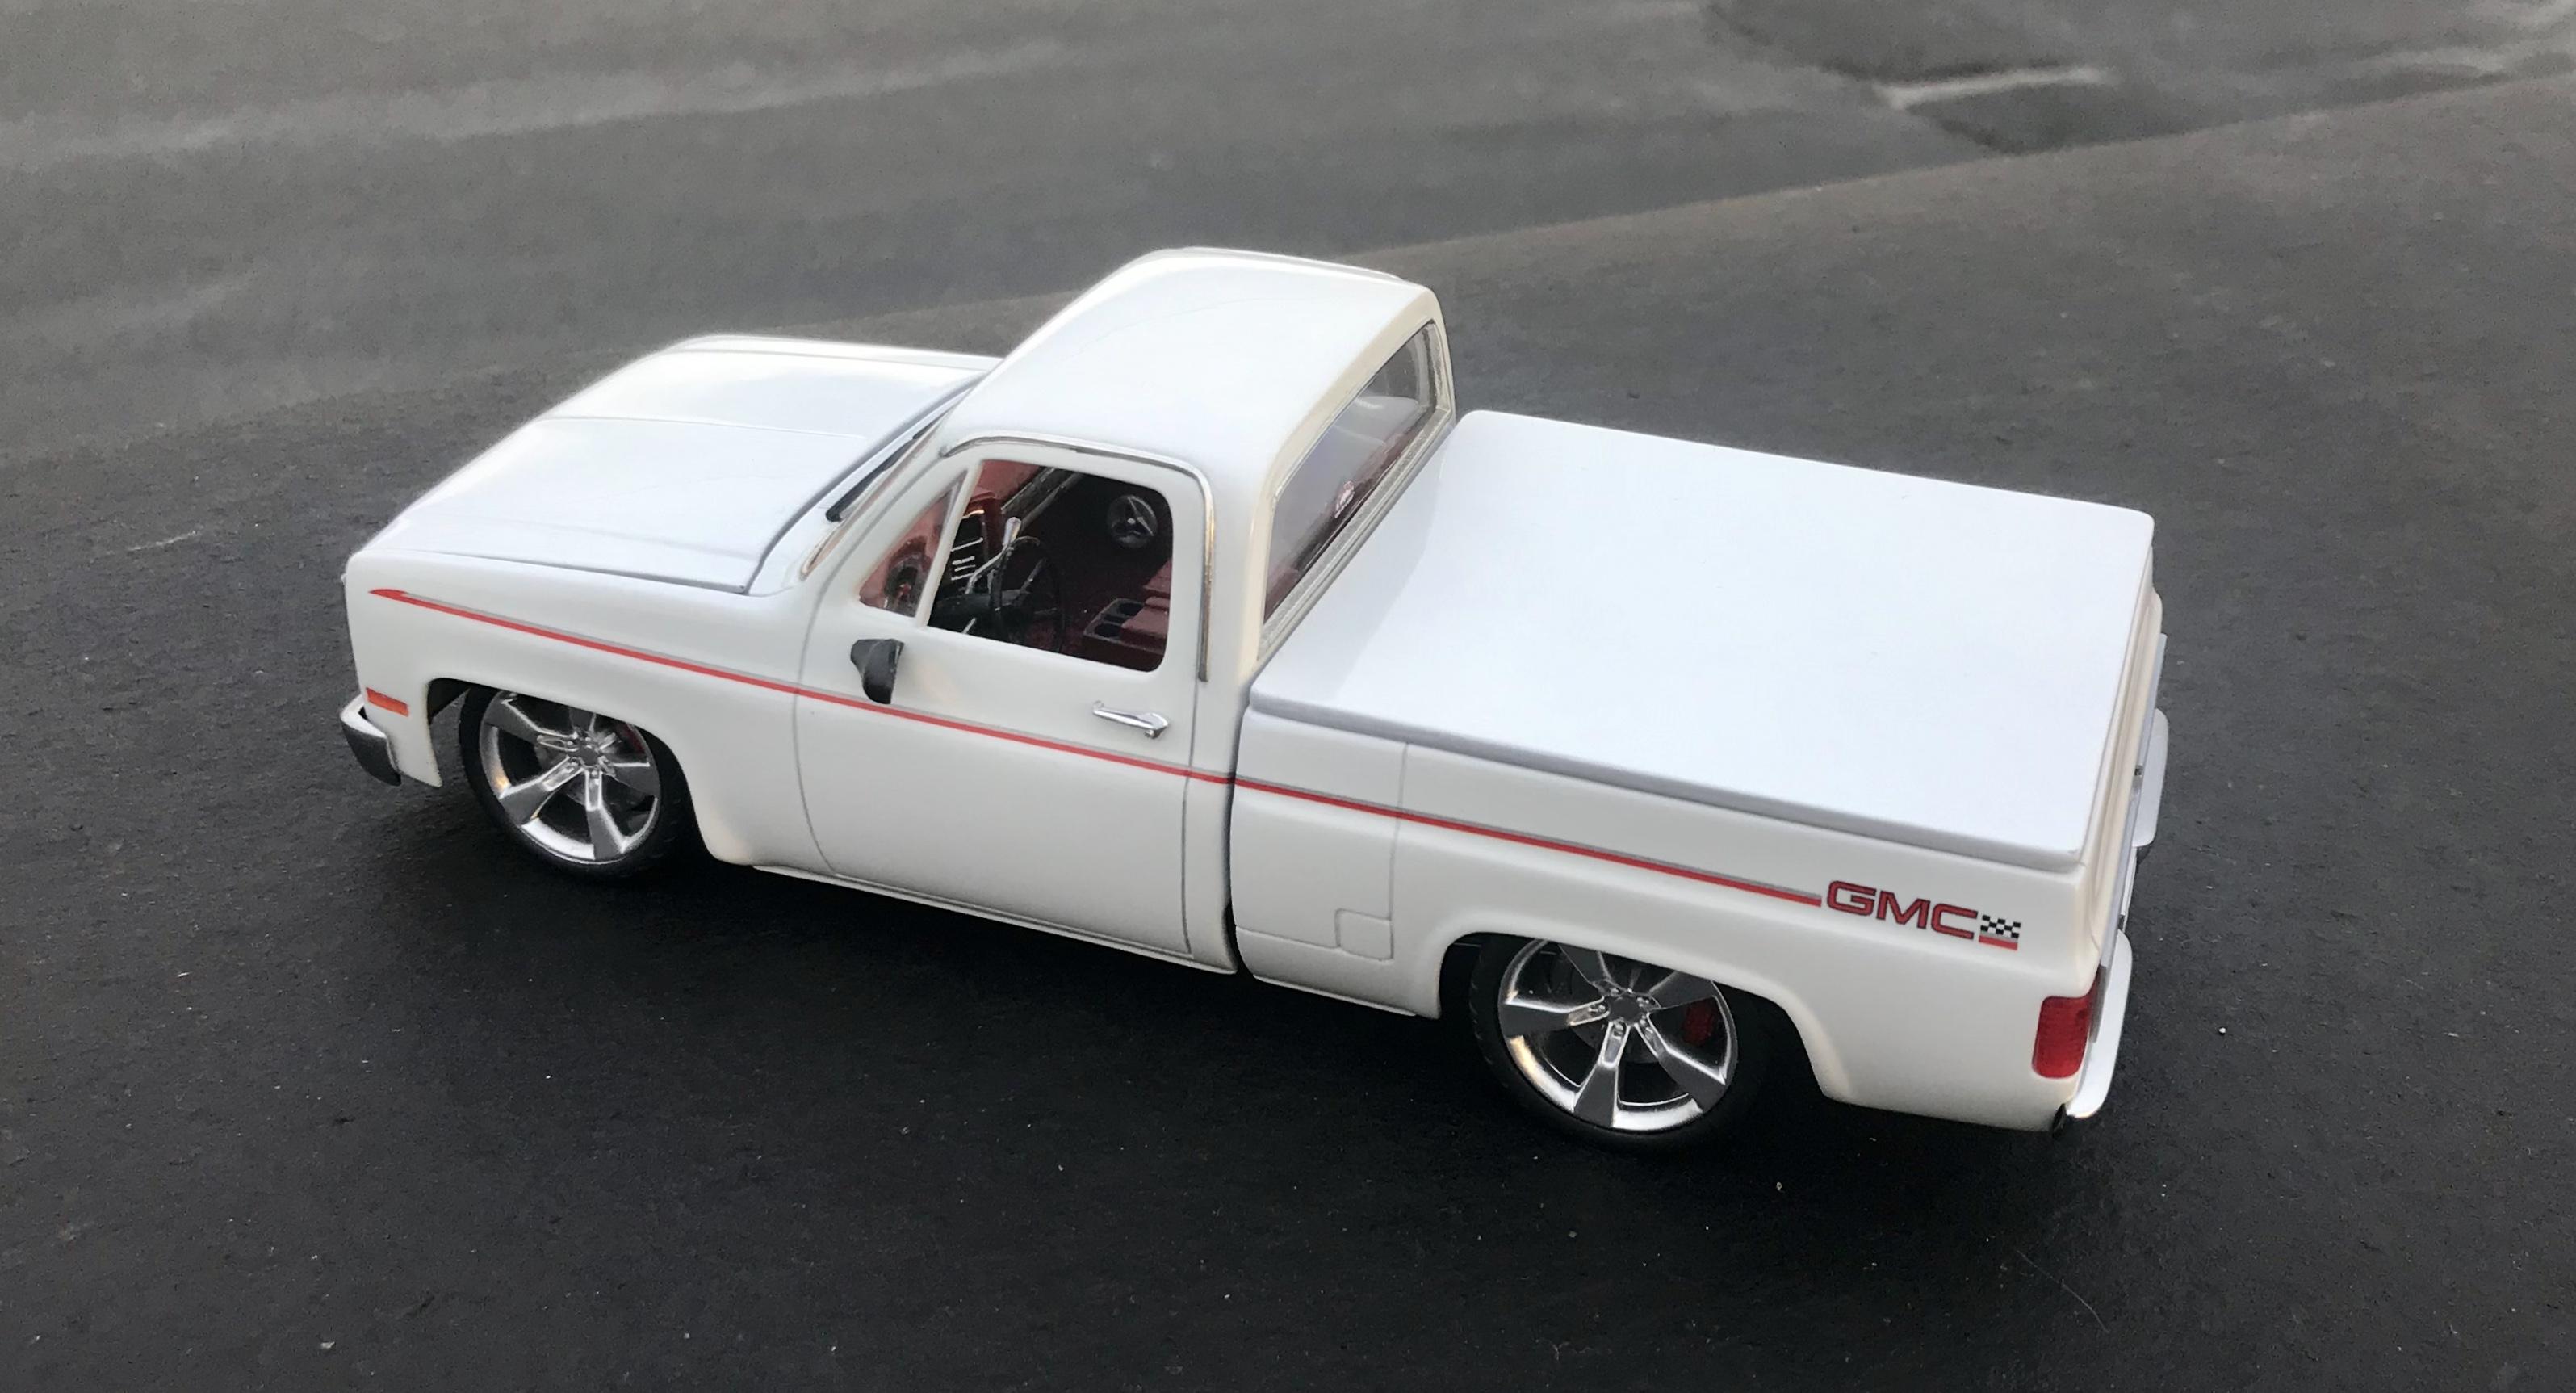
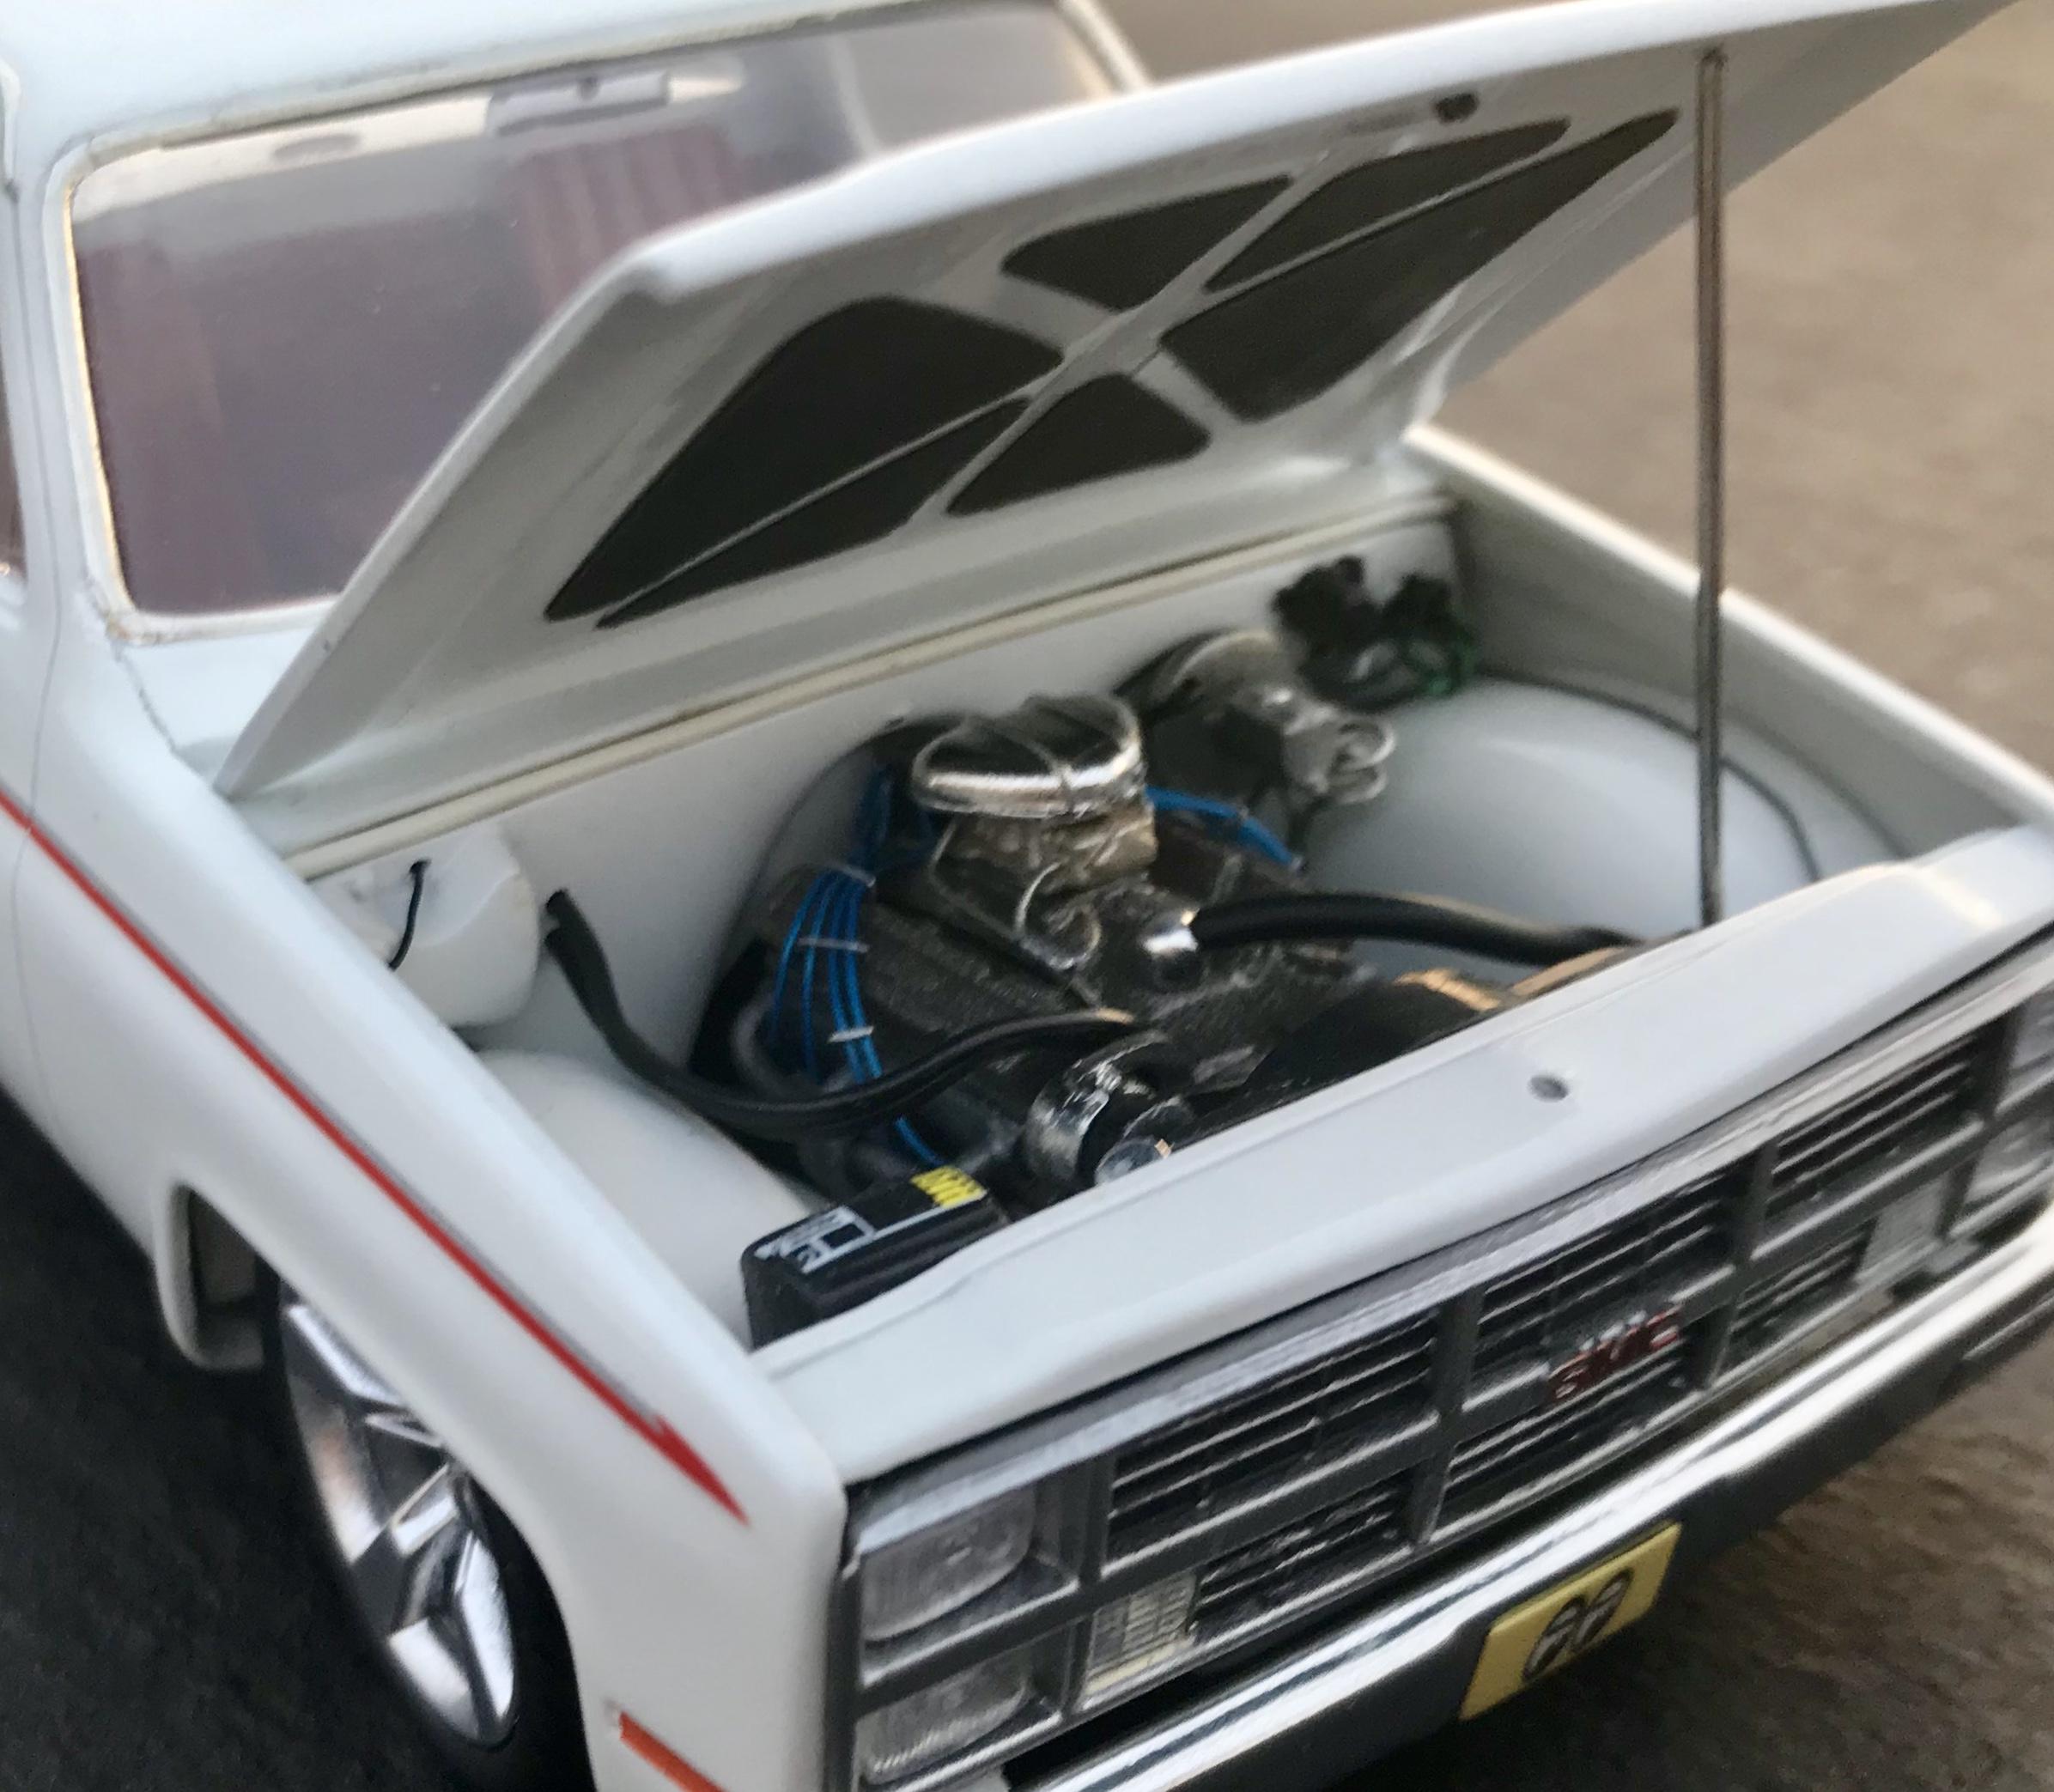
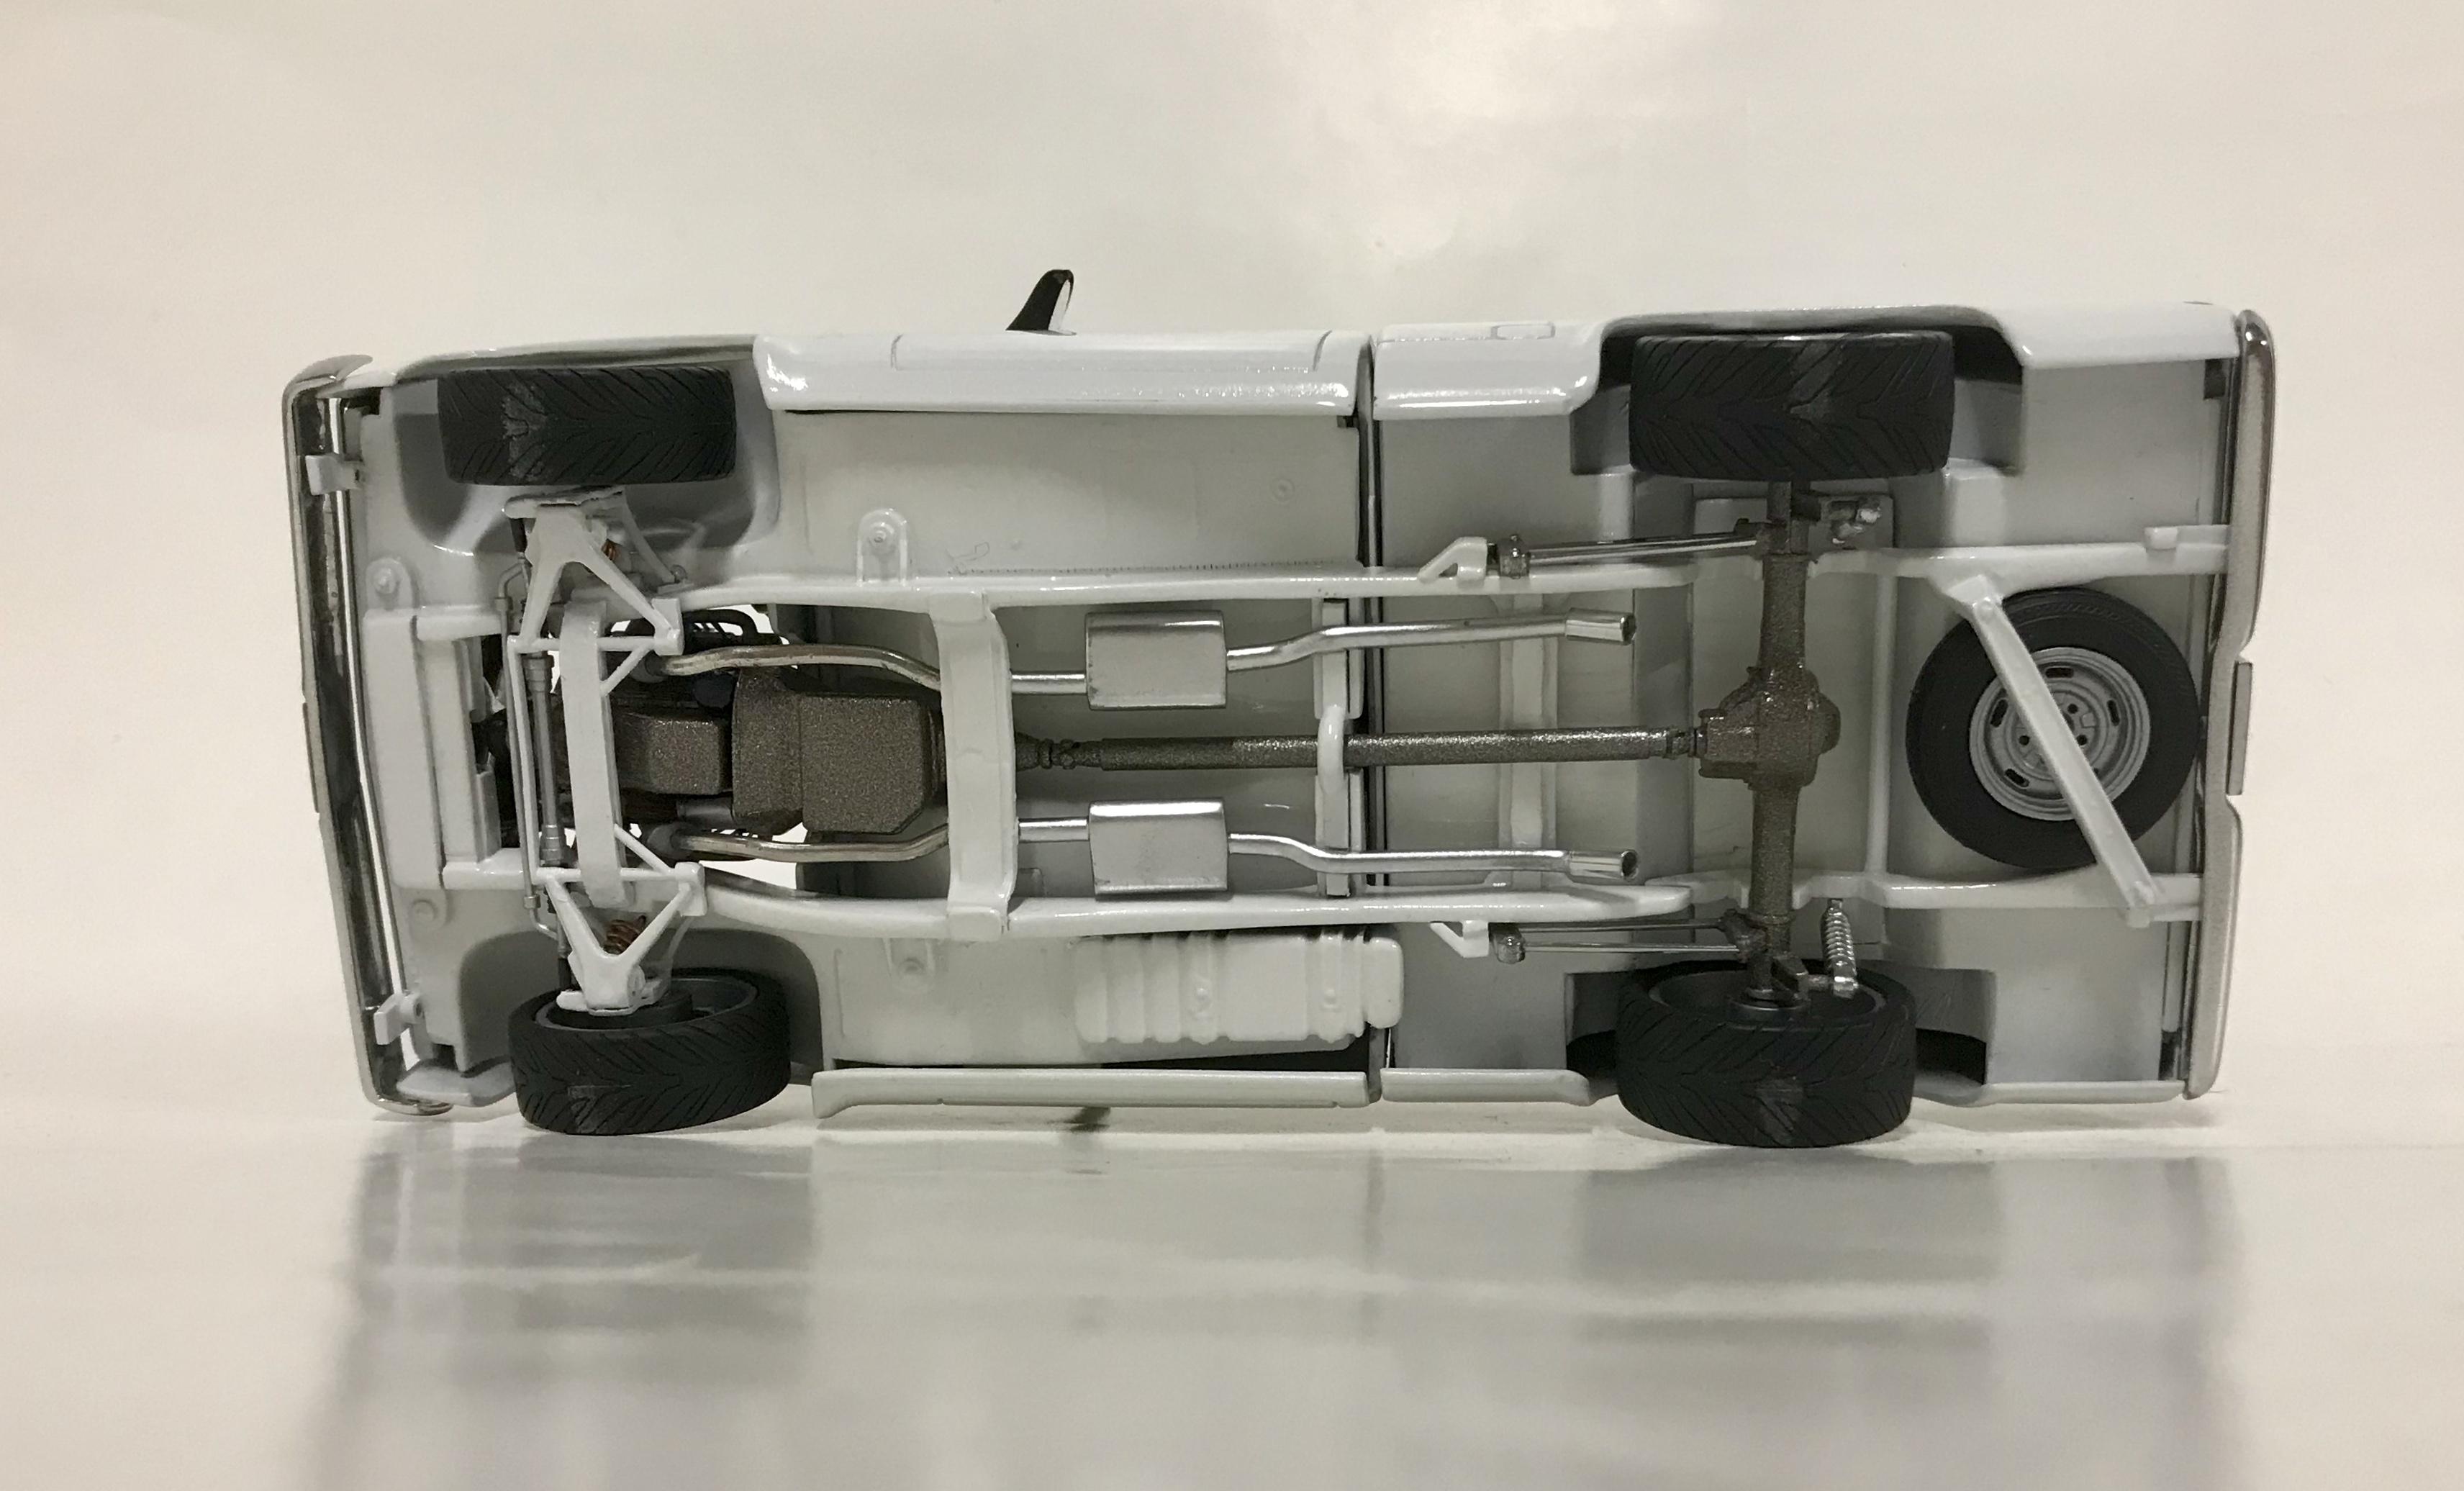
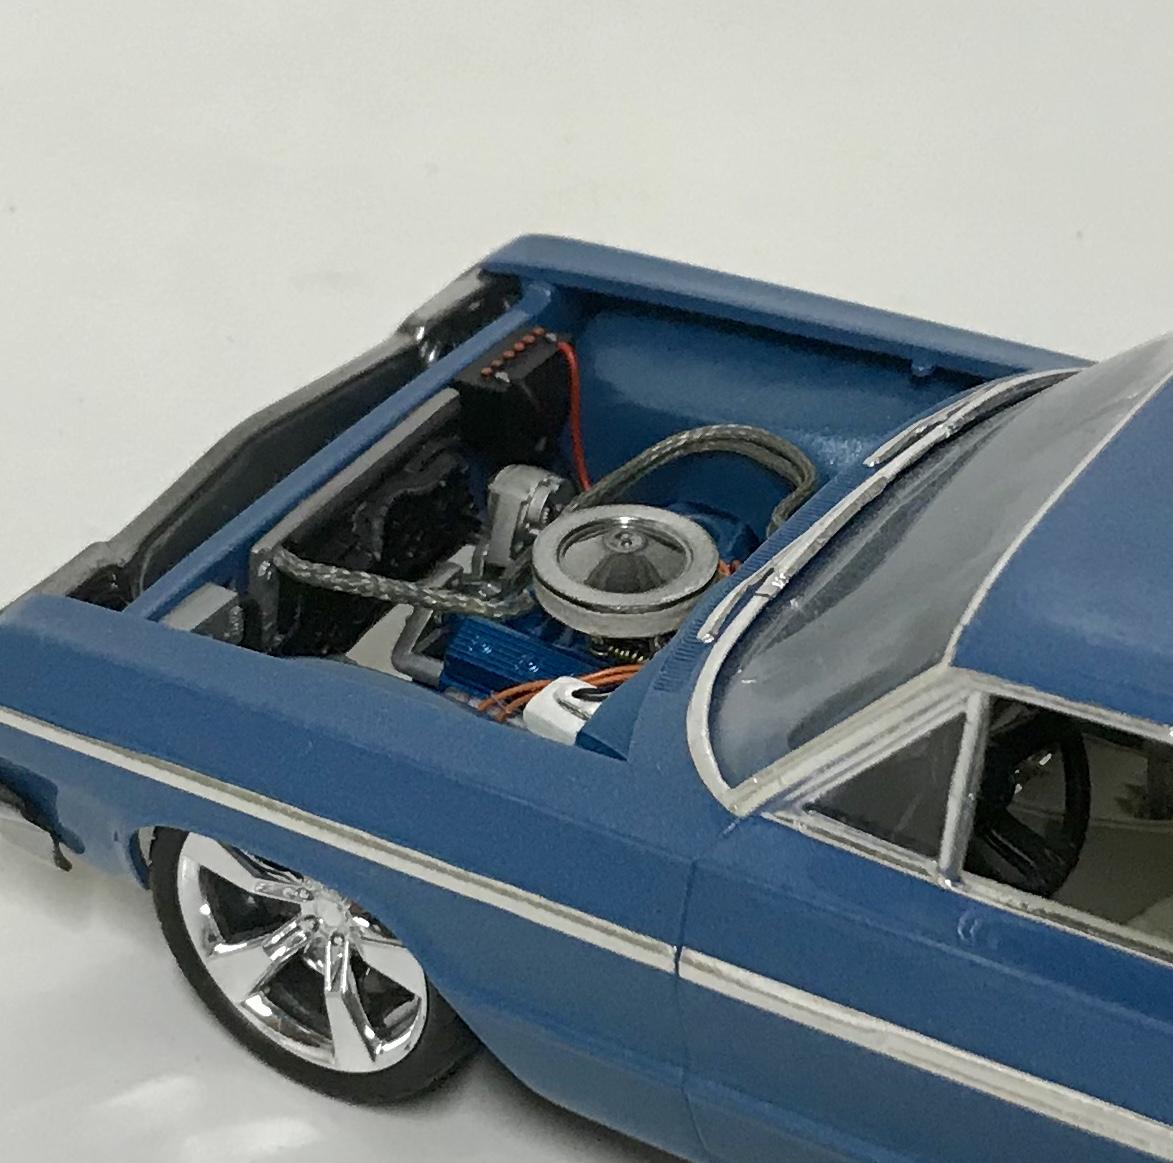
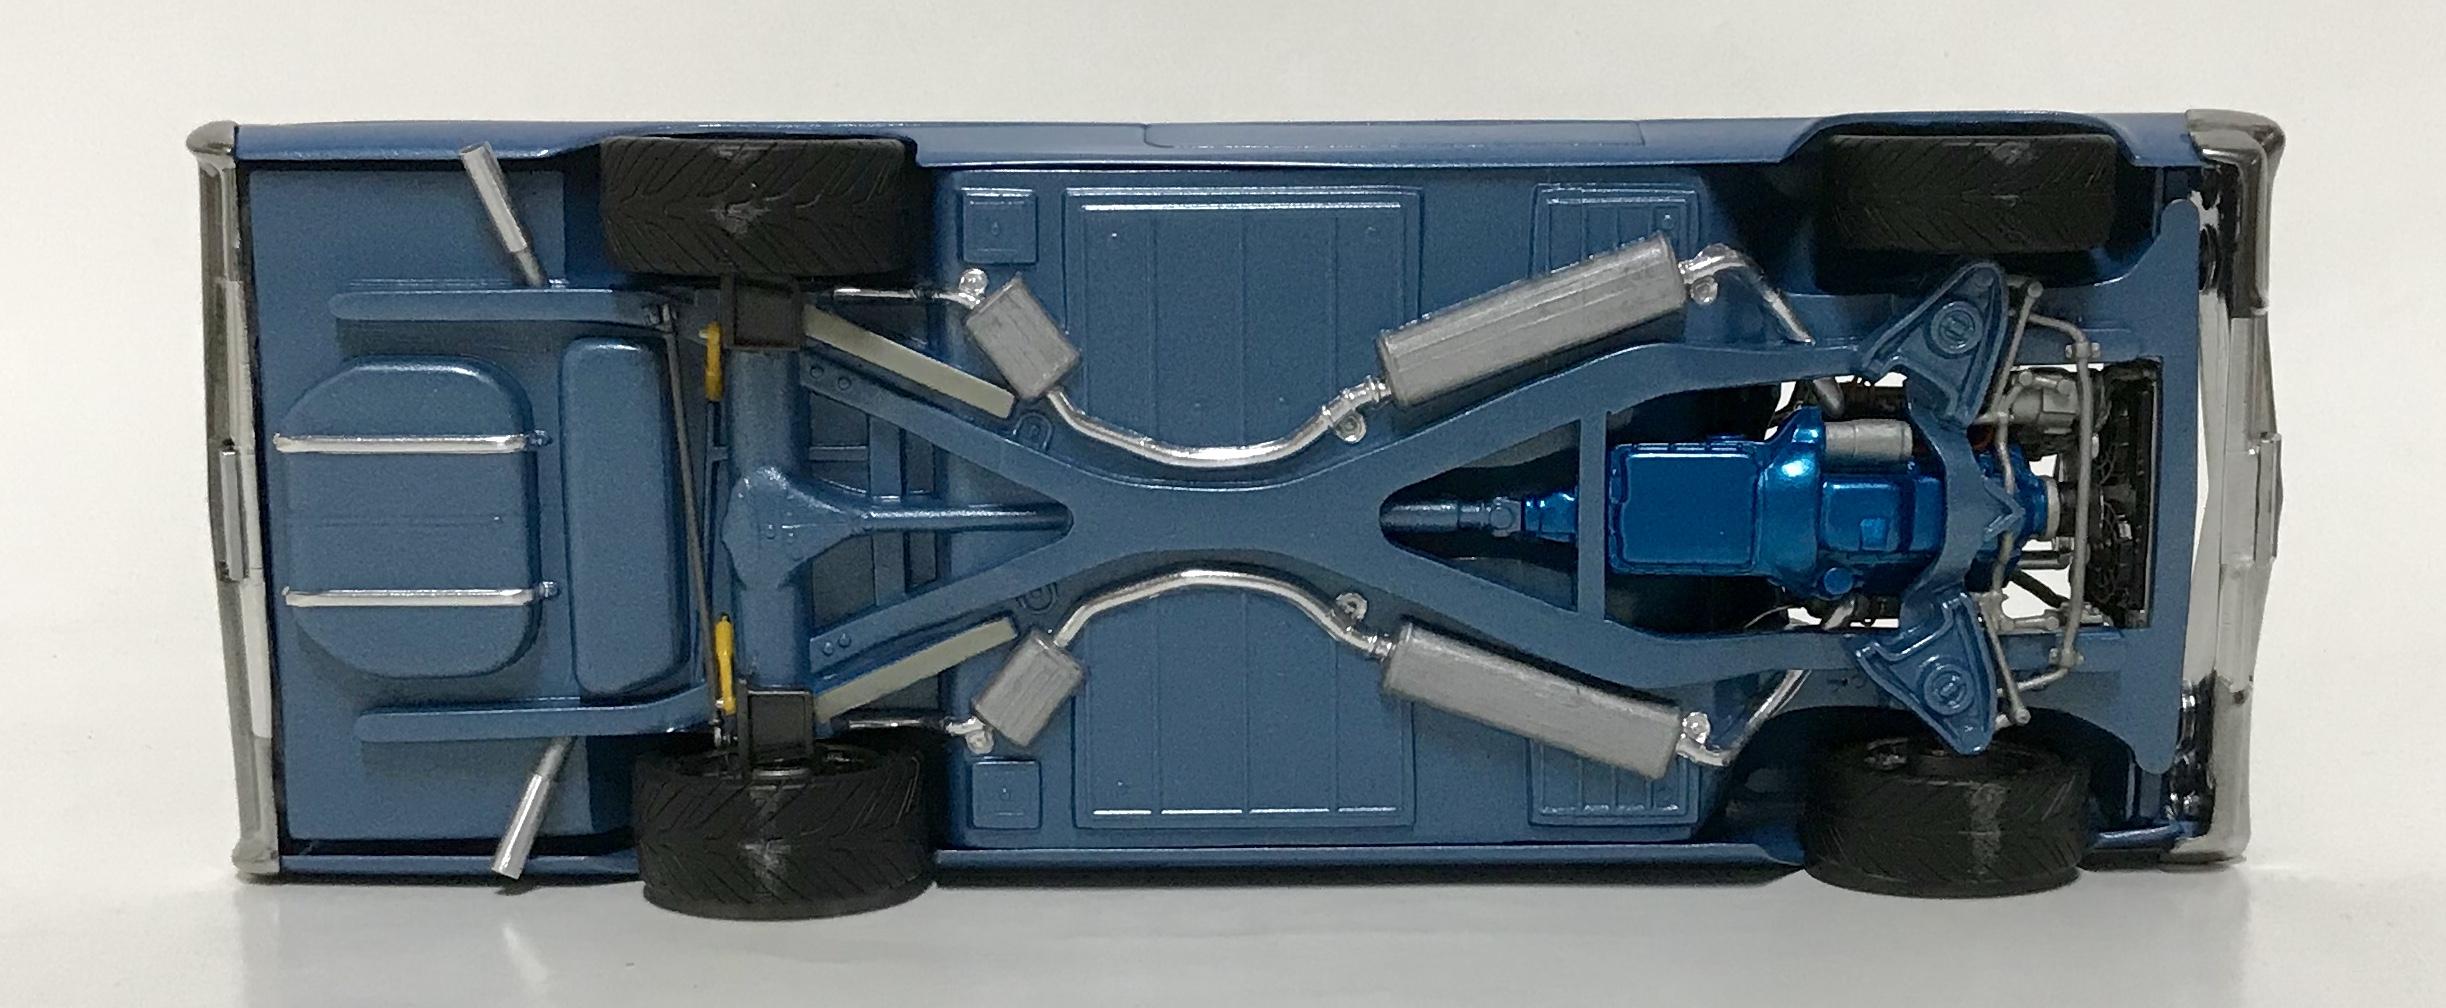
This is my show rig finished up. I’ve had the Corvair built for a while and I posted it on here when I had Photobucket, but it got sunk in the vast sea of watermarks. It has a new life as a trailer queen, being hauled by my 84 GMC pickup. The trailer is an MPC piece my late brother in law gave me back in 1988. The Corvair was built using a set of IROK wheels and tires from Pegasus, along with their disc brake set. I added some aluminum exhaust tips, some engine wiring, with scratch built license plates and shifter. It was painted with Dupli-Color medium Maui blue metallic that I found at Ollie’s for $1.59, with some clear that was cut and polished. The trailer was given to me by my late brother in law back in 1988, and I’ve saved it until now waiting on just the right project to include it in. It started out, when I got it, with dark blue enamel paint and all the cross braces were broken. I stripped the paint and fixed the cross braces, then scratch built the ramps and the trailer hitch, along with the safety chains. It was painted using Plasti-Kote Ford silver metallic, that I again found at Ollie’s for a $1.99. I covered the running boards and ramps with craft paper, trying to get everything uniform. The wheels came in the AMT Dodge D50 pickup with parts box tires. The 84 GMC is the MPC Deserter 4 wheel drive that I converted to a 2 wheel drive. It took quiet a bit of work to get it there, but it was worth it in the end. I used a Foose pickup for all the front and rear suspension. I had to c notch the frame and the bed floor to get the stance I was looking for, and scratch built coil over shocks for the front end. The wheels, tires and brakes came from the Revell Concept Camaro snap kit. The engine came in the kit, with parts added from an AMT GM NASCAR kit, along with the headers from an AMT 55 Chevy Stepside pickup. The rest of the exhaust is a combination of soldier, Foose pickup pipes and mufflers, and aluminum tube for tips. The interior has scratch built door panels and trim, along with armrest and window cranks and a few other tricks. It was covered with Tamiya dull red and matching custom mixed flocking. On the exterior, I added headlight lenses from the parts box, and modified the front bumper. Windshield wipers were added from the Lindberg Chevelle, door handles from the Foose pickup, and side mirrors from a Saleen Mustang, along with the rear bumper from an old Bigfoot monster truck. The tonneau cover was scratch built, along with the tags on both ends. It was painted using Dupli-Color pure white from, yes, you guessed it, Ollie’s for a $1.29. The kit decals were used for the stripes and cleared and polished. I built these in memory of my brother in law, David Wood. He passed away from cancer in 1994 at the age of 36. I tried to build this as outstanding as he was. He’s the only person I ever met that loved model cars as much as I do. I still miss him.

-
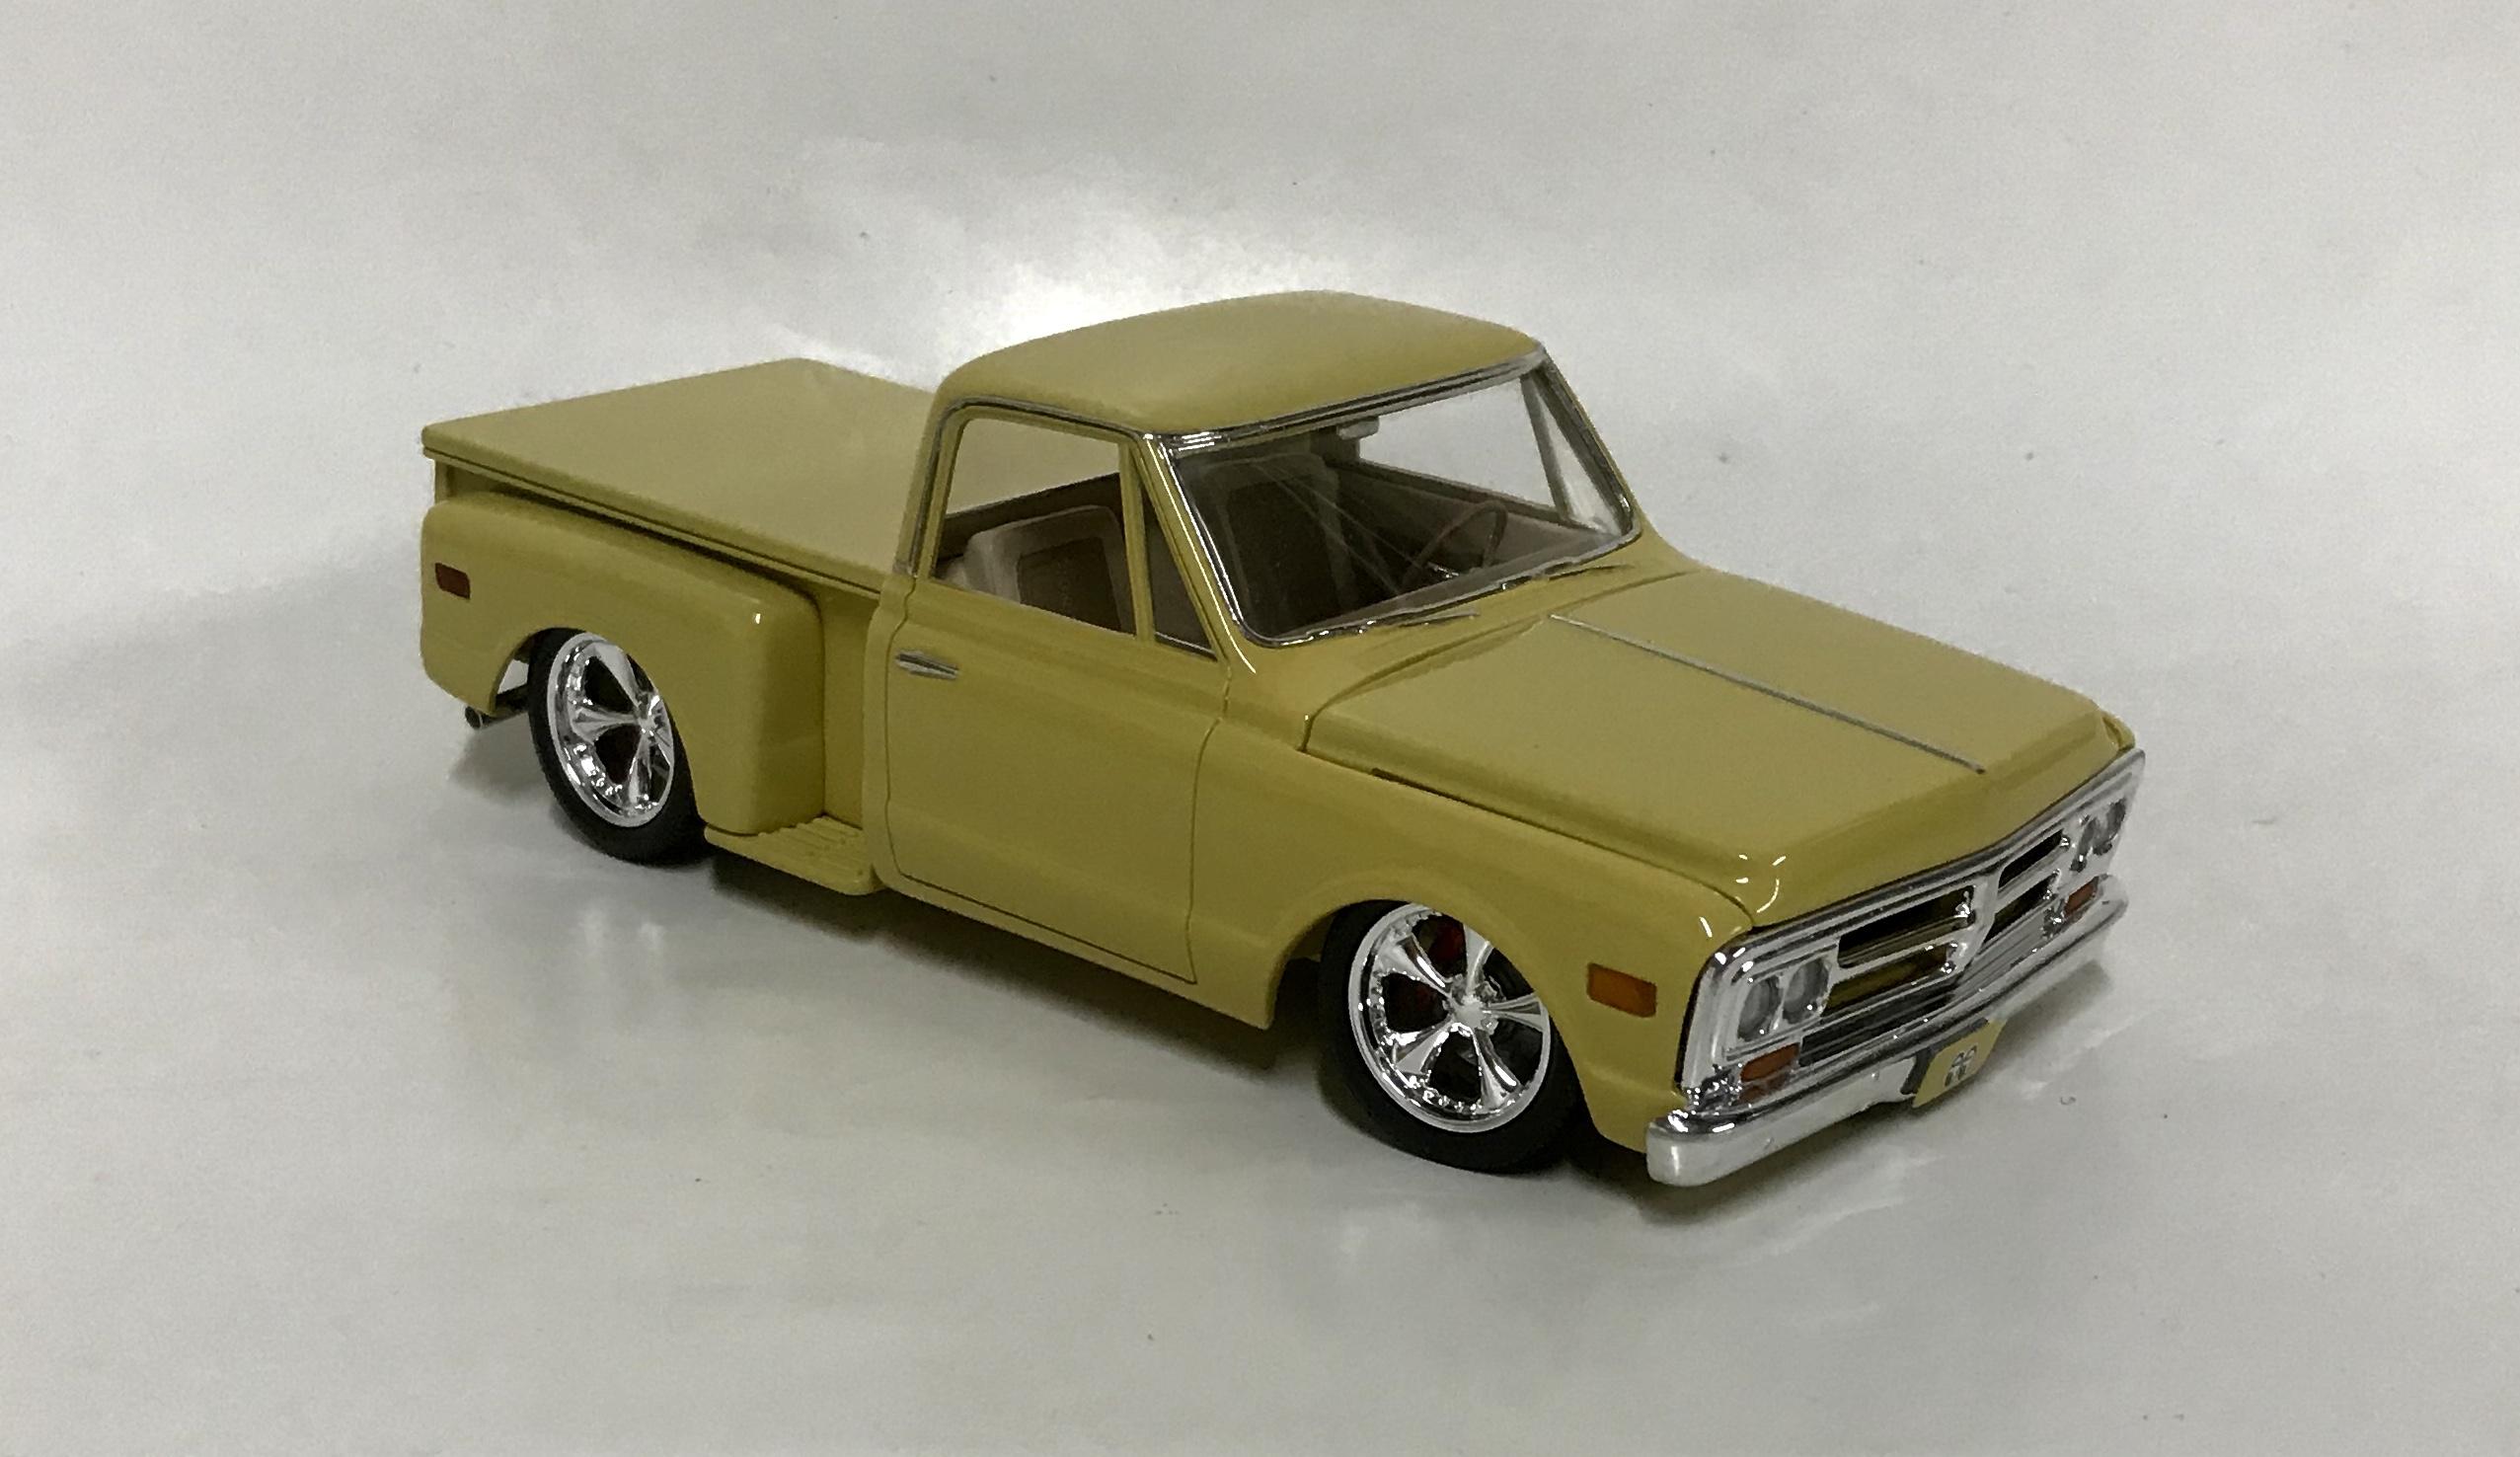
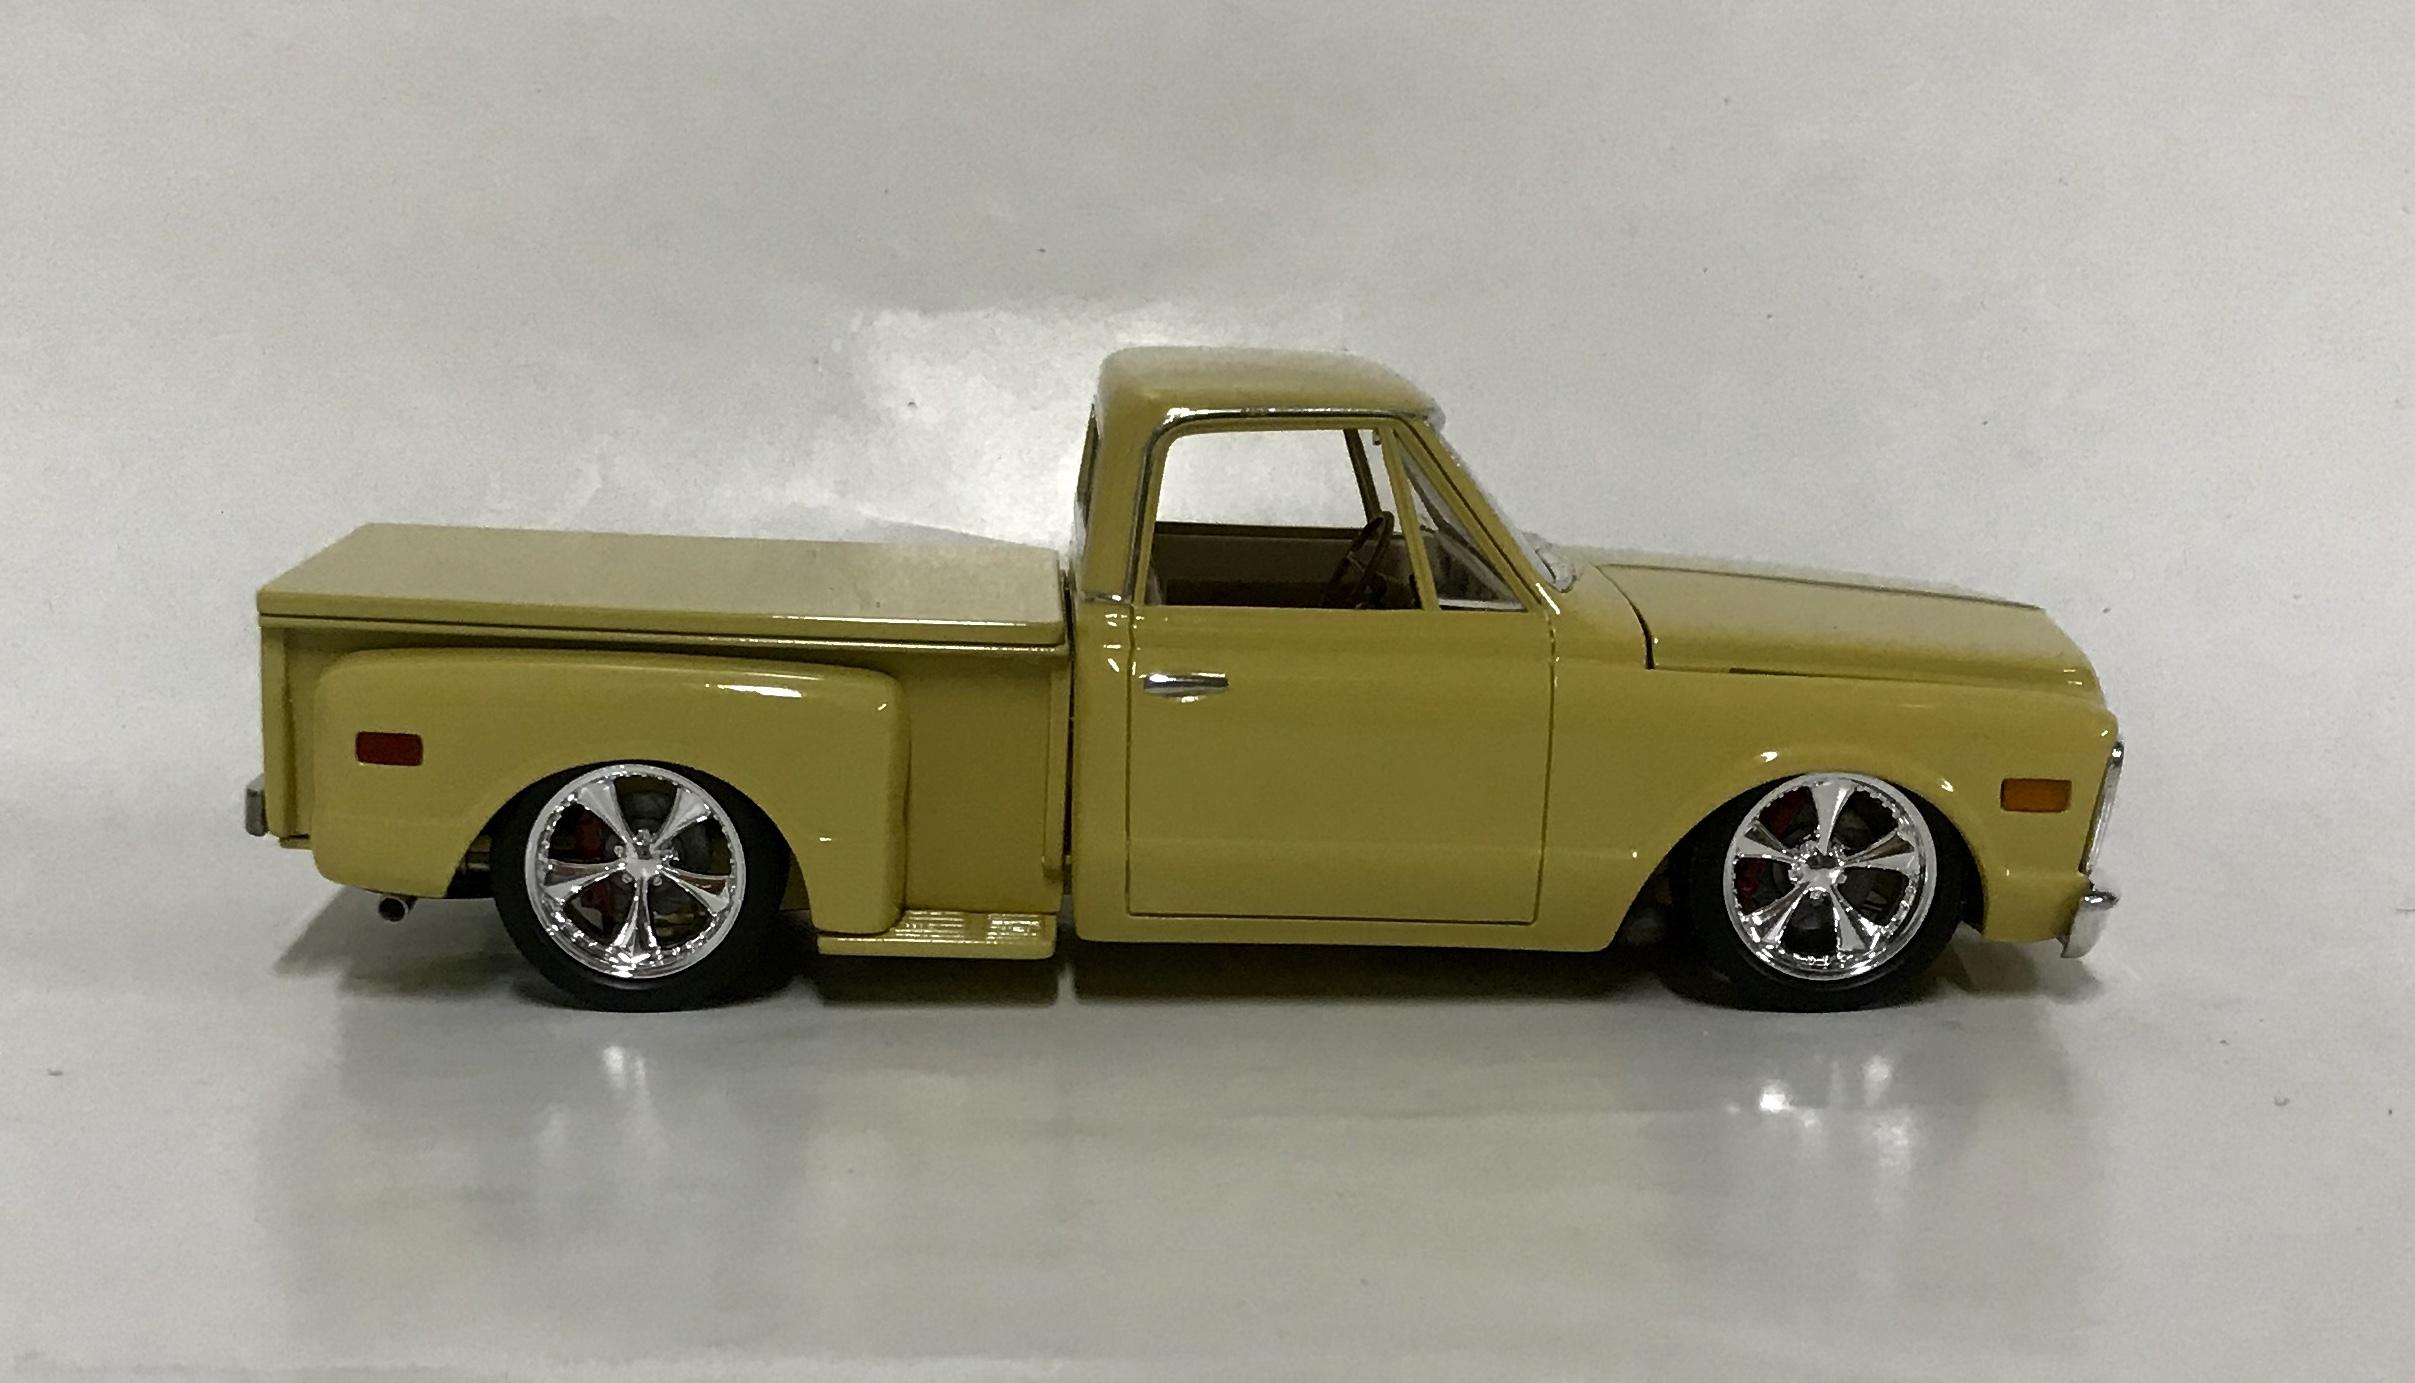
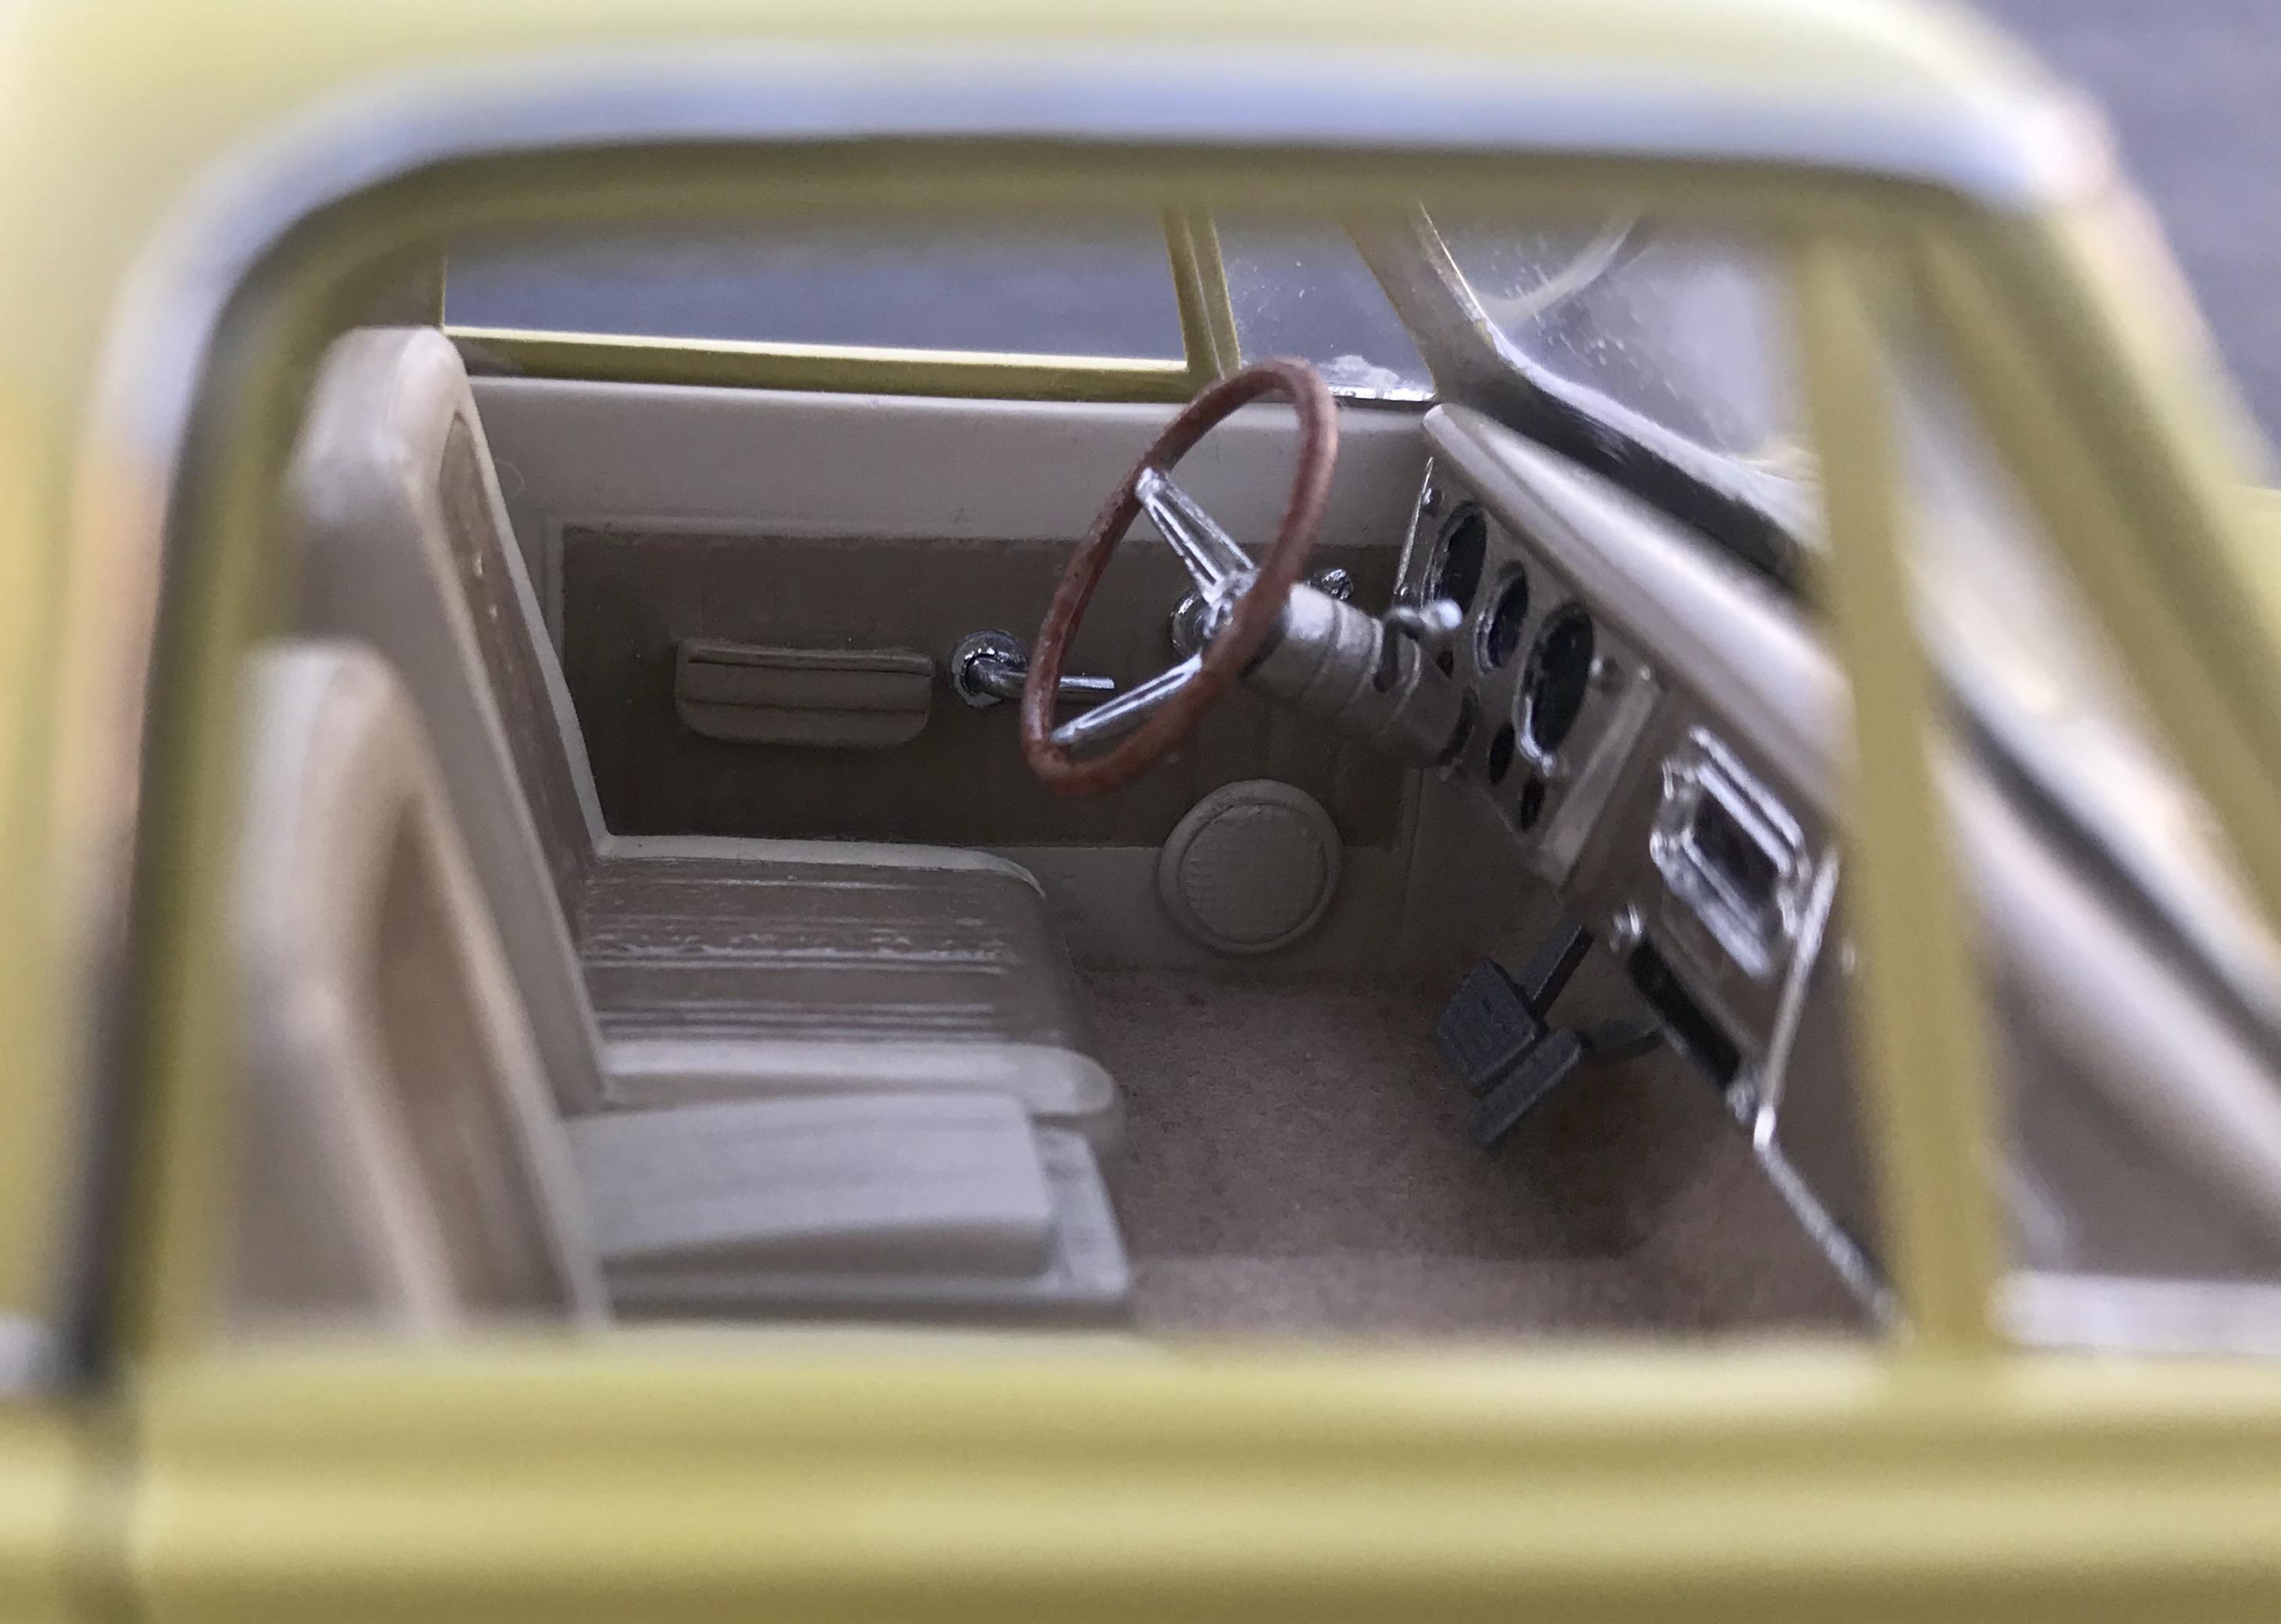
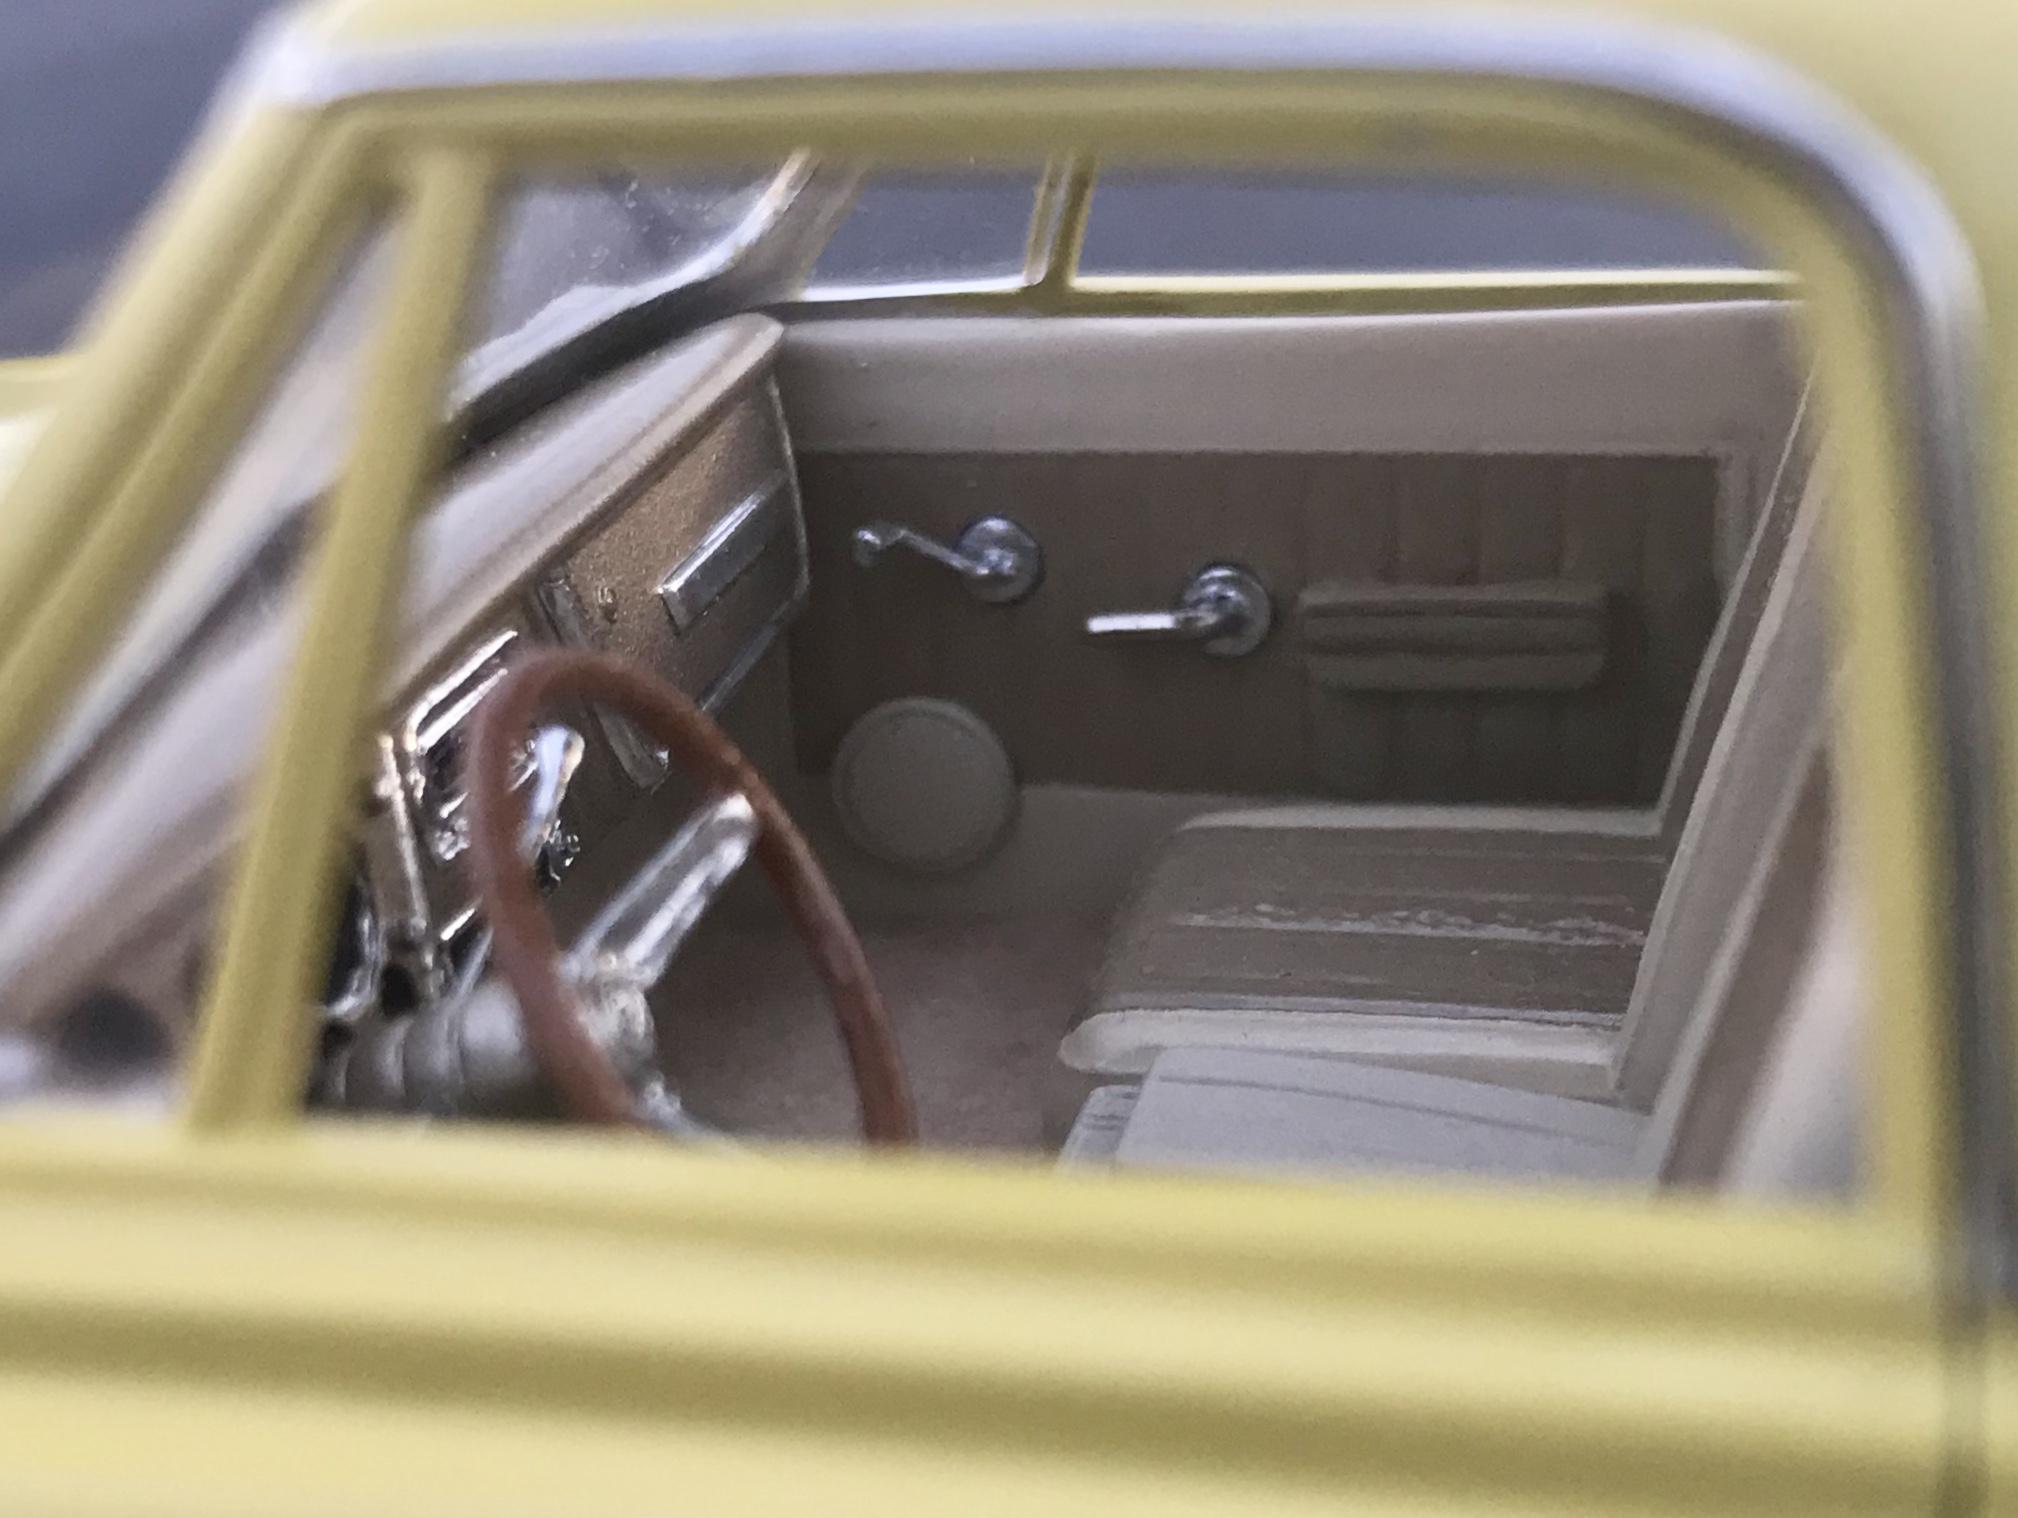
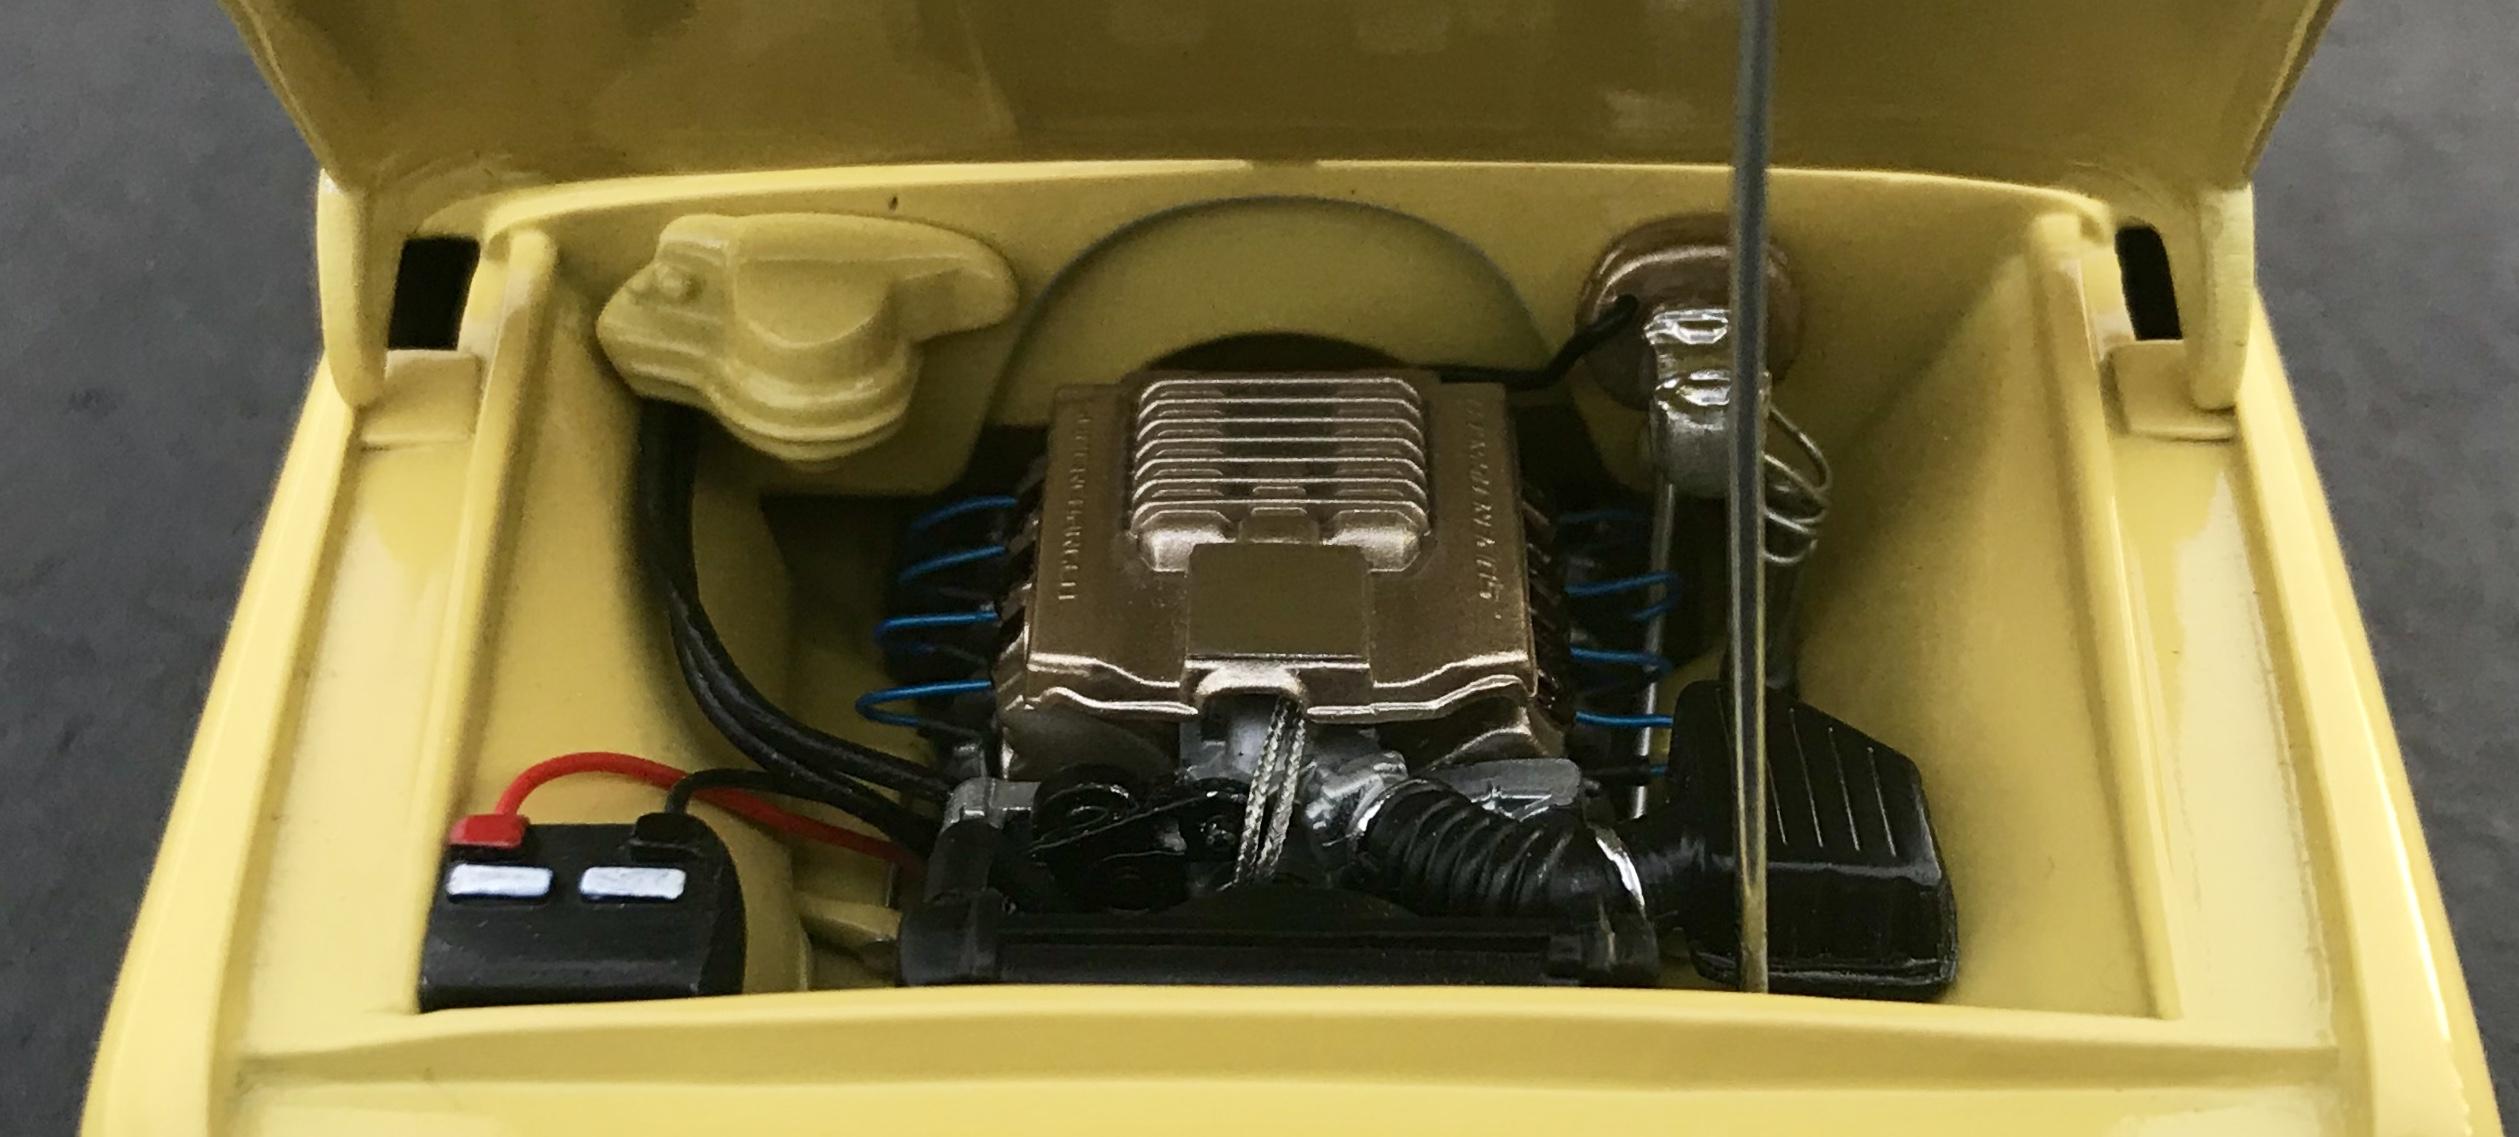
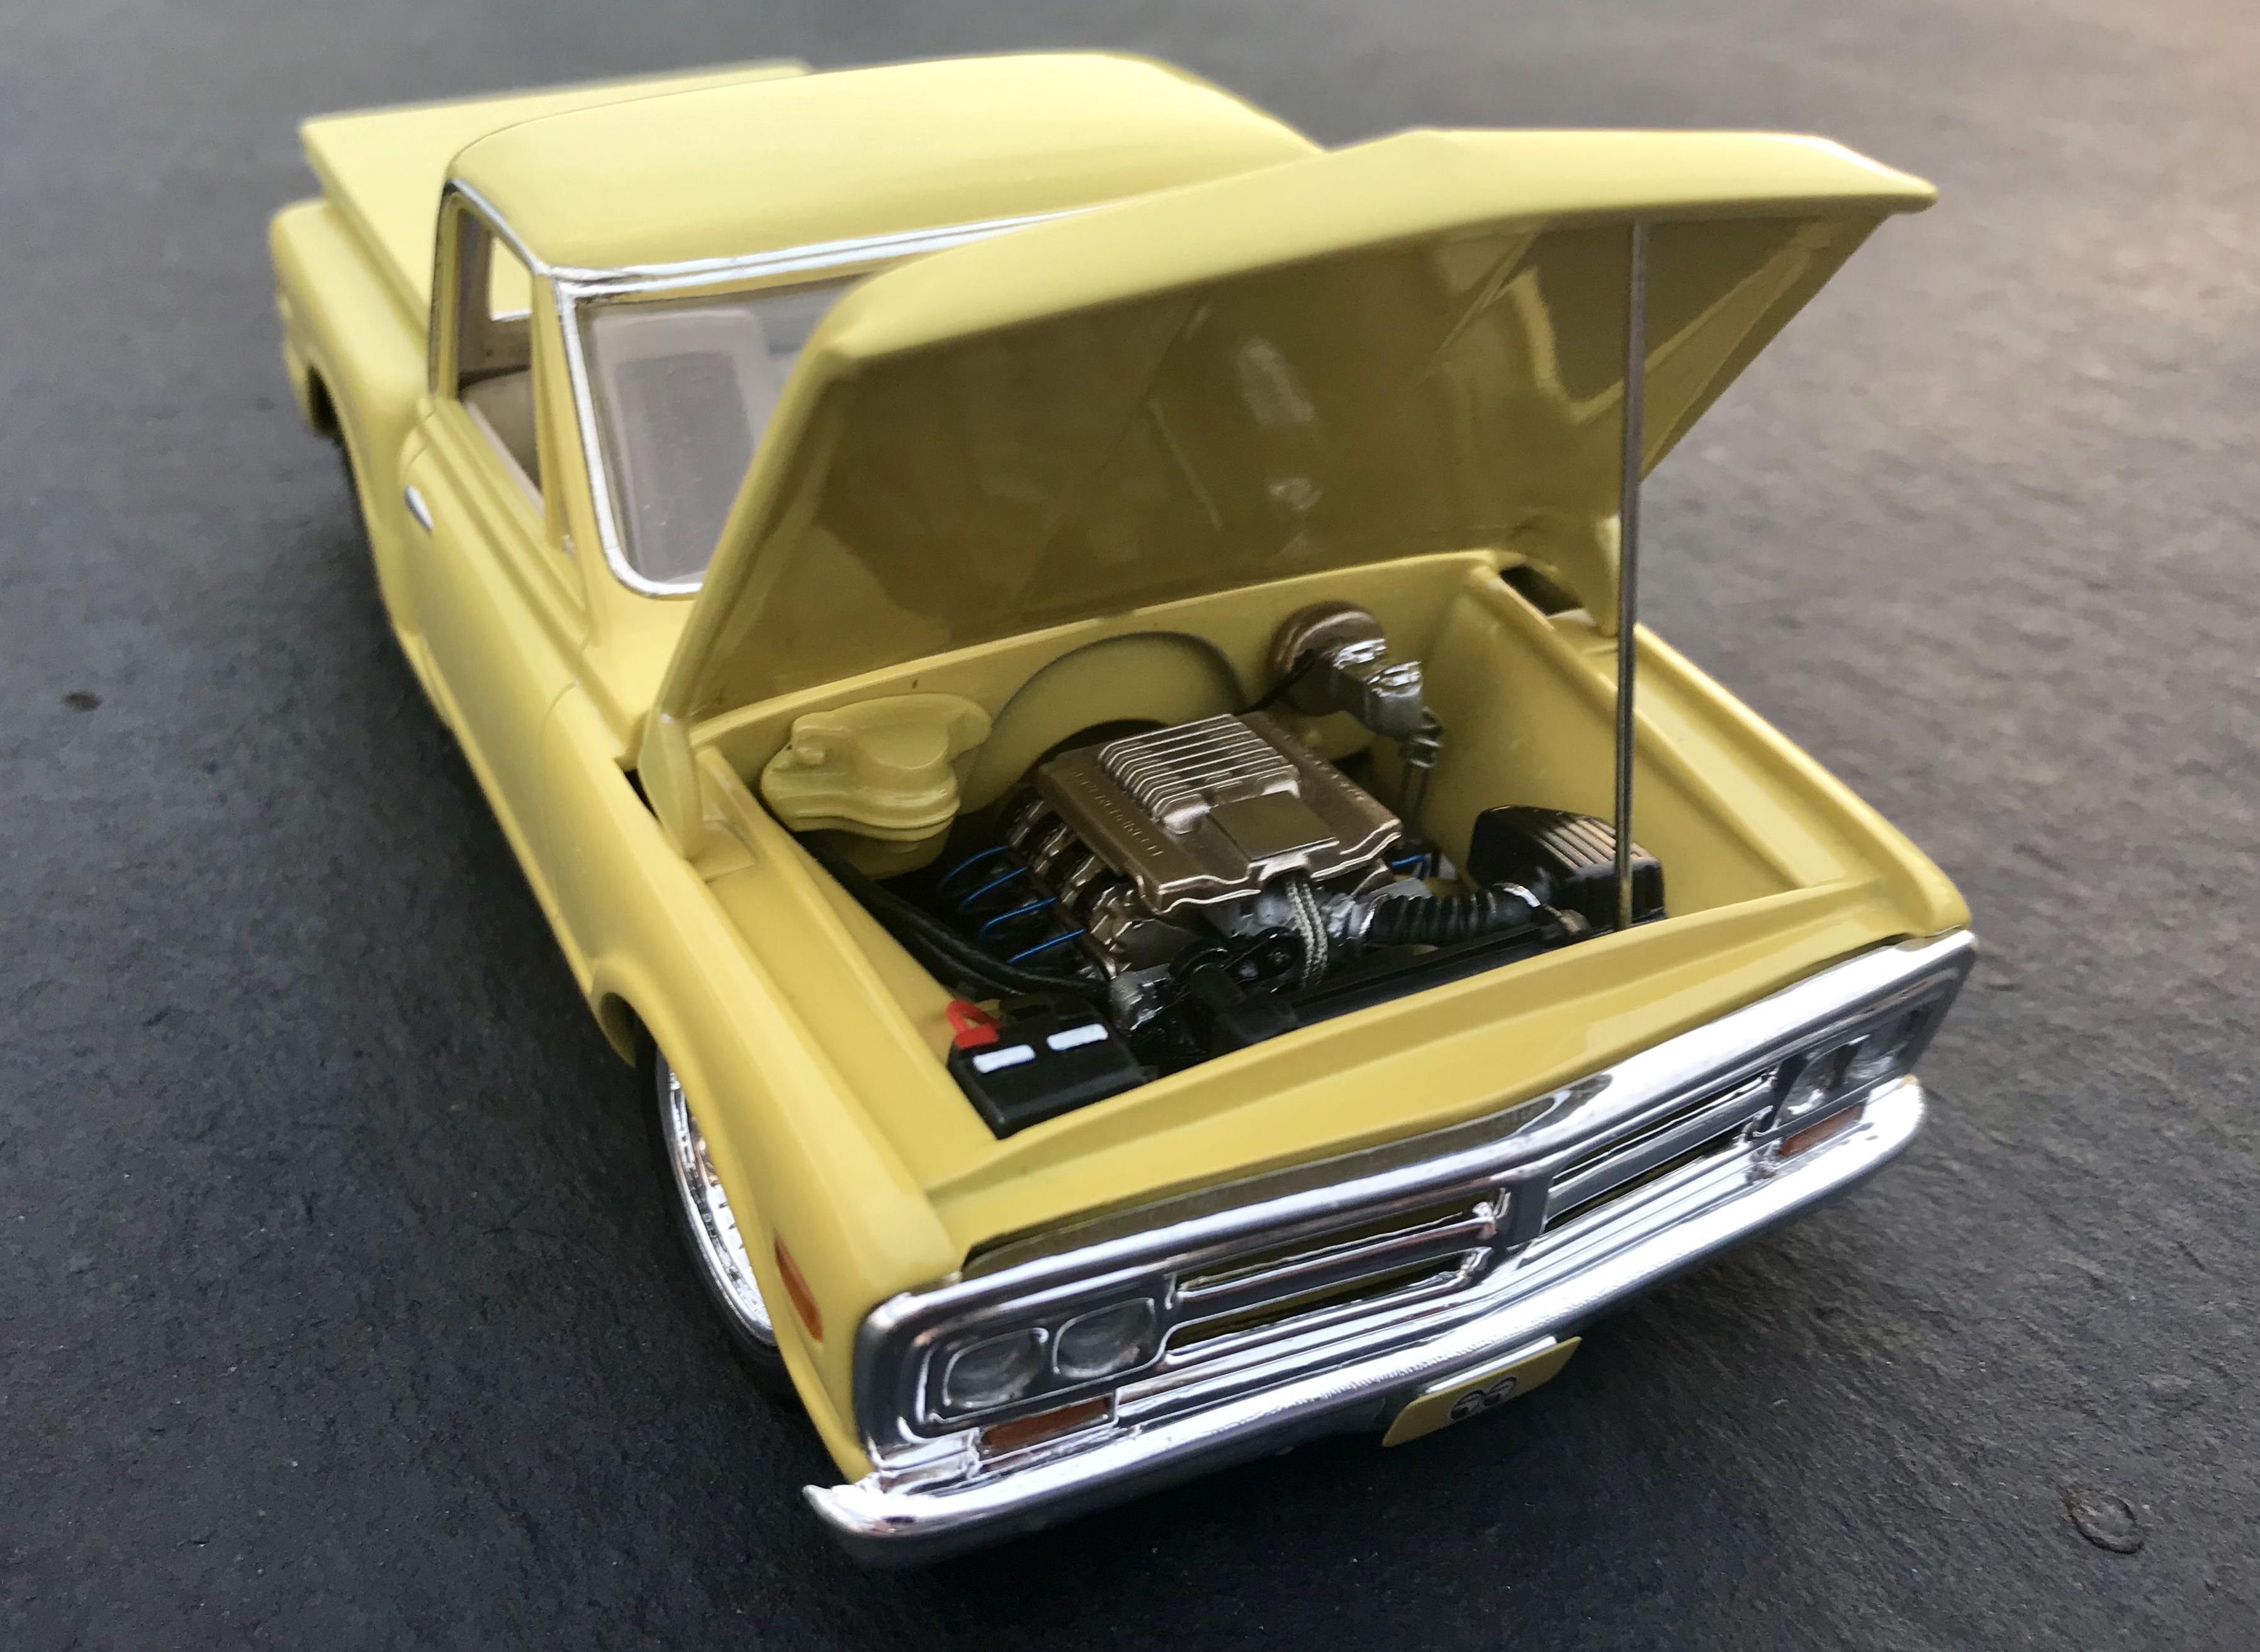
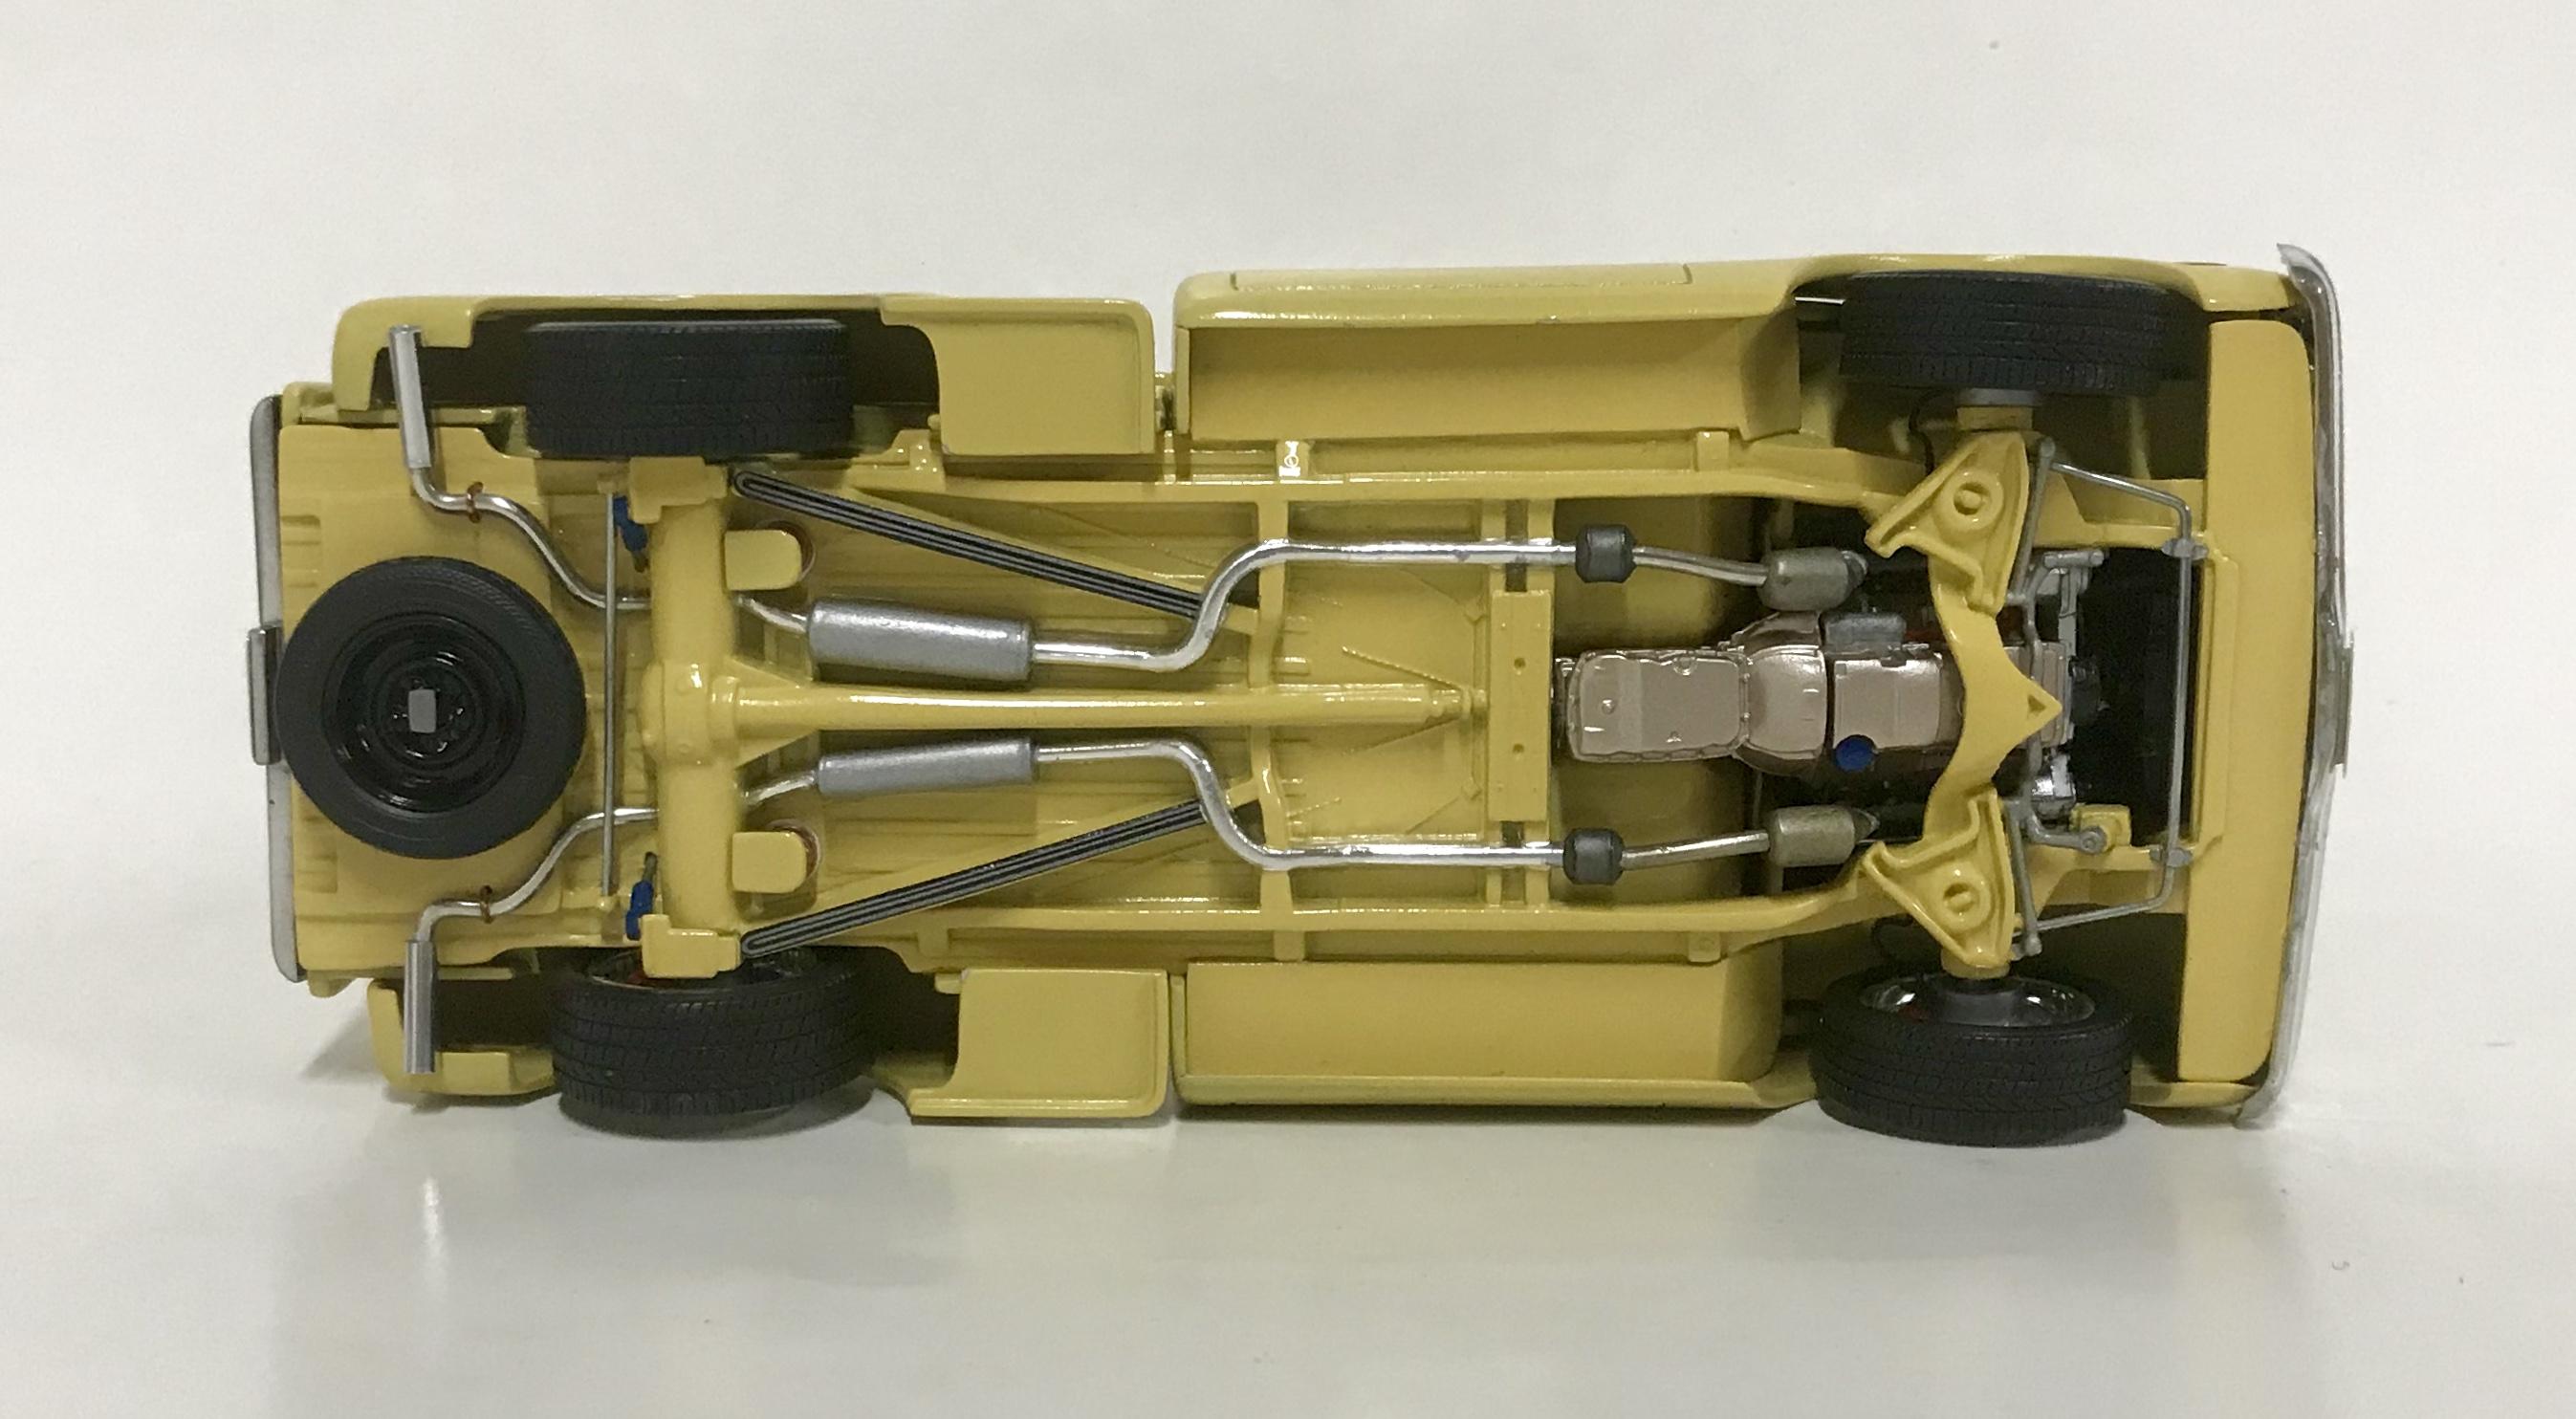
I built this AMT 1972 GMC Stepside a while back and it cooperated easily with everything I wanted to do to it. It had been waiting patiently in my stash since I got it back in the 90’s. I’m glad I waited to do this one now instead of back then, as my skills are more developed now versus then. Once I started on it I couldn’t put it down, I was on a major roll. Besides the Stepside kit, I used parts from a Foose pickup and a Revell 2013 Camaro, a Revell 1967 Chevelle, an AMT 1967 Chevelle and several other kits. It is covered with Dupli-Color Toyota Yellow and clear with the engine painted with Dupli-Color Naples Gold. The interior was covered with Krylon Almond satin and Khaki satin and I tried to pull off a wood grain steering wheel. It doesn’t have one single aftermarket part on it but it does have some scratch built ones. This one was fun one for sure.
-
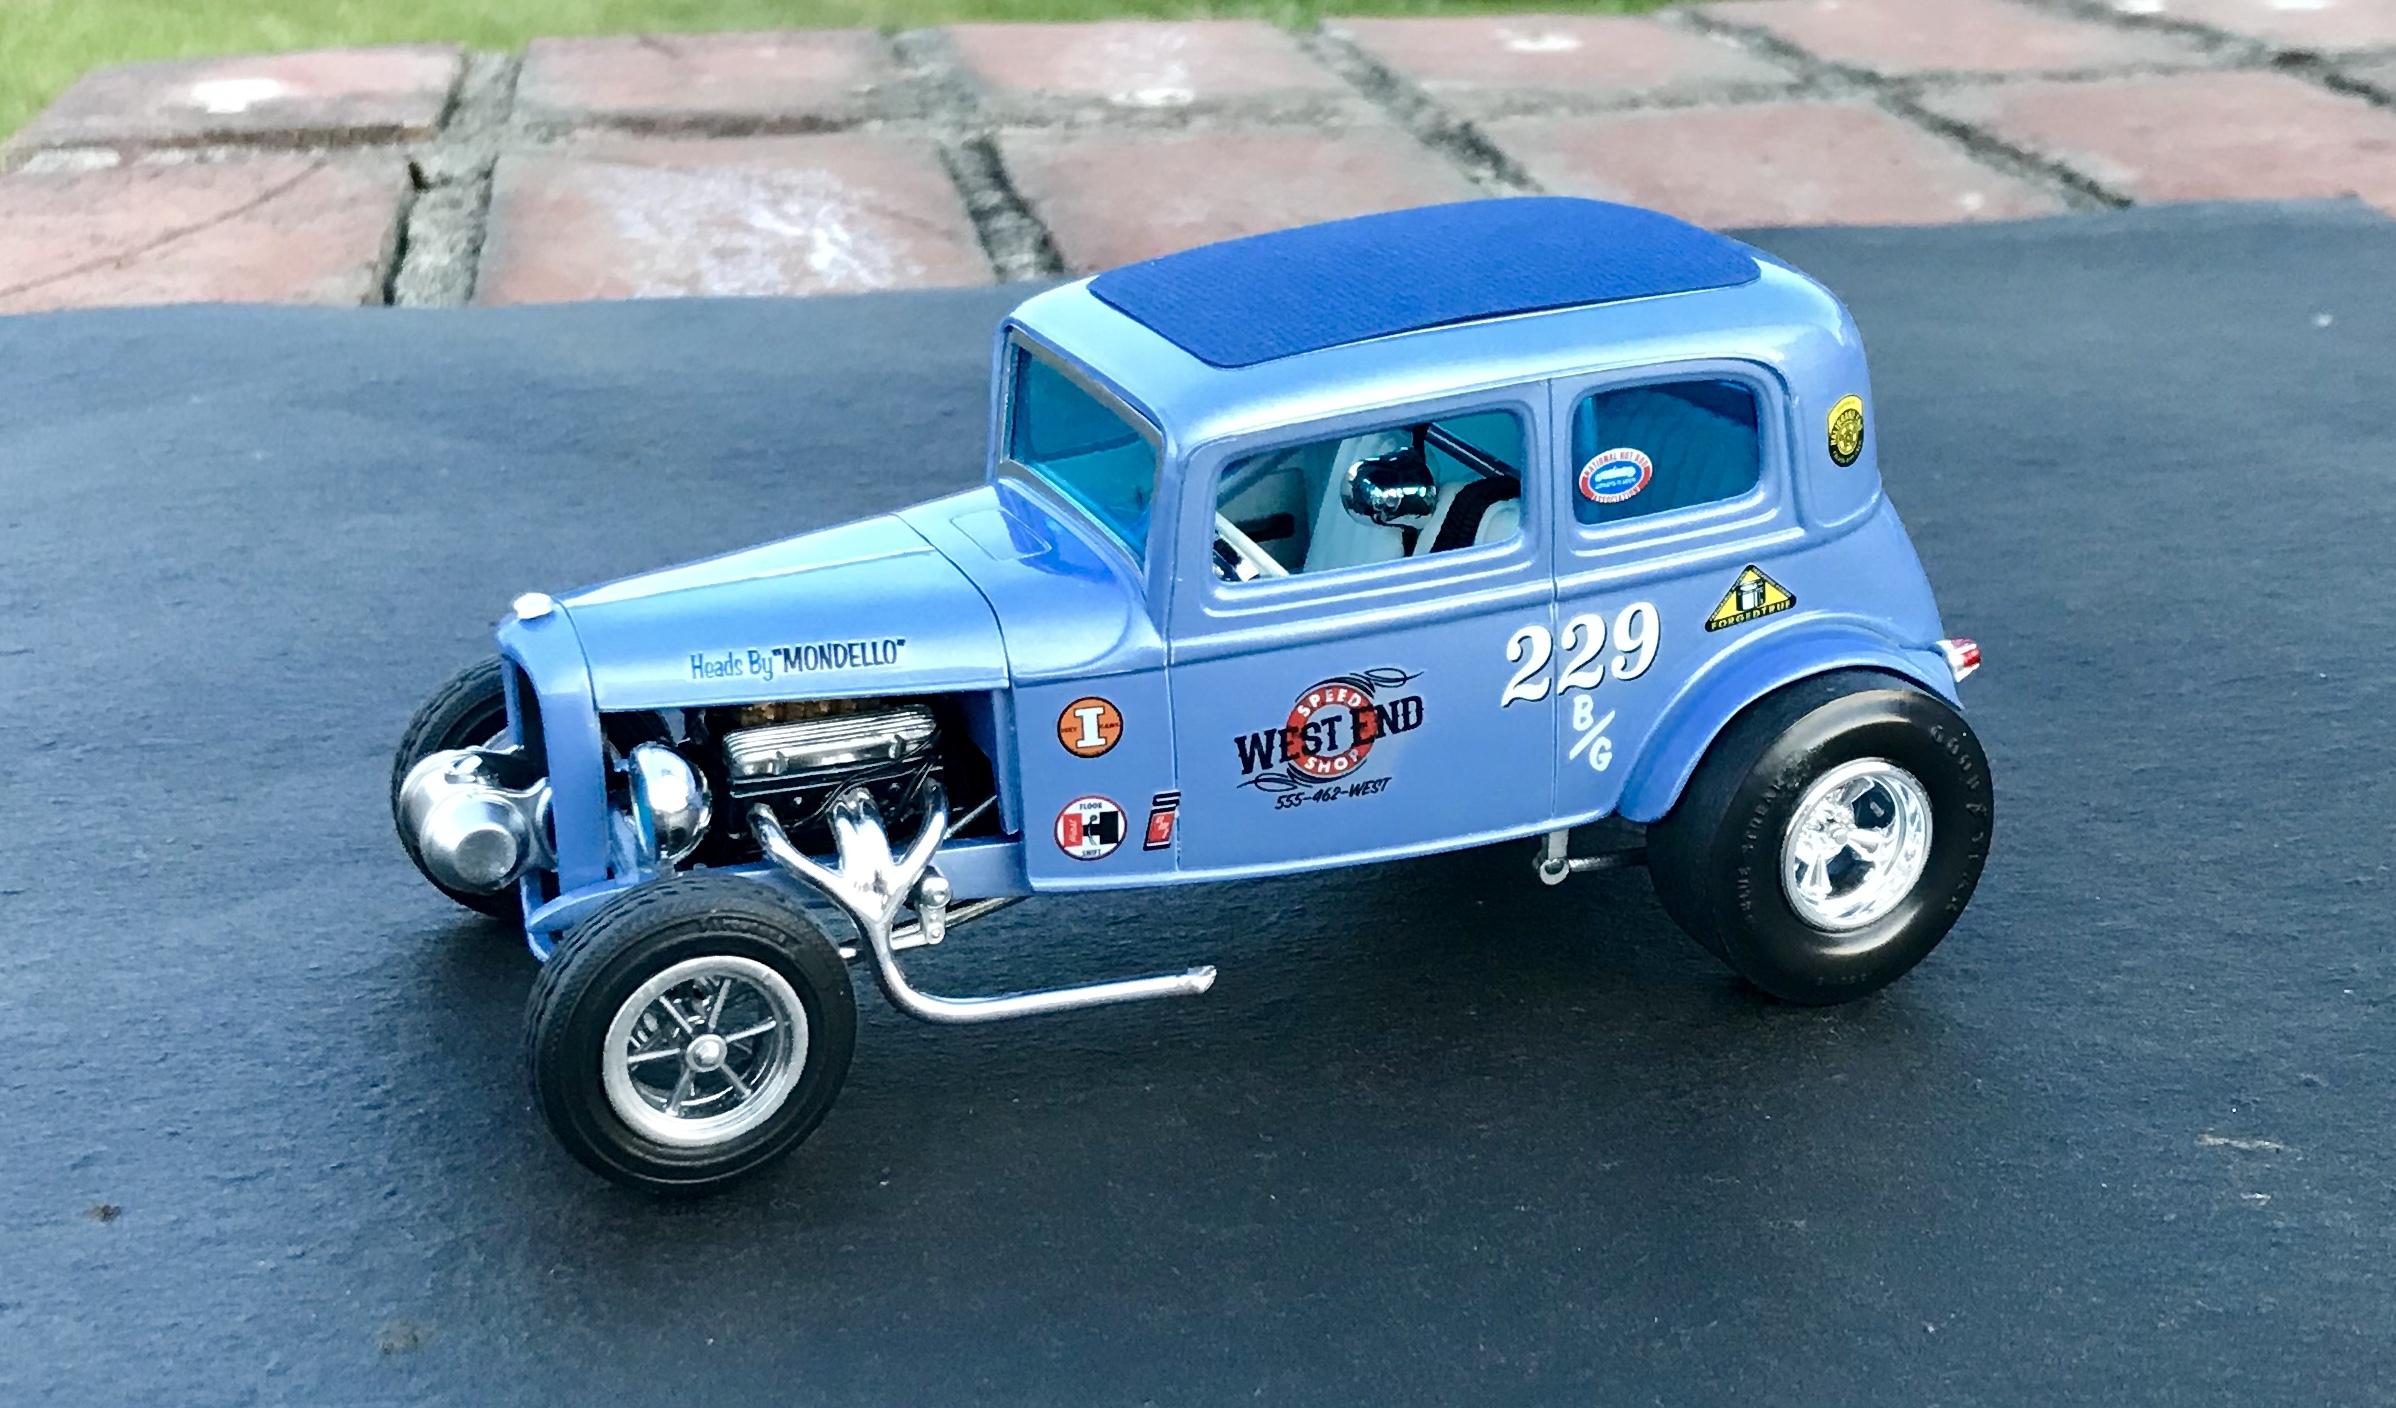
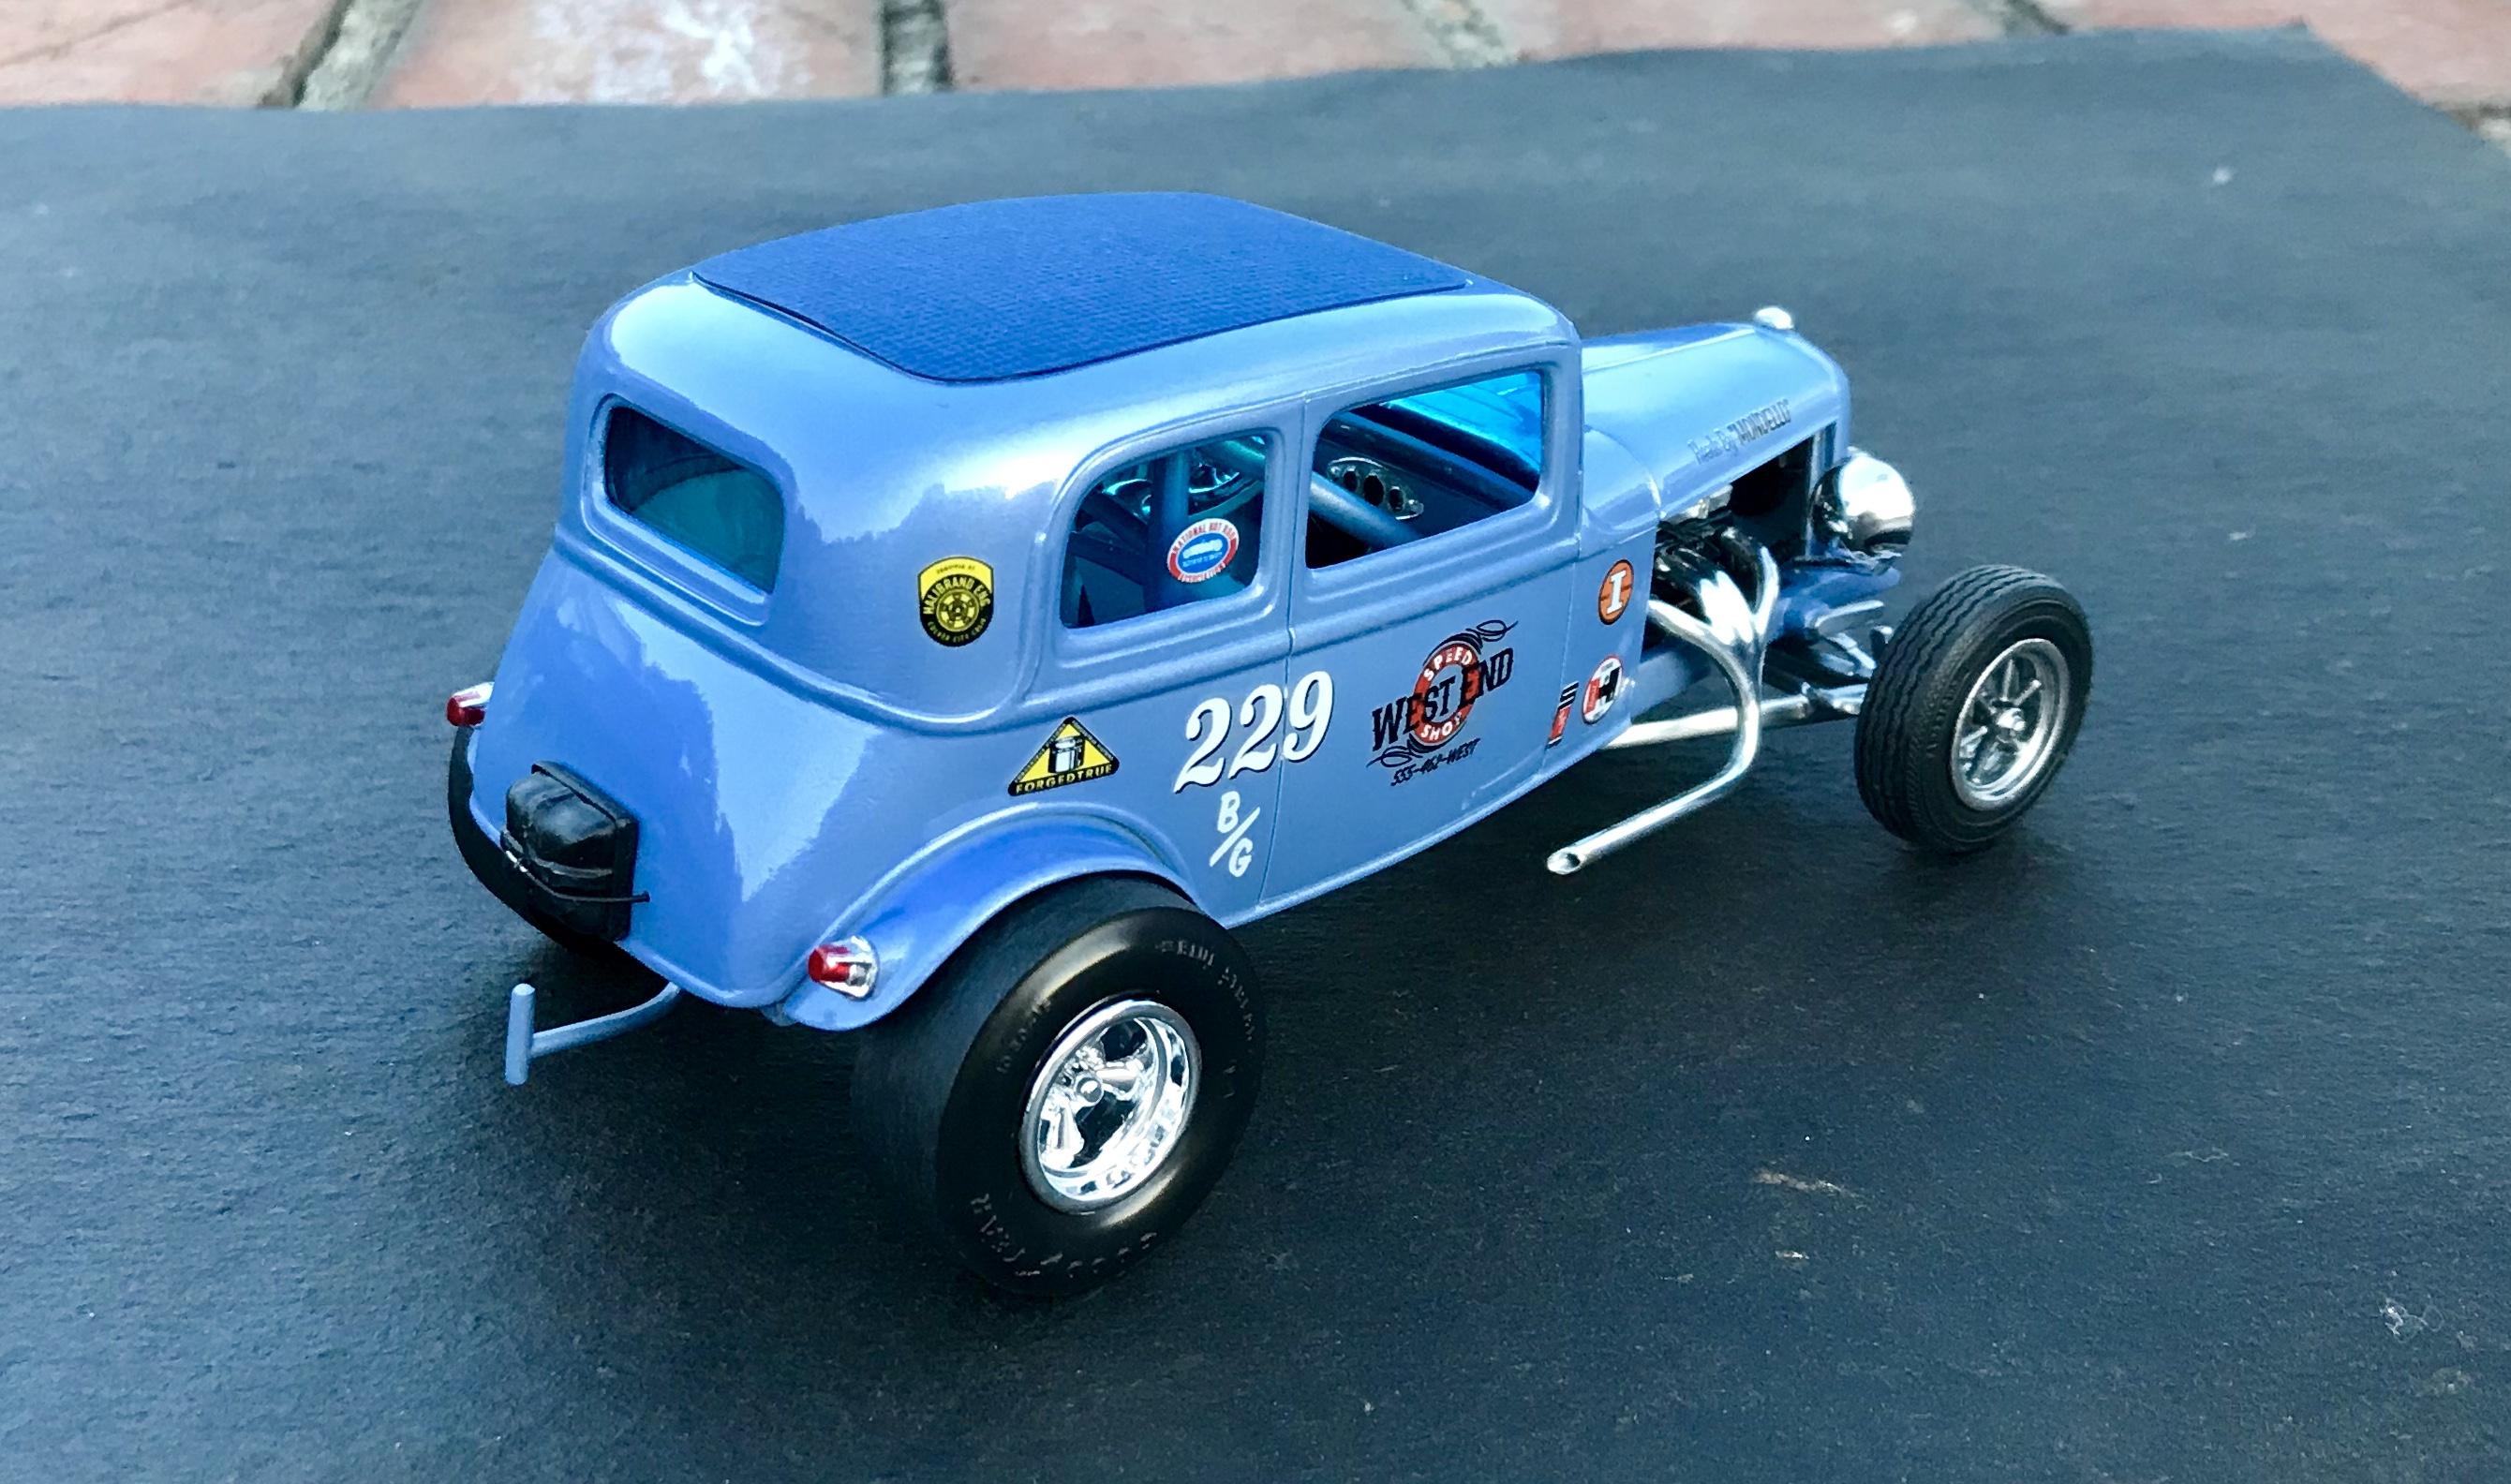
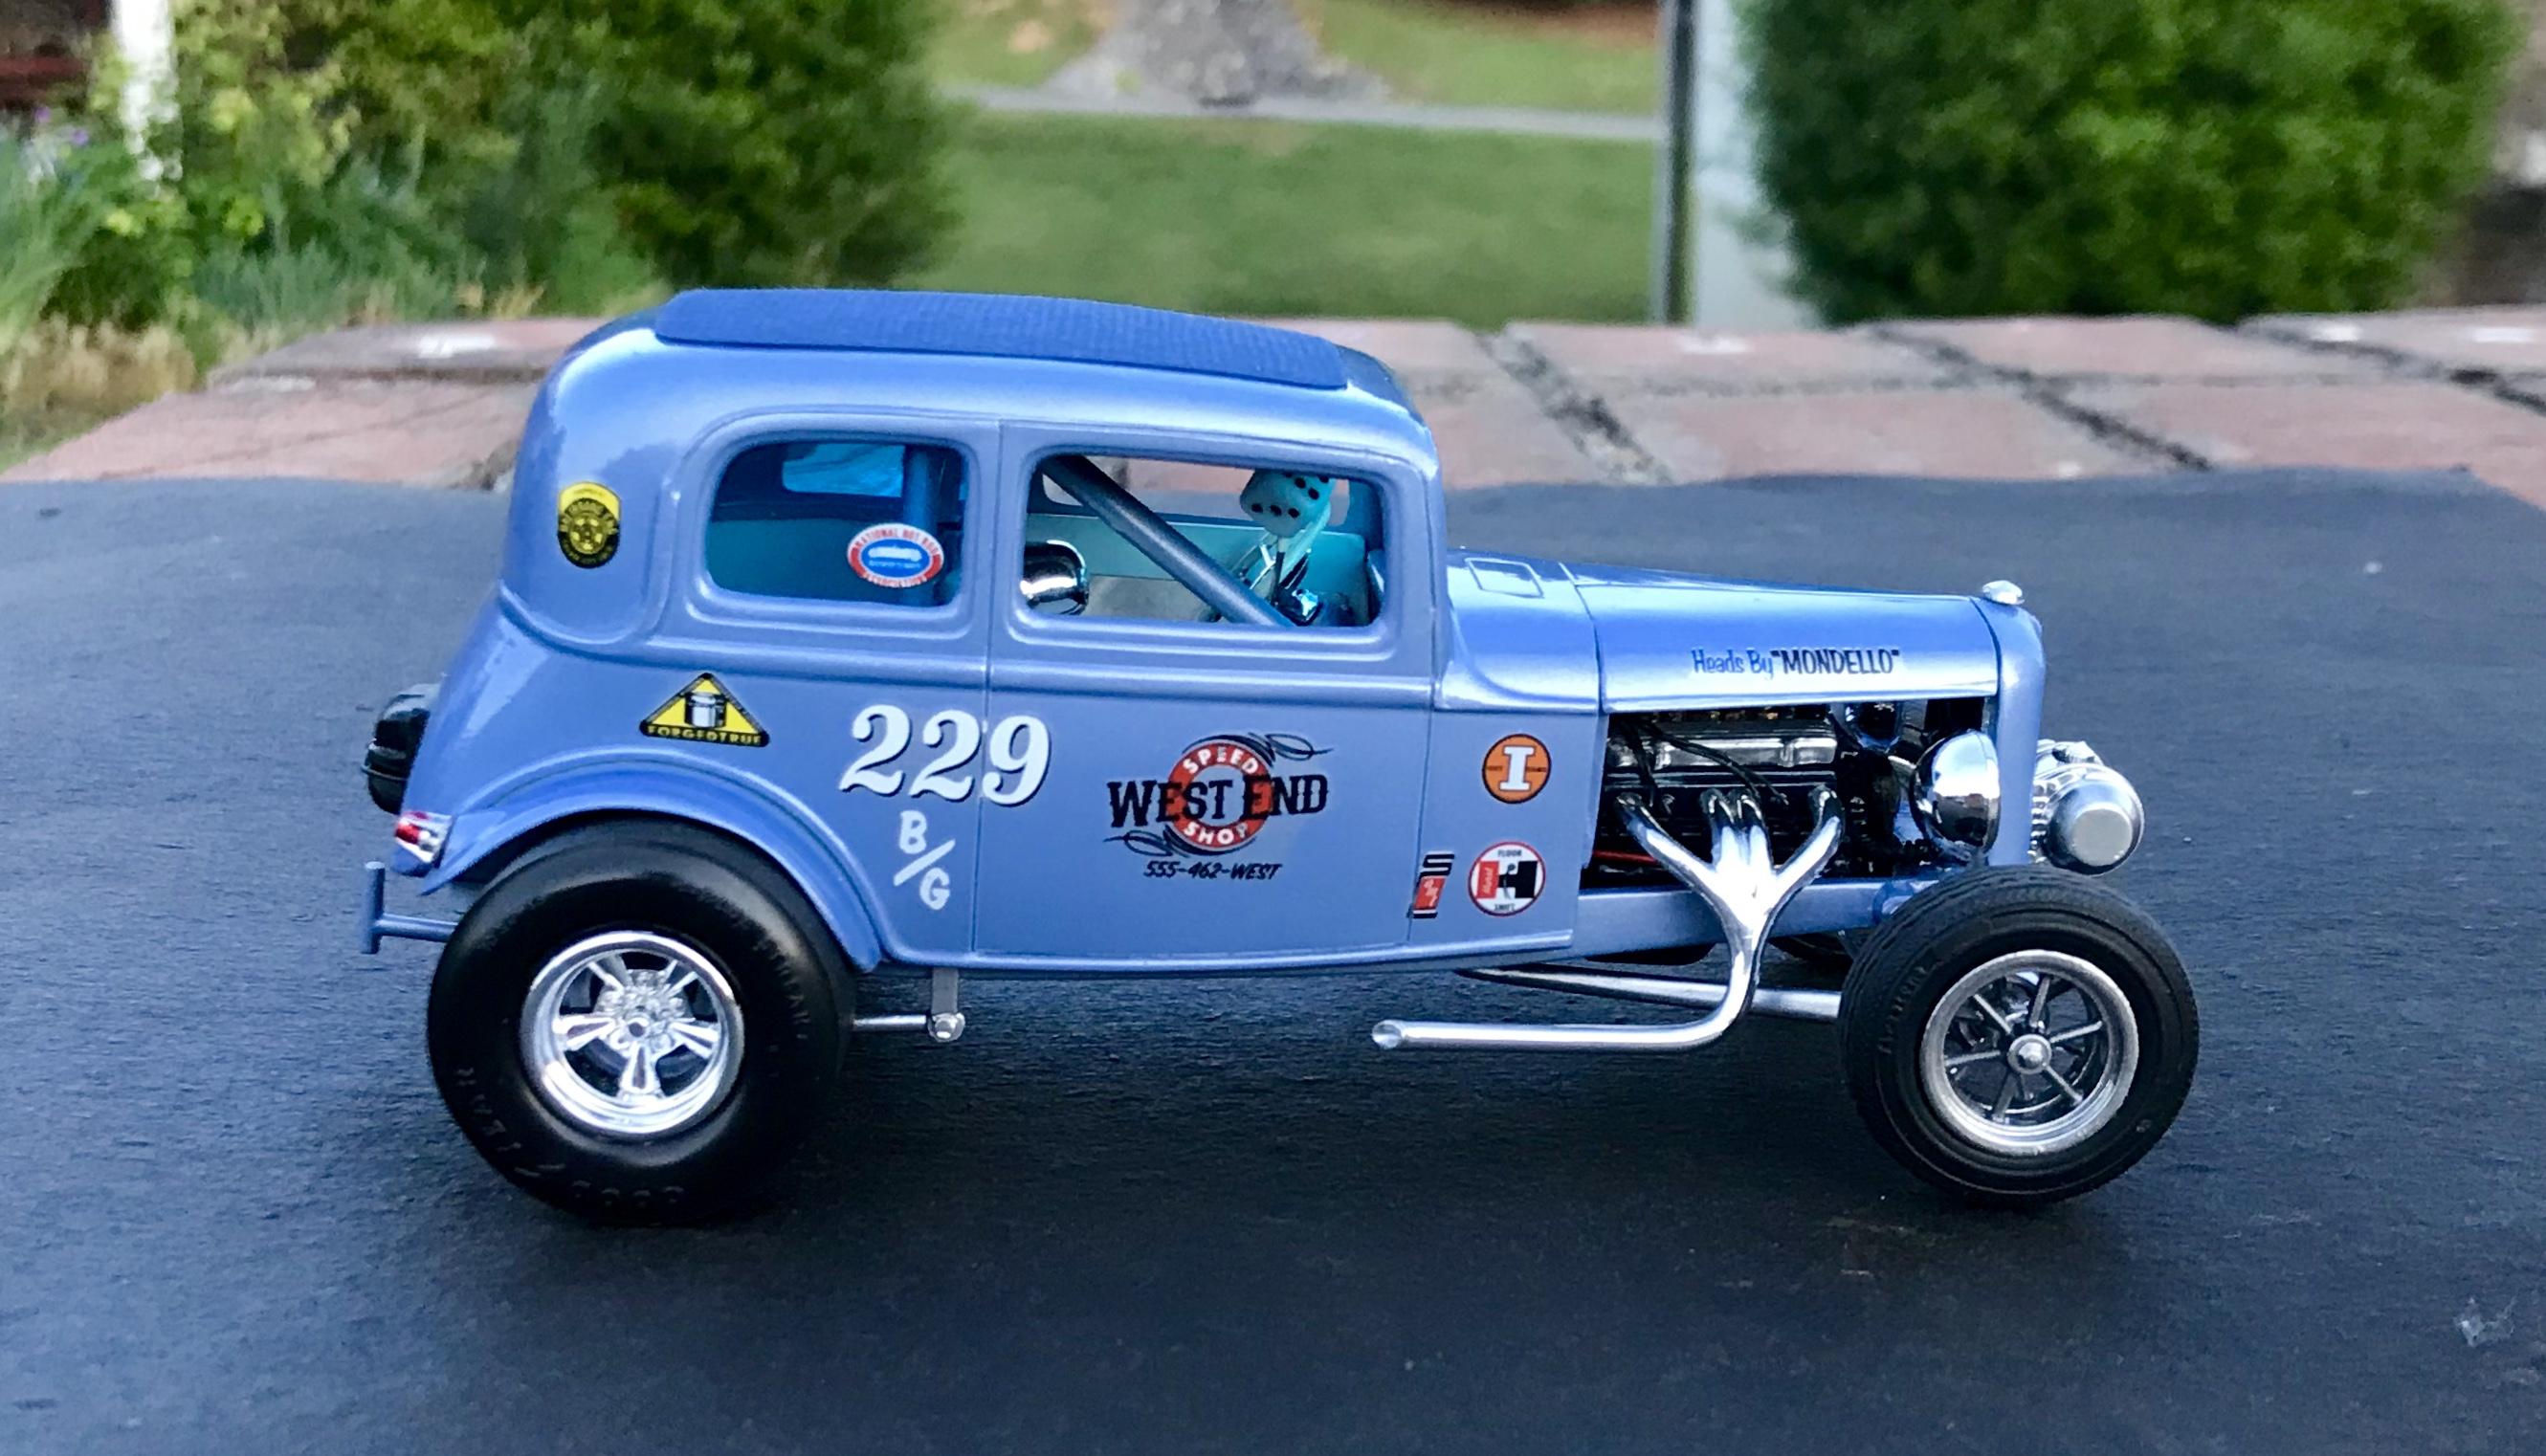
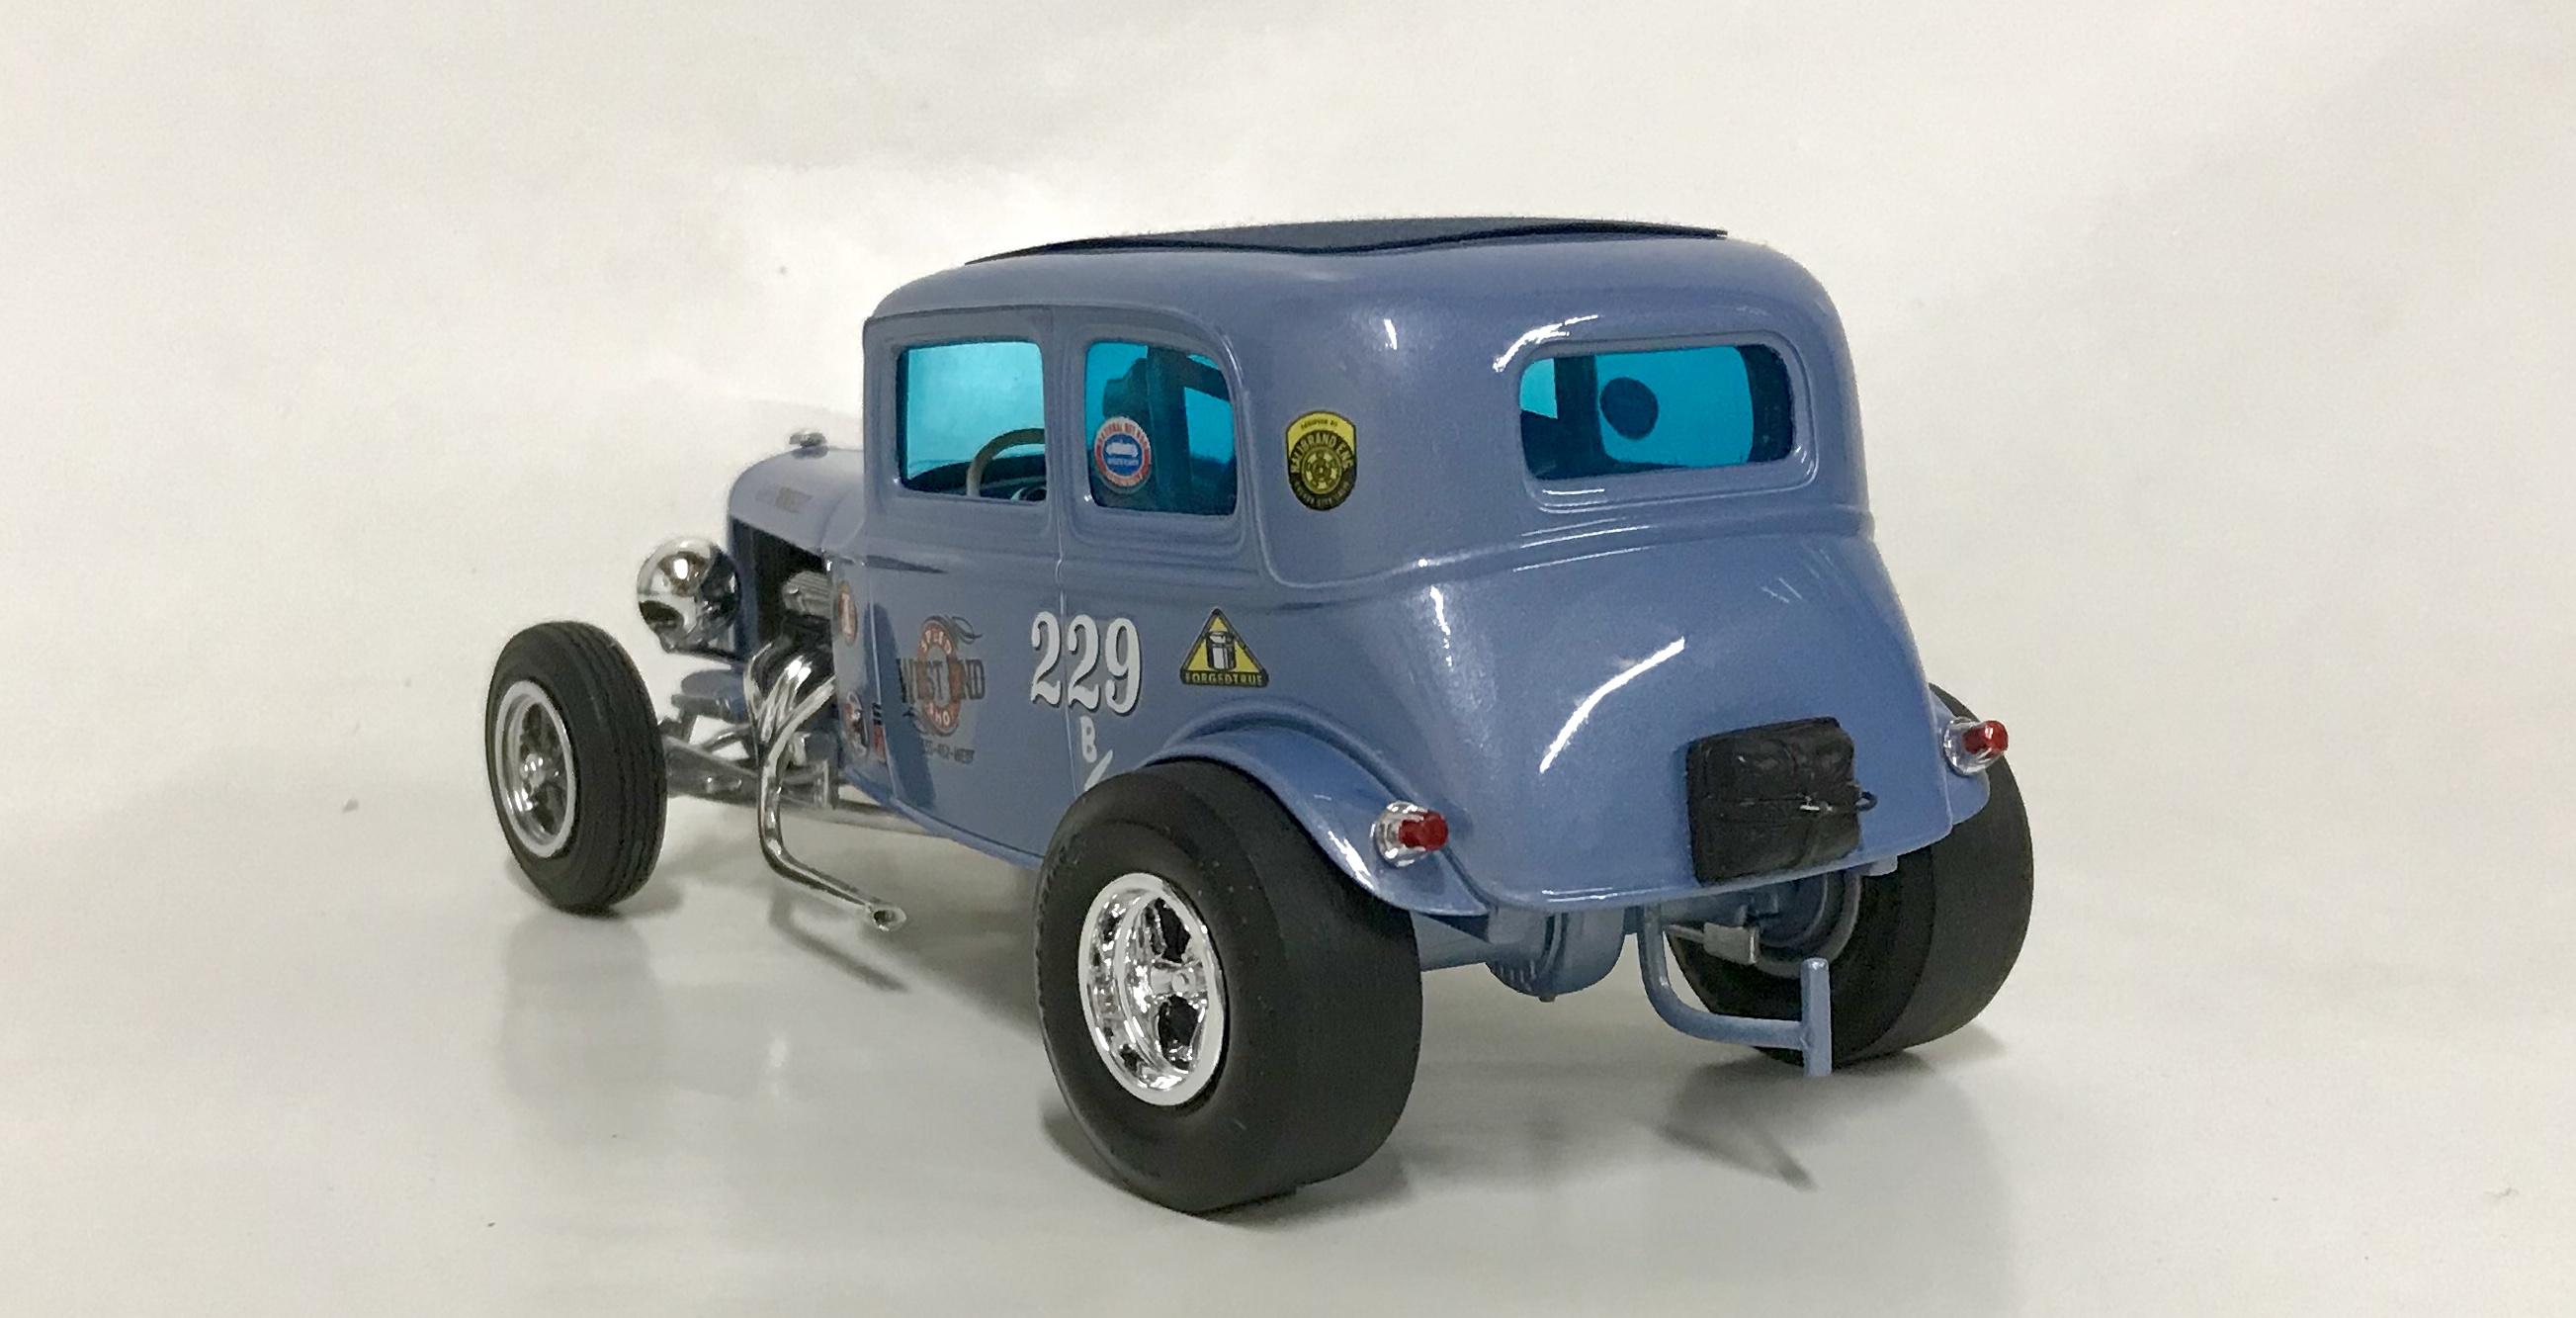
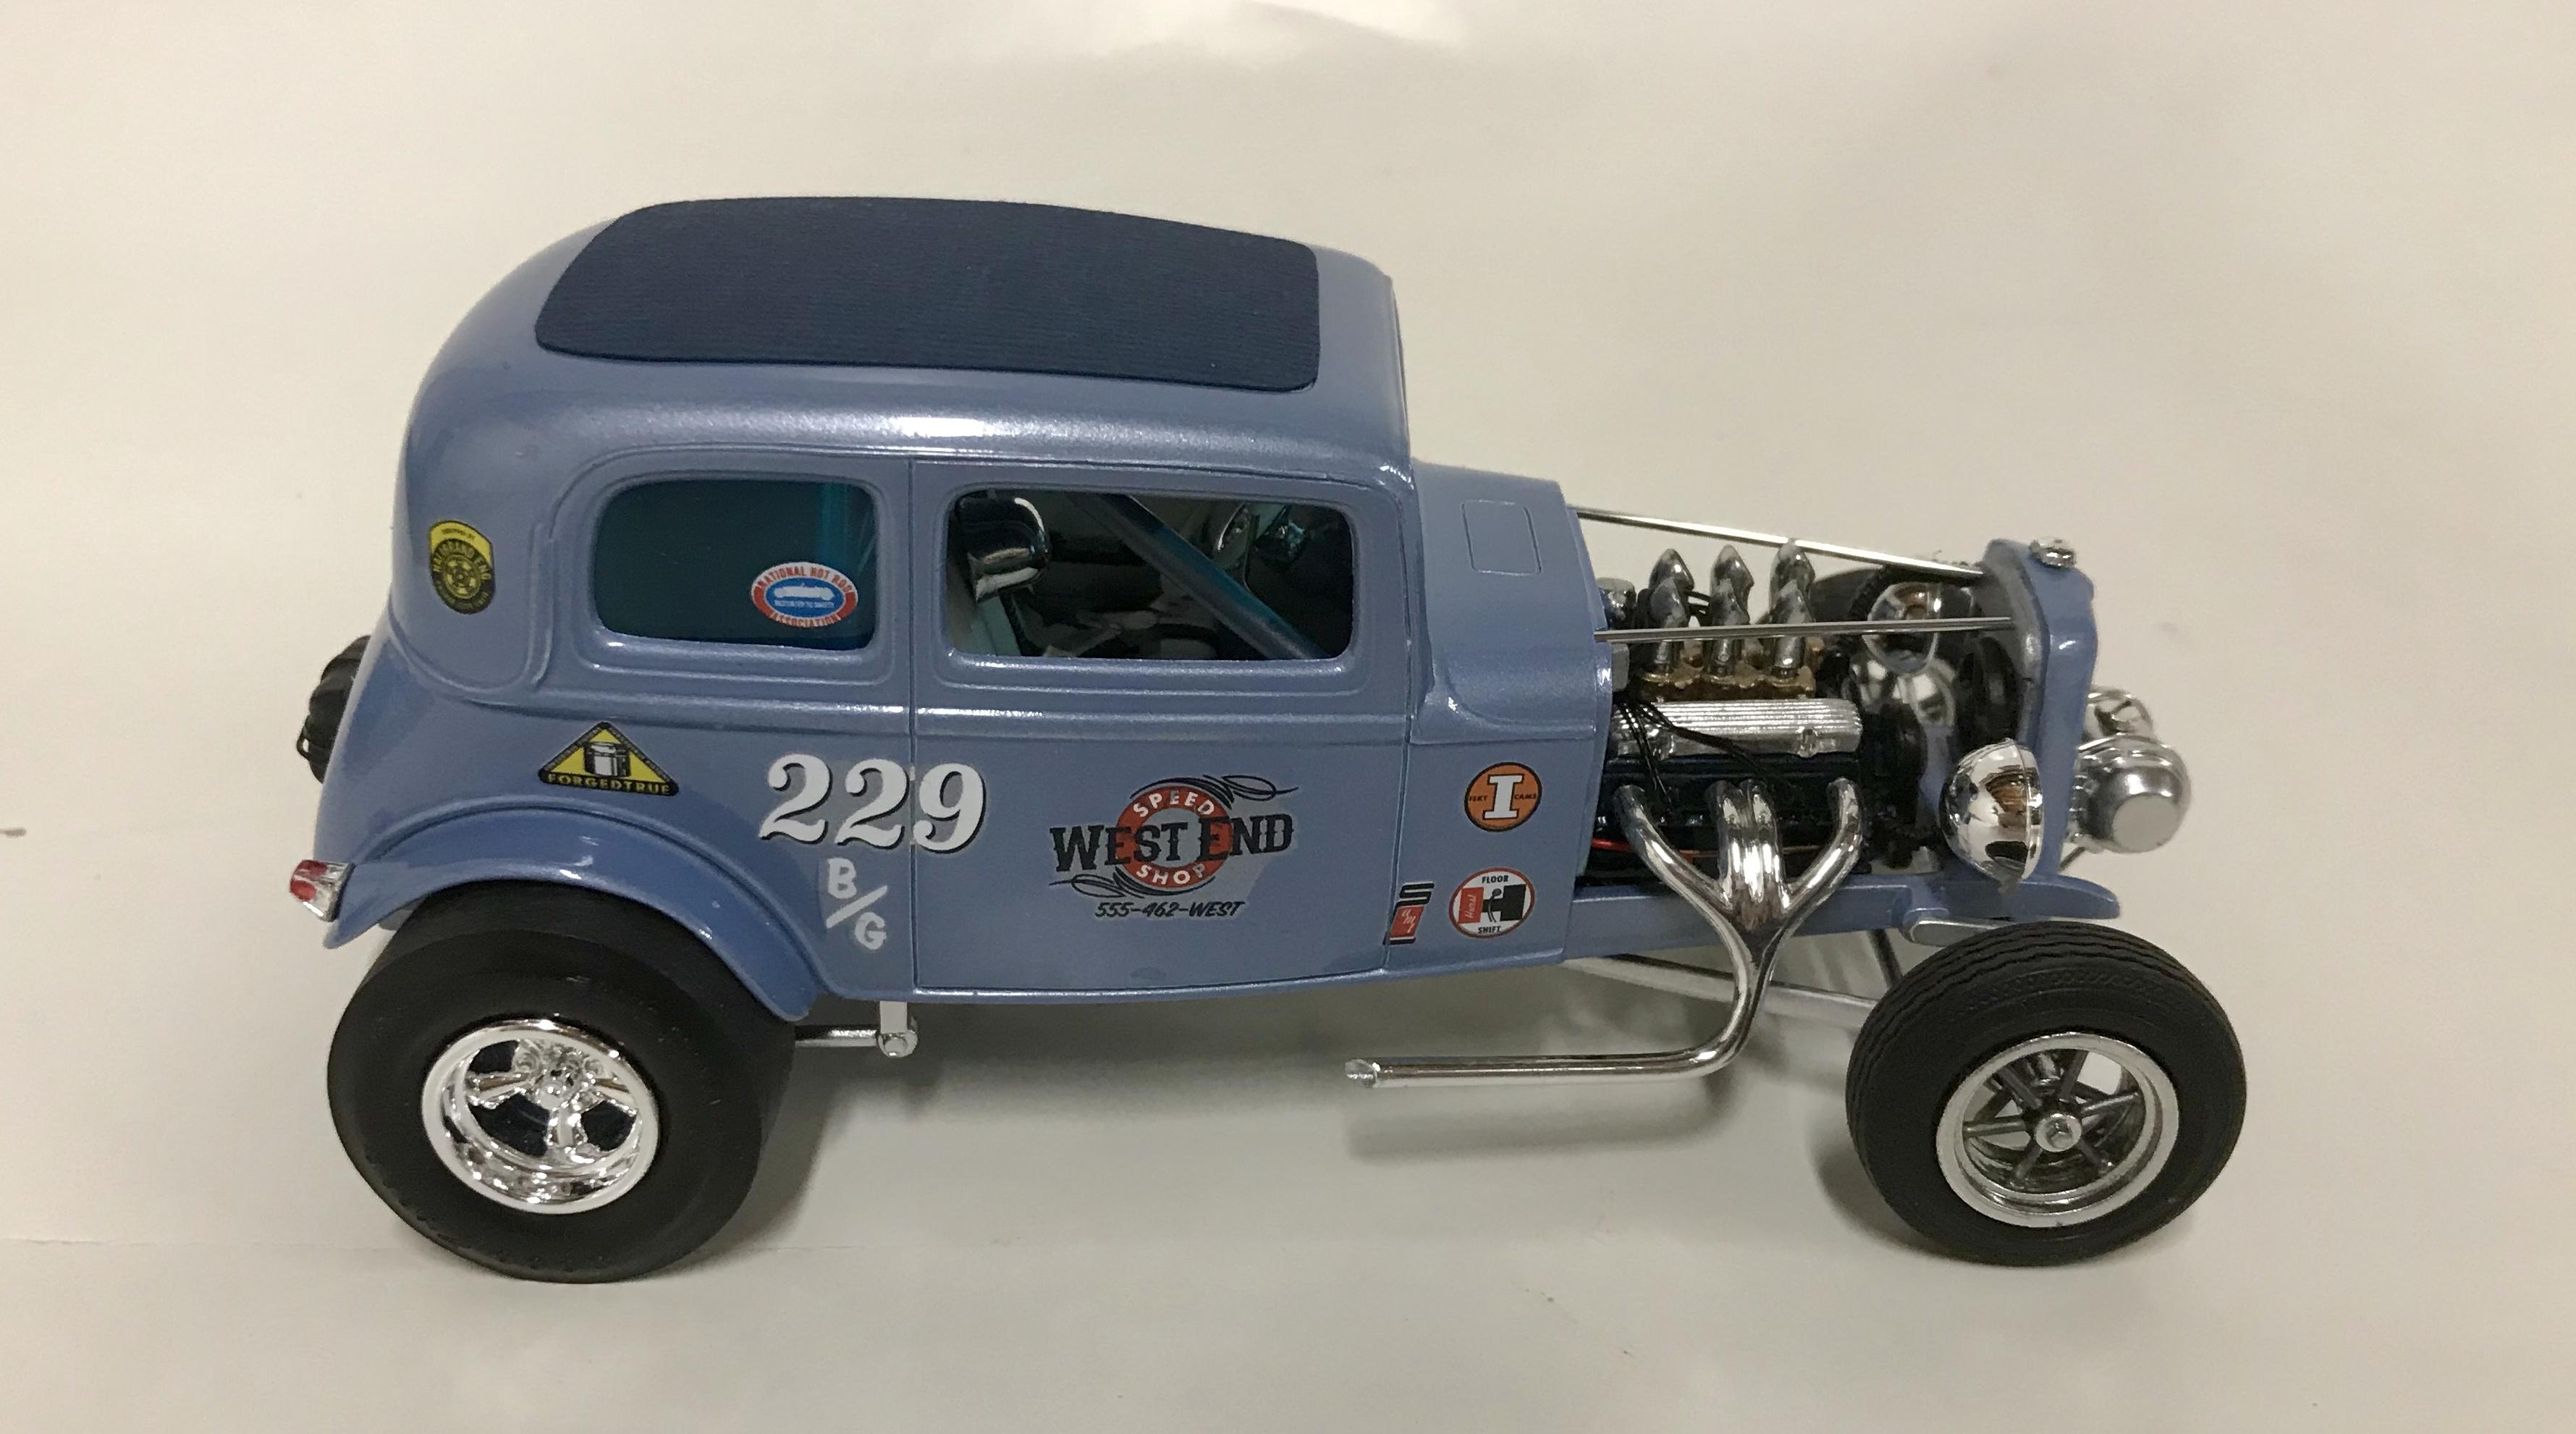
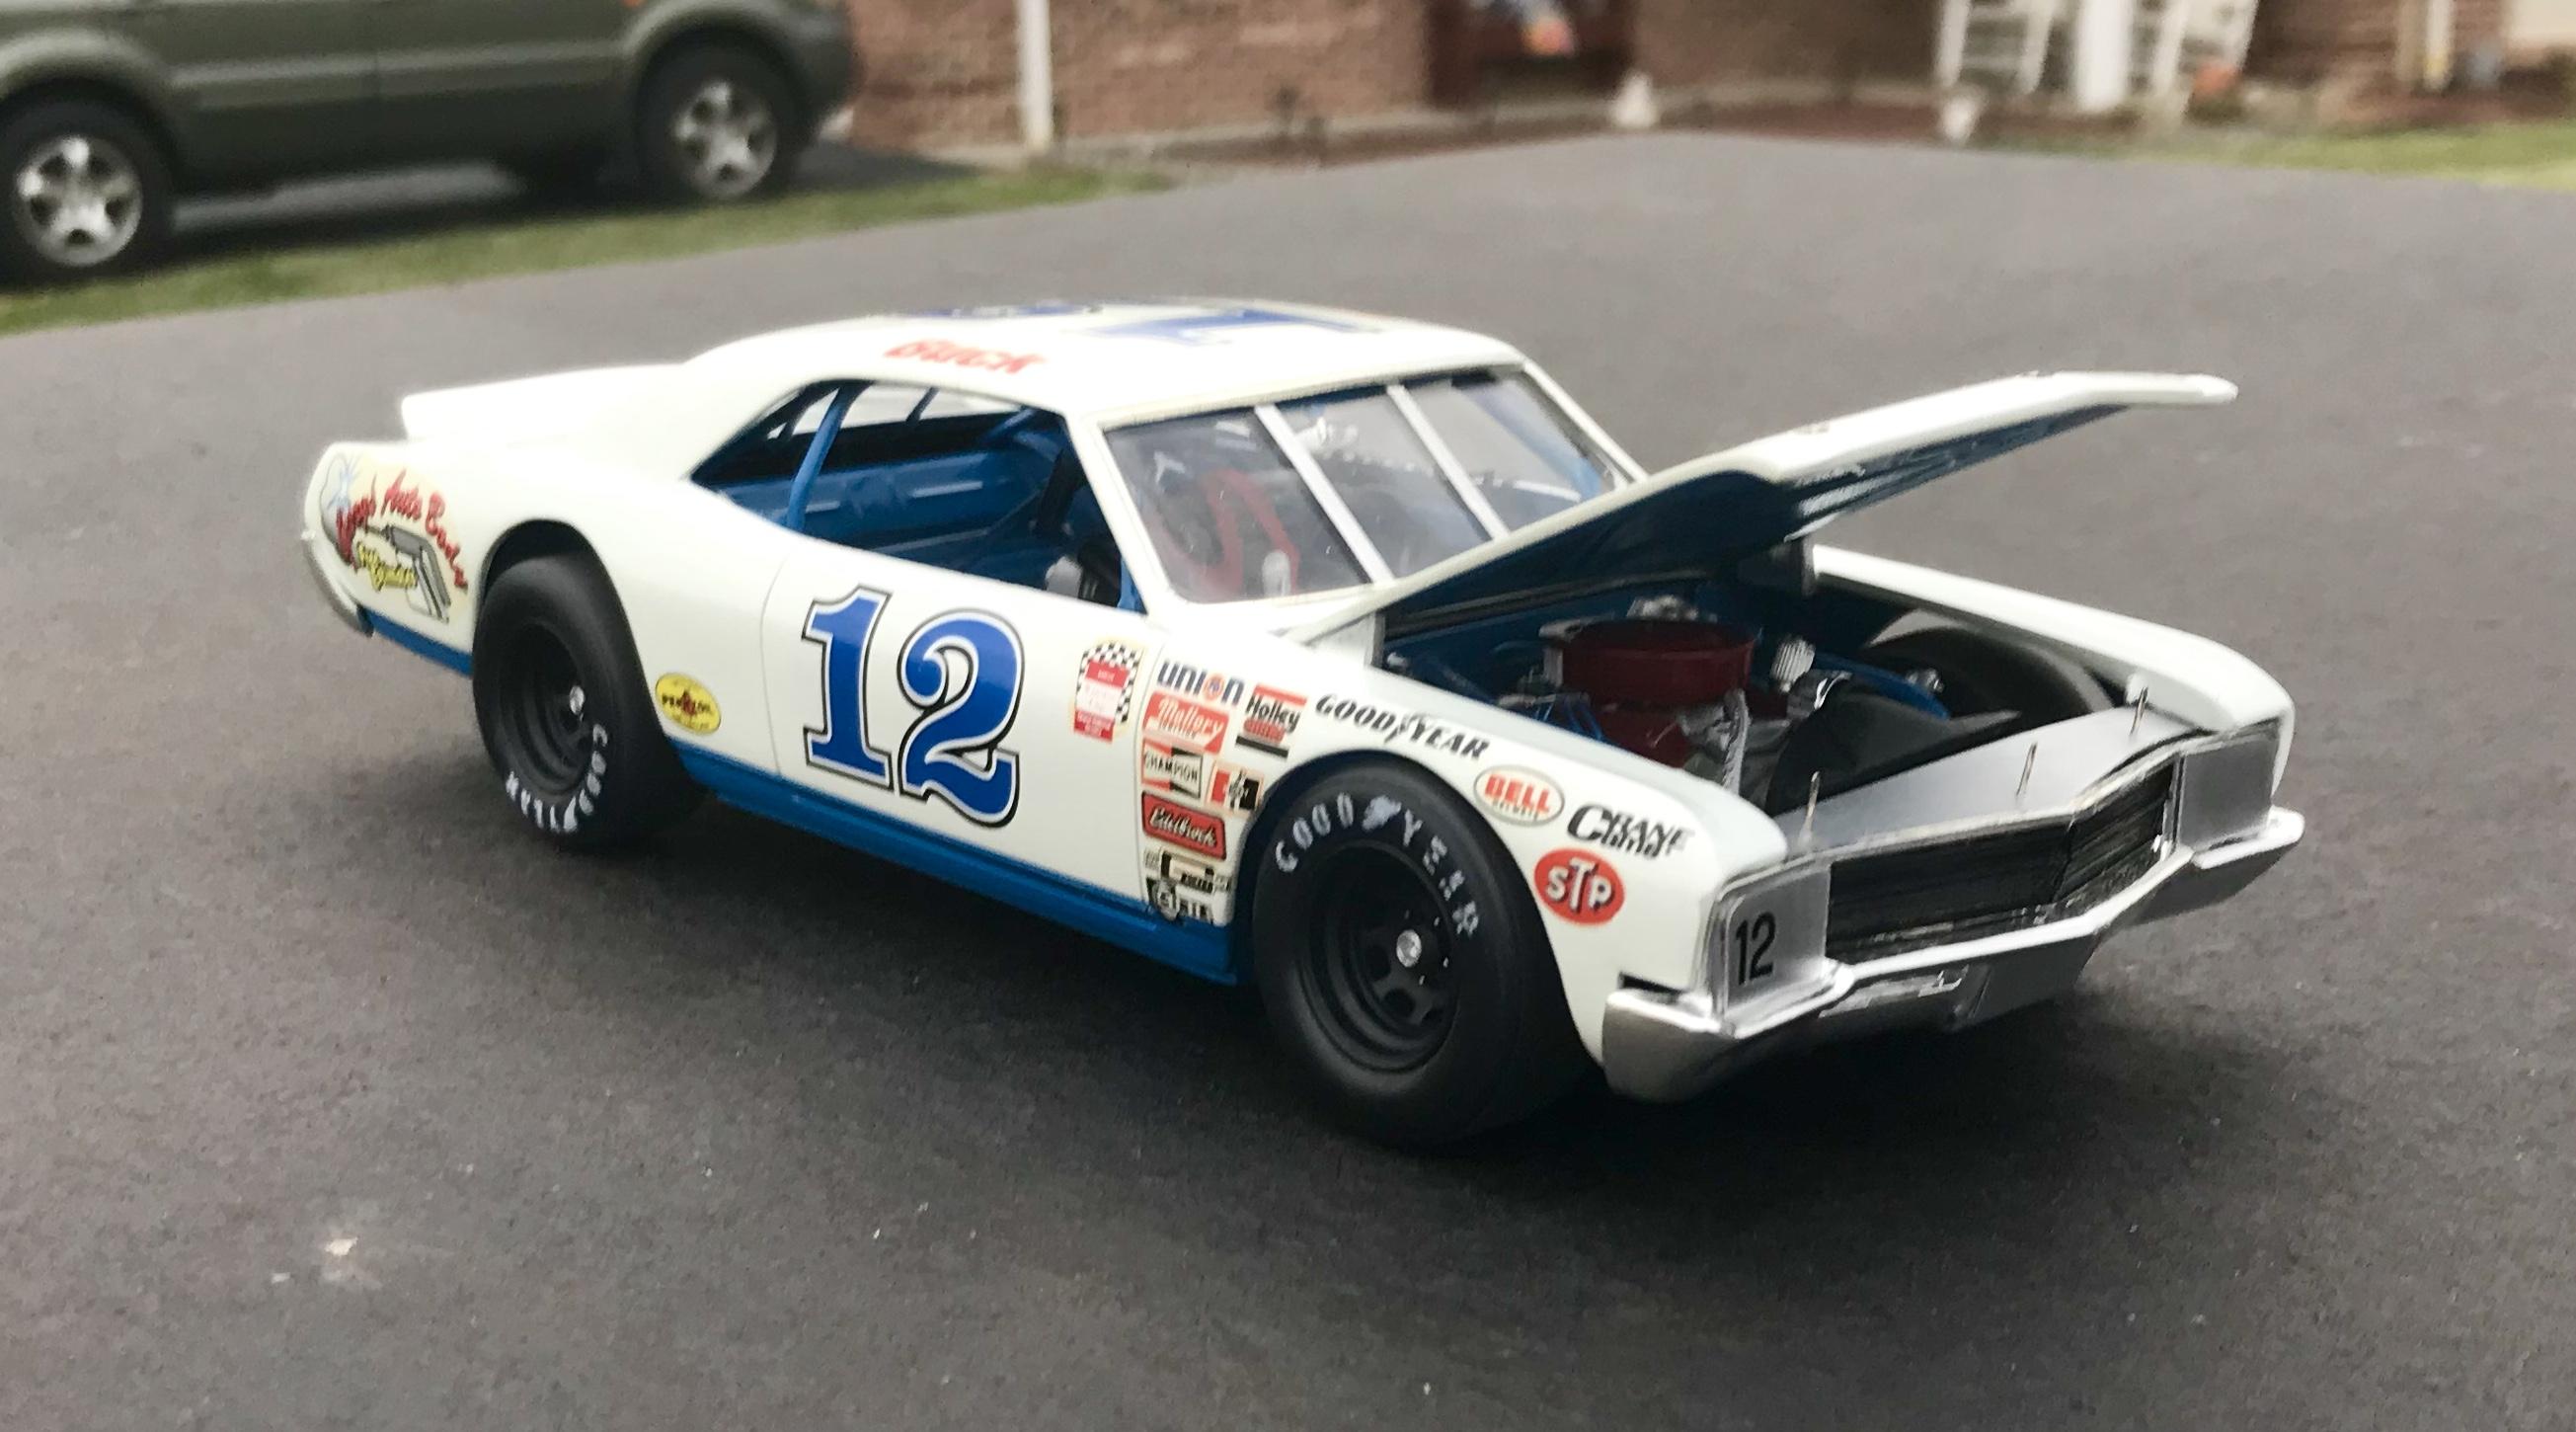
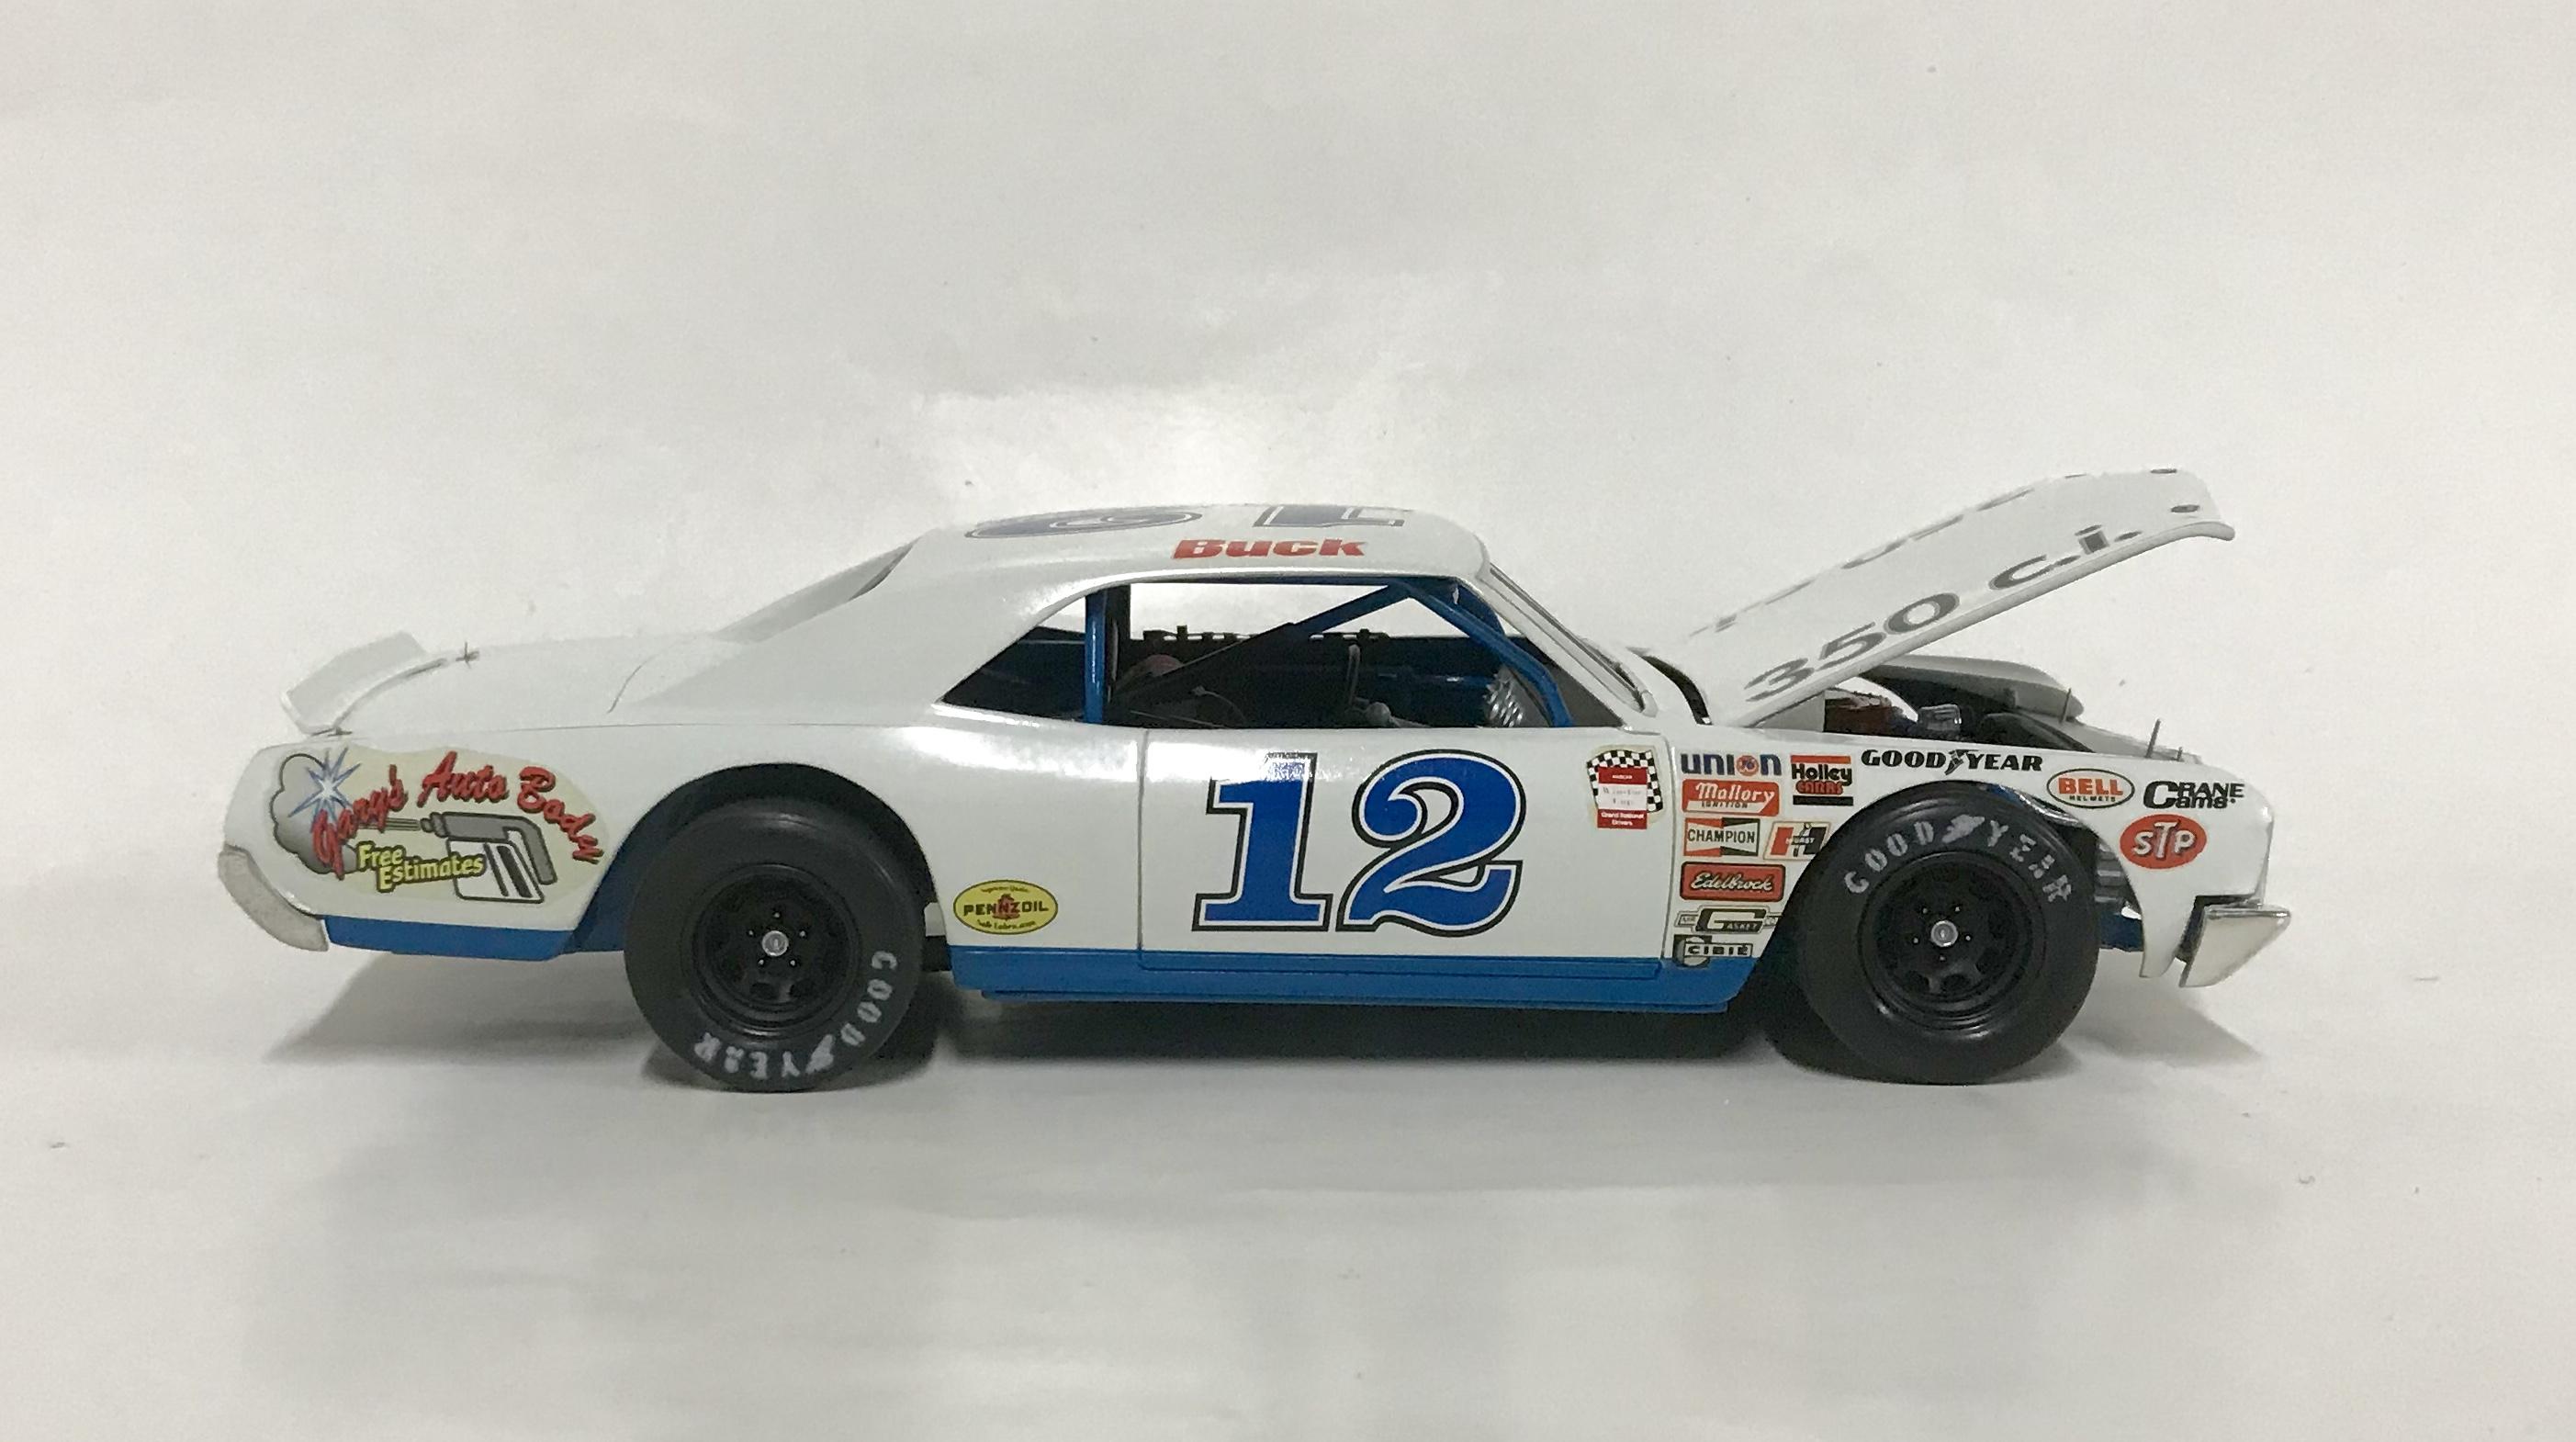
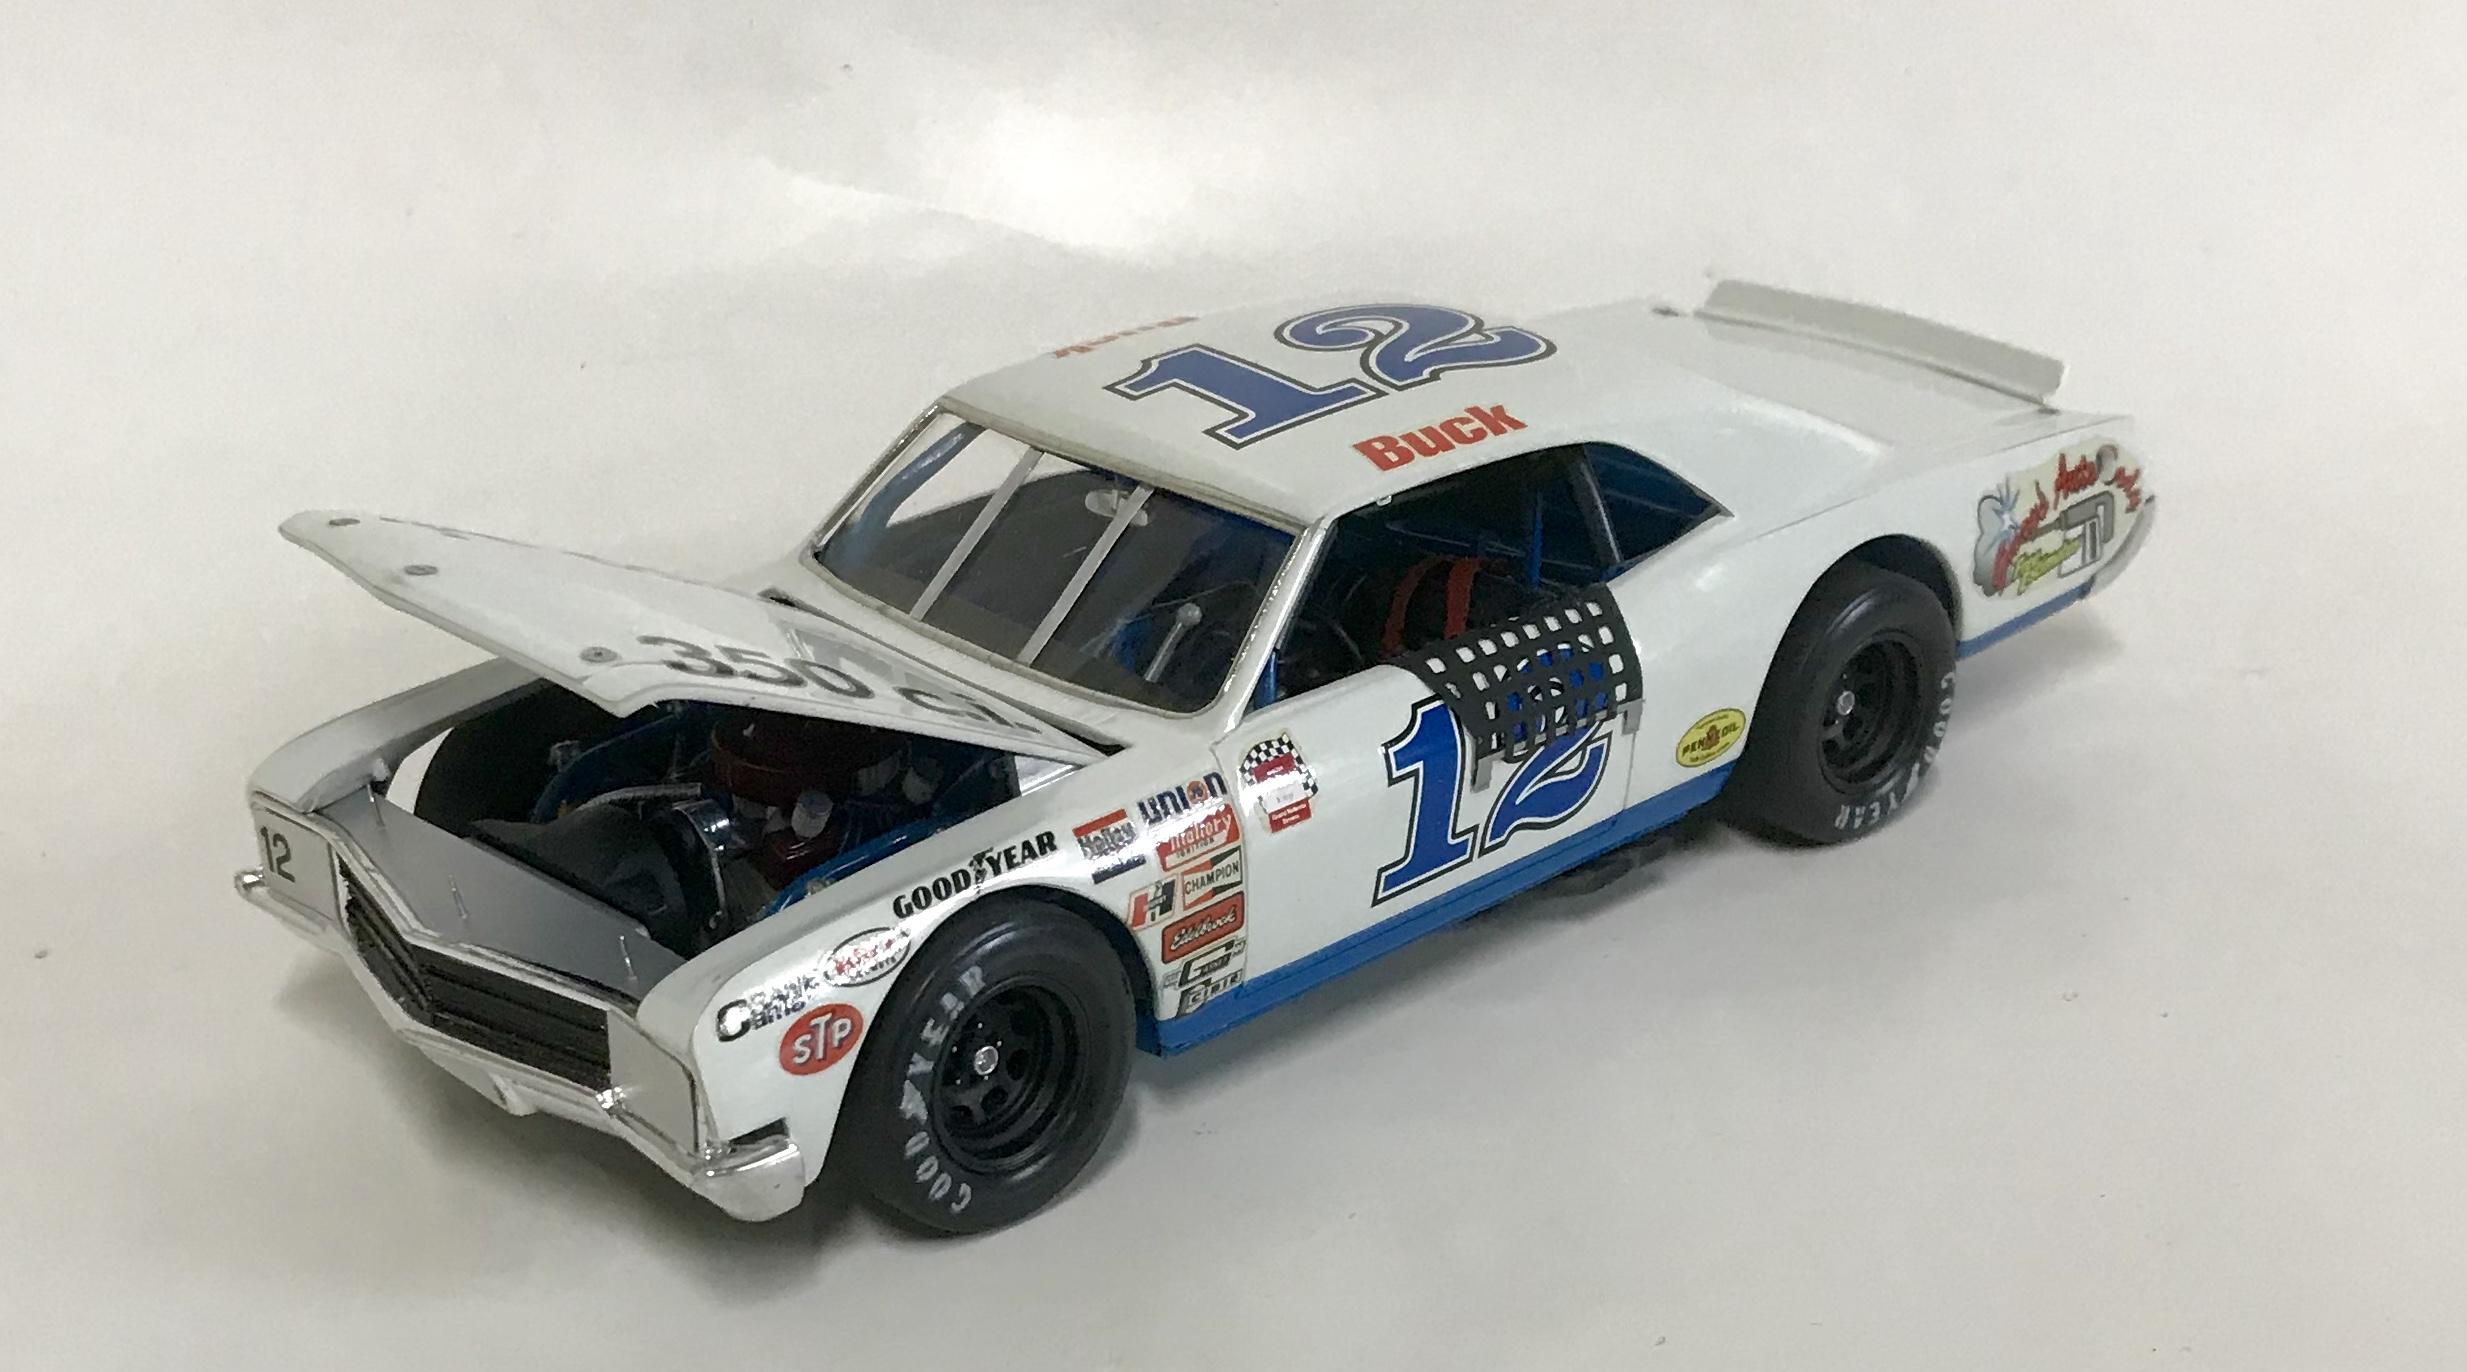
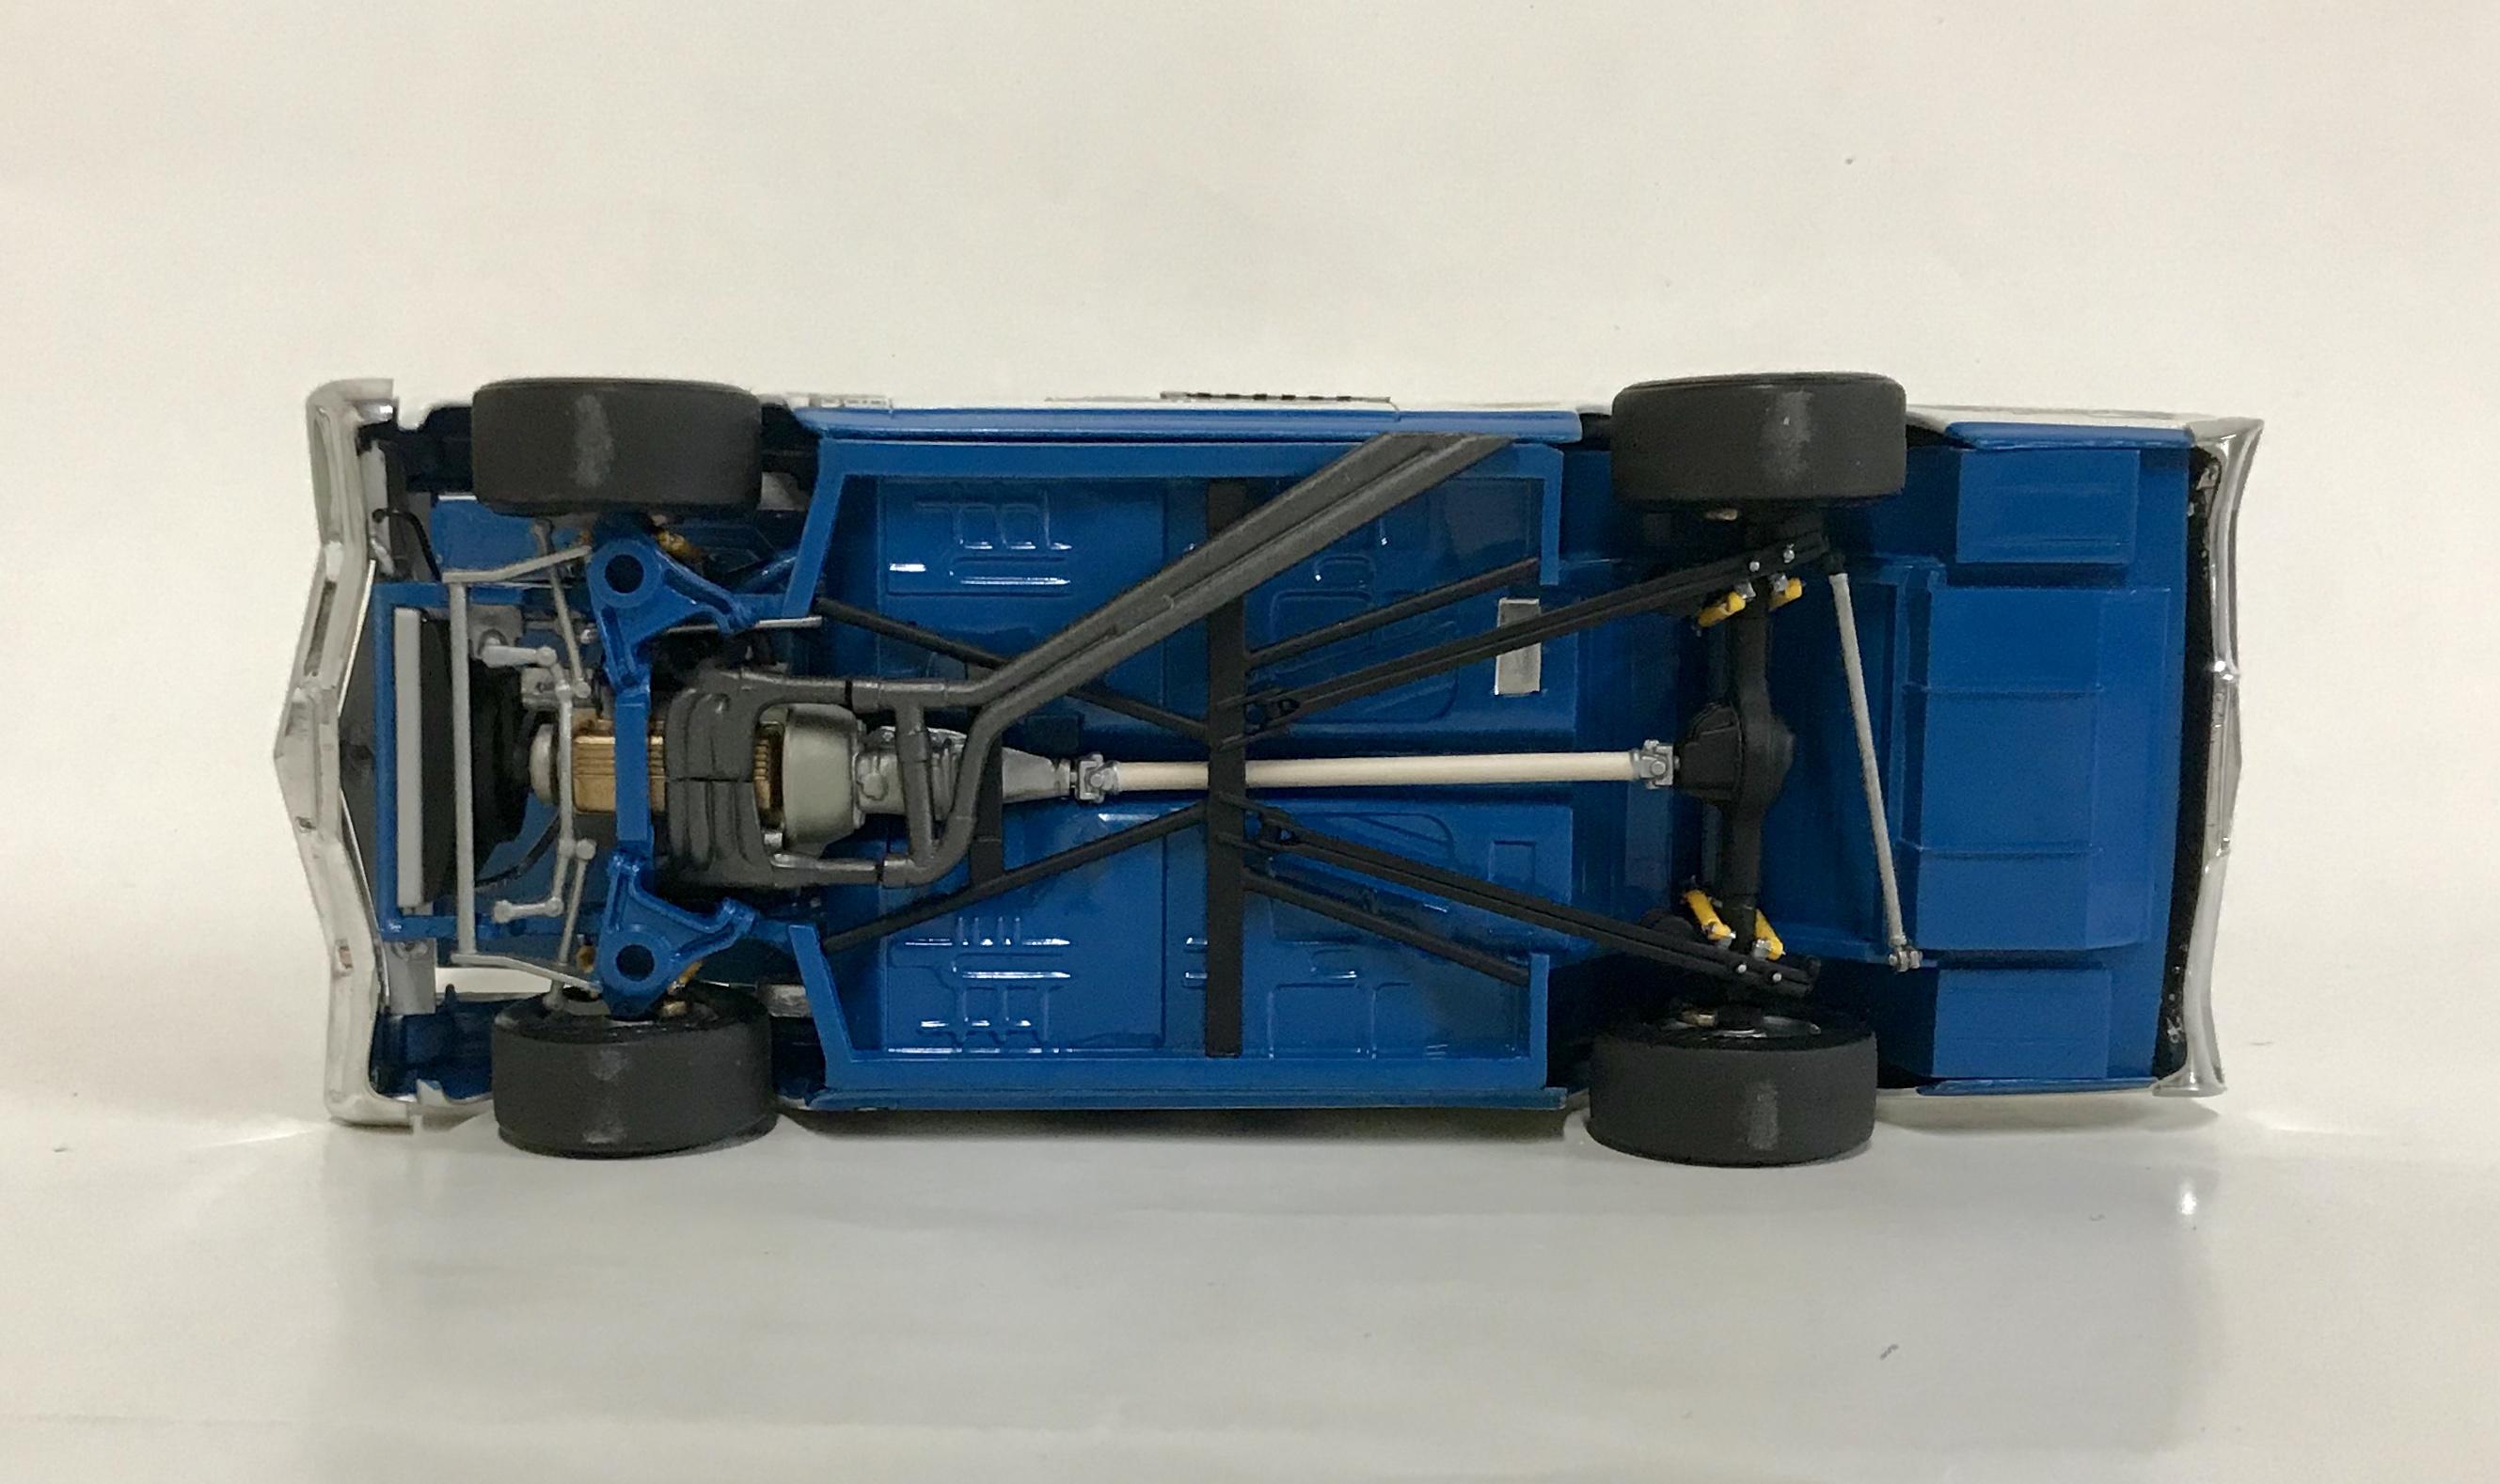
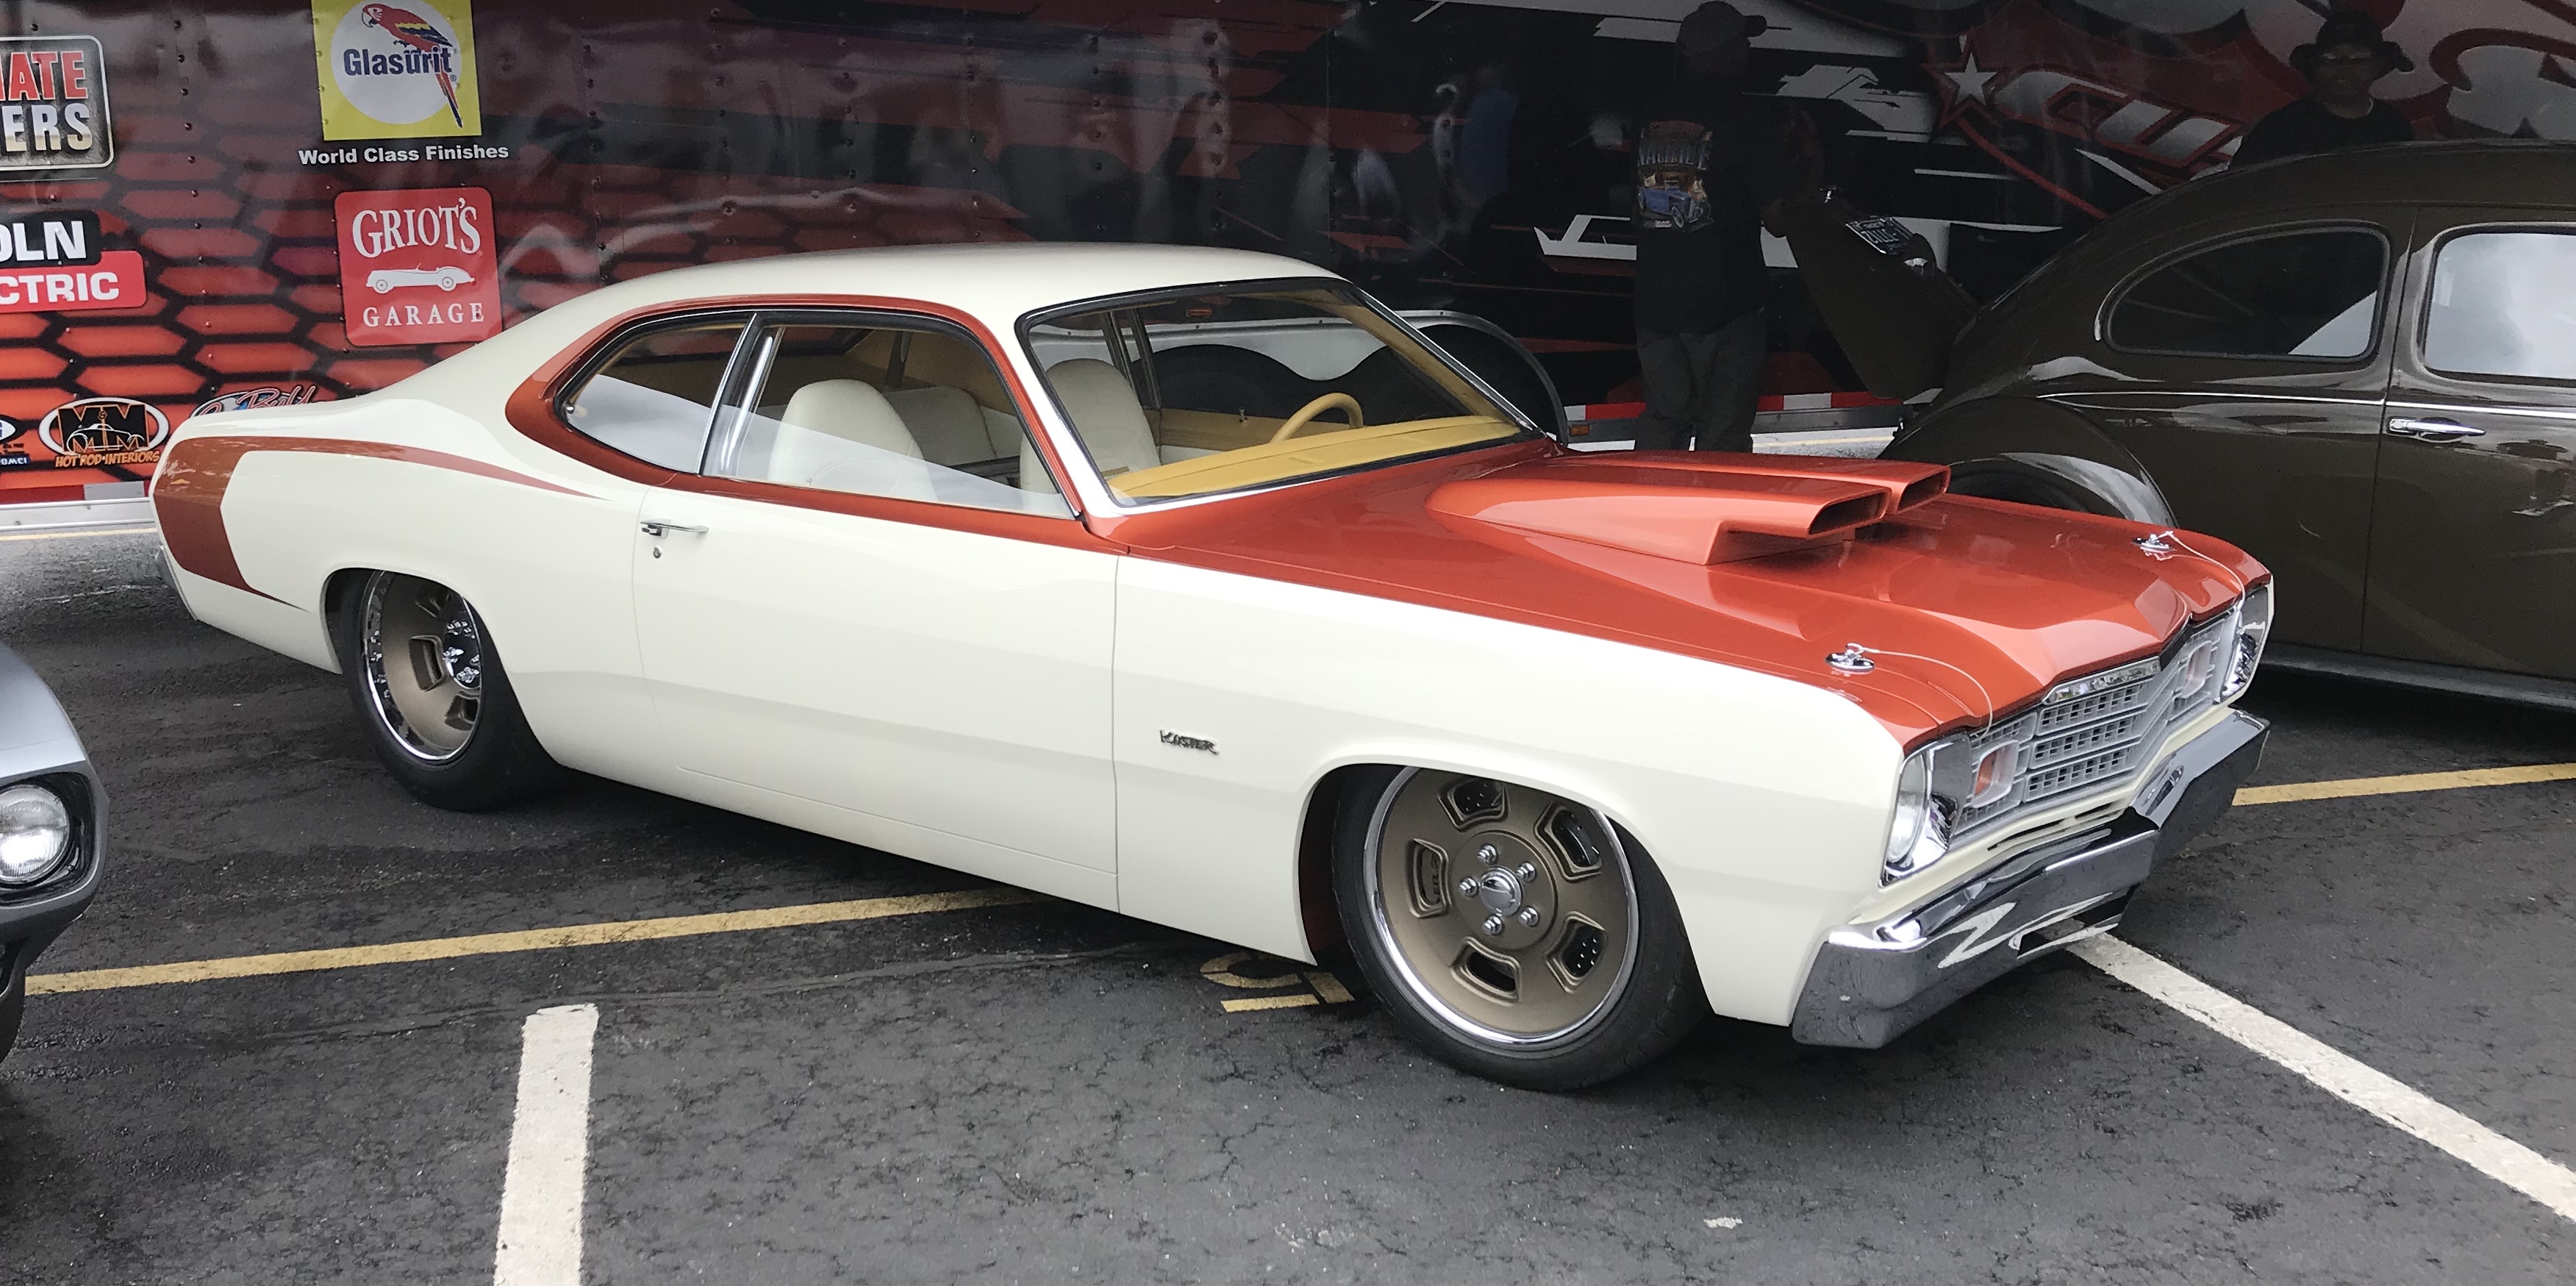
This build started out a little different than most of my other’s. I had a kit of the AMT 32 5 window coupe and when the Li’l Viky kit was reissued, I bought one to bash together with the 5 window coupe. I switched the chassis and engine and all the cool drag parts out of the Li’l Viky into the 5 window. After all that, I was looking at all the remaining parts from the two kits and thought there were enough left over to build something with. The 5 window had a fairly neat looking small block Chevy and a promo style chassis and the Viky had the stock front axle to go along with the body, hood, and grill shell. So after evaluating the situation, I thought what would Tim Boyd do? Therefore, that’s where the WWTBD came from. ? I didn’t have to think long and decided he would build a killer drag car with it, so that’s what I set out to do. I began by taking the promo chassis and removing the floor boards and molded in exhaust. I cleaned up the frame and rear axle and used sheet plastic to create new floor pans. In my eyes that was the biggest bang for the buck, as it made the rear axle appear to be a separate piece. I also built up the rocker panels to help close up some of the gaps with the rockers and the frame. I dug through my parts boxes for the wheels and tires and some other parts as well. Most of what I used came in the two kits though. This is my first Tamiya paint job and it won’t be my last, that stuff laid on like a dream. The decals were some from the kit and an aftermarket sheet from AMT. I hadn’t built a drag car in a long time and I doubt it would pass tech inspection,but it was a fun one for sure. Way back in the 80’s I had discovered the model car magazines on the market at that time. There wasn’t anything remotely close to the internet at that time, so if a person wanted information or images related to model cars, the magazines and some books were the only game in town at my house. So I got every one I could find and I studied them just as hard as I studied for my masters degree. I had a great desire to learn all I could about building and painting models. My favorite contributors were Bill Coulter, Juha Airio, and of course Tim Boyd. There were quite a few others who contributed as well. I learned quite a bit from those fellas and they saved me from heading down the wrong road many times with their willingness to share their knowledge and the great how to articles they created. I would like to thank them for all they have done for the hobby. I’m forever grateful and I’m still modelcarcrazy to this day.?
-
Thanks big guy. The drivers name was Butch Miller.
-
I built this kit long ago, in 1990. Even though it’s such an old build, only a very few people have seen it. It was built straight from the box, while also using the kit decals. Everything was painted using Testors, except the tires. I hand painted them using water based paint. I just brushed it off and wiped it down a little and I think it still looks pretty good.
-
I posted this long ago but Photobucket decided my photos had to go. I’ve taken some new photos to reintroduce her to the world of today. I watched cars similar to this one race at Kingsport Speedway back in the seventies when I was a teenager. I combined the modified stocker body and a Monogram NASCAR chassis to replicate a mid-seventy Late Model Sportsman NASCAR racer. I used Testors and Model Master paints and decals that I scrounged up from other kits. It was a fun build and it turned out better than I had hoped it would. I think it’s a keeper.
-
It appears like all the plastic is still there. Before doing anything drastic, I would try using hot water and try to bend the plastic back into the original shape with my fingers as close as possible. After working it into shape, hold it under cold water to cool the plastic back down. With some careful work and determination it could possibly be straightened out. You have nothing to lose now.
-
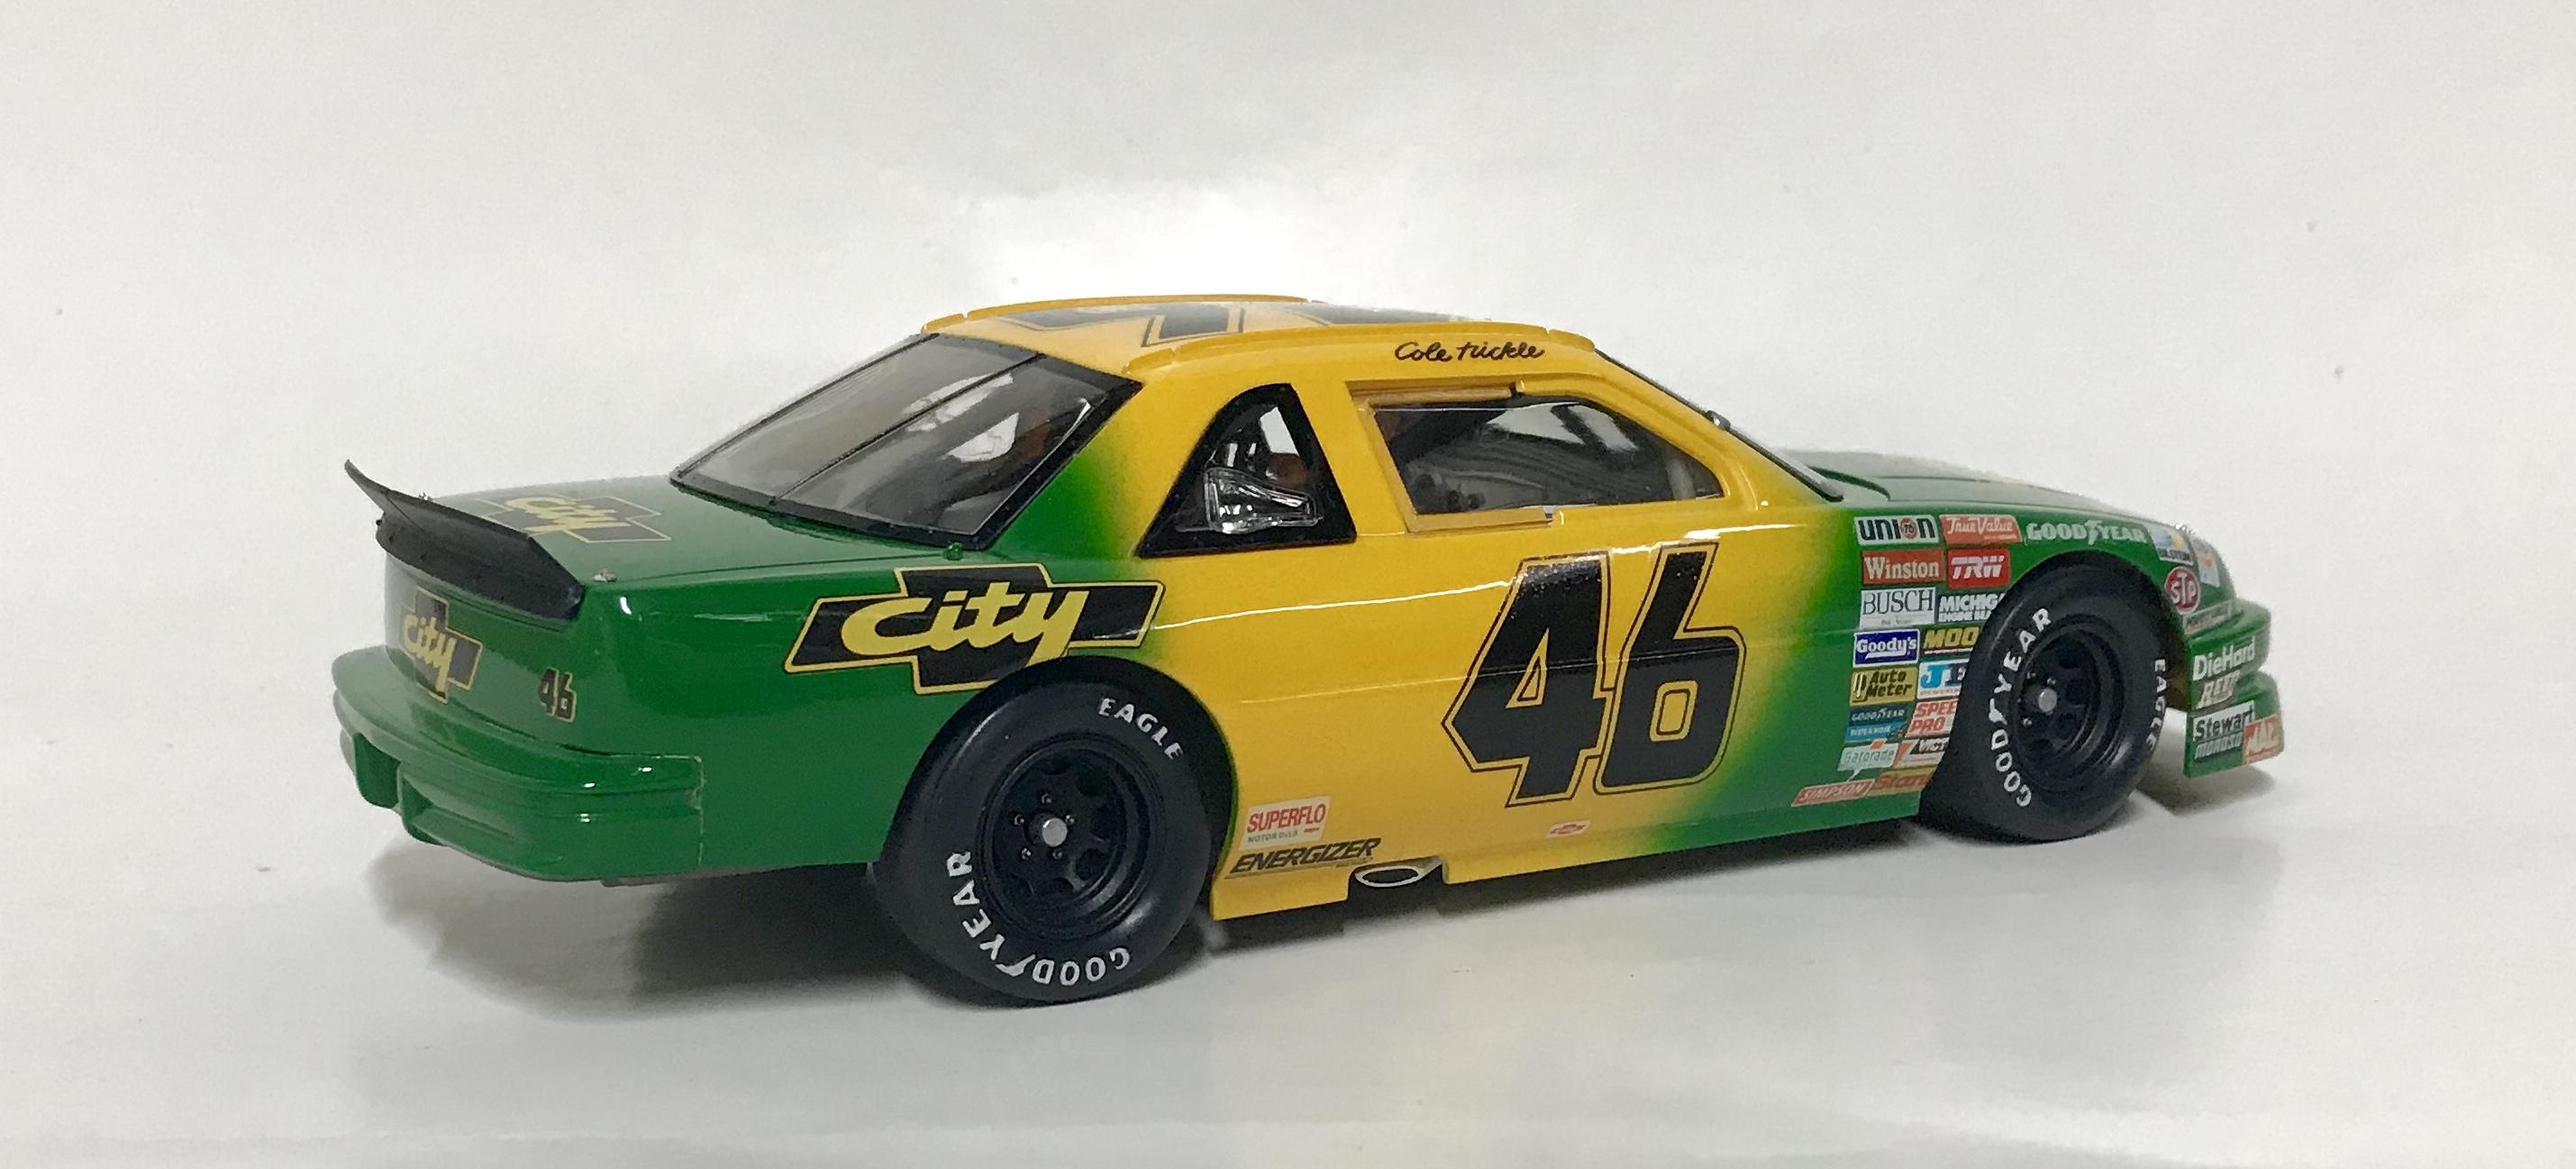
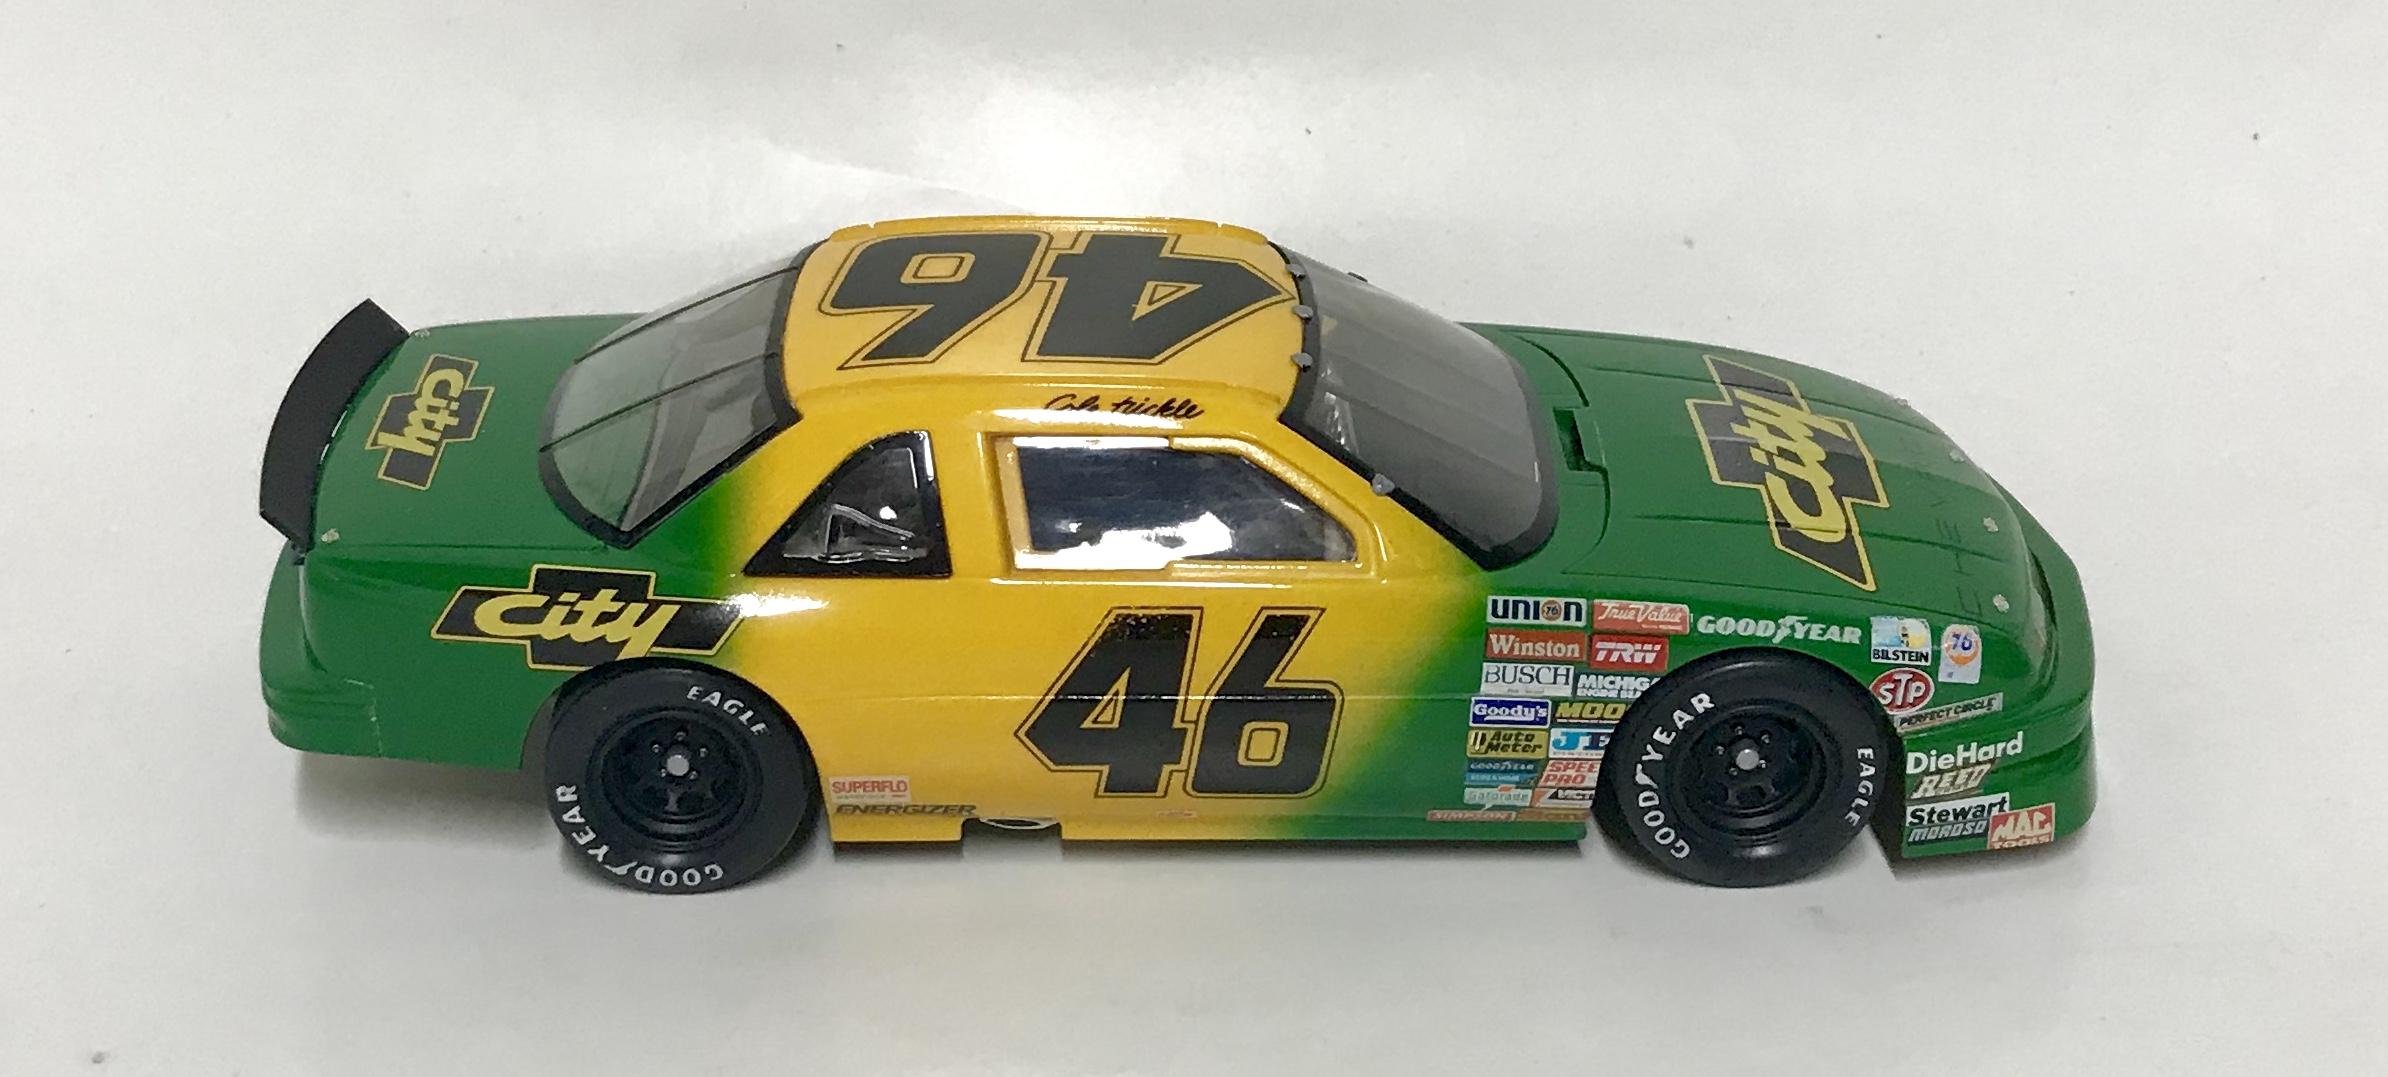
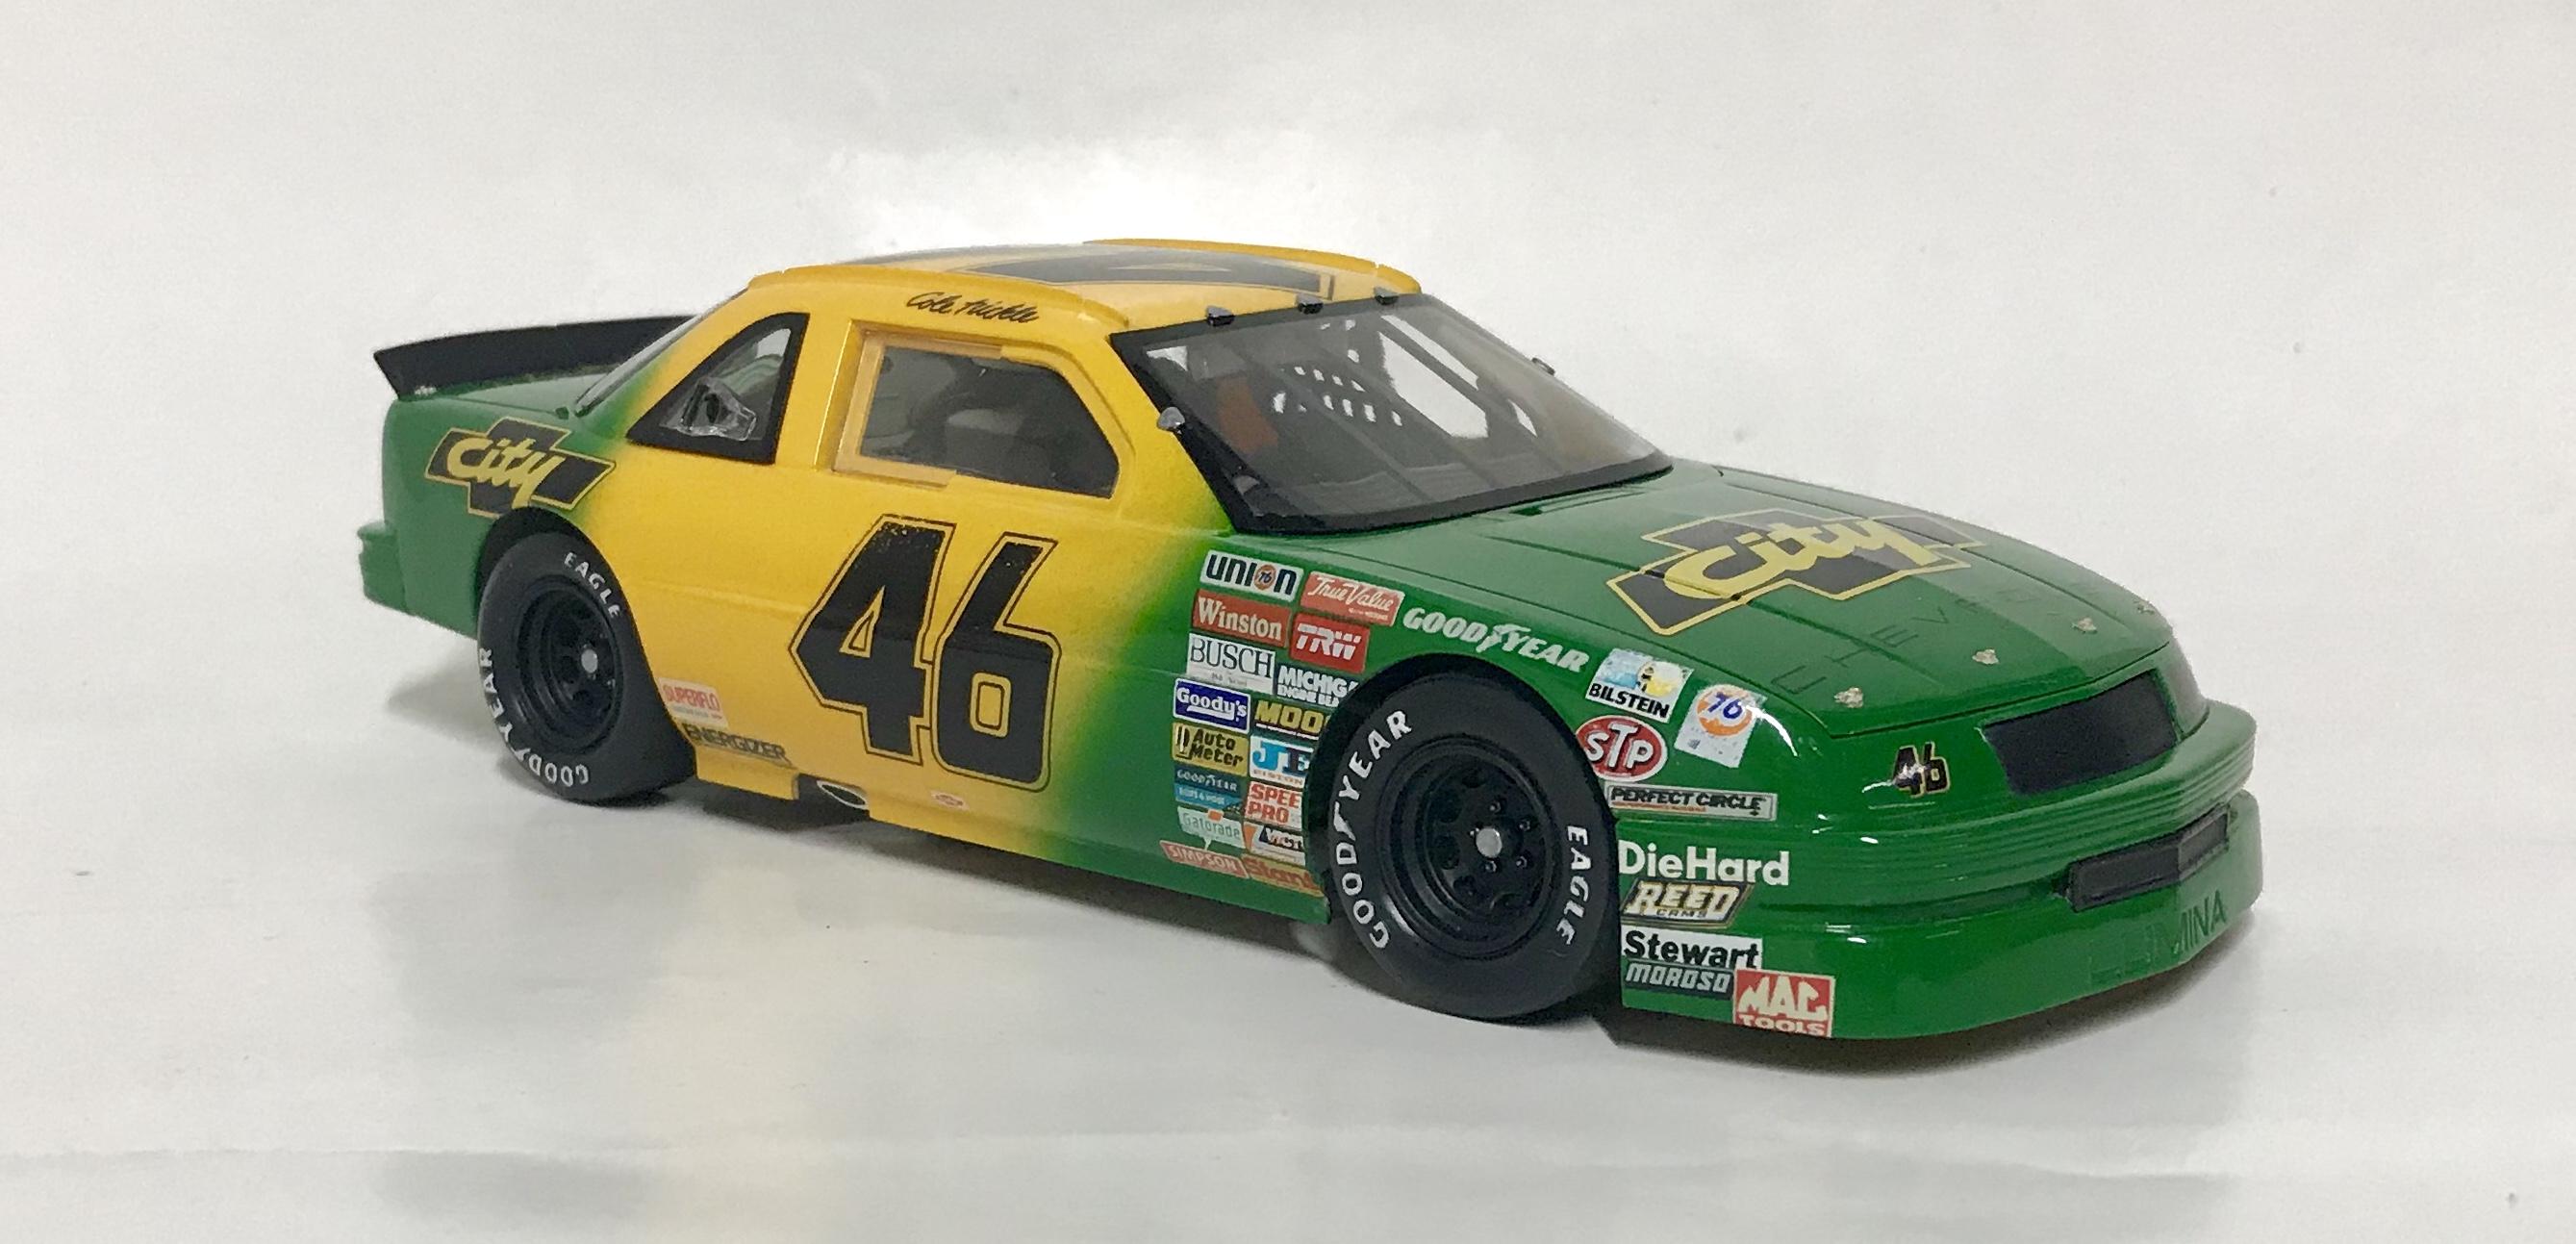
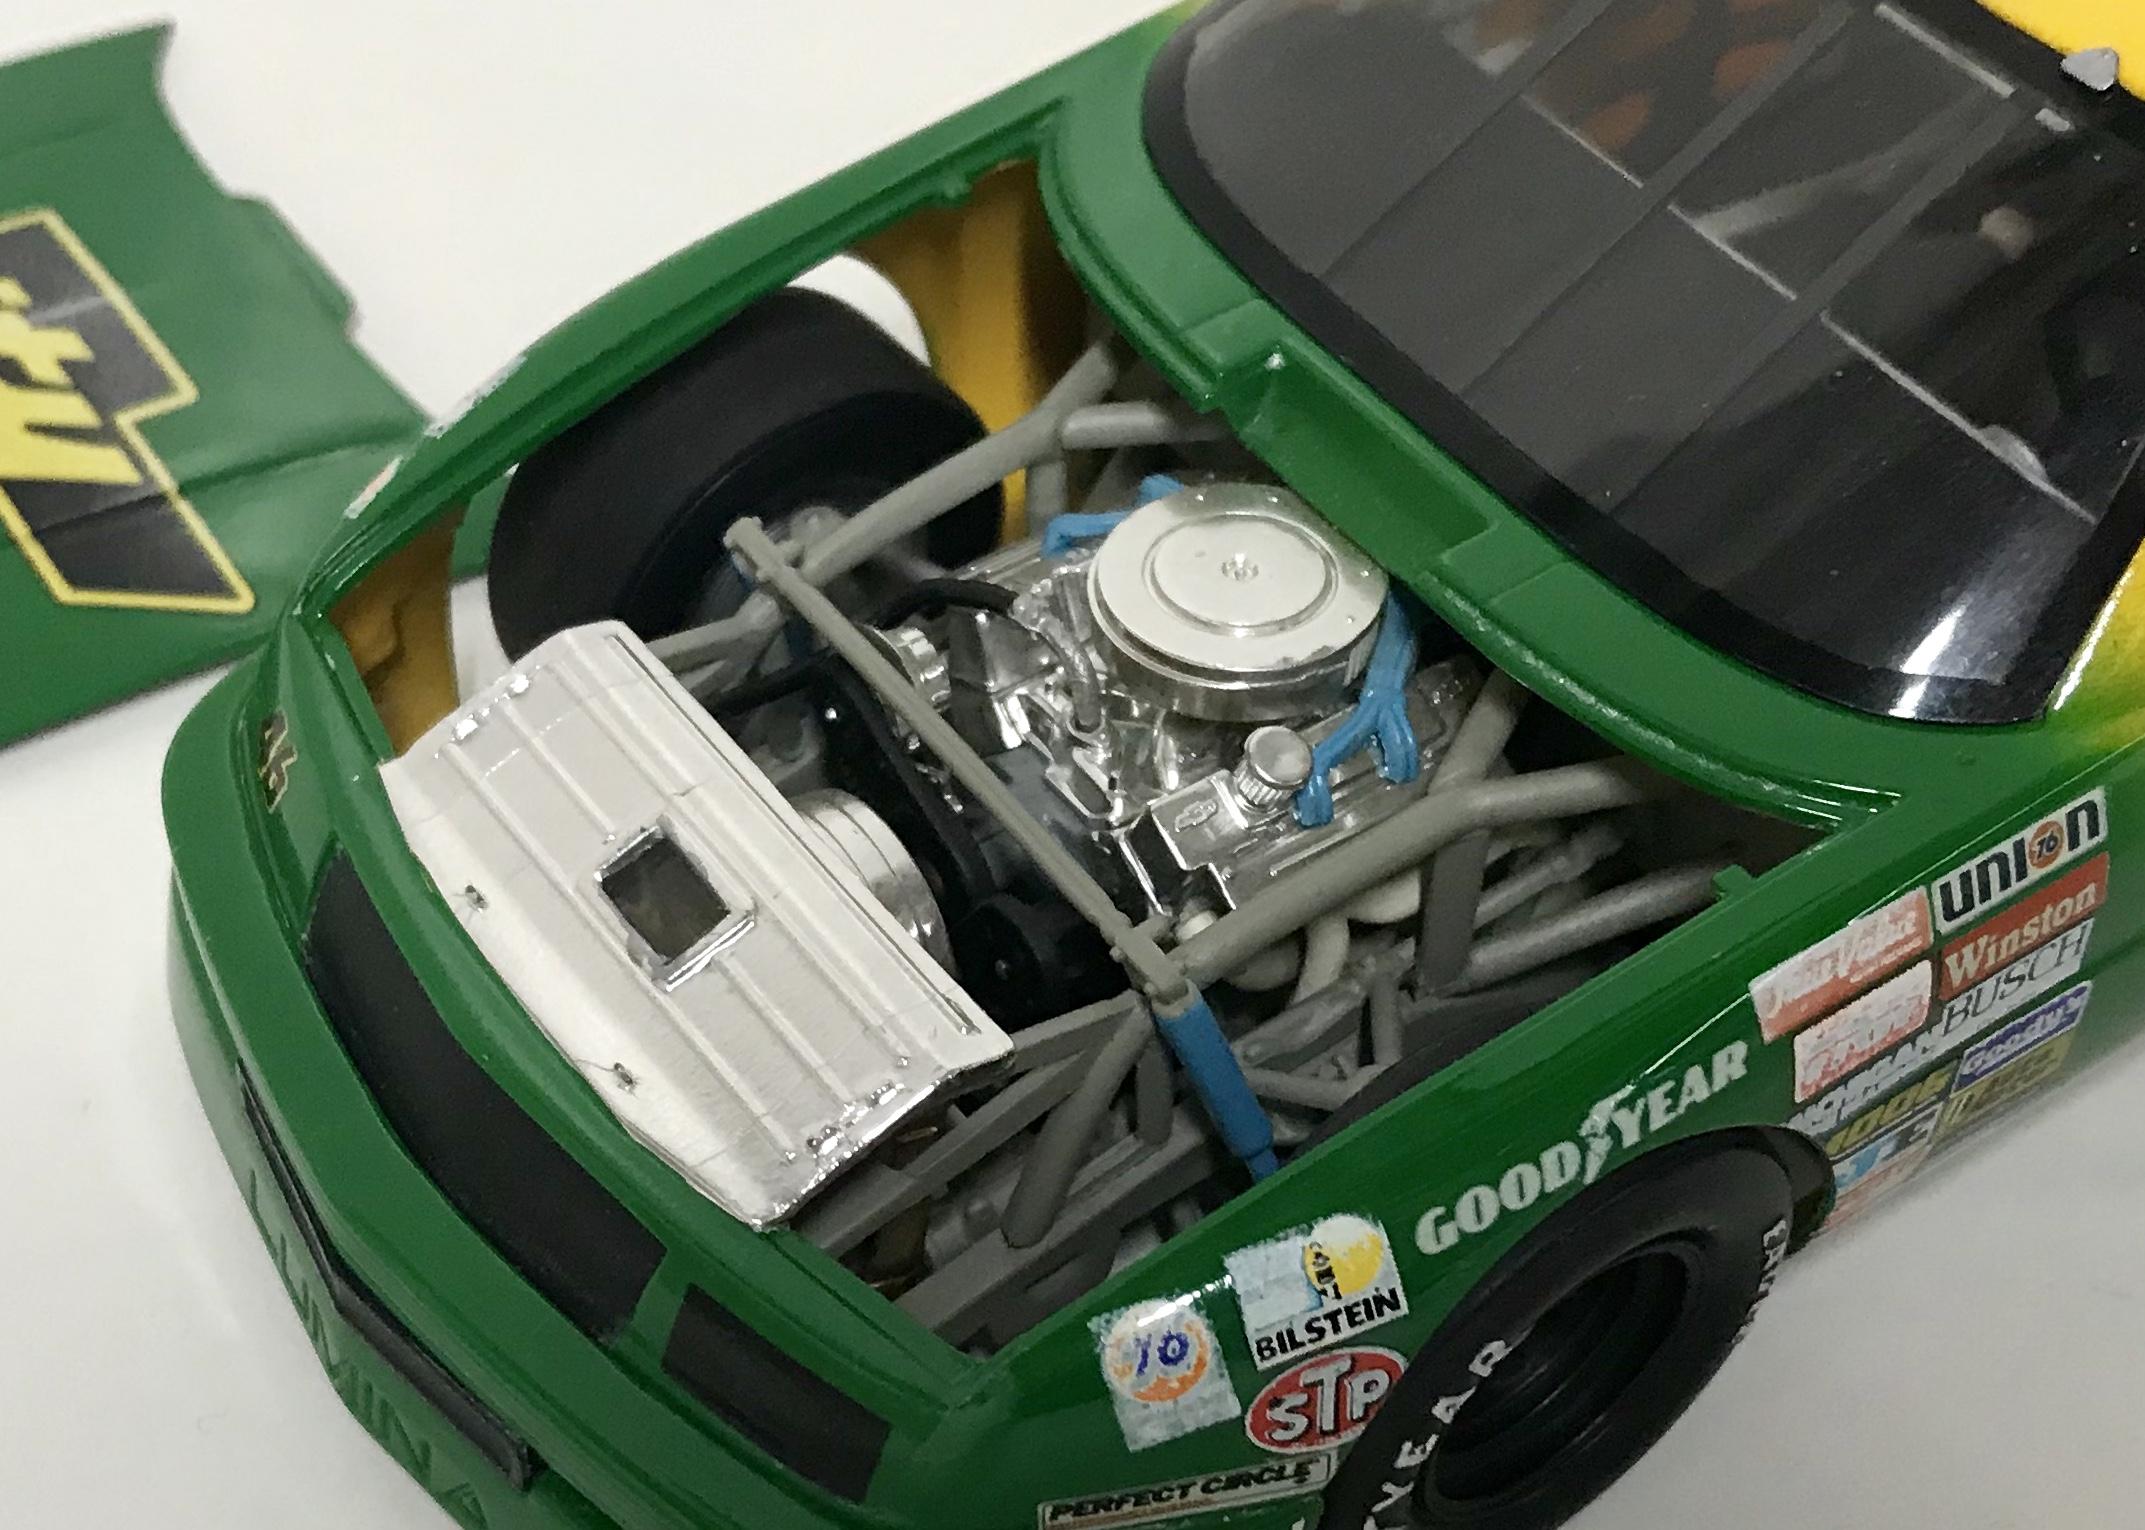
Tom Cruise’s ride in the movie Days of Thunder. It was built in 1993, box stock. It is wearing Testors and Model Master paint and the decals supplied in the kit.
-
I think this one looks pretty close ?
-
I posted this once before back in 2013 and photobucket sank it in the vast sea of watermarks. So I have taken some new photos with my phone. It’s still looking like a pretty mean cat.
-
This is an old one I built in 1986. I originally built it box stock but wasn’t feeling it so I tore it apart and added parts from a Monogram pro stock kit as well as a few others. It’s painted with Testors enamel and decals I scraped up from different kits. I thought I would post it because even though it’s been 35 years since I built it, very few people have ever seen it. It’s not my best work by far but still one of my favorites.
-
You have gotten some excellent advice in these prior posts. However, I have been building models for over 50 years and I believe achieving a really good paint job might be the most difficult part of modeling. For beginners, I would suggest to stay away from metallic or pearl paint and work on getting the basics down first. The metallic and pearl paint is more difficult to work with than solid colors, especially for beginners. I would also suggest to use the same brand of paint for the primer, color coat and clear to greatly improve your chances of compatibility in all the products your using. I don’t know of very many people who have perfected this process right off the bat, as it will take time to get to where you would like to be as far as your skill level. The more you work at it the better your chances of improving. Take your time, knowing what not to do is just as important as knowing what to do. It will take a lot of studying and research and a strong desire to improve to get outstanding results. After over 50 years I’m still looking for ways to improve and messing up isn’t out of my reach either unfortunately. Good luck.
-
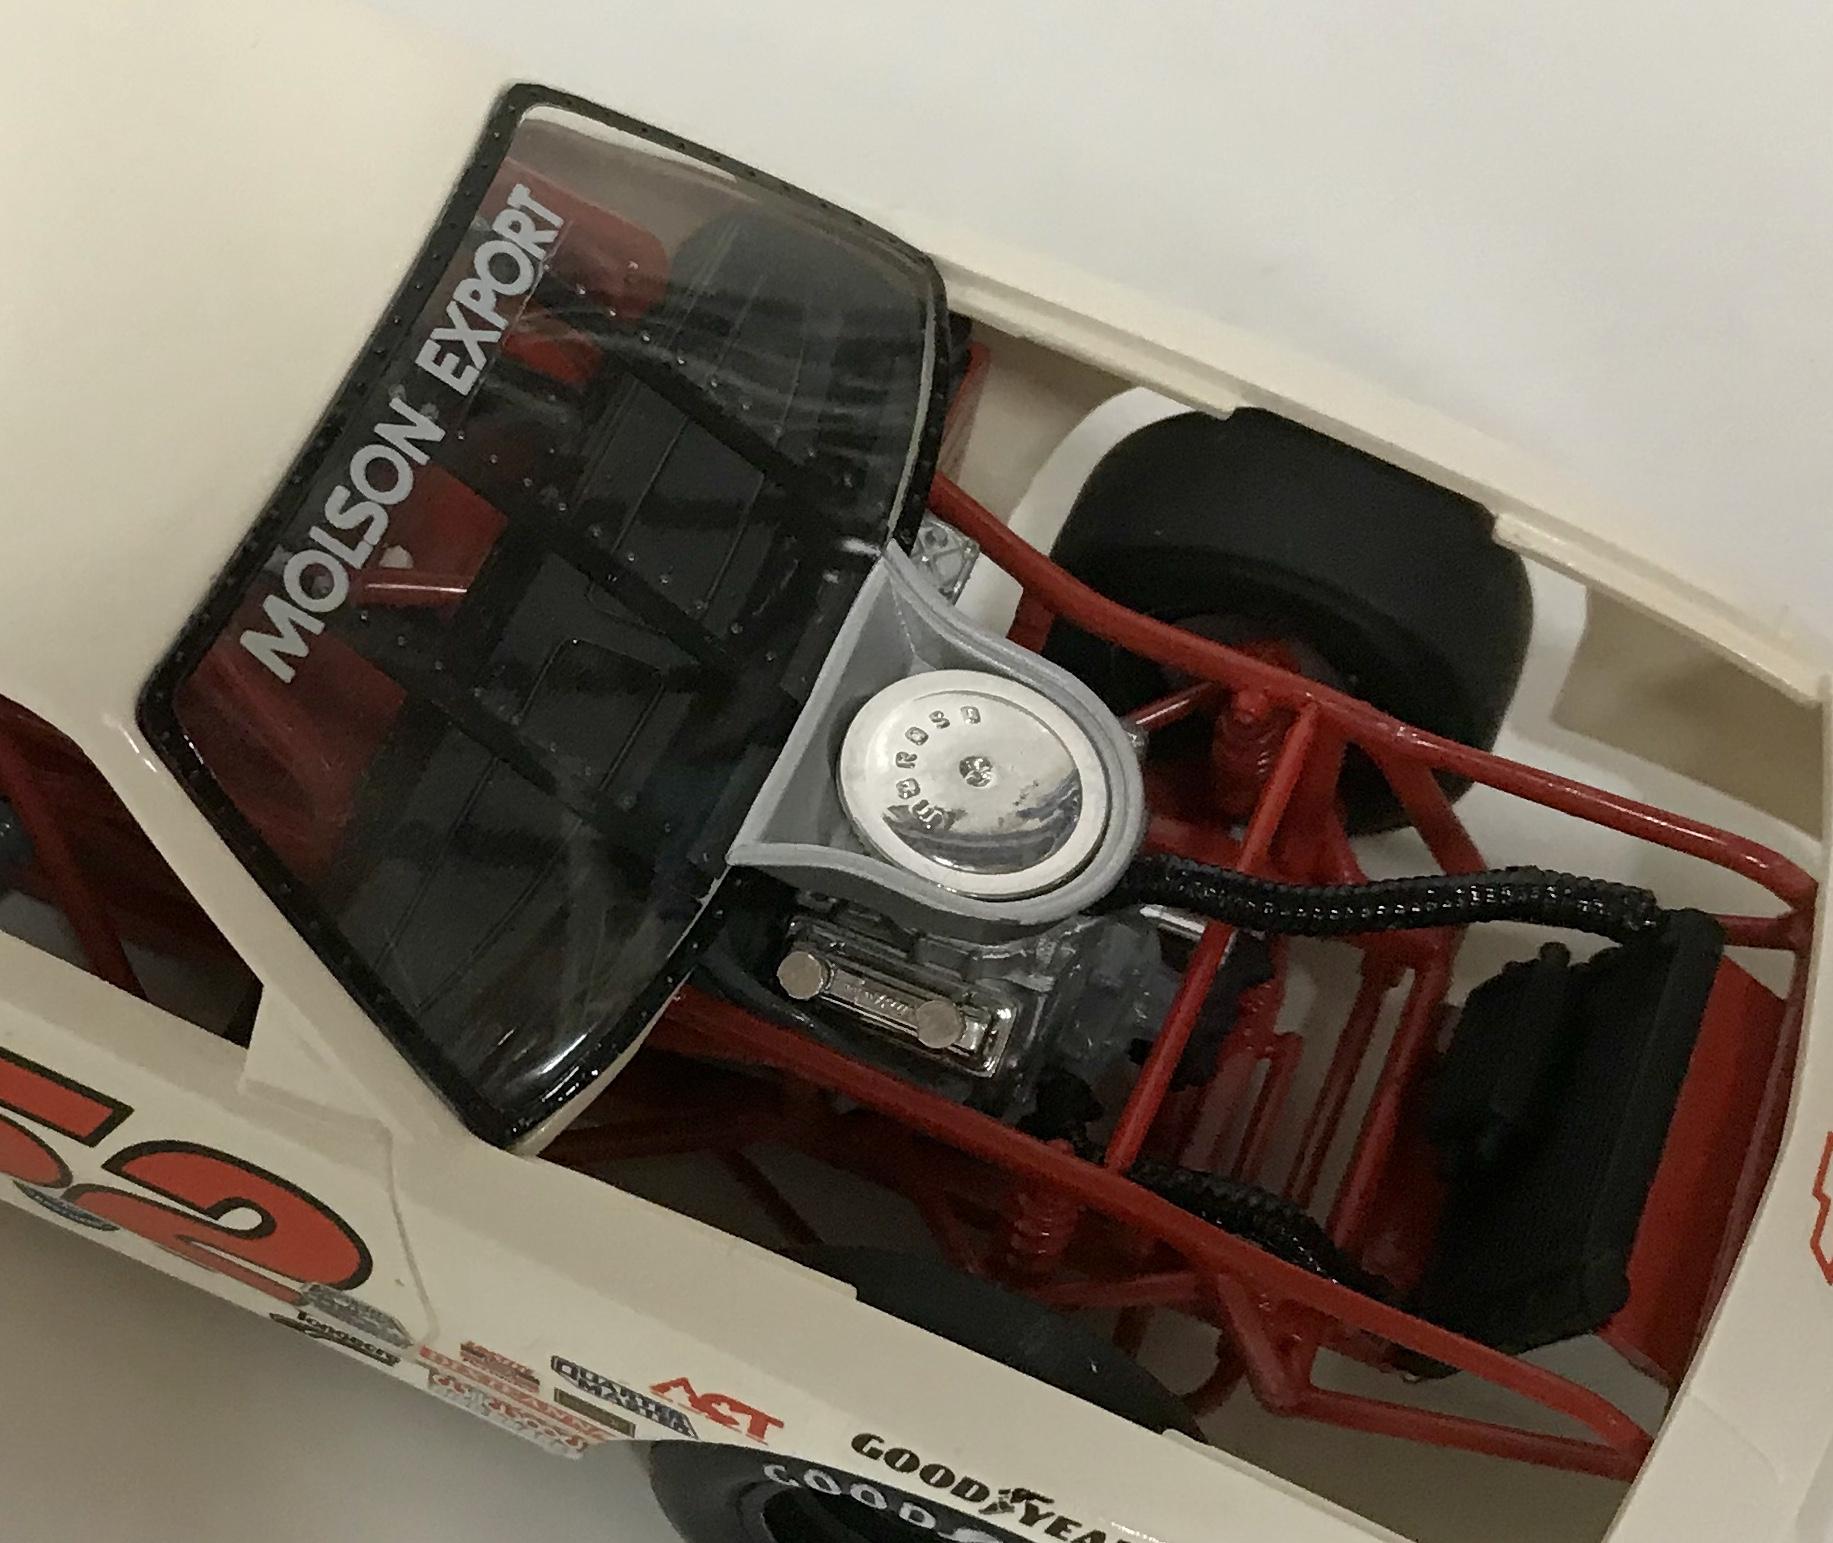
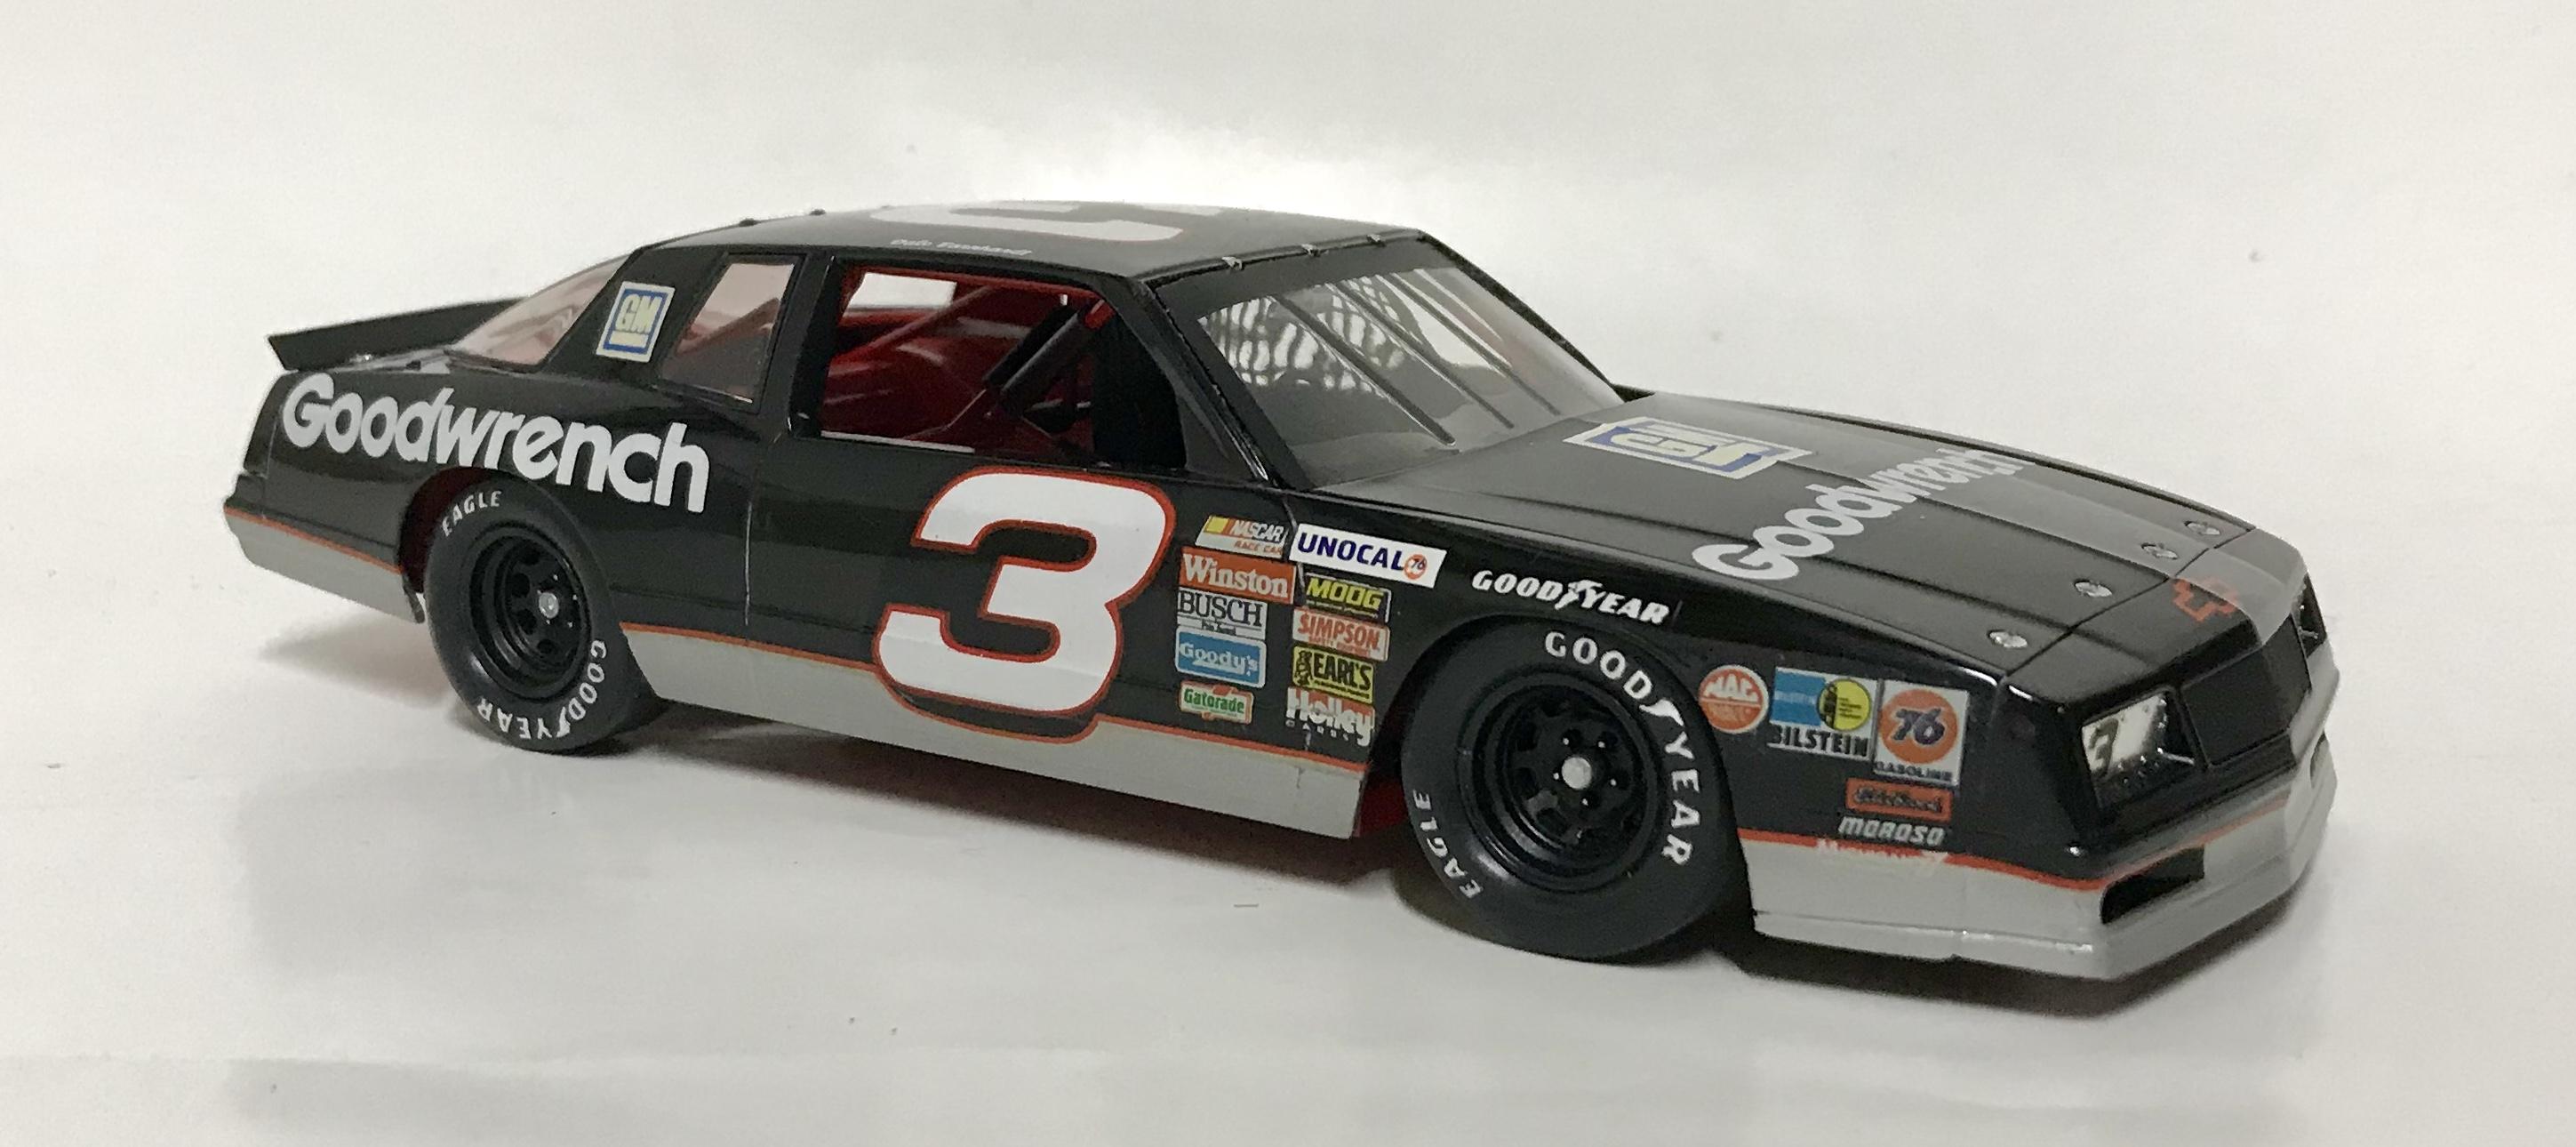
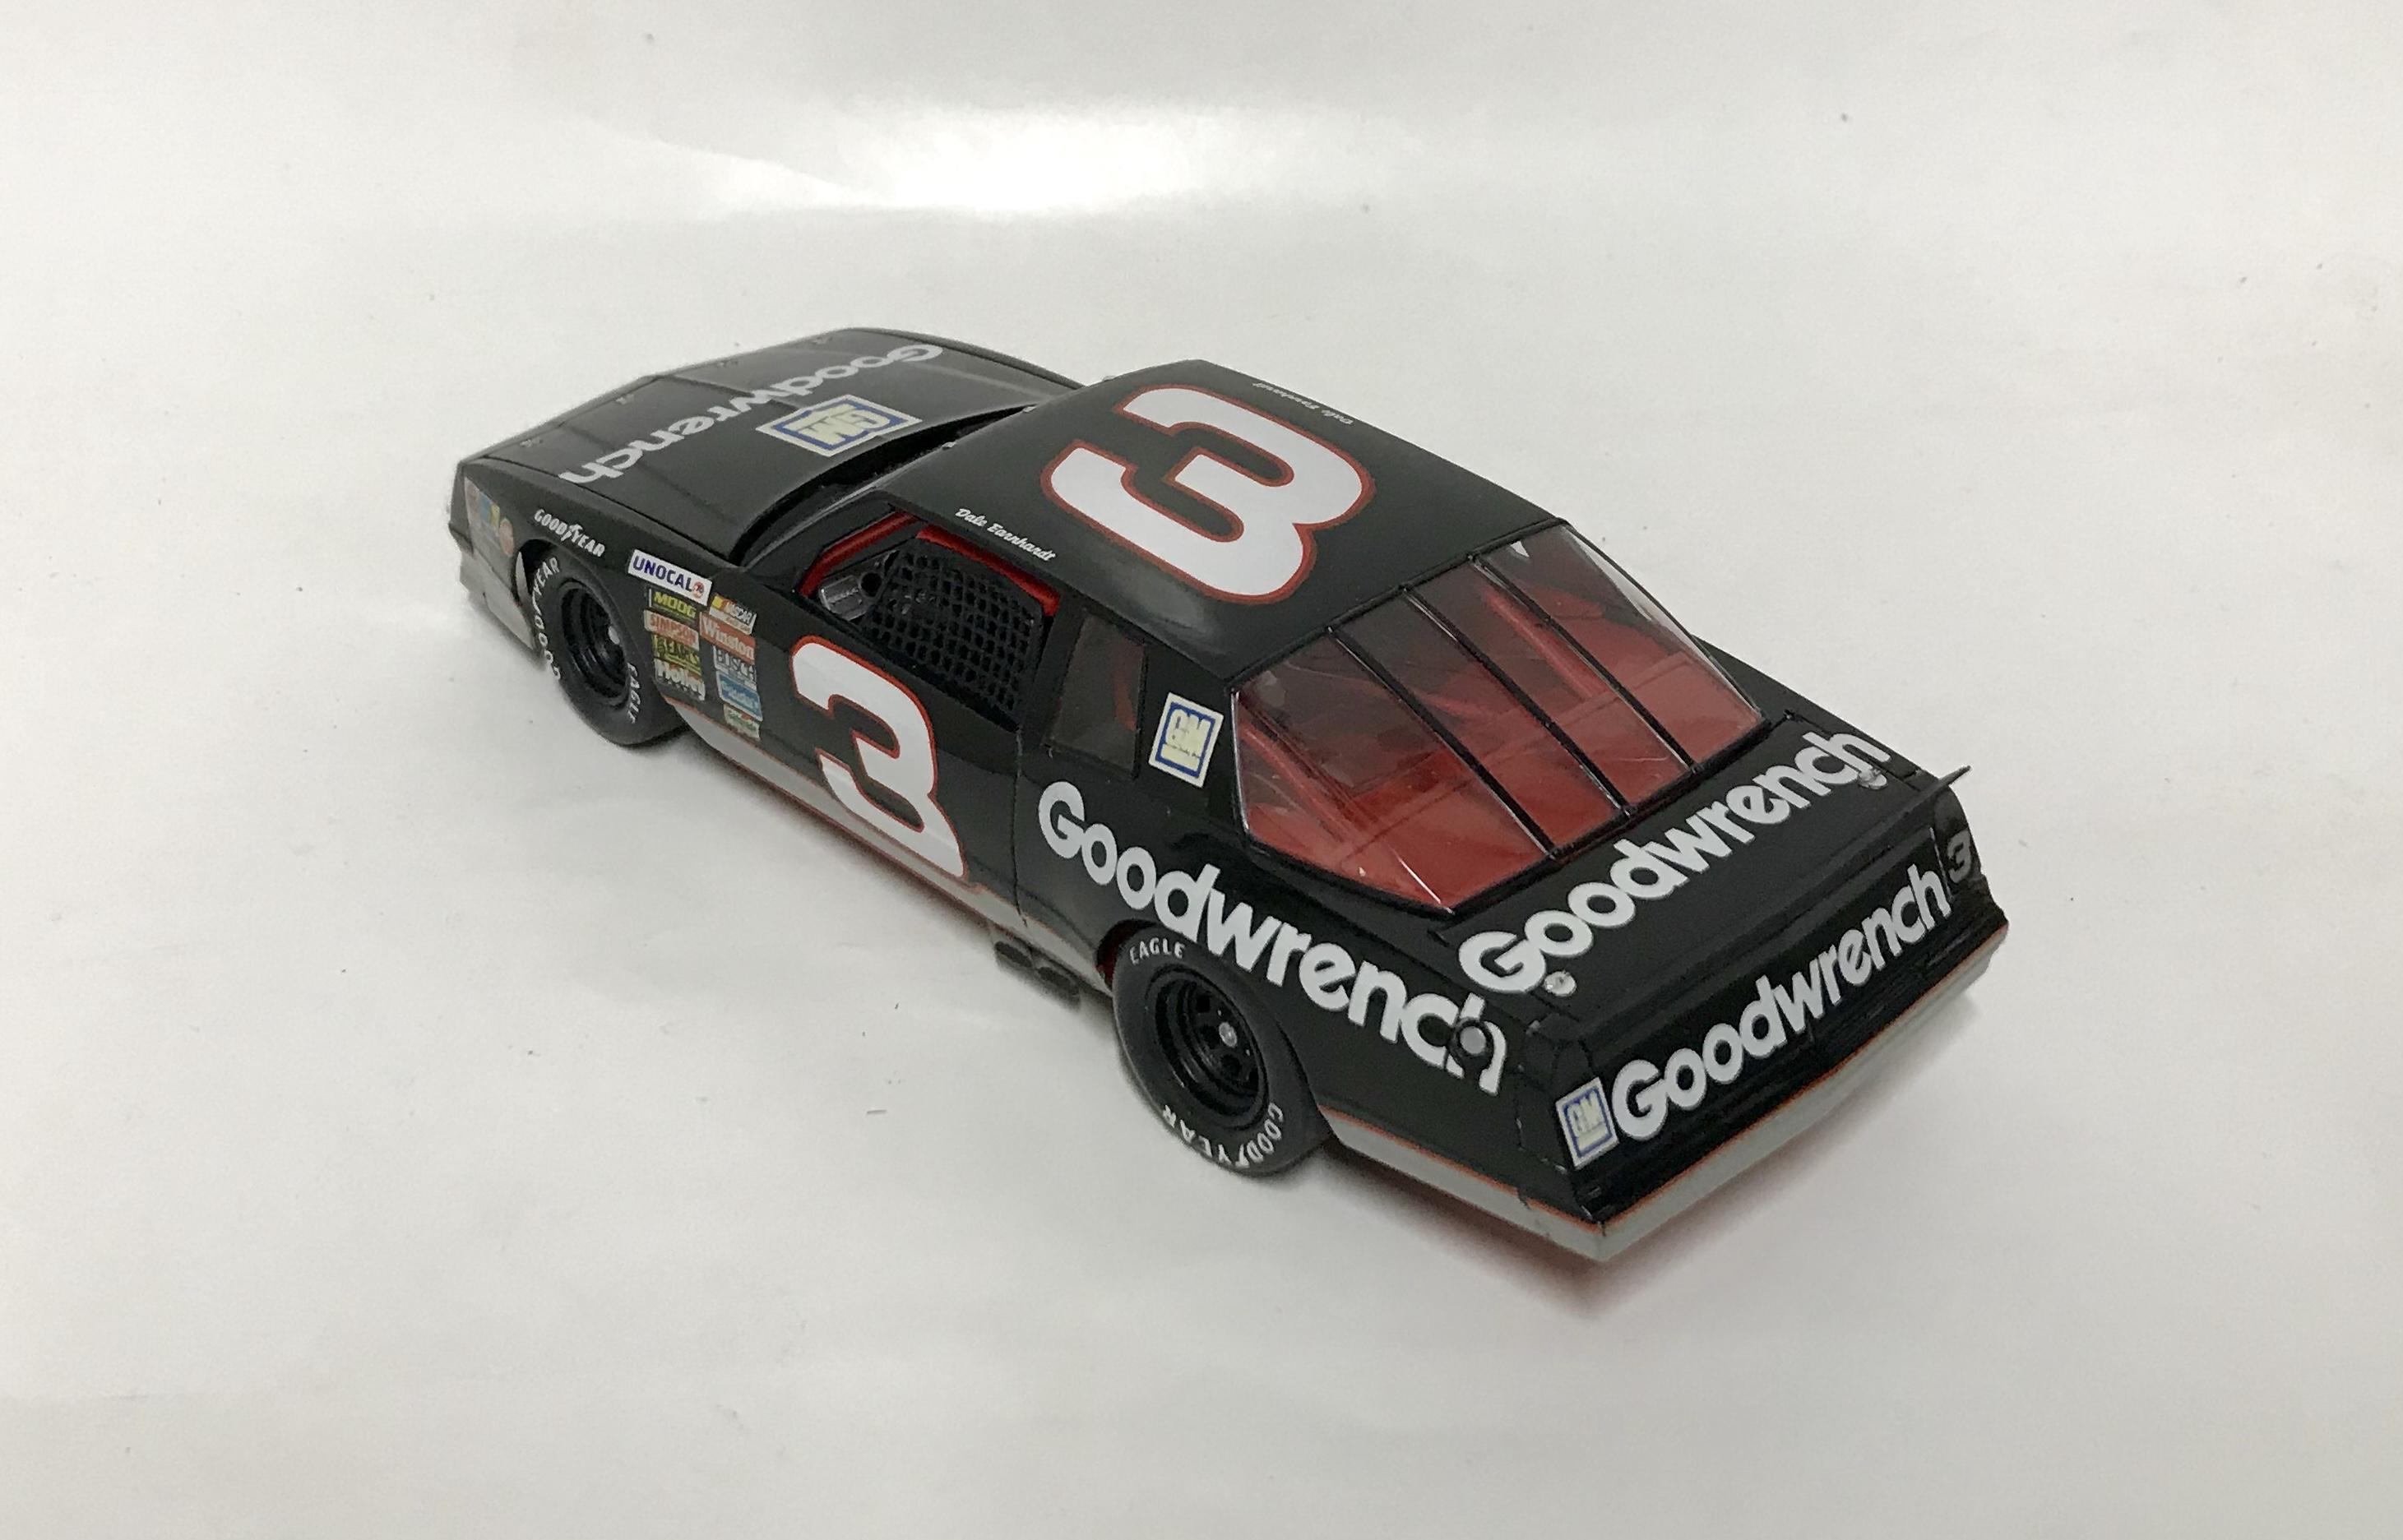
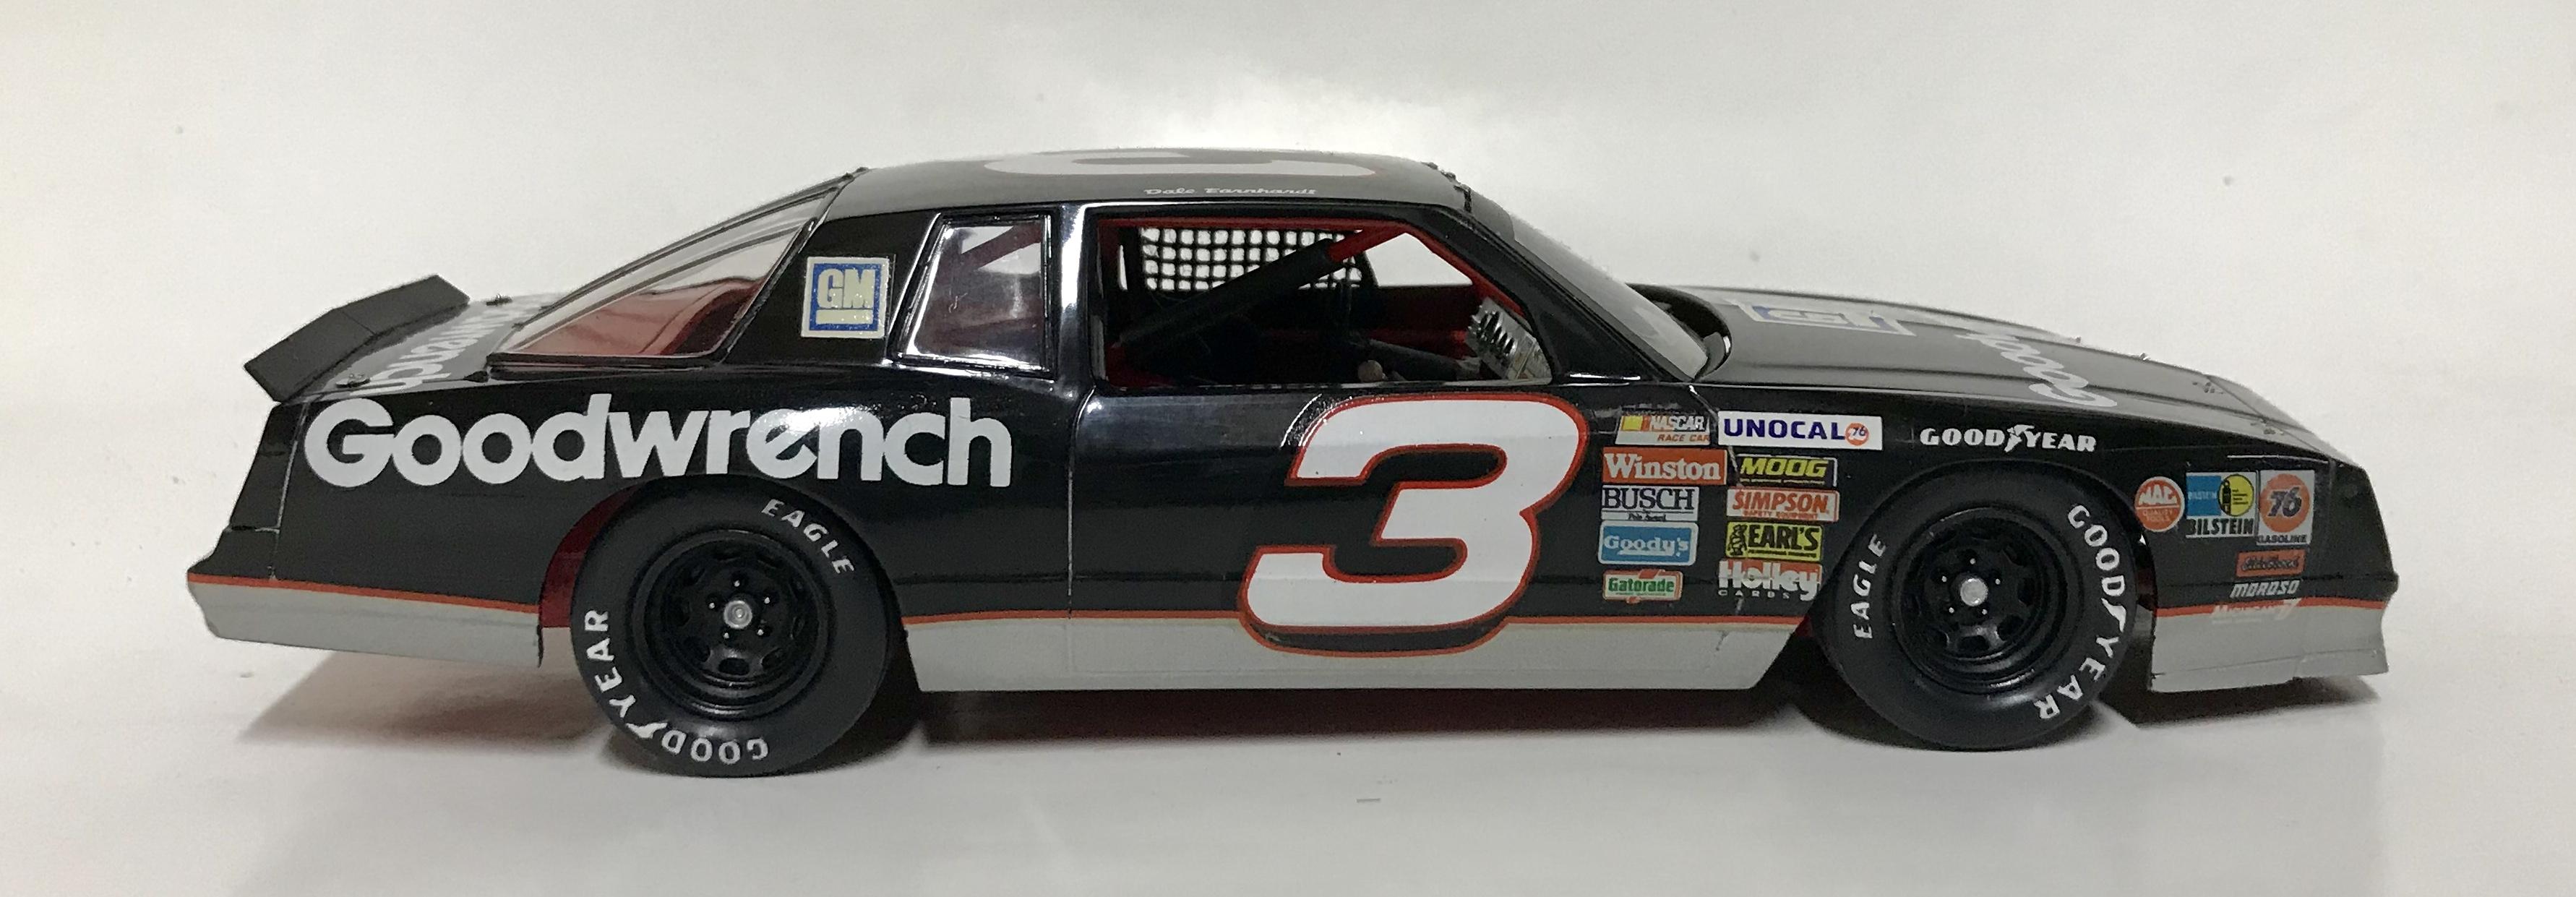
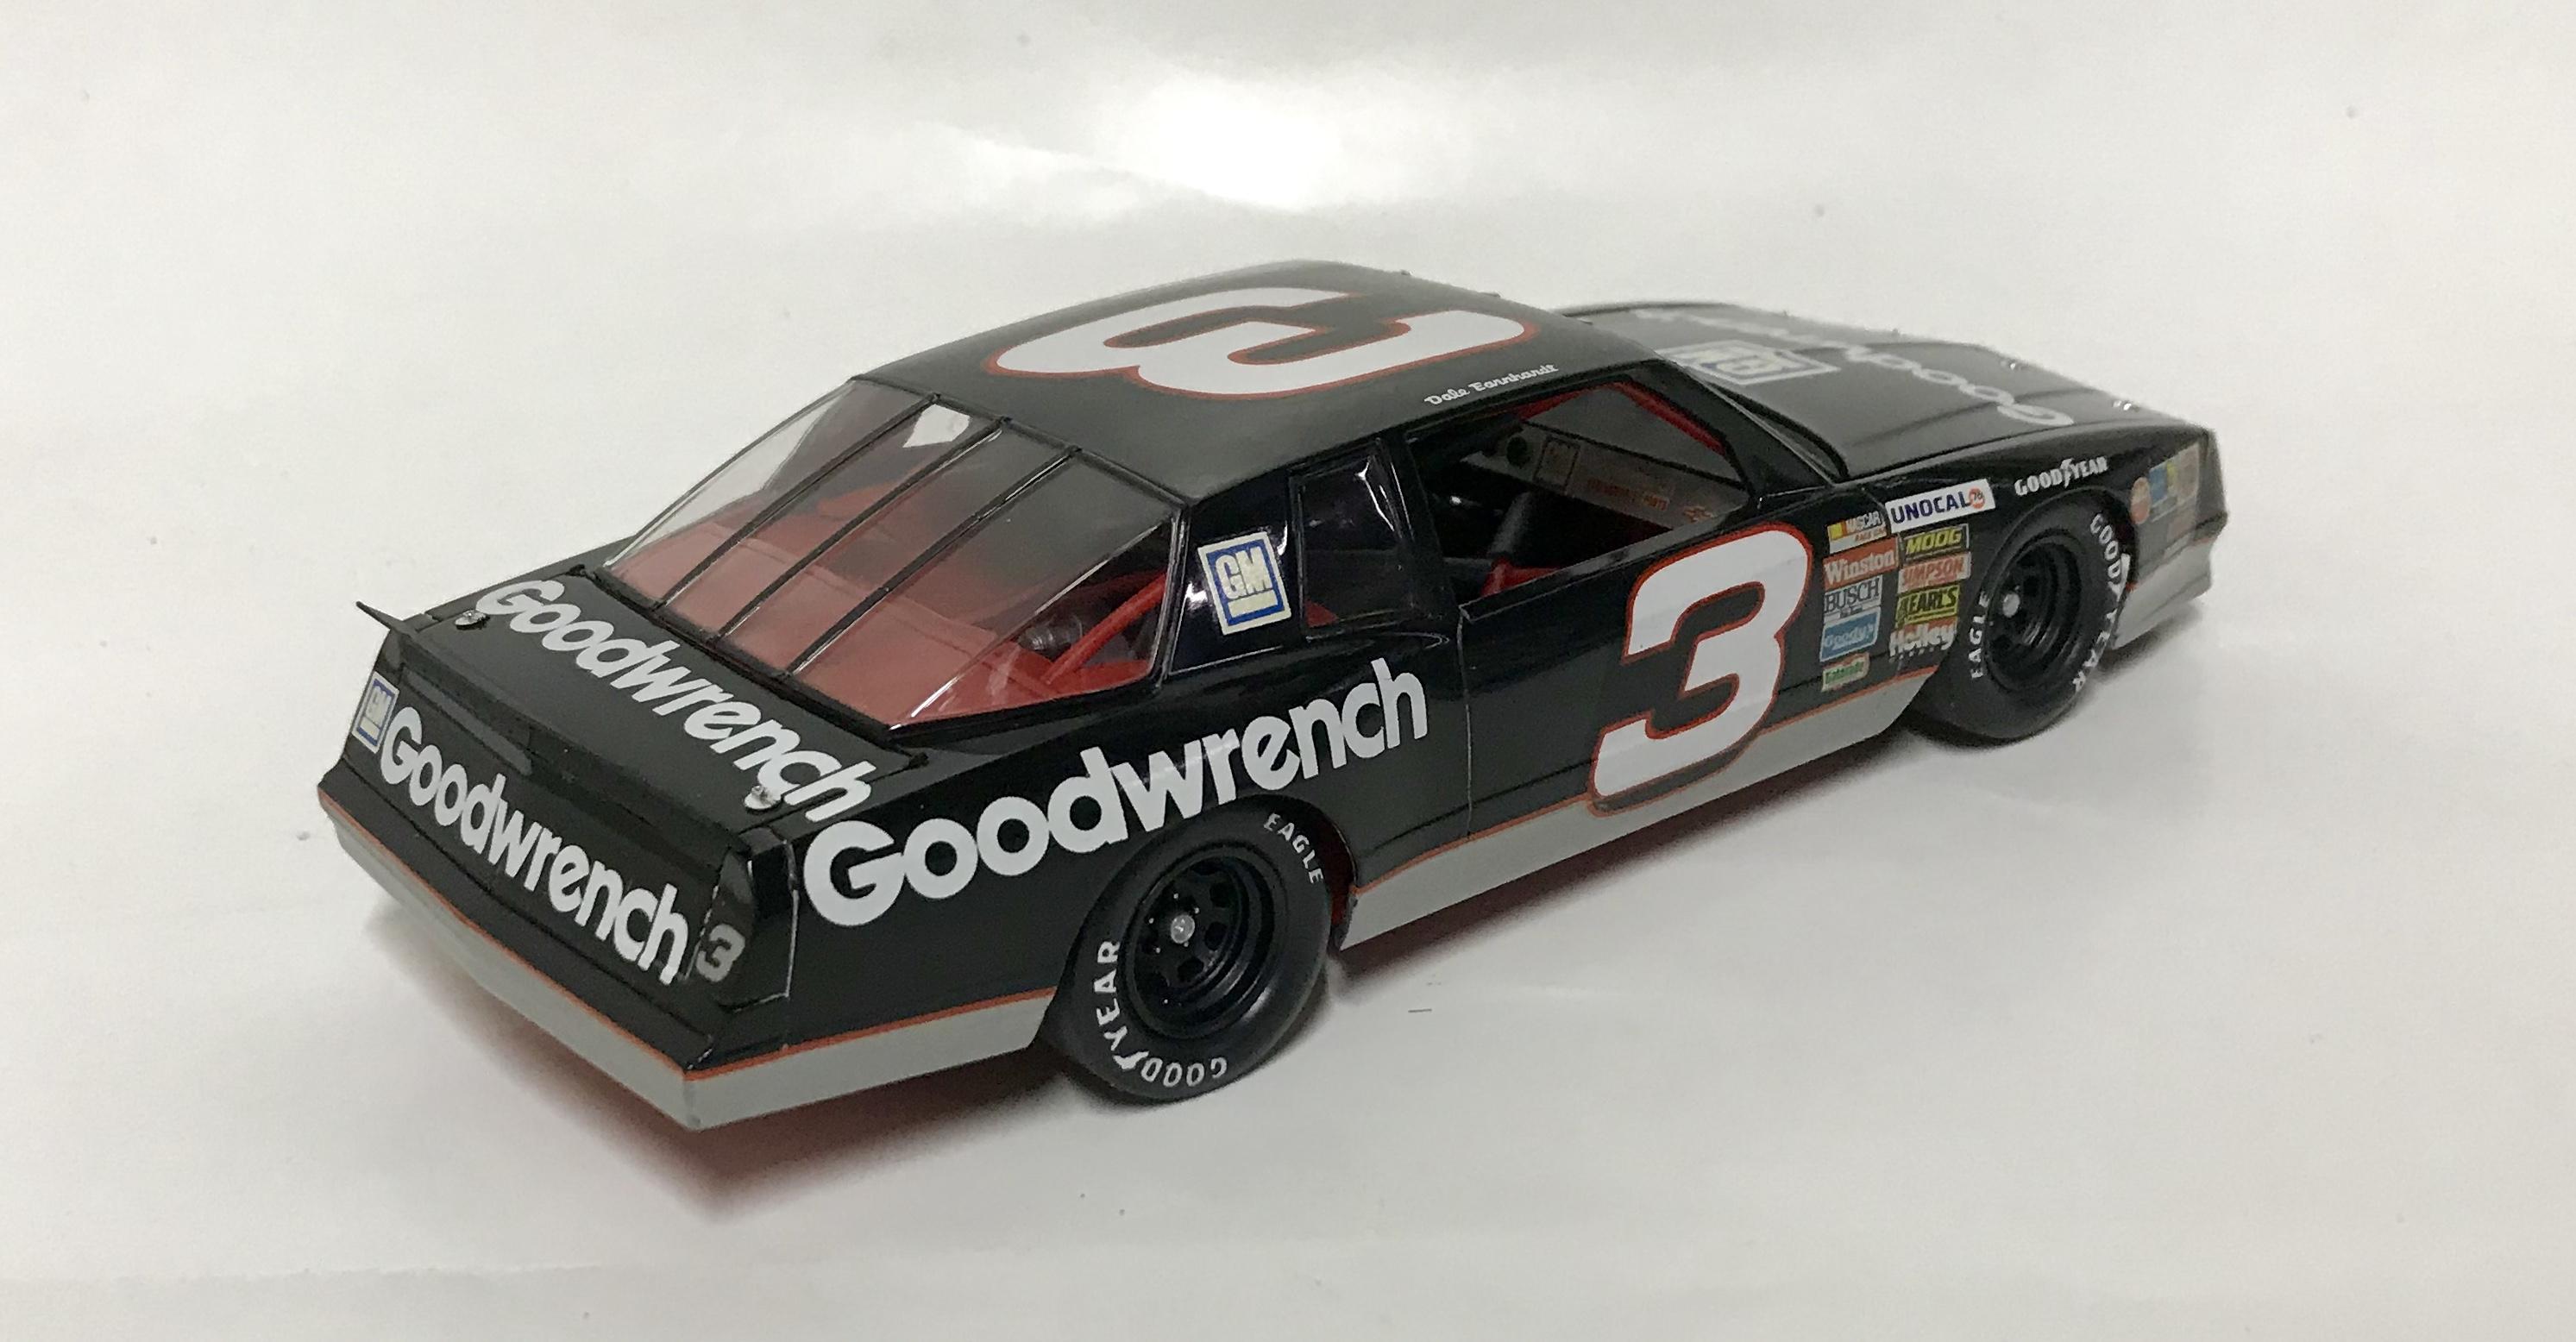
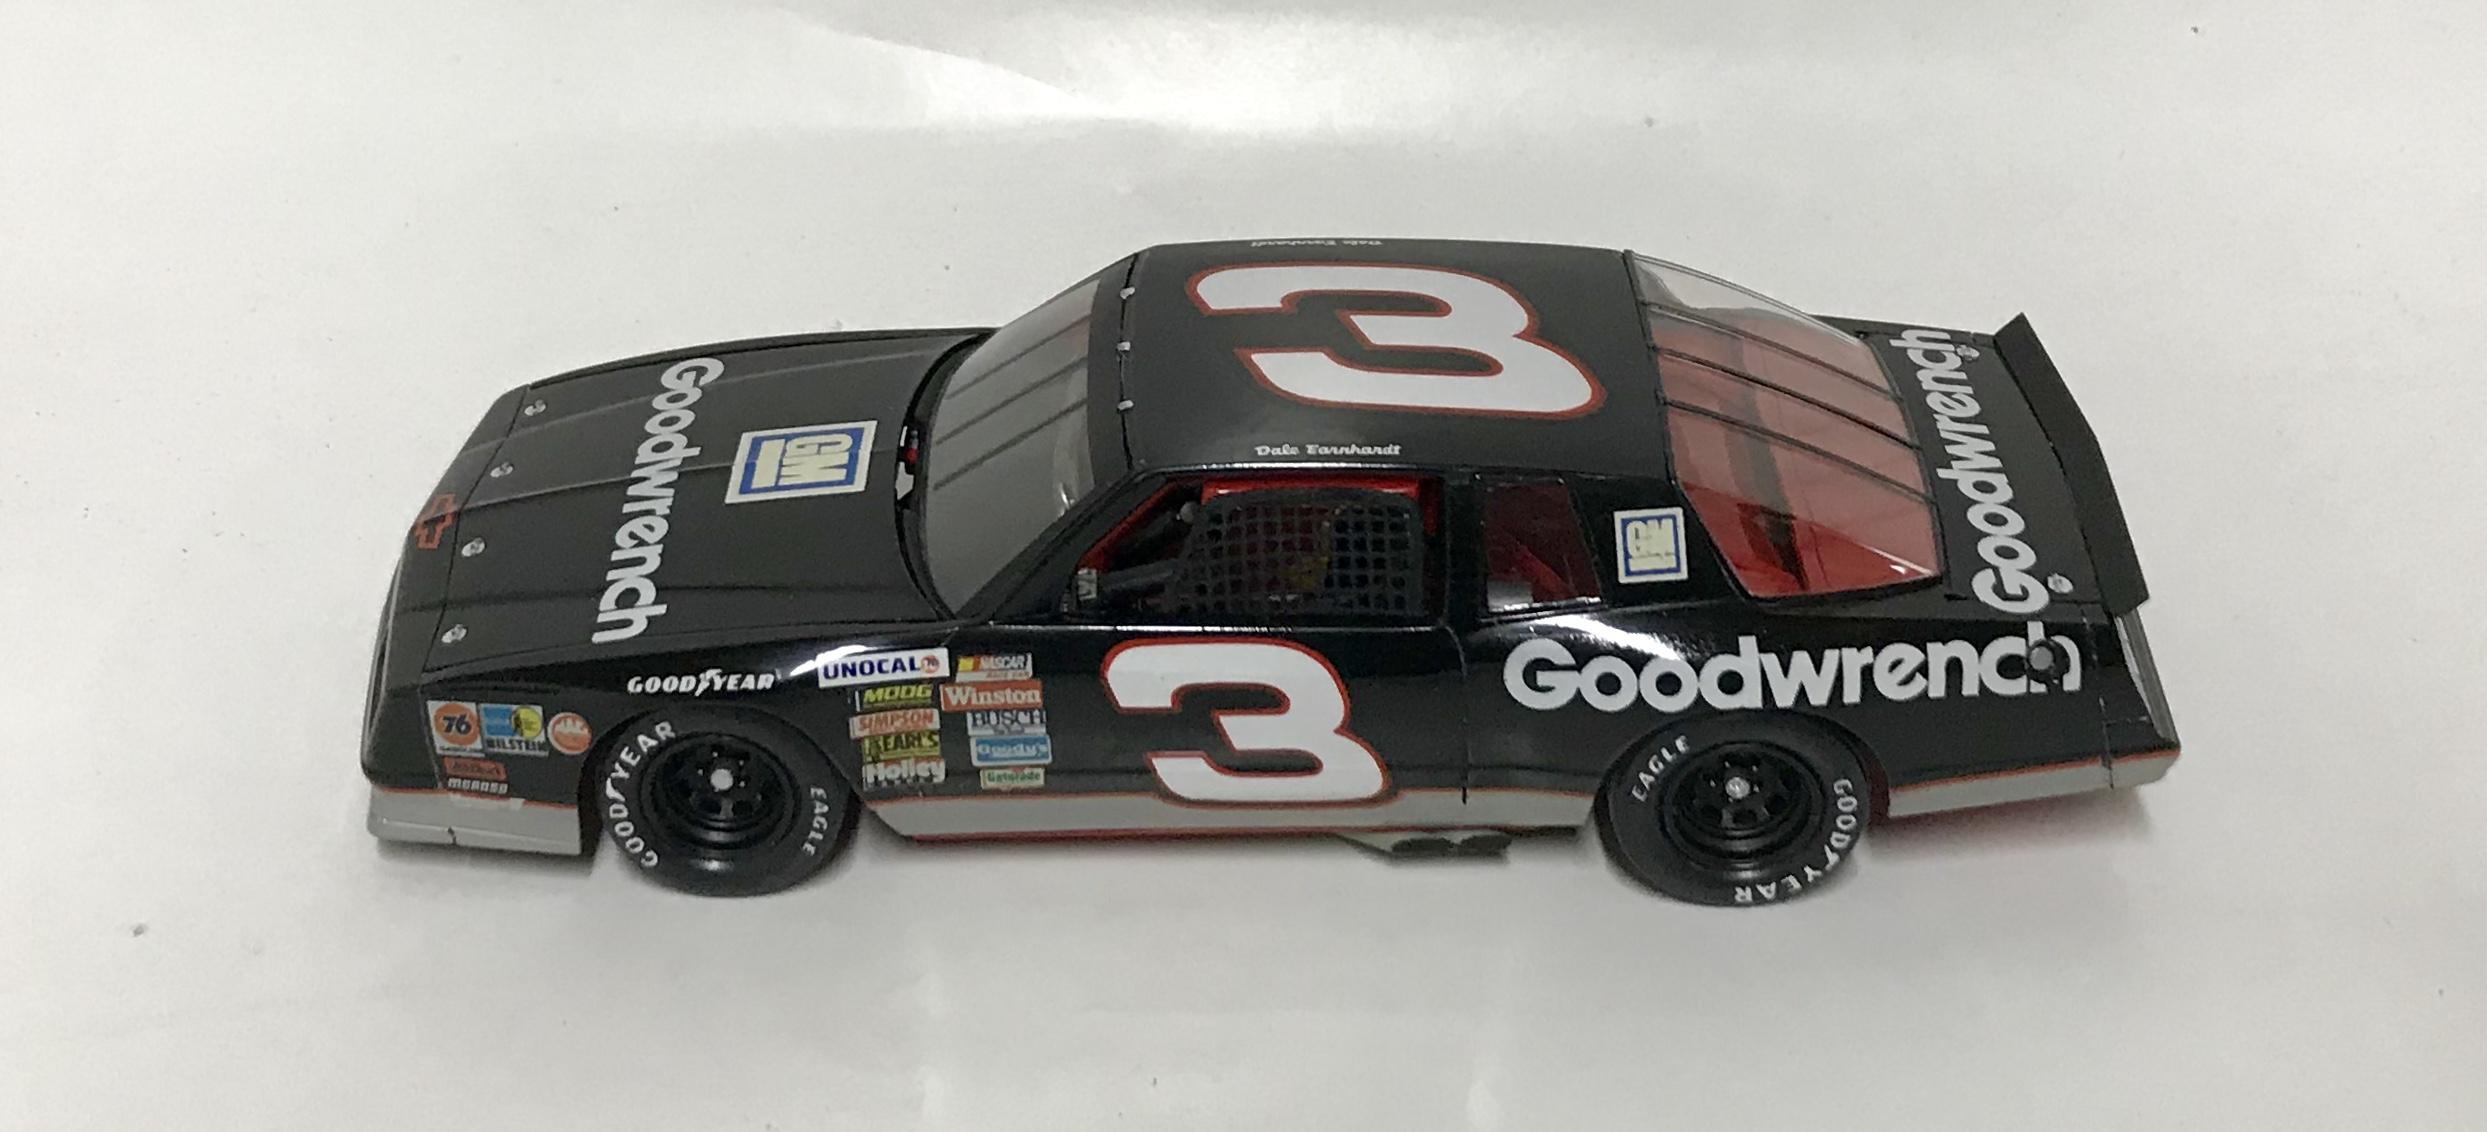
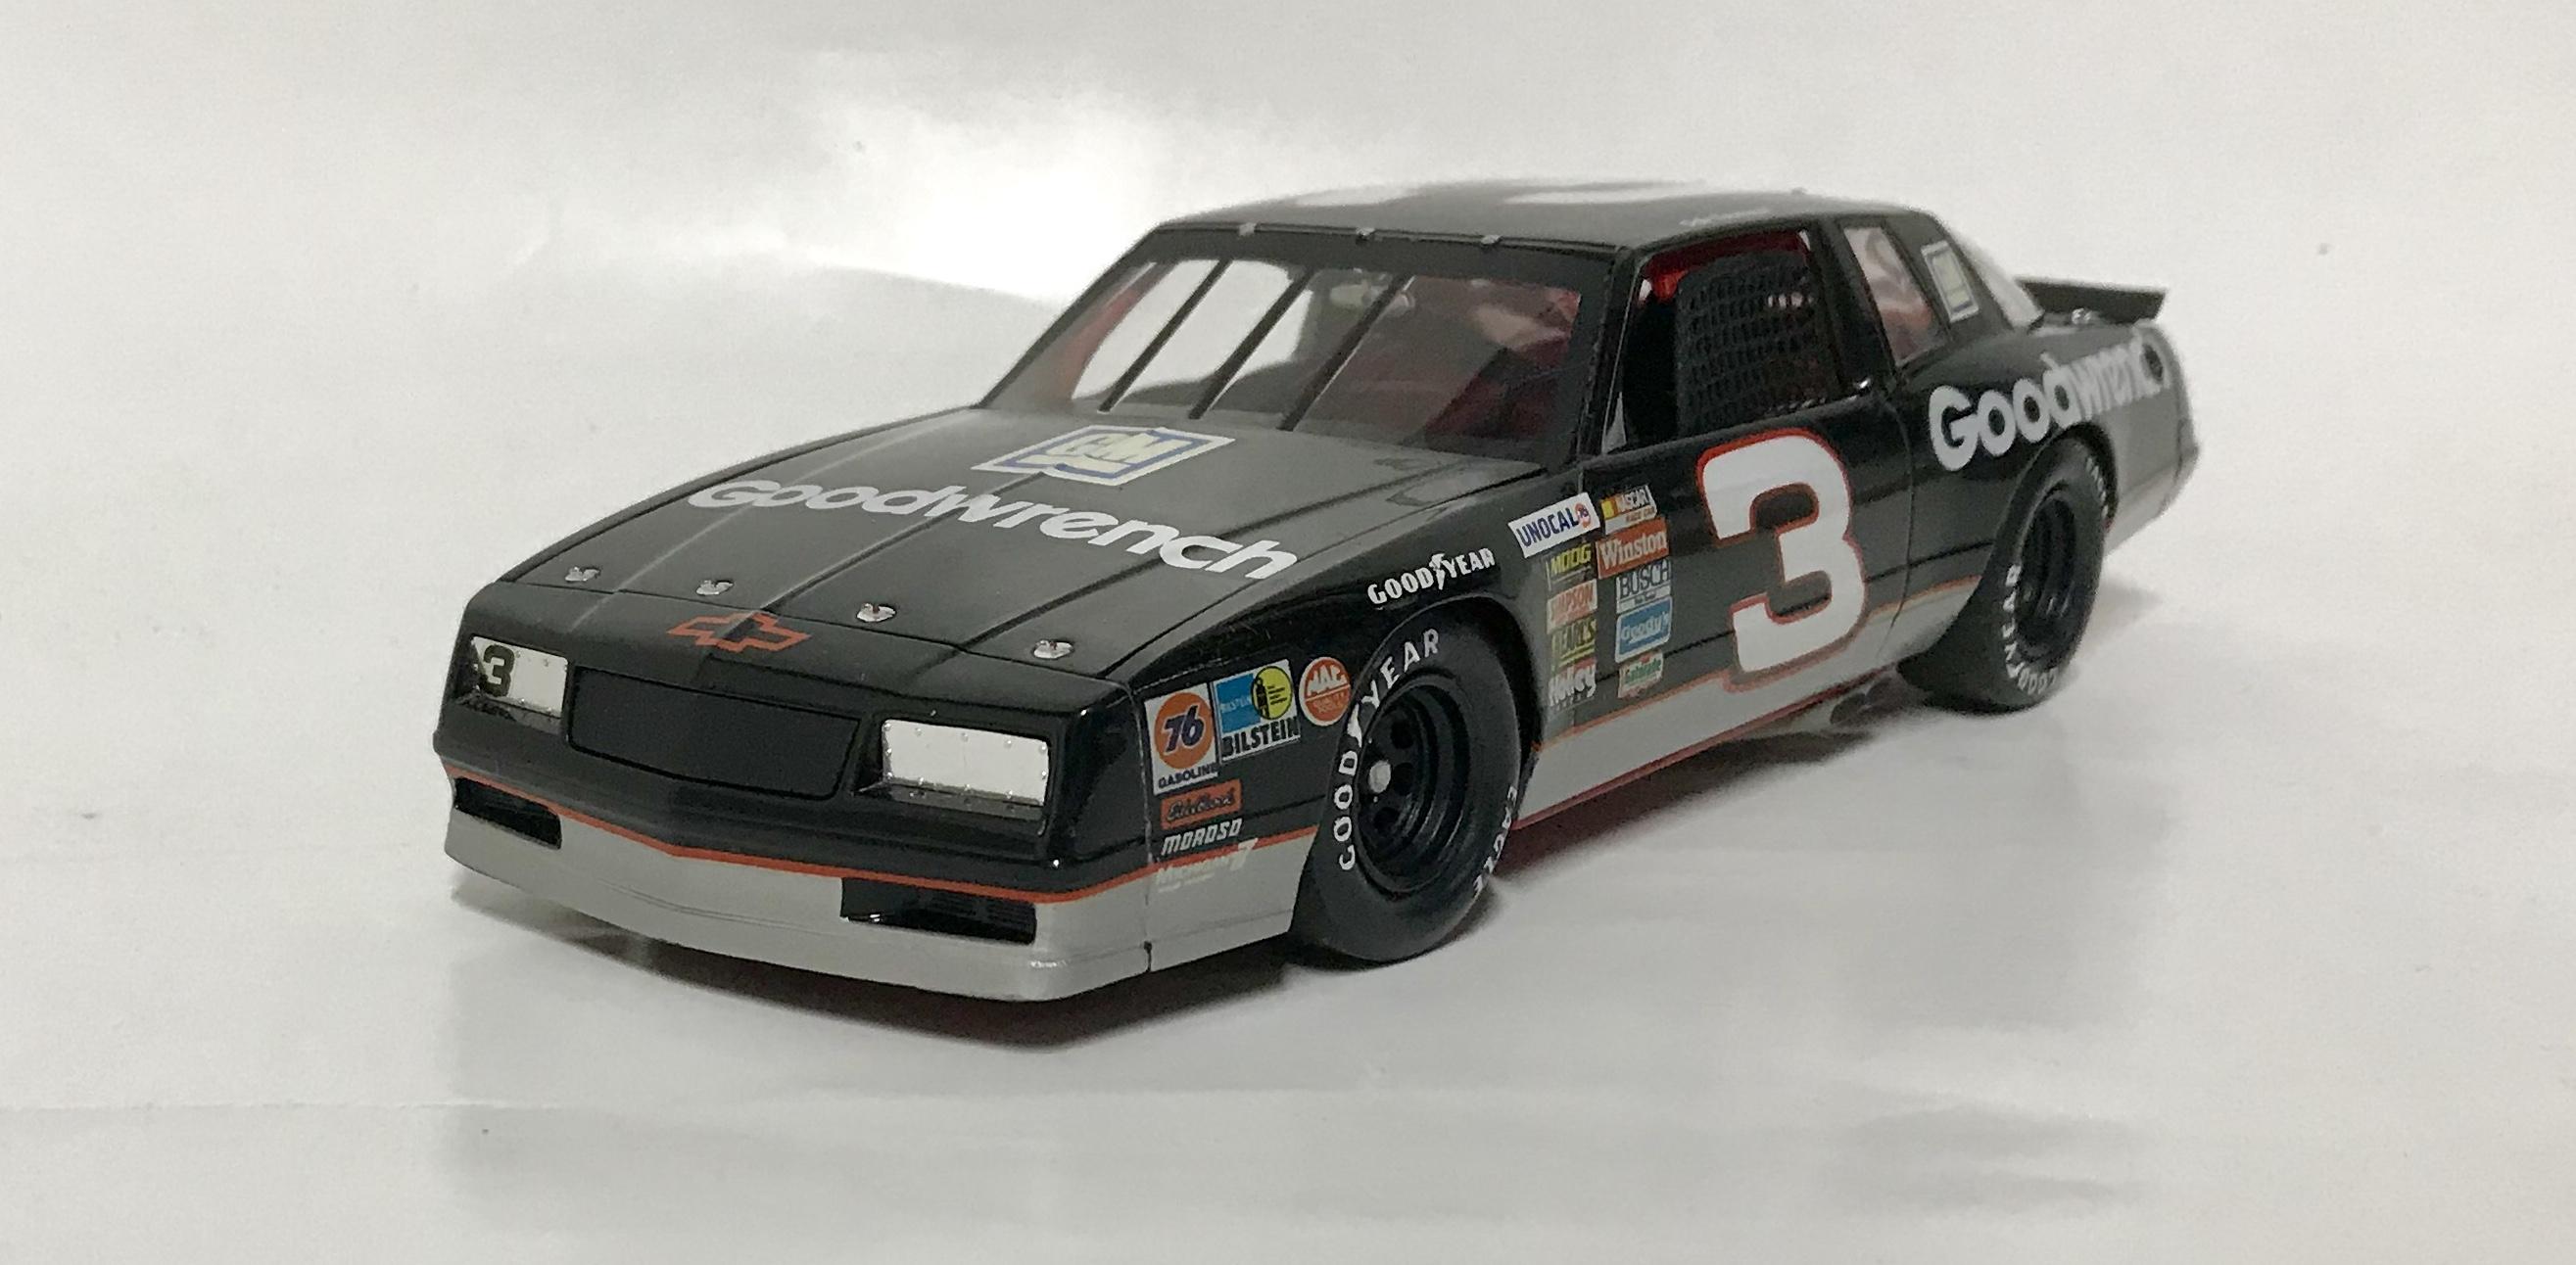
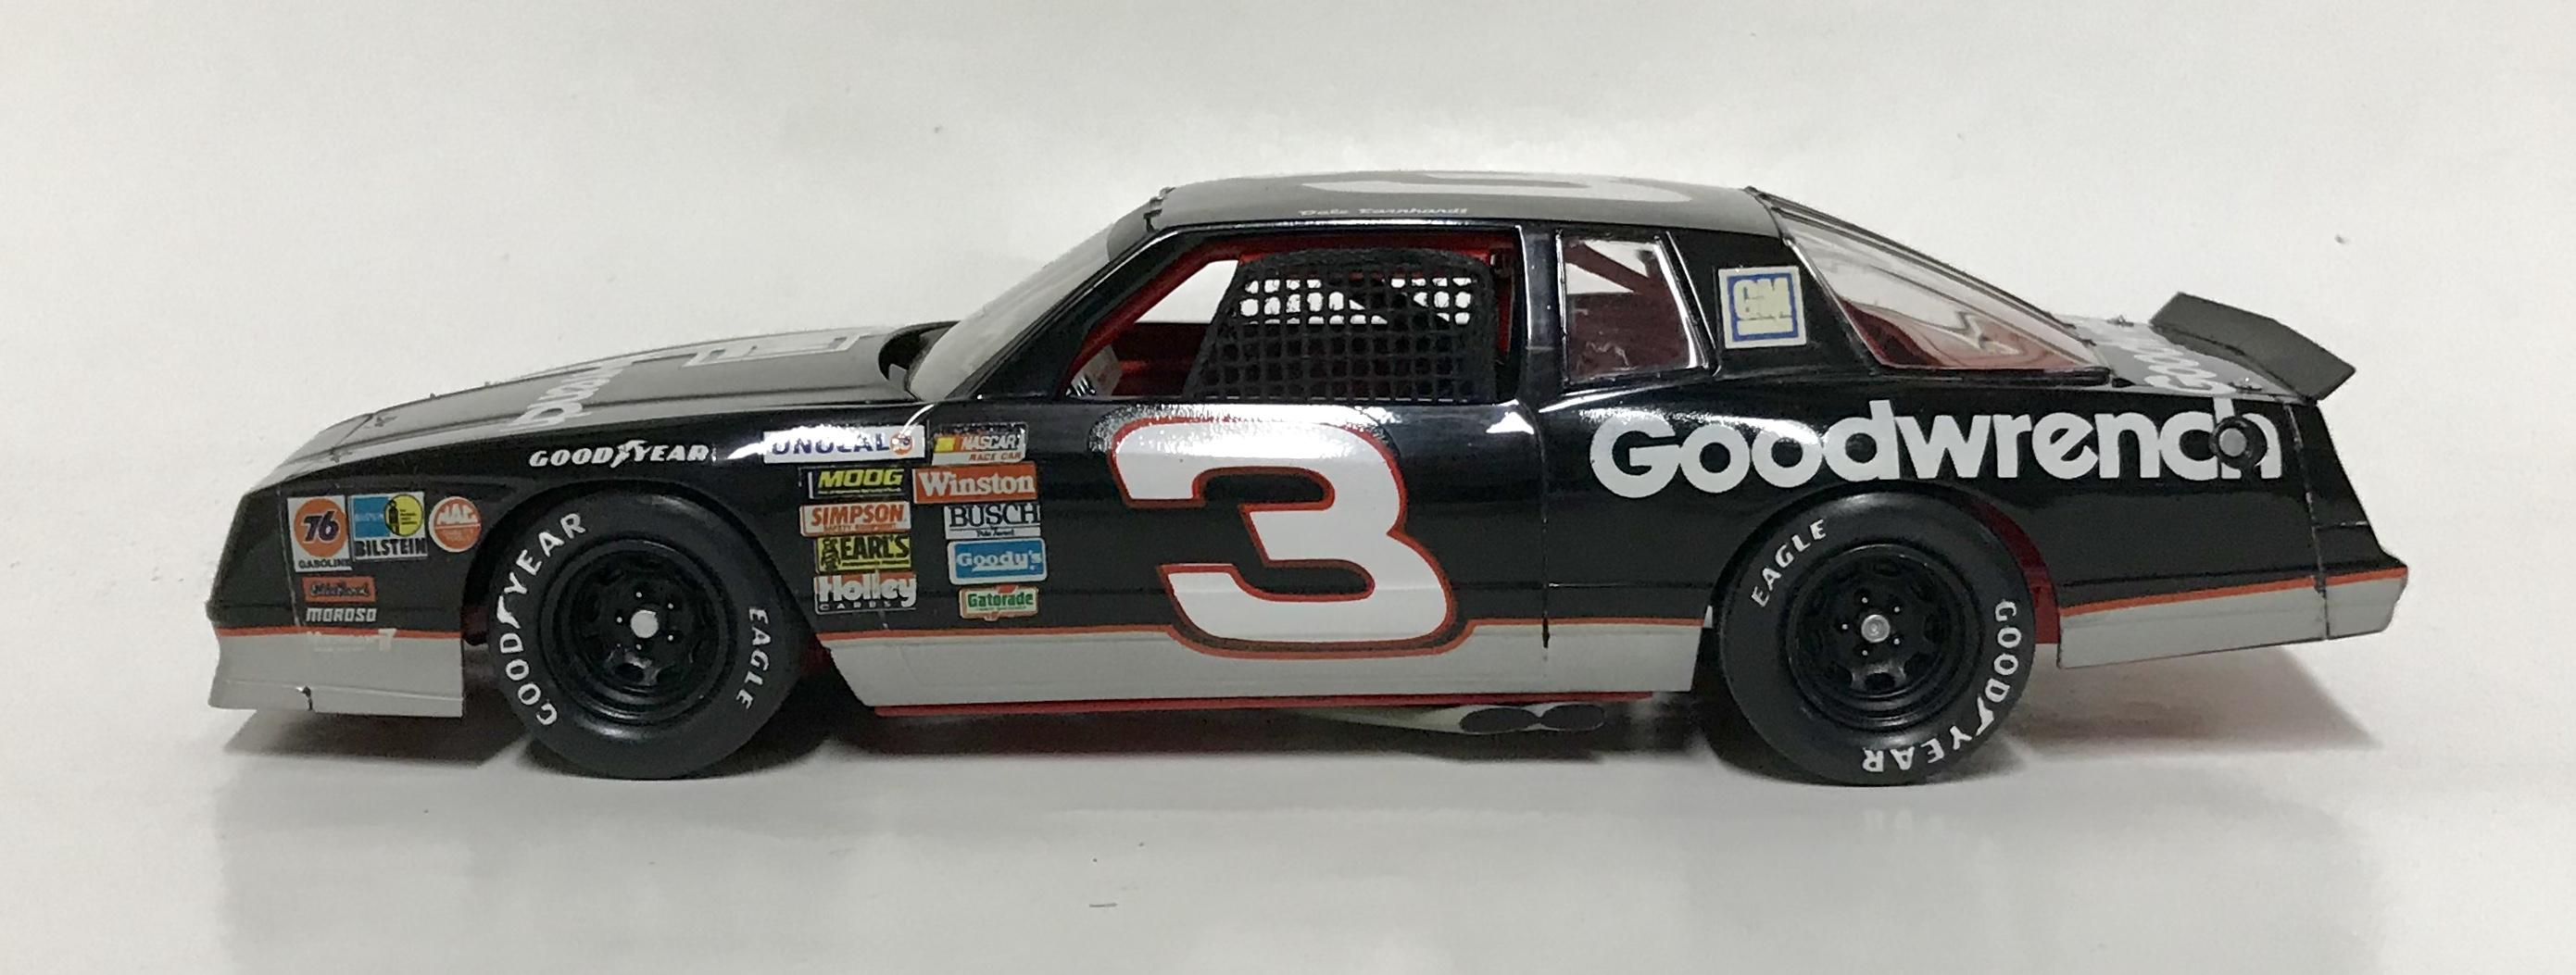
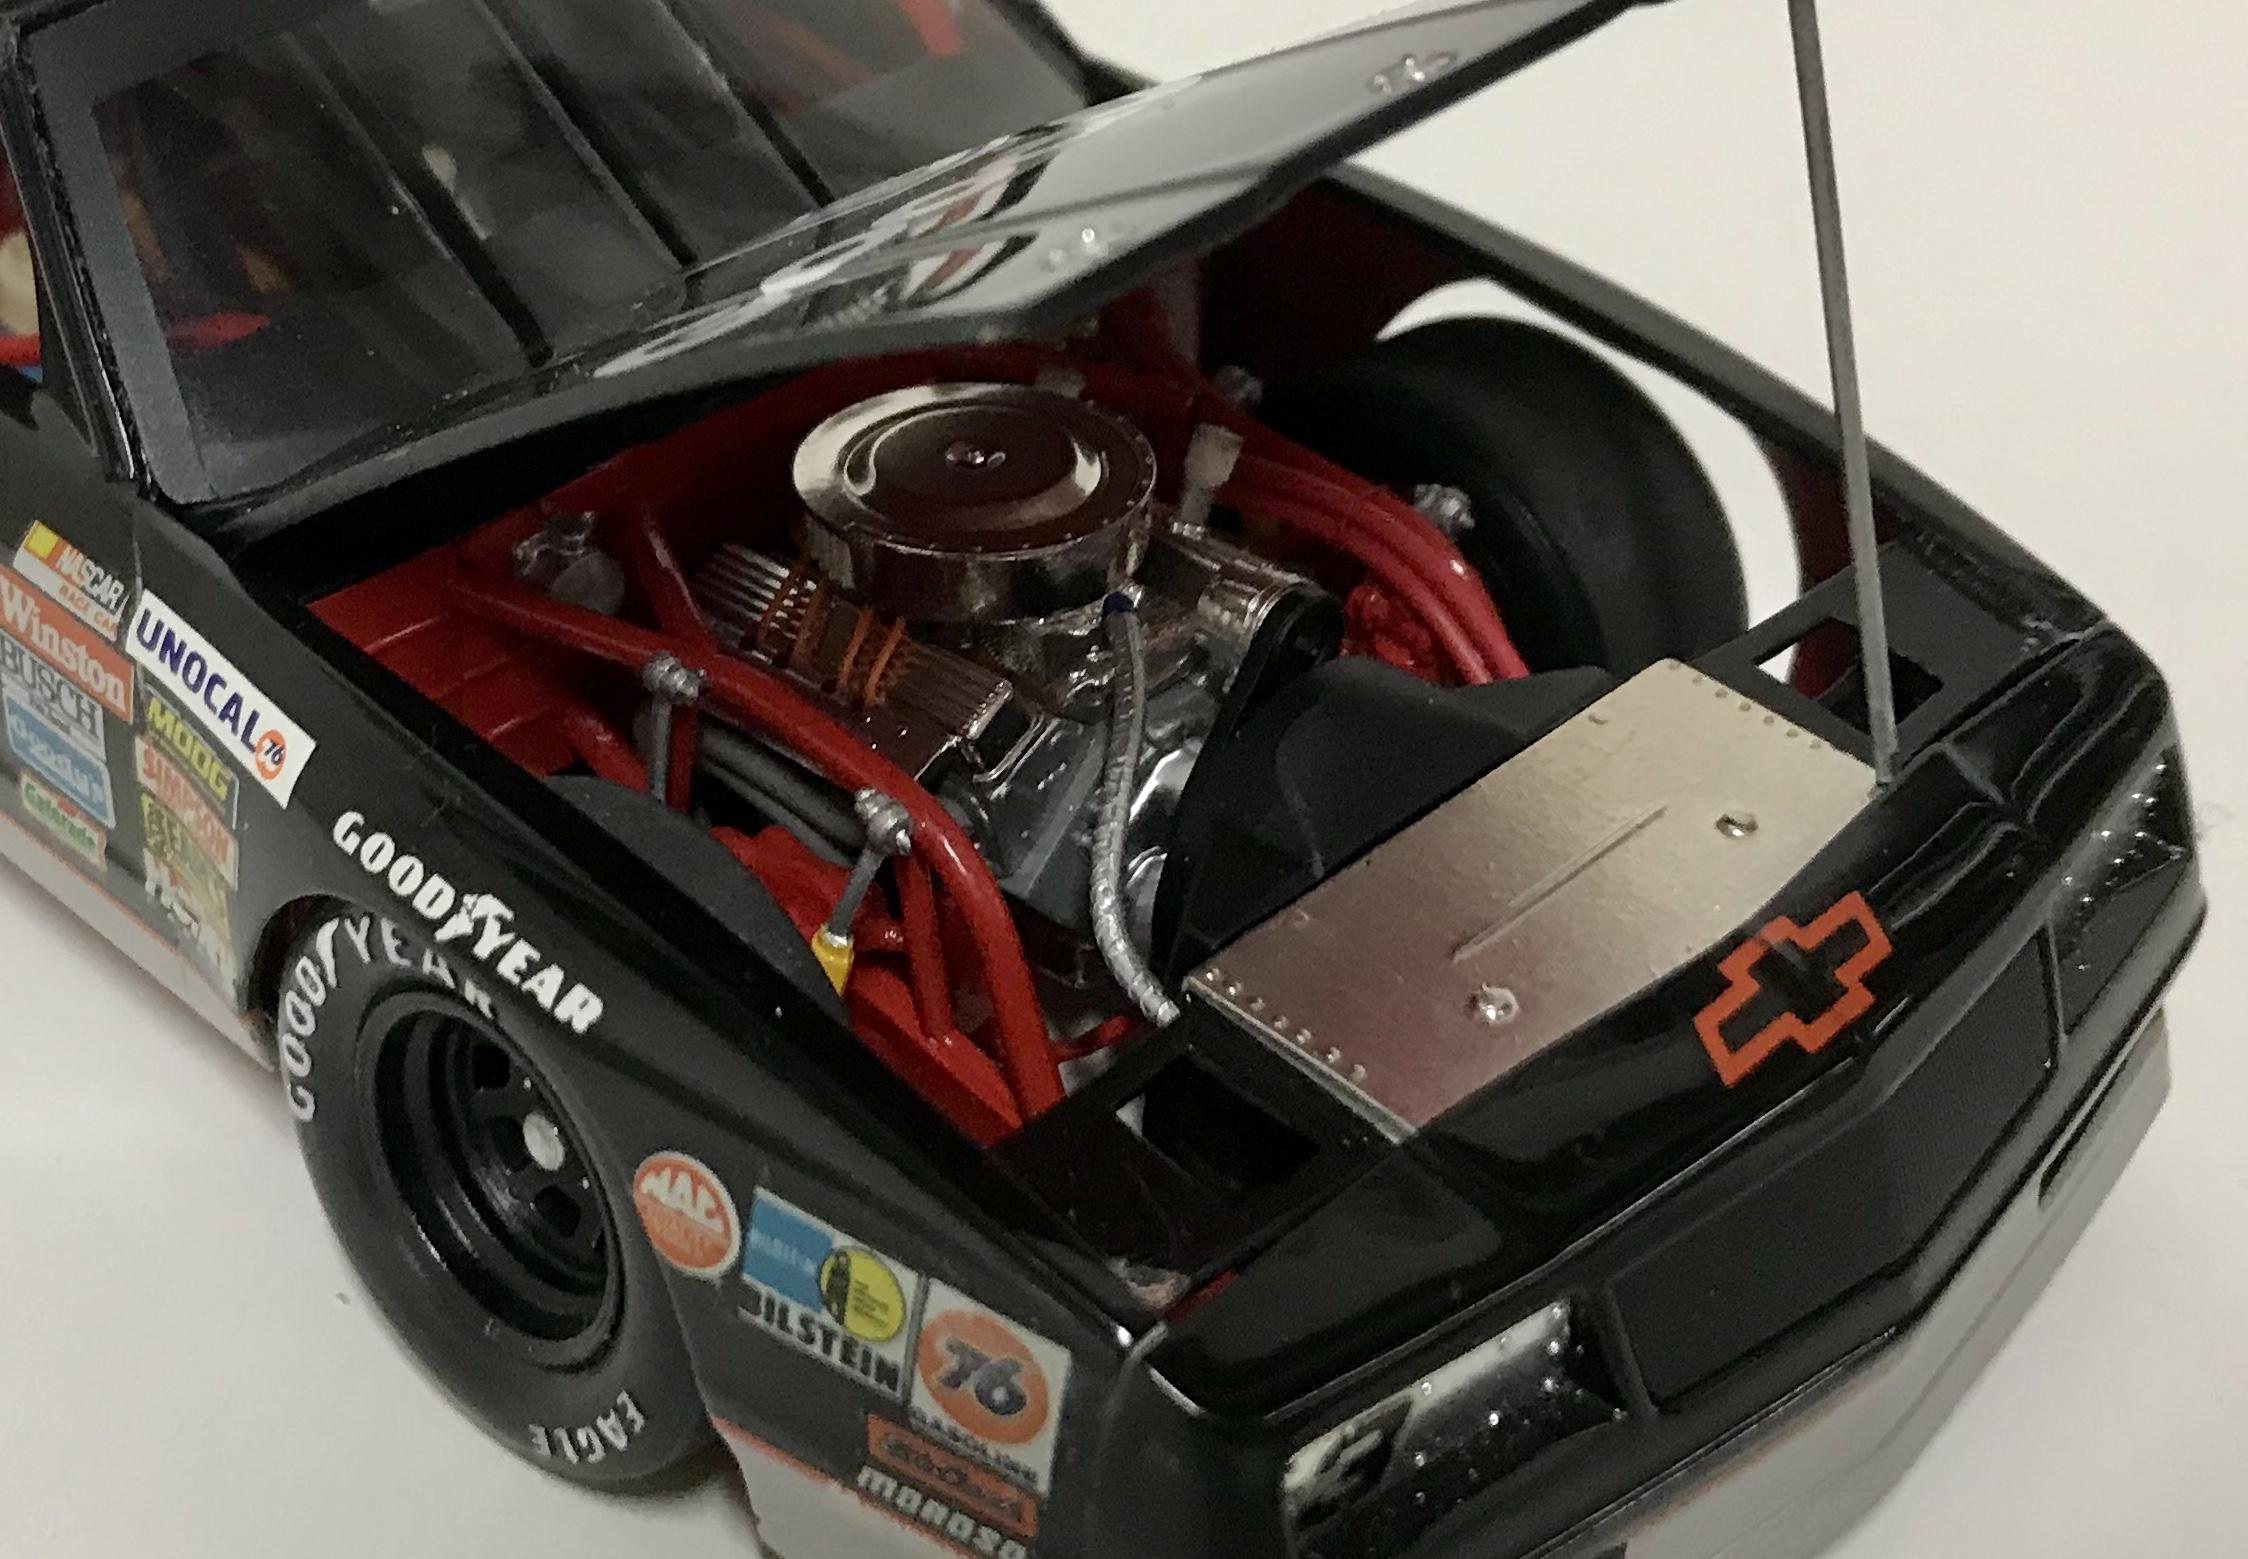
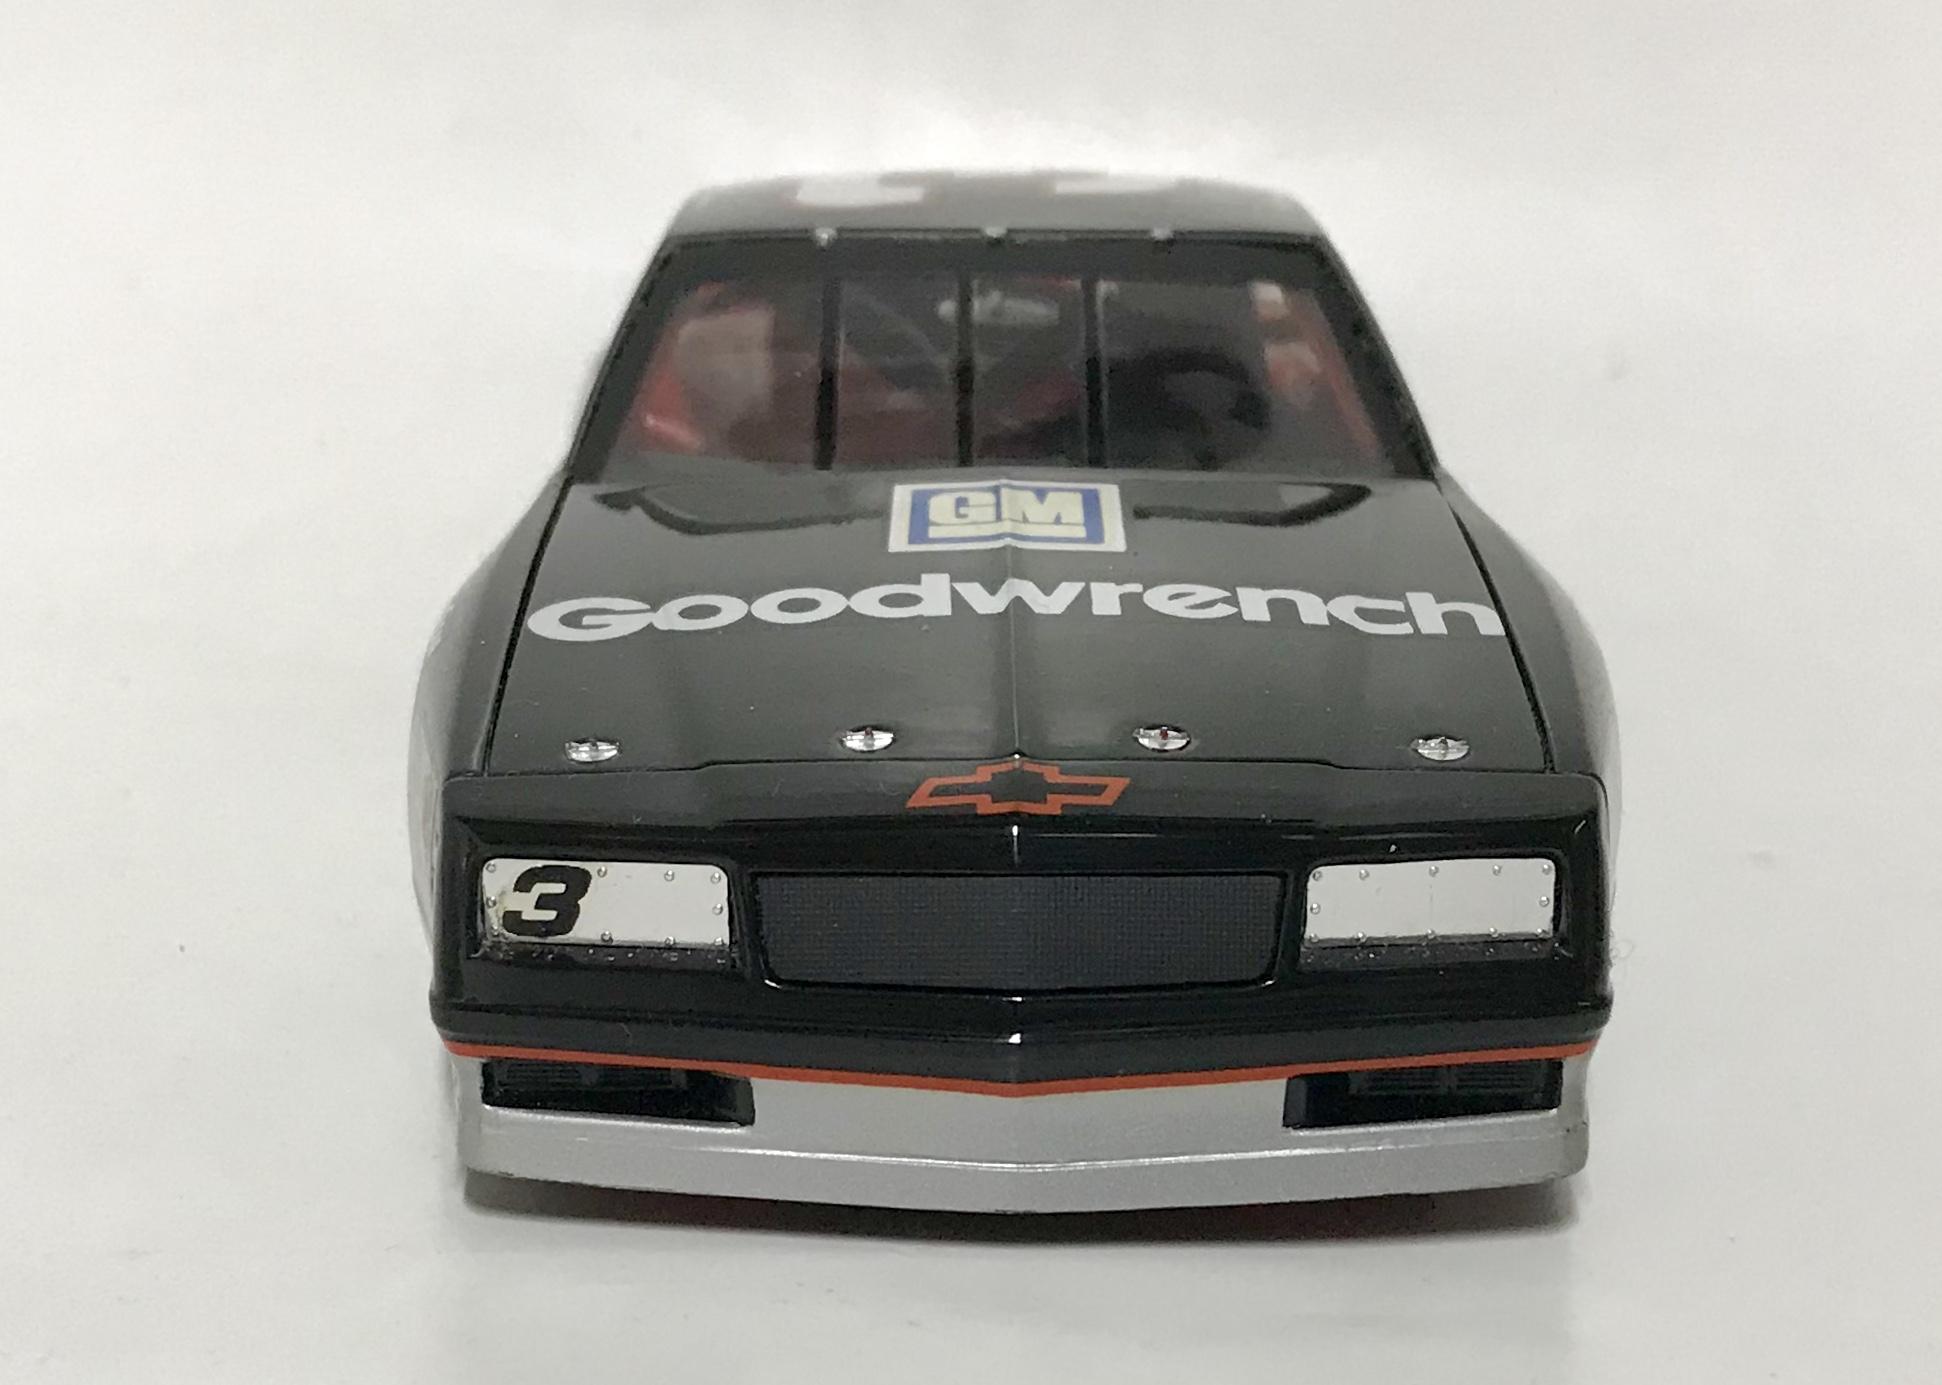
In memory of the Man In Black. April 29, 1951- February 18, 2001 We lost him way too soon. A once in a lifetime talent. Here is the view no one in NASCAR wanted to see in their rear view mirror.
-
Jo-Han Javelin inspired by Ringbrothers' Defiant
modelcarcrazy replied to FrozenPlastik49's topic in WIP: Model Cars
I ran across this car at the Goodguys show in Nashville in 2019. A very impressive machine. I’ll watch your build as this is right down my alley. Great start, keep it up.
-
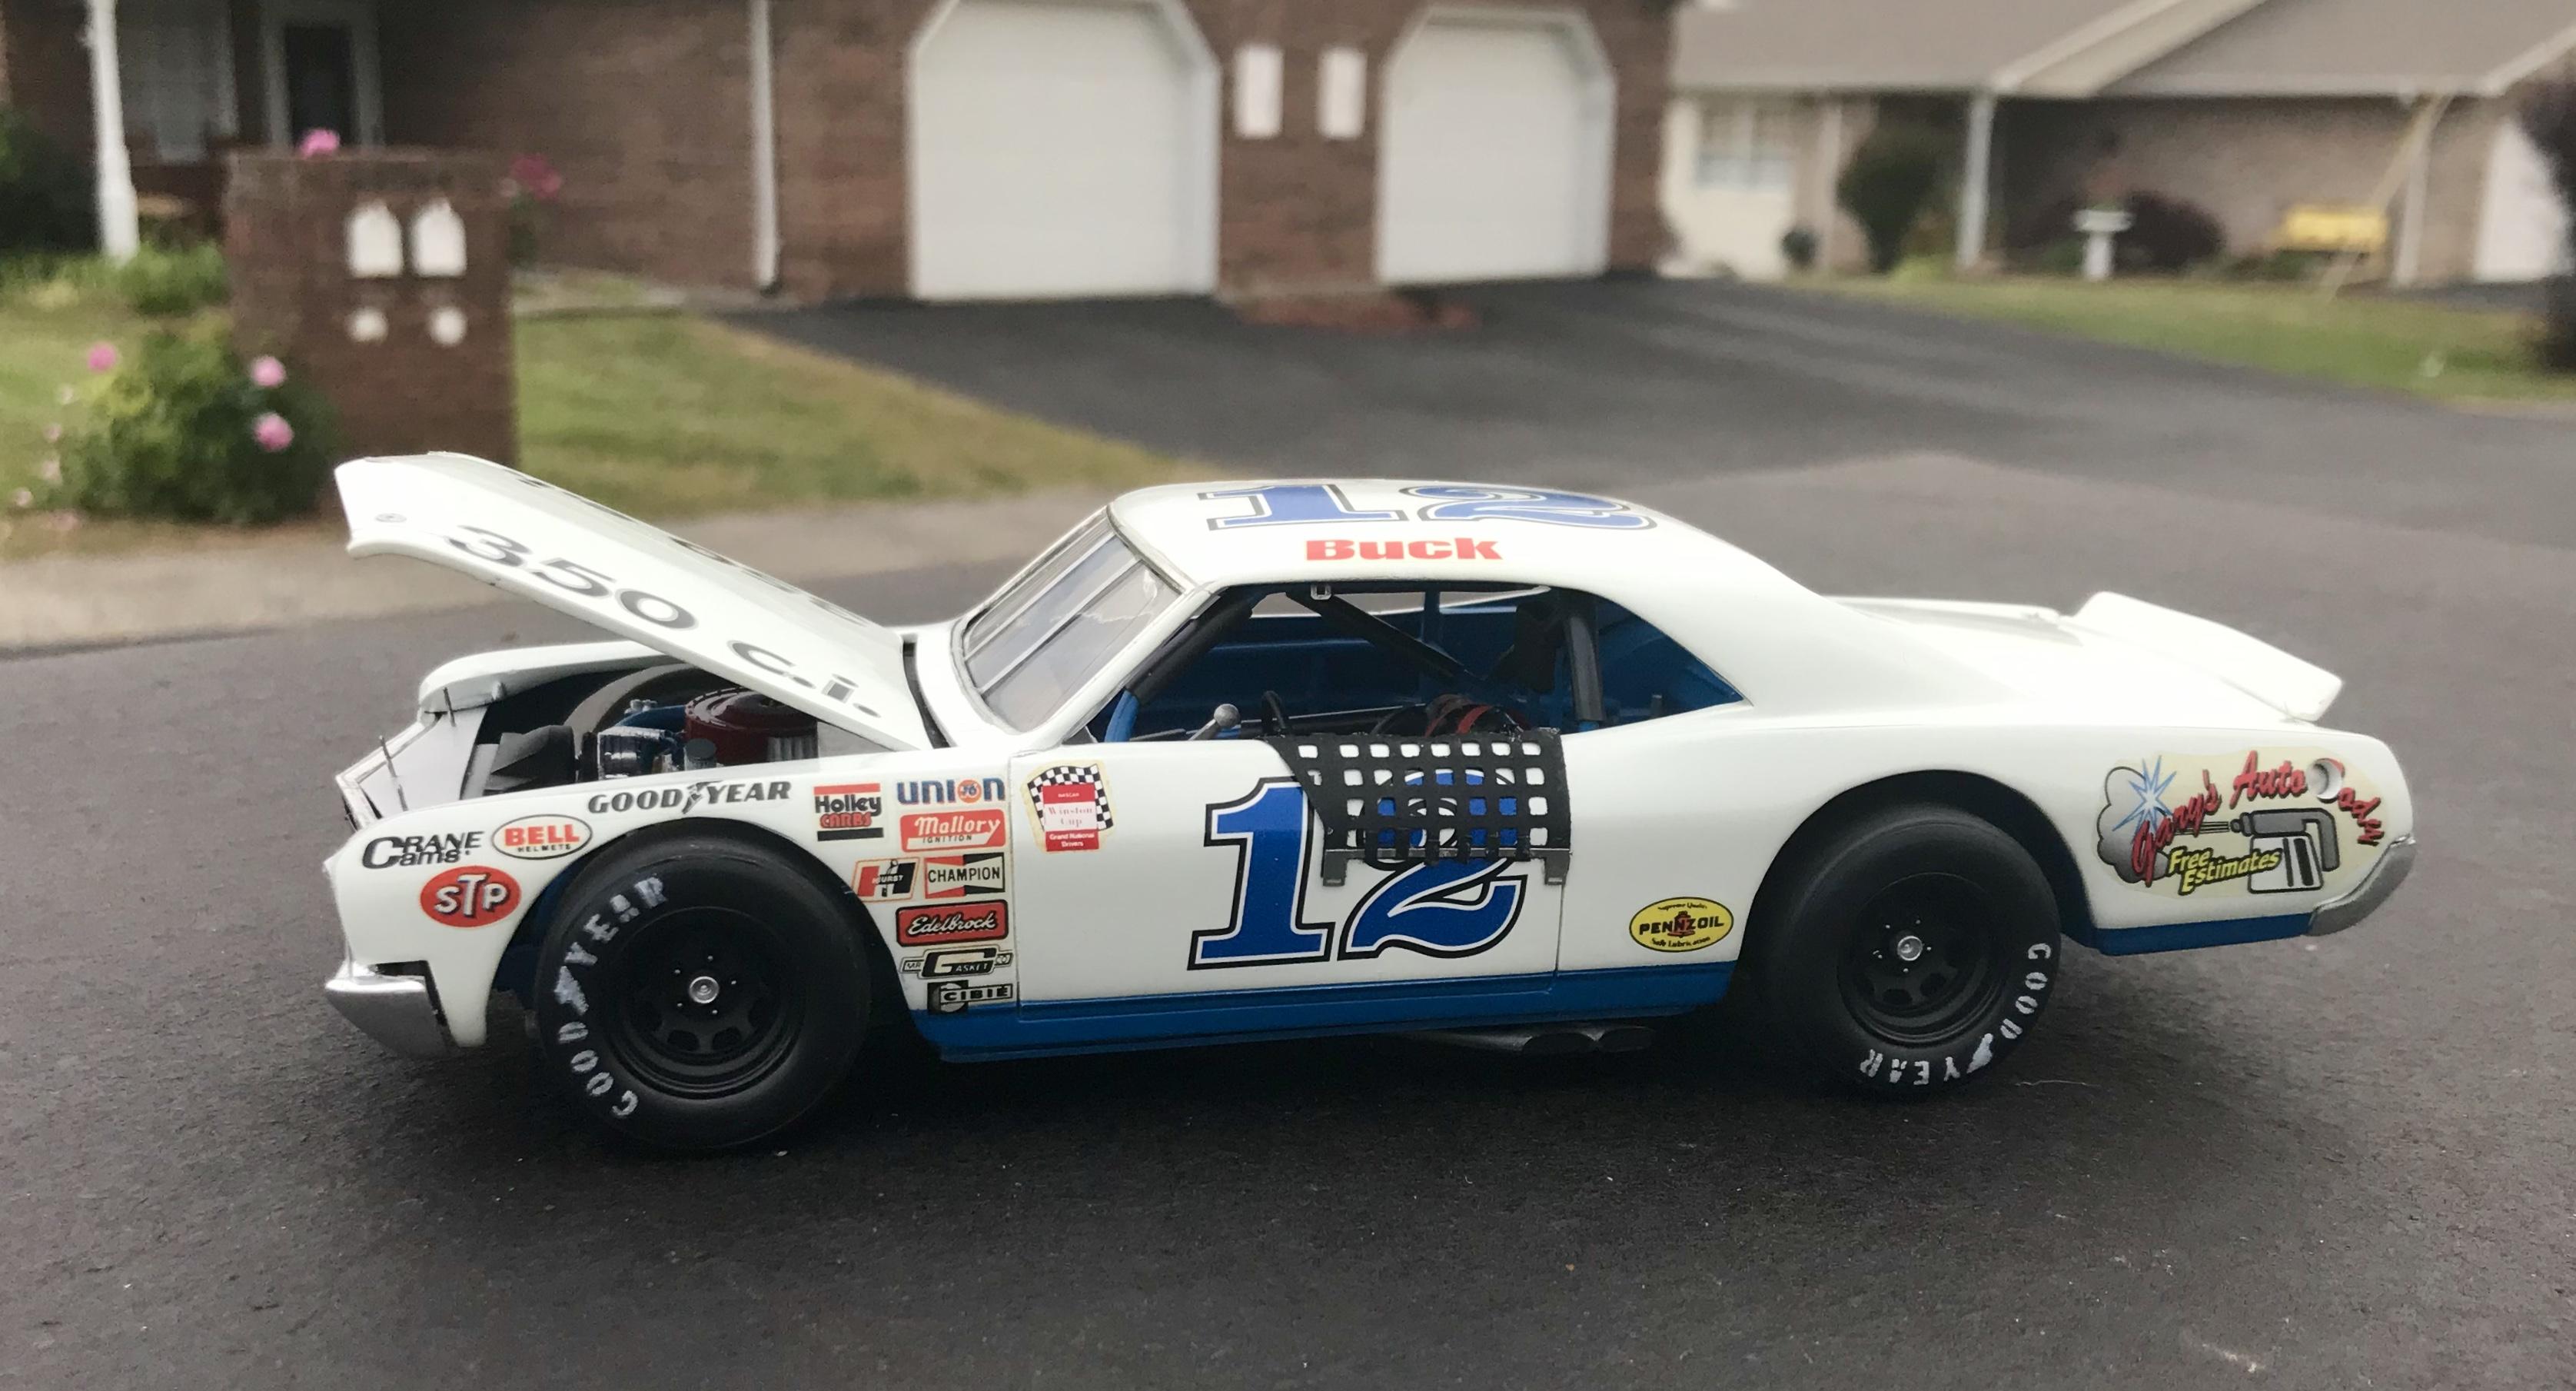
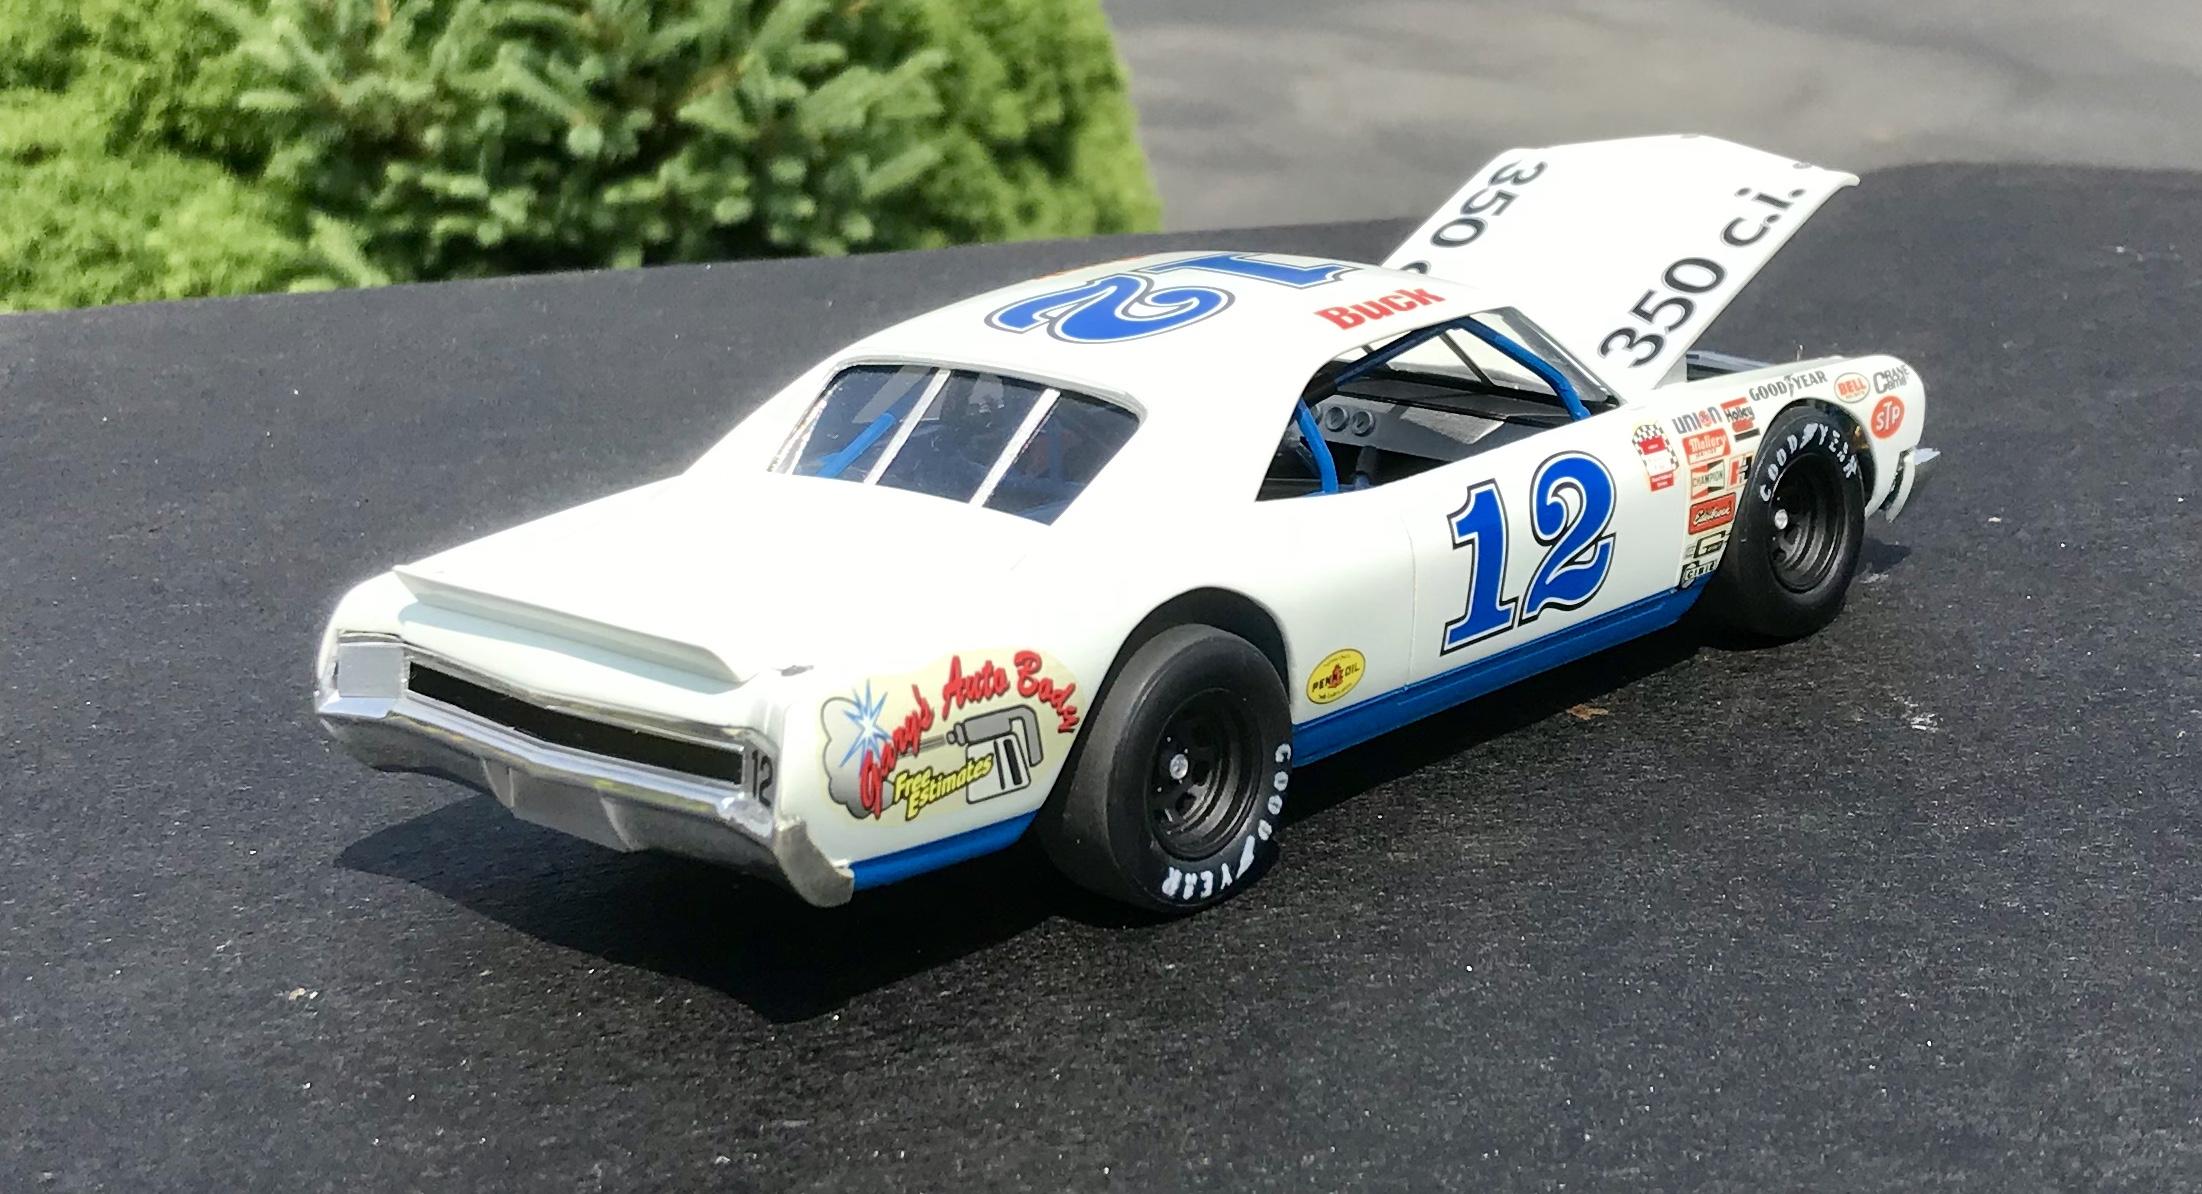
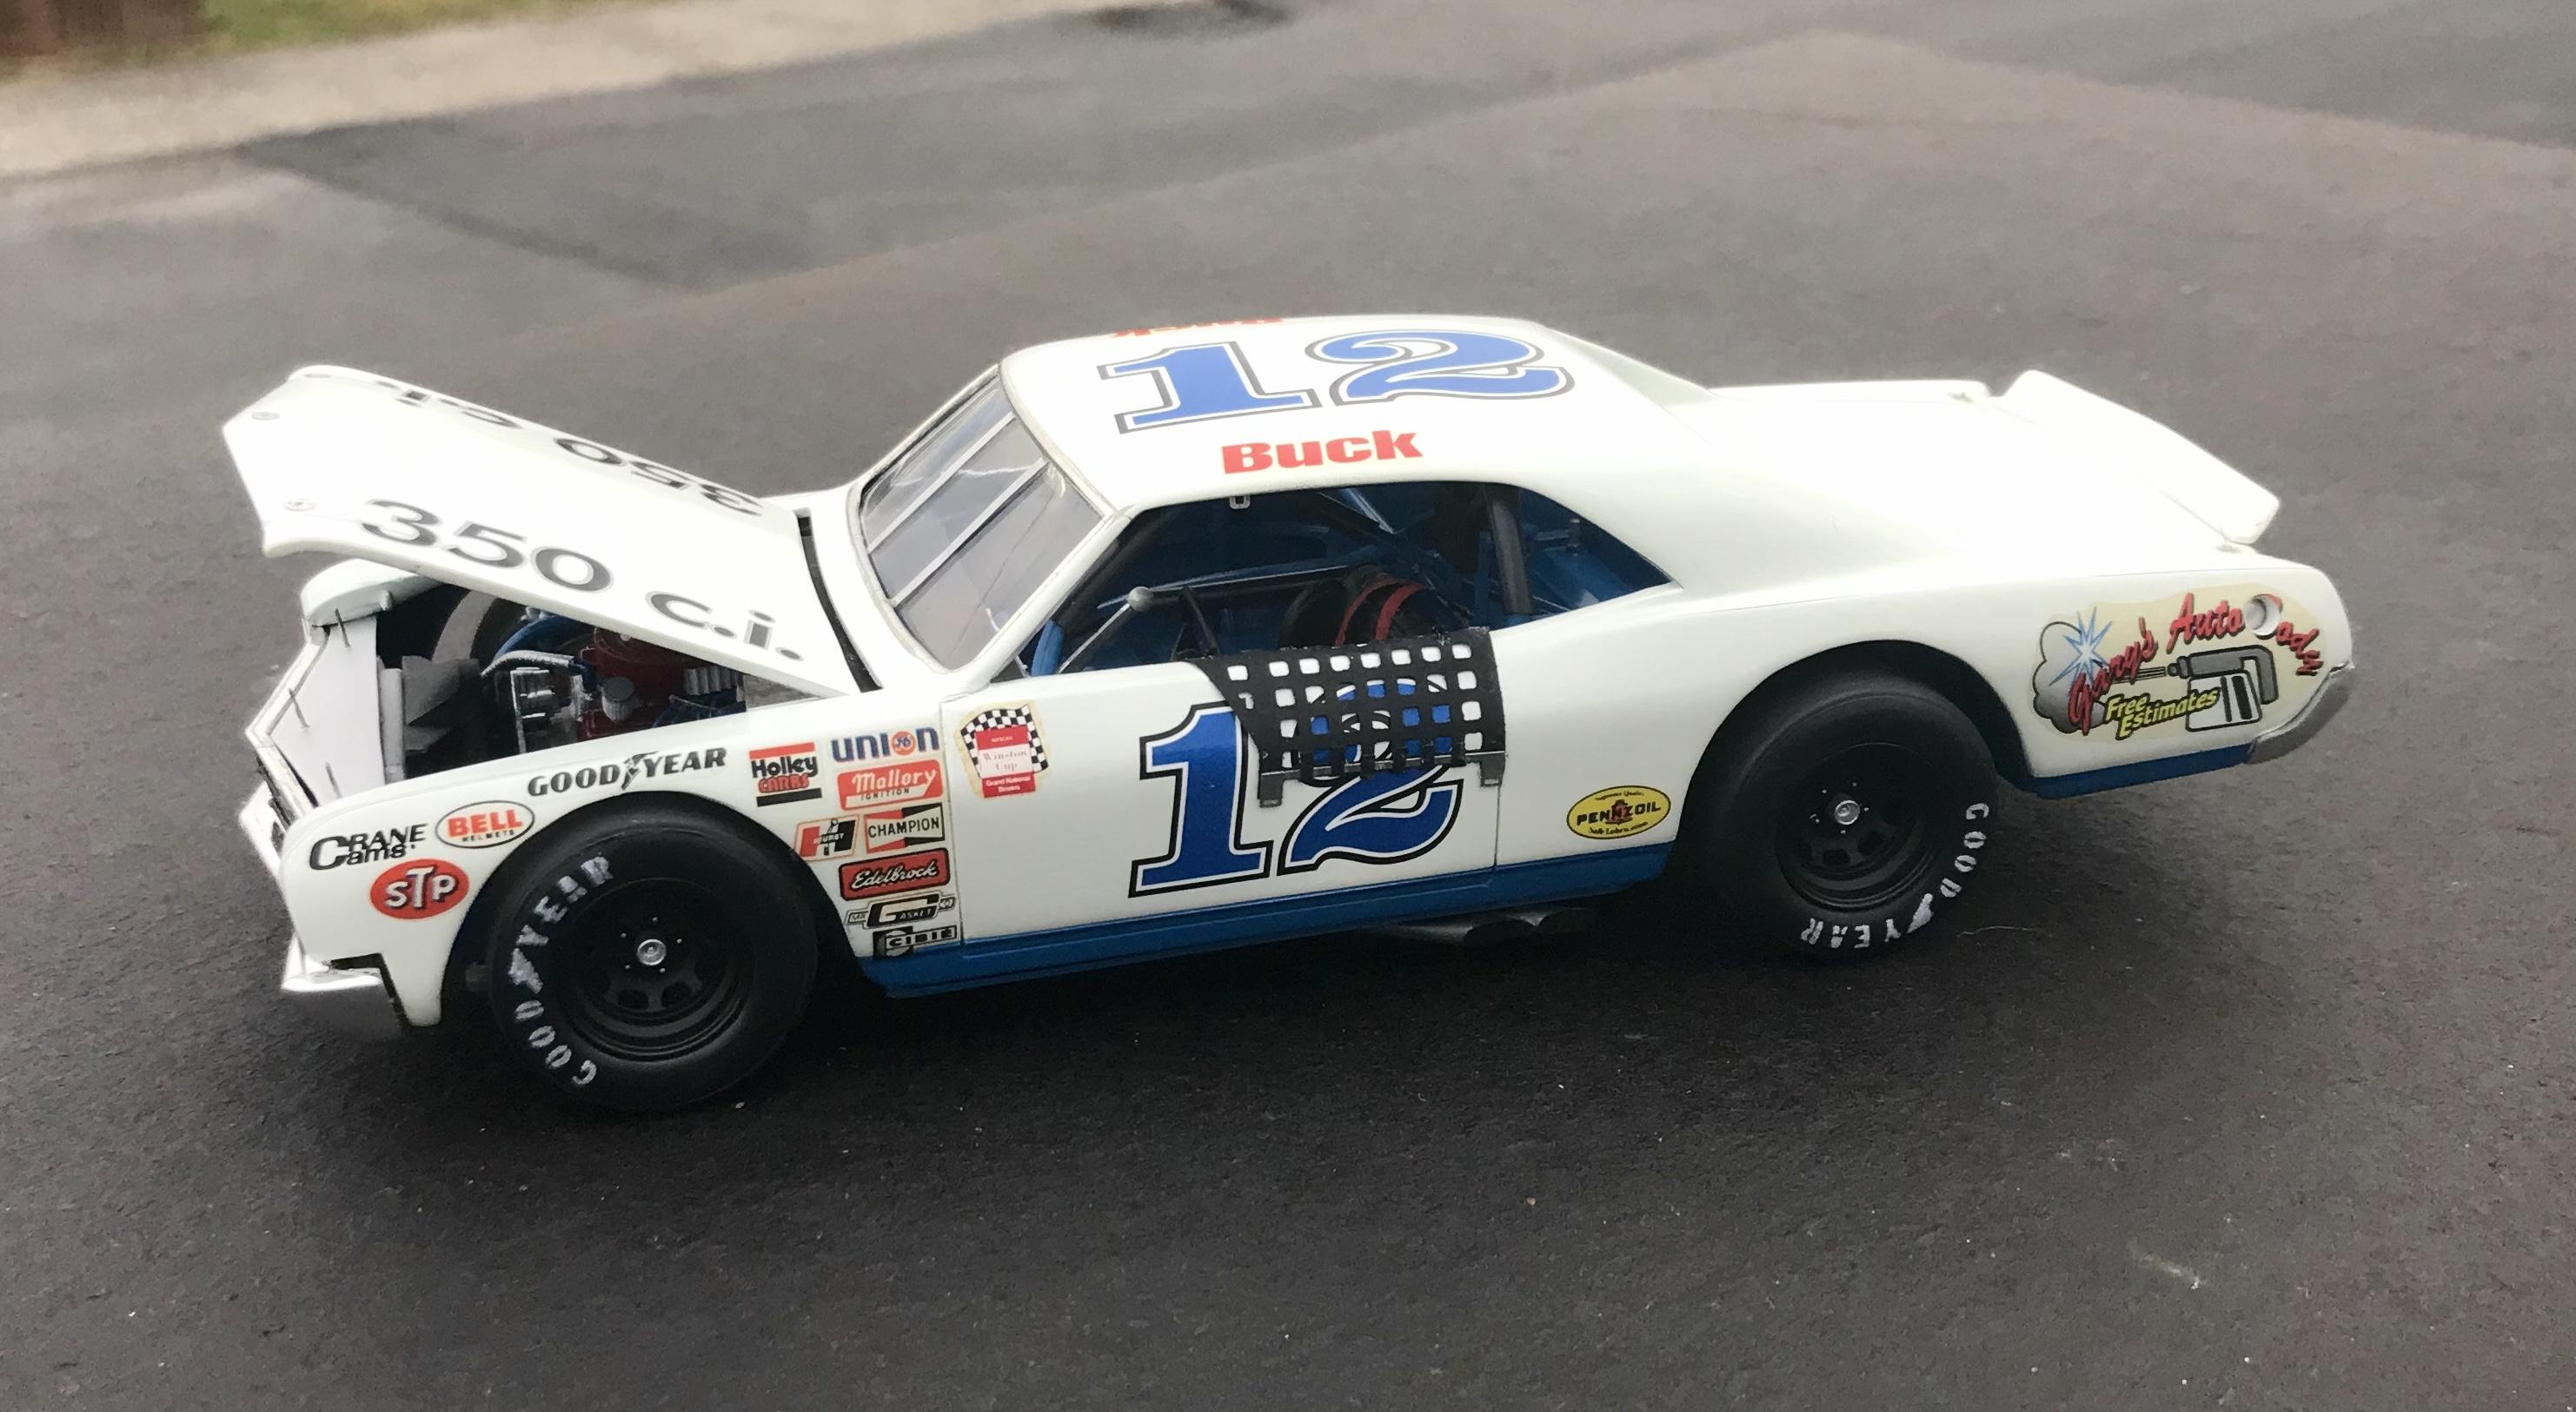
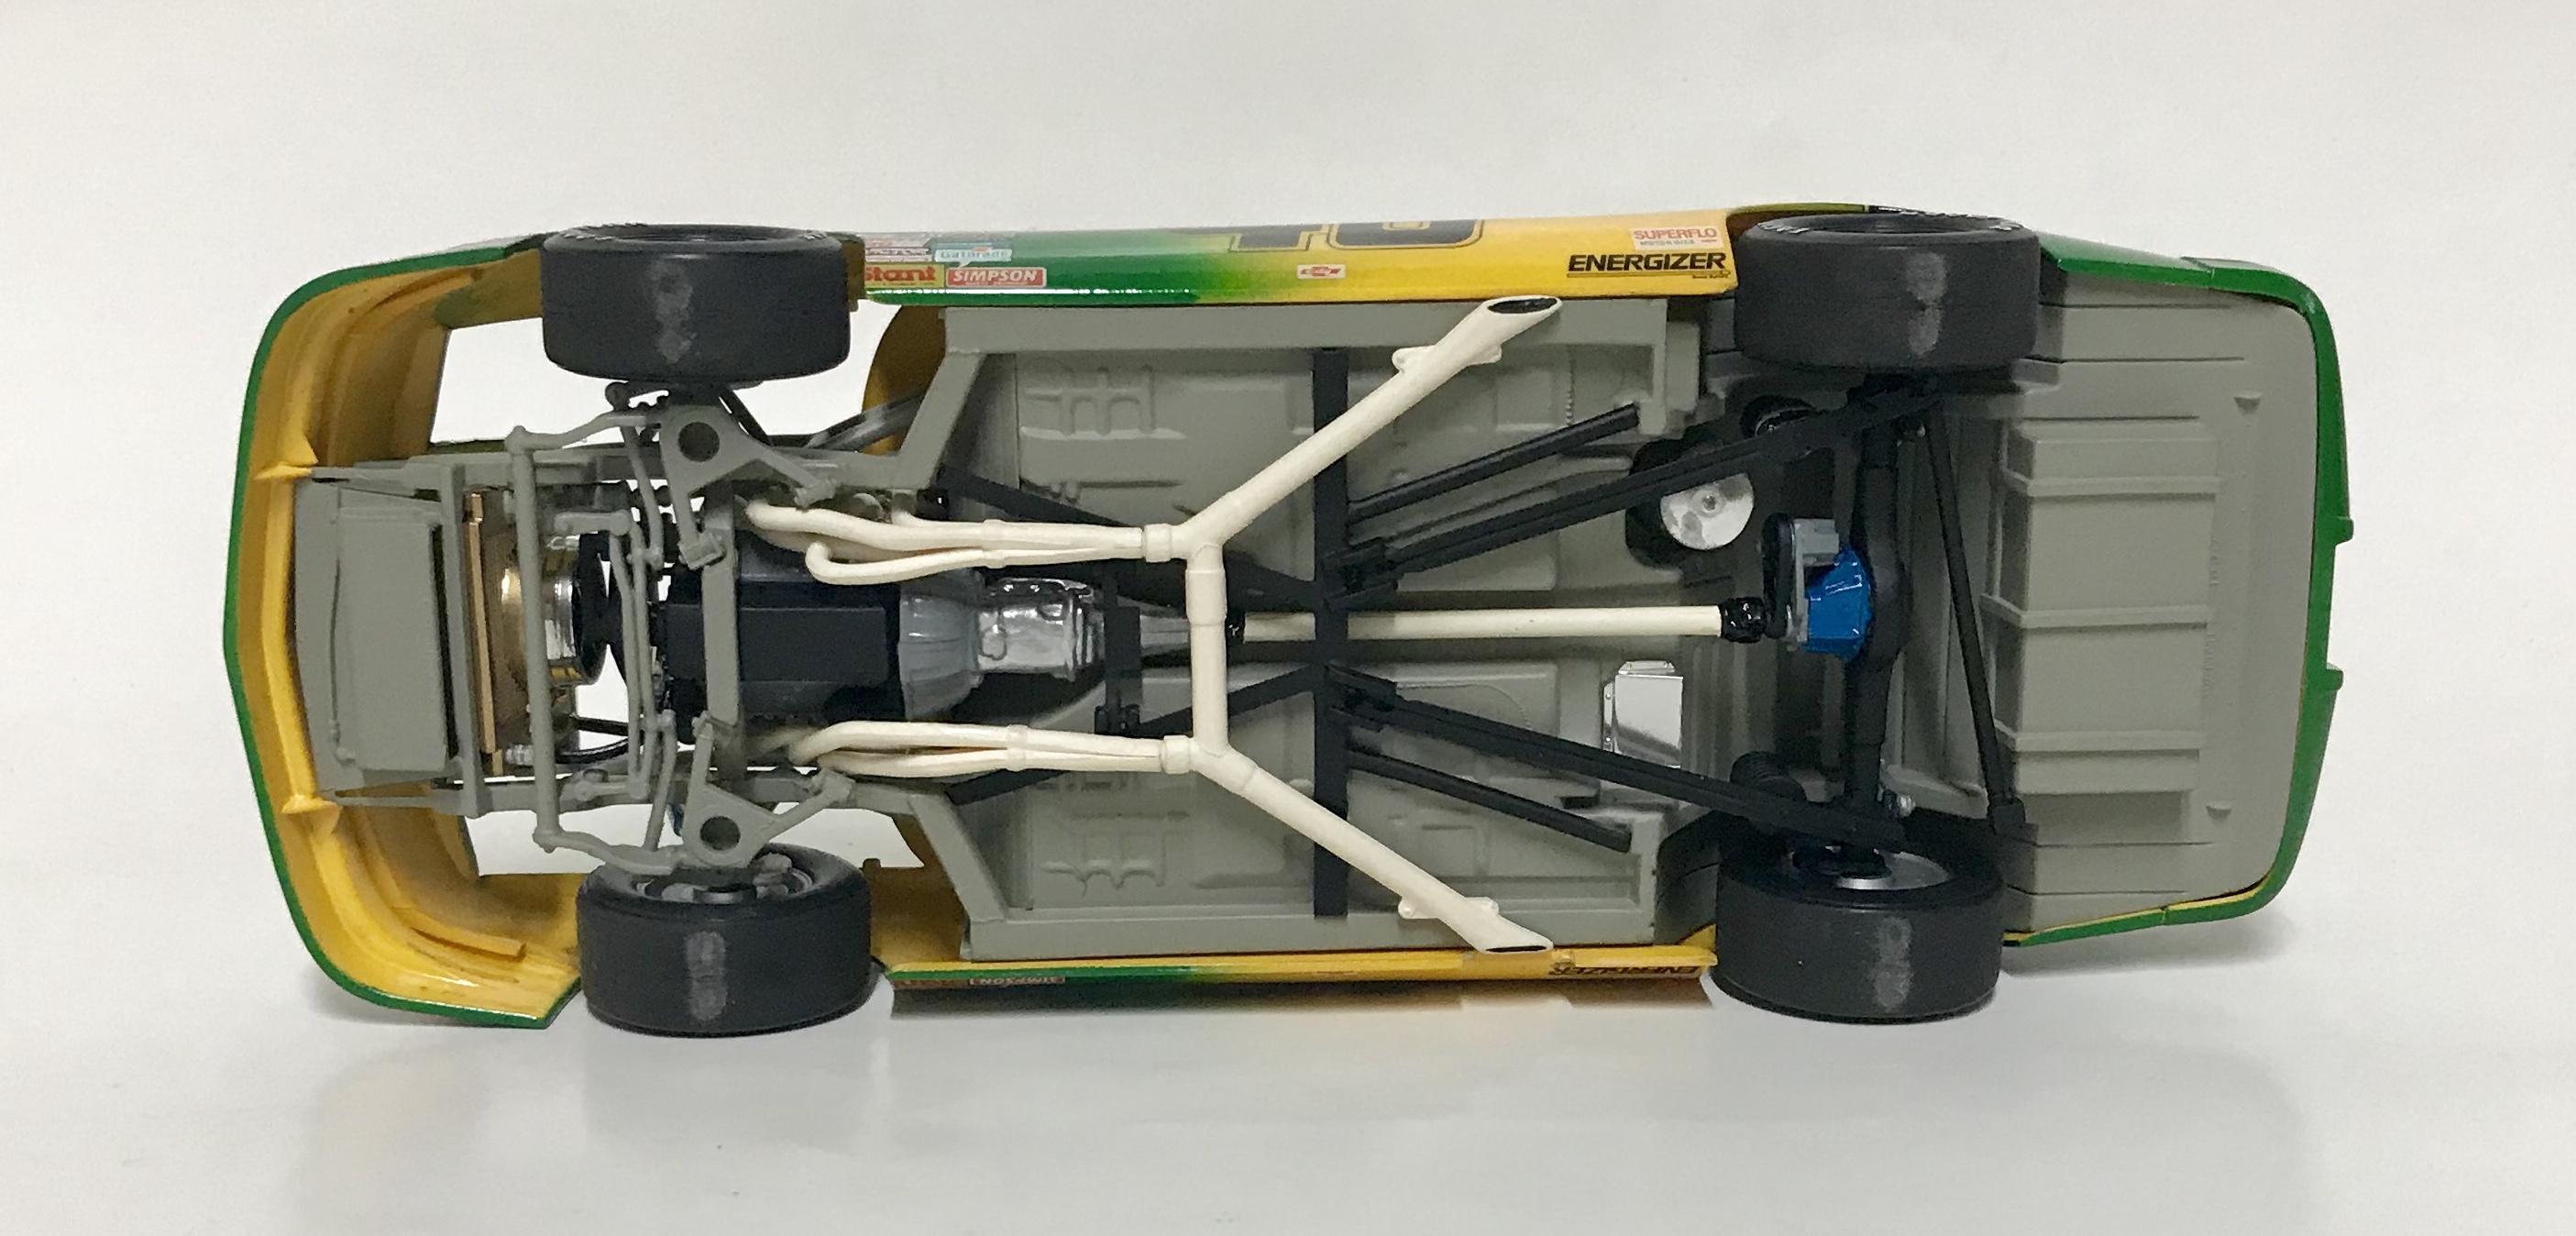
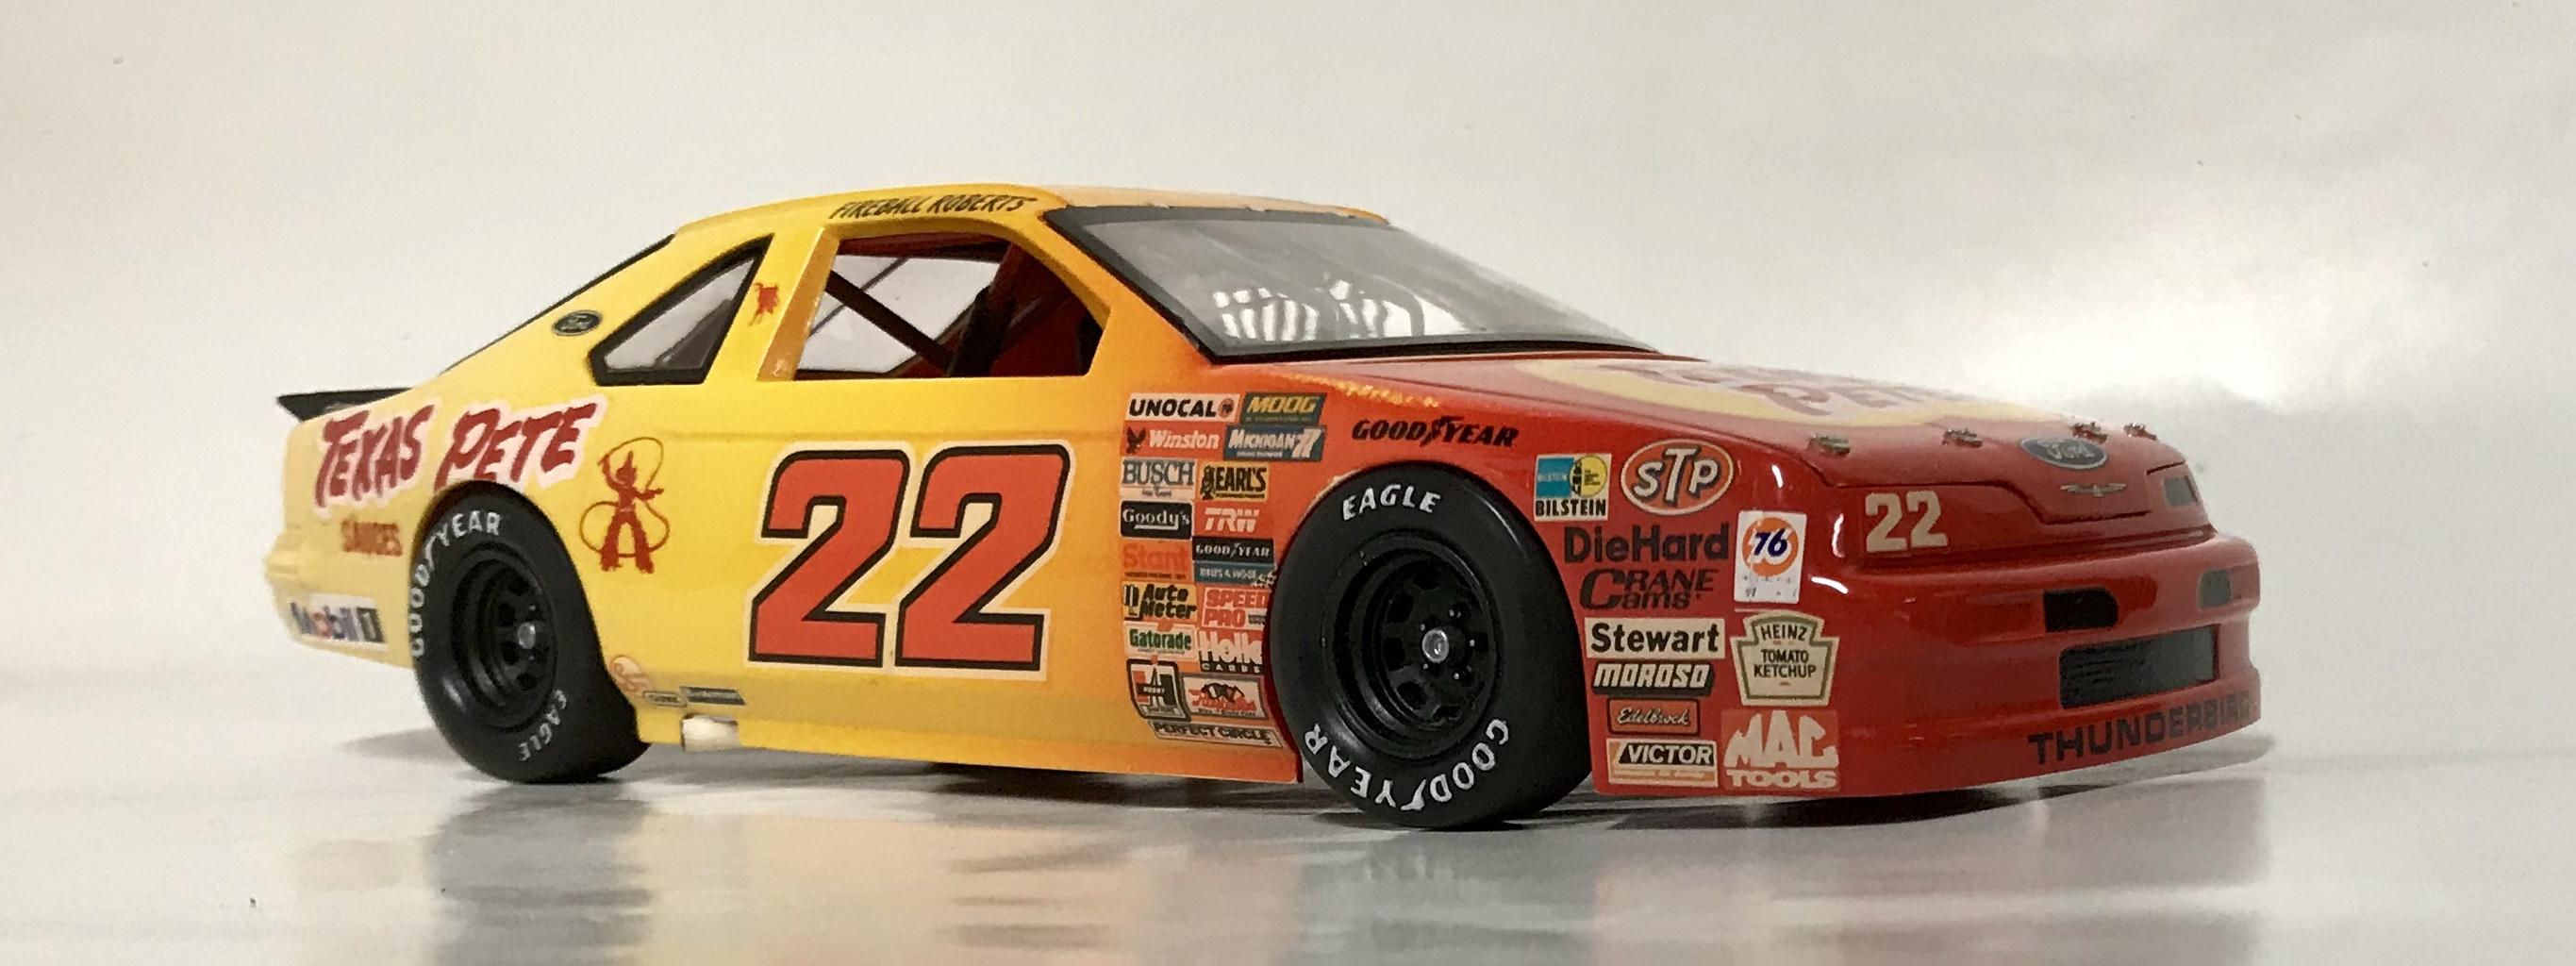
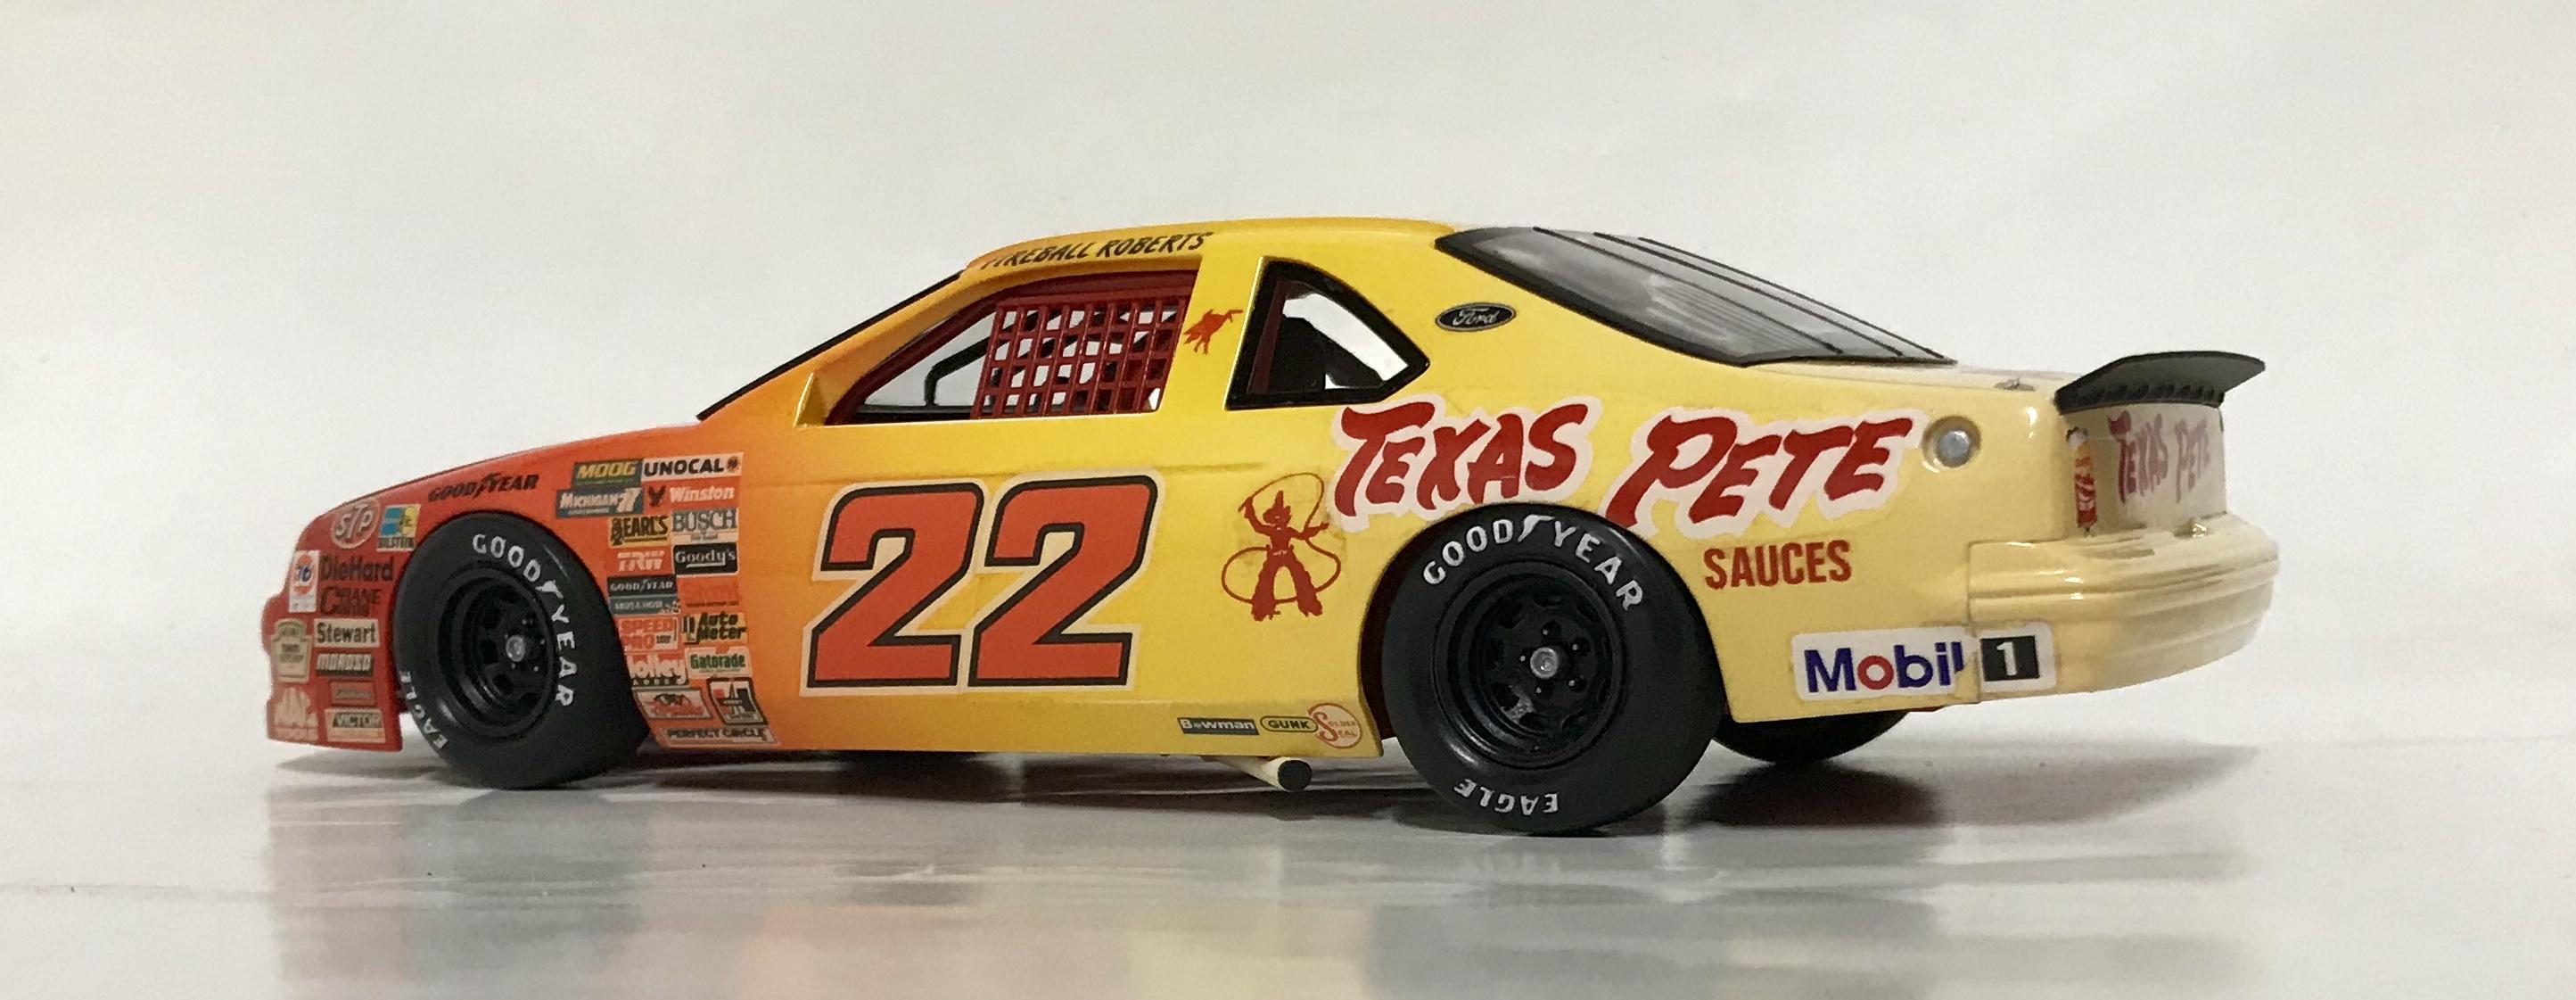
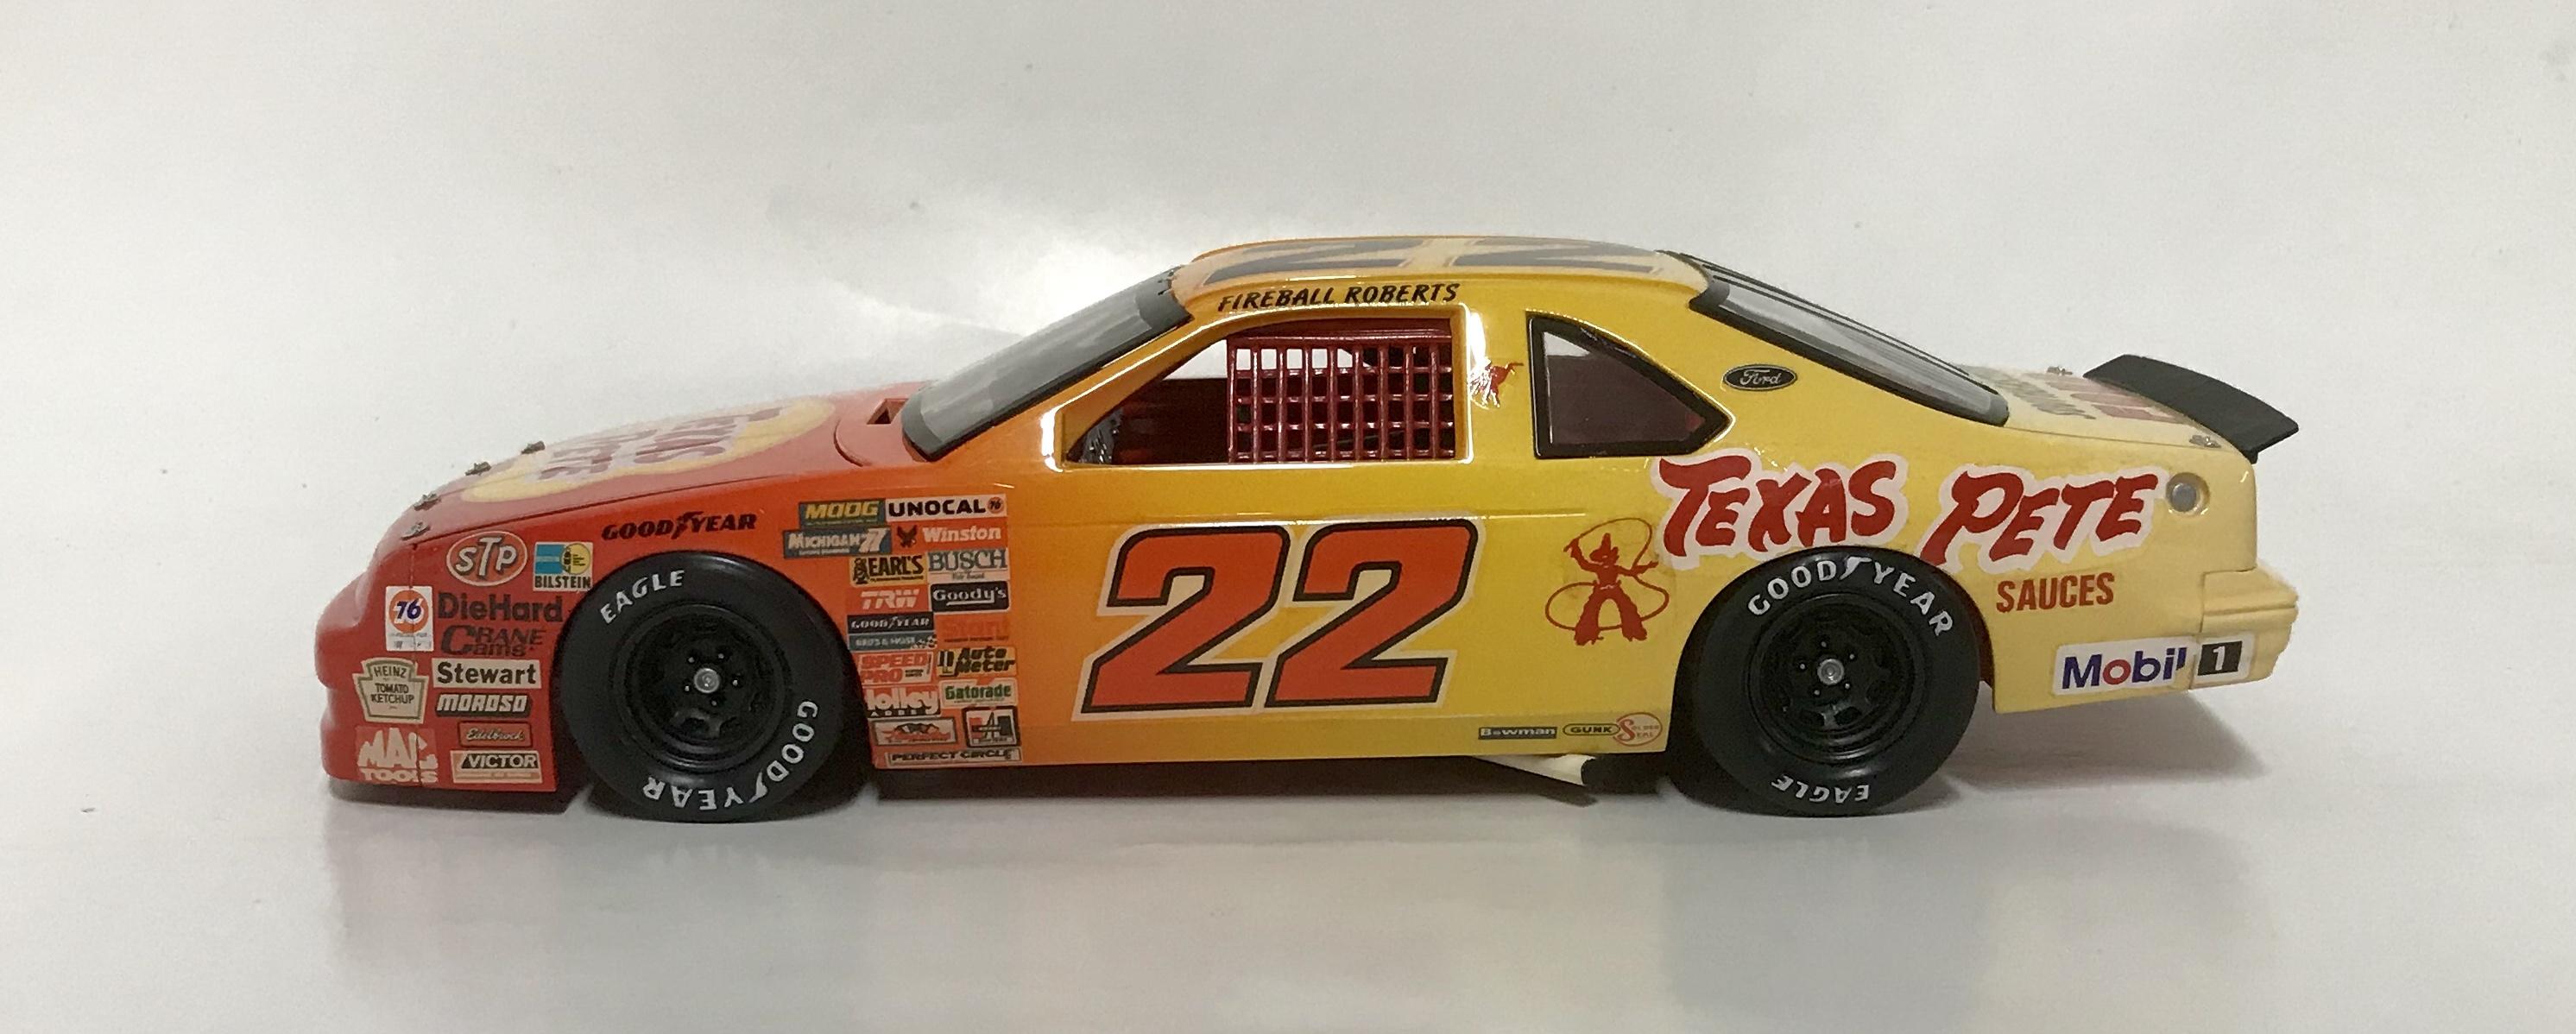
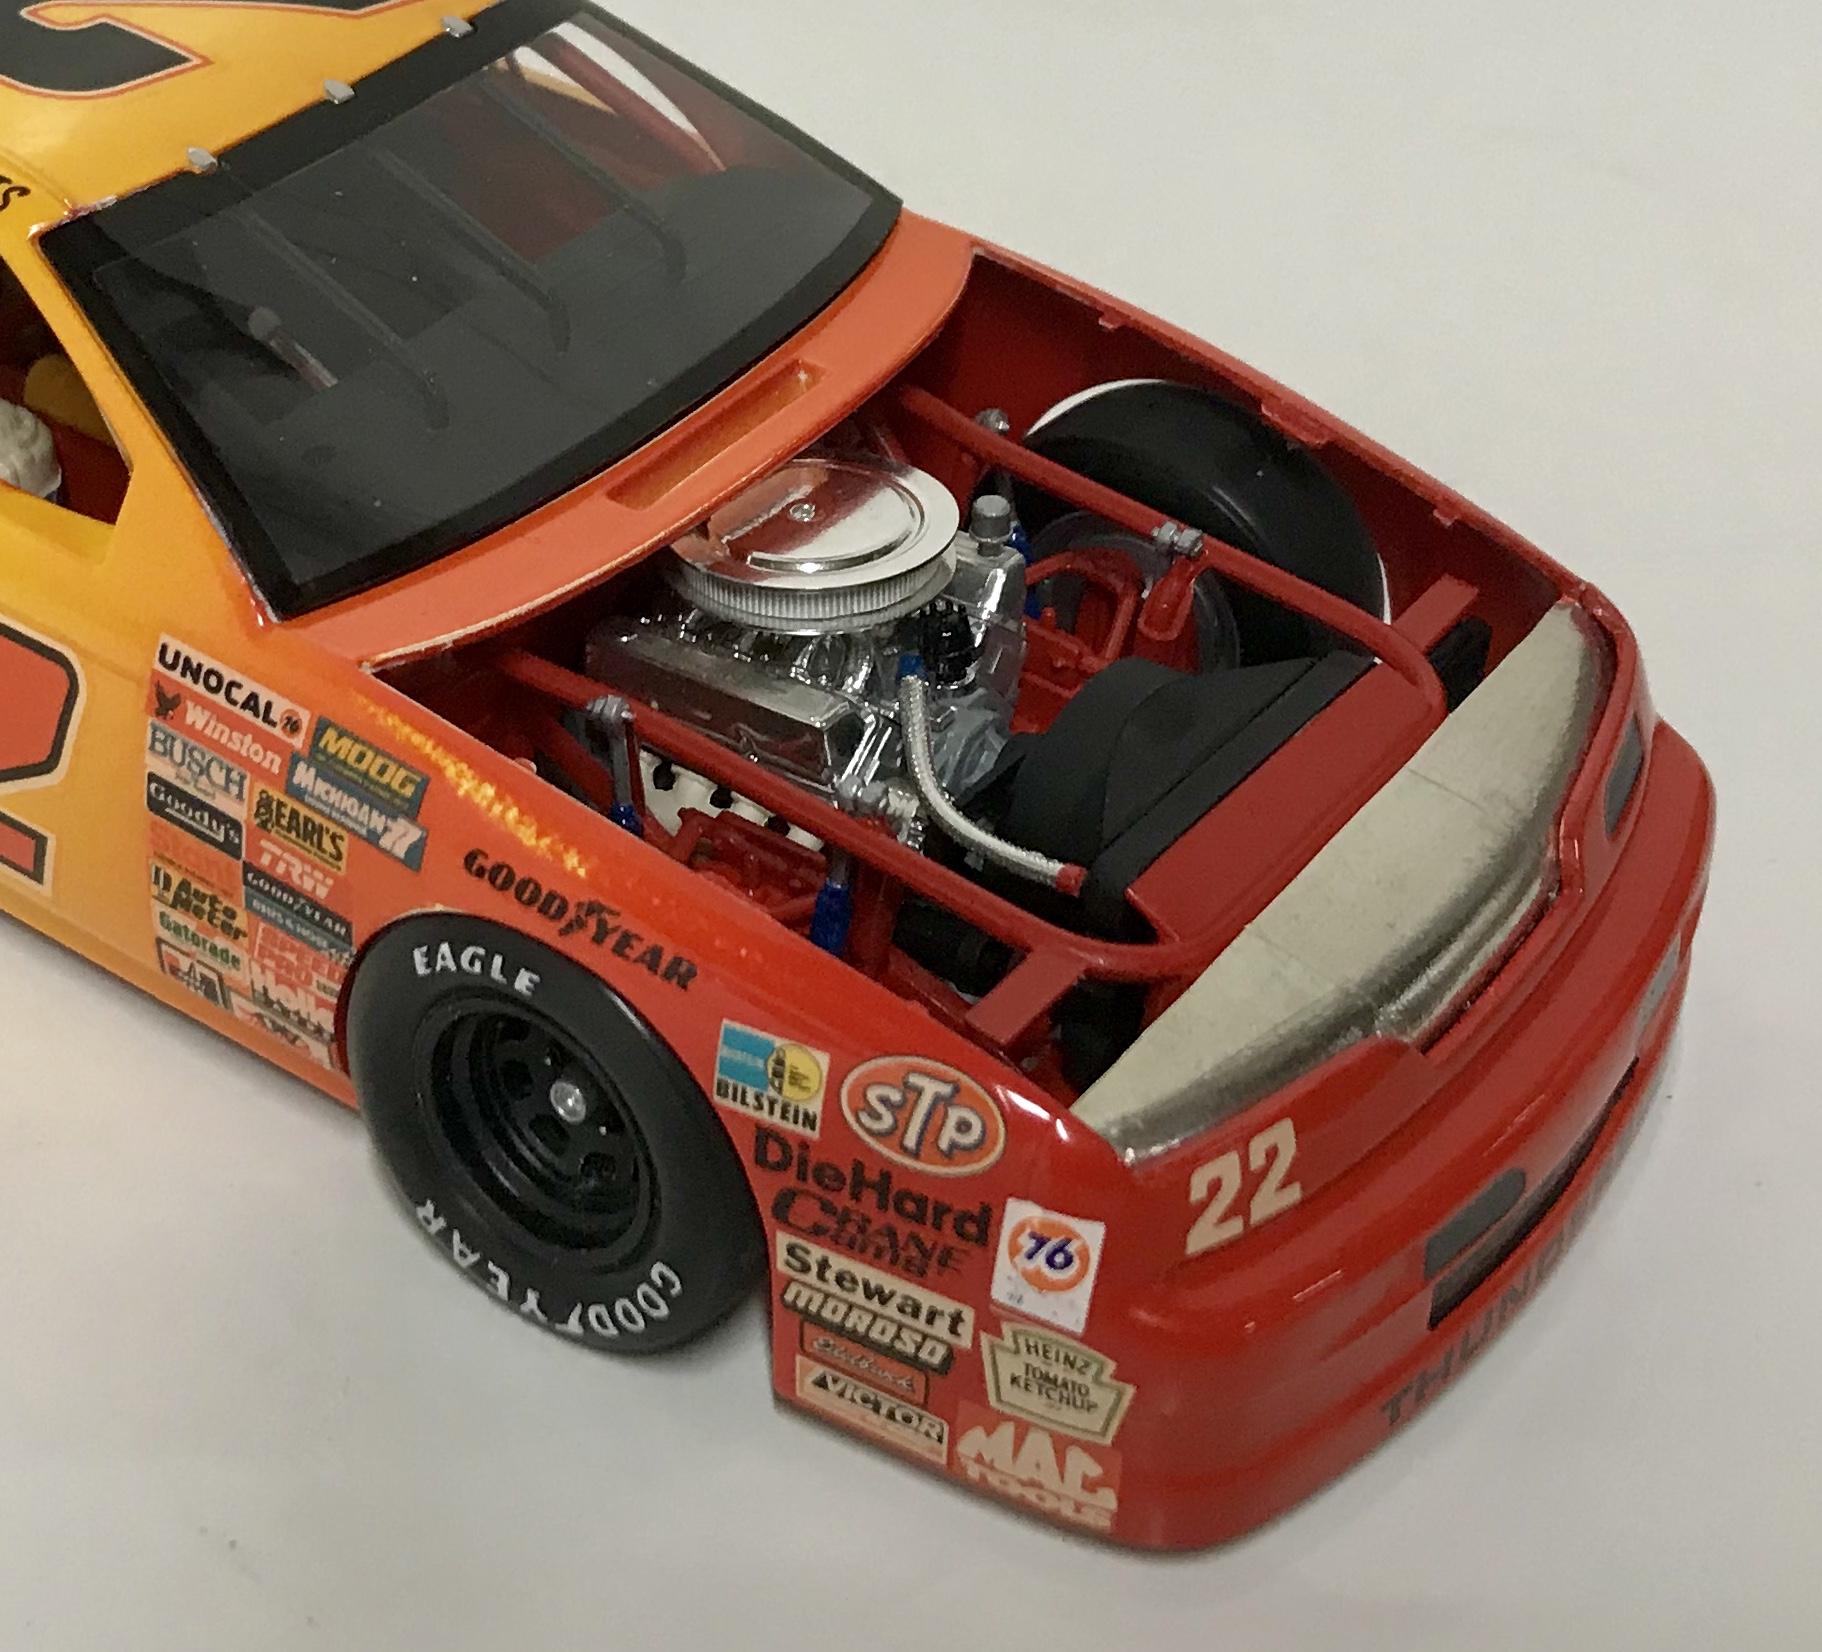
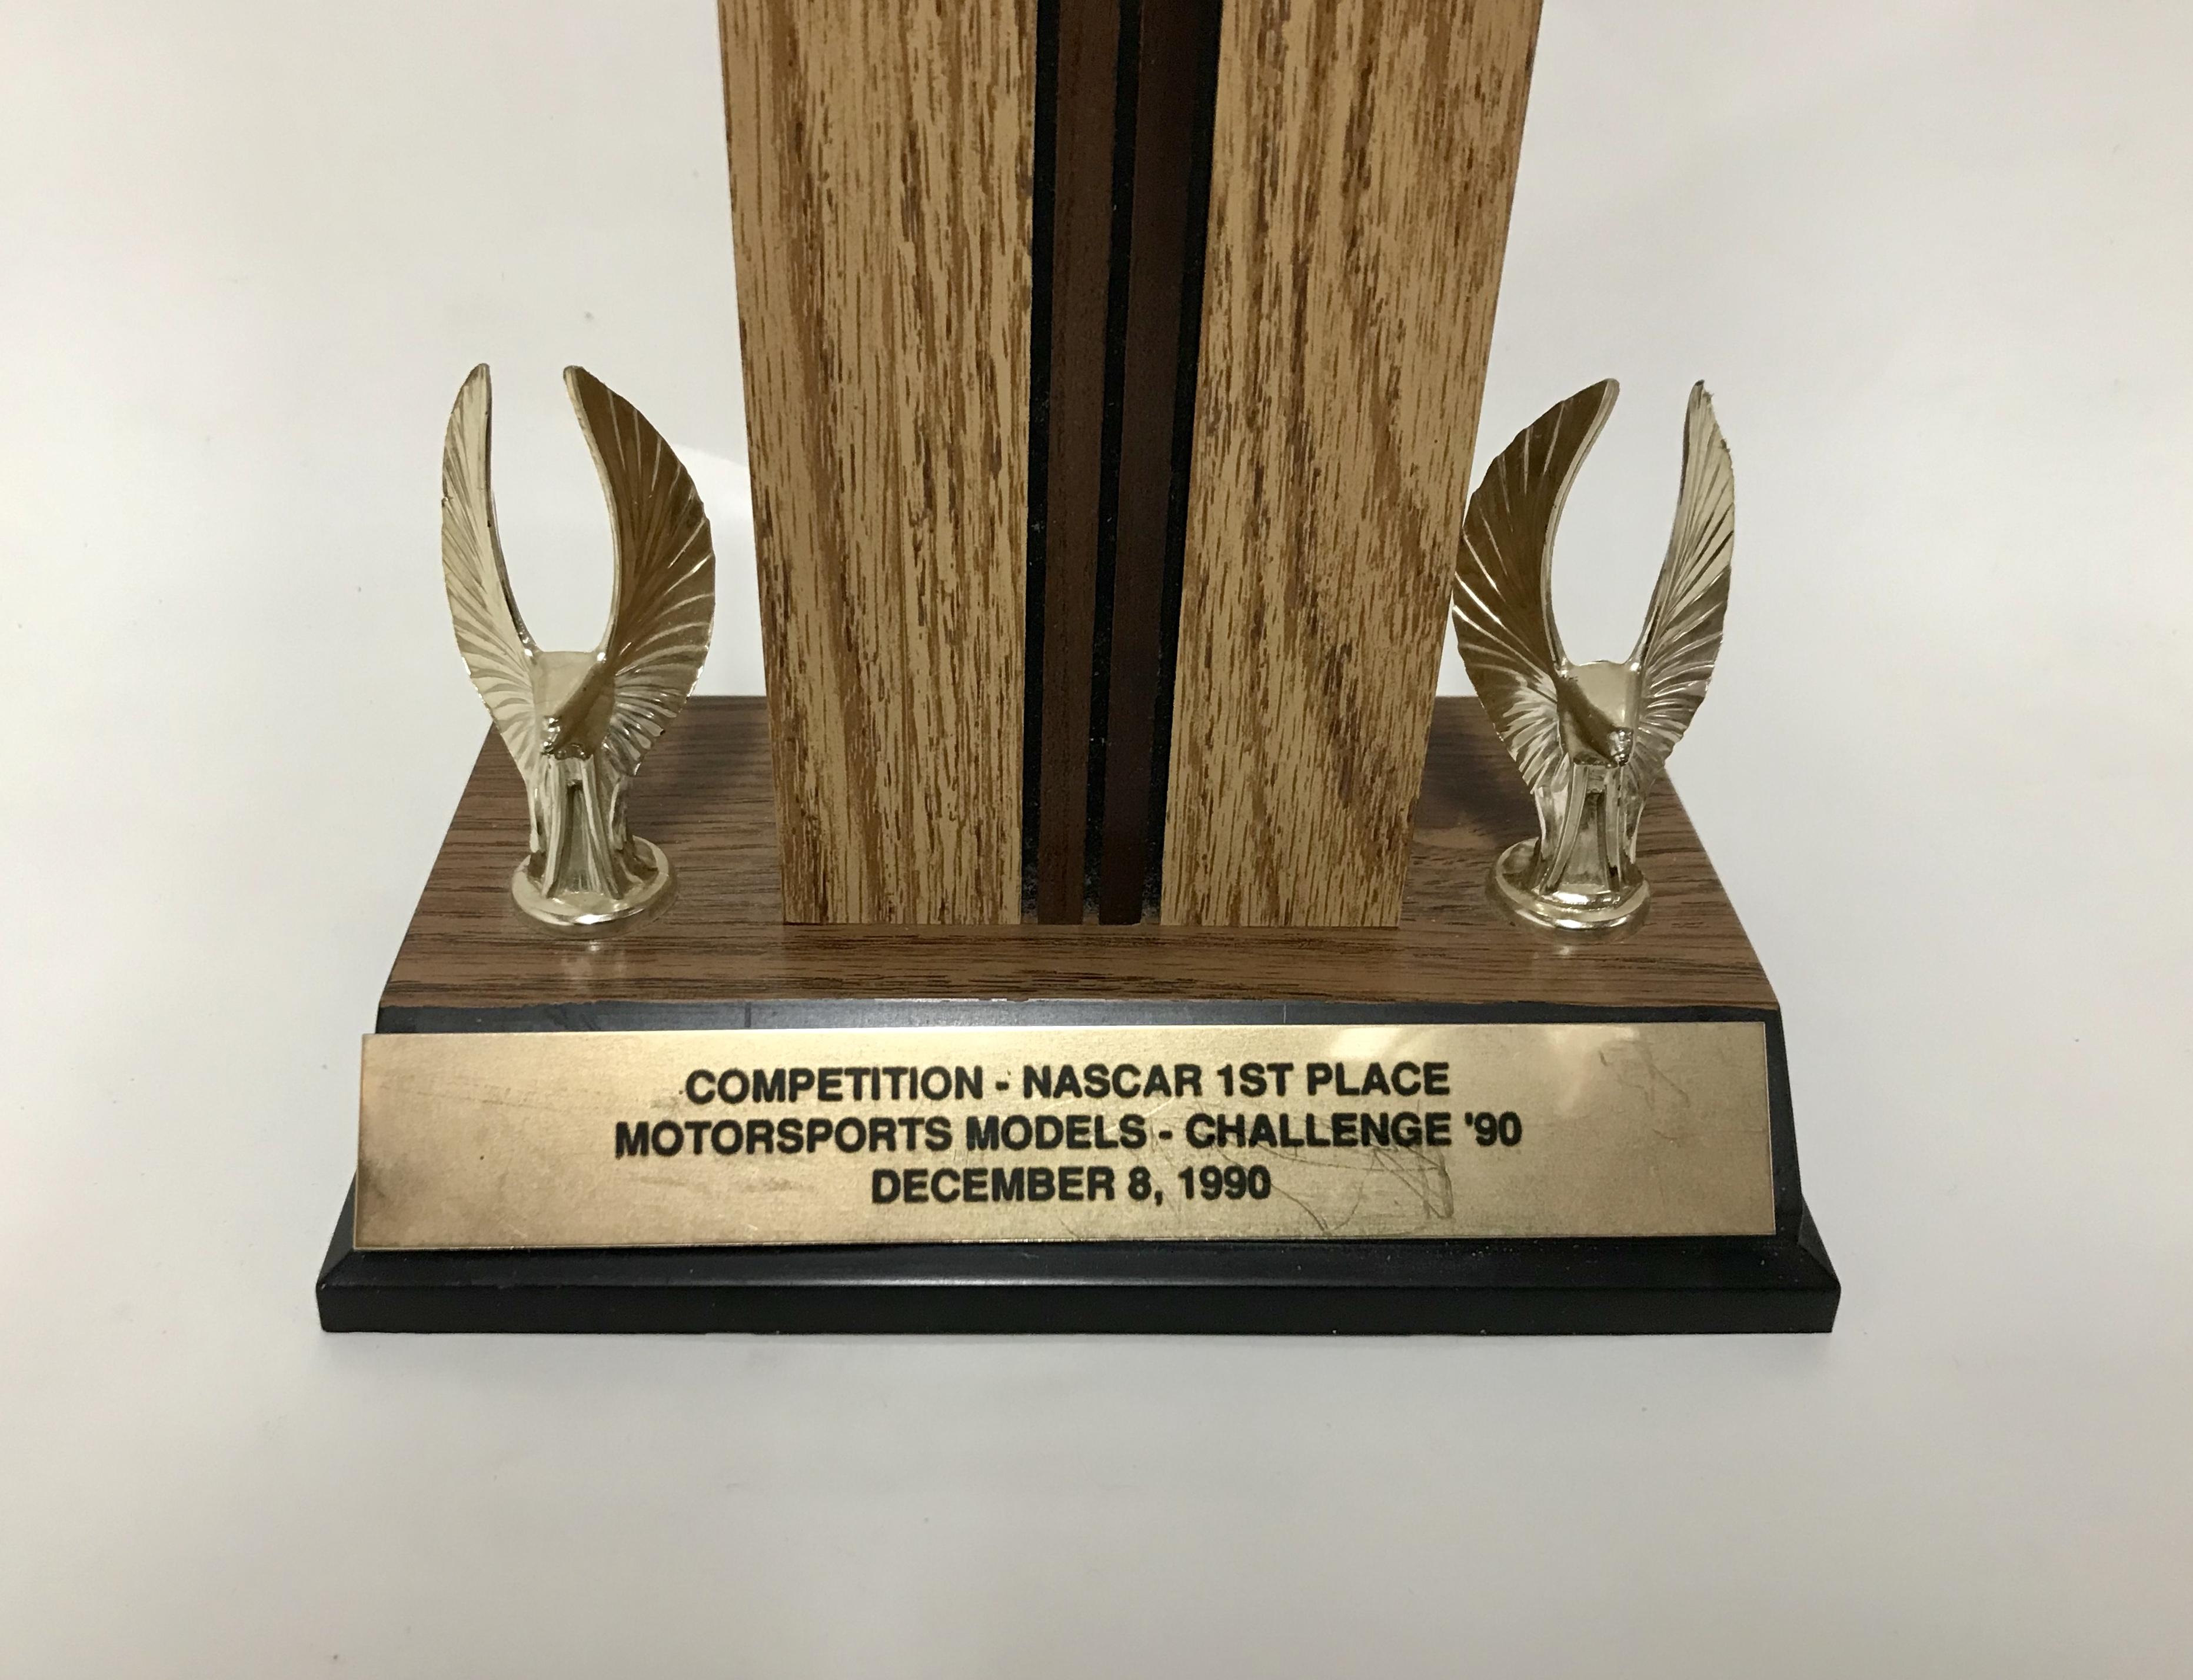
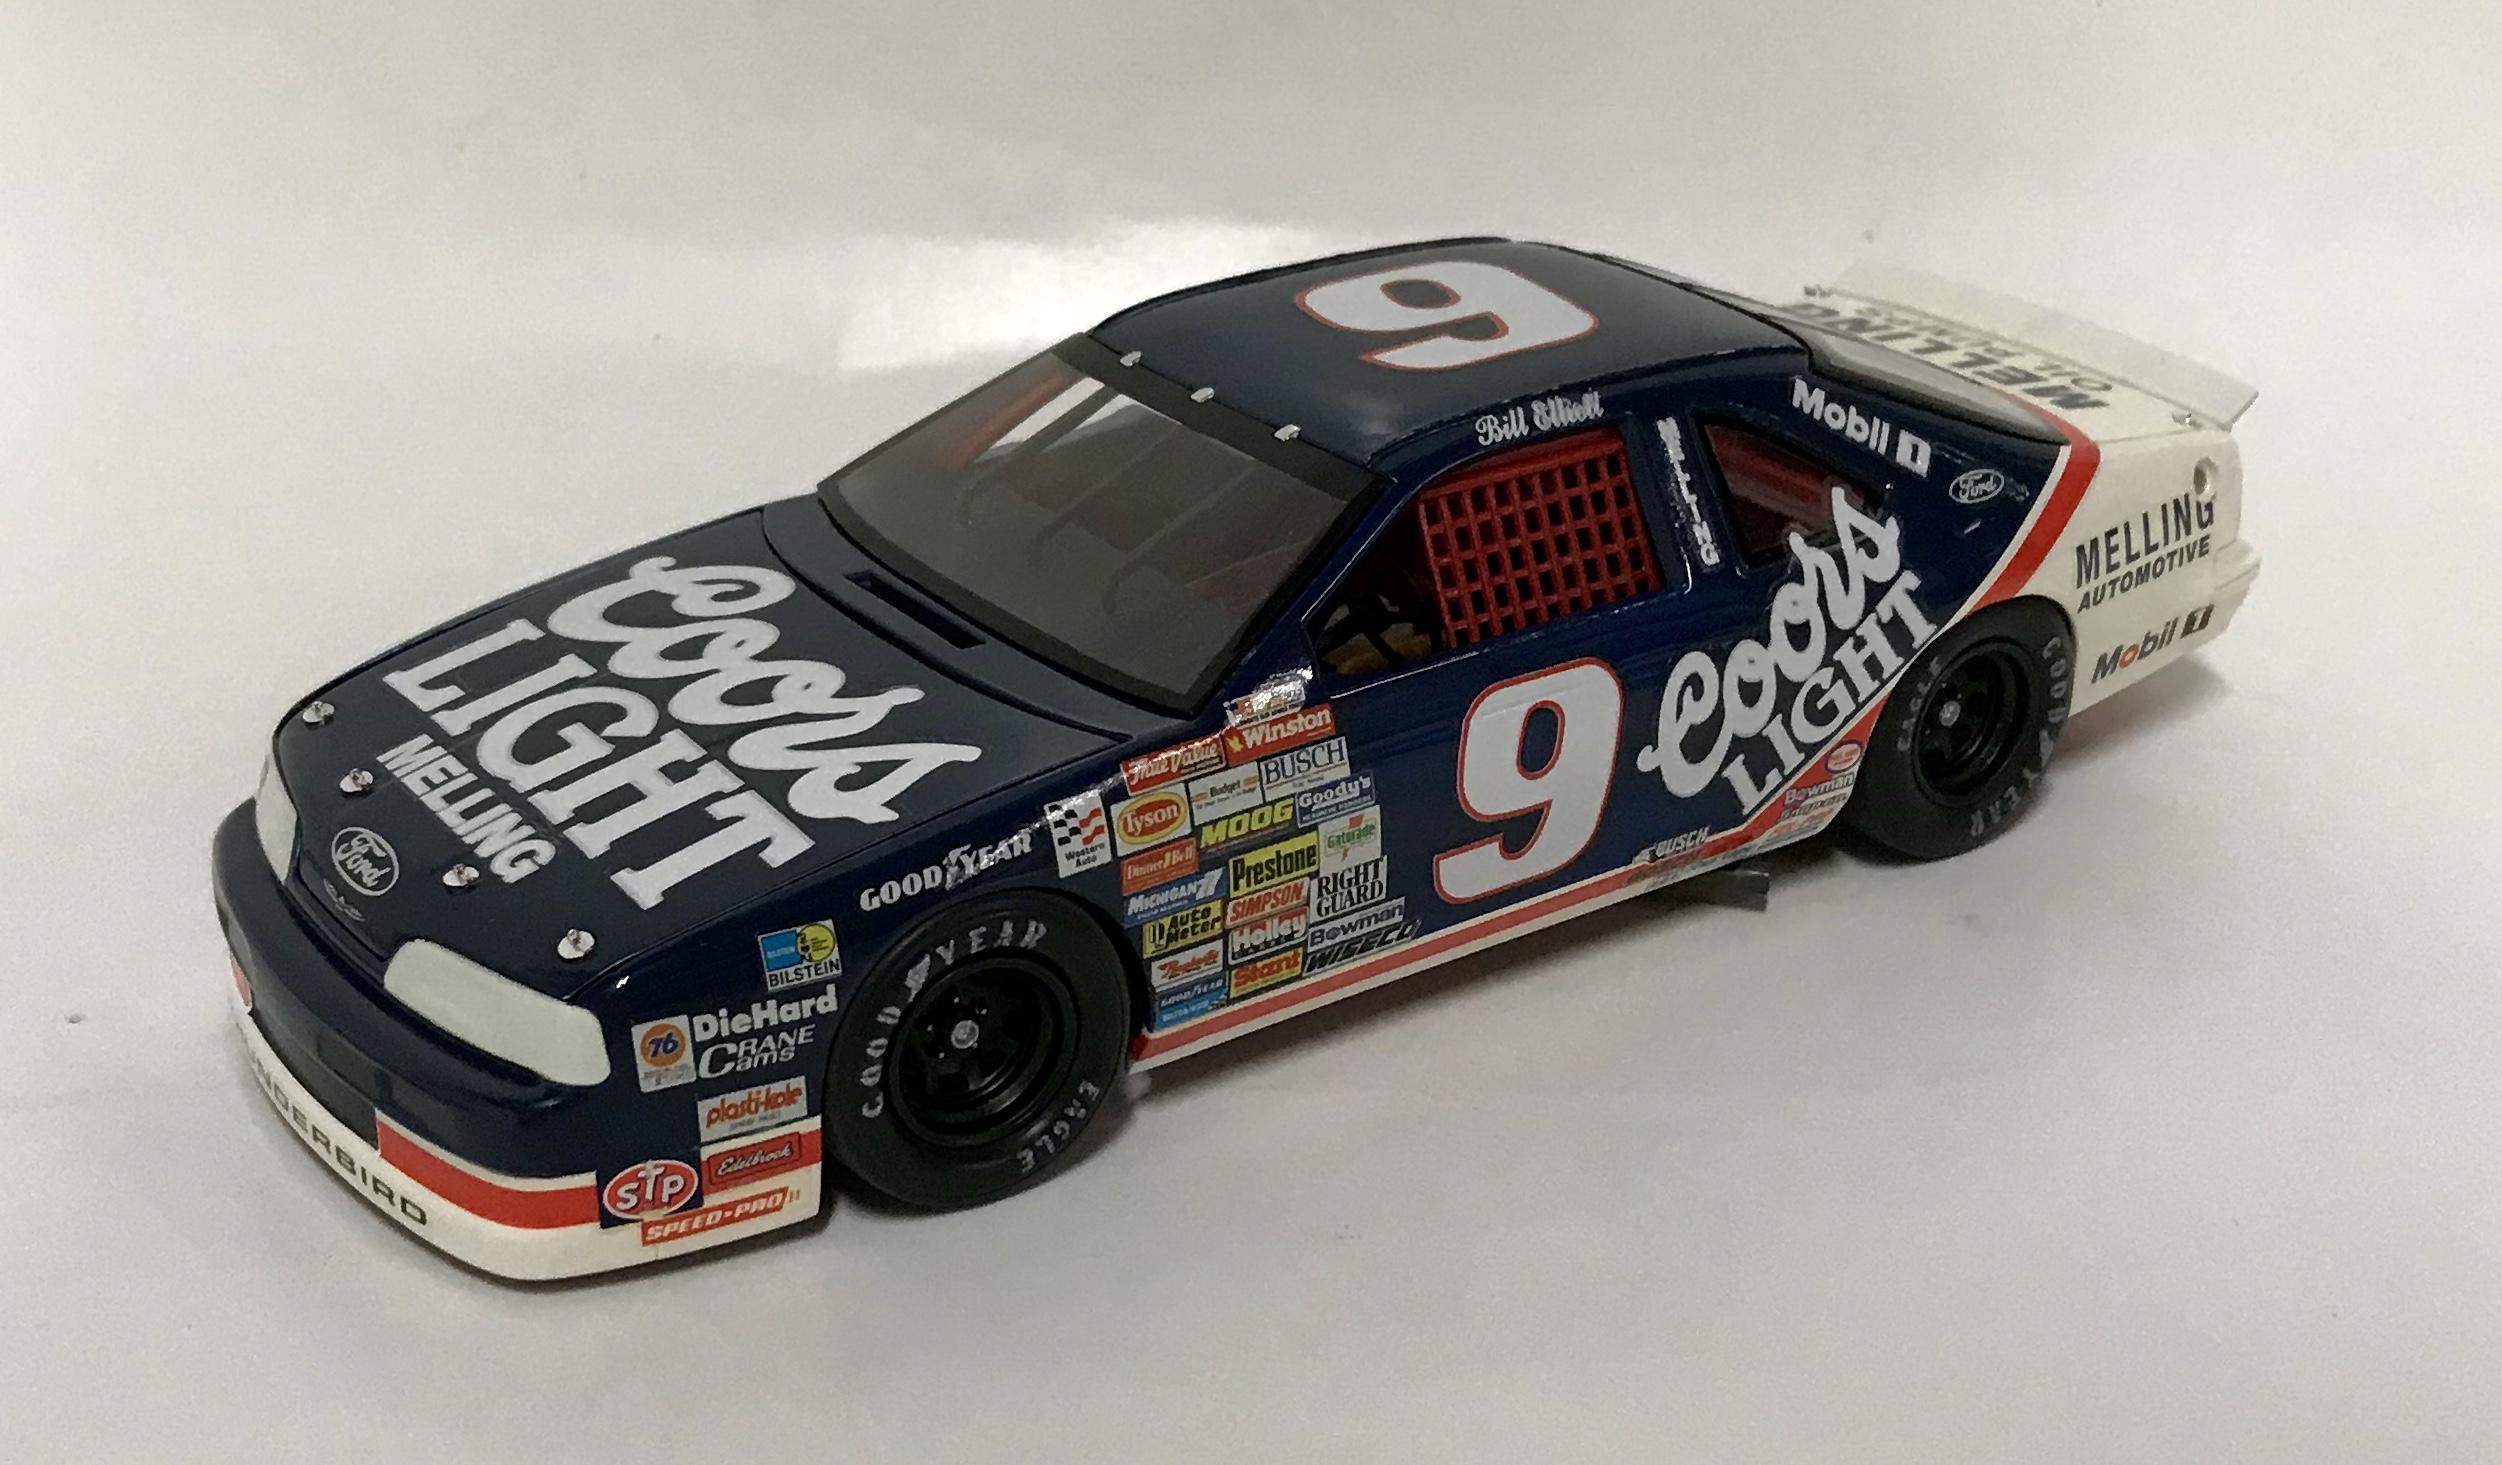
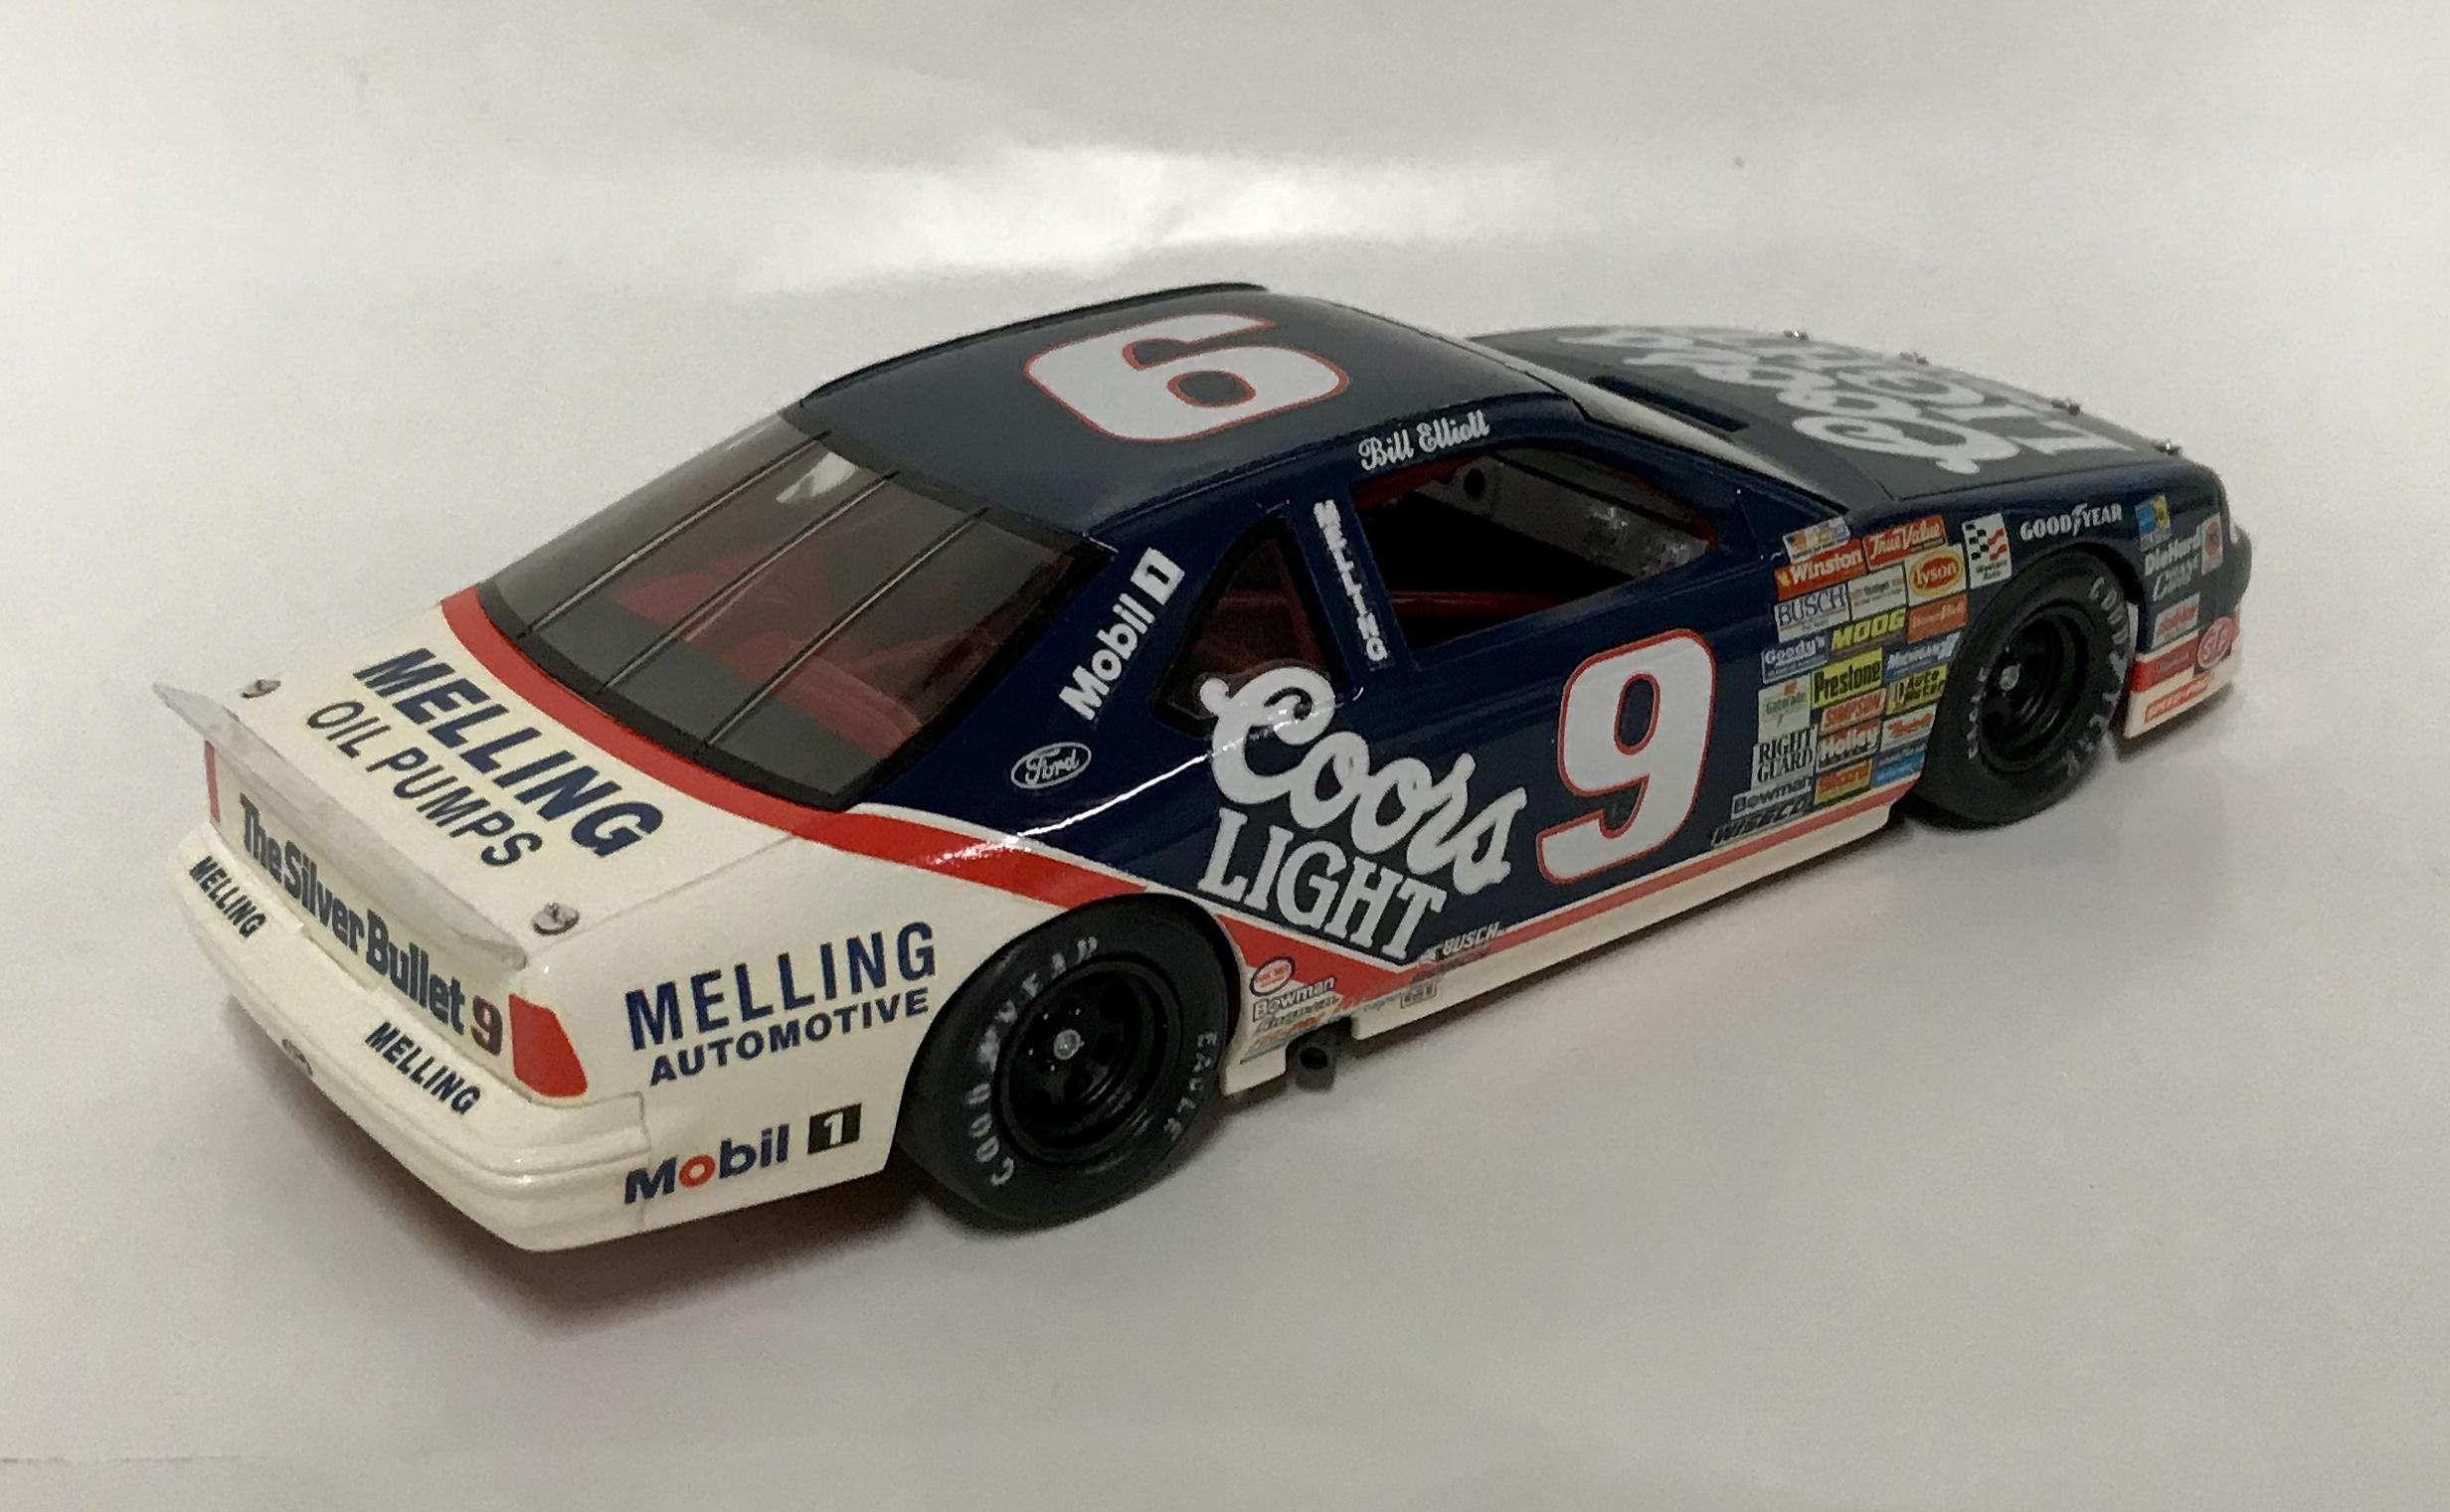
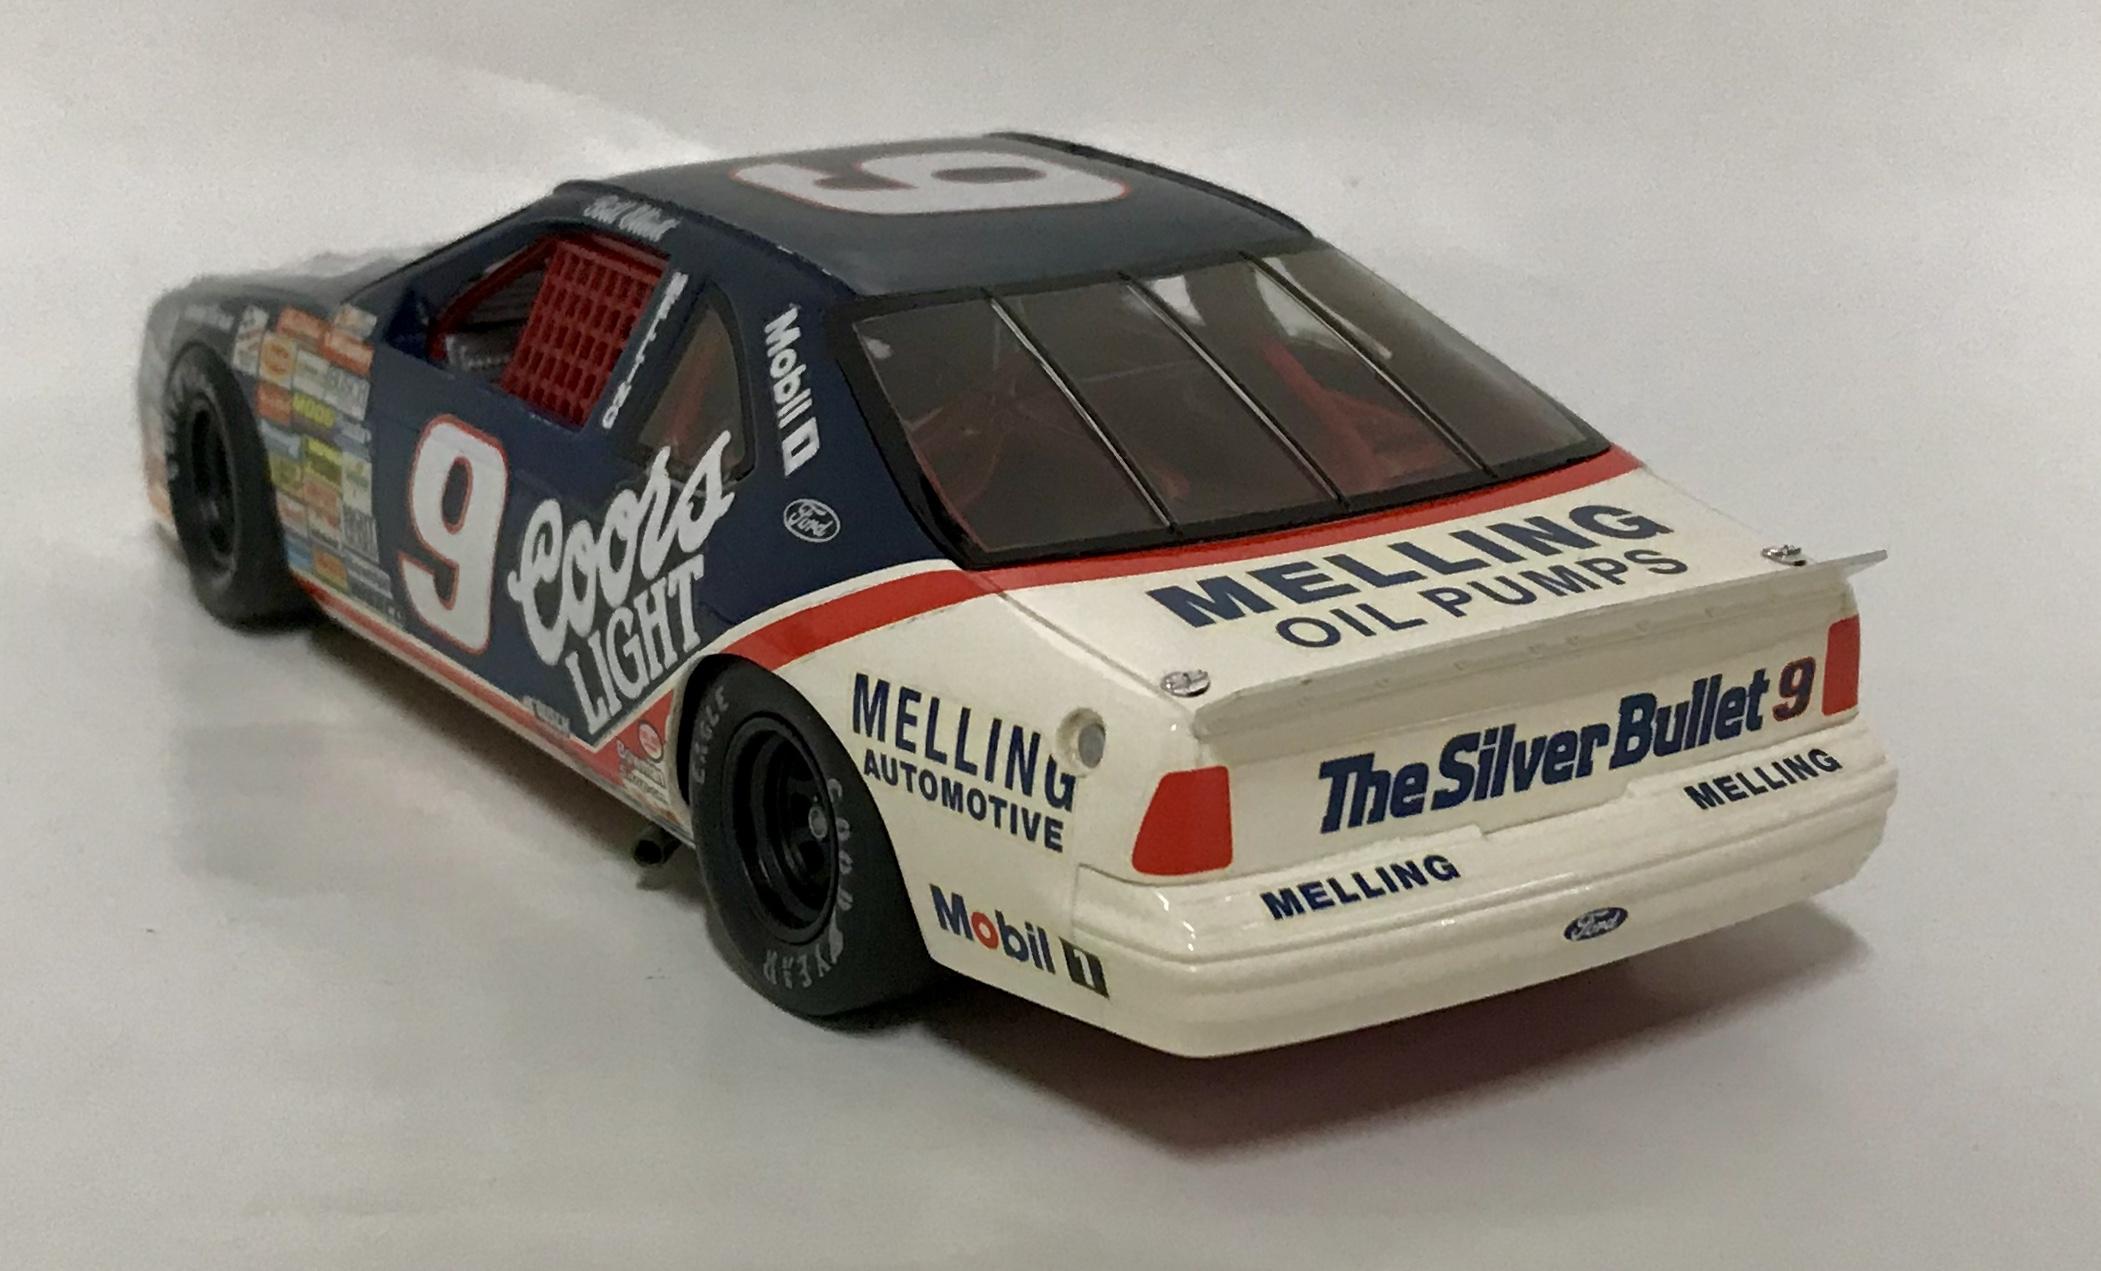
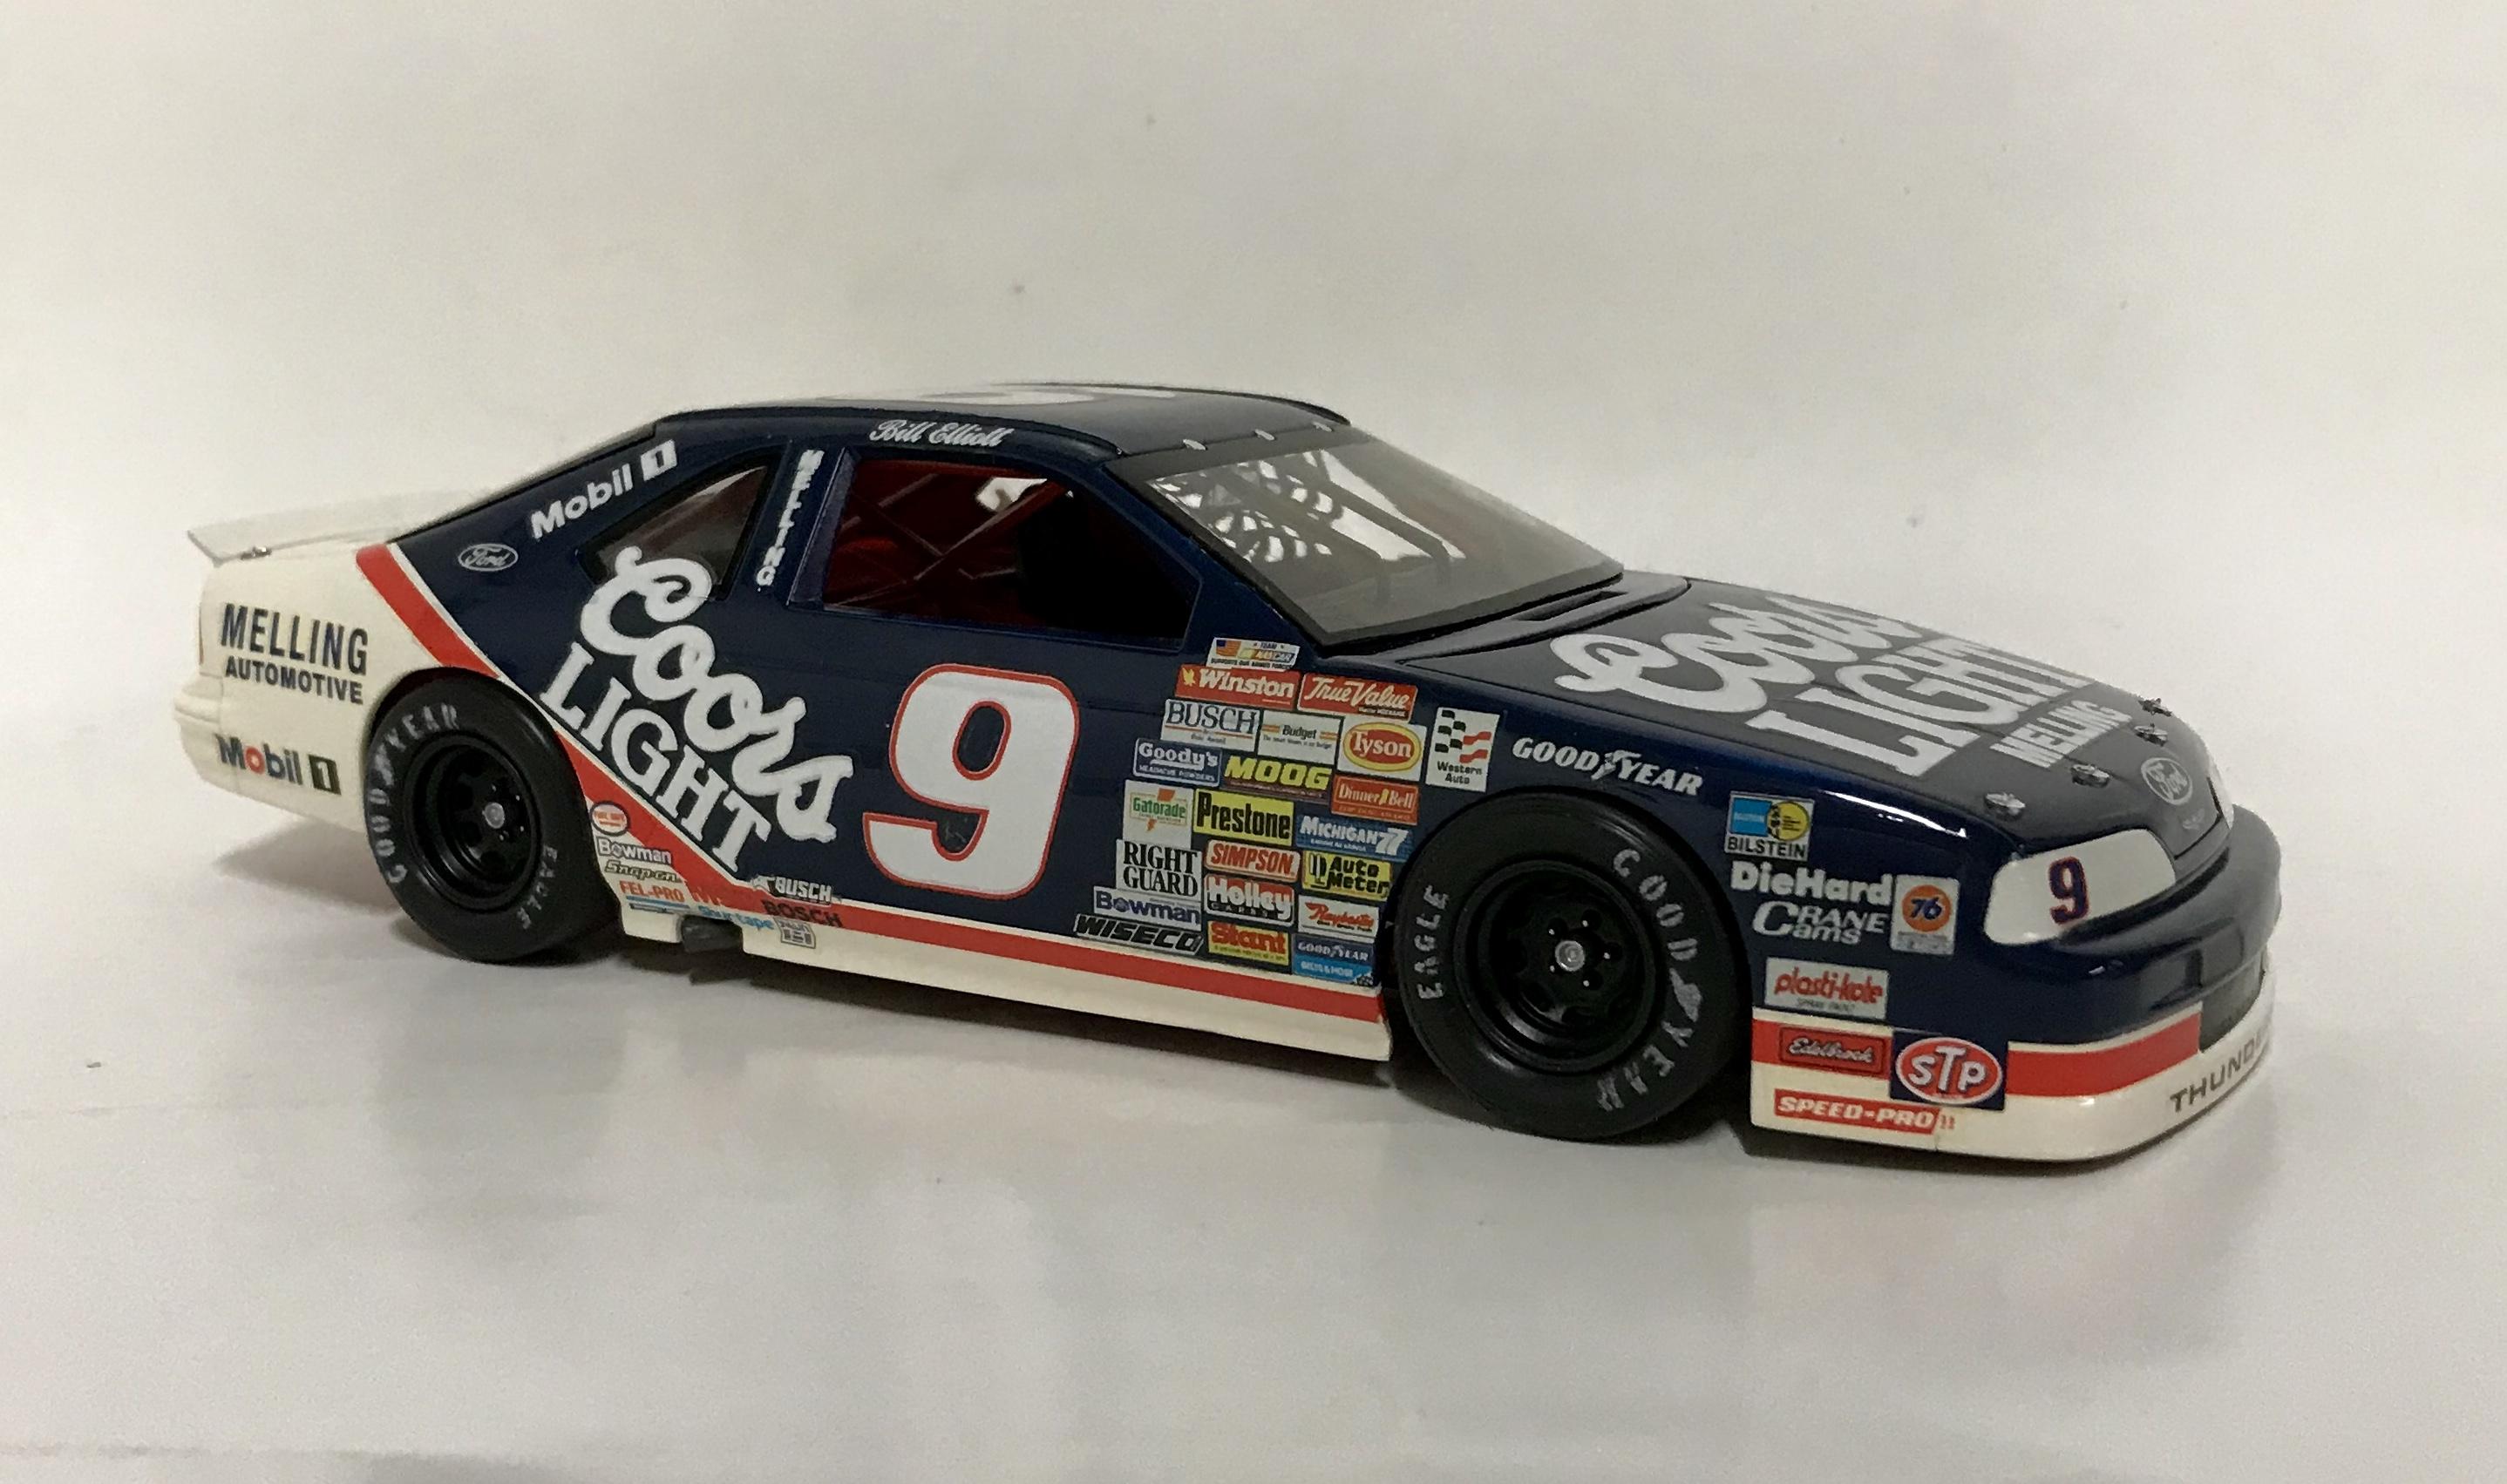
This is a fantasy build of the late great Fireball Roberts. I built this in 1990 and was my first win in a big model car contest, taking first place in the competition-NASCAR / open class in the Motorsports Models Challenge in Bristol, Tn on Dec. 8 1990.............. It was built box stock except for the GM nine hole wheels with Testors paint used exclusively. The decals are a mixture from Fred Cady JnJ, and a few select ones from the Peak Pontiac kit. It’s been sitting in it’s box without any attention for quiet awhile, so I decided to post some photos of it on the 30th anniversary of it’s big win. I think it still looks pretty good. Thanks for looking....
-
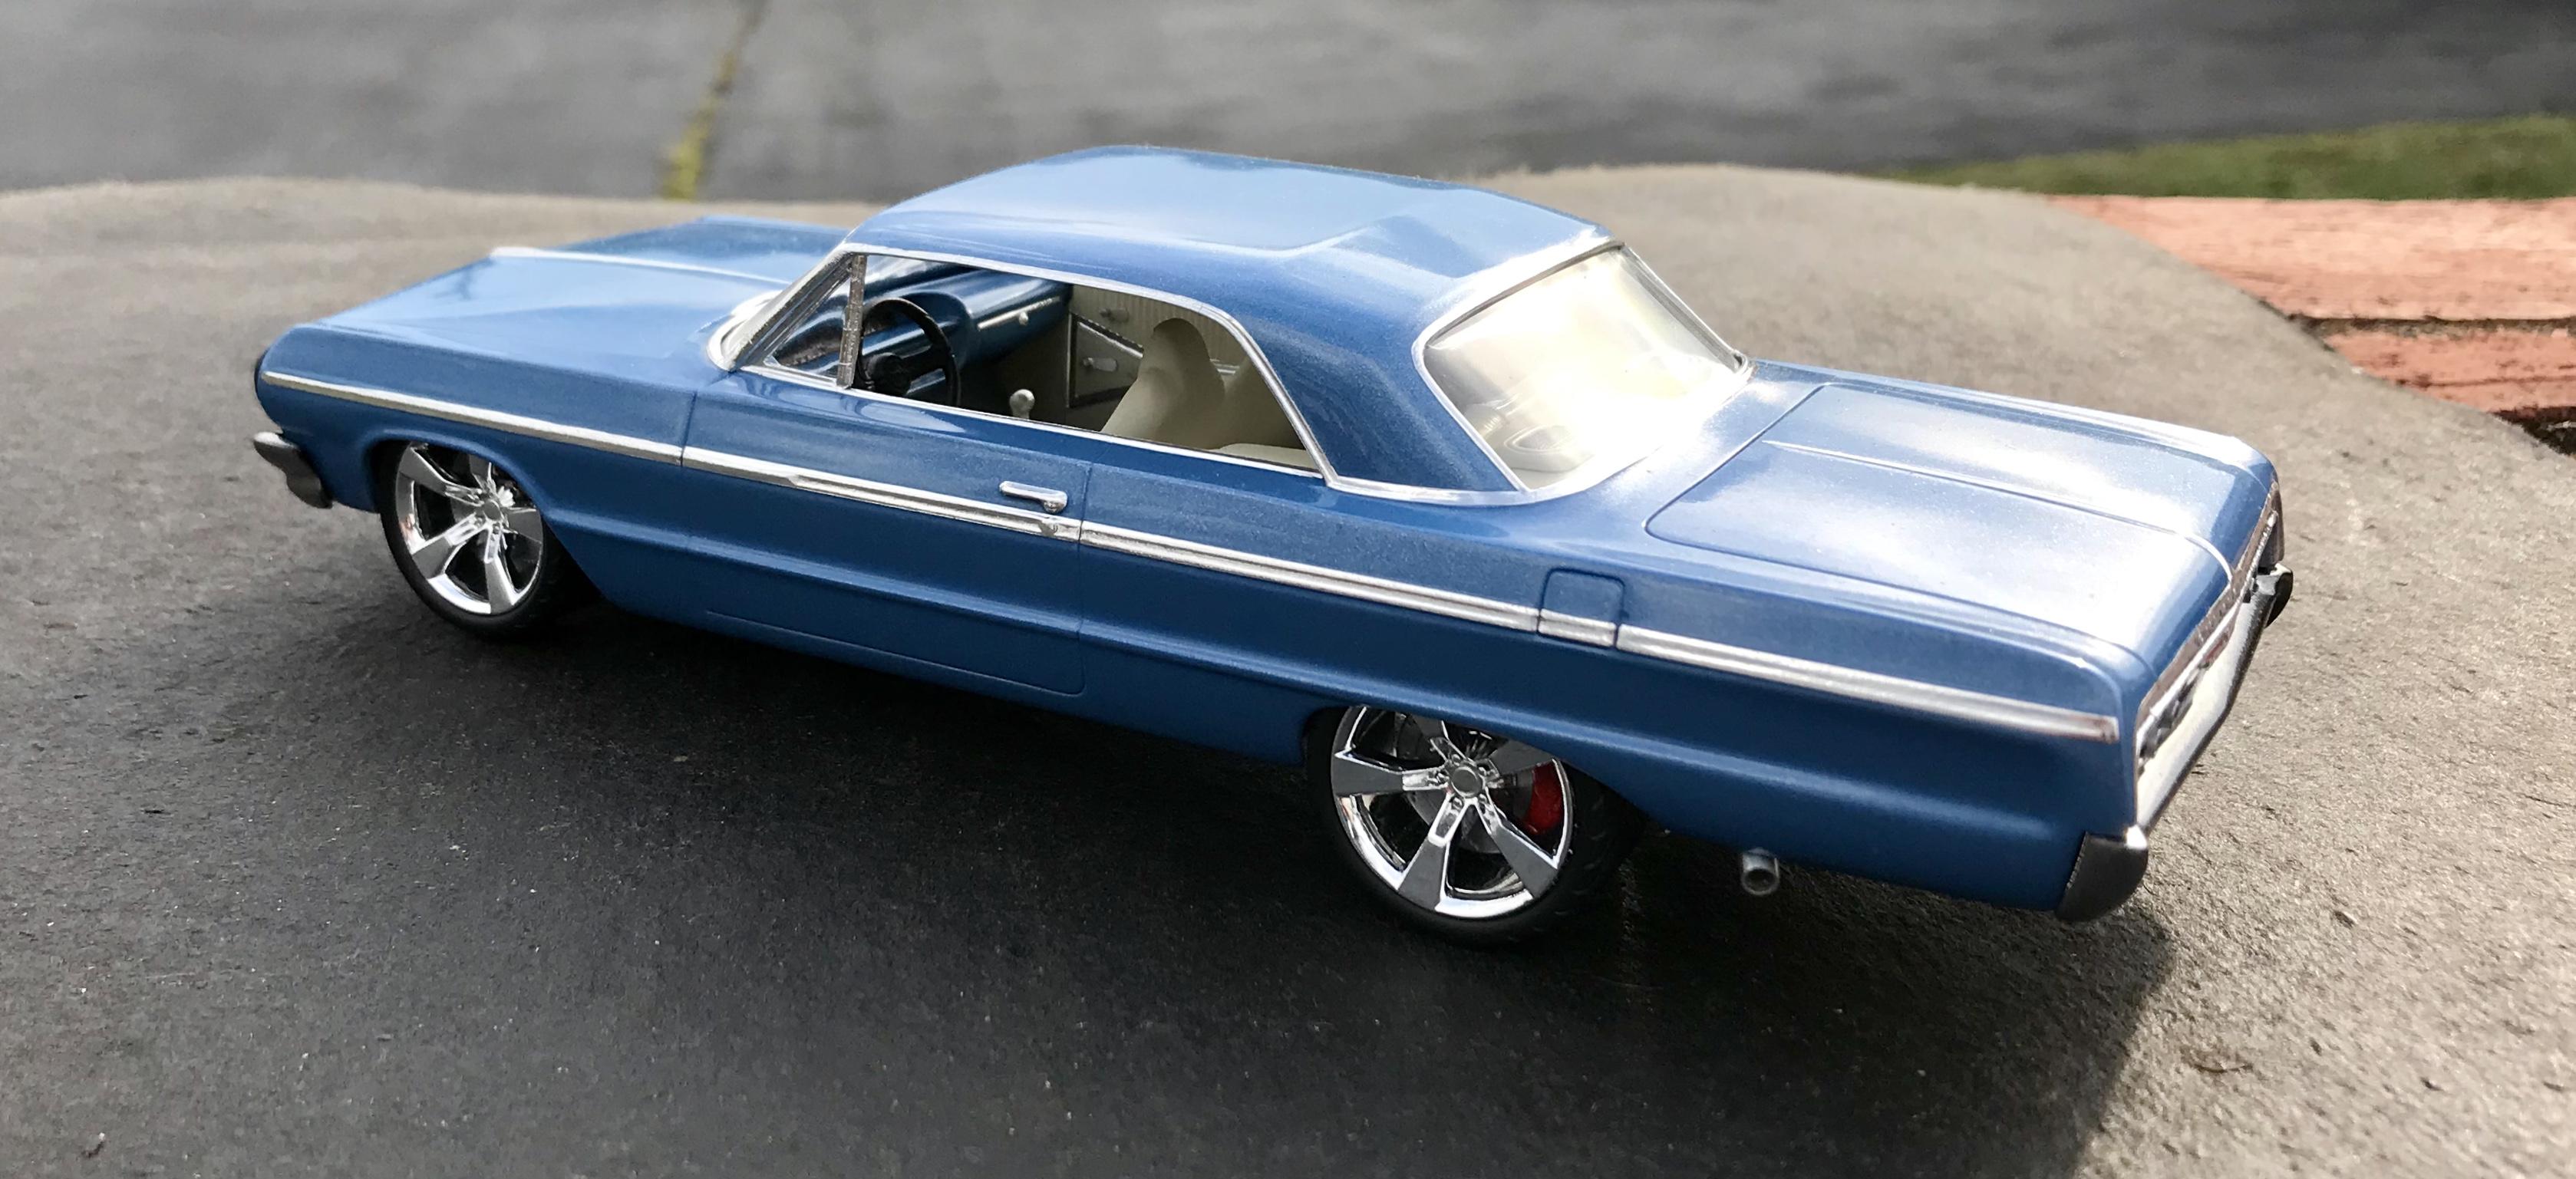
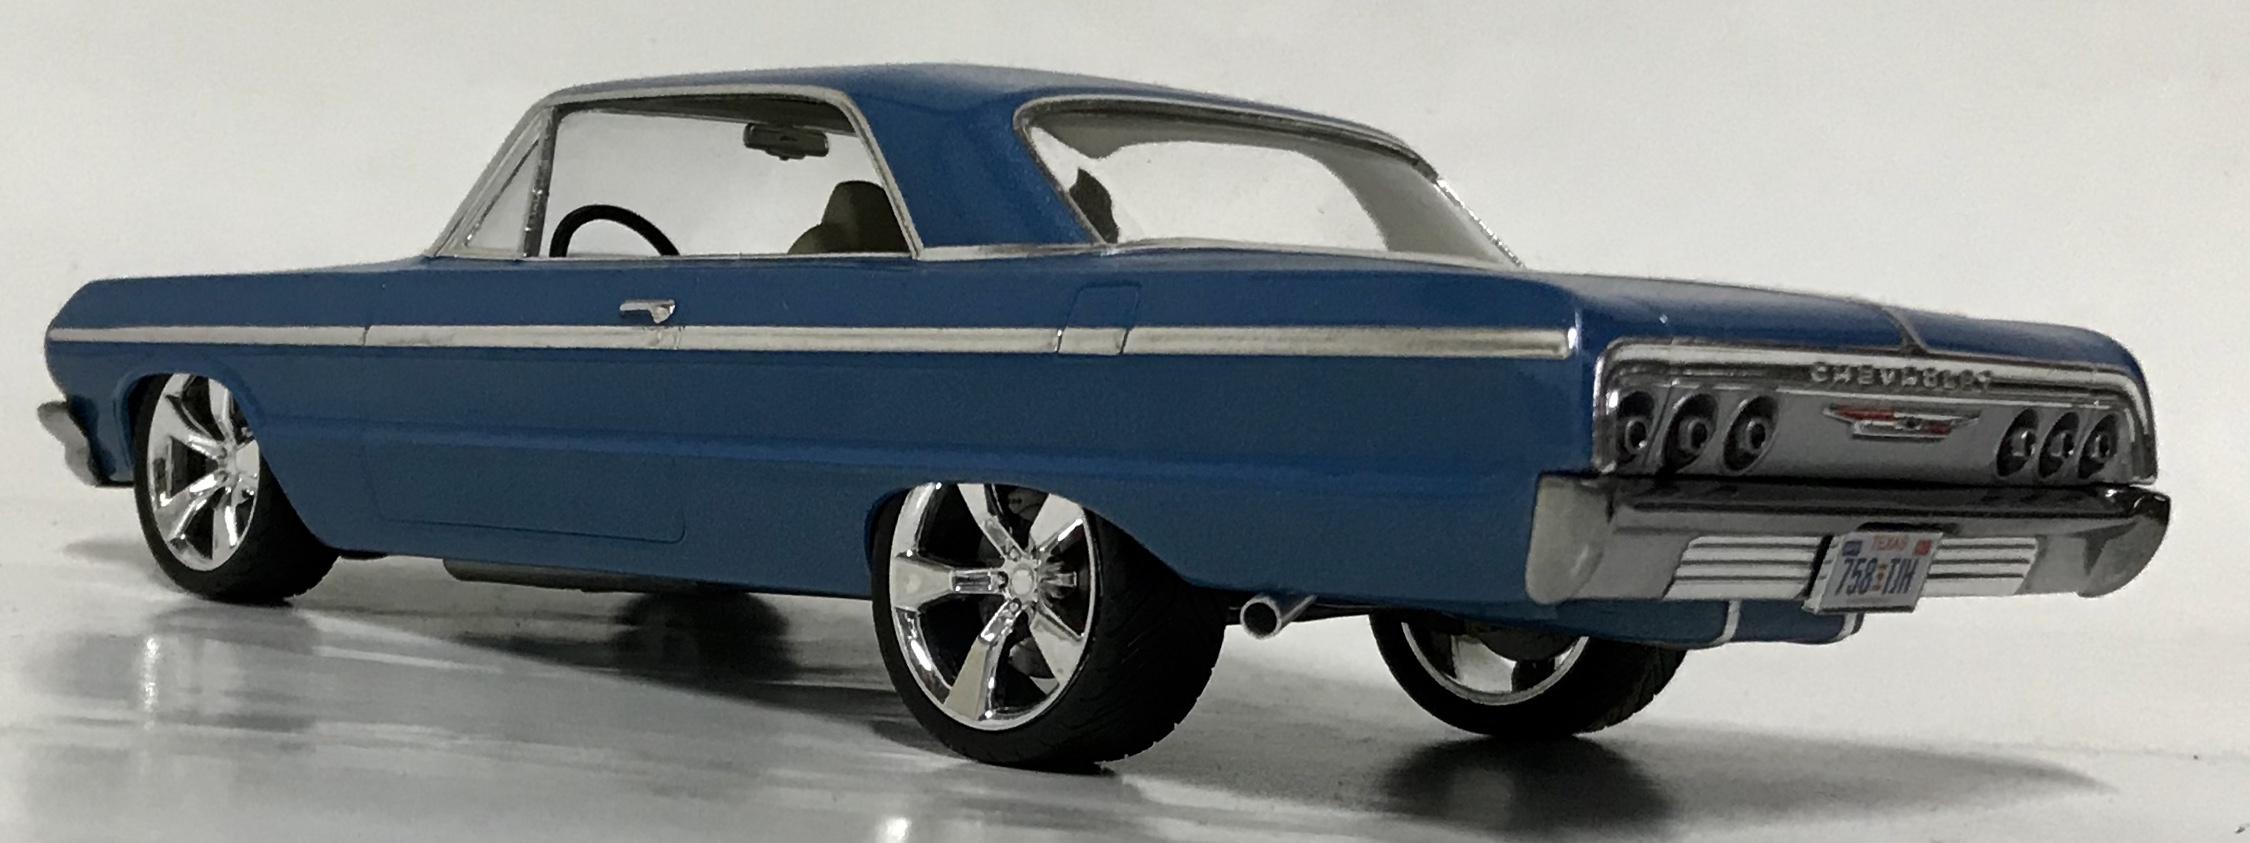
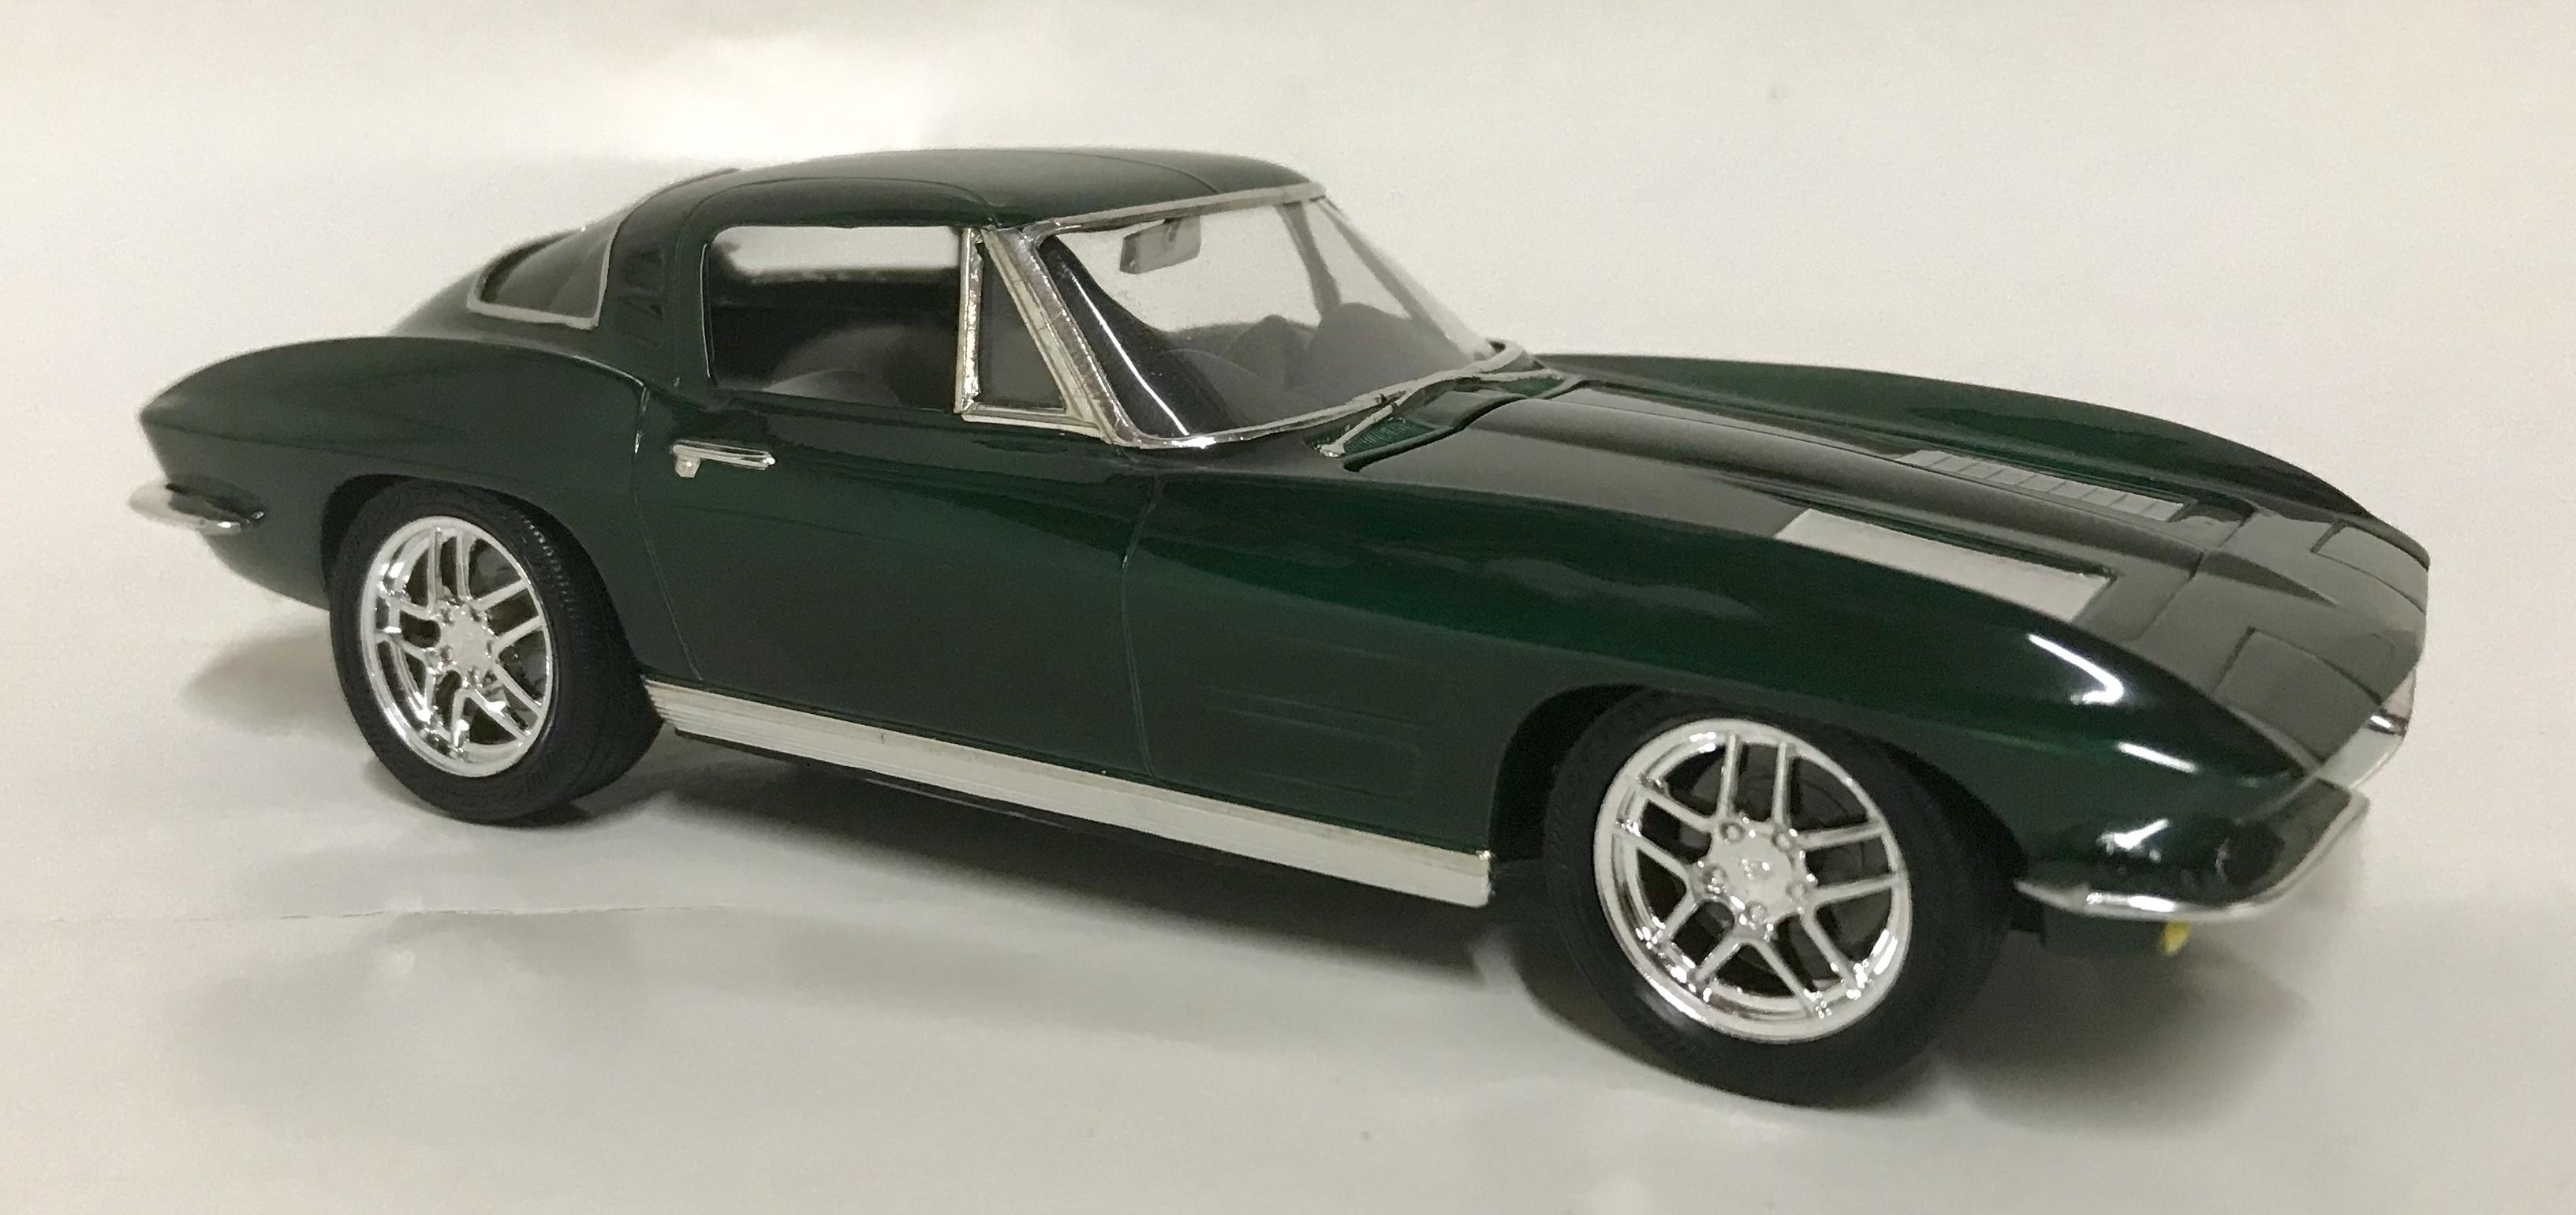
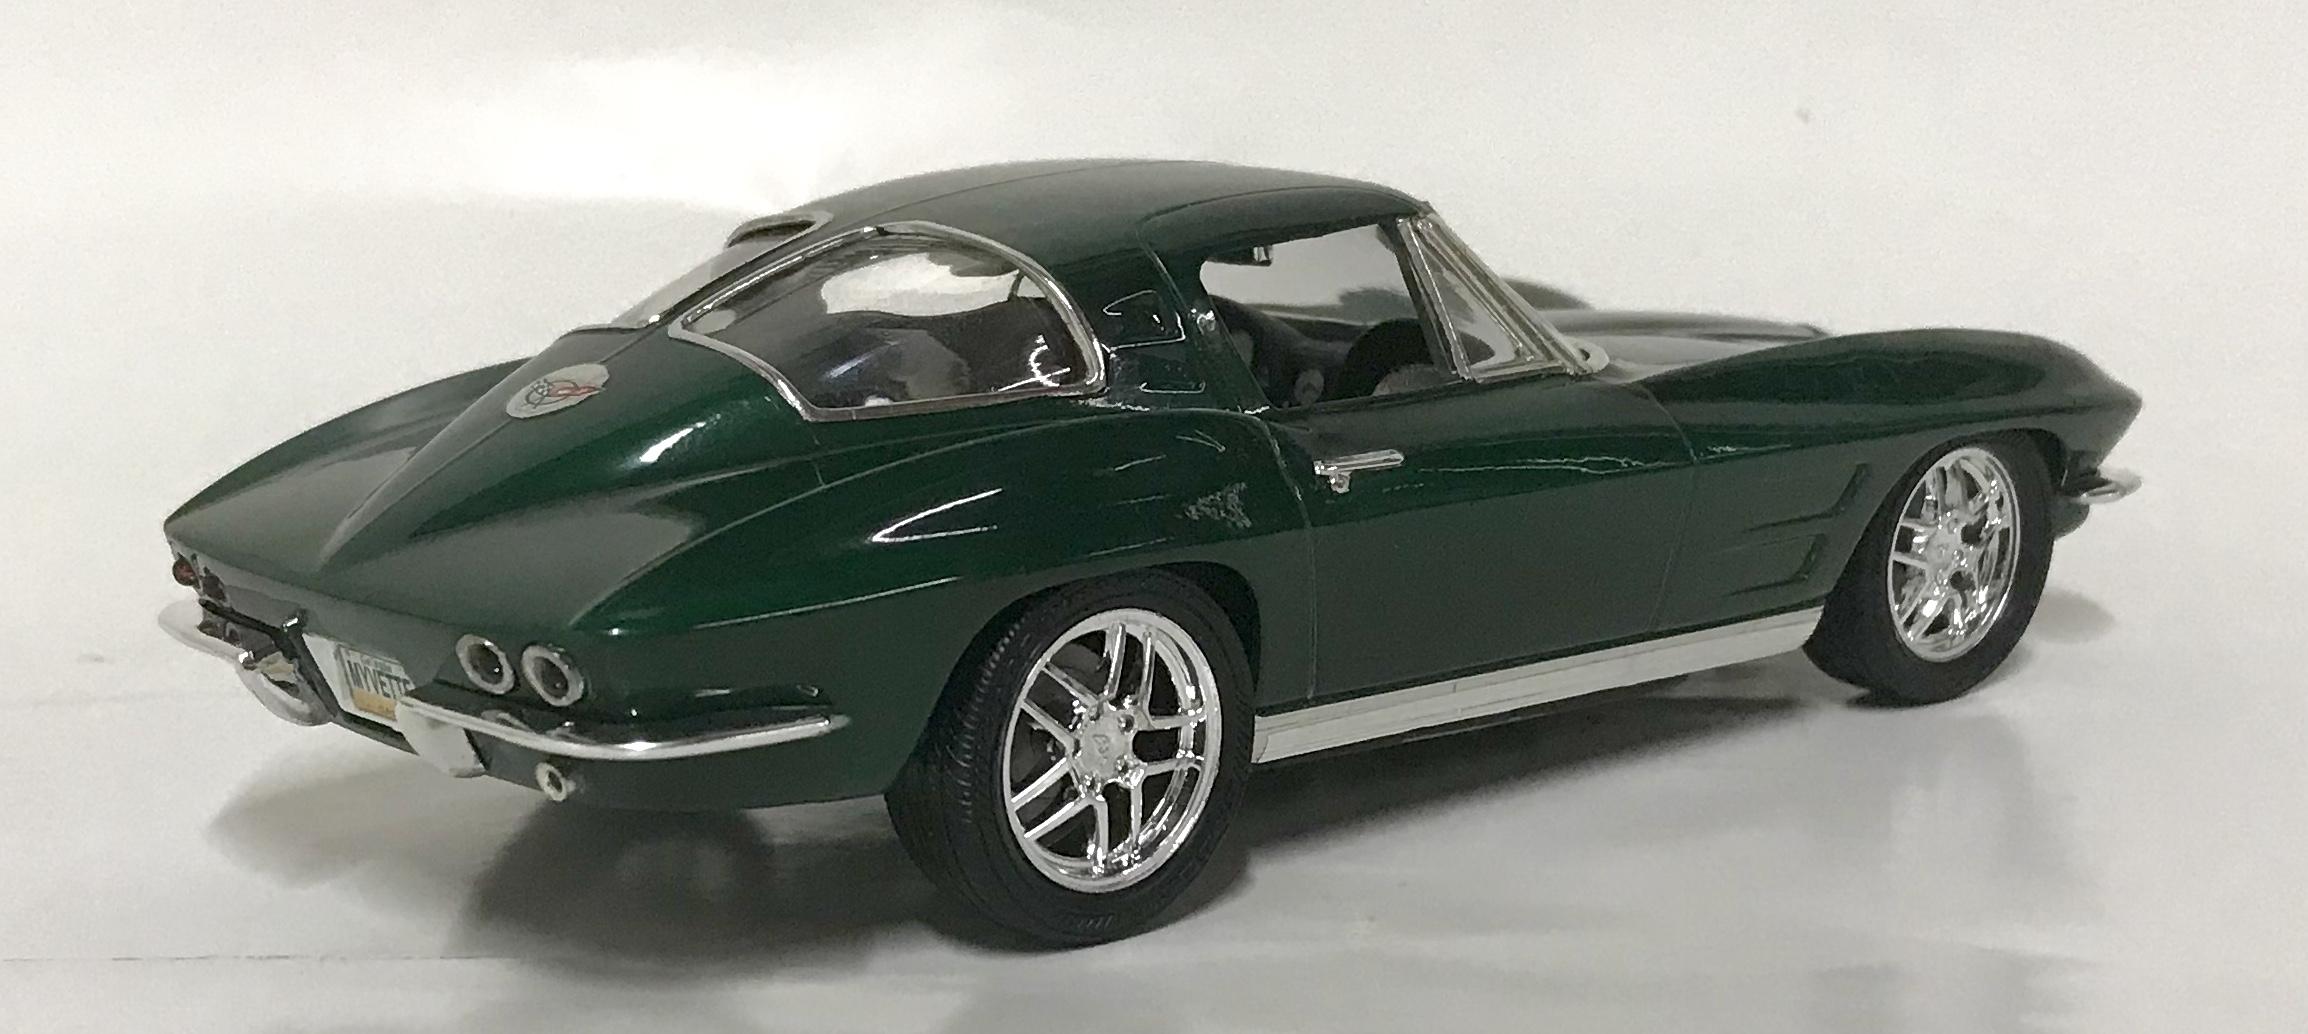
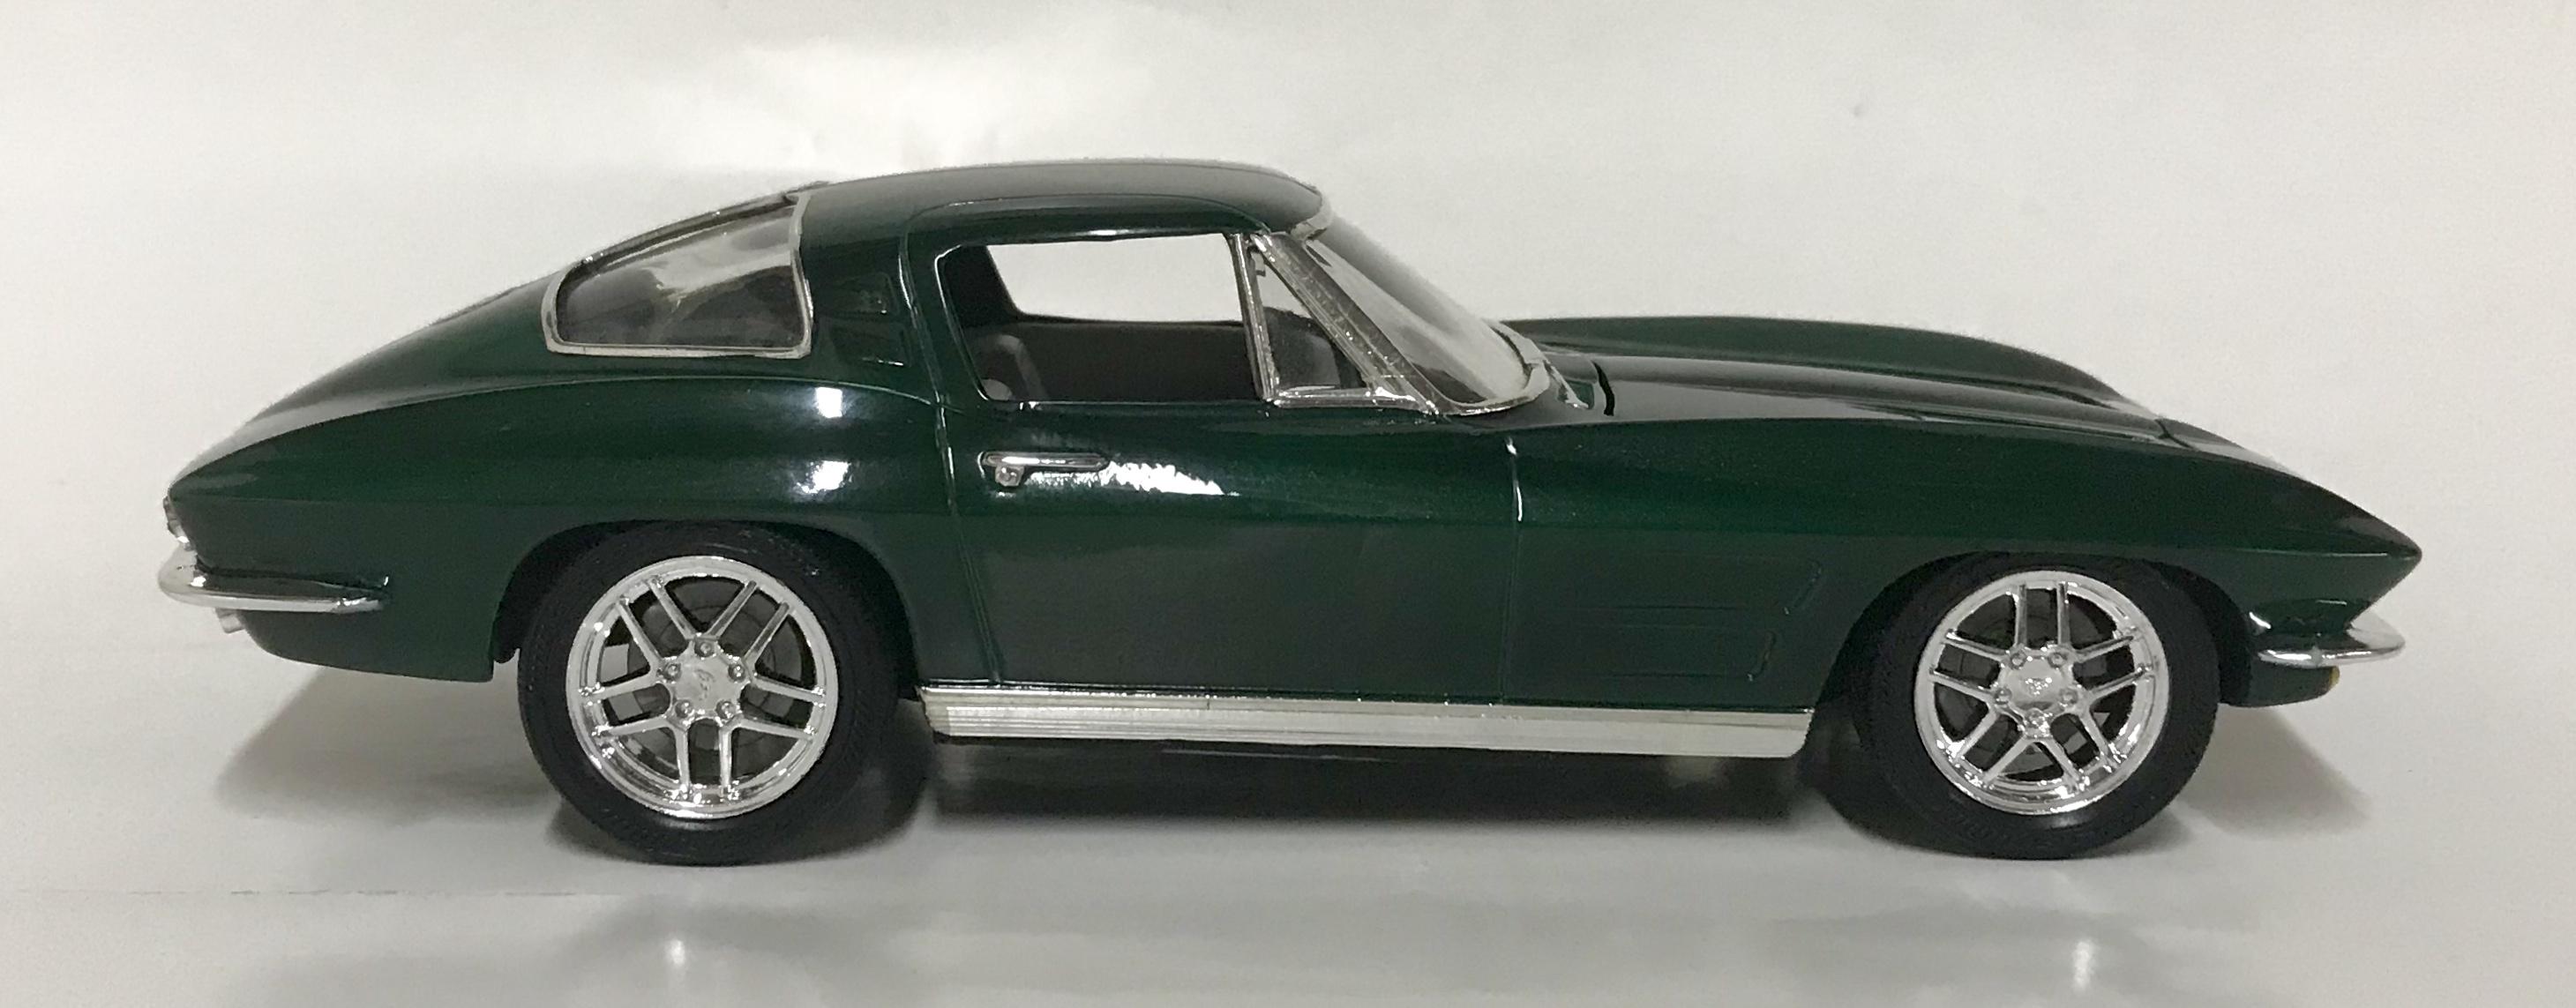
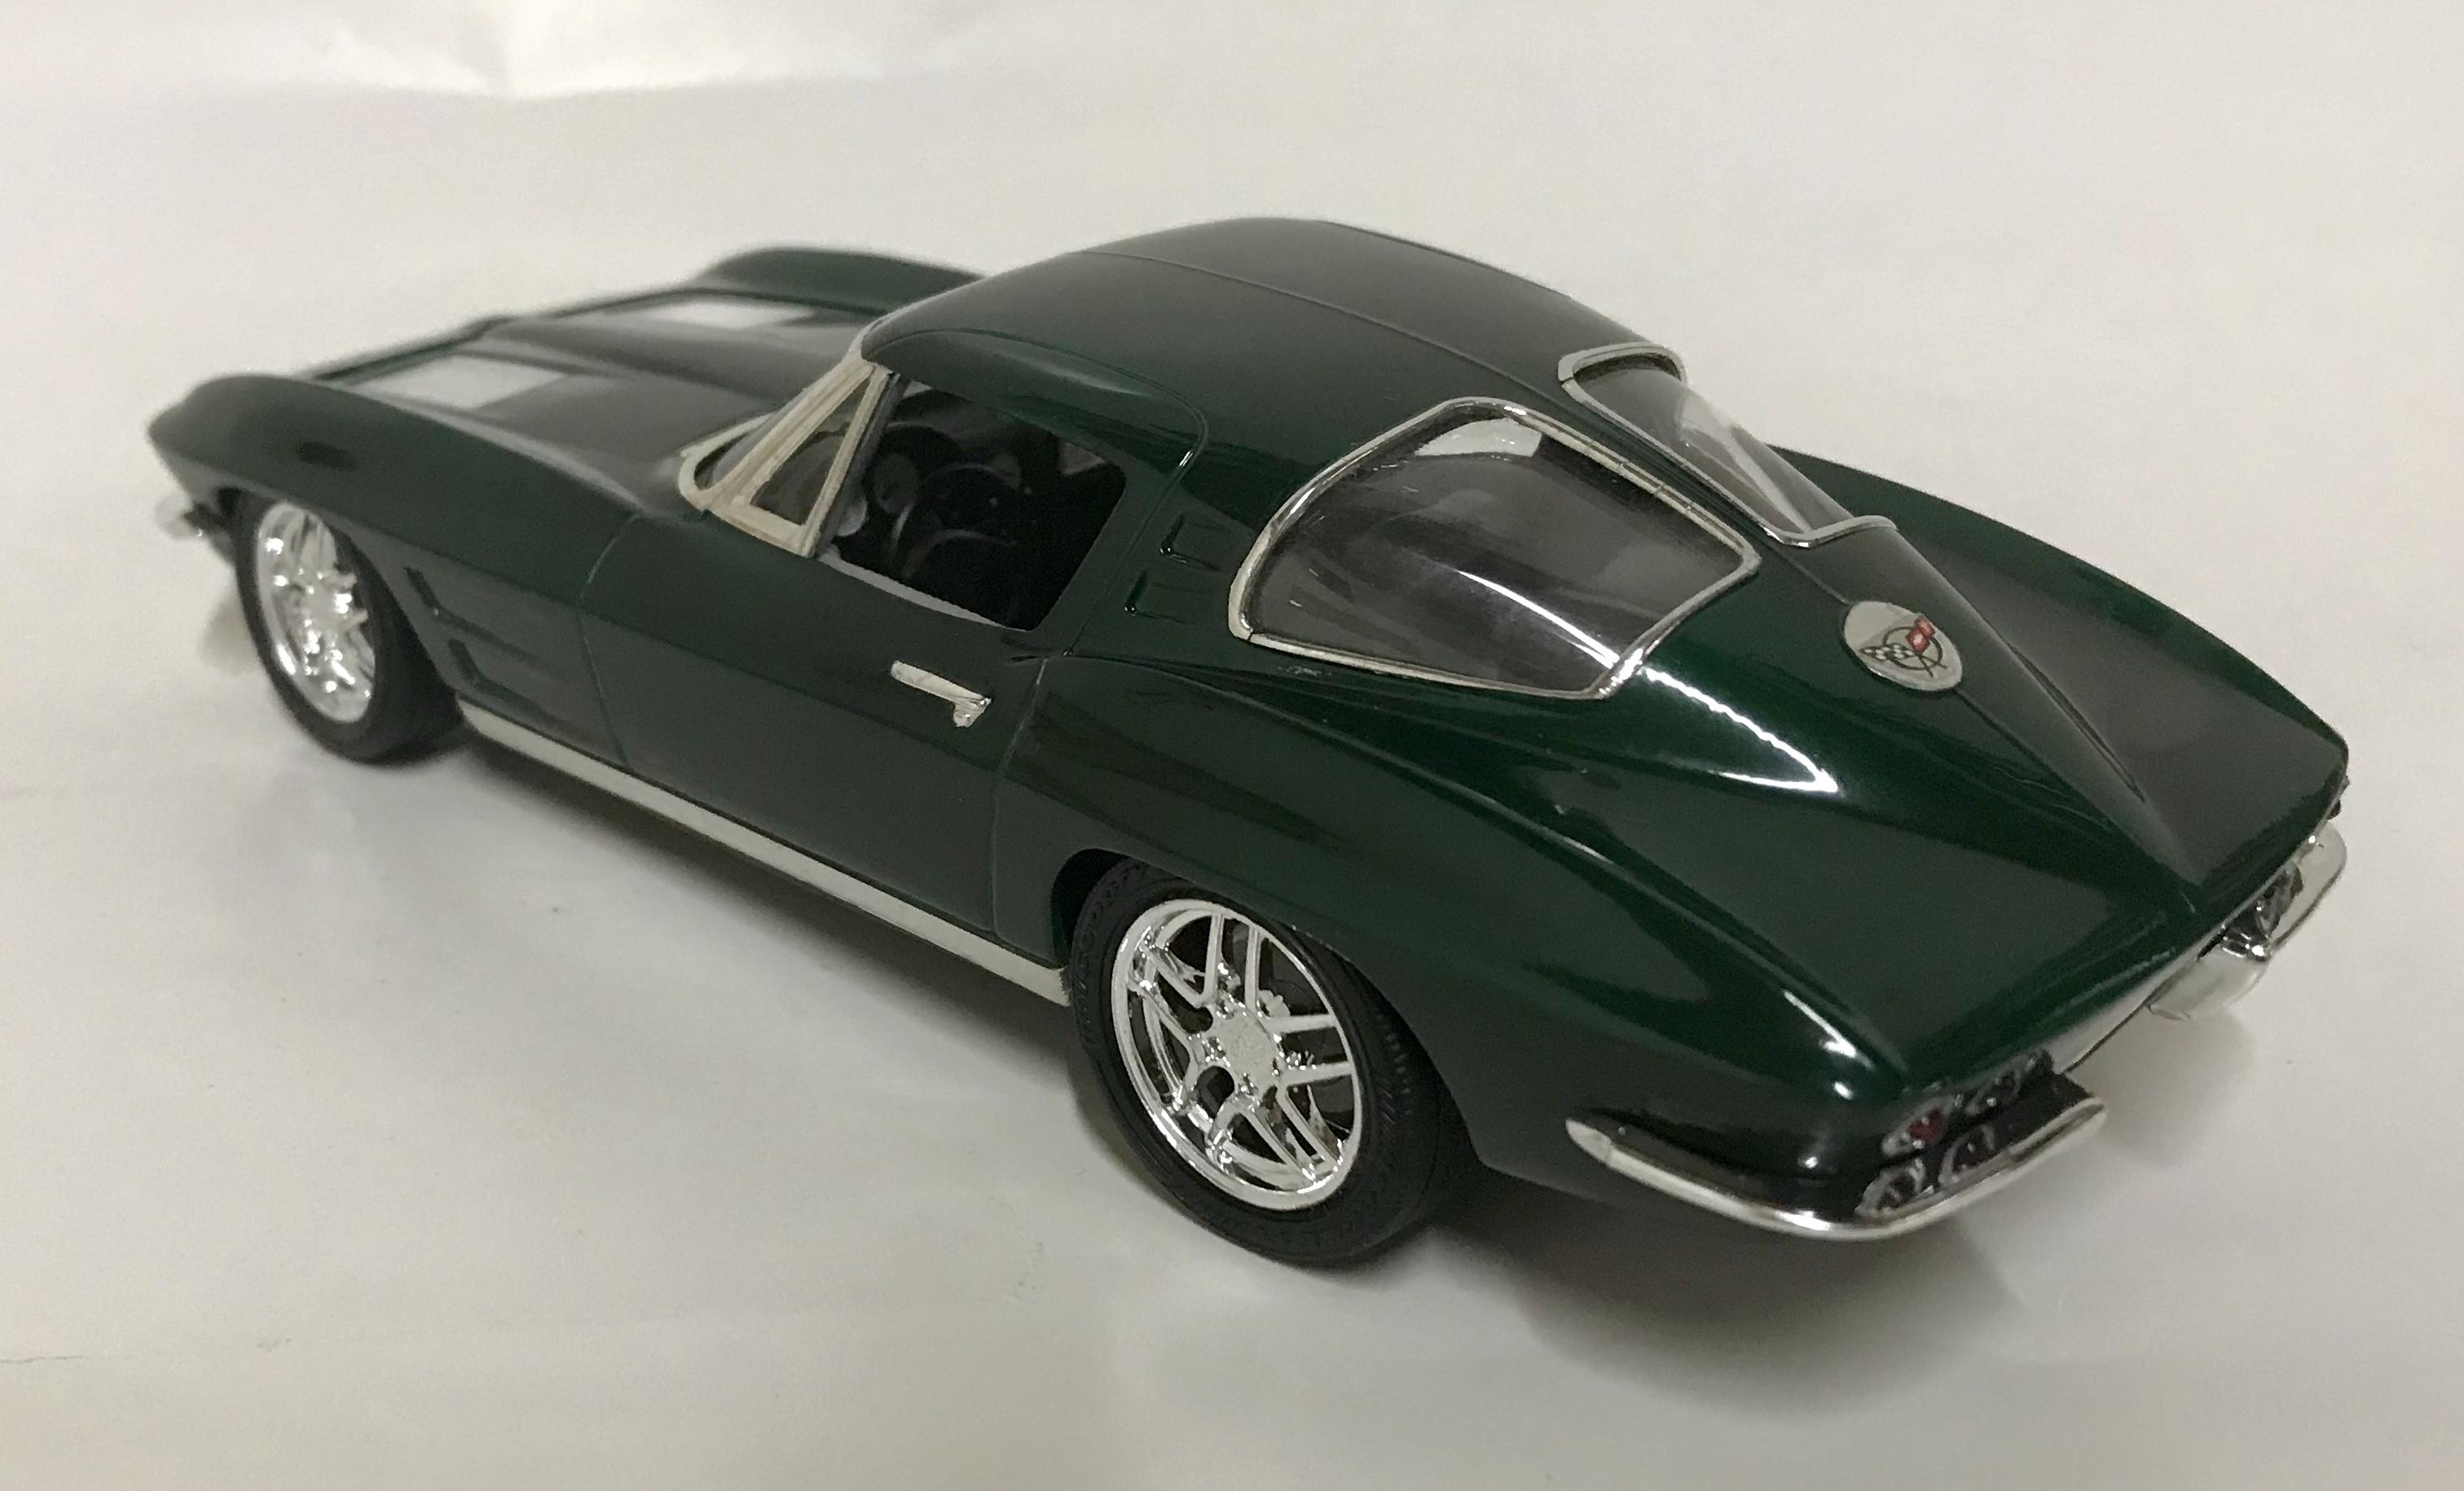
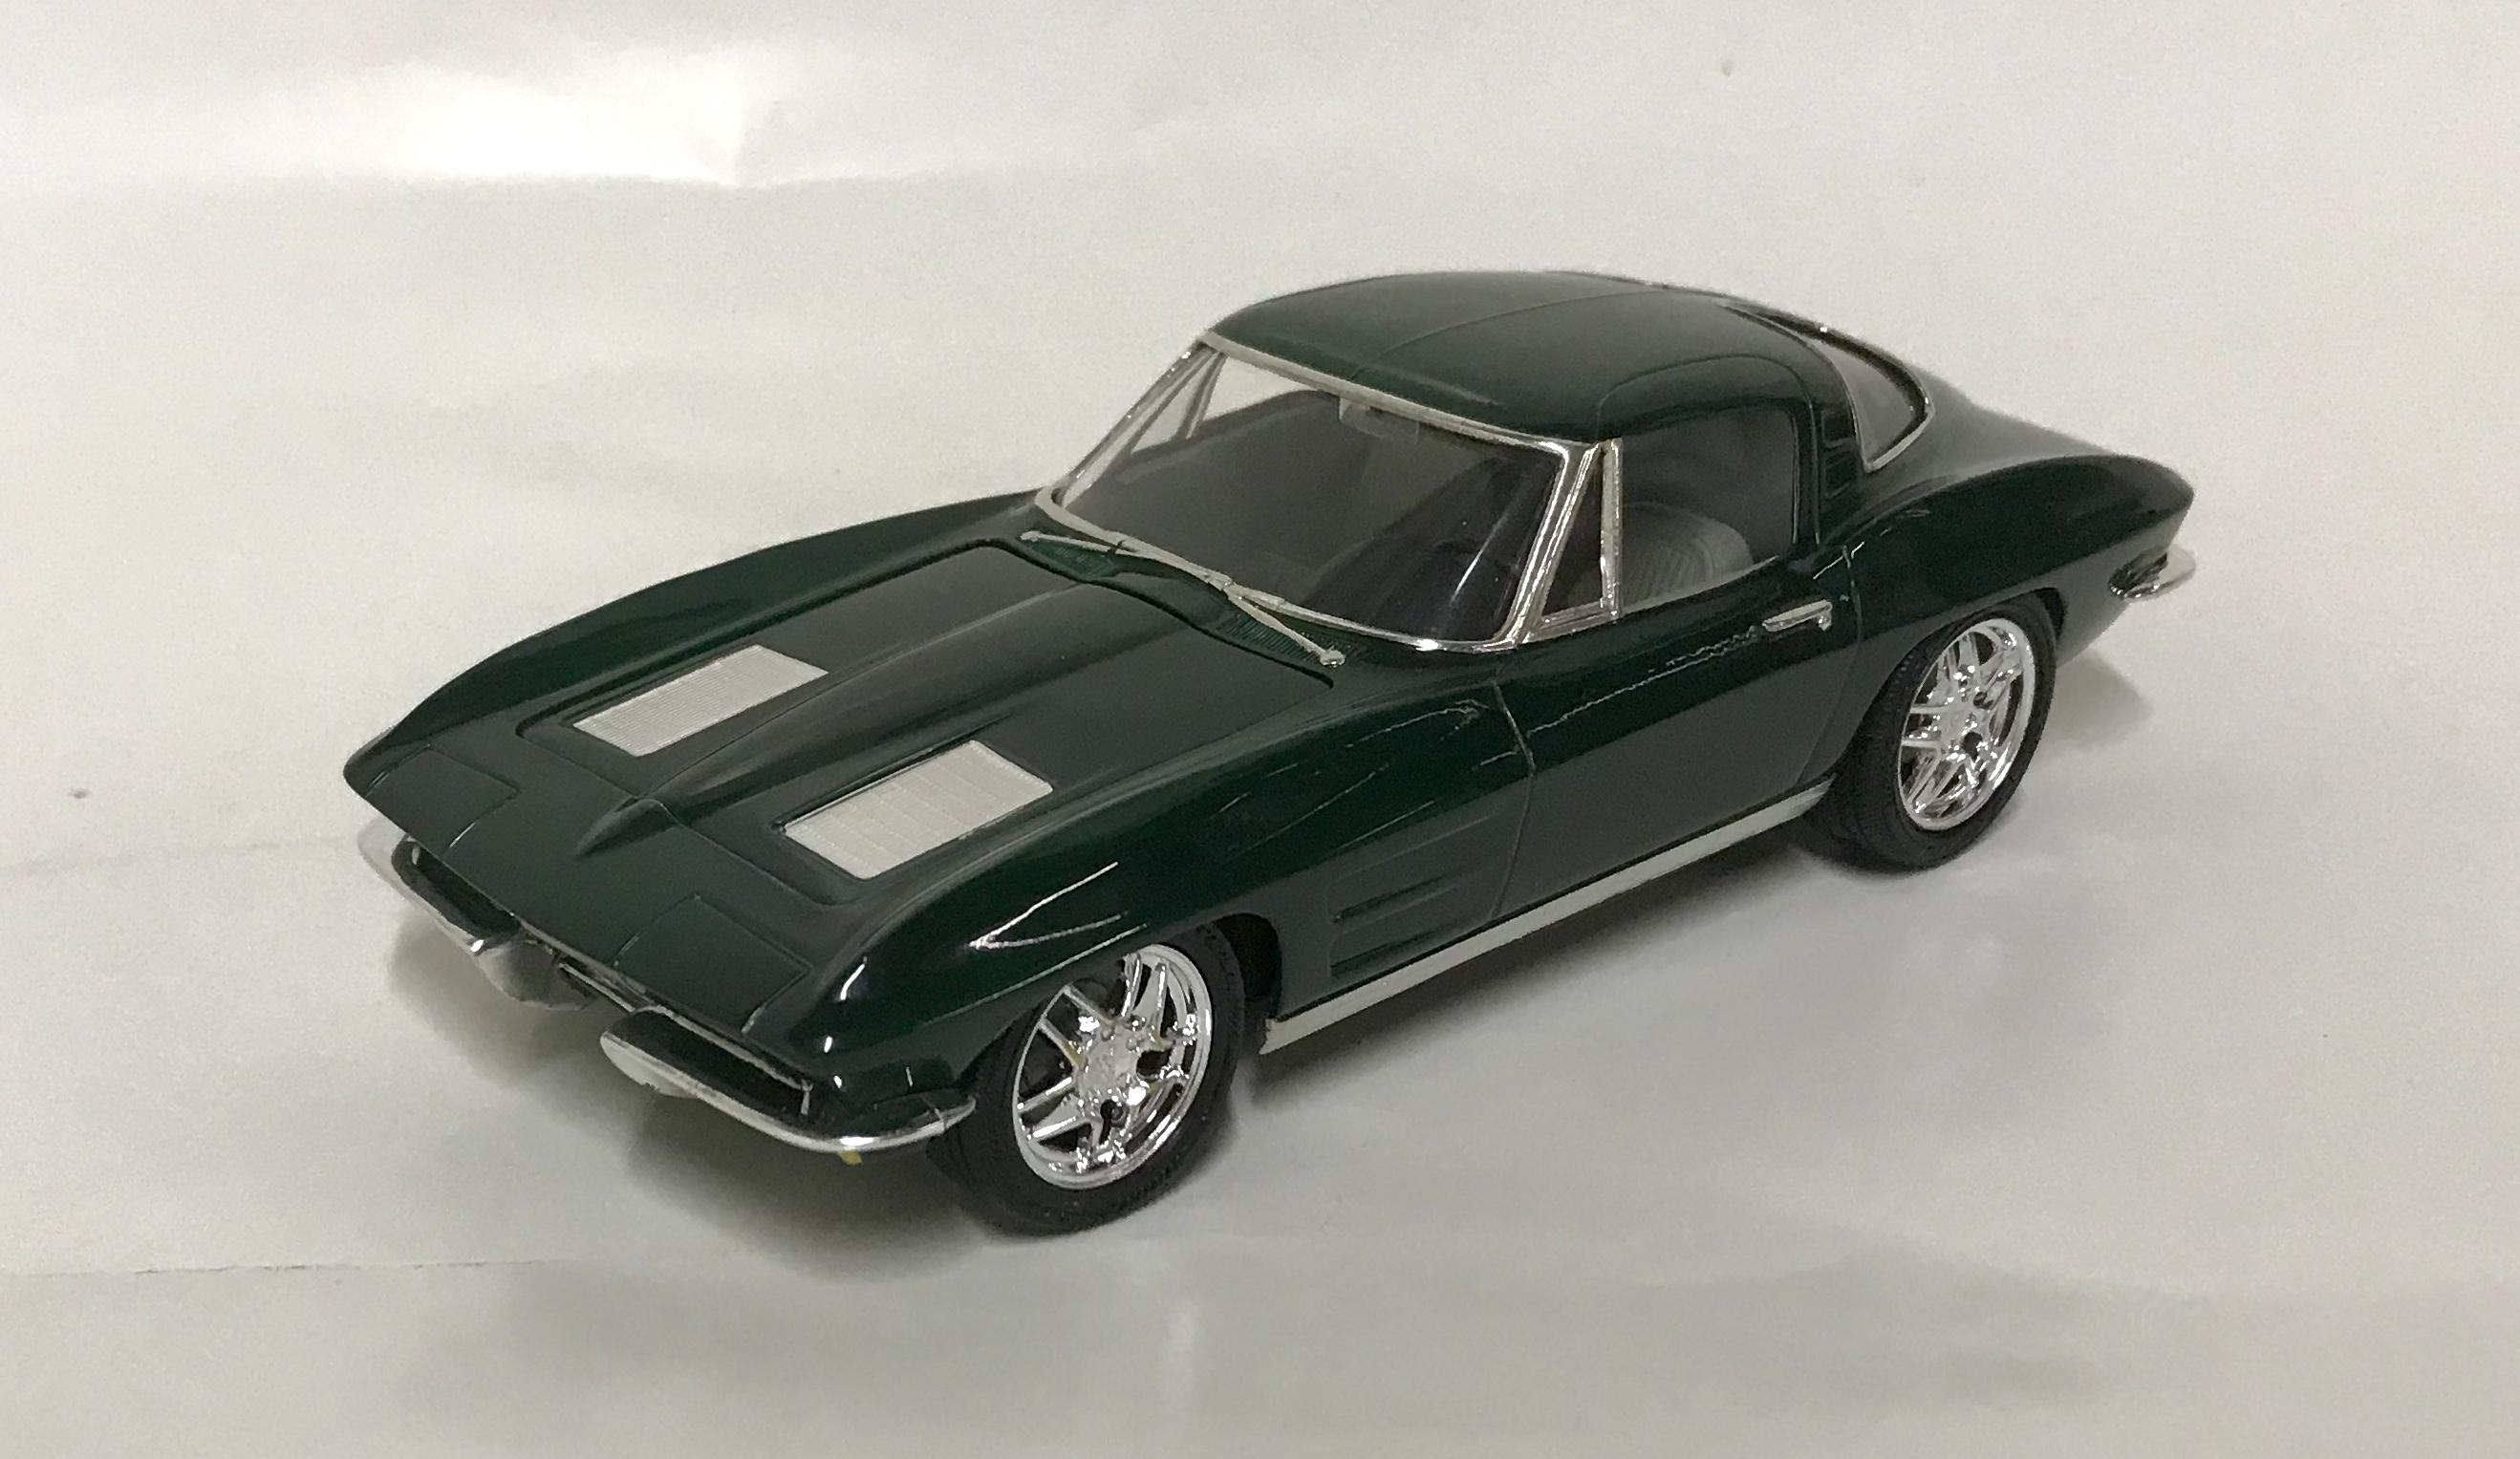
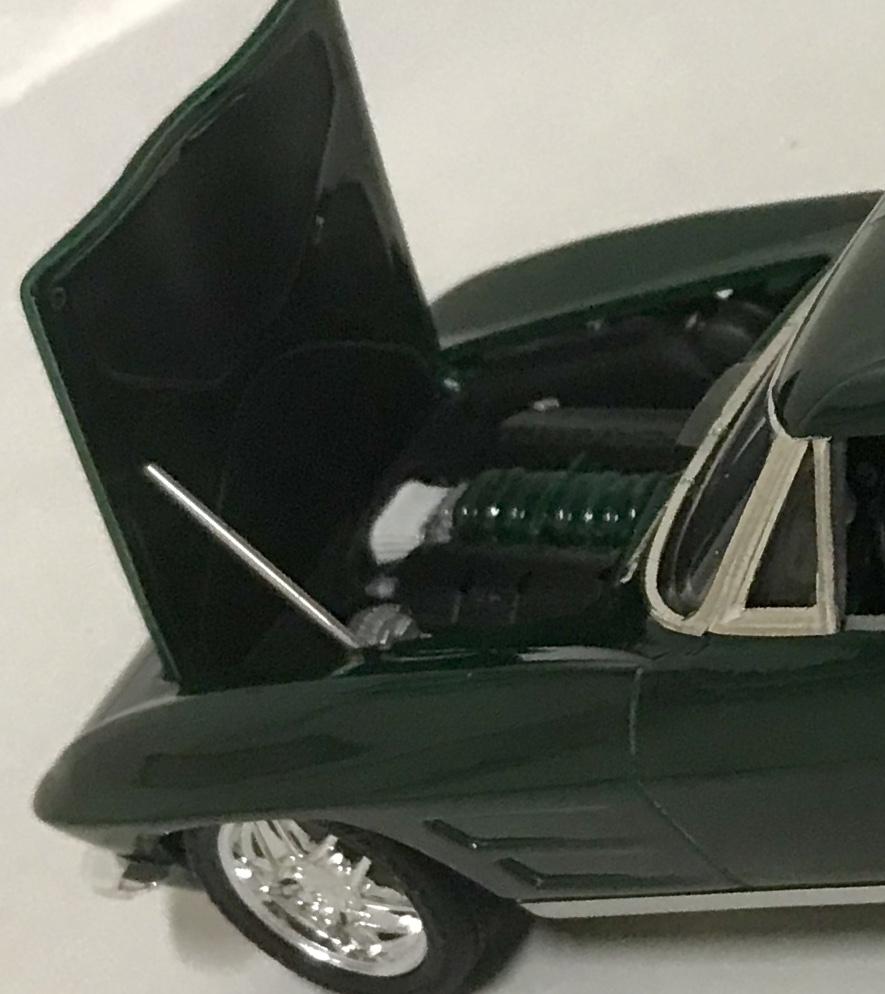
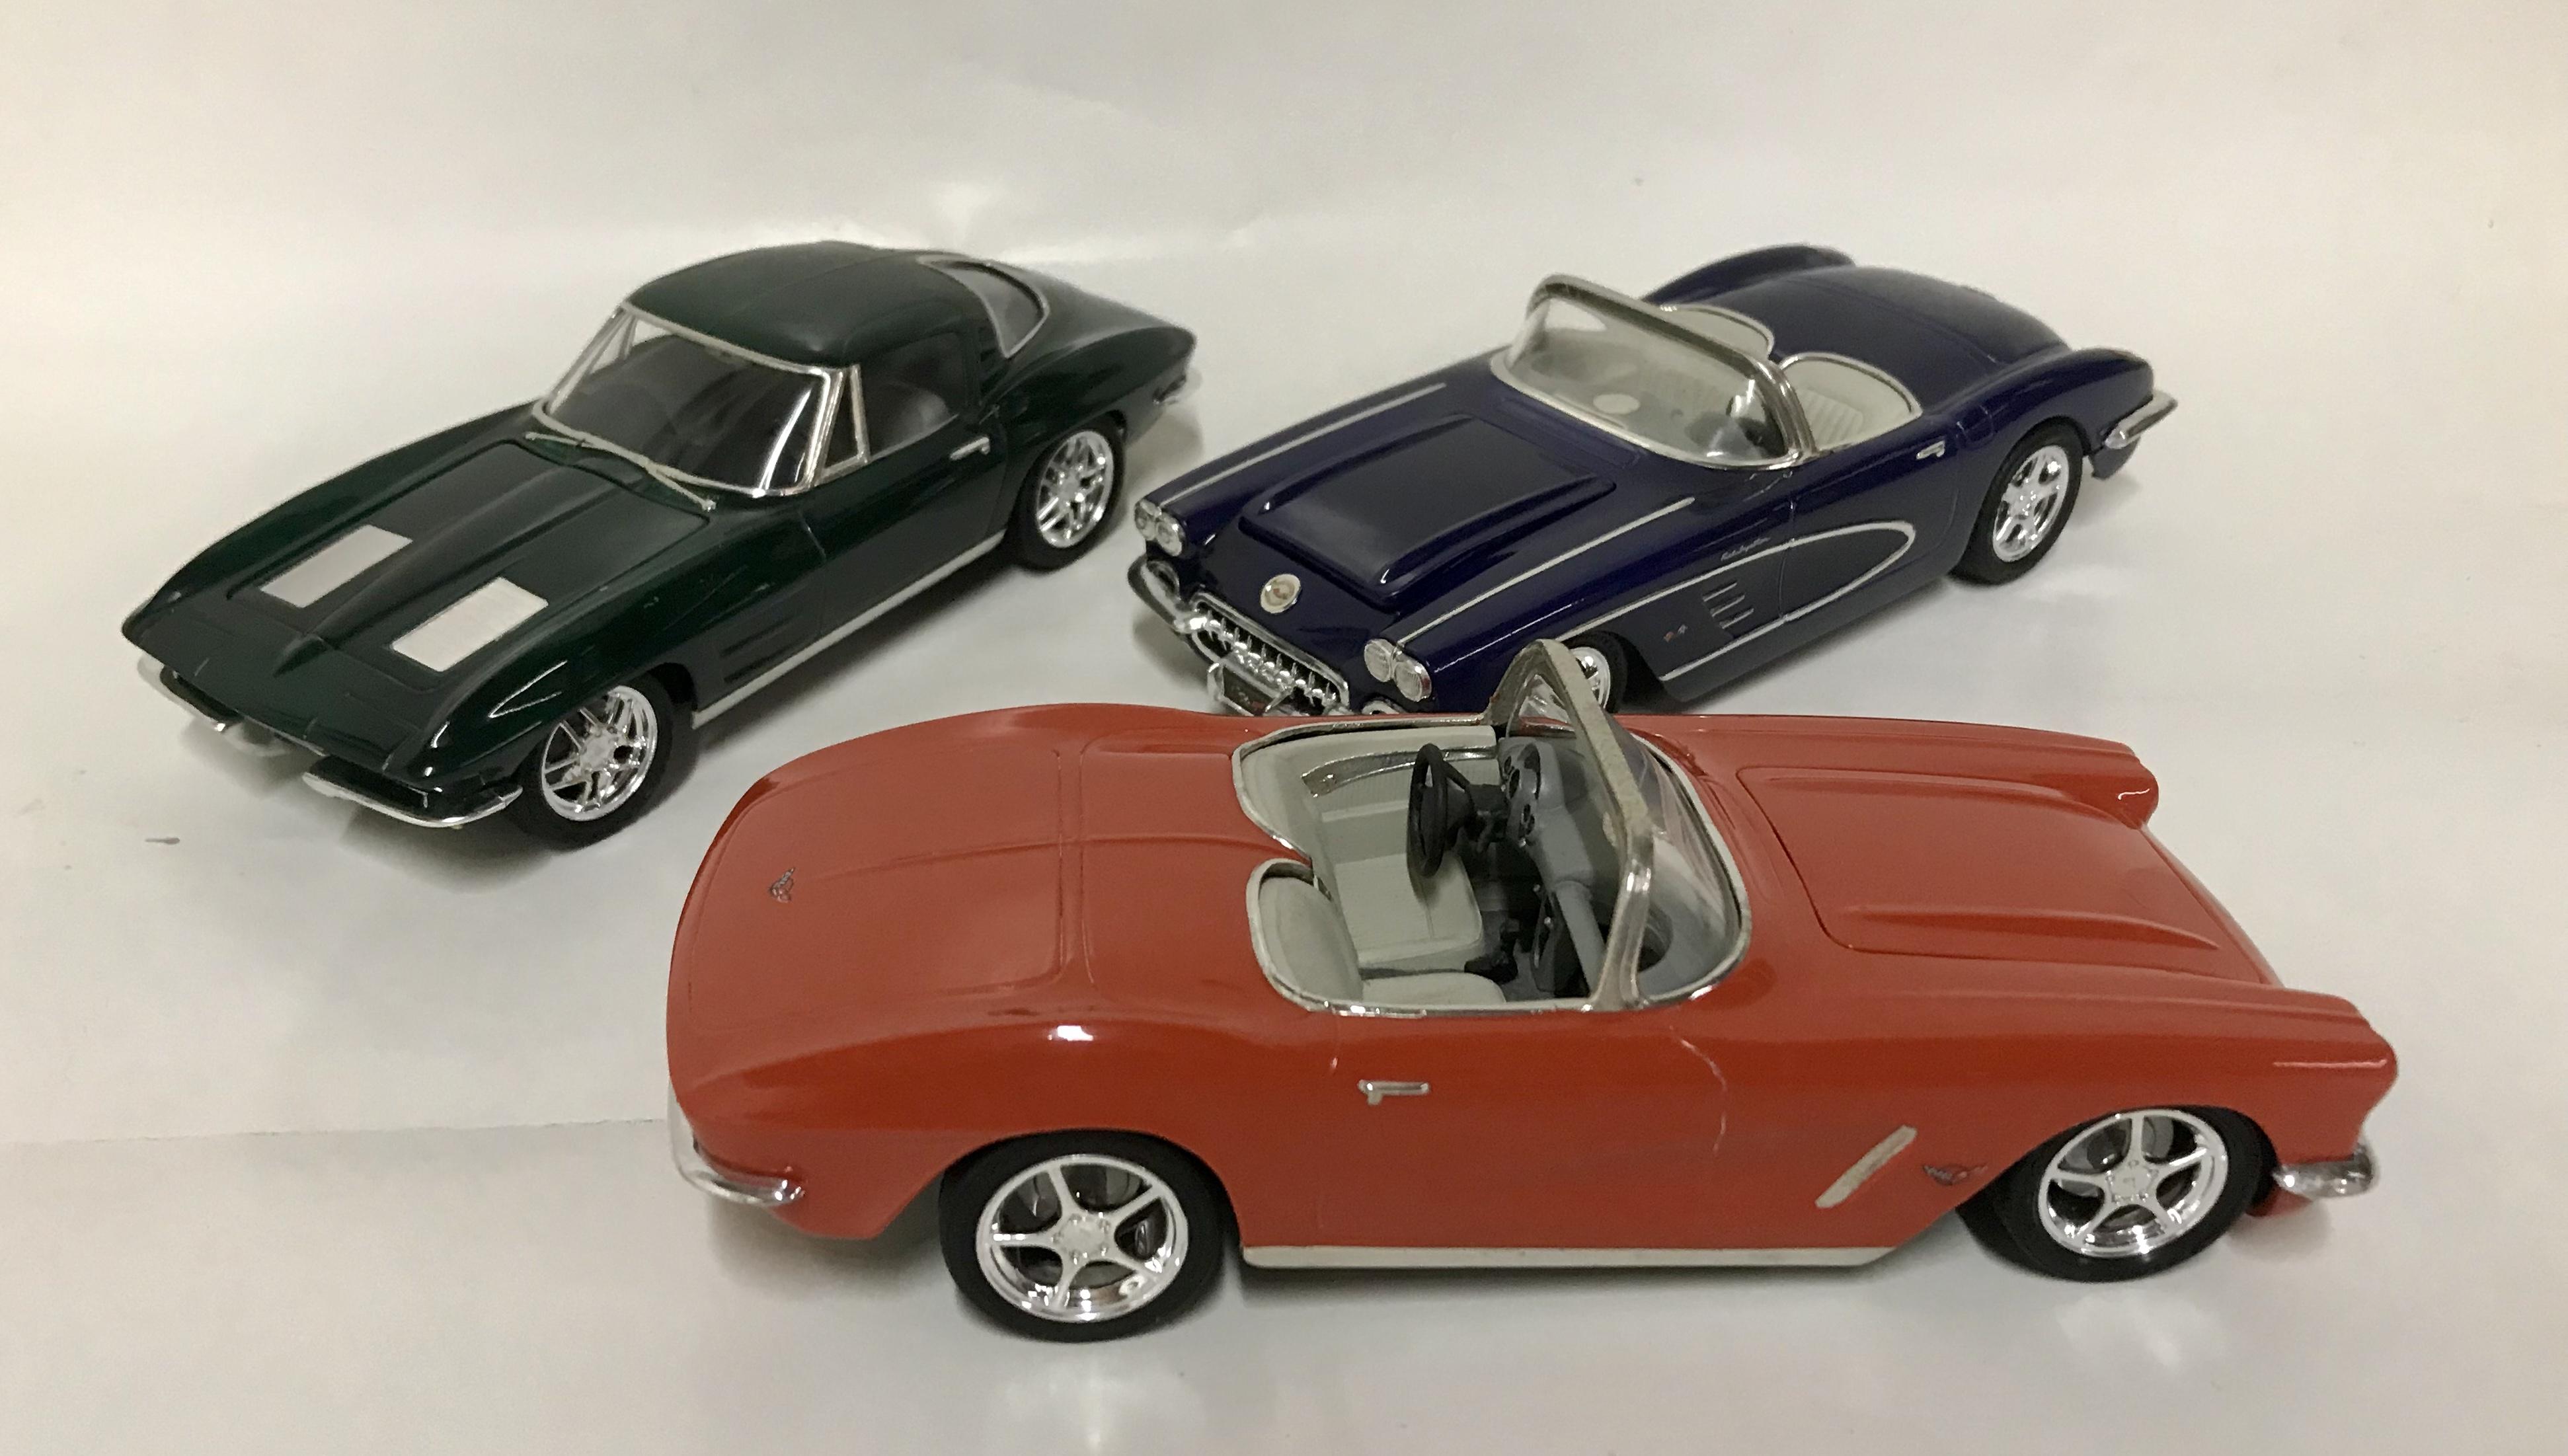
This one is the AMT 63 Corvette with an LS swap and wheels and tires from a 2000 Z06. The paint is Boyd’s dark green pearl with Testors clear enamel with a good polishing. Thanks for looking.
-
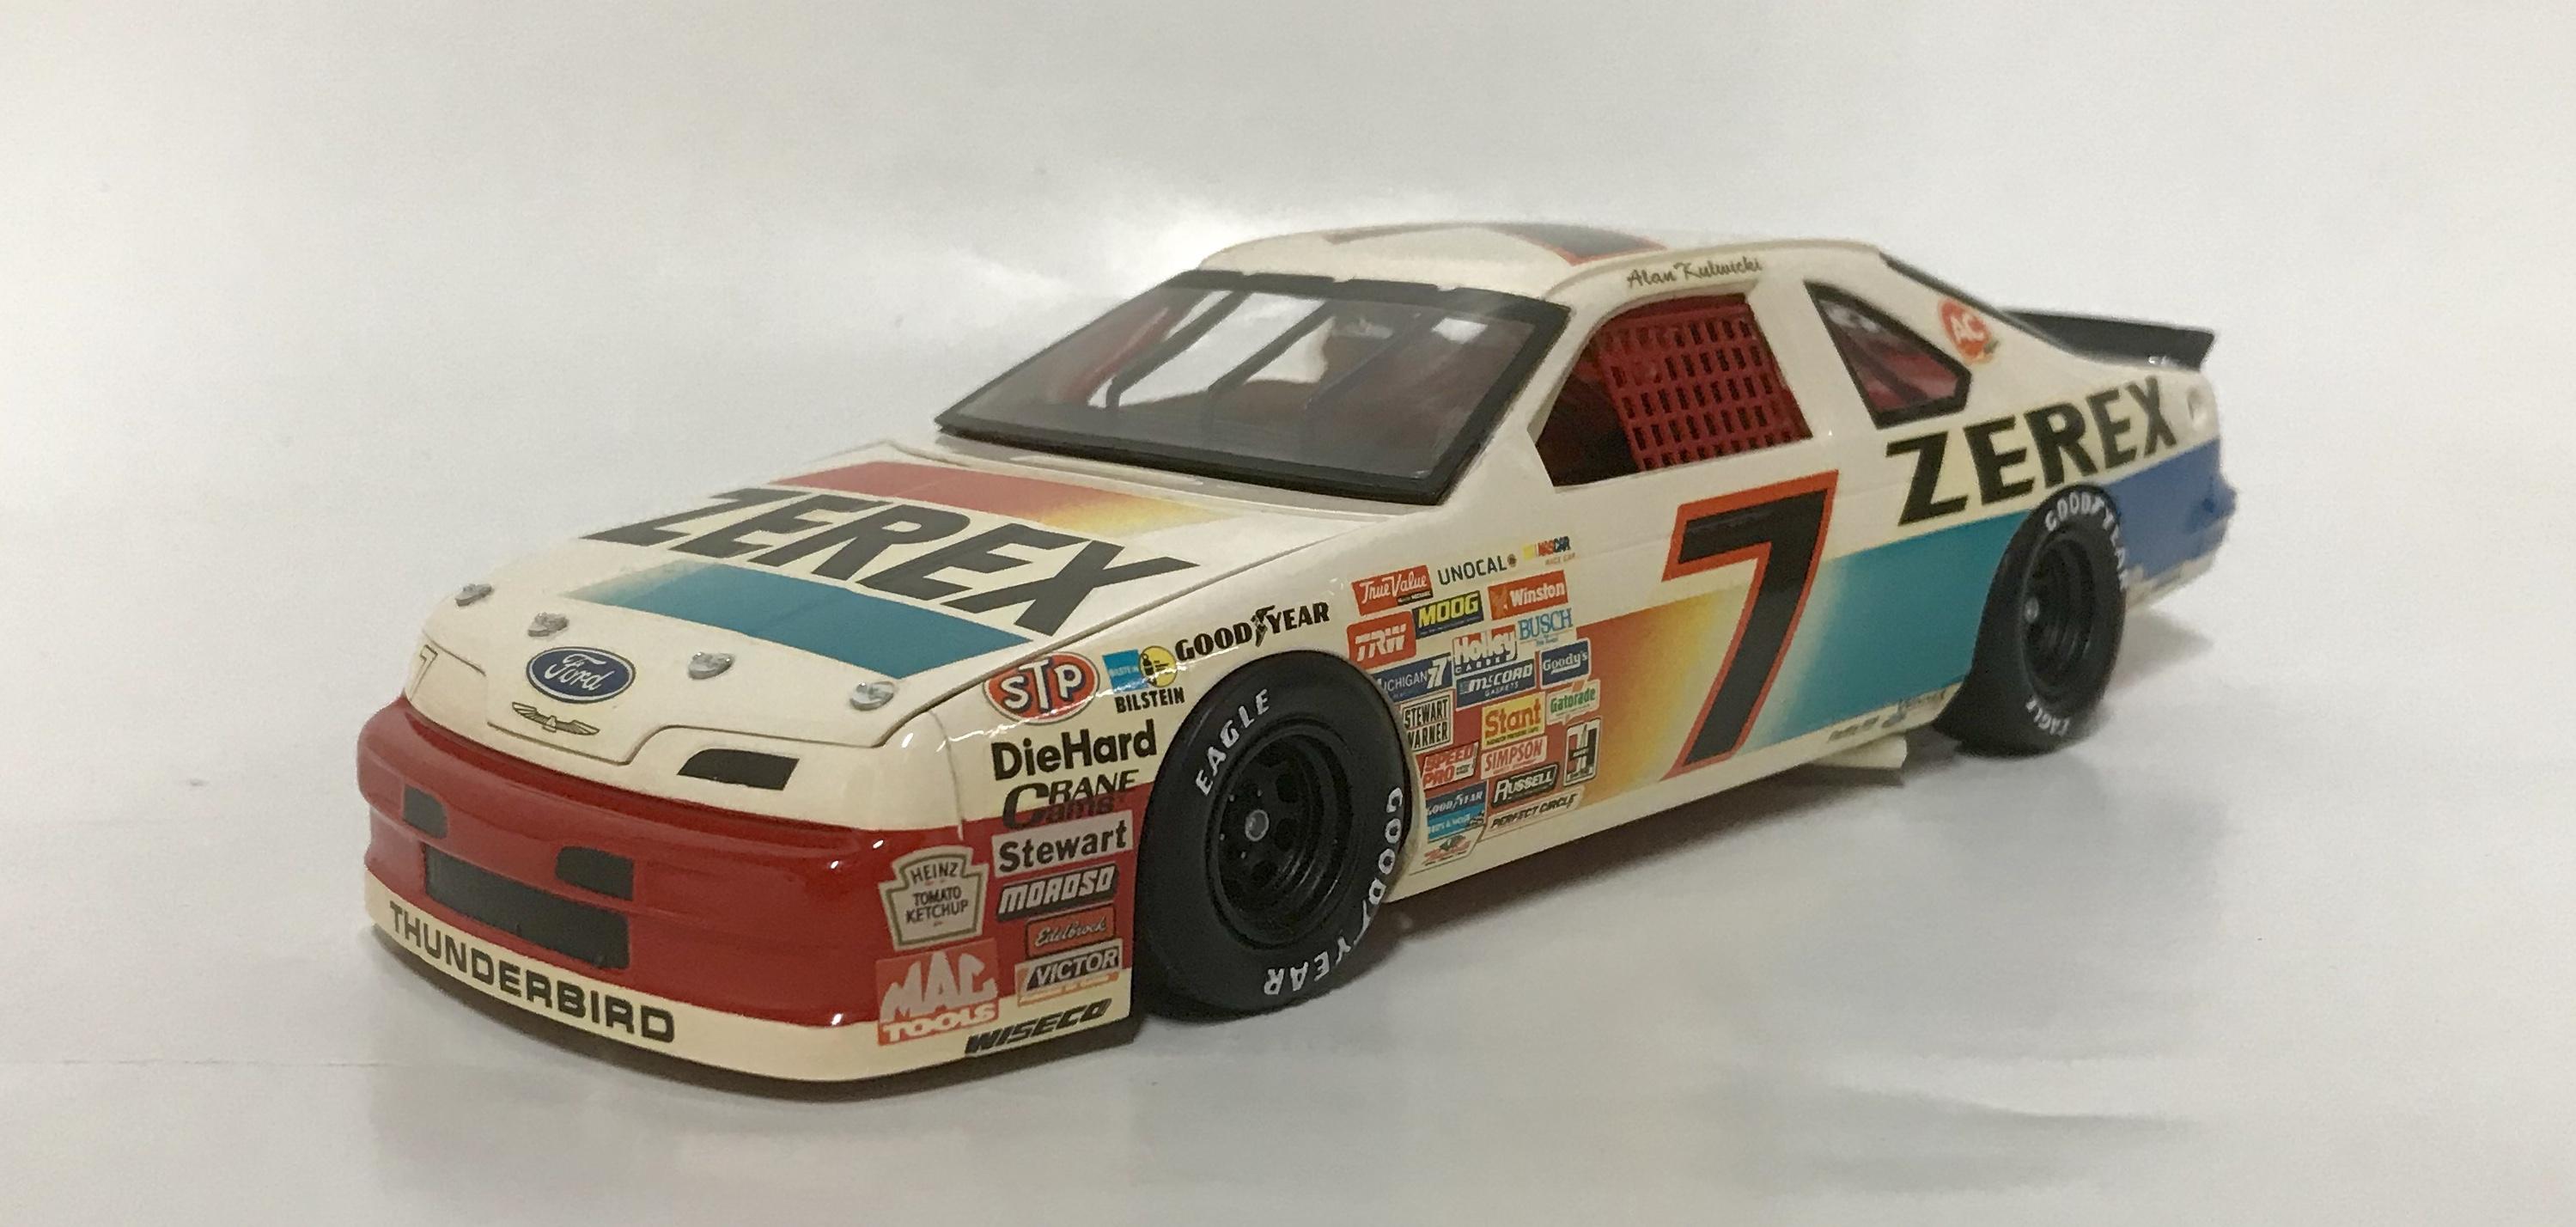
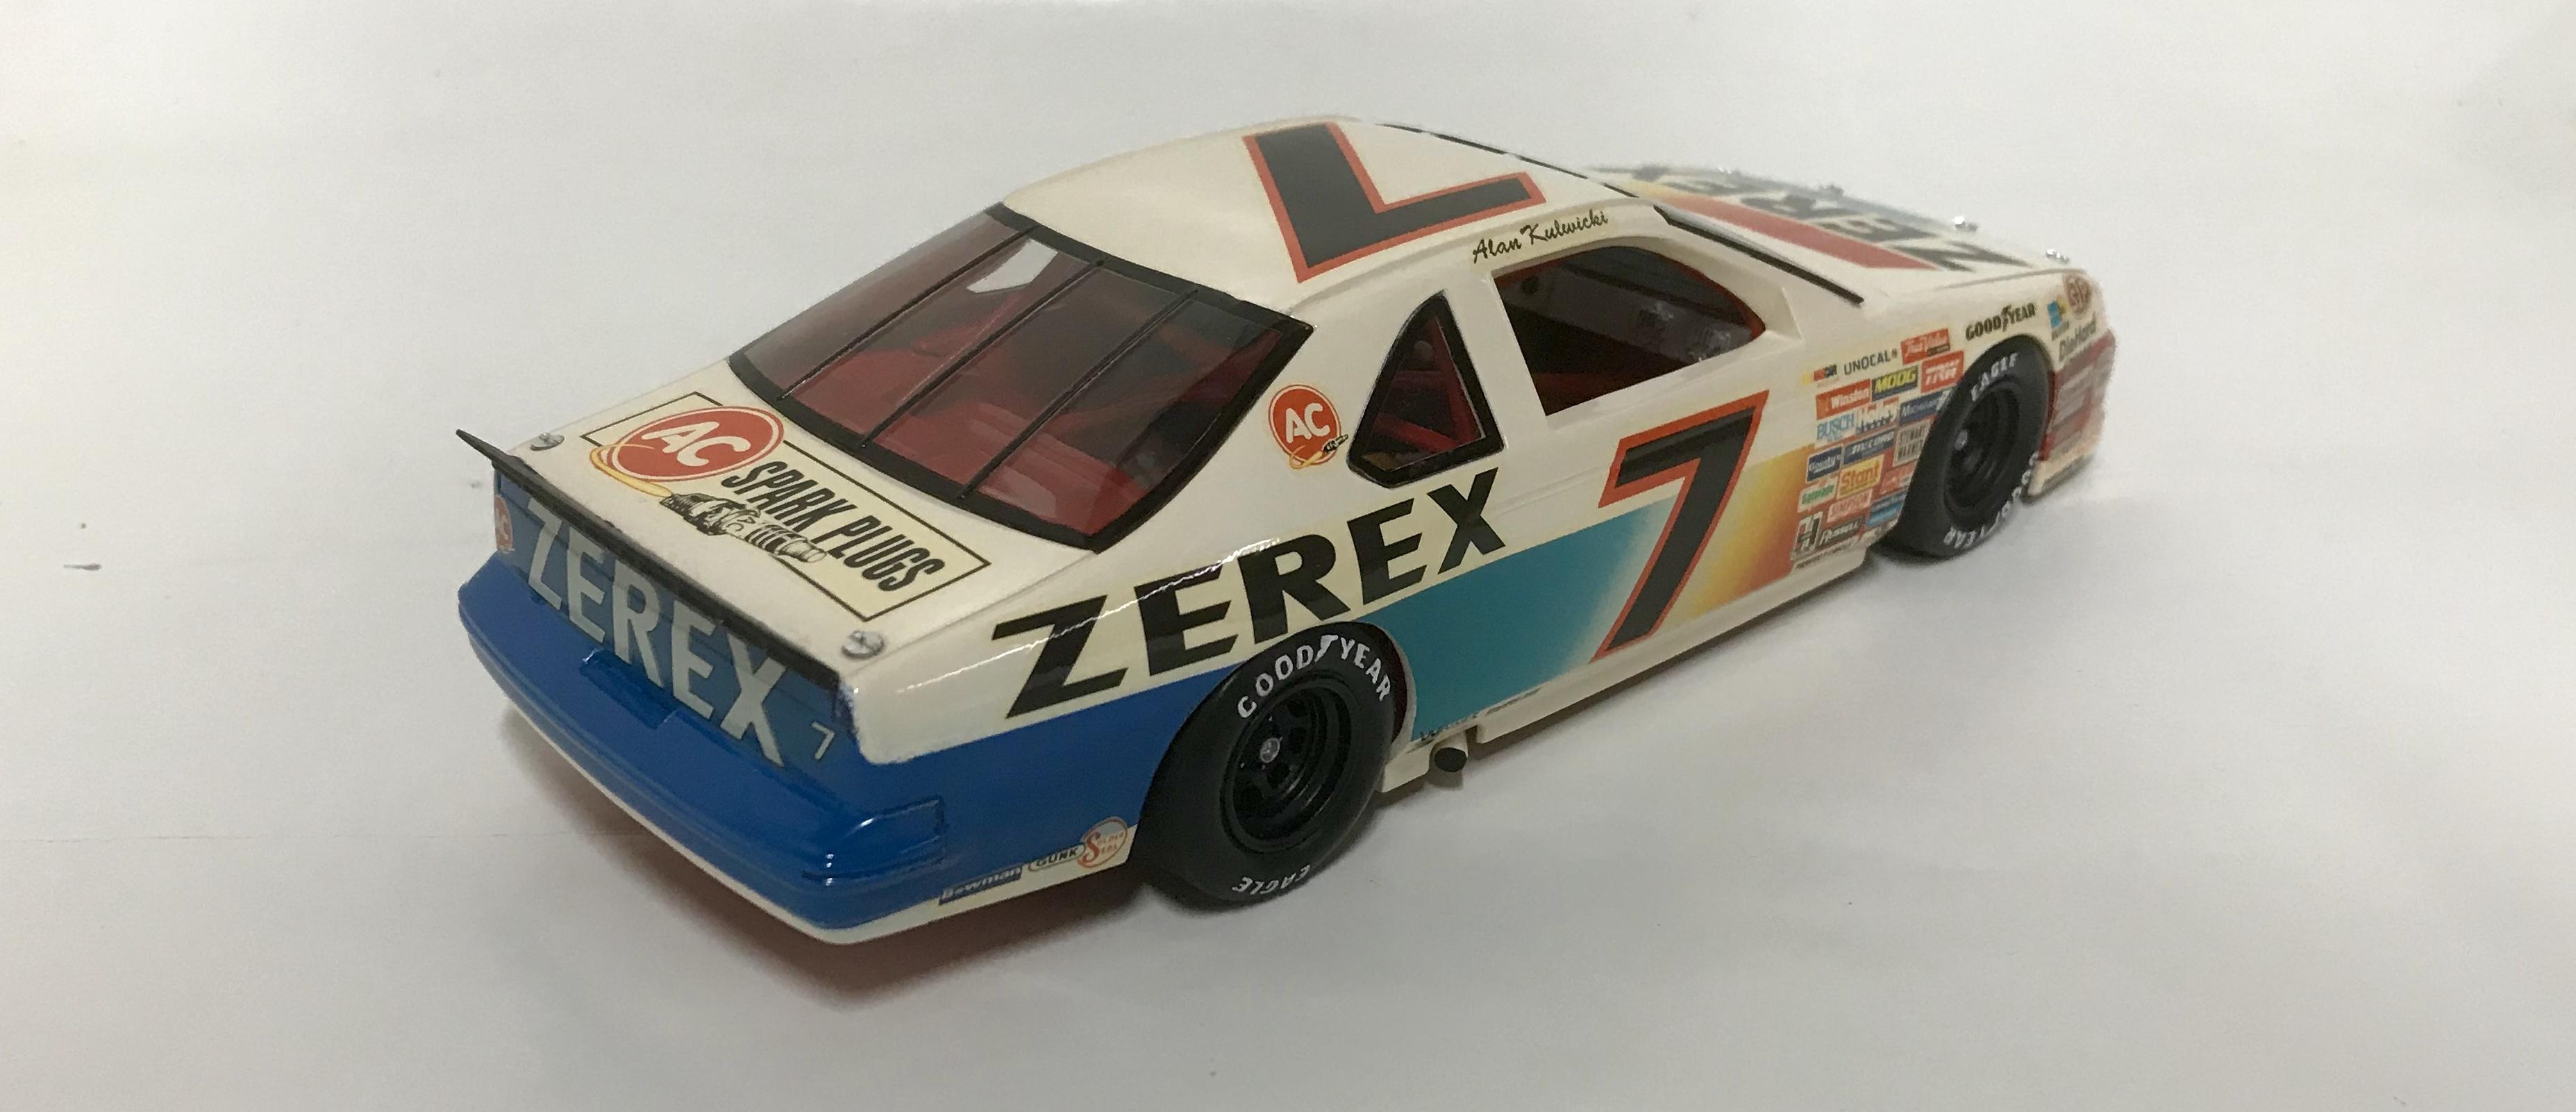
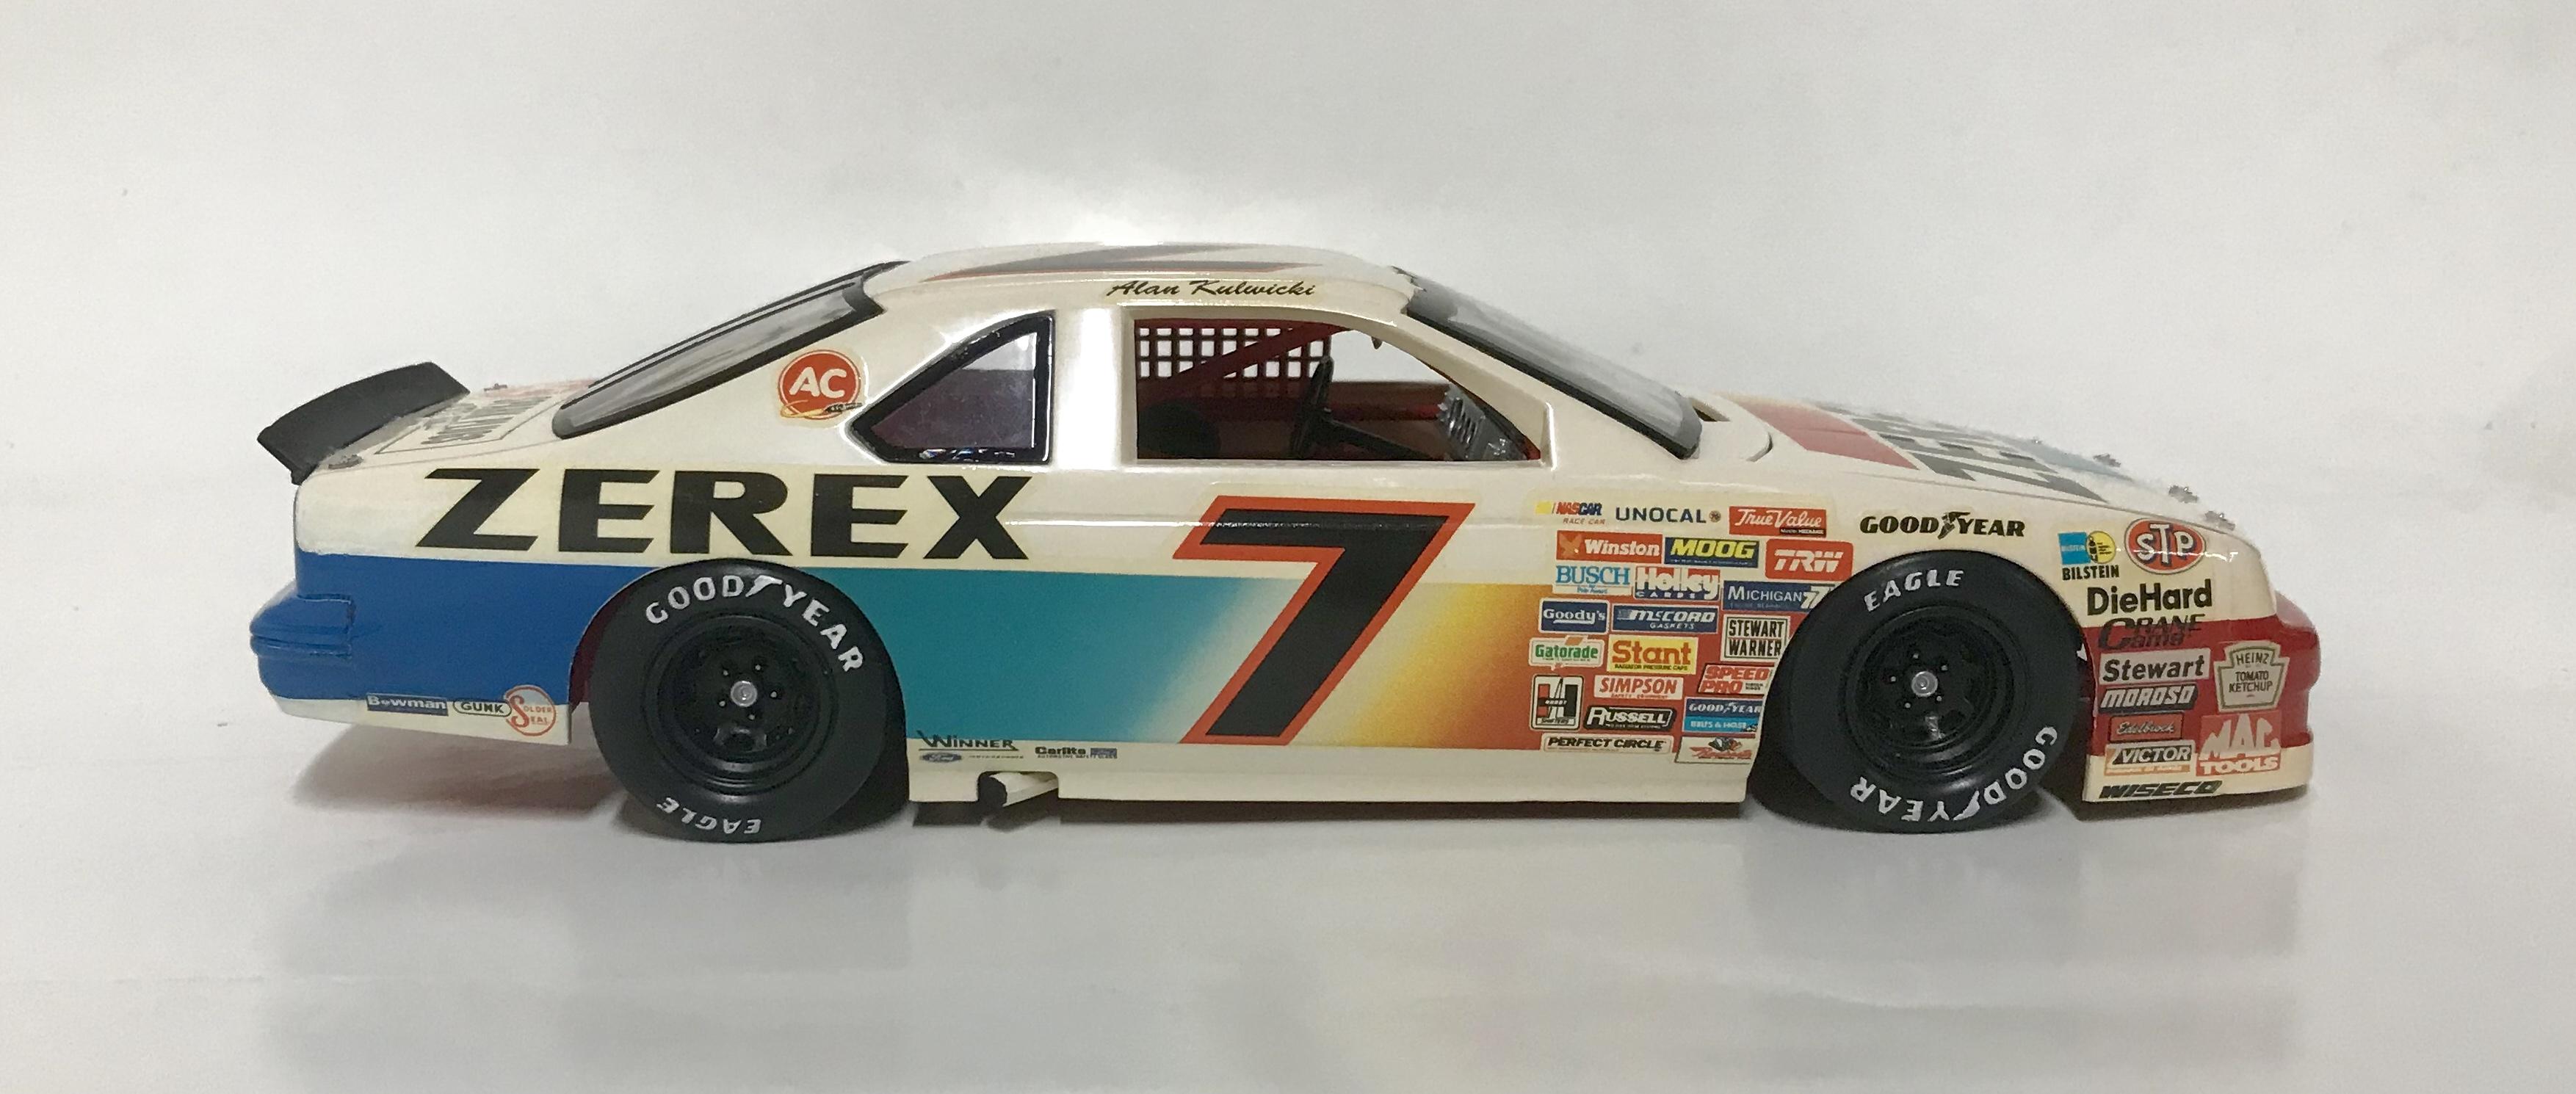
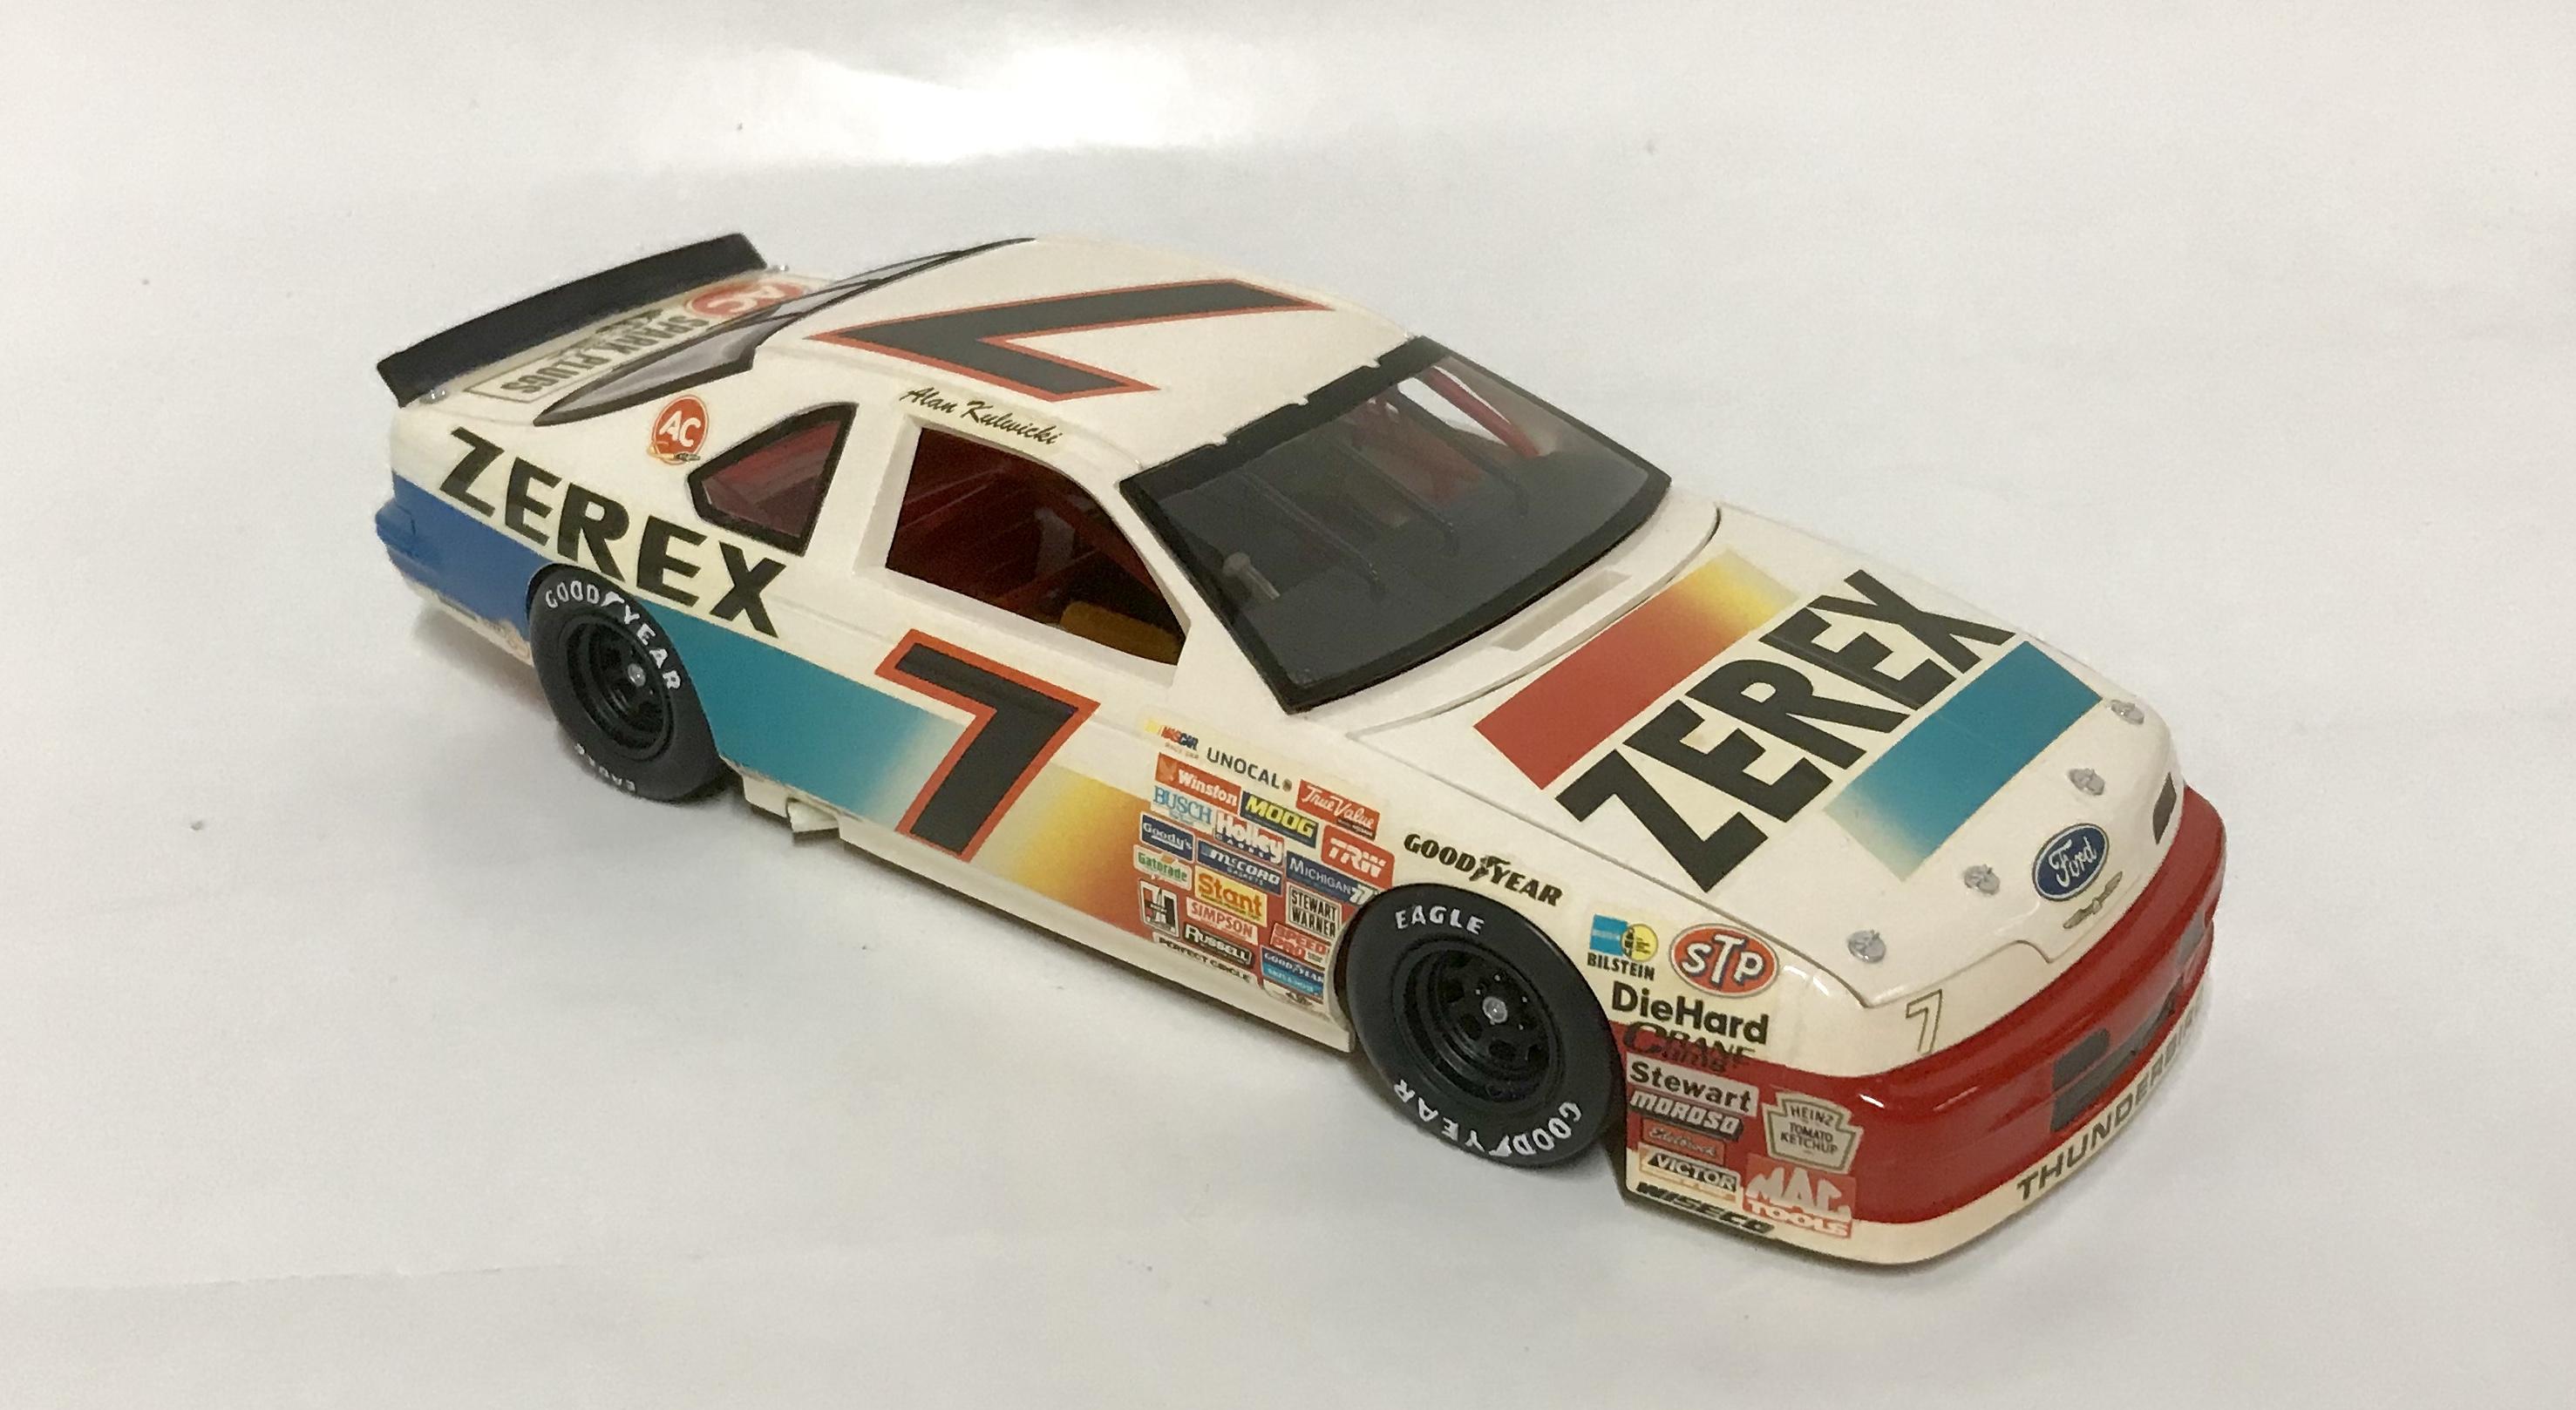
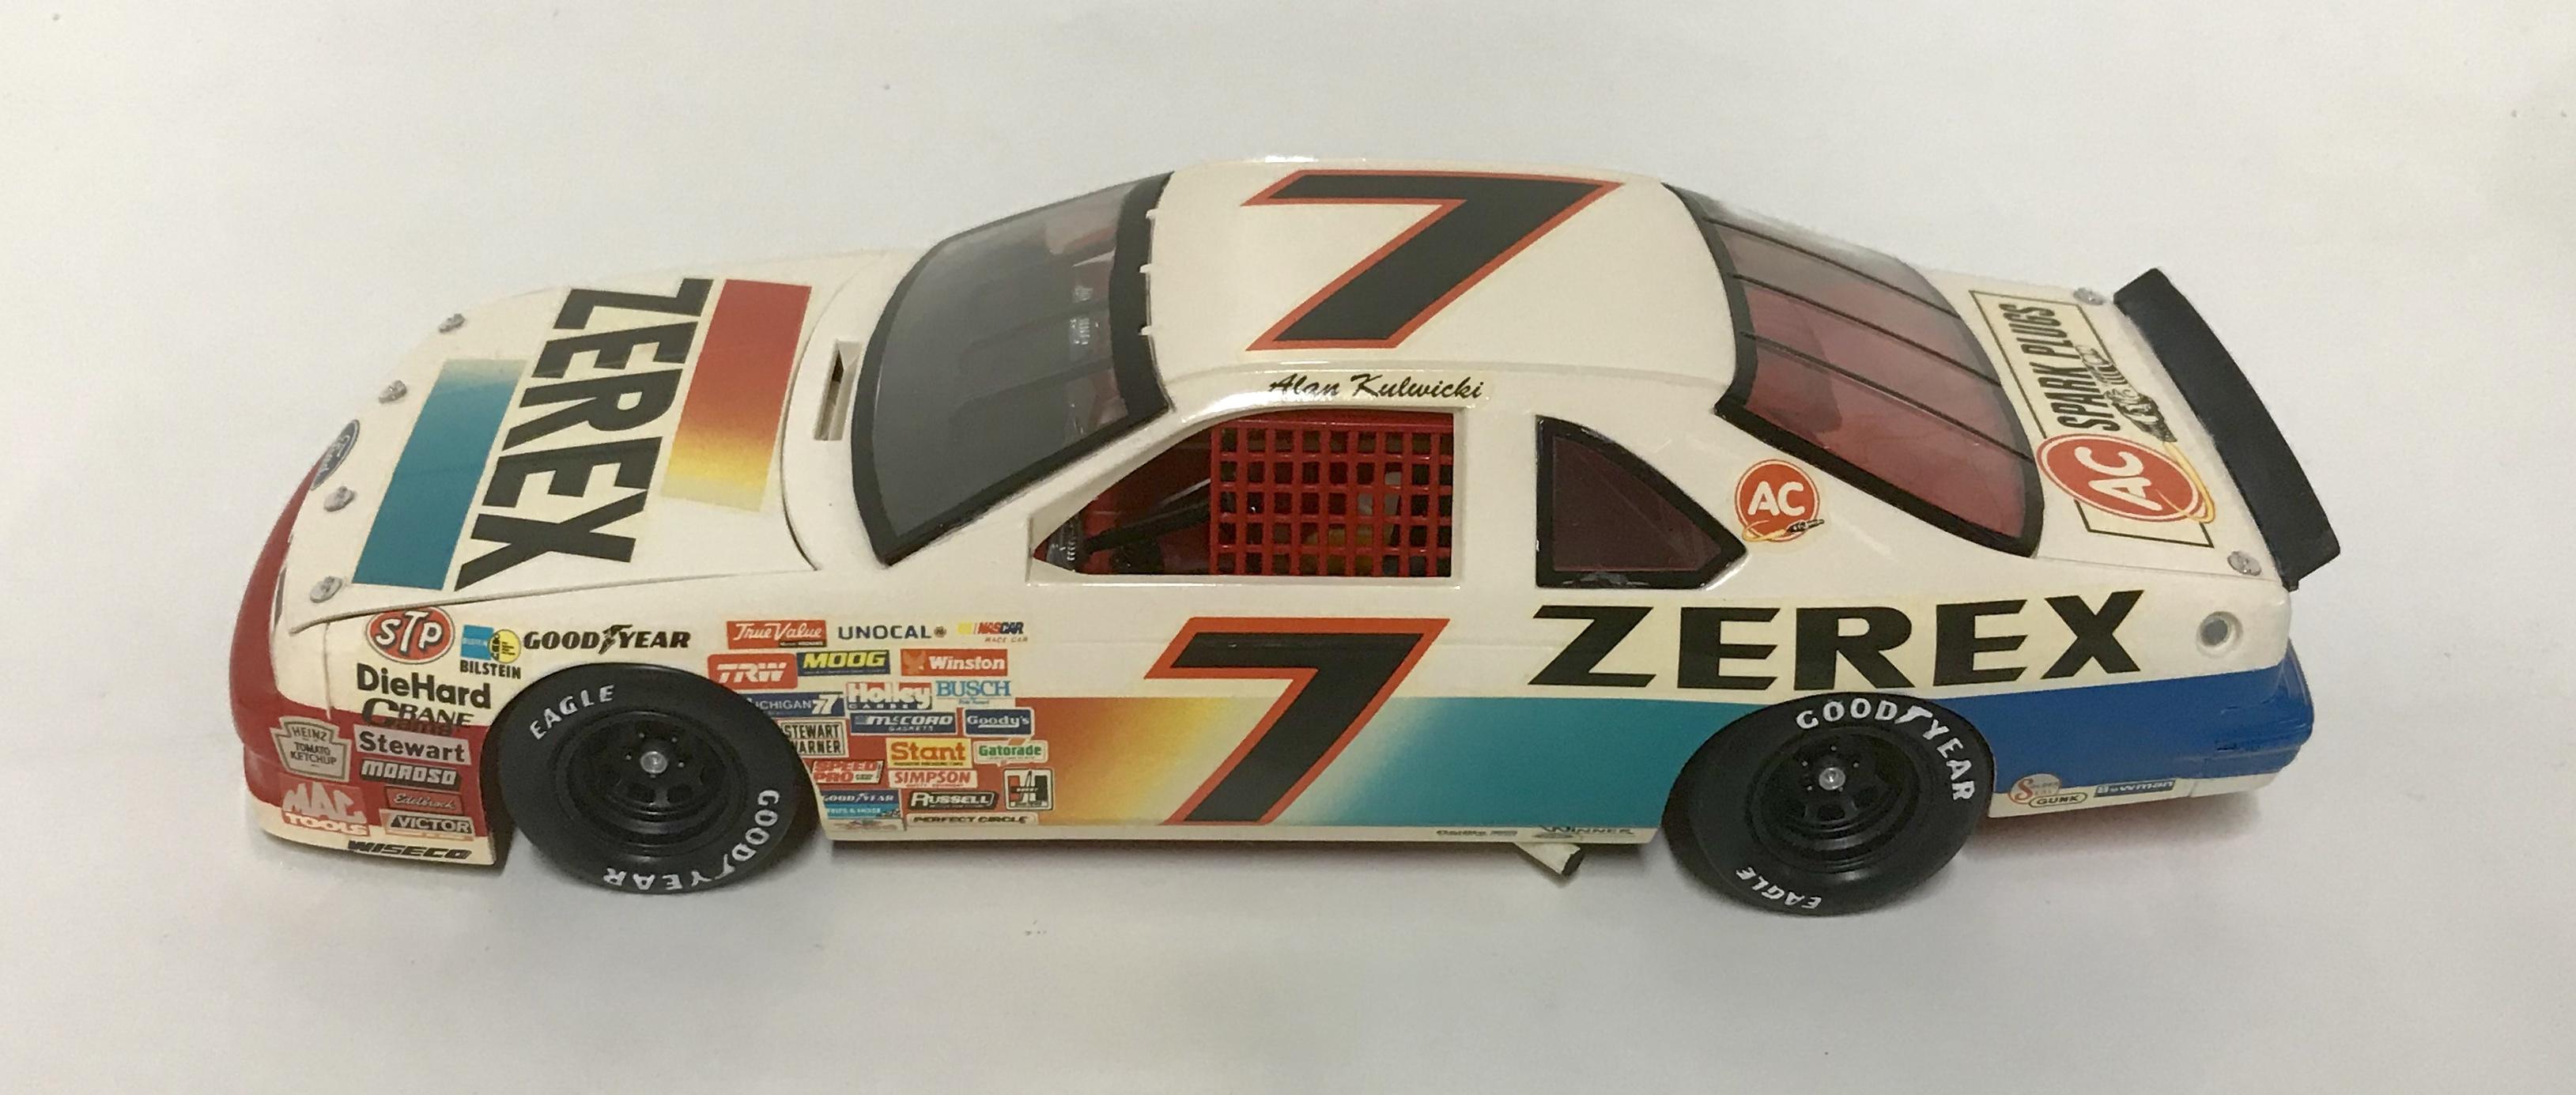
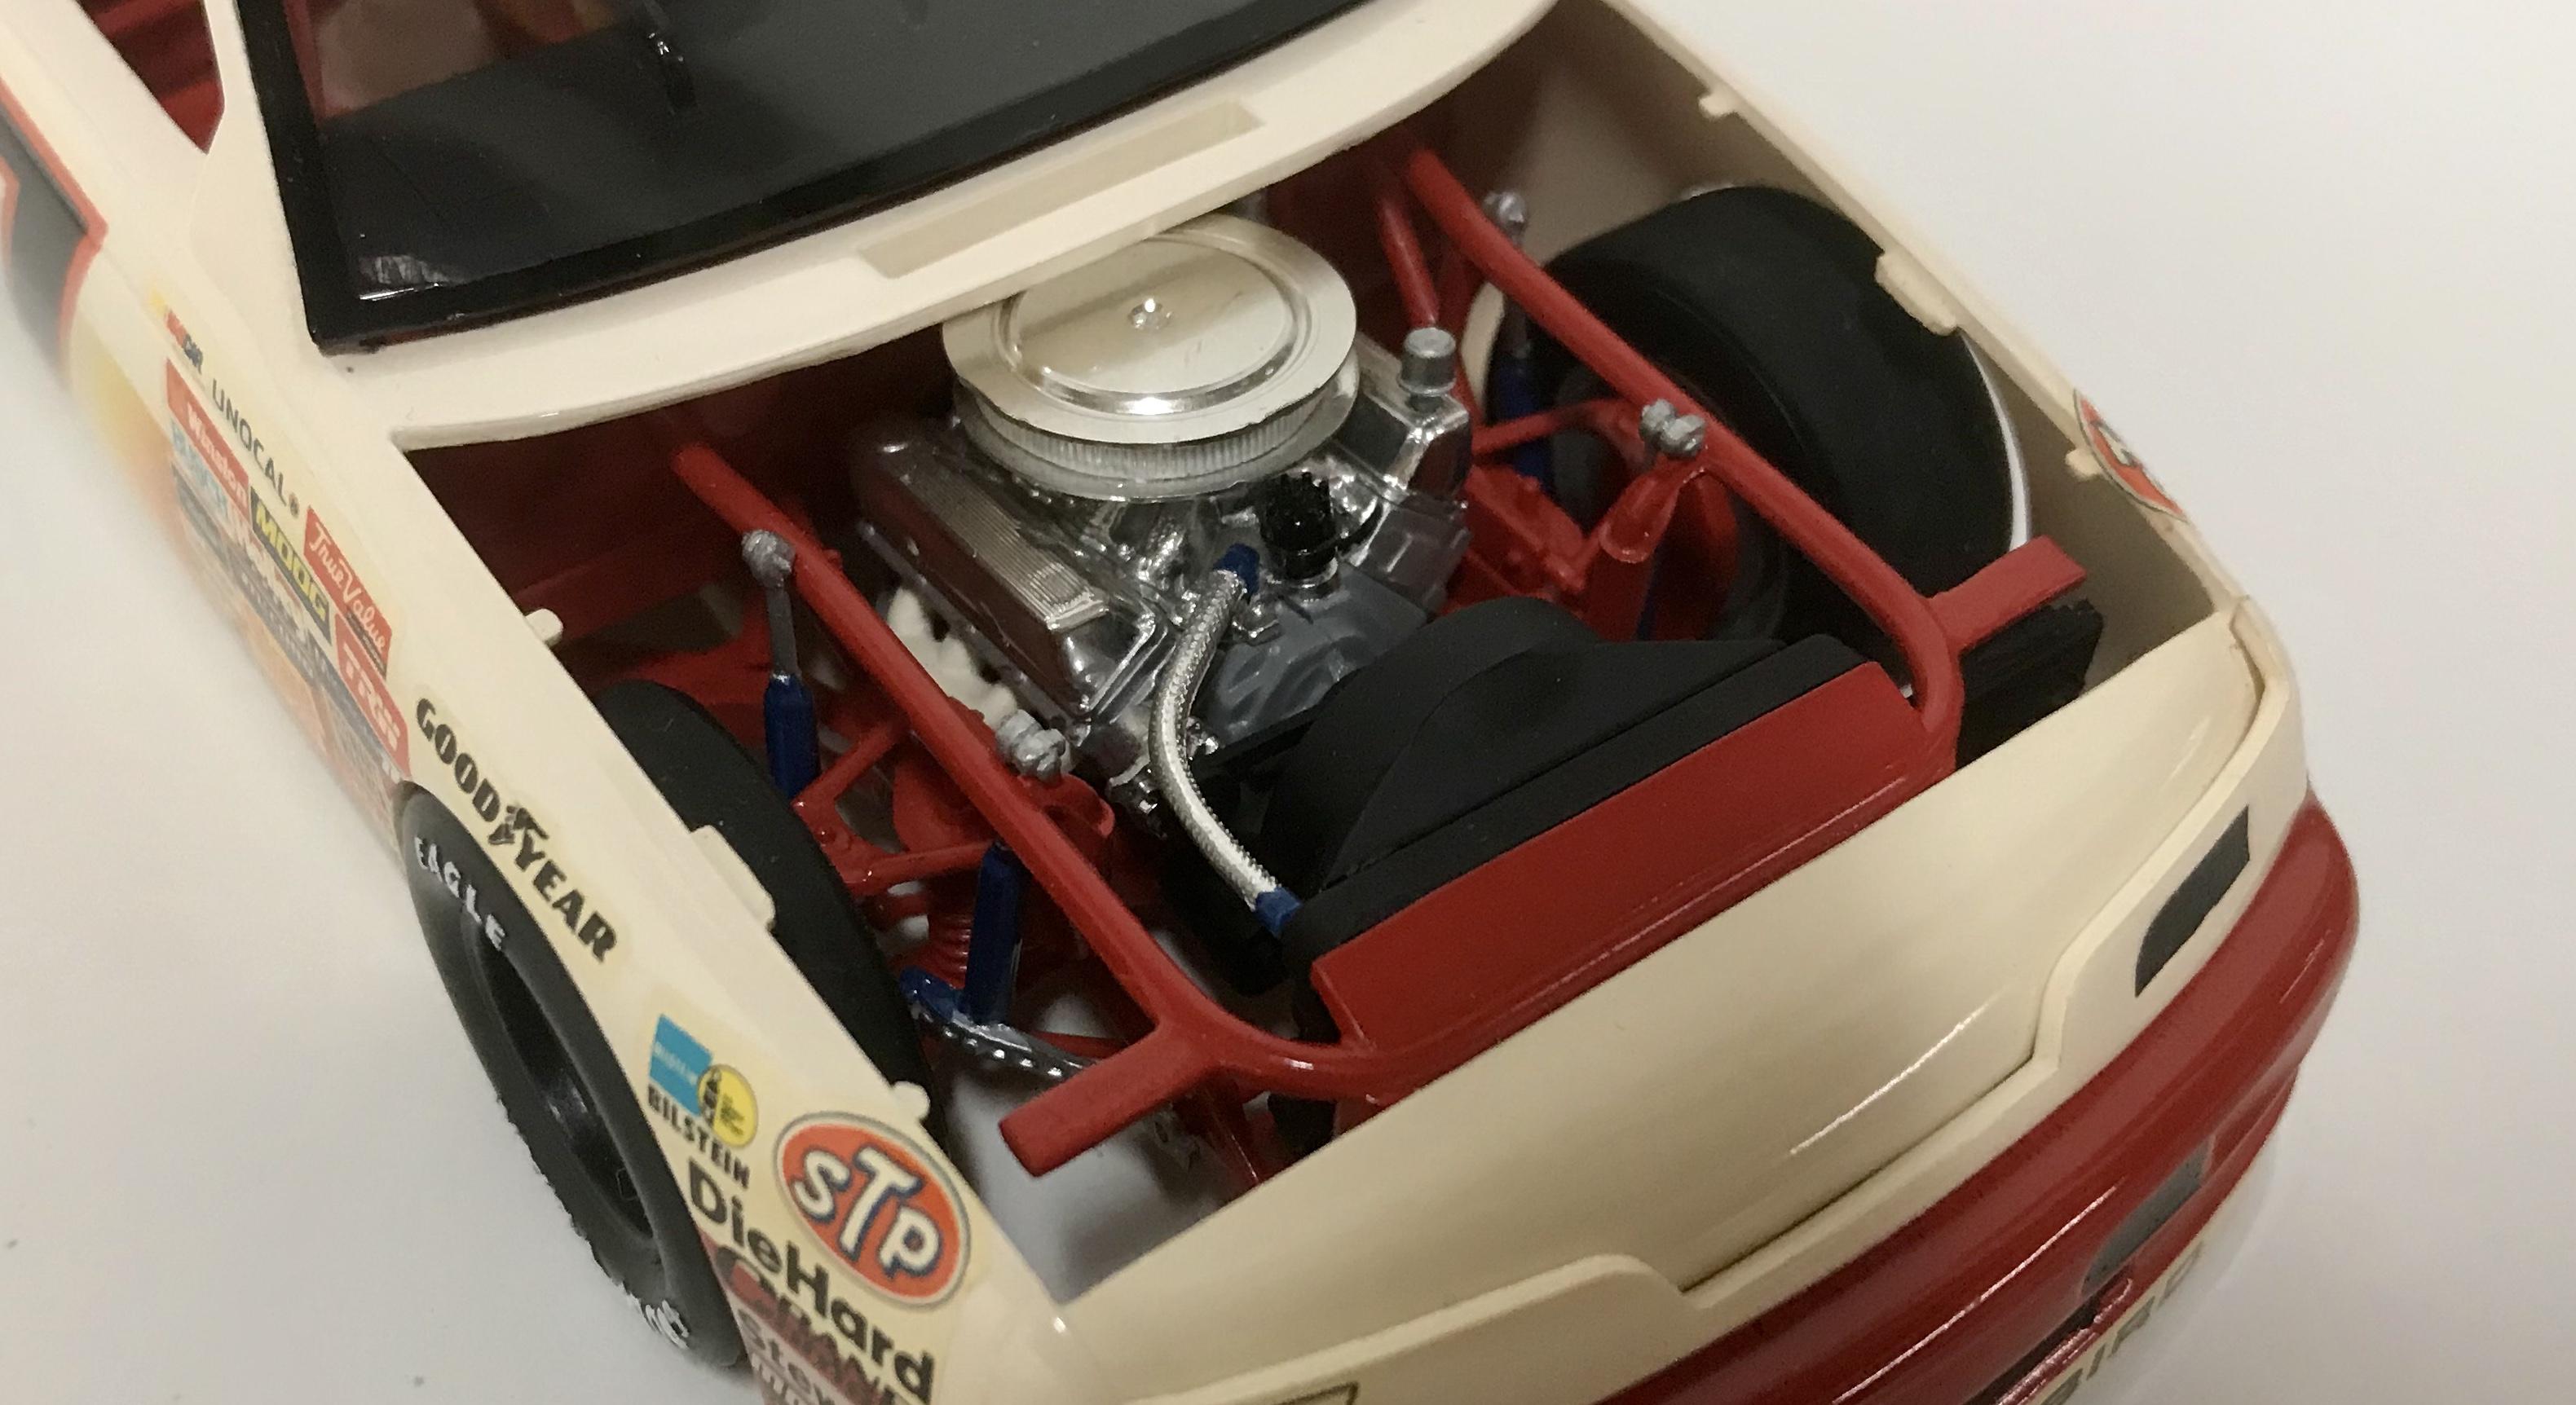
This is a box stock build from 1990. Testors Gloss White,1203 Red and Model Master French Blue on the body with 1203 Red inside along with the kit decals. The Zerex car was one of my favorites back in the day.
-
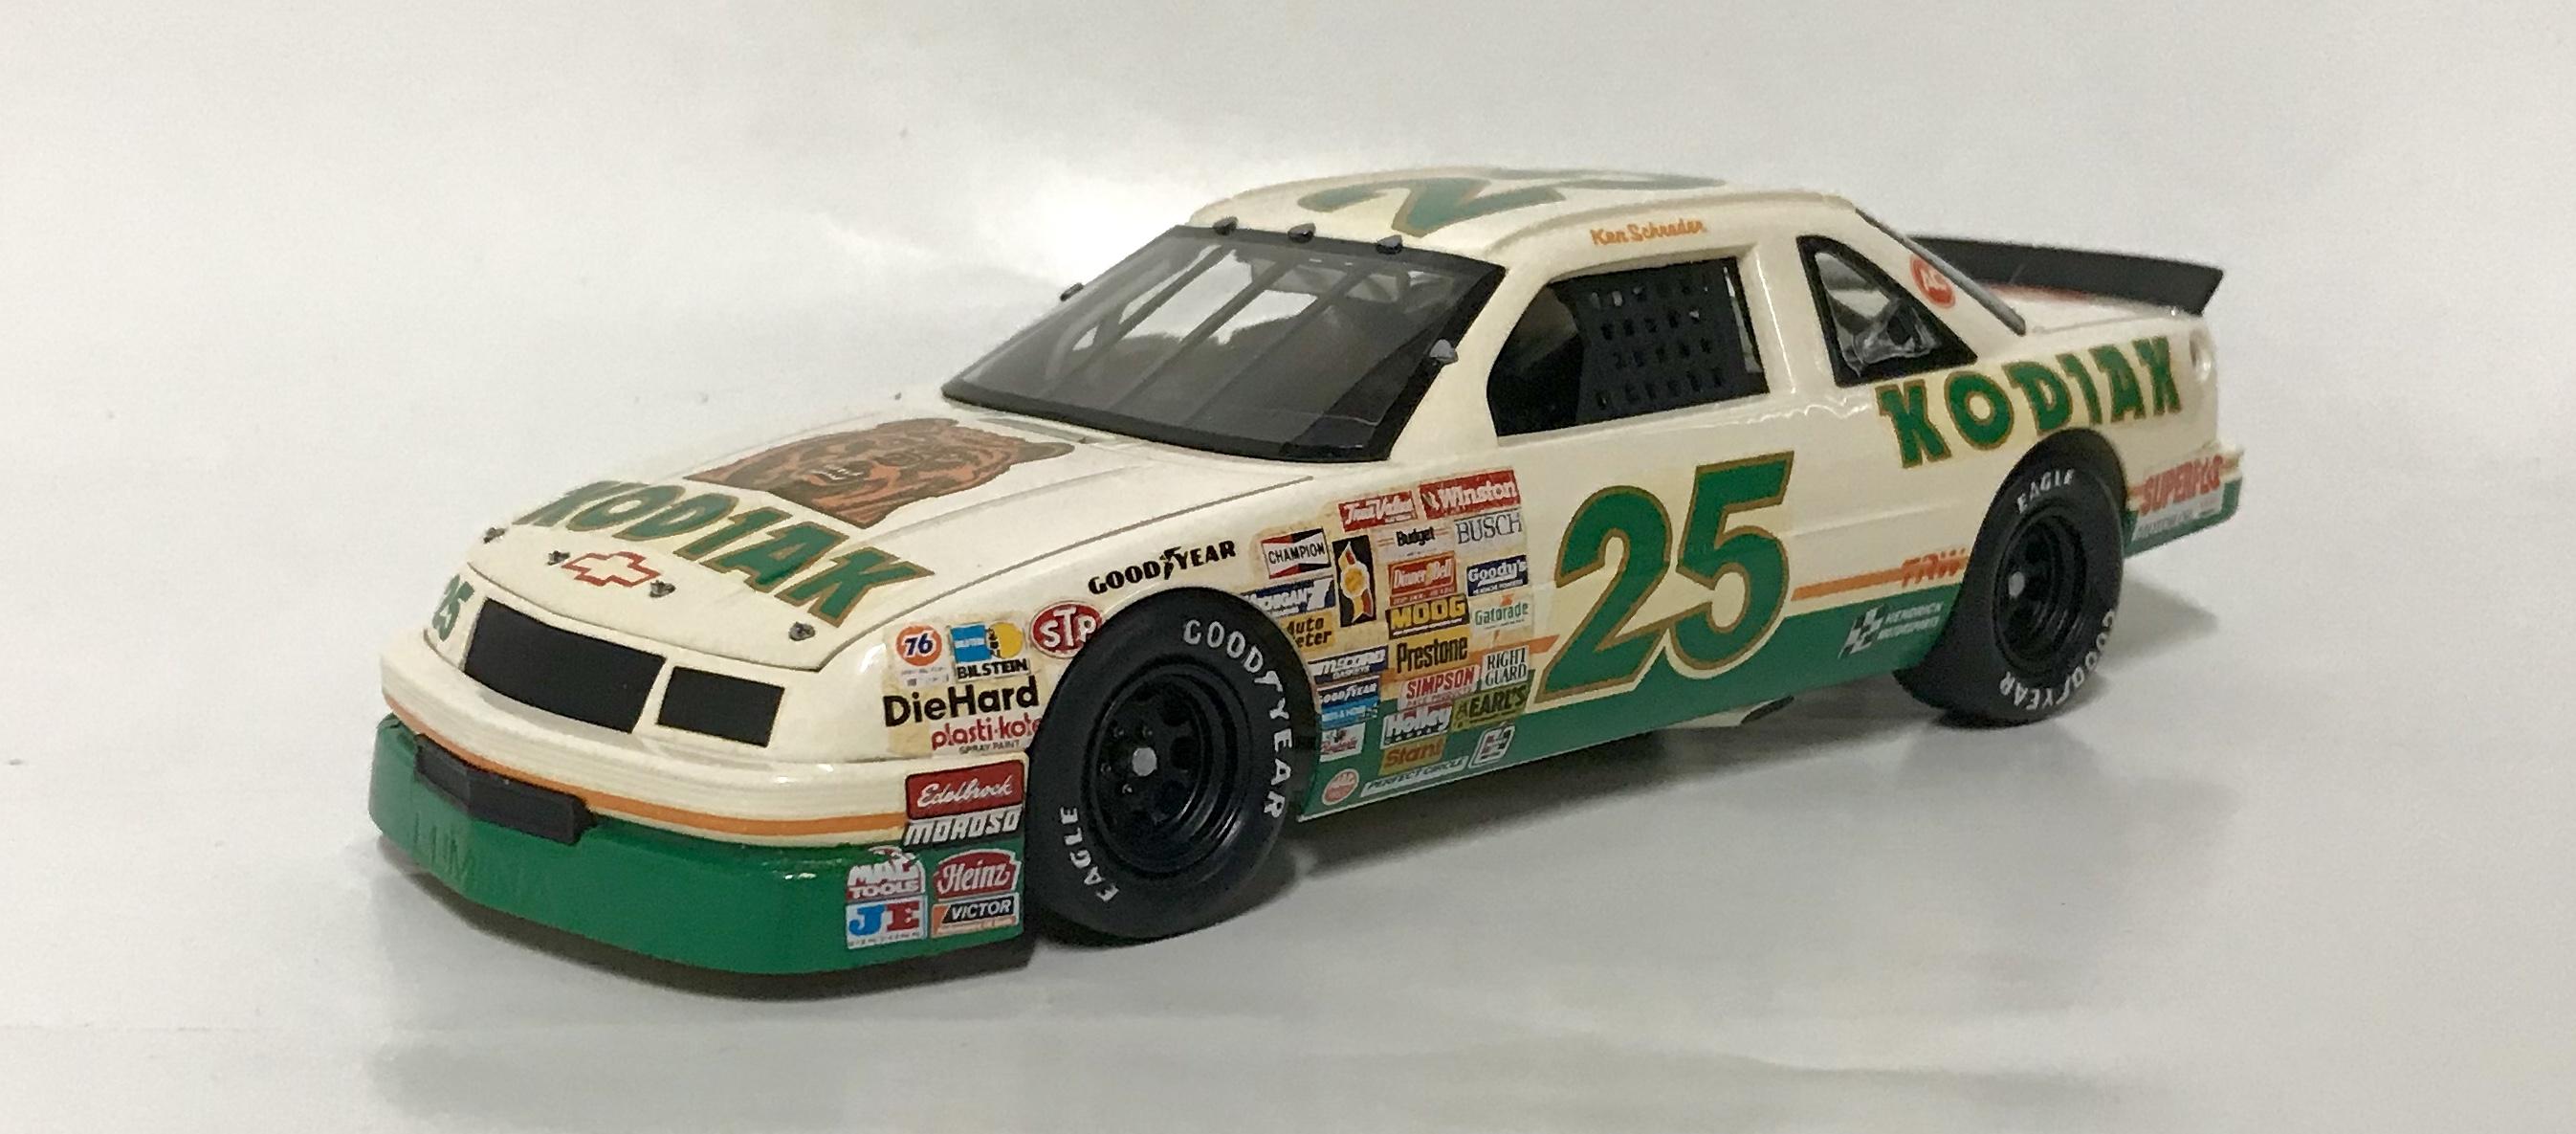
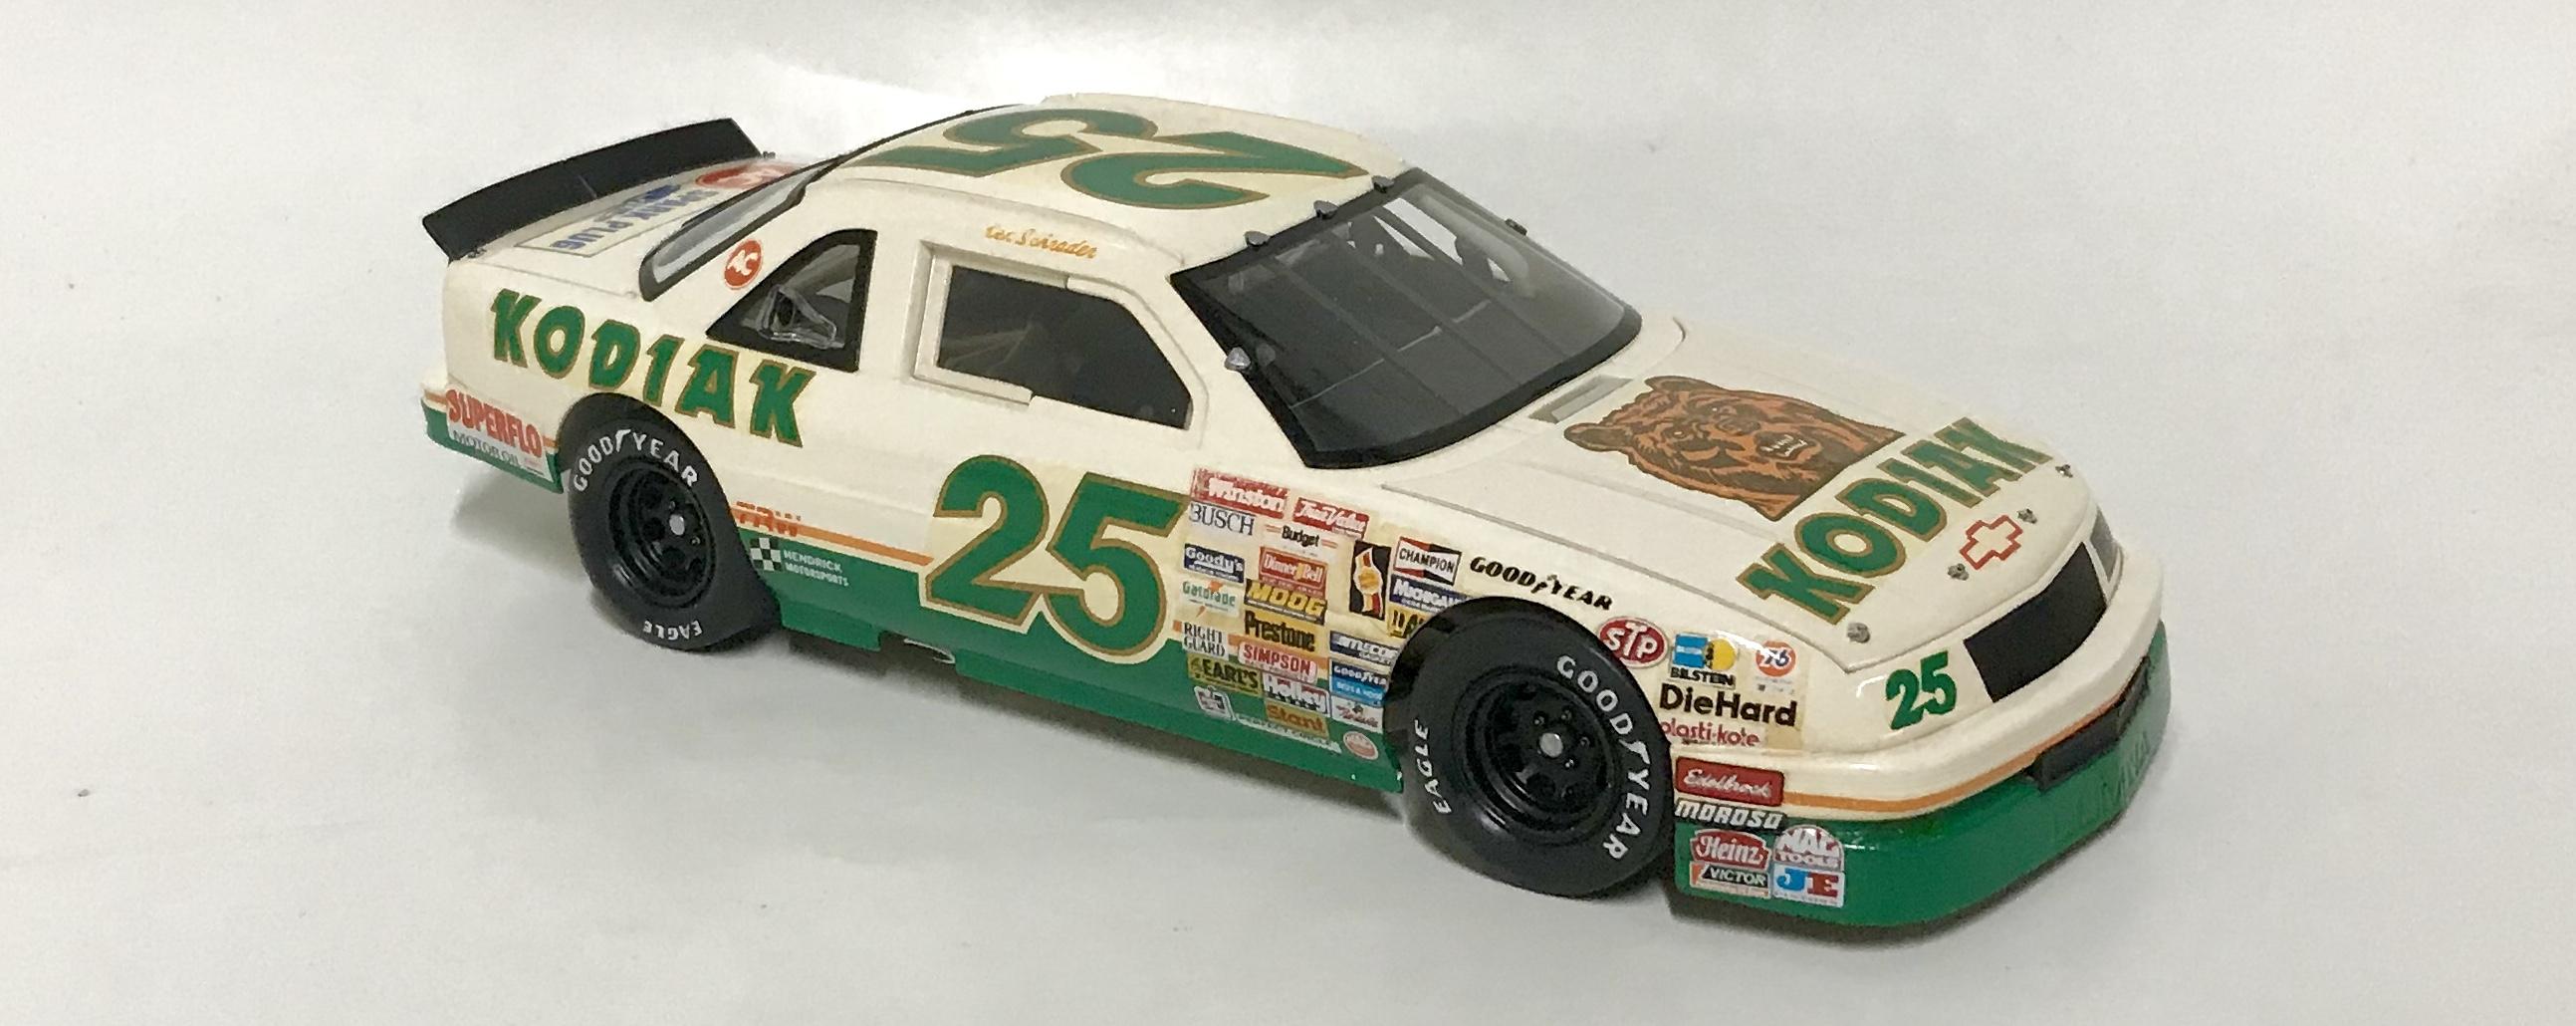
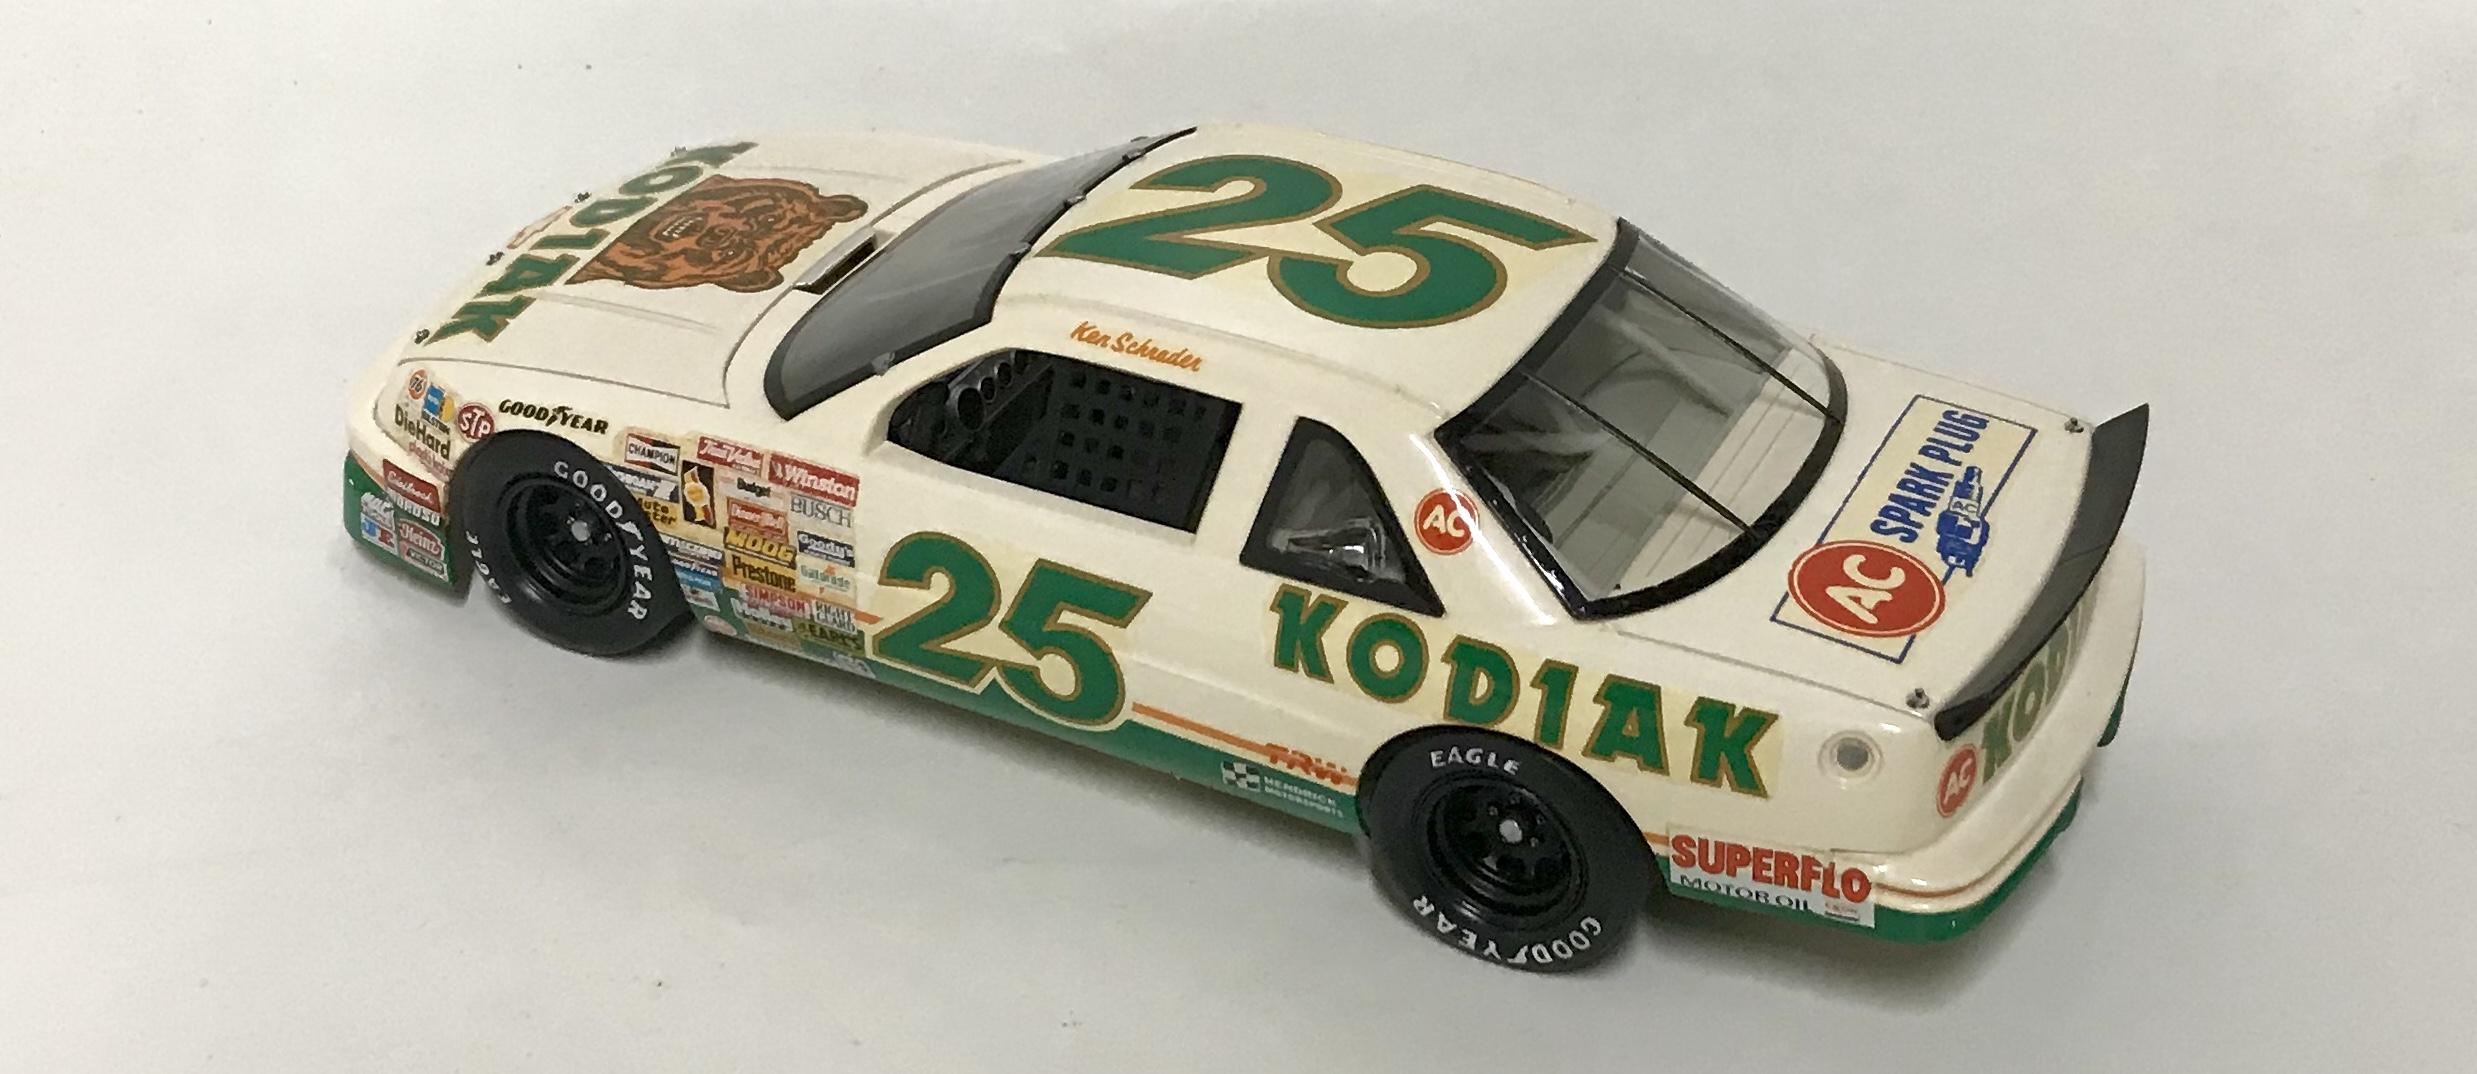
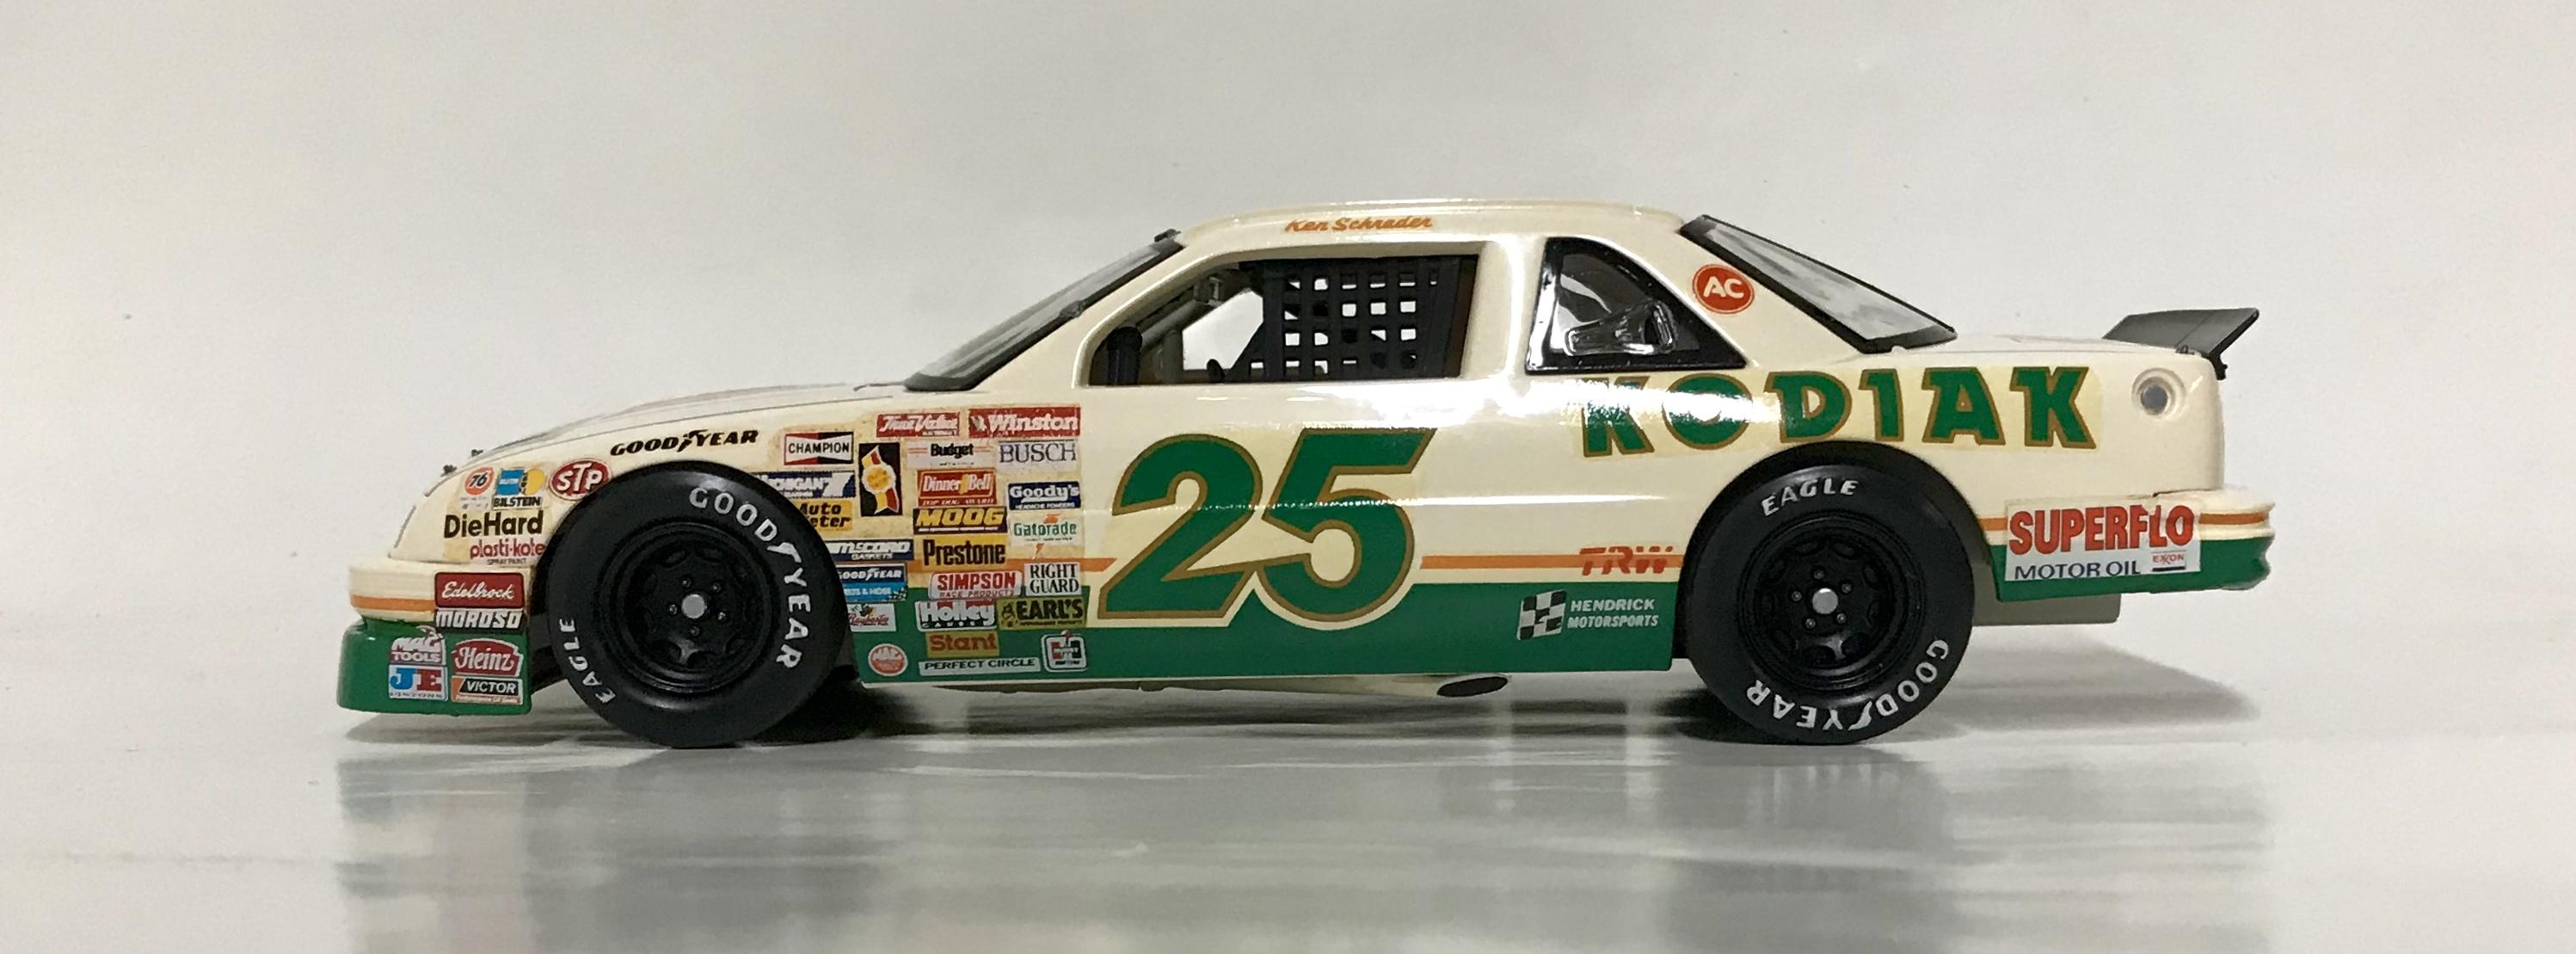
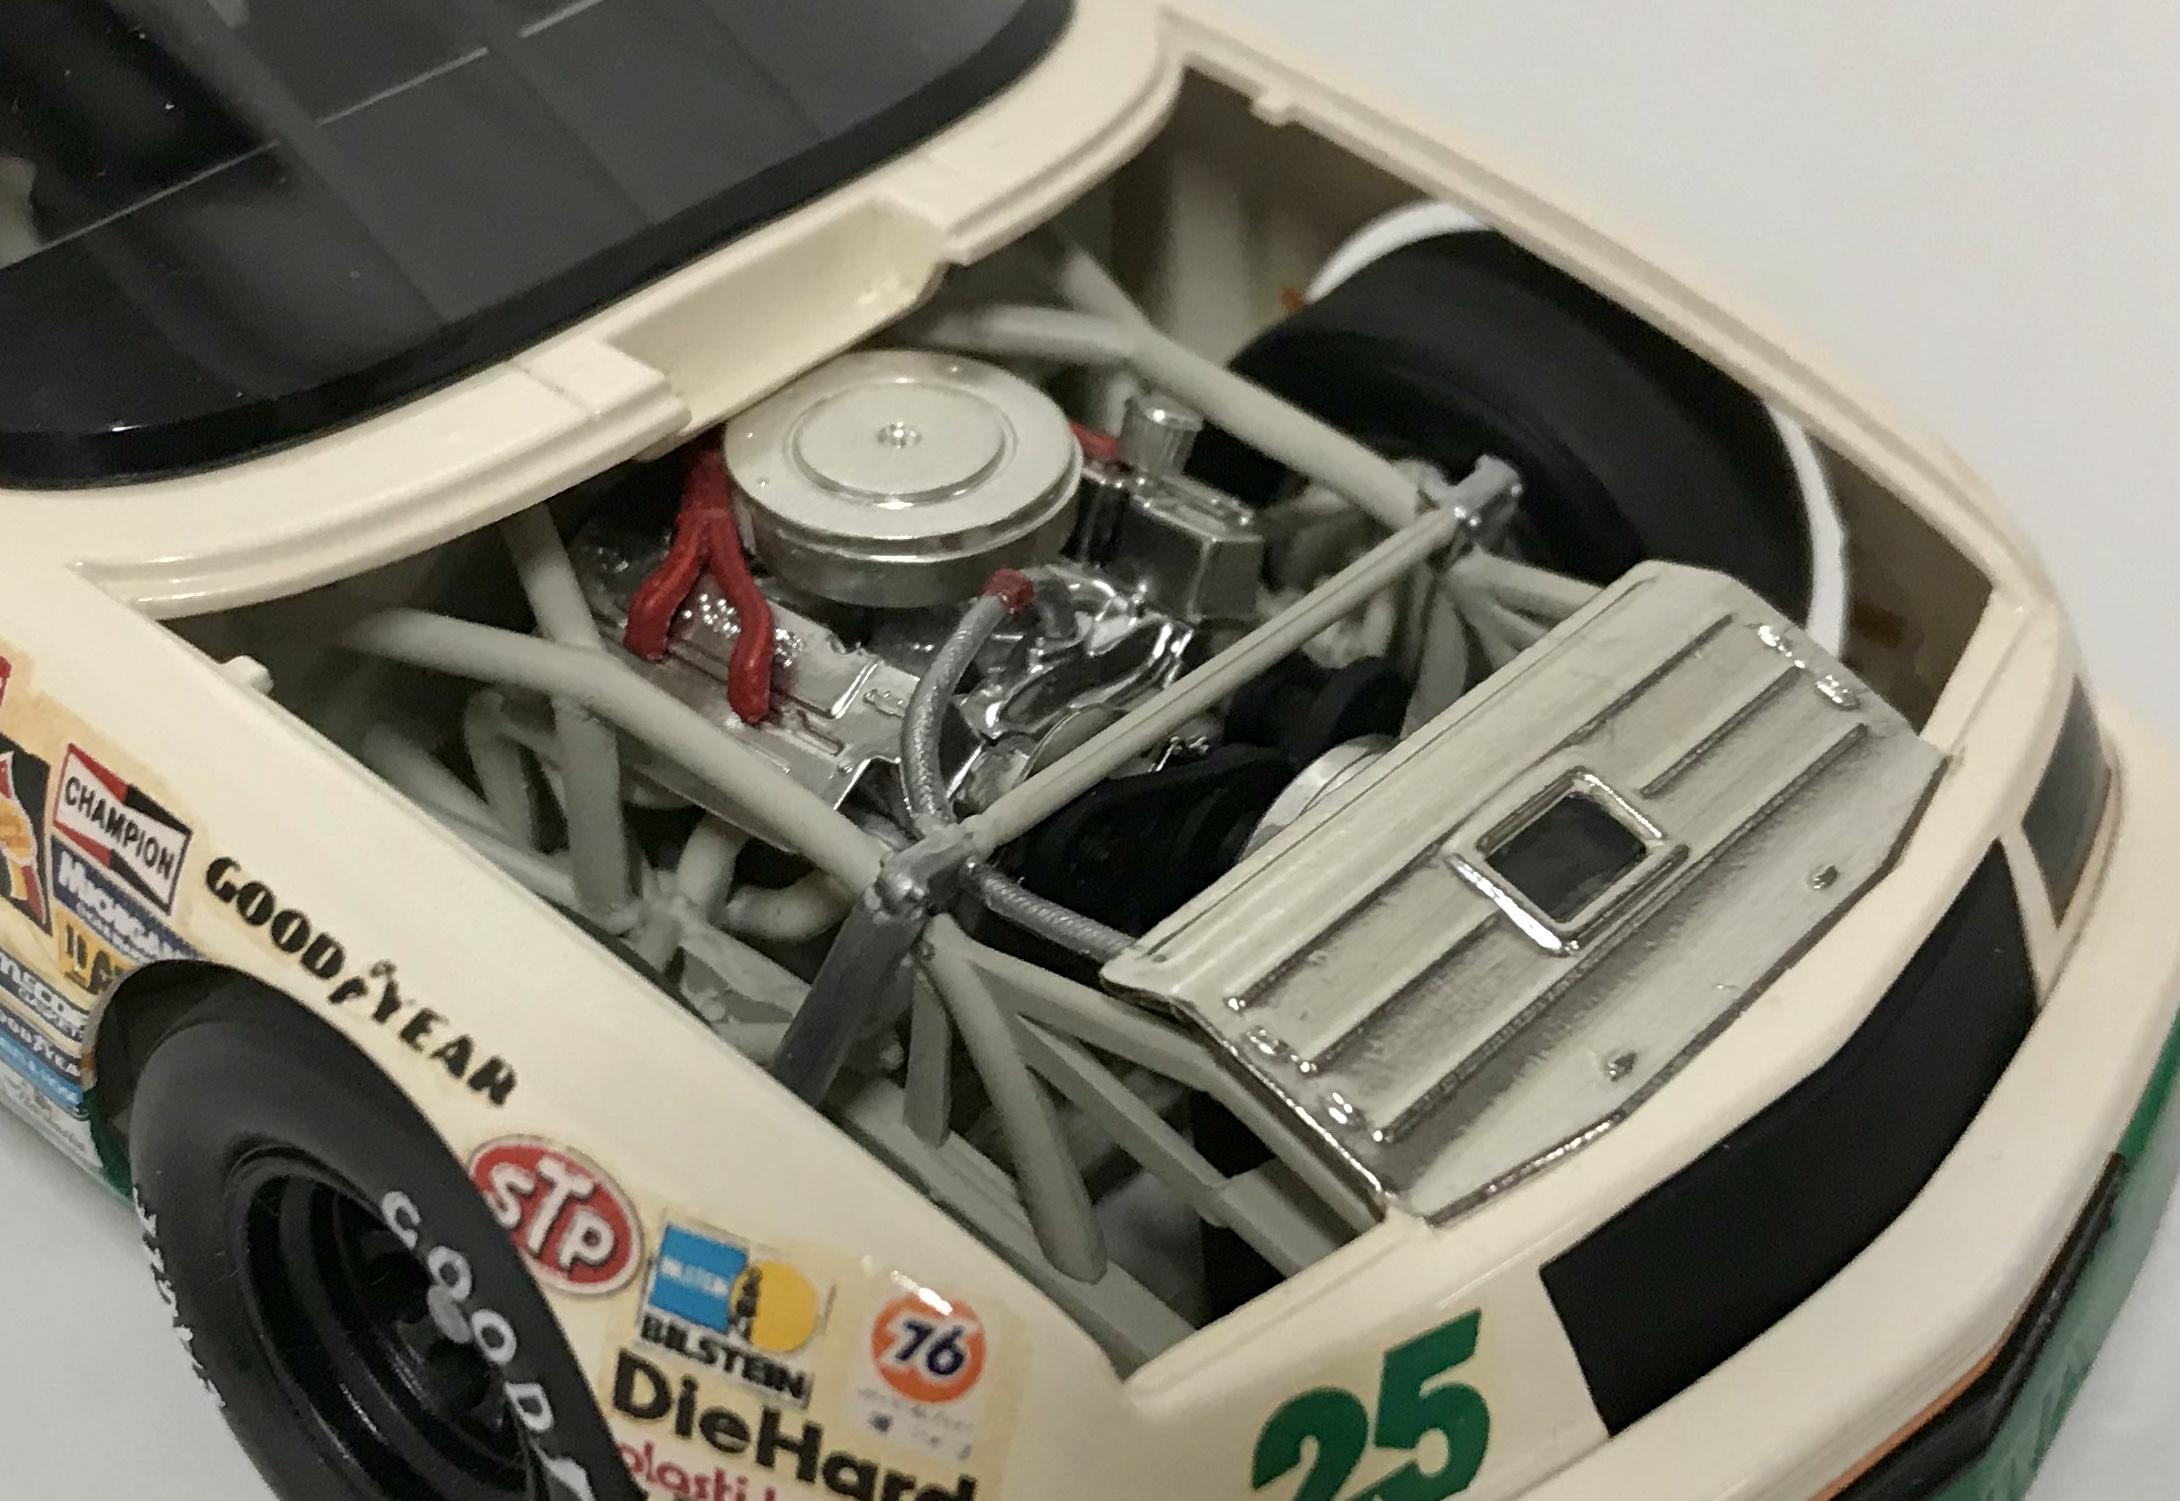
This is one I built in 1991. The Kodiak Lumina, driven by Ken Schrader and owned by Rick Hendrick. It was built box stock with Testors paint and Fred Cady decals. I think the Lumina kit is the best designed and engineered of all the NASCAR kits, it builds up very nicely without any problems. Thanks for checking it out.
-
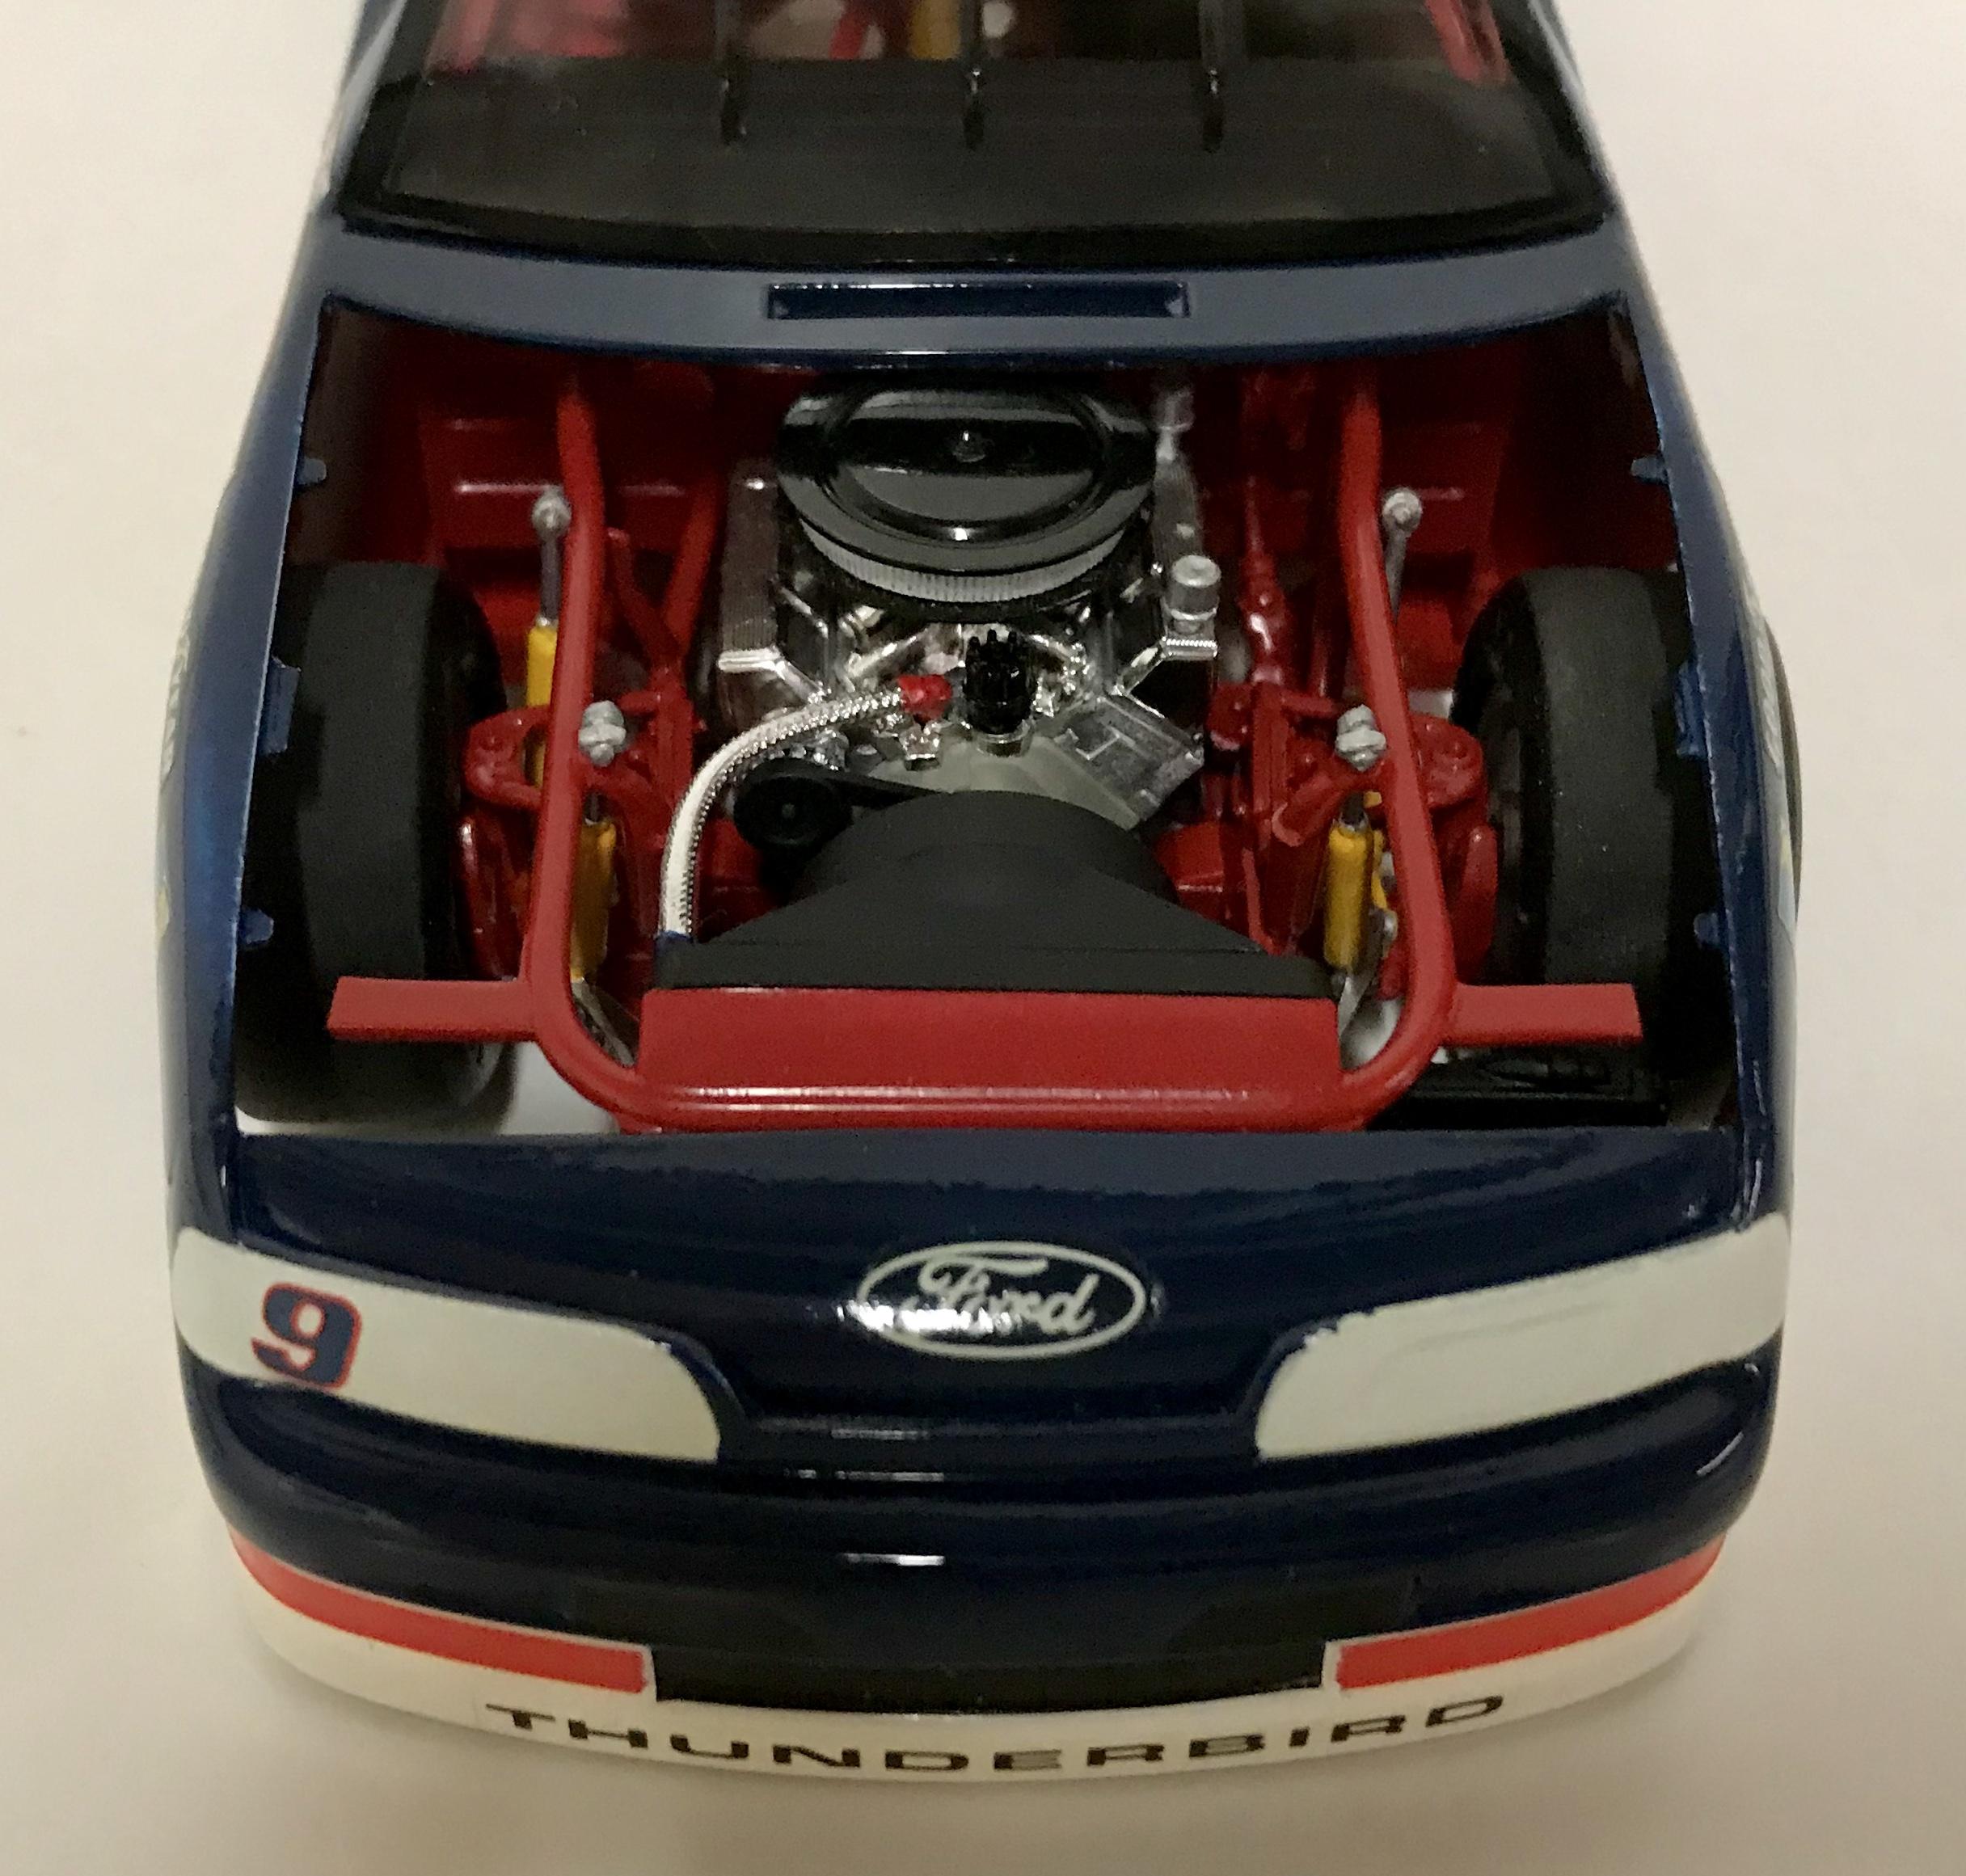
This is one I built in 2003. It’s the Monogram Thunderbird, built box stock except for GM 9 hole wheels, with decals from the AMT kit. It’s painted with Pactra Imperial blue and Testors gloss white on the outside and Testors 1203 red inside. I thought it turned out pretty good.
-
Thanks Bruce, I didn’t use any tire decals. I actually painted the letters on the tires by hand with a 000 brush and water based paint. I just did them one letter at a time and if I messed one up I would wipe it off and redo it. They did turn out pretty spectacular and still look great 30 years later. One advantage I had at the time was some 28 year old eyes. I did these at that time without any visual aids, now with 58 year old eyes, I couldn’t do as well even with bifocals and magnifying glasses. Dang it man!
-
1966 Ford F100 Fleetside
modelcarcrazy replied to dougwintz's topic in Model Trucks: Pickups, Vans, SUVs, Light Commercial
Very nice looking build. Those kits look to be top notch, but isn’t this a build of a Flareside instead of a Fleetside? -
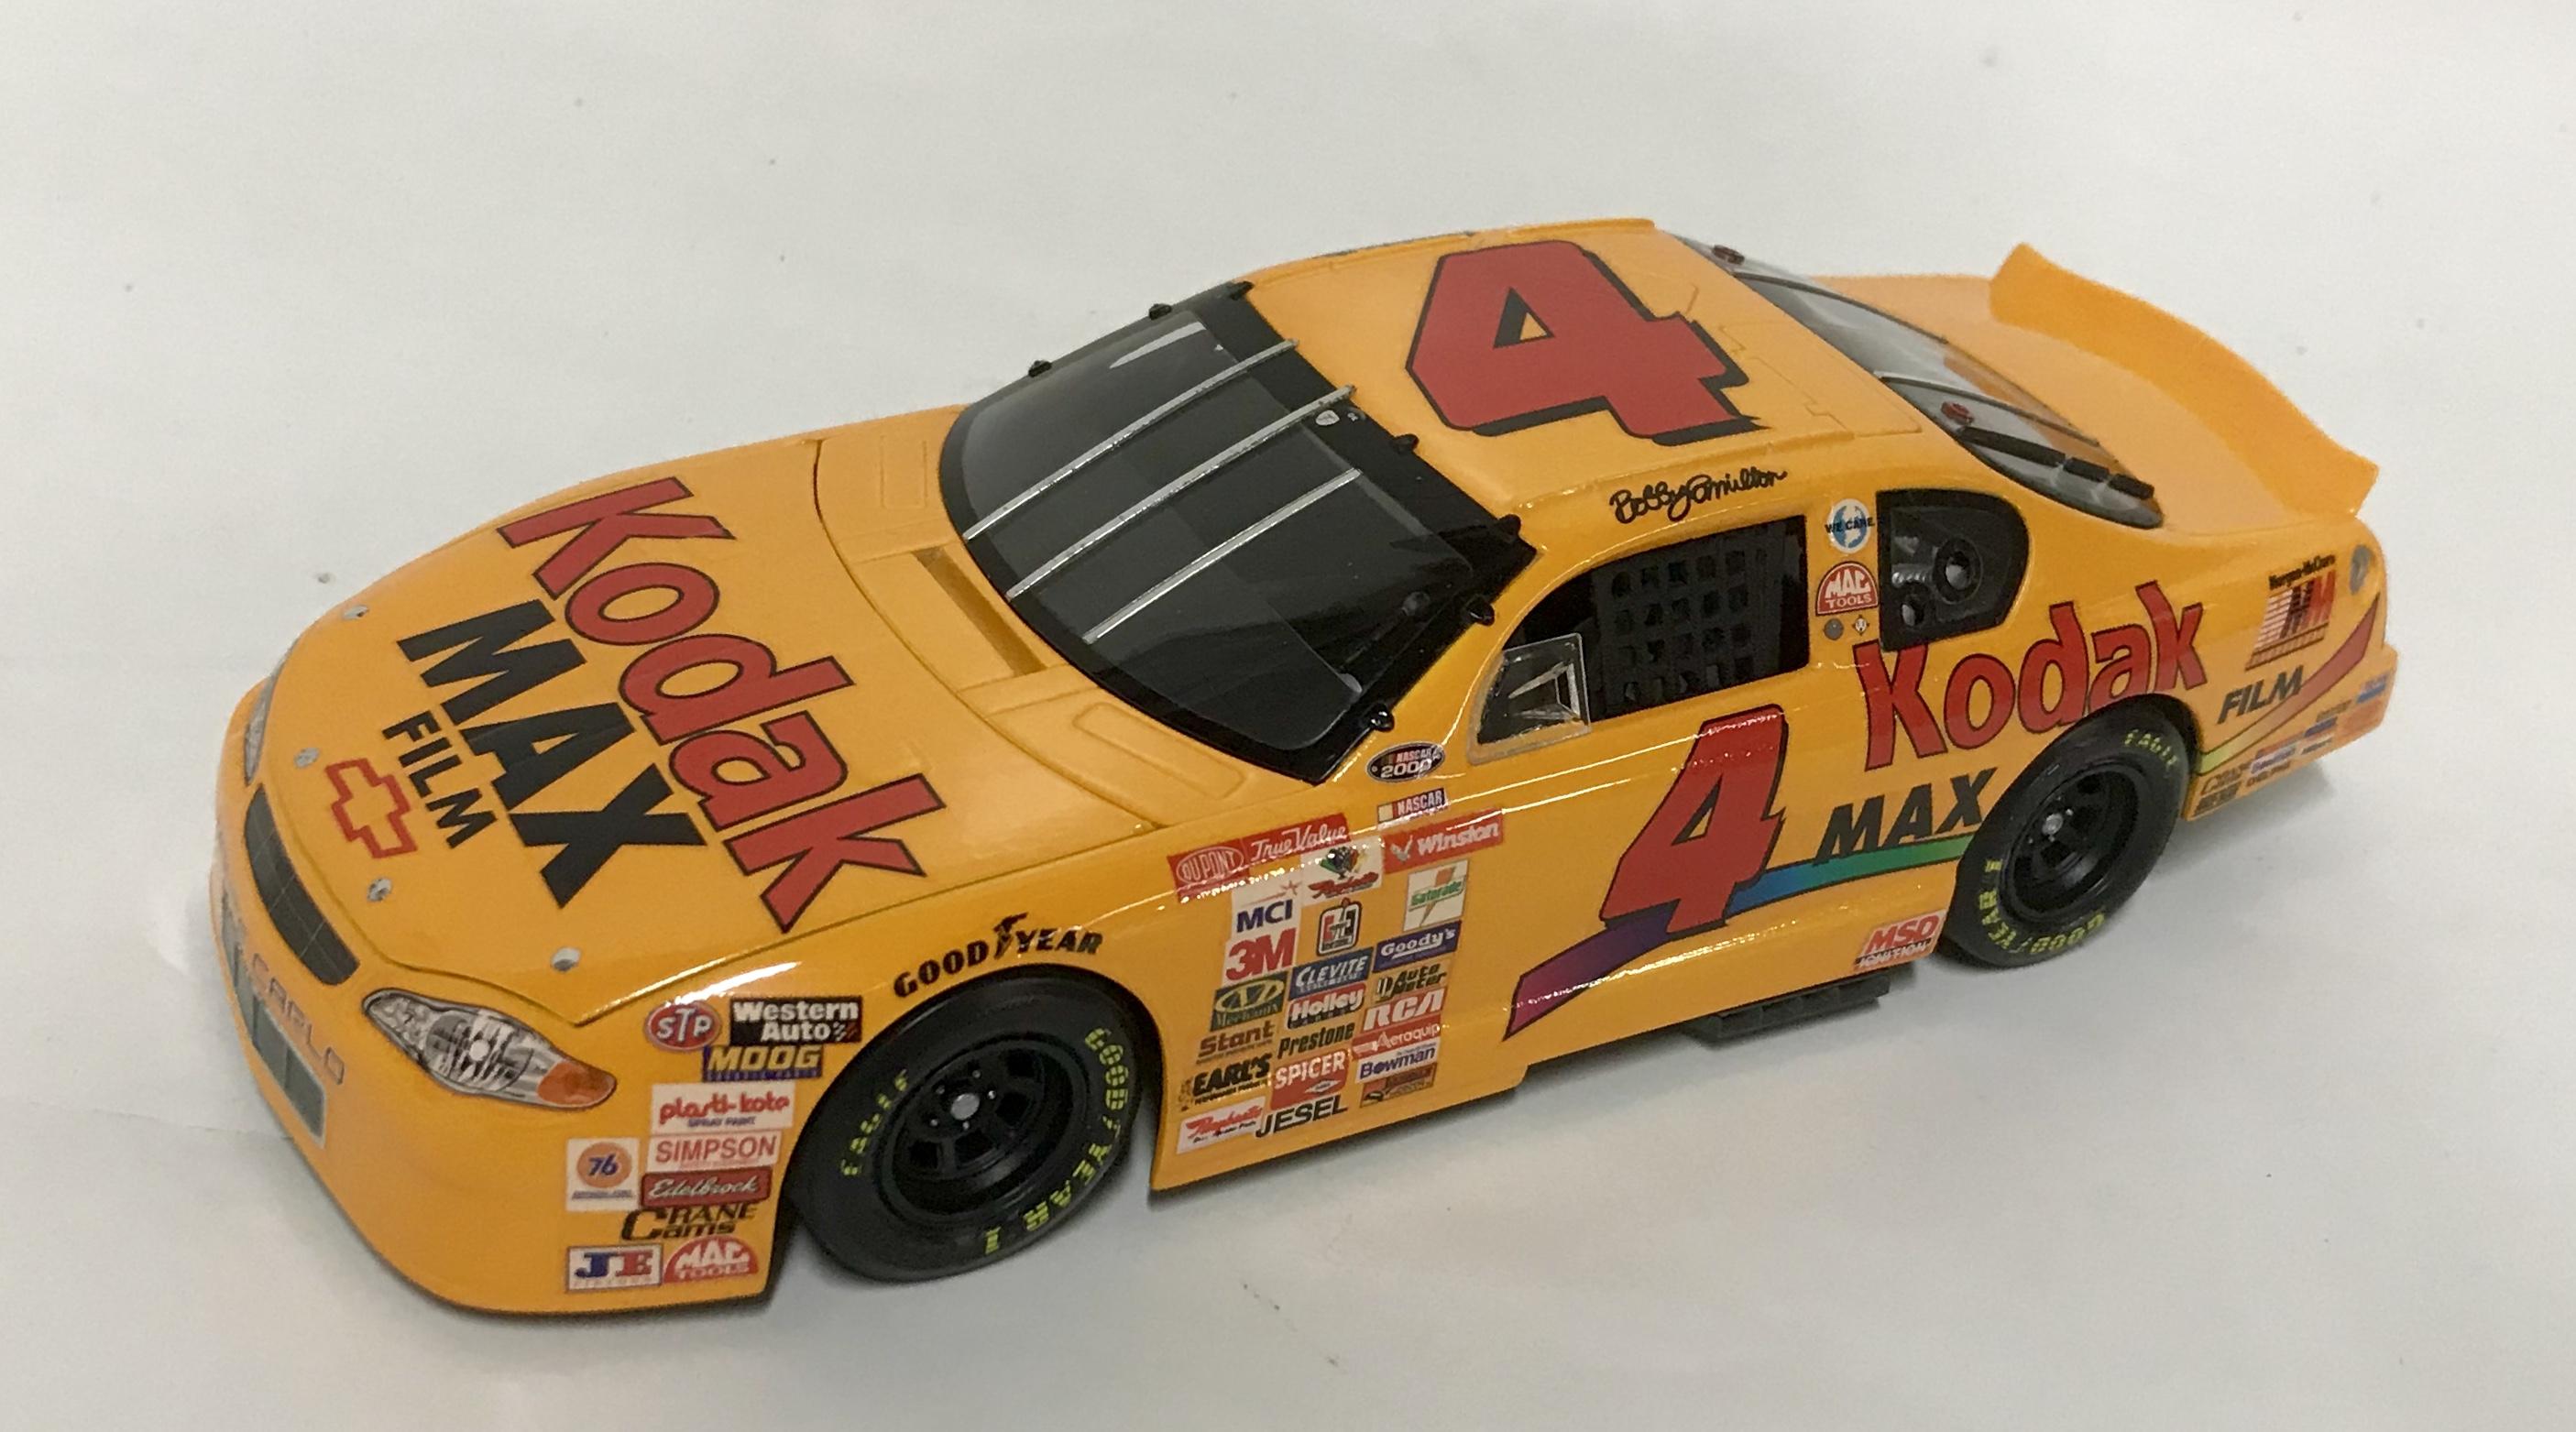
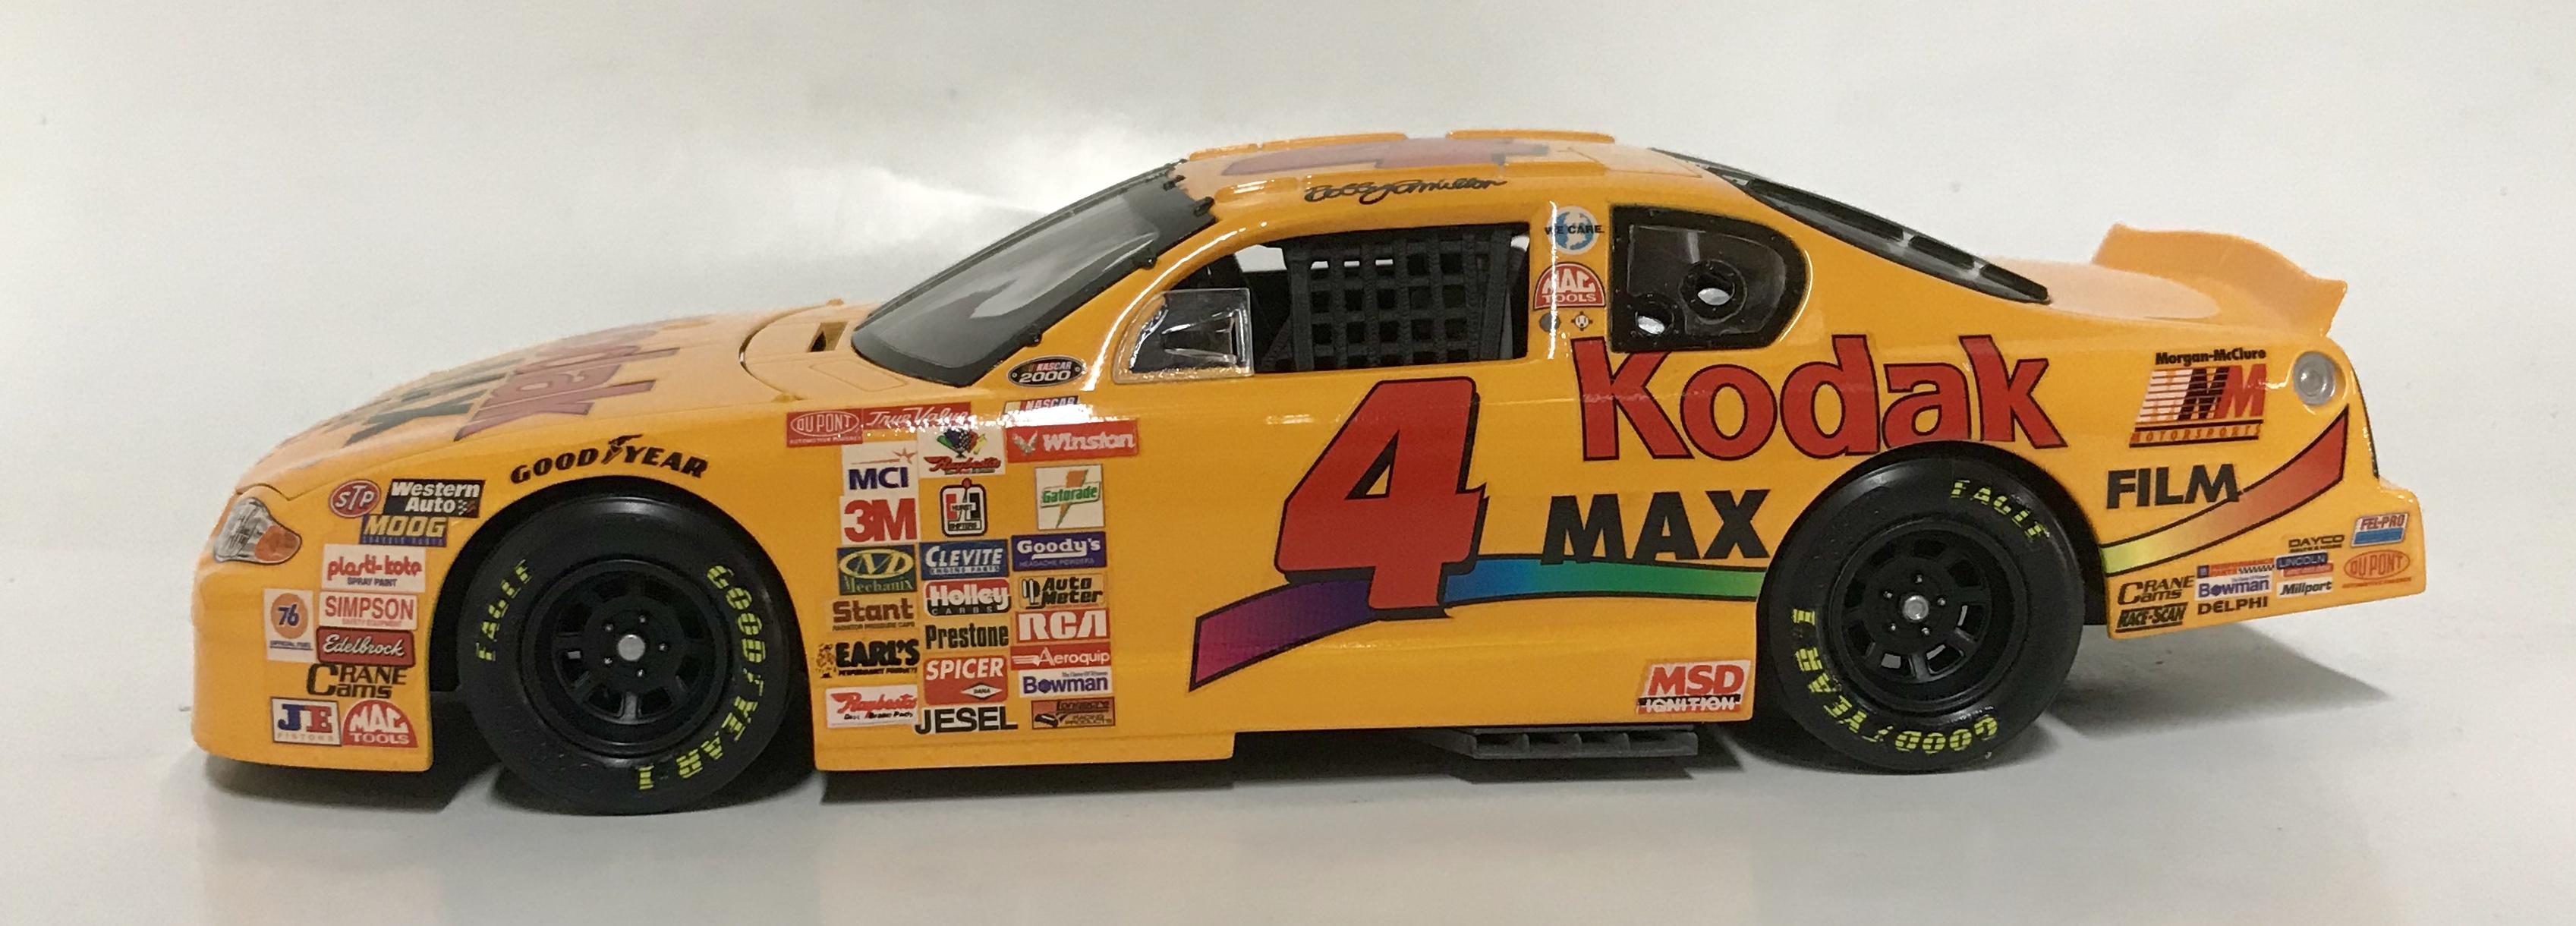
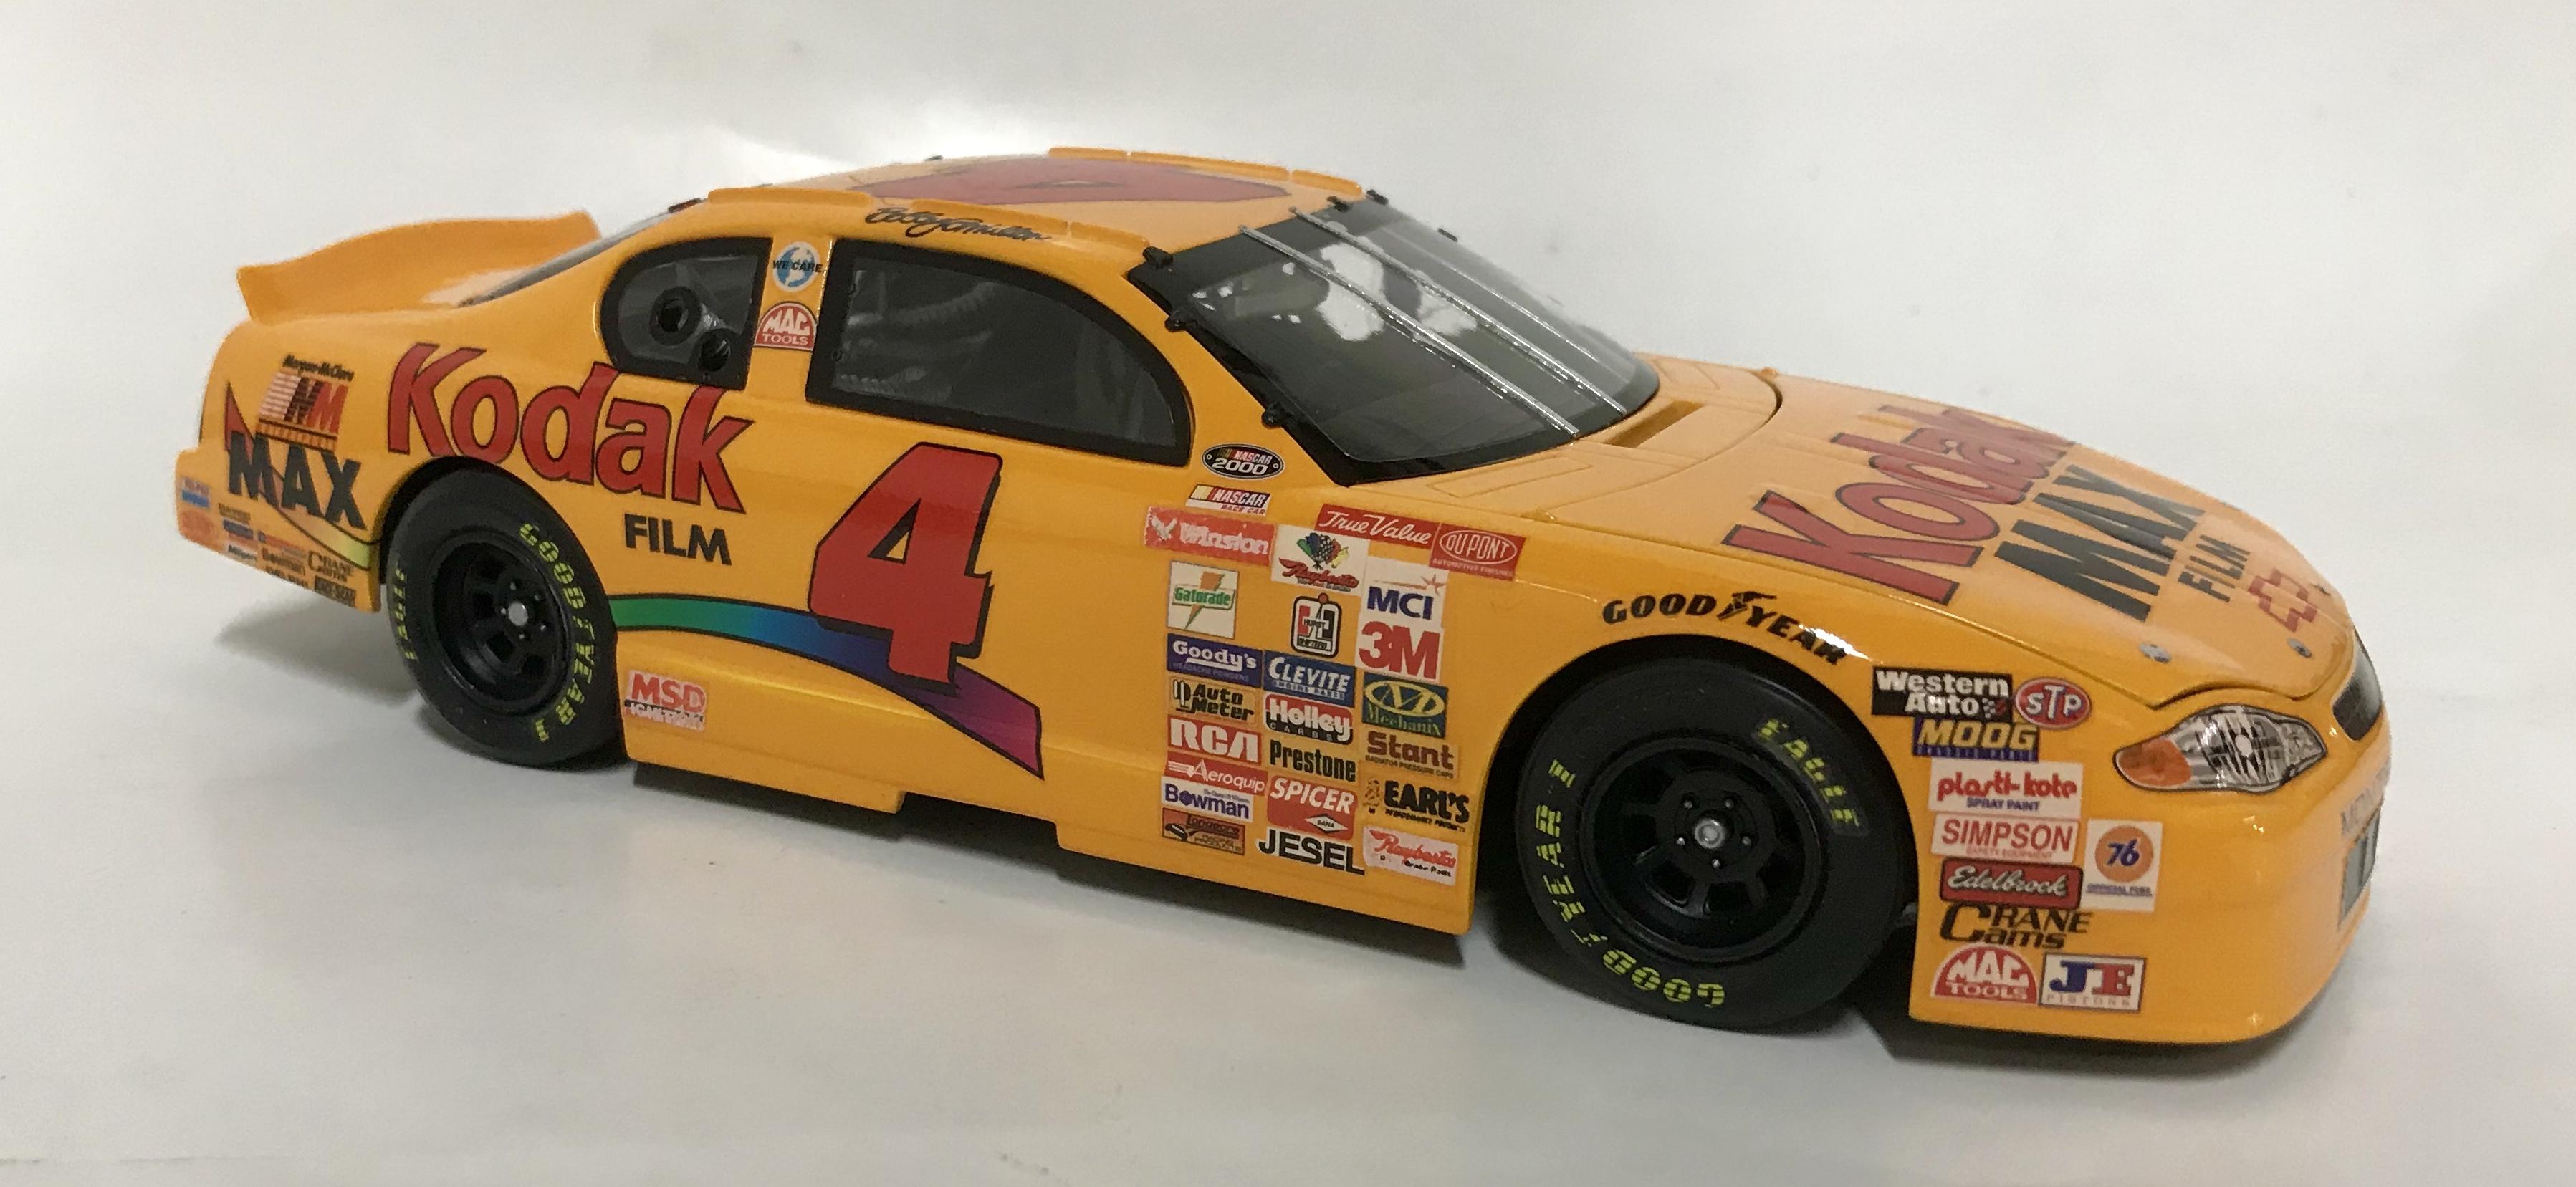
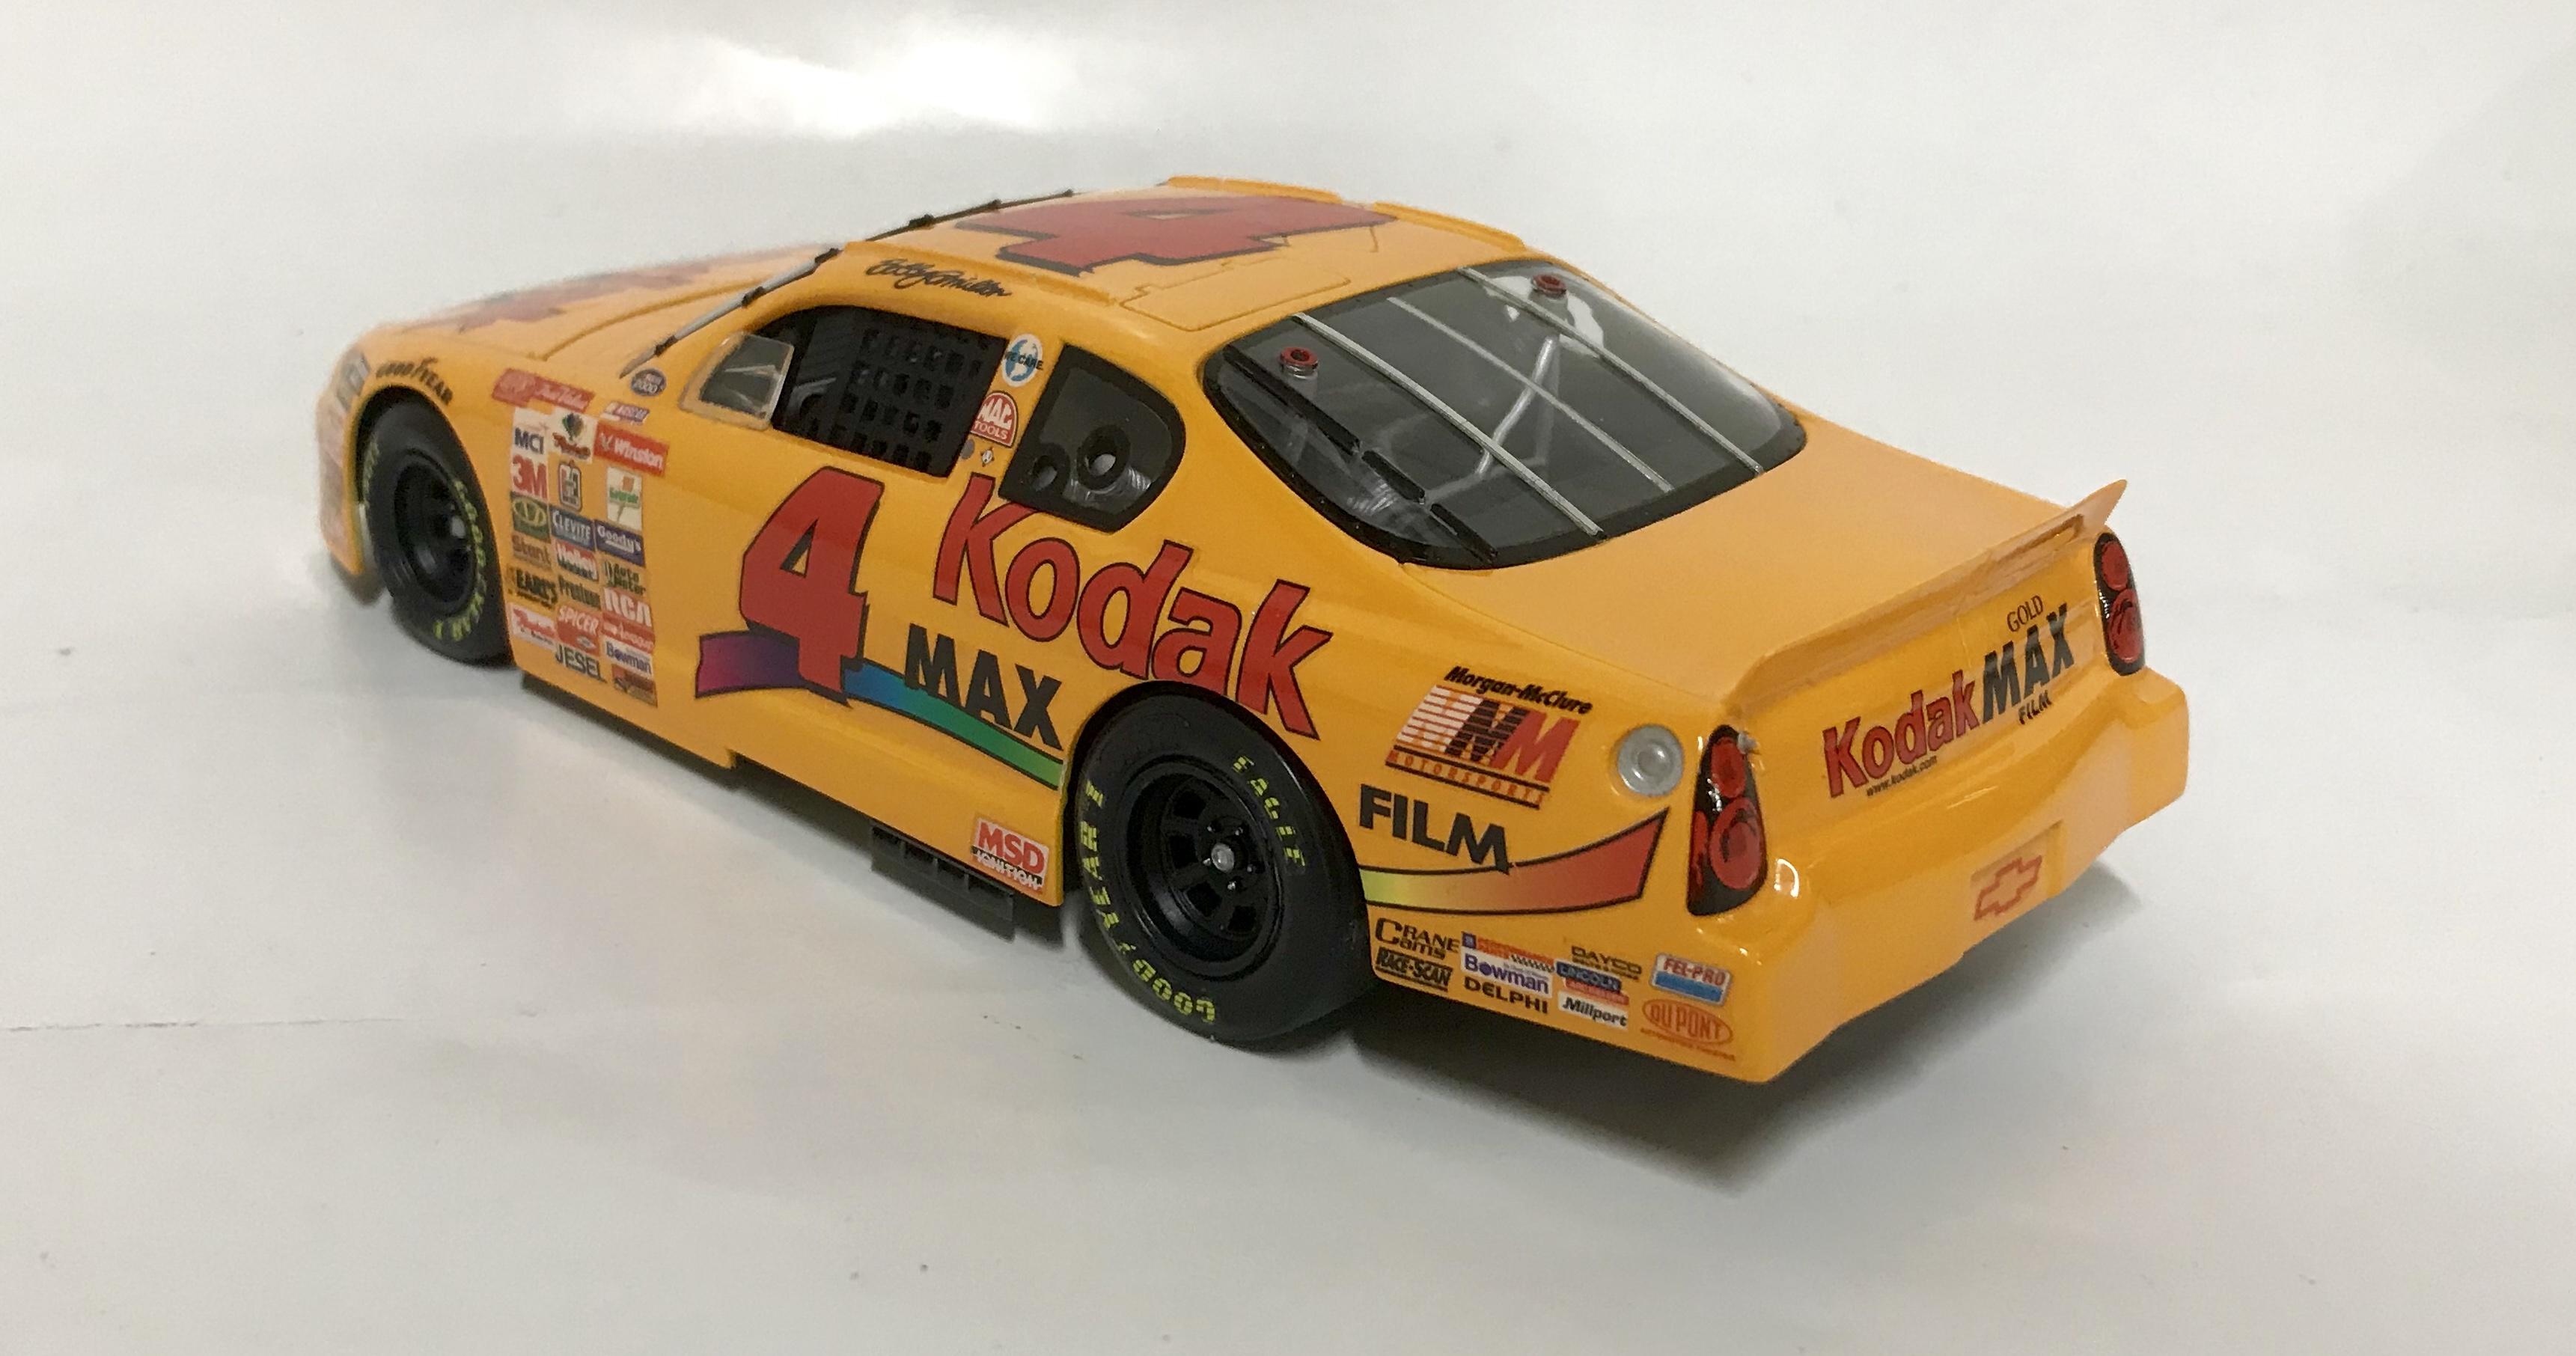
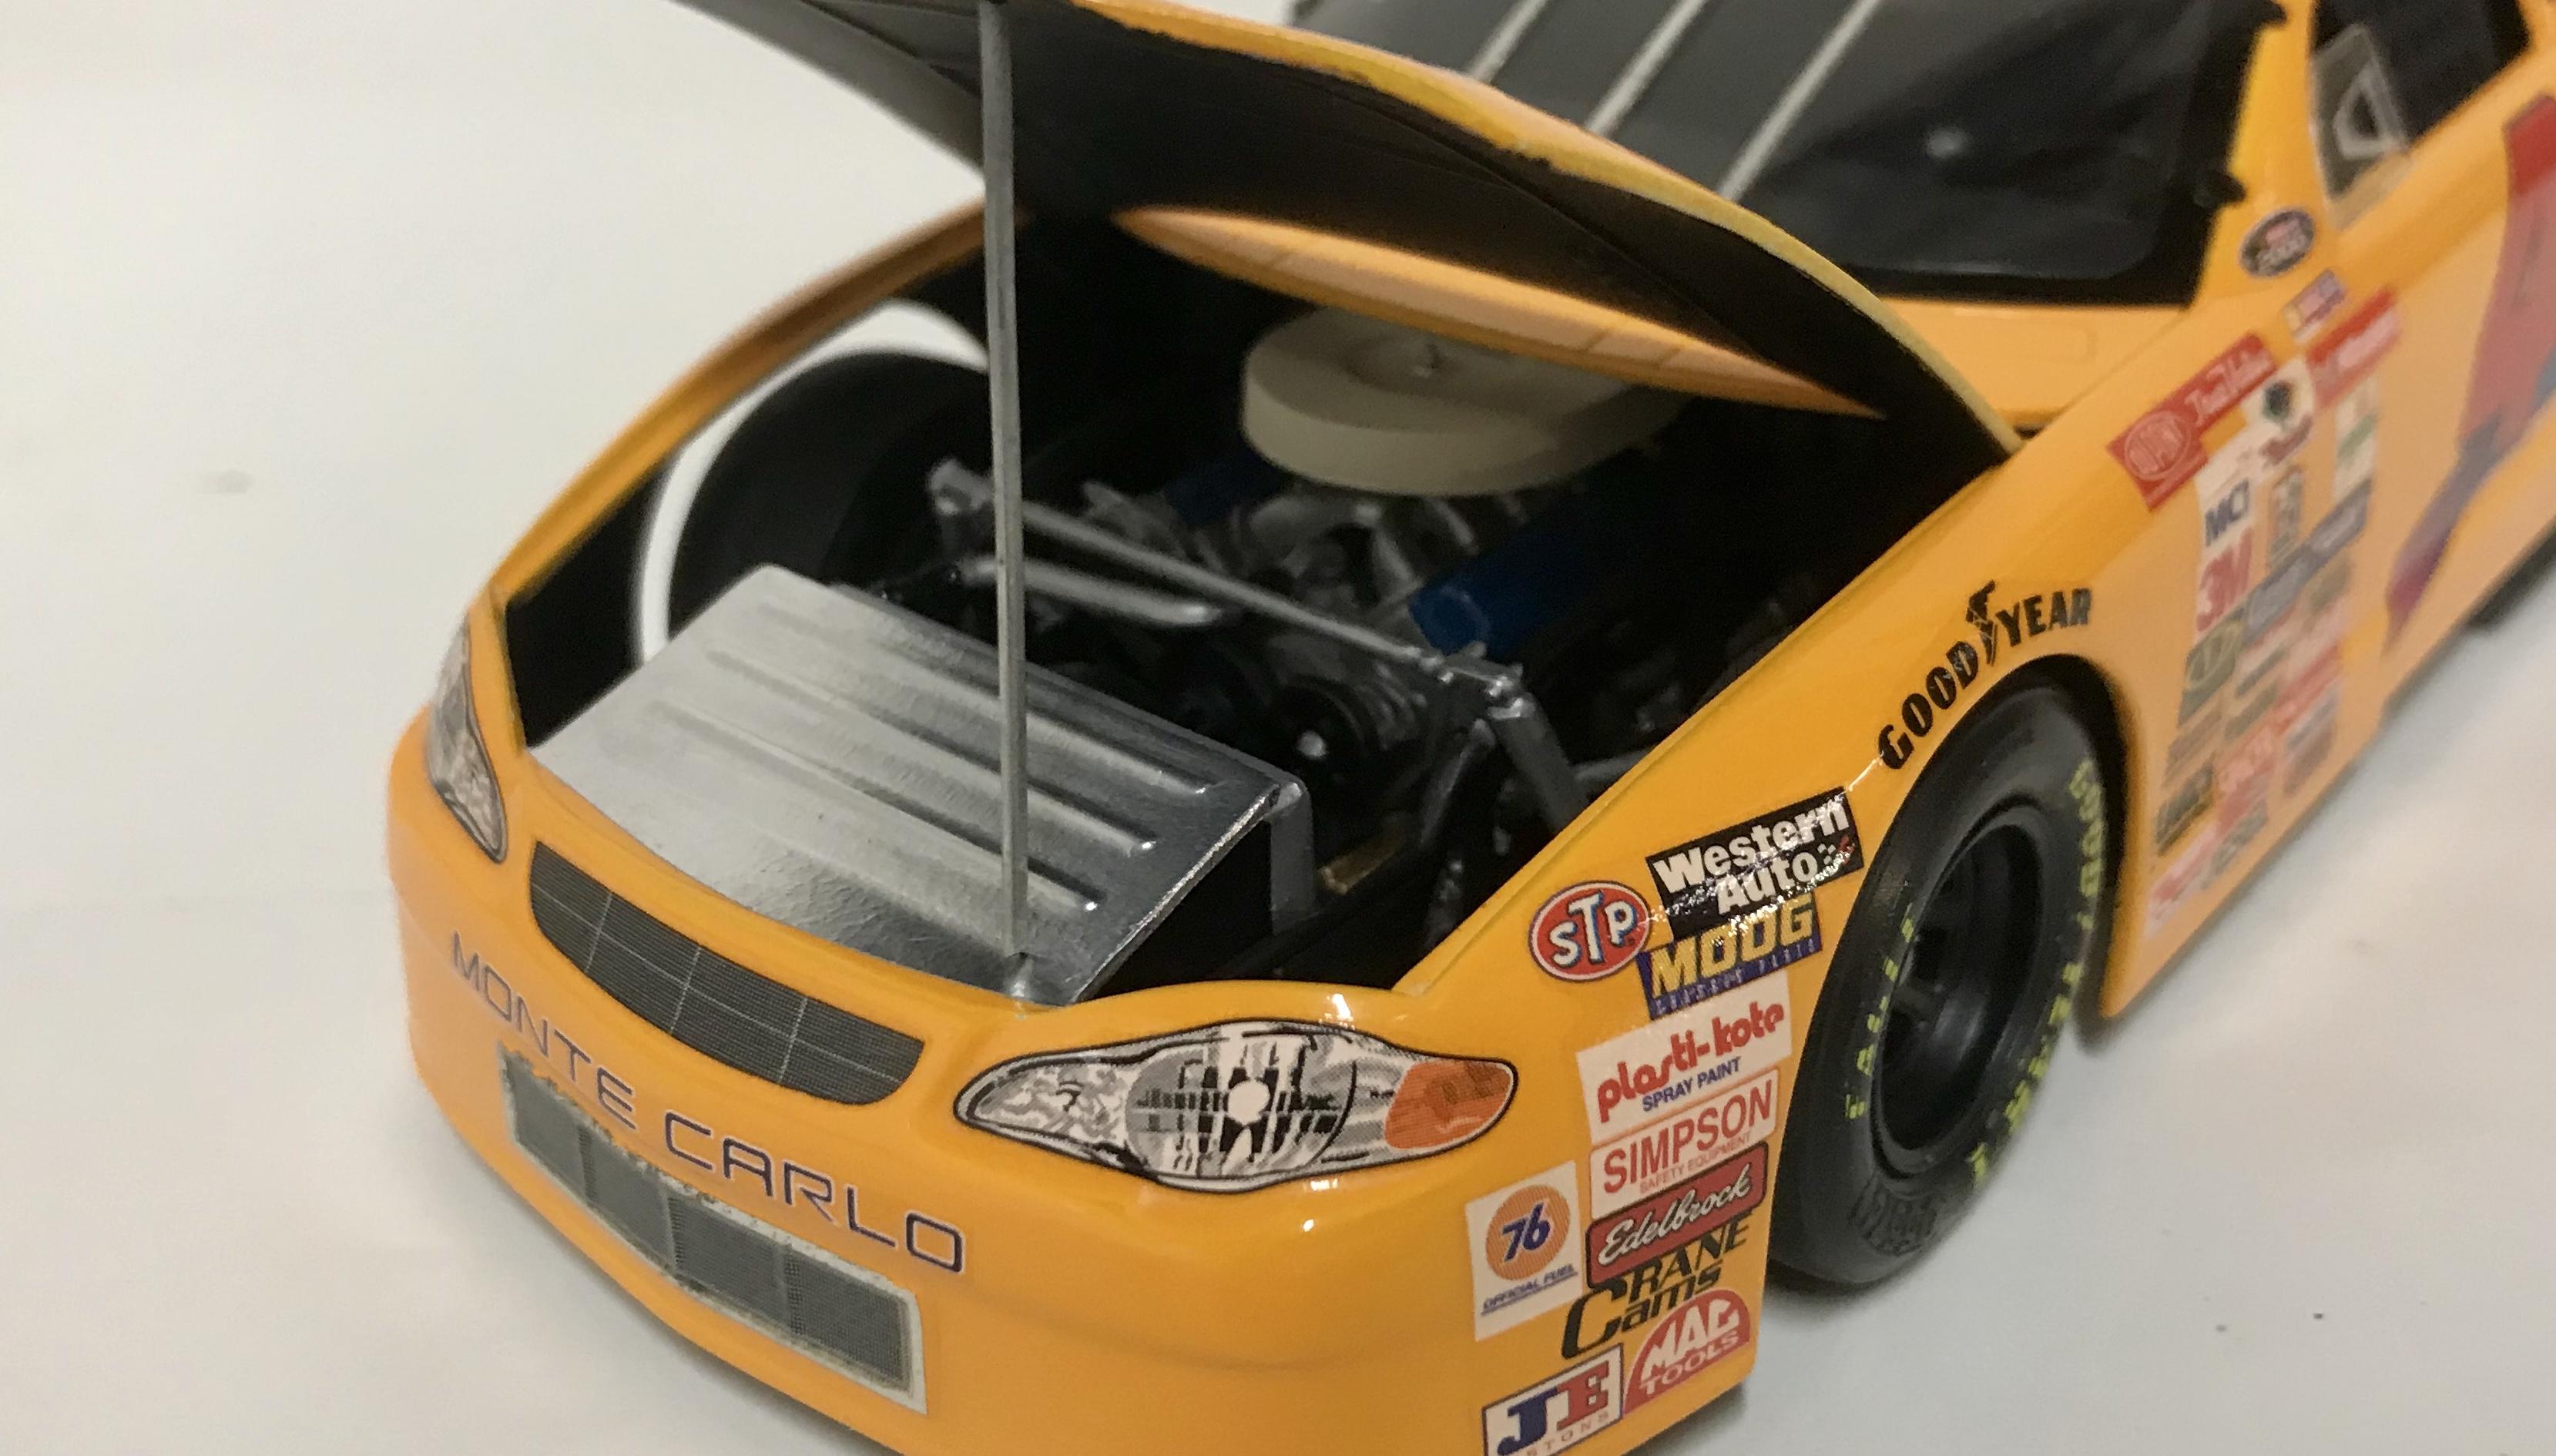
I built this in 2003. Revell kit, box stock with Testors racing colors Kodak yellow and Testors flat black inside. The decals are from the AMT kit.