modelcarcrazy
-
Posts
126 -
Joined
-
Last visited
Content Type
Profiles
Forums
Events
Gallery
Everything posted by modelcarcrazy
-
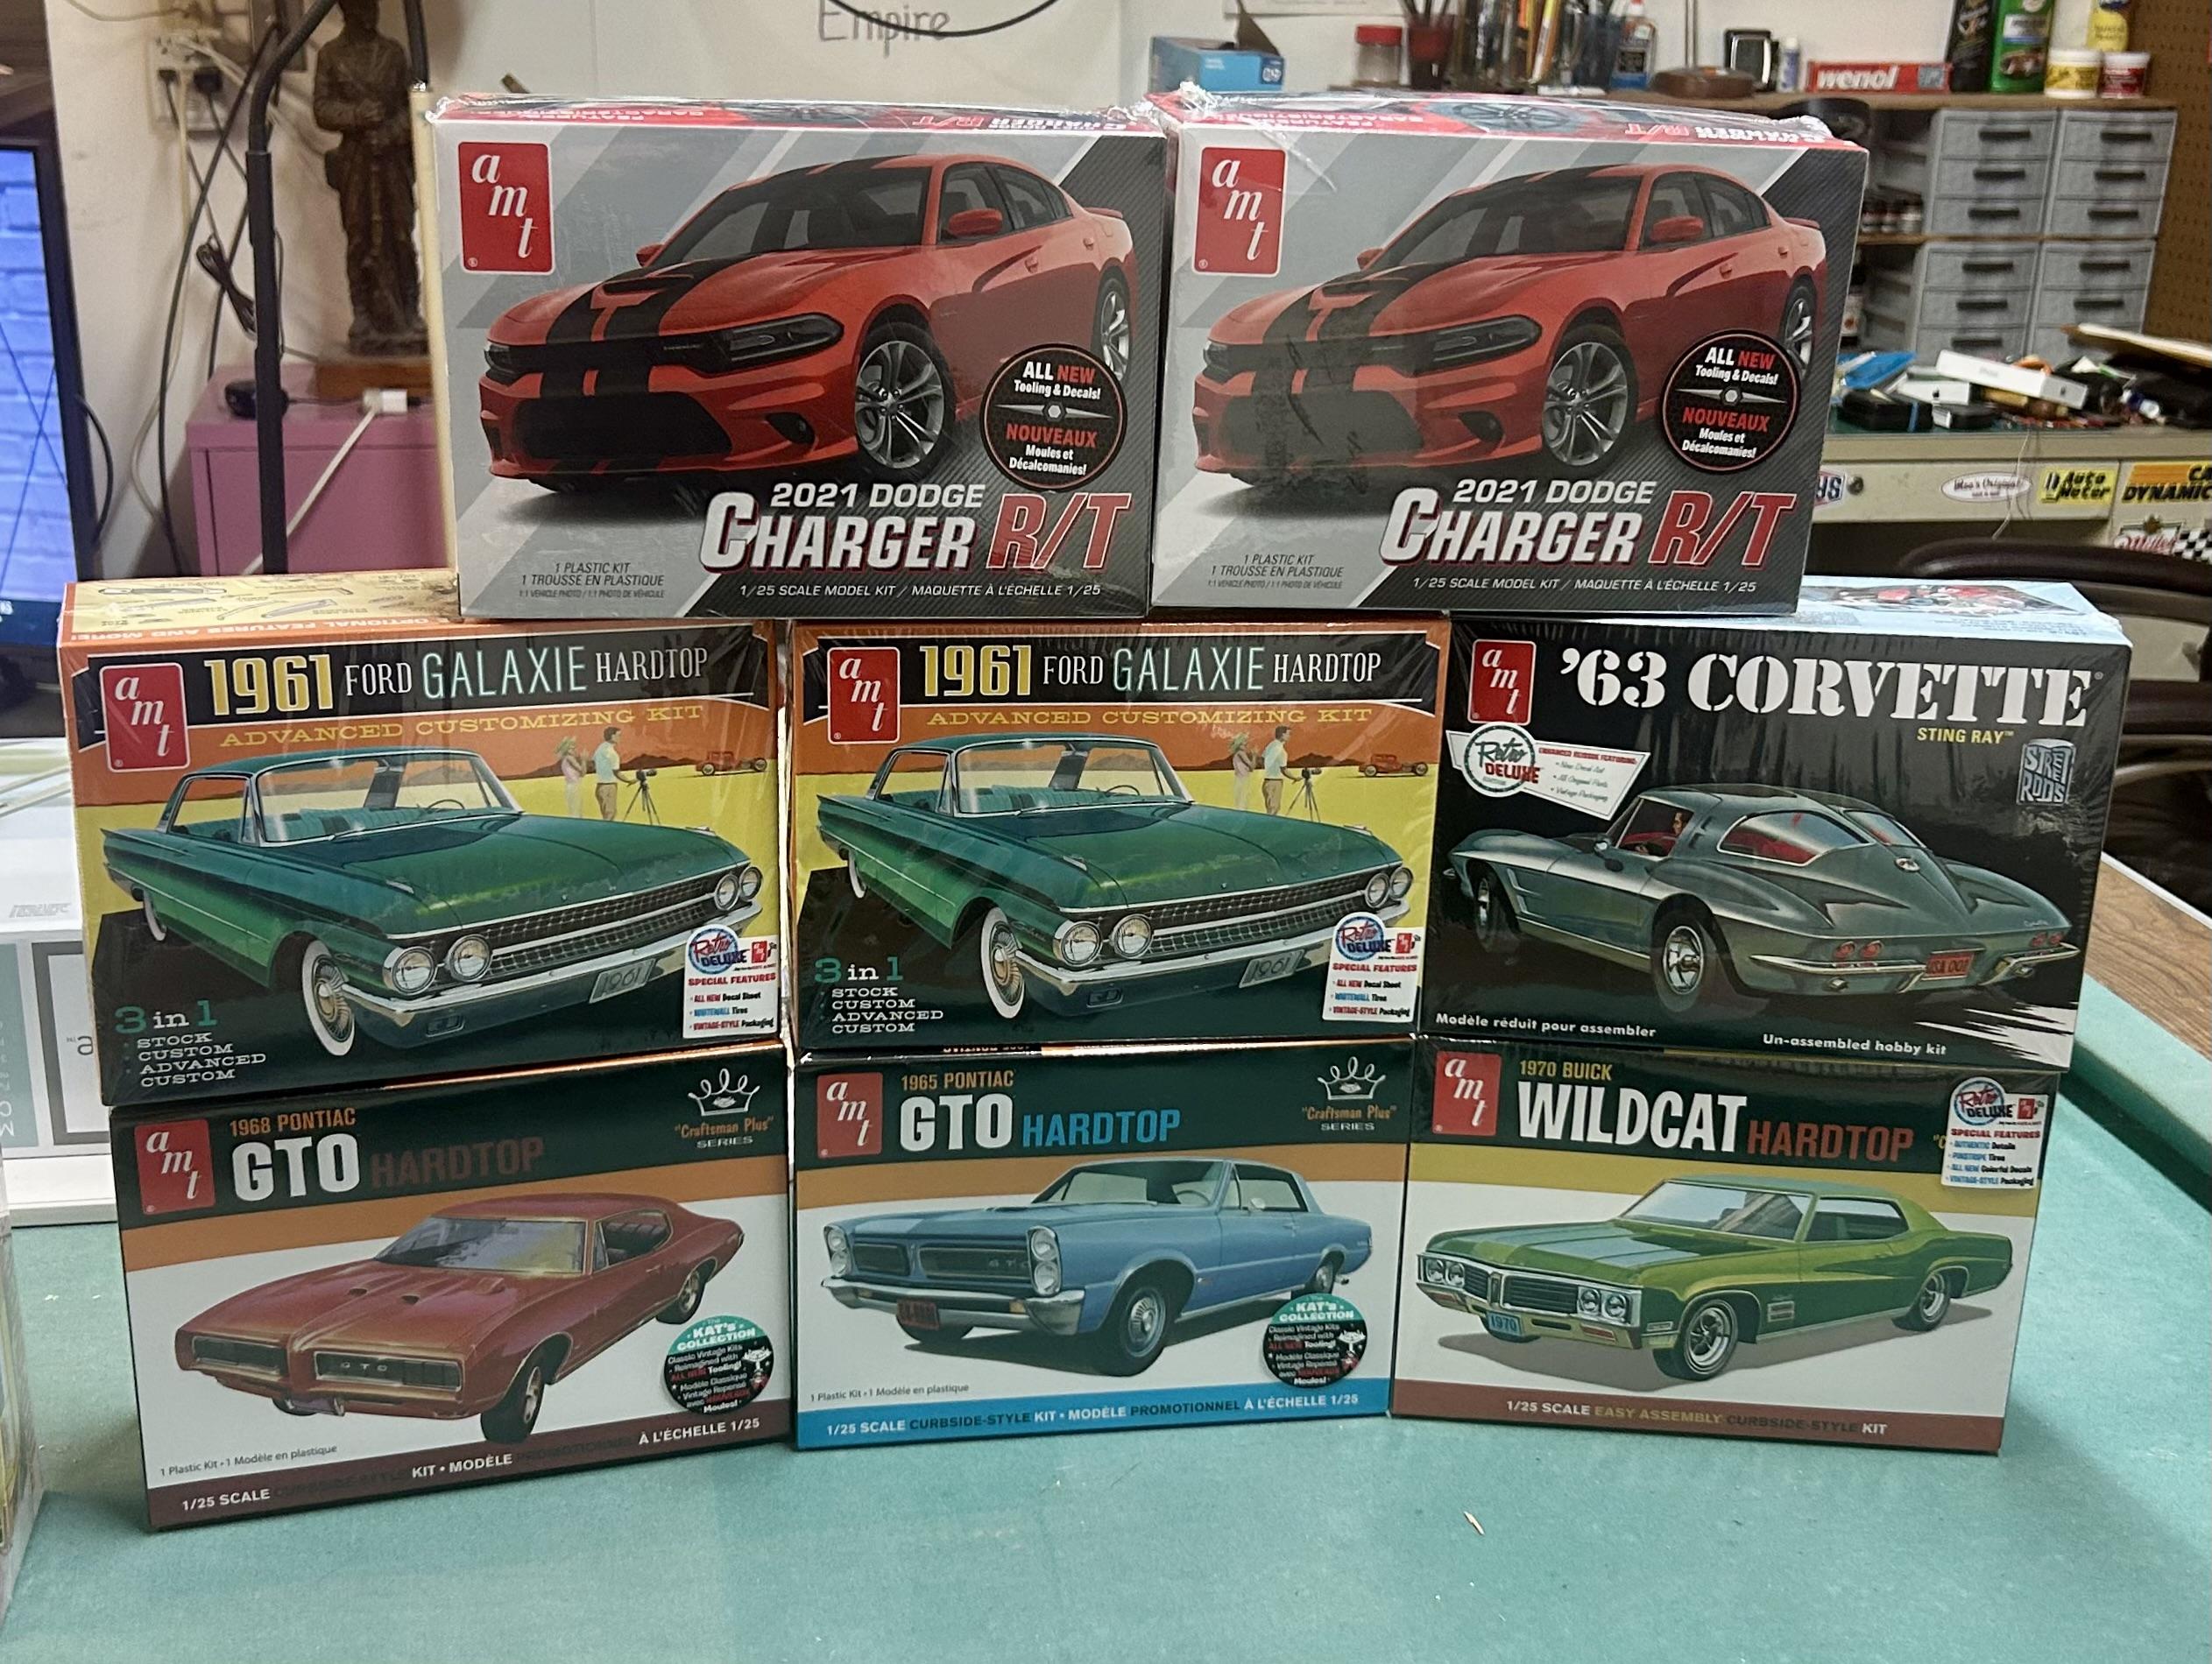
I hauled these home from Walmart. They had all their kits on sale for $10 each. I hauled these home from Wes’s Model Car Corner.

- 39,099 replies
-
- 8
-

-
- johan
- glue bombs
- (and 1 more)
-
No, back in 1993 I had never heard of a WIP. Back in those days digital cameras hadn’t become part of my world yet and the internet was just making its way out of Al Gore’s imagination. I was focused mostly on hot chicks, which have now become gray headed grandmothers. Dang it, man.
-
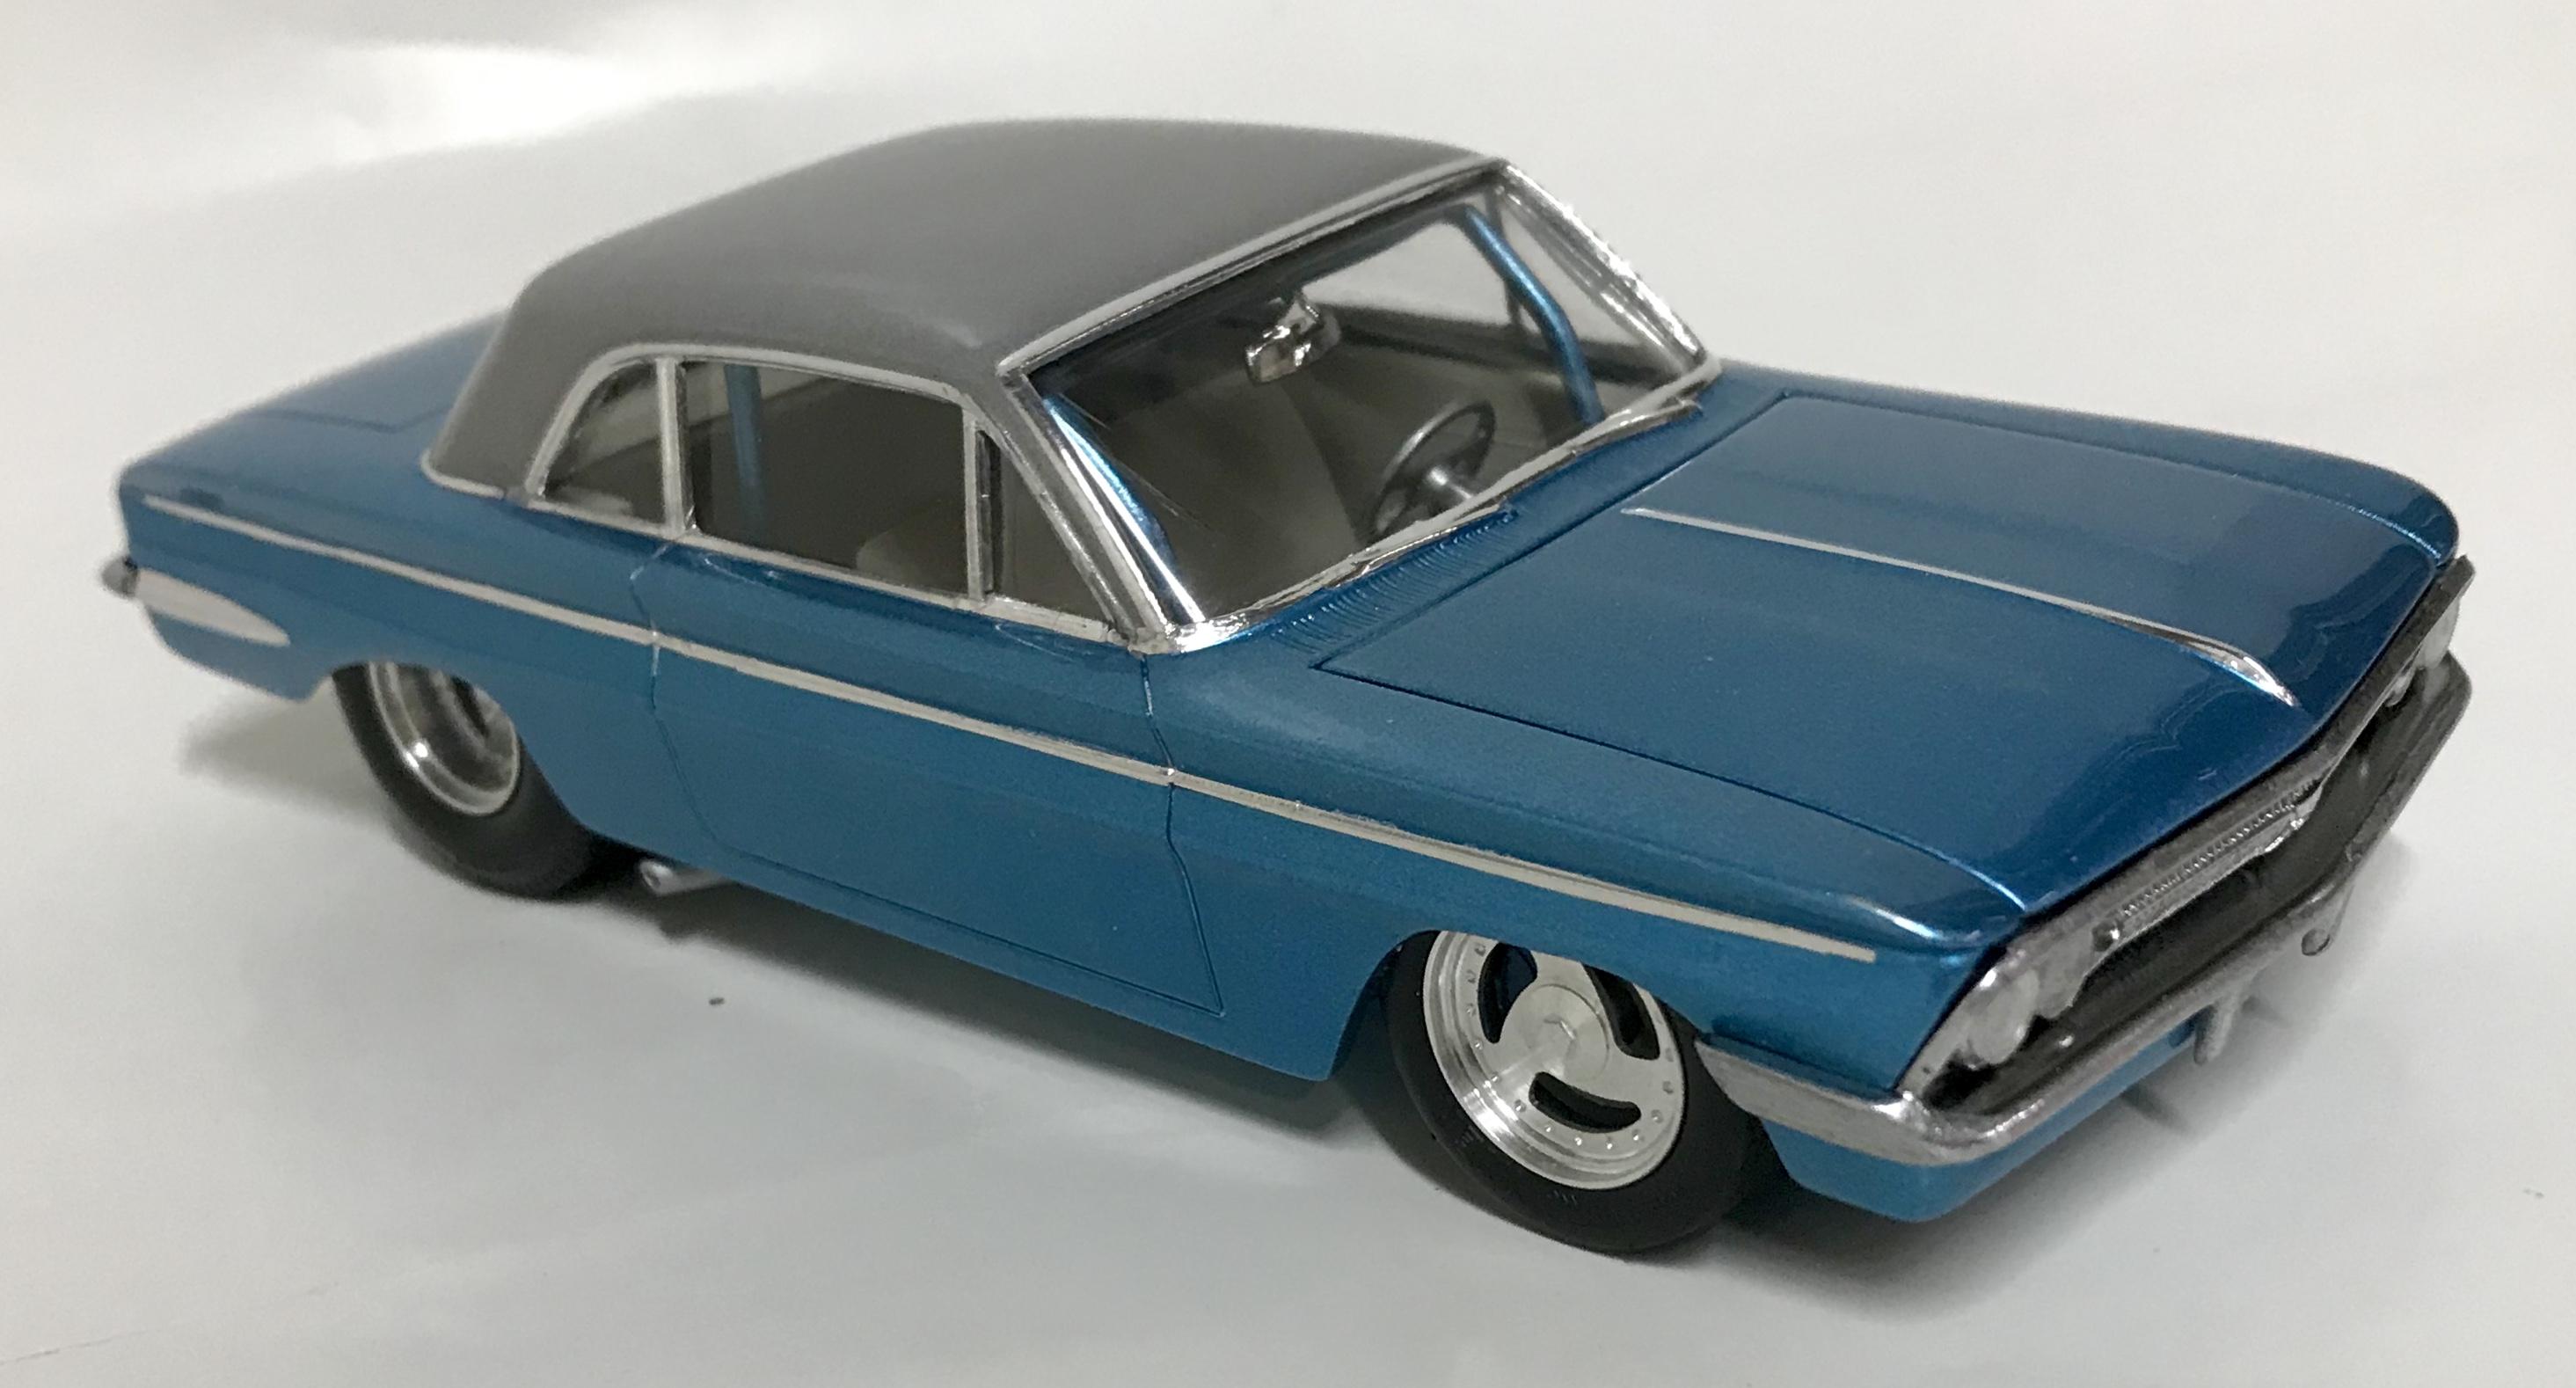
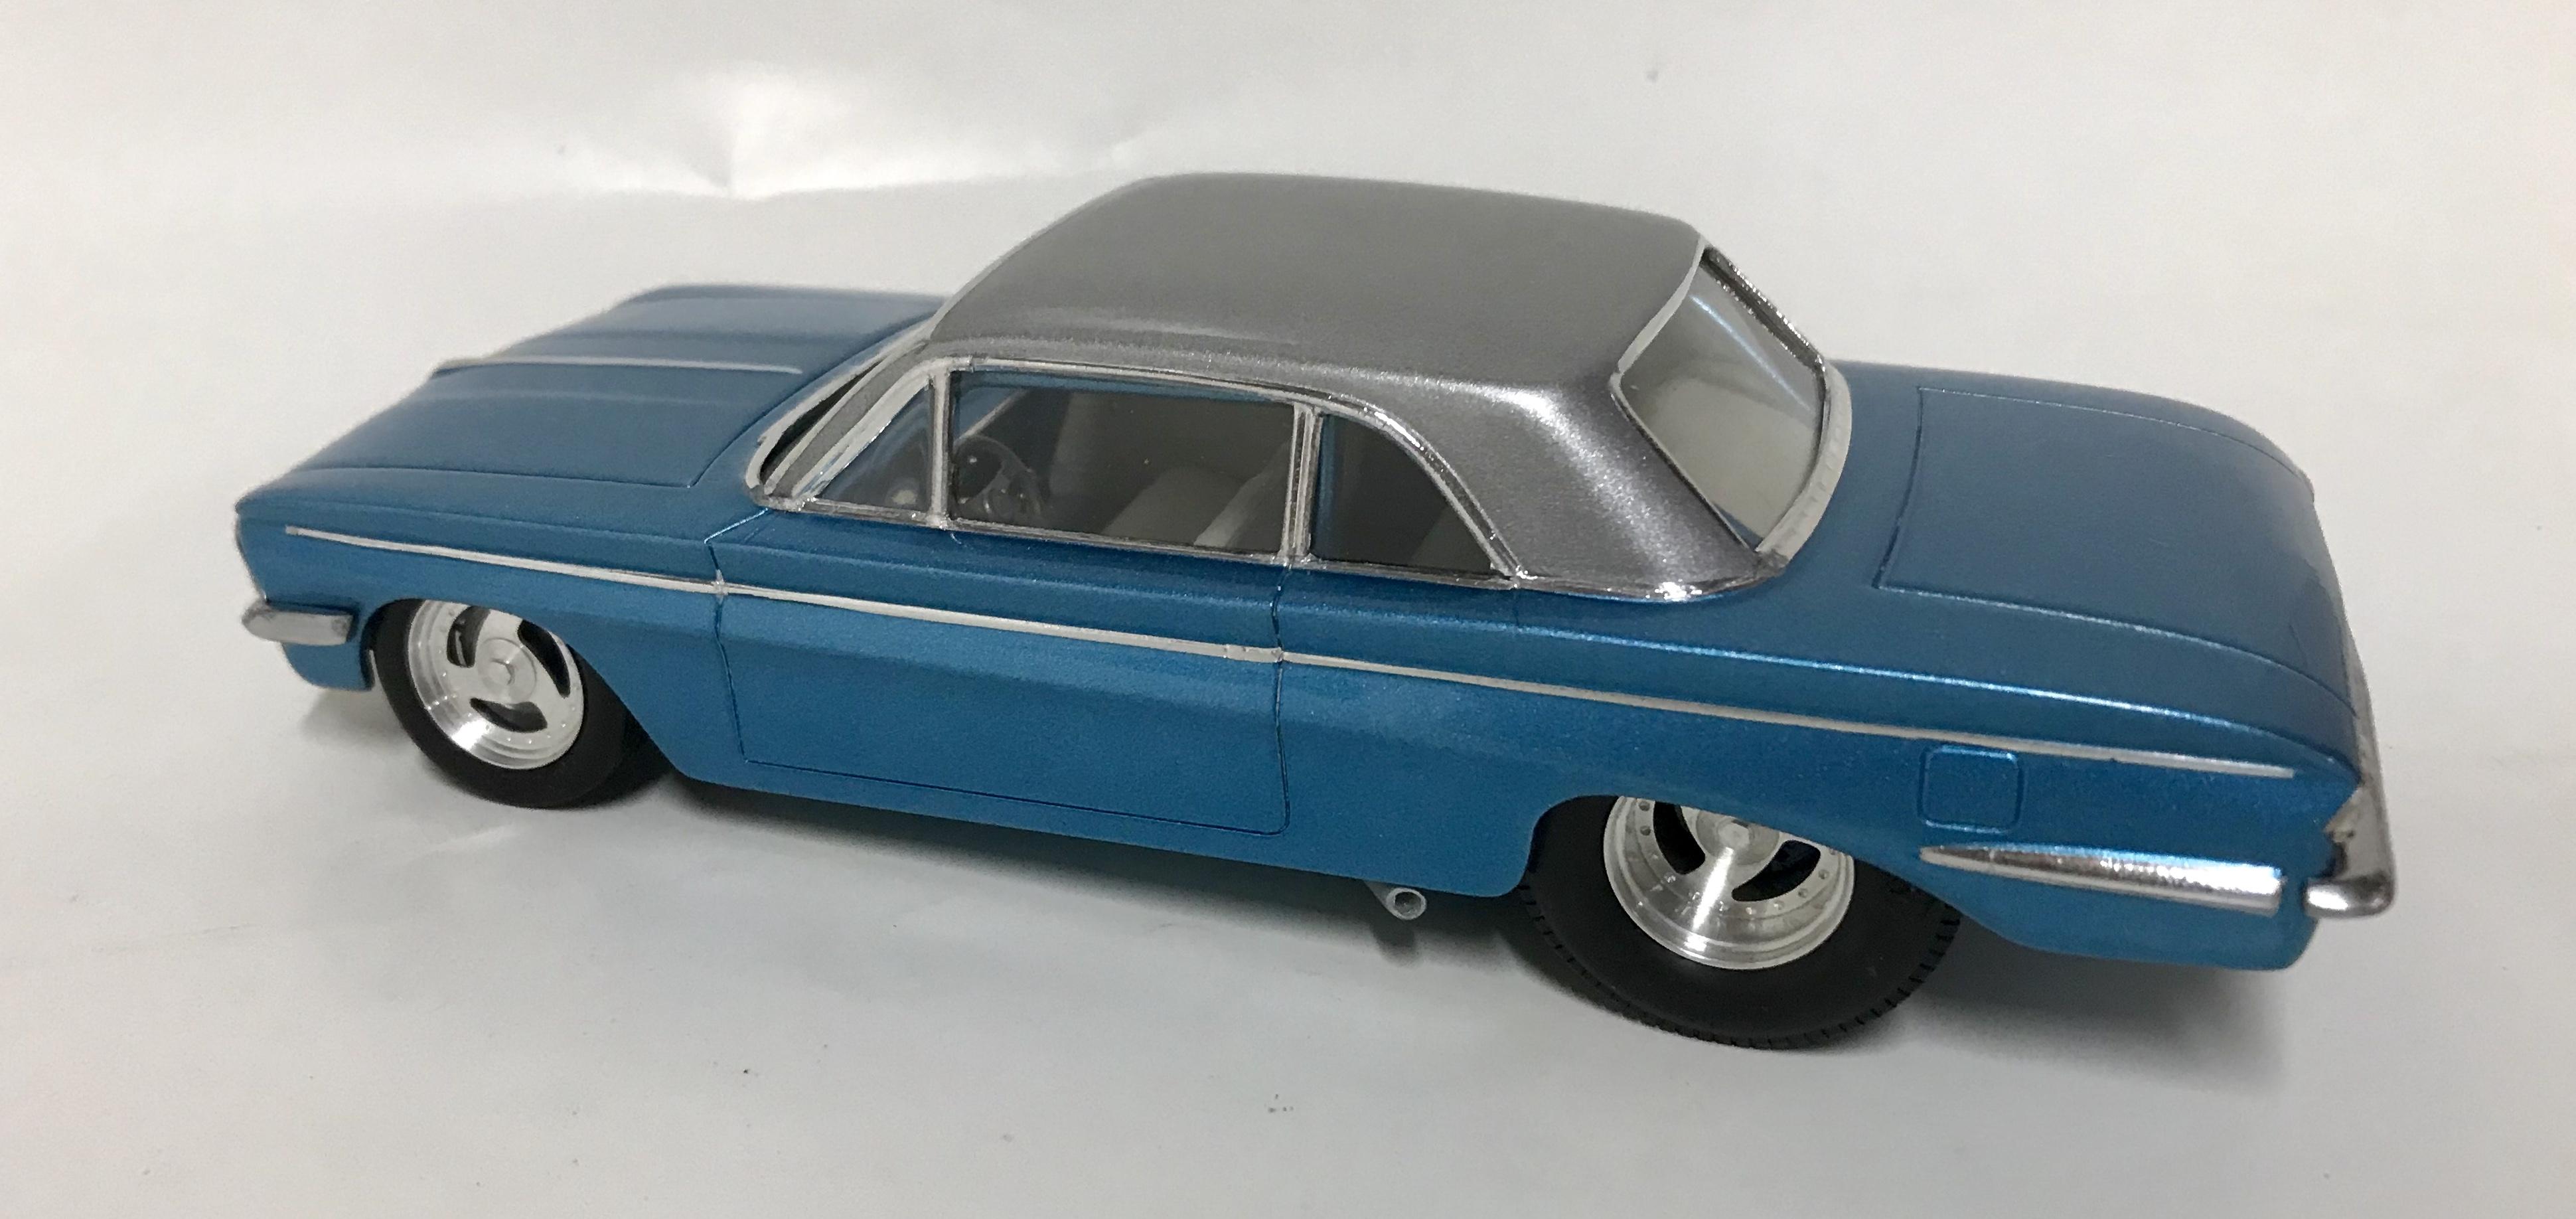
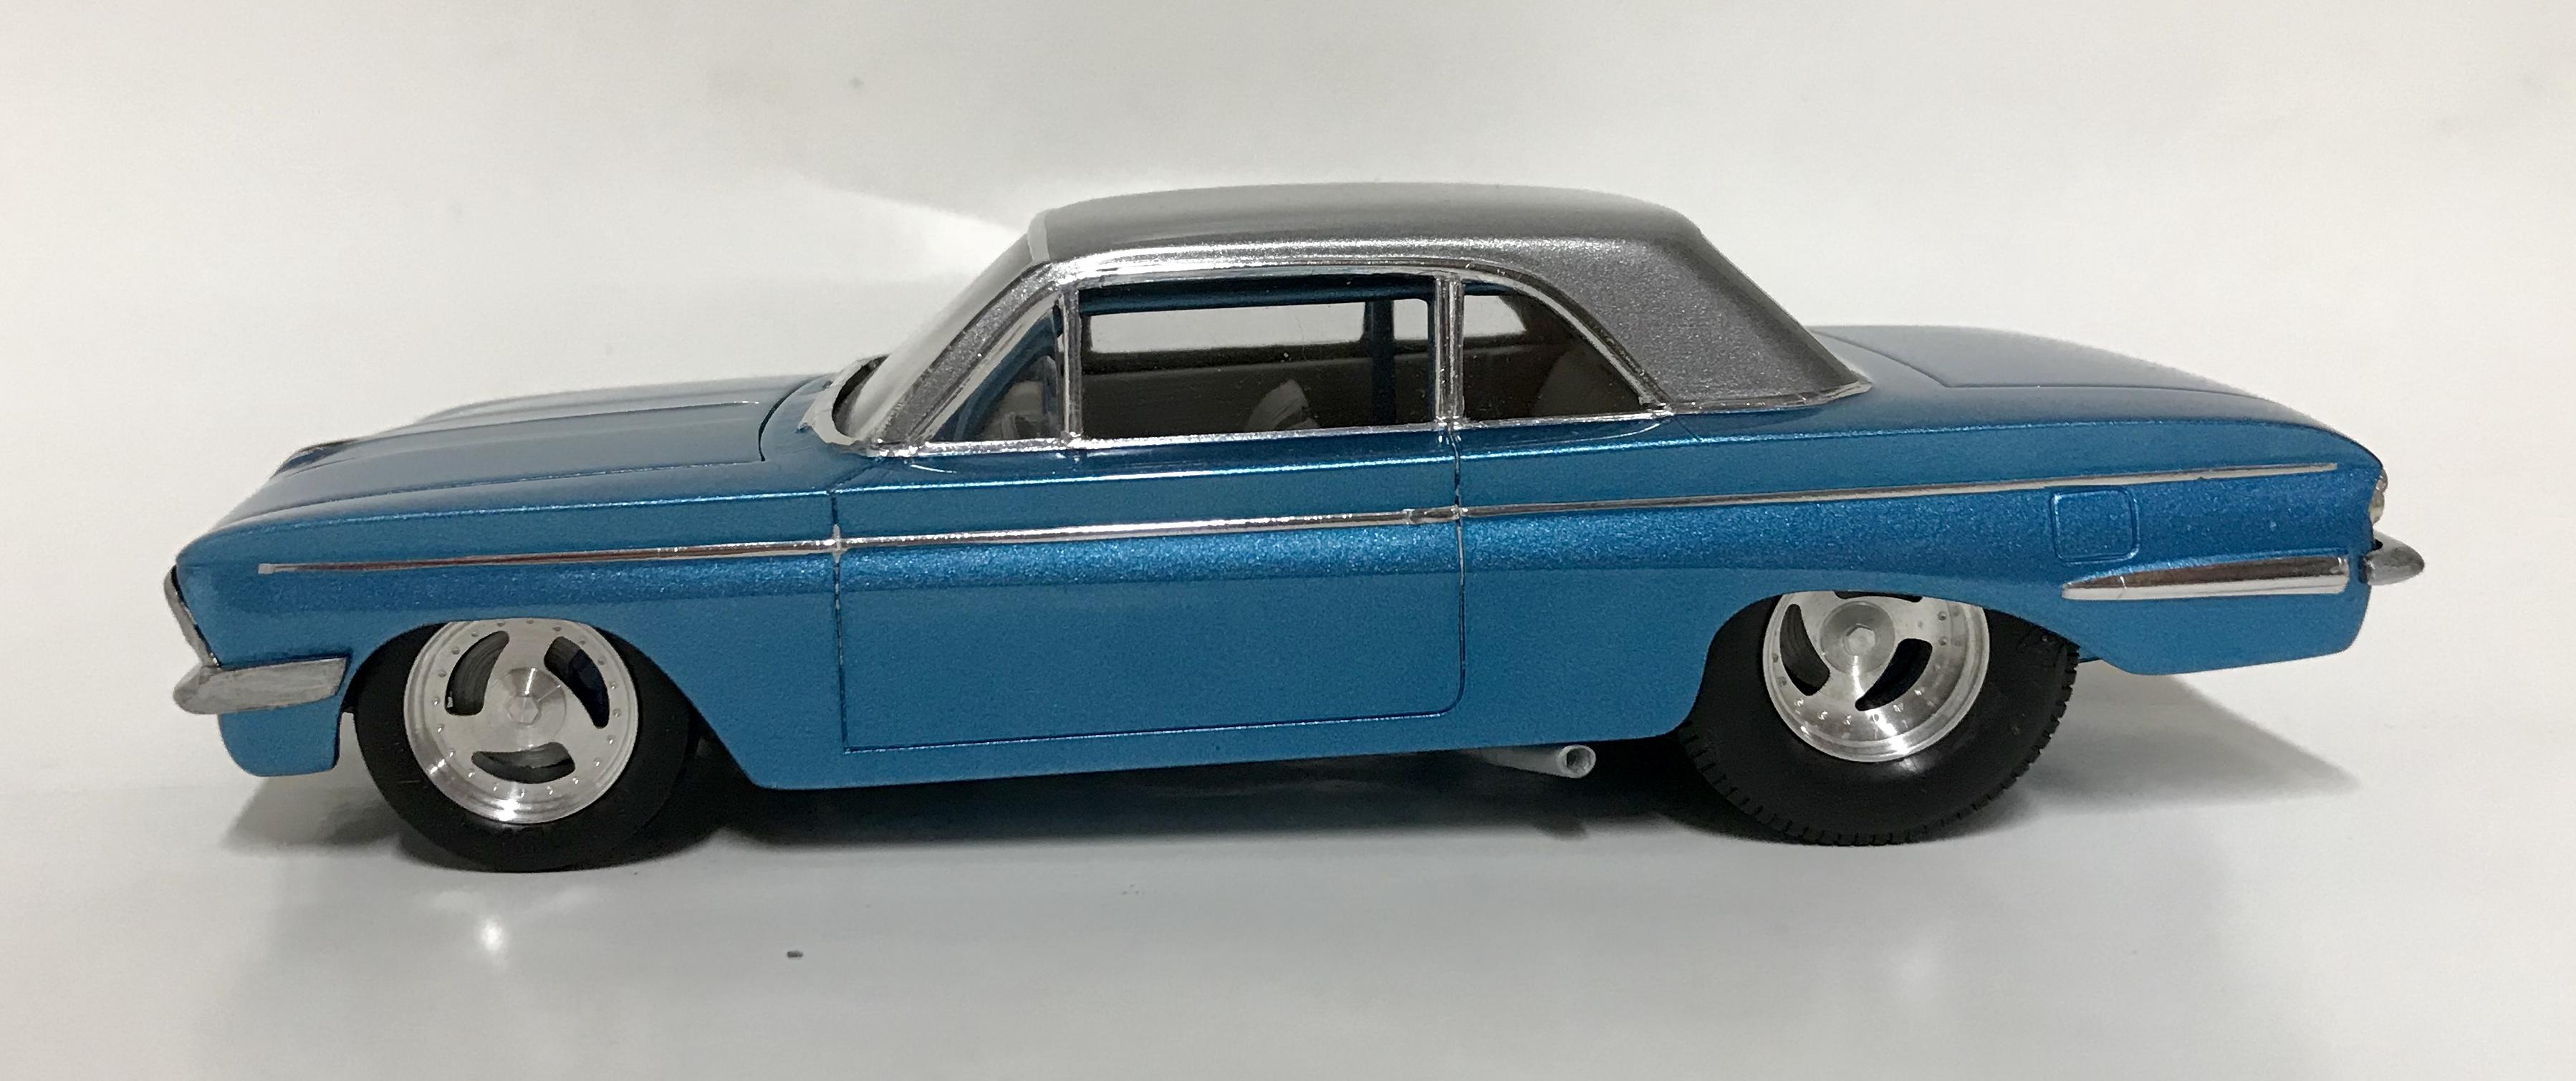
It’s going on 32 years since I built this one ( Wow, time has flown by. ) I don’t remember all the details of it, but I can recall some of the things I used. At the time in 1993, I only used hobby enamels. The yellow was sprayed on with the rattle can, and after I let it cure out some, I decanted the green from the rattle can, thinning it slightly with mineral spirits. I shot it with a cheap Badger external mix air brush at around 20 psi. I began the green at the fade point and worked away from the fade. Attention to the angle of the spray pattern is key, as to keep the blend clean. After the same process on both ends, I let it cure out before decanting the clear enamel. I again thinned it with mineral spirits and shot it at around 20 psi. I didn’t seem too difficult to me, but if you want to try it, practice on something first to get you a game plan going. If you start with the mindset of “ I can do it “ the road to success is always shorter than the one of “ I can’t do it “. I have faith that you, or anyone else for that matter, can do it, if you want to bad enough.
-
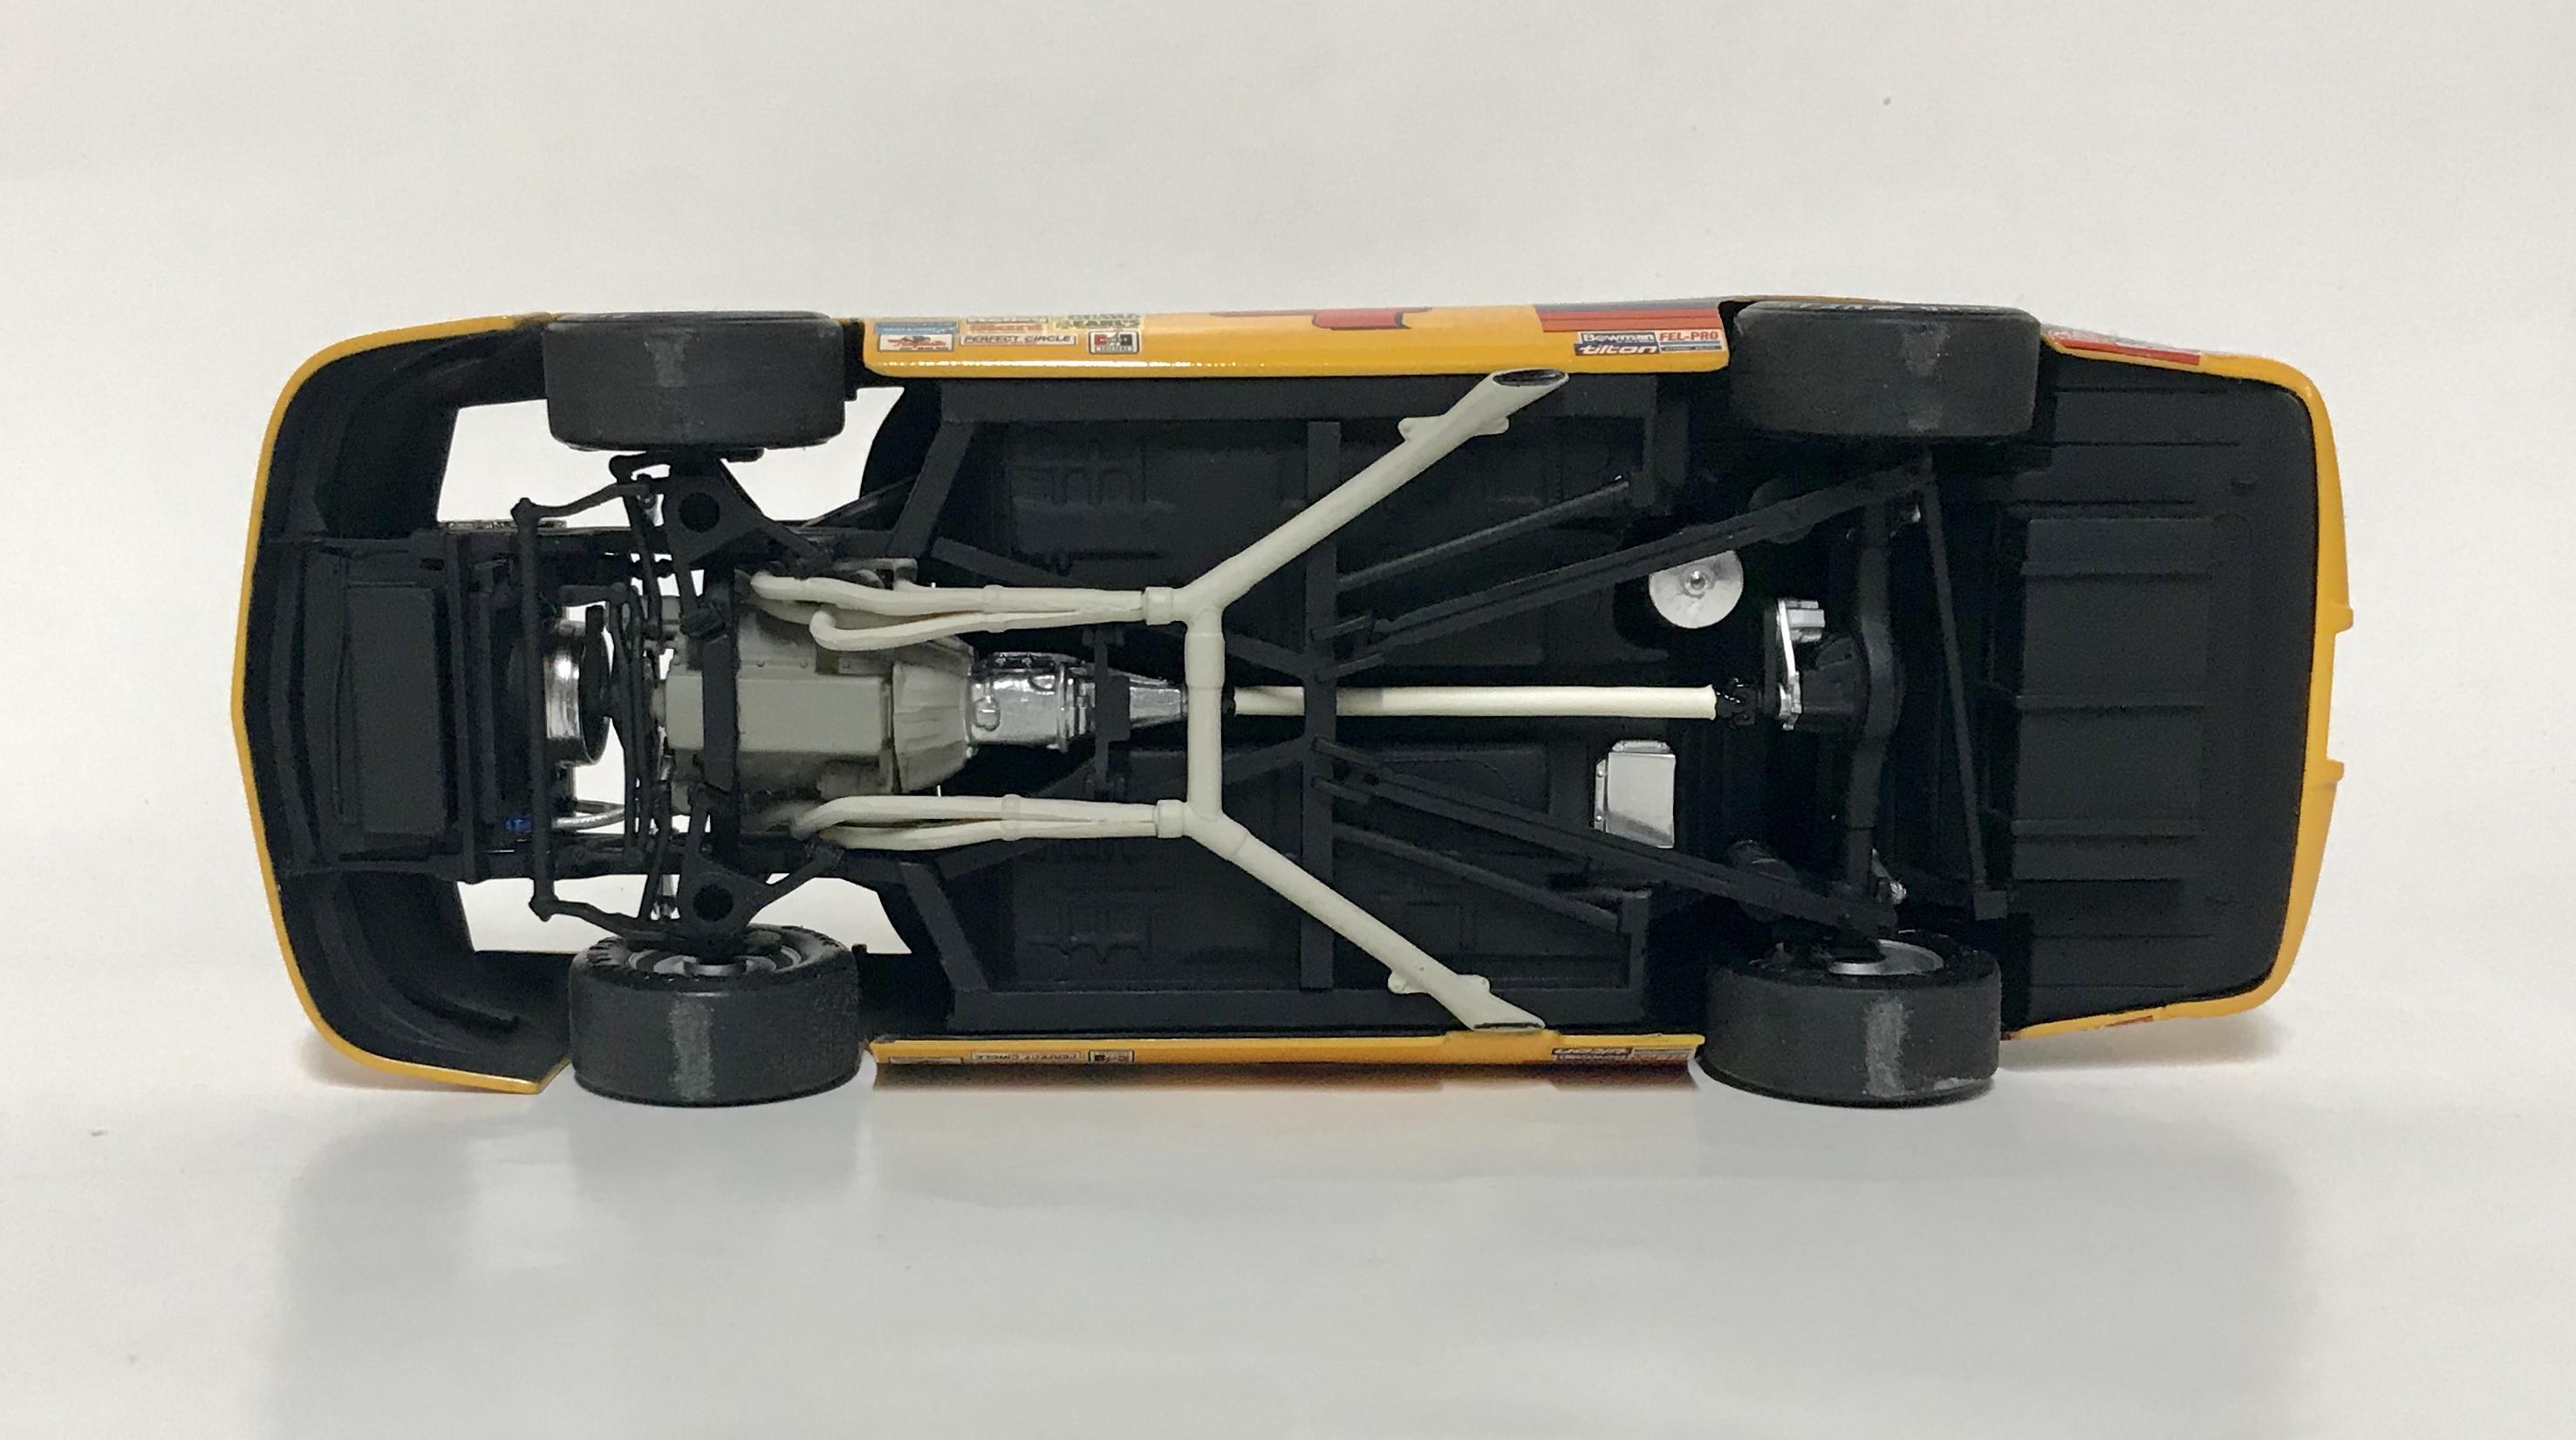
I’m a firm believer that either example could be built into something special. The Revell kit being a 2 n 1 is based off the stock configuration, that includes several different options. It can be built stock or as a street machine with several options for the engine. It’s a very nice kit with outstanding engineering and parts fit. The AMT kit, however, only includes the street machine version and doesn’t contain any optional parts. It does contain features that no other ‘57 Chevy kit has, like the back halfed frame as a separate unit, mini tubbs, a 4 link rear suspension and a big block engine with some fairly modern looking dress up parts. It also has the trunk lid molded open with some details included for the trunk area. As a bonus, the kit comes with wire for the plug wires and bare metal foil for the trim. It’s a very nice kit with outstanding engineering and parts fit, also. Considering that I don’t care for the Corvette wheels included in the AMT kit, I believe the kit is deserving of a set of some really nice, modern looking 3D printed wheels and tires. Just adding that feature alone would take it over the top for me. So, my opinion would be the AMT, it just has a little more potential. BUT, if you can’t decide, you could always just buy both of them. You couldn’t go wrong with either of them or both of them.
-
I did the yellow with a rattle can and then the green with a cheep Badger external mix air brush. It wasn’t anything too complicated, but it turned out good enough to suit me.
-
Free to good home: low rider bicycle from AMT ‘66 Riviera kit.
modelcarcrazy replied to LDO's topic in Wanted!
Thank you. You’re very kind. -
Free to good home: low rider bicycle from AMT ‘66 Riviera kit.
modelcarcrazy replied to LDO's topic in Wanted!
I’ll take it. -
Good luck.
-
Wow! That’s flatout awesome.
-
Tennessee Volunteer #14 BGN
modelcarcrazy replied to Volzfan59's topic in Stock Cars (NASCAR, Super Stock, Late Model, etc.)
GBO! Coon dogs rule the world!!! -
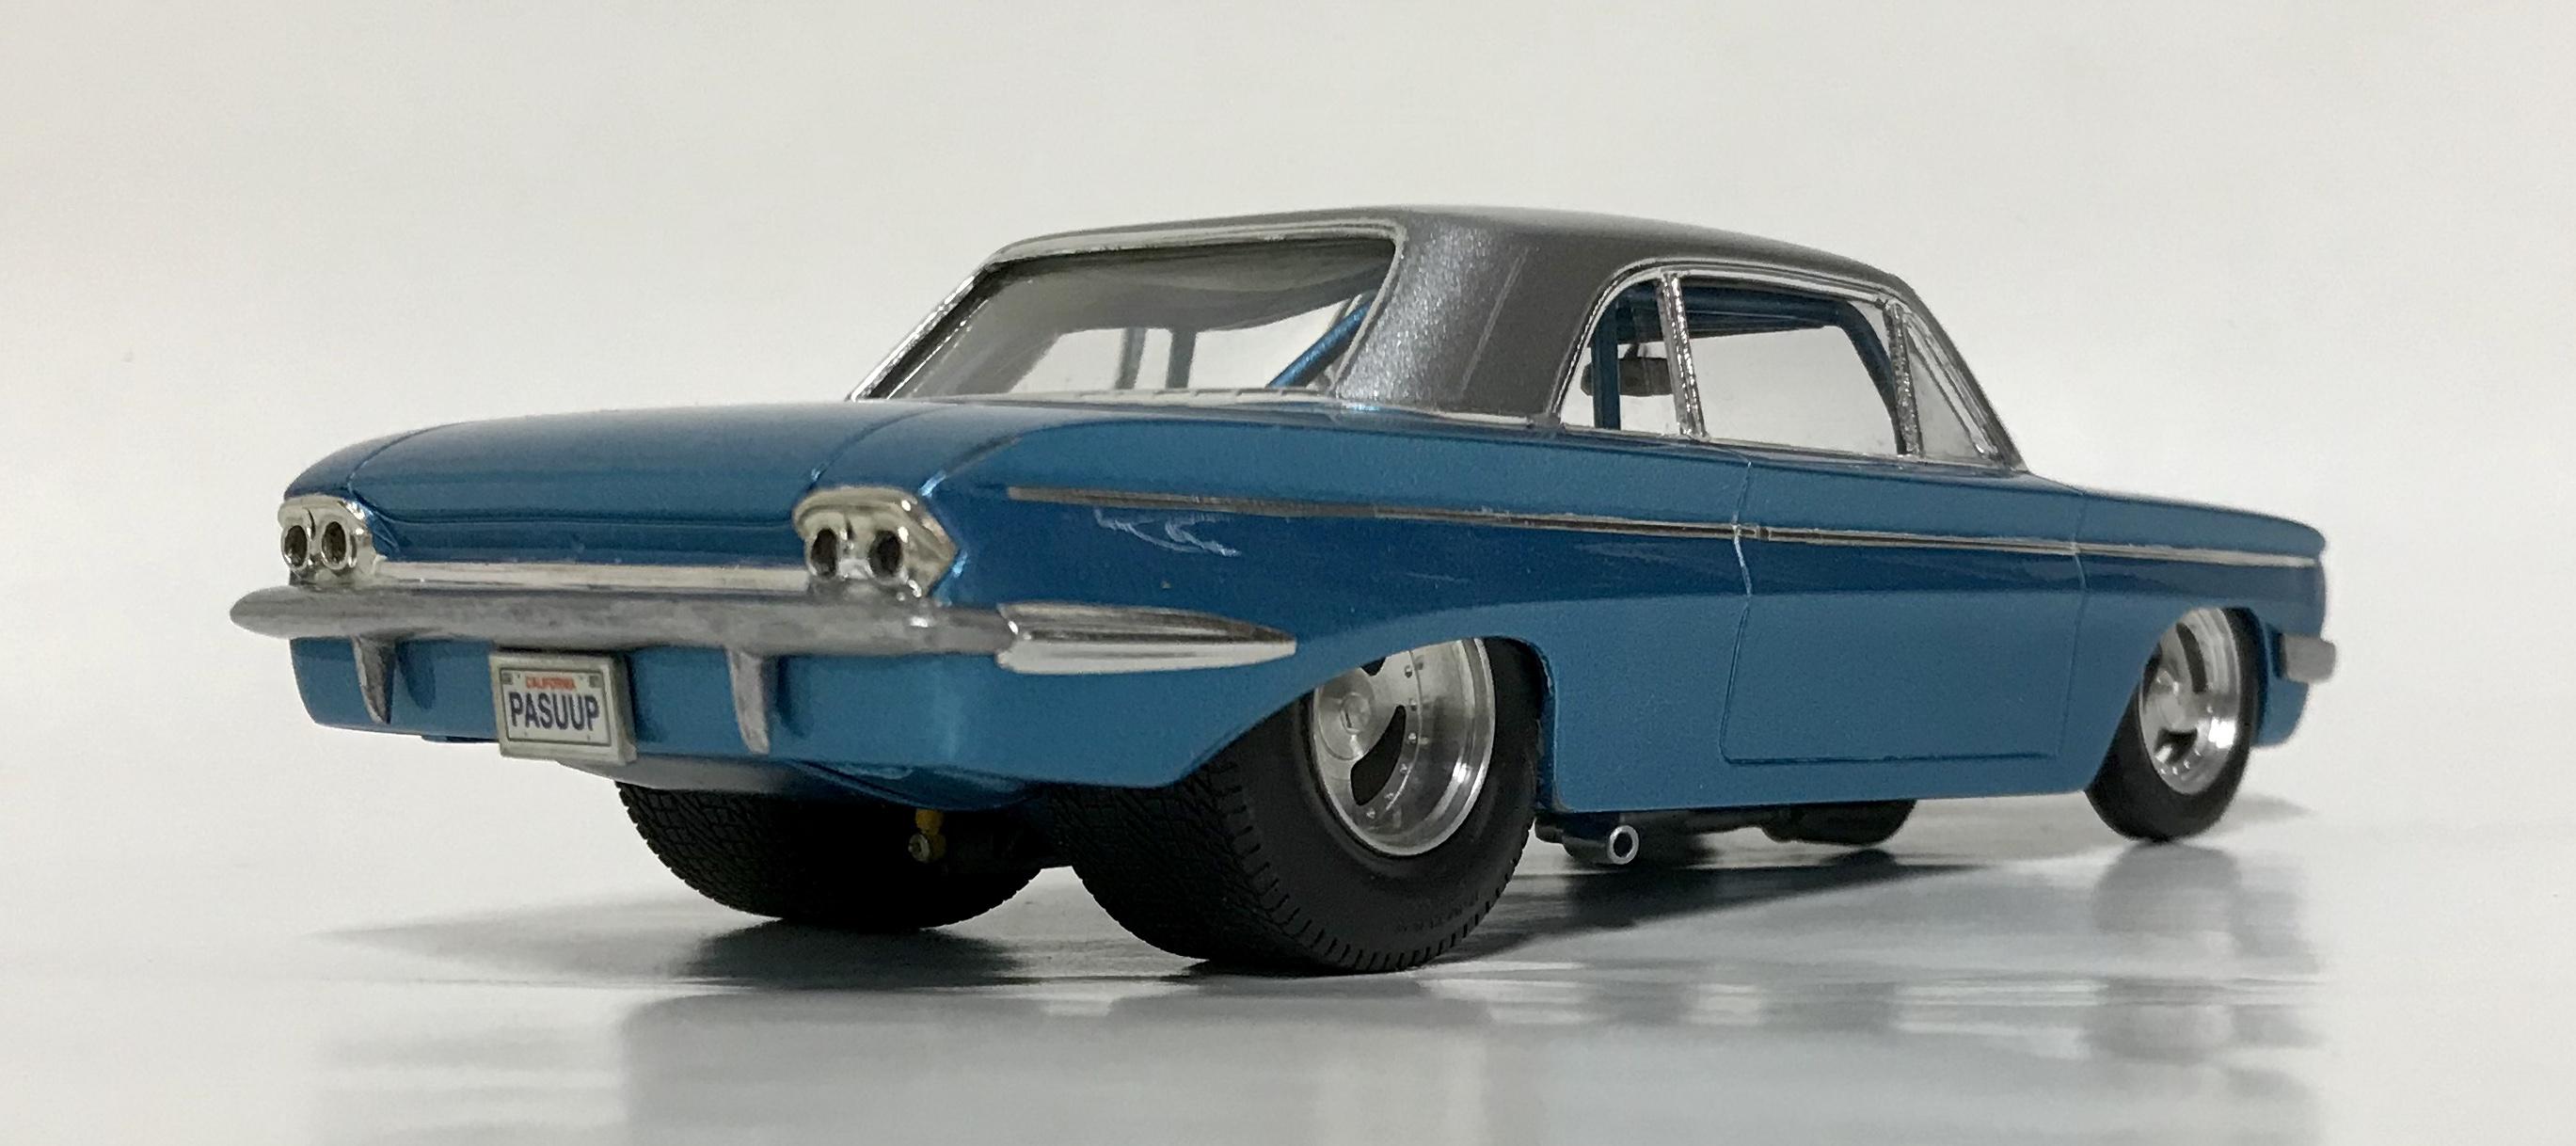
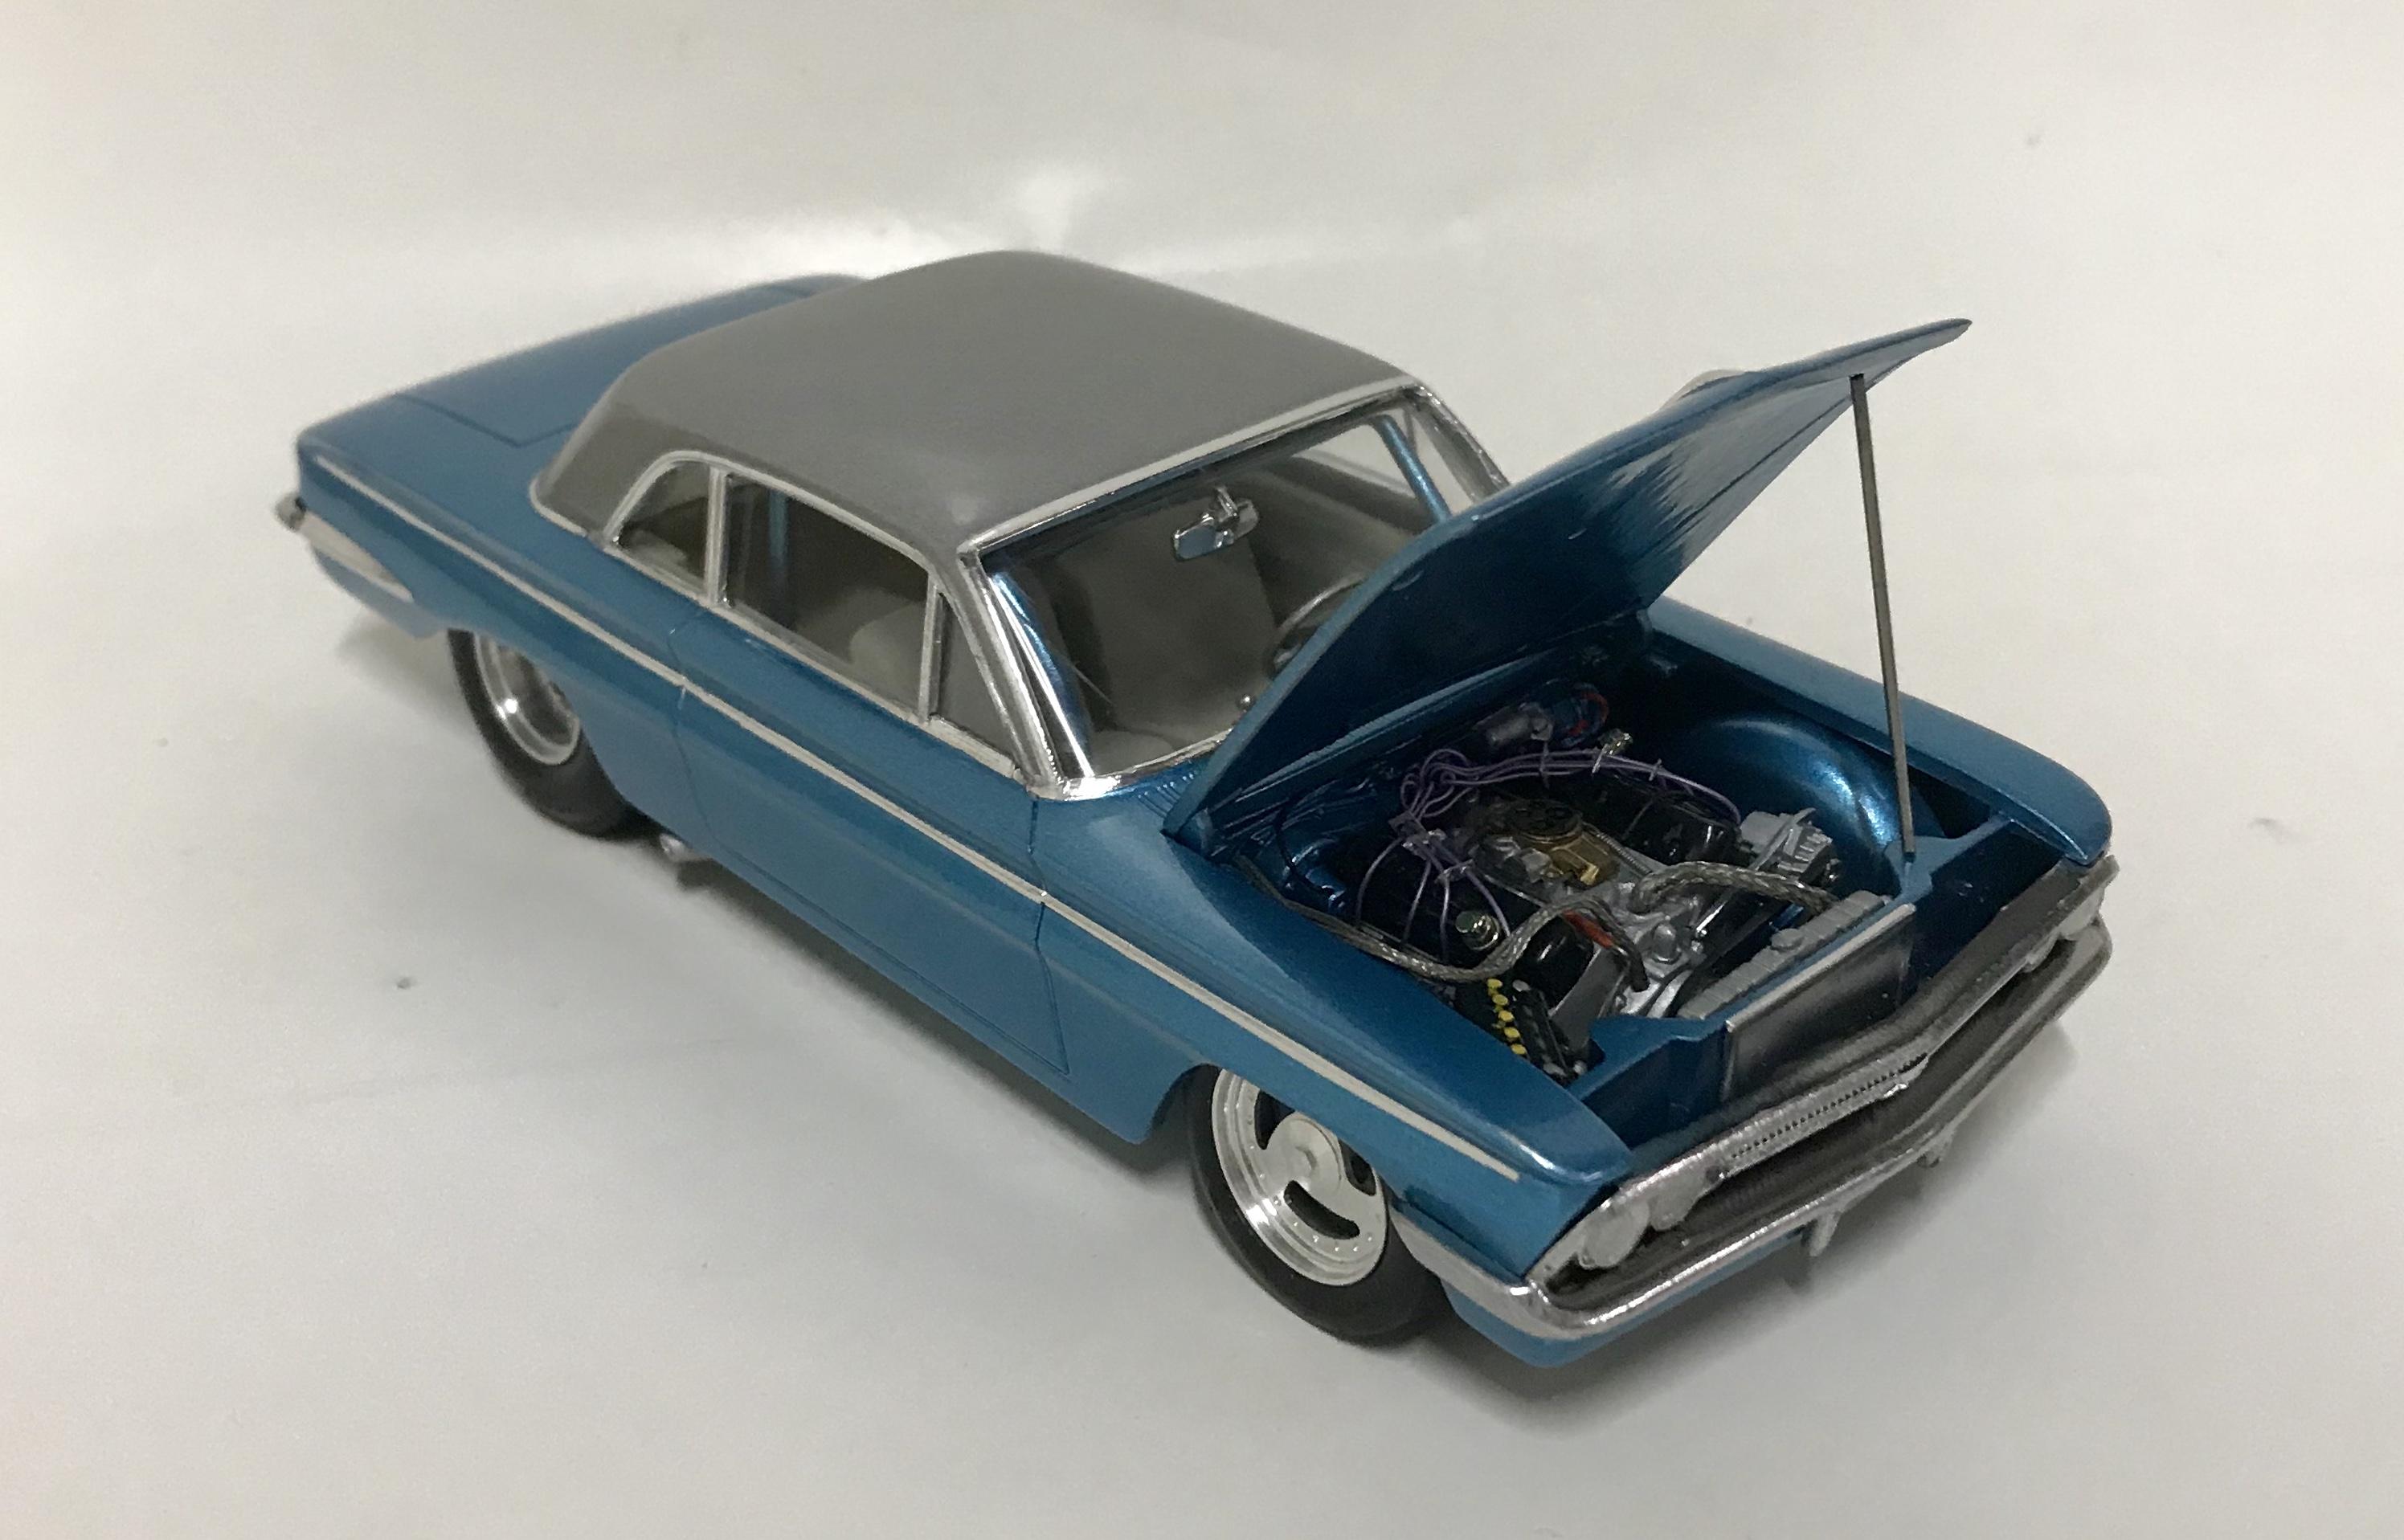
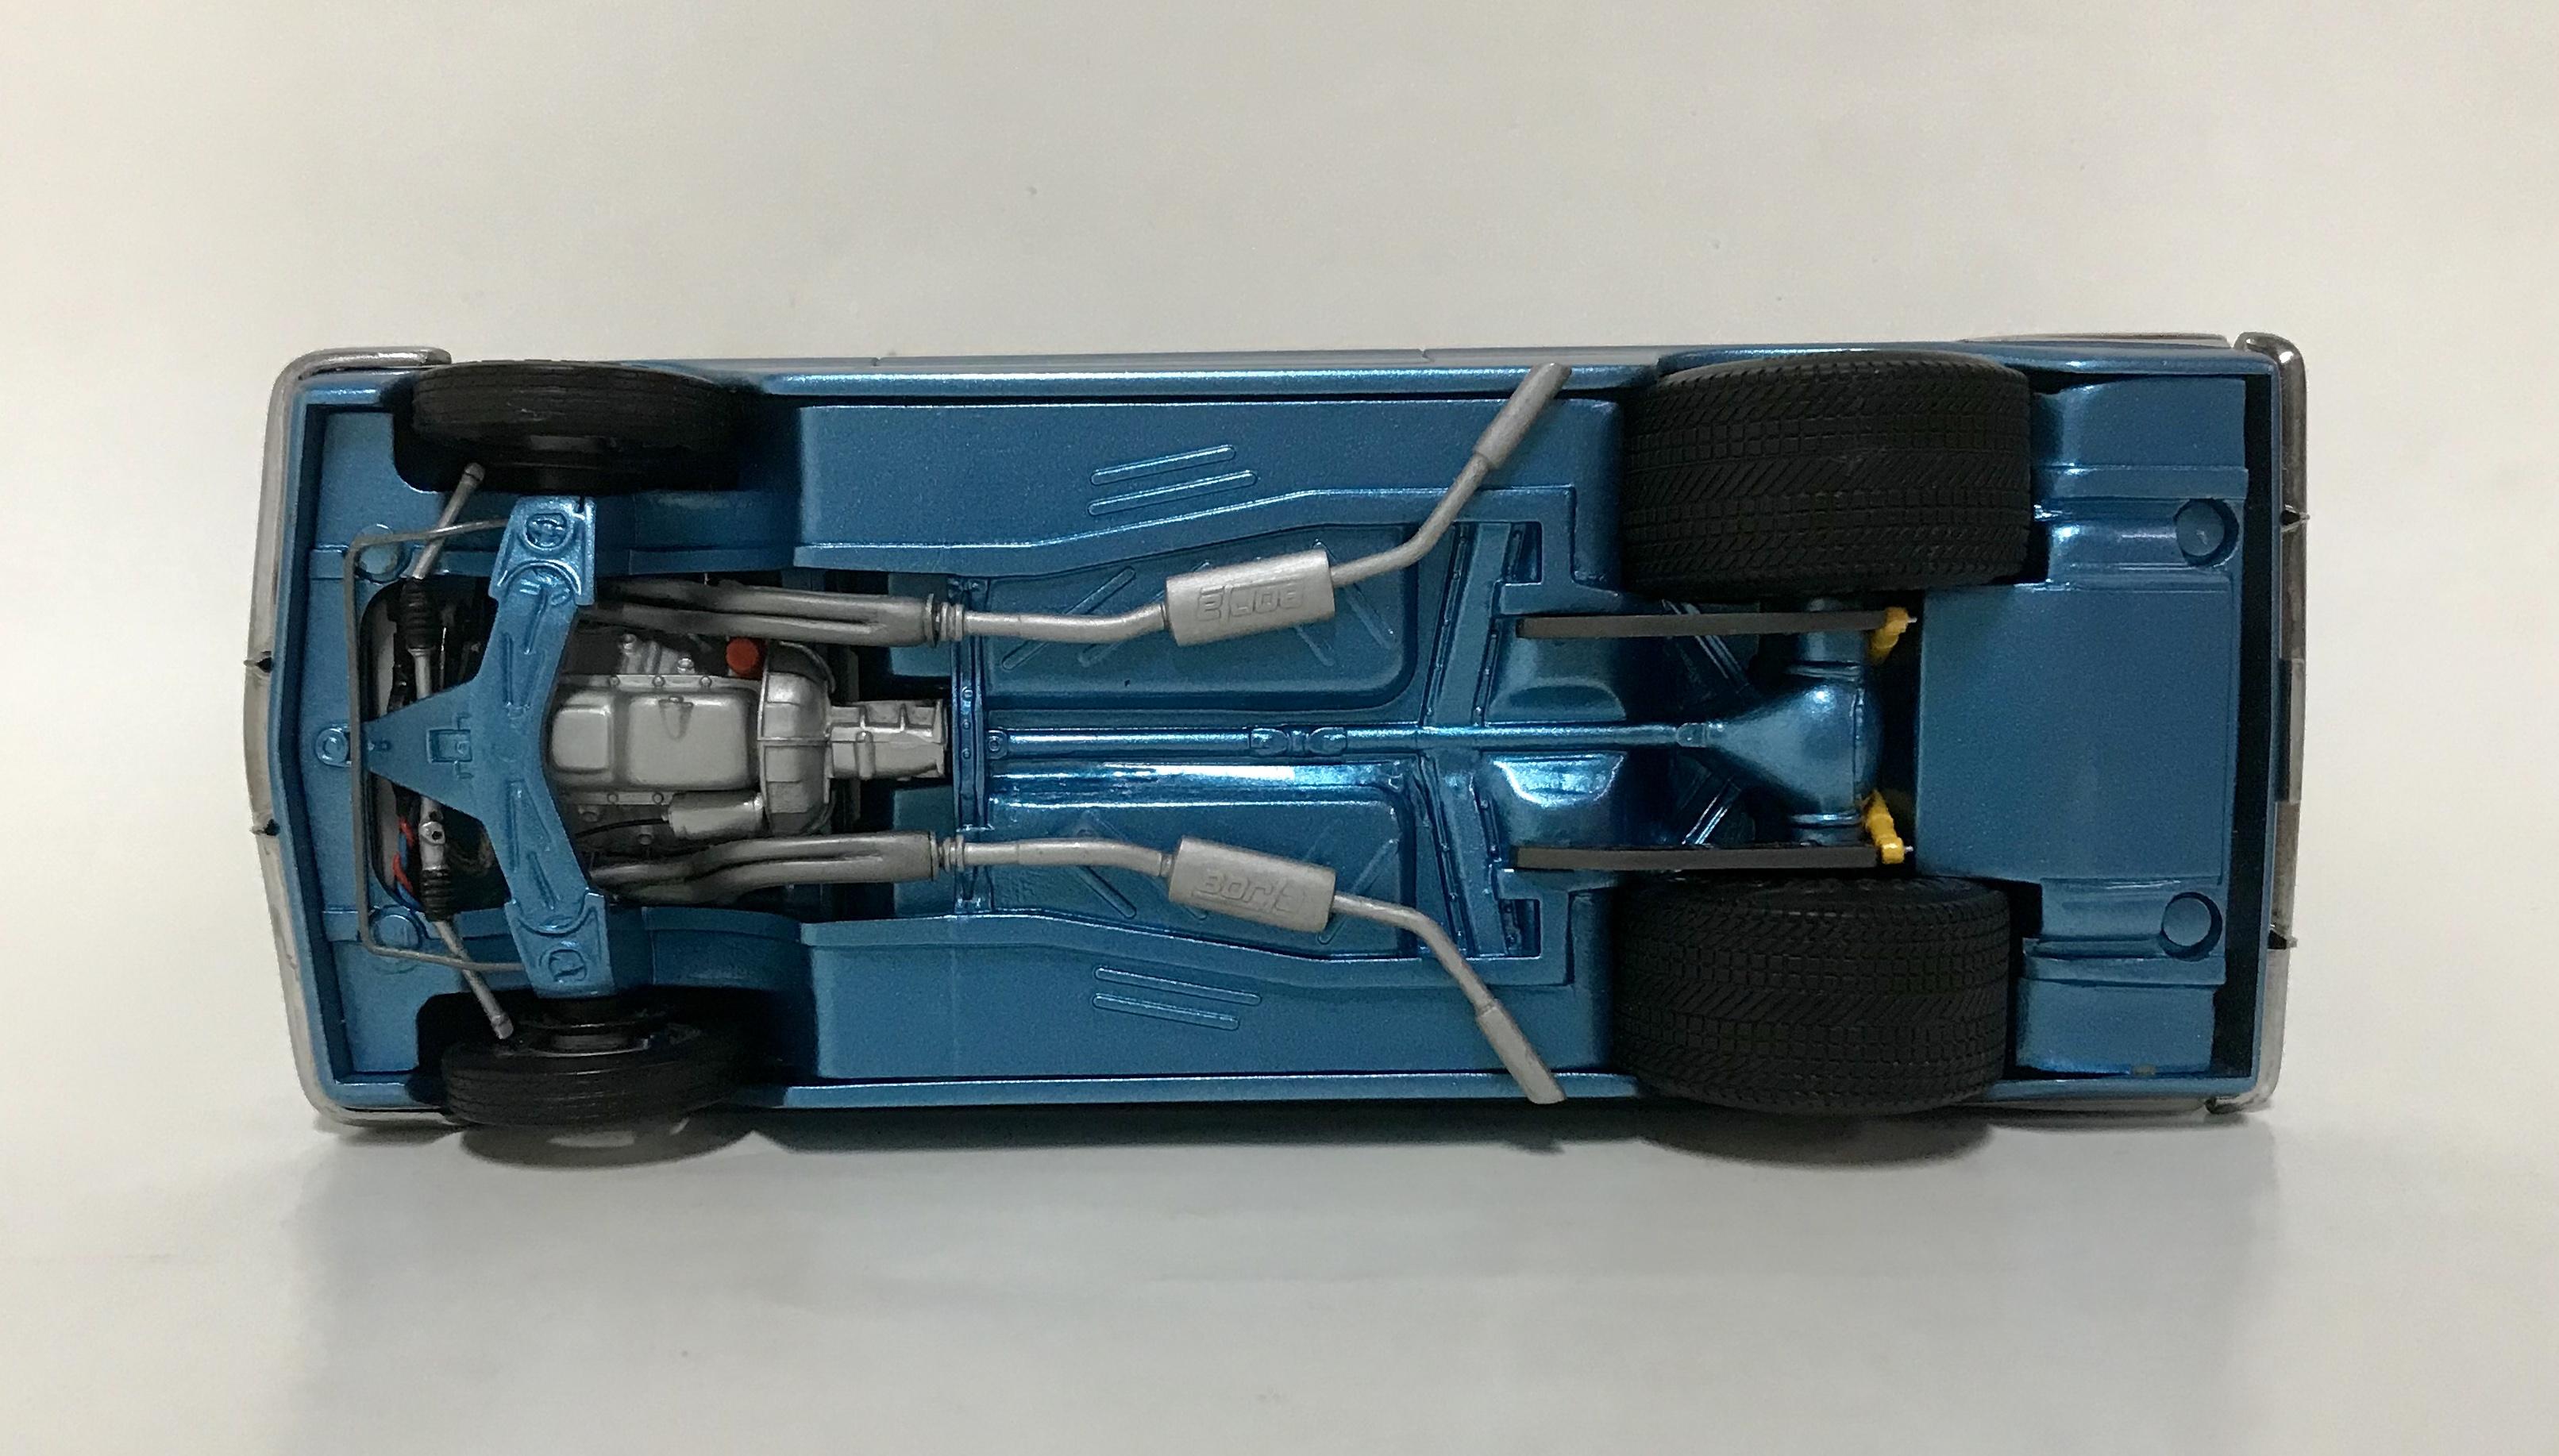
62 Oldsmobile Cutlass F-85
-
I really like all three versions, but I’ll vote for the third and most recent version as my favorite. It’s a stellar example of what can be achieved using the ancient 32 Ford kit. It still looks great after all these years.
-
Salvinos JR 1971 Petty Plymouth
modelcarcrazy replied to TooOld's topic in Stock Cars (NASCAR, Super Stock, Late Model, etc.)
I really enjoyed following along during the build process in your WIP. Every day I checked into the forum, the first thing I would do was look and see if you had updated your build thread. I was riveted! Now that you have posted photos of the finished product, I can describe it in one word, Outstanding! -
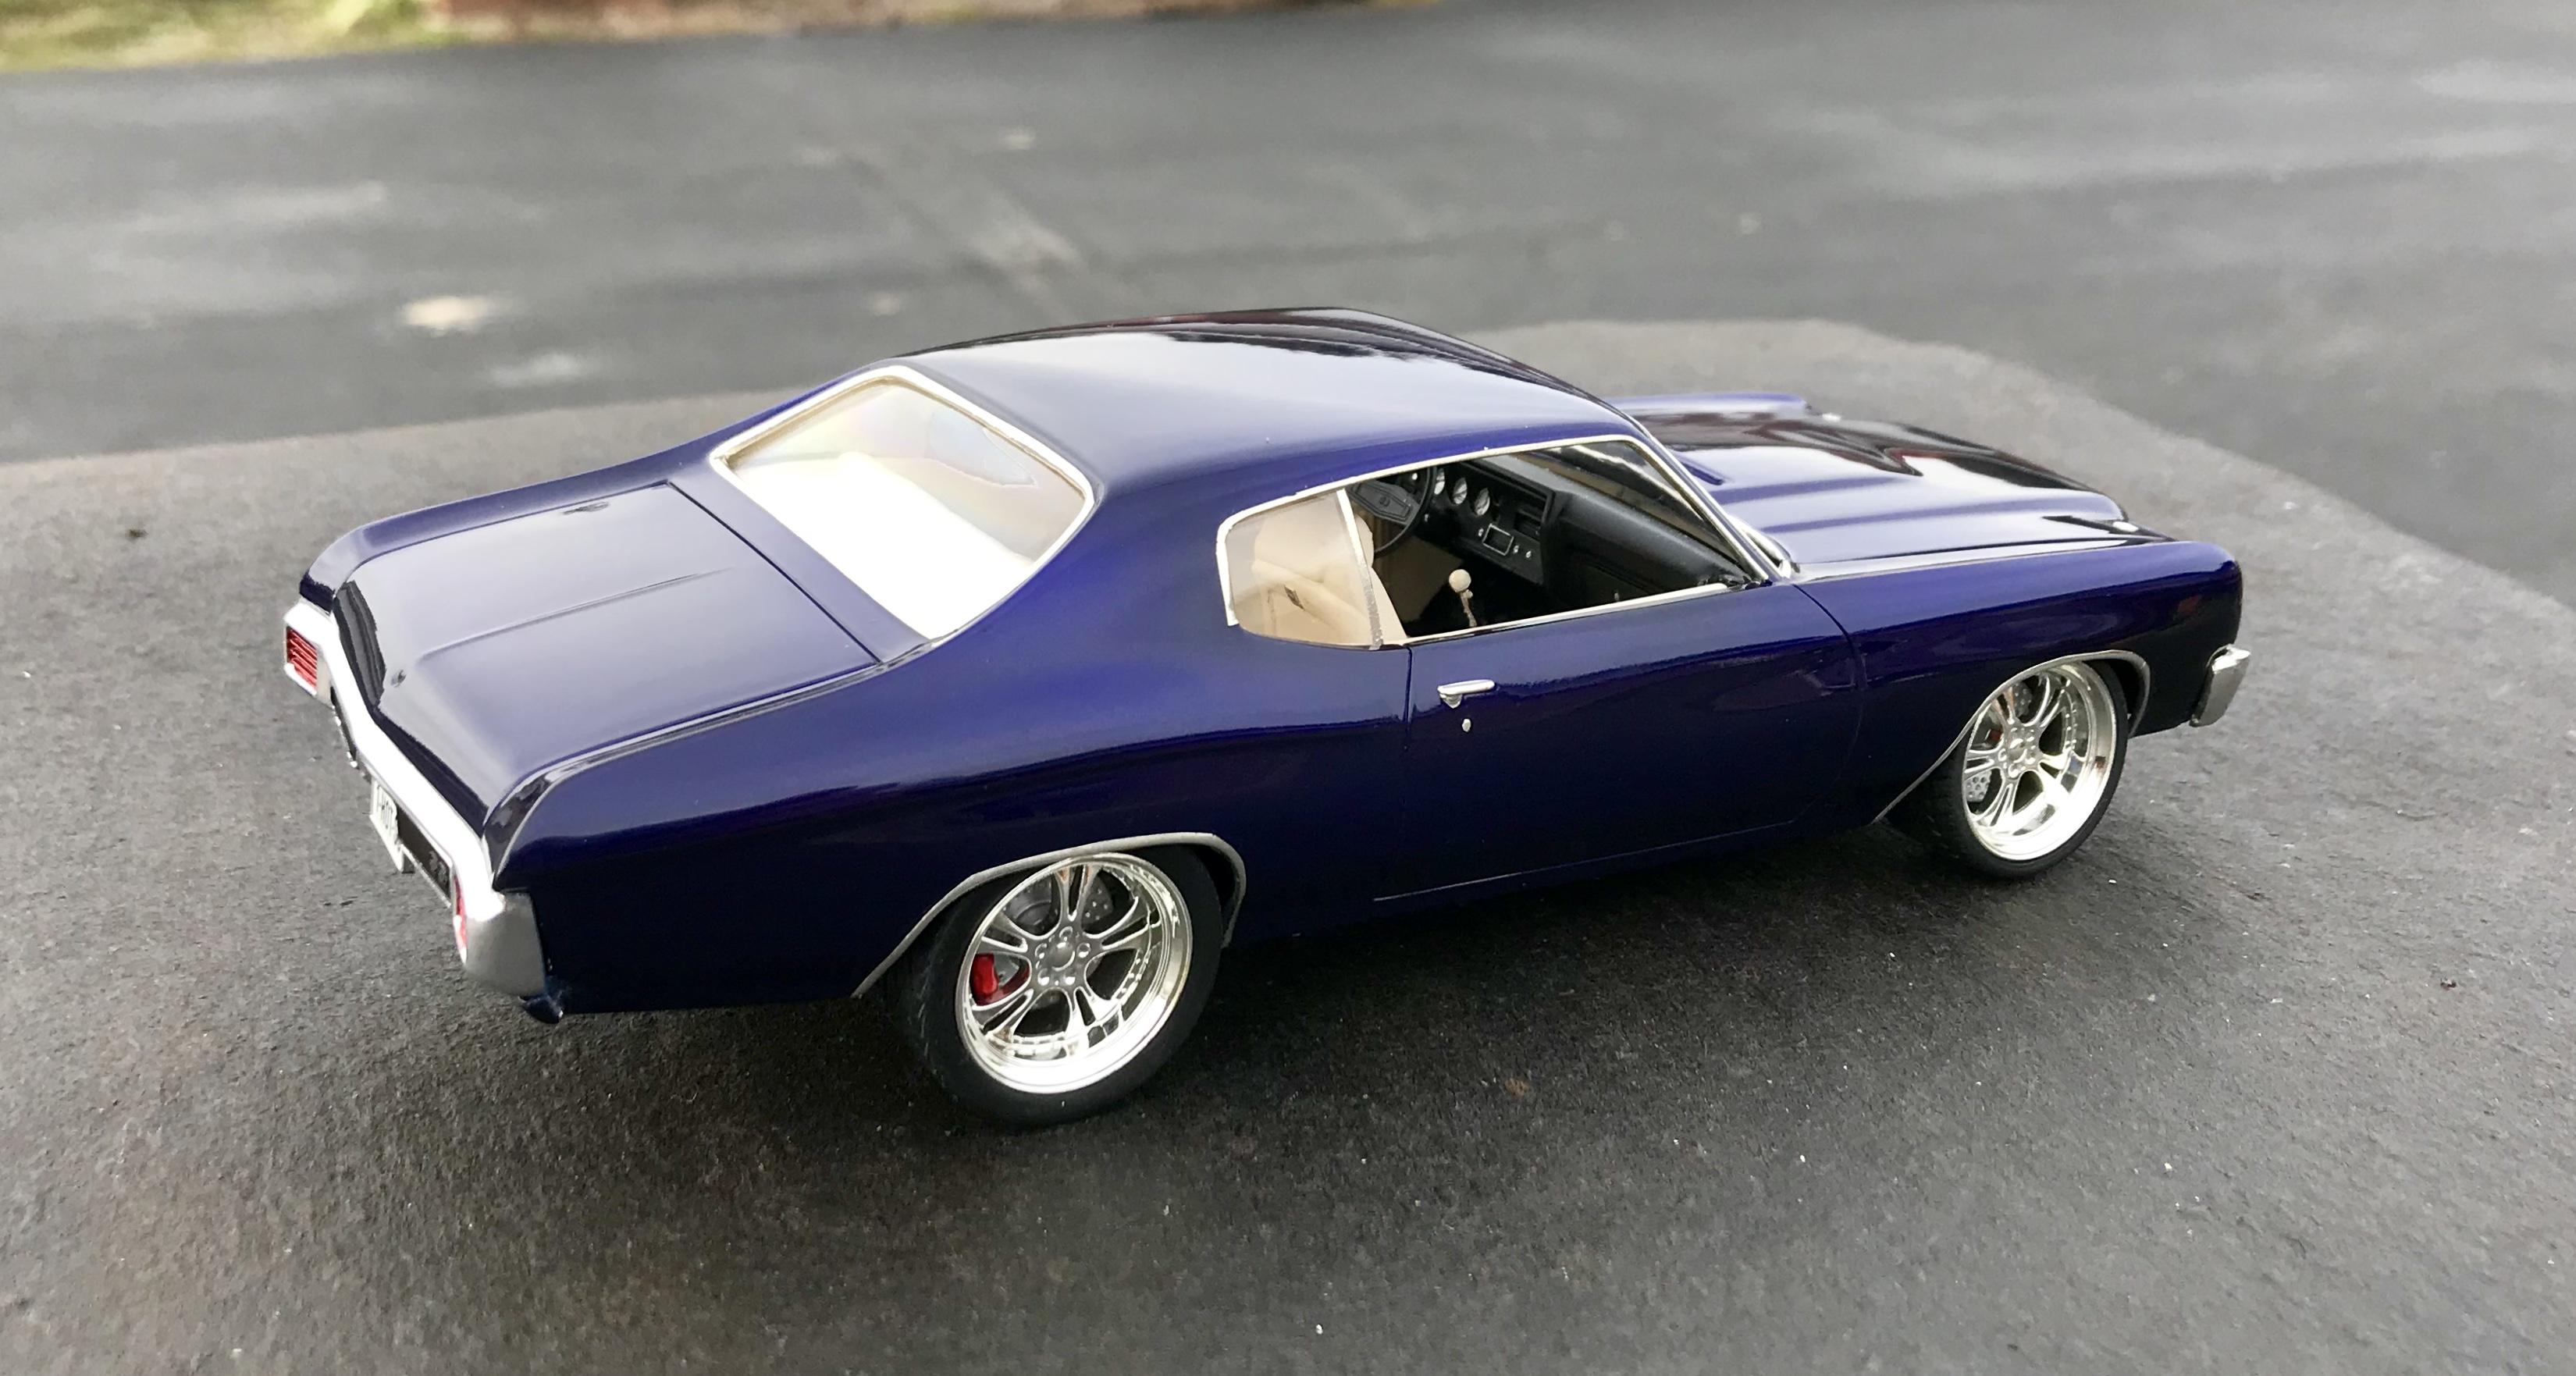
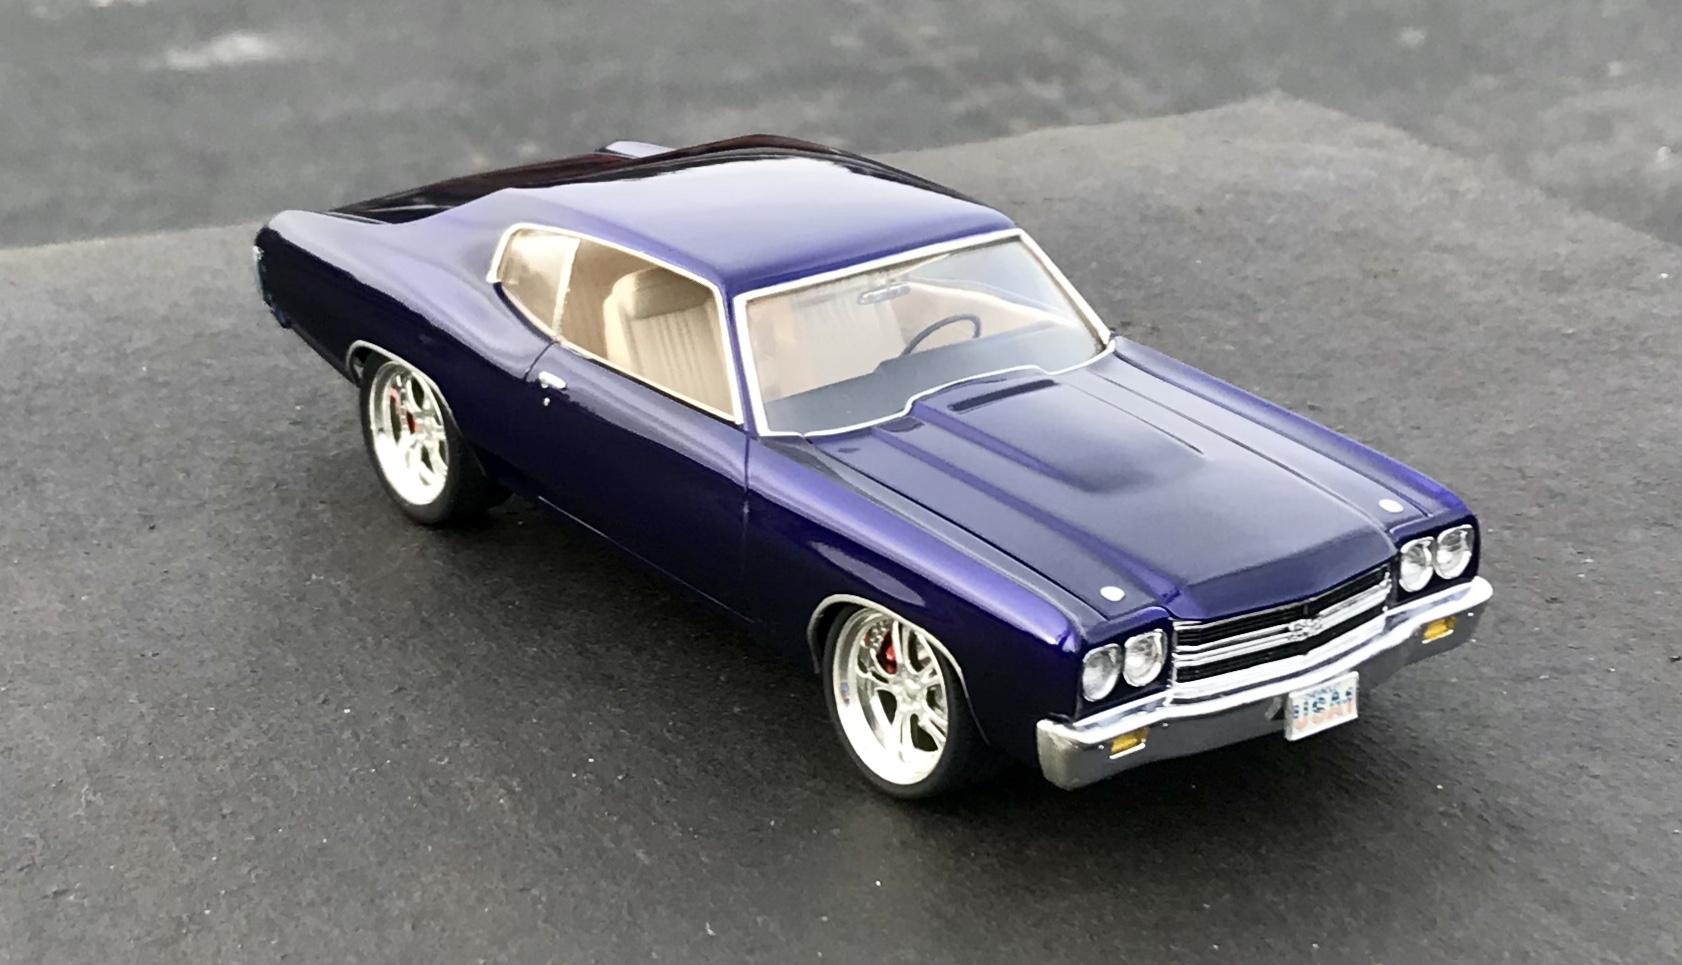
Here are a couple photos of my Heavy Chevy with Boyd’s black and blue pearl.
-
Glueing evergreen to clear windshield.
modelcarcrazy replied to NOBLNG's topic in Model Building Questions and Answers
Another solution would be to use a small wire with black insulation. Experiment with what size would work best. Make sure the wire is long enough to wrap around the windshield and rear window. Strip the insulation from the wire and carefully split the insulation and push it down onto the edge of the glass and trim to fit. It will resemble the gasket used on the actual truck and it will no longer be too small for the opening and much easier to install cleanly. -
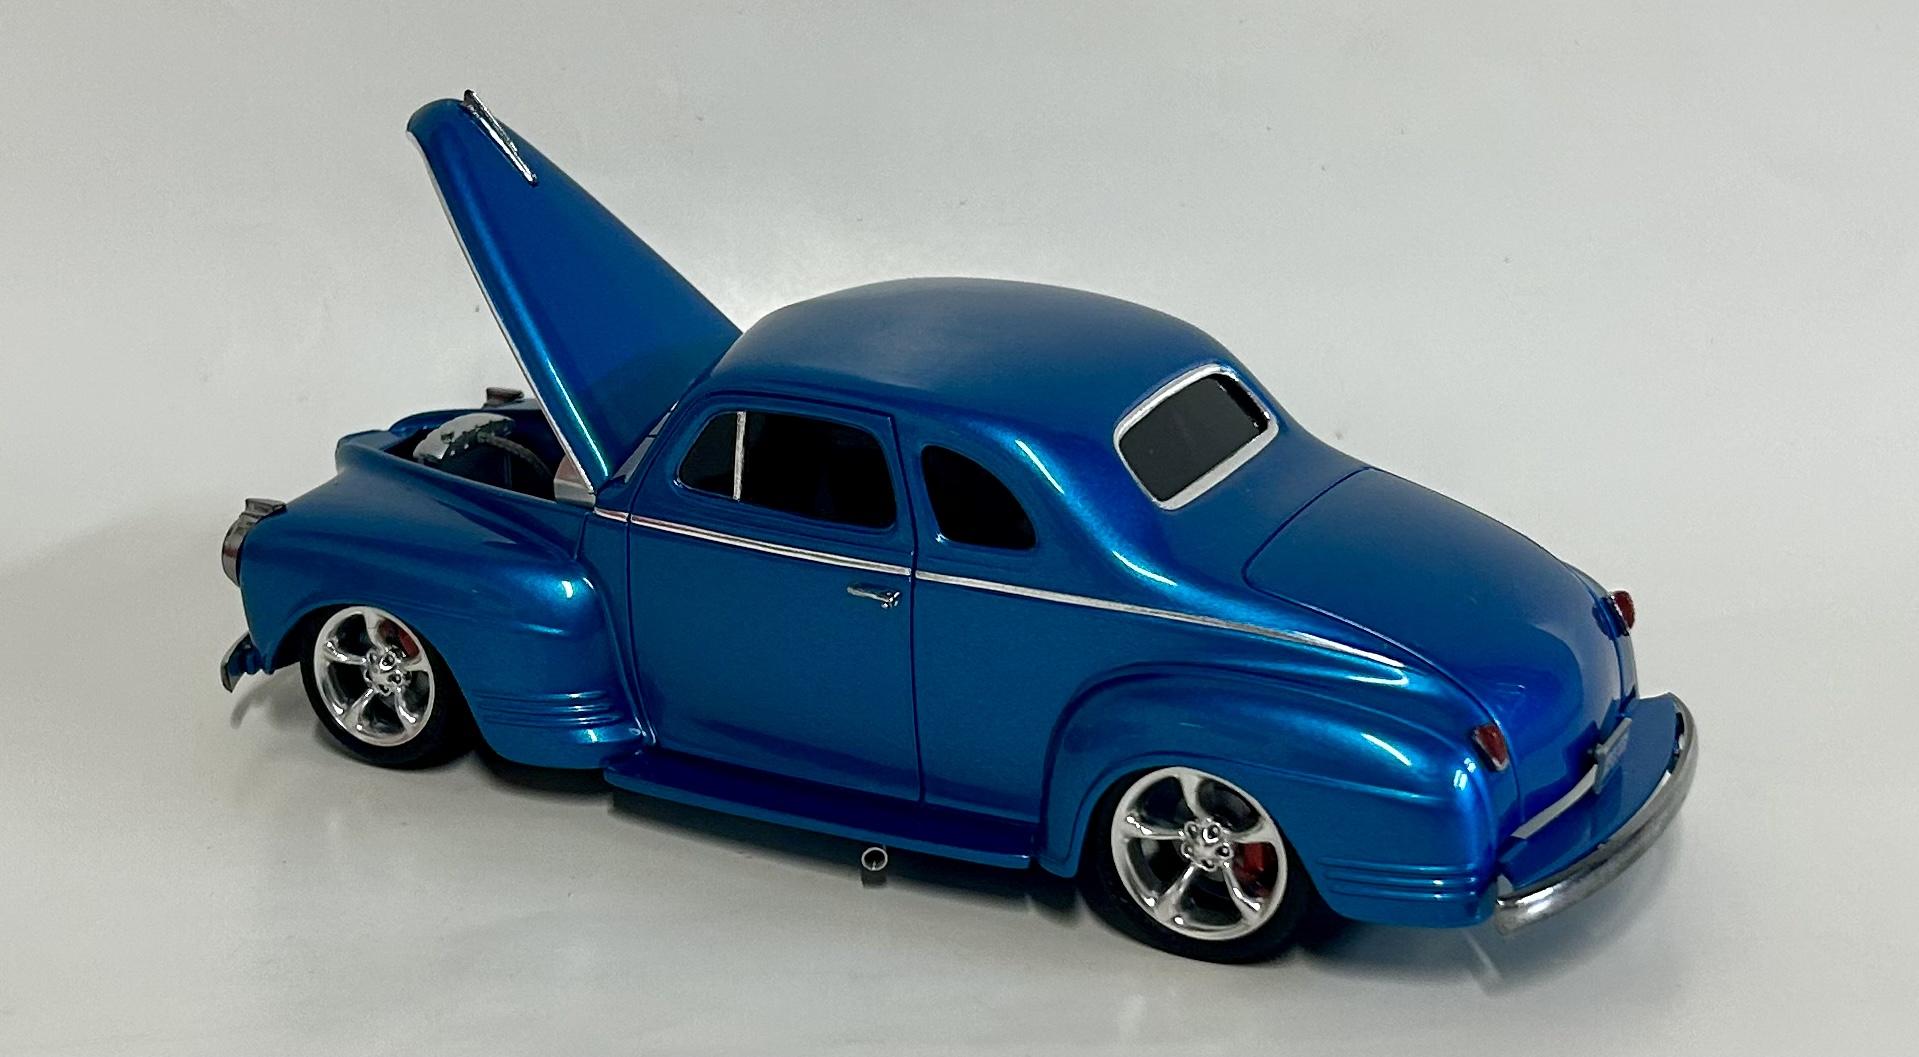
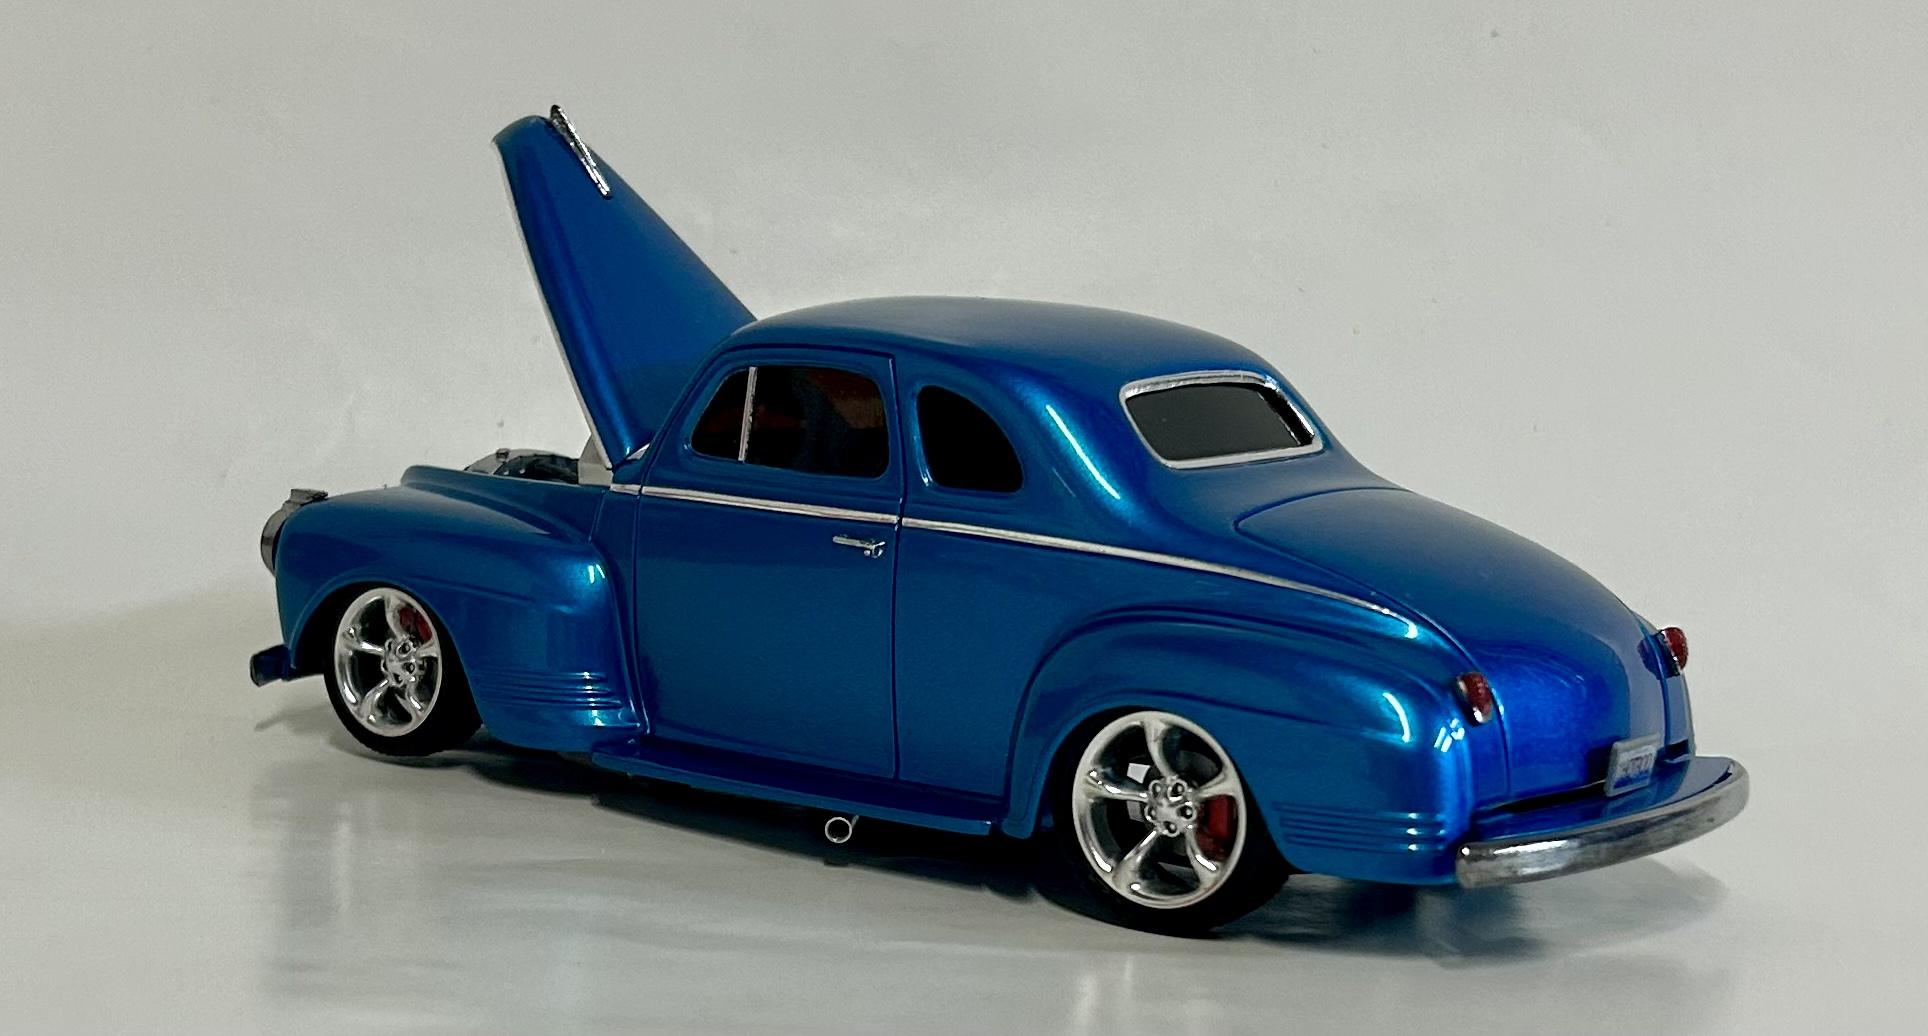
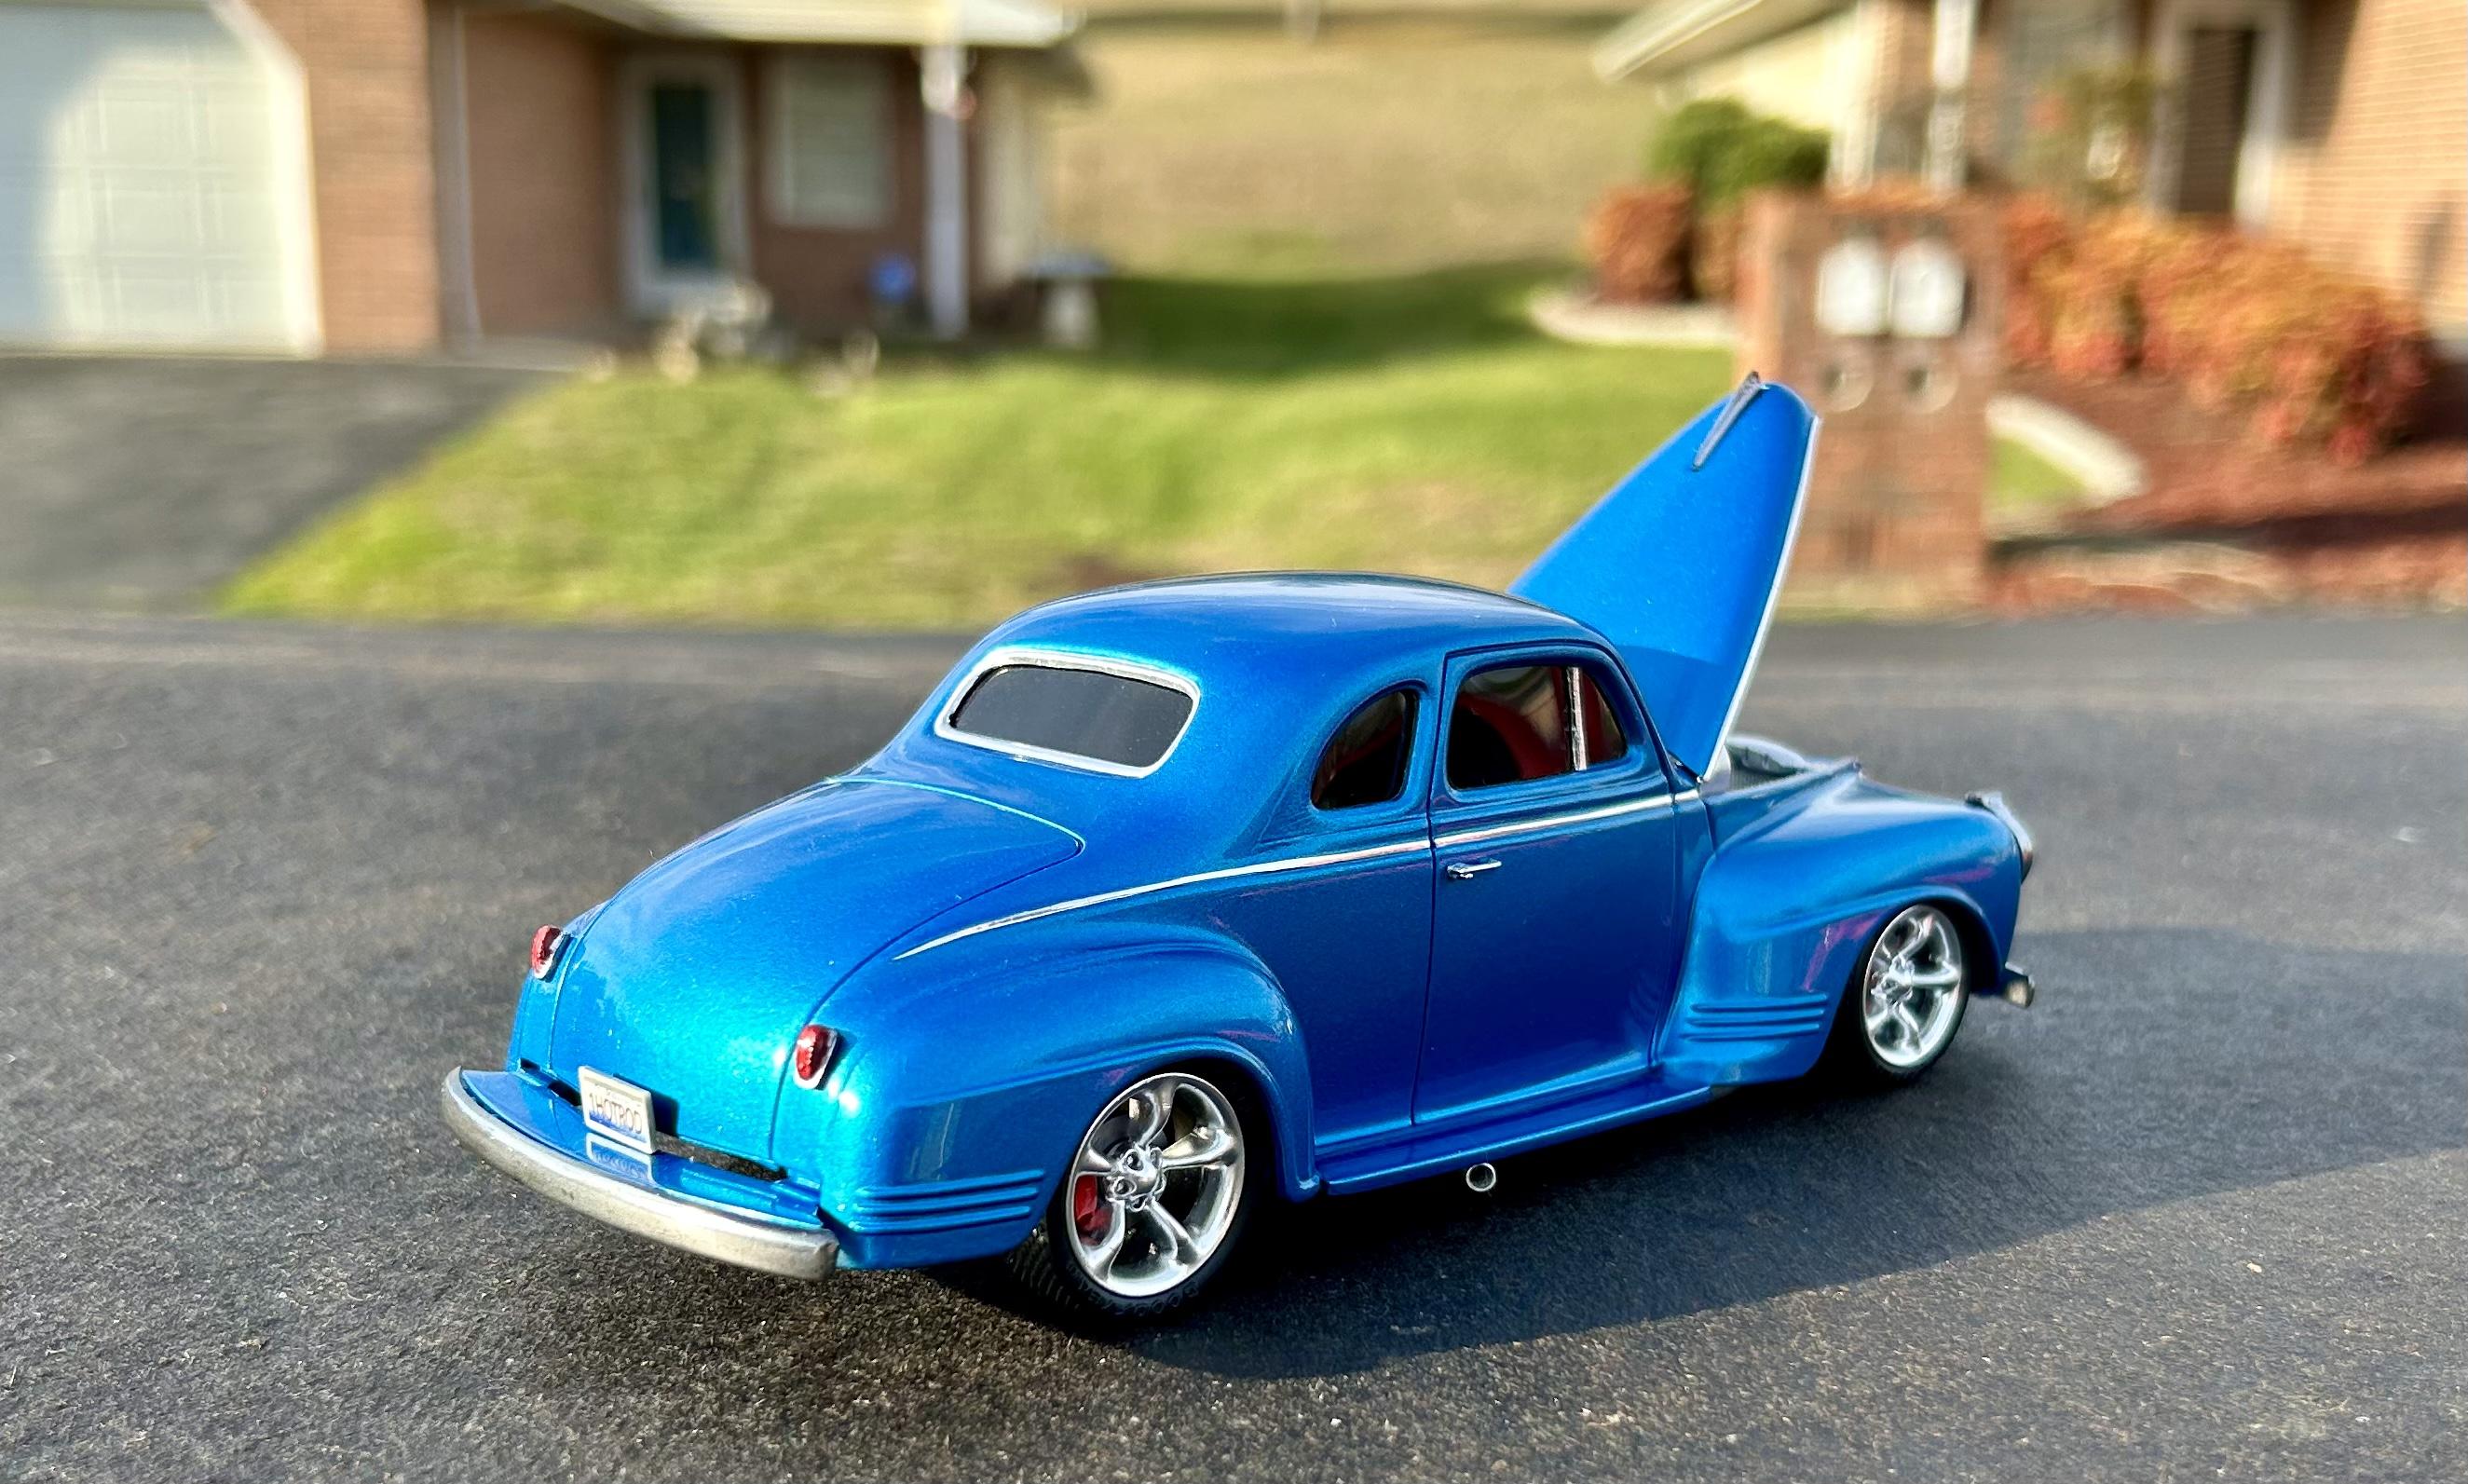
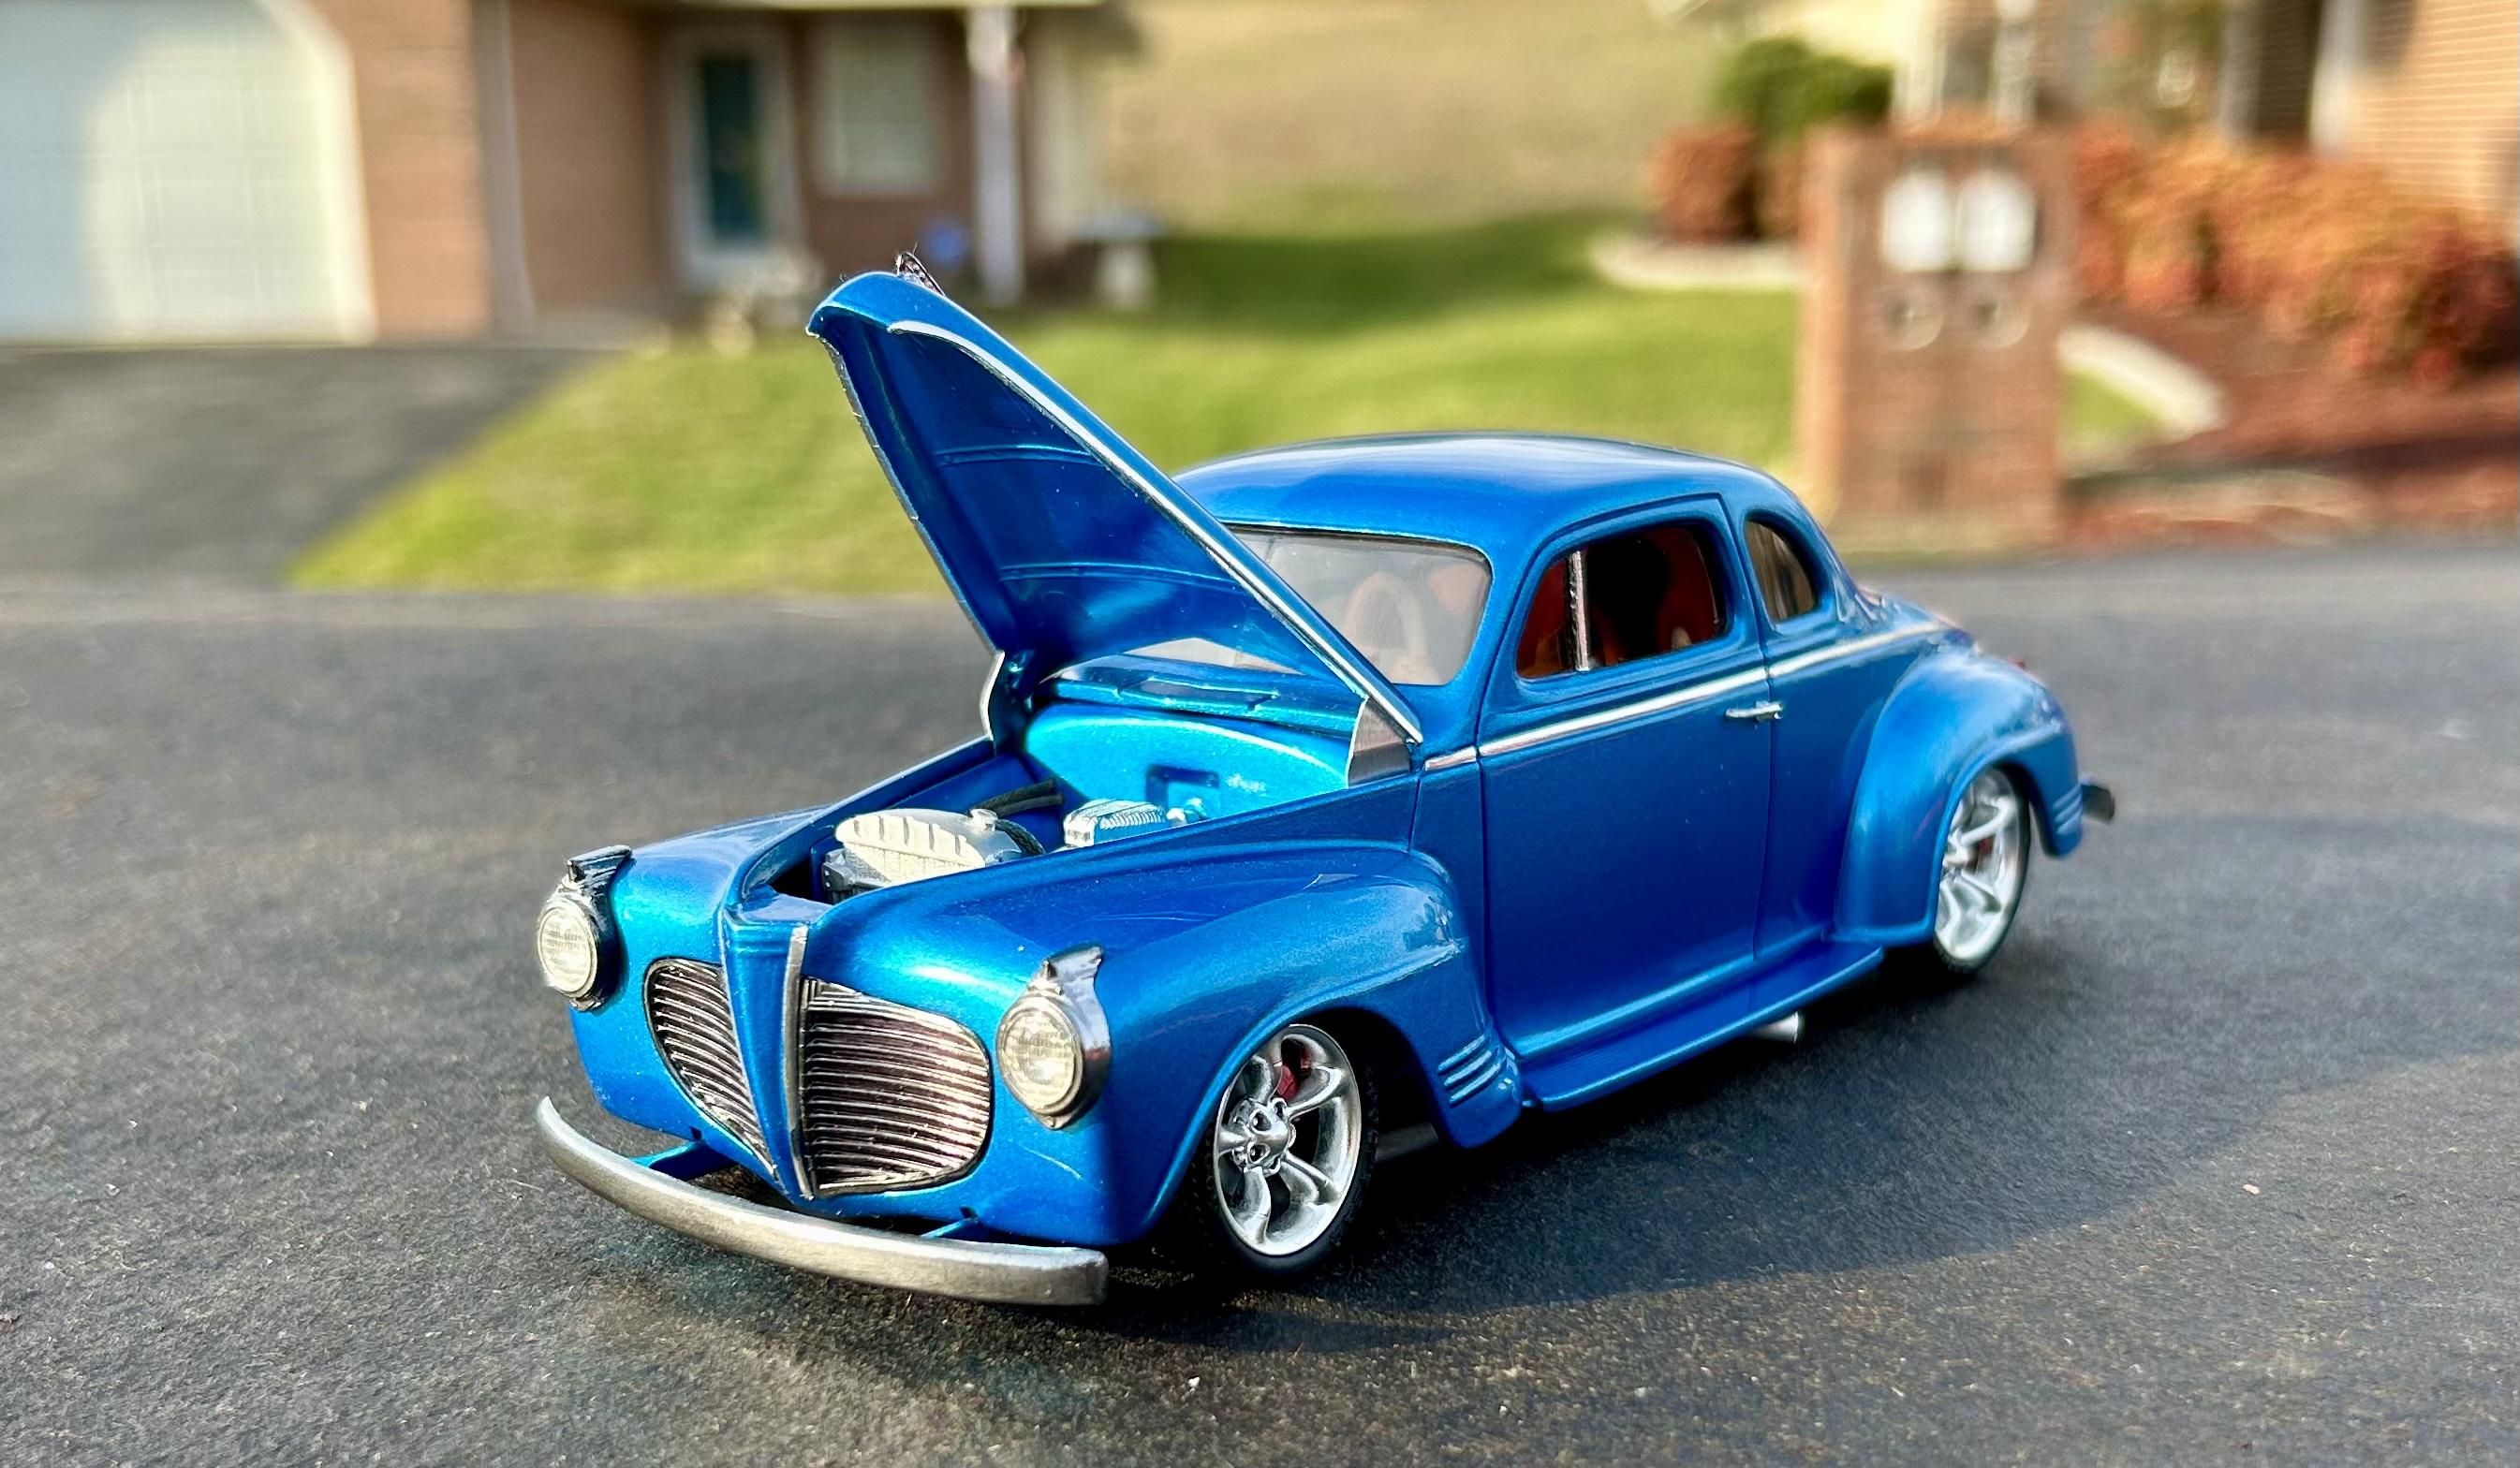
Thanks for the compliment. Blue is my favorite color, and I have to resist the temptation to paint every one of my builds some shade of blue. The wheels and tires, which I think look really killer, came in the Revell Dodge Copperhead concept car. I’m not much of a white wall and hub cap fan.
-
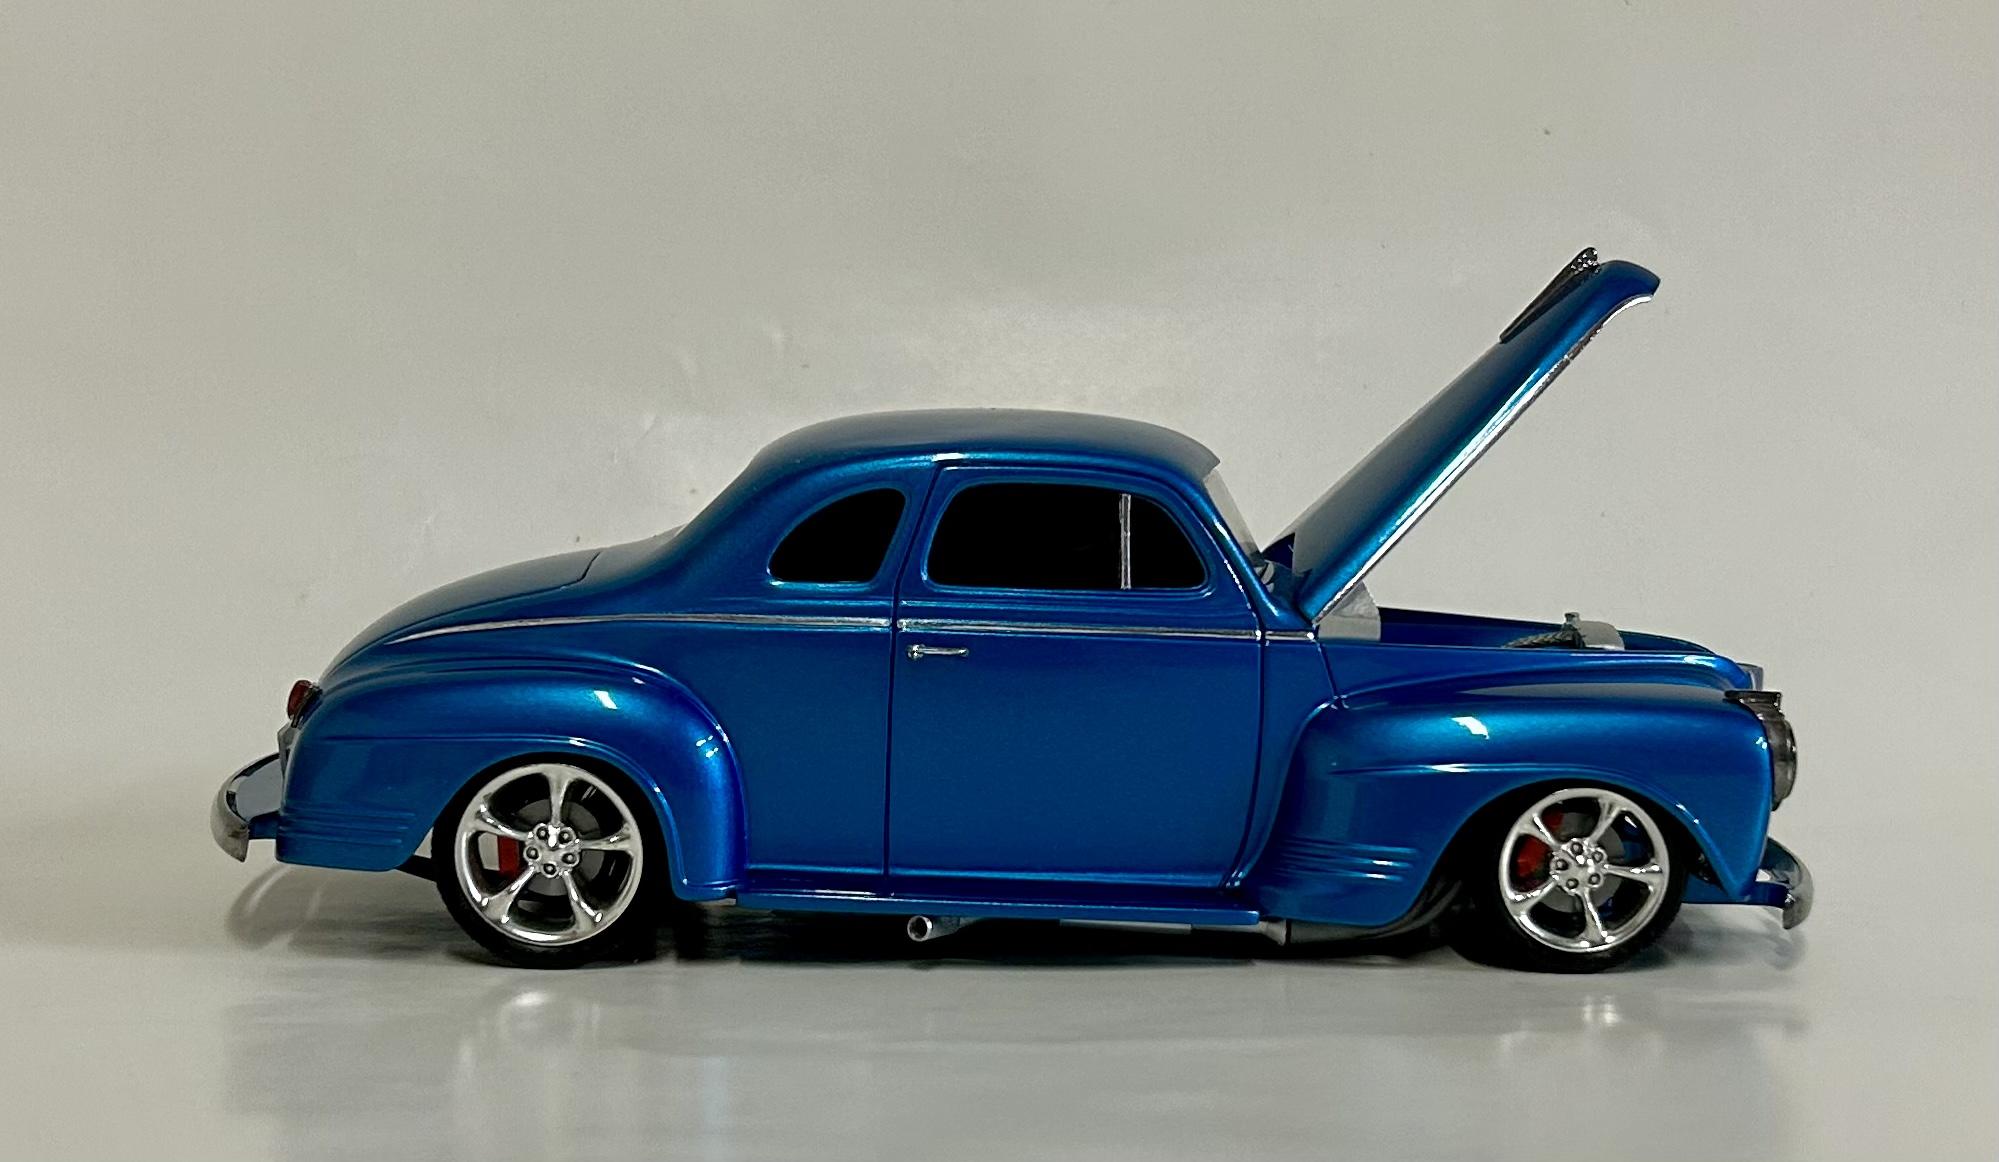
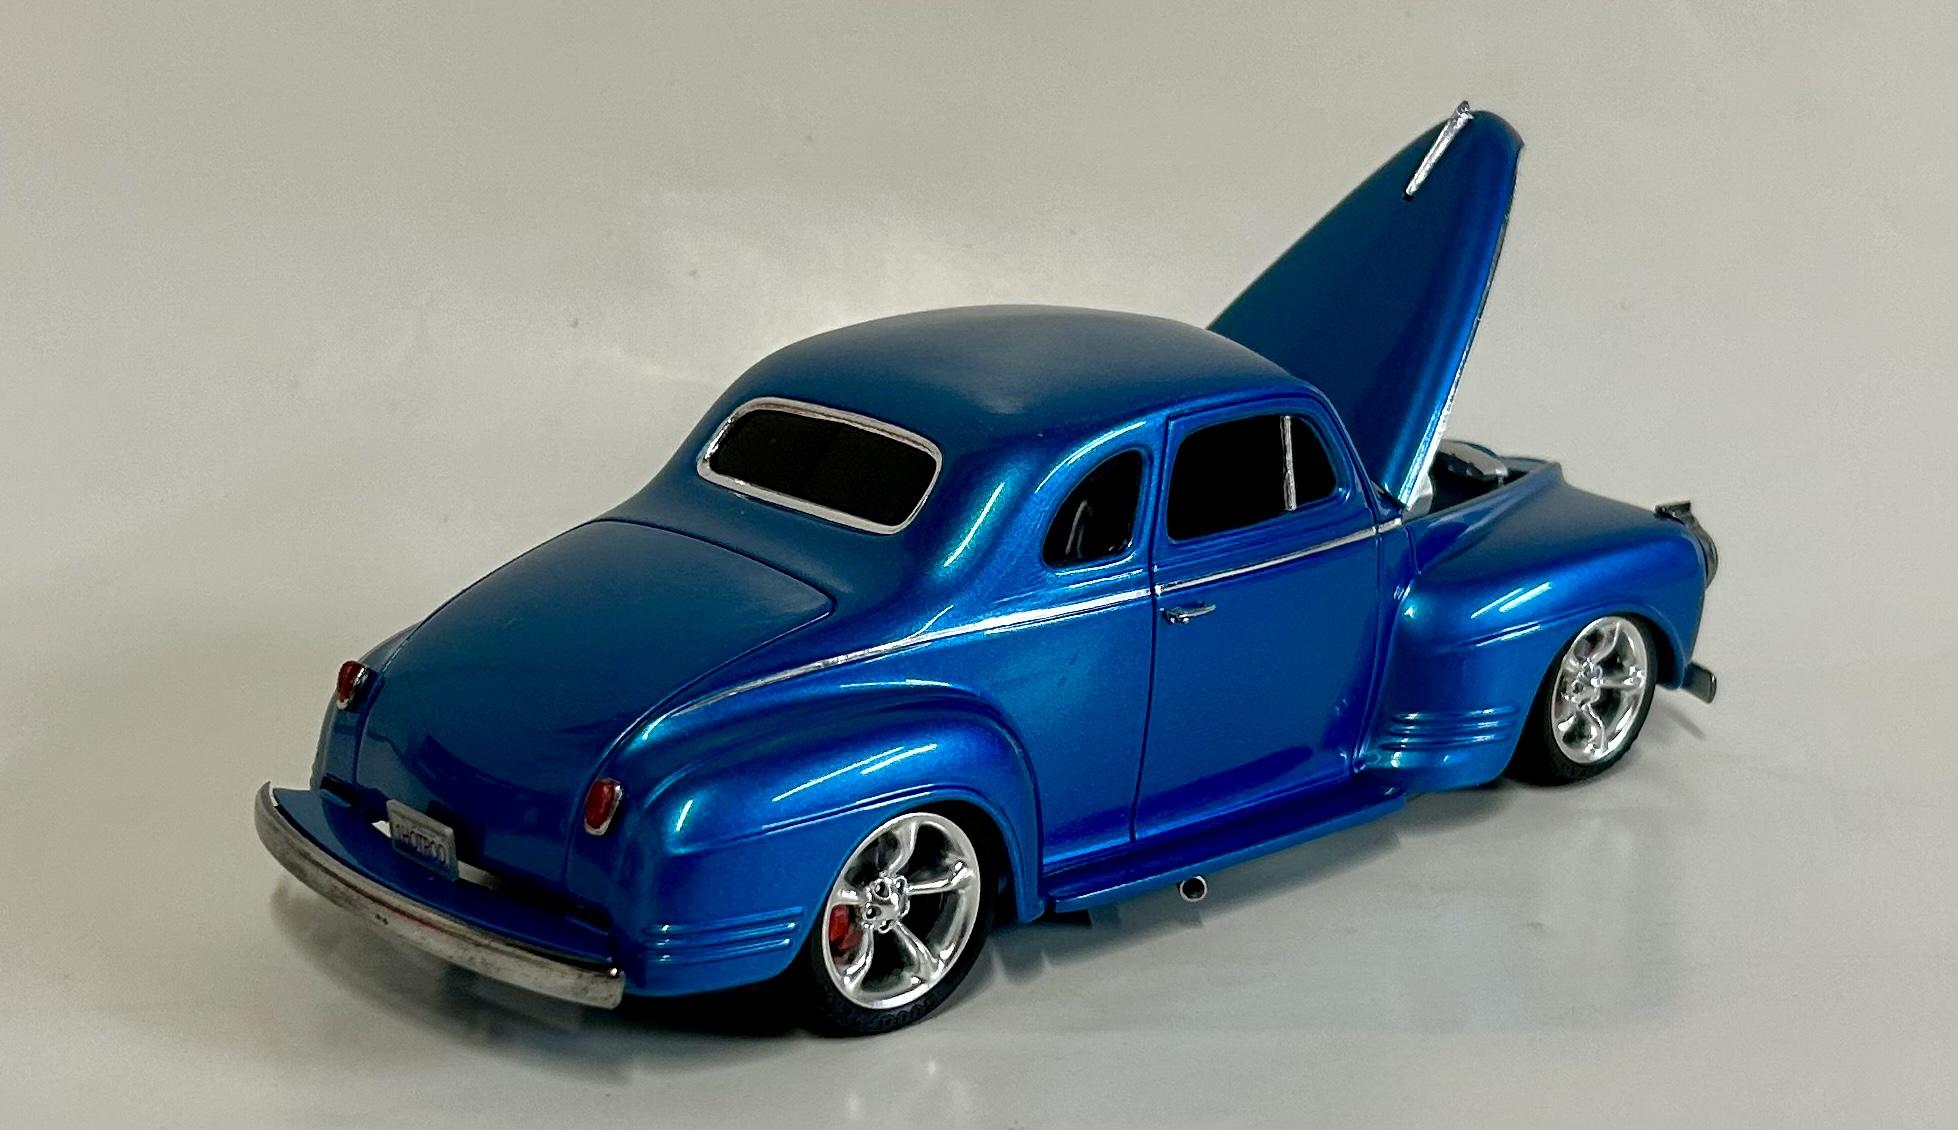
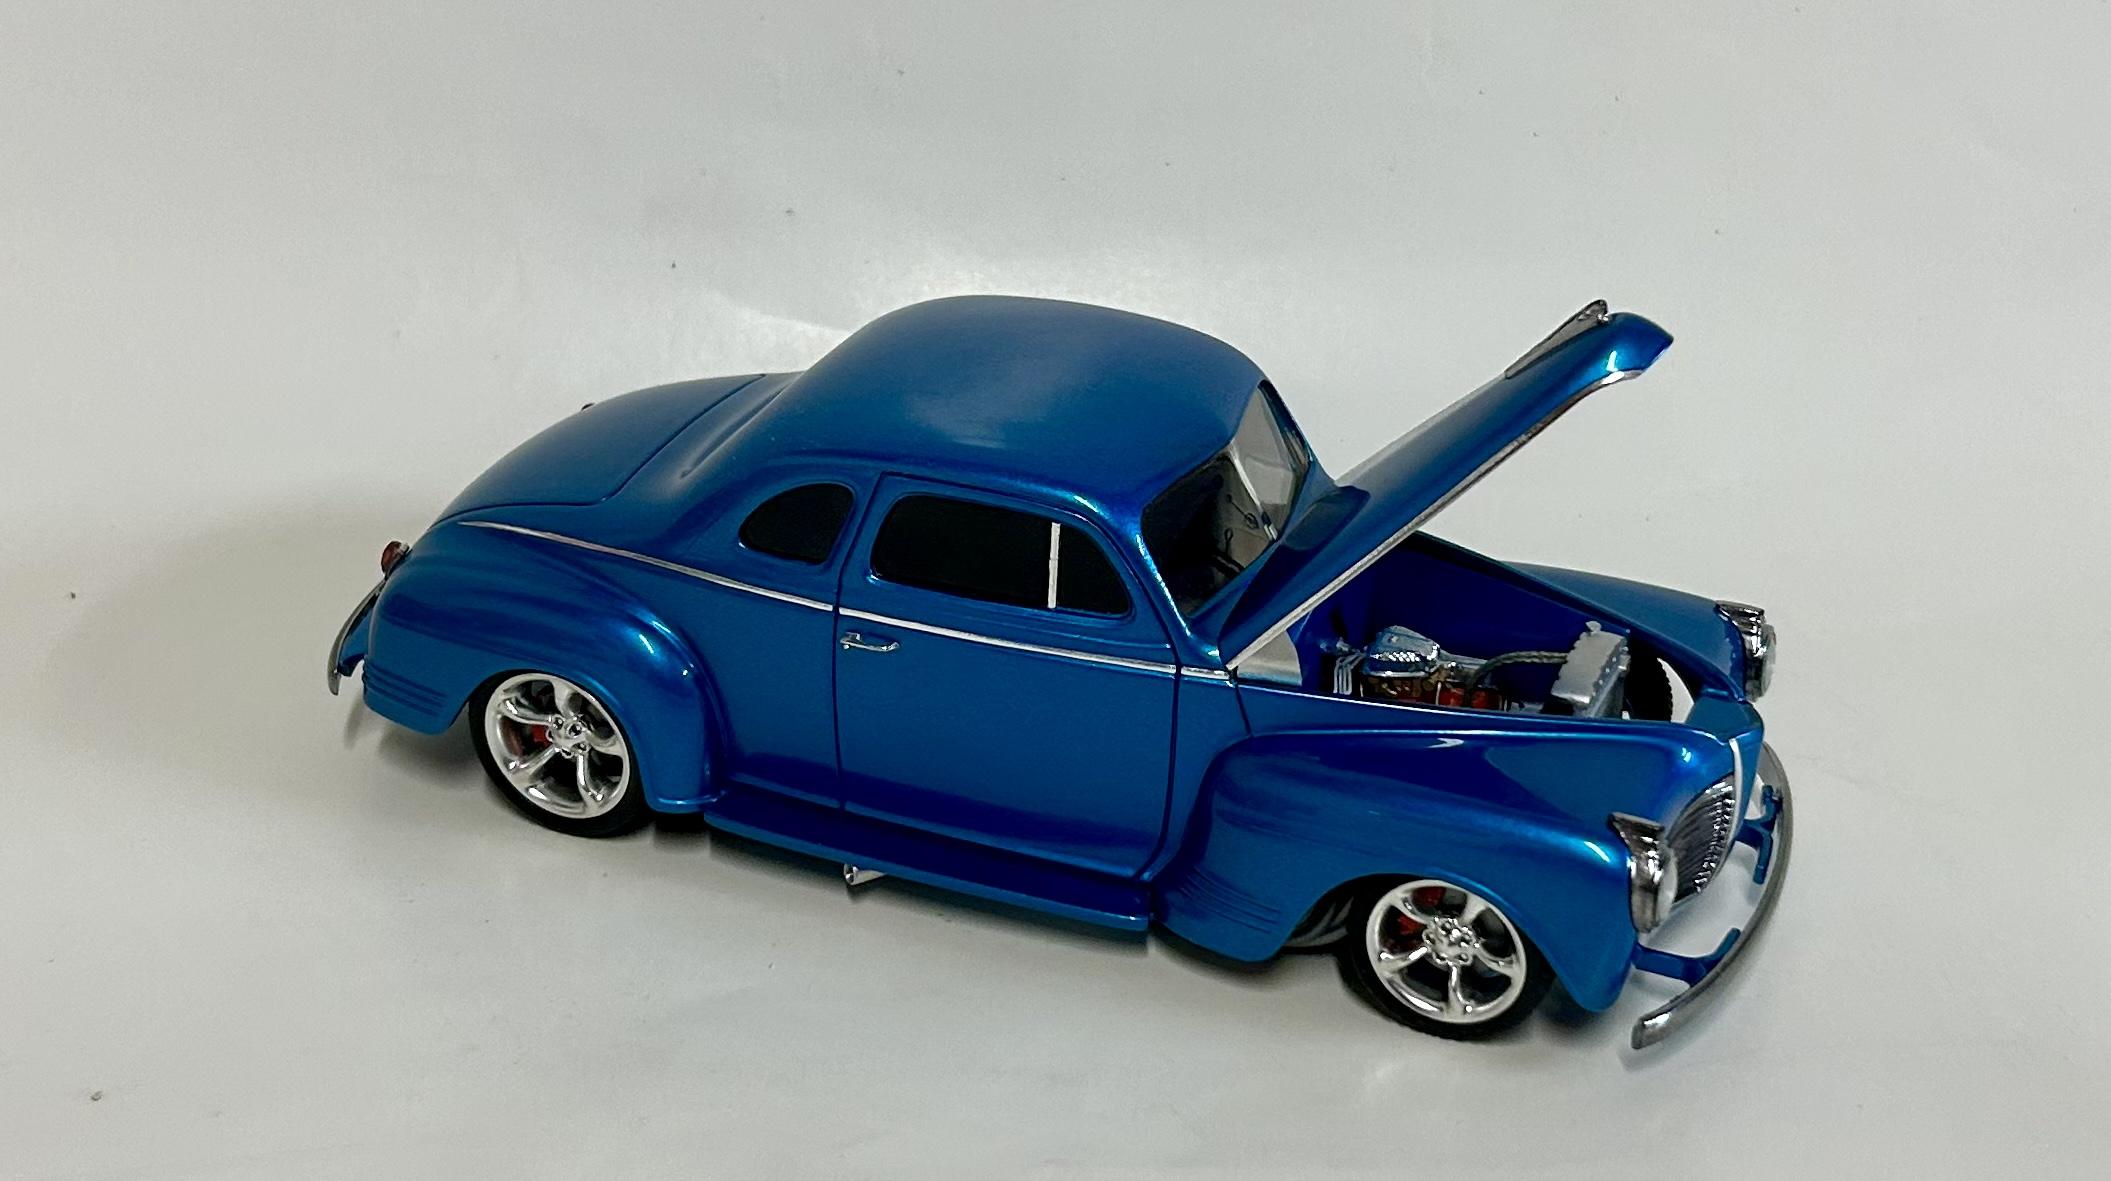
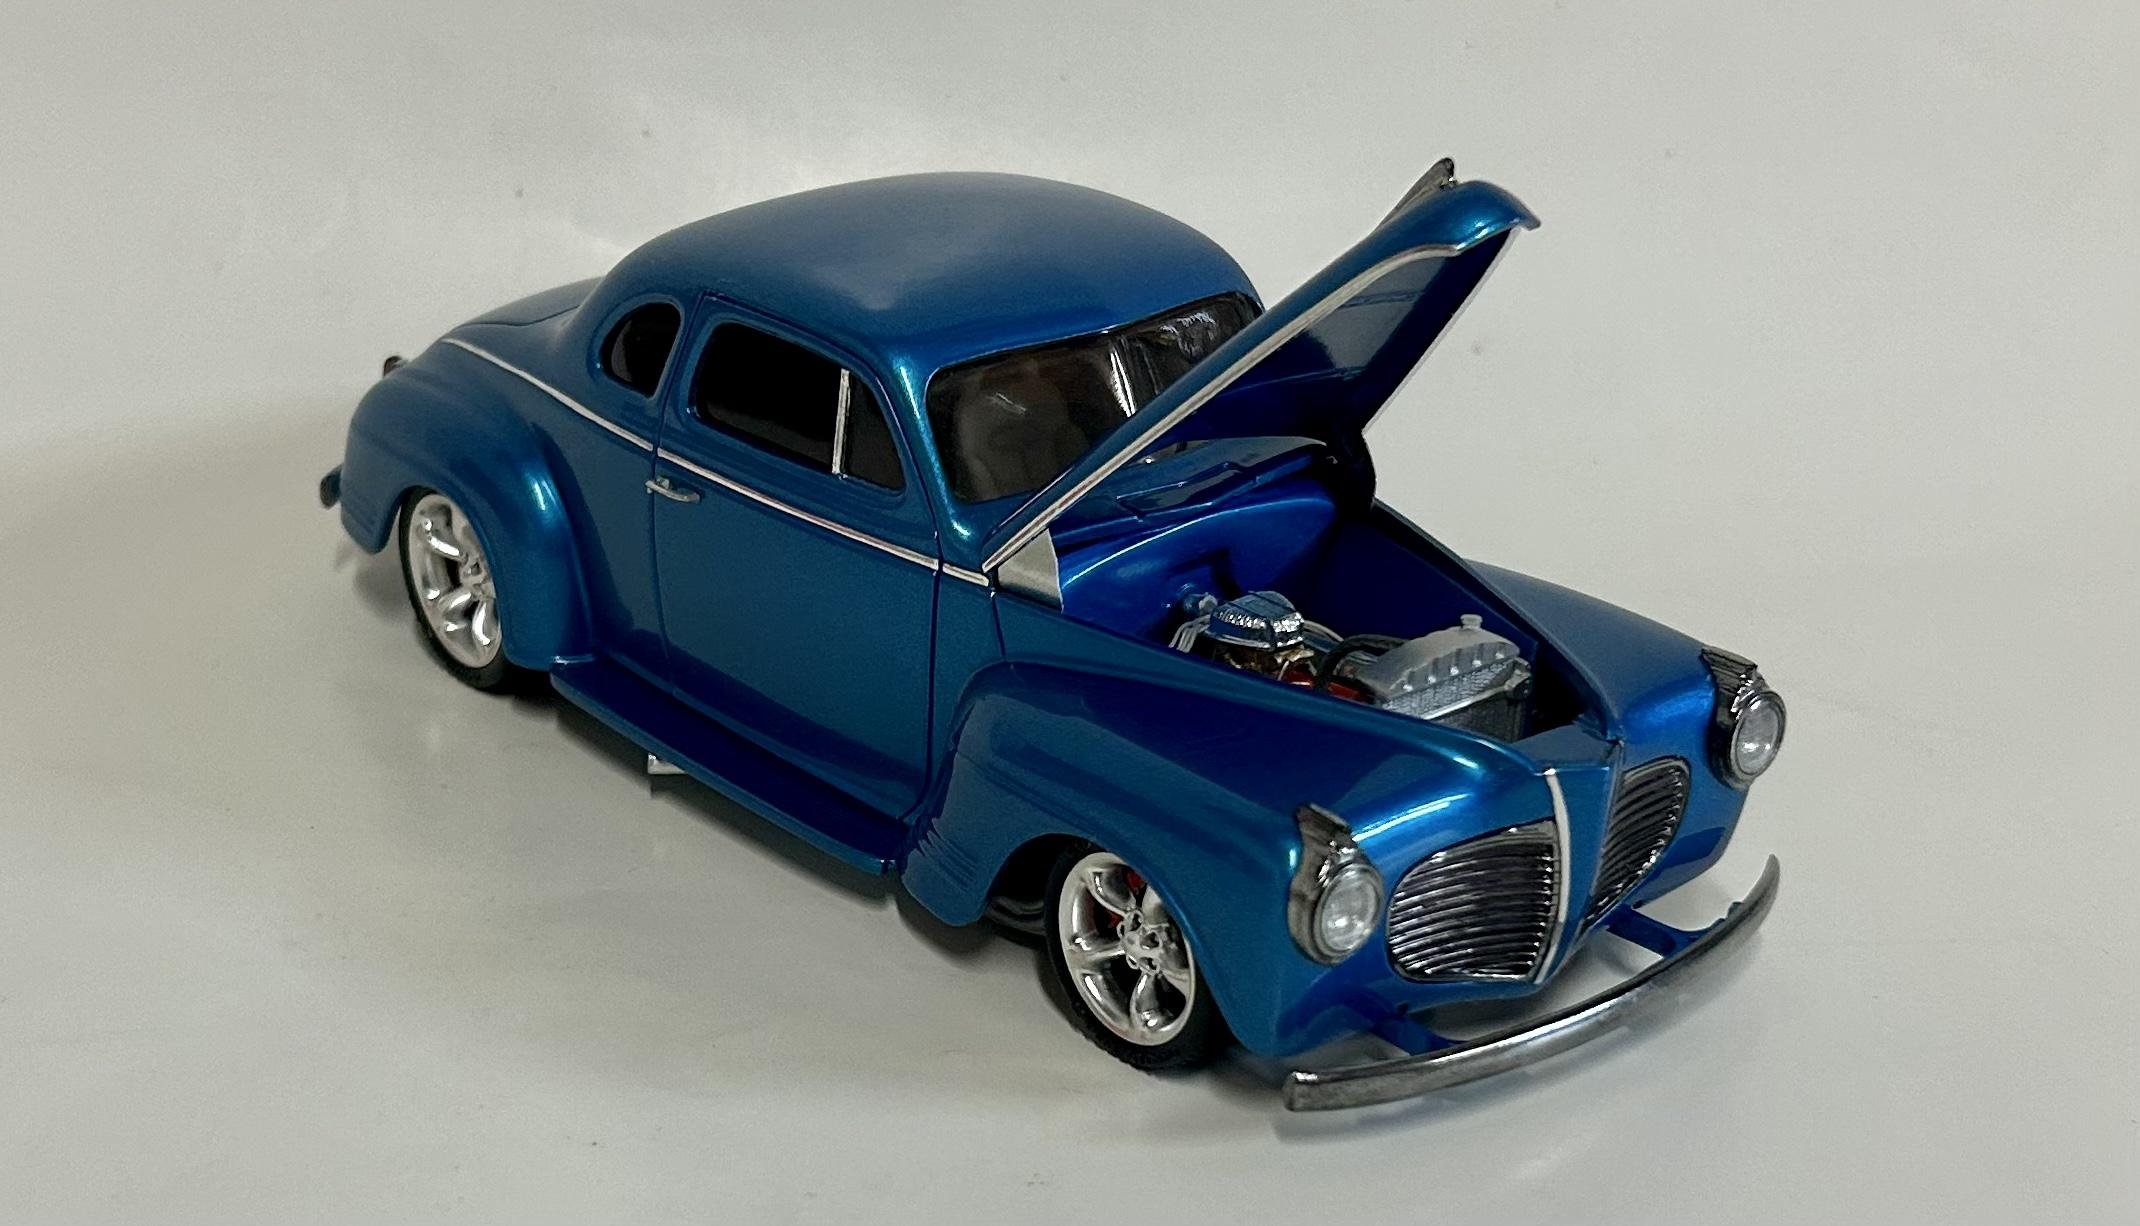
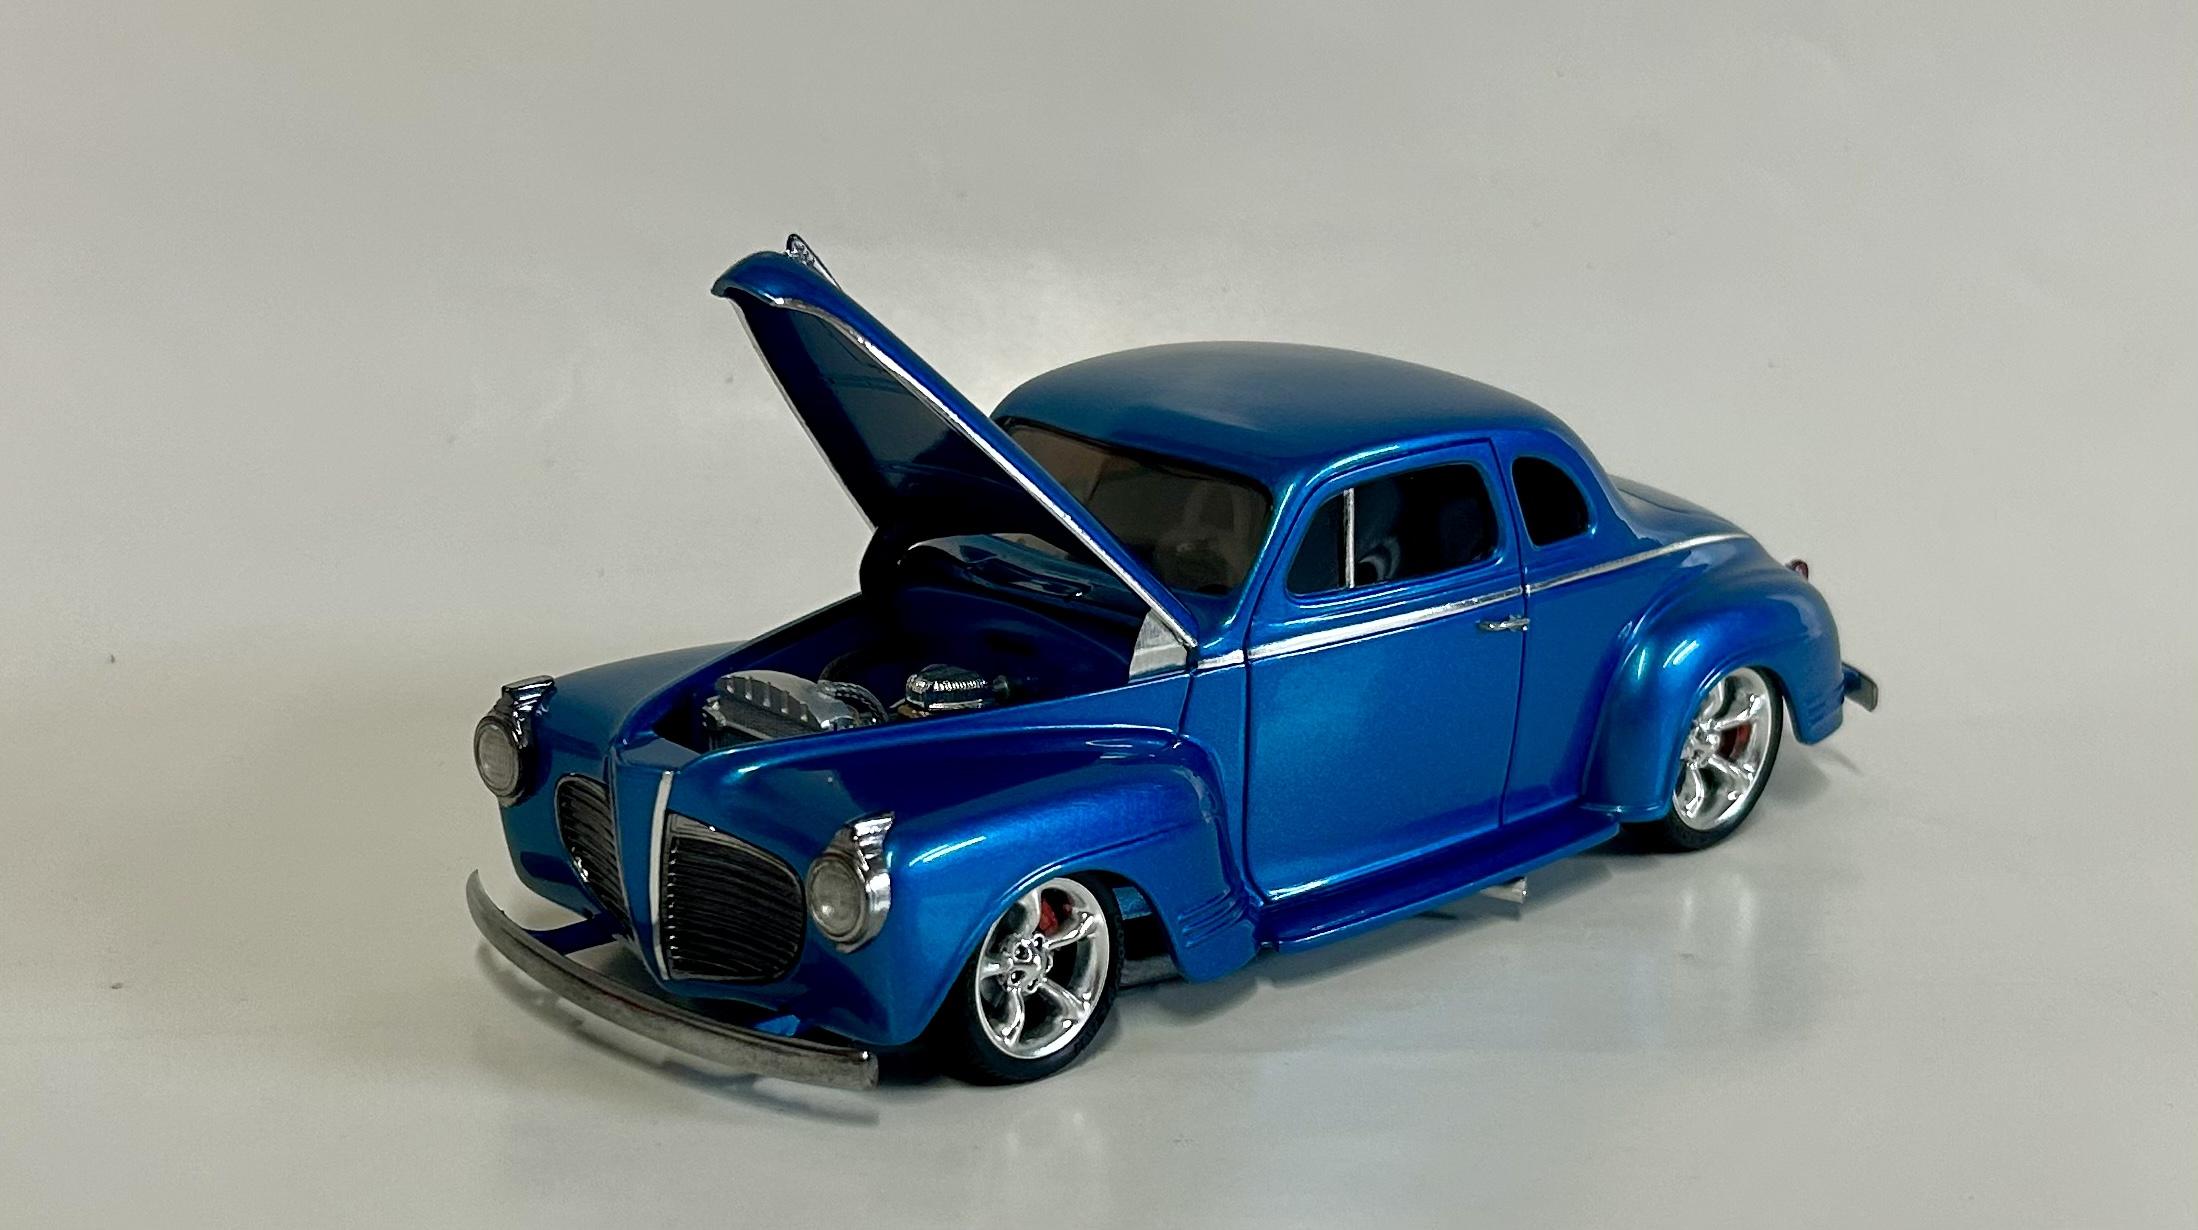
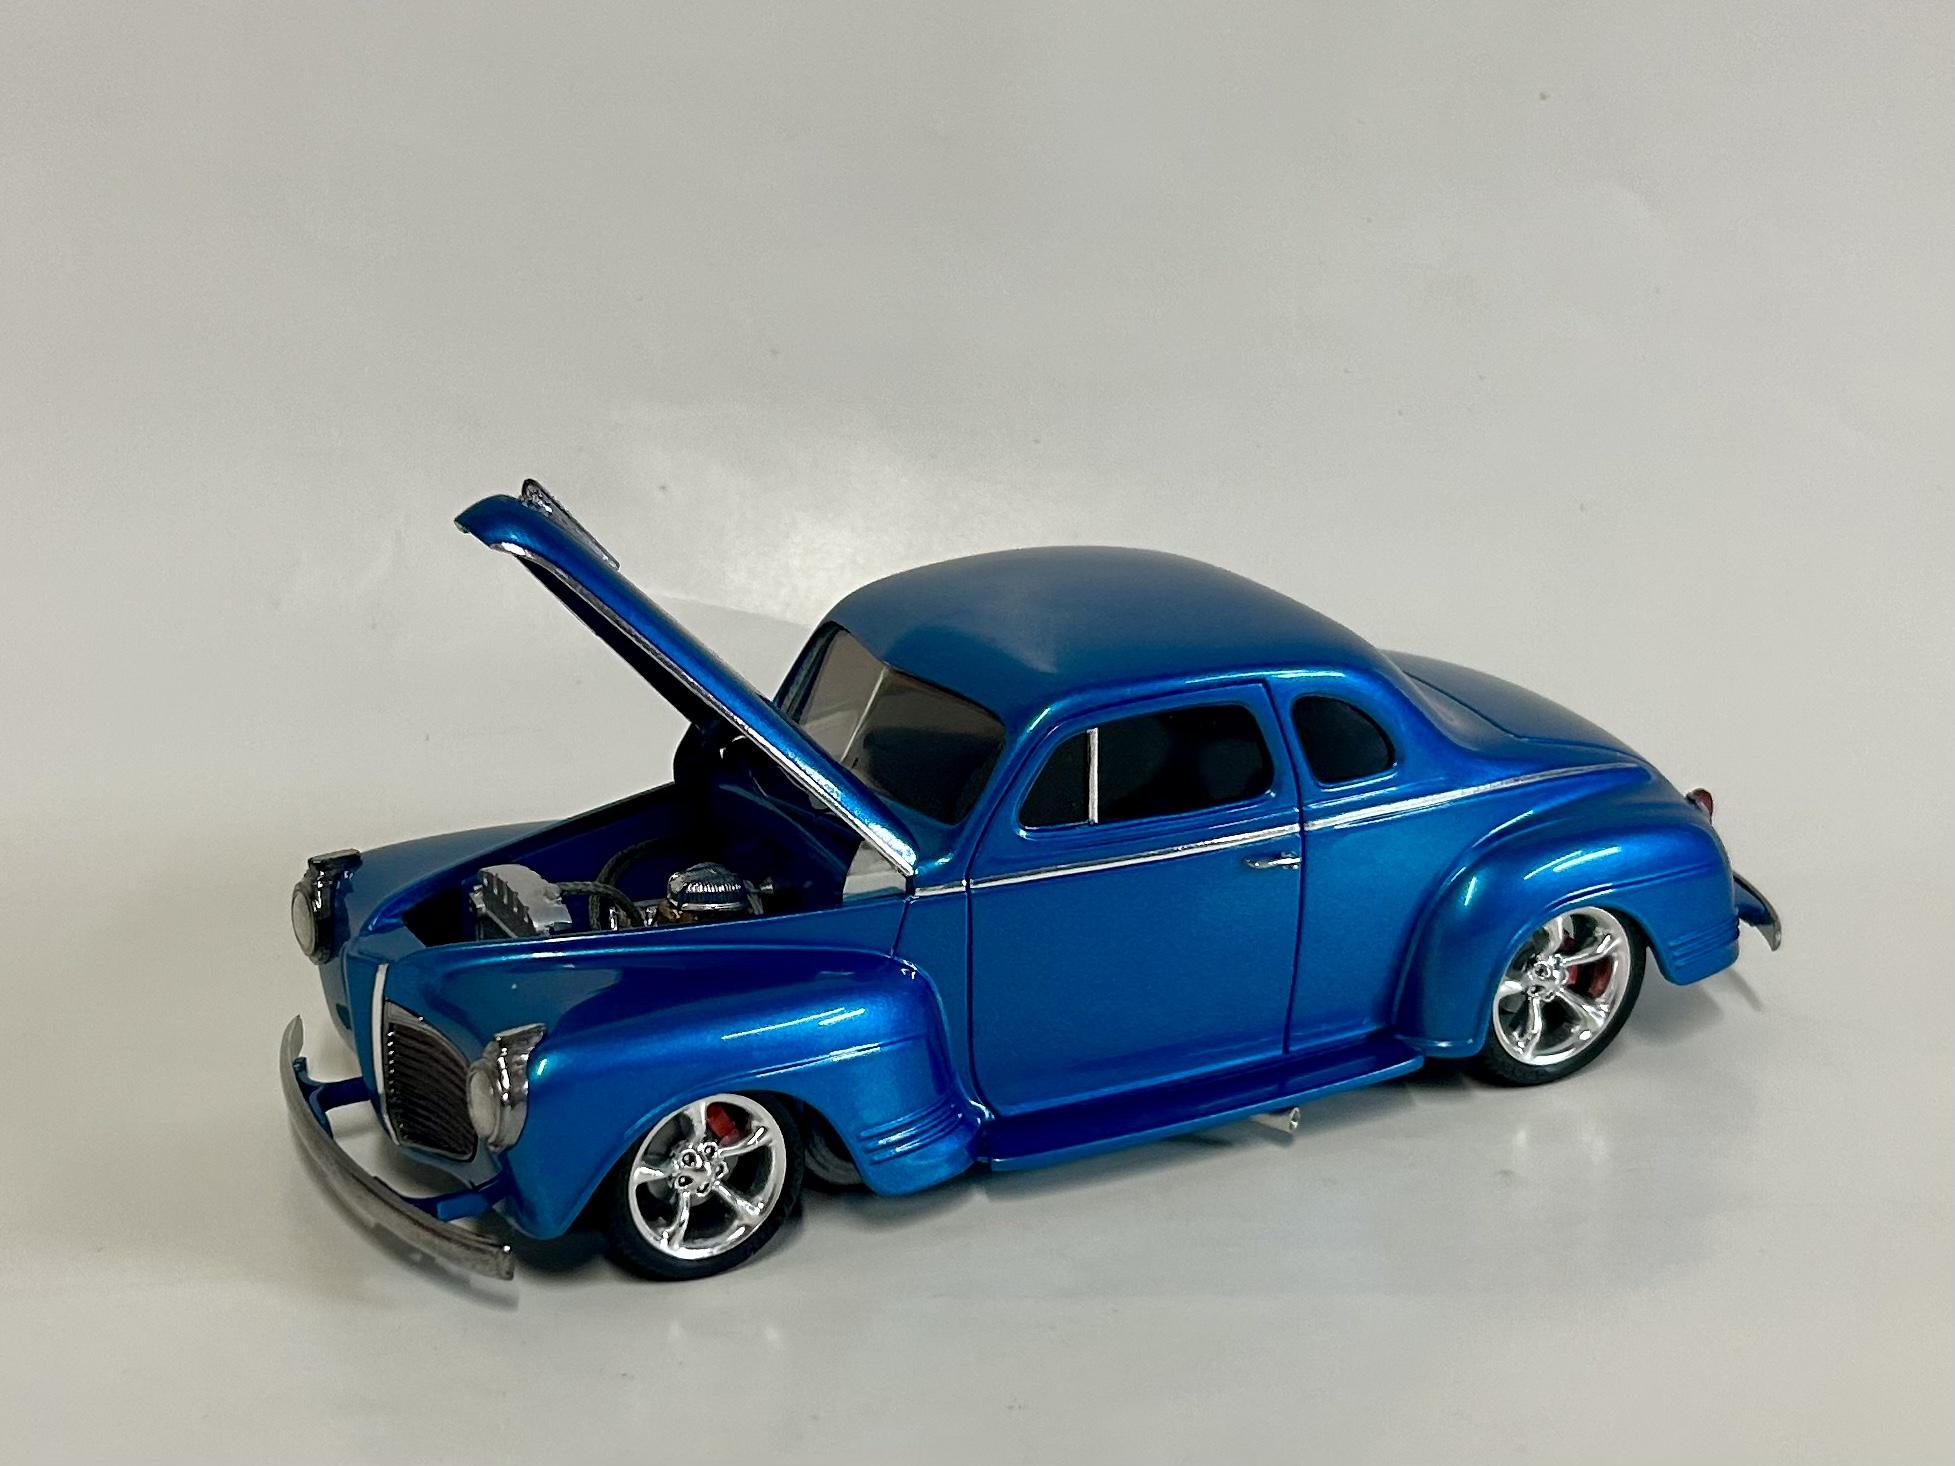
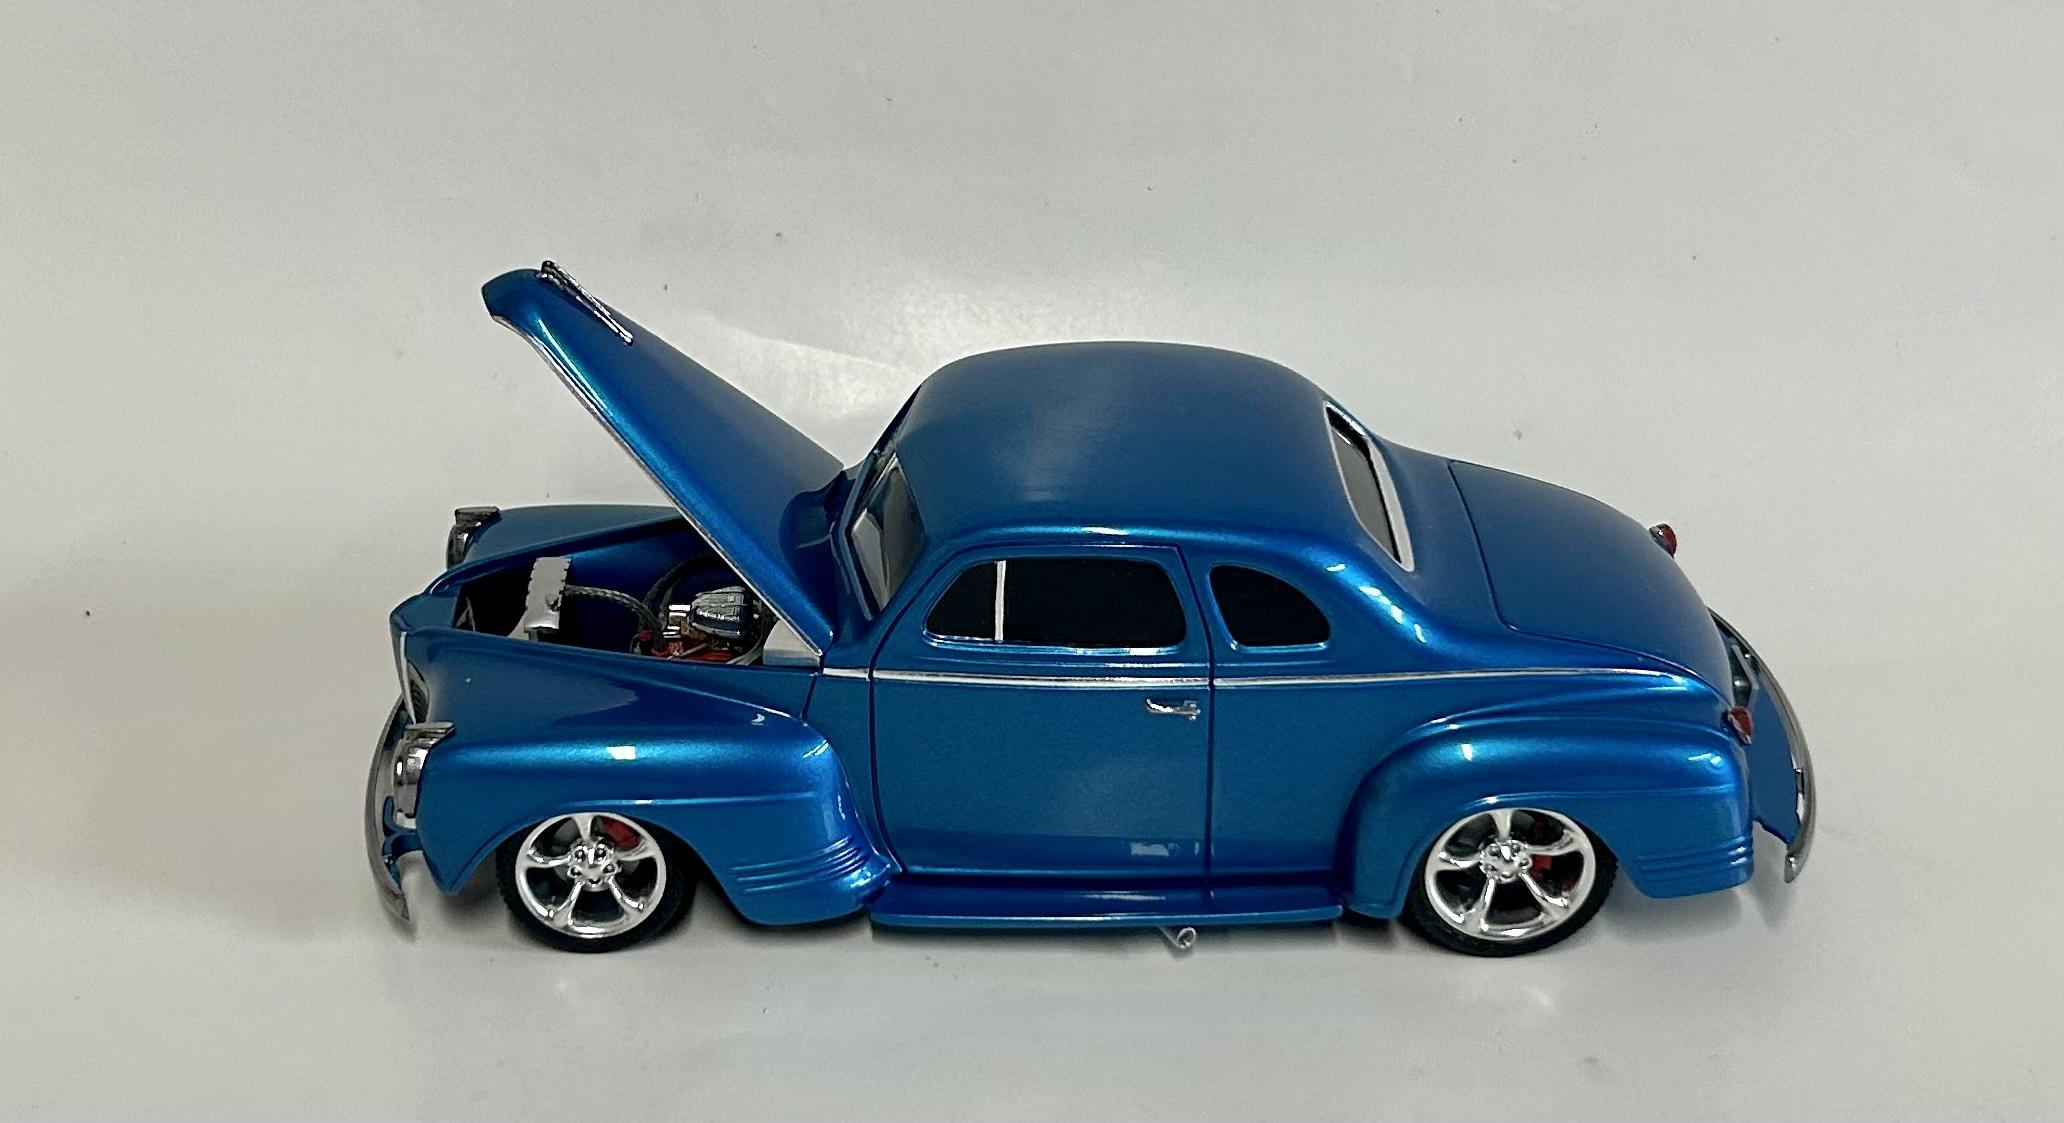
Hello model car world, I am reposting a build from several years ago. The thread was done in by Photobucket because I liked my money better than their services. So, I’ve taken some new photos using my new I-phone 14 to try out the camera, and I have to say the camera is outstanding. I built the Plymouth using most of the parts it came with, and some that didn’t. Some polished Dupli-Color was used on the outside, with Modelmaster on the inside. I also adjusted on the stance and attitude to give it a more modern look. It’s a better kit than it gets credit for. A fun build for sure.
-
Coca Cola Cameo kit
modelcarcrazy replied to Oldriginal86's topic in Model Building Questions and Answers
Use a small wire with black insulation, make sure it’s long enough to wrap around the edge of the plastic windshield. Strip the insulation from the wire, then split the insulation with a no. 11 blade. Push the insulation down onto the edge of the plastic windshield, trim to fit. The insulation looks like the gasket on the actual truck and the windshield will no longer be to small. It will fit much better and much easier to attach with a clean look. -
Hey, thanks Roger. ? The wheels, tires & brakes came in the AMT/ERTL Camaro concept car. I think the concept car came around 2006, or so.
-
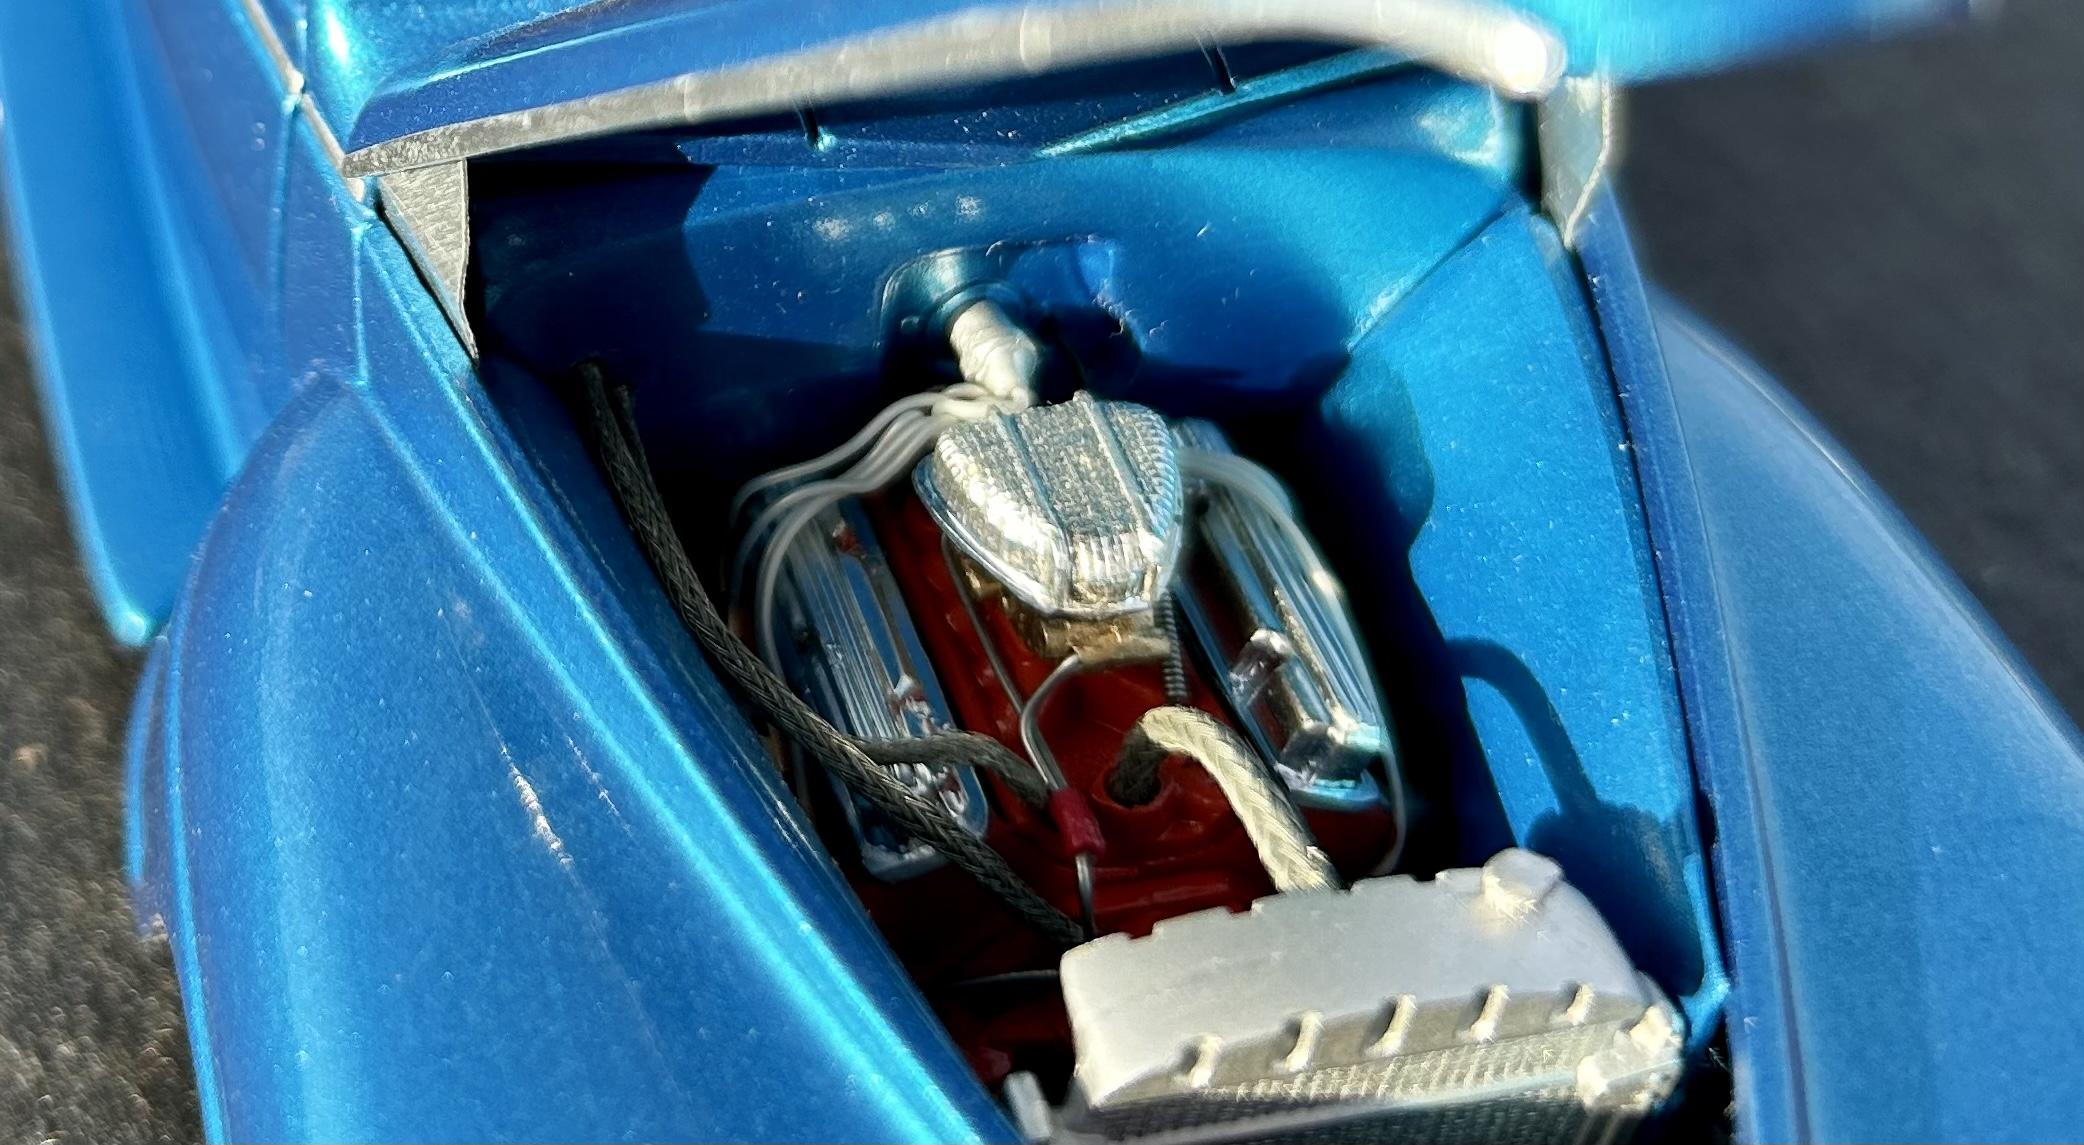
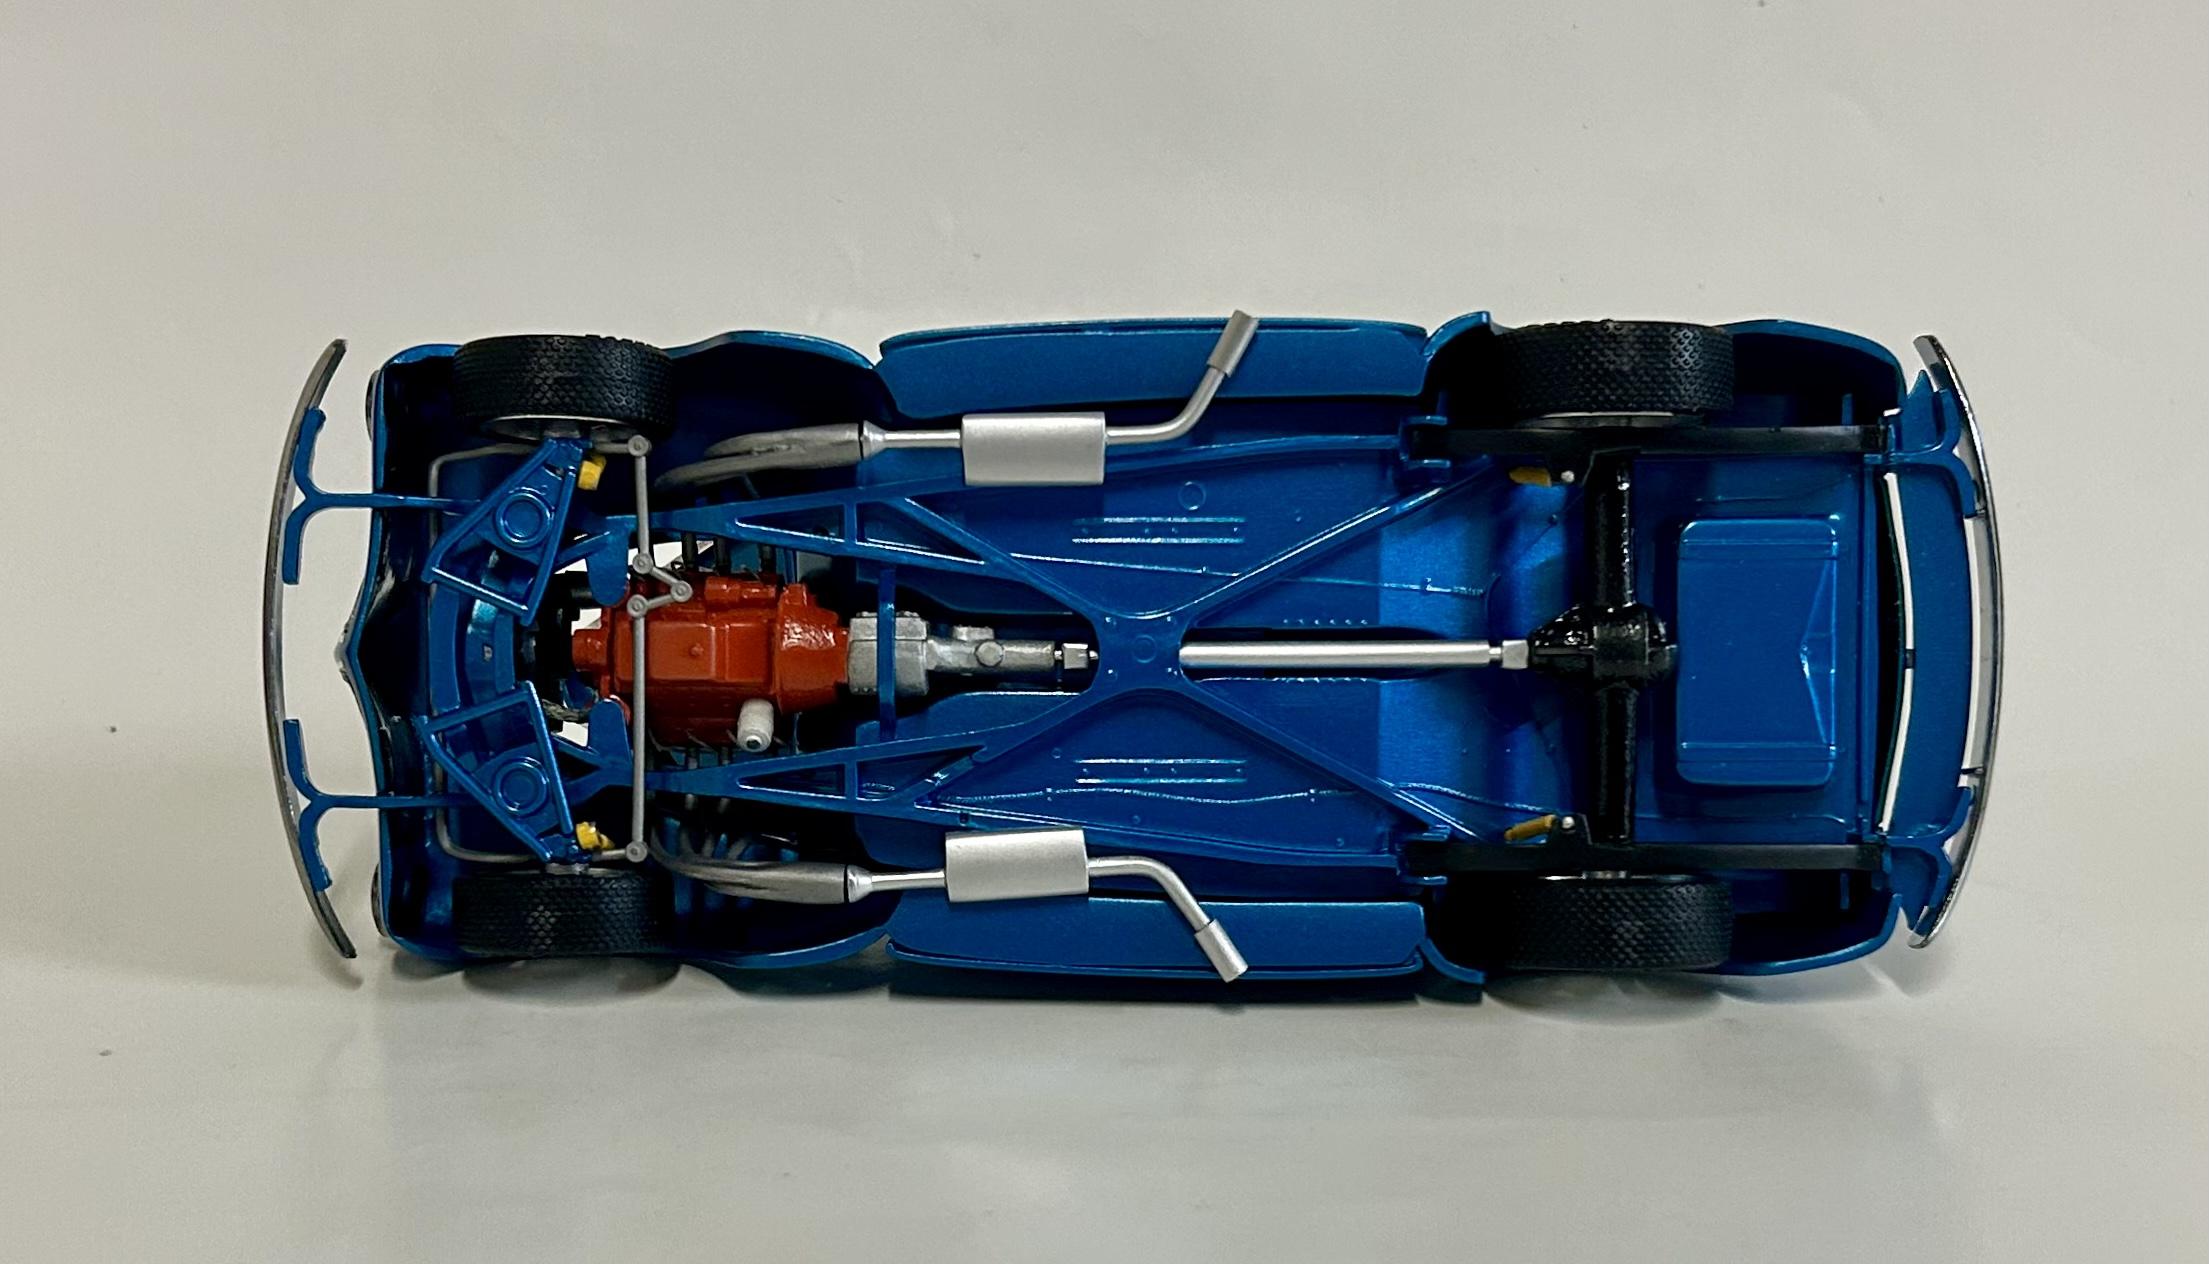
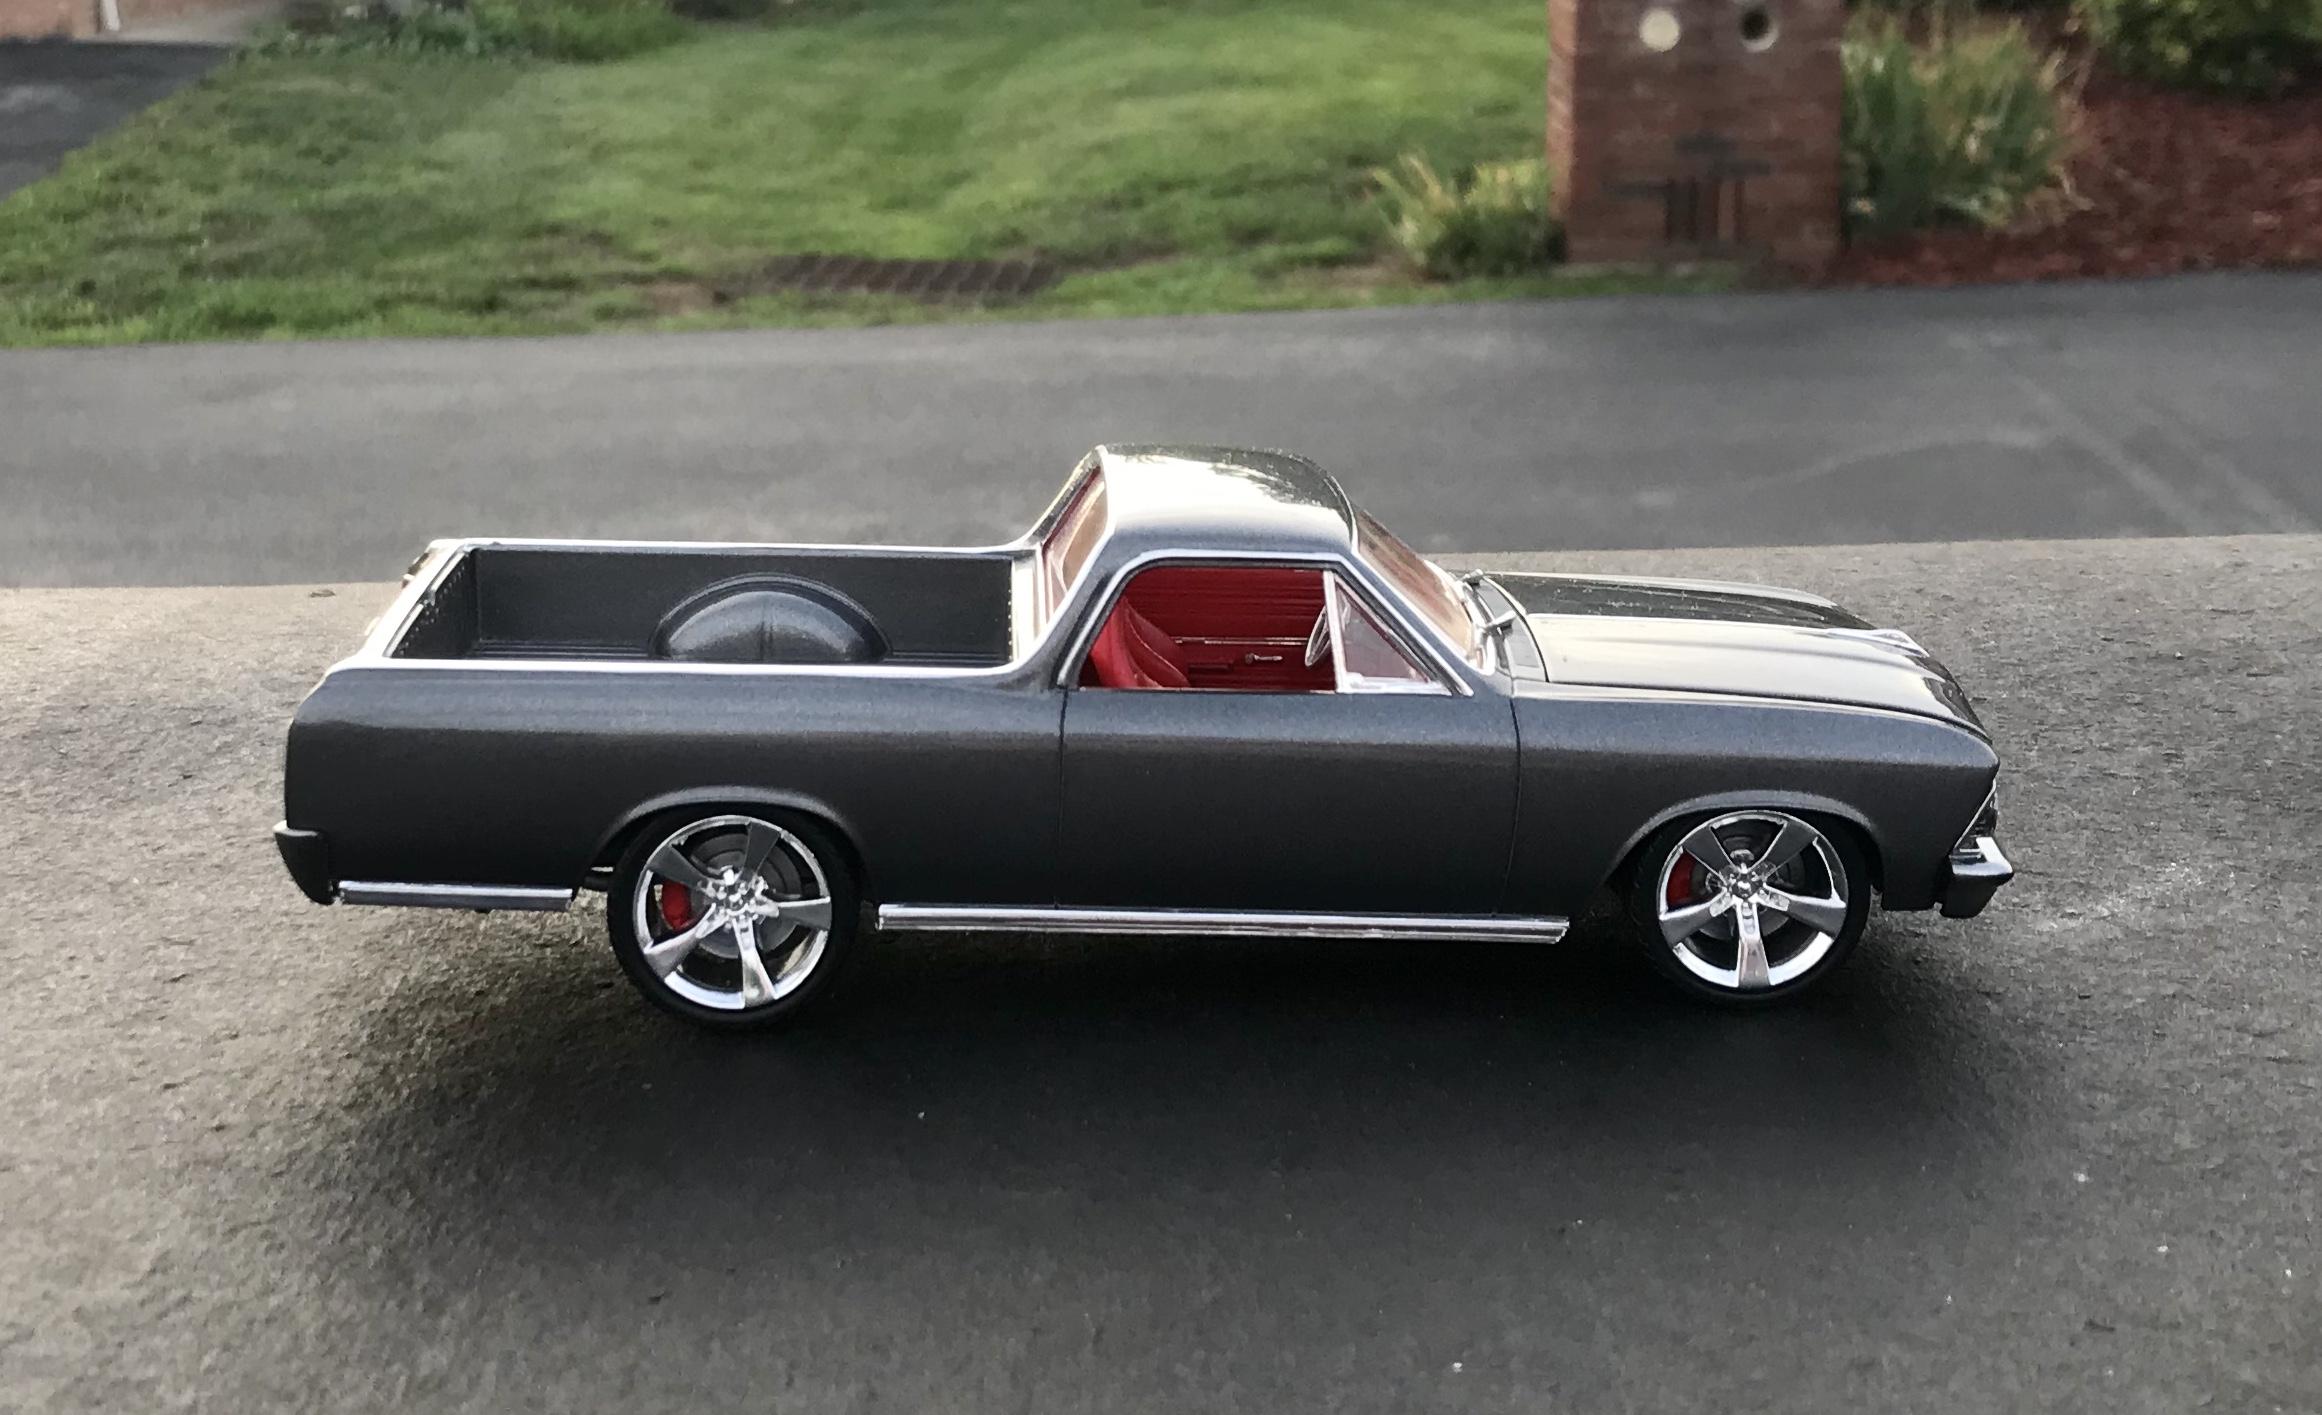
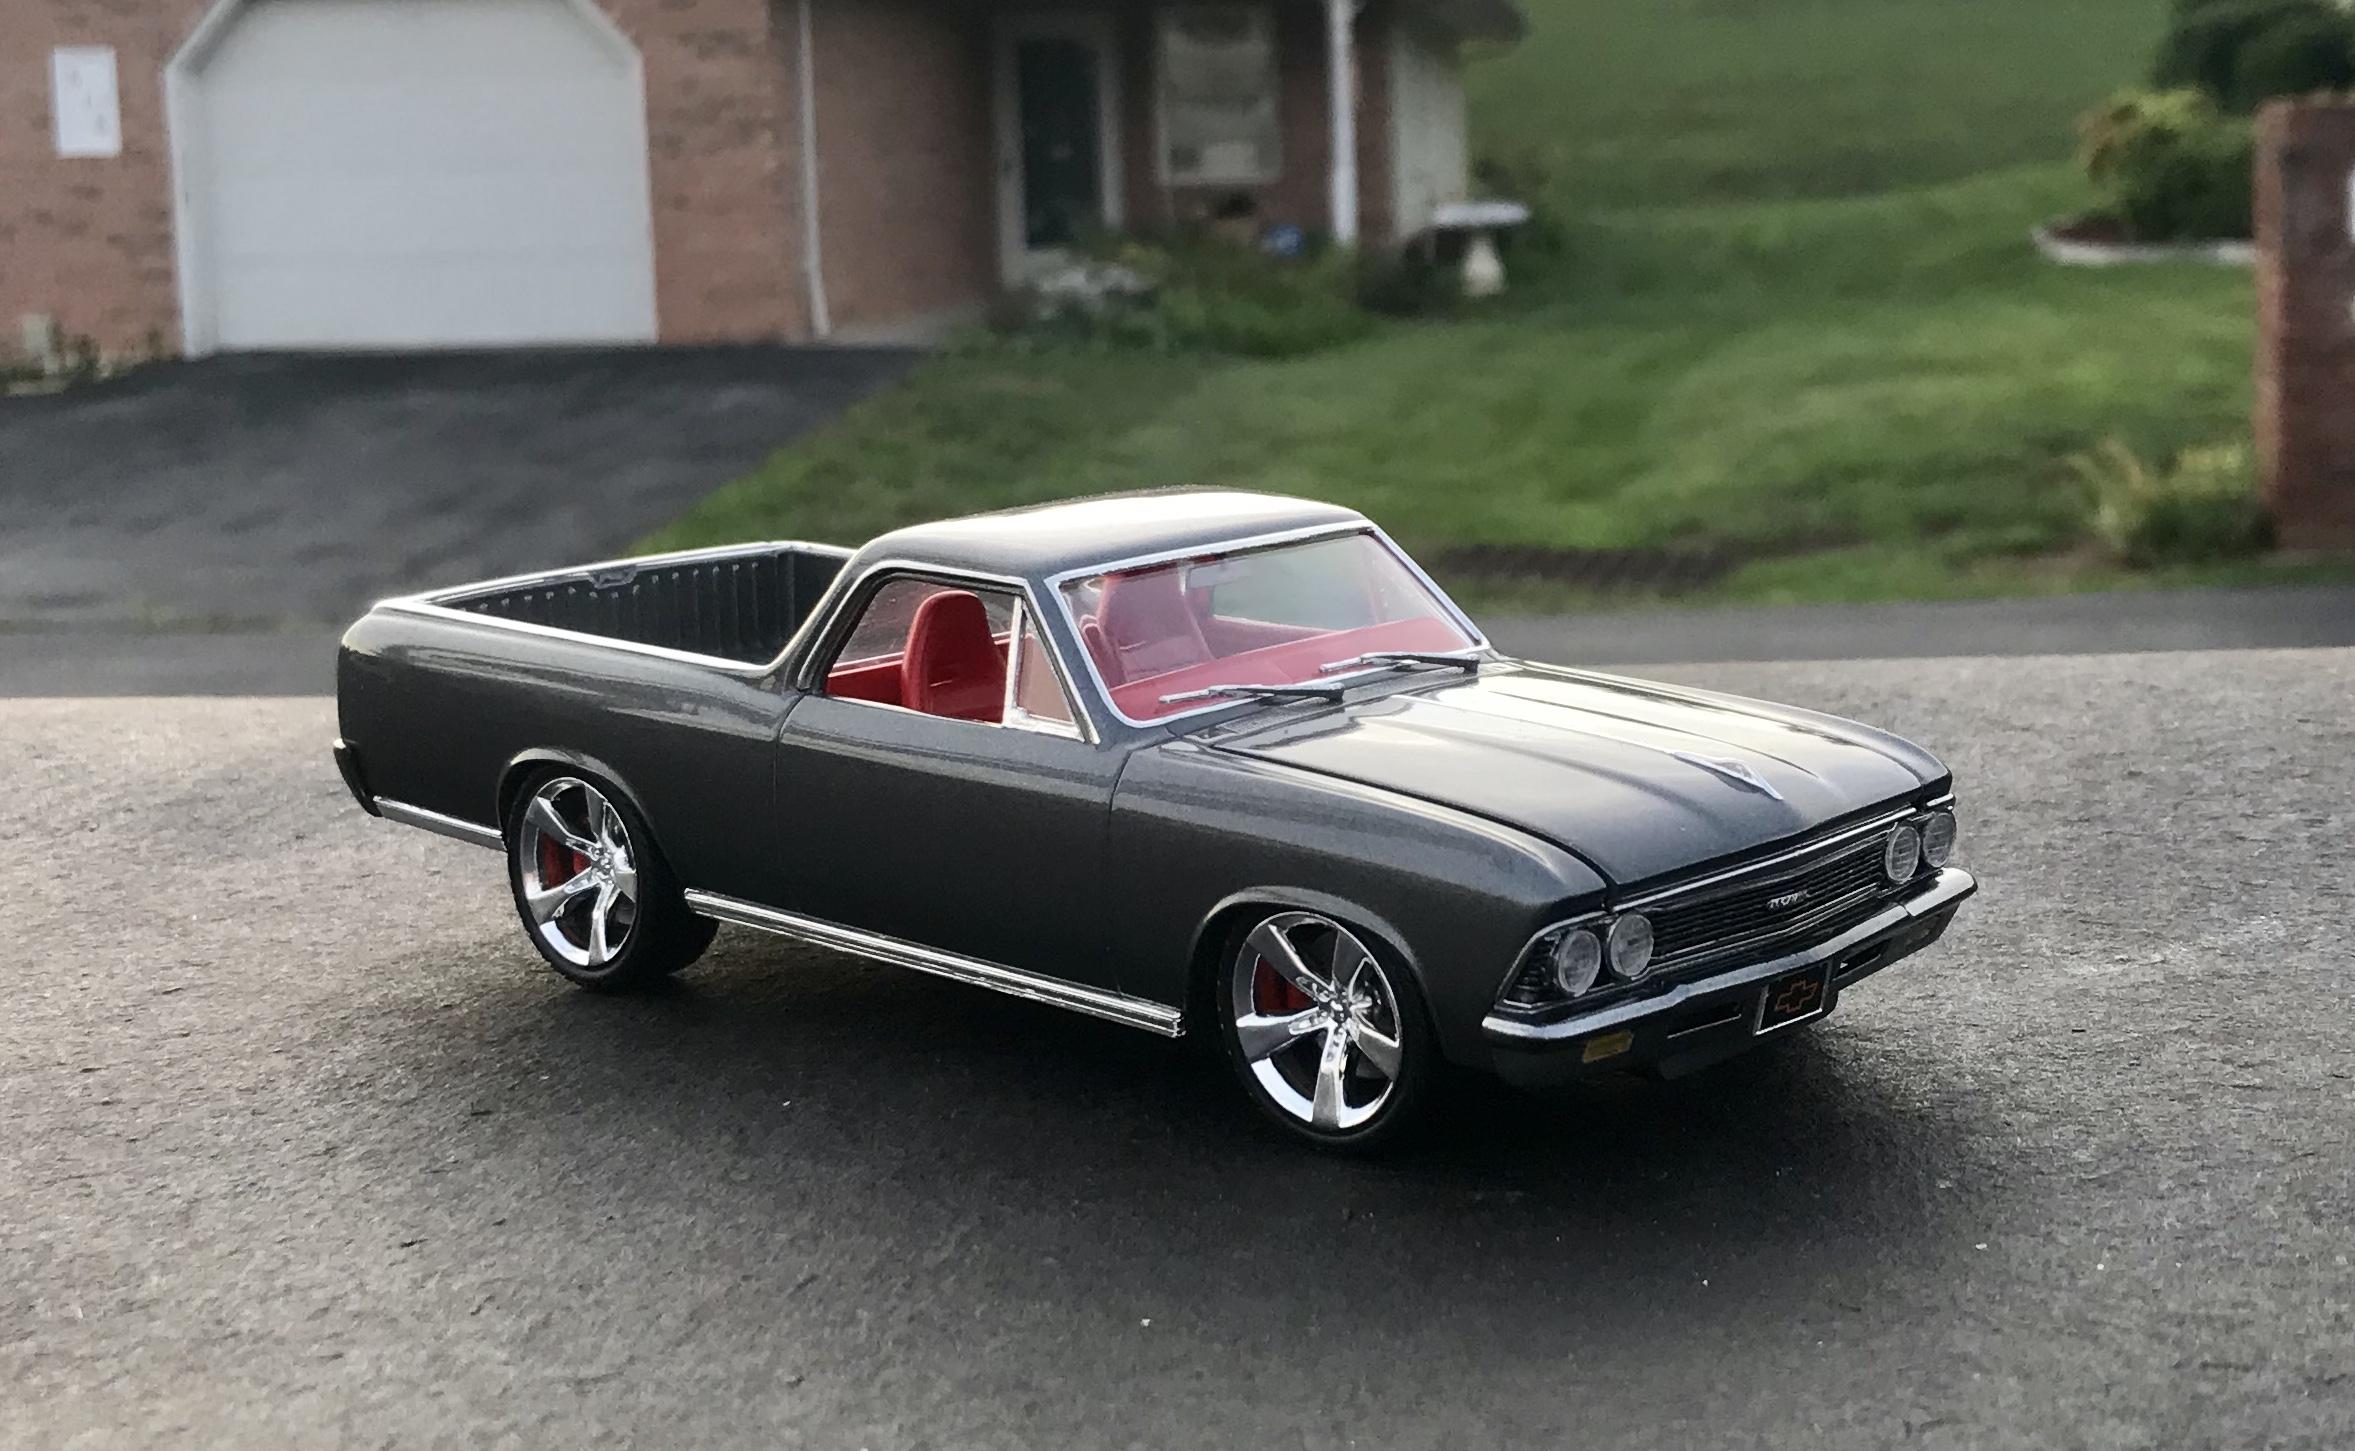
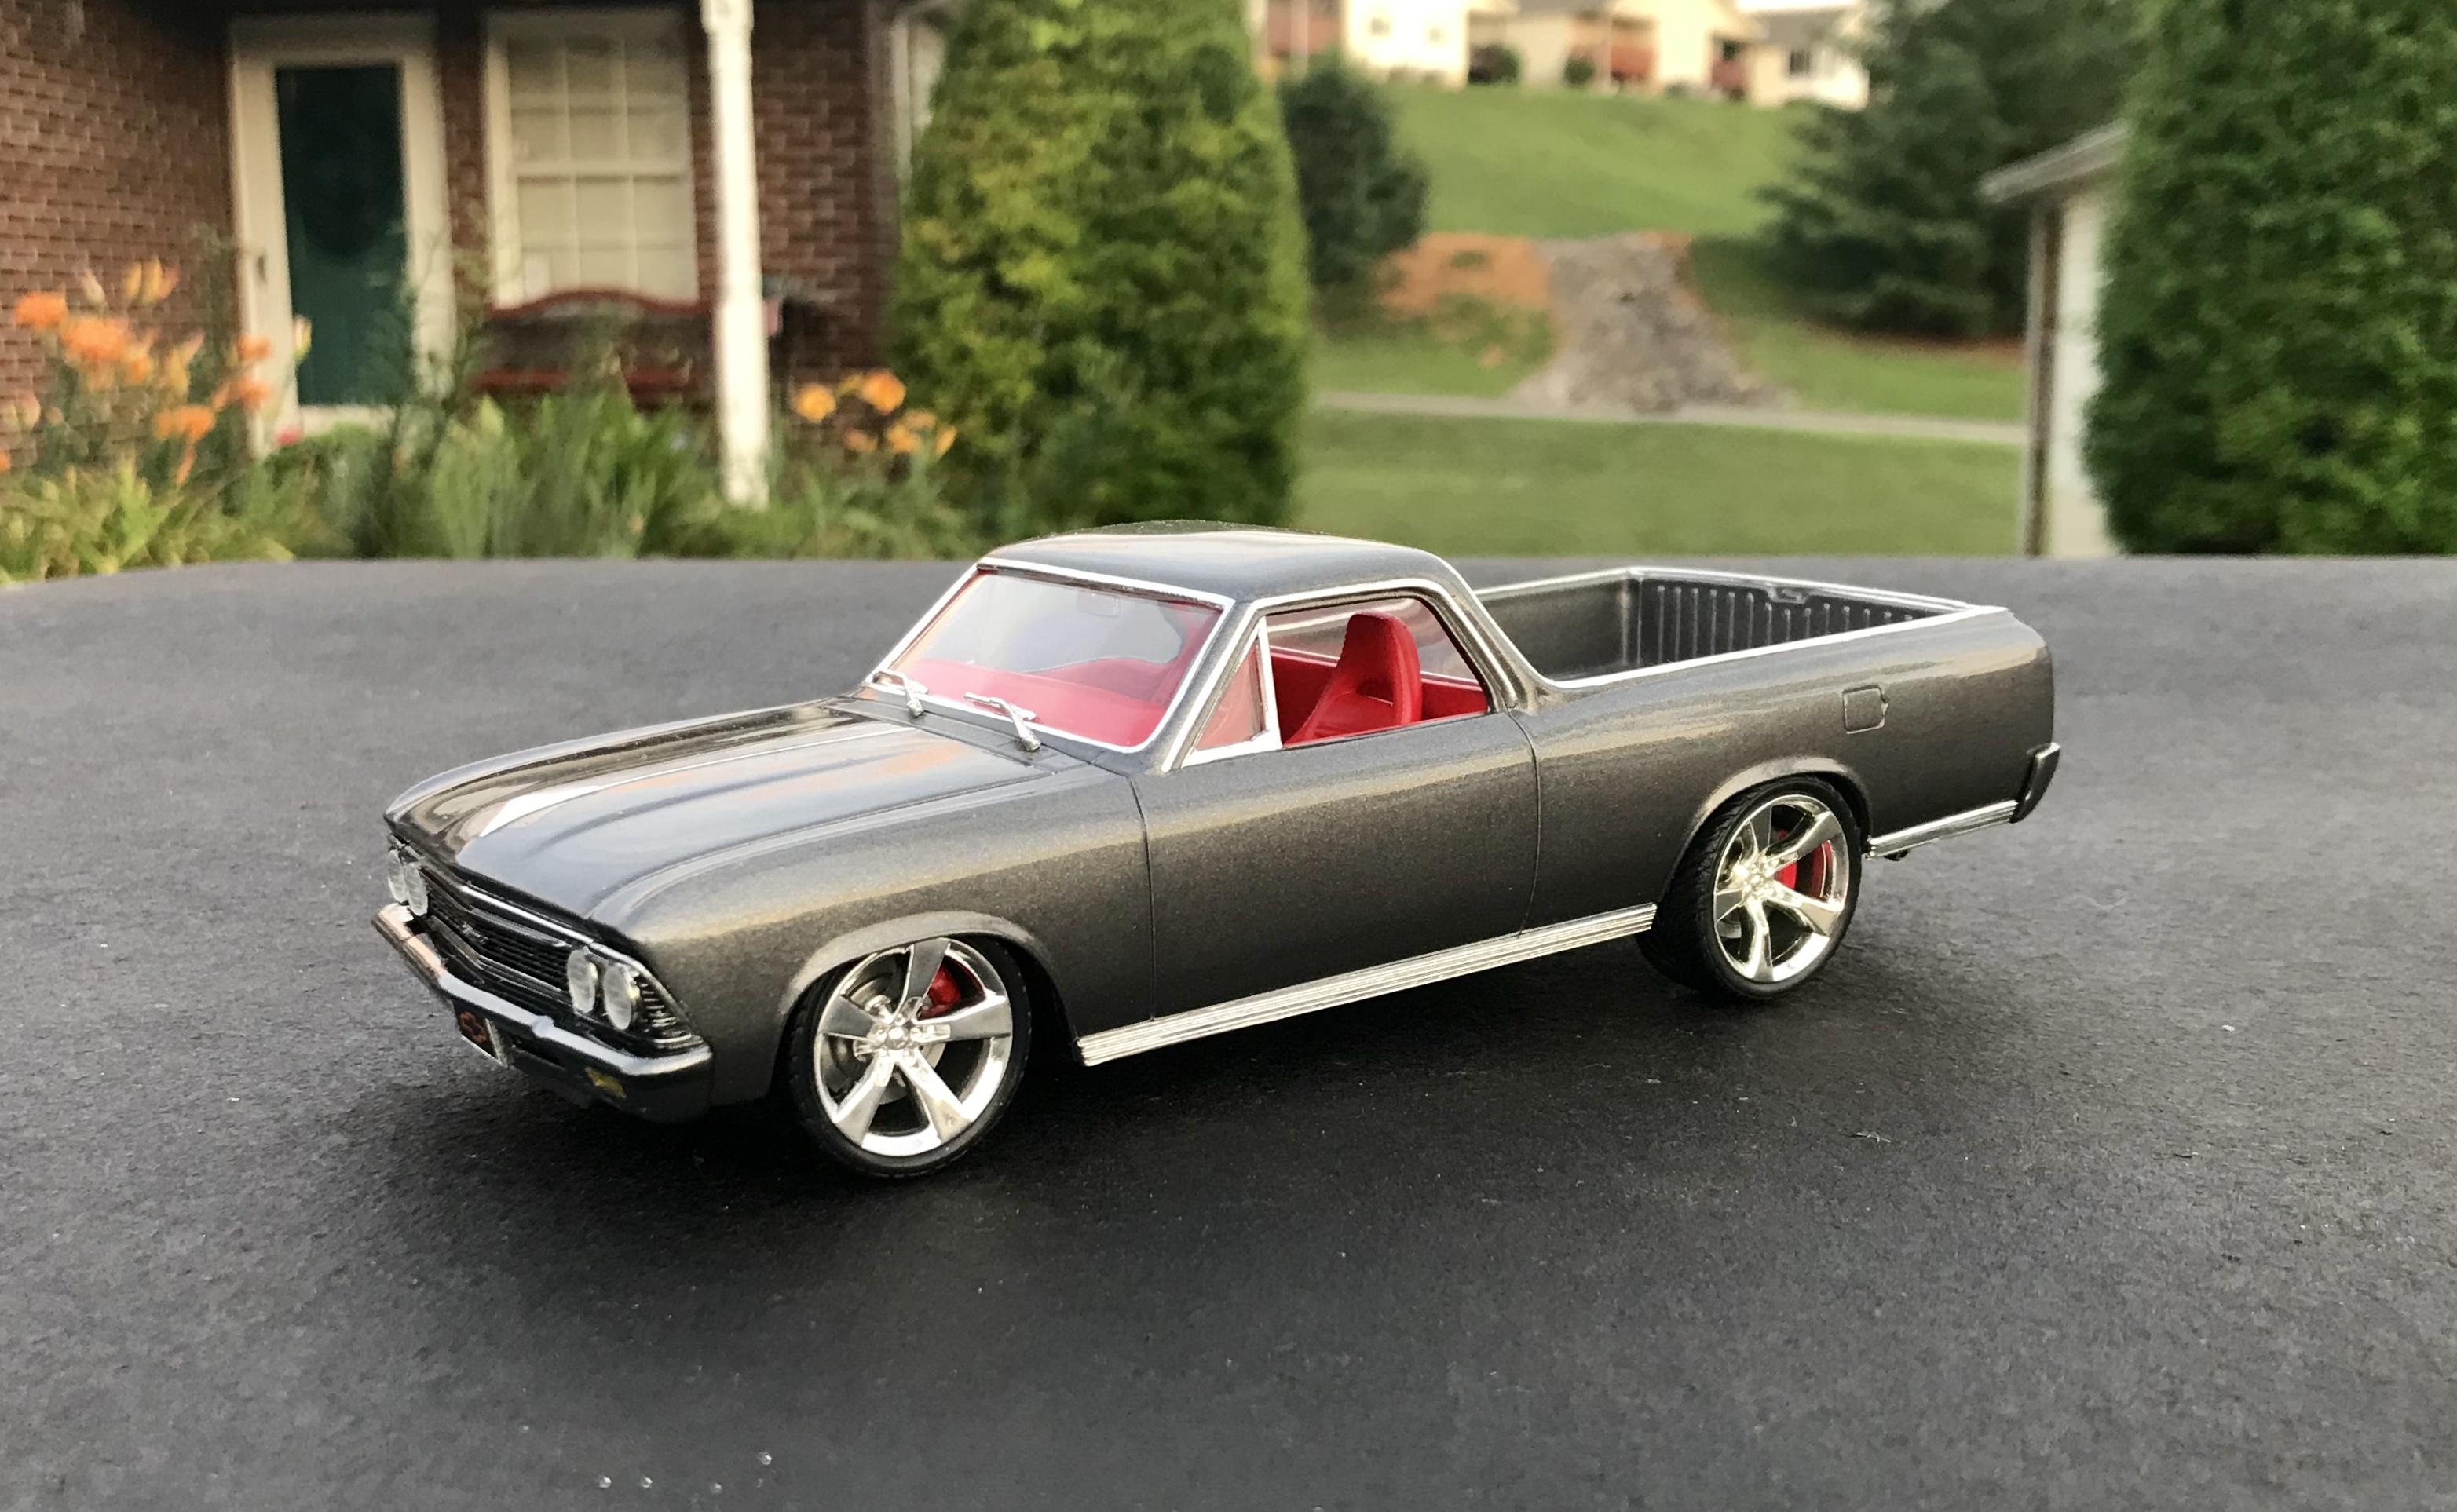
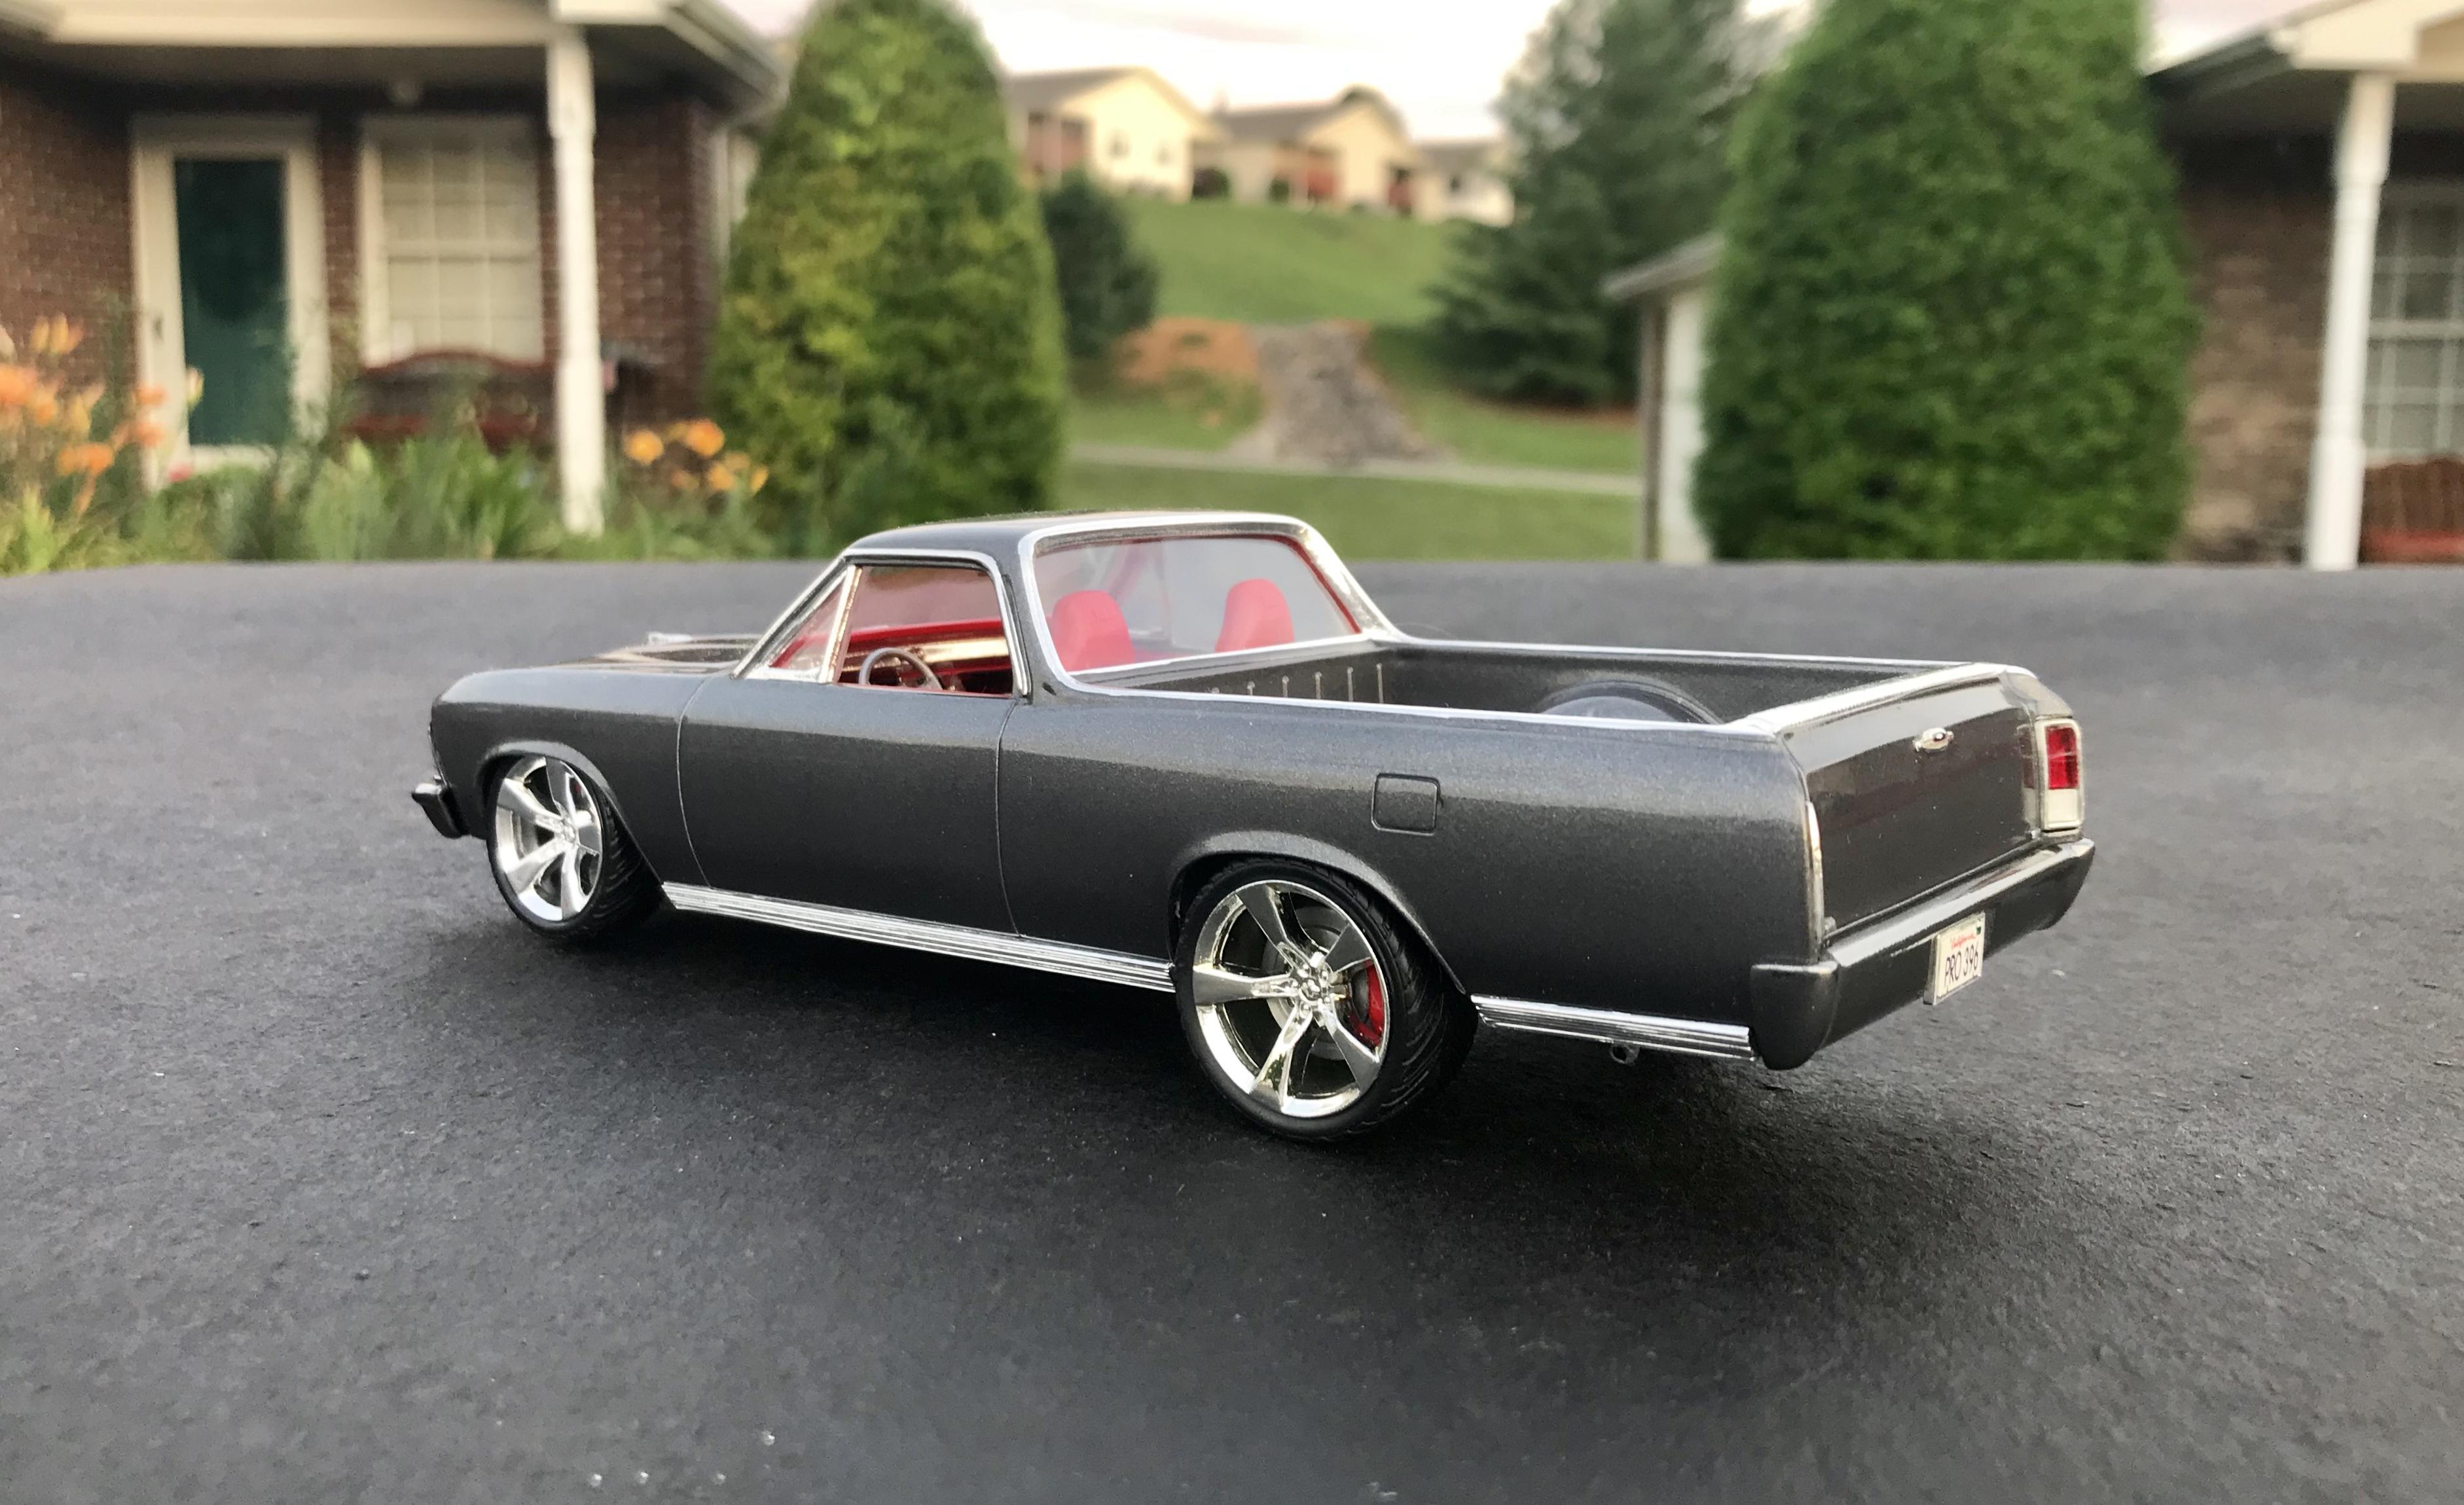
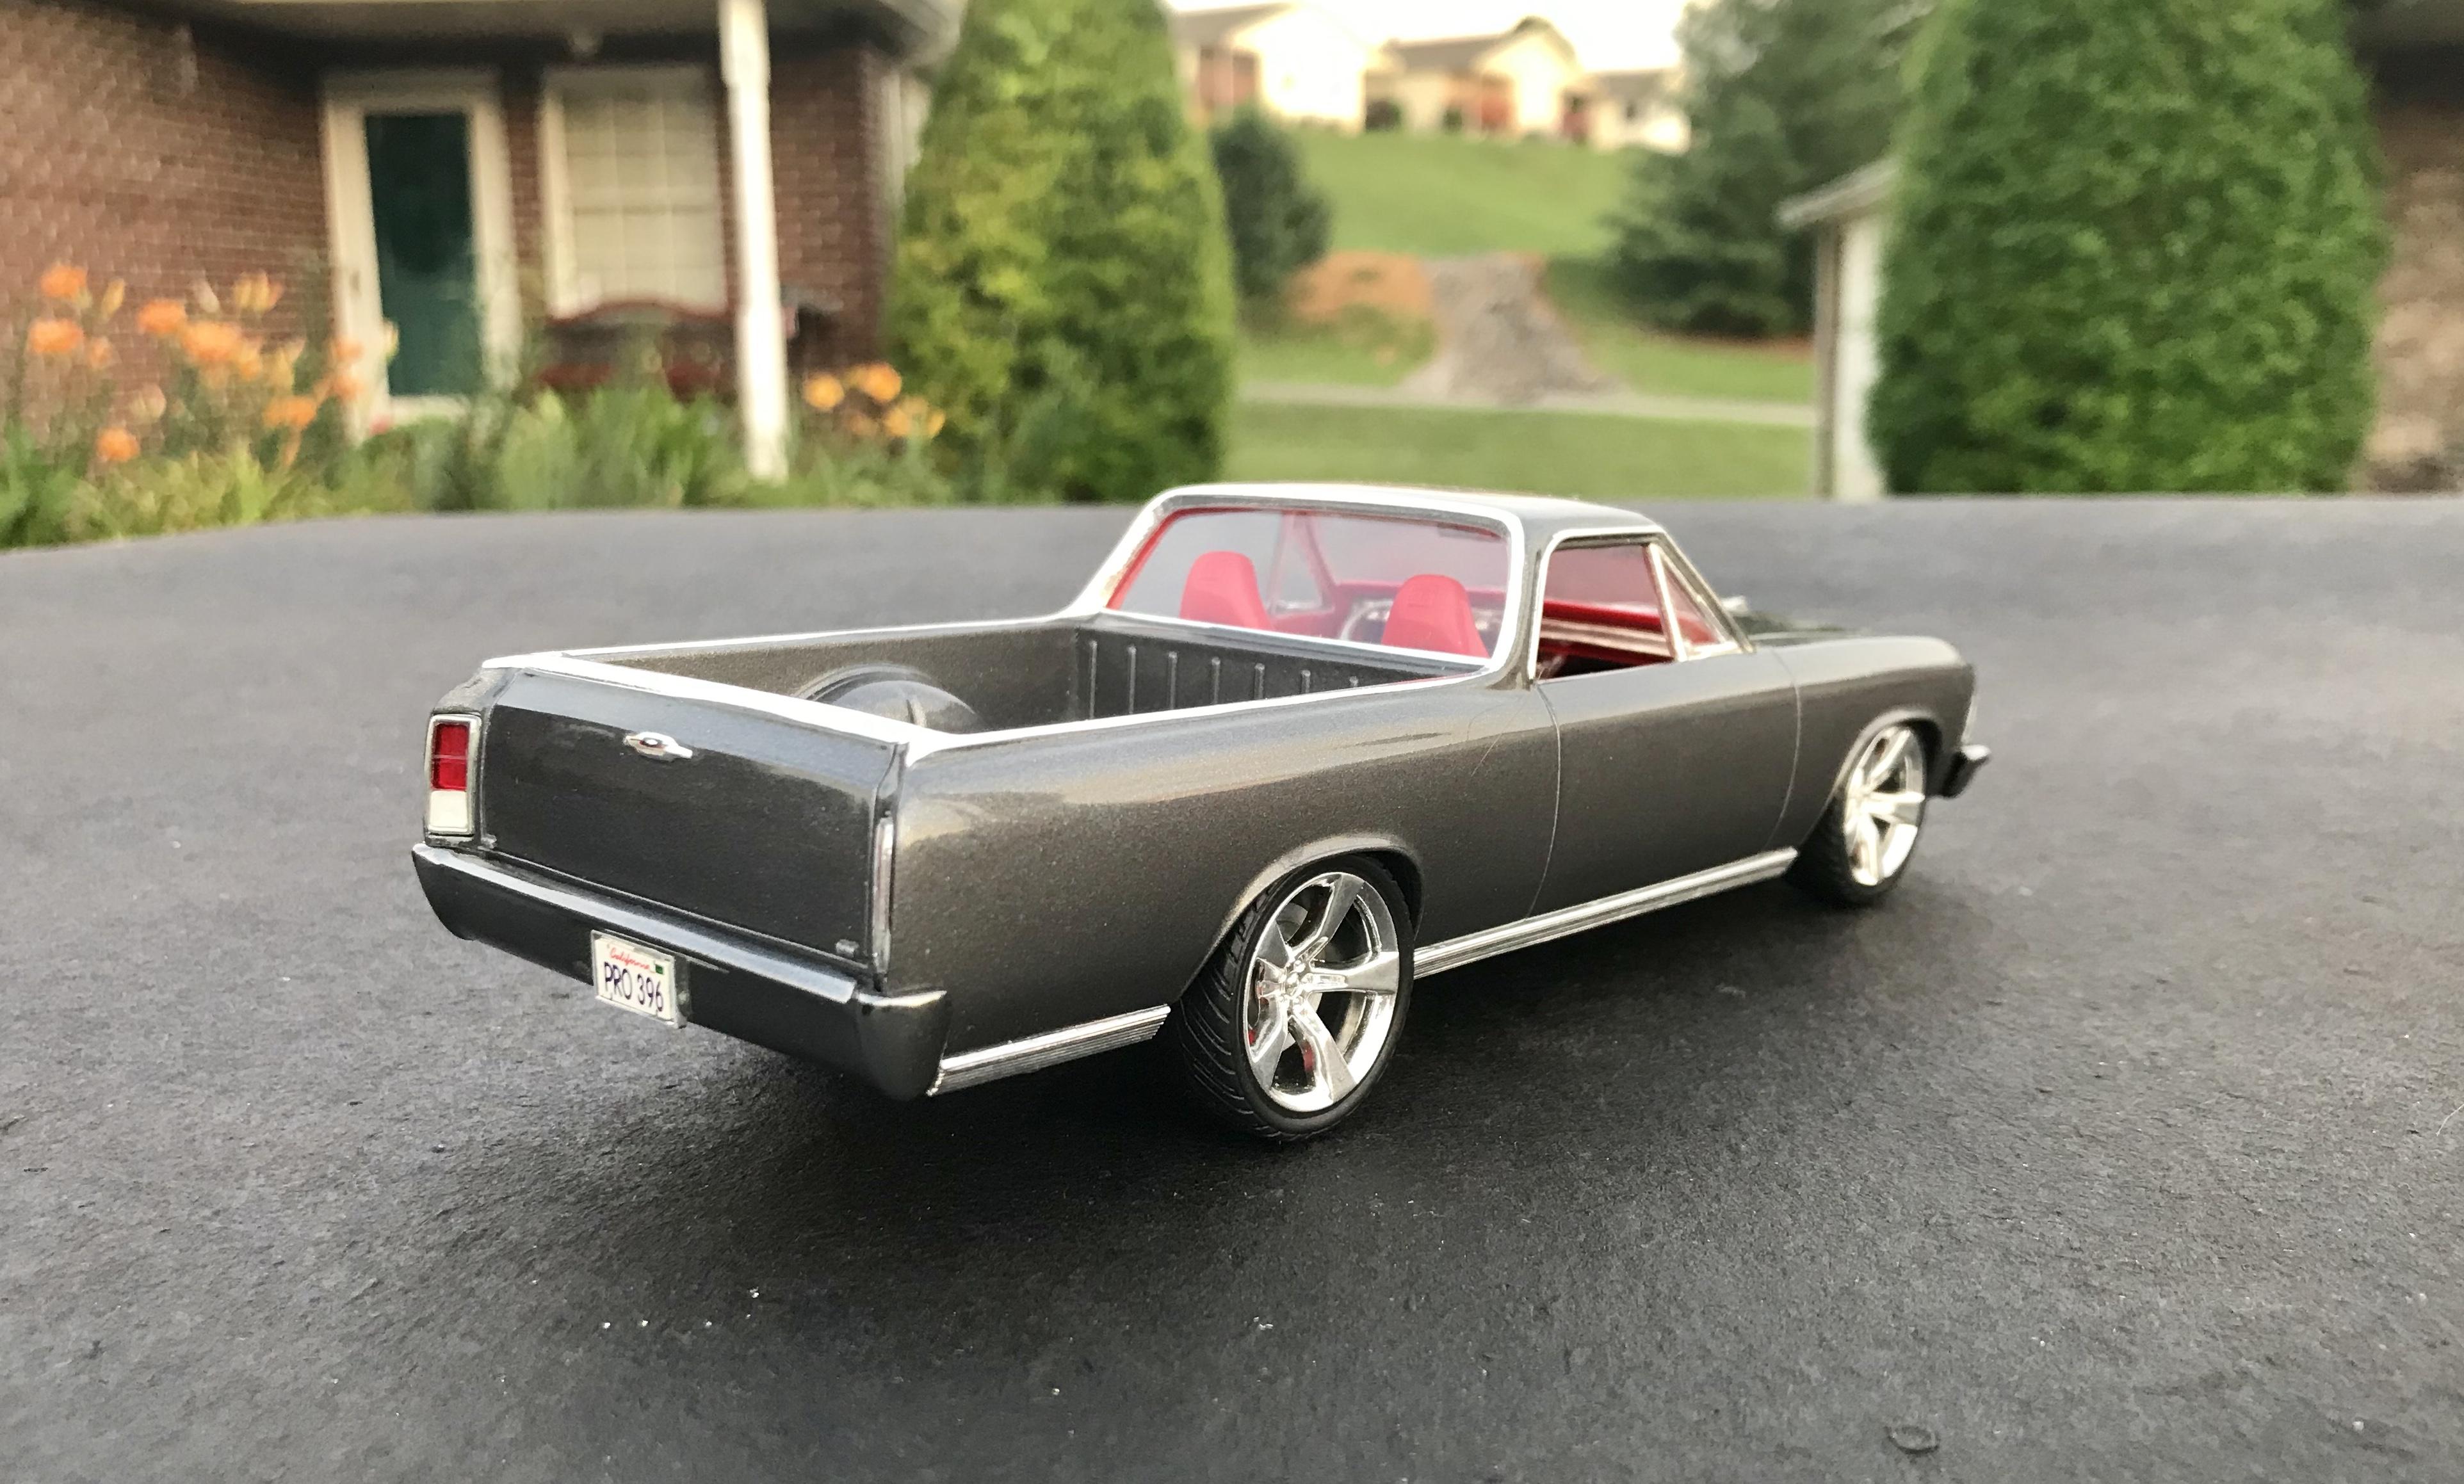
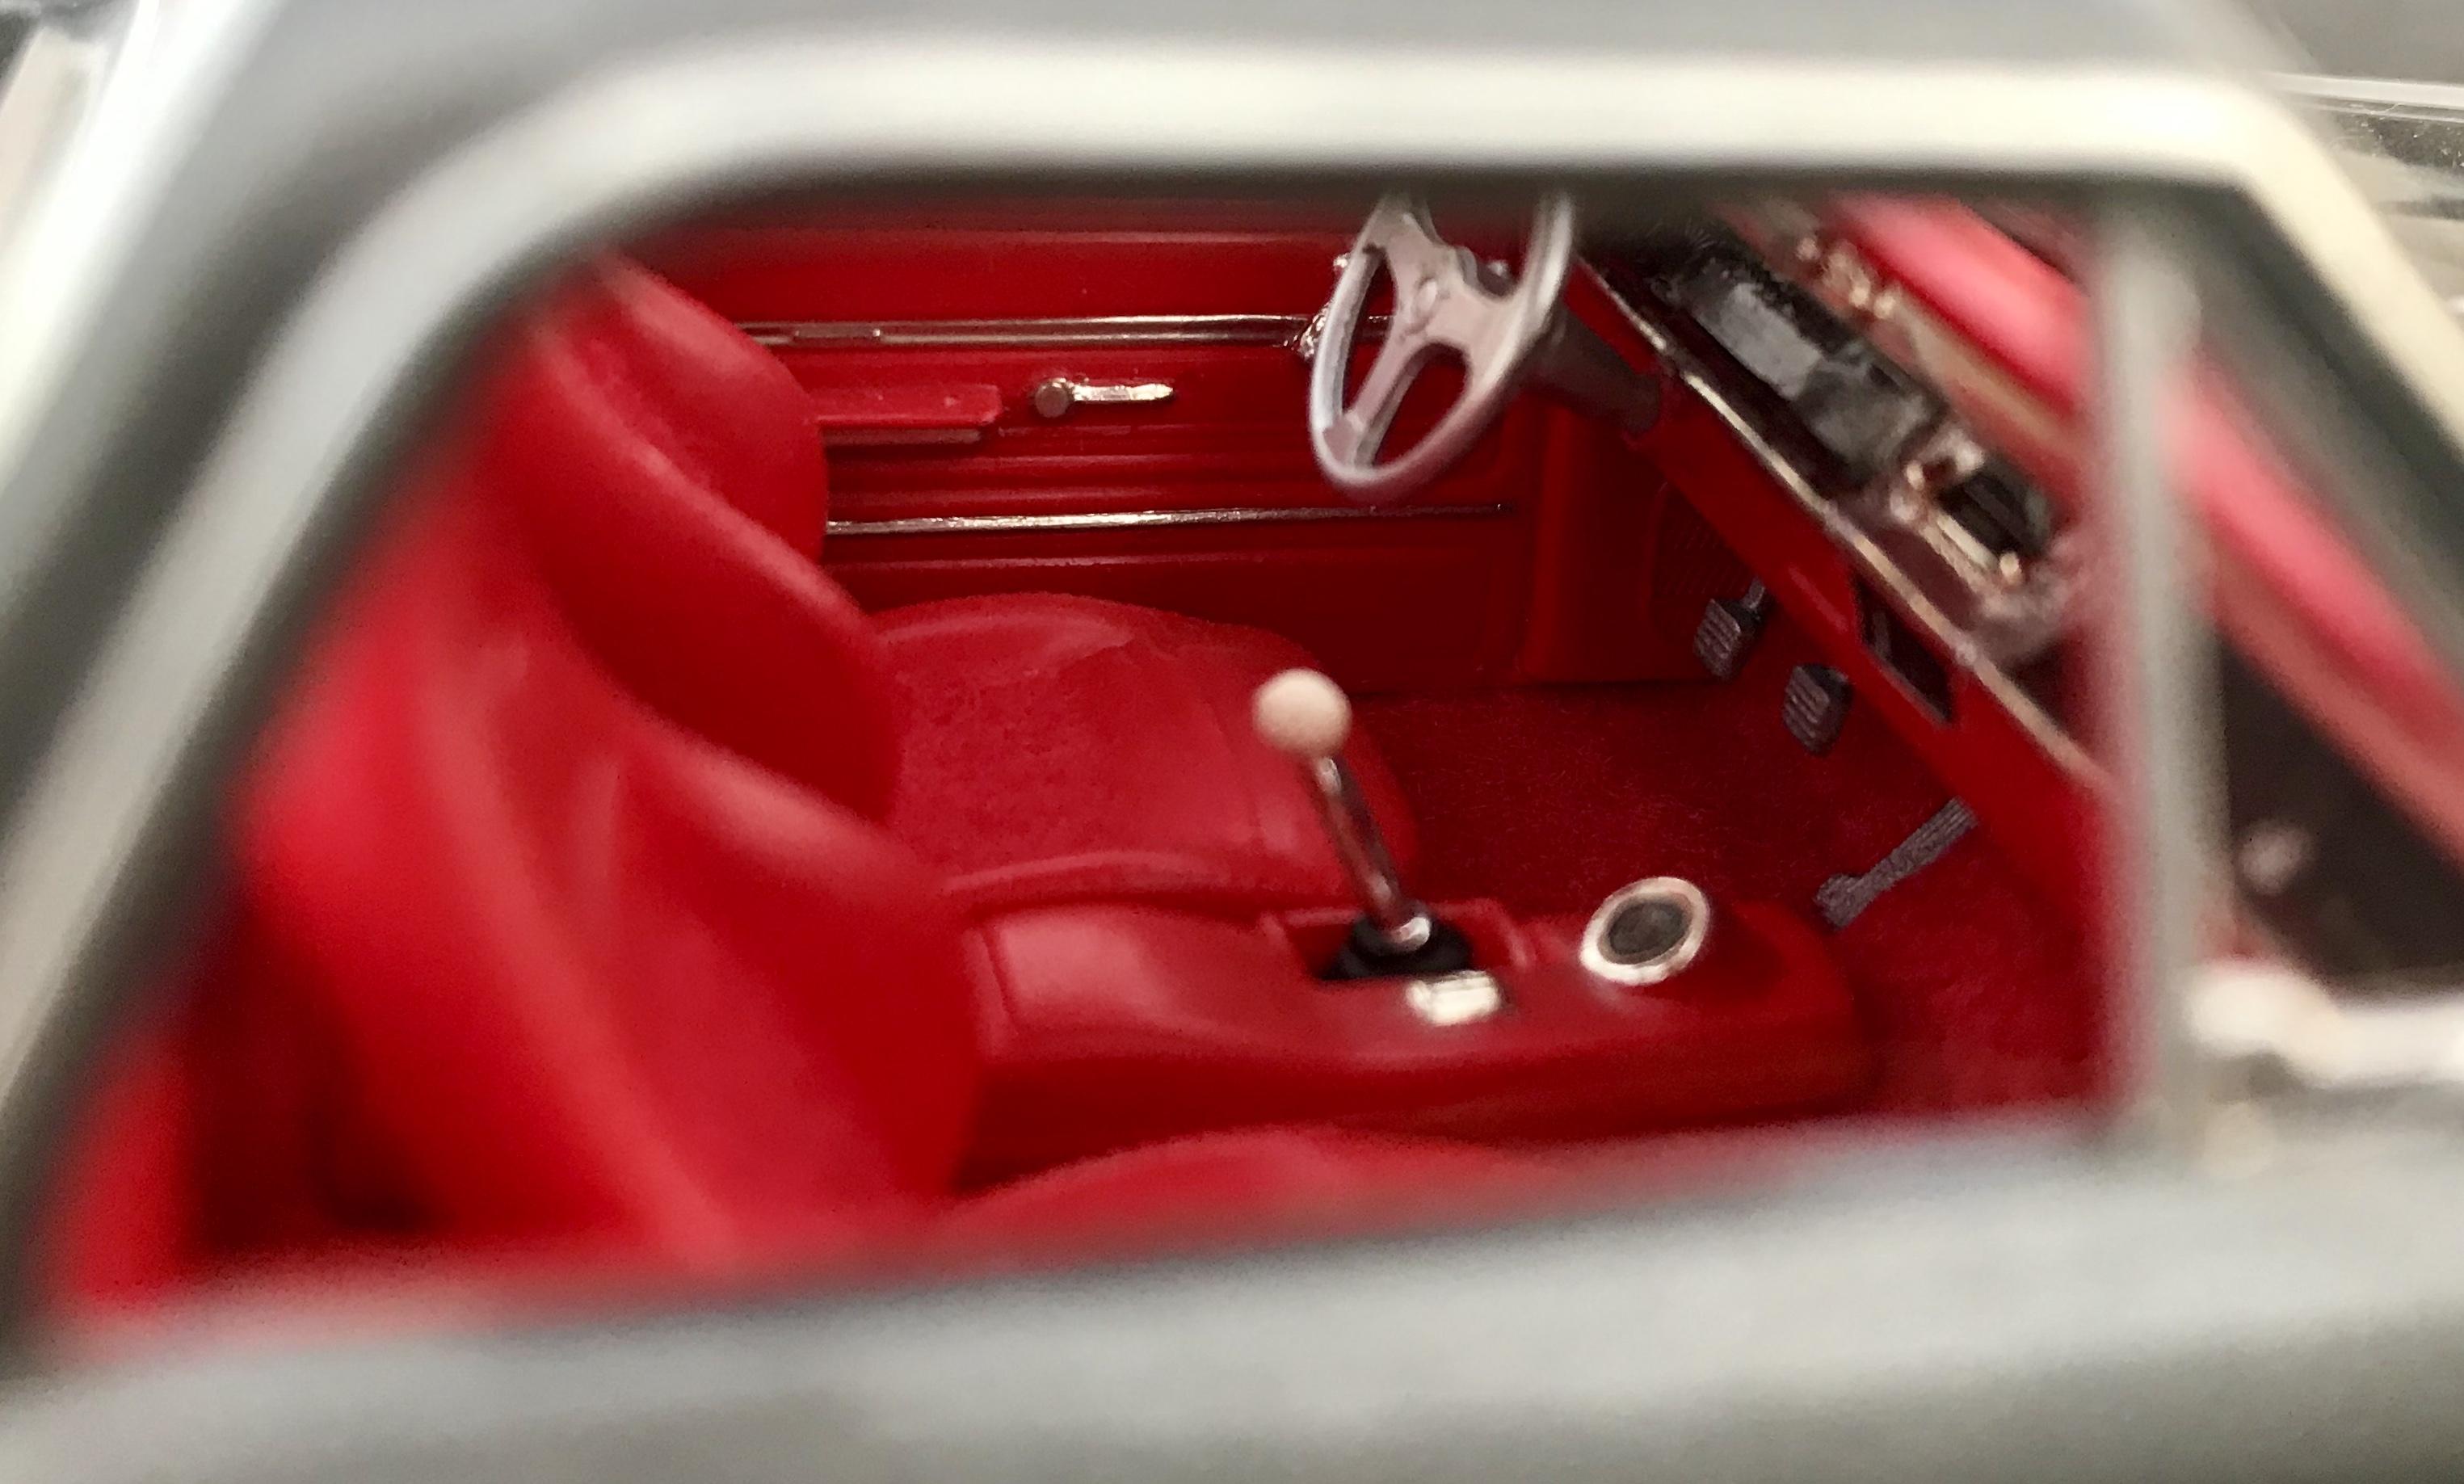
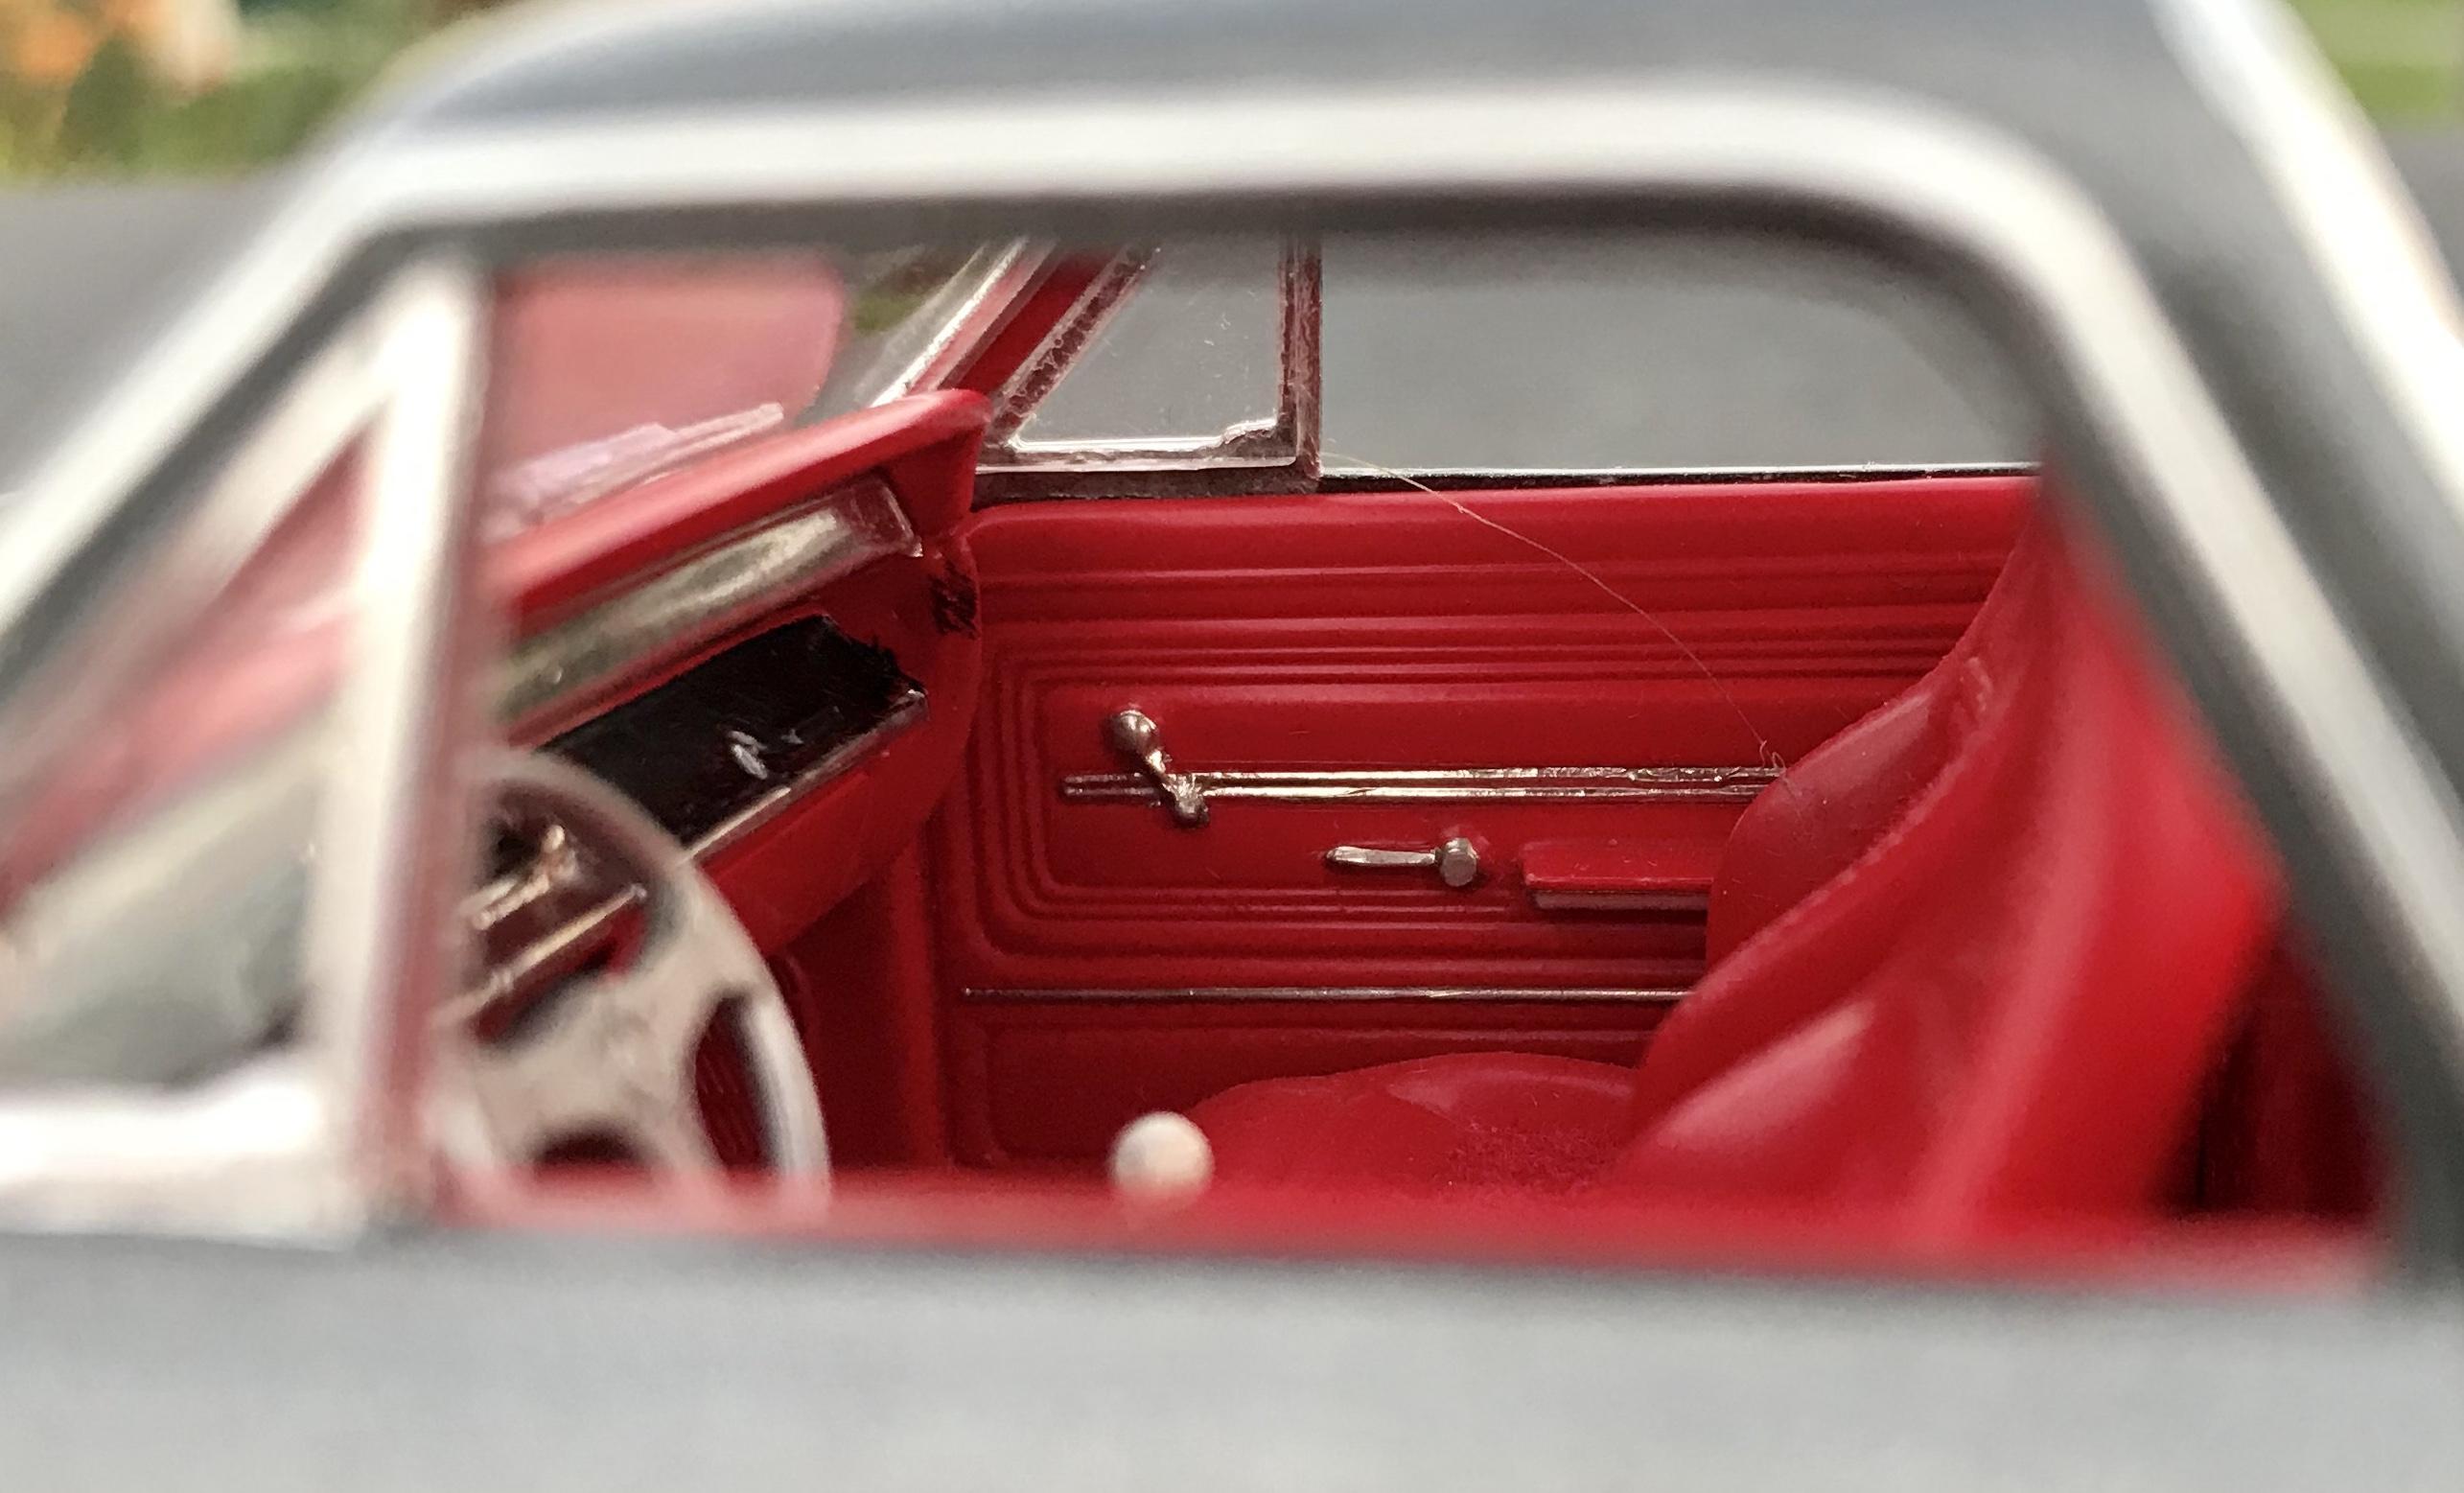
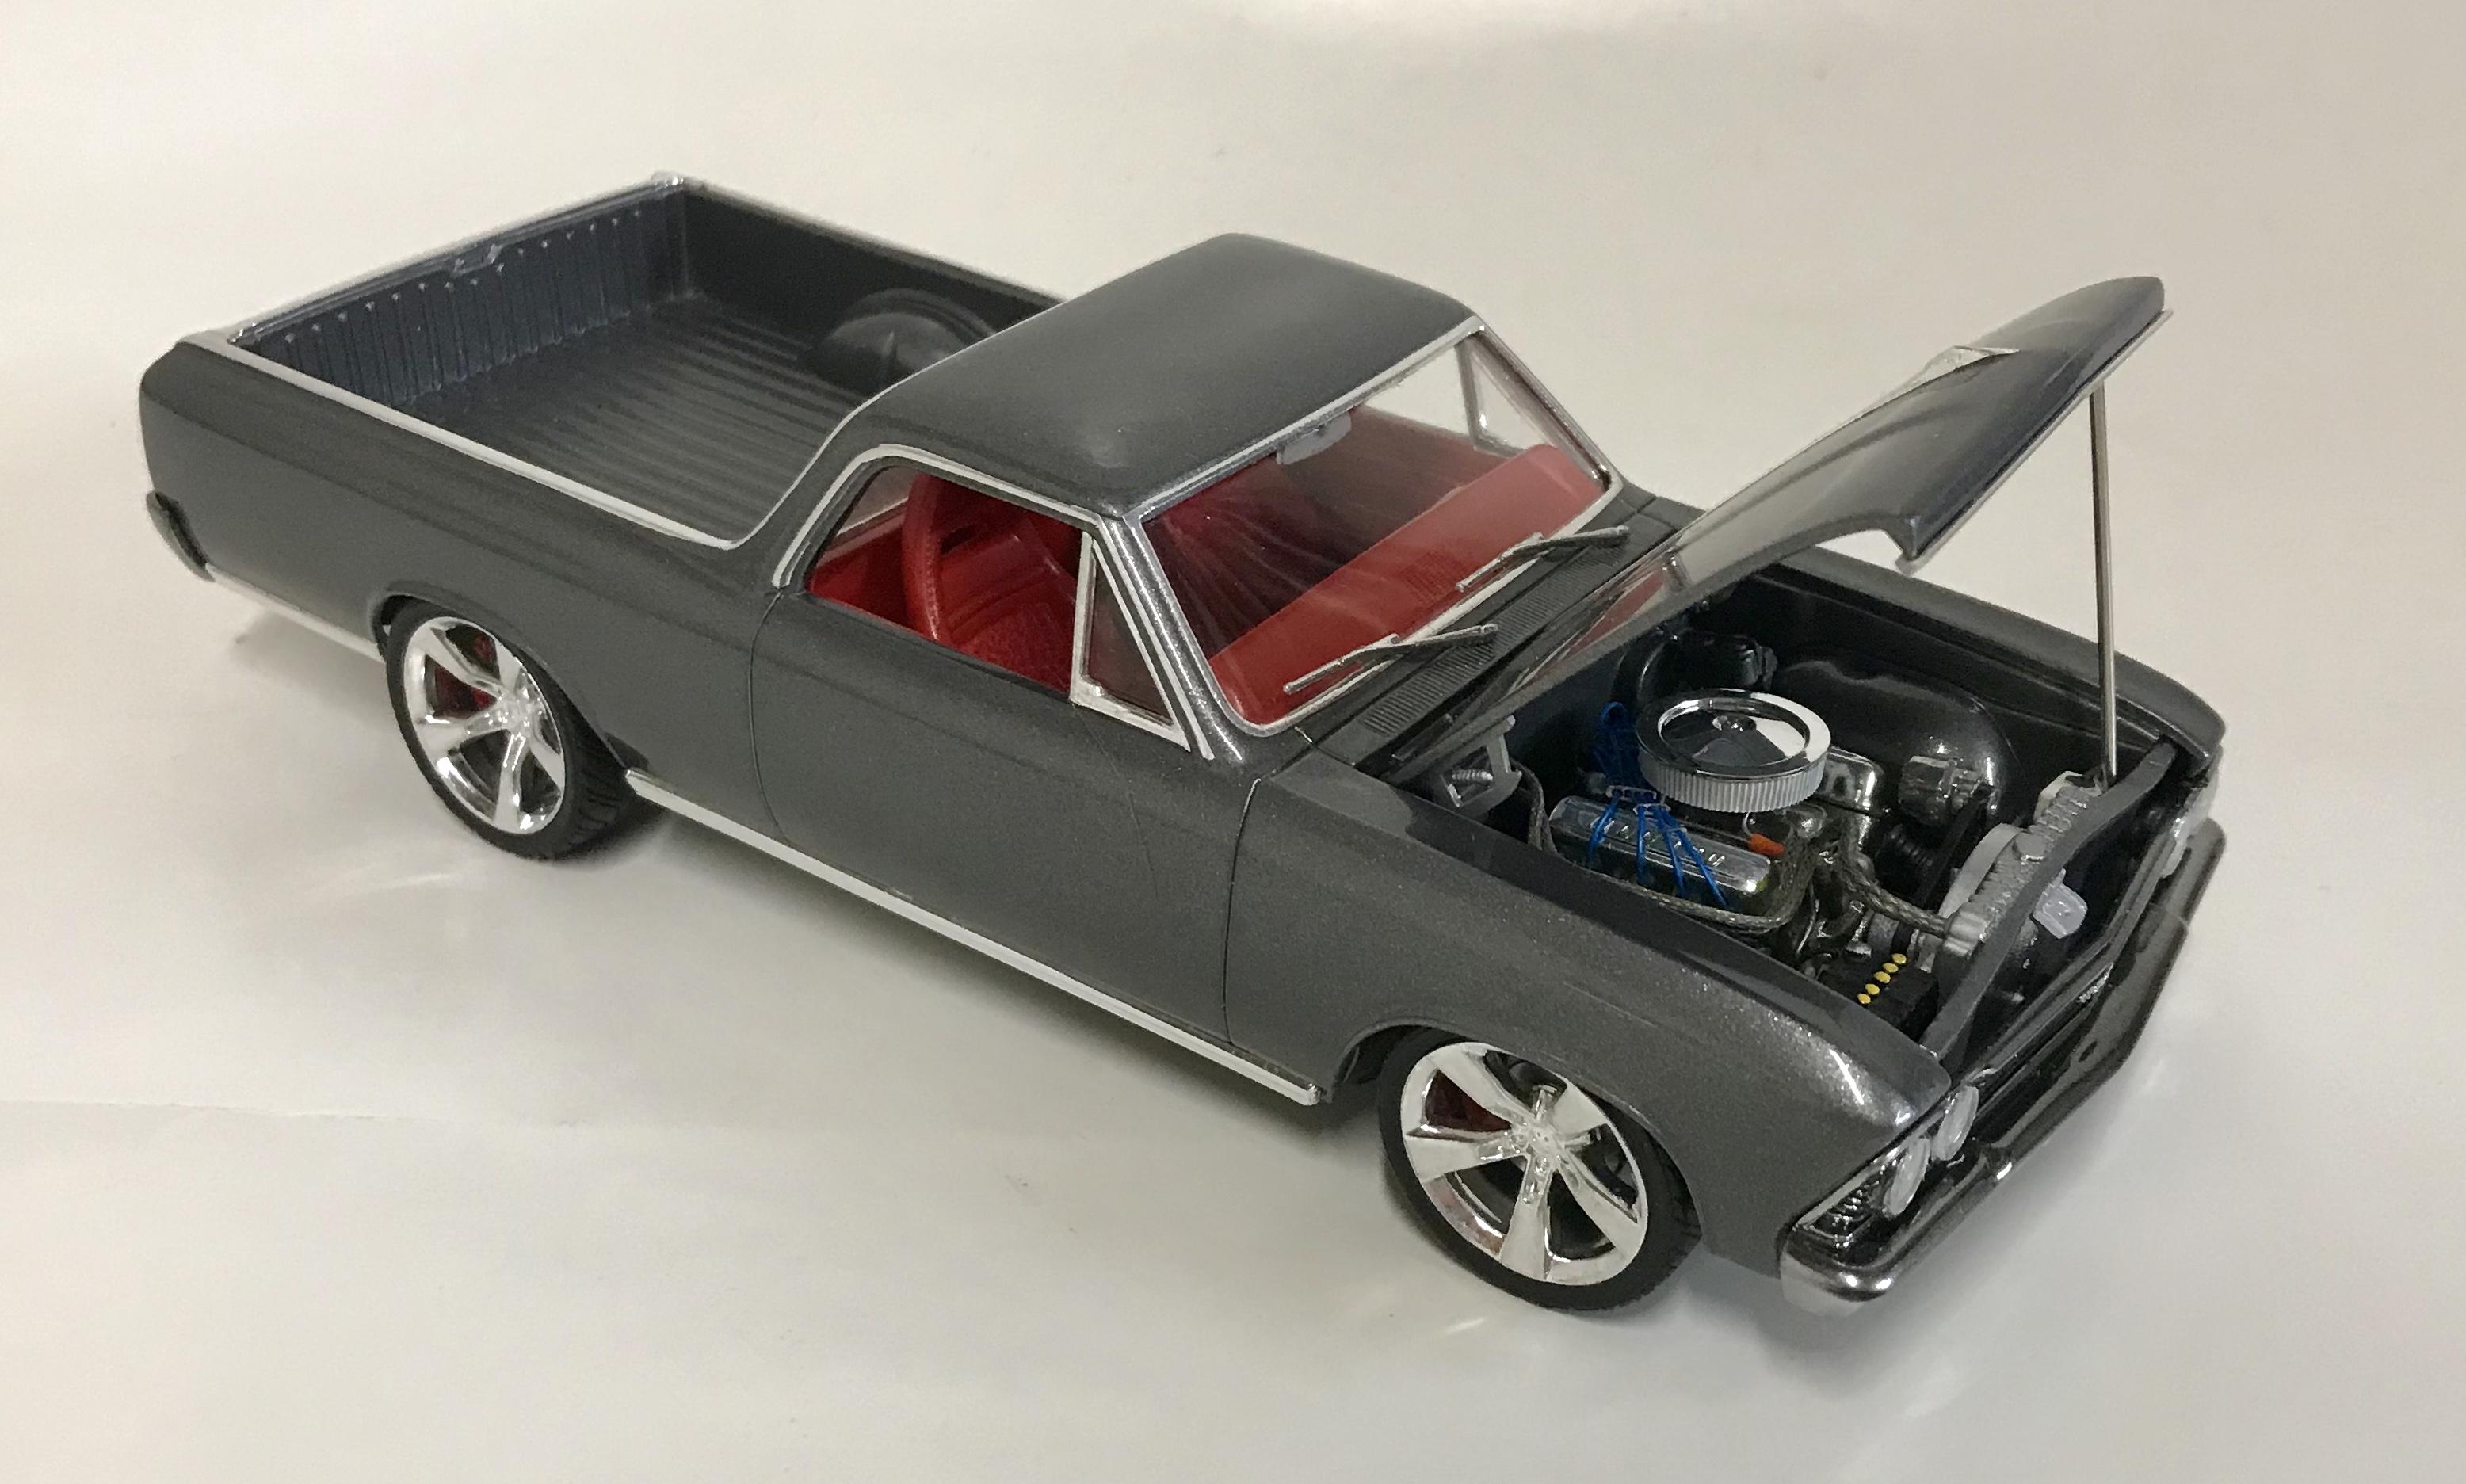
Here’s my ‘66 El Camino, built using a lot of the parts it came with, and some that didn’t. Some polished Dupli-Color was used on the outside, with Testors on the inside. Adjusted on the stance and the attitude for a more modern look. A fun one, no doubt.
-
Thanks big guy. ? I used the chassis from the Monogram Tim Richmond Folger’s Monte Carlo SS. Kit # 2734. I had to modify the cal and dash, along with some other small areas, to get it to all work together. It was nothing too hard or difficult to pull off. Good luck with your build. I hope I get to see it when you finish it.
-
My list would have to include the Badman ‘55 and the S’cool Bus funny car.
-
Airbrushing Duplicolor?
modelcarcrazy replied to Duncan4114's topic in Model Building Questions and Answers
Why don’t you just spray it from the can? You said you got pretty good results. Why try to reinvent the wheel? It’s way easier and less messy. Shake the can really good for at least two minutes and heat the can with some hot water. The hot water helps increase the pressure in the can and helps it spray better. I have three air brushes but I rarely ever use them, the only time I break it out is when I use the Testors bottles. Good luck big guy! You can do it. -
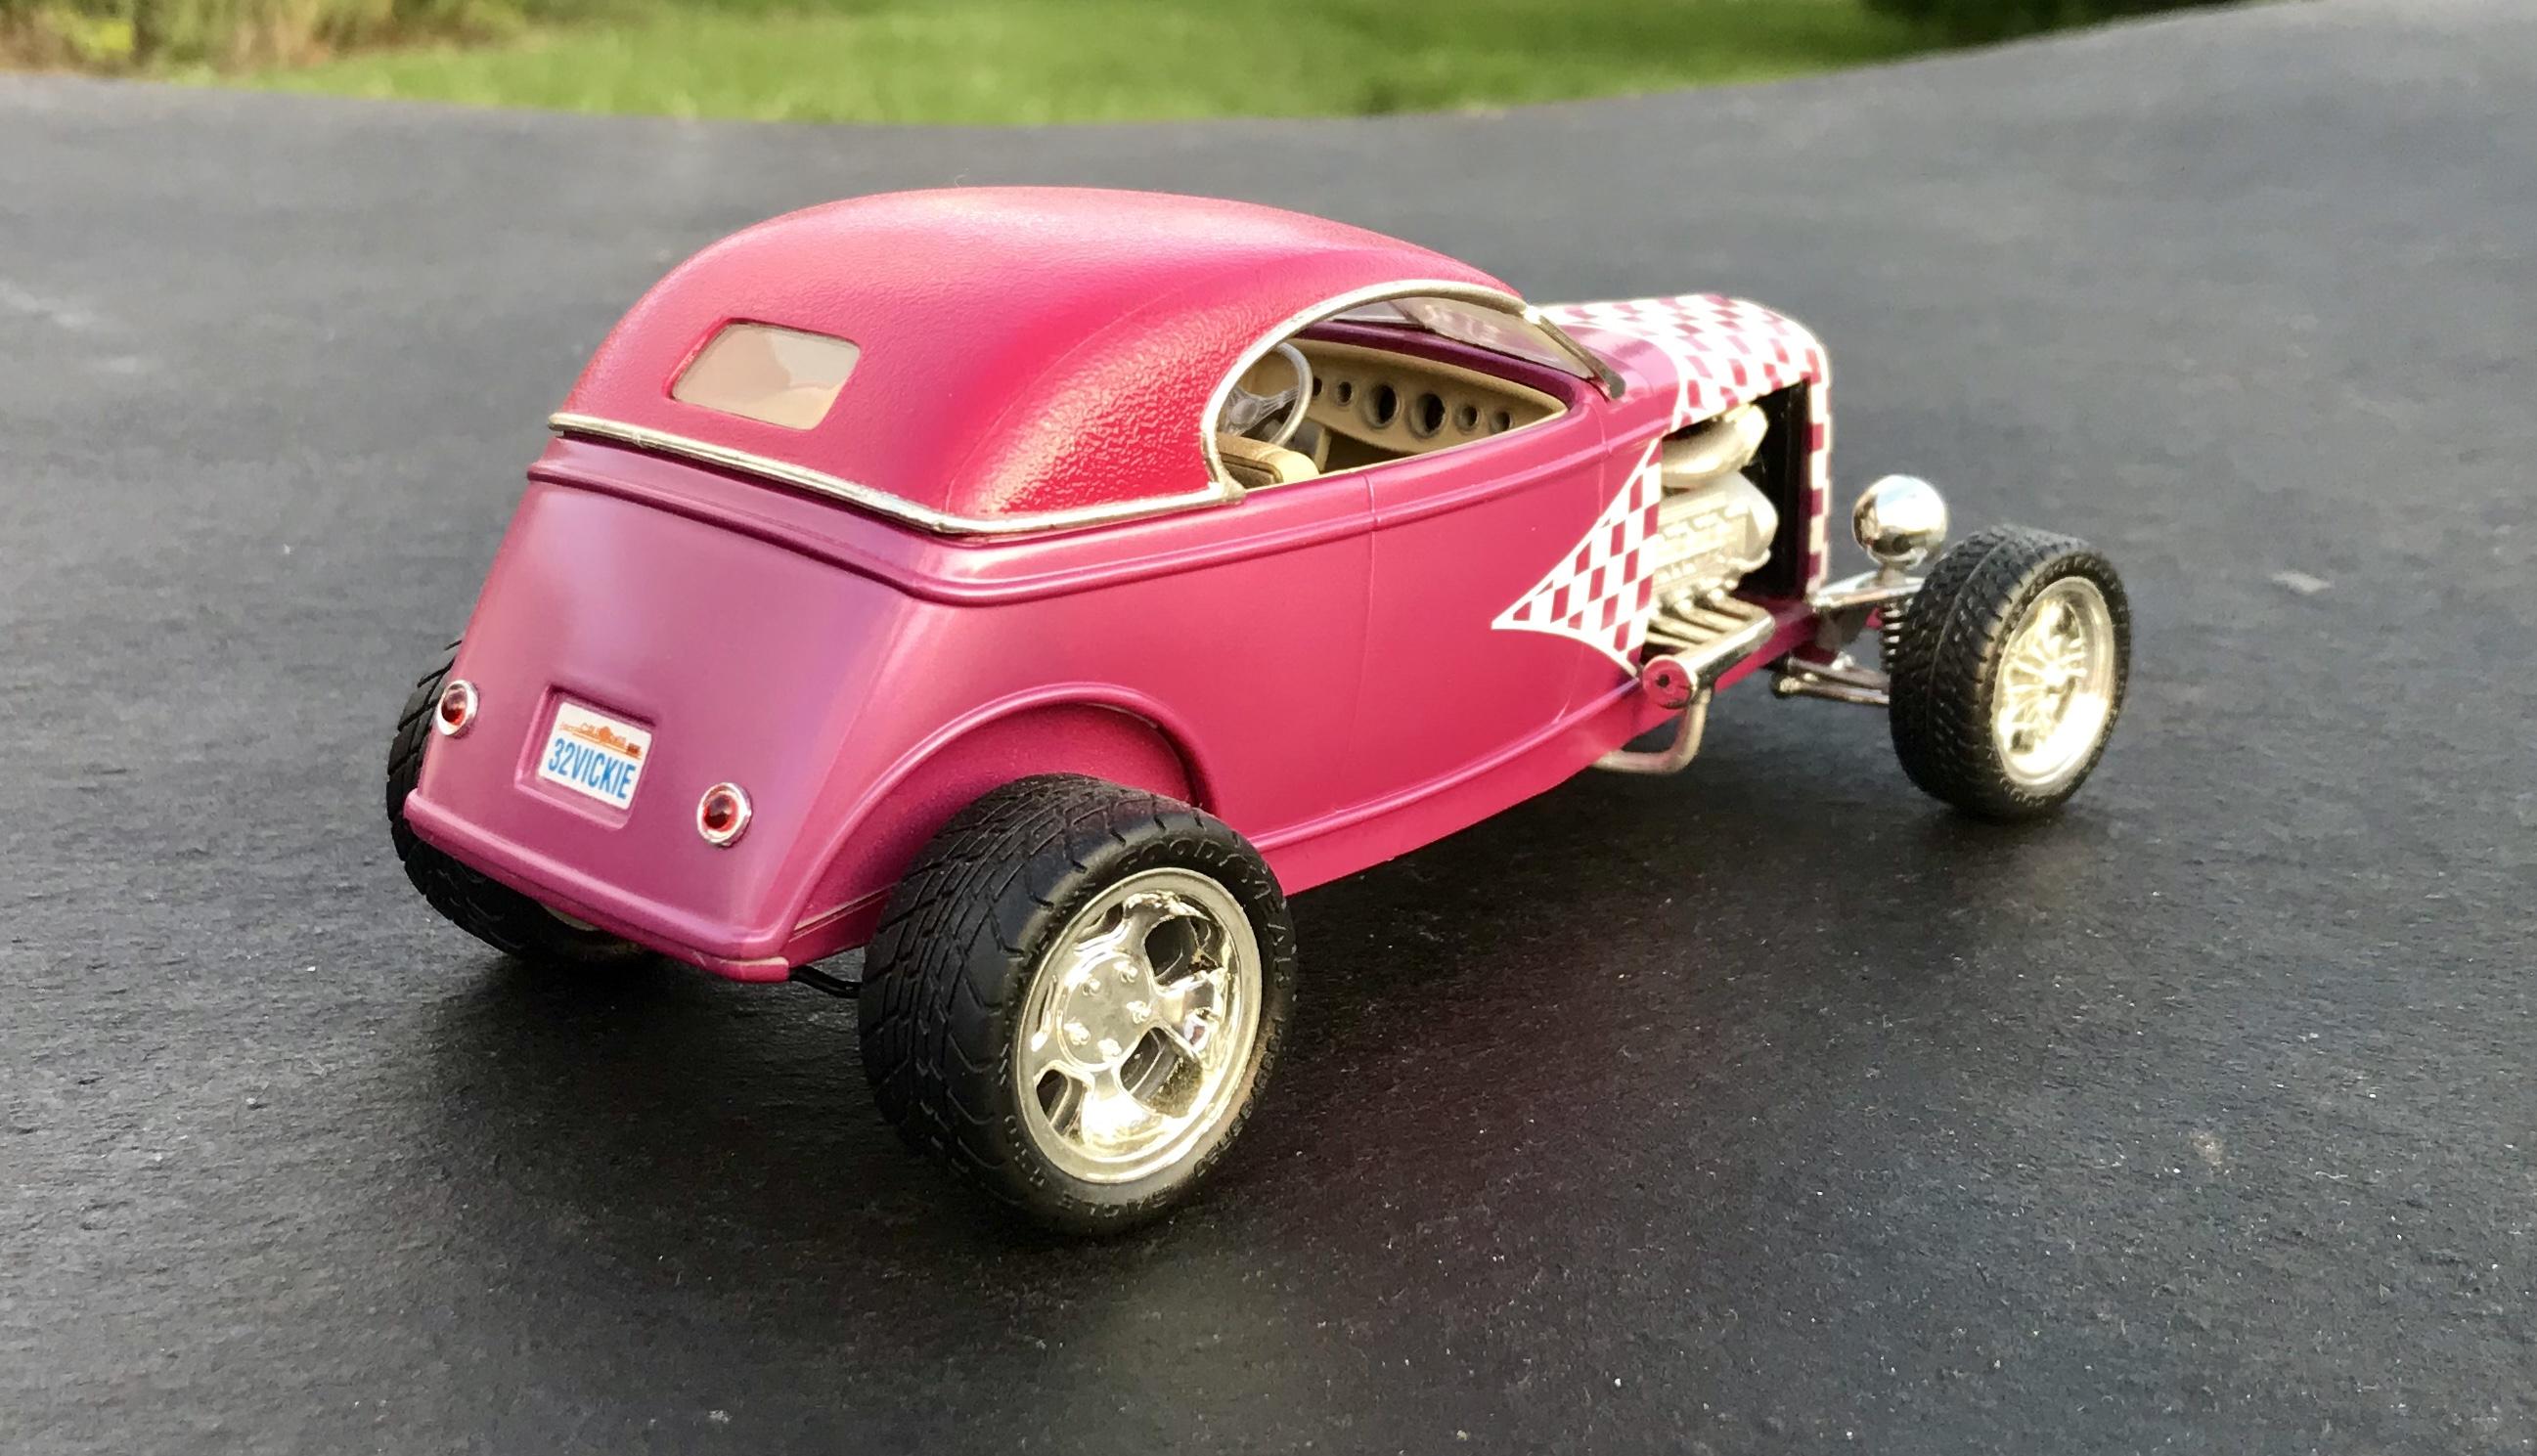
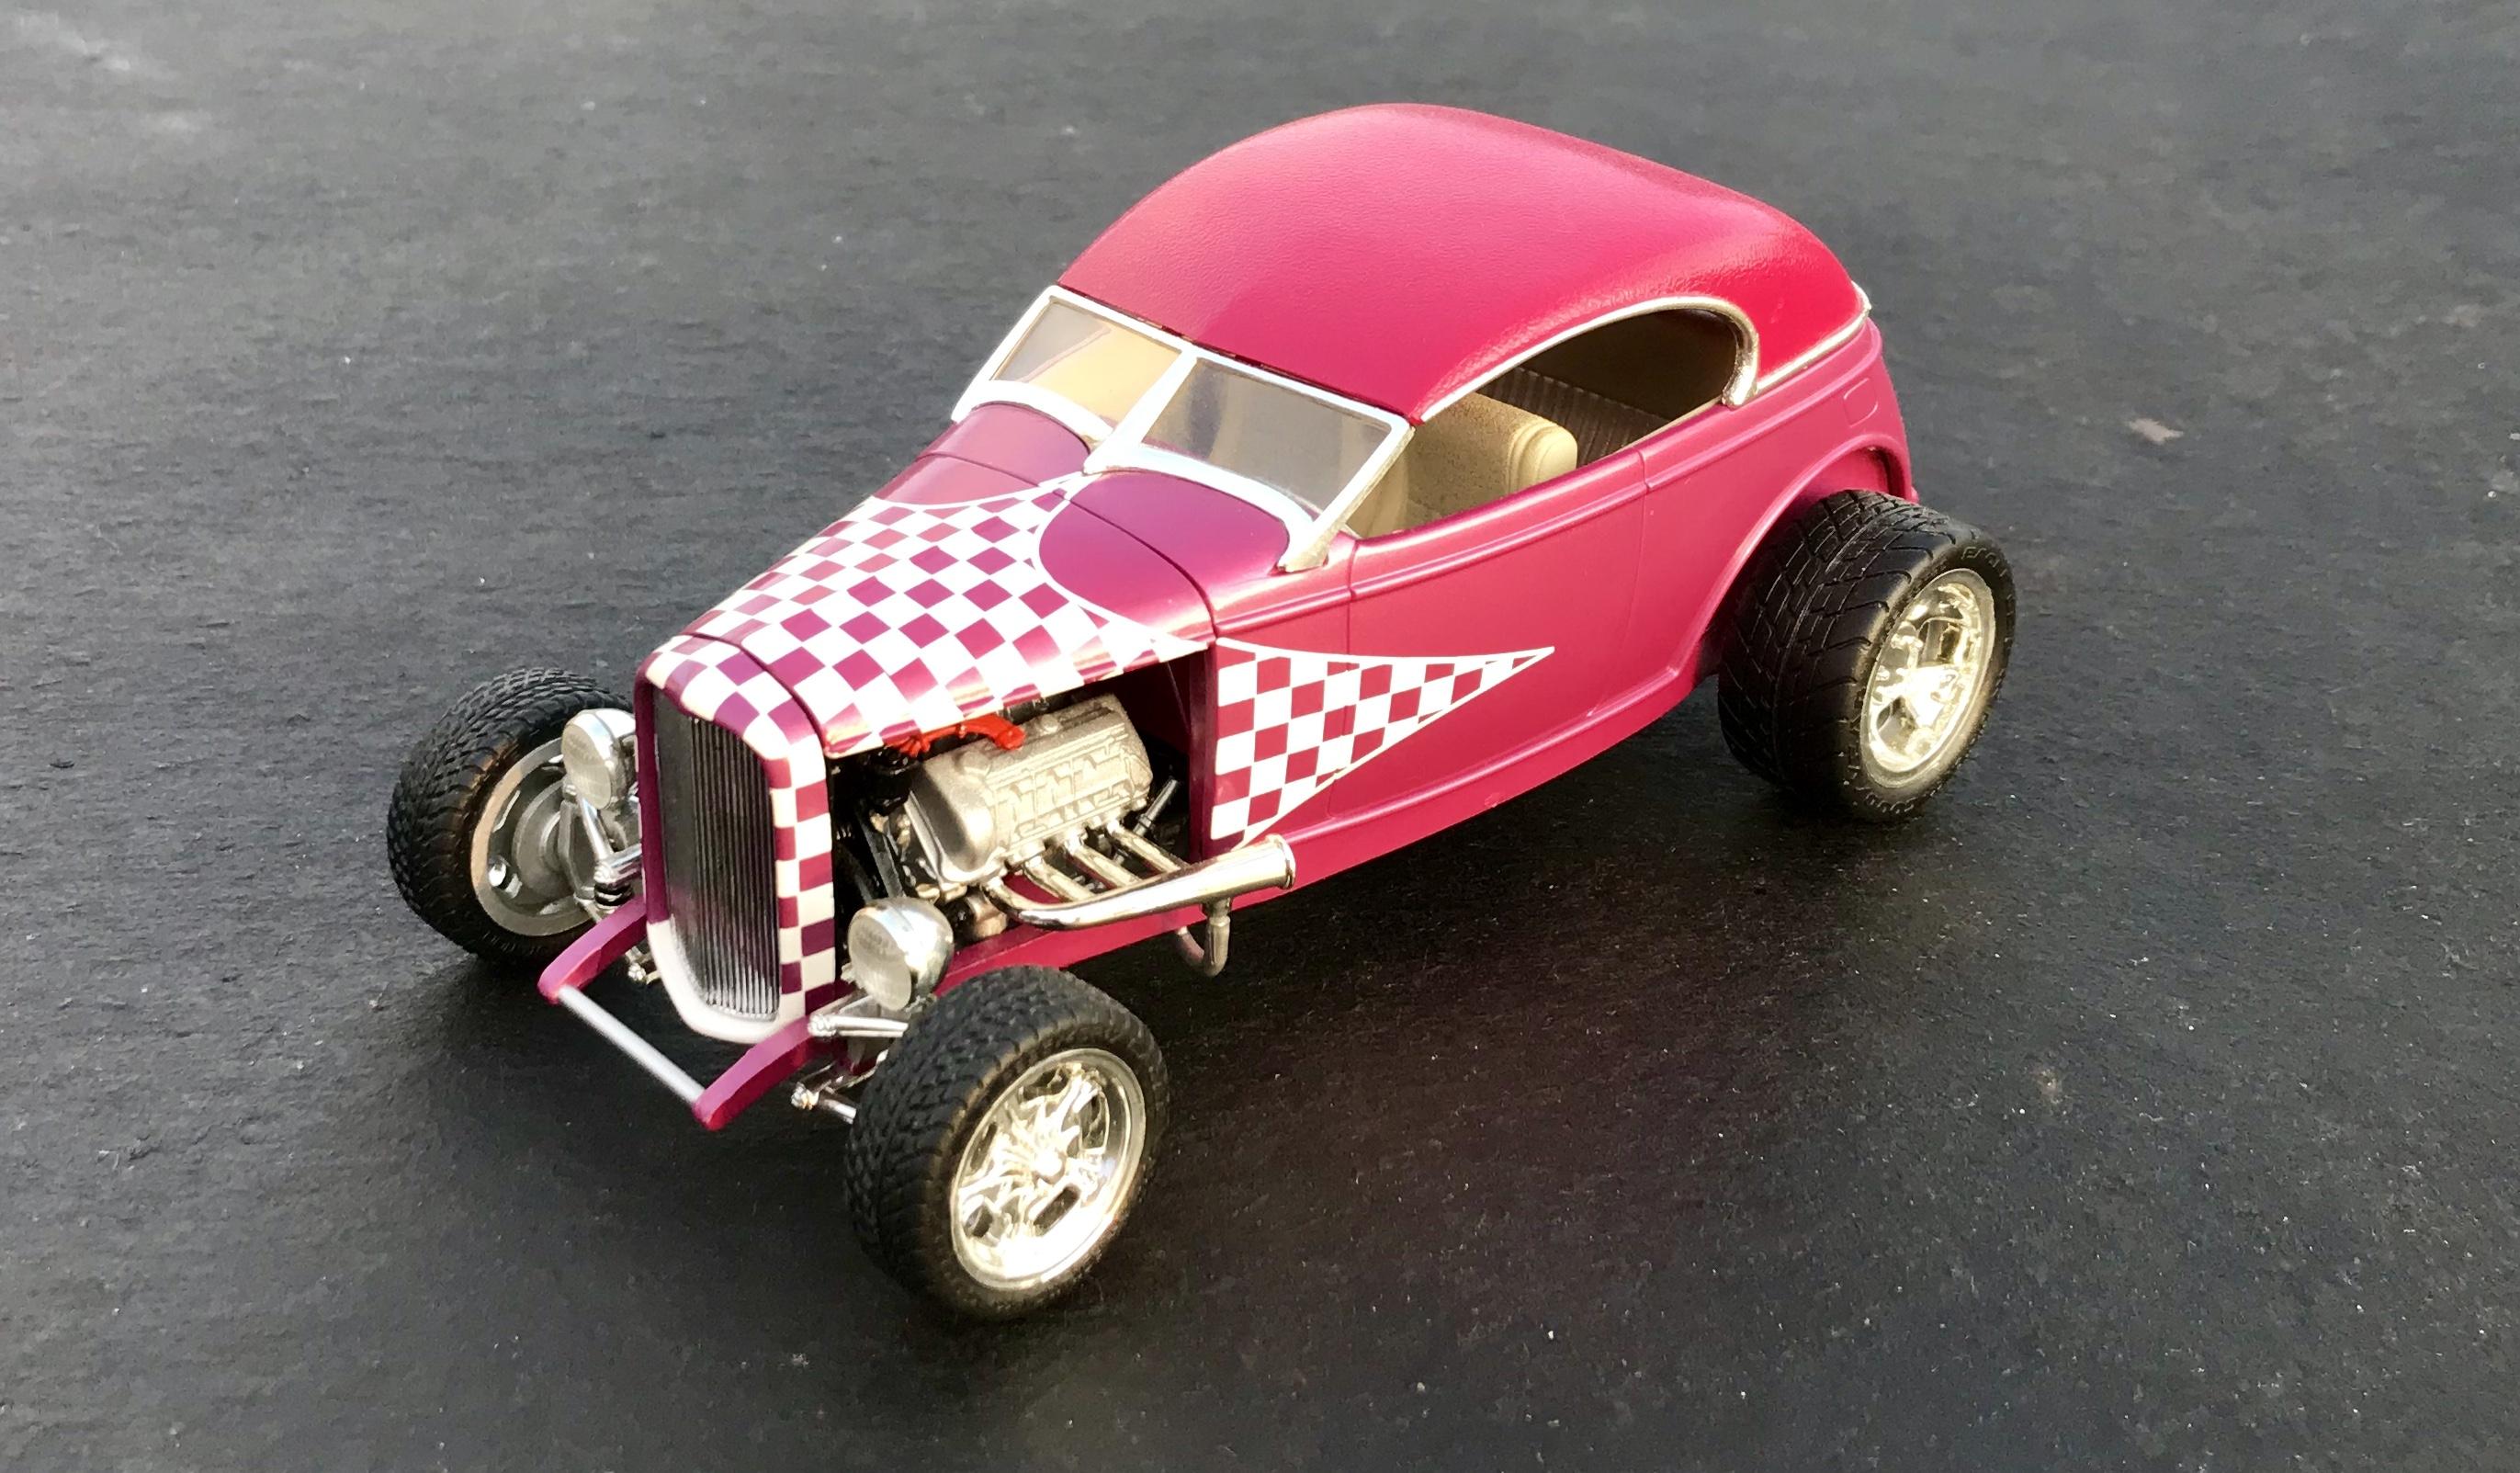
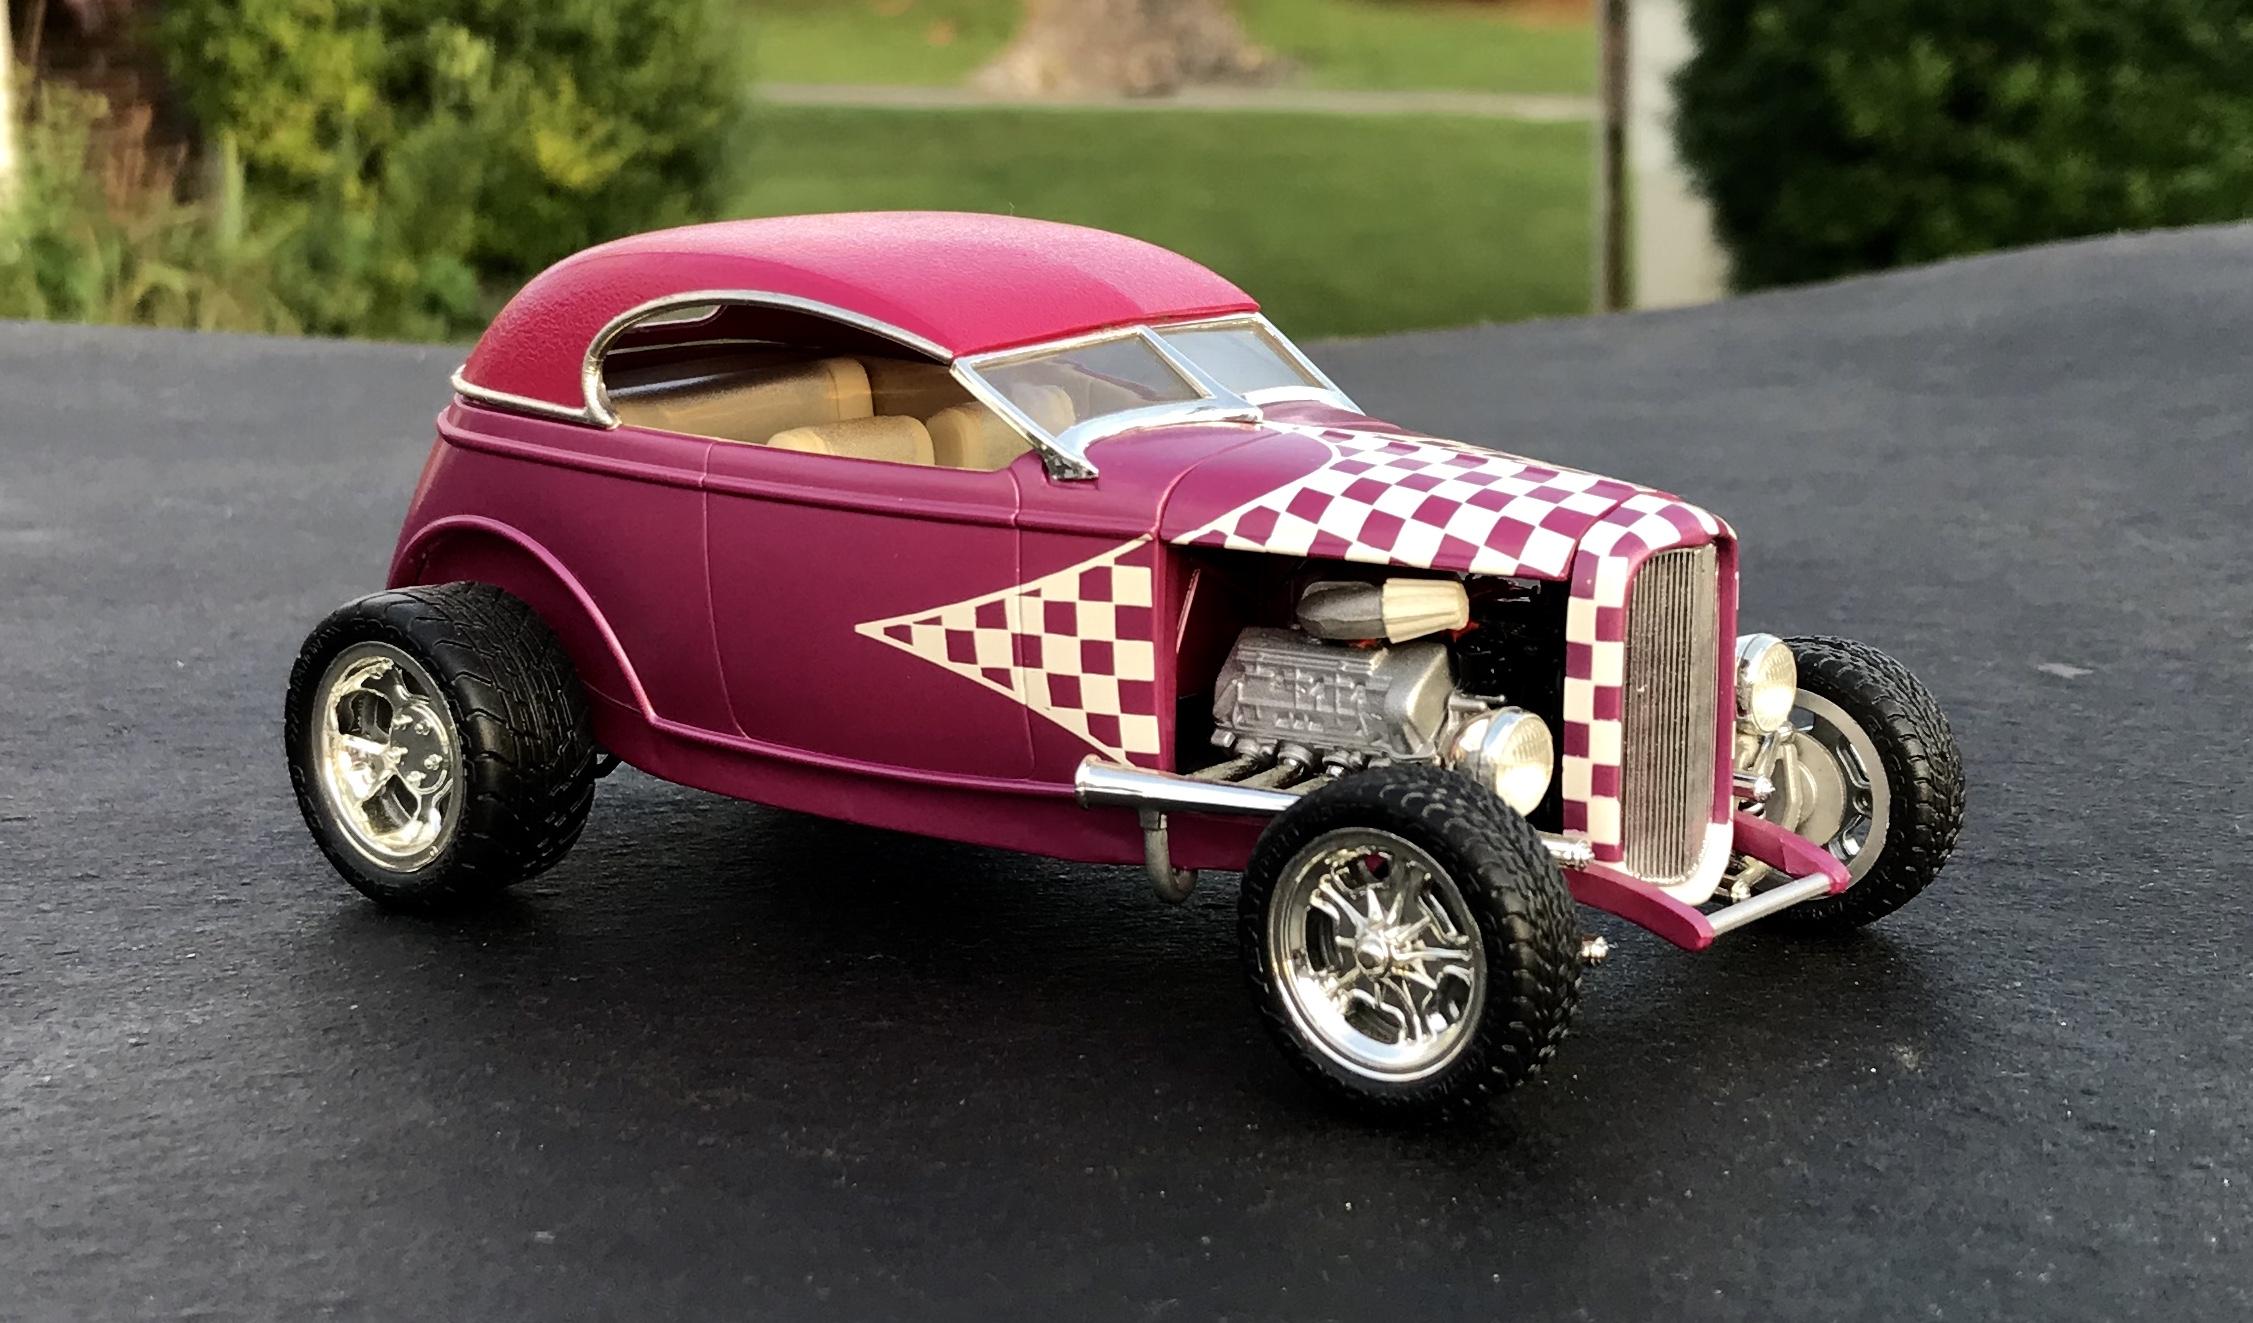
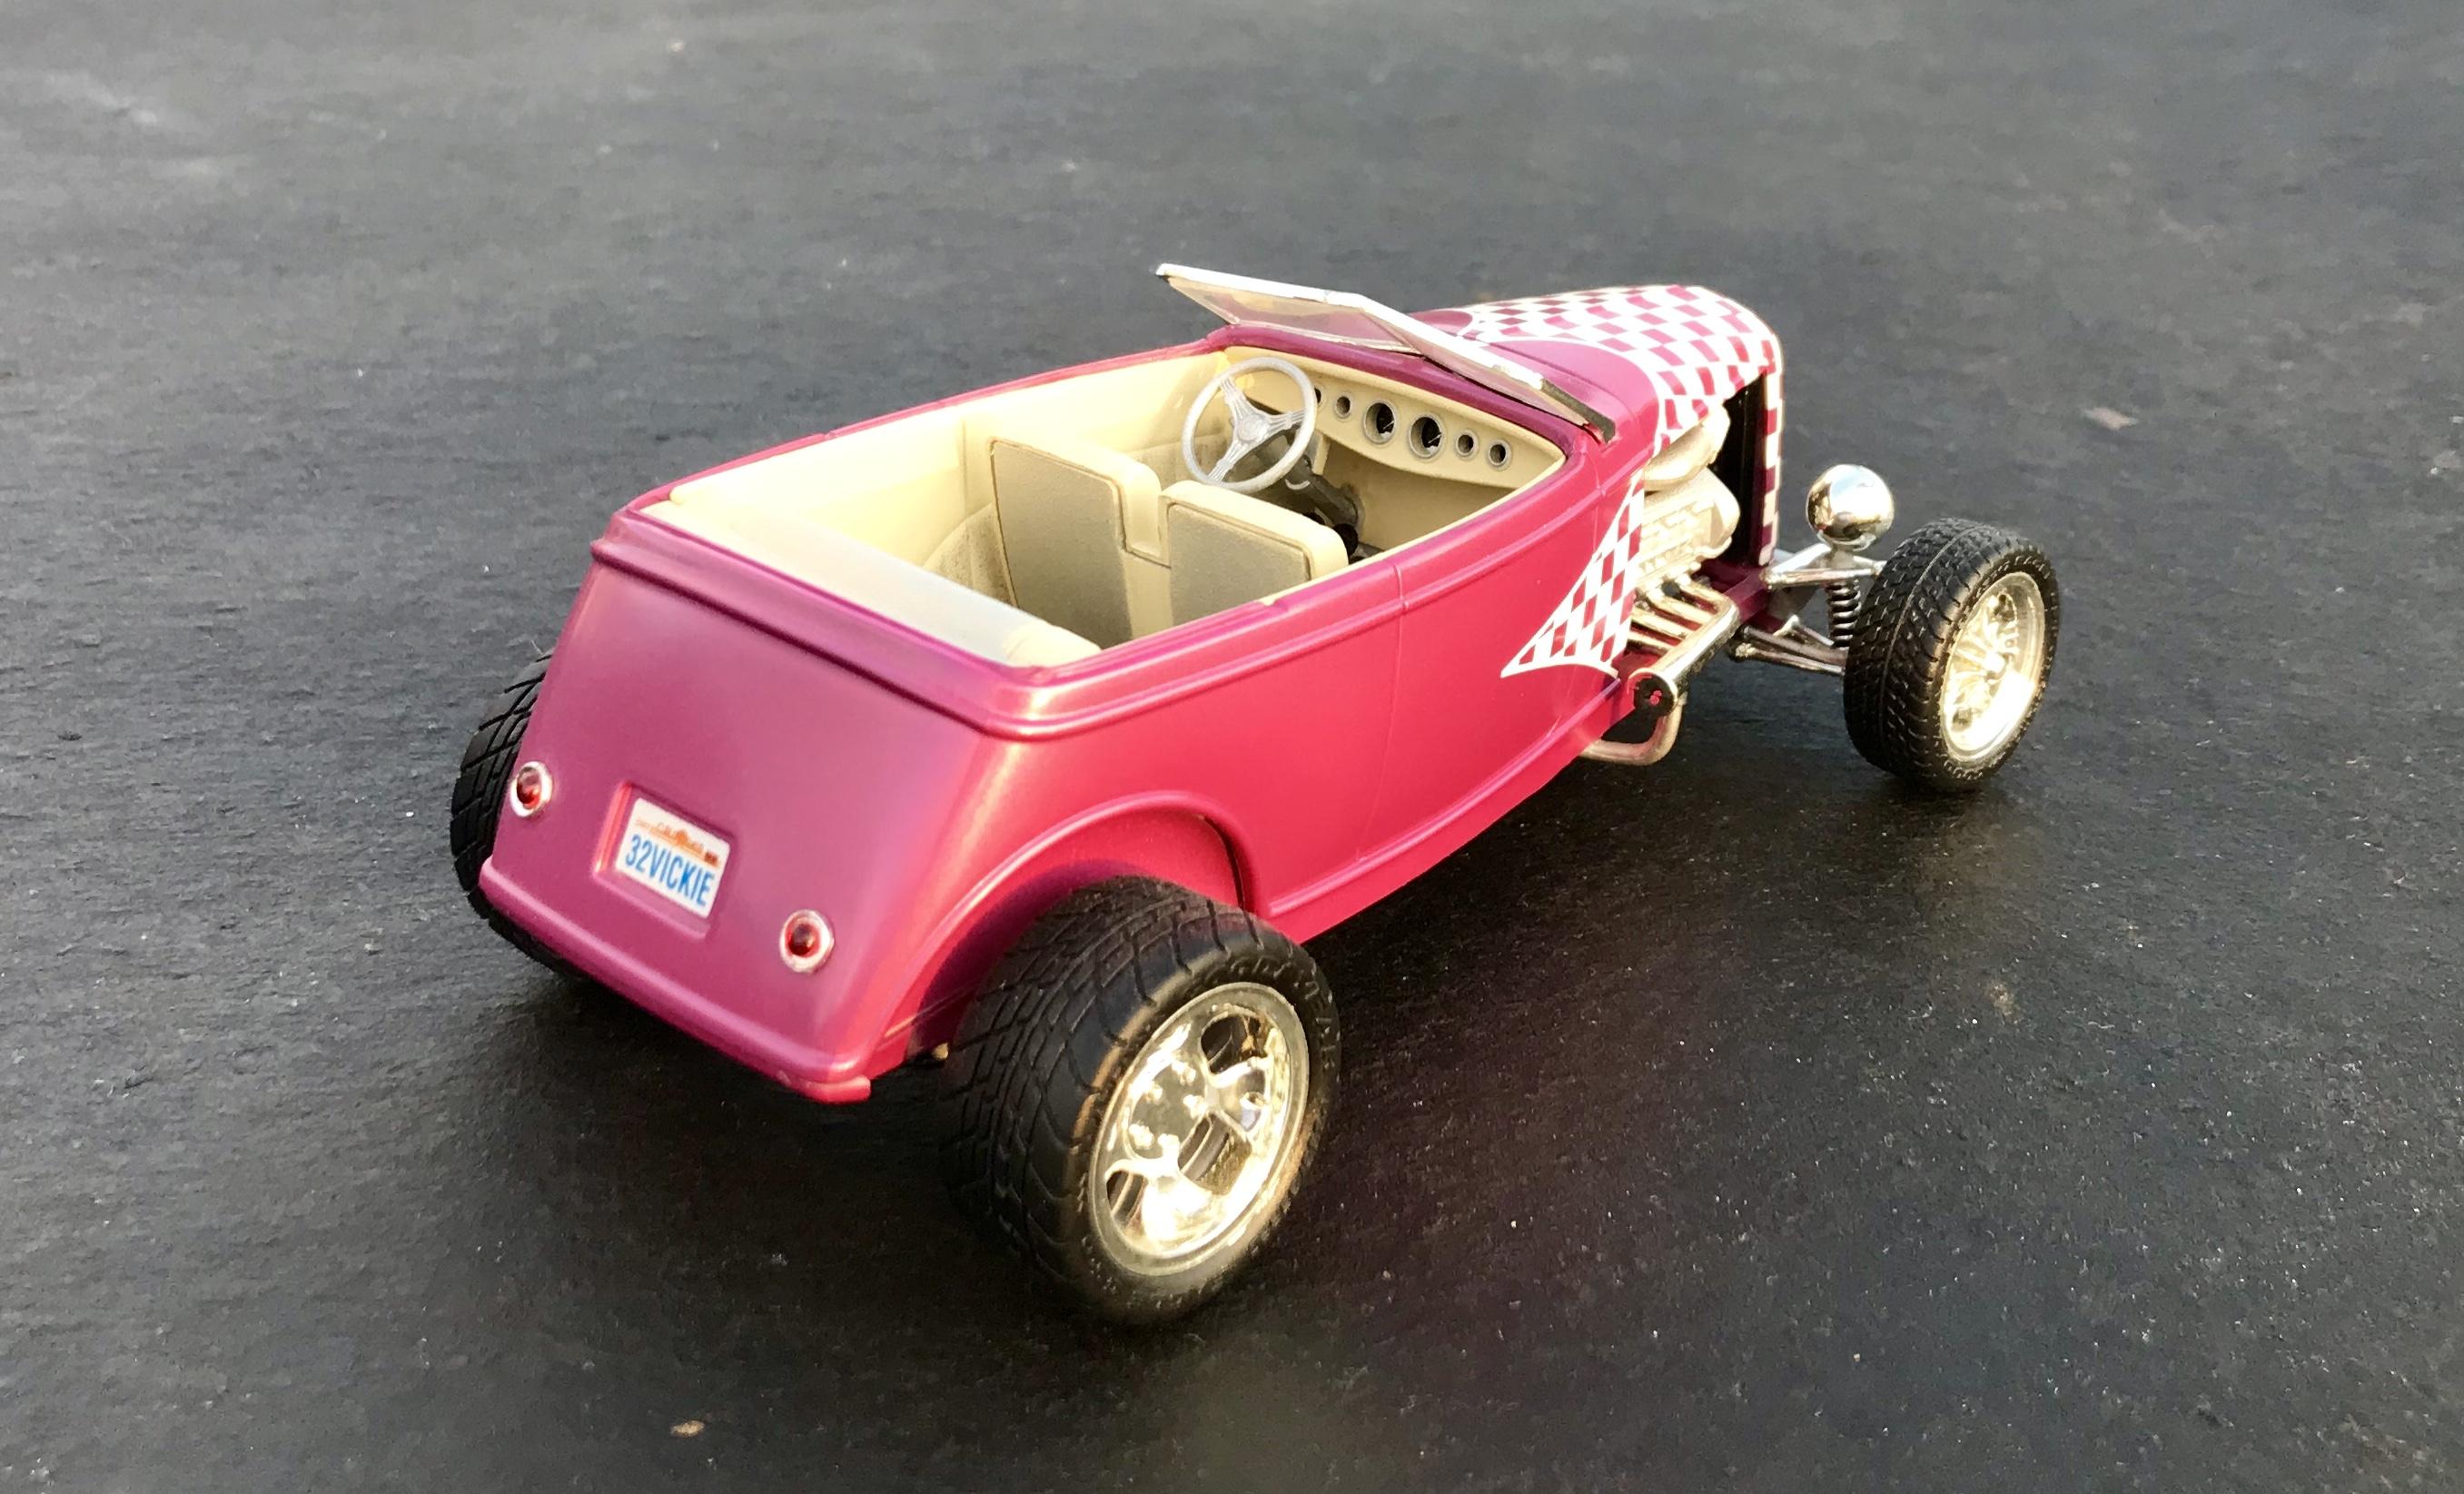
The EXCLUSIVELY '32 VICKY ONLY thread. Show us what you got!!!
modelcarcrazy replied to mrm's topic in Model Cars
I built this soon after it came out several years ago. If I had known then what unbuild examples of these were selling for today, it would have remained unbuild. Regardless, it builds up very nice, and I think was the best of the lot, as far as the Pro Shop kits.
-
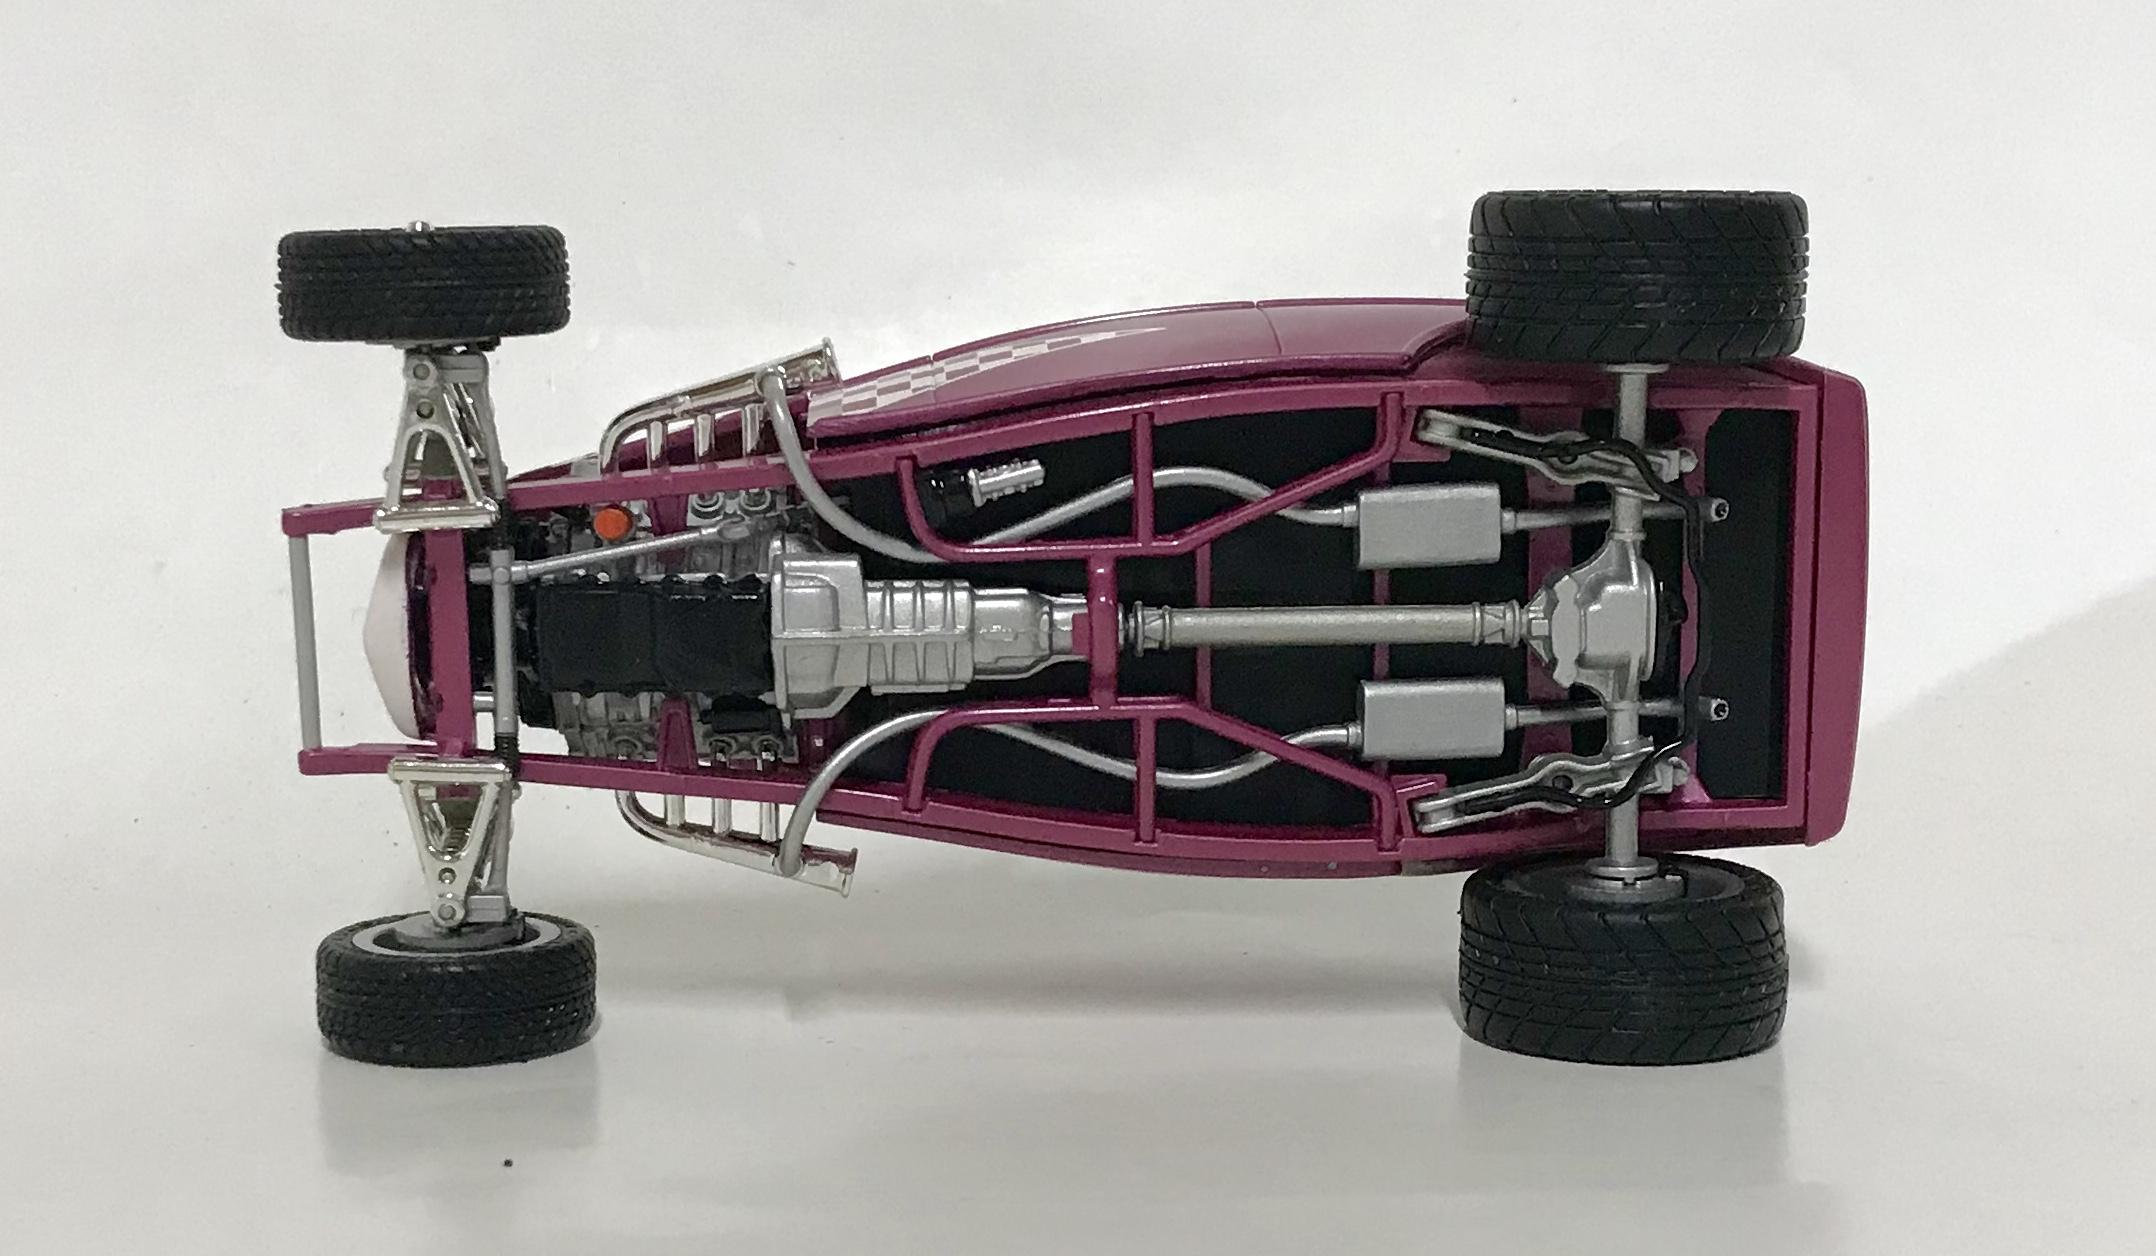
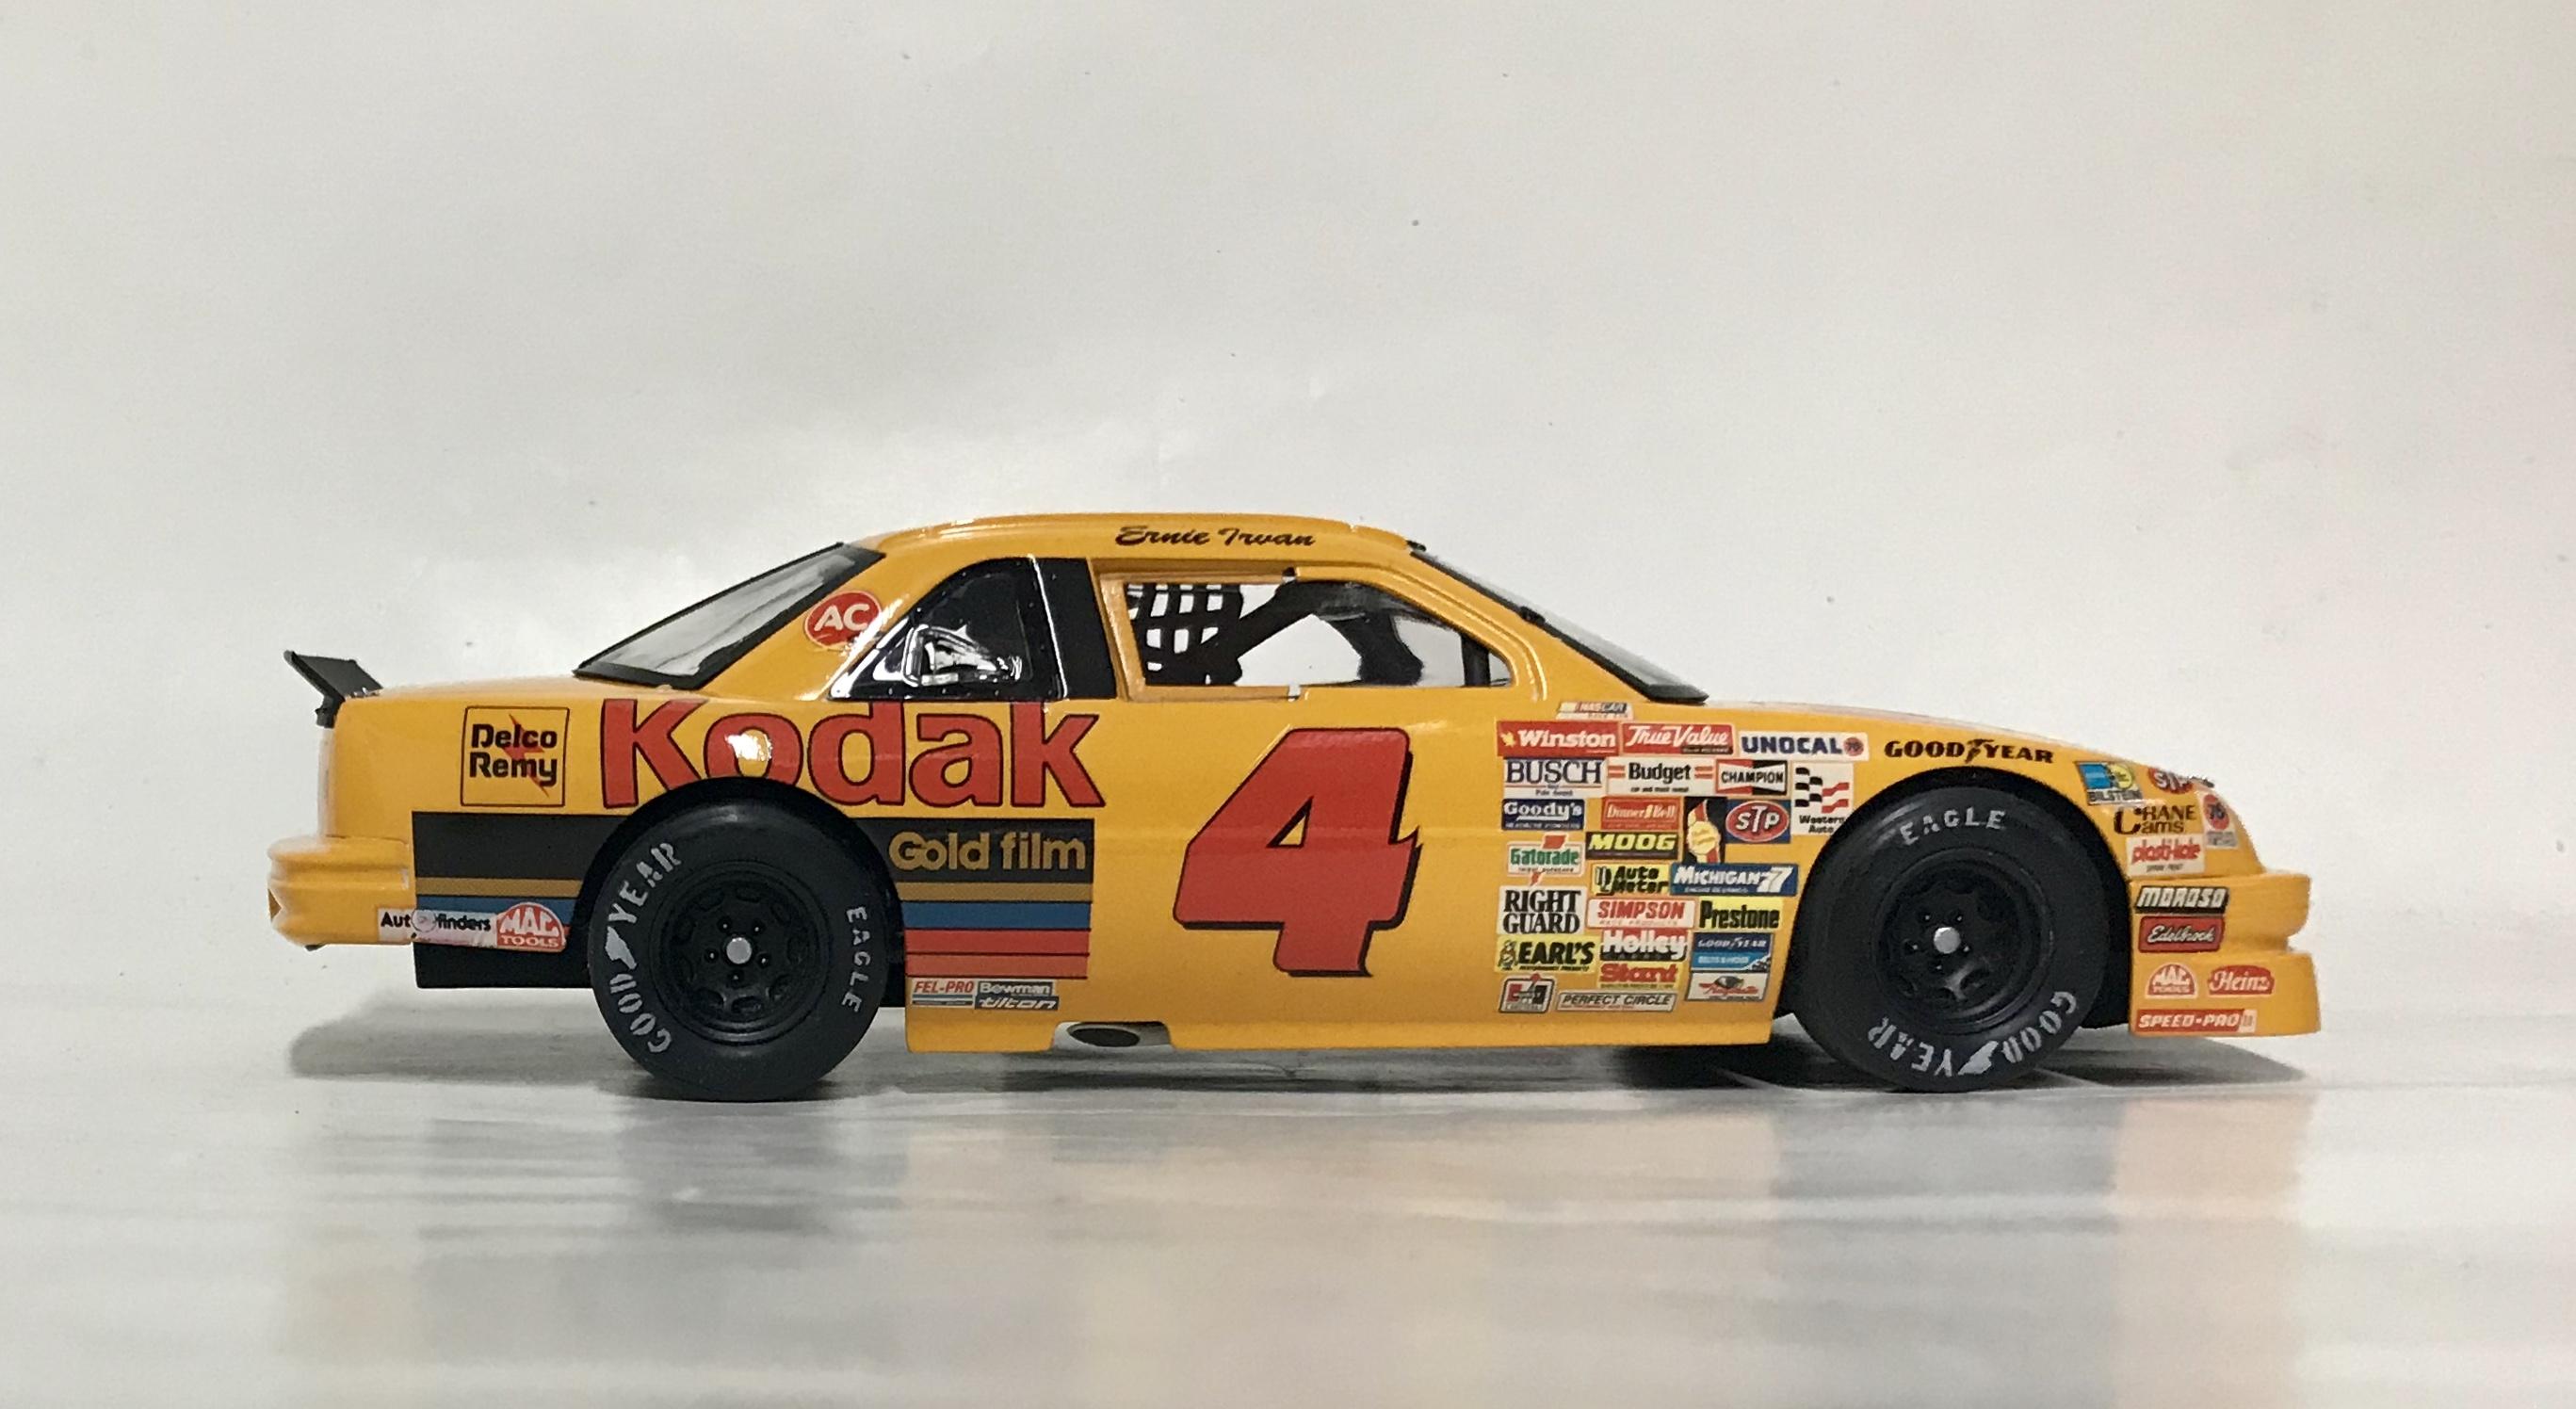
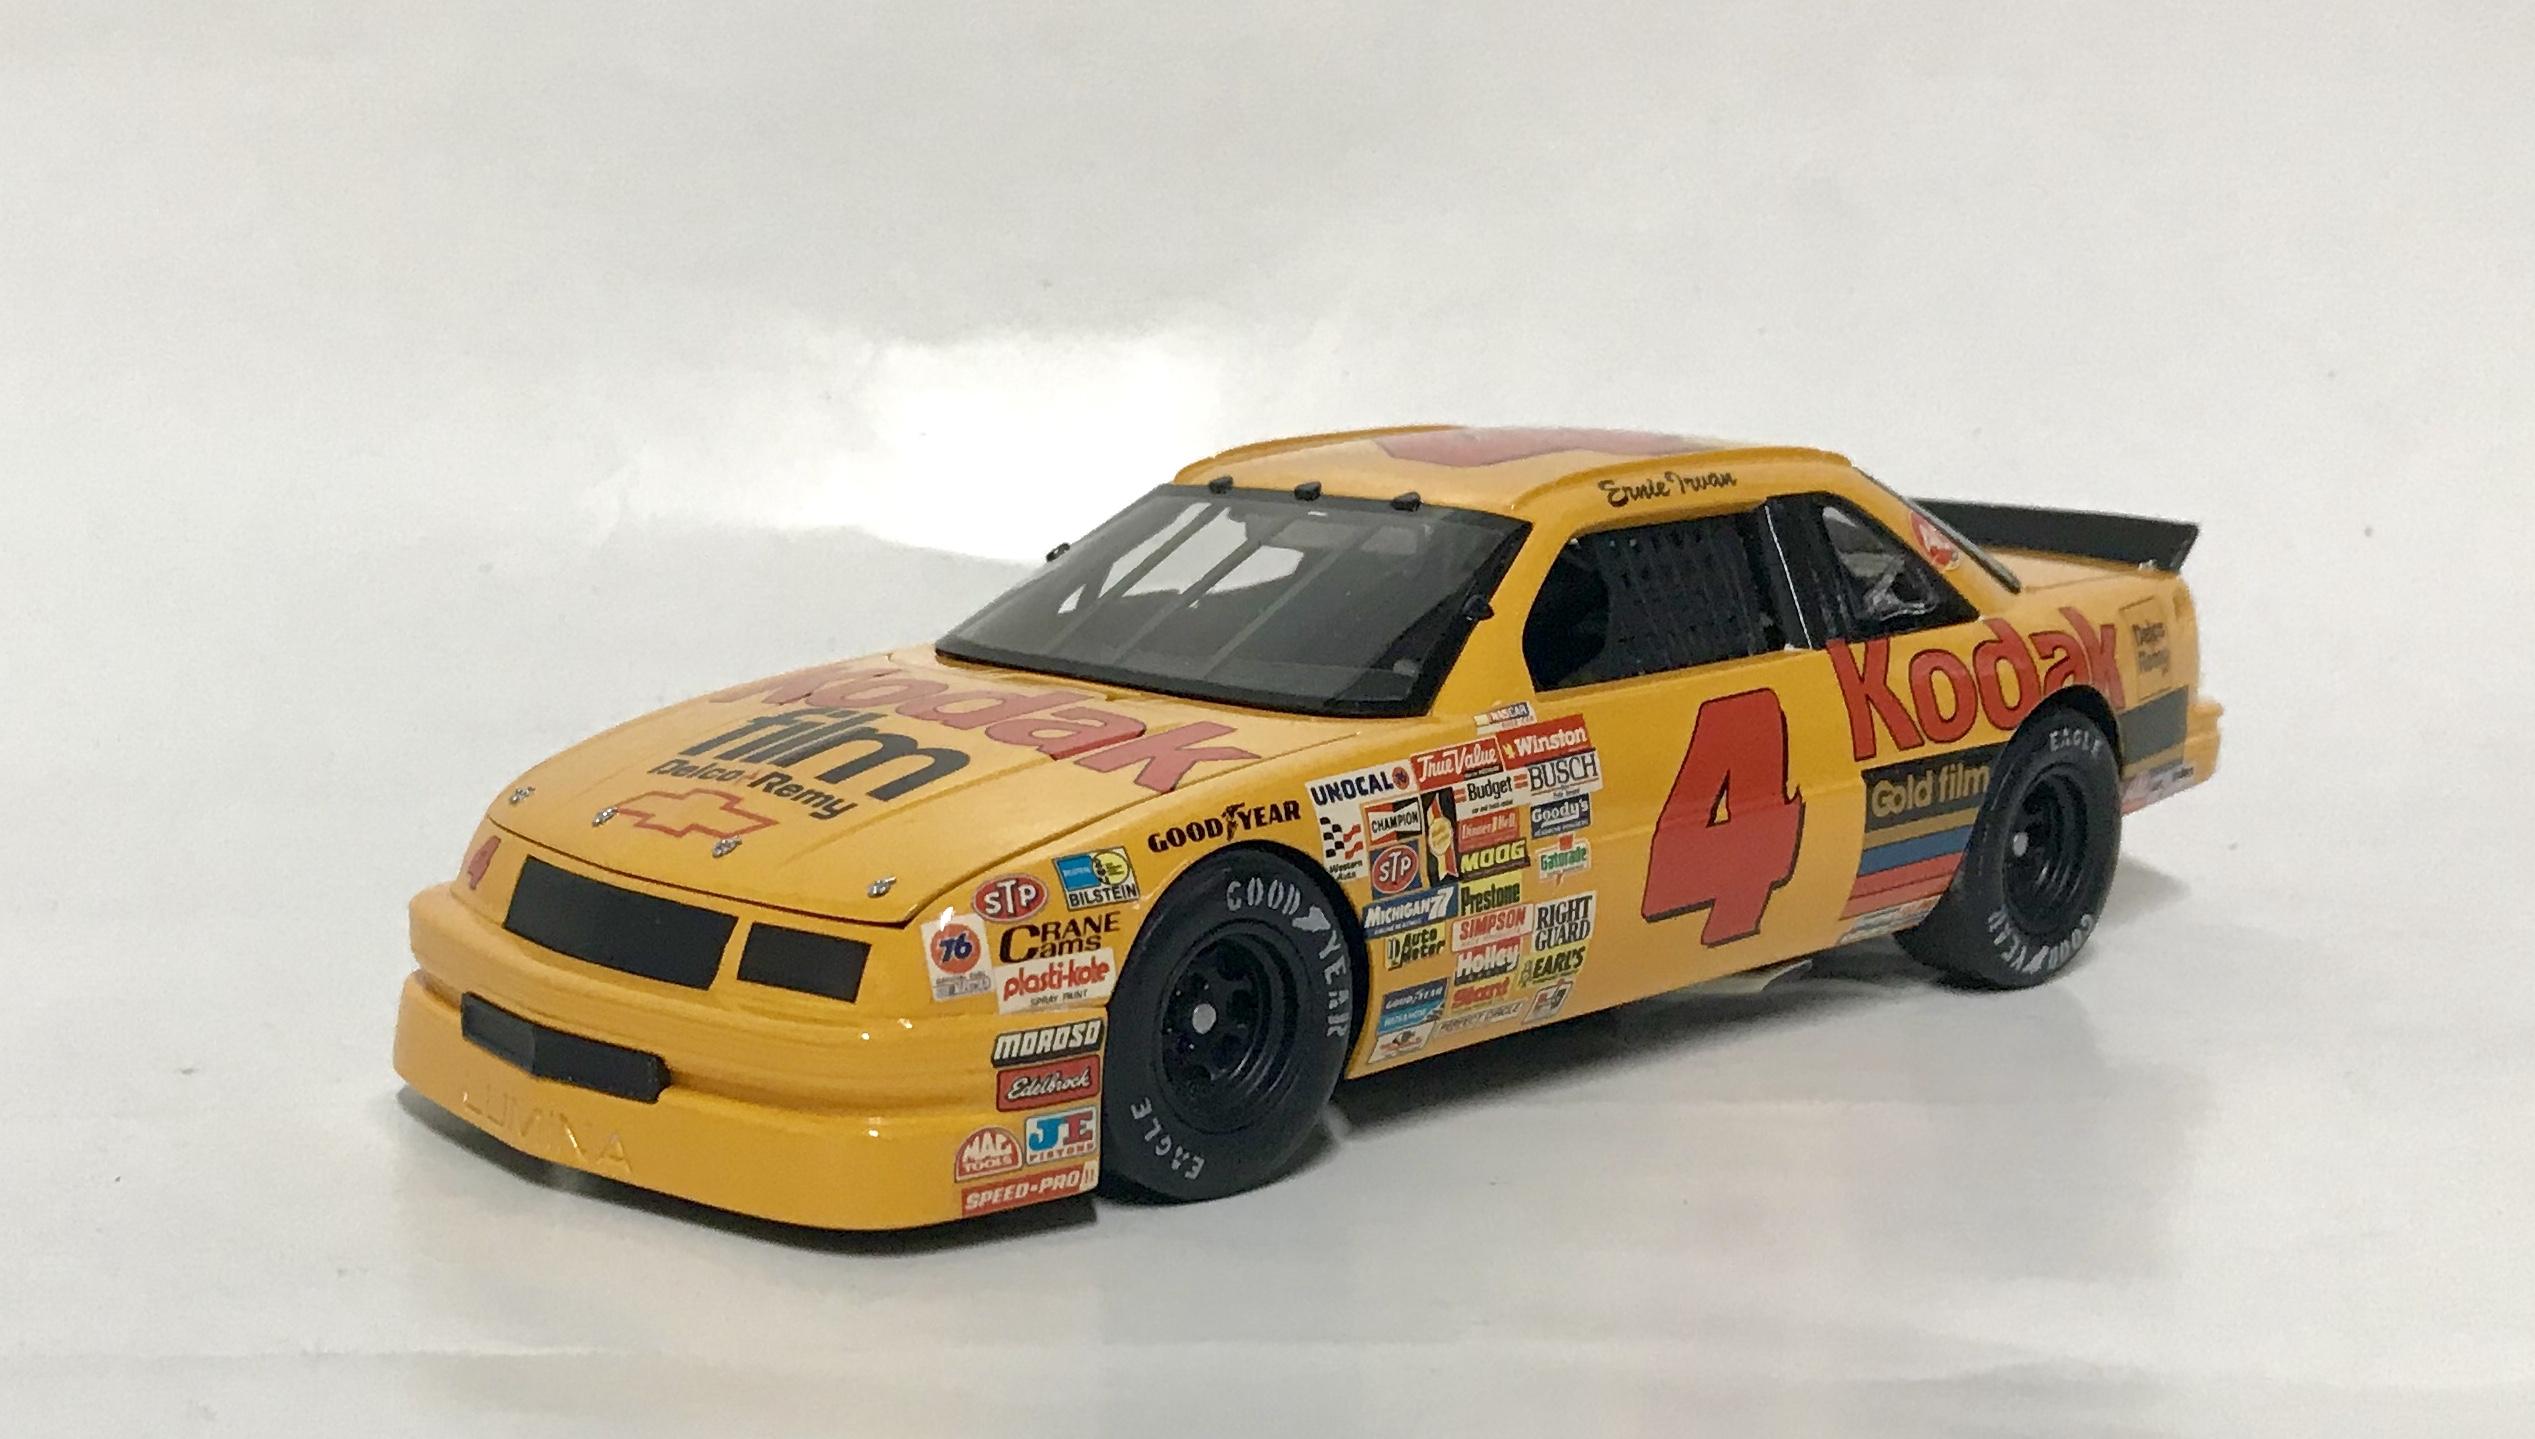
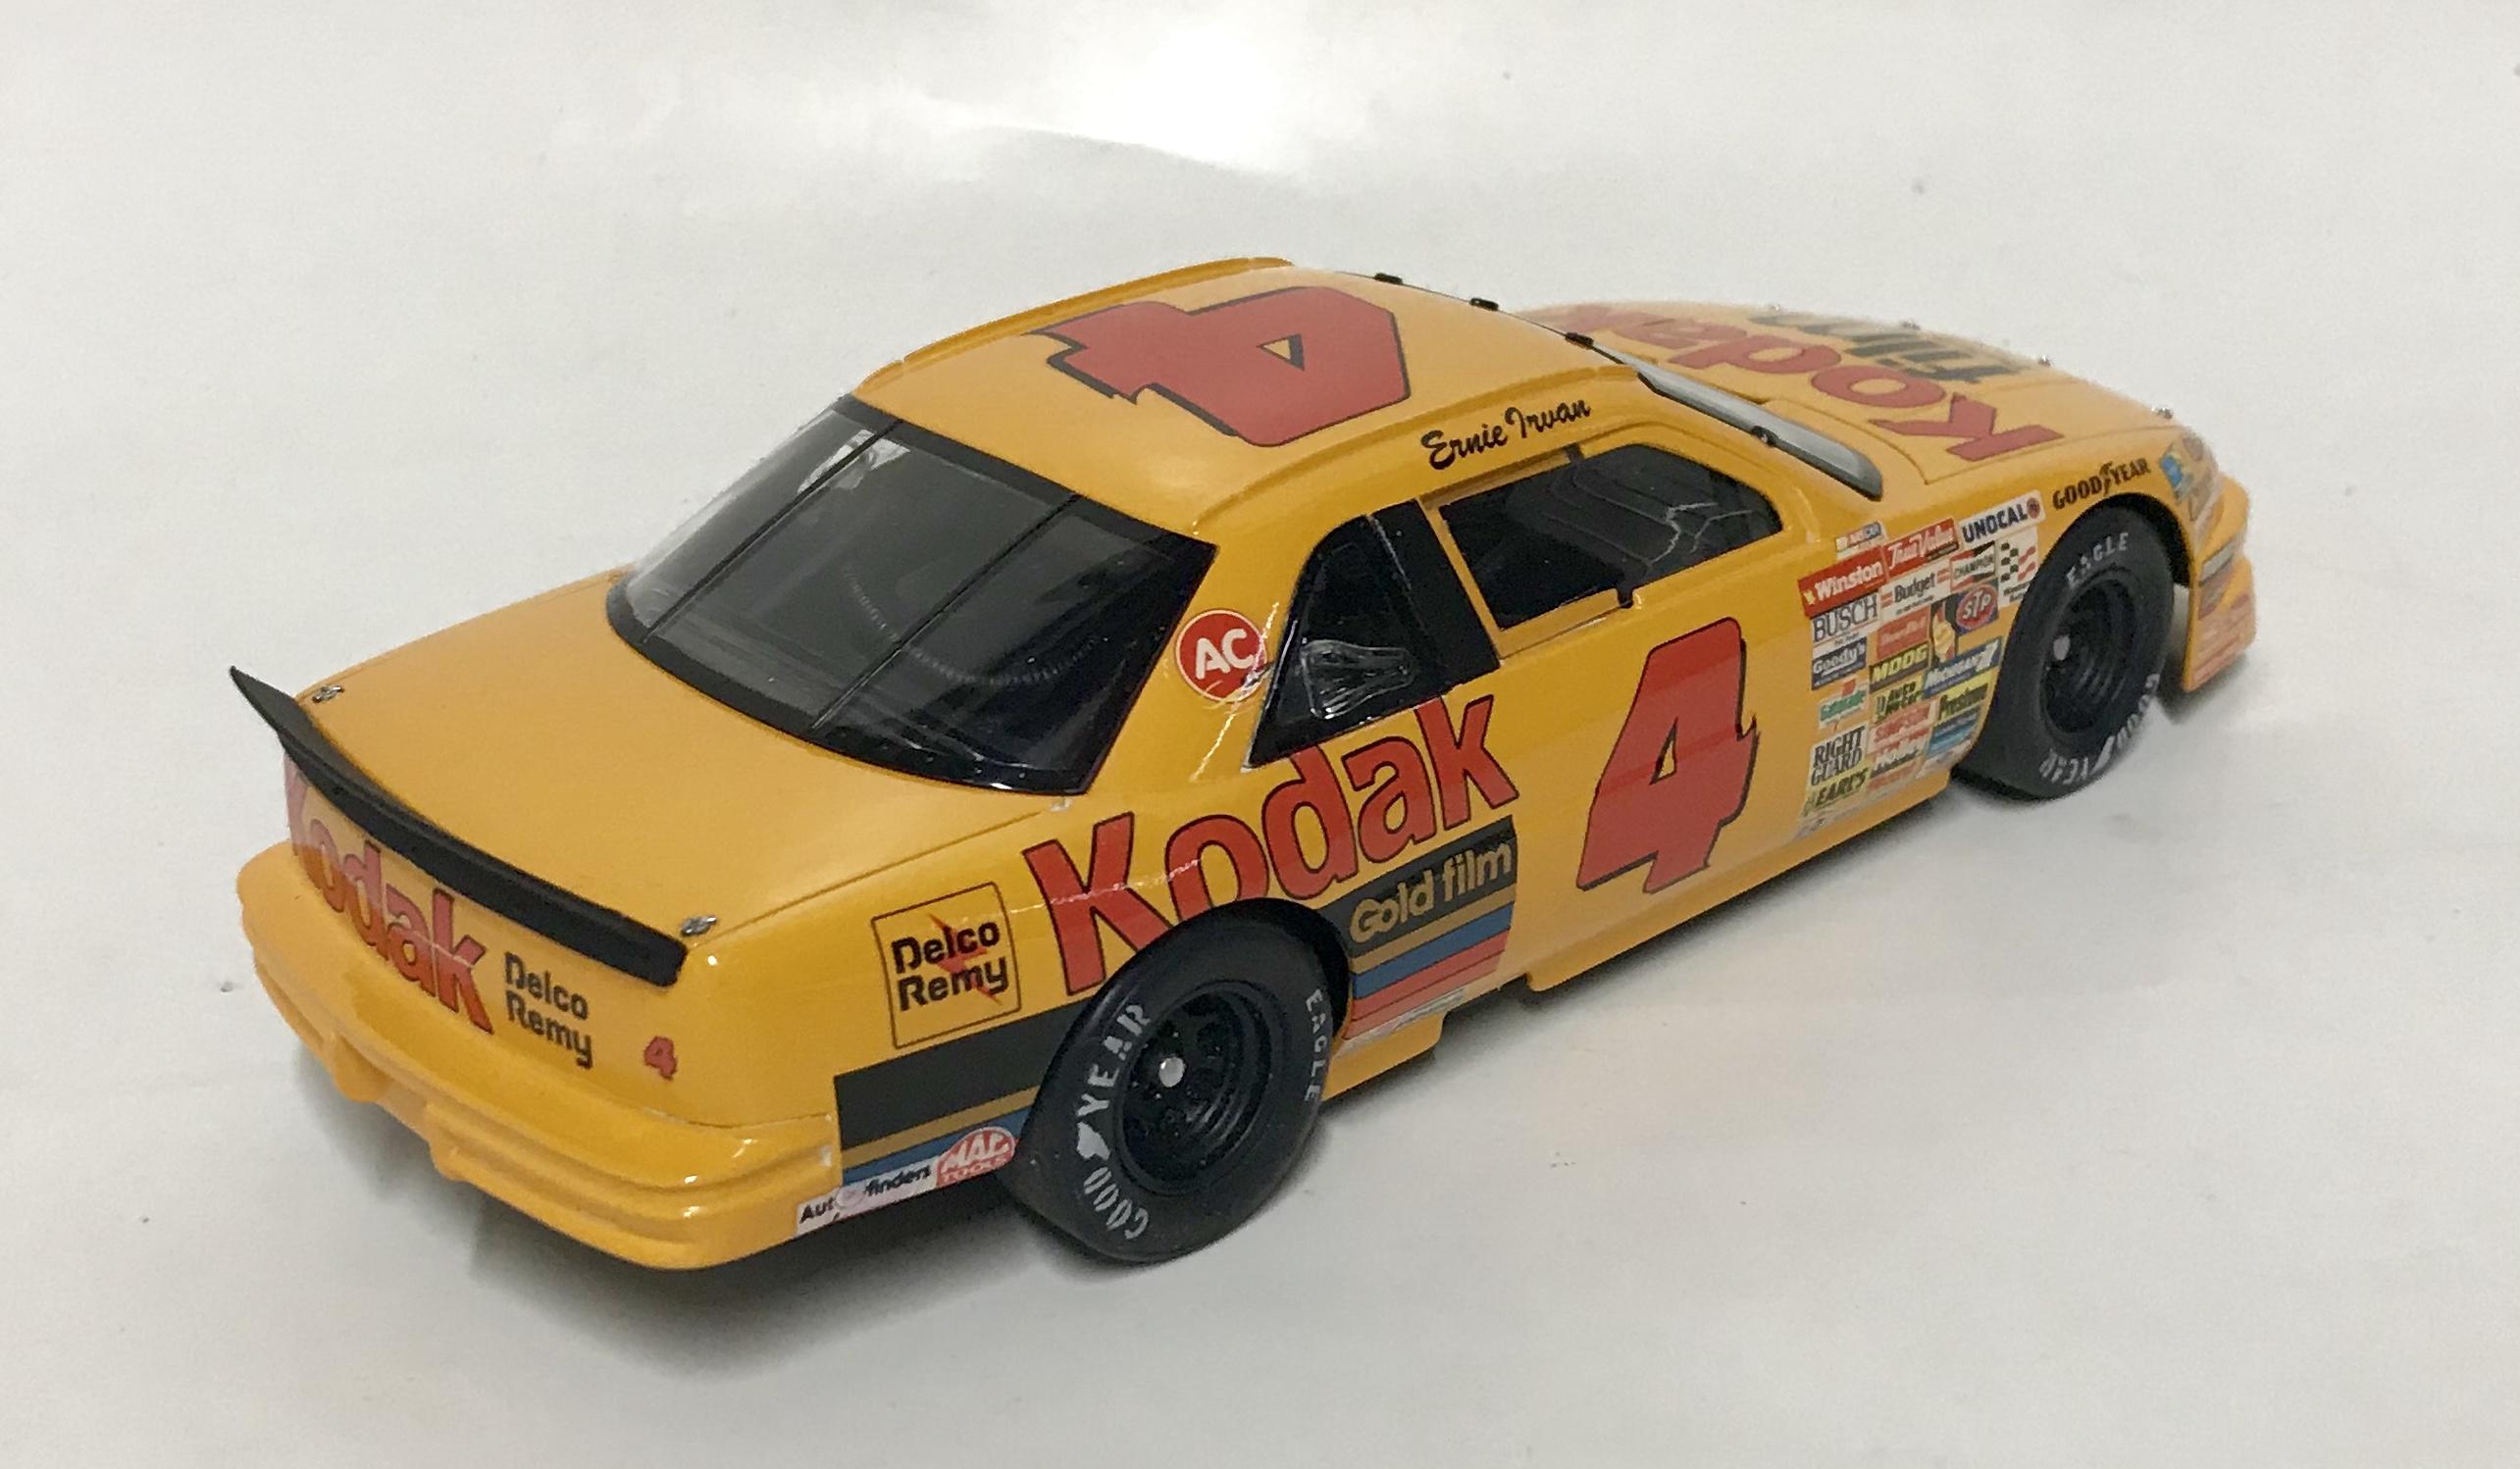
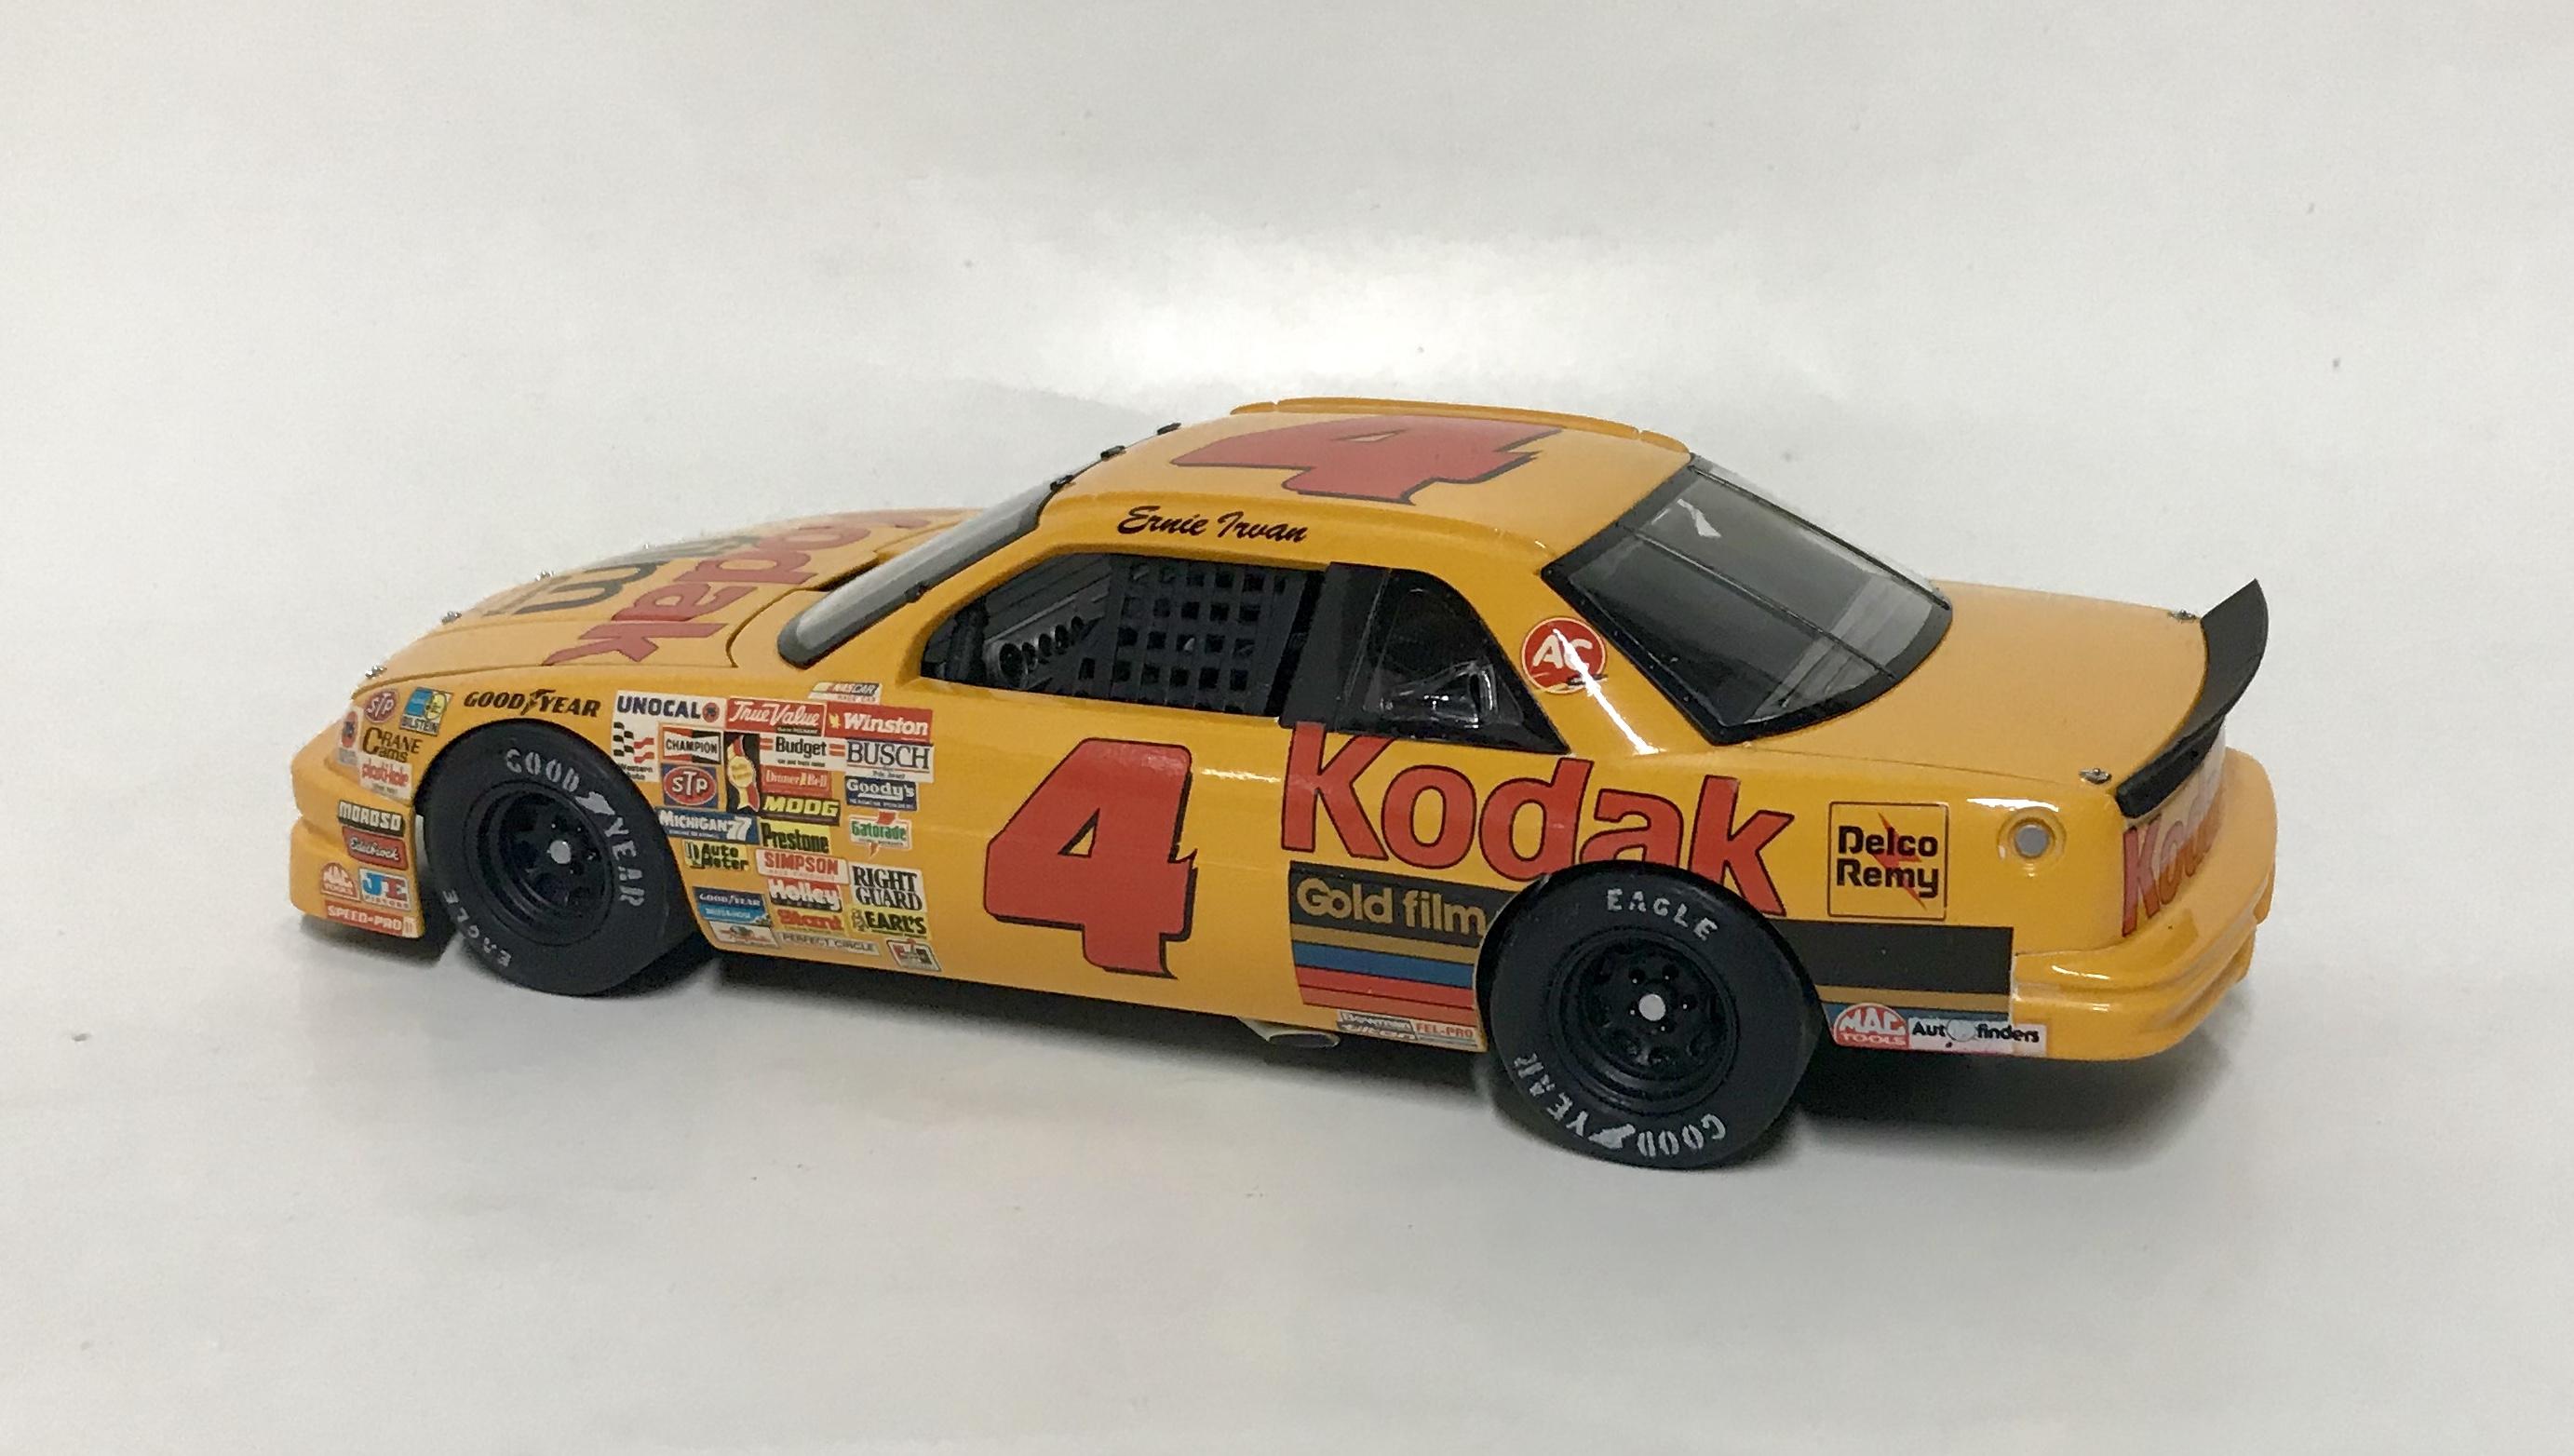
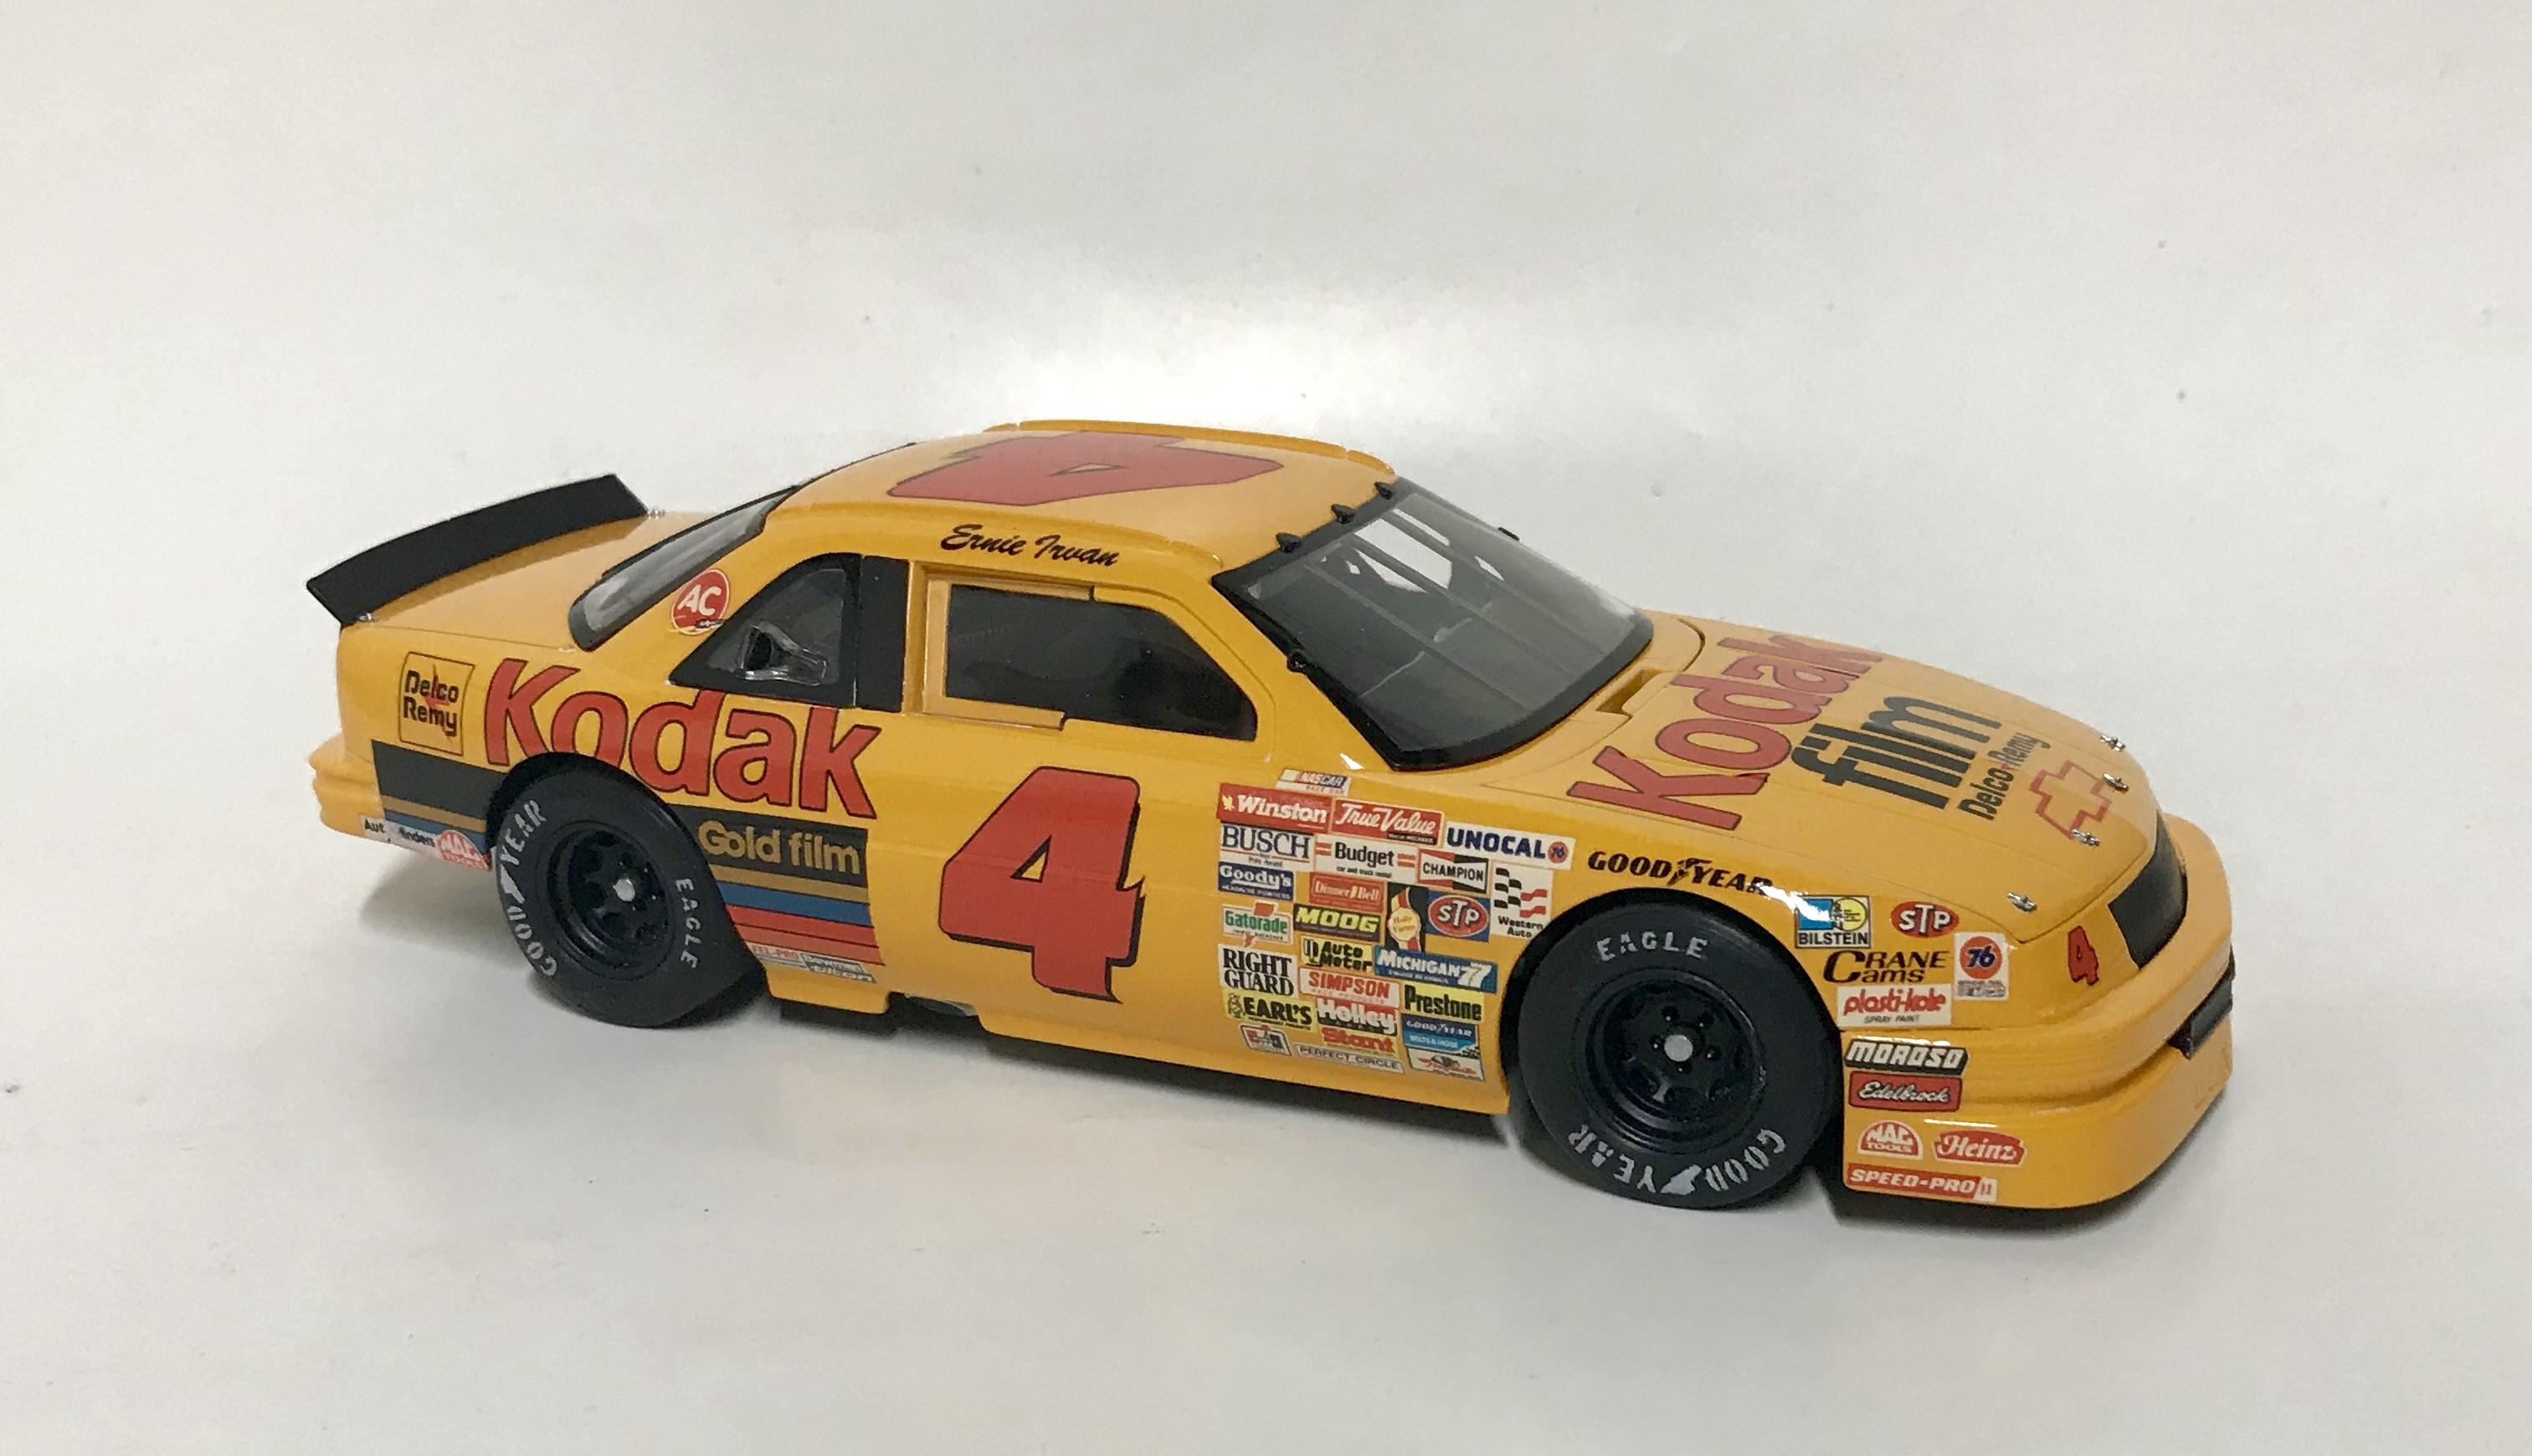
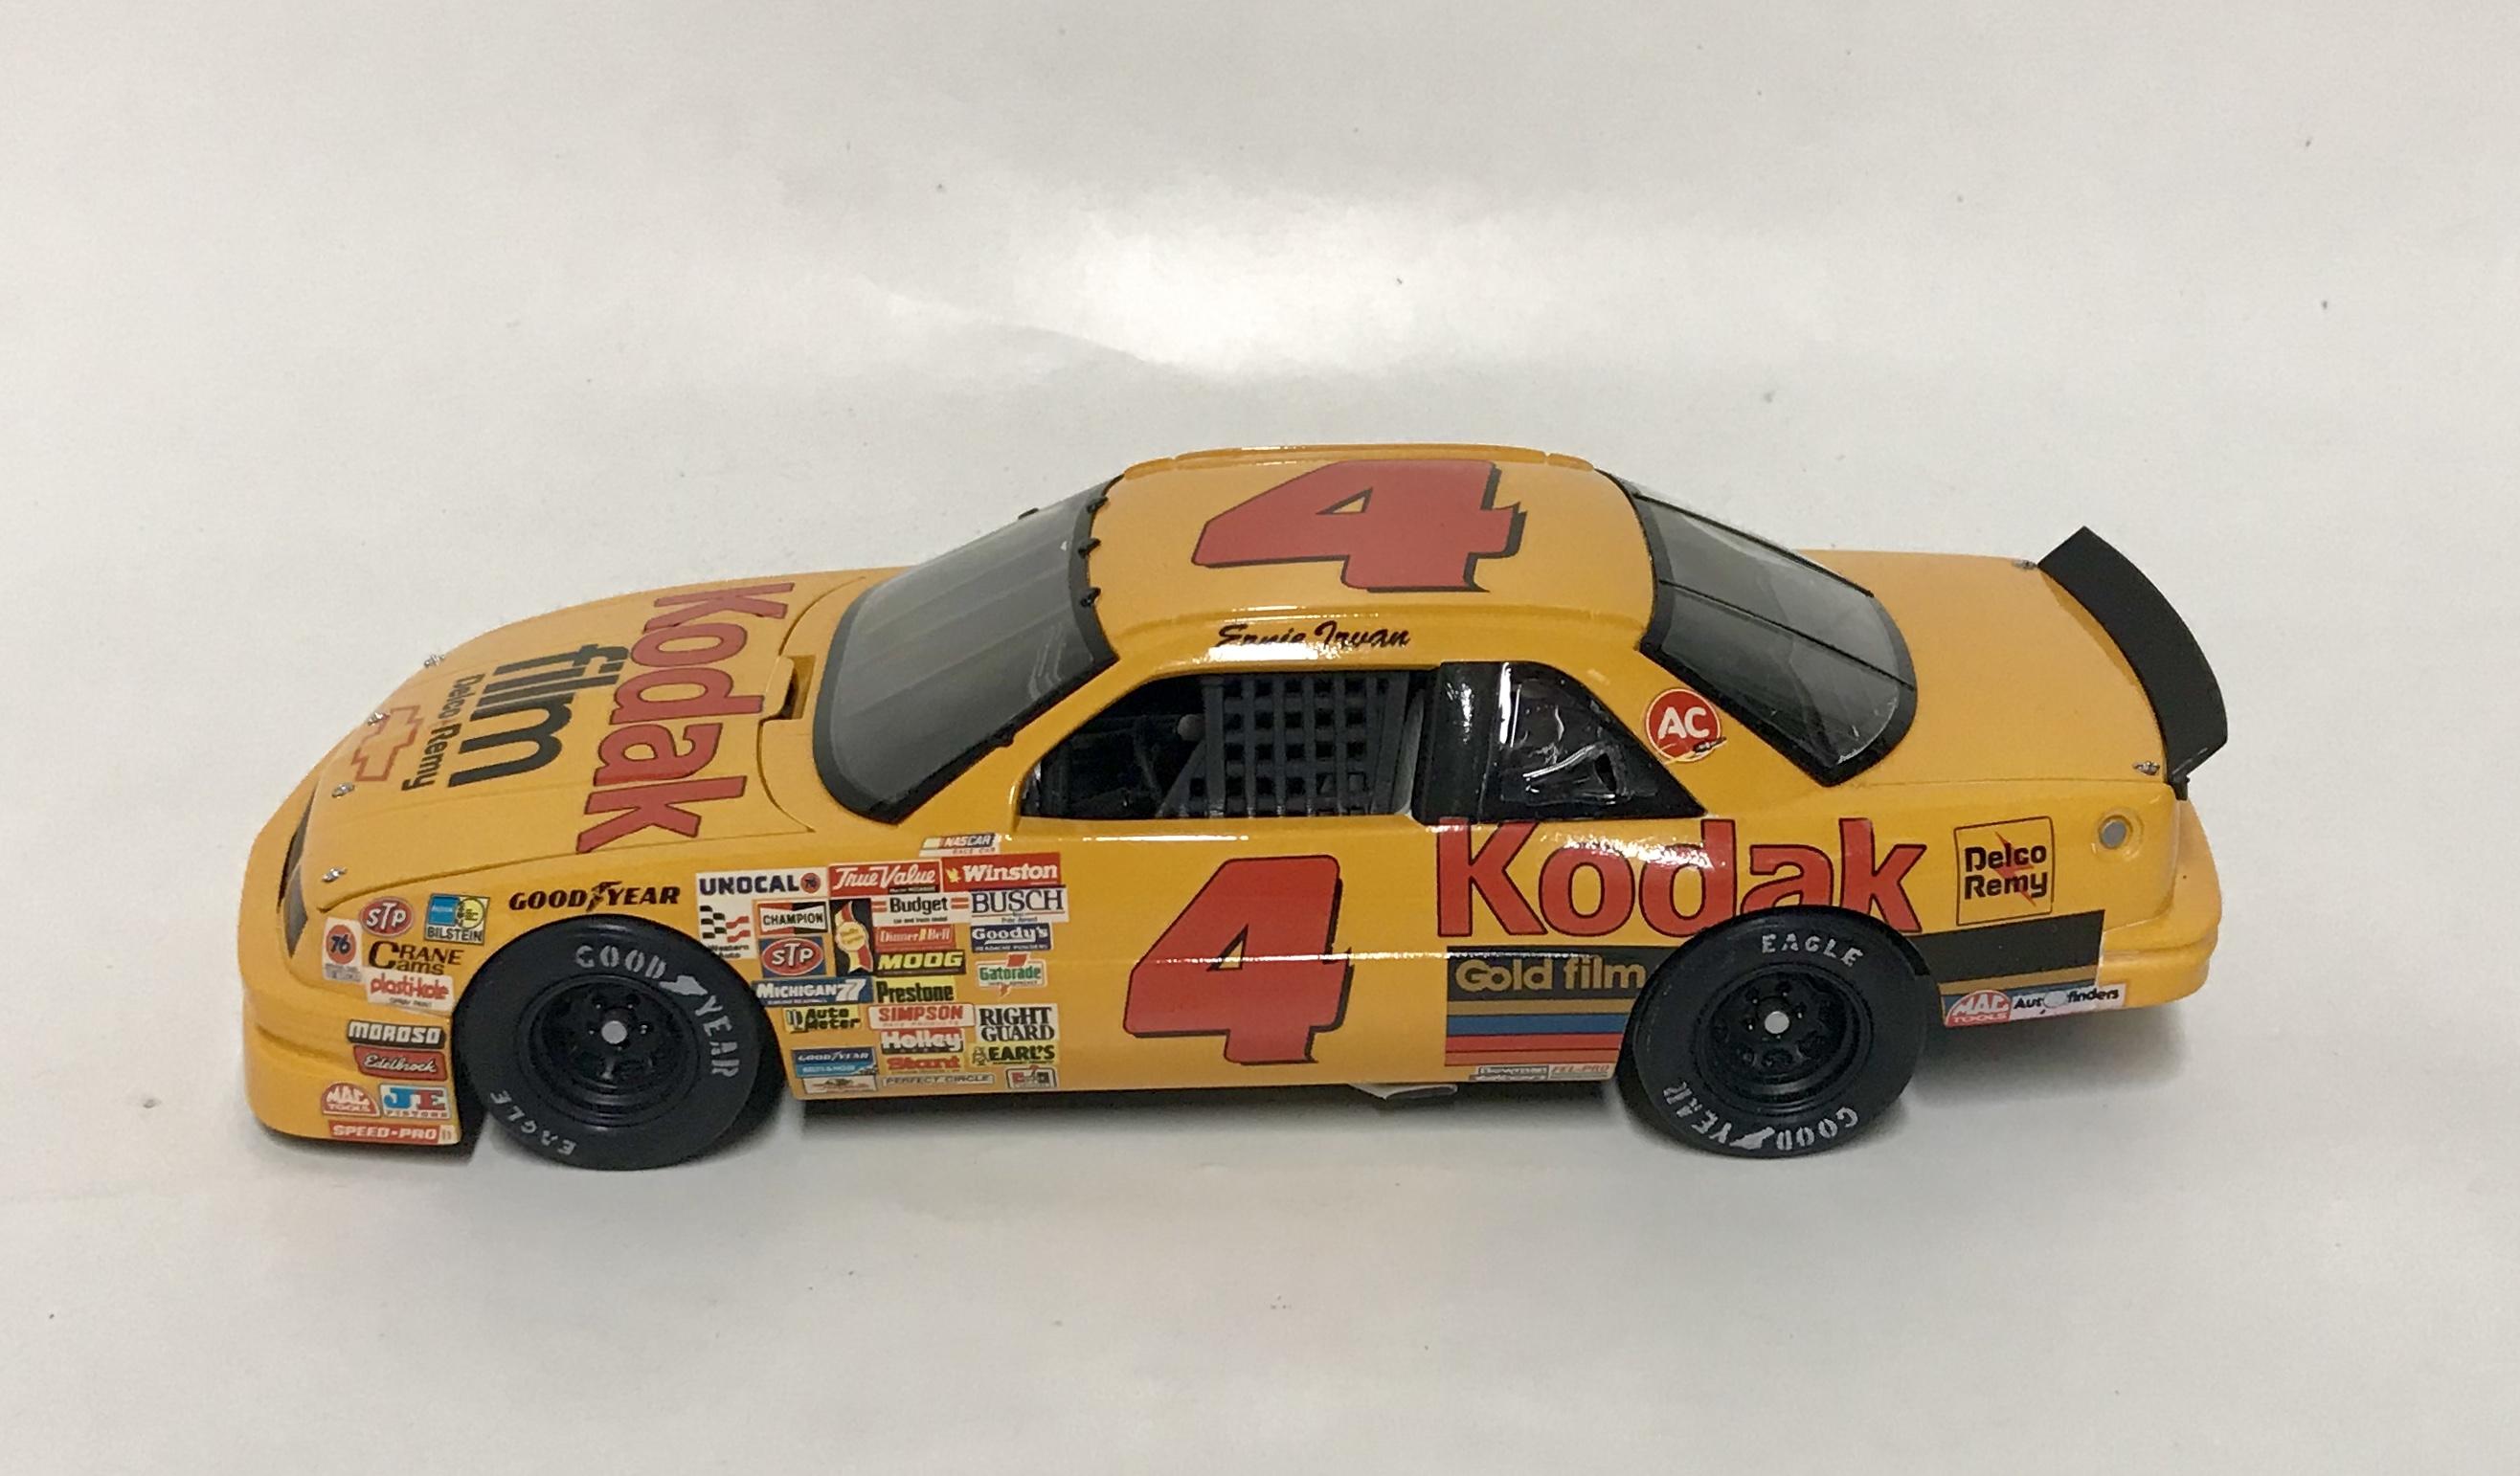
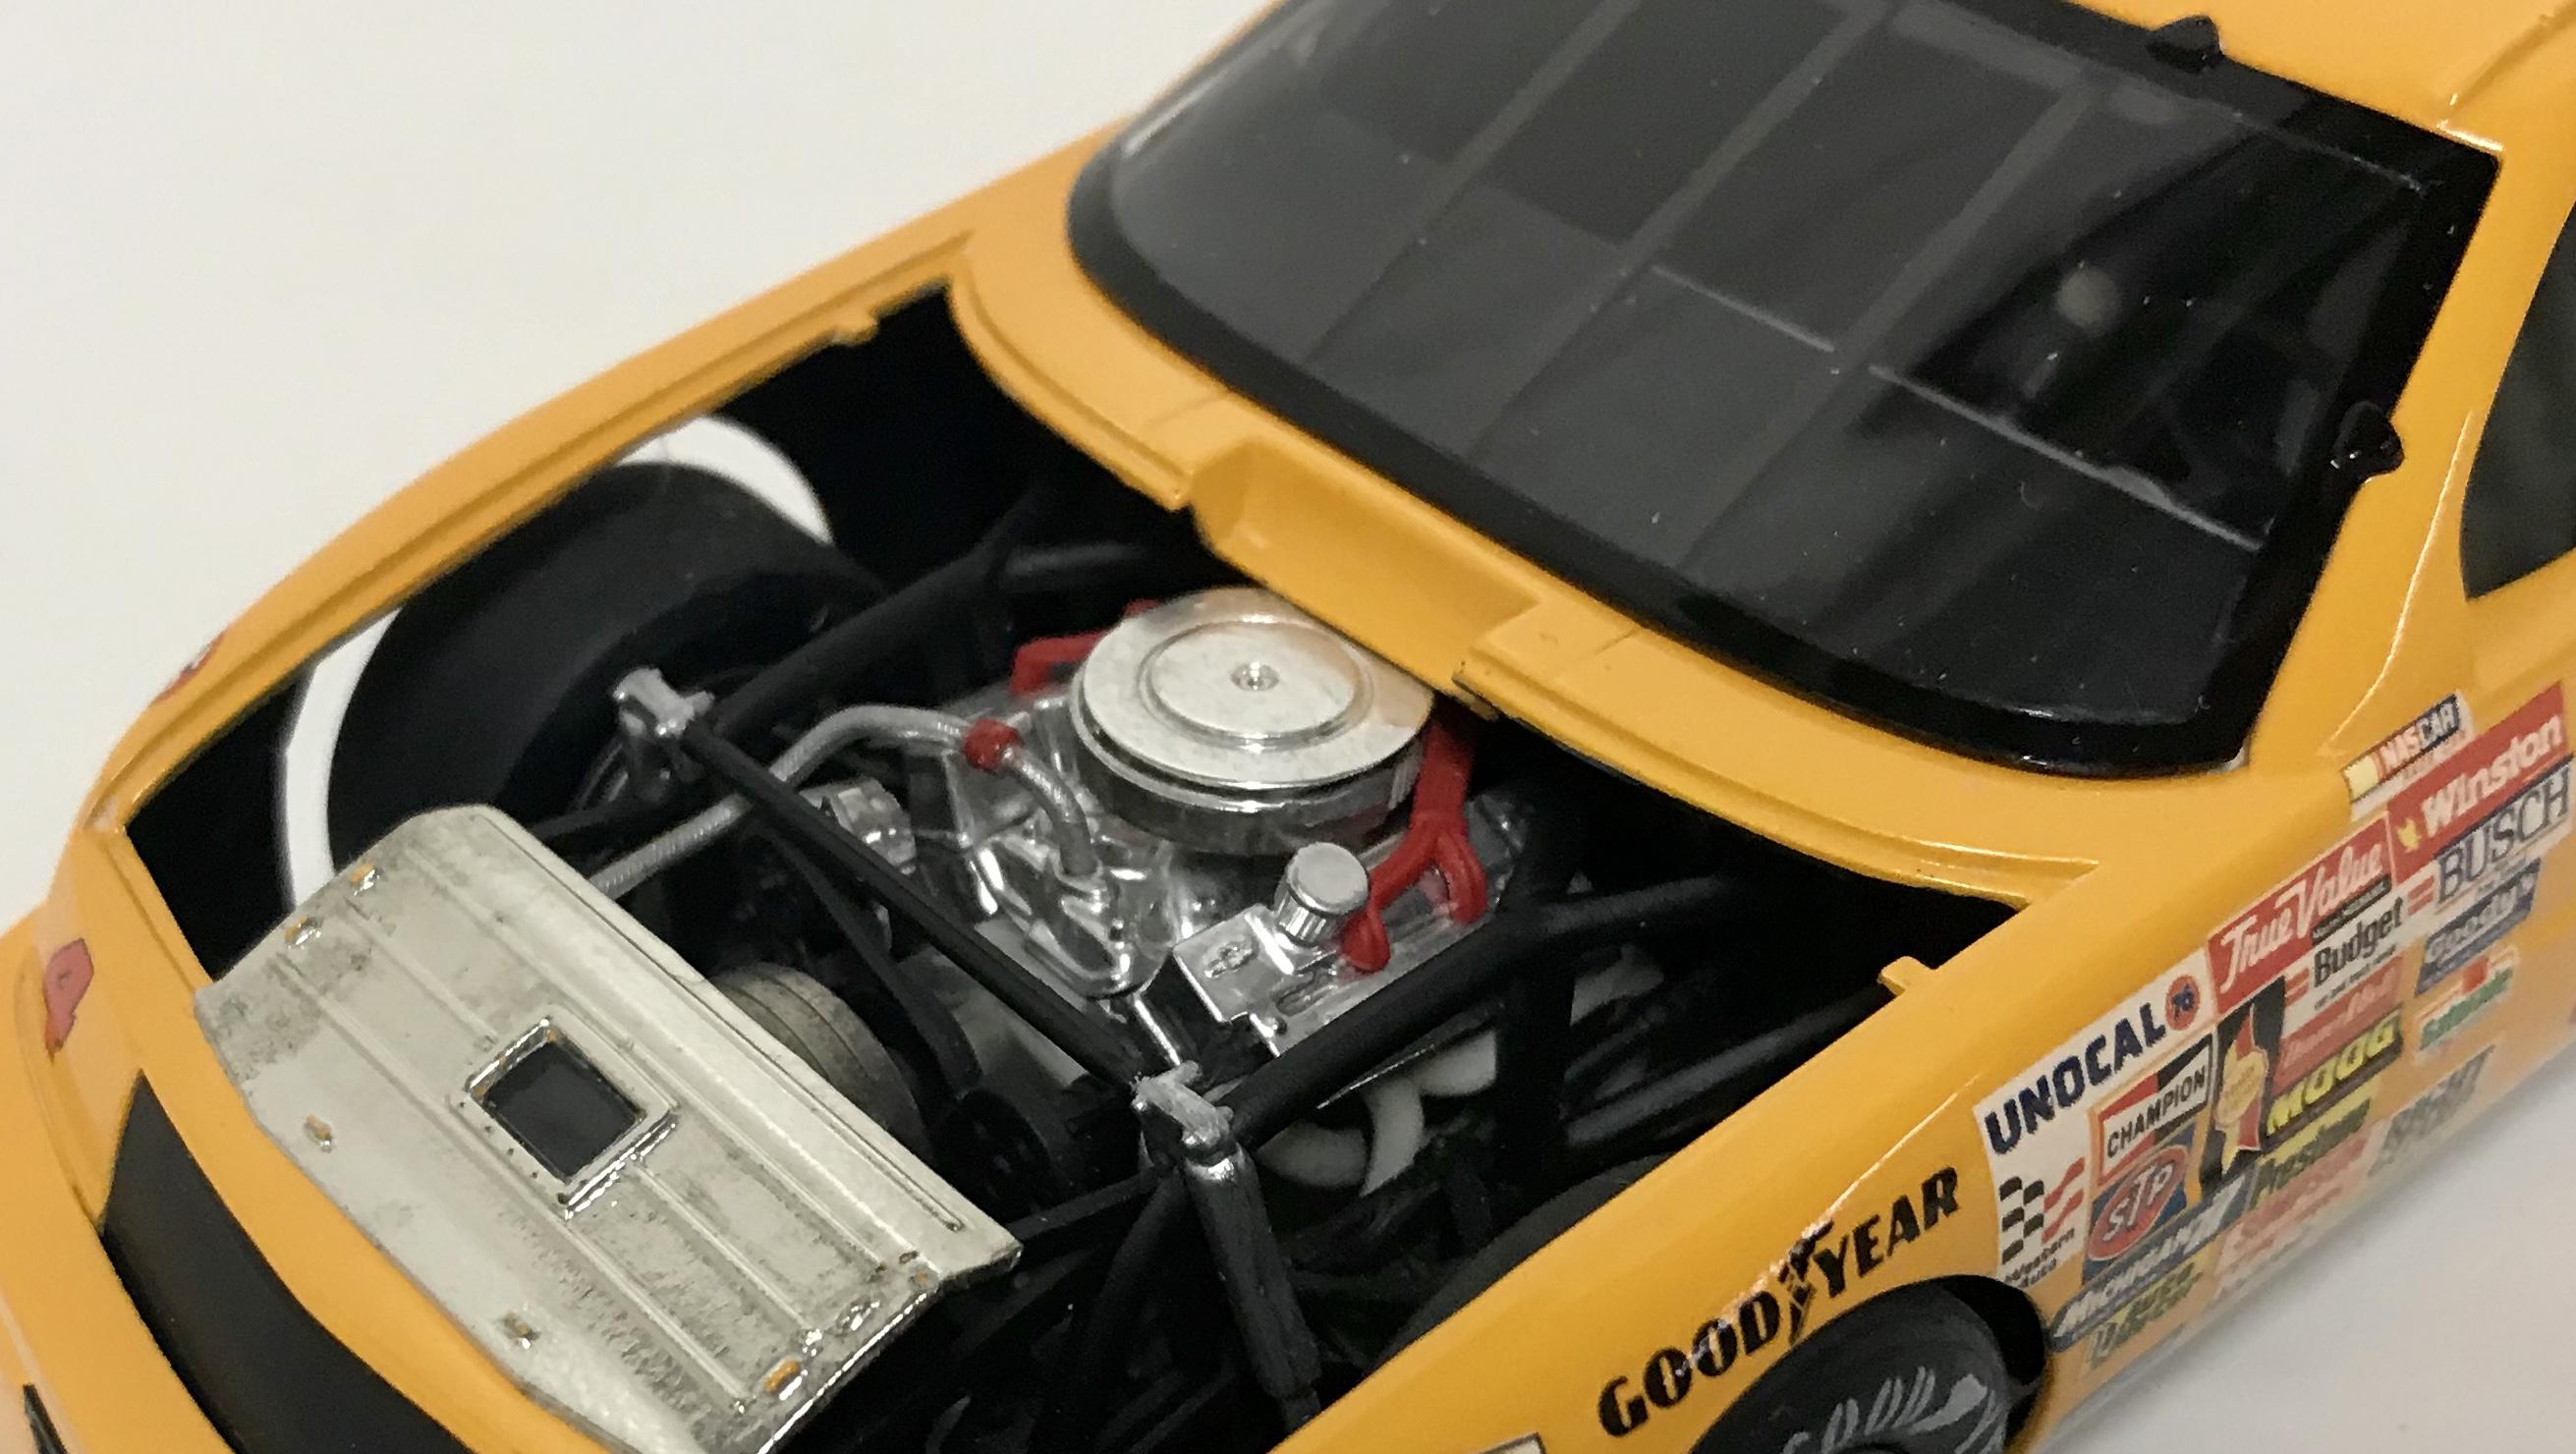
This one is the Monogram Lumina combined with a mixture of the AMT Kodak Lumina and Oldsmobile decals. It’s covered with Tru-Match Kodak yellow and Testors flat black inside.