Byron5150
-
Posts
388 -
Joined
-
Last visited
Content Type
Profiles
Forums
Events
Gallery
Everything posted by Byron5150
-
Thanks man!
-
Thanks dude! Thanks mate!! I really appreciate that comment
-
Got the battery installed and battery wires. Drilled holes using a pin vise to install them to the engine and battery. Still have decals to put on the air cleaner and battery.. Were getting close!! I plan to build the push bar last.

-
Thanks man!
-
Battery cables, battery detail, and brake/ fuel lines start tomorrow as well as installing the steering box/ column. Cheers & happy modeling,
-
 The HiPo engine was used in modified form by Carroll Shelby for the 1965-1967 Shelby GT350, raising rated power to 306 hp (228 kW) at 6,000 rpm. Other than that I assume it was an option, for other models in those years. I got the info above from wiki. By reading that I would assume that it was put in every 65-67 gt350's unless there was an option to get a different motor.
 -
Revell's Original Mini Cooper Final Assembly
Byron5150 replied to microwheel's topic in WIP: Model Cars
This little guy is turning out great man nice door work -
I will lol!! The flames do look great man and so does the paint
-
Man that carb is looking great! Nice job! I'm learning myself making things for my models out of different kinds of materials it's amazing the things you can use. Look forward to seeing continuation of this
-
Peterbilt 359 Wrecker
Byron5150 replied to model1:25th scale's topic in WIP: Model Trucks: Big Rigs and Heavy Equipment
looks good so far should be pretty cool -
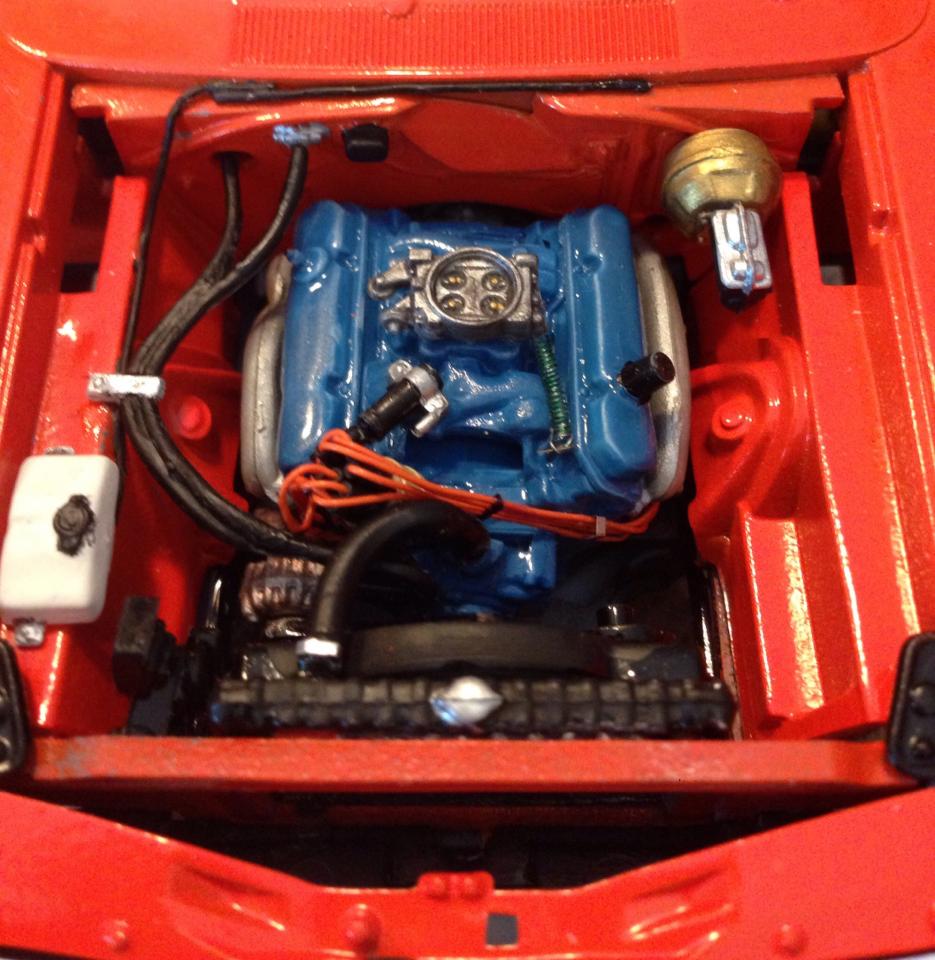
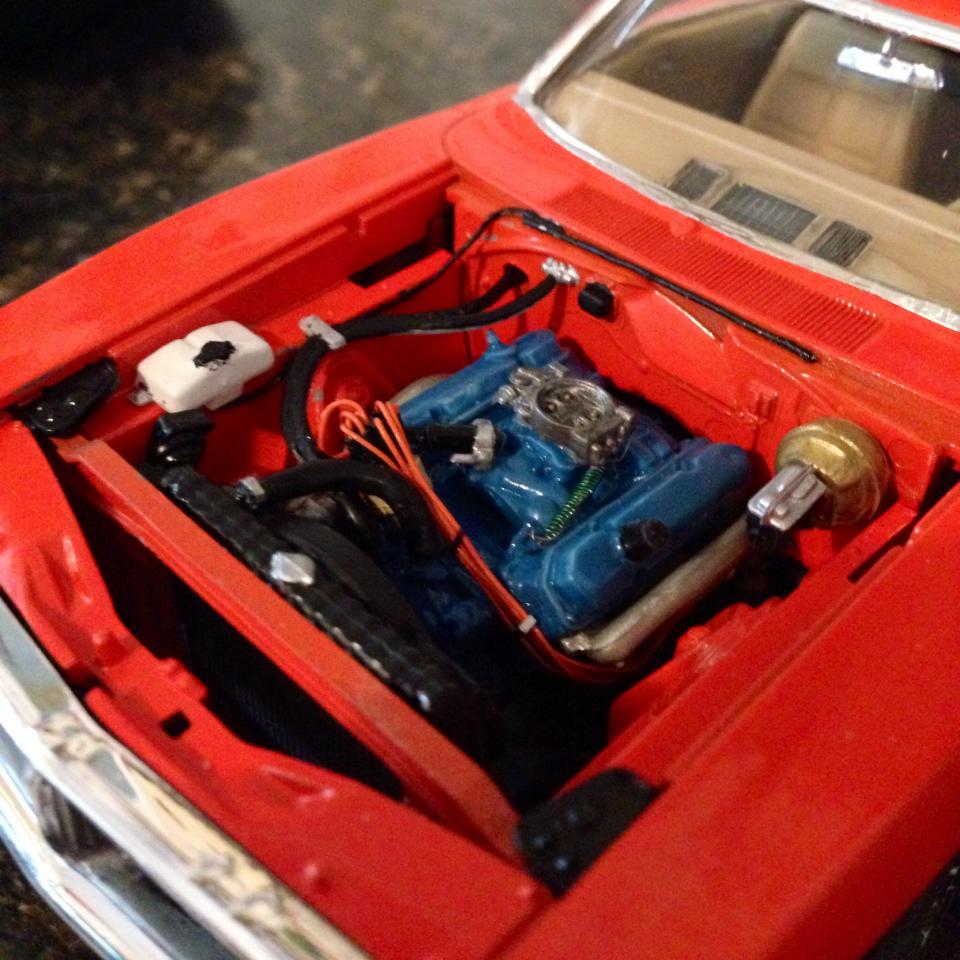
Got the heater hoses painted and installed. Got the washer fluid reservoir installed. Using solder I made the washer fluid hoses and ran them from the tank to the top of the firewall. Did a good test and it still sits flush. I found some wire that is a perfect size match to the radiator hose in the kit. So I made a custom replacement hose instead of using the plastic. And using a piece of photo etch material I made the clamp. Still gotta add a clamp to the hose where it attaches to the water pump. Also did some small detailing paint on the fire wall. Still more to come. Lastly here's a pic where I'm basing most of my wiring off of. I'm using different pics for angles but I used this pic for heater hose placement and washer fluid hose placements. Also I trimmed the heater hose closet to the fire wall to allow me to rout the plastic elsewhere. Enjoy, Still gotta add some paint to bottom part of the heater hose closest to the engine Thanks for watching so far!!
-
1976 Chevy Nova Street / Strip Update: 2014/8.12
Byron5150 replied to Tumbler75's topic in WIP: Model Cars
Lookin good mate like the engine bay -
Thanks man!!
-
Thanks bro Thanks
-
I know mold lines don't exist on a lot of things lol. Sometimes I don't even notice all of the mold lines haha thanks for the tip. Yea detail master says to cut the spark plug boots to 1/16" I followed this wiring tutorial off of some low rider tip and the guy cuts them to 1/8". http://www.lowriderbike.com/model_tech/03lrmsum_distributor_cap_wiring/?__federated=1 I'll make them shorter next time I do it. Thanks Thanks Carl, I just have to figure out how much more detail I want in the bay
-
Dang looking good!! I'm real mechanically inclined and patient. But I don't think I'd have the patient of building this from scratch! Great job on the hood so far
-
Thanks dude!
-
Roadkill's '68 Dodge Charger "General Mayhem"
Byron5150 replied to JTalmage's topic in WIP: Model Cars
Cool and interesting build. -
Got the carburator painted, detailed, and black washed. Added the return spring, it's my first time making them and installing them. Looks pretty cool to me. Got the the master brake cylinder installed. Wheels are mounted, uh oh burn out, yee haww
-
Thanks Stan
-
Thanks Carl
-
Thanks dude should be able to start some wiring on it today
-
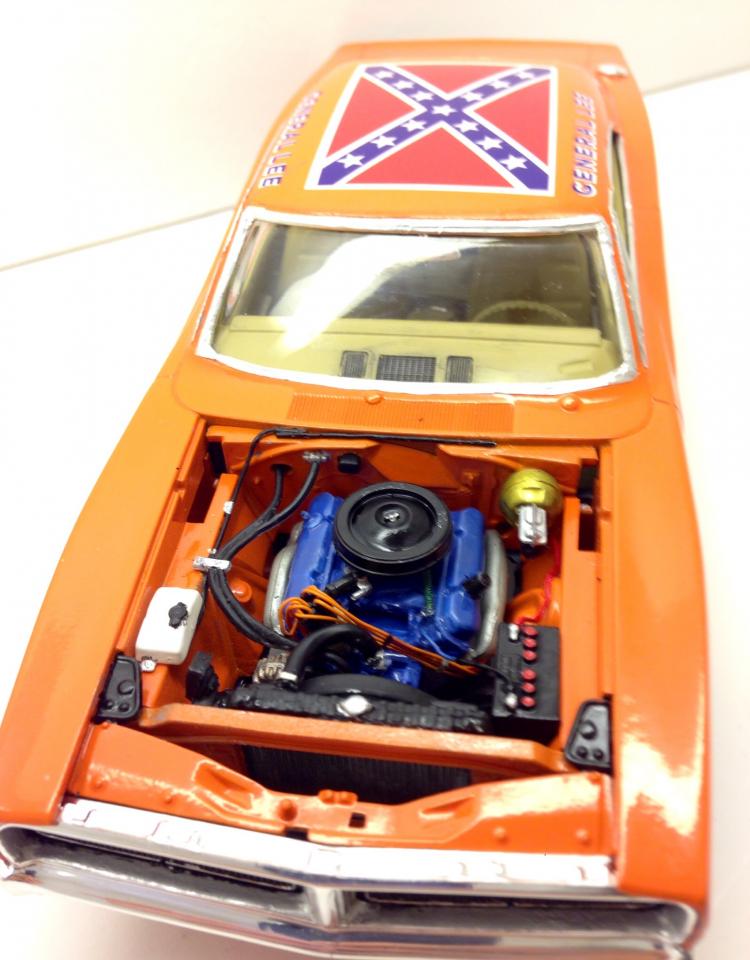
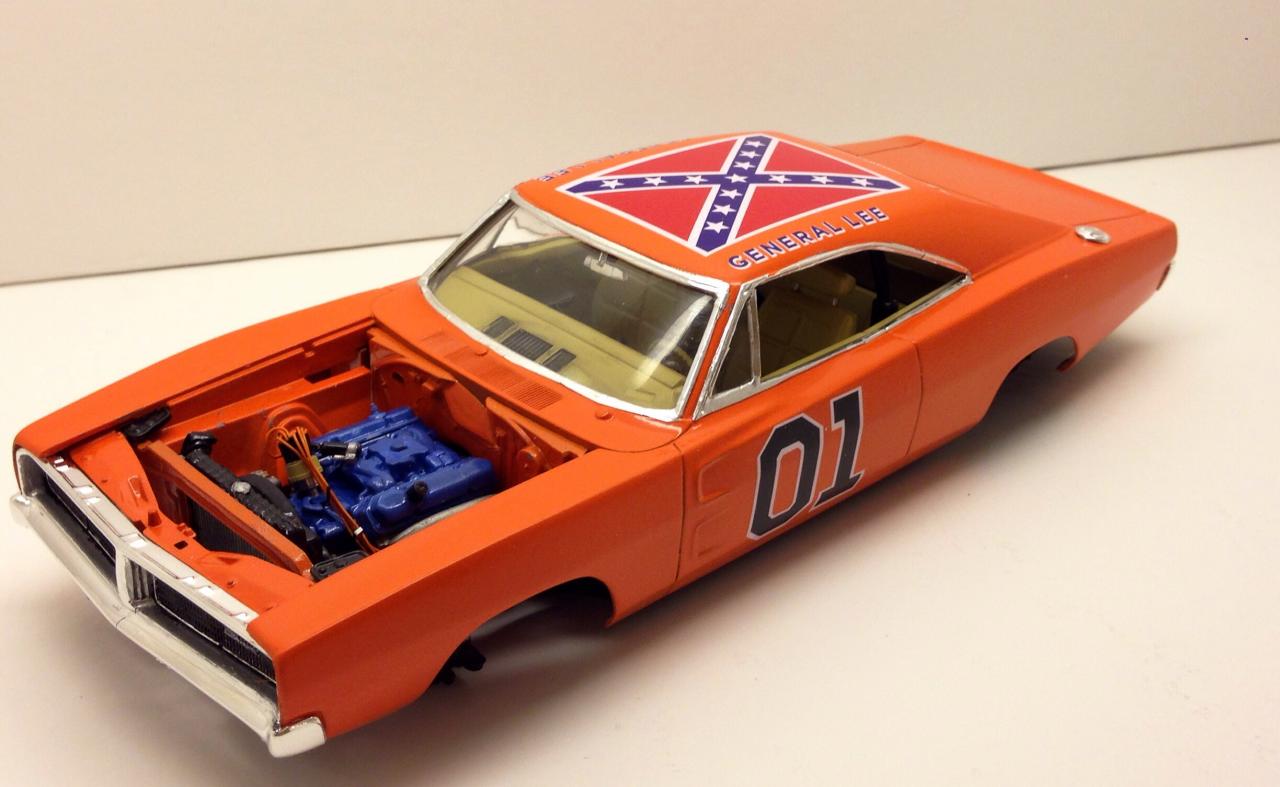
Got the belt and fan assembly installed. I was going to detail it a bit more but you won't really see it that well. Here's the engine before being mounted in. And a few pics of the car at it's current state. I just have to fix the front suspension and the wheels will be mounted. And now all we have left is the engine bay, and a few exterior parts.
-
Thanks bro
-
thanks mate!!