scalemodelworld
-
Posts
161 -
Joined
-
Last visited
Content Type
Profiles
Forums
Events
Gallery
Everything posted by scalemodelworld
-
Looks like an awesome build. Can't wait to see it all done. Not having built a woody myself, what does the kit provide for the wood, and are you going to use it or scratchbuild something?
-
Looks pretty good to me. Good recovery on the paint job
-

Chevrolet Caprice police car (with lights)
scalemodelworld replied to Clemi's topic in WIP: Model Cars
I wish my German was as good as your English! The build is looking fantastic. Great detail in the interior and the lights look fantastic. I'd be interested to see a step-by-step with product details on how you are doing the lights. I did head lights and tail lights for my "Christine" Plymouth Fury just using 4 LEDs, and it was a nightmare. -
Sorry..... no photos yet Got a LOT done yesterday. Managed to re-sand the body and remove most of the fish eye problem, then resprayed with OK results. Good enough for me at least. Removed the two centre legs of each rack support, lowered them to 3.5mm so they fit JUST over the blue hoses. I also realised that the blue hoses don't reach the rack if left the way they are. And looking at movie pics, the rack goes closer to the edges of the roof than the kit, so I widened the centre equipment thing. Only problem is, I added almost 1cm to EACH SIDE, so now I have these wide, plain strips on each side. They don't look horrible, but not sure how to fill them. I also layered some sheet styrene and roughly carved it into the shape of that canister thing on the roof, then covered it in putty and sanded it more into shape. Hopefully it will look good when it's painted. Probably won't get much done today - I'm off to buy an airbrush setup. My friend runs www.thepaintingbunker.com which is really about Warhammer type stuff, but he has won awards for his painting. He's freaking amazing. So I e-mailled him yesterday, and in about half an hour, I'm picking him up and FINALLY moving to airbrush! Yay me!
-
I use Tamiya tape. The edge is pretty sharp by itself, if it's burnished well, but a trick I learned is the lay the tape on your cutting board and use a ruler to slice the tape in half. With a sharp #11, the two "inside edges" will be super-sharp. Just remember to burnish, burnish, burnish!

-
Need help with paint issue
scalemodelworld replied to scalemodelworld's topic in Model Building Questions and Answers
Geez, I feel like a newb after reading all those posts. Maybe I'm just lucky, never having had any real problems with paint before. I've never heard of "purple pond" or fish eye, although after some quick research, I've now learned. I'm going to try sanding the body and re-spraying, rather than purple ponding. I've used brake fluid to remove paint before and it works a treat, but as I keep saying, everything in Australia costs a fortune. Paints are $15 each, primer is $17 (for the bigger can), so if I purple pond it, I'm looking at another $47-ish just to repaint. This is actually the main reason I'm looking at getting an airbrush. I think I'll be saving money in the long run. -
Wow, talk about some serious help! You've covered things that I haven't even thought of, or discovered yet. I've scoured the web and the movie, but it's hard to get decent ref shots to see all the different angles. I picked up some "square rod" yesterday to build the ladder, and plan to use layered styrene to build the striped canister thing on top. When I modified the rack (shown in my first post), I kept the section with the mounting pins for the rear light and cut them off. There's a shallow slot at the back of the roof for the rear of the rack, where it holds the tank. I glued the light pins into that and then puttied the rest of the slot. It doesn't look great (since my puttying skills still need work), but it should be fine once the light bar is in. I wonder if you can help with my biggest problem? In the movie, the dish on the roof is clear, but in the kit it's white. I saw someone use clear plastic from a drink bottle to make a windscreen, so I figure I could use something similar to make the radar dish in clear. My biggest question is: How do I heat the plastic so it becomes pliable without melting it? Boiling water? Microwave oven? I assume I would need to make a mould of each side of the white dish with putty, let them harden and then sandwich the heated plastic between the two. Is it that easy?? I don't have parts to make the forward facing roof lights . There's one in the kit that might work, so I planned to just point it forwards and paint it to look like a light. Not sure what I planned to do for the second one.
-
Wow, thanks Dan. While I'm going for the look of the original, I don't know that I will go as far as getting new wheels and doing the windows. Sad I know, but model kits in Australia are ridiculously expensive, and without a decent spares box, it's not worth the money just to get a set of wheels. Thanks for the tip on the upright canister thing. I've been wondering how I'm going to manage that. Might just need to glue some styrene together and shape it myself. And yes, I'm doing the "all blue lights" version. Easy, since I just painted the clear cover and not worried about all the intricate colours inside. The biggest issue with that, is that the light tube sits on the roof, not on the frame (like with yours)
-
Pretty sure it's the re-issue, based on your comments. It has decals for both cars, and says you can build either car. I've noticed the equipment on the roof is WAY different to the movie, so I have a lot of scratchbuilding to do. Luckily, I'm off to the hobby store today to restock paints, so I can pick up more styrene while I'm there.
-
Need help with paint issue
scalemodelworld replied to scalemodelworld's topic in Model Building Questions and Answers
Thanks for the help everyone. To answer the questions: The primer was applied almost a week before the colour, so it shouldn't be an issue there. I applied two mist coats, waiting until the paint was a little bit beyond touch-dry between coats. Not sure if that's the perfect timing, but it's my usual process and I've never had trouble before. The body was wet-sanded between the first colour coat and full wet coat. It was then rinsed, shaken dry and then air dried. I'm thinking that the body maybe wasn't 100% dry when I applied more colour. I'm thinking that my best solution is to sand it all back and recoat the whole body, rather than just try to fix the small areas. Can anyone suggest a better option? -
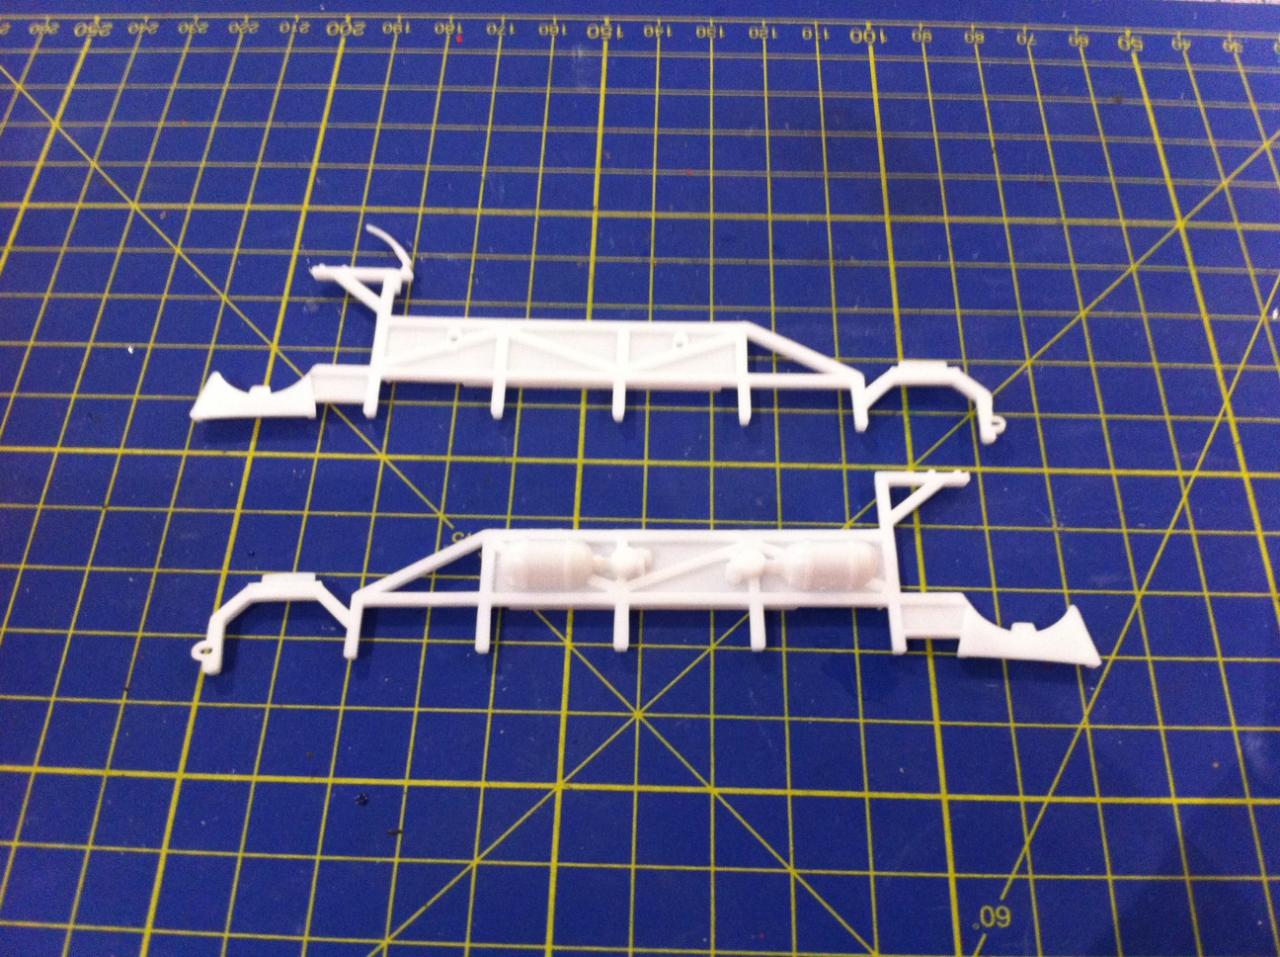
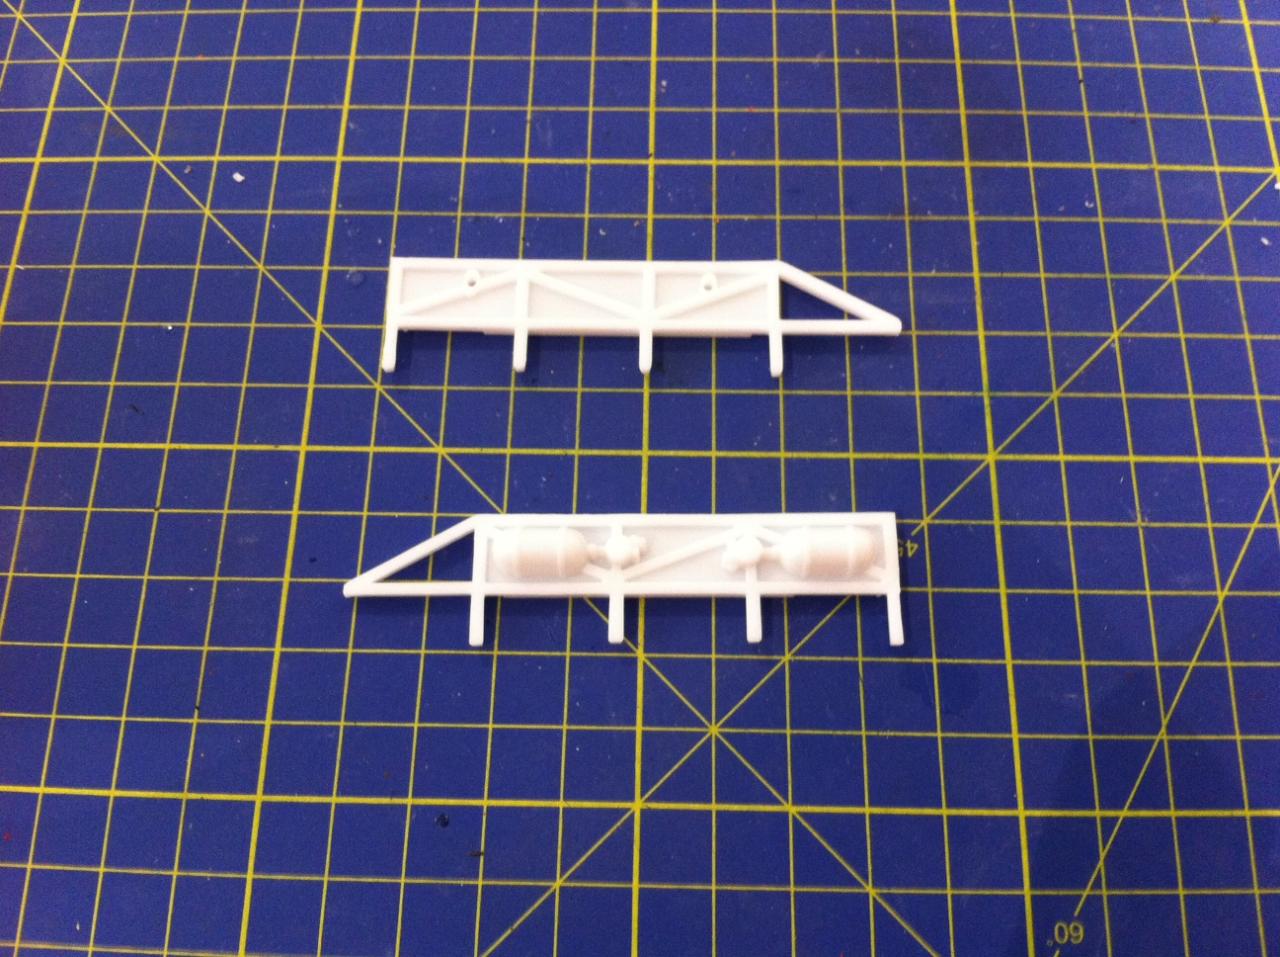
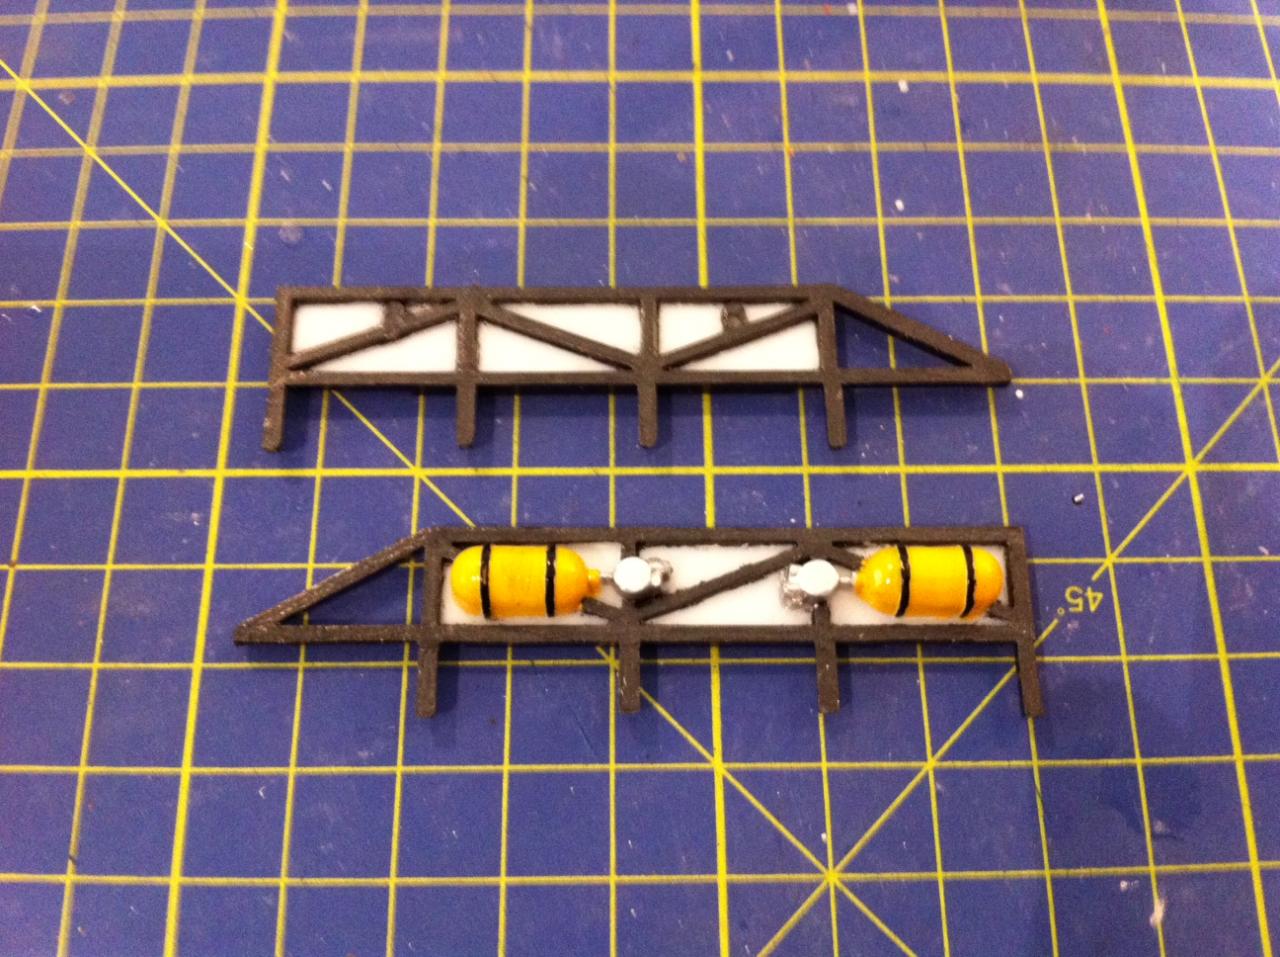
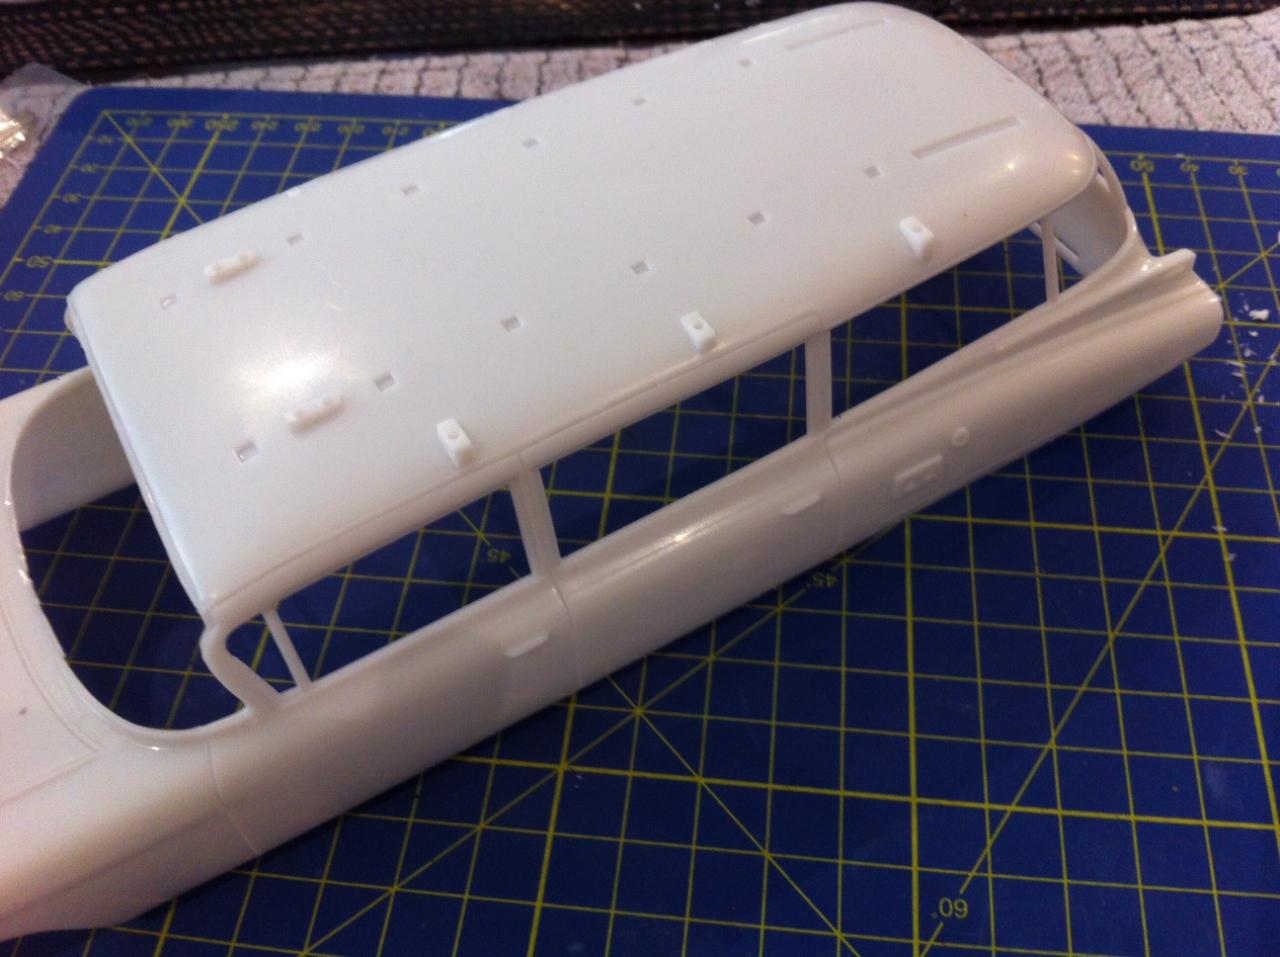
While I wait for some supplies to arrive so I can finish my pimped Buick, I got started on the Ectomobile. As usual, the kit is wildly incorrect compared to the movie. I've done the research and started modifying it so it looks right. Here's an example: How the roof rack comes in the kit: Trimmed down to look like the movie car: All painted up: The roof is also a problem. It comes ready to instal signs for the sequel-movie car, so to build the original, you have to remove the 6 supports on the edges of the roof. I need help with the paint job on this model. I've posted a separate query in the Q&A forum for those interested in helping me resolve a paint issue that I've never seen before. Here's the pics (more info about the details in Q&A):
-
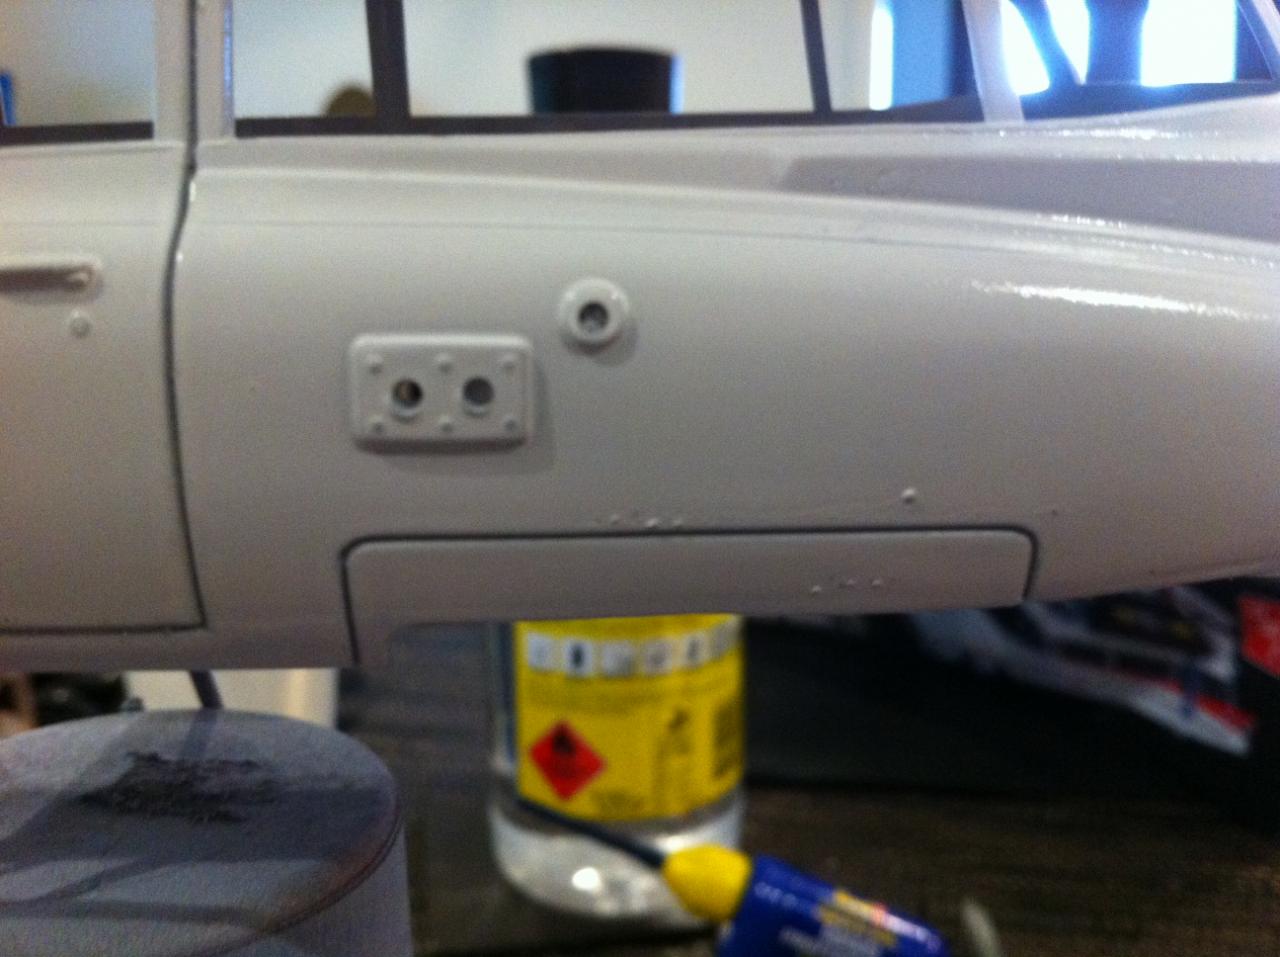
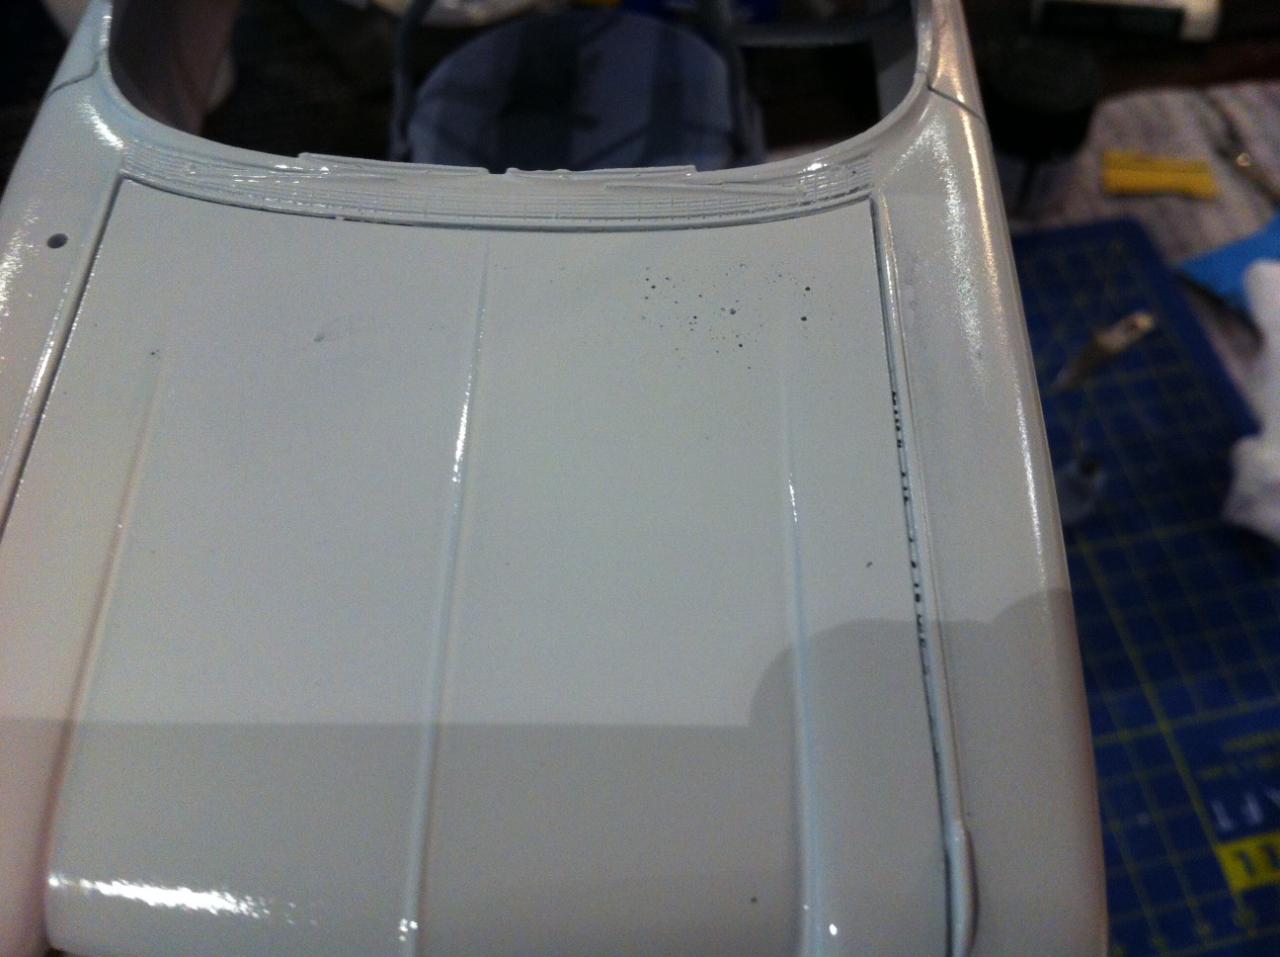
I've started building the Ghostbusters Ectomobile (from the original movie), and something weird has happened to the paint, as you can see below. This has never happened to me before, so I don't know WHY it happened, or how to fix it. I'm assuming I can just sand it back and repaint, but I want to make sure the problem doesn't re-occur. Any advice on the cause and/or corrective action would be greatly appreciated. To help with the diagnosis, the body was primed with Tamiya grey primer, and then coated with TWO mist coats of Tamiya Pure White (acrylic) which went on perfectly. It was when I applied a wet coat that the issue happened. I painted outside using a rattle can, where the weather was warm (not hot) but maybe a bit humid. Please ignore the fact that I put white paint on grey primer. The issue is just above the wheel skirt: Here the problem is on the top right of the hood and in the panel line:
-
1955 Chevy Nomad completed chassis, ready for body
scalemodelworld replied to toddy427's topic in WIP: Model Cars
Holy cow, that is awesome. What scale is it??? -
Great work mate. Looks awesome with all that foil
-
Any plans for mods, or will it be OOB? I still haven't built a 50's Chevy, but it's on the list.
-
Amazing build. How do you paint the tiny detail like panel lines and "corvette" letters AFTER you've done the main colour??
-
AWESOME! All that colour inside makes it look like a video game!
-
G'day Allen. Looking good mate. Even though I try my best on every build, something inevitably goes wrong, and I chalk it up to experience. As long as you're enjoying your builds and learning from your mistakes, you're on a winner. Don't be afraid to ask the forum members for tips if you get stuck.
-
As usual, I've only found this build a long way in. When I saw the first few pics, I didn't think I'd like the look of the whole car, but wanted to learn from seeing all the issues you dealt with. But seeing it progress and grow has won me over. I think it looks great and can't wait to see it finished. For my 2 cents worth, I think that if the bottom of the body was straight, between the front and rear wheels, it could give it more of that classic Merc look. Not sure I'd be able to manage it myself, but having seen what you've been capable of on this build, I reckon you could pull it off if you wanted to.
-
Sadly, I've come in late on this build, but it looks fantastic. Love the attention to detail. Can't wait to see the finished product.
-
AMT 40 Ford Sedan Stock Car , first time building
scalemodelworld replied to CrazyGirl's topic in WIP: Model Cars
Looking awesome for a first build - and lots of detailed mods. Can't wait to see how this one turns out. -
77 Mustang Cobra II from Charlie's Angels
scalemodelworld replied to mangodart's topic in Model Cars
Looks real nice -
Looks just beautiful Andy. I love the detail in the dash.
-
I think it looks great in the pics - not sure why you seem disappointed. But as I learned from someone on this forum: every build is simply practice for the next build.
-
55 Chevy Handyman Shorty Wagon - Update
scalemodelworld replied to Dave Mikrut's topic in WIP: Model Cars
Great build Dave. Always good to get stuck into some serious modding