cobramike
-
Posts
408 -
Joined
-
Last visited
Content Type
Profiles
Forums
Events
Gallery
Everything posted by cobramike
-
Lol, no trickery for your eyes, I had every intention of putting the battery in, alas, while wireing it I made a real mess of it so until I come across a new battery that I DON'T screw up it's powerless....
-
Thanks for the complement
-
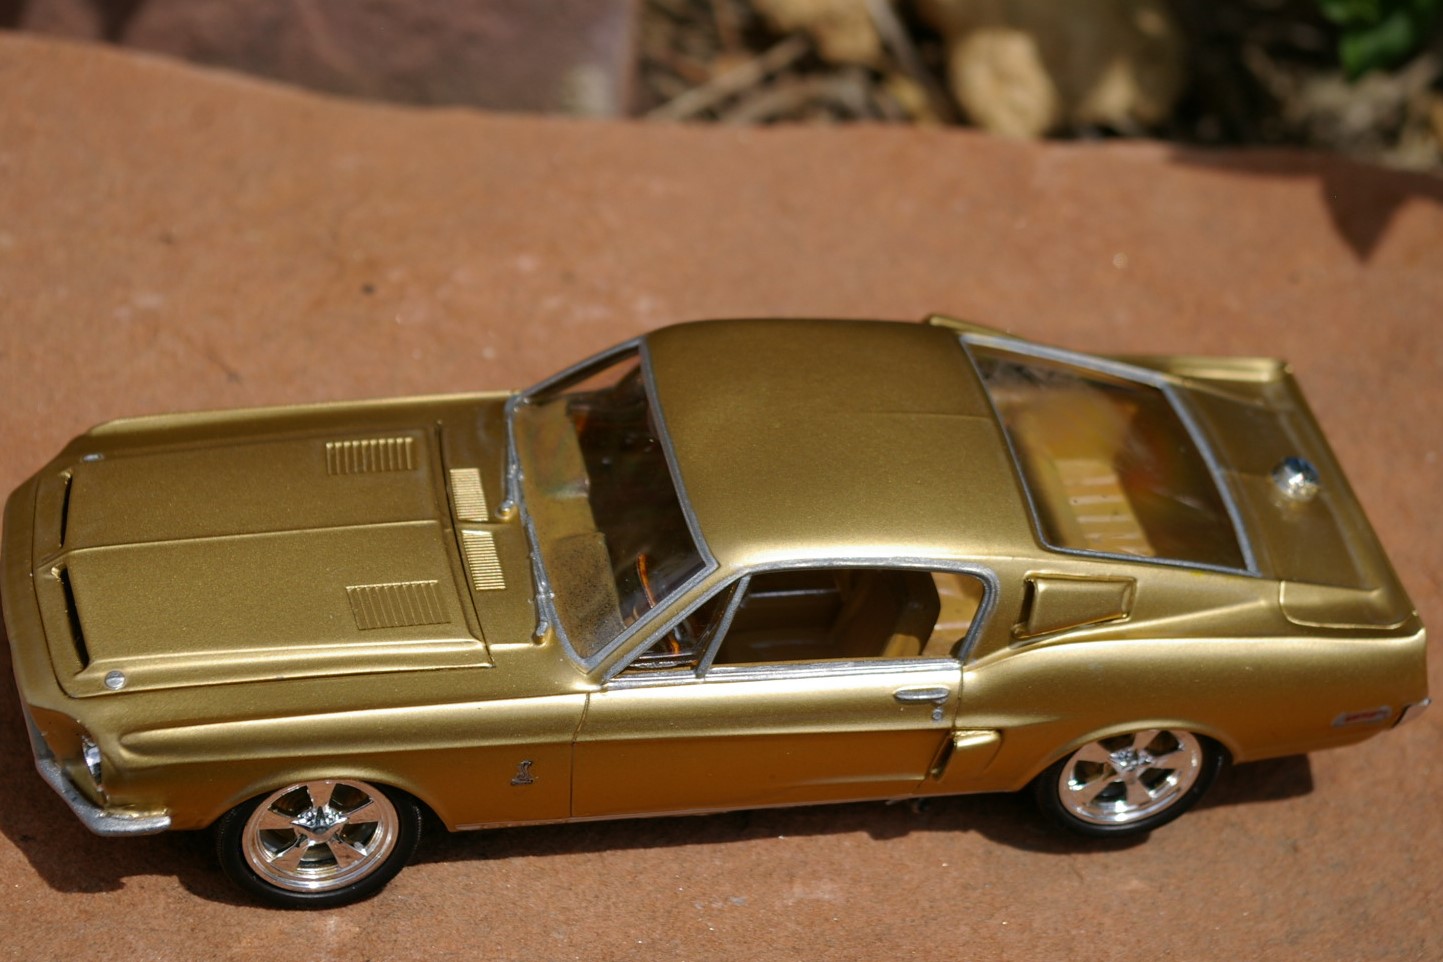
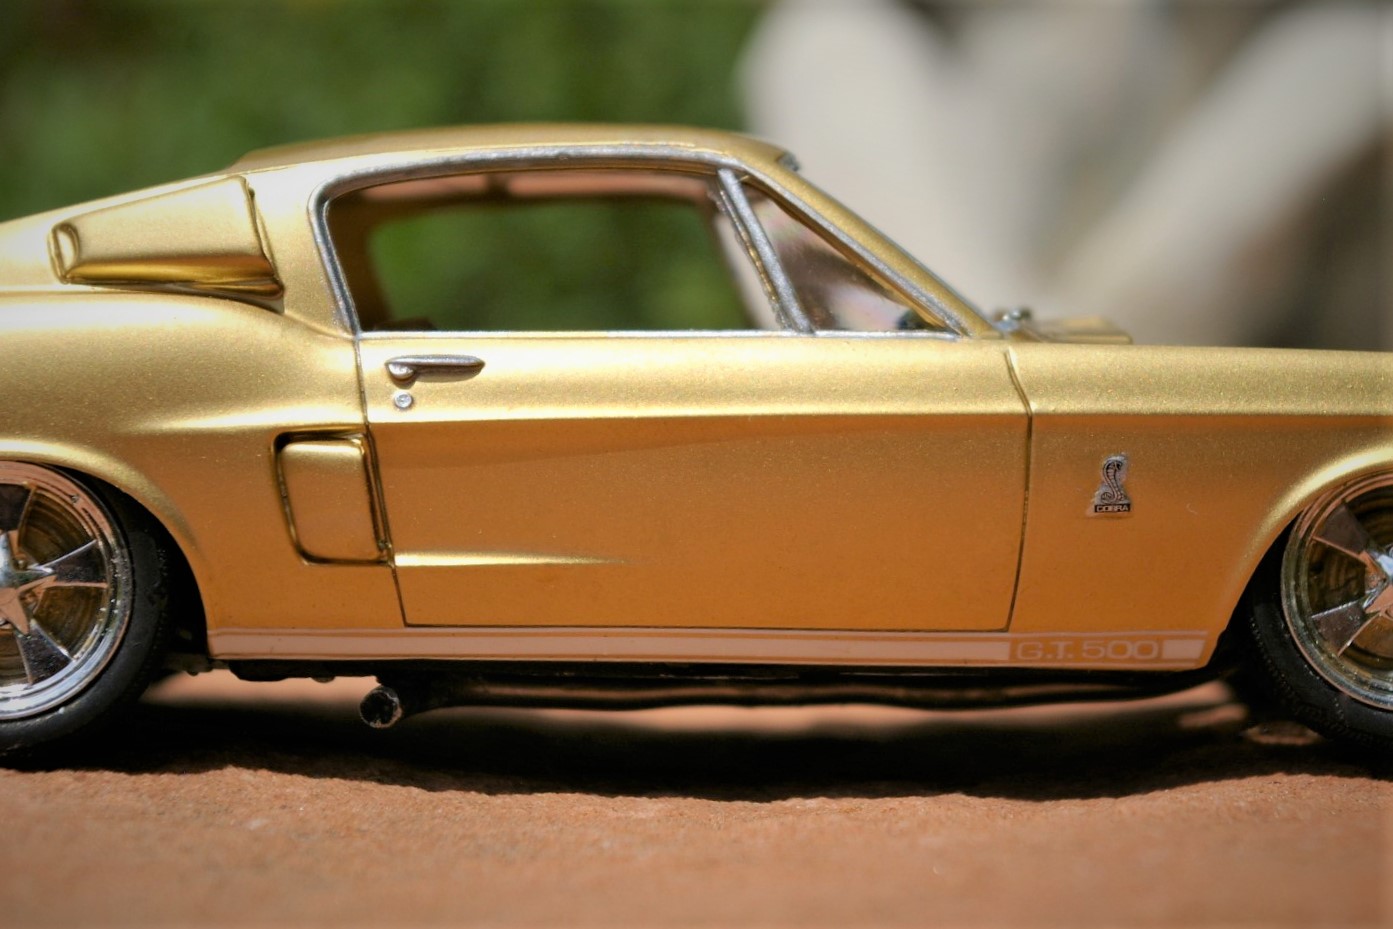
You are right about the side stripes, here's a great pic and others of the 1.1 cars that show it clearly at the bottom of the doors and not on the rocker panels like I did them. https://www.google.com/url?sa=i&rct=j&q=&esrc=s&source=images&cd=&cad=rja&uact=8&ved=0ahUKEwihqumkyrHVAhVqxYMKHUudB9oQjRwIBw&url=http%3A%2F%2Fwww.barrett-jackson.com%2FArchive%2FEvent%2FItem%2F1968-SHELBY-GT500-FASTBACK-16348&psig=AFQjCNGVj5S0-gbbNz9KQRAVbD0FuIeItw&ust=1501523827935881 I was going to do them on the doors and cut them like you stated but I had a real fear that they would disintegrate since they were so brittle and old so I did it one piece to avoid that. Since then I have found that I could have sprayed them with some clear lacquer and then cut them before soaking them. BTW I used Testors 1244 gloss metallic gold decanted then airbrushed. I did 4 coats sanding between each one then used Tamiya TS-13 clear decanted, 4 more coats. Lots of extra effort perhaps but it came out looking decent I think. I used the Gold because I saw a SWEET 68 500 at last years Rocky Mountain Mustang Roundup that was done in metallic gold. Man it was stunning sitting there in the sun glistening, it grabbed me from a distance and would not let go! Nice job on your blue baby in the pics. Keep it up!
-
Very nice Jaguar man. I have about 20 of the cobras built...like they say "they are addictive"!
-
LOVELY!!! Nice family you have there. I am working on my own family as well.
-
BTW I did the chrome trim with the "liquid chrome" 2MM size. I think it came out pretty good if I say so myself!
-
Thanks friend! I aspire to do as good as your own work!
-
I like to think I took a sow's ear and made a silk purse out of it! I found that the kit had/has it's fair share of problems, but I knew that going into it. I decided that I was going to take my time and try to make it into a nice model, ot box stock. Thank god for DREMMEL! The inventor of them should be given the medal of honor! The interior honestly is the biggest pile of BLAH_BLAH_BLAH_BLAH you could think of. I know now where and how to attack it in the future when I do another of these. It's all about making things fit!
-
I agree that the rear needed to be higher, but the cutting and chopping of the rear went a bit to much
-
Thanks Mustang Madness; uhh the wheels are aftermarket, I think I got them from "Morgan Automotive Detail".
-
Thanks for the idea, however I originally made it black but I saw a Shelby at the Rocky Mountain Mustang Roundup this year that had the engine bay painted the same as the body and it looked really cool, or at least I think it did. Changed it to the gold as you can see by the bumps in the pics.
-
Thanks. Ehhh, gotta have them both. Wife say's that I have too many hobbies. Between camping, fishing, gardening, knife making, model building, leather working, etc she is looking at me with her queer eye these days, saying that maybe I need to UNRETIRE!!!
-
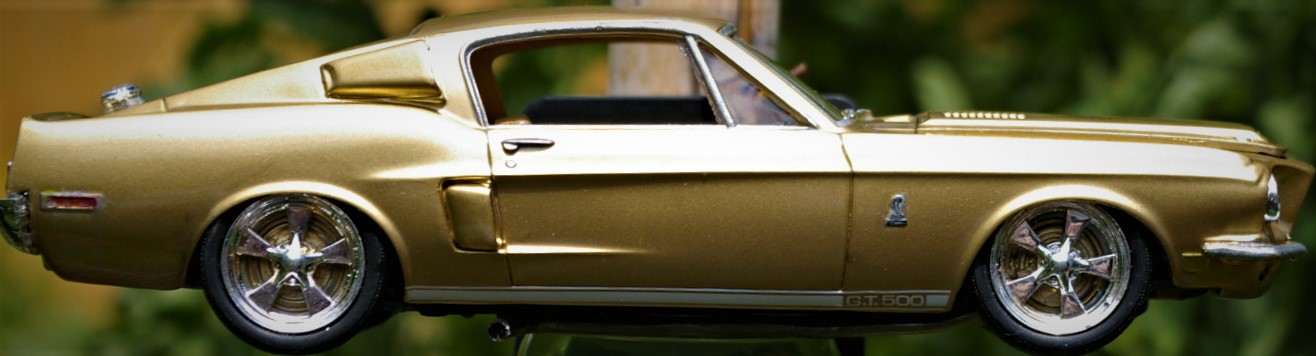
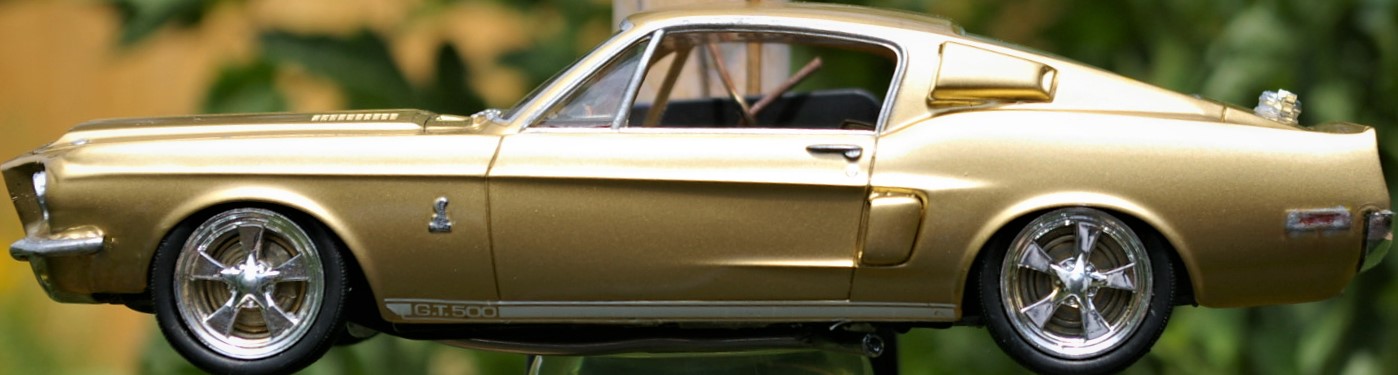
After much hard work, stress, and then more work I finally finished my 68 Shelby Gt 500. First mistake you ask? I let my wife decide how to finish the interior tub...never again! Second mistake? I tried to make this model into a silk purse but forgot how to spin silk! All kidding aside it took about 5 months to finish but that was mostly because of getting my greenhouse going this spring, then rebuilding all of my raised bed garden boxes and bringing in new soil etc and getting the beds ready, then along came the hail storm on the 6th of May that tore up allot of my hard work, fixed that with much gnashing of teeth, hand wringing, and I swear if I had been younger I would have smacked the insurance adjuster in the mouth! Then came camping season, had to replace brakes, tires, wheel bearings, and oh so much more work than I anticipated on my pop up camping trailer. But lo and behold all is well and I finished the car with a flourish a week ago. Anyway, I am going to try to post some pics of it, I can't go through photobucket because for what ever reason I cannot sign in. Please be nice in your criticisms but I can take some punishment as well so I hope you all "like" this car. On to the next project....

-
I started this build way back around Christmas of 2016 and recently got around to finishing it. I hope it isn't too hard on the eyes. I had allot of problems with getting the frontal area to fit right, warped pieces and my eyes don't mix too well these days. At any rate it was a fun build when things went right. I call her "GOLD FINGER"! IMGP0010.PEF IMGP0019.PEF IMGP0012.PEF IMGP0024.PEF IMGP0030.PEF IMGP0034.PEF IMGP0031.PEF
-
 today I found some resin parts for the Revell Bronco on ebay on "Olson Brother's resin parts"! here's their email: info@resincastmodelparts.com http://www.resincastmodelparts.com/pics/logosm.jpg
 -
I just happened to come across these parts on ebay today. All new to me at "Olson Brother's resin parts"! http://www.ebay.com/itm/Olson-Brothers-Resin-Roadster-Doors-for-new-Revell-1-25-Ford-Bronco/252892581943?_trksid=p2047675.c100005.m1851&_trkparms=aid%3D222007%26algo%3DSIC.MBE%26ao%3D2%26asc%3D40130%26meid%3D04b4ccab437f467b8398ed1f77d5015e%26pid%3D100005%26rk%3D1%26rkt%3D6%26sd%3D252903587753 http://www.ebay.com/itm/Olson-Brothers-Resin-Full-High-Clearance-Rear-Quarters-for-Revell-1-25-Bronco/252892553994?_trksid=p2047675.c100005.m1851&_trkparms=aid%3D222007%26algo%3DSIC.MBE%26ao%3D2%26asc%3D40130%26meid%3D04b4ccab437f467b8398ed1f77d5015e%26pid%3D100005%26rk%3D3%26rkt%3D6%26sd%3D252903587753 http://www.ebay.com/itm/Olson-Brothers-Resin-Cast-High-Clearance-Hood-for-Revell-1-25-Ford-Bronco/252892563707?_trksid=p2047675.c100005.m1851&_trkparms=aid%3D222007%26algo%3DSIC.MBE%26ao%3D2%26asc%3D40130%26meid%3D04b4ccab437f467b8398ed1f77d5015e%26pid%3D100005%26rk%3D4%26rkt%3D6%26sd%3D252903587753 http://www.ebay.com/itm/Olson-Brothers-Resin-Shaker-Scoop-for-new-Revell-1-25-Ford-Bronco-and-other-kits/252892555453?_trksid=p2047675.c100005.m1851&_trkparms=aid%3D222007%26algo%3DSIC.MBE%26ao%3D2%26asc%3D40130%26meid%3Dd1cf9fe9eadf44f68b655ae1ceb8f564%26pid%3D100005%26rk%3D2%26rkt%3D6%26sd%3D252892563707
-
Fun kit, there are some weird things with this kit, the 3 I've built were all the same...getting the glass to fit right, wheels really being 13" not 15" like the 1:1 BRONCOS I have had. The air cleaner sits in the wrong position and that will keep the hood from closing correctly, changed the snorkel to a more forward pointing position and that fixed it. Also the skid plate is interfered with setting correctly by the transfer case. Over all a good clean model. Good luck with yours, and do post more pics of the build
-
keep up the good work! Lot better model to work on than that GT 500 you and I just finished
-
https://m.facebook.com/caboose.hobbies.9/ Today, Saturday fab. 25th is the new opening, http://www.caboosehobbies.com/catalog/index_brief.php
-
great news...Caboose Hobbies has reopened in their new location in Lakewood. https://www.denverite.com/
-
I don't know of any clubs or contests here in the Denver metro area. There is of course the railroad club at union station, and never miss a chance to point out the best model railroad hobby store around, "CABOOSE HOBBIES"!
-
a drop top would be sweet!
-
There was only small differences between the 11-12-13-14 model years. Ford ran with the S197 platform for ten years, it was getting old and the Camaro had overtaken it in sales, and style, Ford made a bold move away from that platform, for the better I think.
-
Have you built it out yet?