Metalmad
-
Posts
1,309 -
Joined
-
Last visited
Content Type
Profiles
Forums
Events
Gallery
Everything posted by Metalmad
-
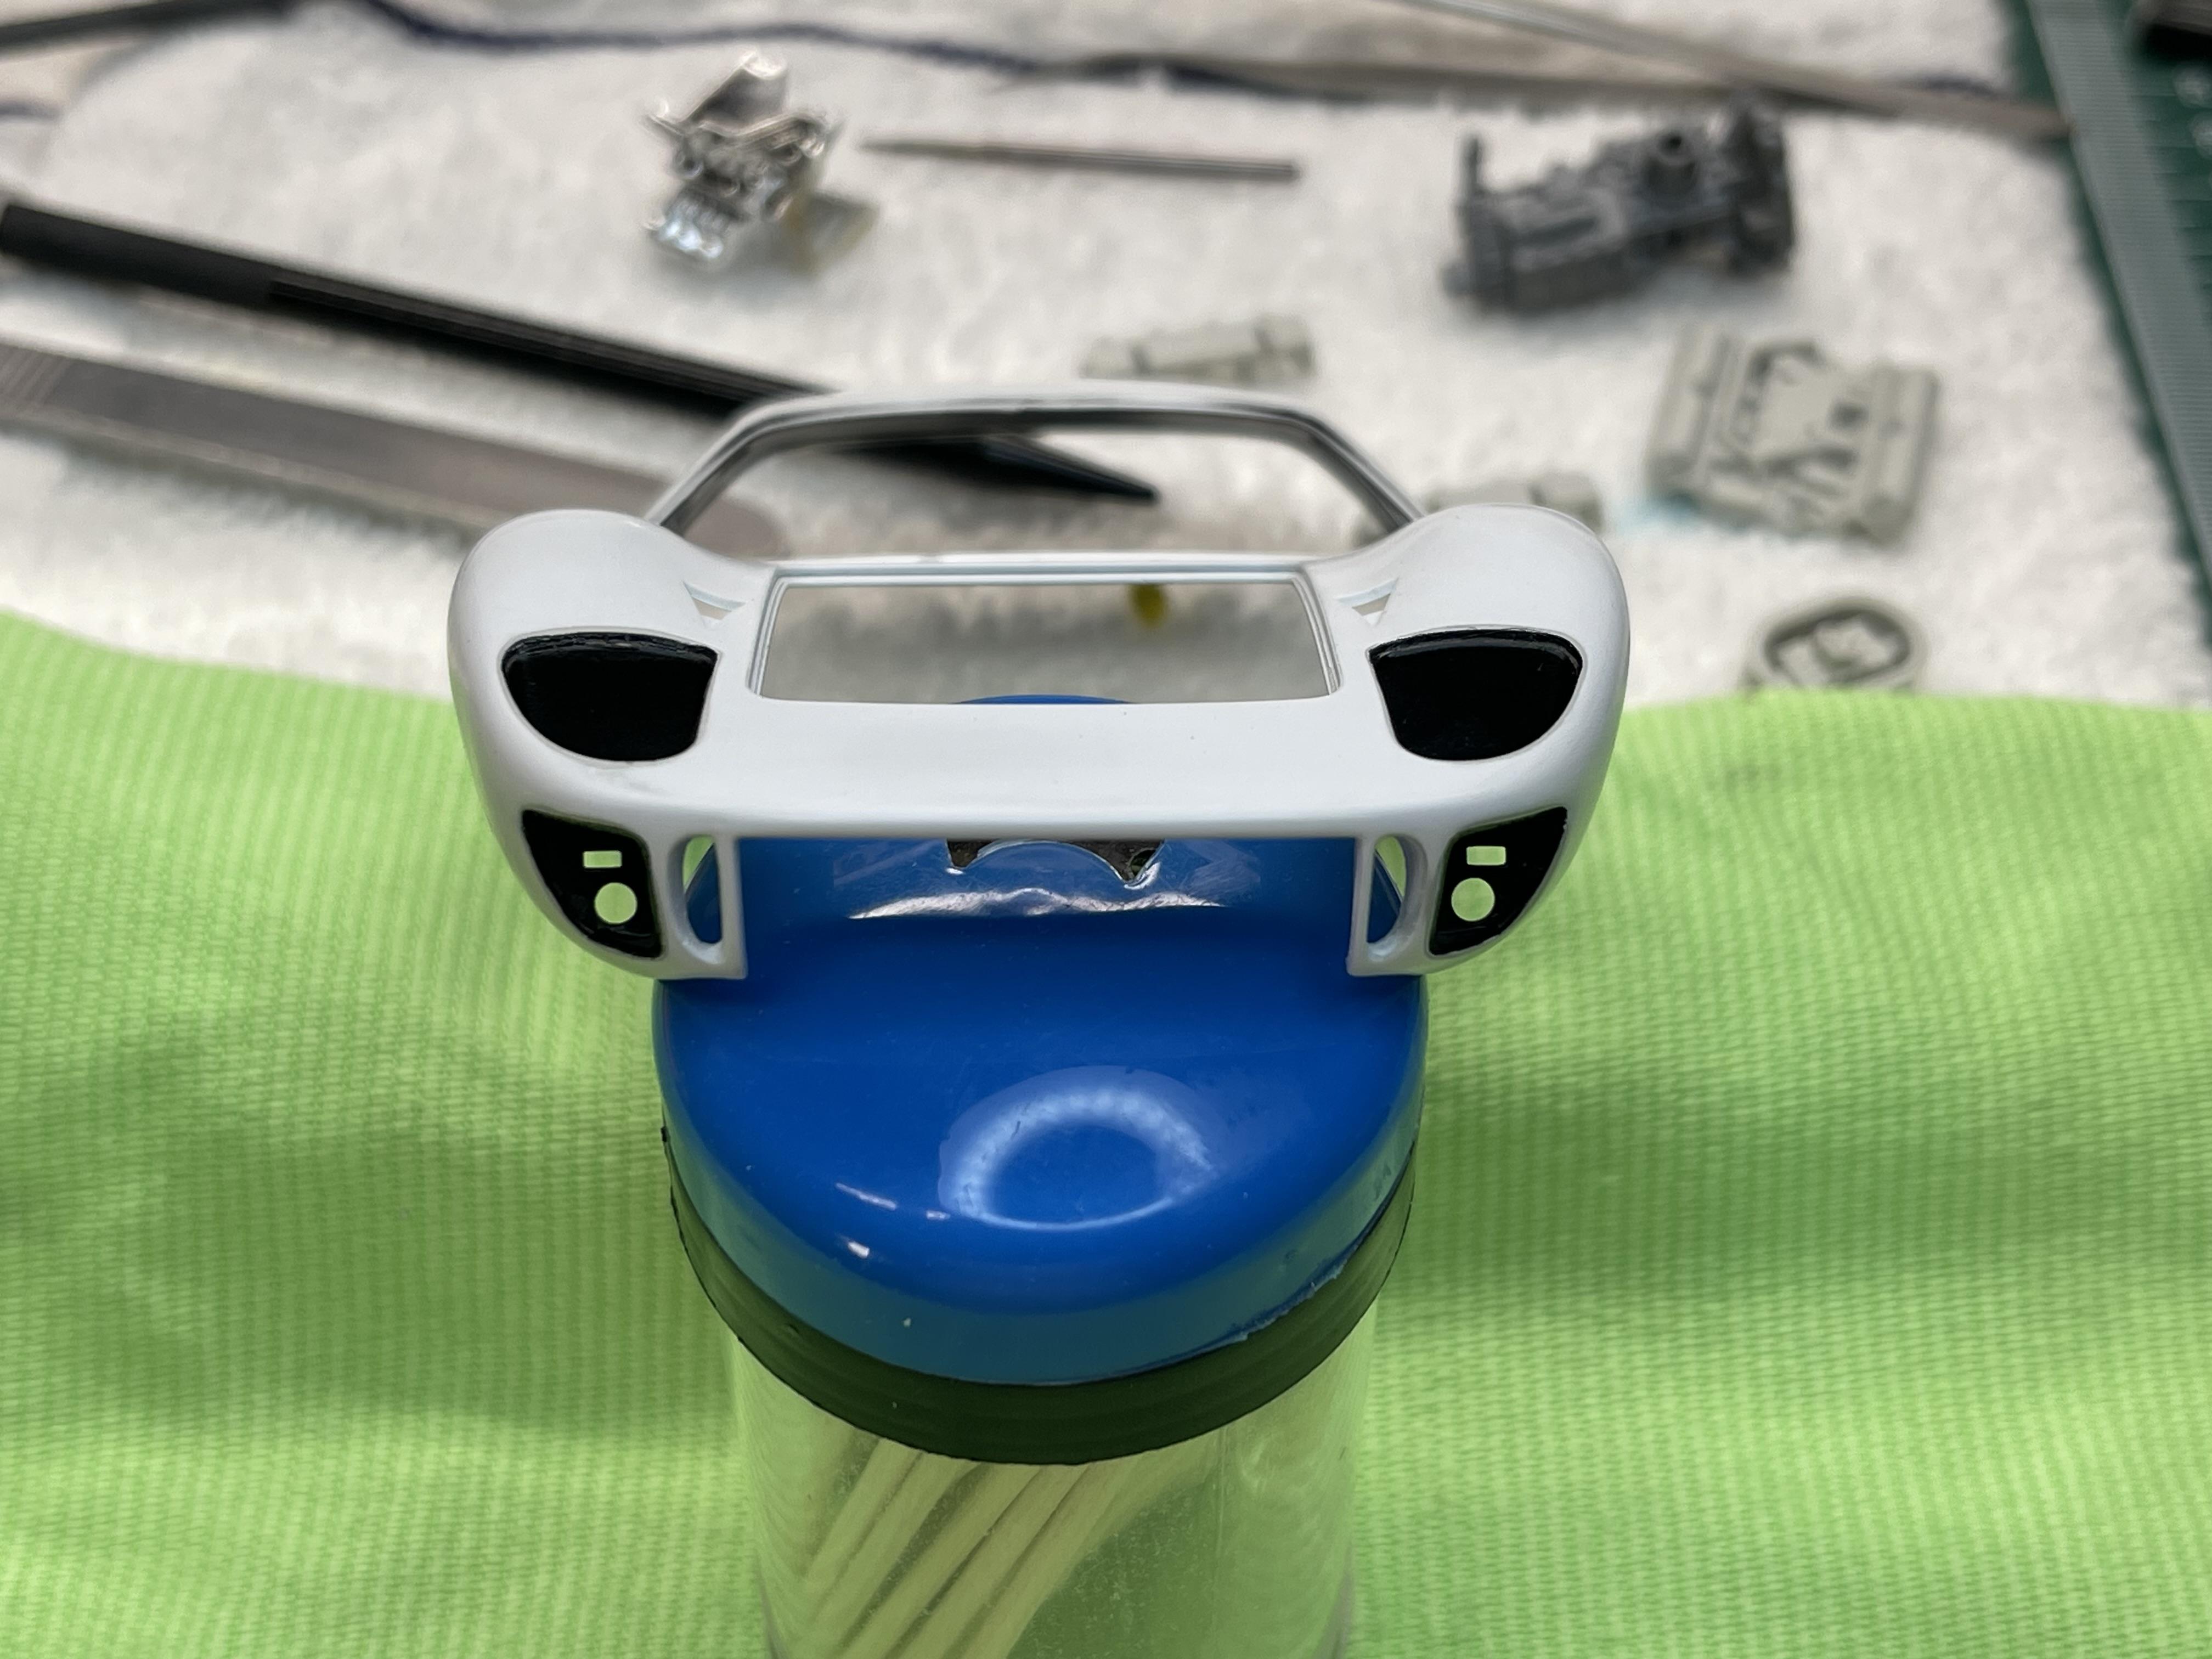
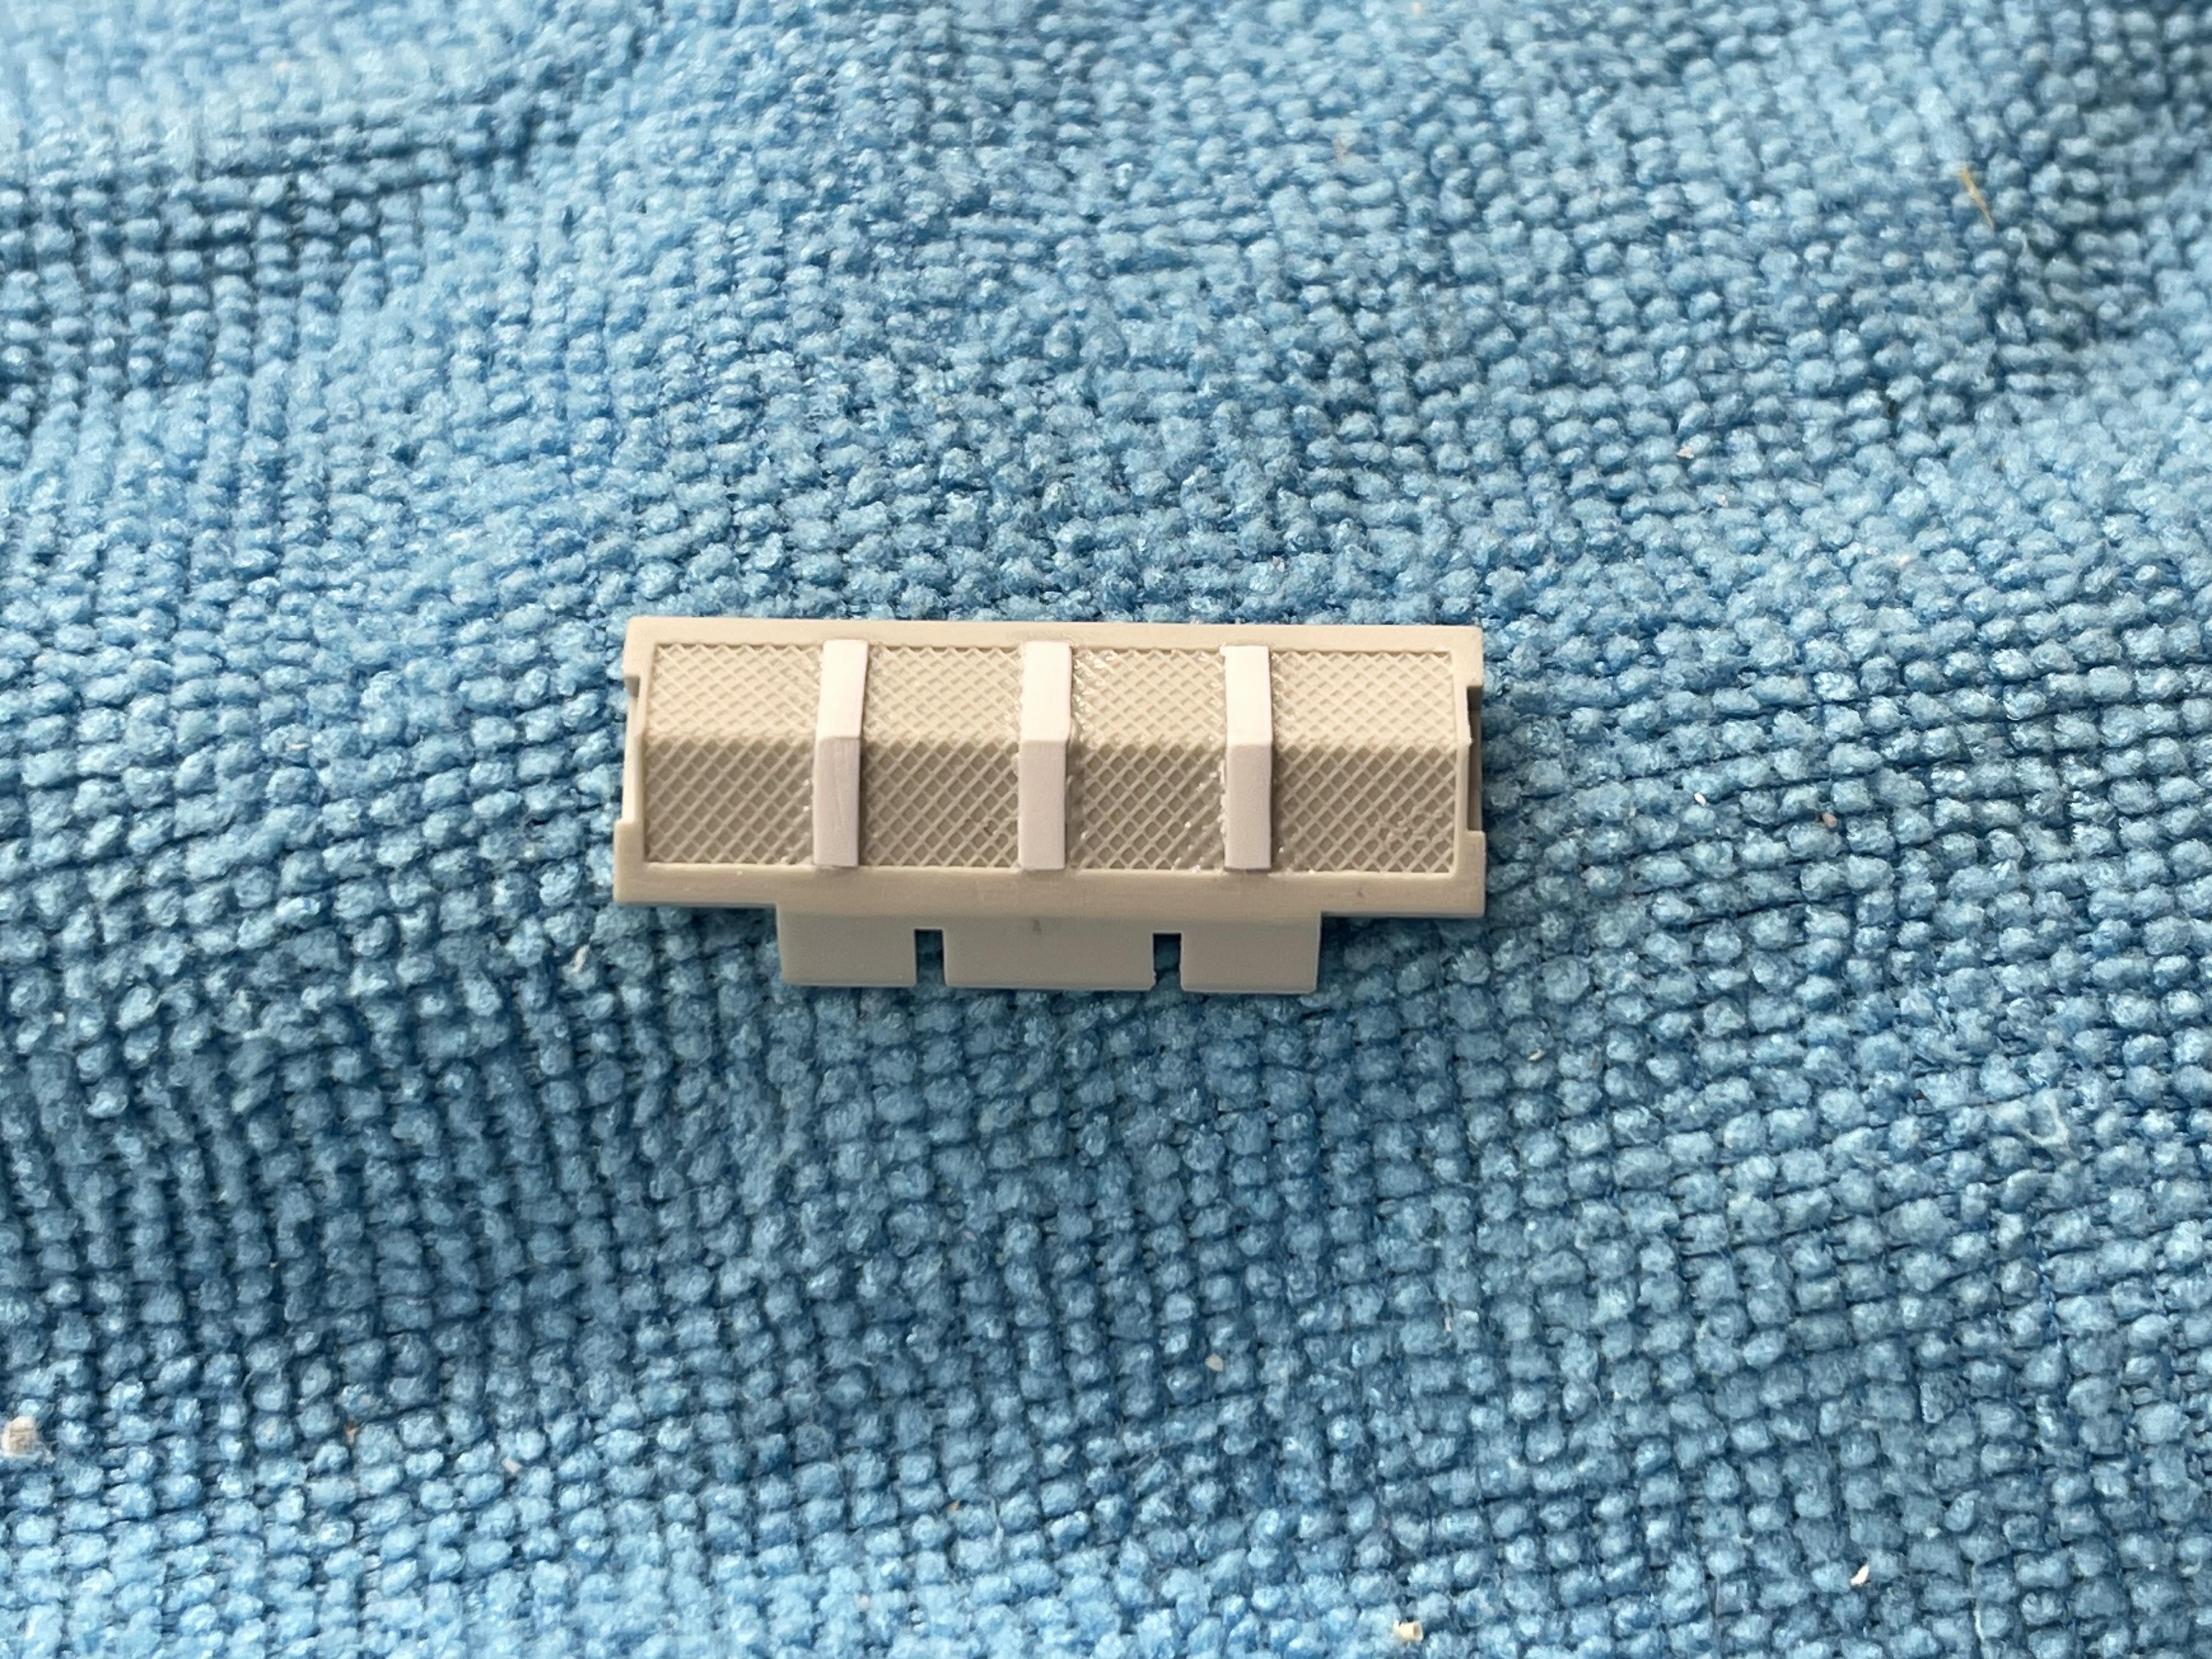
 Was able to get in a few hours in today to work on the GT40 which I proceeded to tape off the front portion of the body and then carefully remove the areas around the headlight buckets and the lower light buckets to shoot some semi black into the upper and lower light buckets. I also noticed on some of the reference photos i have that there are four supports on the face of the radiator so I then scratch built the supports and added them to the kit radiator next I will shoot some aluminum paint on the radiator and do a little detailing on it with some black wash. That's all for now !
-
Rich ...Thank you for your input ..... I have taped over decals in the past and never had a issue with the Tamiya tape pulling off the decals so I will tape off the body first around the headlamps and lower light buckets then shoot the semi black first then tape off the light buckets and then shoot the body color.
-
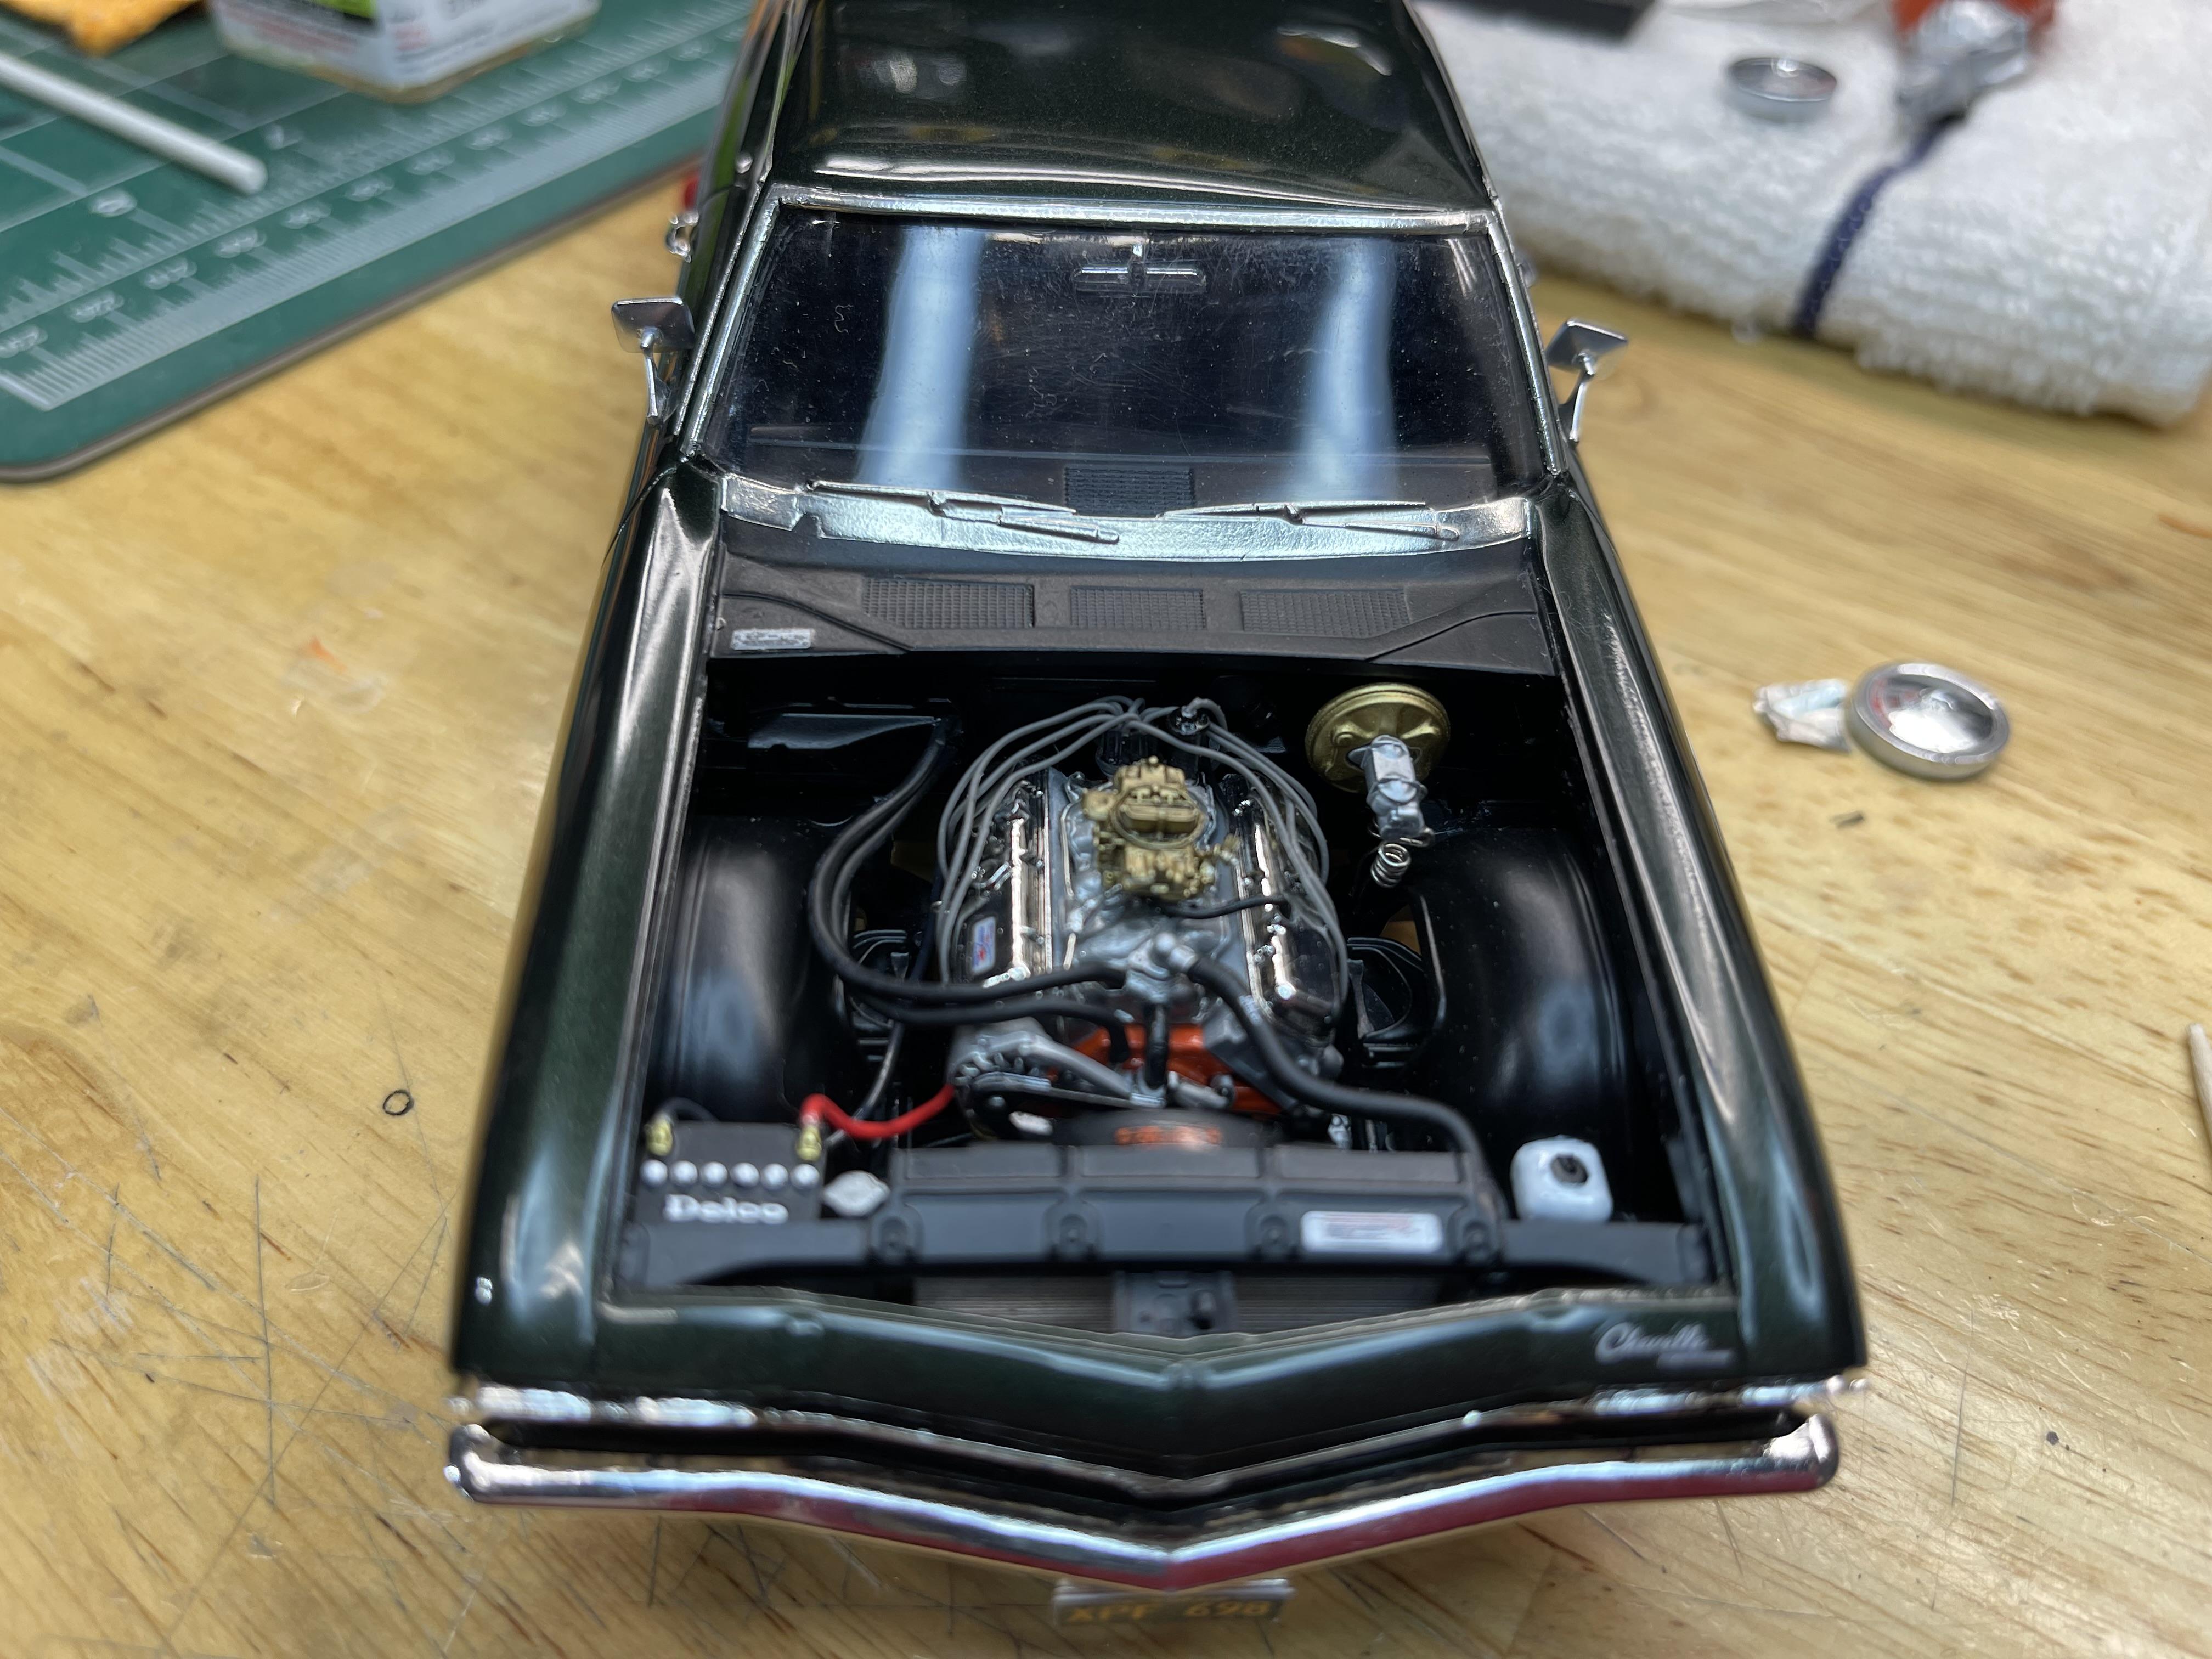
Finally have this build back on the bench and unfortunately the reason it was put back in the box was that I had taped off the body except for the headlamps and the lower lights so I could shoot the light buckets in semi gloss black so after the paint had dried I was removing the masking tape carefully which I only use Tamiya tape the decals came off with the tape which I have never had this issue before with the Tamiya tape. So for that being sad I stripped the paint again but after the third time having to strip the paint the body became real brittle so I ended up purchasing another kit for just the body so that's where I'm at with this build so I started with getting the blue stripe decals on the tires and sealed and now I will start back on the engine and trans assembly.
-
Nice and clean !
-
Updates coming soon !
-
Trumpeter Ford GT40 with my twists
Metalmad replied to kensar's topic in WIP: Other Racing: Road Racing, Land Speed Racers
Awesome detail that your adding to this Ken. Its motivating me to get back on the 1/24 scale Meng kit get I started awhile back. -
This coming Sunday May 5th 2024 8am to 3pm So Cal Open Rancho San Antonio Boys Home in the gymnasium 2100Plummer Street , Chatsworth Ca
-
James if you end up painting it the fathom green I recommend laying down a base coat of semi gloss black.
-
Thank you guys for the awesome complements and encouragement ! Next project will be to get back on the Meng Ford GT40 to finish up.
-
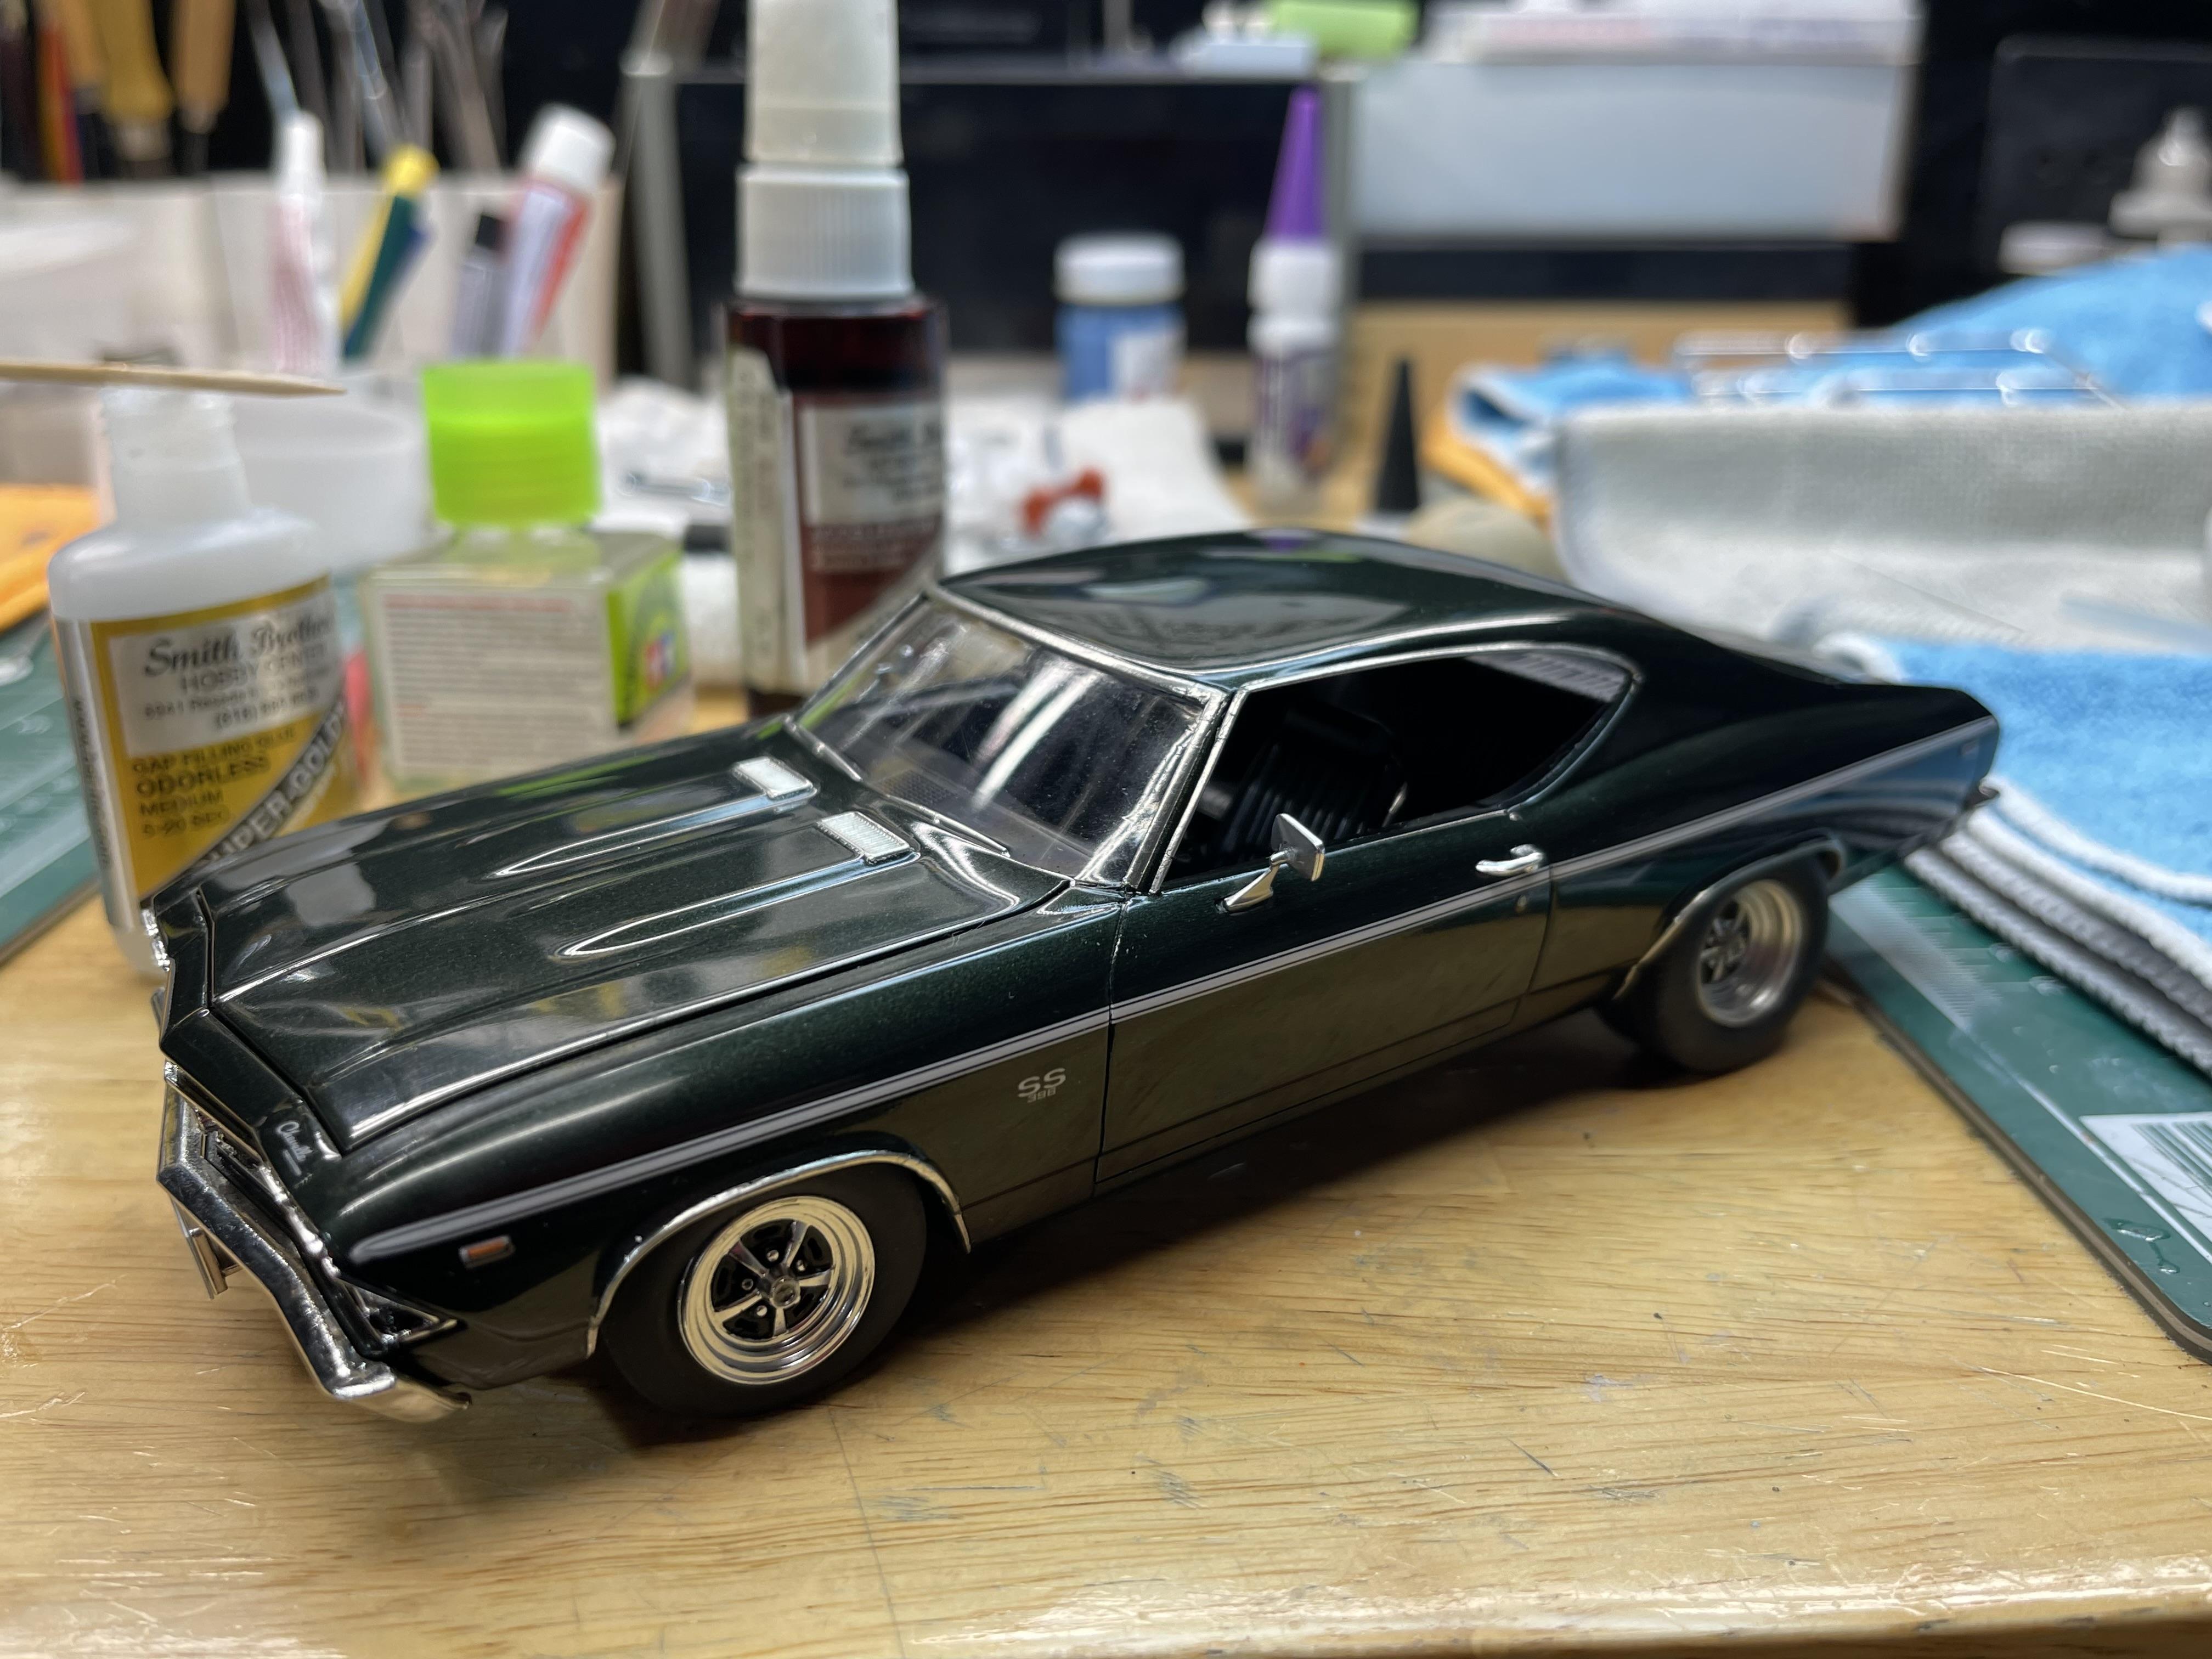
A few more pictures of the progress before the finally assembly which I did get her finished up in time to make the Modelfest show in Venture last weekend and the Chevelle placed third in the replica class which was a surprise to me. Next stop will be under glass after I get a few pictures taken outside.
-
Hey Jim that's my 1957 Ford Ranch Wagon which took third in the Street Machine category. It was a good time at the show and a good turn out .
-
From what I understand the convention center has kept rising prices on the room and i'm sure there are other costs that keep going up.
-
Hello All, Sad news is that it was announced at the show Sat. that the NNL West 2025 will be the last NNL West show.
-
Please delete this post ...... Thank You
-
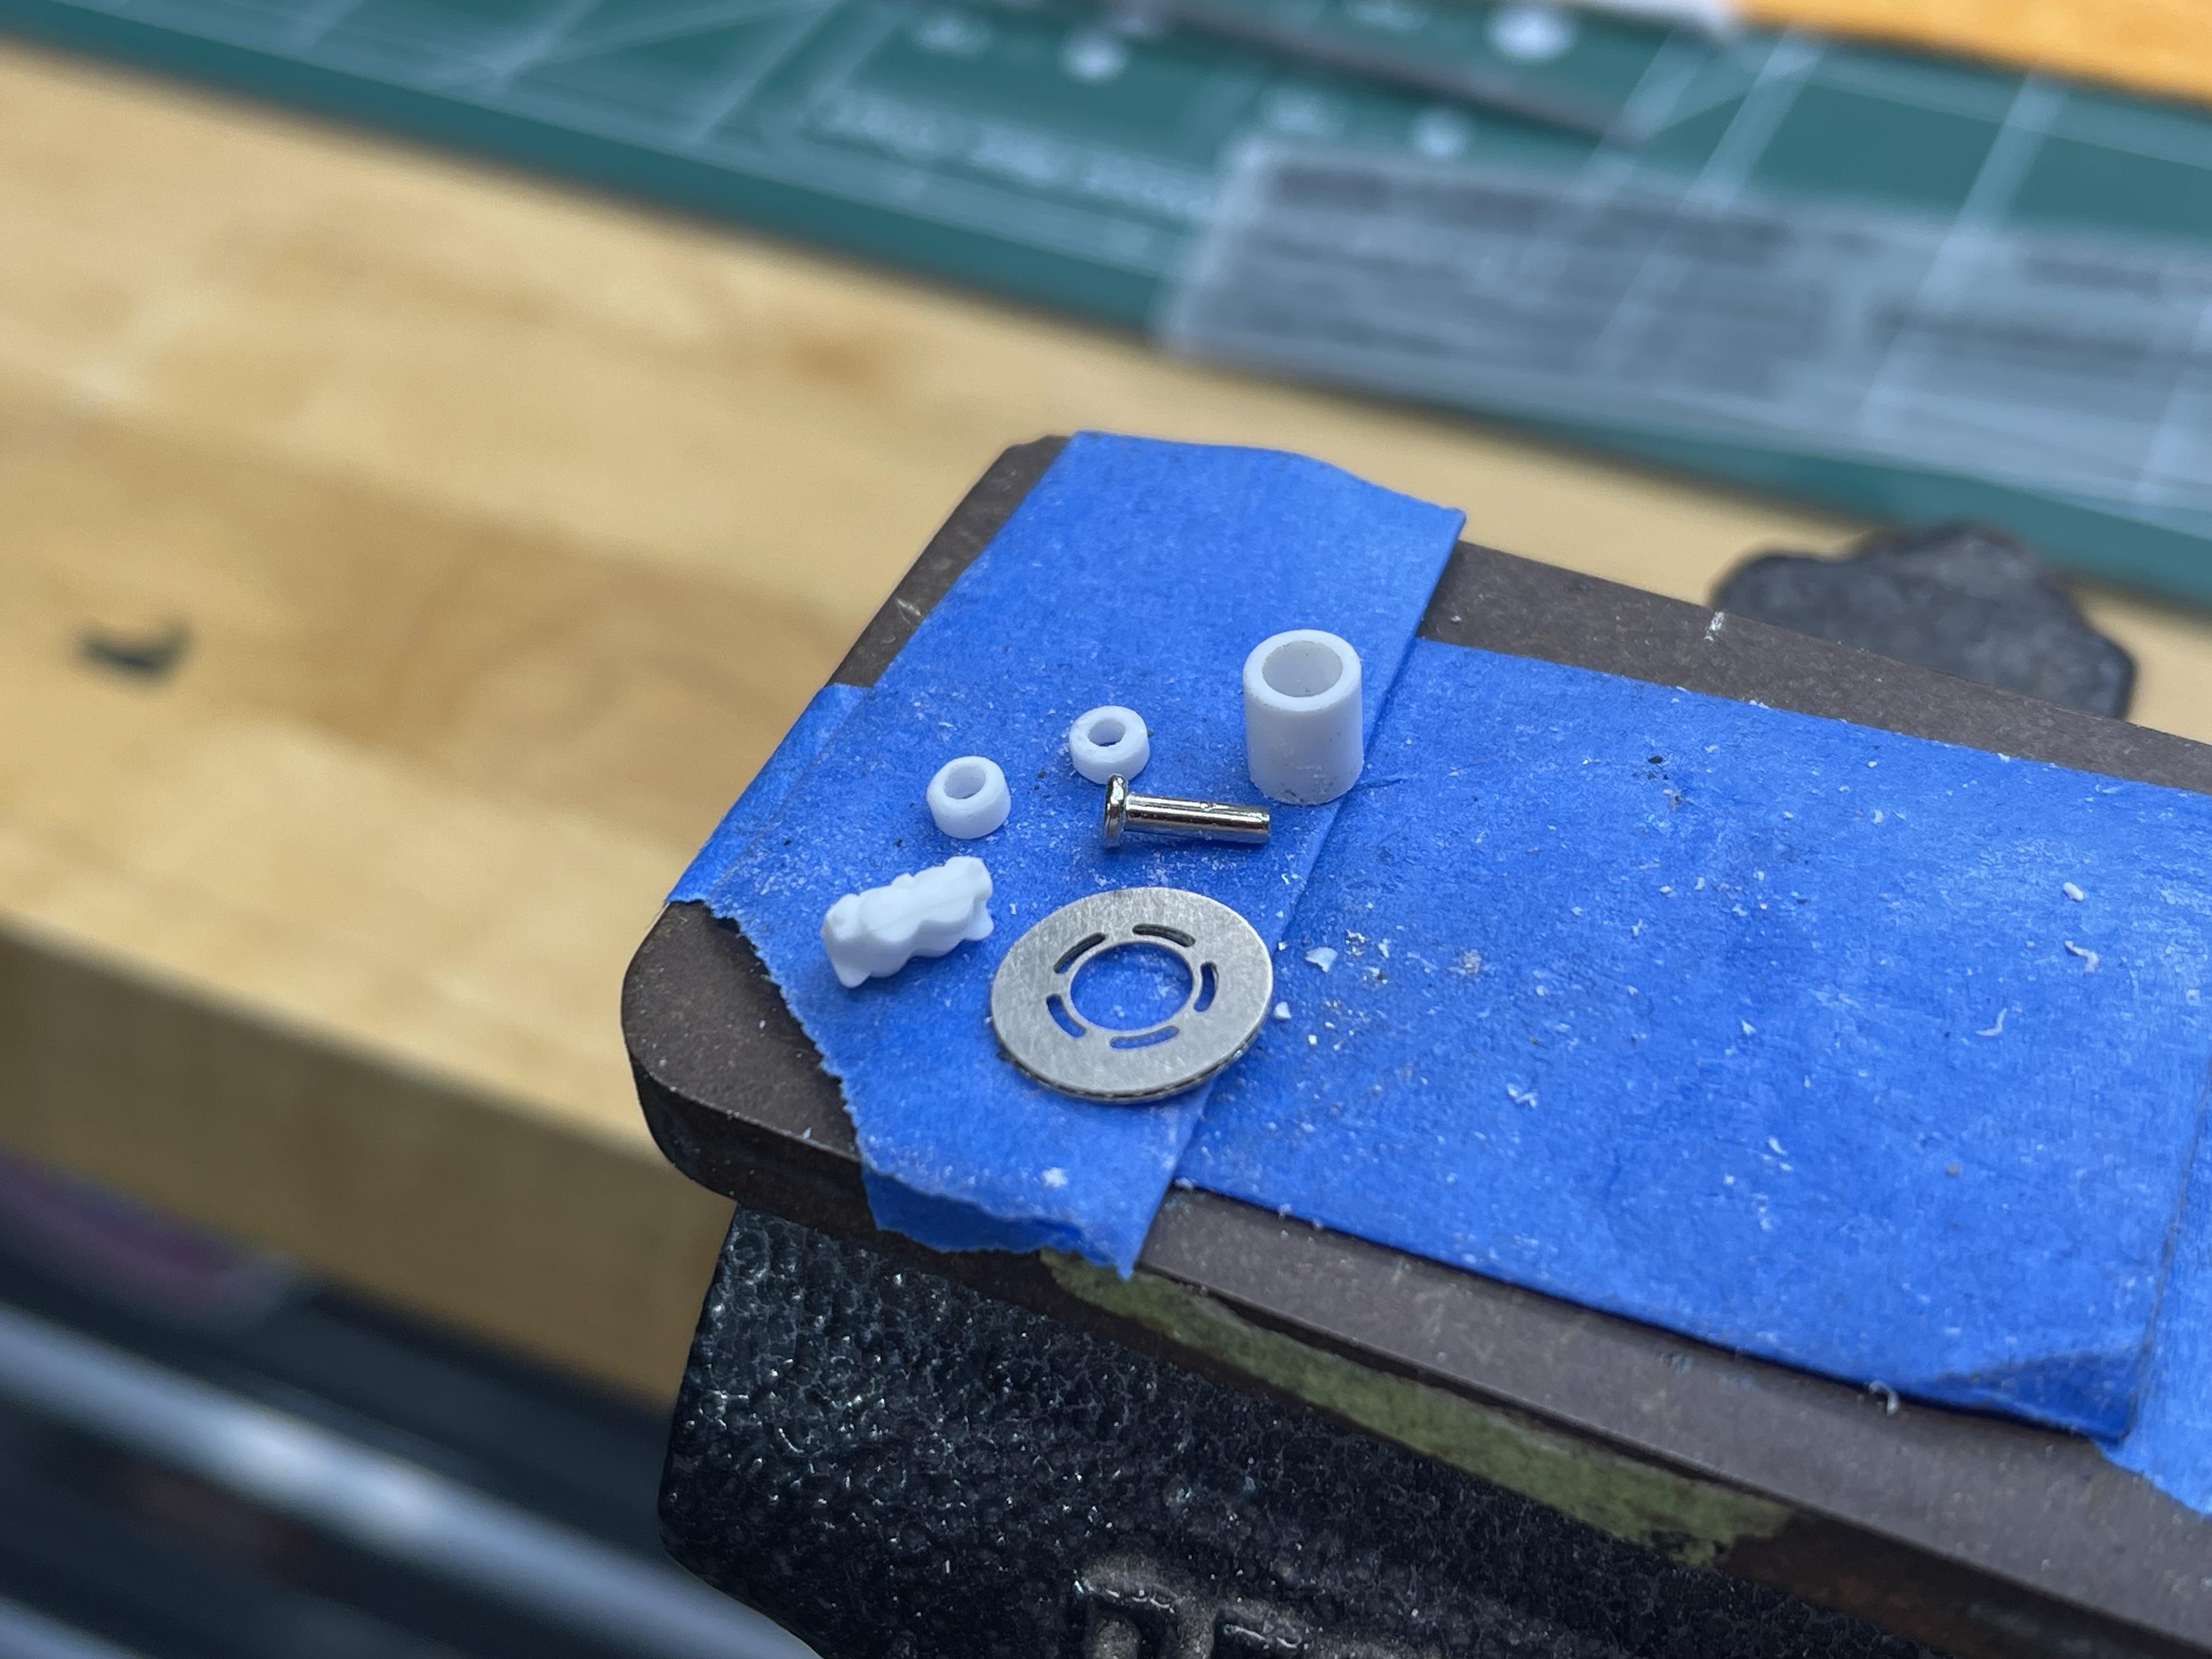
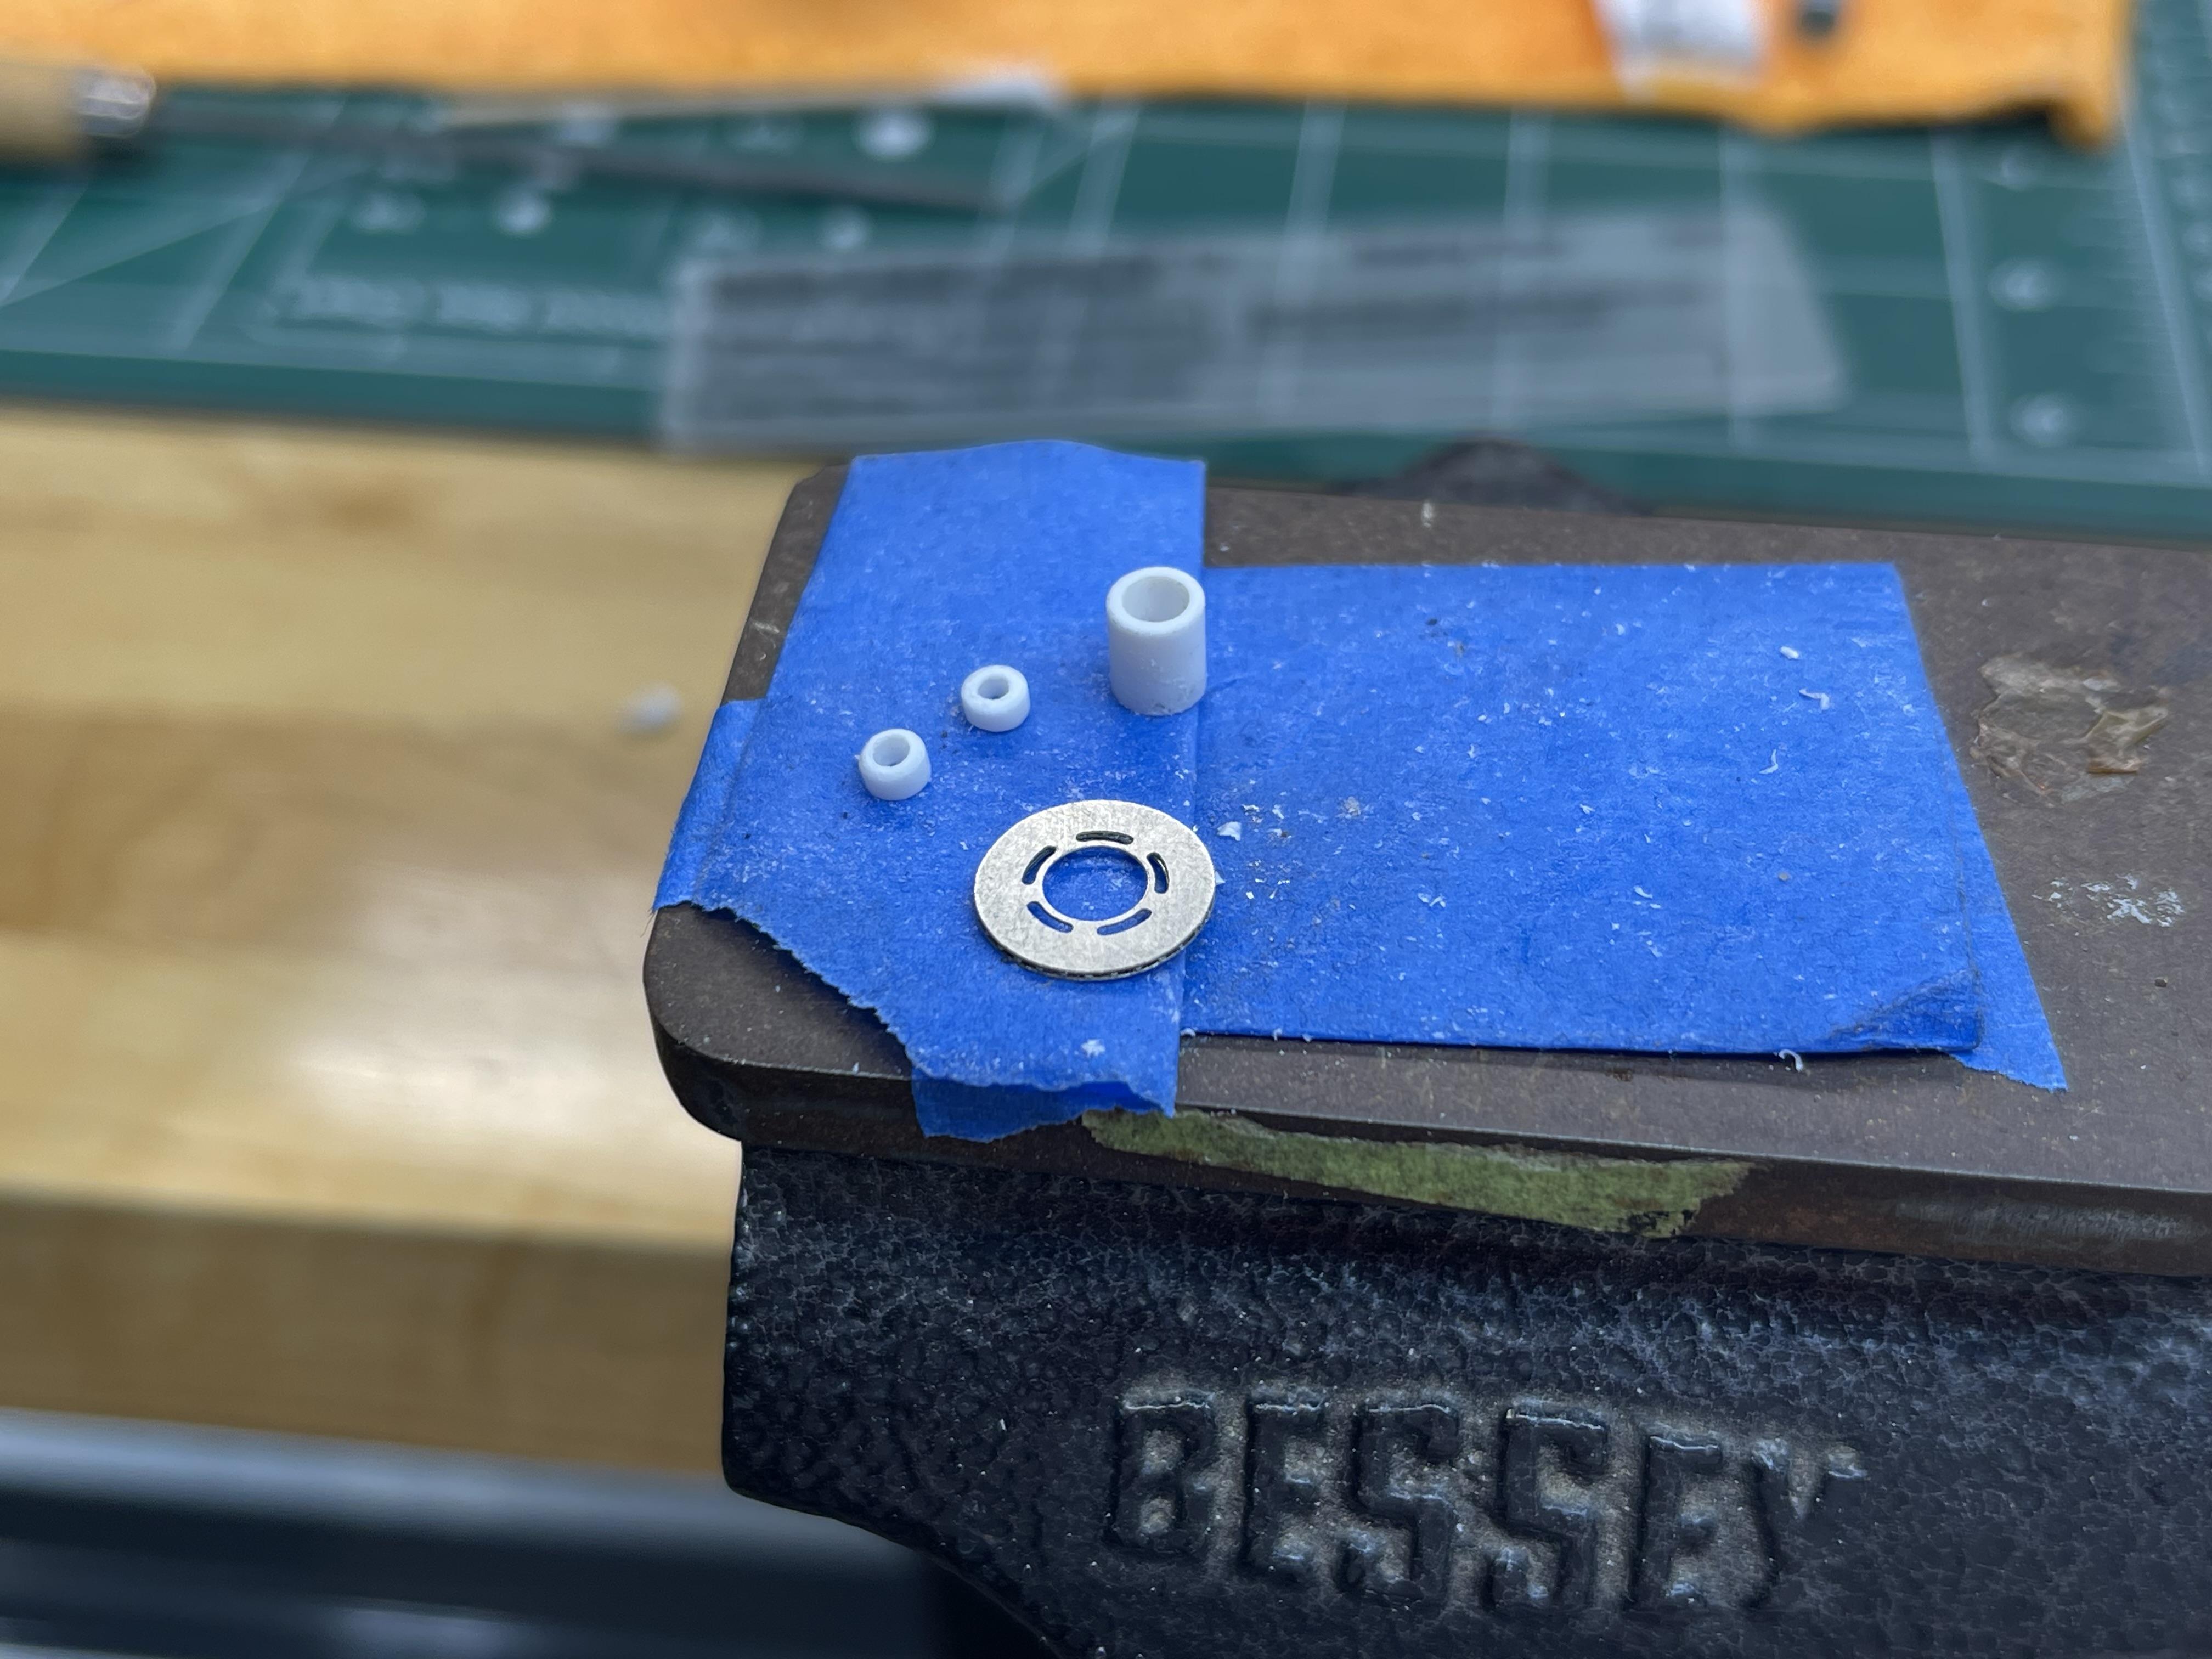
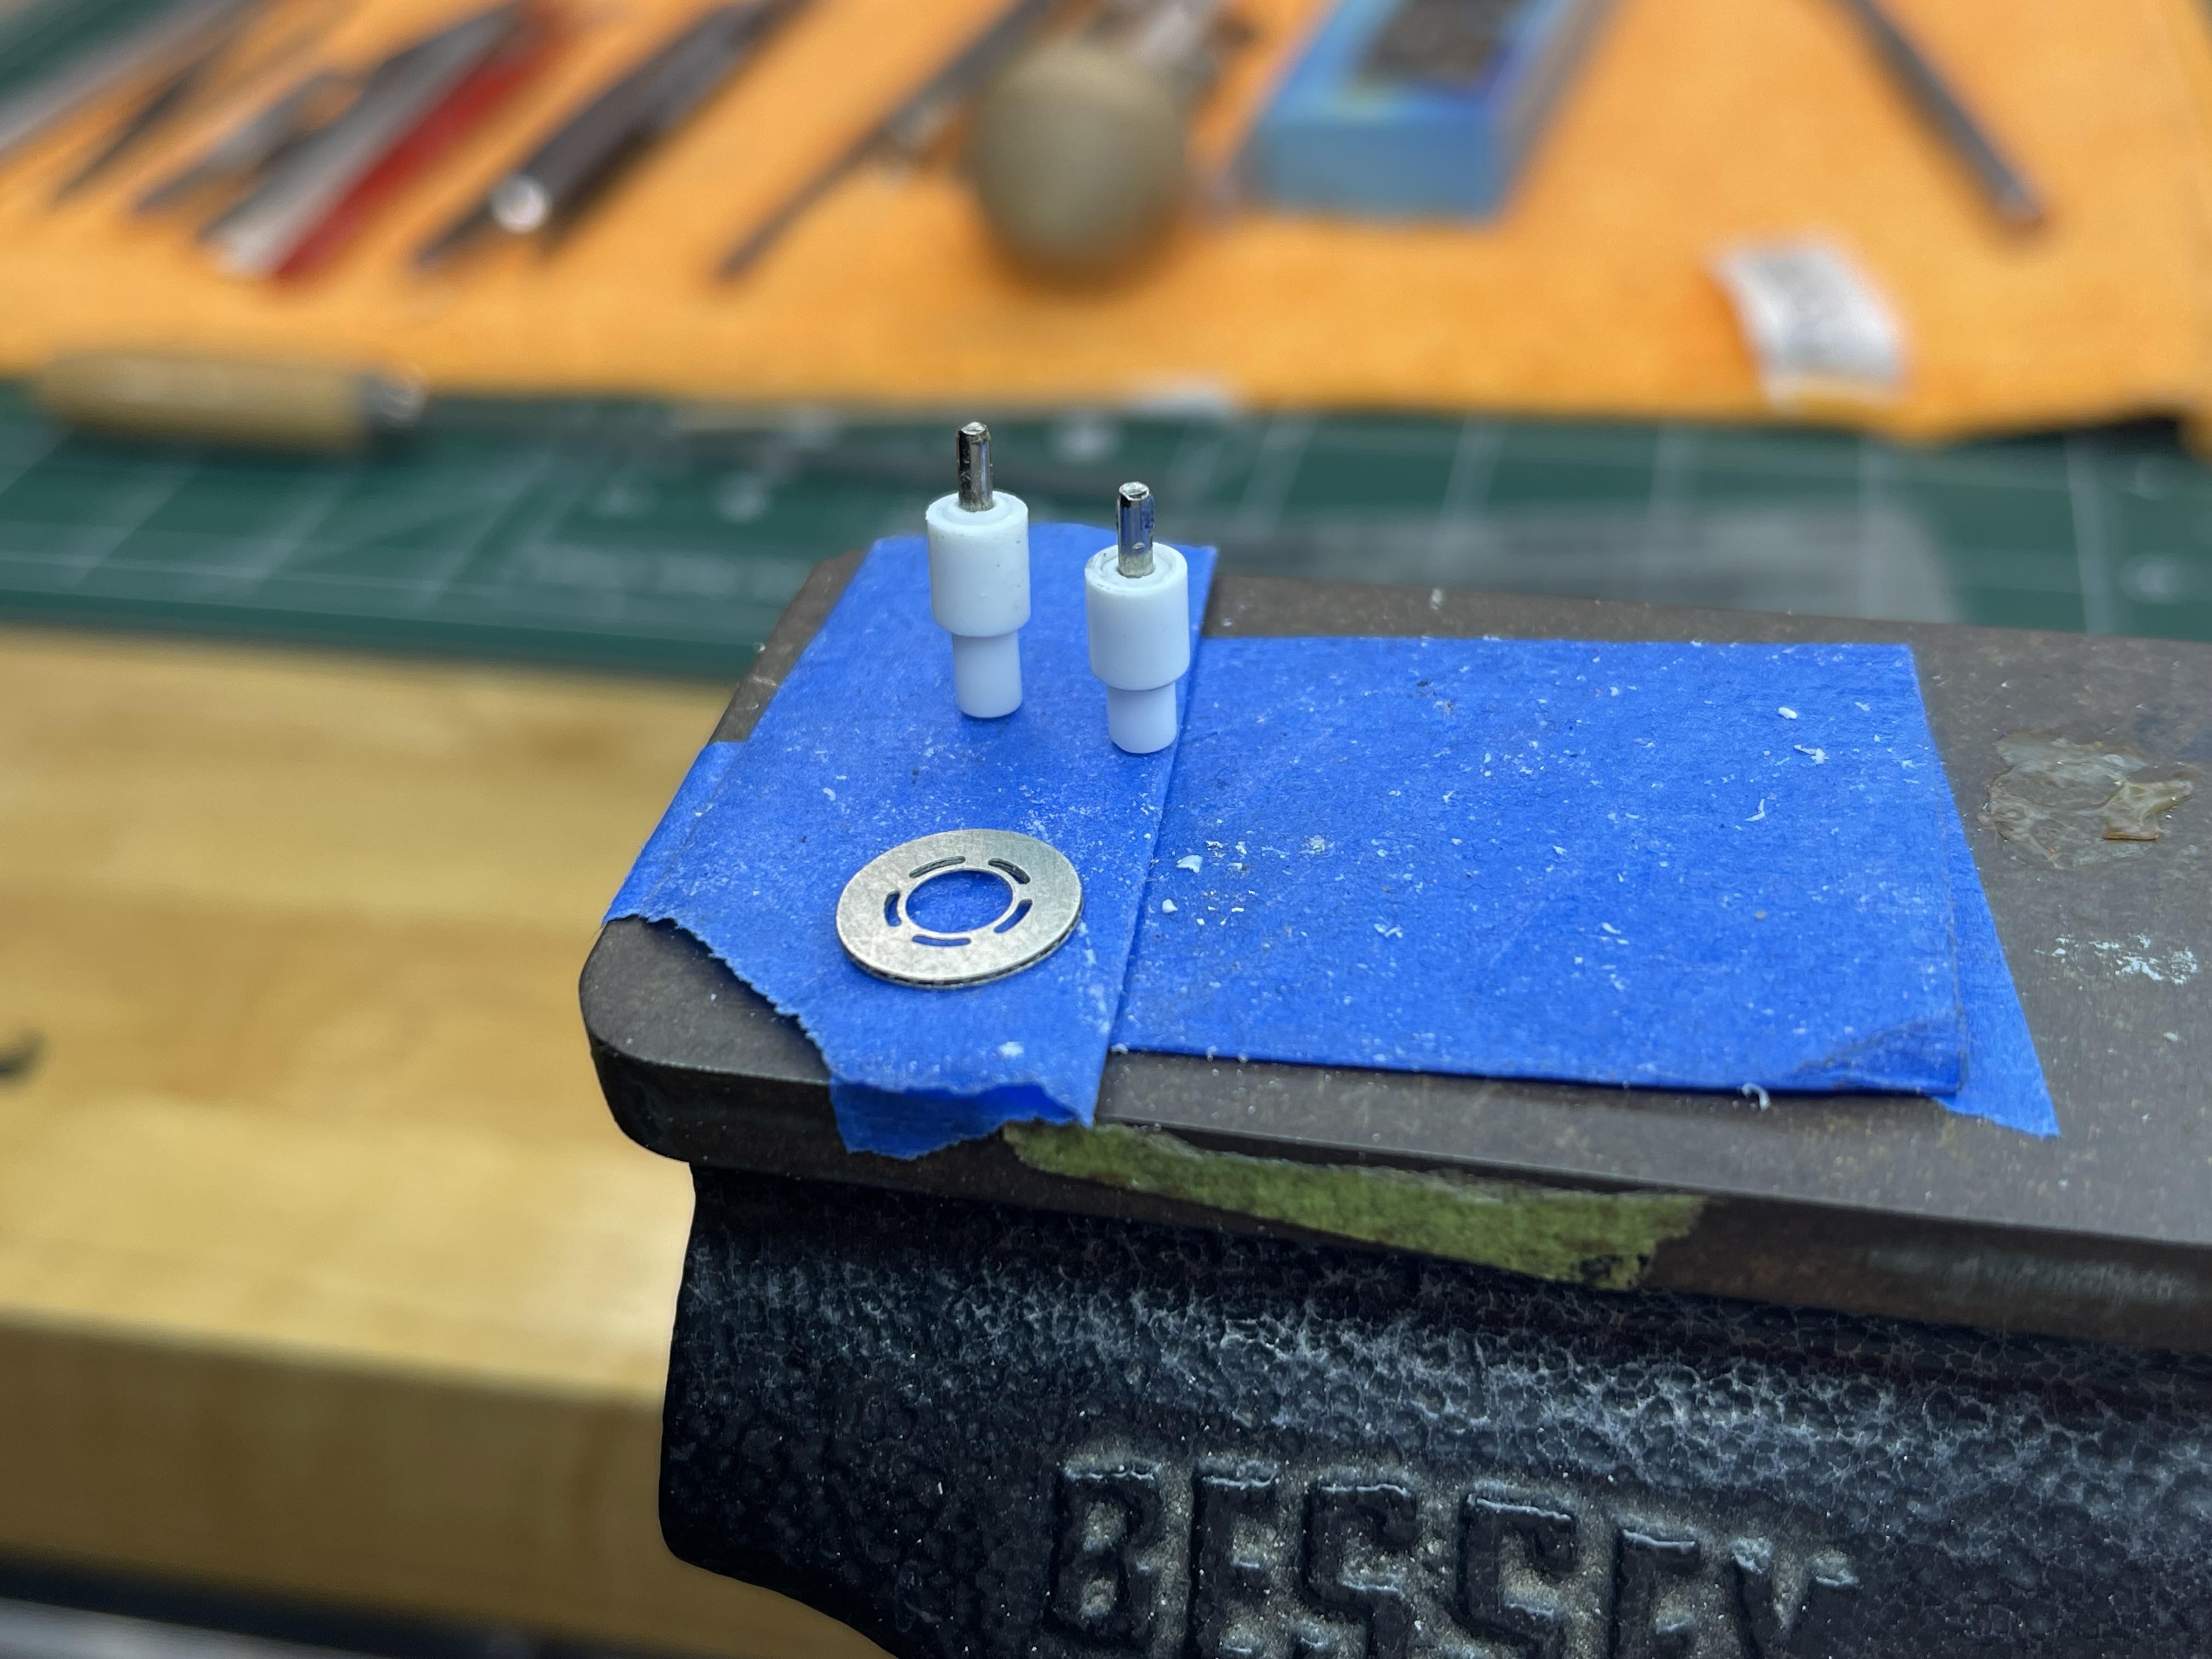
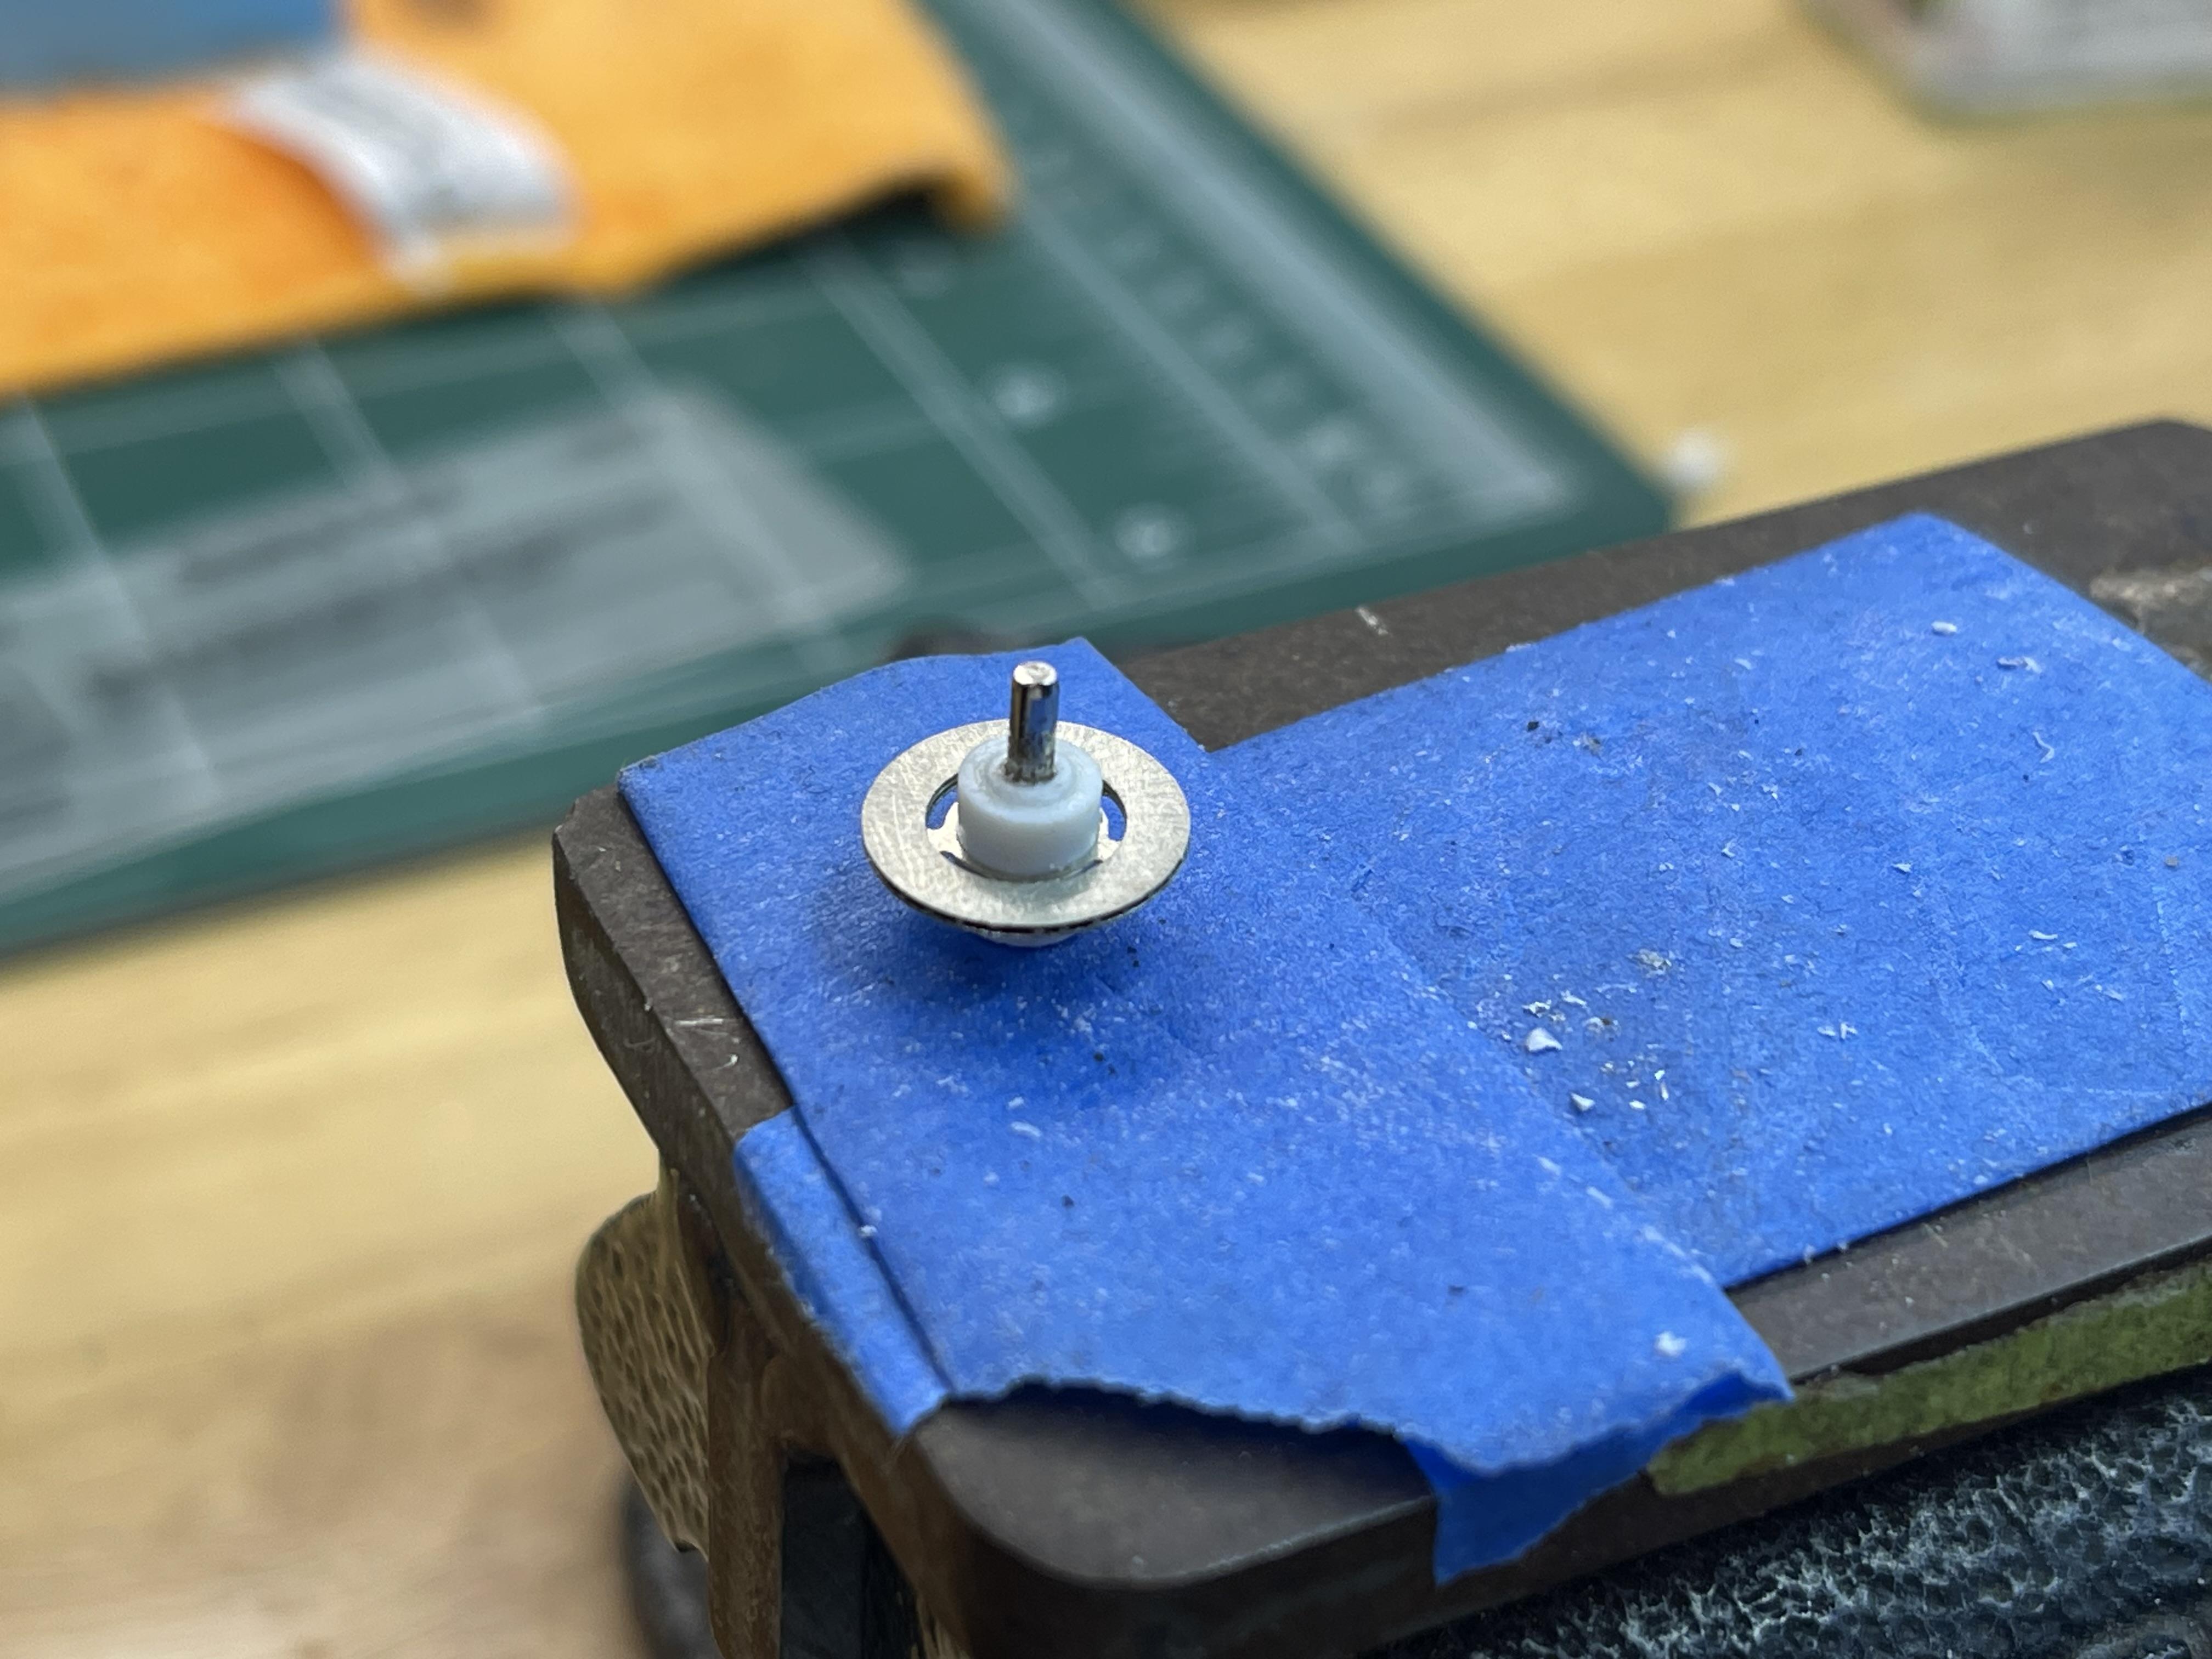
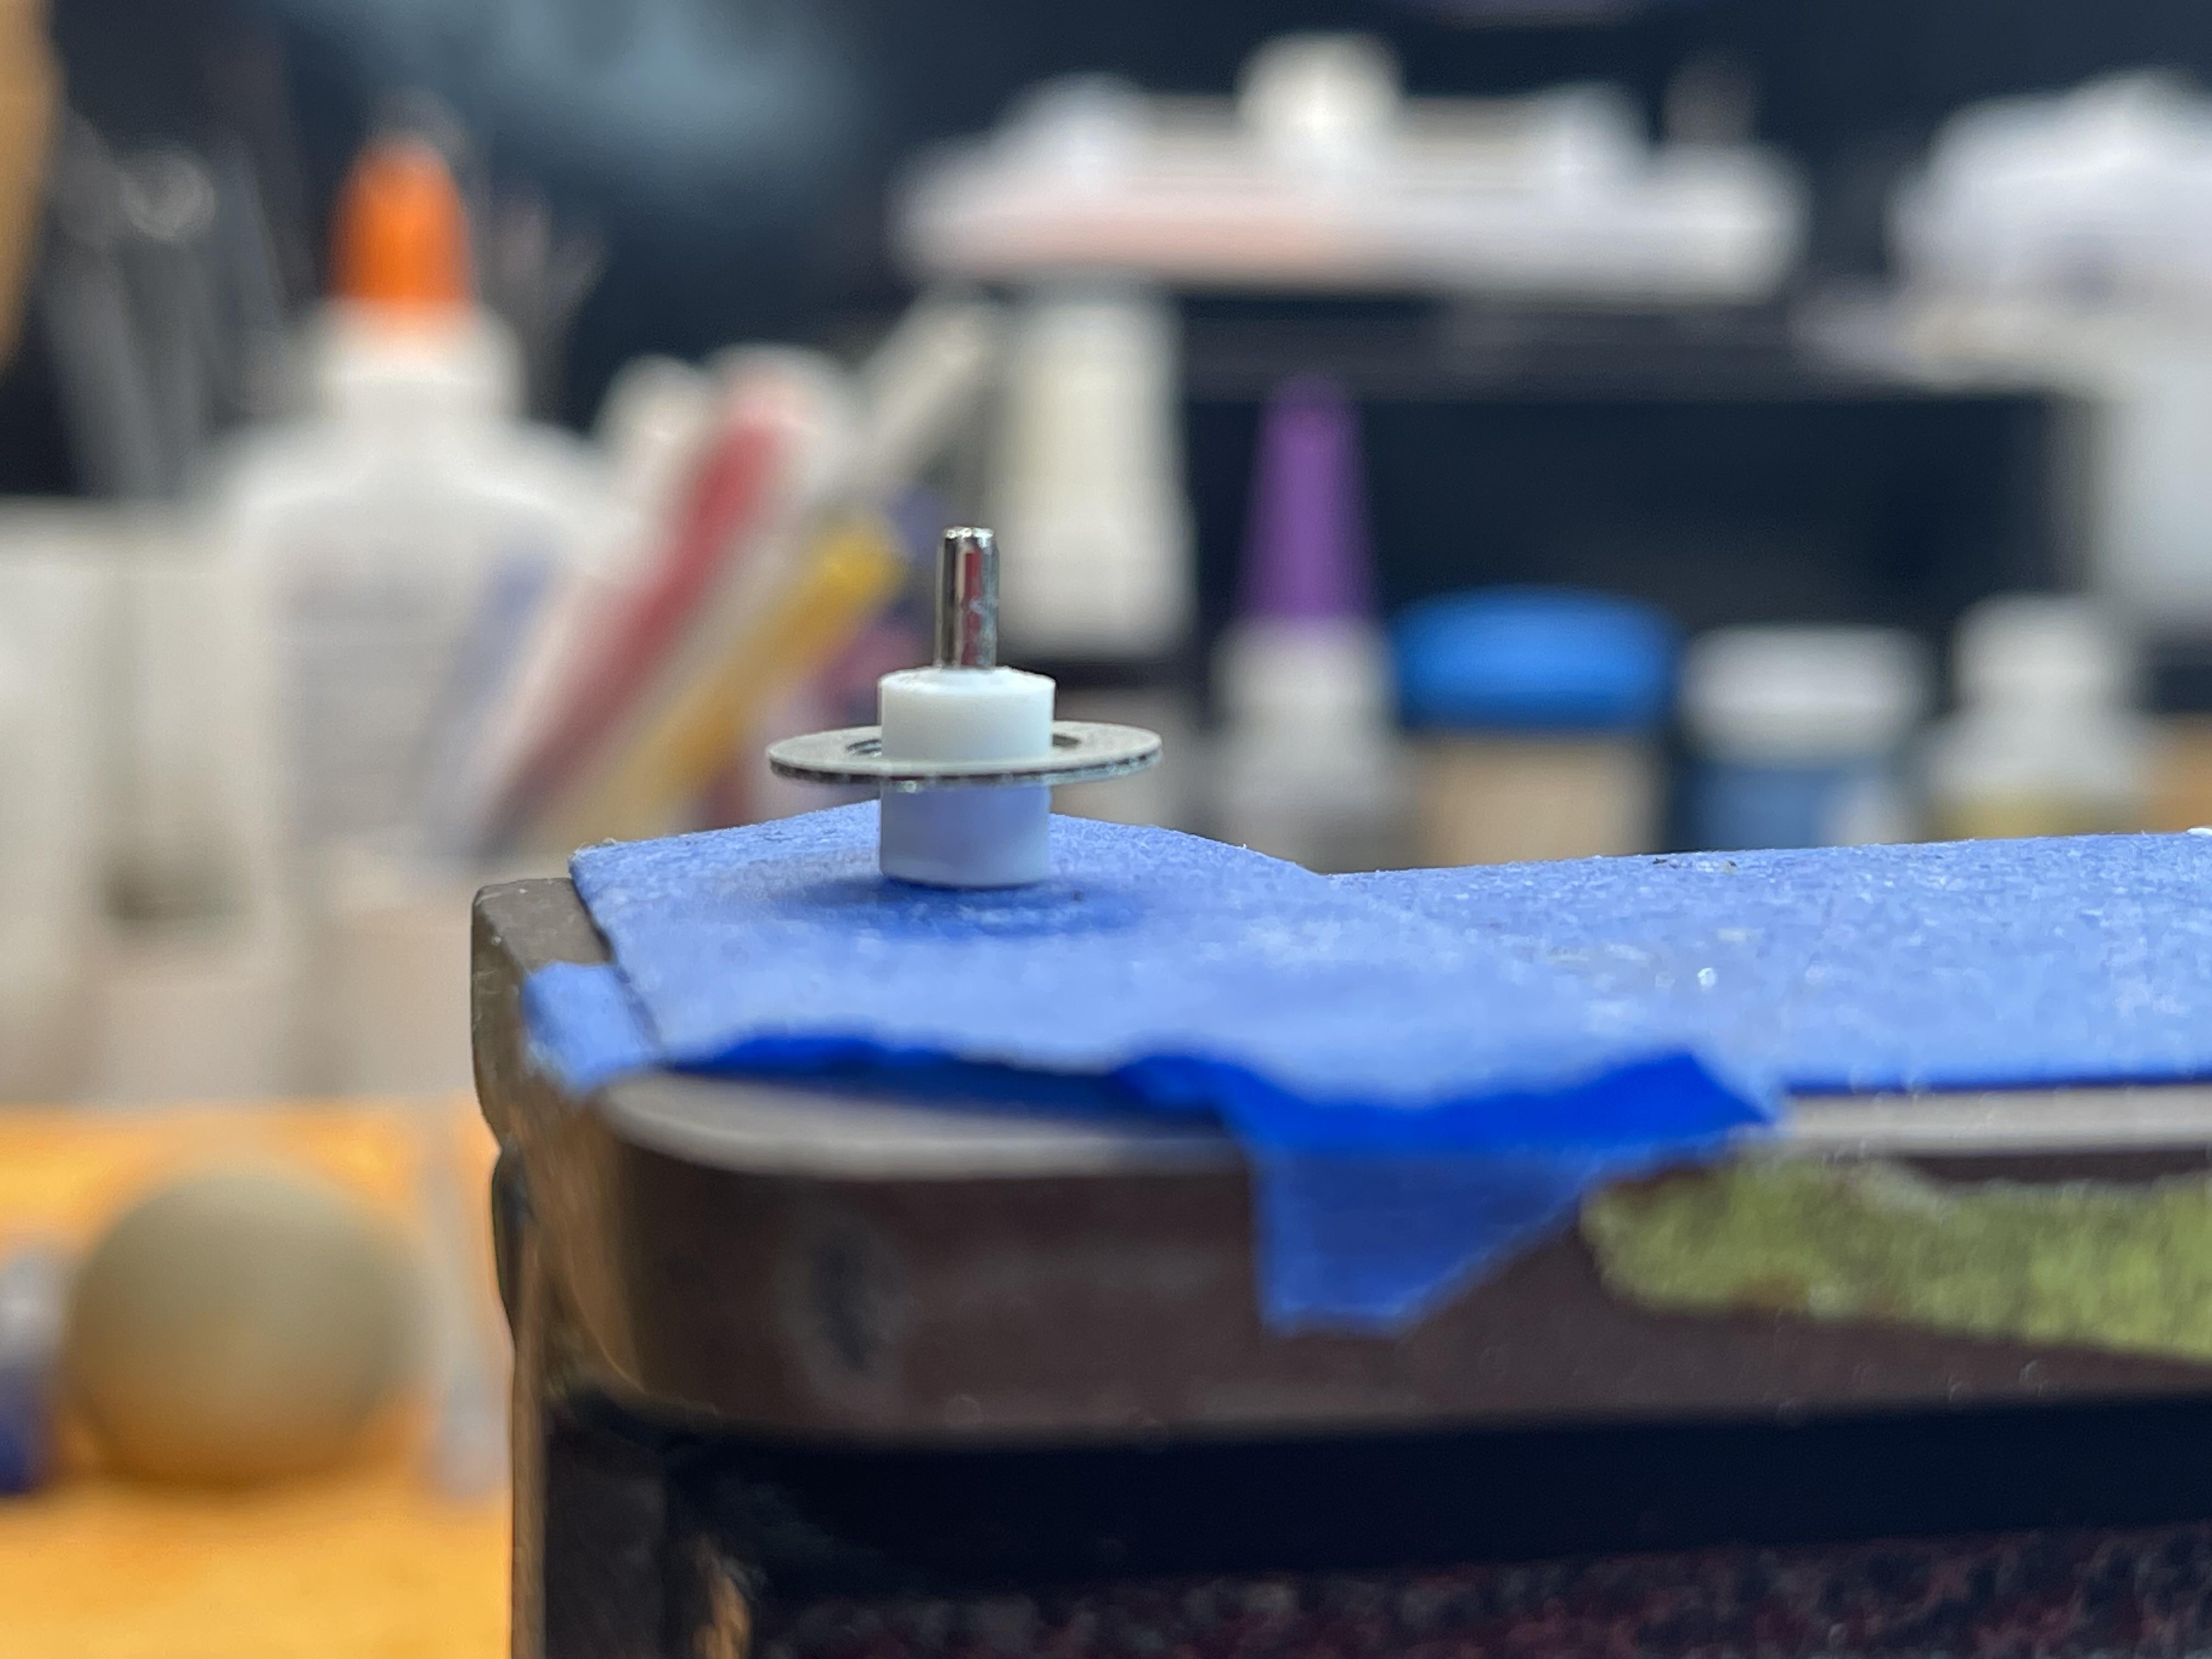
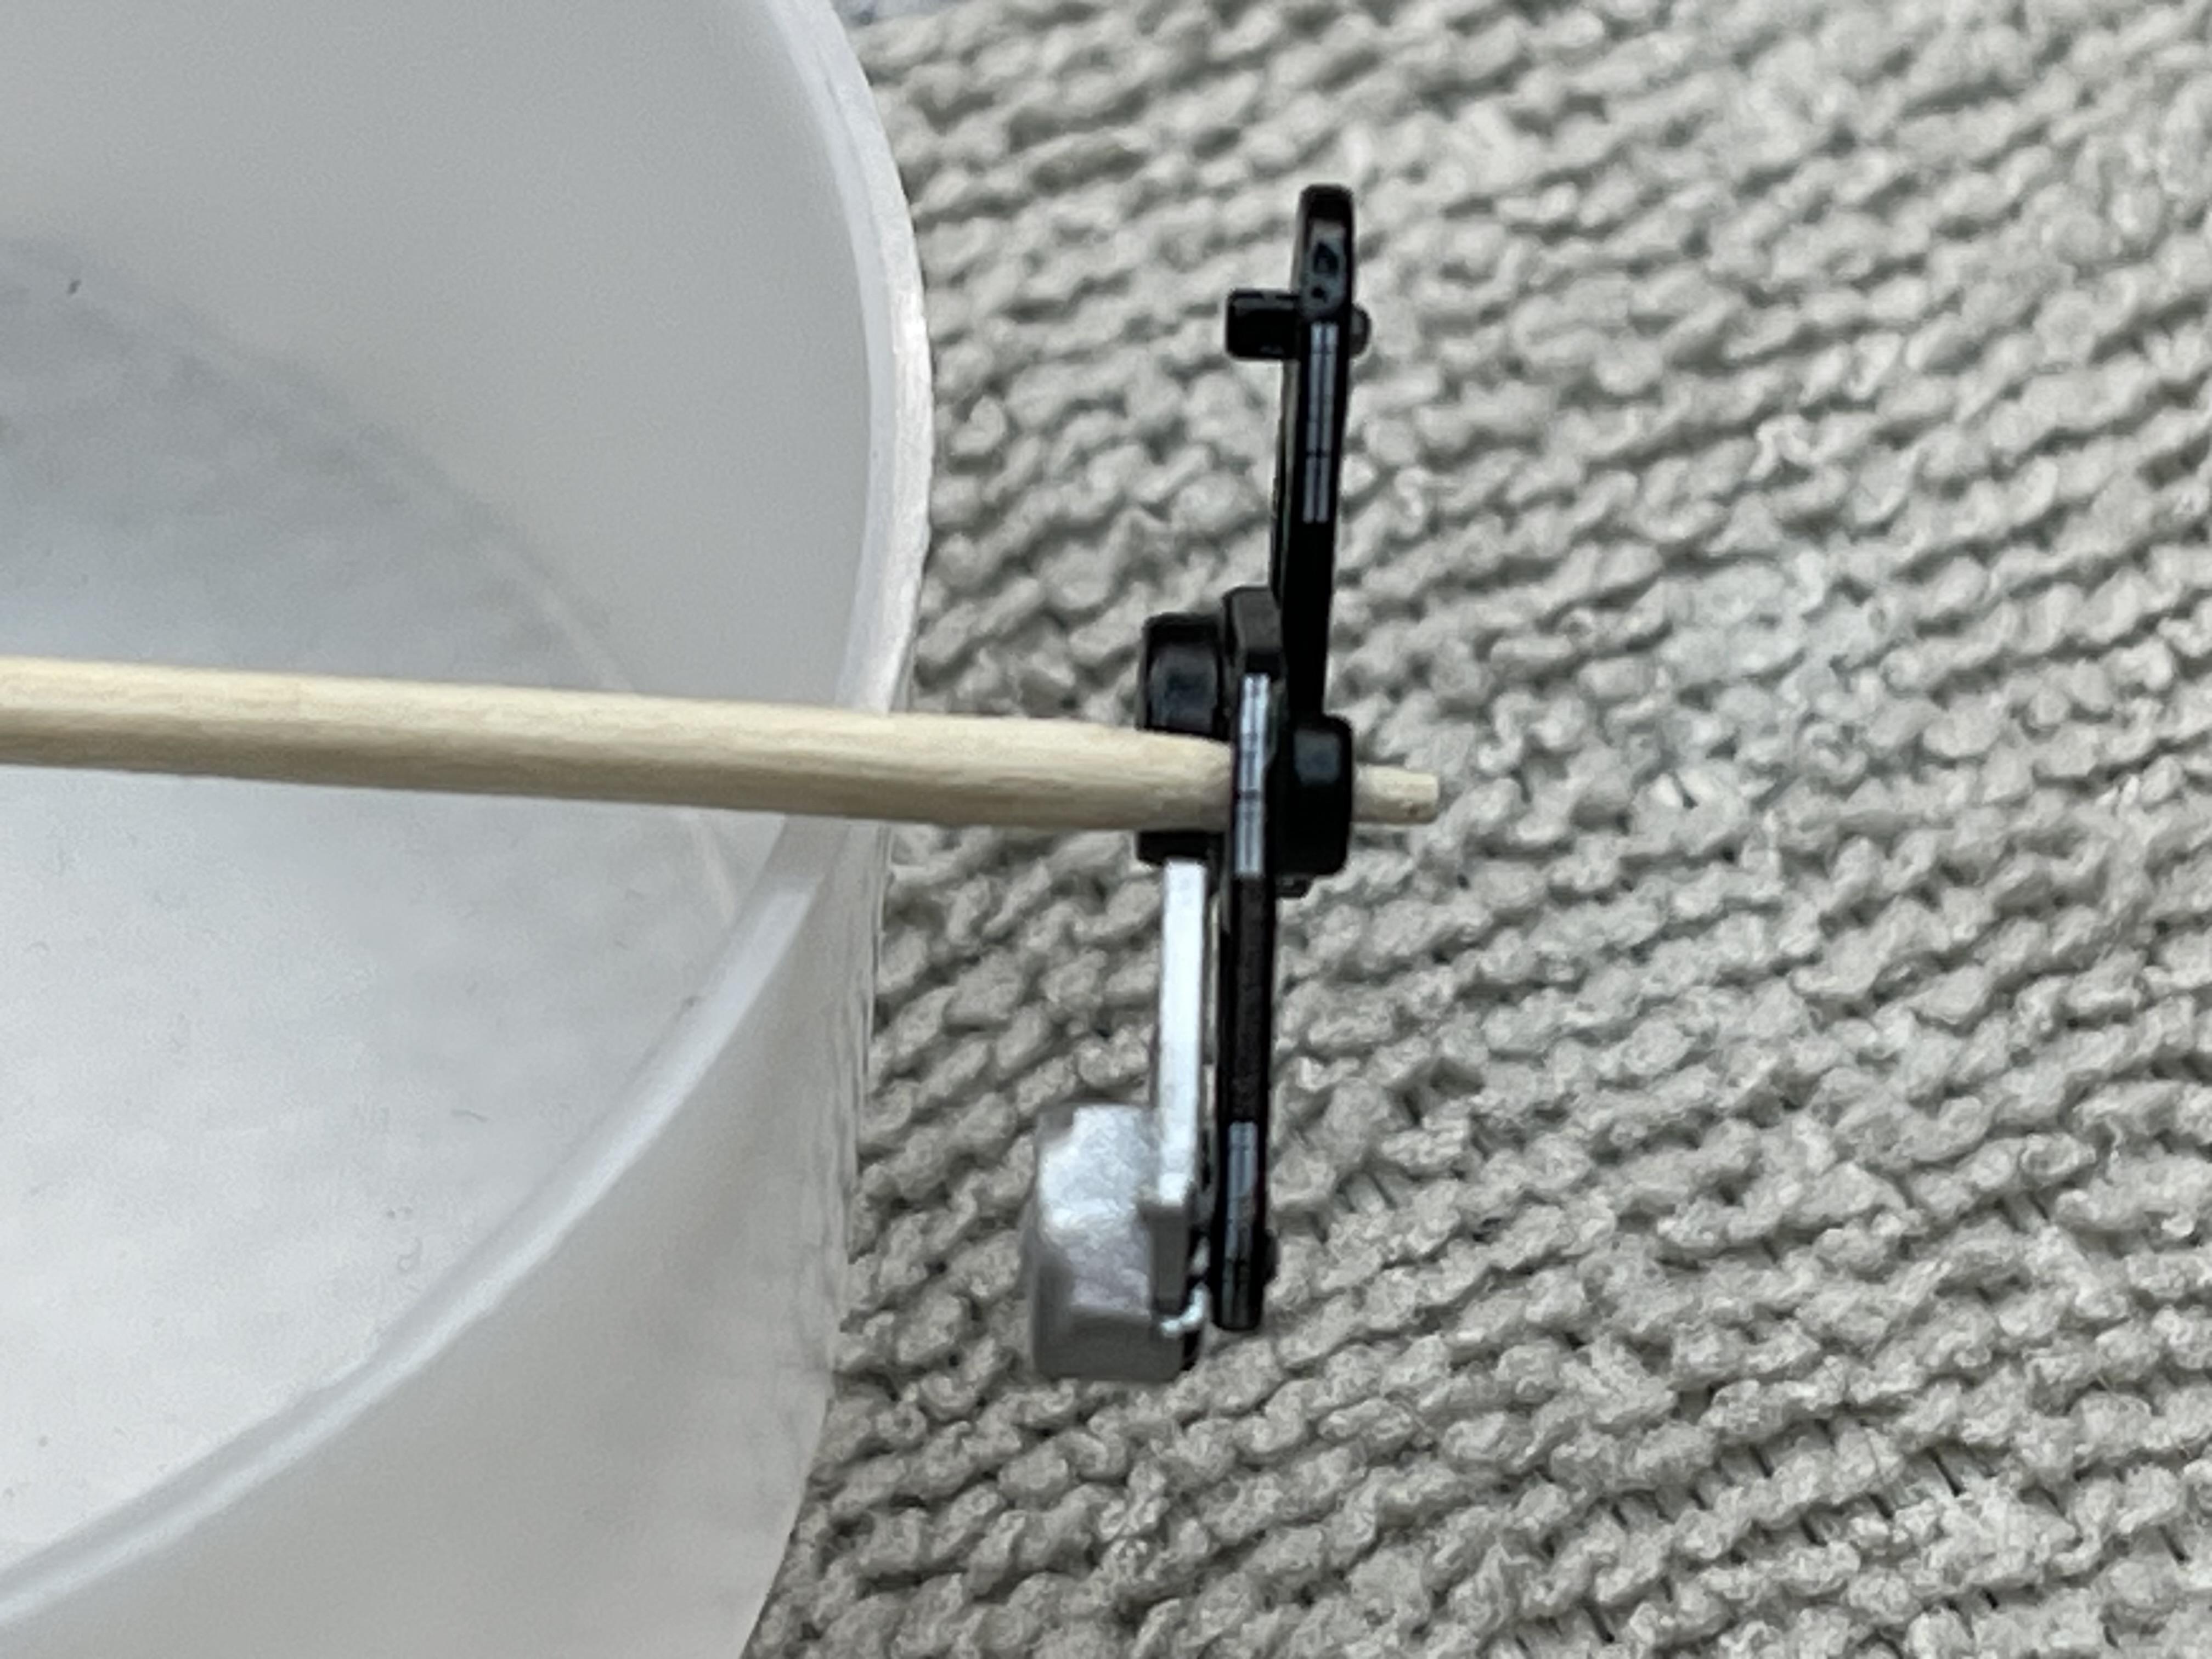
Hello All .... I was debating on whether to add front brake rotors to this build or not since the factory car got front disc and the kit did not have that option. So my decision was to add front disc so I have started scratch building the hubs to add the front brake system. So here are a few pictures of my progress so far.
-
Shelby Cobra Daytona
Metalmad replied to 2whl's topic in WIP: Other Racing: Road Racing, Land Speed Racers
Paul ..... Awesome build ! Question ..... where did you purchase the kit from ? -
Bob the battery terminals are part of the kit battery and what I did was just drill holes into the terminals then glue in the cables then I just detailed the terminals by painting them. Thank you for the encouraging comment Dennis !
-
Thank you David !
-
Thank you Roger ! and yes it does take me a bit of time to successfully finish a build.Mainly because of making mistakes and having to correct them but I do learn from the mistakes.
-
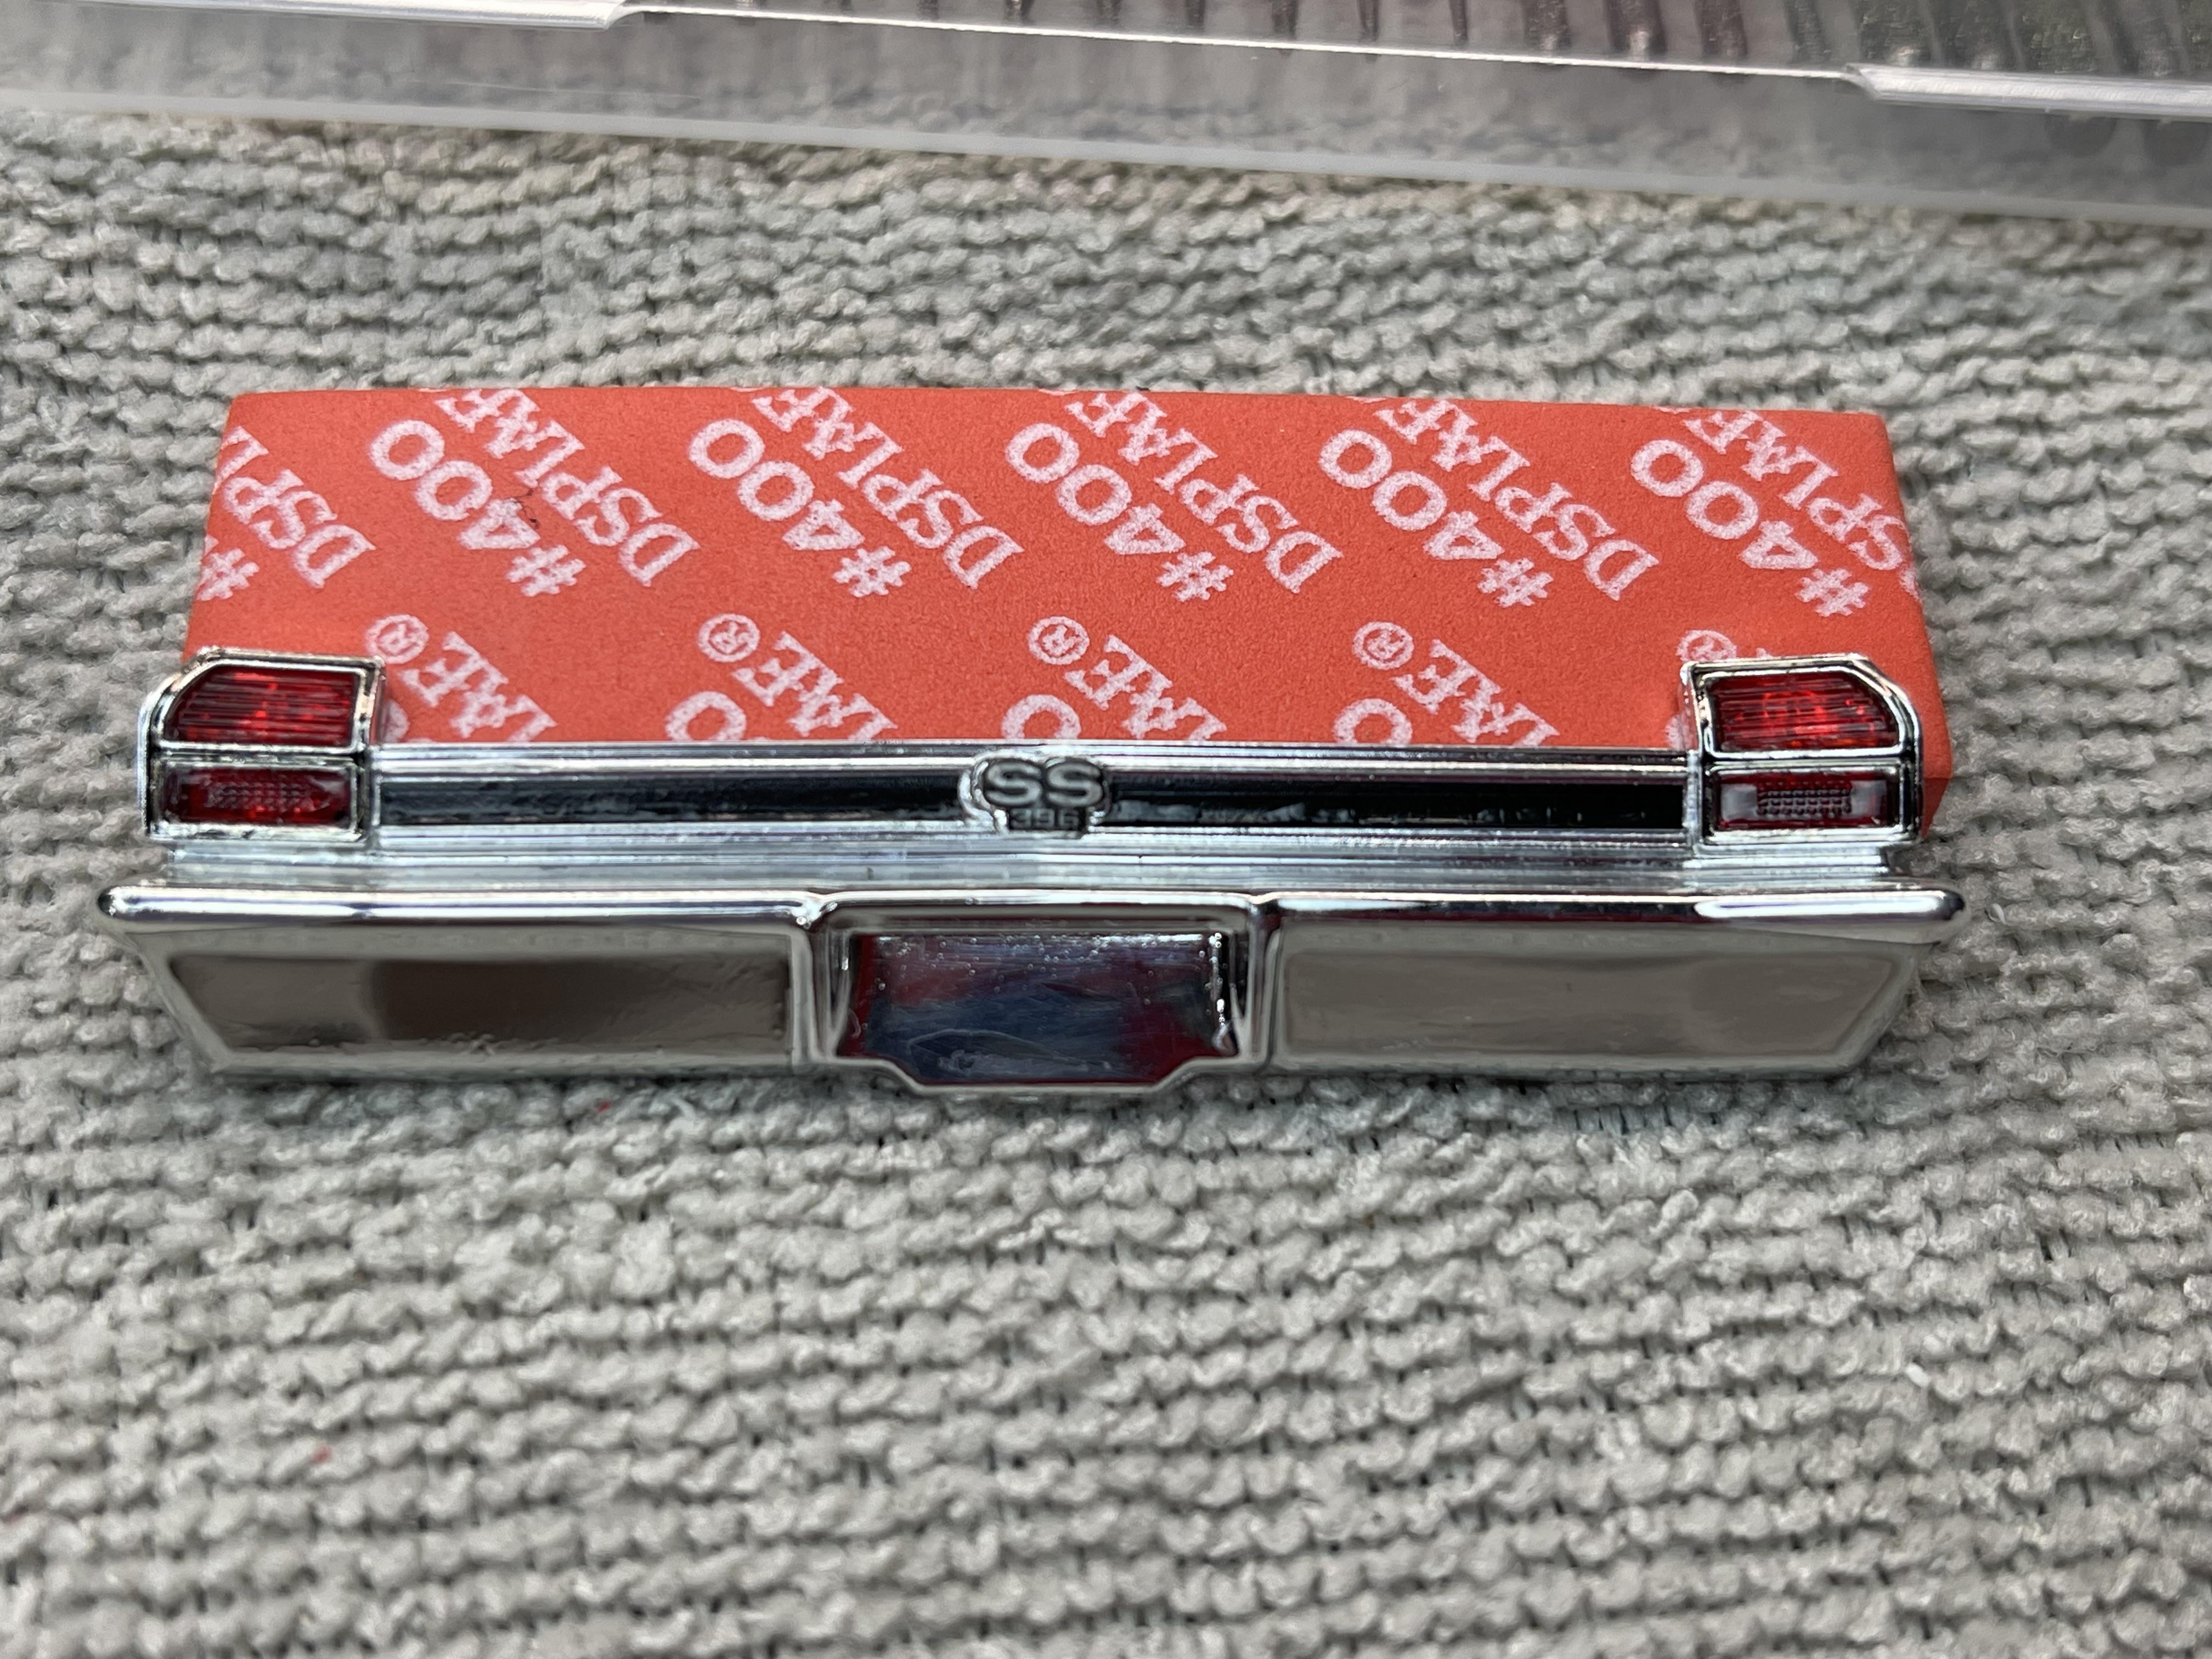
Another small update ...... I installed the rear tail light lenses and also detailed the chrome around the lenses by carefully adding black in the grooves around the lenses.
-
Thank you Greg ! Just wish I had a little more time at the bench.
-
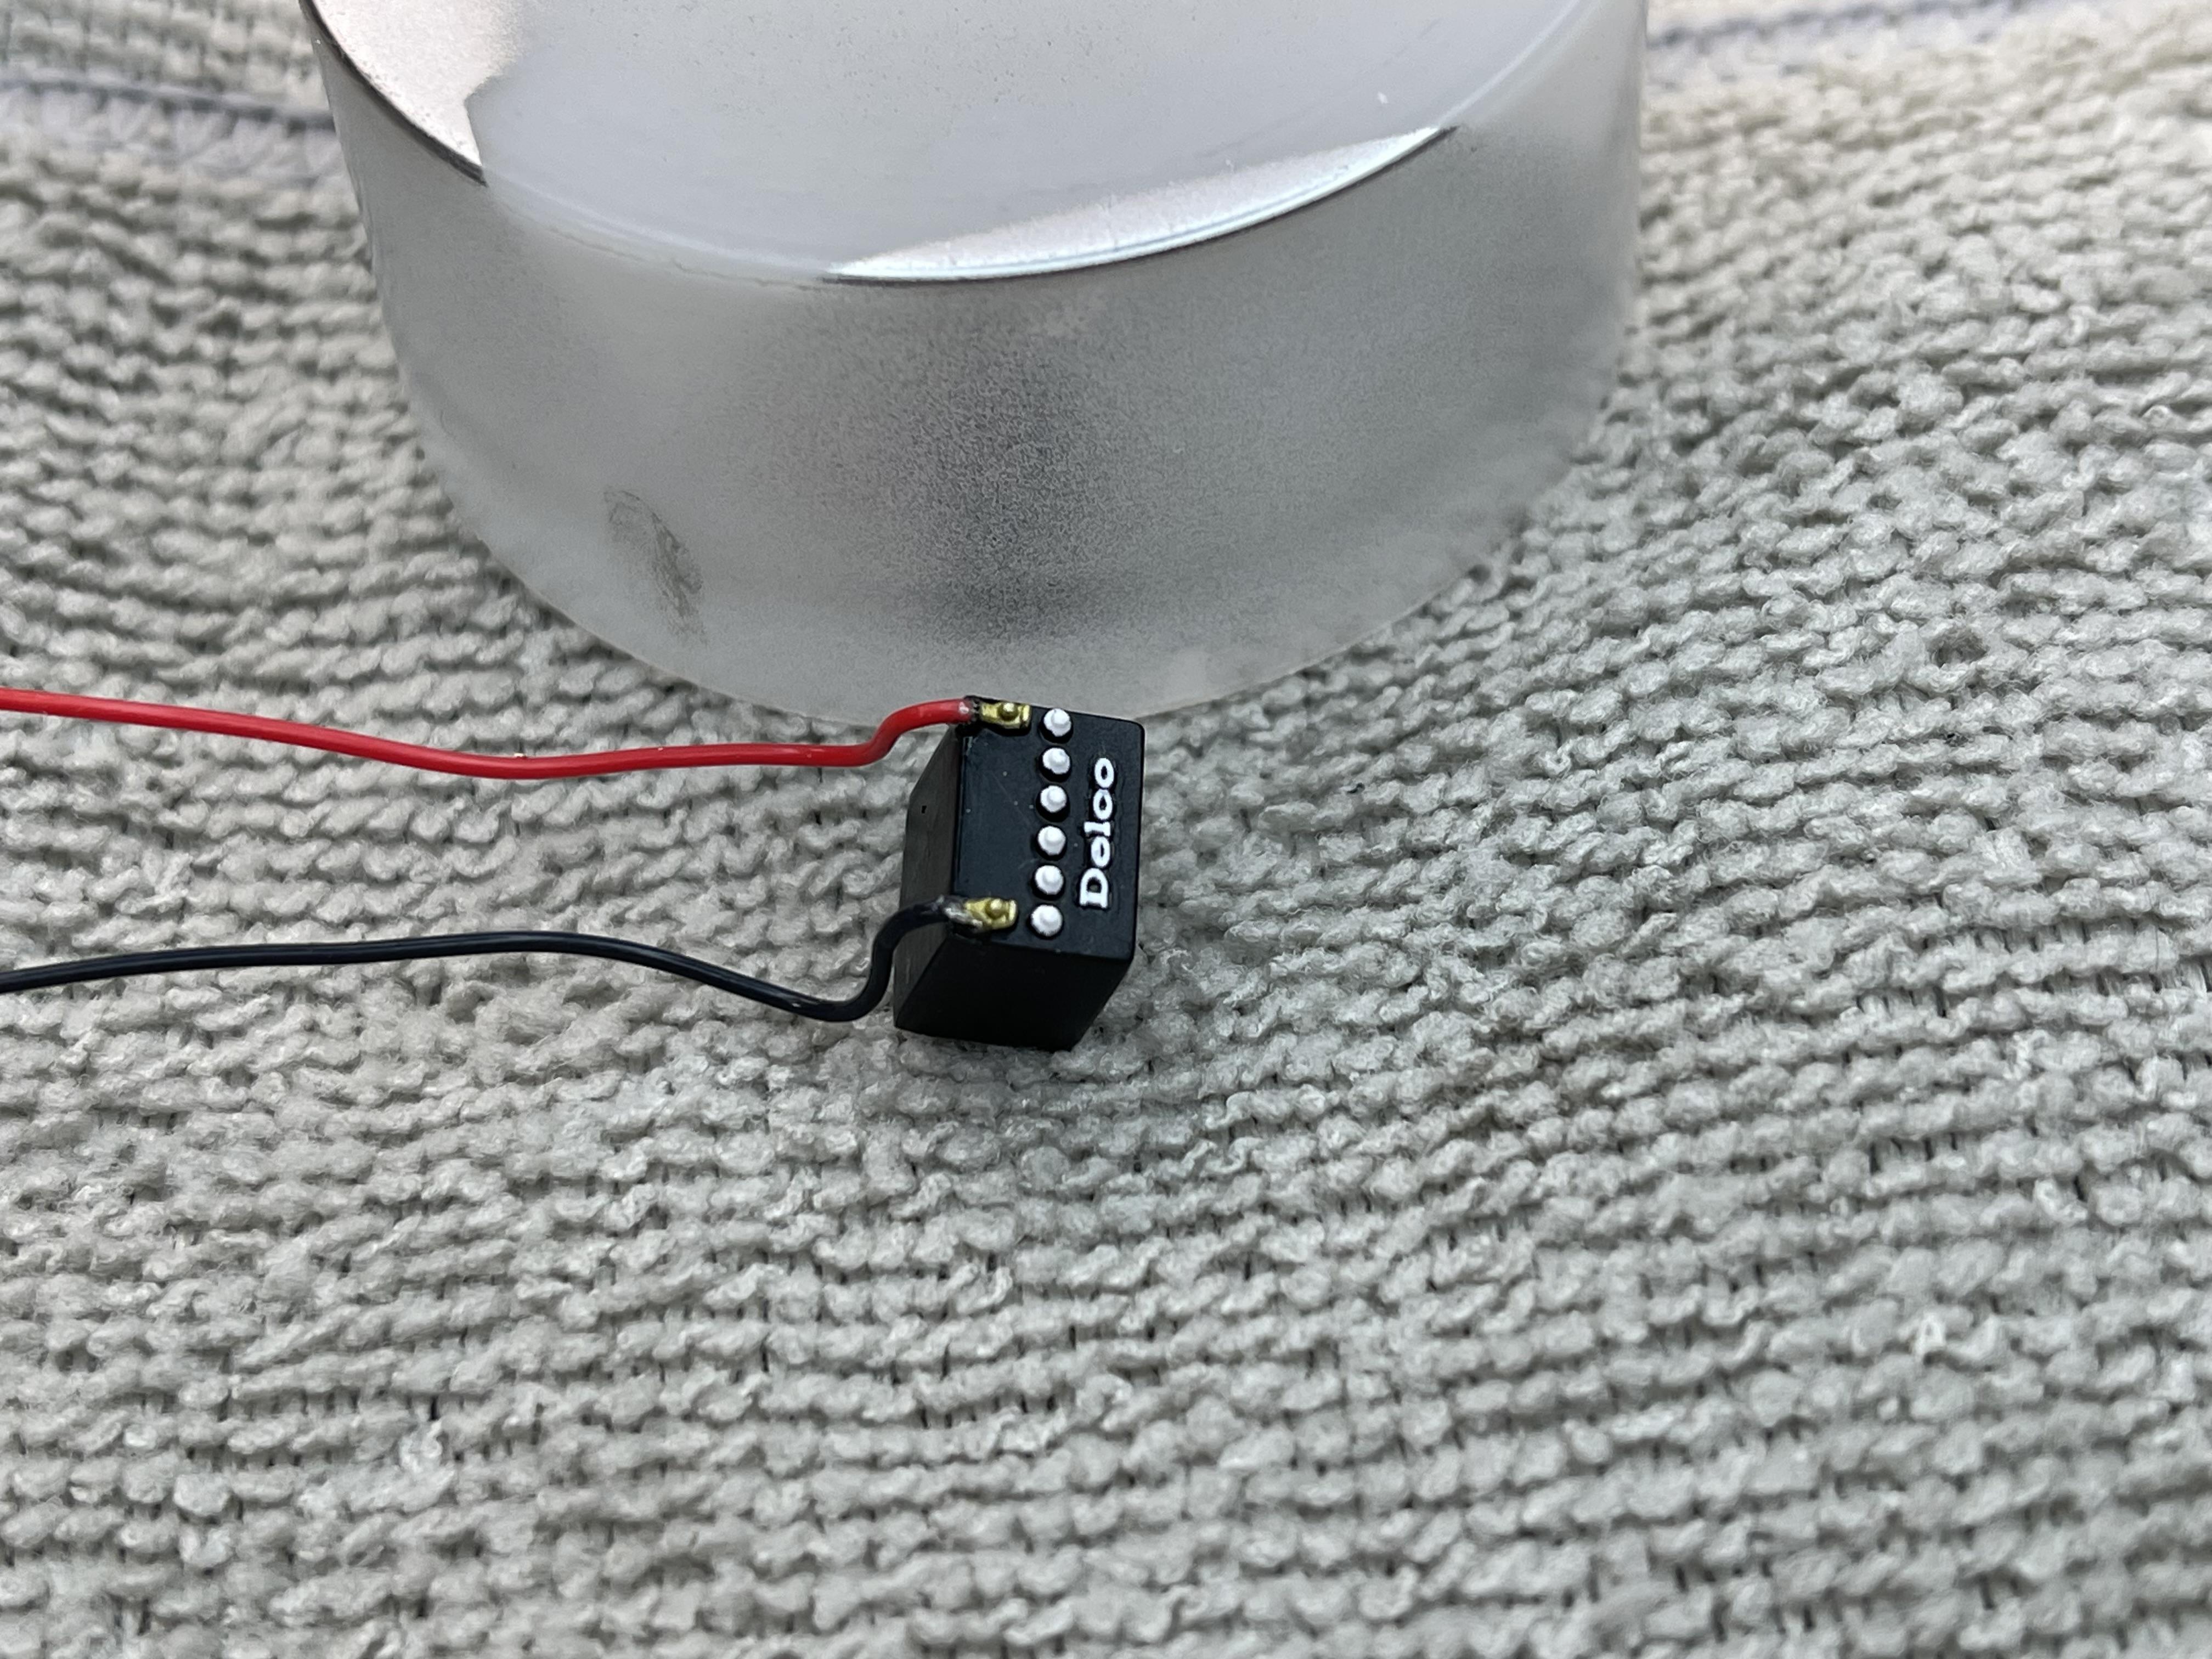
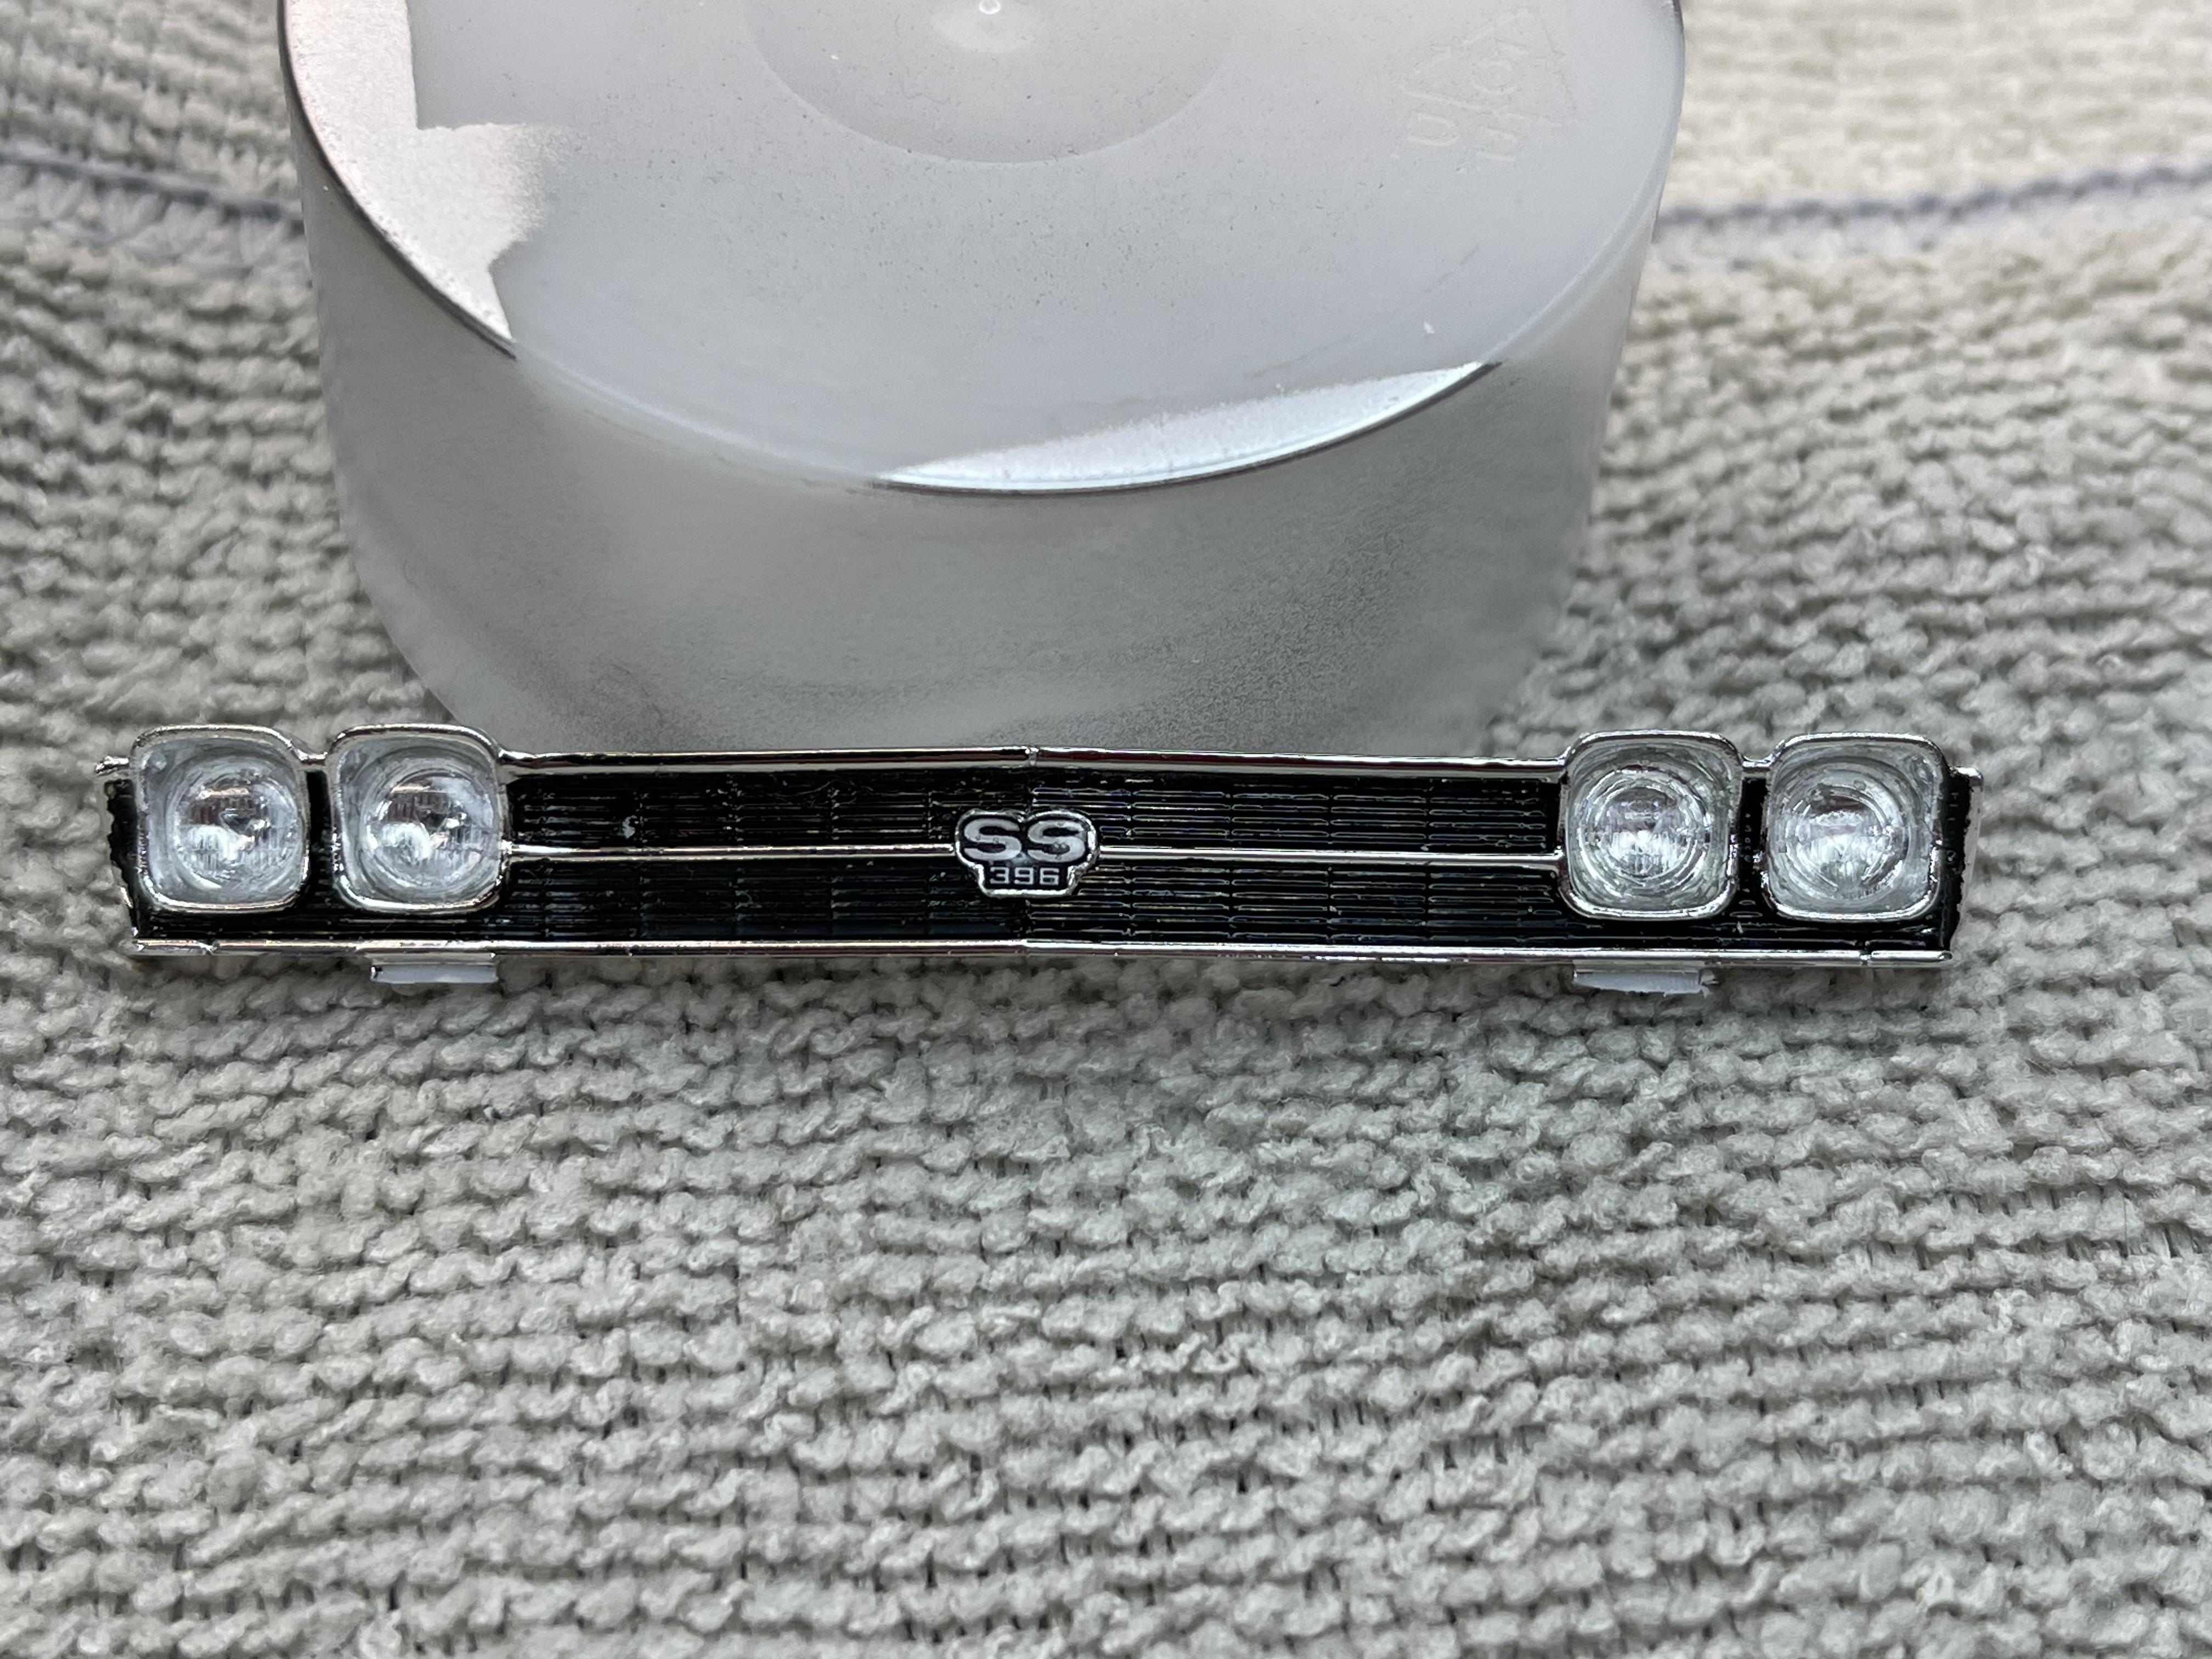
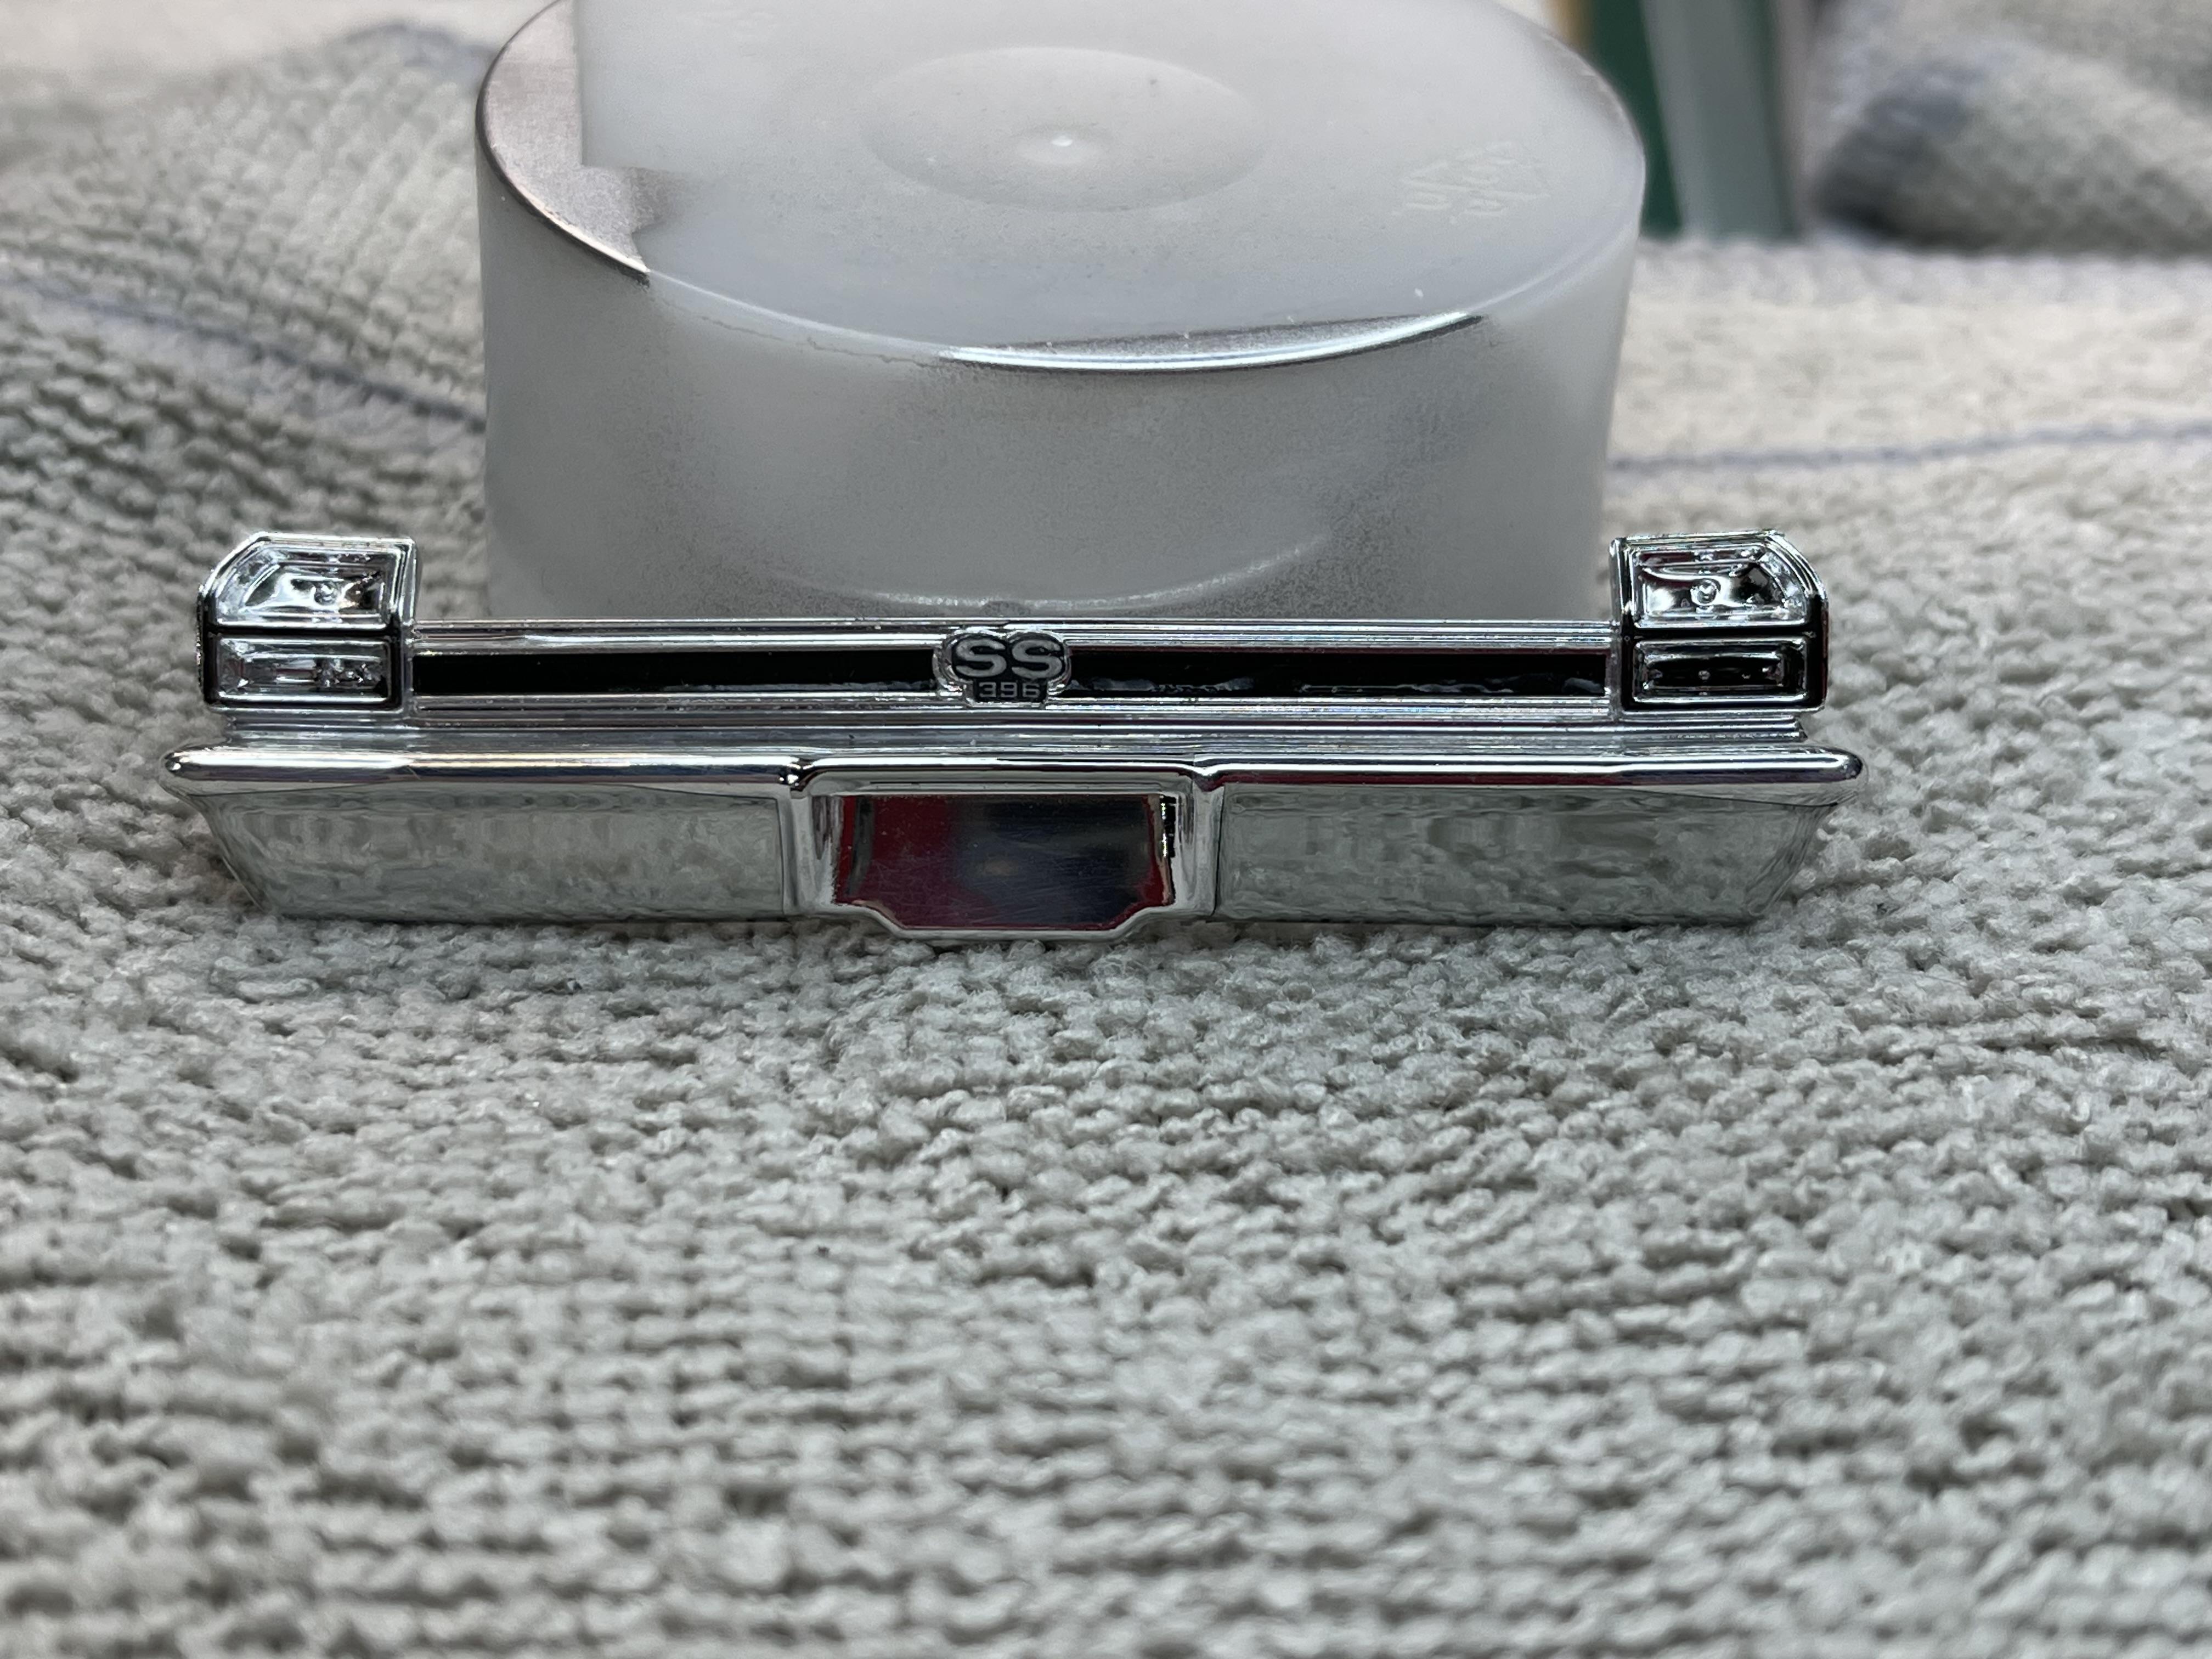
Was able to get a some bench time in and as you can see I have added the decals to the drive belts, front grill , battery which I also finished detailing the front grill and battery. And also added the decals to the rear bumper but I still need to install the rear red lenses.
-
Kevin, MCW does have the correct GM green paint for the 69 SS which then it would have to be airbrushed.
-
Has anyone used Future Floor Polish over your chrome parts that come with the kit ?