
MitchP
-
Posts
301 -
Joined
-
Last visited
Content Type
Profiles
Forums
Events
Gallery
Everything posted by MitchP
-

Henry J Twin Turbo - Didn't see that coming..........
MitchP replied to Codi's topic in WIP: Drag Racing Models
Oh no, Chris?! More eye candy from the cream of the crop here to drool over! Just got done glancing through the 1st page and I'm hooked already. Have a blessed evening! Mitch -
Henry J Twin Turbo - Didn't see that coming..........
MitchP replied to Codi's topic in WIP: Drag Racing Models
Tim: Still picking myself up from the floor over the shocks... p.s. - never seen Dave's pro mod Camaro WIP... Anyone got a link or location? -
1/16 Scale Army Vega Funny Car - Finished 10/14/2018
MitchP replied to Mooneyzs's topic in WIP: Drag Racing Models
Excellent Chris! -
1/16 Scale Army Vega Funny Car - Finished 10/14/2018
MitchP replied to Mooneyzs's topic in WIP: Drag Racing Models
Chris: I agree with choice #2. The challenge is to get the fabric composition of the model to match the real car. I realize you couldn't get a really good close up of the blanket fabric, so I think you did well. Once you settle on the color combination, perhaps you can prepare a couple of scraps of the fabric and dirty them up a bit to get clutch dust effect. How do you intend to add the brownish/tan color from the original blanket's cutaway? Haven't posted in a while, but this is beyond fantastic. As a strictly can painter, is there anyway someone like me can emulate the HOK black base/clear/Alclad effect? P.S. I've PM'd you a couple times on my progress with the 1/25 scale Soff Seal kits you sent me. Not sure if you've checked, but they're not up on Fotki yet. If you can email me at templetantrum@msn.com, I'll send you some. Otherwise, they'll get on Fotki eventually! Mitch -
Dave: That paint is sweet. The wing resembles a comp. resin item?! I like the way it fits the body lines. I'm afraid to ask about the wheels; they look like rather expensive Micro Nitro ones. If you can get another hood, check out the variety of comp resin scoops. I'm pretty sure you can find something that will work. Just measure the size of the hole in the hood and match it up. Great work!
-
1/16 Scale Army Vega Funny Car - Finished 10/14/2018
MitchP replied to Mooneyzs's topic in WIP: Drag Racing Models
Chris: Congratulations on your 200th page! Hopefully you won't tease us with another 200 until roll-out time! Blessings, Mitch -
1974 Hornet Pro Mod IT'S FINISHED! 2/7/15
MitchP replied to am73grand's topic in WIP: Drag Racing Models
Good for you Ron! I know you've put a LOT of effort and detail in this one, probably more than any of yours I've seen before. The engine is priceless, as well as the improved shifting mechanism. I tried a laptop once with that Camaro that still needs a body repaint, but I put the Racepak on a fake windows screen. I couldn't figure out how to make keys other than carving lines with an xacto and my heart wasn't in it. However, this piece gives me new motivation with the Christine pro mod body parts Tubbs gifted me. Once life settles down this spring, I'm taking your tips and tricks out again and hitting the bench! You go bro! -
1/16 Scale Army Vega Funny Car - Finished 10/14/2018
MitchP replied to Mooneyzs's topic in WIP: Drag Racing Models
Chris: I wait in between pages (or when I can get down the stairs to the computer) just to chime in. I hope you'll save some money for new hats 'cause your head should have grown around 3-4" by now with this build. I nominate this for a permanent sticky in Model Cars Mag (and hopefully a full spread shoot and centerfold for a printed issue) as a testament to your hard work, fabrication skills and pure love of modeling. Mitch -
1/16 Scale Army Vega Funny Car - Finished 10/14/2018
MitchP replied to Mooneyzs's topic in WIP: Drag Racing Models
Fantastic progress Chris, even though some of it is live and learn (not you?). I hope I'm not repeating the obvious, but Scott's cockpit P/E levers are a work of art, but when I got mine I was surprised by the blued reverse side and tried to peel it off like it was rubberized LOL. After asking him, I found out cleaning the part in paint thinner or acetone (if I remember right) would remove the colored side. I only used one piece and foolishly painted the blue side flat aluminum, which ruined the overall effect. Keep up the good work my friend! -
1/16 Scale Army Vega Funny Car - Finished 10/14/2018
MitchP replied to Mooneyzs's topic in WIP: Drag Racing Models
Chris: Wow - lot's of lessons learned from this phase for sure. I think God may be telling you not to be so hard on yourself with the blower casing though! I found Purple Pond hard on plastic as well, but it was my error. I had originally build and painted the McEwen '57 Chevy stretched flopper and shot the body metalflake lime from the Testor's "One Color" line just to be different as I'd heard horror stories of the decals in the kit and mine was a purchase of the original, not the new re-issue. Once nearly finished, I disliked the color and ponded it off. After that, I tried to mask up areas for the bumpers and go for the original red; however, my can skills aren't all that good and I can't afford a gun kit. After the 3rd try, the pond solution had softened up the plastic it was unusuable. Luckily, am73grand came to my aid and we found the mid 2000's Avenger body style of Densham, Lee, etc models fit my '57 chassis perfectly. This is even with some mods on my part where I grafted an insanely large 3 hole pro-mod hat and blower onto the stock engine build. It's primed and waiting to be painted one of many choices I have. Your effort is looking top-notch and I hope you make a 12/31/2015 deadline brother! Mitch -
1/16 Scale Army Vega Funny Car - Finished 10/14/2018
MitchP replied to Mooneyzs's topic in WIP: Drag Racing Models
WHOO WHOO CHRIS! Thats got to be the most intricate detail Ive seen in quite a while! -
1/16 Scale Army Vega Funny Car - Finished 10/14/2018
MitchP replied to Mooneyzs's topic in WIP: Drag Racing Models
More beautiful work Chris. I can't wait to see more plumbing detailed and hooked up. Taking notes, taking notes.... -
WOW Chris! That is smokin'. My kit was the Iaconia kit turned Billy Glidden pro sportsman/stock. I never did get good pics unfortunately, but you can check out my Fotki and there are some from a digital camera. Newbie stuff pretty much, but I have the Bob Glidden kit in the closet with the family and all the trophies on the front and it's my "holy grail" of builds to come. Mike's build definitely has a great stance and detailing.
-
1/16 Scale Army Vega Funny Car - Finished 10/14/2018
MitchP replied to Mooneyzs's topic in WIP: Drag Racing Models
Chris: Thanks for the education! That's mind-blowing conceptually, although it kinda takes the purist viewpoint out of a build, y/n? In any case the work in exceptional. Not sure about the injector sizing for the holes as I've seen 1/25th builds using brass ferrules with .020 alum or similar rubber line. I'd have figured at least .025 or .035 for your scale but what do I know? looking good bro; have a blessed evening! Mitch -
1/16 Scale Army Vega Funny Car - Finished 10/14/2018
MitchP replied to Mooneyzs's topic in WIP: Drag Racing Models
Chris: it may be buried in the massive number of pages, but briefly how does this 3-D printing work? Do you give someone a drawn spec (picture) or a physical part (styrene or resin) and they create an actual translucent copy? That is totally incredible my friend and it shows your dedication and passion for detail! -
Henry J Twin Turbo - Didn't see that coming..........
MitchP replied to Codi's topic in WIP: Drag Racing Models
Thanks Tim! Does your nickname happen to refer to the old rock band from the late 60's? Us ex-hippies gotta stick together! I was thinking that styrene would still make an acceptable chassis without compromising the integrity of the build, but with the expertise and equipment you've got go for whatever you feel comfortable with. Check out DragRacingUnderground.com for a VHS called "Mod Squad" which chronicles the early days of top sportsman/pro mod and NOS vs. blowers. With the Soff Seal '57 Chevy, Christine and "Animal" Jim Feuer leading the way against Jim Oddy, Scotty Cannon and other blower turn-coats, it's definitely a nice piece of nostalgia and even has Ronnie Rox's NOS Comet laying down some nice high 6 sec. runs! Mitch -
Henry J Twin Turbo - Didn't see that coming..........
MitchP replied to Codi's topic in WIP: Drag Racing Models
Tim: Do have a link to your build albums? I'd really like to check out your other work. Thanks! Mitch -
63 chevy 2 nova outlaw prostreet updates 10/31/14
MitchP replied to tyrone's topic in WIP: Drag Racing Models
Beautiful Tyrone: I'll be bookmarking this for reference on detailing for the love of the hobby. One suggestion: Hobby Lobby has nice brown hemp necklace rope that when painted aluminum makes a great 'chute line. No worries of lint showing. Thanks for giving us a view of your talent. Mitch -
63 chevy 2 nova outlaw prostreet updates 10/31/14
MitchP replied to tyrone's topic in WIP: Drag Racing Models
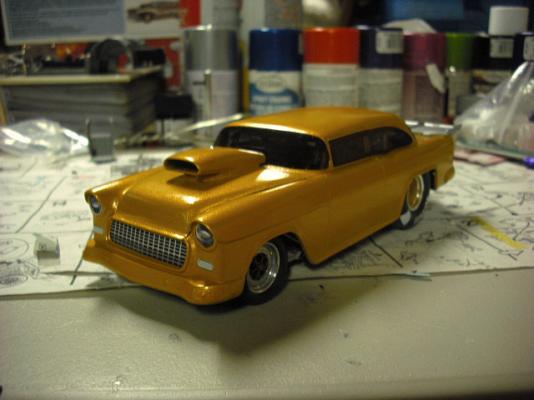
Tyrone: Those sure look like a bead or two from Hobby Lobby for the wheelie bar wheels I've just about given up on a clean install with plastic "glass". I use Testors glass glue, but no matter what, the age of the model, the placement of the install (from inside the body or out), everytime I try installing them it's a disaster. Not only that, but after a great Sharpie job for the window framing/reinforcement or SLIXX decals, it's still a challenge. I'm ready to start trying Pepsi 2 litre bottle material. Excellent detailing on the outlaw hood and the scoop combo. Did you order a resin one-piece outlaw hood and graft the scoop in or vice versa? Either way it's beautiful. If you've glanced at my Fotki builds so far, I started with the basic twin carb sportsman and then went to modding them into pro-mods like this: http://public.fotki.com/Mitchp/chevy-drag-racing/fotki-55-chevy-2-jpg.html to this: http://public.fotki.com/Mitchp/ford-drag-racing/hays-t-bird-pro-mod.html My attempt at bondo on a hood doesn't quite cut it yet LOL... And yes, I've tried the link, image,etc options and the pictures won't insert into the text. It says something about an illegal file extension -
63 chevy 2 nova outlaw prostreet updates 10/31/14
MitchP replied to tyrone's topic in WIP: Drag Racing Models
Tyrone: you made a glue bomb mistake??? LOL. j/k I too like the Fiery Orange as I am just finishing up on an old Revell Tony Fonti LAPD Camaro kit which I changed the theme from LAPD to pro mod with Ron (am73grand) walking me through the process of building my own cage for the 1st time and putting the intense detailing on the engine. I shot the Testors and it came out a little darker as I used grey primer on the white body, but it looks great. I've never had luck spraying any clear, so I use that J&J floor wax liquid trick for a clear. My only problem was the windshield and side windows - I meticulously used several sizes of Sharpie to outline the glass as it had those support strips molded into the kit around the edges. The the window install was from outside rather than inside and you know how older plastic kits warp over time; the Testors window glue still made a mess despite my best efforts. It has a lot more window decals now than I'd wanted to use but I still like it. I'm adding a Comp Resin promod/stock rectangular resin wing to the rear for a little extra. Great job on your build as usual and thanks for giving us newbies a bar to aim for! -
Need help with roll cage
MitchP replied to topher5150's topic in Model Building Questions and Answers
Bill's right: Sometimes you need to stretch your skills with these kits, especially with cages. I got help with a nice tutorial here: http://www.modelcarsmag.com/forums/index.php?showtopic=72815. Doug's cage is nice too. I wish I had an easy way to build a jig as I build pretty much the same basic cage for pro mod cars which are supercharged conversions of the Revell "pro sportsman" series. The hardest trick for me was getting used to using a candle to heat the Evergreen rod to the right angle without going overboard. I've heard there are other methods like hair dryers, soldering type guns which put out a much lower heat to allow more precise bending. Good luck. -
63 chevy 2 nova outlaw prostreet updates 10/31/14
MitchP replied to tyrone's topic in WIP: Drag Racing Models
Tyrone: Another wild and tastefully detailed build. Question for you please: based on a recent Hot Rod article about a gold "Fastest Streetcar", it used an MSD crank trigger magnet setup except the feeds to the plugs were all individual coil units. I see on yours you have a simple MSD coil used with your crank trigger system. May I ask how/where it's wired in? I see so many possibilities with your creations but I'm so new to the game I don't want to throw a bunch of stuff together that violates a real 1:1 relationship. Thanks and good luck with your competitions! -
Tyrone: Not to jump your thread - but you did ask for some pics LOL. Like I mentioned in the PM, I'm only a couple of years and about a half dozen builds into newer models but I'm trying to learn anything I can from the excellent builds here. Too many people to thank, but Ron (am73grand) has withstood the most q&a from me without losing his mind . Here ya go: http://public.fotki.com/Mitchp/ I intend to do individual build threads for most of these once they are all finished.
-
Man, I wish there was a delete button for accidental multiple postings...
-