
MitchP
-
Posts
301 -
Joined
-
Last visited
Content Type
Profiles
Forums
Events
Gallery
Everything posted by MitchP
-

Henry J Twin Turbo - Didn't see that coming..........
MitchP replied to Codi's topic in WIP: Drag Racing Models
Tim: I've been off-line with health issues which have benched my own modeling for a while. Being a kit basher, there isn't much I've been able to take from your artwork or from Mooneyez's Stardust, but the last I was on here both of you were creating astounding pieces. Besides the changes in the board, it's gonna take up a lot of time catching up to your work as well. Now that I can start work again, I've chosen the re-issue Chi-town as a close to possible build, but detailing it greatly in the ignition, fuel and slicks department. The other piece is creating a blown pro-mod out of a Glidden p/s with Lenco push button shifting and modern blower with all the ignition and fuel system tricks, along with a hand made pro cage. Keep up the crazy great work! You inspire a lot of people at all levels! -
How many kits do you have in your stash?
MitchP replied to danman6677's topic in General Automotive Talk (Trucks and Cars)
I've only picked this hobby two years ago, so I have around 7 or 8 finished drag models, about 8 in the closet and 4 on the bench either waiting for custom decals or being pre-primed and put back so I can jump right in if I struggle on one. I do a lot of mid 2000 Revel funny cars, retro's like JJ's early Vega and a Monza I just got and my bastardized Heavy Hugger kit (Ford engine with a GMC blower). But the most fun is buying resin blowers, hats, valve covers, one piece rubber slicks and suspension DIYs. I'll use the Revell top sportsman chassis or mod a pro stock kit into a pro mod. -
Good points Cap't (guitar reference for reverb?) Most kit instructions I've found lately say wait 48 hours for decals to dry. As for clear, I've got an unopened can of Tamiya ts-13 that will prolly never be used! Testors one coat for shiny and regular Testors for dull coat protection. Just my experiences.
-
I believe Testor's "Model Masters" line is also lacquer and states it' a two step process requiring their clear coat to work to it's fullest effect.
-
BTW, one advantage to Dons DVD is that he goes into thinning the paint, pressure of the pump, custom jobs, etc.
-
The fold up booth, if it's the same one I have, has a vacuum motor built in for fumes, the stalks with clips for hold parts to spray is separate and it's way too small for painting bodies! I'd recommend staying away from aerosol can propellant and bite the bullet for a pump and gun. Don Yost is a top notch builder and his $20 dvd gives you all the information for the best parts for different budgets, as well as conquering that fear of moving away from spray cans. Alas, I haven't picked it up yet but do intend to. If you have a 40% off Hobby Lobby coupon, you can a beginners acrylic kit from Testors with a aerosol can, six acrylic bottles of basic colors and primer. The point is that is has a single stage (?) gun, glass jar for shooting from and for a little over $10 with coupon, you could start with spoons or glue bombs to get the hang of an adjustable spray method vs. a can IMO.
-
Thanks again all. I'm going to do a spoon test on all Tamiya sprays and then use my Testors ultra gloss clear. Decals are going slowly as these big ones that stretch the side of the entire body and on the hood are very hard to slide off the backing for me. Timing is everything and keeping the water warm. I use a large tray for soaking them so they don't curl up as much. Happy Independence Day!
-
Thanks again. I'm very cautious about painting and clear coats and have spent my share of Power Purple removing bad base coats. I've finally gotten comfortable with the basics, and if you've seen the decals from this MAD Revell kit, you know why I'm concerned of messing up what I've done so far. The spoon idea jogged my memory from following Mooneyez' thread on his incredible funny car build, so I'll pick some up and start experimenting with Tamiya primer, some leftover Tamiya paint and Testors.
-
Thanks guys, but as you see when I originally posted - everyone may have different experiences. That's why I mentioned I always use decals so that could be factored in to any responses. The decals I've been running into lately in mid 2000 Revell funny car kits say wait 48 hours after painting before applying. Testors One Coat dries within 24 hours or maybe a little more. I allow the extra time with Tamiya because I apply extra coats and wait longer in between each one (45 mins) after the mist coats. What about the old saying of stick to the same product line from start to finish? I have Testors One Coat shiny clear coat. Anyone heard of compatibility problems with Testors lacquer clear over Tamiya lacquer base? I don't want to try the "floor wax" liquid experiment again LOL. If anyone can recommend a nice clear coat with shine that won't discolor or destroy decals or craze my paint job, please let me know! Thanks again.
-
I've tried both Testors "One Coat" paints (metallics) and Tamiya (still being an amateur at can painting); I've followed Marco's advice concerning mist coats and then following coats for base. As for clear coats, I only had to wait a day or two to apply decals to Testors and the I waited 48 hours before applying their clear. No problems and I'm really not familiar with polishing systems at this time either. As for Tamiya, this whole issue of using TS-13 has got me like a cat up a tree. I don't shoot models that don't have decals, so I'm looking for real world experience using Tamiya products from start to finish. Their website and linked articles are full of contradictions IMO. Here's my latest project: MAD Jerry Tolliver funny car, body in white. I used Tamiya grey primer first and then fine white to ensure the body was free of mold lines and lightly sanded for the base. I shot the Lavender base TS product and then let it gas for 6-7 days. I now have to paint one small rear spoiler strip yellow along with the fins, which means using some thin Tamiya tape and newspaper to protect the rest of the body. Once these parts are gassed, the whole thing will be assembled and decals will be applied. So, can I apply my TS-13 then or do I have to wait the remainder of time to total an entire month from base to clear? Seriously, I saw that as one of the warnings. I just want to know dry/gassing time for TS paints and then wait time for TS-13. Thanks!!!!
-
Henry J Twin Turbo - Didn't see that coming..........
MitchP replied to Codi's topic in WIP: Drag Racing Models
This a beautiful example of a blower CF application. However, I work with 1/25 and received a sheet of similar scaled CF. I couldn't even start to conceive how to apply the form I needed for a mid-2000's hat, much less my eventual goal of a pro mod style like this. I ended up cutting out a one-piece paper pattern like an exploded box where you have to fold certain pieces correctly to form a 3D image. Surprisingly it turned out well on the top of the hat, but the sides were weak where folded down and didn't adhere well. Besides that, the instructions required the piece to sit for 4-5 days Can you please let on as to how you got the decal to contour to the large, rounded butterflies and how you cut/matched the CF to the gooseneck part of where the hat meets the blower top? Thanks. As usual Tim, a knockout job. I'd hate to even try to compete against builds like these! -
In the immortal words of Charlie Brown: "Aaaaarrrrrrggggghhhh!!!!!!" Links I've been finding: http://www.modelcarsmag.com/forums/?showtopic=31664 Tamiya offers no real help, showing a "tag" decal instead of a body decal: http://www.tamiya.com/english/scale/beginner2/3.htm So, based on Bob's info and addl. research, I just shot a 2nd, more improved basecoat on my Avenger body. This time, water temp holding paint can was appr.100 degrees, distance was closer to model body and speed of paint sweep was higher and more consistent. The original paint job had 3 mist coats completely covering the surface and one overall final coat. It had been gassing out for almost 2 weeks now and despite the knowledge above that "one coat", the metallics and even the Tamiya lacquers may be a combo of base/clear, the finished product was somewhat lackluster to me. I observed the paint application and I saw no runs, sags or errors, so tomorrow I'll examine it with a fine tooth comb and a flashlight on the paint wheel. If it's o.k., I'll give it about a week and apply the decals. During the drying time I'll keep shooting bodies from my backlog and store them in my big tupperware tray with a lid. Thanks for the help everyone! BTW: great article reference from Bob; however it gives good reason for when to clear, but not the process, recommended clear or issues of gas time, etc. http://www.tamiyausa.com/articles/painting-with-tamiya-synthetic-lacquers-35?category_id=8#.VSsUL5PsiZO
-
Bob: I thought somewhere I'd read where if you went the polishing route (or spraying clear) prior to decal application, the decals just wouldn't adhere when everything was ready to go. I guess I'll use an old body I have: sand off the existing color on a fender, prime, mist about 3 coats to some spare base, apply a few mist coats of clear and then let it all gas out. Last step will be to apply decal set as usual and put a few on; see if they hold at least a week. Thanks!
-
Thanks Tony. I saw that option on their color chart and was definitely something of an option,since I use to collect Muscle Machines back in 2002 and there was a '51 Mercury that had a pearl white finish on it. It wasn't hugely different from one of the white '66 GTOs but you could tell. Those little collectibles were fun to fill in on my shelves between the Action 1/24 scale funny cars. The 1/64 Muscle Machines more resembled Rat Fink rods than anything else. They went for around $3-5 dollars retail; I was trying to make shelf space for the models I'm now building and the little cars in near excellent condition only fetch around $2 for a group of five on Ebay.
-
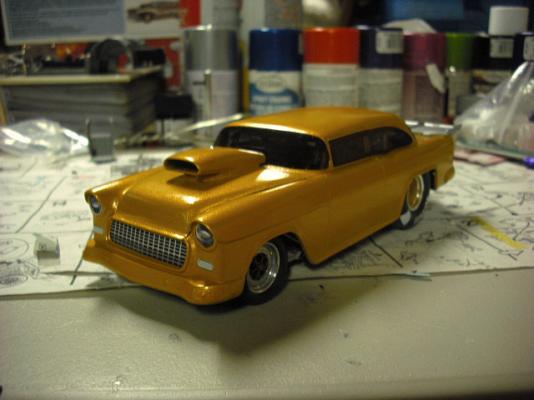
Again folks: THANKS! 30 days is a light sentence considering the effort I've put forth on these builds. Please take a moment to check out the Fotki link in my sig line to see (roughly) my progress through so far. The "Billy the Kid" Glidden may have been my first serious attempt or it might have been the "Nightmare" (aka Kalitta re-issue) black Mustang flopper. The Frankenstein version of the Hayes pro street (what 351?) was one of my proudest jobs as I'd learned to build my own roll cage by following am73grand's instructions and I added my own front support bars and strut mounts along with extra tubing ahead of the engine for a fuel cell. The Gold '55 Chevy is actually a Revell top sportsman body on a failed Shoebox built frame, running gear and interior as I didn't fair well with my 1st attempt at using clear on the Shoebox body and liked the Chevy better. I have the Firebird "street match" car ready to paint with homemade cage and converted carb to blown promod engine, an original Soff Seal Chevy heavily detailed along with a twin with the same converted carb to blown promod engine; parts courtesy of Resin Masters. Last but not least, I was gifted the body parts and glass of the original Christine top sportsman, which I'm using with a spare Shoebox chassis, rear, Hemi engine and hand-built roll cage. This kit will have lots of Futurattraction parts such as an alum front engine mount, strut assembly, hand formed styrene rod front end and strut support, huge slicks and pop-up DZUS fasteners for panels along the tranny tunnel. I'm using a crank trigger system so I hope to make a believable ignition. Also on the bench and making great progress is the Pioneer Tom Hoover Avenger build with some fuel and ignition detailing. All the info you've give me is SO valuable as I think I've got about 6 bodies left to paint that have chassis's finished and waiting! Thanks to each and everyone for your knowledge, I may be able to convince my wife to spend a little green for that Ace hardware hydrator. I think it's only 9" tall and 14" around, but it might fit a funny car body. I just don't know if the temp is adjustable. What setting should a body dry on temp wise and for how long? I gotta crash. Us east coasters get grump in the morning G'night!
-
Thanks folks! The question of an additional coat of base - Bobthehobbyguy gave me several links to the Tamiya site which pretty much showed me I was doing many things wrong in the basic painting process - not consistently heating the can pre-painting, shaking instead of using a stirring motion to prevent separation of solvent from paint before spraying, etc. However, the question of adding an additional coat of paint once I'd discovered flaws in my technique didn't come up. It's only been 48 hours; is it too late to lay down another coat? It looks good (gloss black) but could use a little more depth. If I can't, I'll deal with it and move on to the clearing step. I intend to use Tamiya TS-13 clear; any idea on time between coats? Should I use the gas-out time for the base color? Thanks again! Mitch
-
Bob: this is succinct and prolly the best explanation of EVERYTHING I've been doing wrong! The one coat lacquer from Testors creates that show car look, but this current piece is basically the Matco Tools Nationals Avenger kit with some bizarre resin pro mod pieces like a bigger blower, hat, full fuel system, Pro Tech pulleys, etc. I had to hack the heck out of the interior tinwork to accommodate for the blower! The original kit was the McEwen '57 Chevy flopper; am73grand bailed me out when the original body paint turned out really bad. Turns out the Avenger body and windshield required no mods to fit my overactive detailing imagination! I do have several questions not addressed by the links and perhaps you might know. First, I now realize I could have added multiple additional coats for a deeper finish had I followed the proper steps. As it is, the finish is clean from imperfections like dust and lint. Since it's been about 48 hours since the last coat, is it too late to add an additional coat or two now that I know the correct steps? From what I've read so far, non-contest people like me can benefit from clear coating. However, I haven't found instructions for applying multiple coats of or wait time in between applications of Tamiya TS-13, their clear coat. This the one I want to use because of the amount of decaled surface area on the body. Have you any experience with canned clears of the lacquer variety? You have no idea how much help you've been pointing me in these directions. P.S., I hope your weather is better than here on the East side except I've heard it's a bit dry though. Mitch
-
Hi all: I have painted only four bodies before, all from testor's One Coat metallics. I use Tamiya fine primer and have never had issues. I only use spray can paint as I don't have the budget for everything involved with air brush, hydrator, etc. There have been a few issues with dust which I've lightly wet sanded out based on instructions here. I'm not a perfectionist and don't enter shows. This is my hobby to ease pain from a disability. Only recently have I tried painting with Tamiya as the topcoat. I used almost the same technique as for primer: three mist coats checking for dust or imperfections and correcting them. The primered body gets wiped with a tack cloth or rubbing alcohol using dust free painting gloves. The color coats get three mist coats 15-20 mins. apart to allow for a tackiness to develop and then a final coats are applied. Those coats I fear the most as I have had runs and what you might call "fisheye bubbles" develop which require up to 3-4 days drying time so I can sand them out and re-shoot the area carefully. Smaller dust particles might get 3-4000 wet sanding to fix but if I've not used 2-3 heavy coats I'm afraid it might get to the primered area. I just used my first can of Tamiya lacquer to spray a funny car body and although it looks nice, I didn't go heavy on the one coat after misting for fear of messing it up. It's dried and has been for two days. I'm not going back to using Future, and I understand I now must wait up to 4 days before applying clear. I will be using Tamiya to be consistent with all paint products. If I had applied the clear within 20 minutes of the last coat, I believe I could have shot 2 coats right away. This is important as I have 6 finished builds waiting to paint, along with 2 in WIP! Is it possible to re-dust it now and try to add another coat of the same Tamiya base? If not, what purpose would adding a clear coat be? If someone here could examine my techniques and point out where I could improve, I would appreciate it. As you might tell, I love detailing drag race cars but HATE to paint!
-
Scale of Lenco Transmissions In Revell Drag Kits?
MitchP replied to Quick GMC's topic in Model Building Questions and Answers
Funny story and kinda off topic: I obtained this kit in a trade and was going to build it stock, but the pro-modder in me swapped in a Resin Master blower and hat. I also swapped in a homemade push-button Lenco shifter with air bottle and safety blanket around the trans. I don't do well with mult-color paint jobs since I can paint, so I shot it with Tamiya fine grey primer and then Testors "one coat" metallic fiery orange. Sad story short, I prepped the windows with Sharpie for the outer support but totally nub'ed the install and damaged both A pillars and the glass. The intrinsic value of the model rarity went with the body at about 40mph against the basement wall. The carefully detailed engine with D/M fittings, Pro Tech line, etc. sat for months until another Godsend came my way. A 1/16th scale pro modeler here gifted me with two Soff Seal '57 kits; one complete and one missing some pieces. The body parts were all intact. Believe it or not, the Soff Seal body fit the Tony Fonti chassis like hand in glove. Now I have a genuine Soff Seal NOS car and a pro mod version! -
Henry J Twin Turbo - Didn't see that coming..........
MitchP replied to Codi's topic in WIP: Drag Racing Models
Tim: I might be a rich man right now (or at least be in a better state for buying resin promod bodies, those cool promod '68 stretch Camaro frames/body combo's and LOTS of MAS alum. accessories and even completely built engines) if had known about the discontinuation. I bought the typical minimal dremel kit 2 years ago and have since been buying bits for spark plug holes in valve covers, etc. I'm sure the stylus's were available. I live in a rural area where there are small Ace hardware stores and specialized home repair centers not associated with Lowes, etc. If you PM me a part number, I'll scour our immediate area in these small cubby holes and I might have some luck. And no, I won't ask $200 from you Mitch -
Henry J Twin Turbo - Didn't see that coming..........
MitchP replied to Codi's topic in WIP: Drag Racing Models
Tim: I was about to ask a simple question until I followed the pics and saw the engine. The P/E Chrysler crank trigger set, DZUS fasteners and sportsman motorplate I just received from Scott Popham for "Cristine" seem almost insignificant. On top of the rear shocks, are those dimples designed for use with a spanner to change spring compression and how did you manage that beautiful work? And pardon me if I missed this in prior updates but about the engine: cubes, twin turbos or single or where can I found out about it. Your work, along with Chris and several others all deserve pages of build pics upon completion in MCM or Scale Auto. Heck, dedicate an entire issue to your drag builds! -
Henry J Twin Turbo - Didn't see that coming..........
MitchP replied to Codi's topic in WIP: Drag Racing Models
Tim: Thanks. I remember the owner of Neverlift Motorsports (RIP) quoting a 25.1C or so I thought as the target spec for mid to 7 sec range, but the tape was filmed in 2001. I guess things may have become more stringent or you desire a more protective environmenty; my point was your build is so overwhelmingly "tubular" compared to the cages of those days. When I see your progress, I can't imagine how a driver could squeeze into the cockpit (compliment!). I researched a later tape with Tricky Ricky Smith's Viper, Scott Shaperall's Vette, and several blower rides more like today's NHRA's cars and the frame/cagework was quite like yours. Thanks and keep up the great work. It's actual motivation for us kit bashers -
Henry J Twin Turbo - Didn't see that coming..........
MitchP replied to Codi's topic in WIP: Drag Racing Models
Tim: I ran across an old relic a bit beyond the artwork displayed here: a Drag Racing Underground VHS tape I used to play non-stop years ago: "Pro Mods Gone Wild". Featuring cars of sportsman/pro mod infancy such as the Soff Seal '57', Christine, Jim Oddy's series of blown 'Vettes that ignited the NOS vs blower wars. The difference between your tube work and then: is it driven by any SFI spec you're working from? Except for "Animal" Jim Fueher's last ride, I've not seen anything like yours. I don't get to NHRA events anymore, so is yours representative of 2015 spec? Sorry for the novel and thanks for the patience as I'm mocking up my 1st attempt at firewall forward tubing and motor plate work using a combo of styrene rod, strut springs, metal rod and alum. My goal is a little more than "pro street" LOL! -
Henry J Twin Turbo - Didn't see that coming..........
MitchP replied to Codi's topic in WIP: Drag Racing Models
Tim: Go back maybe 10-15 years in your building ( I can only hope! ) and imagine kit building, maybe at the level like I'm at: using a Revell '55 top sportsman chassis and related parts to chop on to create a more detailed pro-mod. That's where I'm at, with the help of am73grand, after 2 years of experience. I have to raise the bar this time by extending the firewall forward frame and strut supports to increase the wheelbase. What I'm attempting is like the first Godzilla suit acting films of the late '50s and mid '60s as compared to the new '2000s CGI productions you're putting out! It's truly a work of art that I don't believe I'll ever pursue due to the cost of equipment and ingenuity you express. Like so many others here, it's appreciated and enjoyable to witness you, Mooneyzs, Tim and Dave reach for the sky. I only wish I could make the travel to some of these shows or "contests" (how could one choose a 1st place given the variety of materials used and manhours invested???) Keep up the awesome work. One day Canton Ohio may have a modelers museum to recognize such talent! Mitch