harti20
-
Posts
270 -
Joined
-
Last visited
Content Type
Profiles
Forums
Events
Gallery
Everything posted by harti20
-

Mercedes-AMG GT3
harti20 replied to harti20's topic in WIP: Other Racing: Road Racing, Land Speed Racers
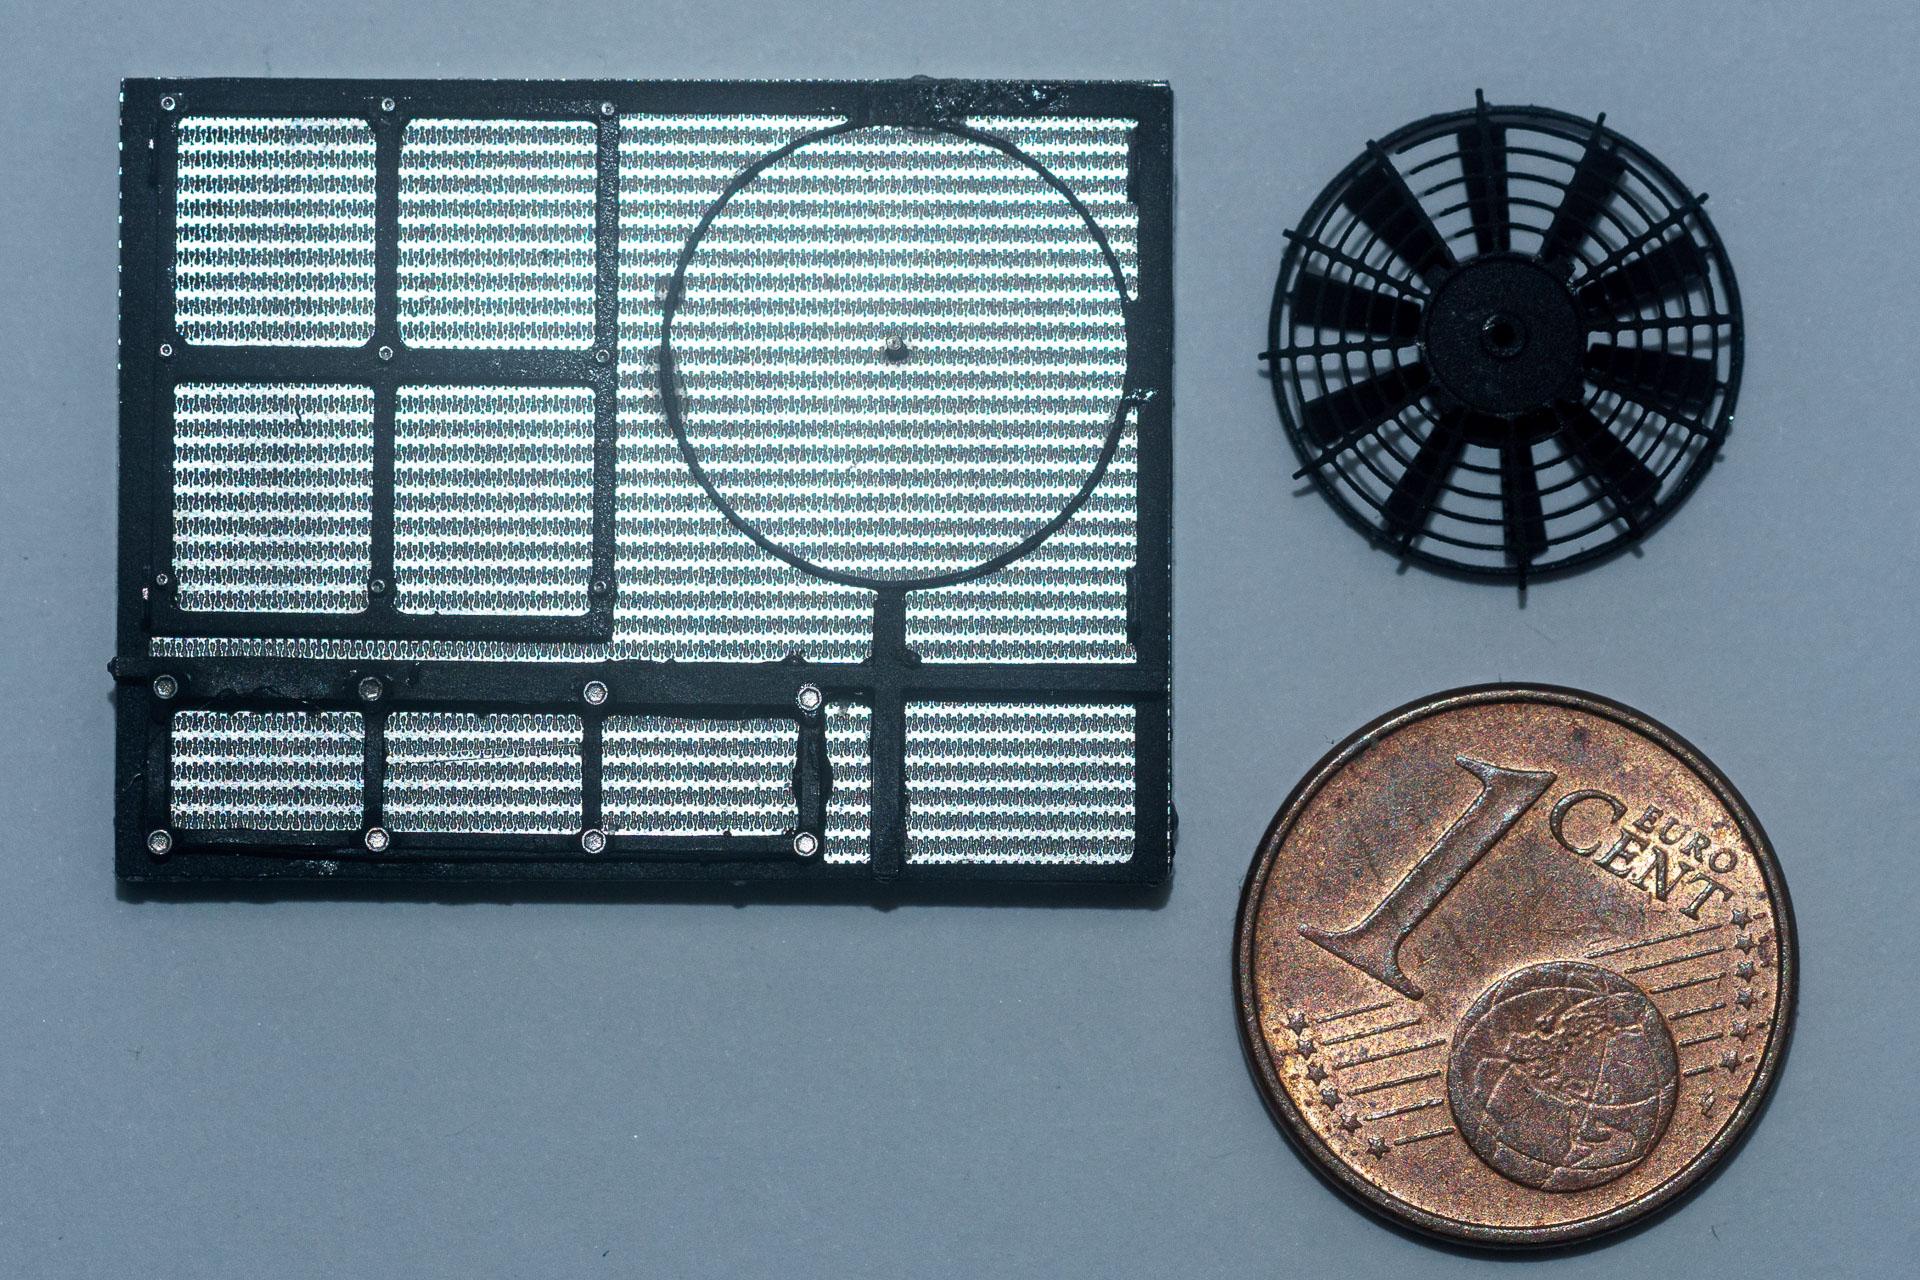
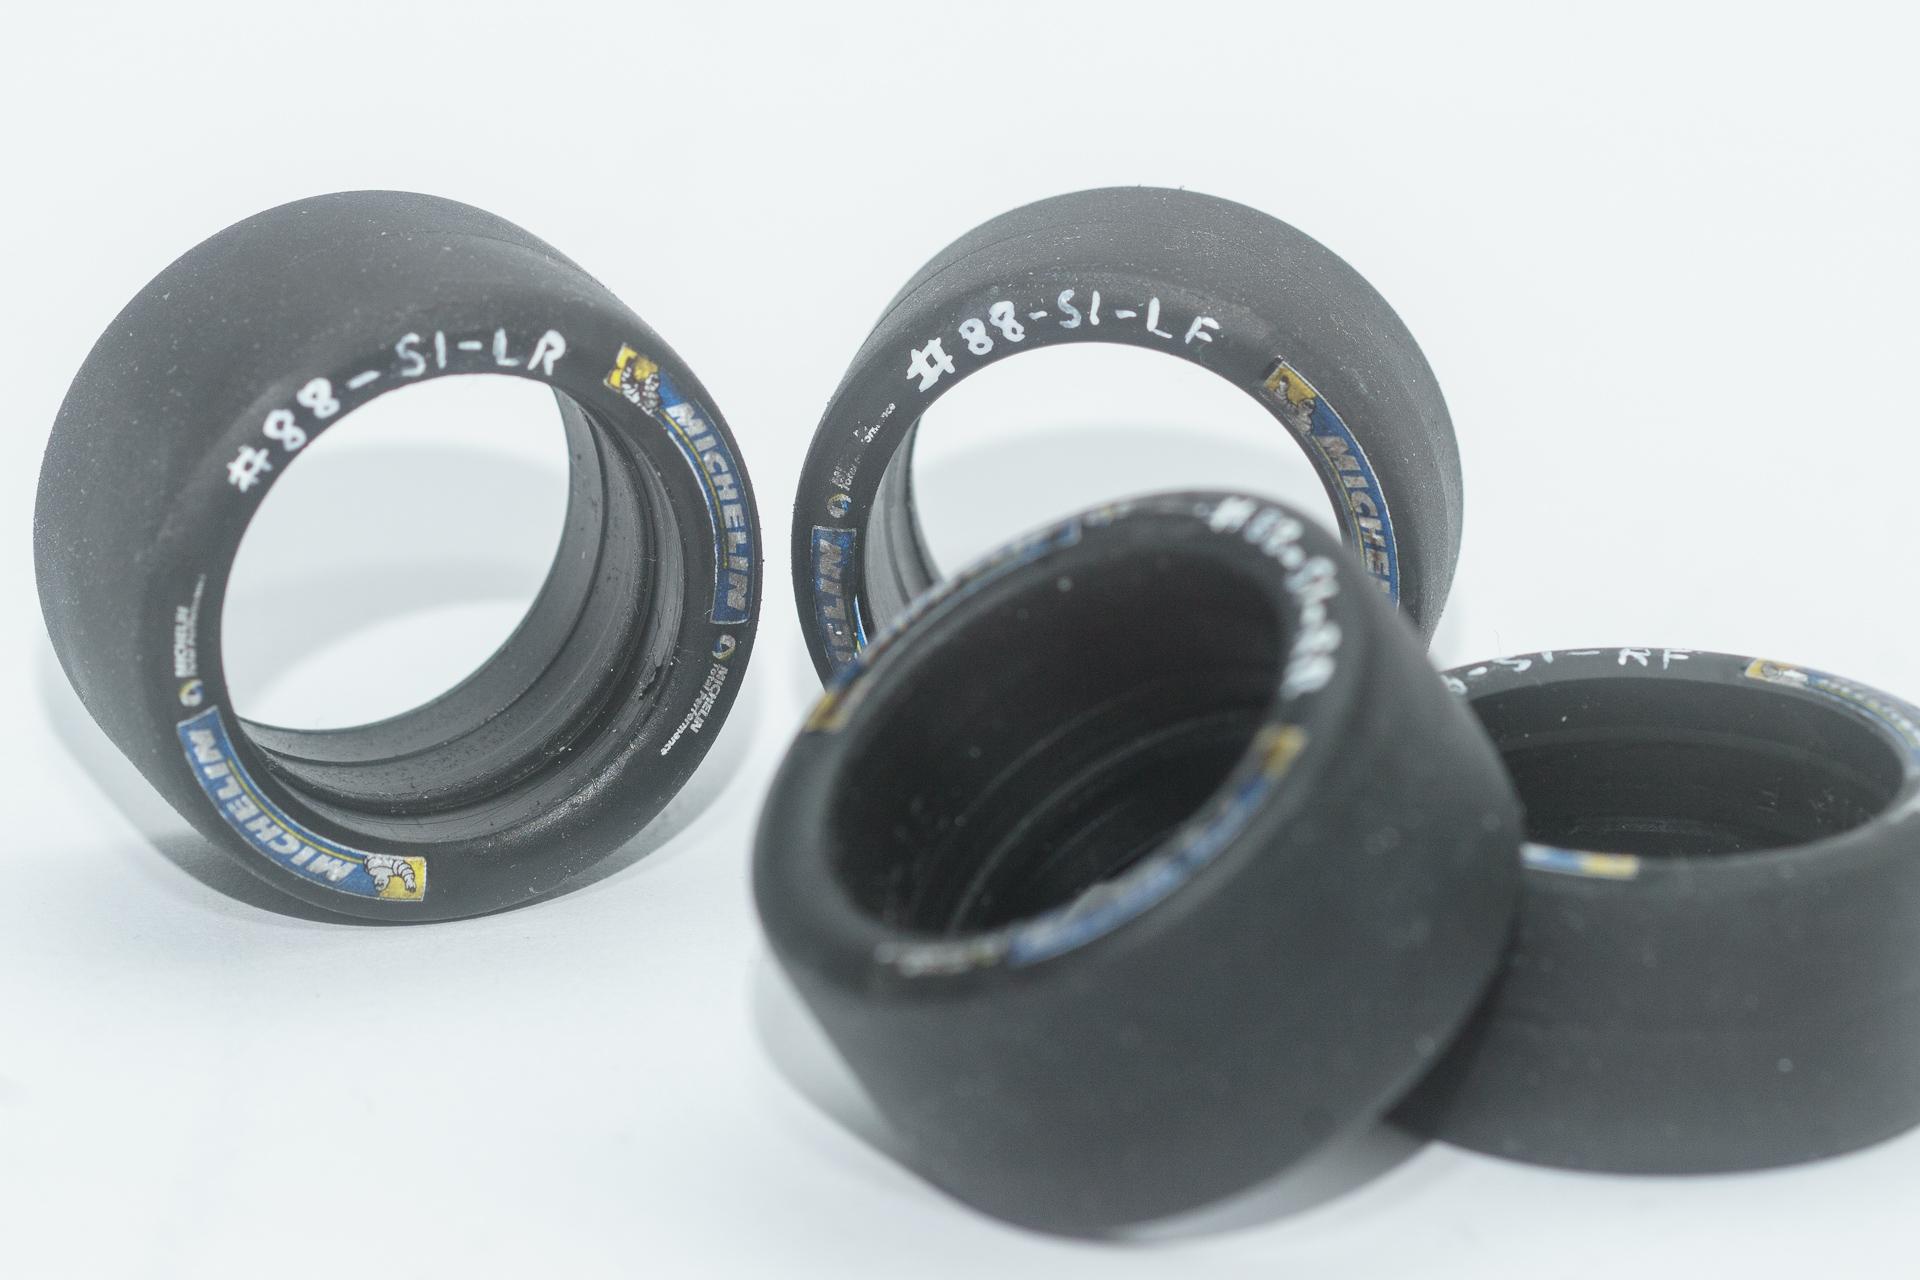
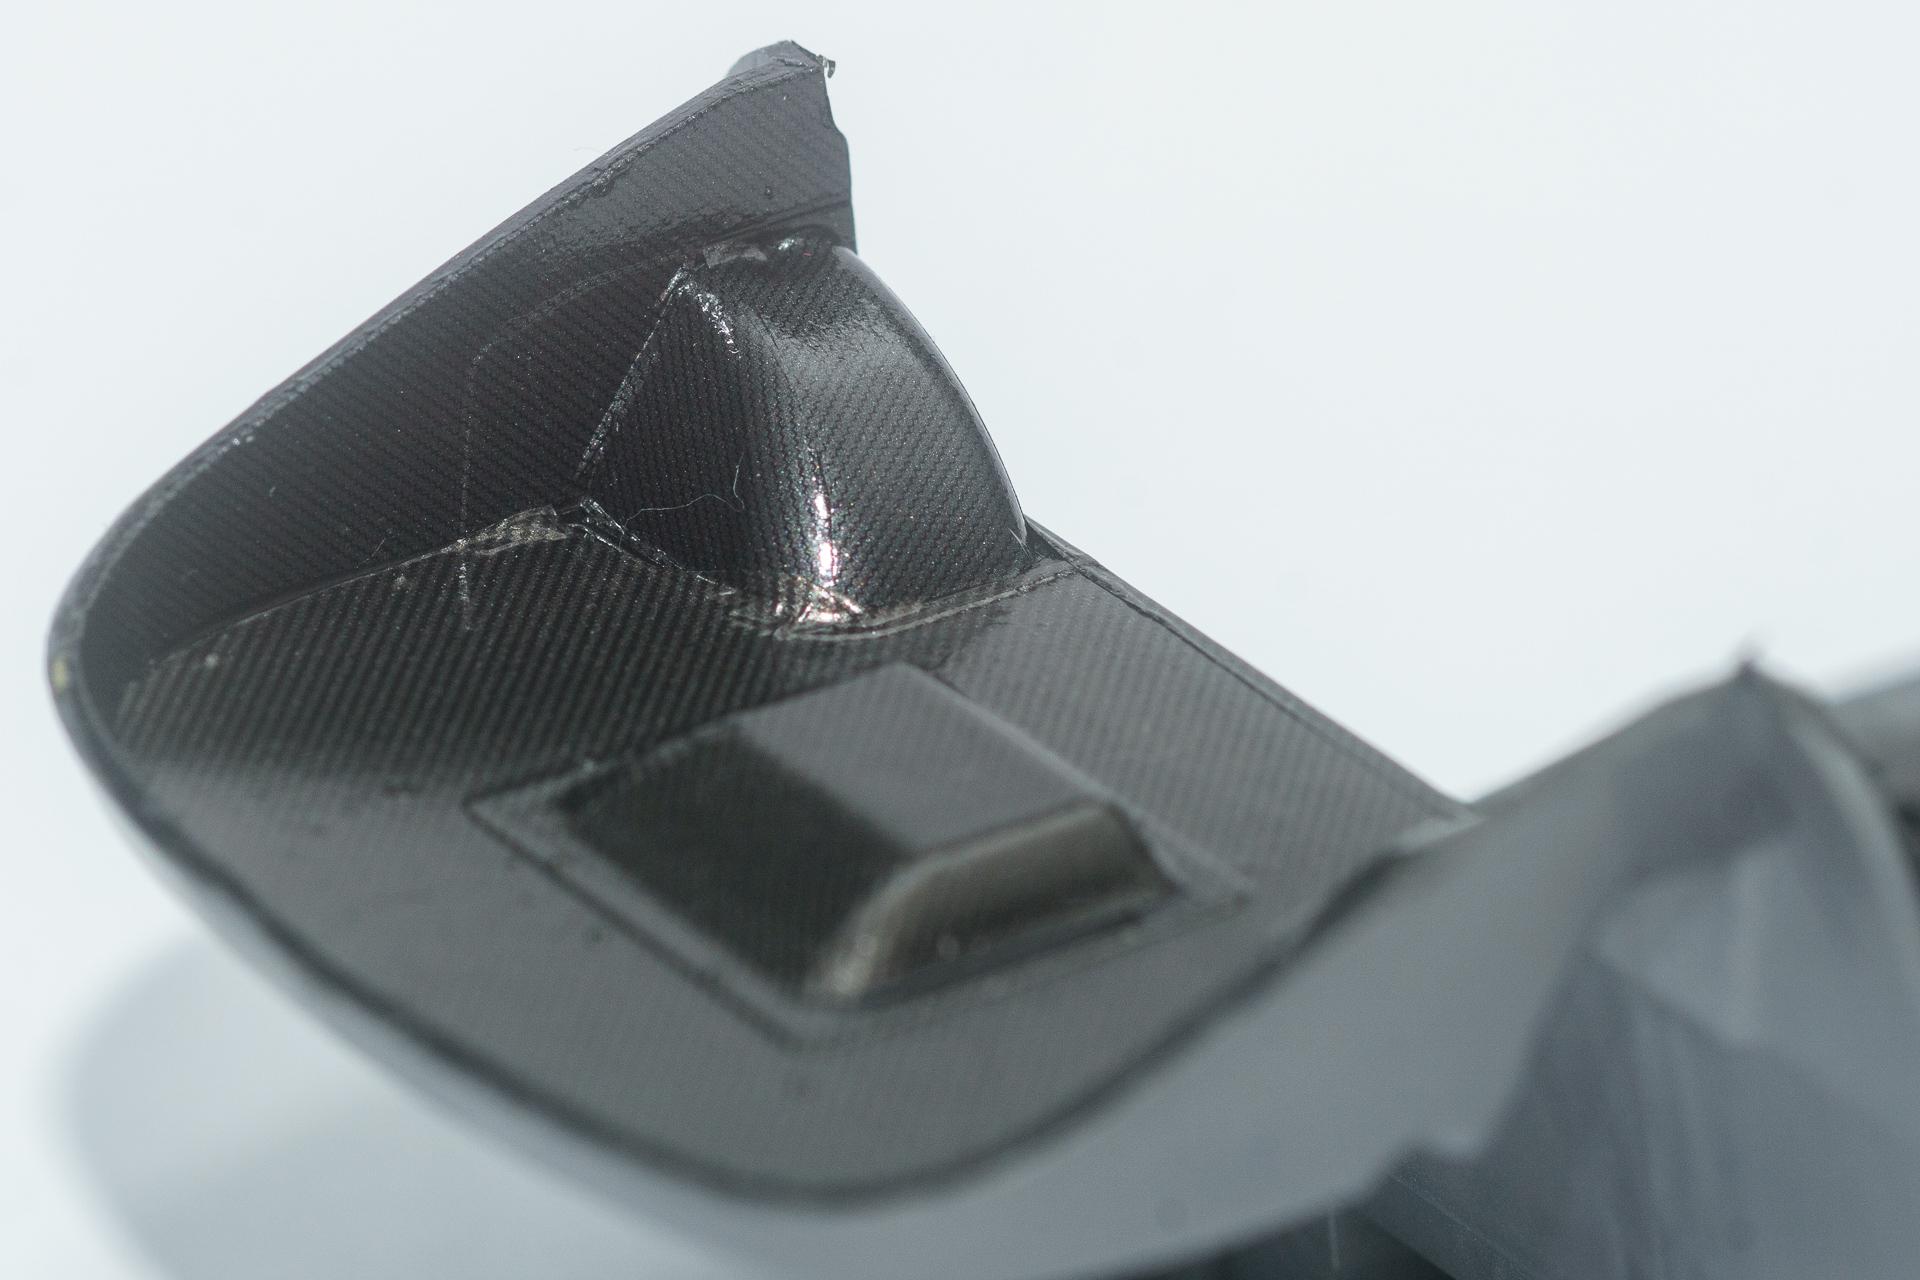
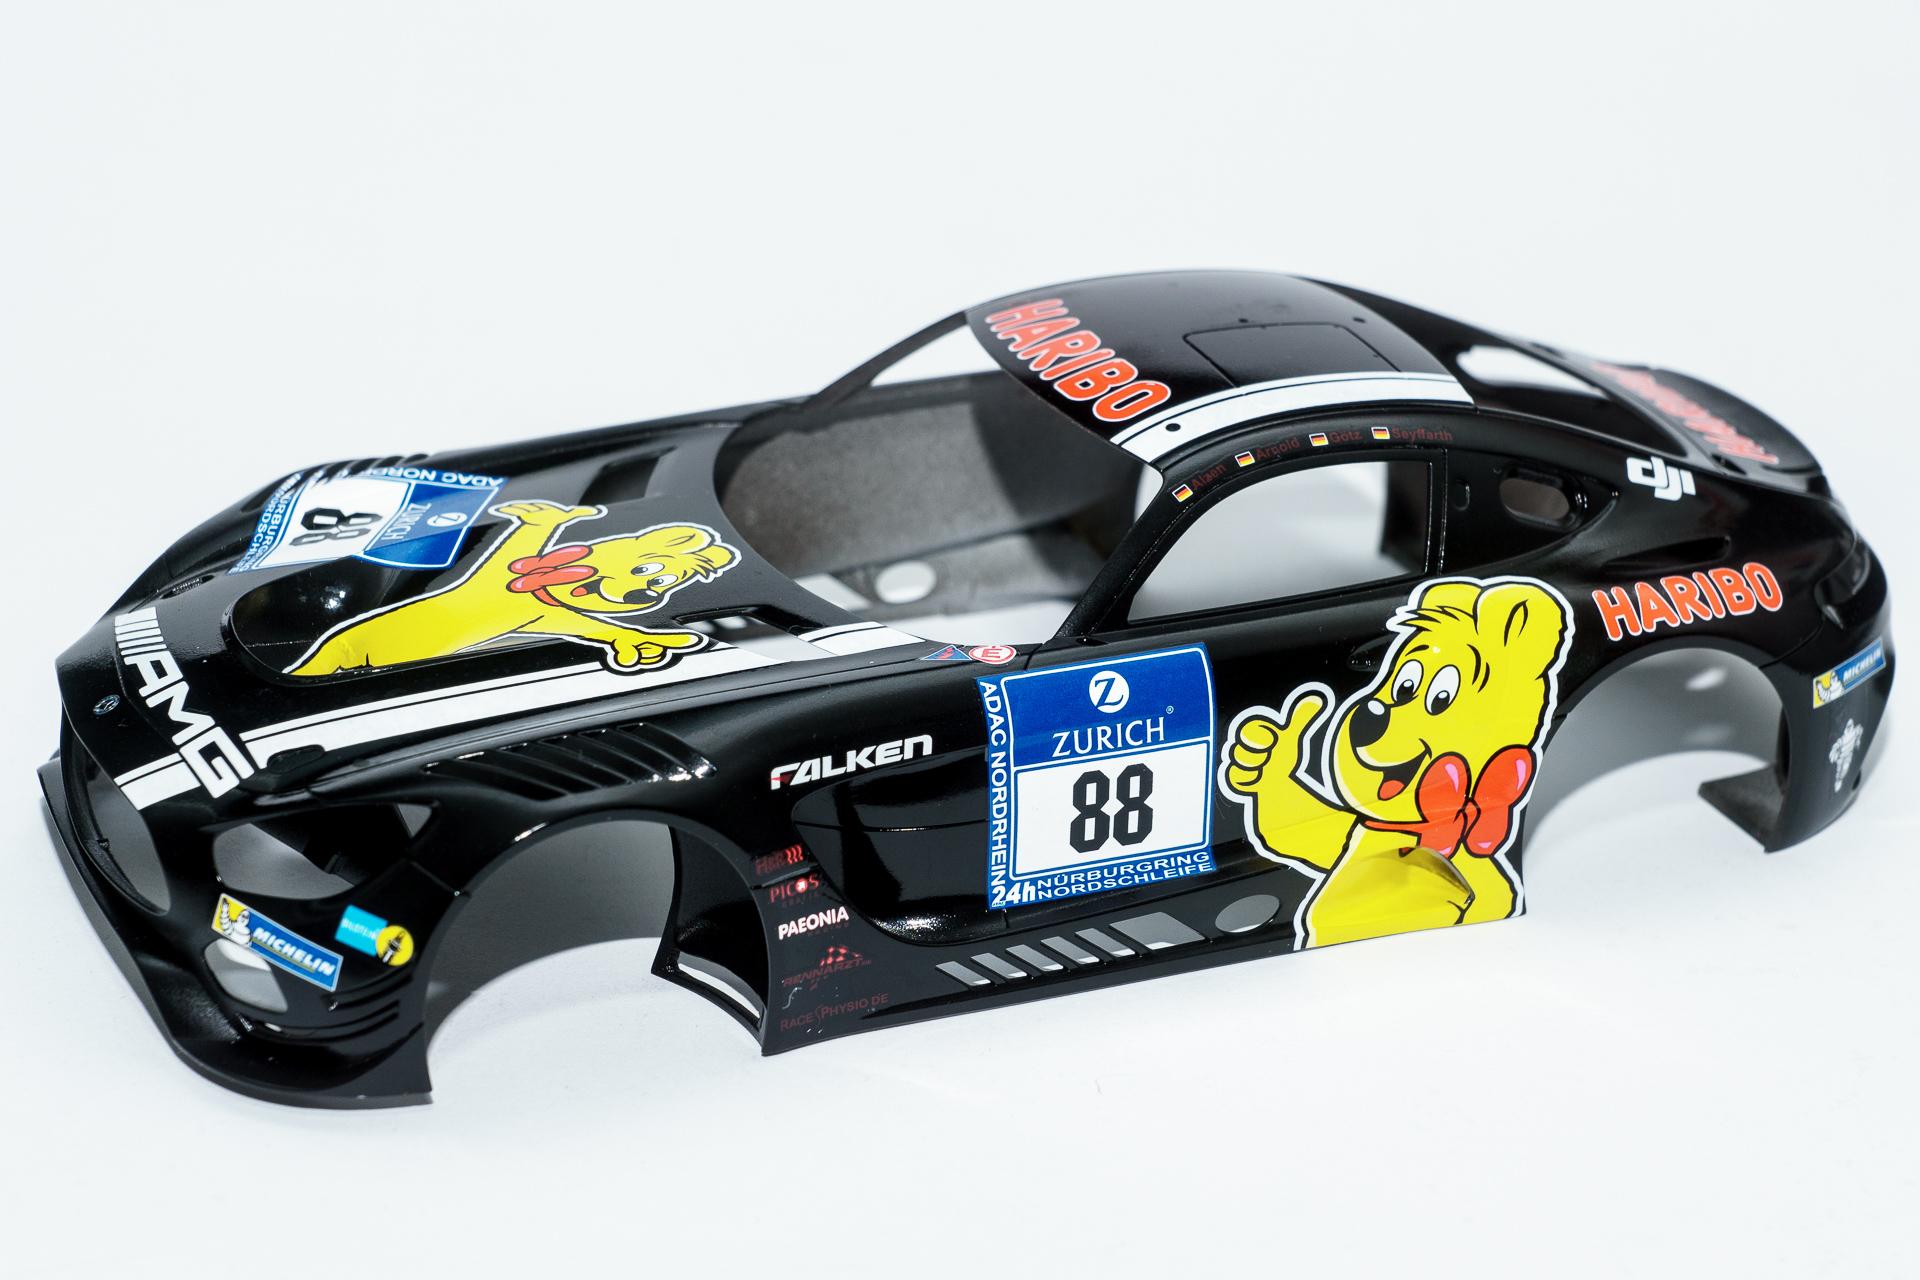
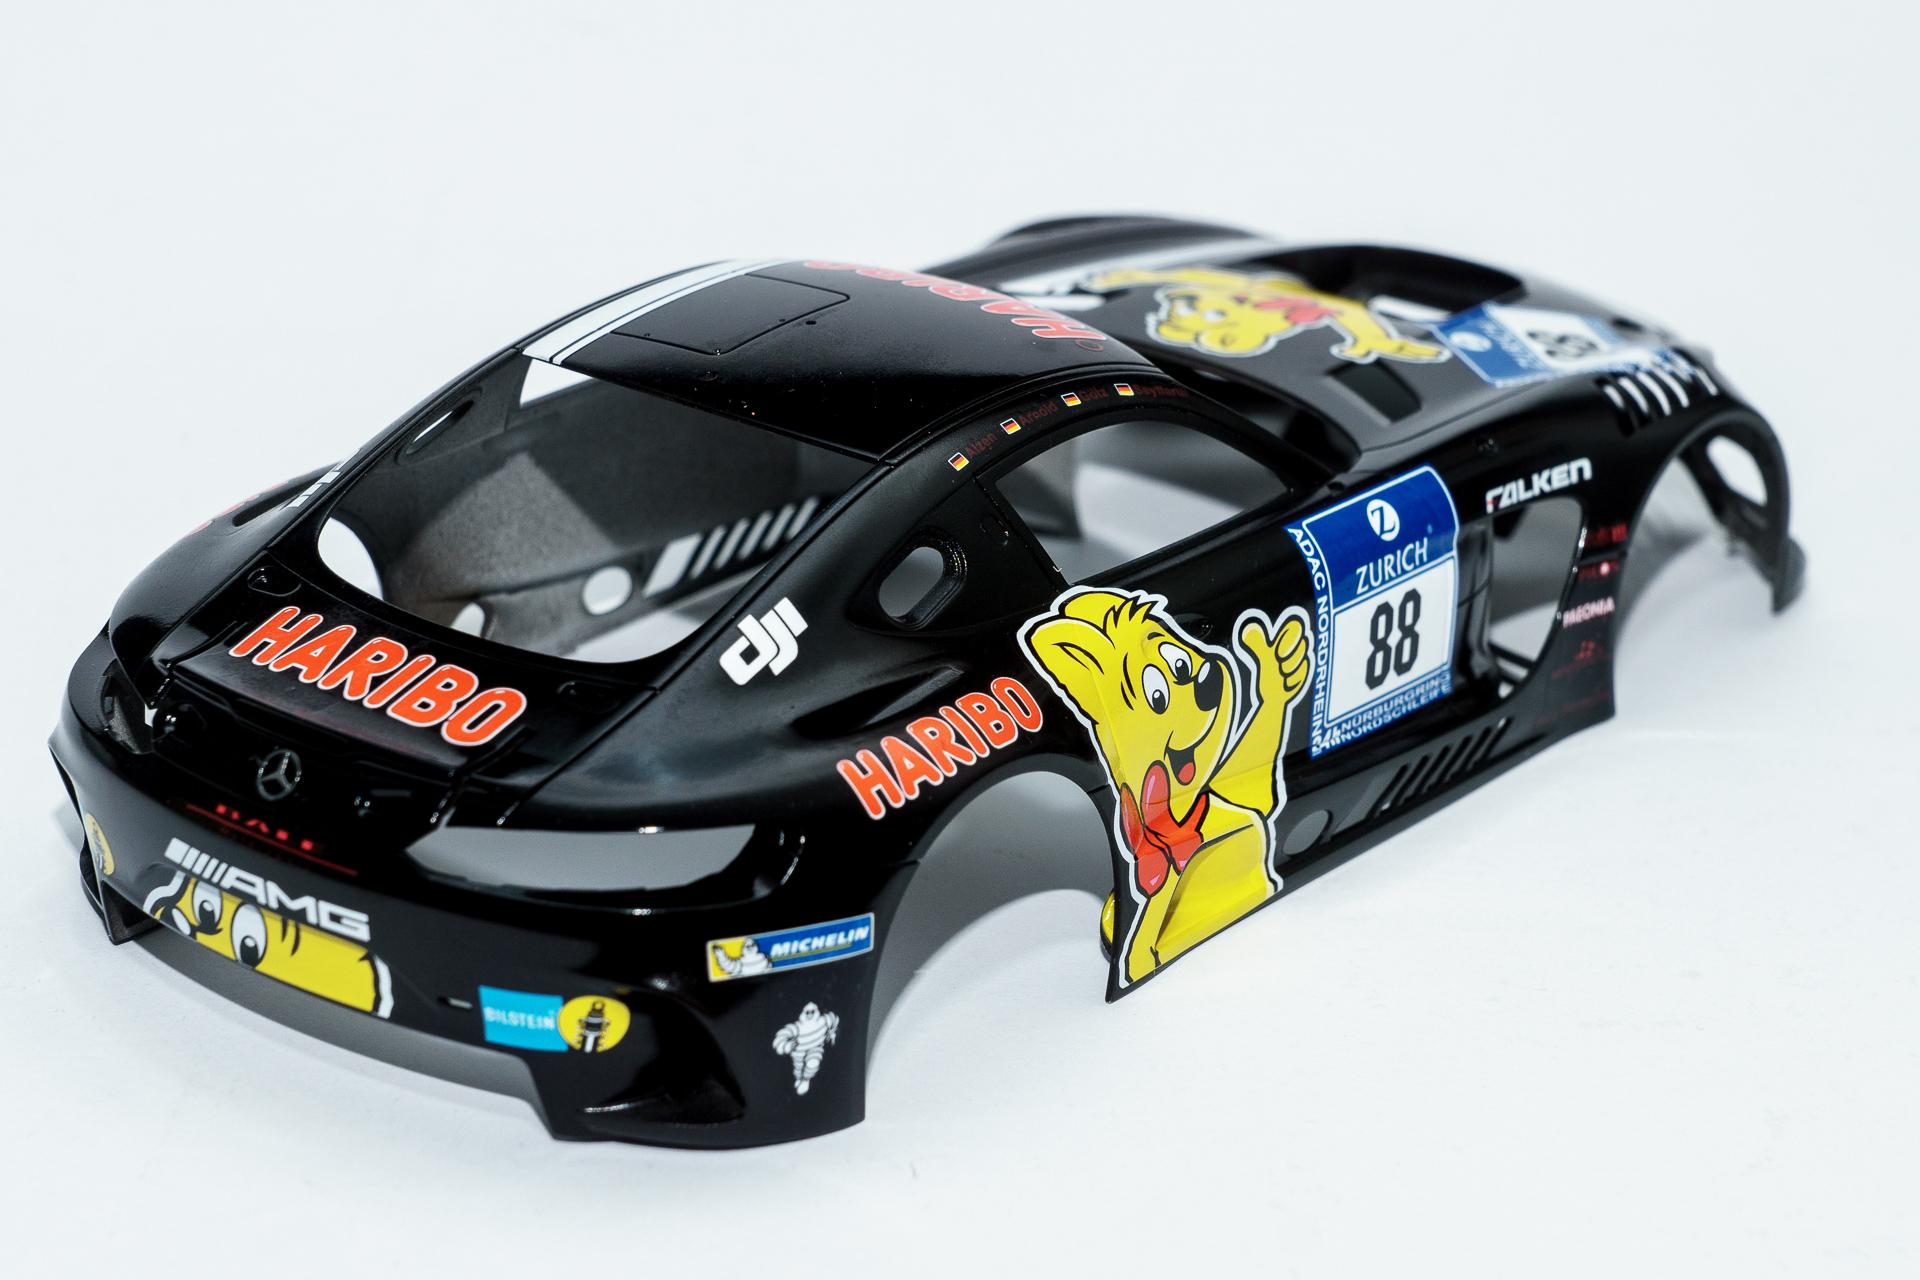
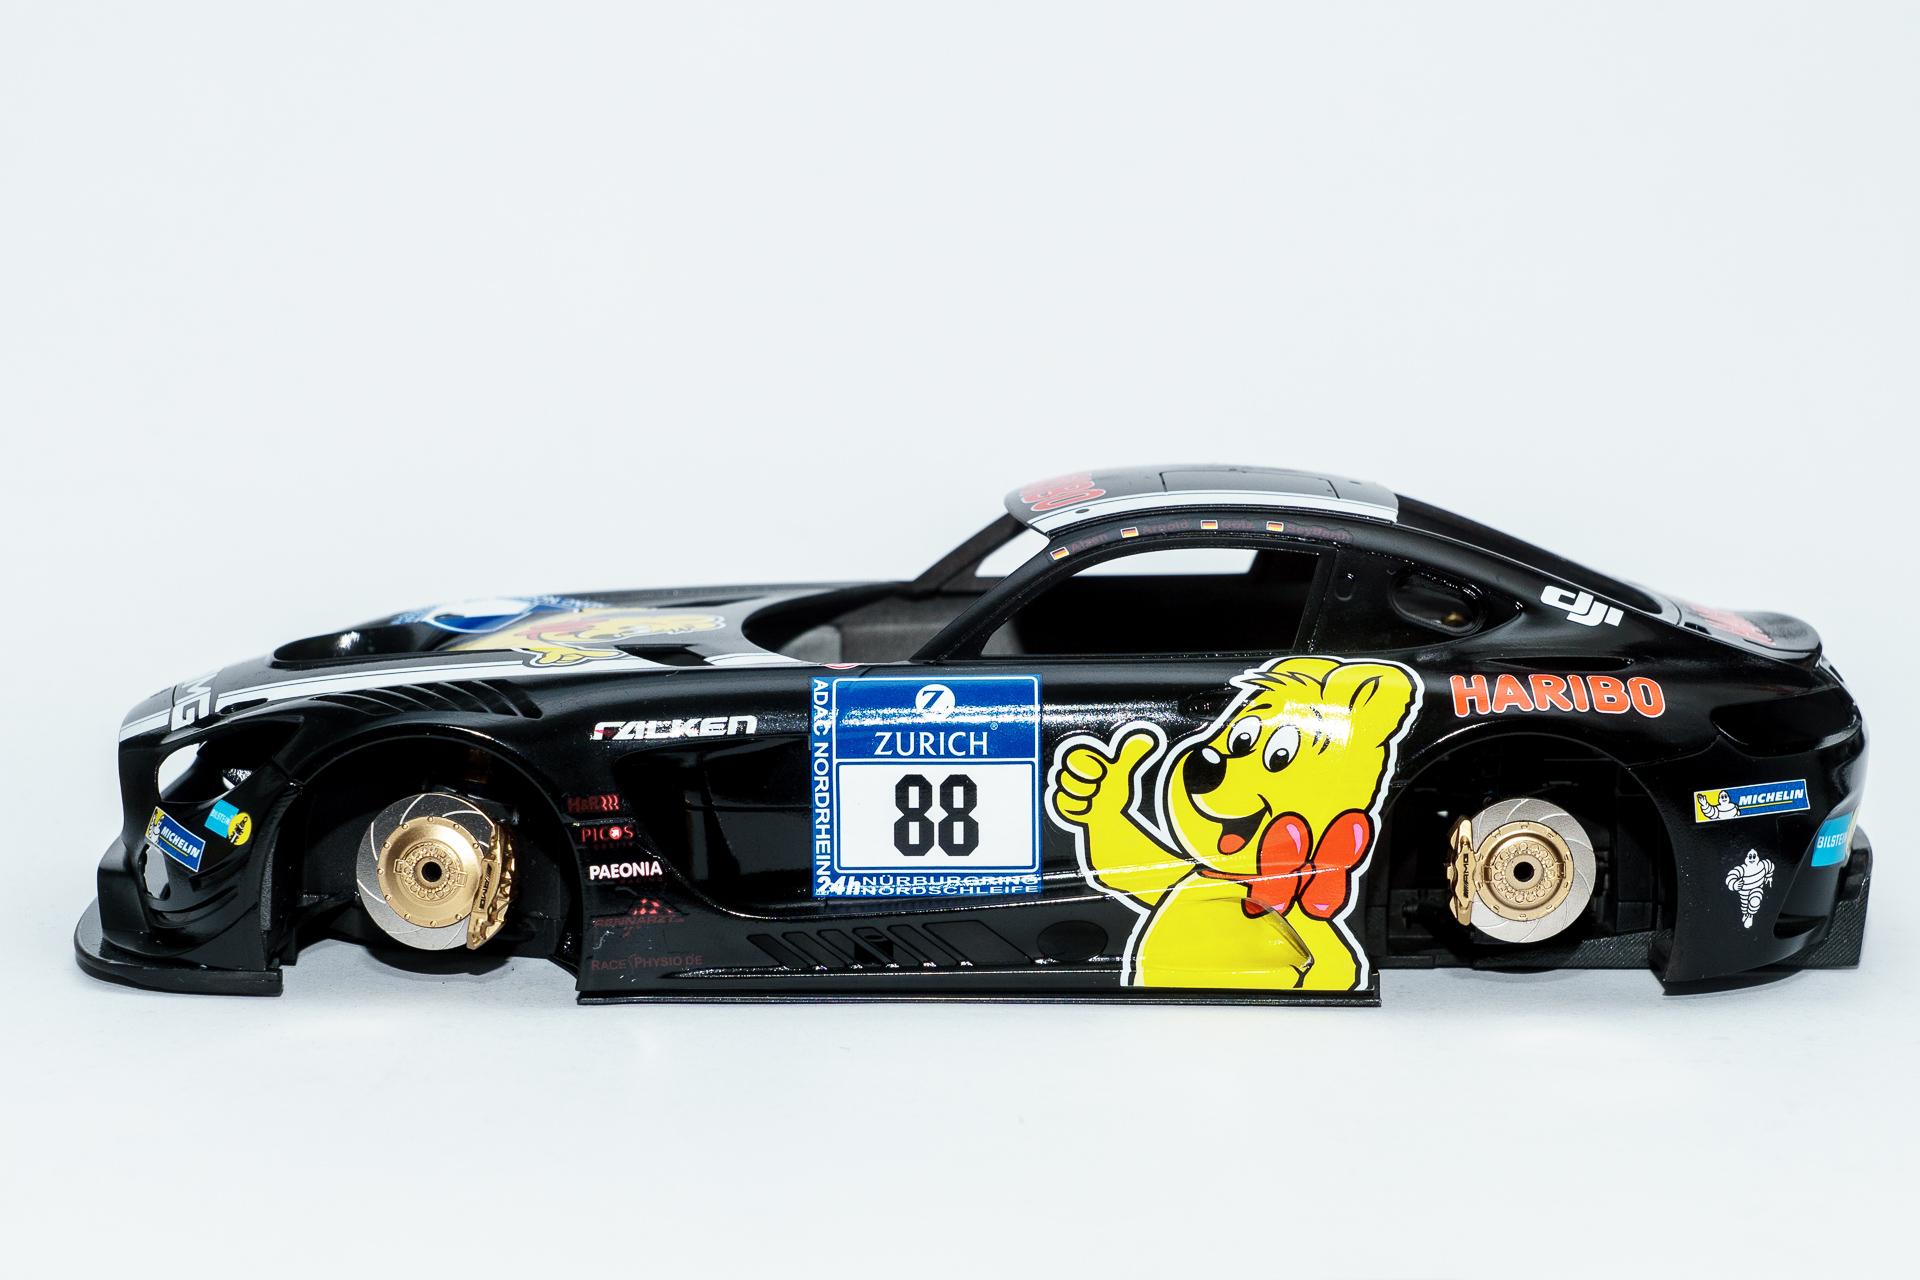
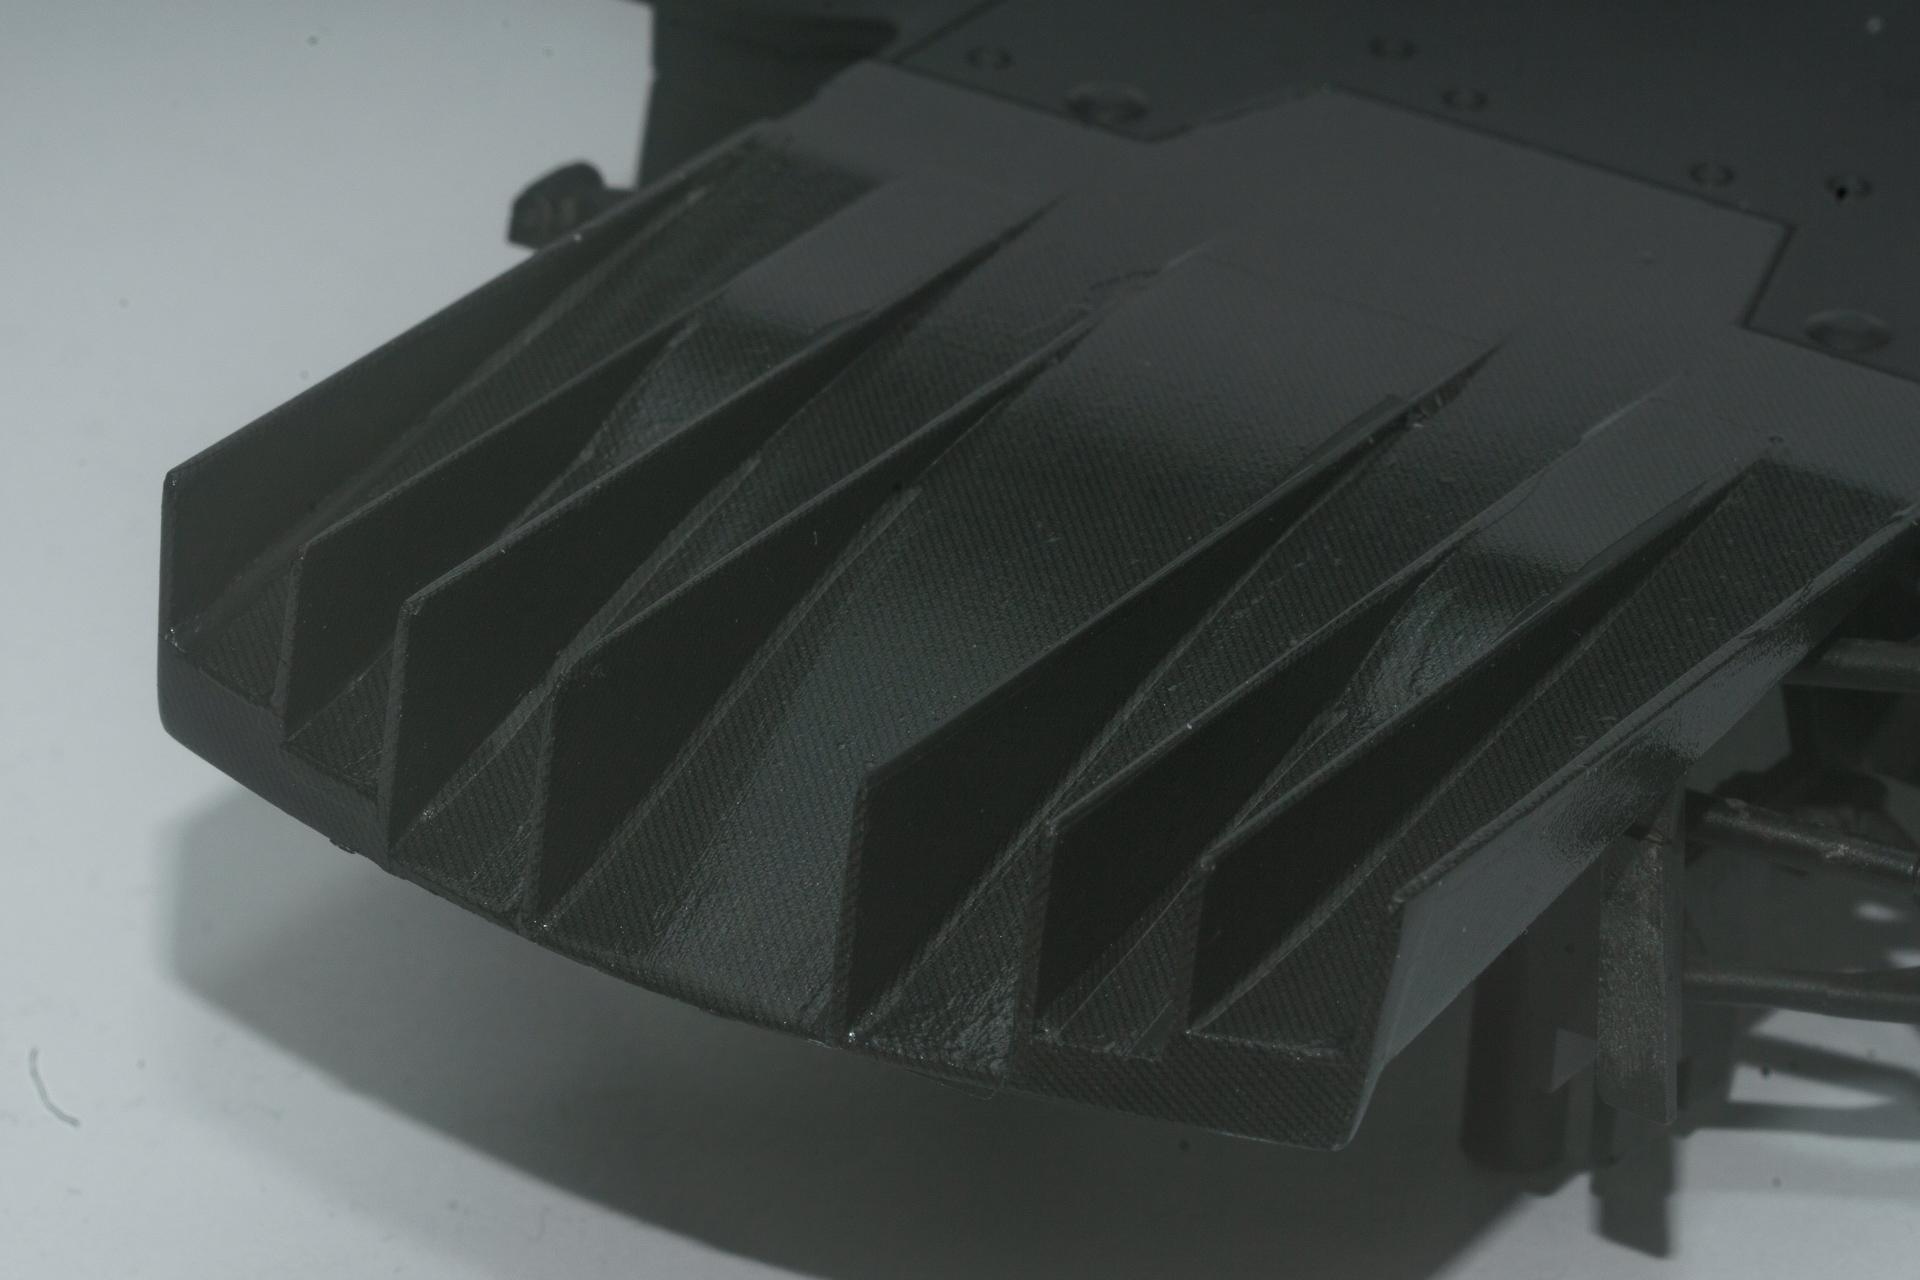
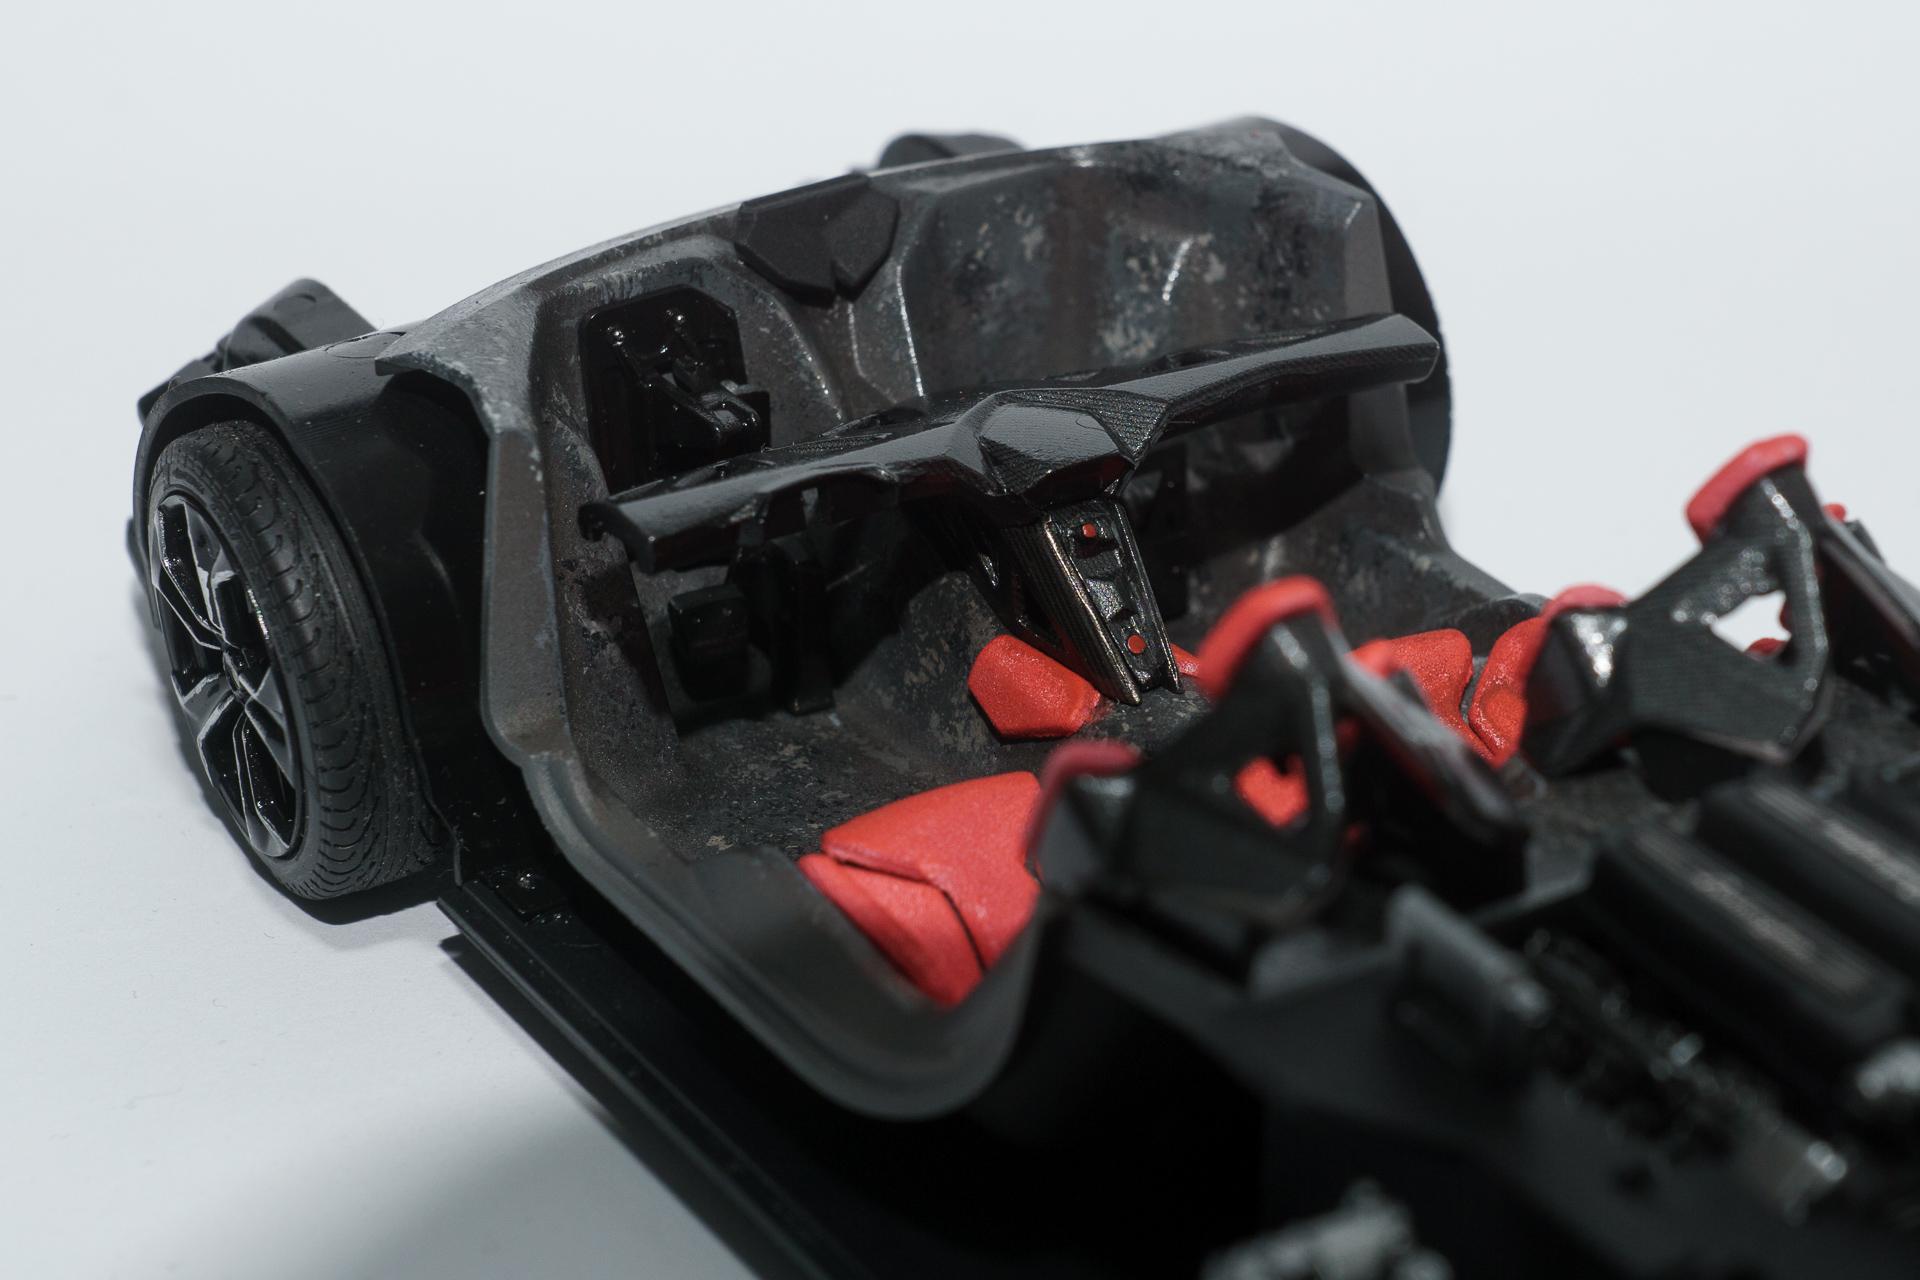
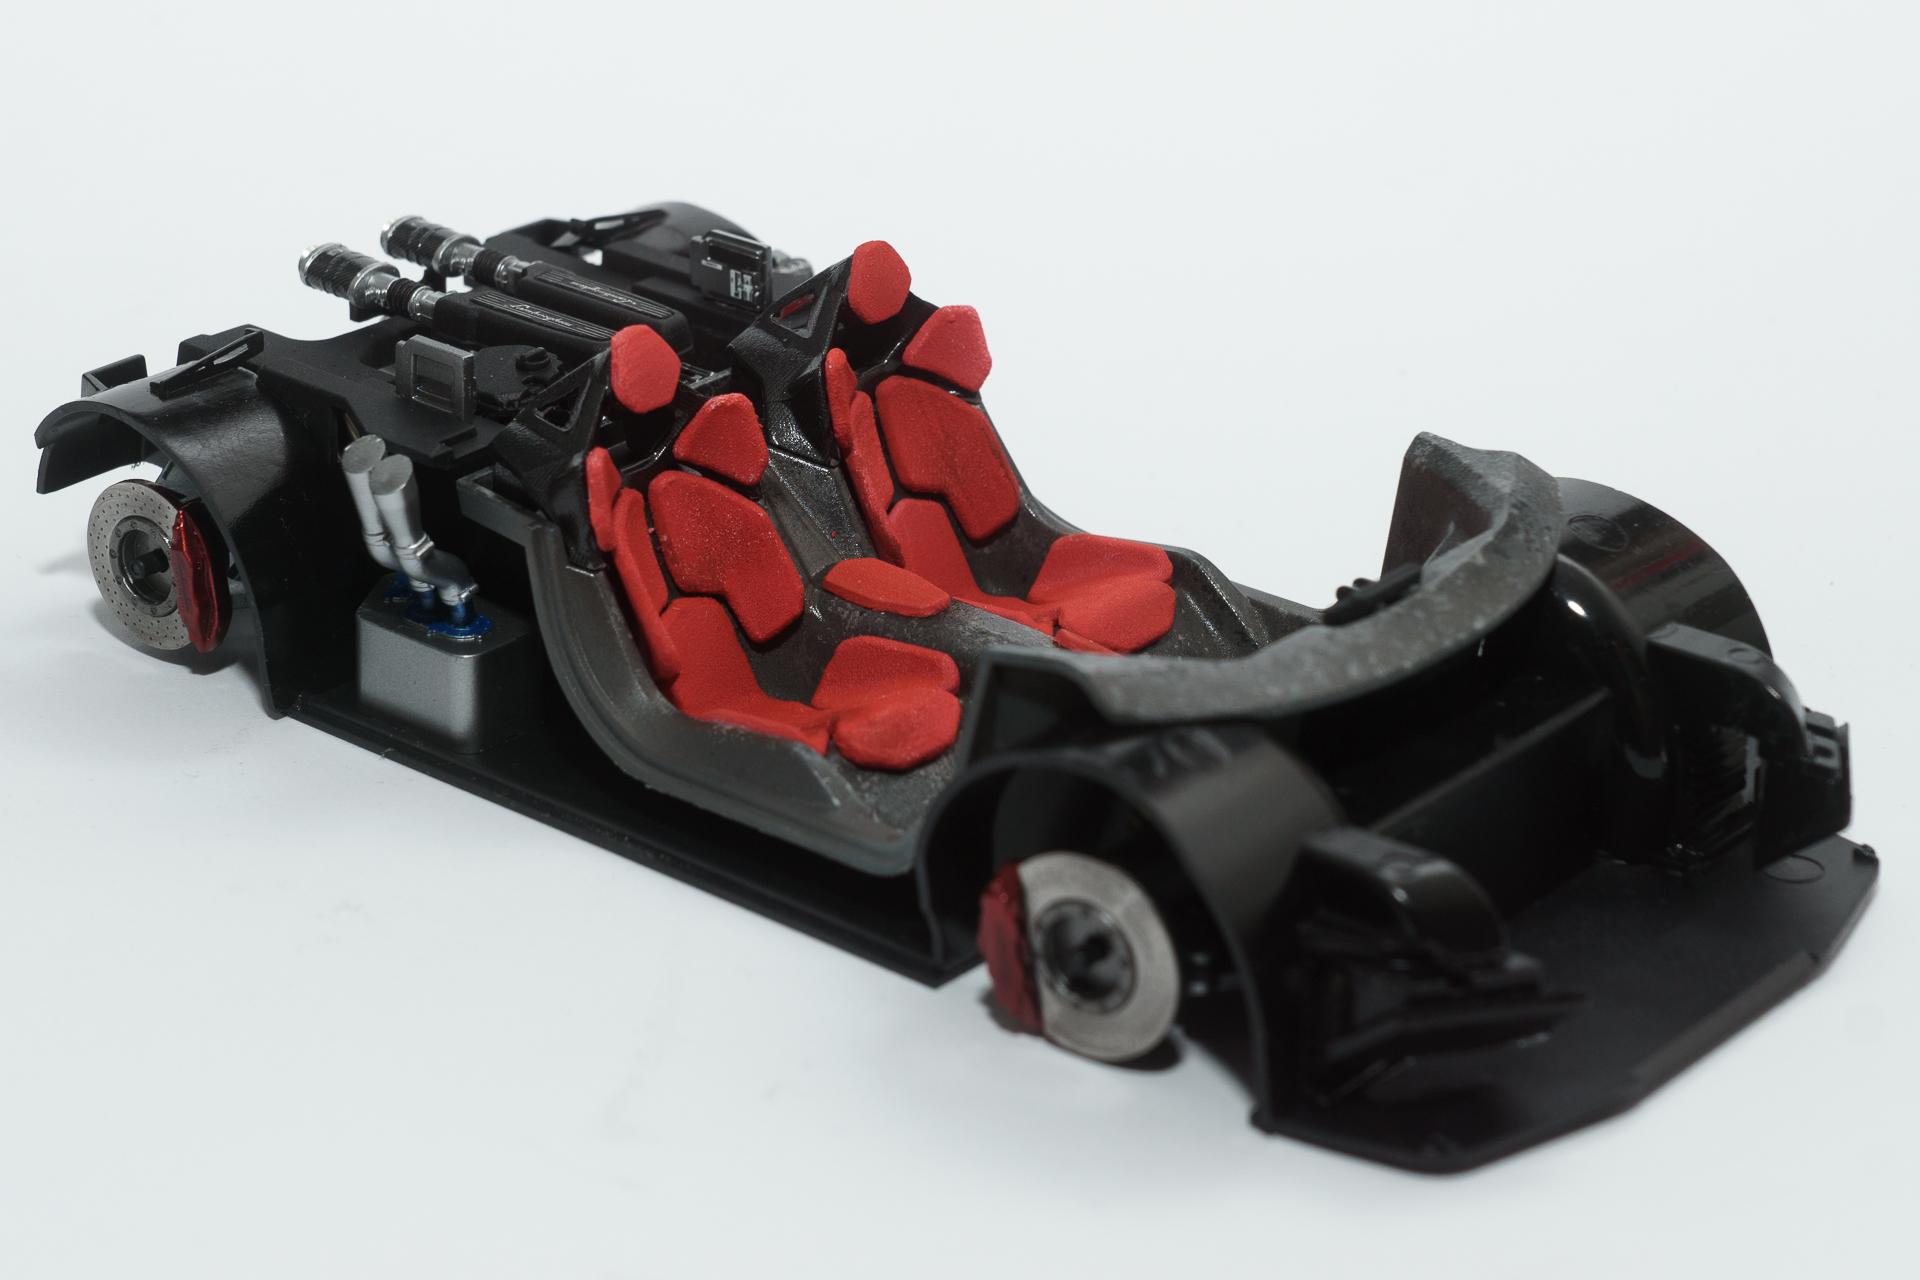
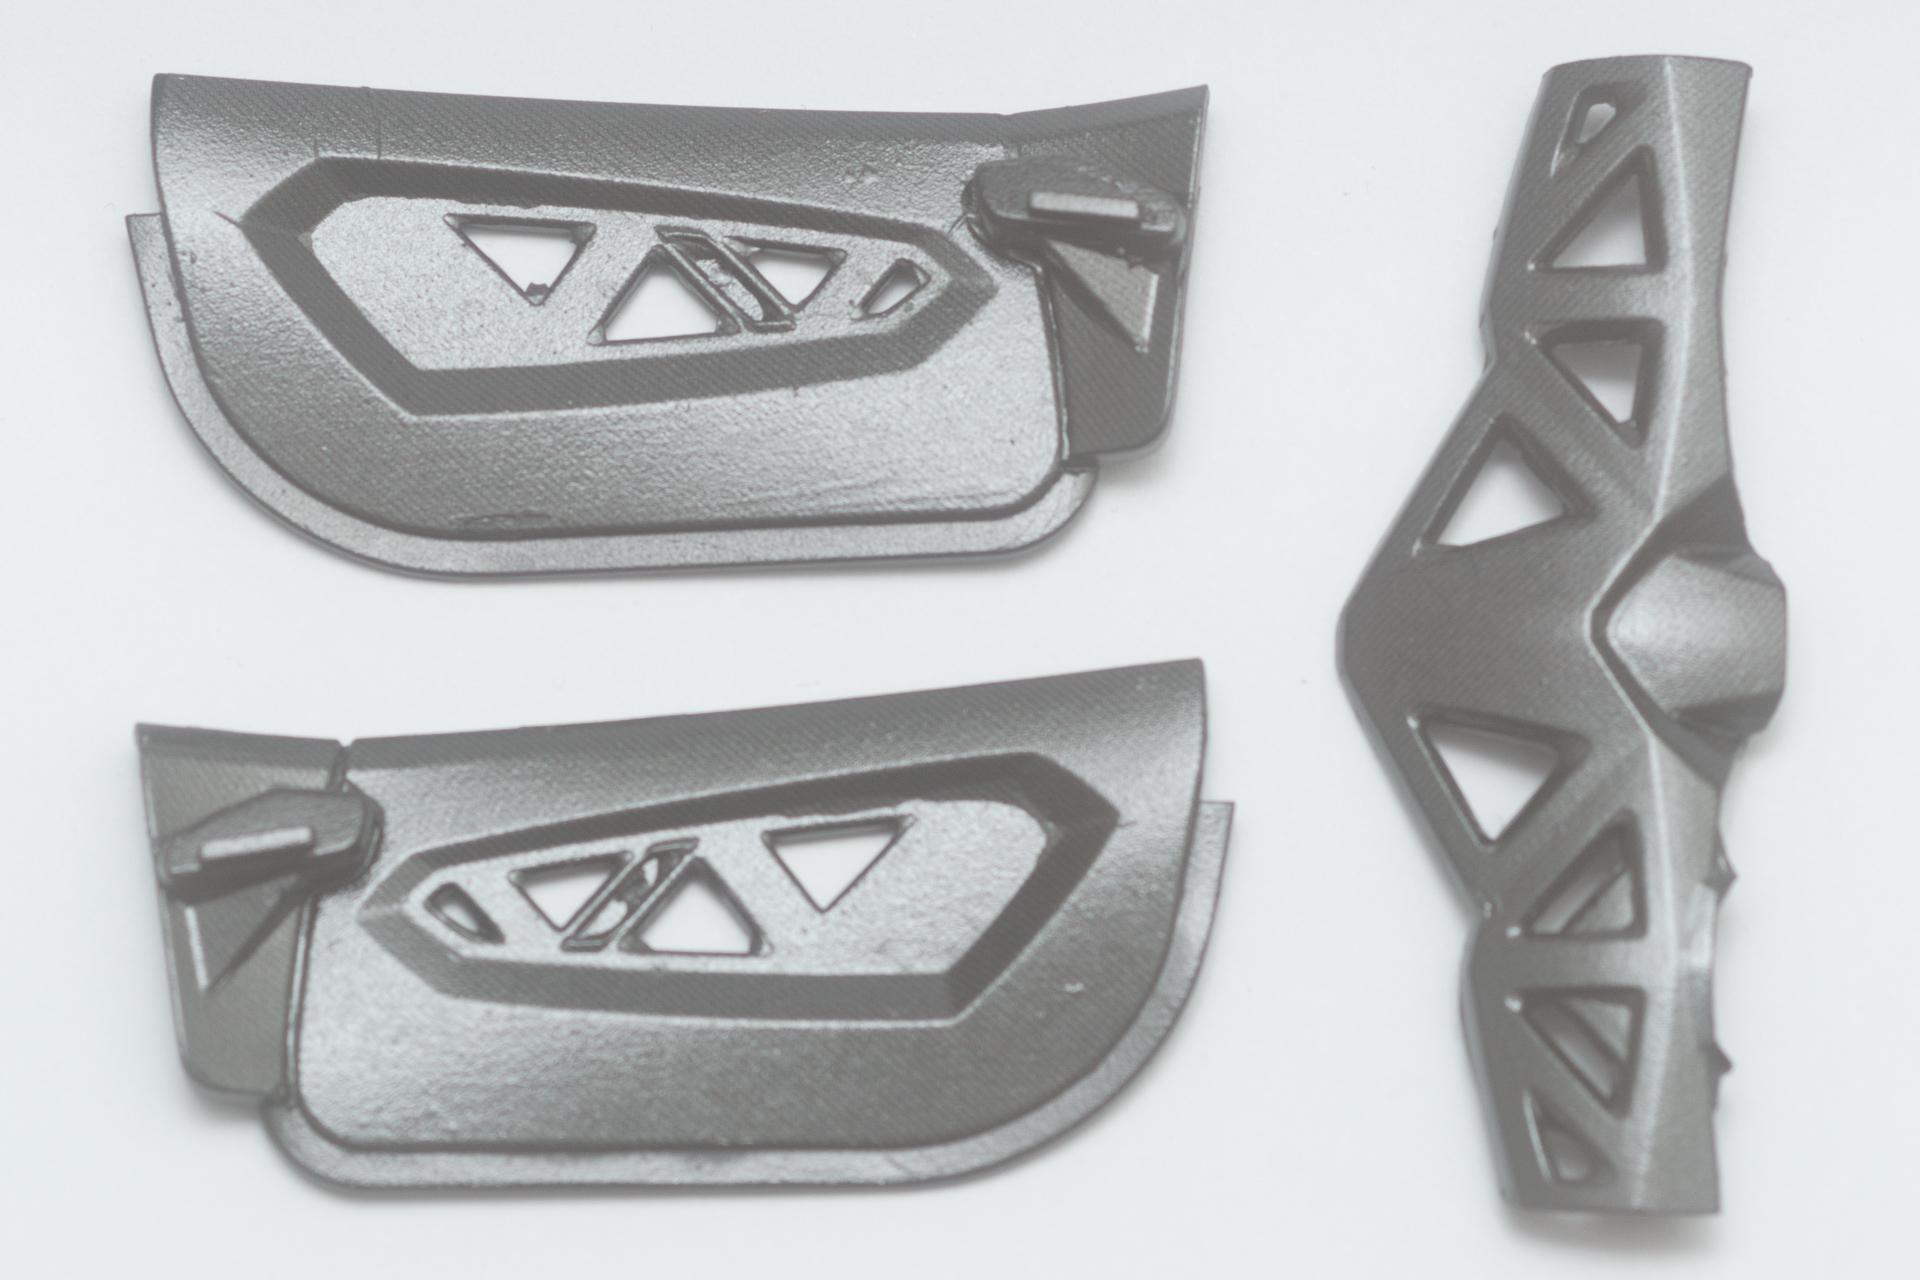
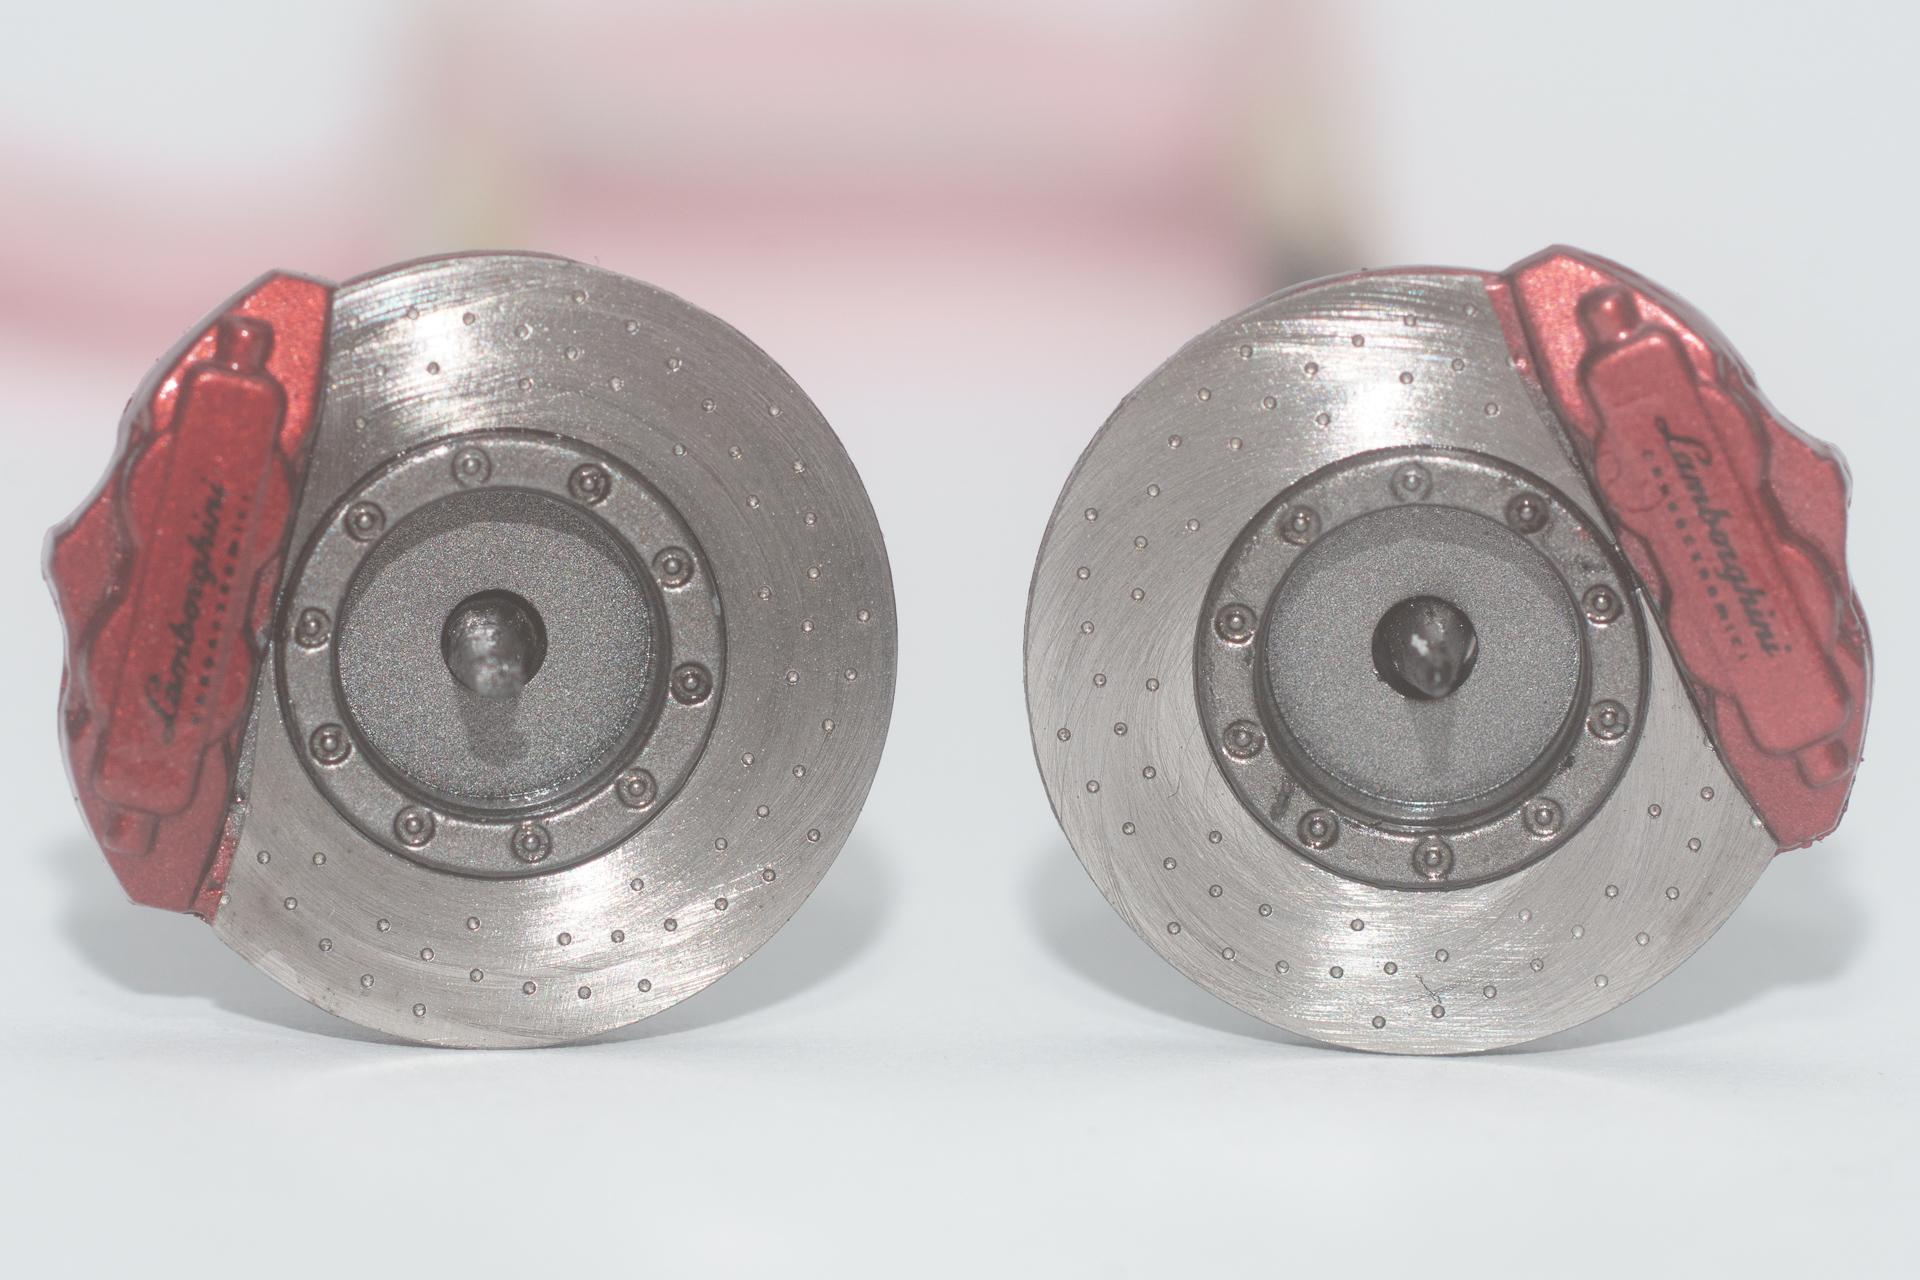
Hi all Somehow I had the impression that I didn't made that much of a progress this week. When I took the pictures to show you what happened here, I was surprised how much it was though. First the carbon on the seat was touched up The first of the doors got another part from the PE set. Another will follow on the door handle. The interior got it's carbon decals. This time I'm not that happy with the outcome. Somehow I didn't manage to take proper stencils for the decals and had to do some spot repair, especially on the far side of the center console. The front got some black paint which was scraped off of the front faces right after application Then I tried for the first time to do a labelling on the tires. Once I was satisfied with it, the decals were applied. After some drying time I added a decent (ok, in some spots not so decent) wash with Tamiya's black Panel Line Accent Color. Unfortunately I waited a little too long to wipe it off, so that the wash got much heavier than planned... Finally I spent several hours today assembling the front fan from PE parts. The fan itself needs some additional work. When assembling the lower part (in the meaning of the picture) I didn't manage to align all the 0.5 mm holes over all 5 layers of PE parts, so I could no longer use the rivets provided in the set (the ones you can see in the upper part). Luckily I had some head-only rivets for an old PE set for Tamiya's Ferrari Enzo, so I used them instead. I know, they are larger than the original ones, but I preferred that over having nothing That's all for this week As I am on vacation the upcoming week I think, I'll have some progress to show in next weekend, as I can't do much than building models Urs
-
Mercedes-AMG GT3
harti20 replied to harti20's topic in WIP: Other Racing: Road Racing, Land Speed Racers
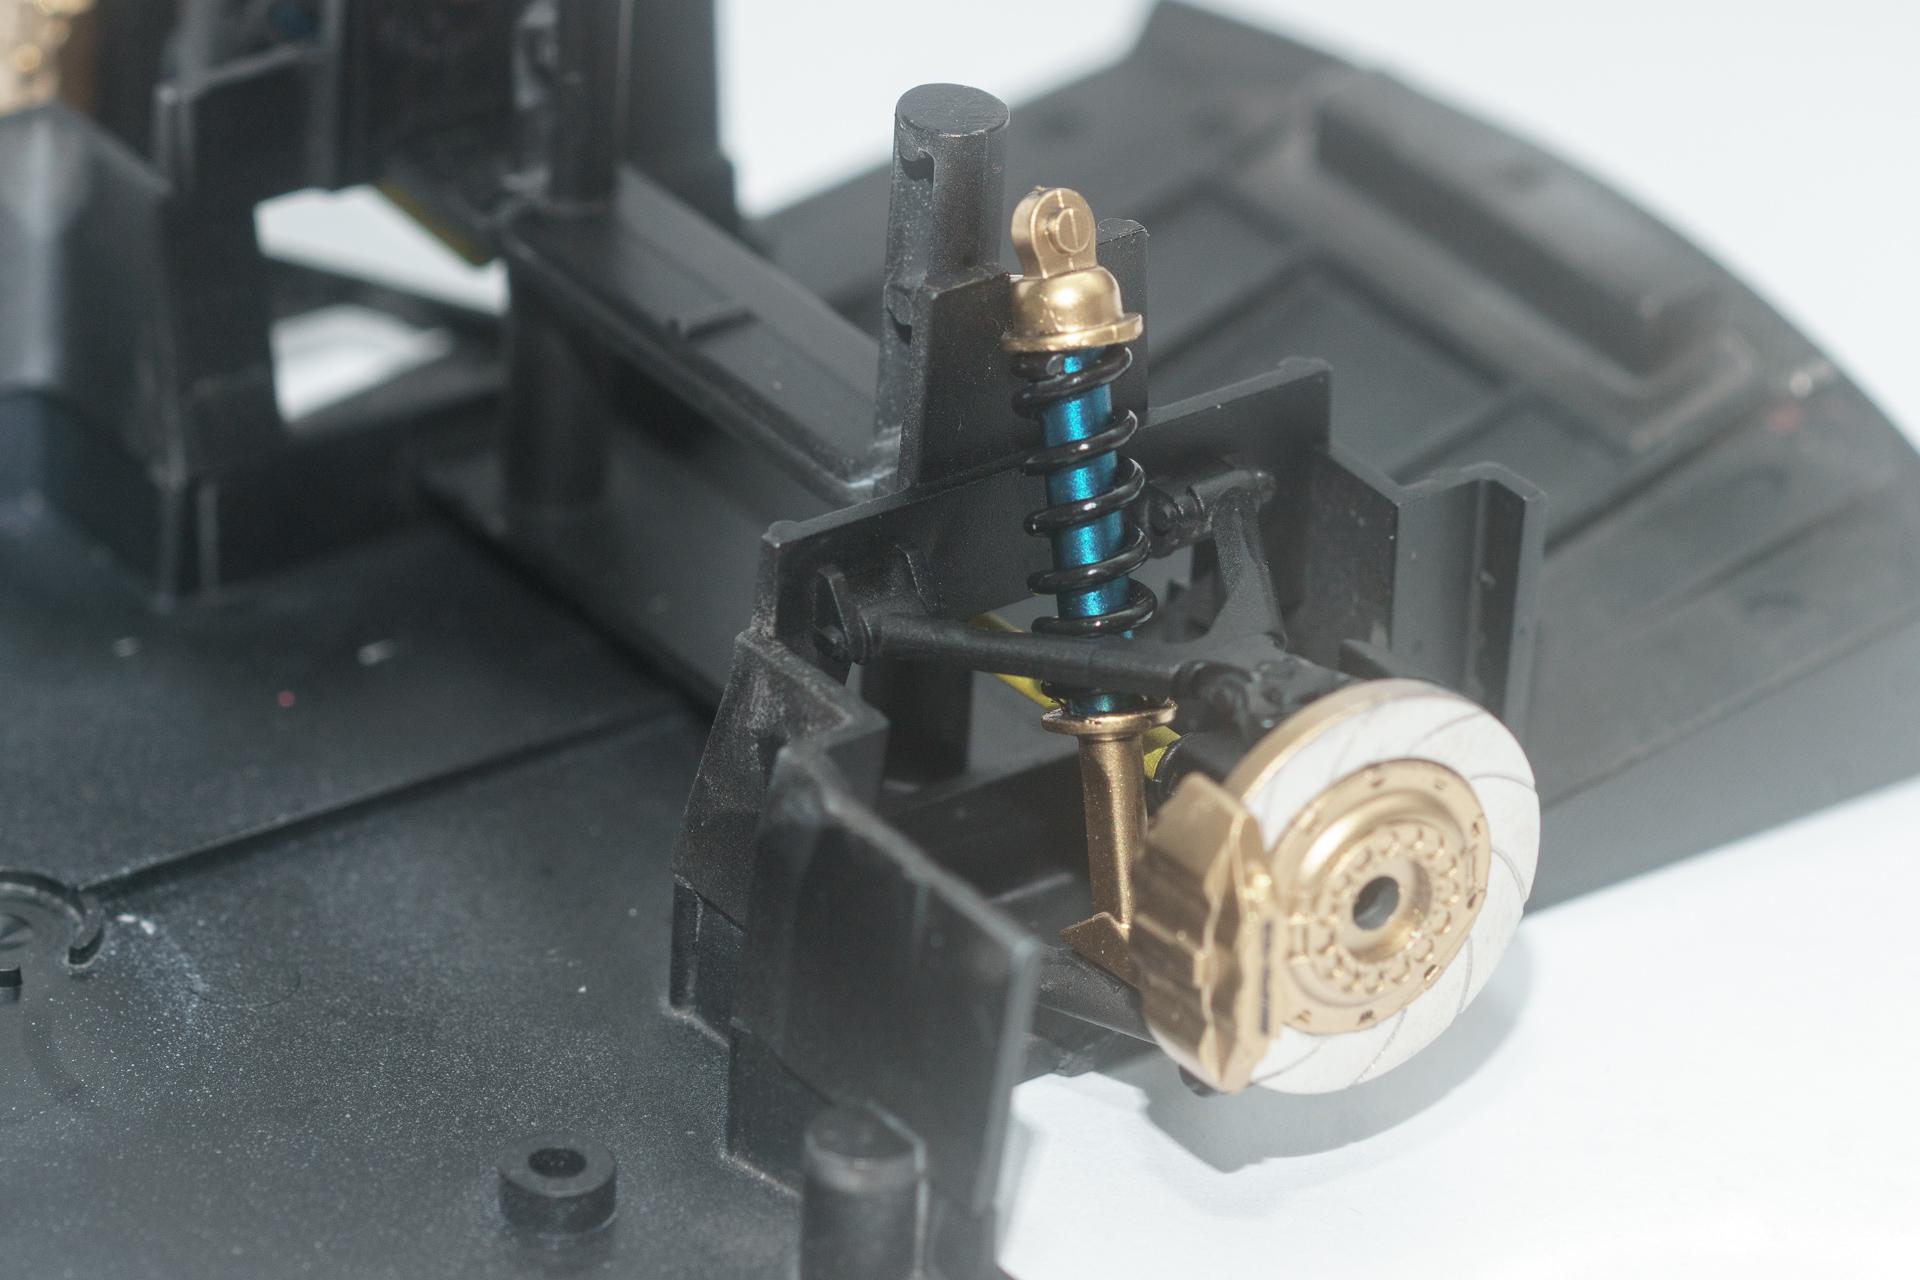
Hi all Thank you for your feedback. This week was dominated by bodywork. First it got its paint on (Gloss Black by Zero Paints). Even if I really love working with Zero Paints, the gloss black will never become my favourite. I always get massive orange peel. Here I had to sand the first (wet) coat with some 3000 sanding sponge and then reapply it. It still got some orange peel but not as much as it would cause silvering. So I decided to apply the decals. After clearcoating it will all be gone (at least this is what I hope for ). Somewhen in between I placed the shock absorbers. As they will hardly be seen in future I though, I'd take a picture of them in their final stage. When I wanted to do something different than applying decals to the body I made stencils for the carbon decals on the inside. Today I started by adding some of them to the seat. Unfortunately they wrinkled on the possibly only spot that can be seen on the final model So I think, I'll have to try to reattach it. Finally I made some additional parts which will be attached at a later point in time. I won't tell what it is, but I'm sure you'll find out yourself very easily That's it for today. I wish all of you a nice week and stay healthy Urs
-
Mercedes-AMG GT3
harti20 replied to harti20's topic in WIP: Other Racing: Road Racing, Land Speed Racers
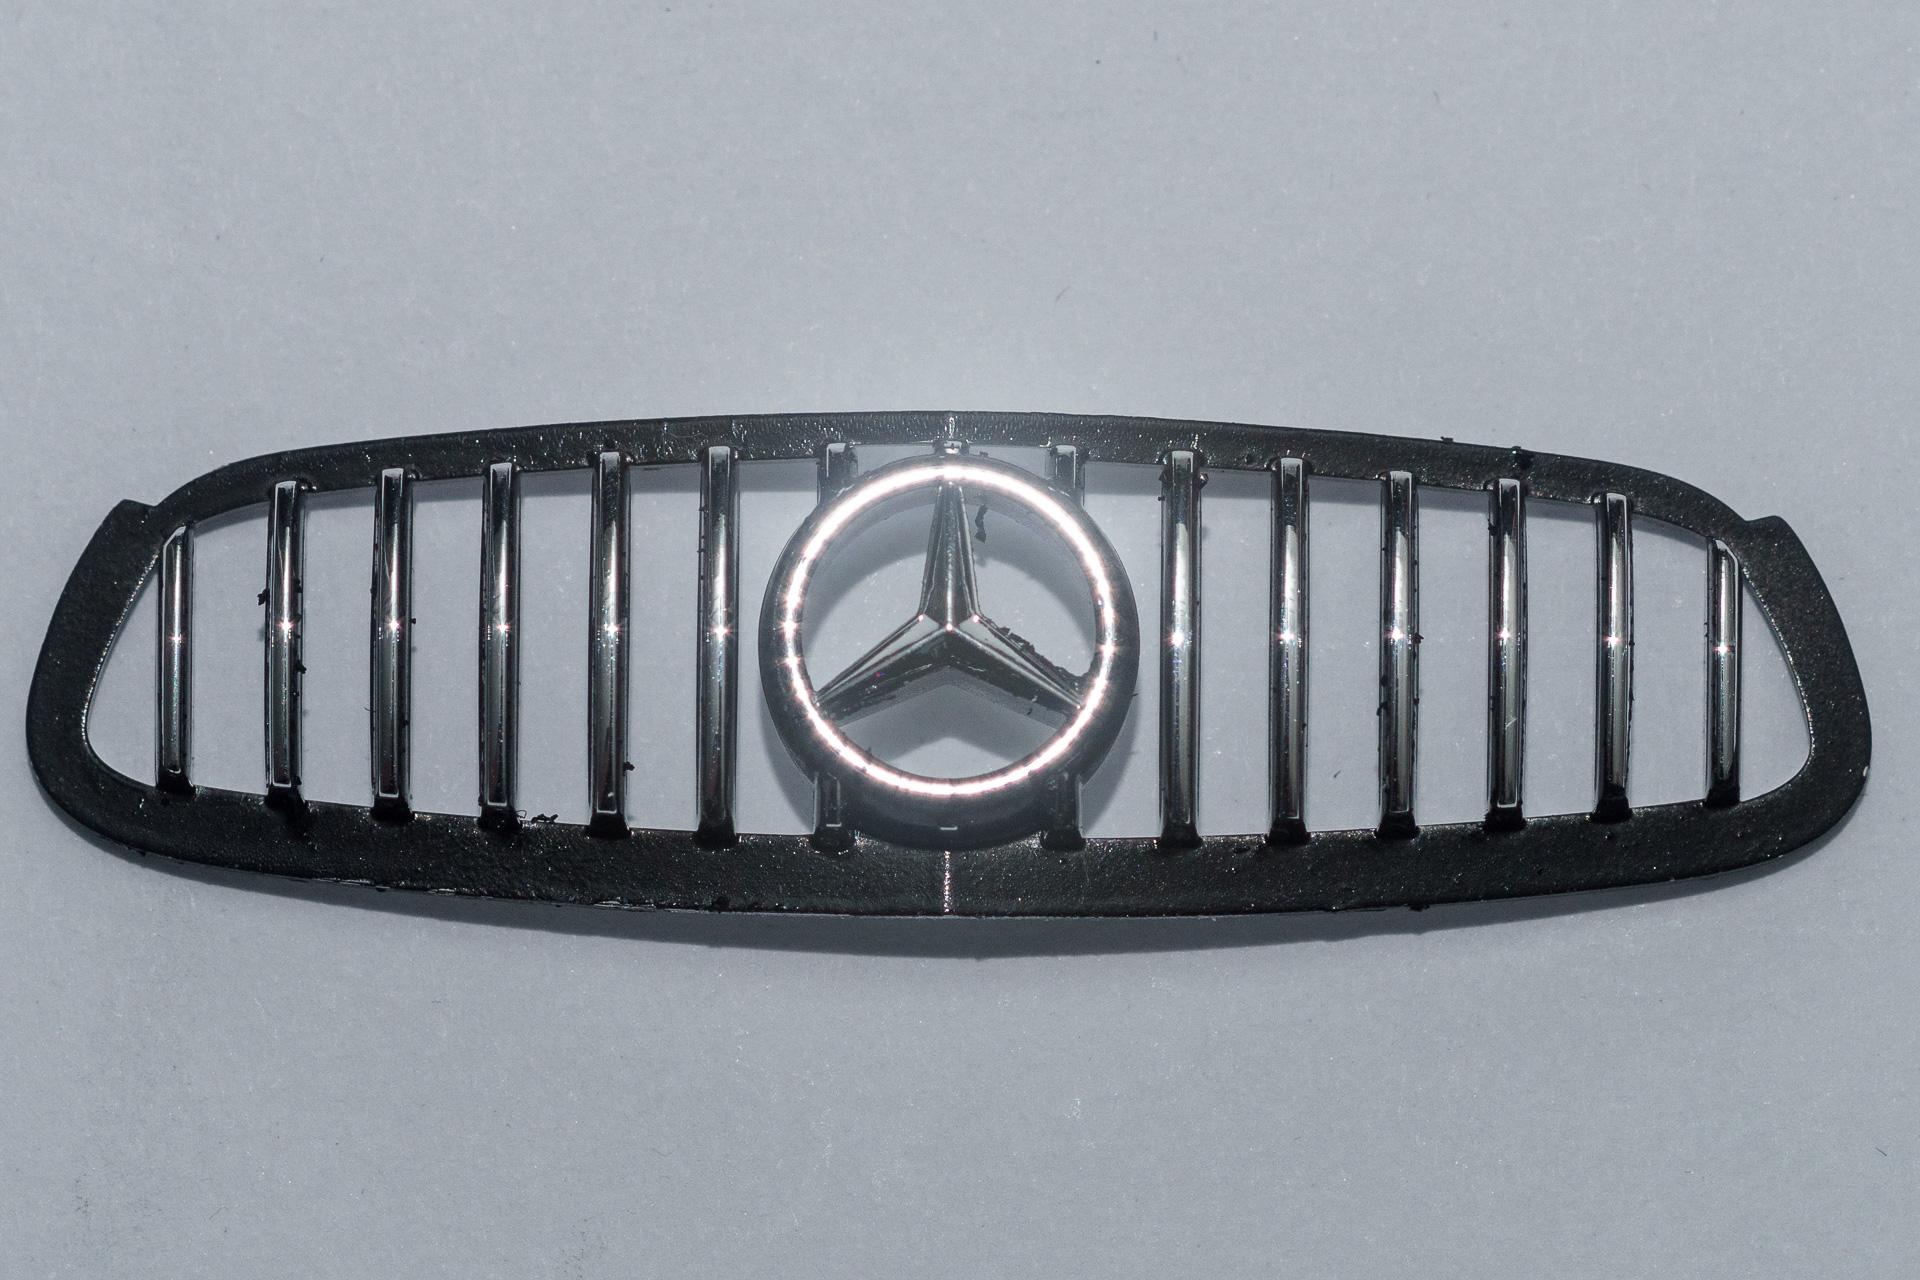
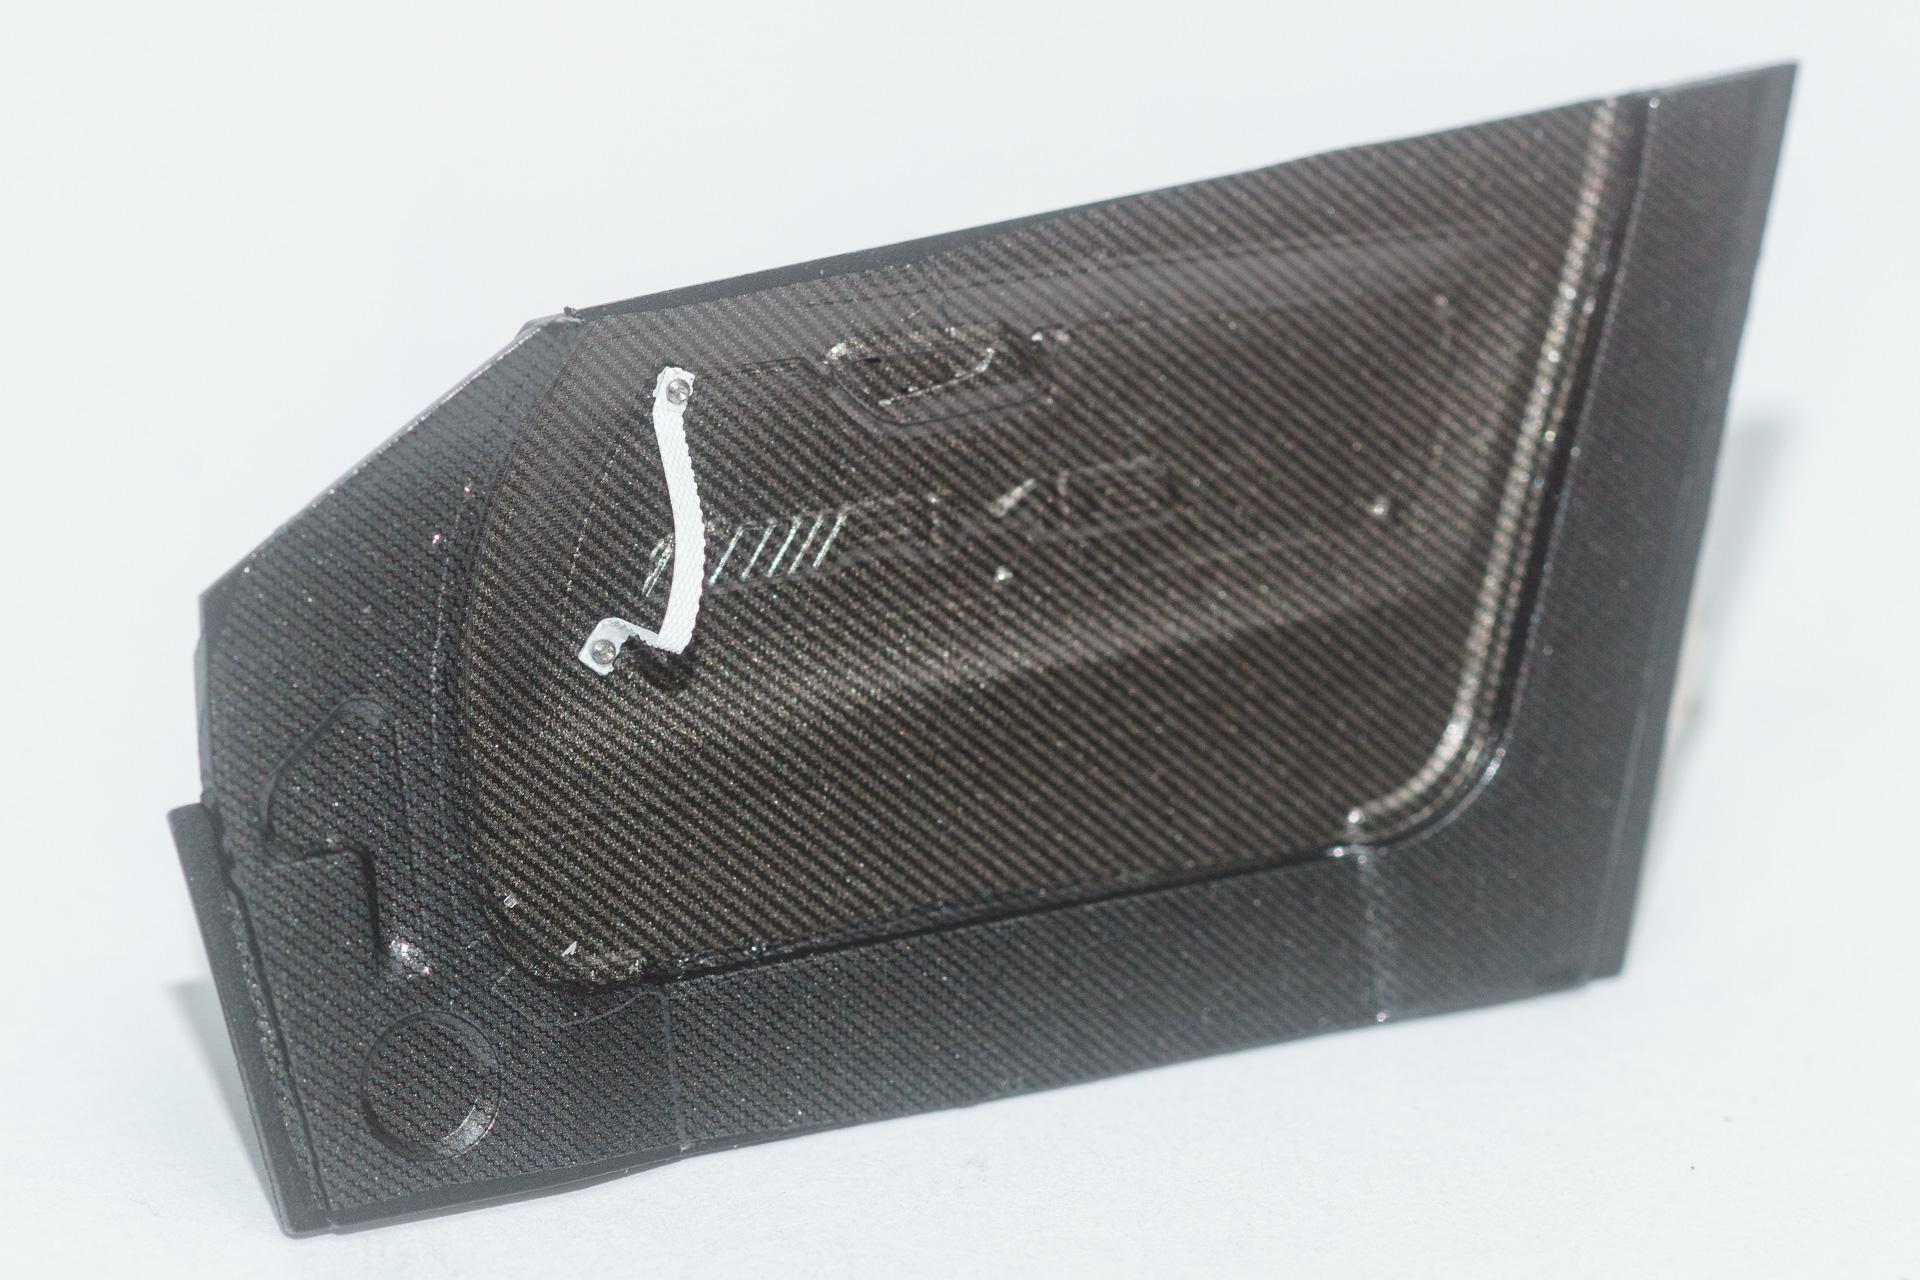
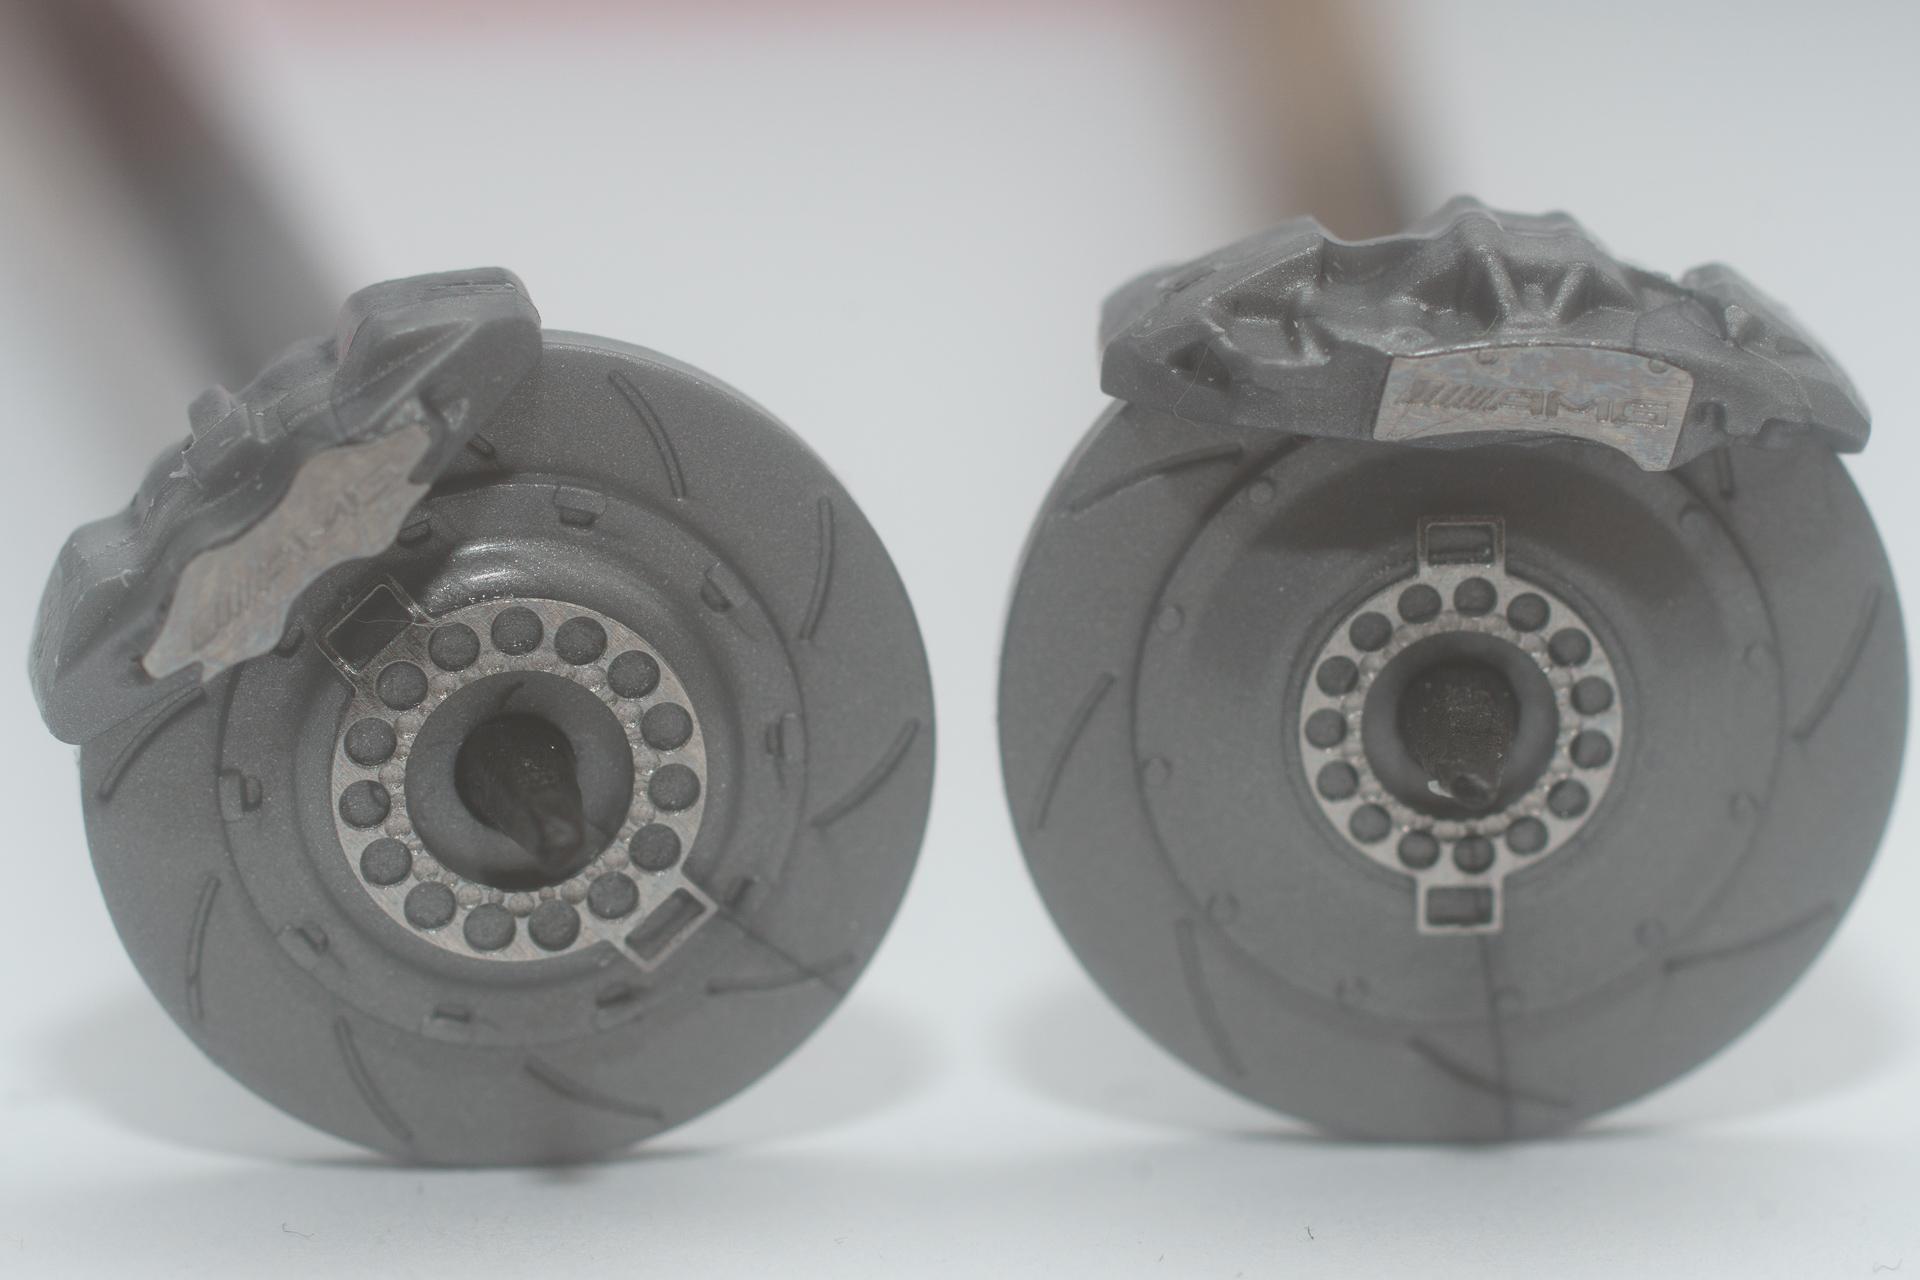
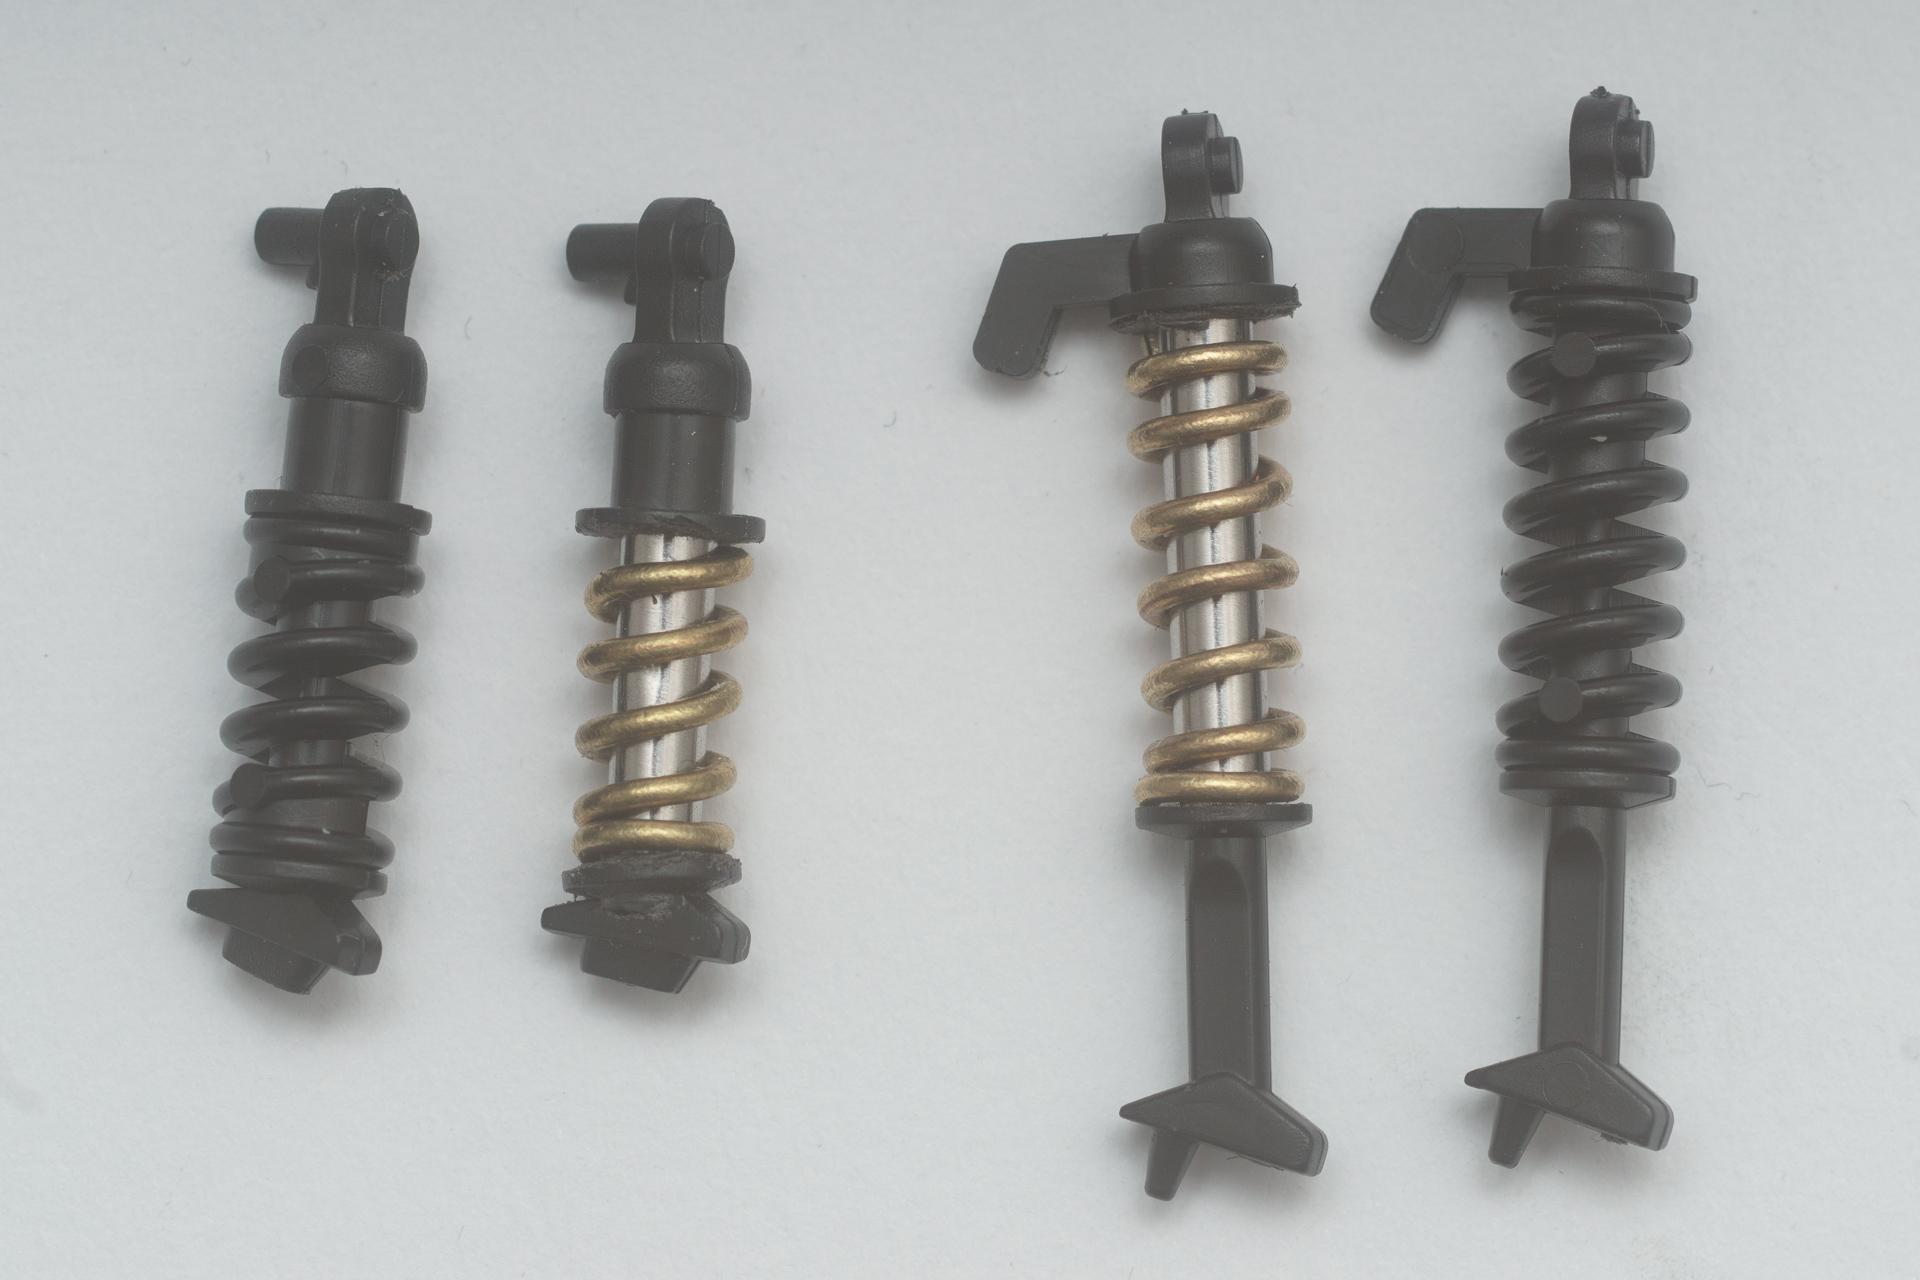
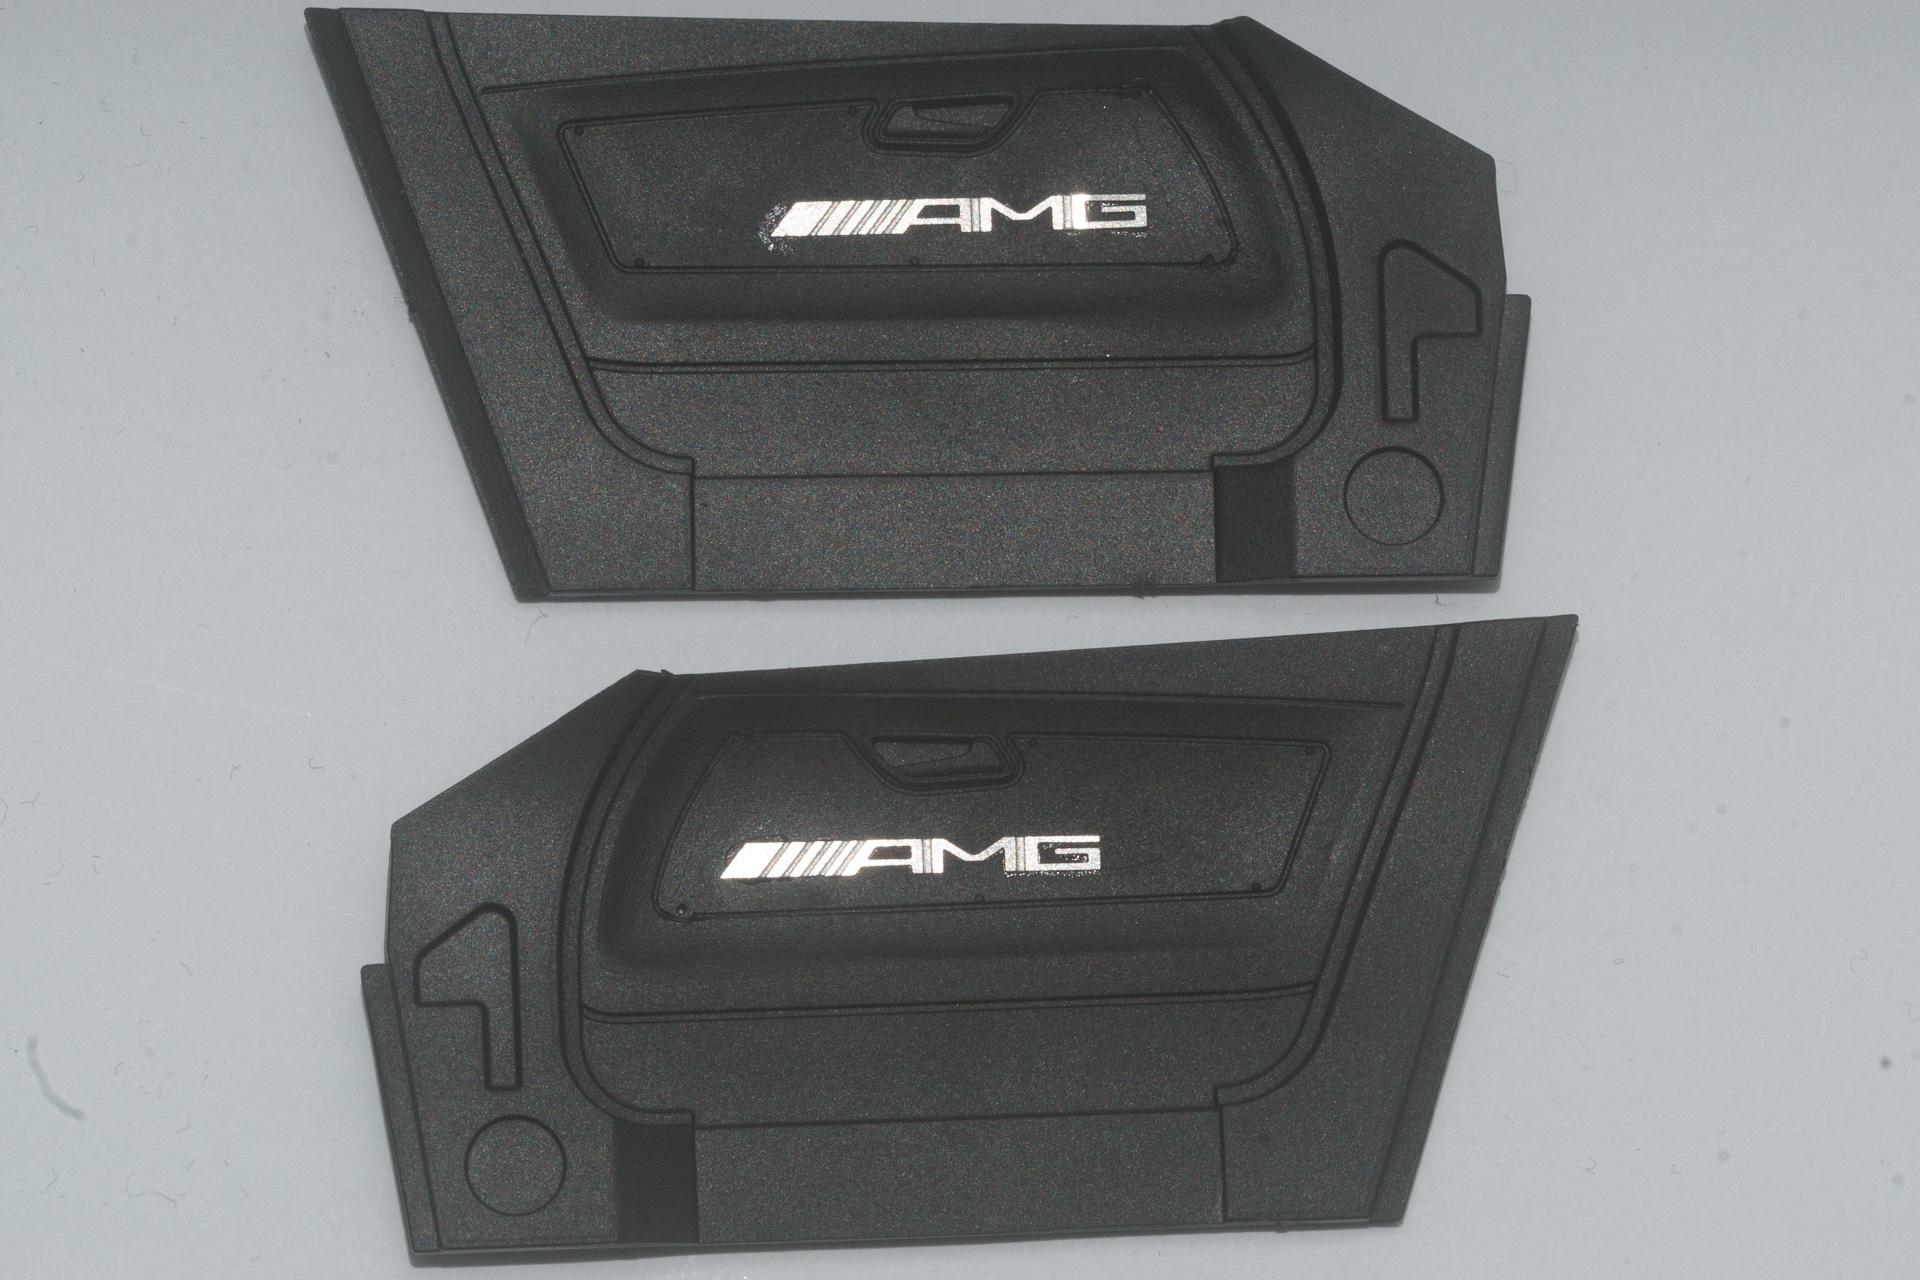
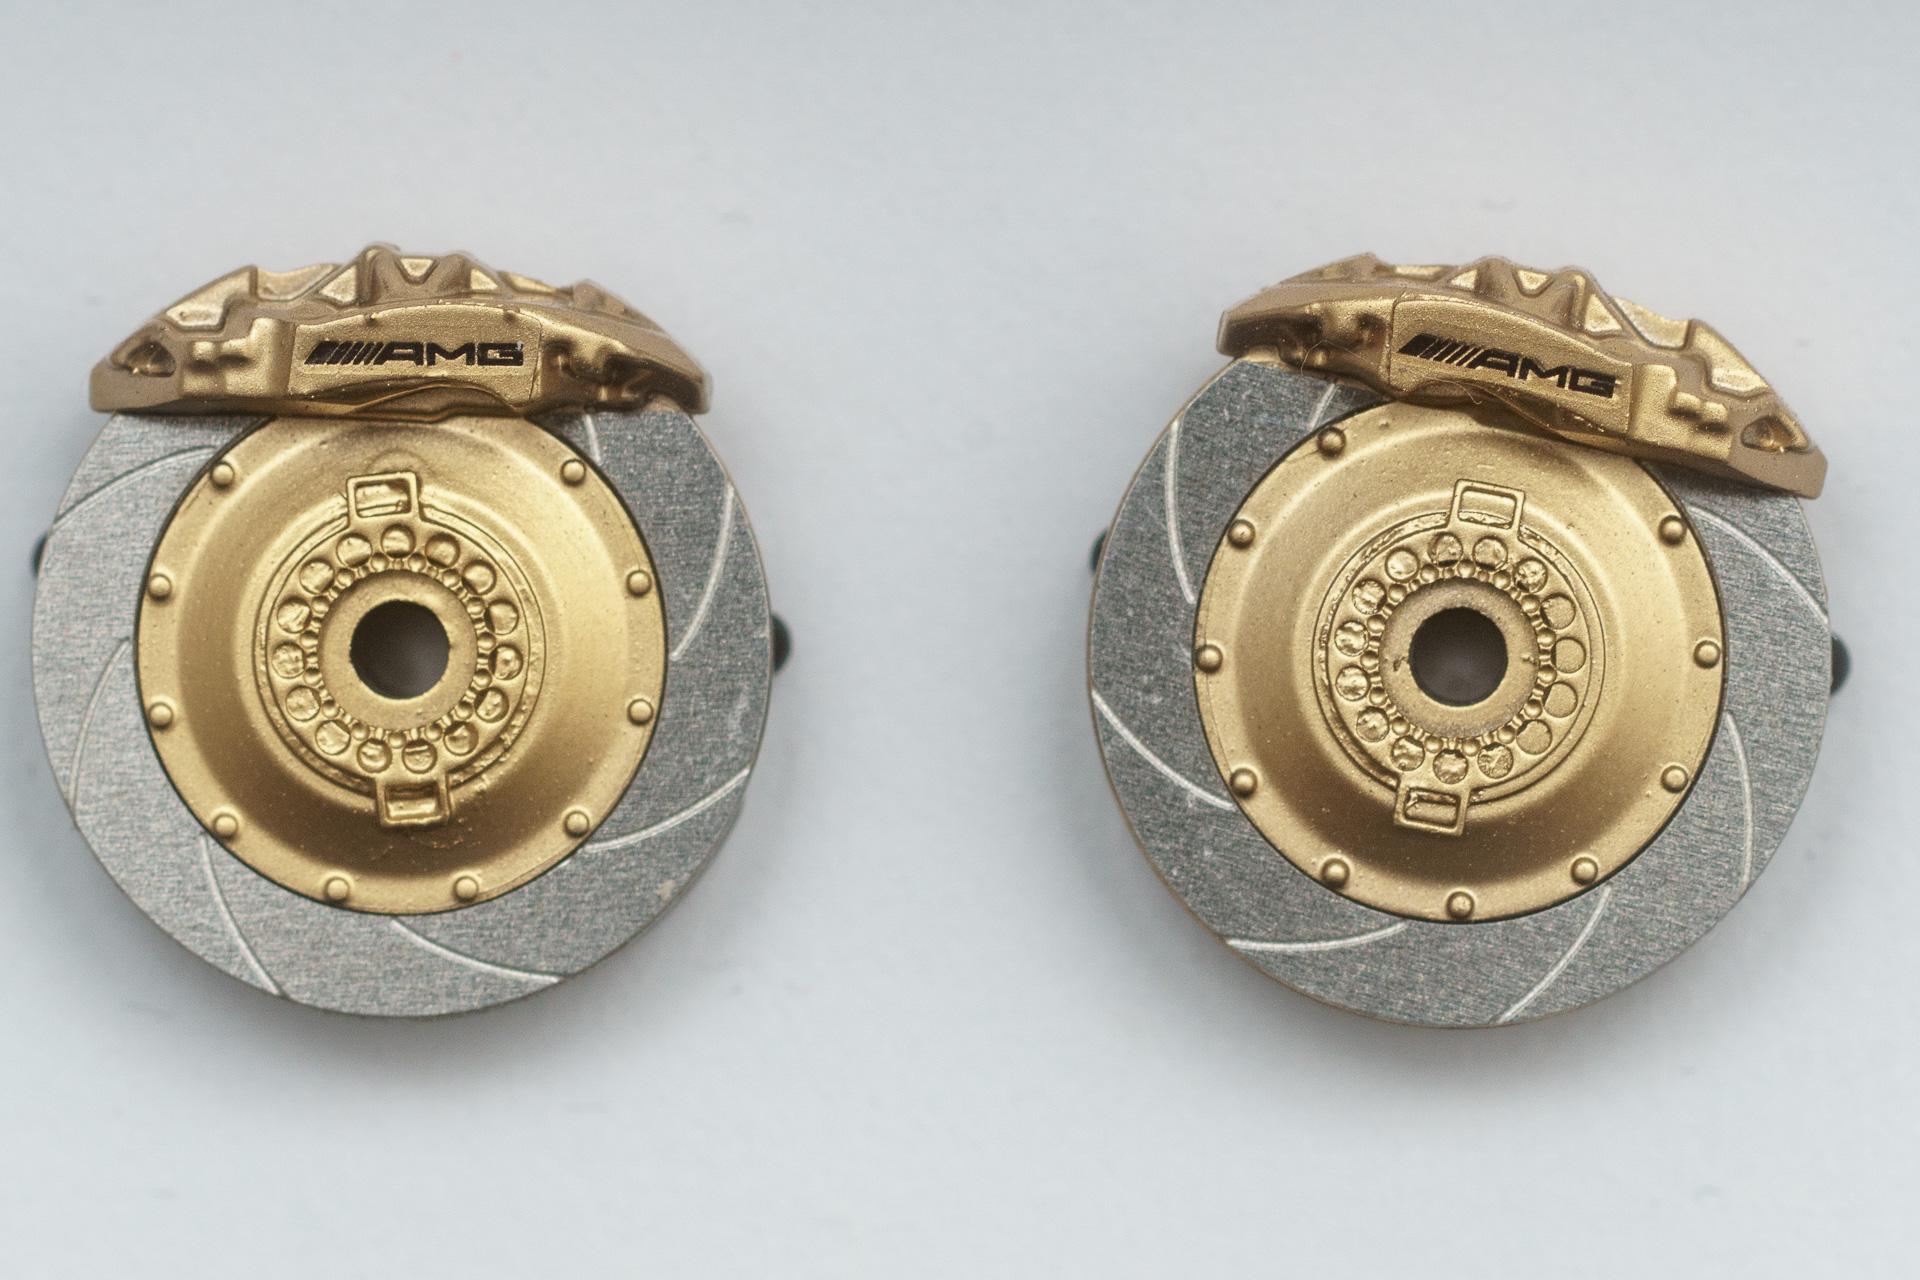
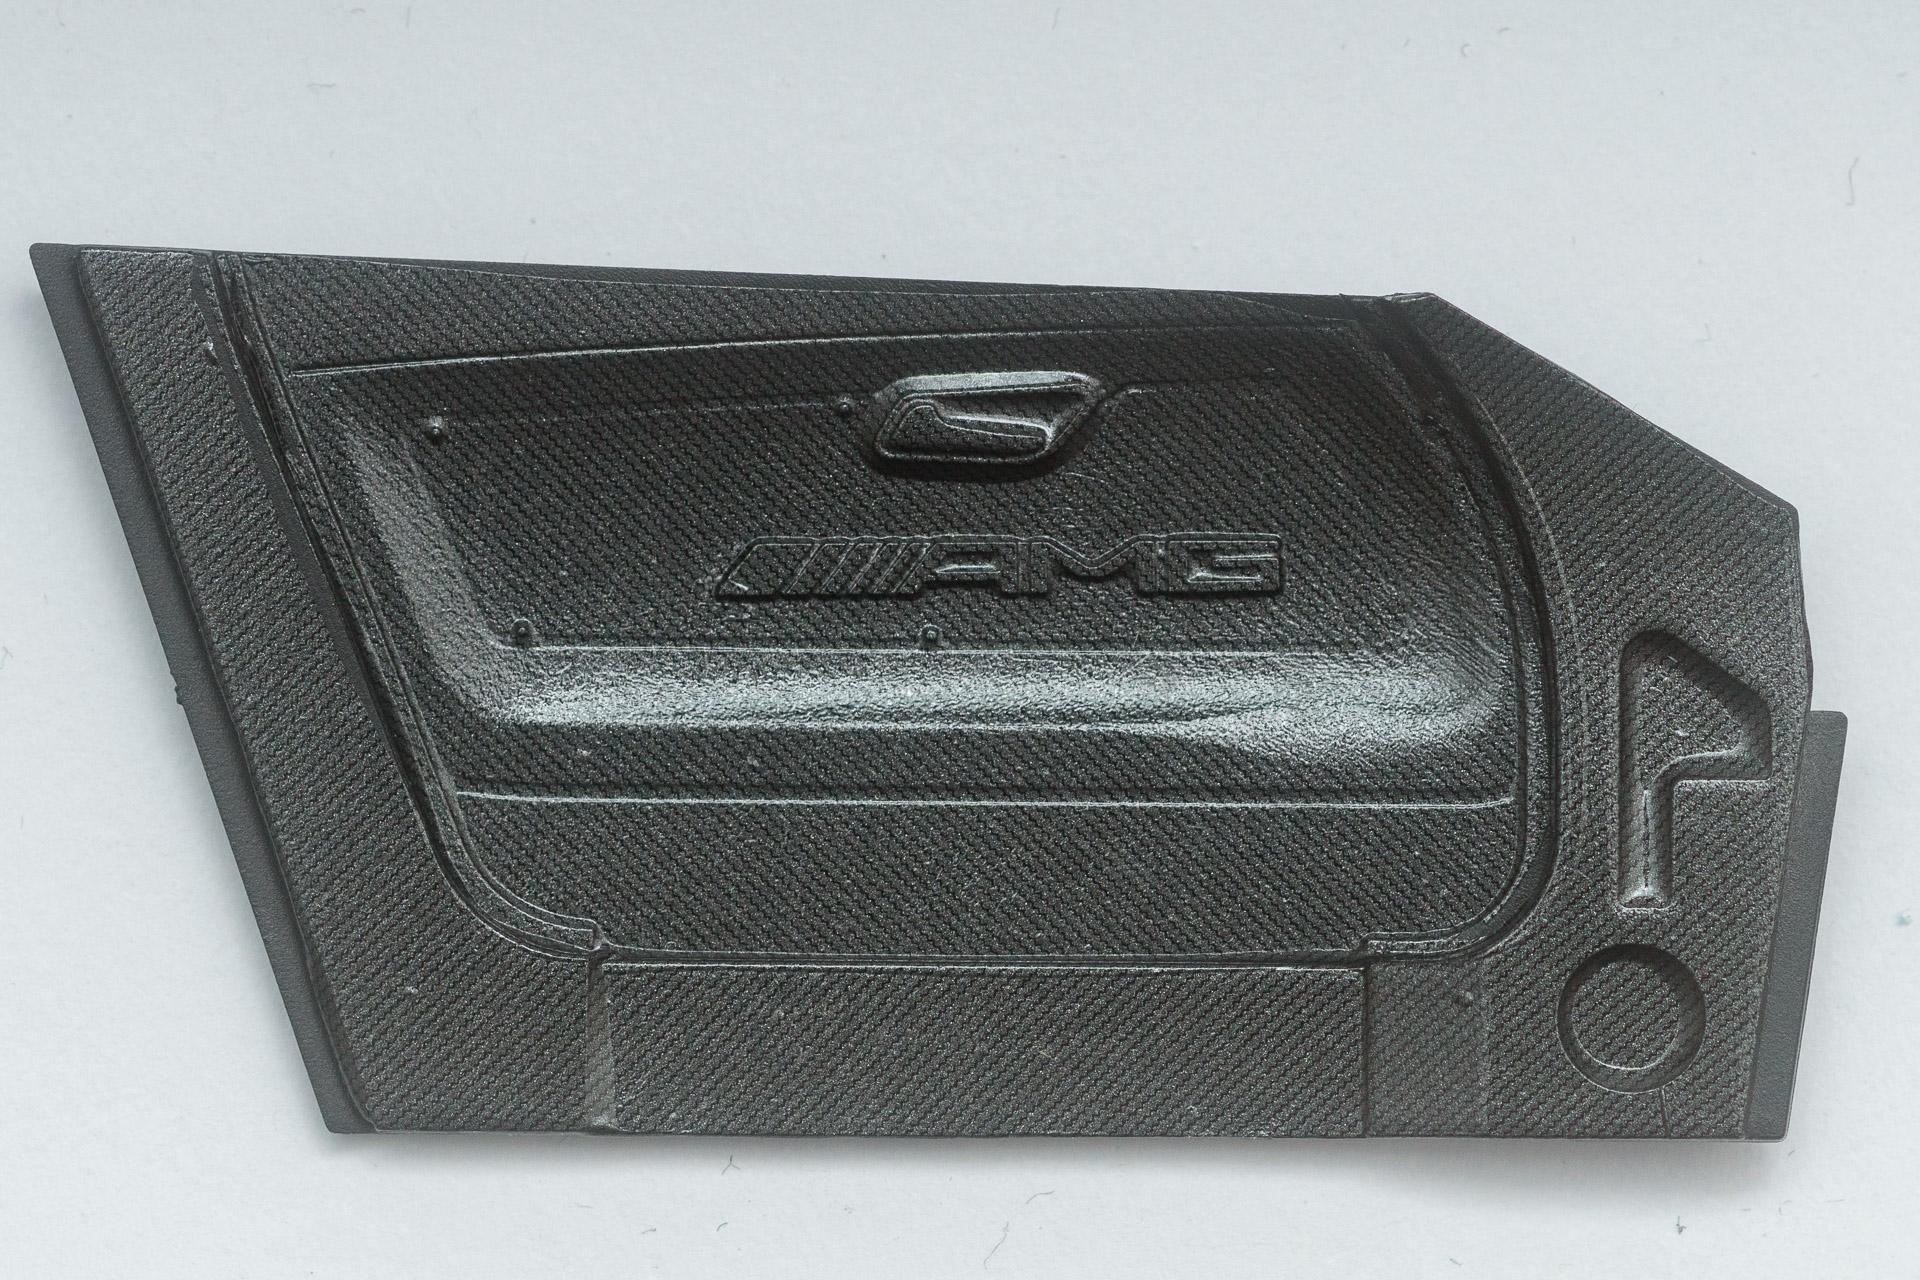
Hi all As promised here is my weekend-update First the missing parts have been added to the body. The whitish parts in the front are sanding residue which I forgot to wash off before taking the picture. Of course I cleaned it meanwhile After that the diffusor got its carbon decals And the inside of the doors was primed using Alclads Black primer. Then the AMG sign from the PE set were glued on and after letting the glue settle over night, the carbon decals have been applied. The brakes have been finished some time ago, but to this day I always forgot to take pictures of them Finally I managed to complete the shock absorbers. That's all for this week's update. I hope you like it and as always, I'm open for constructive criticism (as well as for plaudits of course ). Urs
-
Mercedes-AMG GT3
harti20 replied to harti20's topic in WIP: Other Racing: Road Racing, Land Speed Racers
Hi all Thank you for your comments. An update with pictures will follow later this weekend. Thank you very much. Without you I would have forgotten these two parts. Now they're installed, putty has been applied and everything is sanded out smooth (I hope). Somewhen this weekend I will apply a coat of primer over these spots, then I'll see if everything is as smooth as I wanted it to be -
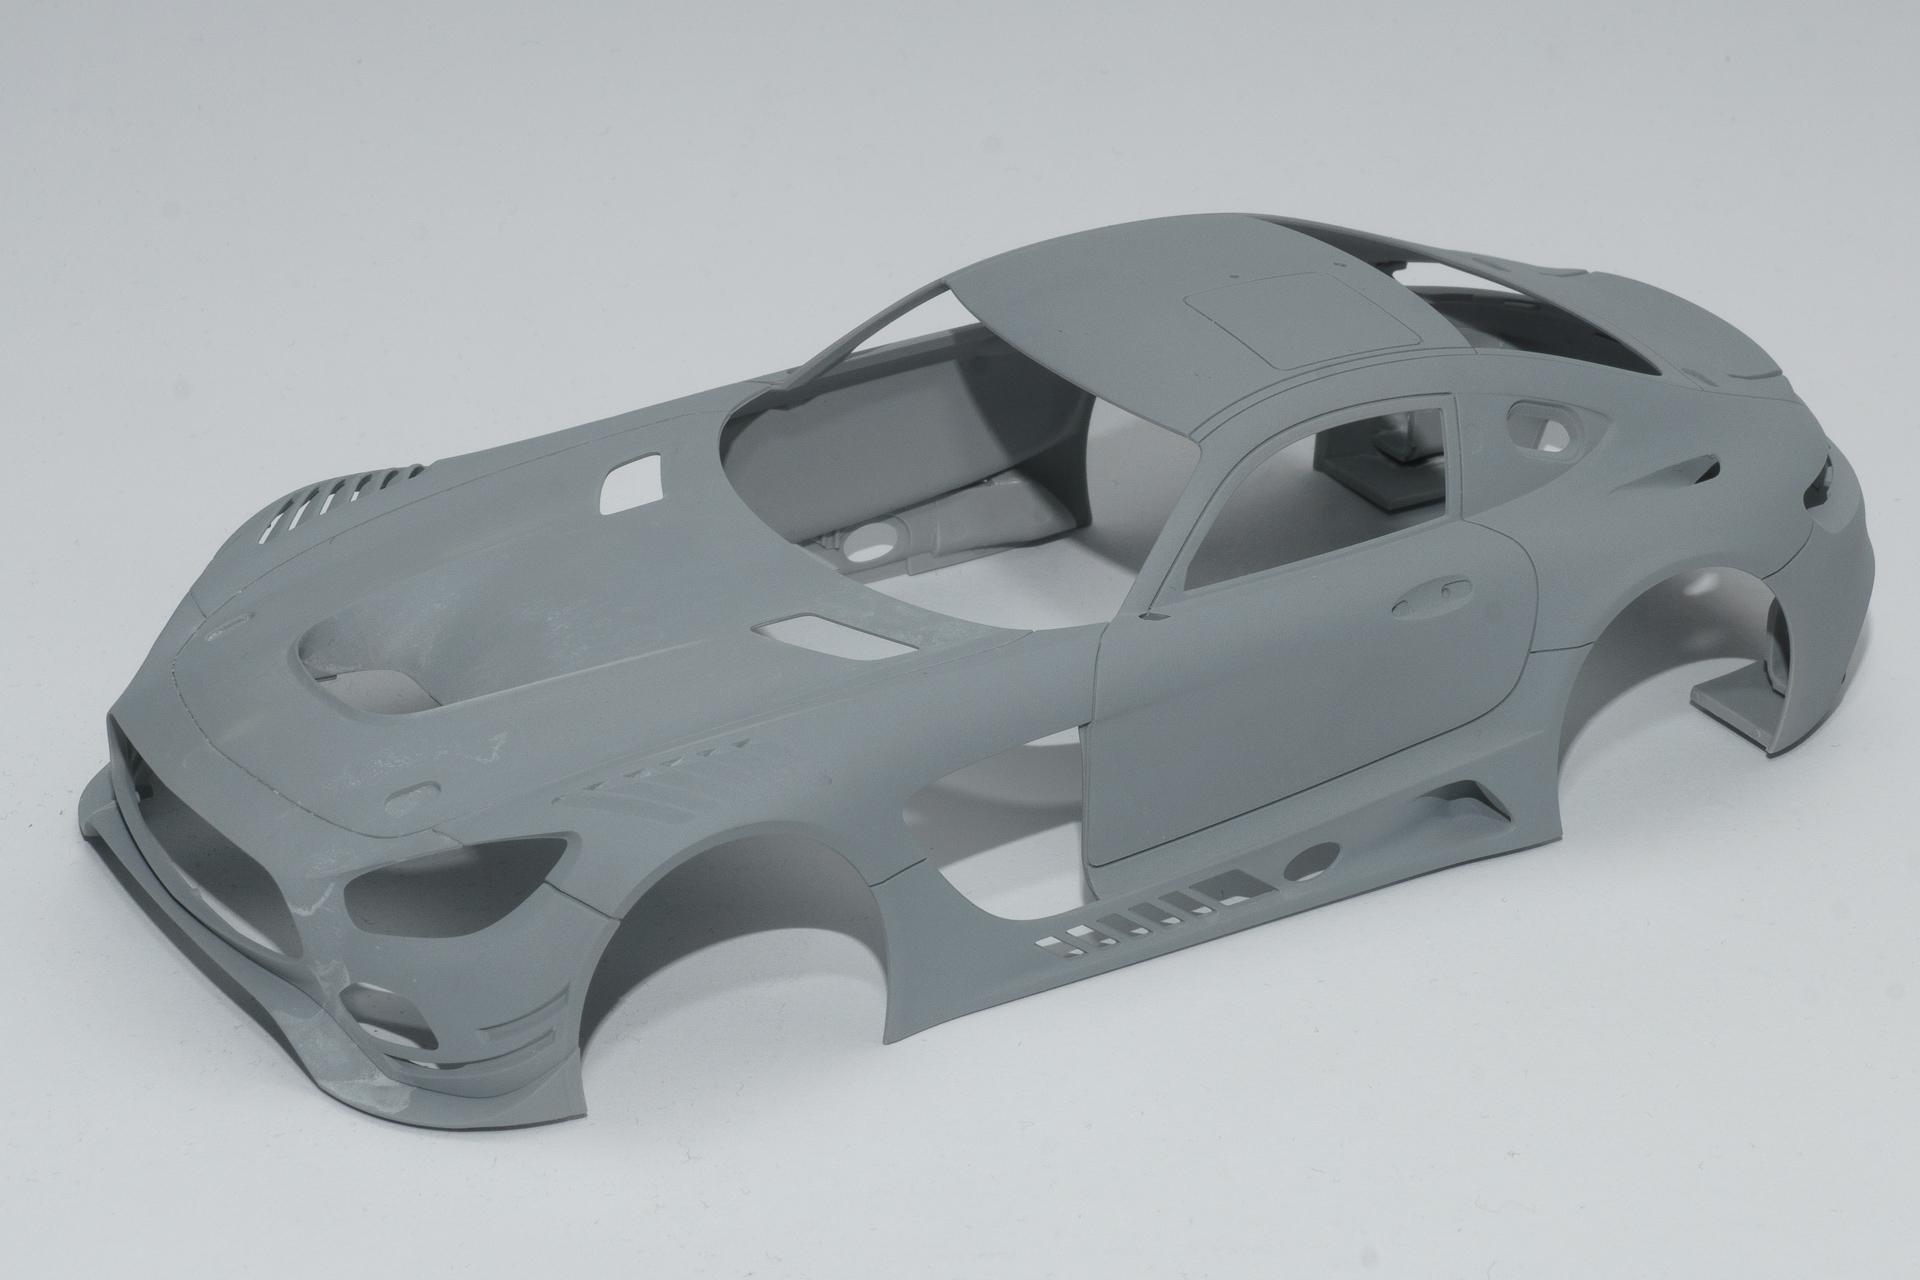
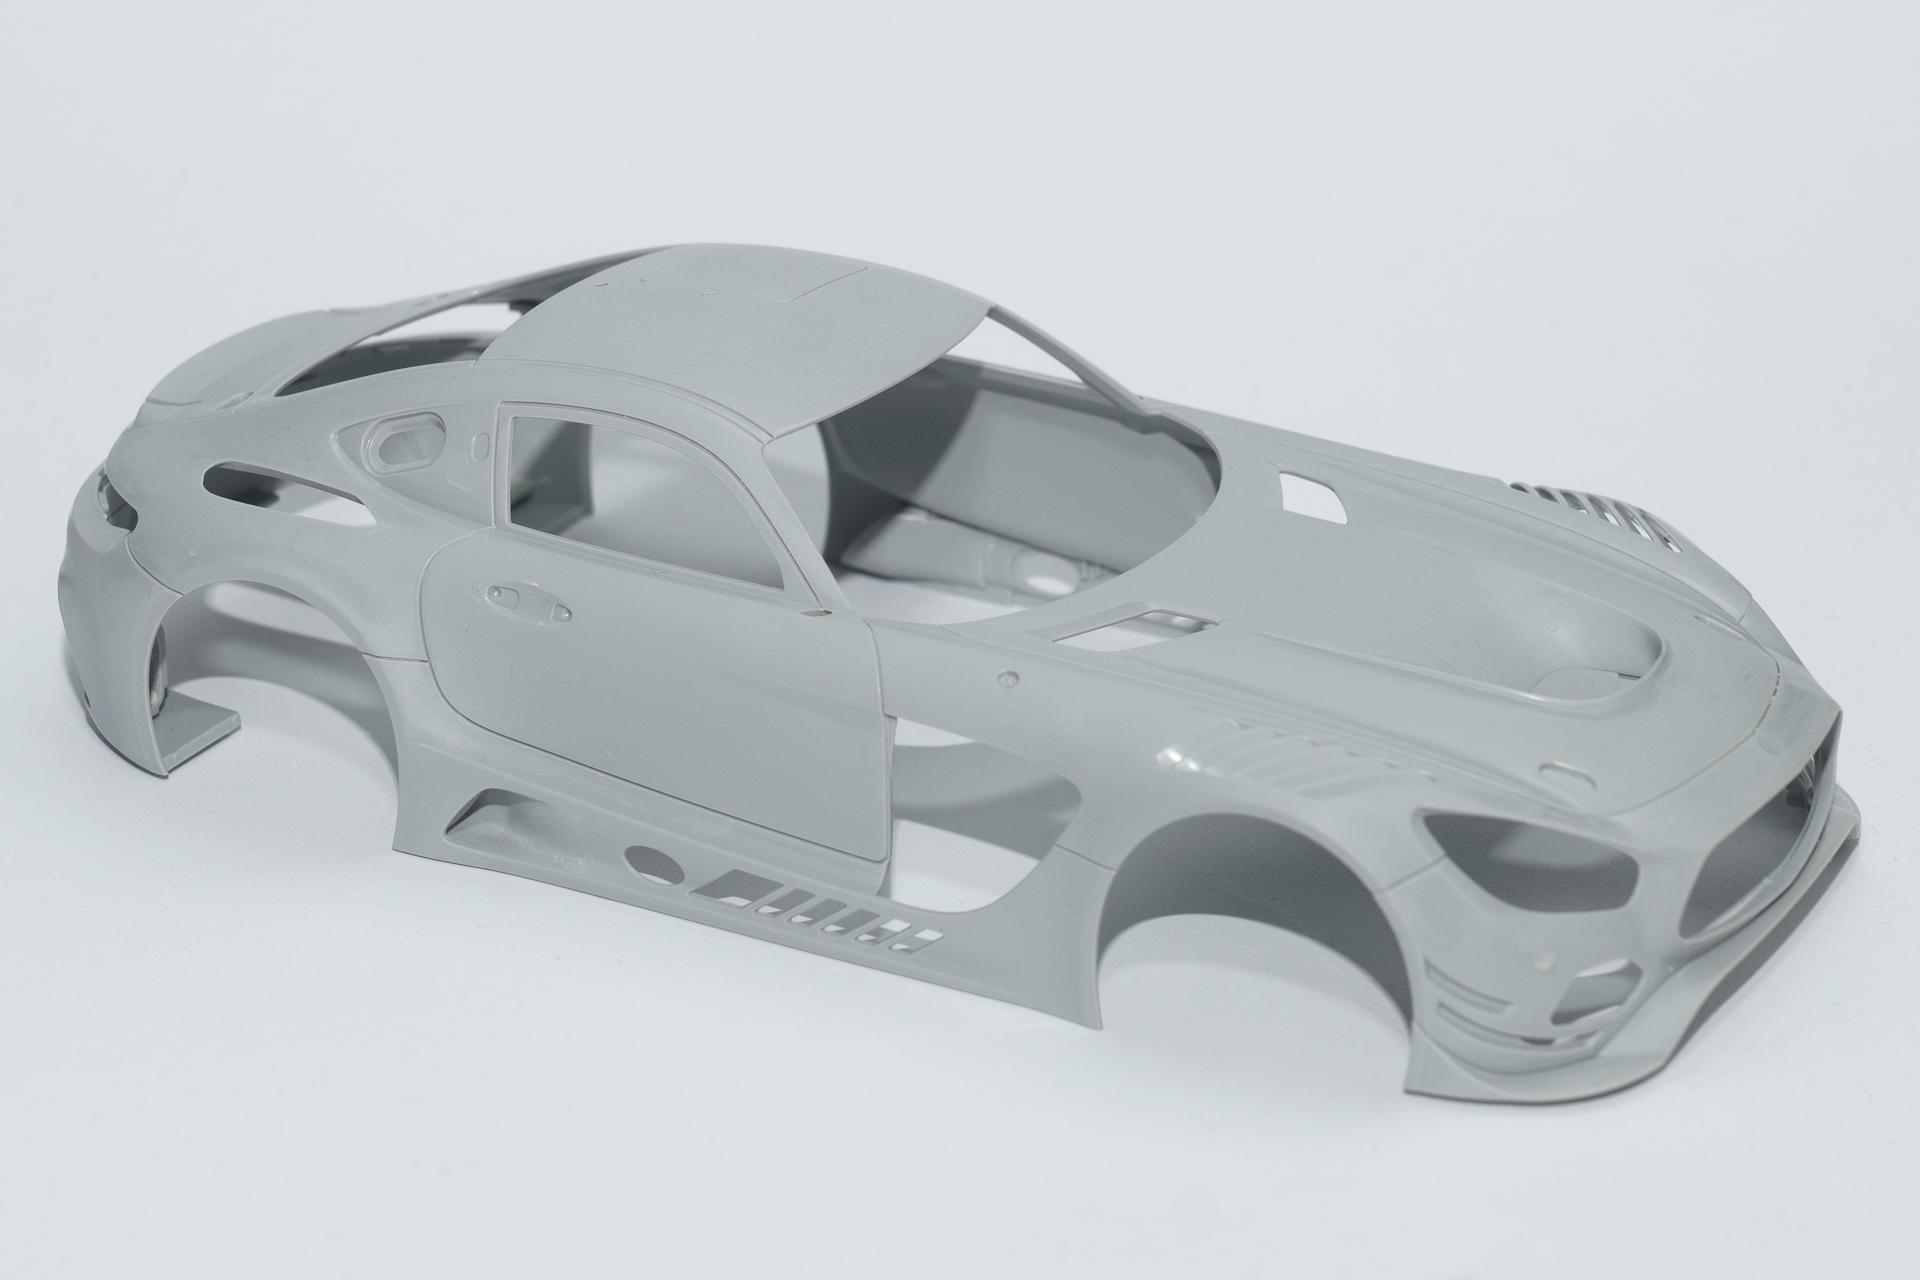
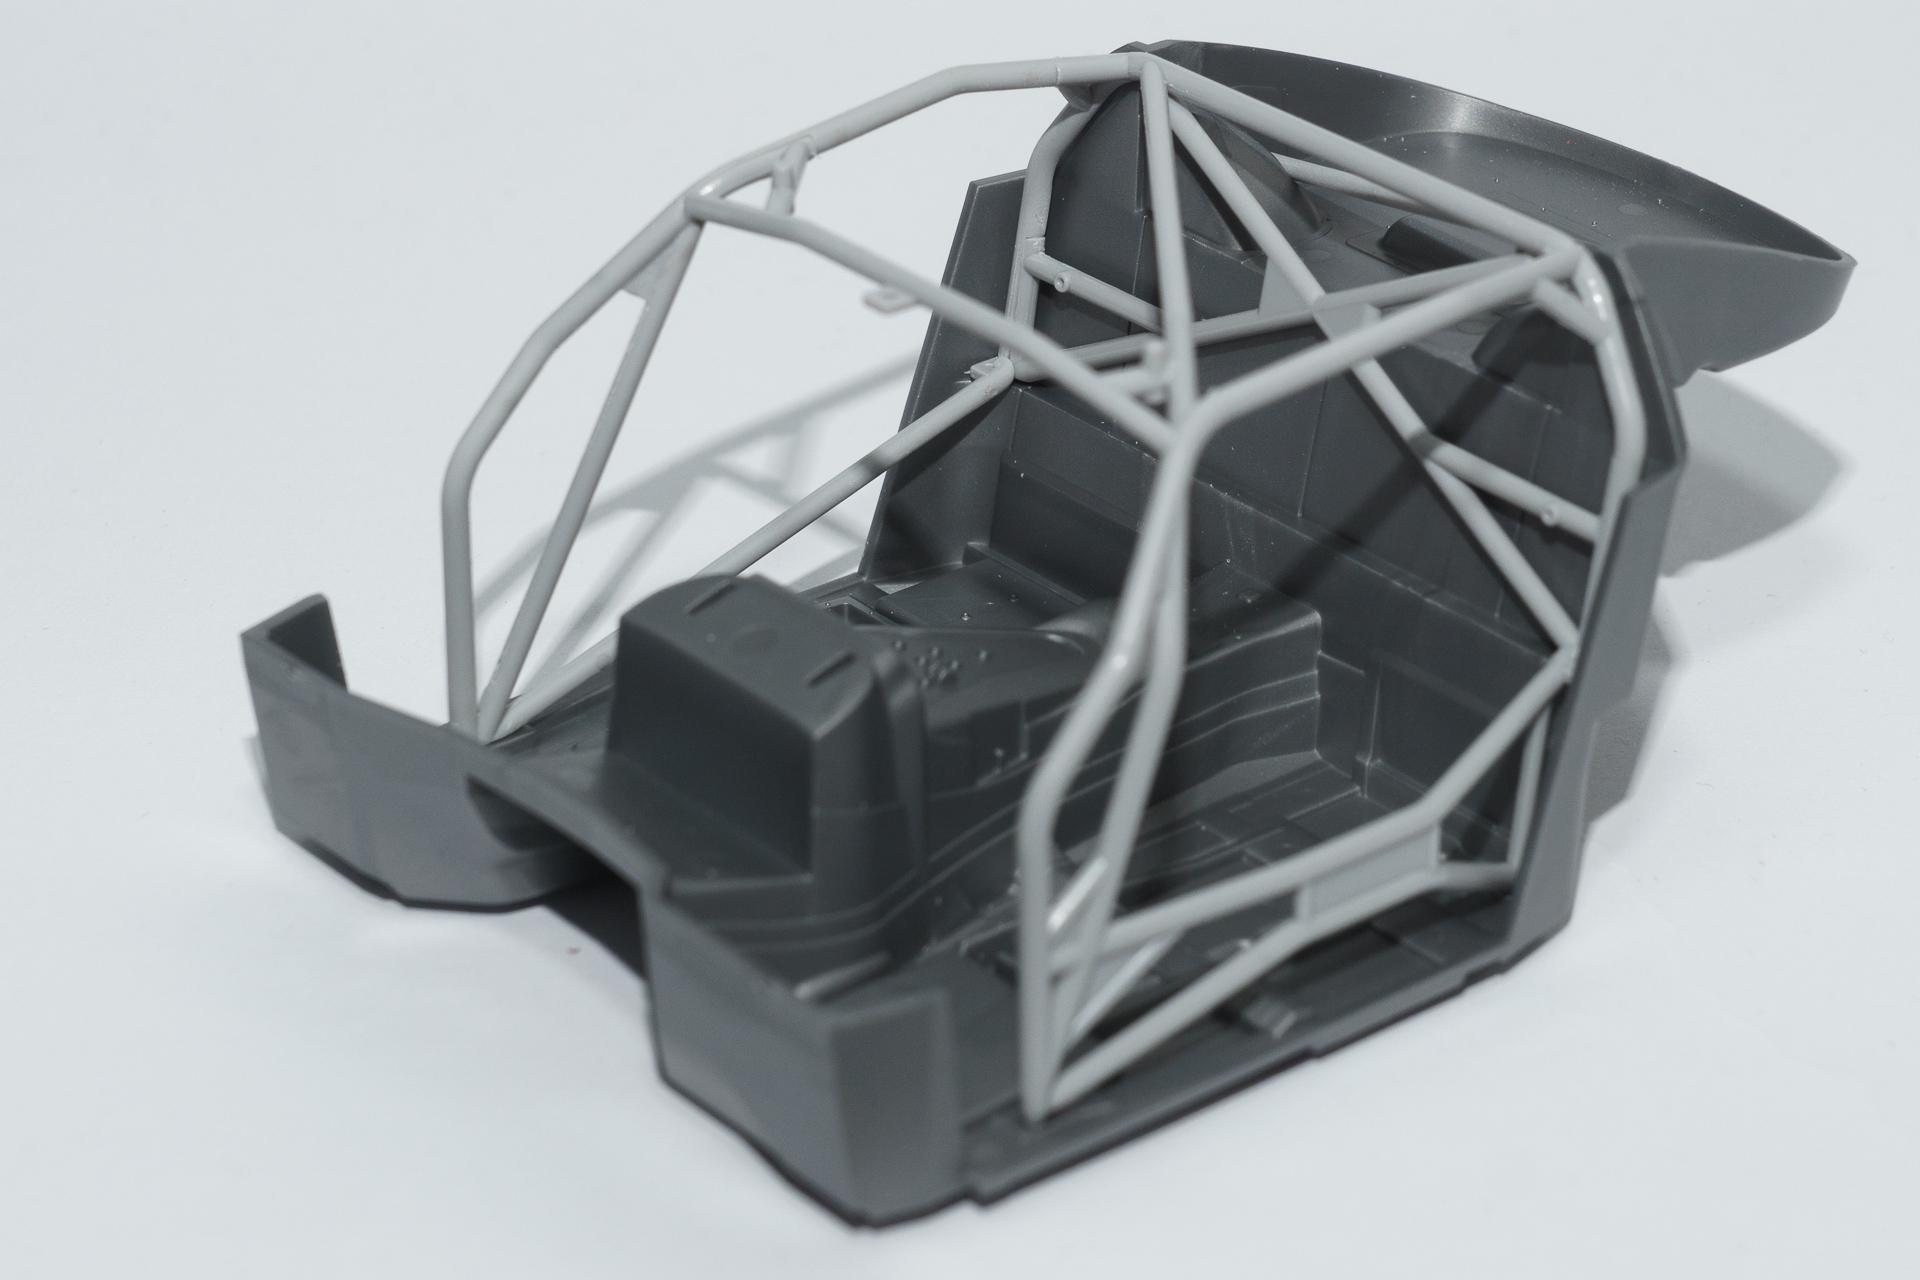
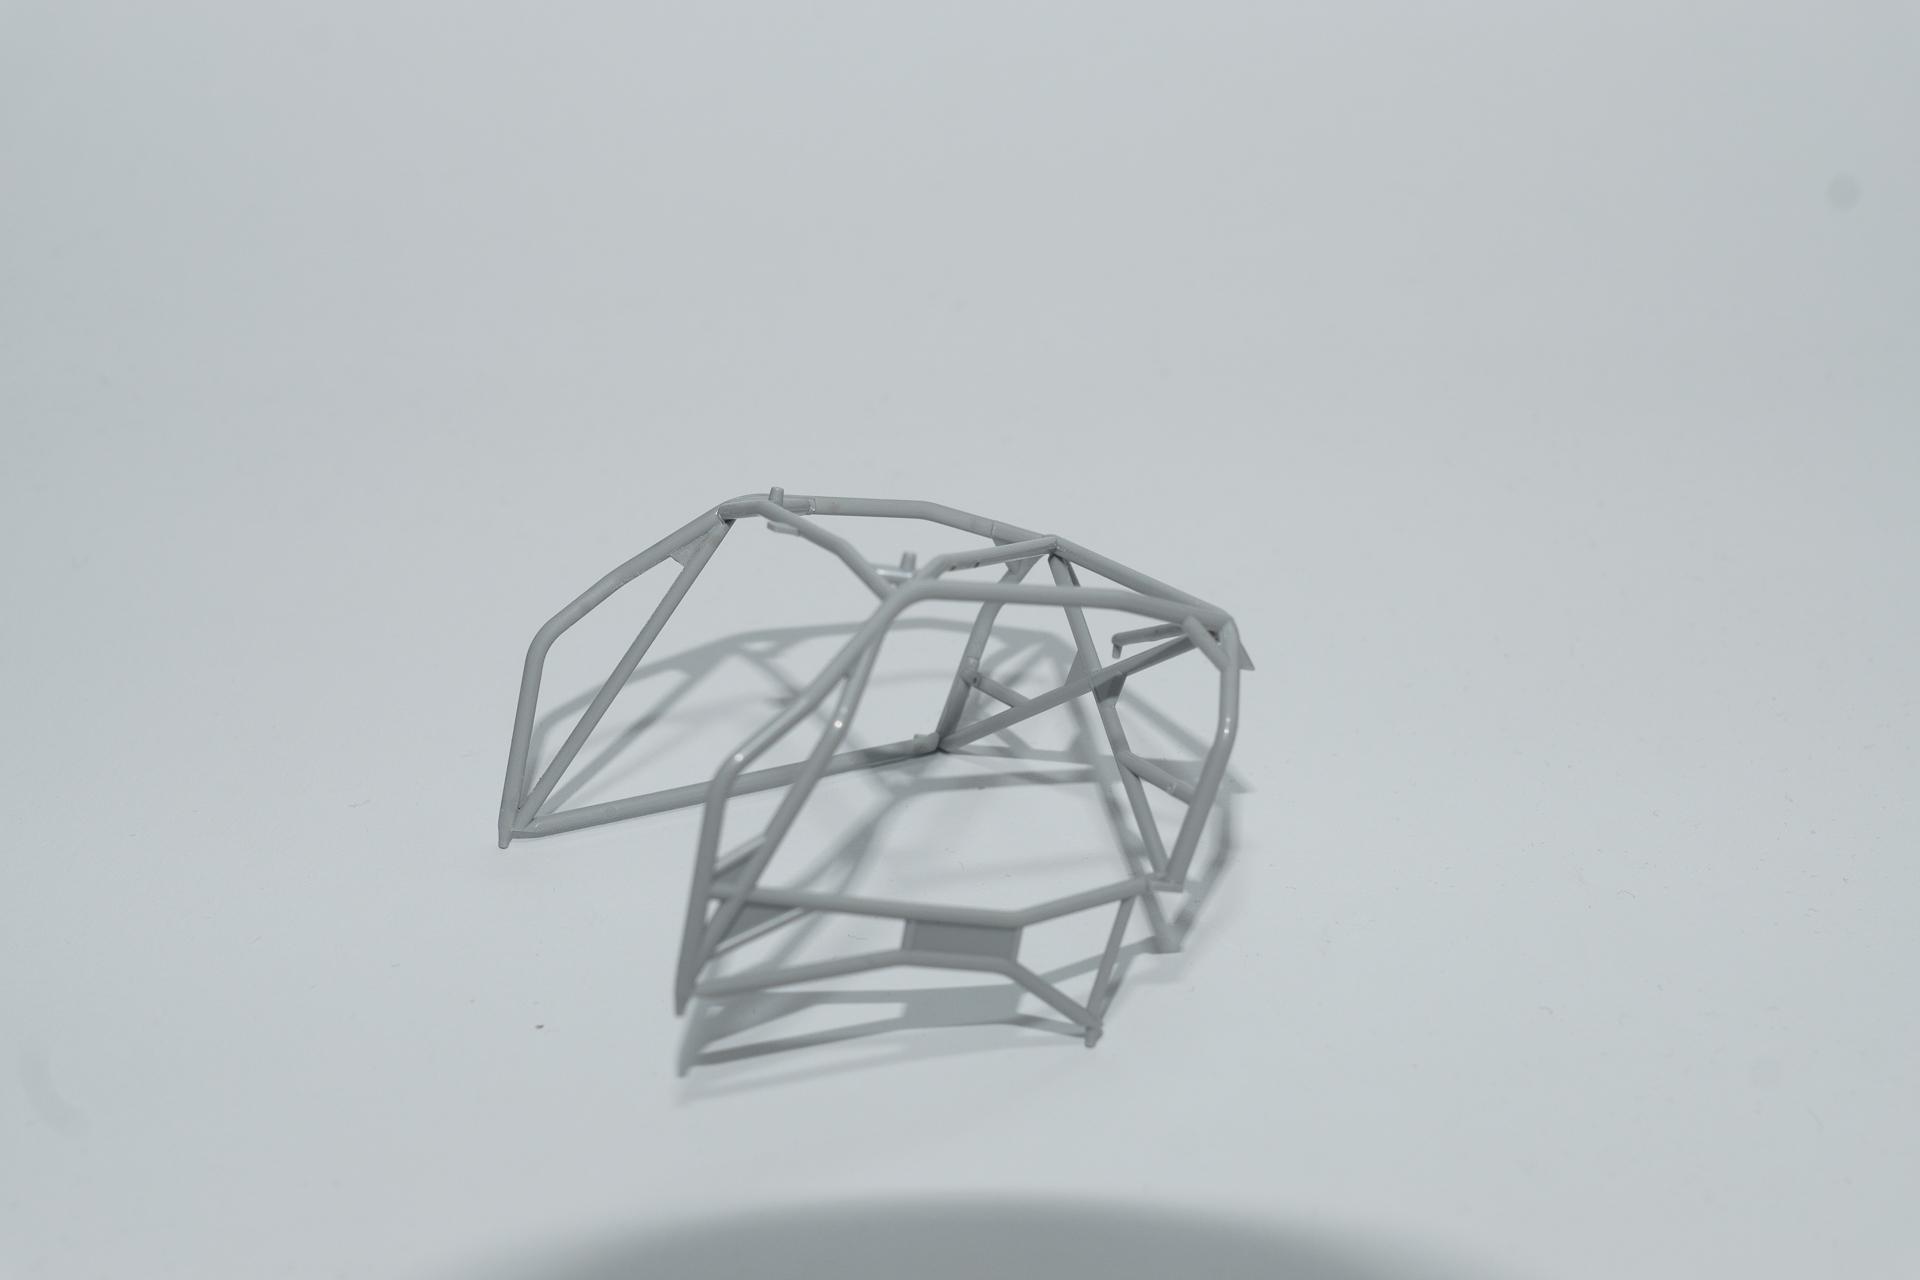
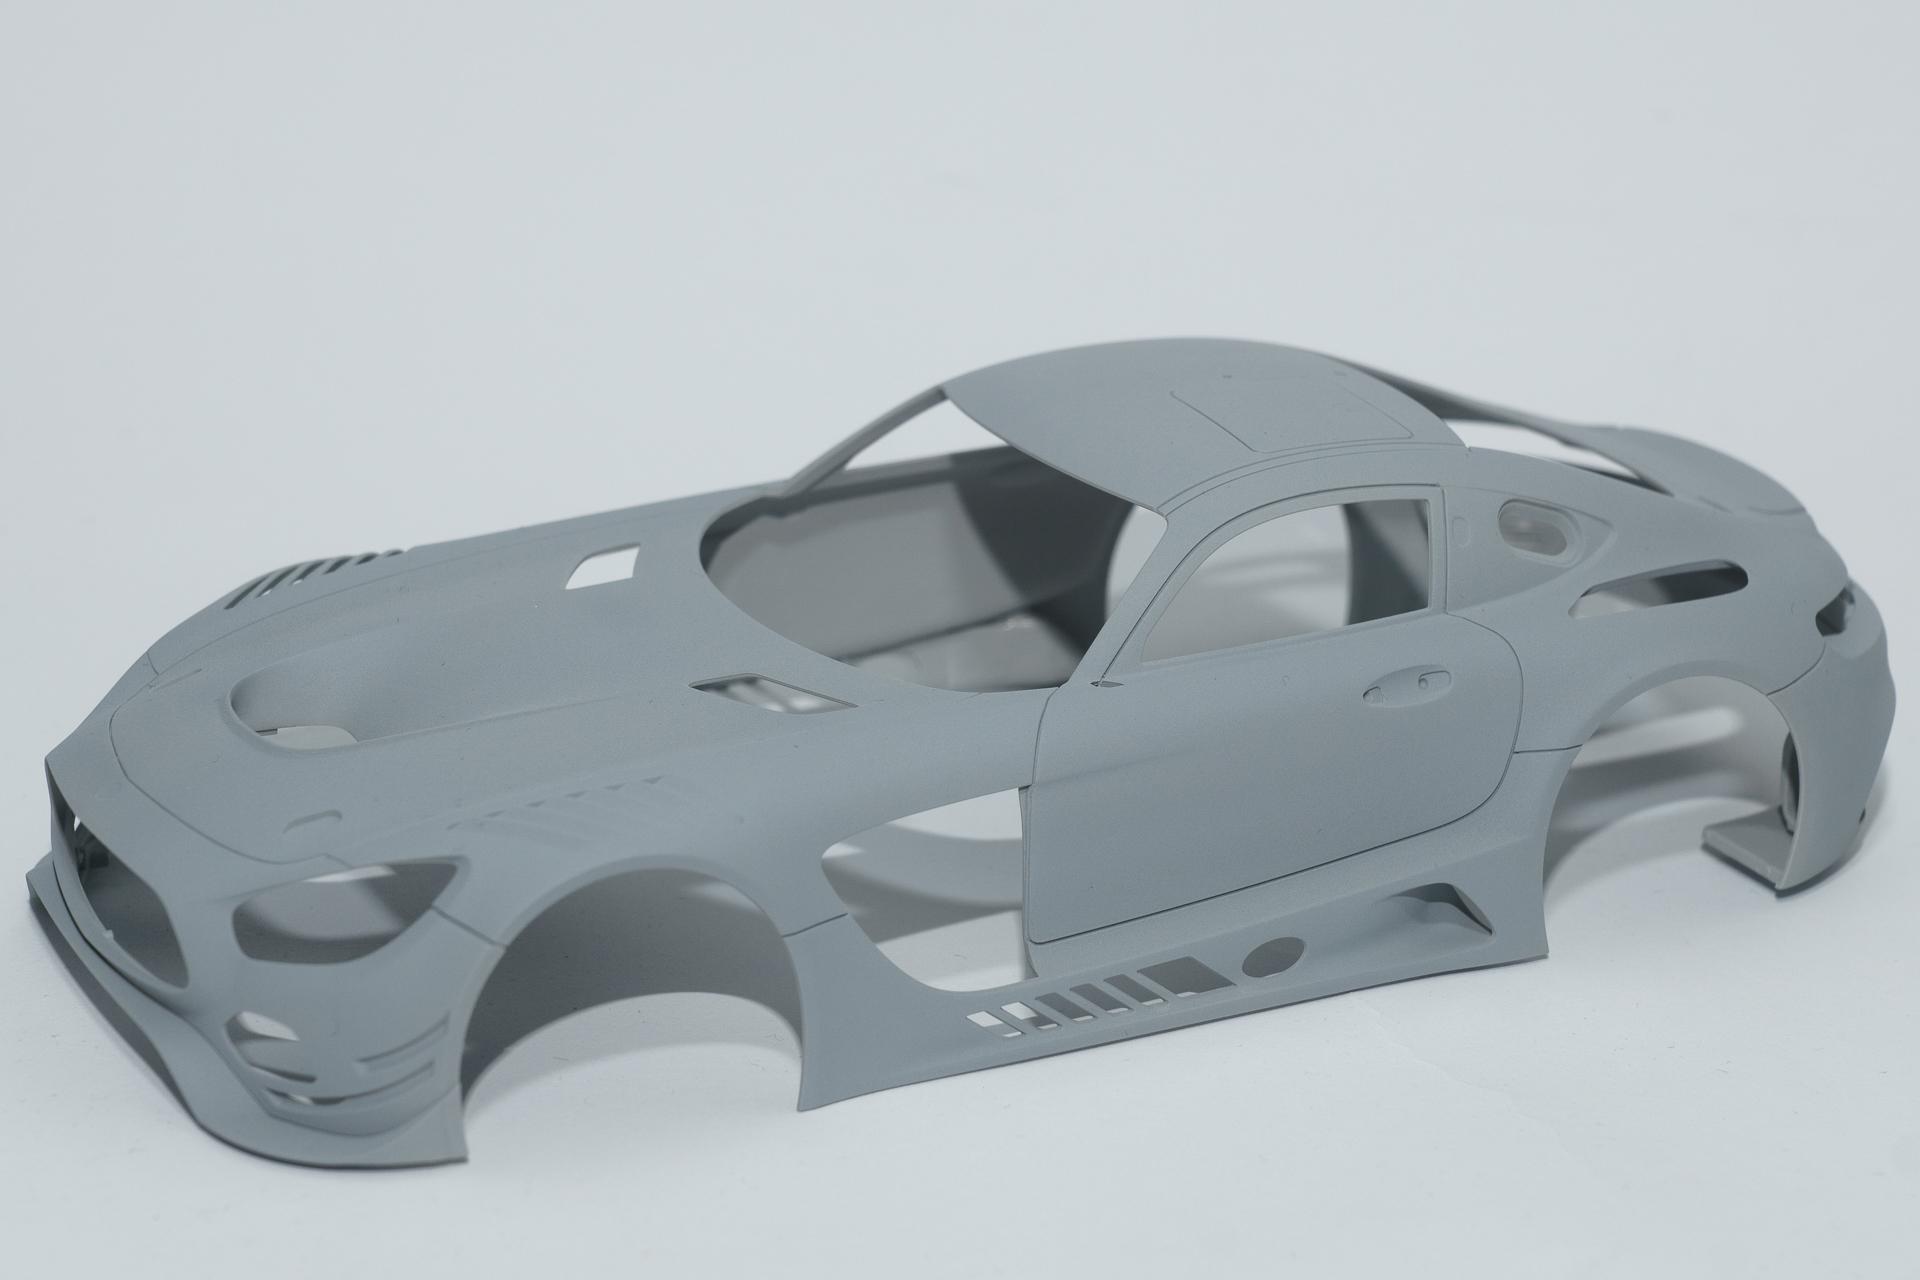
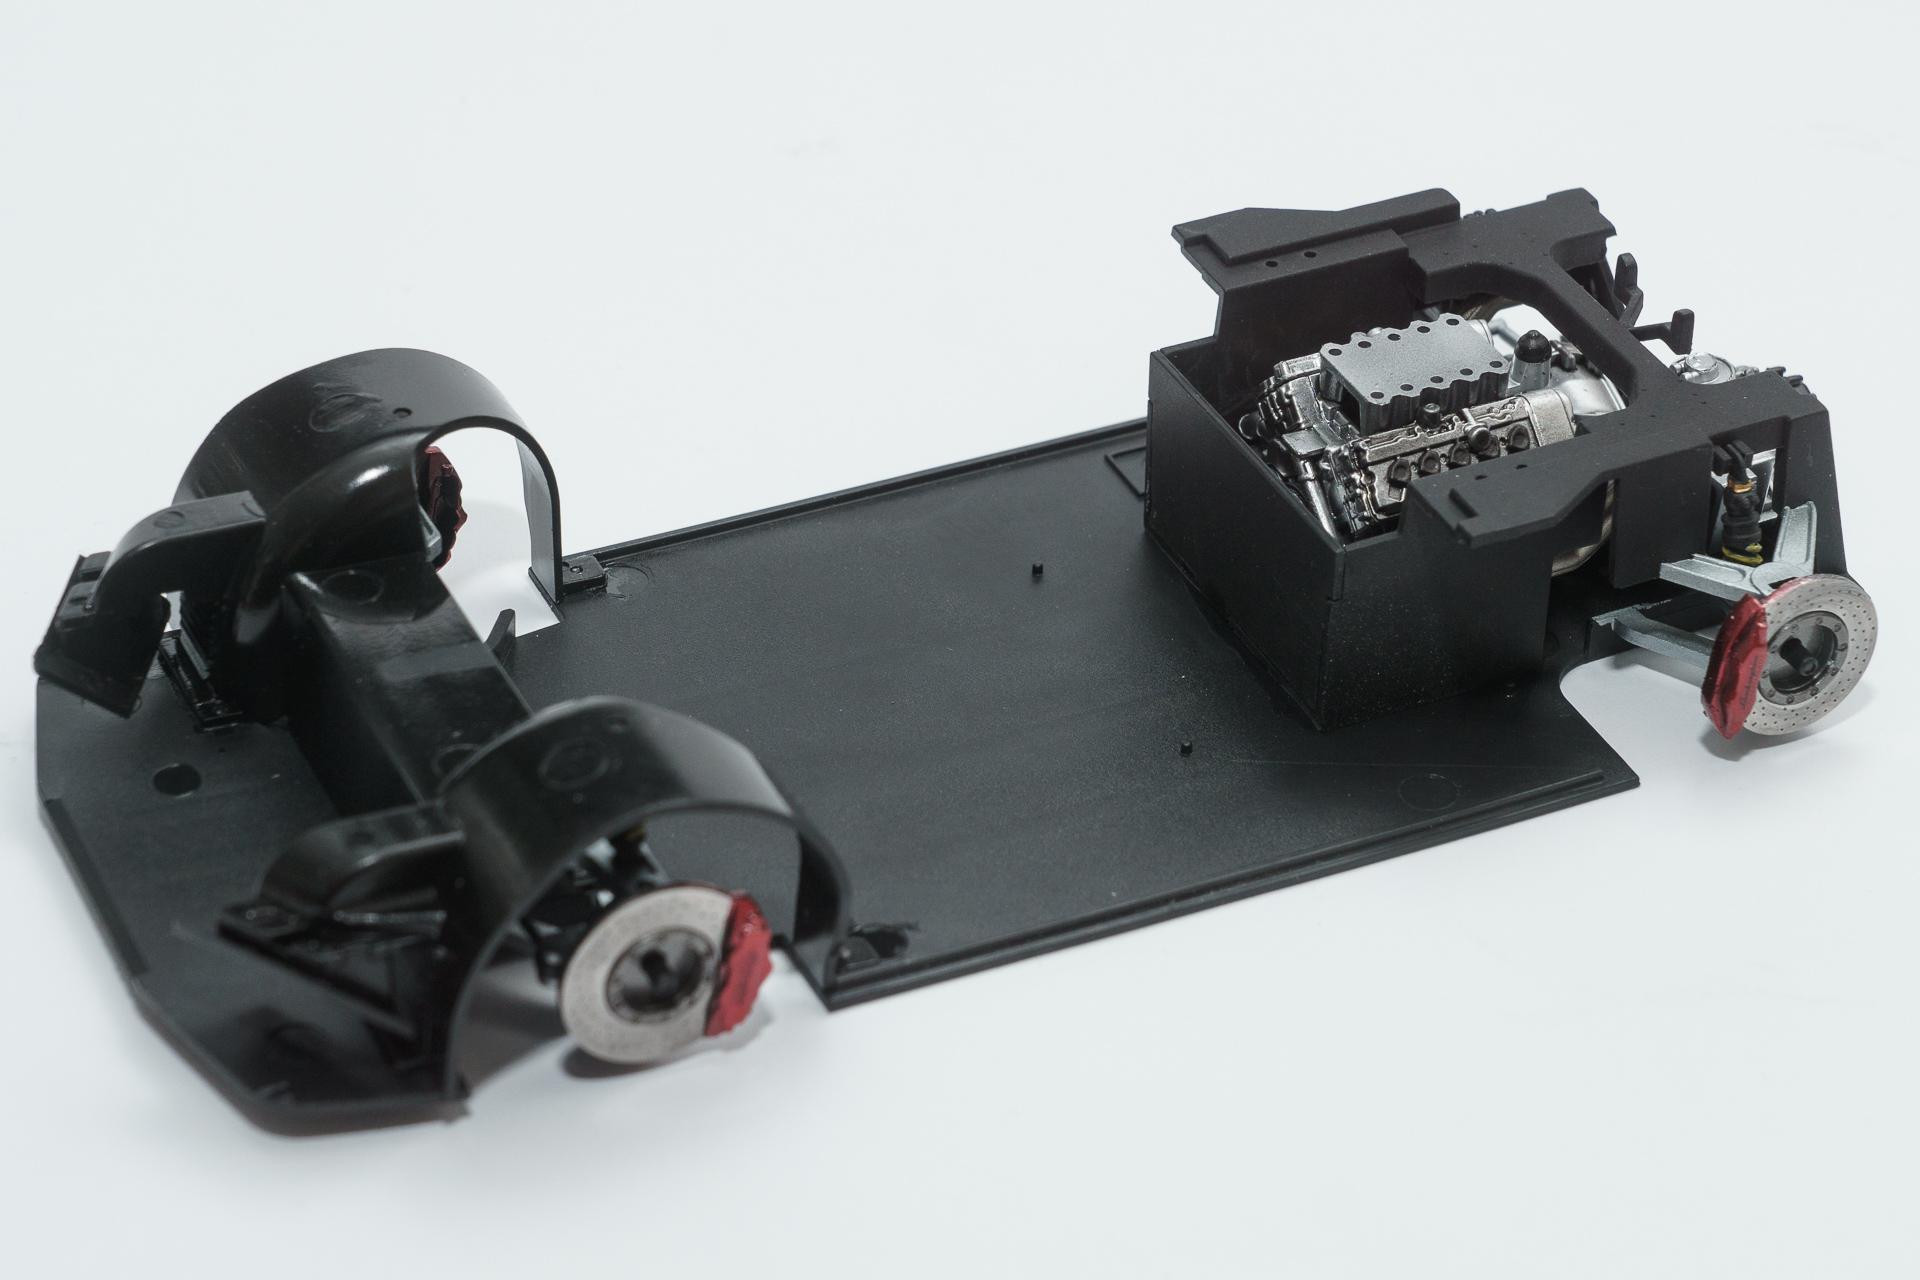
Hi all As my wip on the Lamborghini Sesto Elemento will be on hold for an undetermined amout of time due to the corona virus and the closed borders I decided to start a new WIP. Somewhen I will be stalled on this build as well because the body color is in the same parcel as the missing parts for the Lamborghini. But as I already started the build before the borders were closed, I continue anyway and do as much as possible without having to paint the body. With a little luck the borders will be re-opened by the time I reach the point I can't continue And if not there are enough model kits in my stash where I have everything needed to finish them ? First I started with glueing all body parts together without risking any troubles on the final assembly and without making the painting process unnecessaryli complicated. The fit was absoluteley excellent so I needed almost no putty to close the seams. Then the roll cage was put together. To make sure everything will fit on final assembly I placed it inside the interior tub to let the glue set. For the PE set I had to open up the air outlets behind the front wheels. Here two PE meshes will be added once everything is painted. Once everything was prepared I primered the body parts and am really happy with the result. That's where I am at the moment. Next time I think I should be able to show you my enhanced version of the shock absorbers and the undercarriage with the carbonized diffusor. For the moment I wish all of you a good and, first of all healthy, start in the upcoming week. May you and your beloved ones stay healthy. Urs
-
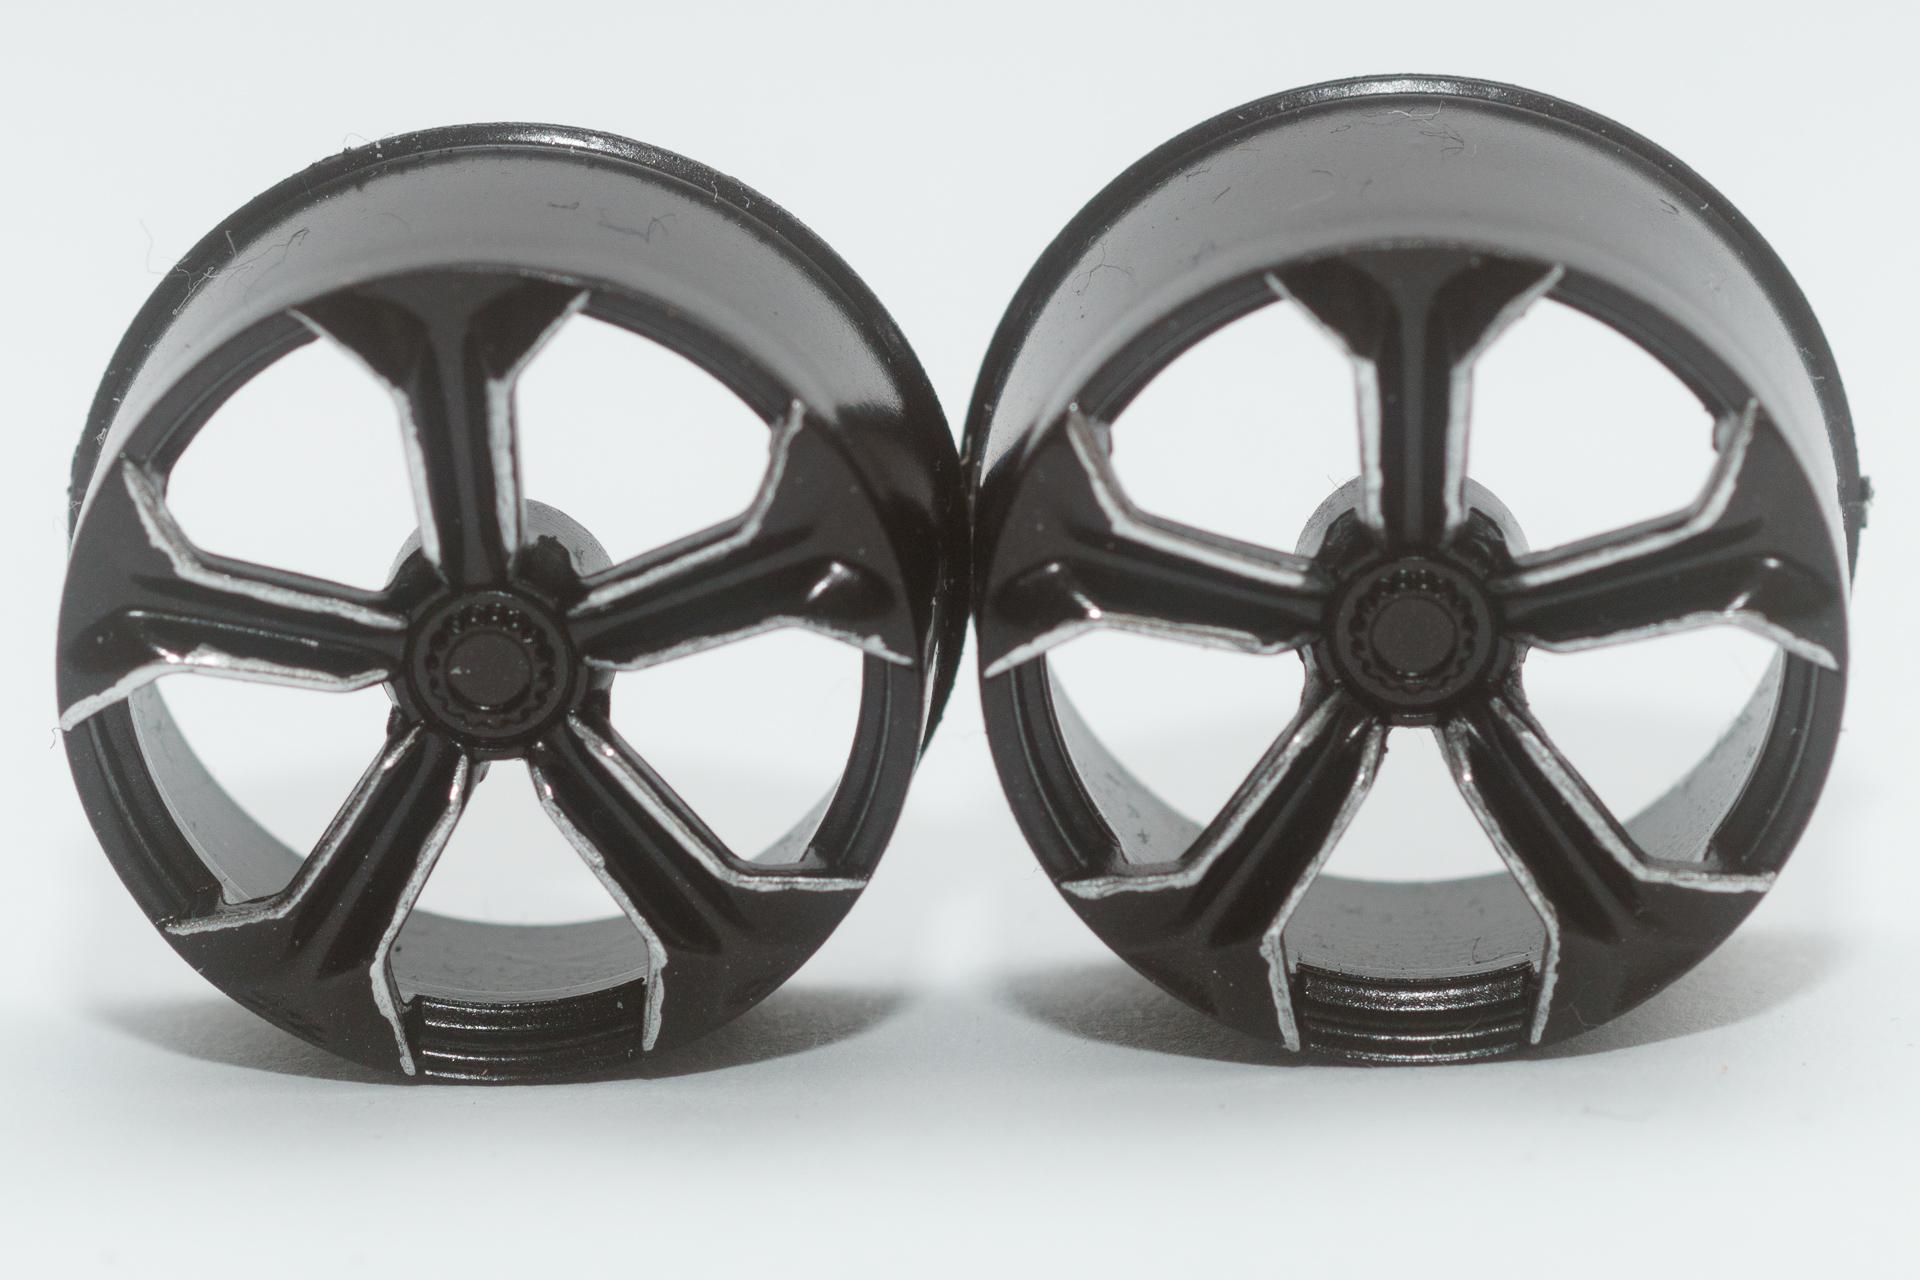
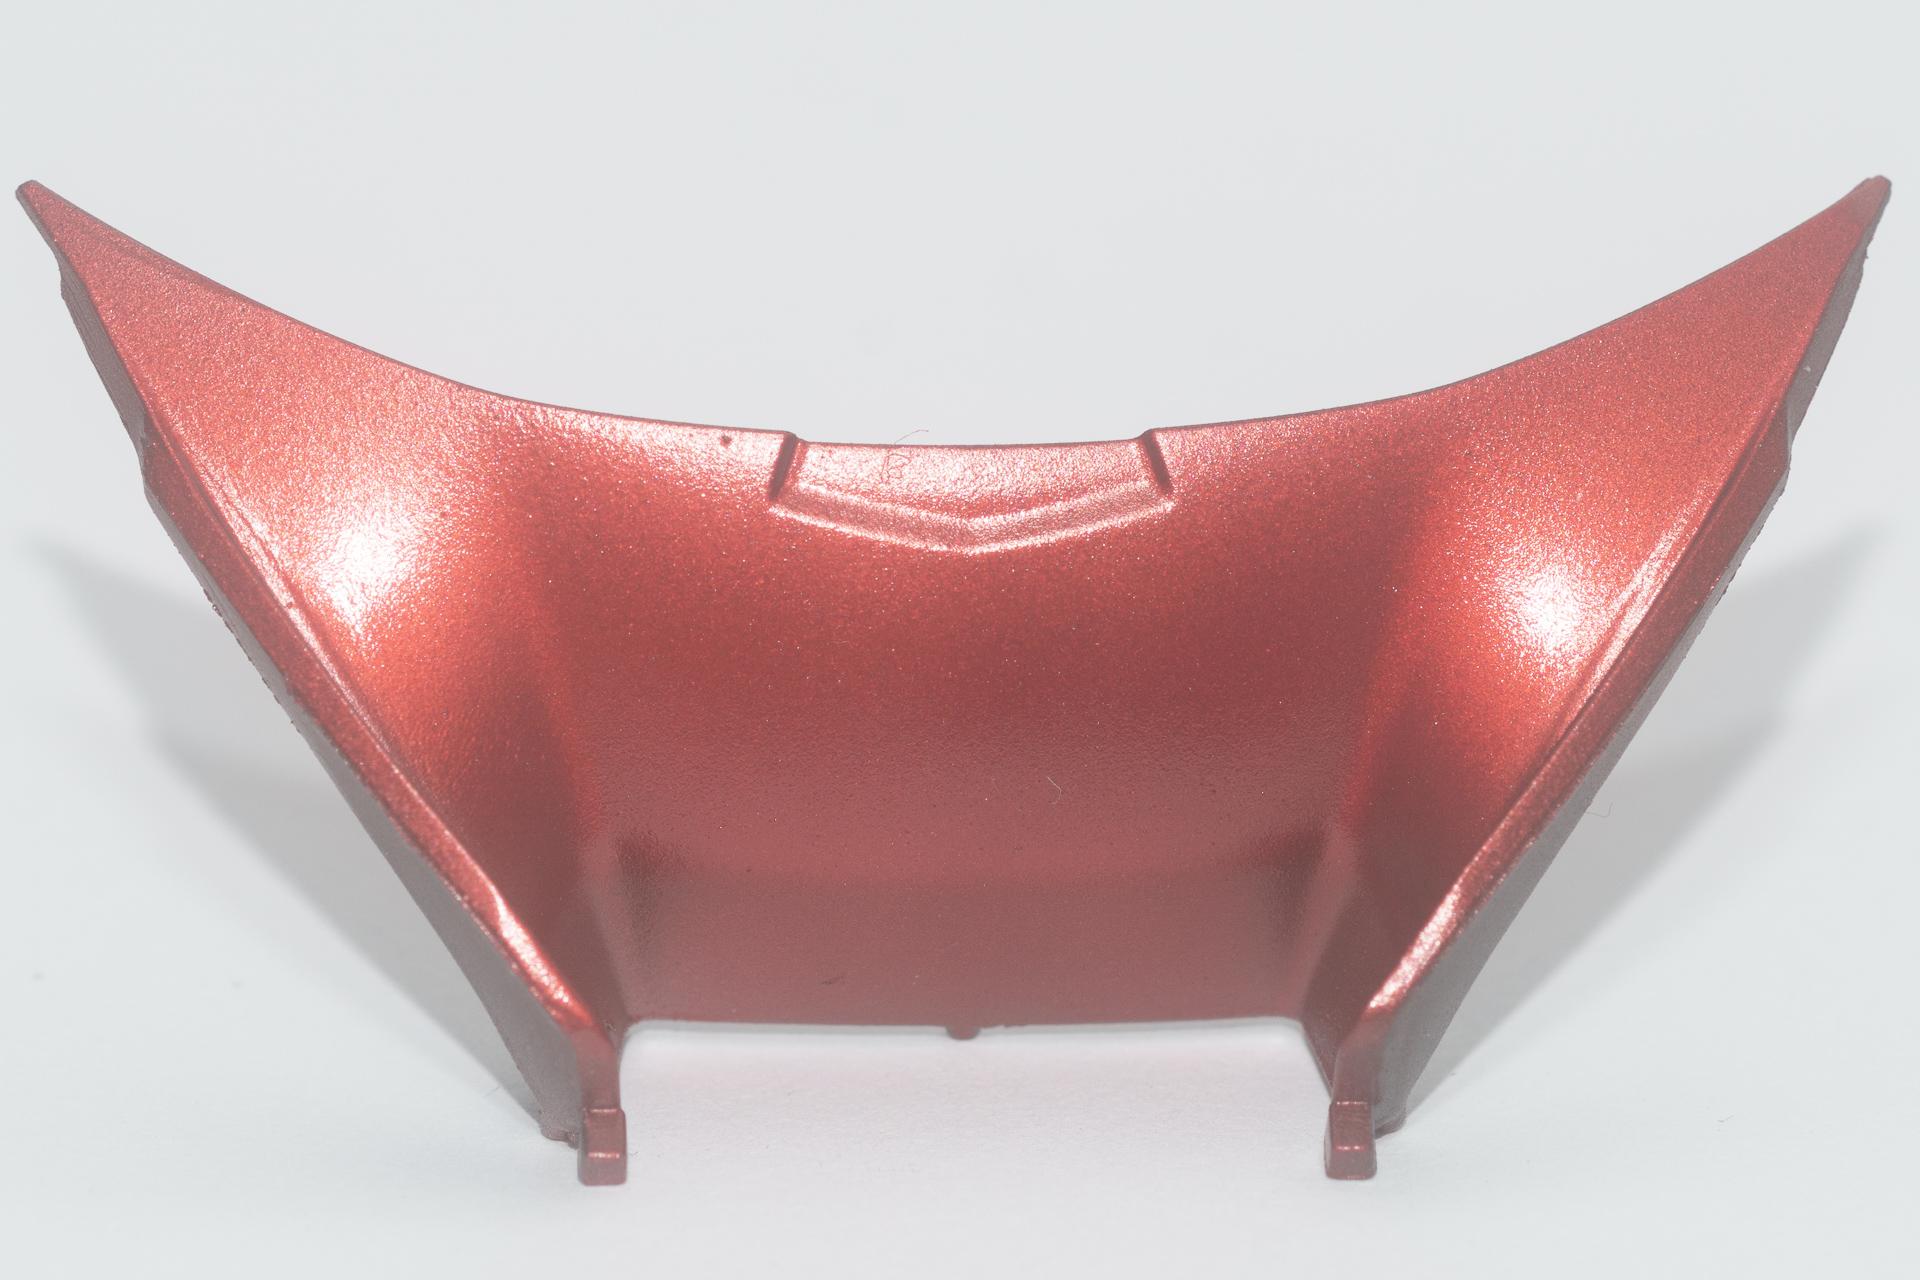
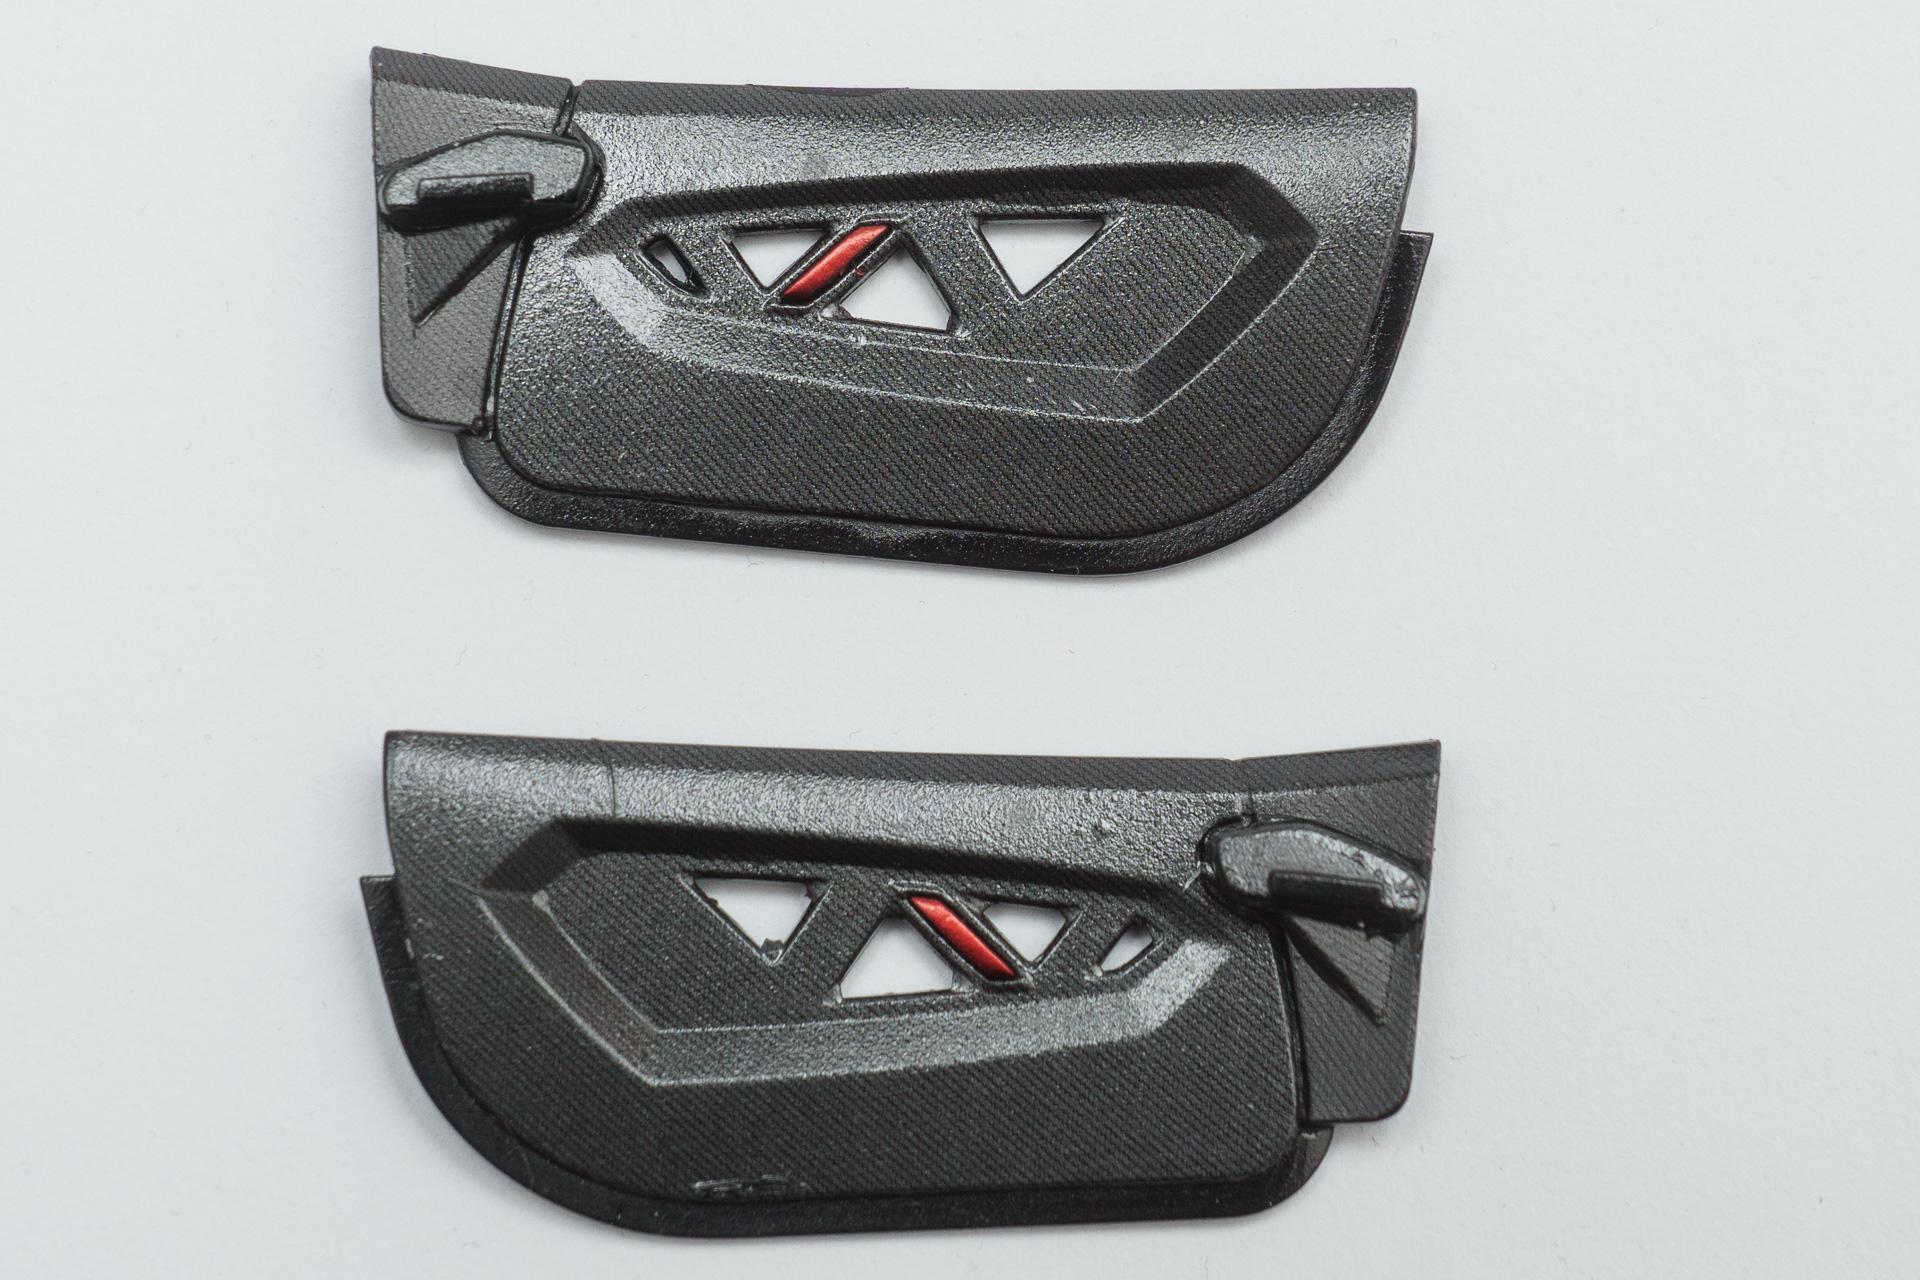
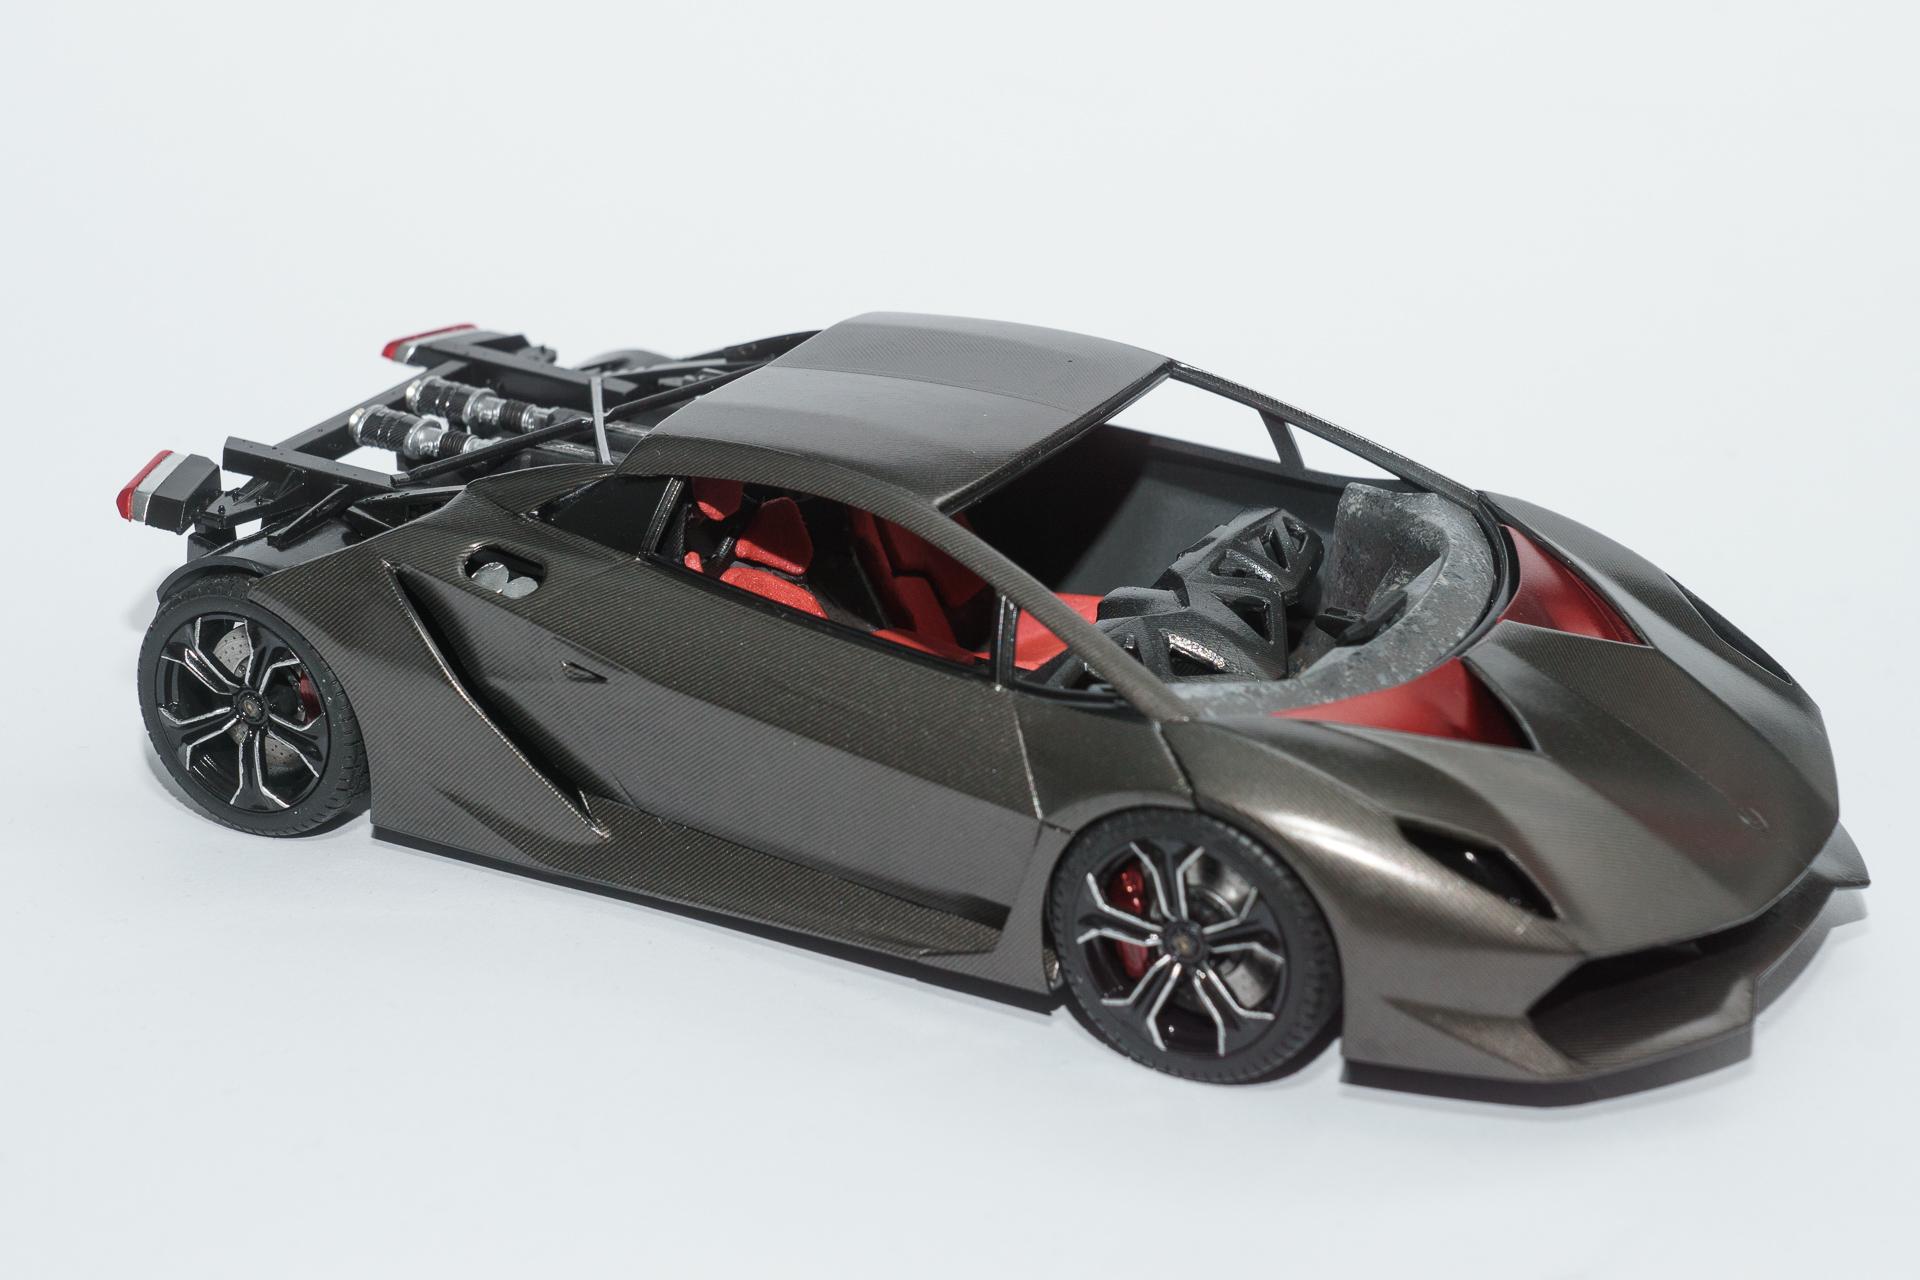
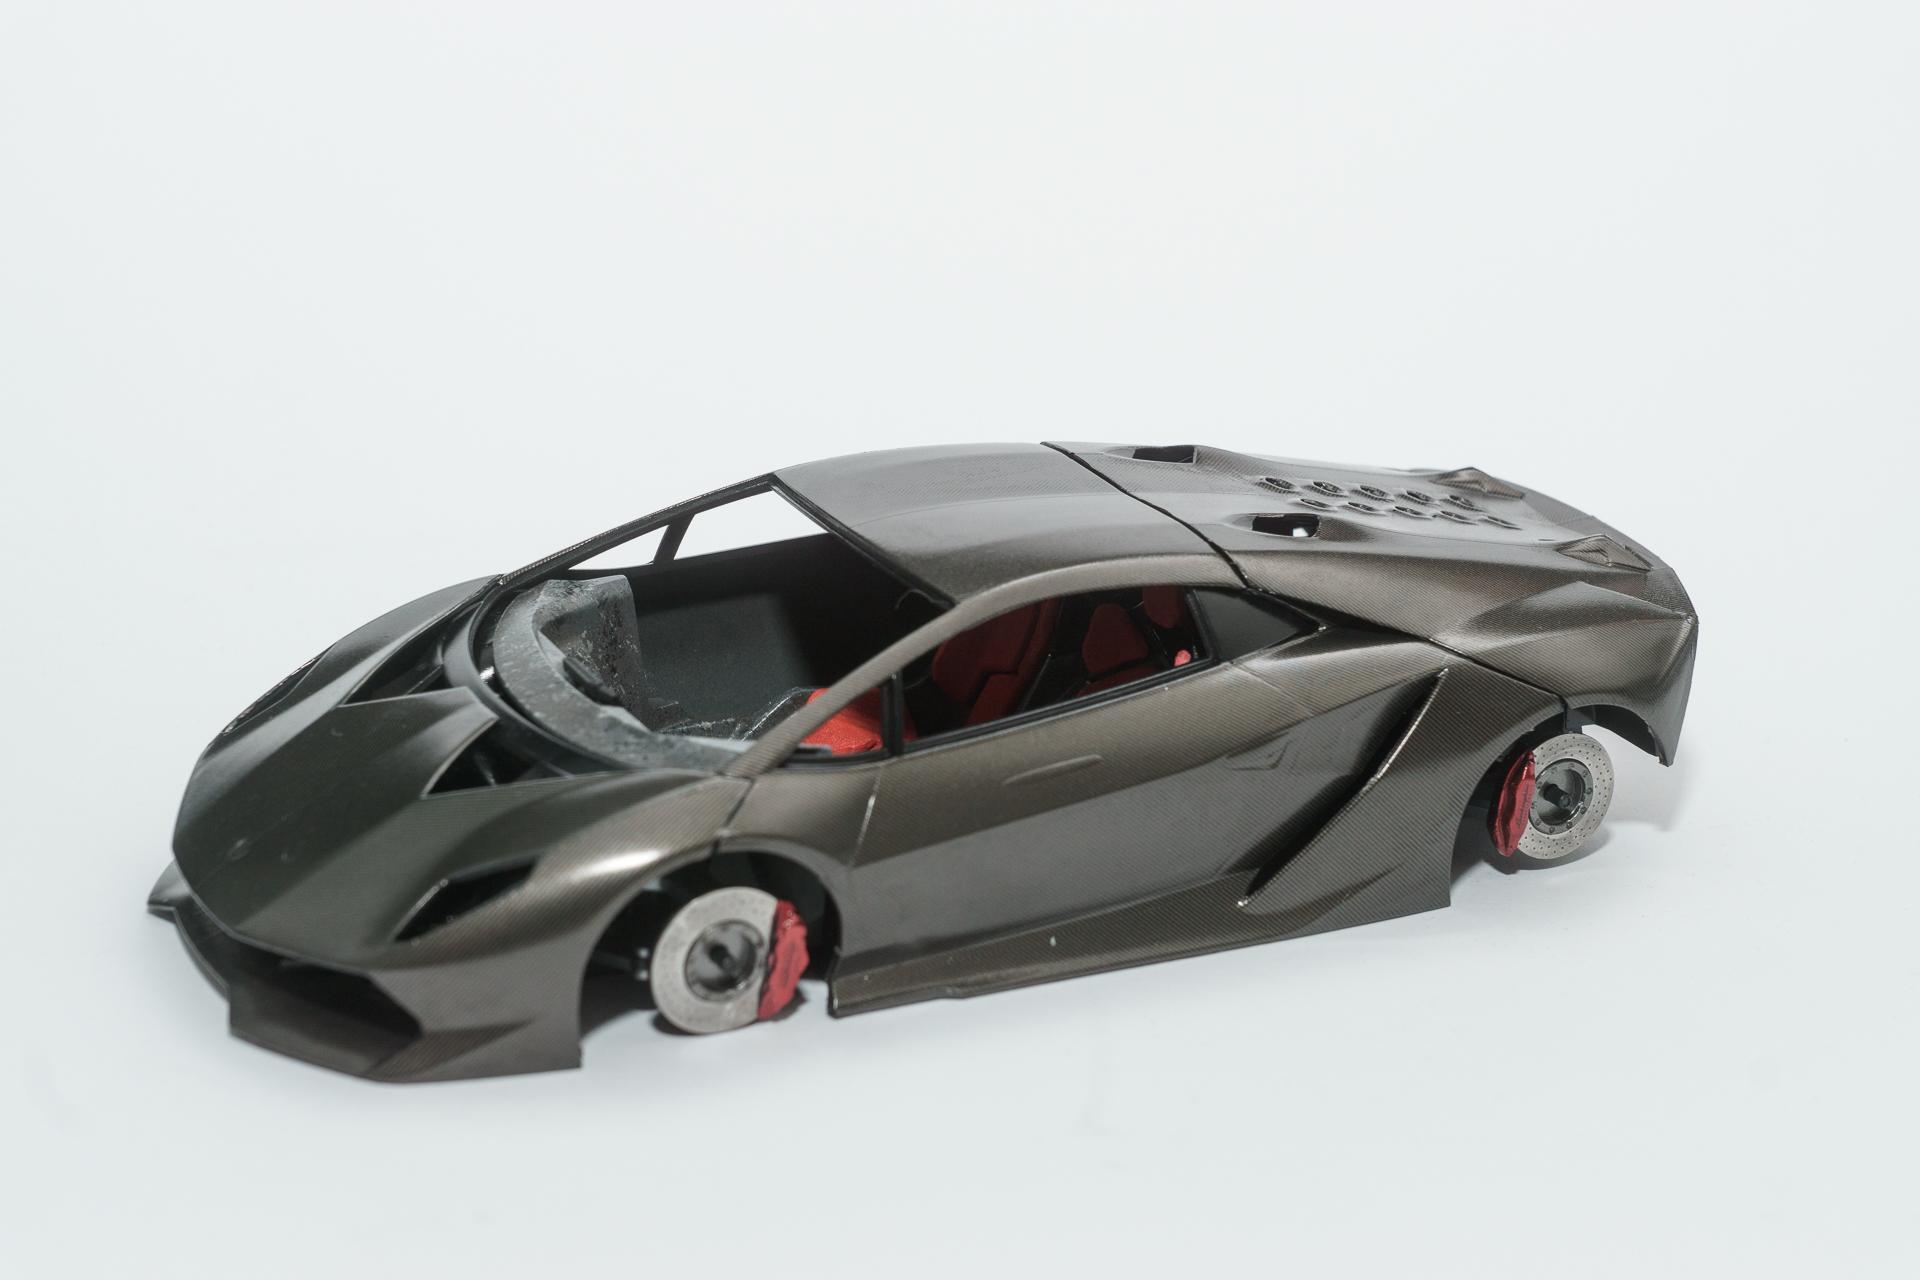
Hi all Thank you all for your kind comments. Unfortunately I will have to suspend the build of the Sesto Elemento after this update, as I am still waiting for a delivery of which I don't know yet when it will arrive at my home. So I did everything I could without the items on order and will show you now the current status. The red part on the front has been painted. Therefore I painted it Alclad Aluminium followed by Alclad Transparent Red. The interior has been completed as far as I could. Some details are in the order mentioned in the beginning, so it hasn't reached final status yet (the doors are lacking to decals which will put on sometime before final assembly. I just forgot them so far). The tail-lights have been assembled and the engine cover has been completed as well. The tank neck has been assembled from PE parts And the rims have been completed To finish an overview of the current status, currently without the engine cover as it won't stay in place at the moment. After final assembly I will have to check whether it stays in place once all the other parts are in place and securley fixed. Otherwise I will have to glue it on permanently. That's all for the moment. I wish you all a nice weekend Urs
-
Hi all Thank you very much for all your kind comments I used Zero Paints' Ferrari Rosso Corsa 300 (ZP-1007). Before clearcoating the difference between color and the red part of the decals was very well visible. After clearcoating (using Zero Paints' 2K Diamond Clear) you can only tell the difference because the edges of the decals are slightly visible. But you have to go very close to the model to see that
-
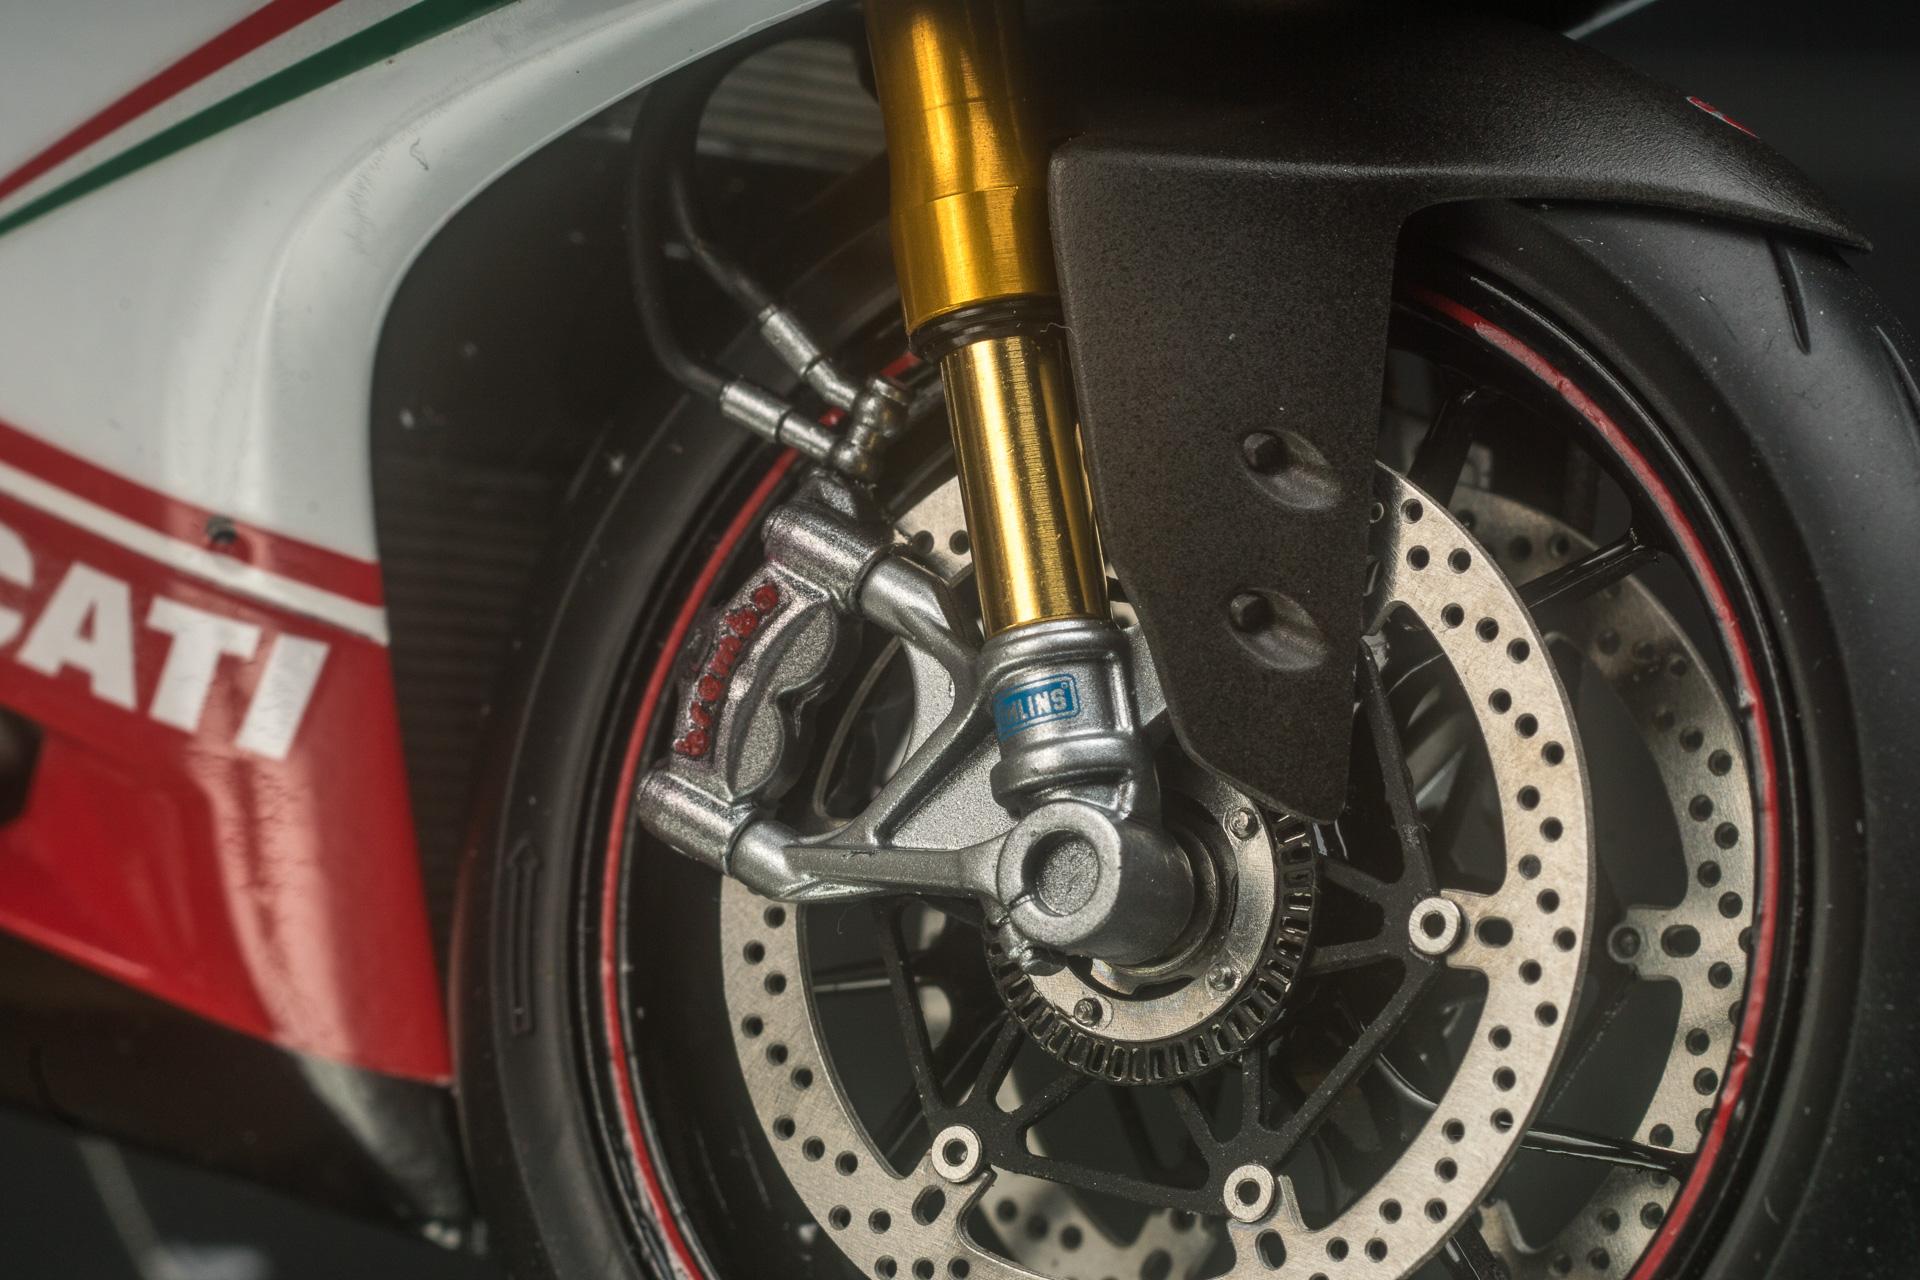
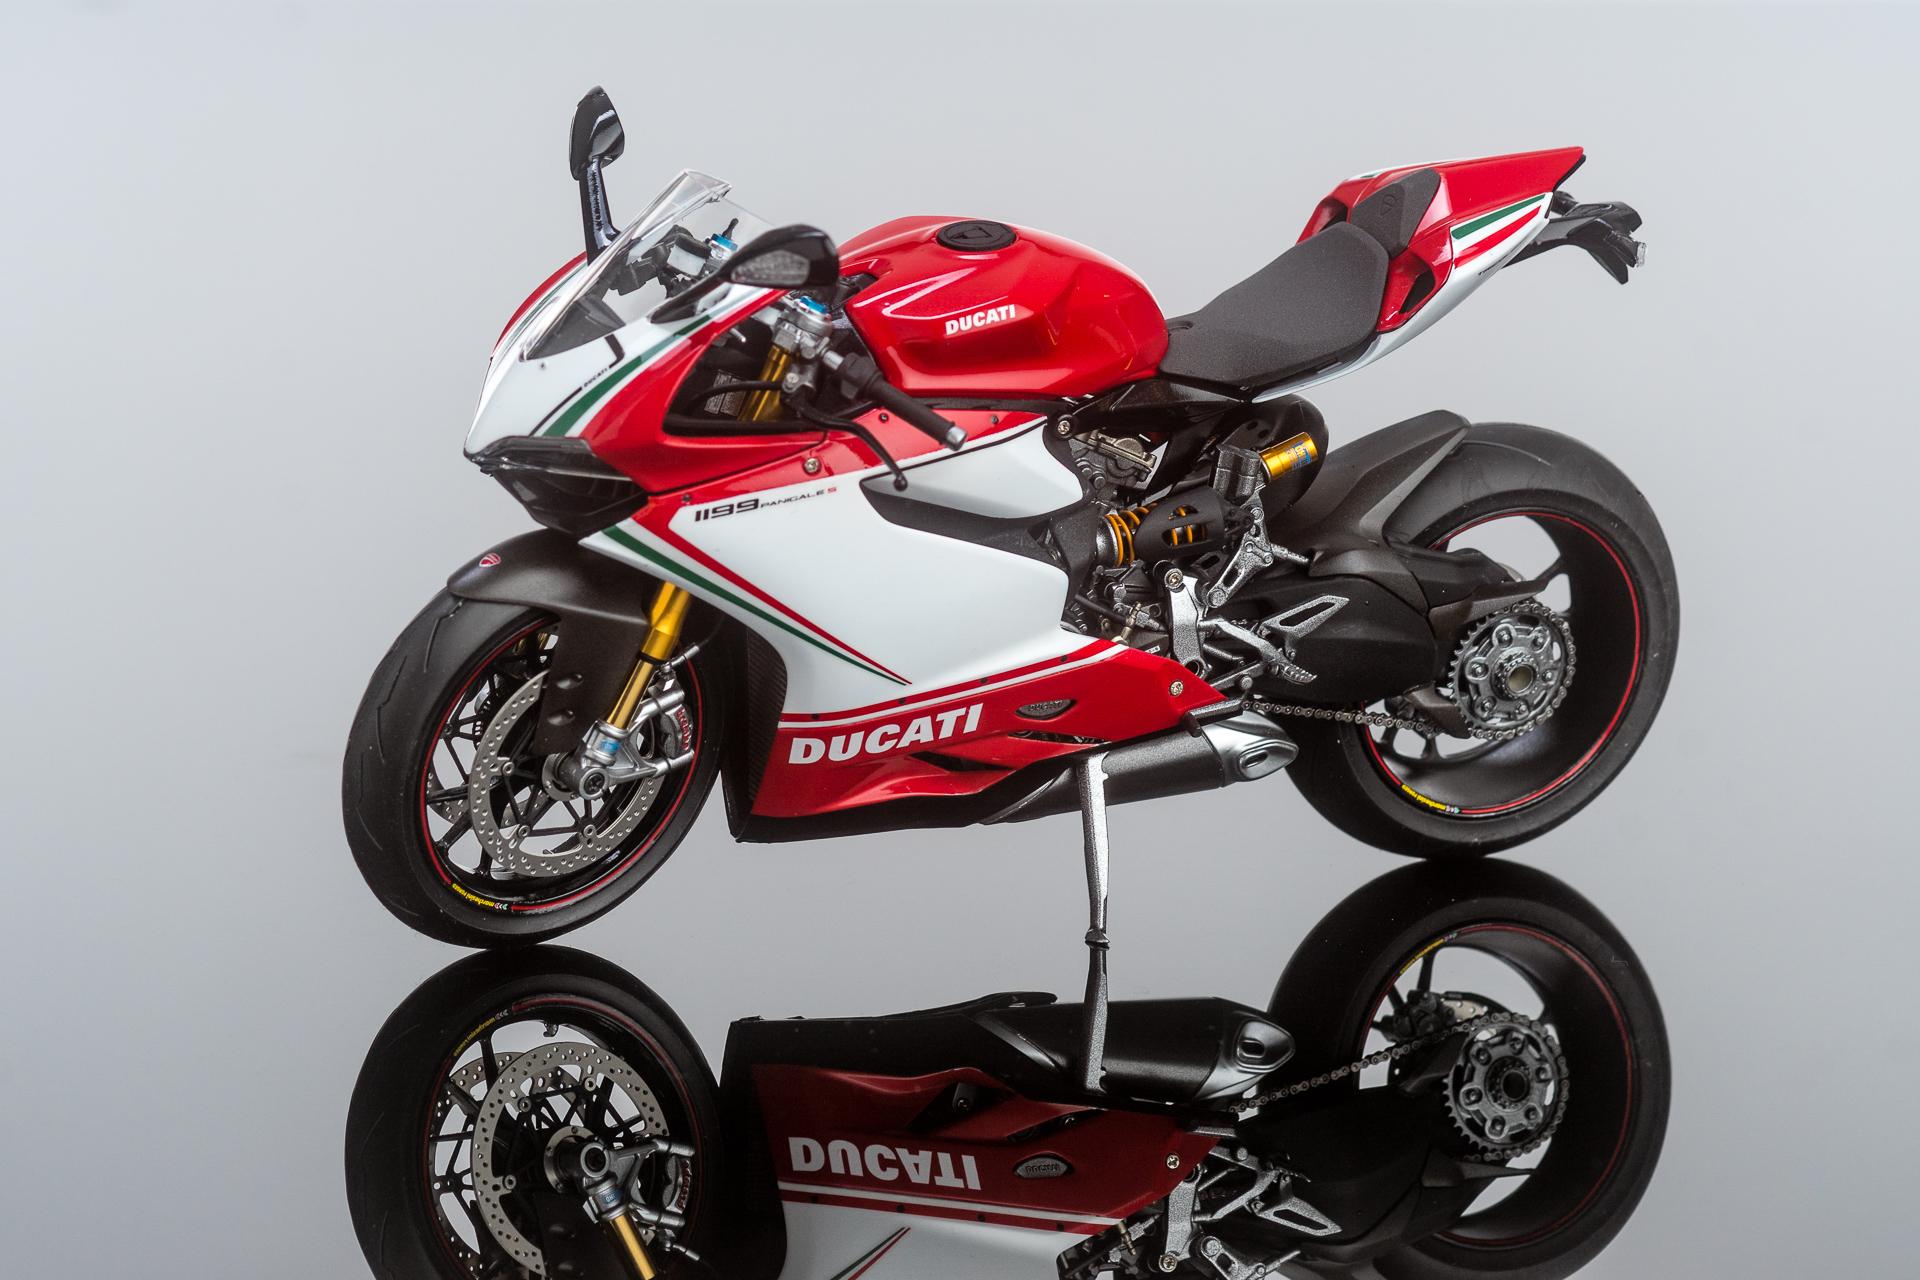
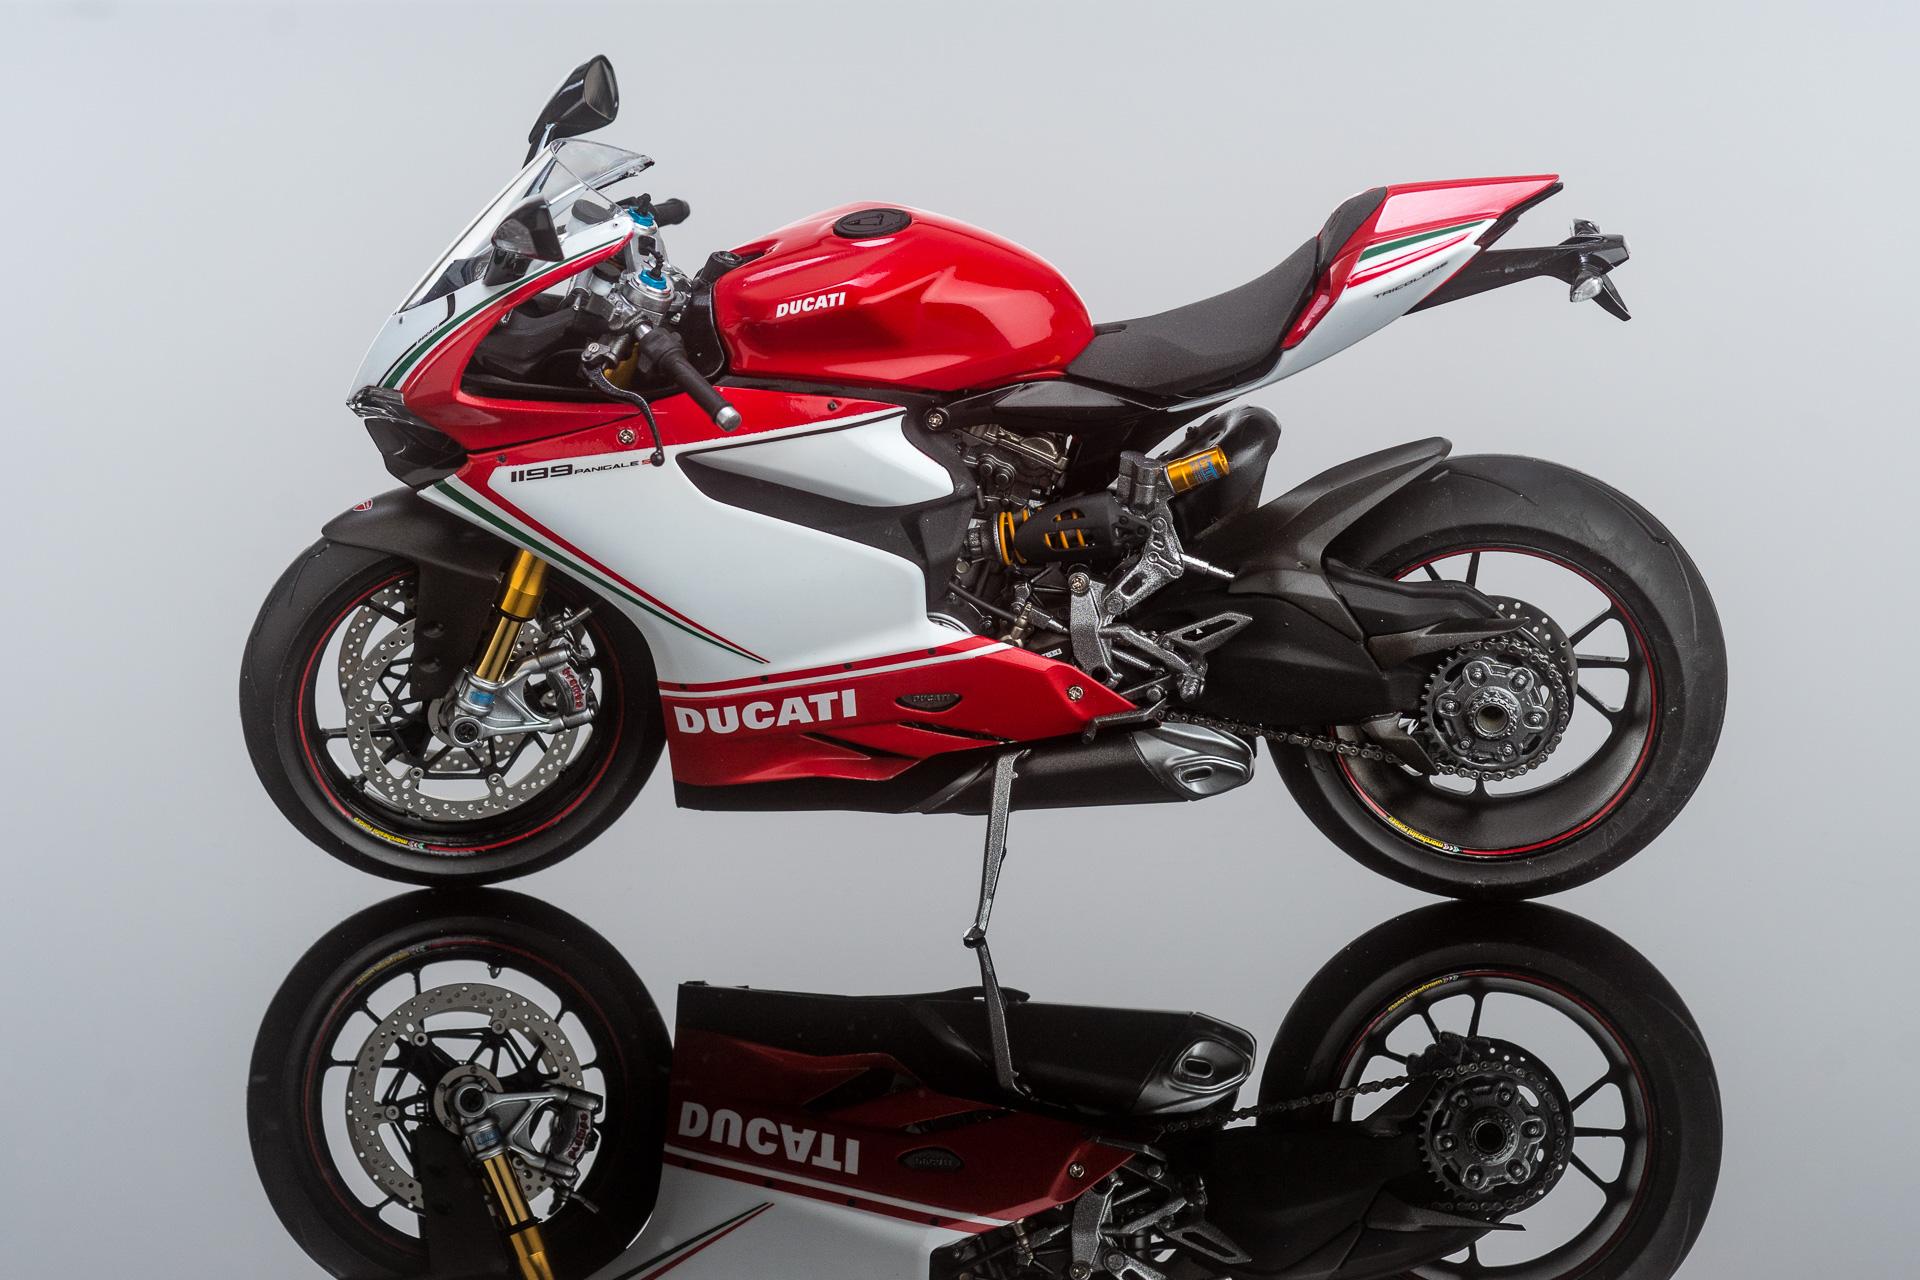
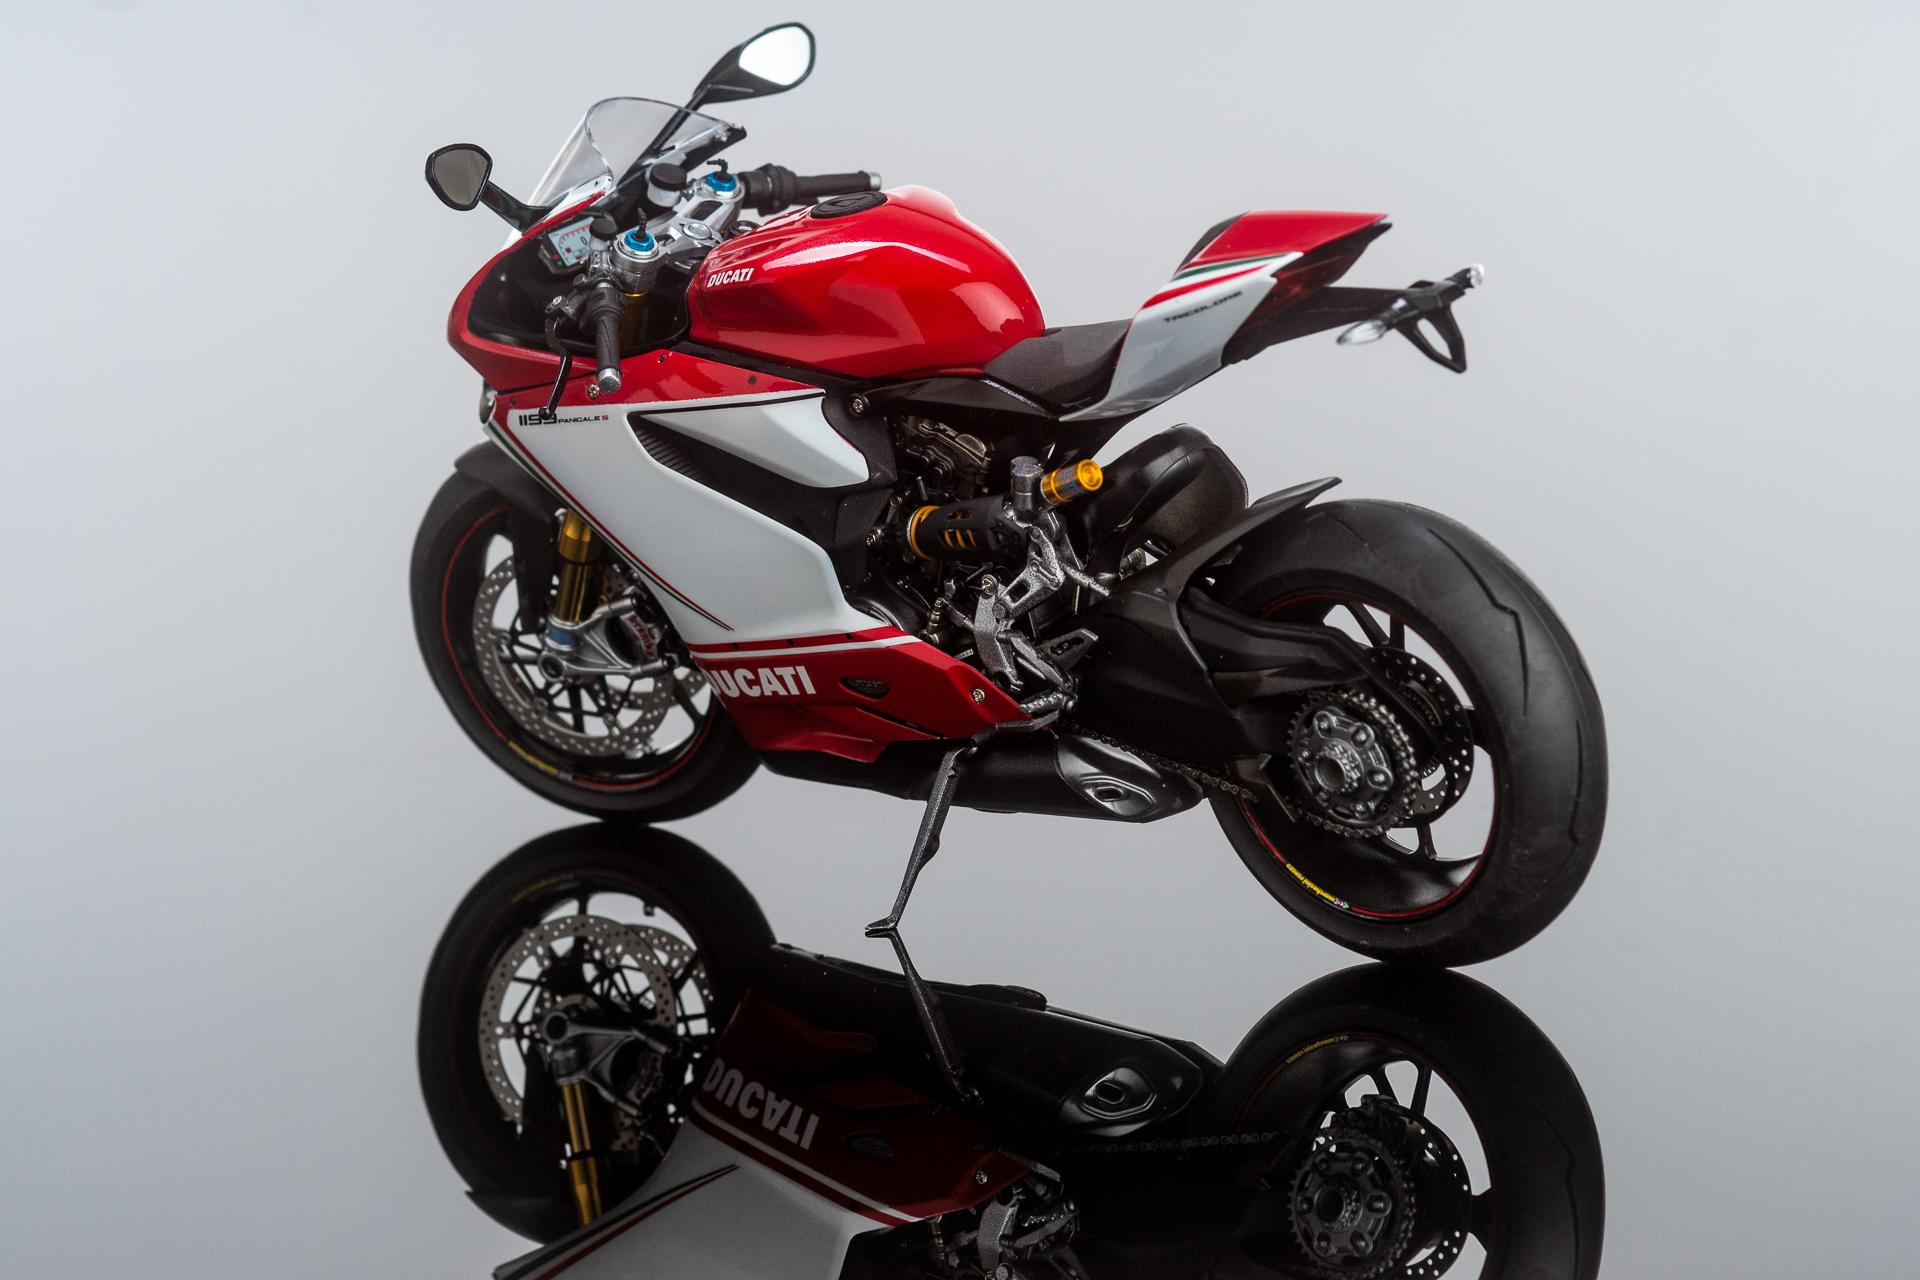
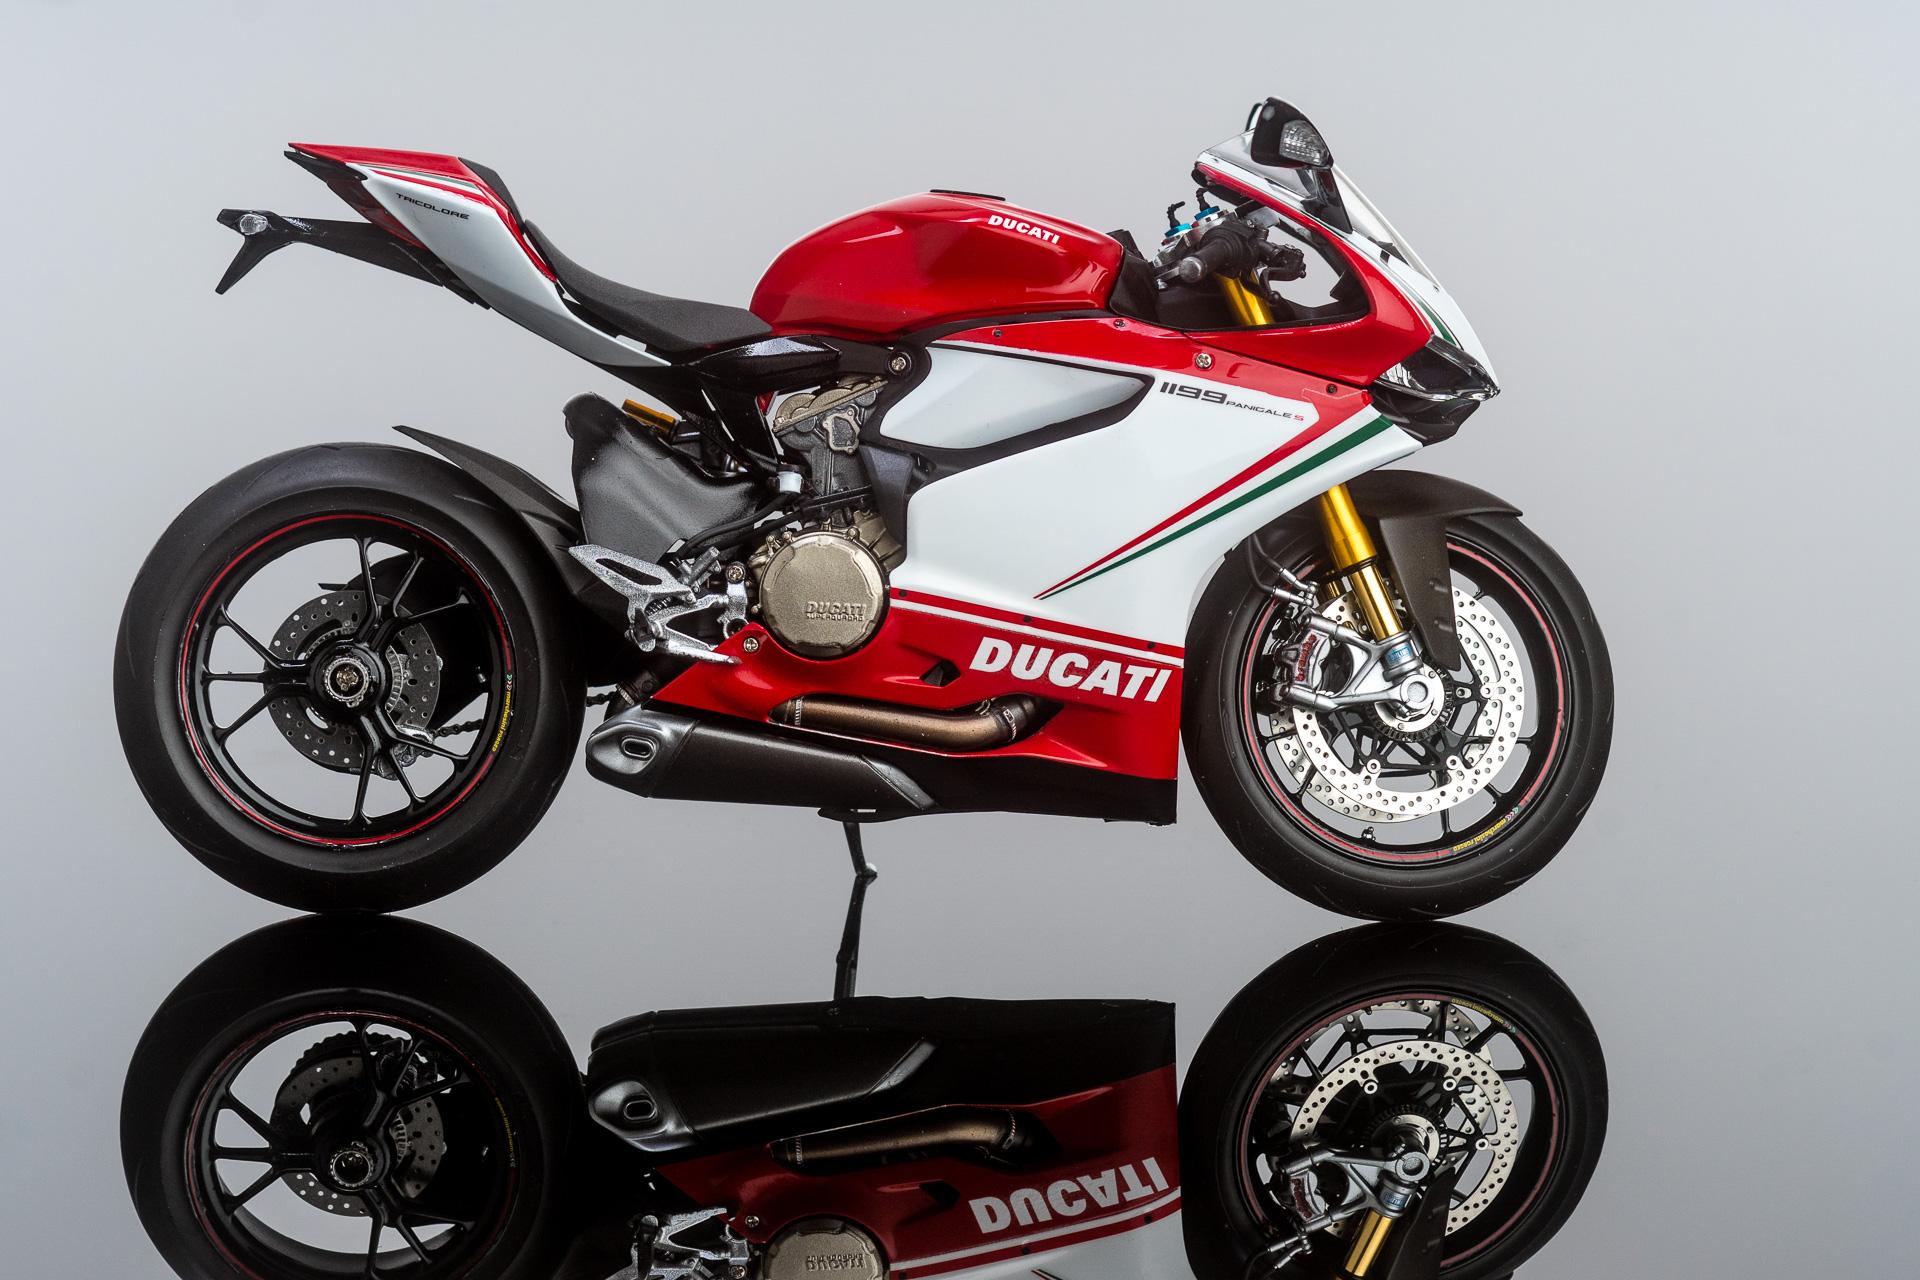
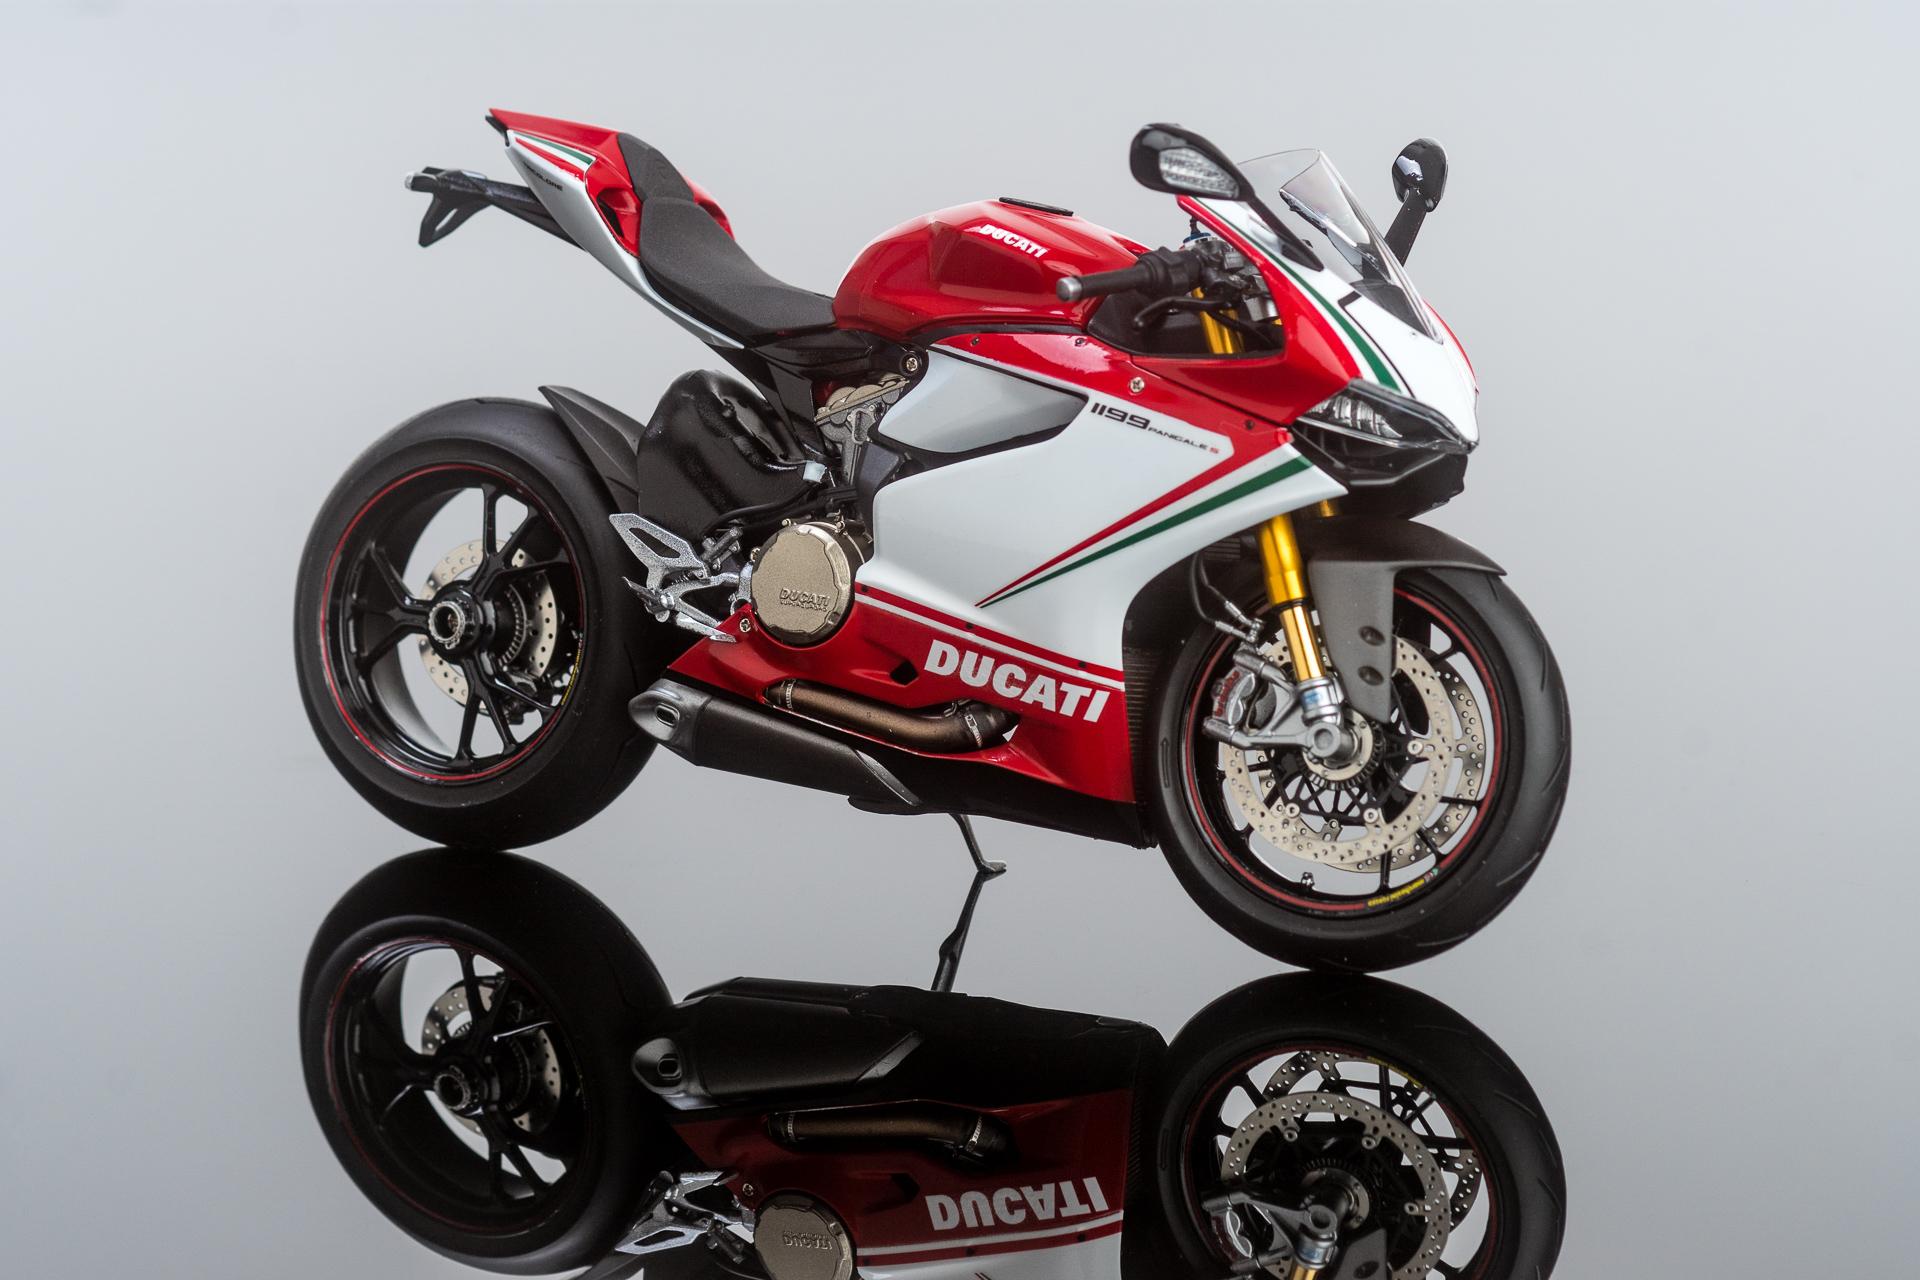
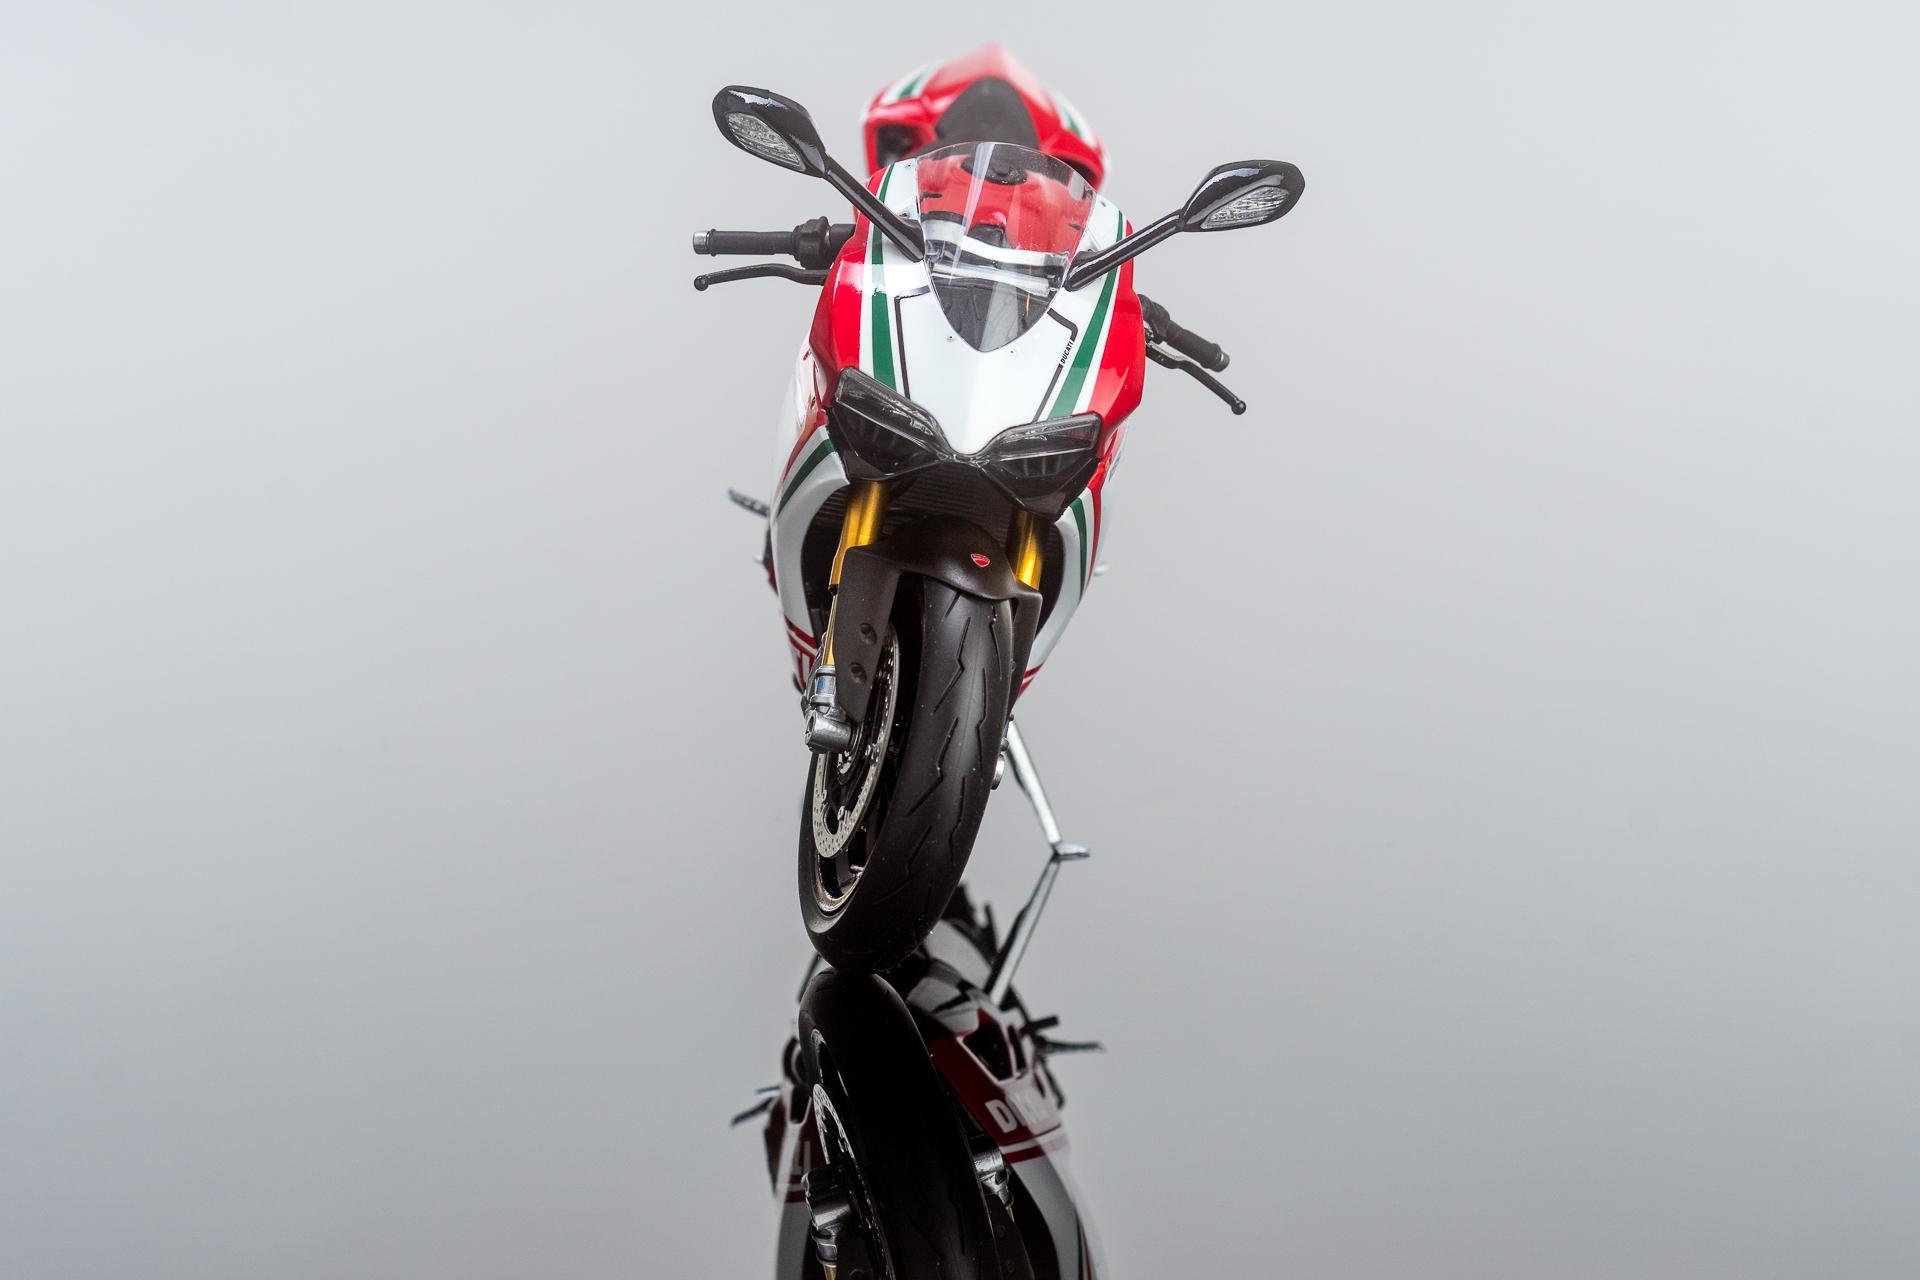
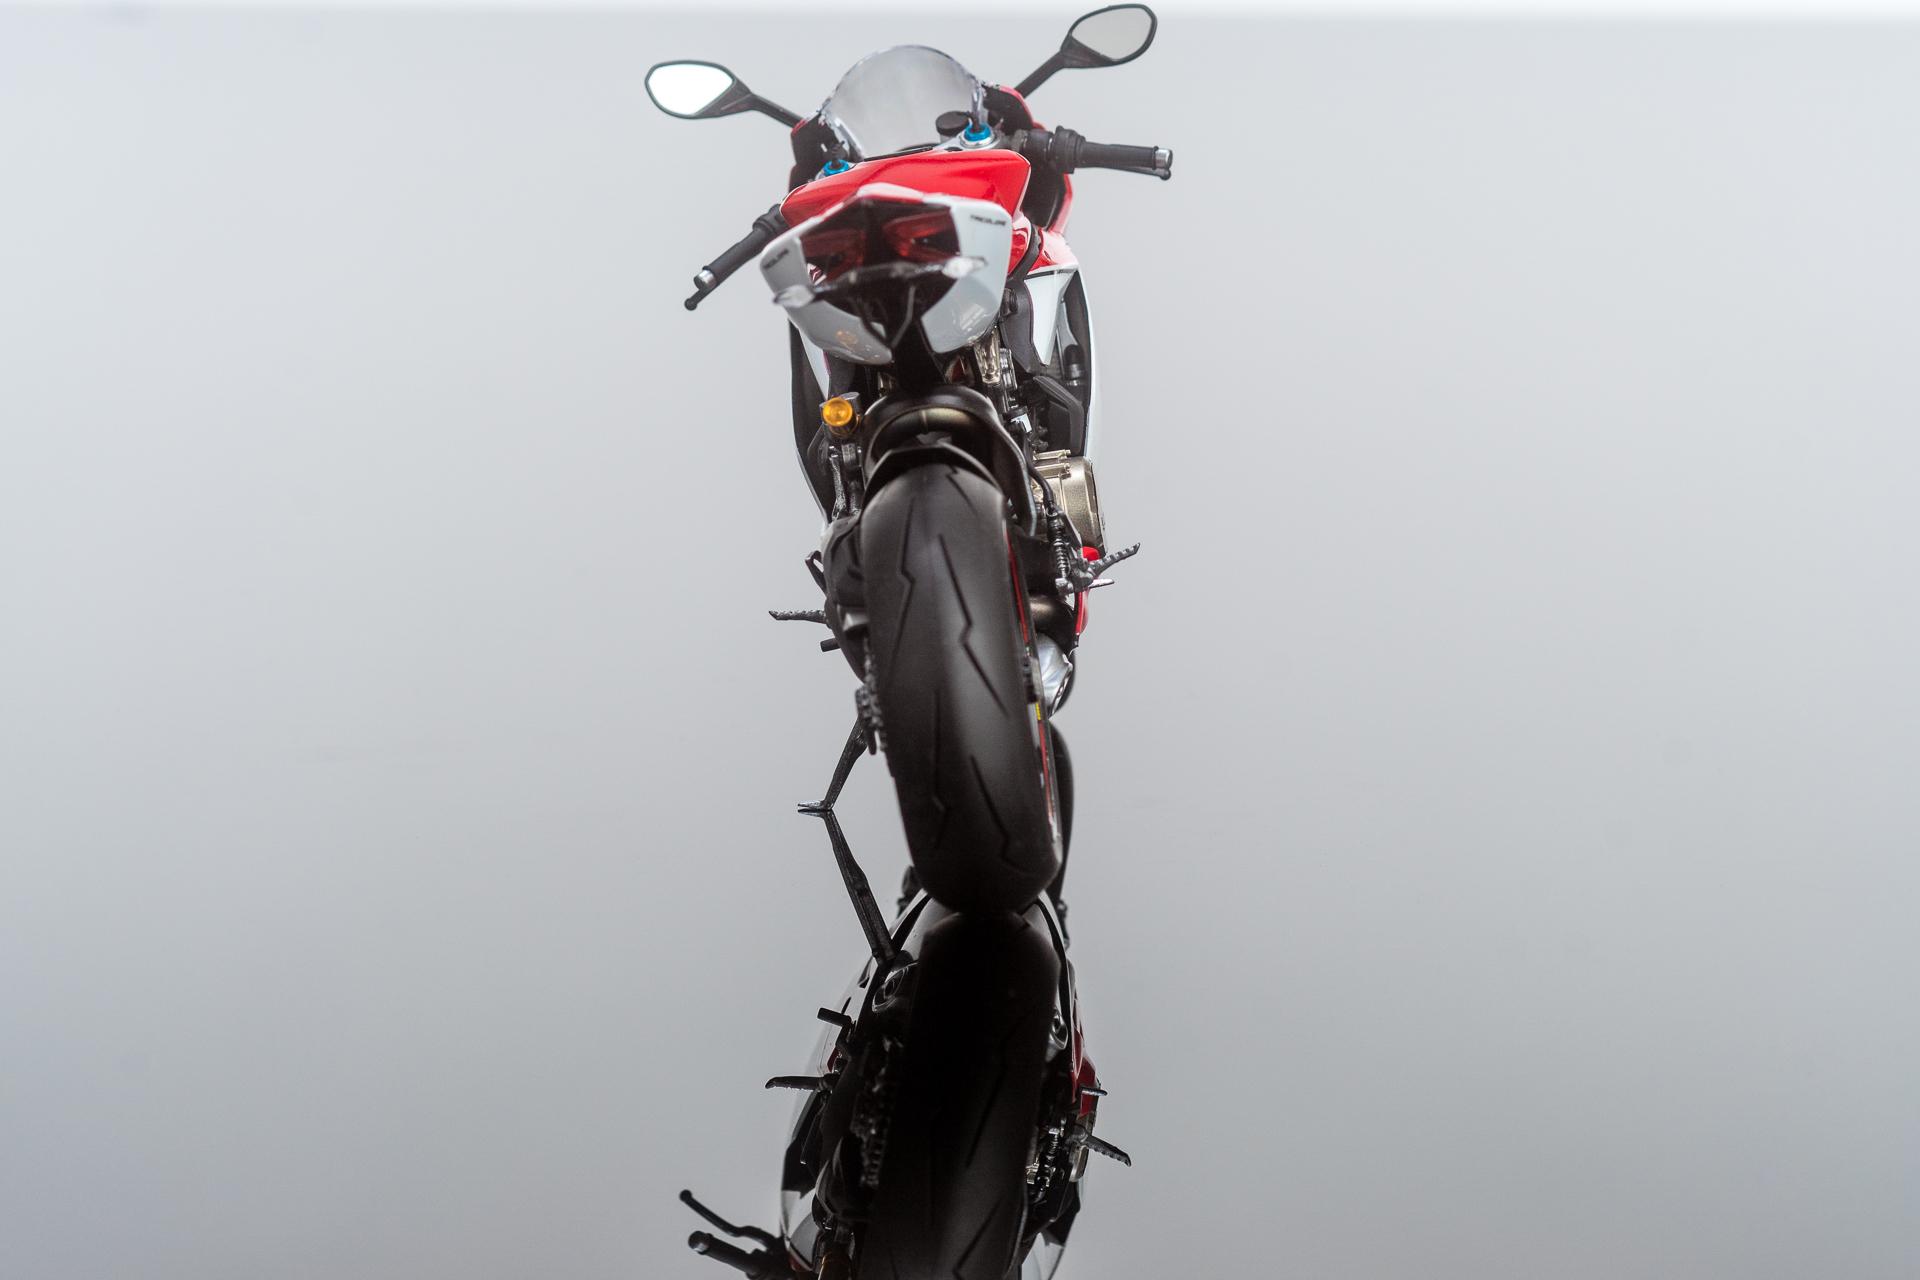
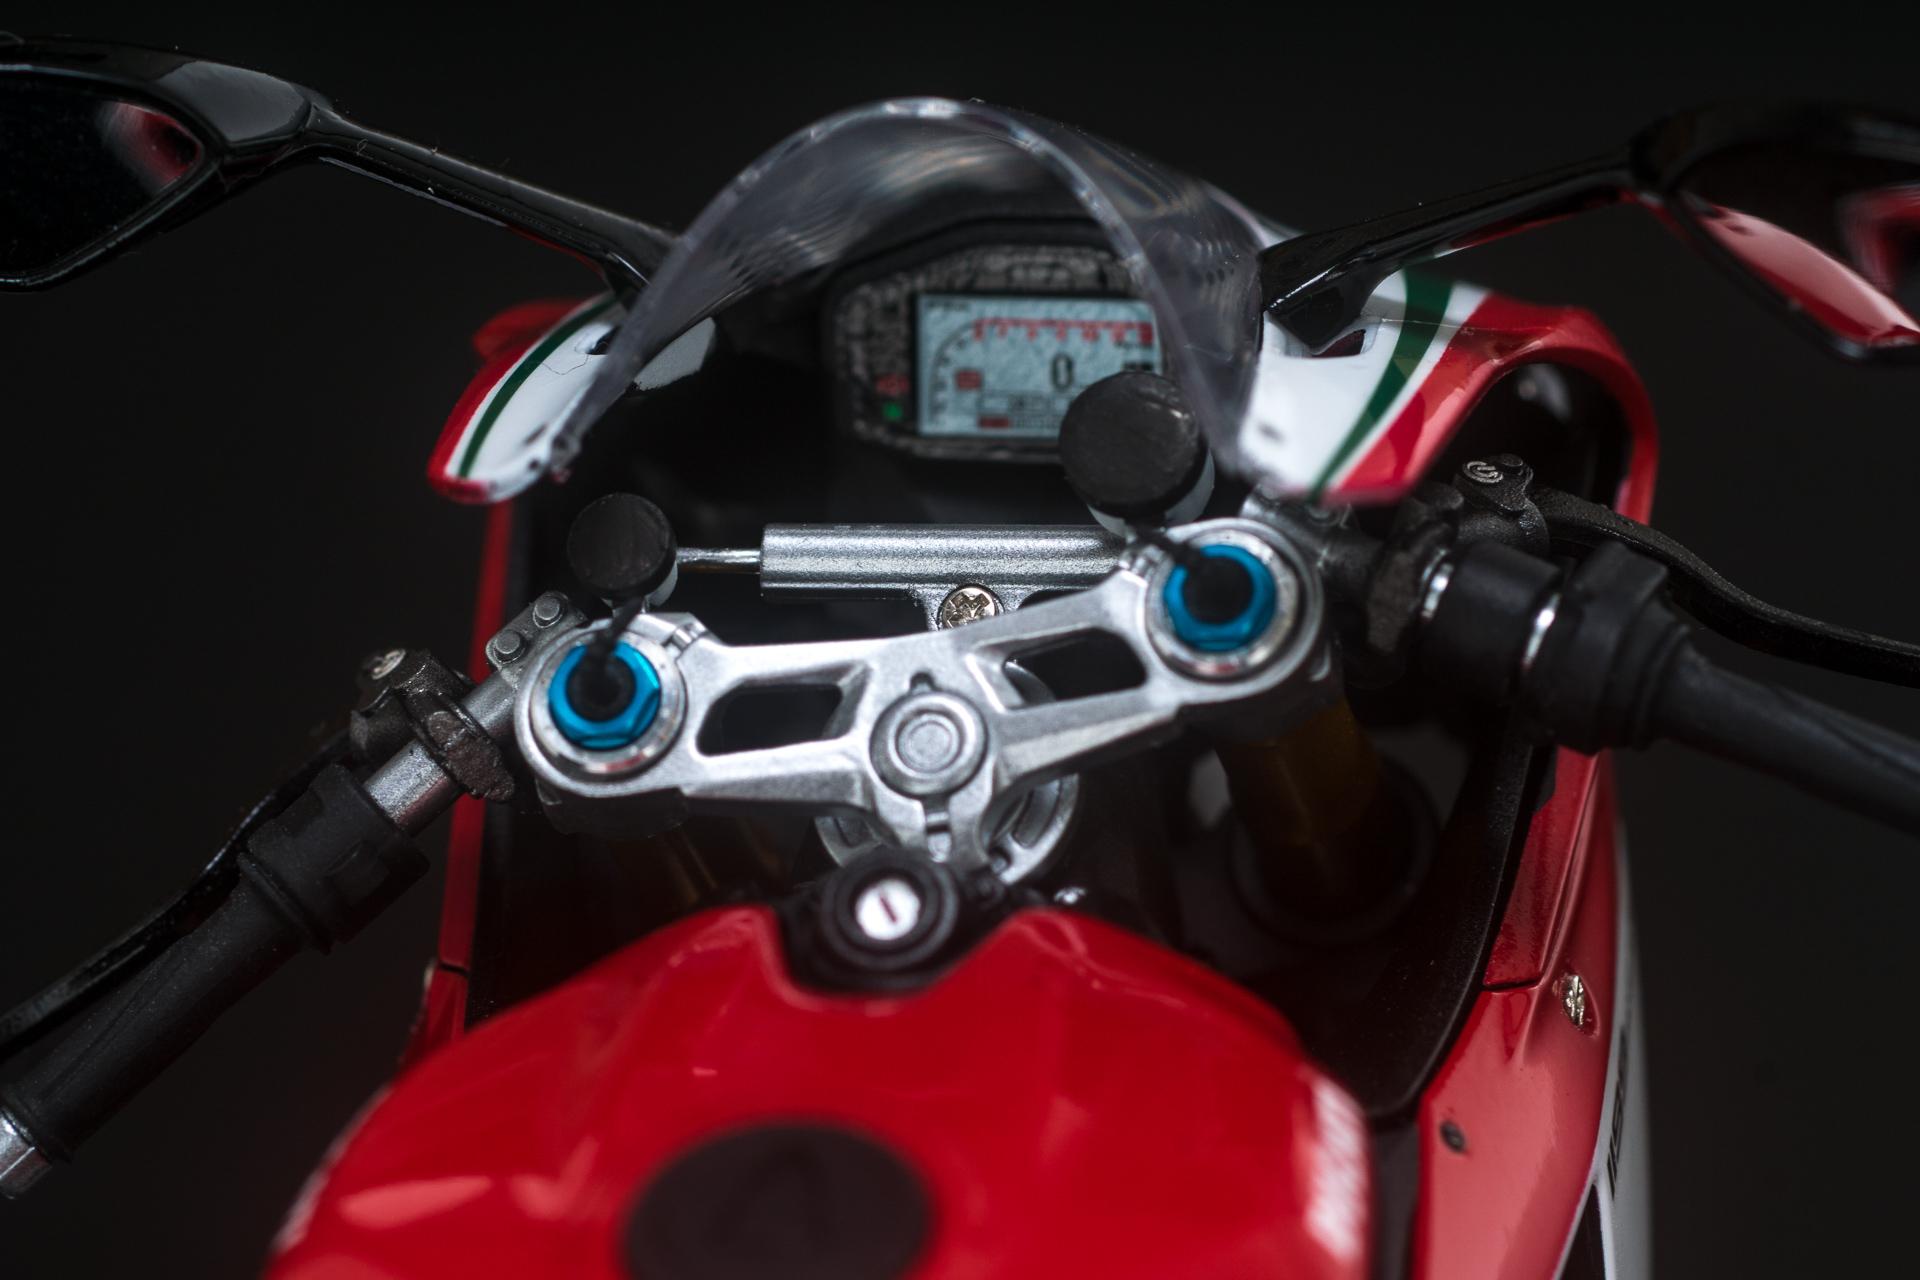
Hi all, A few weeks ago I finished my first bike after almost 30 years. It's Tamiya's Ducati 1199 Panigale S Tricolore in 1/12 scale supplemented with HobbyDesign's PE parts and the front fork set from Tamiya. Today I finally managed to take some gallery pics. Don't hold back with critique and plaudits Urs
-
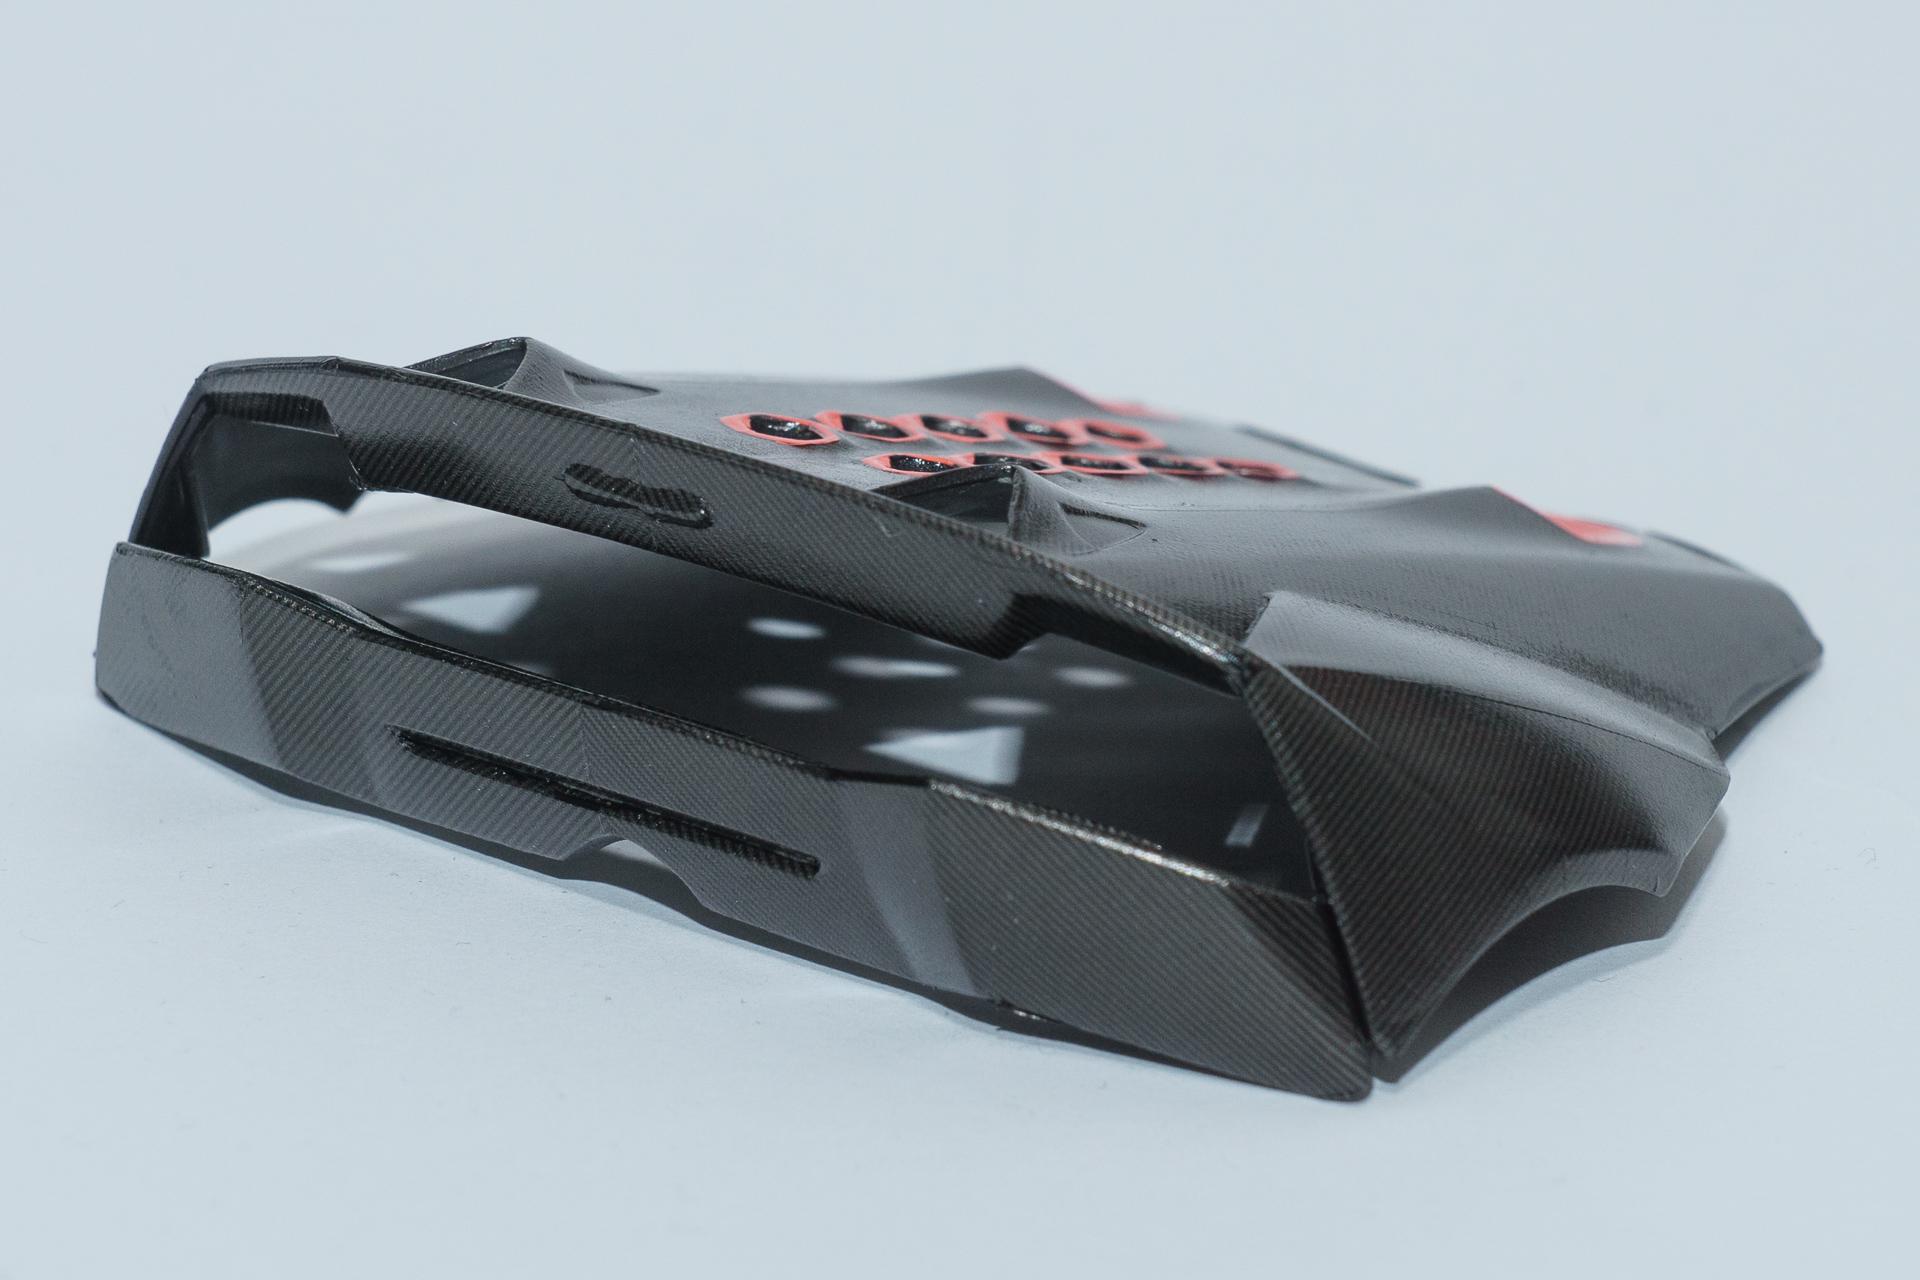
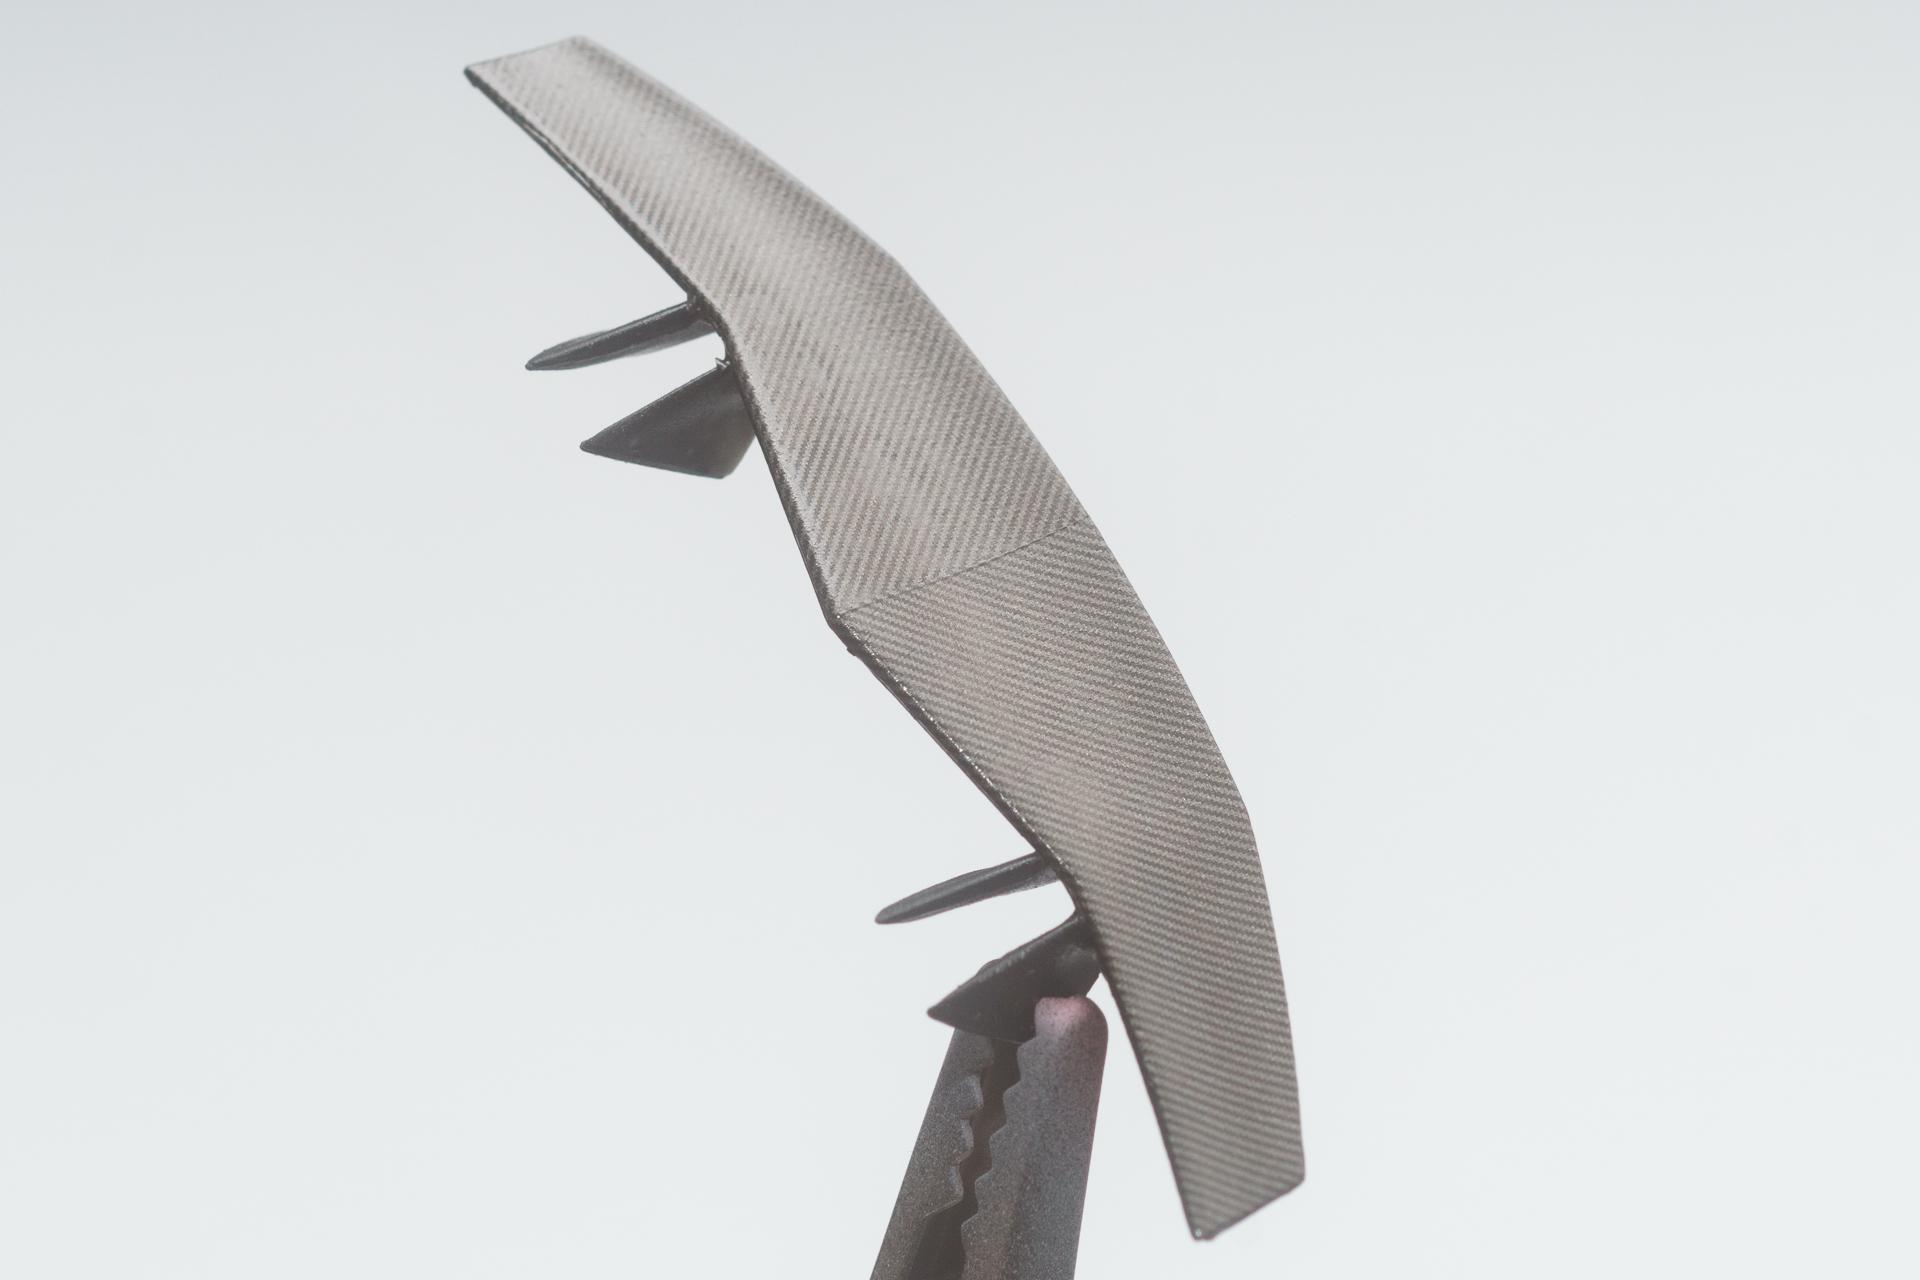
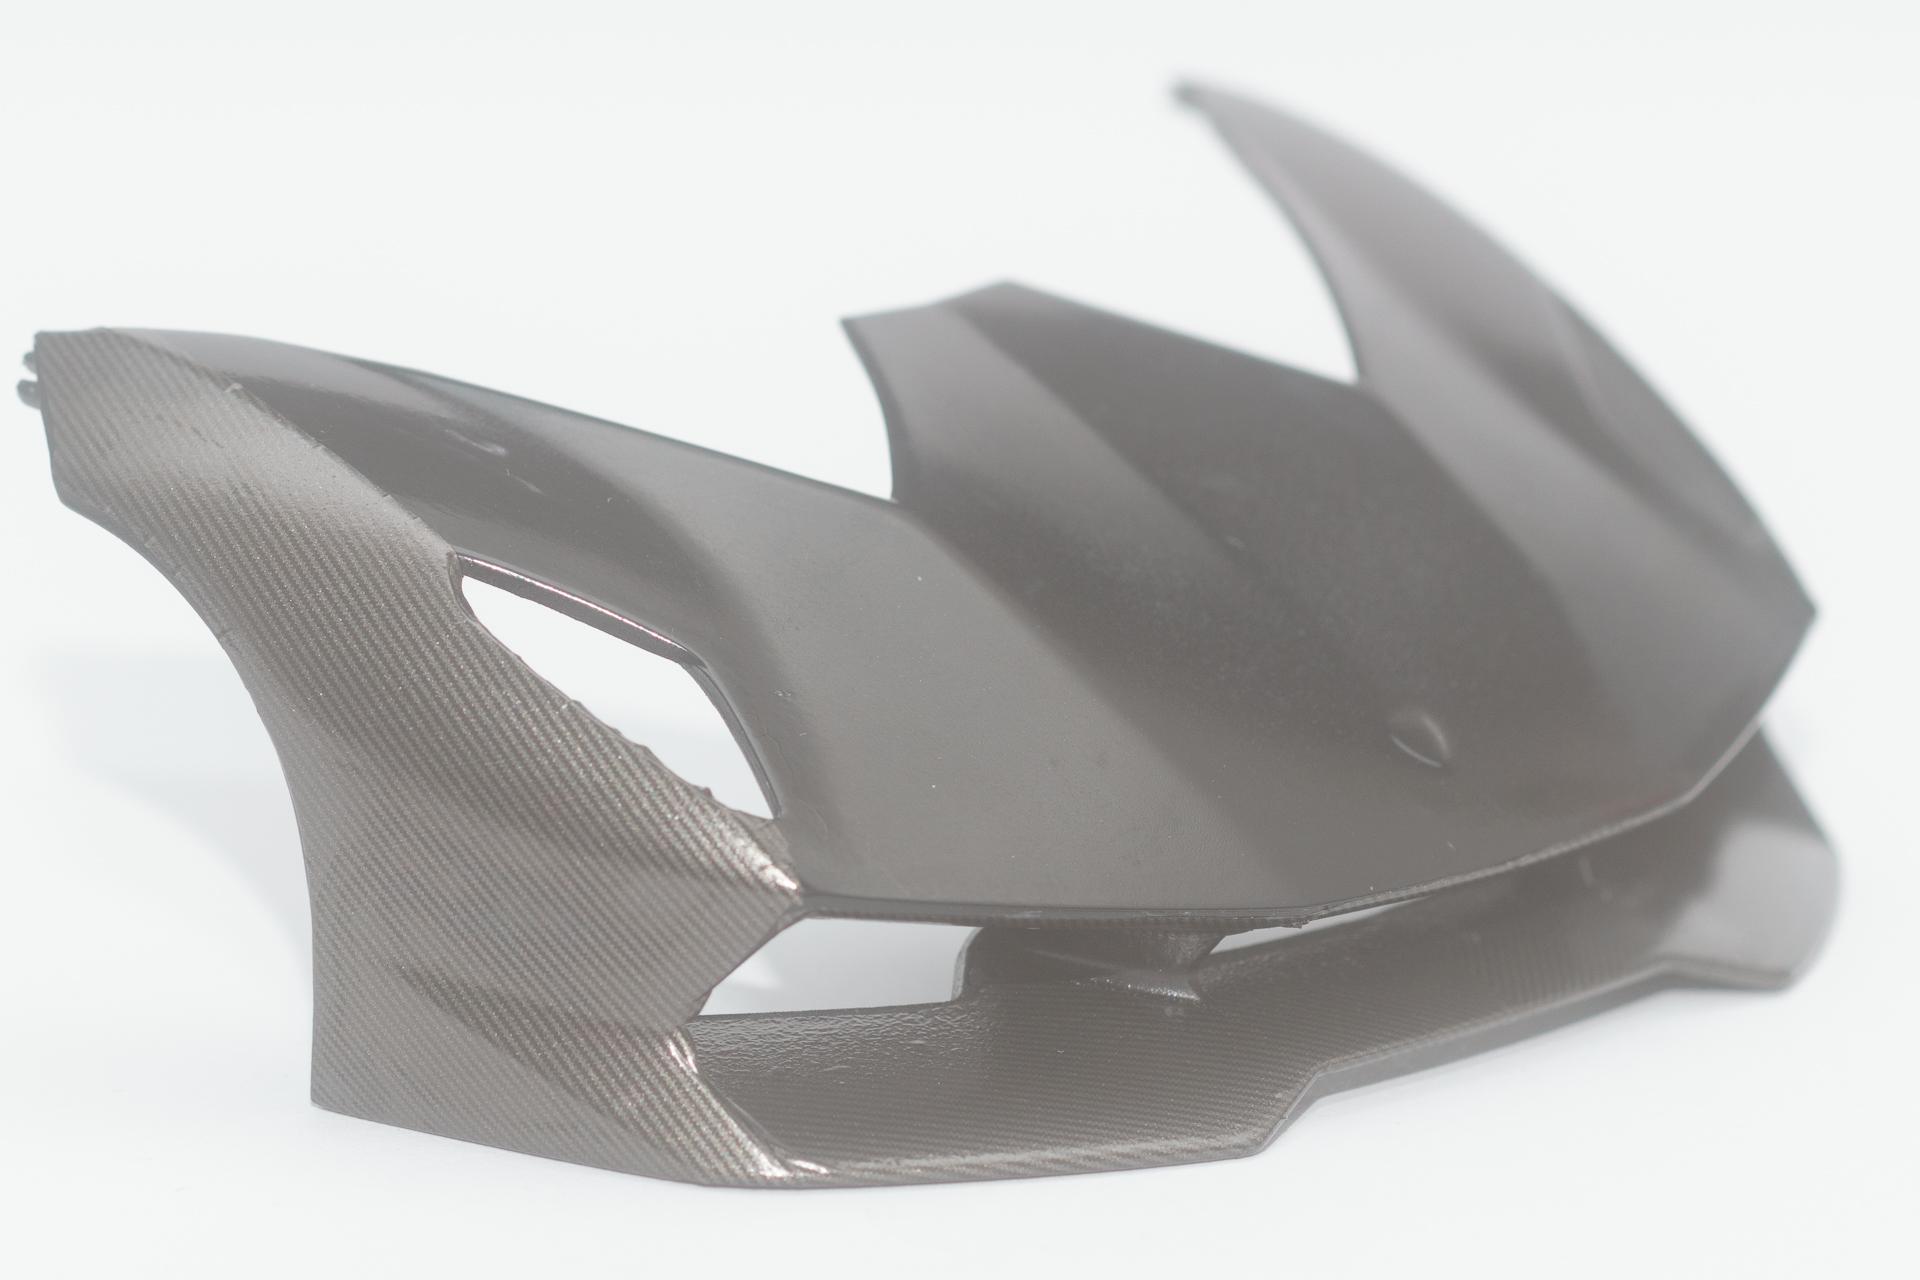
Hi all Unfortunately I didn't manage to get to the working desk as much as I had liked to, so there is only minor progress I can show you in this update. First, the engine cover got its colored edges around the holes and the spoiler got its carbon decals on the wing. That's it for this week. Urs
-
Thank you. No, these are the scaleproduction decals. Very thin and easy to apply
-
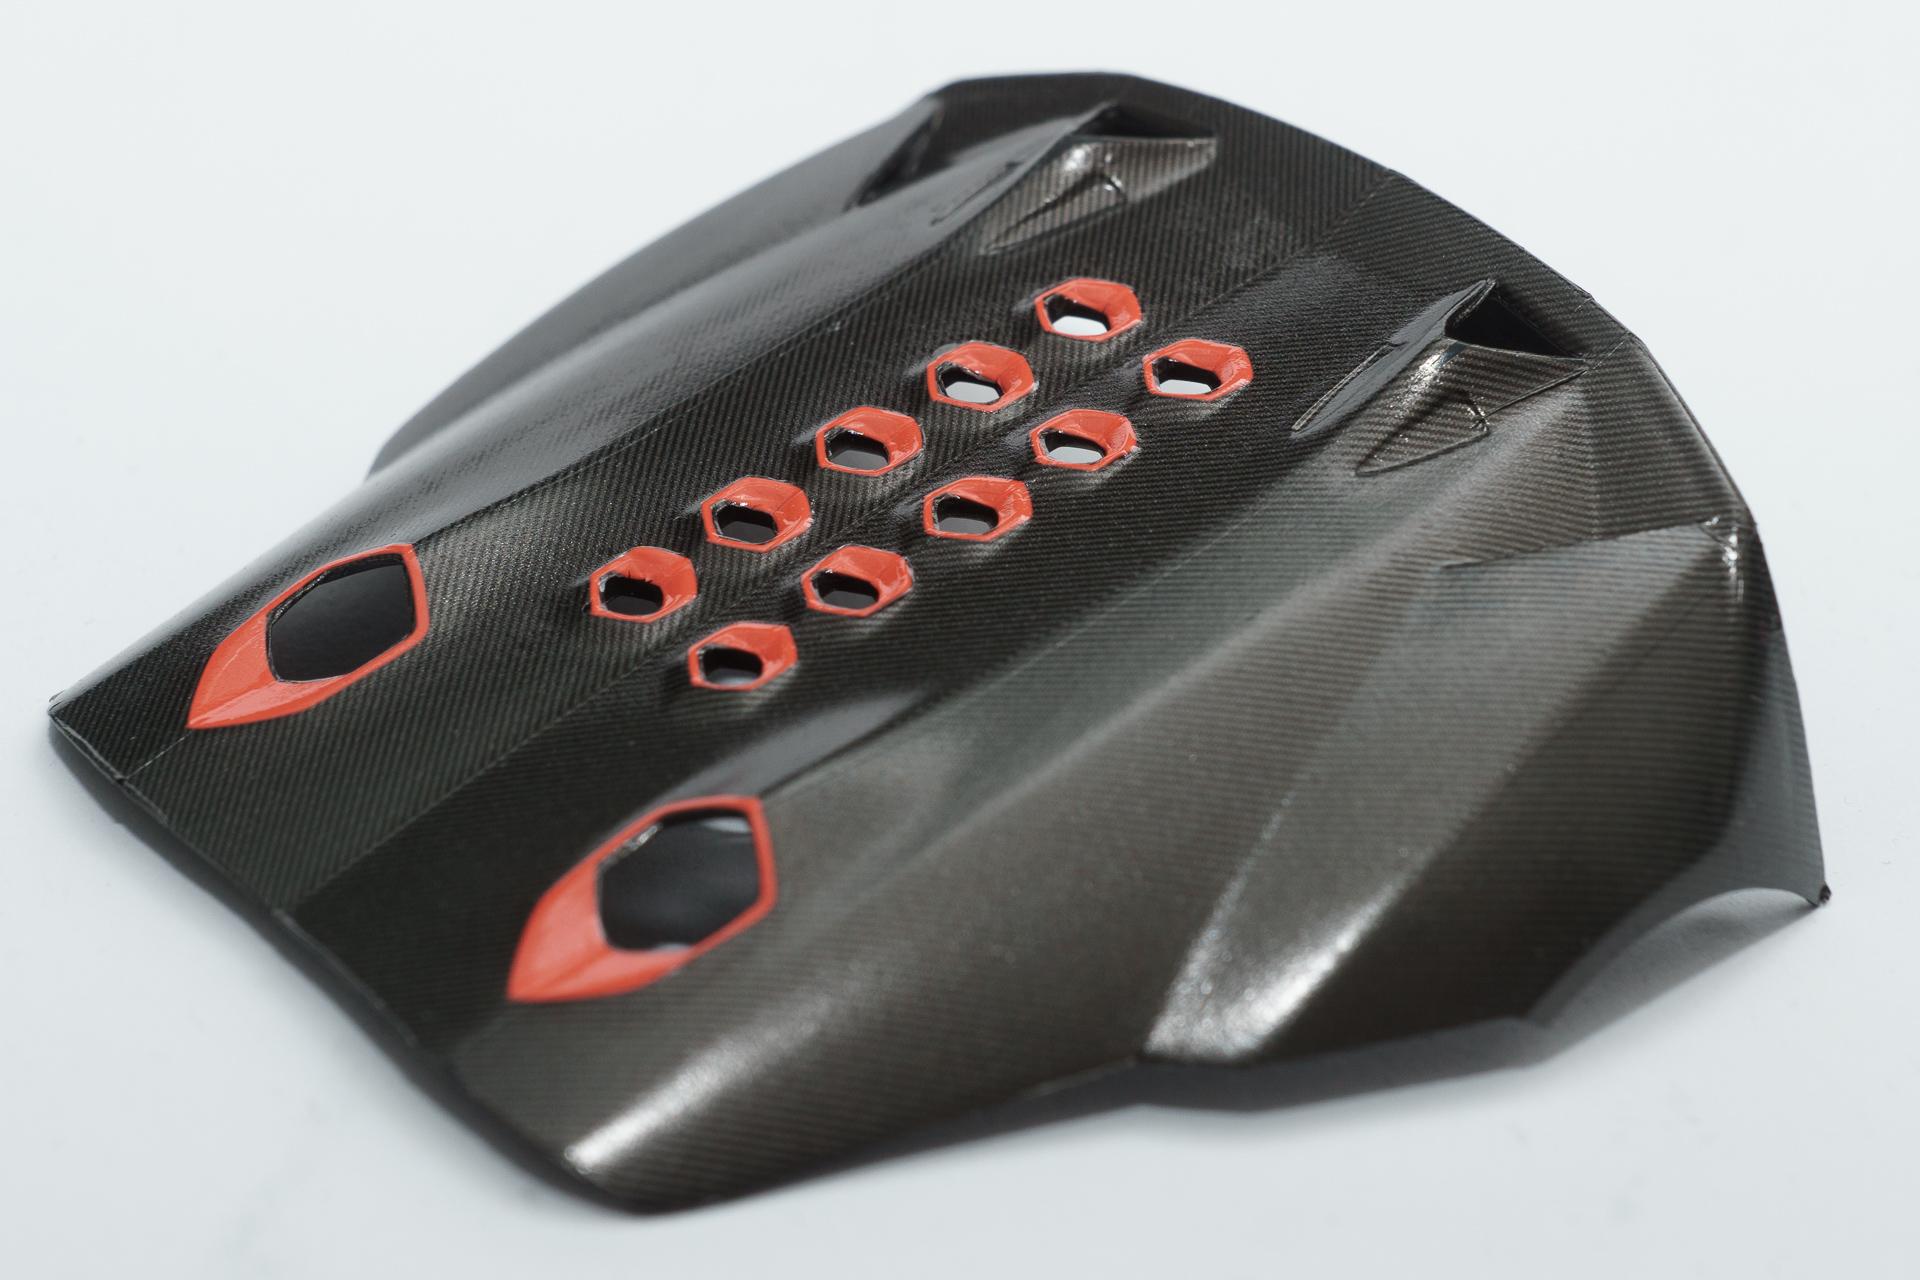
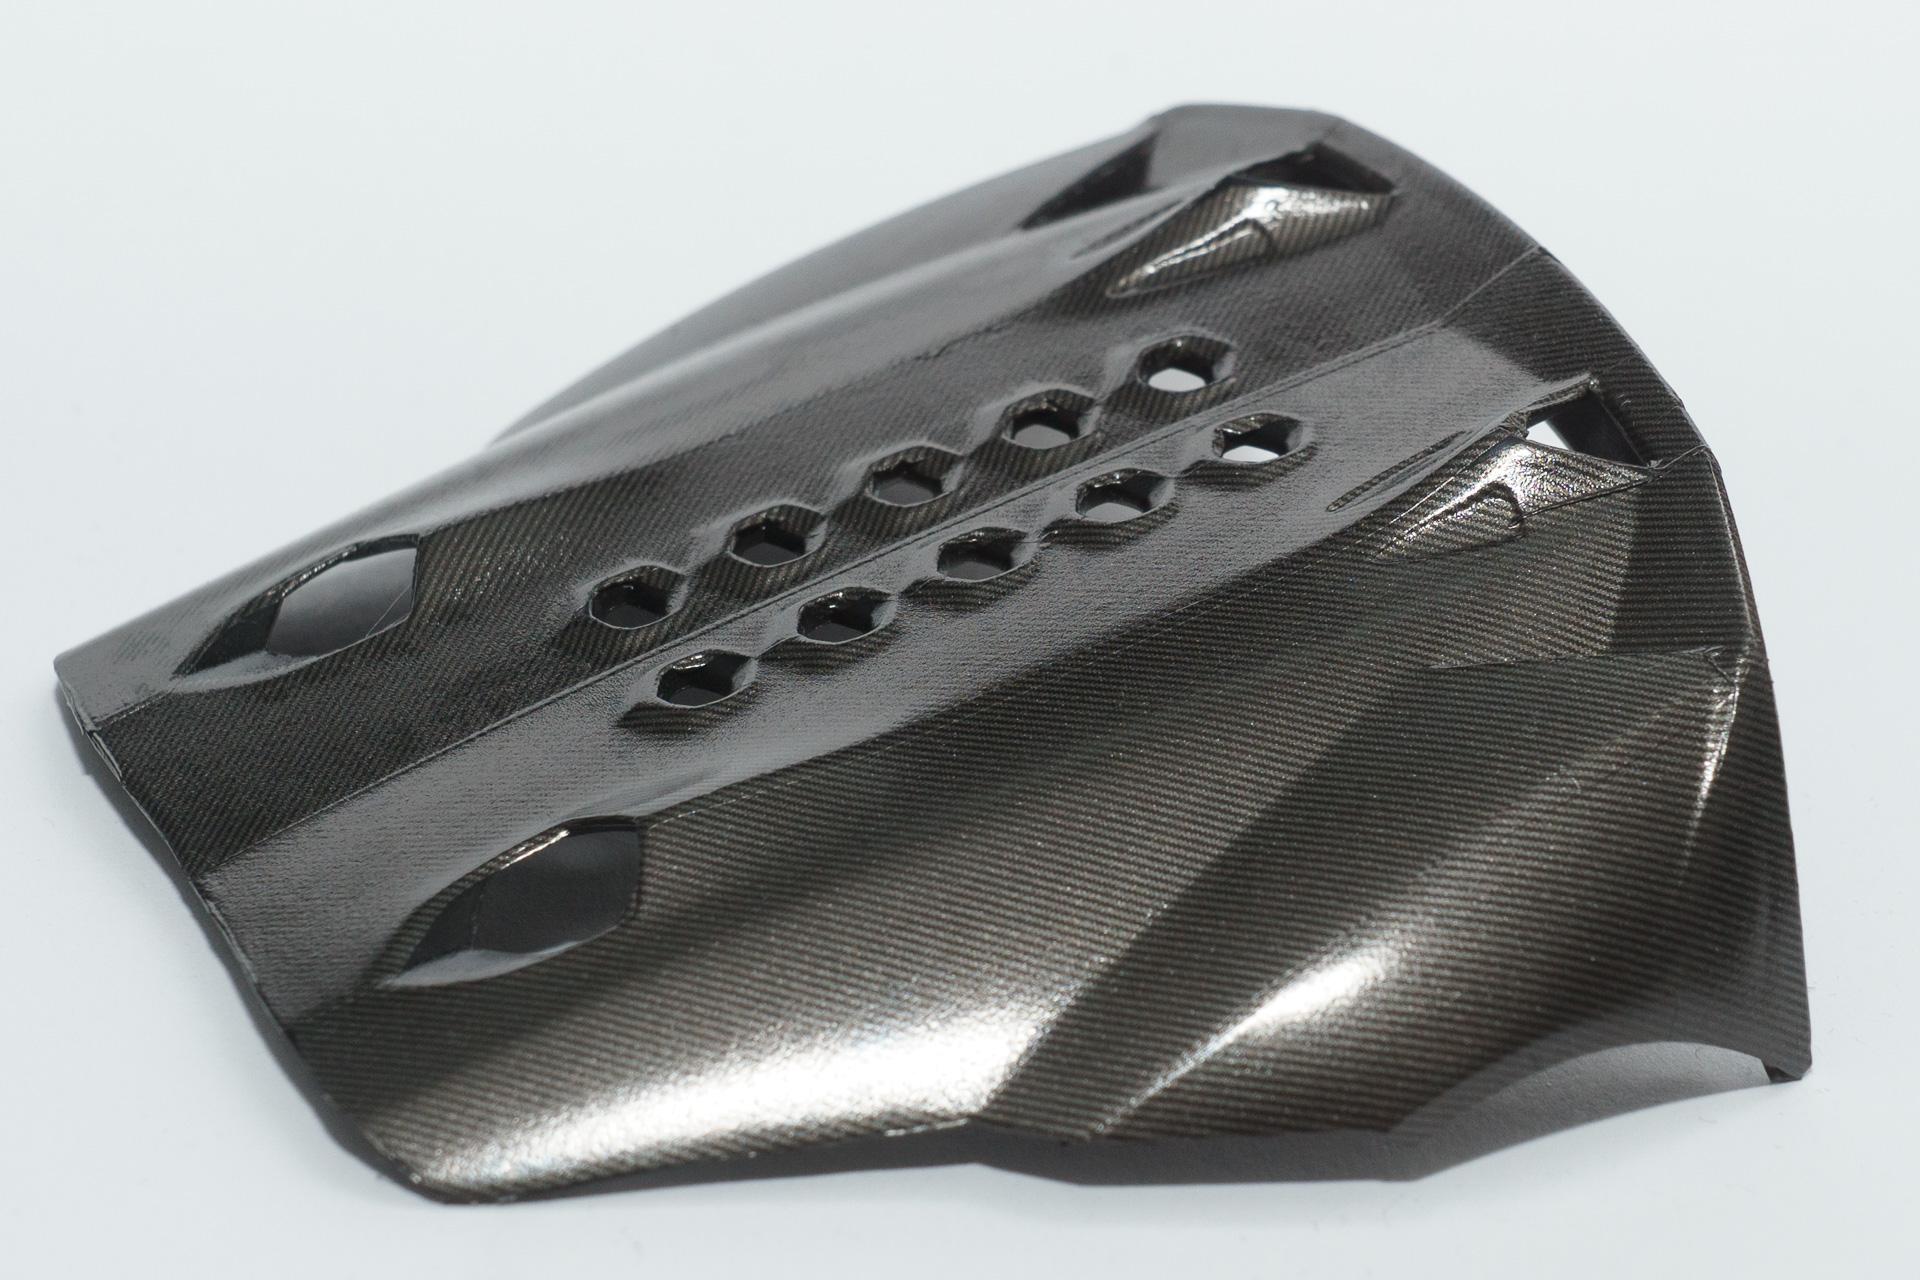
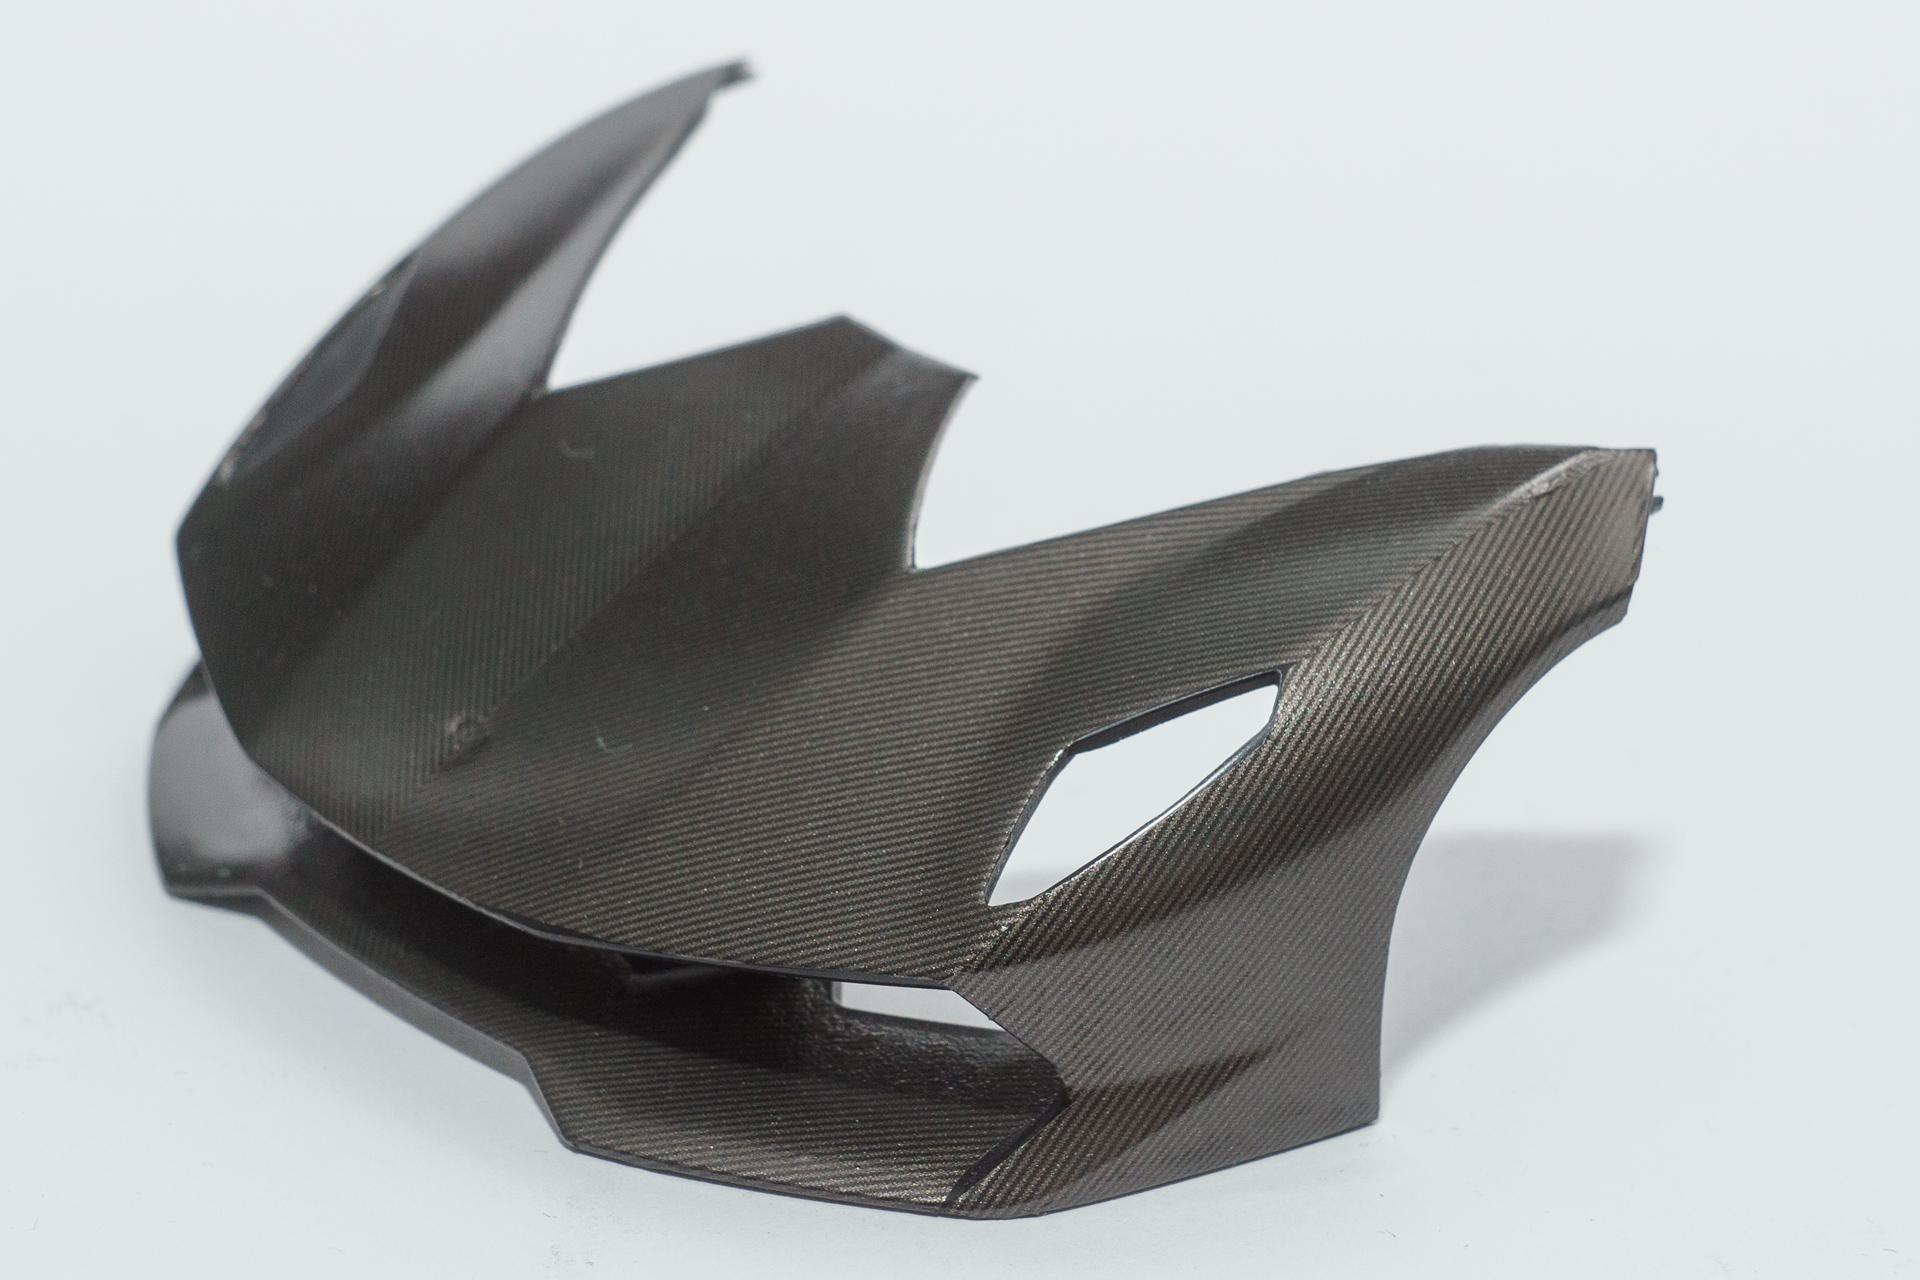
Hi all Thank you for your kind comments. This week I finished the headrests. At the moment they're only put on top of the interior tub without gluing them, as I'm still waiting for the seatbelt material and it will be easier to attach the seatbelts to the inside of the headrest when the headrest ist not yet attached to the tub. The second big point I managed to check as done is the body: All the carbon decals are applied now. On the pictures I saw some spots now where I'll have to fix some minor issues, but on the whole I'm quite happy the way it turned out The cowl will still get some red decals around the hexagonal holes. Once this is done, i'll only have to wait for the clearcoat to arrive to seal the decals. That's all for this week. Hope to see you again on my next update. Urs
-
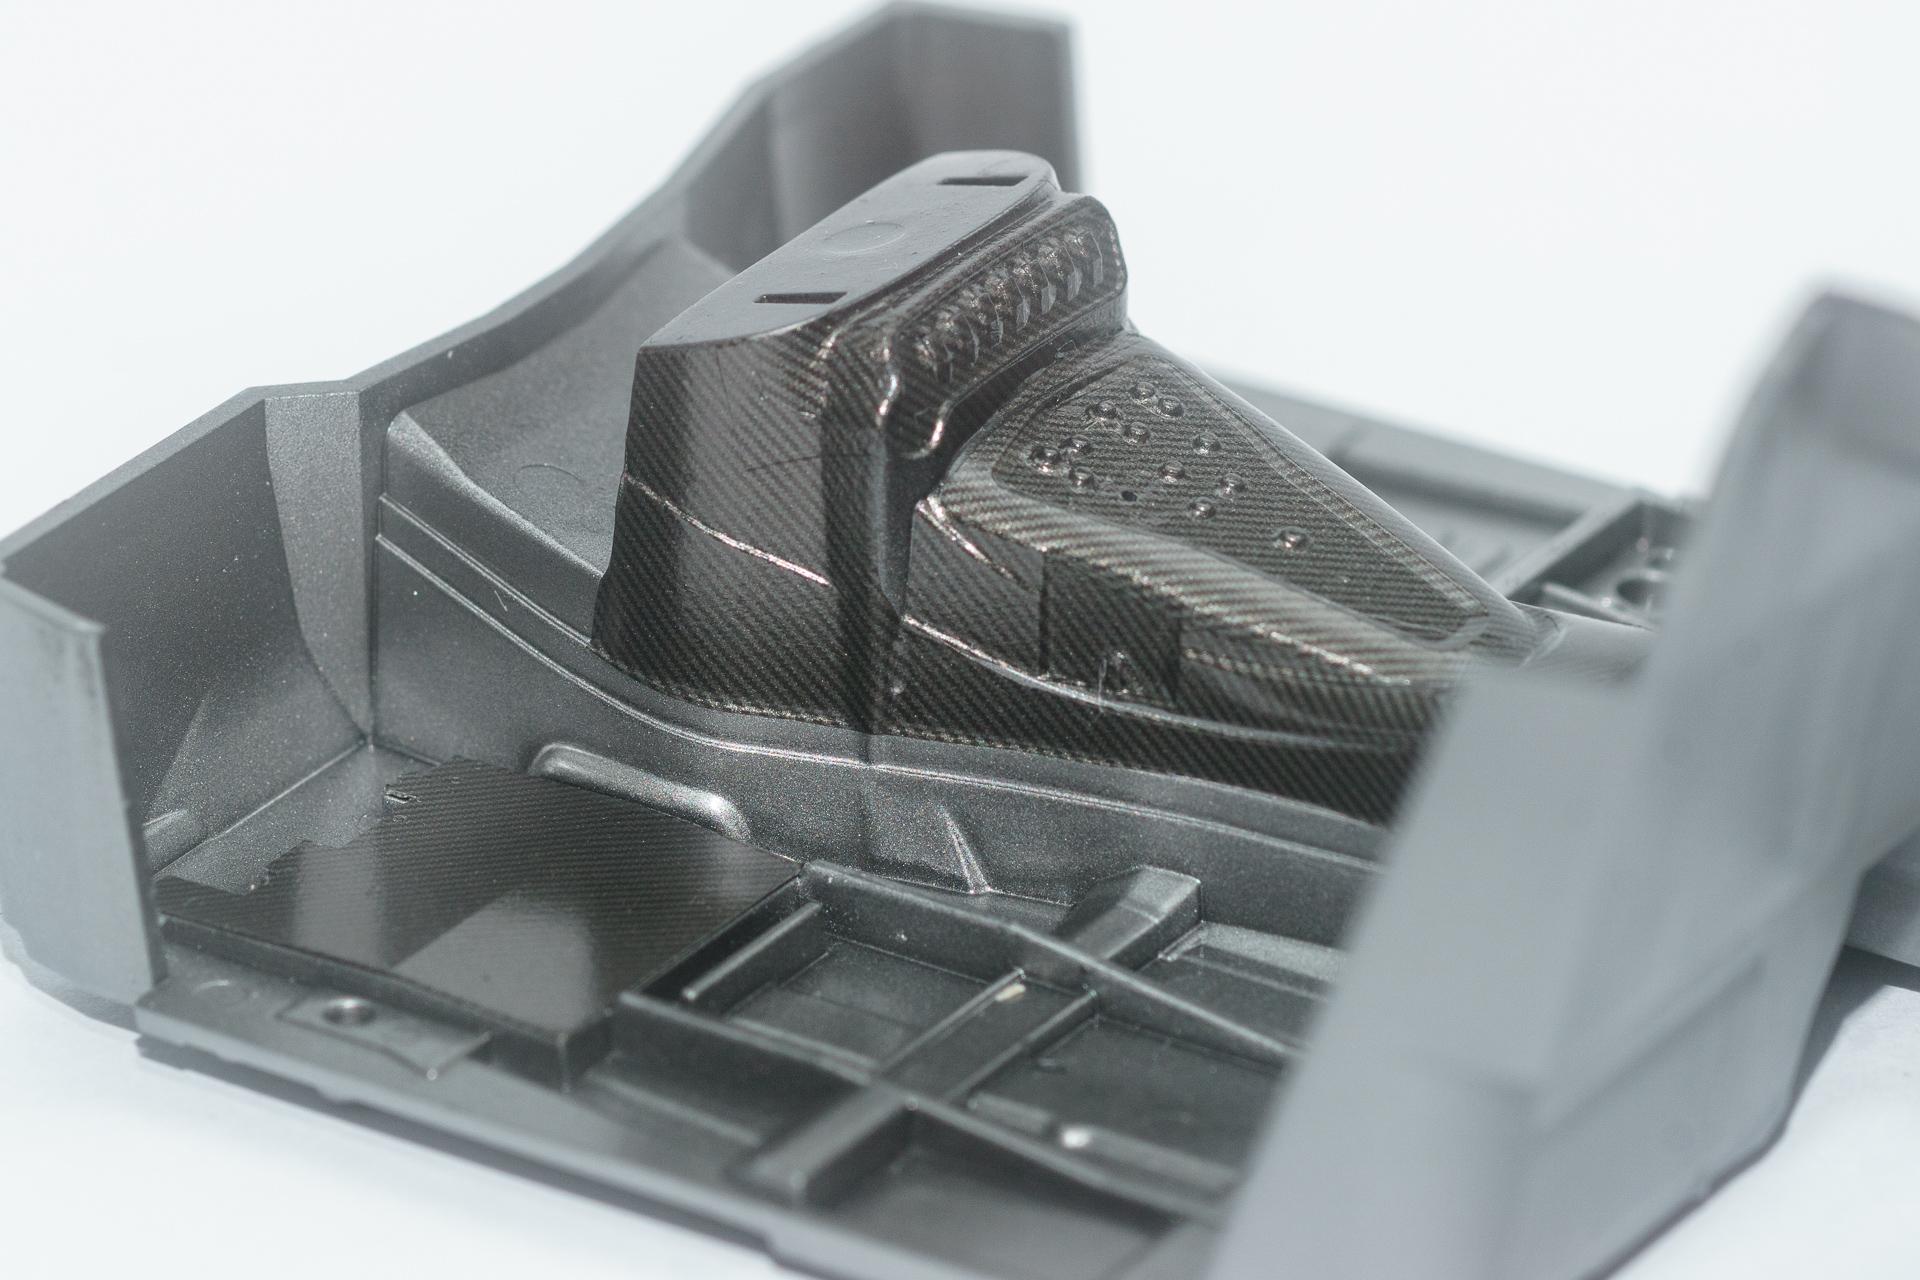
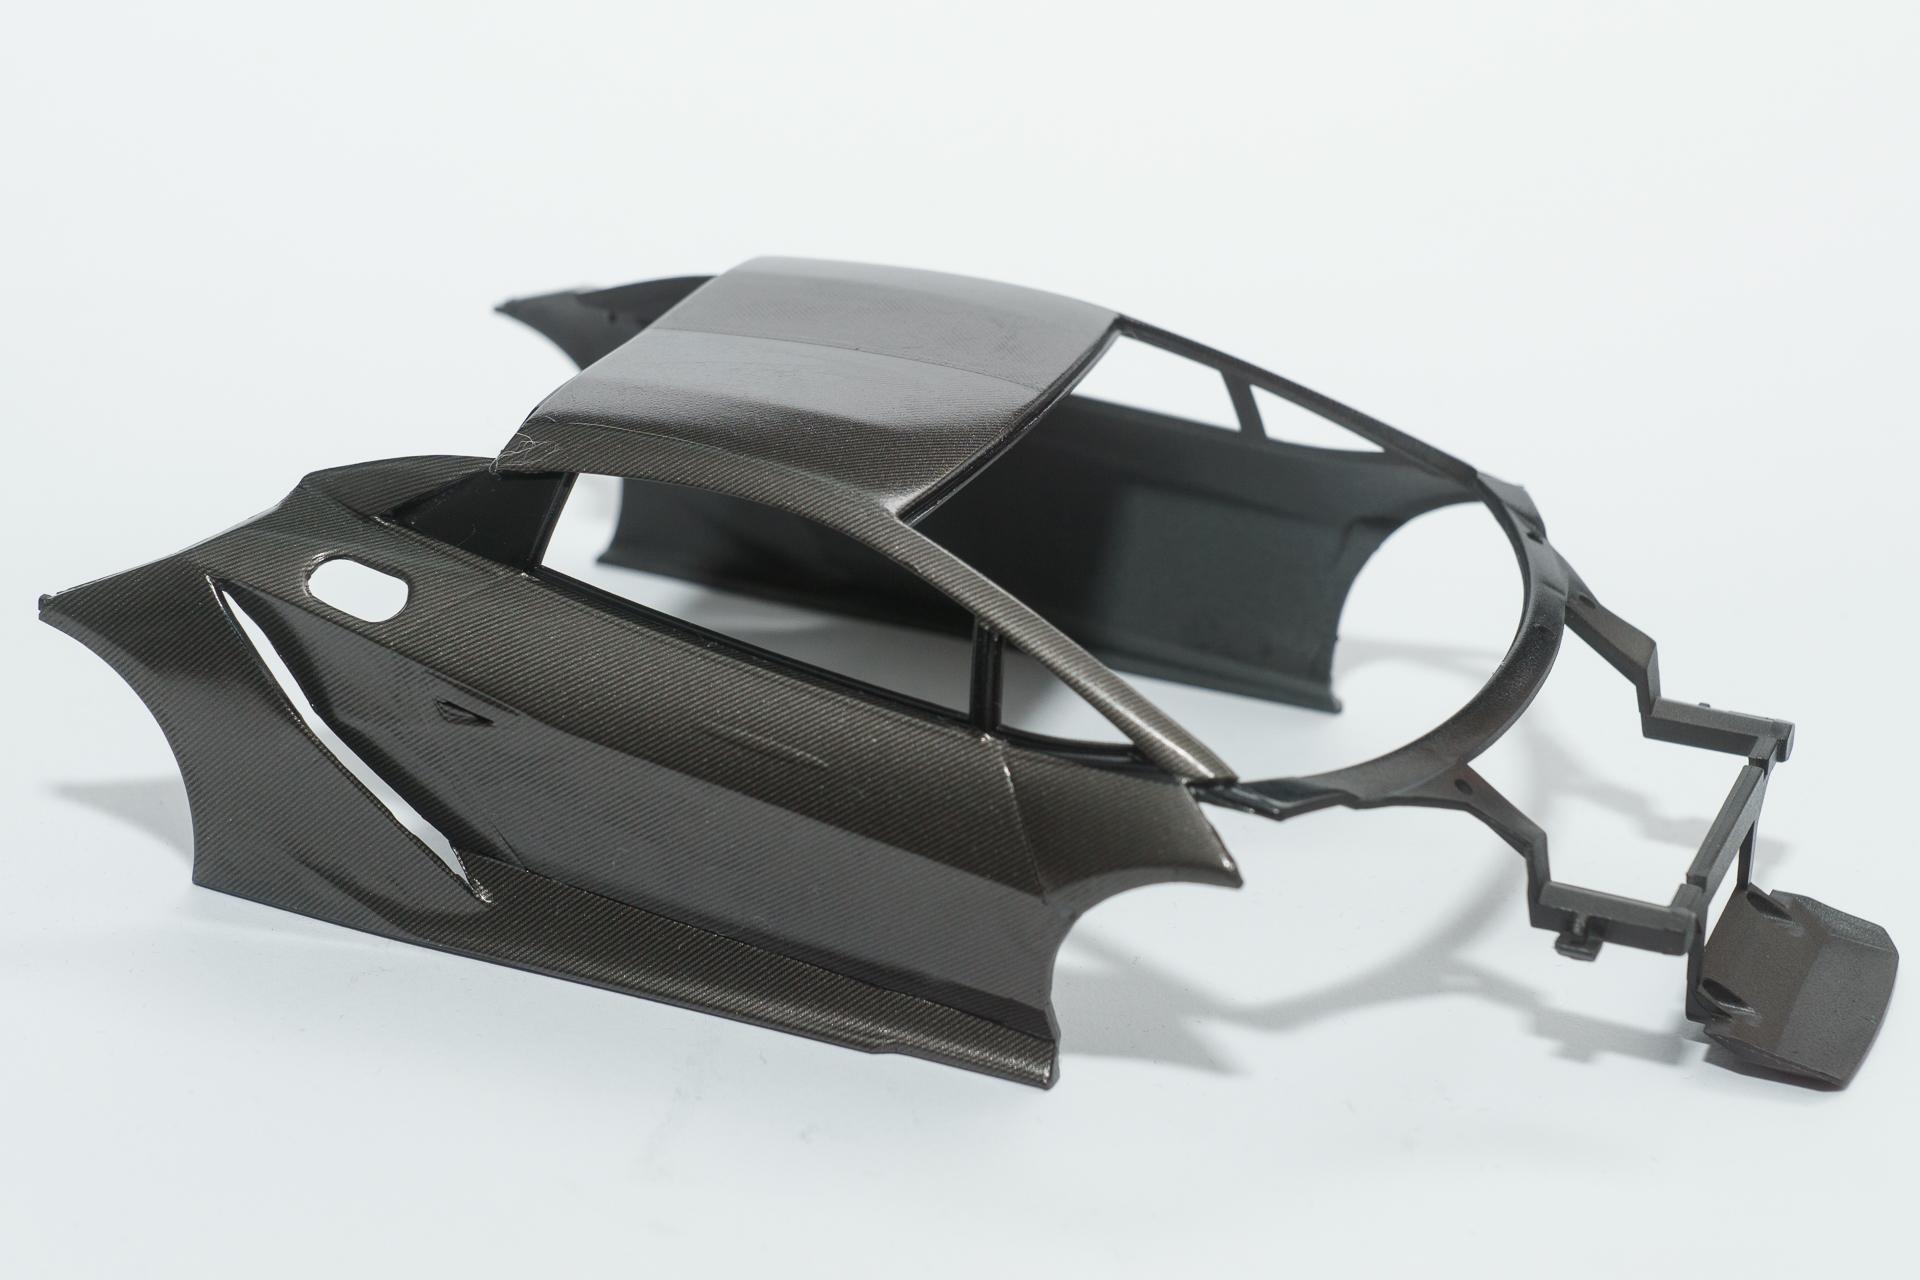
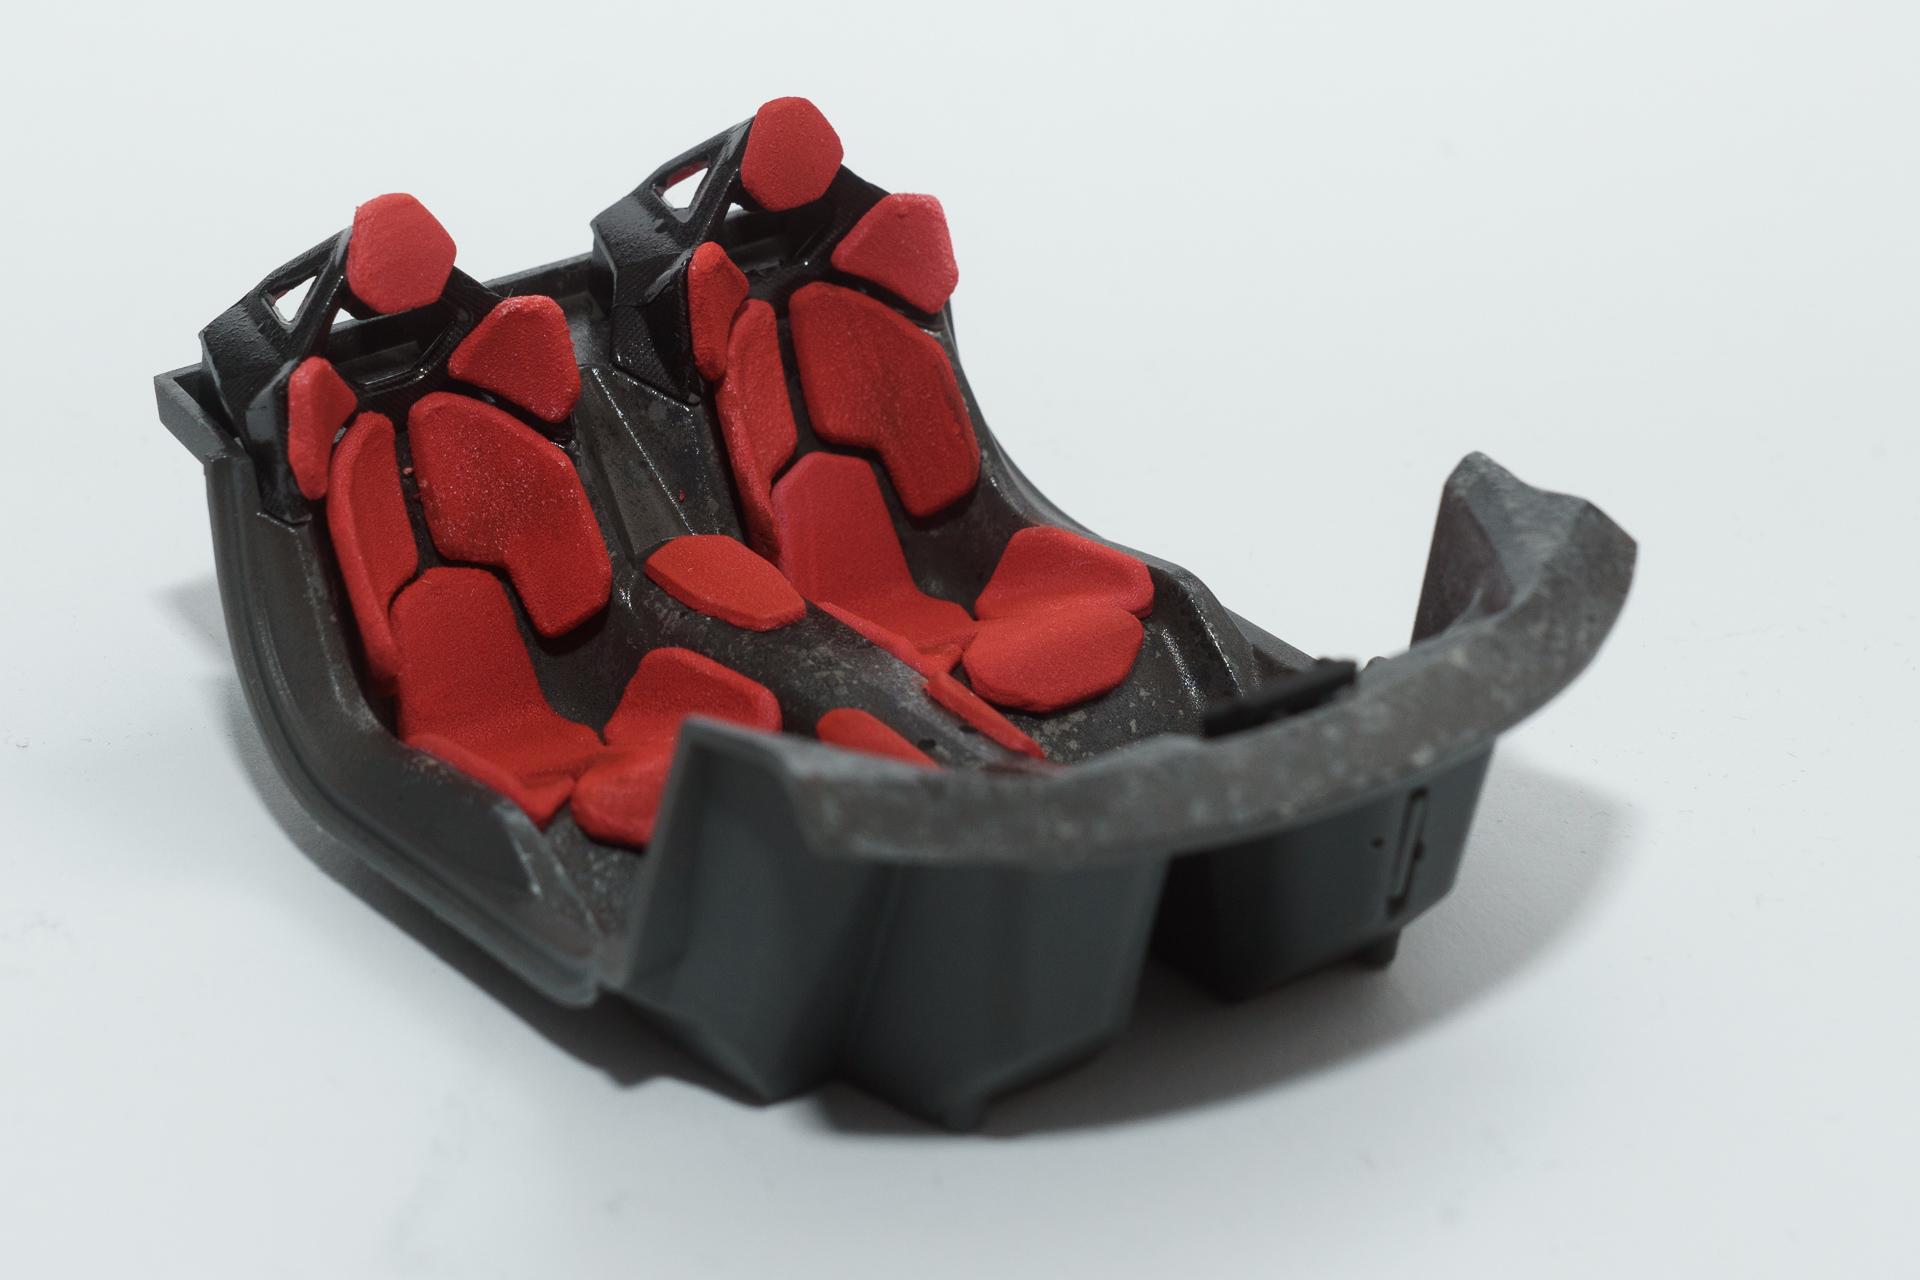
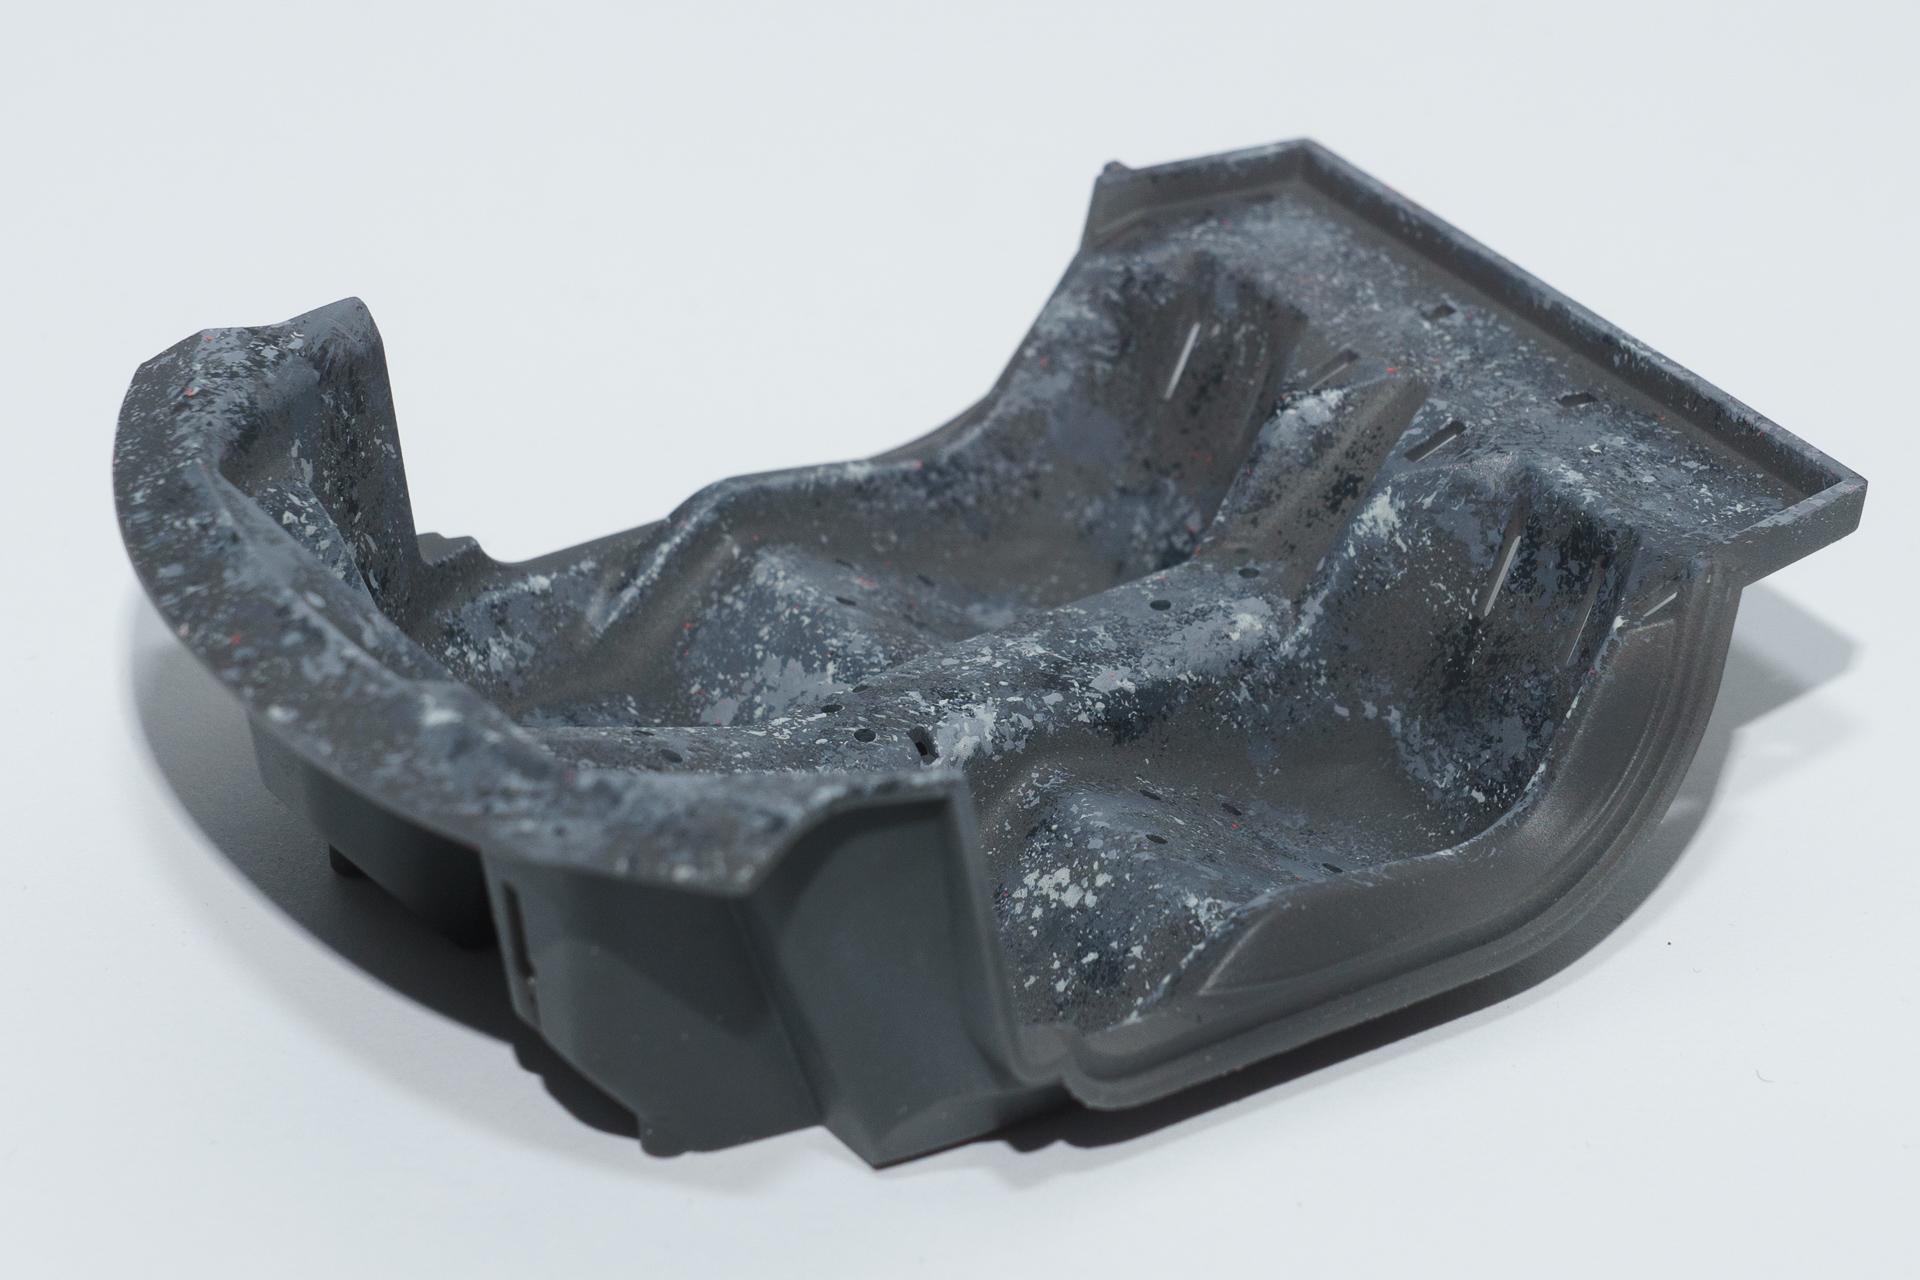
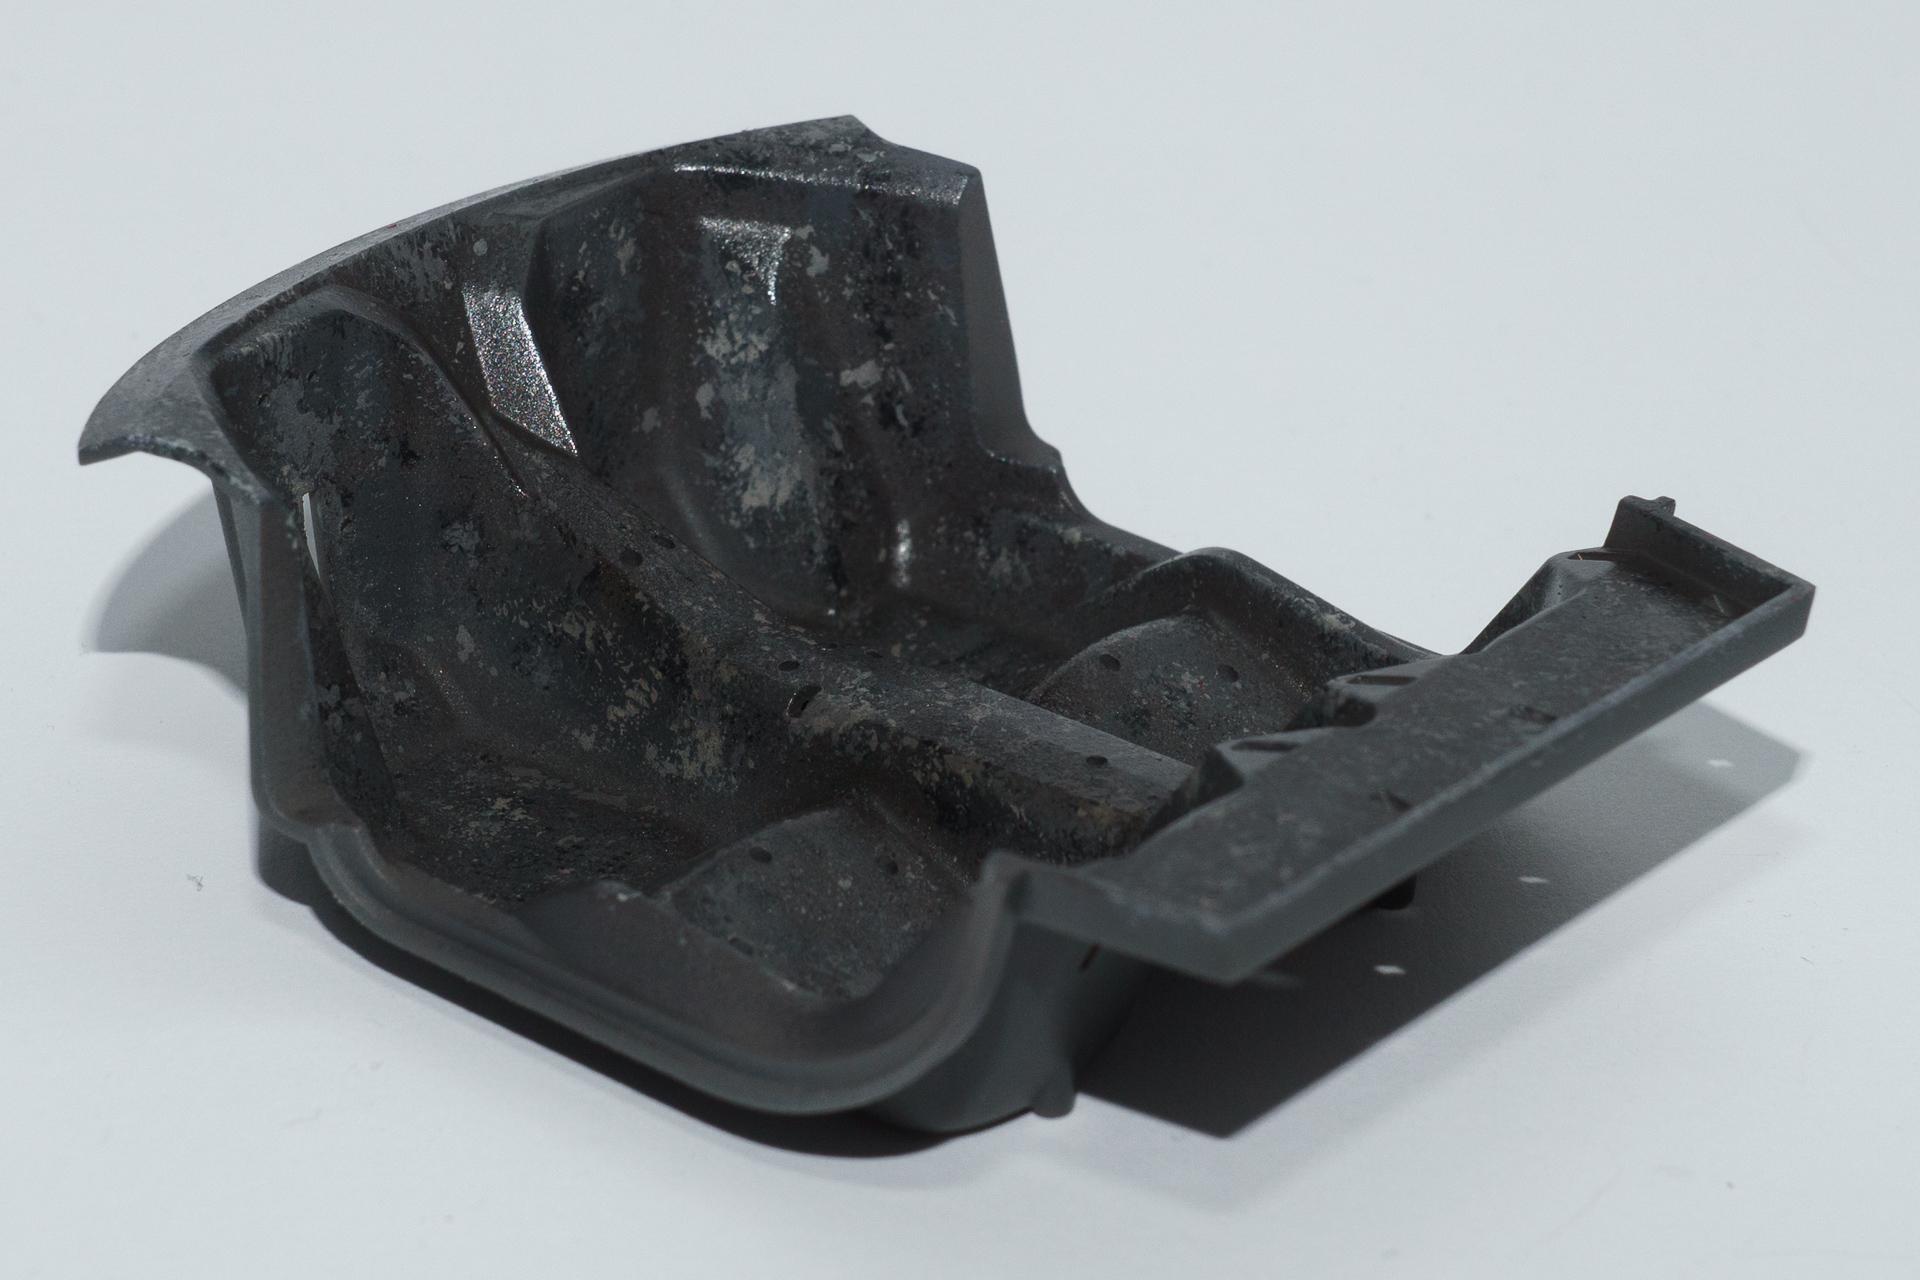
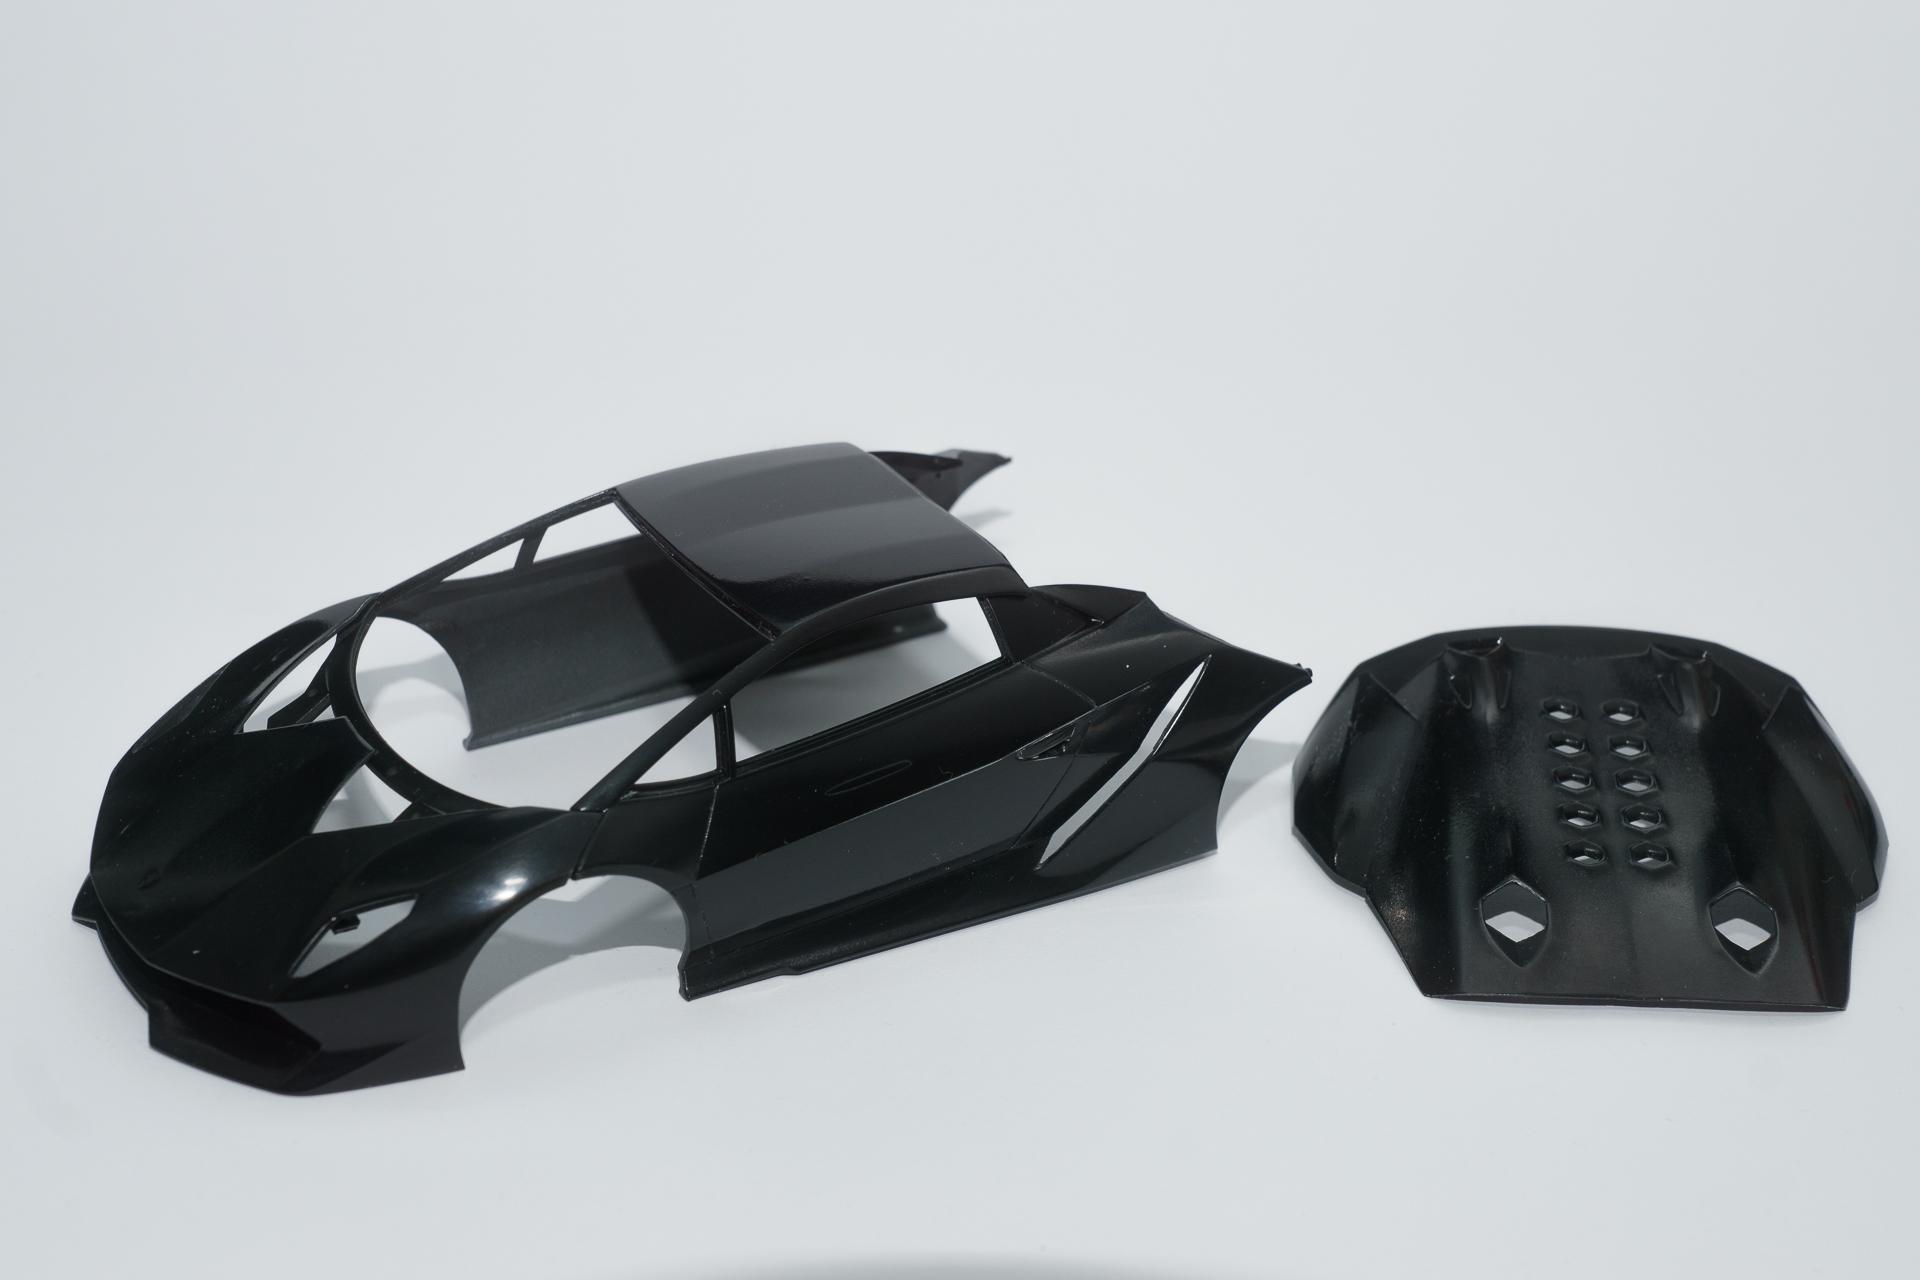
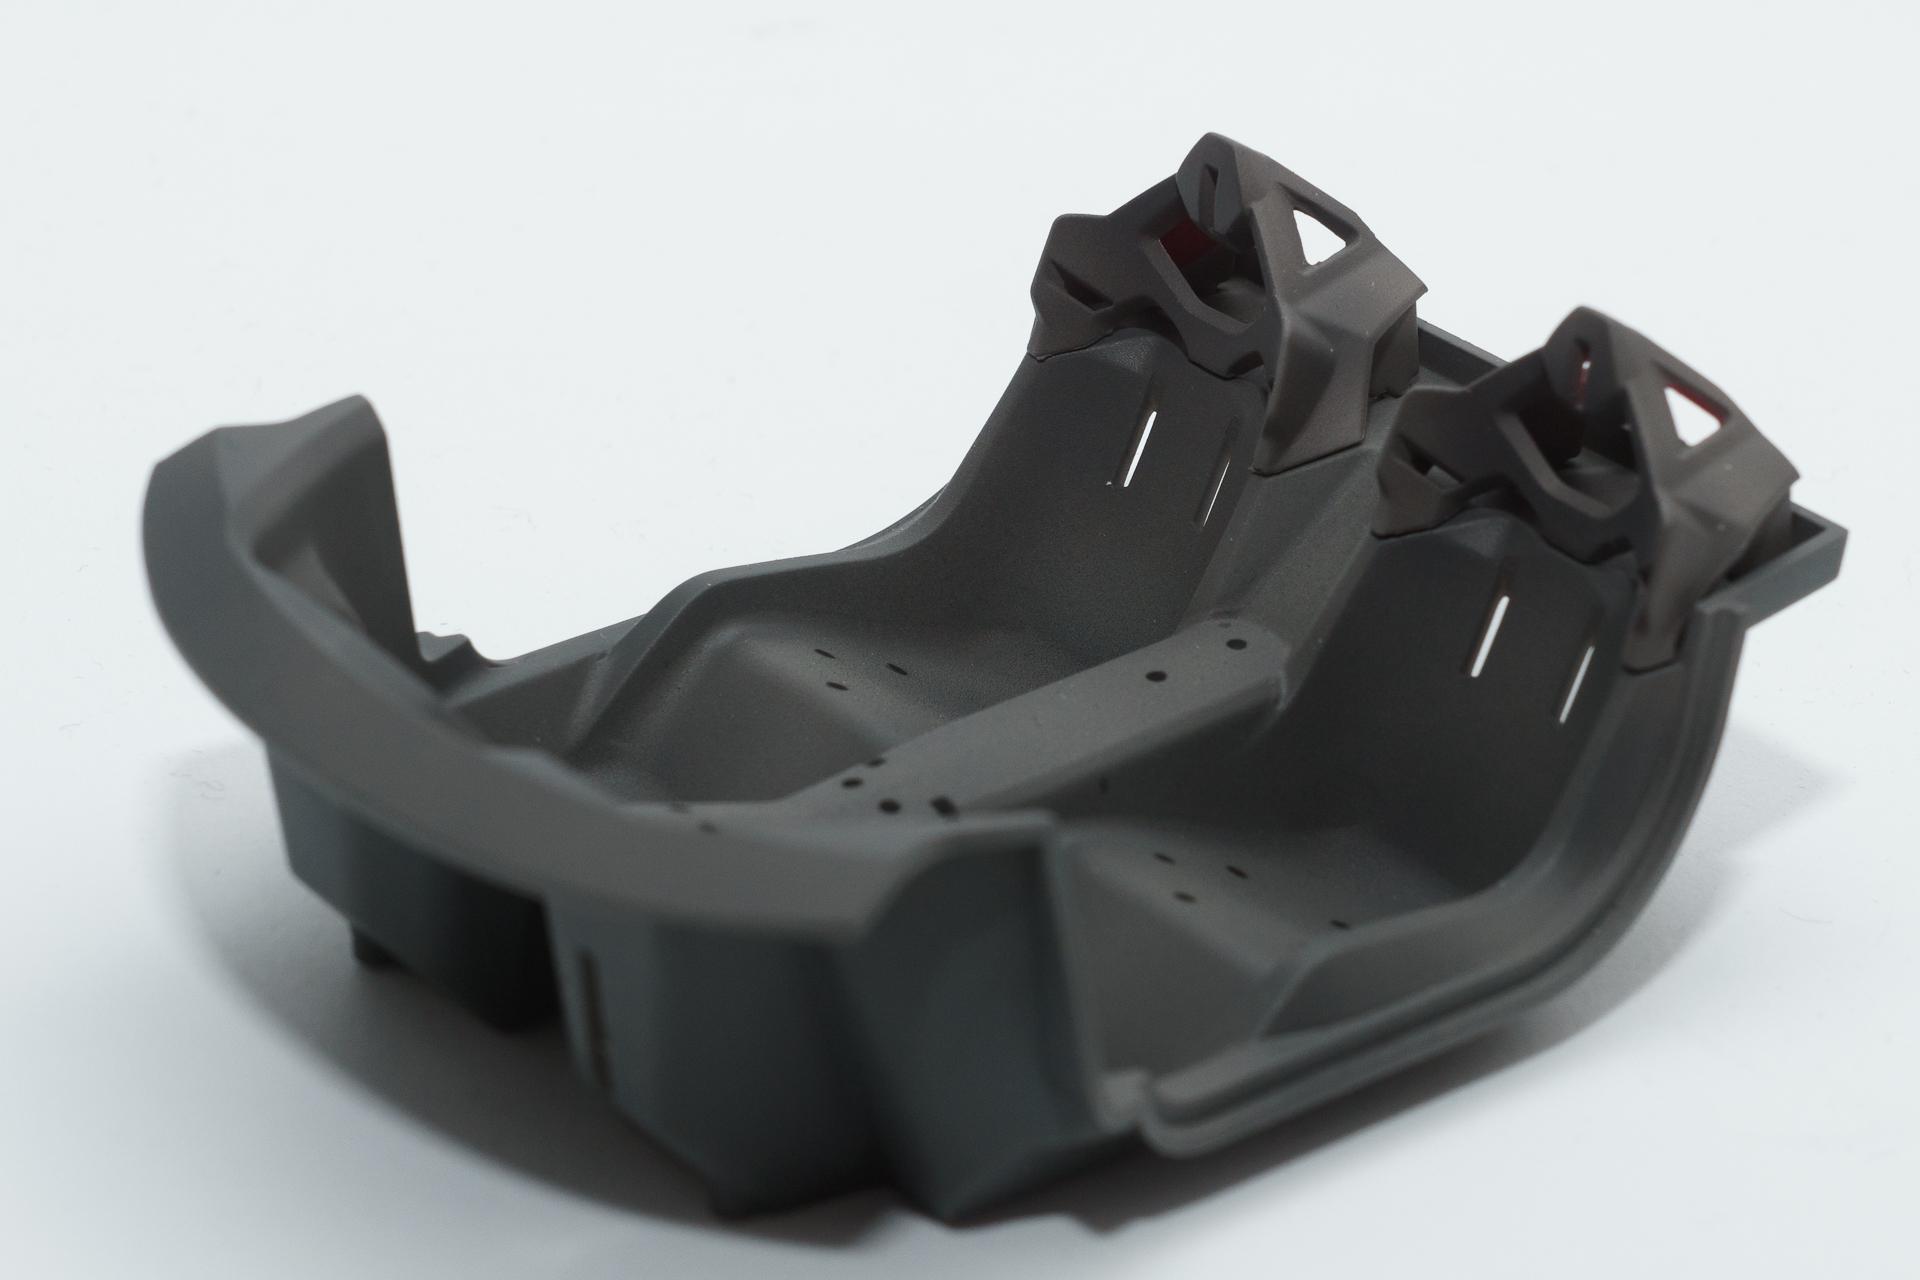
Hi all The main task during the last two weeks was making stencils for the carbon decals for the interior and body parts. However I could paint the interior in forged carbon pattern. Therefore I tried it the way Matt Bacon describes in his thread: and after some Tamiya Smoke applied: Then, the seat parts have been flocked with microballons and painted red. The headrests are still missing, as they had to be carbonized first. The inside of the doors and the dashboard have been carbonized. One part still needs some attention, as the decals has lifted off on one edge. After that the body parts have been painted gloss black, just in case the carbon decals wouldn't fit perfectly, so it wouldn't be that eye-catching. Today the first part of the body got its first carbon decals That's all for the moment. Next week I hope to be able to show more of the body work in carbon look. Urs
-
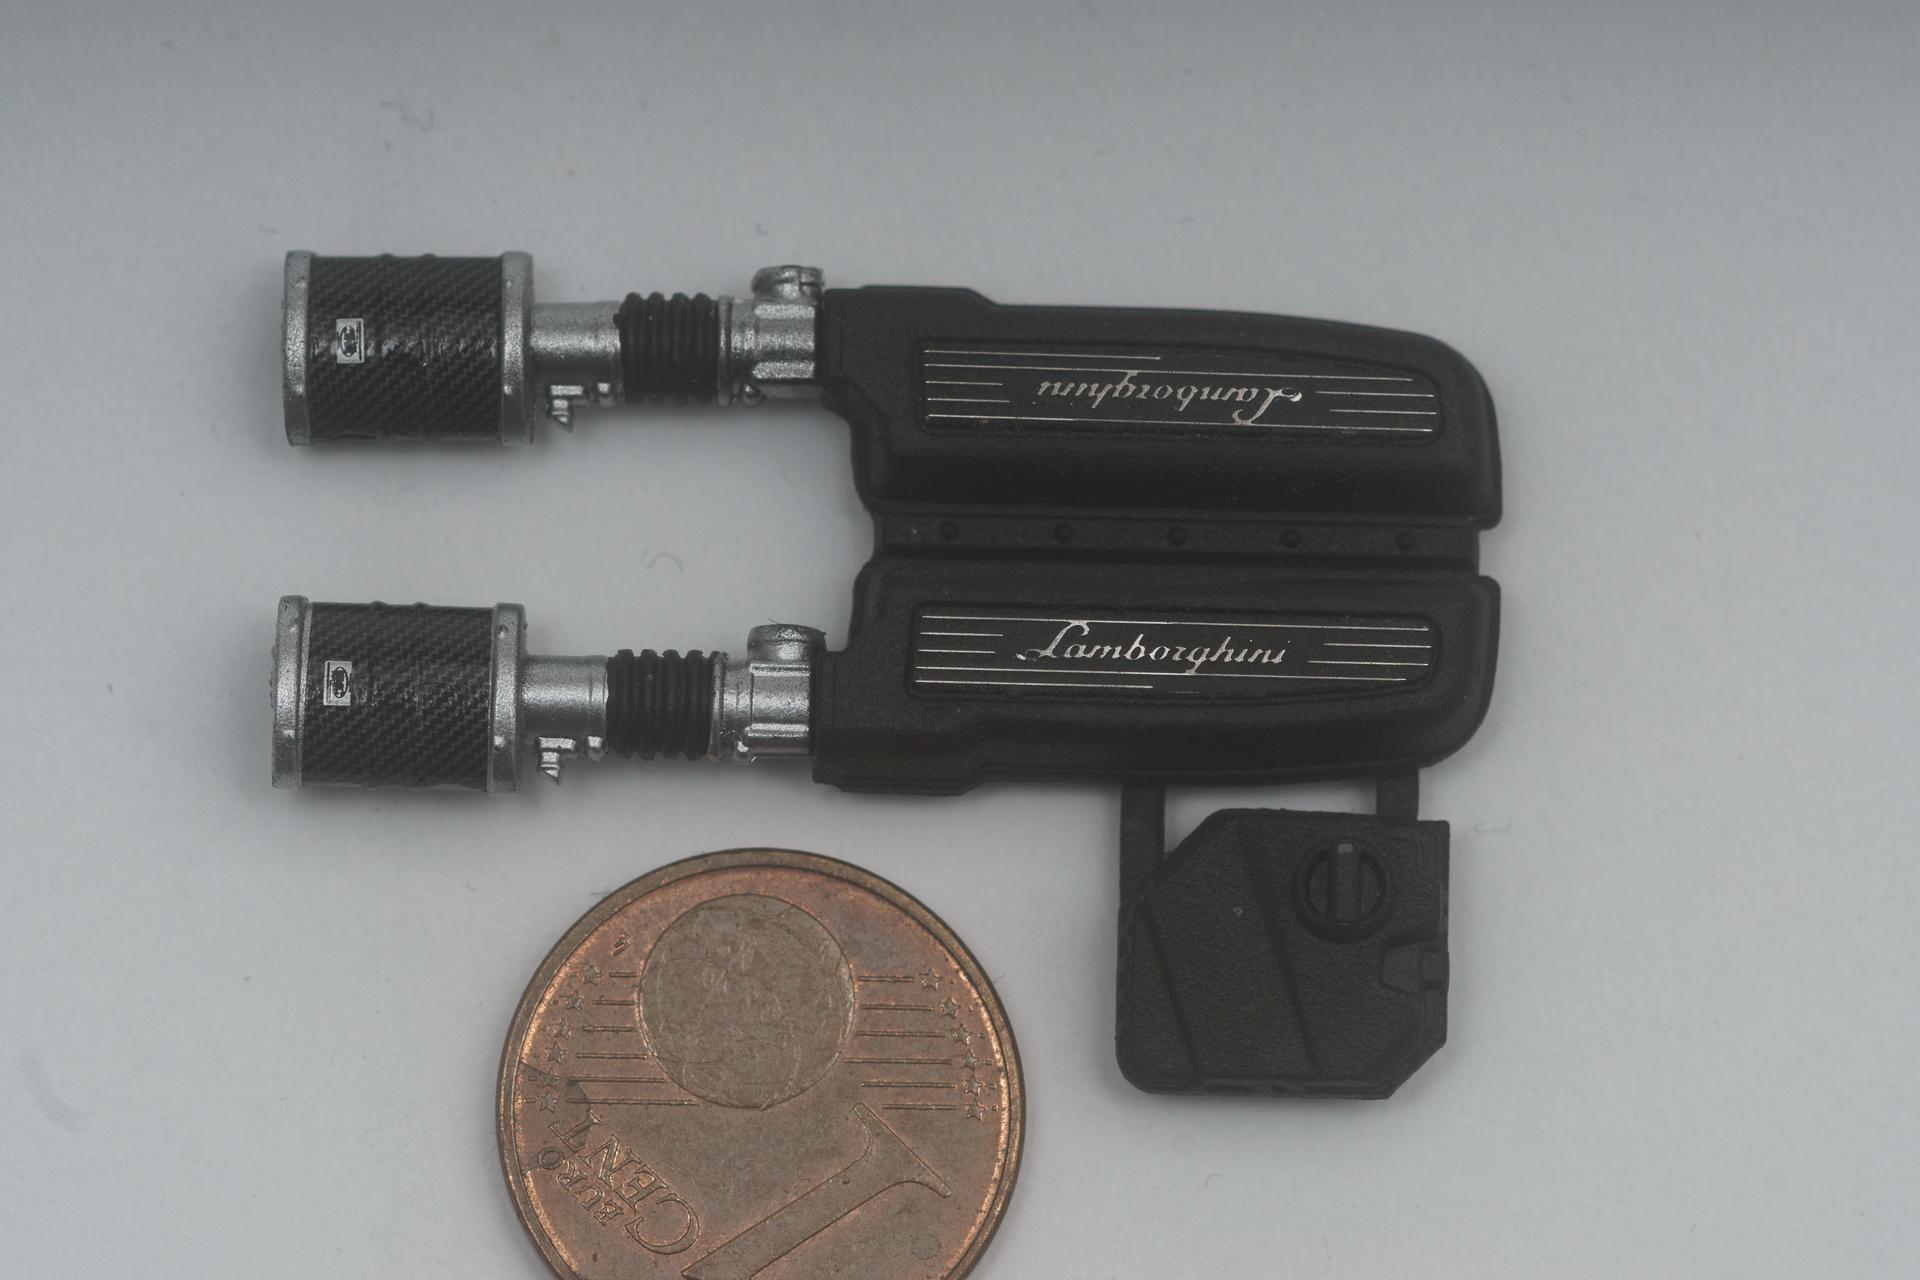
Hi all Nice to have you joining this build. There was not much progress last week (well, at least not much I could show) because I mainly did the stencils for the carbon decals all over the body. But some small bits and blobs could be done. First the engine got completed. Two hoses are still missing. I will only add them at the very end because they go out the engine lid, so I have to be sure they really fit and the design of the parts allow quite a wide range of angle to mount them. The interior tub got its primer and a coat of carbon grey. Now I will try to use Matt Bacon's method to apply forged carbon. One first piece got its carbon decals already. In some spots I will have to add some additional softer and / or some tiny pieces of decal to fix the gaps, but overall I'm quite satisfied. That's all for this week Urs
-
Yes, I'll try to fully cover it with carbon decals. This will be my first model completely covered with decals. No idea whether it will work out the way I want, but I'll give it a try
-
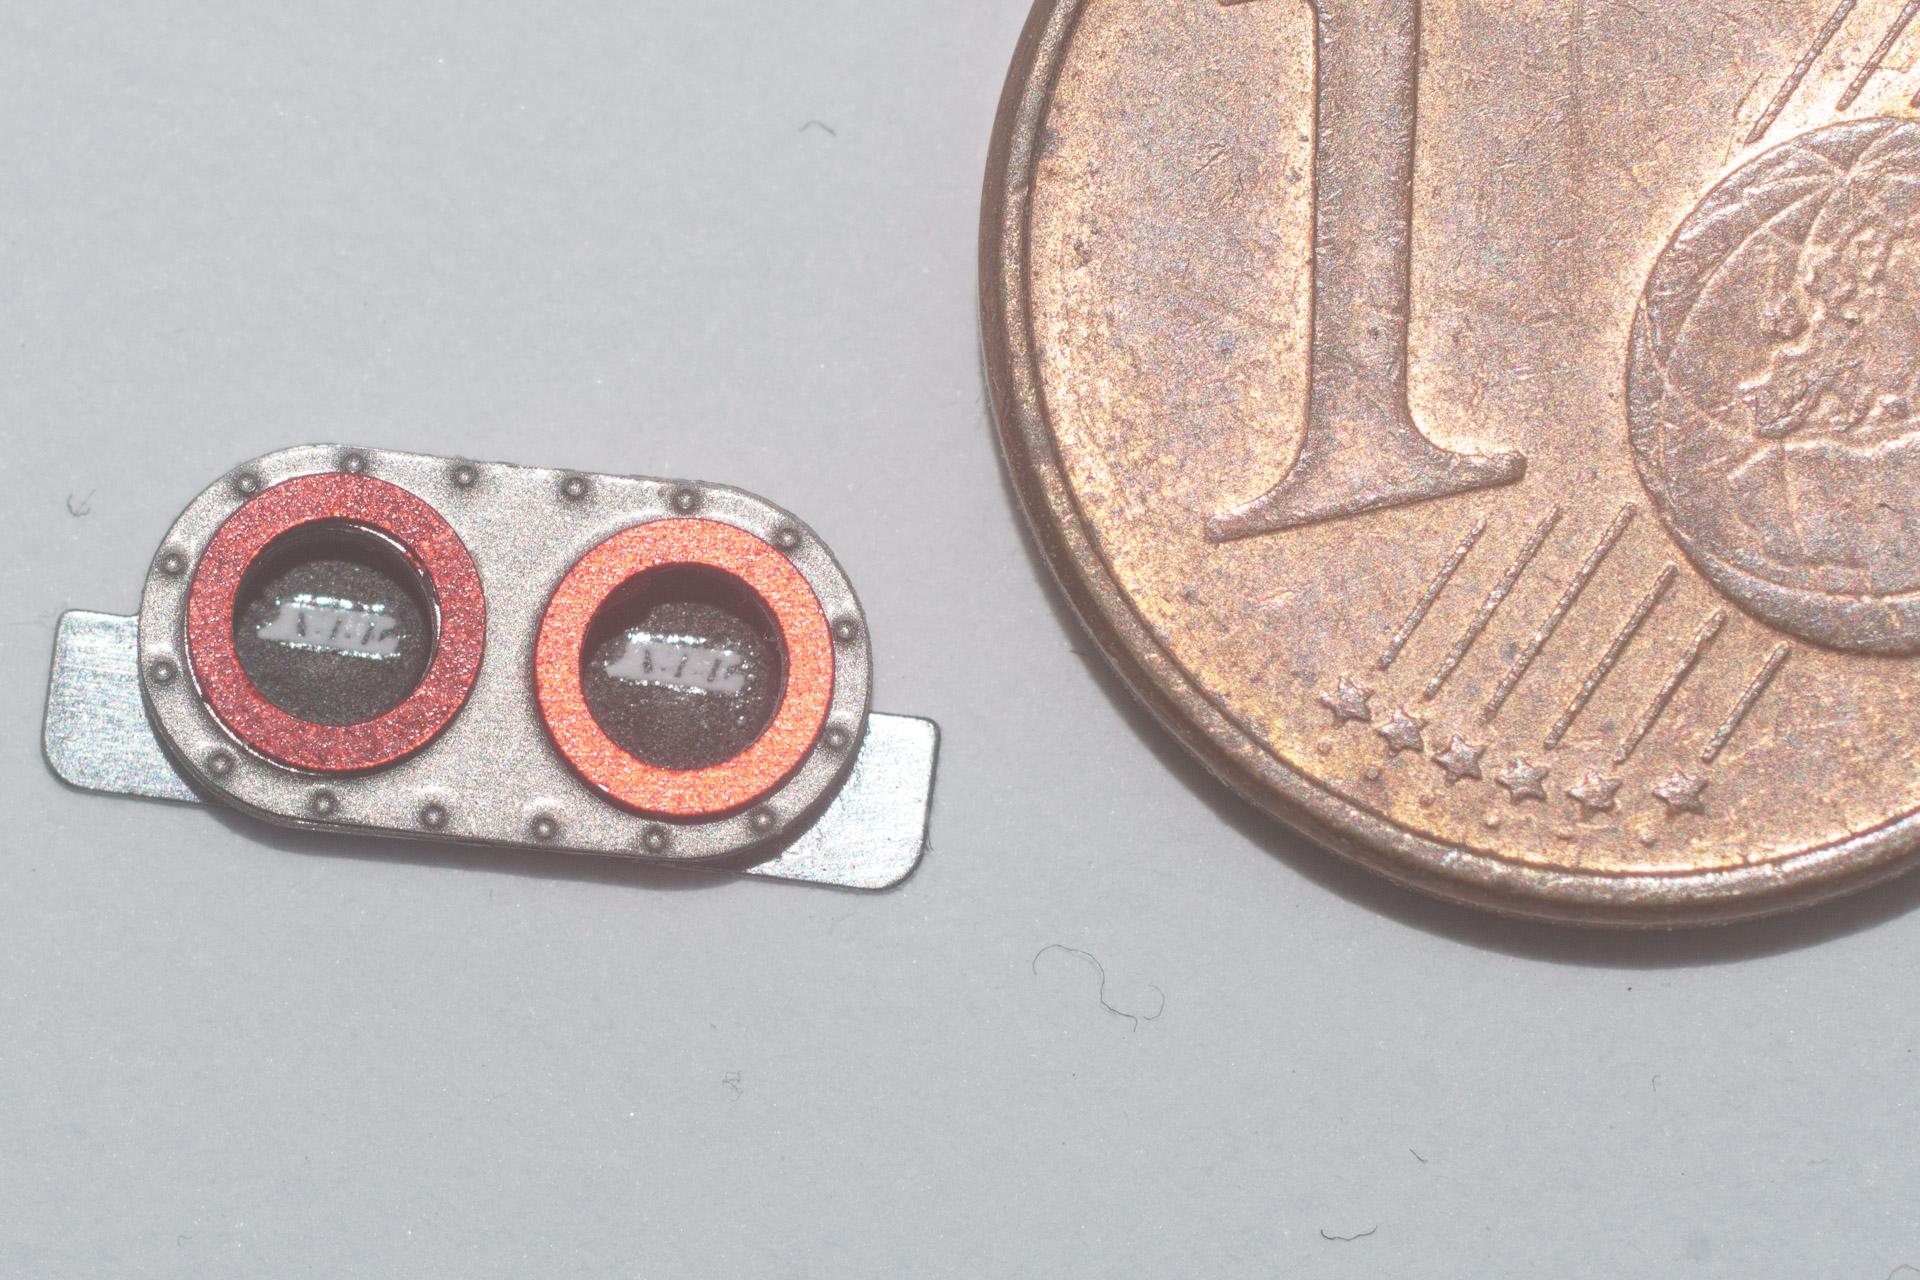
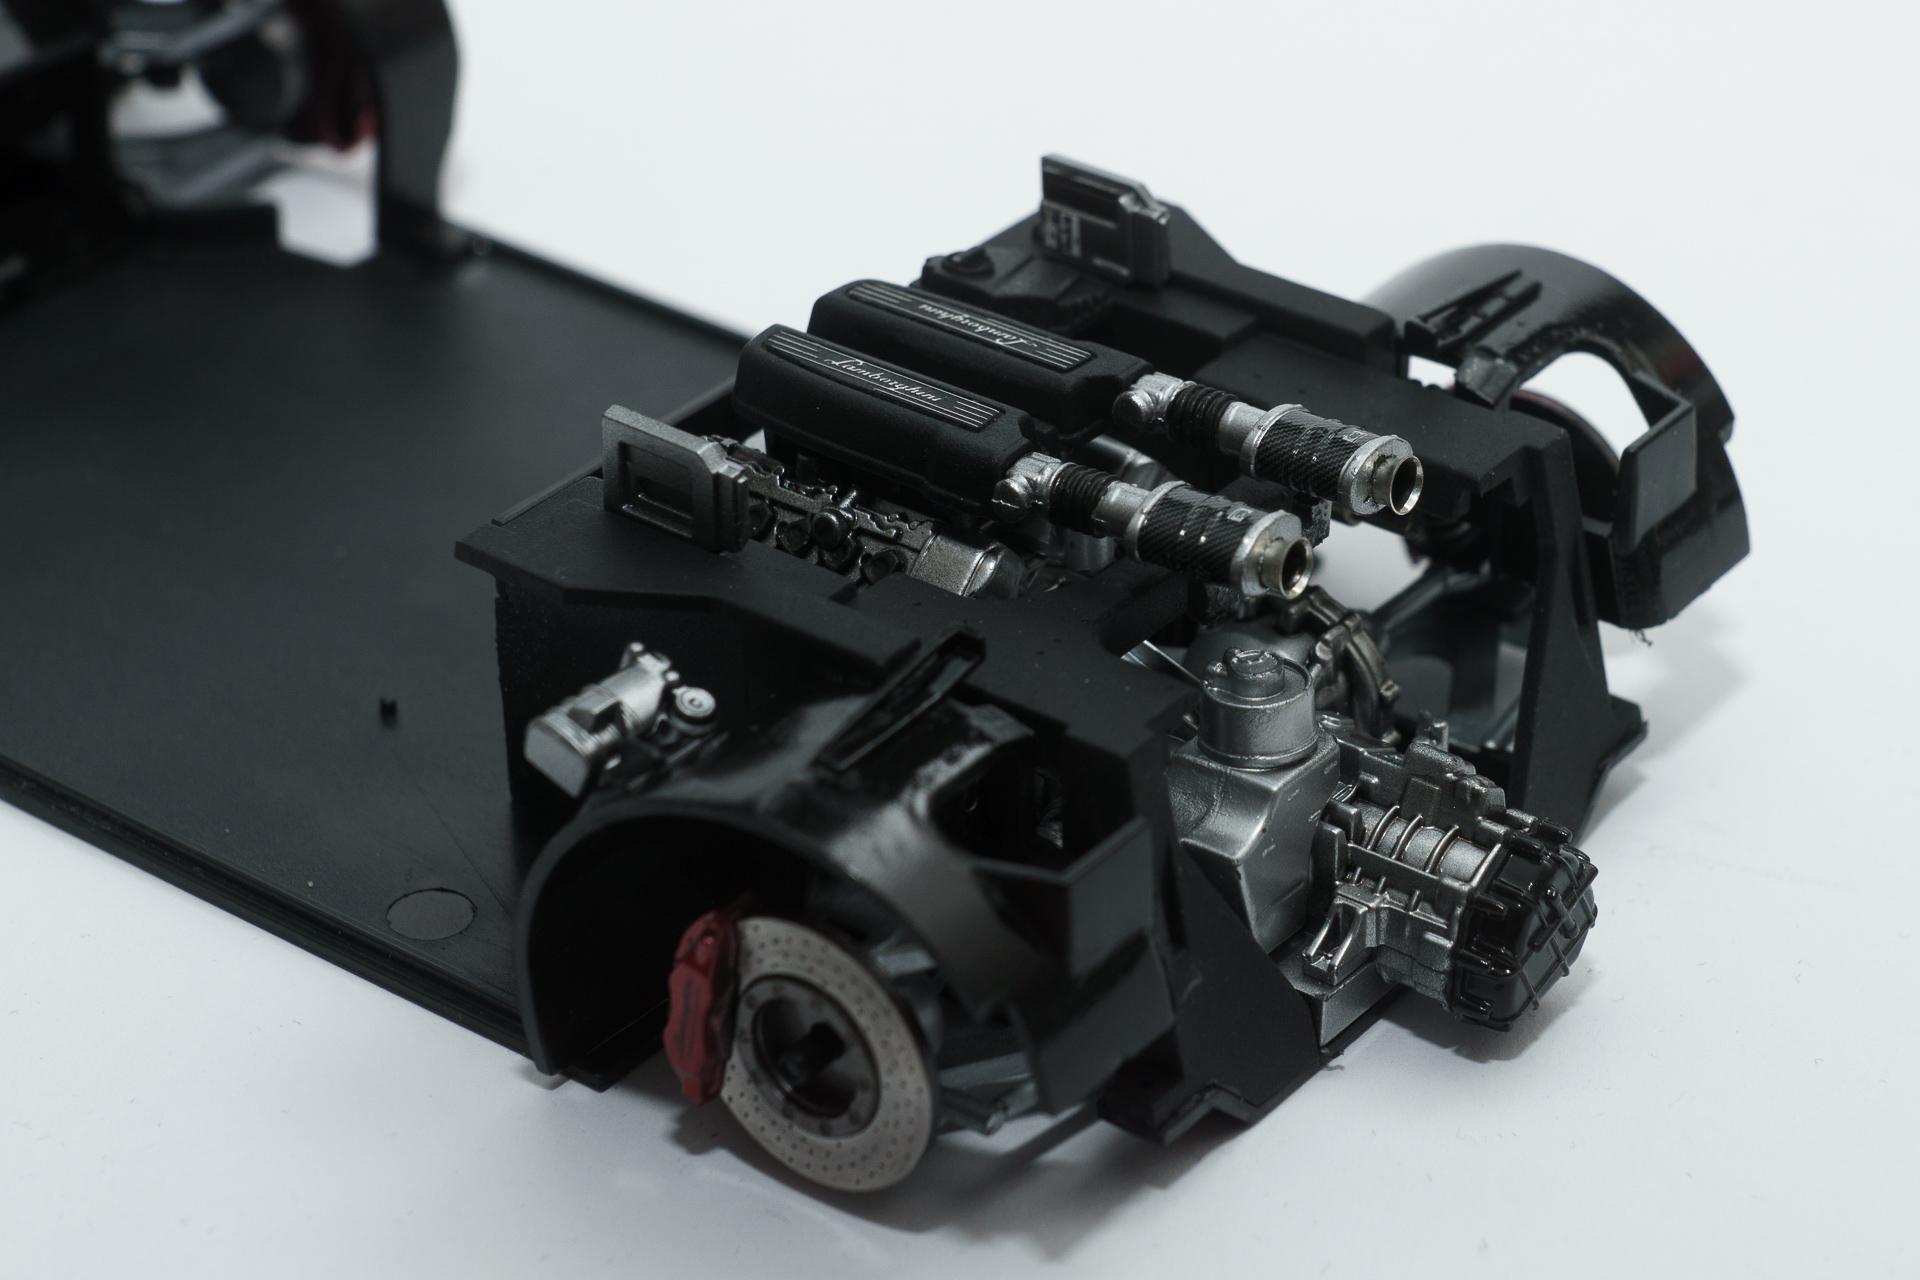
Hi all Today I'm starting with a new work in progress. On my workbench is Aoshima's Lamborghini Sesto Elemento and the corresponding PE set from HobbyDesign. The start was made with the engine which left a ambivalent view to this kit. On one hand there are beautifully engineered parts with superb detailing which will be hidden inside the engine/gearbox unit, so nobody can see it after the engine is completed. On the other hand there are parts in potentially visible spots where one side is left open... But as my models always stand on the shelf with the engine compartment closed and considering the fact that hardly anything can be seen through the engine lid, I didn't spend to much time building the engine. The breaks got their break discs from the PE set. I only saw on the pics that they didn't match completeley, so there is some paint visible from underneath. But as this will hardly be recognizable once the wheels are in place, I don't care too much about it. The calipers have been painted Alclad (White?) Aluminium in the first place and Alclad Transparent Red over it. After the decals have been applied, I clearcoated them with AK's Intermediate Gauzy Agent. Finally I put everything on the undercarriage. Some parts are still missing in this picture, as I forgot to paint them. Even when I painted the parts I forgot in the first place, I forgot them again... ? So much for the start. Another update is planned for this weekend, as I will get back to the workbench tomorrow. Urs
-
Thank you all for your kind comments The kit is from Revell. The paint used for the body was Alclad Duraluminium, clearcoated with Alclad Aqua Gloss. The doors didn't really fit on this one neither. I had to reshape them by dipping the doors in hot water and bend it in shape. Yes, I used a very fine real mesh for the hood grille. A member of another forum sent me a small piece, so unfortunately I can't tell you what it originally was or where you could get it.
-
Thank you all for your feedback I can only recommend this kit. It was pure fun building it from start to end (apart from the clear coat that didn't work out as smooth as intended).
-
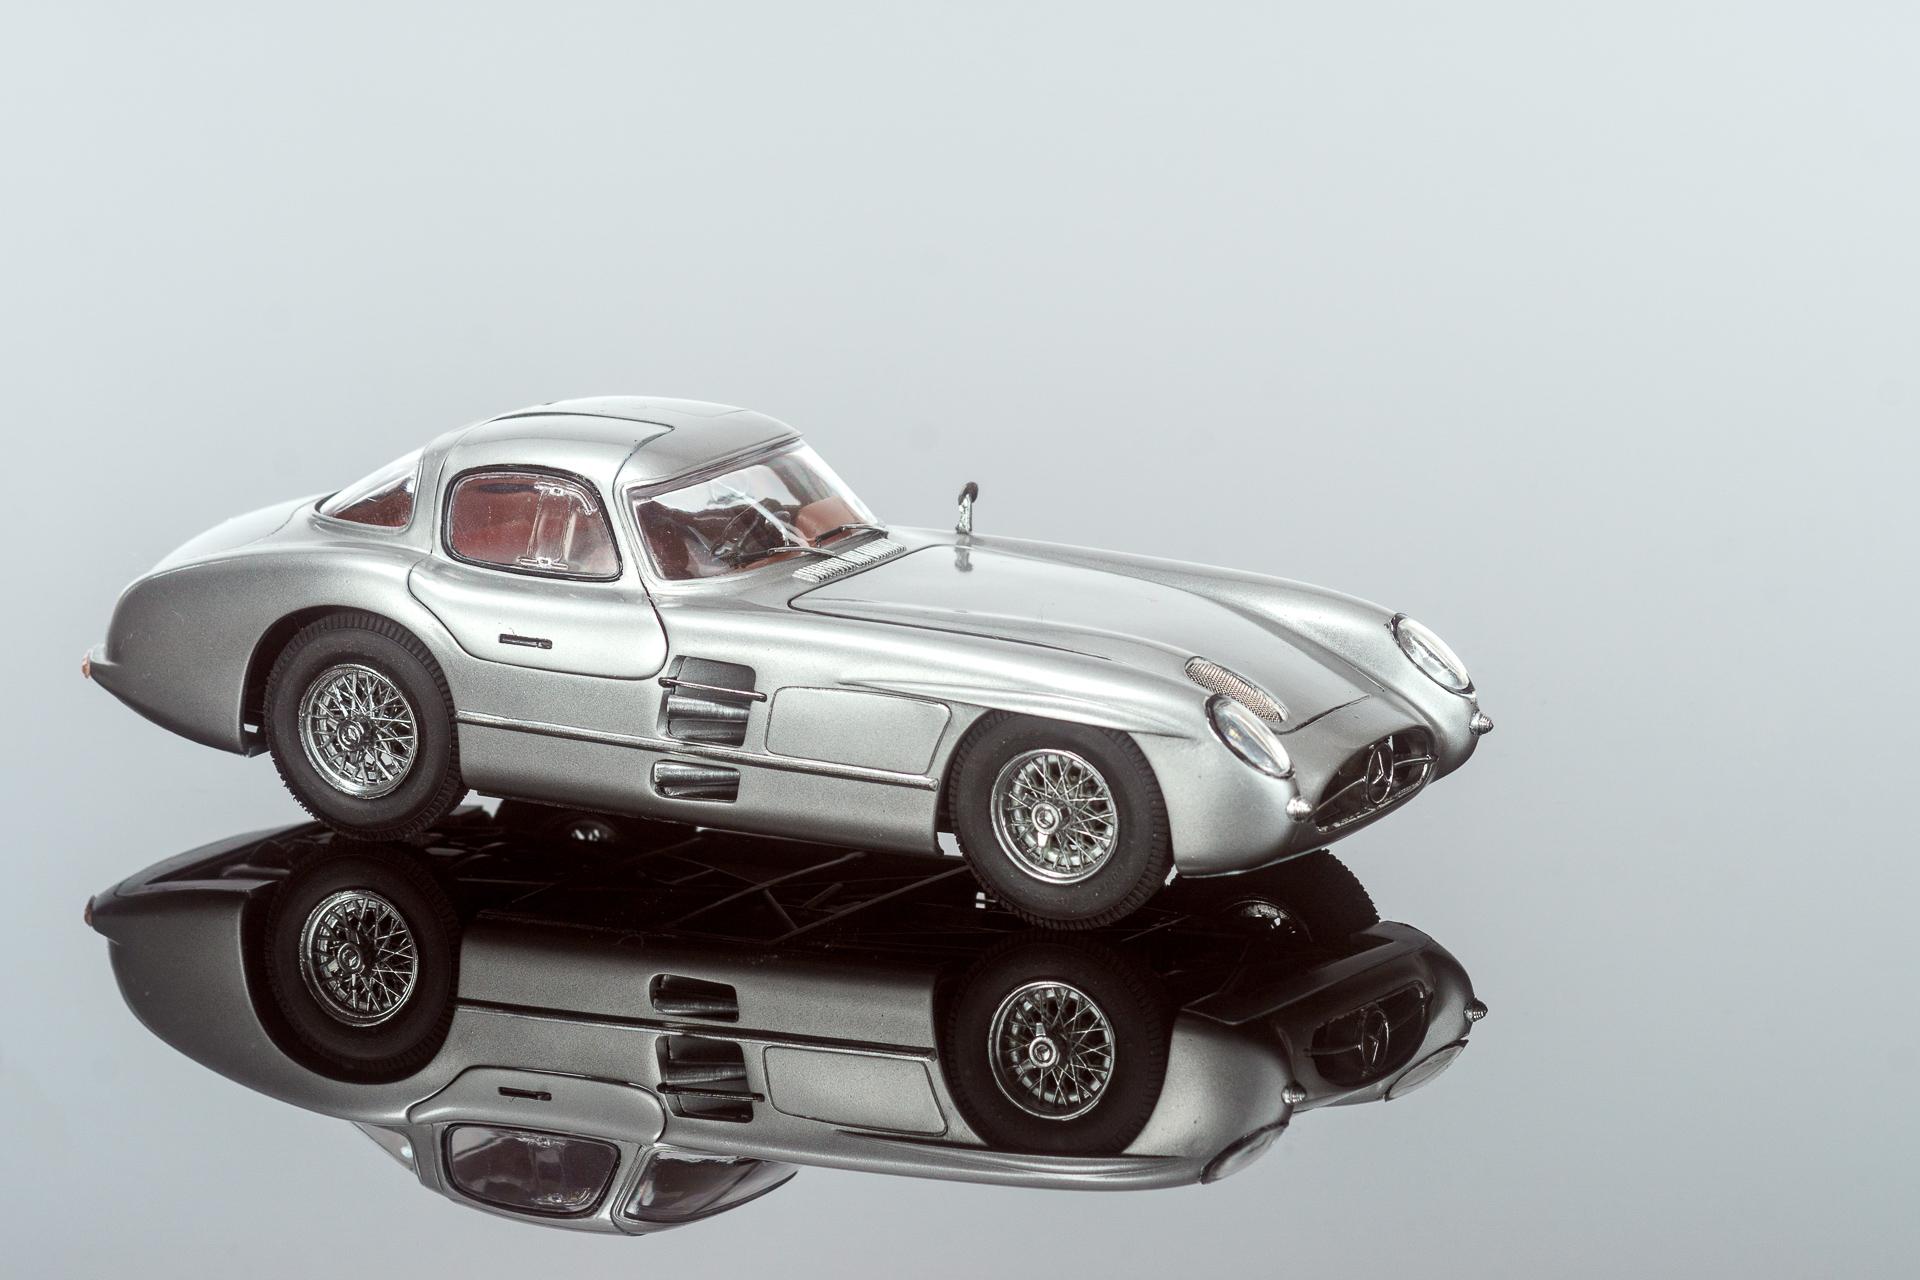
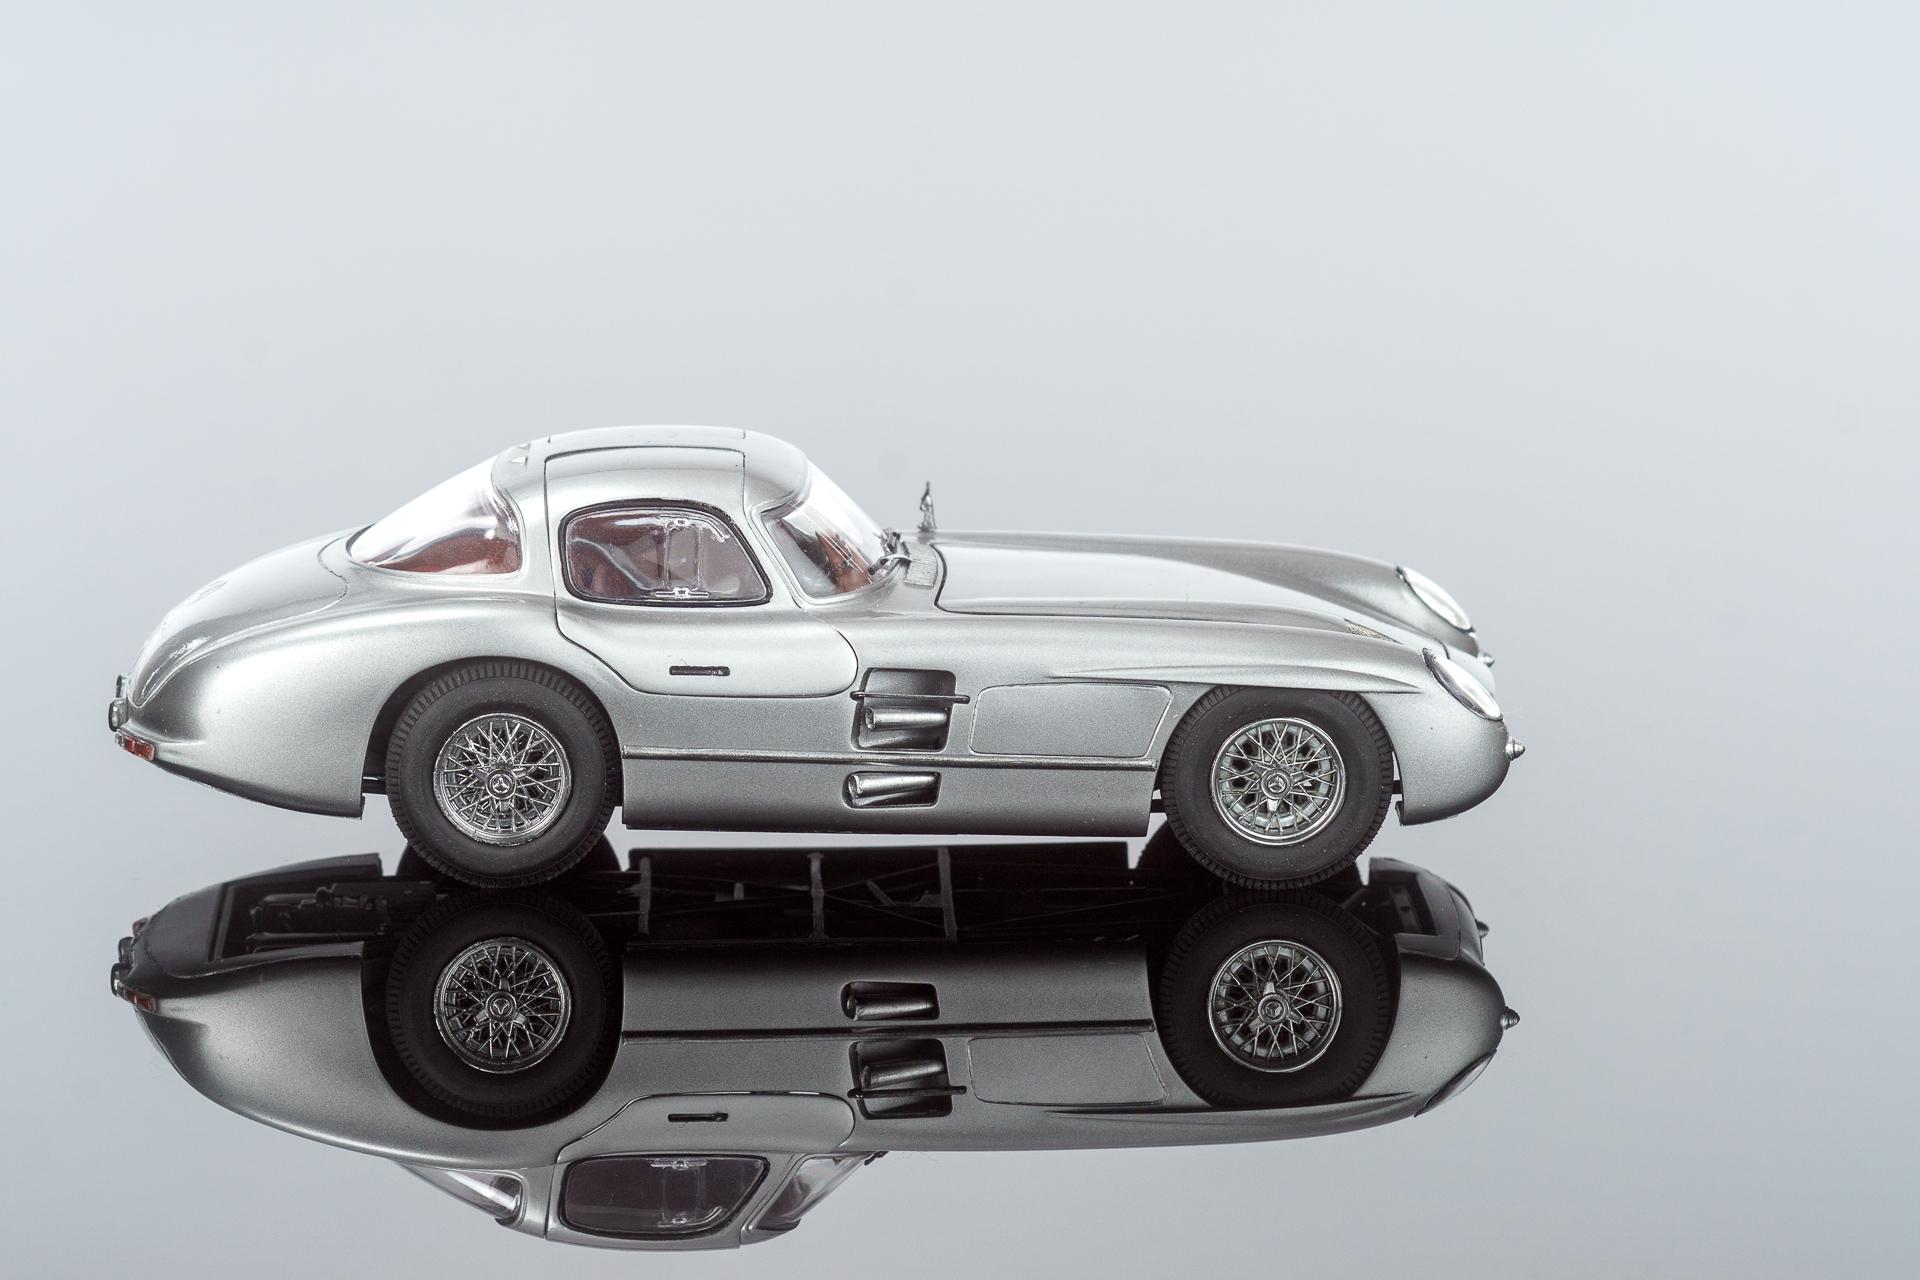
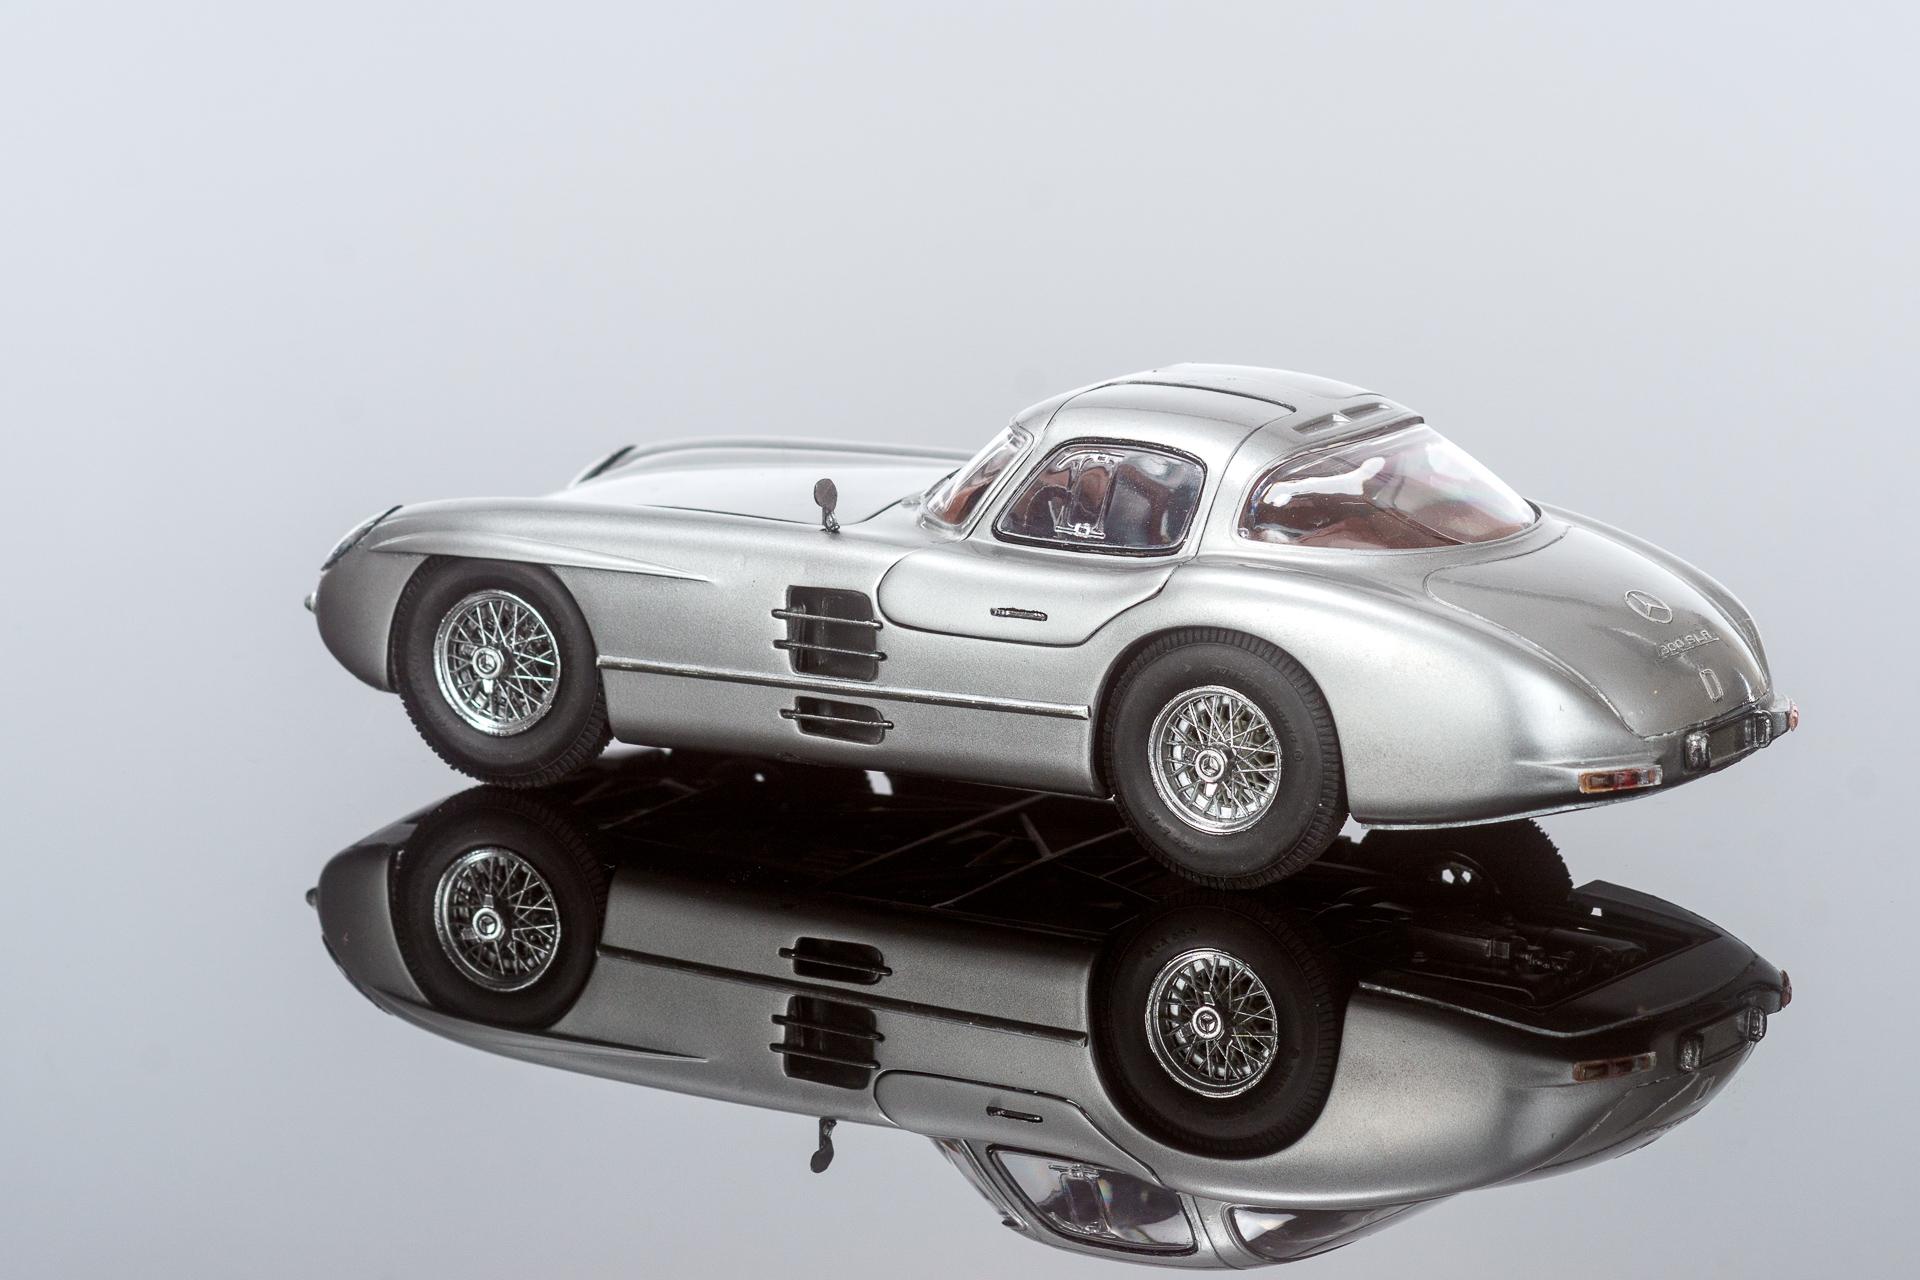
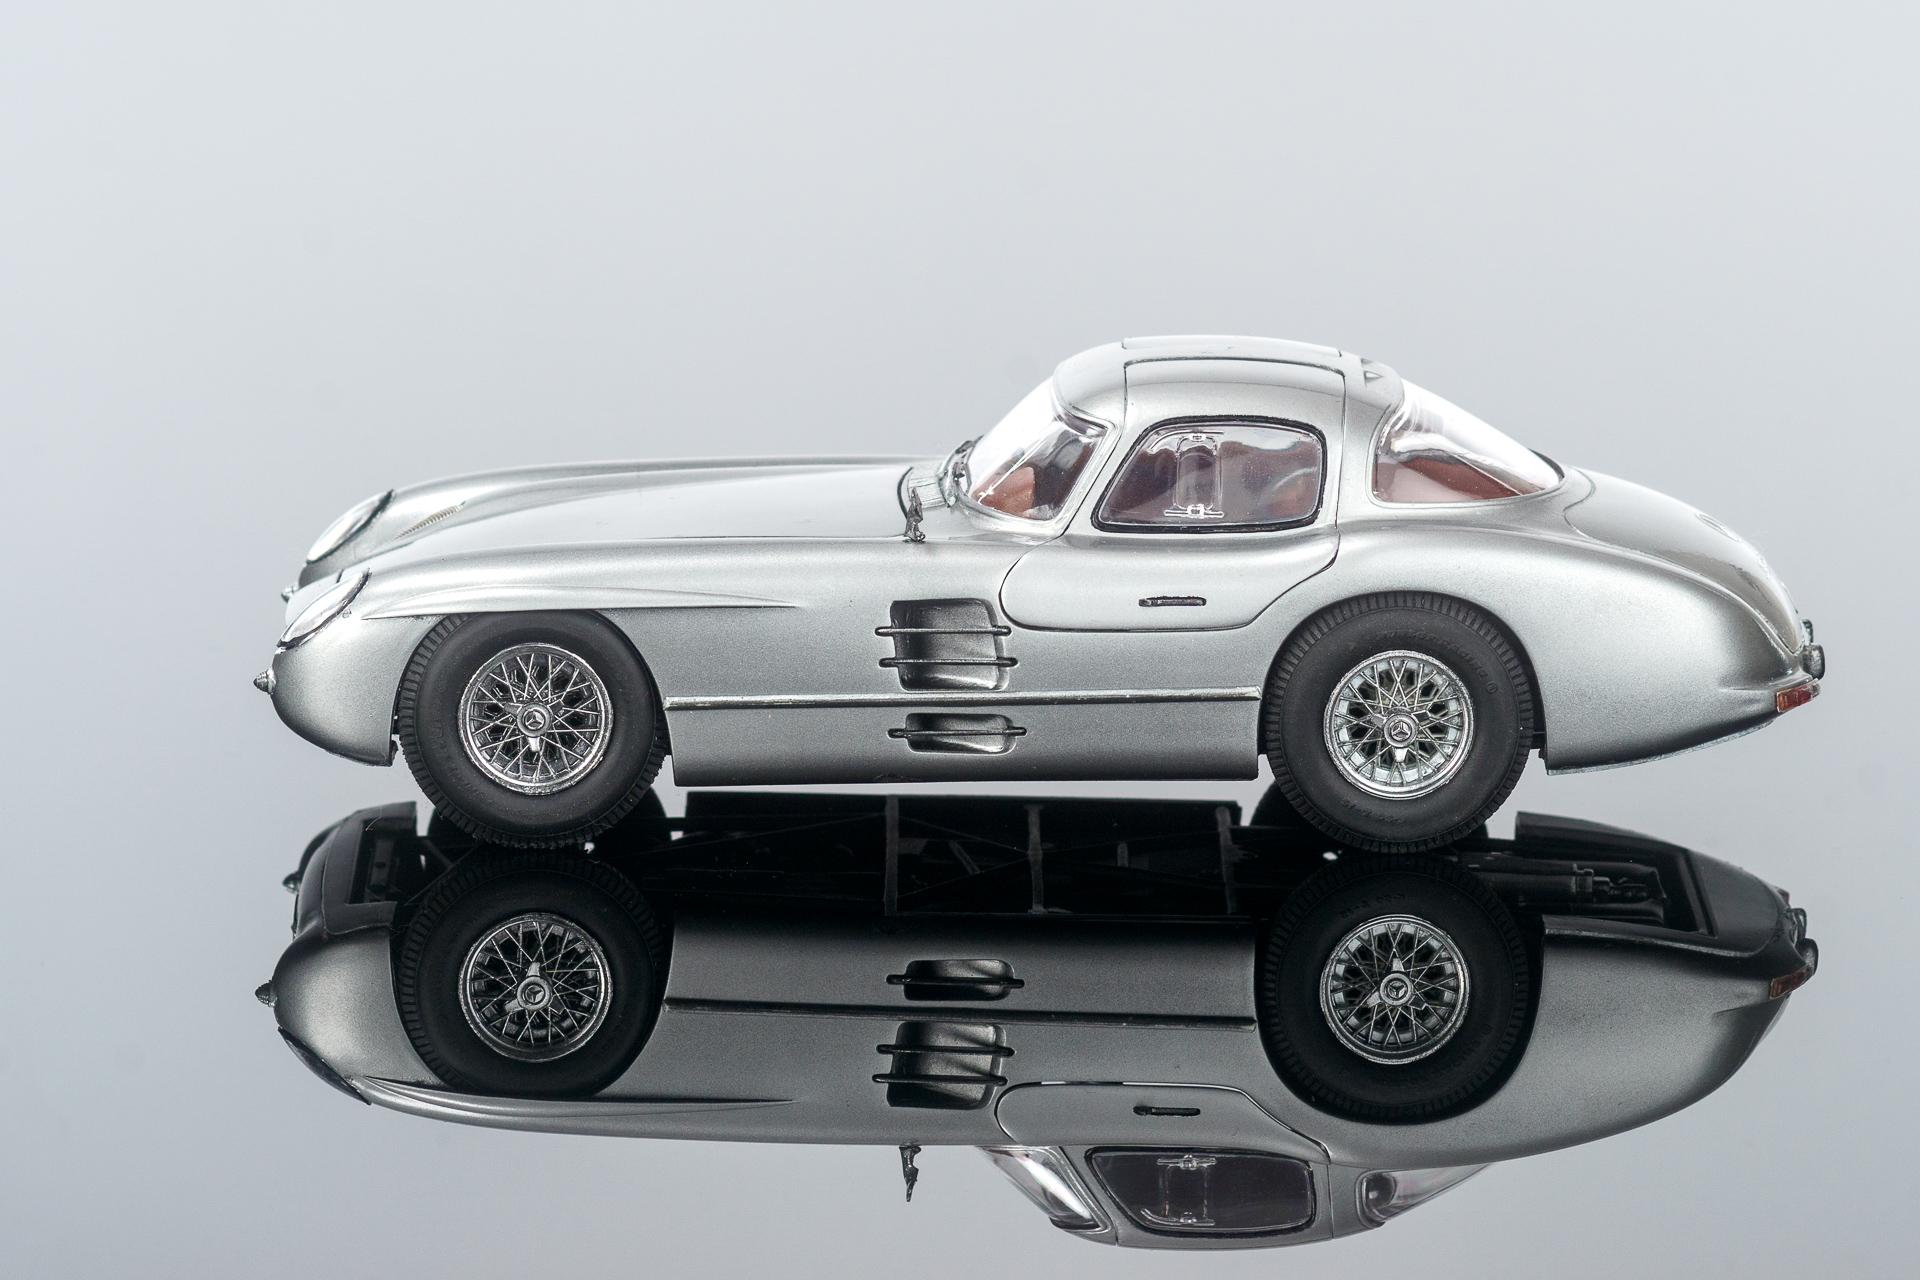
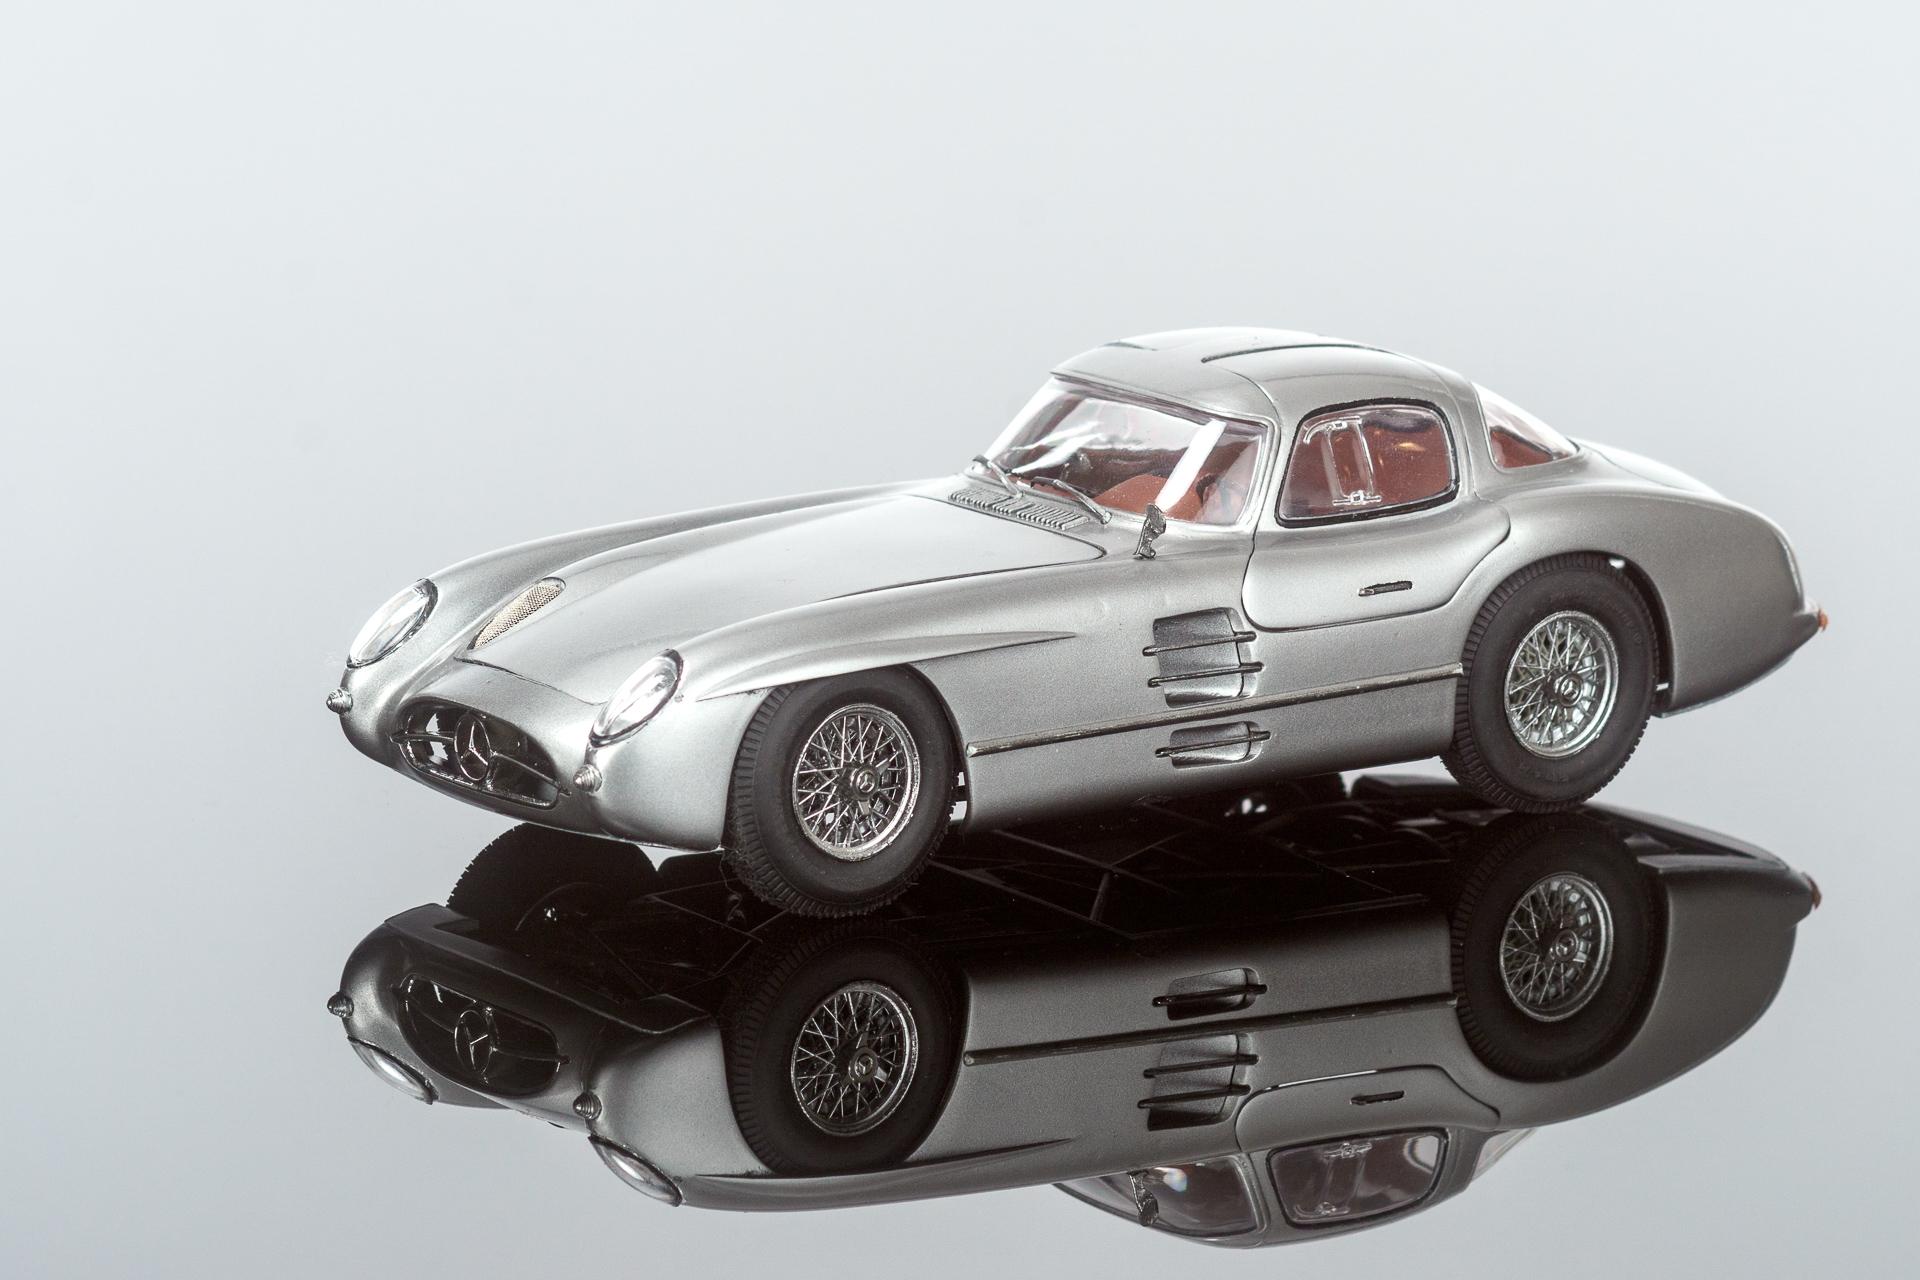
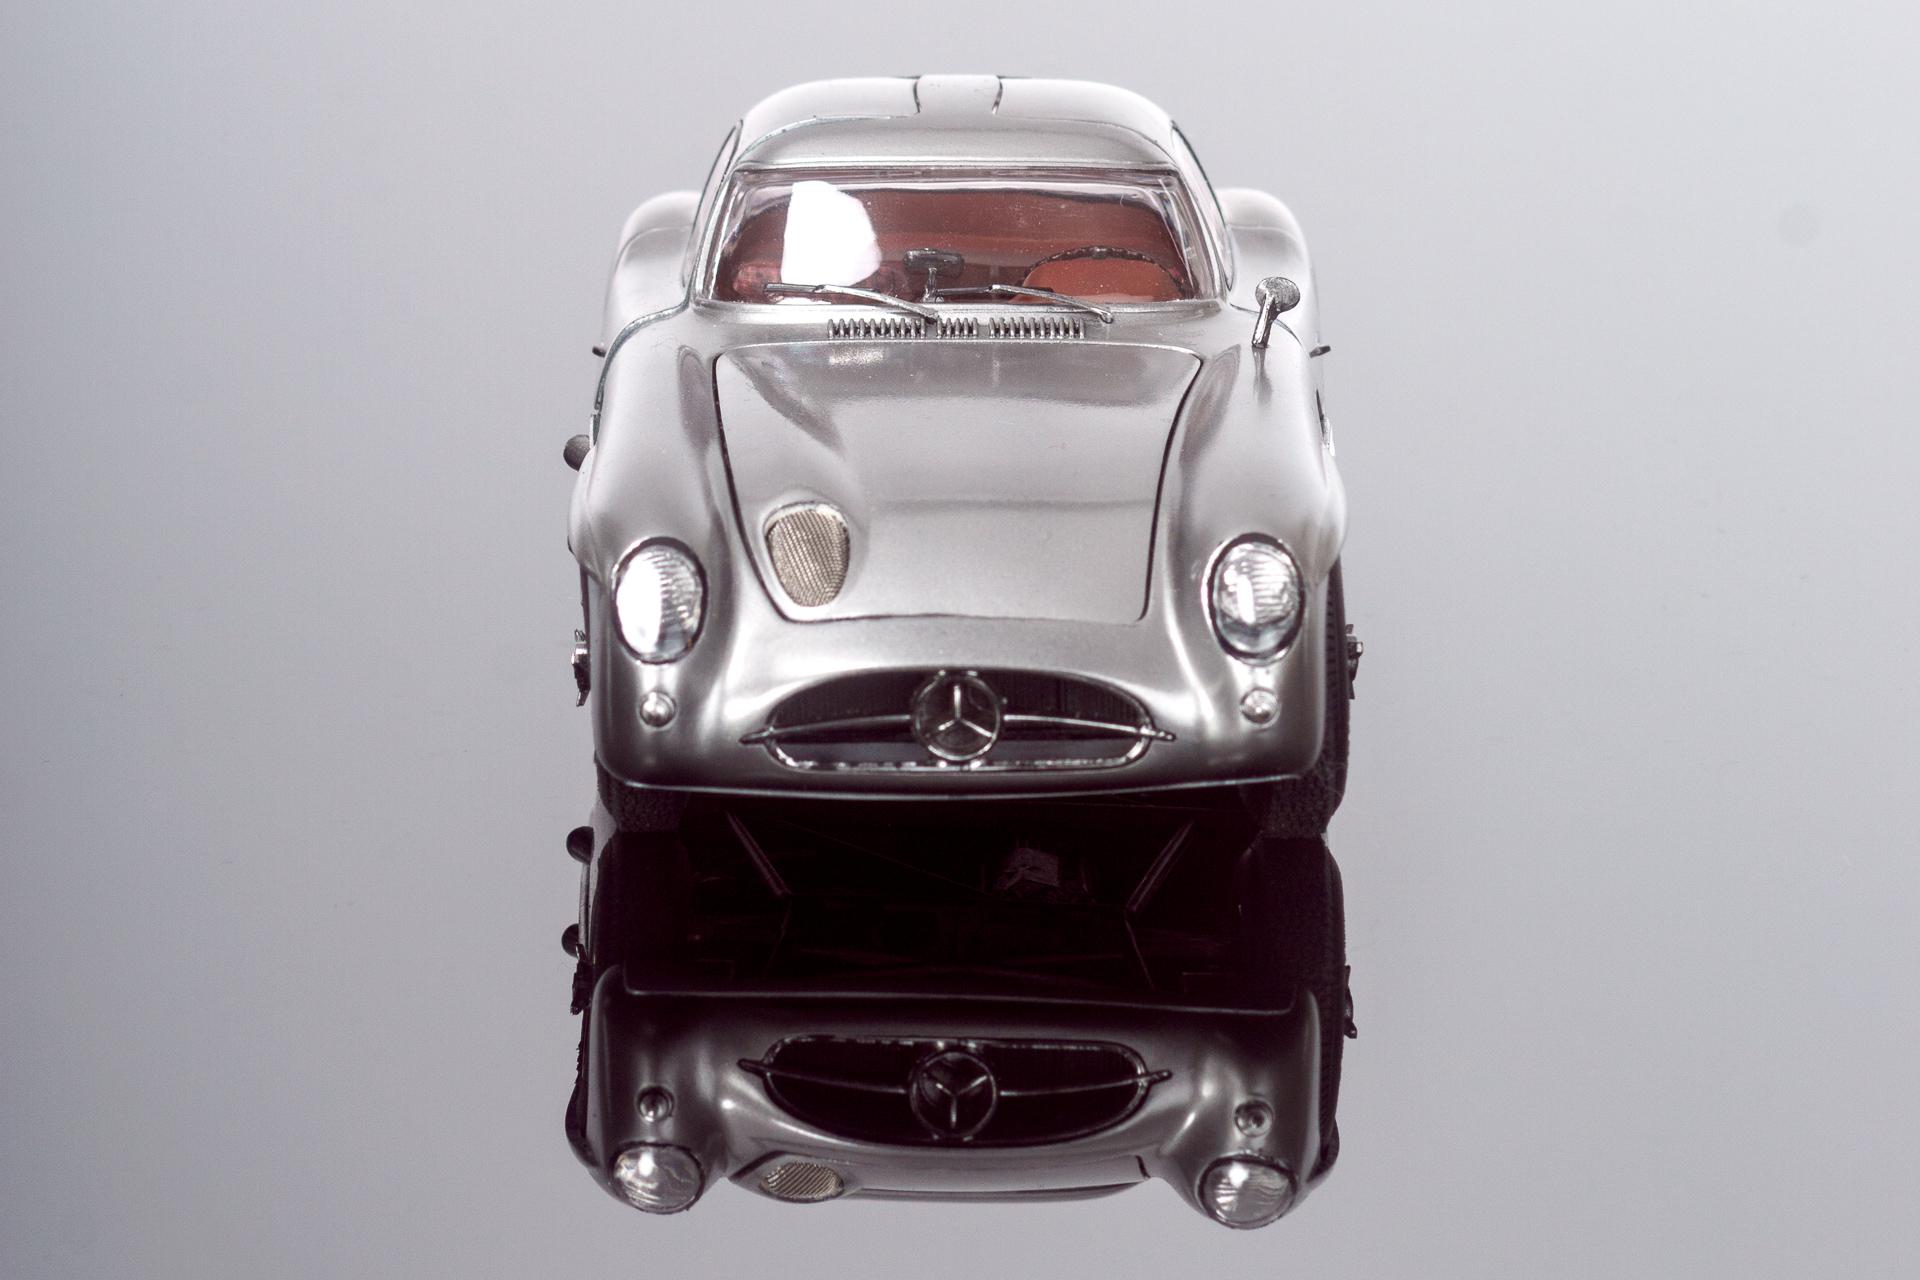
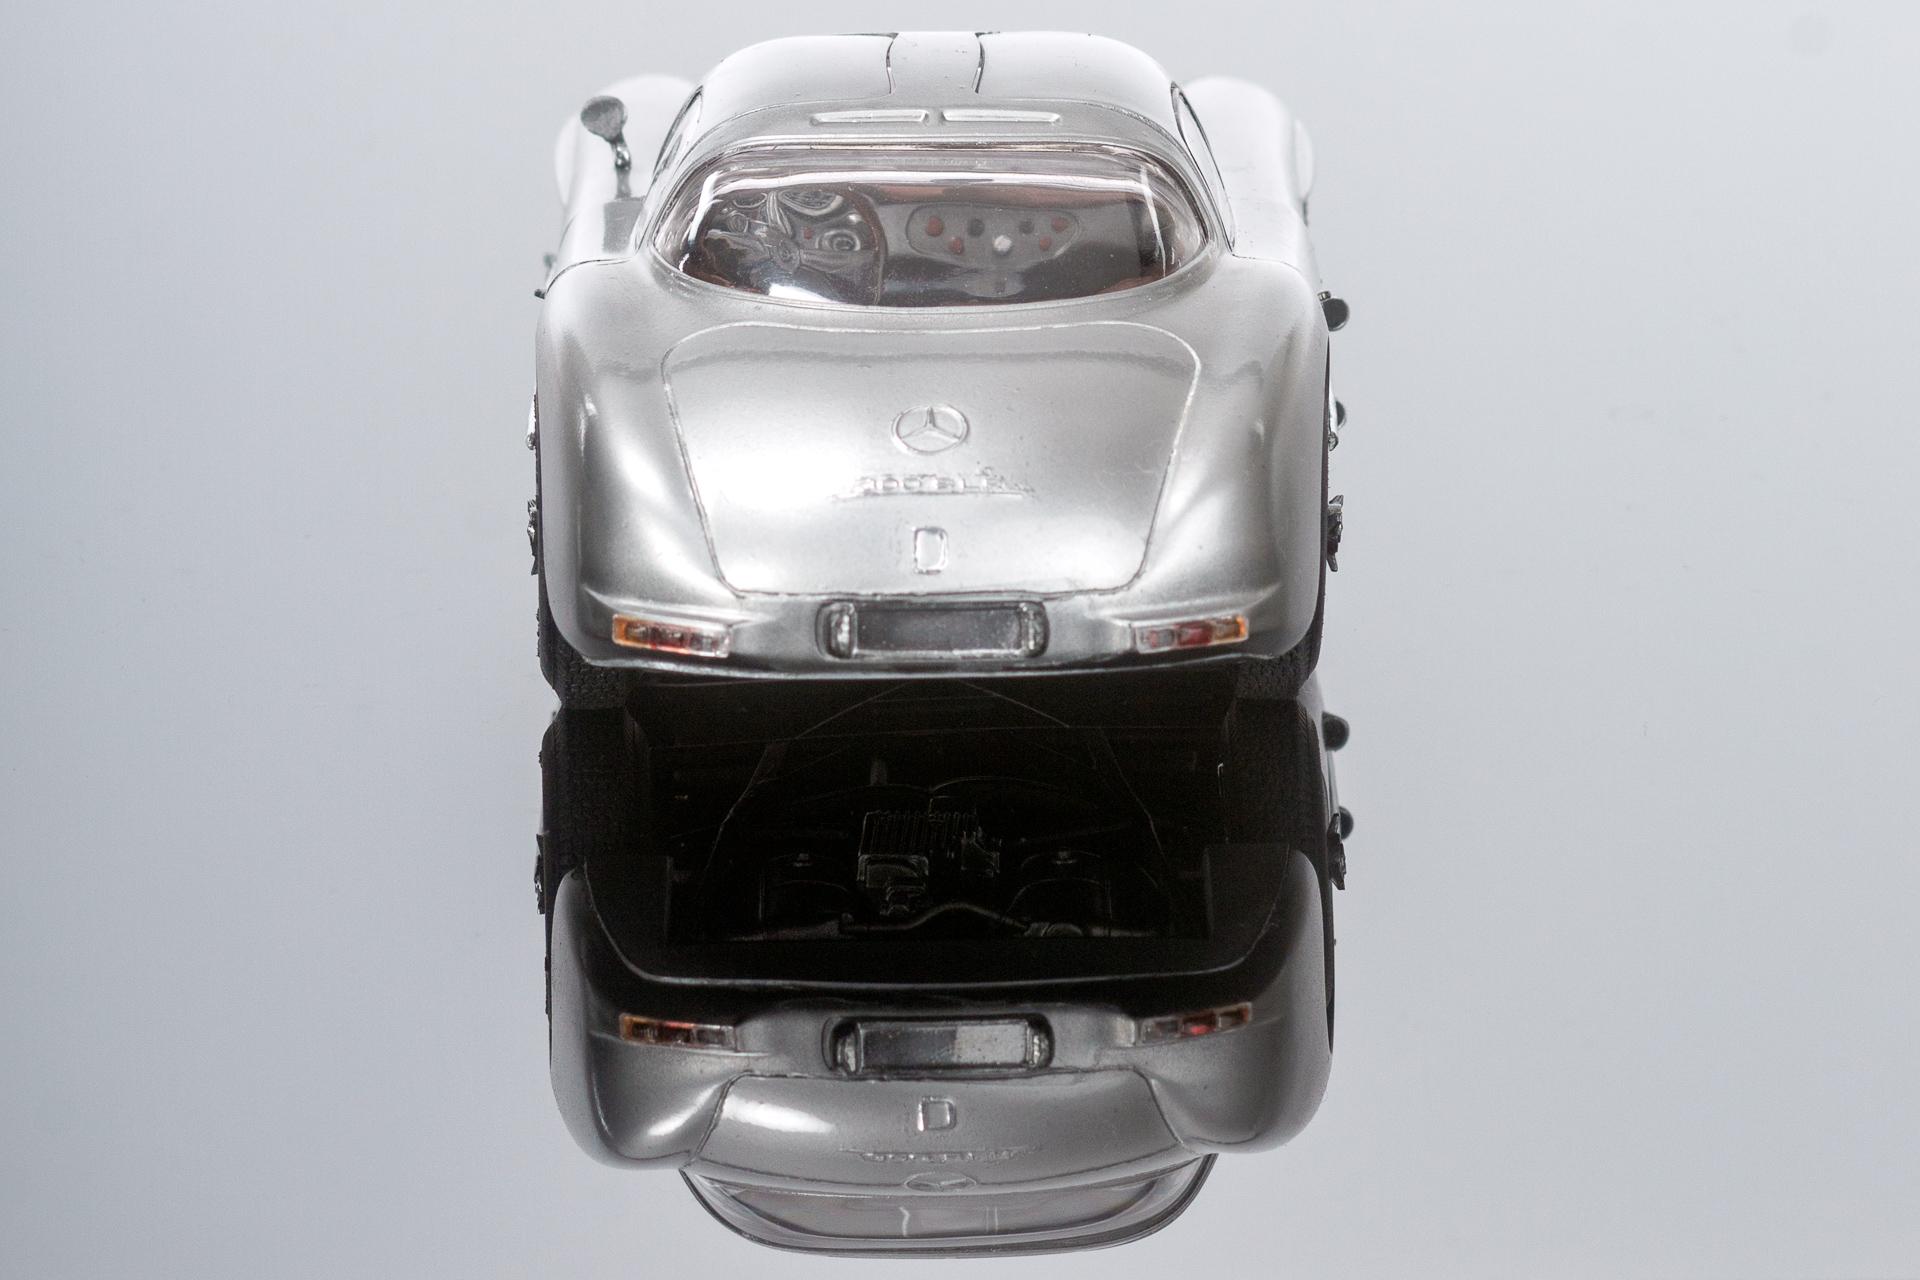
Hi all Long time ago I built Revell's Mercedes-Benz 300 SLR Uhlenhaut-Coupé (I think, Tamiya's kit was not yet on the market at that time). Although most people tell this was a terrible kit with poor fit the problems I faced during build were mostly self made. Somehow I must have got an exceptionally good copy of this kit. It was only my 4th model after a 20+ year hiatus in model building, so there is a lot I would do different now (hopefully better), but somehow I still like this model. So I decided to take it to the studio's yesterday to take some gallery pictures of it. Best, Urs
-
Hi all Last summer I started my first WIP (which can be found here) here on Model Cars Magazine with Tamiya's Honda NSX. Today I finally managed to take the finished model to my studio to take some gallery pictures. I hope you like the photographs of this beautiful car. Best, Urs
-
Hi all Thank you all for your kind comments. Yes, I have. Not too much, but here you are The wood was all done with Vallejo Model Air colors. First I airbrushed Model Air Sand, than I applied Model Air U.S. Brown and Model Air Mahagony with an old, short and bristly paintbrush. The technique is similar to drybrushing but with slightly more paint left on the brush to get some strokes. In this step it's important to brush only in one direction to get a realisitic pattern. After the paint has cured, I applied a coat of Tamiya Clear Orange. The floor was made exactly the same way, but before the Clear Orange had completley dried, I added some Tamiya Smoke over it.
-
Thank you David The gold trim is a mix of airbrushing and hand painting because the airbrushing did not work out that well... Urs
-
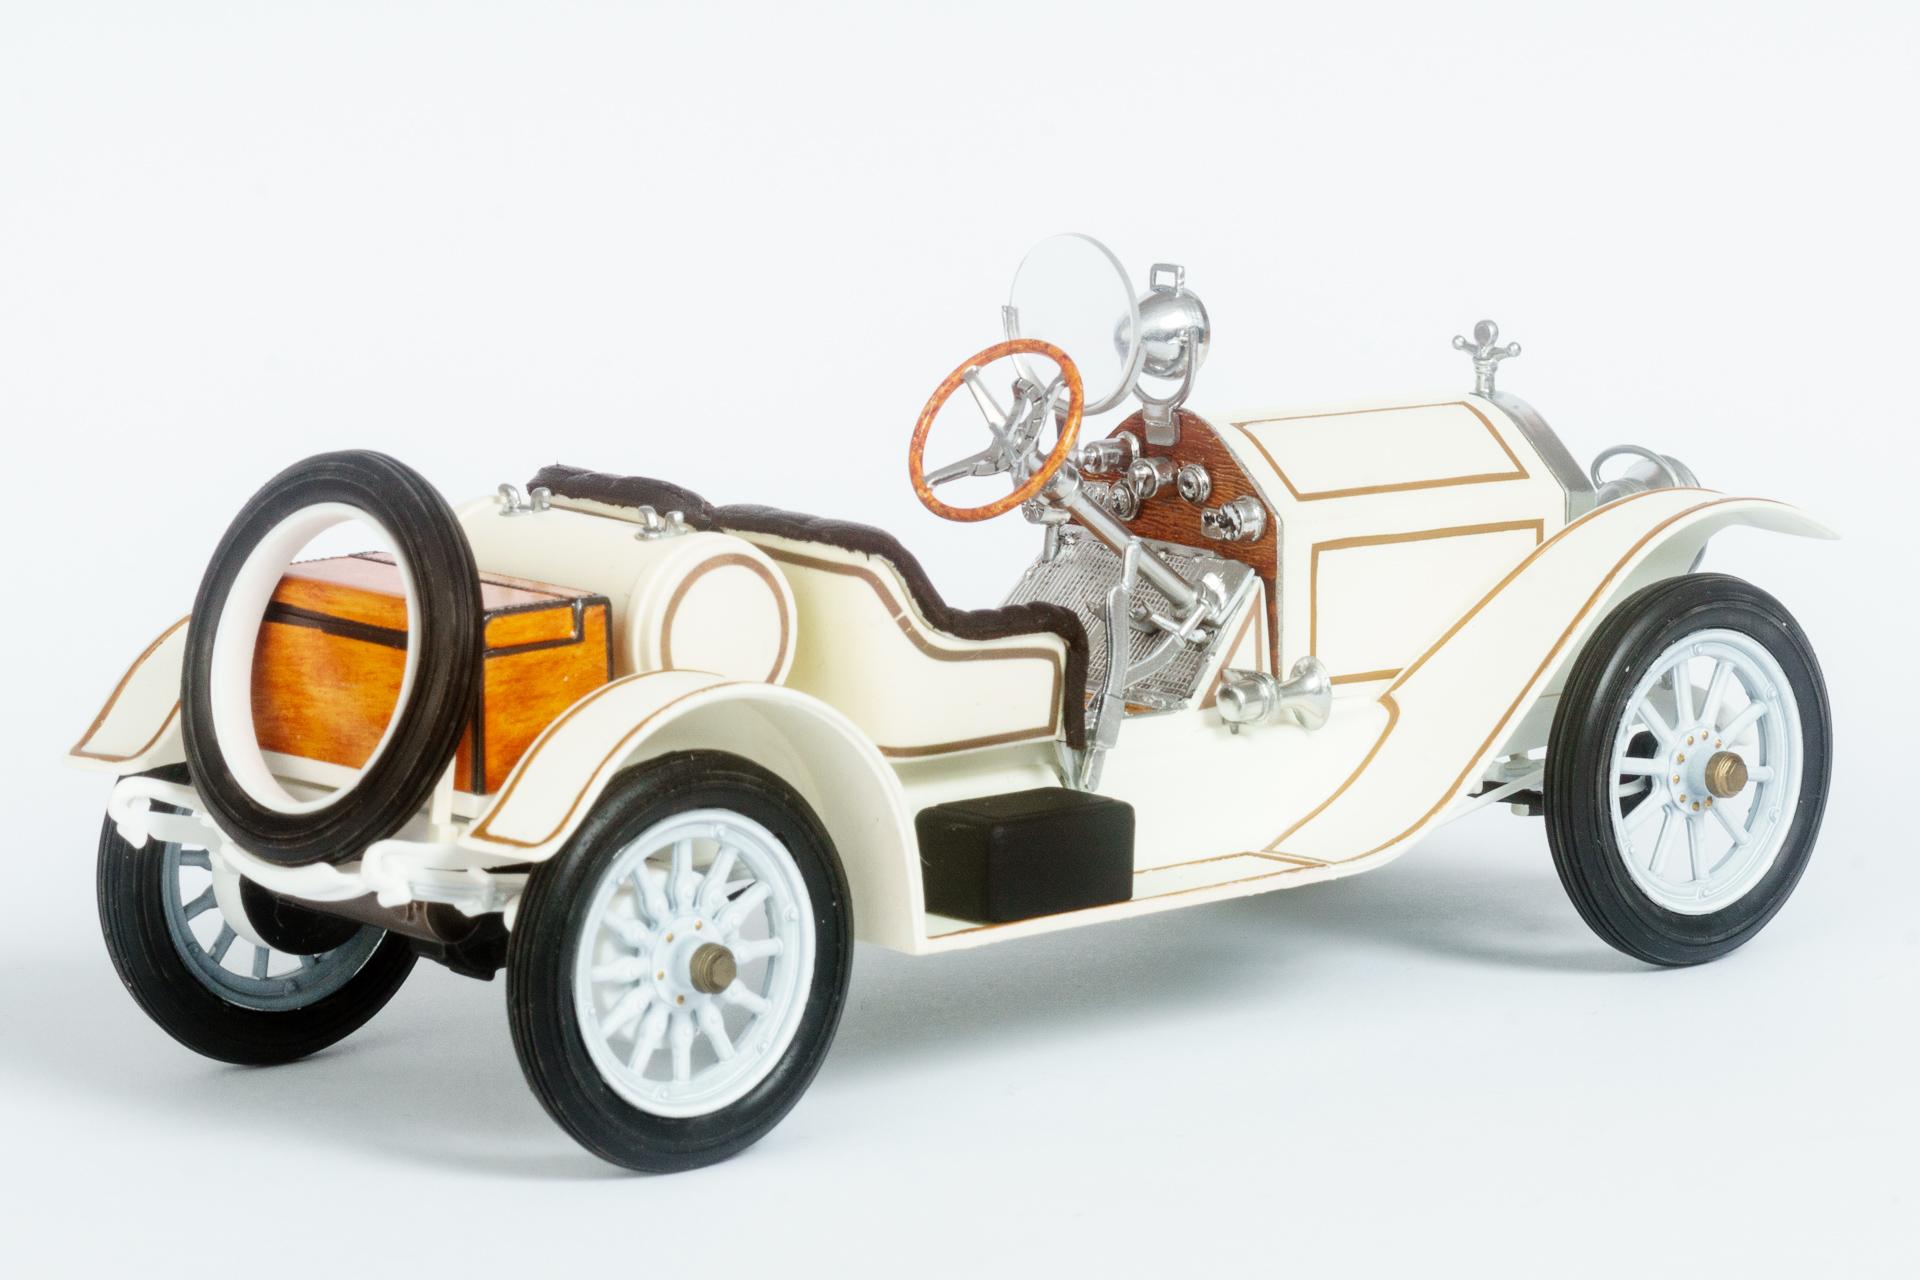
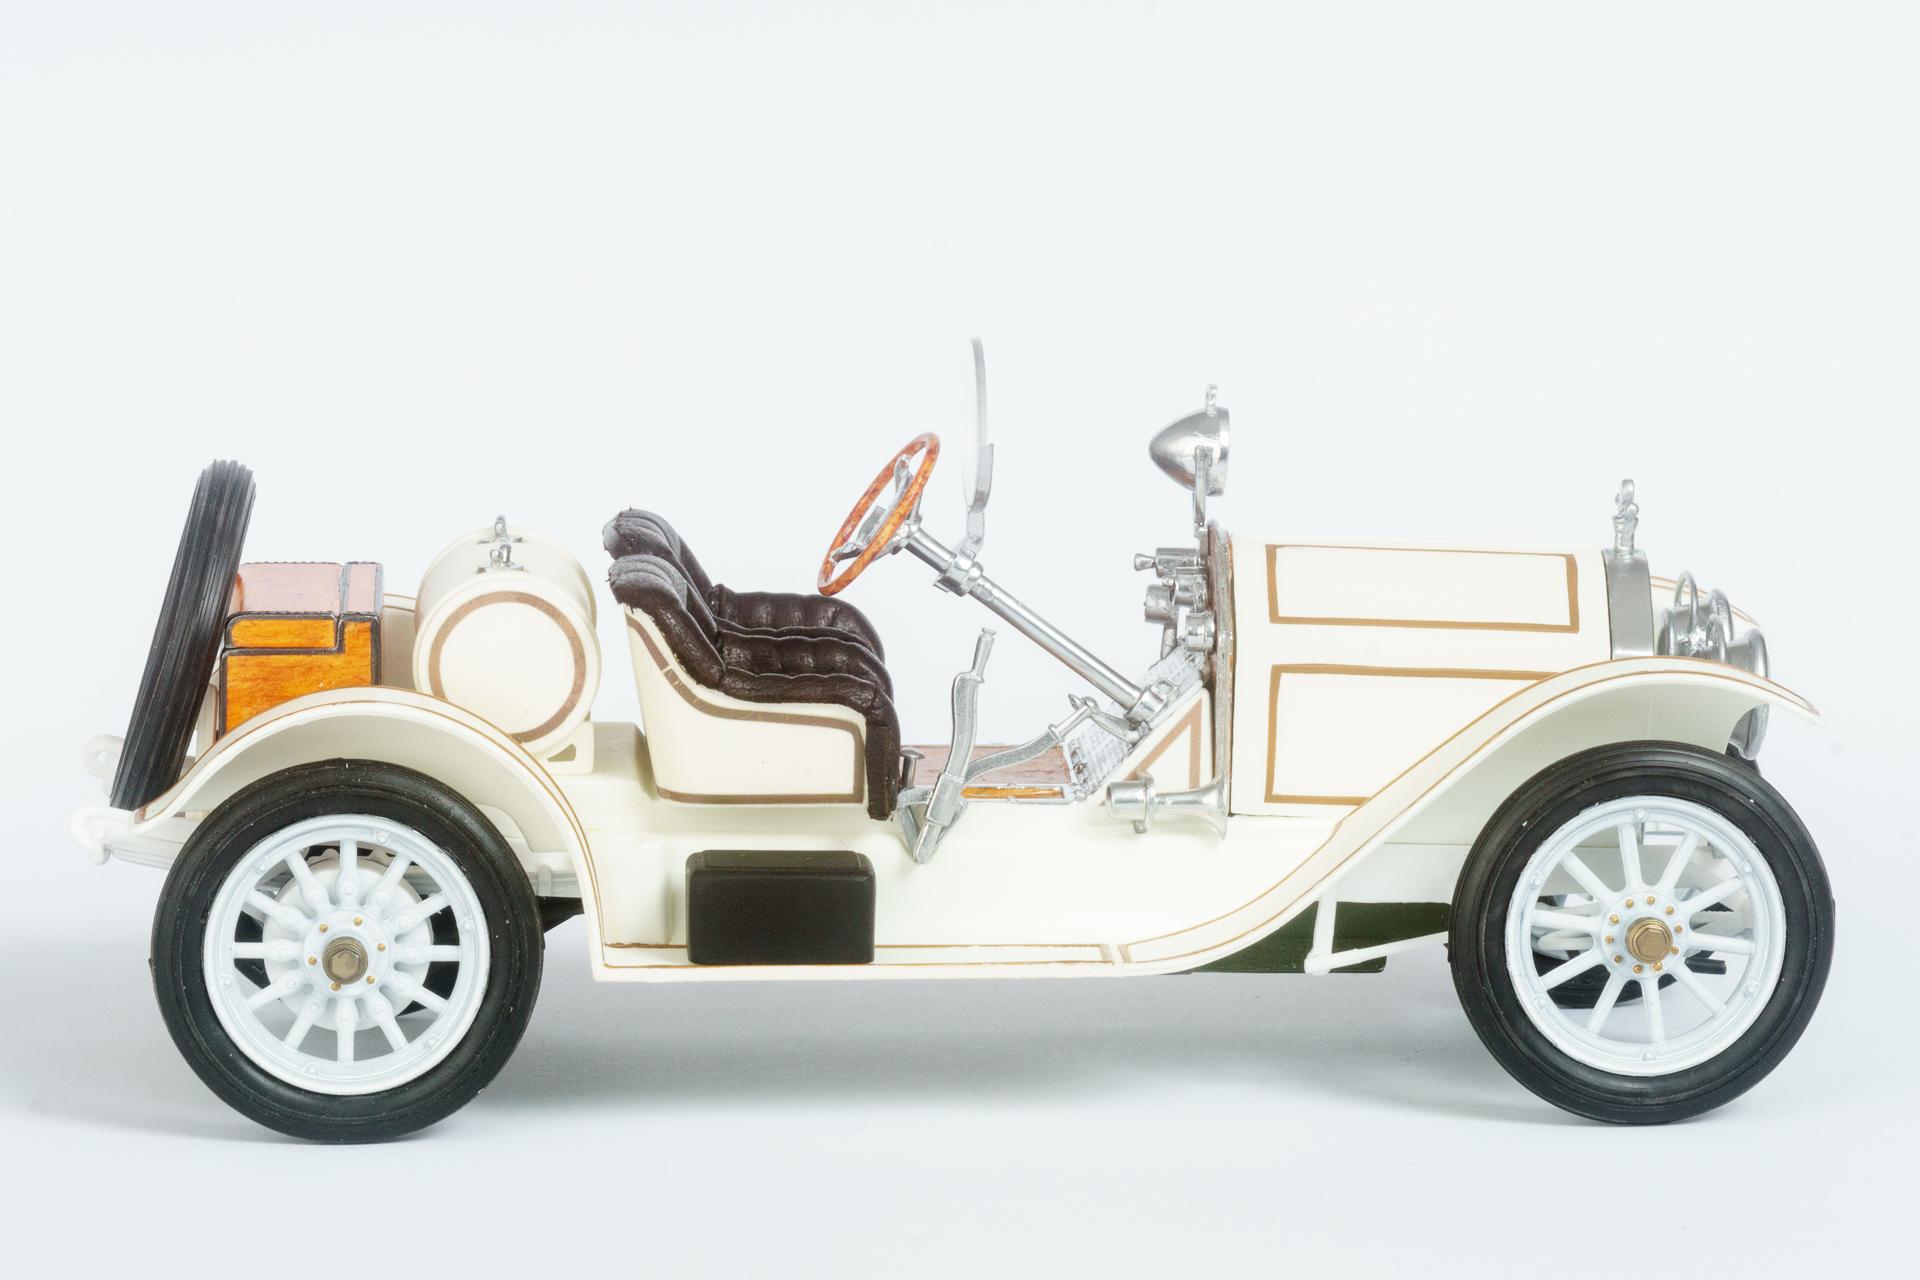
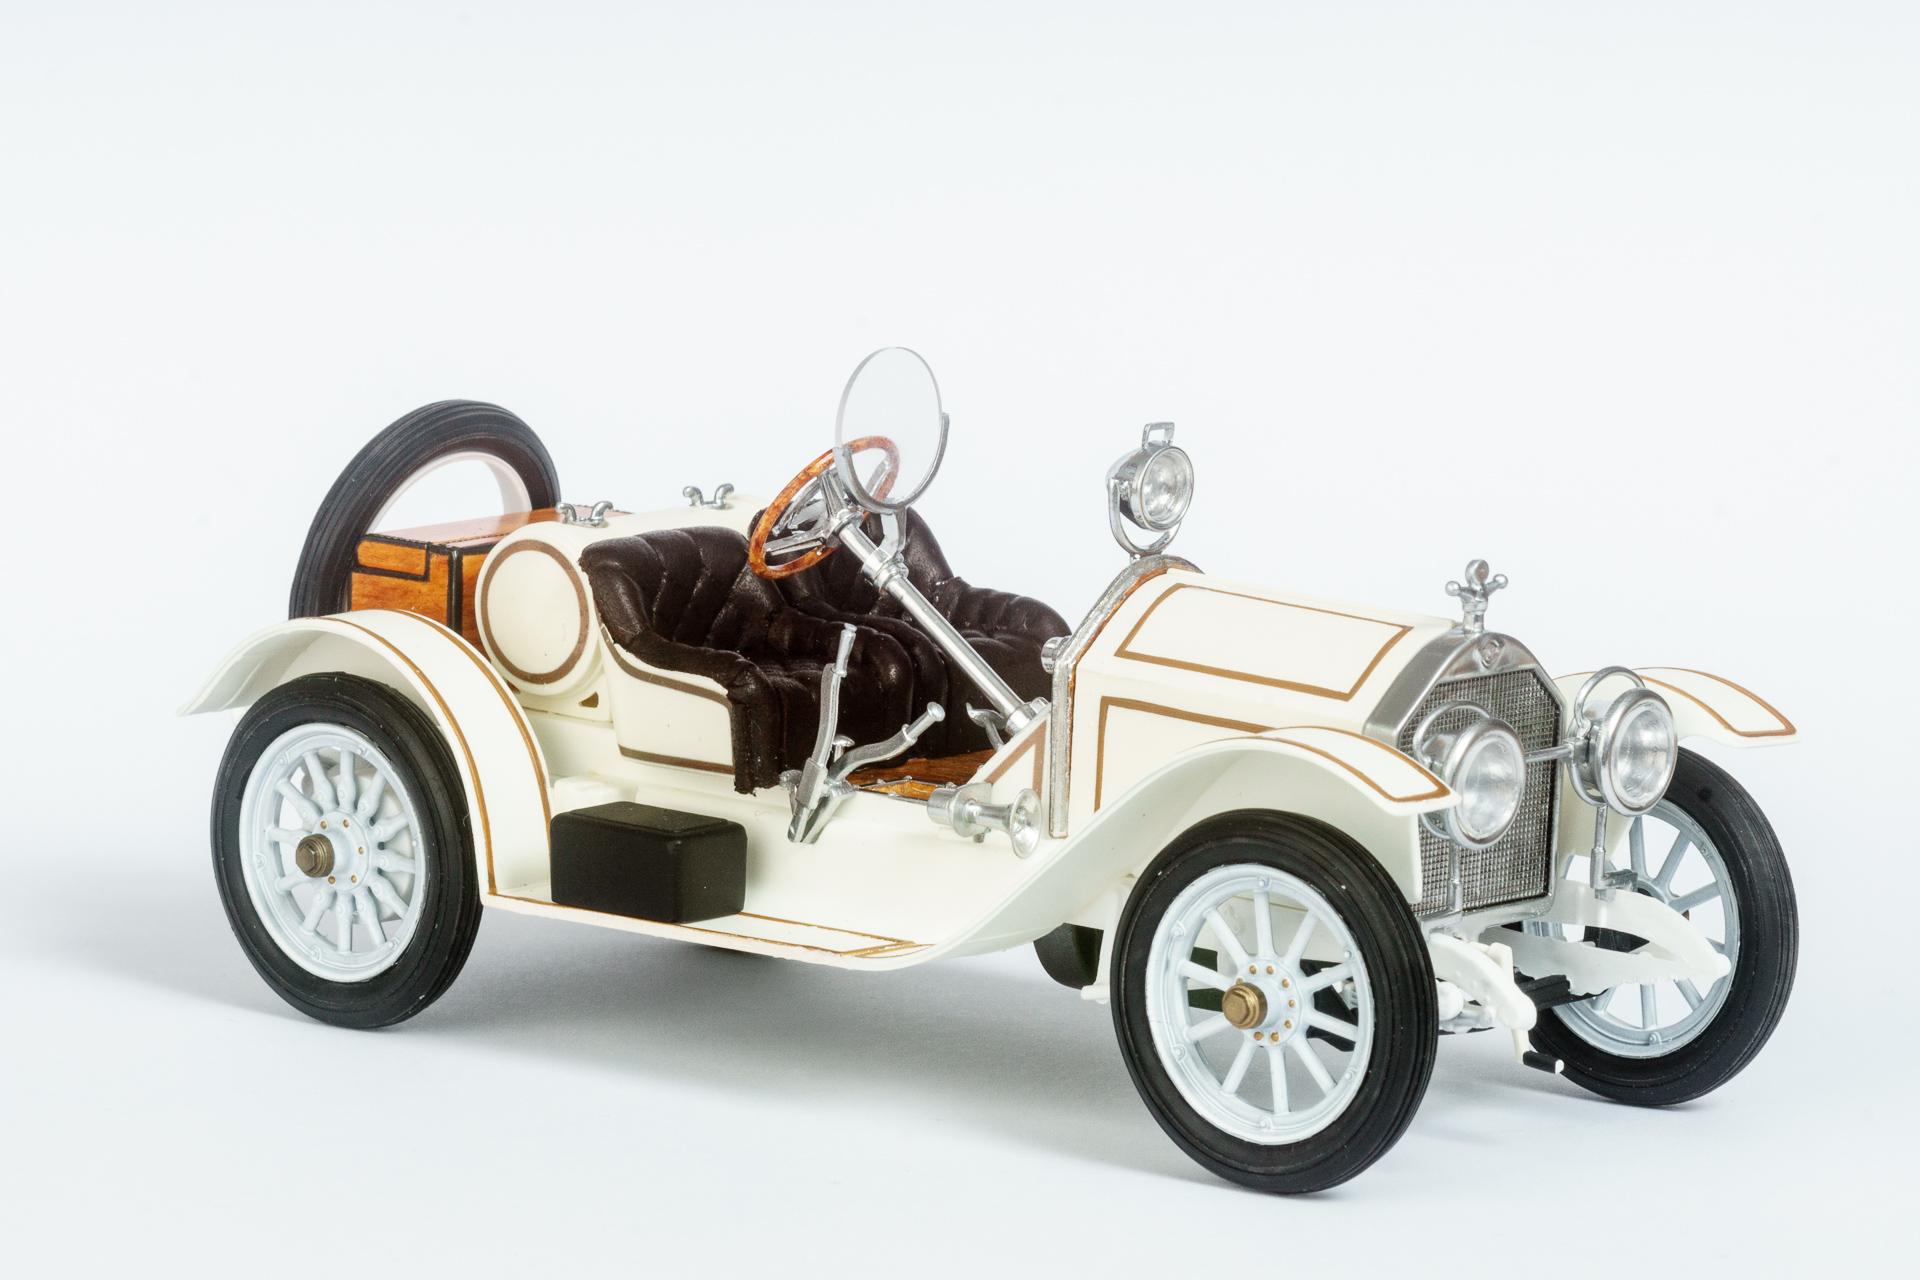
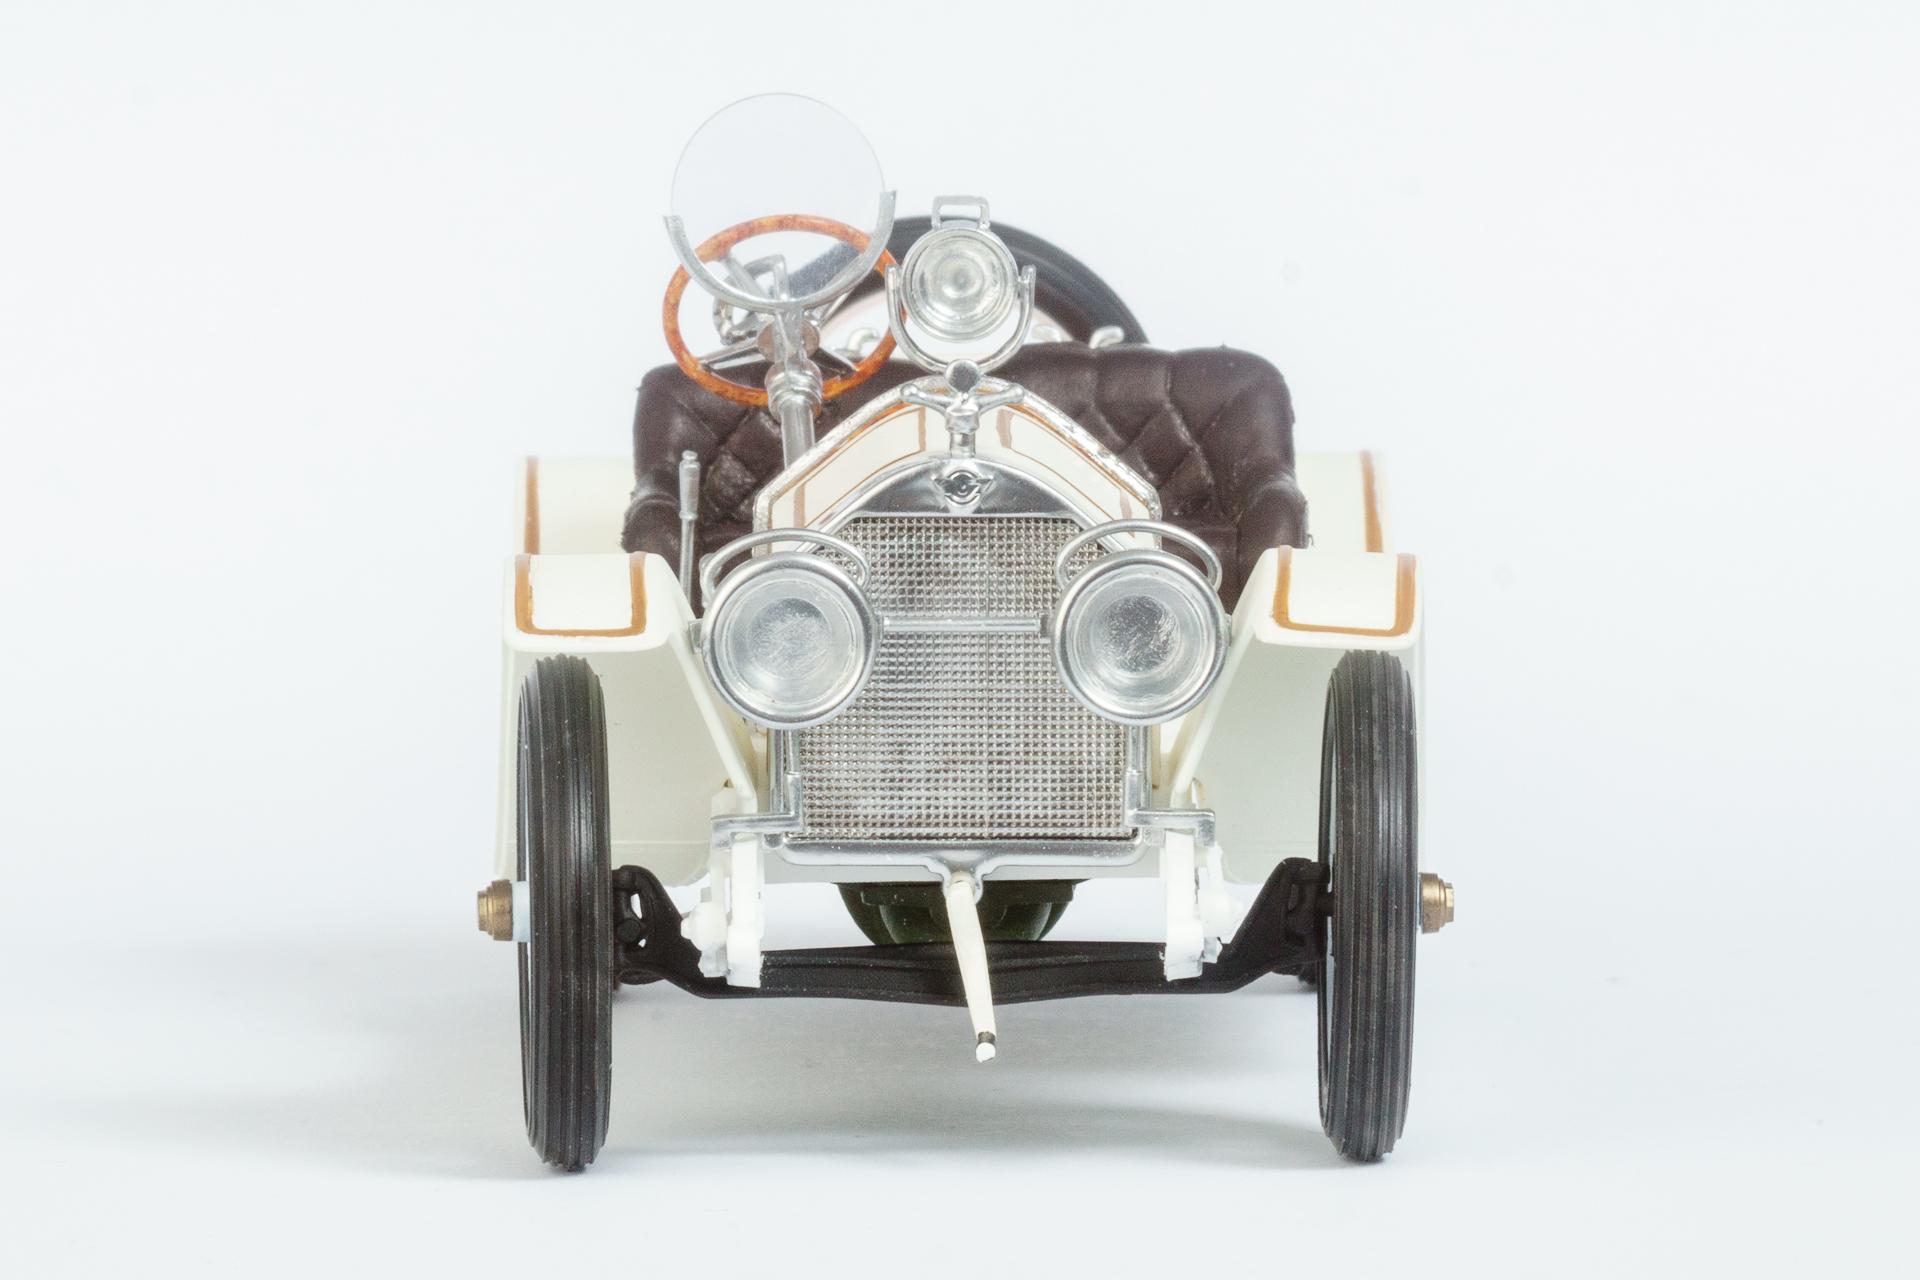
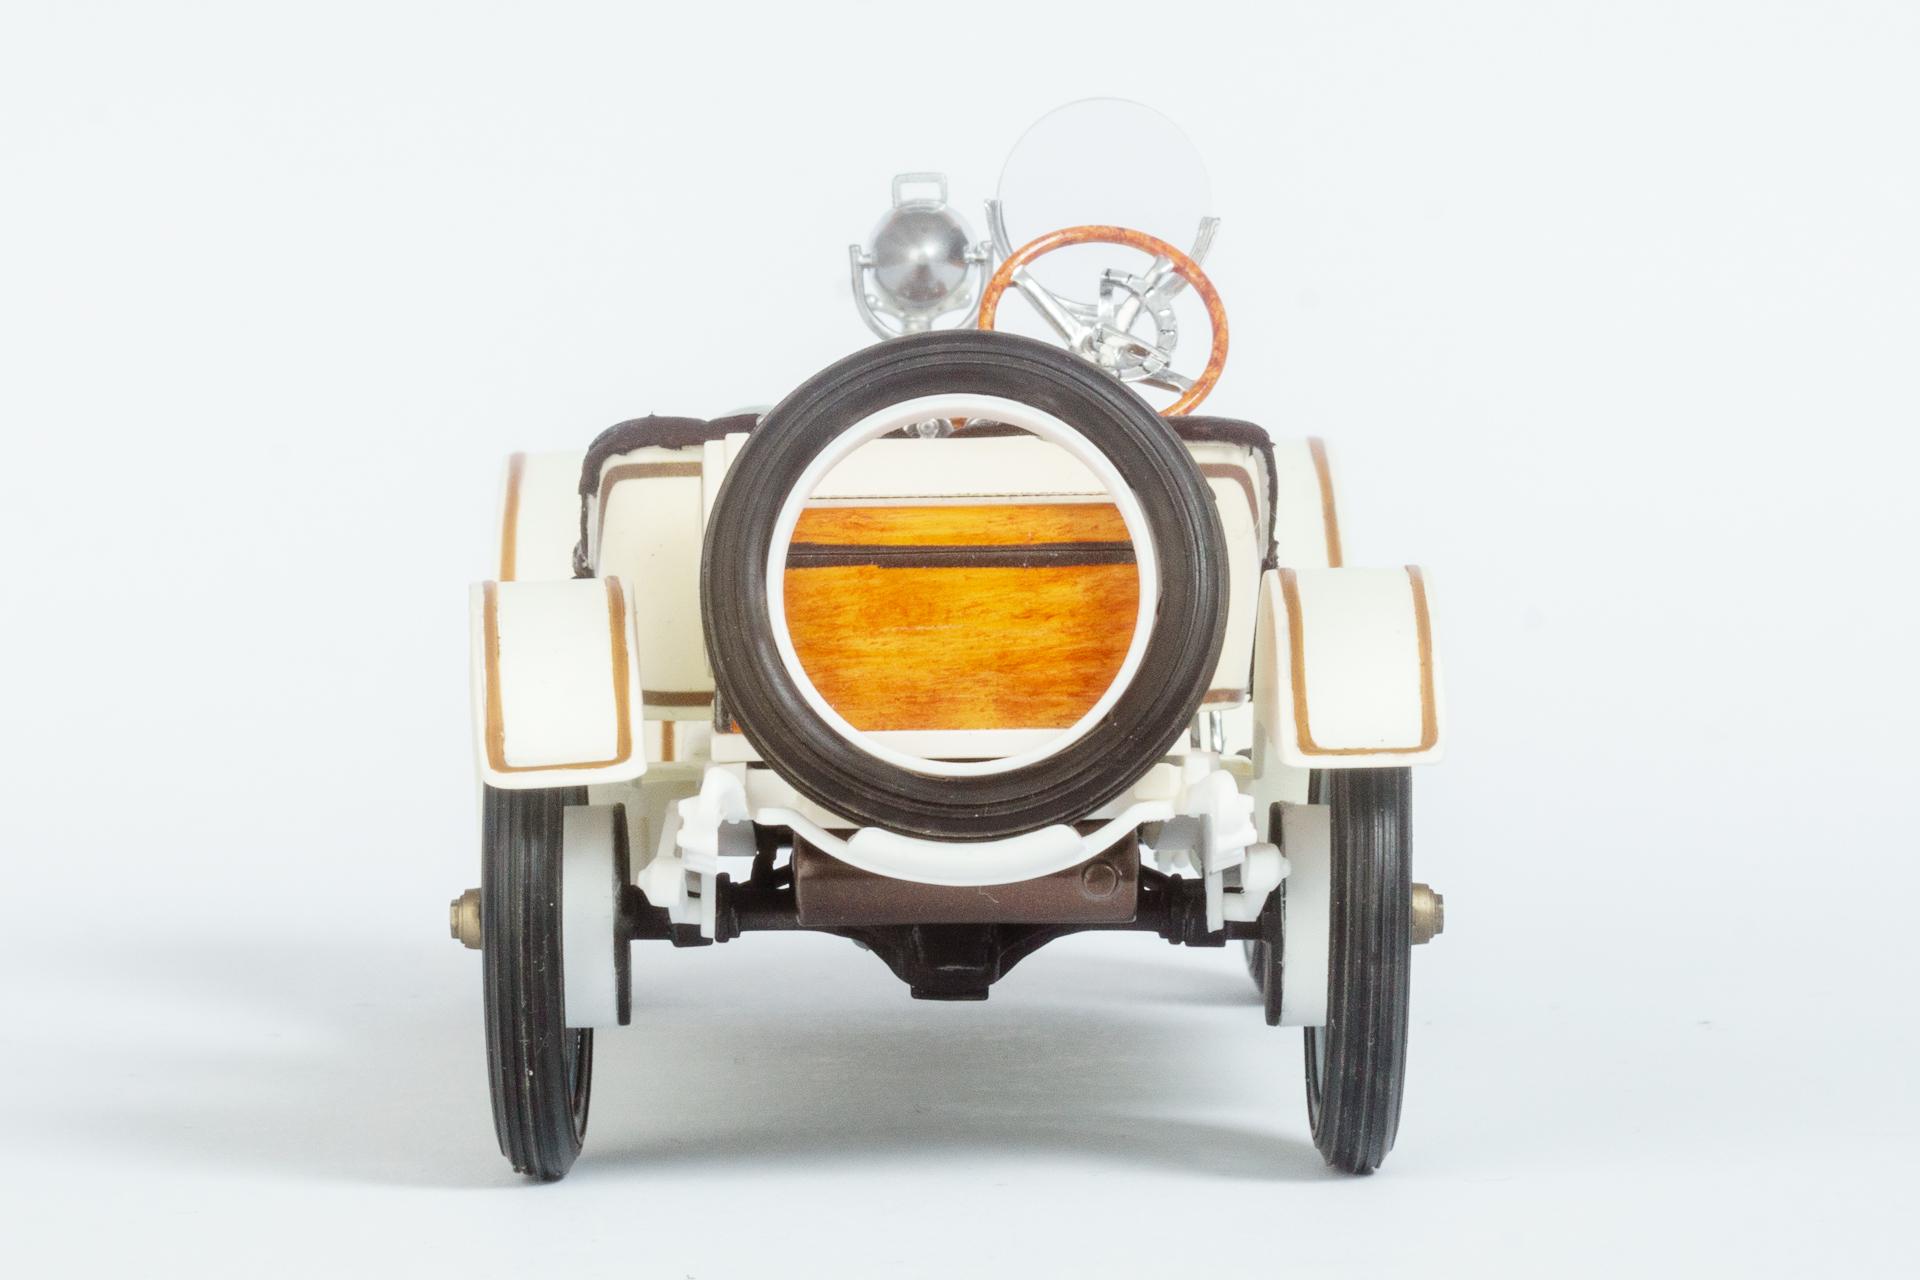
Hi all Today I'll show you pictures from one of my latest builds, a 1914 Stutz Bearcat. The kit was from mpc and according to scalemates it was produced in 1974, which was quite noticeable in some points during building. The seats have been upholstered with very thin genuine leather from an old glove. I hope you enjoy the pics. Don't hold back with critique and plaudits Urs
-
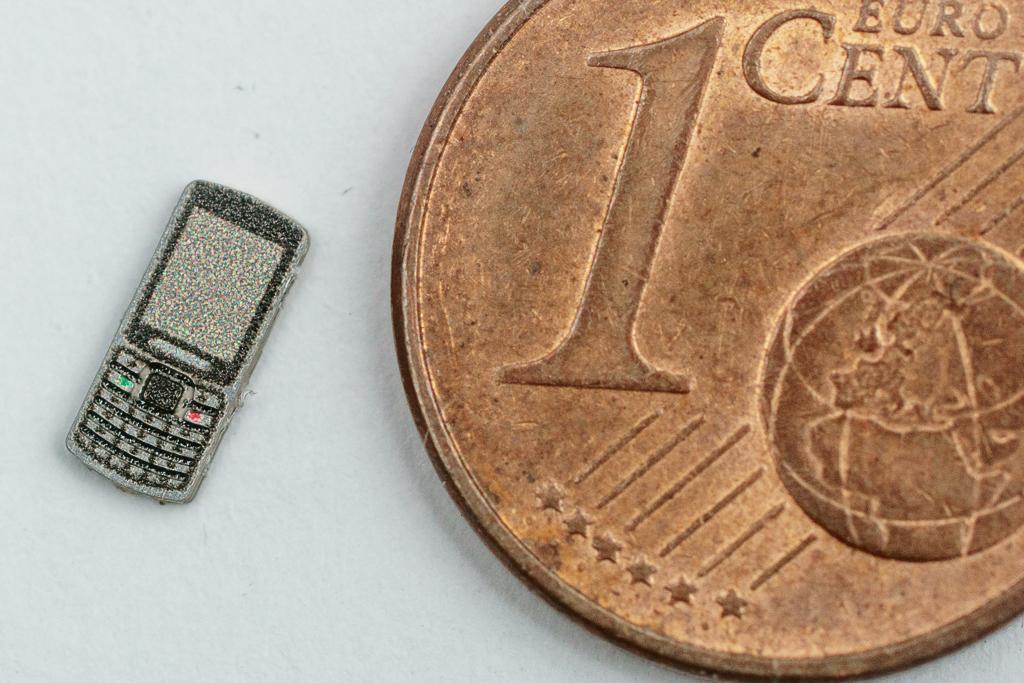
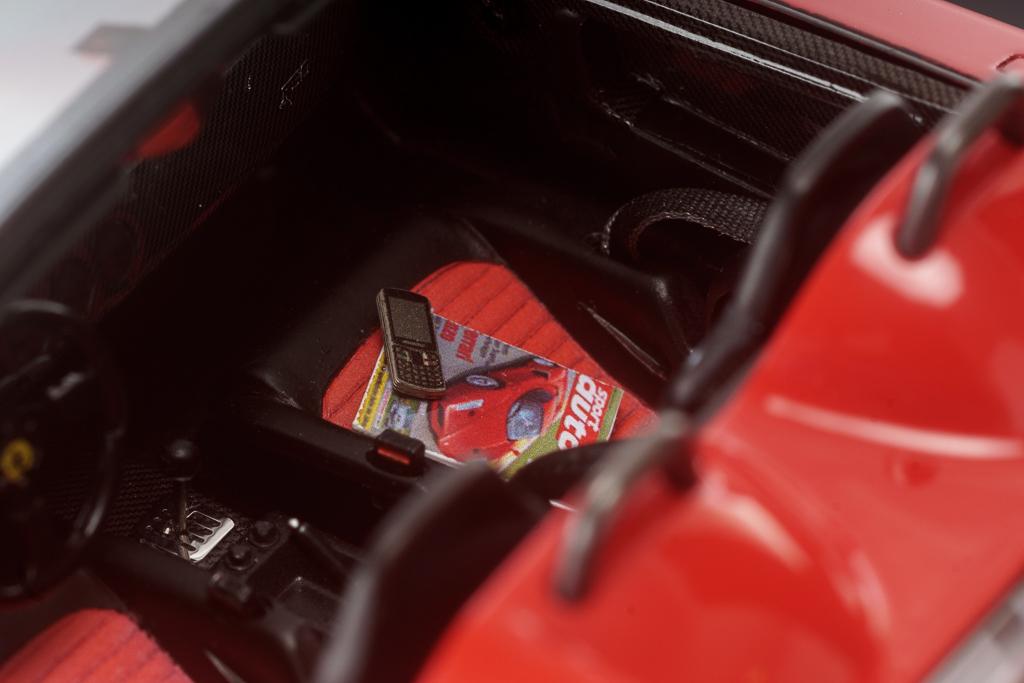
Thank you all for your kind comments Honestly, I have no idea It was in a set of PE cell phones and seemed to be the best match for a car of this period and price range. Here you can see it a bit larger and more from the front
-
Very nice build and a beautiful color scheme. I really love it.
-
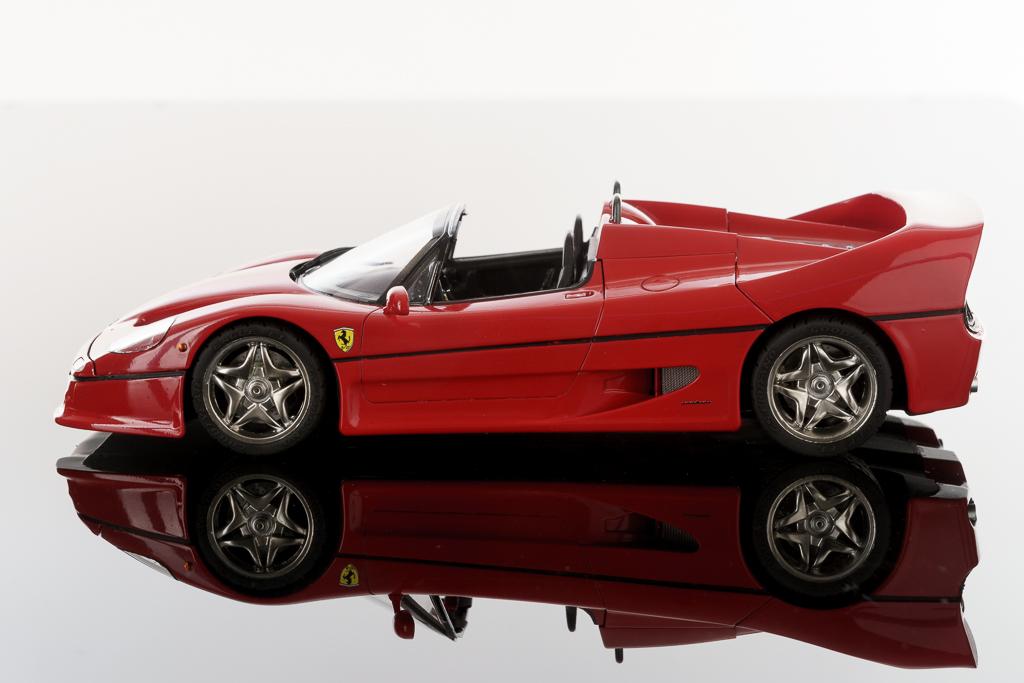
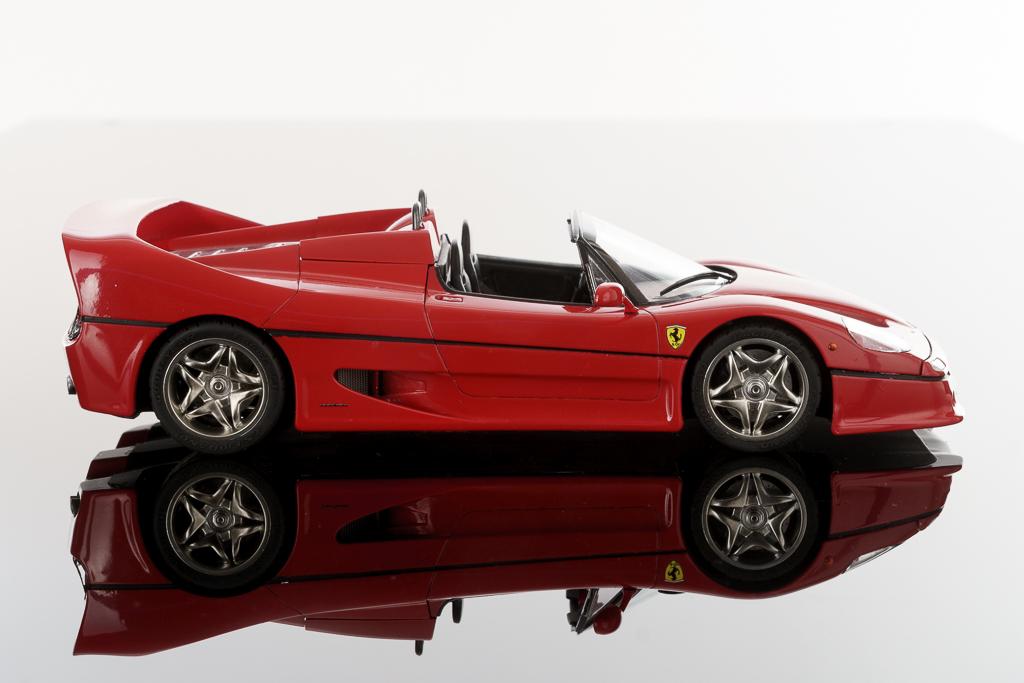
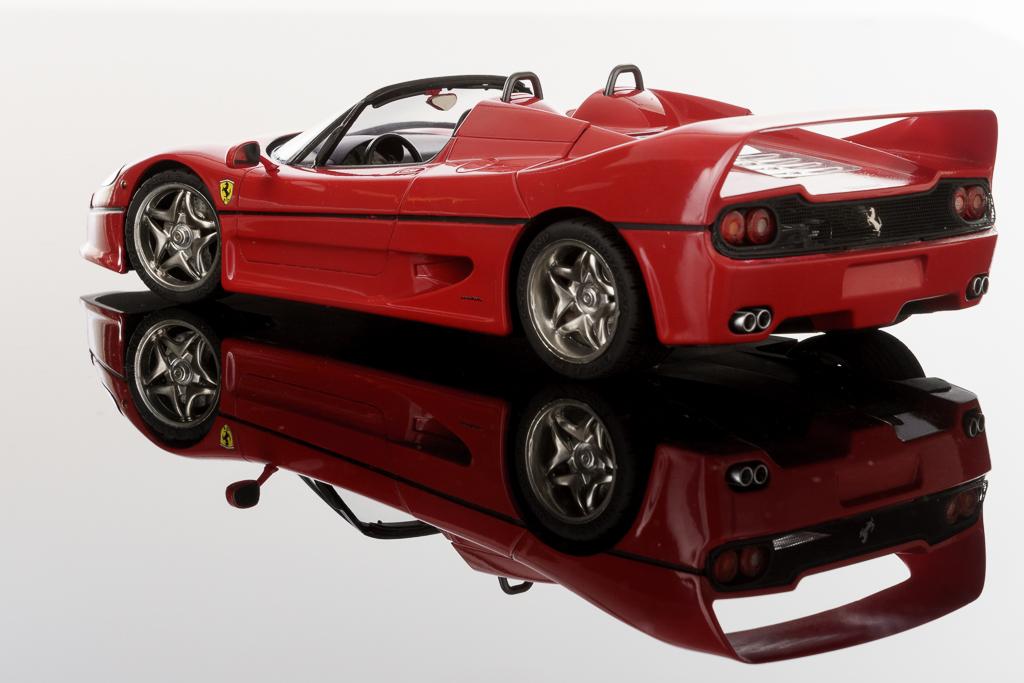
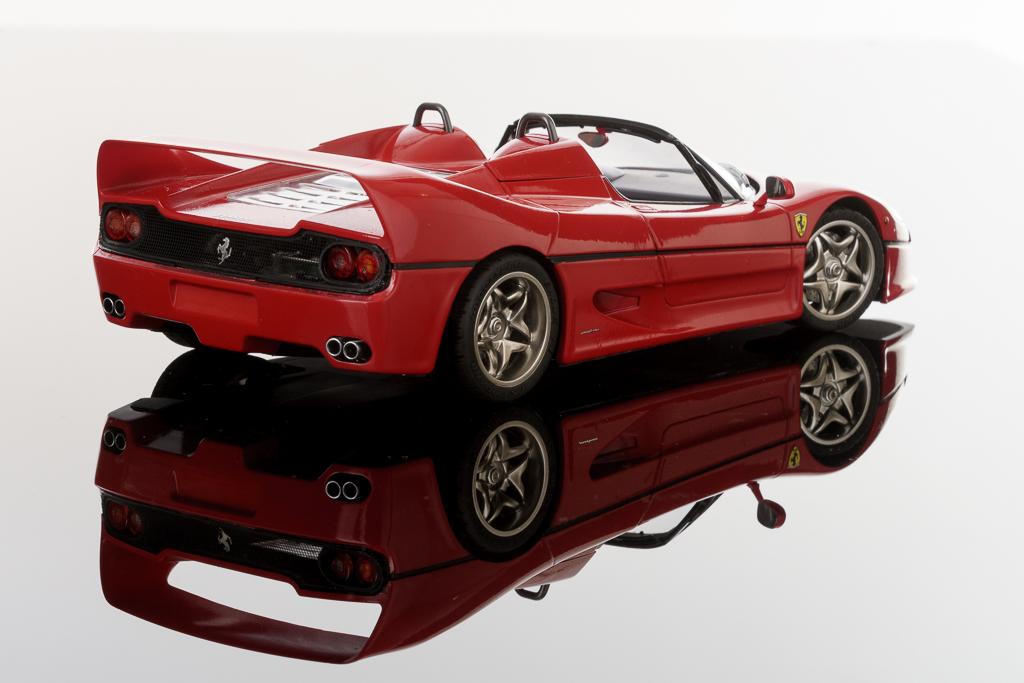
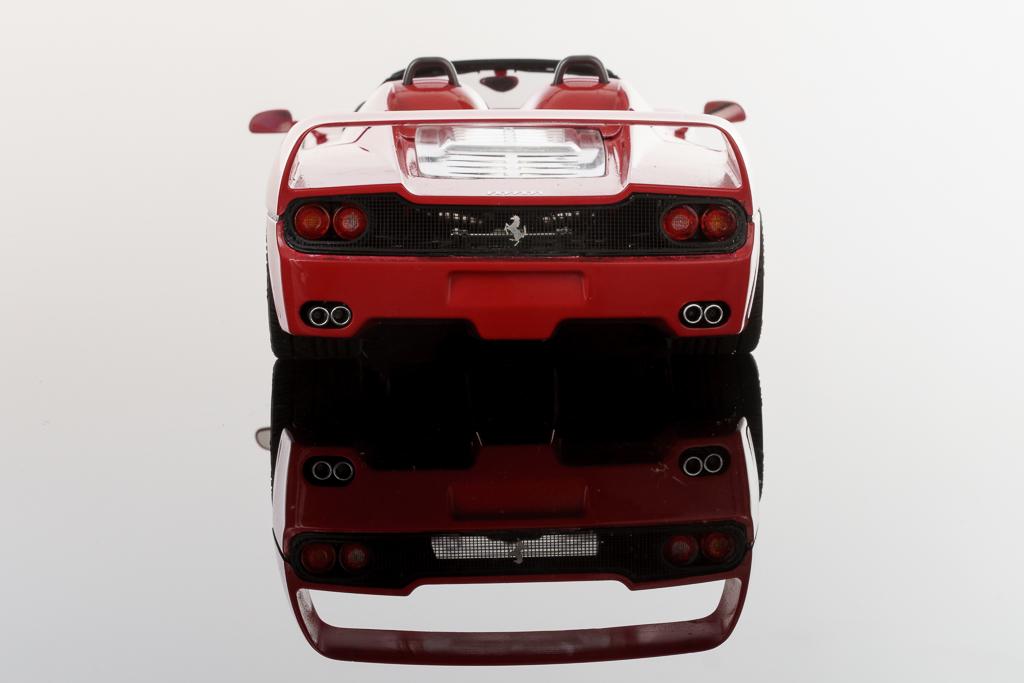
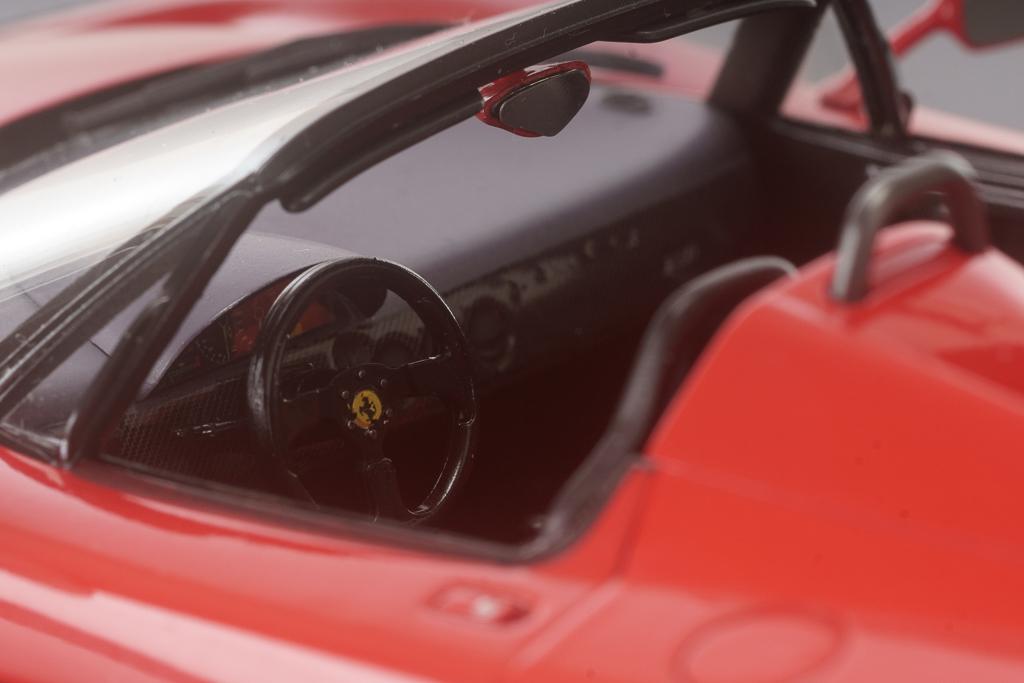
Hi all I just noticed that I promised more pics from my last visit at the studio's long time ago and didn't show anything. Here are now the pics from my Ferrari F50. The kit was from Tamiya, enhanced with the detail set by Hobby Design and a mobile phone by Czech Truck Model. Regards, Urs