harti20
-
Posts
269 -
Joined
-
Last visited
Content Type
Profiles
Forums
Events
Gallery
Everything posted by harti20
-
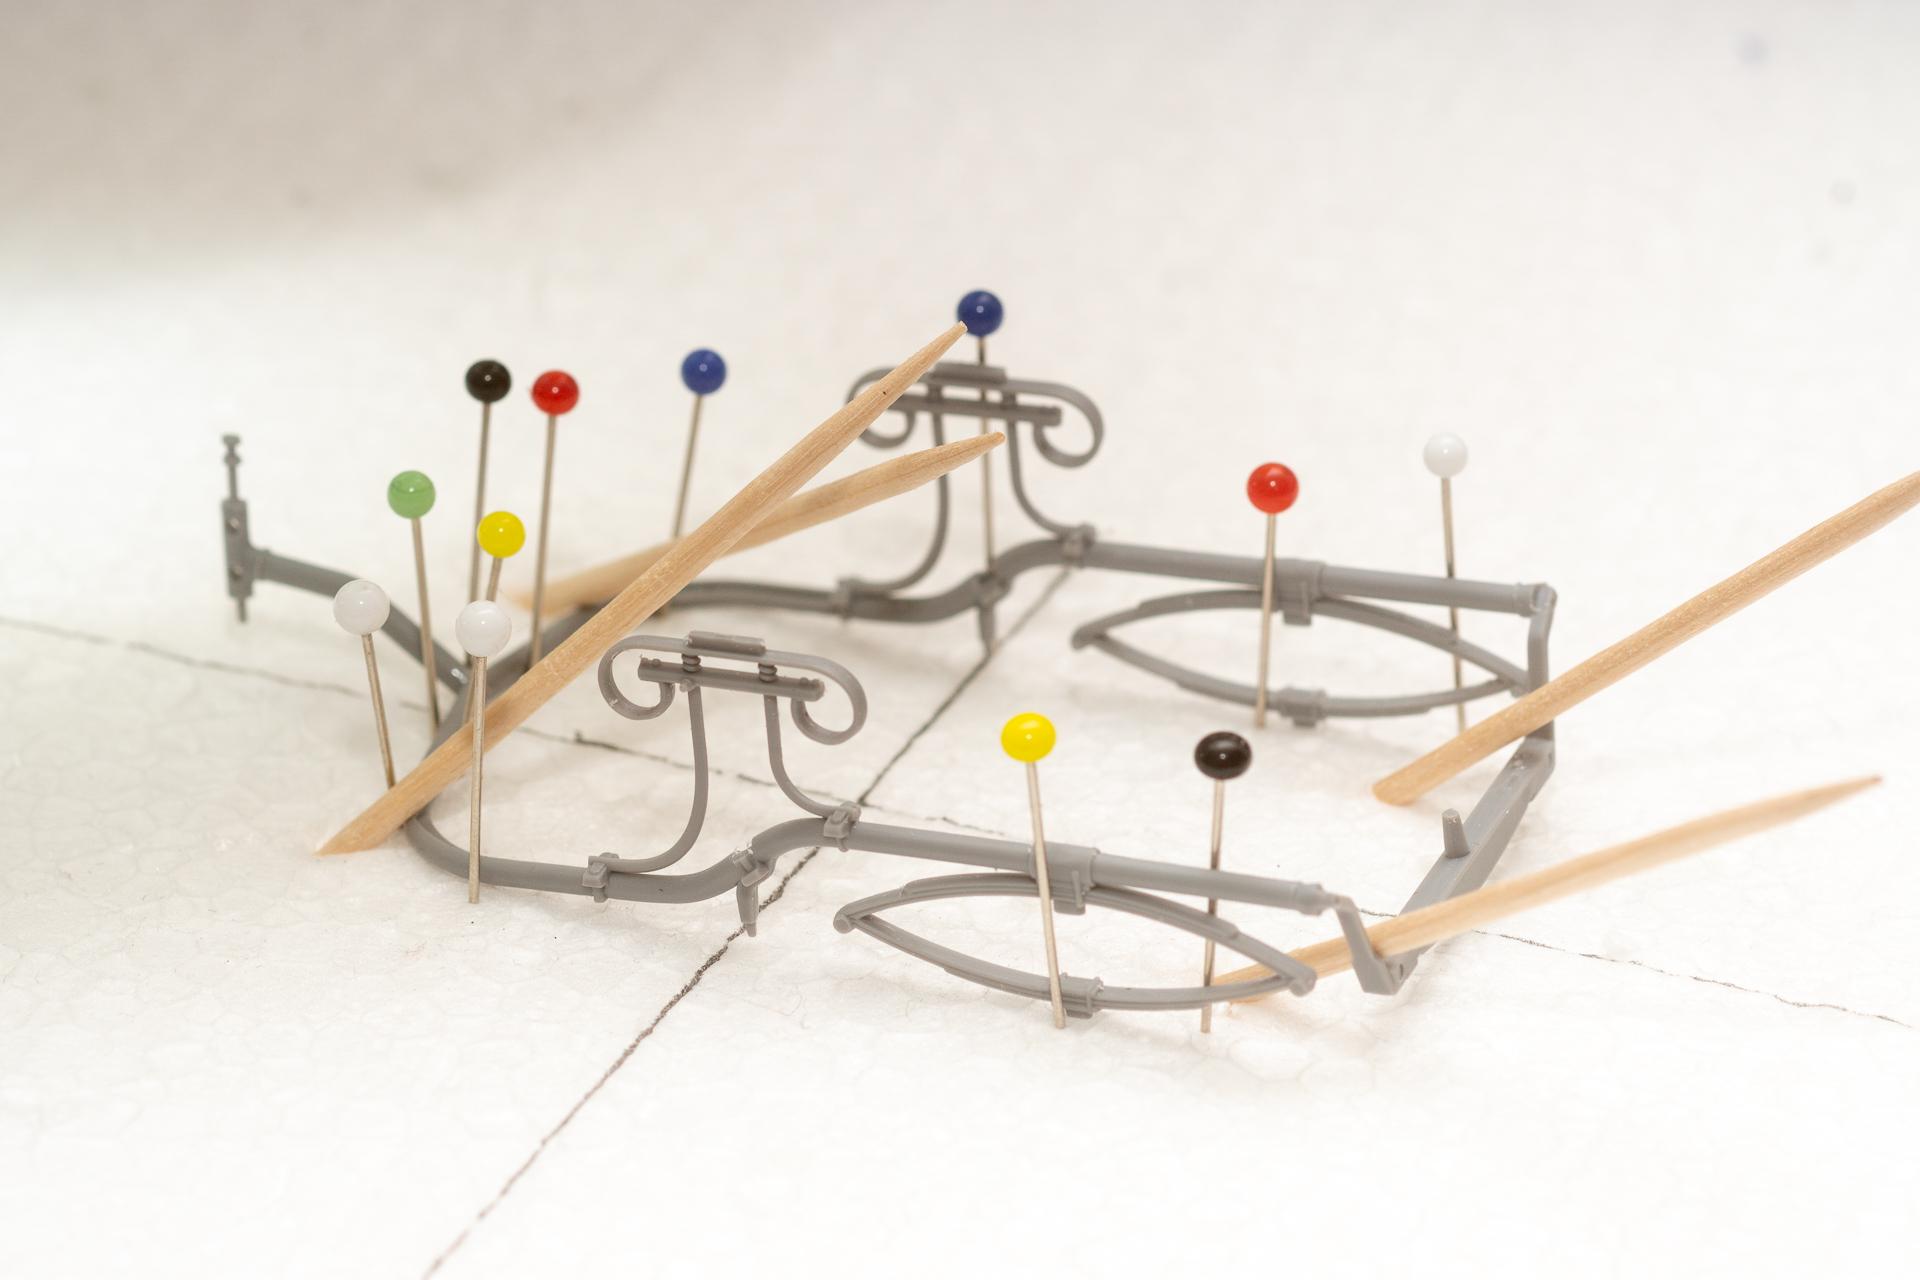
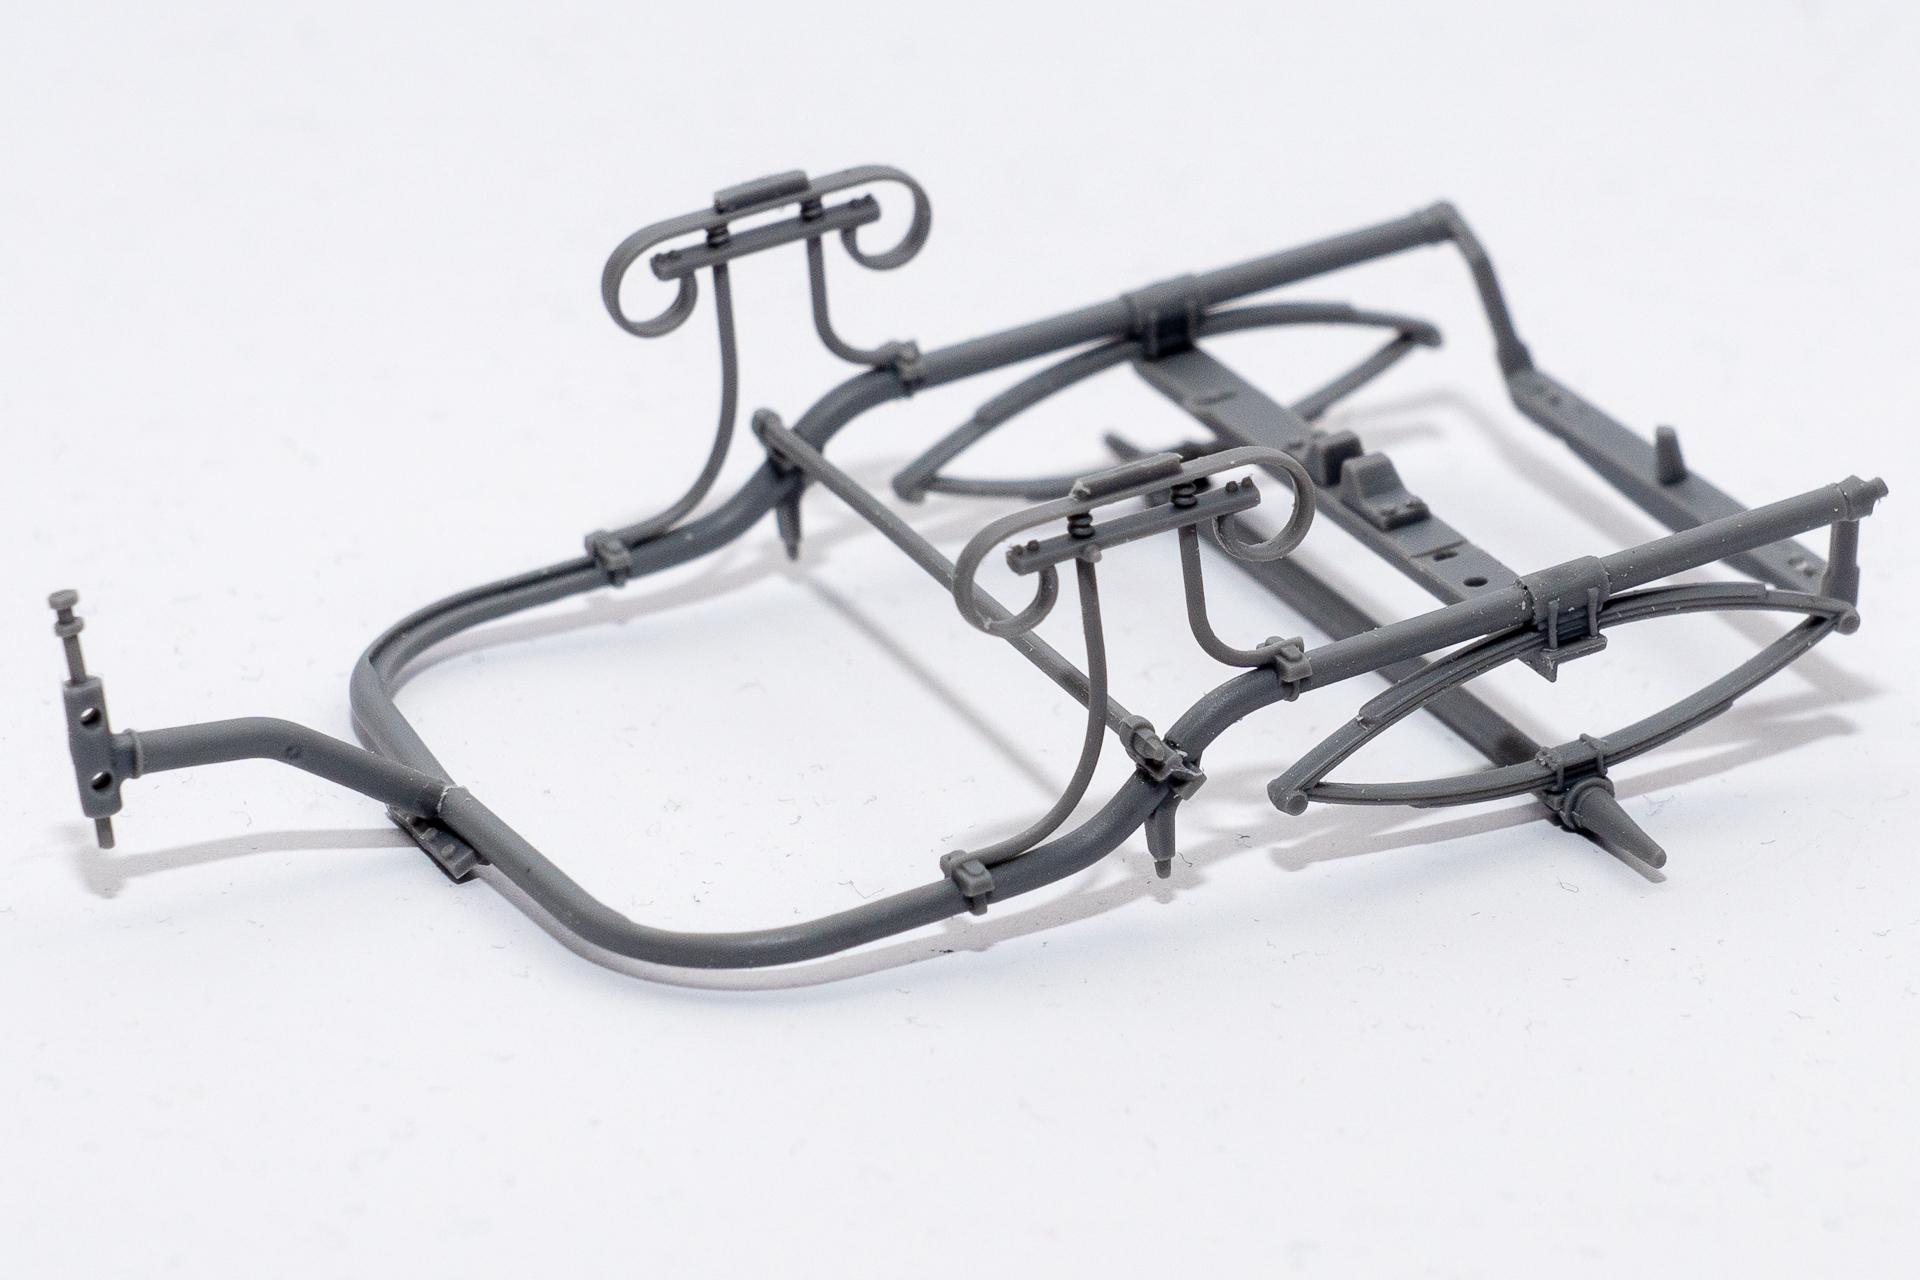
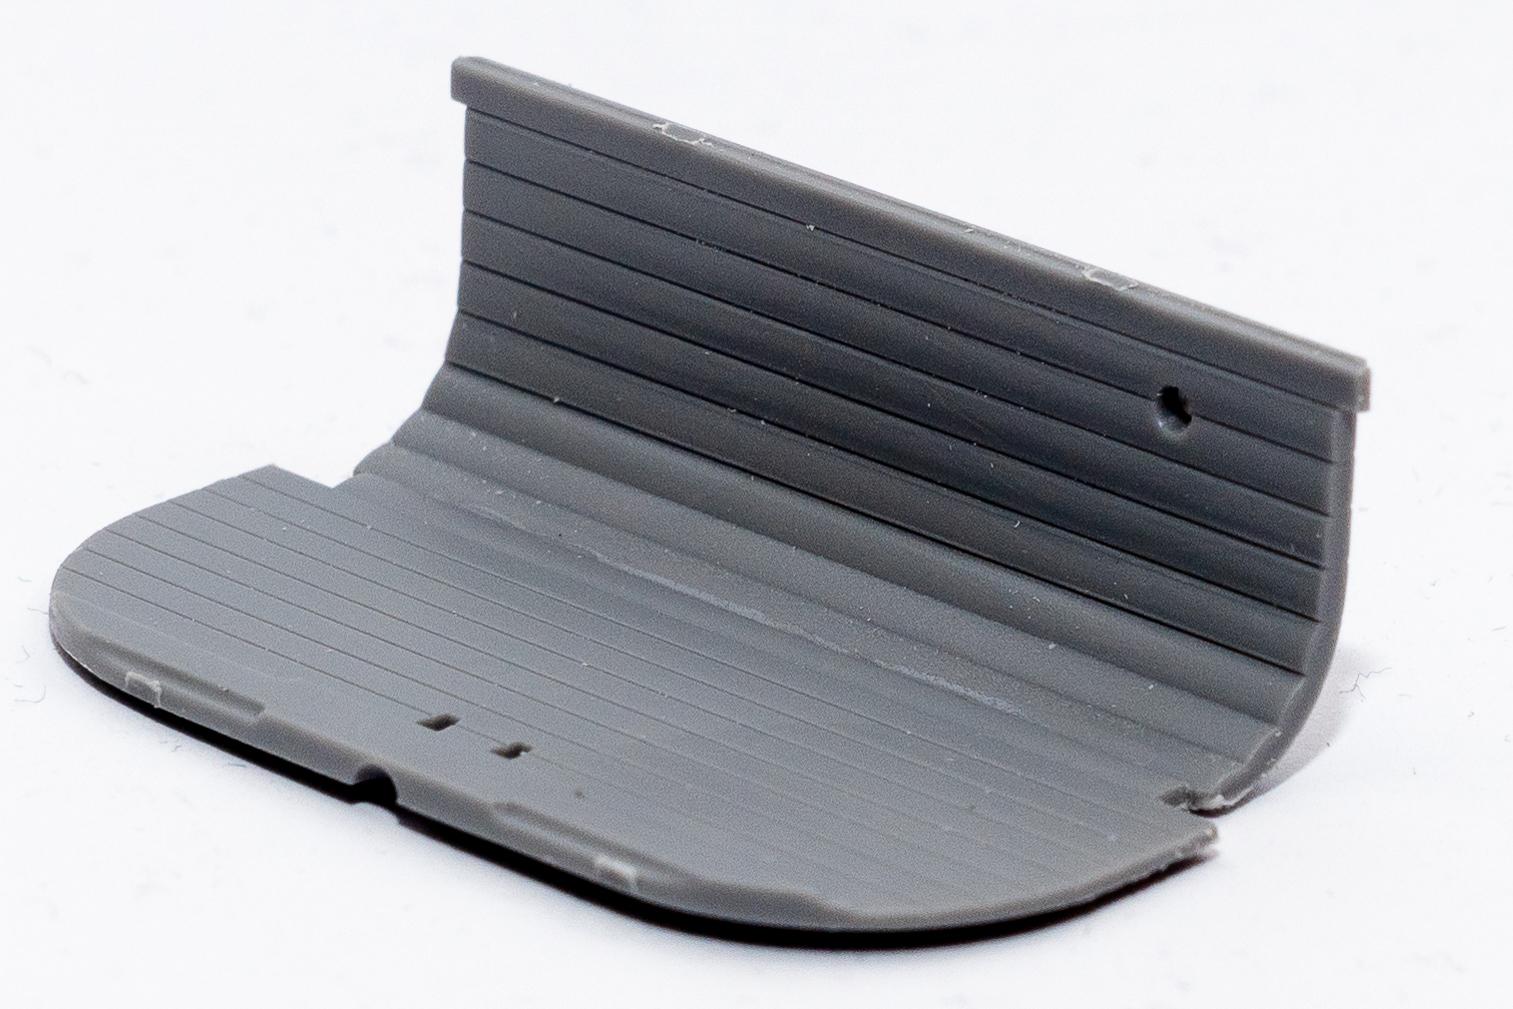
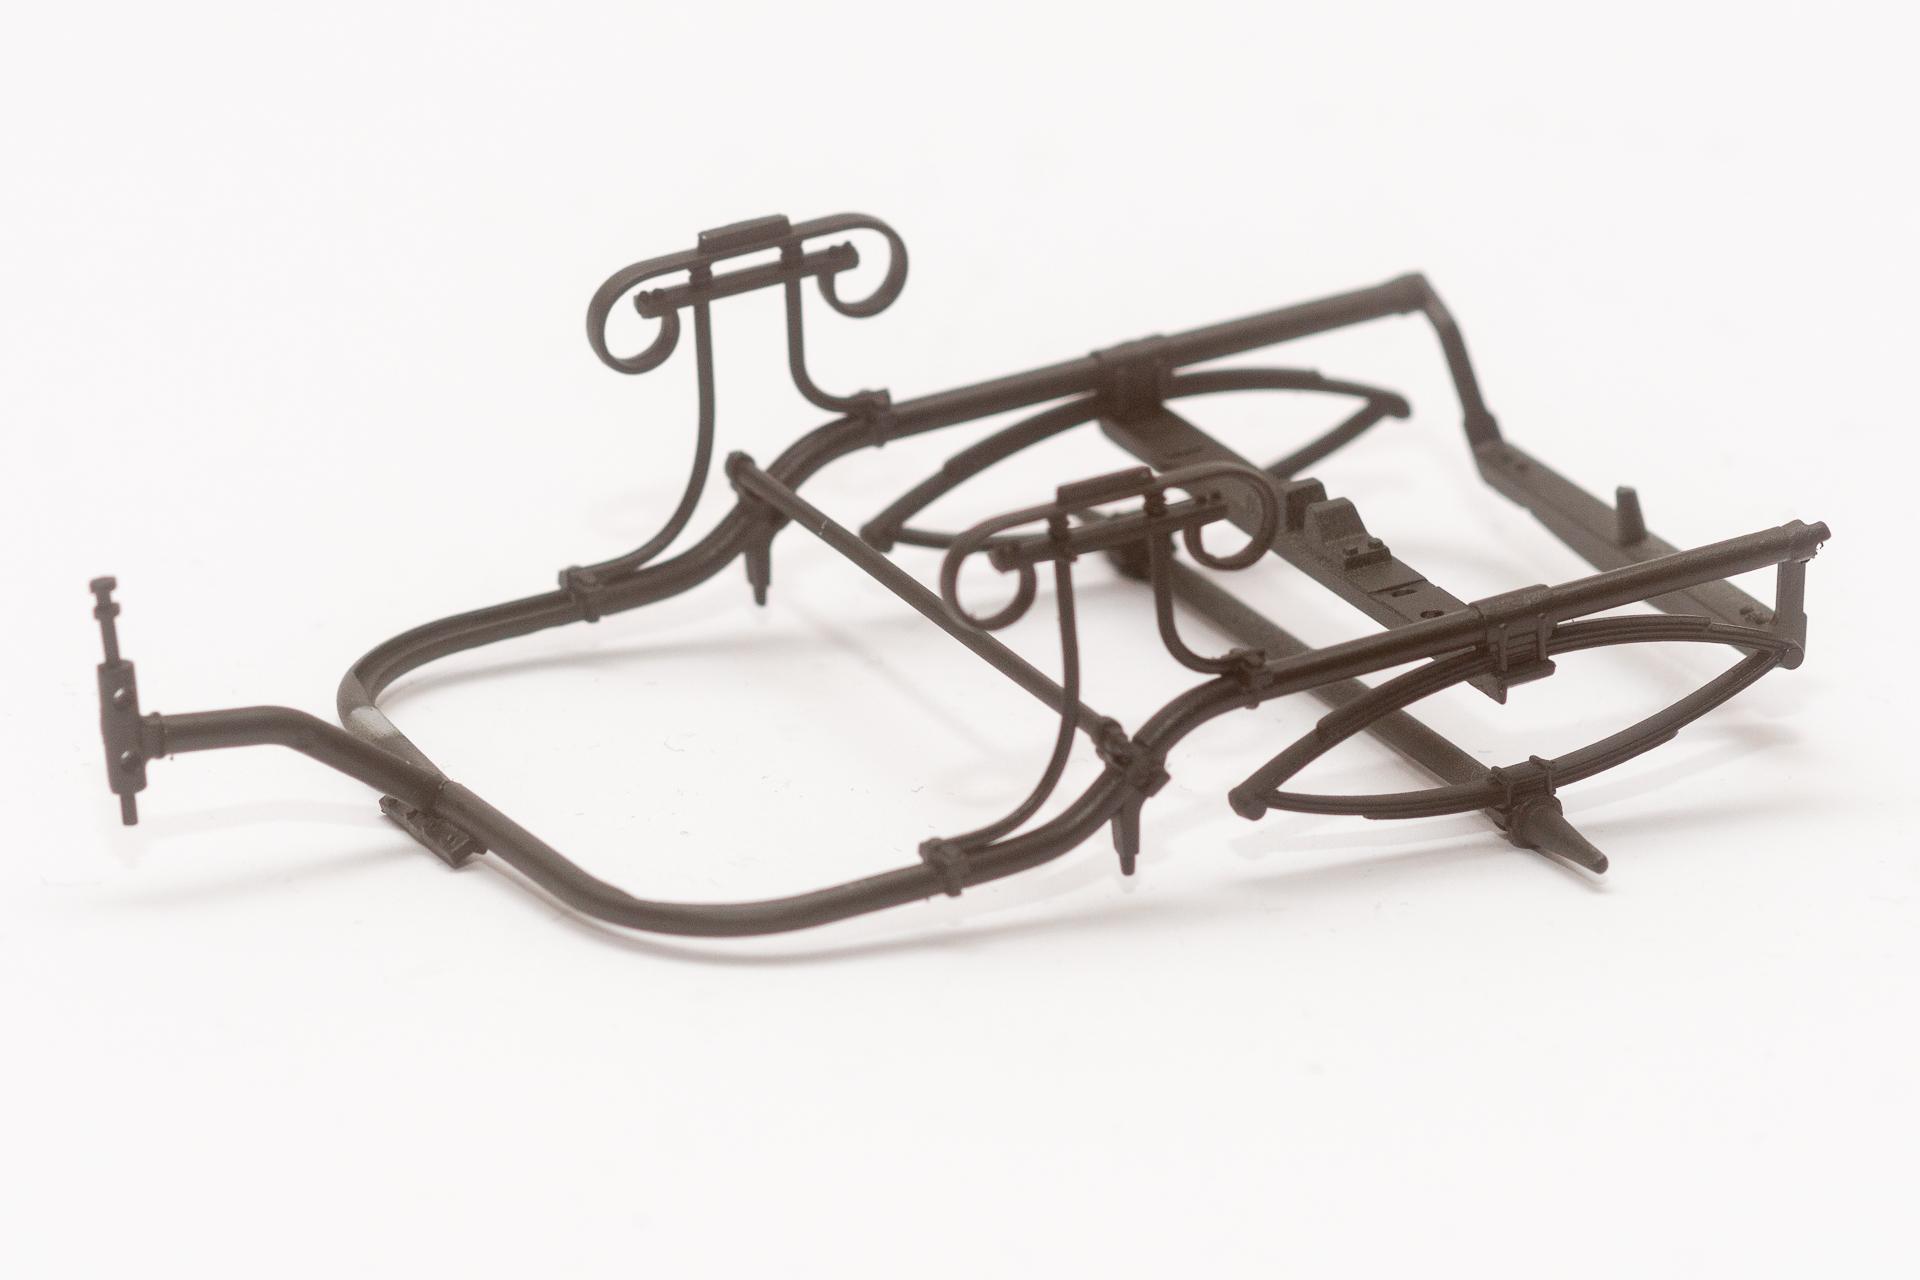
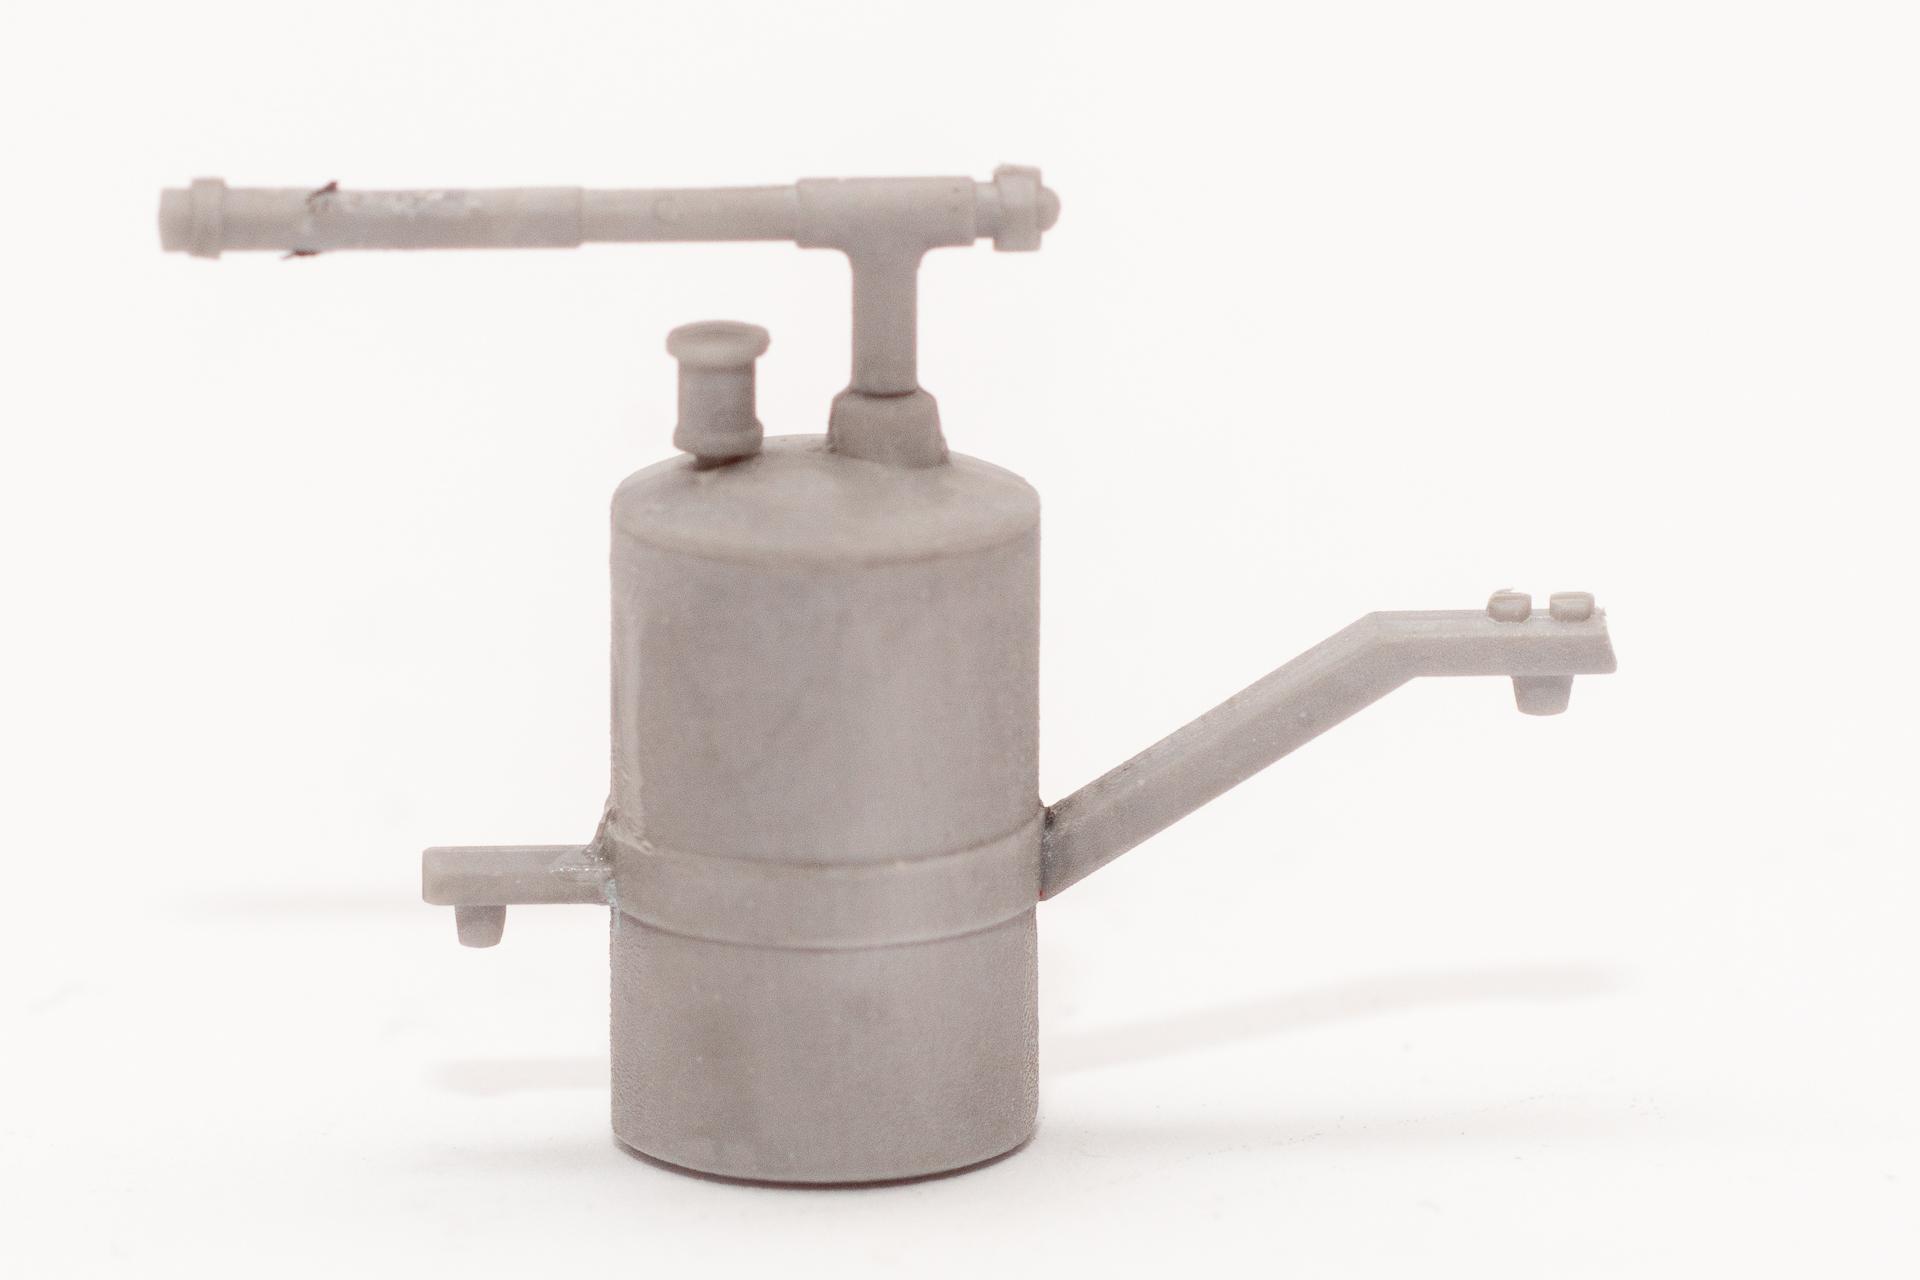
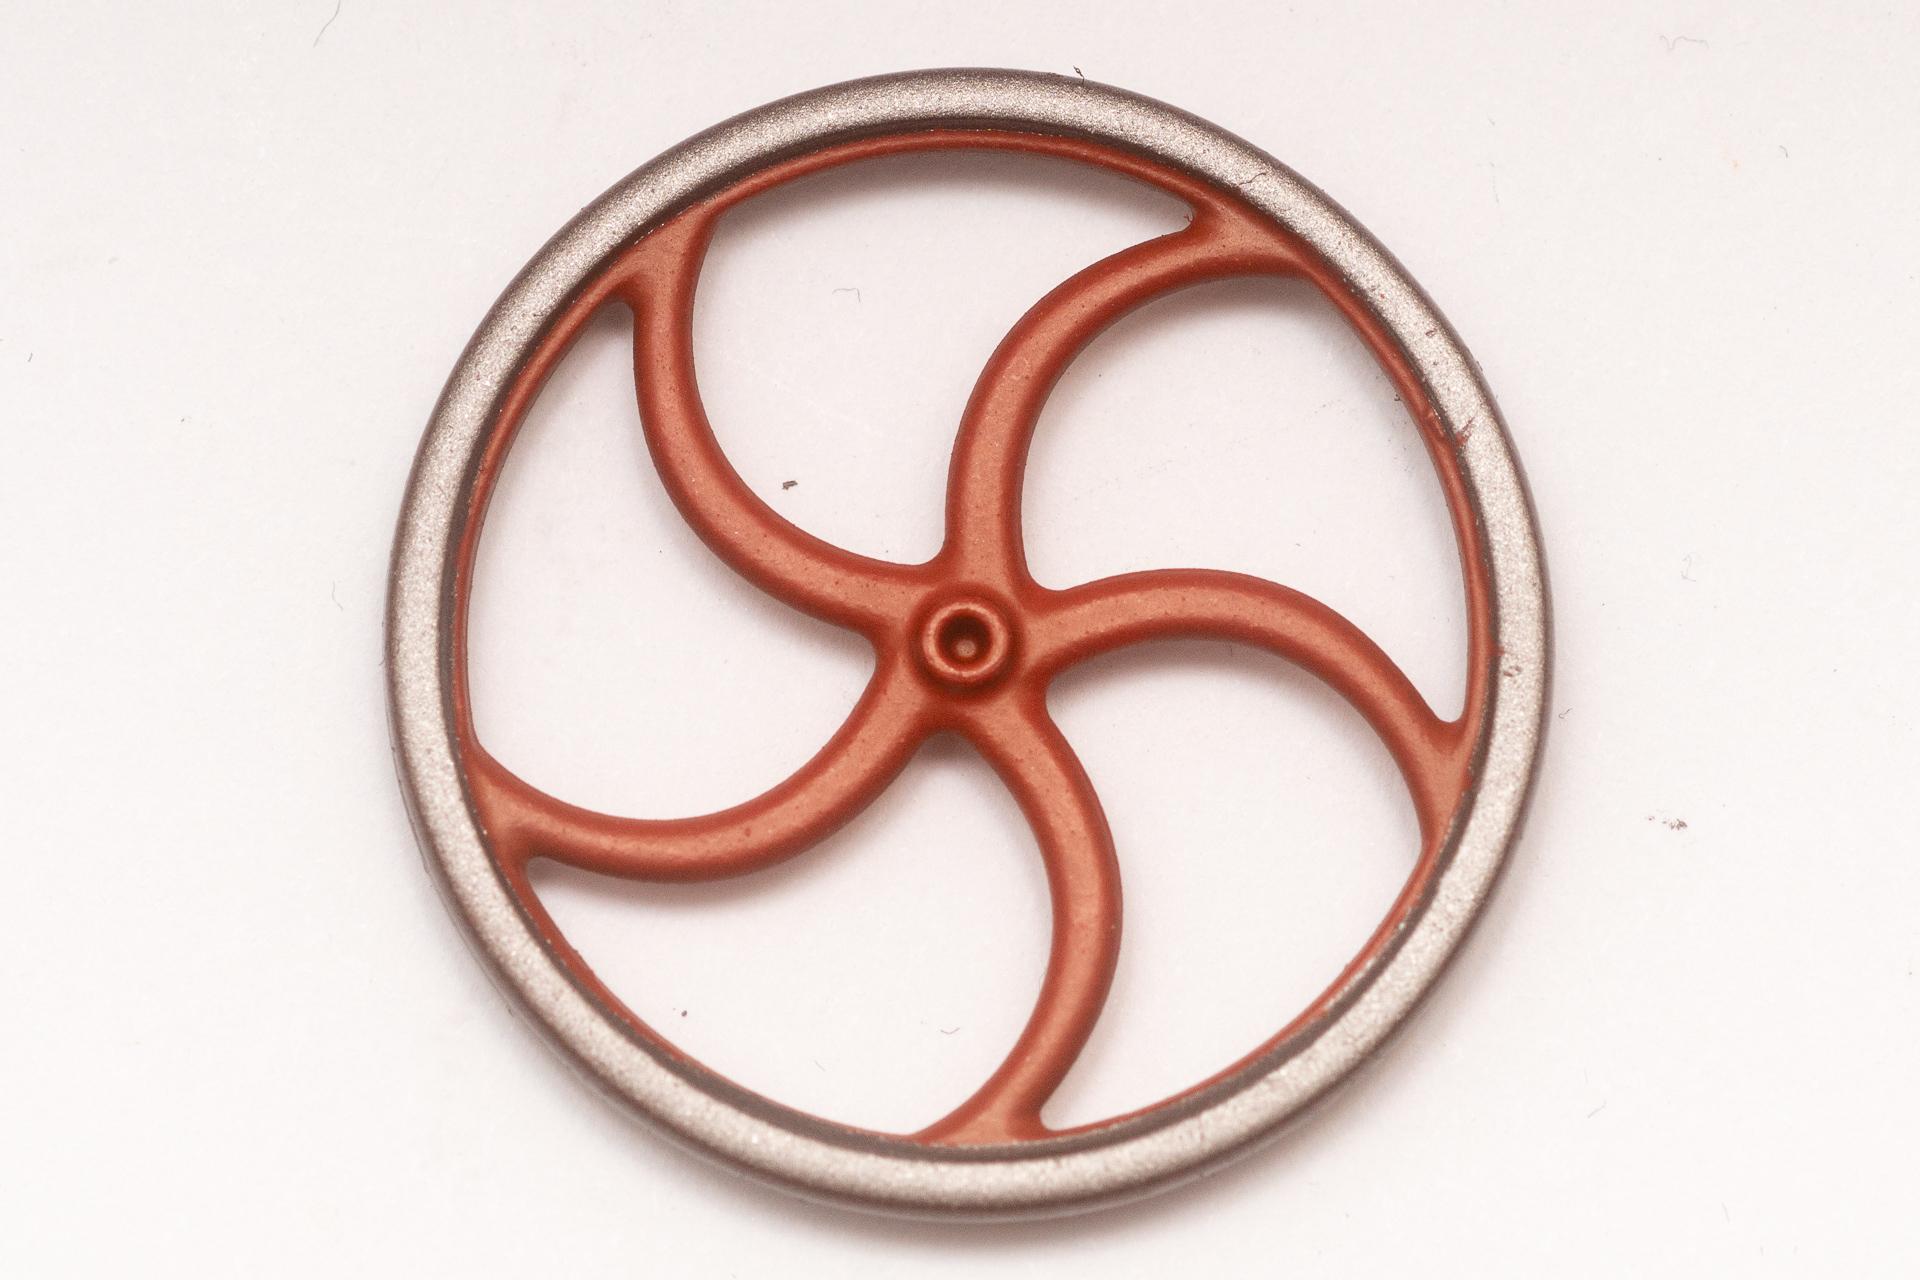
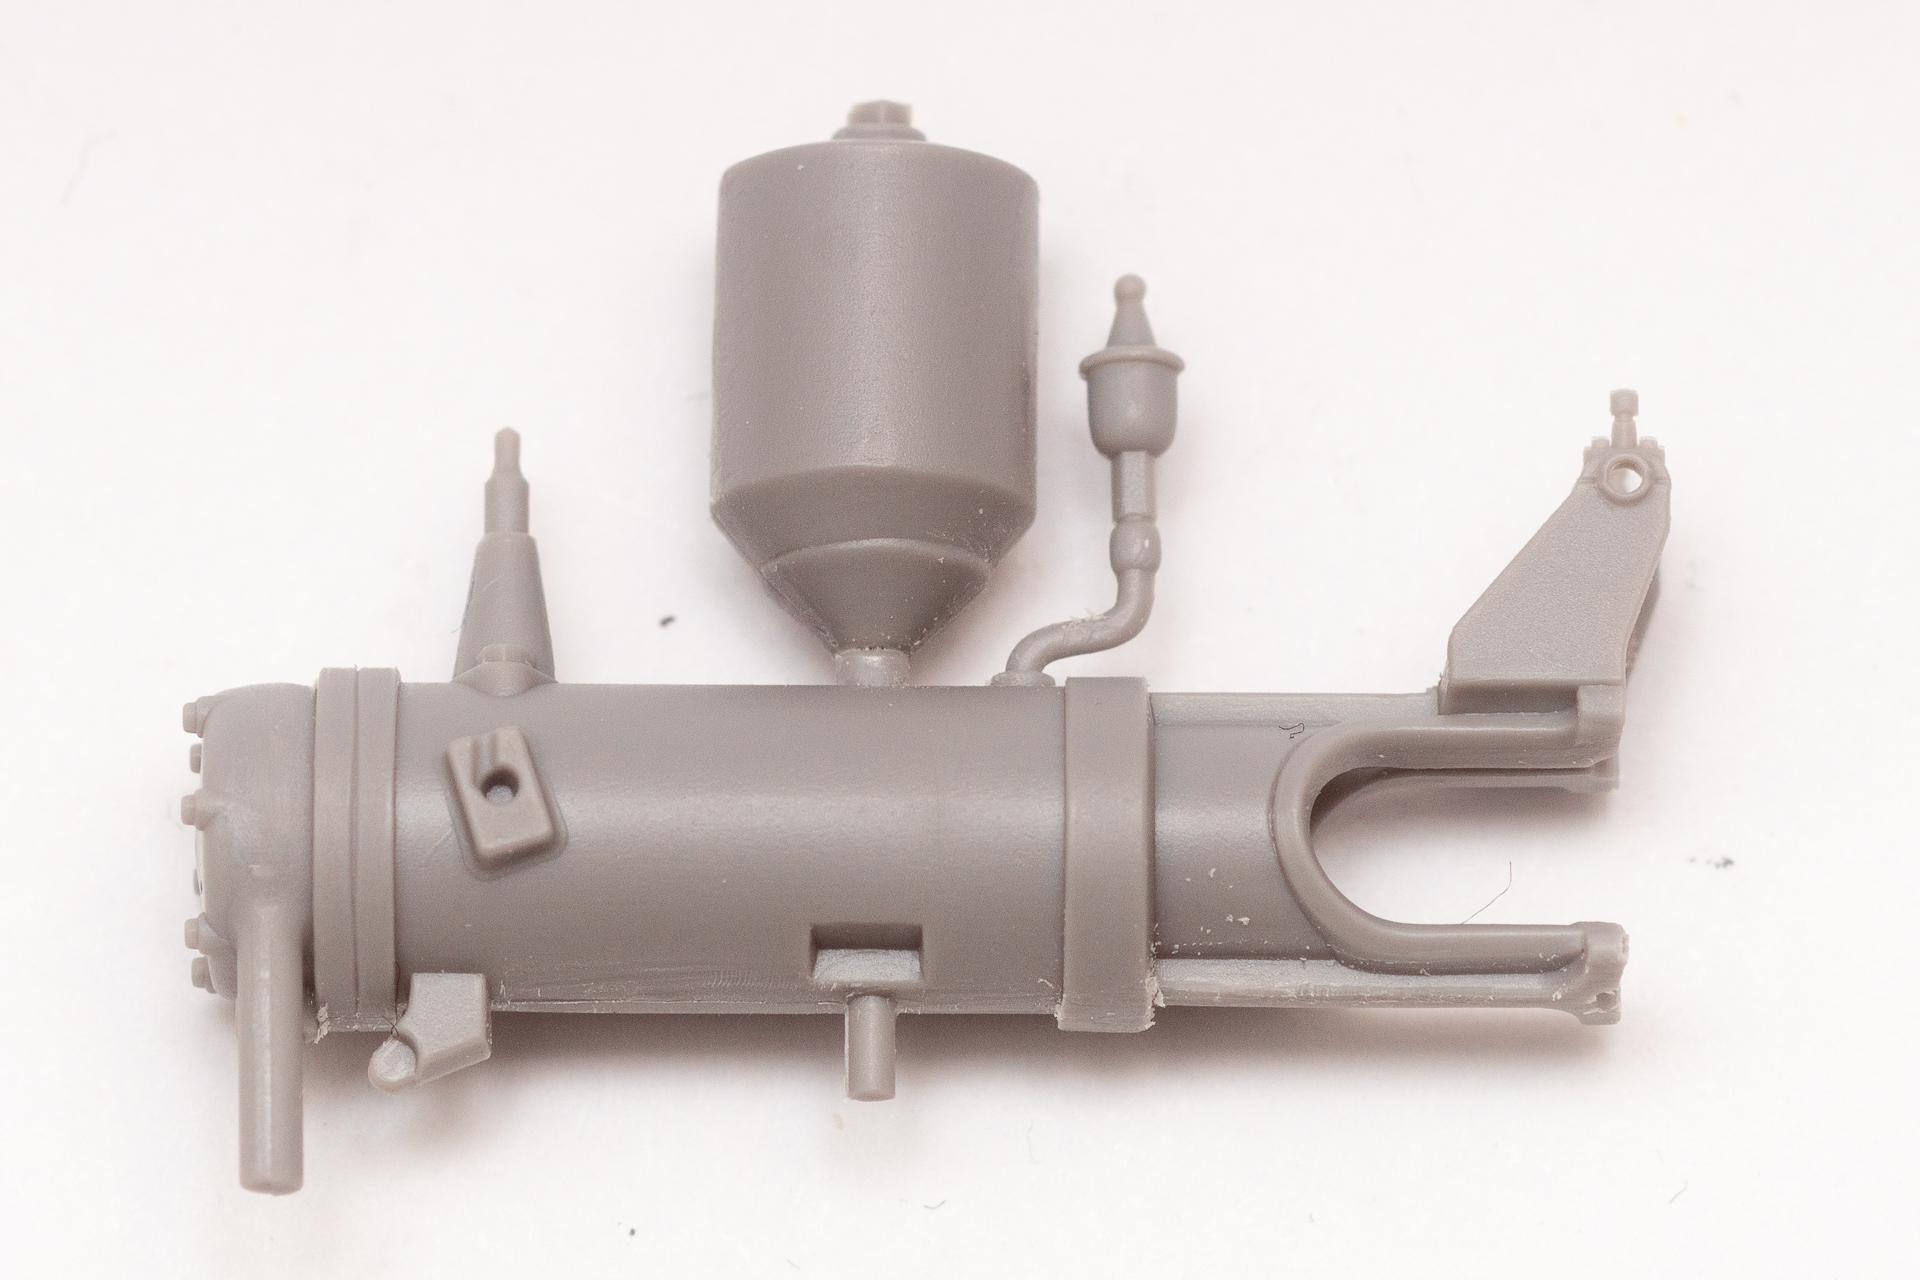
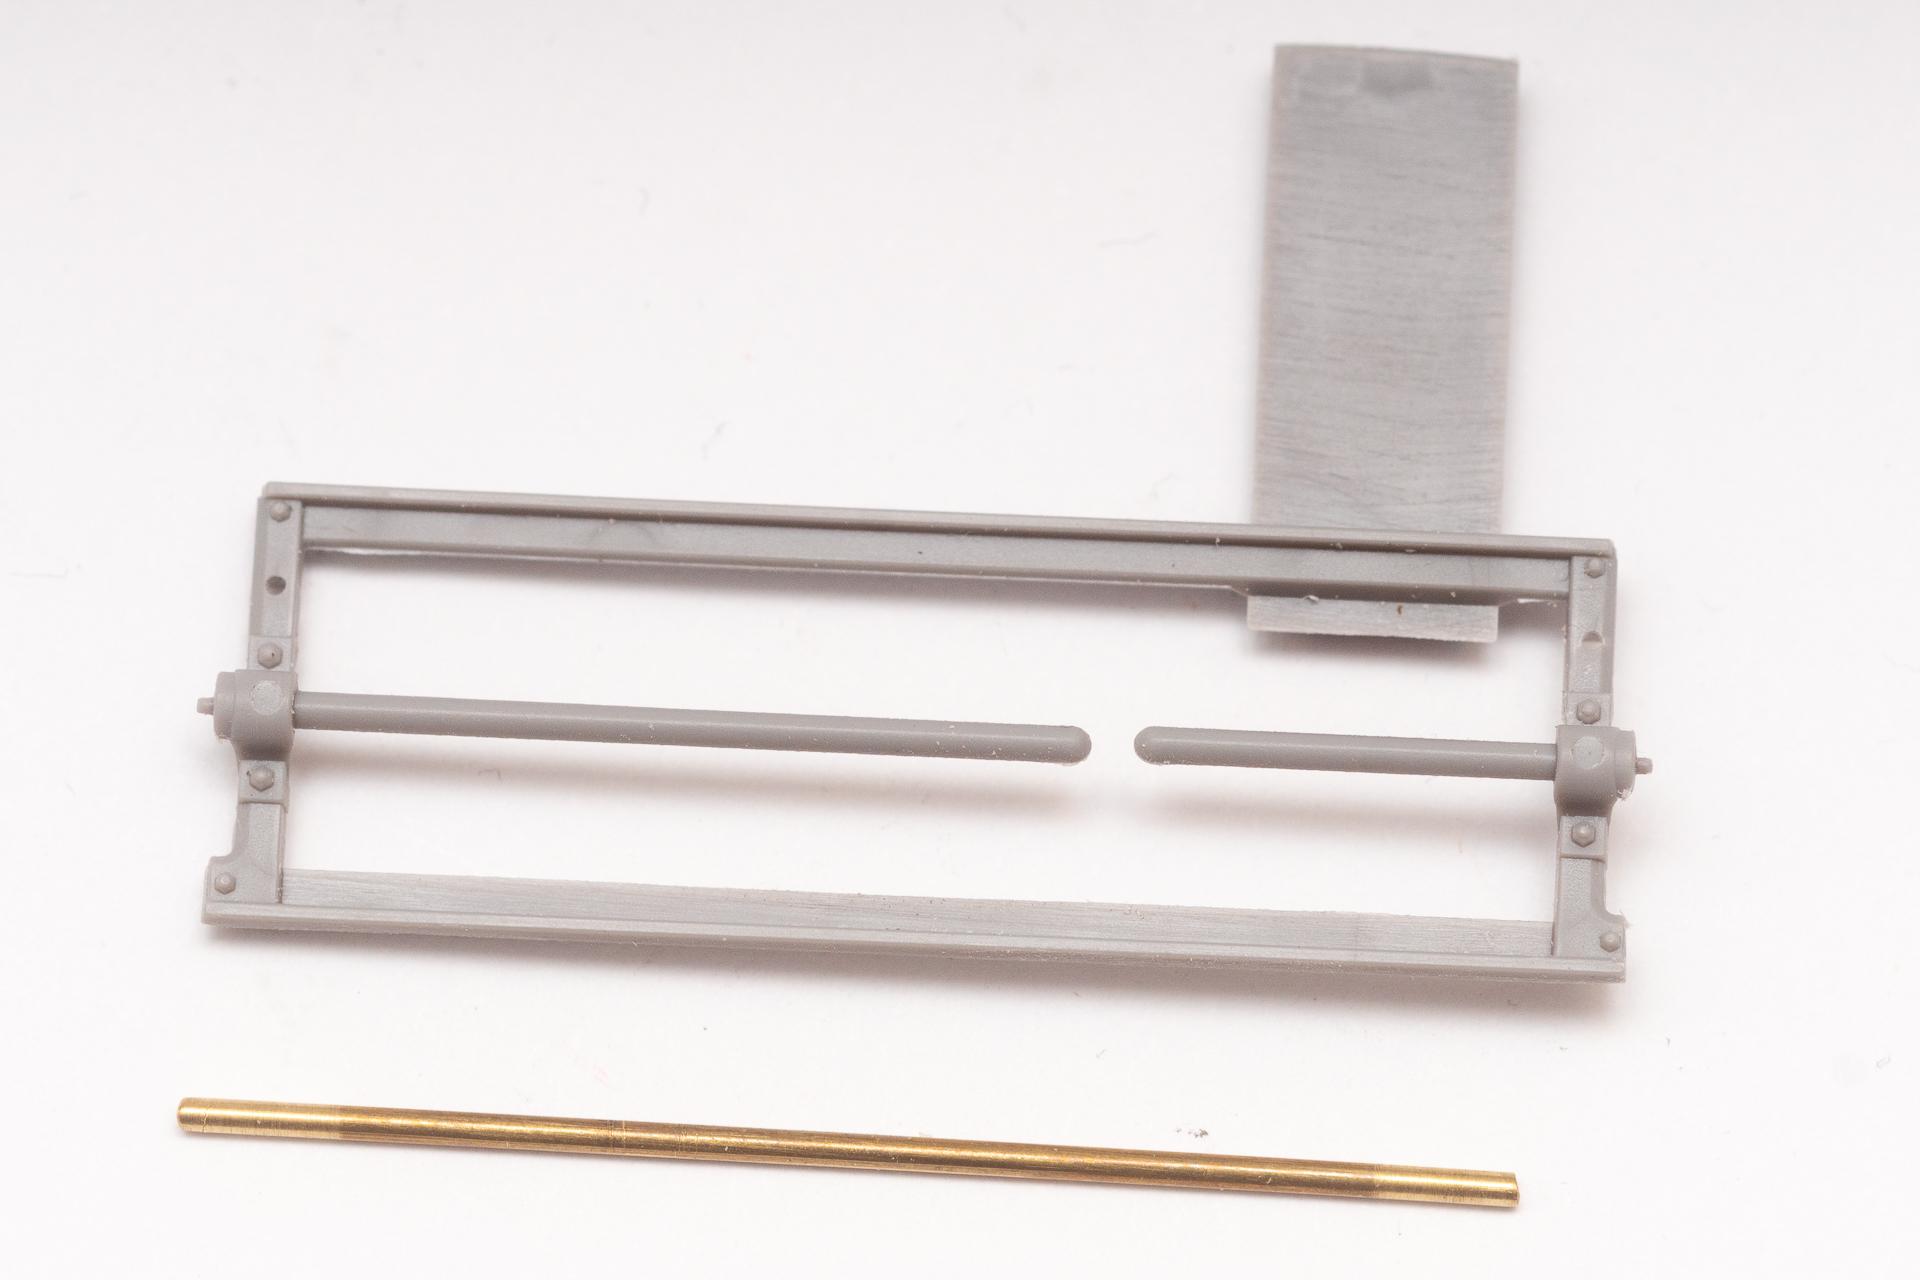
Hi all After my Ferrari I decided I wanted to do something quite different. The moment I saw that ICM would release the Benz Patent-Motorwagen I knew that I wanted to build it. Then I got it as a christmas present by my wife and the urge to start it got stronger and stronger during completion of the Ferrari. So it was time to get it off the shelf and start building it First I made some kind of jig out of some styrofoam, some needles and a few toothpicks to hold the frame in place while letting the glue dry. Meanwhile the frame is already painted in black green. ICM tells you to paint the whole frame black, but I wanted it more the way this replica looks like: https://www.scalenews.de/benz-patent-motorwagen-walkaround-66/ The engine has been built and waits for some color and some additional wiring. As I saw in another WIP the propeller shaft is quite weak, especially if you exercise your option to build it with a scratch built belt. That's why I cut some brass wire to the length needed. Now I only have to remove the cast on axle and drill some holes to mount the wire. The flywheel has already been painted and is waiting for its final assembly And last but not least the footrest has been assembled an painted. That's all for the moment. I hope you enjoy following me on this journey Urs

-
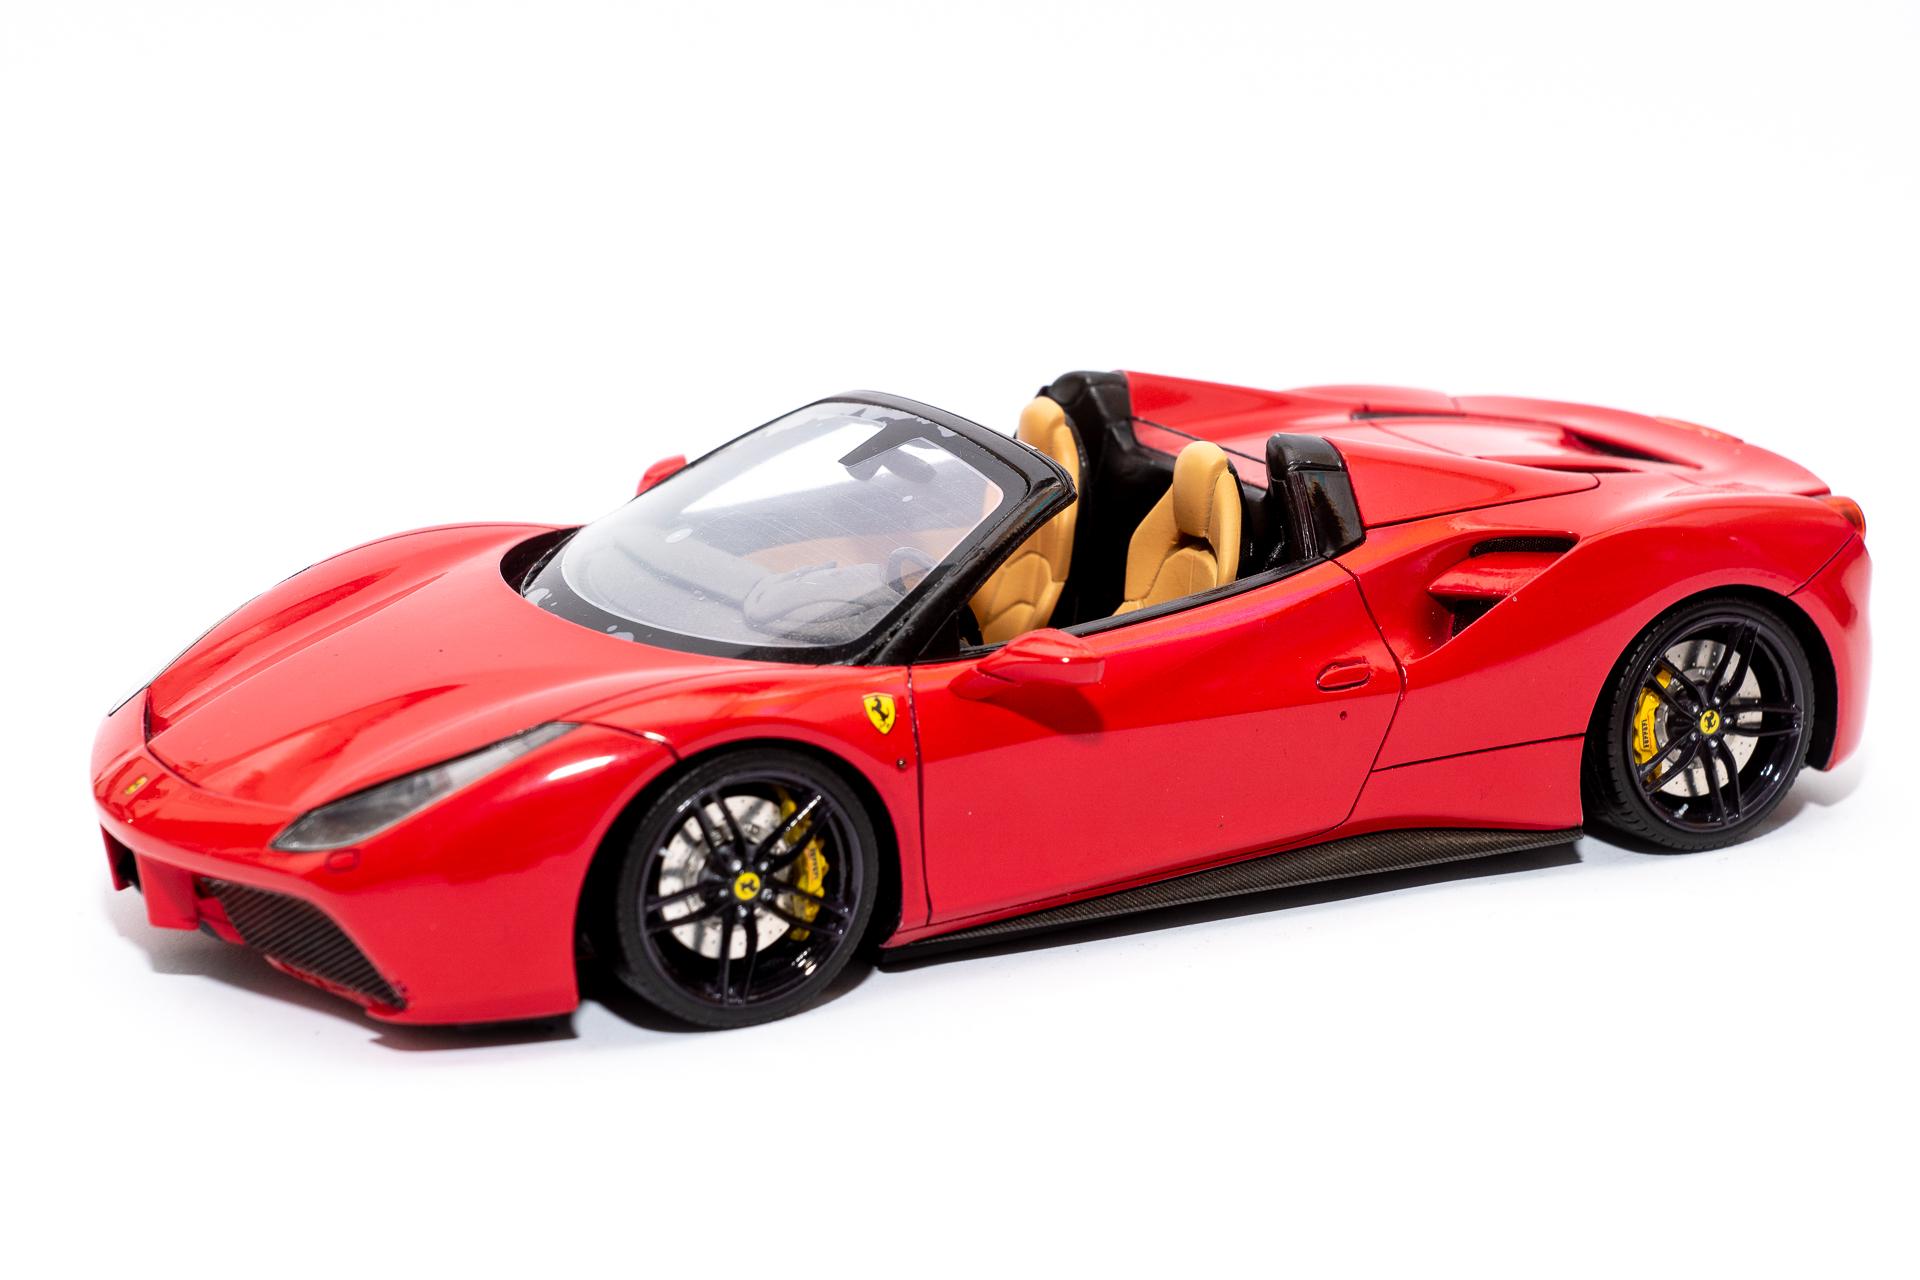
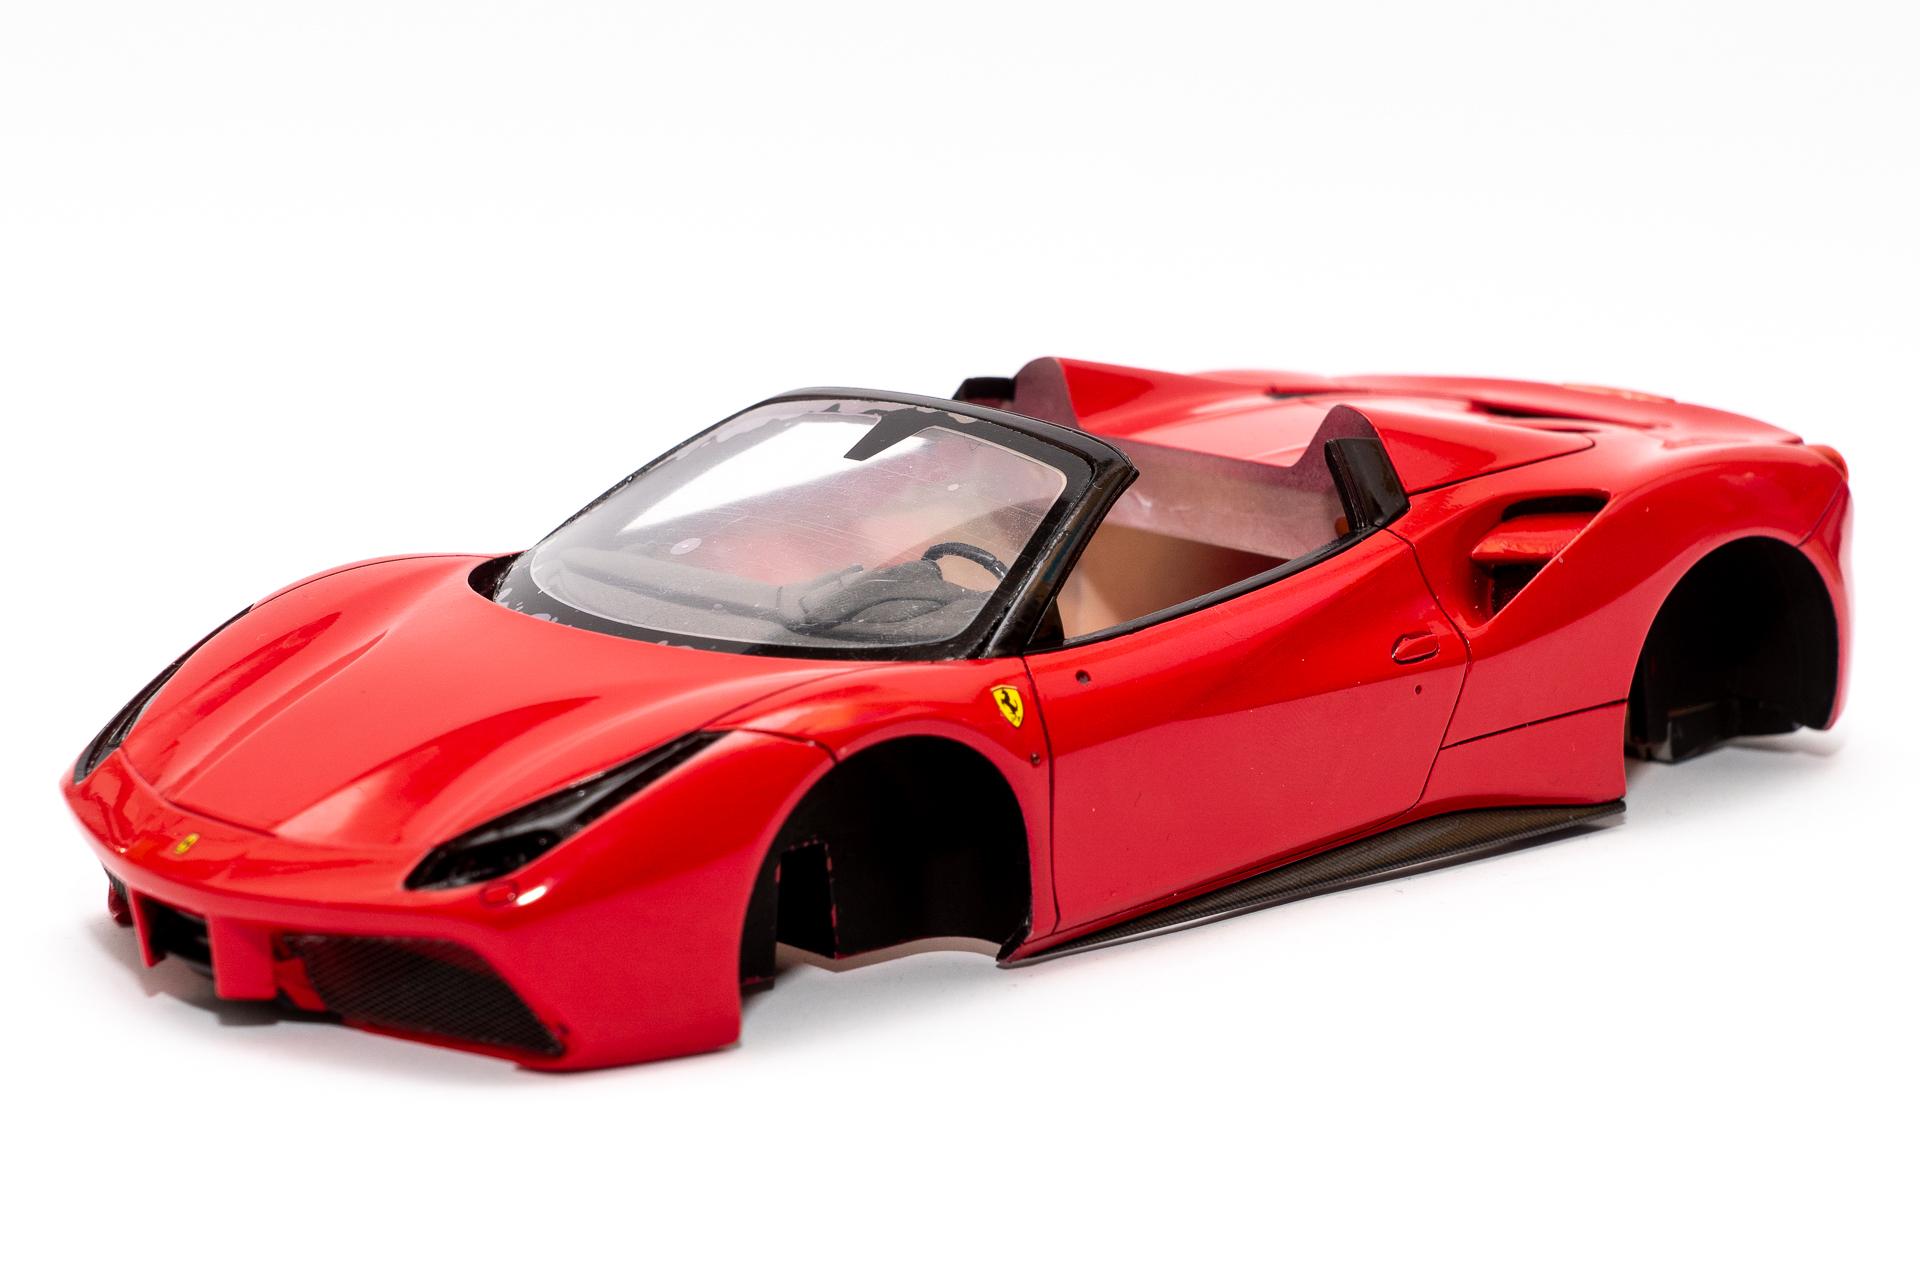
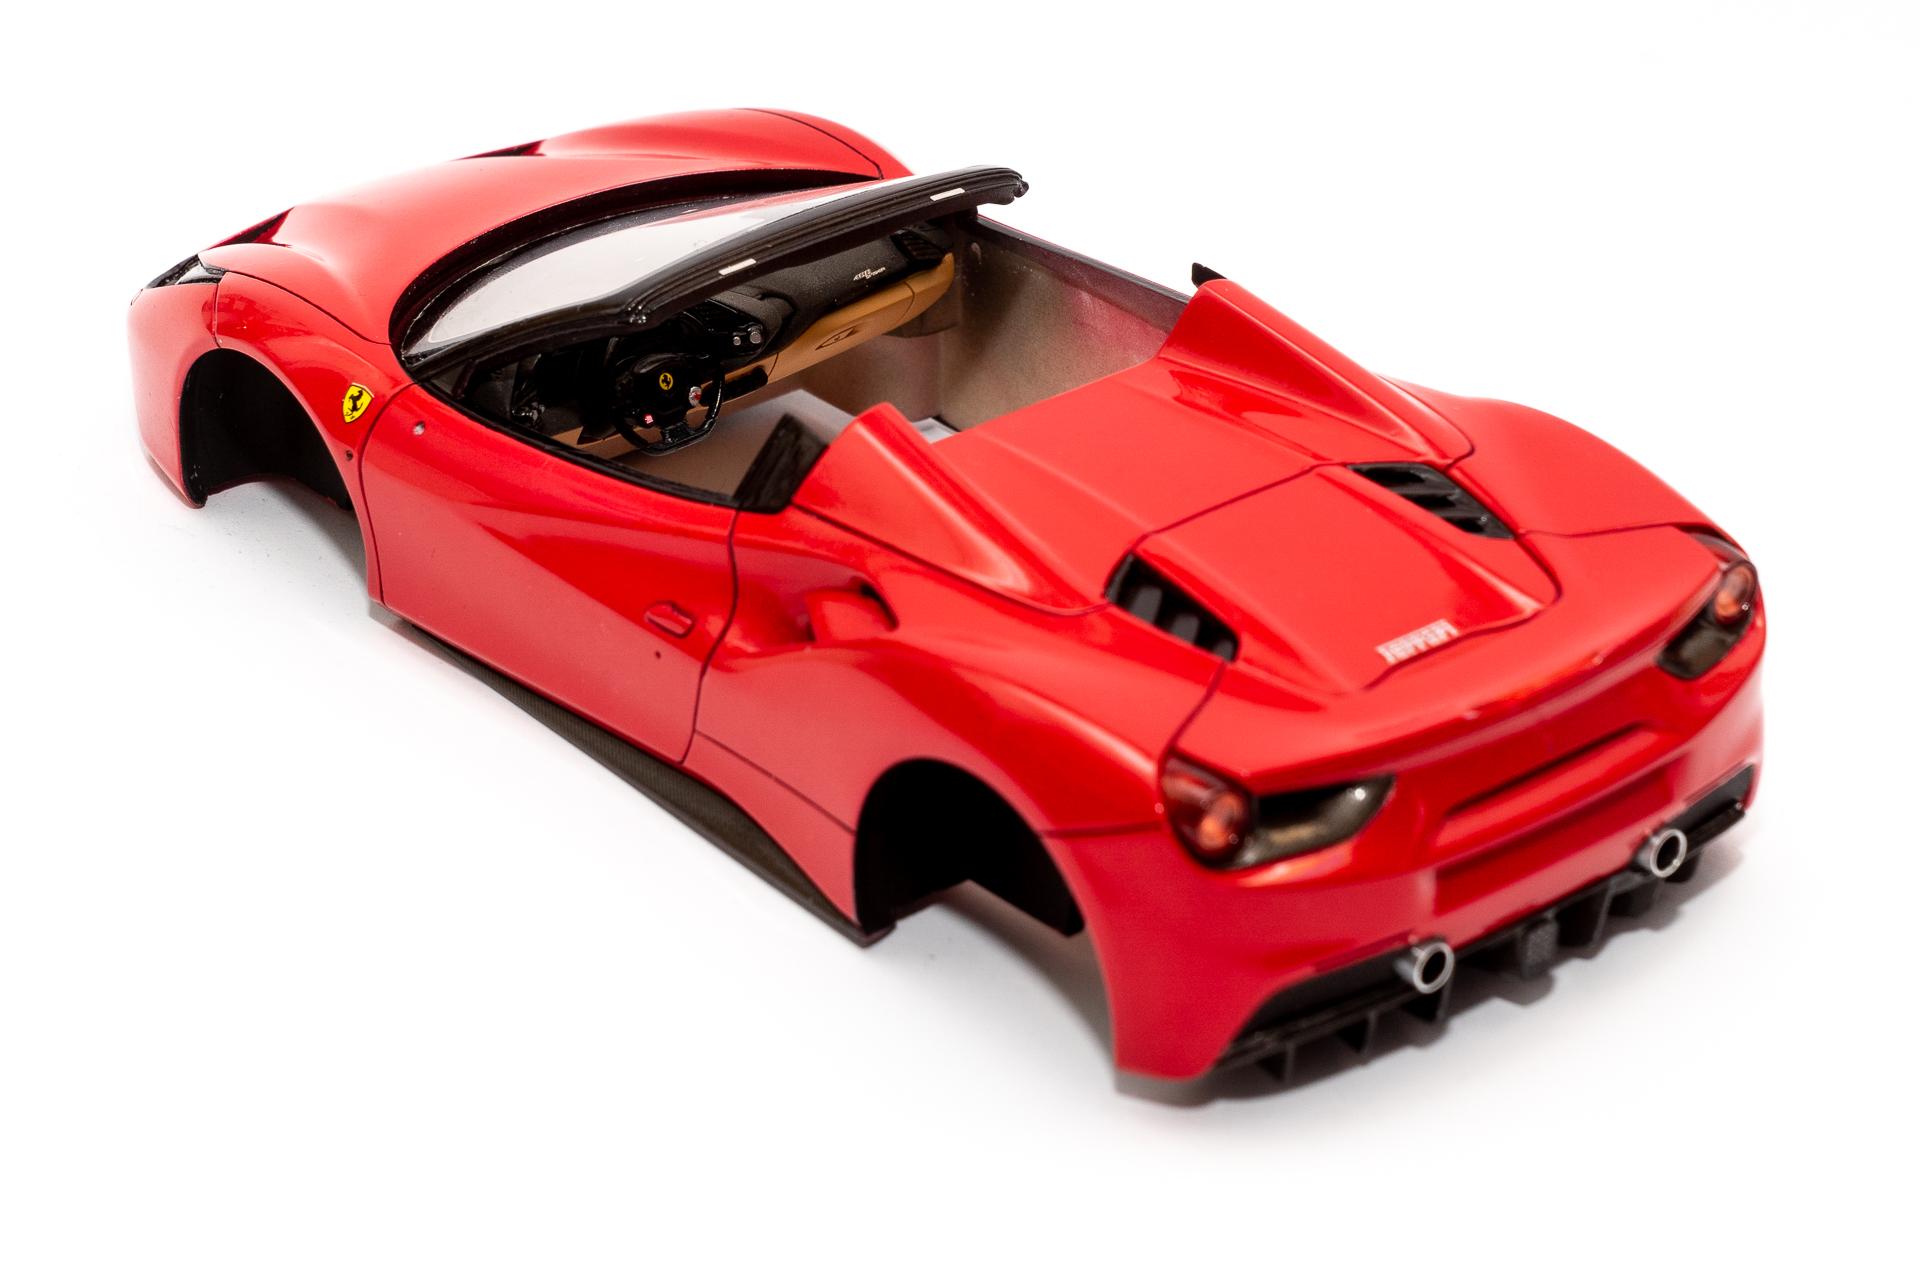
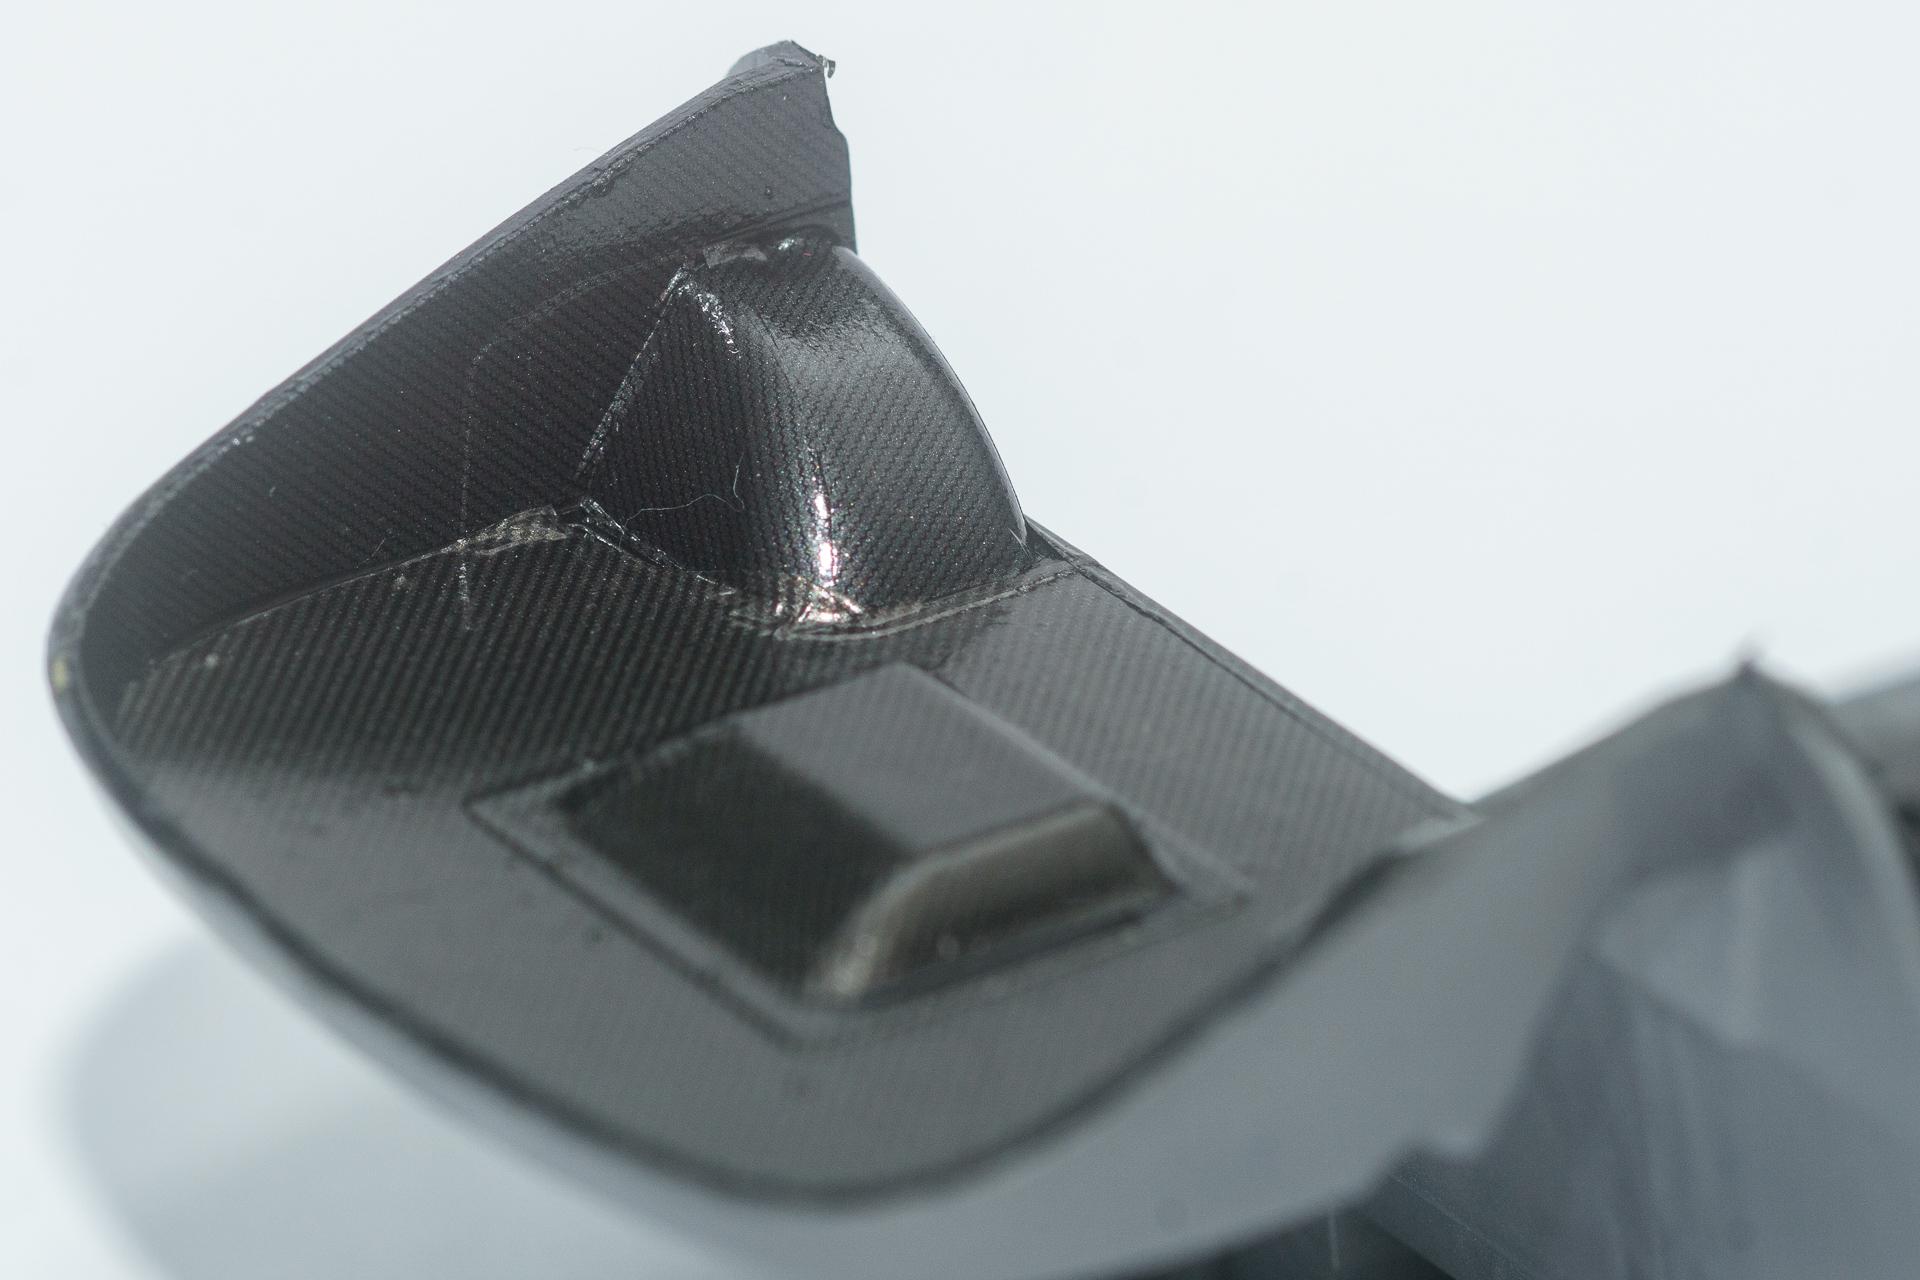
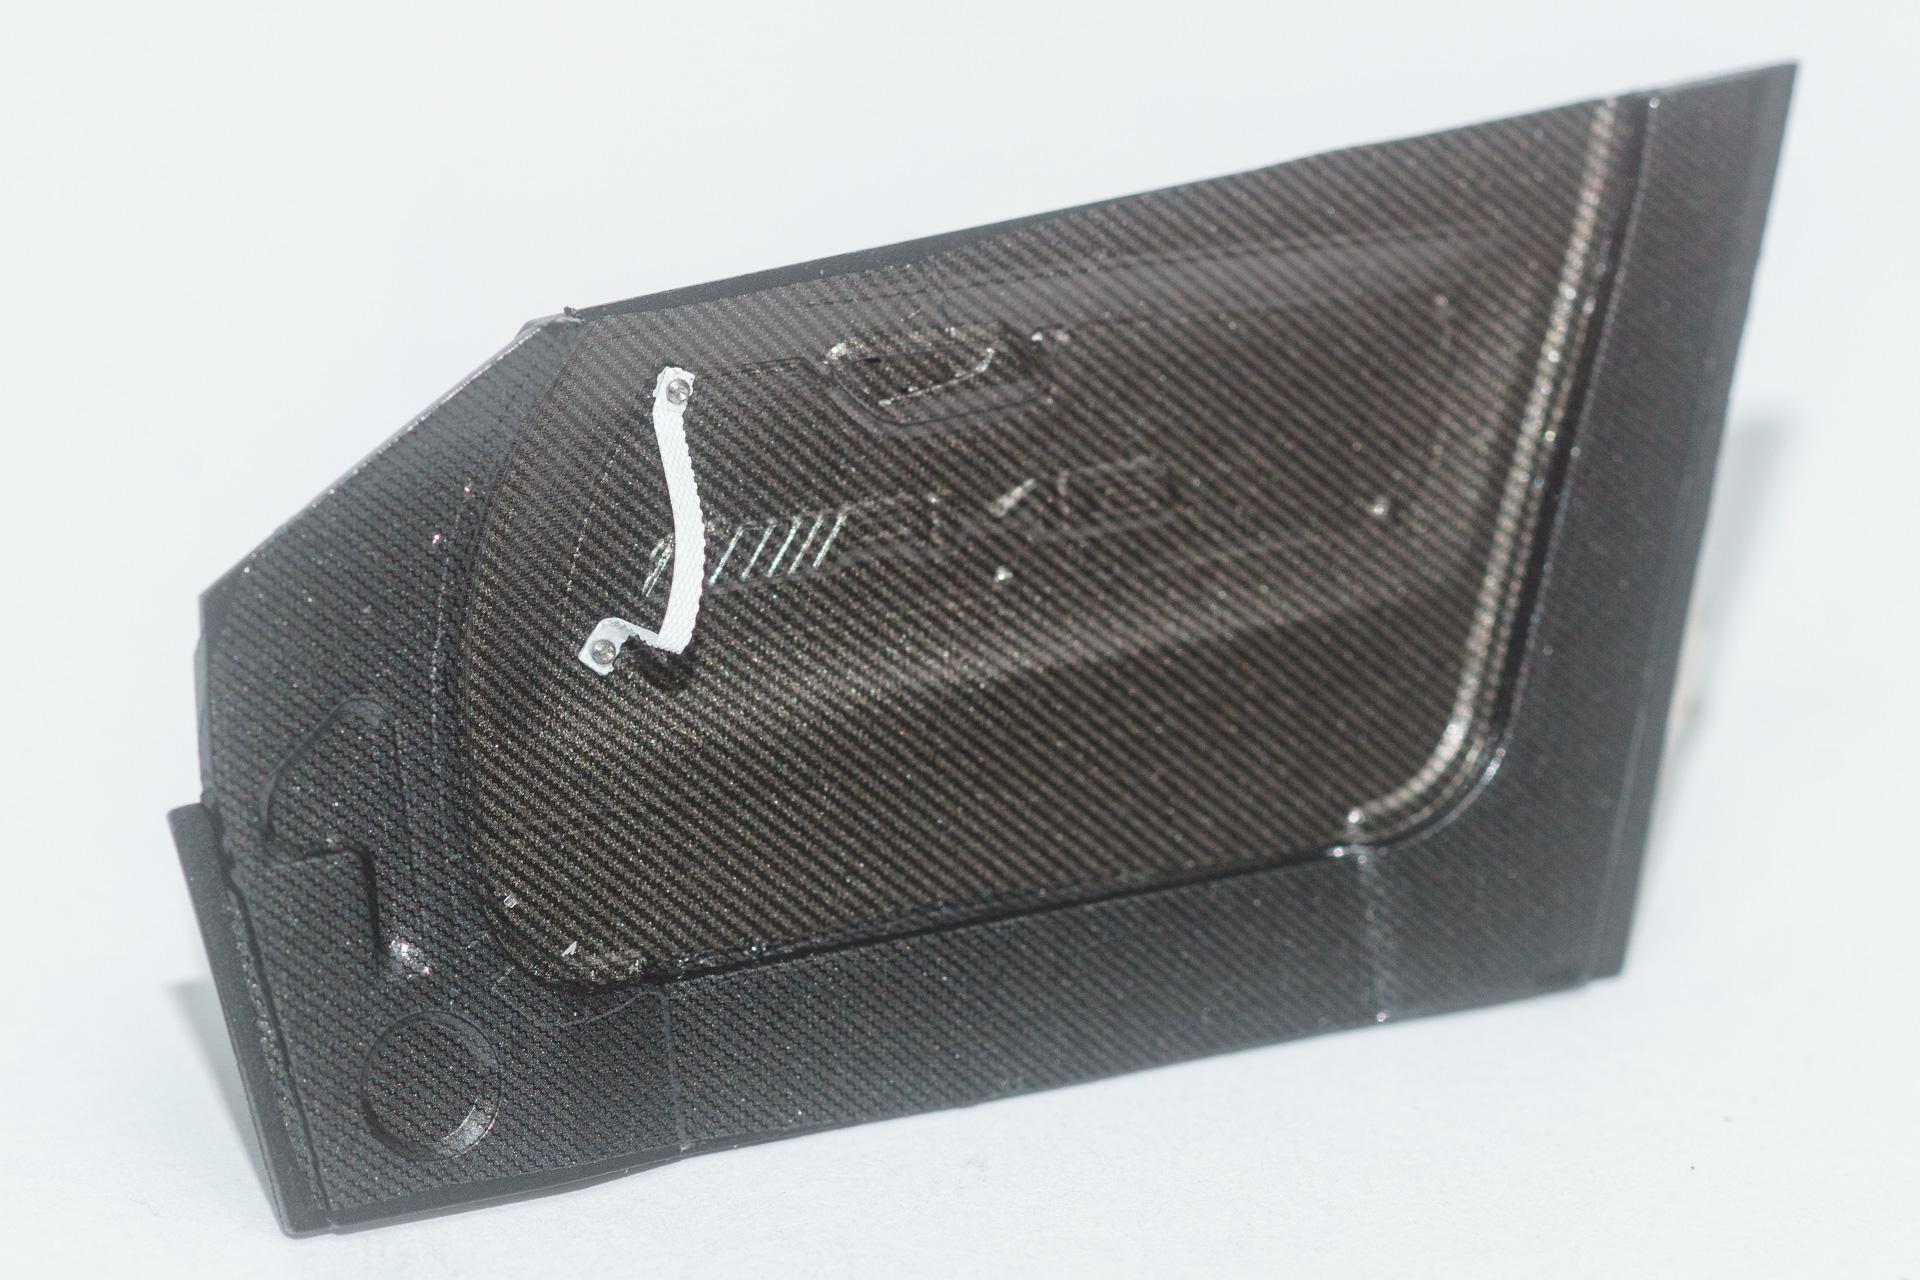
Hi all Although I had vacation last week I couldn't do as much as intended, so the Ferrari is not completely done yet. Most of the parts found their place, but for the remaining work I couldn't find the tranquility I'd need to finish. First of all there's the splitter which needs to be installed and is und quite some tension. Once this is installed, I will have to assemble the wipers, one thing I always mess up when dealing with Hobby Design PE parts. Usually I can then just use the wipers that came with the original kit, but here the PE parts unfortunately are the wipers that came with the original kit, so I will have to find a way to cope with the assembly. But at least I can show you the current state. Nonetheless I think this will be the last update in this WIP. Pictures of the finished model will be published in the RFI section once I managed to install the last parts and take it to the studio. Urs
-
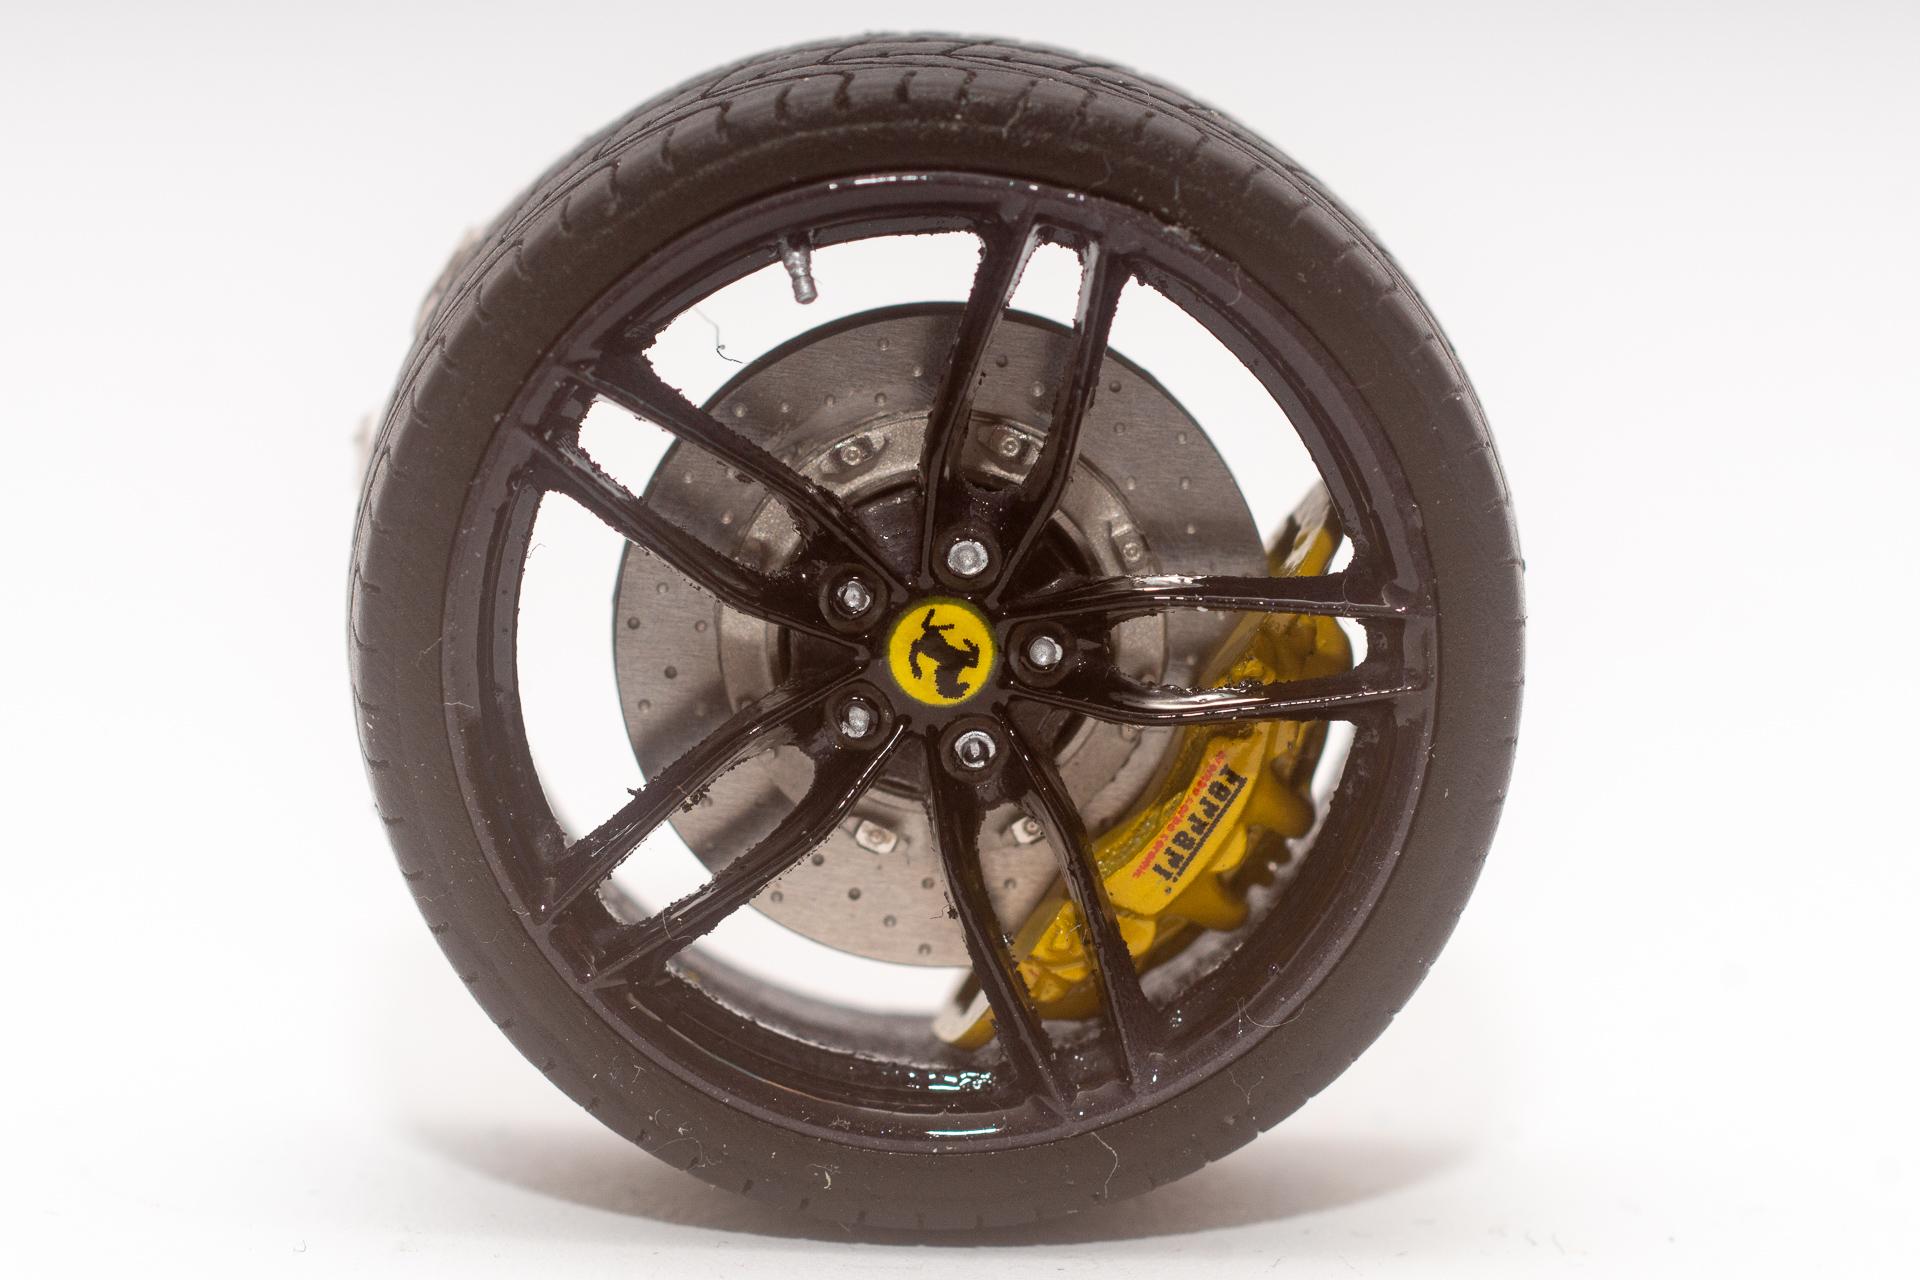
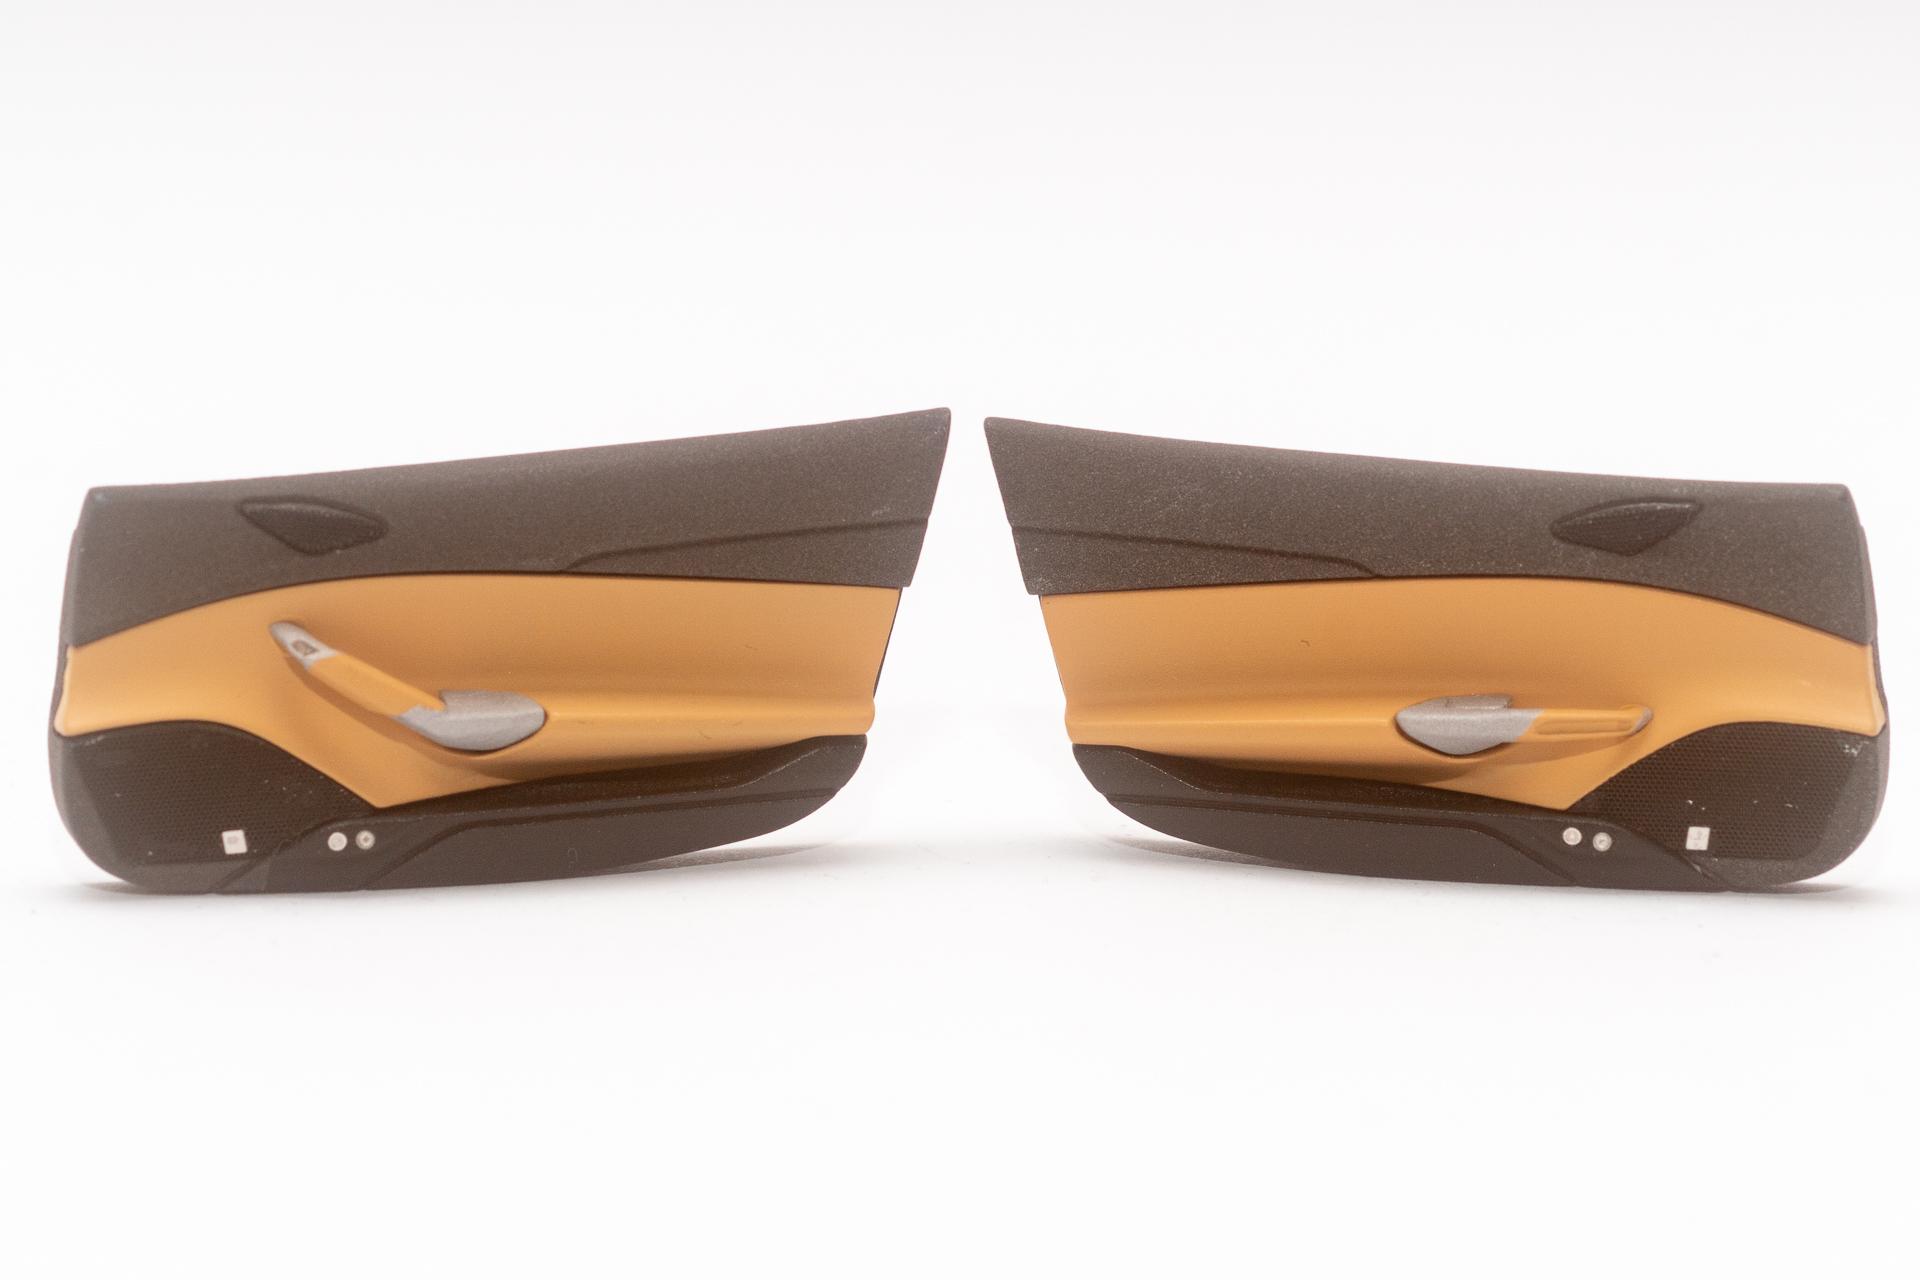
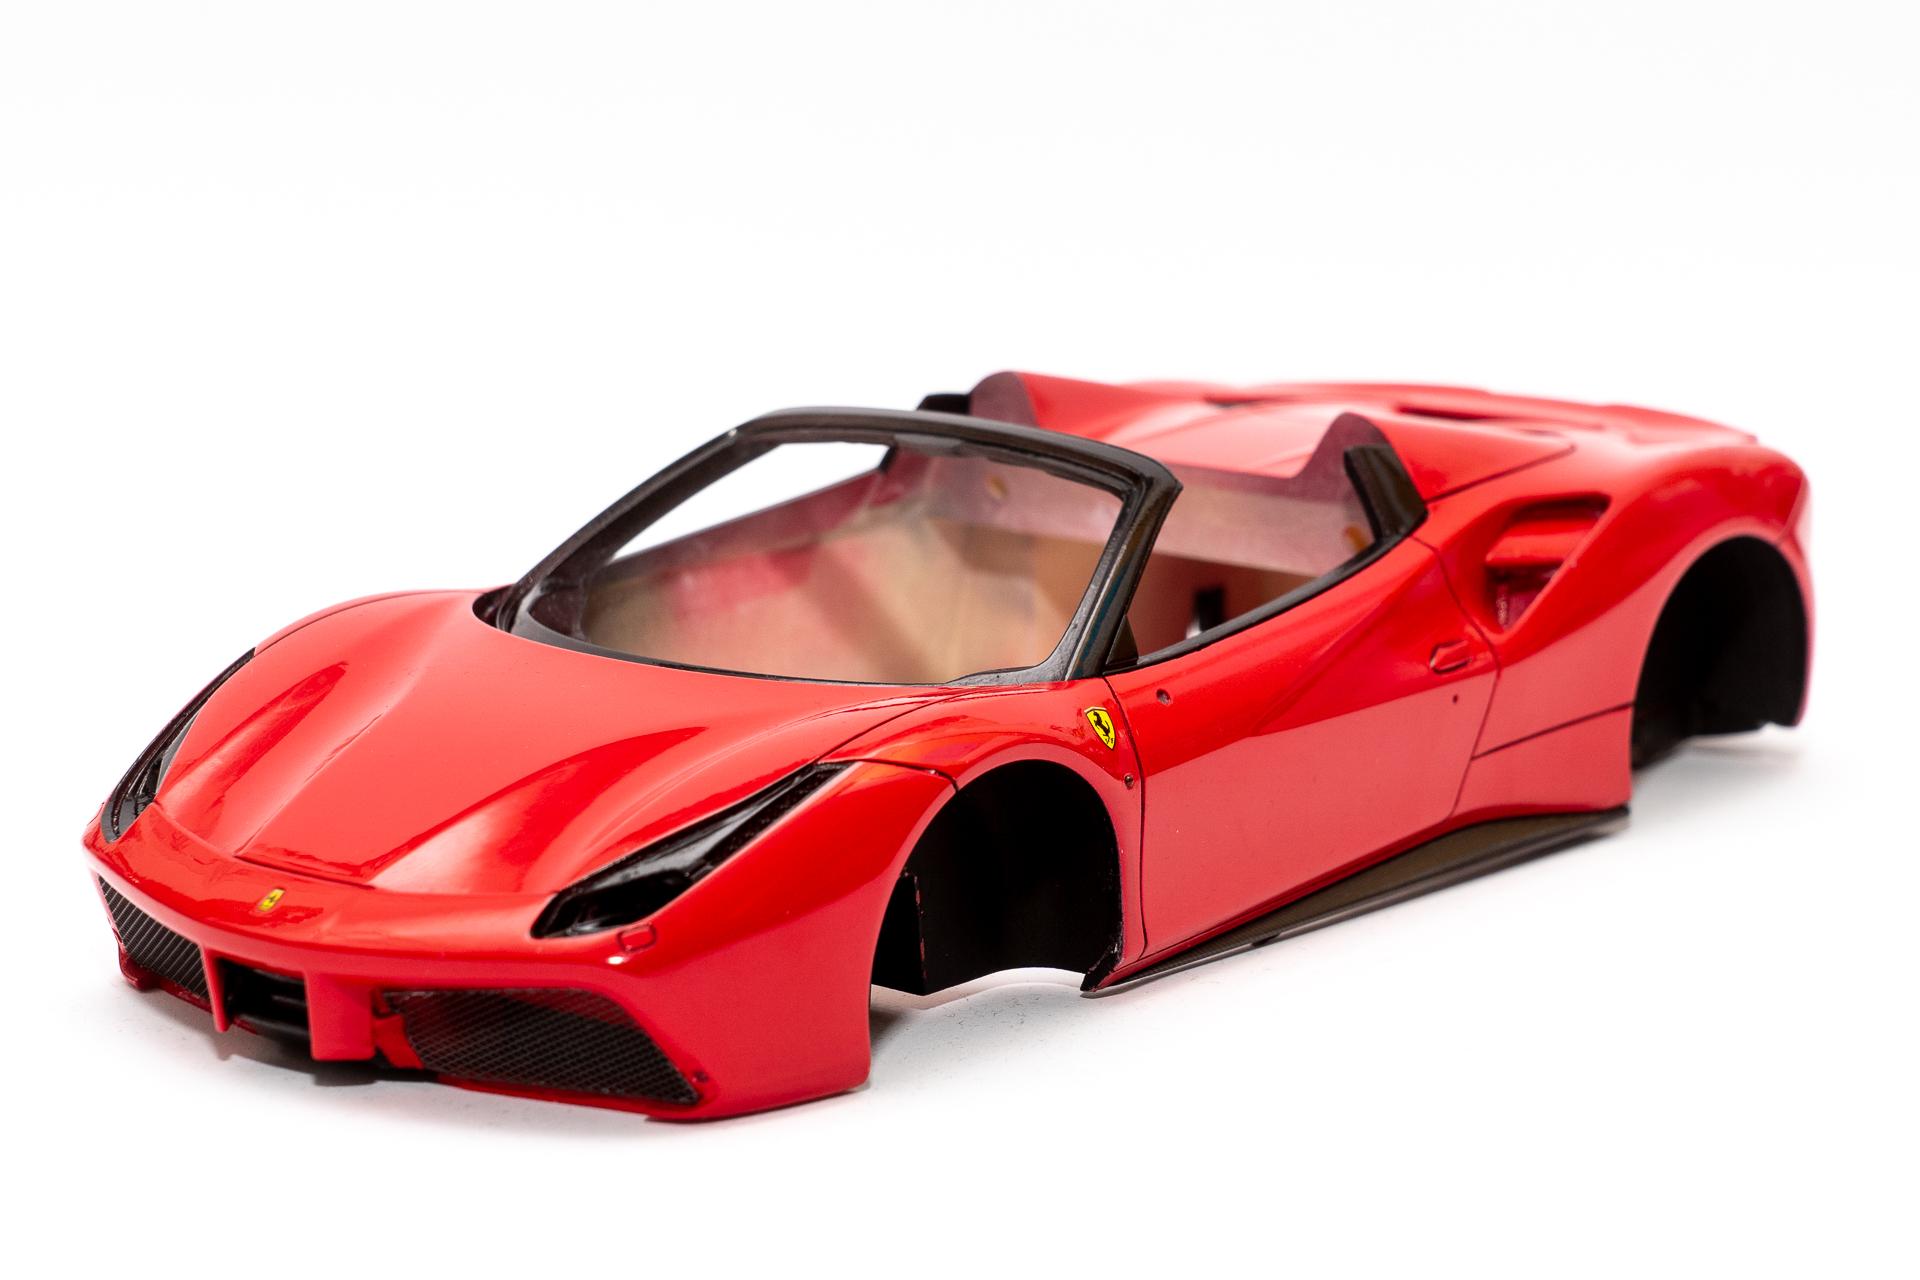
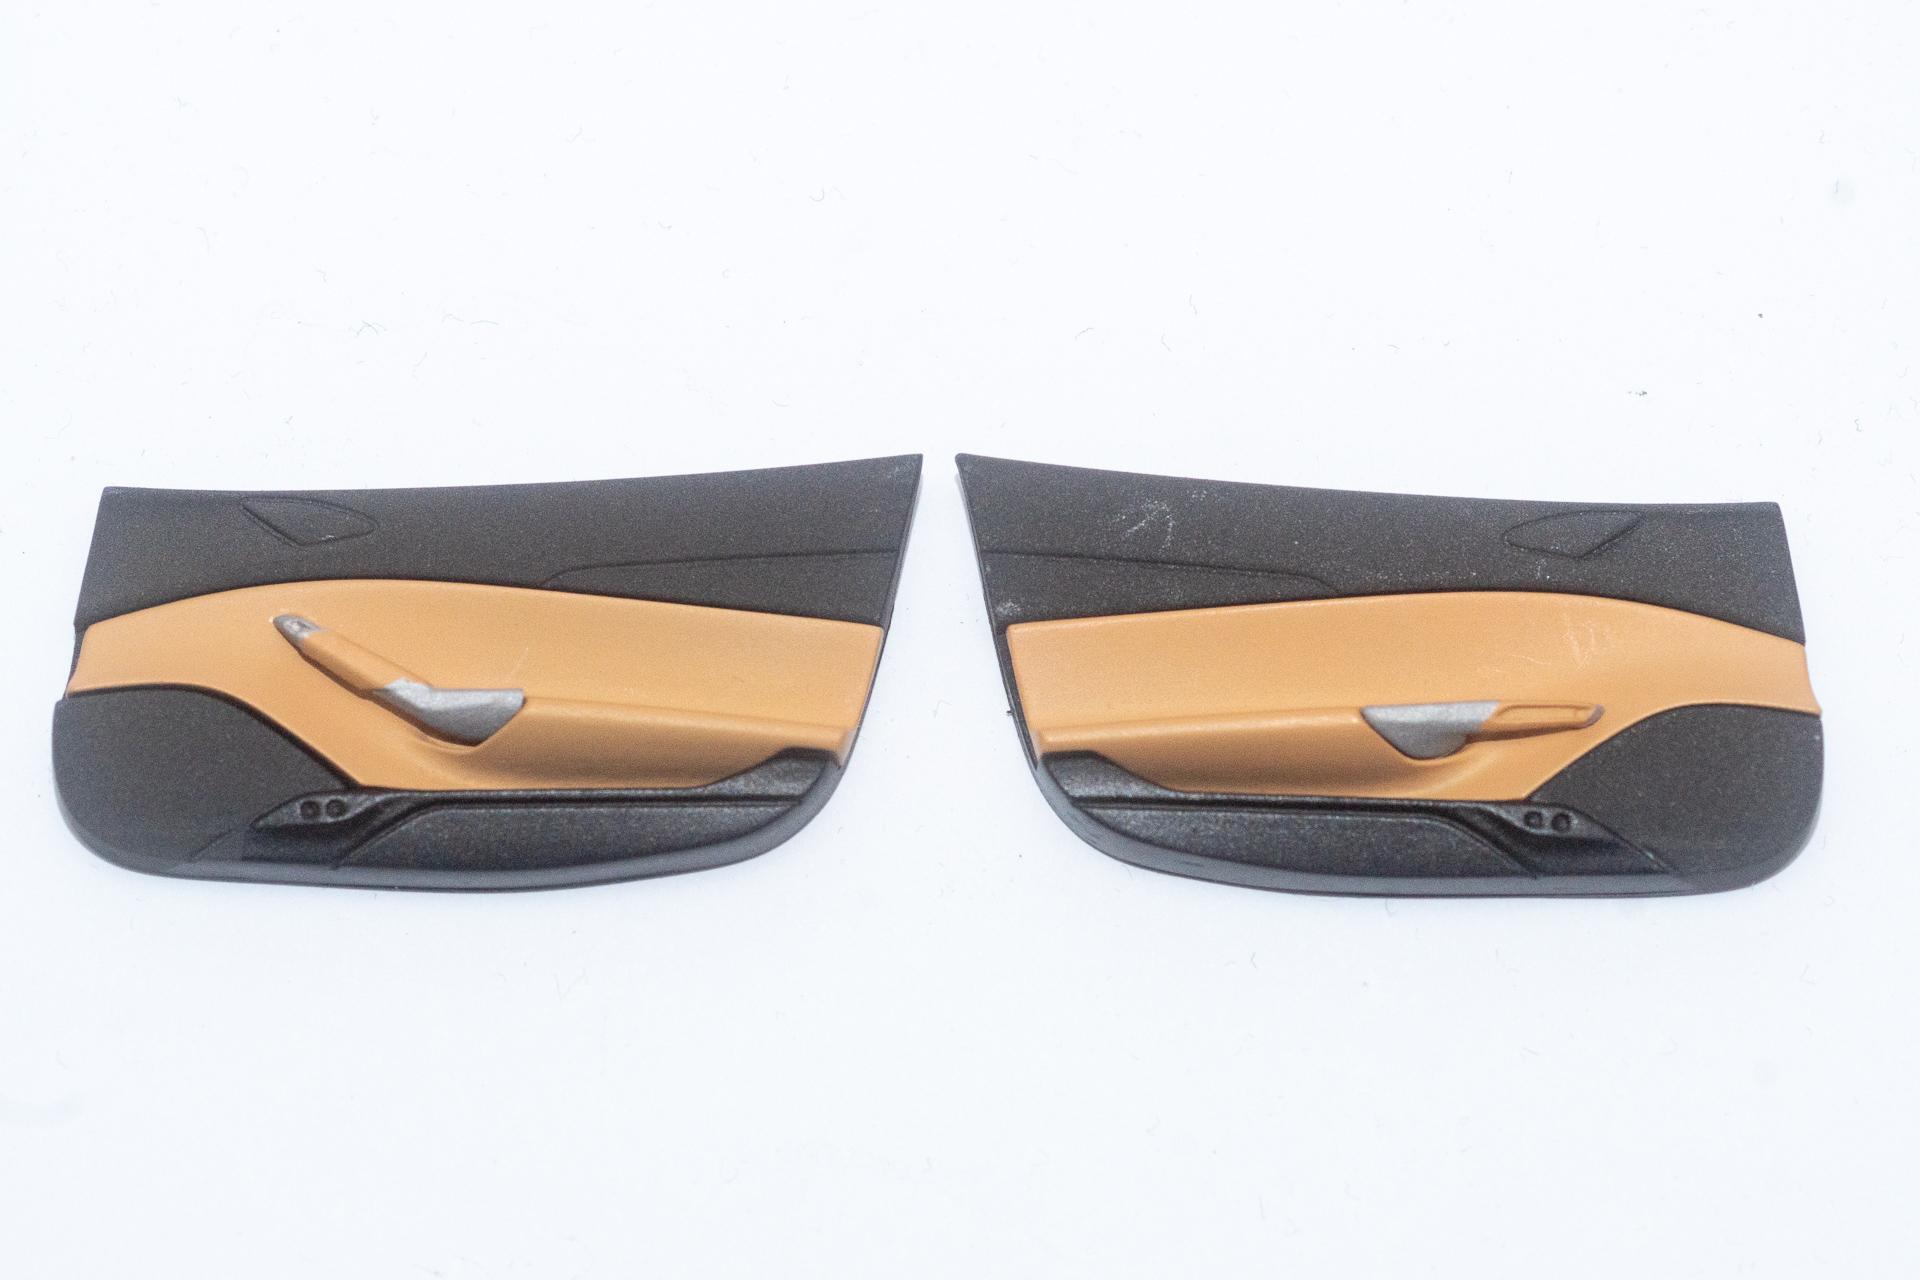
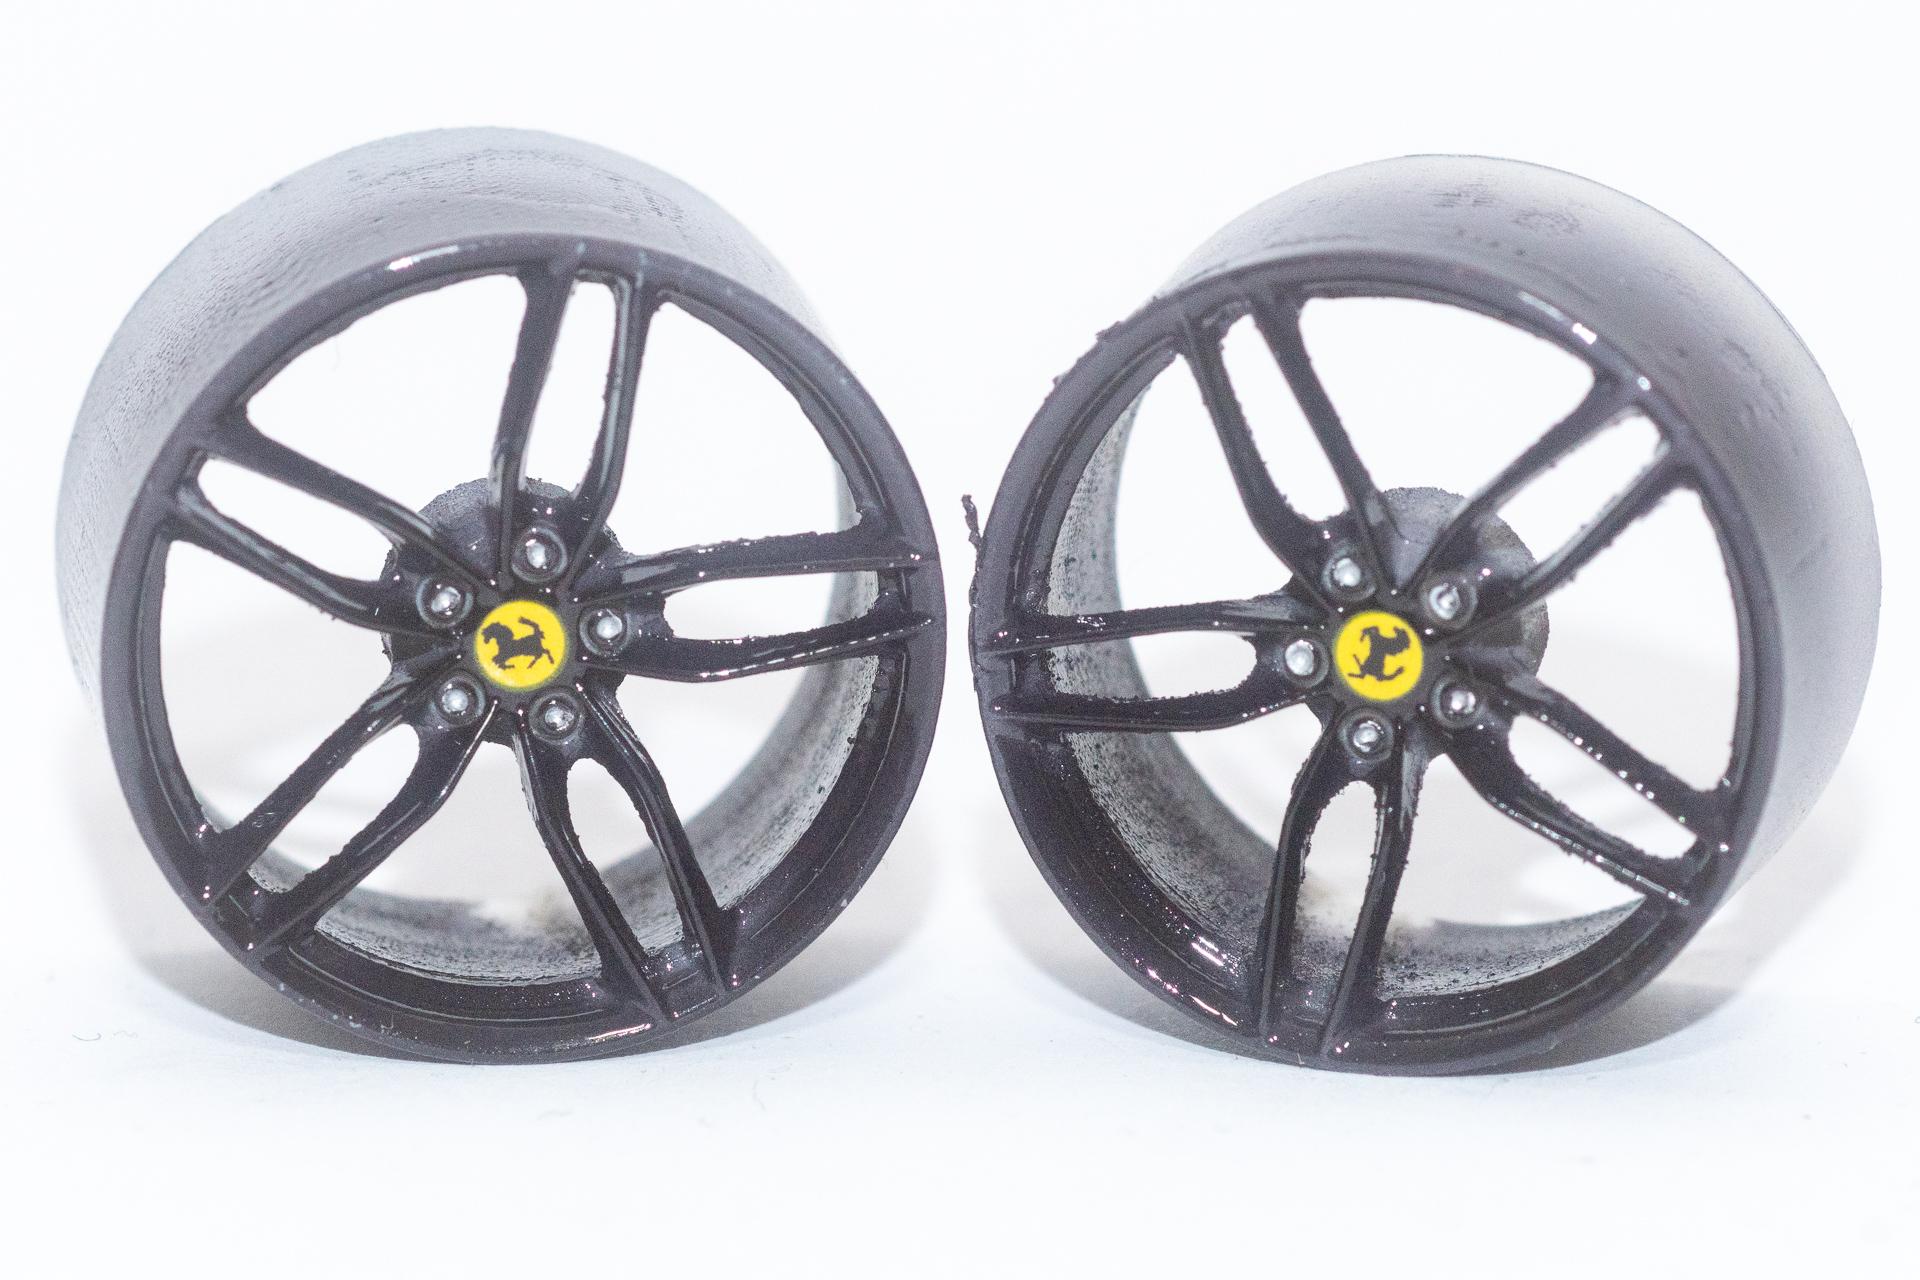
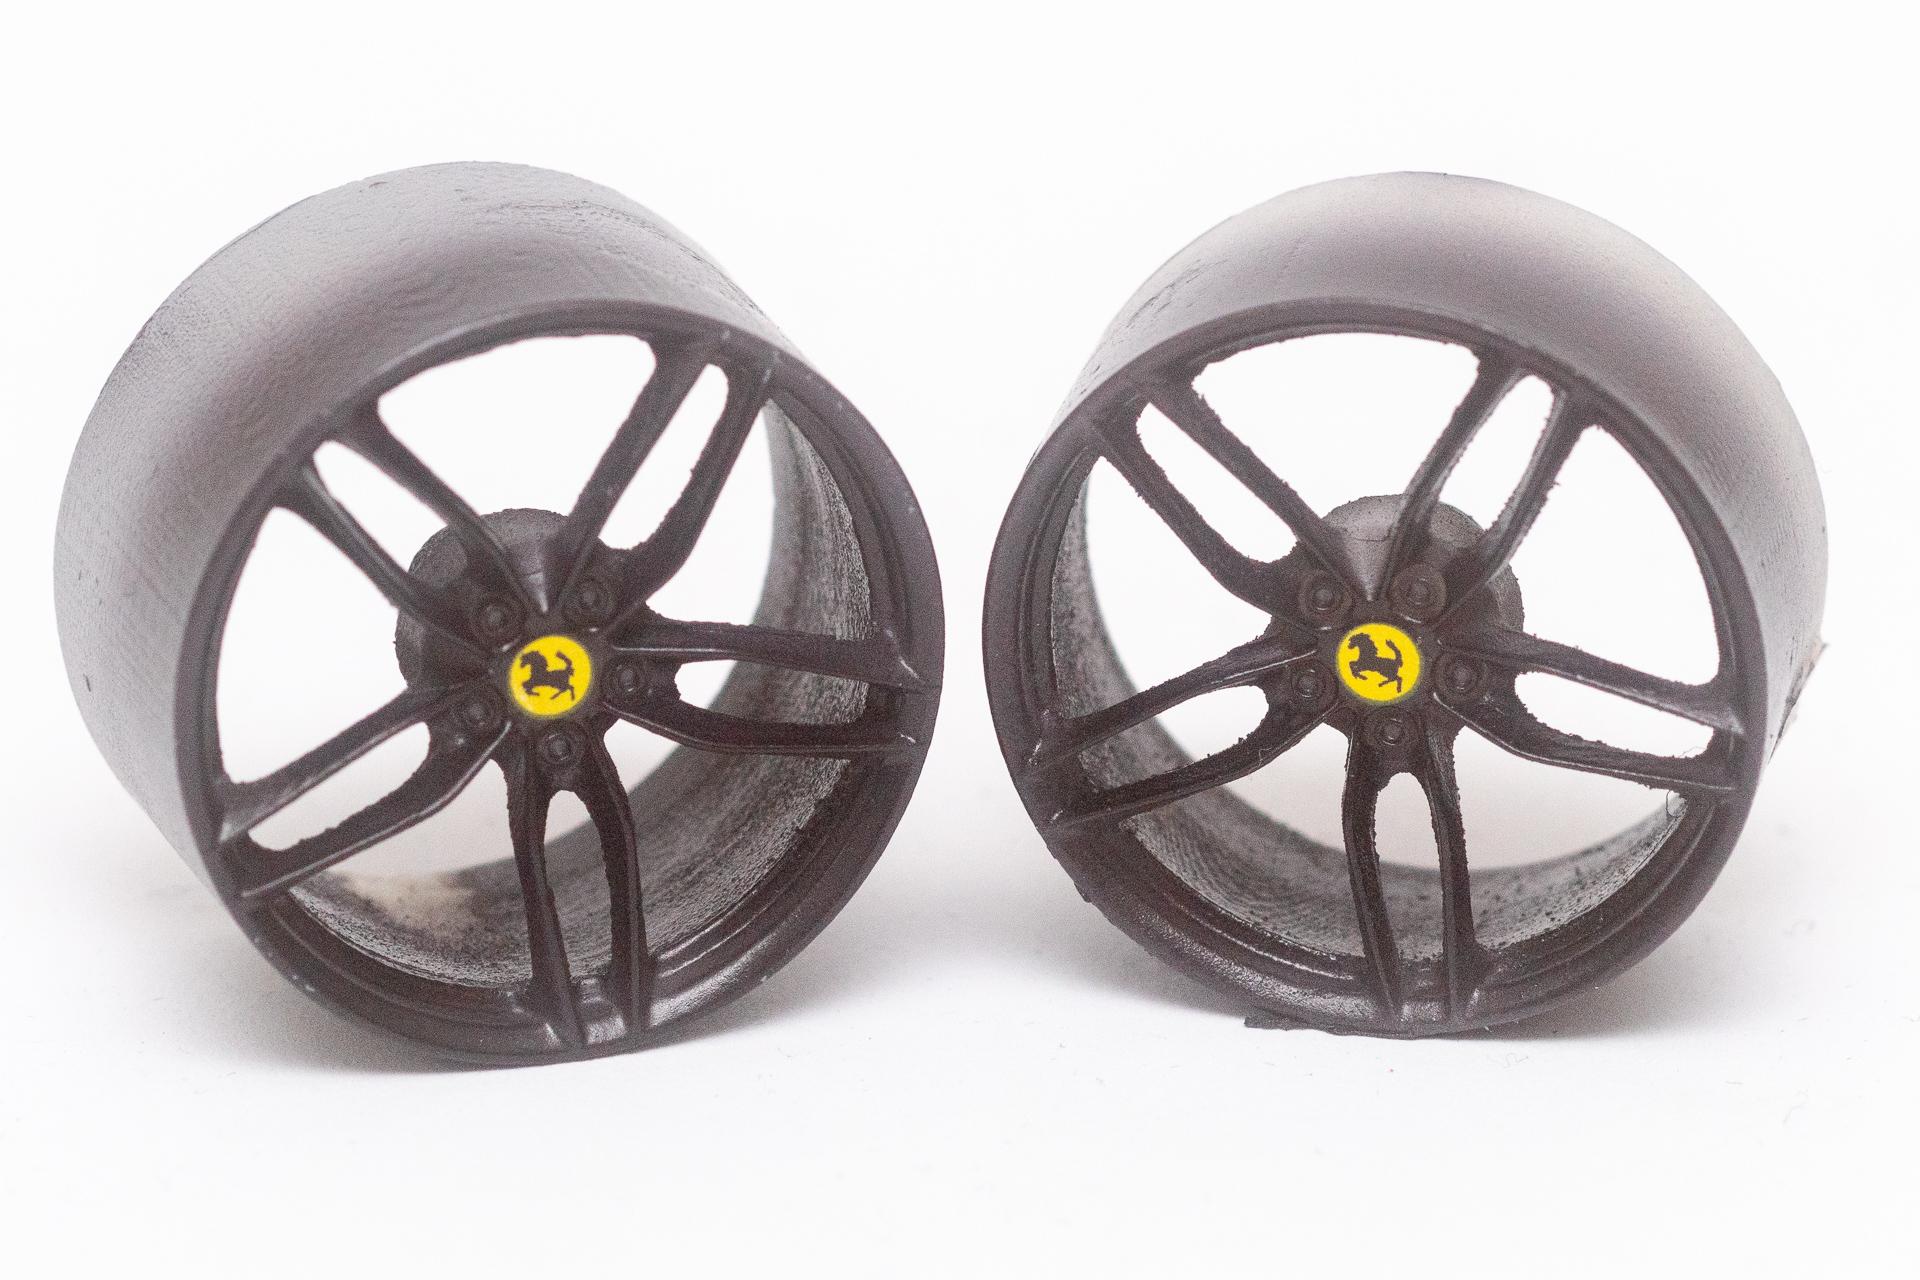
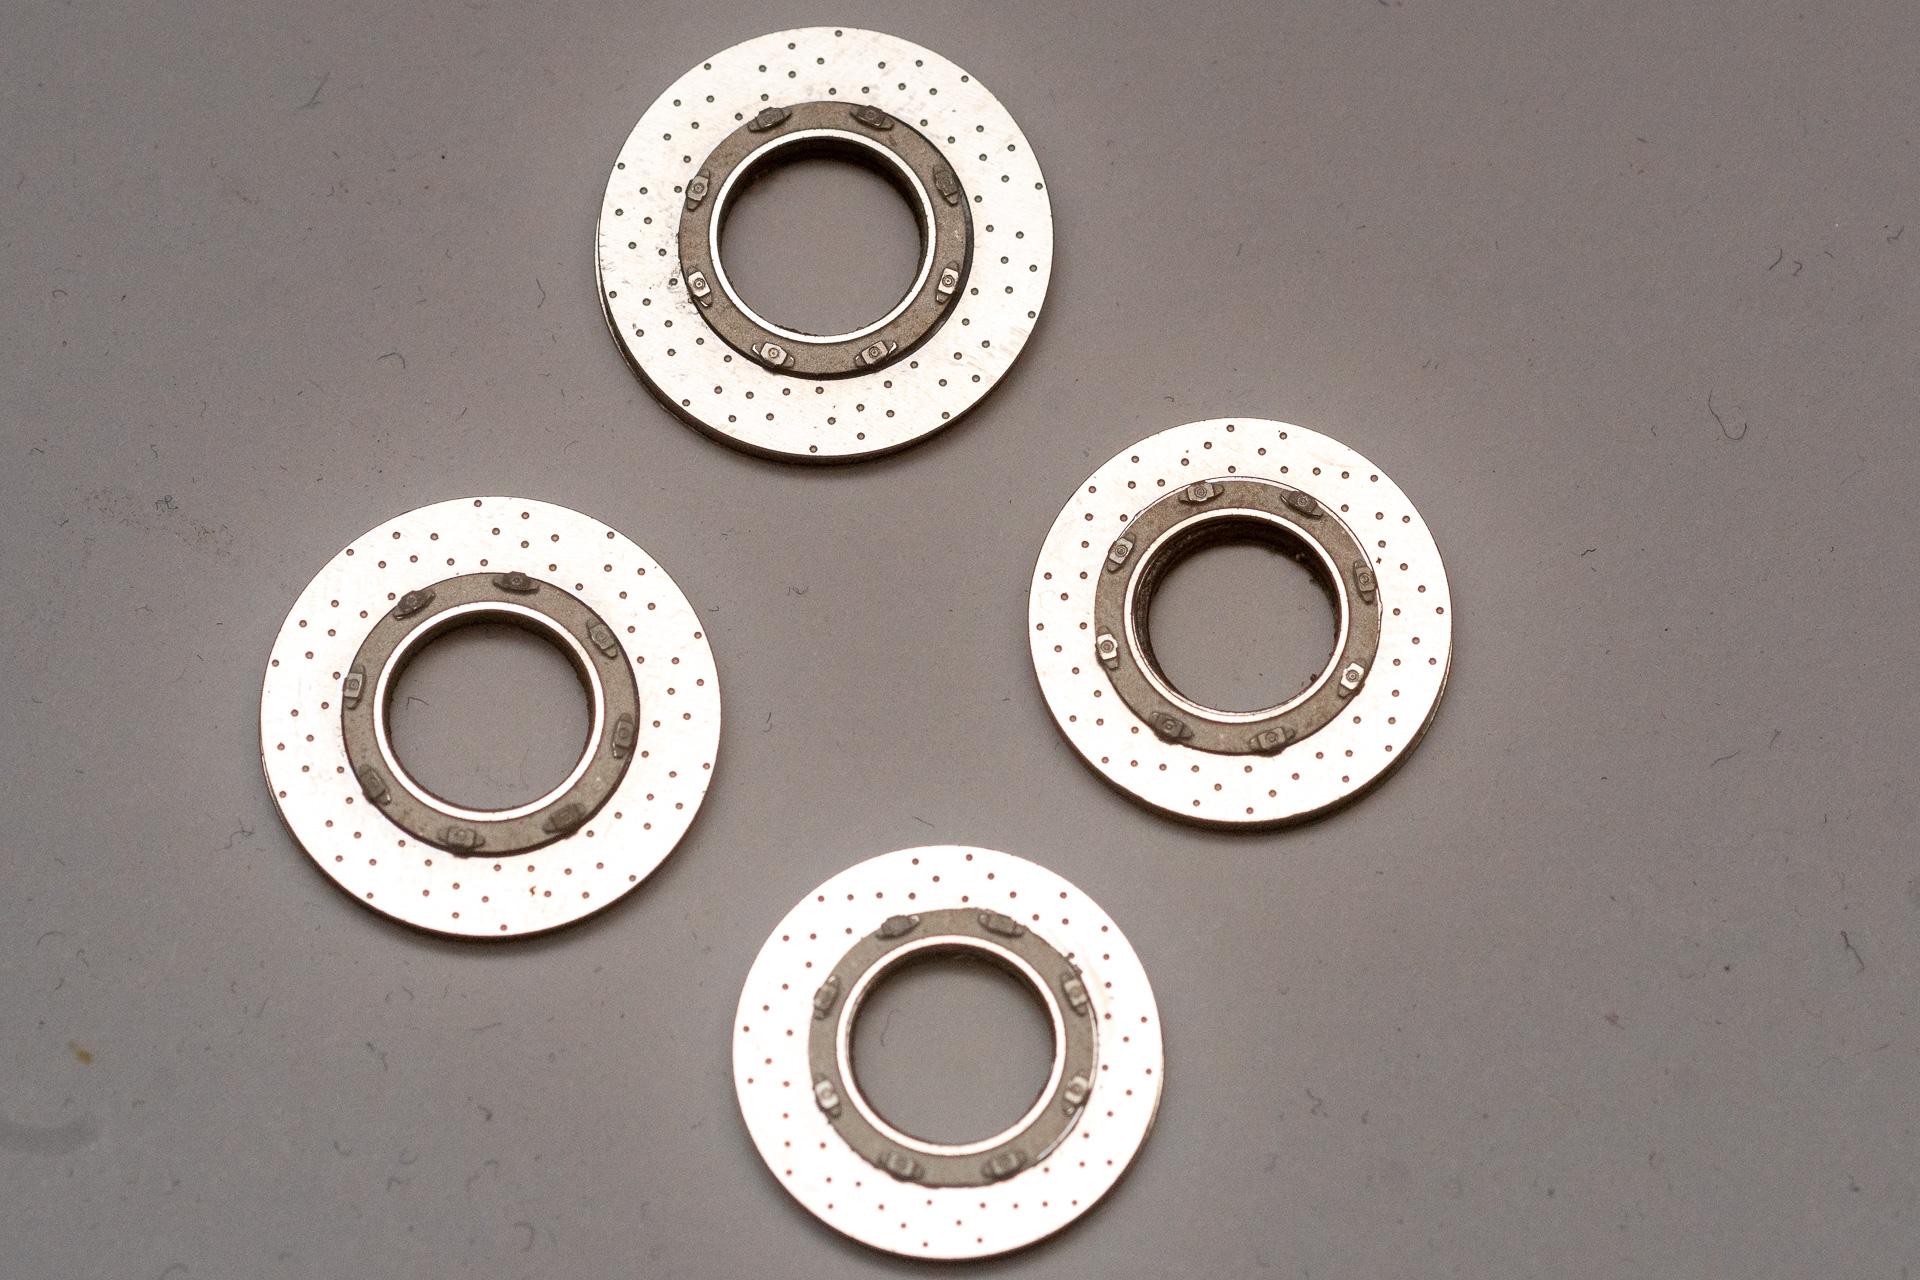
Hi all Thank you very much for all your kind comments and welcome to the first update in 2021. Maybe it will also be the second to last update in this WIP. First of all the door cards got their last few pe parts, once I finally remembered to paint them a second time. The wheels have been assembled as well. There I had to notice that the screws provided by Alpha Model didn't fit at all. On one hand the drill hole inside the rims, which is meant to meet with the screw was way too large so that the screw just fell inside. On the other hand they are about 3 mm too long for the front wheels. As I didn't have any matching screws at hand, I just half filled the holes in the rims with some gemstone glue, put the breakdiscs on top of the wheel suspension, put the rims on, turned everything around and just put the screw in and let the glue dry. Then I flocked the interior and assembled the pedals along with the footrest Finally the body got its last few pe parts. Today I also attached the windshield, which was quite some struggle because the tension was so high, that the part had to be fixed until the glue completley dried. On top I could use some clamps to hold the parts together, but in the lower corners I had to hold them together by hand. To have some entertainment during these rather long periods of time, I once again watched "Die Another Day" on my surround system The windshield still has its protection sheet on it, that's why it doesn't look that great yet. That's all for the moment. Urs
-
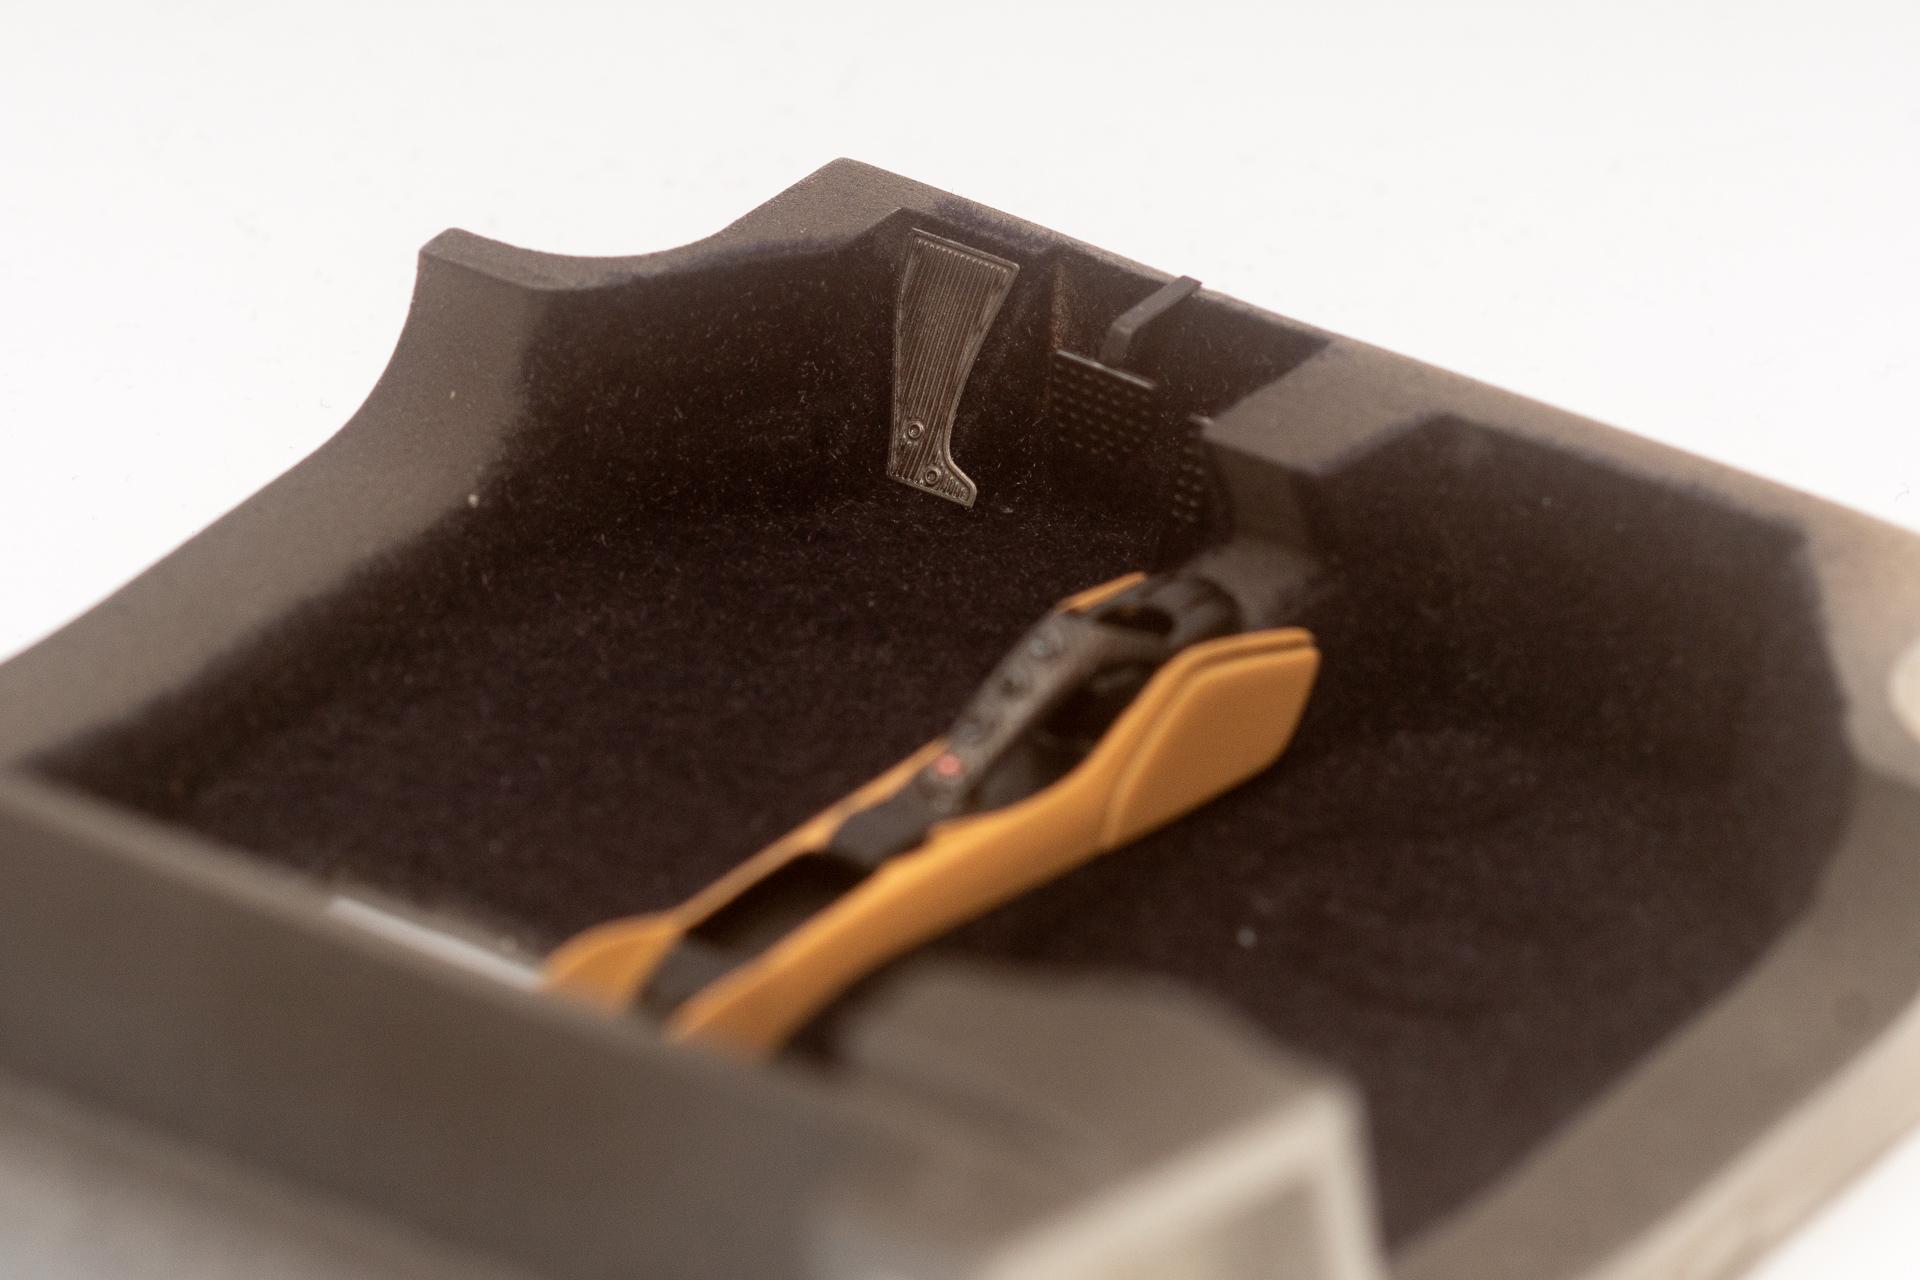
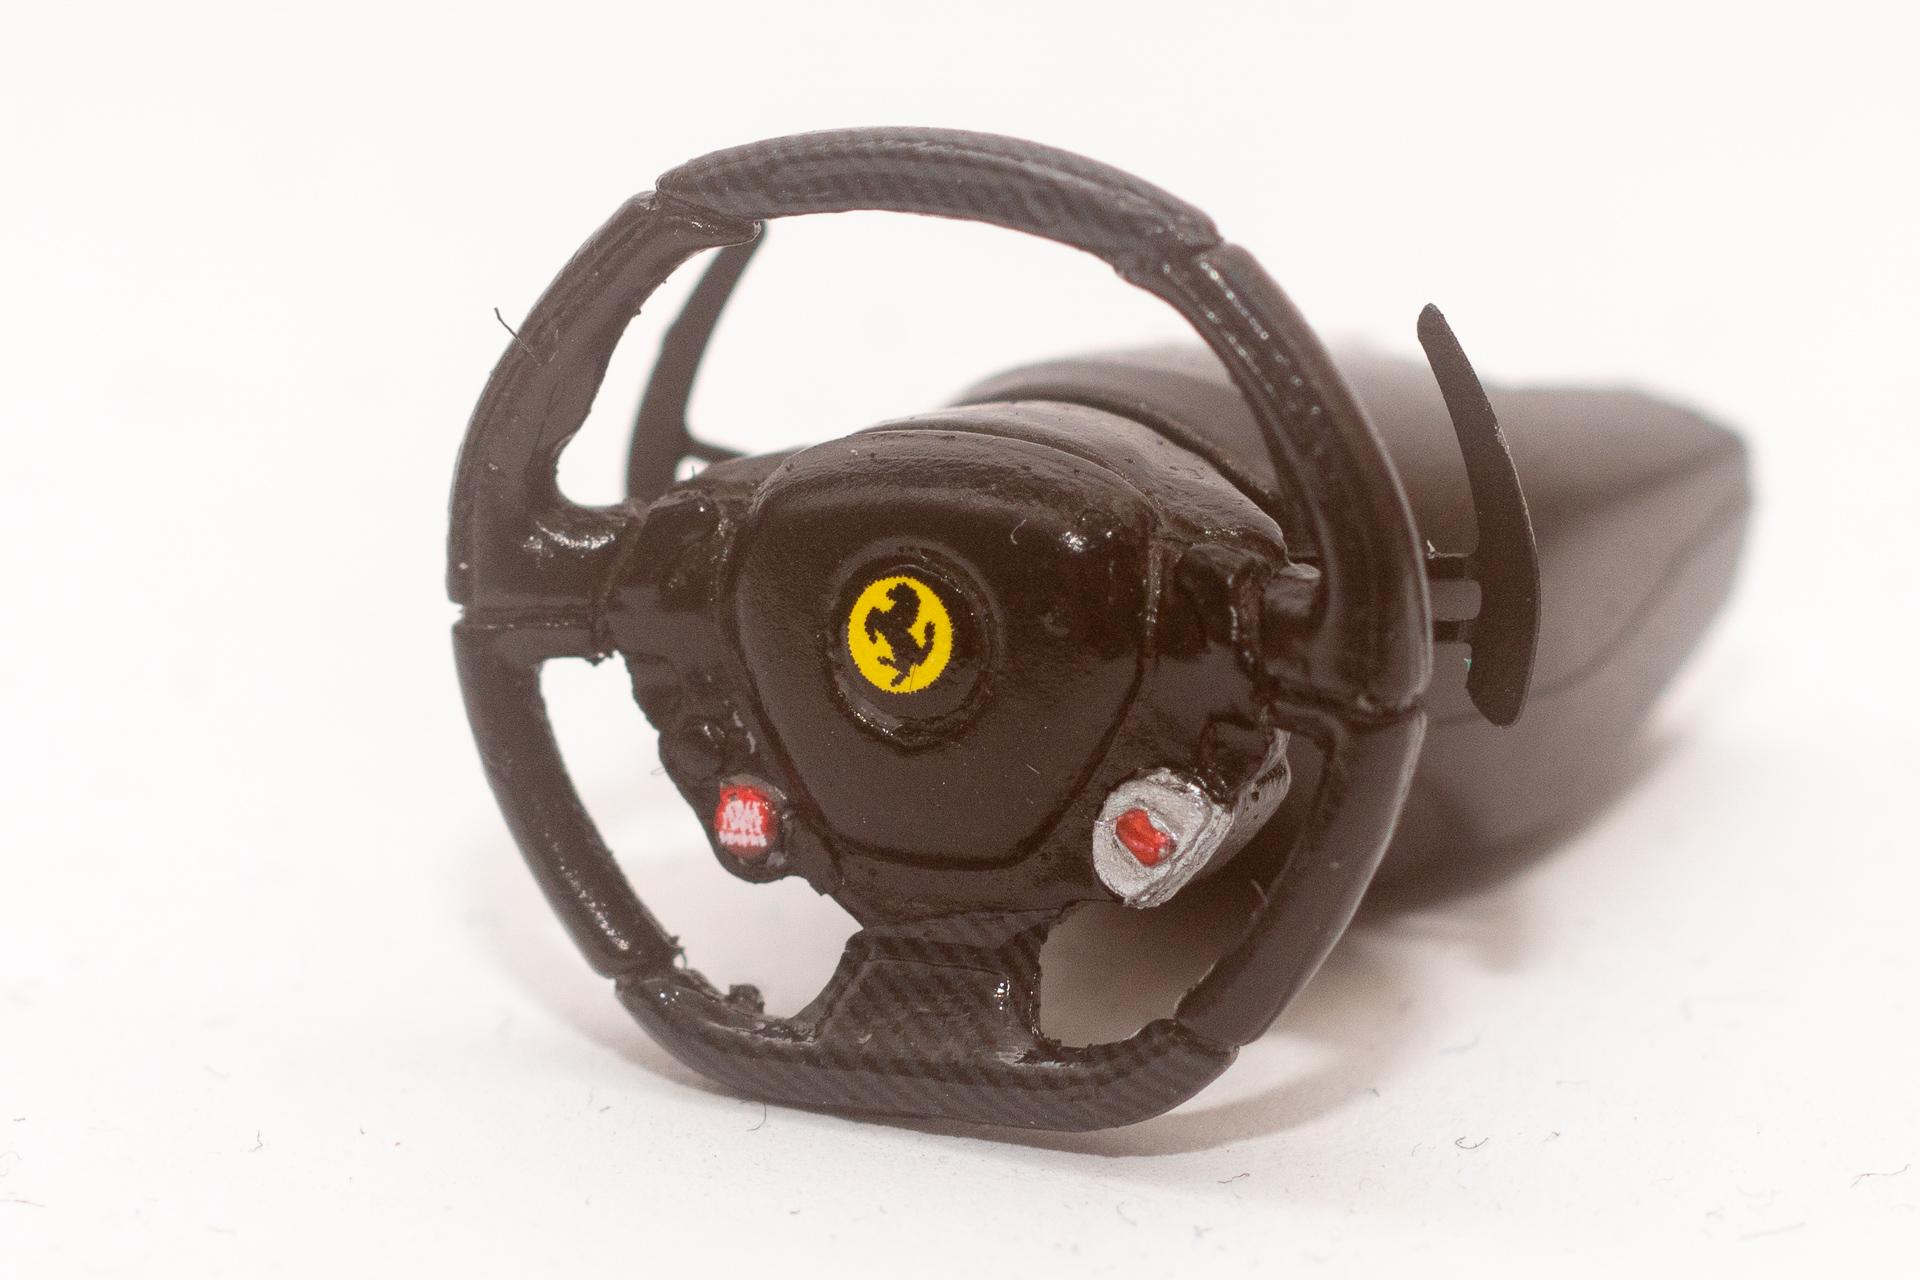
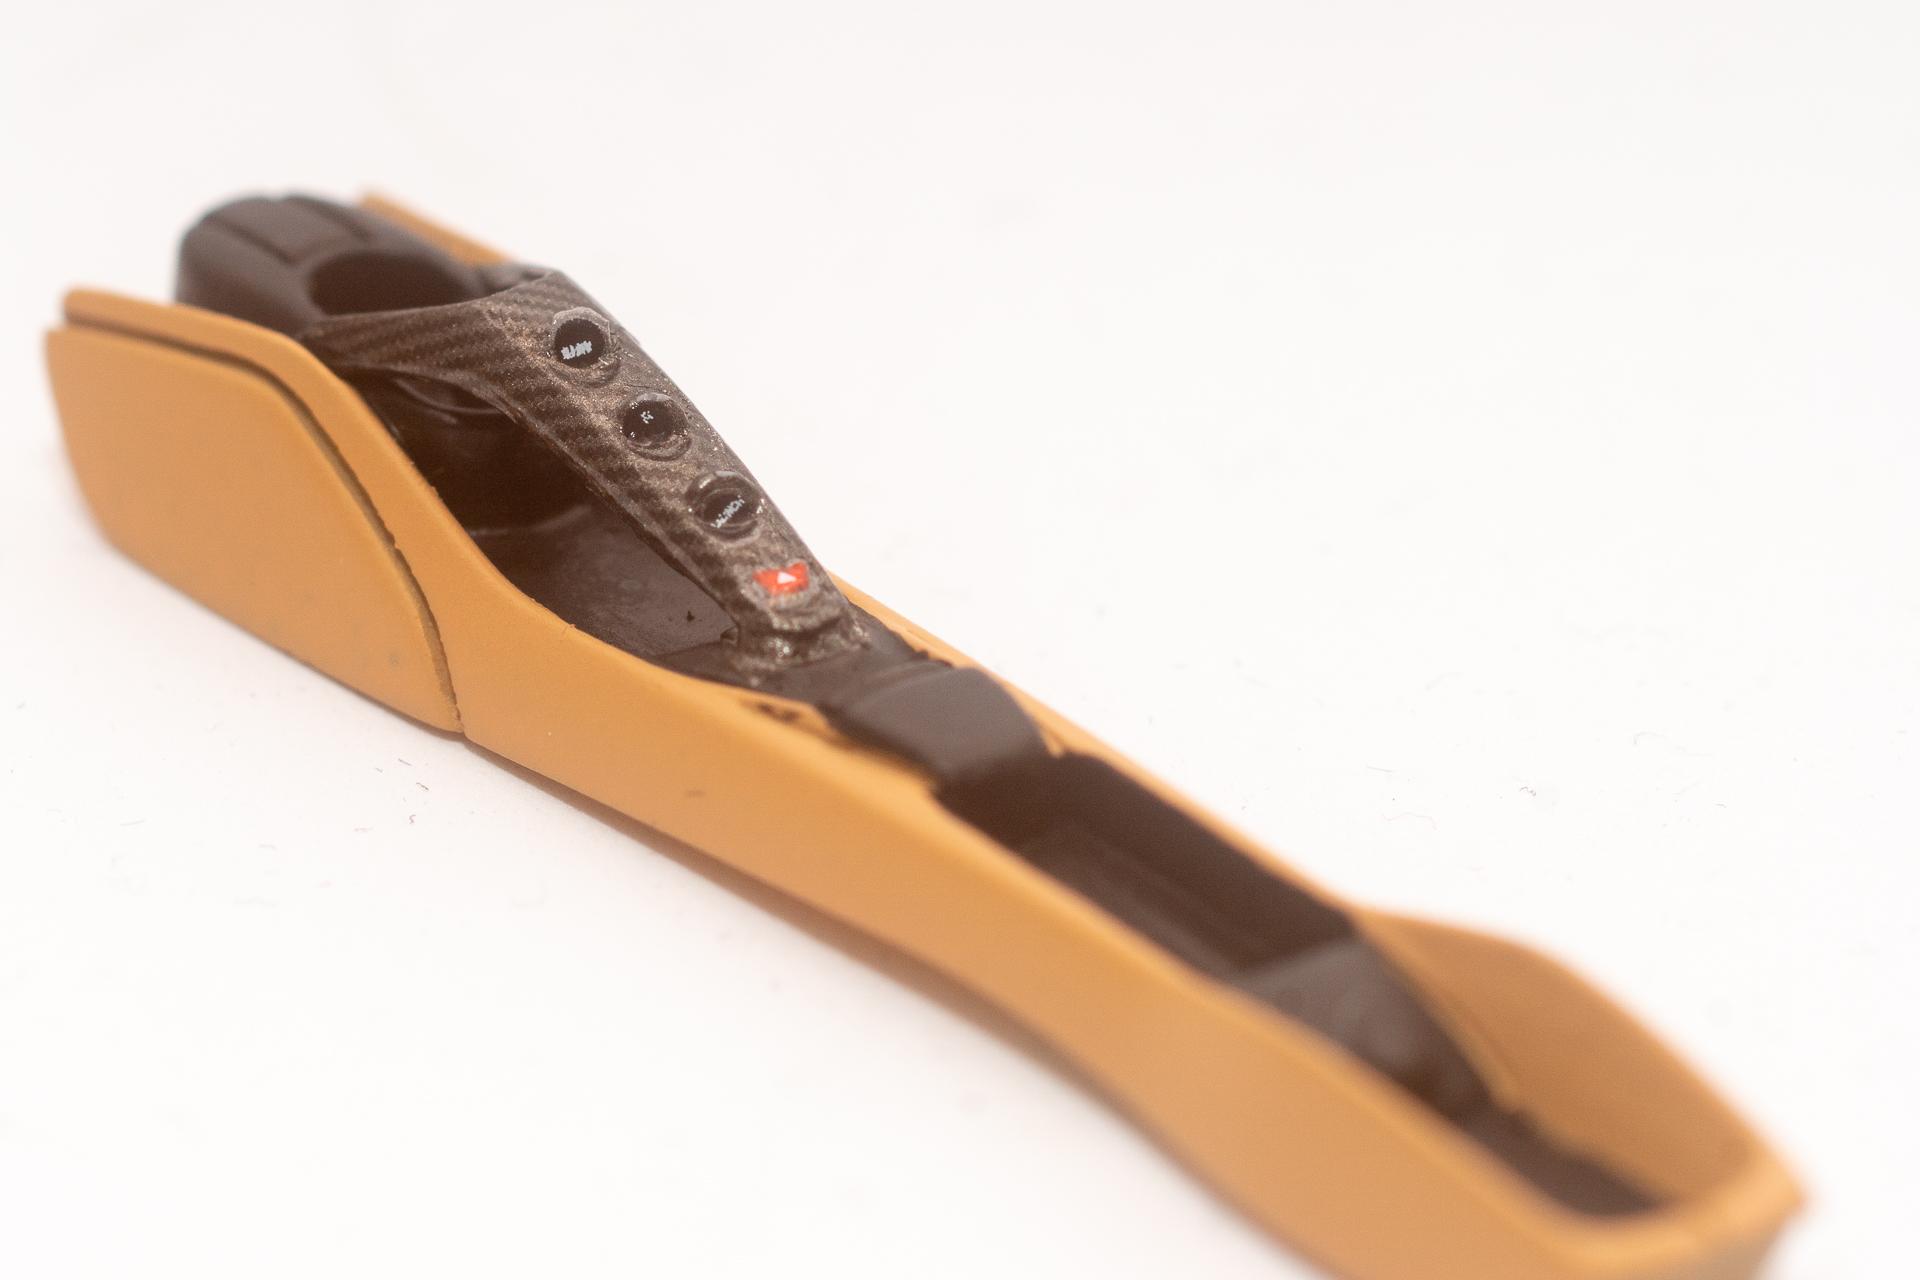
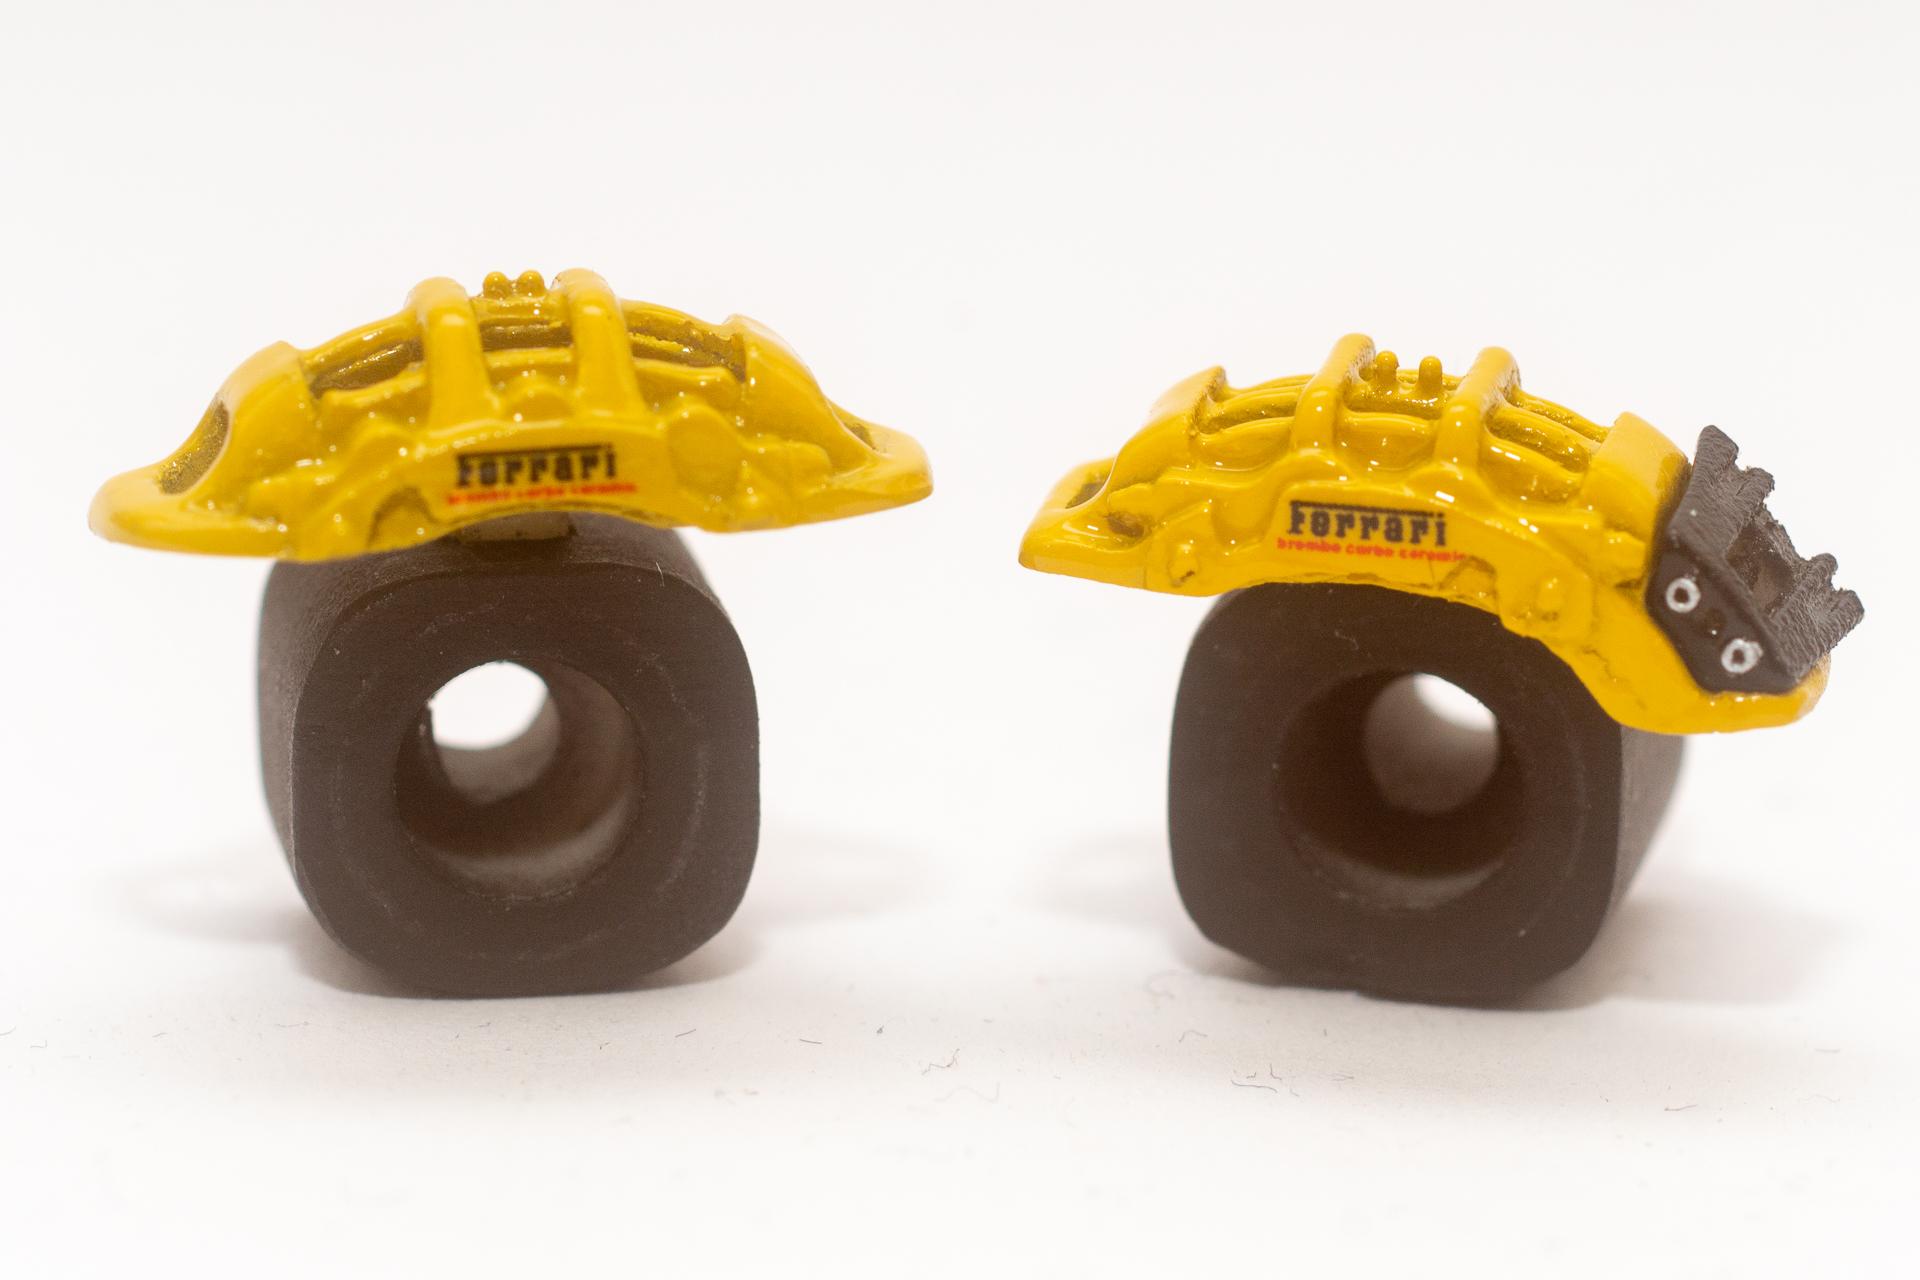
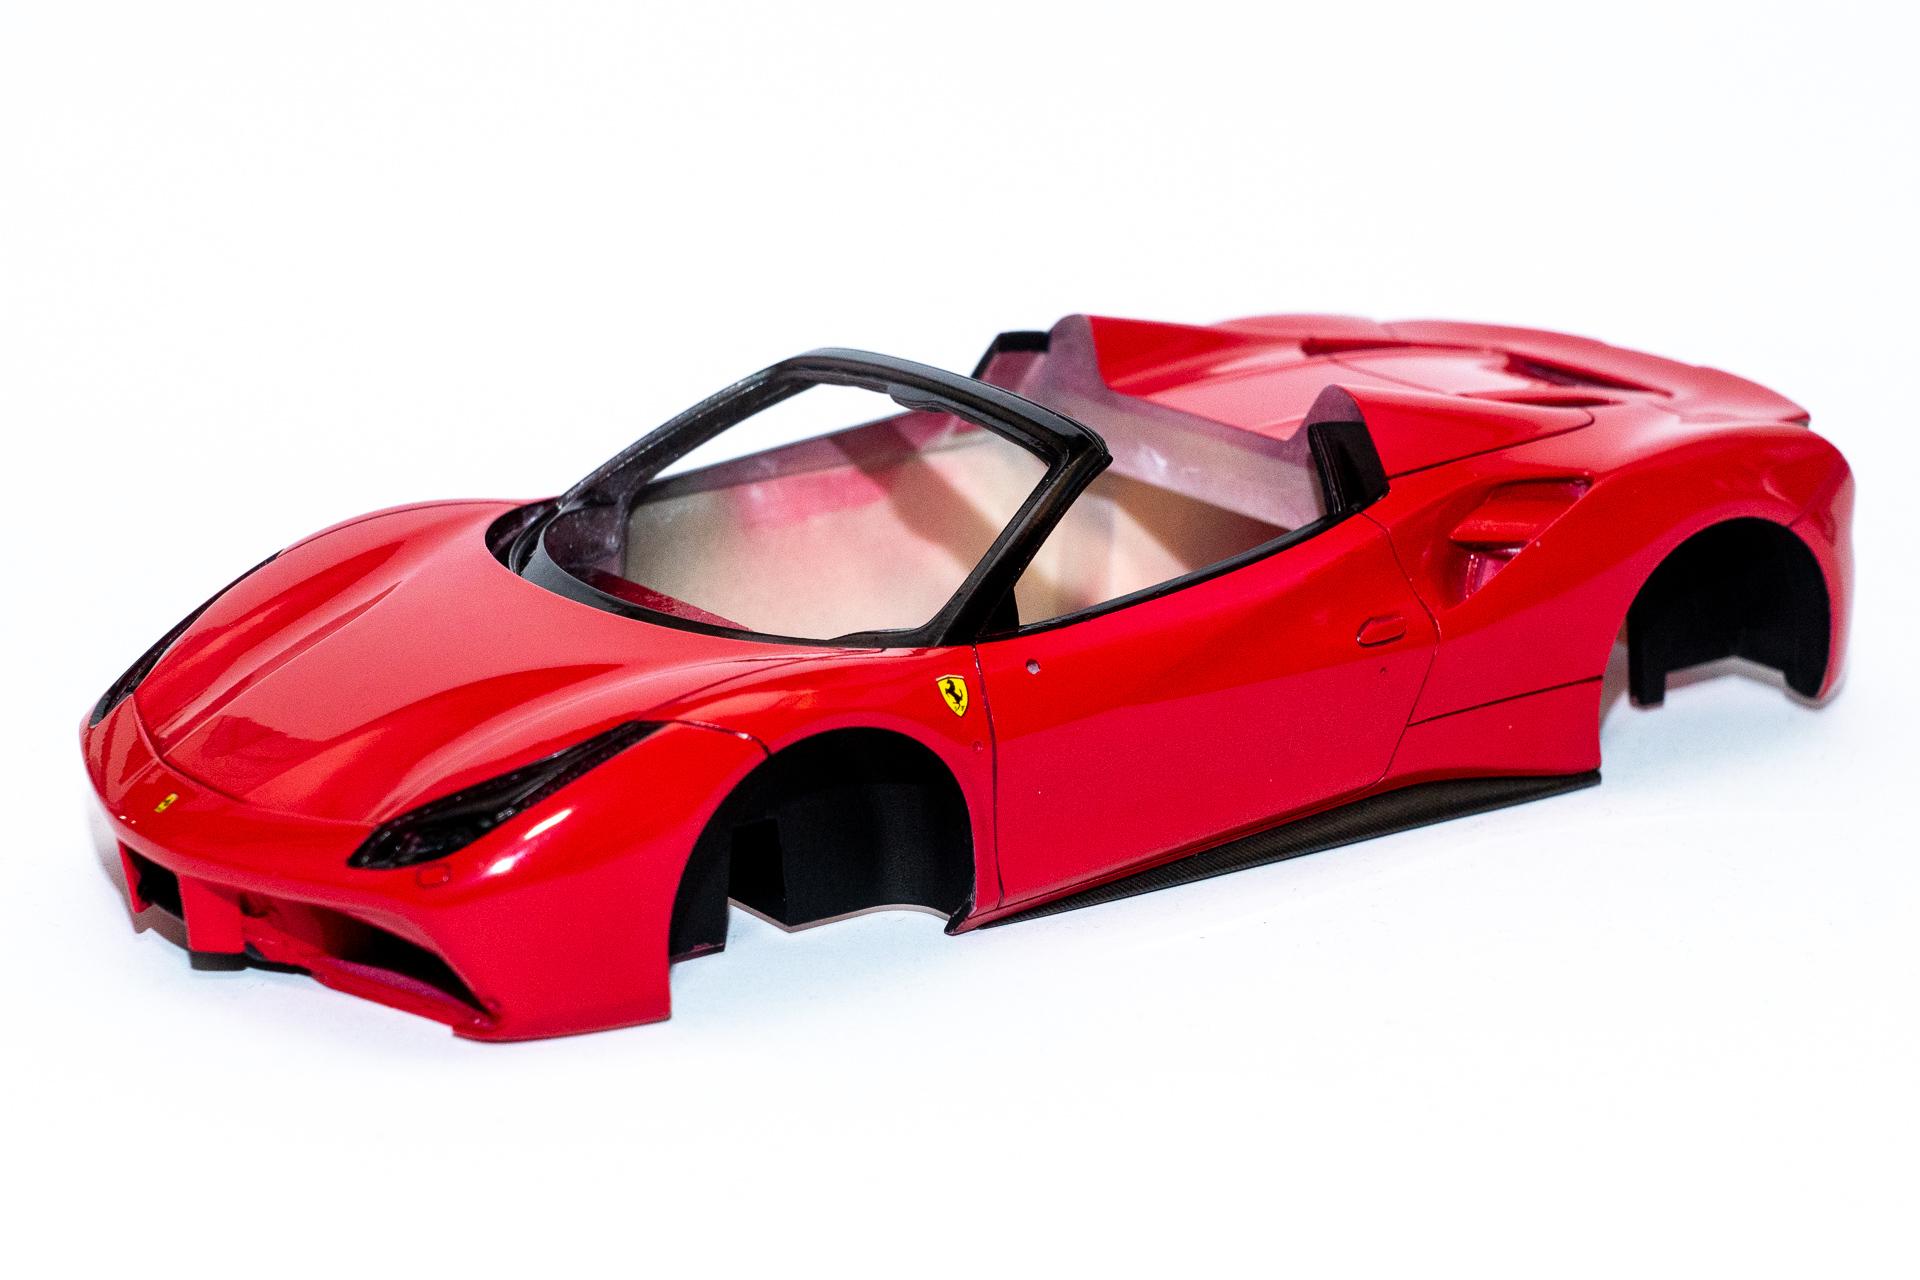
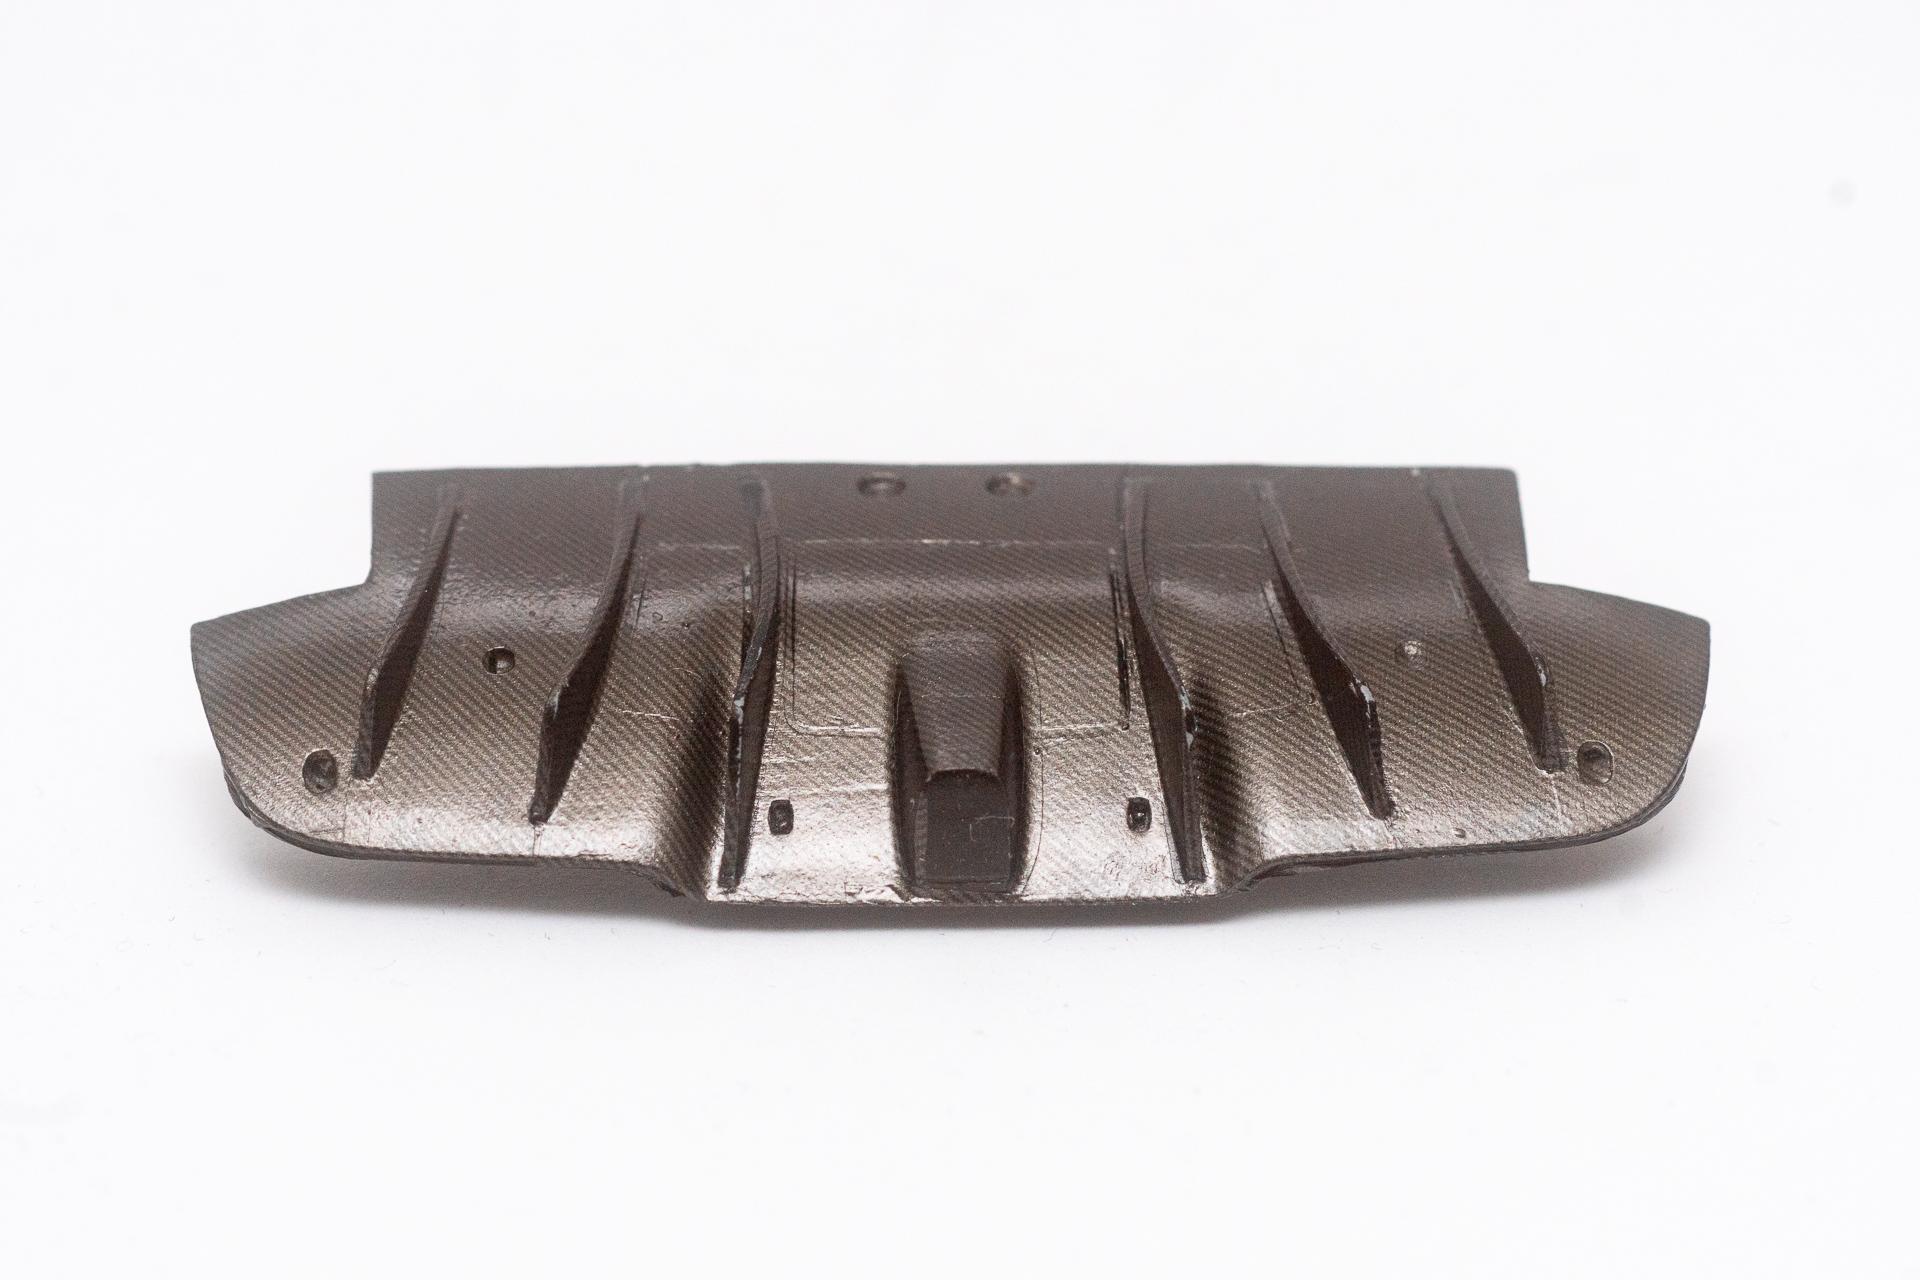
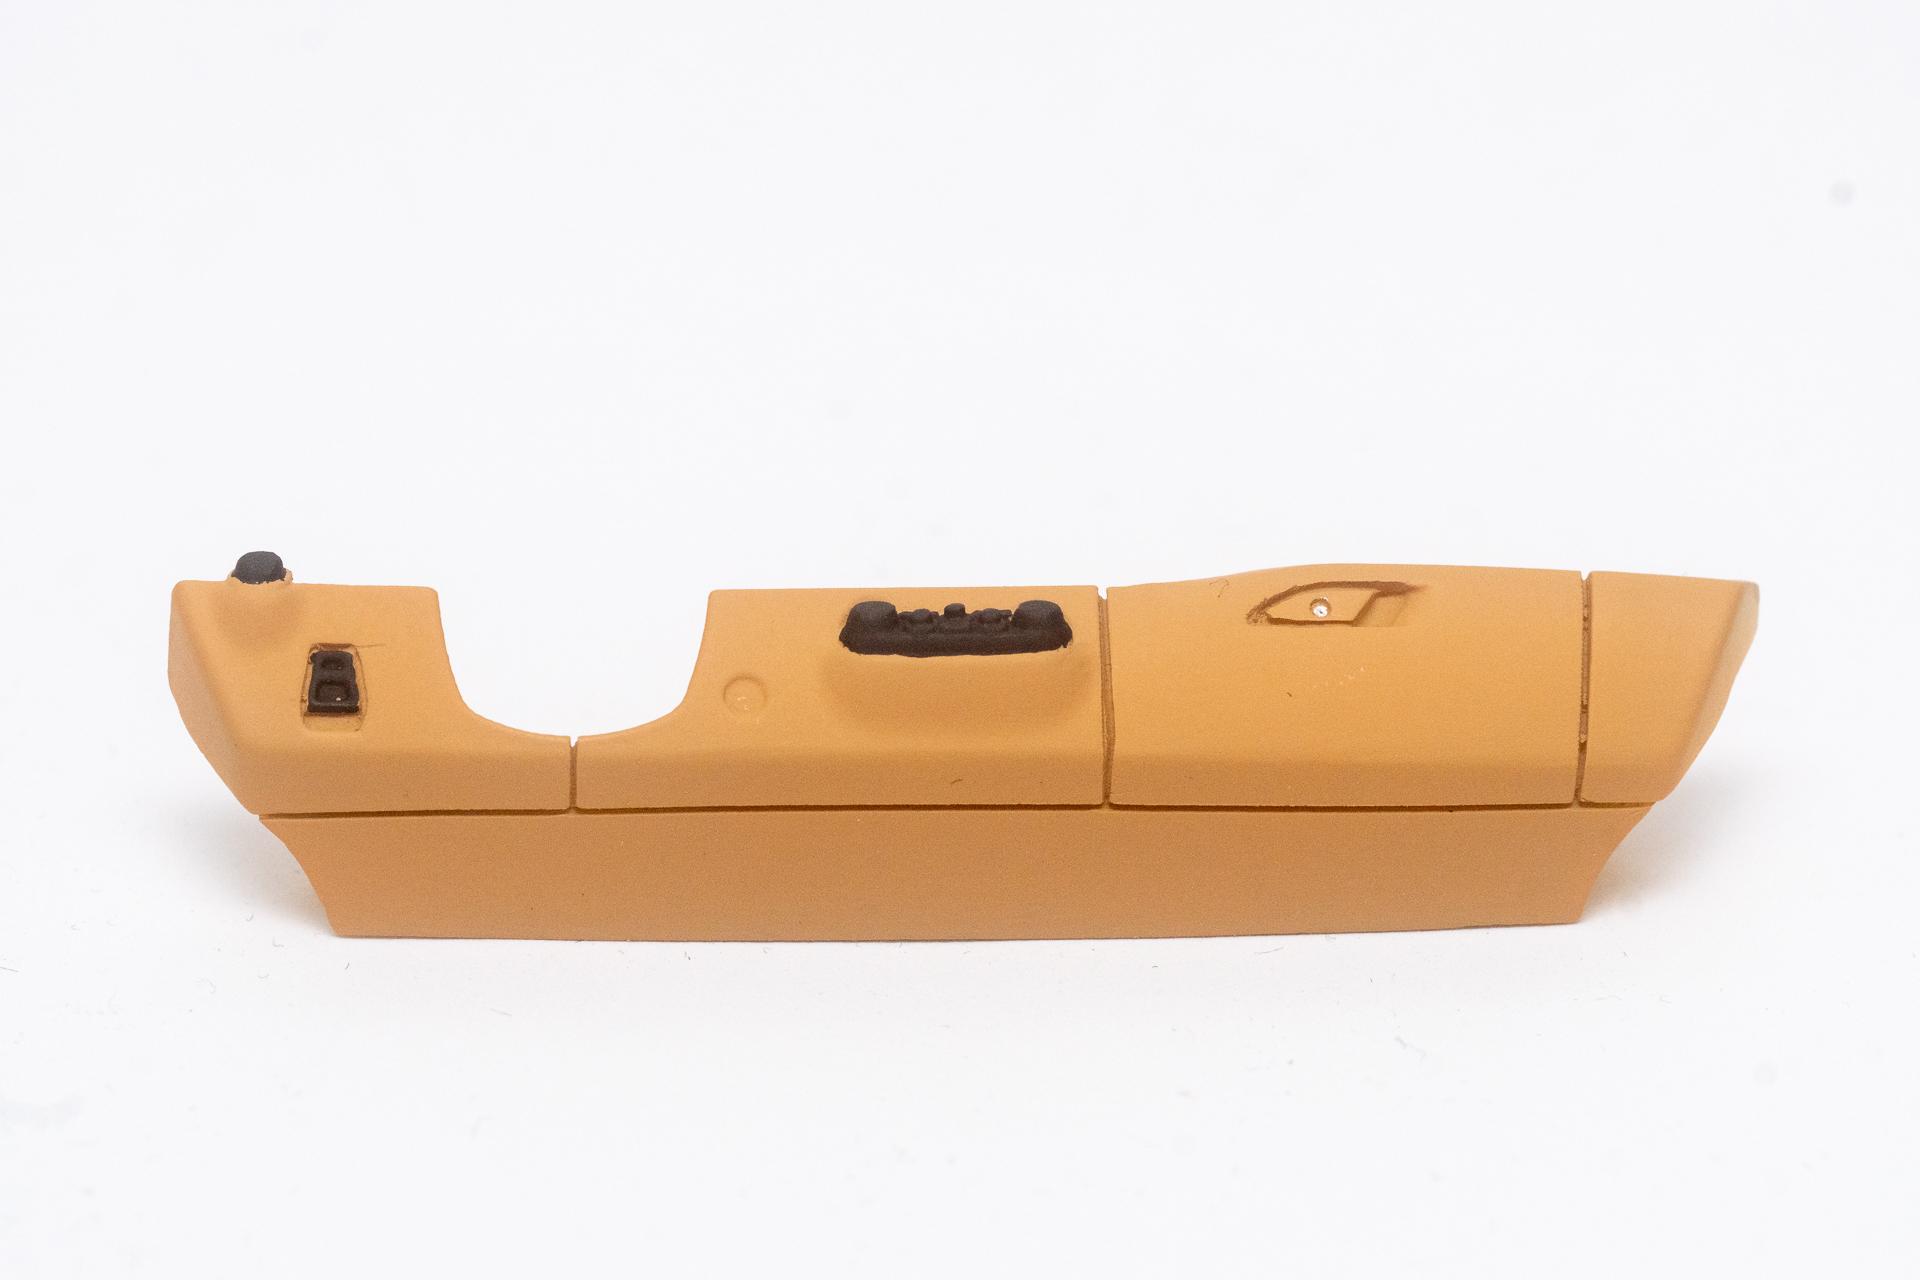
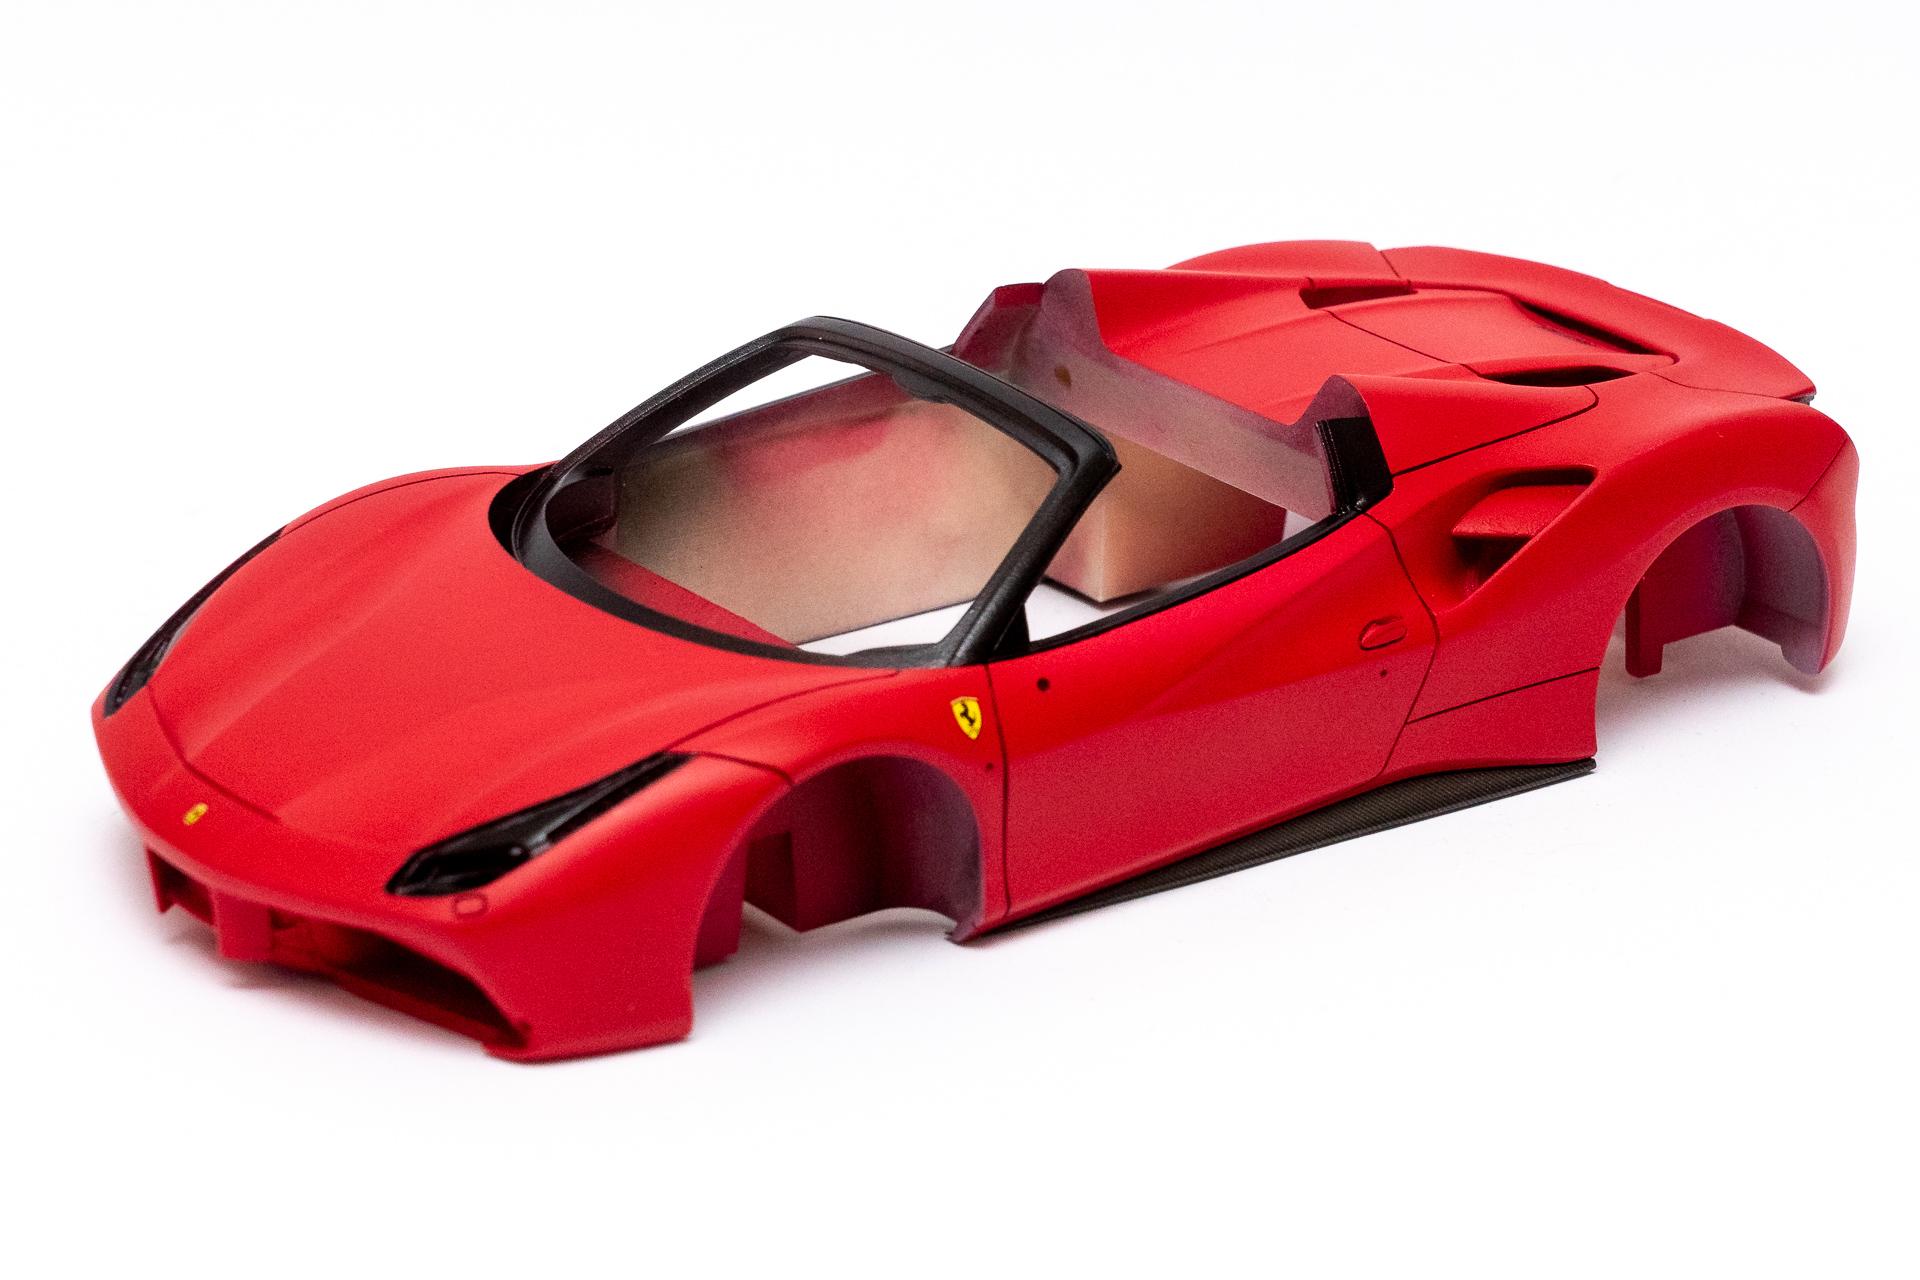
Hi all Welcome to another update to my Ferrari 488 Spider. This week the calipers have been finished und mounted to the wheel suspension (or at least what Alpha Model provides as suspension in this kit) The steering wheel has been completed and assembled and is now awaiting final assembly as does the center console which got its last carbon piece. The labeling of the buttons has once again been botched up by Giuseppe. Some people think that Giuseppe is on the pay roll of another company based in Sant' Agata Bolognese, but that's only a vague suspicion... Finally the body received its first few PE parts. Also the tailpipes and the diffusor could be attached. The prancing horse on the back unfortunately got wiped off by the first gentle wipe when sanding and polishing the body after clear coating. Now it sits on my cutting mat waiting to be reapplied. Good luck it doesn't seem to be damaged too much. But to be sure, I will have to take a closer look. Luckily the wiped off part was a Metal Transfer sticker while there is also one prancing horse on one of the PE frets. So if it should be damaged or can't be reapplied, I can still use the PE part instead That's all for today. I wish all of you a calm last week of the year and a happy and healthy 2021 Urs
-
Hi all Thank you and thanks for the tip with the exacto blade. This week's thursday was clear coat day. Unfortunately I wasn't happy at all with the result. In some spots I might have applied to thin, so that I got a quite rough surface and in some other spots the airbrush spit large drops of clear on the body (that was definitivley caused by my own stupidity). But after a few hours of sanding and polishing I think the clear turned out quite acceptable. The door cards in their first version haven't had enough contrast between the different black parts, so I decided to mask off the lower part and repaint the rest with some charcoal textured paint. In real it looks much better now, even if I had to notice that in the pictures there's still hardly any difference visible. The rims got some clear coat as well. After clear had dried, I painted the nuts. Now all that's missing are the air valves. I know, on the real car the cavallino rampante is also visible on the cap of the air valves, but I think, my 488 will have to do without That's all for this week. I wish all of you a merry christmas. Urs
-

Ford T 1914 Firetruck
harti20 replied to harti20's topic in Model Trucks: Pickups, Vans, SUVs, Light Commercial
Thank you all for you kind comments on this build -
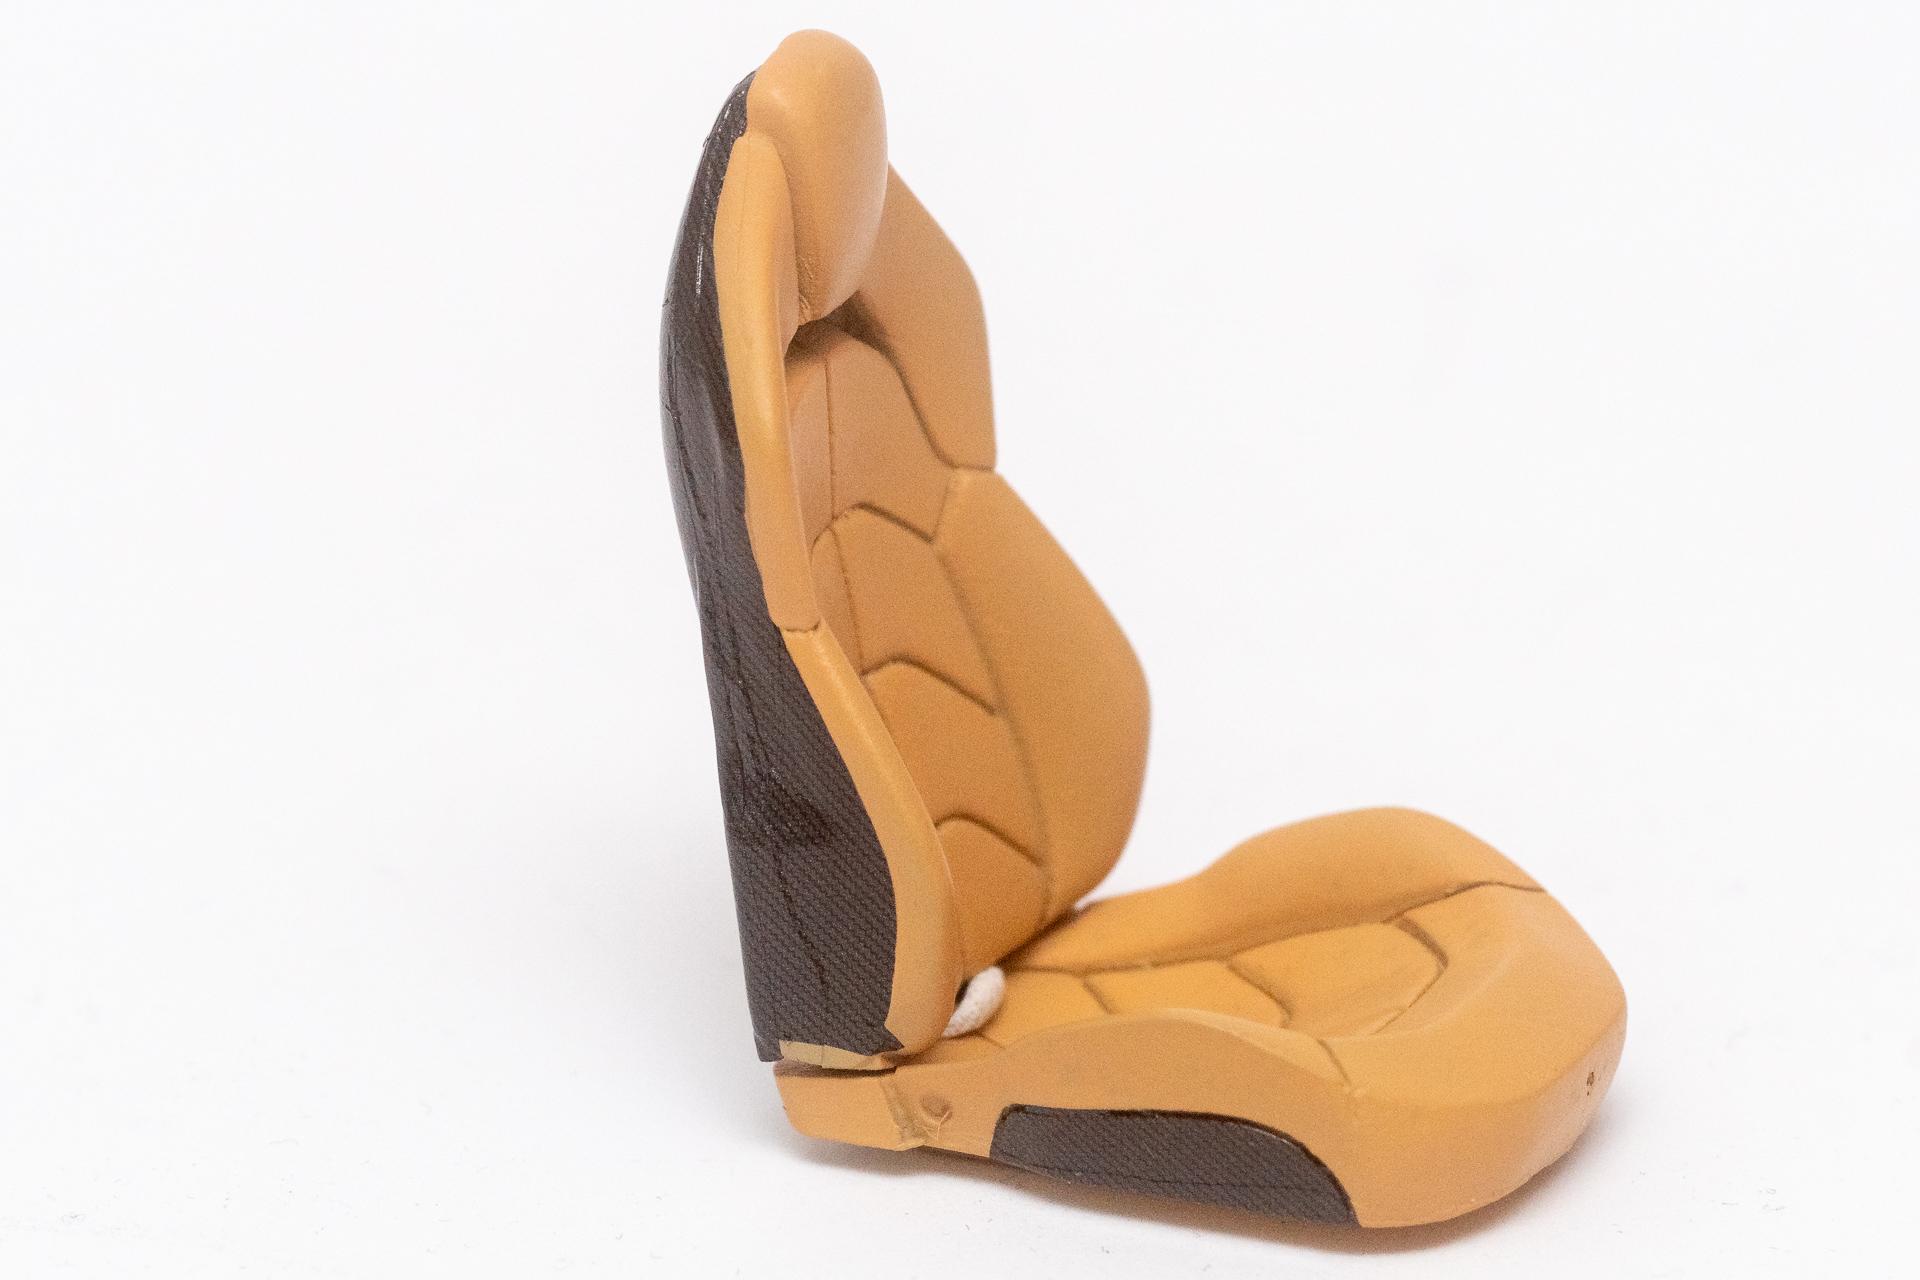
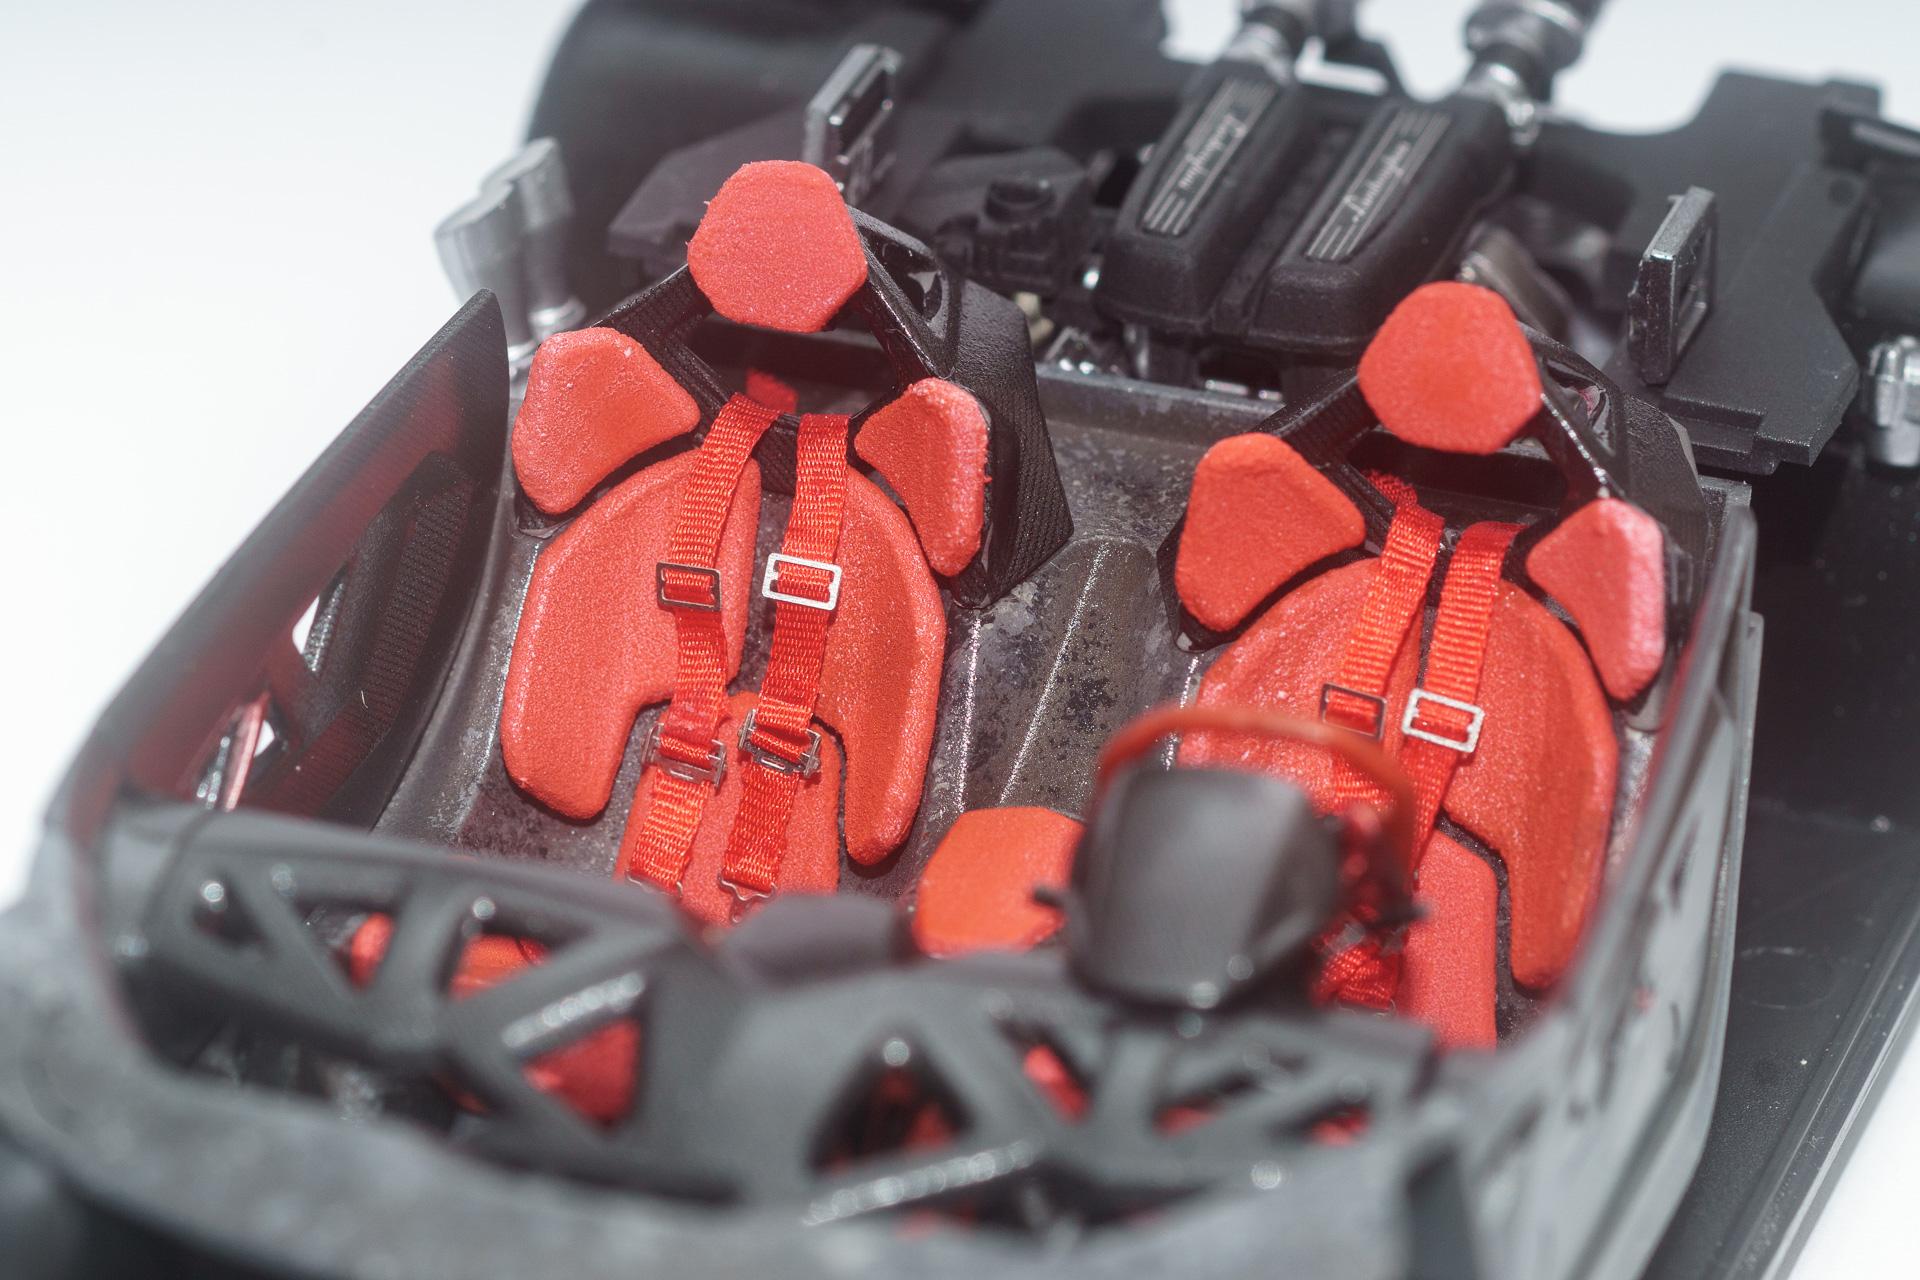
Hi all Thank you for all your kind comments. This week I made only small progress but that took quite some time. First of all the diffusor got its carbon decals. I only saw all the hollows after having attached the decals. But as they are on the underside of the car, I'll leave them as they are, but keep in mind for further builds of any Alpha Model kits that I have to better control the surfaces of the parts. The seats are ready for final assembly. The white stuff between seat and the backrest is only some blue tac that I used for temporary assembly. After temporary assembly I recognized that I'll have to add some more carbon decals on the sides. The lower part of the dashboard got some detail painting The rims were painted with Alclad Gun Metal and will get some clear once I clear coat the body Today the brake discs were assembled. Maybe I'll do some slight wash on them, but I'm not quite sure yet. And finally the body got its decals and metal transfers. I everything comes together the way I'm planning it, it will time for clear coating on thursday. That's how far I got for now. Before continuing I should now finally start with the PE parts, but somehow I'm lacking motivation to fiddle around with these parts. So maybe I'll dive in another project I've already started beside my Ferrari. If I will do so, I'll open a new WIP here Urs
-
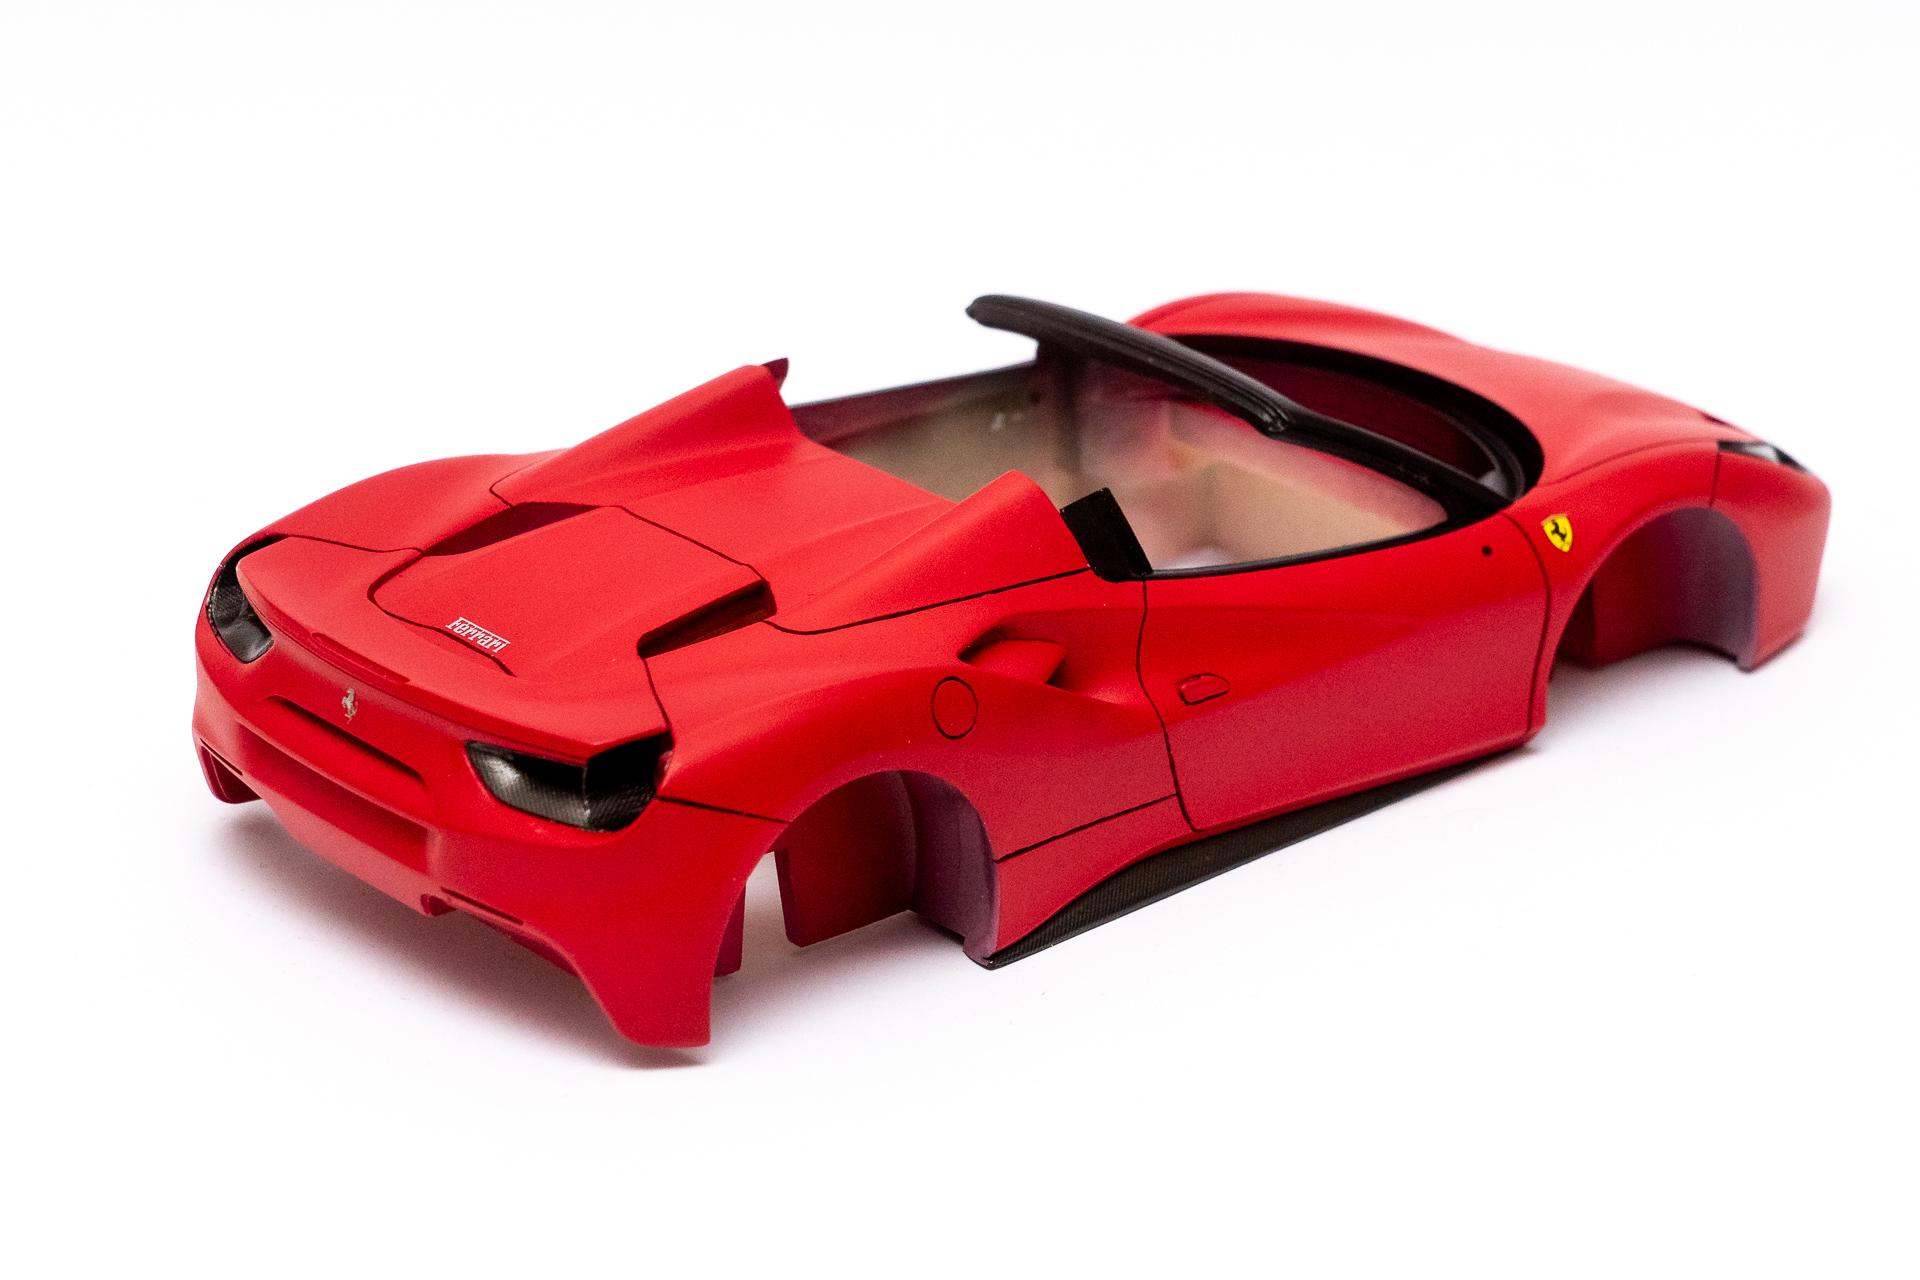
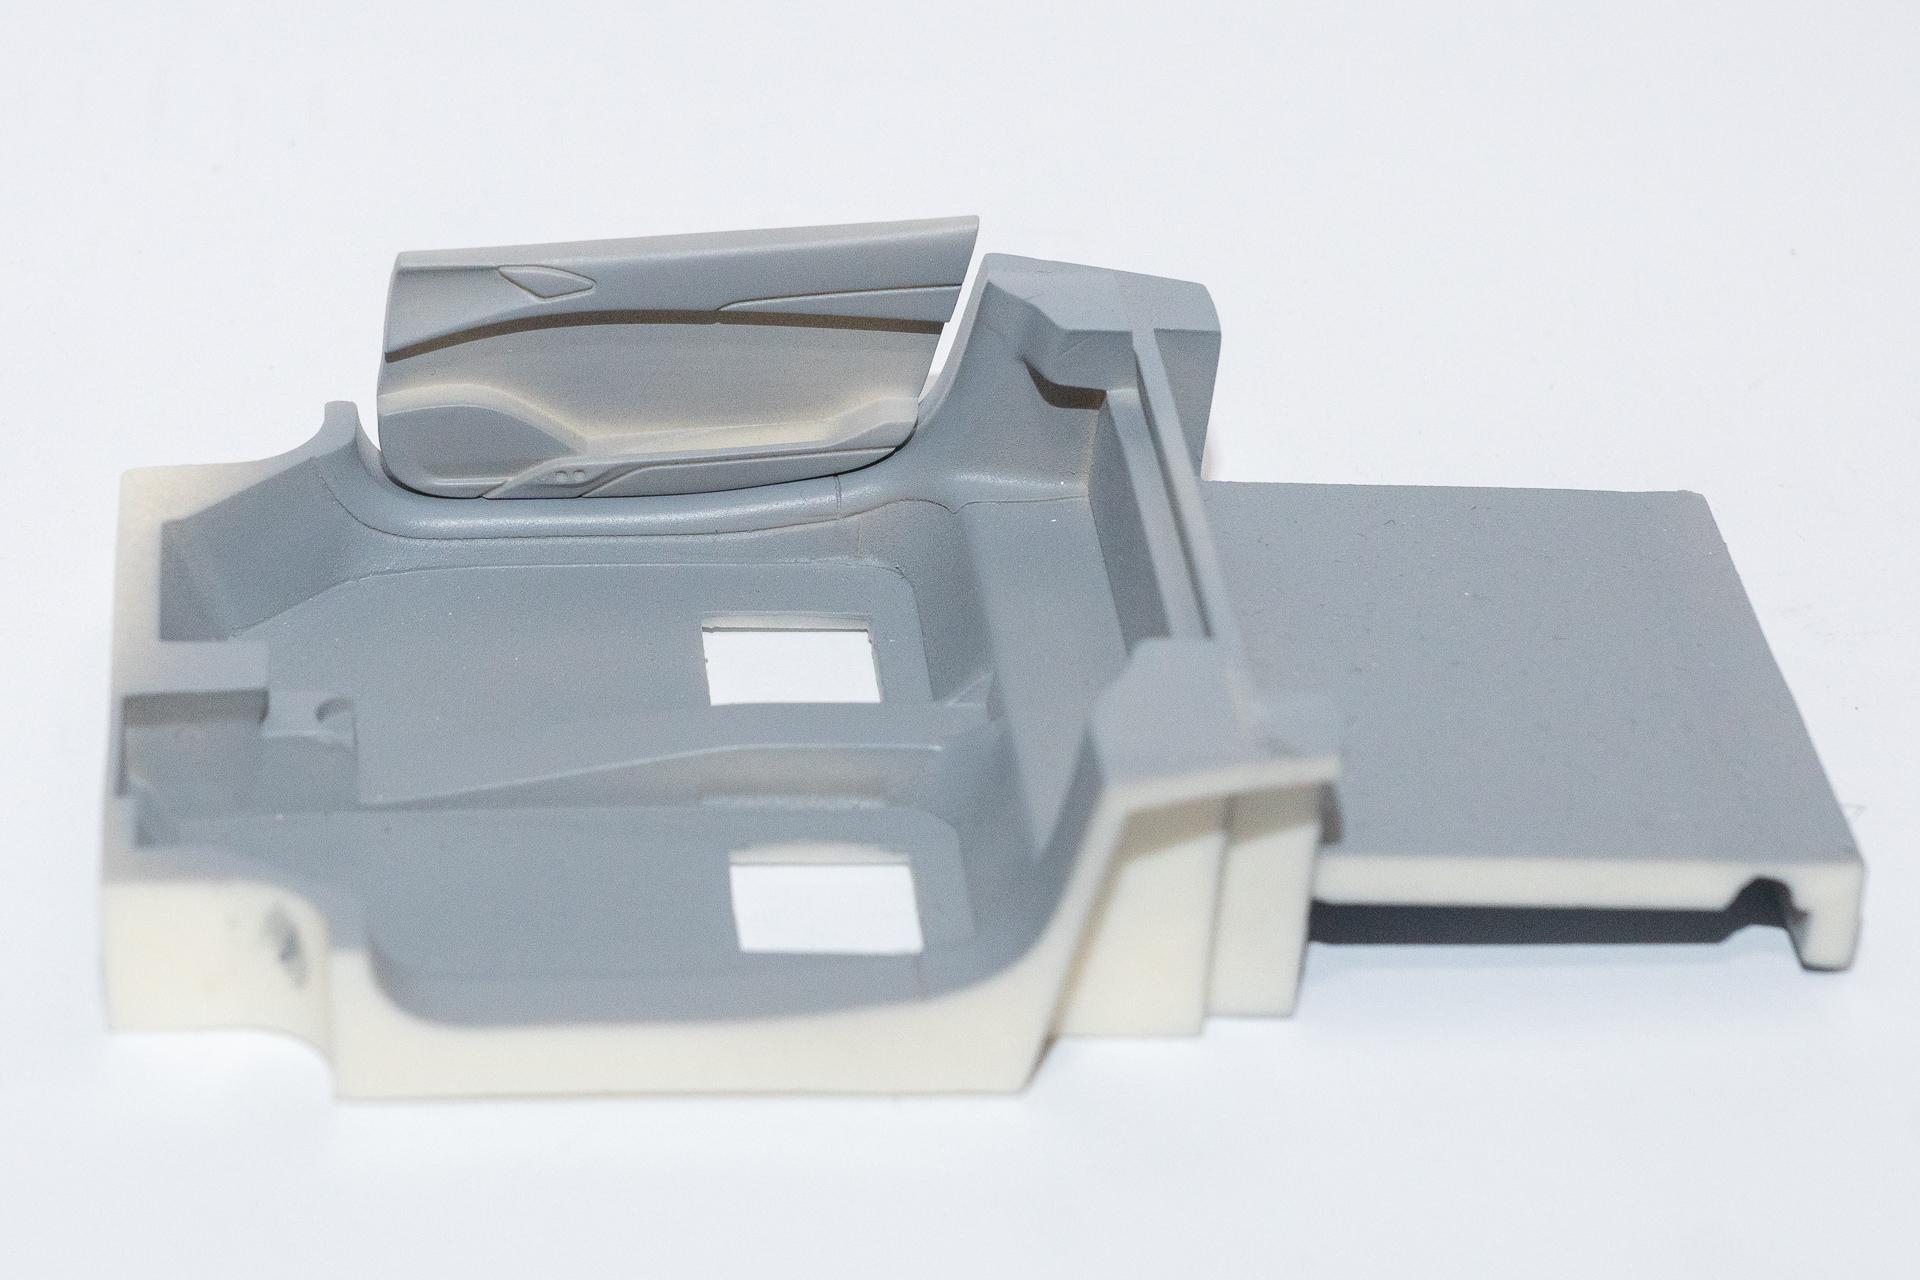
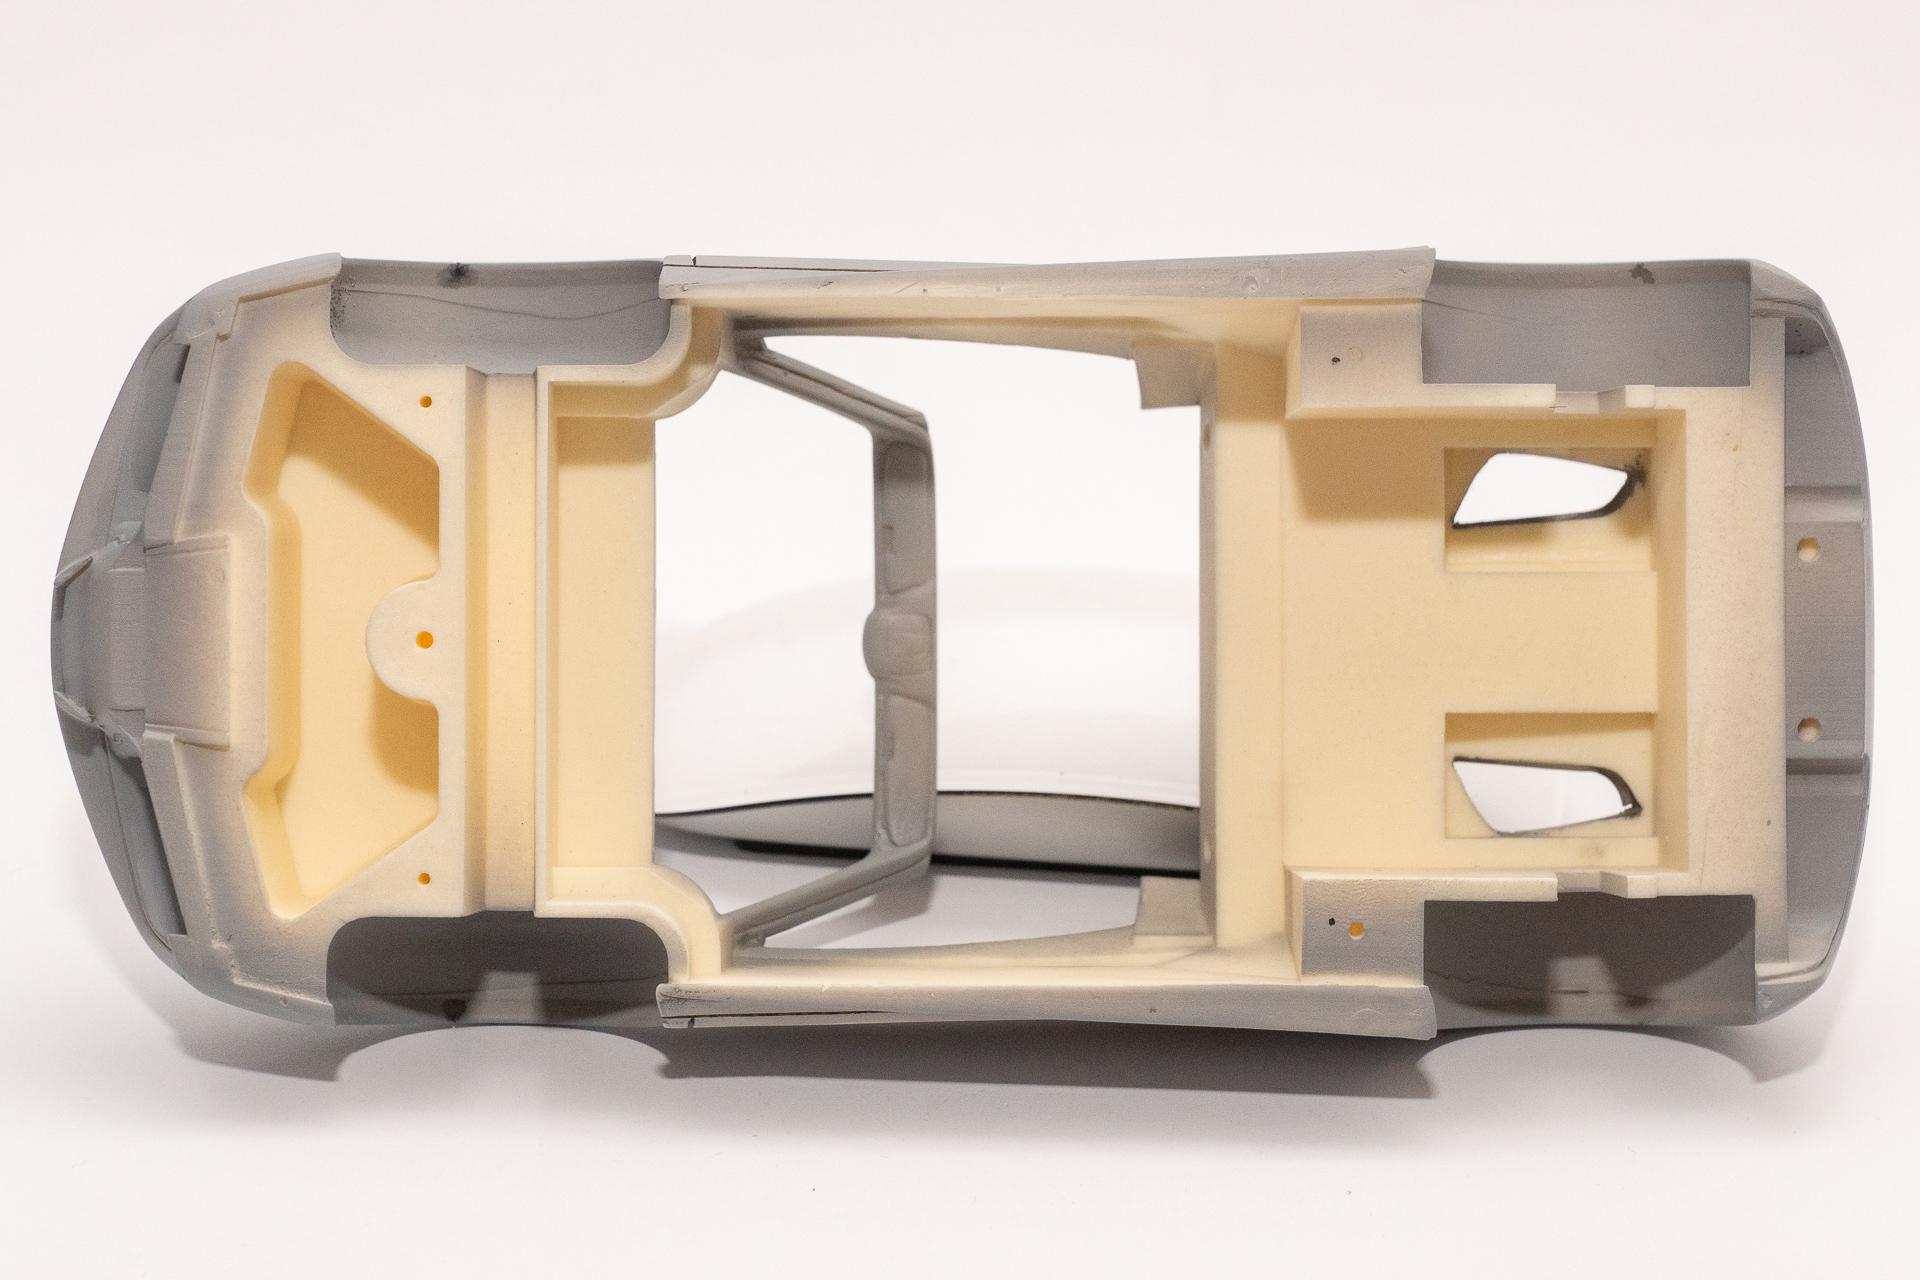
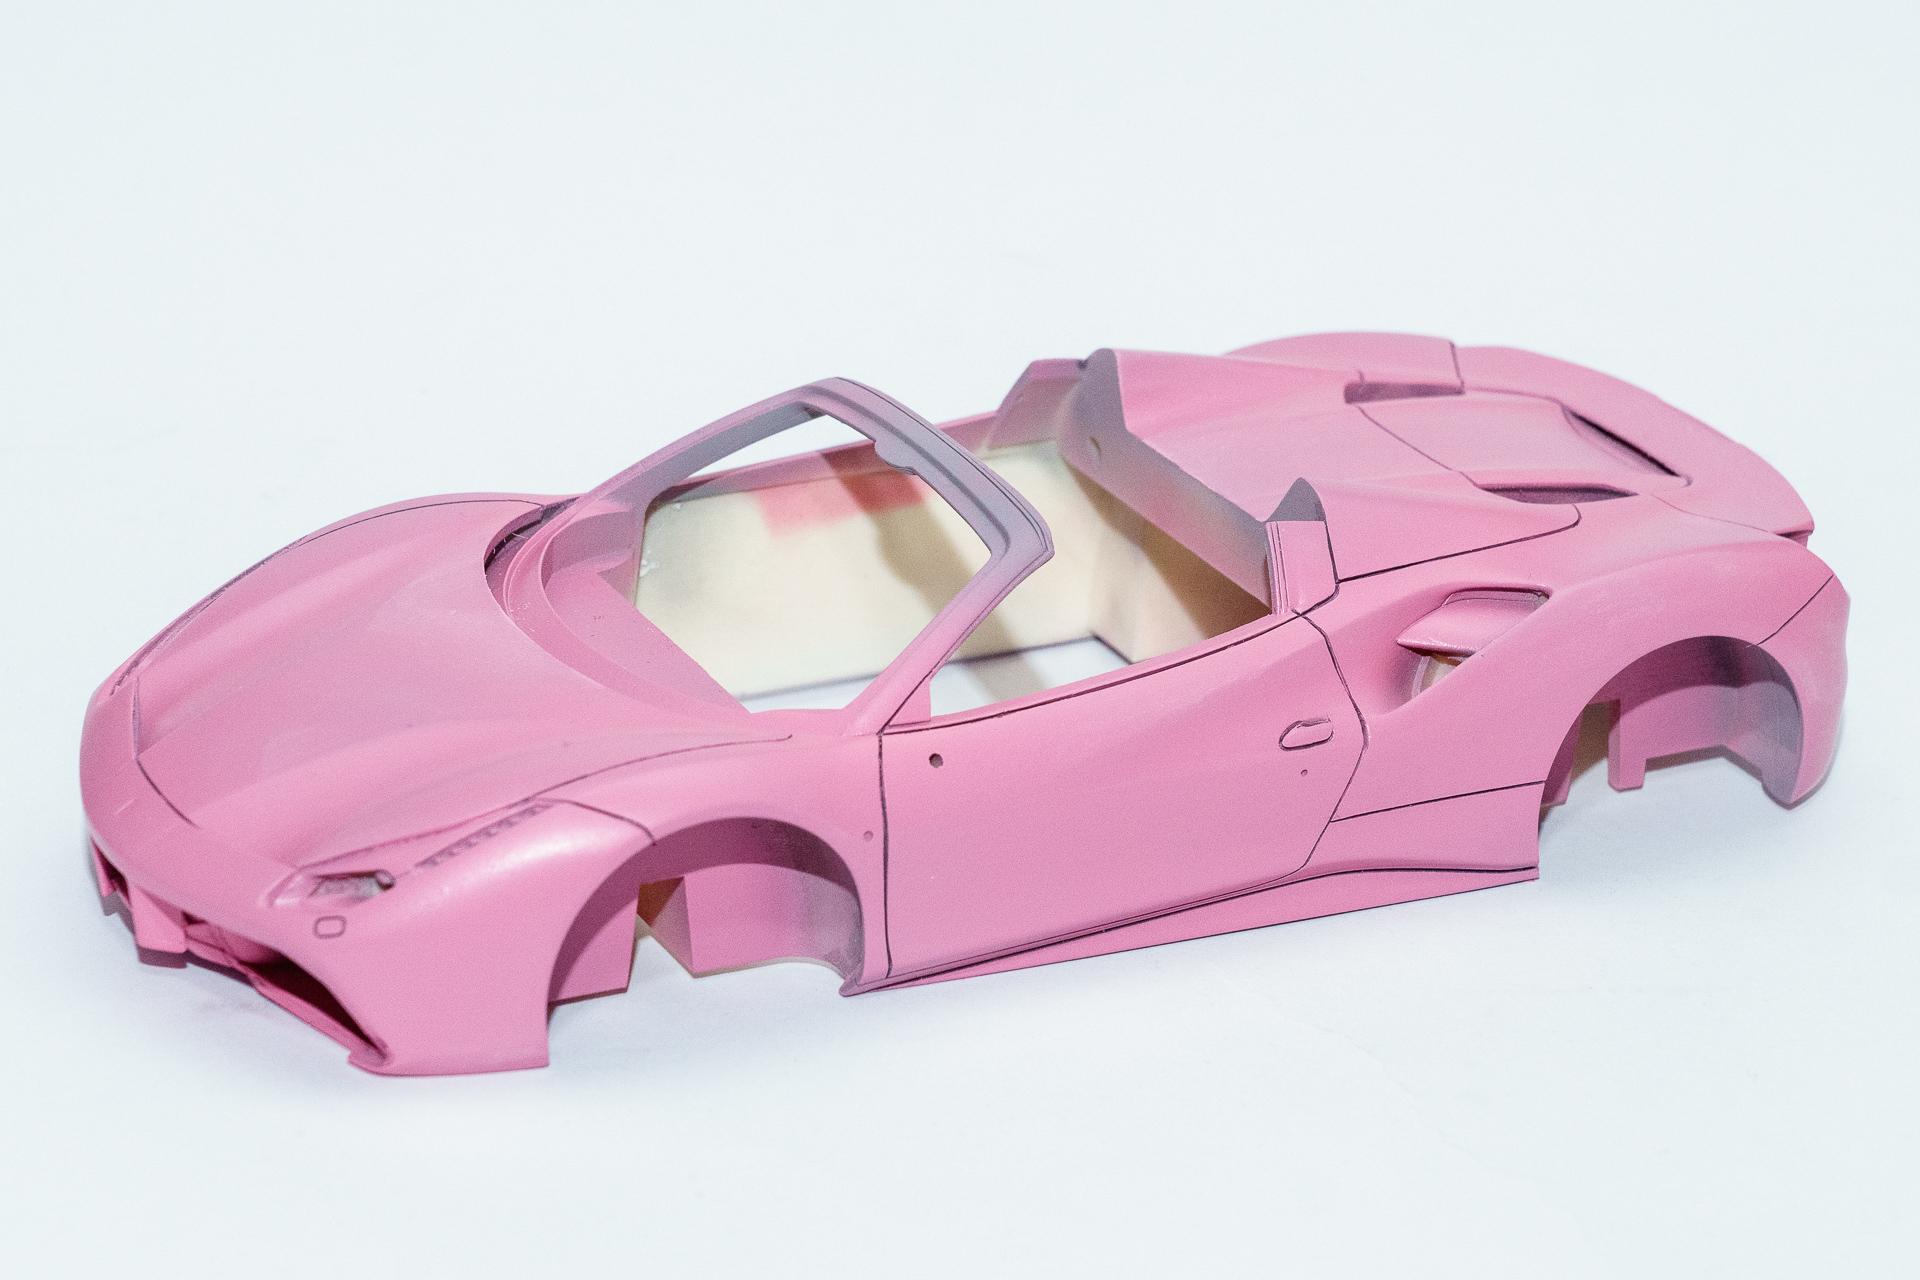
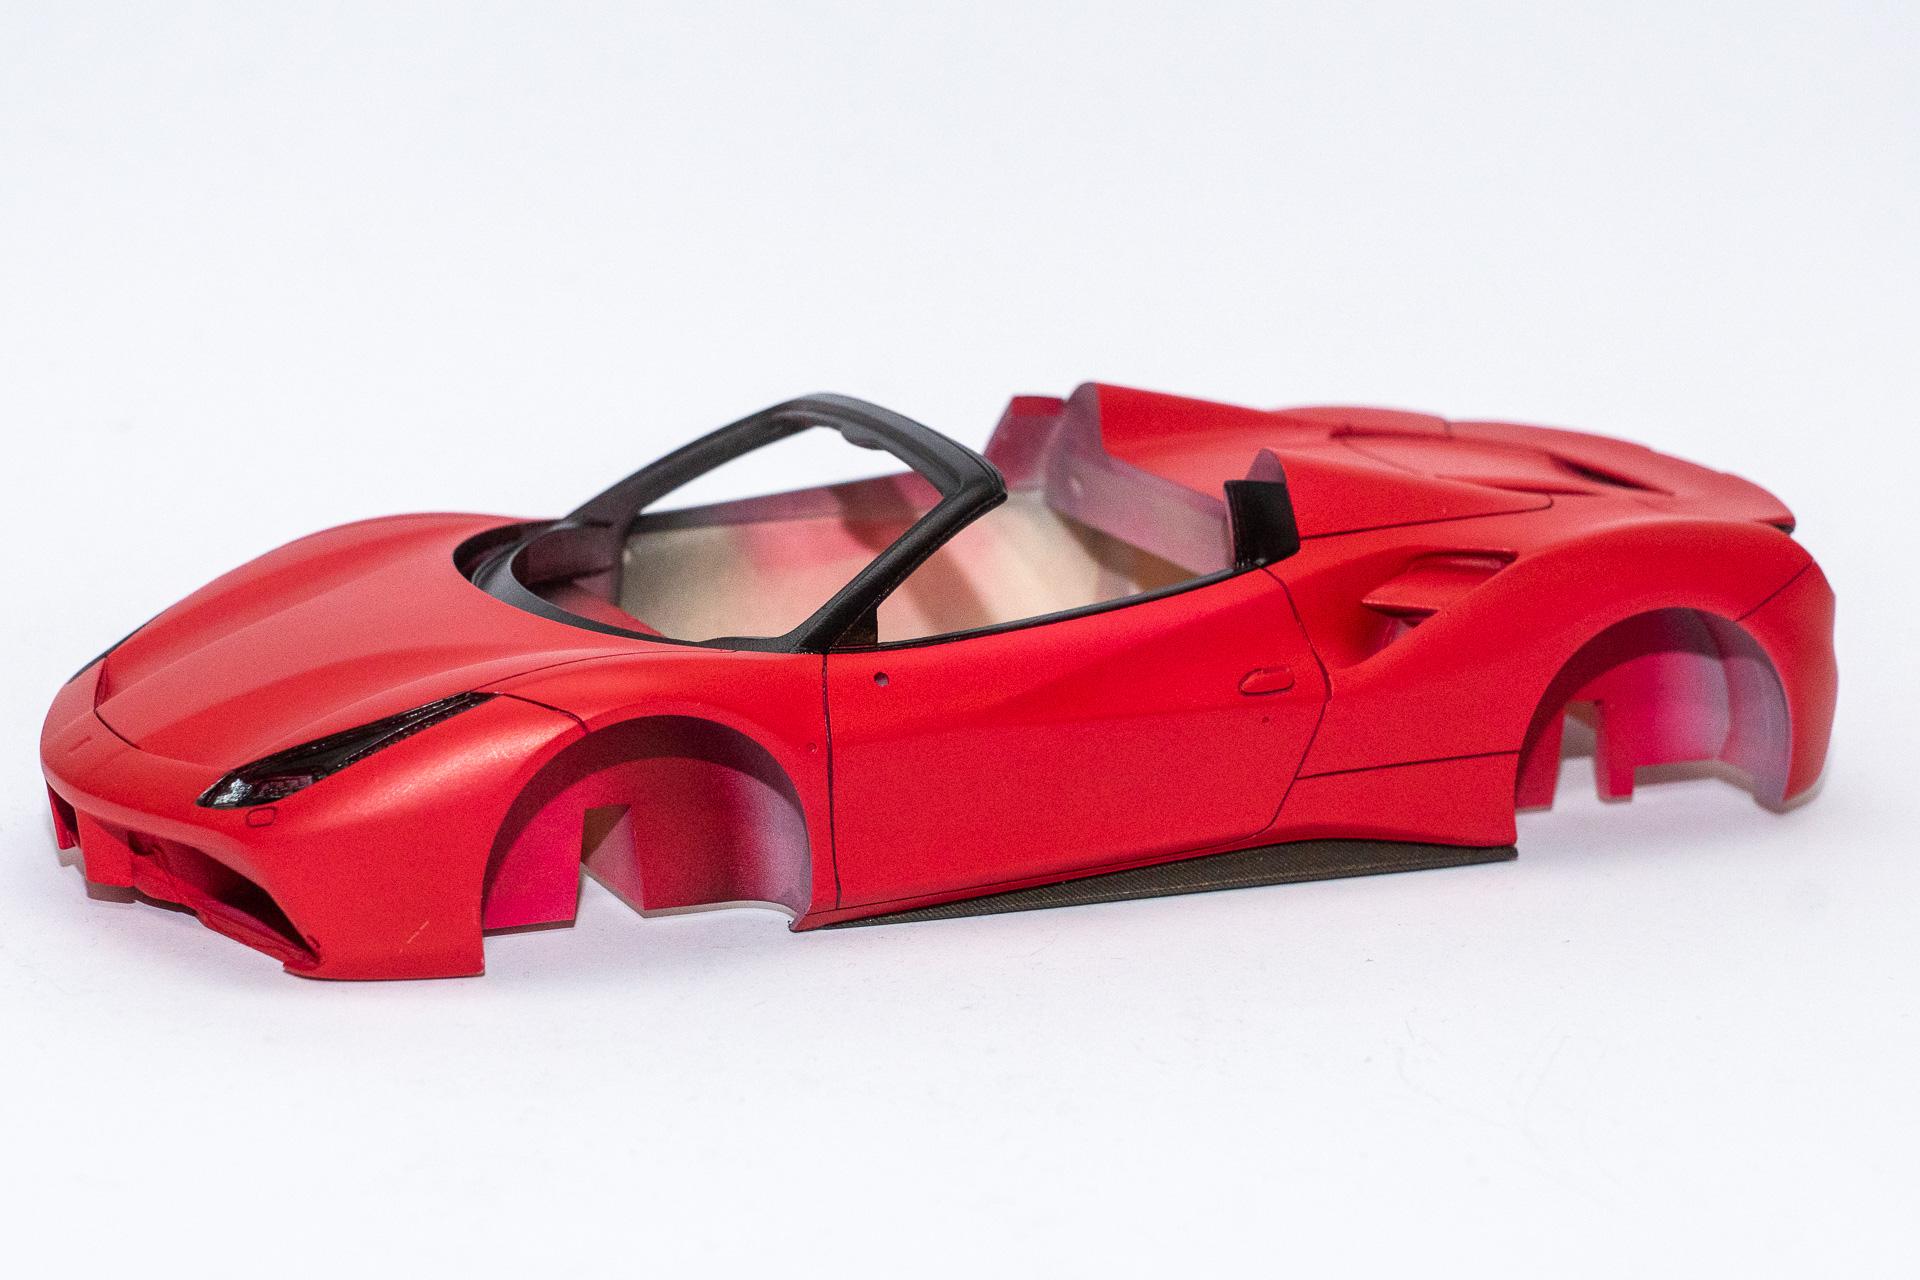
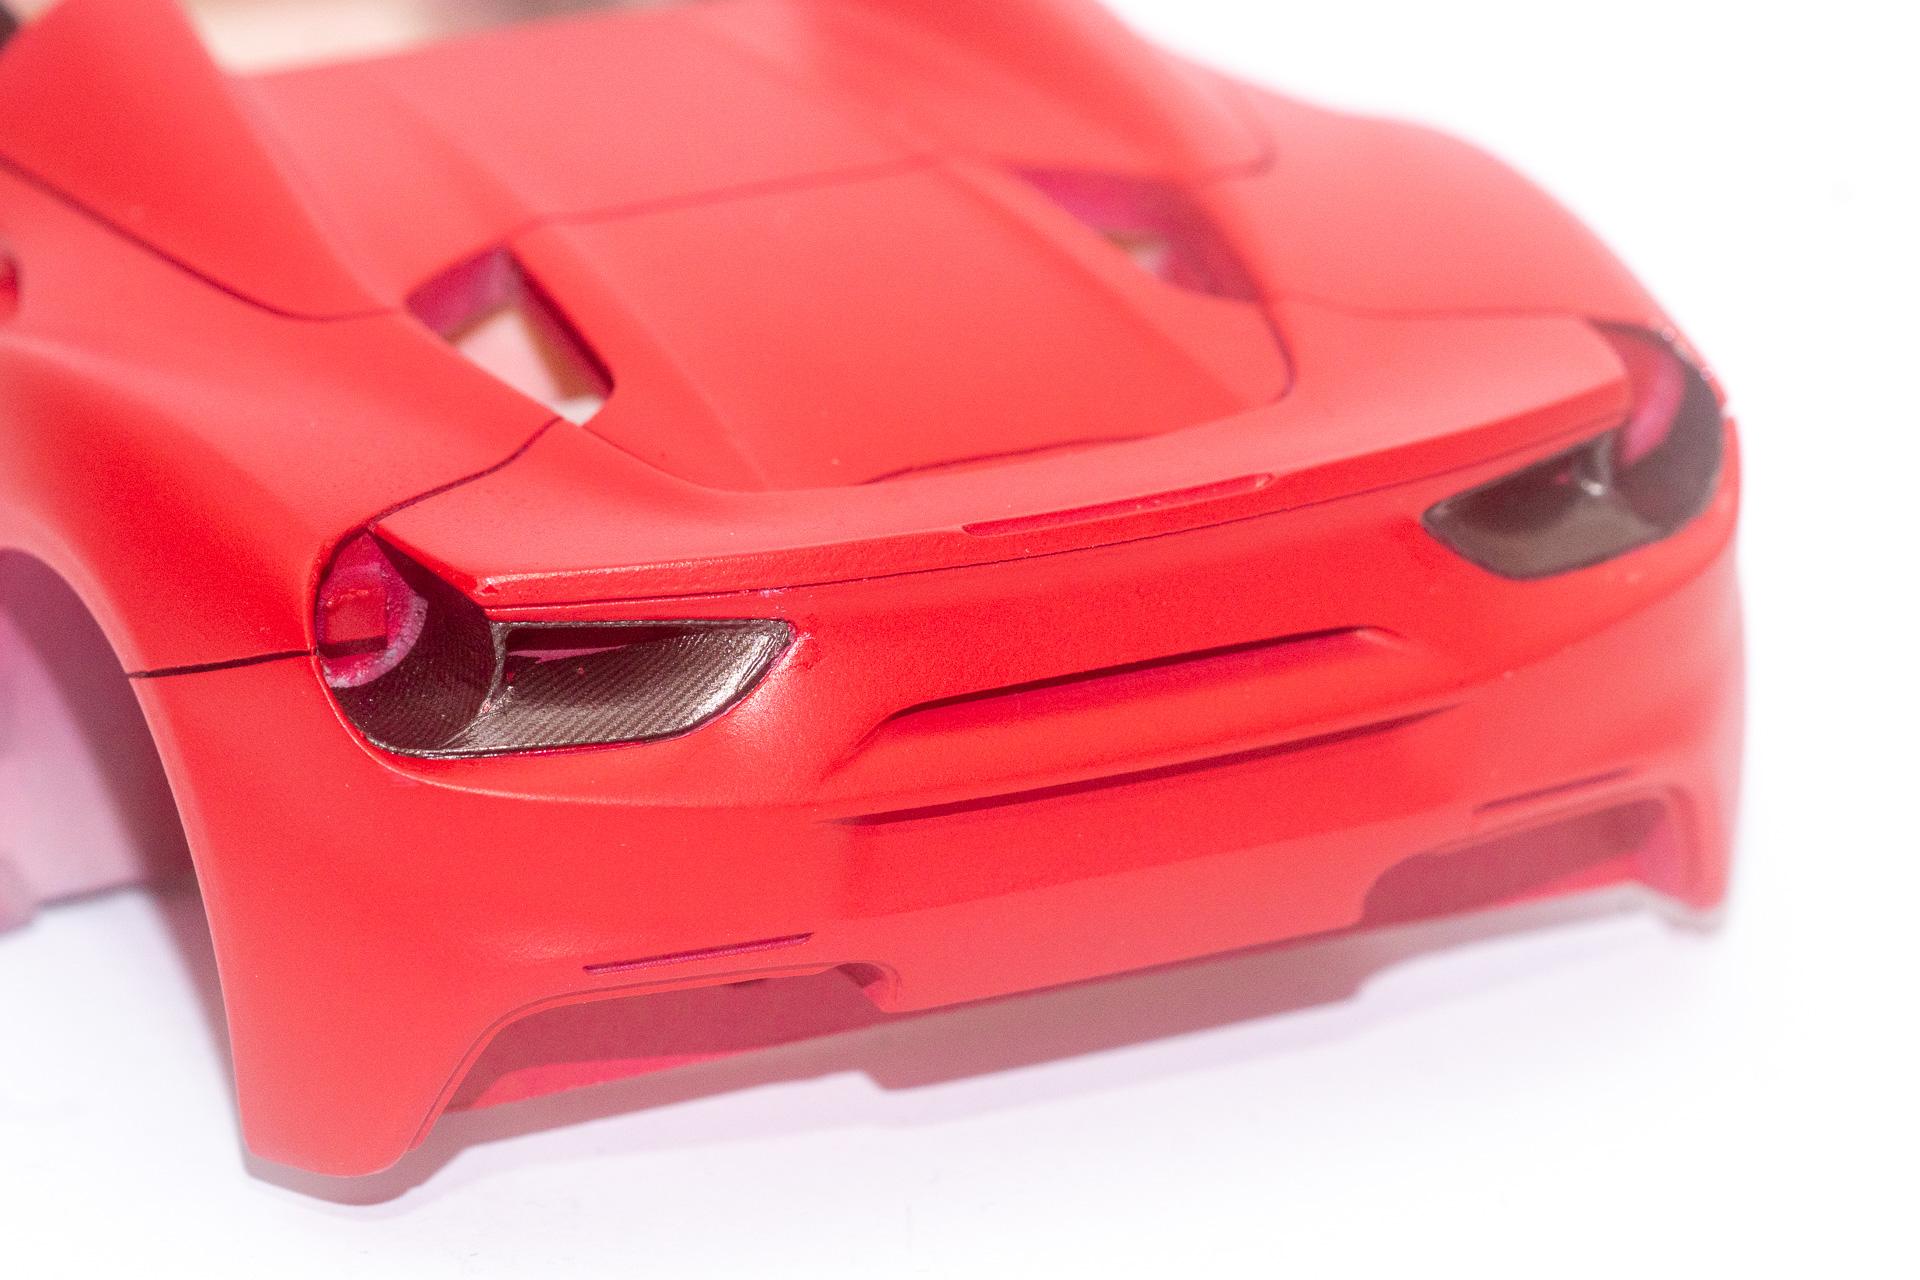
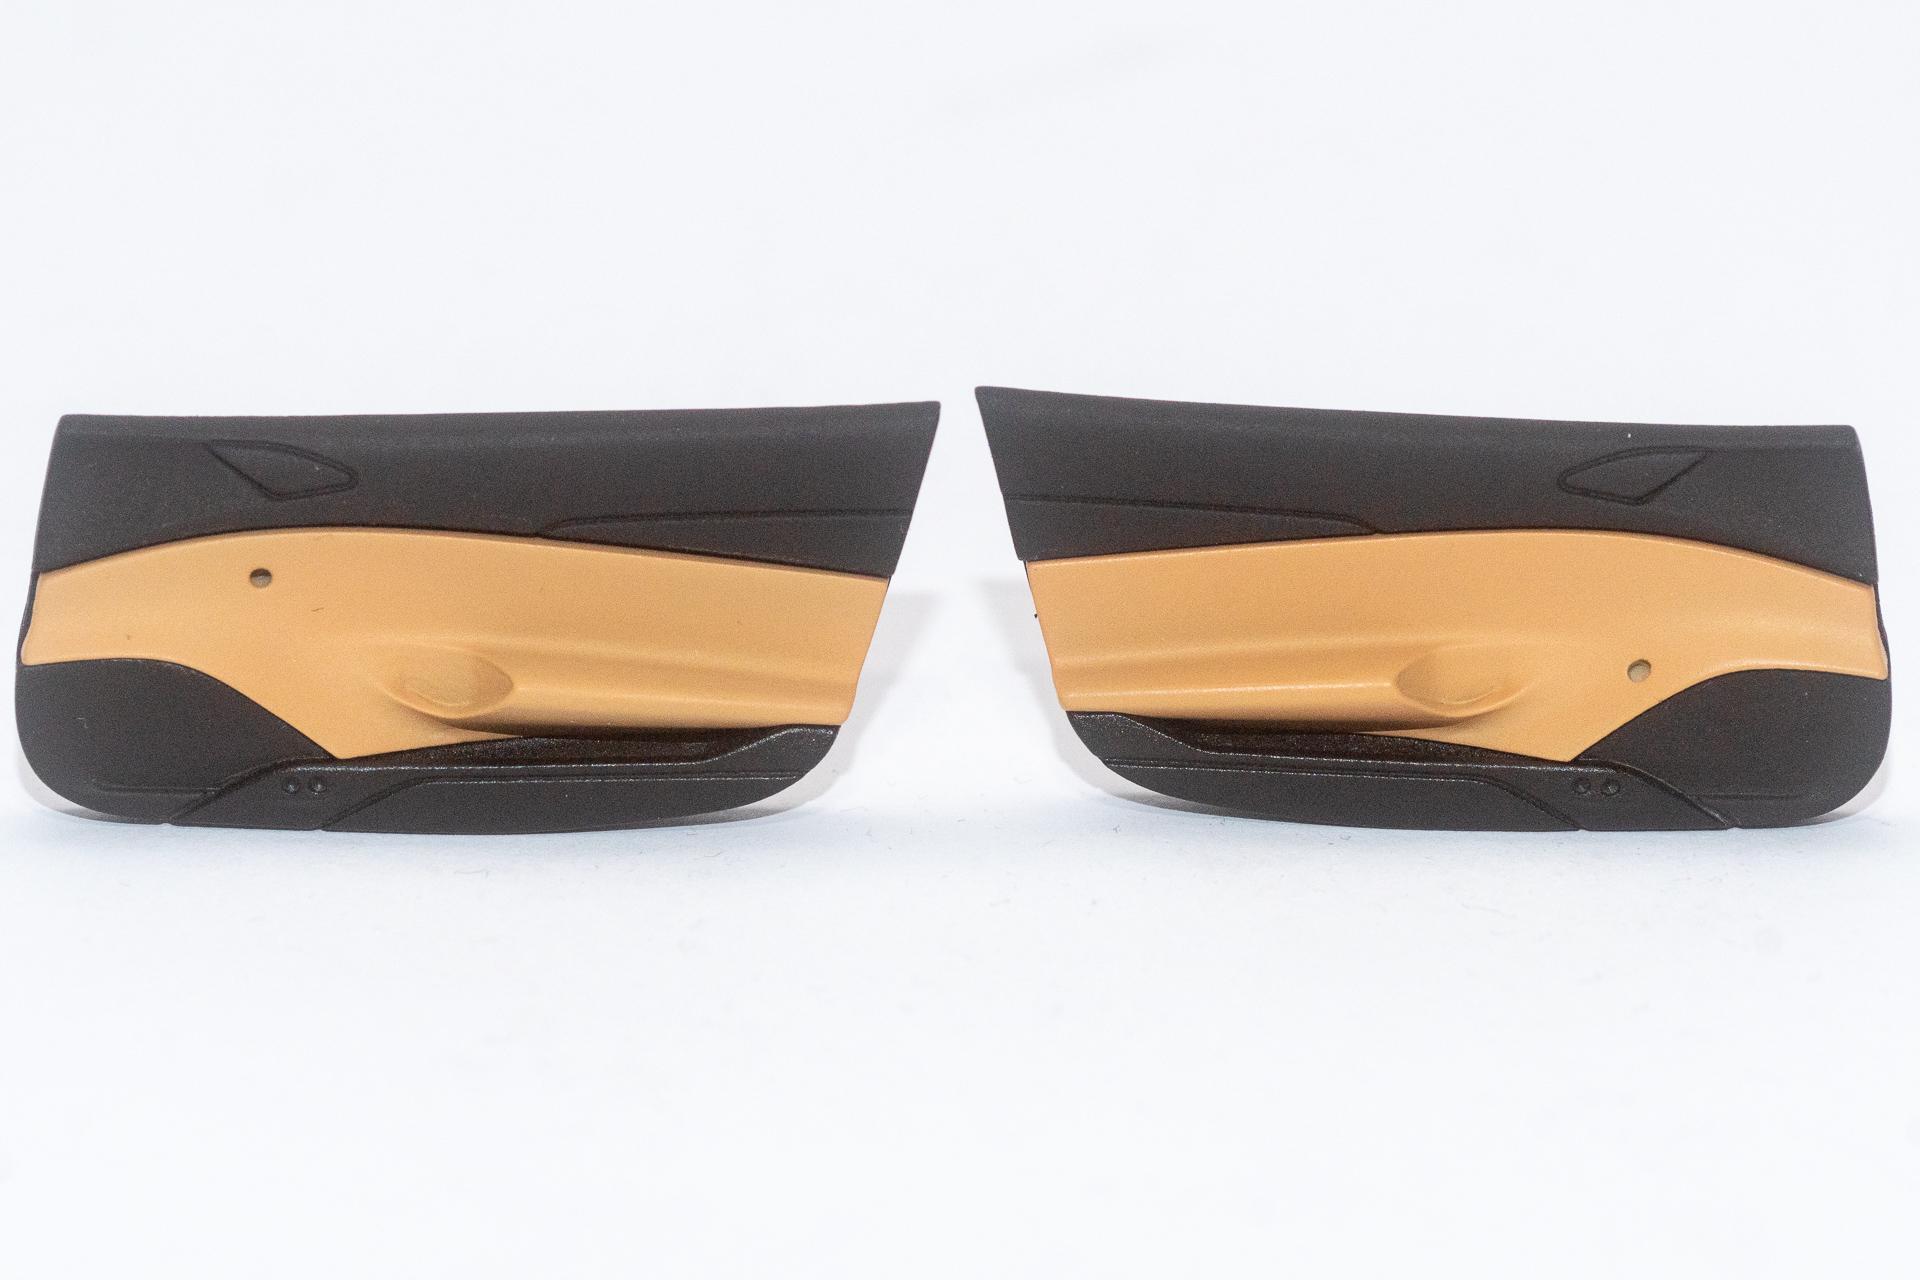
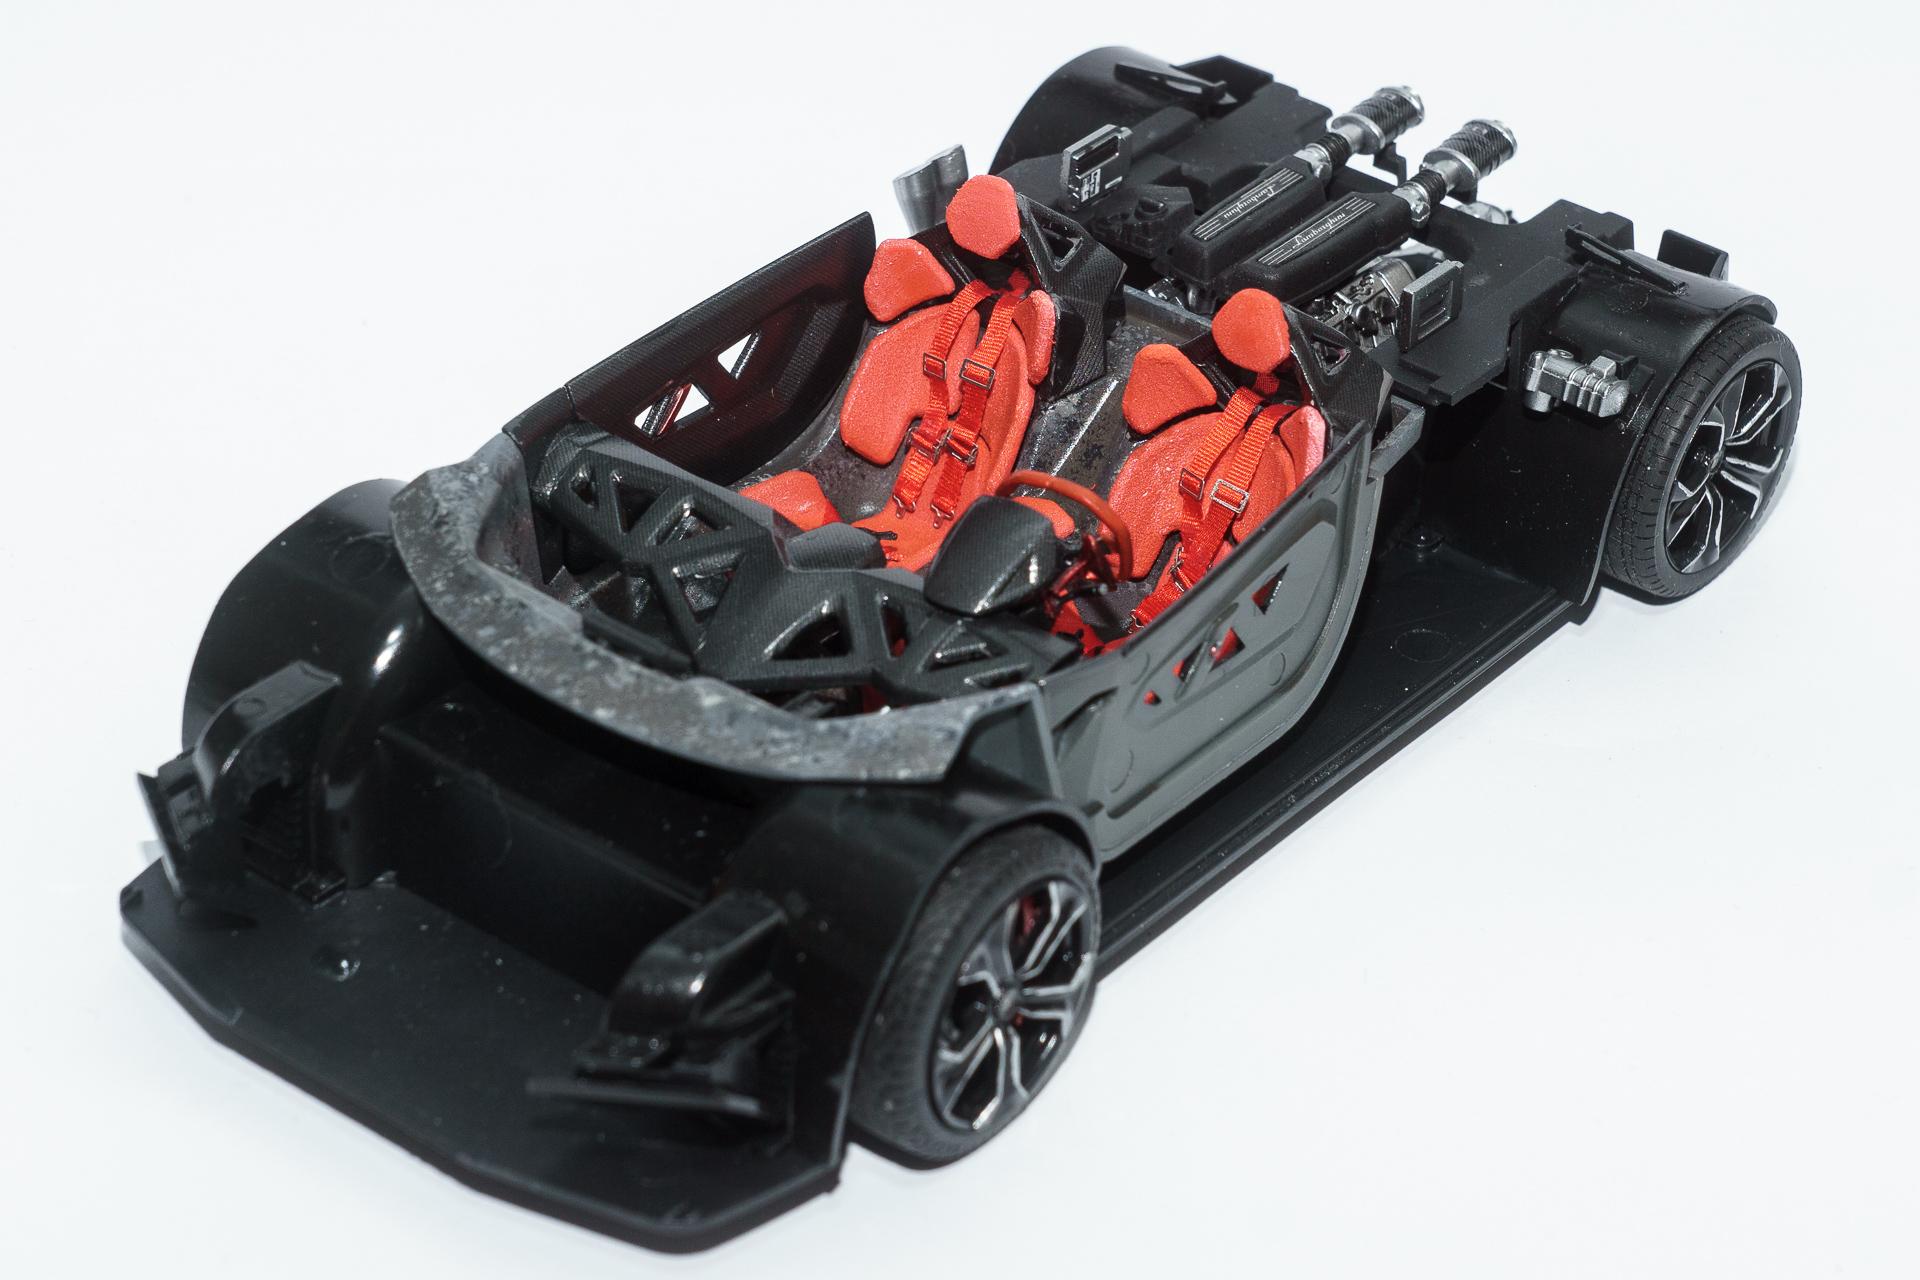
Hi all Initially I wanted to continue with Tamiya's Ferrari FXX-K after finishing my Lamborghini Sesto Elemento. But considering the fact that I wasn't that happy with the outcome of my last few builds and that the FXX-K (together with the detail up set by Hobby Design) seems to be not the easiest kit I decided to put it aside and start something else. So I took my first Alpha Model kit off the shelf. First I was quite shocked by the fit of the interior parts. The inner door panels are way to short for the openings in the passenger compartment But if you mount the door panels to the inside of the body shell and slip in the passenger compartment afterwards, everything looks fine. The gaps are all hidden by other parts. Shortly after that I tried the fit of the undercarriage which should be attached by screws to the body. If you line up the three holes in the front than the holes in the undercarriage at the back of the car are where the black dots are. Quite some offset to the pre-drilled holes in the bodyshell... The diffusor should be screwed to the body as well. But if you hold the diffusor to the body and look where it should be attached, there is only air beyond... ? I sincerley hope that the rest of the build will have less stumbling blocks... After priming everything with Zero Paint's 2K Etch and resin primer I painted the bodyparts in pink primer and afterwards in Rosso Corsa. When the paint was dry I masked everything off and added some Jet Black. Afterwards the first few carbon decals have been applied. Unfortunately they didn't cover everything in the recesses next to the rear lights. Maybe I'll try to repair them next week or I'll just cover it with some black paint after clearcoating the body. Finally the door panels got some paint. In this picture there are still some parts missing, but the engineering of the parts is quite well thought. That's how far I am right now. Hope you enjoy following me on this journey and wish you a nice sunday Urs
-
Hi all Thank you very much for all your kind comments
-
Ford T 1914 Firetruck
harti20 replied to harti20's topic in Model Trucks: Pickups, Vans, SUVs, Light Commercial
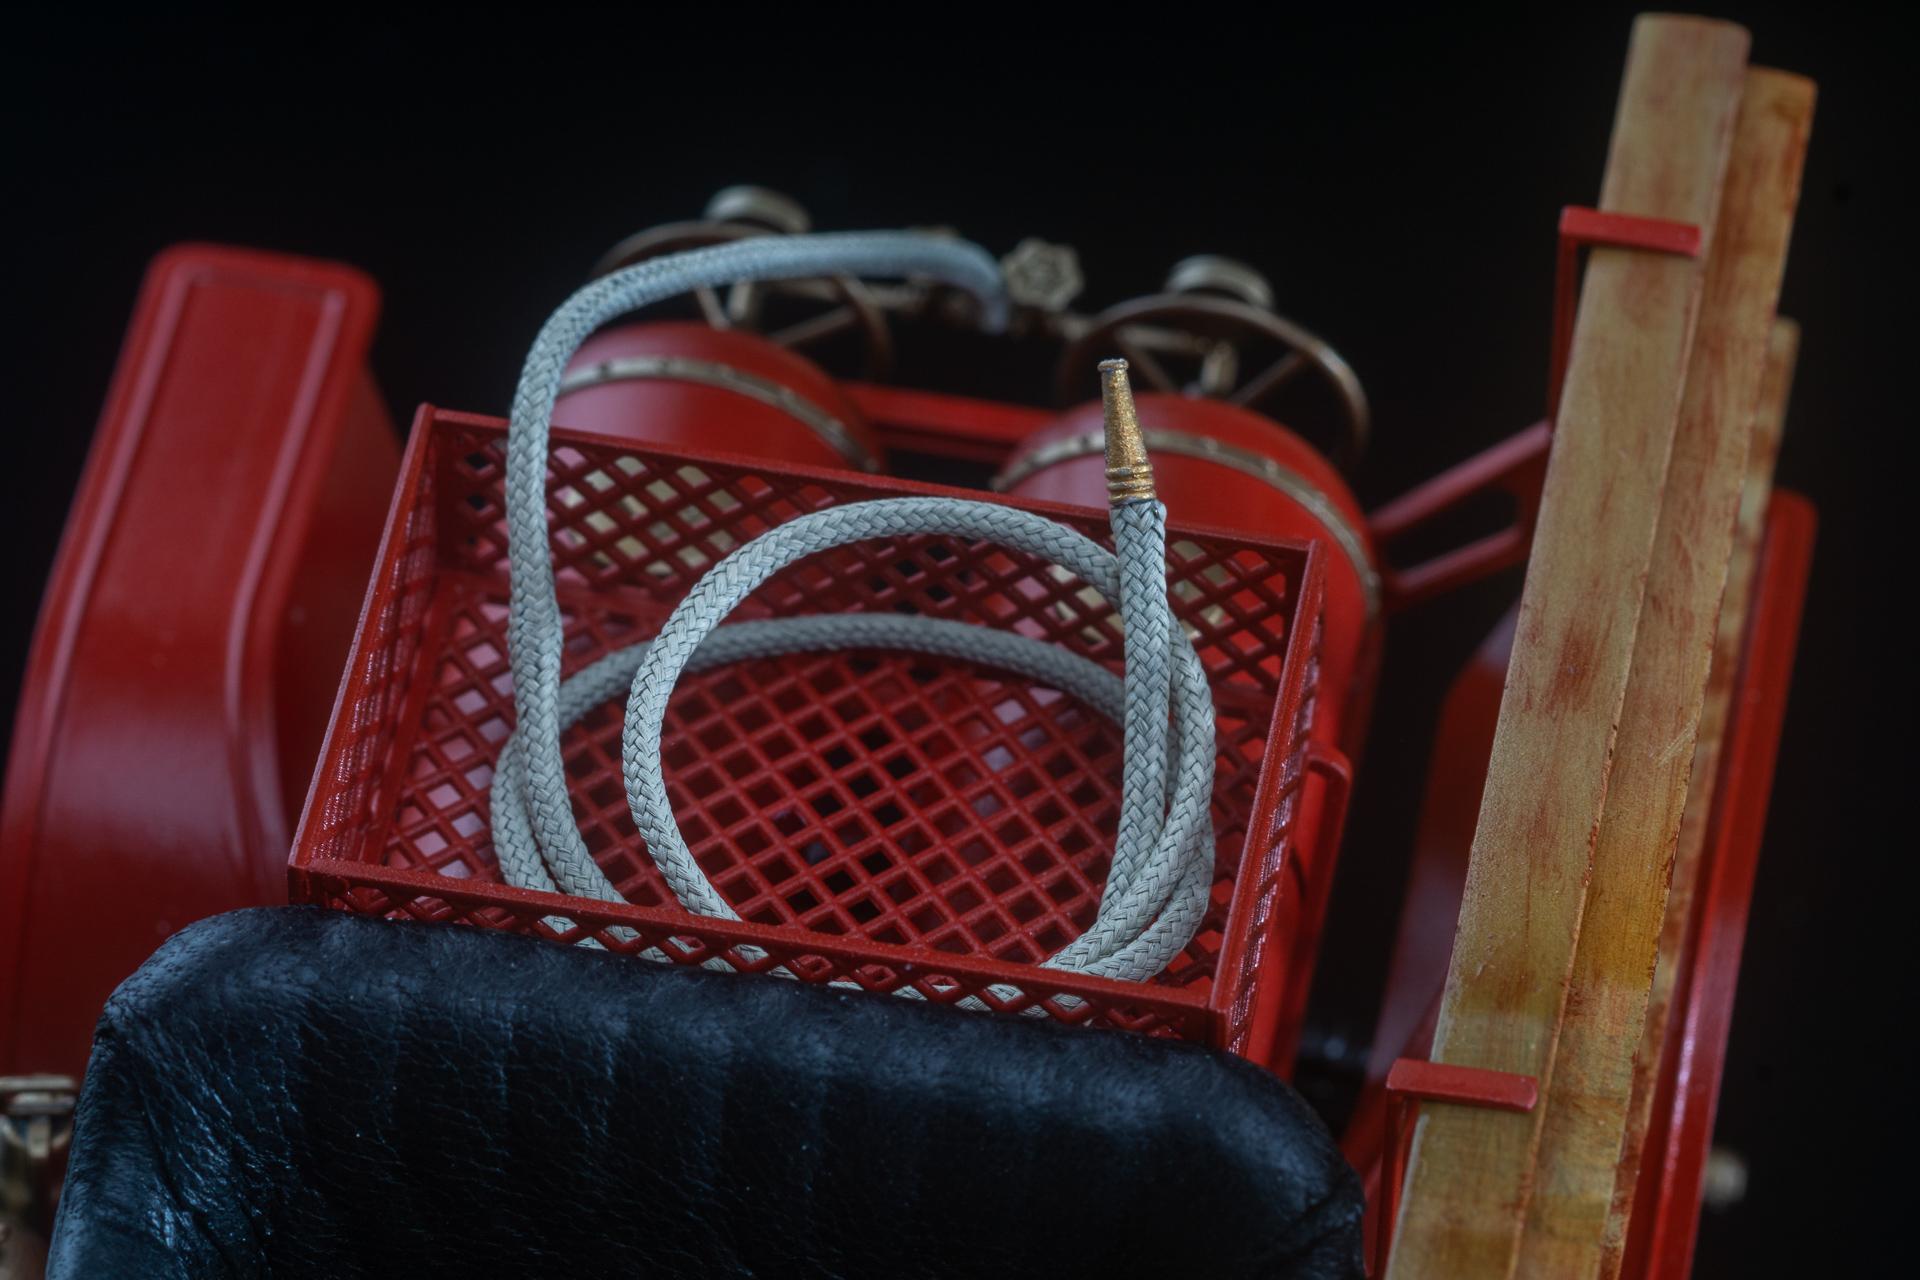
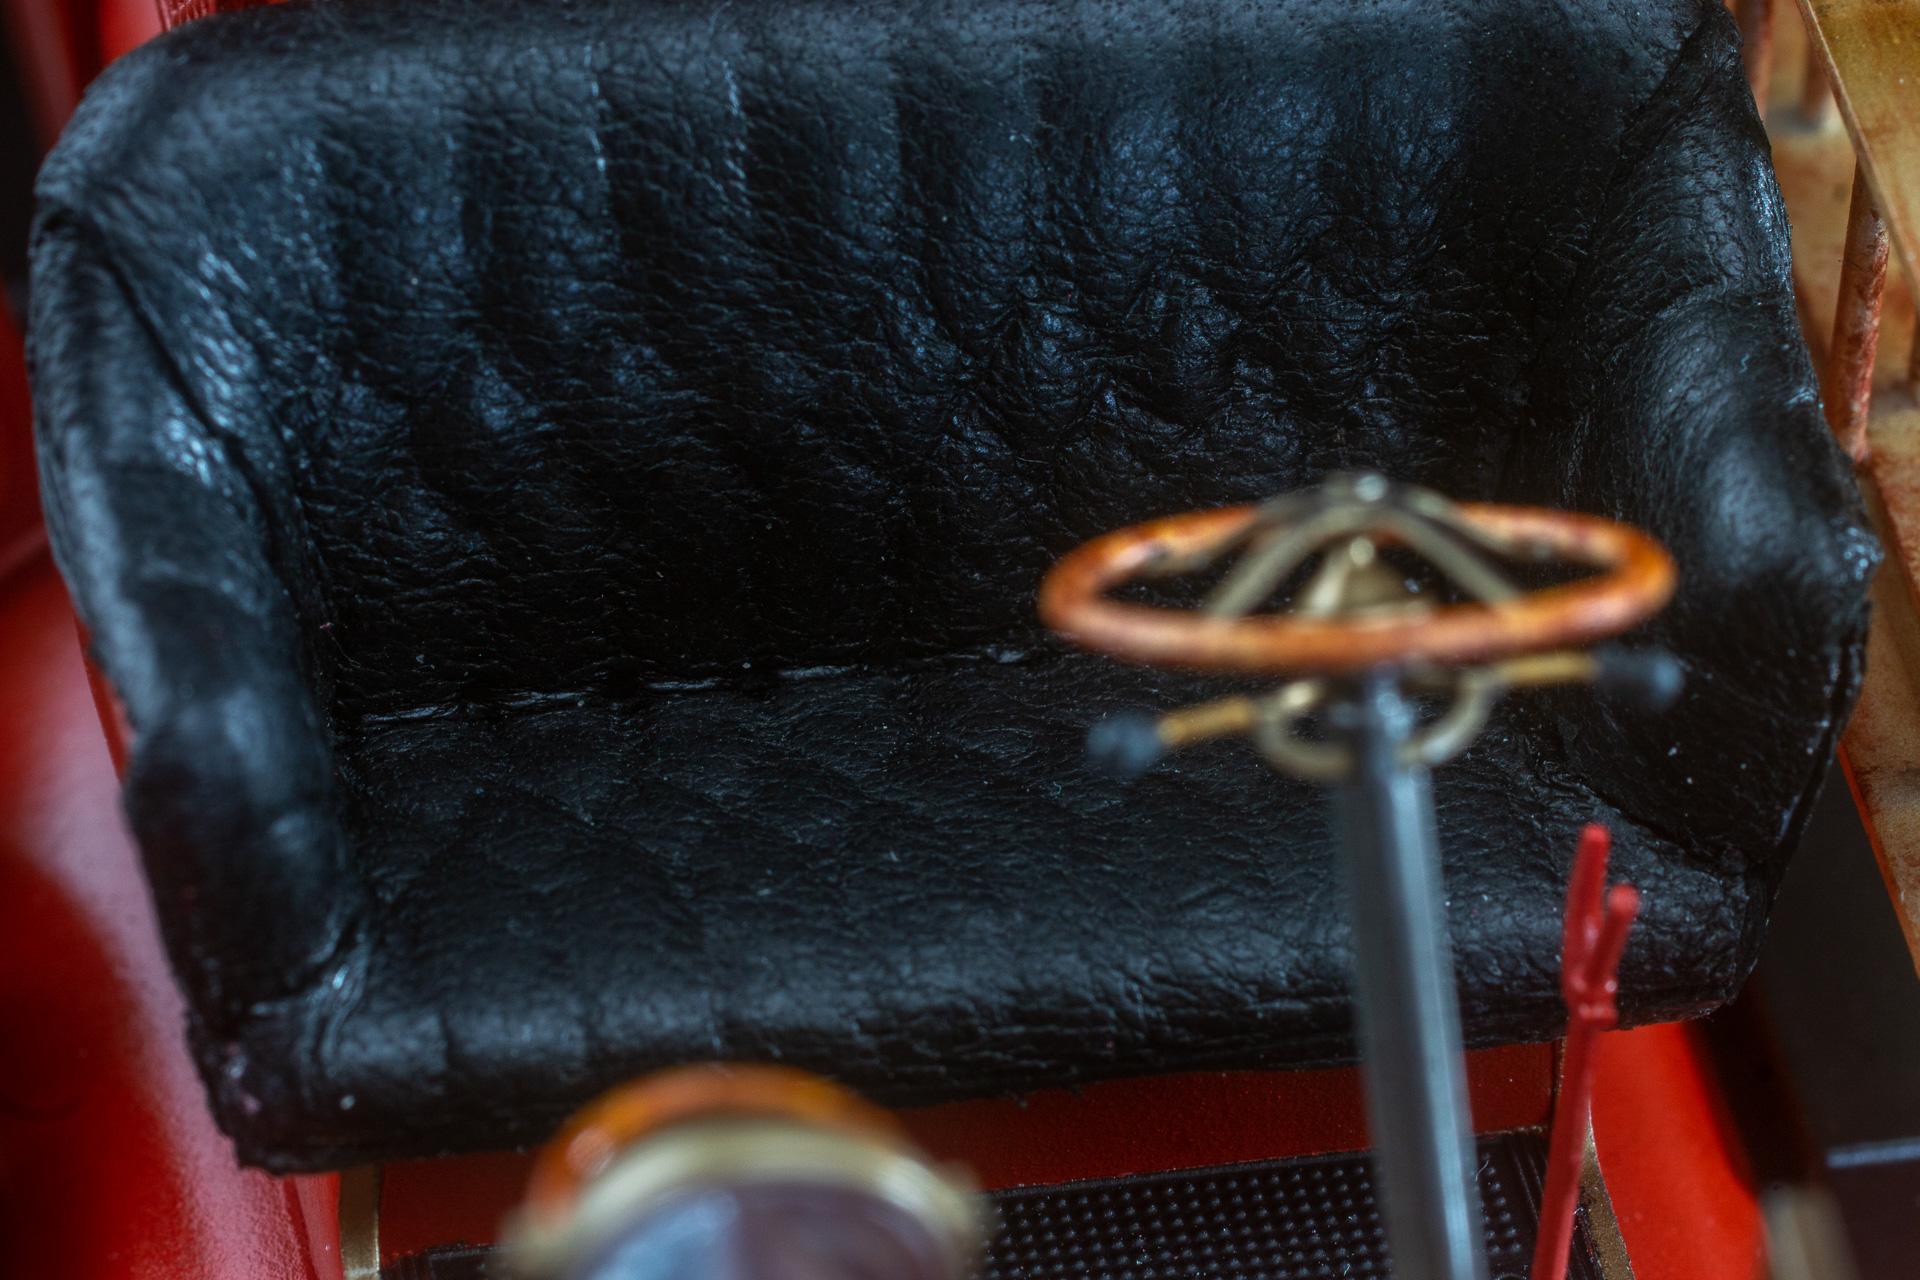
Hi all Thank you all for your kind comments No, the brass parts were not plated. They are all painted with Alclad Polished Brass and clearcoated with AK Interactive's Intermediate Gauzy Agent. I also wanted to add the two firemen to the car, but I gave up quite soon as the bodyparts didn't fit at all and as these would have been my first two figures I felt somehow overstrained. Maybe I'll finish them later when I have done some other figures first -
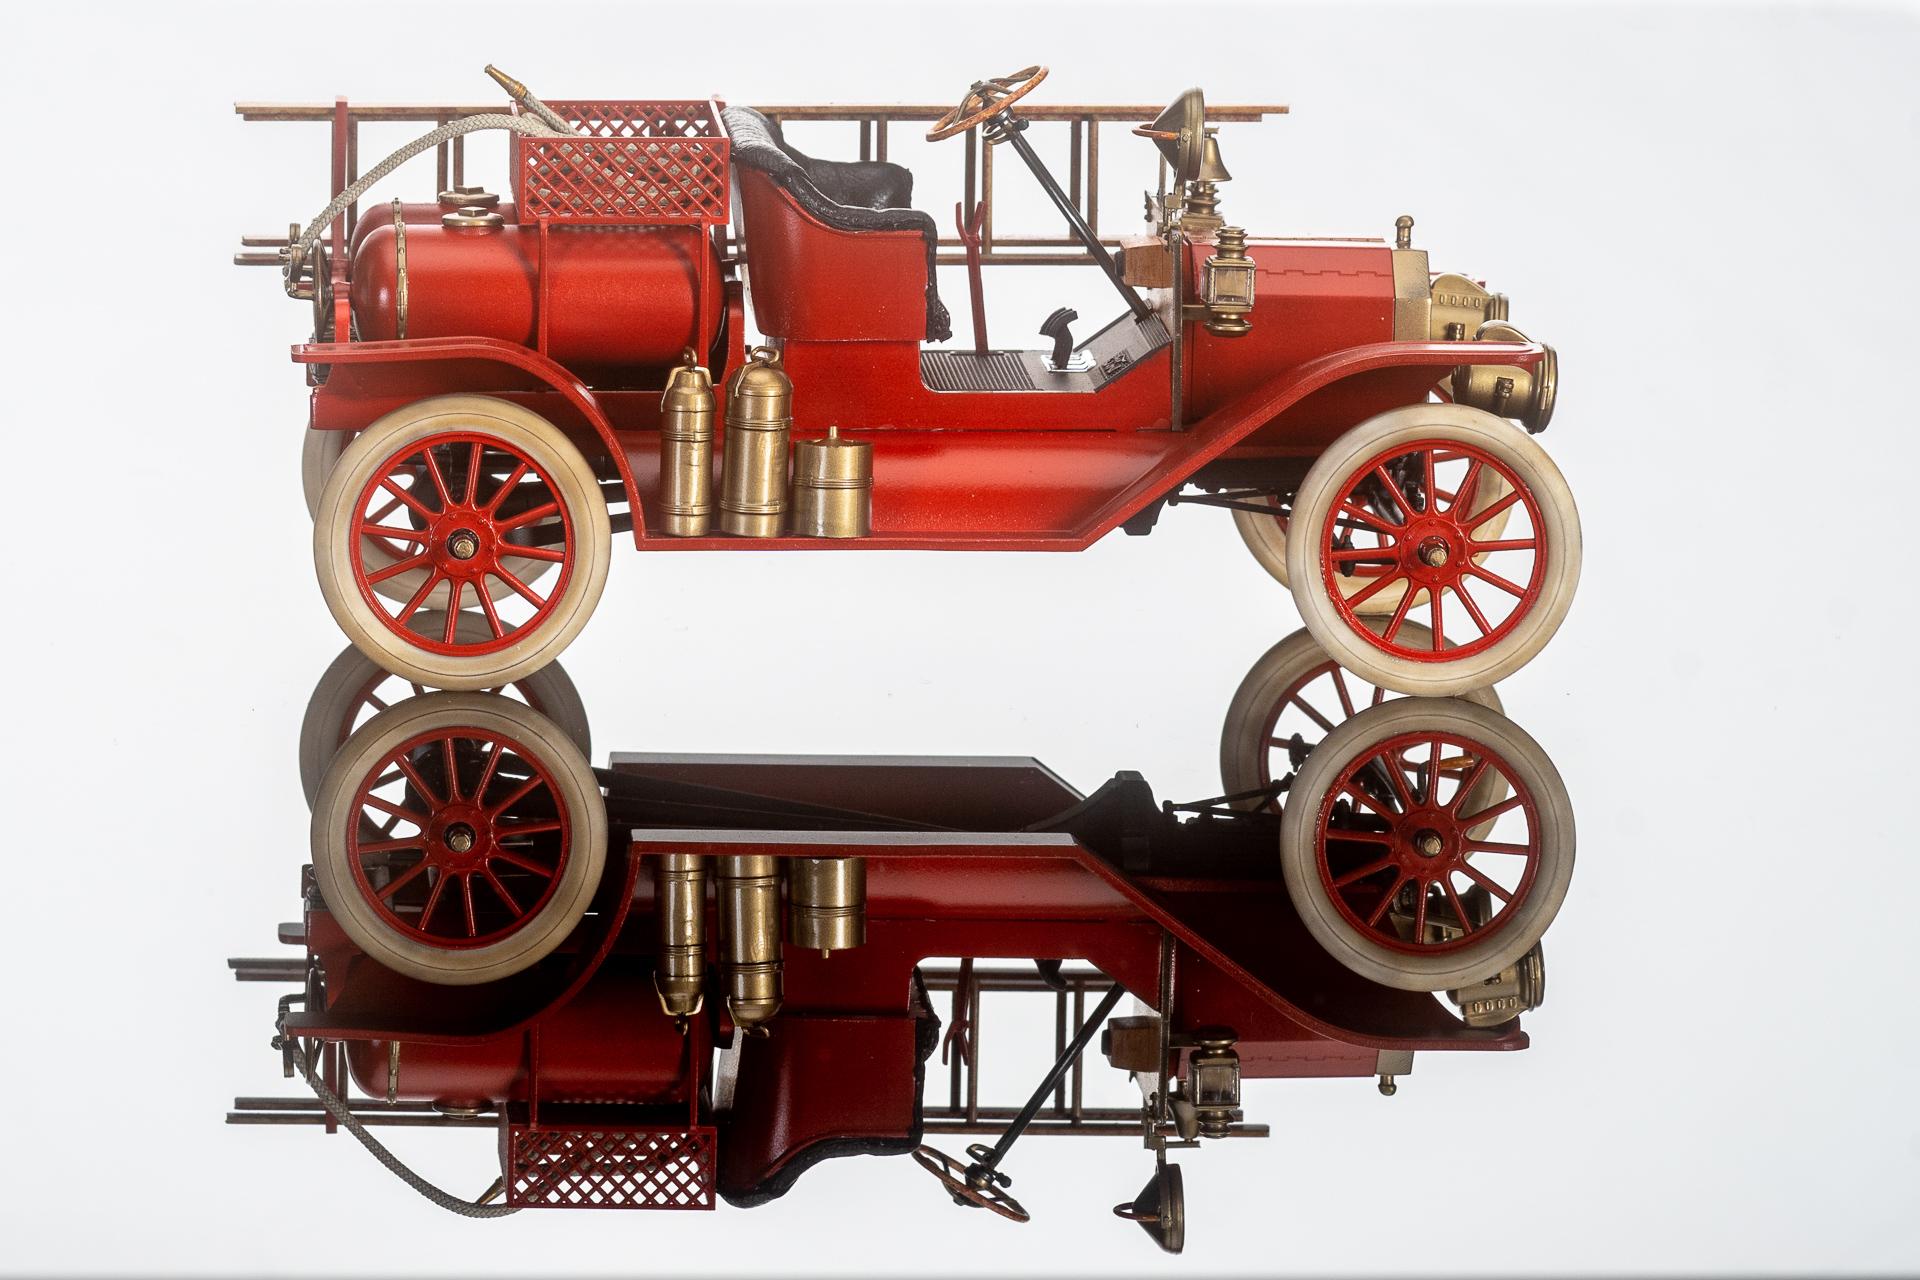
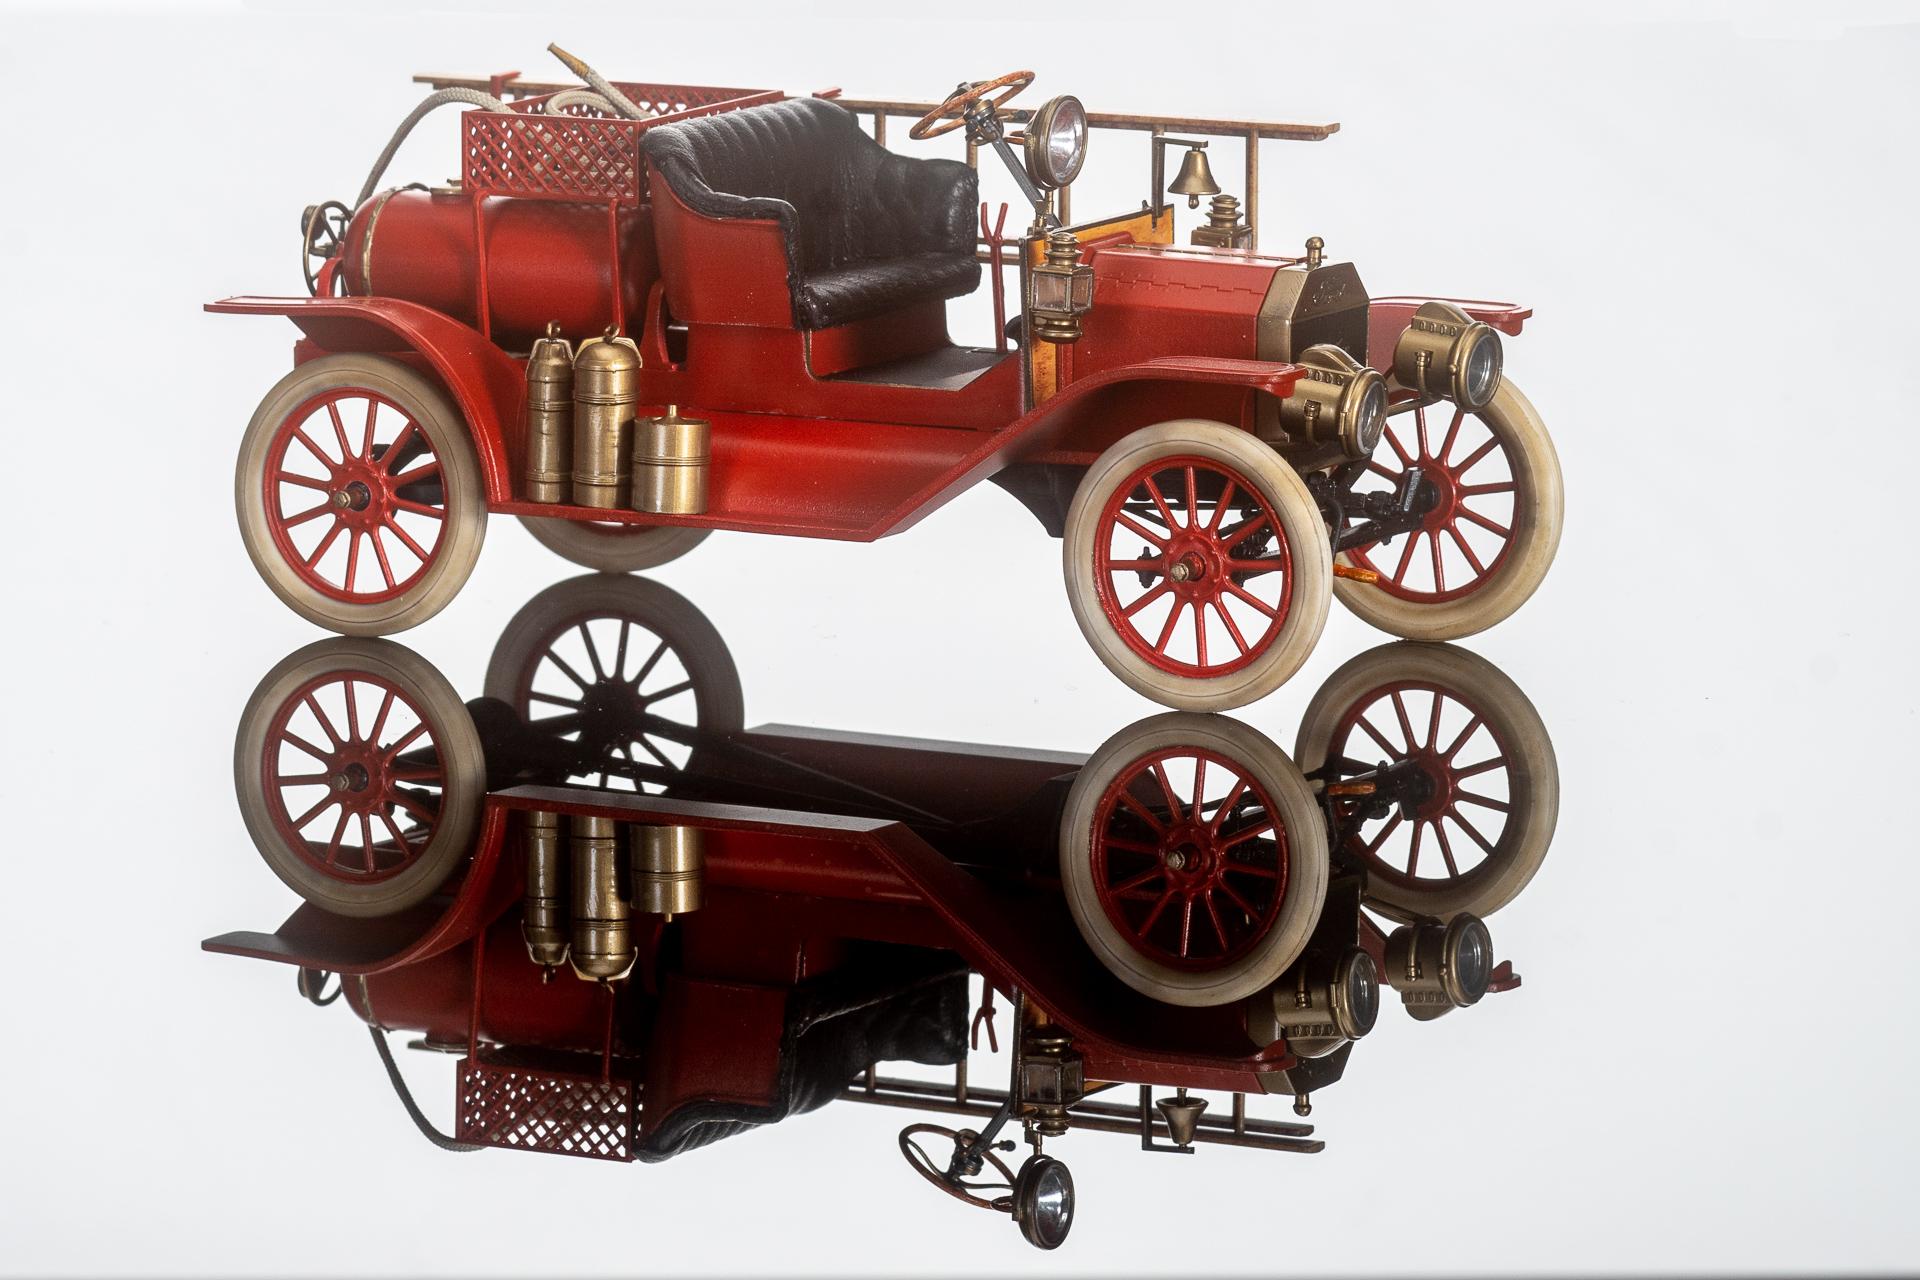
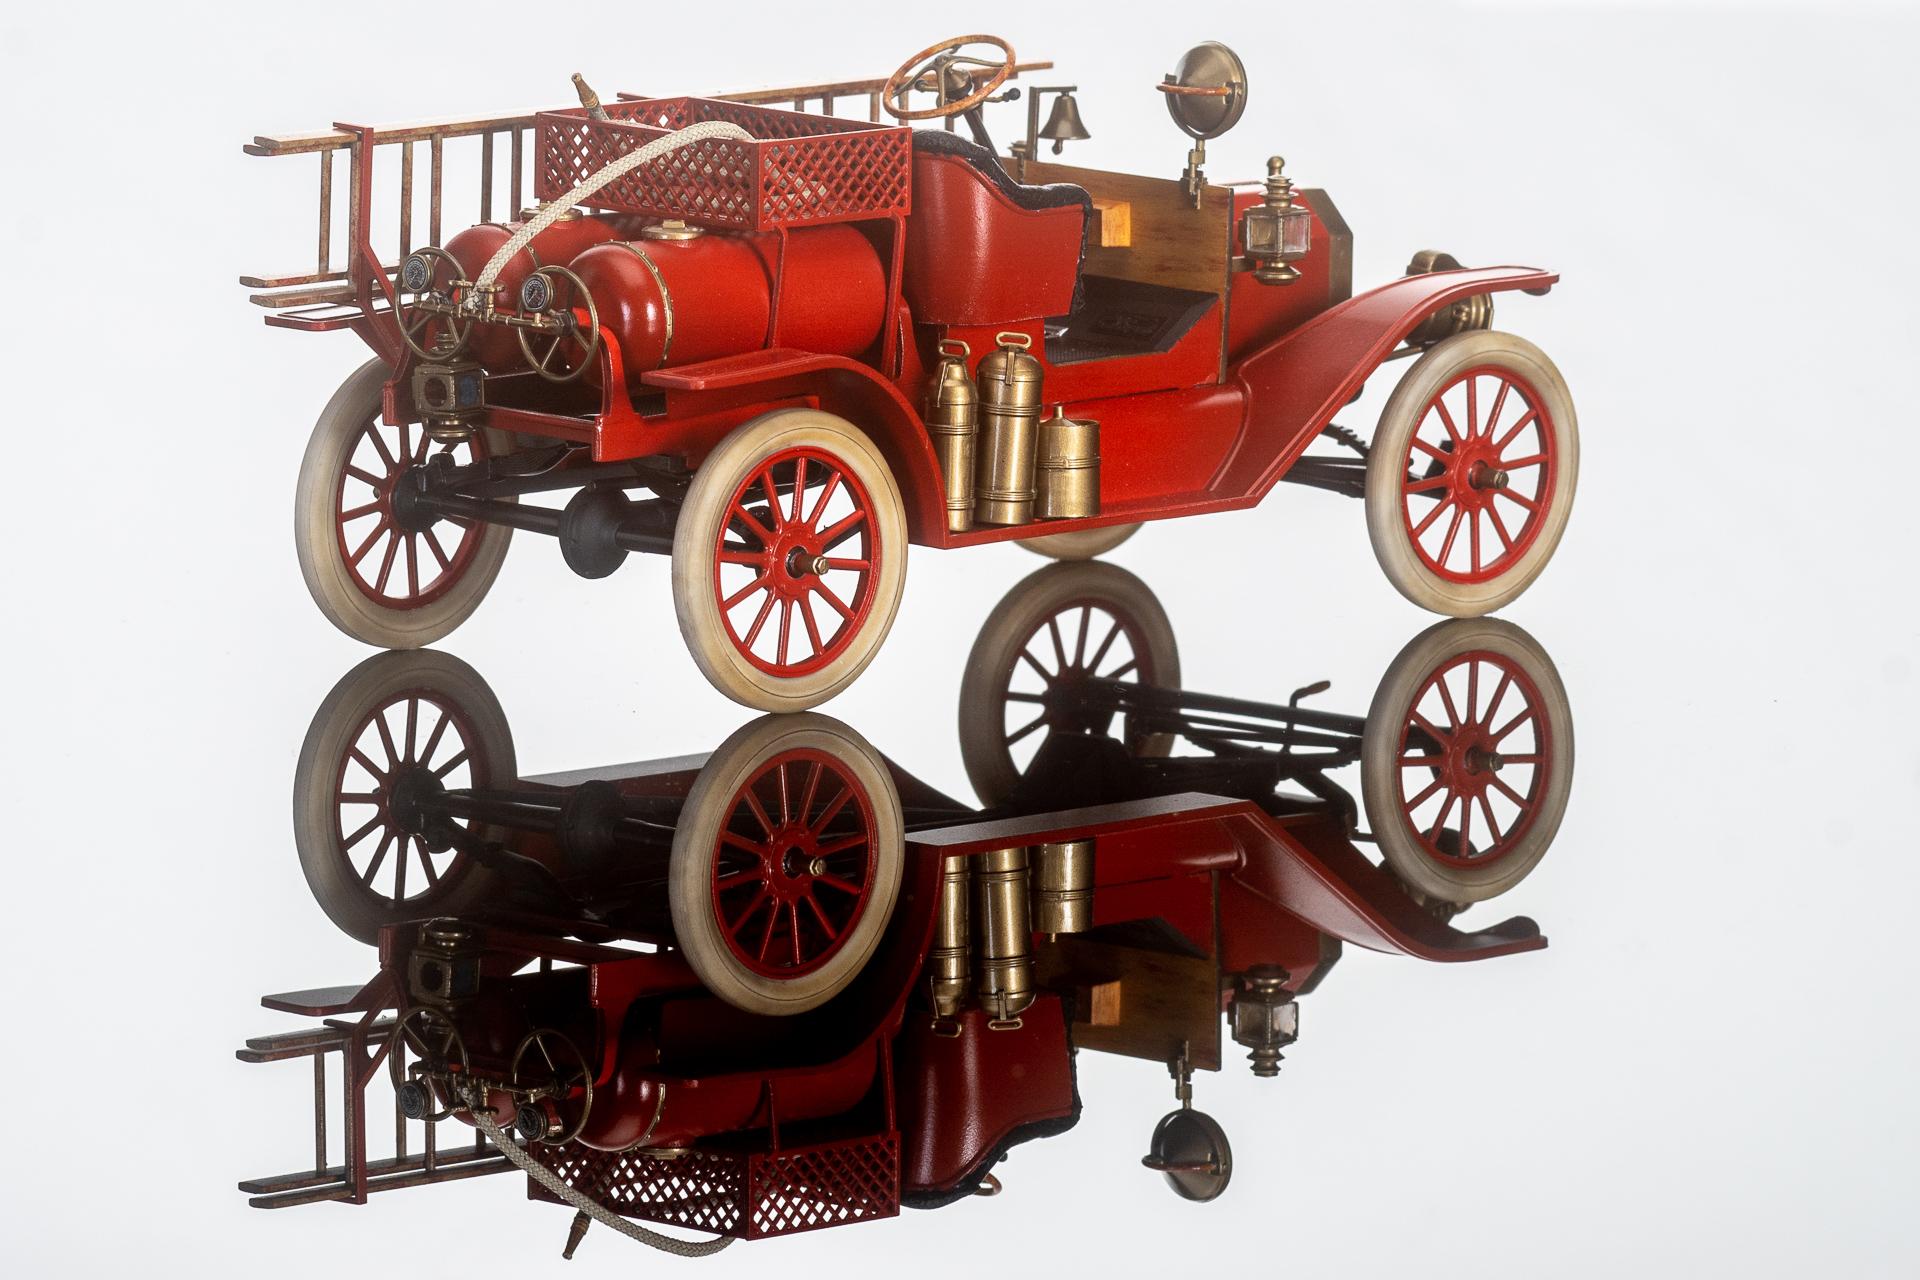
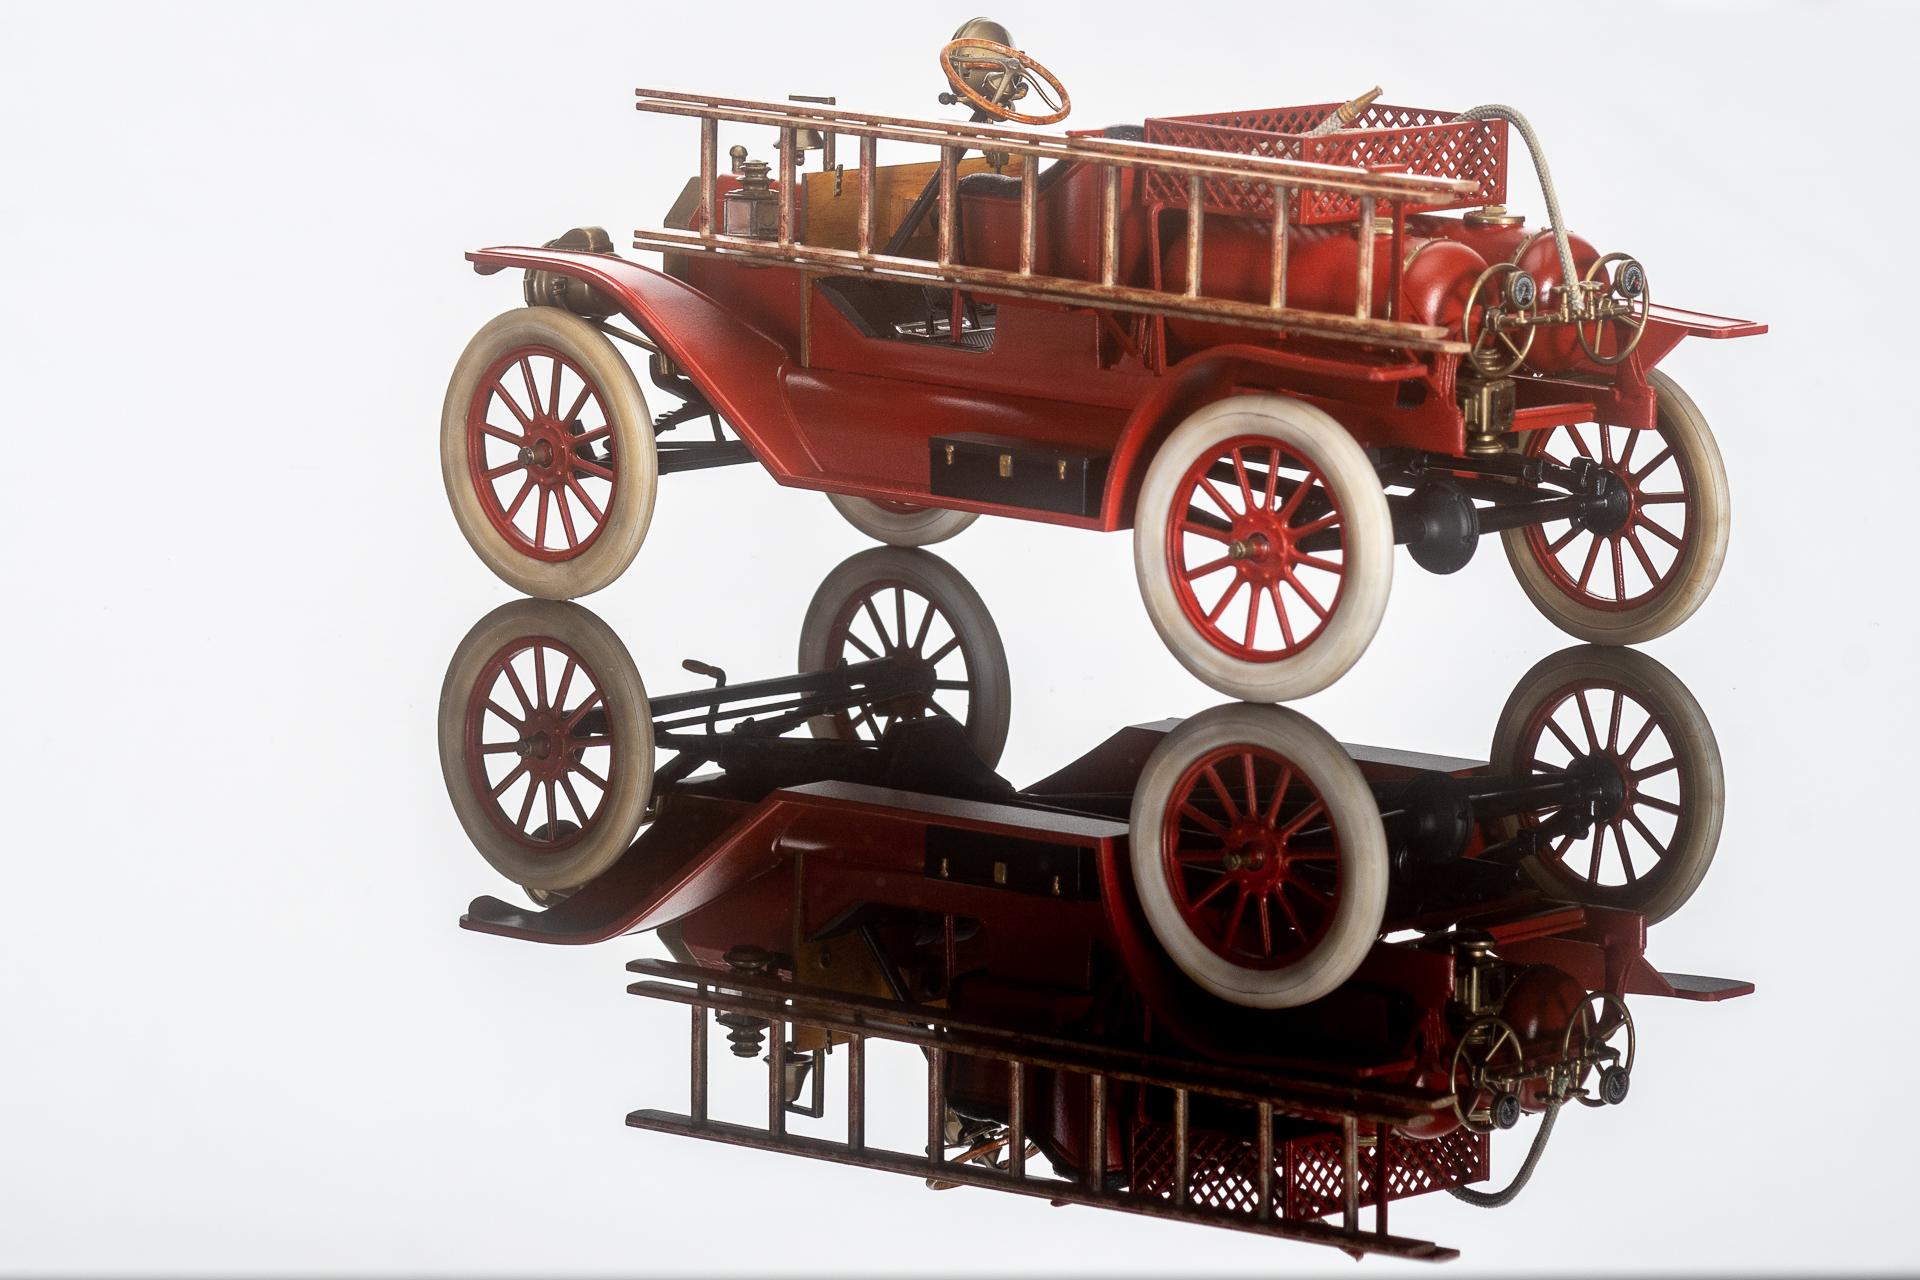
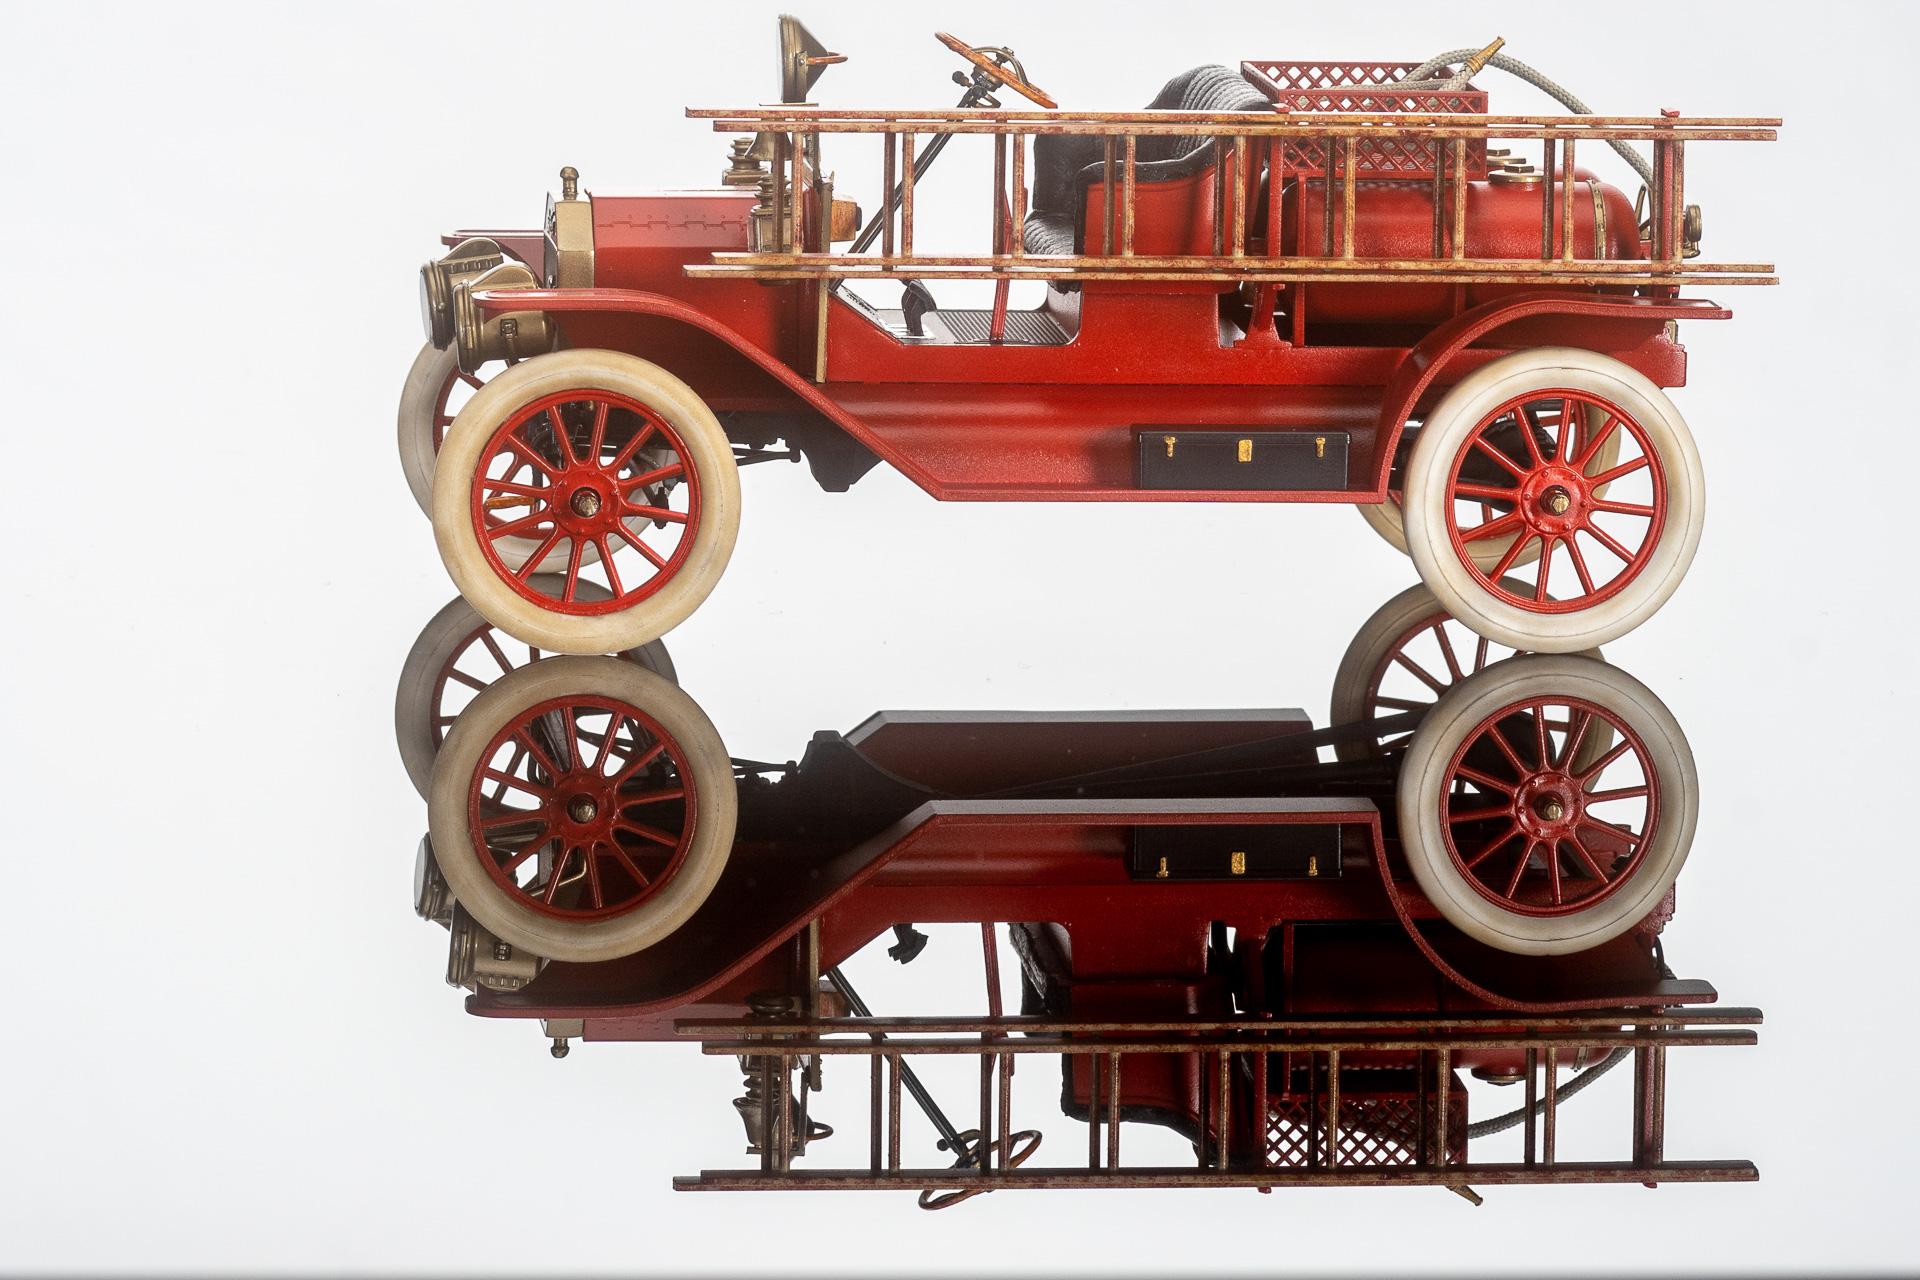
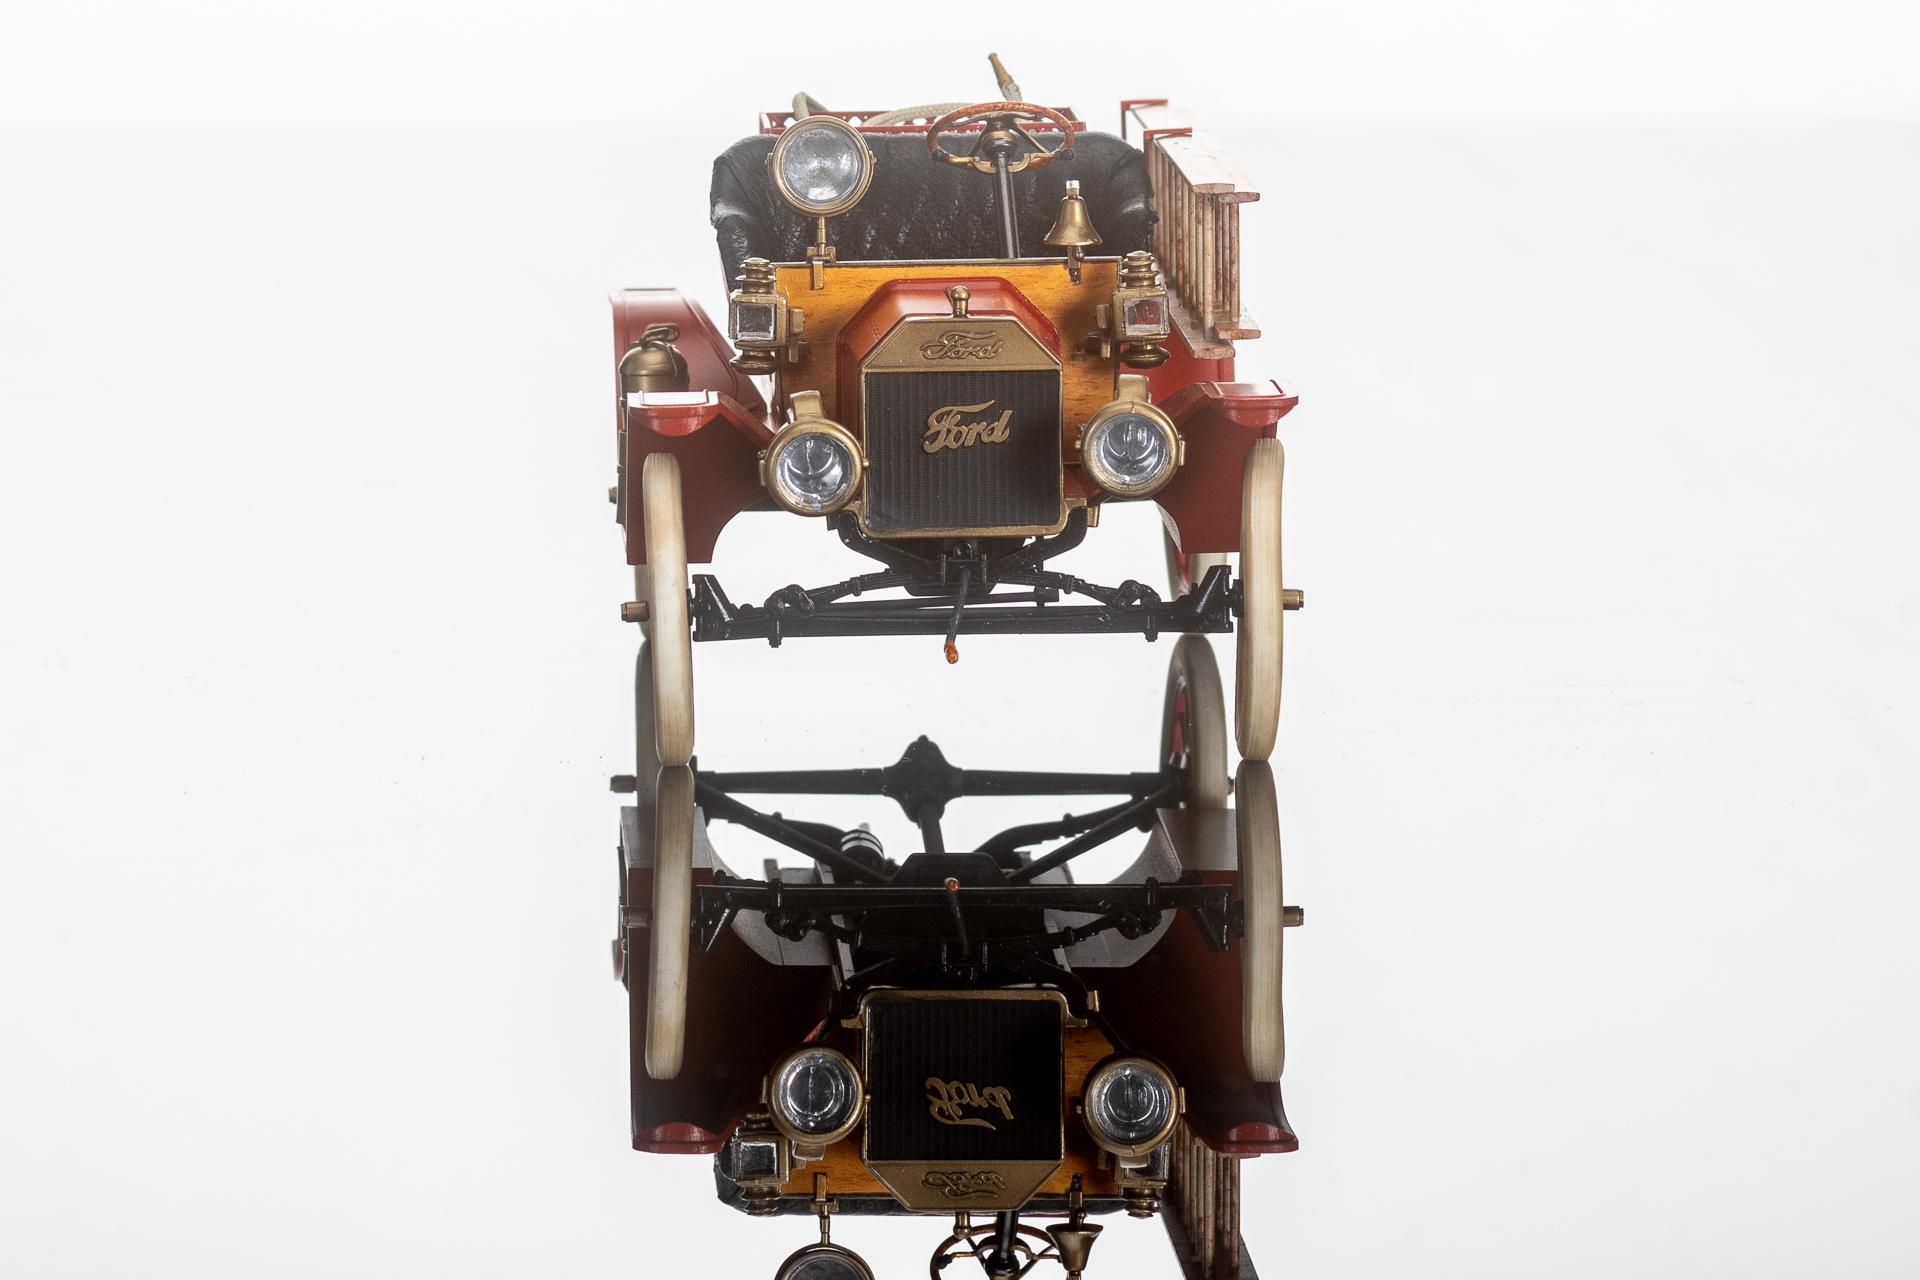
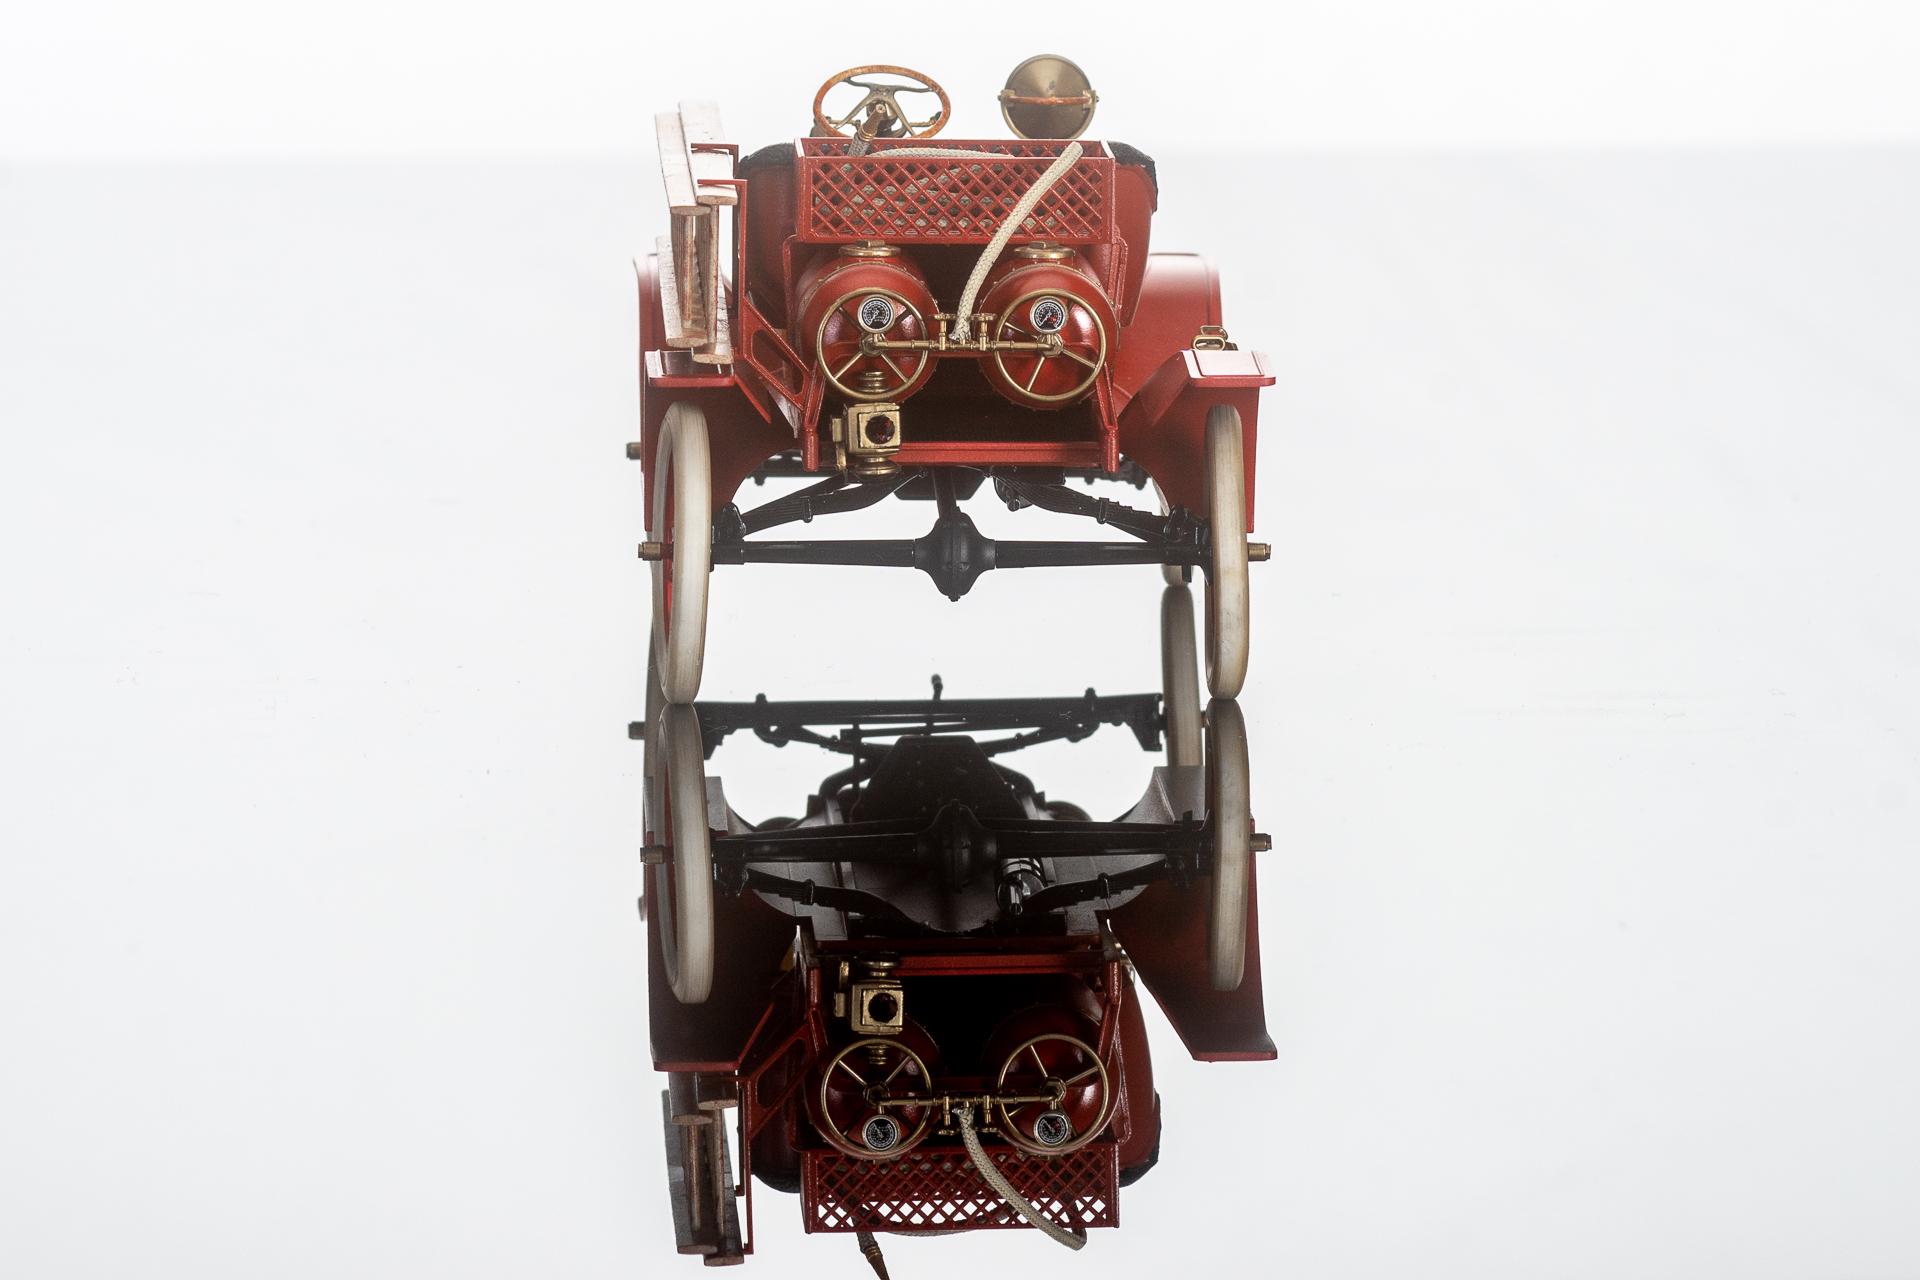
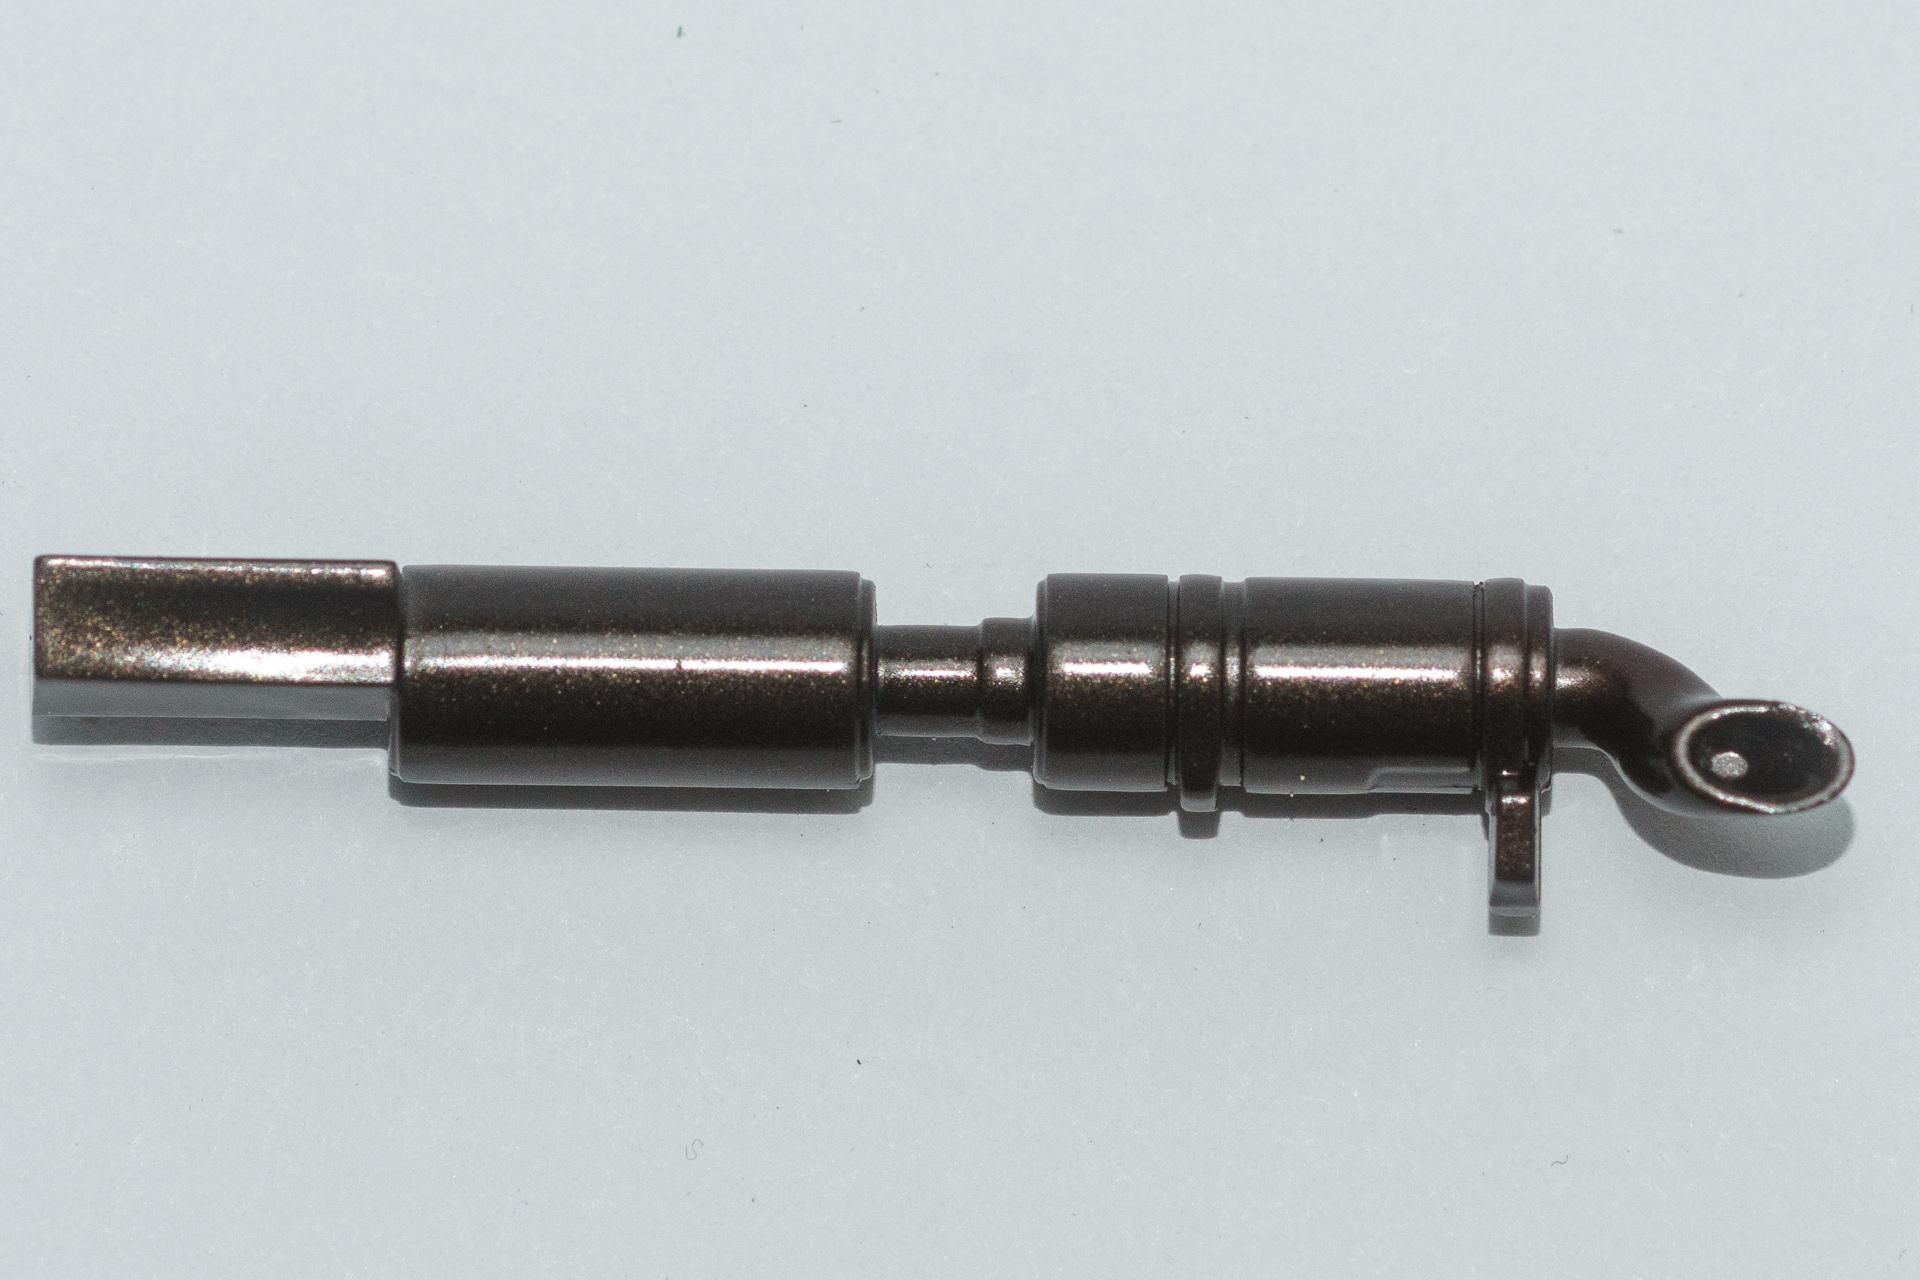
Hi all This summer I built ICM's Ford T Firetruck. It was just pure fun to build it almost up to the end when I noticed that the searchlight provided in the kit absolutely did not fit to the firewall. There was no way how the searchlight could have been mounted (unless you would have it shine perpendicular to the street) without modification of the firewall which was, at that point of the build, already finished and assembled. So I decided to modify the searchlight instead and add some kind of cable conduit to cover the depression in the firewall which made no longer sense. Enough written, let's see the pics
-
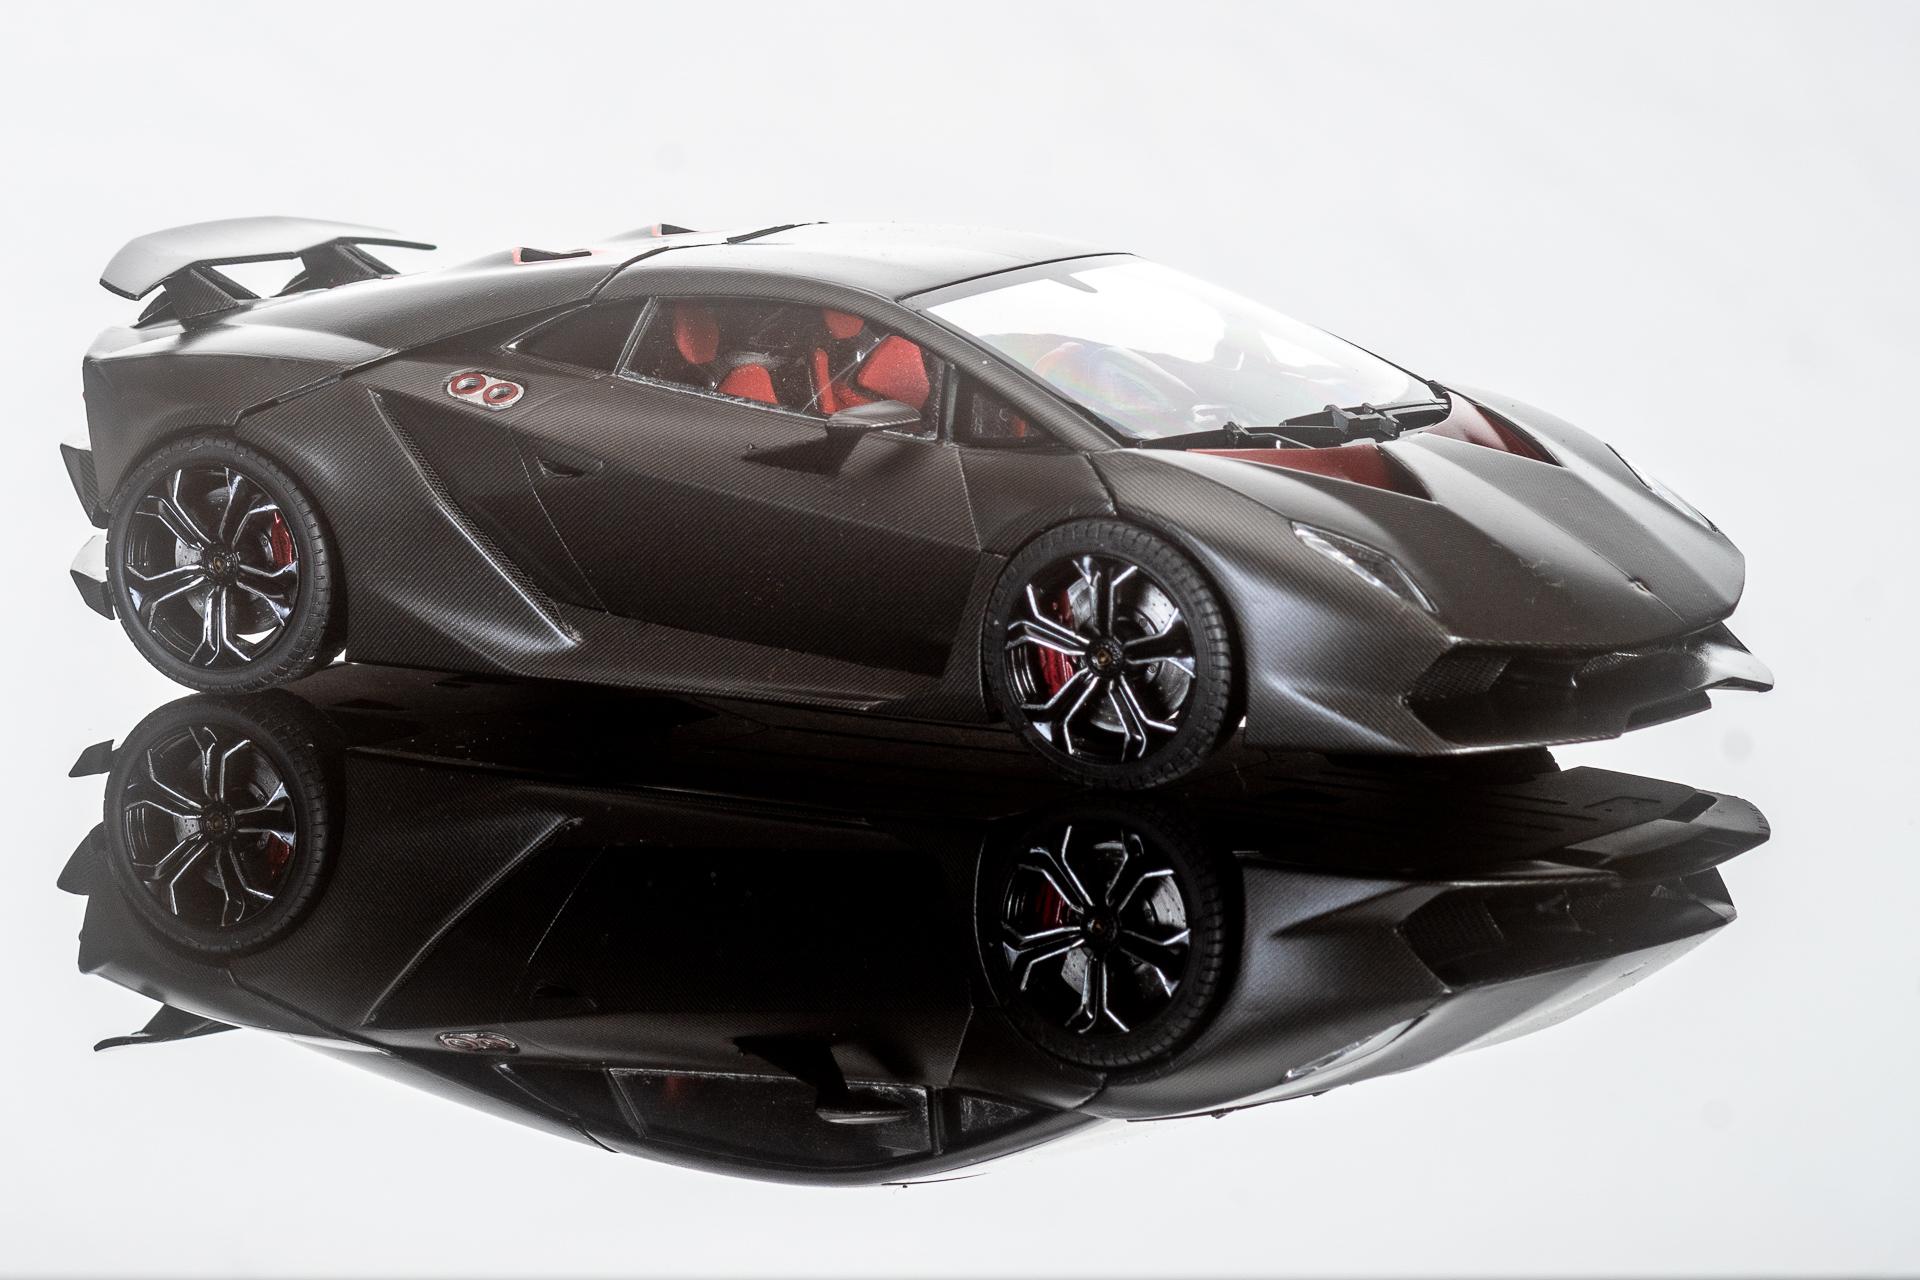
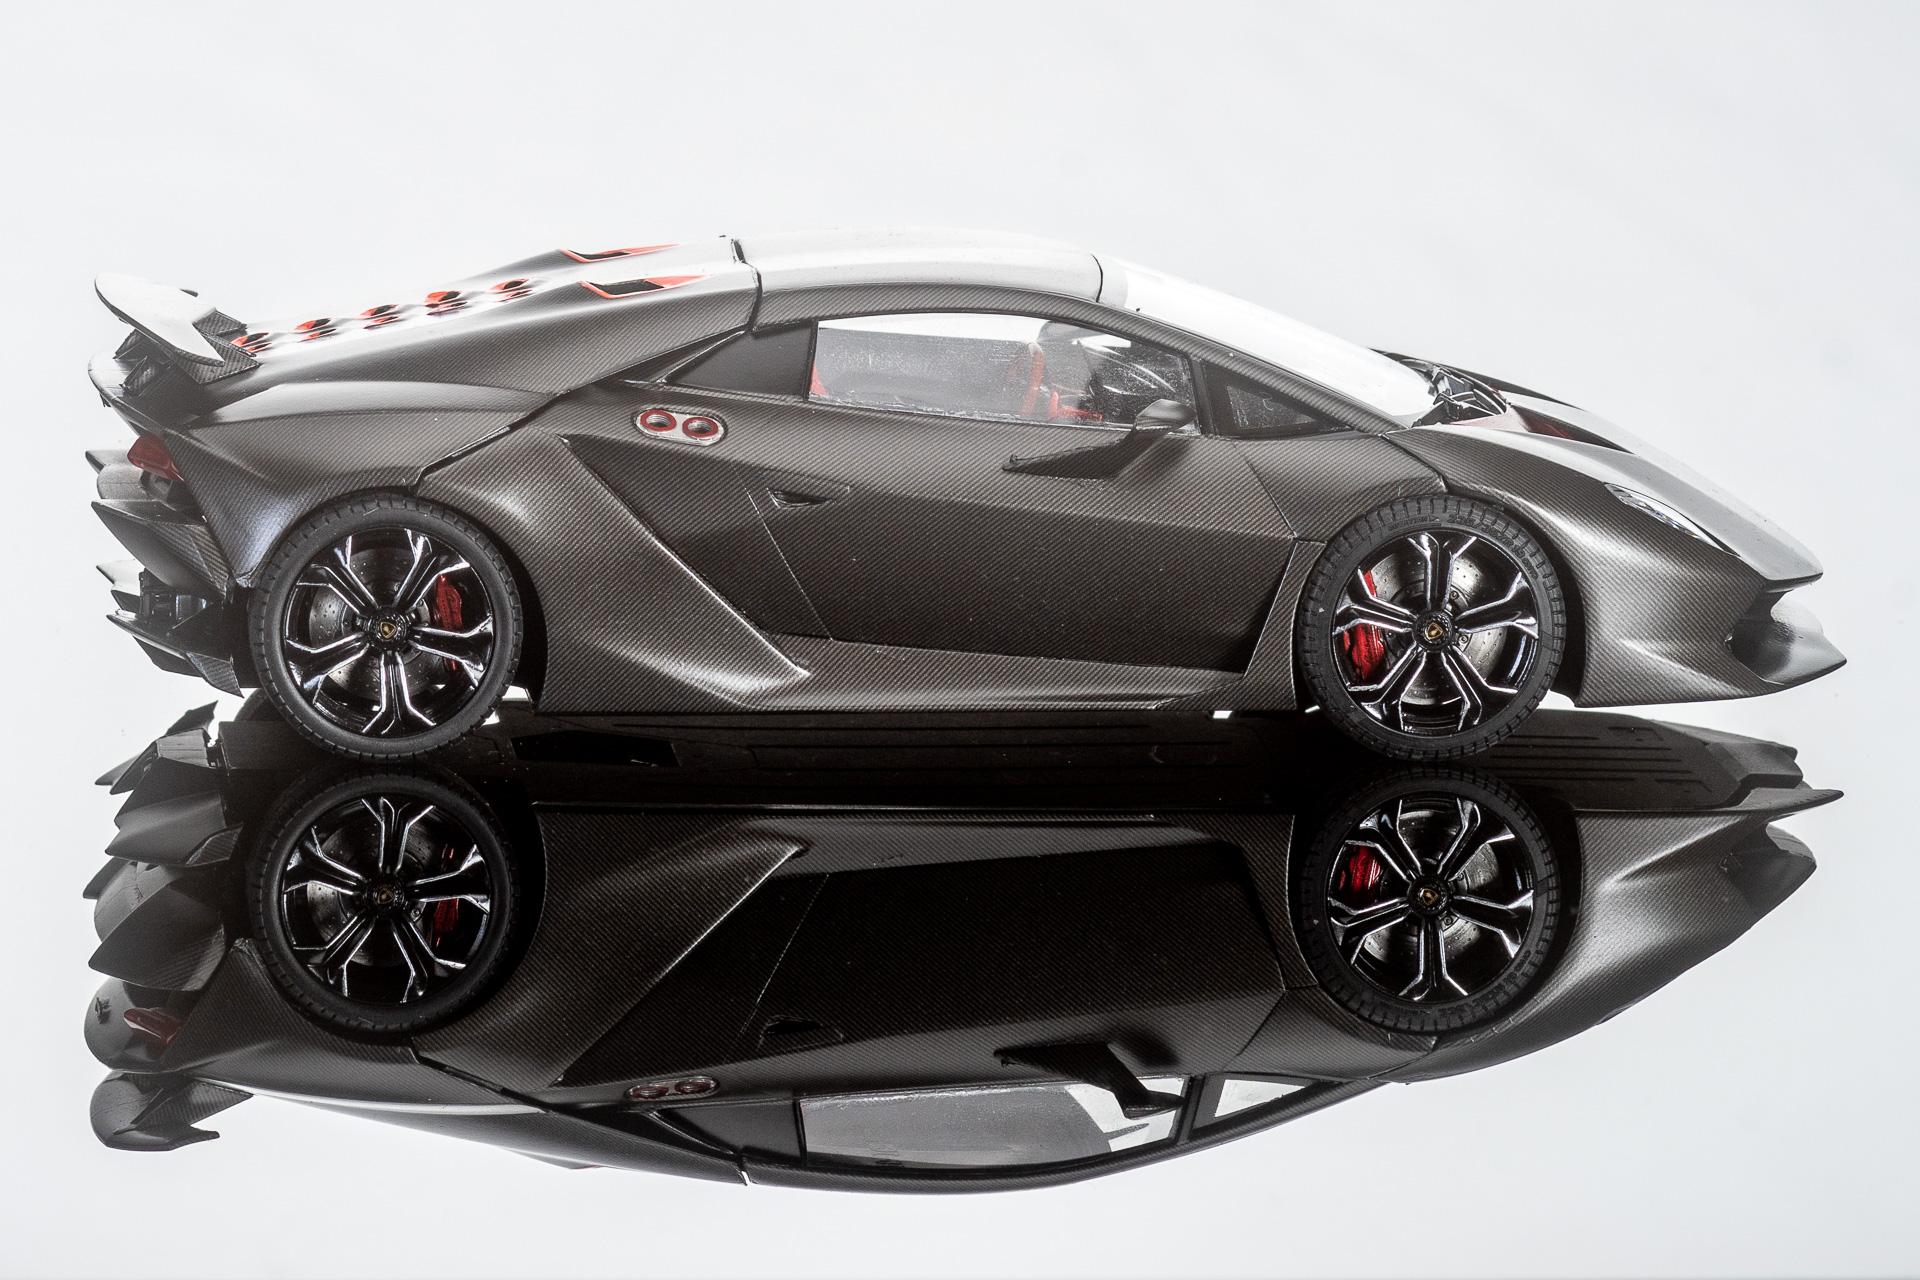
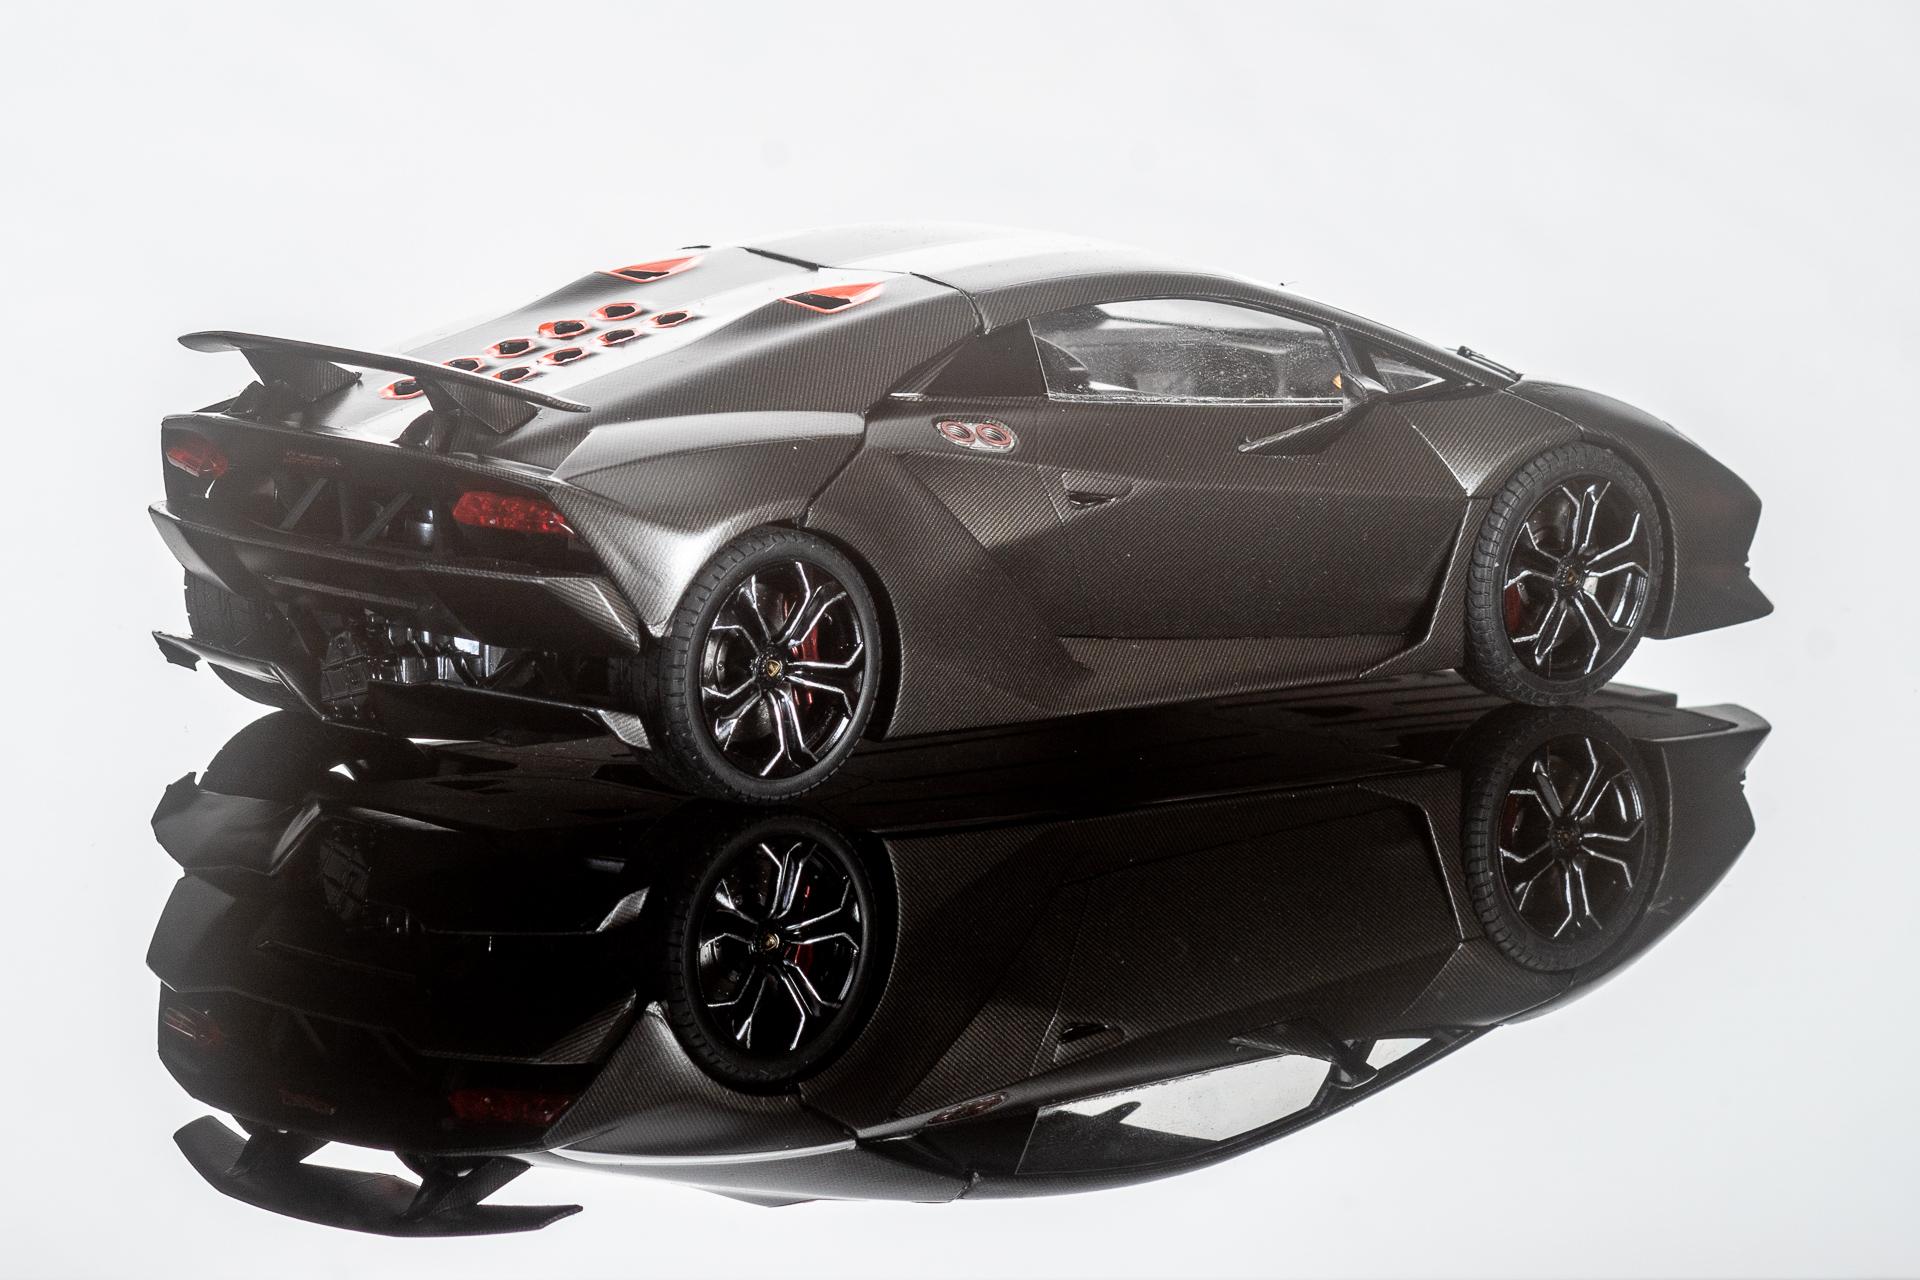
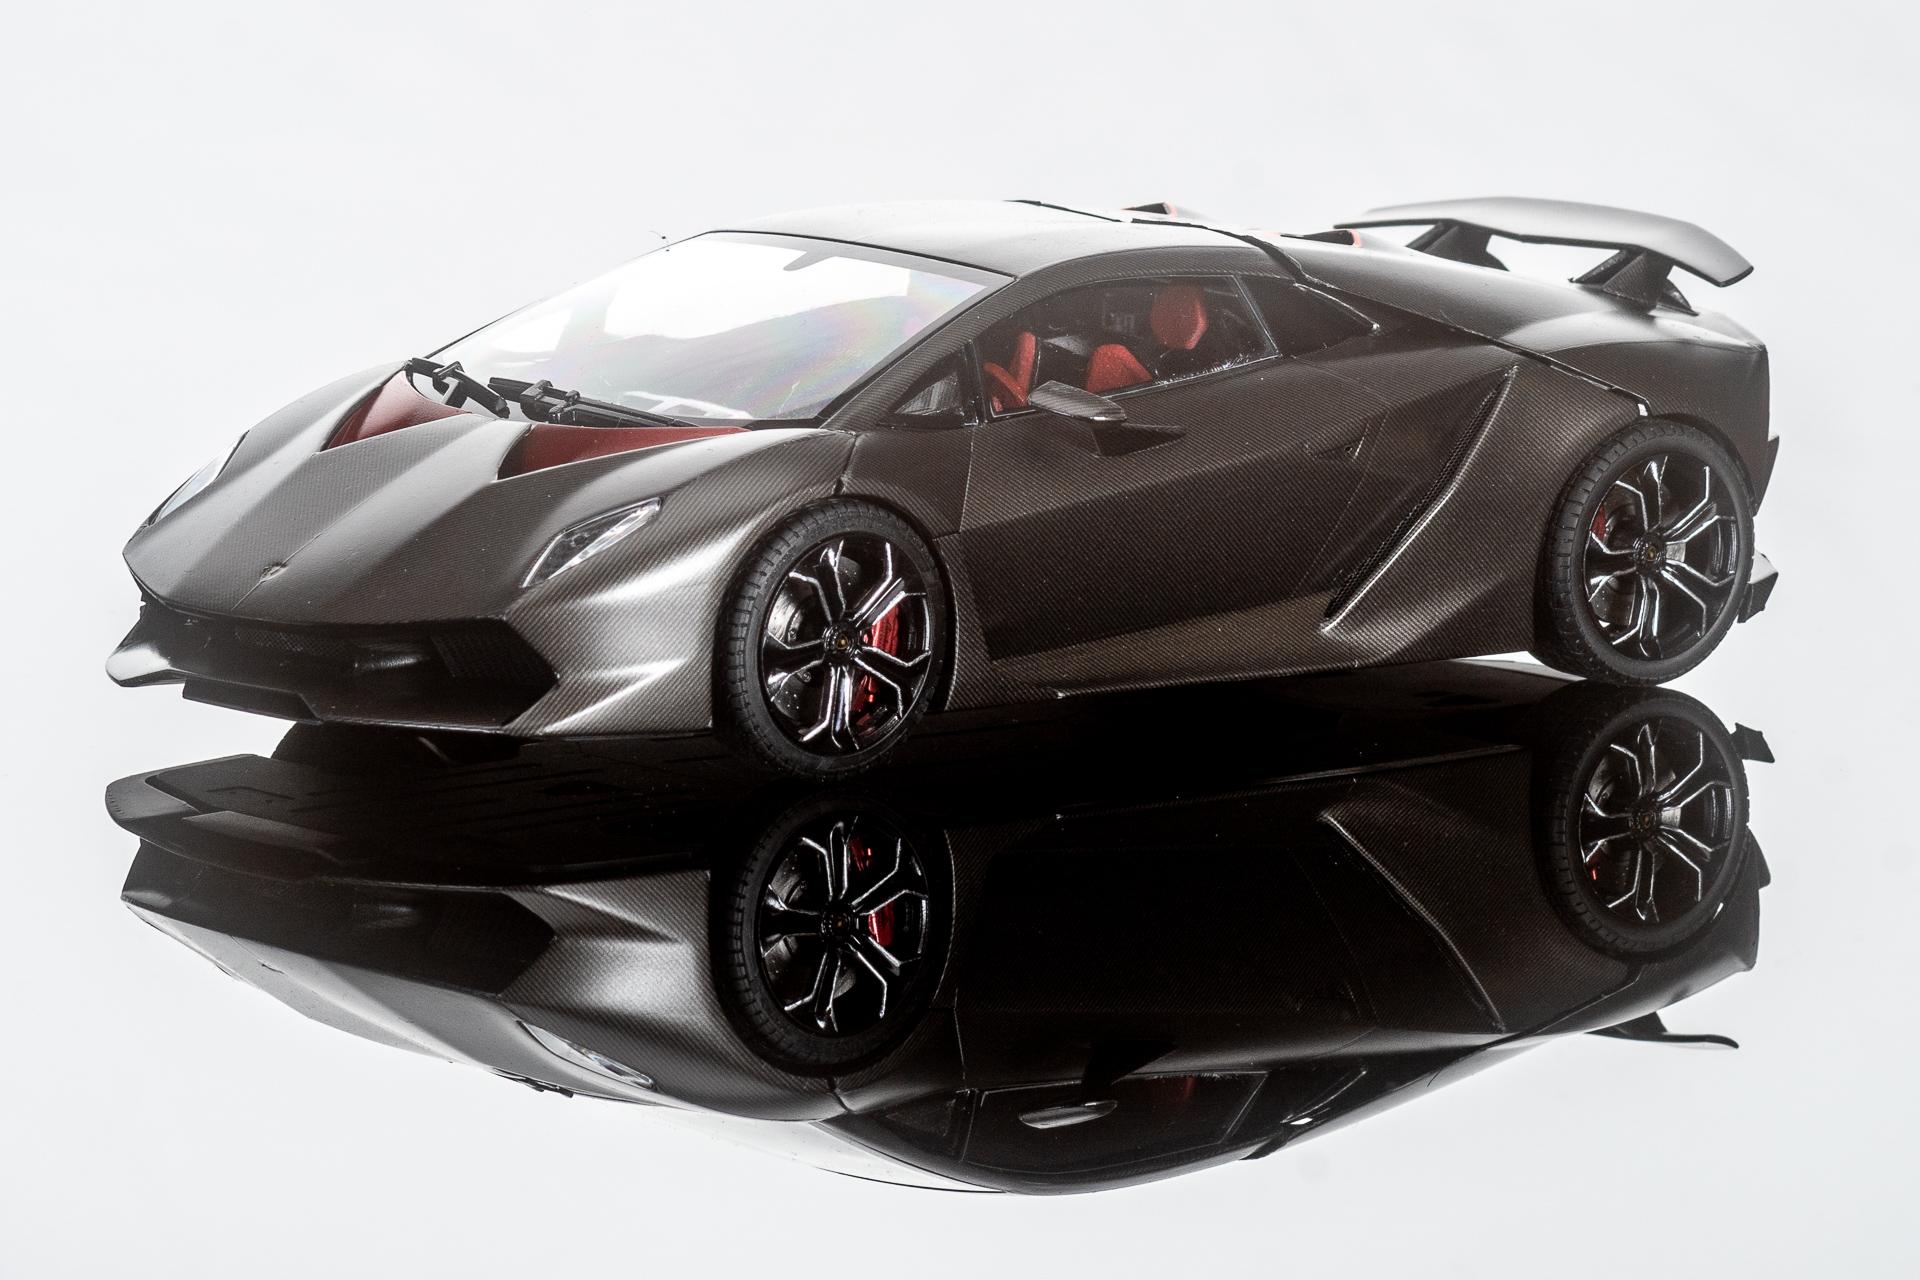
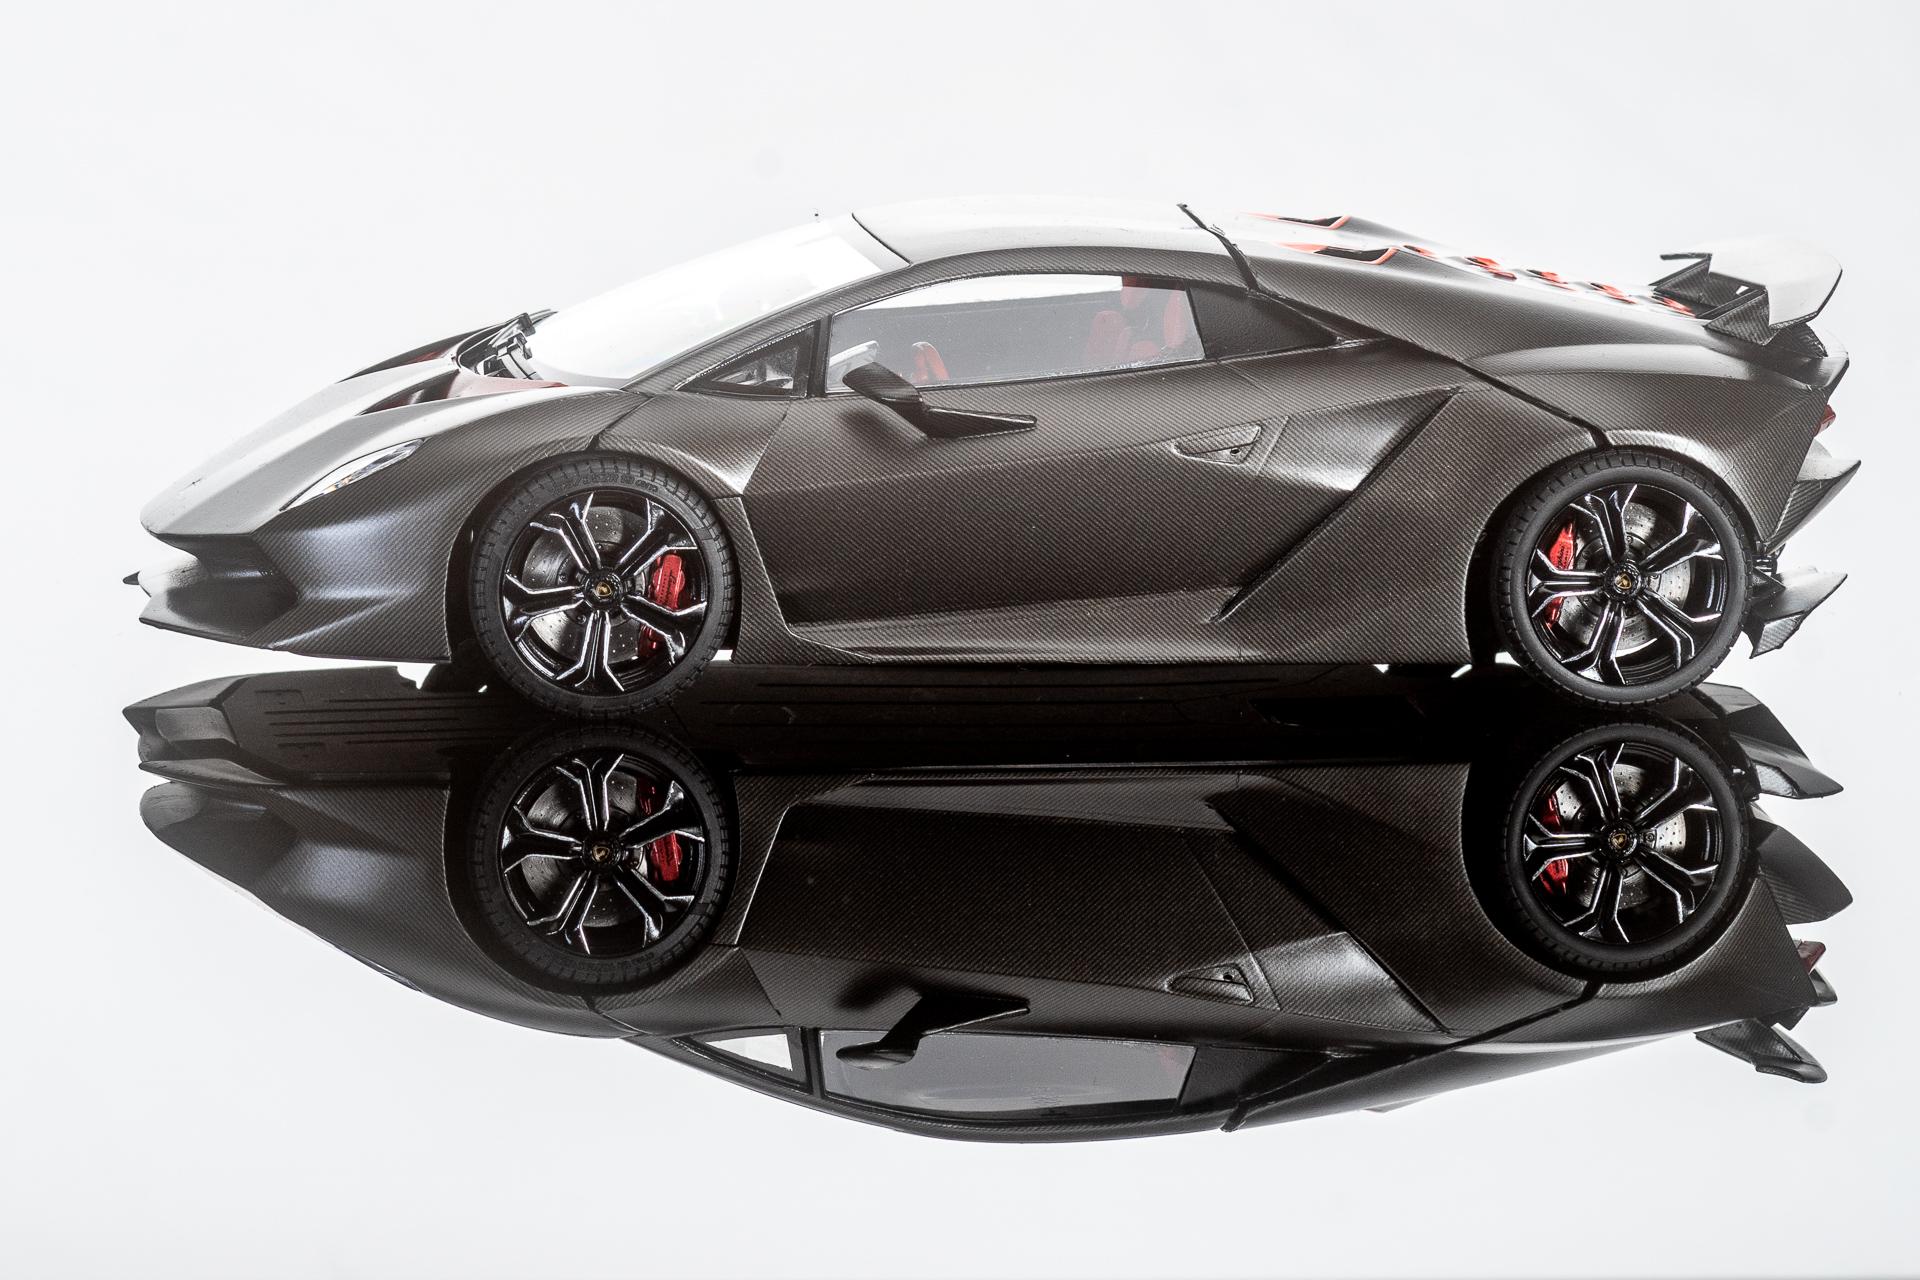
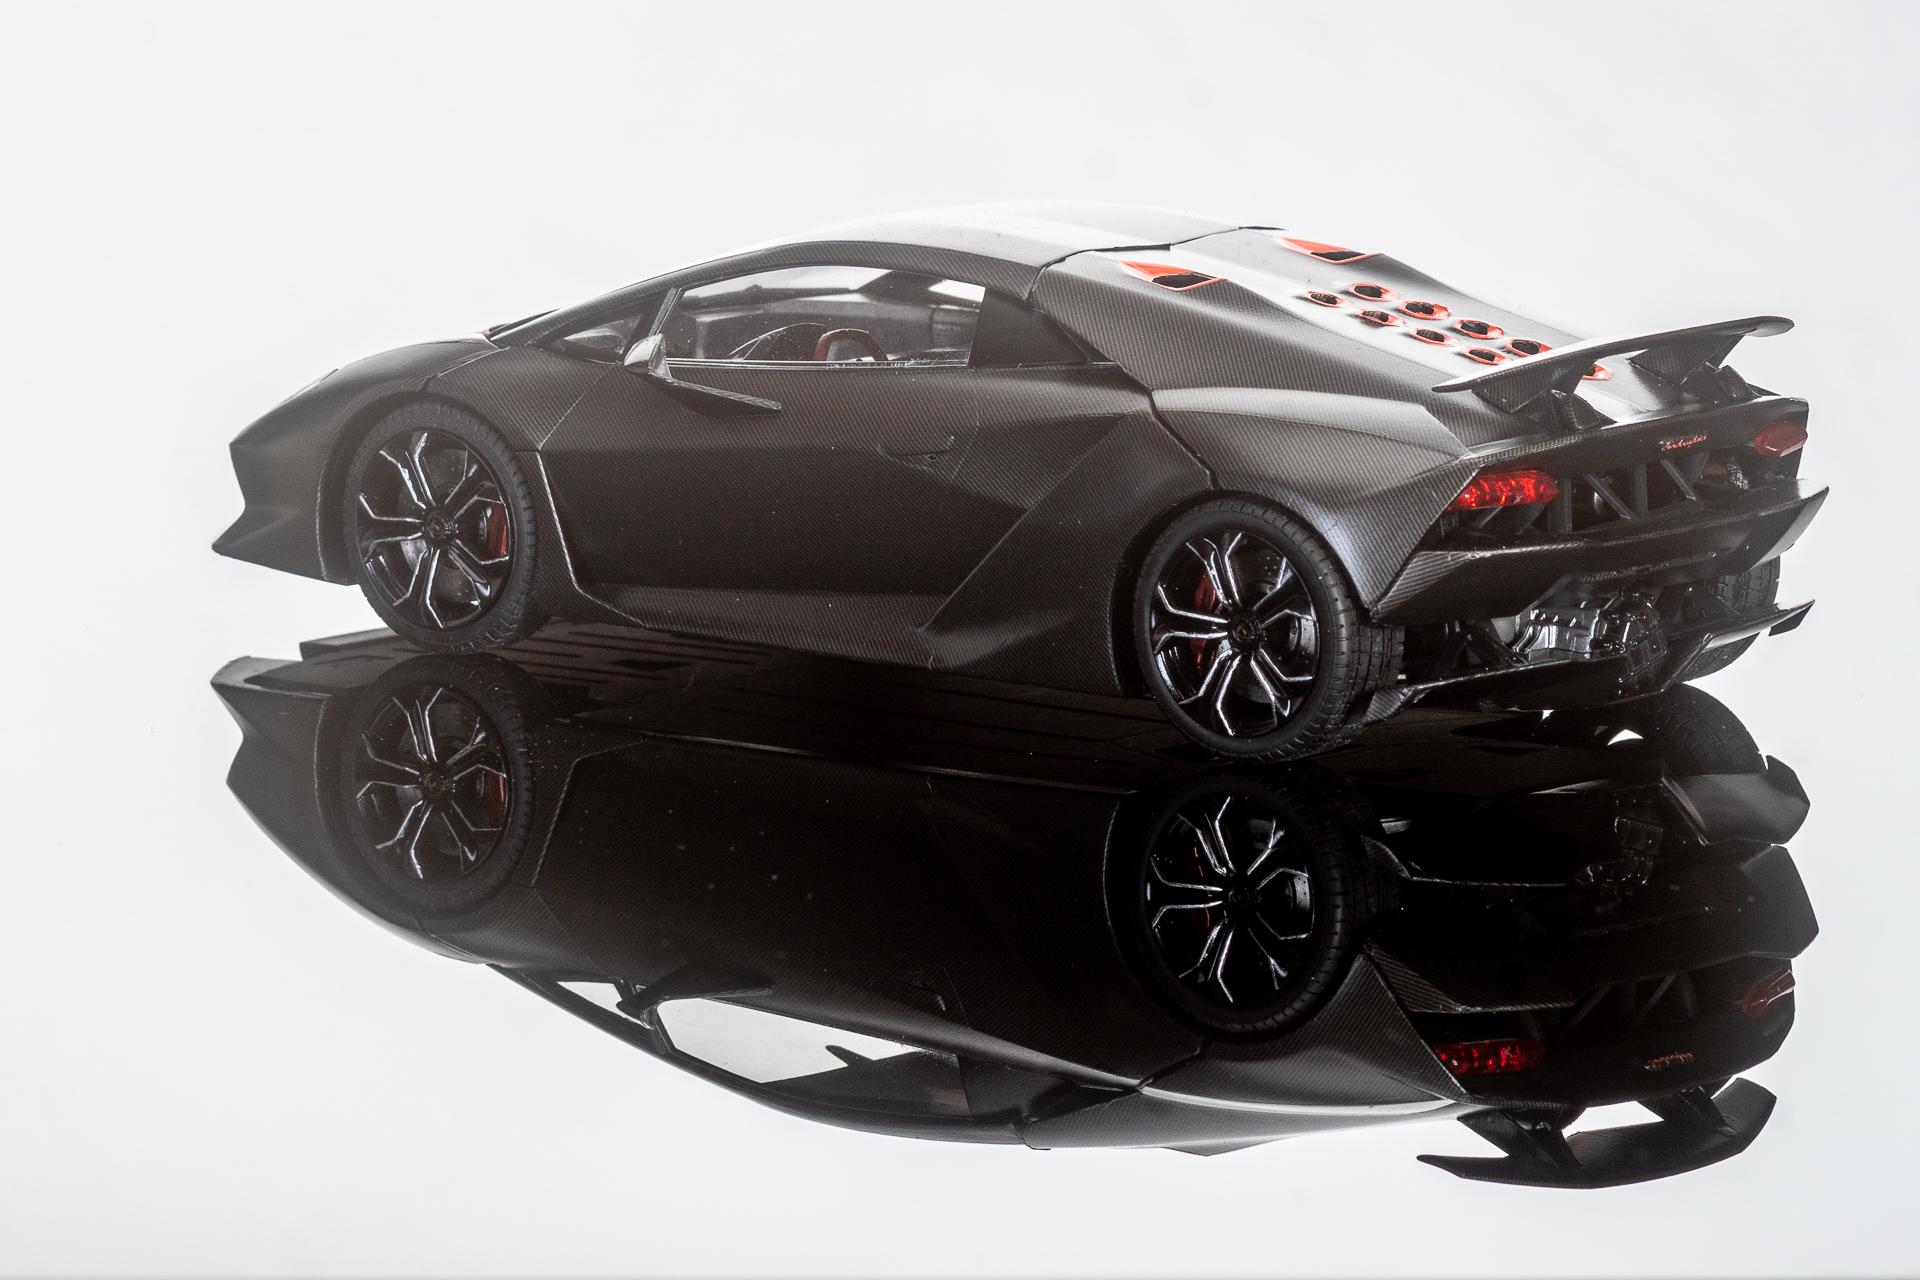
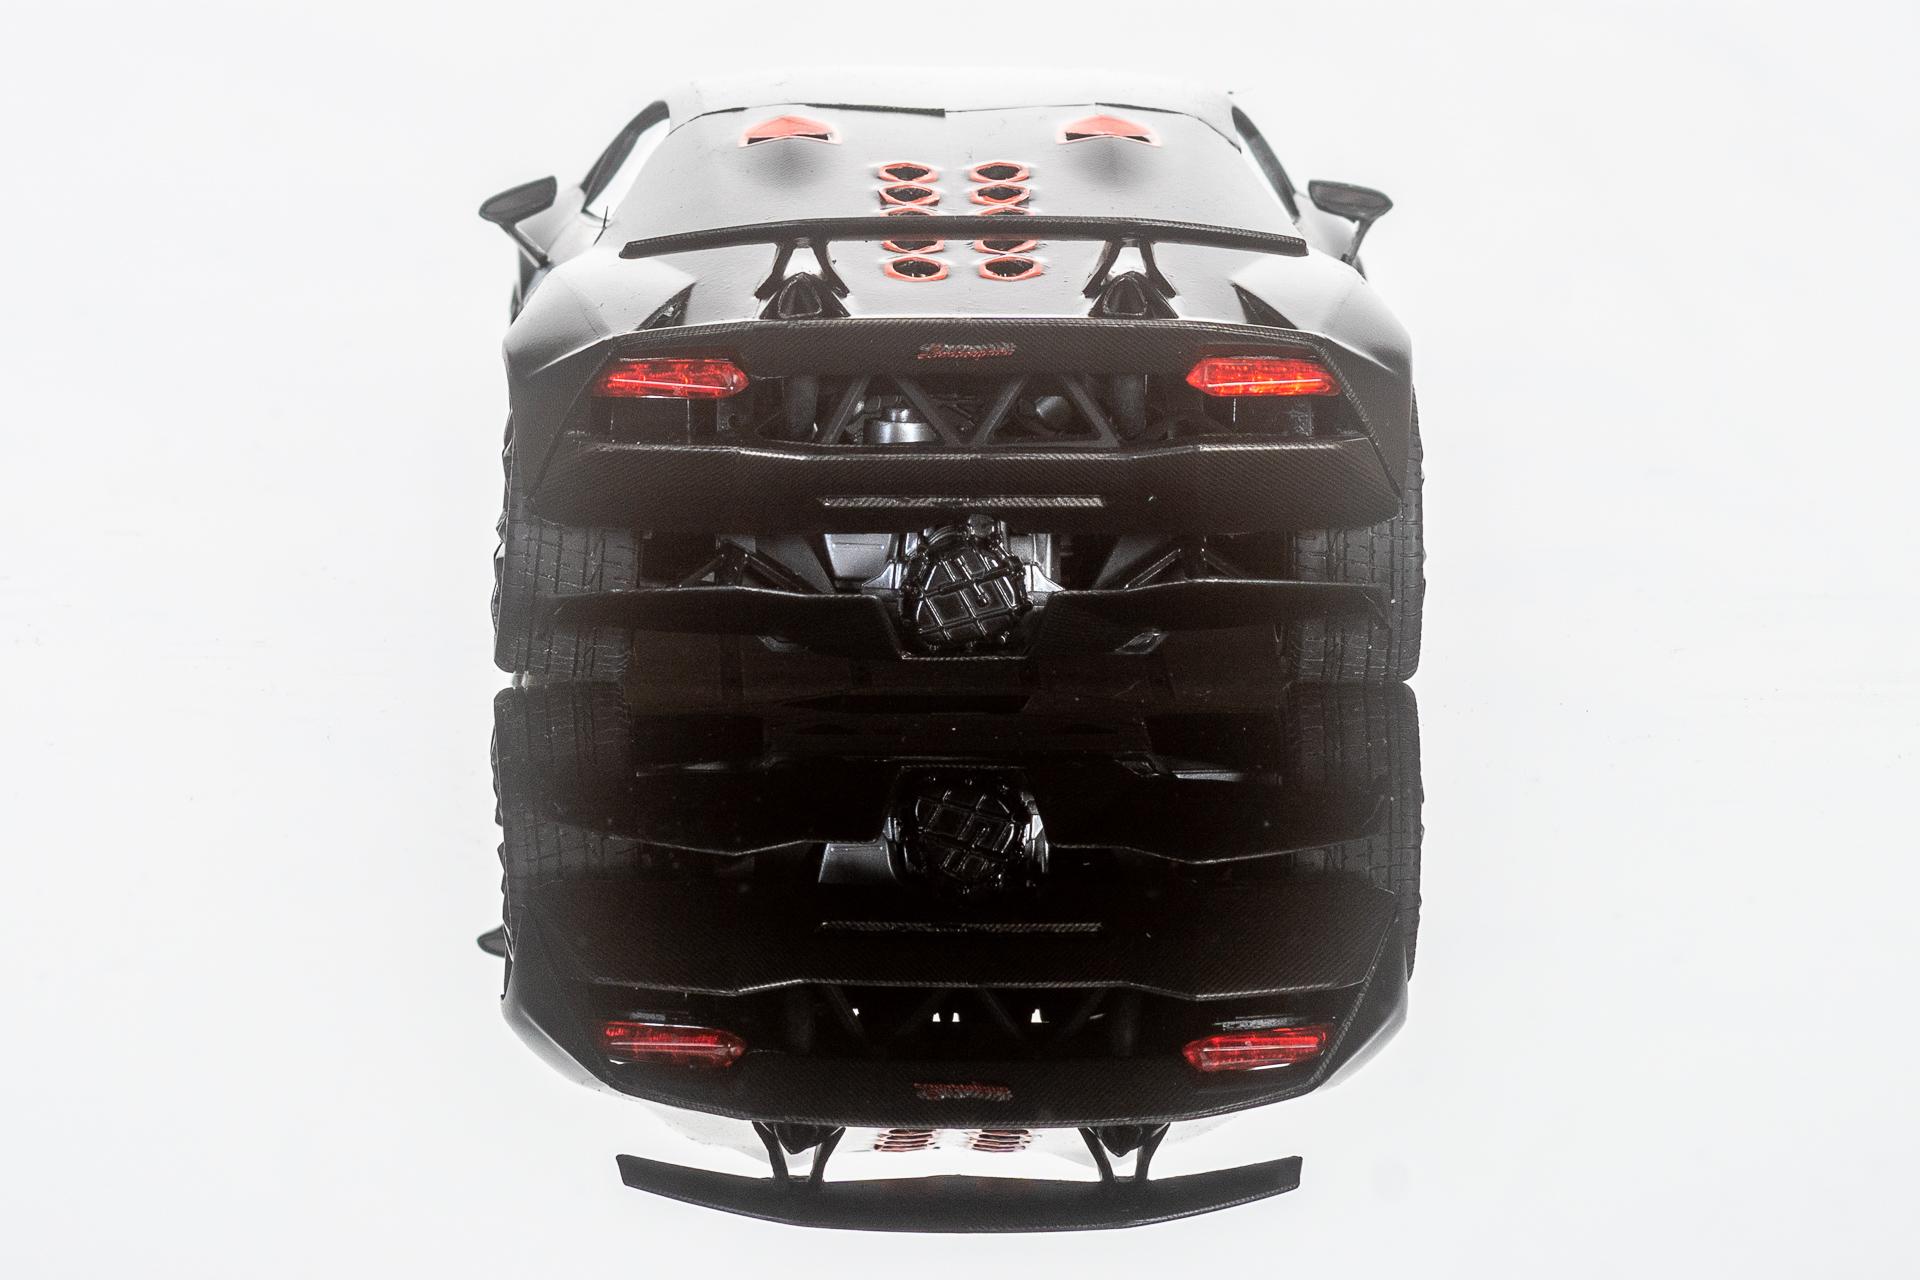
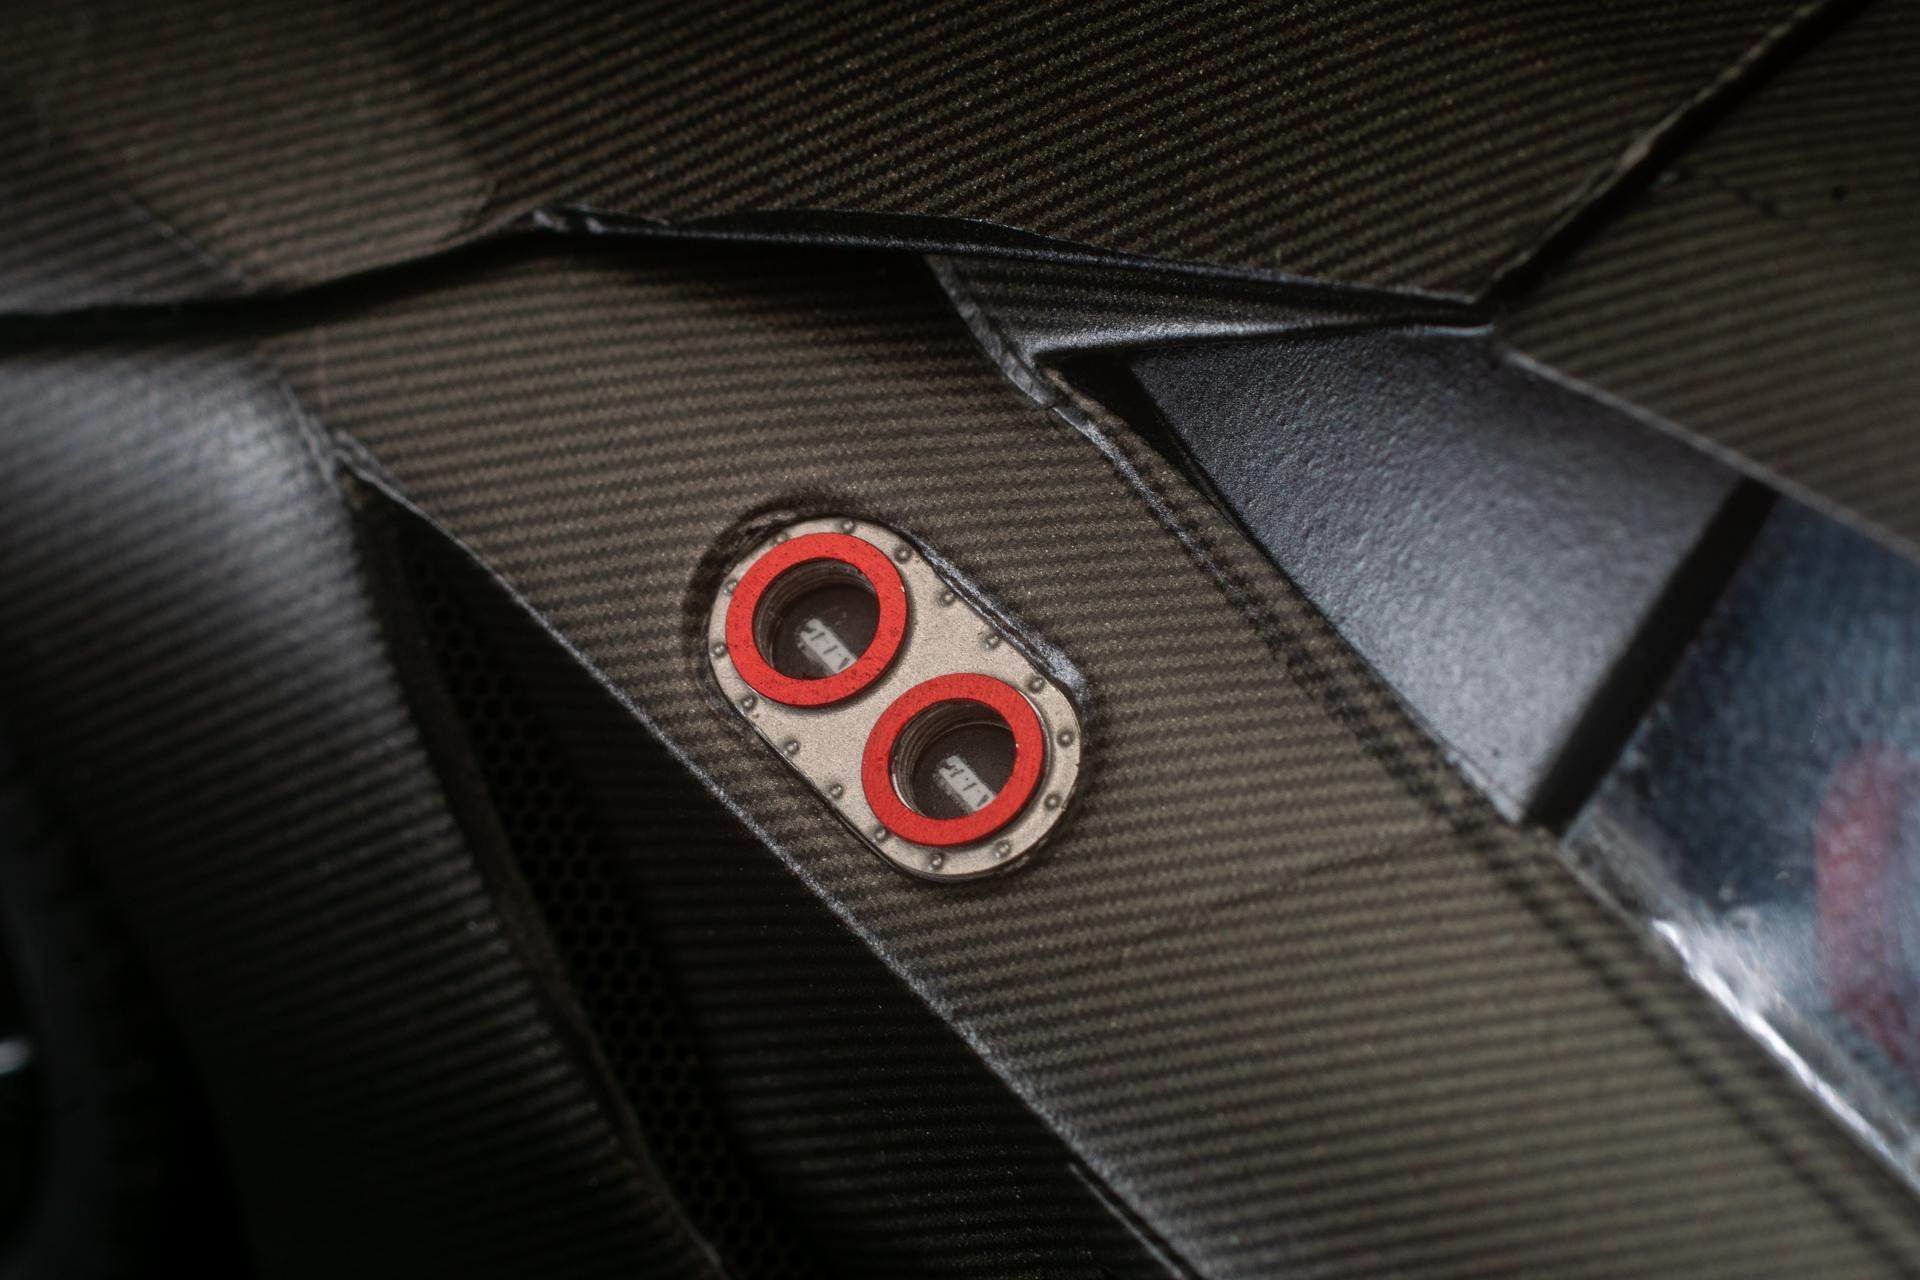
Hi all It's quite some time since I finished my Sesto Elemento and yesterday I finally managed to take it to the studio to take some nice pics. You can find the thread in the Under Glass section right here: http://www.modelcarsmag.com/forums/topic/157591-lamborghini-sesto-elemento/ Urs
-
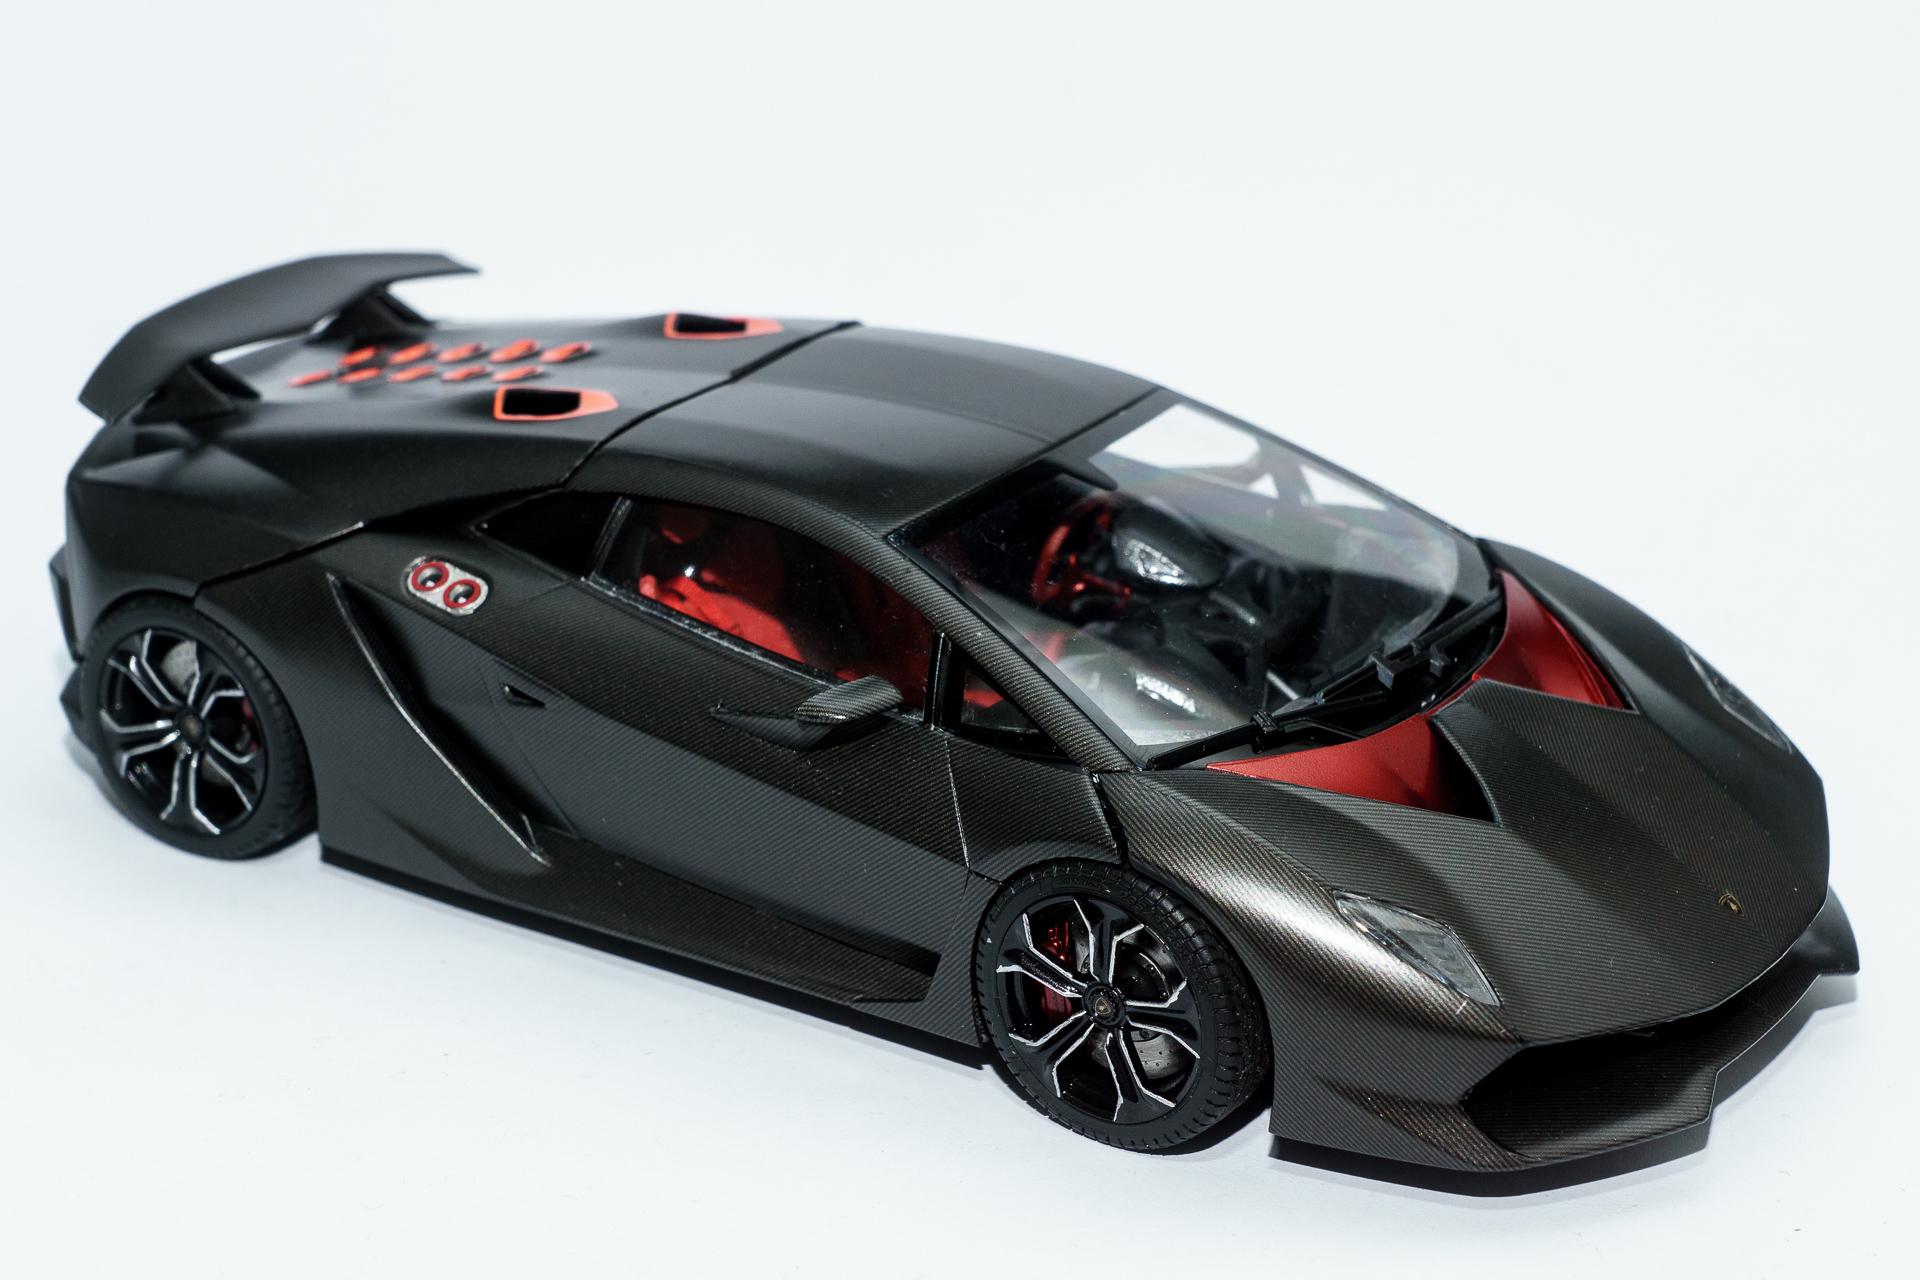
Hi al Finished my Lamborghini Sesto Elemento some months ago and yesterday I finally managed to take it to the studio to take some gallery pics of it. Unfortunately I did not notice that the engine hood was a little out of position until I was back home and looked at the pictures on my big screen Usually the fit is a little better, although not really perfect. I wish all of you a nice sunday Urs
-
I can only double what others have said already. It's a beautiful model of a beautiful car! I have one question about your 7th video (sanding and polishing). After about 7 minutes the body is covered with some grey stuff while you are wetsanding it. What is that grey stuff and what is it for?
-
Loved this series when I was younger. Will follow this restauration with interest
-
Thank you all for your kind comments on this build Next on my workbench will be Tamiya's Ferrari FXX-K. Really looking forward to building this one, but may take a while till I start due to a sprained finger which makes handling the parts a little difficult... ?
-
Hi all As I had some trouble finding the right mixing ratio for the clear, the finalisation of this build got delayed again. But now it's finally done. It was a build that never was fun, but always a struggle, so I'm happy it's over now. I know, the front and the cowling don't really fit, but it's the best I could acheive. ? First the interior got completed with some red seat belts from UCSP. Than the body could be coated with Zero Paints' 2K Semi-Gloss clear coat. That's the thing I'm really happy with this build, as I like the sheen of this clear. That's all for this build. Better pics in the under glass section will follow once I took it to the studio. i hope you liked the build and that you will follow along with my next project. Urs
-
My favourite car of all times. I also have this kit in my stash but don't dare building it yet. Will follow this build with great interest
-
Hi all Thank you for all your kind comments. As the missing parts finally arrived today, I expect that this weekend I will be able to post another (maybe the last?) update to this build
-
Mercedes-AMG GT3
harti20 replied to harti20's topic in WIP: Other Racing: Road Racing, Land Speed Racers
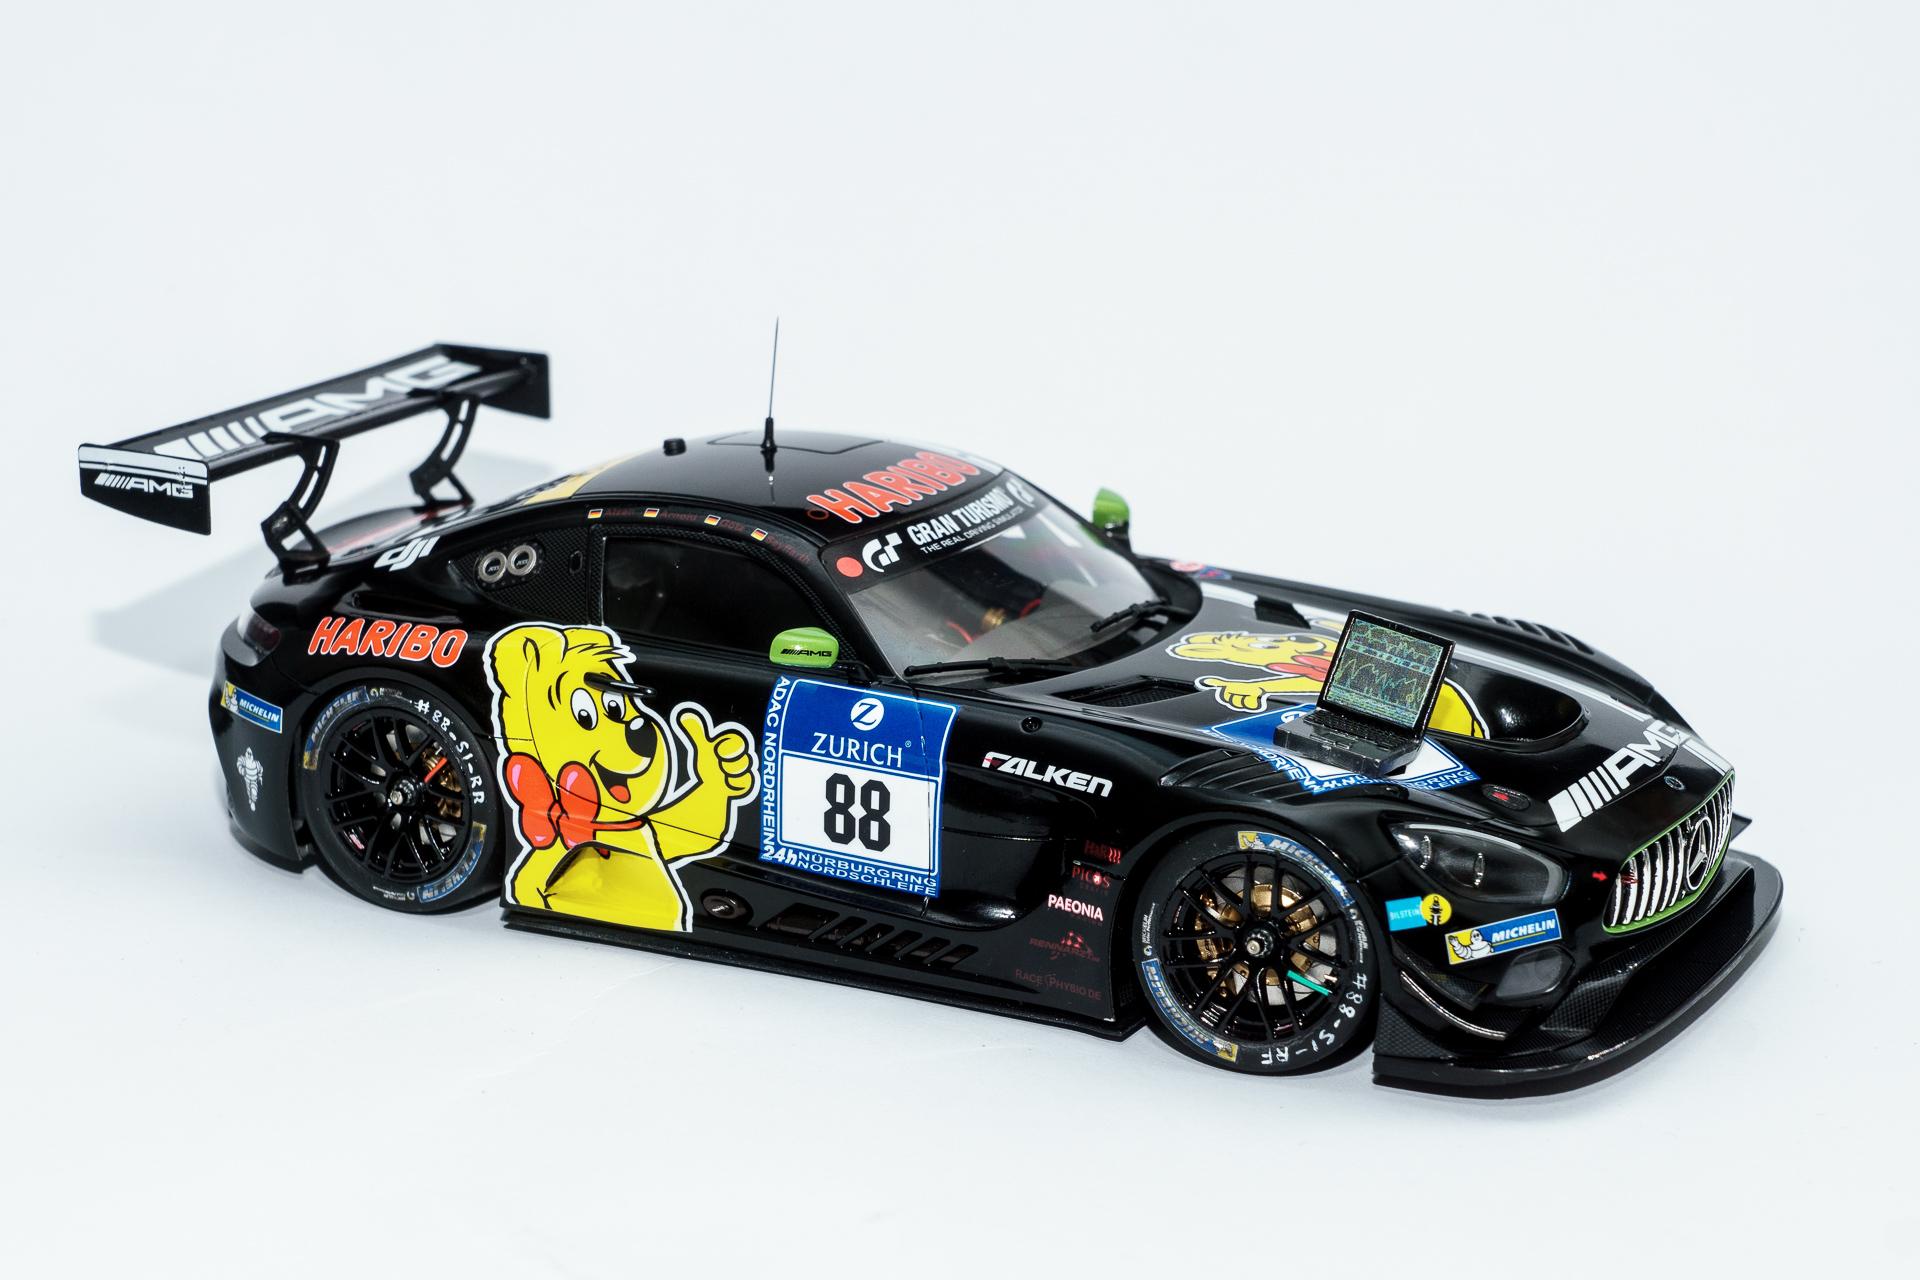
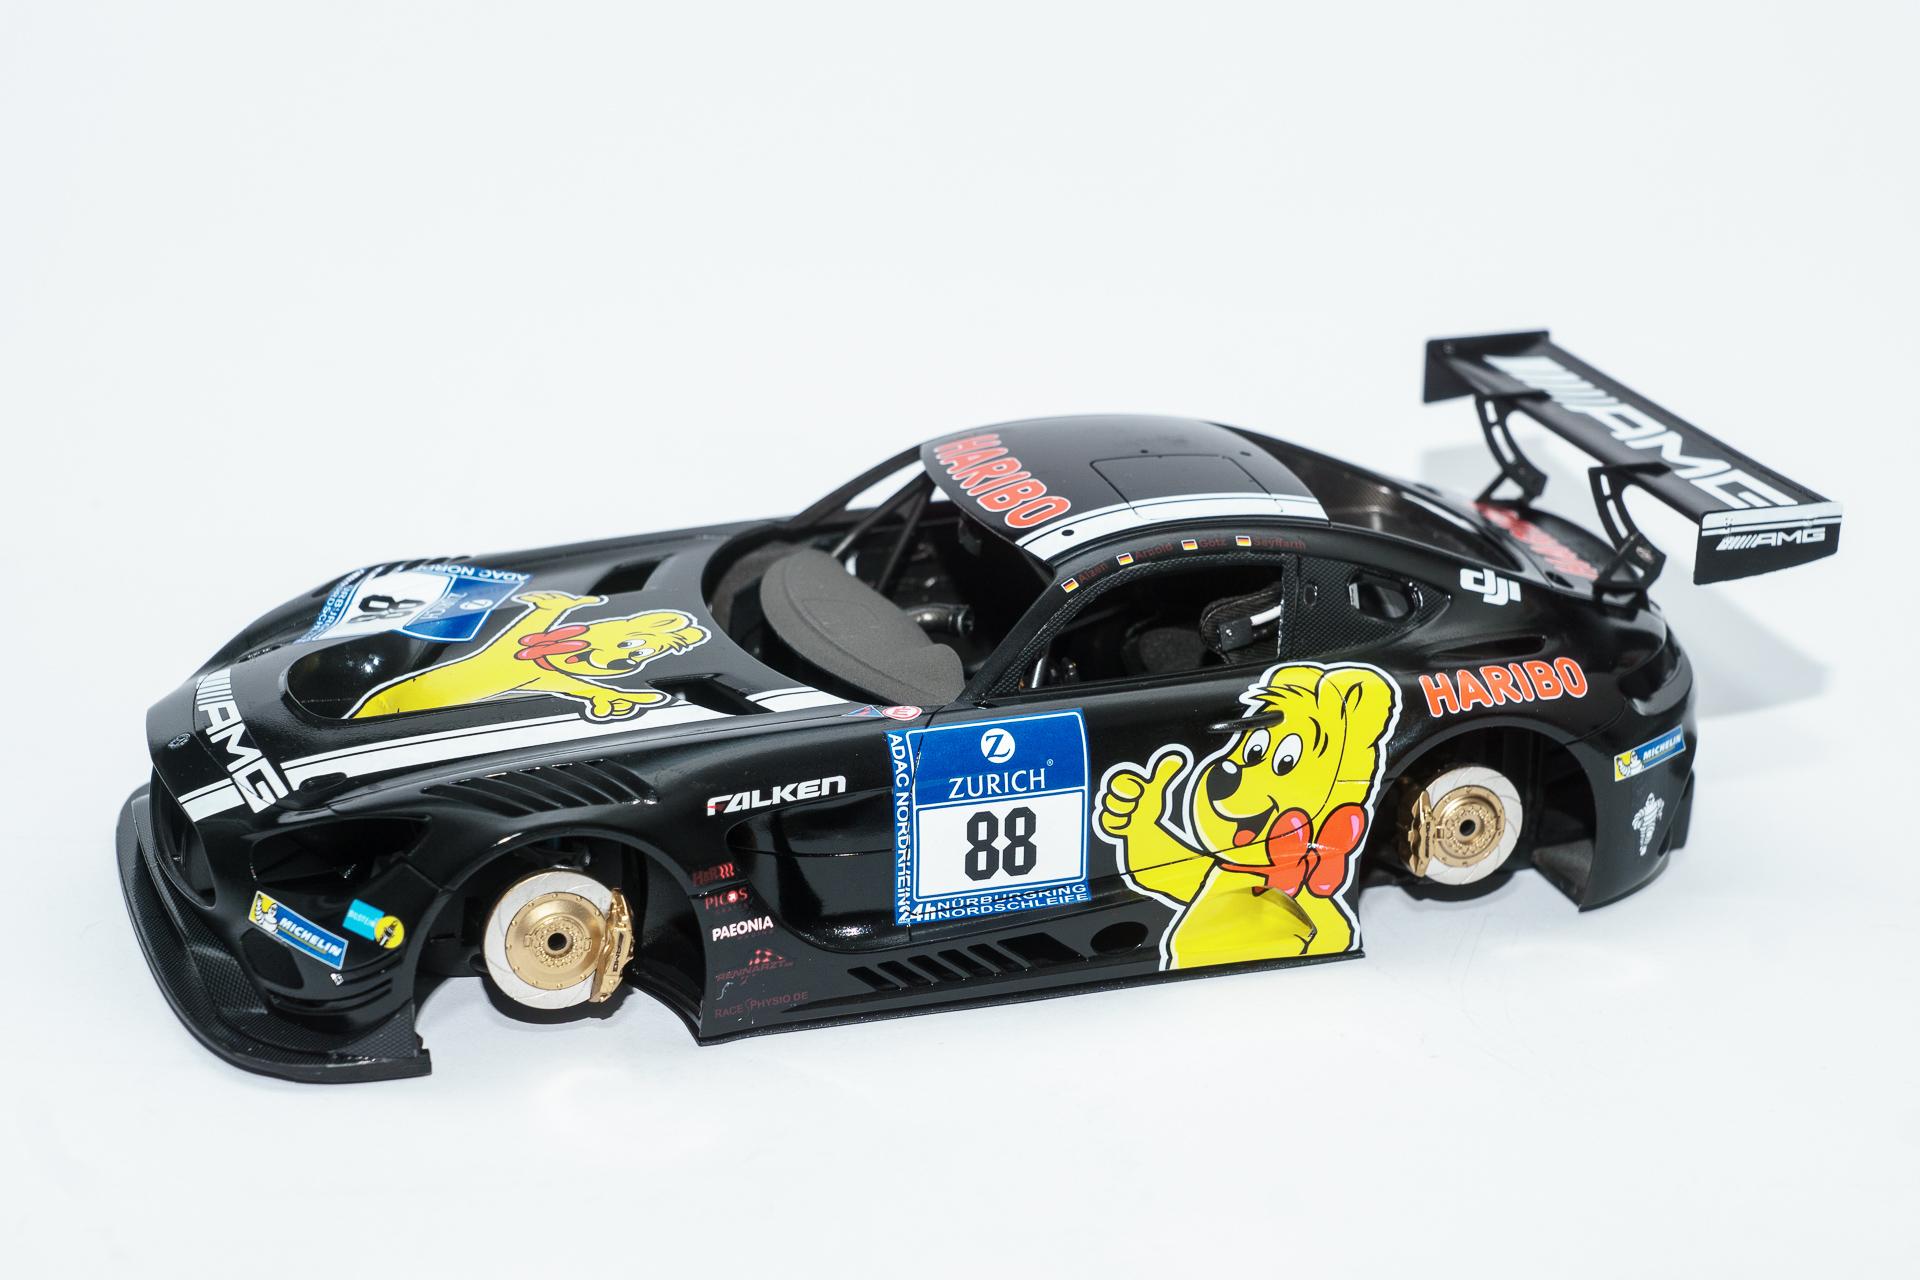
Hi all As mentioned in the previous update, the model could be completed this week. Here are the final pics of this WIP, before the gummy bear will roll over to the gallery somewhere down the road I hope you all enjoyed the build as much as I did and hope you will be following my next build as well Urs
-
Mercedes-AMG GT3
harti20 replied to harti20's topic in WIP: Other Racing: Road Racing, Land Speed Racers
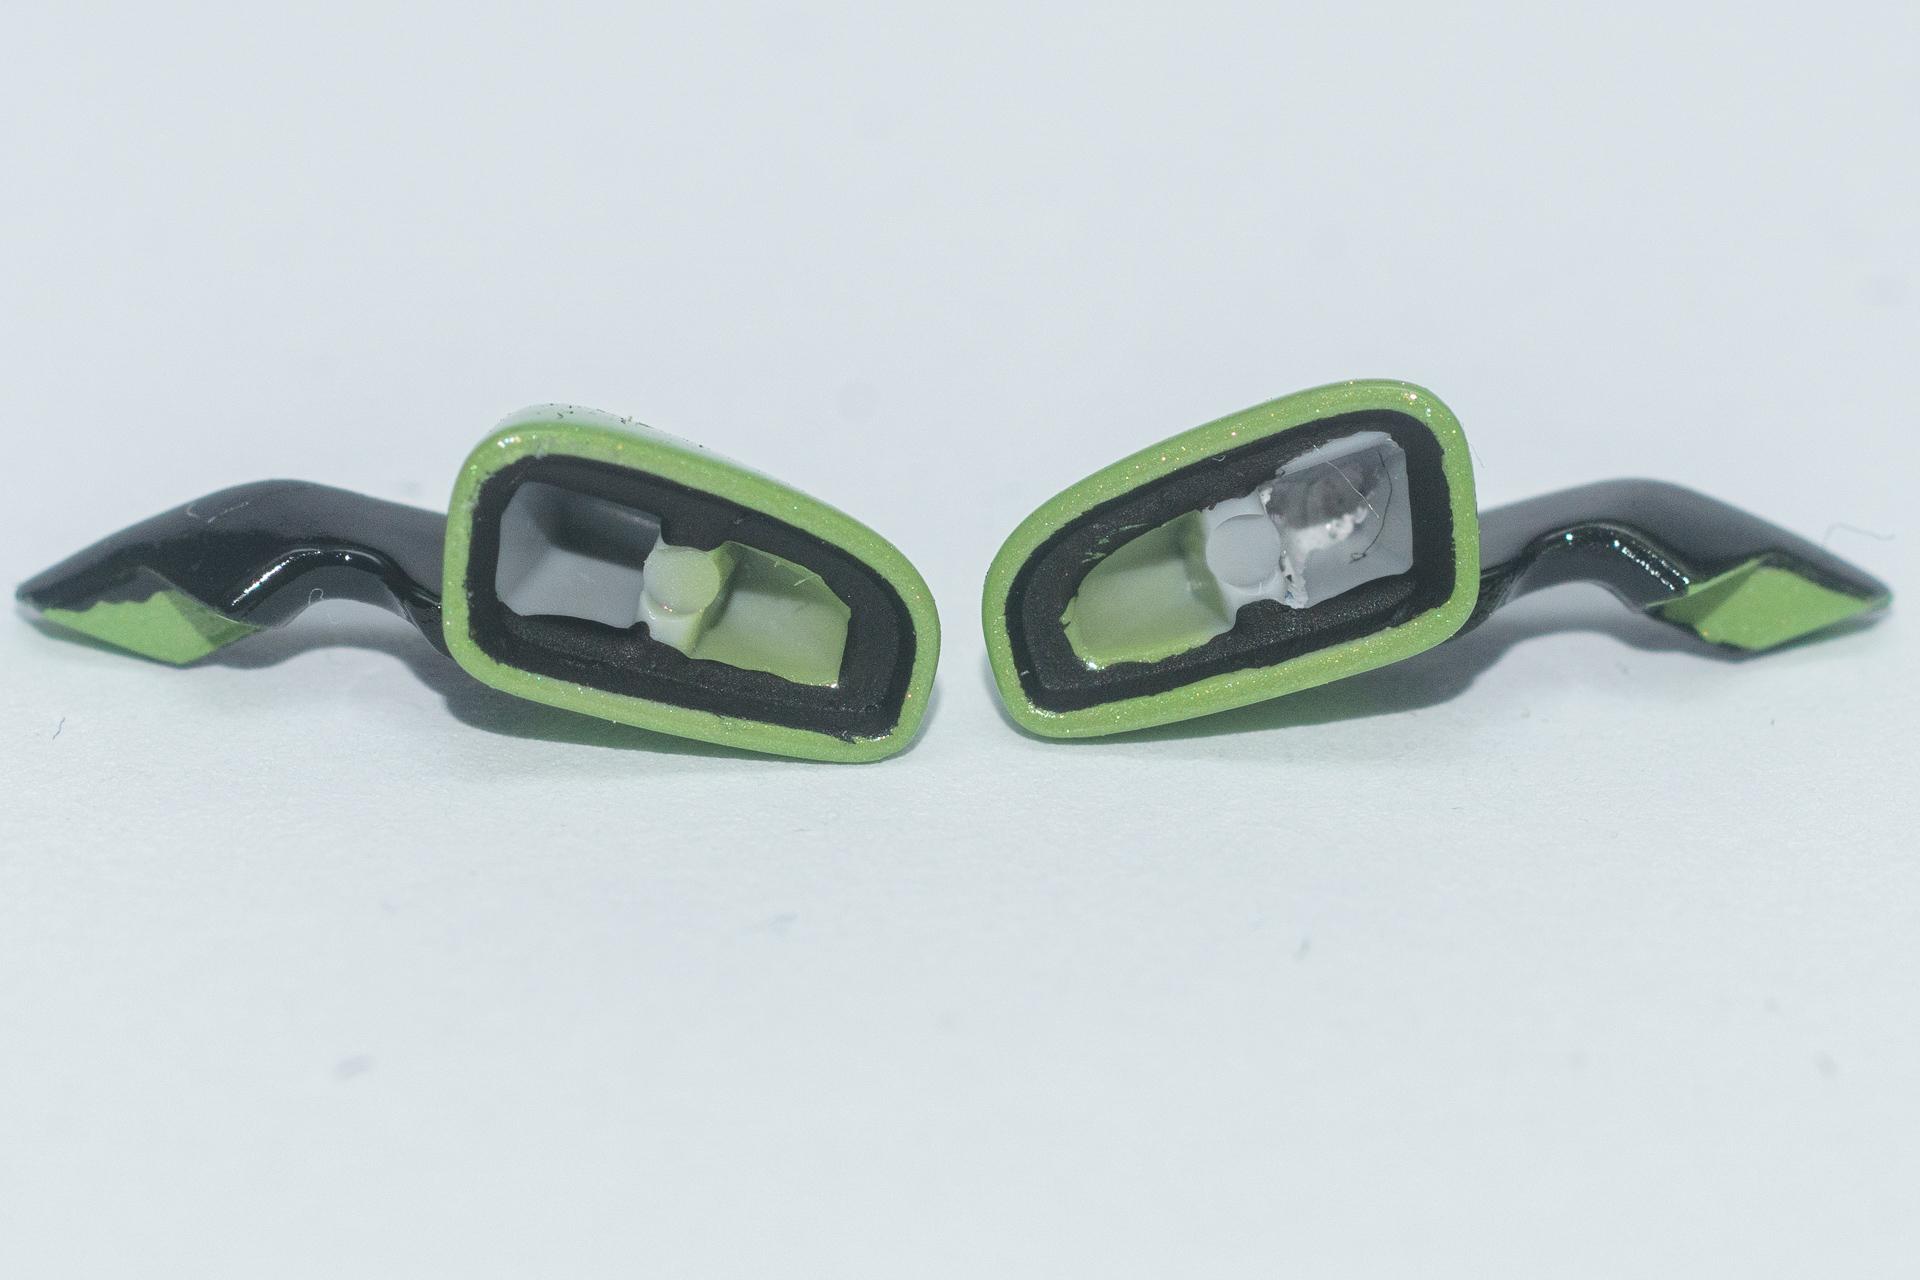
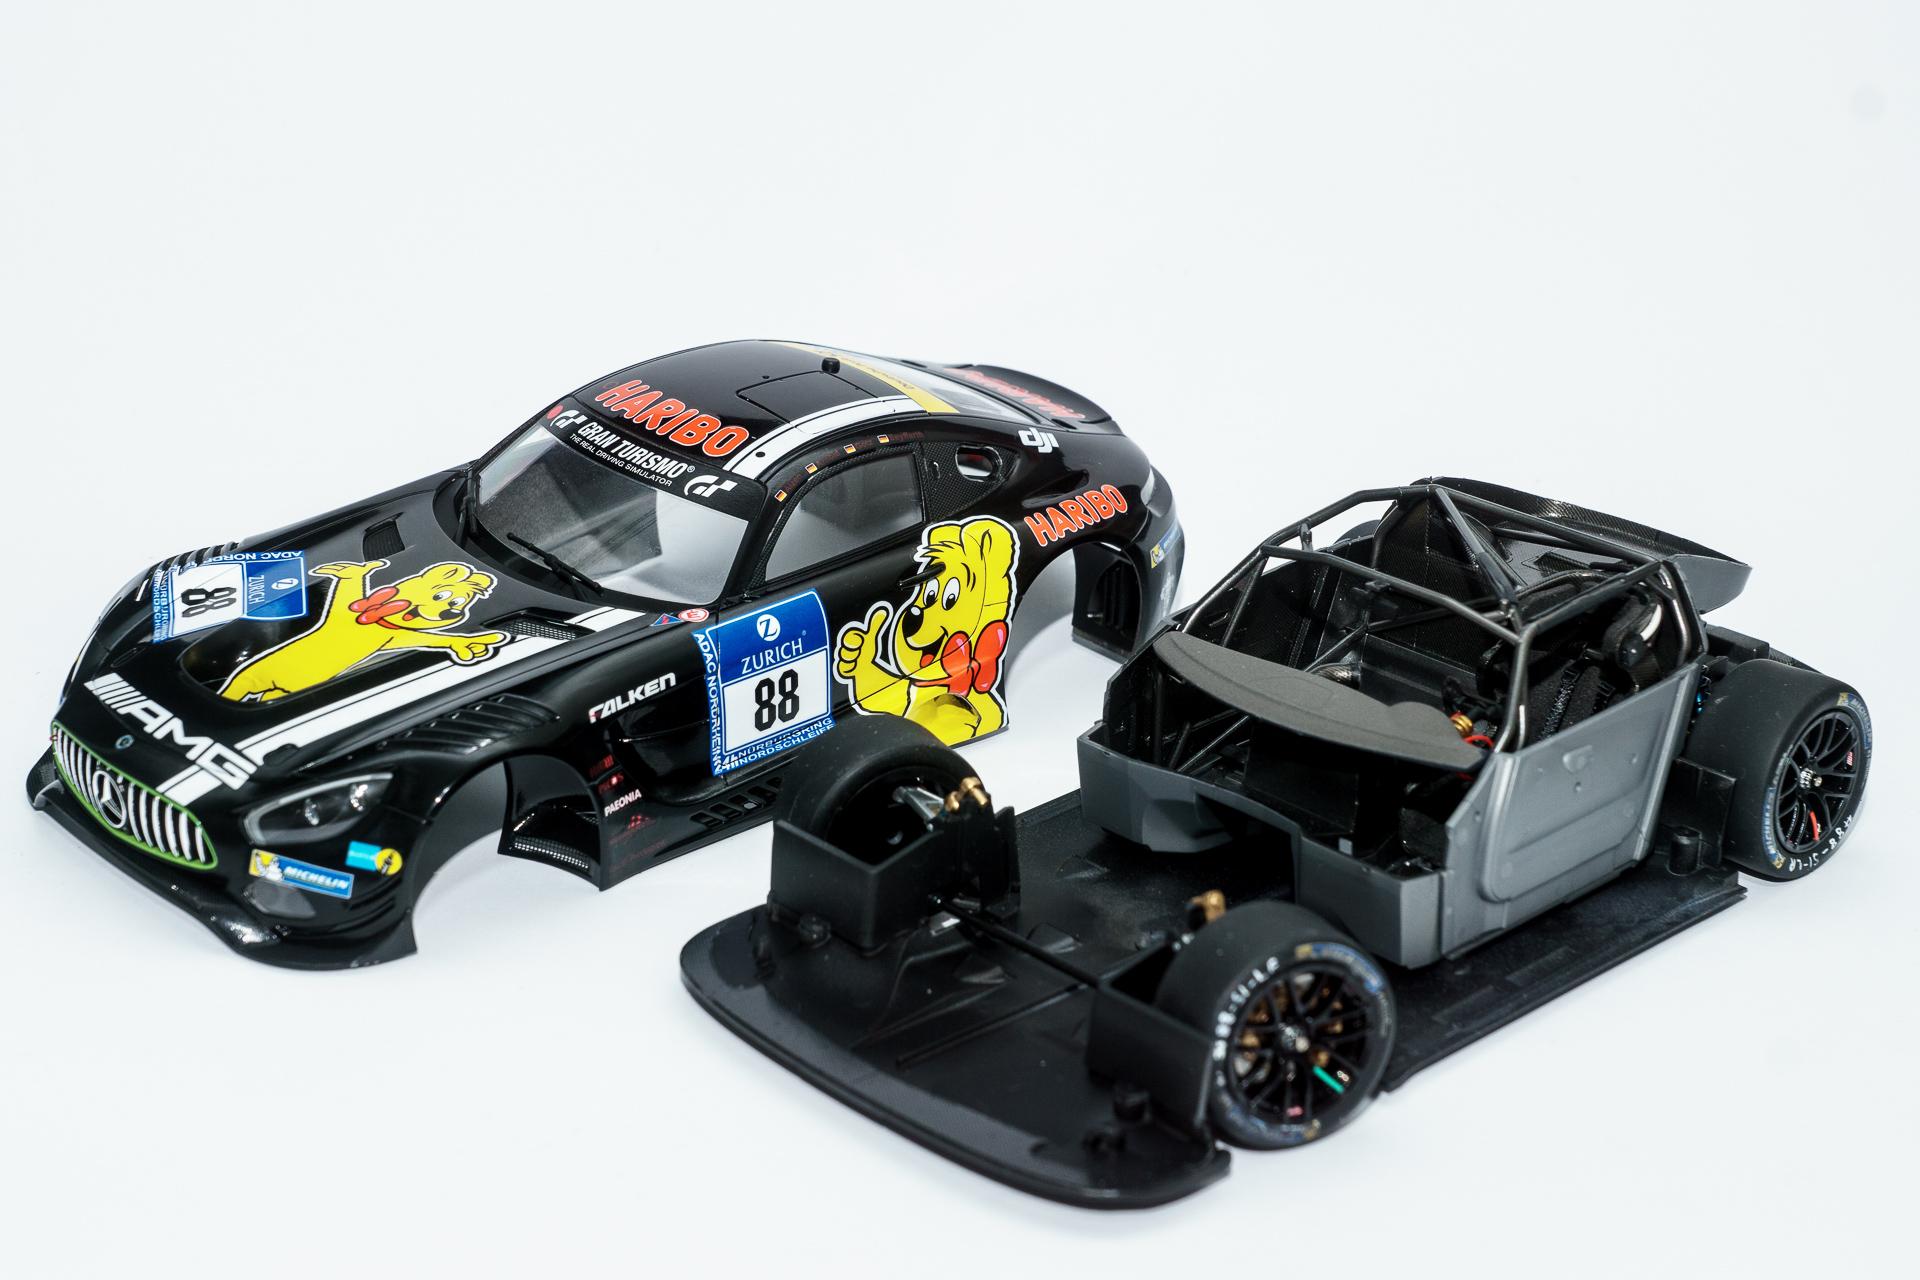
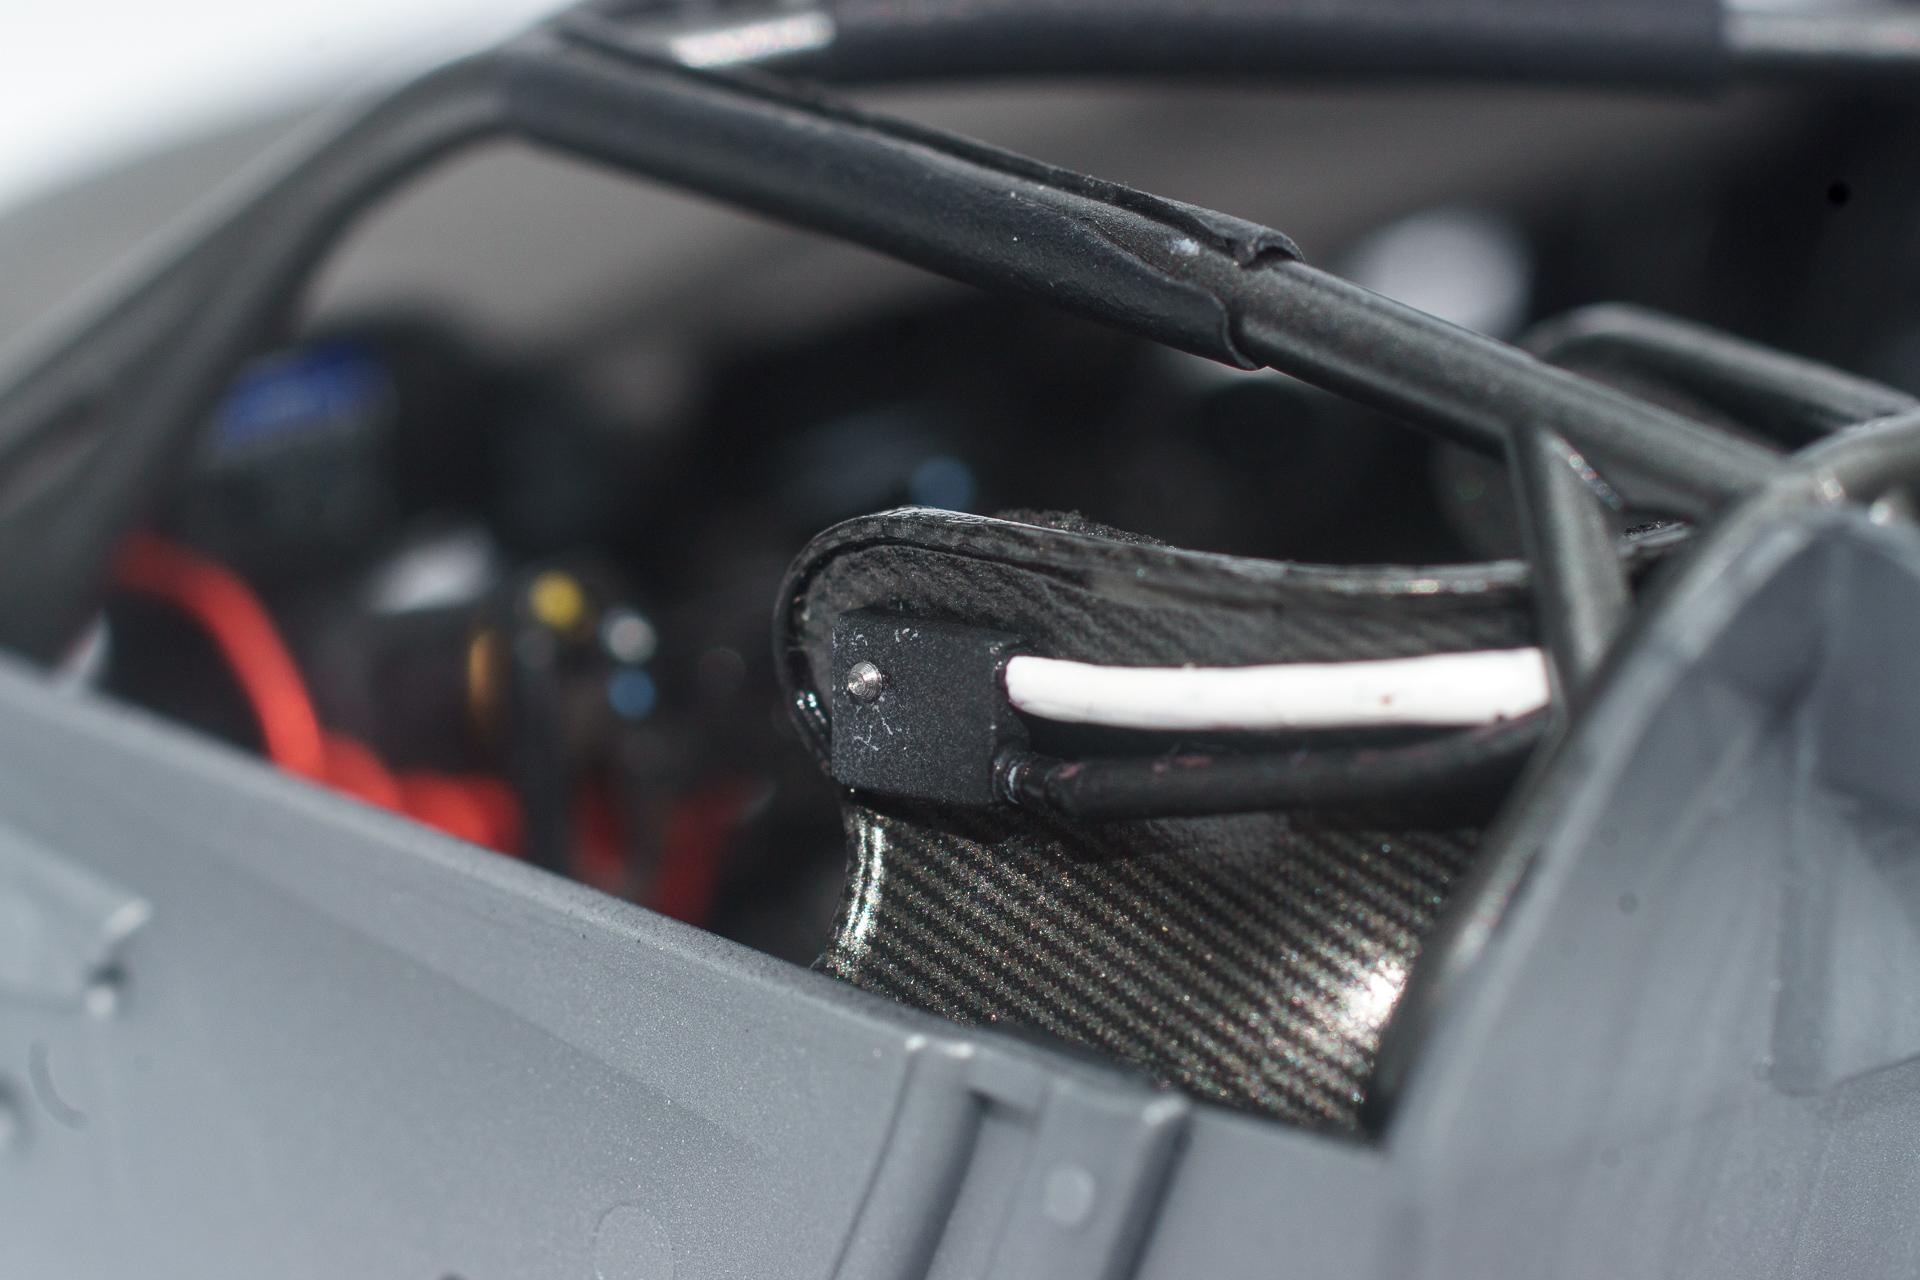
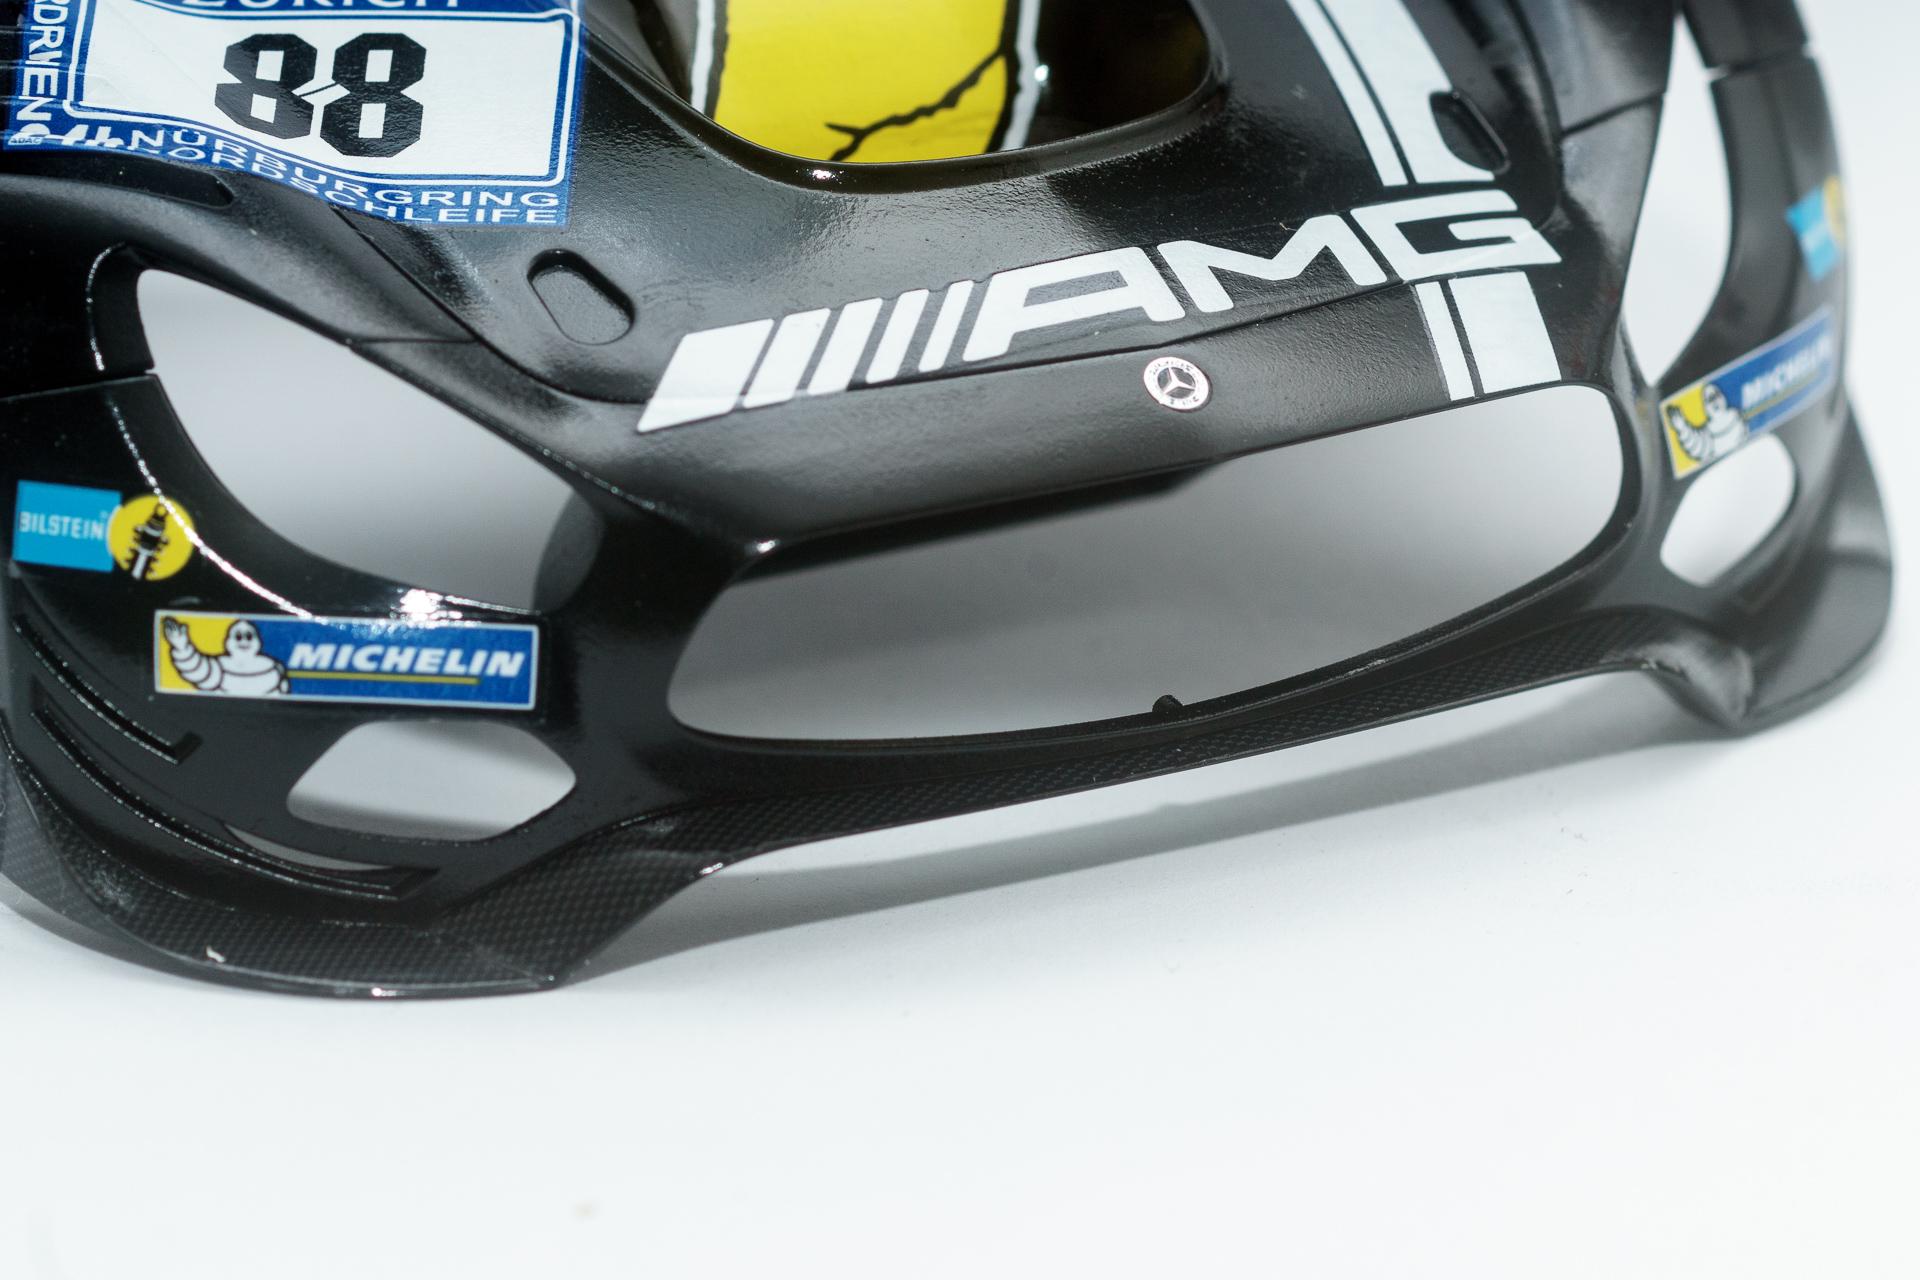
Hi all As home schooling is (at least partially) over, I had the possibility to apply the clear coat to the body on friday. Unfortunately I got some orange peel. Saturday I spent my time wet sanding and polishing the body to get rid of the orange peel. Today I applied some modeling wax to it, installed the clear parts and most of the PE parts. The rear view mirrors got some black color on the inside to enhance the depth once the mirrors are put in place. Only a few small parts have to be attached and then we will have a marriage to celebrate That's it for this update. If everything goes well the gummy bear should be finished by the end of the upcoming week Urs
-
Mercedes-AMG GT3
harti20 replied to harti20's topic in WIP: Other Racing: Road Racing, Land Speed Racers
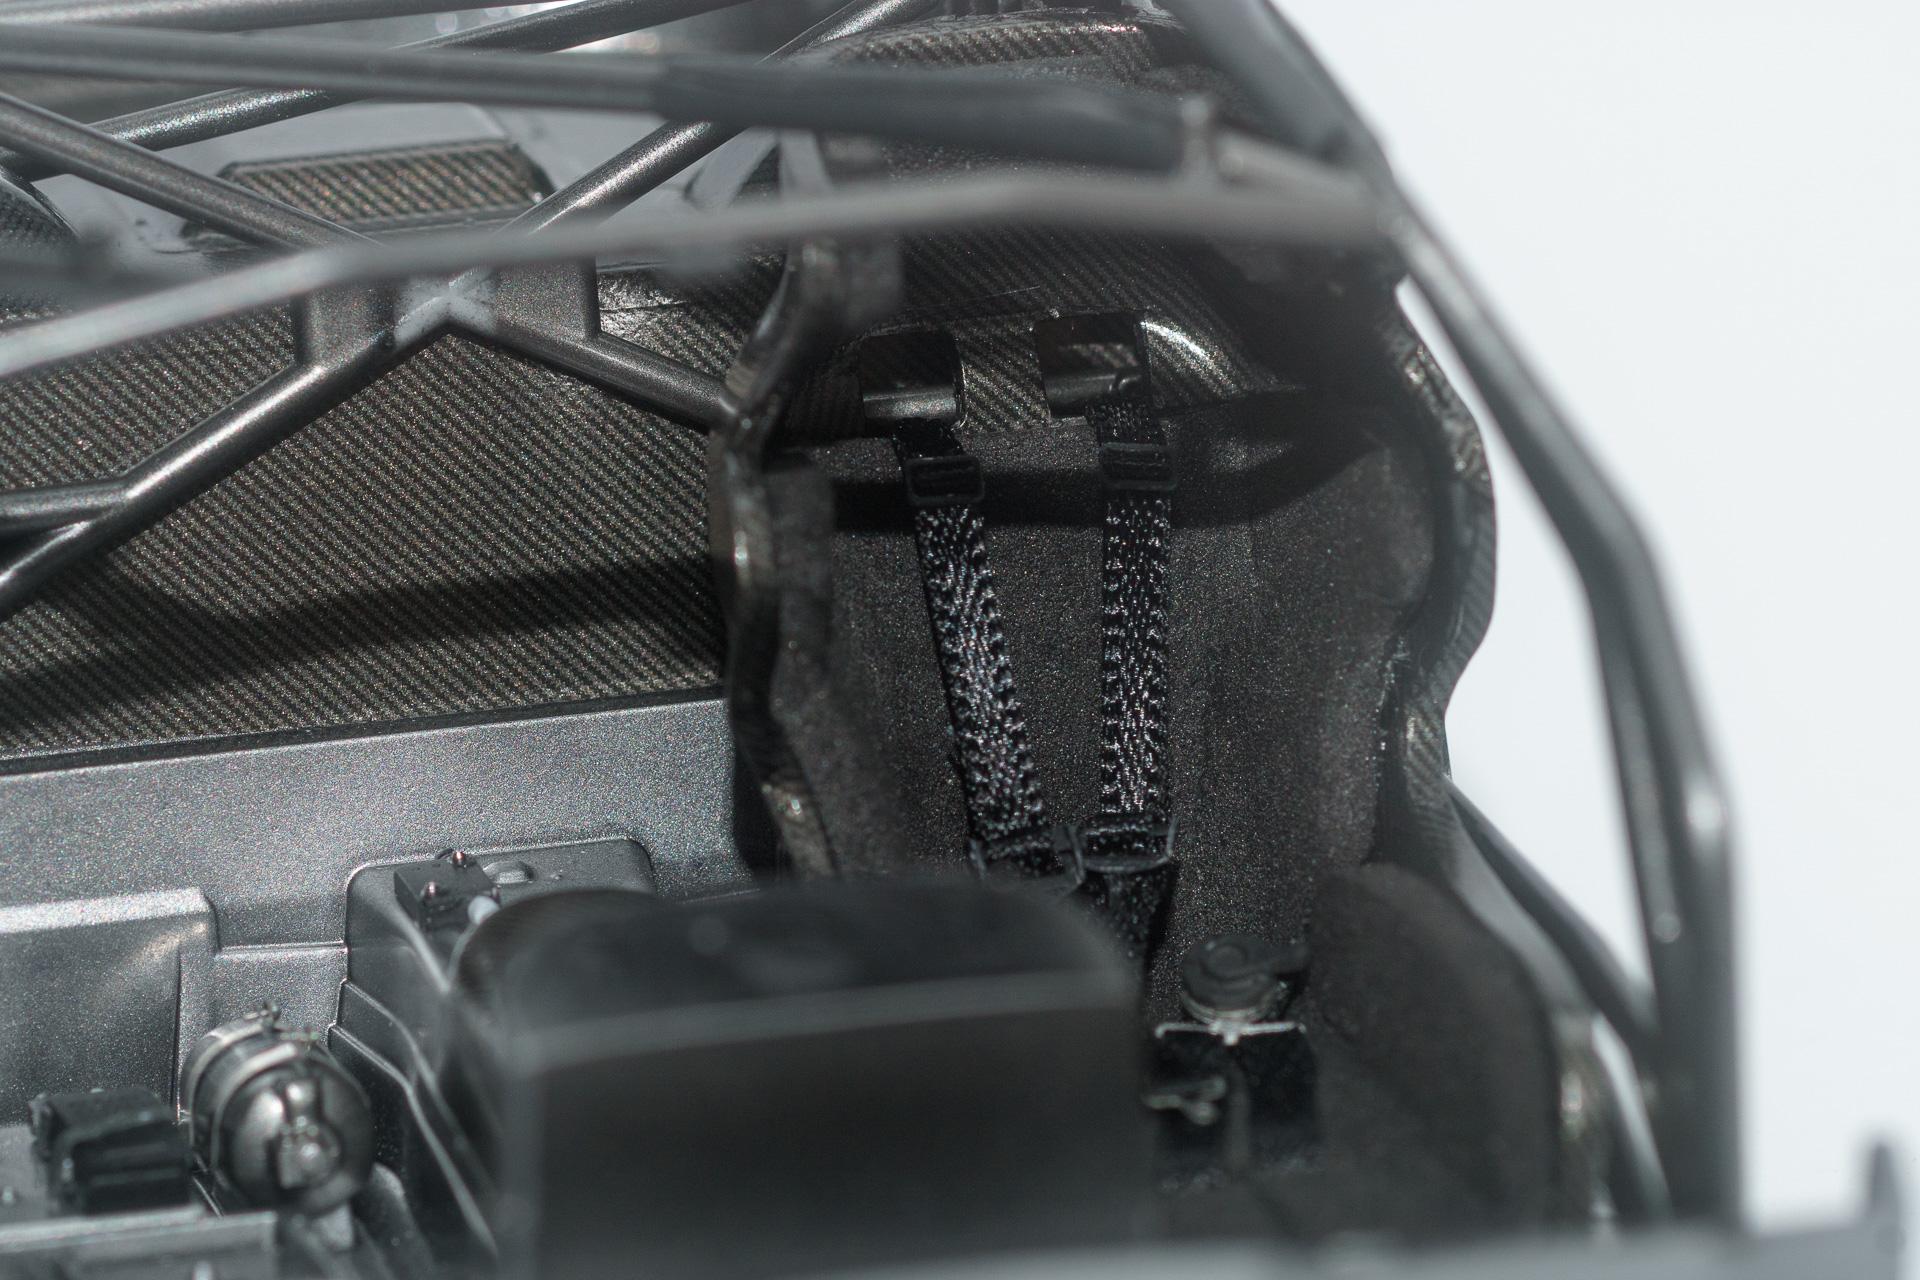
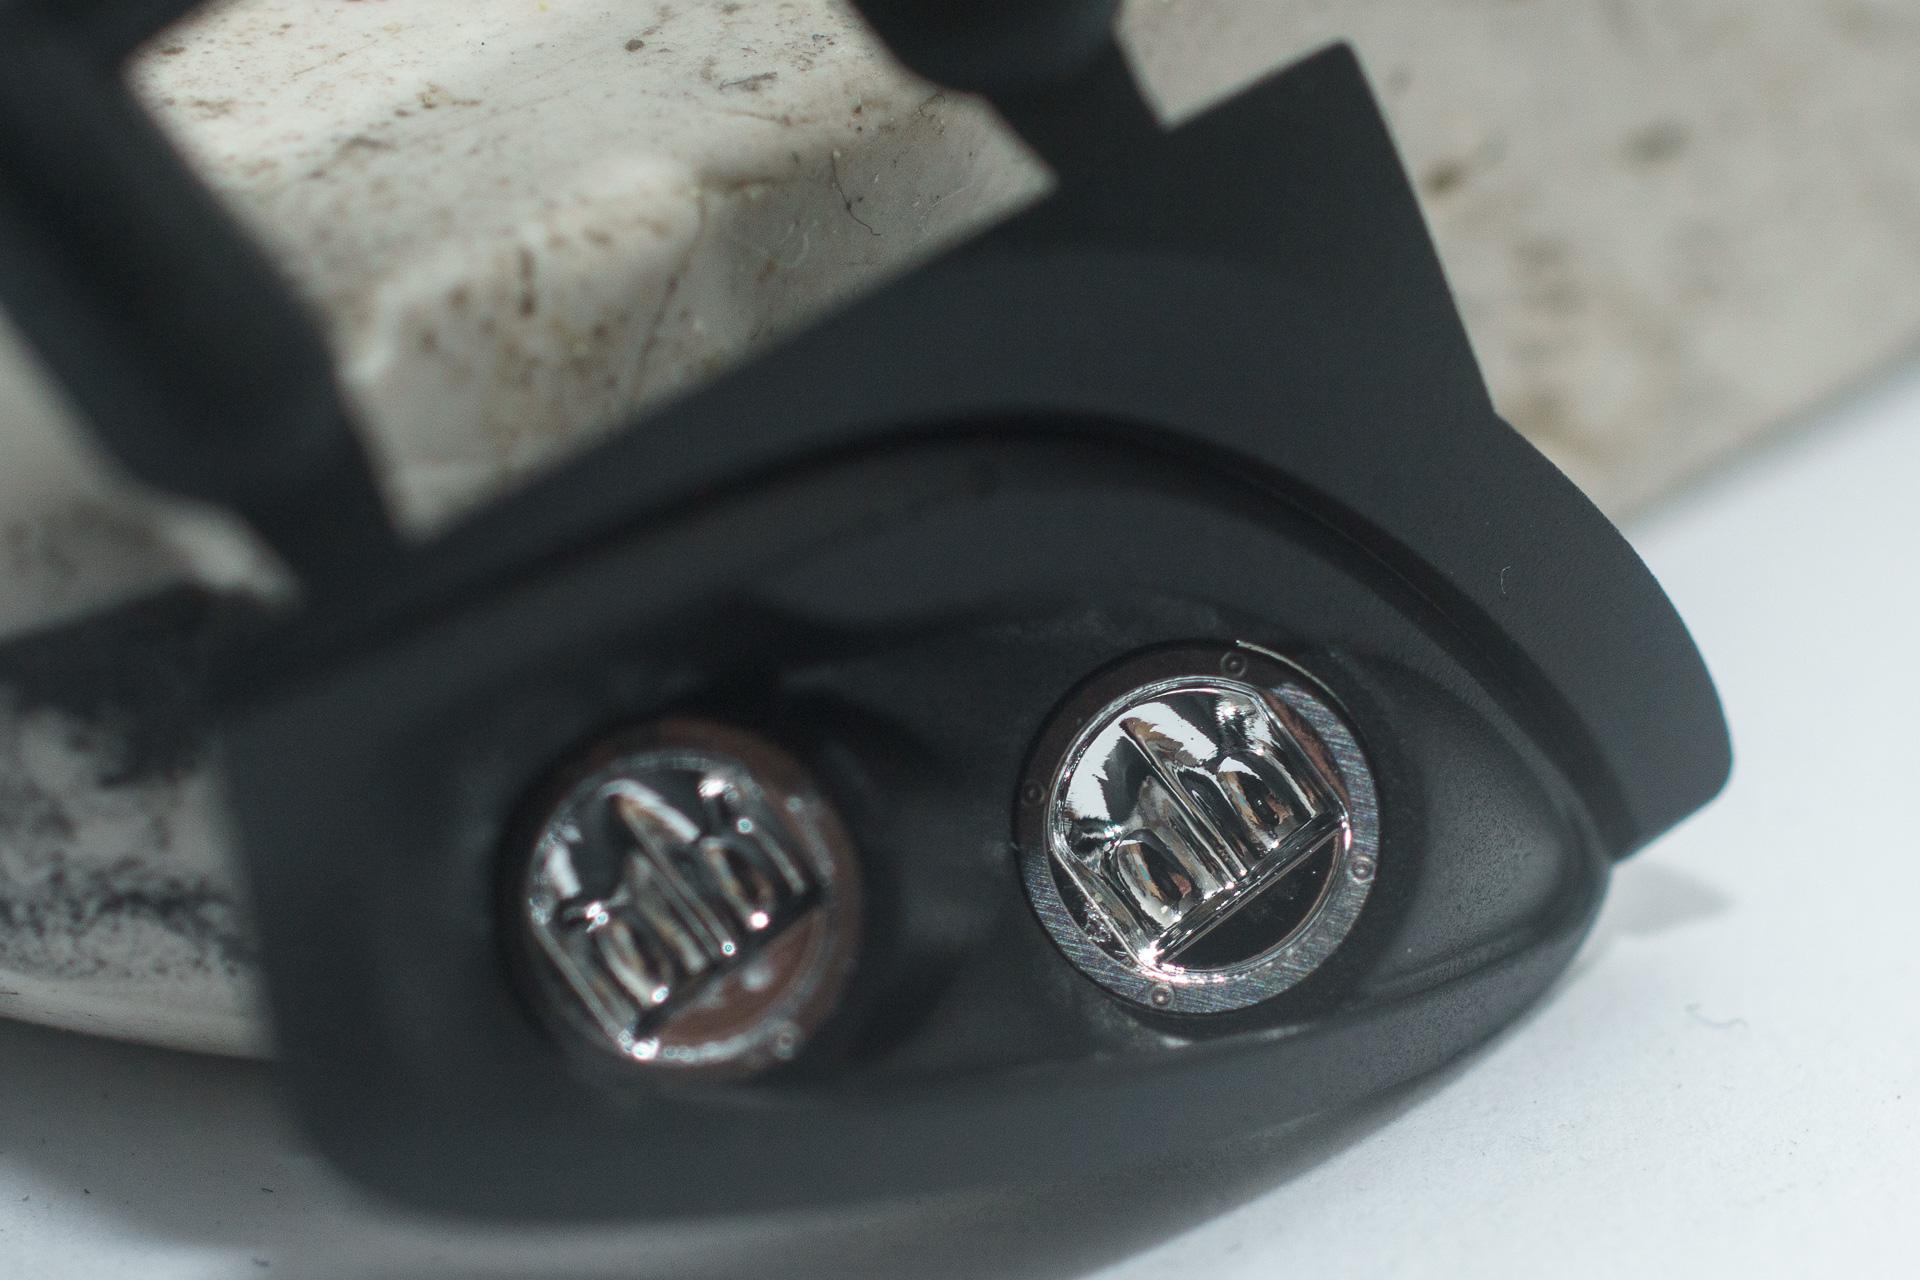
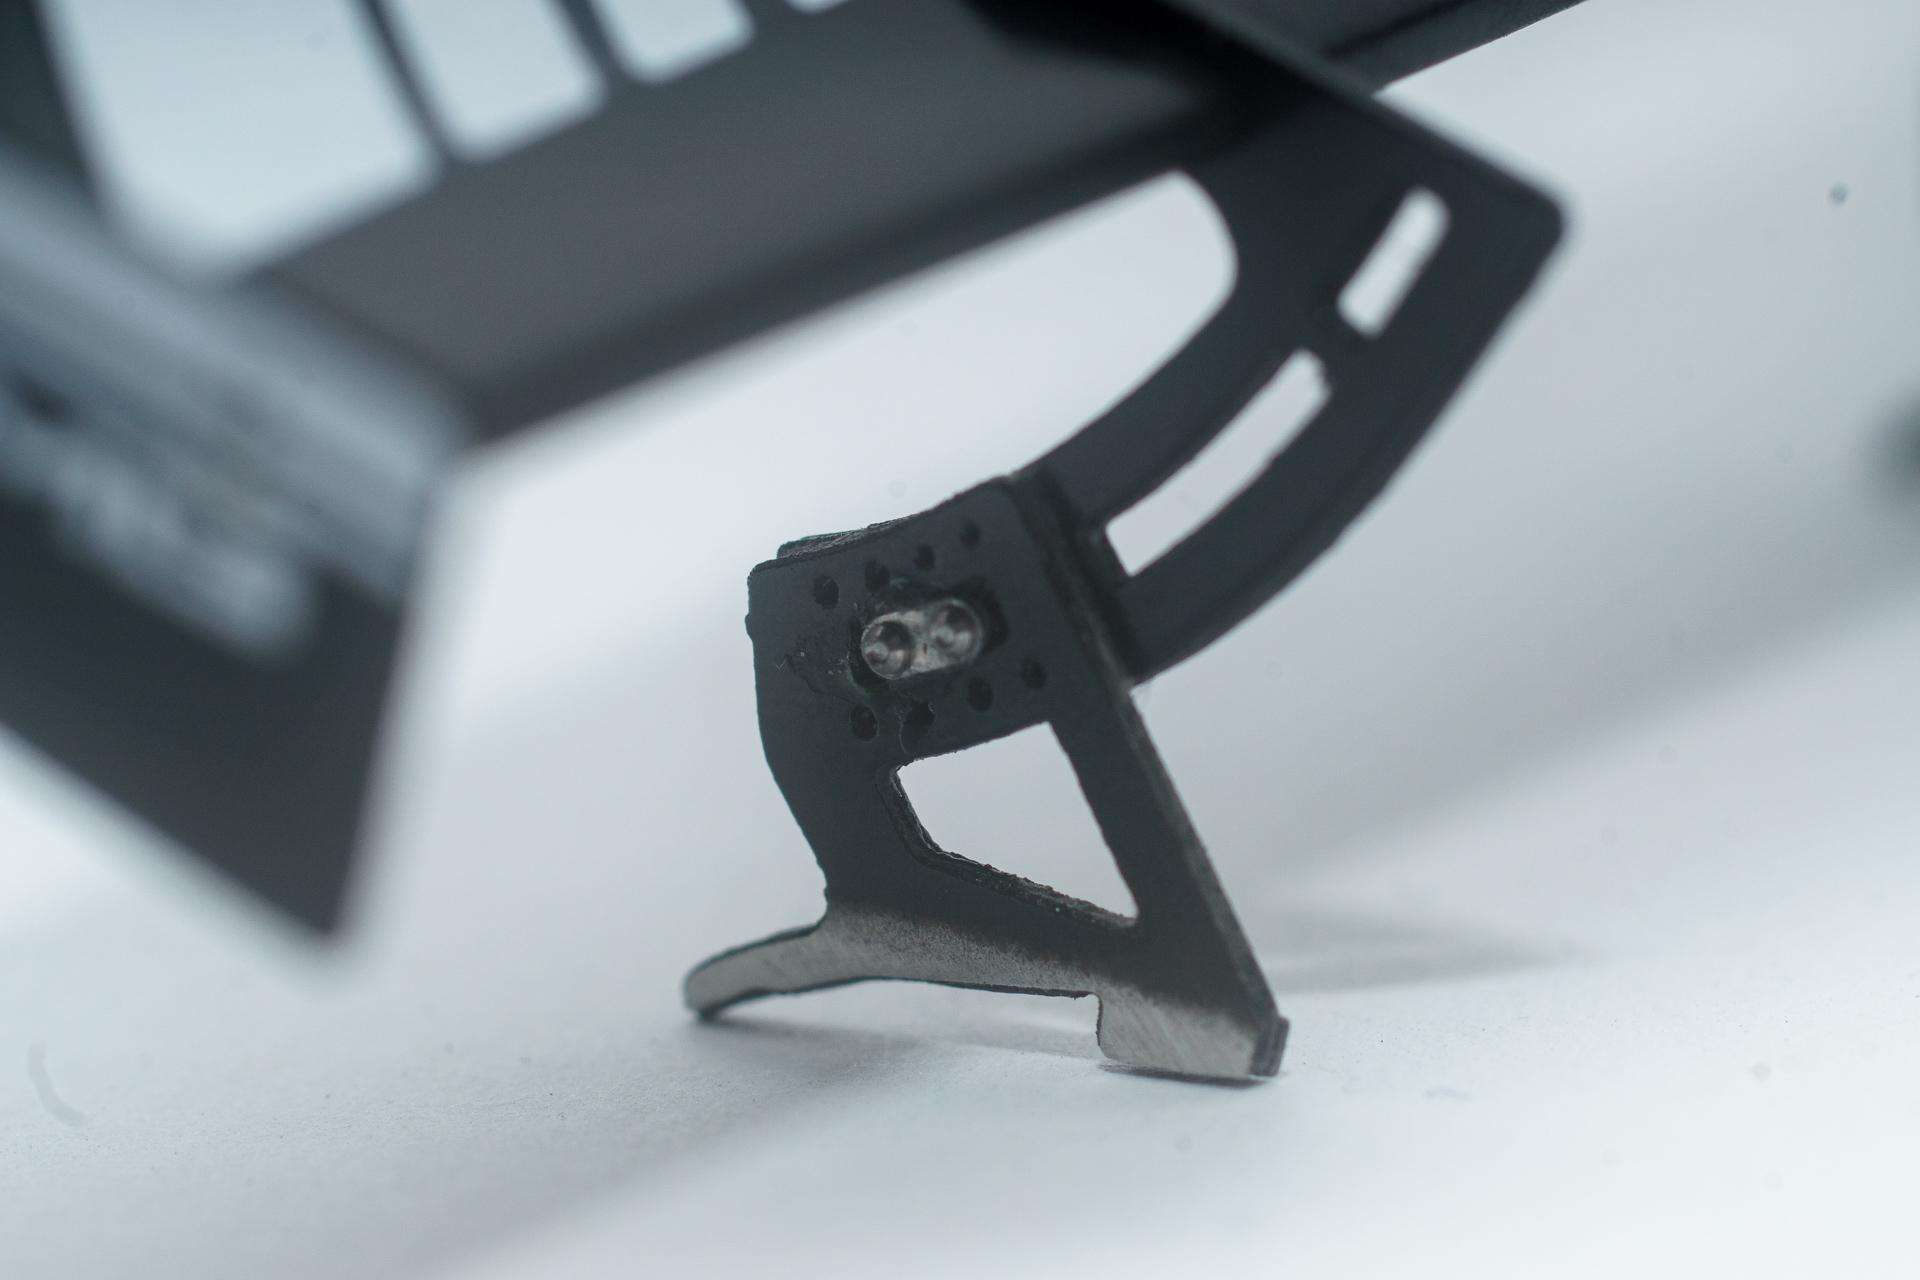
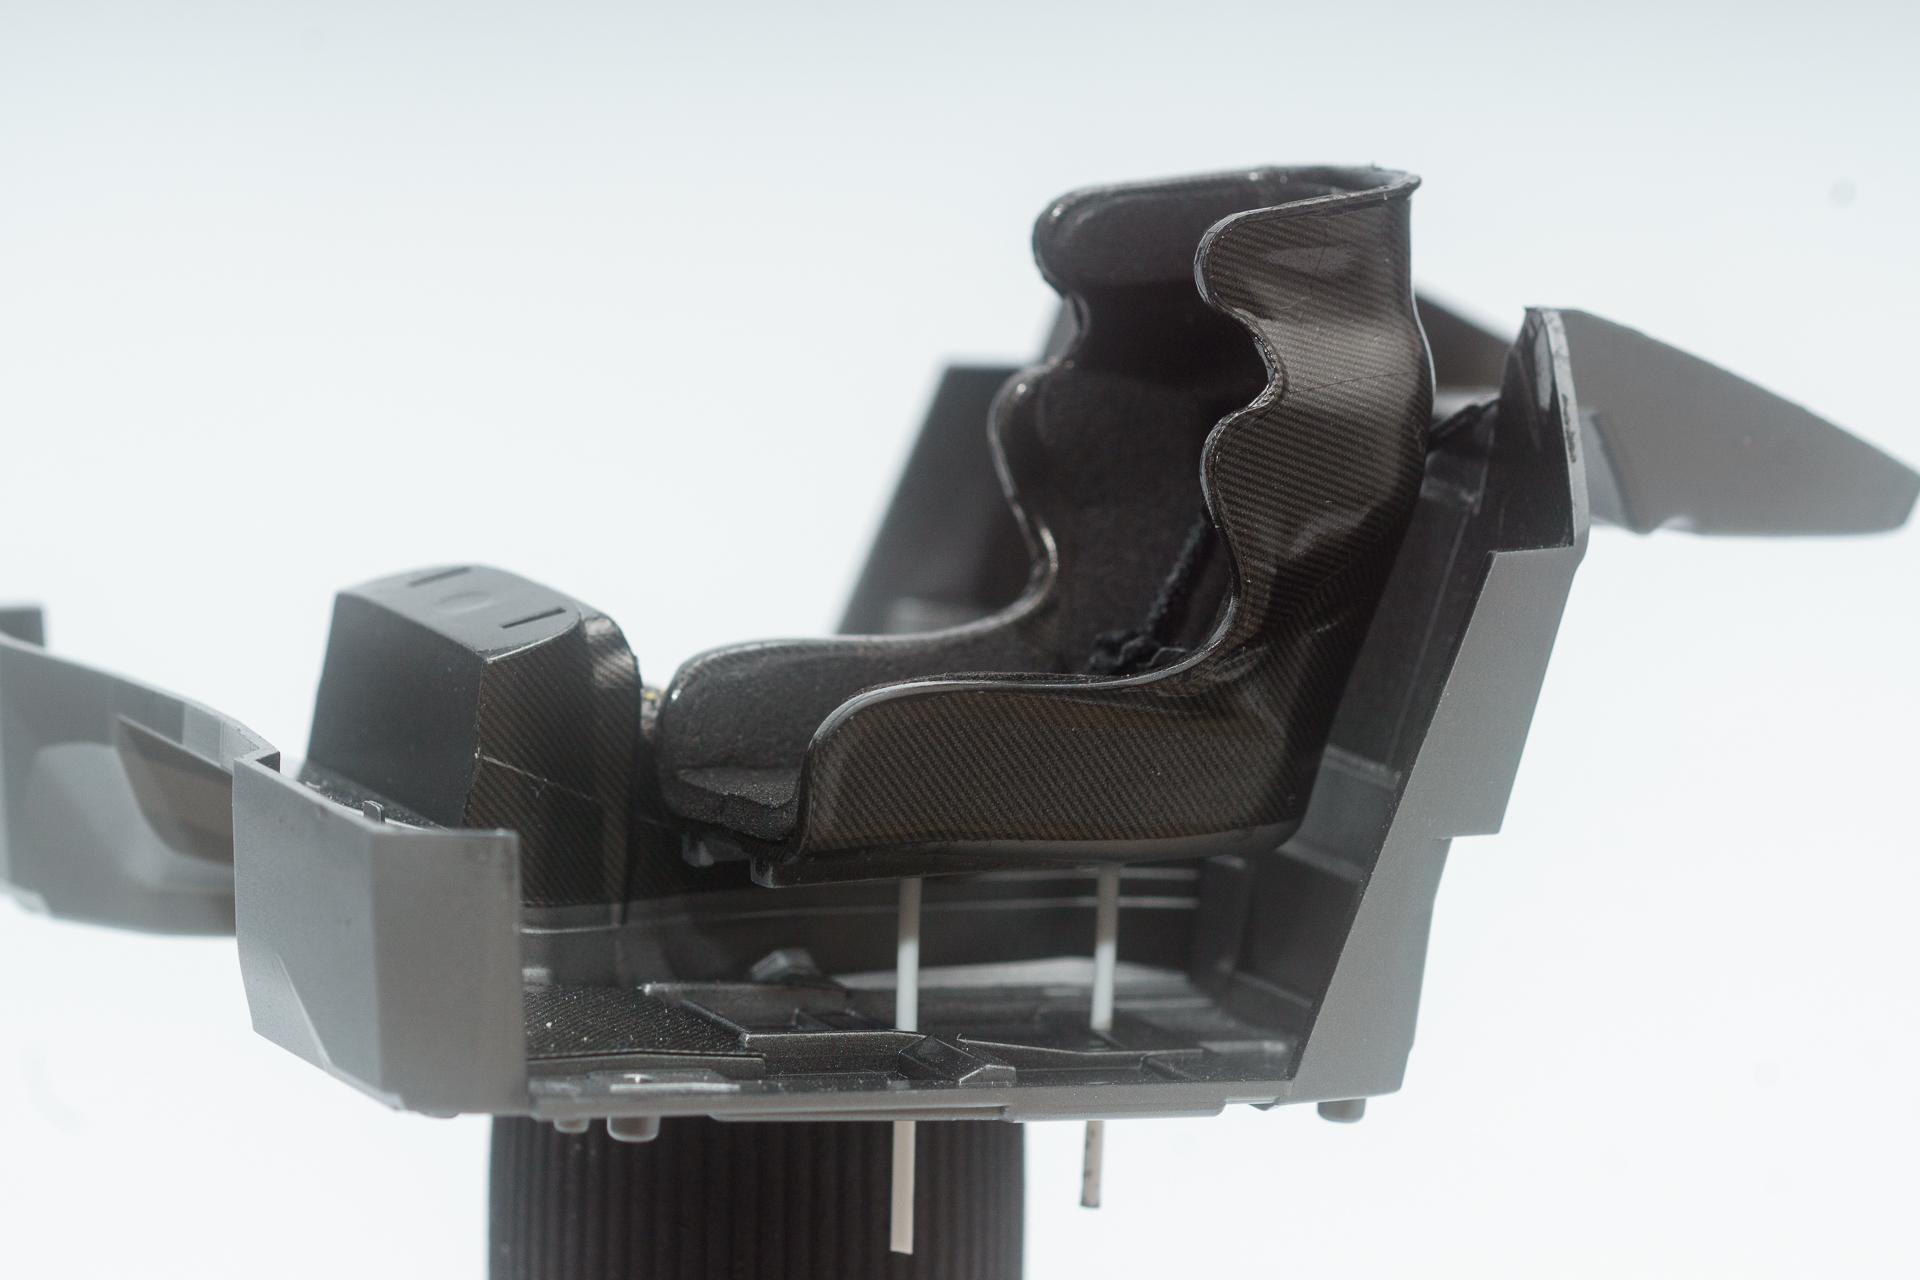
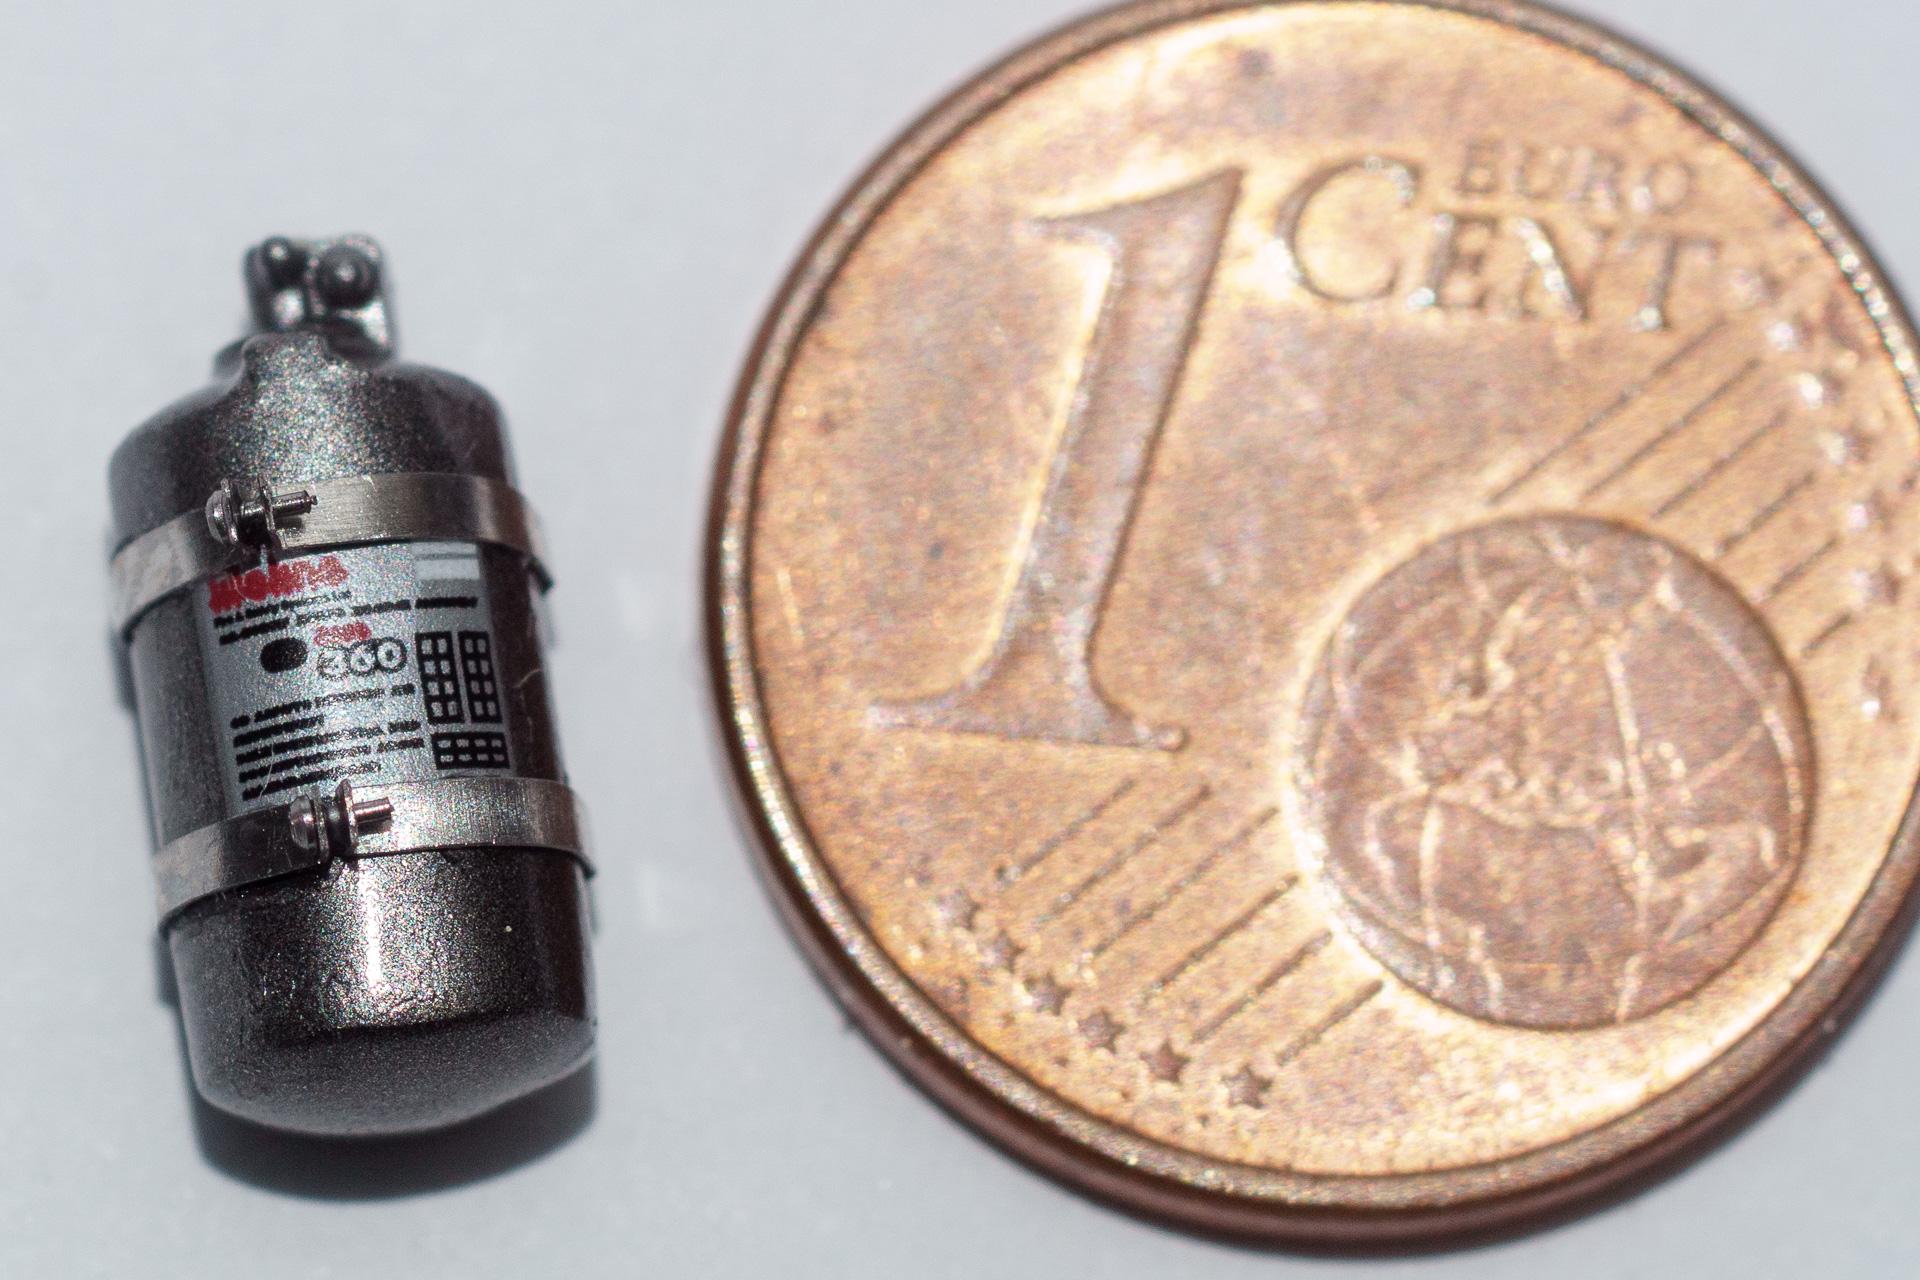
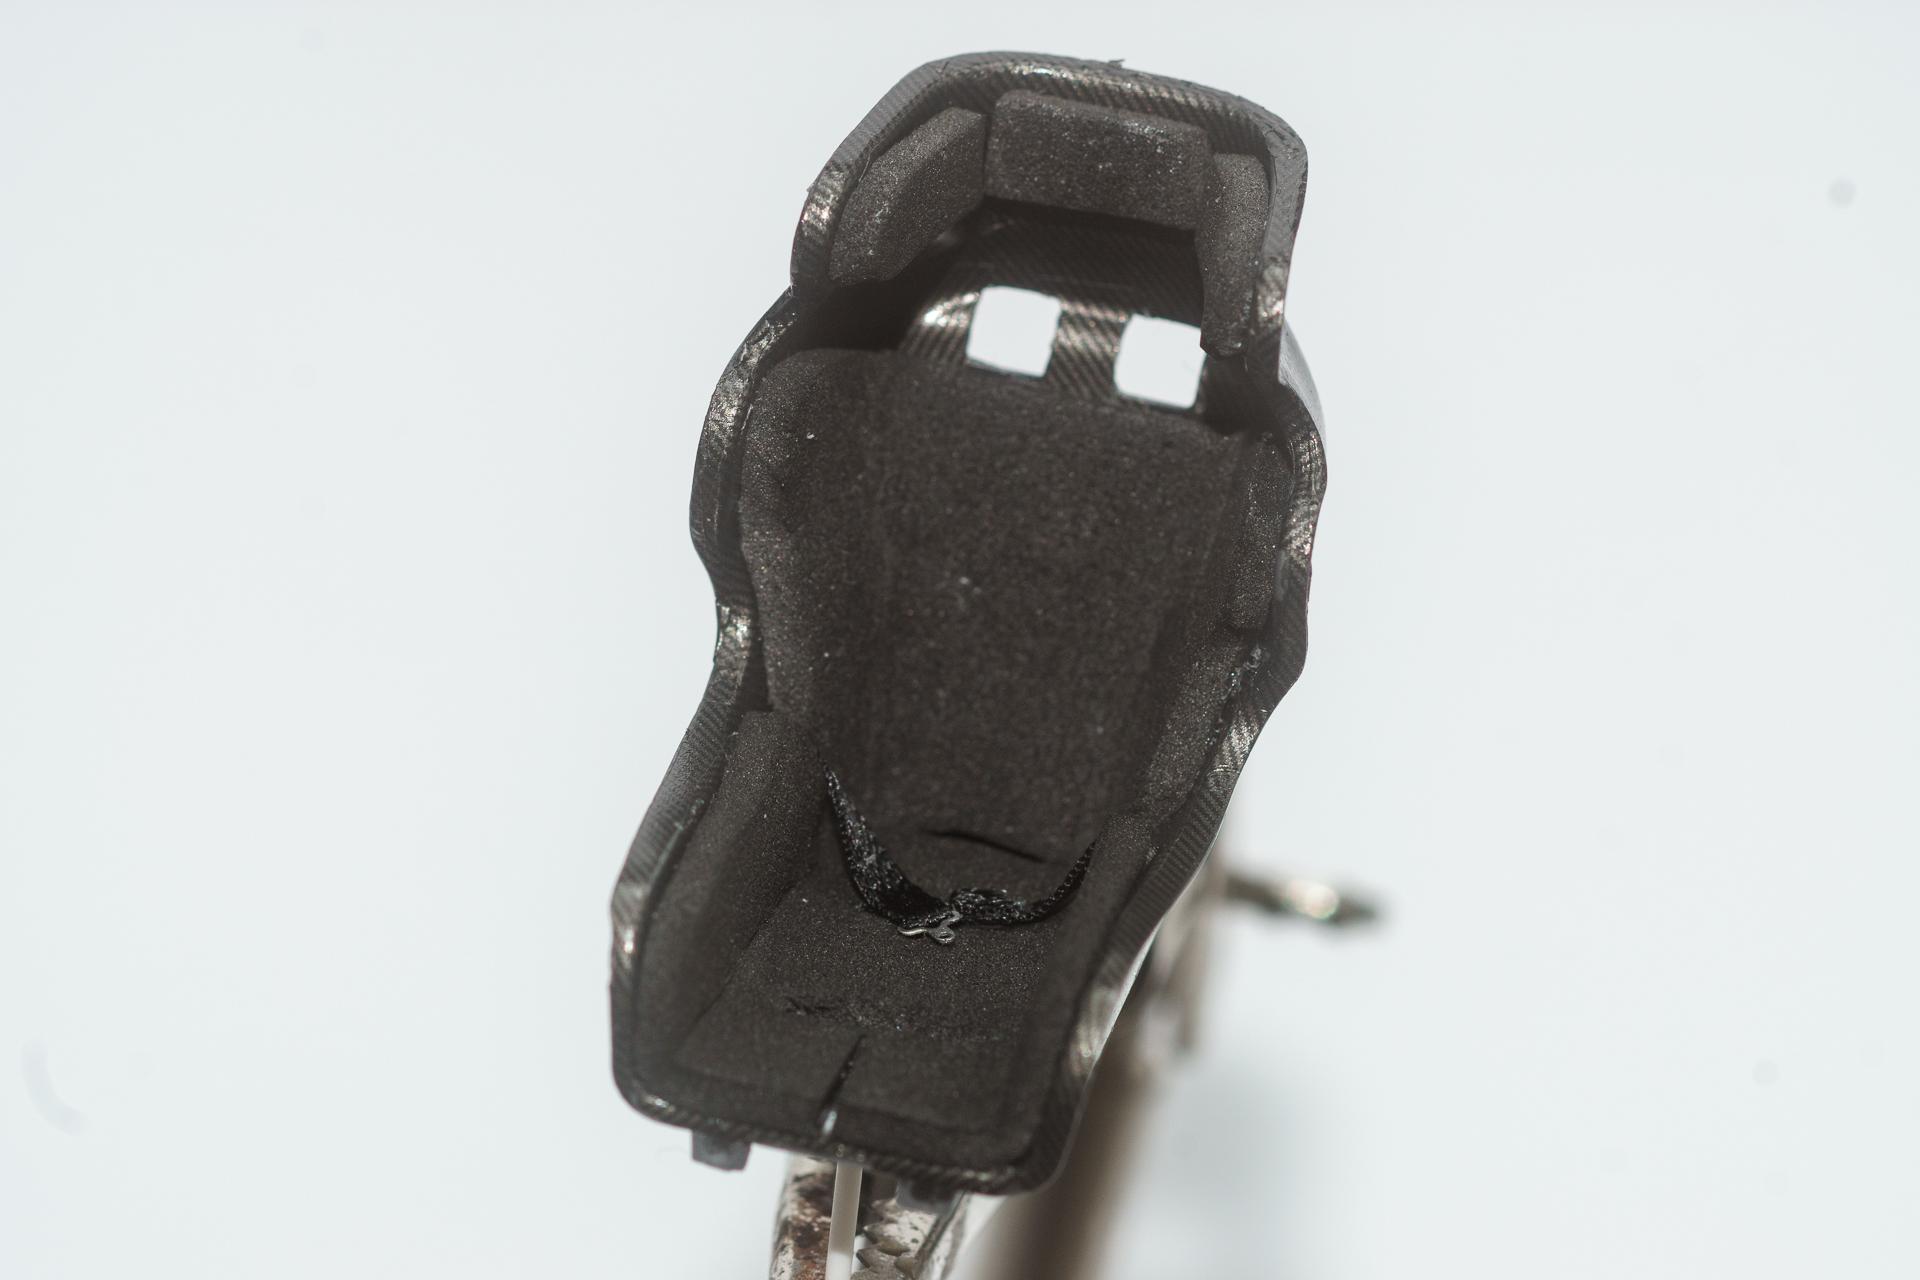
Hi all This week's update is not that extensive as I very rarley found the motivation to do anything on the AMG. Mainly the interior part could be finished. Now it could come to a halt because all I can do now before continuing with the final assembly is clear coating. But right now I have no idea when I will have the opportunity to do so because I don't like using 2K clear when my son is at home, so I'll have to wait until home schooling is over. First the small red PE part got finally its paint (something I always forgot to do before) and was installed Then some small interior components found a place (not always the one they use to sit on in the right car, as one of them was just too large to fit in), the seat got installed and the rolling cage was welded to the chassis A small electronics box from the PE set was installed on the seat Then I had to notice that Tamiya seems to have forgotten the third break light. It is molded in the body but there is neither a clear part for it nor can you find any hint in the assembly instructions. So I just added a piece of BMF which I will paint over with Tamiya Clear Red once the clear coat has been applied. Finally a preview picture with the rear wings only put on the body without glueing yet. That's all for this week's update. I wish you all a nice and healthy week Urs
-
Mercedes-AMG GT3
harti20 replied to harti20's topic in WIP: Other Racing: Road Racing, Land Speed Racers
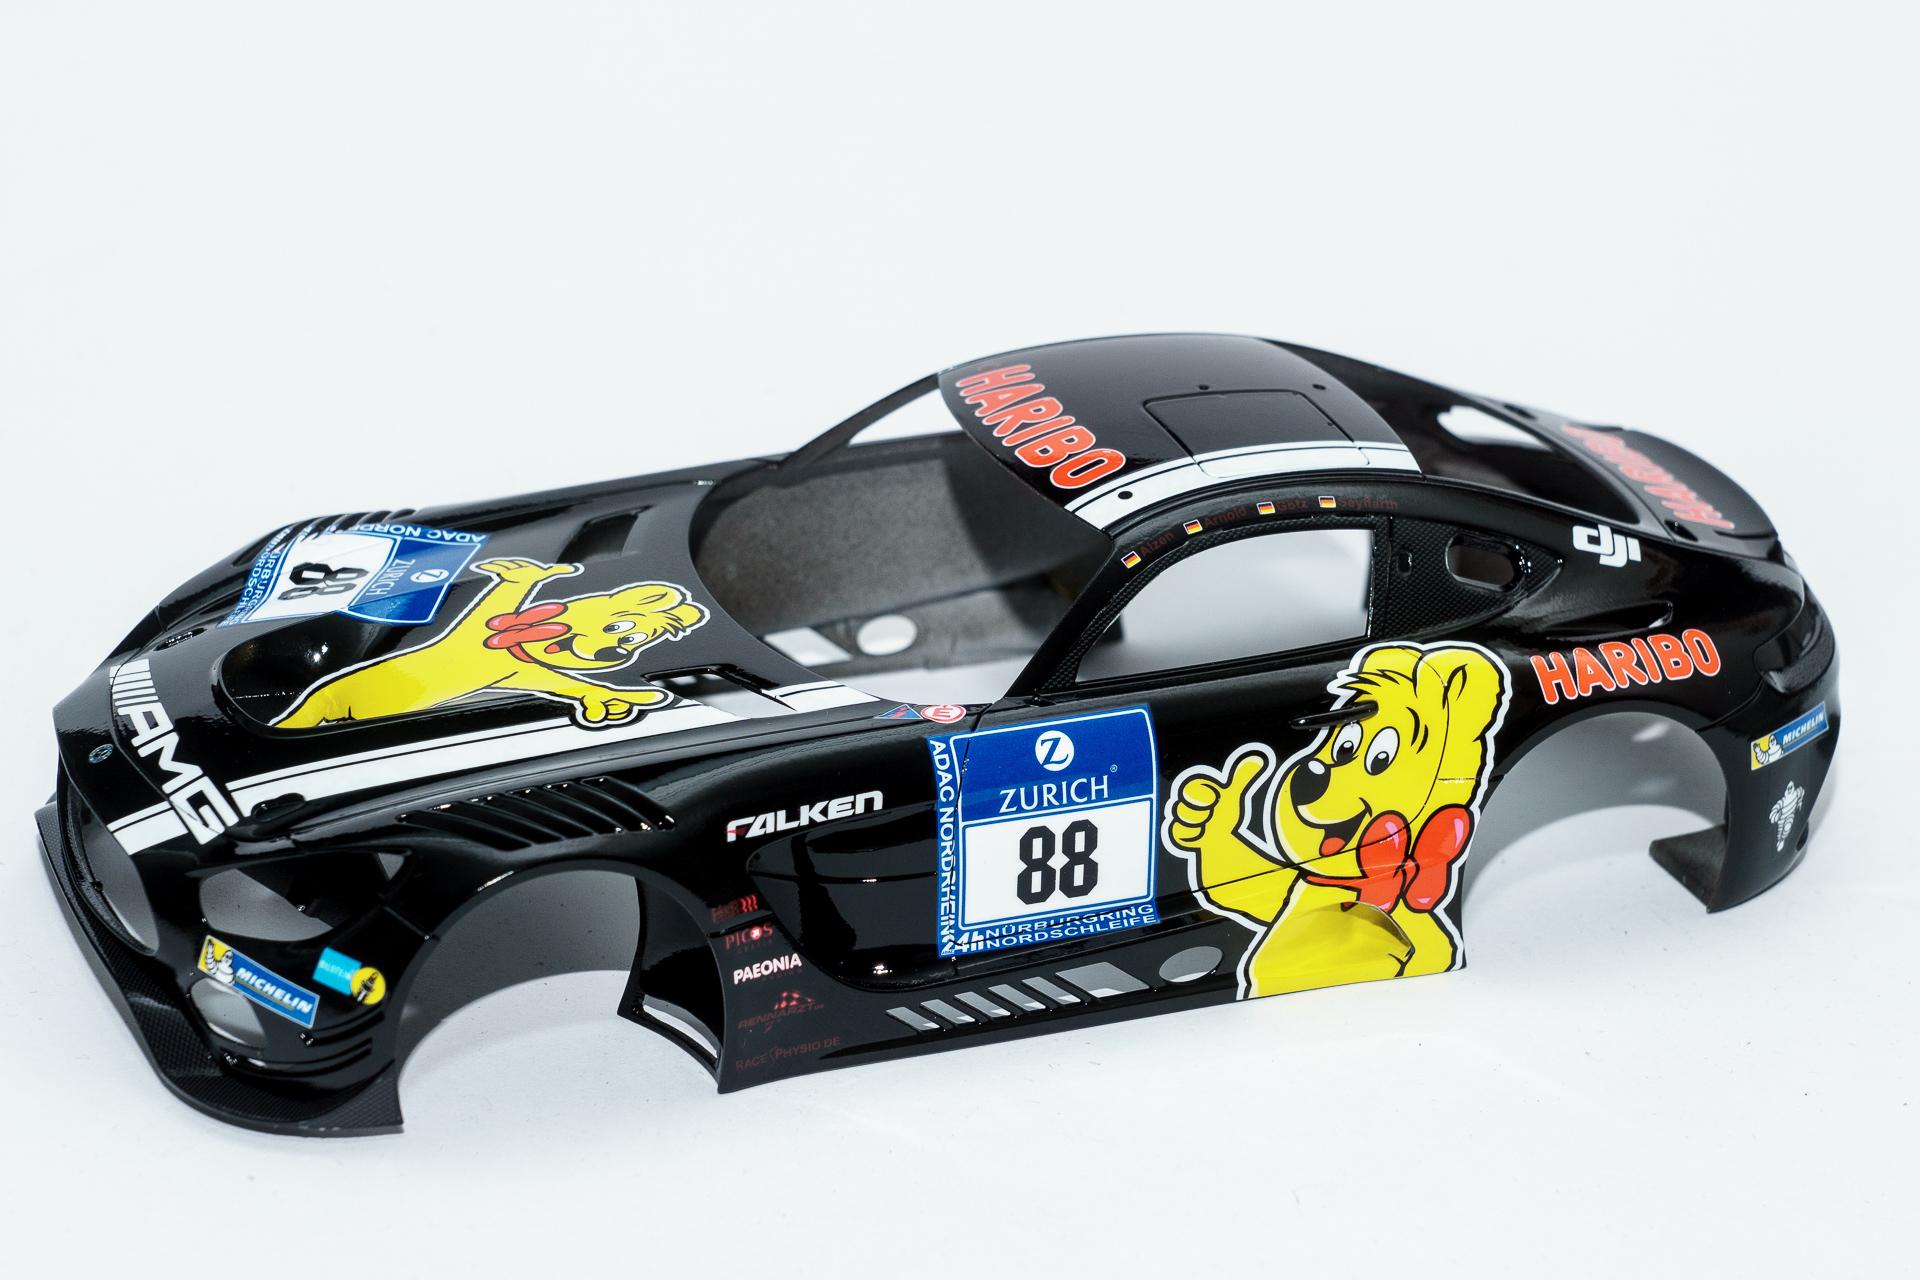
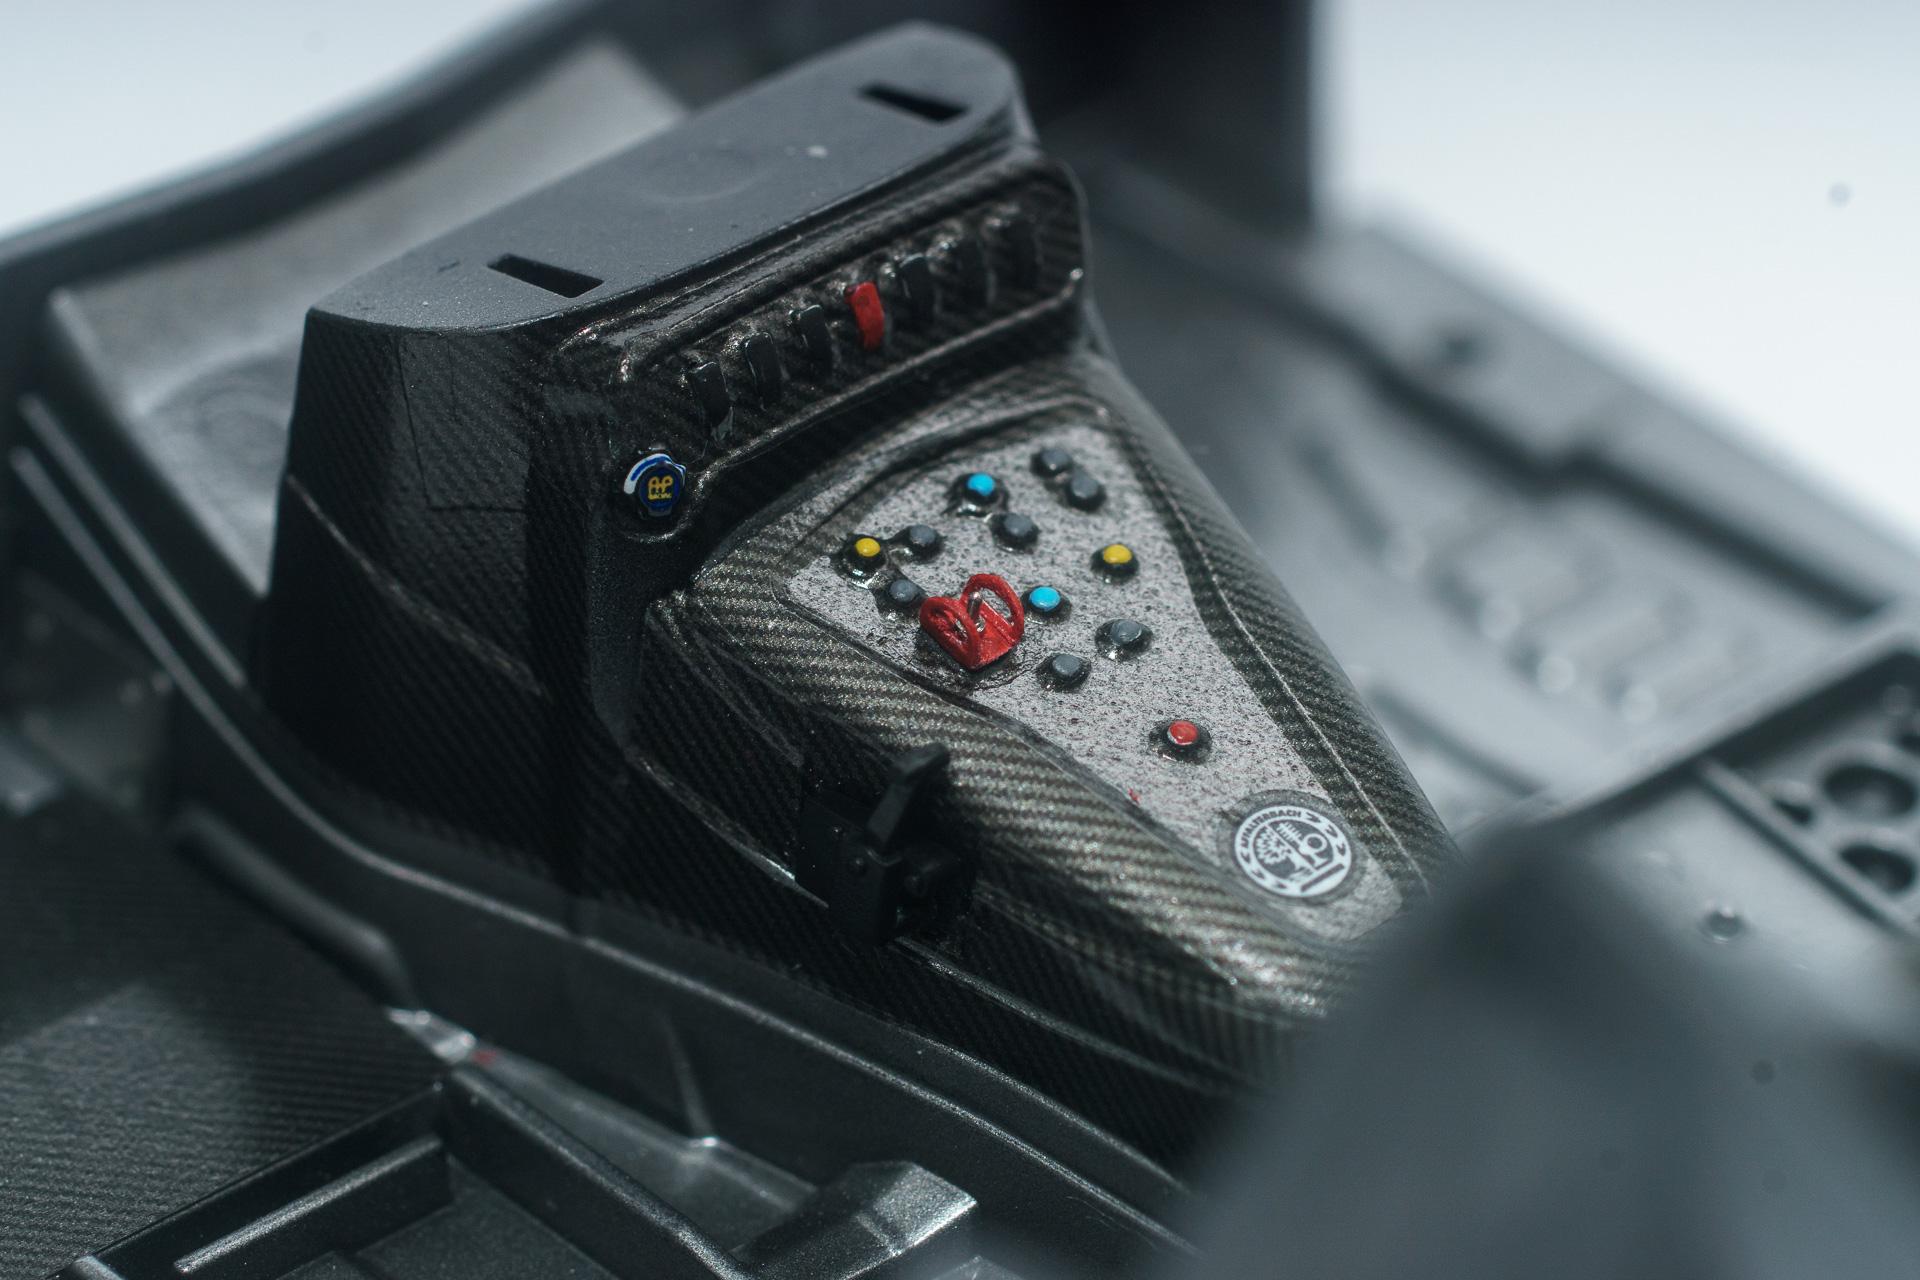
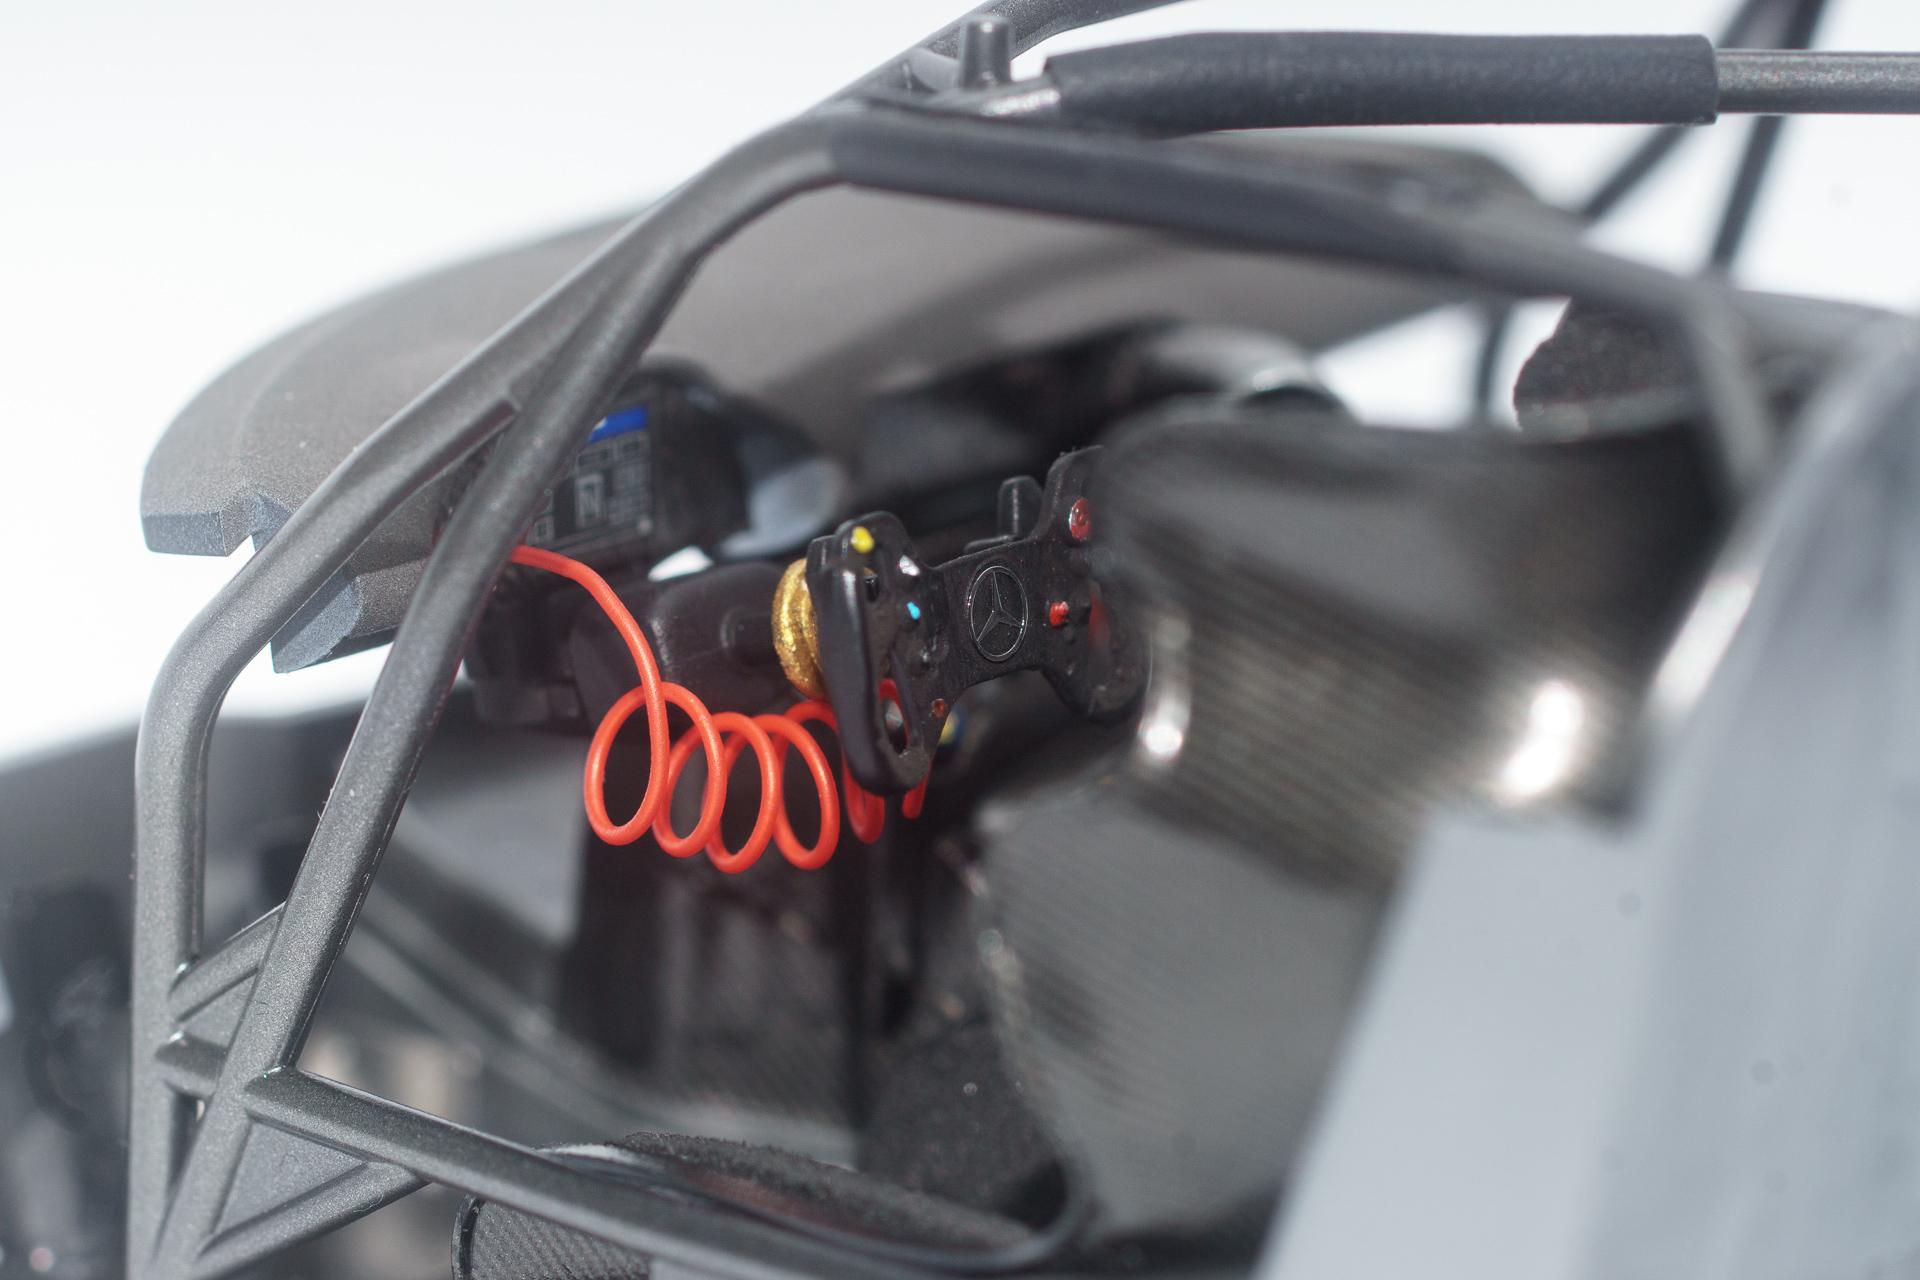
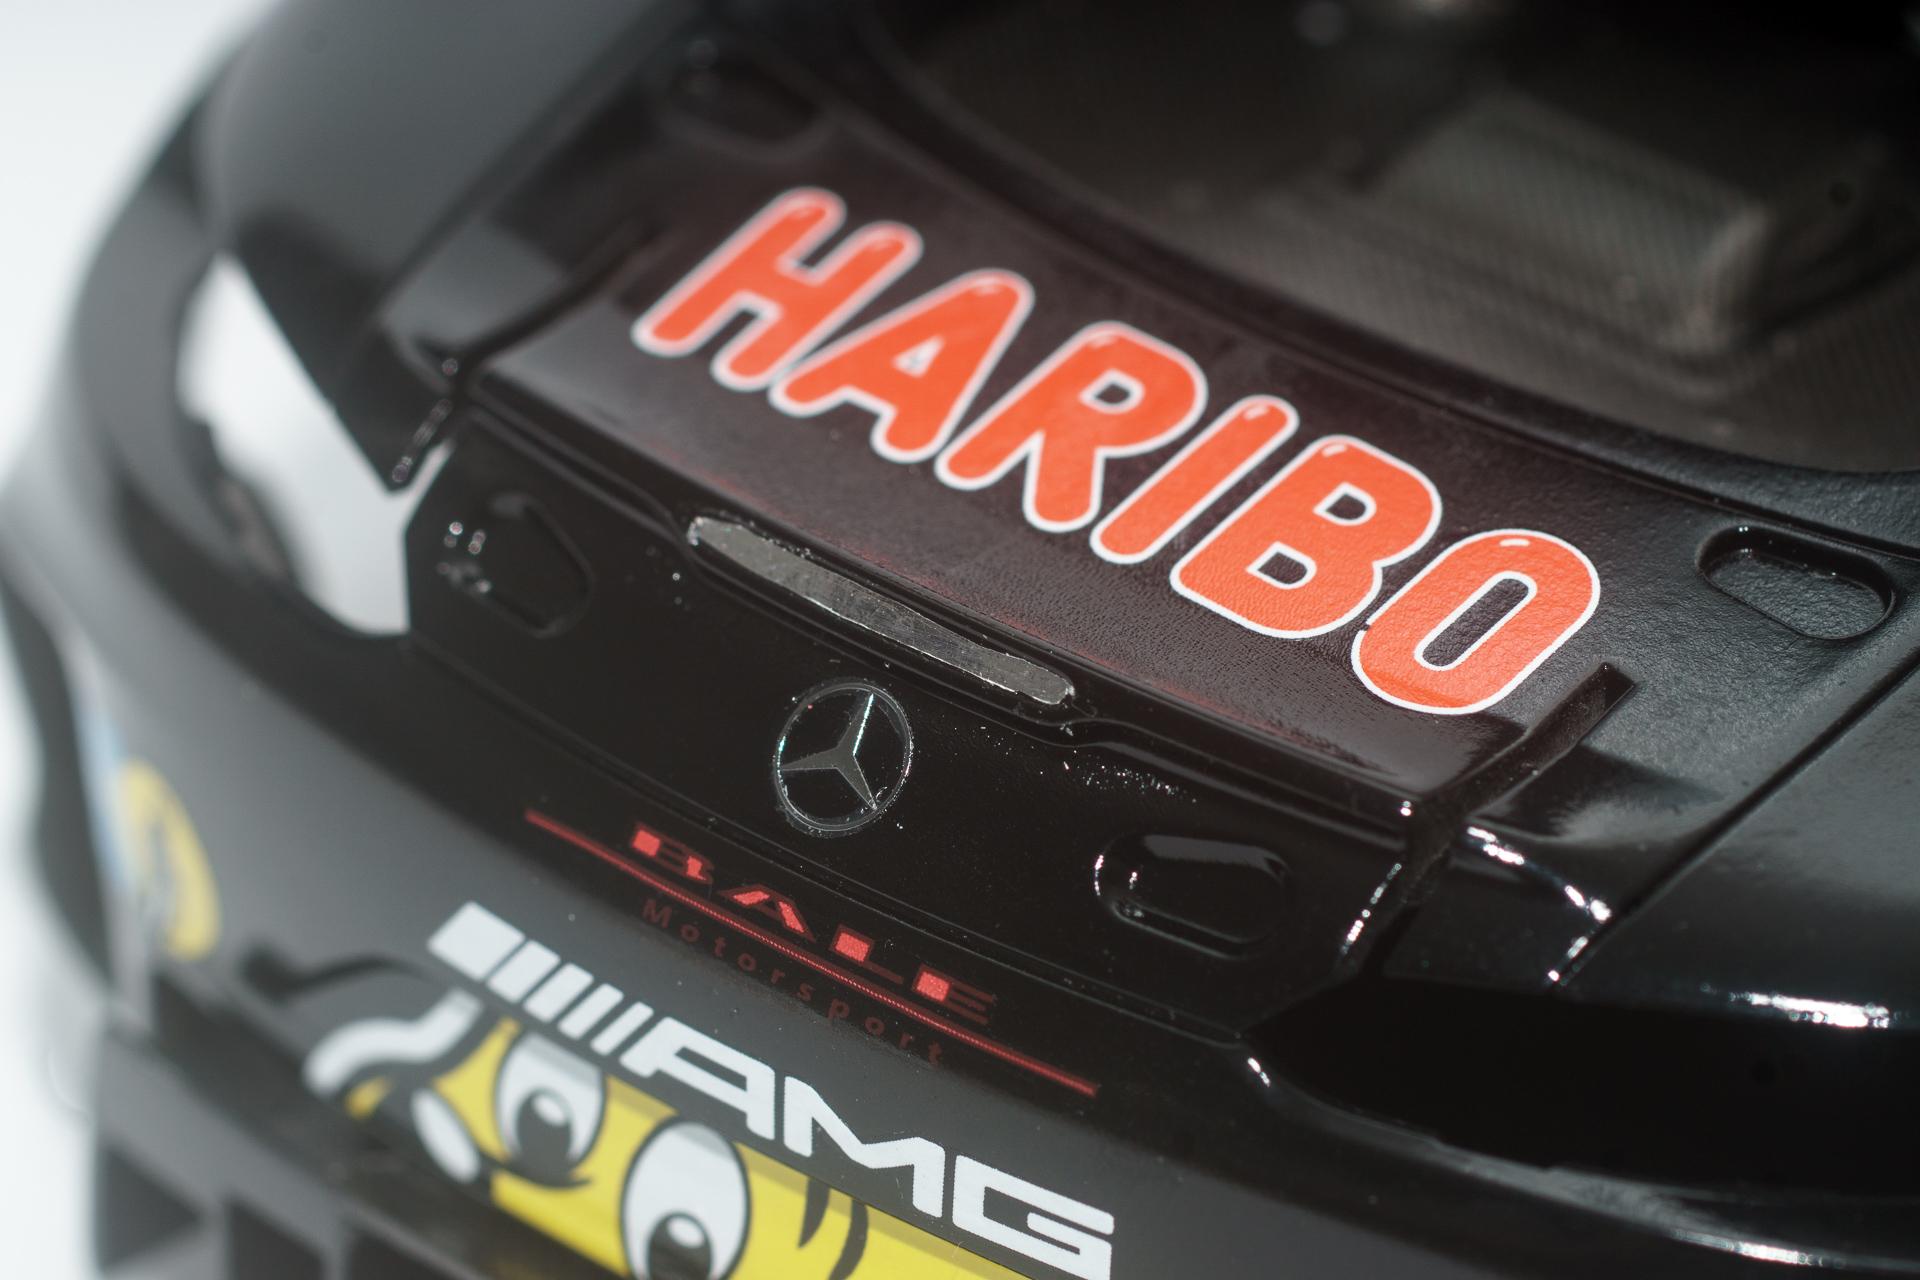
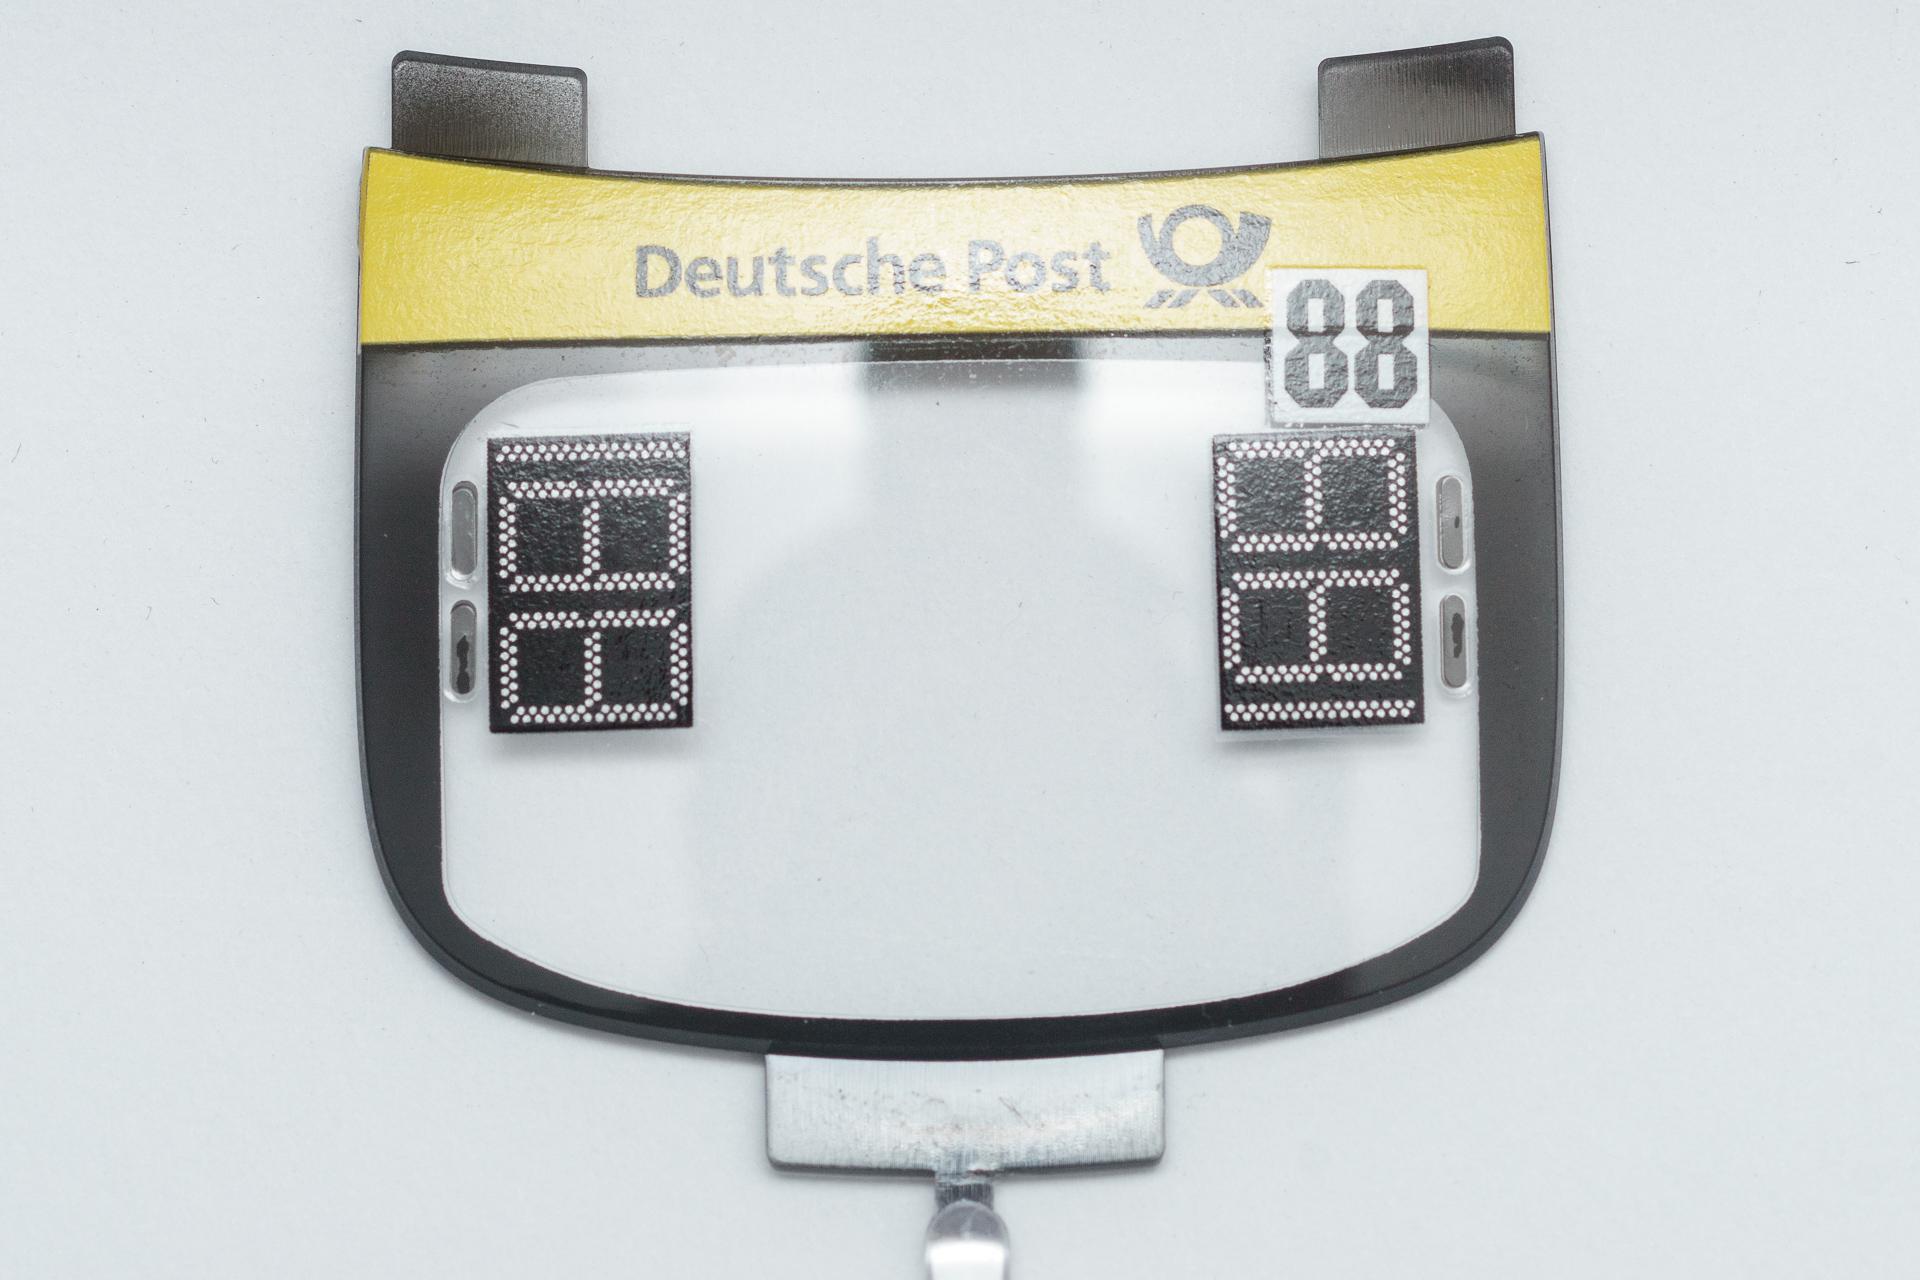
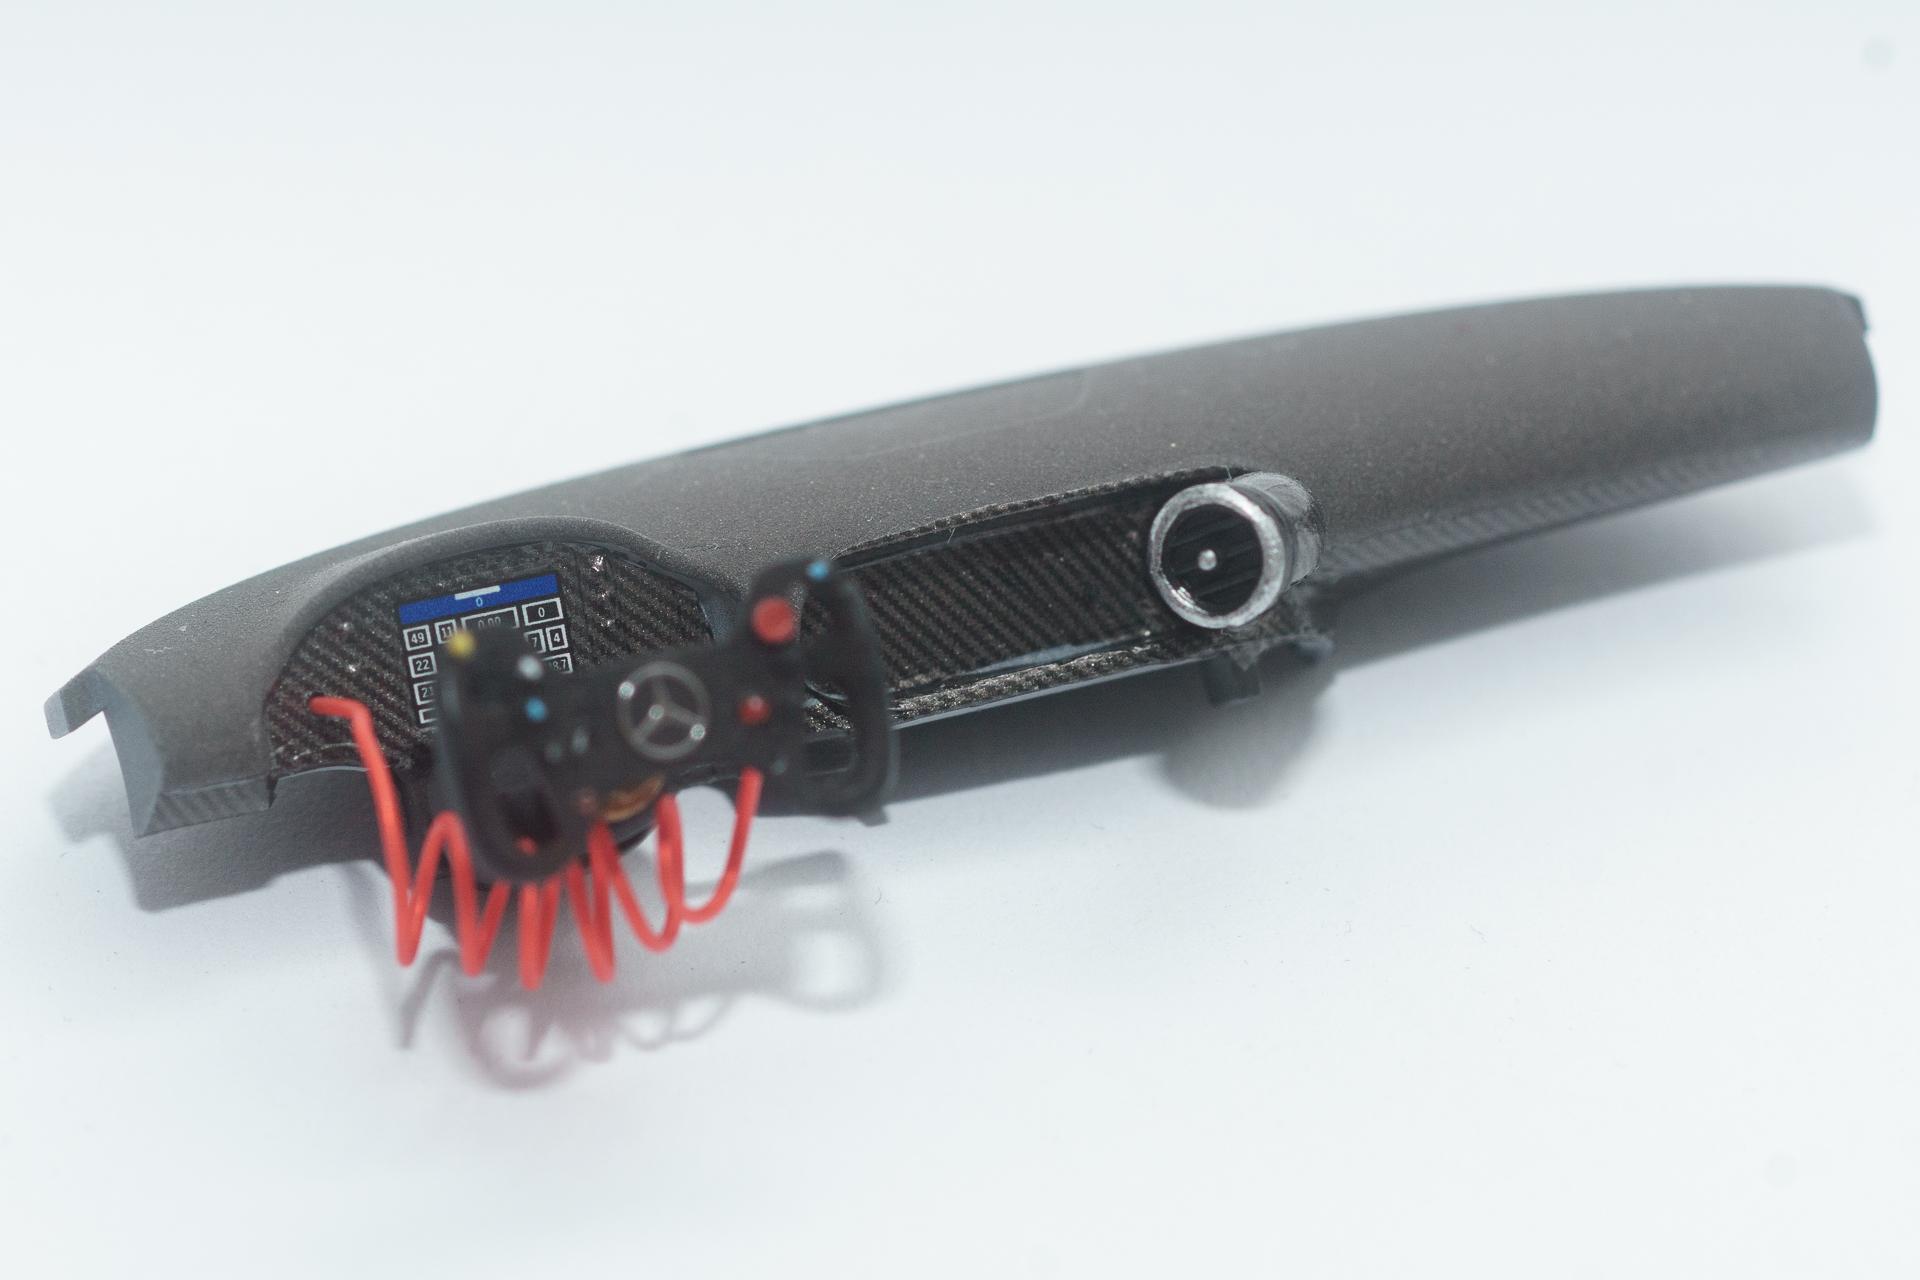
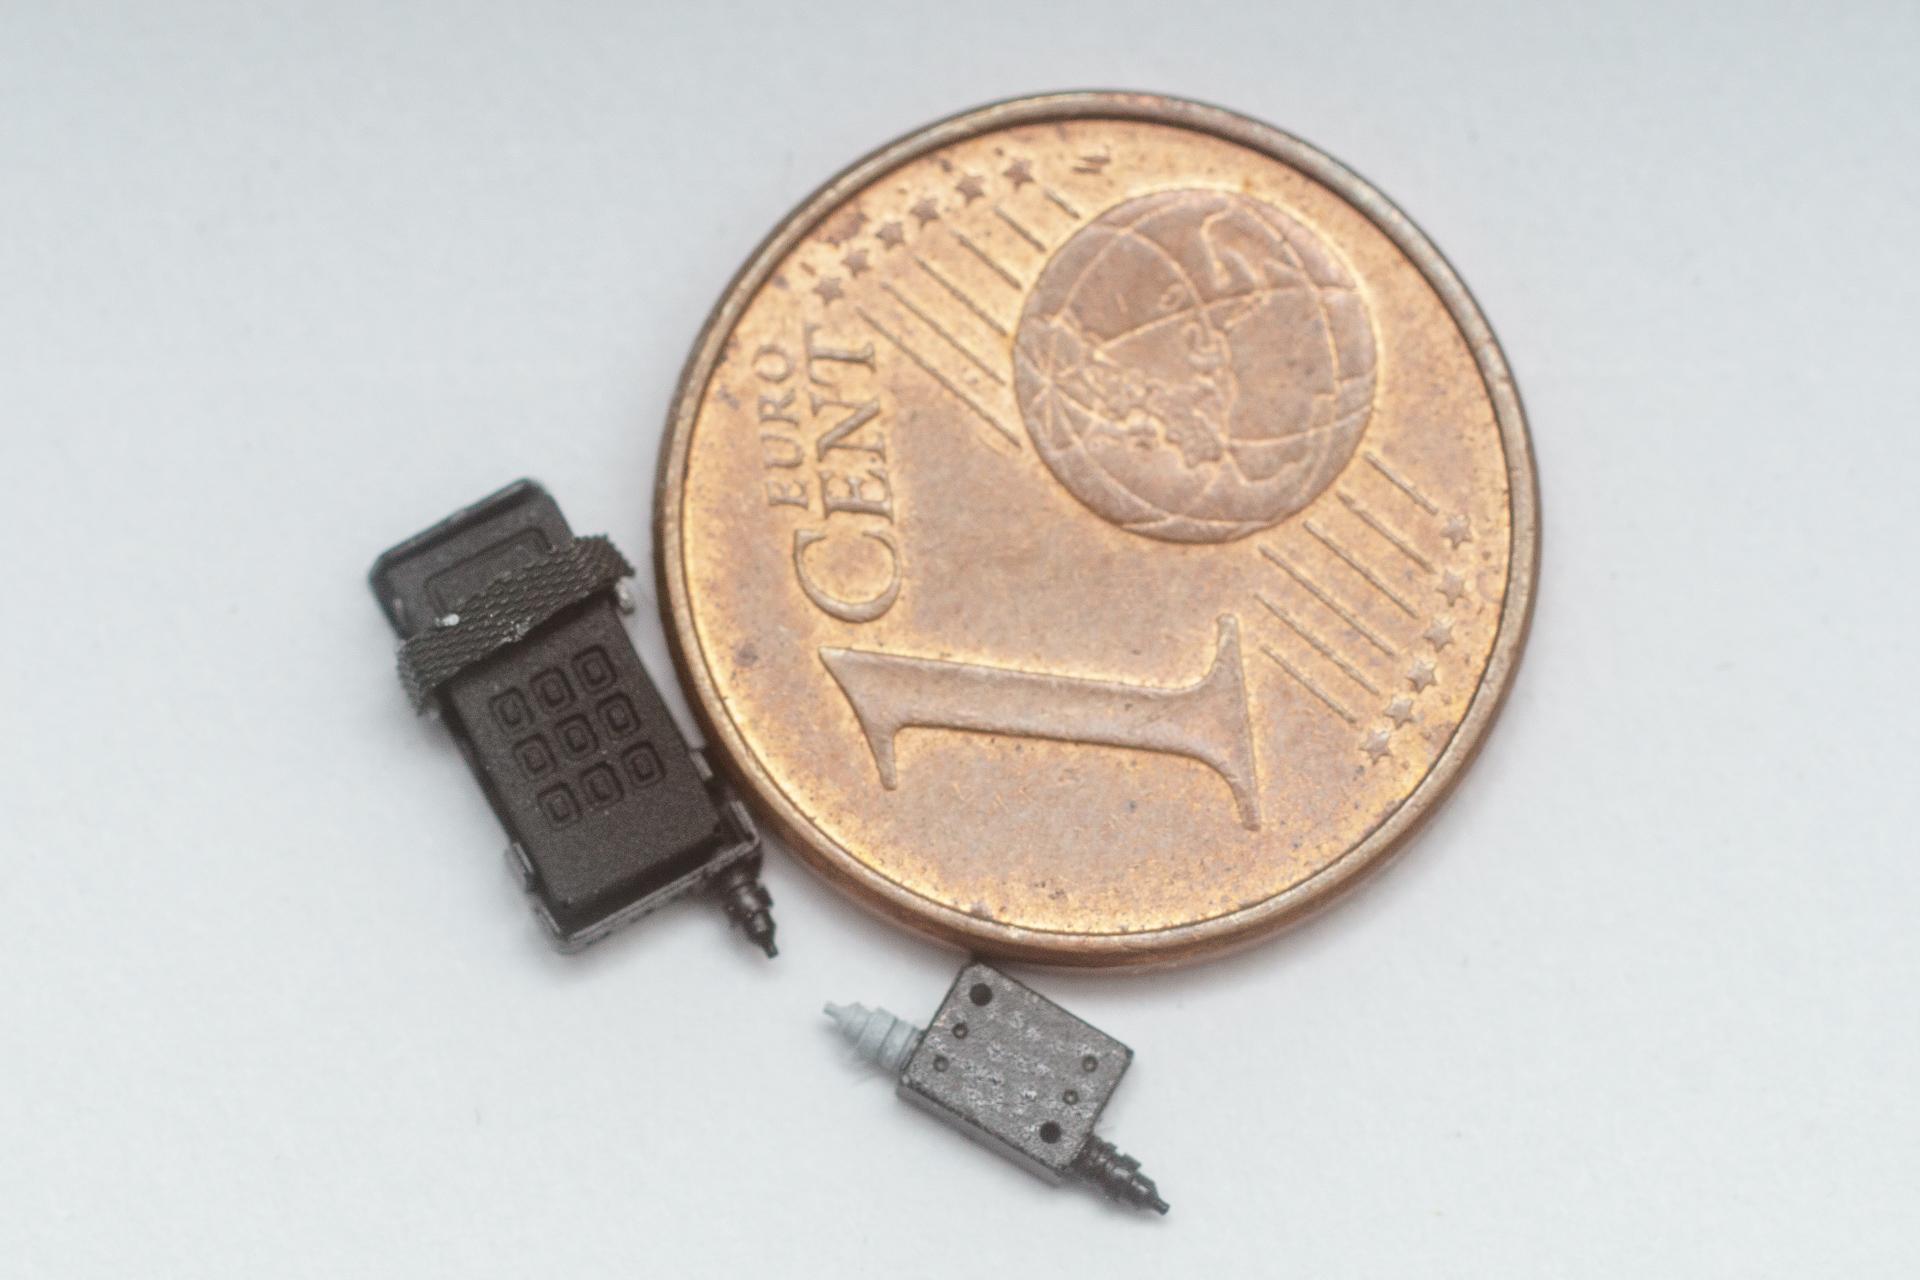
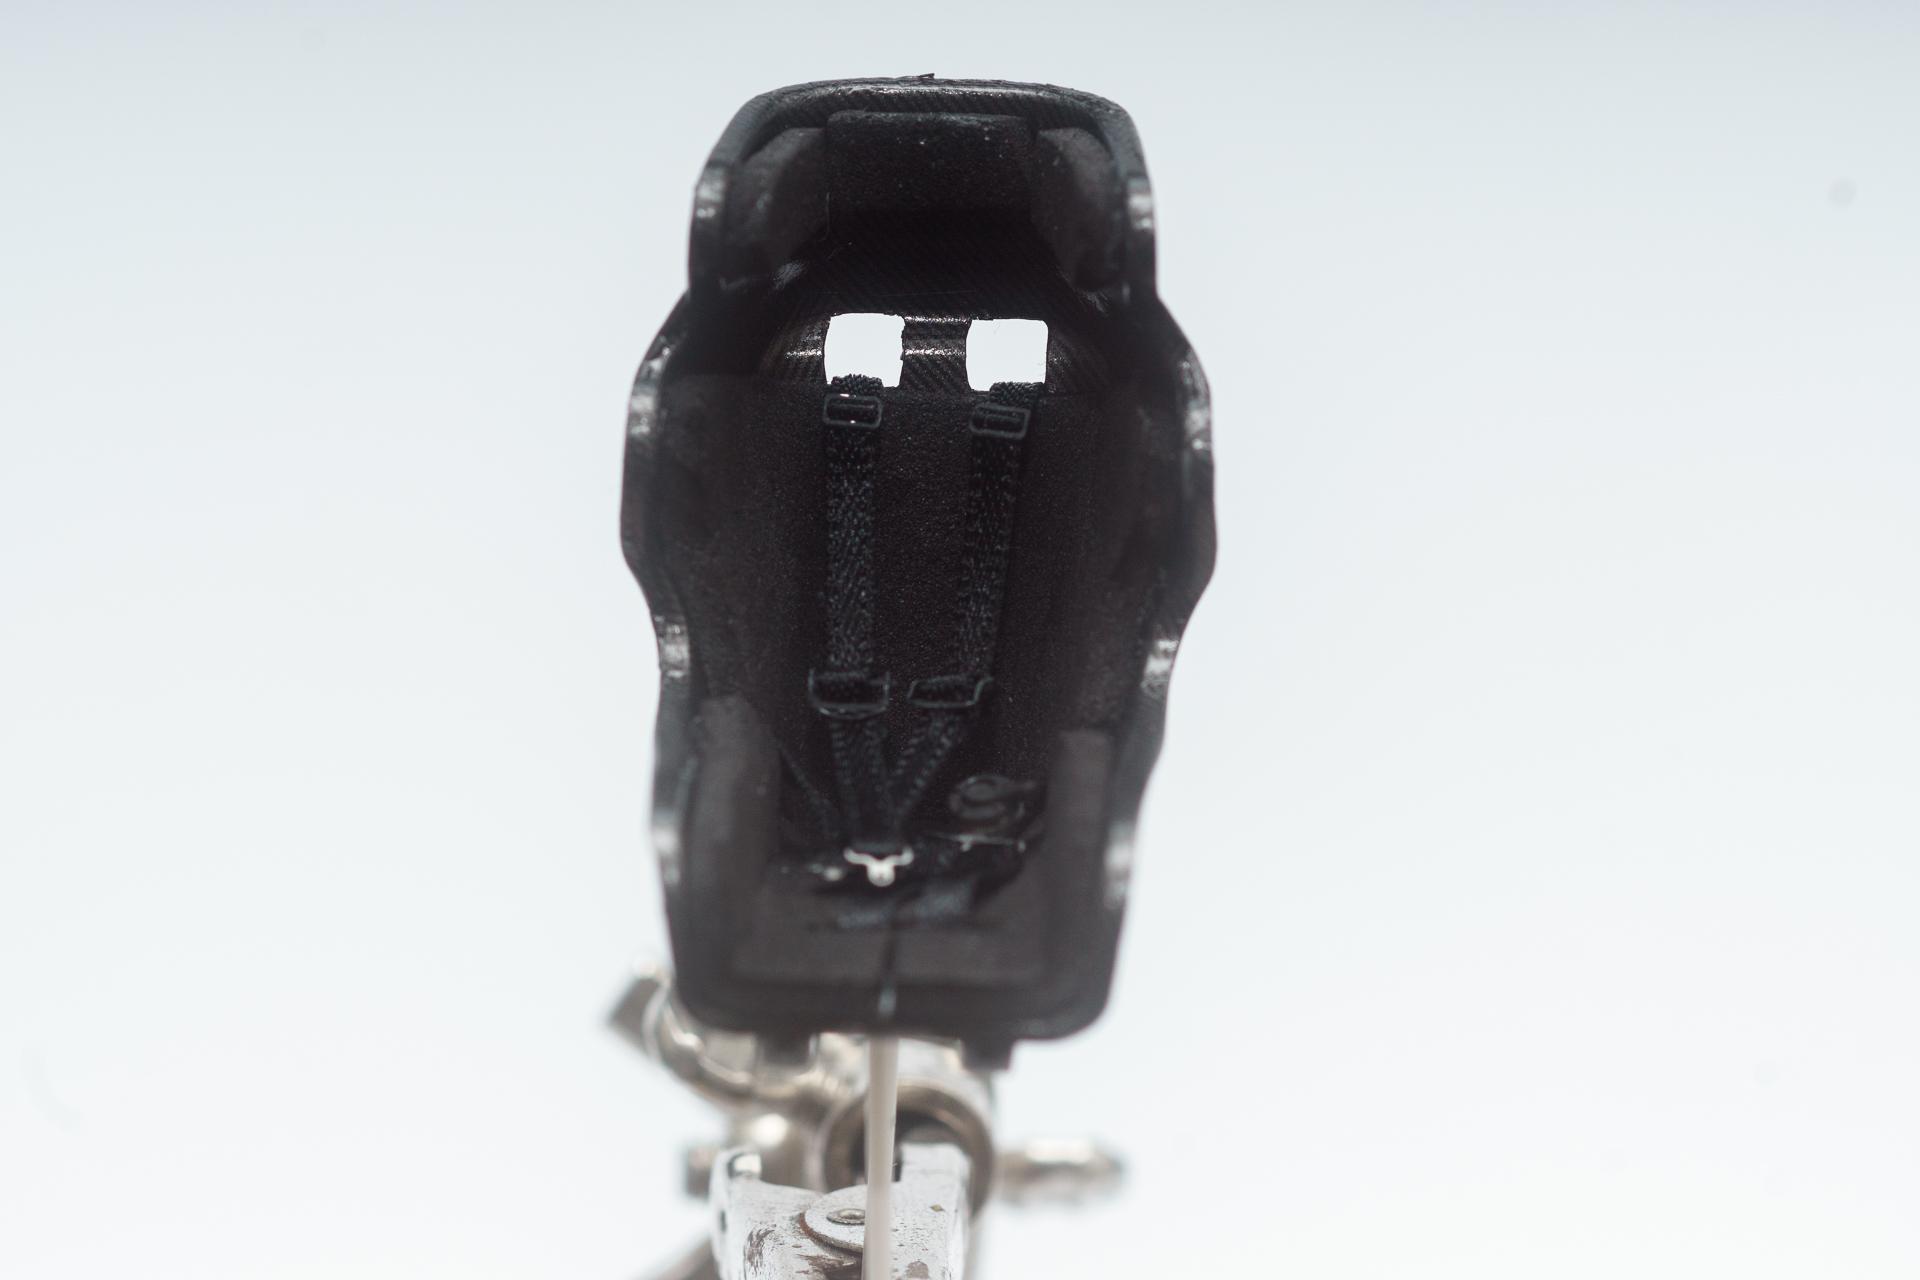
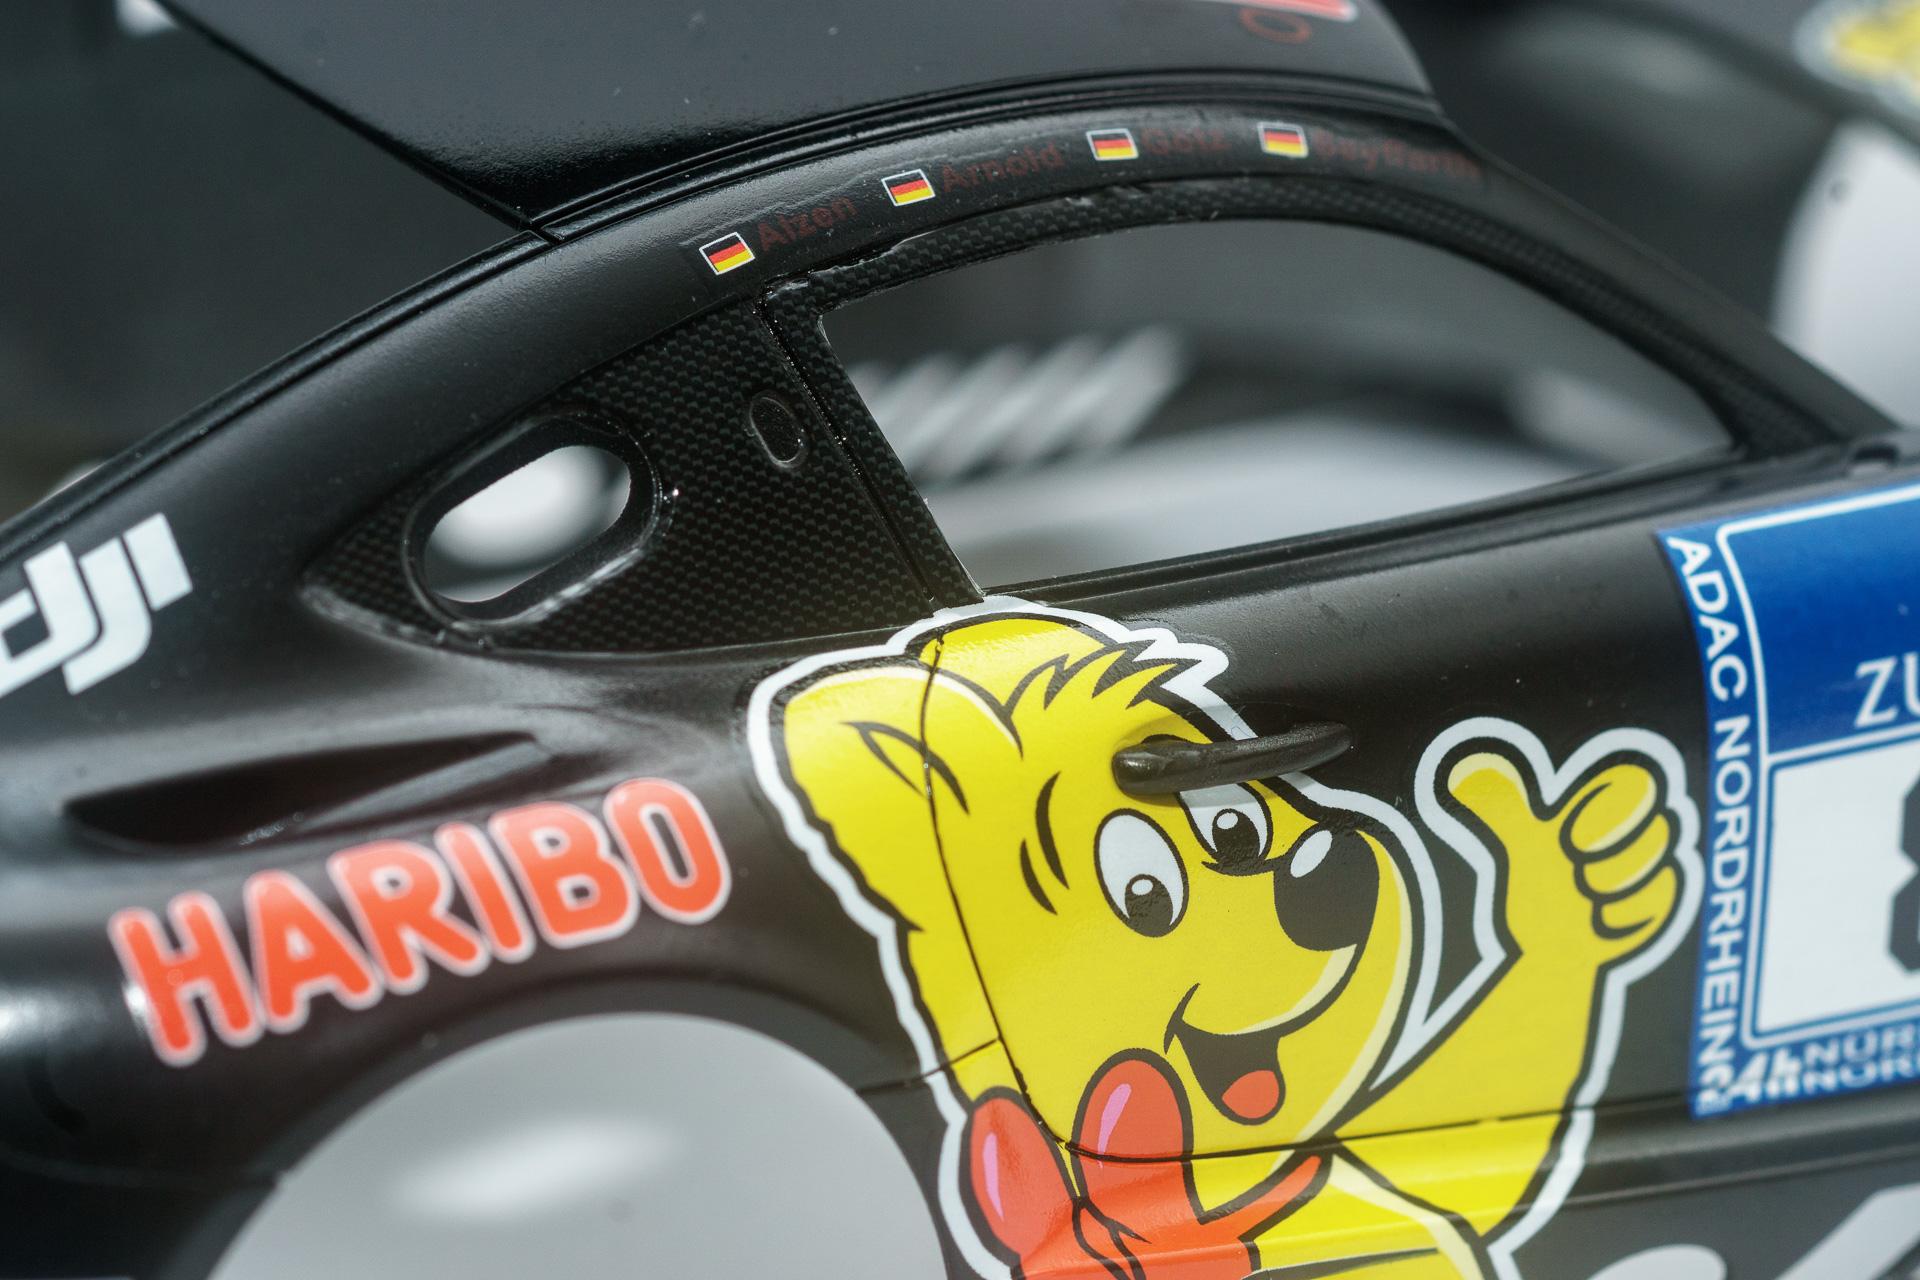
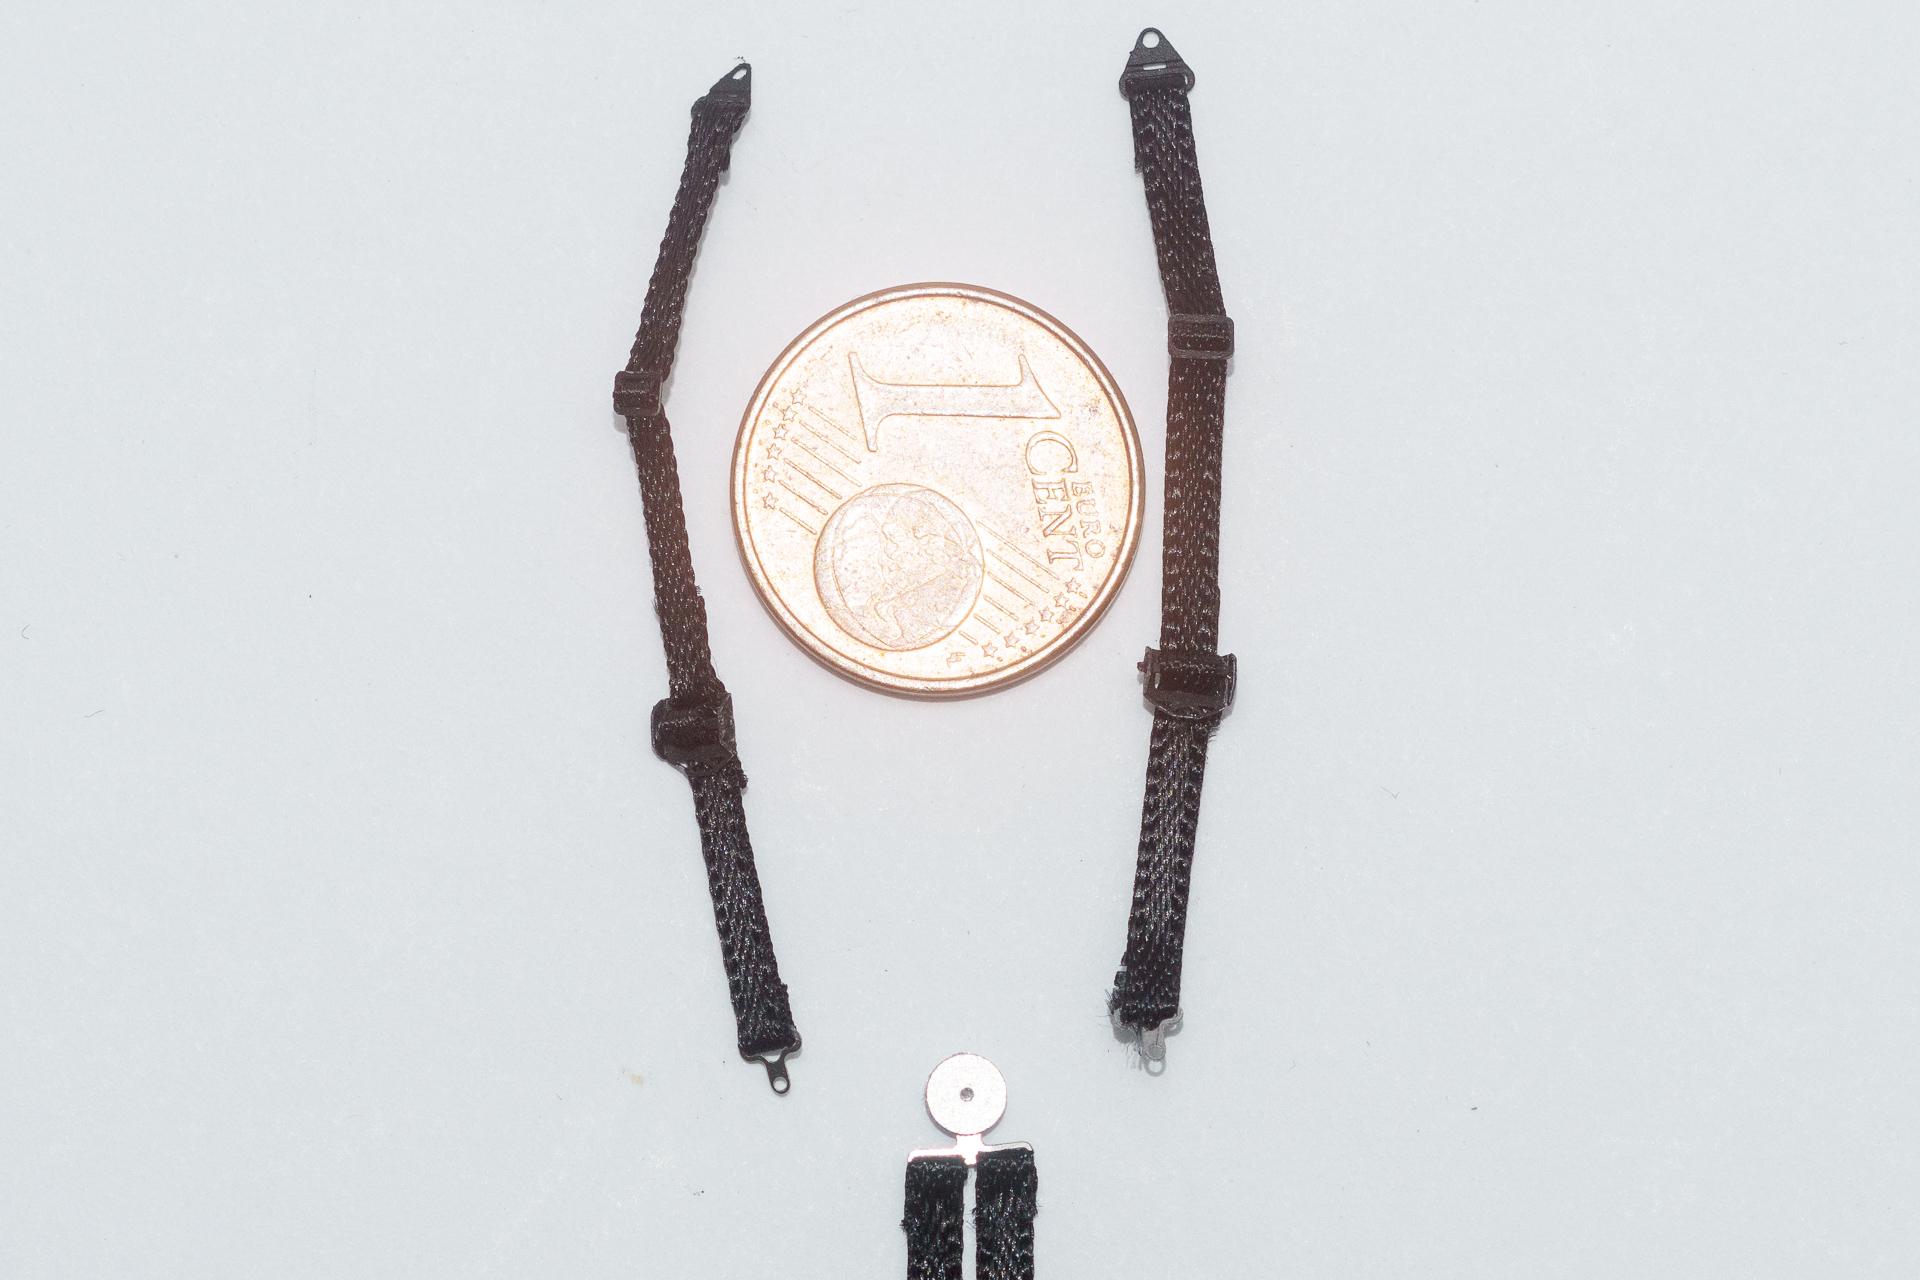
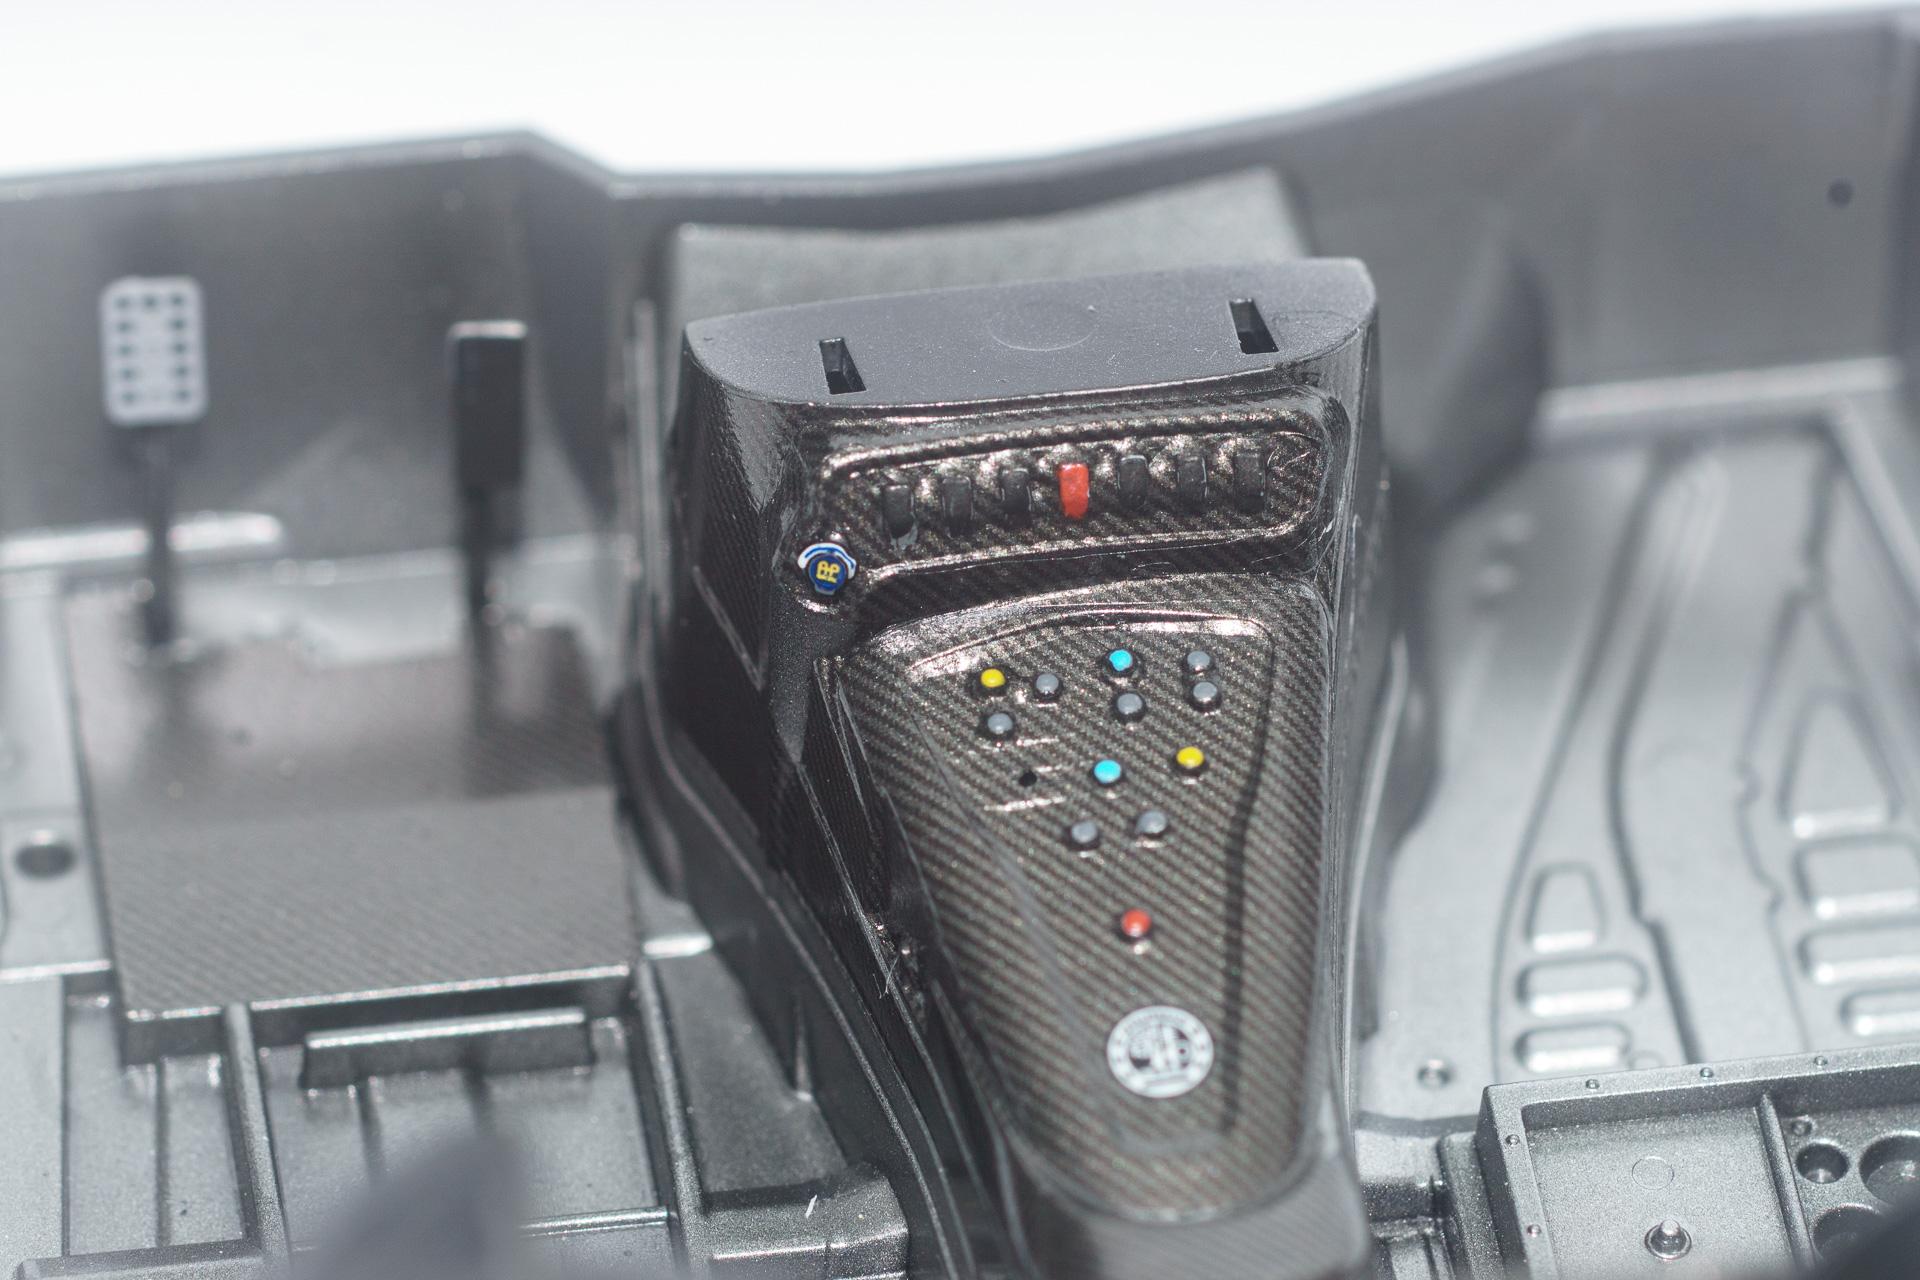
Hi all Again thank you for your kind comments First I owe you a pic I forgot on my last update. I applied the yellow decal on the roof when I was laying down the body decals but remarked at the same time that something was wrong. Unfortunately the clear part was not ready yet to get its decals. So I removed the already applied decal from the roof and transfered it back to the backing paper it was on before. About two weeks later the clear part was ready, so I decided to give it a try, put the decal back in some warm water and tried to re-apply it (at the right spot for once ). To my relief everything turned out fine, the decal sticks to the clear part as if nothing happened at all Yesterday the dashboard came together. Unfortunately I wasn't able to remove the soul from the cable, otherwise it would have been attached to a connector which had already been prepared. So I had to just stuck the cable directly to the dashboard. Not really happy with that, but I couldn't manage the cable to stay attached to the connector as the tension was too high. Some electronic boxes for the interior have been finished as well (the larger one got another connector meanwhile). Then I finished the seat with all its seatbelts. As per the instructions you would first glue together the back and side parts of the roll cage, insert that, then insert the seat and after that attach the top of the roll cage. As I already put the top of the rollcage on, I now have a minor problem getting everything in the interior tube, because the back part of the roll cage would push the seat out of position when I try to slip it in between the back of the interior tub and the seat. And I can't insert the roll cage first as I wouldn't be able to insert the seat afterwards. Although I didn't want to break the roll cage apart as it is already finished. So I decided to try something I already used to insert belt buckles and rear view mirrors: I placed the seat where it's supposed to be at the end and drilled two holes through seat and interior tub (that was of course before I added the cushions ). Then I stuck two evergreen rods in which fitted perfectly in diameter and glued them to the seat. On the upper part of the seat they were cut and sanded. The rods have about 5 cm in length. So, when it comes to final assembly, I will first slip the rods through the holes of the tub but let the seat "float" over its position. Then I can insert the roll cage and once that is in place I can pull on the rods from underneath the interior and bring the seat to its final location, glue the rods to the interior tub and cut them once the glue has dried. The headlights got their pe parts (the small ring around the lenses) before assembling them. In order to complete the rear wing I also had to assemble the supports. The part you can see here consists of 9 parts from the PE set (as per the instructions it would be 10 parts, but I'm afraid that it won't slip in the body once everything is painted and clear coated). Finally the body got its last few decals (the ones with the carbon pattern). As the previously attached decals didn't conform to the panel lines that well I used a sharp hobby knife, cut them and applied some softer. Then I used a soft brush, dipped in softer, to push the decals inside the panel lines. I just noticed on the pictures that there are some spots where I'll have to repeat the last step. Also I completley forgot to do the same thing on the front, so I'll have to repeat it there as well. That's all for this update. I wish you all a nice and healthy week Urs
-
Mercedes-AMG GT3
harti20 replied to harti20's topic in WIP: Other Racing: Road Racing, Land Speed Racers
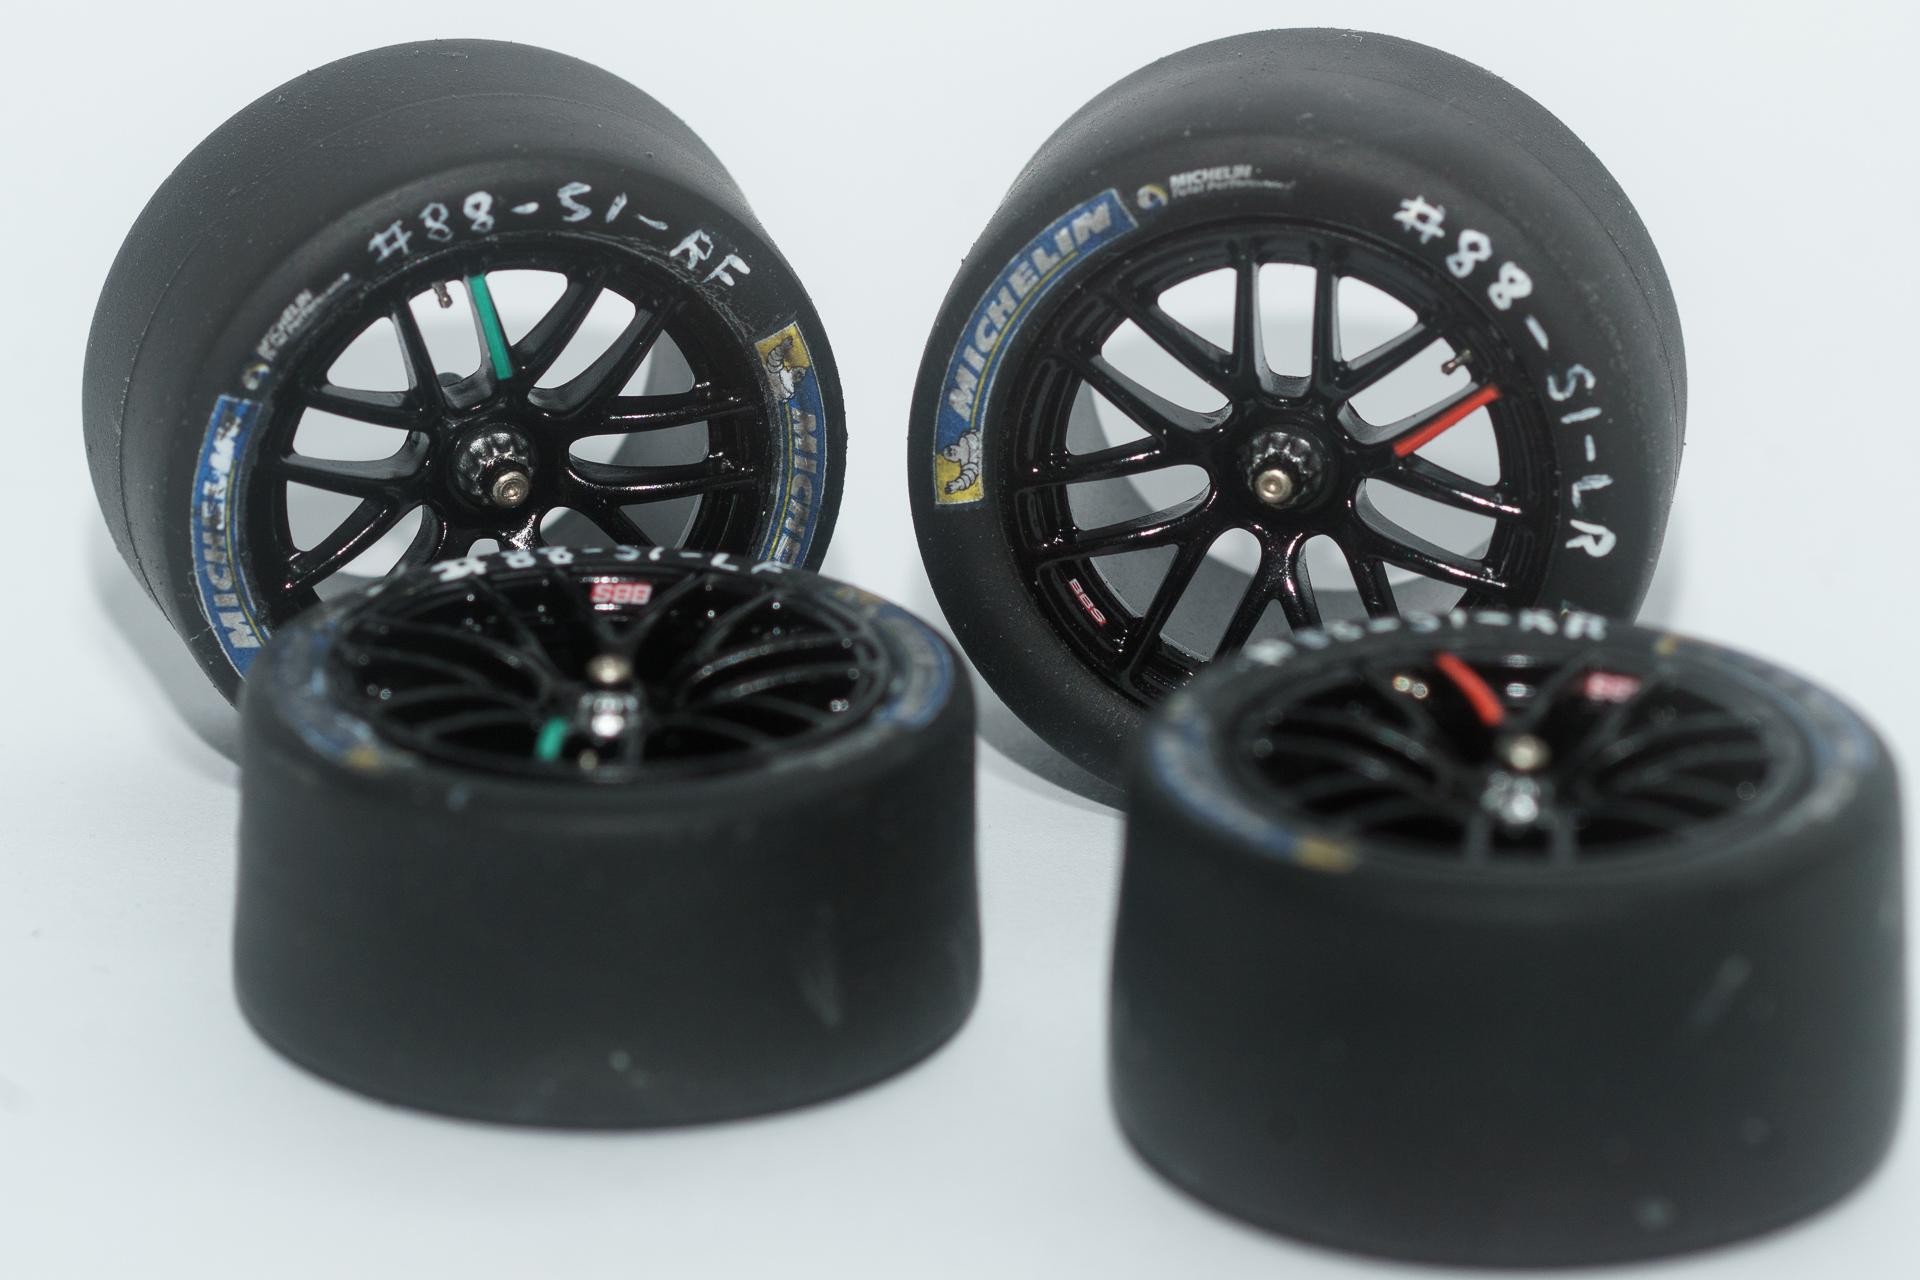
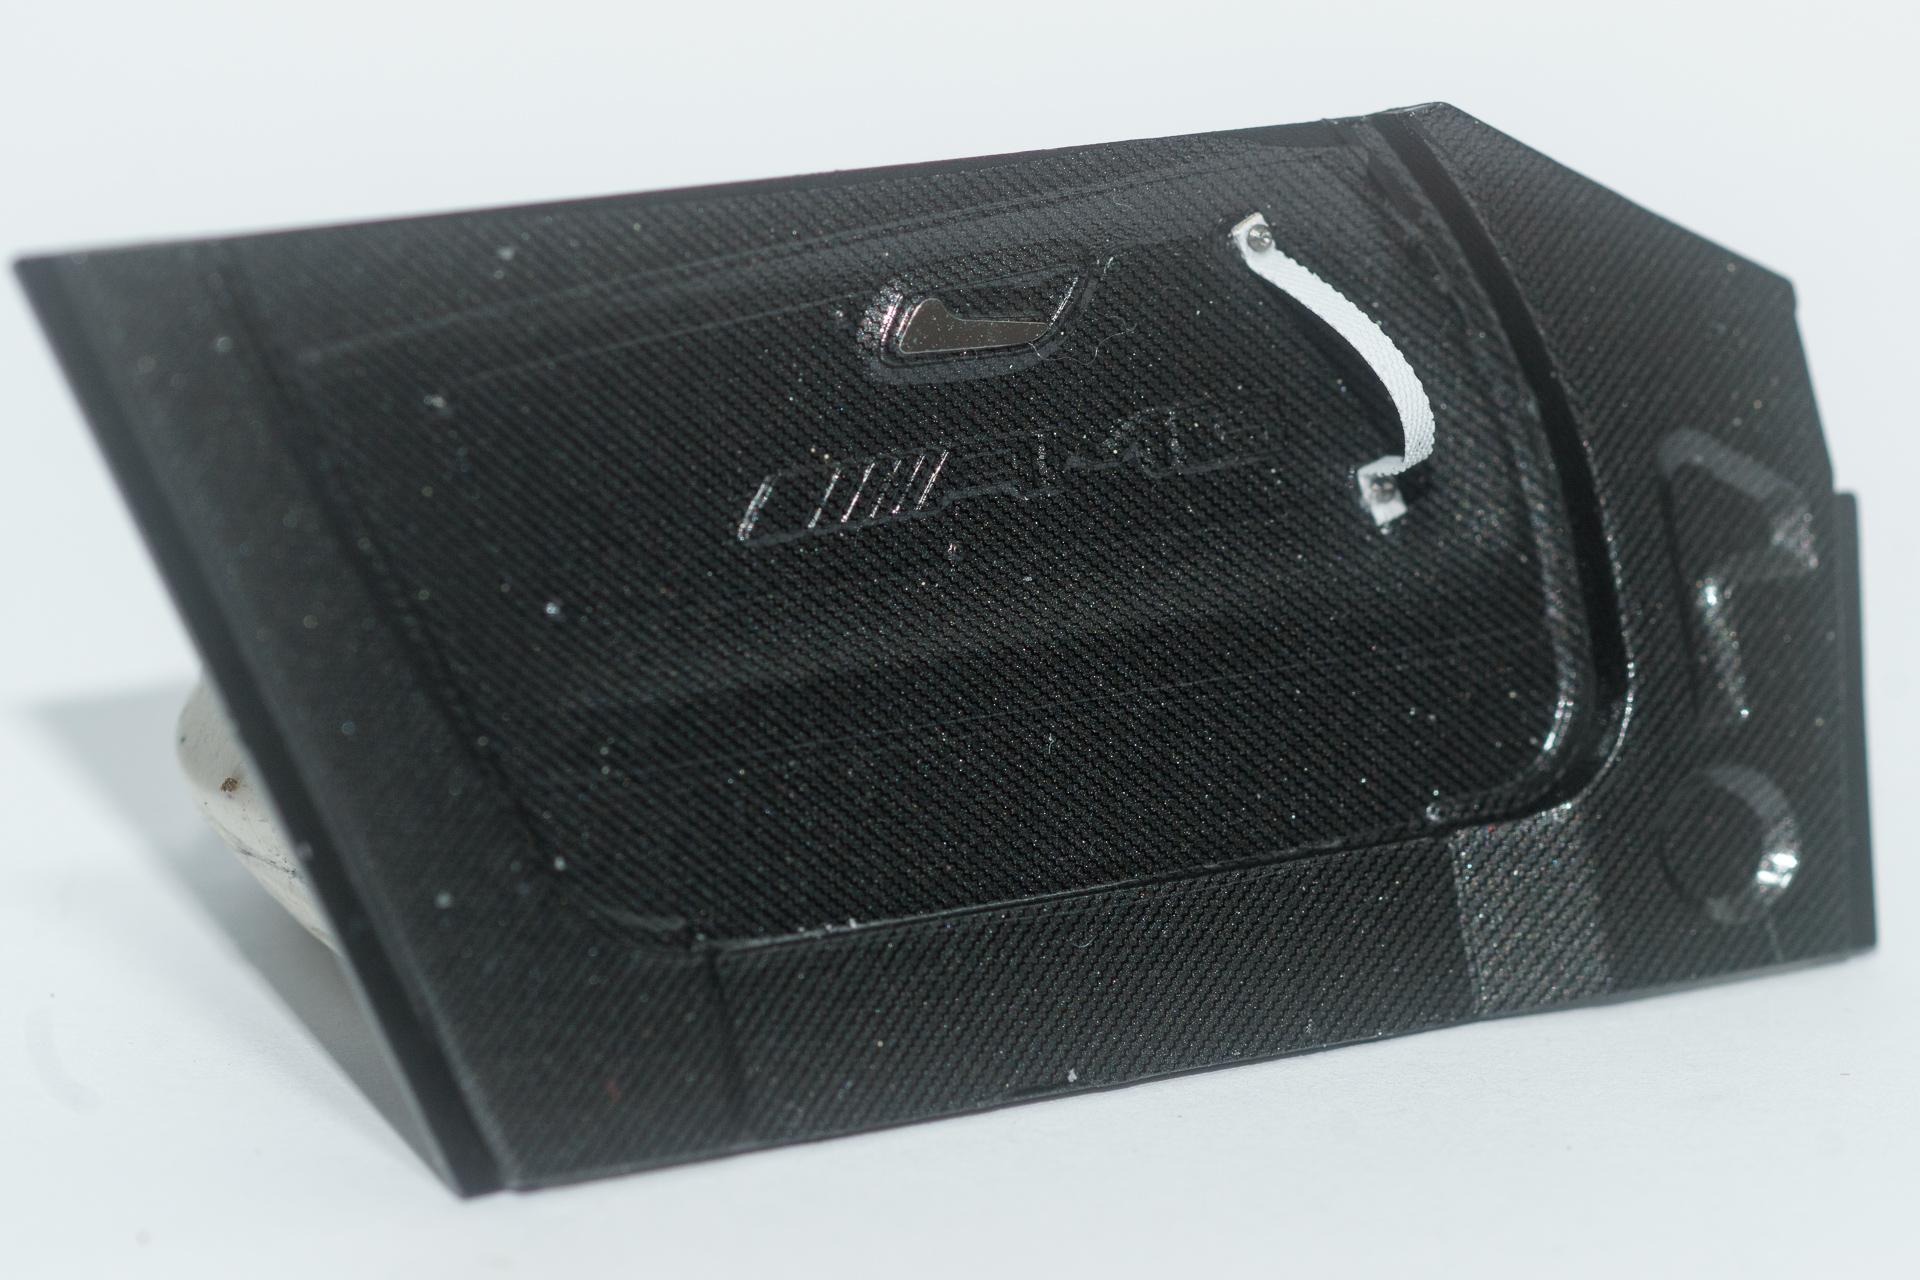
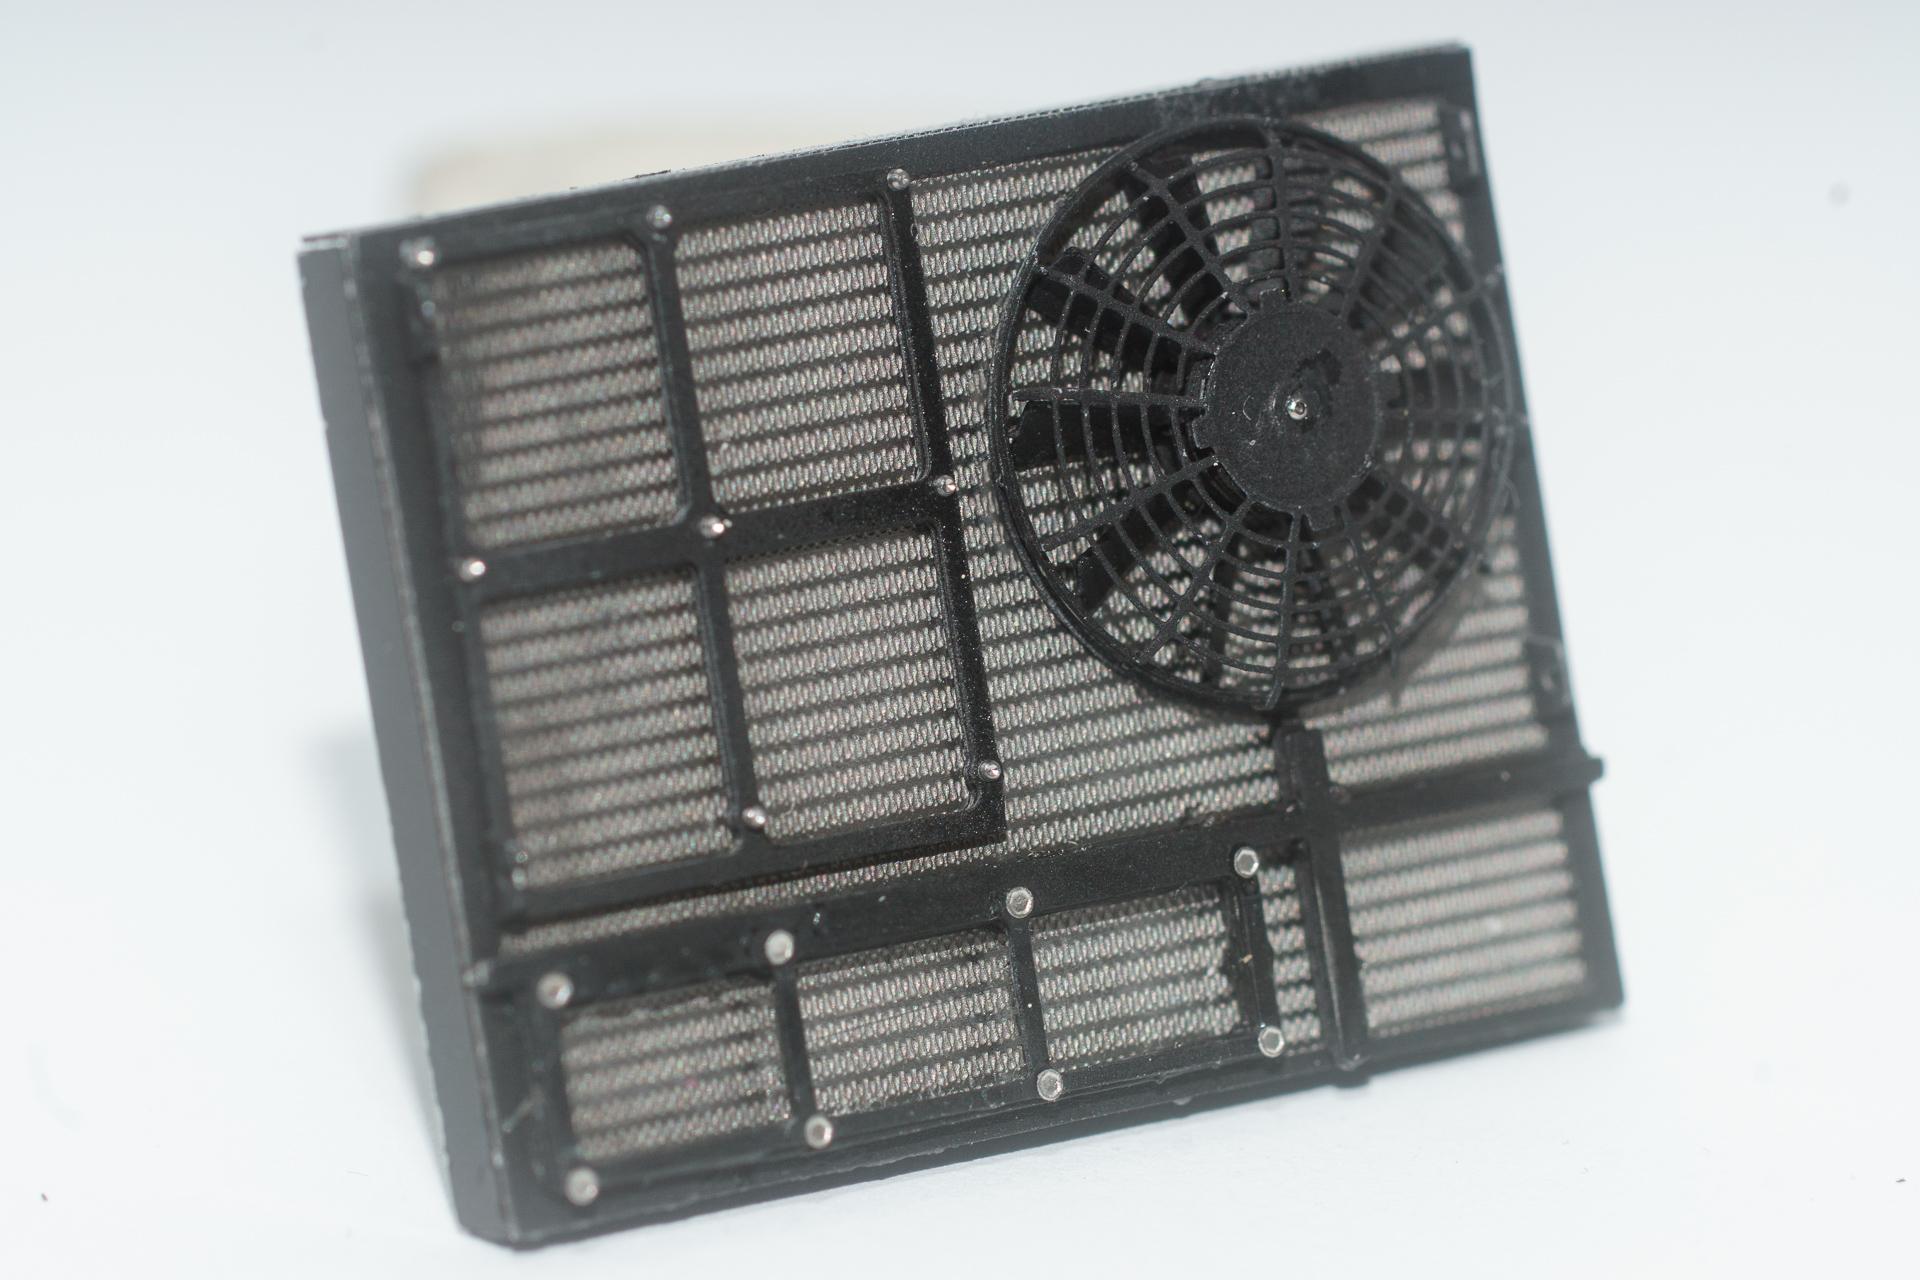
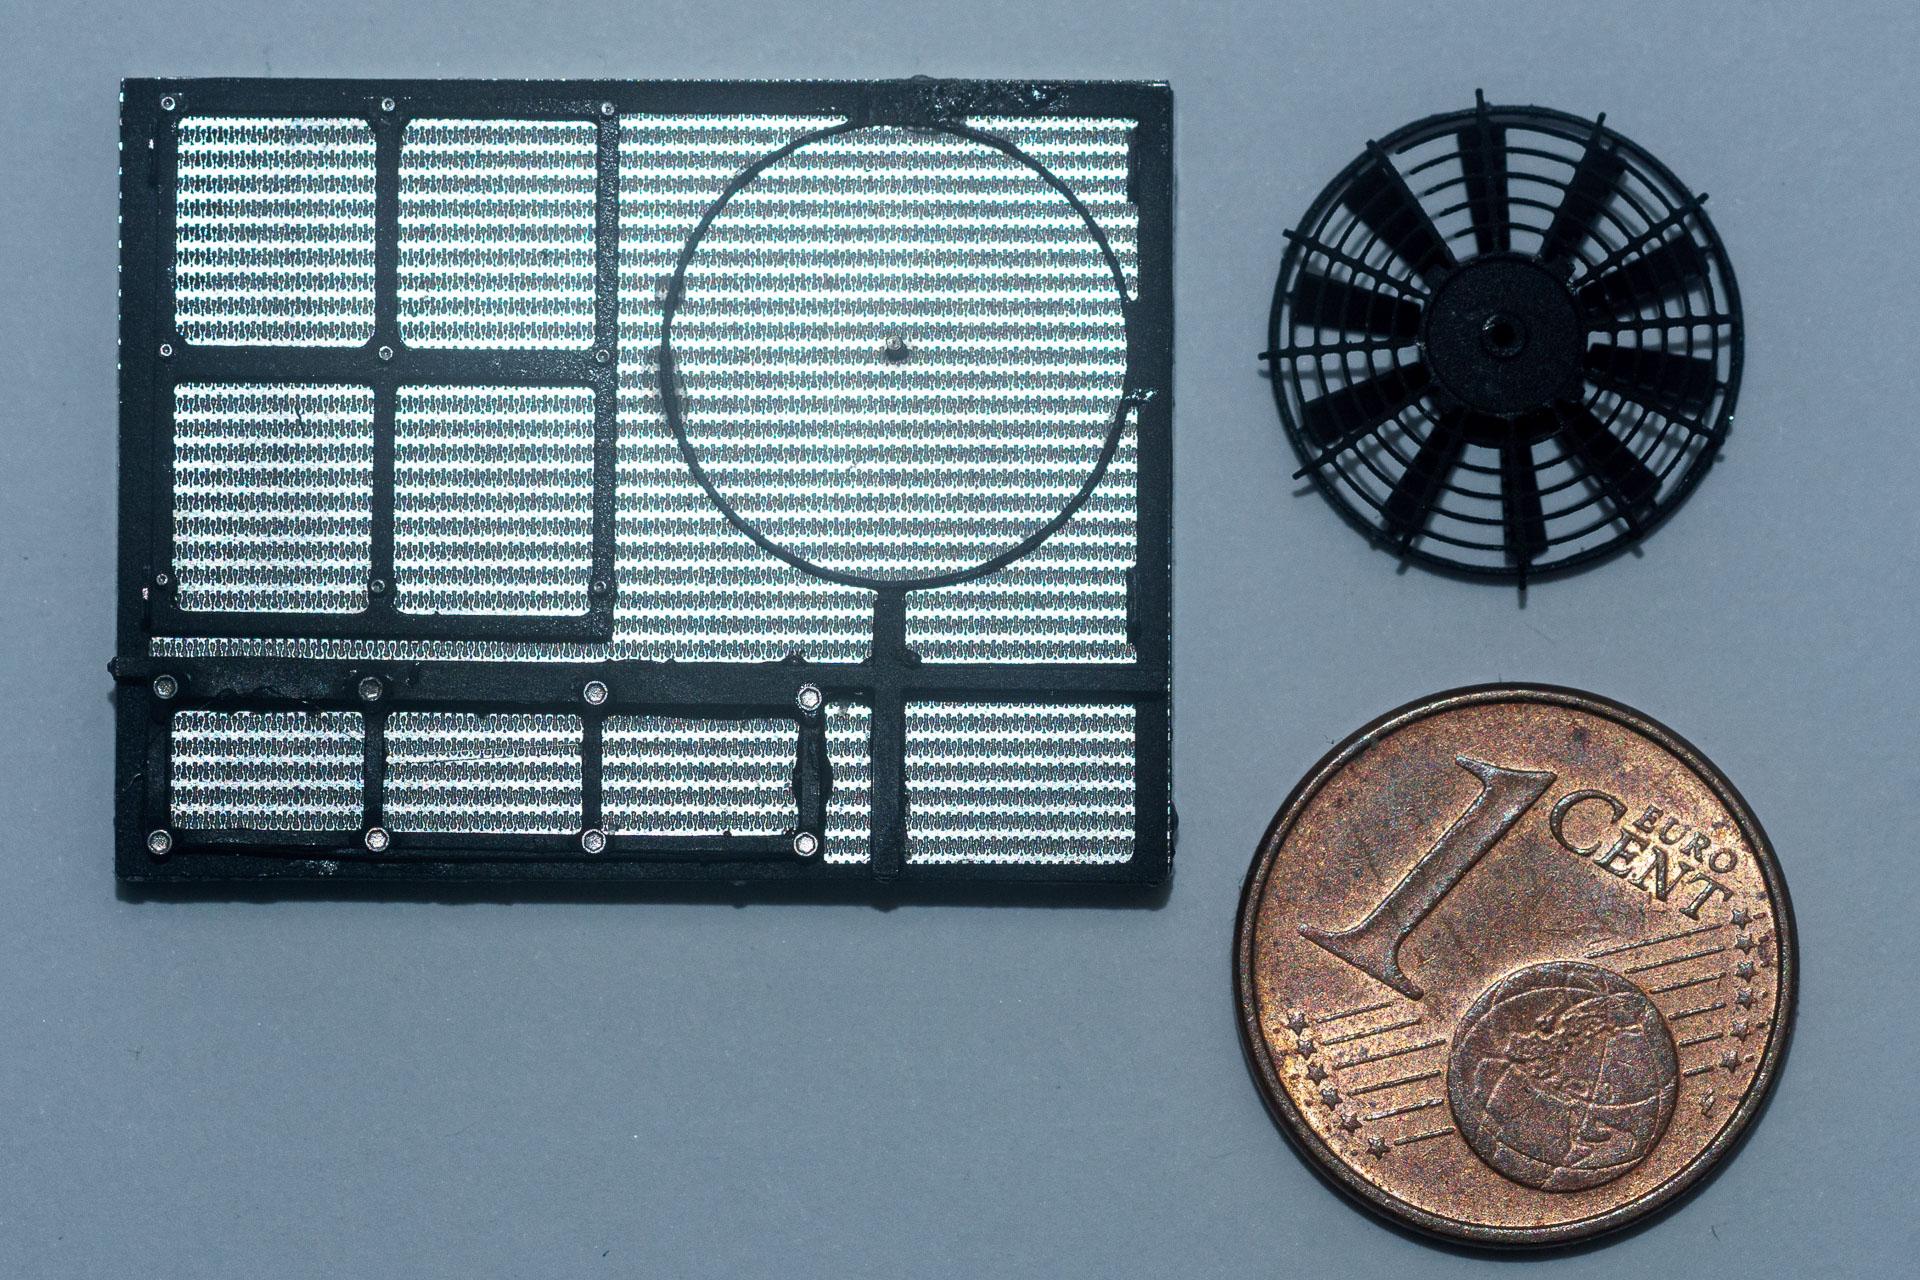
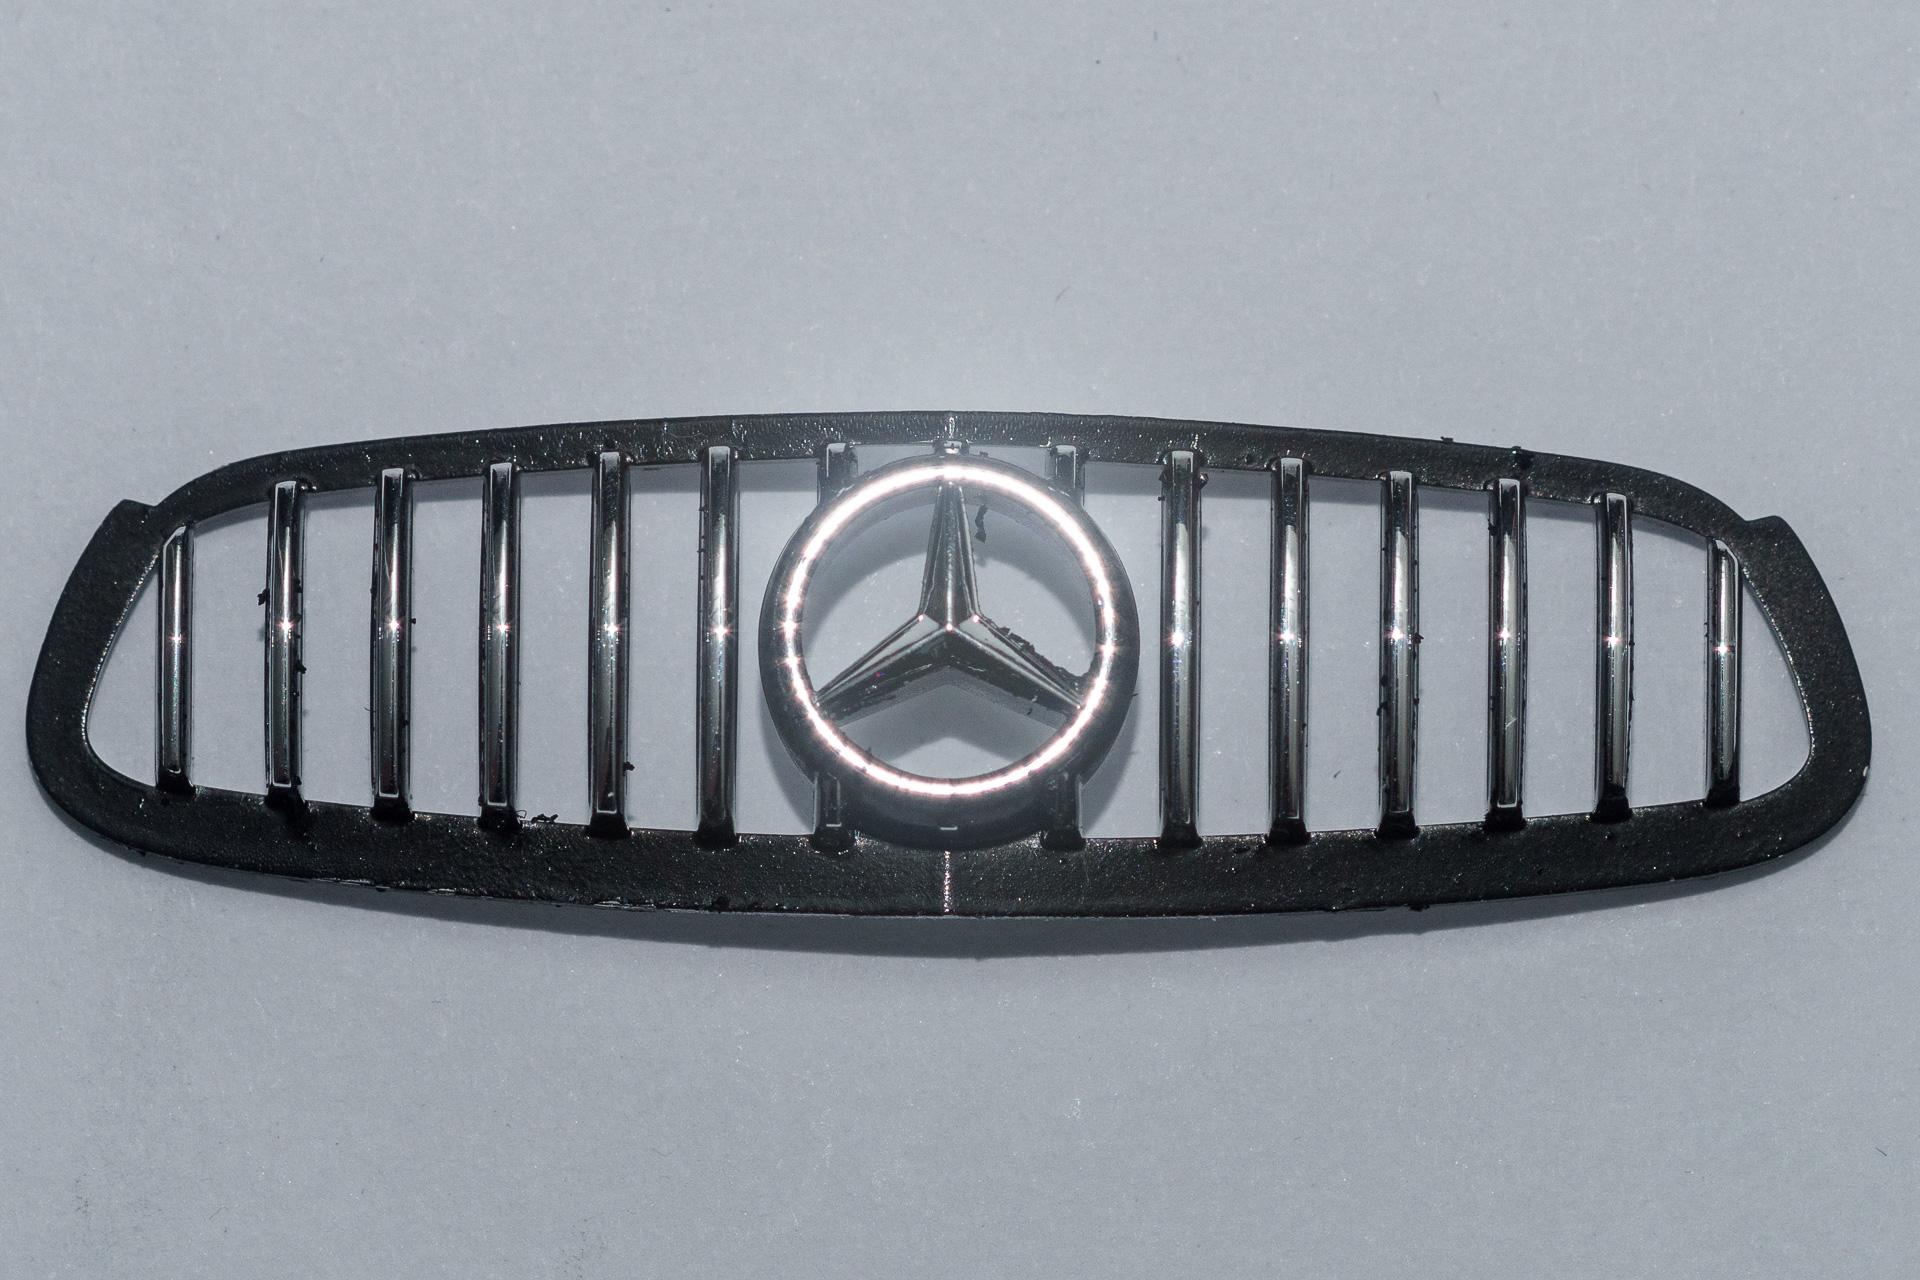
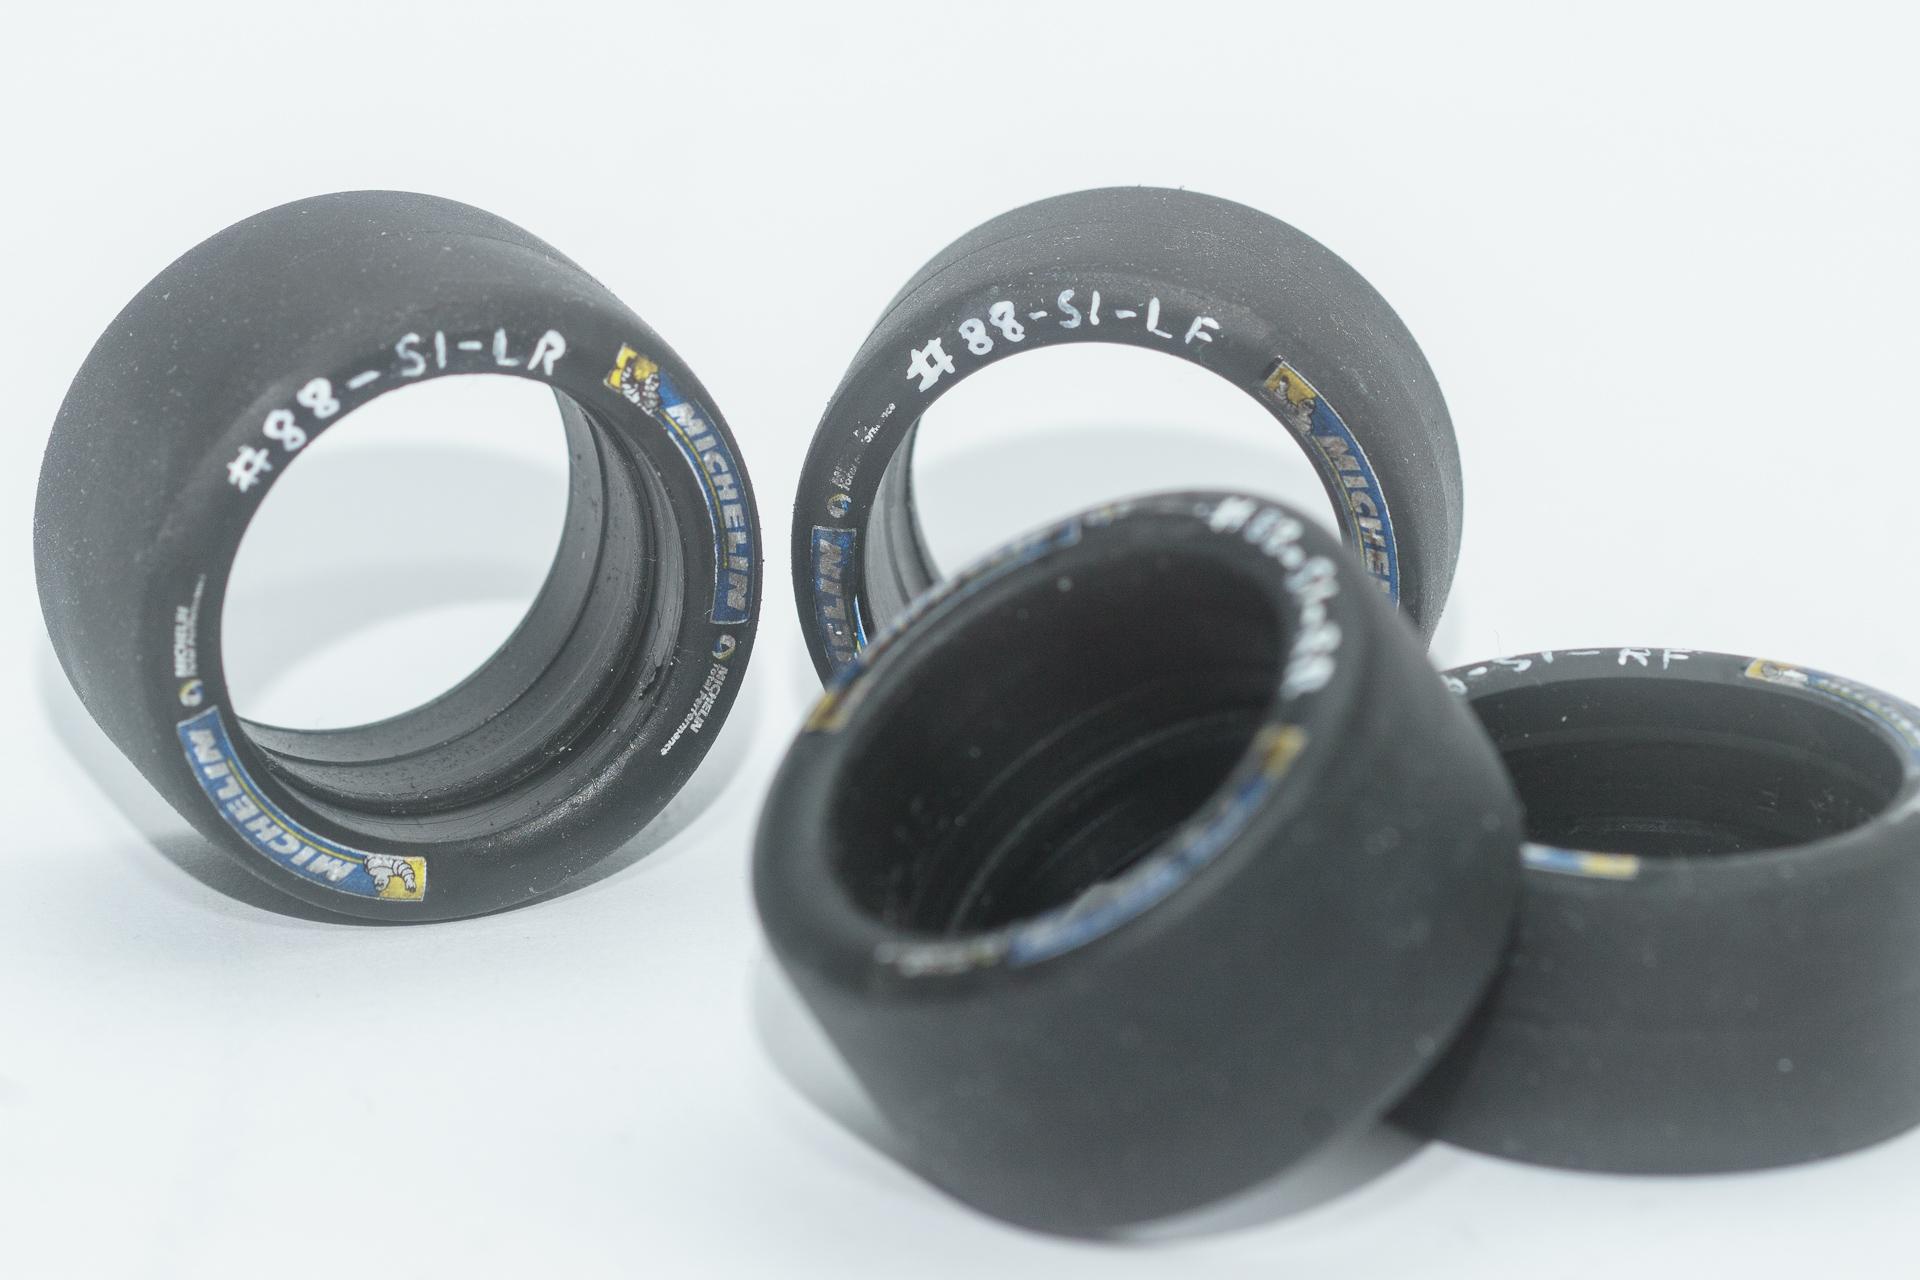
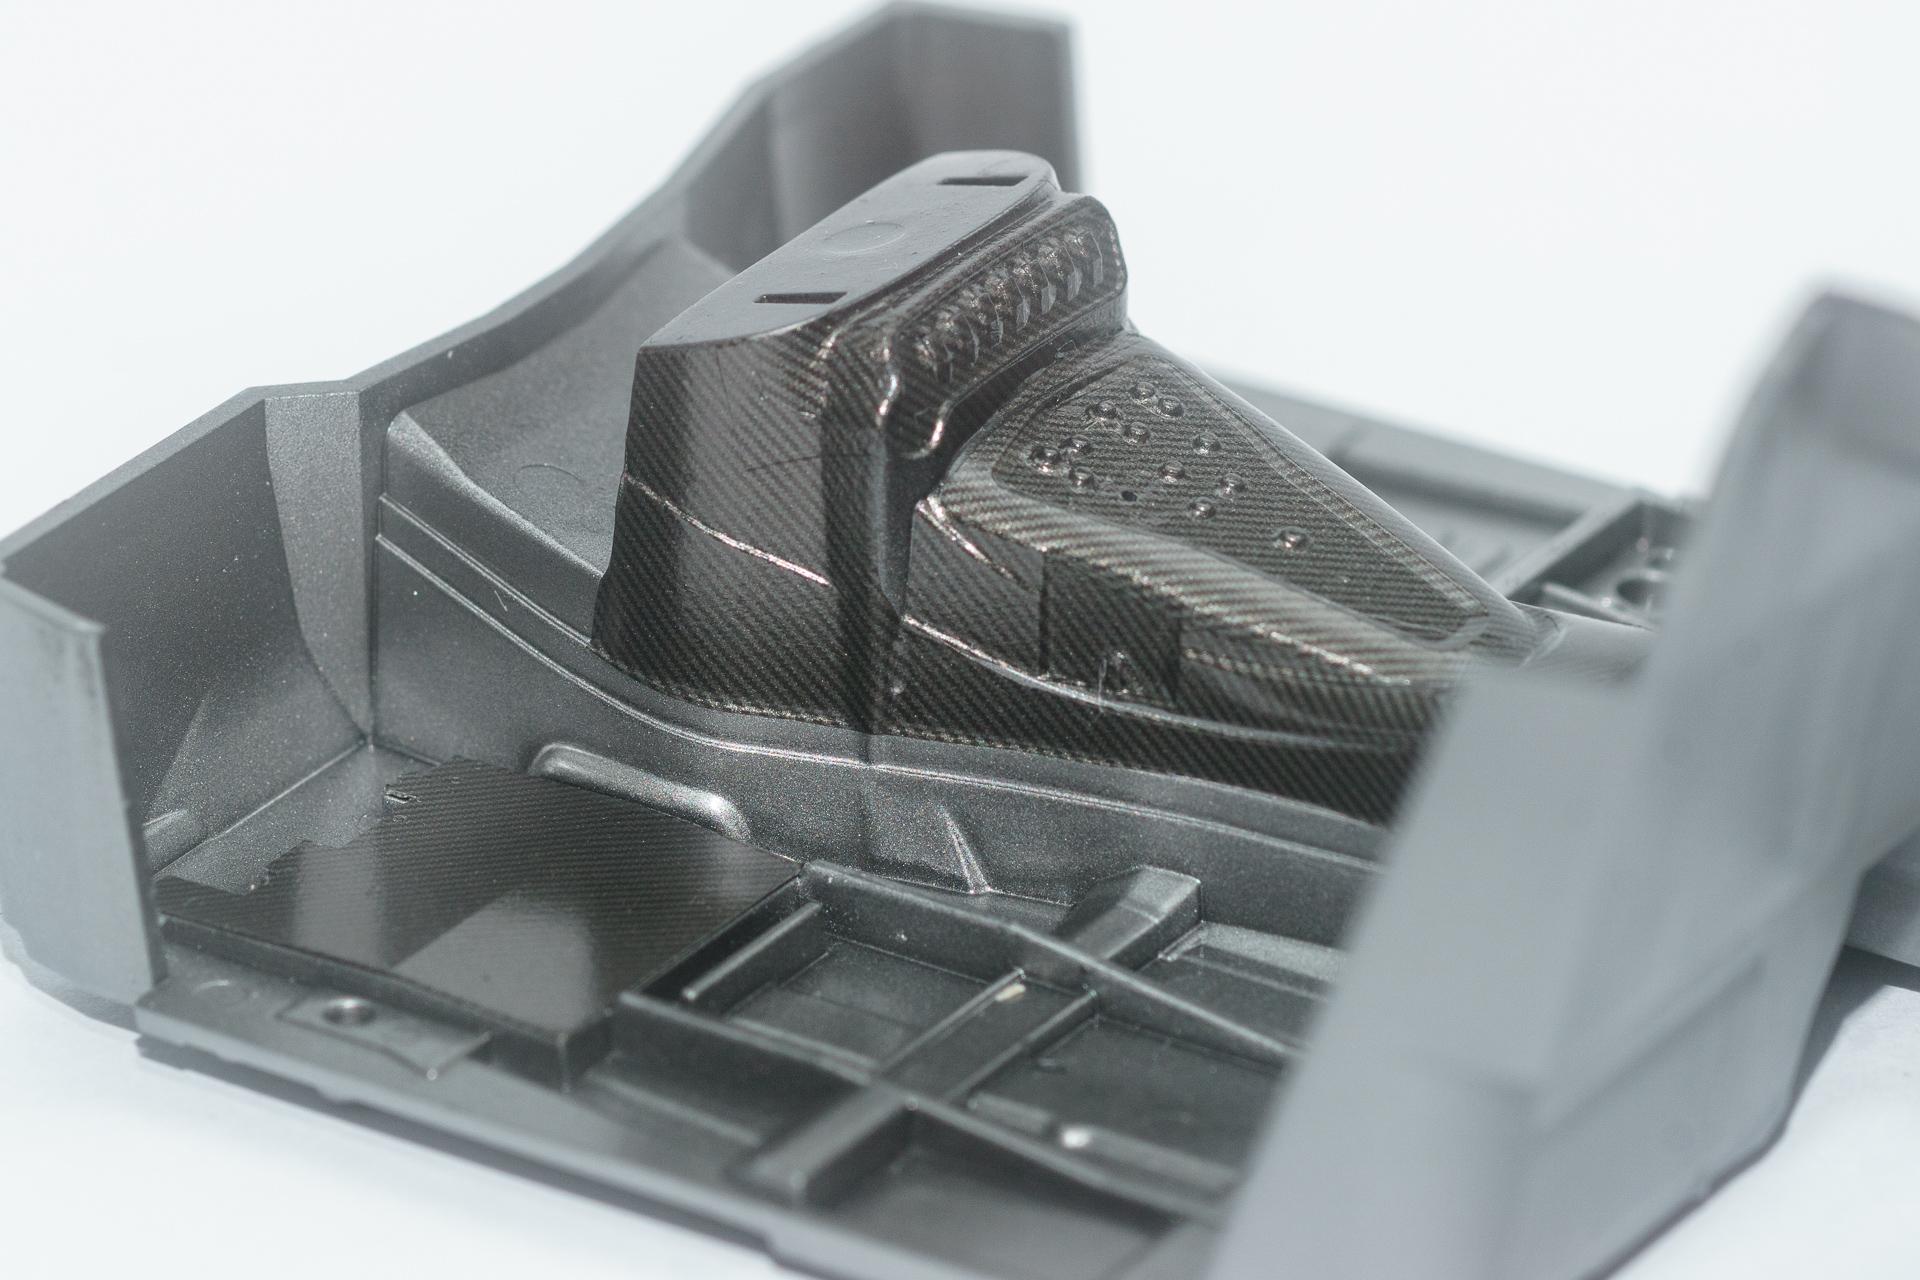
Hi all Thank you. Really apreciate it when I look what you are doing in your WIPs This week was not as productive as I originally thought, but it delivers enough material for a somewhat bigger update today First the rims were painted and received their decals and the air valves. After that the tires were airbrushed with some matt varnish to blend in the decals and to protect the labelling Then the doors got all of their PE parts The front fan was completed And the cushions on the seat have been applied after I finished the lap belts as they had to go under the cushions The rest of the seatbelts has been done as well. There is one part still missing. It's the only resin part from the PE set. I always wondered what that could possibly be, as I couldn't find it on the assembly instructions. Now that I found it I will have to paint it before I can add it to the round part of the seatbelts The exhausts got their paint as well. When applying it, I tried to do some heat stains and was quite happy with it, so I stopped to not overdo it. Now I can't hardly see them... Some more work on the interior was done as well. I know, the brake is still missing, so don't try to go on a test run yet And finally the front has been completed. I hope, that I will be able to add the clearcoat to the body the upcoming week. But before I can do that, I will have to finish the spoiler first. I painted it yesterday, but the finish was not at all as smooth as I wanted it to be, so I will first have to sand and / or polish it out before applying the decals and be ready for assembly. That's all for this week. I wish you a nice and healthy week Urs
-
Mercedes-AMG GT3
harti20 replied to harti20's topic in WIP: Other Racing: Road Racing, Land Speed Racers
Hi all Somehow I had the impression that I didn't made that much of a progress this week. When I took the pictures to show you what happened here, I was surprised how much it was though. First the carbon on the seat was touched up The first of the doors got another part from the PE set. Another will follow on the door handle. The interior got it's carbon decals. This time I'm not that happy with the outcome. Somehow I didn't manage to take proper stencils for the decals and had to do some spot repair, especially on the far side of the center console. The front got some black paint which was scraped off of the front faces right after application Then I tried for the first time to do a labelling on the tires. Once I was satisfied with it, the decals were applied. After some drying time I added a decent (ok, in some spots not so decent) wash with Tamiya's black Panel Line Accent Color. Unfortunately I waited a little too long to wipe it off, so that the wash got much heavier than planned... Finally I spent several hours today assembling the front fan from PE parts. The fan itself needs some additional work. When assembling the lower part (in the meaning of the picture) I didn't manage to align all the 0.5 mm holes over all 5 layers of PE parts, so I could no longer use the rivets provided in the set (the ones you can see in the upper part). Luckily I had some head-only rivets for an old PE set for Tamiya's Ferrari Enzo, so I used them instead. I know, they are larger than the original ones, but I preferred that over having nothing That's all for this week As I am on vacation the upcoming week I think, I'll have some progress to show in next weekend, as I can't do much than building models Urs