
landman
-
Posts
7,700 -
Joined
-
Last visited
Content Type
Profiles
Forums
Events
Gallery
Posts posted by landman
-
-
Neat lloking slingshot. Brobably a wicked driver too. Please describe the "Salt method".
-
Is the loading deck part of the flatbed kit? Nice job.
-
-
Very nice work and progress.
Thank you sir.
-
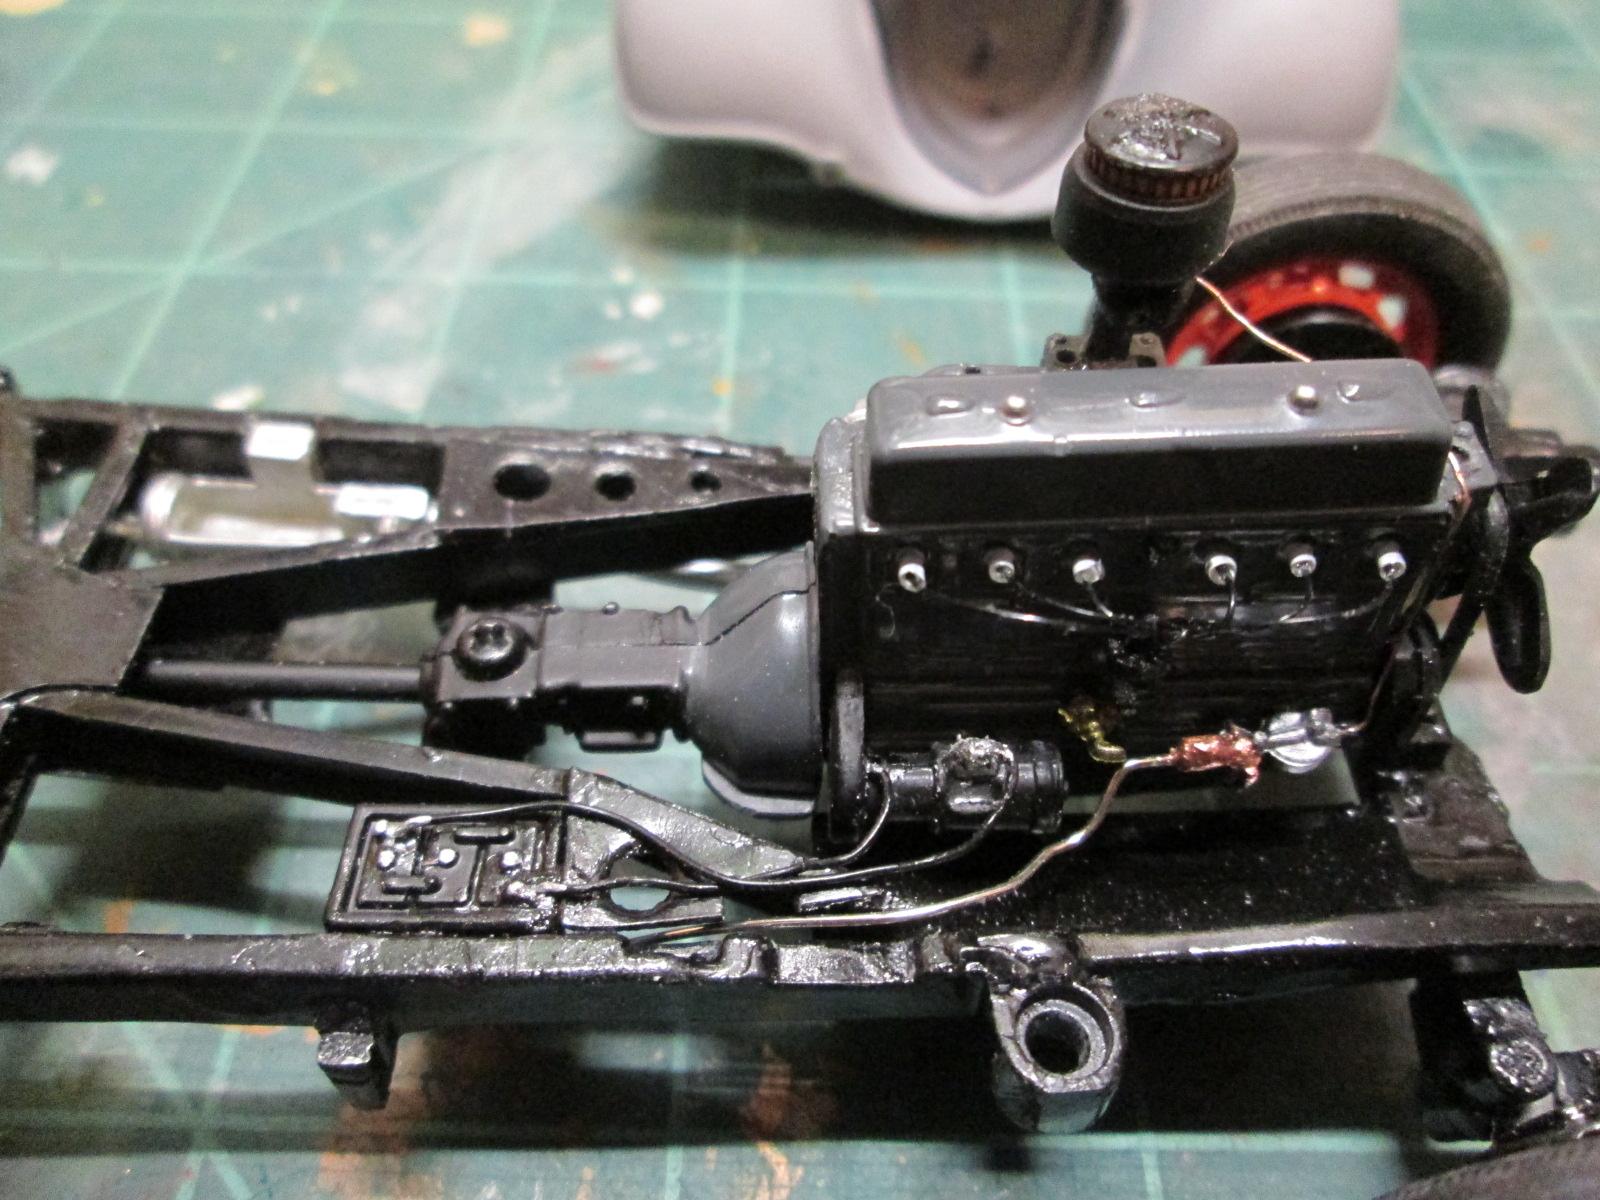
Decided to make a fuel line. Ran it inside the frame rail much as in the 1:1. Hooked it up to the fuel pump.

These are the battery cables on the 1:1. I'm going to try to add some to the model.
While I was taking all these close up pictures I noticed the joint seam between the two halves of the engine and the molding seam along the exhaust system. I guess it is too late now but that would be something to remember next time.
-
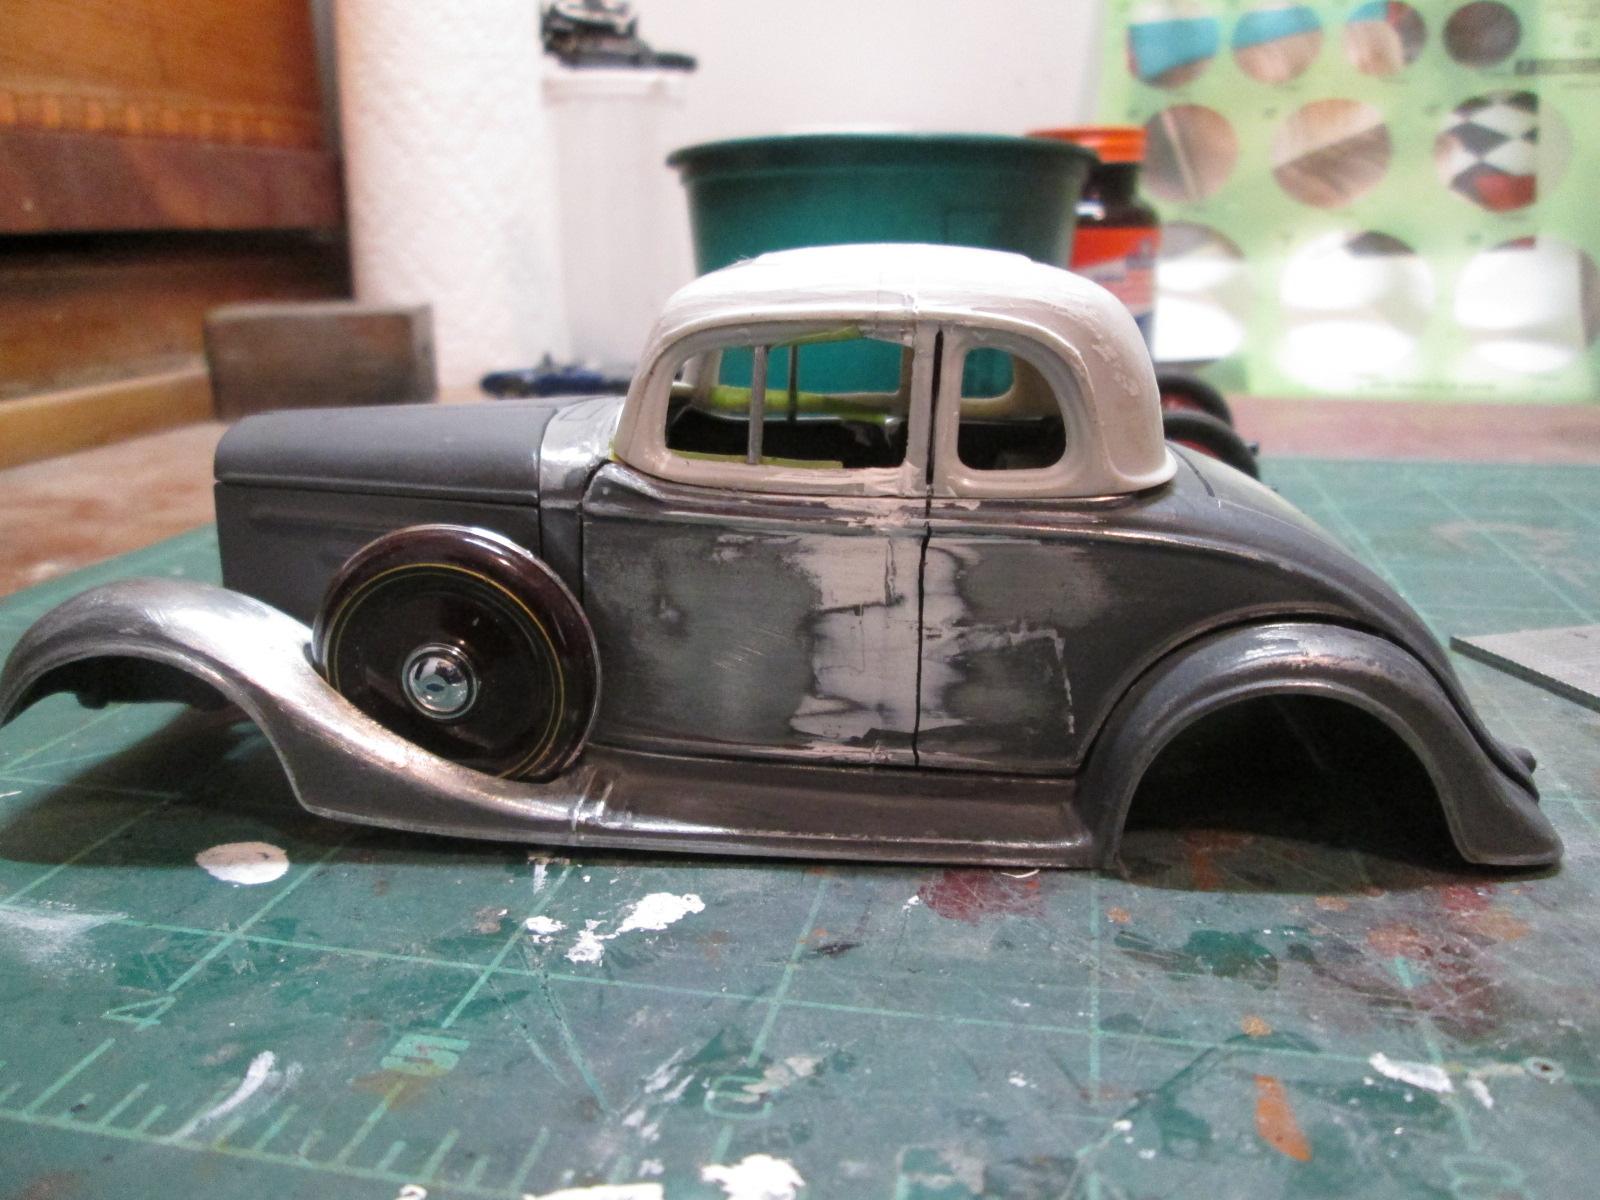
Began filing away at the windshield lower corners.Can't do much more until the roof is glued to the body.
Added the engine, driveshaft, exhaust and battery to the chassis.
Highlighted the battery terminals, fuel pump, starter switch and carburetor dashpot.
-
I bet you can't tell what's different here except the fresh primer. There's a couple of hours of filing in there to remove the reveal that ran above the top of the door.
-
Very informative. Excellent guitar too. I'm going to start by trying to tune up my old Badger 350, or at least to troubleshoot it. Maybe all I need is another nozzle. And I will follow the advice here and select one for primers, and another for colors and maybe a third one for clears.
-
Thanks mike. They had it from 34 to 37 I think then went to a more conventional arrangement. It was a design by André Dubonnet, a French designer from the wine family. It is an actual independent suspension but it had some weak points which wore and caused leaks. They rode very well but were a pain to maintain. On the 1:1 I changed the troublesome needle bearings for bushings. No leaks yet.
-
-
Back in the day I had purchased a racing Kenworth. It had a twin turbo V-12 in it. I had installed the V-12 in a regular tractor and displayed it with the lowboy & Cat D8 dozer. I haven't seen that racing kit anywhere on here or on eBay. Is it that rare?
-
That has happened several times now. I write something below the quote and it doesn't show up. Anyway, I said thanks Jeremy. This is a steep learning curve for me.
-
Wow, the car looks great Pat! the model when finished looks like it will be equally as great, nice workmanship, bravo!!
-
What scale is the big Cobra? I seem to remember 1/16.

-
This makes my project look like a 3 year old's attempt at modeling. Fascinating stuff, Jeremy.
-
Dug out the rest of them tonight. They seemed the worse for wear towards the bottom of the box. There's some terrible ones, some I had forgotten, like the little Alfa. A few fairly nice ones. I think my best is the Bobby Isaac Daytona which would be fair to middlin'n here. So lots of missing mirrors etc. Some are definite rebuilds. Some might be offered on the trade forum. Plenty to keep me busy for years to come. I also have to built shelves and more shelves. I won't post them all here. Here's al ink to where they are:
http://s1176.photobucket.com/user/landman2/library/Models?sort=3&page=1
-
Scribed the new door opening with a razor saw. Don't think it did the saw any good.
Glued little blocks to the lower insides of the windshield. They will be radiused to look like the 1:1.
Tried to paint a whitewall using a circle template. Didn't work. Will try later. The handbrake lever has a handle on top of it that isn't on the 1:1, so cut that off.
-
Thanks Steve. Another question: what is an Ohana? Sounds Hawaiian.
-
The only thing I'll say is one of the reasons I use a siphon feed air brush is the fact that I use a lot of MCW paints. Pop the lid onto the jar, & you're good to go. When I'm done, I don't have to clean cups or jars, just the brush. Plus any detailing paint I have left, I store in airbrush jars. Keeps forever & when I'm ready to use it again, Just screw on the lid & go. One of these days I would like to get a cheap gravity feed brush just for the small quick jobs when I don't need much paint or where I'll be doing several color changes. But for painting bodies & such, there's nothing wrong with my trusty old Badger. By the way, I run MCW "airbrush cleaner" through mine all of the time. It's some pretty wicked stuff! If it doesn't destroy the seals, nothing will! Steve
MCW?
-
Added a piece of plastic to build up the bottom of the windshield.
Sometimes it isn't the big stuff that takes time. Marked the location of the vent window divider. Made them out of 18 gauge brads. Filed notches so they'd sit in a fairly realistic position.
Marked the new door line. Now I have to build up my courage to start cutting.
Impcon is correct in post #89 in saying Ishould also change the shape of the rear quarter window. There is about 1/8 to 3/16 to play with. For that I'd need another '34 Ford roof.
-
In order to see what I'll be doing, I bought a light for my booth.
-
whouw just loving this build <3 whow
Coming from you Richard, this is high praise indeed! I am absolutely awed myself by your garage diorama.
-
-
Any kit, conversion Cab or diecast made of the early 50's International R series.
.JPG.c906e9322d5486c7378cbbb5dcadbc2d.JPG)
.JPG.22fb44b341b820ad8412864b4cd63f59.JPG)
.JPG.eaaf630265fb766e0775dccbe50d1c1c.JPG)
.JPG.a5ae369d52aabe646f6b36519066152a.JPG)
.JPG.551ffd0974fba84deb9c5fd245eb67d1.JPG)
.JPG.a8a5ec2881c373966c162acb4a1654ff.JPG)
.JPG.794308b97dcc1bda3c97c8261b98572a.JPG)
.JPG.cc8f248101dd8963558177c43bcc58c2.JPG)
.JPG.1dbc5843adcff4cf8c7e2e9745799566.JPG)

.JPG.059262b73021ccc0cf9f5db62df58a2b.JPG)
.JPG.882c67cf5831668c55fce7c89399d21e.JPG)
.JPG.f12a5c87169b06681e2fcf411e270377.JPG)
.JPG.243dd97211121039cd236196cfc258c0.JPG)
.JPG.e1e6e4d12b320c8577aa21038a7eaf4f.JPG)
.JPG.61489315efcb863401ece6067ef4b56c.JPG)
.JPG.aa211a50cc3cbf1aab4a413babaa2ce8.JPG)
.JPG.0a9e55e8ed04230ab50259ec2949f02a.JPG)
.JPG.c23cd47f9eb1066c8356a4f17d914ef3.JPG)
.JPG.c9849631302aa9f84495e7dd0f9804a8.JPG)
'35 Chevy ...Chopped three window coupe
in Model Cars
Posted
Clifford, I'm working on something similar. Hope it turns out half as nice as yours. Do you mind if I bug you for pointers from time to time?