Tarkmucker
-
Posts
105 -
Joined
-
Last visited
Content Type
Profiles
Forums
Events
Gallery
Everything posted by Tarkmucker
-
Once I get the new flux in the mail I’ll probably put this back on the bench so I can make the hinges for the rear door.
-
Hot Rod Hauler
Tarkmucker replied to Tarkmucker's topic in WIP: Model Trucks: Pickups, Vans, SUVs, Light Commercial
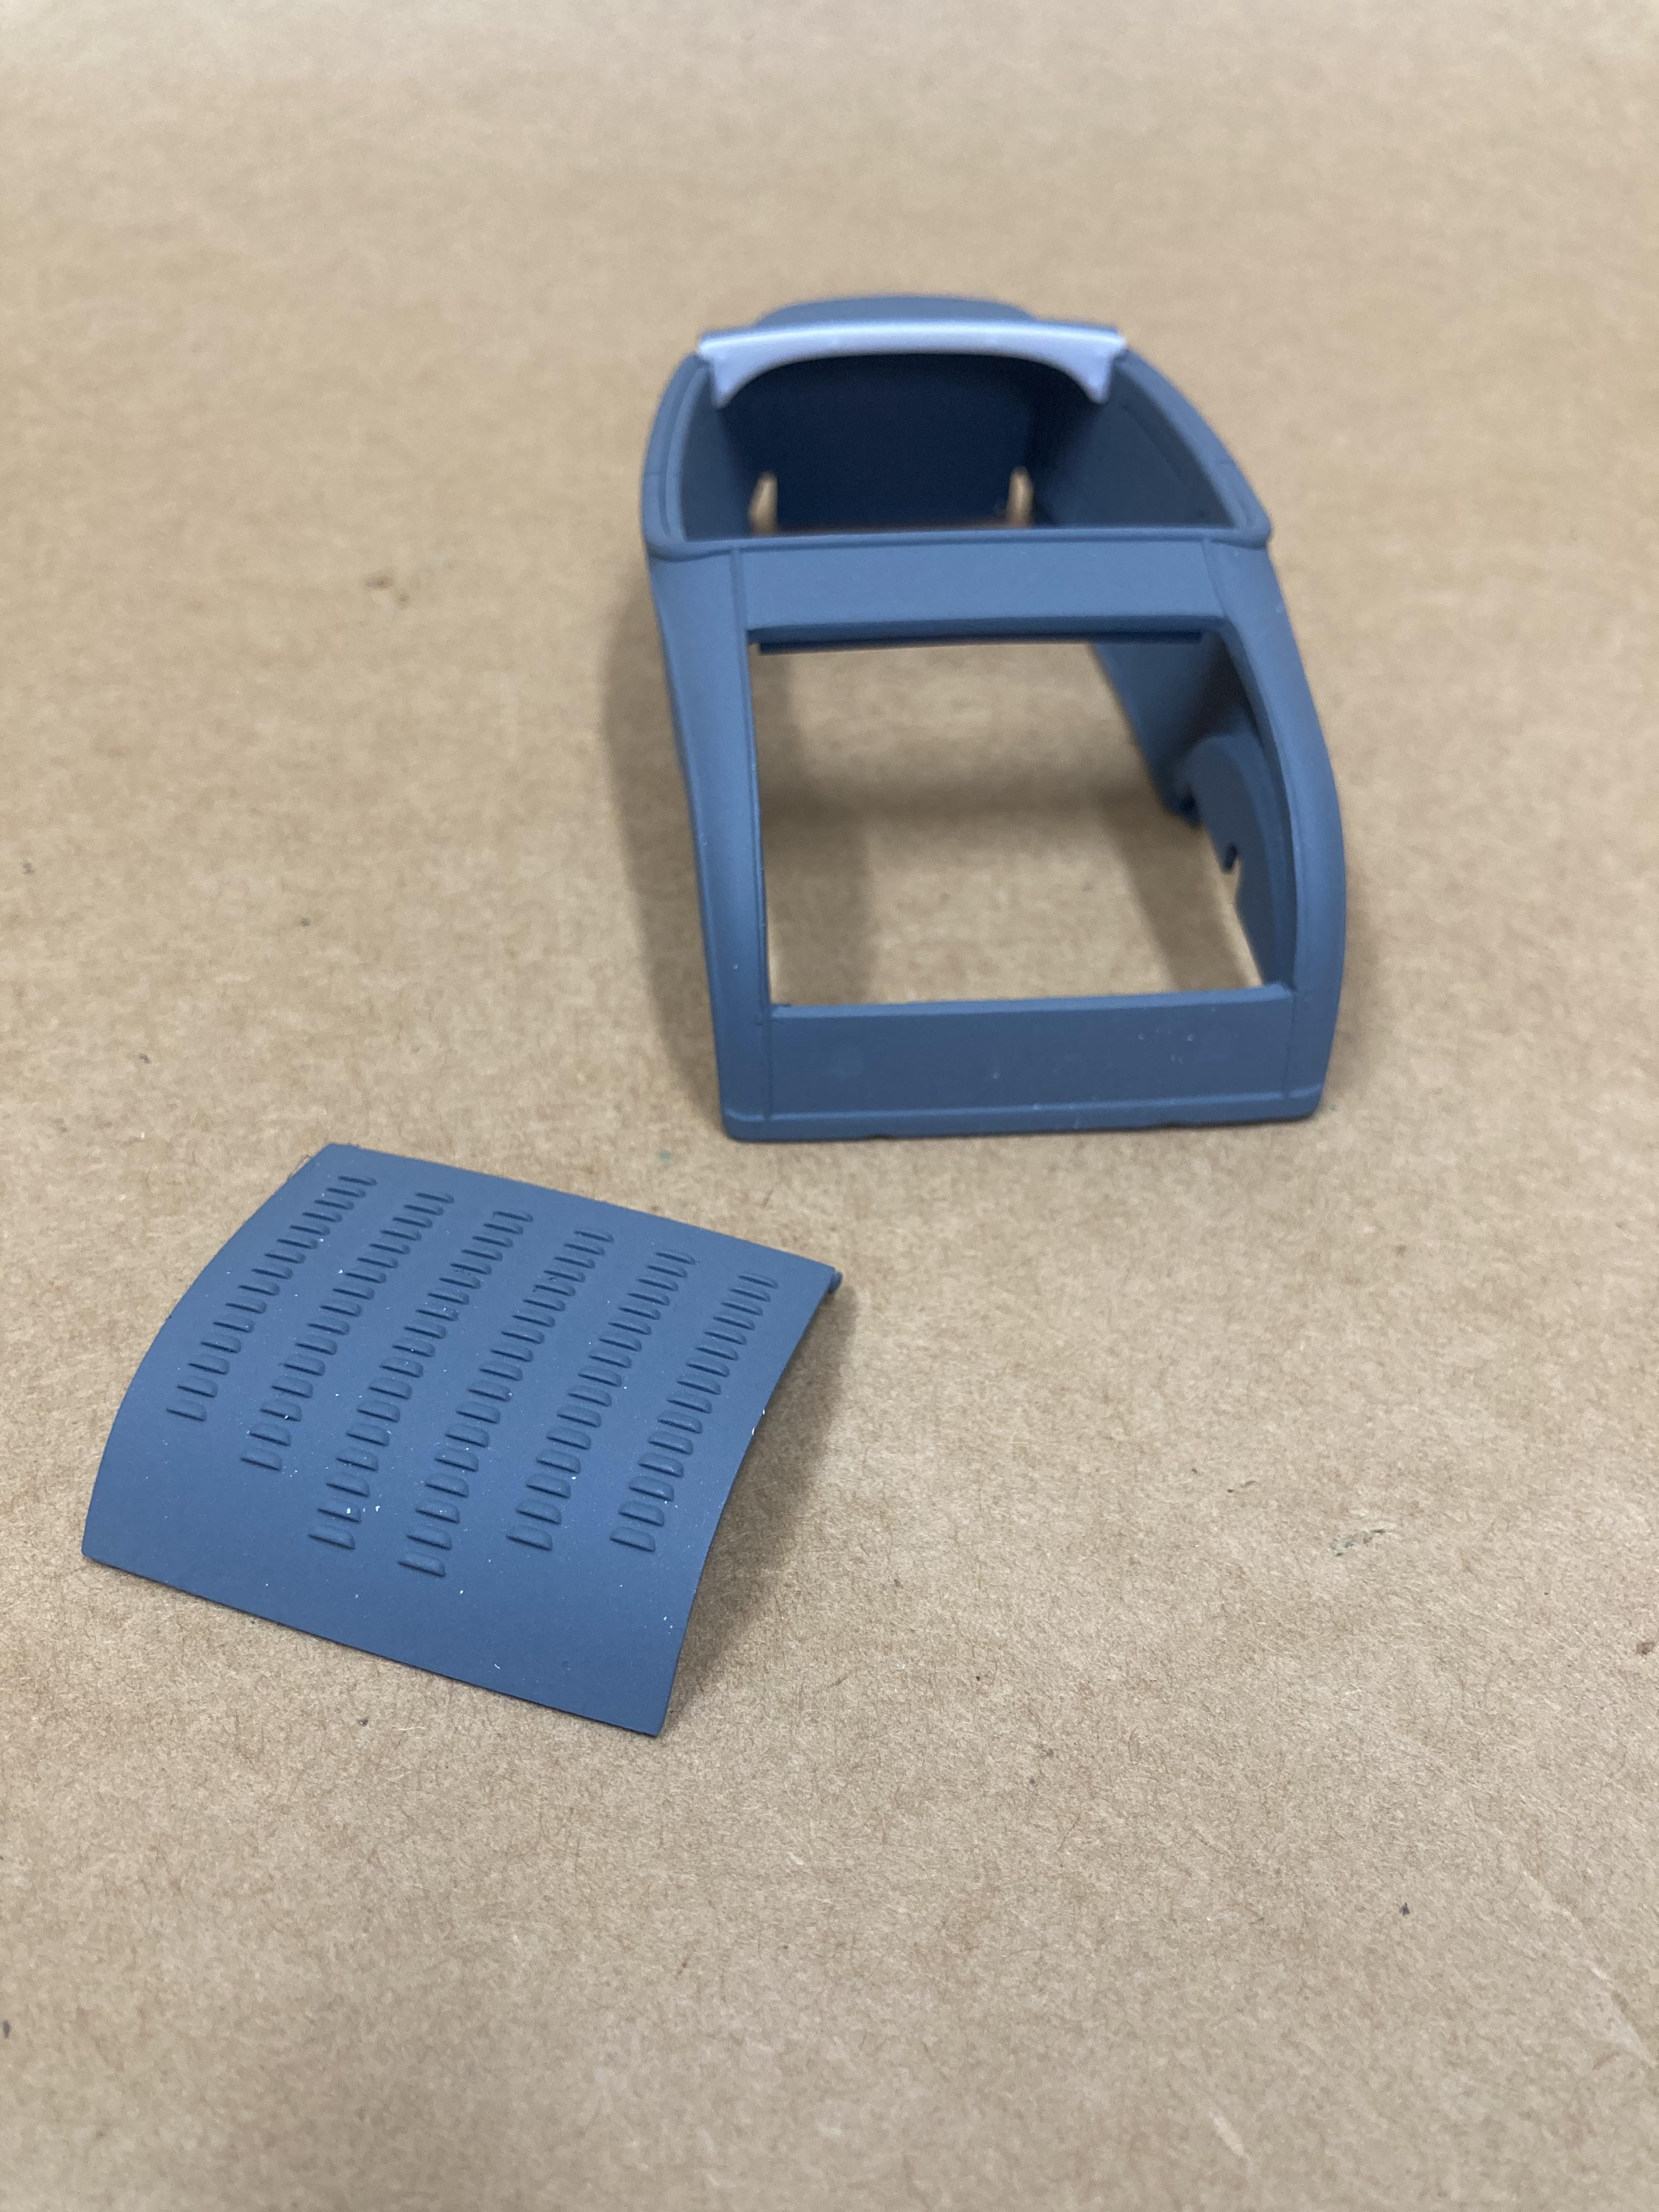
That’s a damn fine looking hauler. I like the ribs in the sides a lot. I’m kinda aiming for more of a modern slammed hauler on bags but this is on the back burner right now while I wait on some stuff to come in the mail. You got it man, always great parts. I’ll be needing a few more sets of these for other builds. And maybe a couple engines -
Hot Rod Hauler
Tarkmucker posted a topic in WIP: Model Trucks: Pickups, Vans, SUVs, Light Commercial
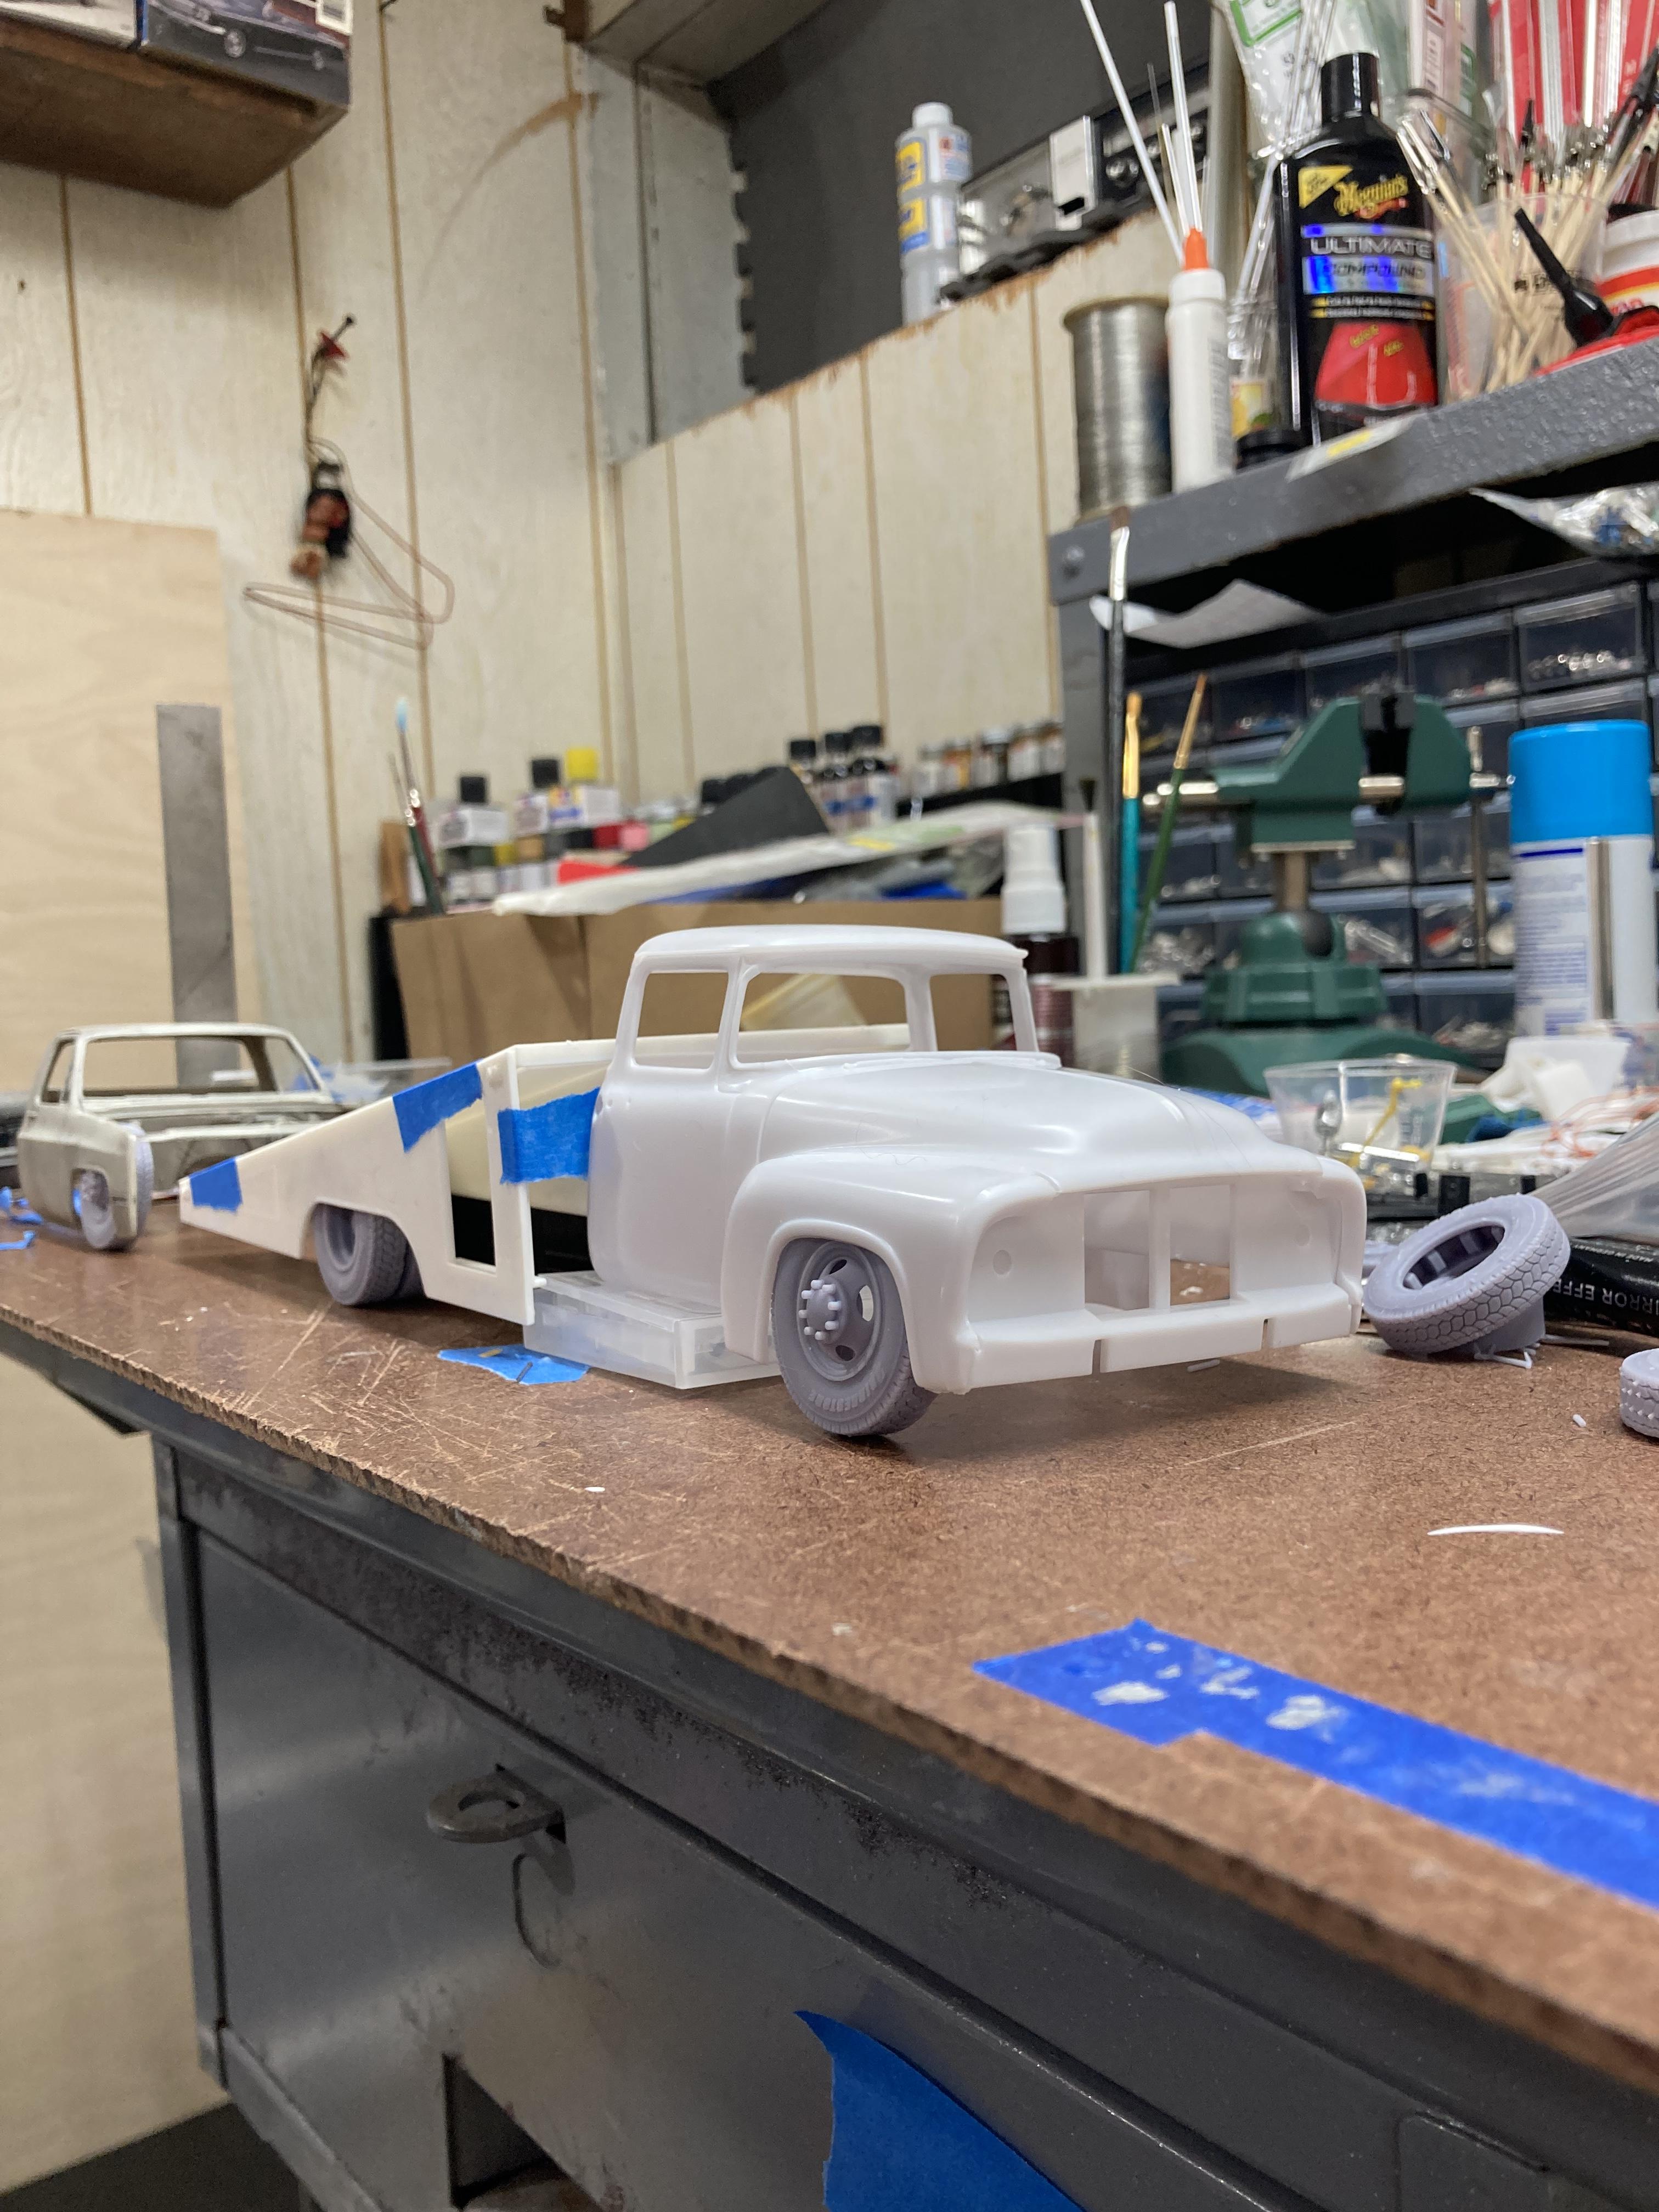
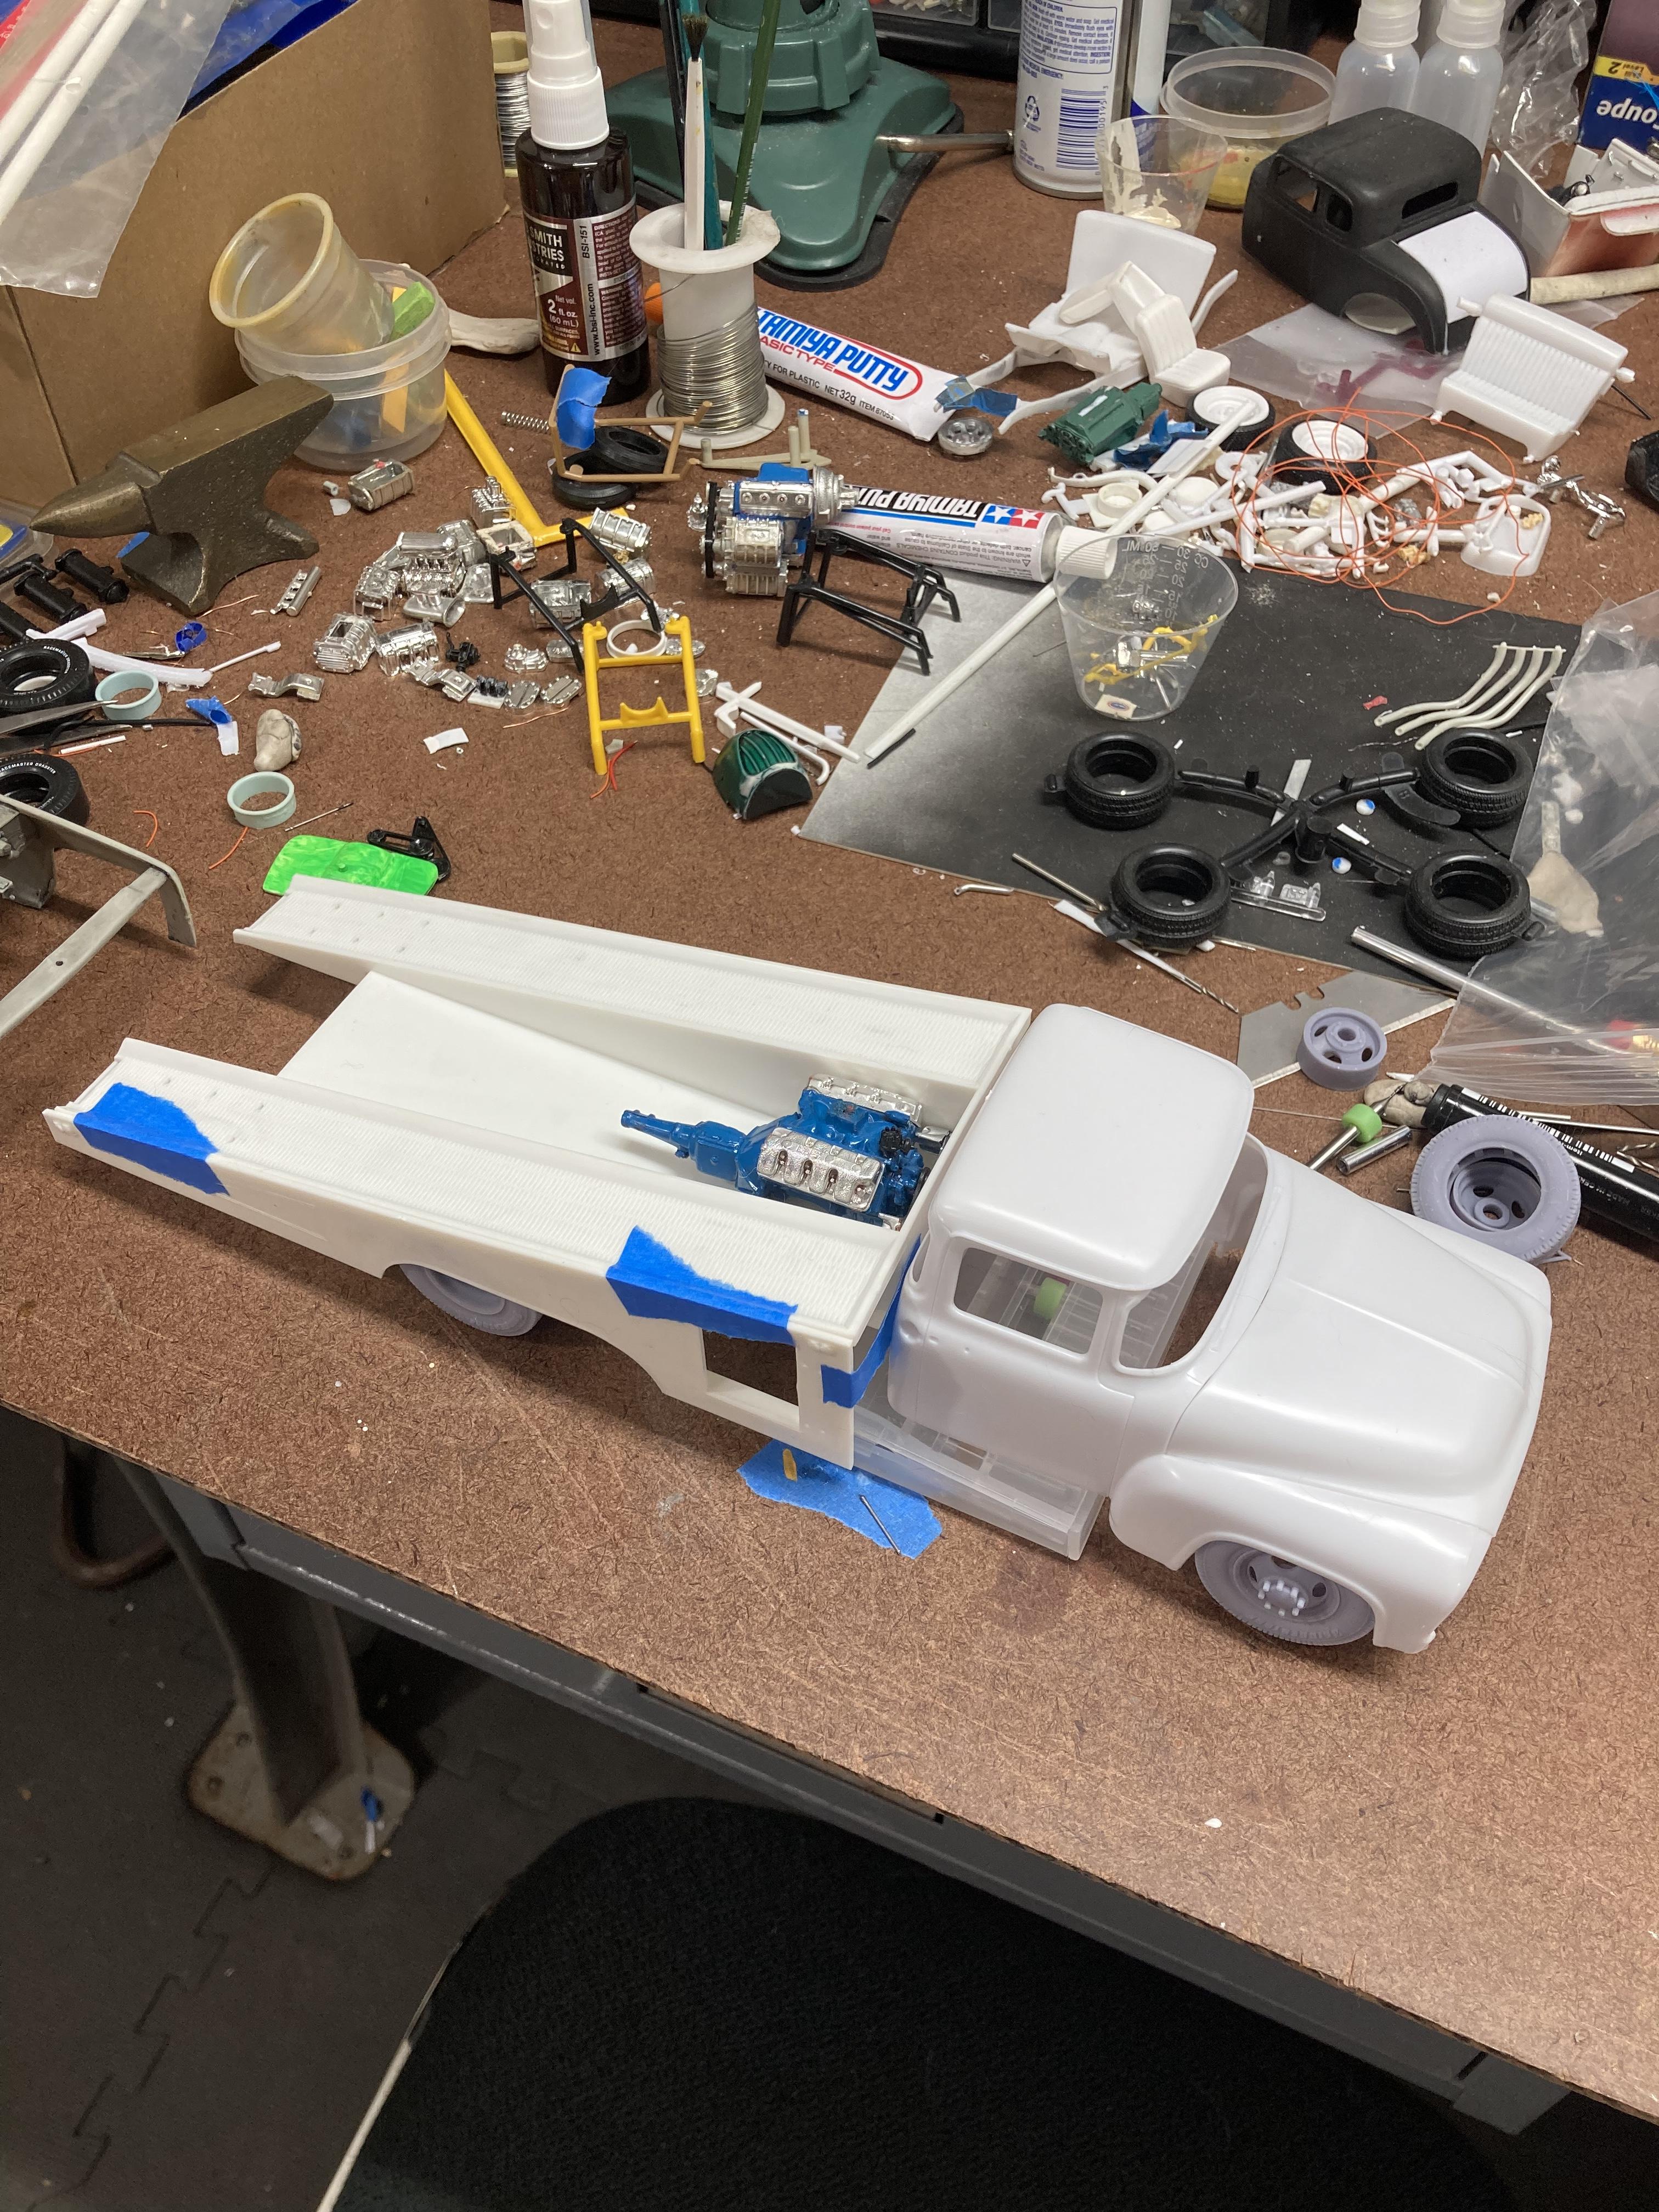
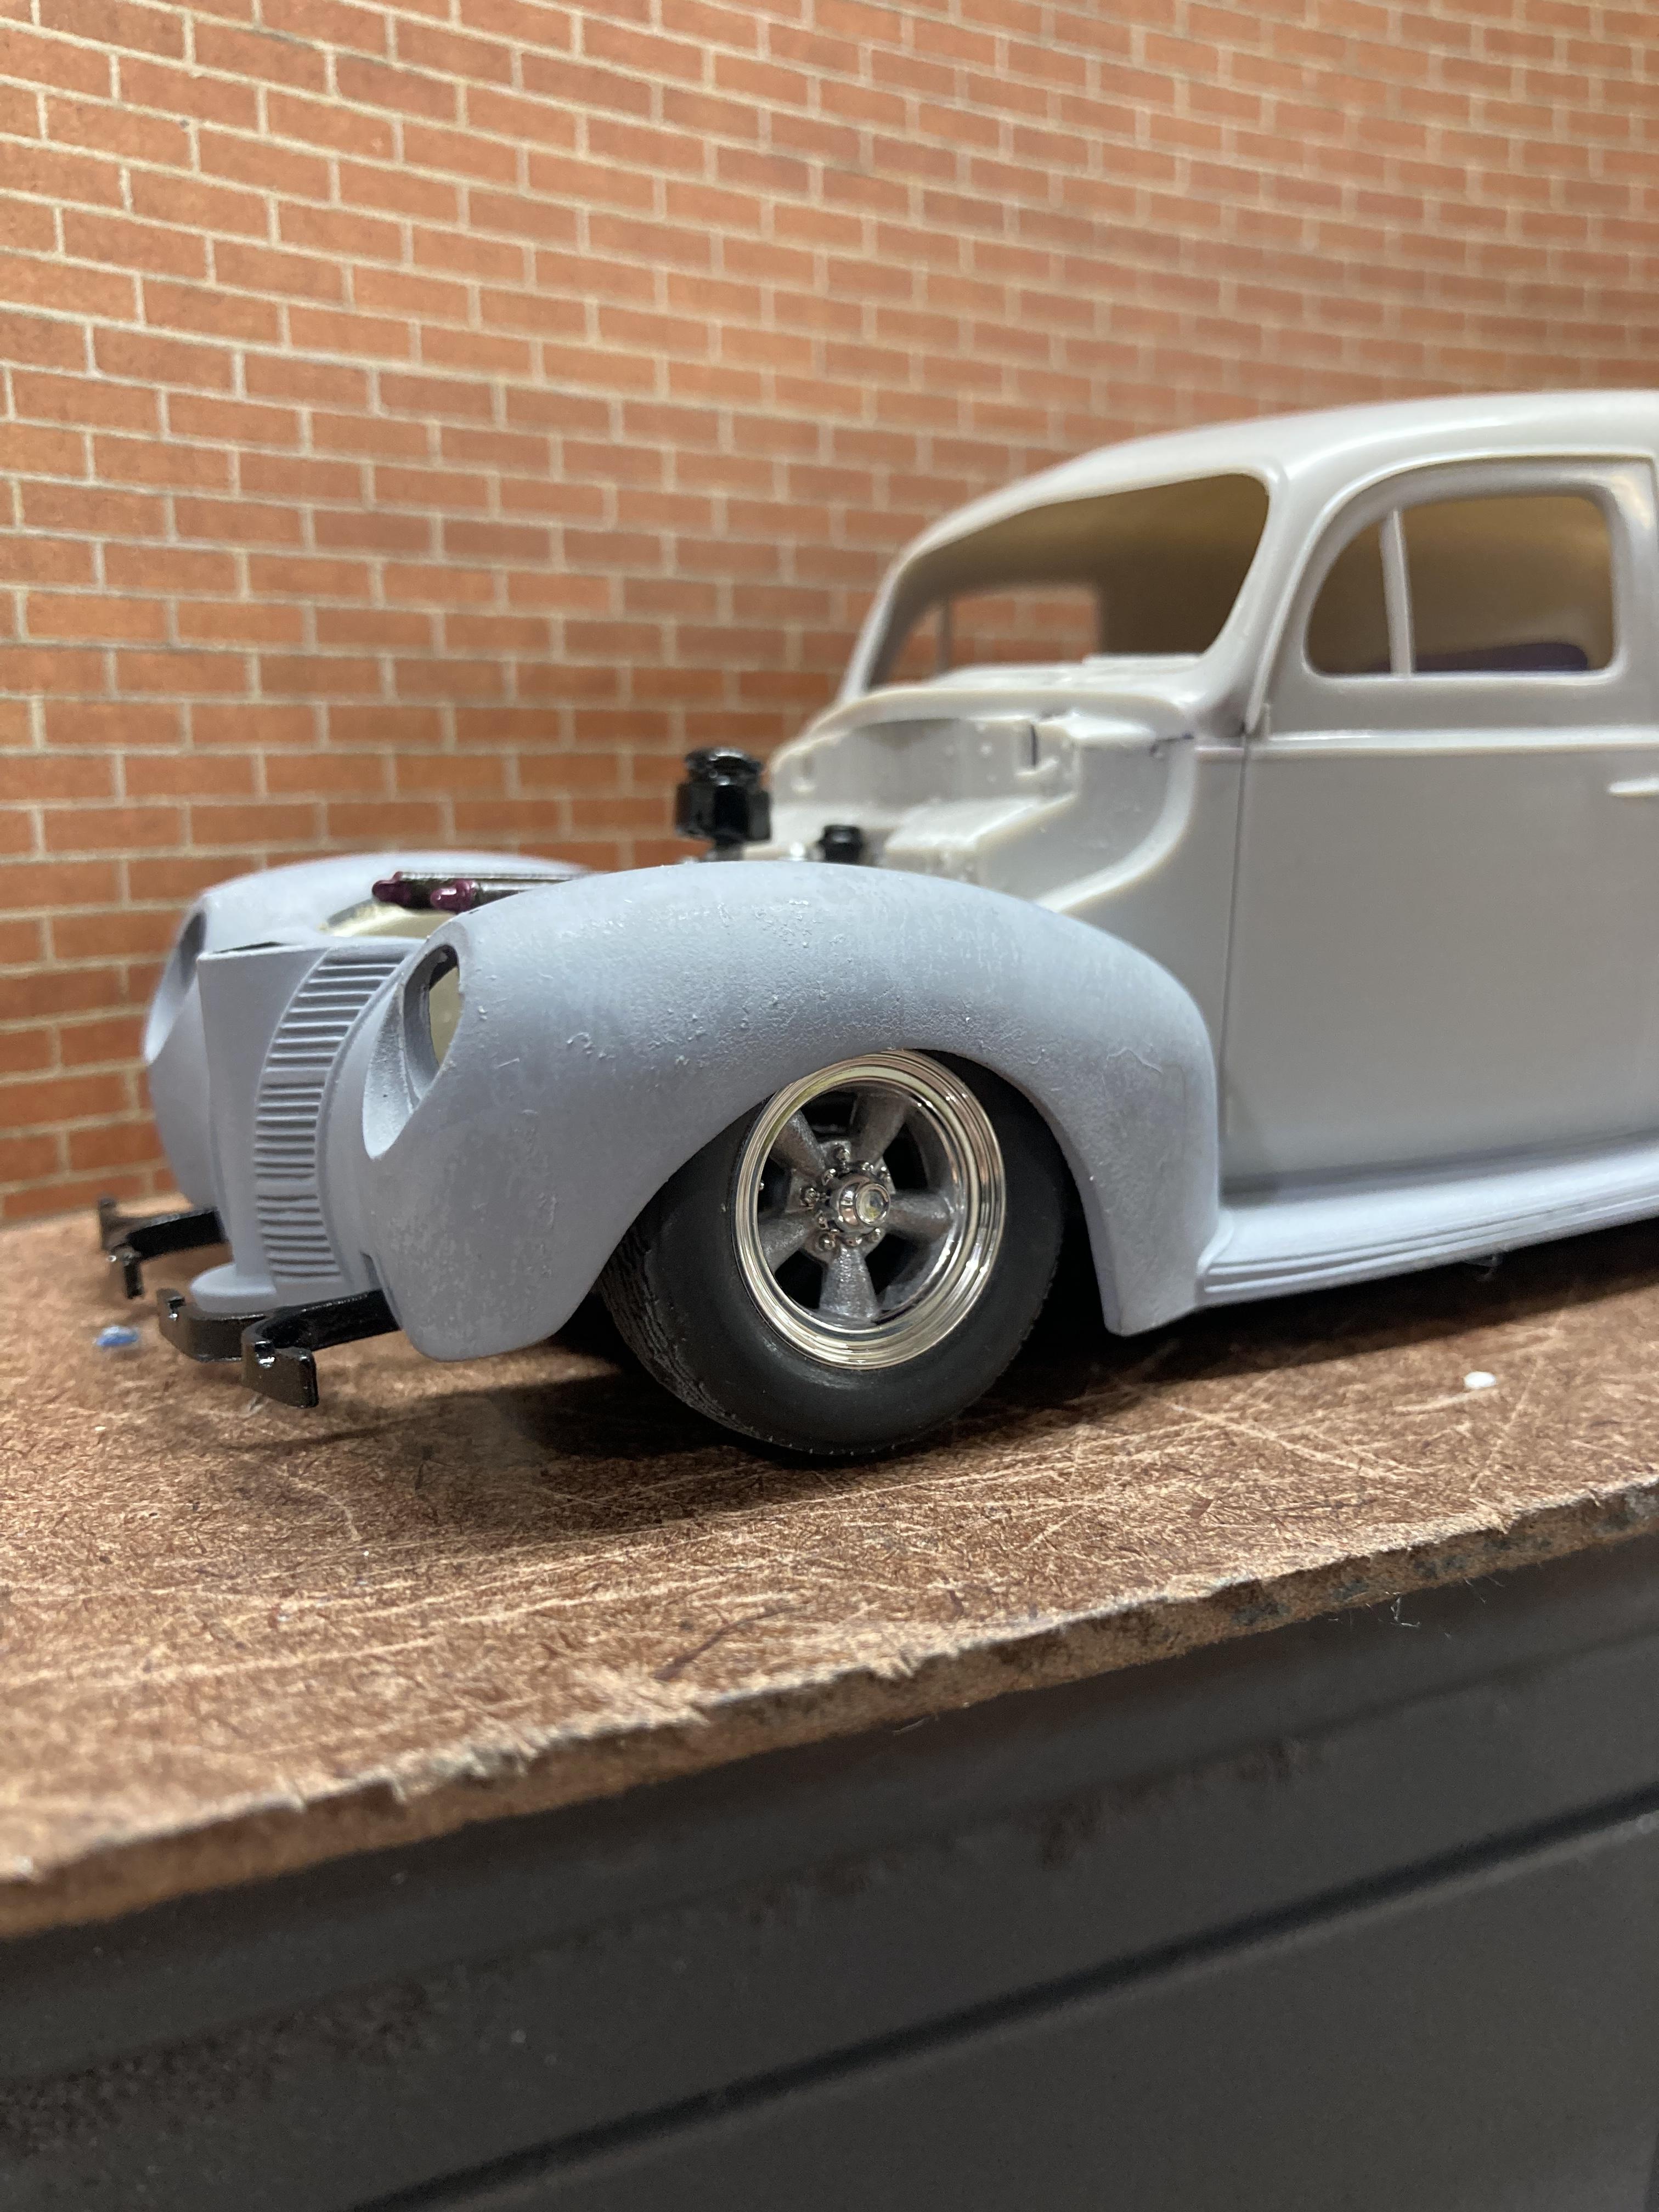
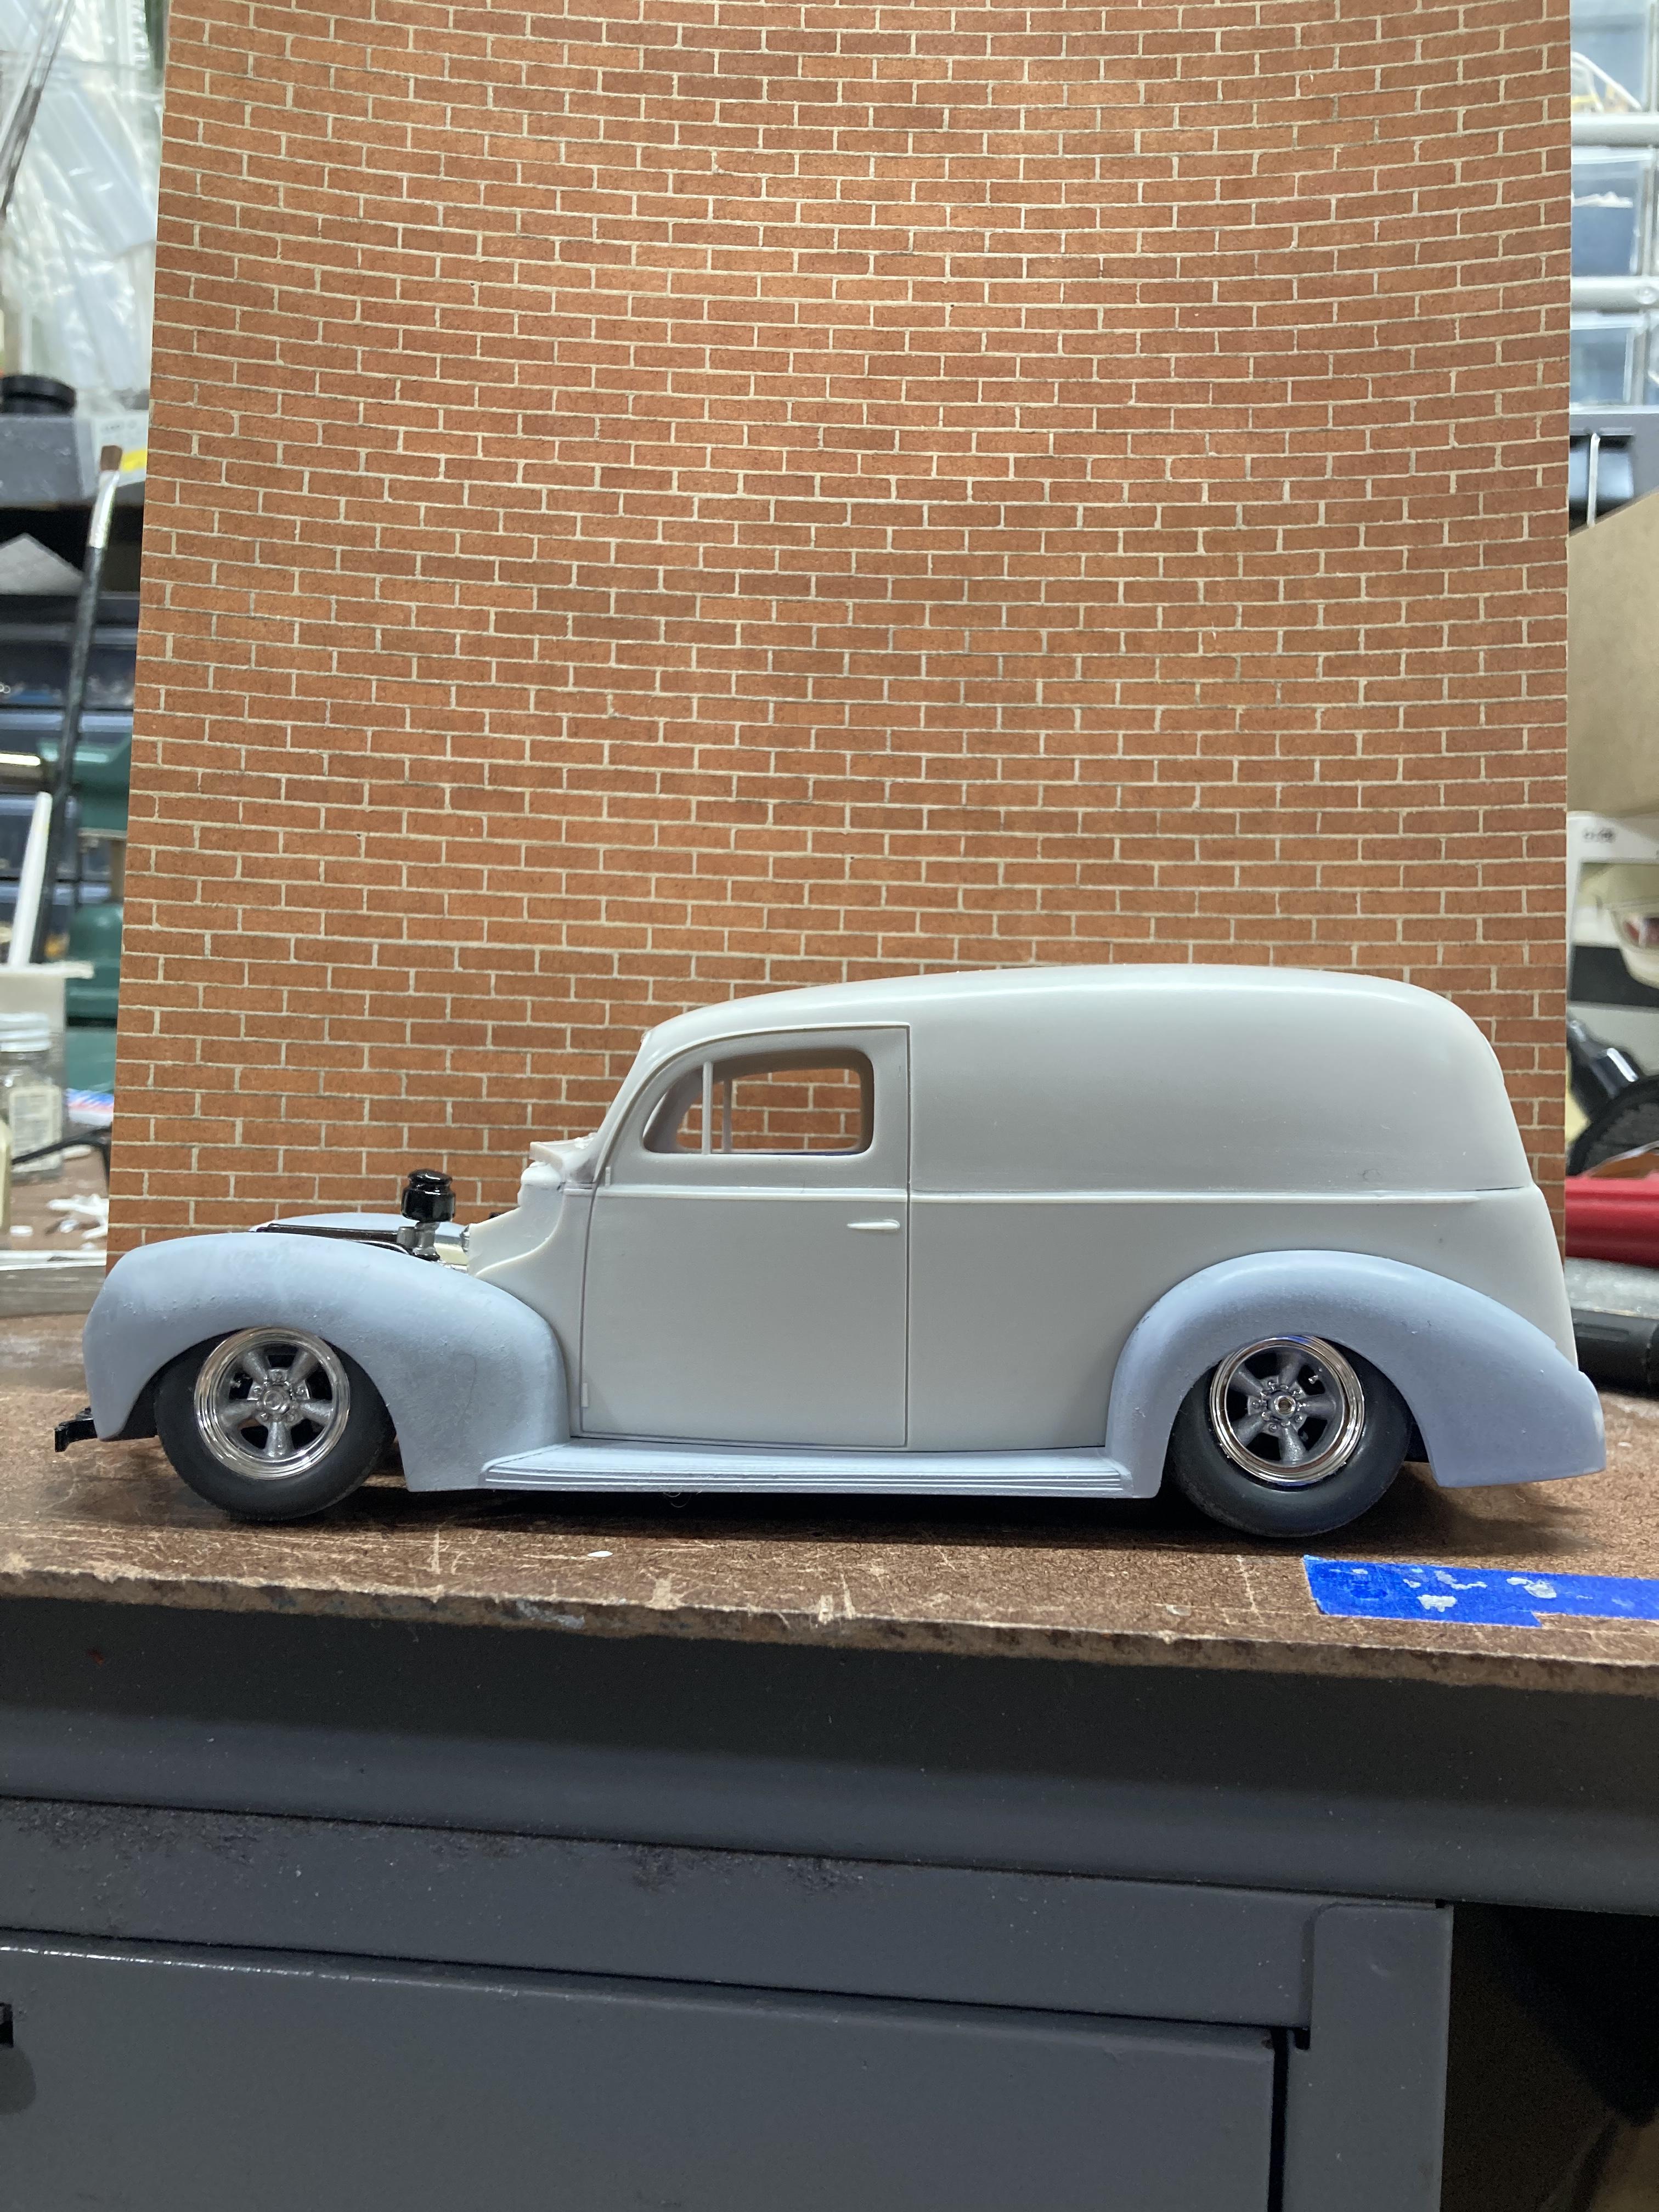
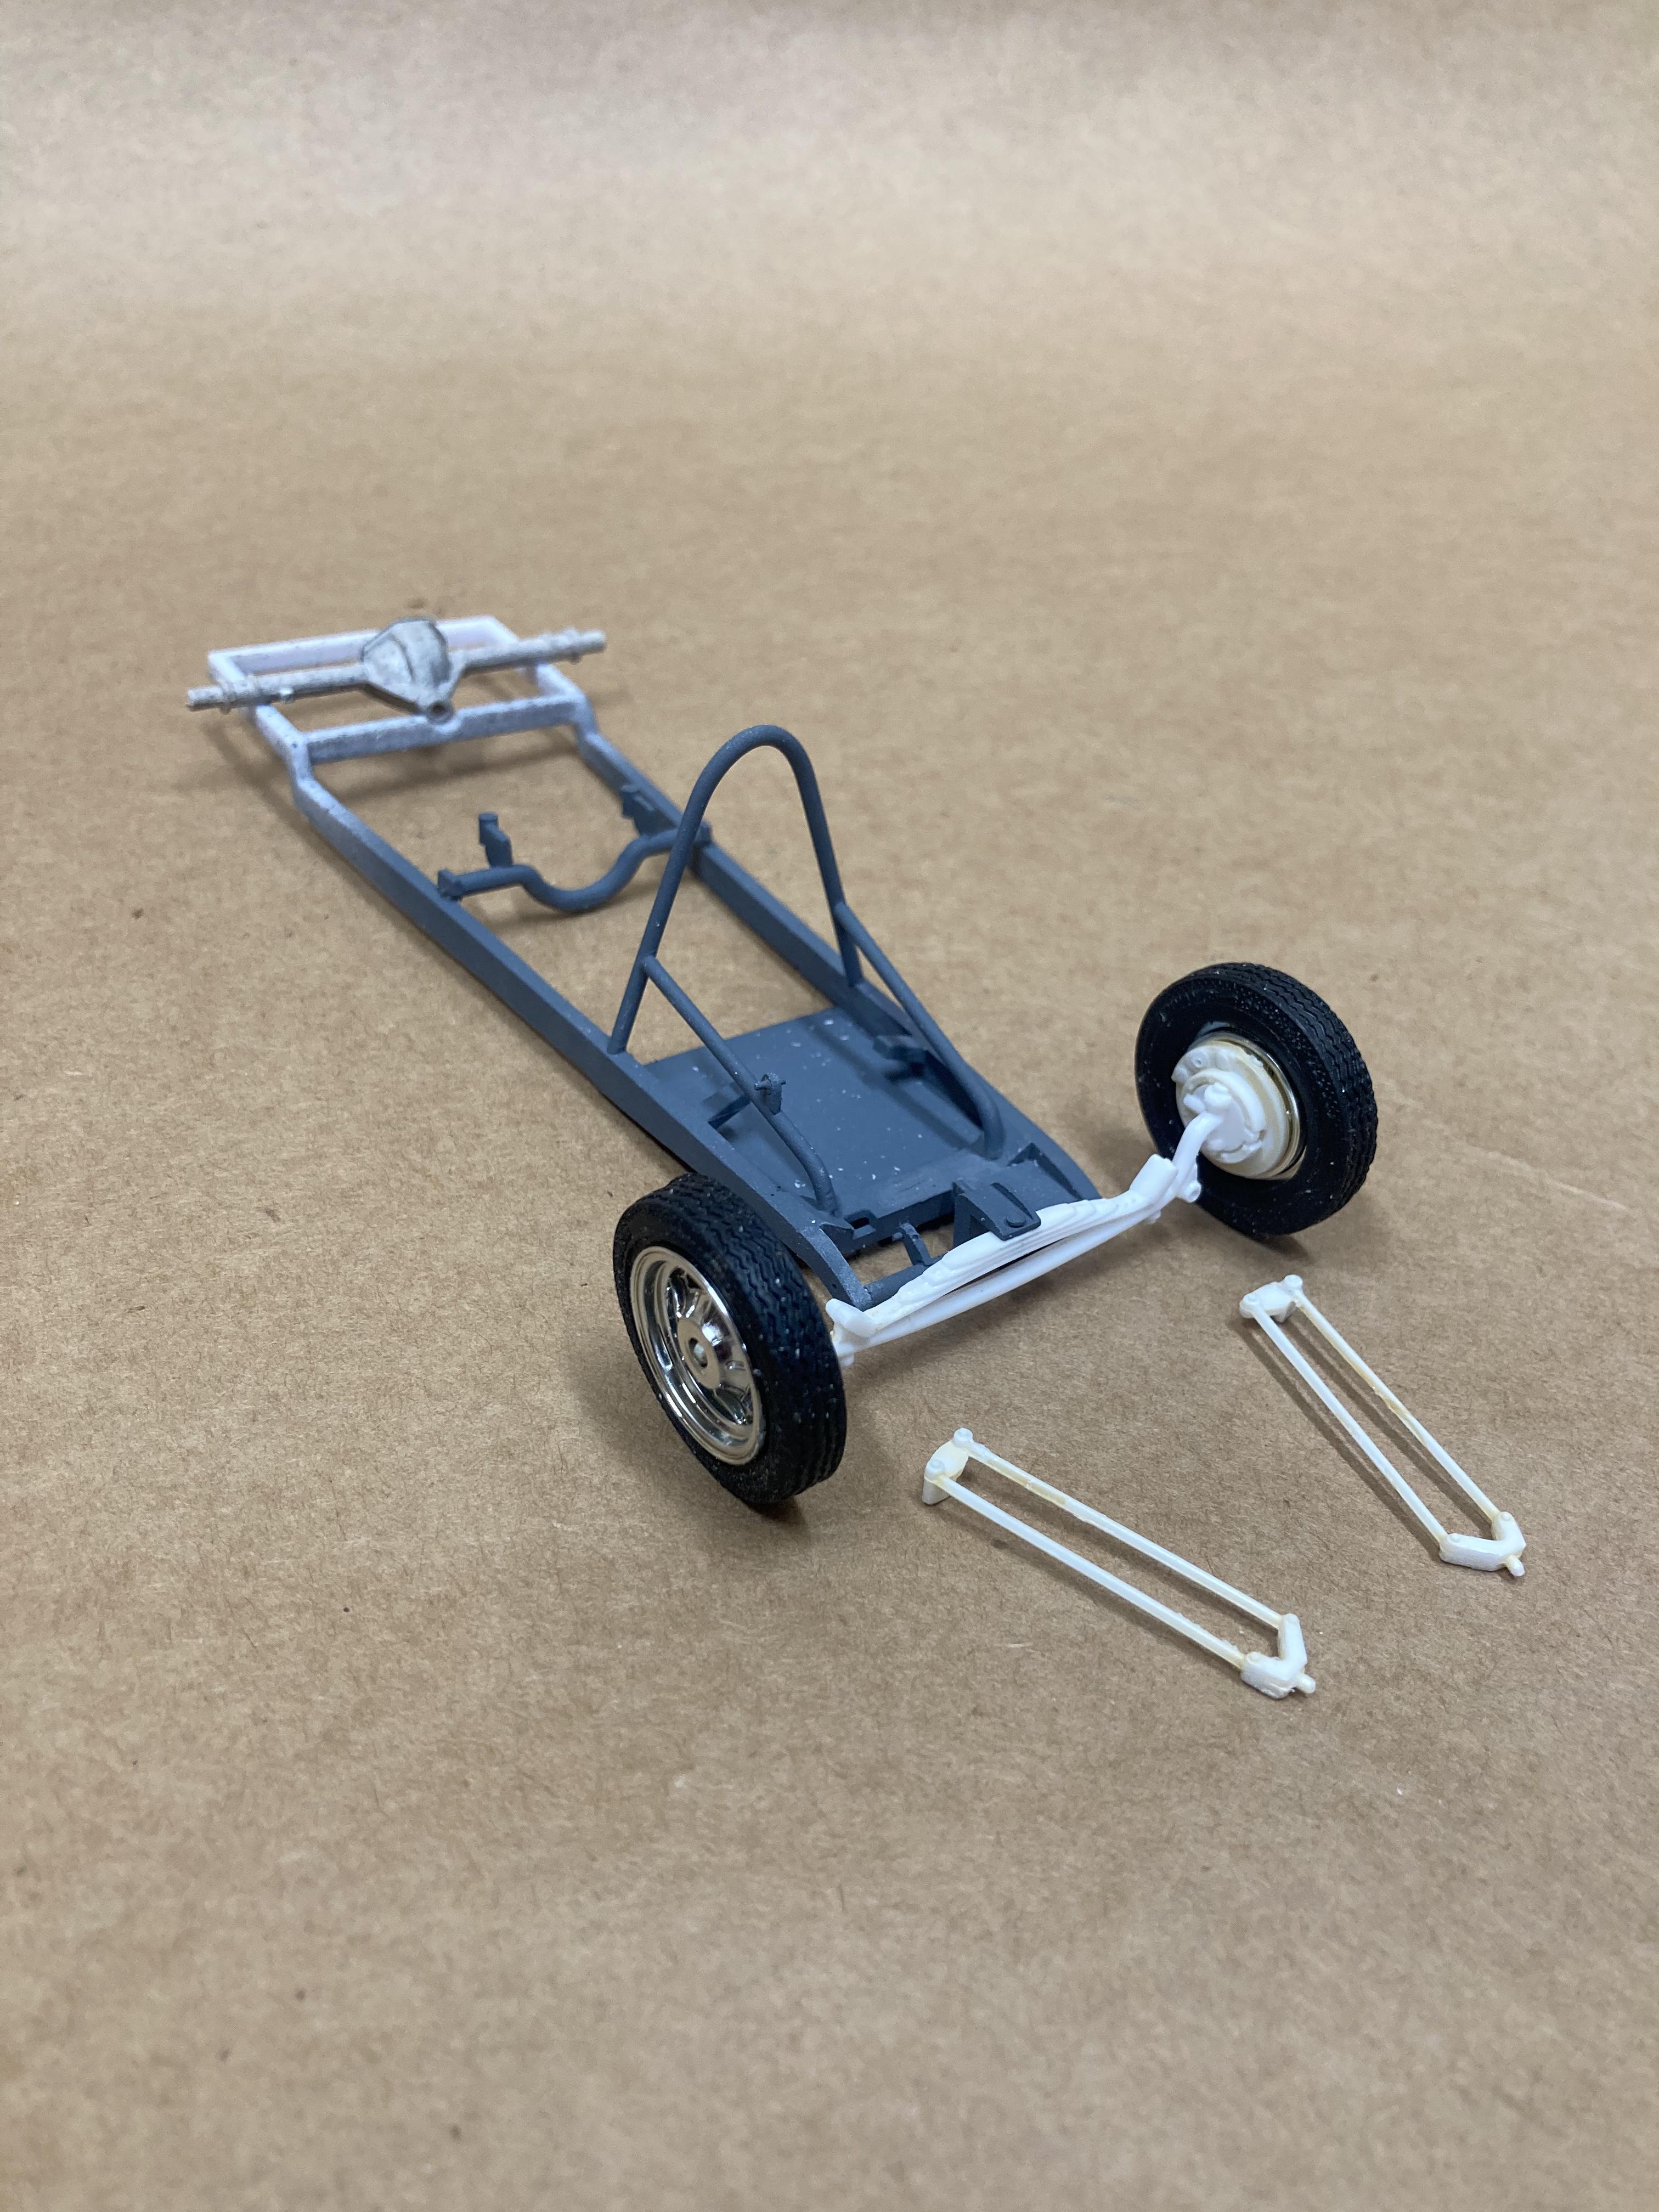
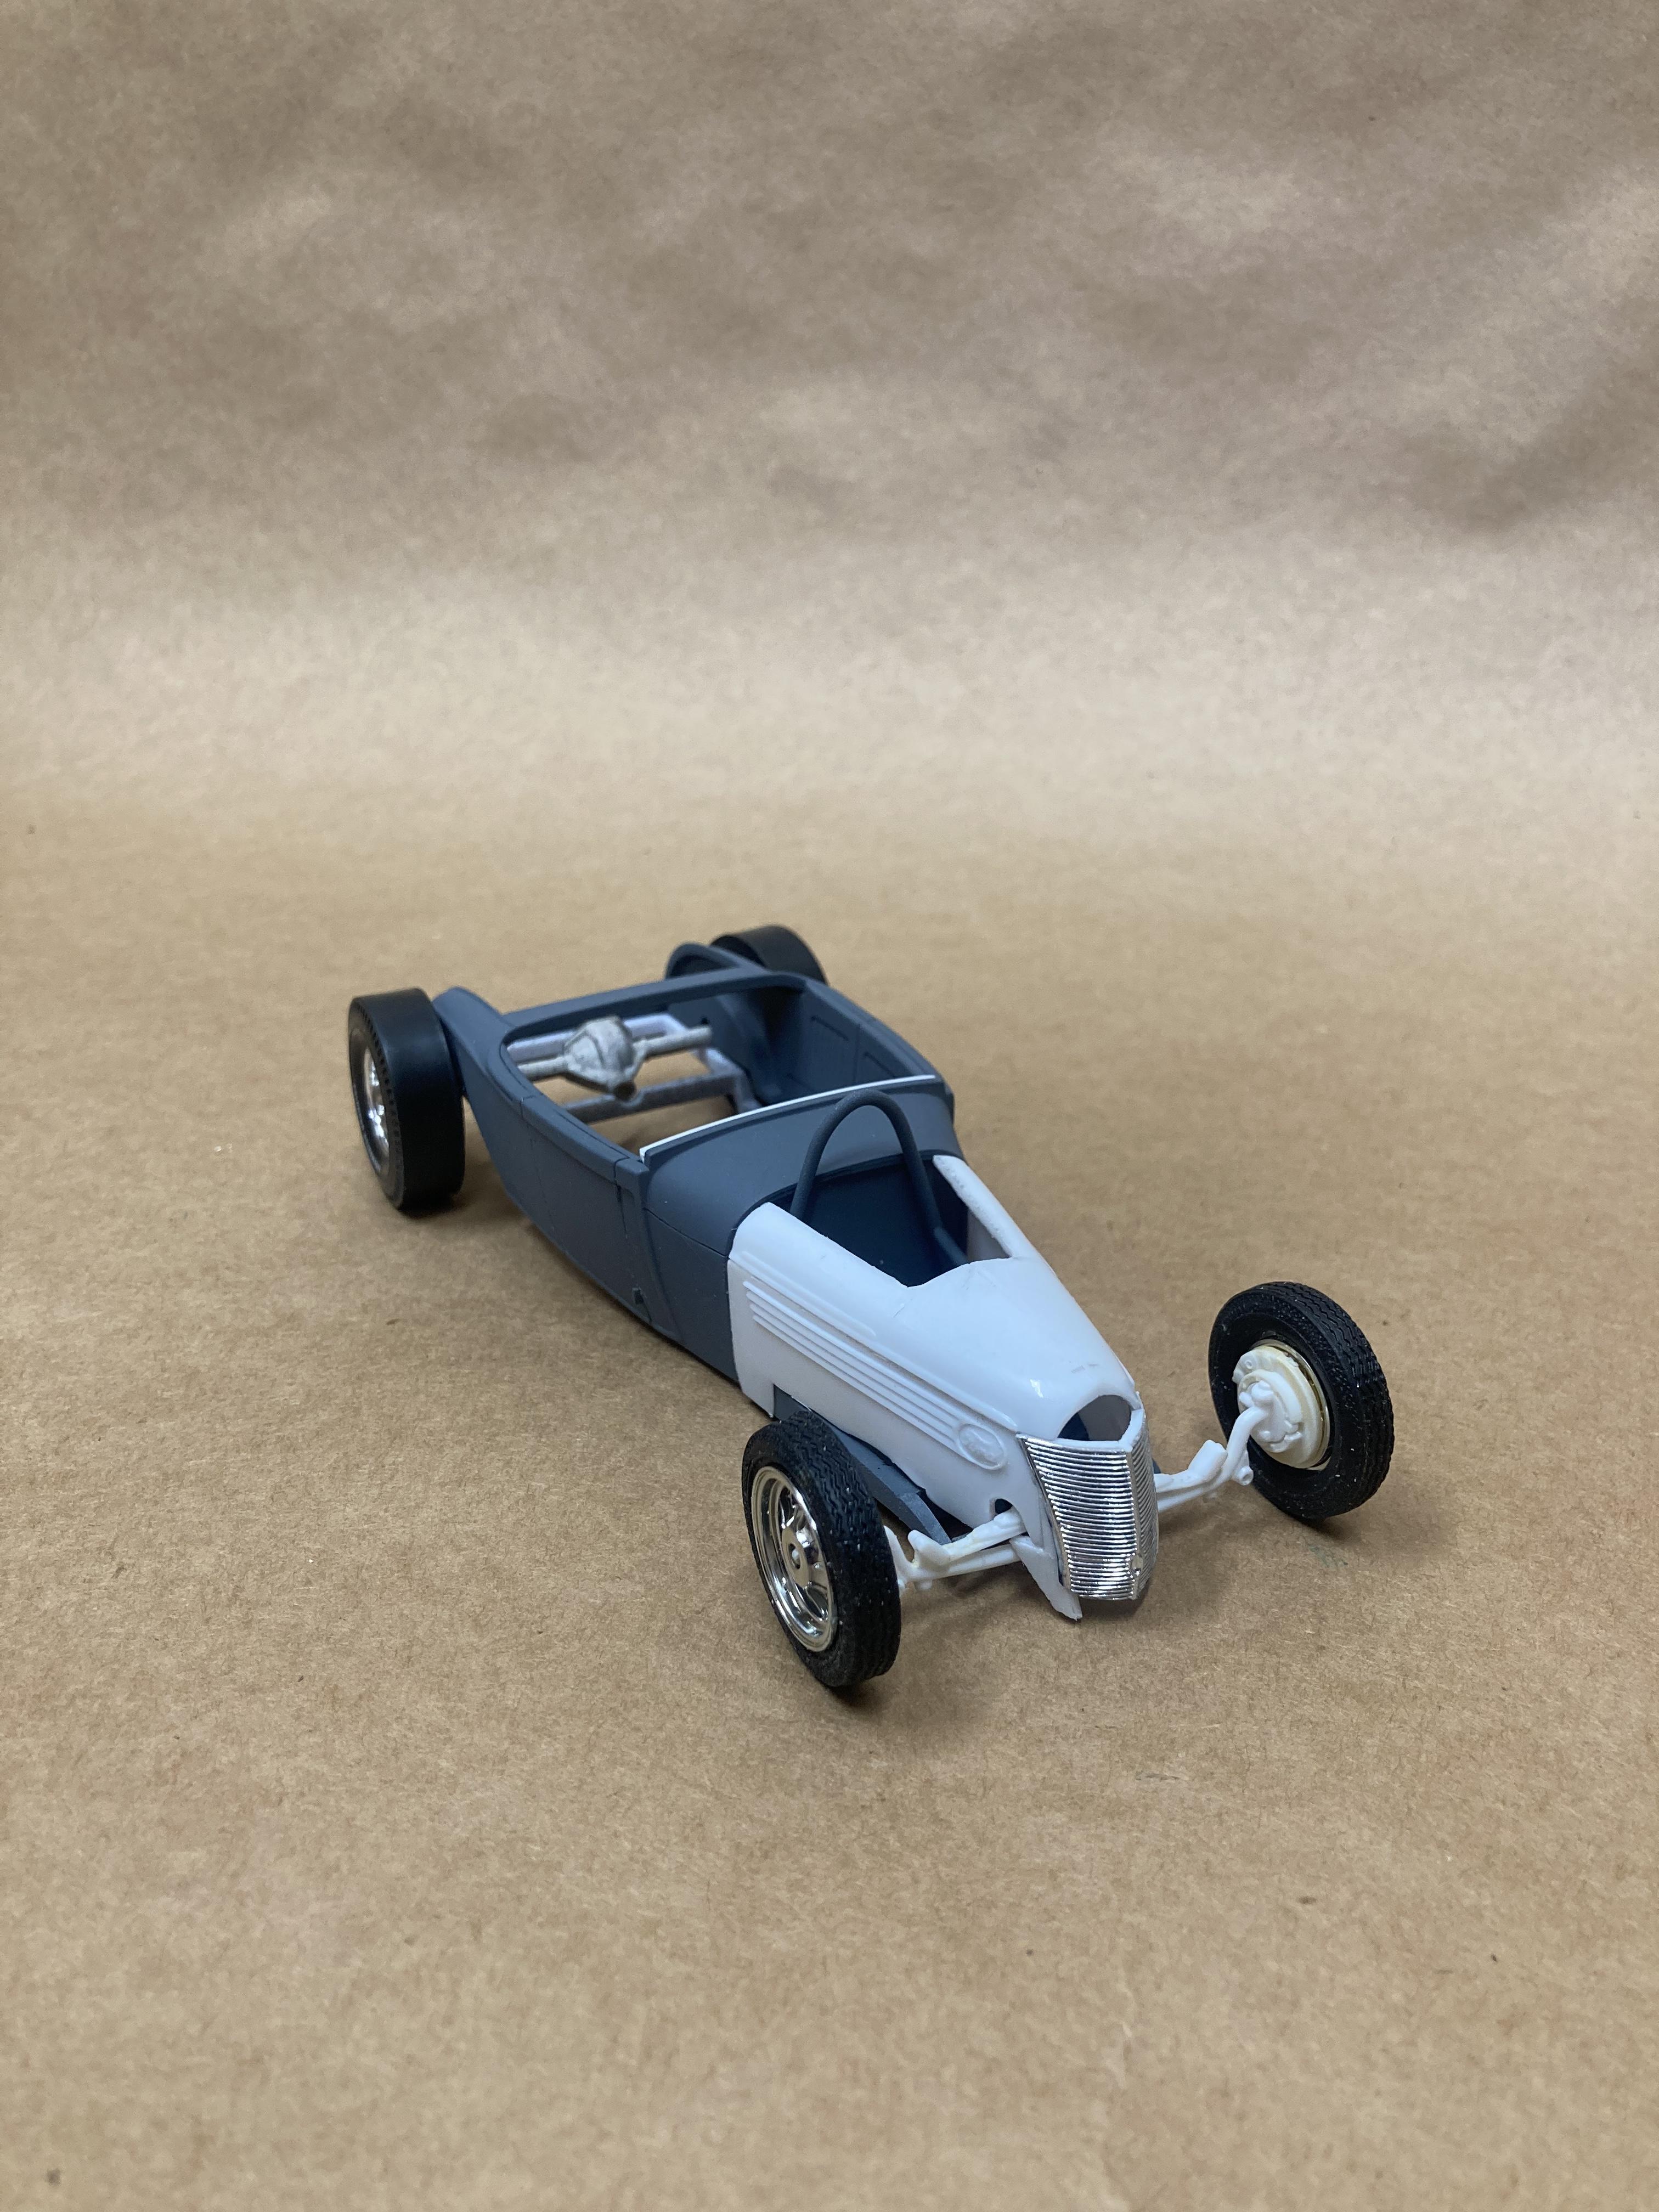
Still not convinced this is the cab or wheels I want to use for this but here’s a mock-up The wheels are from Iceman which are excellent wheels, I’m just not enjoying the ride height and can’t get the front much lower. I’m also debating on switching the cab but either way I’m fairly certain the 429 will live in the back to match my ‘29 I just finished. Also this is part two of that December Parts Box Build. That car needs a cool hauler to match.
-
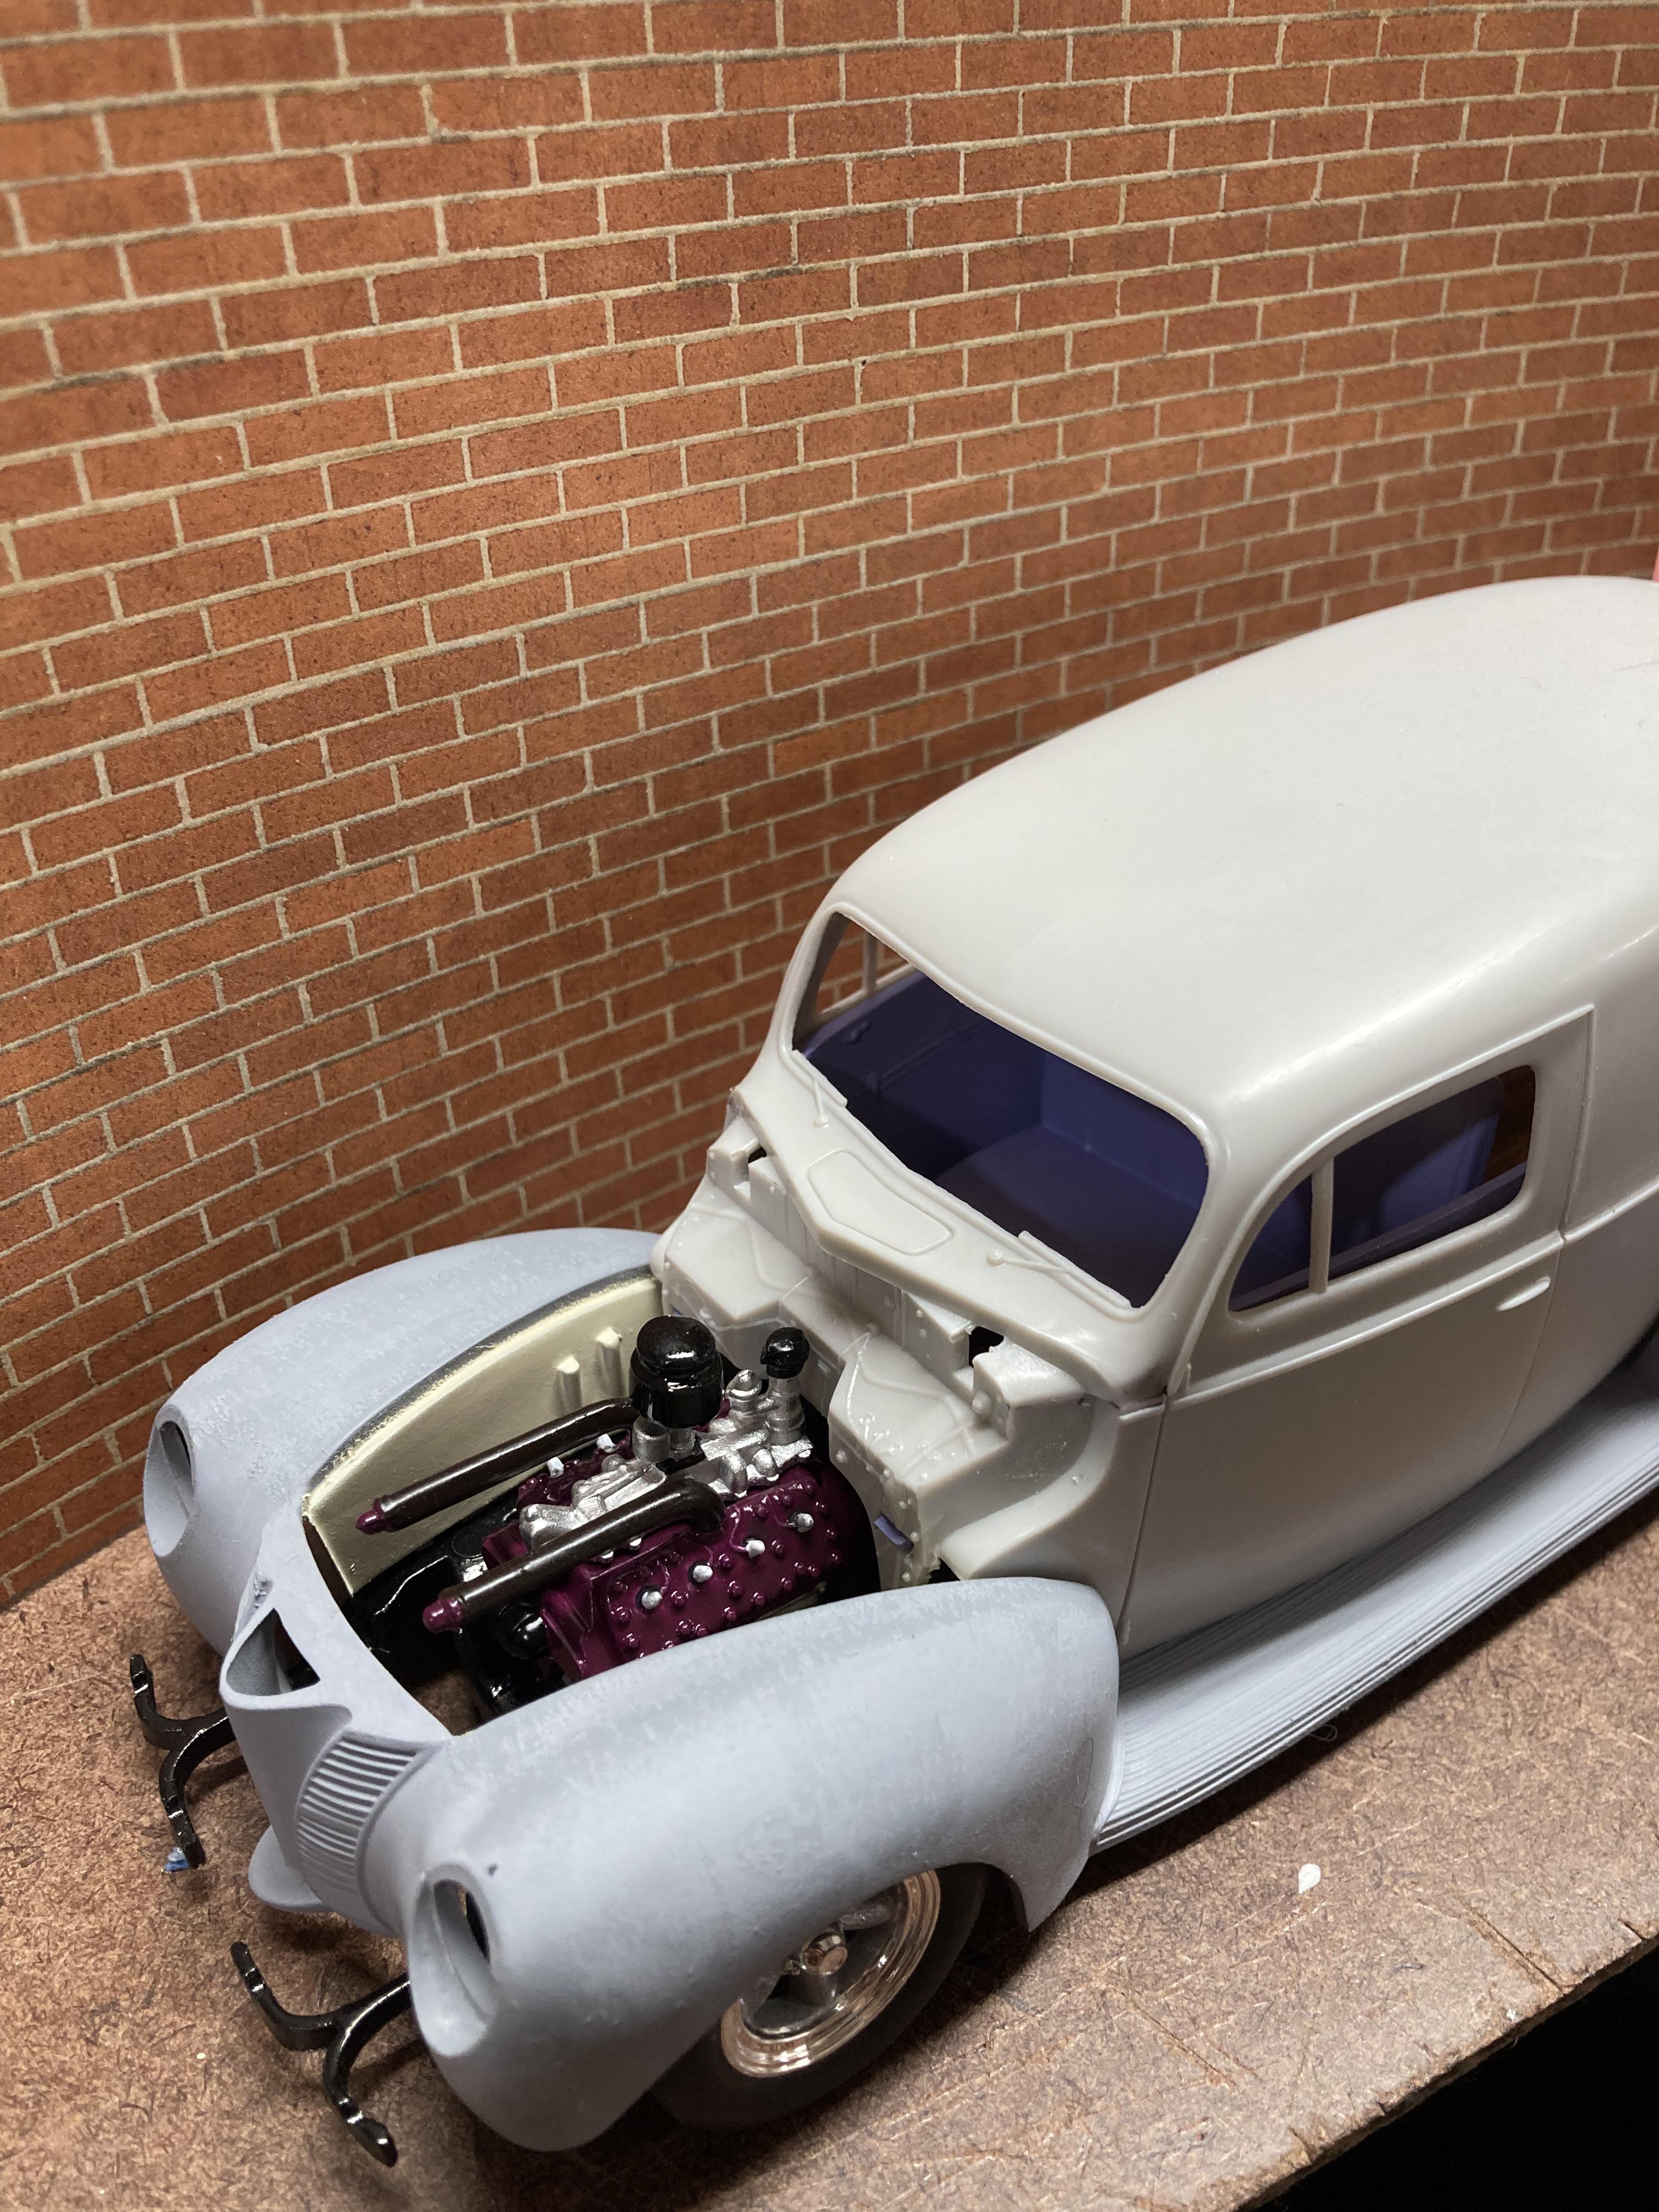
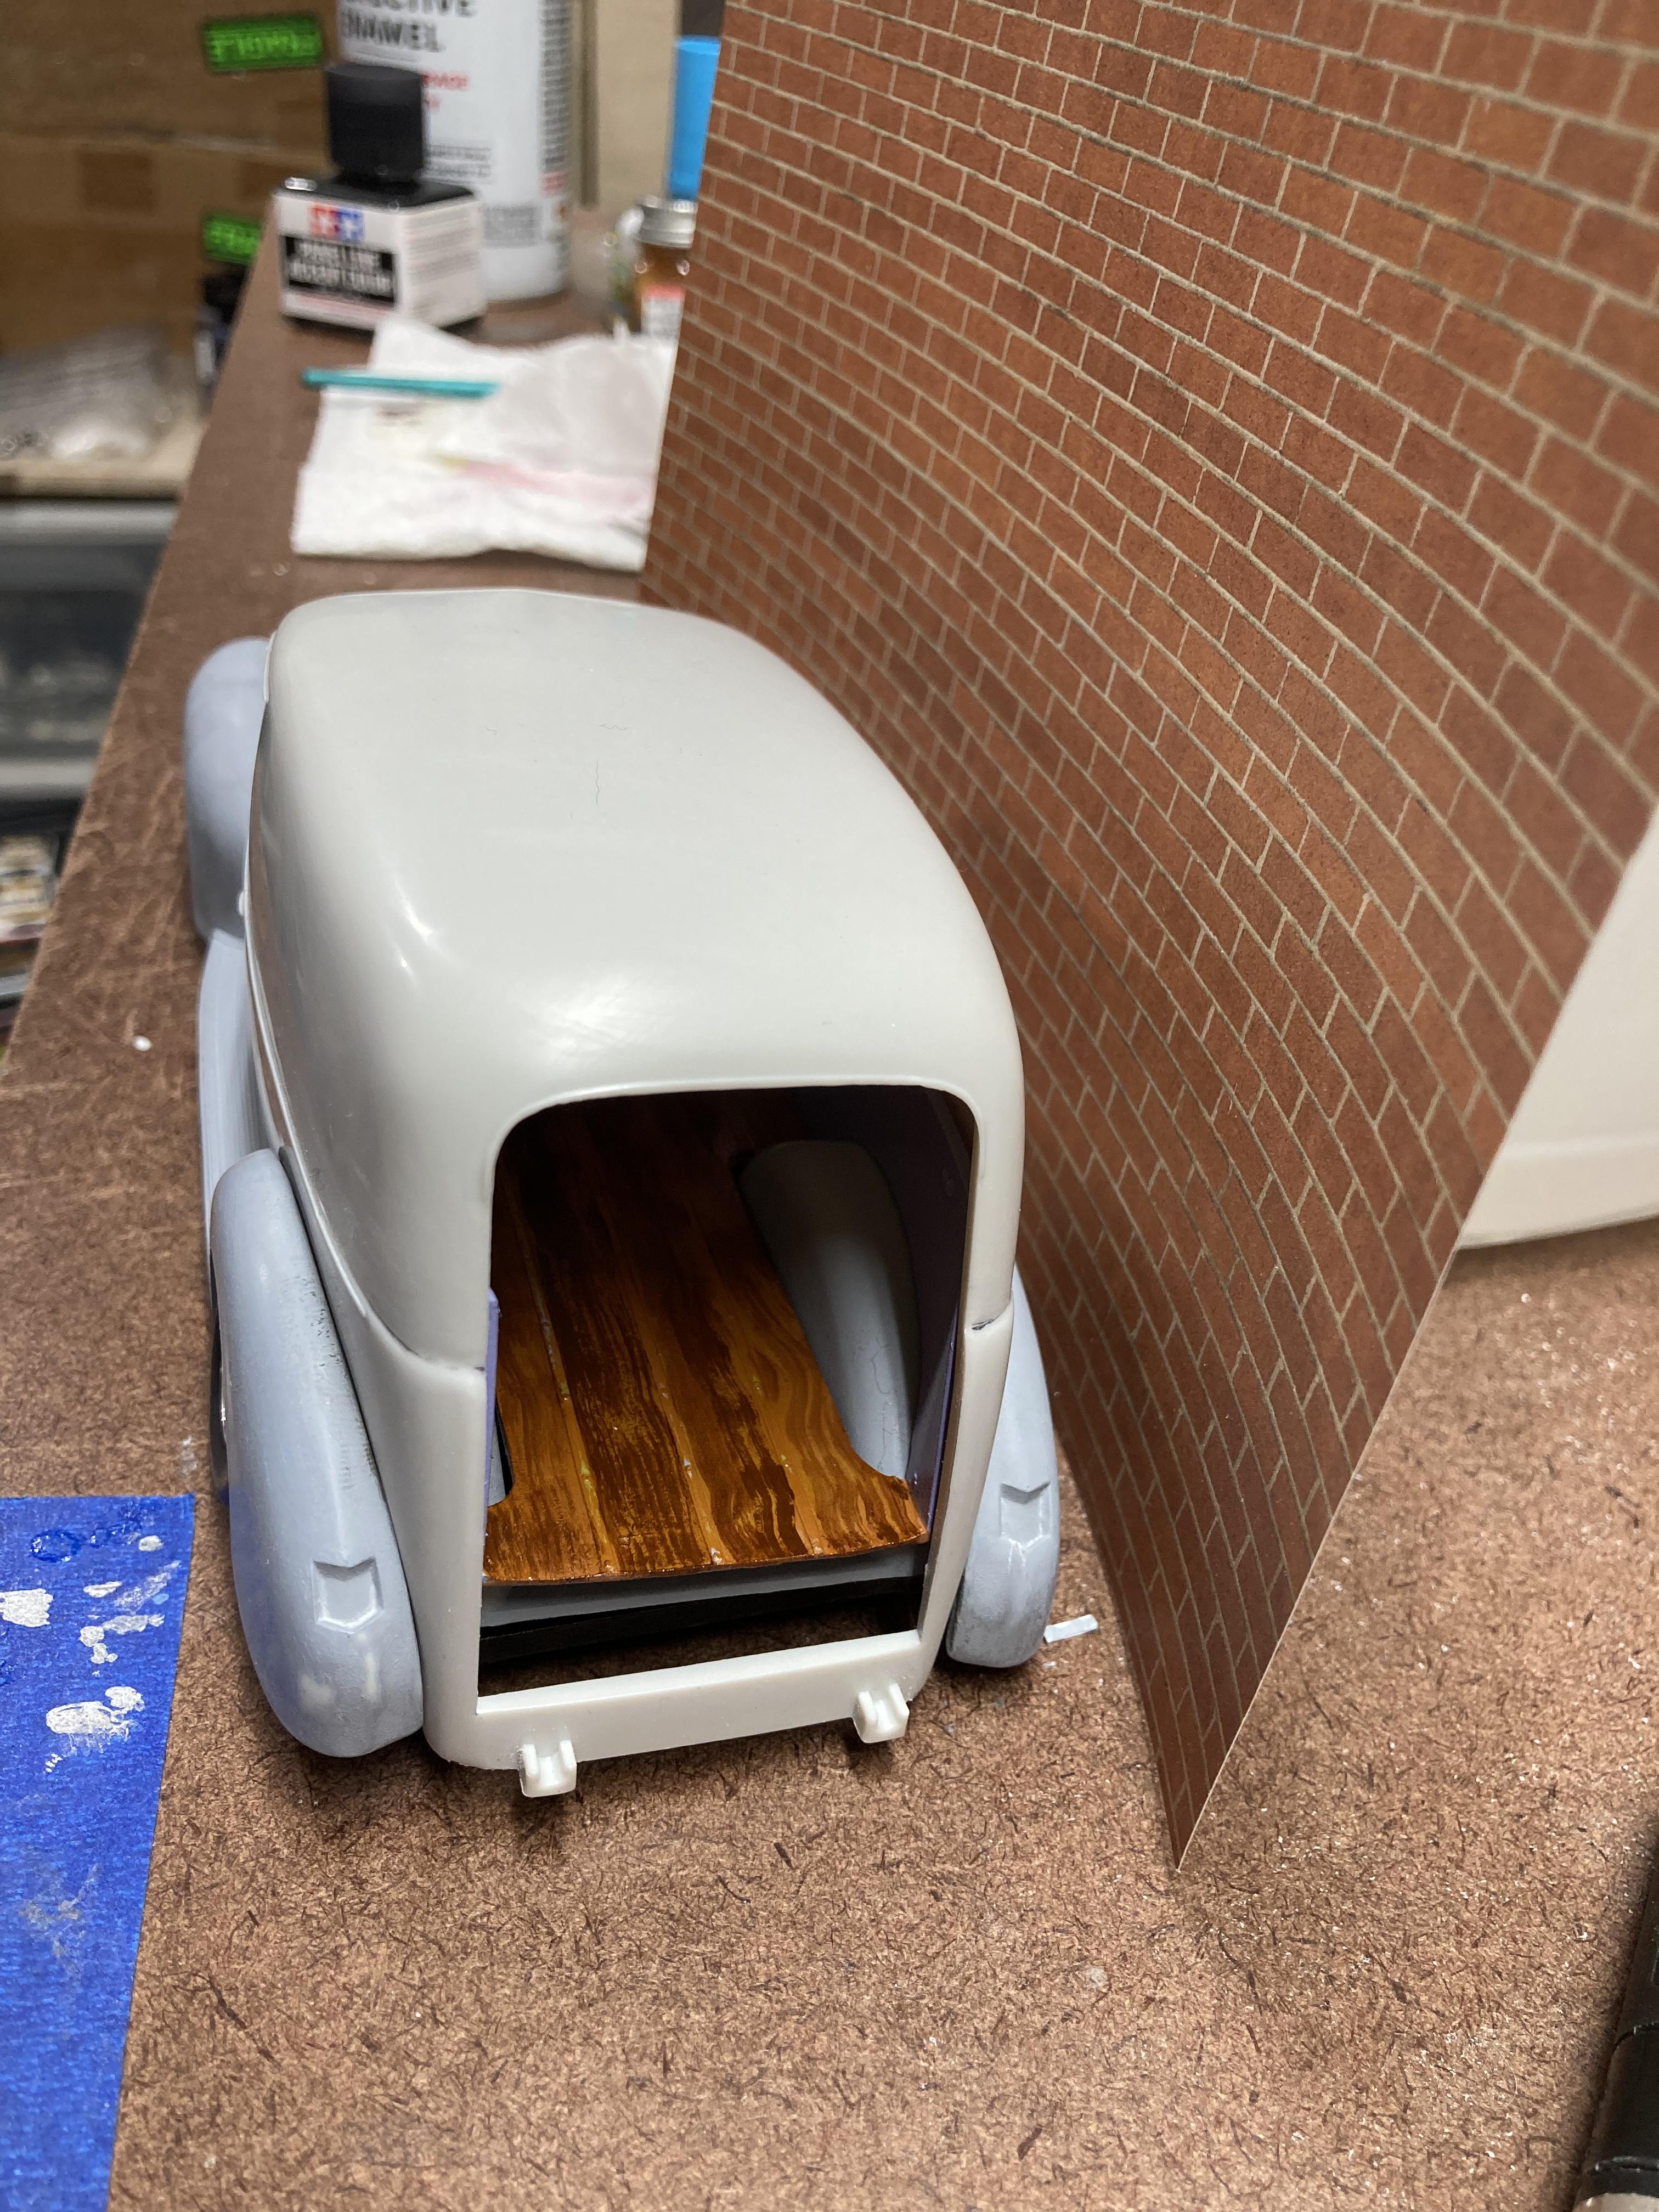
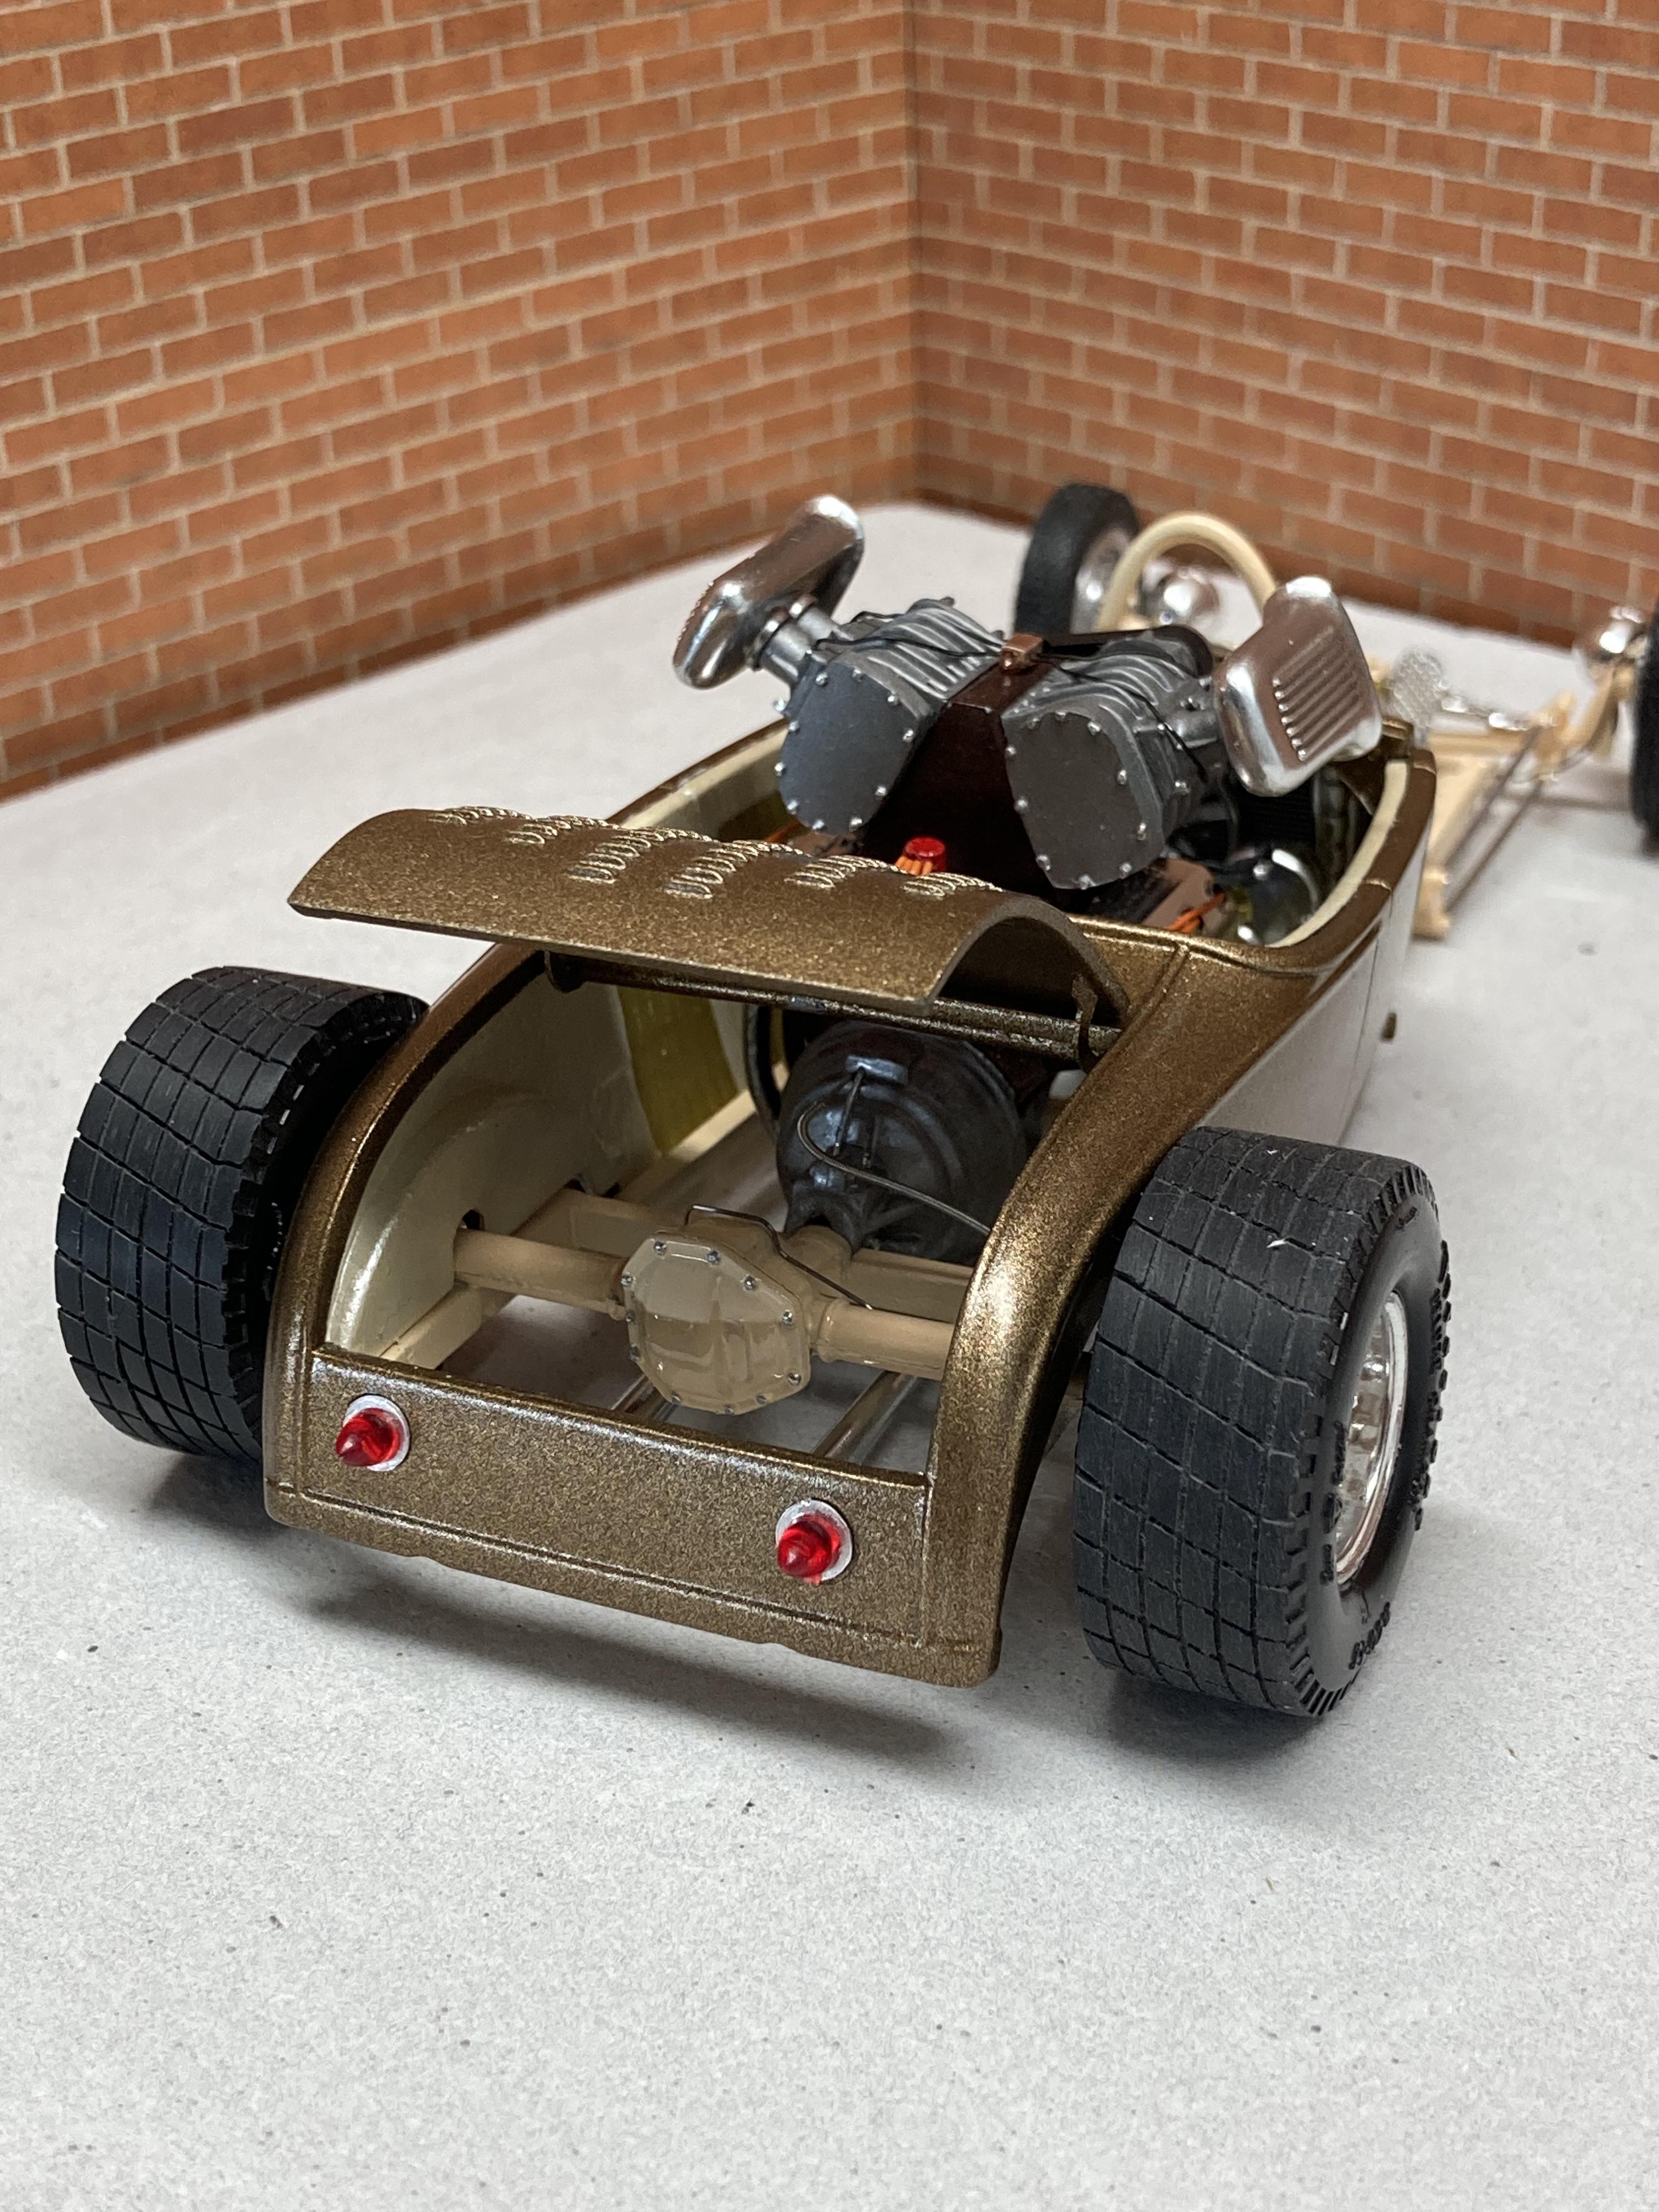
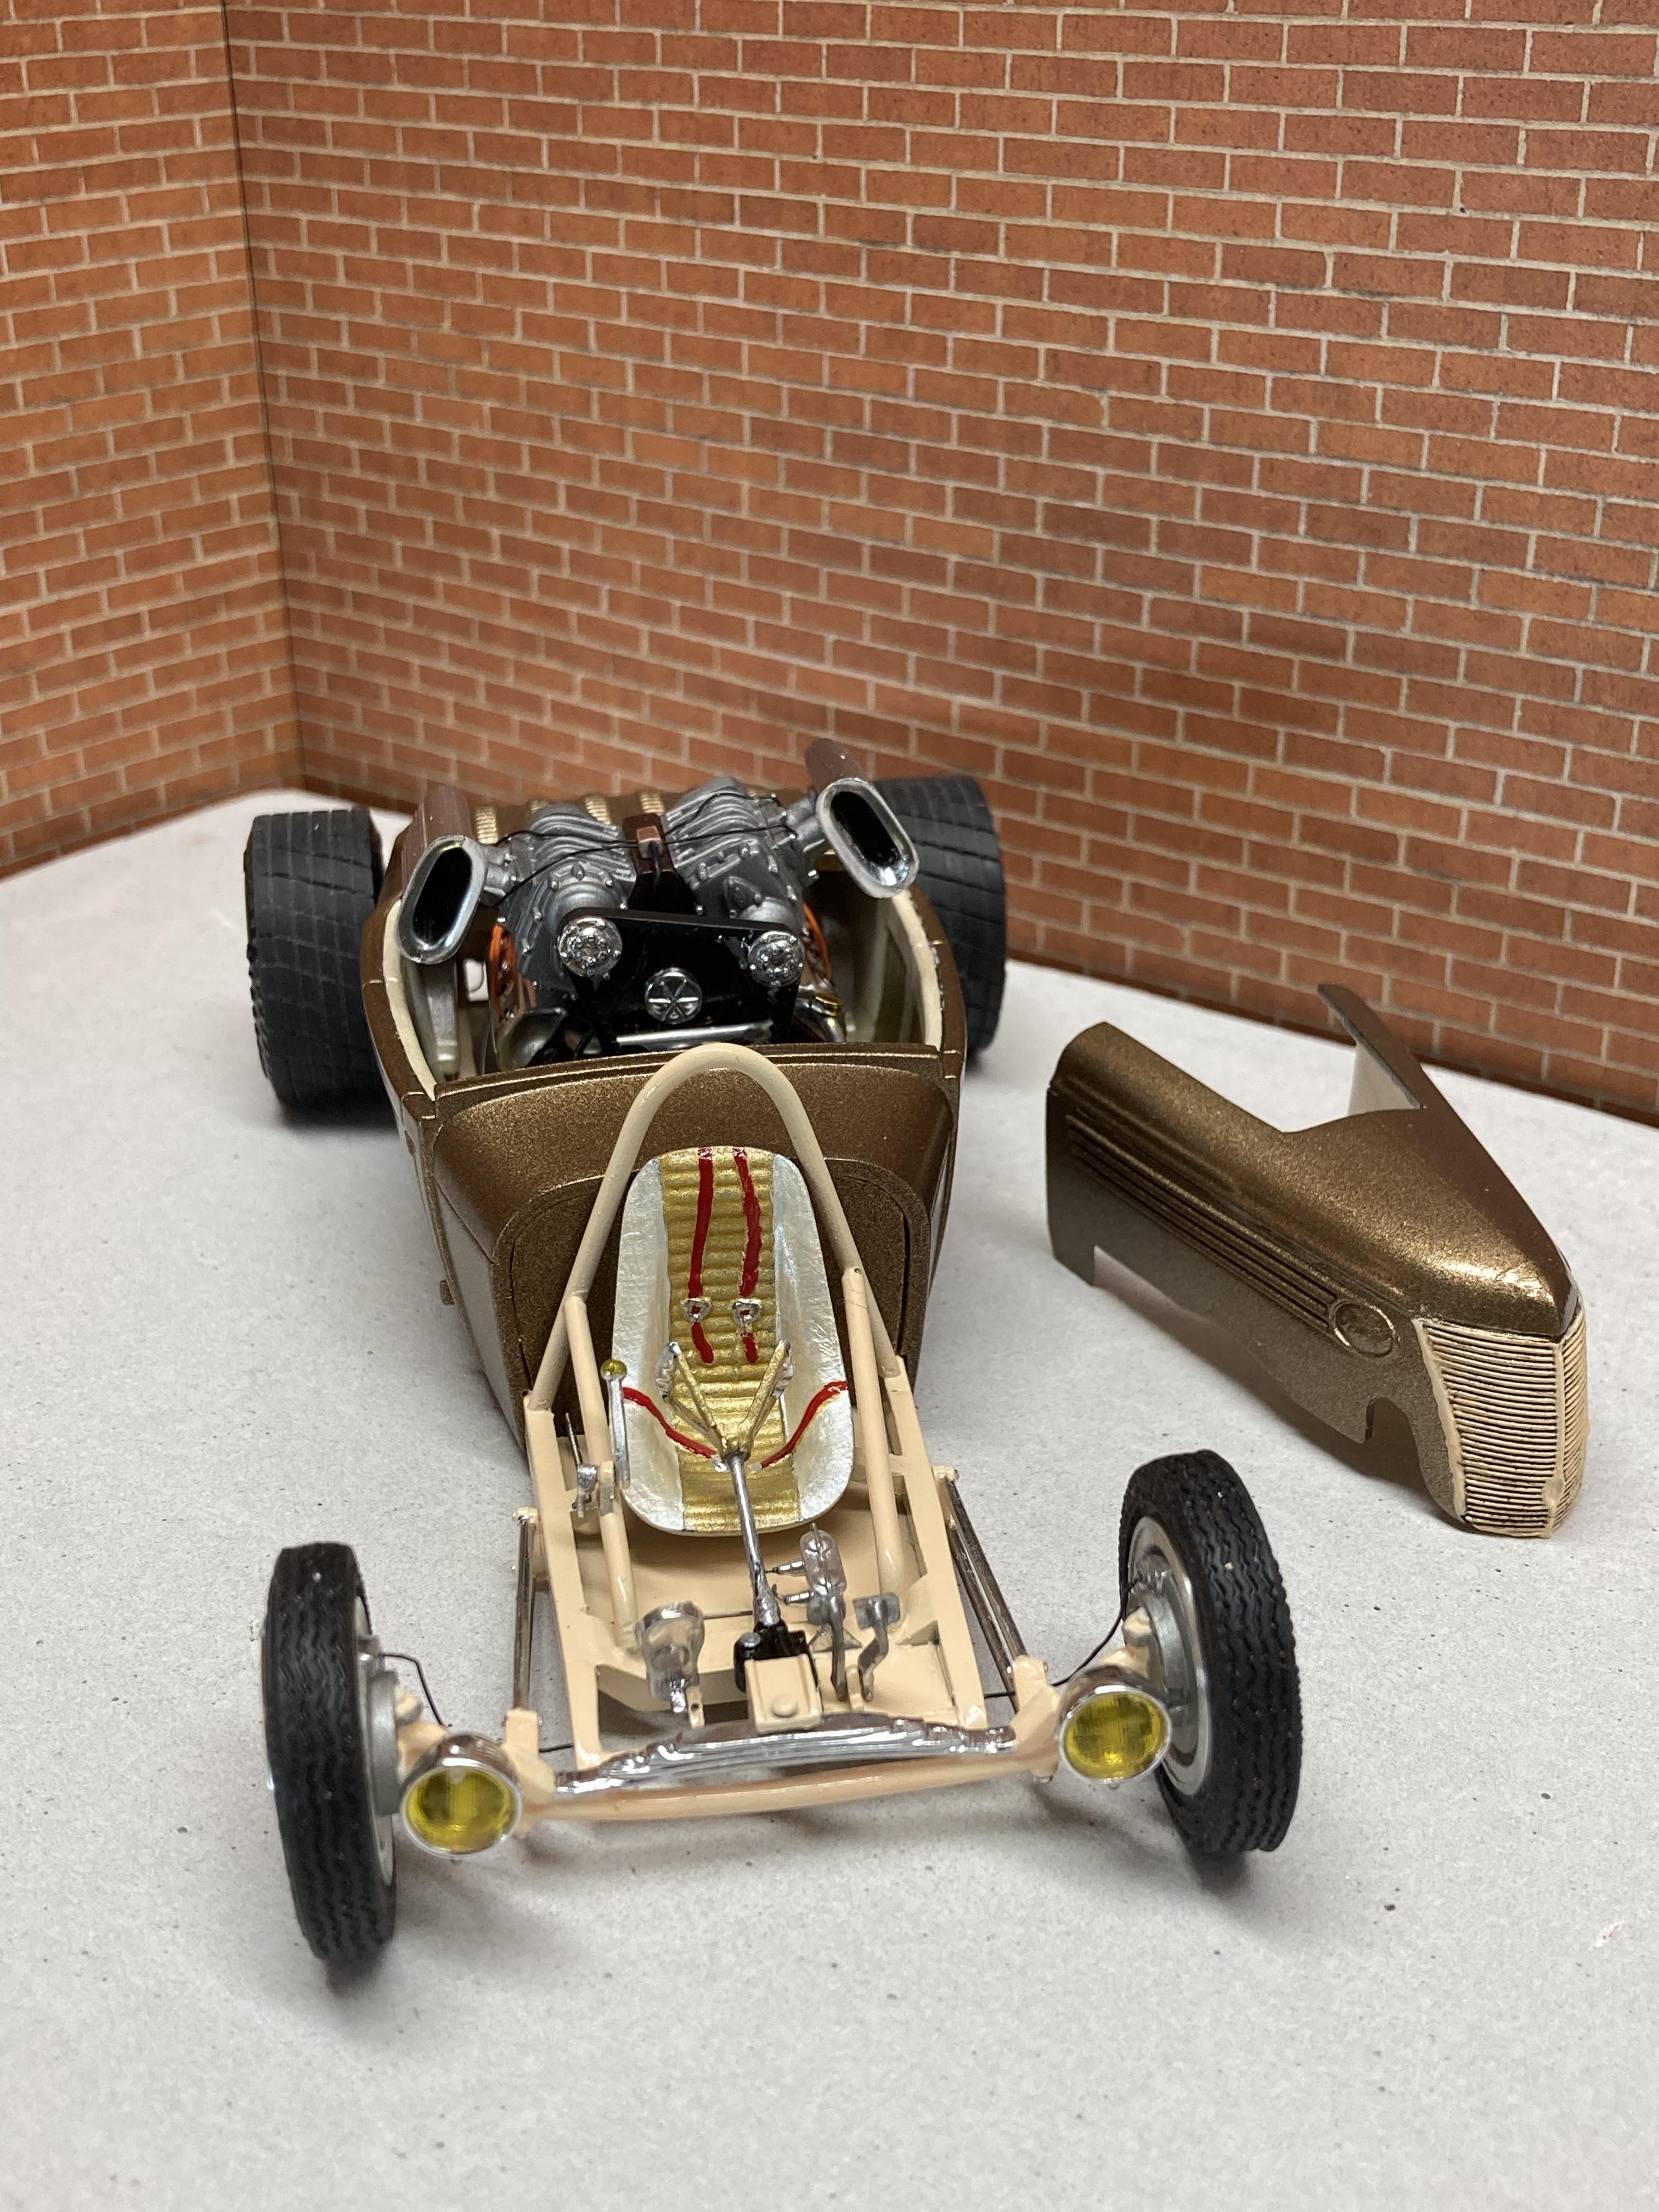
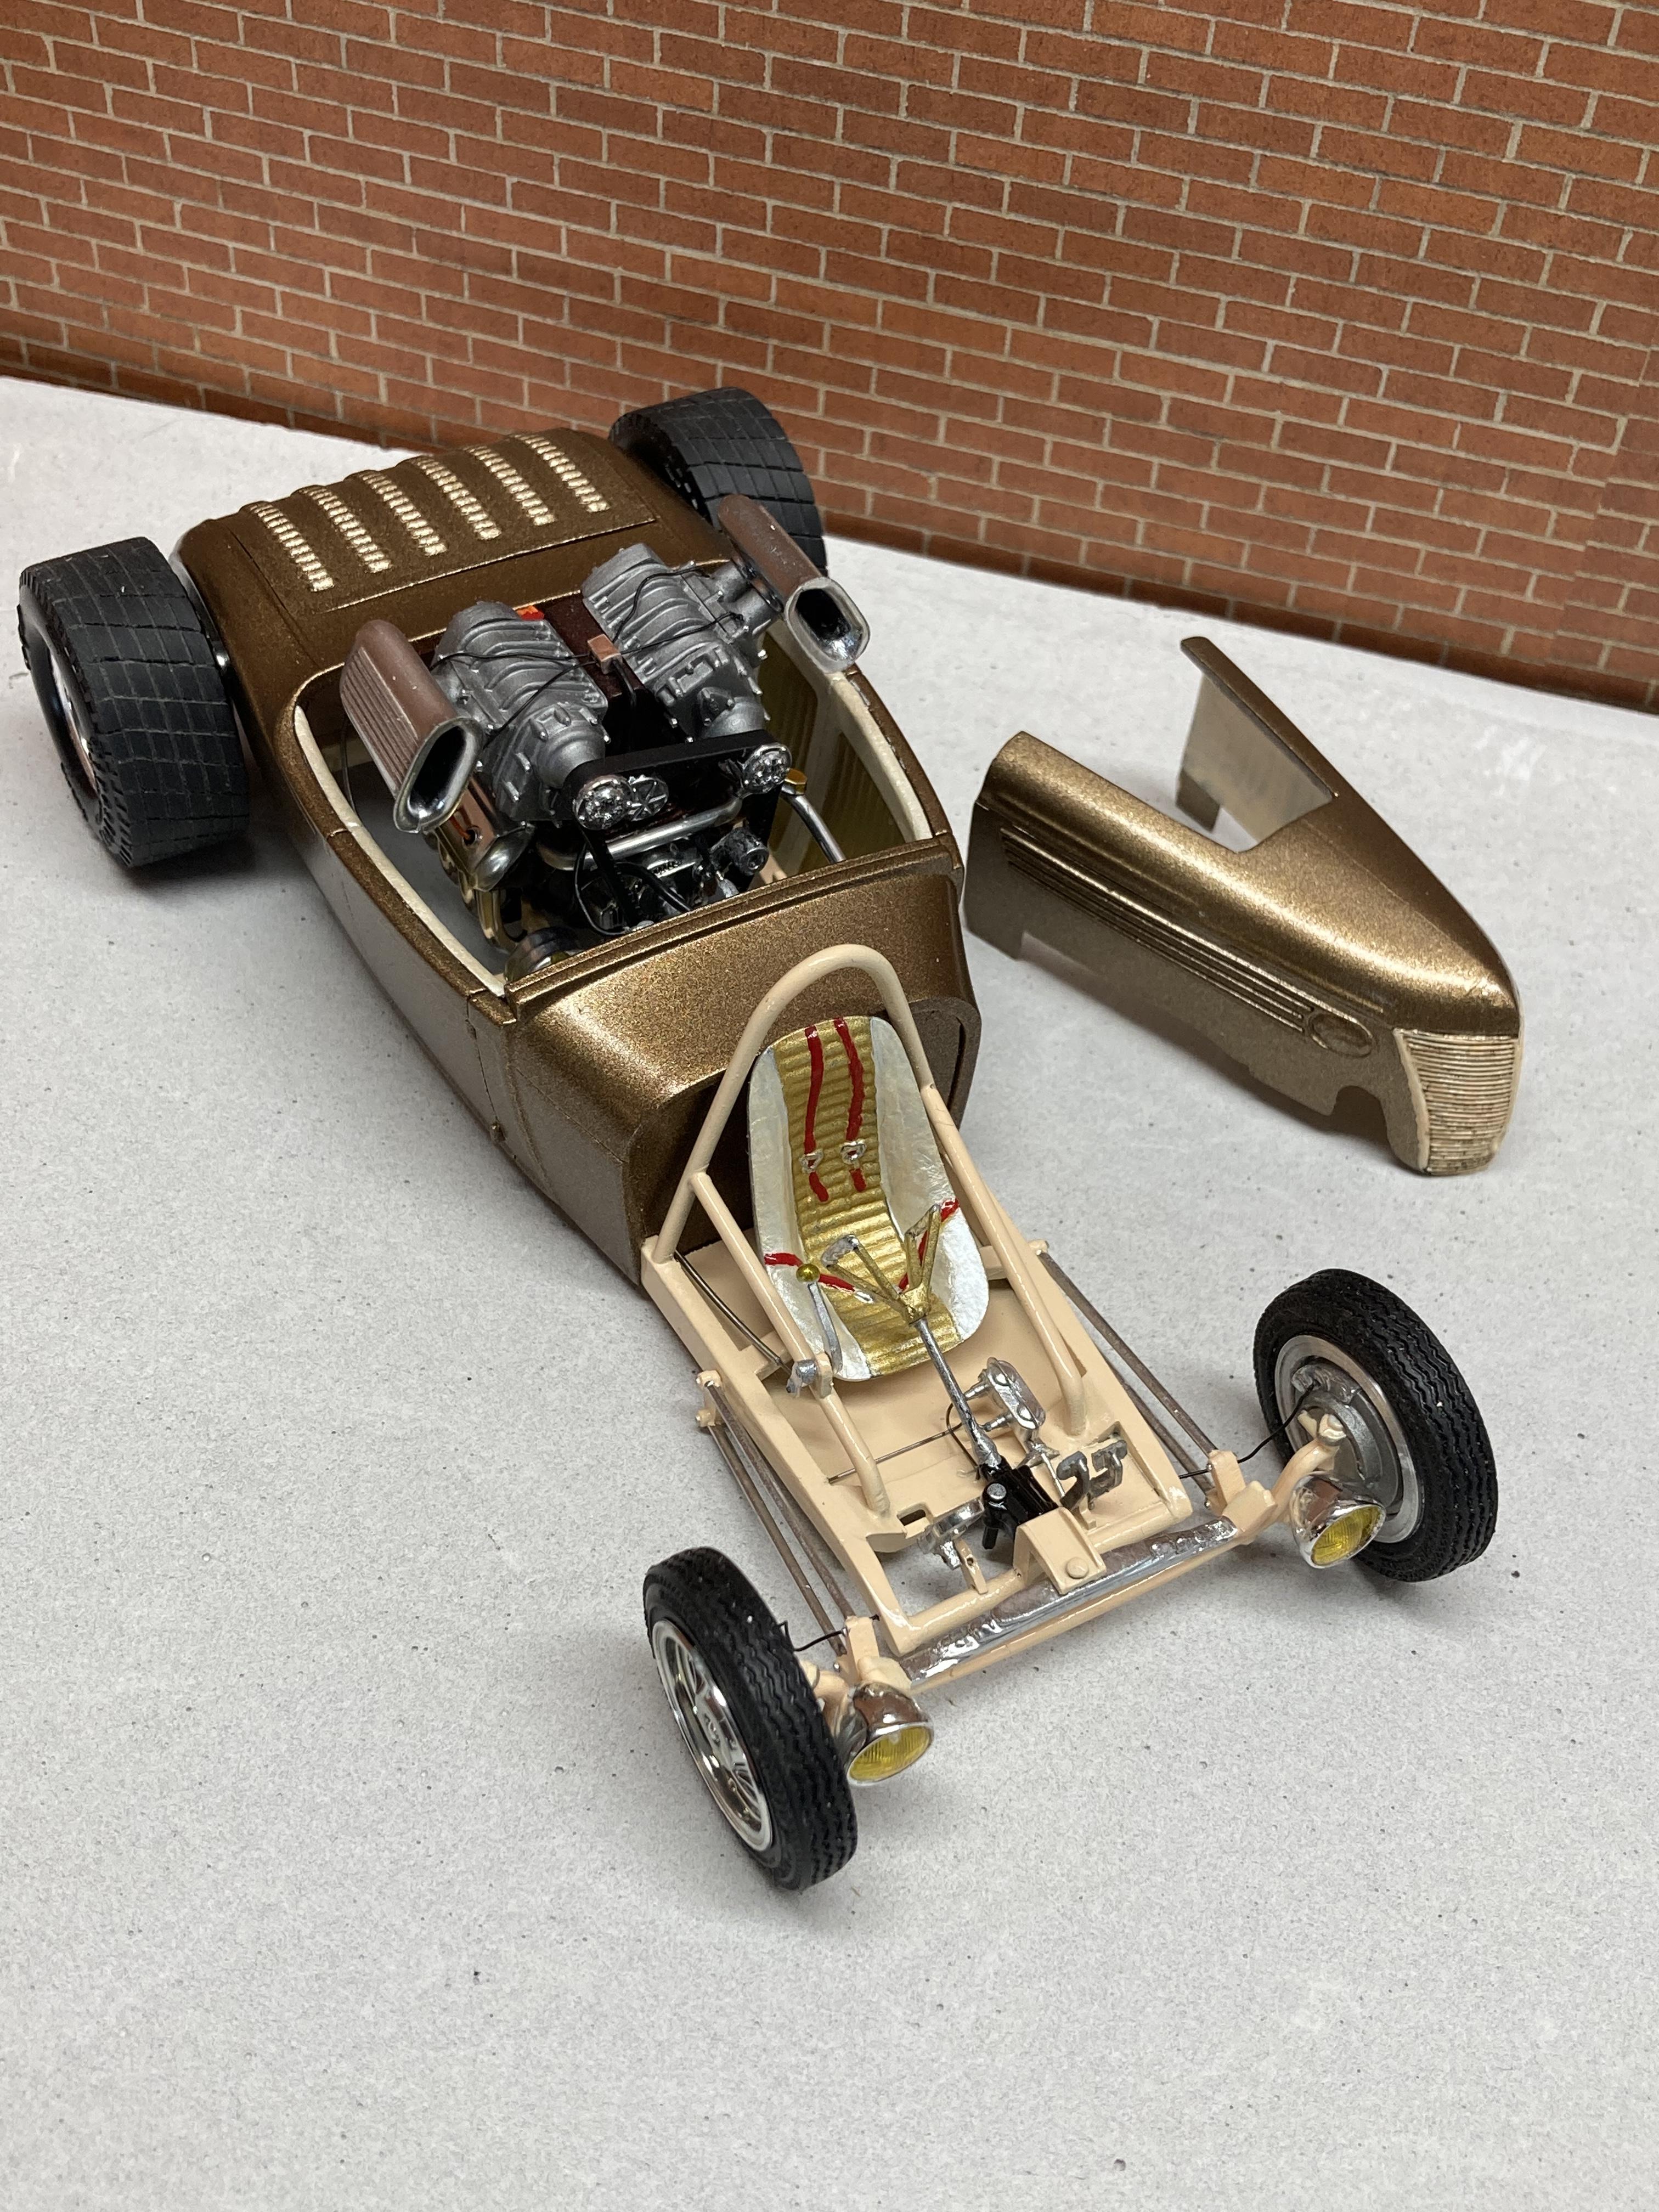
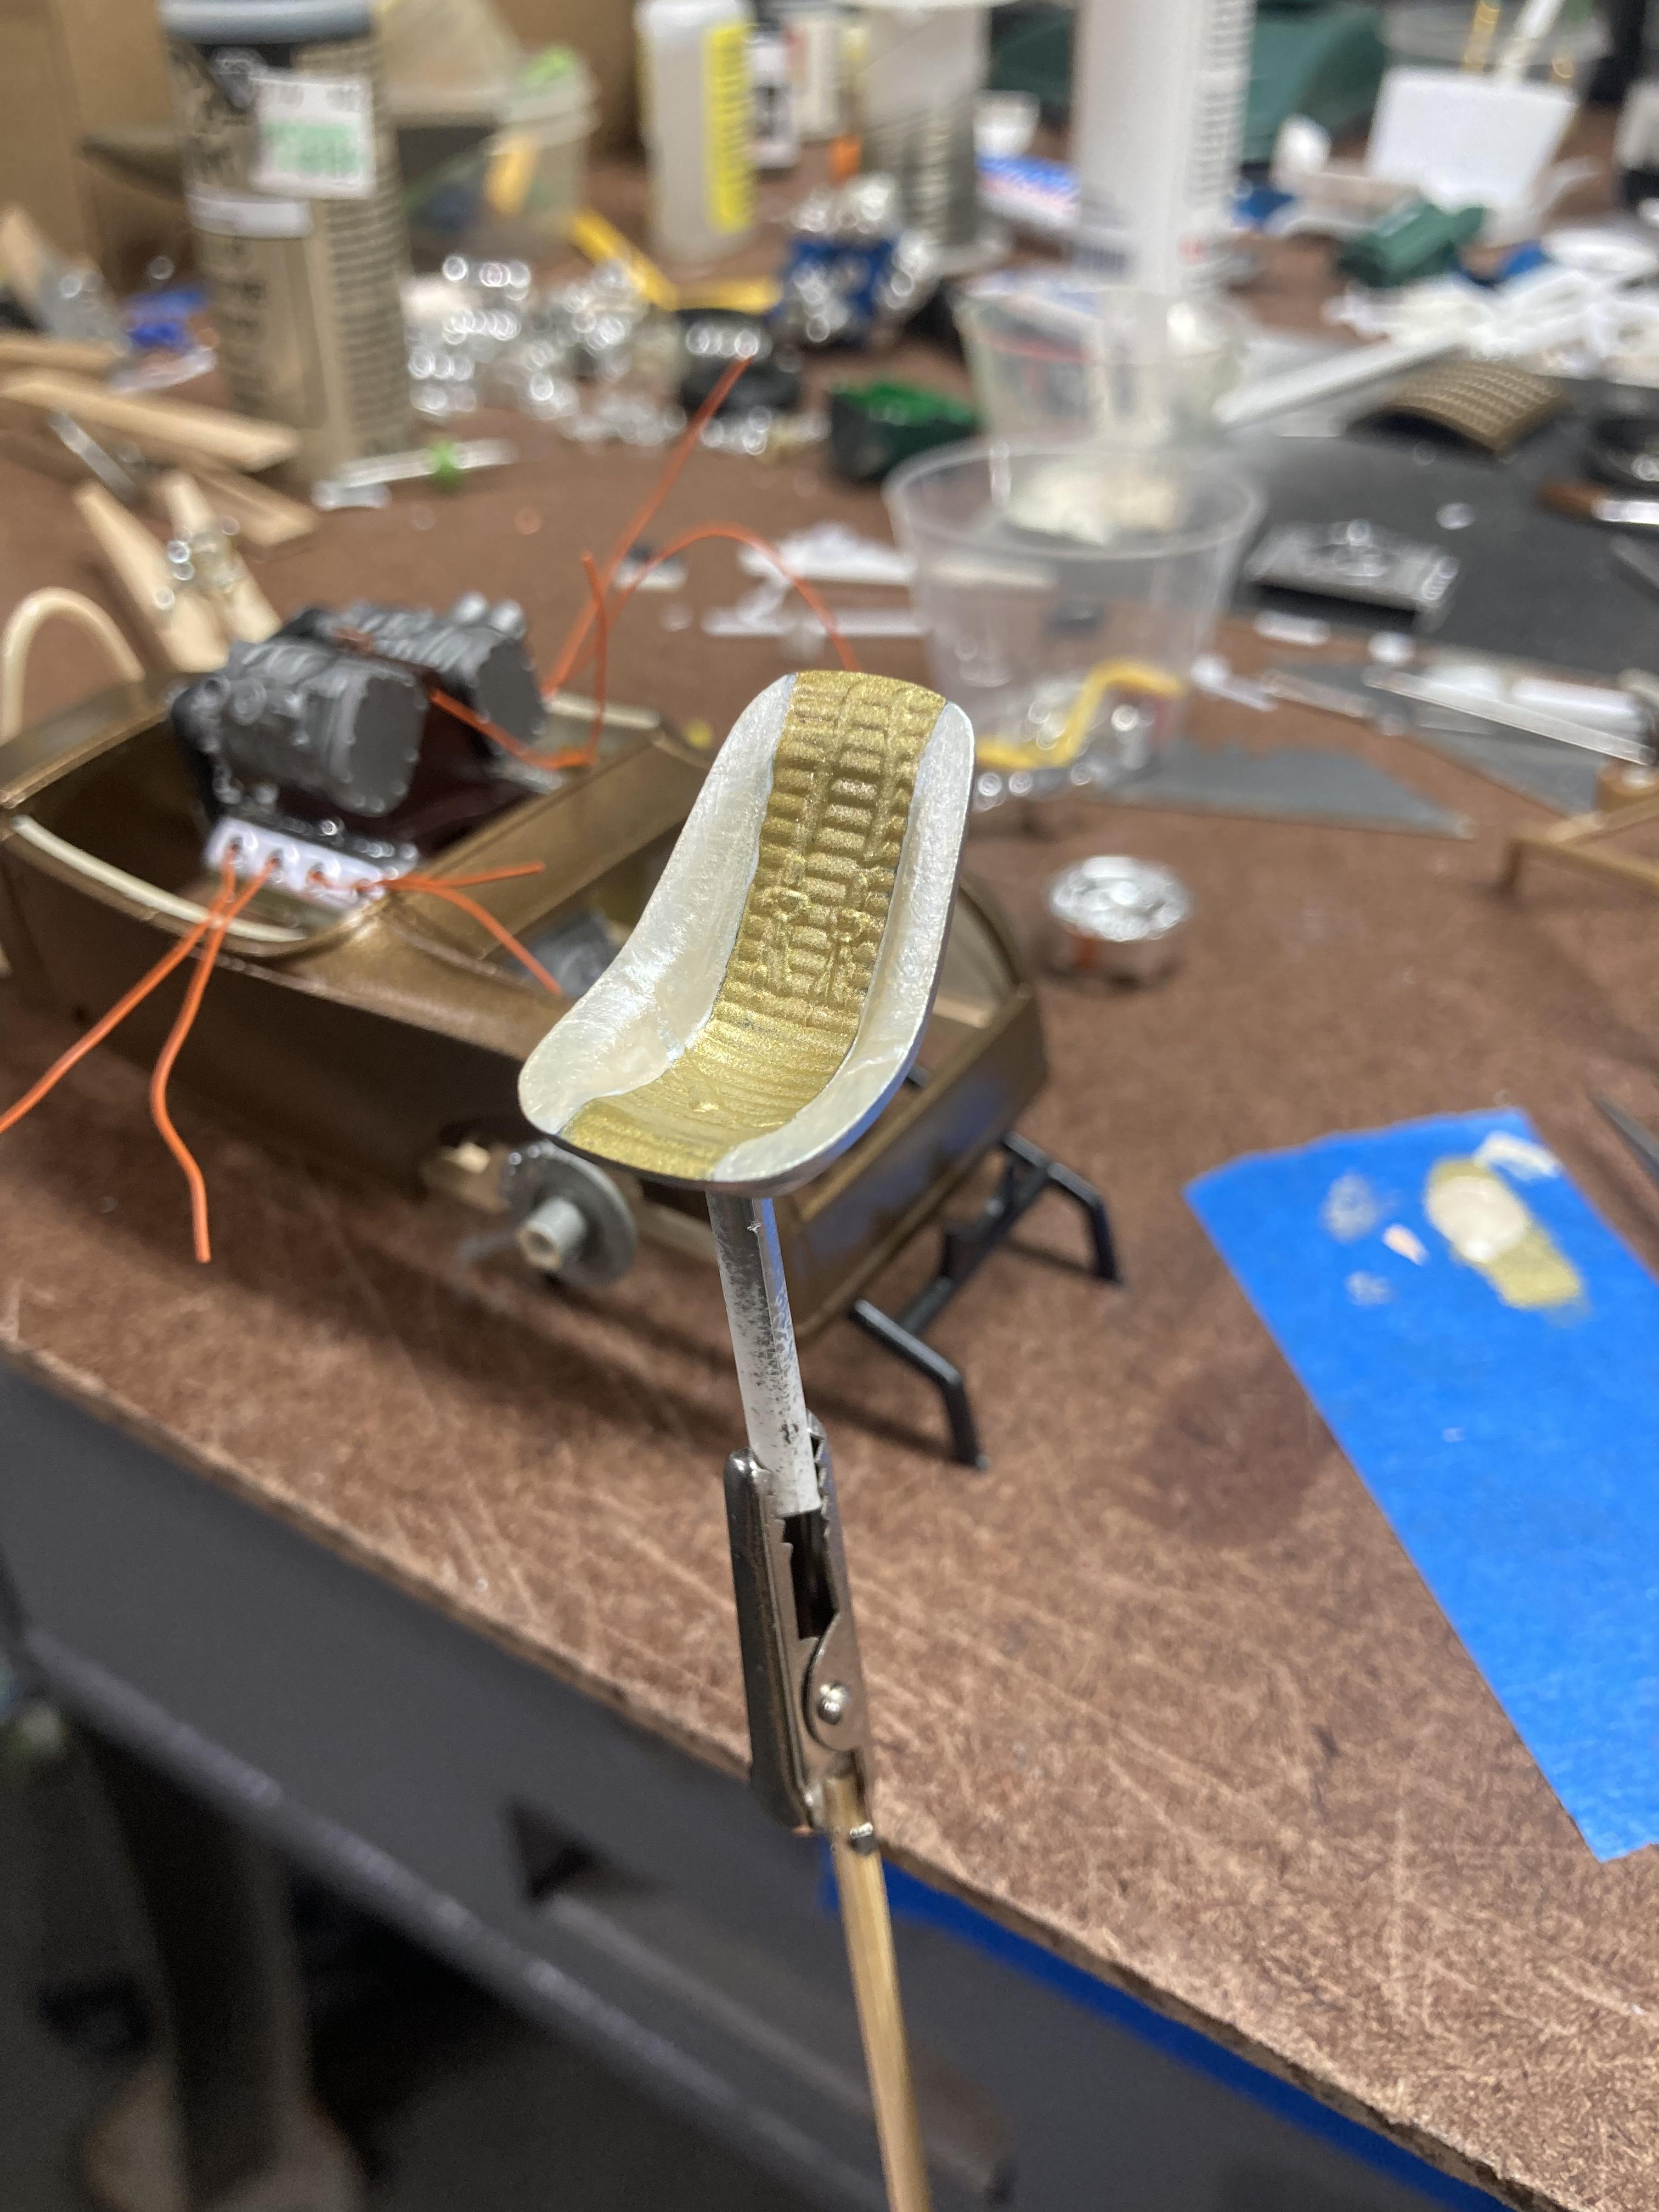
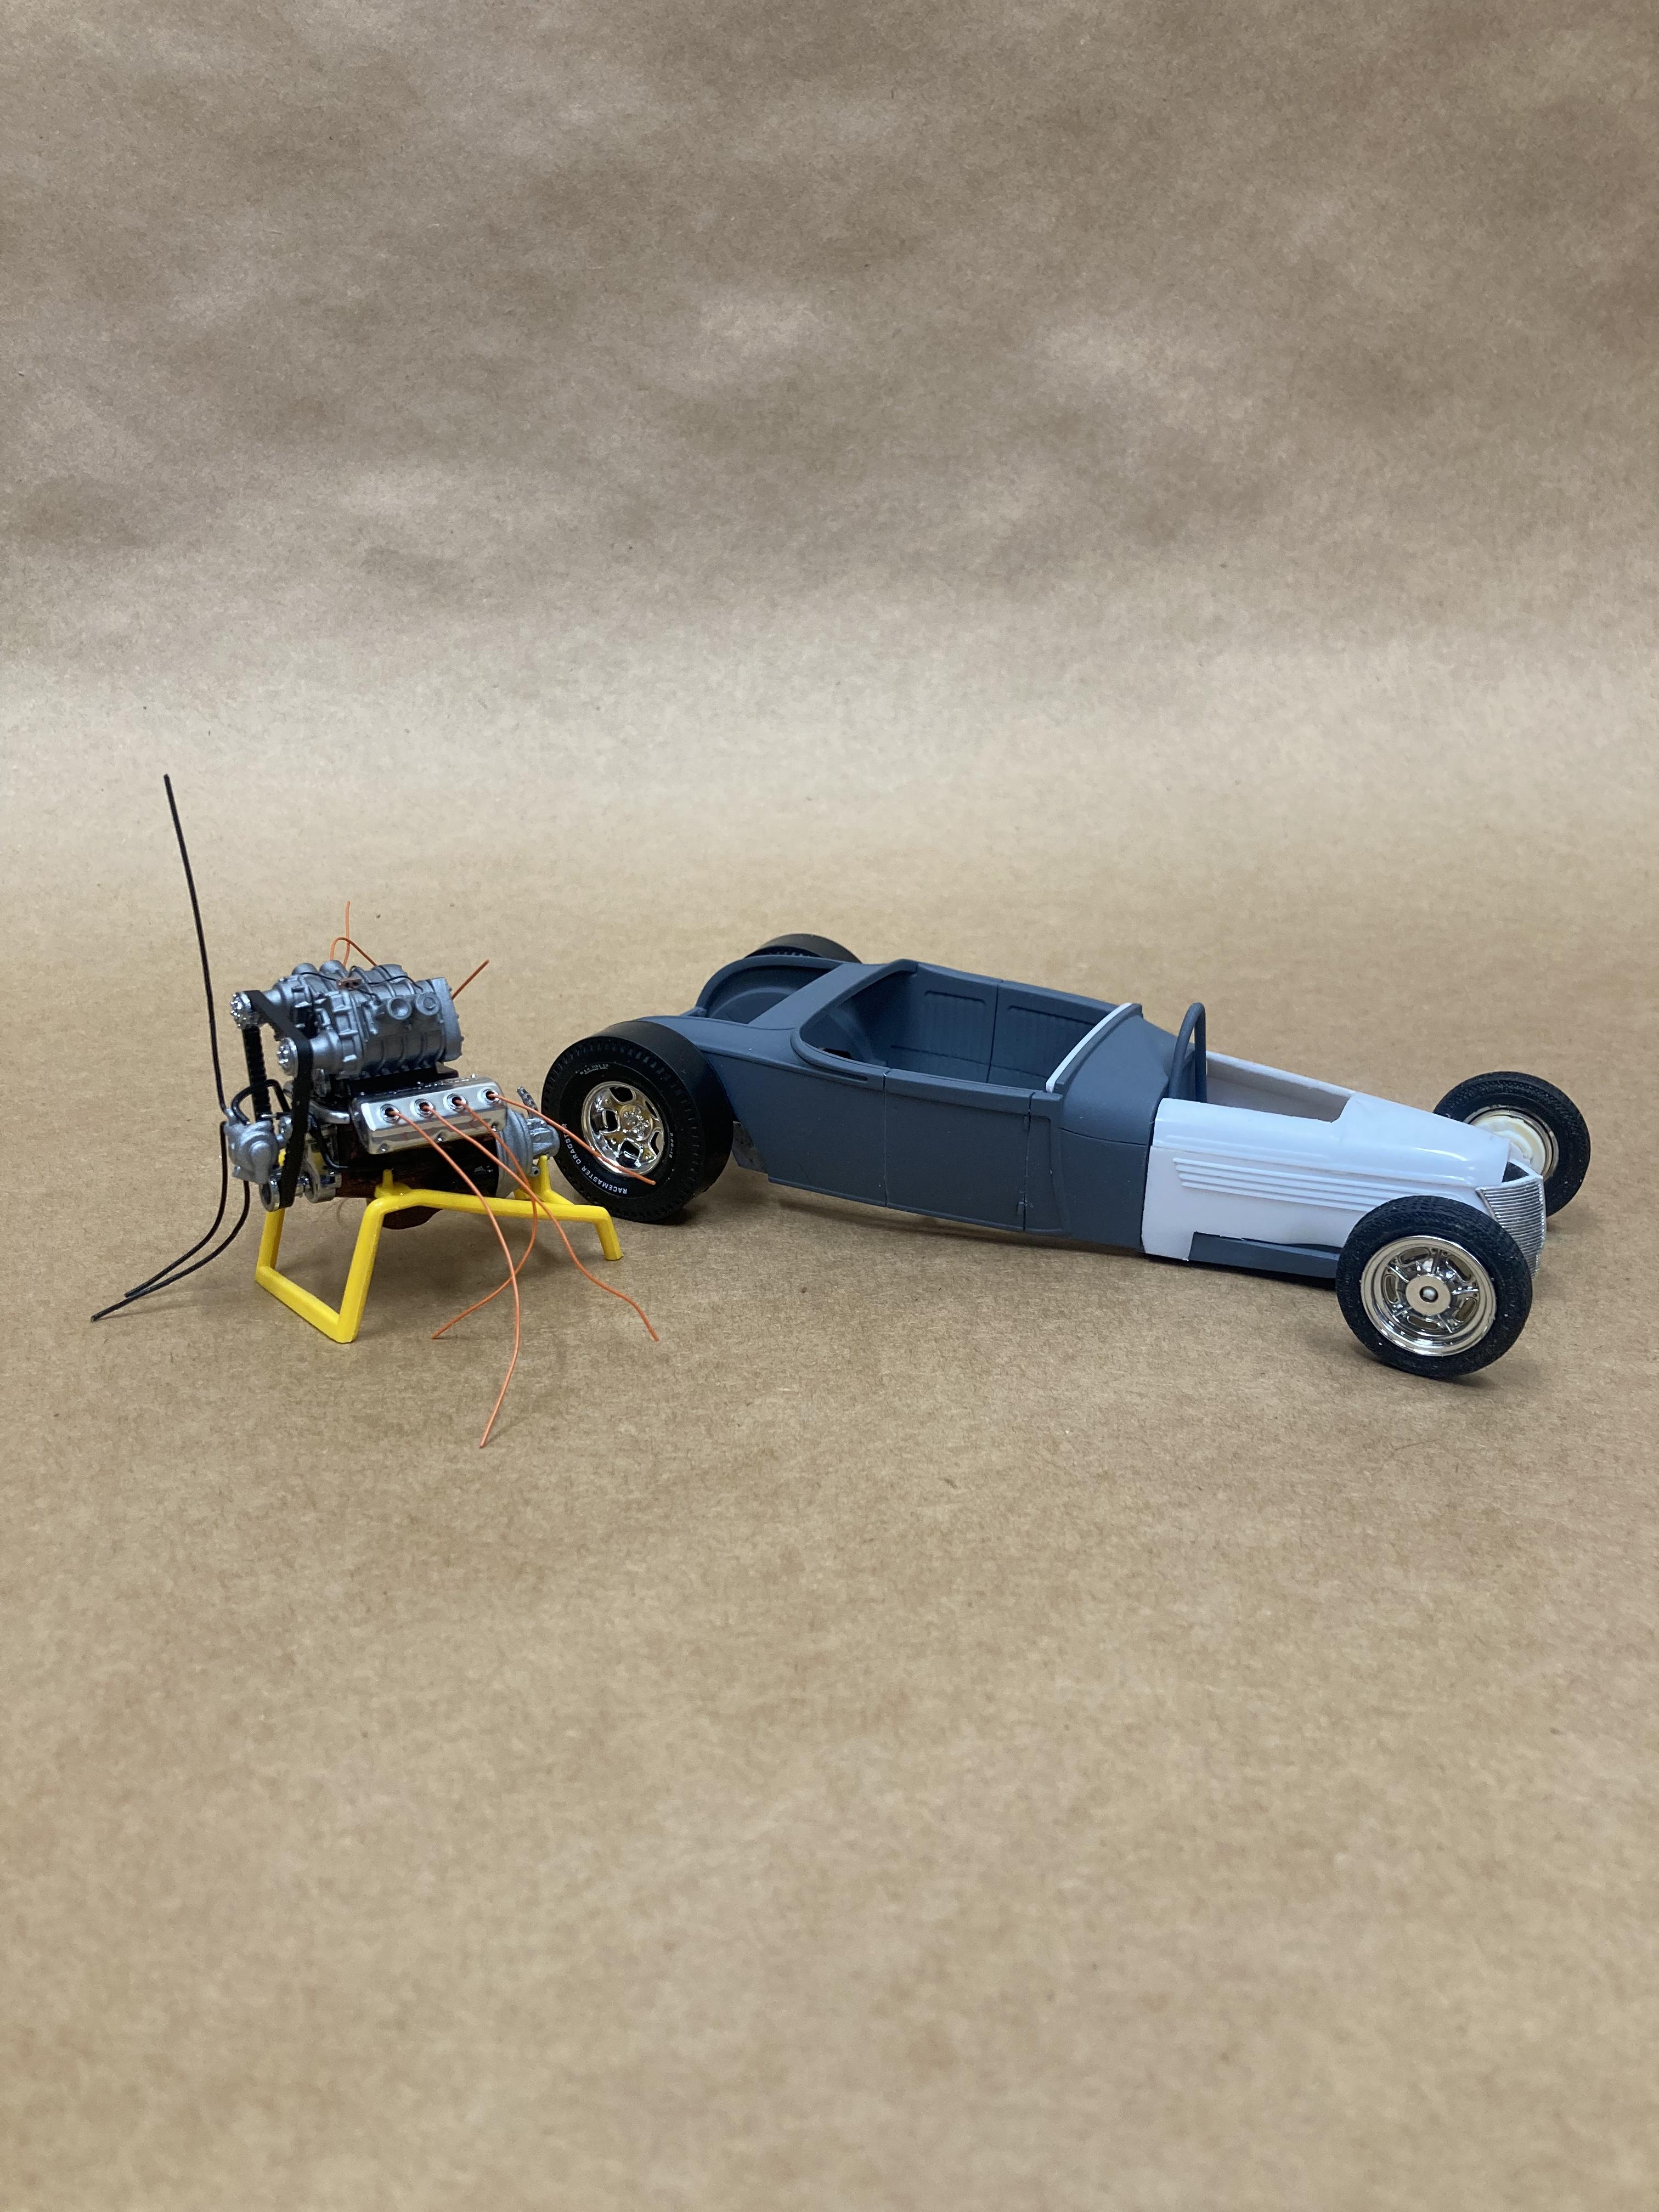
I “started” this build a few years ago. And by started I mean I put the engine together and fiddled around with wheel options then decided to use the kit steelies with the modern tires. I put it back in the box and moved four or five times since then. Back in November it made it back into rotation and got stalled again through December. Once I finished my rear engine ‘29 I decided to finish this one by the end of this month. It wound up back in the box and on the shelf tonight. There’s a chopped ‘32 5 window on my bench in the background of most of the photos on my bench. Back in November I was playing around with the 5 spokes from that kit. I liked they way they looked on this so it drastically changed the trajectory of this build. In high school I worked for a local hot rod/chassis builder, Chick Brignolo. He had a 40 Delivery that was metallic black with flames and American Racing 5 spokes. I started heading in that direction but changed the plan again. I painted the dashboard first to test the color I wanted to use, Testors Blazin Black lacquer. I didn’t like it, it’s too gray for what I was picturing. I have some Alclad candy colors and haven’t used them yet so I spray some candy violet over the black and fell in love with it. I painted the interior Rust-O Lillac…I think… the carpet was done with Dark Plum craft paint. The wood grain is Moccasin craft paint, Testors gloss brown, and Tamiya candy yellow. Still need to do the chrome strips. I’ll be doing the inner fenders/firewall in a gloss almond, the rest of the body will get the same treatment as the dashboard. The engine is super low detail. I’m not worried about it, it’ll be good enough to be on the shelf with the hood closed 99% of its life. Long story short, I want to hinge the rear door but can’t find my soldering setup so I’ve lost interest in this build again. Hopefully by starting a thread it’ll keep me somewhat motivated to finish it. Thanks for looking.
-
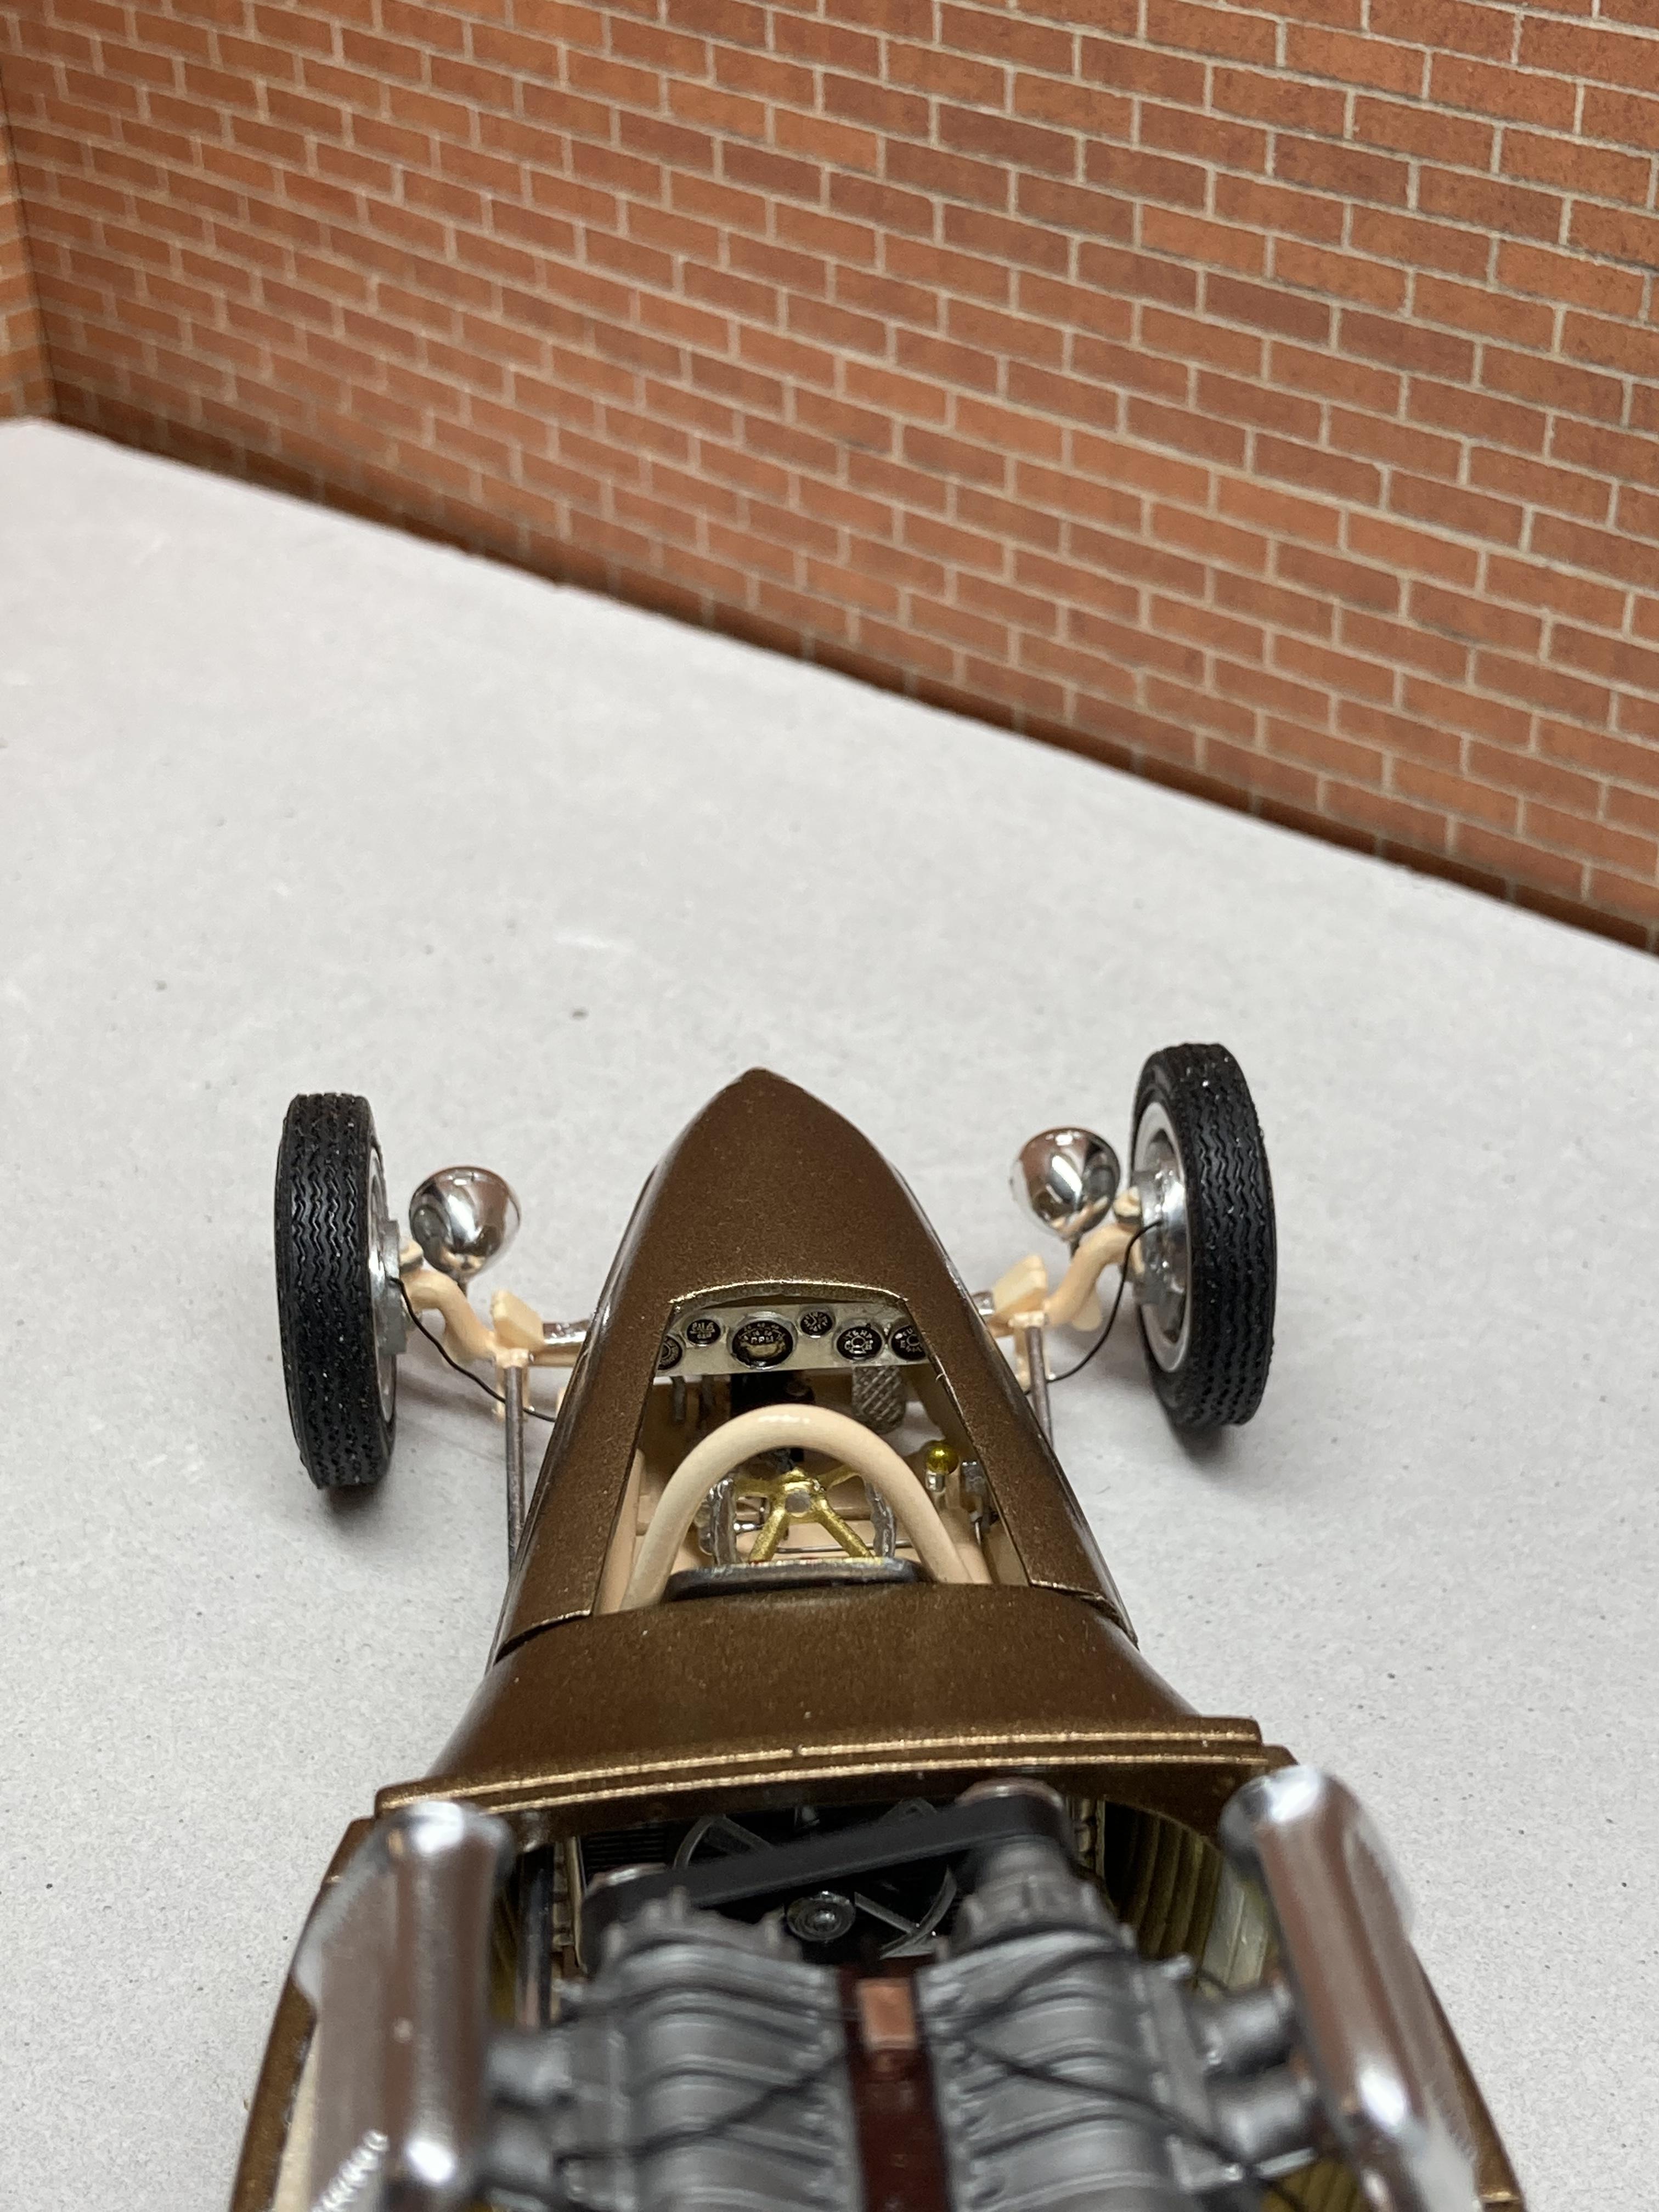
Thanks, I appreciate that. I think I got a little overly ambitious with the details knowing how little time we had. But I went for it! Thank you, the hood was a little tricky for a minute but I’m super happy with it. I have an idea for a ‘32 with a similar hood. And yes! The engine bay is one of my favorite parts, I originally had it in my head that I’d paint it some obnoxious pink with a very “Roth-esque” feel but I painted the engine first and couldn’t bring myself to go back. I love the plausibility factor, although there’s one big flaw….I didn’t put steering linkage on it….hahaha whoops. I’d love to build a full scale version of this.
-
Thanks, I’m glad y’all enjoy it. Part two is in the works. Trying to find the right wheels for what I have in mind is not easy. @CabDriver yes, you definitely need to get some pics posted. I’ve been looking forward to seeing your finished build on here.
-
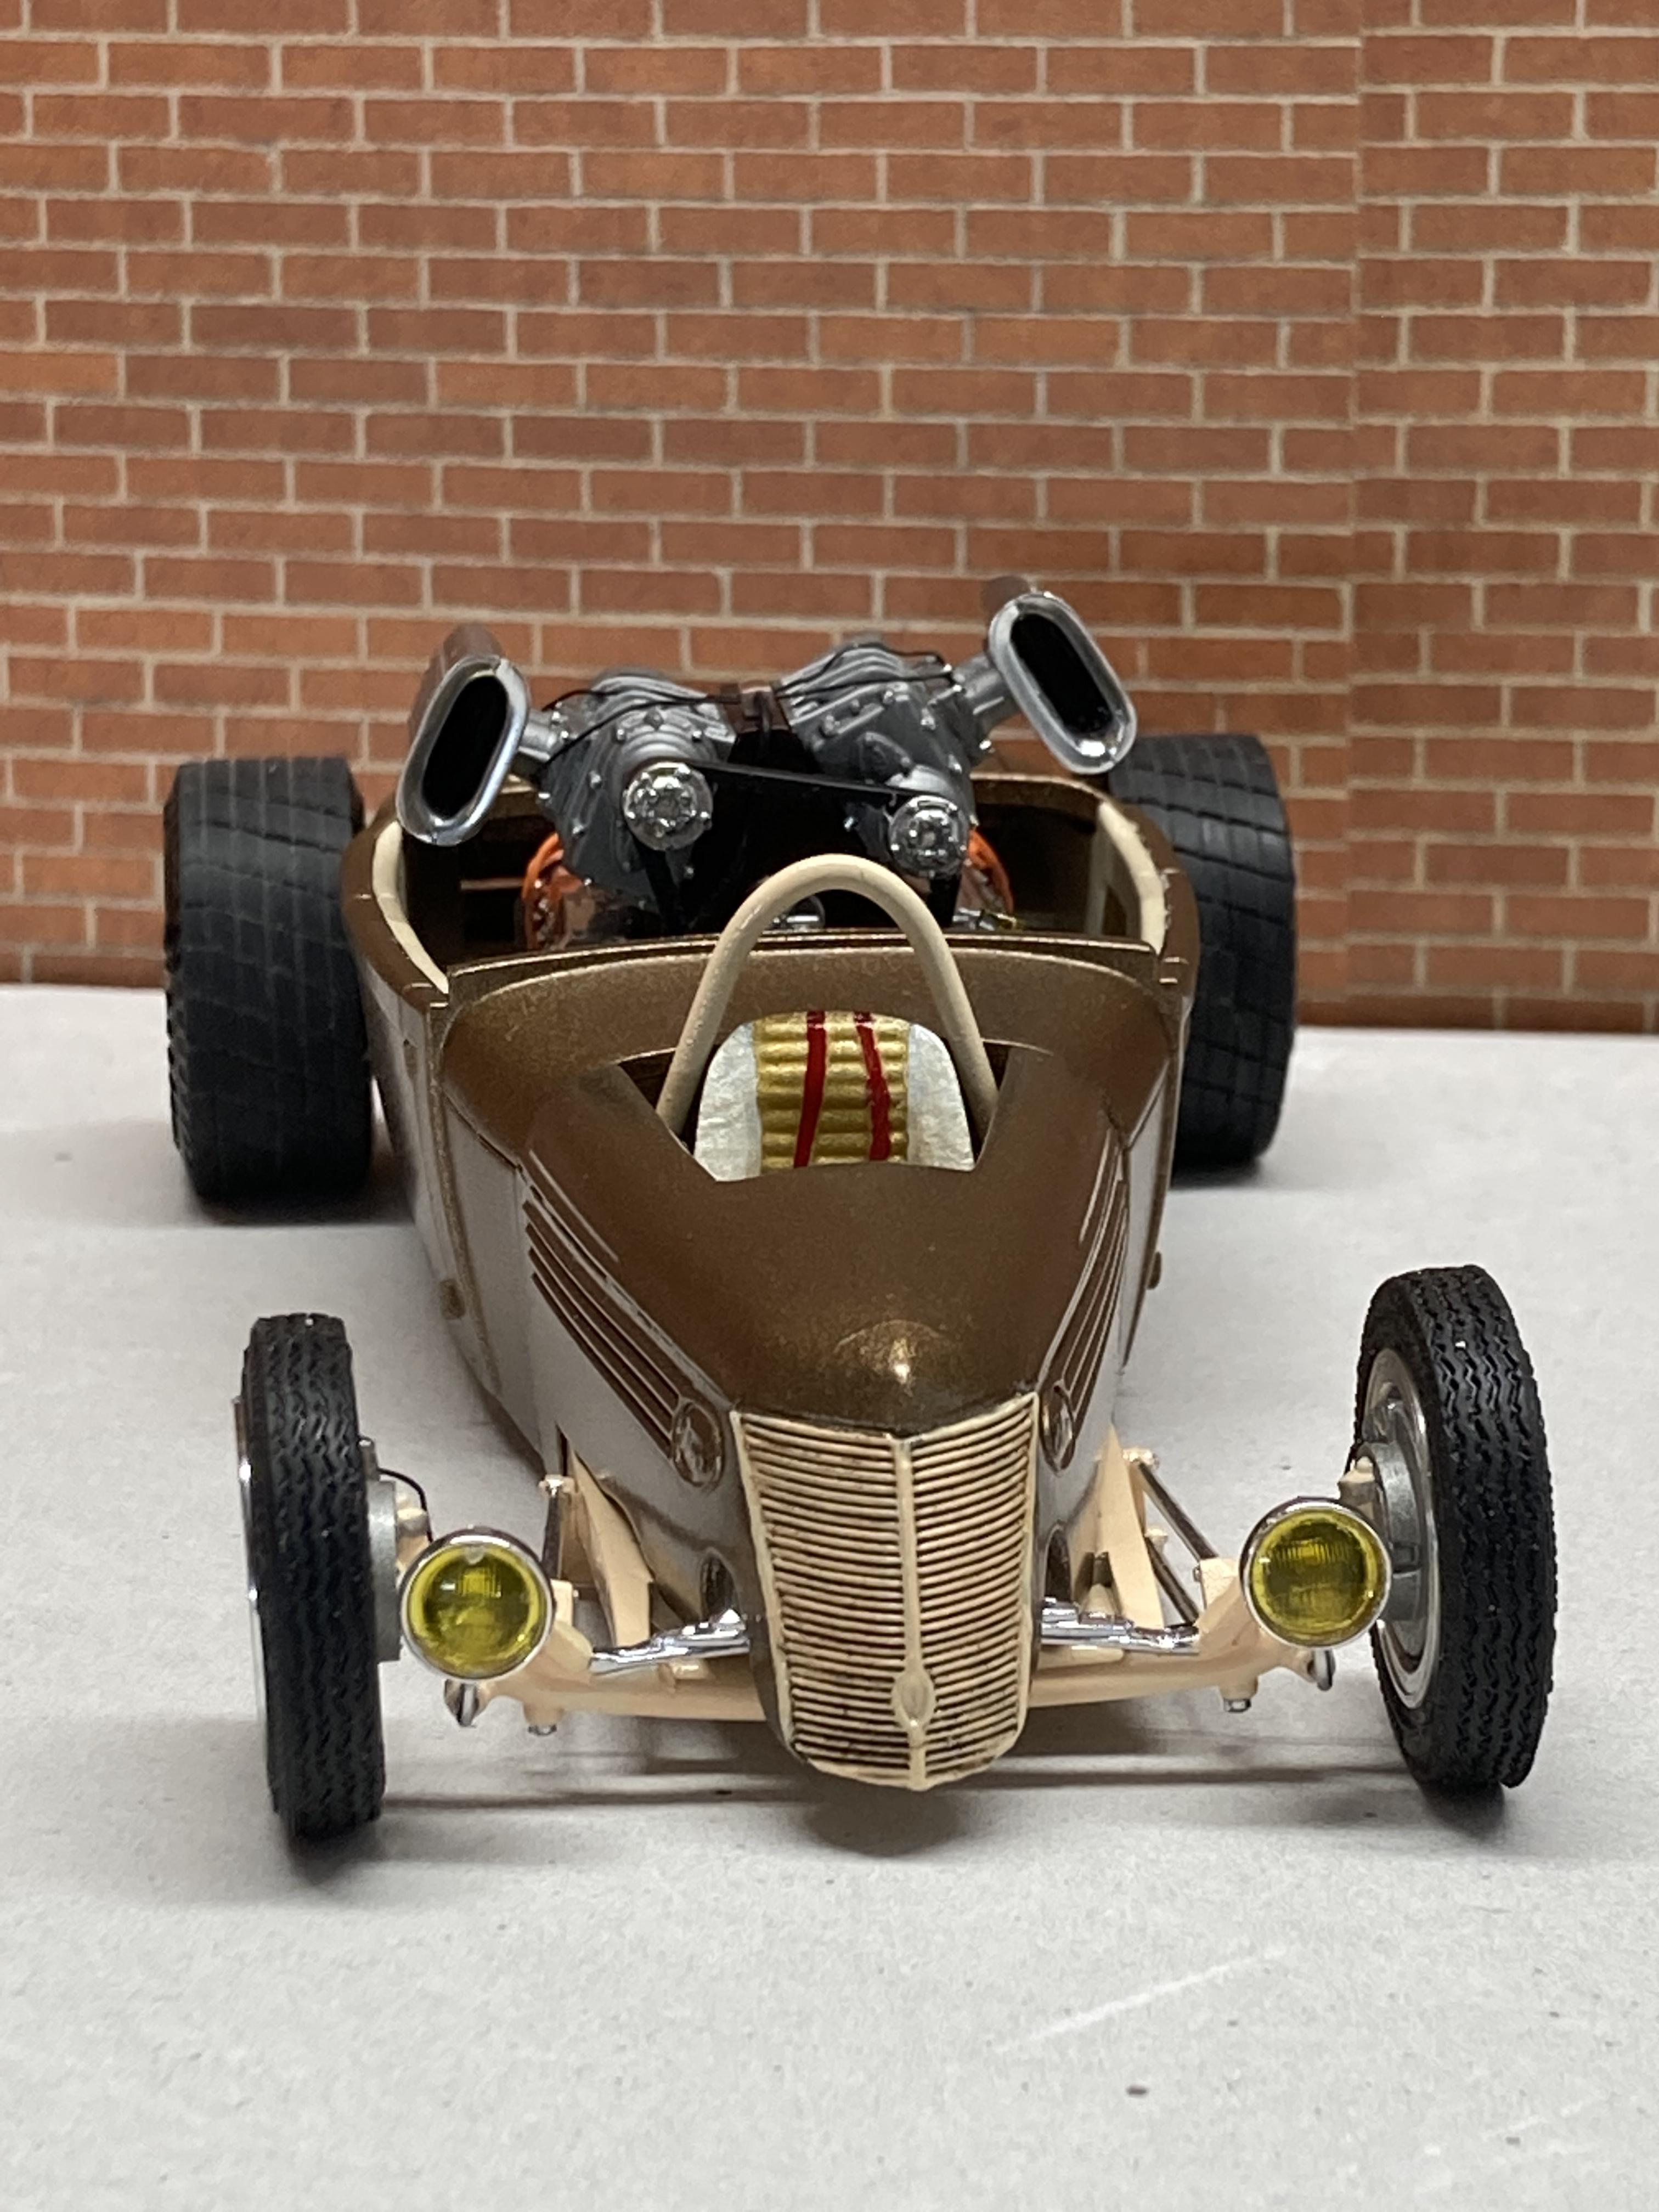
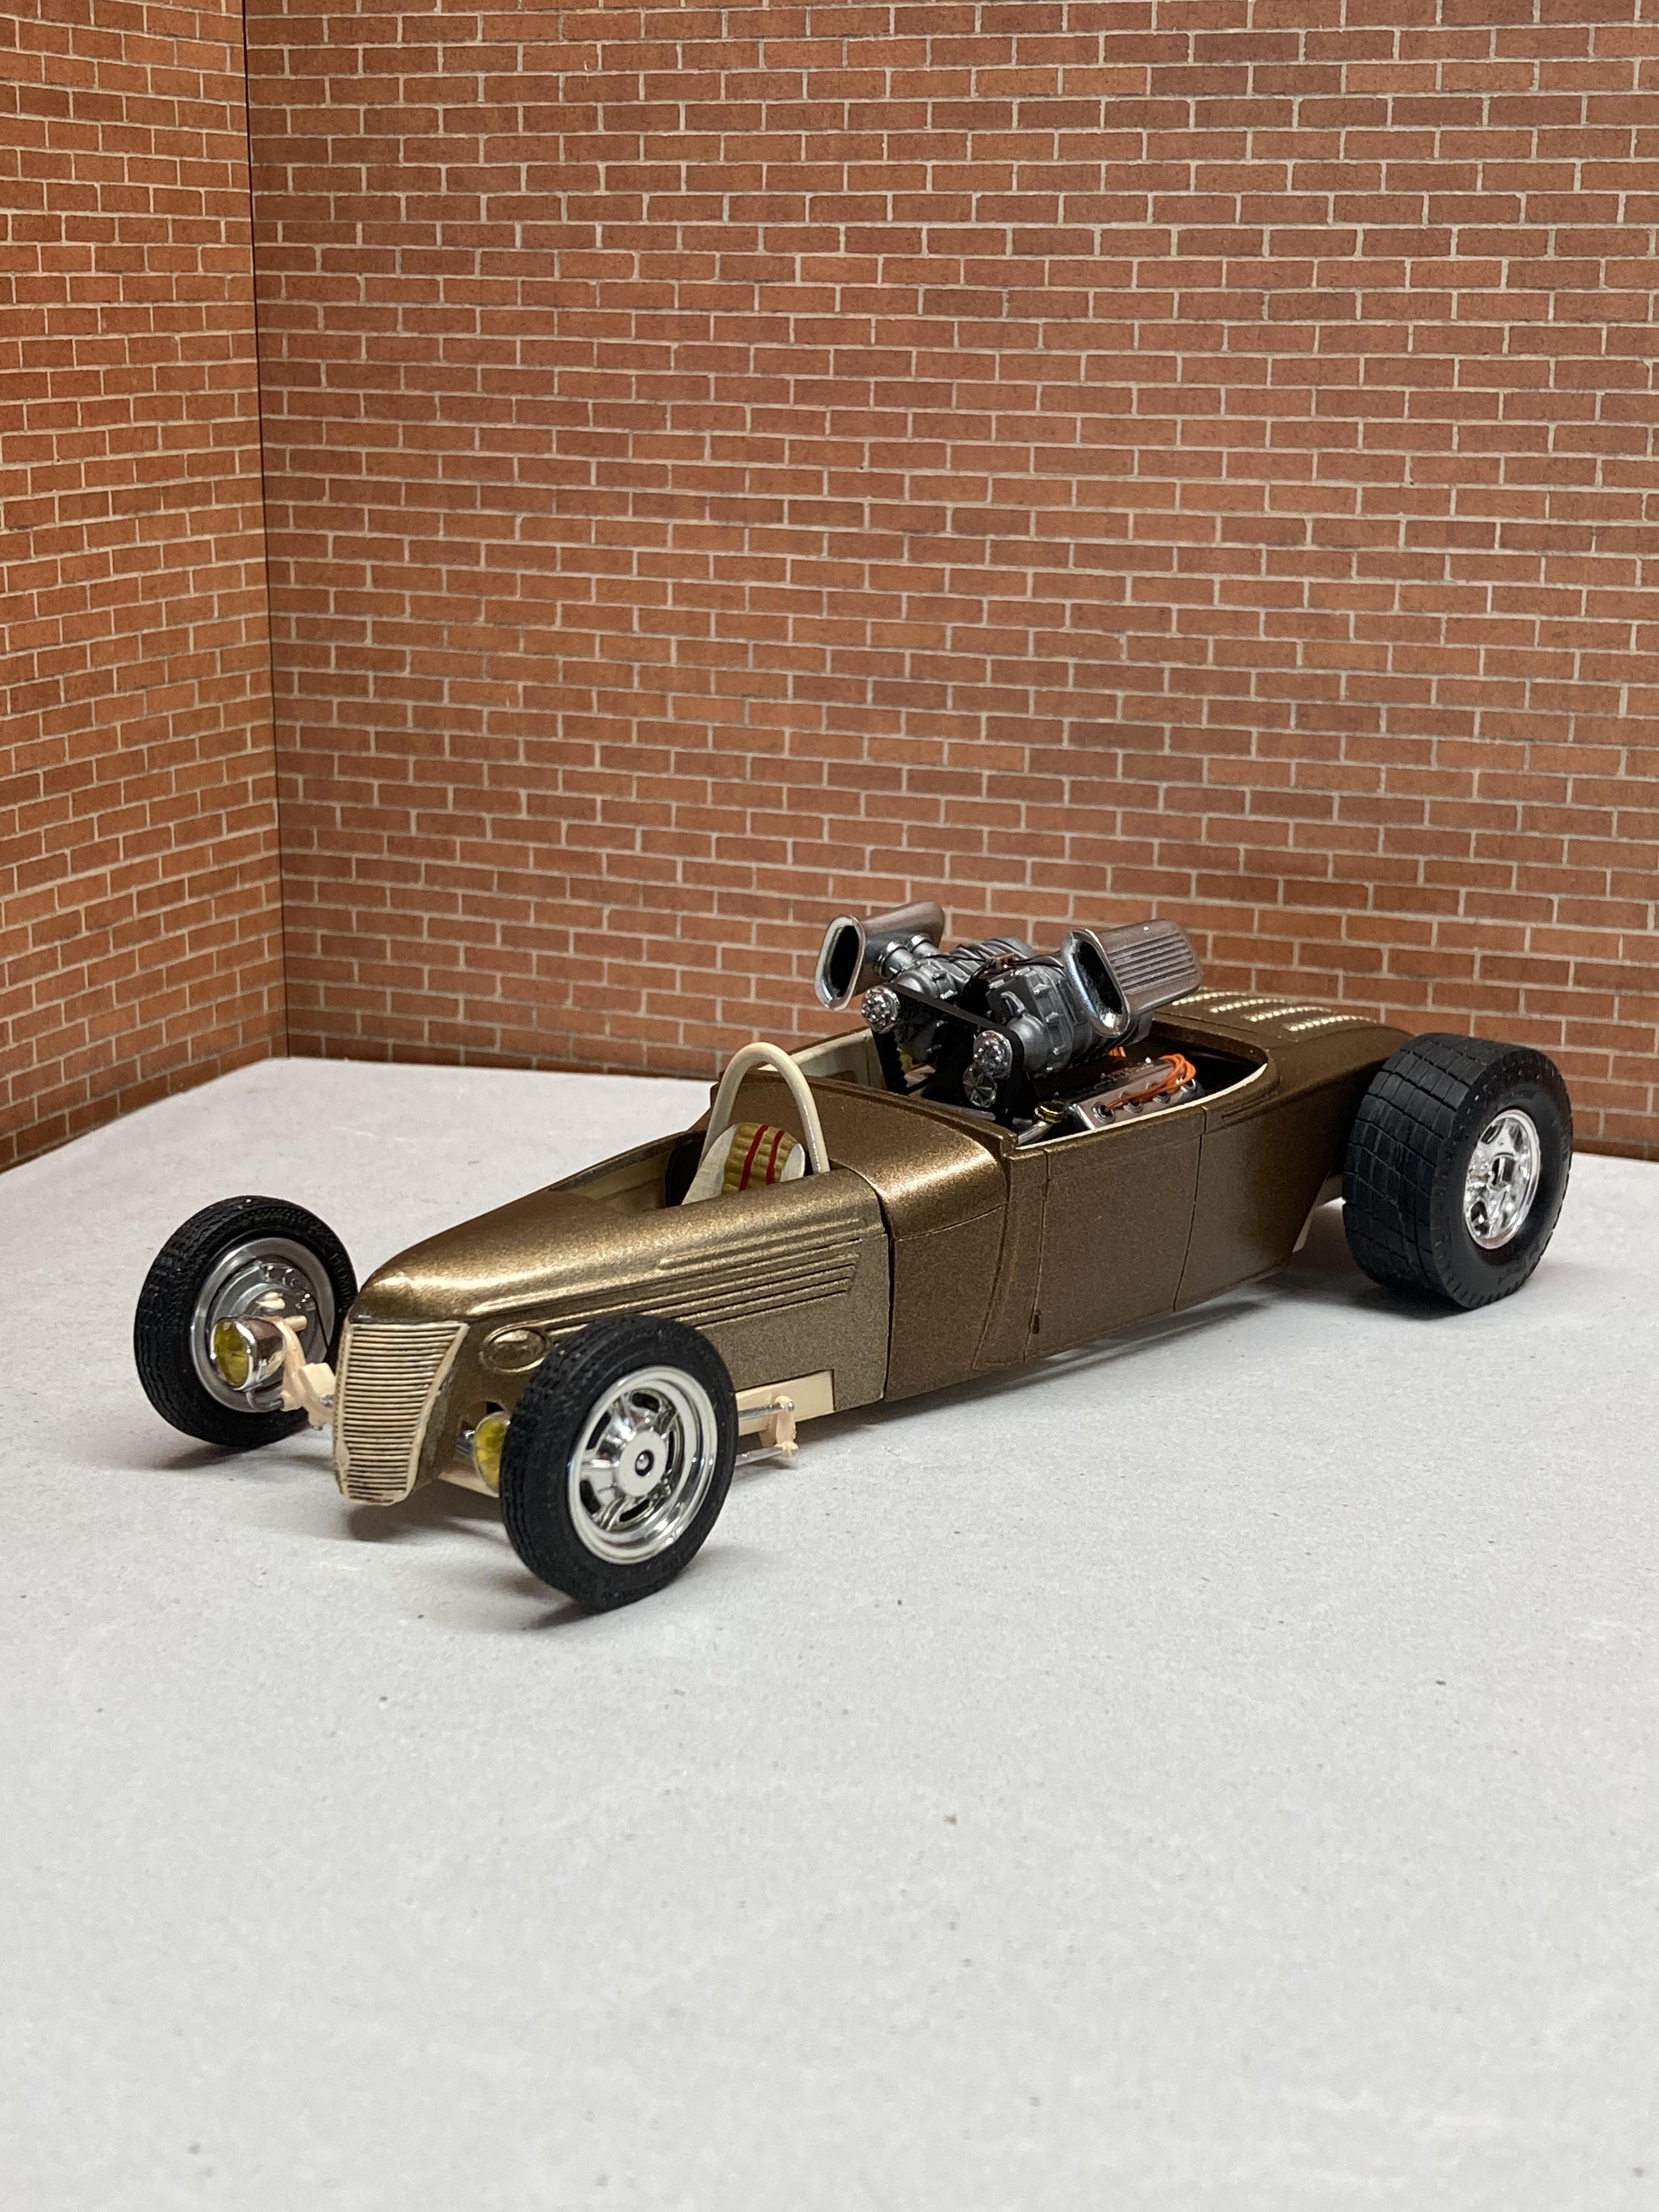
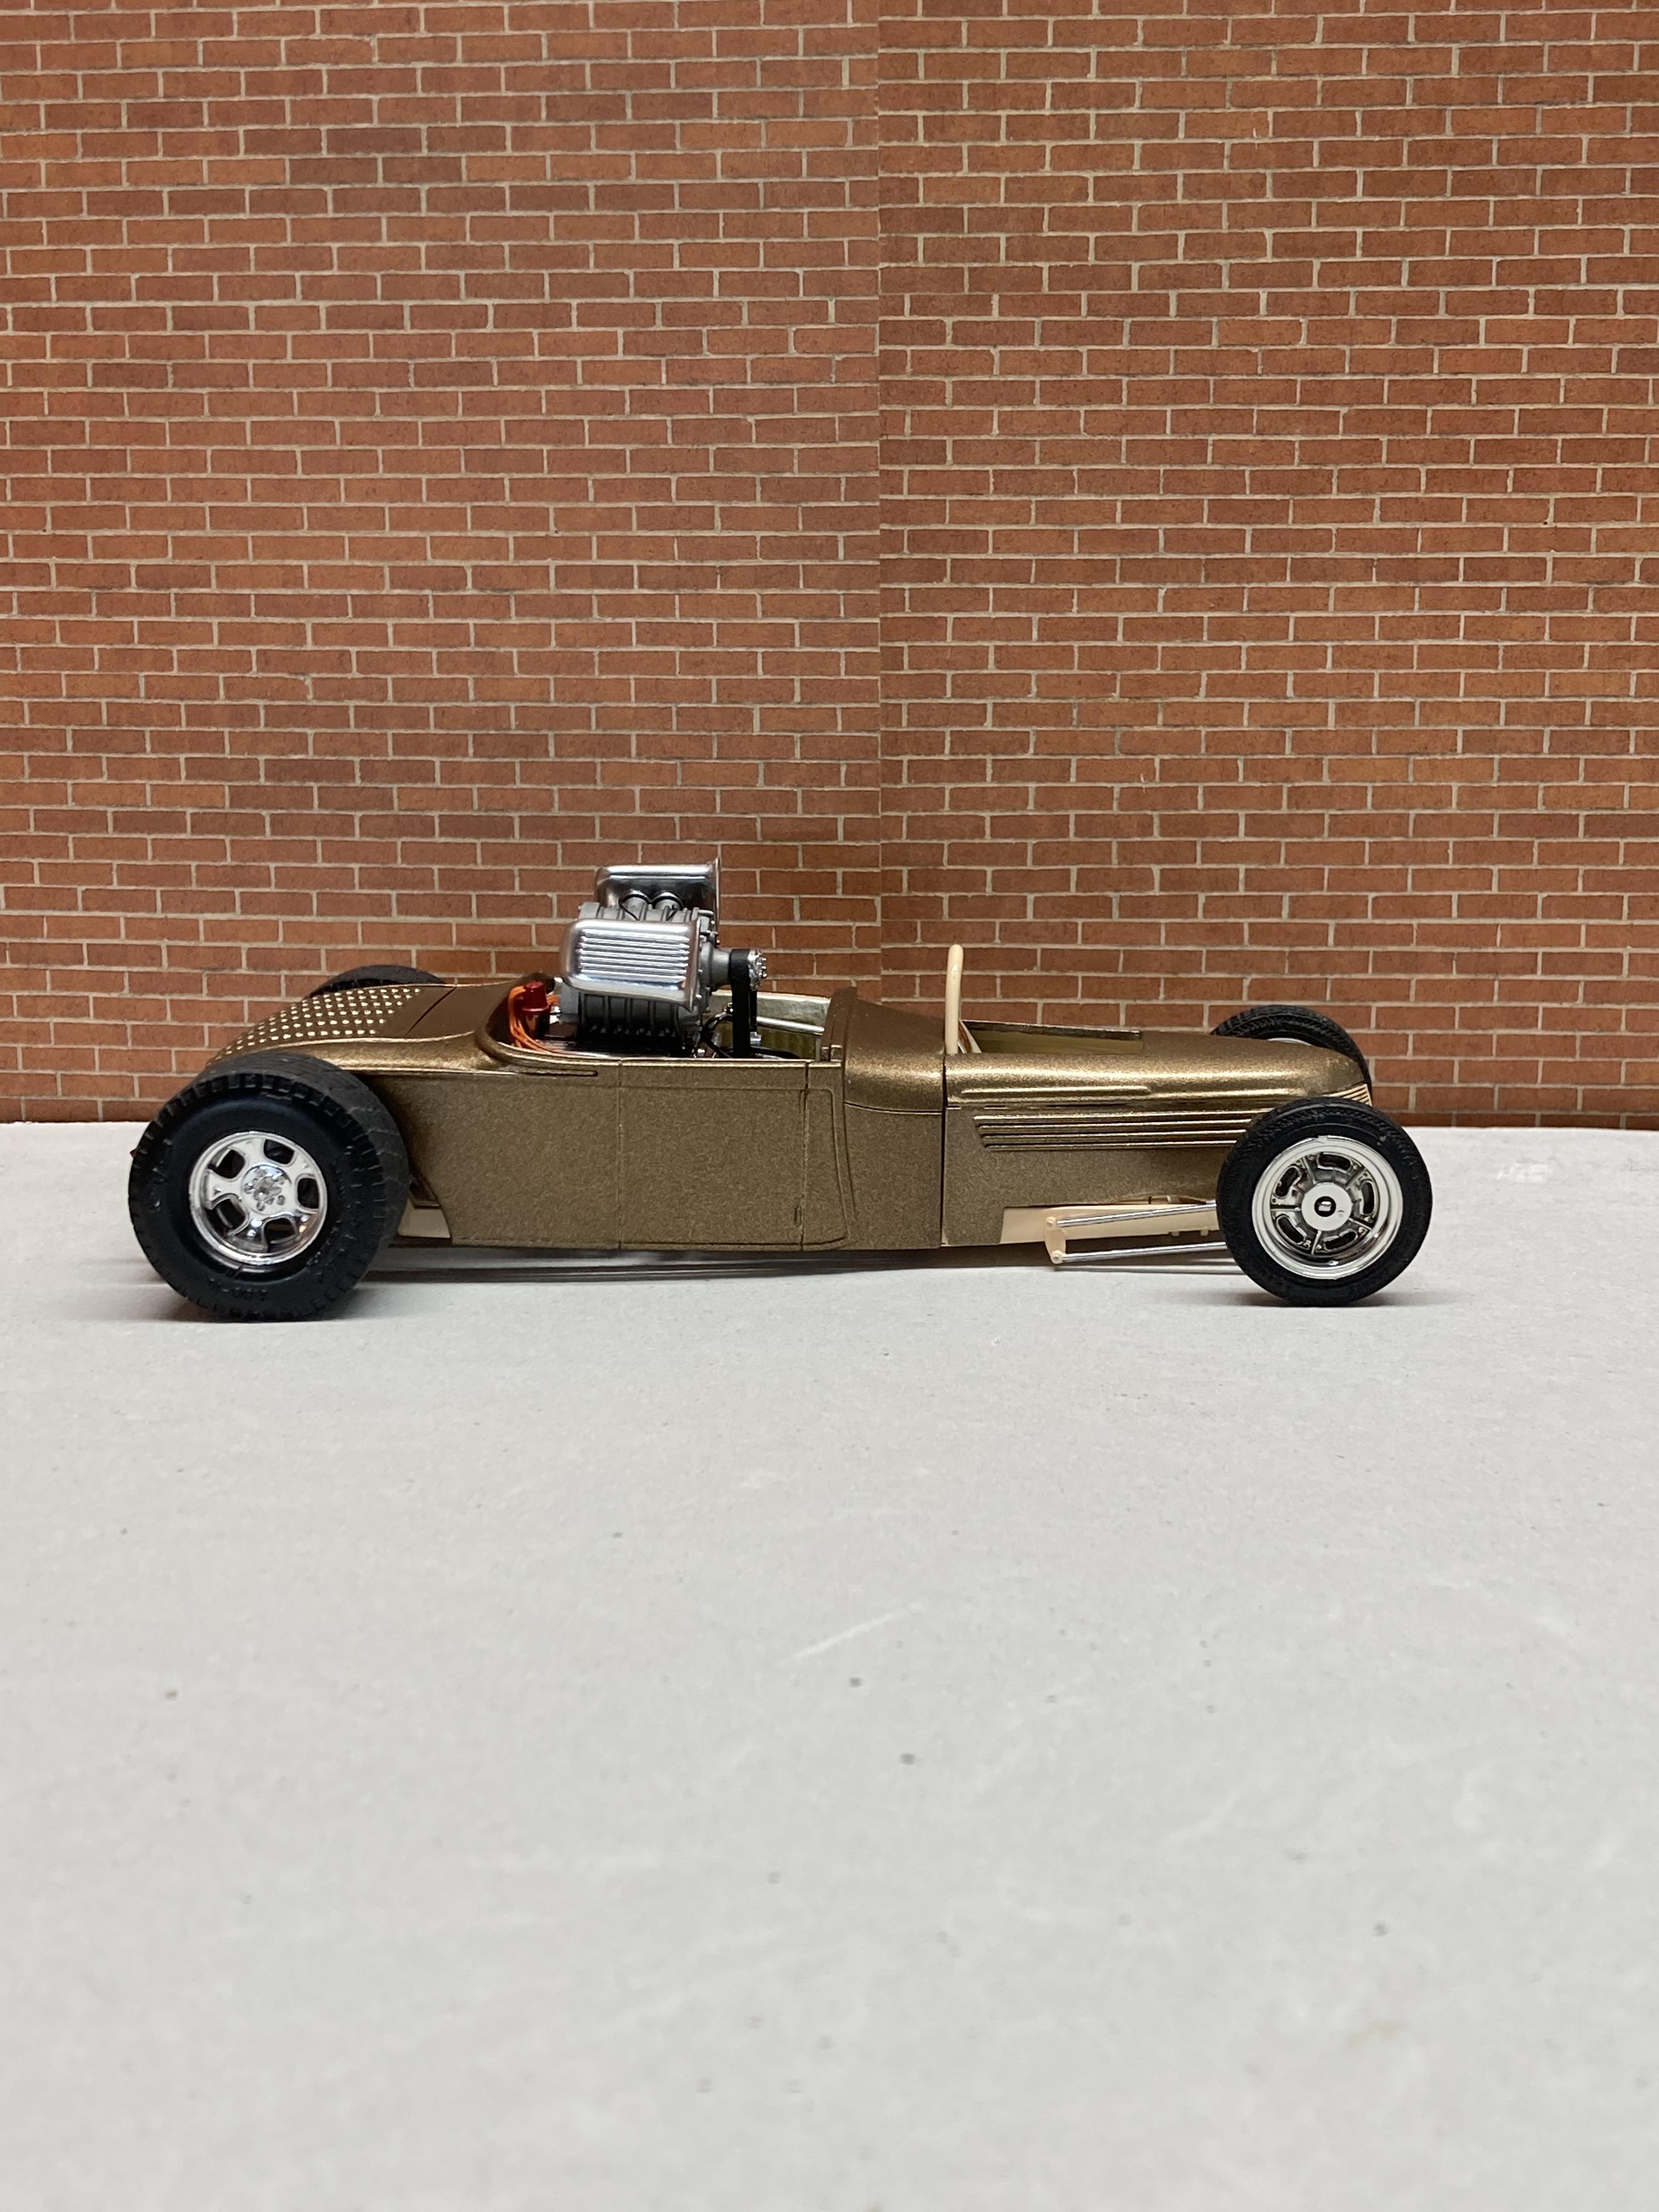
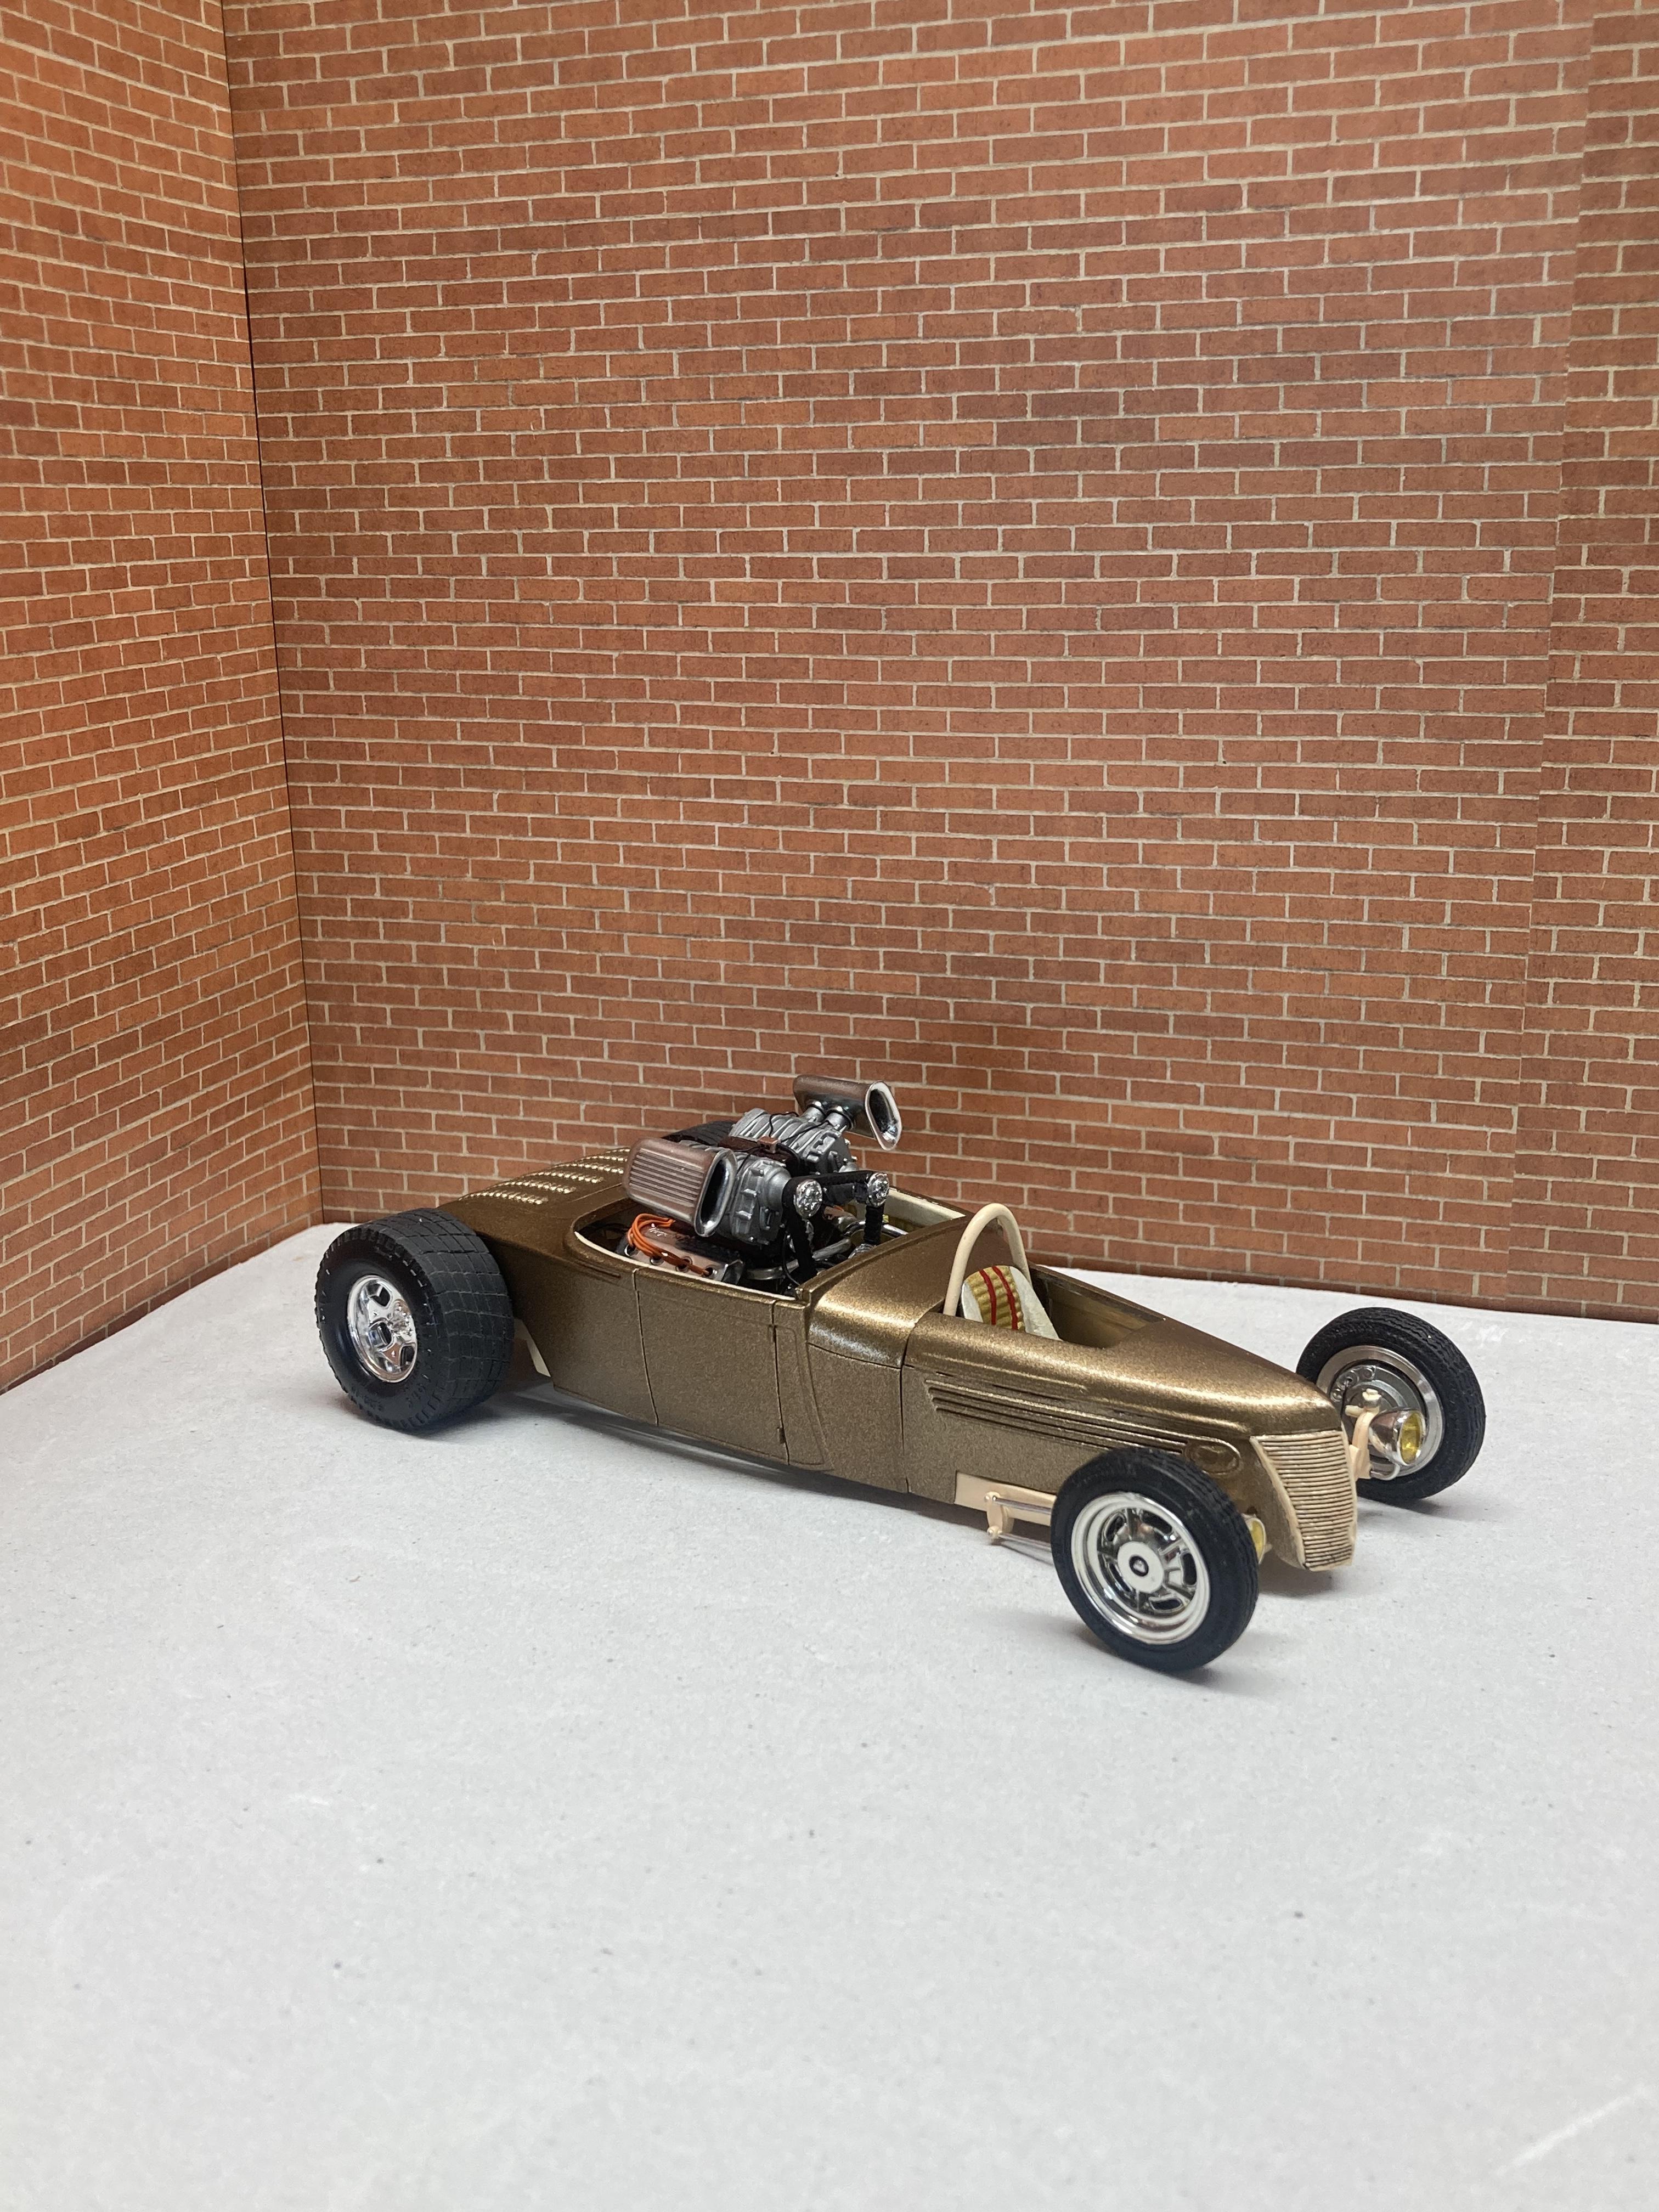
Finally calling this one done. I joined @CabDriver in a December parts box build but took a couple extra weeks to finally get it done. Life happens. Not my most proud but this is also the first build I’ve completed since probably 2007 except for a couple snap kits and one quick ramcharger kit for a kid. There are plenty of flaws and I’m okay with that. Felt good to use what I already had and try a few new techniques. The paint isn’t the greatest, it’s testors extreme lacquer. First time using it and lemme tell you, it does not do well over tamiya white putty. It caused almost every bit of putty to shrink as left lines at the seems. Live and learn. Some stuff is crooked, I missed a couple pieces and forgot to build some stuff until after I had layed paint. Oh well. Here it is. Thanks for looking and thanks to everyone that has followed along and thanks for the feedback. On to the next.
-
Thanks, Sam! I’m officially calling this one done and making a post in the “under glass” section. Here’s one for…the r…road? Thanks for looking.
-
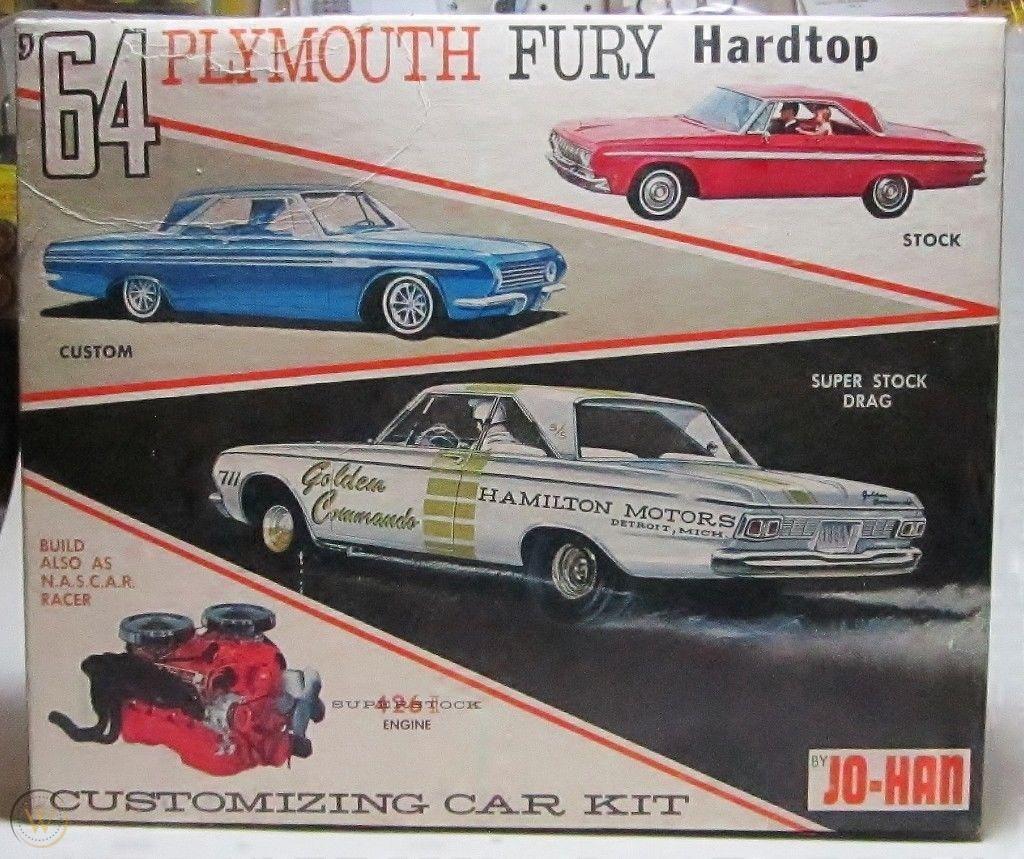
Does anyone have any info on these kits? I’ve been searching but not coming up with much other than one sold a while back and that it was 3 or 4 in 1 kit.
-
How big is your... stash?
Tarkmucker replied to Pierre Rivard's topic in Model Building Questions and Answers
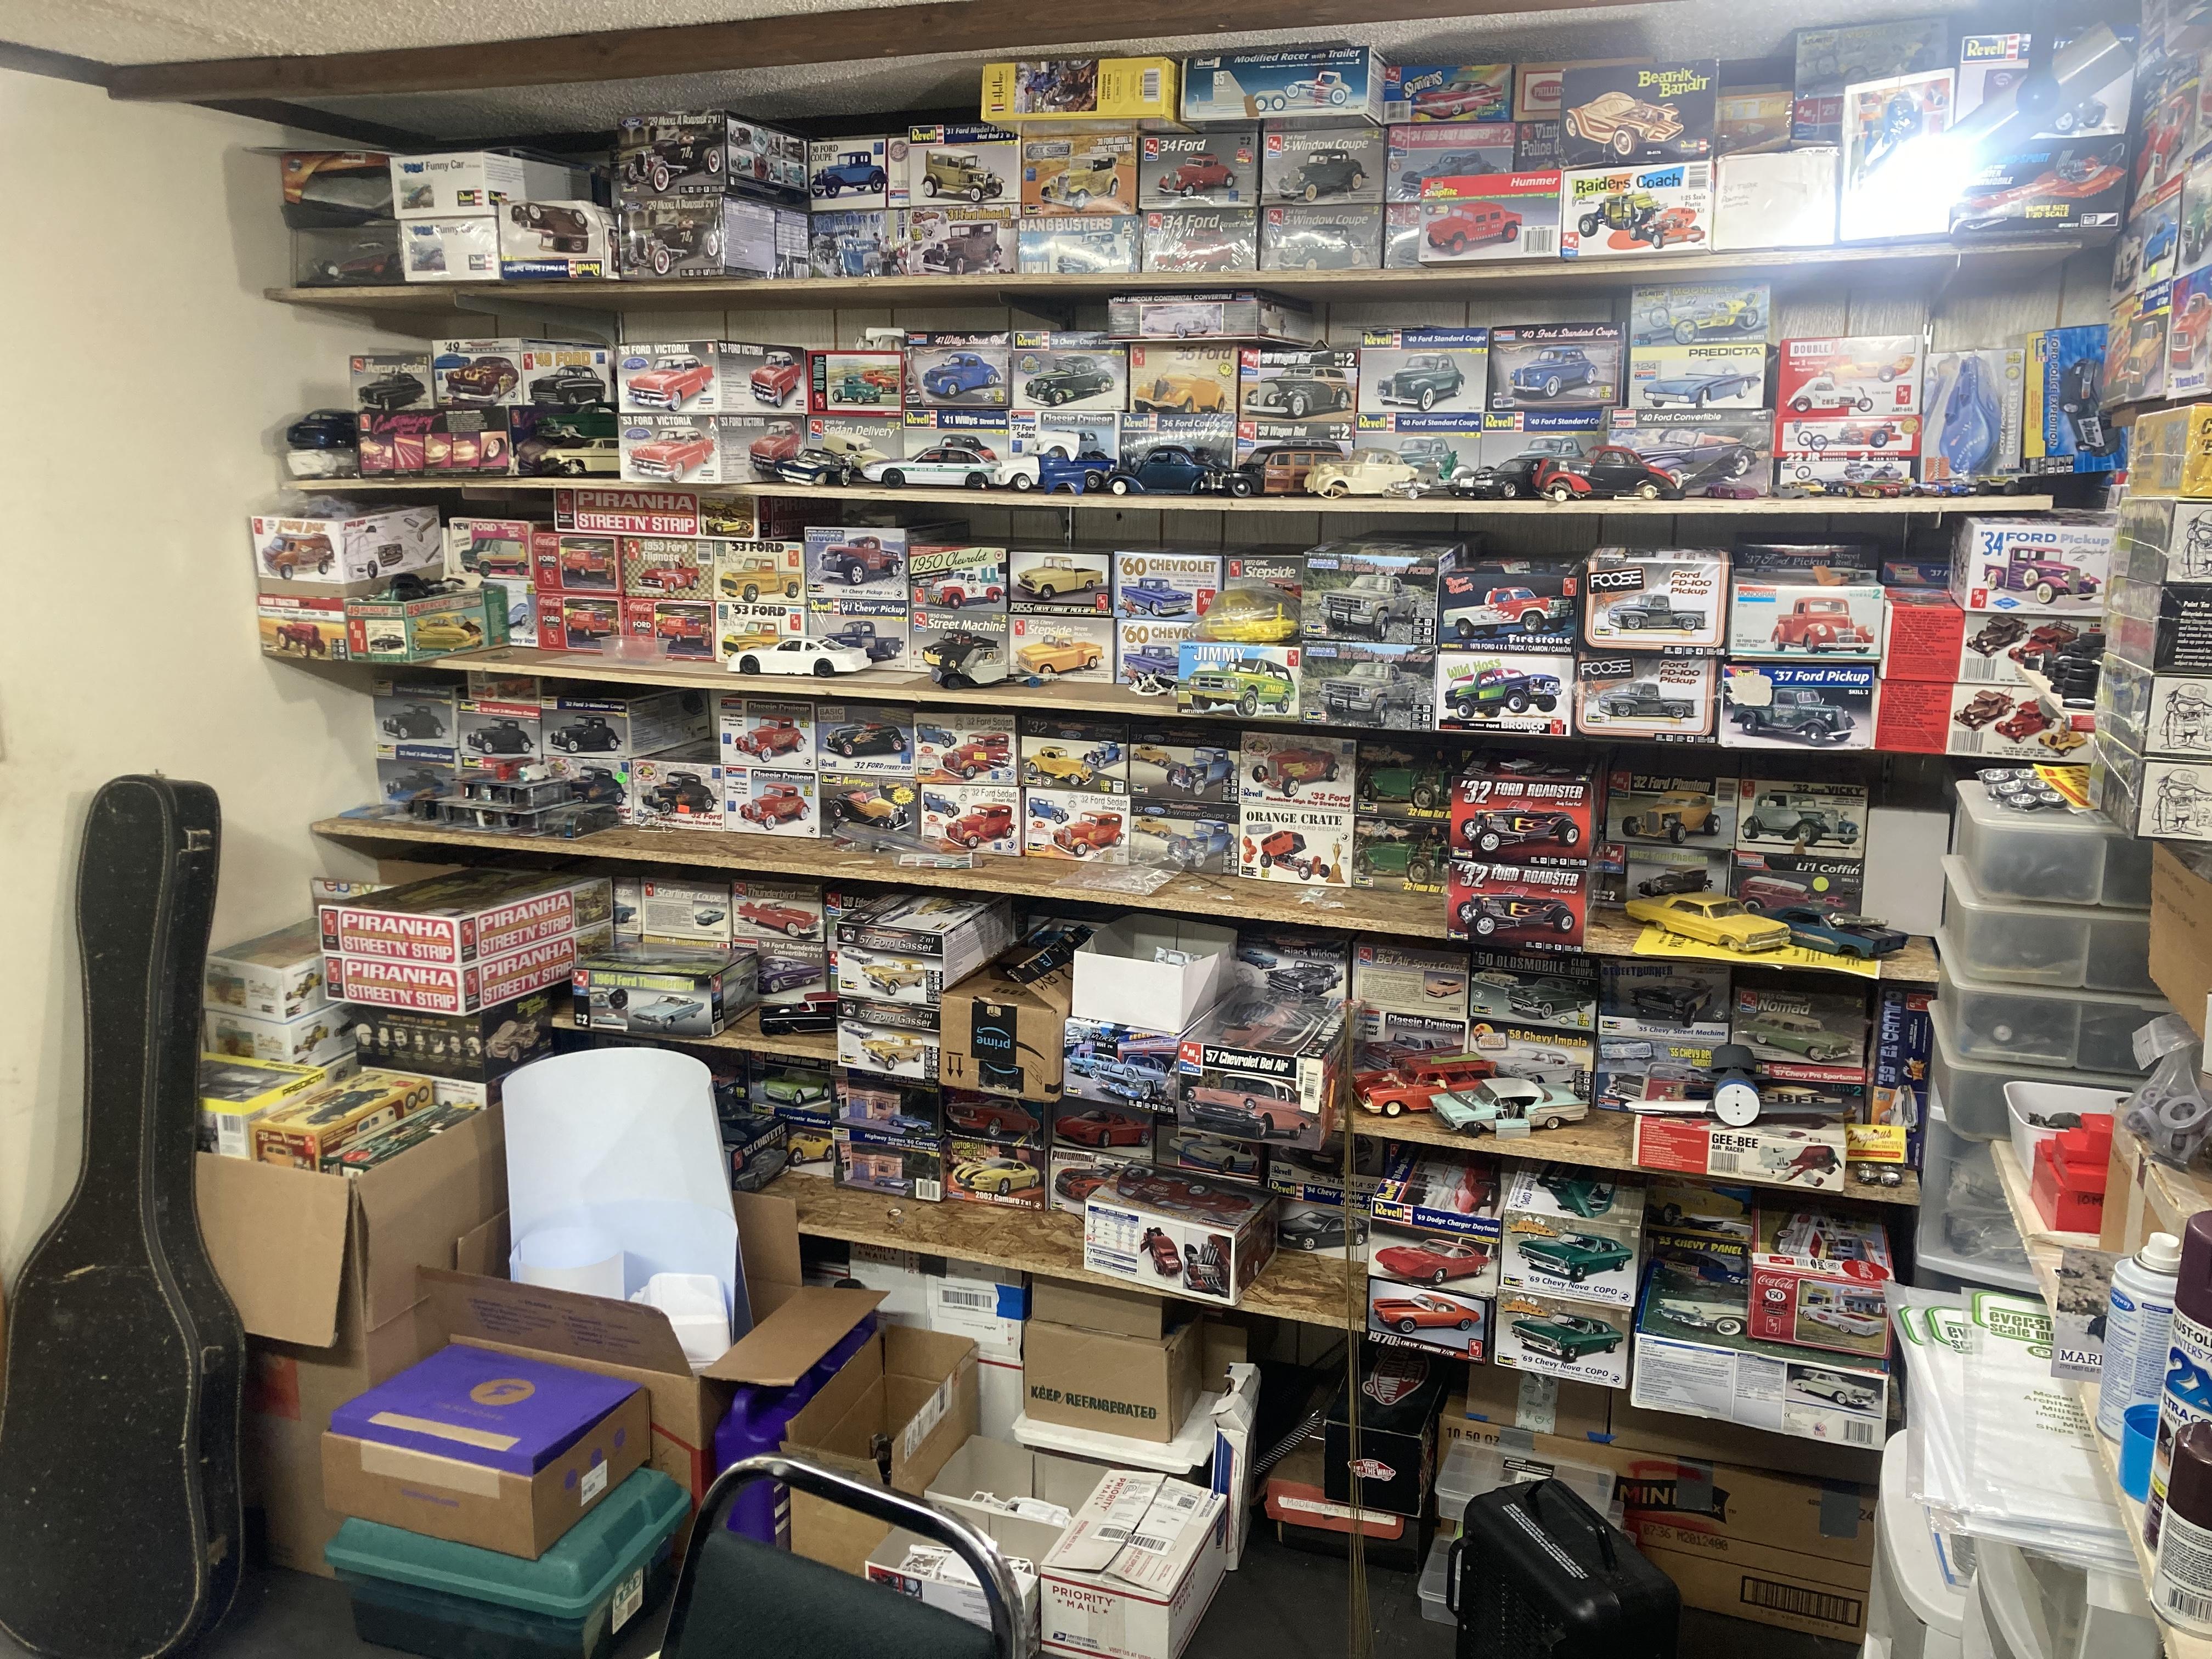
I counted all my kits in boxes a few months ago, I was somewhere around 500. That doesn’t include the ones that have two kits in a box, unboxed kits, big scale kits/motorcycles, or piles of parts to make full builds. Since then I think I’ve added another 150 kits….maybe close to 200. I stopped building for a while but now that I’m into it again I just keep buying kits I want to build since I can’t find anything I wanted 10 years ago at a reasonable price anymore. Kits that used to be on the shelf at Michaels/AC Moore and Hobby Lobby (like the Revell 32 sedan) seem impossible to find. And every time I sell one thing on eBay I buy six more lol. At least it keeps me busy and happy. And it gives me something to do when it’s too cold to work on motorcycles in the shed. -
Looking good man. I’m excited about this one. I love 40 fords and have a few in progress. This is making me want to get a couple of mine back in rotation
-
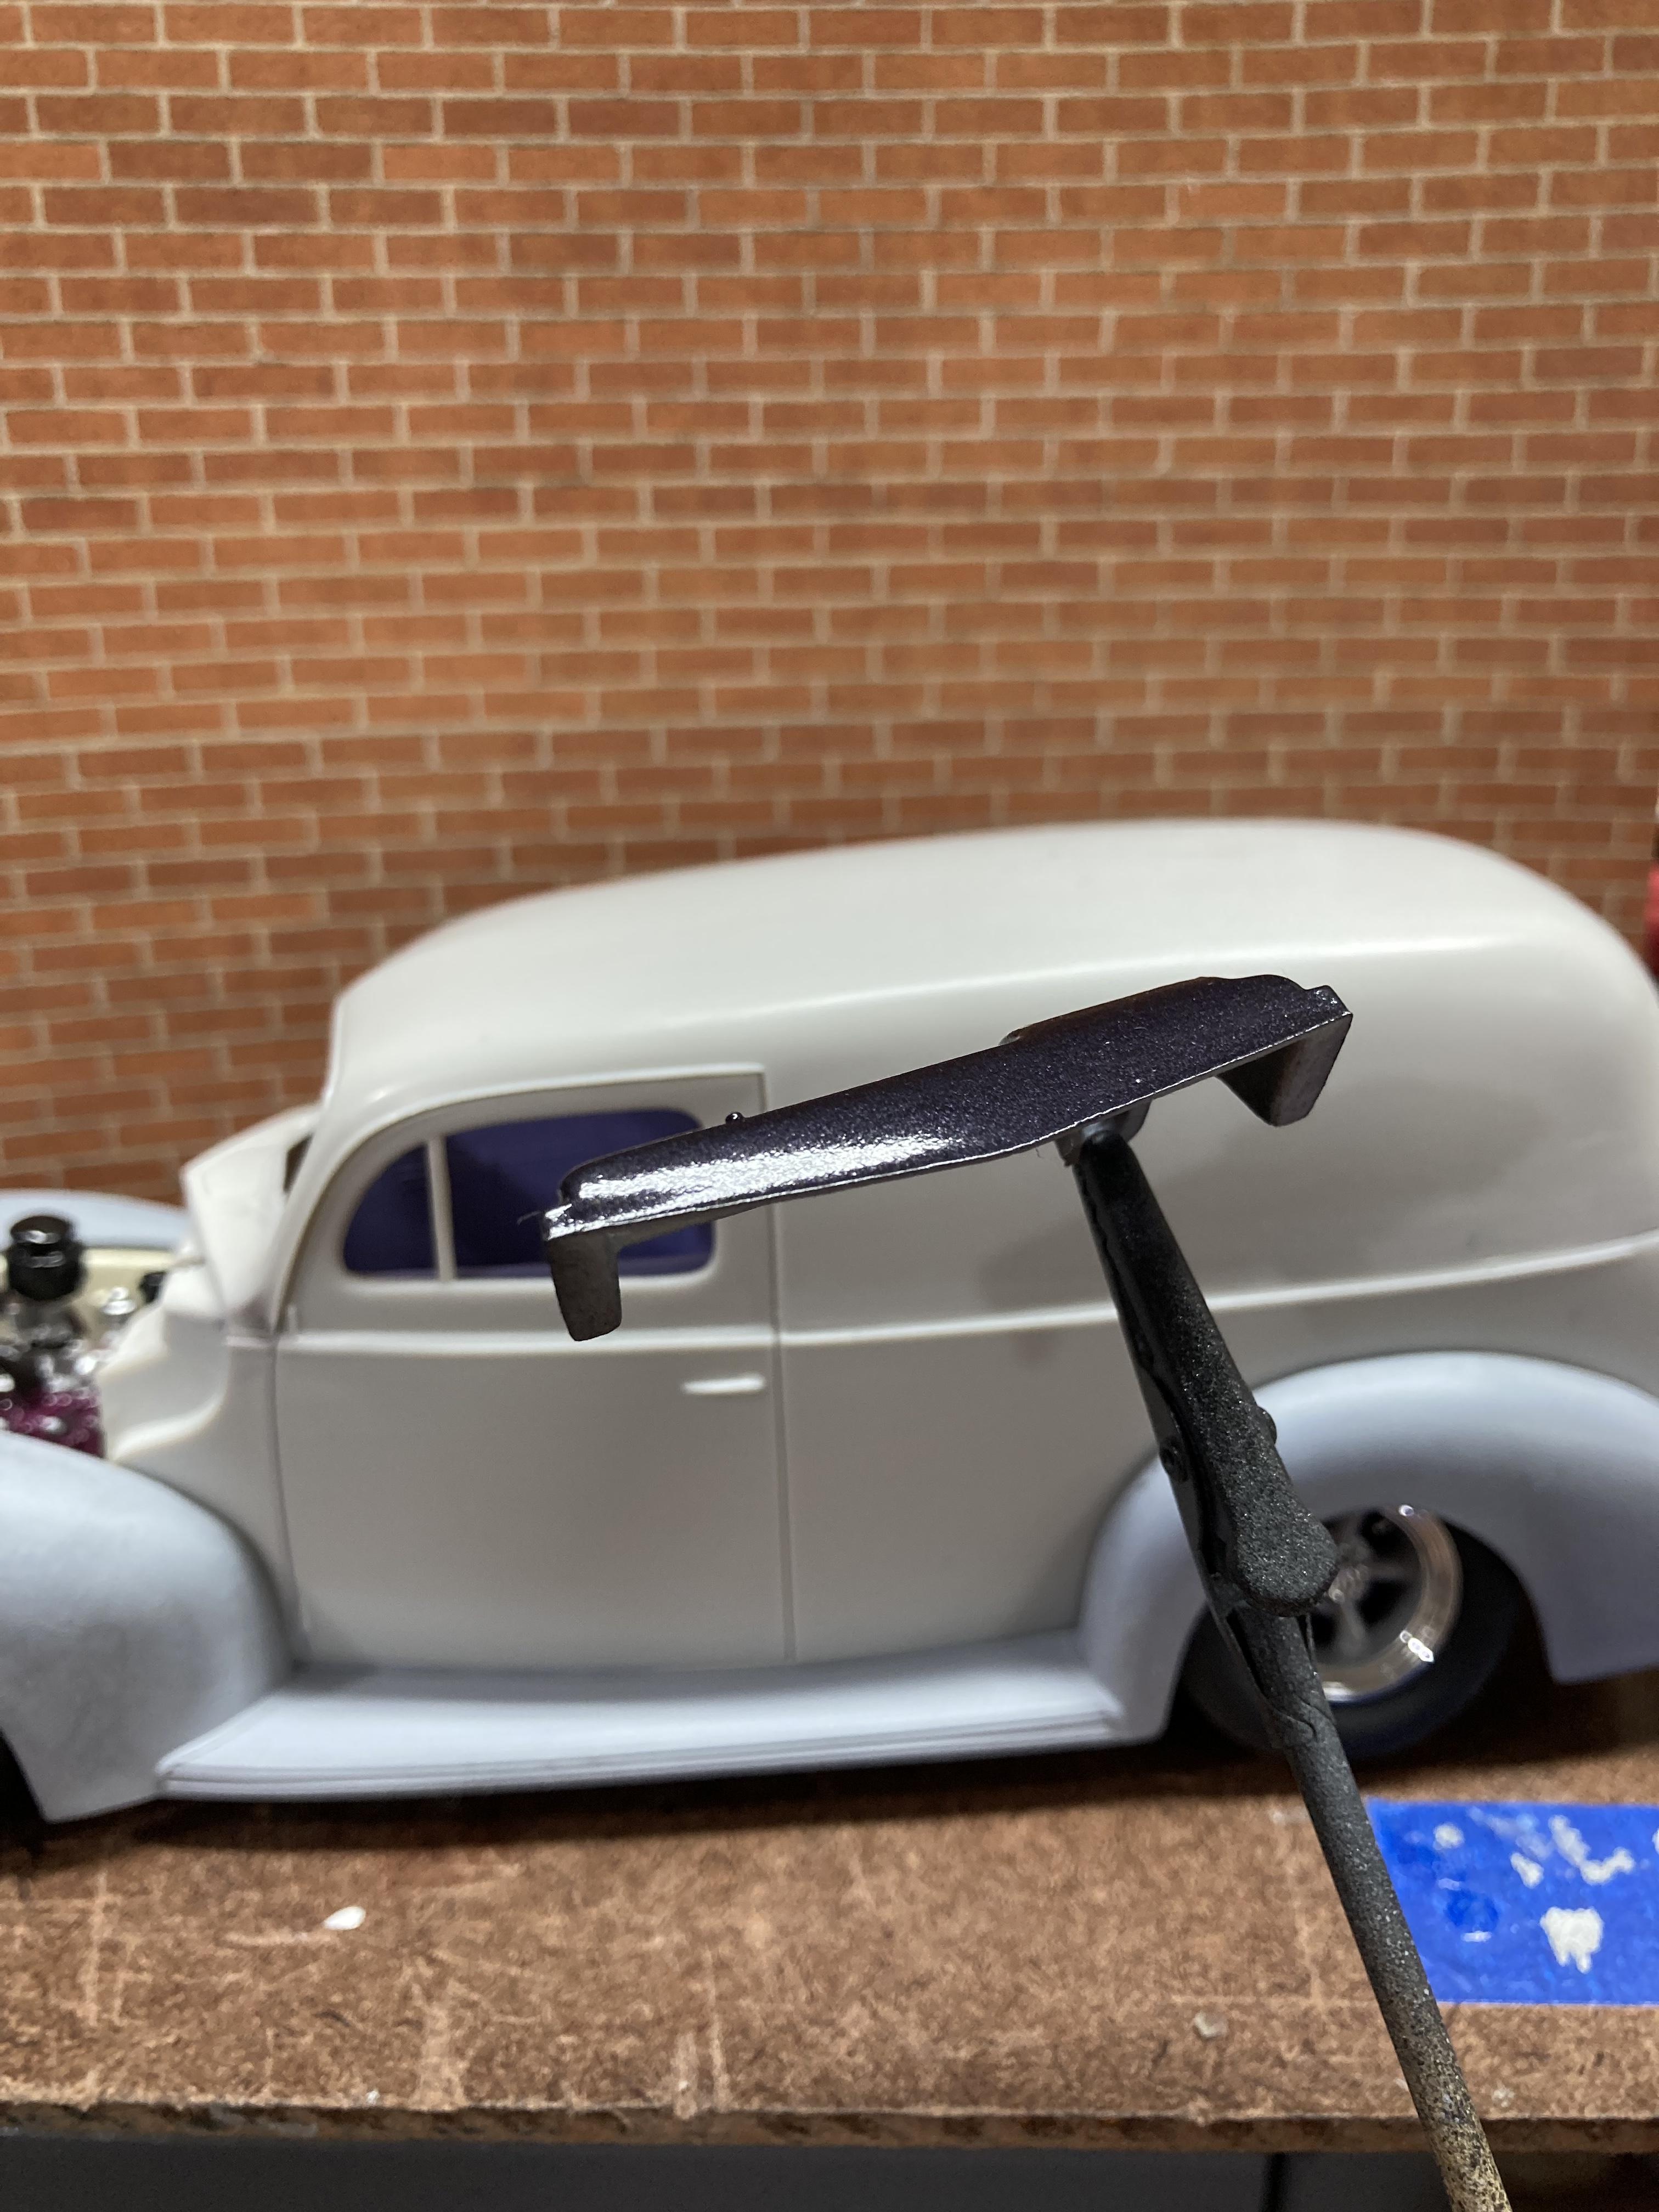
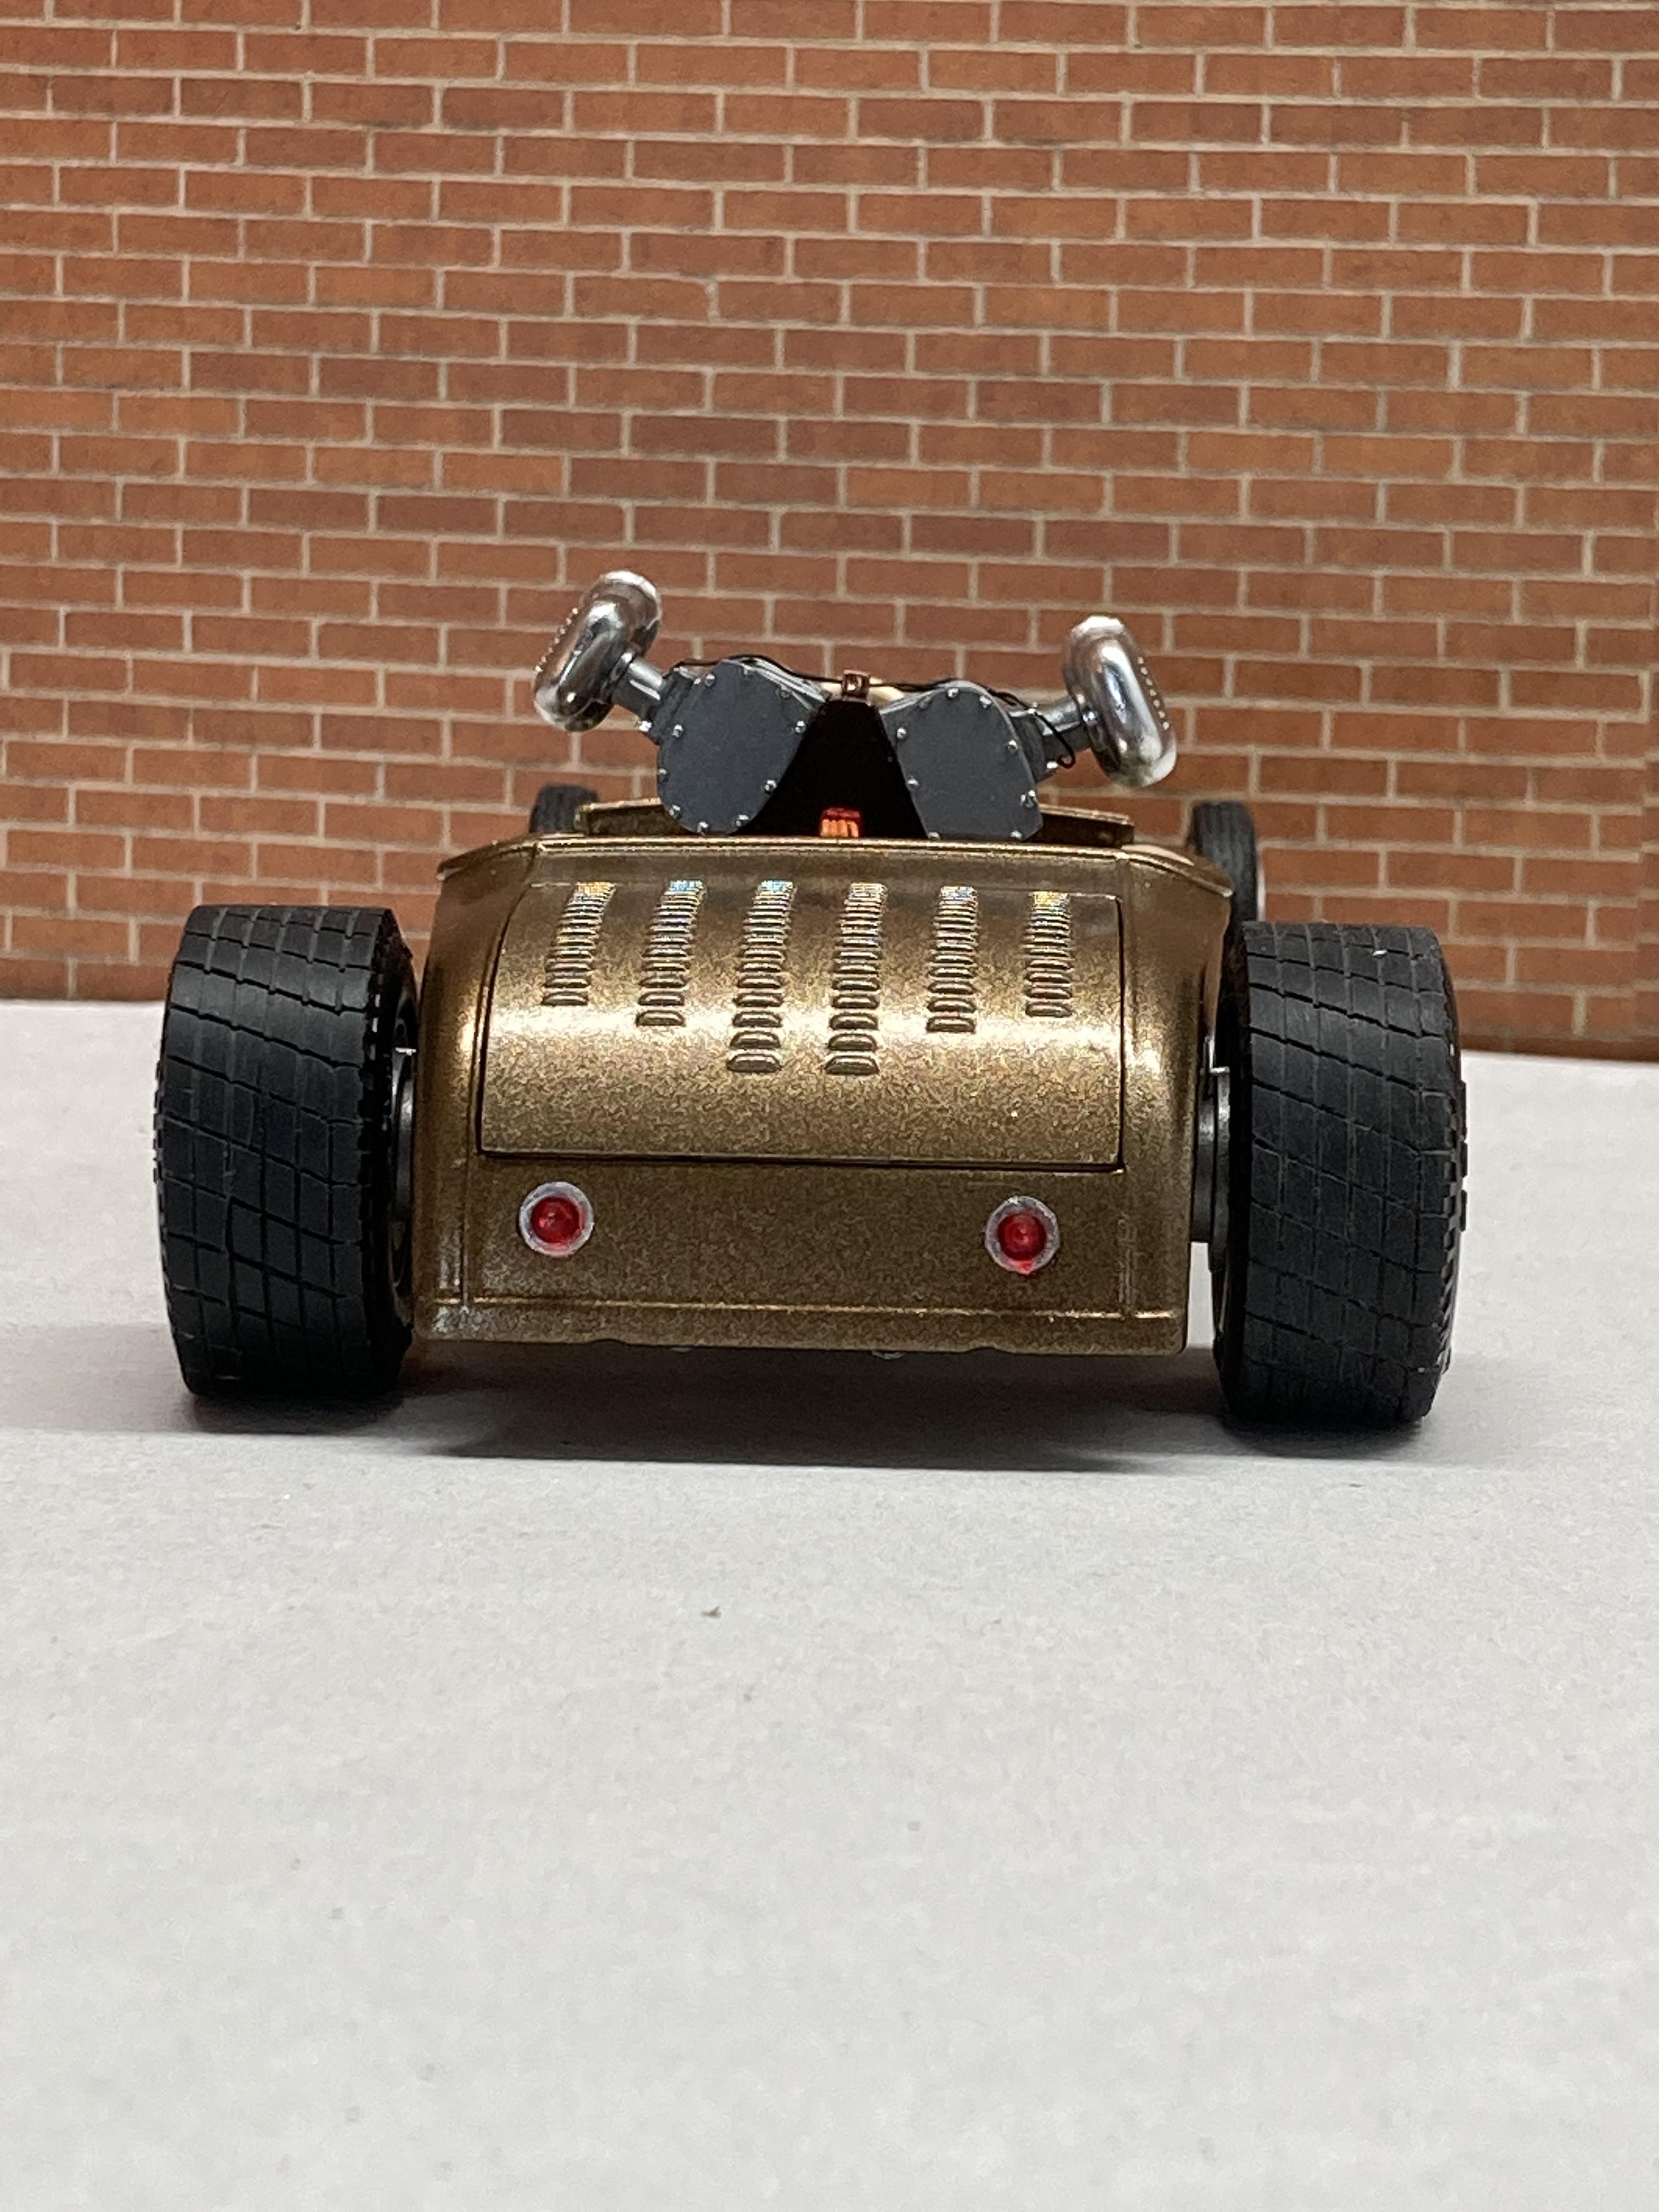
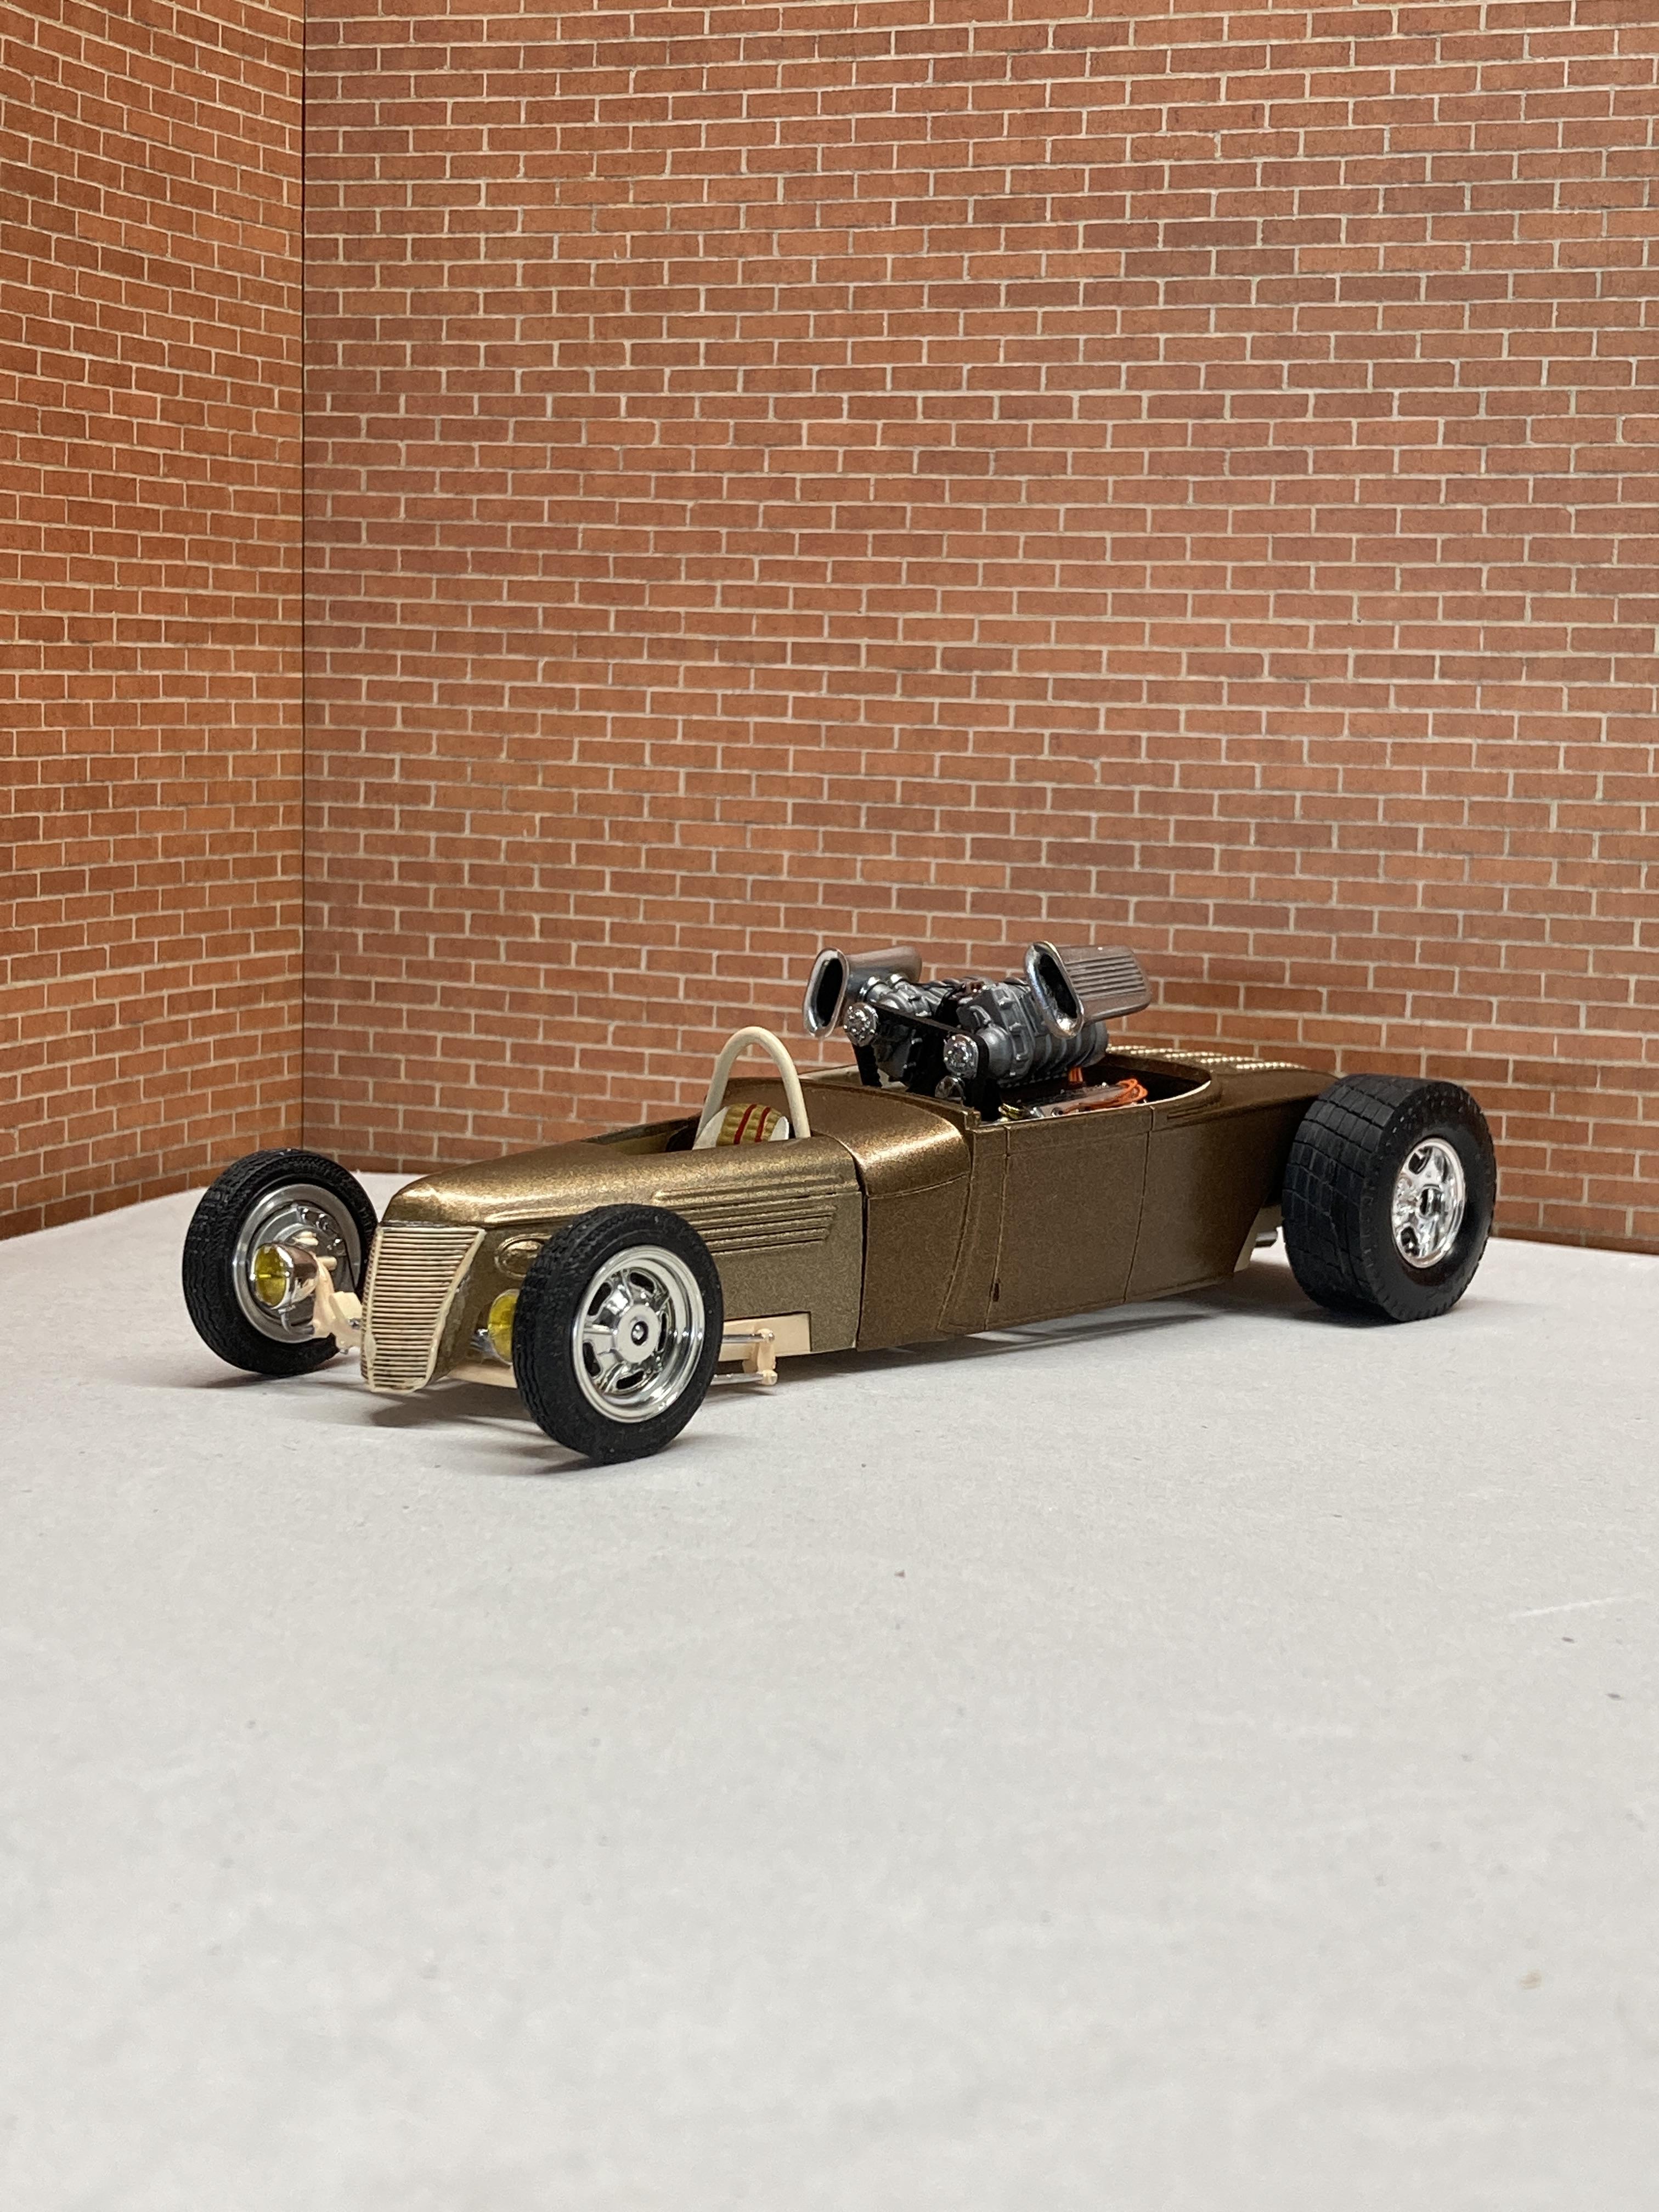
Been trying to get this thing done when I have time. Very close now, need to put the tail lights on, deck lid, headers, and last bit of shift linkage then I’m calling it done for now. And this last one from tonight with the brick wall facing the wrong way. As soon as this is off the bench I’m starting another project to go with this.
-
Thanks, Bob. More to come soon.
-
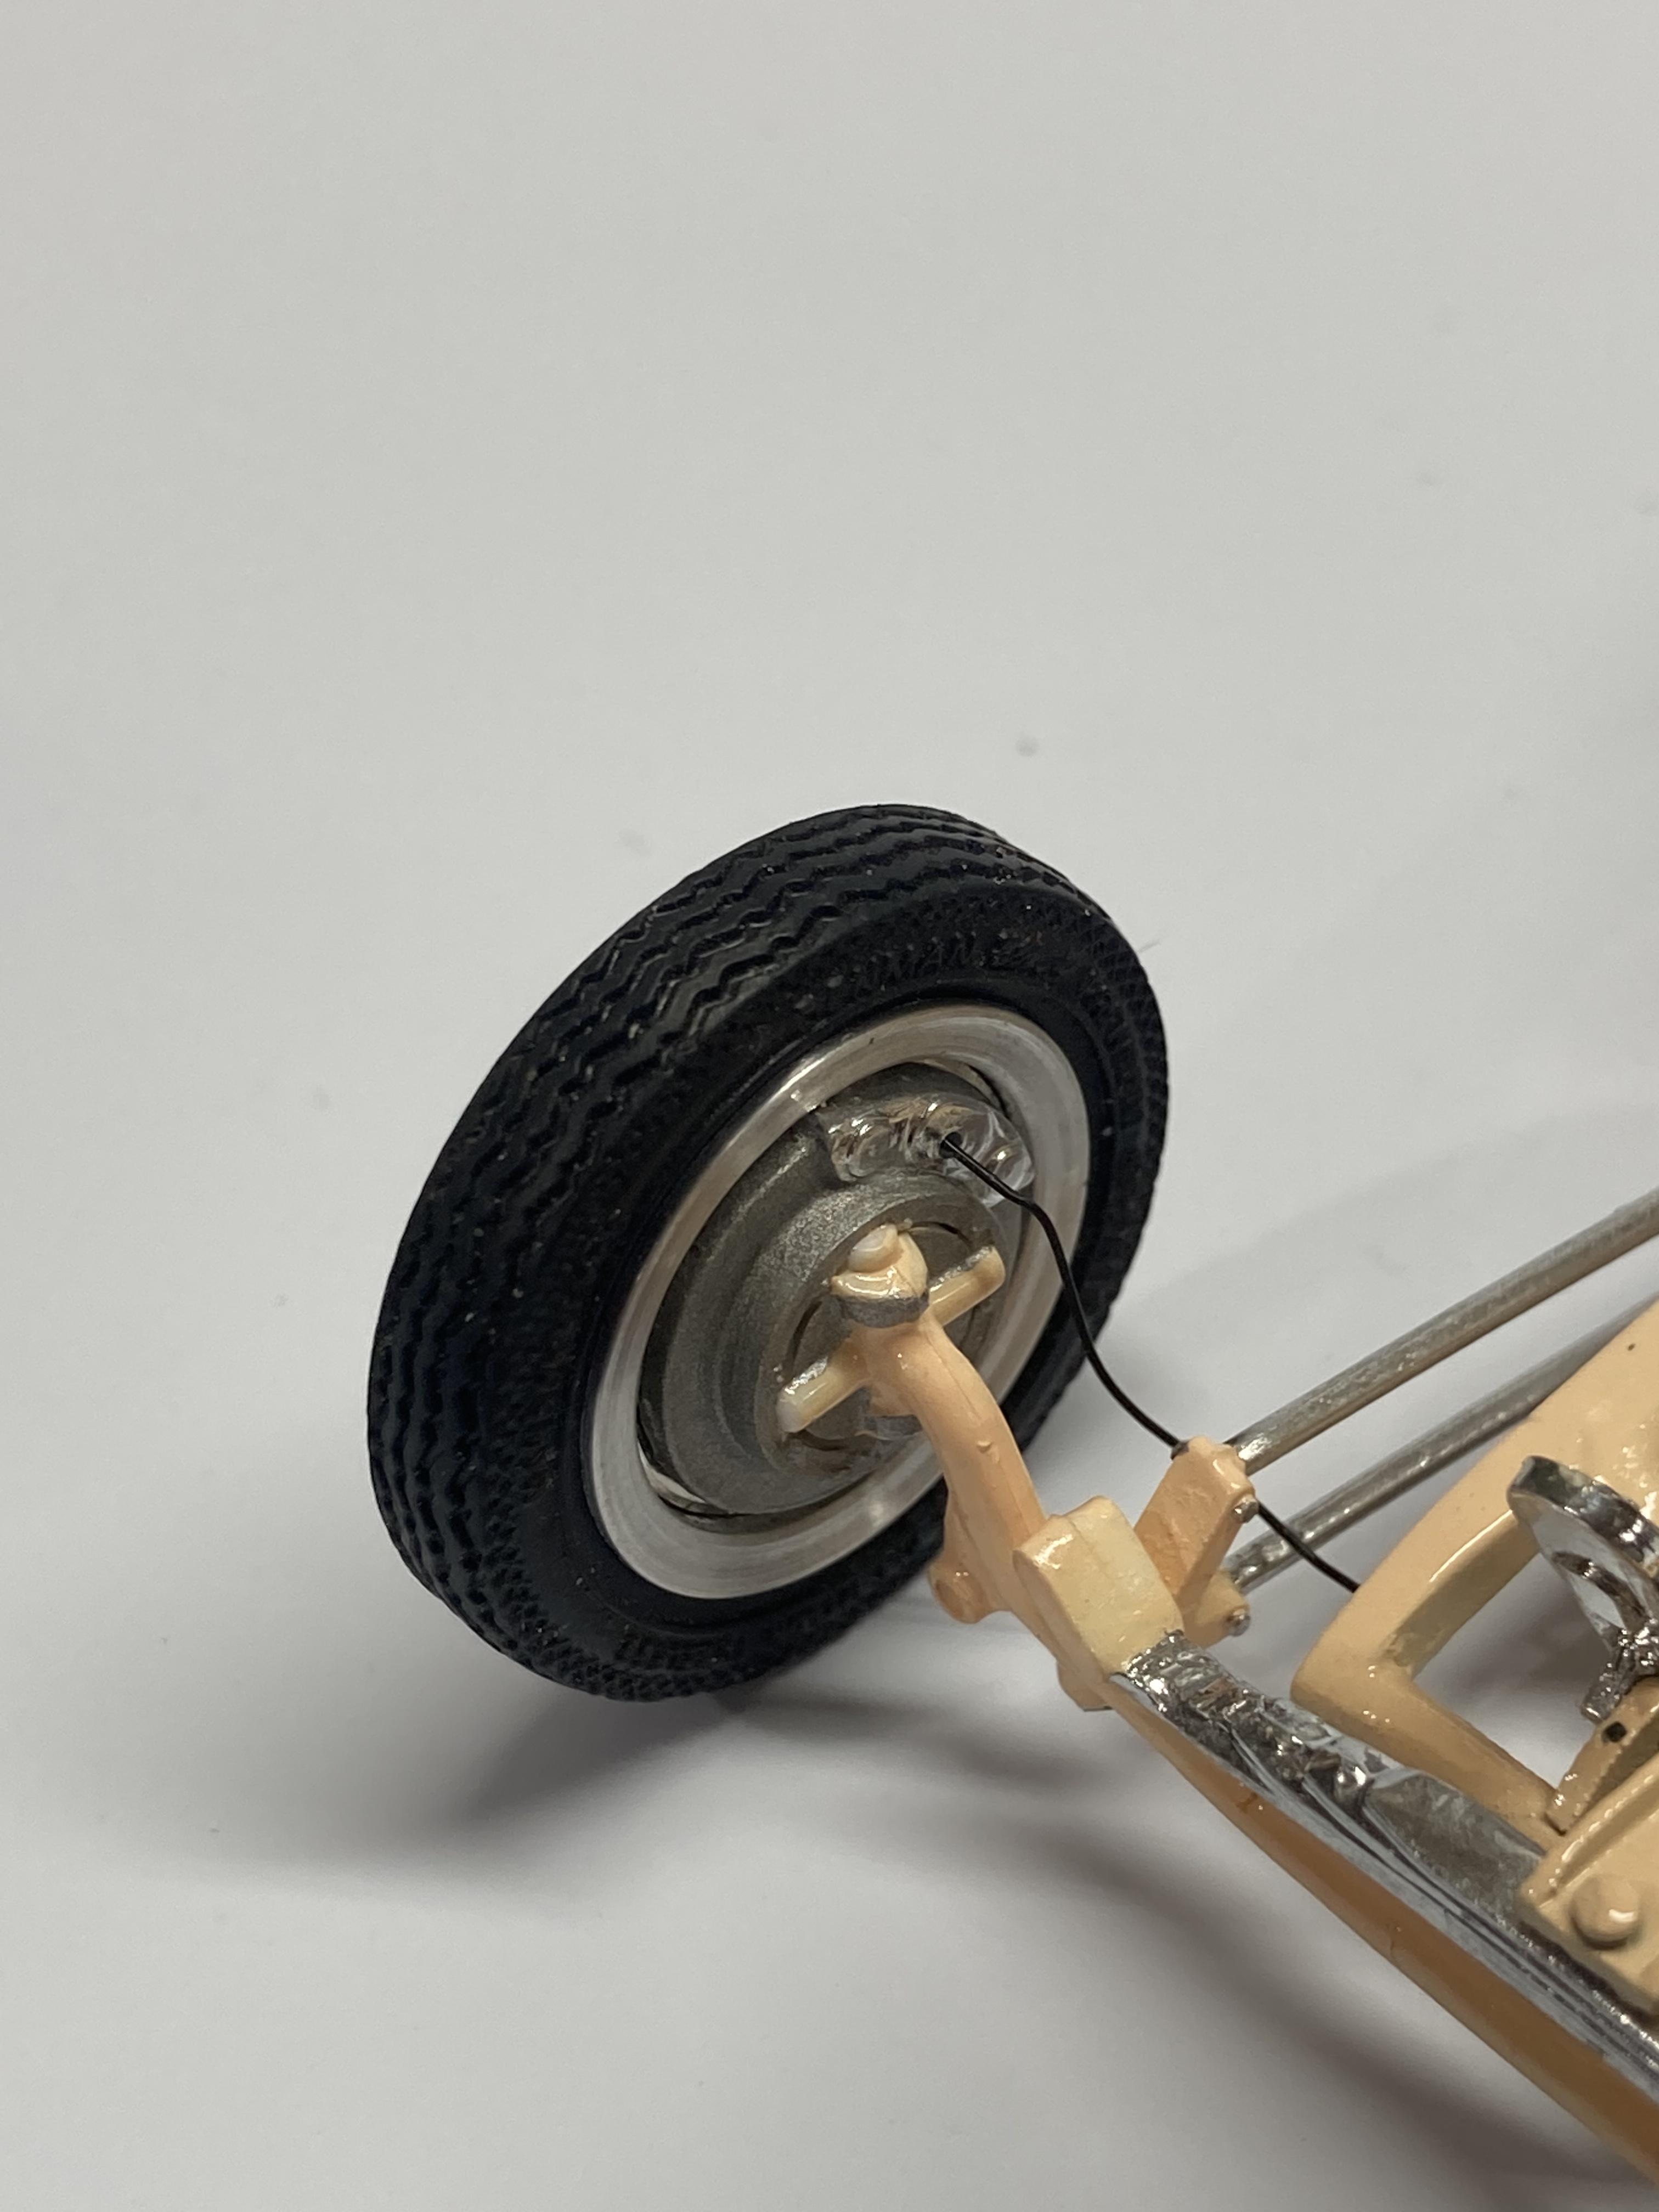
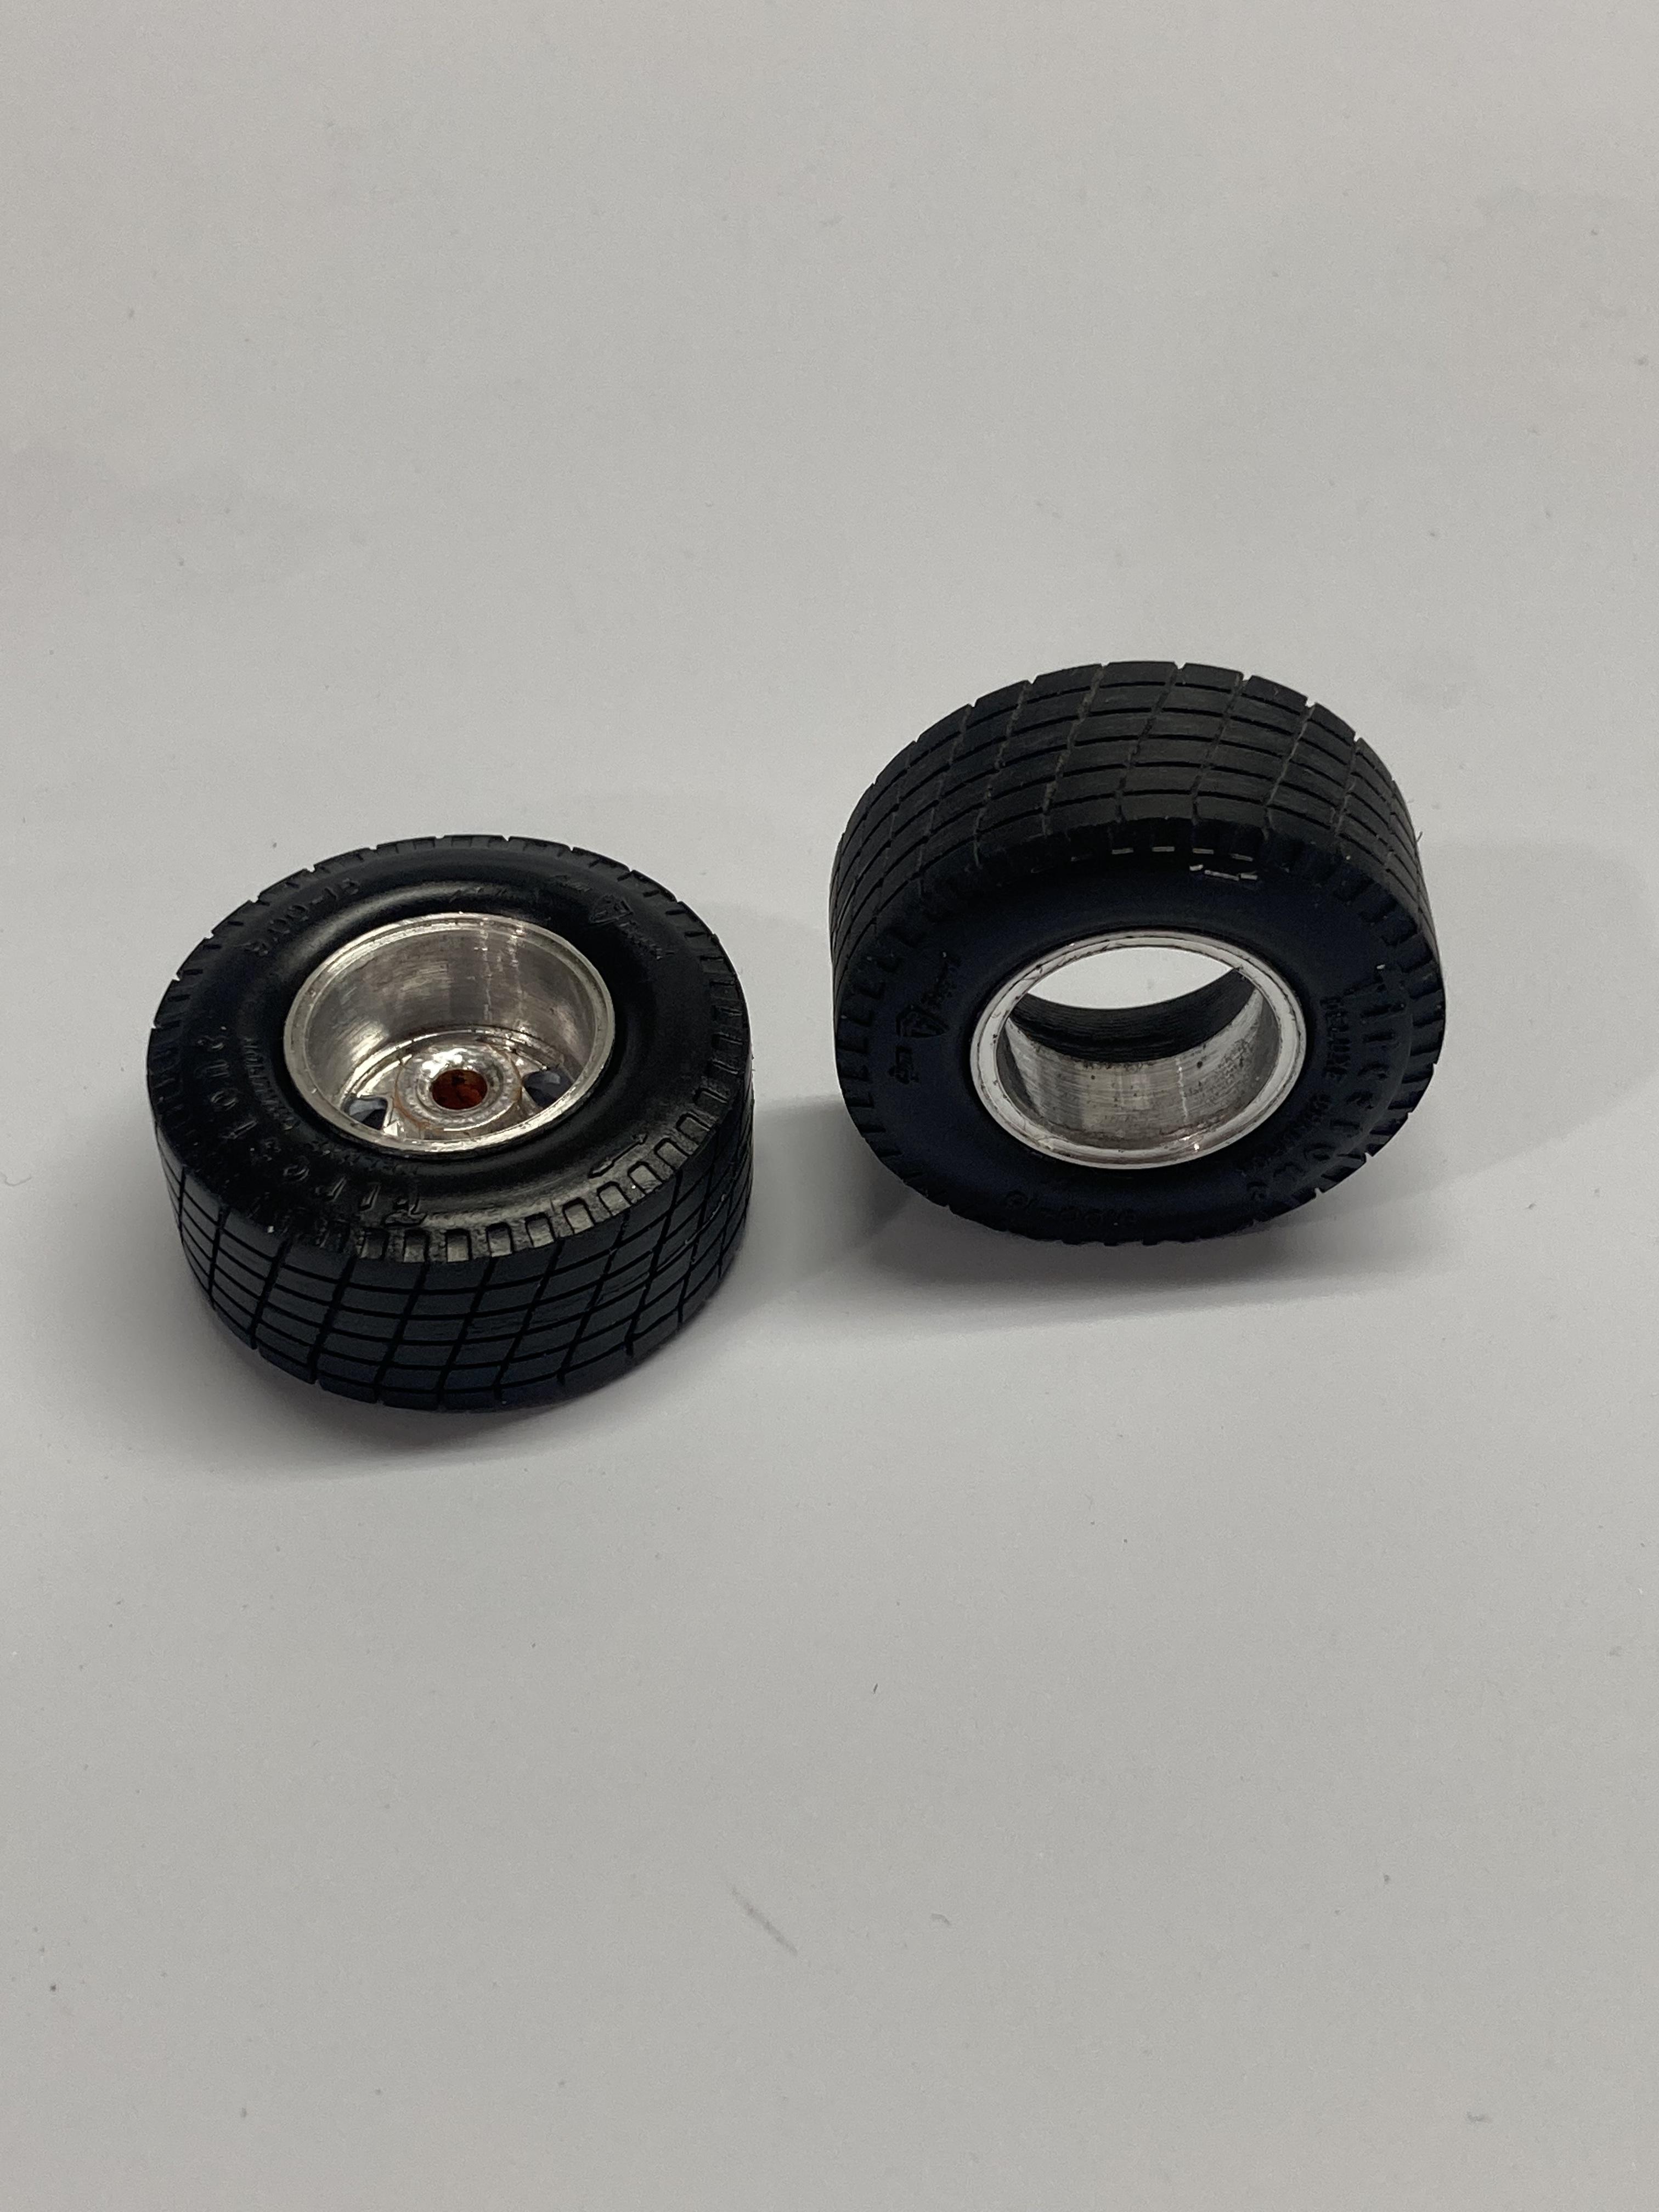
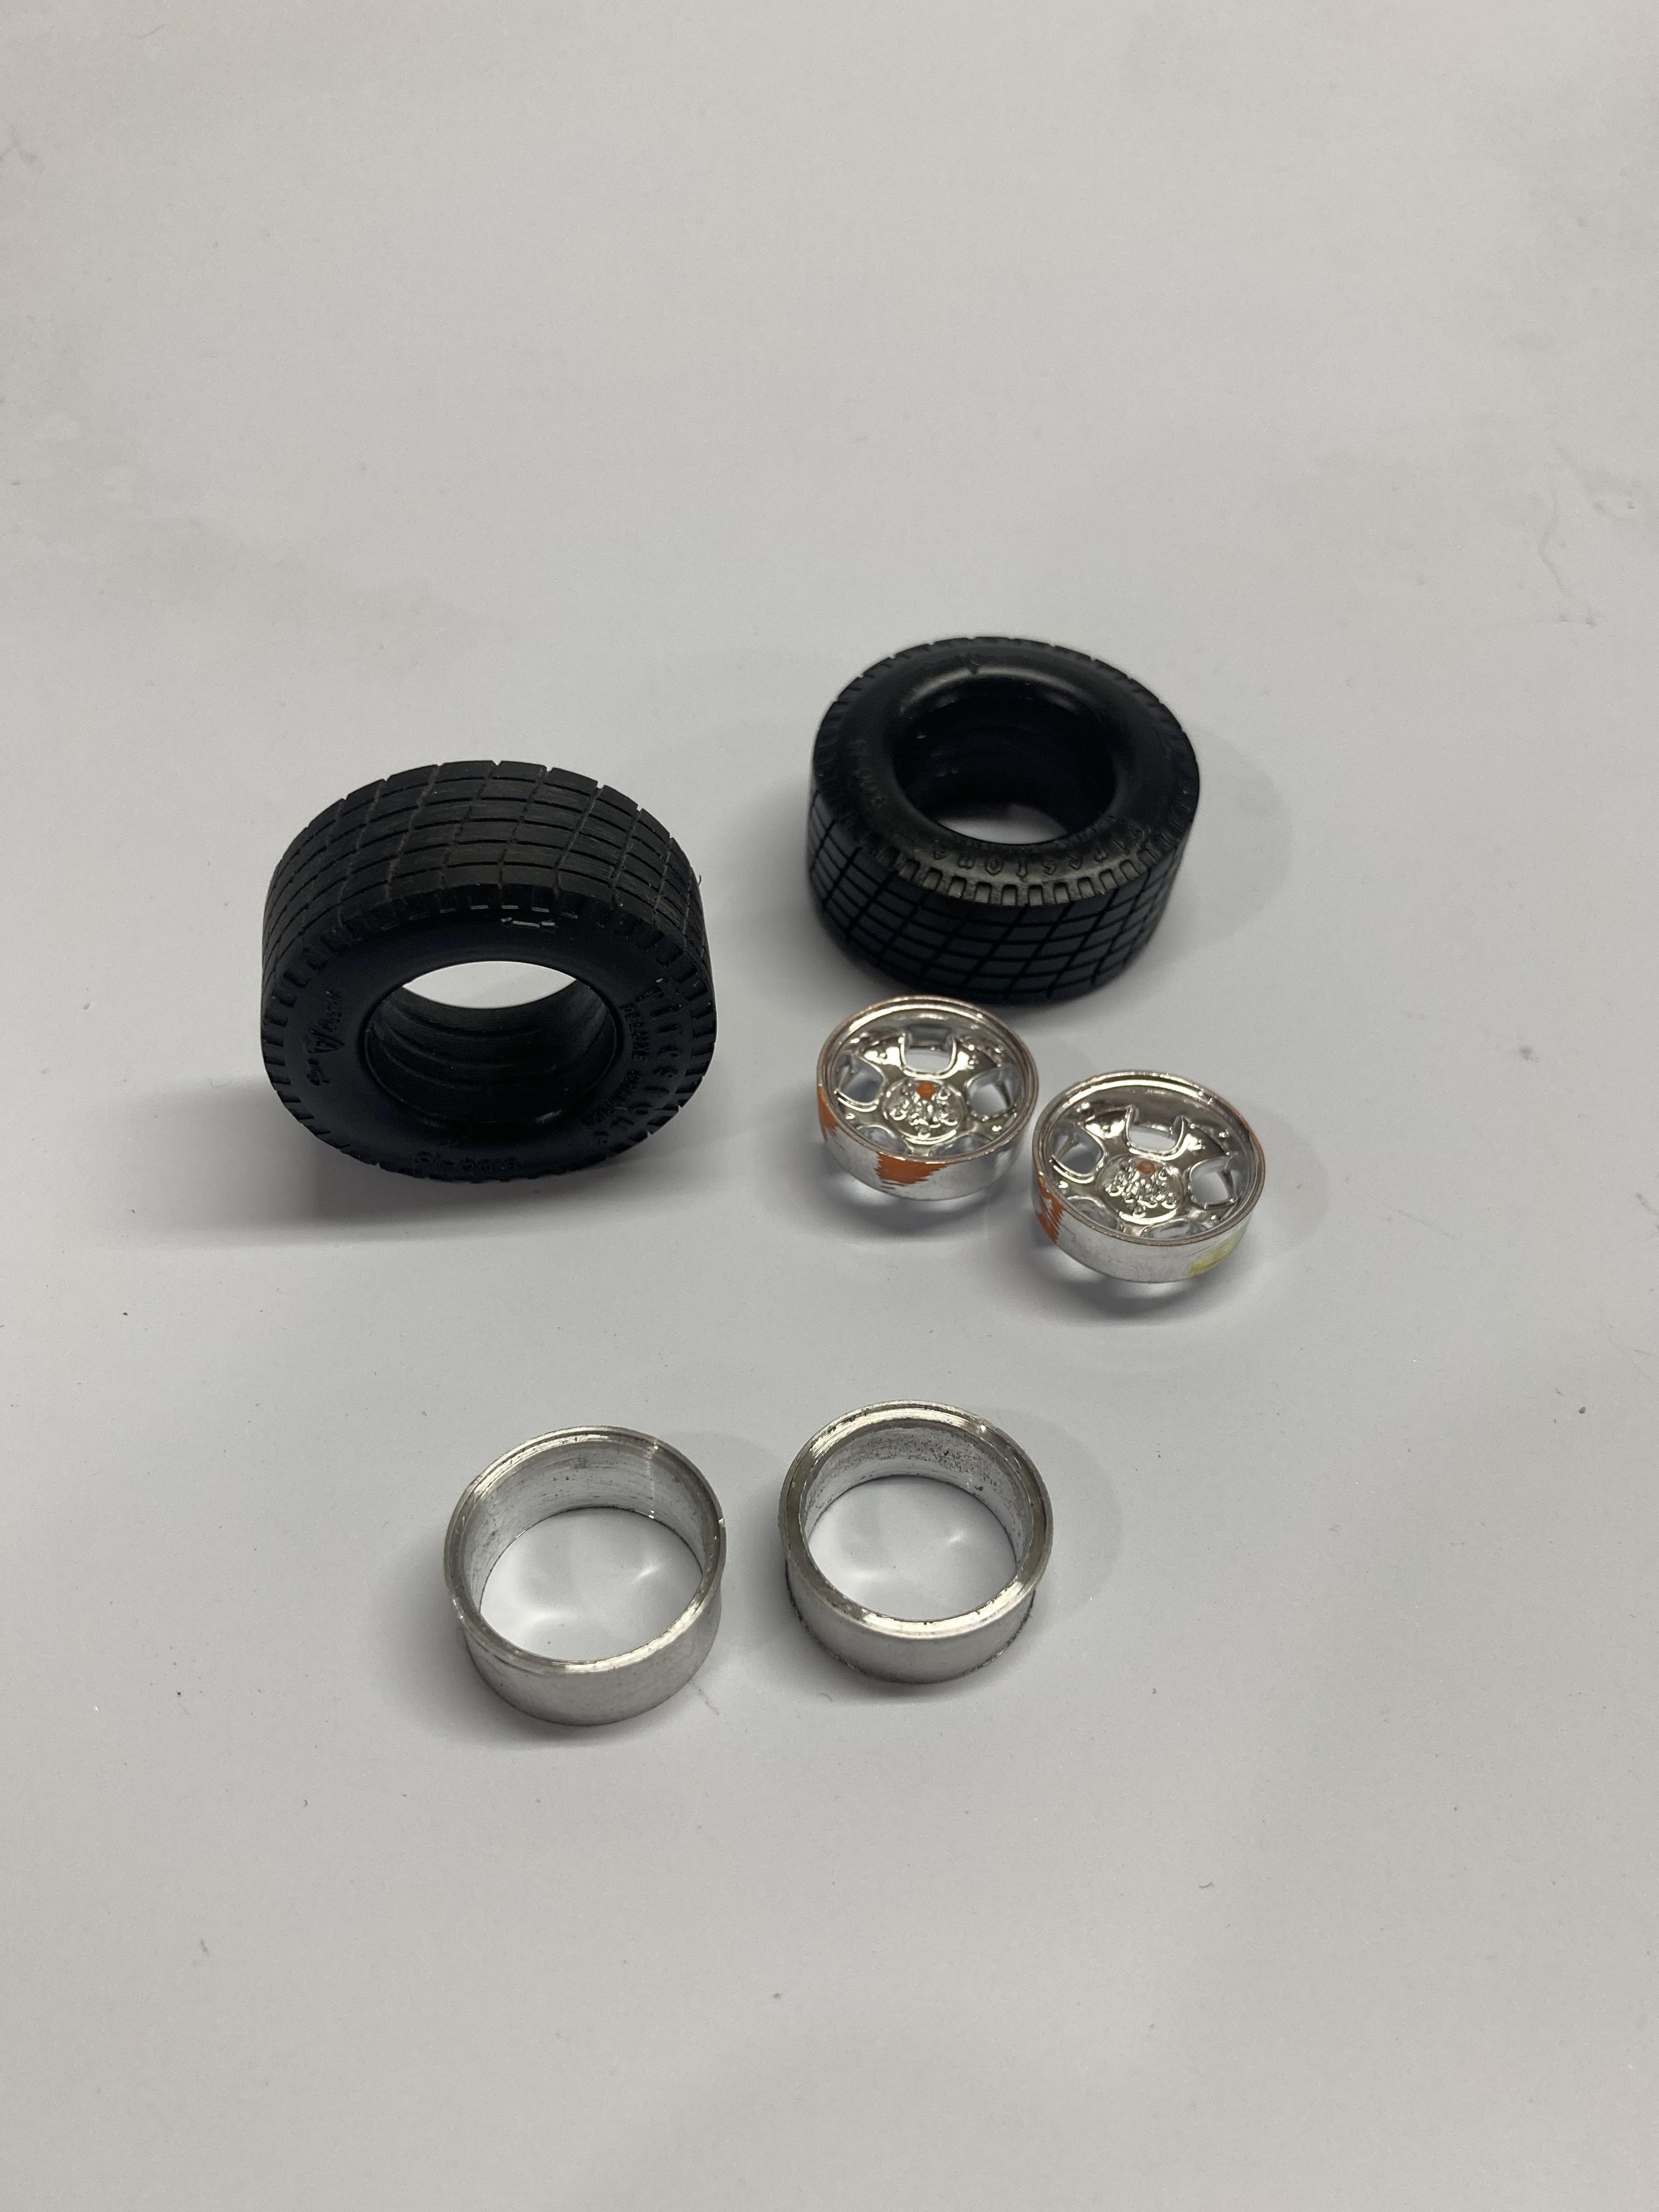
No bench time tonight but I made wheels backs on the lathe today in between making parts for work. I started with a piece of 3/4” 6061 round bar. They’re not perfect but they’re close enough.
-
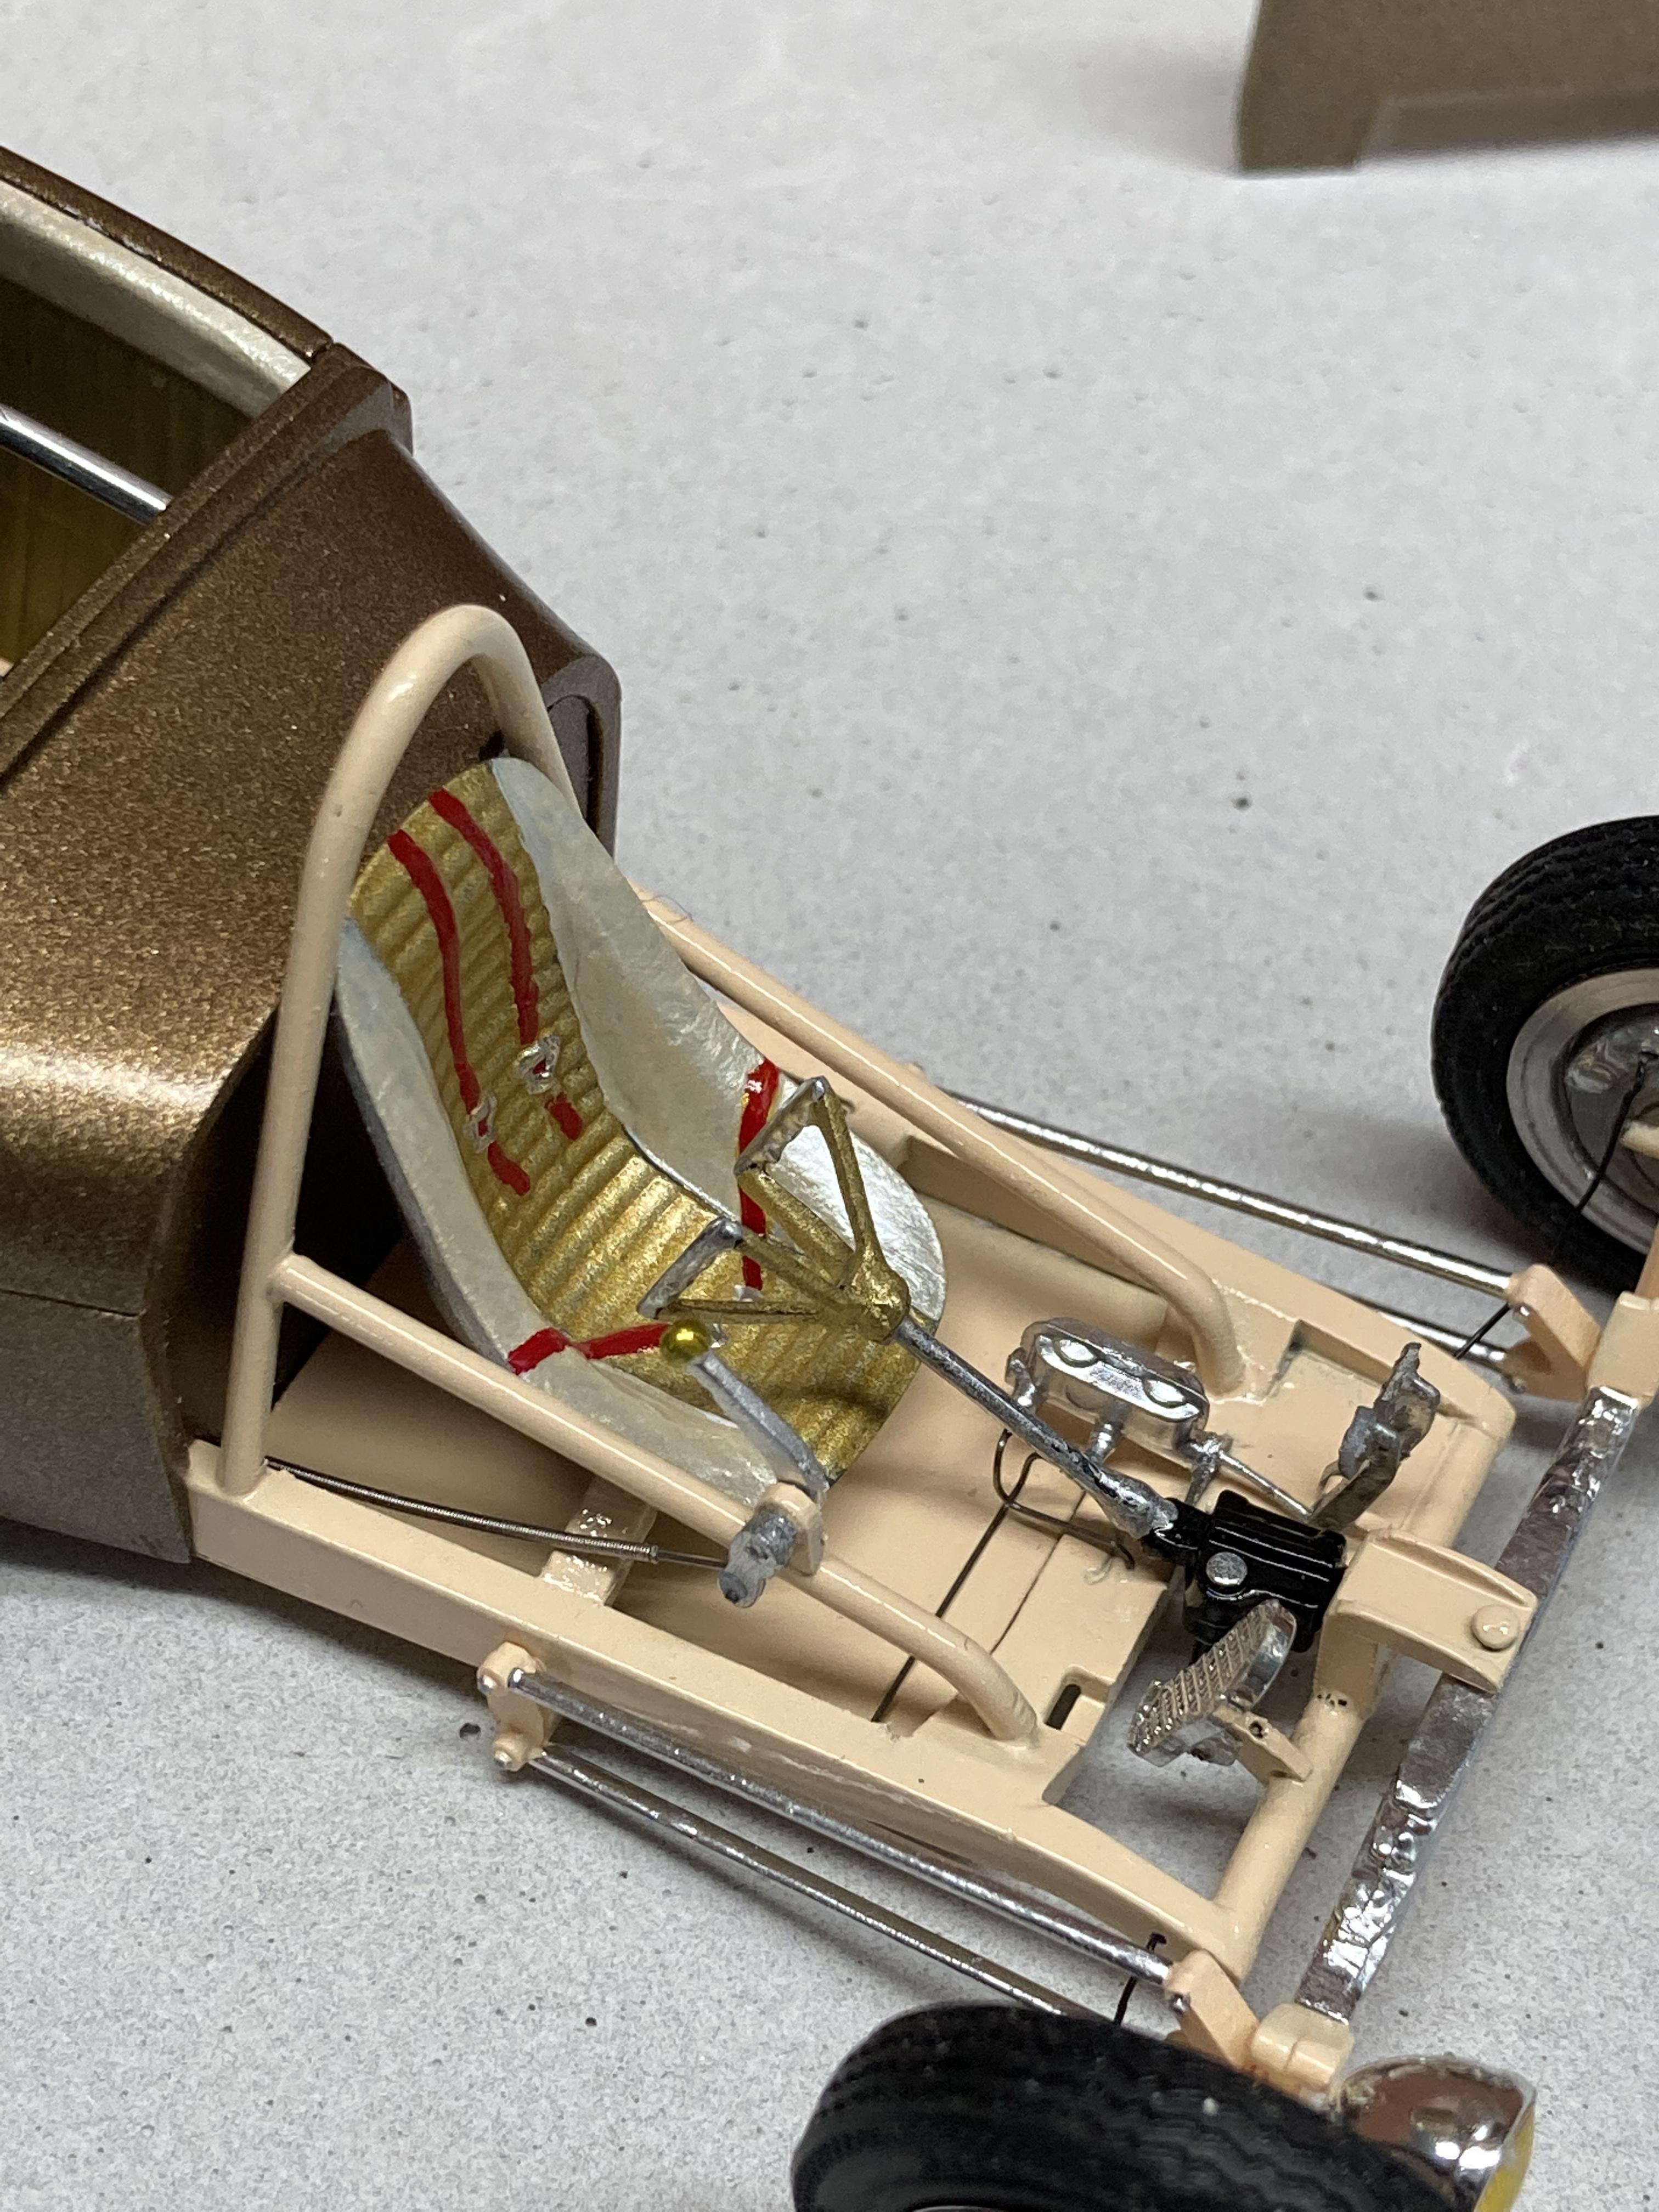
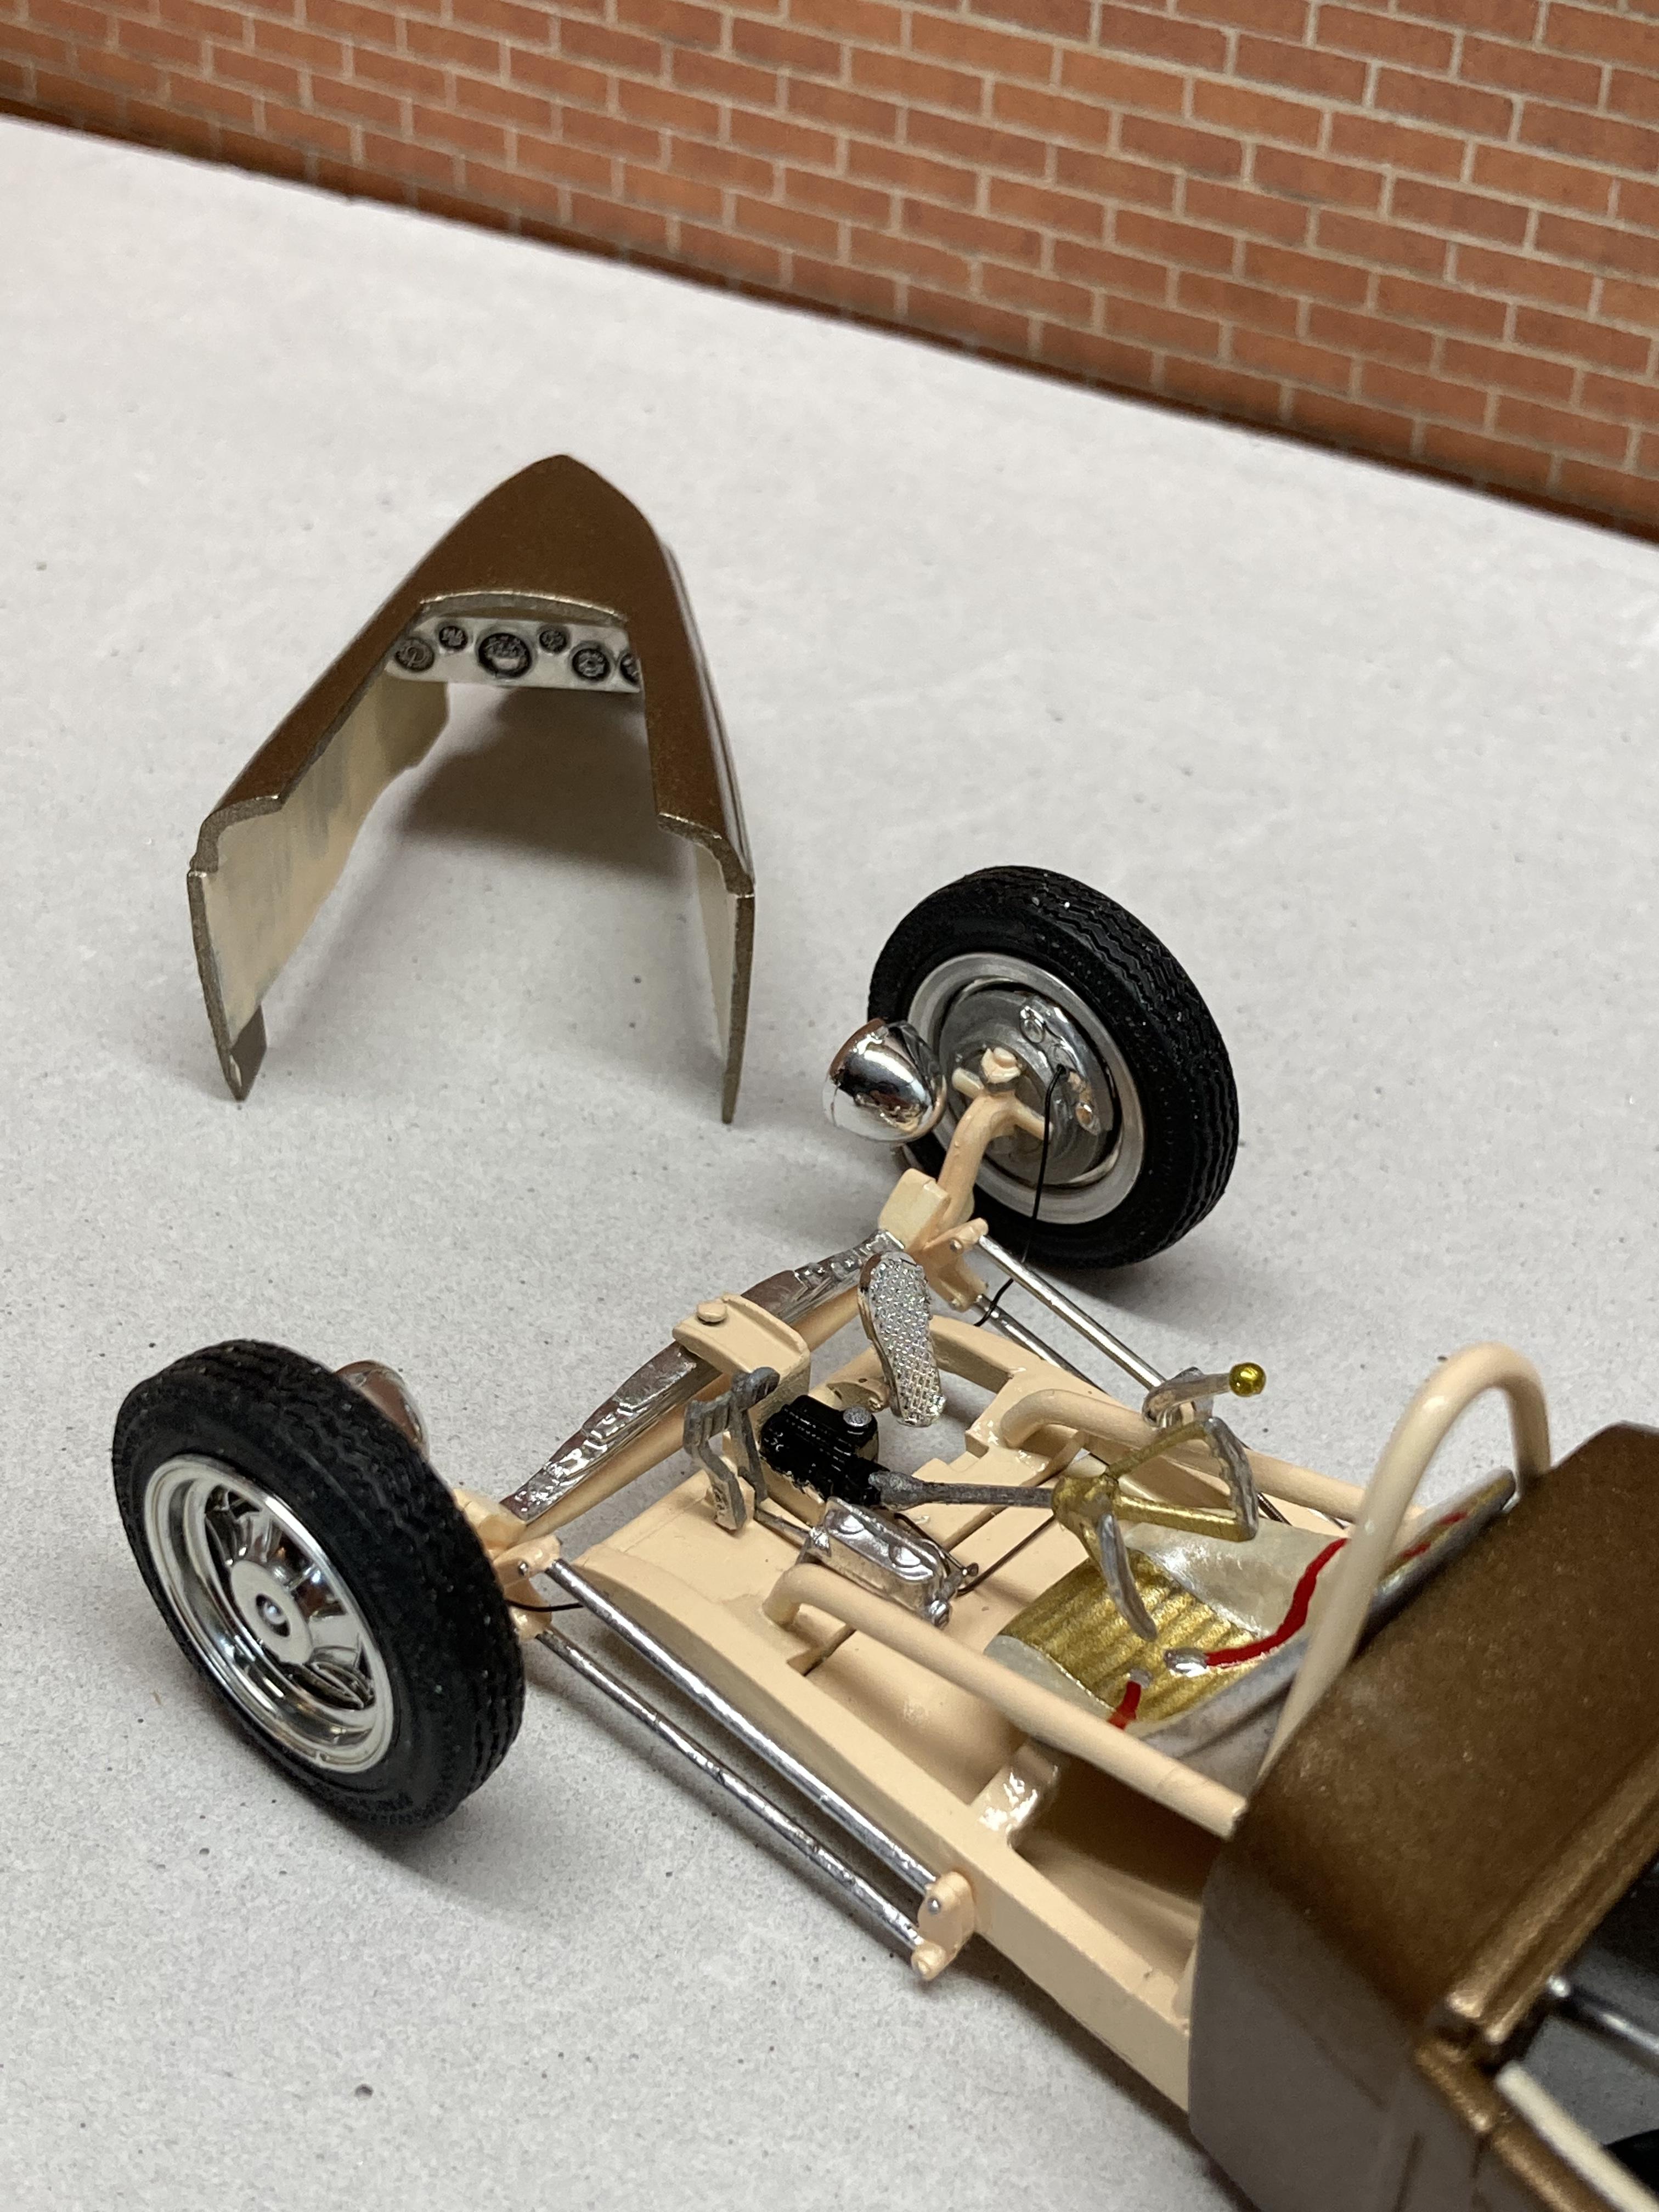
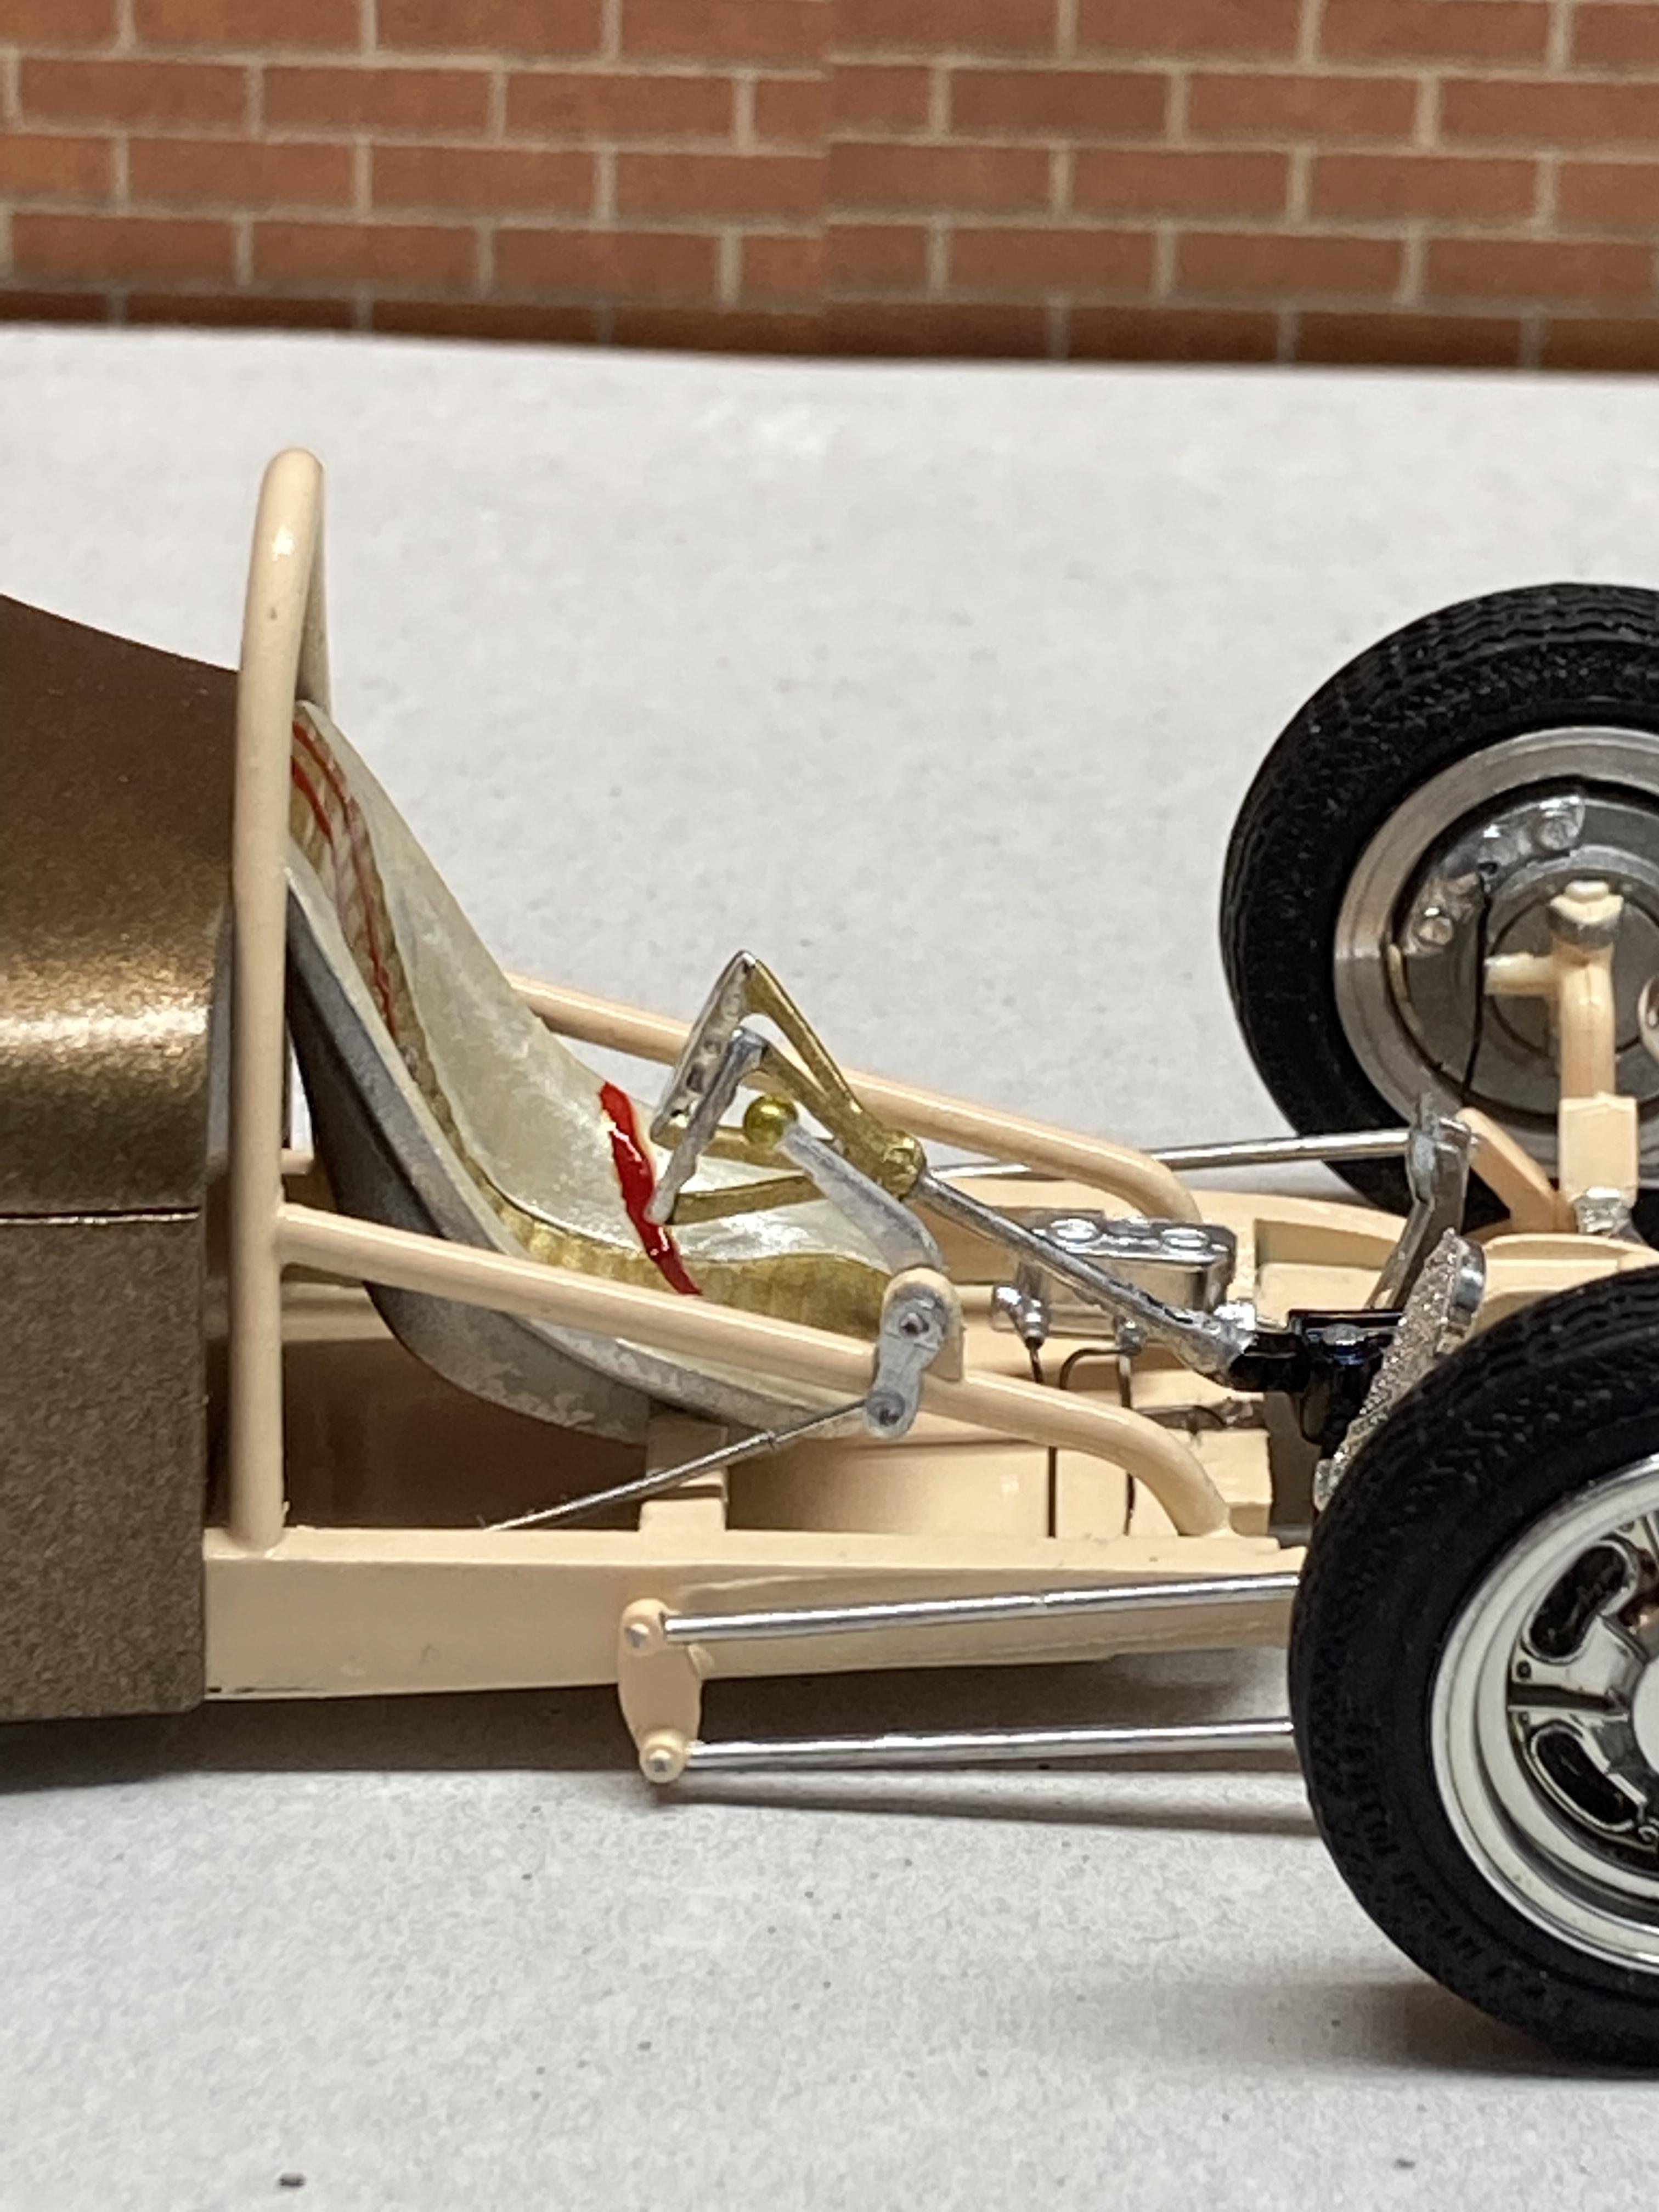
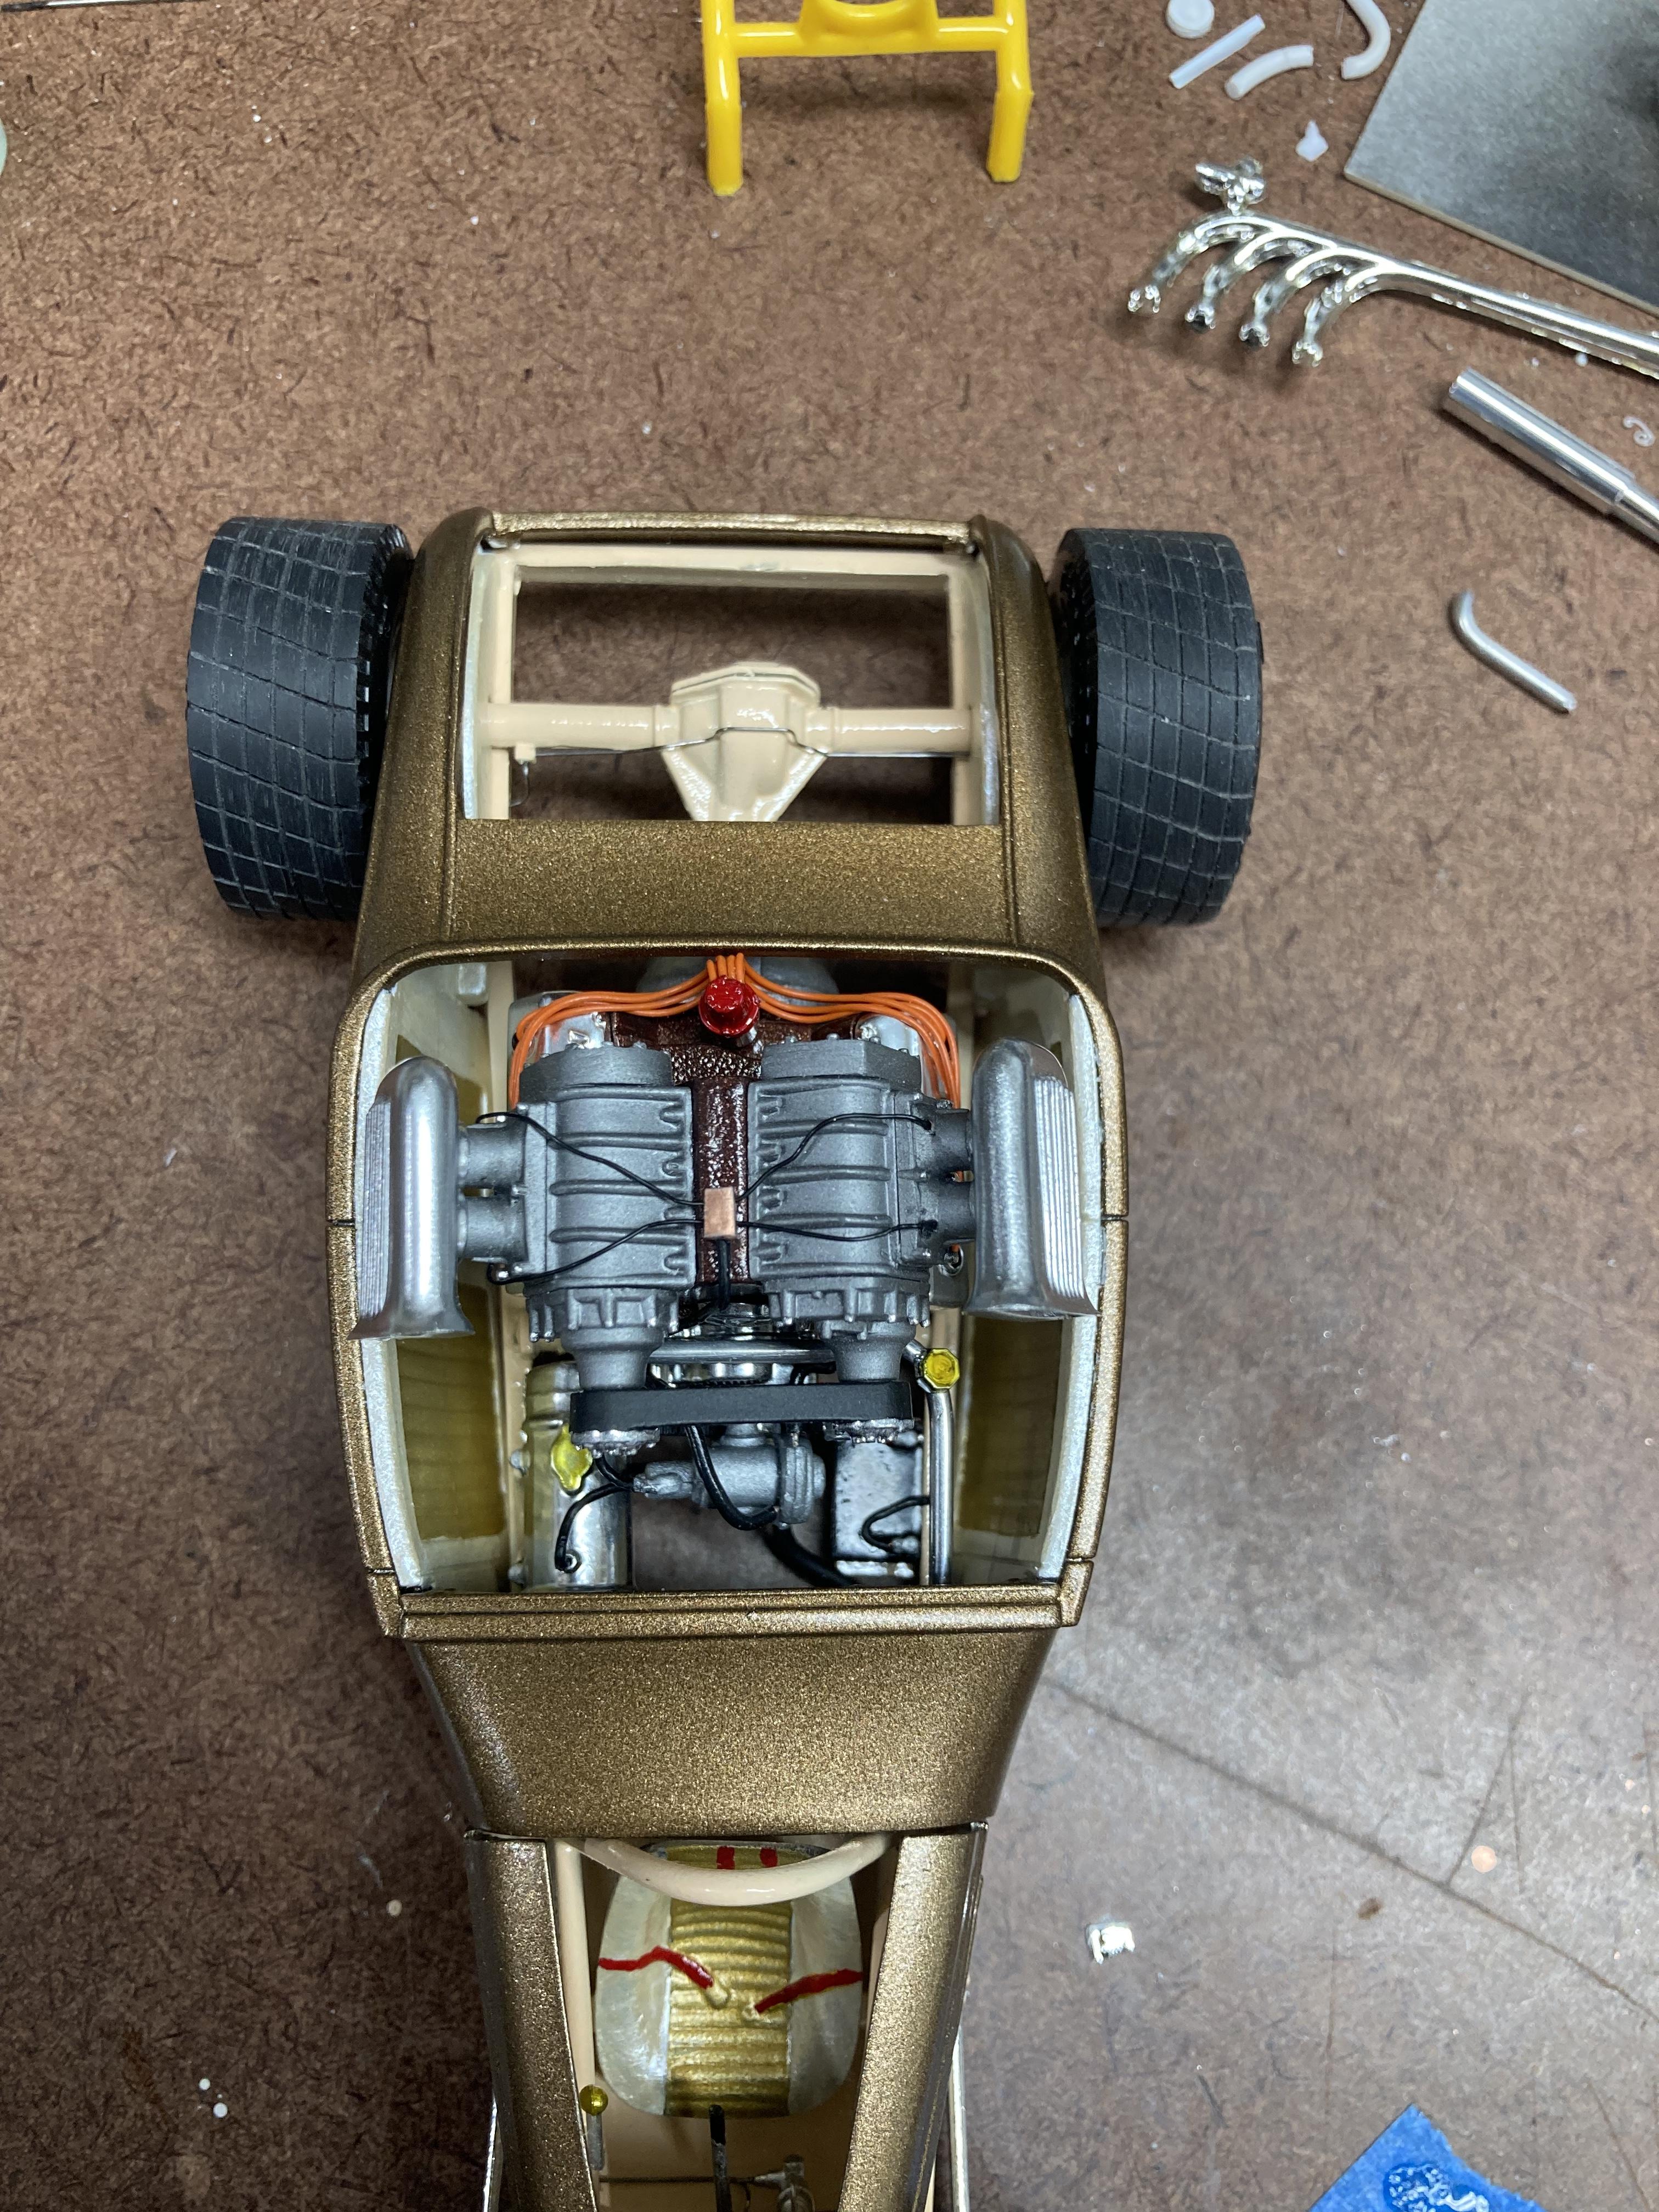
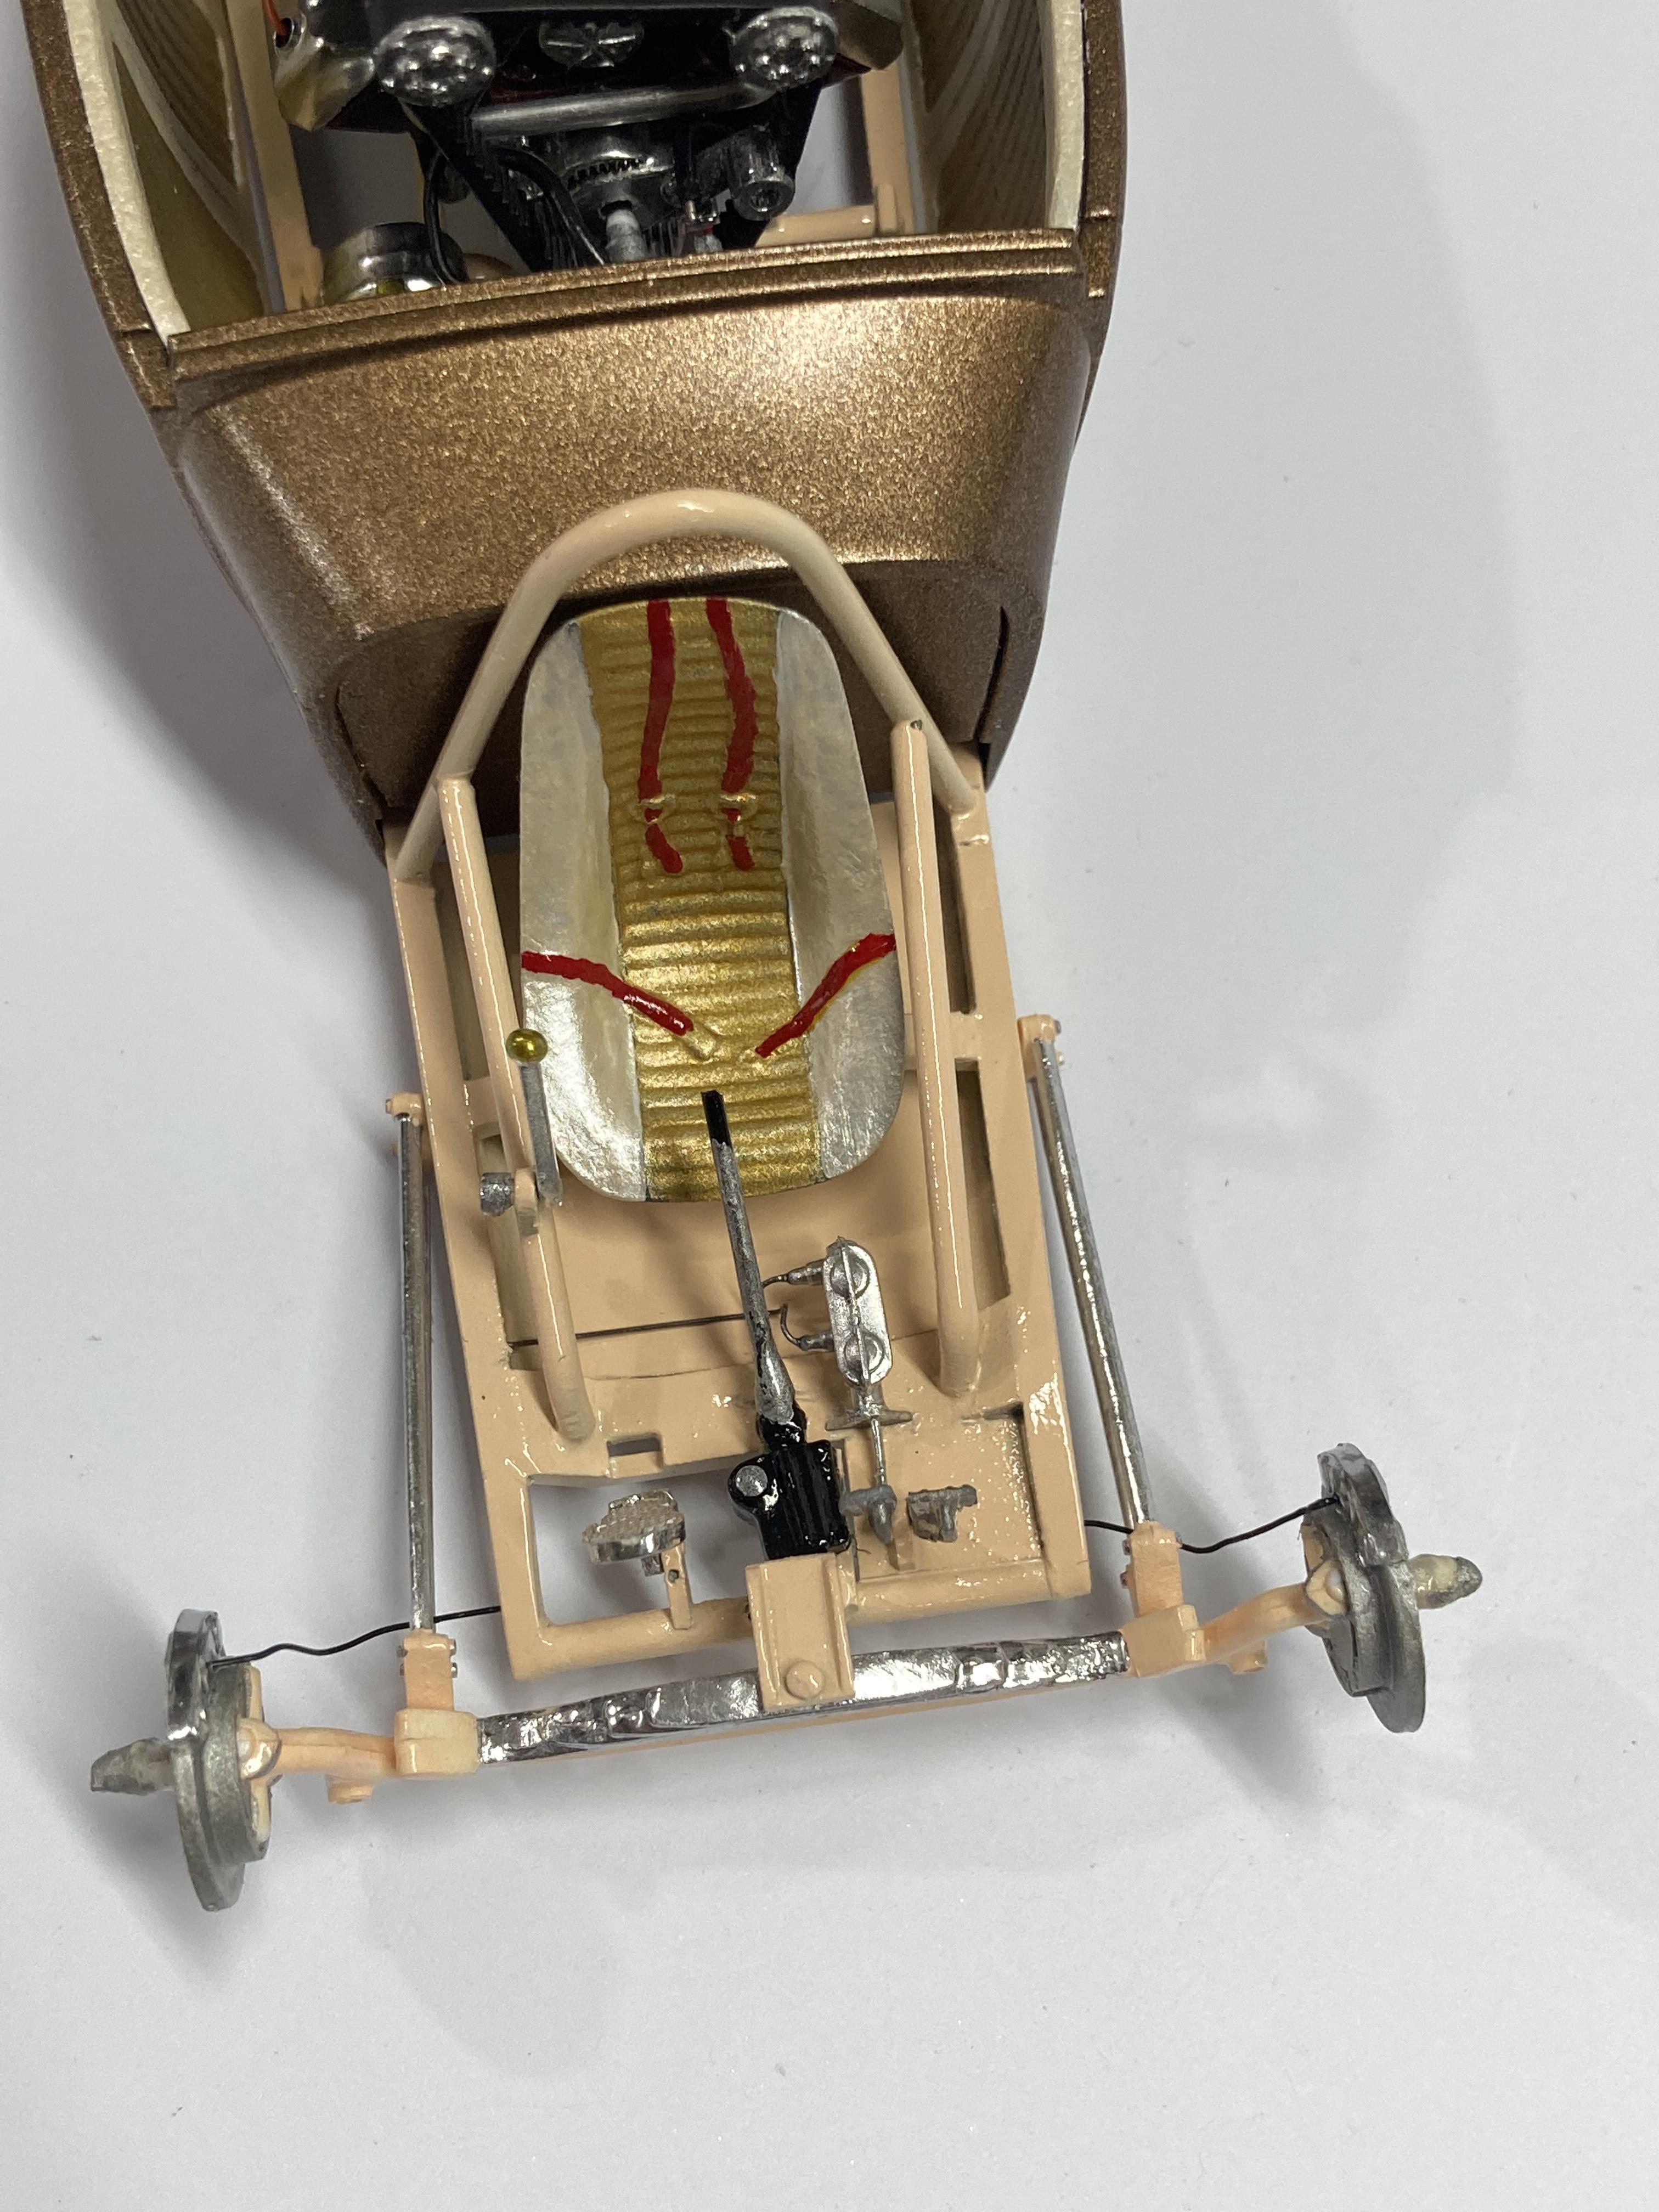
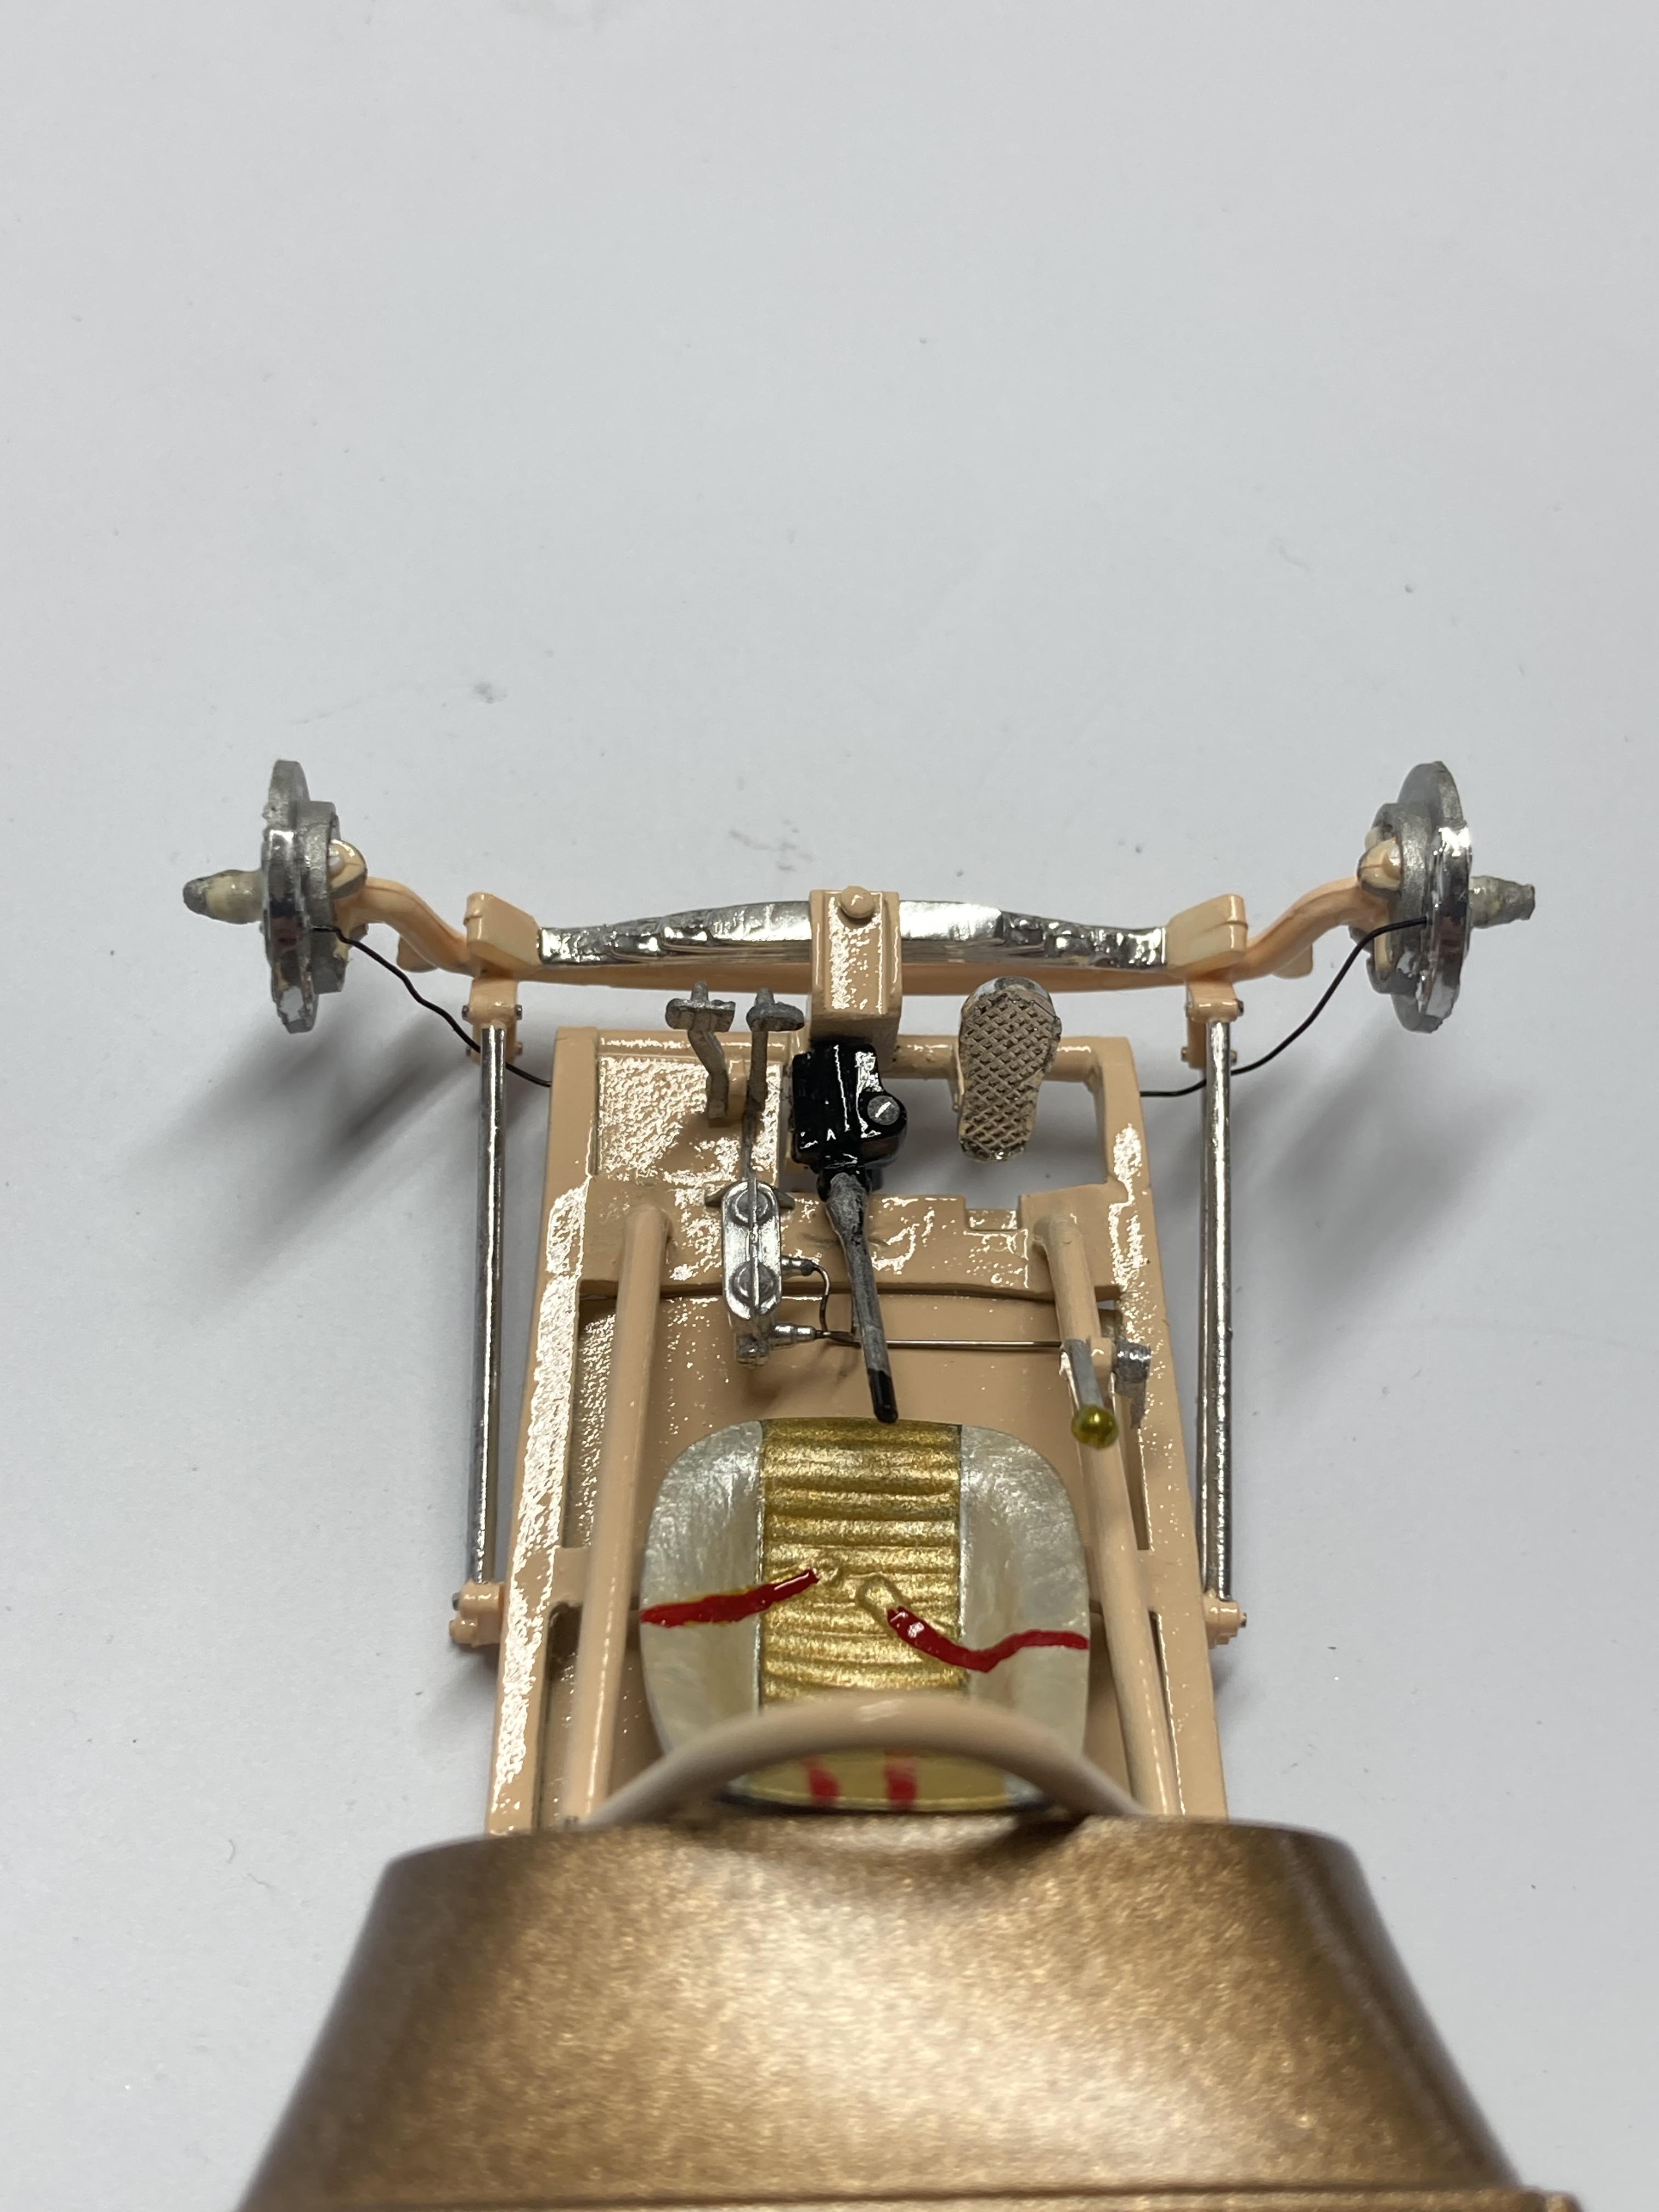
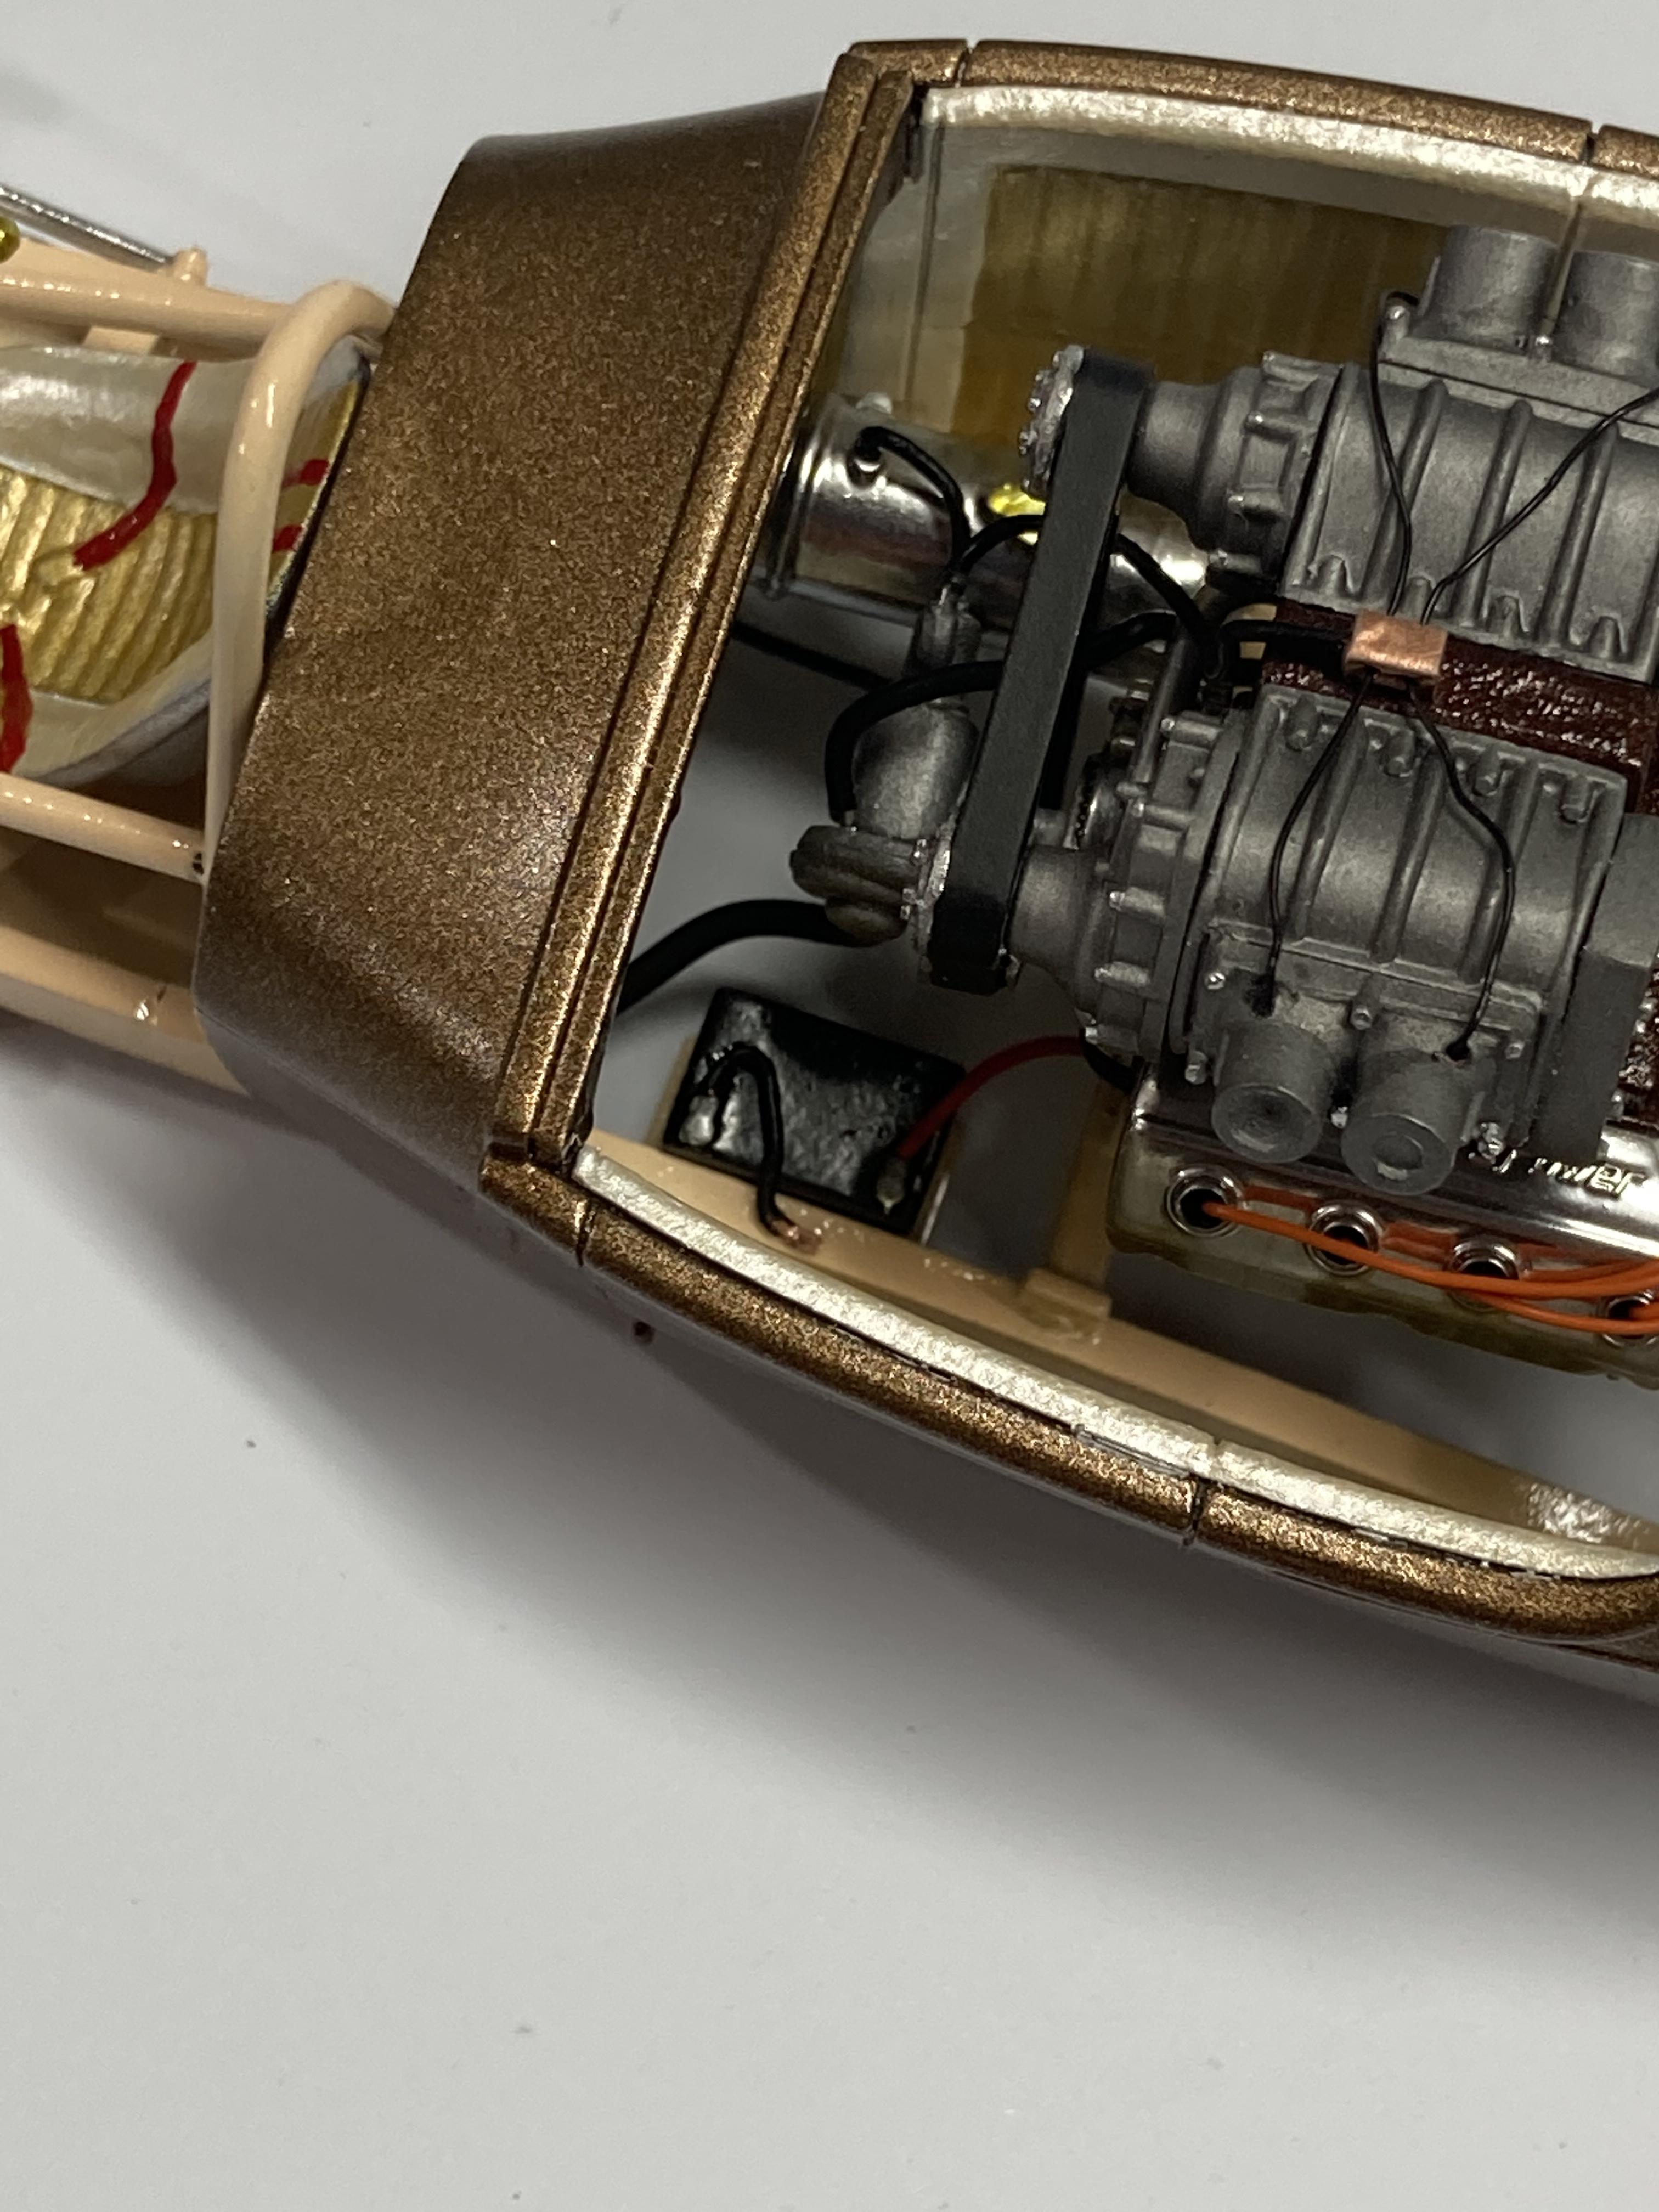
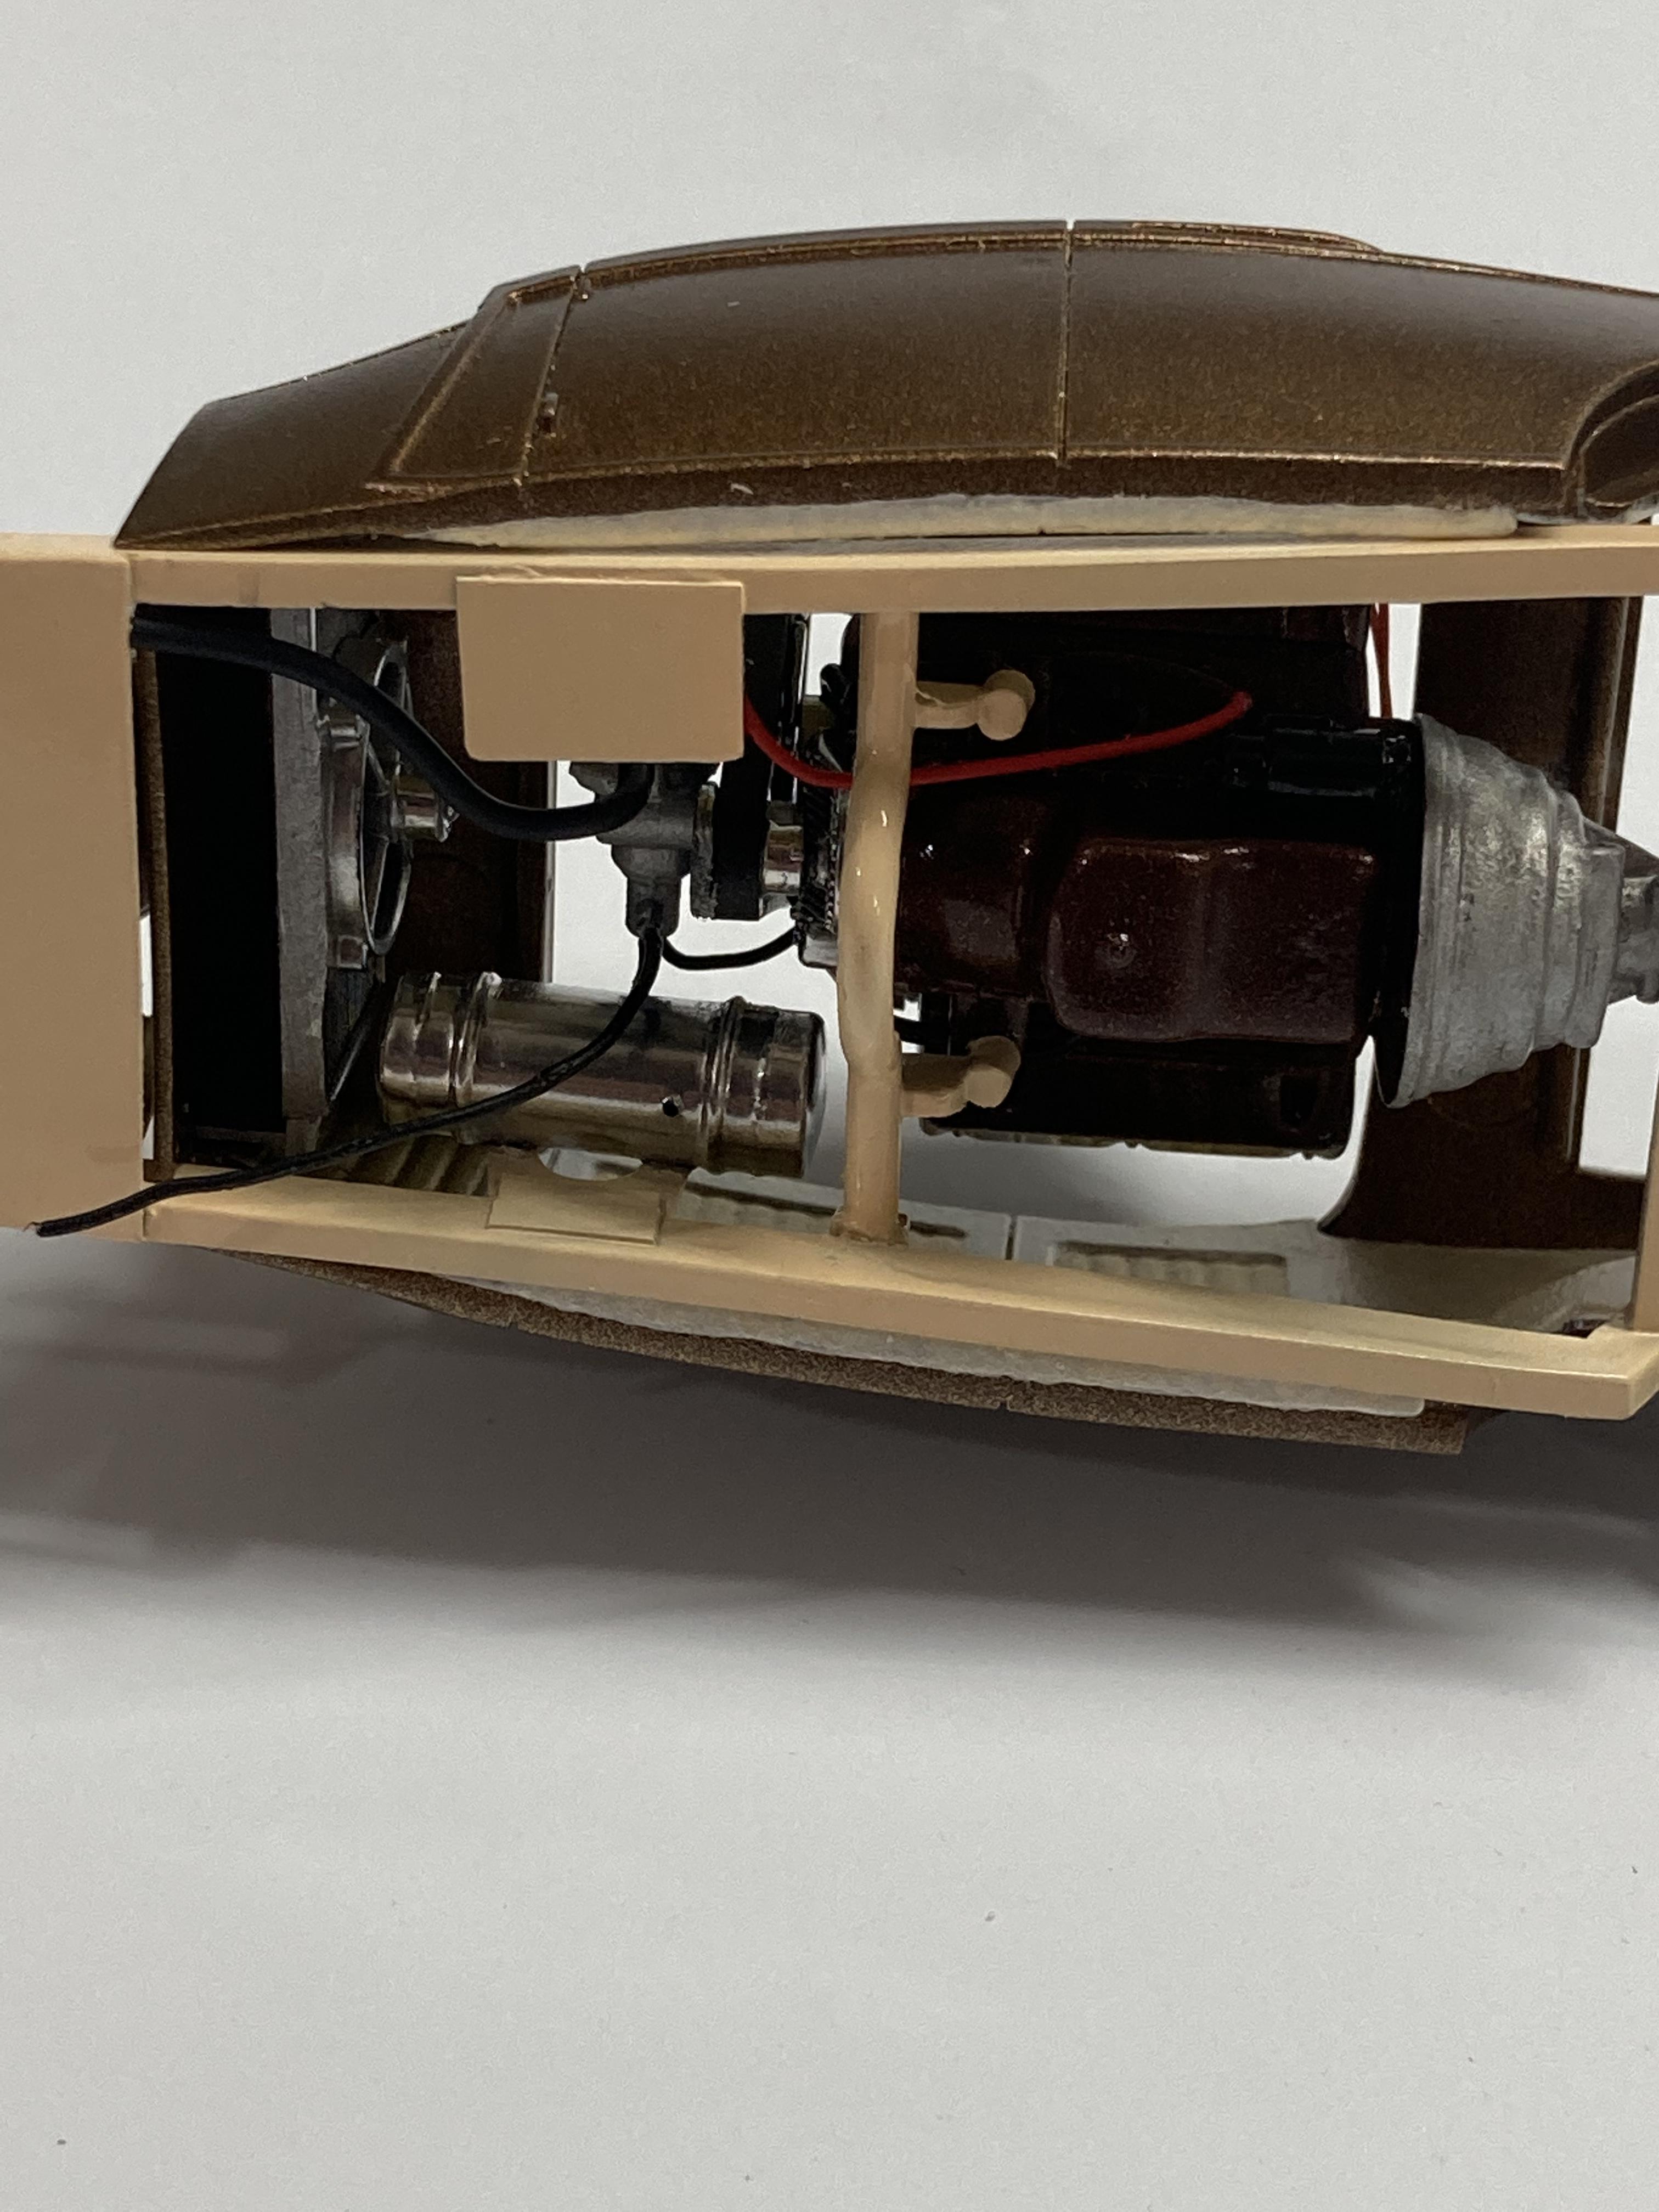
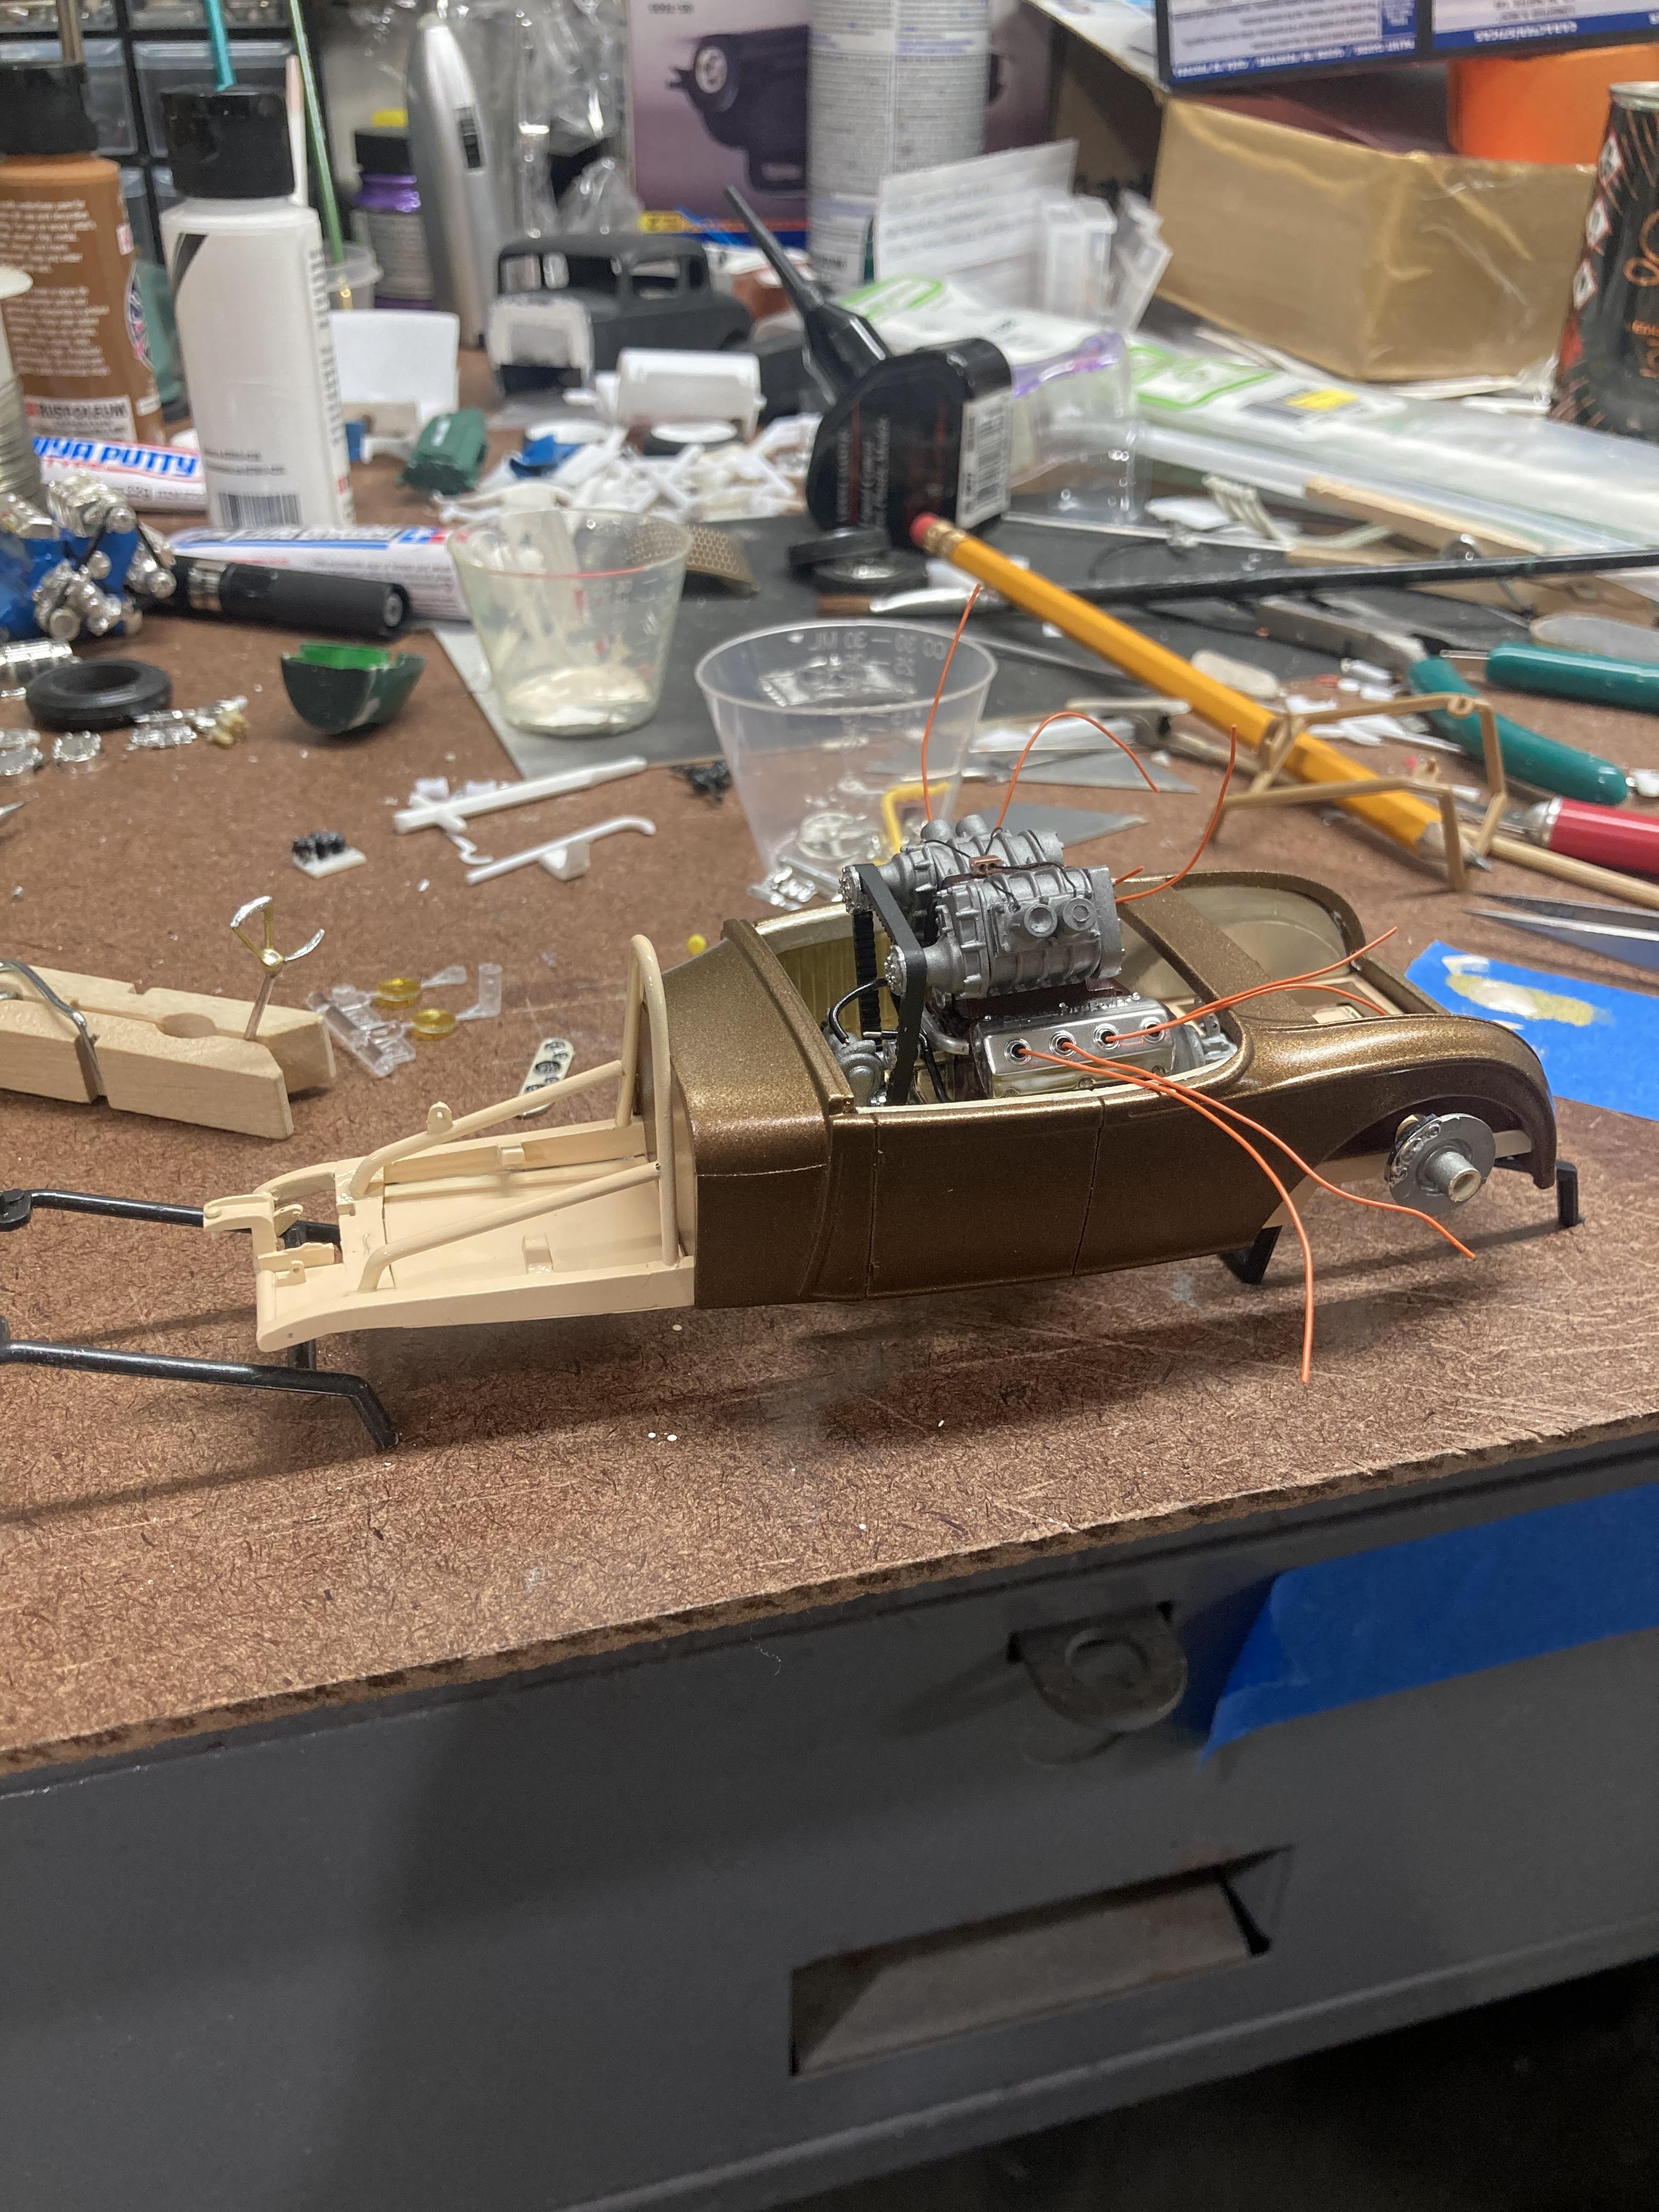
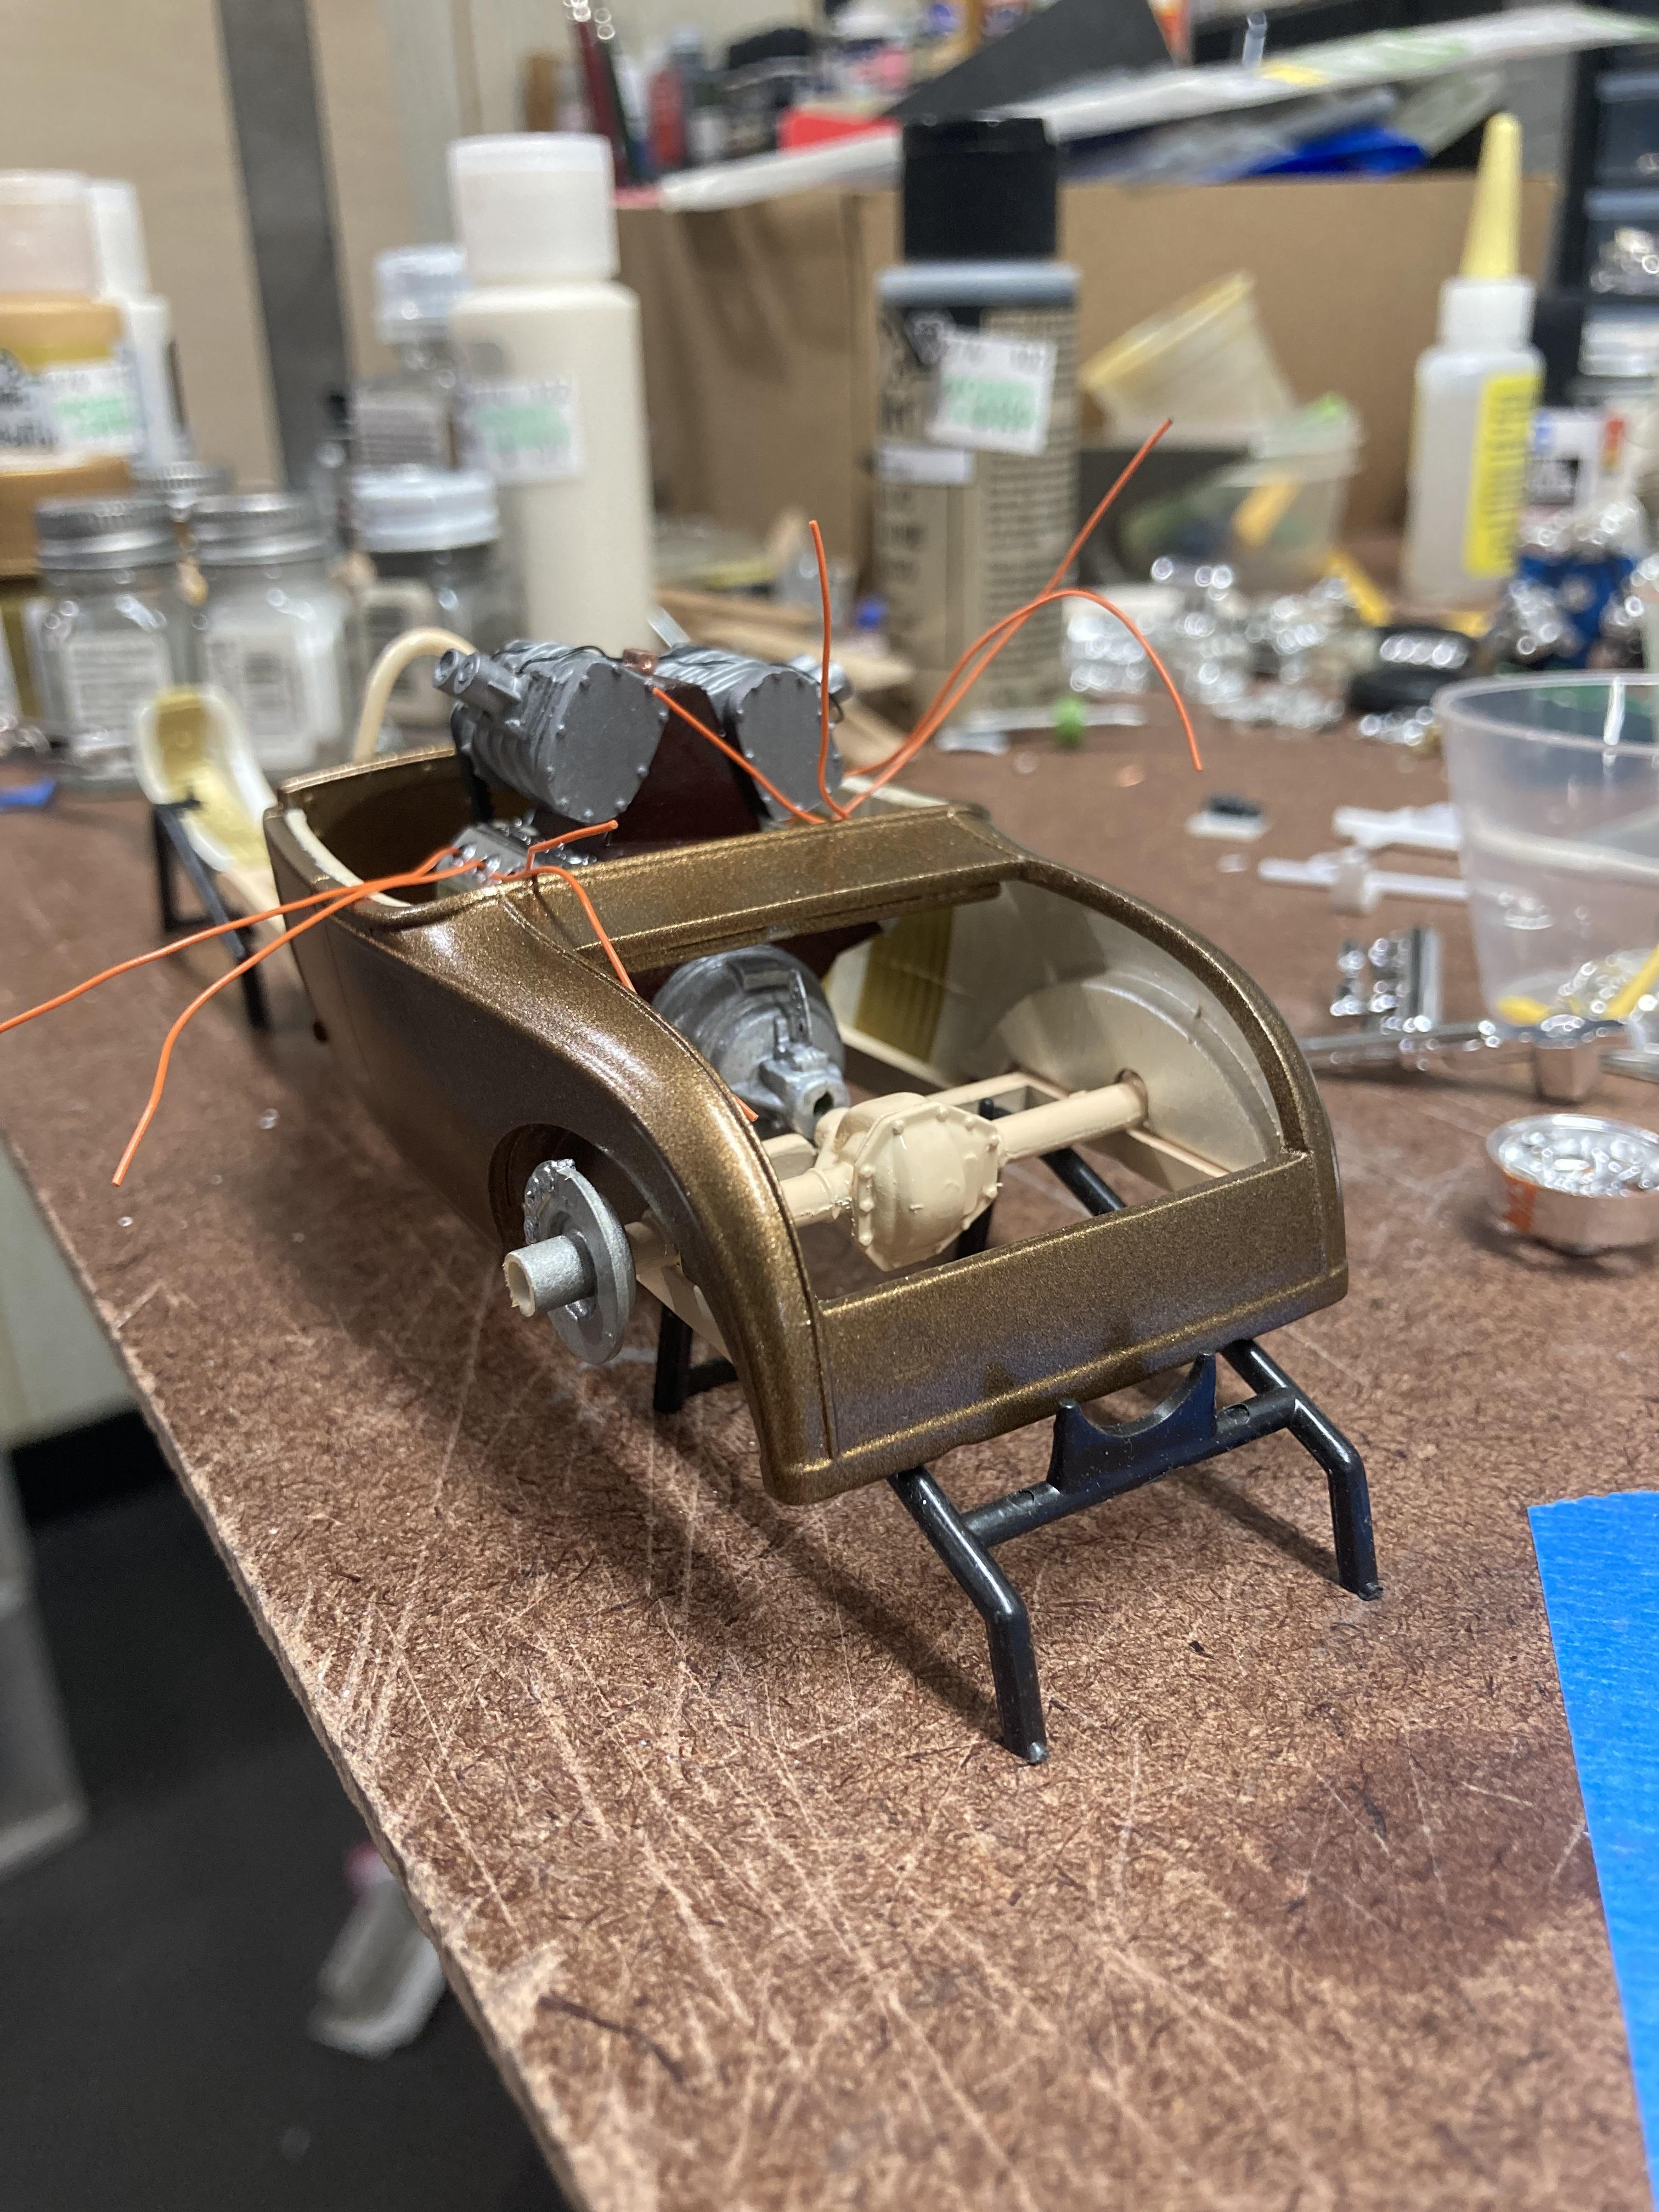
Also, while I’m here. I had a couple hours tonight to get some wiring and plumbing done. Plug wires, brake lines, fuel line, battery cables. I’m not overly impressed with my choice of red for the seatbelts. I figured it would tie in the magneto cap and battery cable though. I may change them before I chrome the buckles. Water lines still need to be finished. And after all the scratch building I never thought to make an actual mount or anything for the steering column. Anyway, here it is for now. Thanks for looking.
-
Thanks guys, appreciate your feedback. I love old school race cars and hot rods so this build has been a blast. I’m still poking away at it when I have time, just been too busy. I think my cat has a thread, something about a rat trap rat rod something or other ?
-
Ollie's strike again
Tarkmucker replied to GLMFAA1's topic in General Automotive Talk (Trucks and Cars)
I’ll have to check back there periodically I guess. -
Ollie's strike again
Tarkmucker replied to GLMFAA1's topic in General Automotive Talk (Trucks and Cars)
I made a stop at a “local” Ollie’s today in Woonsocket, RI. They said they’ve never seen model kits there before. Since I’m home alone for a few more hours and can bring some new kits in the house without and repercussions I called the Ollie’s in Seekonk, MA to see if they have anything in stock…another dead end. They said they have never had any either. So if anyone in the area was wondering, save yourself the trip. -
Thanks man, I was thinking the same thing and already have plans for one down the road. I missed the December deadline but….it’s still December somewhere…right? I haven’t had much bench time, if any, for the last few weeks. I snapped a few pics while I was down there looking for something earlier. Here’s where I left off Hopefully I’ll have some time to finish this week.
-
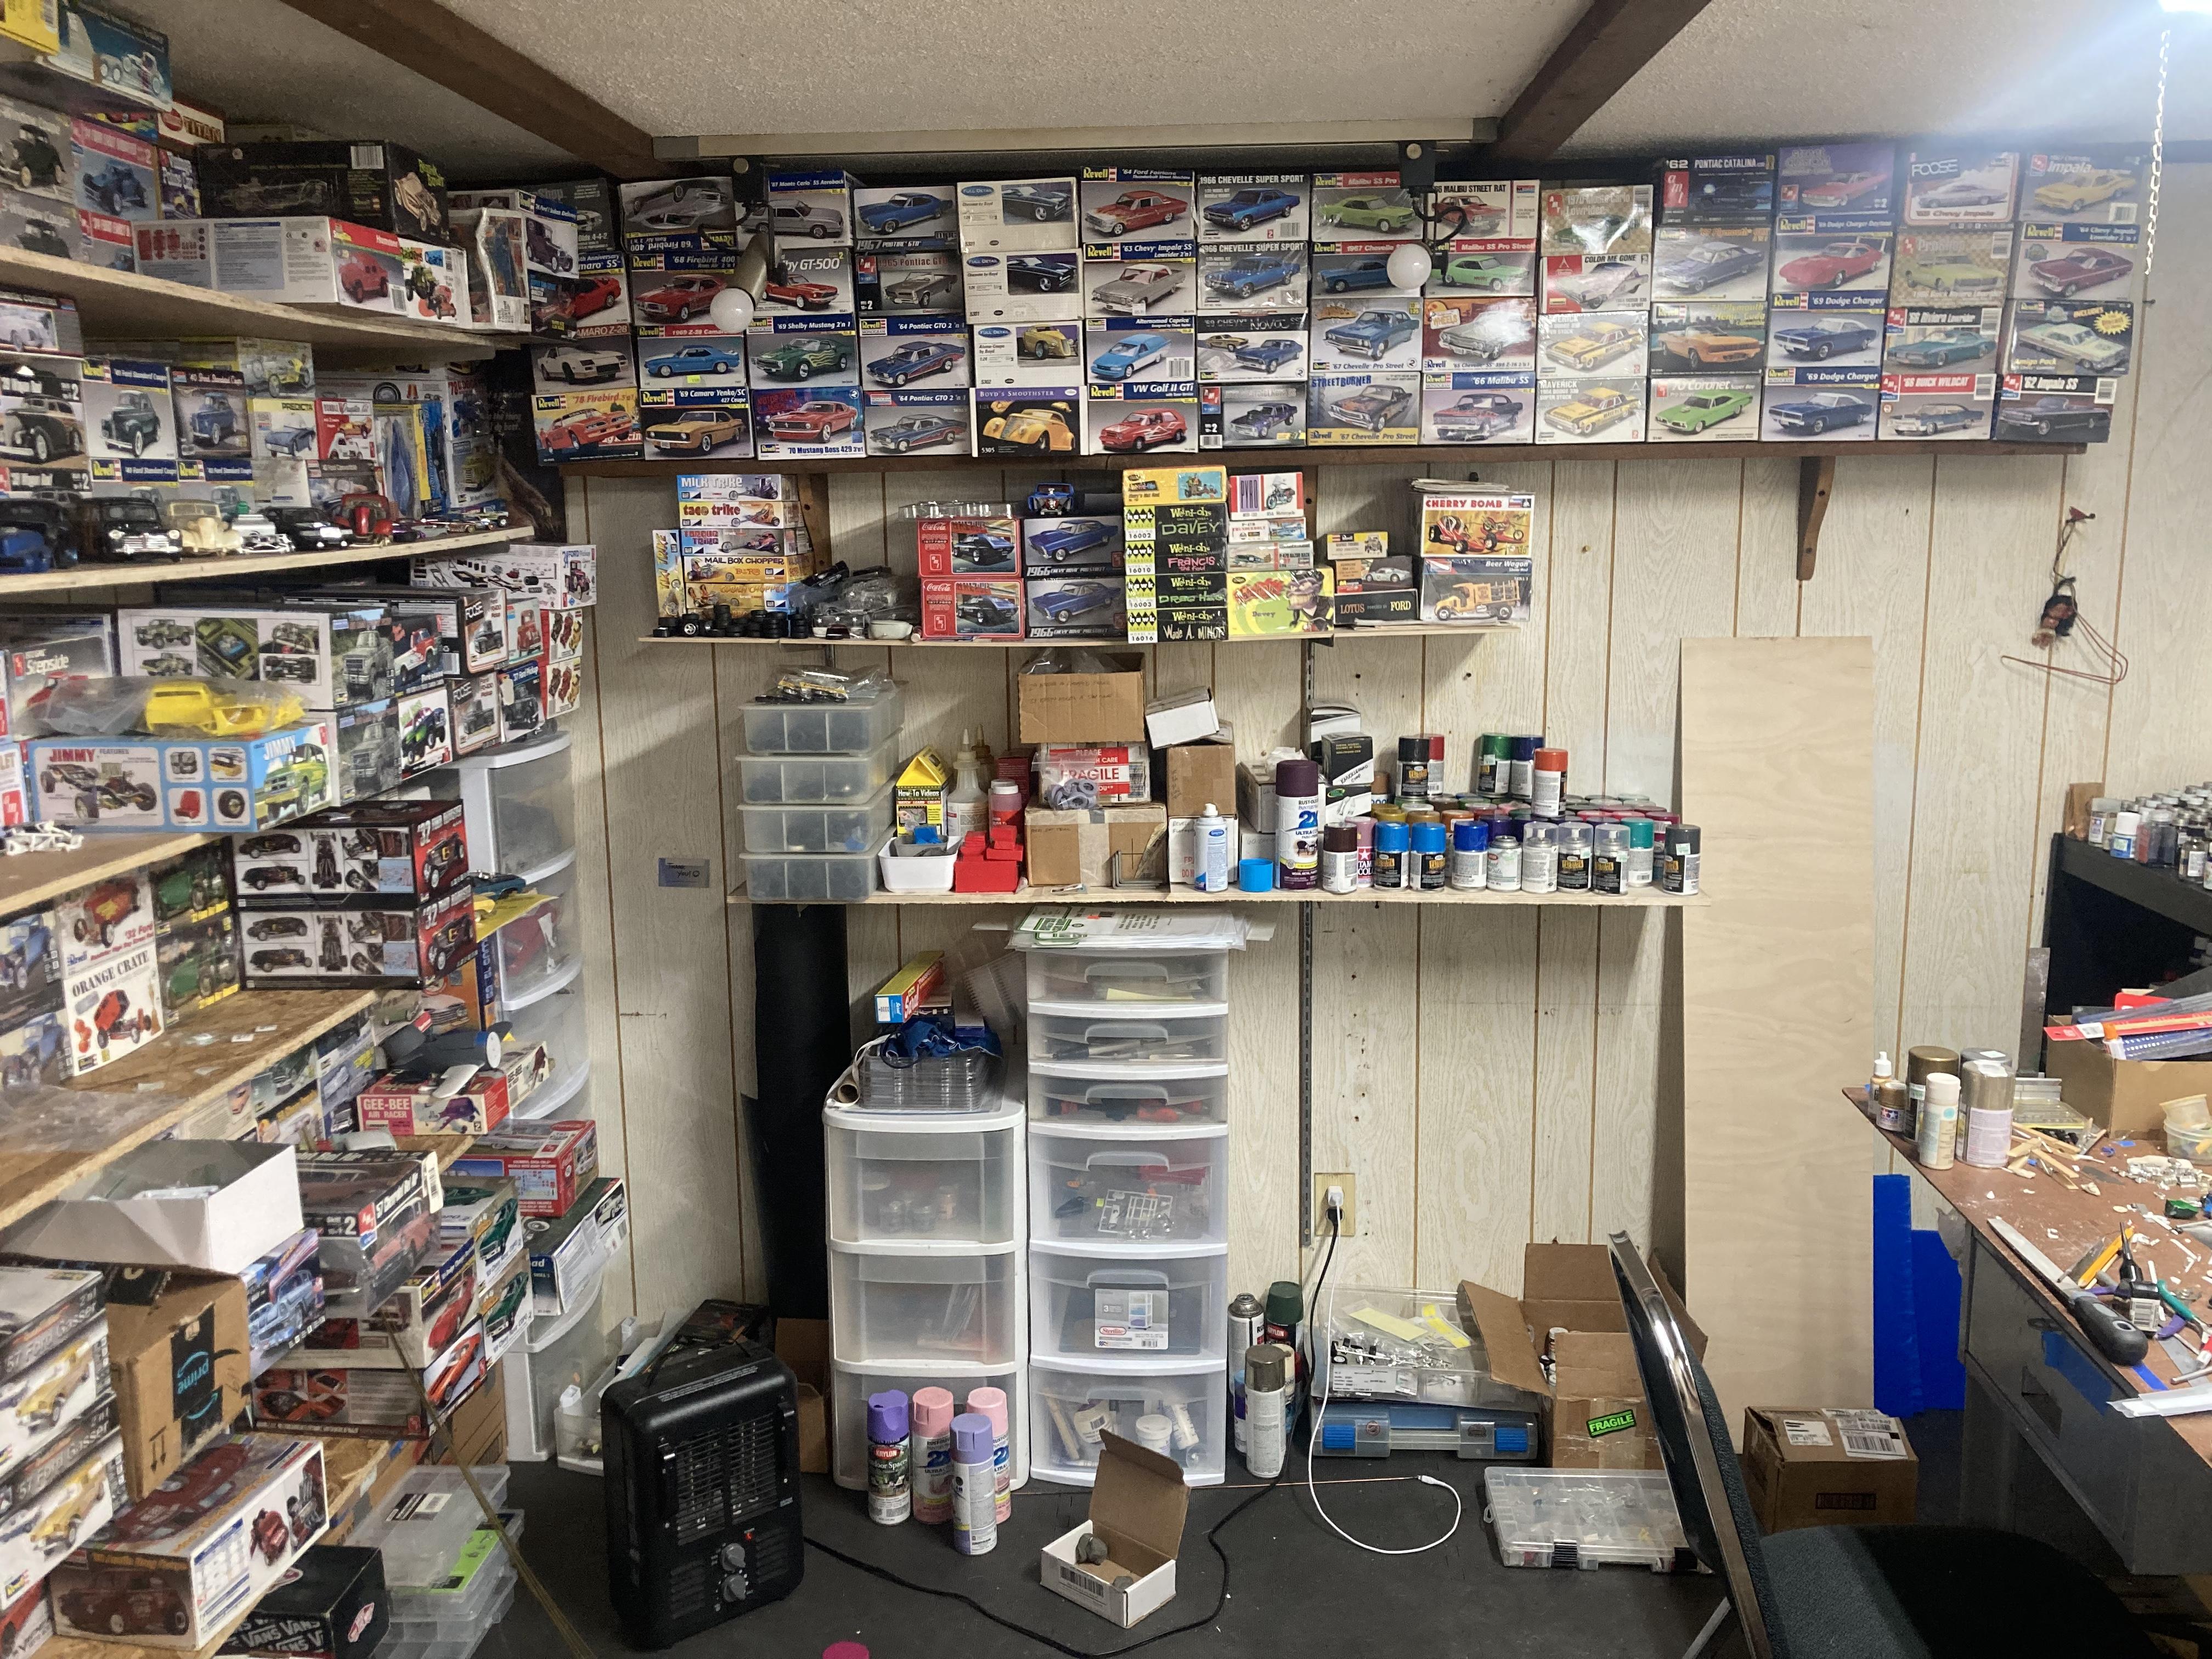
Behind you and the bench
Tarkmucker replied to KC FitiWerks's topic in General Automotive Talk (Trucks and Cars)
Moved here last year and maybe three months ago I started to build out work space in this room in my basement. There’s still stuff everywhere and I’ve been trying to get rid of things I’ll never use. And in between working on anything I just “put this right here for a minute” while I’m cleaning or going through things then my bench turns into an absolute nightmare. I still manage to work on it though. And there’s another shelf outside of the room filled top to bottom with motorcycle kits and one shelf of 1:16 kits.
-
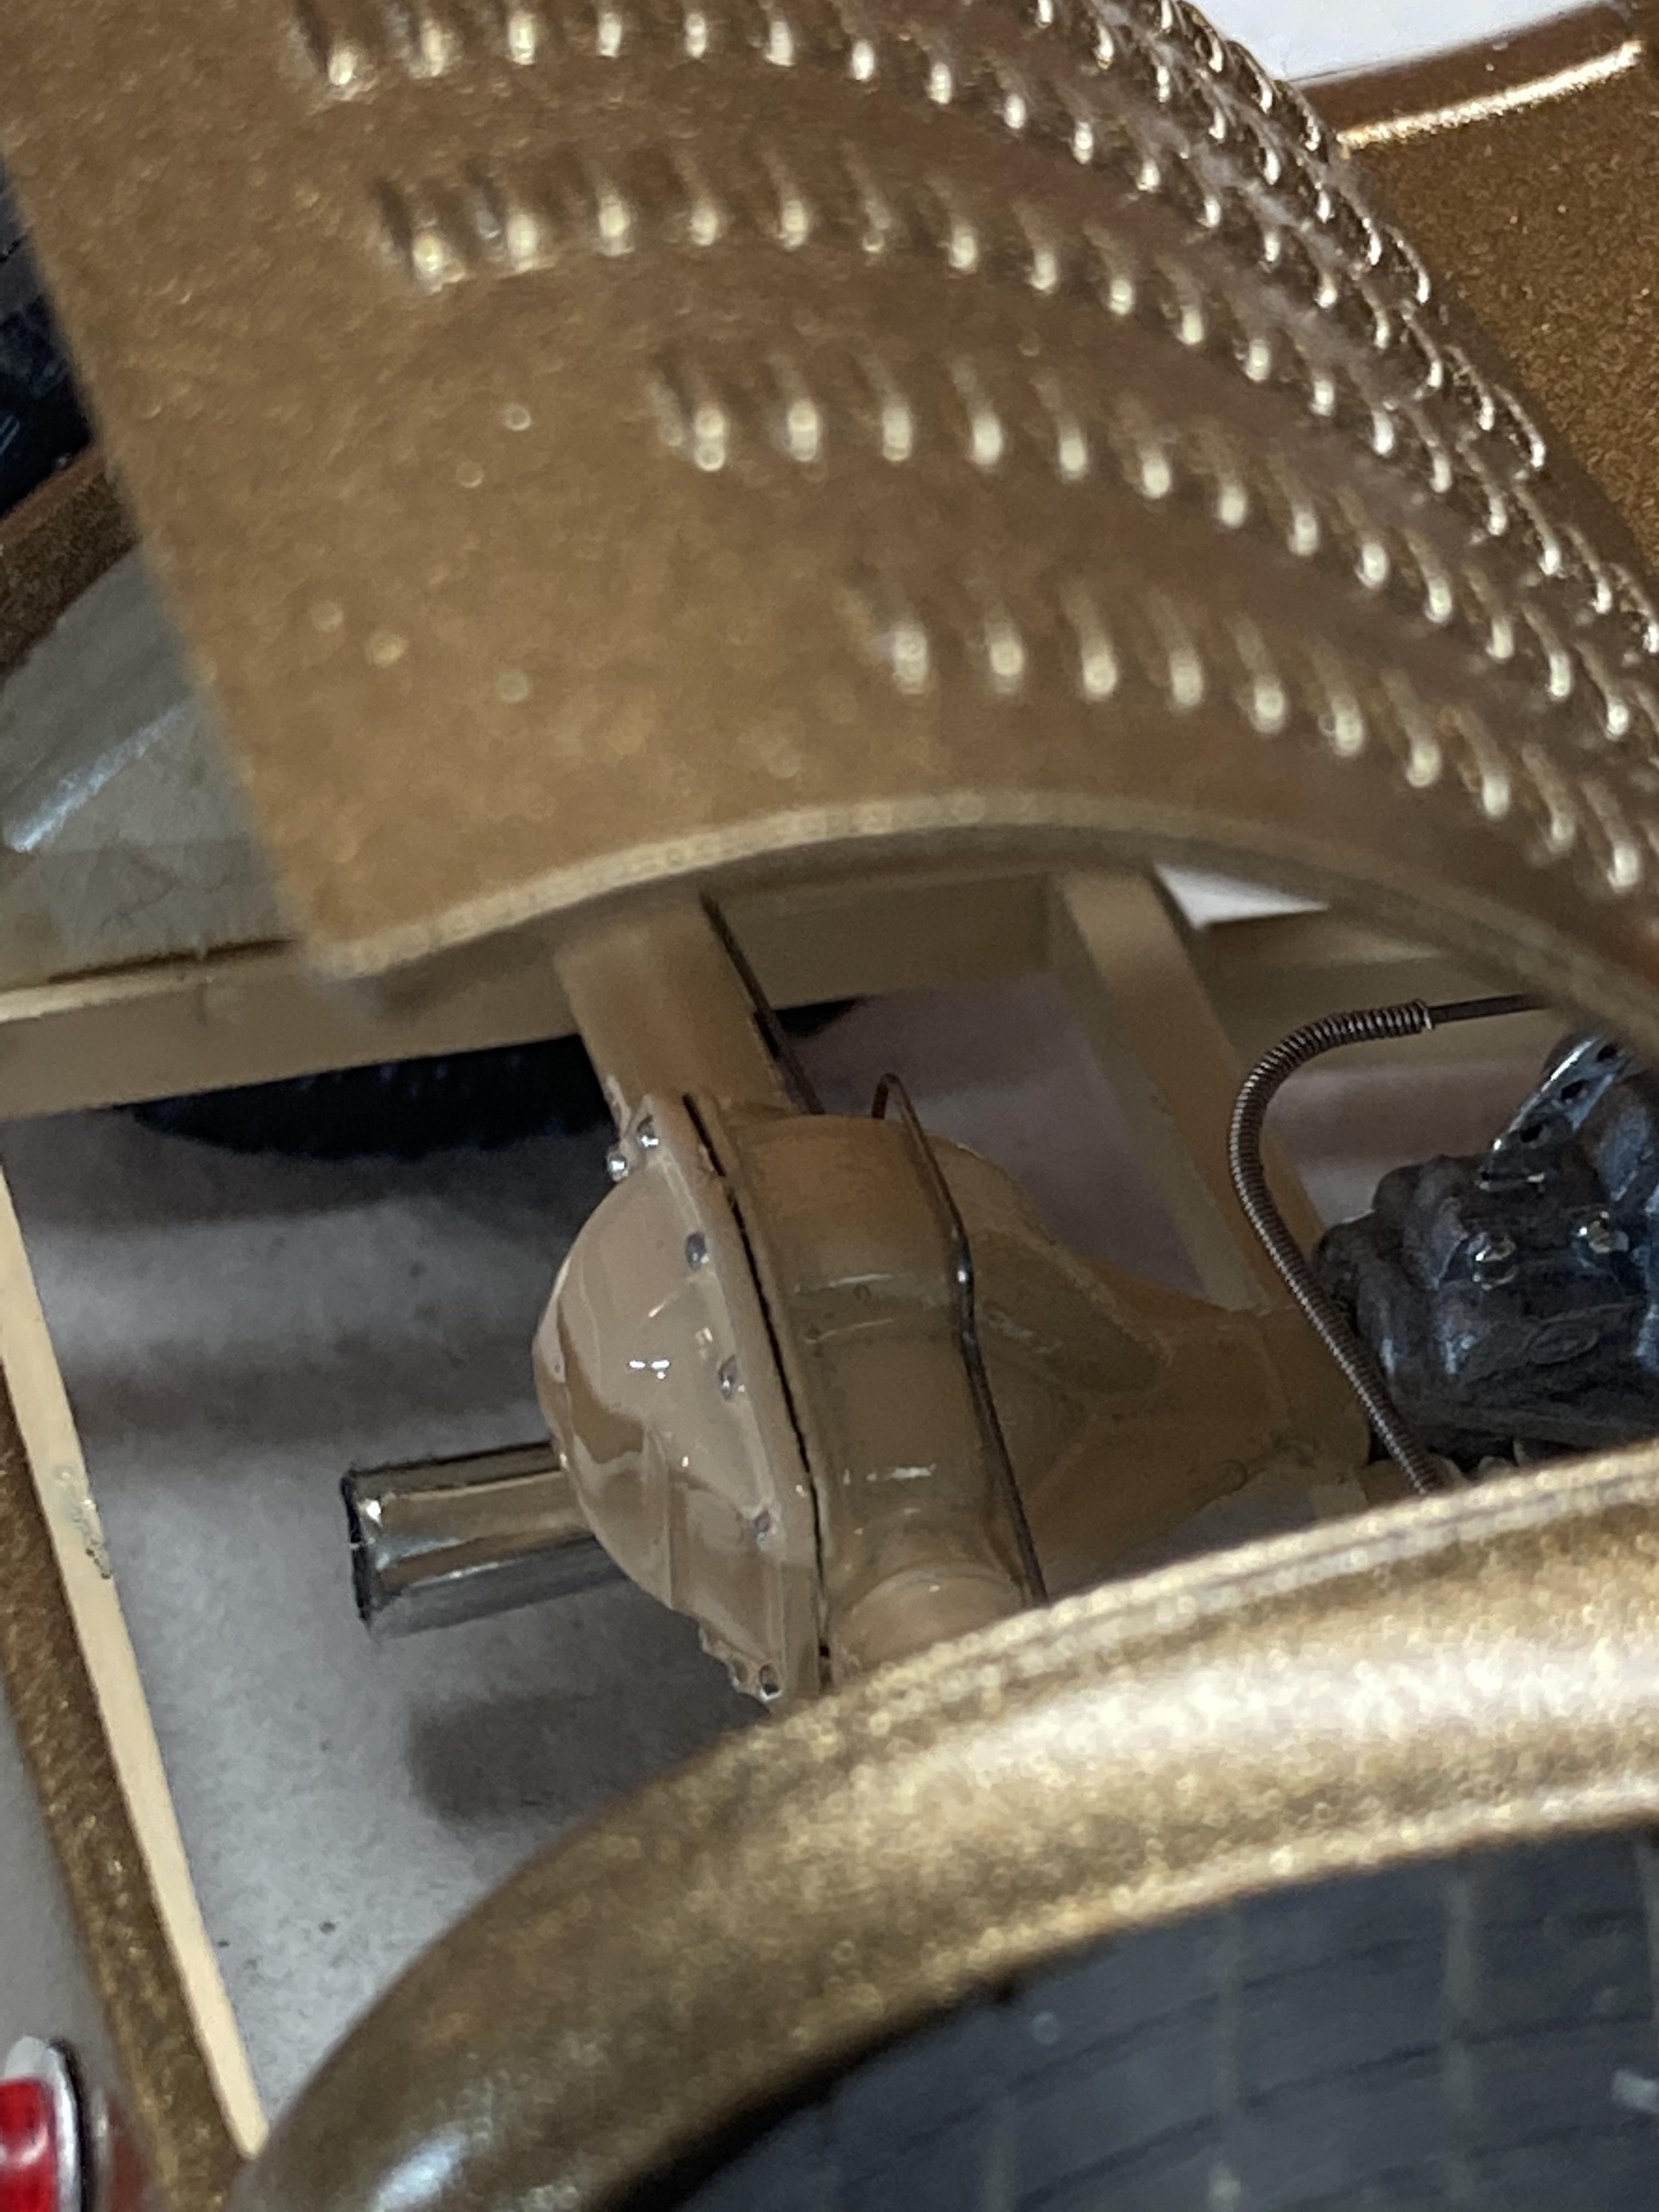
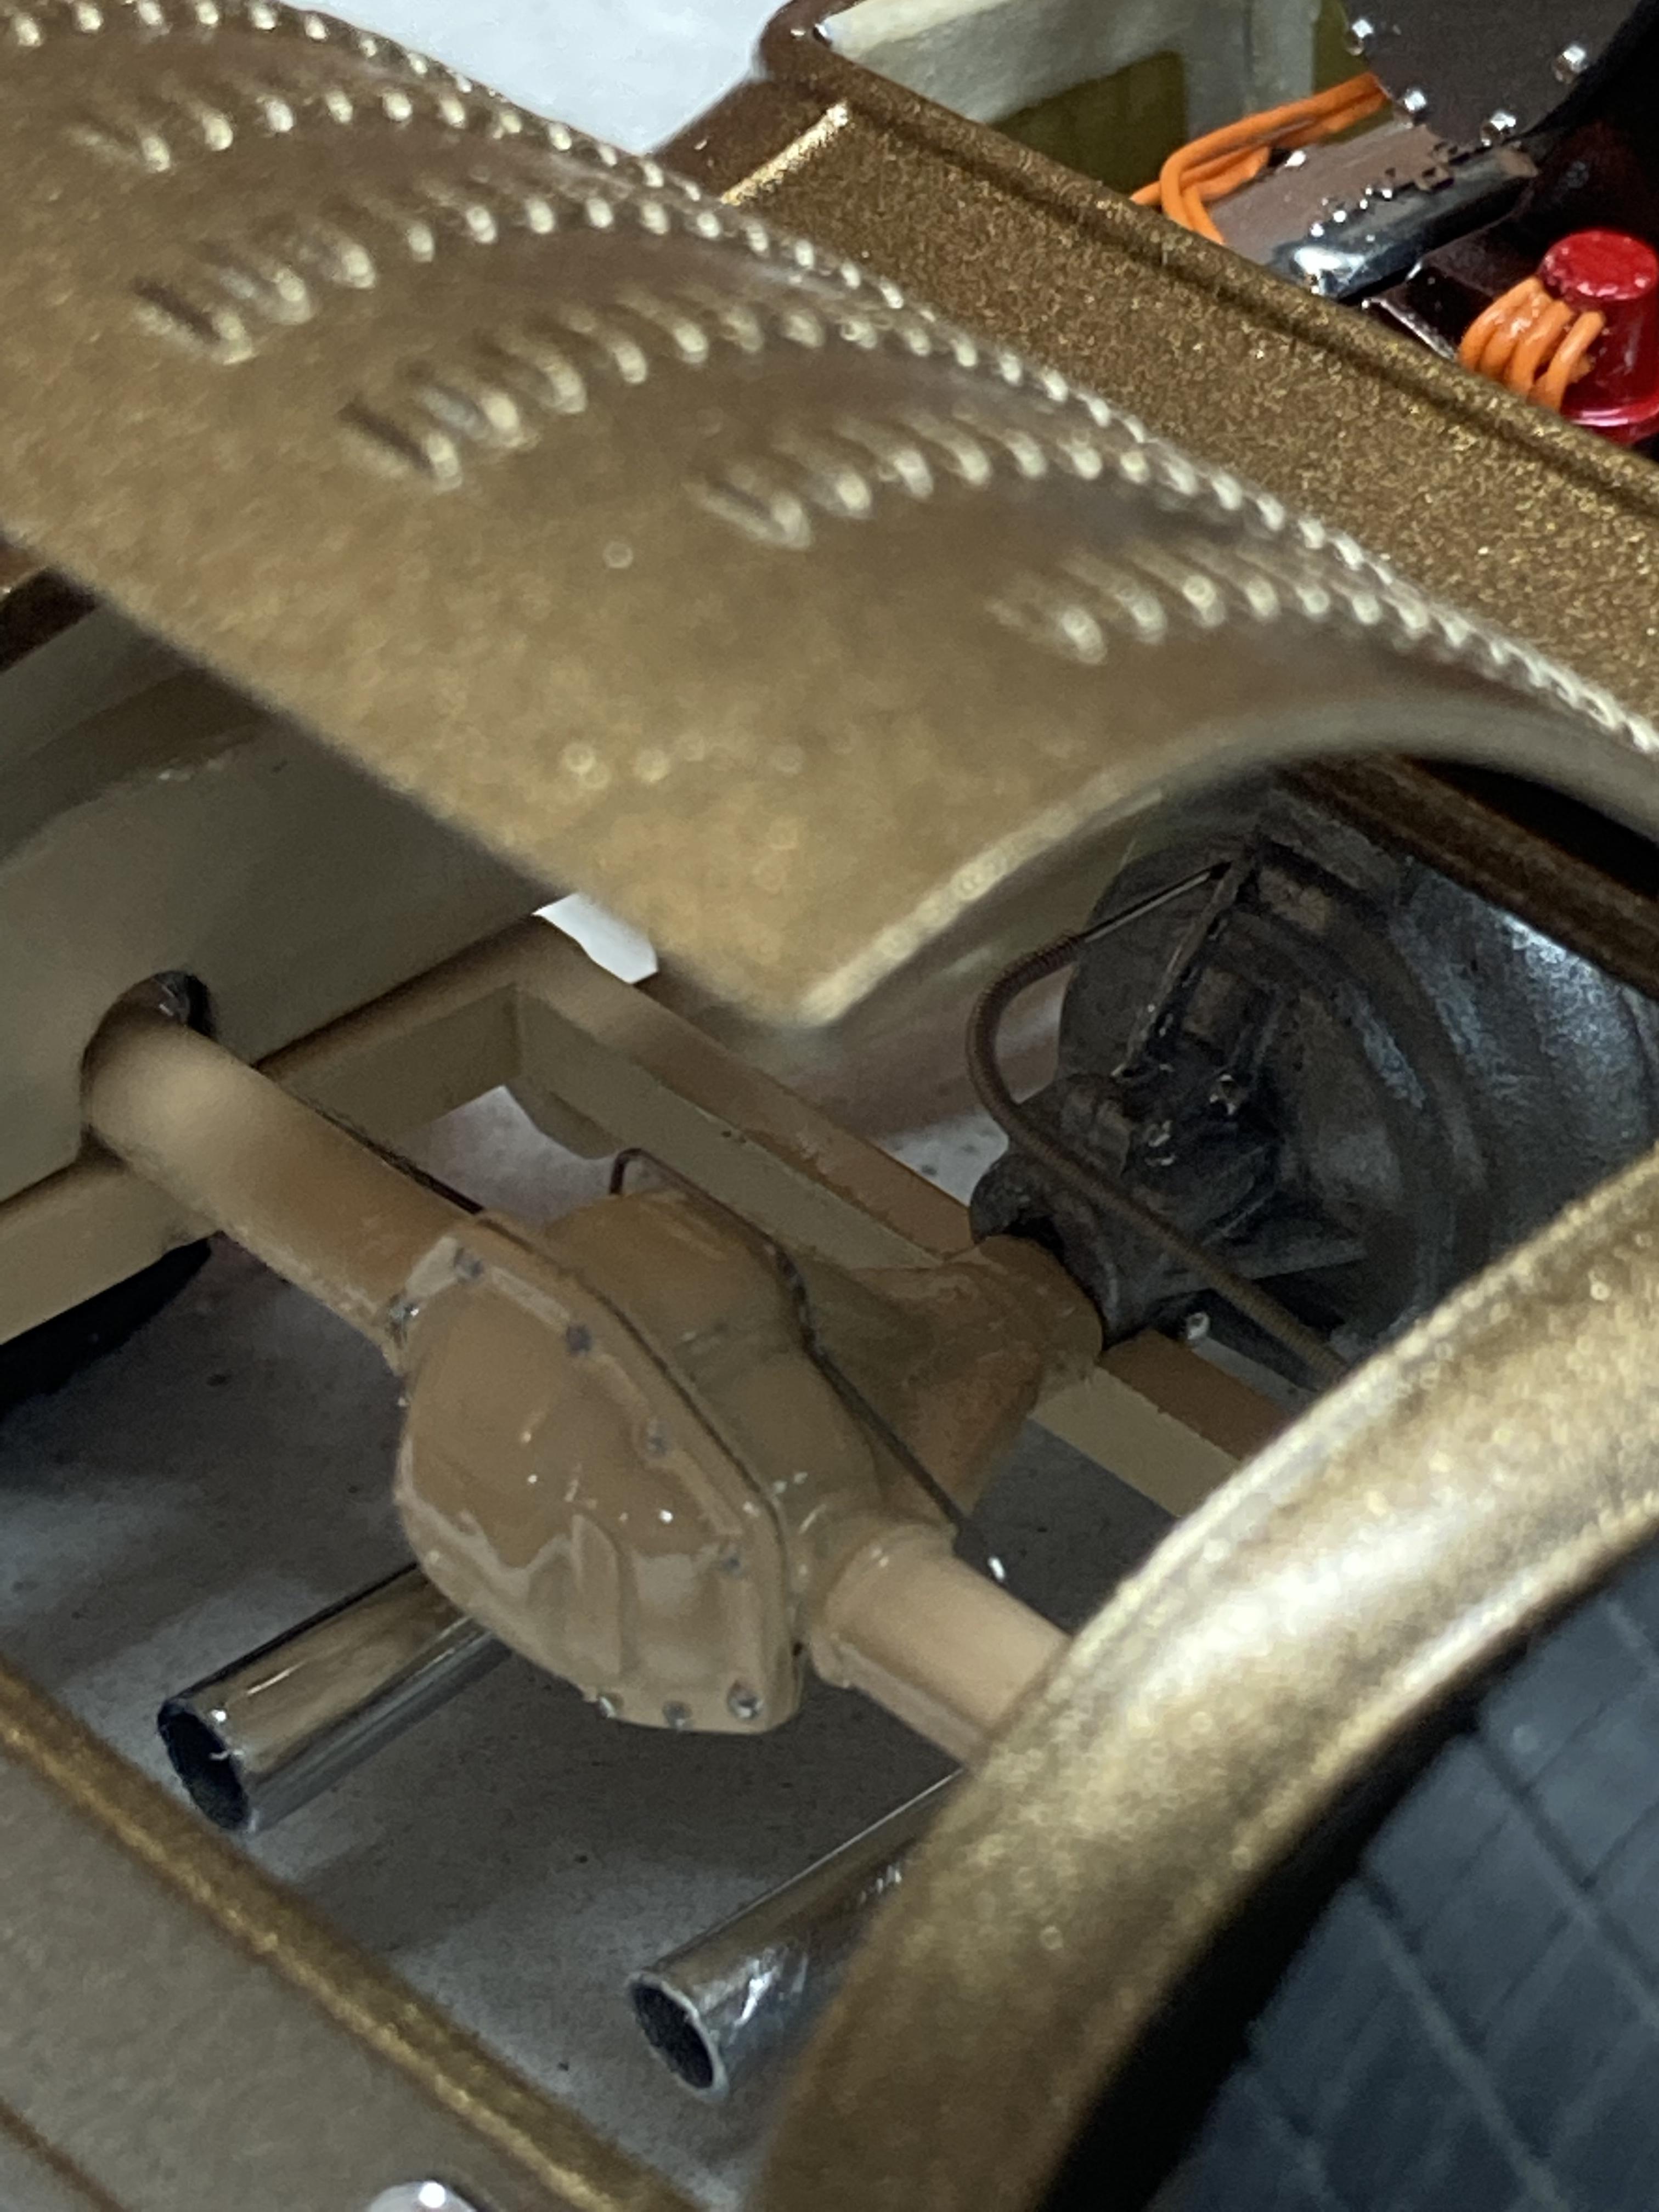
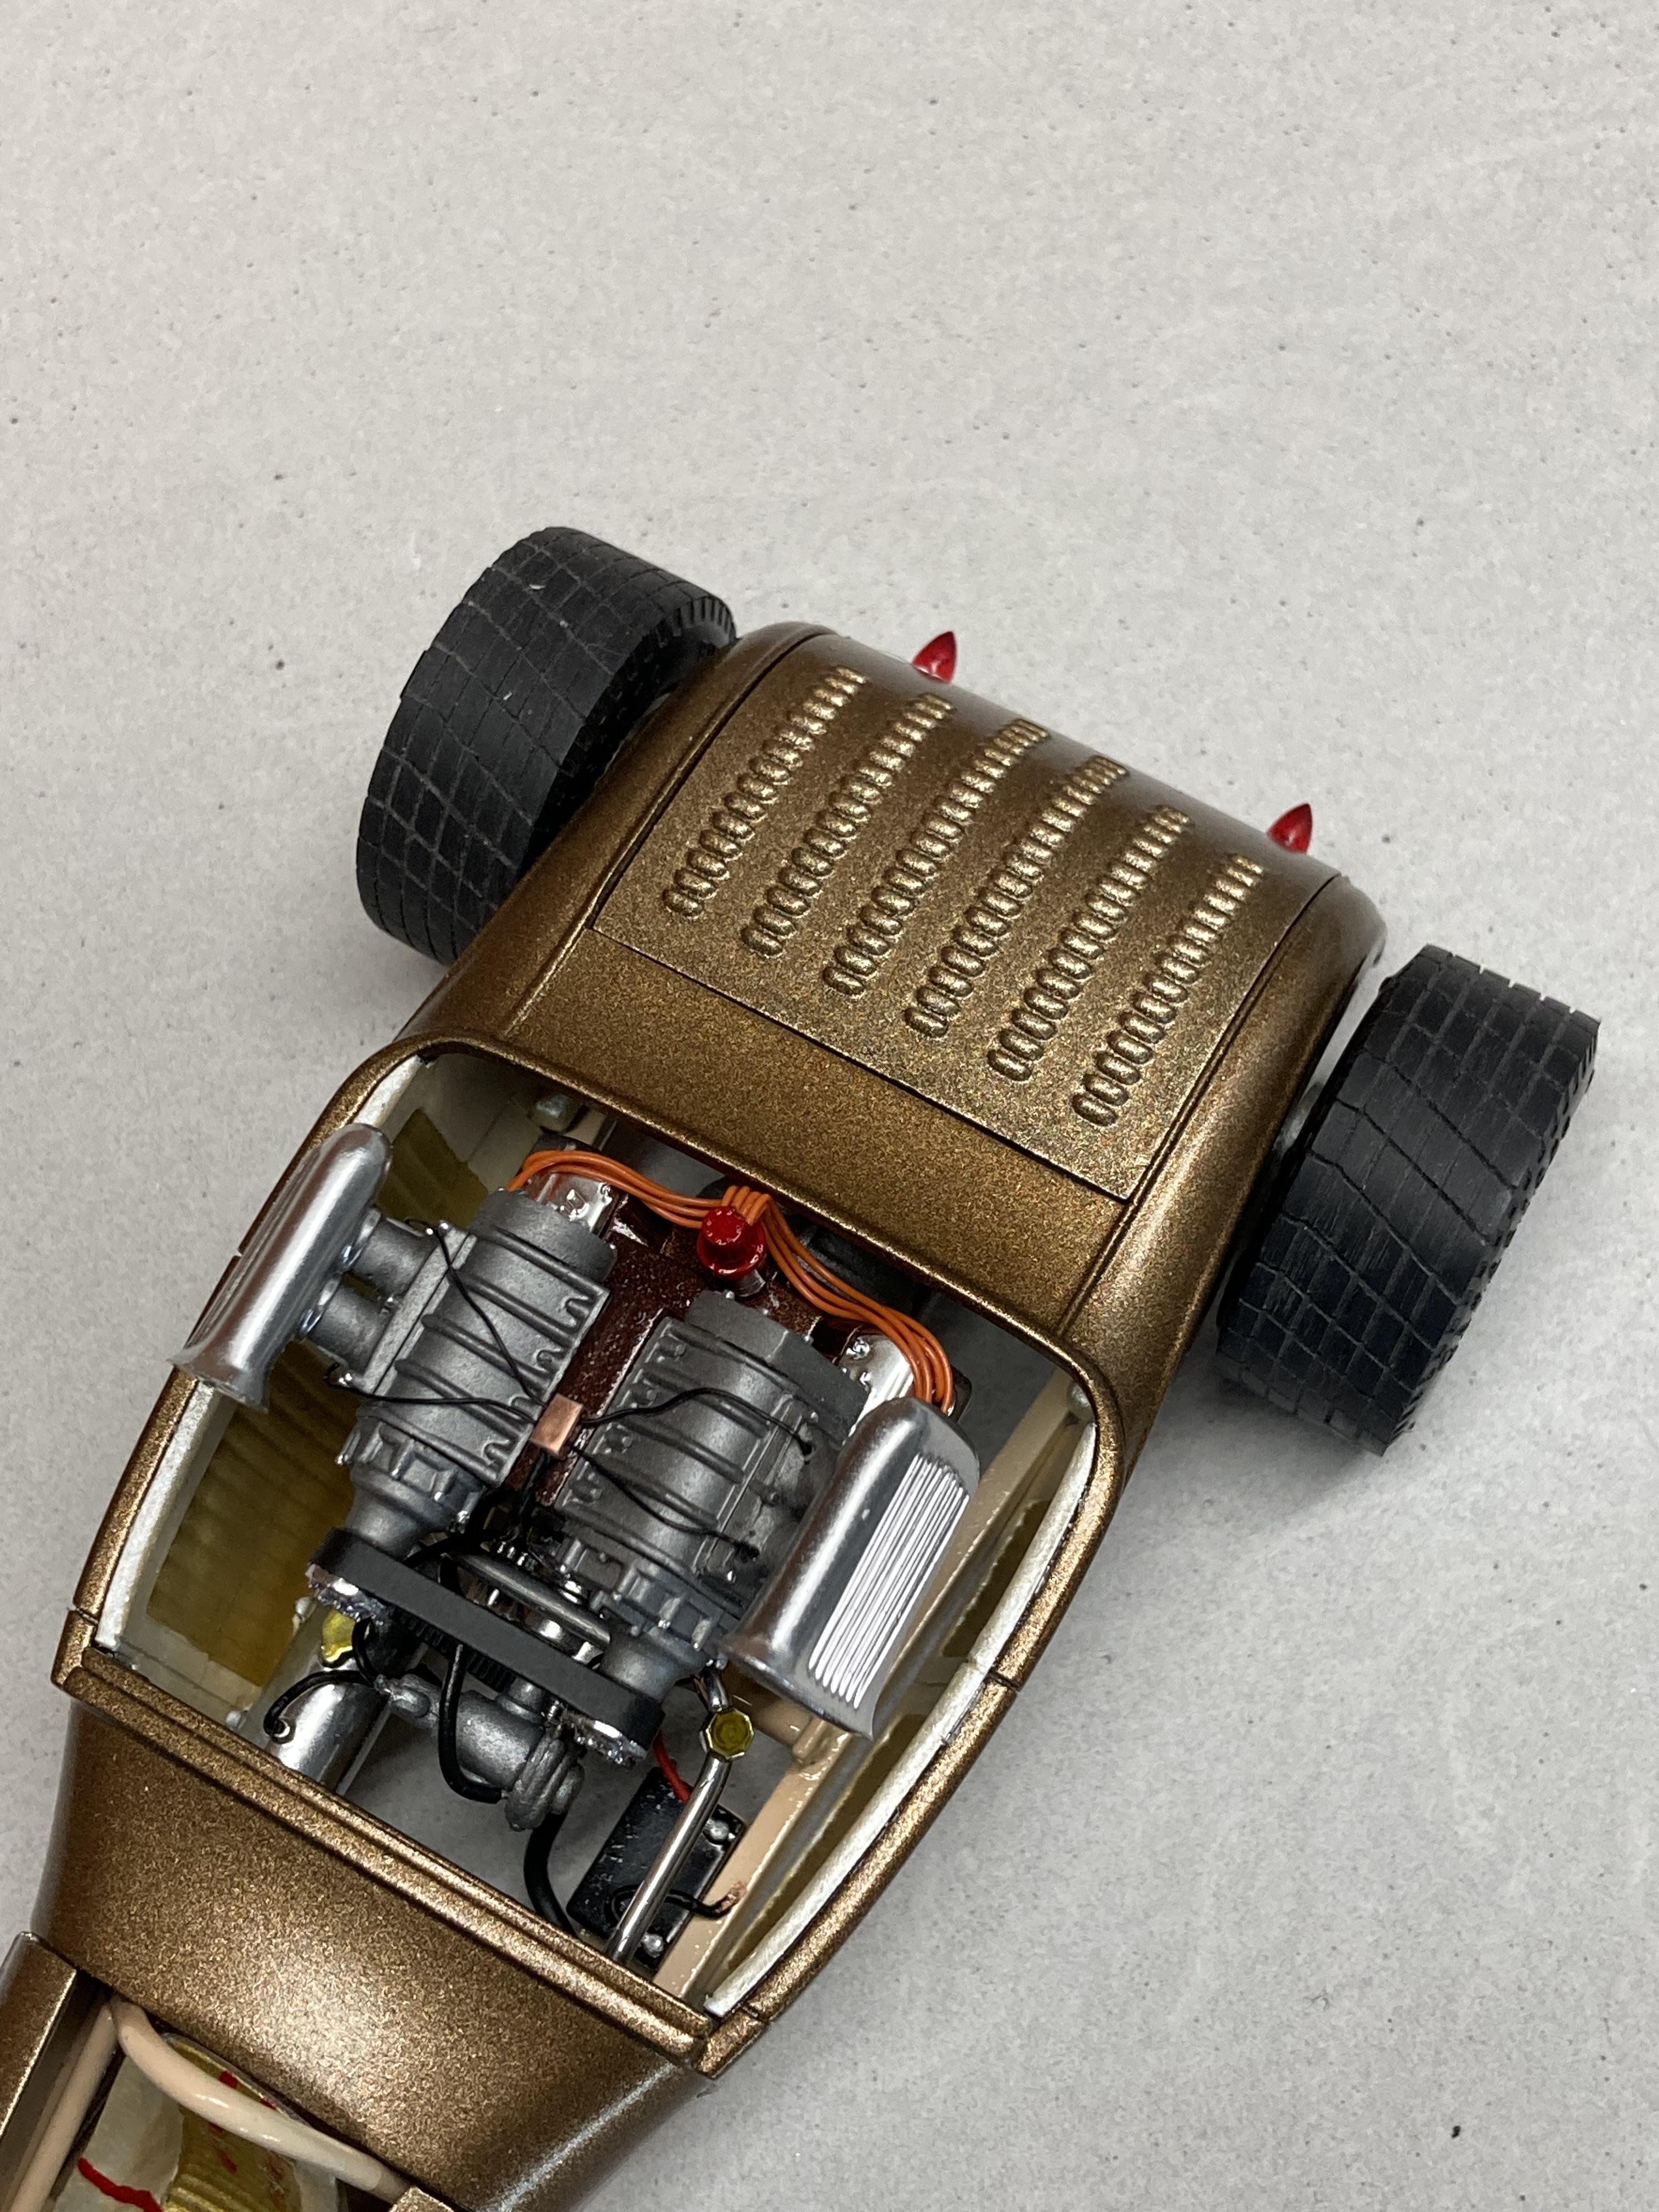
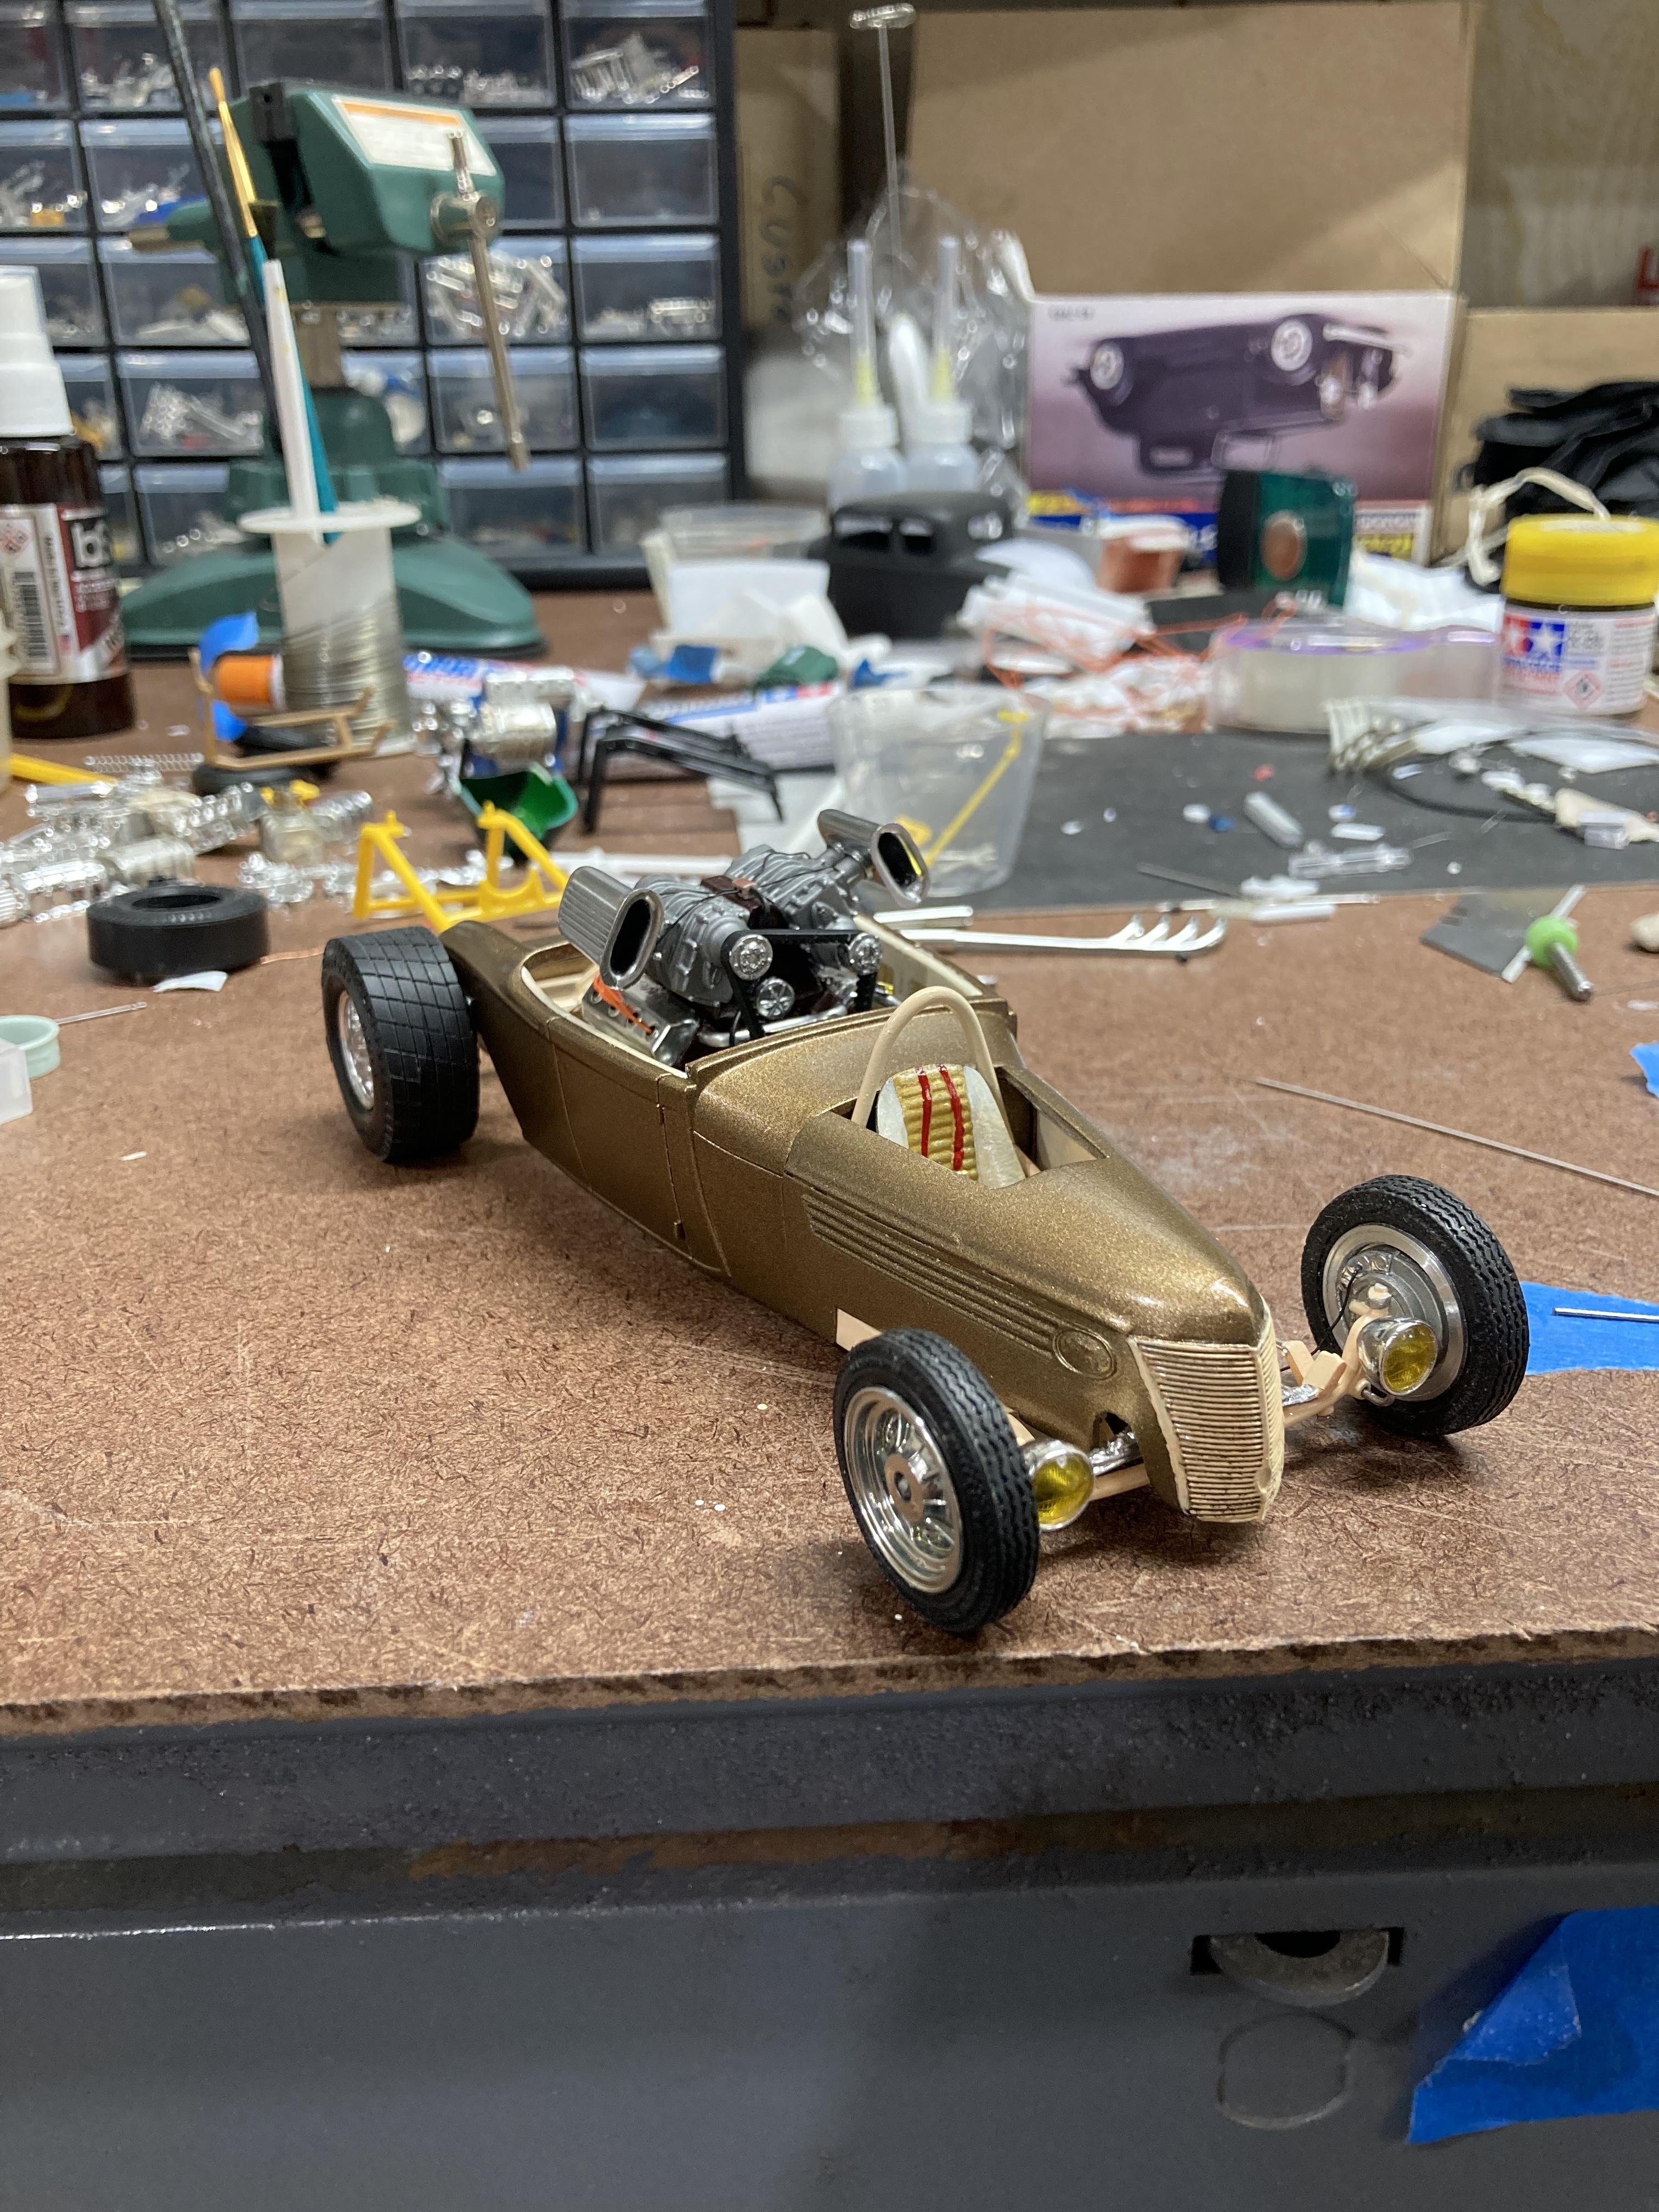
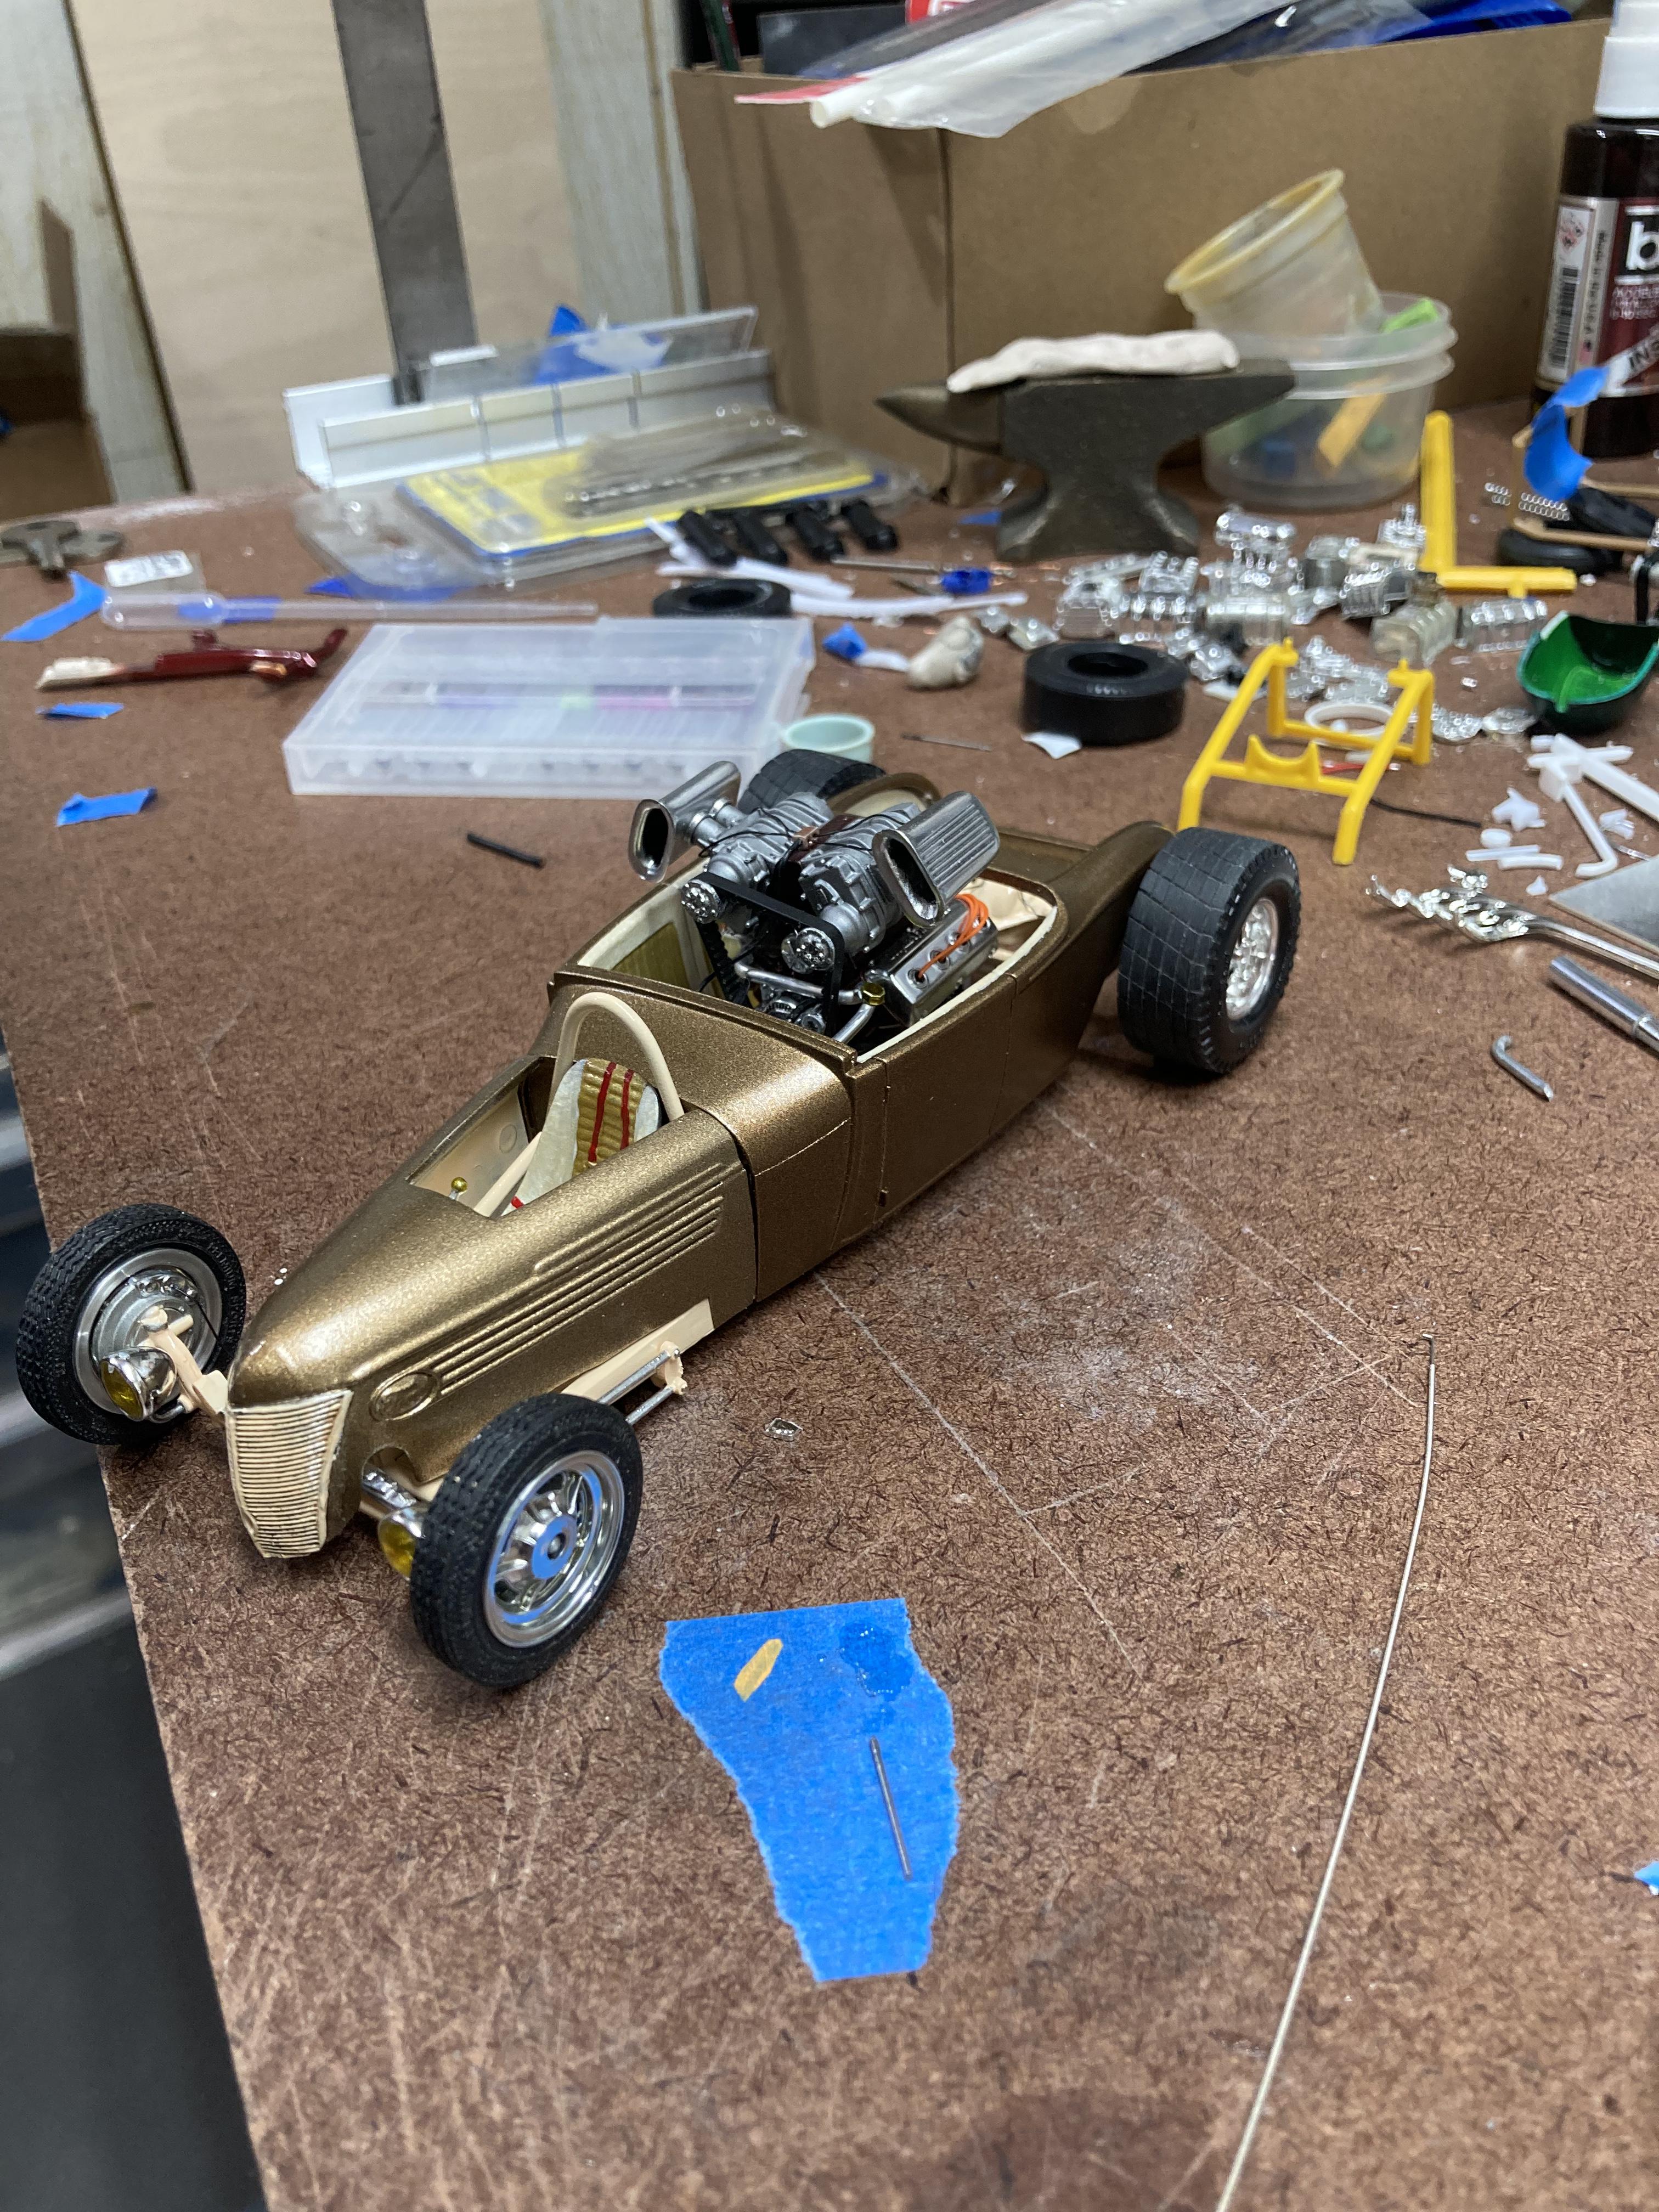
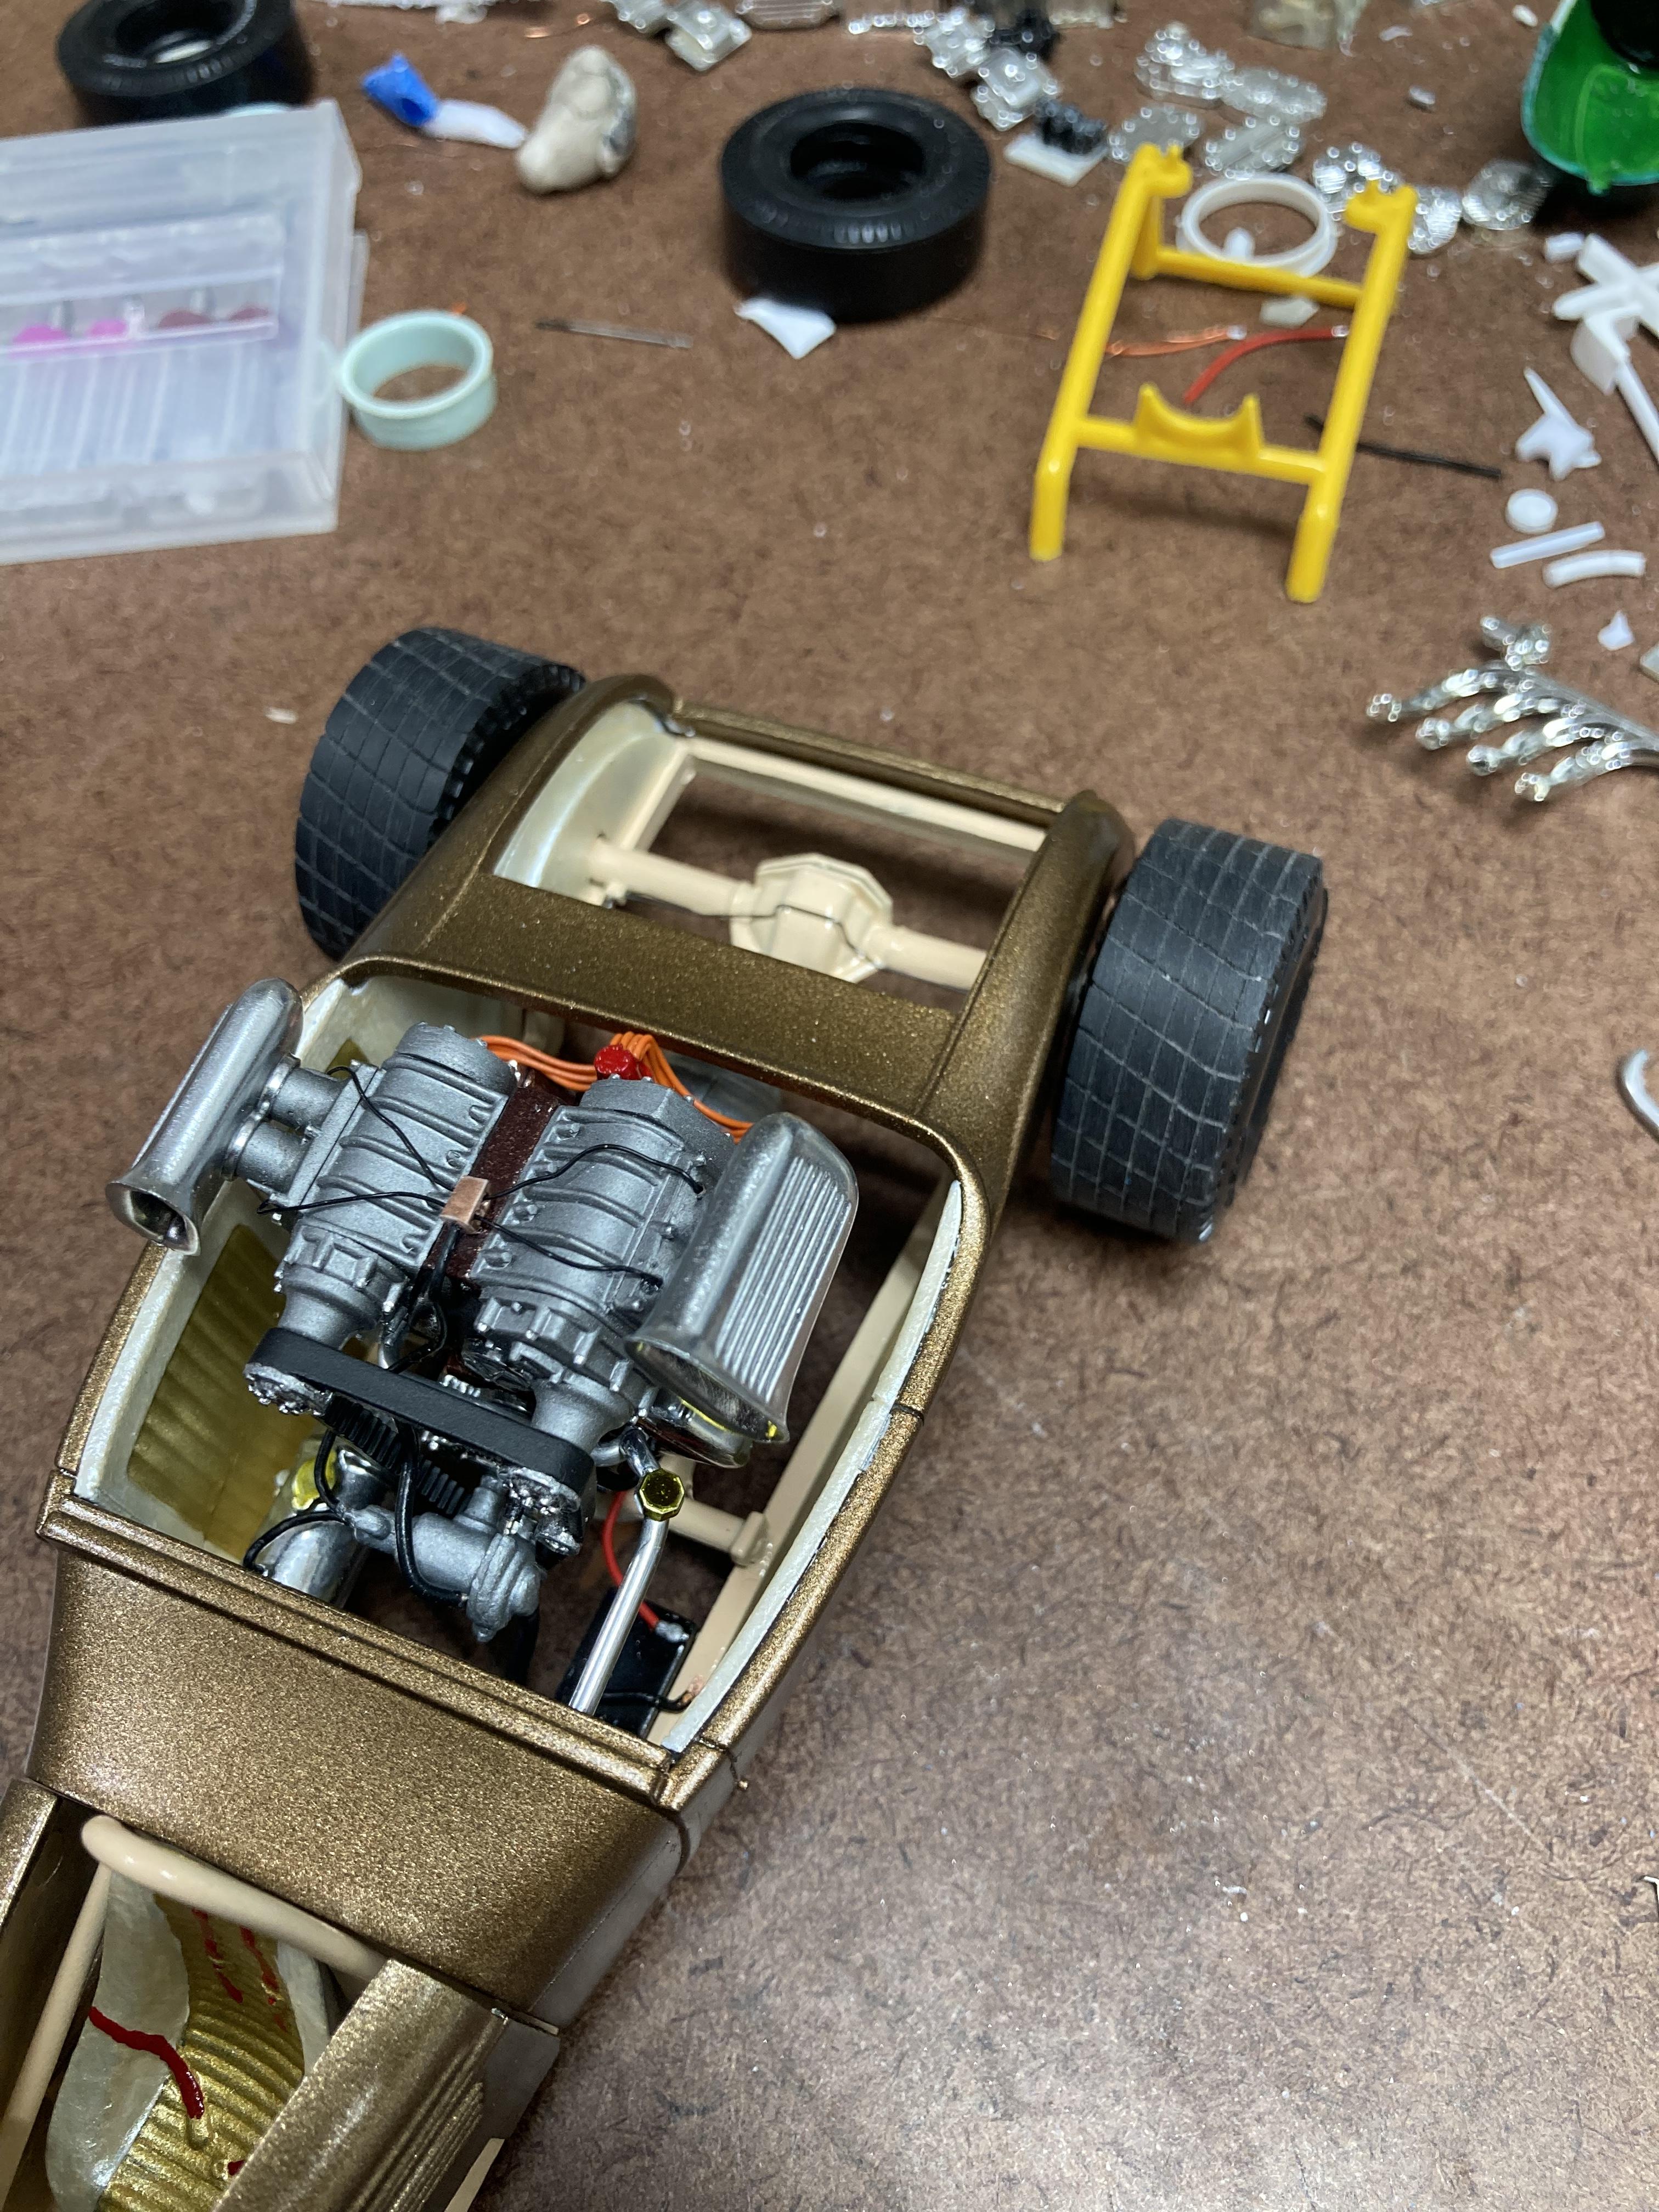
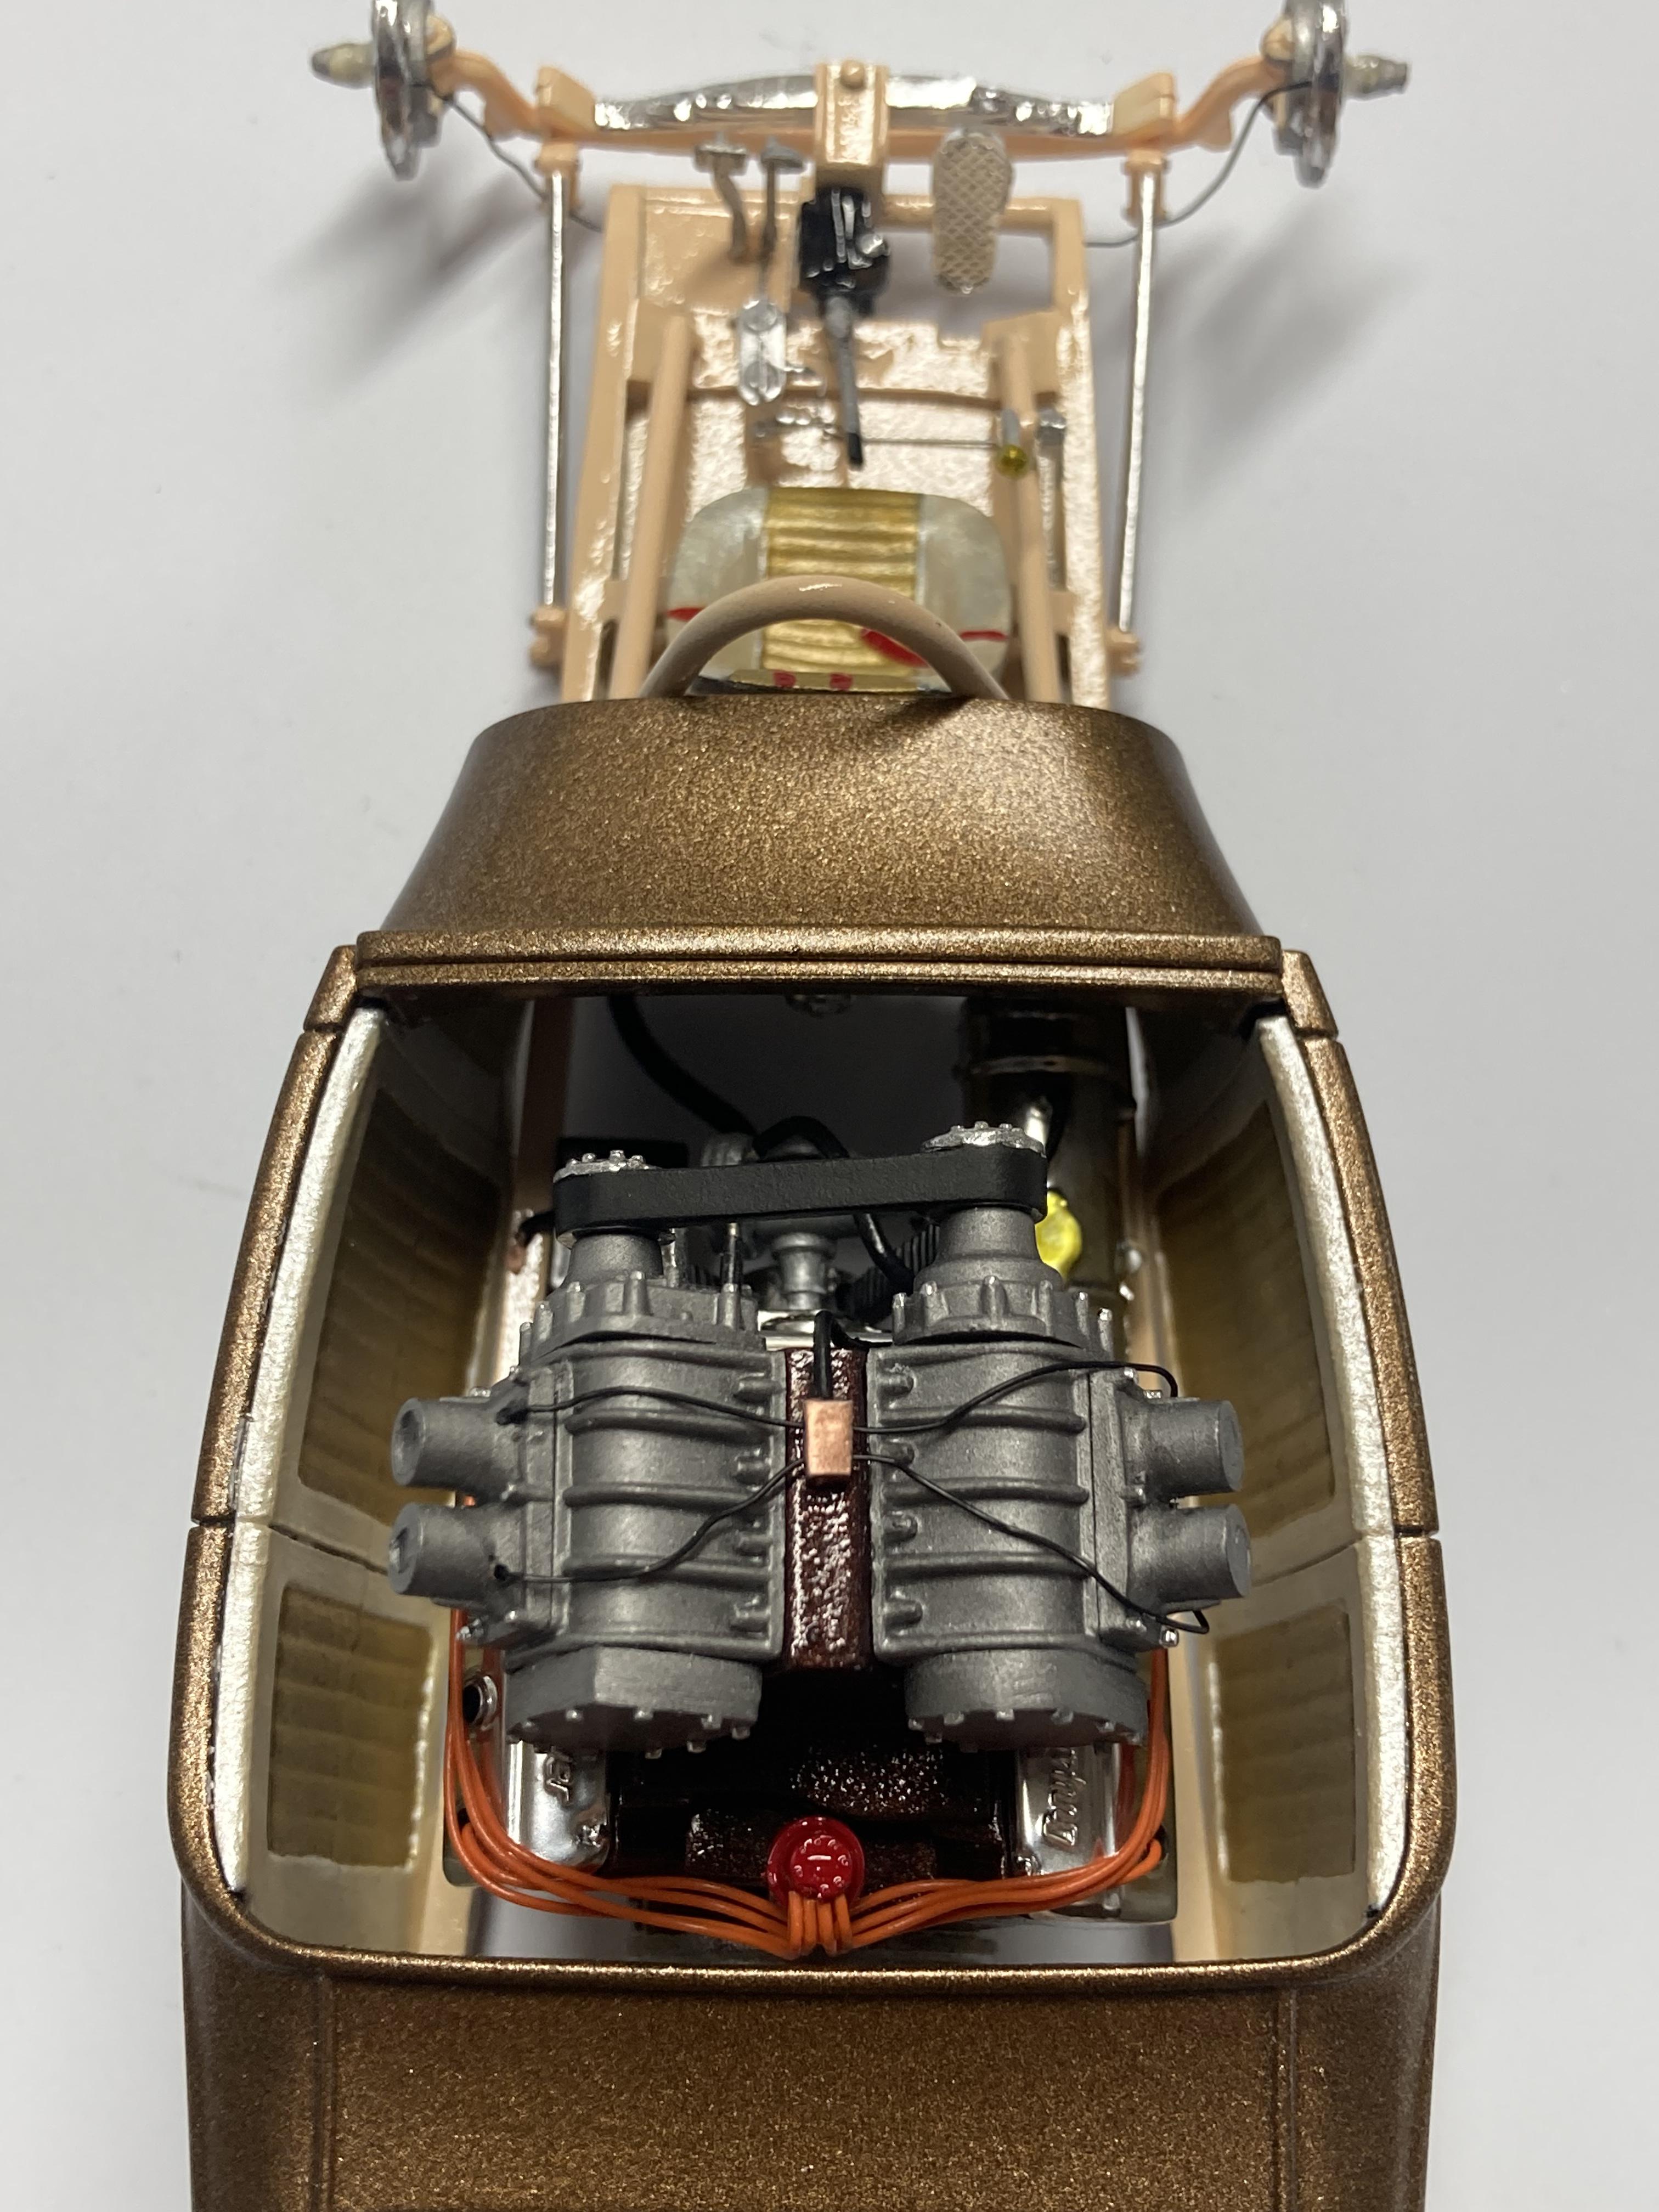
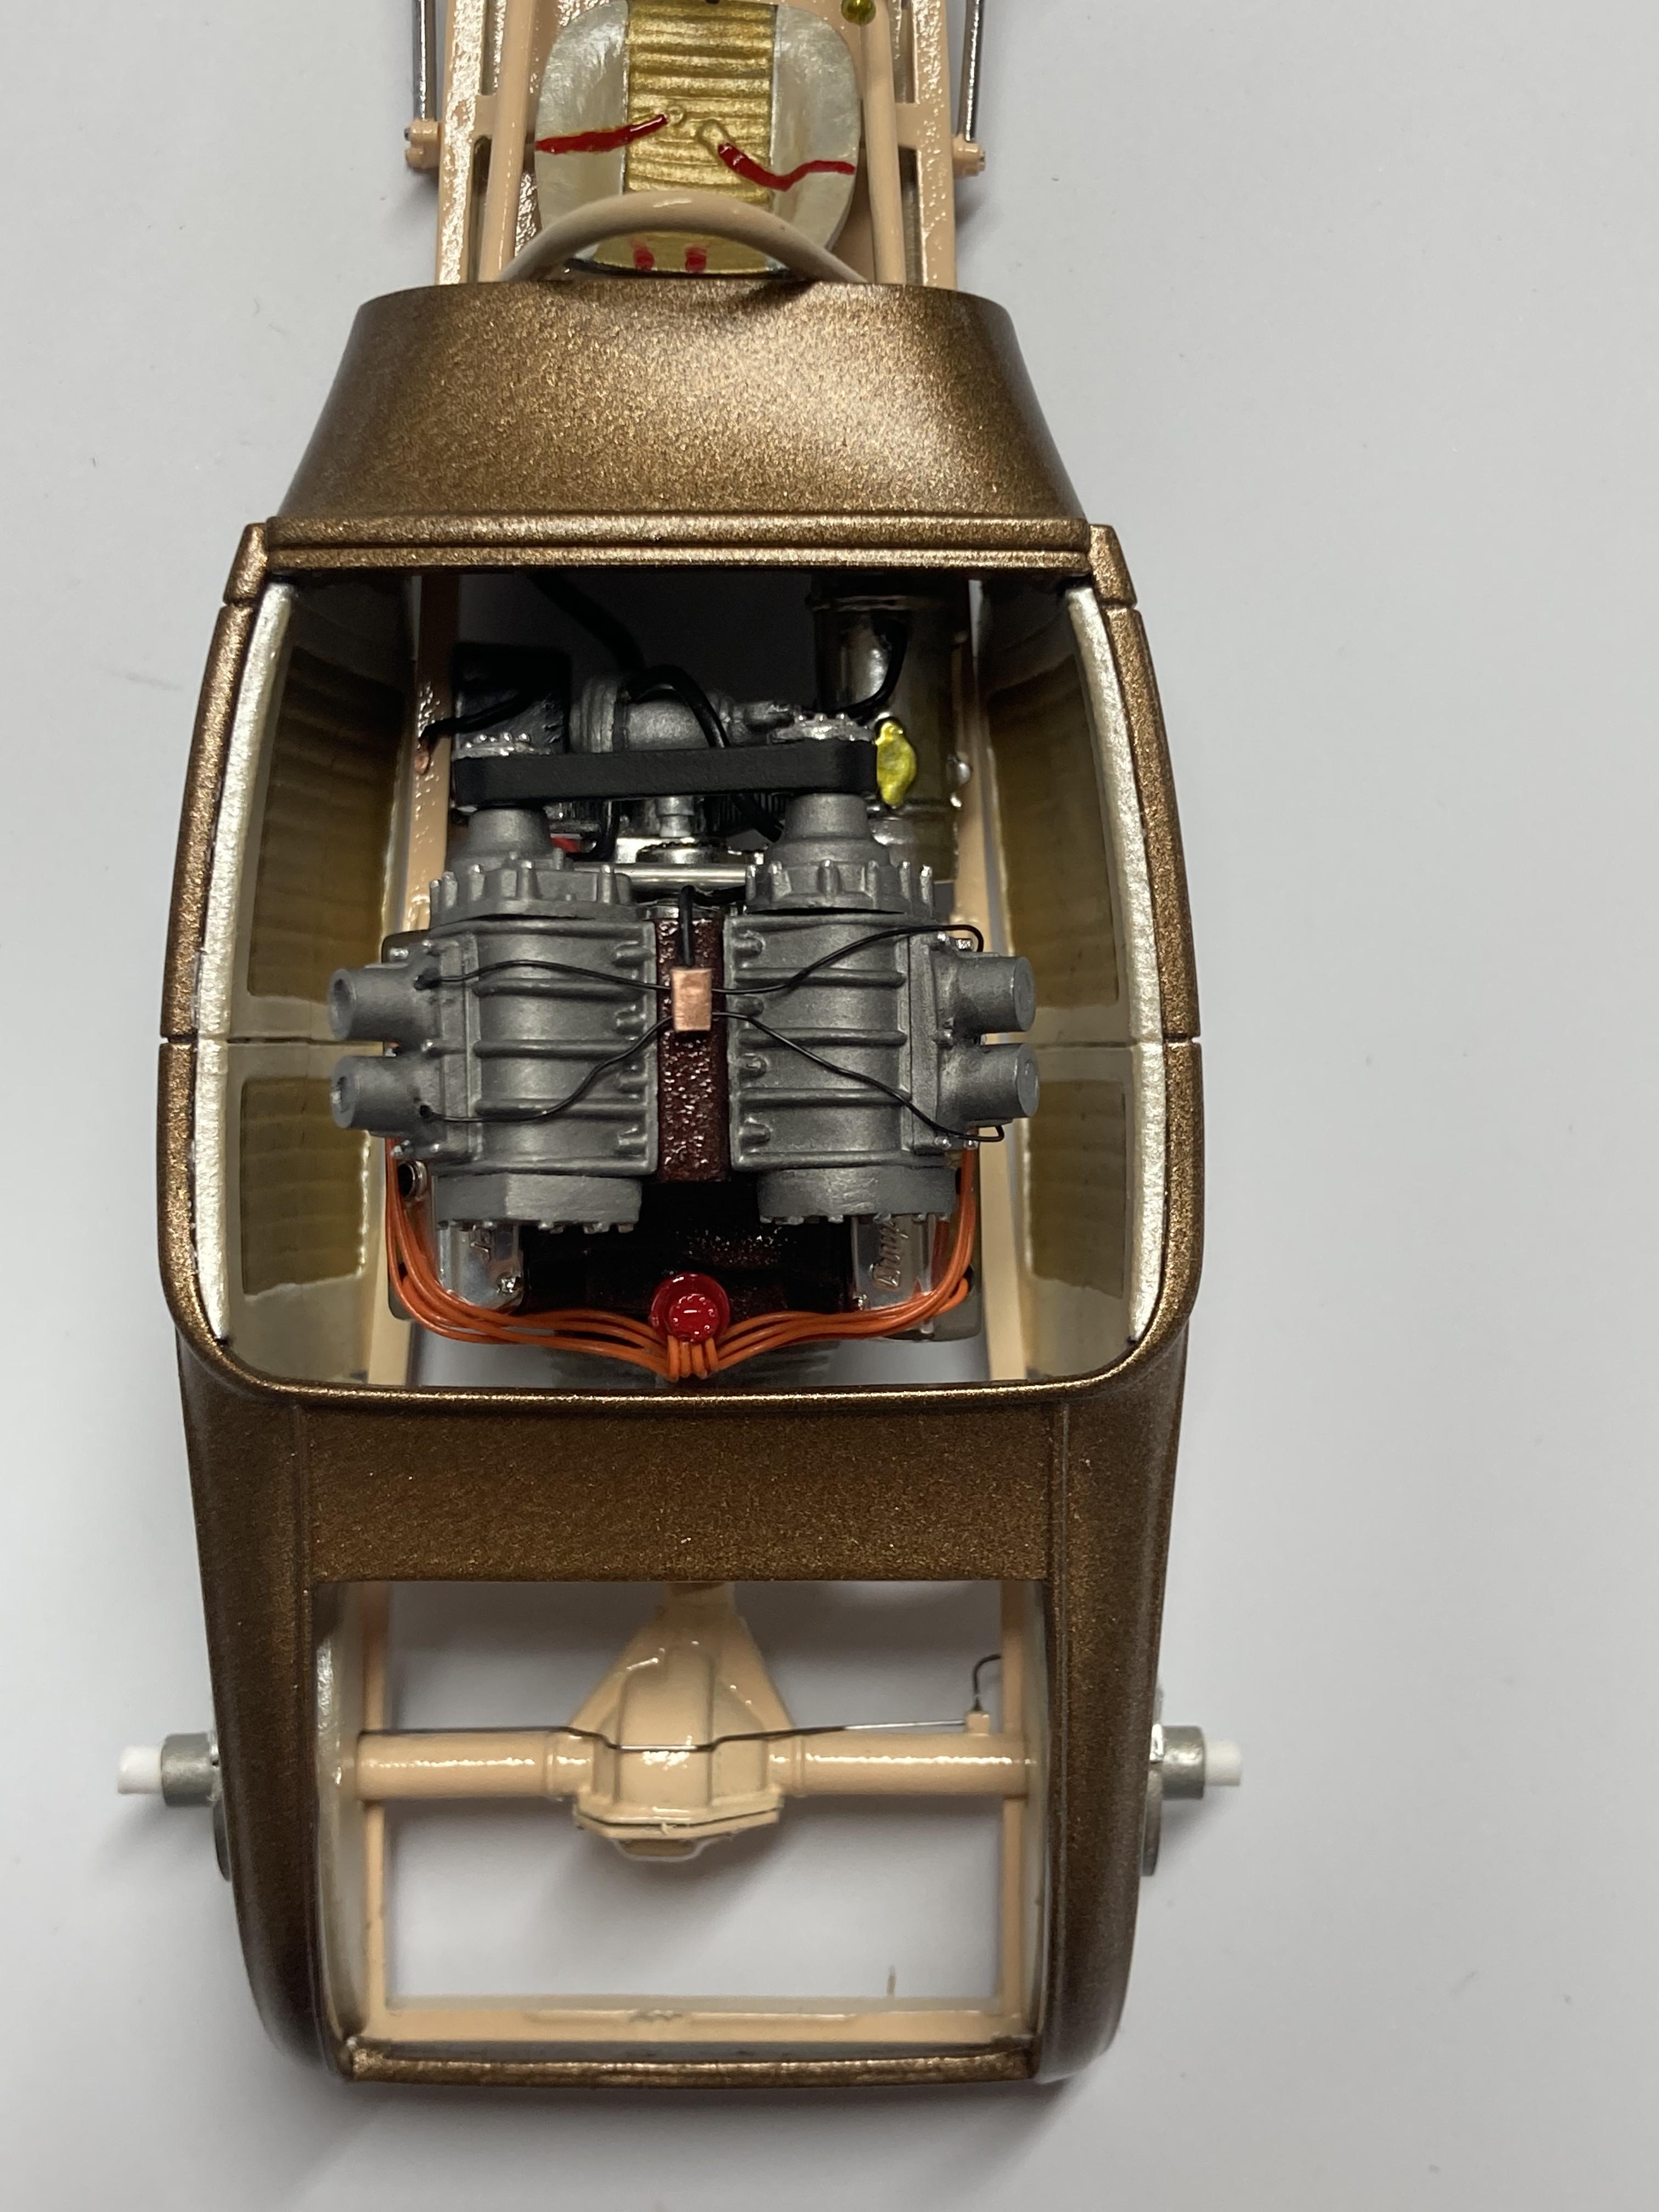
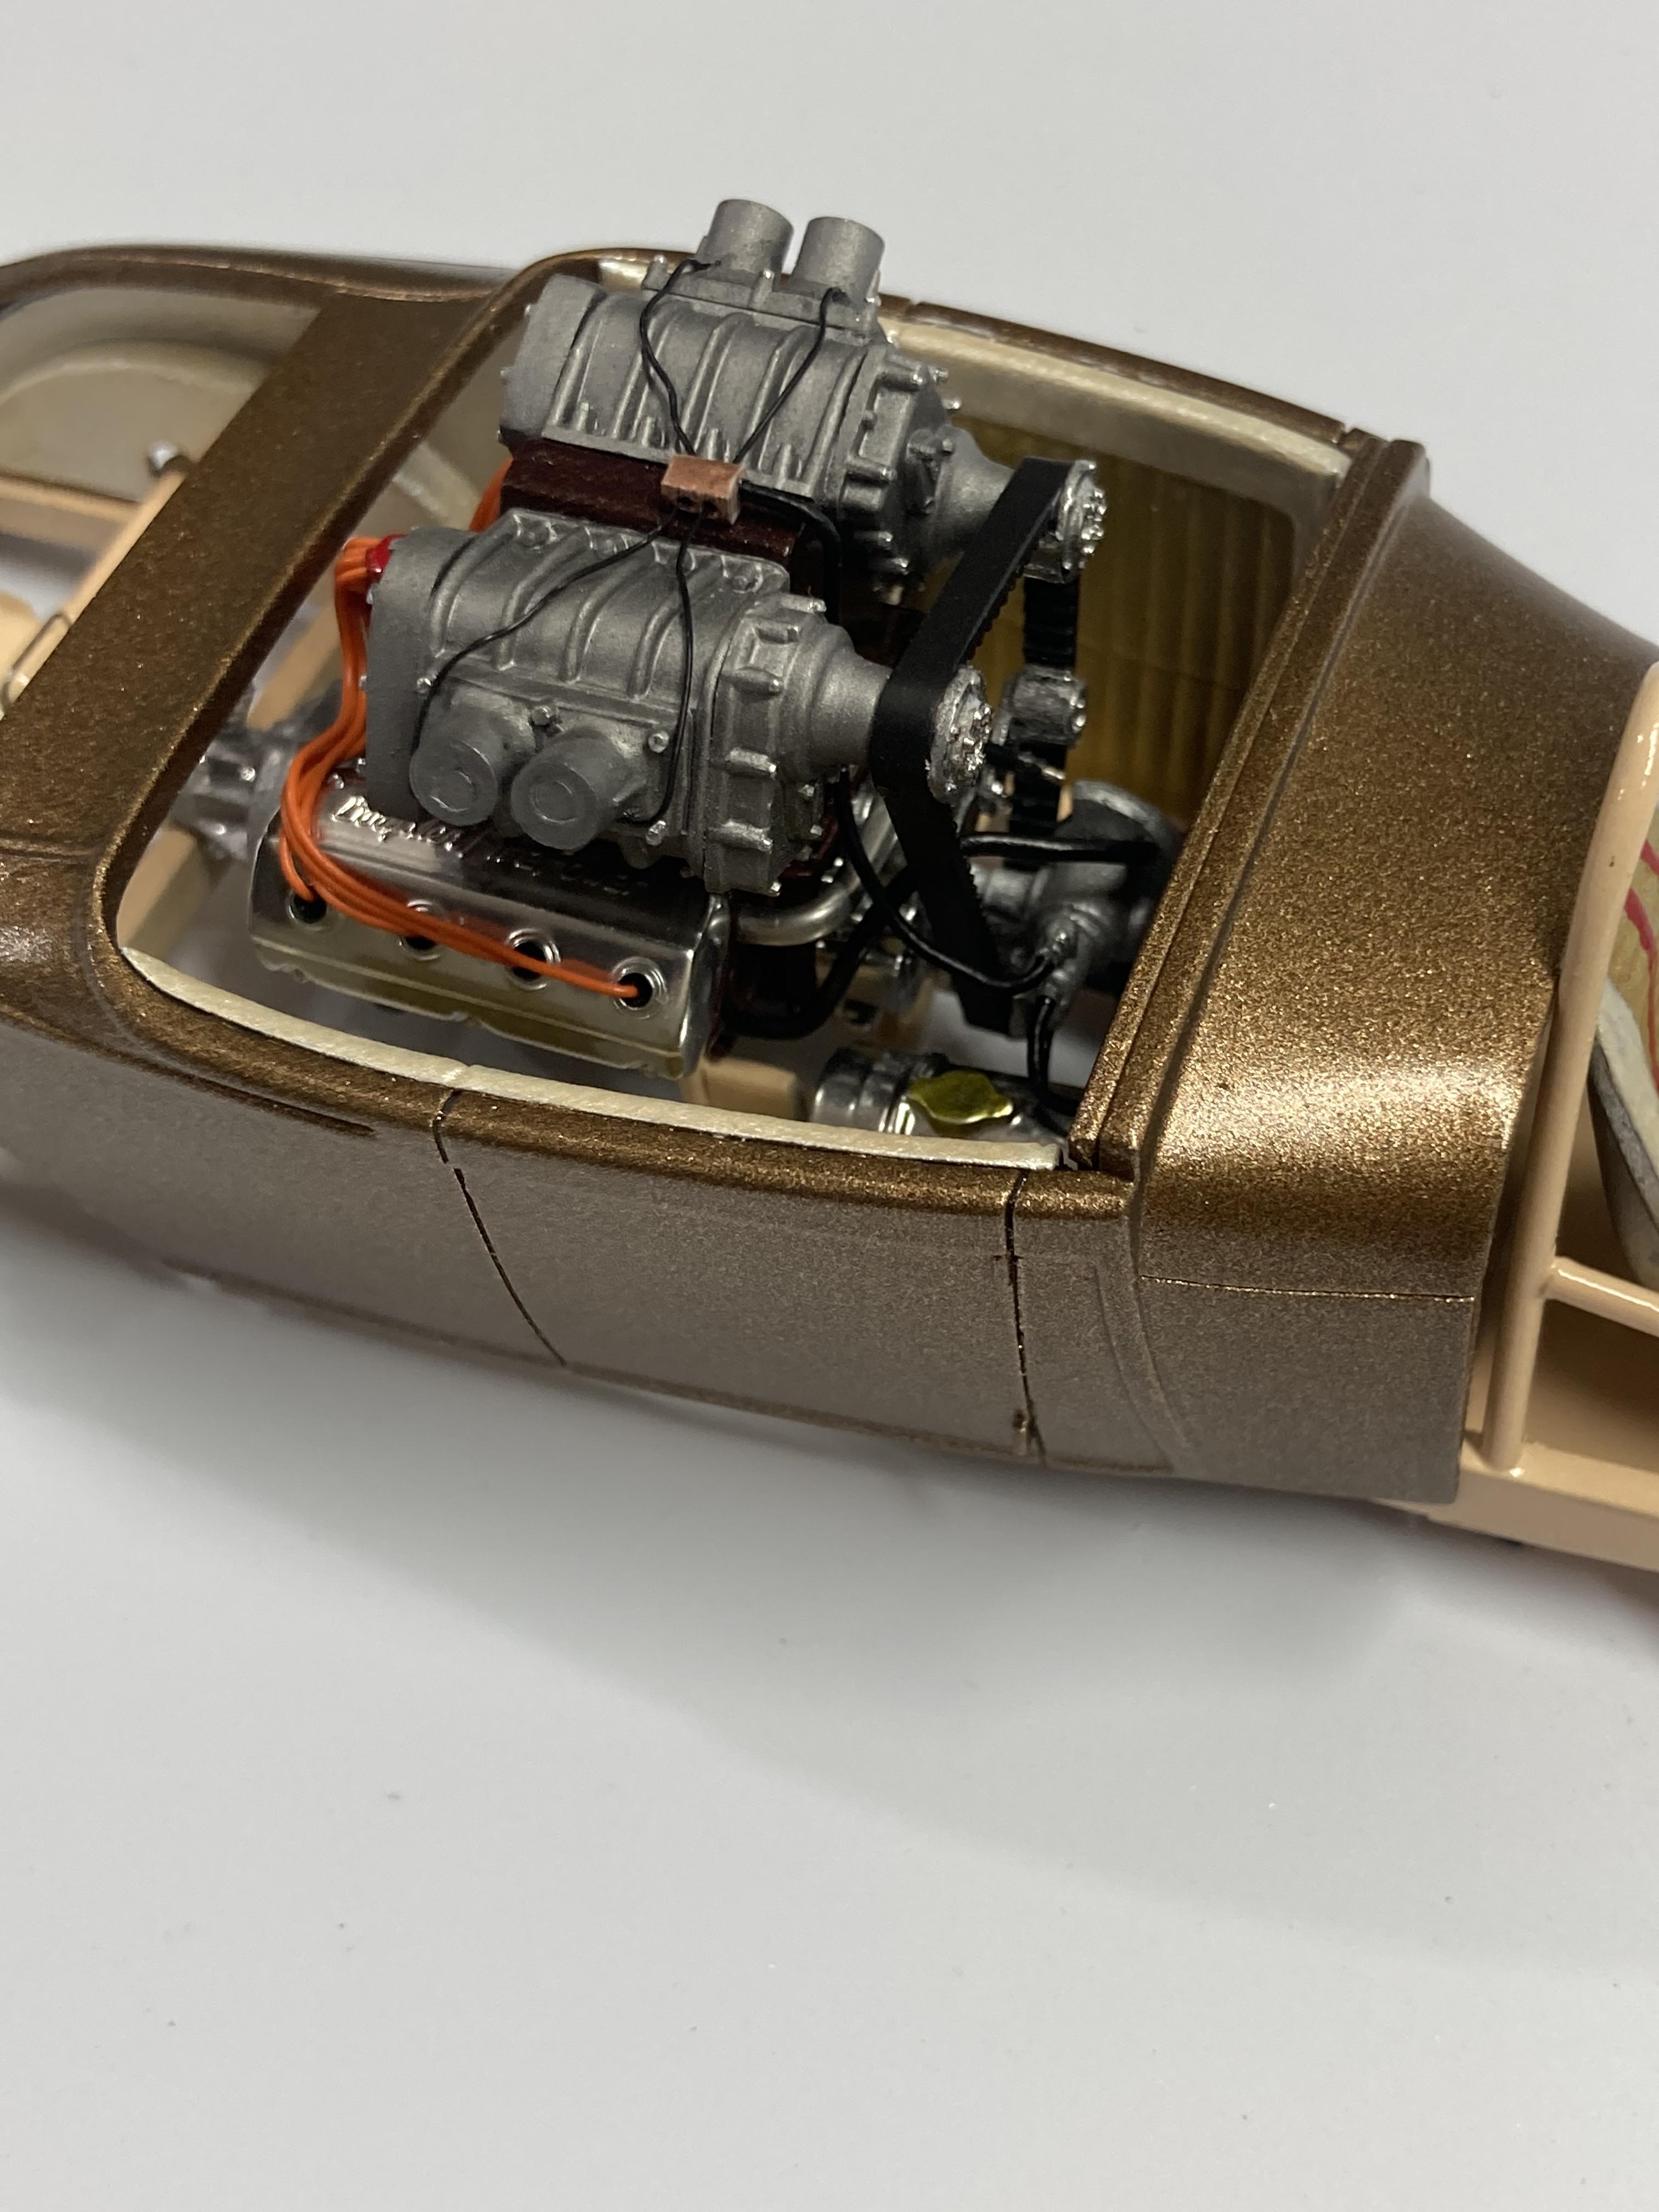
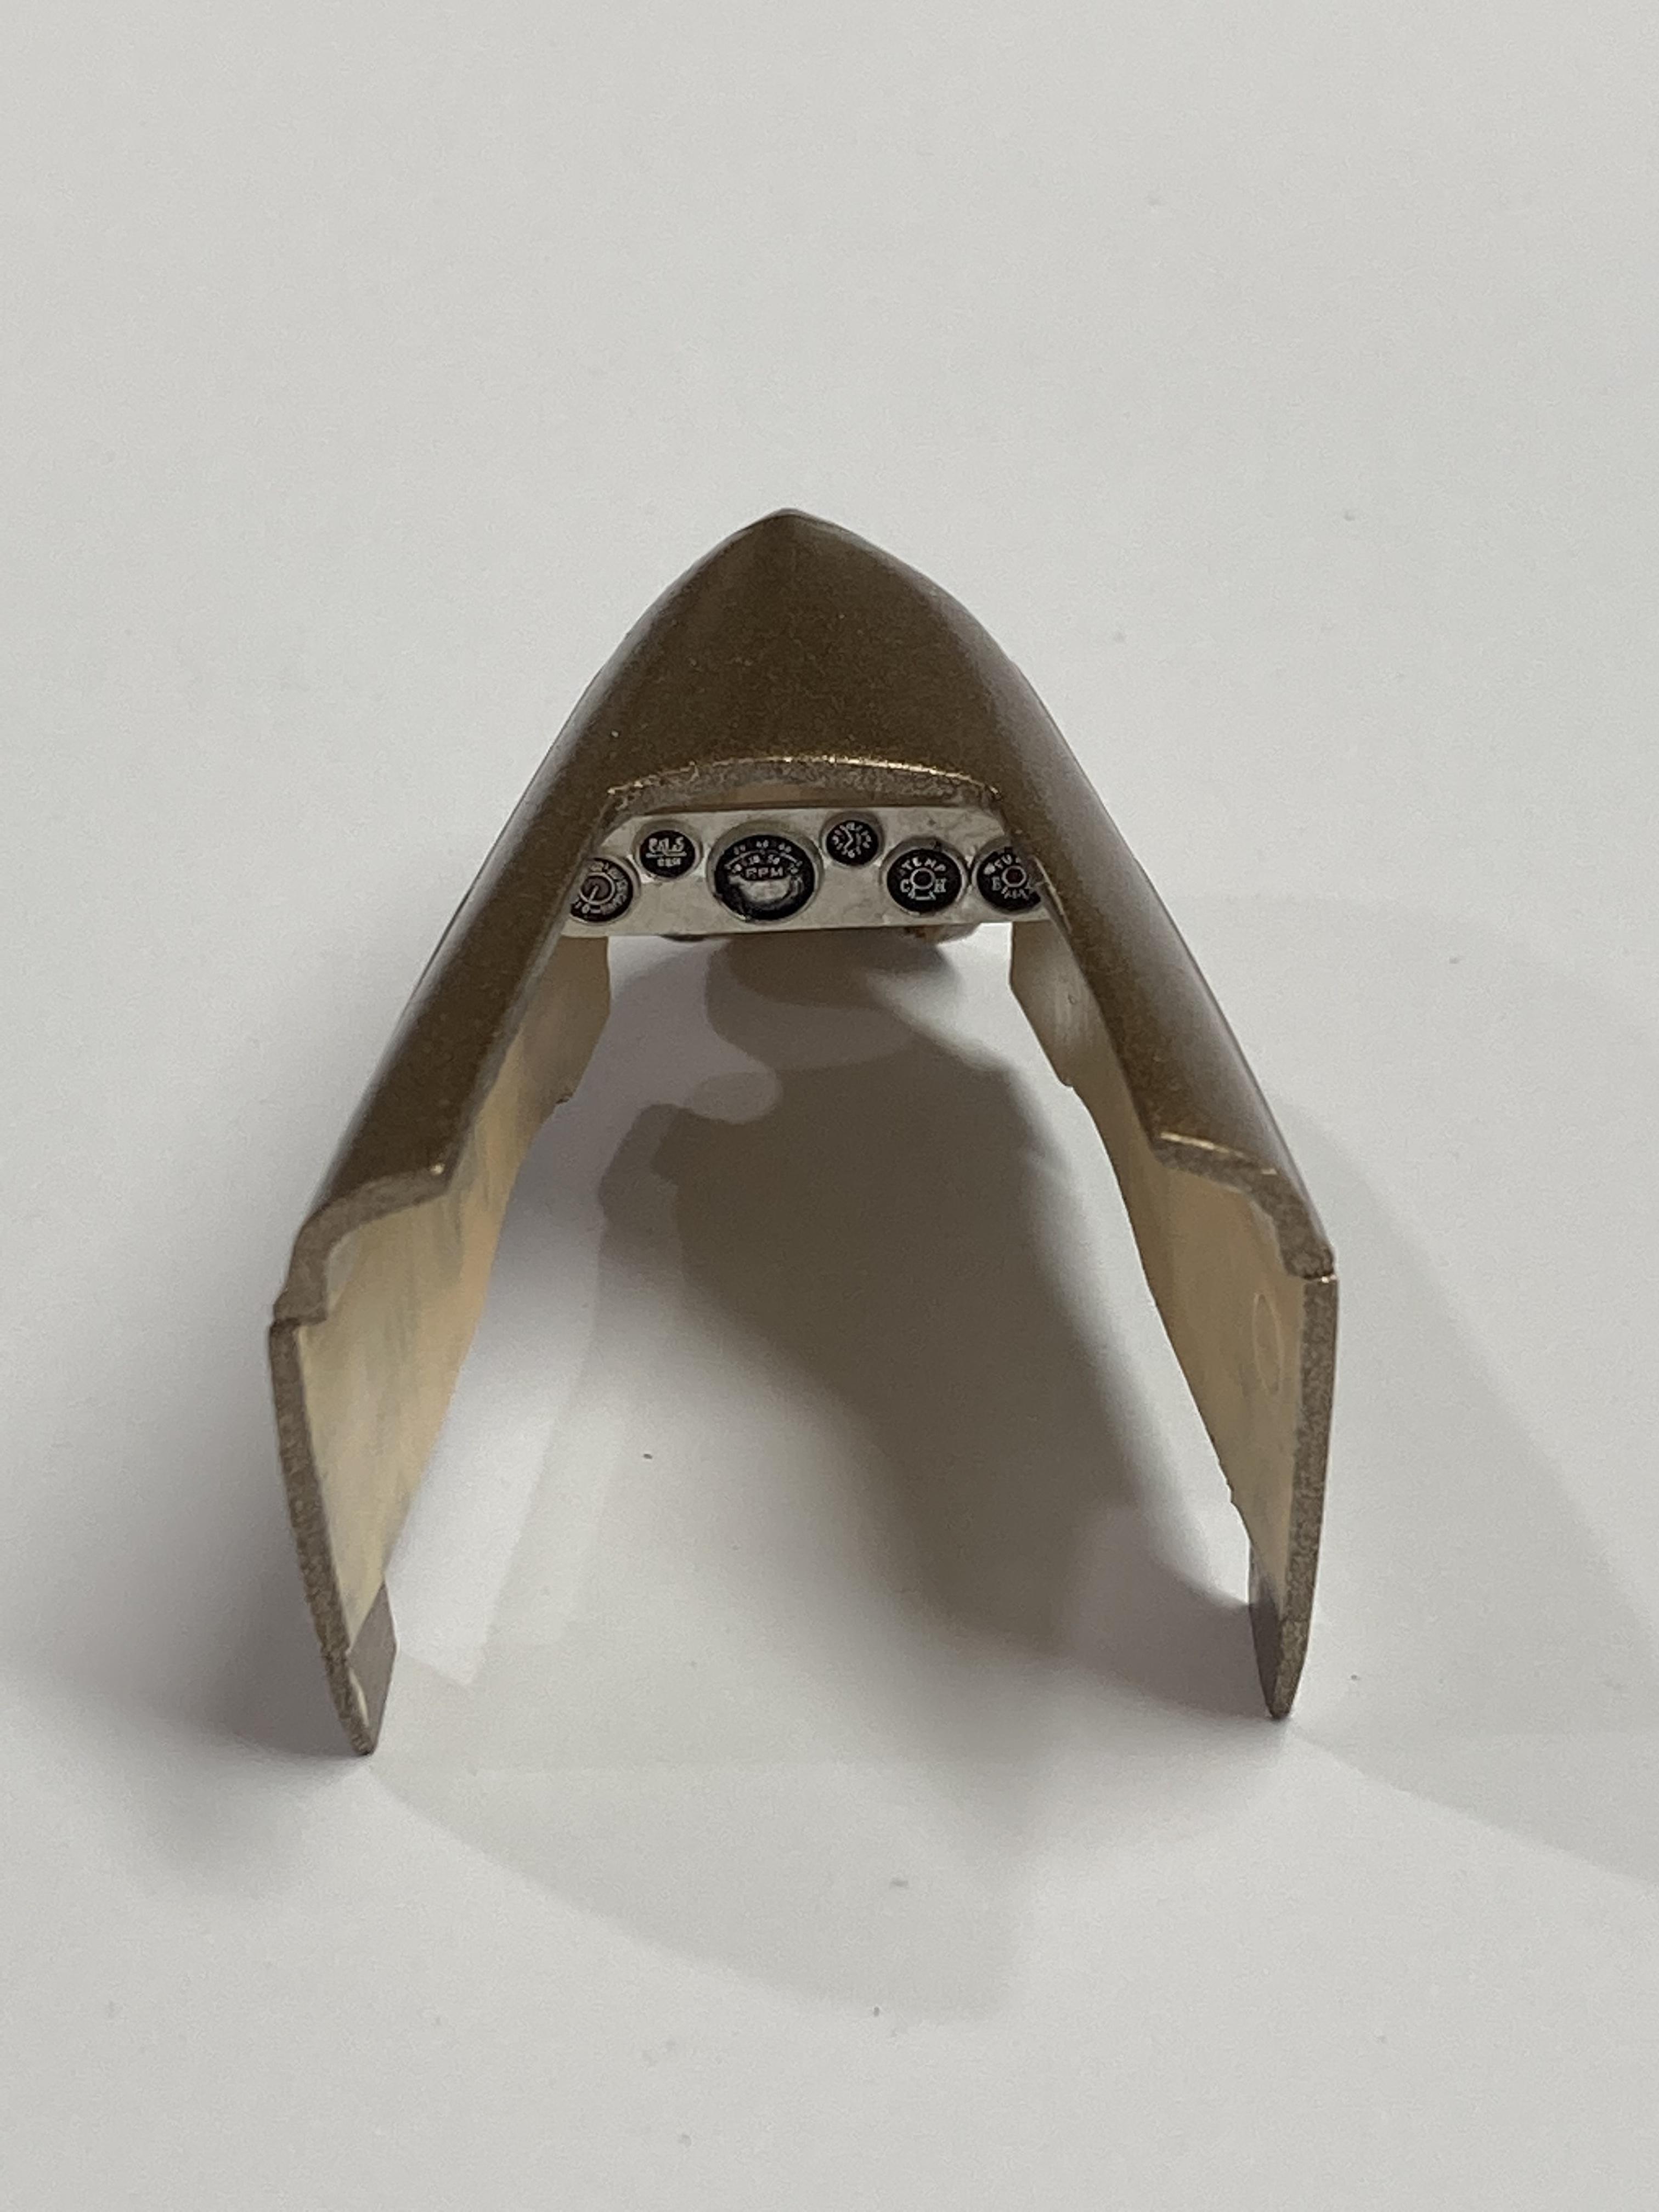
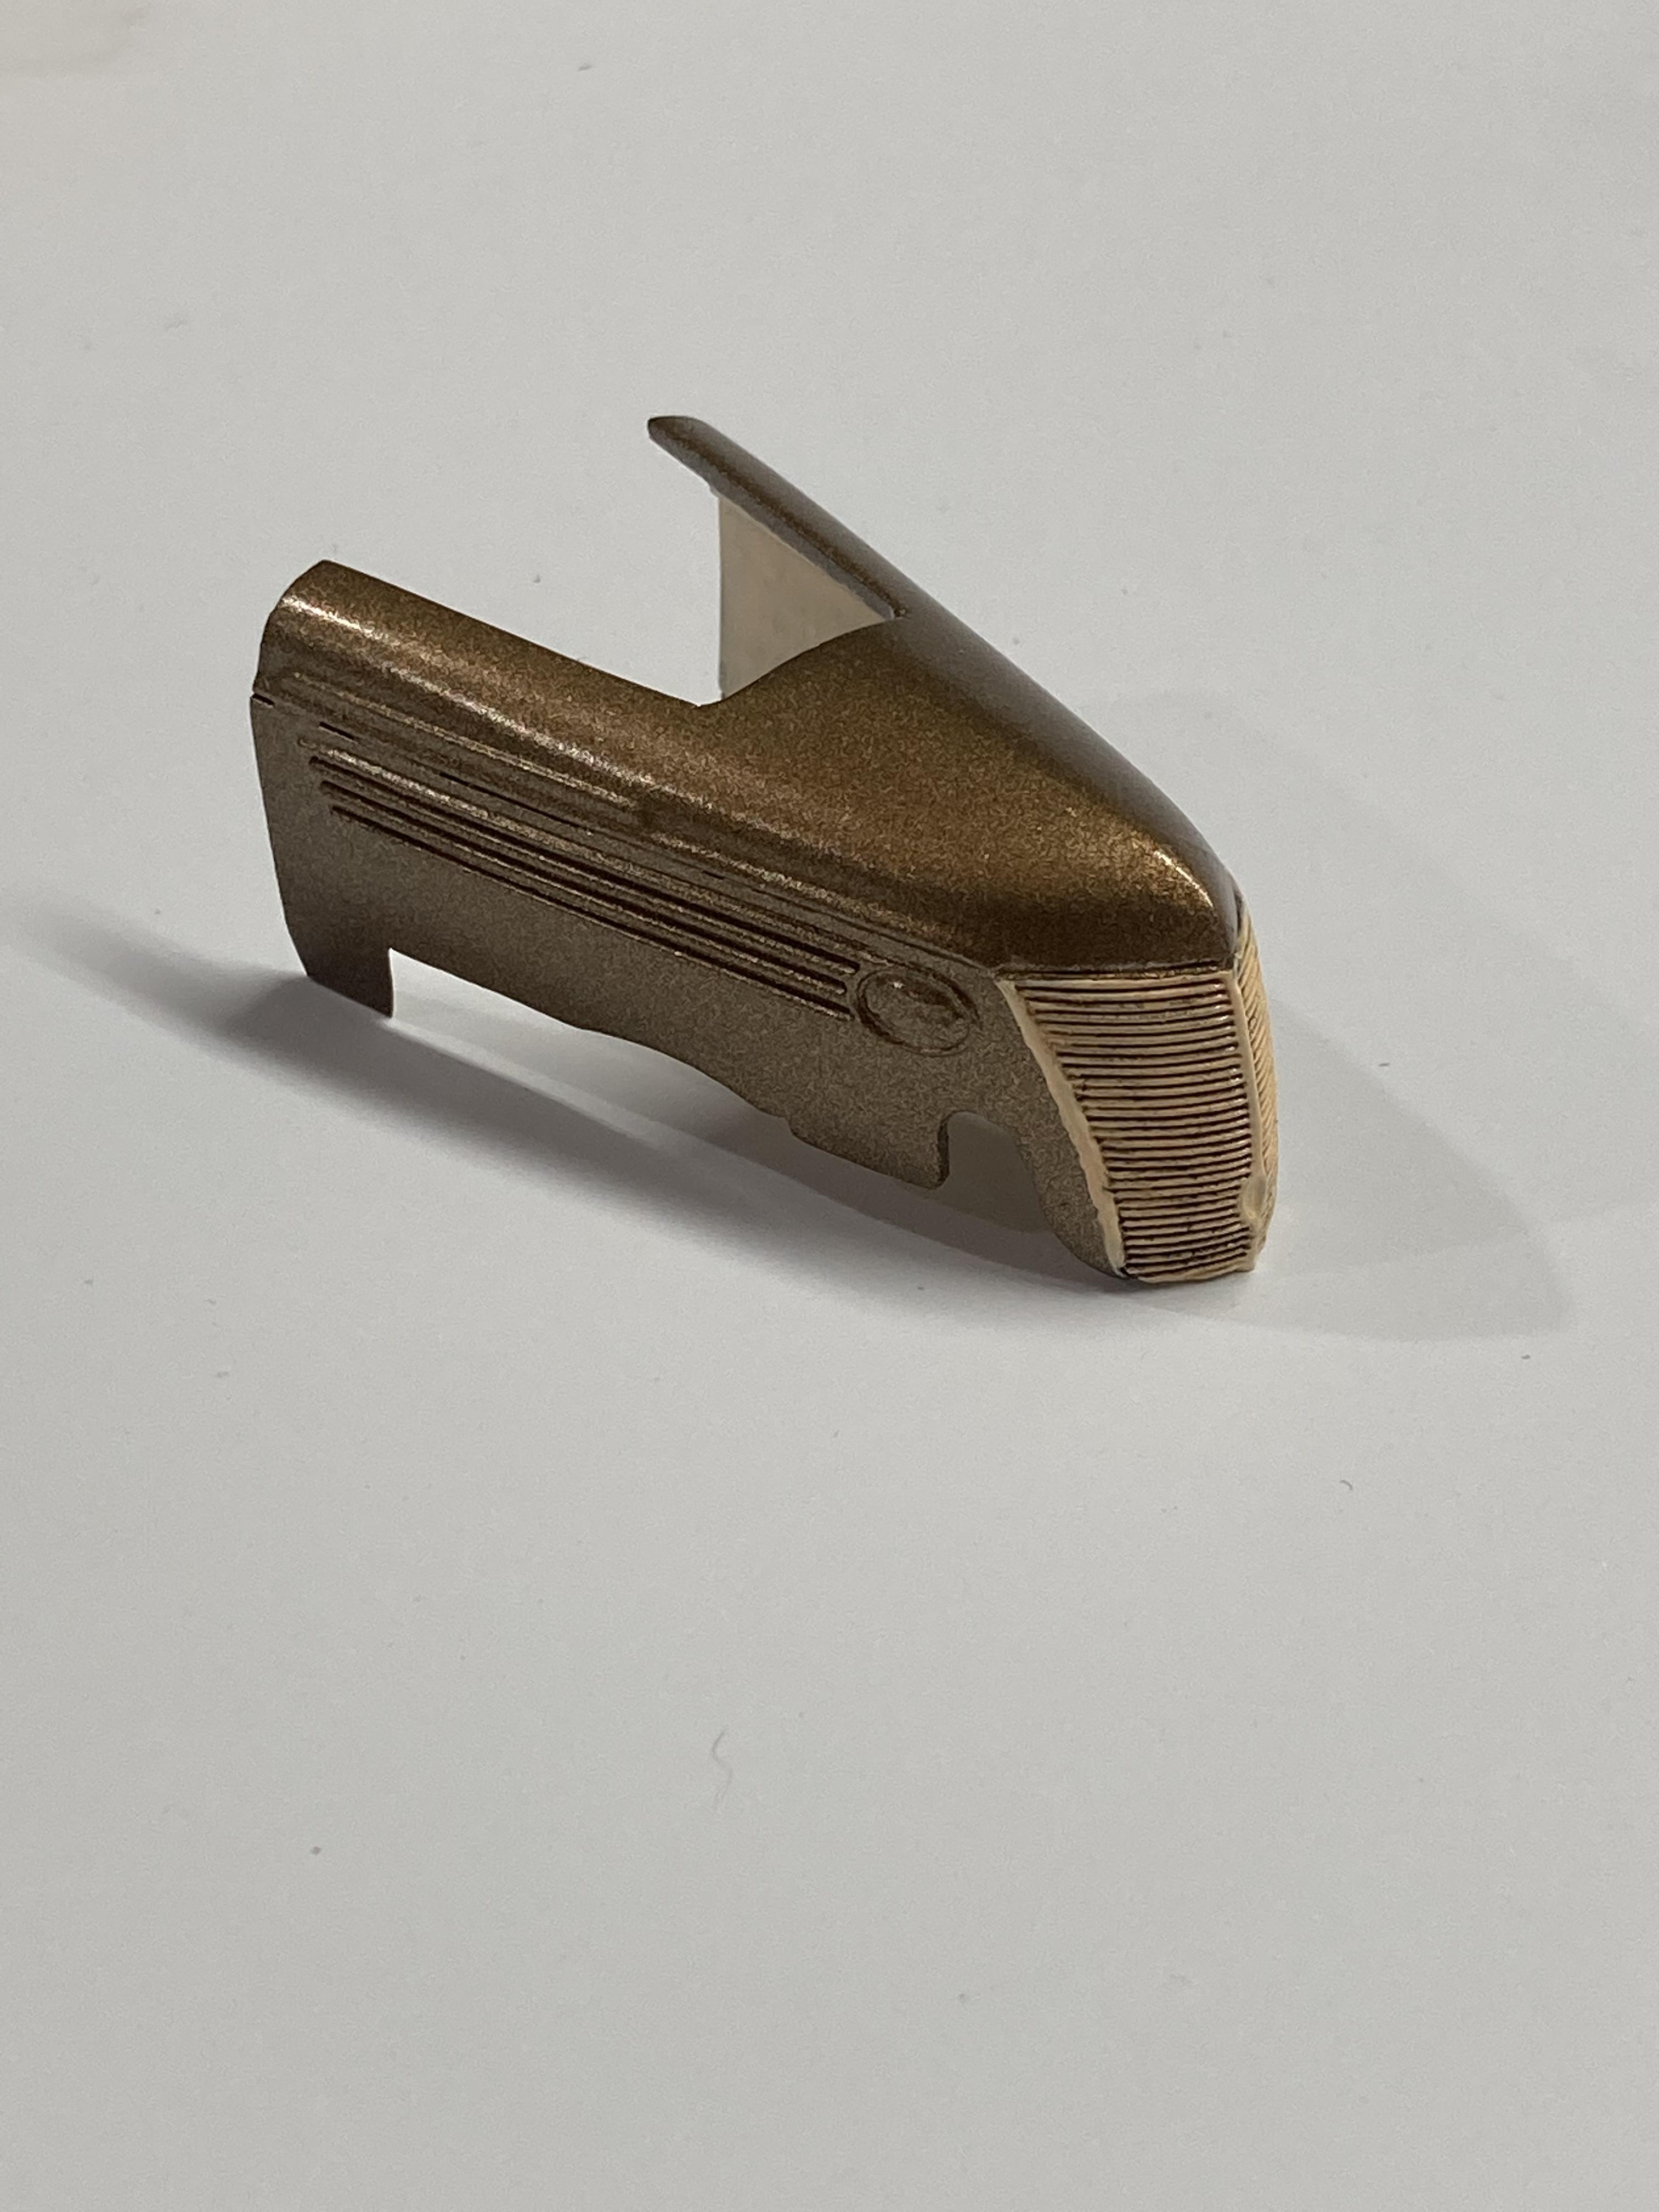
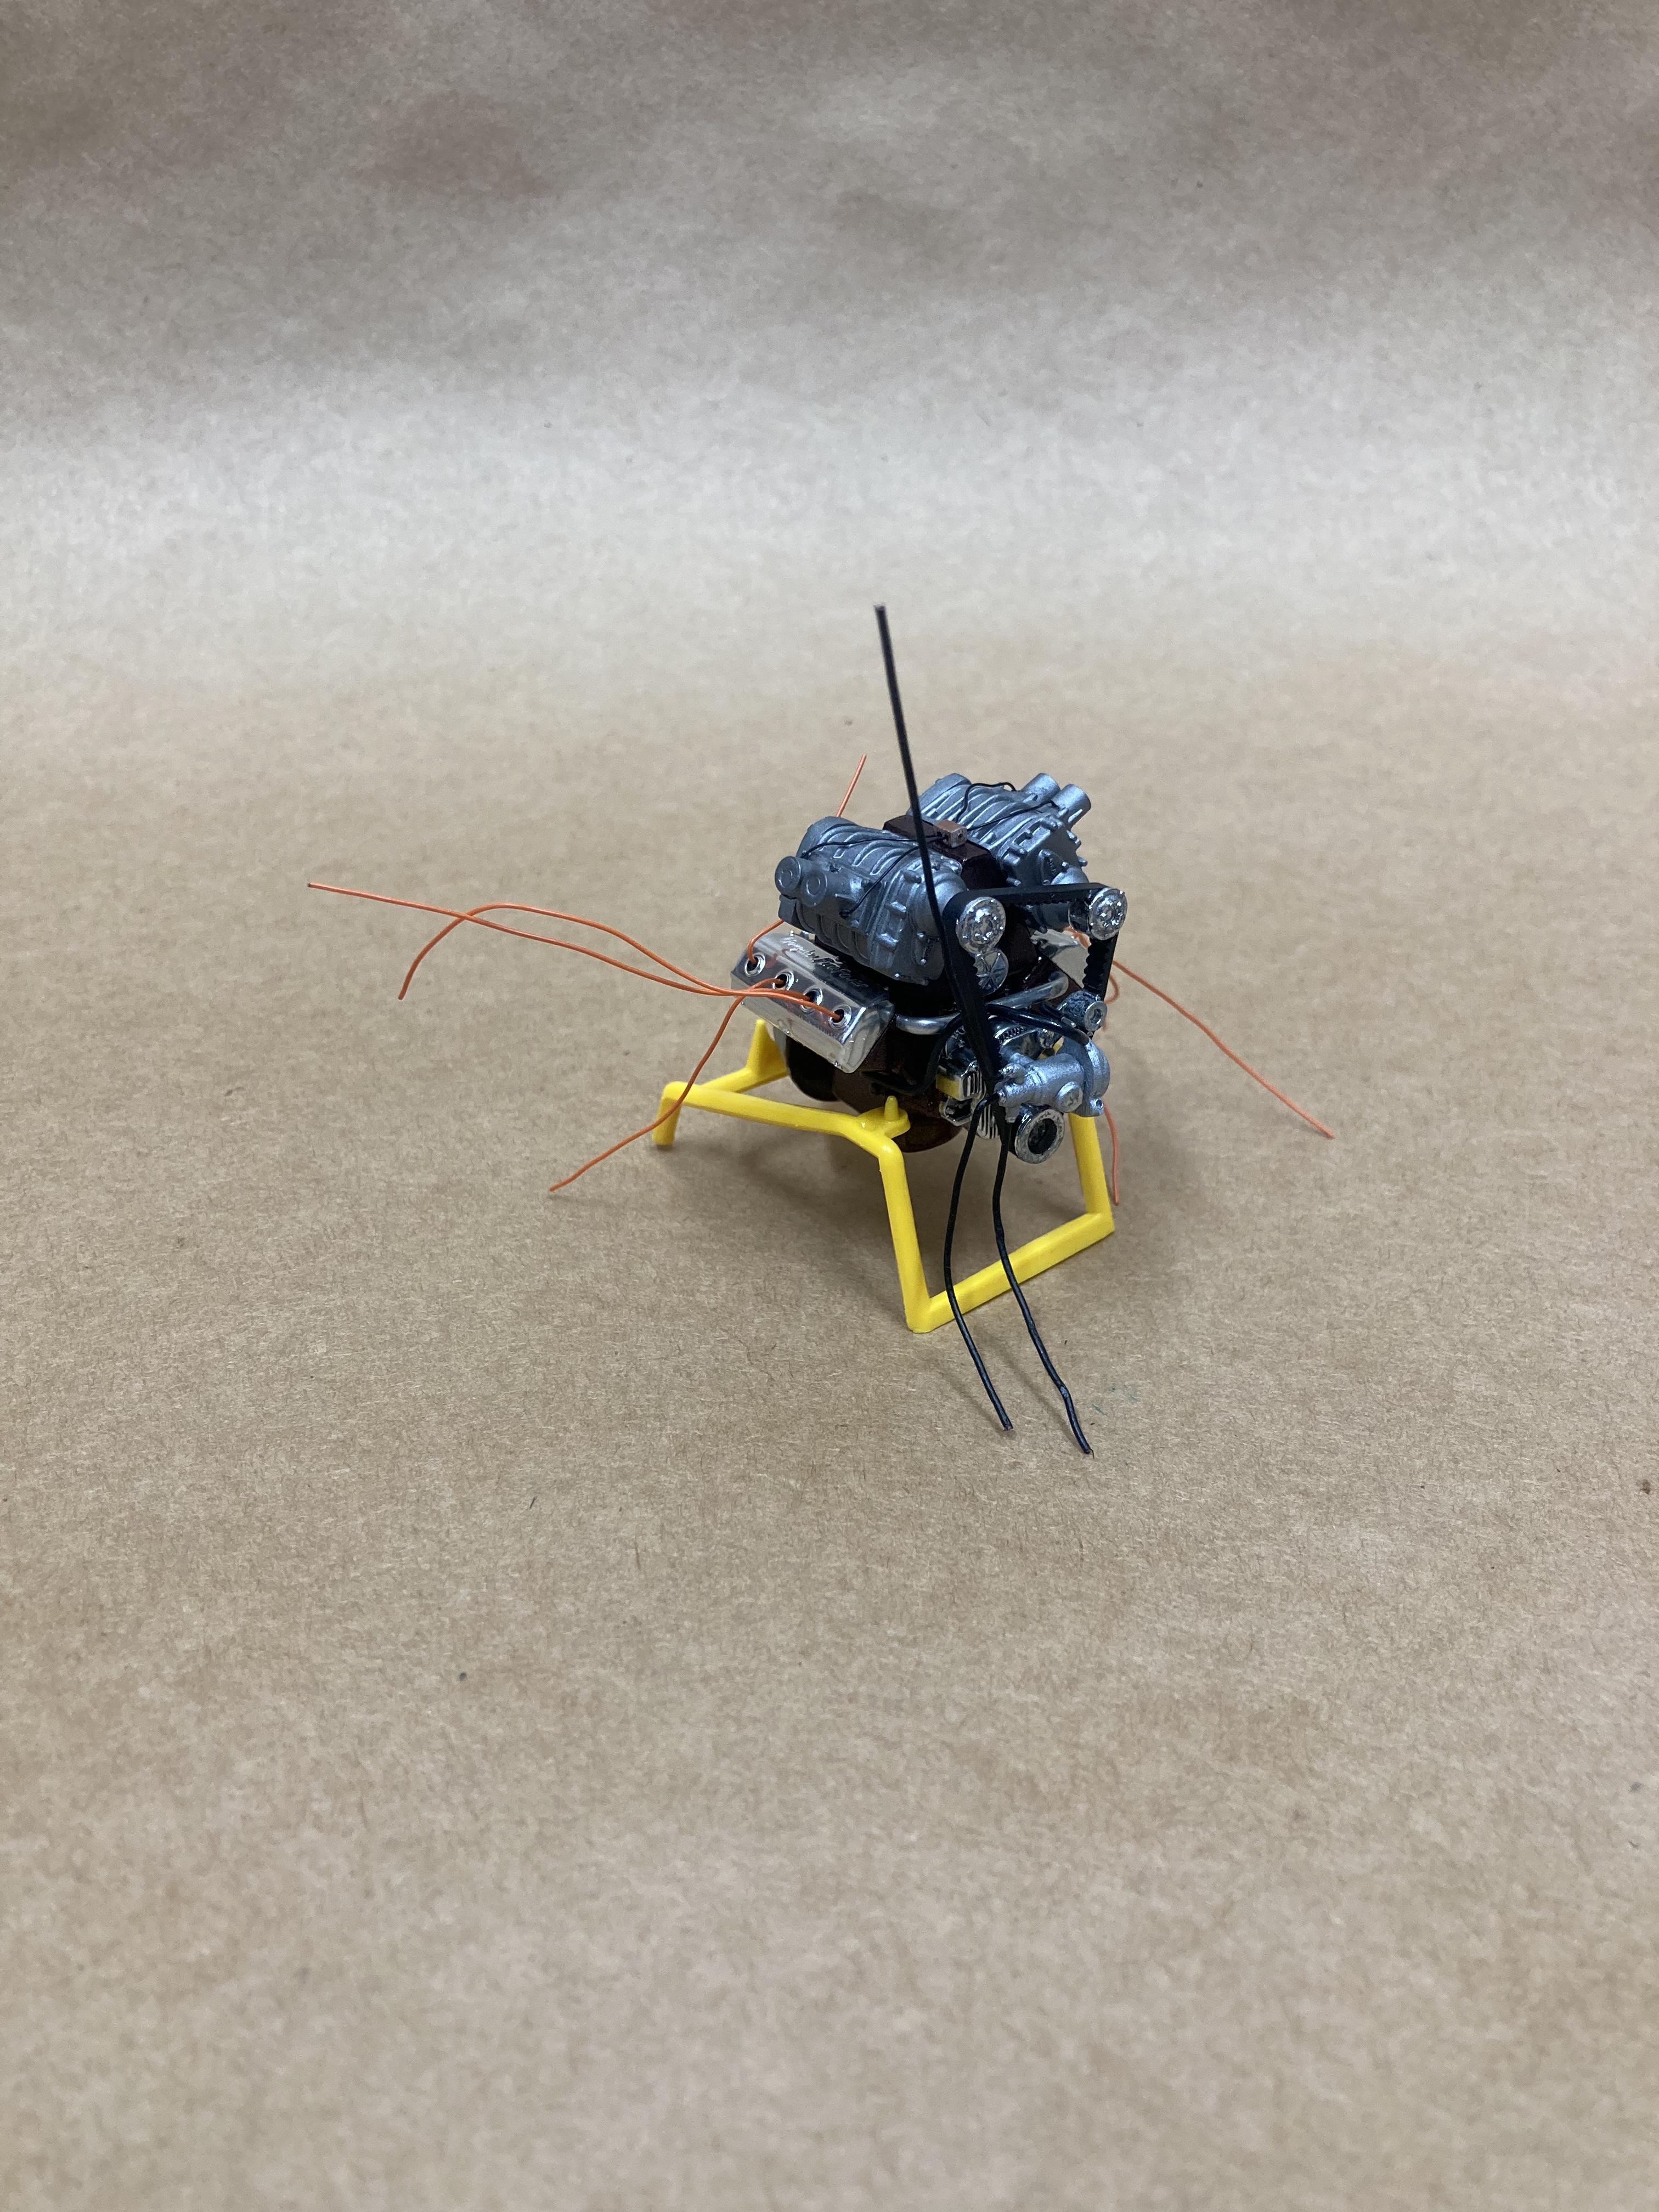
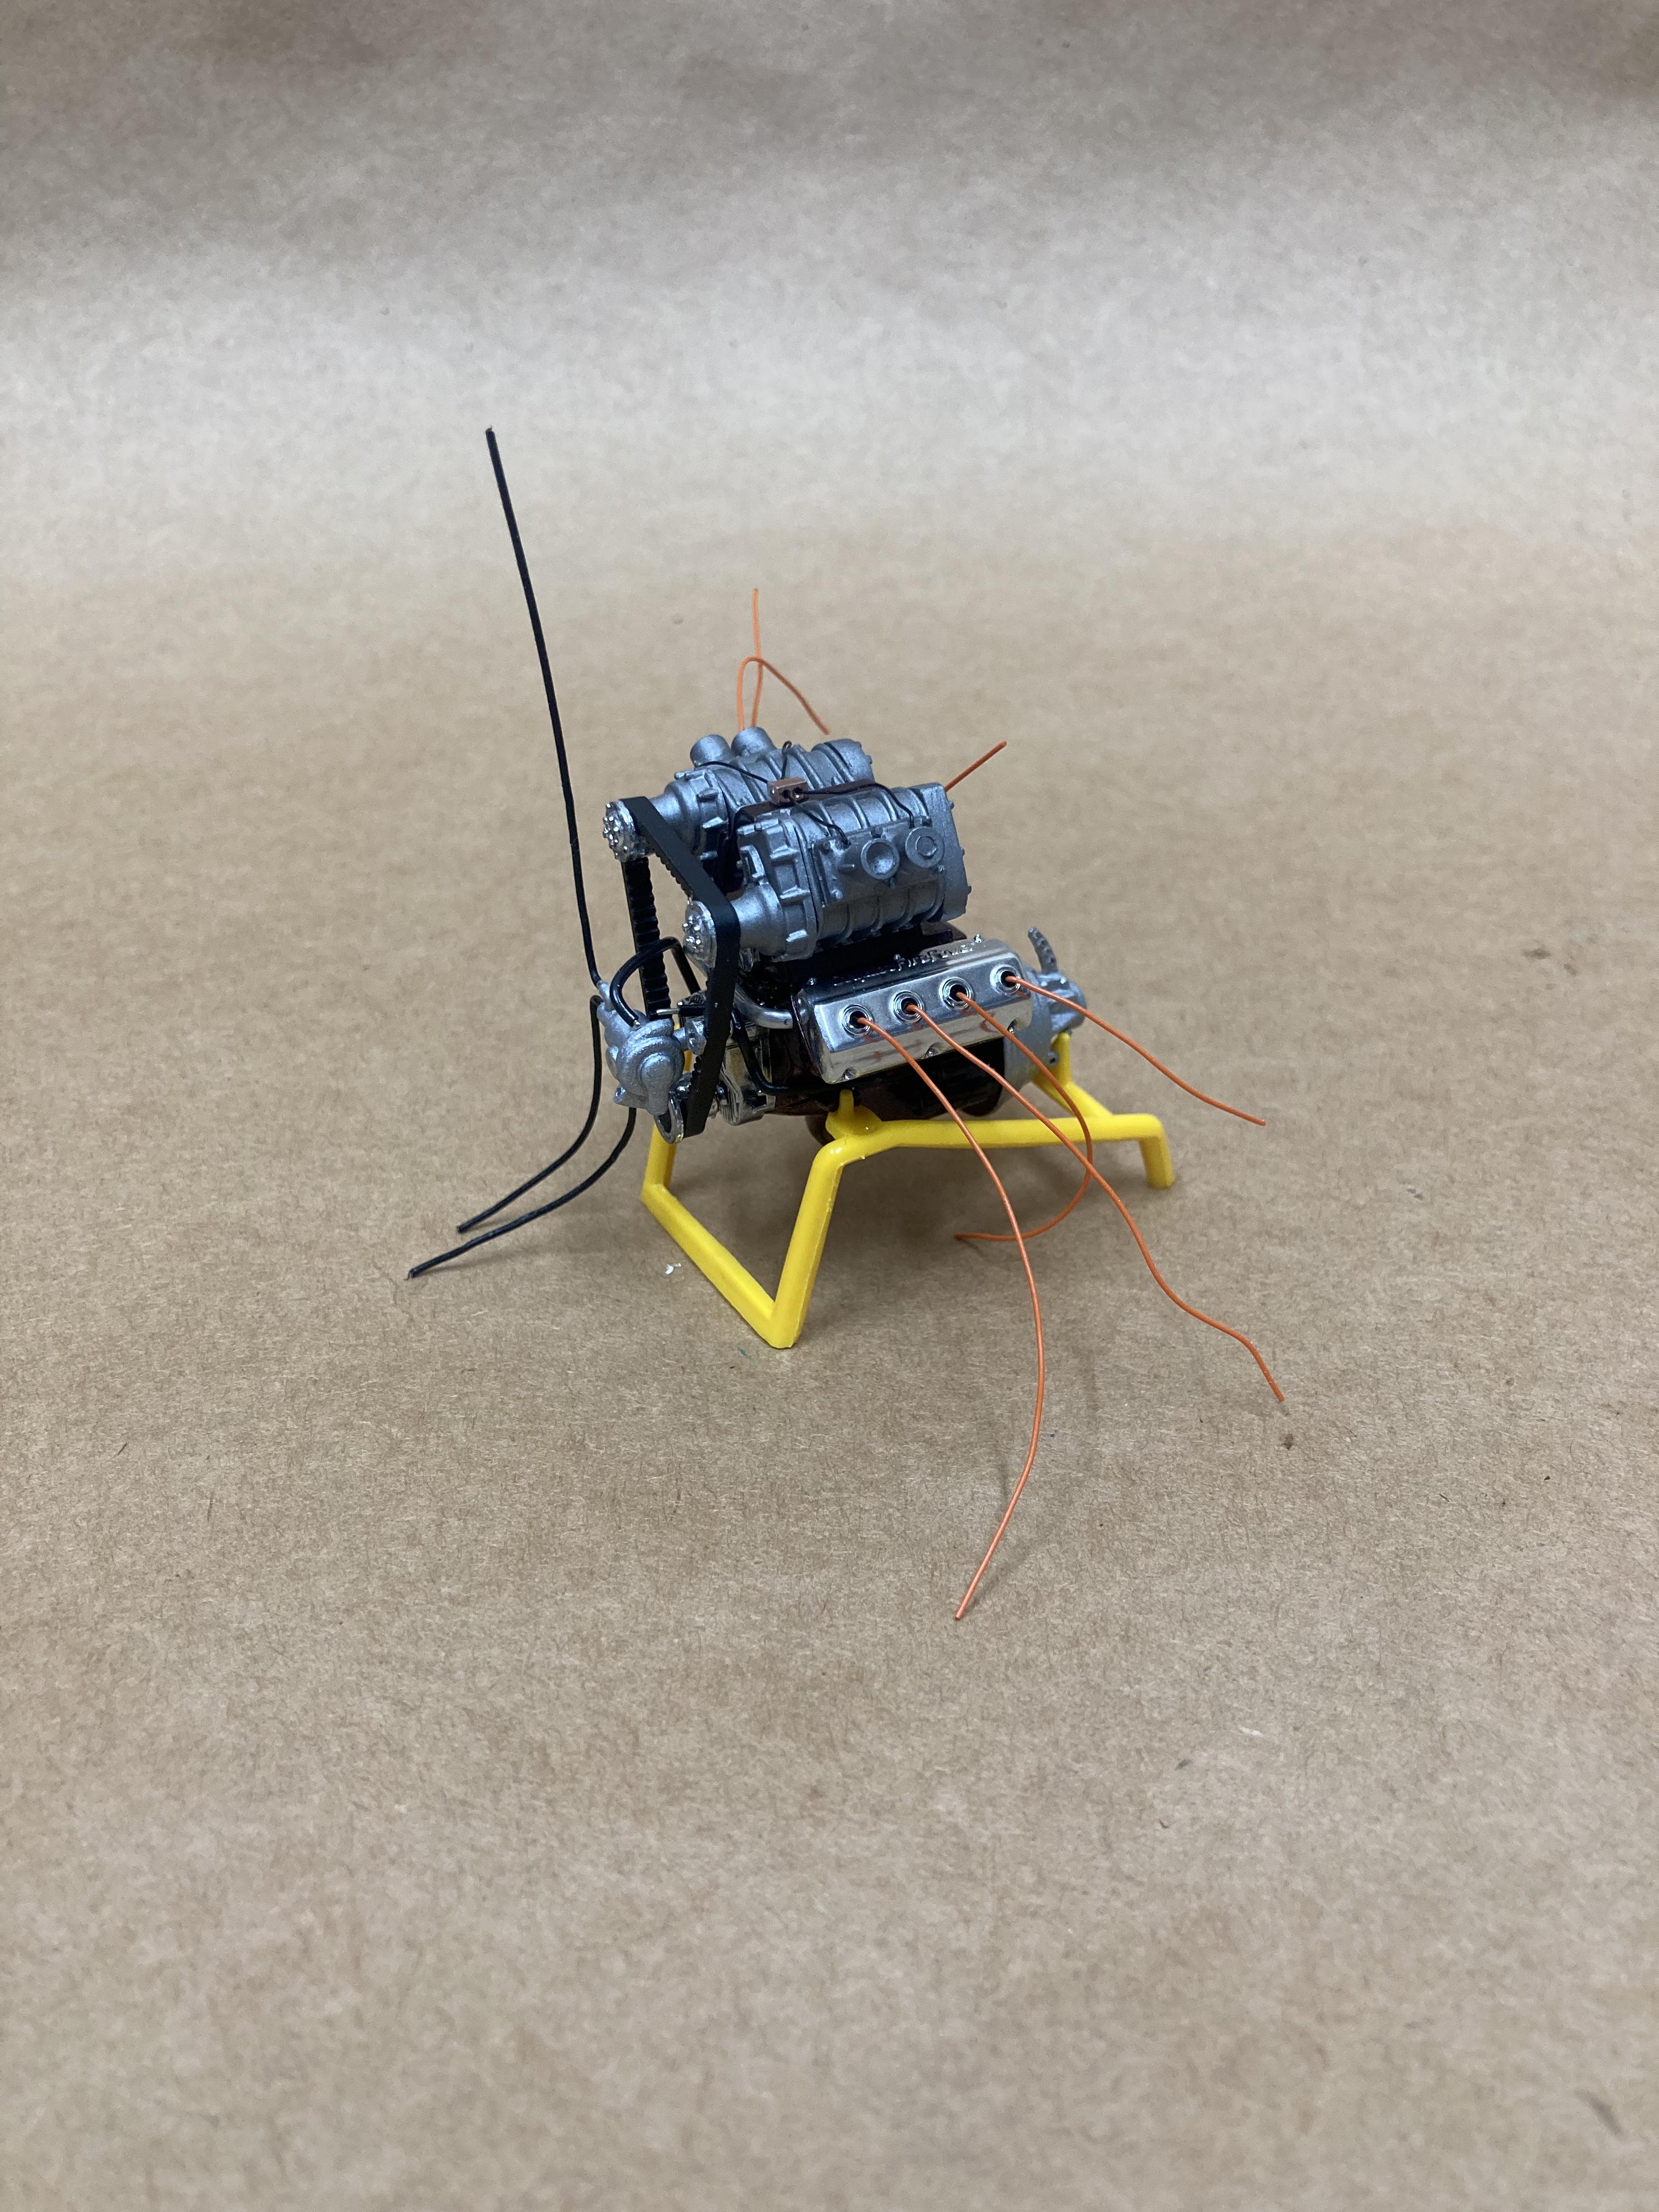
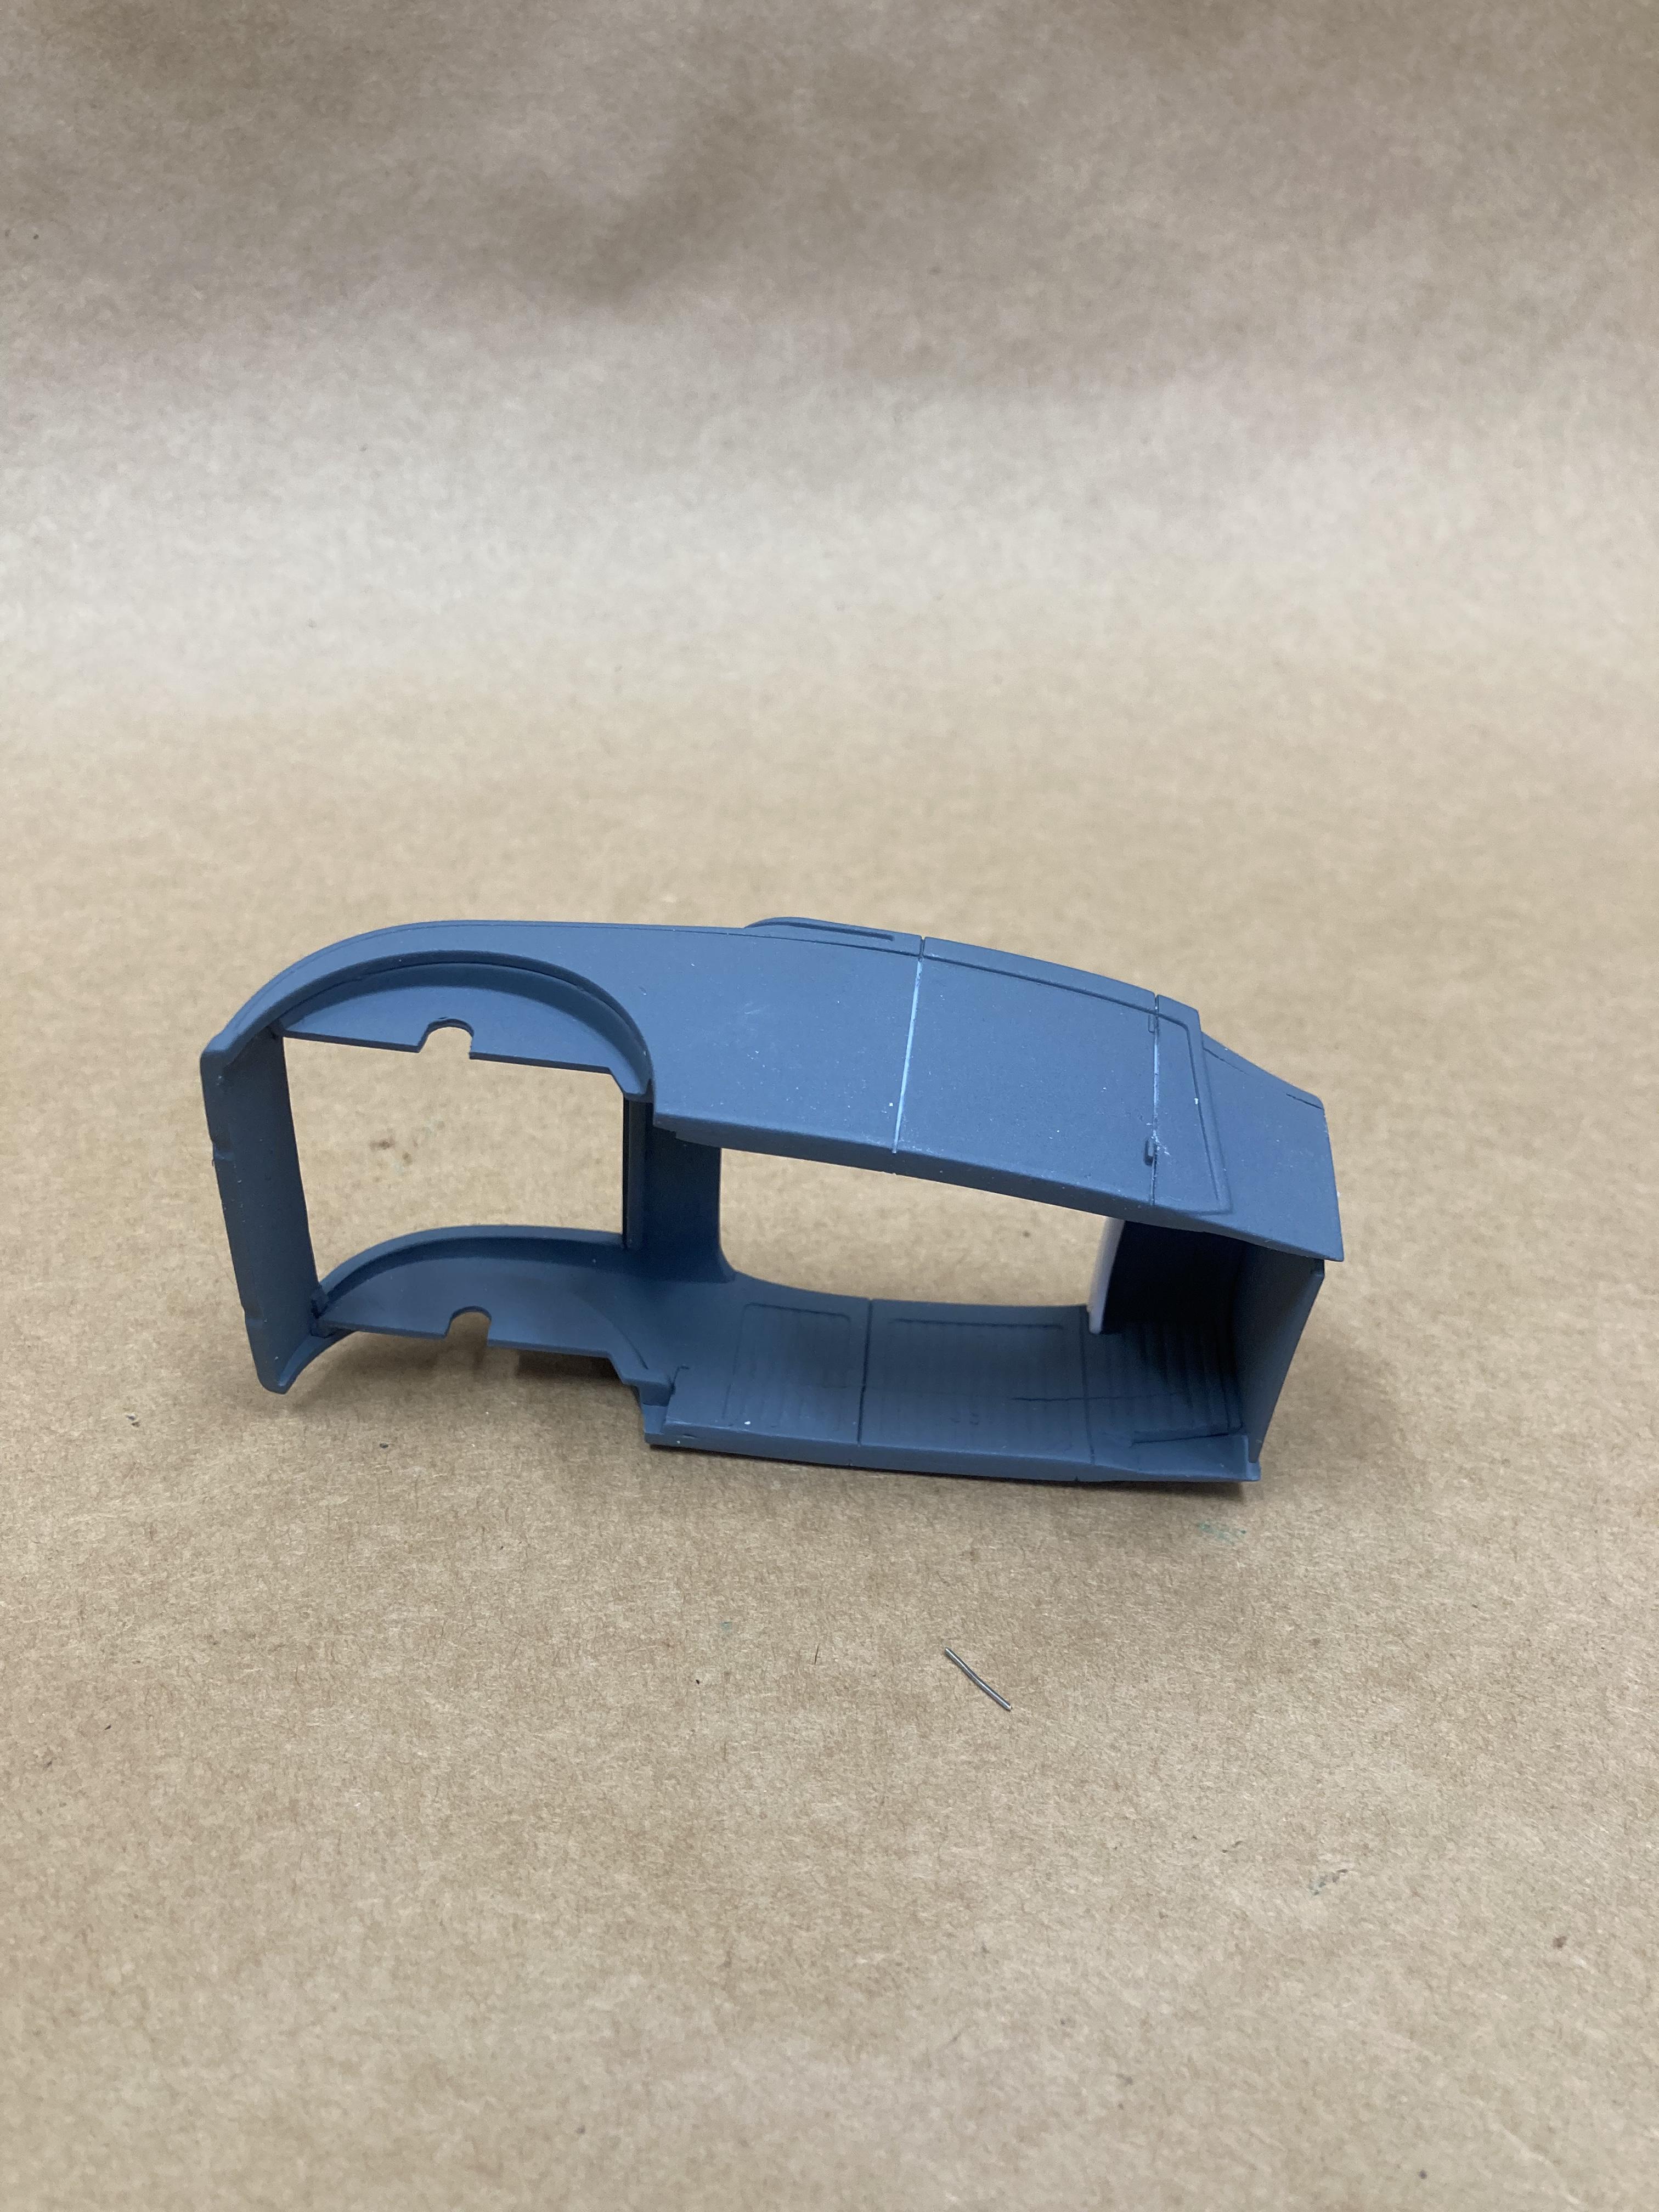
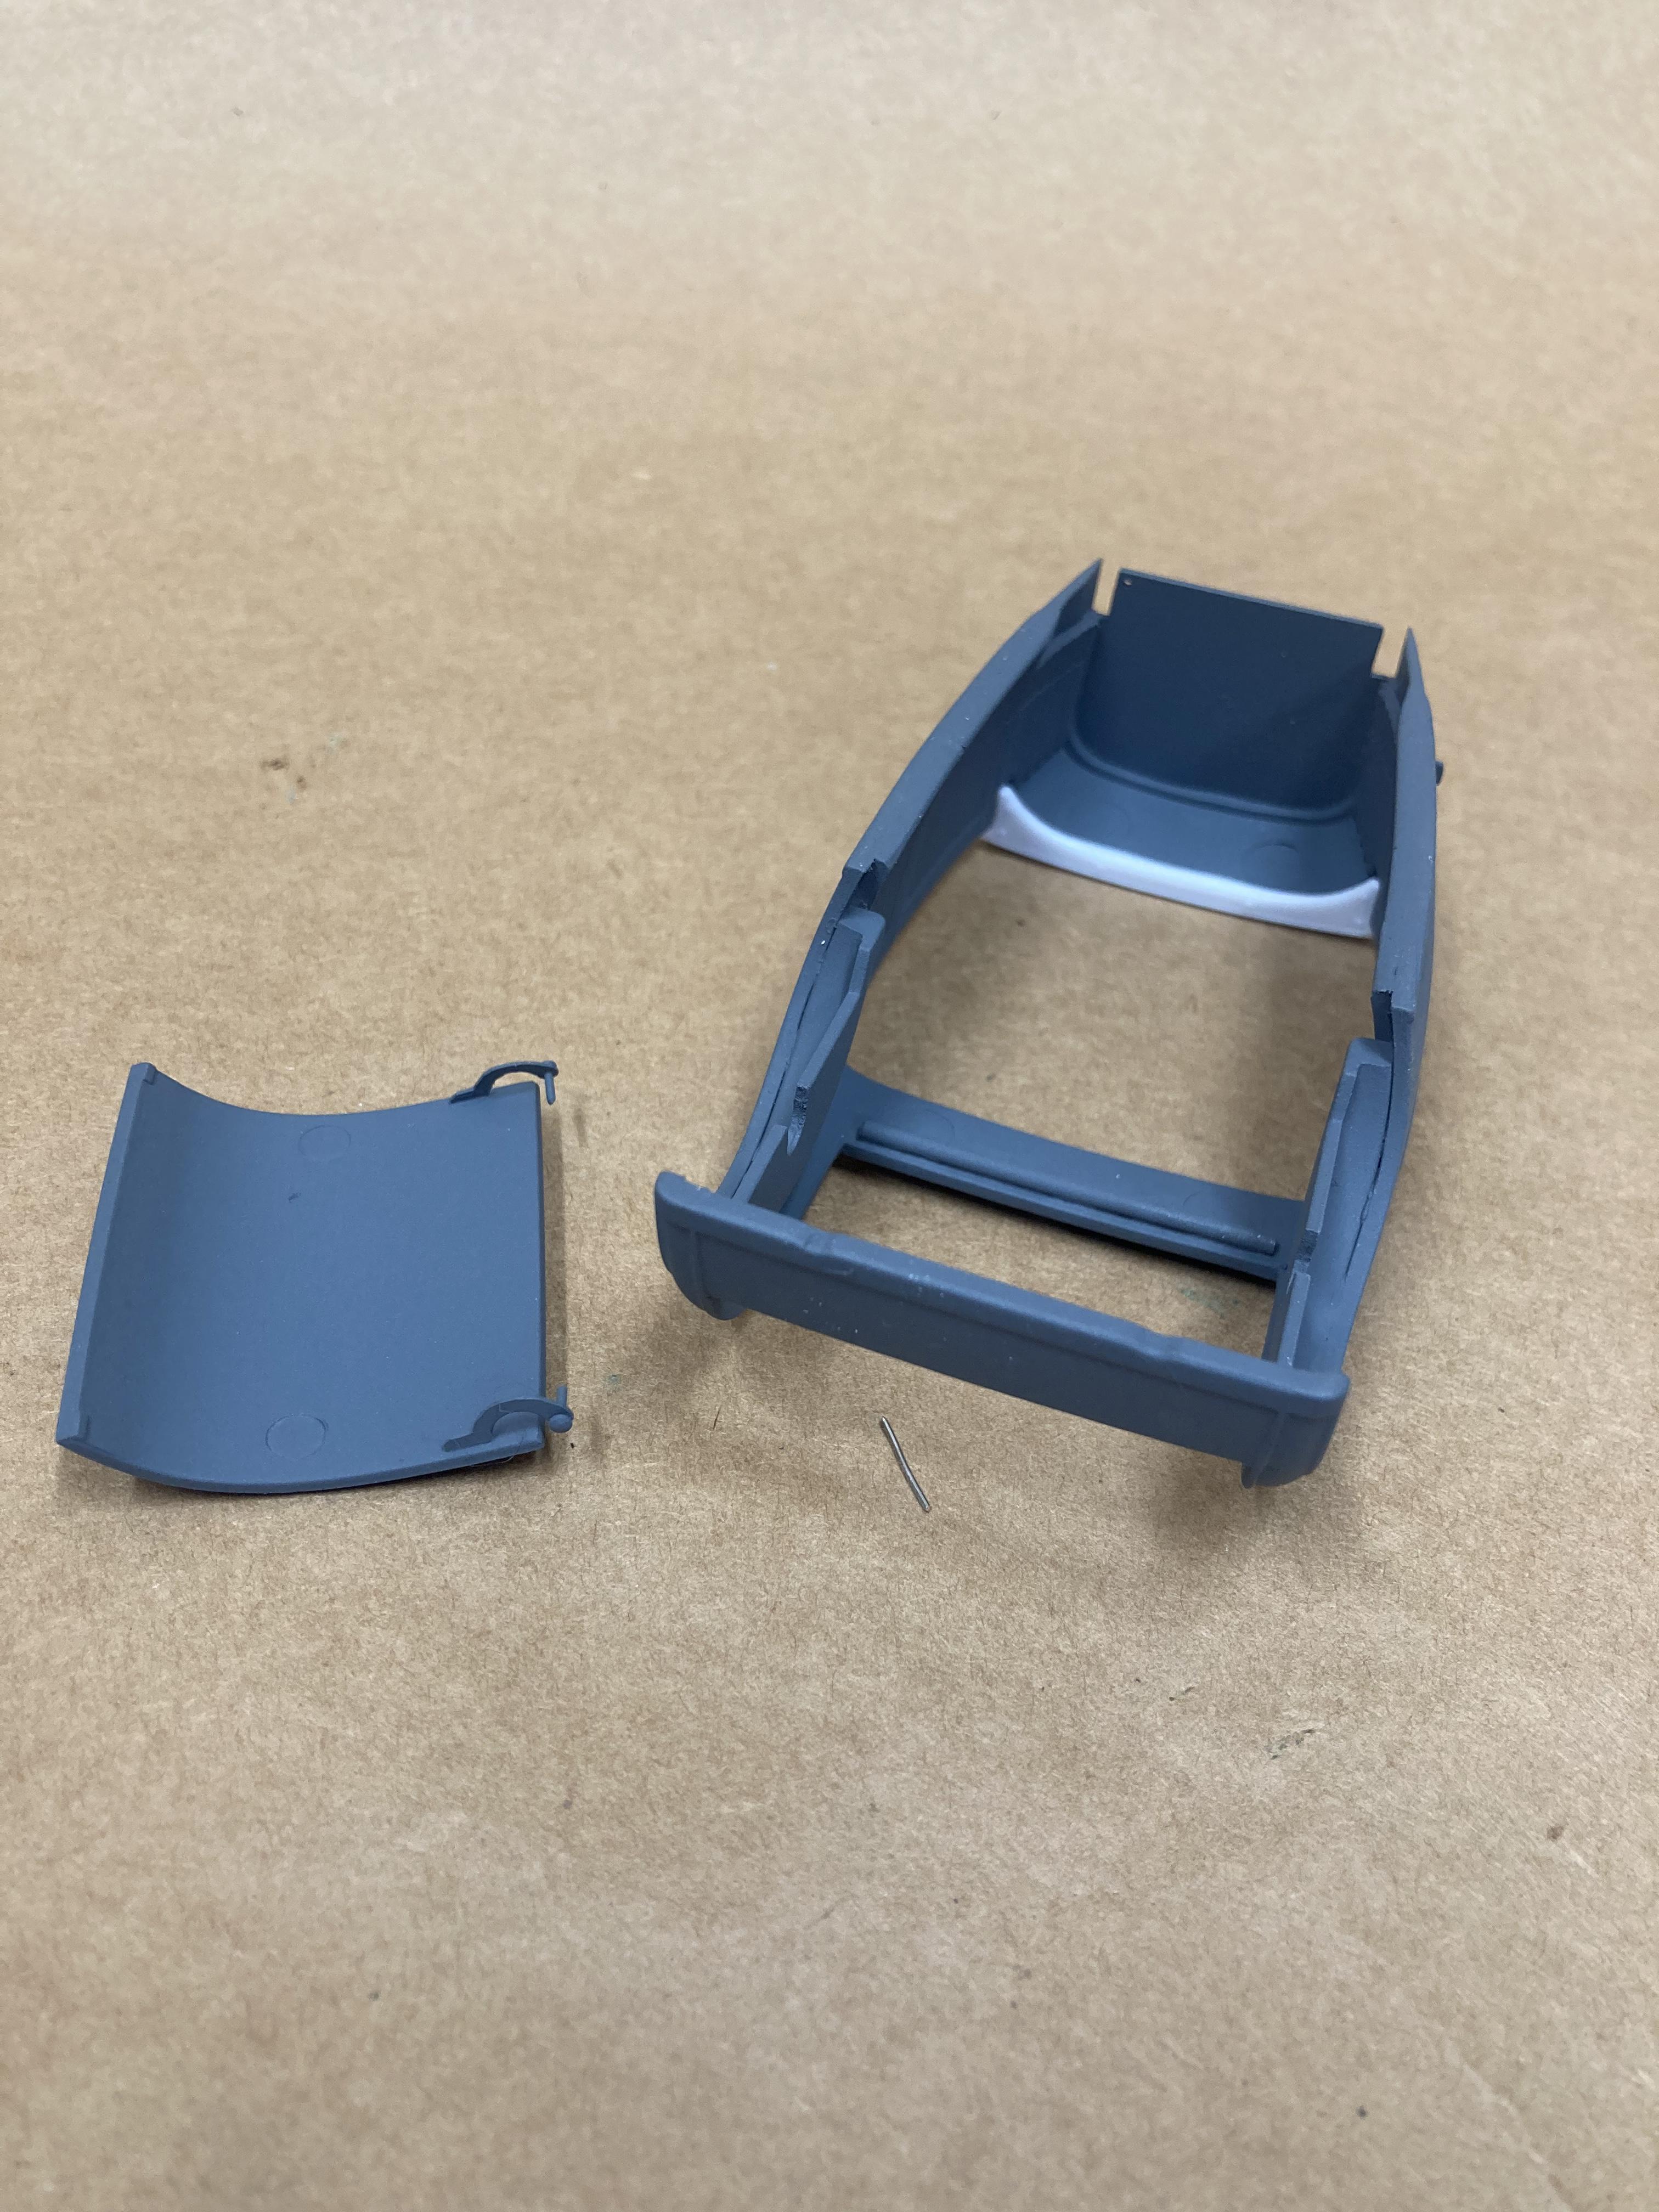
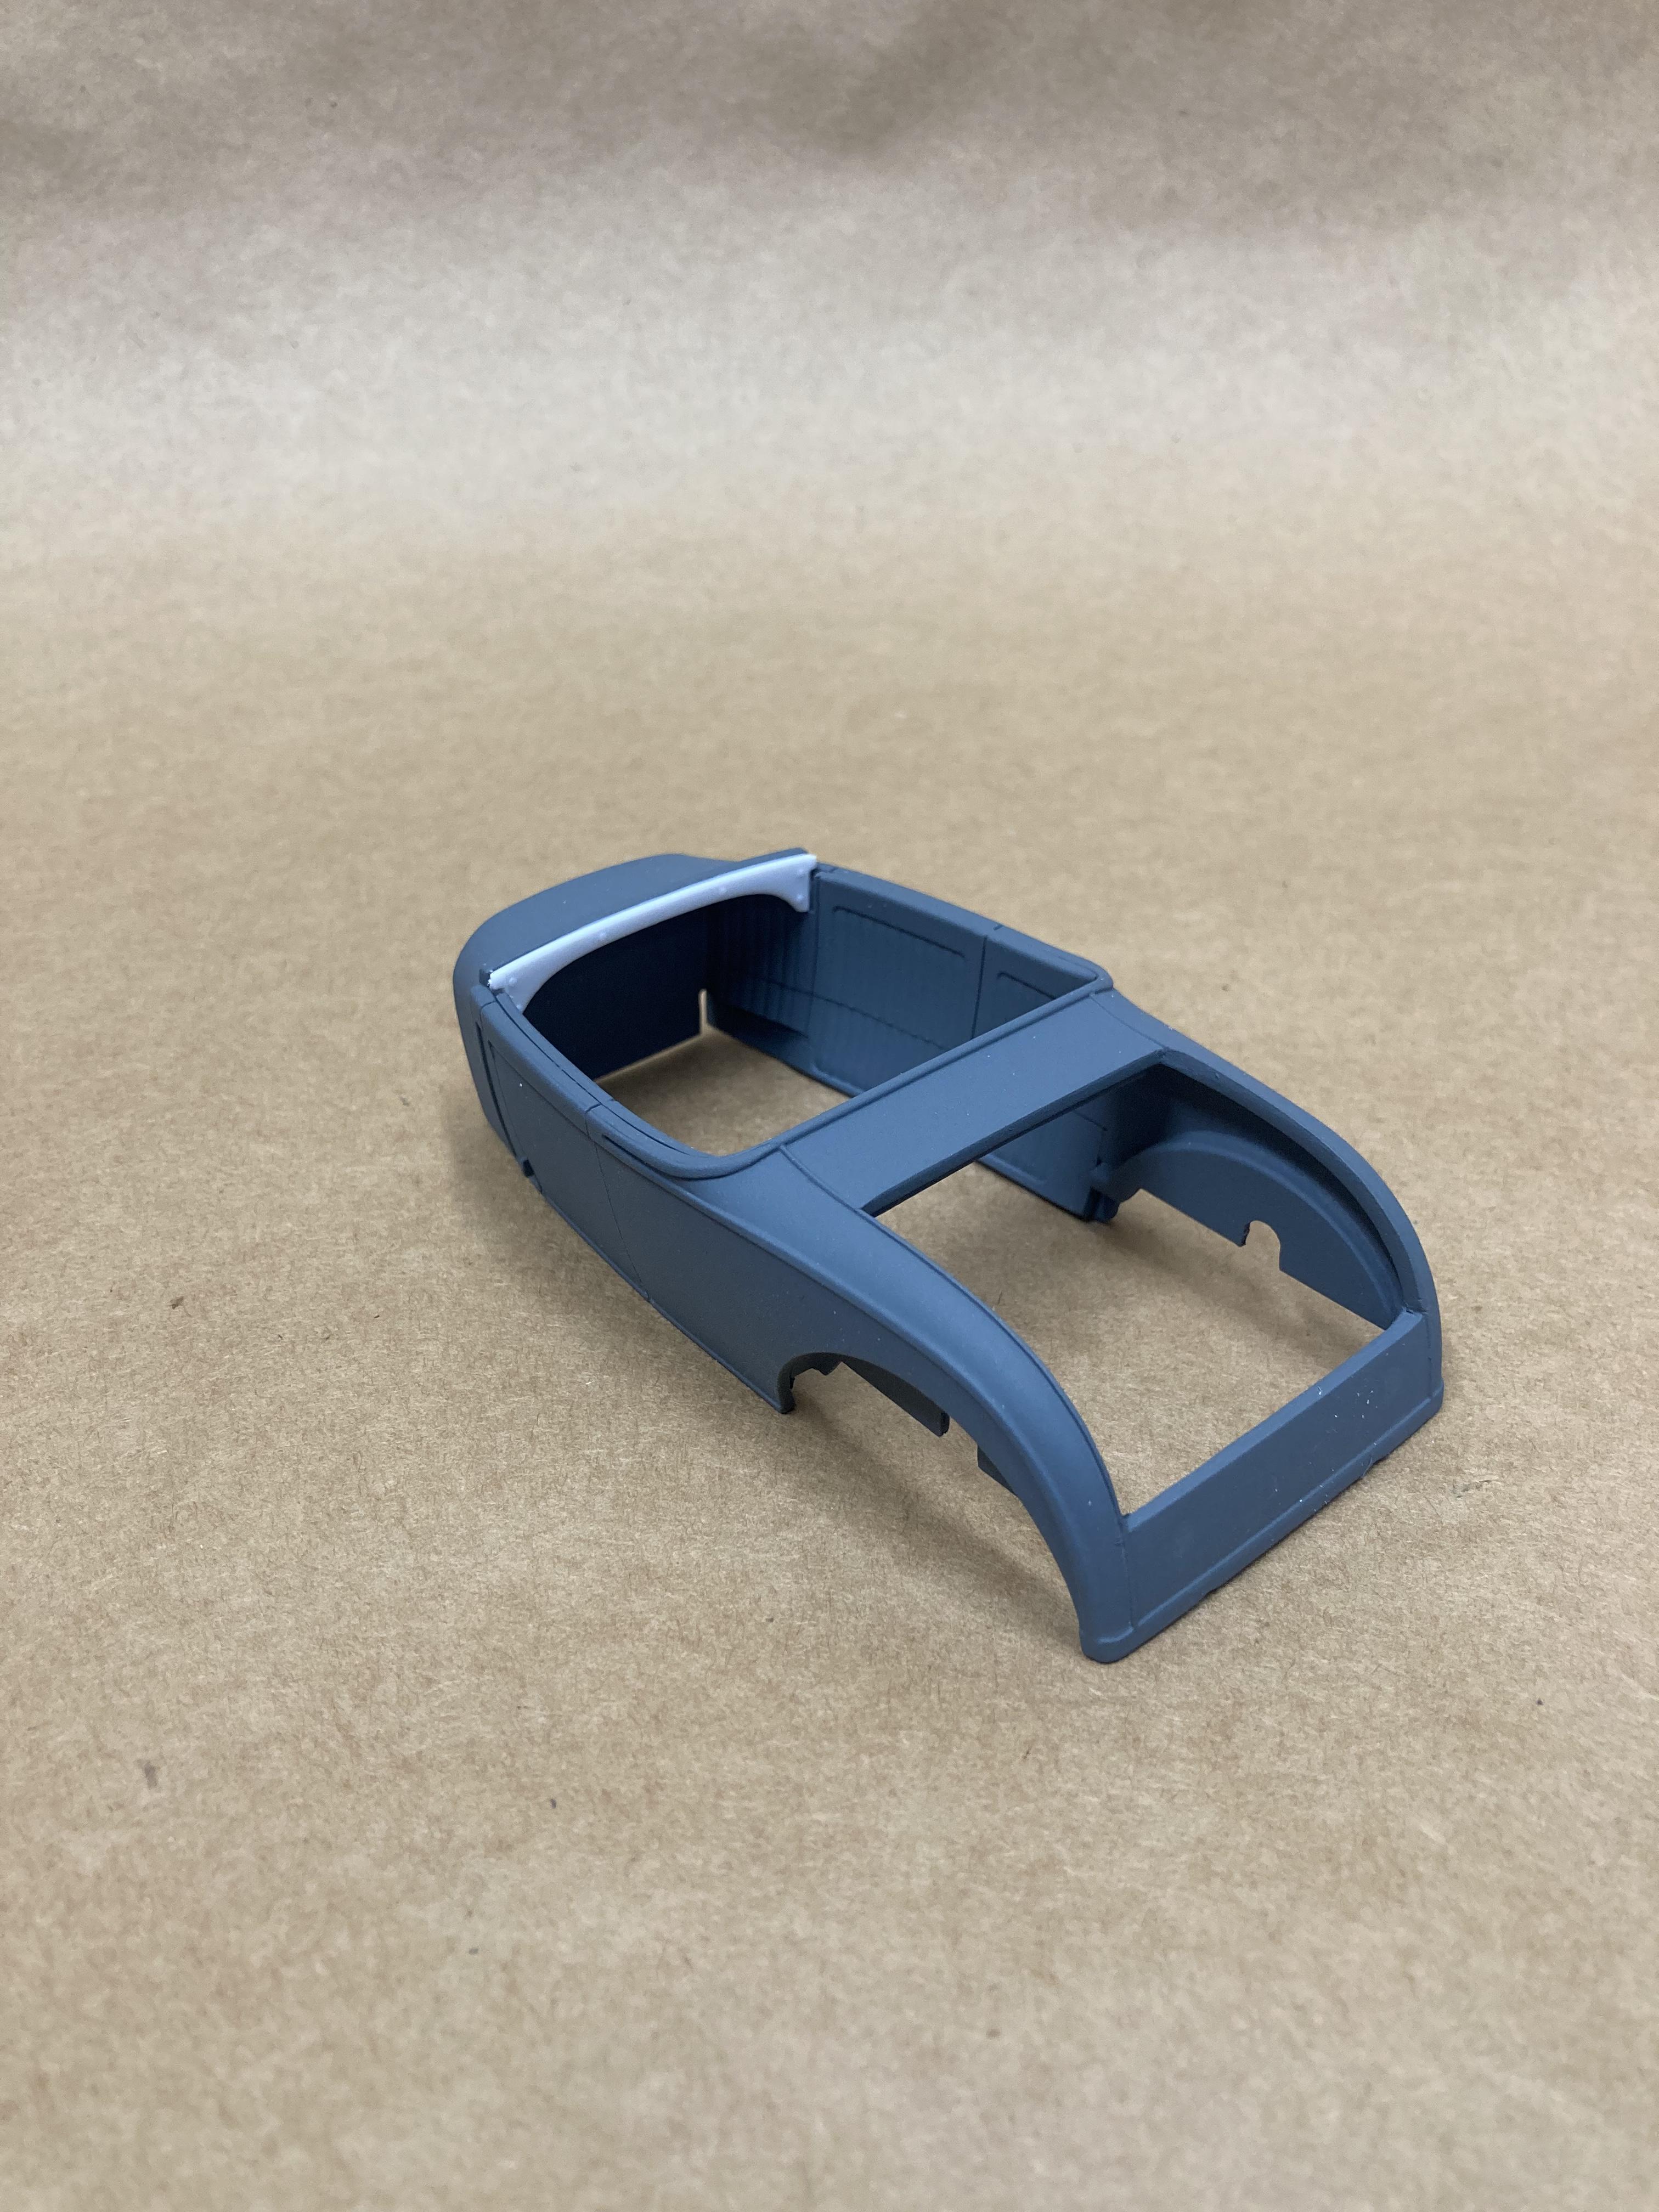
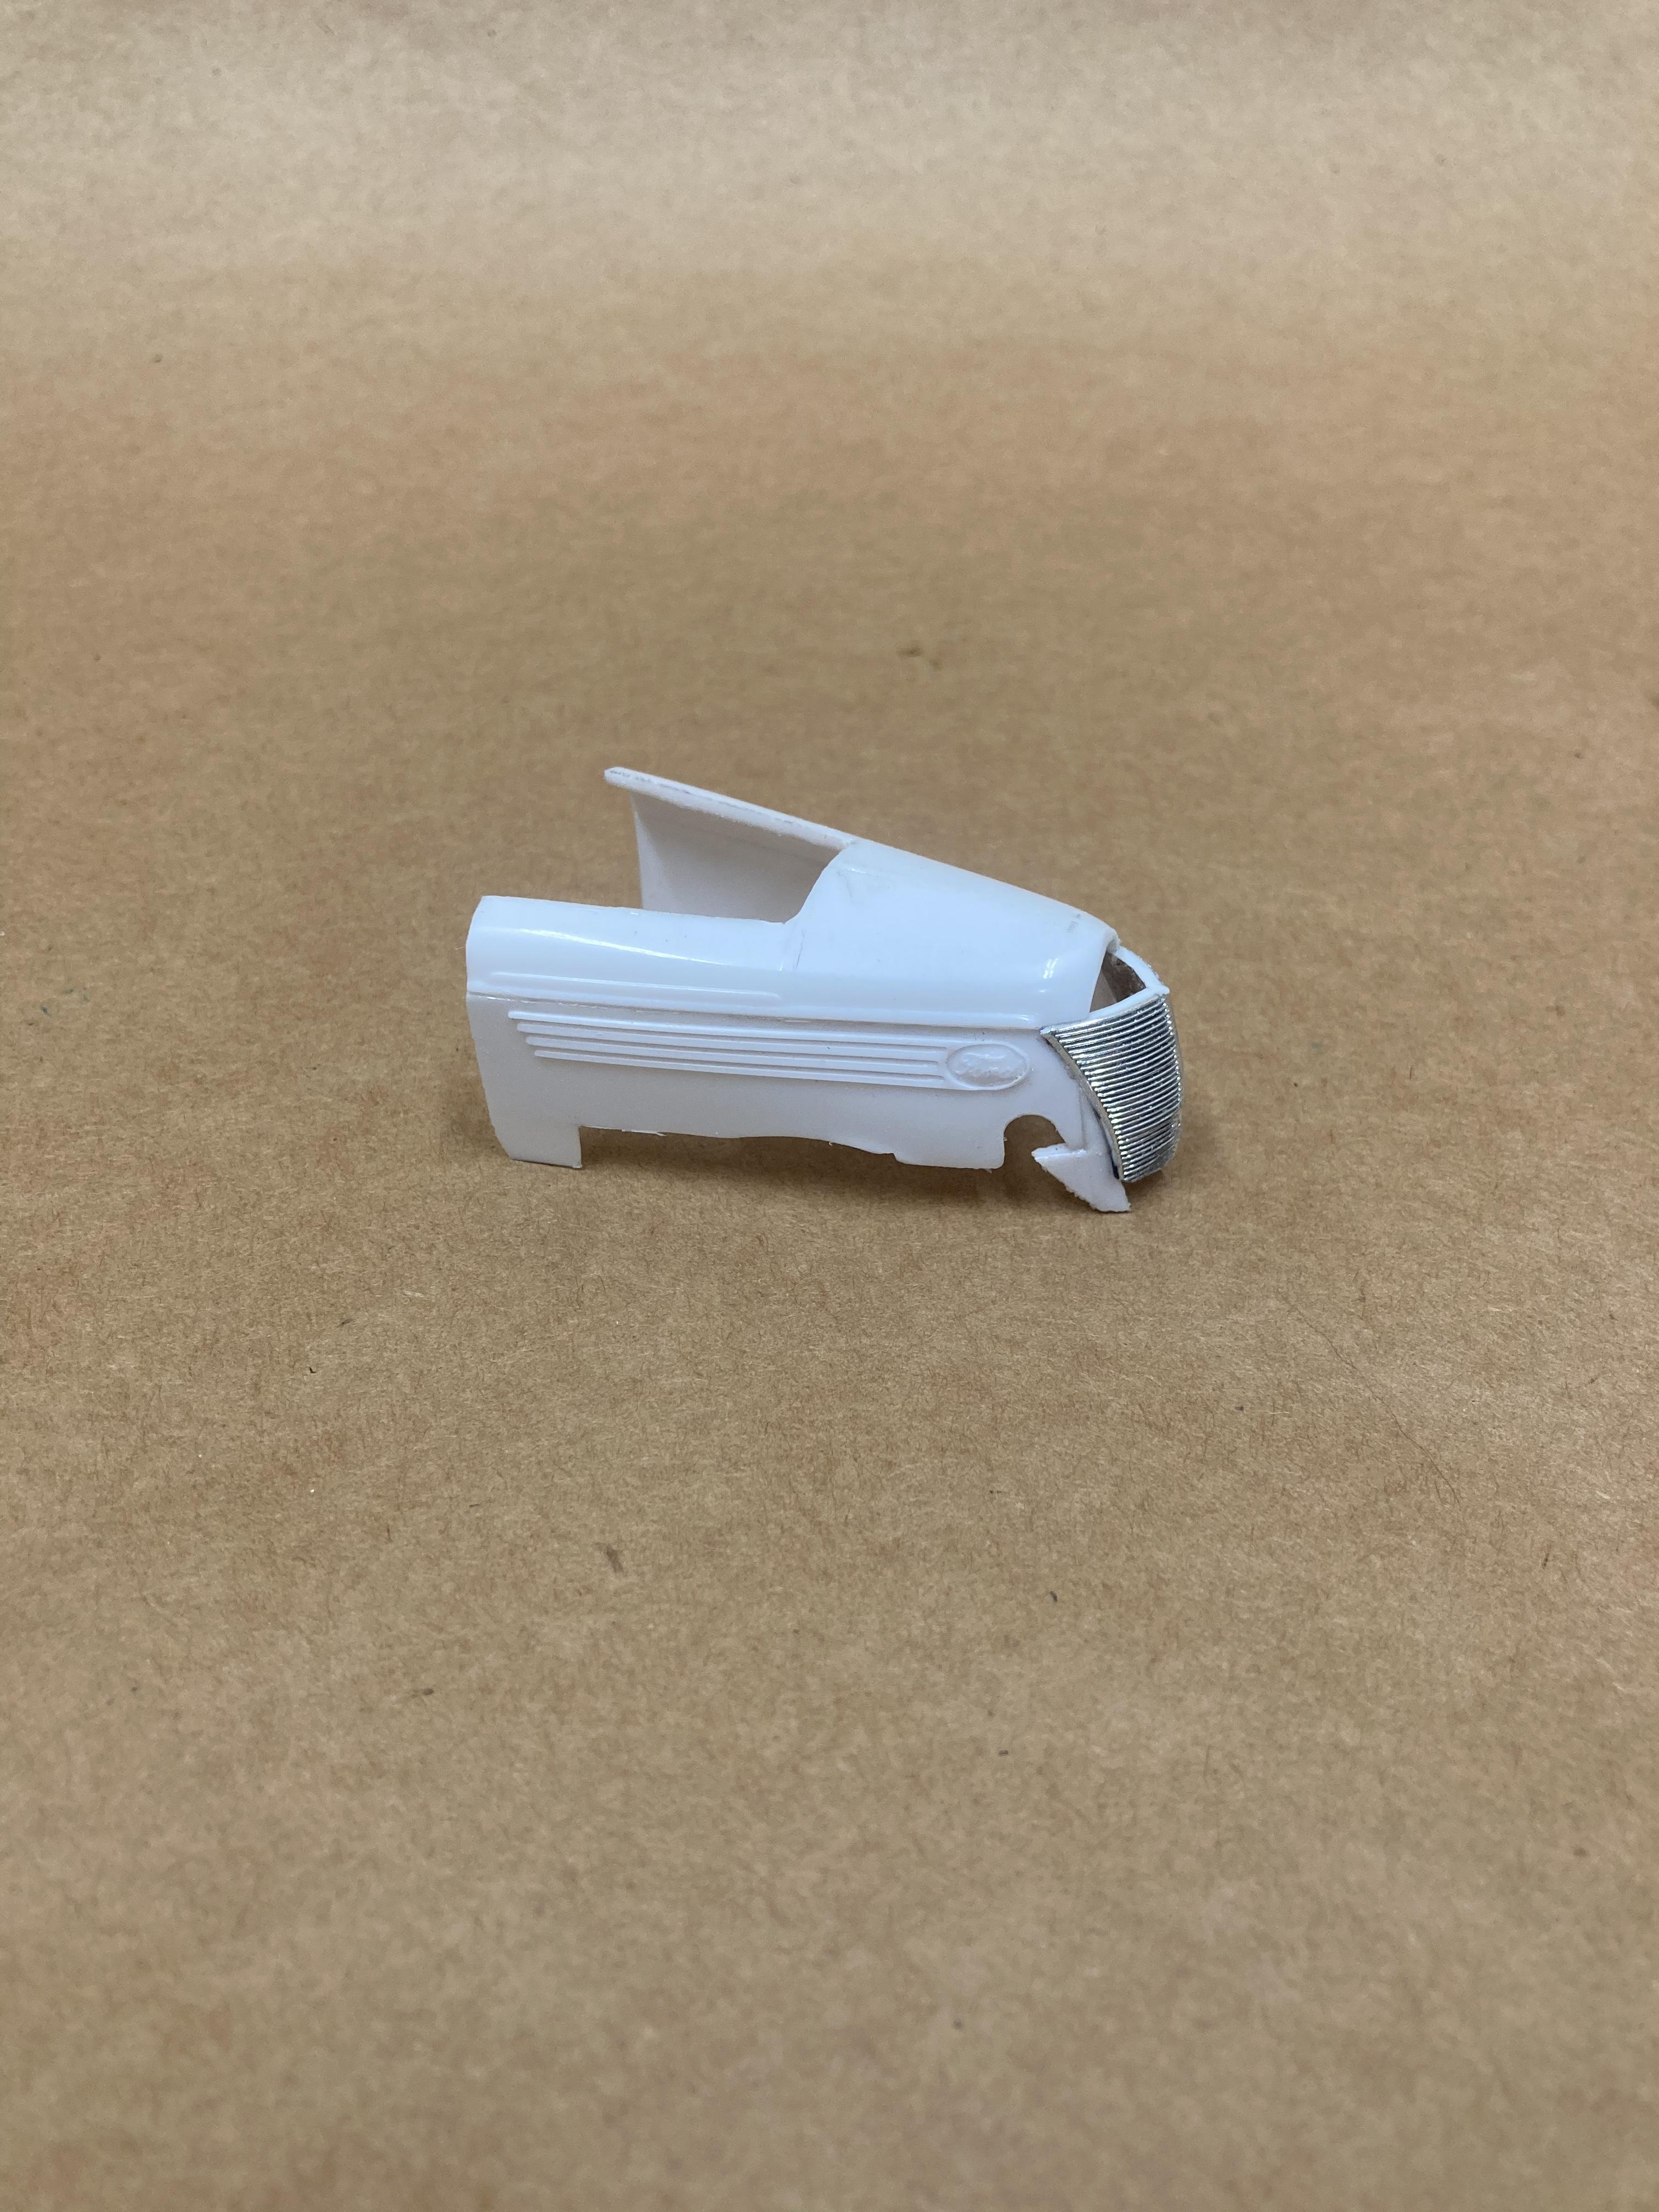
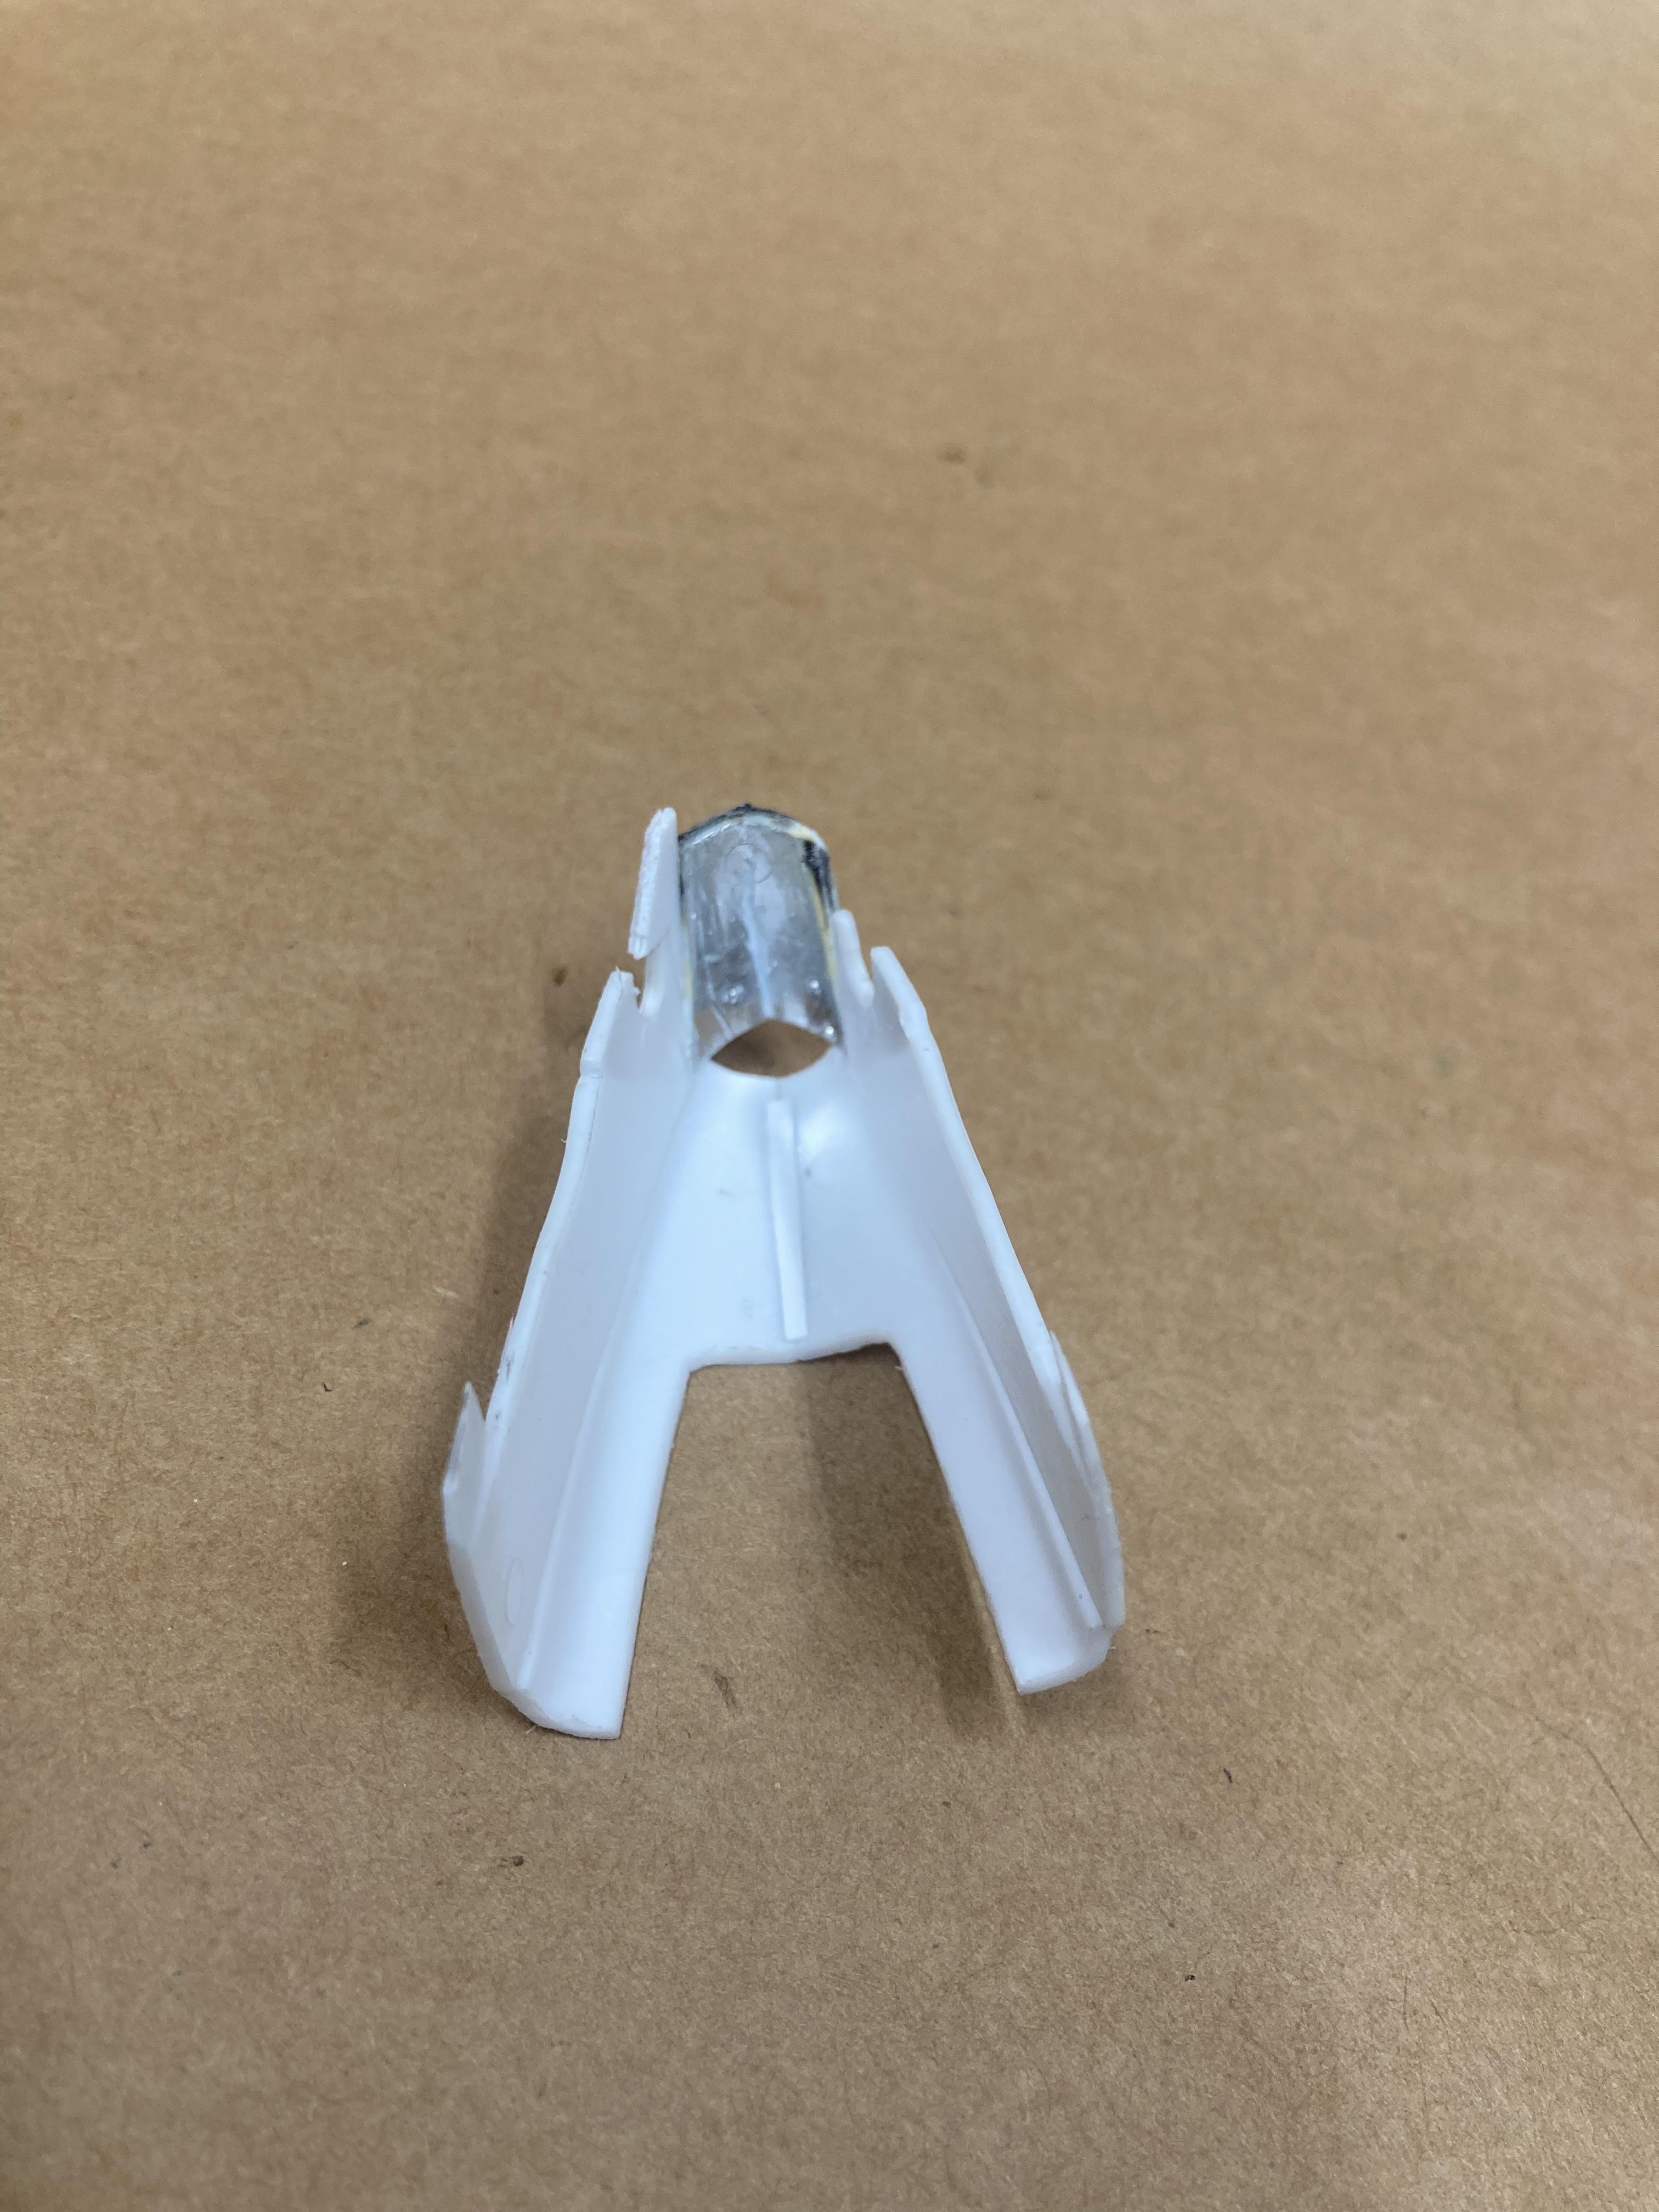
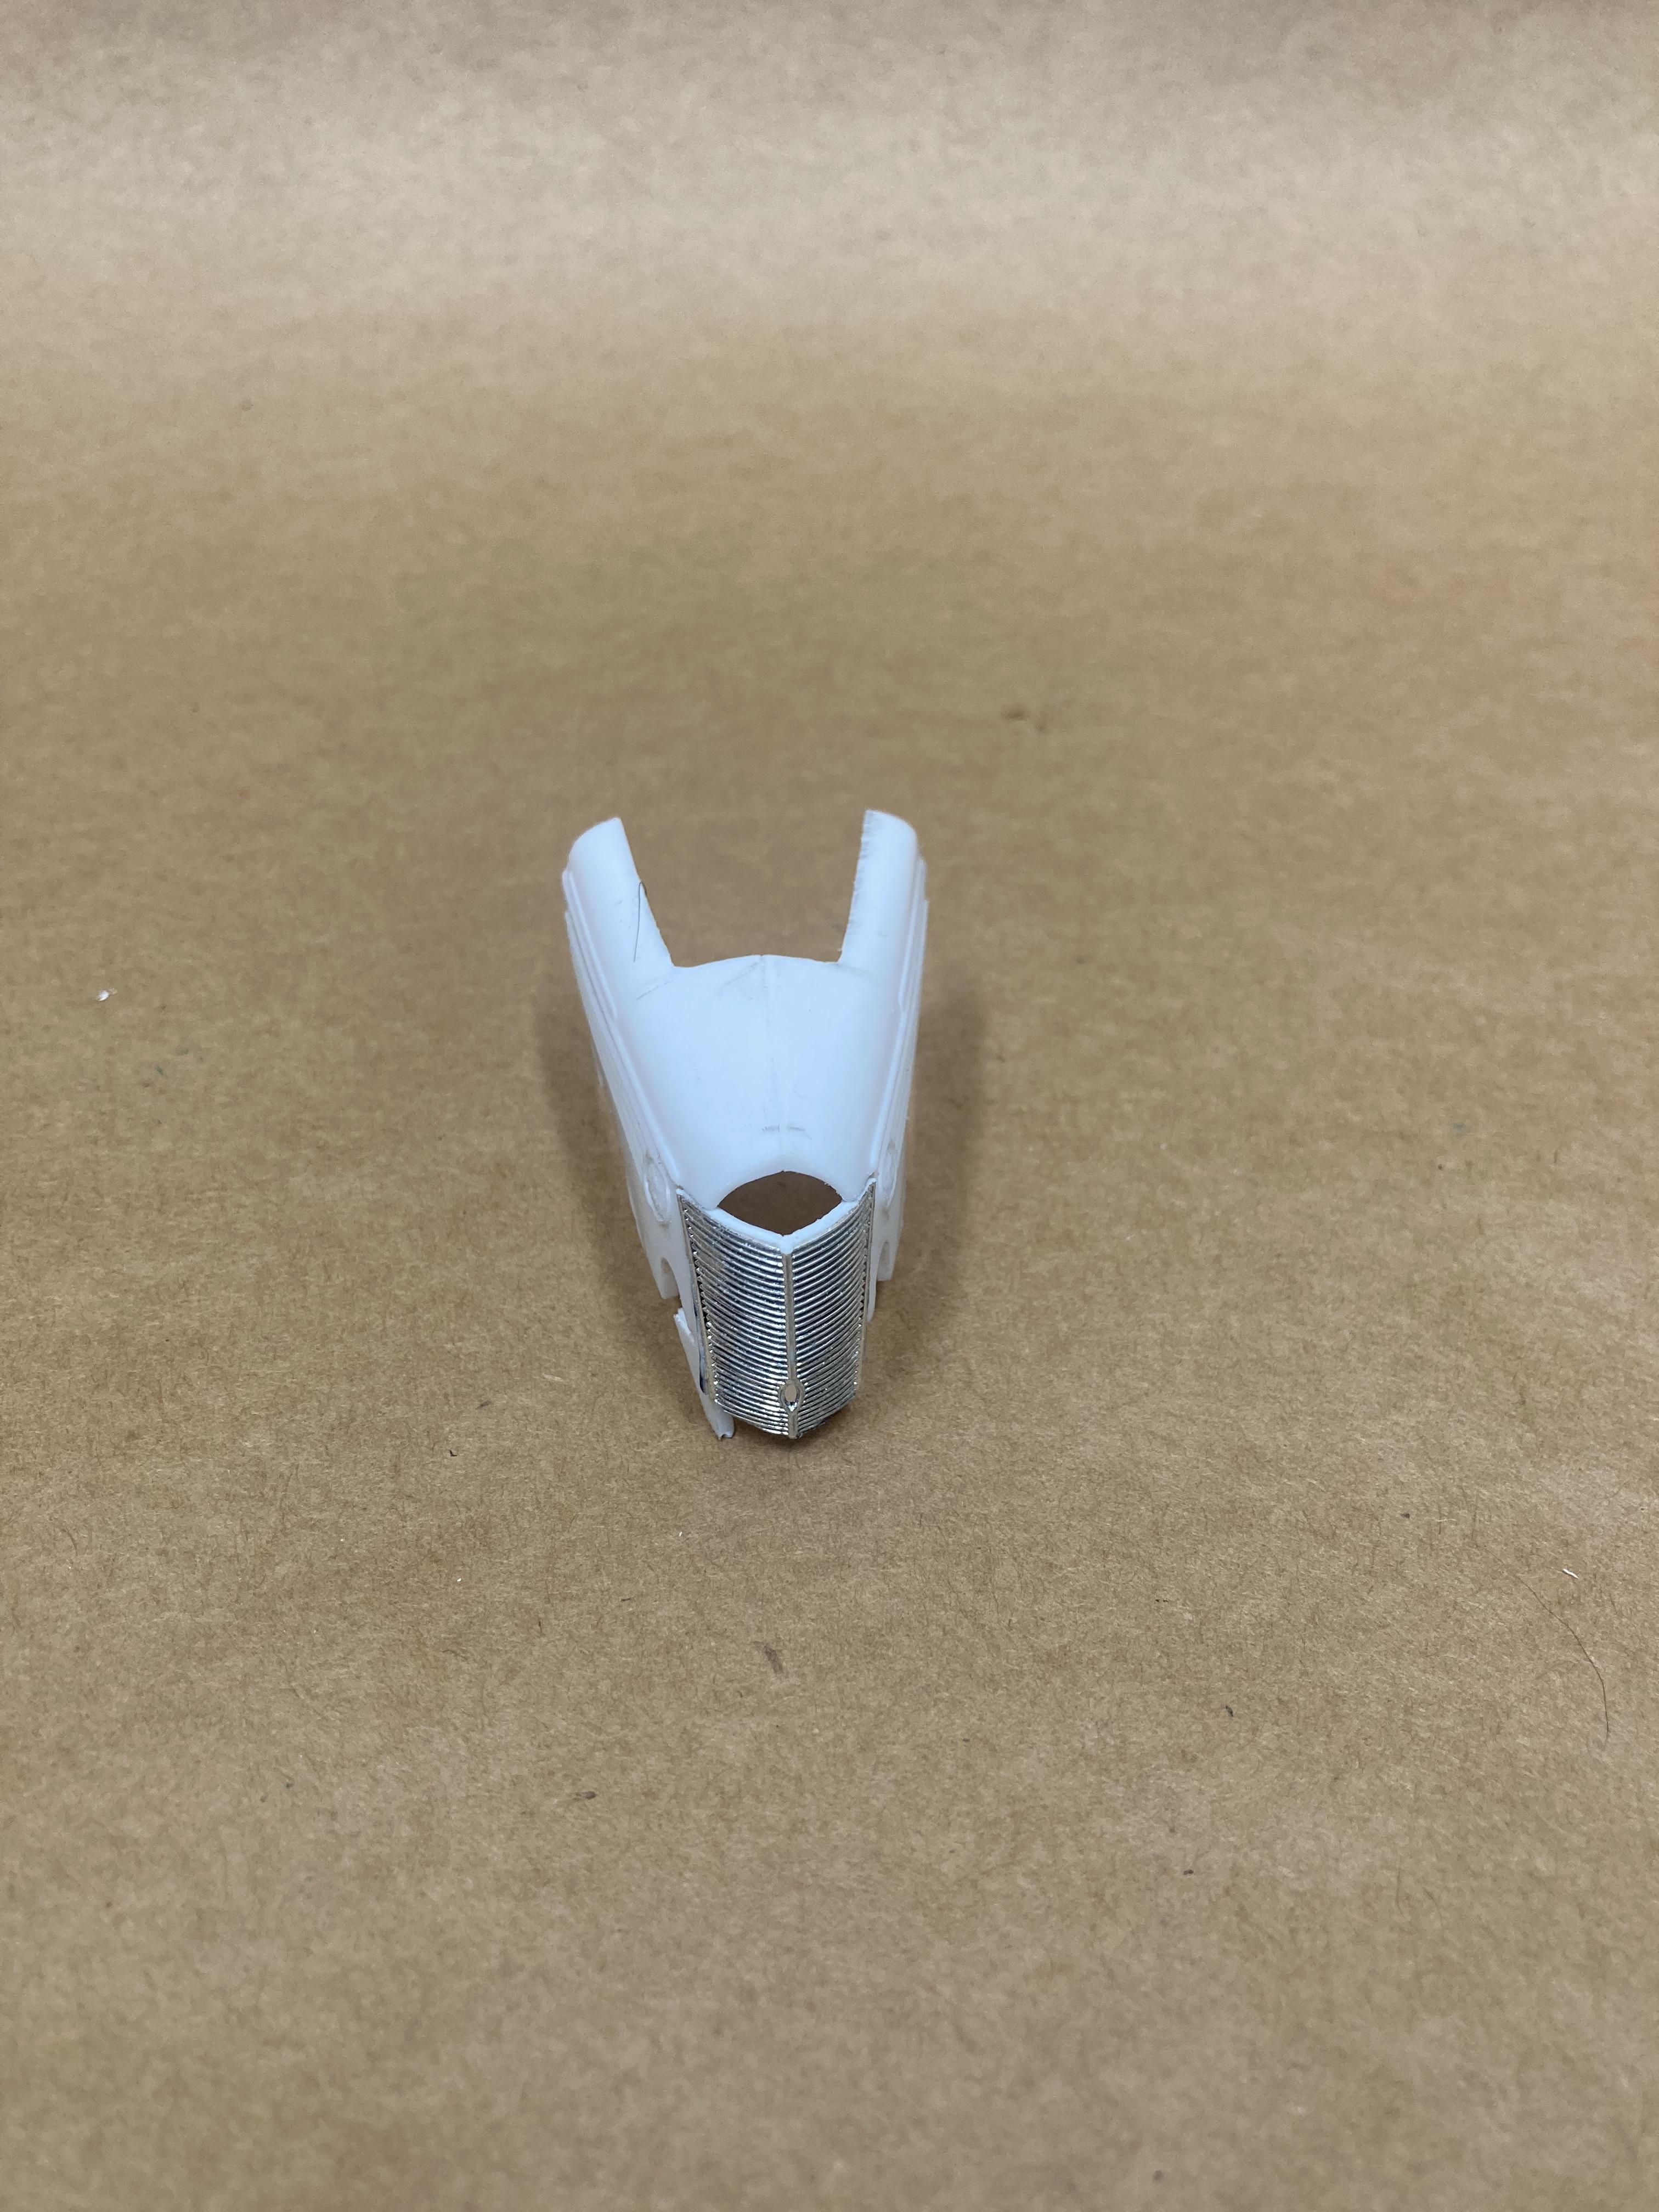
Finally got some pictures. Most of the plumbing is done/close to being done. Need to mount the mag and attach the plug wires. I used orange detail wire from detail master (I think) and a few other sizes of random wire I had in a drawer. I despise when plug boots are too tall and very out of scale looking so I tried a new approach. I drilled out the plug holes on the valve covers then I dabbed black craft paint into the holes and stuck the wires through. One it acts as an adhesive for the wires and two it looks more like hemi plug boots. Radiator, gas tank, magneto, shift linkage, and pedals all got Alclad polished aluminum. I cut two sets of door panels and made them taller to fill from the bottom of the body to the top. I made trunk hinges from .010” sheet and two pins that I cut down. I glued in a piece of aluminum tube where the hinges will attach to the body. Cut the center of the dashboard away and used the top “sill” of the dash to fill the void and tie in the sides. And I cut notches in the inner wheel wells to fit the axle. the front end is still about the same. Still need to fab a couple brackets. I trimmed the hood sides and narrowed the hood from a ‘37 Ford truck. My cat stole the grill I was going to use but I found another that I liked better anyway. It was on a built ‘37 coupe I got on eBay years ago that’s been sitting on the shelf in pieces. I trimmed it down to about half the height and used the bottoms section, slightly bent the sides inward to fit the narrowed hood better. I made a filler piece to fit in the gap in the first picture of the hood. It still needs to be trimmed and repeated for the other side. There’s notches in the hood sides to slip over the axle/spring. It’s not in the pictures but I trimmed the tip of the nose off the hood of a Willys to fill the gap at the front of the hood where it meets the grill. Hopefully I can get everything else in primer tomorrow and shoot some color on this before the weekend. Speaking of color… These are the colors I’m playing around with right now. I don’t have a 100% solid plan yet but I have an idea. At least I’ve narrowed it down from the 48 options I had before lol. I already painted the engine root beer brown so I can’t really go back to the gross pink I was thinking about using. Wouldn’t sit right with me. We’ll see how the next few days go, still need to get caught up on Christmas stuff since being sick really put me out. Anyway, that’s all for now. Thanks for looking.
-
Progress update: I’ve been sick for about a week now and haven’t had much bench time. In the meantime my phone camera has also decided not to work properly anymore. I’ve made door panels, narrowed/trimmed the hood and glued it to the hood sides, made trunk hinges, decided to use a 39 Chevy grill then my cat stole it as soon as I stripped the chrome off it so I found one from a 37 Ford coupe, trimmed that grill and need to shape the hood sides slightly. Most of the motor is assembled. Radiator mounts are made. Made a coolant crossover tube with a thermostat/water neck. Need to make exhaust still, mount the battery and gas tank, make a bracket for shift linkage, and need a tube across the cage in the front to mount the steering column. Enough rambling. Hopefully I can get some pics tomorrow.
-
1941 Chev Panel Van.
Tarkmucker replied to Bruce Scully's topic in Model Trucks: Pickups, Vans, SUVs, Light Commercial
Looks great. Would love to get my hands on one of those bodies if you ever find the source. Is everything else from a 41 truck kit? -
You didn’t miss it, I forgot to mention that part. I used .010” styrene sheet. Glued it to the bottom of the frame rails and butted it up the the front crossmember. I used the same material to make the plate under where the clutch/brake pedals will be.
-
Cam driven accessories. Help.
Tarkmucker replied to Tarkmucker's topic in Model Building Questions and Answers
I appreciate everyone’s responses. This is what I was asking. Specifically the flow of that pump. I assumed the large cast boss facing down would be the port out to the radiator. I kept finding info on marine pumps but none that looked like that and I was getting frustrated. All of the info provided is appreciated and will be of use.