Tarkmucker
-
Posts
100 -
Joined
-
Last visited
Content Type
Profiles
Forums
Events
Gallery
Everything posted by Tarkmucker
-
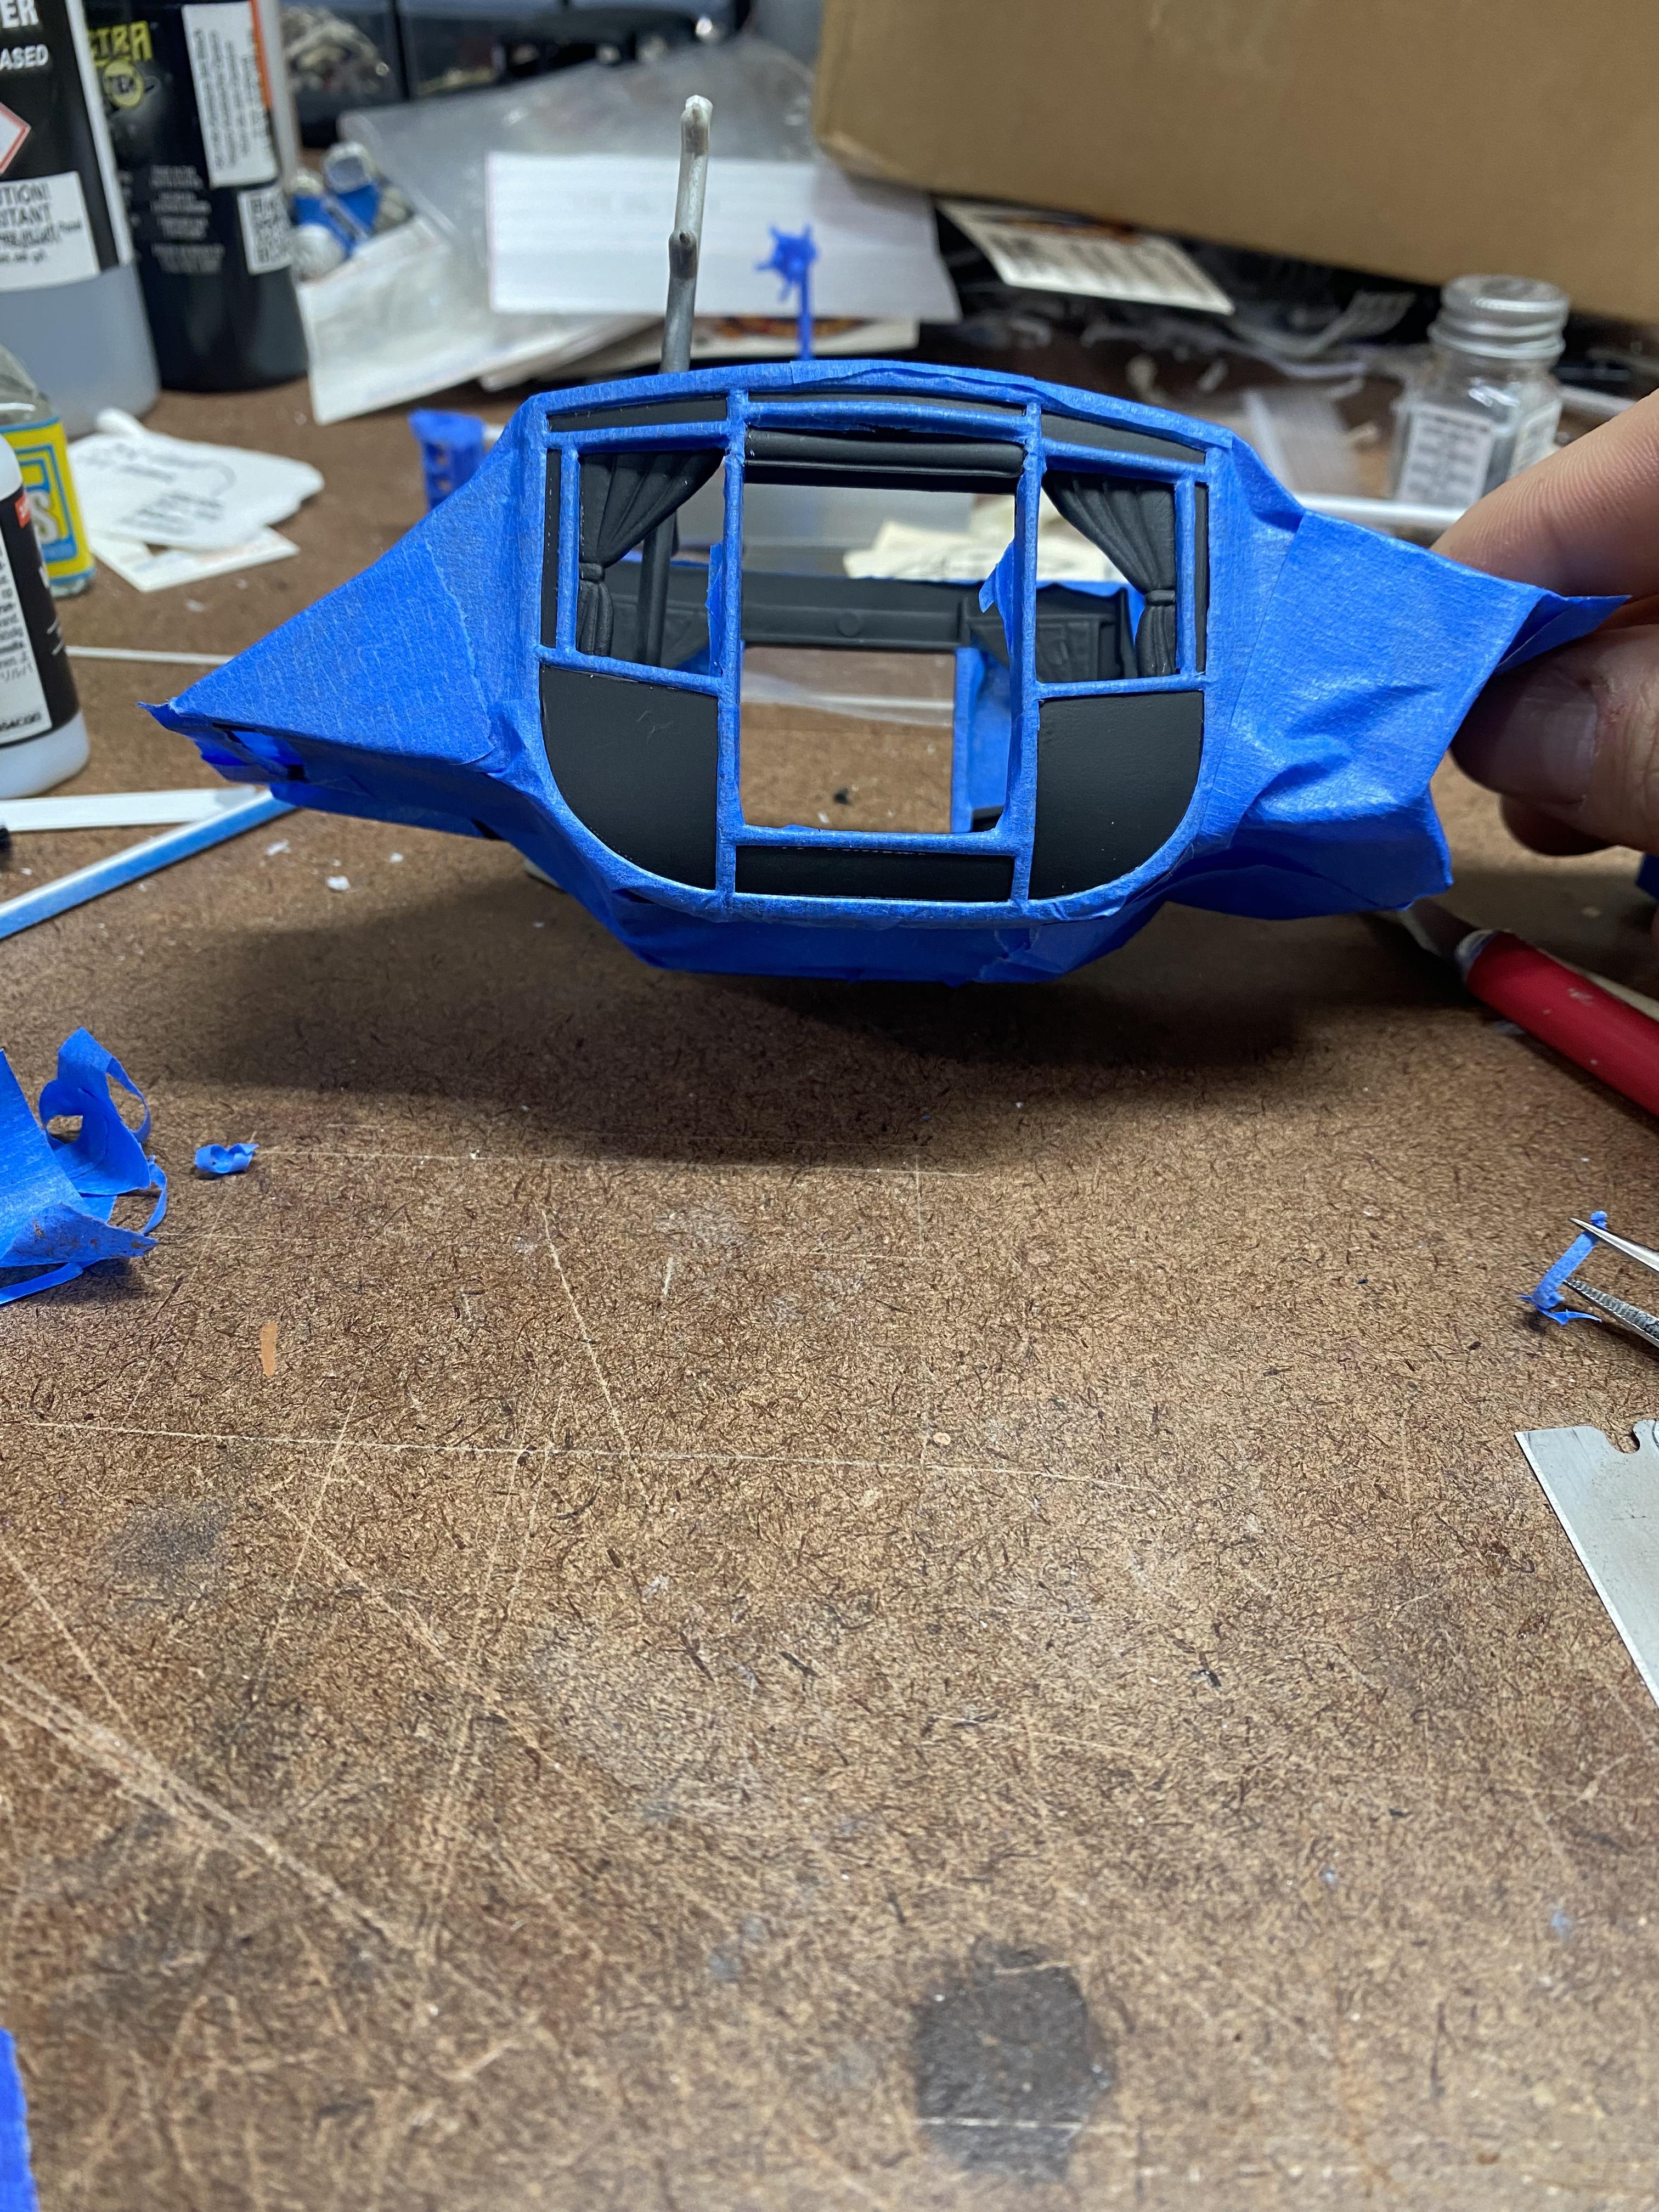
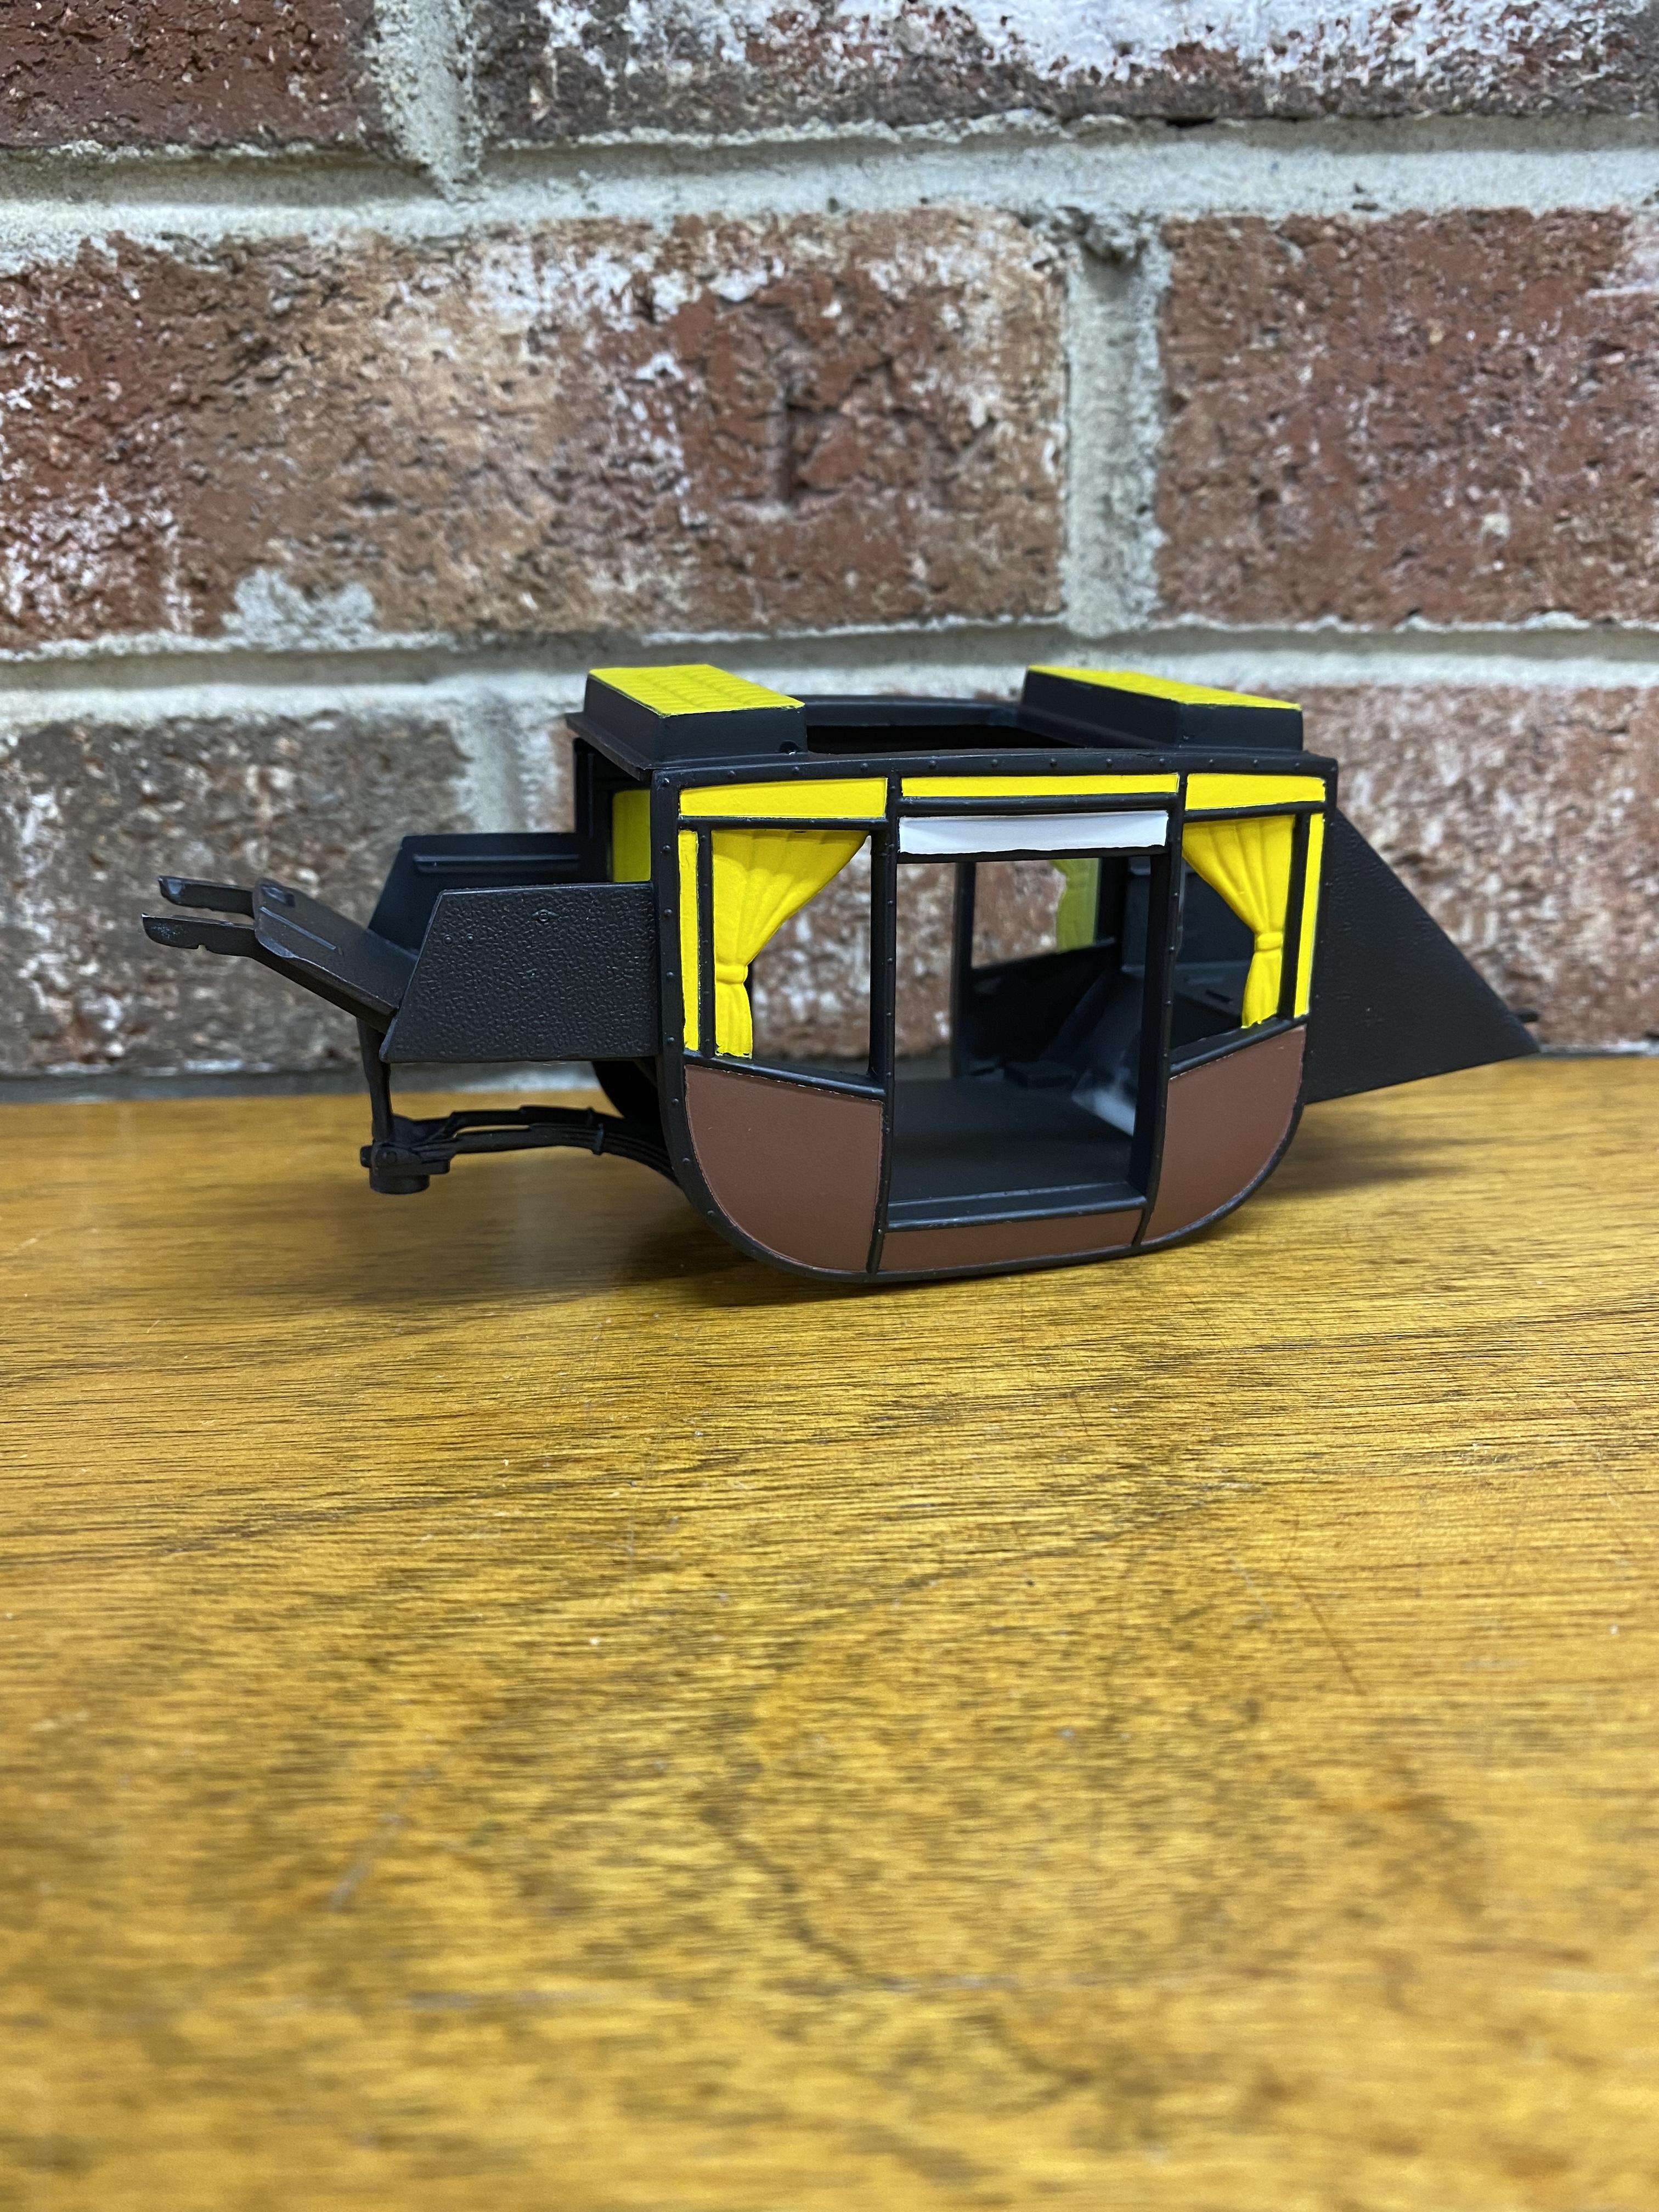
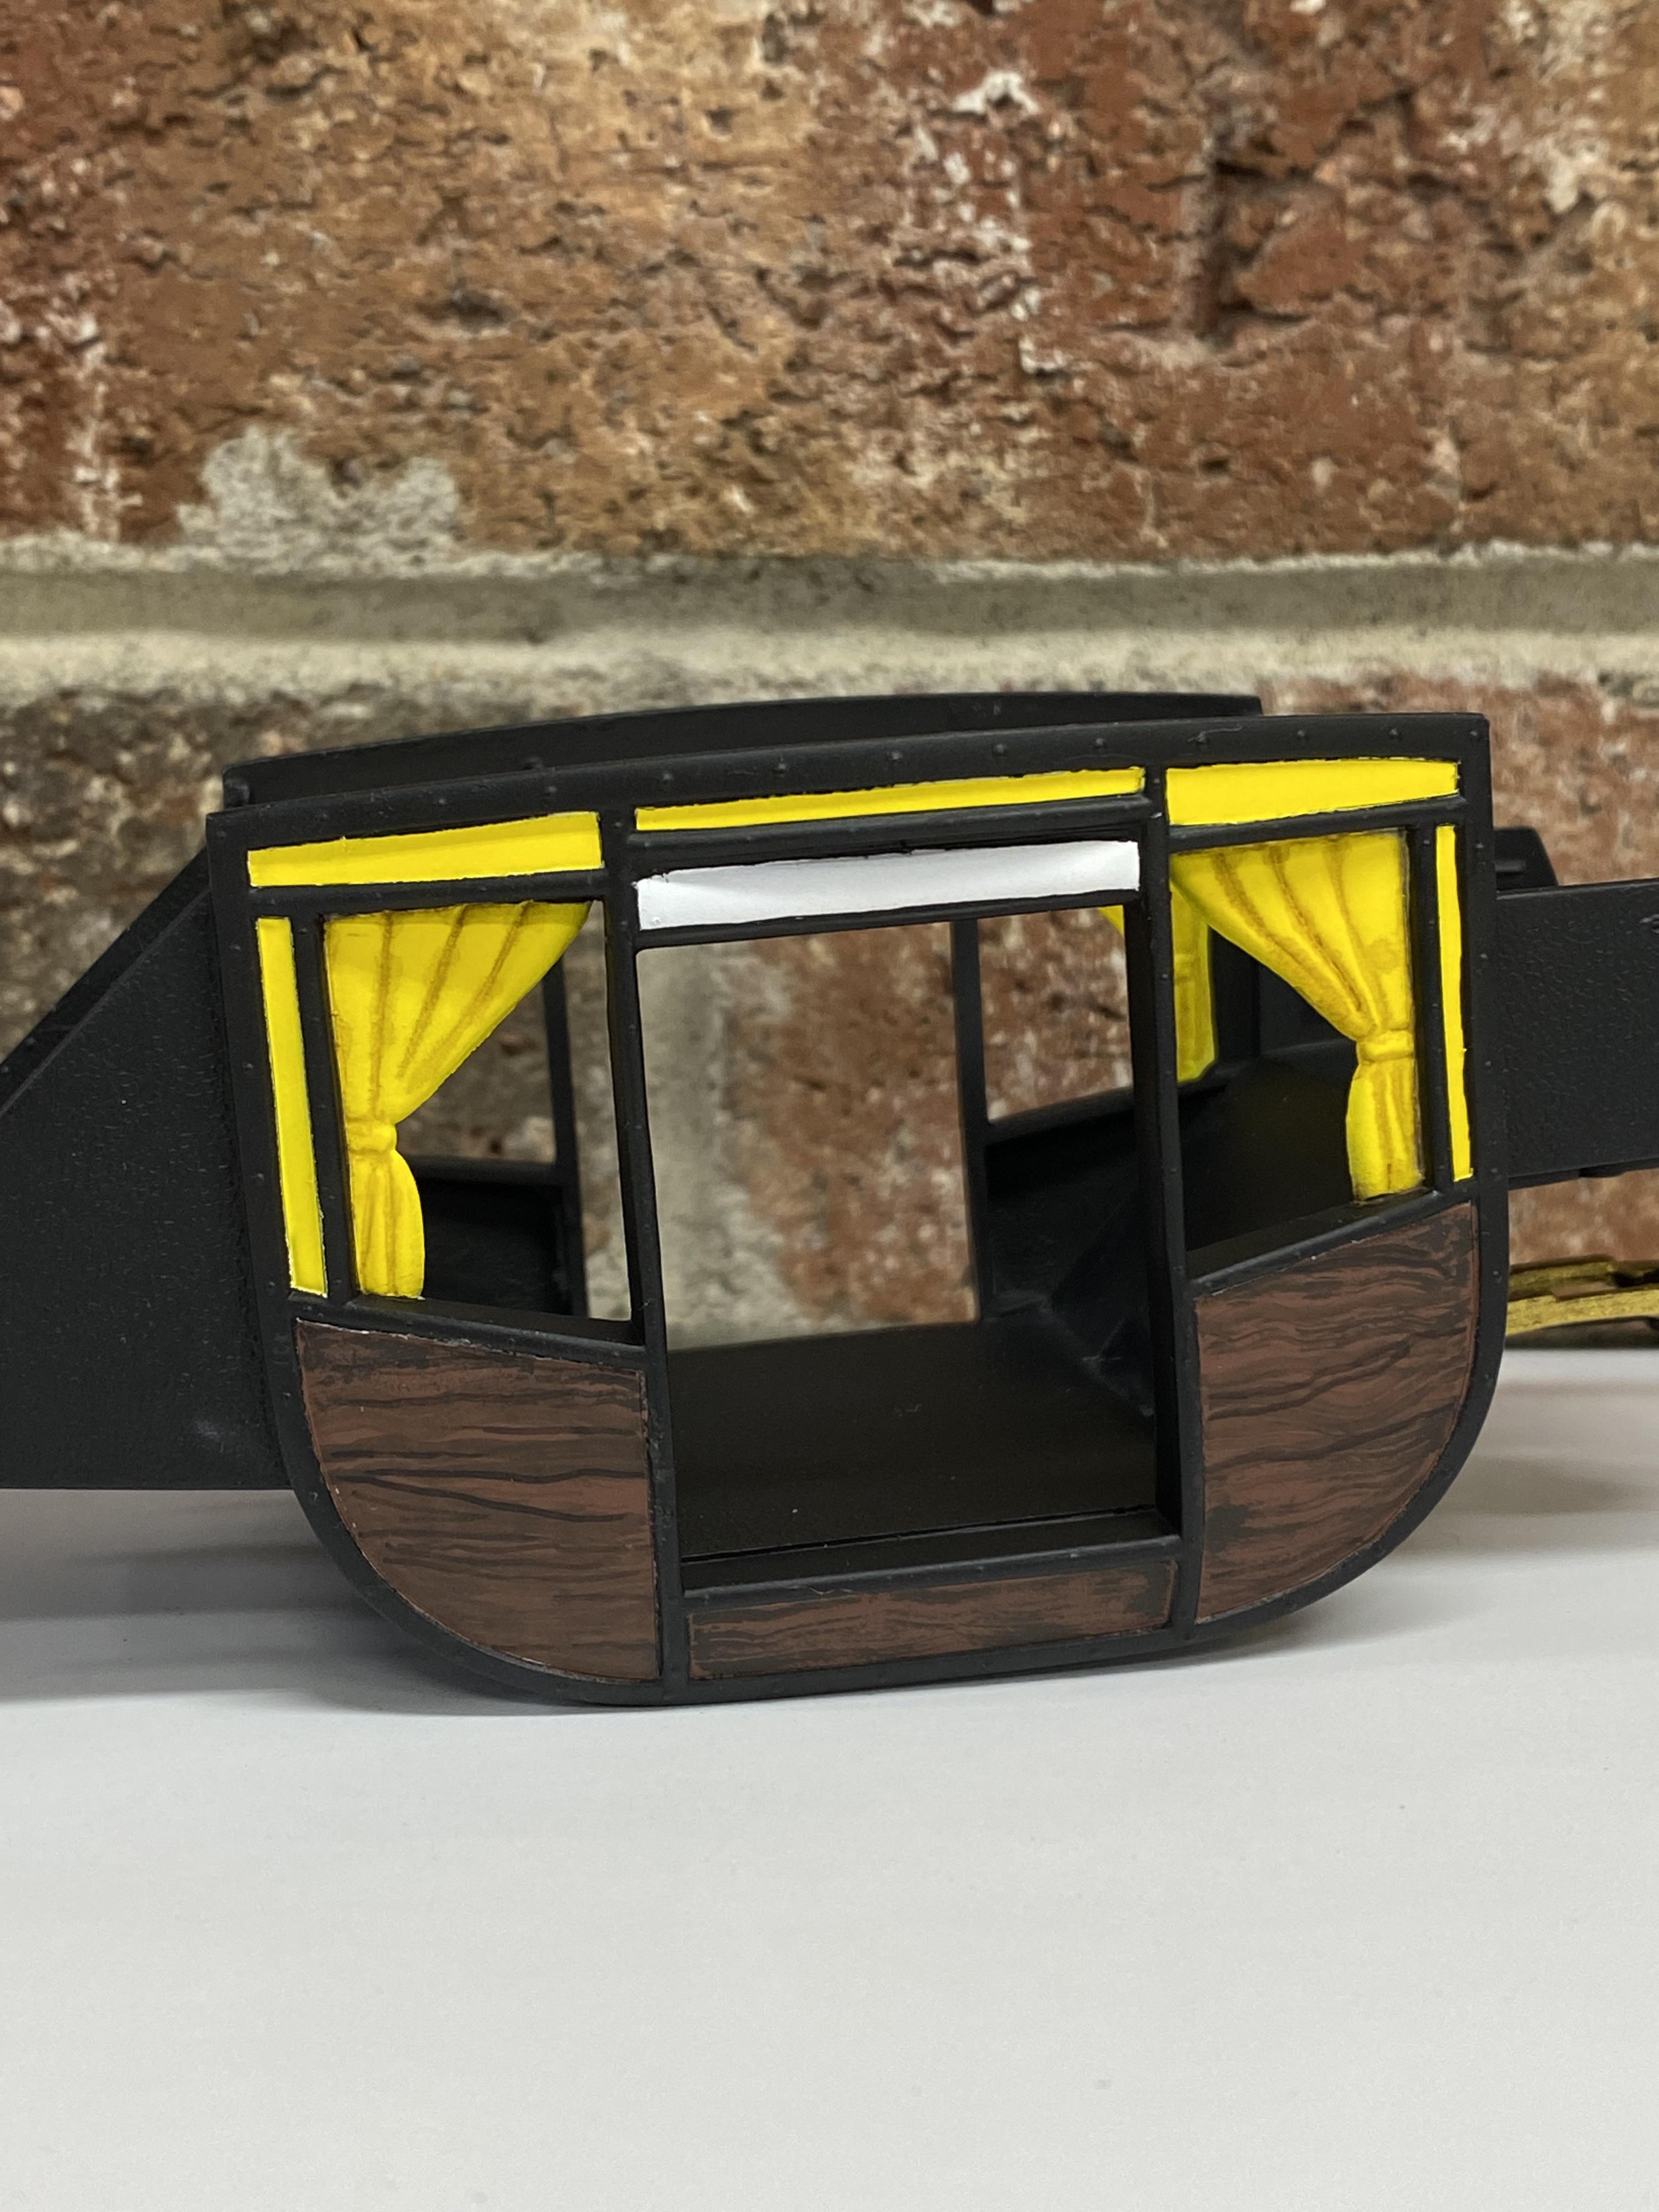
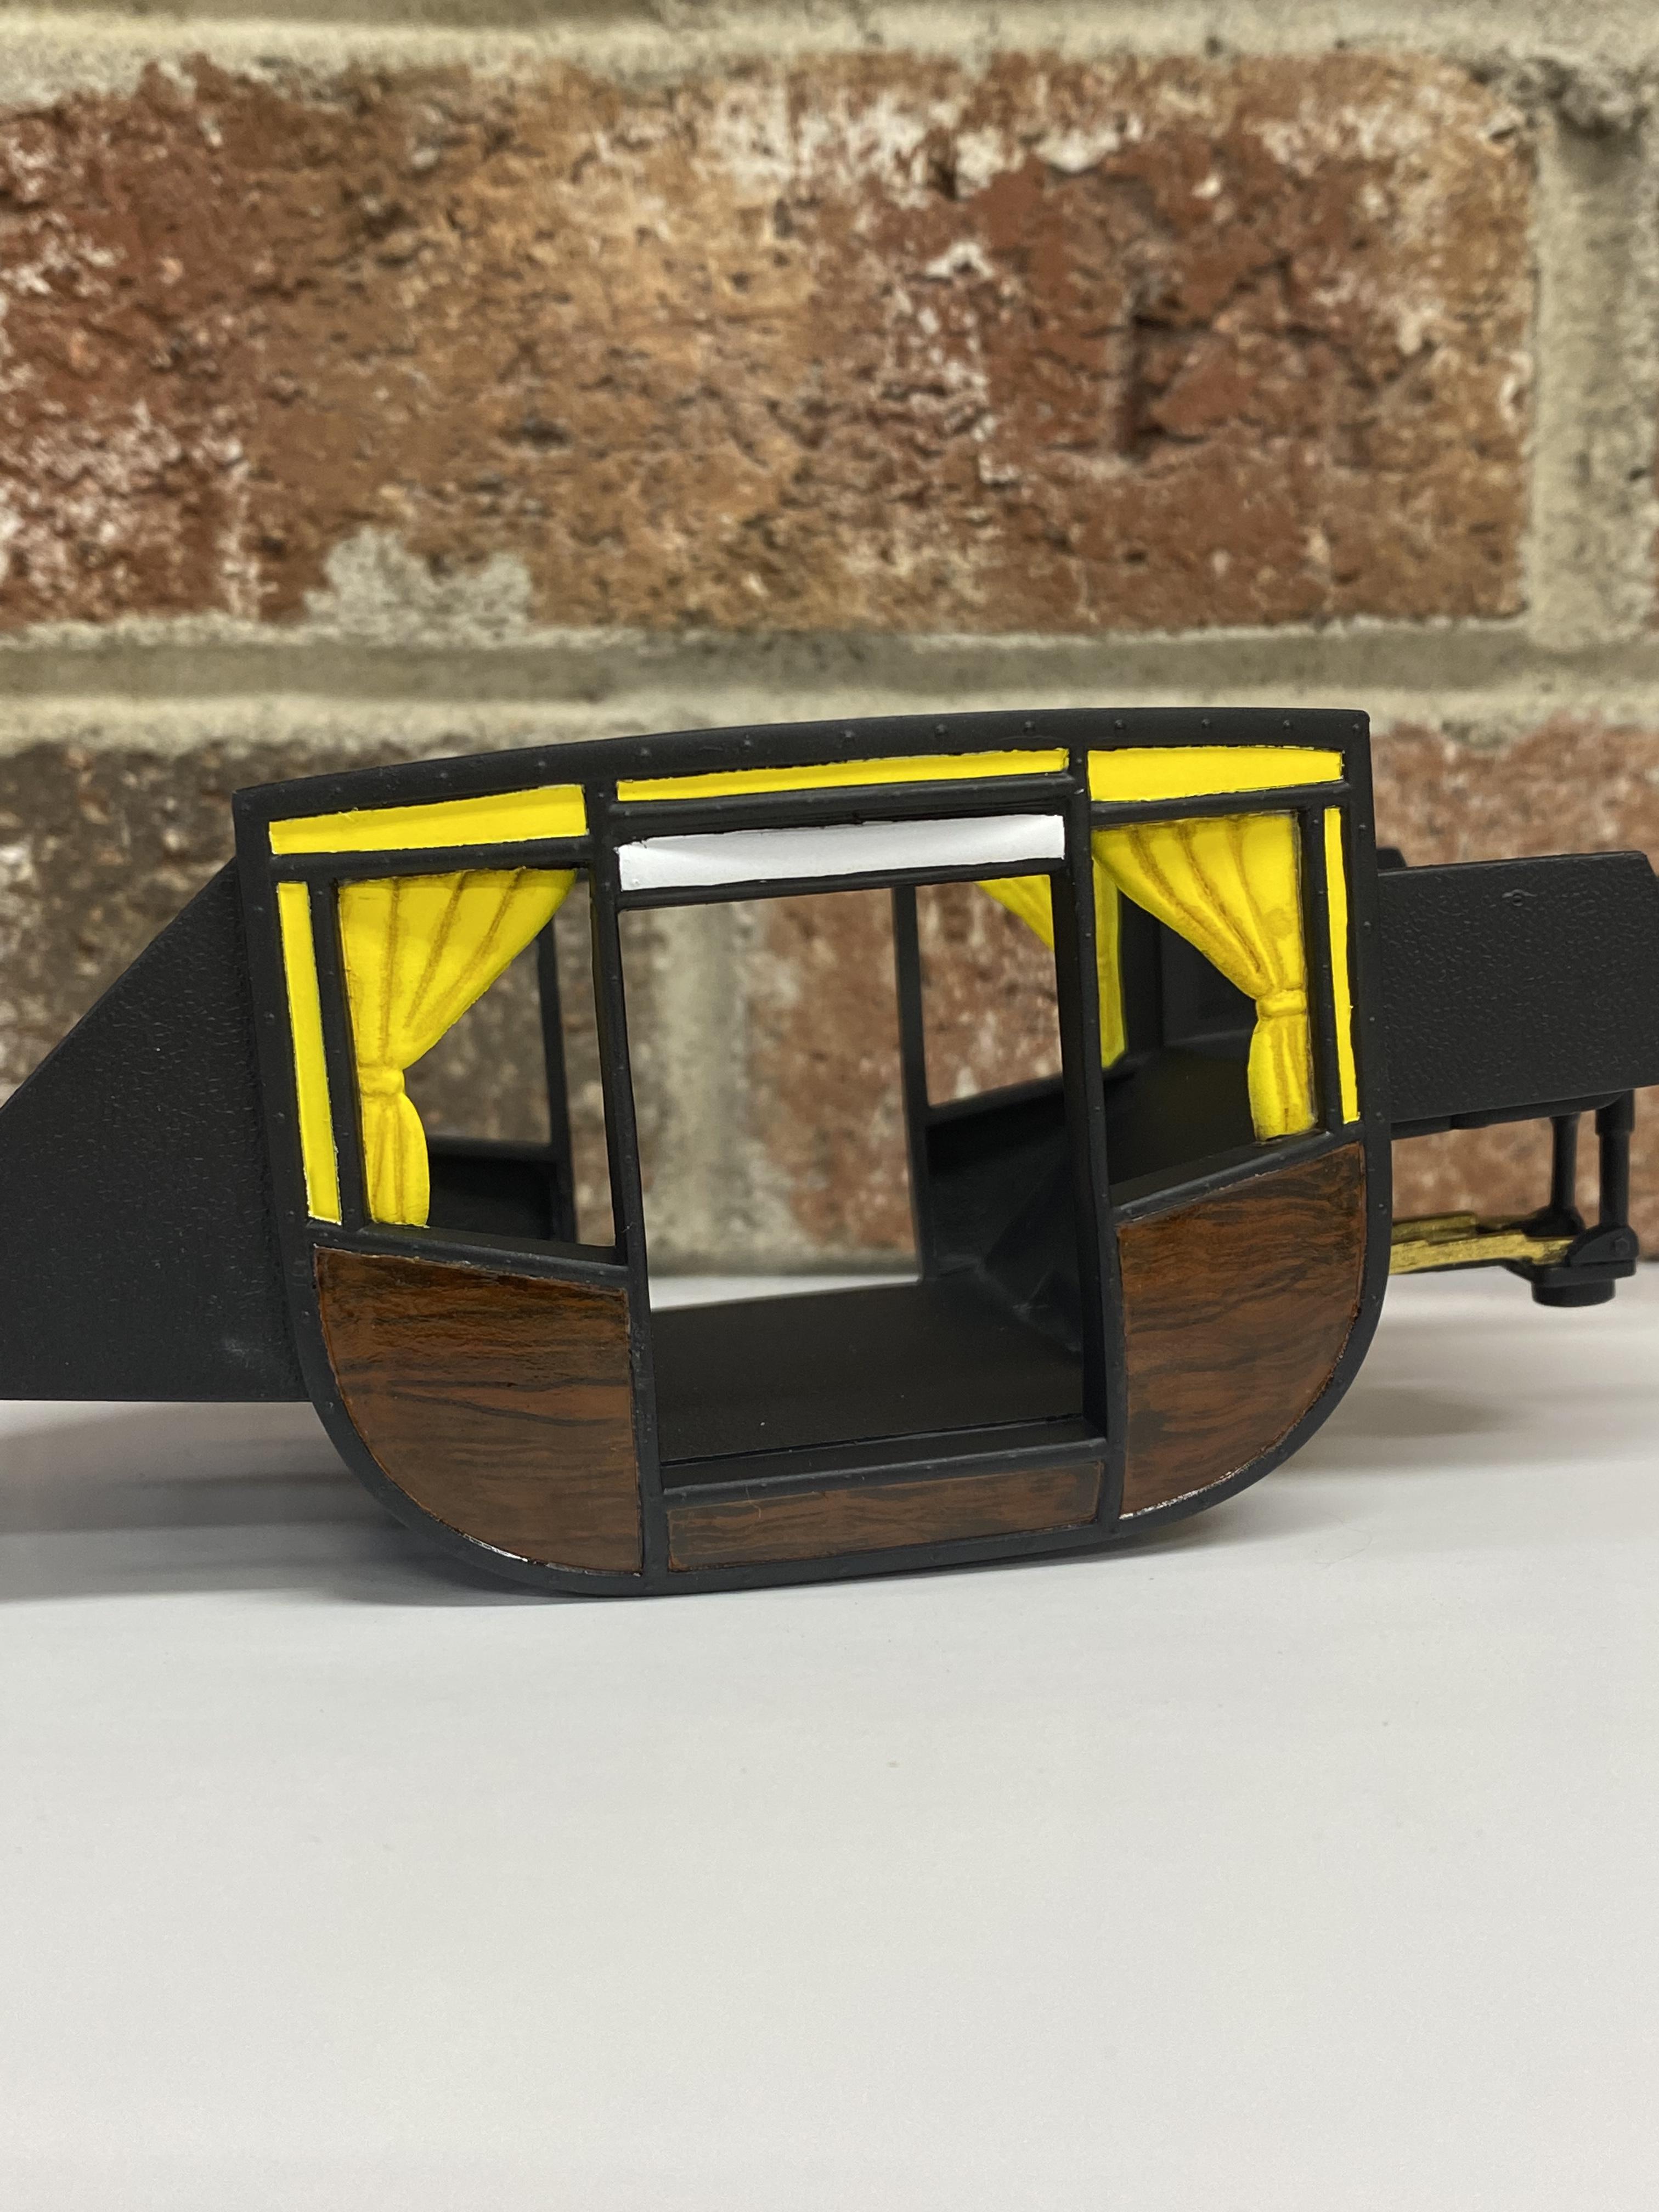
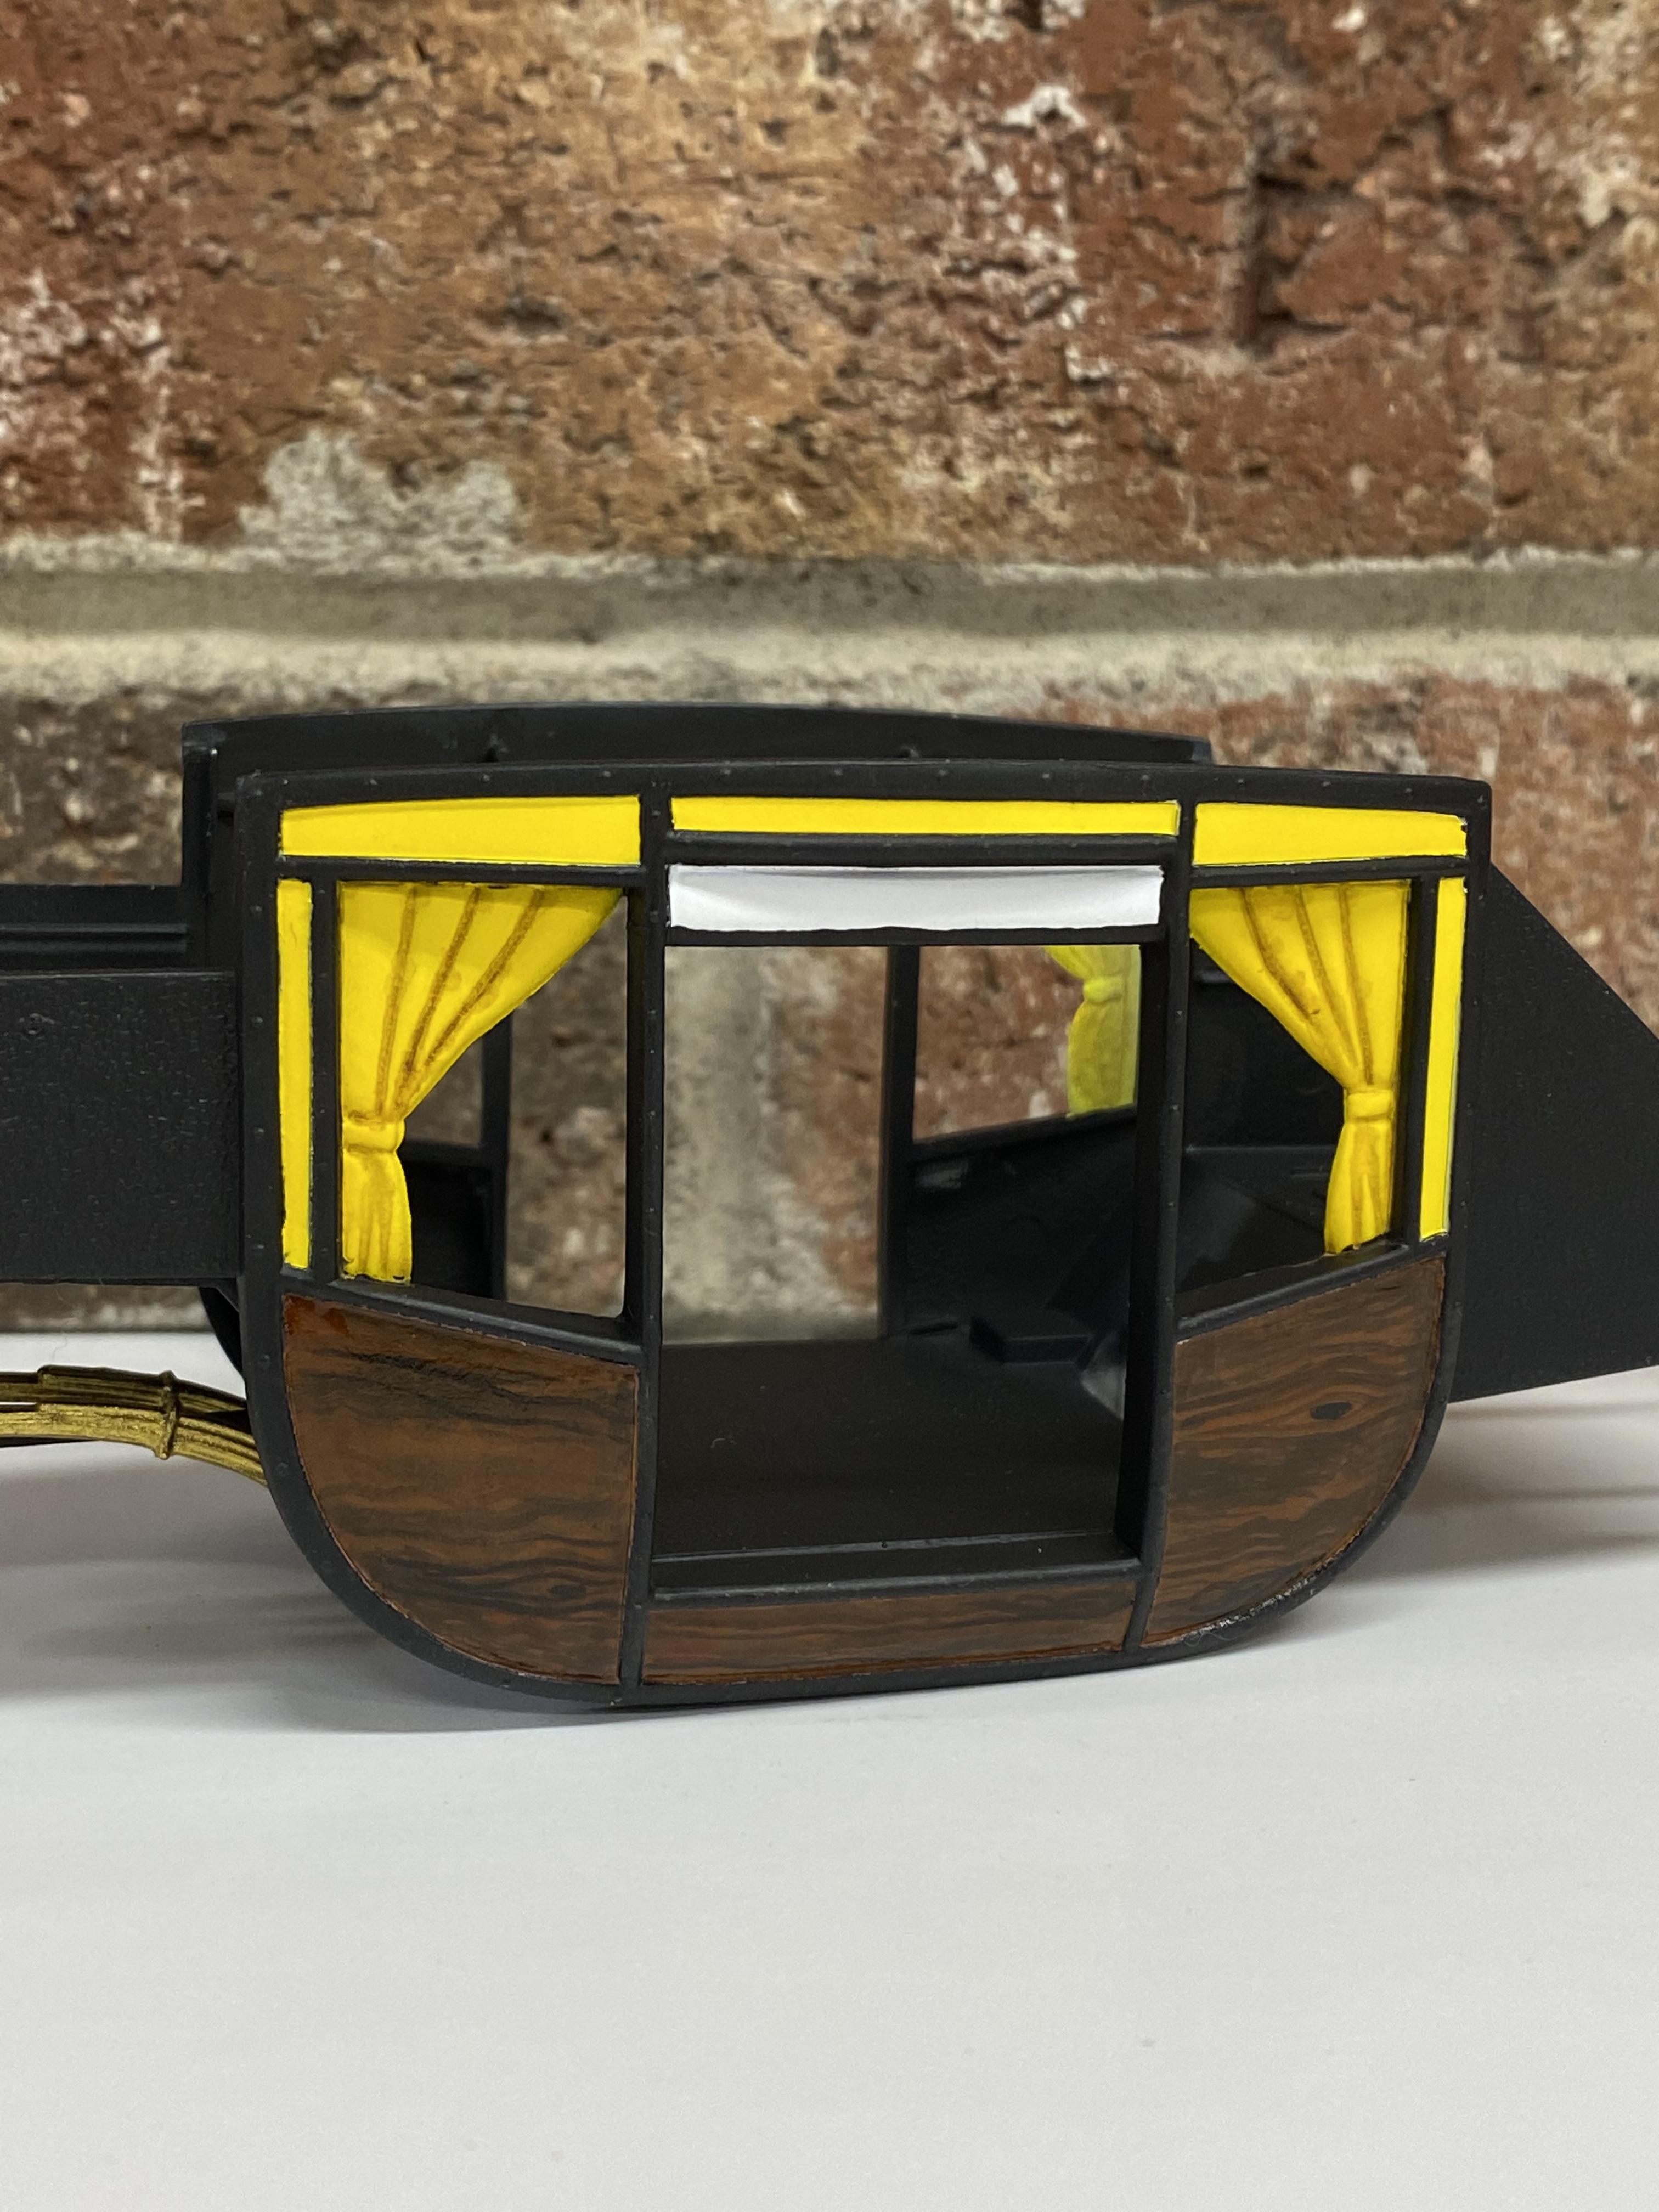
This is the early 2000’s release and has those doofy hollow Goodyear tires which aren’t correct to the actual car but who’s looking anyway…. I decided to make my life hard and paint darkest to light so I can have all the fun masking EVERYTHING. Once that was done I primed over the black areas and applied a light coat of white followed by yellow and brown in the corresponding spaces. After that cured I added some brown wash in the creases of the curtains and hand painted woodgrain on the lower panels. (Not my best woodgrain technique but it’ll suffice) After the woodgrain I applied a layer of transparent orange over it to give it more of a finished wood look adding some depth and slightly darkening it. I haven’t been taking many photos as I’ve been building but there will be more the come soon. Thanks for looking.

-
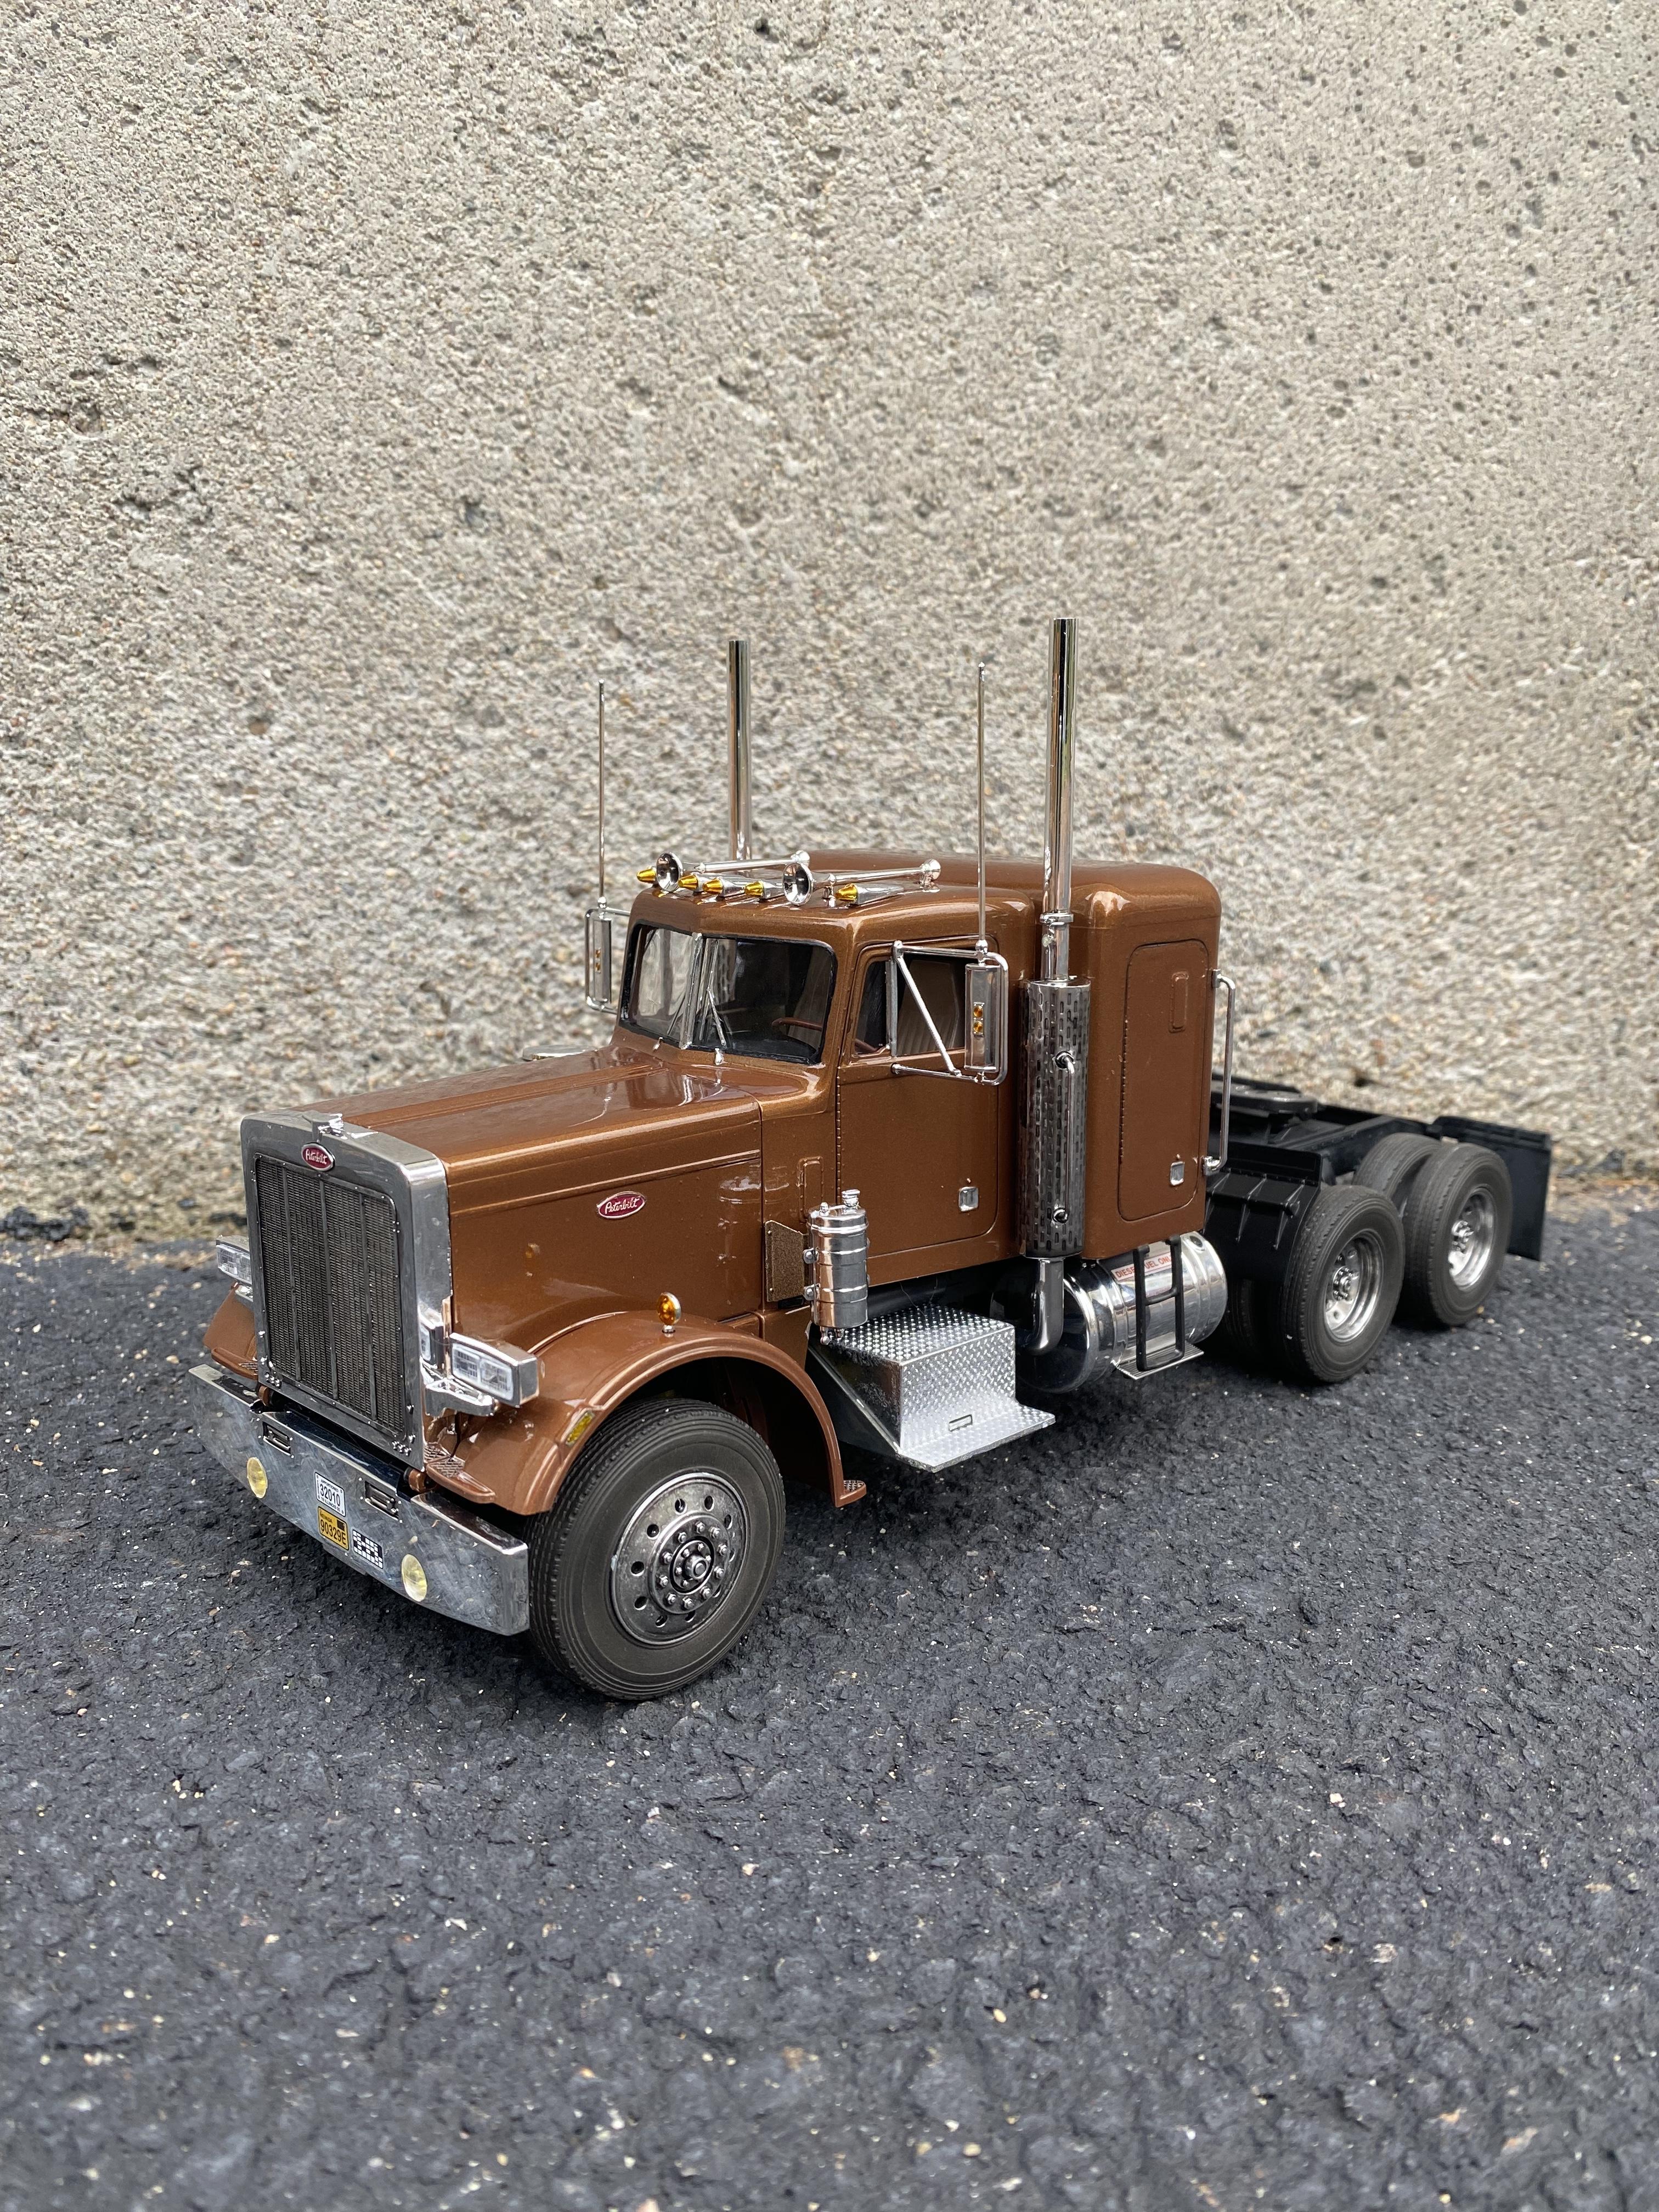
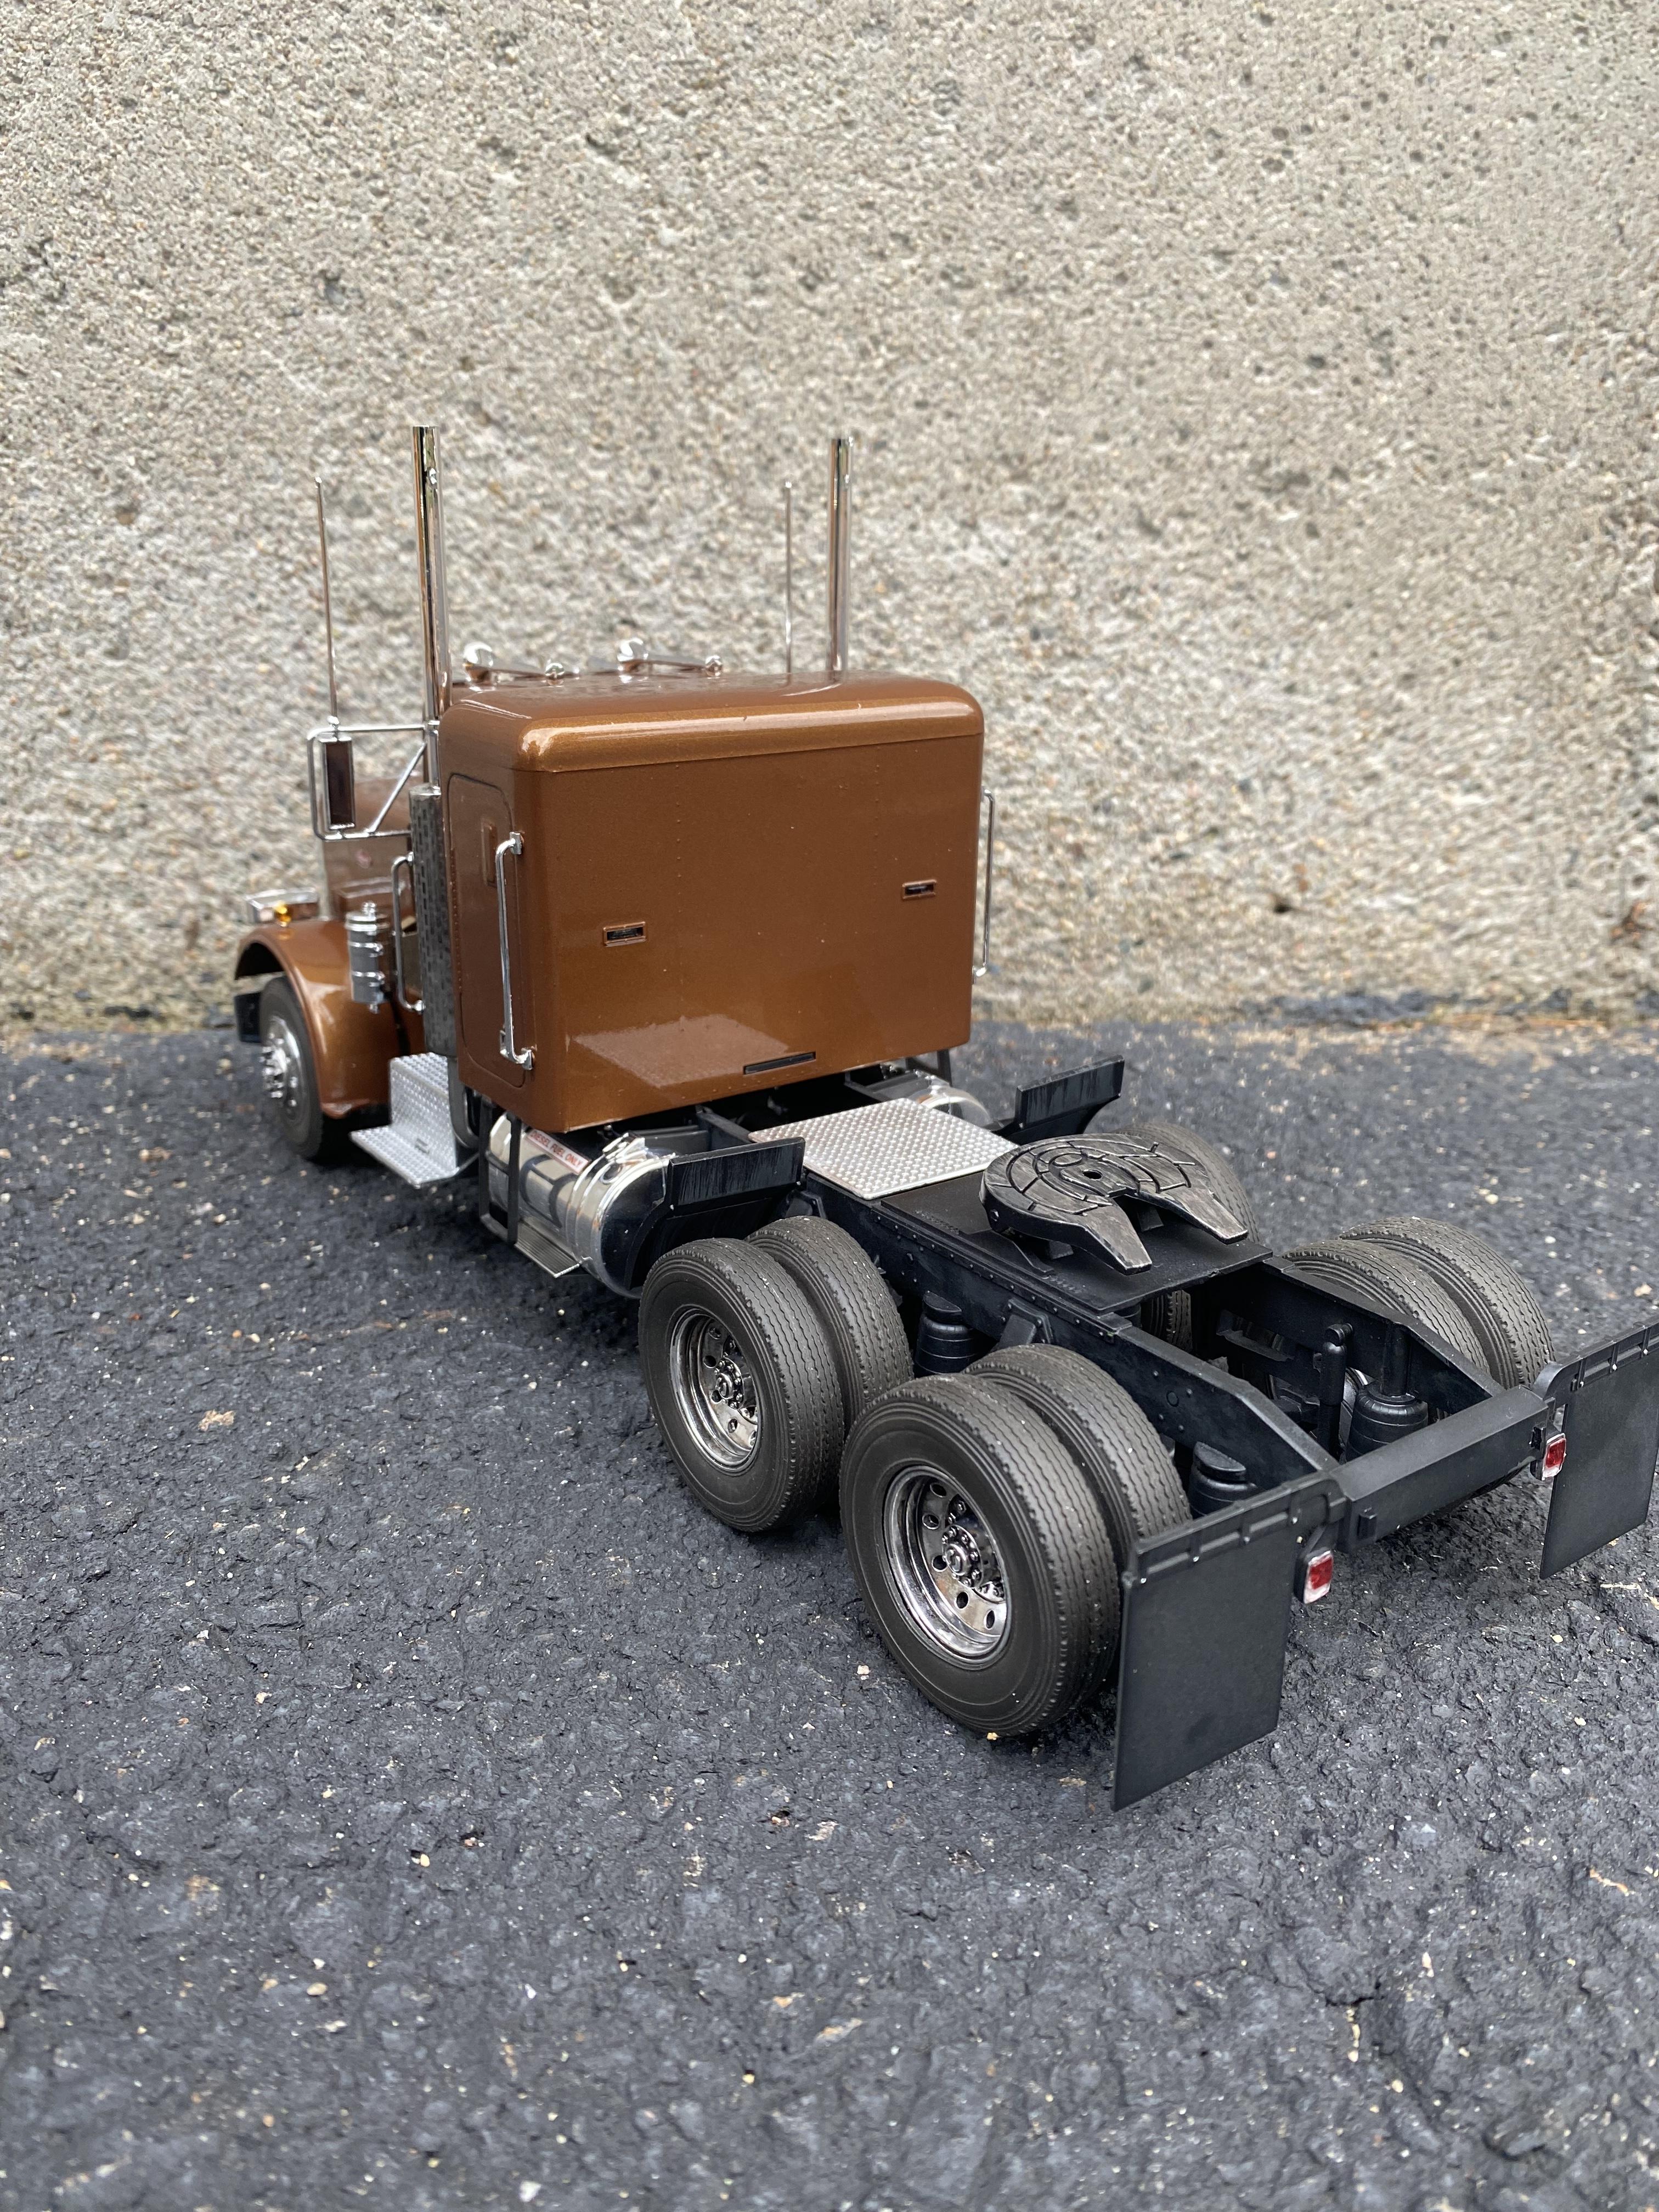
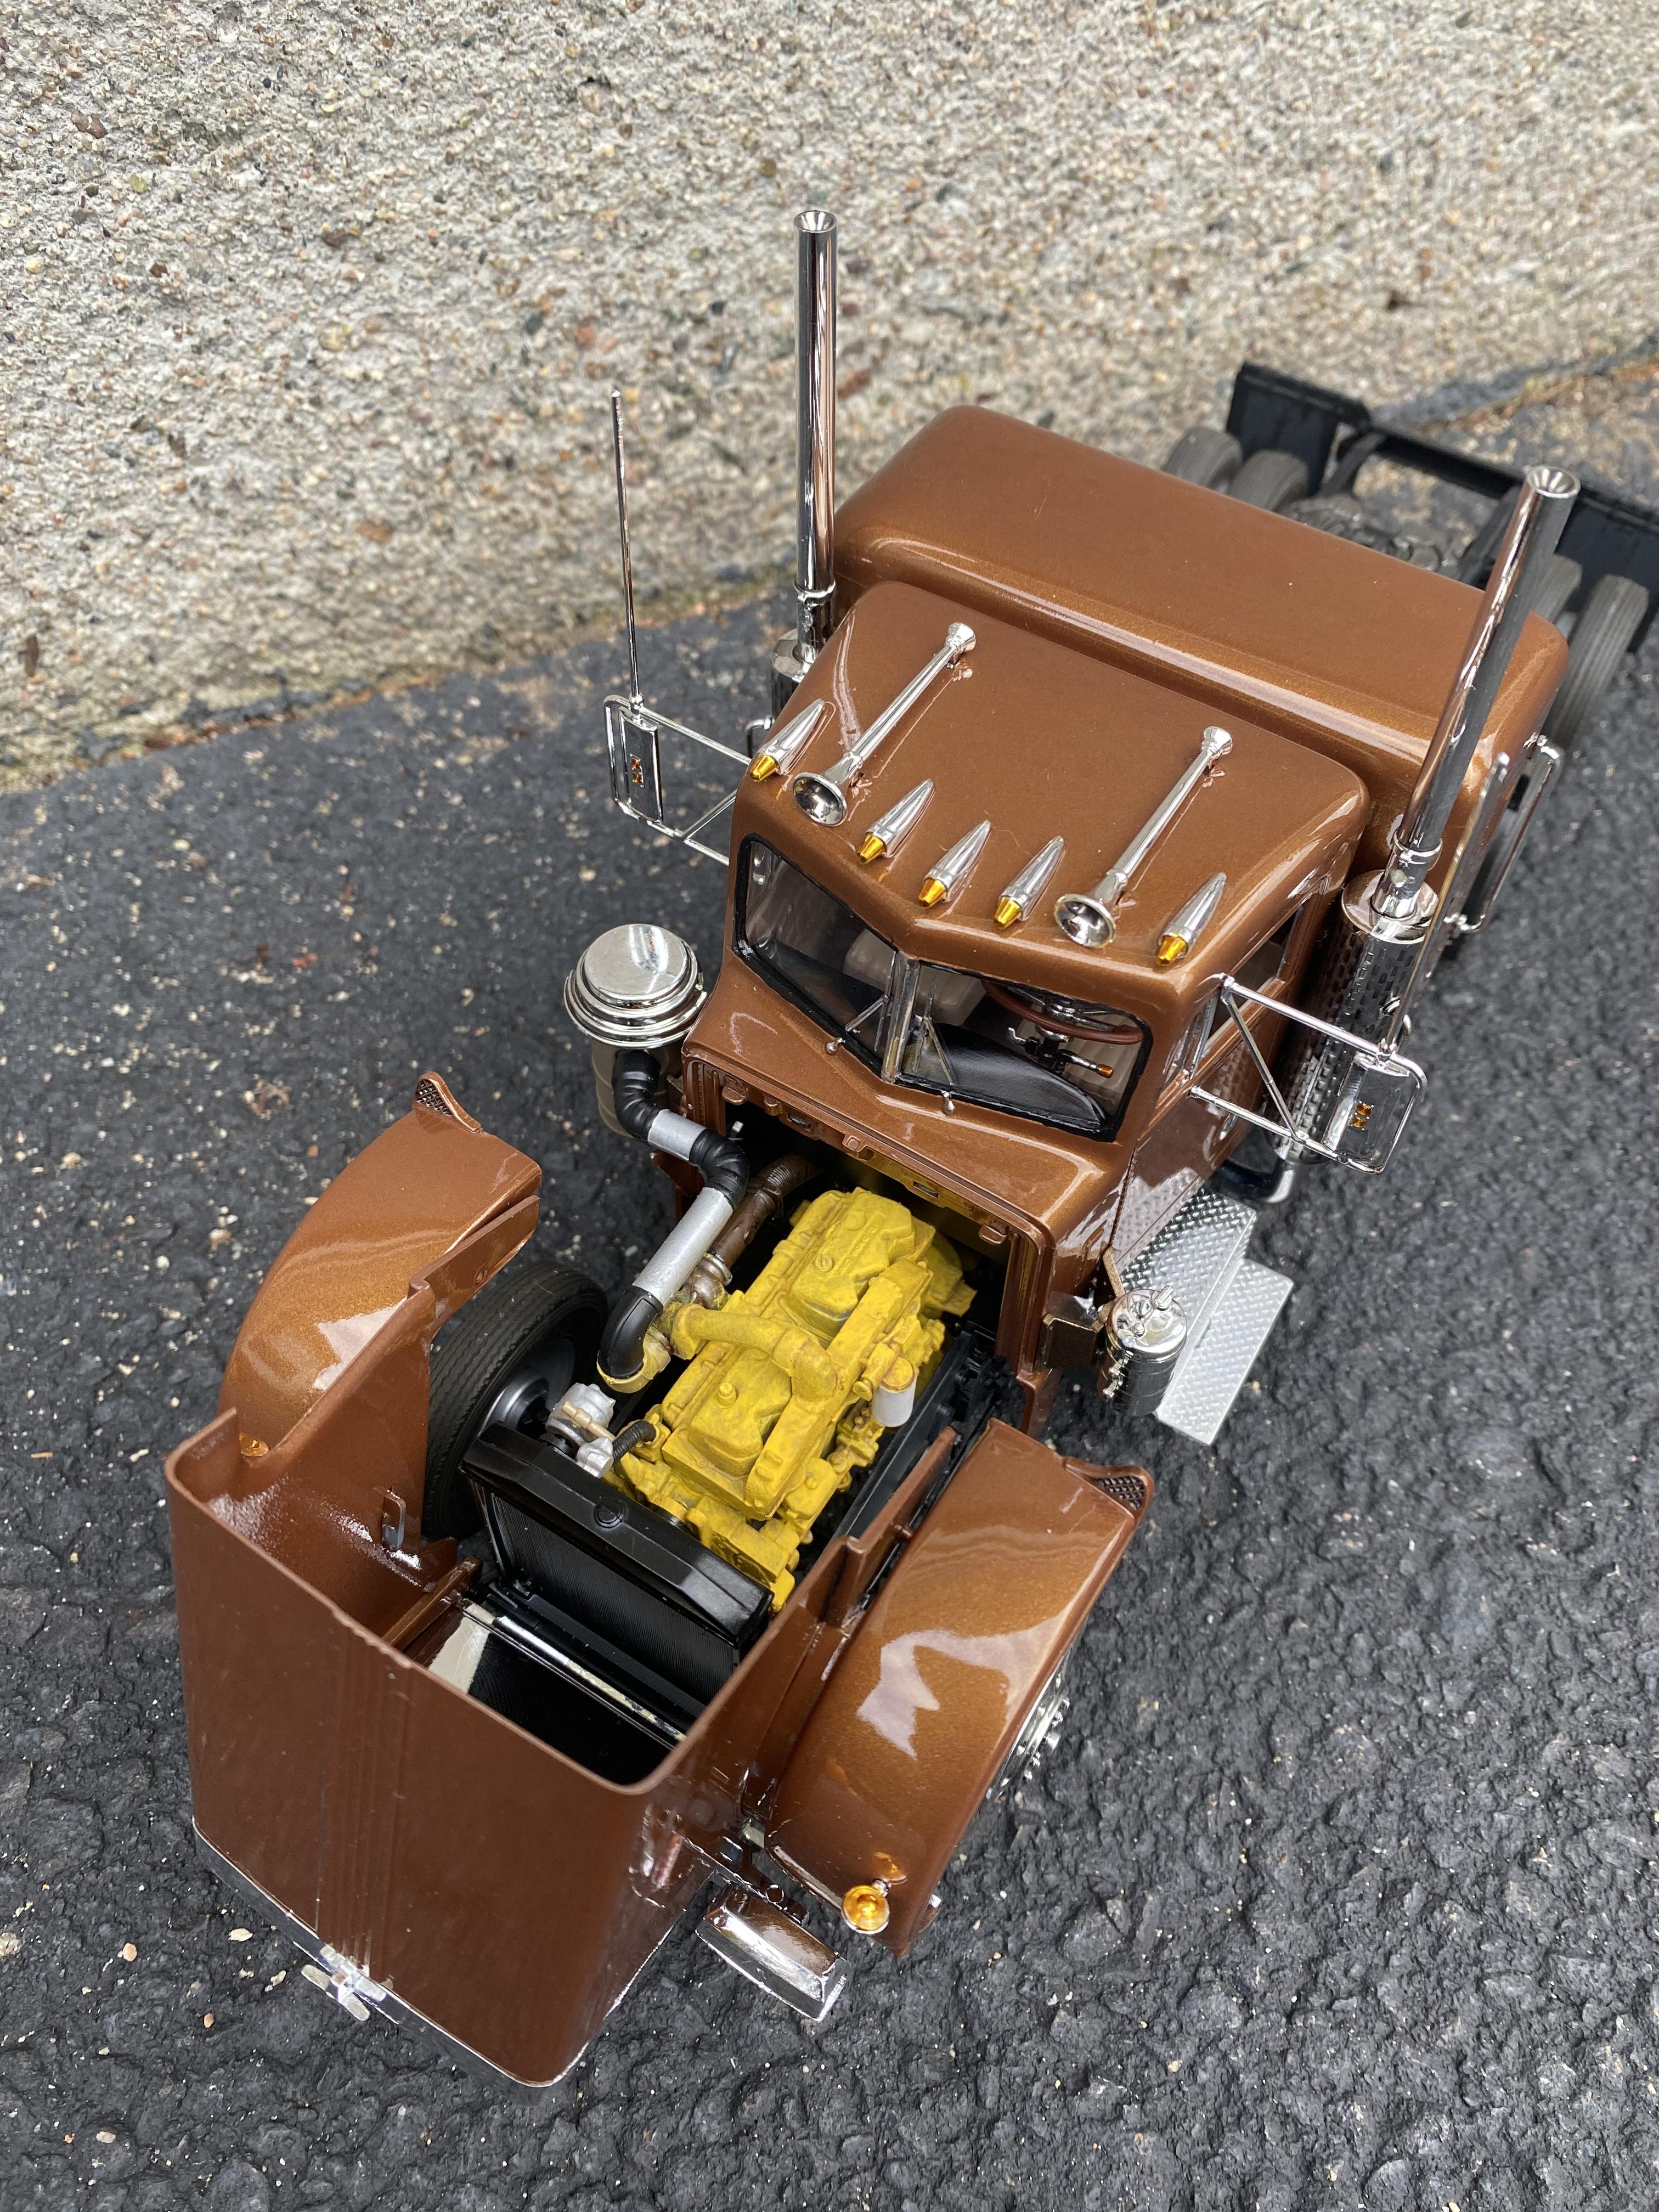
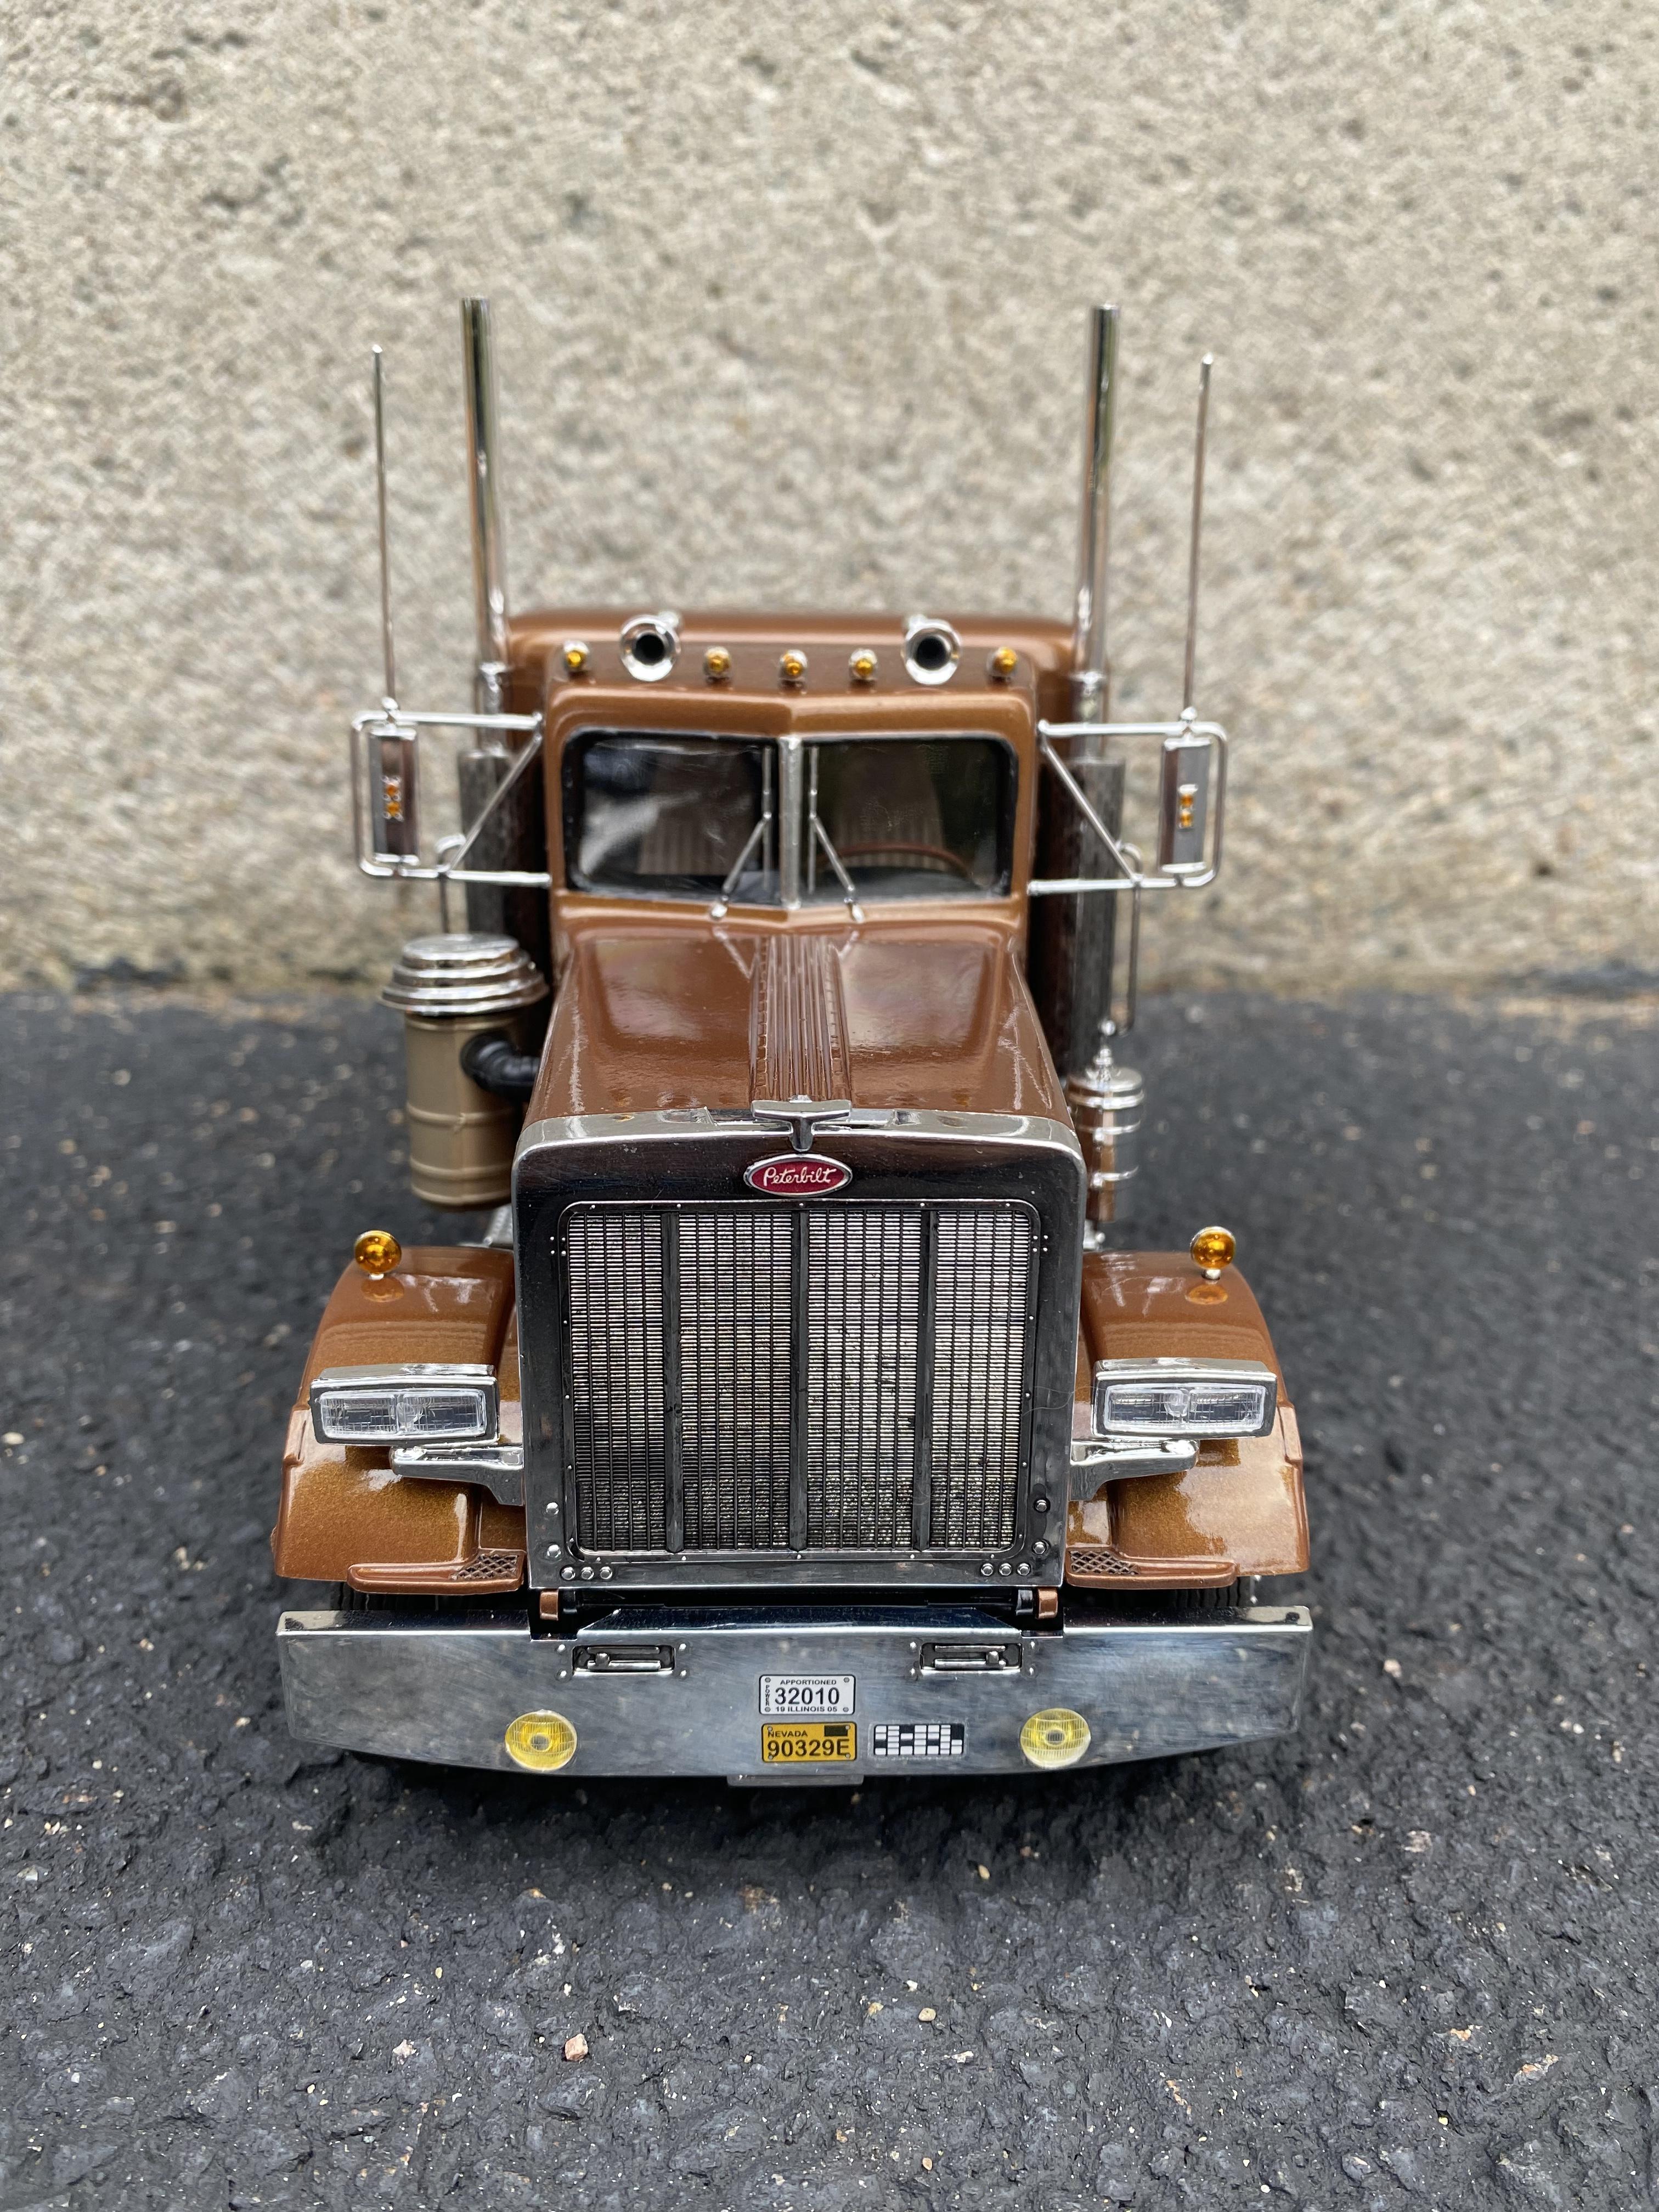
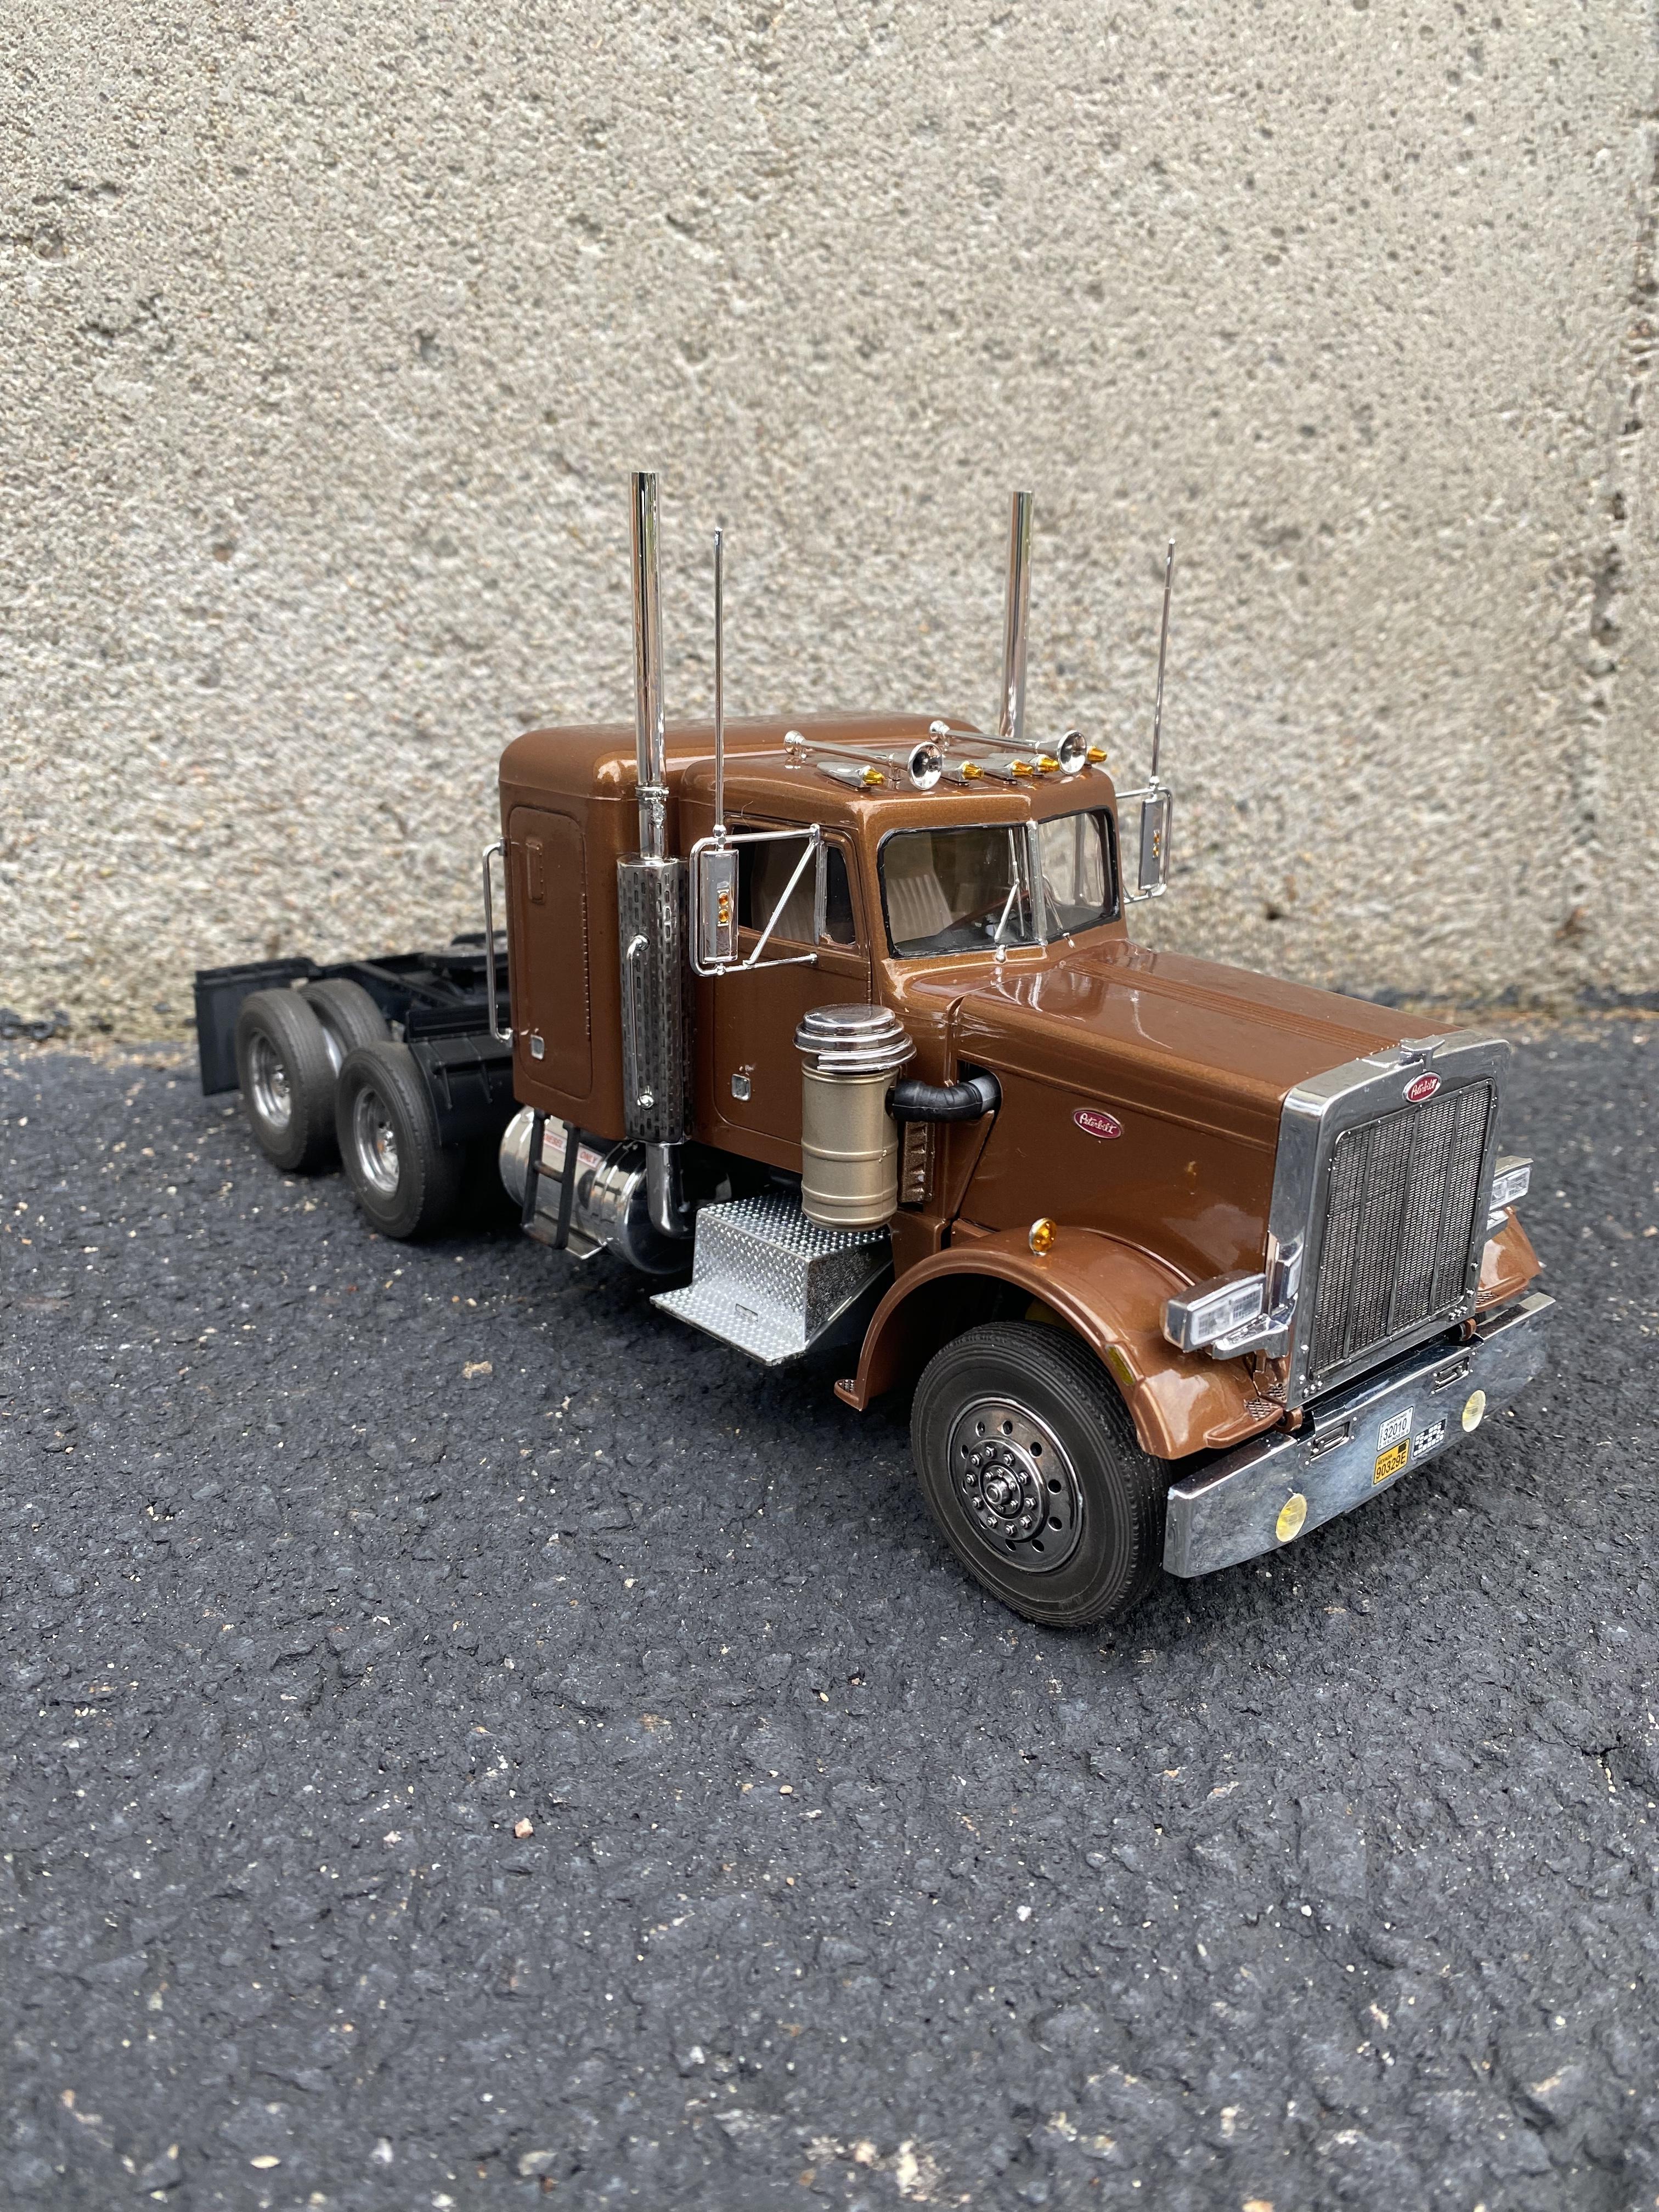
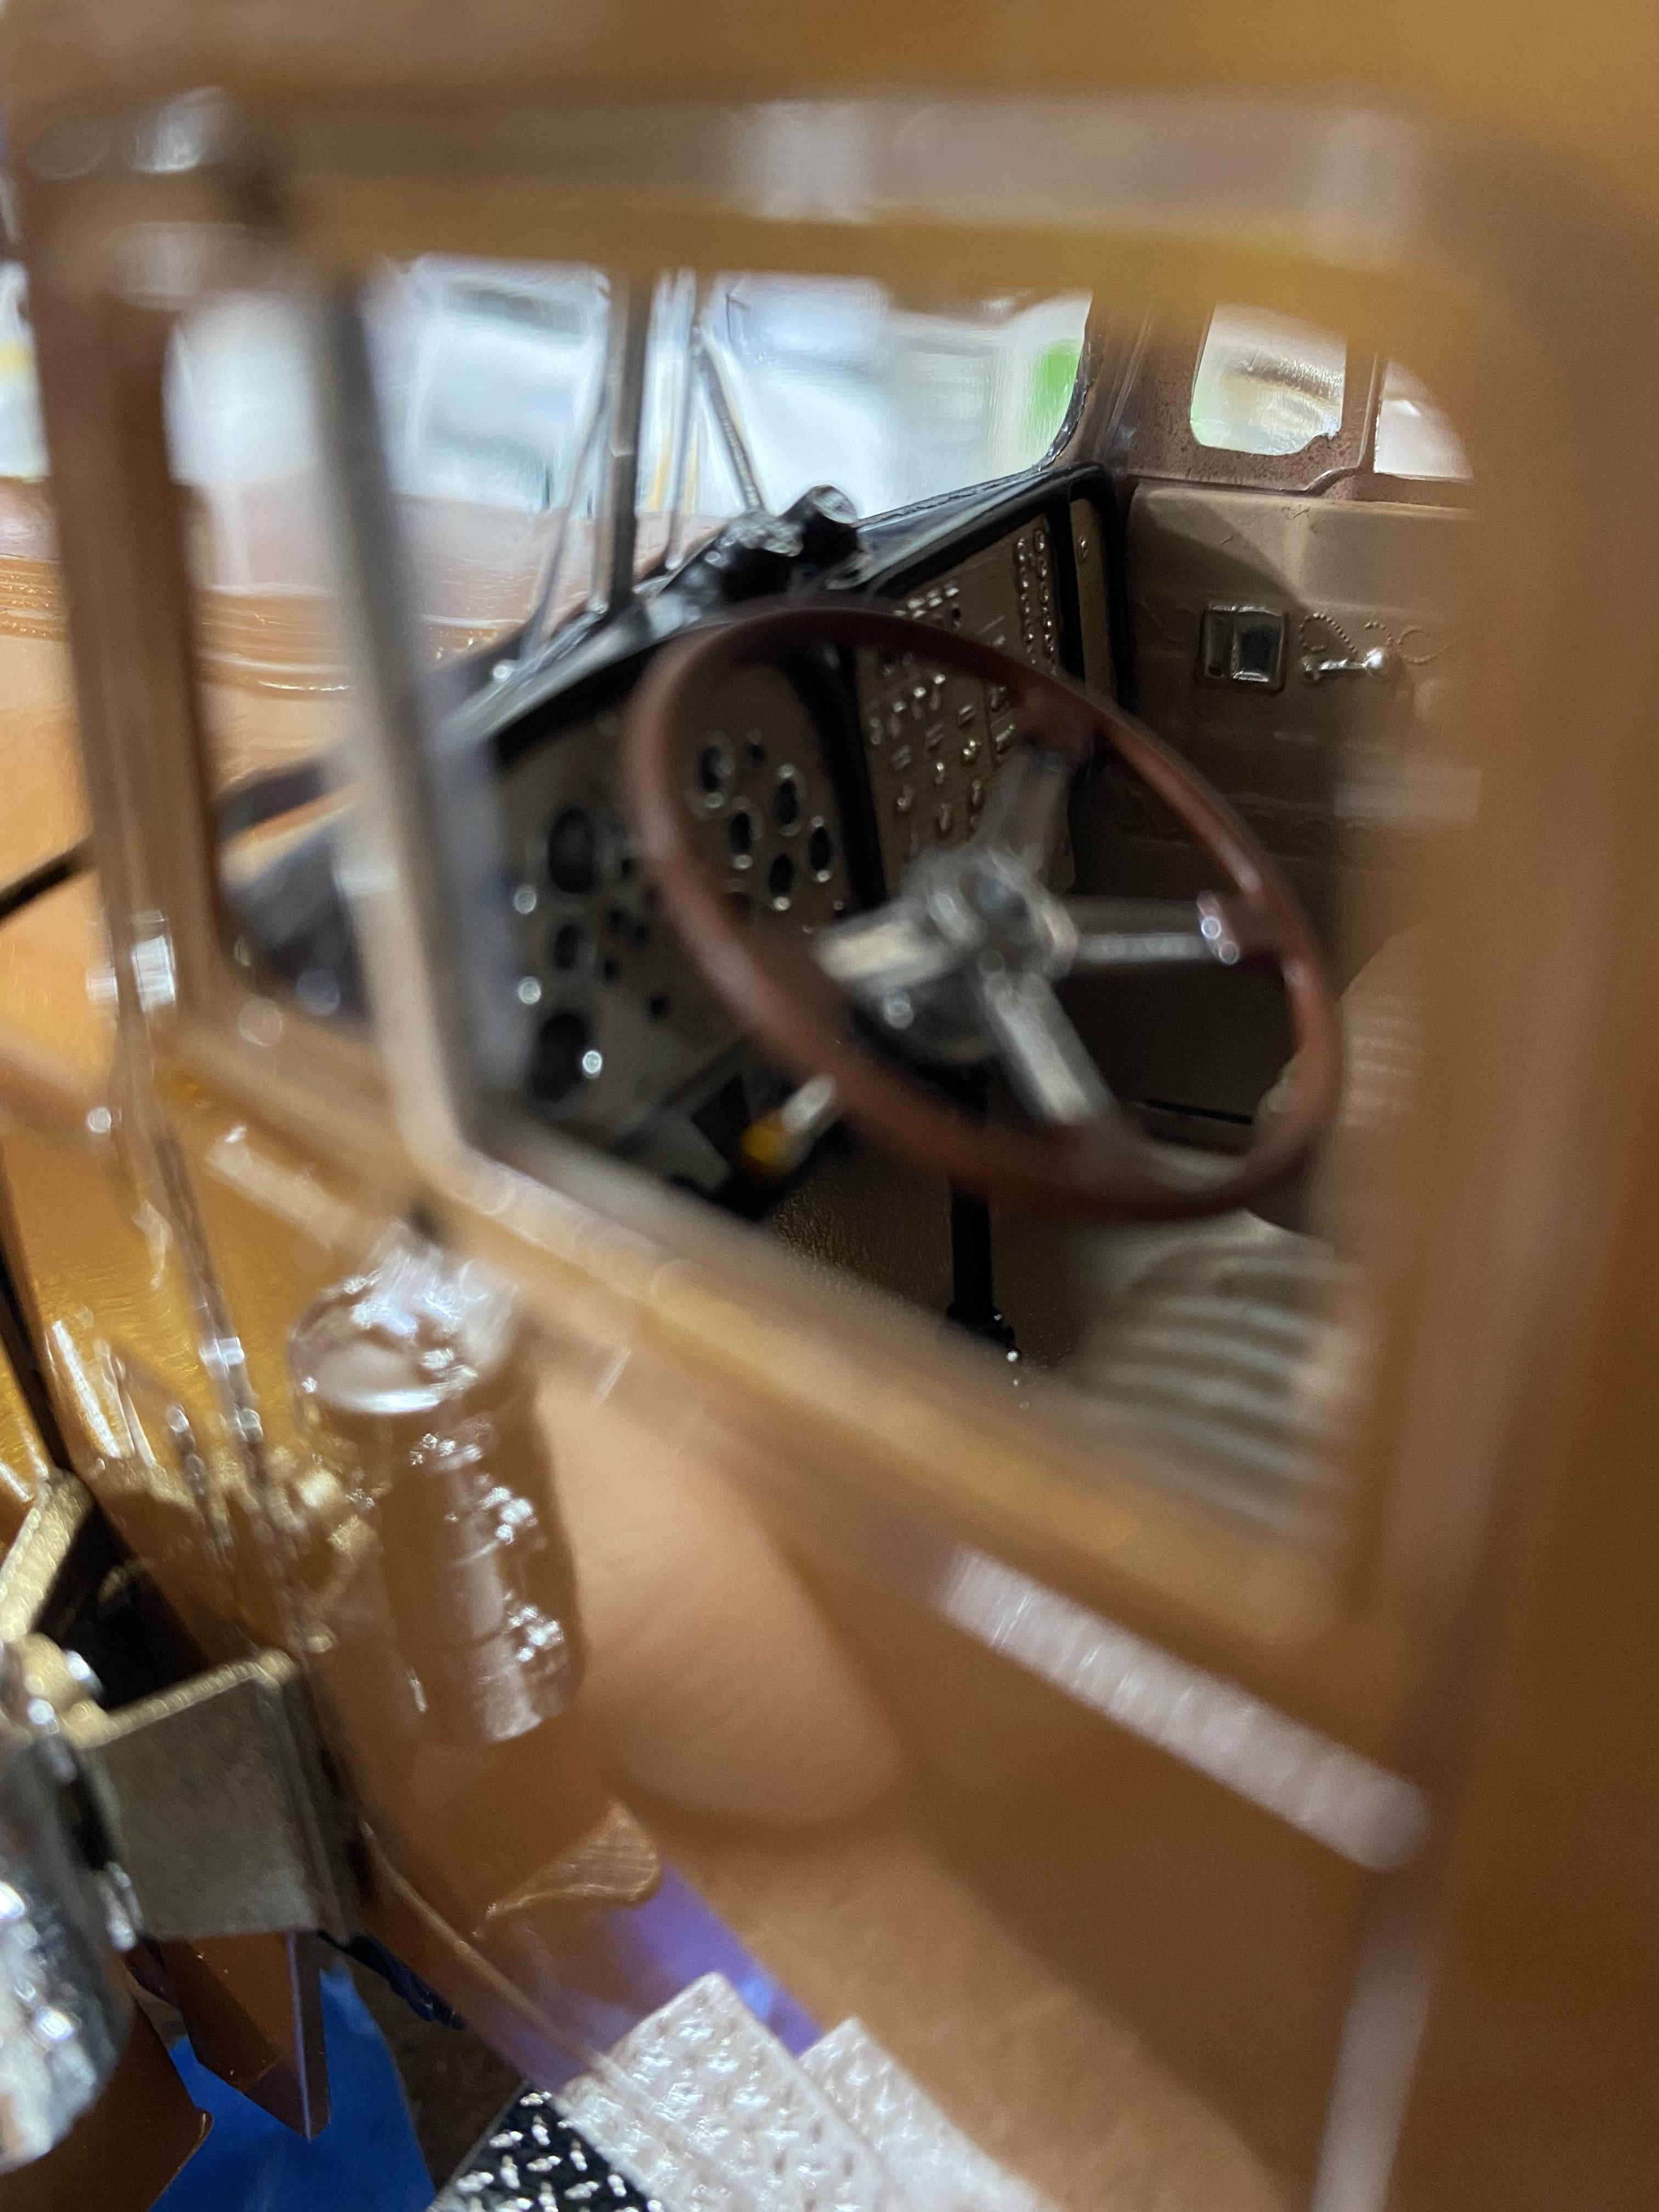
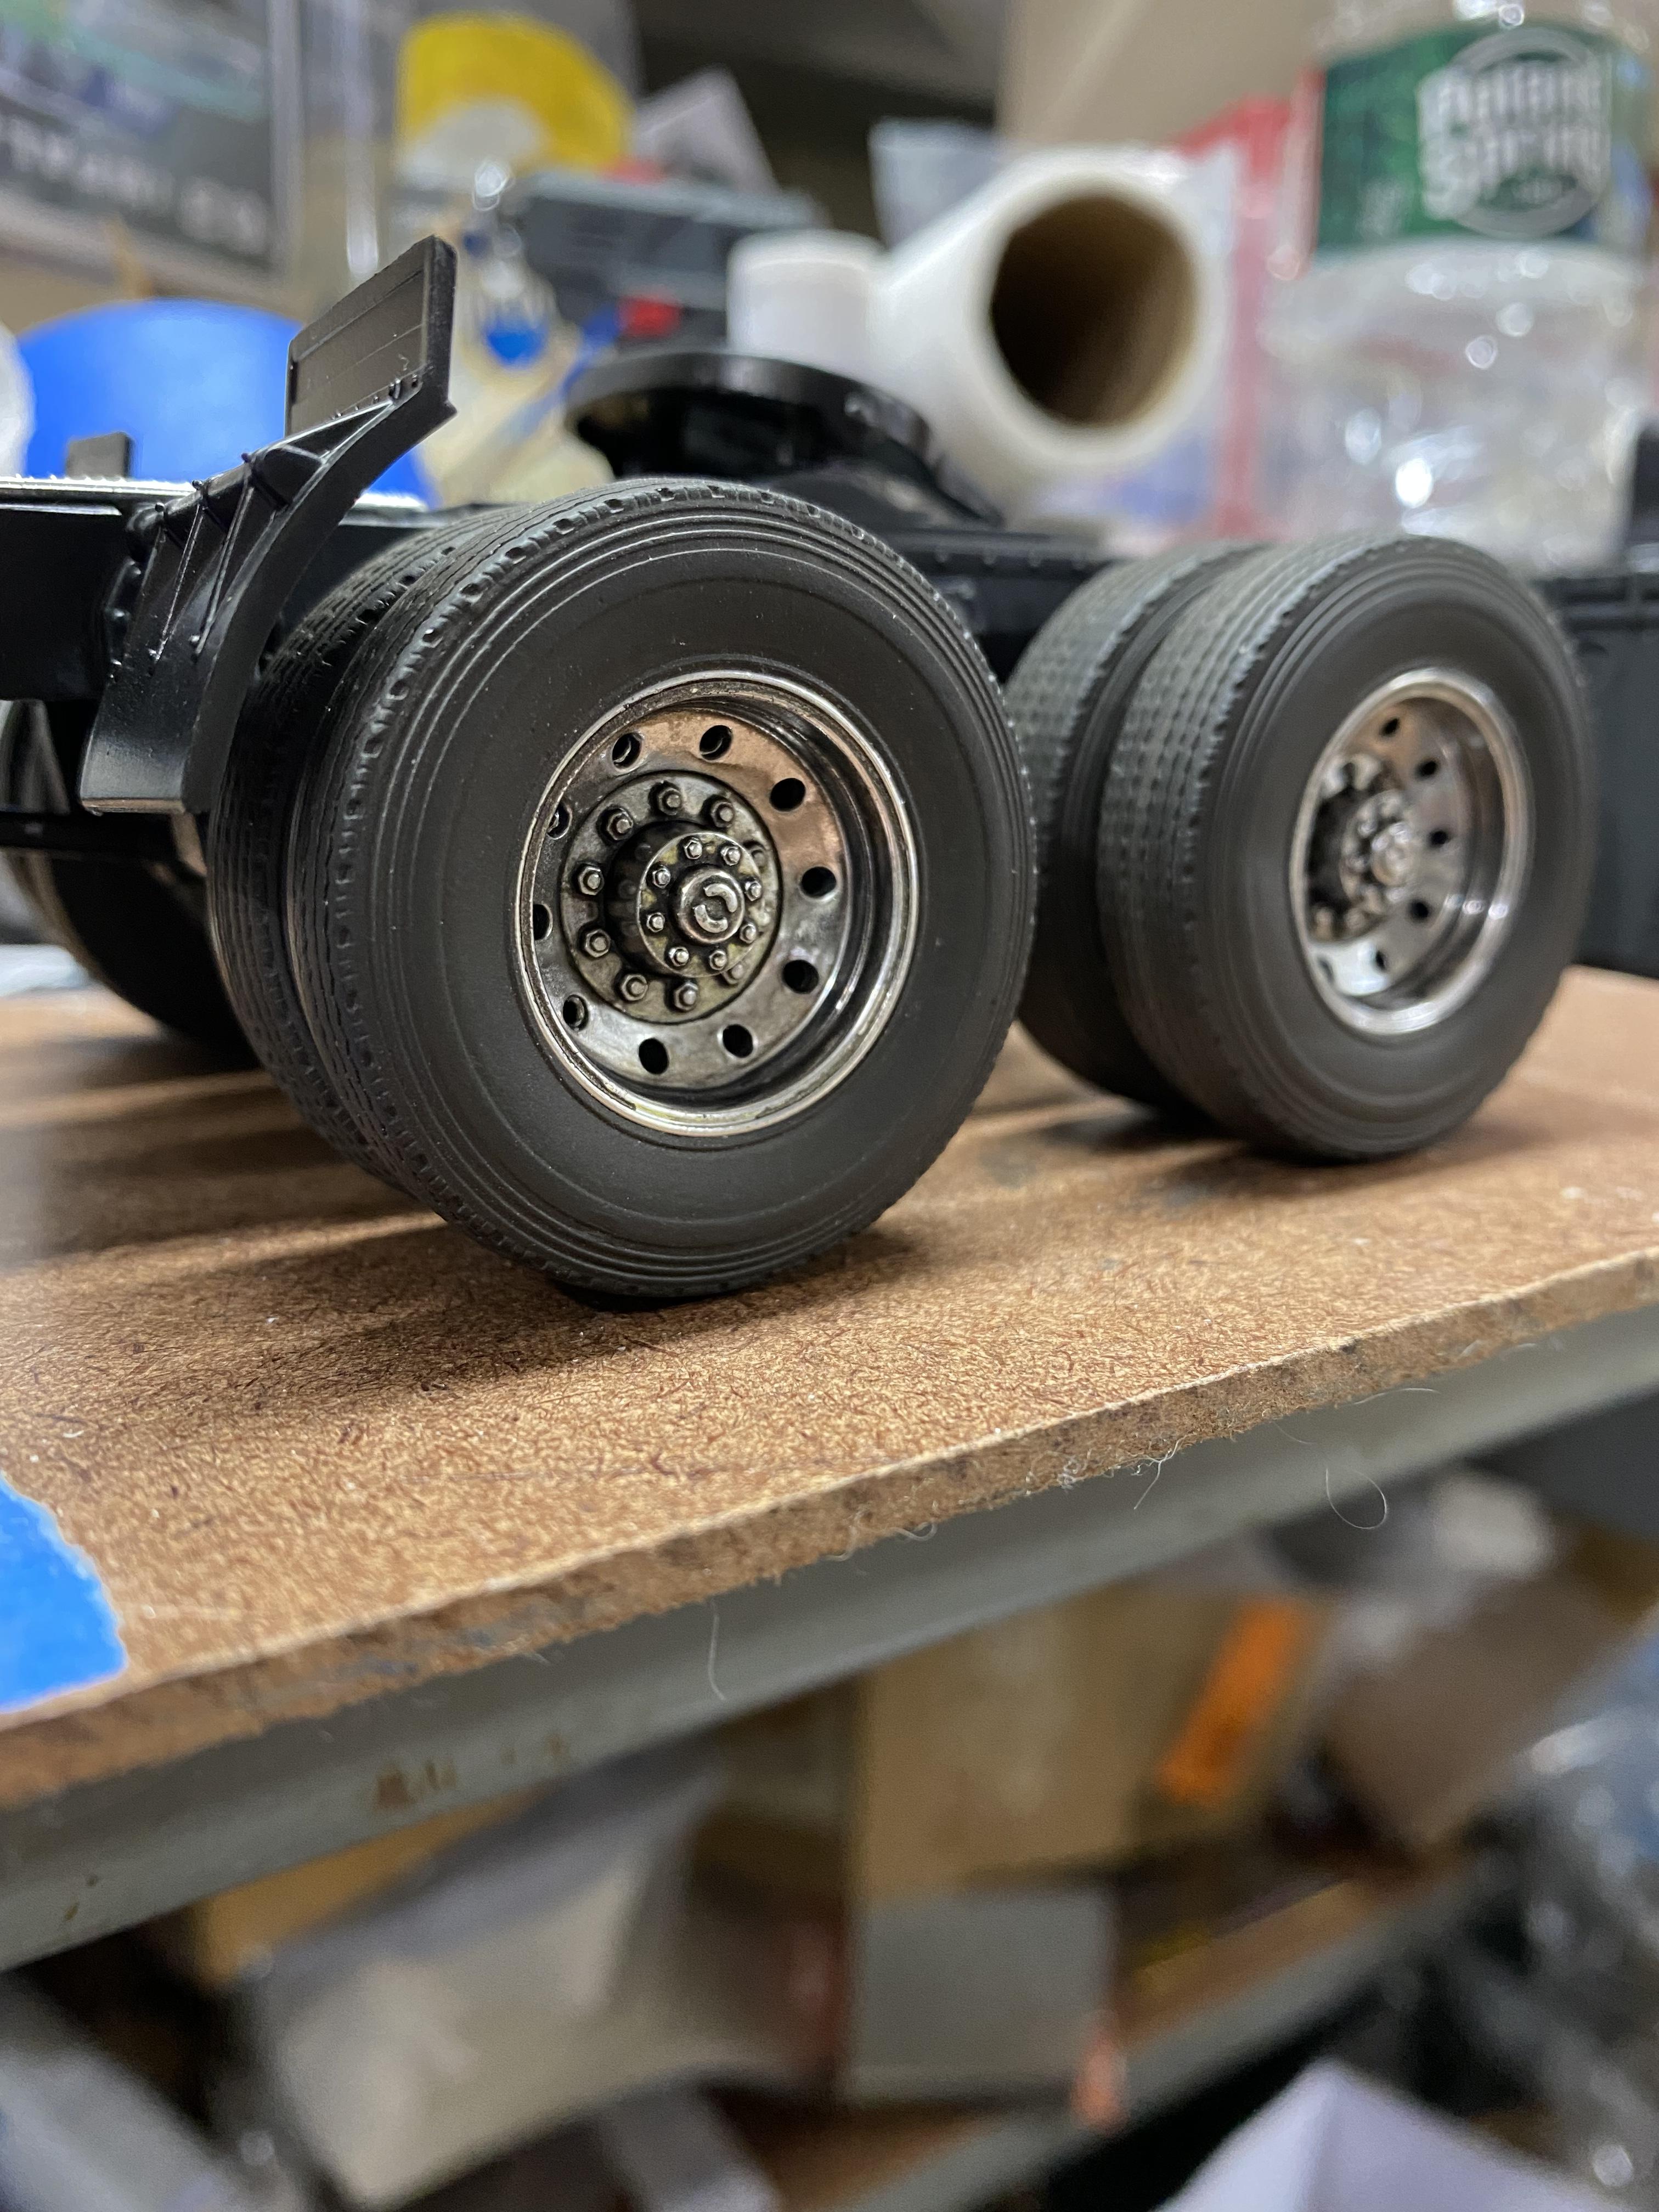
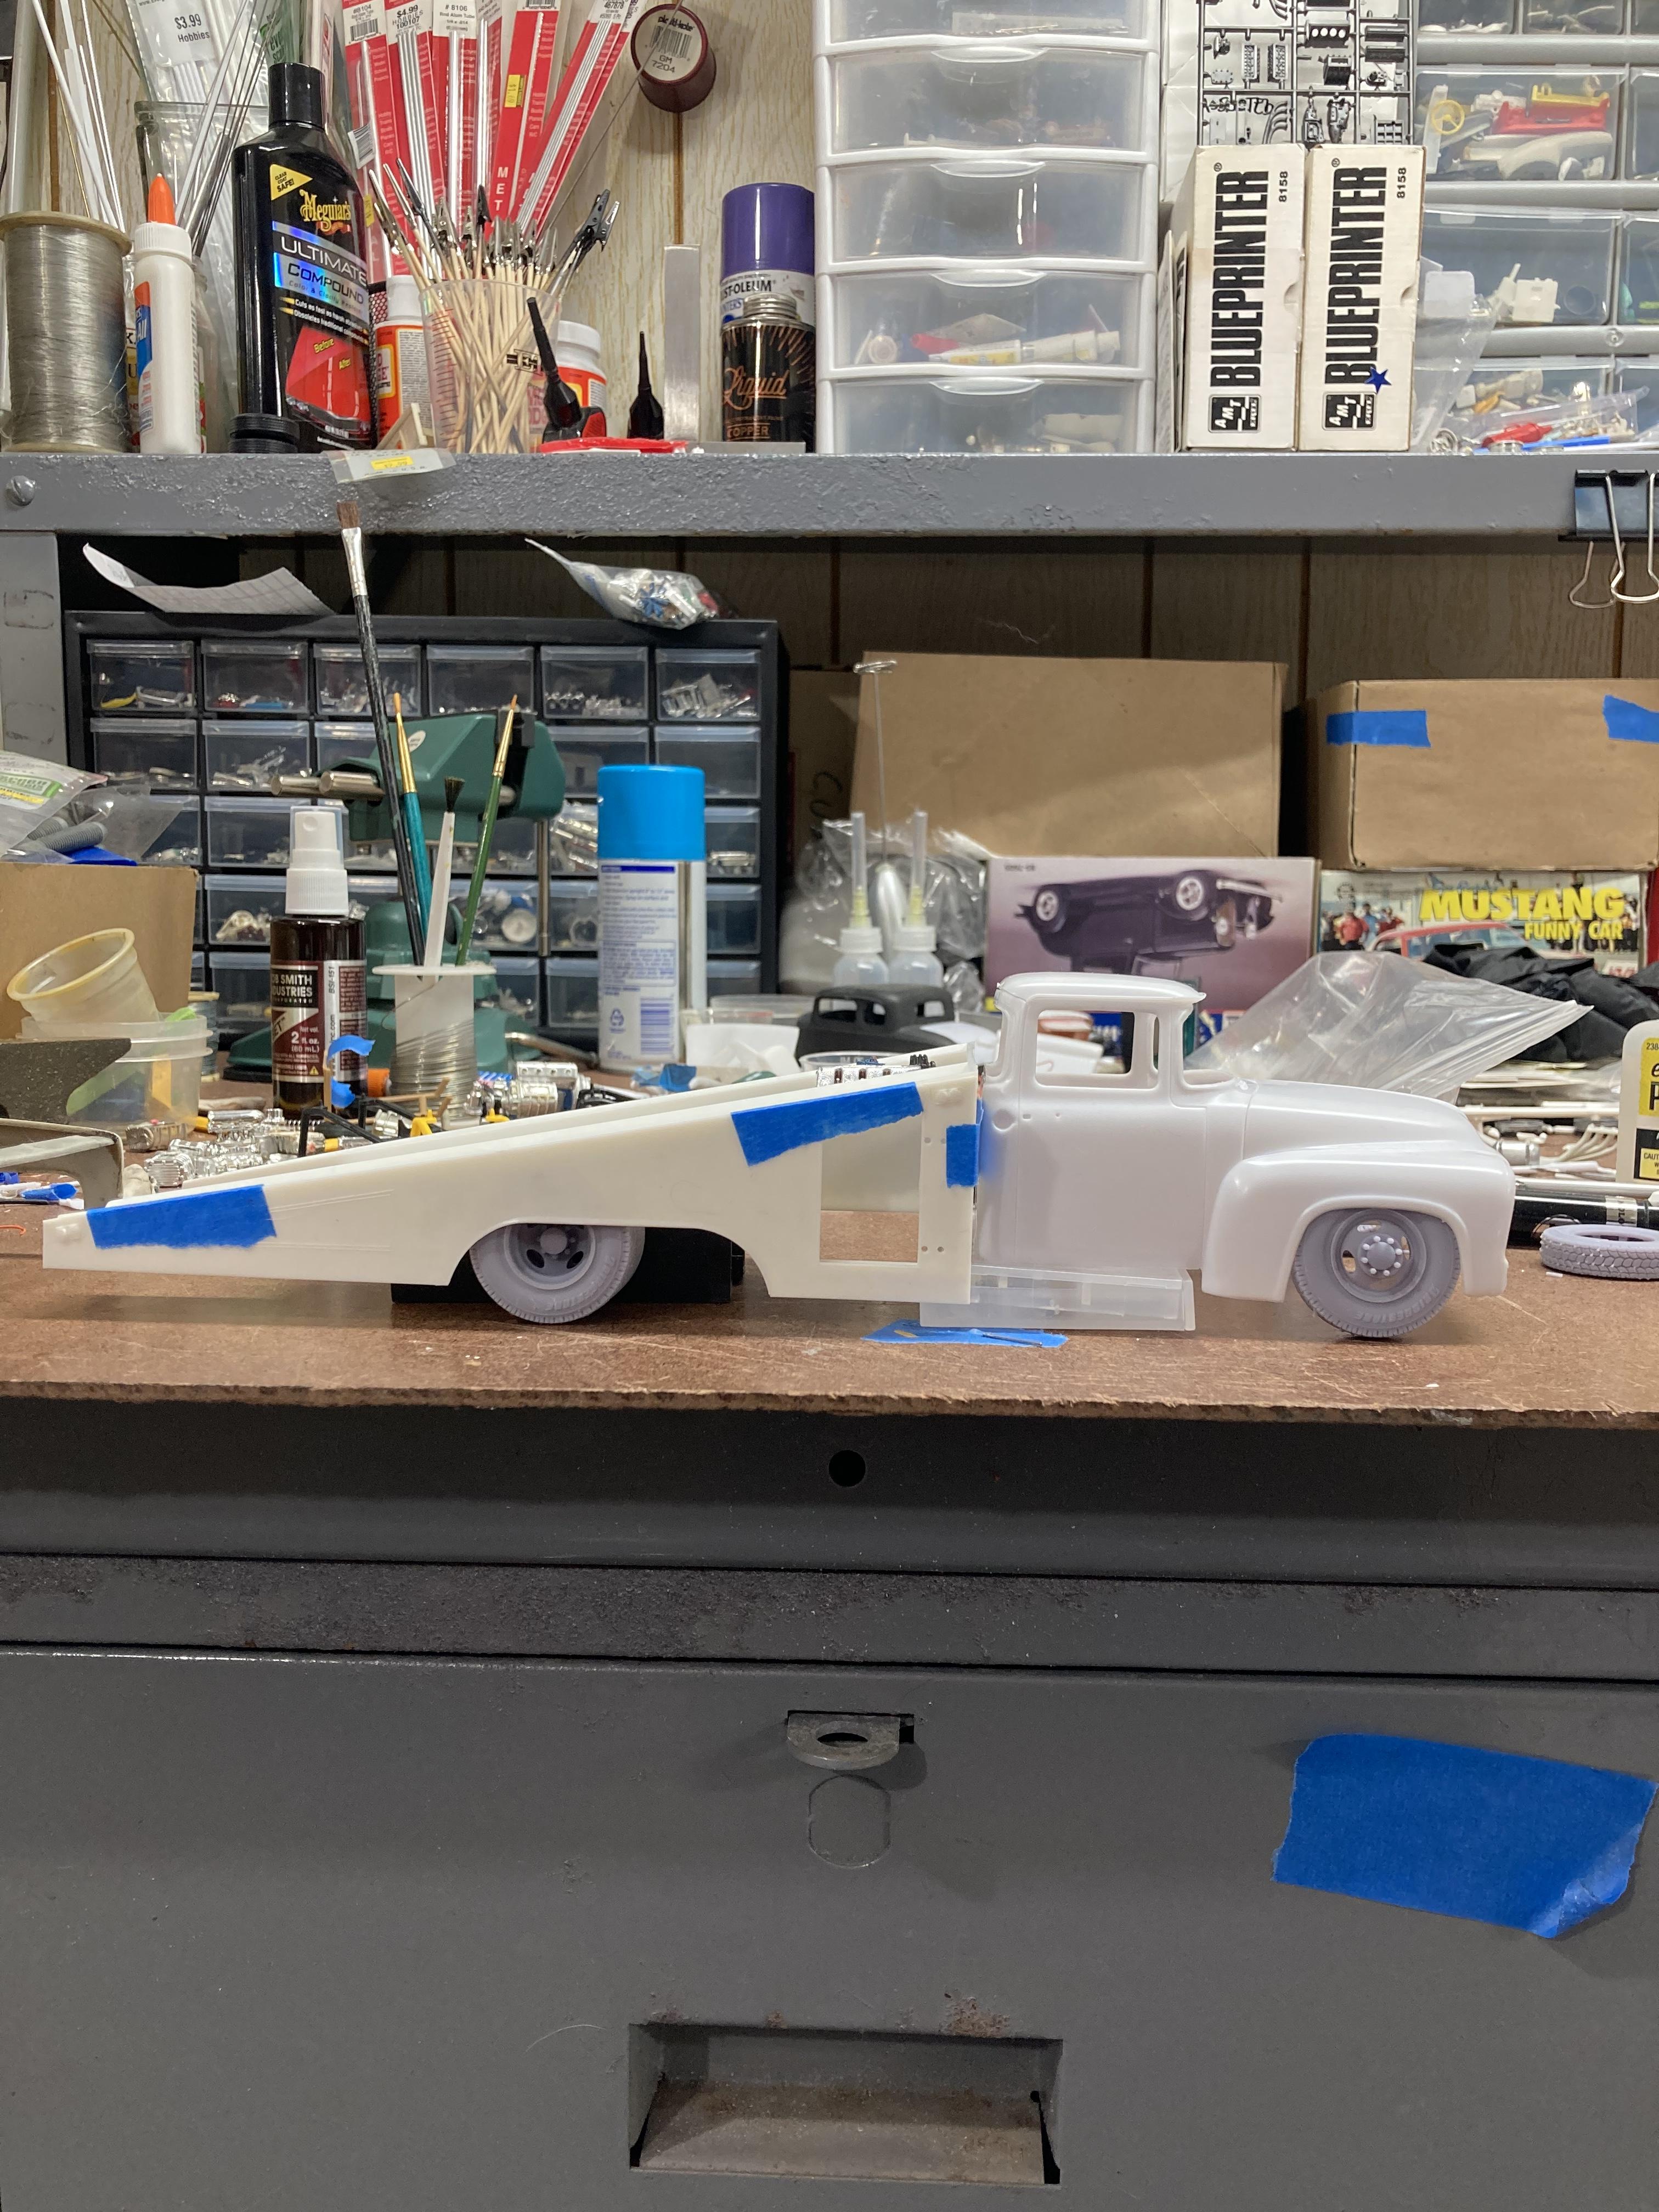
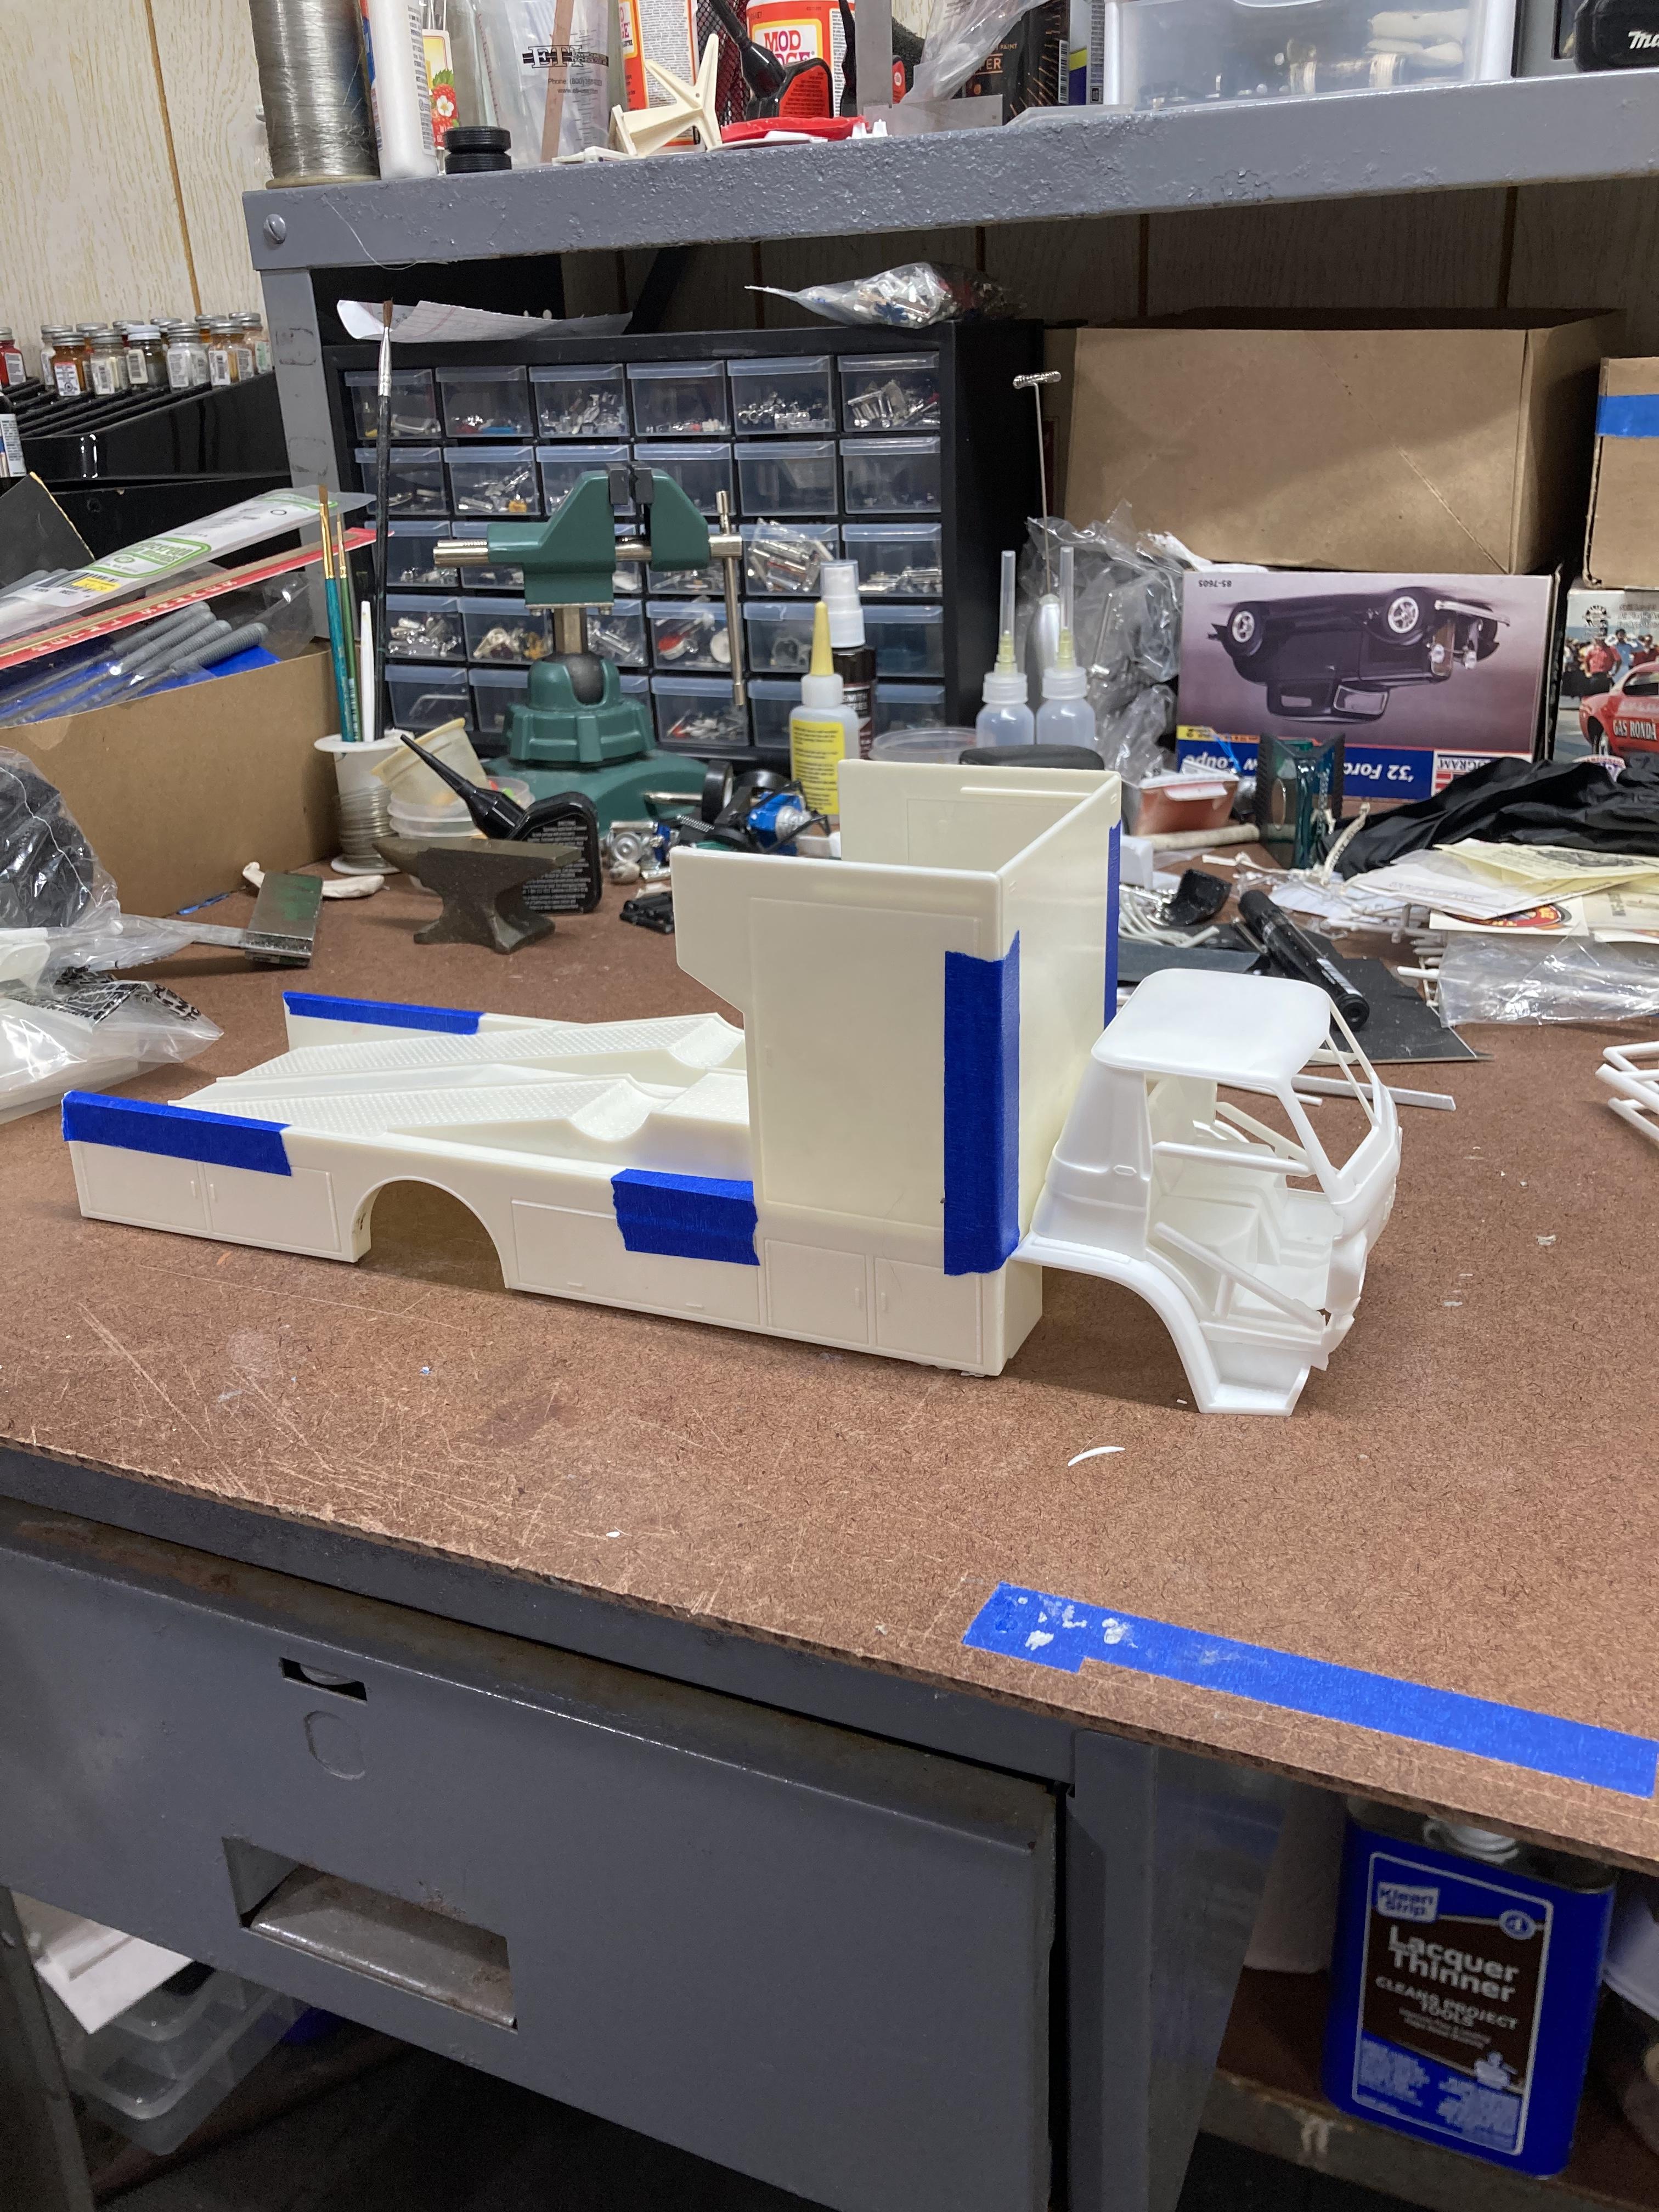
This was a first for me as I’ve never built a big rig before. I figured I’d start with one of the simplest kits available before I start any of the more elaborate trucks I have. Also, I was in a slump for a while and hadn’t been building so this was good to get the juices flowing again. The paint is a custom mix of gold and two browns with an automotive 1K clear coat. The engine has a base coat of khaki with yellow craft paint splotched on and some light washes of browns to make it look mildly weathered. The chassis is rattle can semi gloss with no primer so if would react to the plastic a little bit to give it a lightly weathered look/texture. The interior is a custom mix of browns with white that I probably could’ve used an existing color to achieve but was too stubborn to use what I have on the shelf. Most of the chrome was dulled down with light sprays of Alclad chrome and washes of Tamiya black panel line paint. I sand blasted the tires and lightly scuffed the tread with 320 sandpaper. (the interior shot isn’t the greatest photo but it’ll do) My personal opinion of the kit, very simple but super wonky in some aspects. The cab doesn’t fit well to the chassis, it sits too high in a couple spots. The locators aren’t hidden at all, they stick out through slots around the cab. Worst of all are the deformed tires that don’t want to stay on the wheels even with super glue on the bead. They’re unevenly formed from one side to the other. Aside from that, the detail is okay and it goes together pretty well. I’m not aiming for show quality by any means with this, just something to look good on the shelf with the car hauler attached to it…once that’s done. Thanks for looking.
-
Hot Rod Hauler
Tarkmucker replied to Tarkmucker's topic in WIP: Model Trucks: Pickups, Vans, SUVs, Light Commercial
I haven’t been on here since February but I think we’re nearing the time to put this back in rotation. Once I finish the current kit on the bench this will be revisited. -
Quick mail call. It’ll be a bit before I get to these but I’d rather get them at a decent price now.
- 35,997 replies
-
- 3
-

-
- johan
- glue bombs
- (and 1 more)
-
The plate from inside the microwave and/or all the lightbulbs in the house
-
78 Bronco (LRB)
Tarkmucker replied to Tarkmucker's topic in WIP: Model Trucks: Pickups, Vans, SUVs, Light Commercial
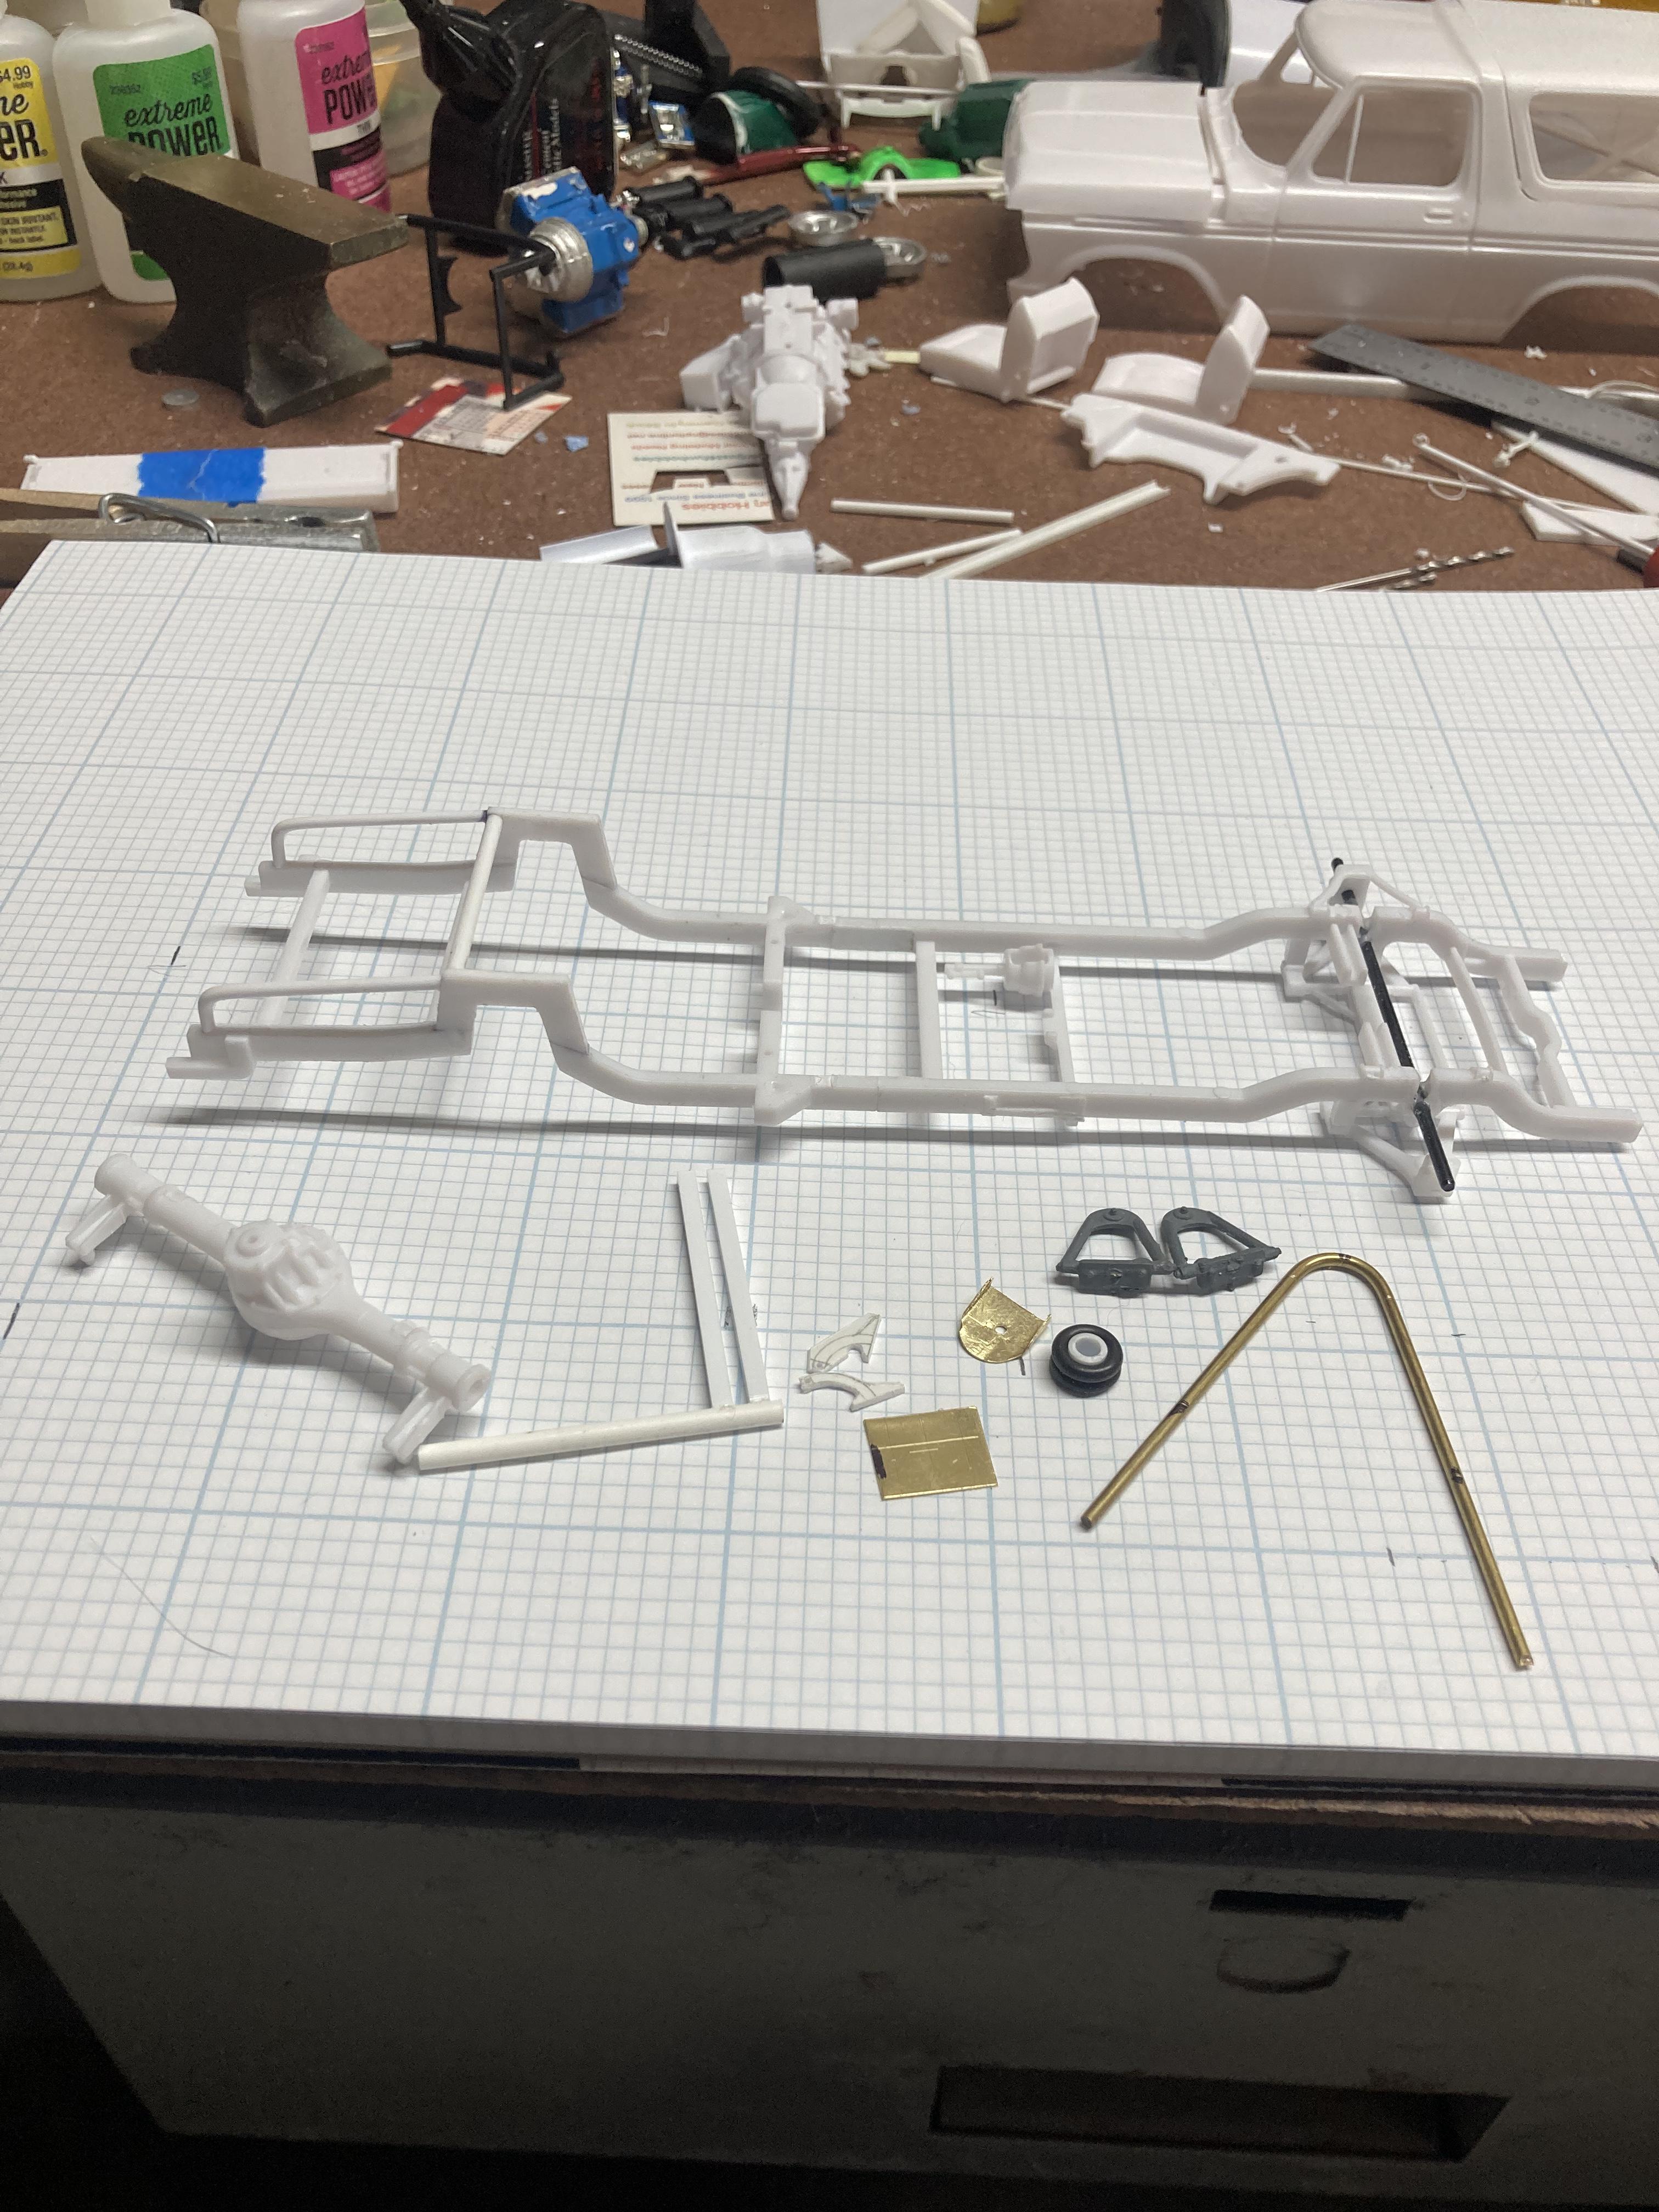
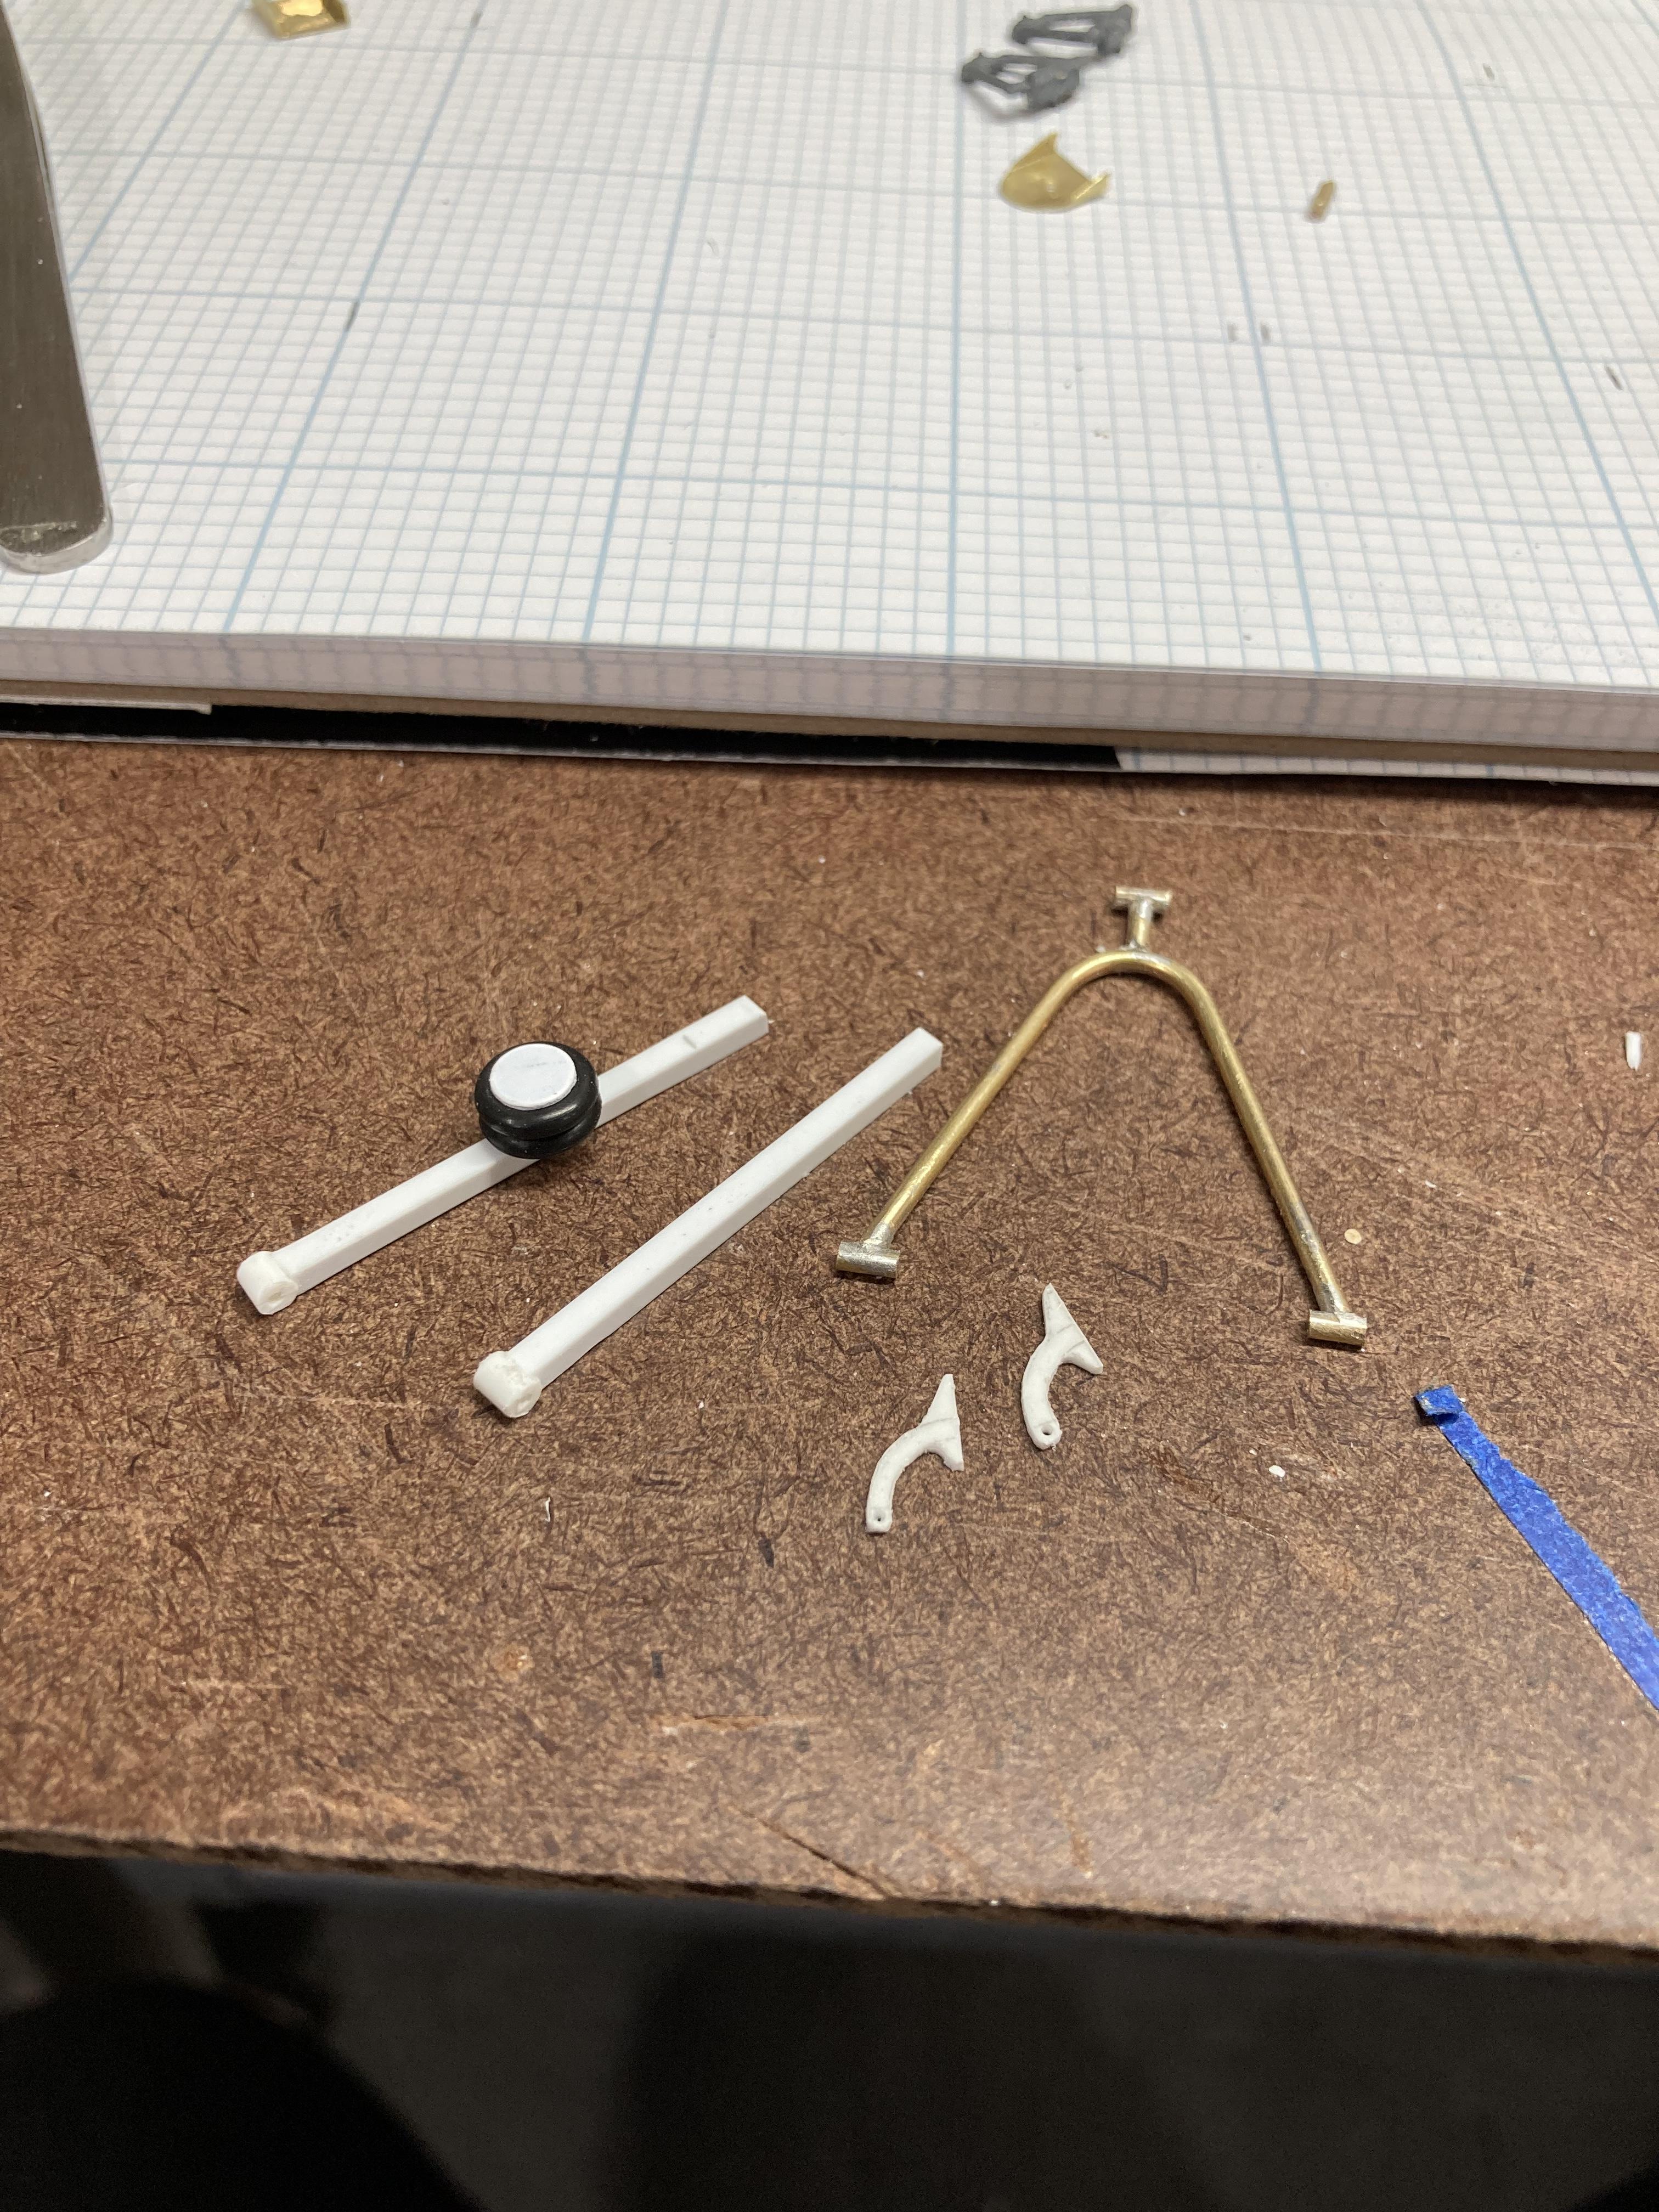
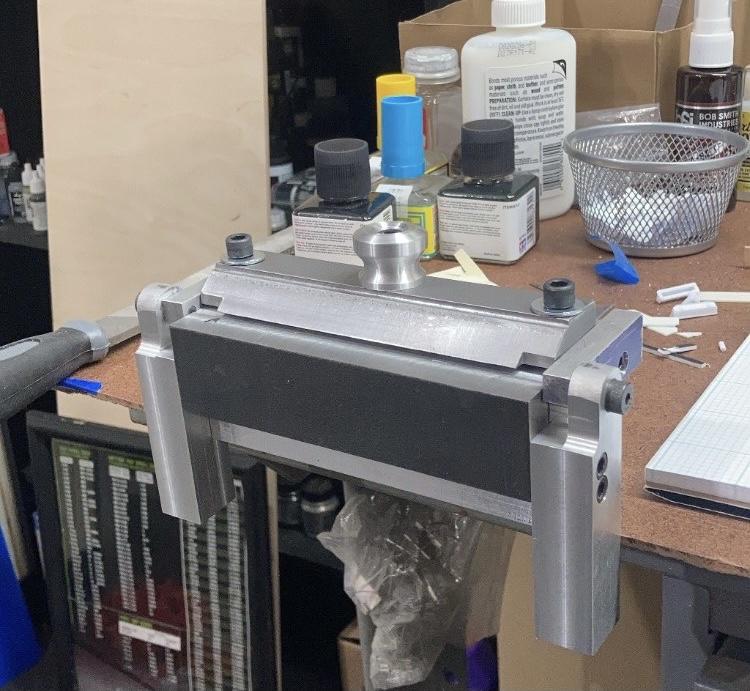
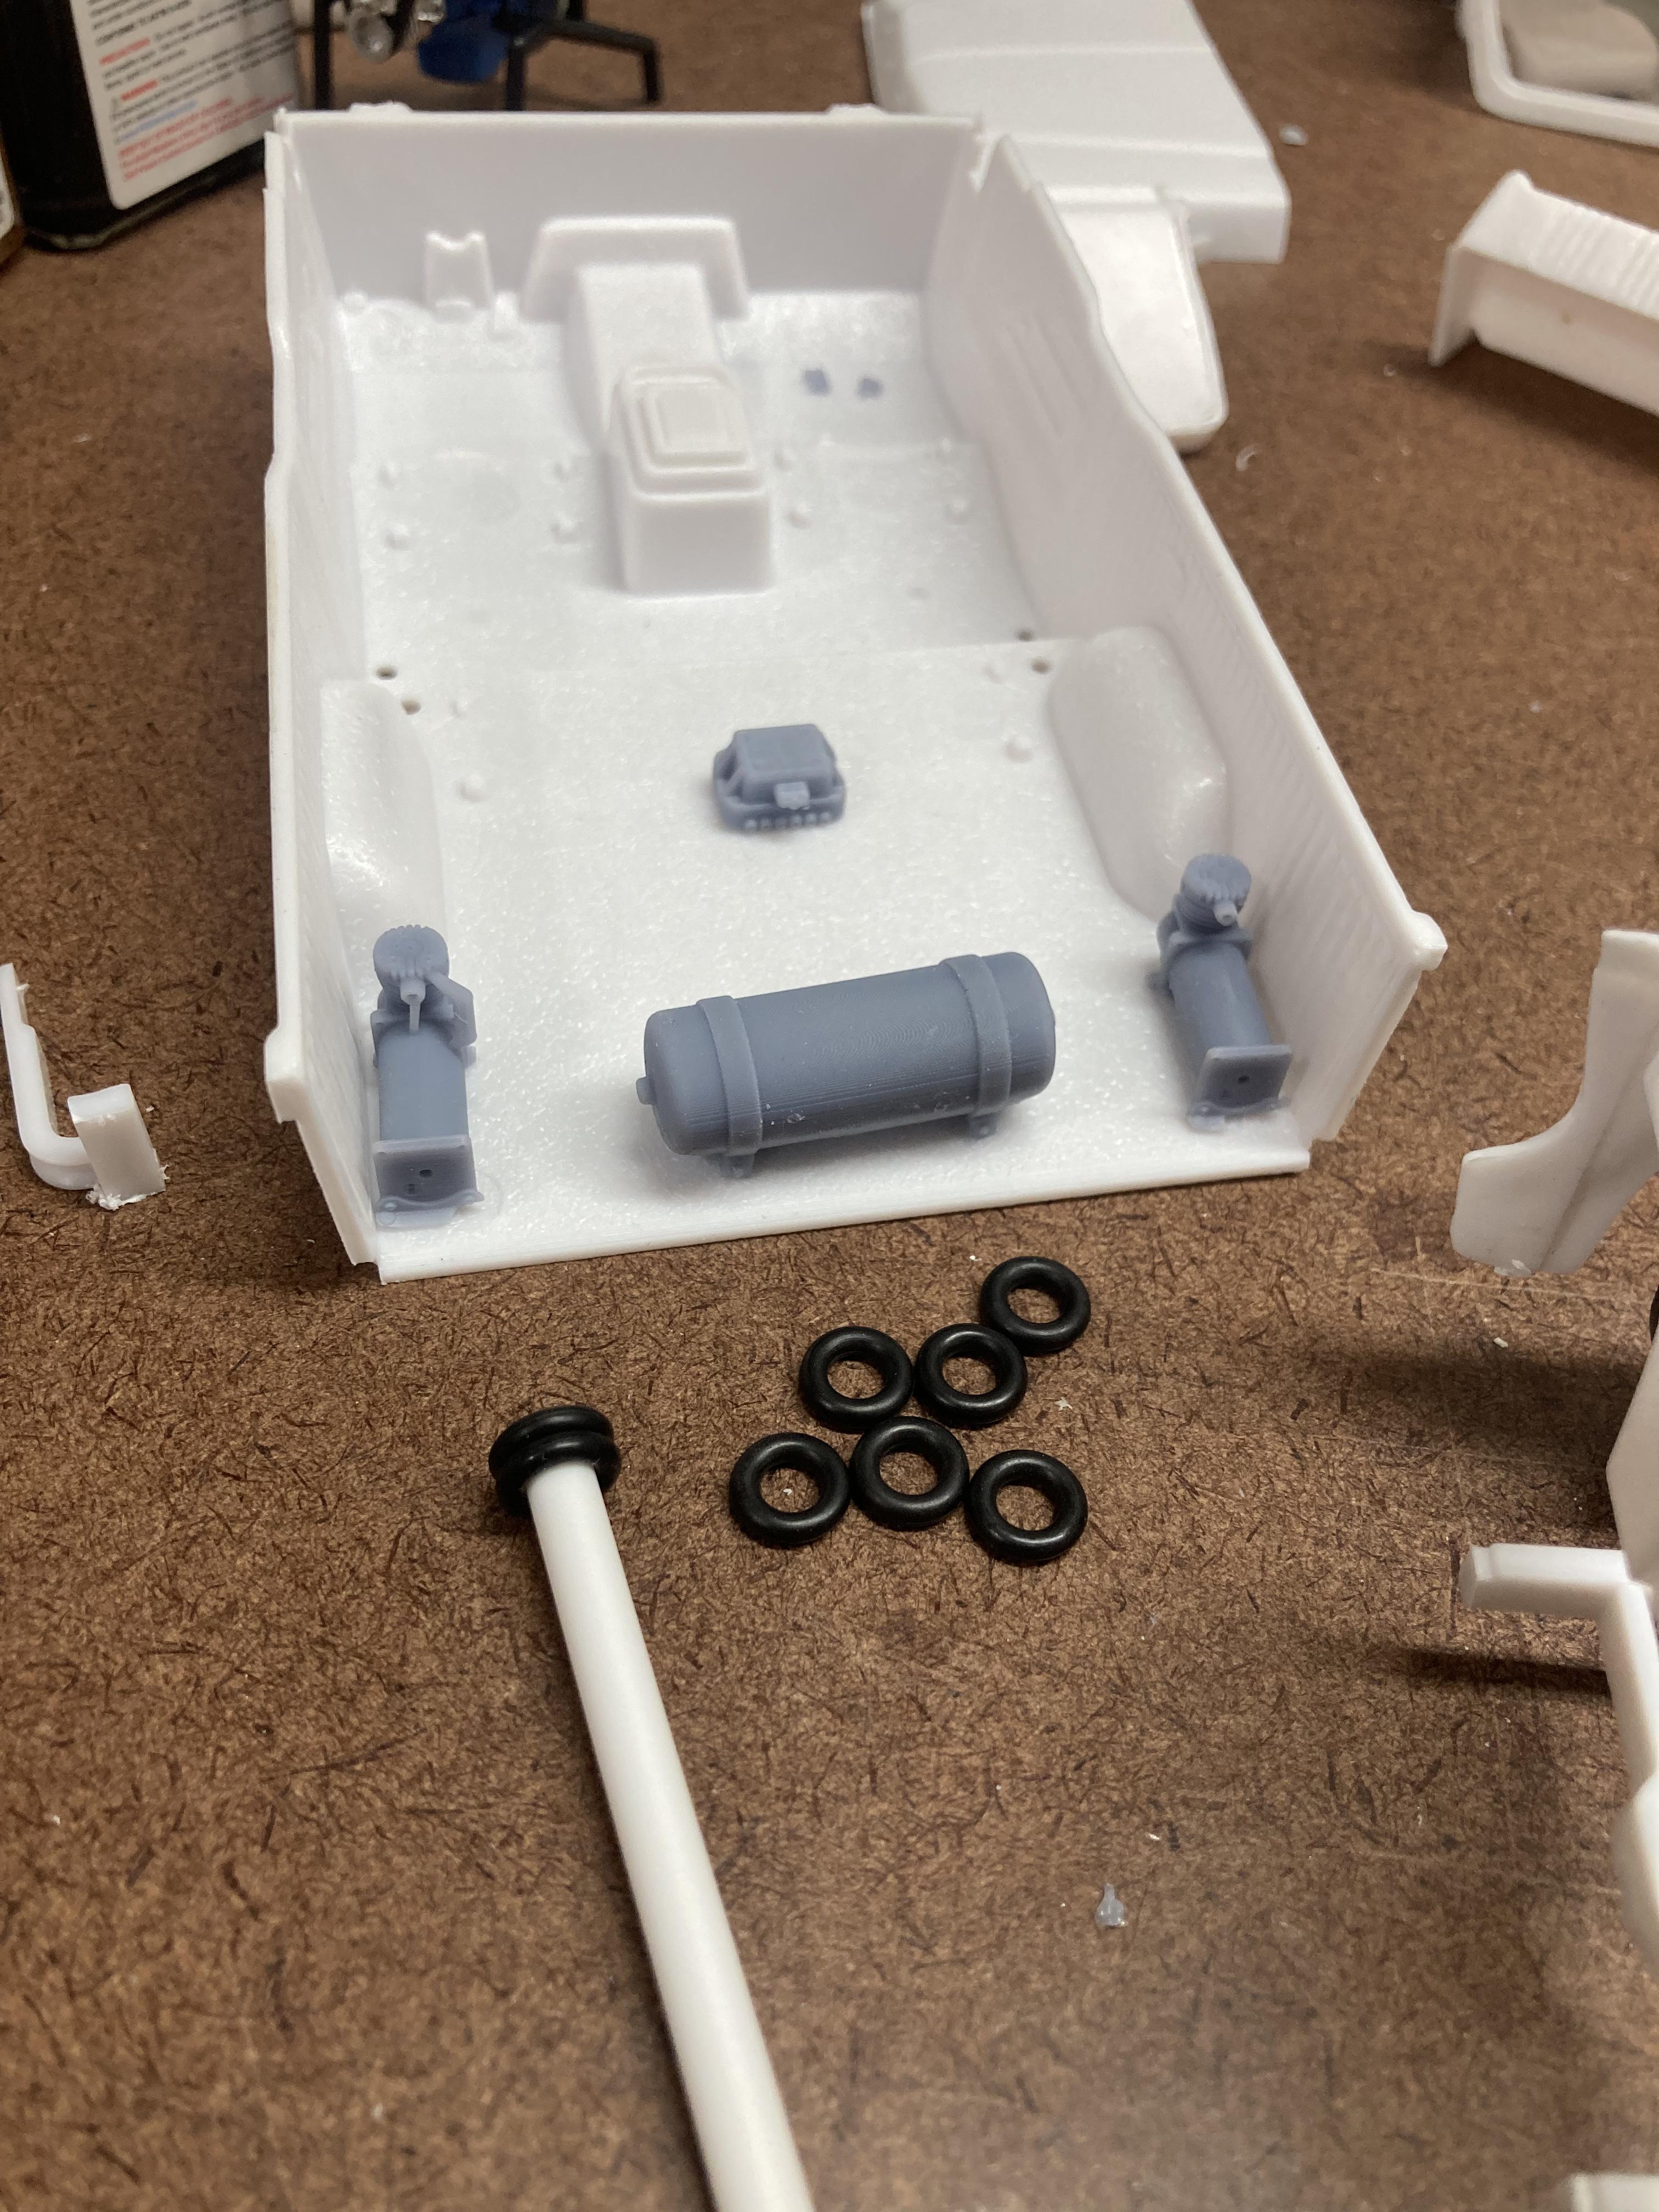
Not much progress has been made. I’ve been too busy with side work. But here’s what I have since the last time I did a little more cutting and filing on the frame. Made hinges for the rear floor. Lower link bars are made of styrene and the upper link is brass front bag brackets are going to be brass. And to bed brass/aluminum sheet efficiently I made a mini brake. Thanks for looking
-
78 Bronco (LRB)
Tarkmucker replied to Tarkmucker's topic in WIP: Model Trucks: Pickups, Vans, SUVs, Light Commercial
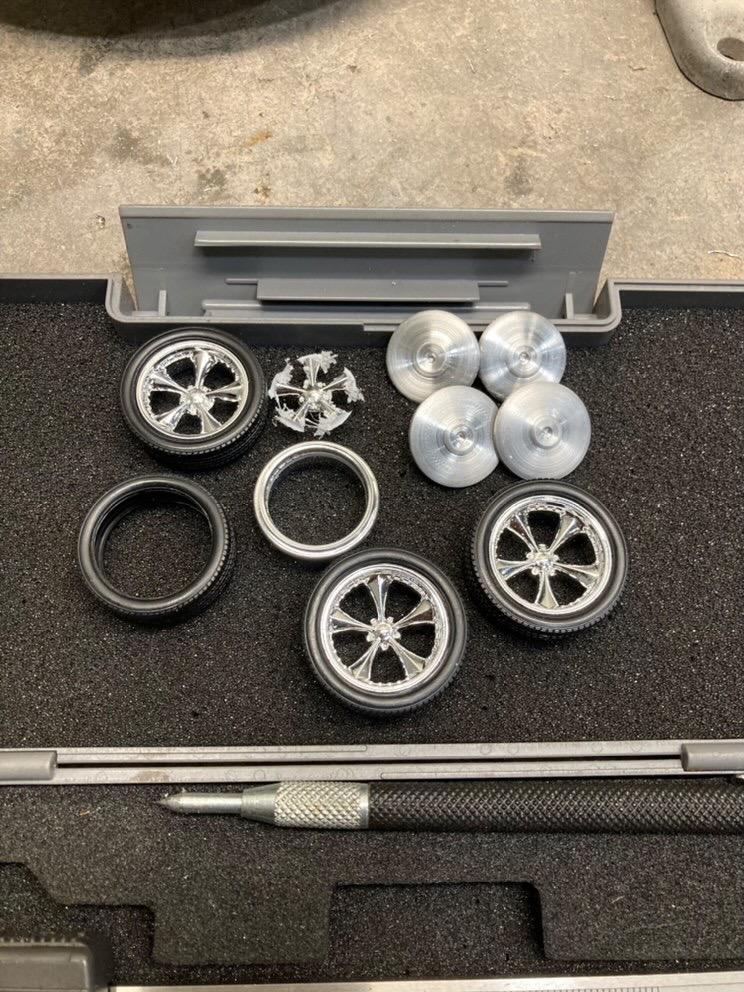
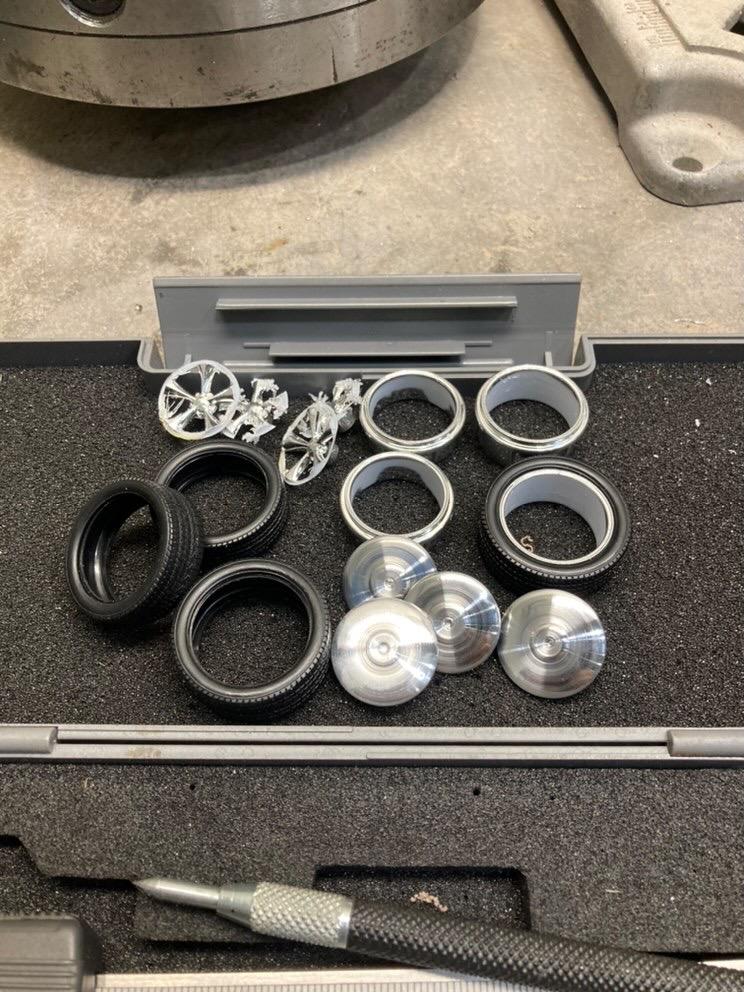
Exactly how I planned it. The two “tubes” that are attached to the rear that are floating in space need to be rebent and attached to the notches. Then I’ll add a few more tubes to stiffen up the rest of it. I haven’t been getting as much time as I’d like at the bench but a few minutes a day is better than none. I spent about a half hour on the lathe before I clocked in this morning. I got the old wheel centers out and cleaned up the rims a bit. No crazy detail on the new centers I made since I’m putting caps on anyway. and I ran down after dinner to throw the wheels under it and see how I felt. thanks for looking.
-
Who doesn't love a mock-up? Let's see yours!
Tarkmucker replied to Belairconvertable's topic in WIP: Model Cars
Here are a few that are in the recent rotation. The Bronco is in an Instagram build off so that’s the main focus right now.
-
78 Bronco (LRB)
Tarkmucker replied to Tarkmucker's topic in WIP: Model Trucks: Pickups, Vans, SUVs, Light Commercial
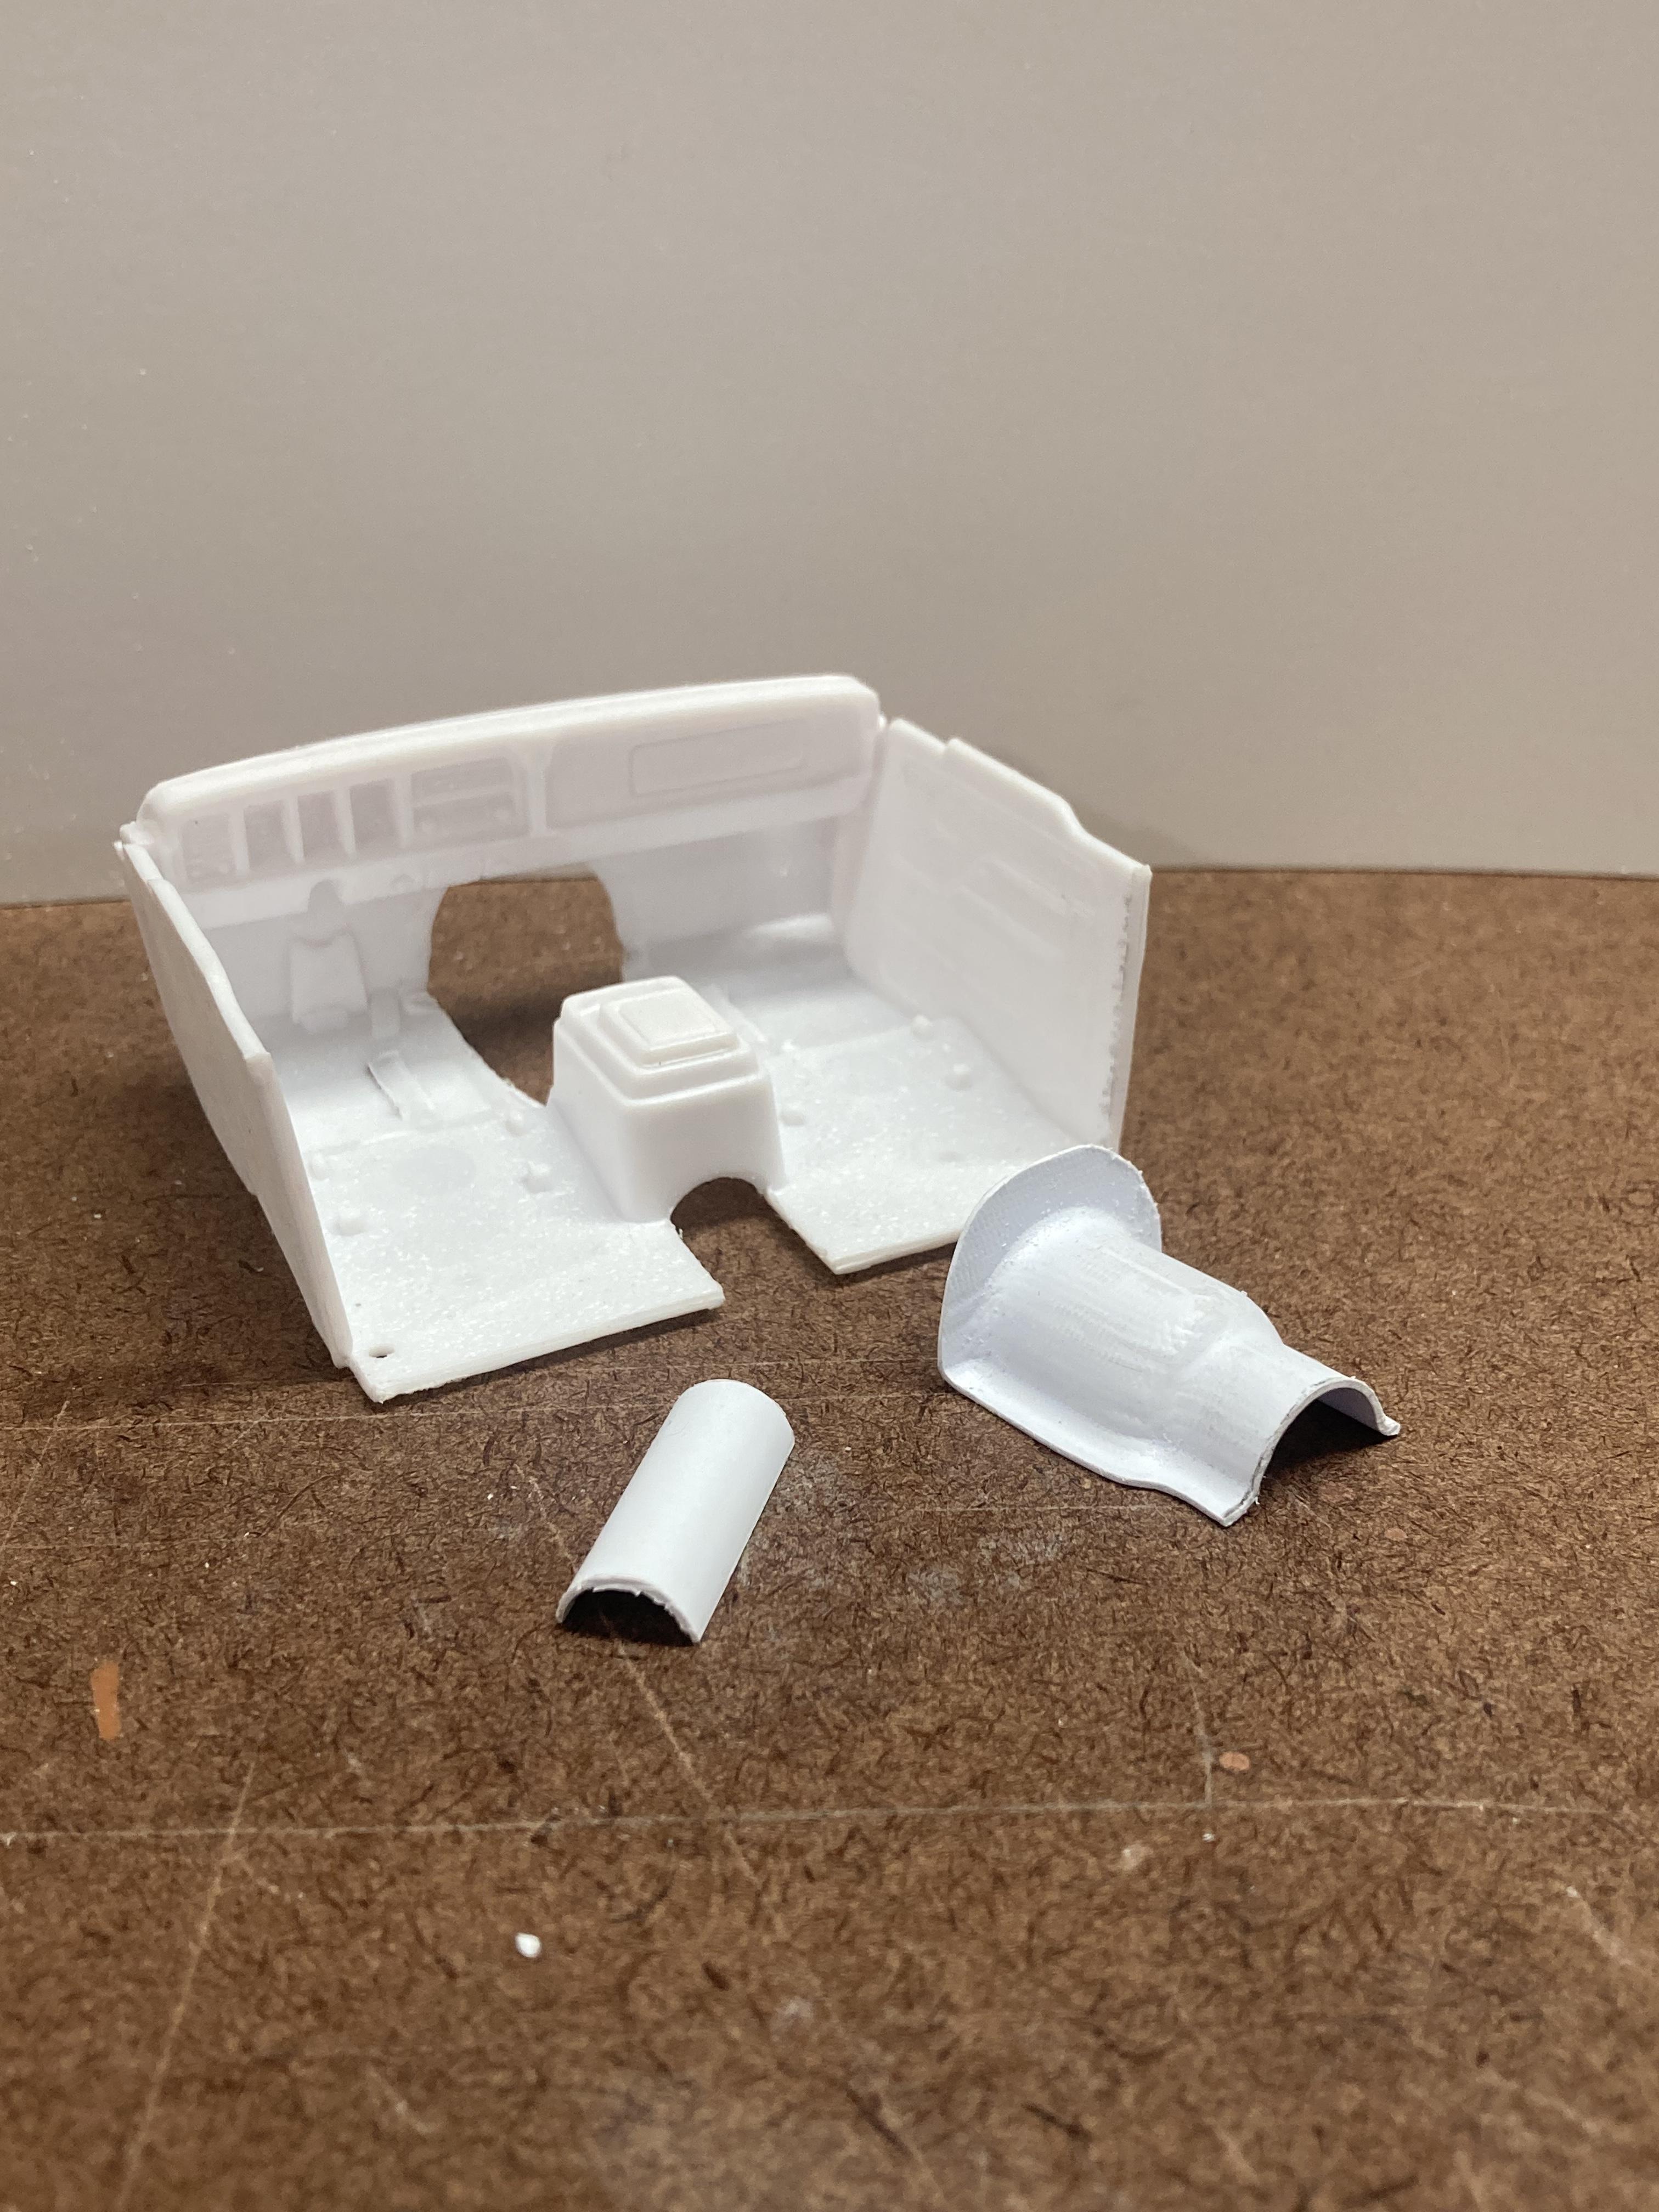
I haven’t had much bench time but here’s an update. a quick check to see how the bags will fit in. Step notches are in place, next is to continue on the structural tubes/mounts. I cut the interior tub in half to make my life a little easier…or harder….haven’t figured out which way that scale tips just yet. I formed the transmission tunnel pieces in .023 HIPS on the handformer at work. cut the center section of the rear floor out and trimmed it to fit between the filler panels/wheel tubs. Made floor bracing and a rear panel. and a quick mock-up again before I start cutting anything else apart. Thanks for looking
-
When that project makes it back on the bench that will probably be the more interesting part
-
Aside from what you have listed what types of cars are you interested in?
-
78 Bronco (LRB)
Tarkmucker replied to Tarkmucker's topic in WIP: Model Trucks: Pickups, Vans, SUVs, Light Commercial
Thanks Mathias. I spent a little while at the bench tonight. Feels like I didn’t get much done while simultaneously feeling like I did a lot. I made some tubs on the handformer at work using a nose bushing. After thinking about them for the rest of the day I decided I didn’t like them so I turned some 1.25” round bar on the lathe and put a radius on the edge. Then I cut a .825” slug off the end and used that to make new ones. I cut them in half and trimmed a bunch off. The back tubs are trimmed down pretty close to what I want while the fronts are just getting started. I glued the outer piece of the drivers side in place for now. I cut the floor out of the back and started laying out the rest of my cuts and where I want to raise the floor to. I realized just in time when I tacked the interior tub in place it was too far back so I have to move my rounded cut lines back. I also need to trim the driveshaft tunnel (and by that I mean I need to make one). I trimmed a bit more off the frame and started to lay out my step notch. just a rough template. Tomorrow I’ll get back at it with better focus and not waste so much time staring at it. thanks for looking
-
Hot Rod Hauler
Tarkmucker replied to Tarkmucker's topic in WIP: Model Trucks: Pickups, Vans, SUVs, Light Commercial
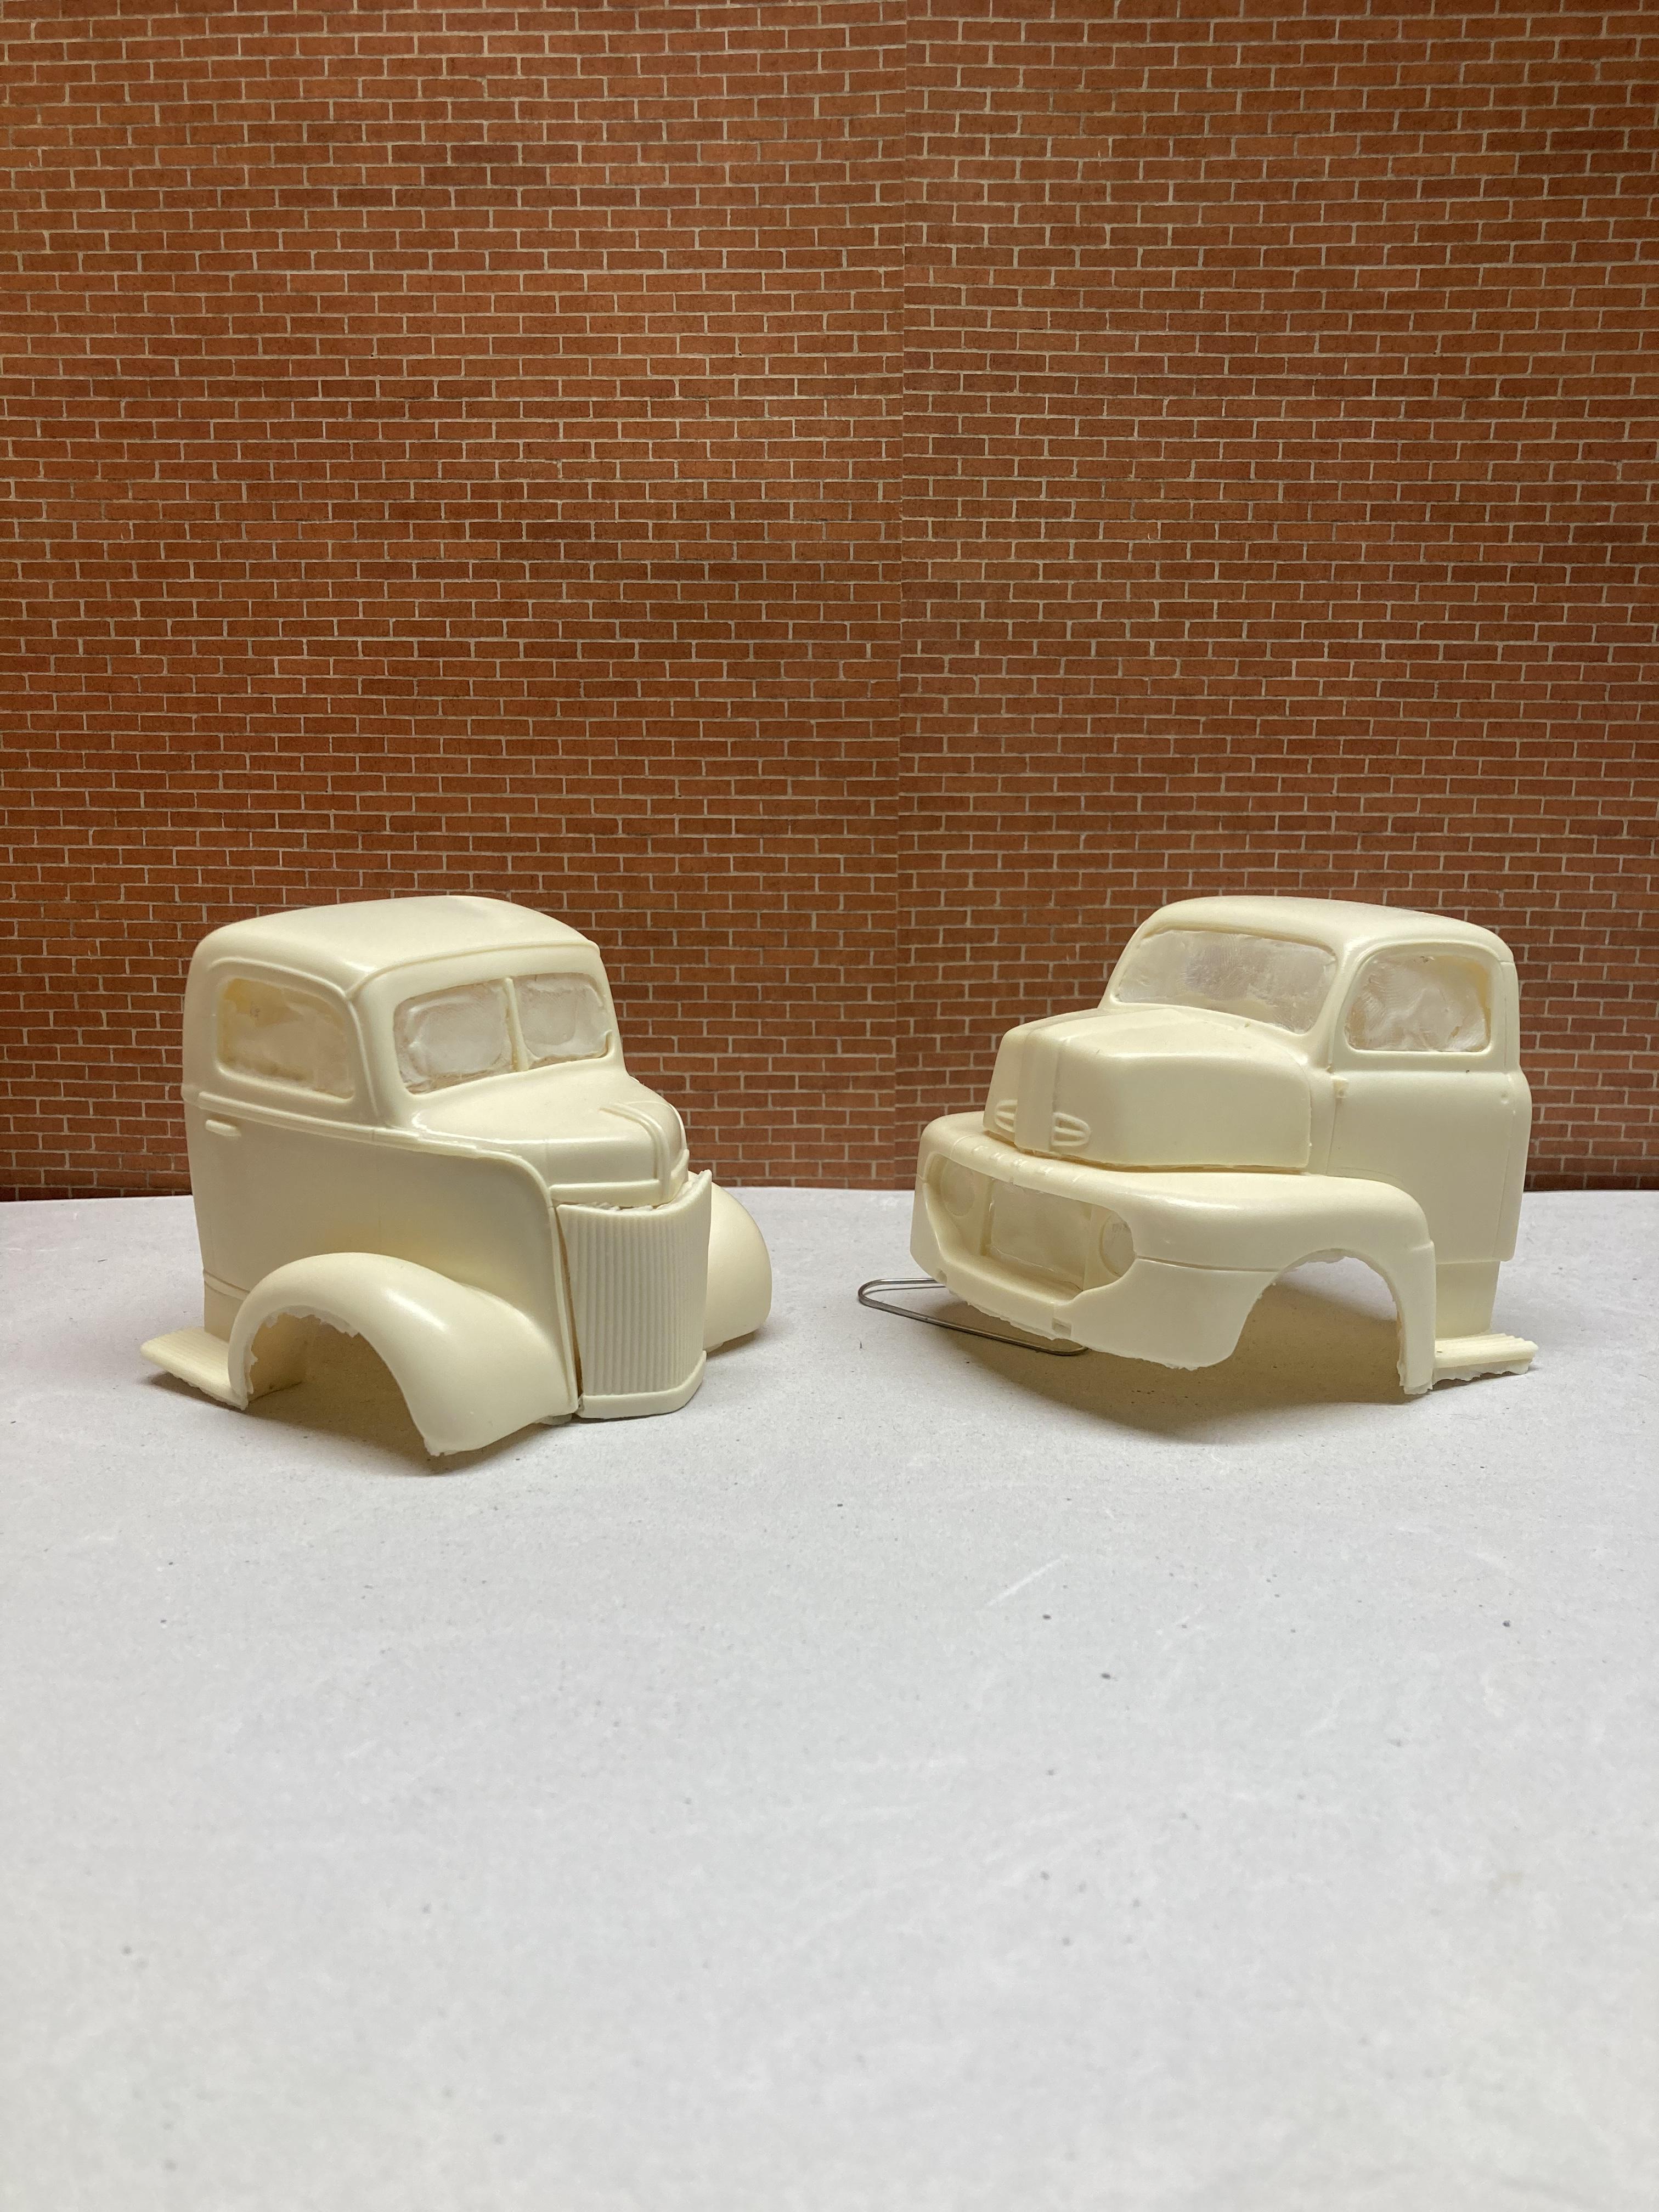
I got two resin cabs in the mail today. Was heavily considering using one of these instead of the ‘56 but I think I’ve gone back on that idea. They’re a little too stubby for the wedge and look too doofy for my liking. They’ll find their way into other projects down the road. Already had another idea for the ‘41 anyway.
-
78 Bronco (LRB)
Tarkmucker replied to Tarkmucker's topic in WIP: Model Trucks: Pickups, Vans, SUVs, Light Commercial
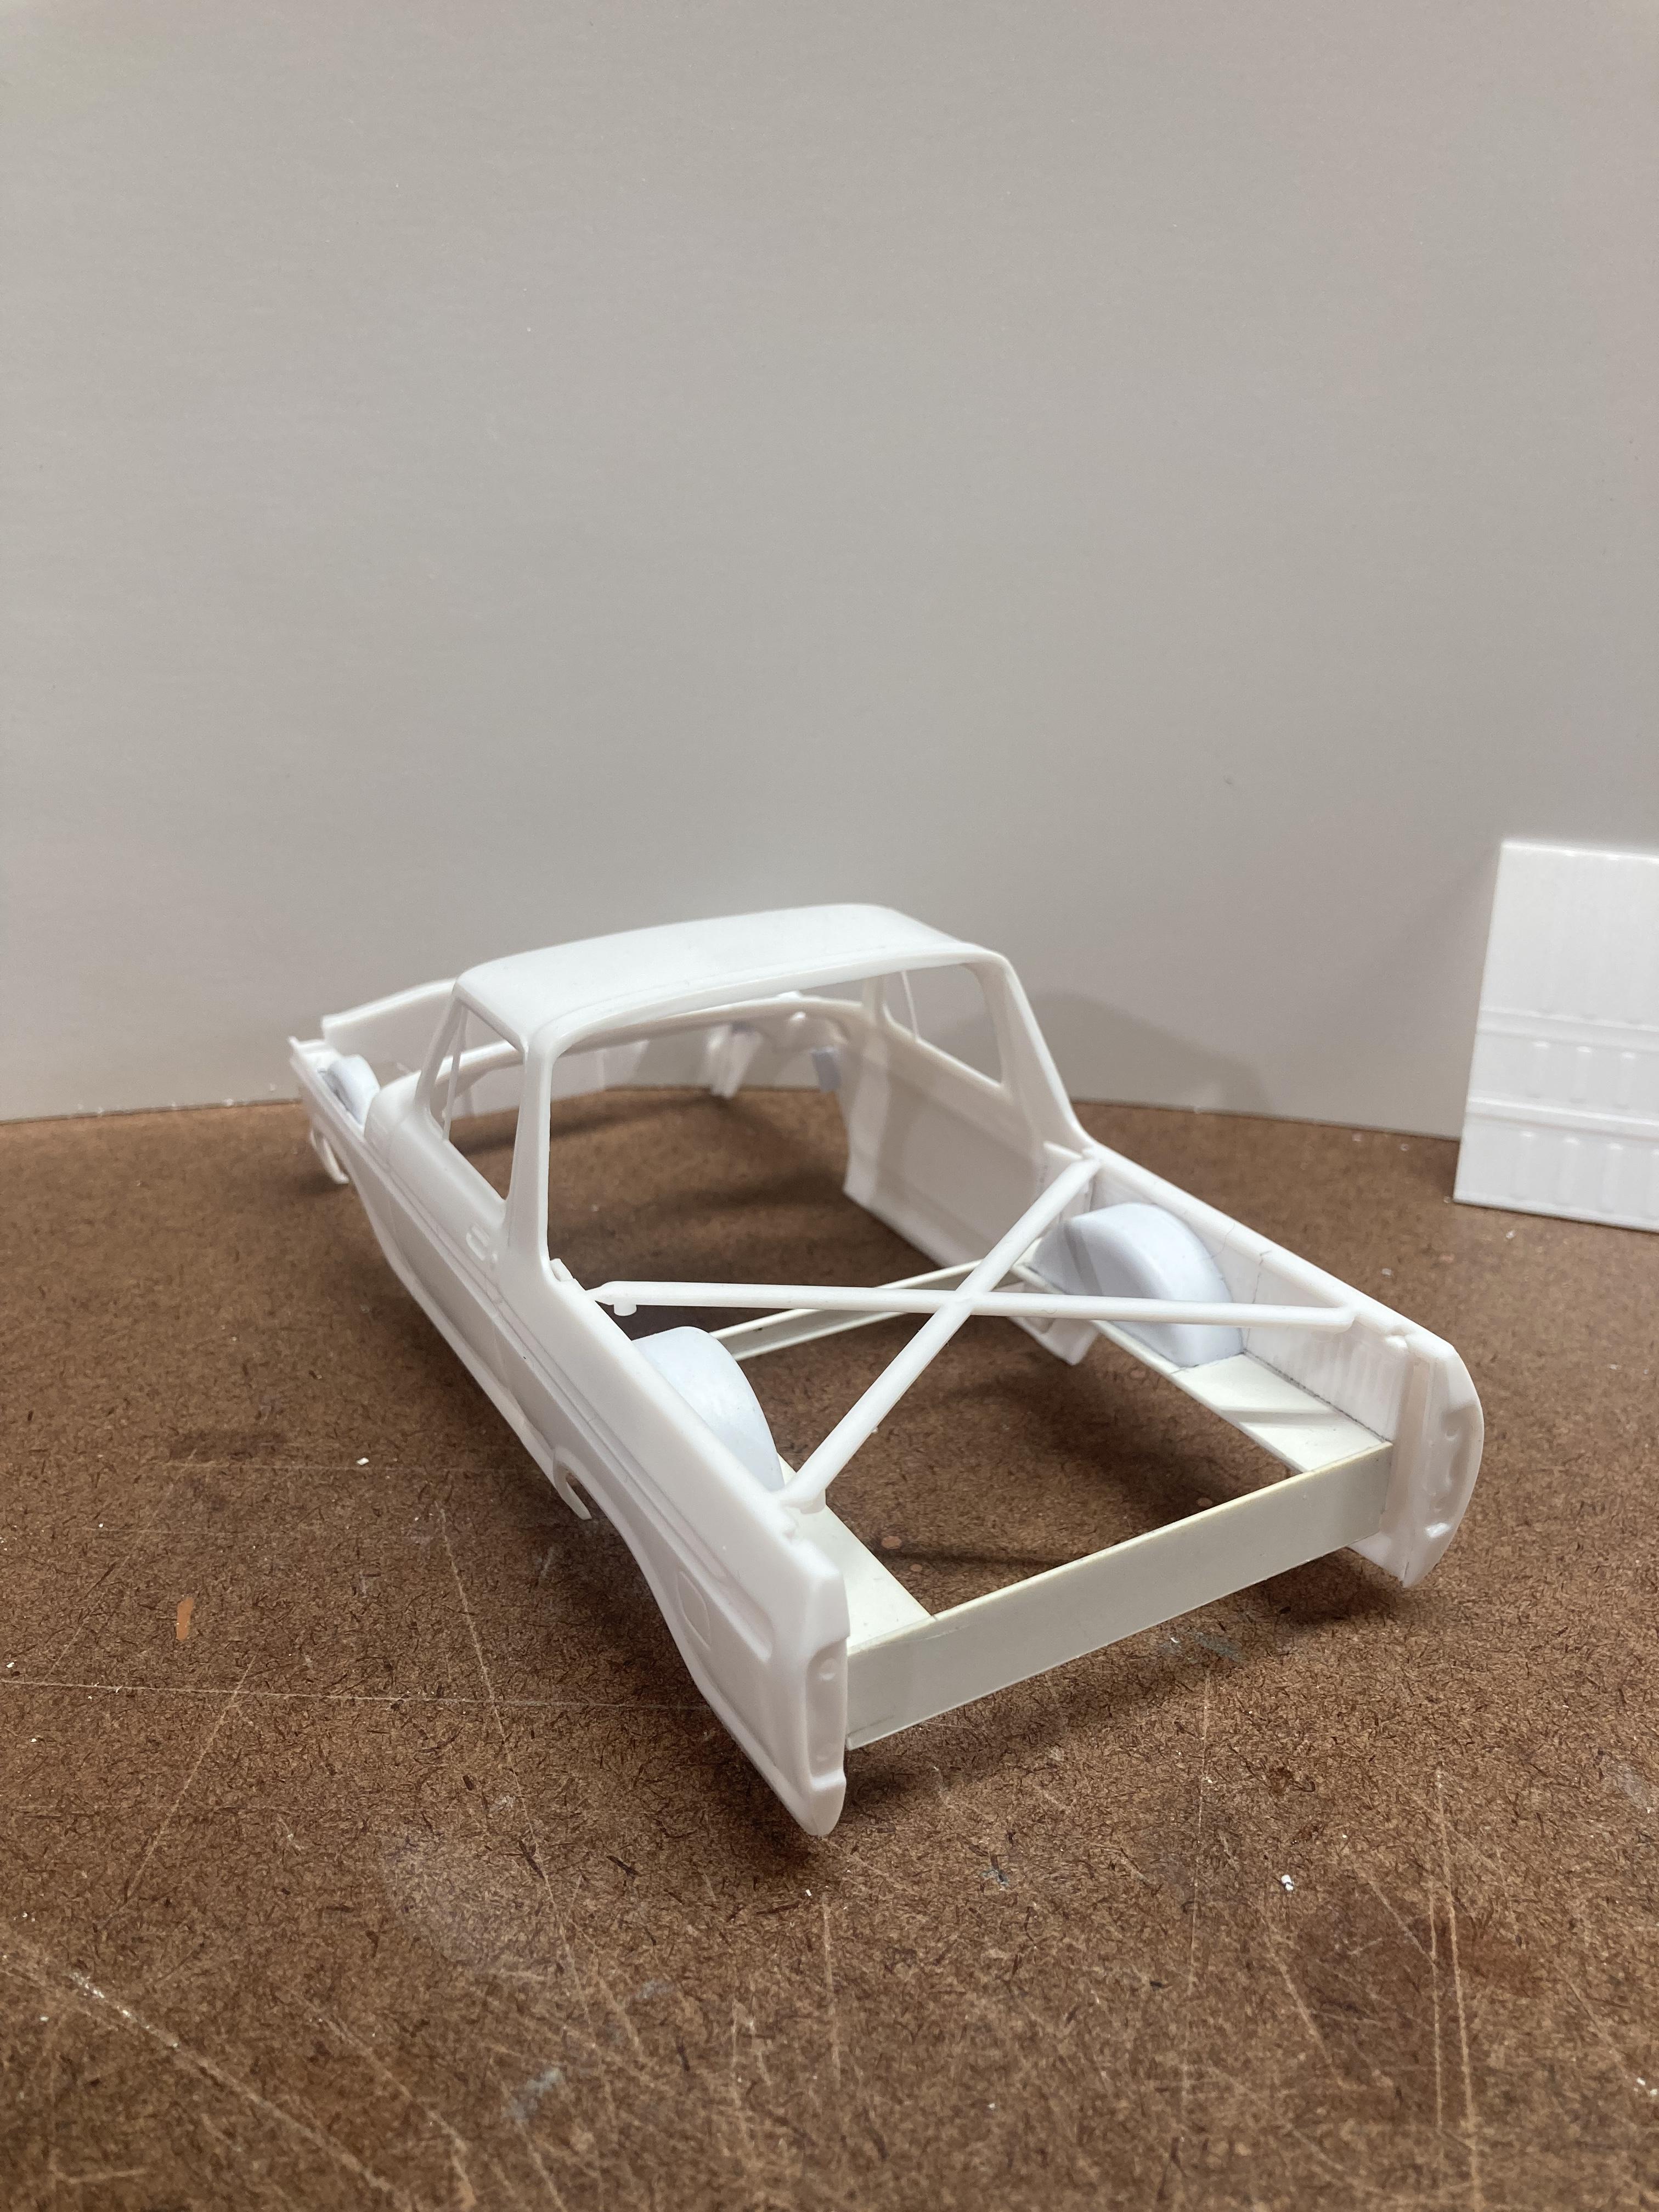
Not much progress last night. About 15-20 minutes of bench time. I shortened the frame to 104” wheelbase, trimmed the running board mounts off, trimmed the legs off some 3D printed airride parts, and started making bags. Back at it in a few hours. Thanks for looking.
-
AHH that’s exactly what I was looking for. I made a punch a few months ago but didn’t make a die. I figured it would be the same as the full size tooling. Now to finish making the setup and reproduce the hood of my truck in scale. Only 374 louvers…
-
I’m very curious about the louvers, do you have a thread about making them?
-
PM sent
-
Thanks for the advice, Mike. I’ll definitely try masking on the next one. And thanks for the feedback everyone, I’m glad so many people enjoy this one!
-
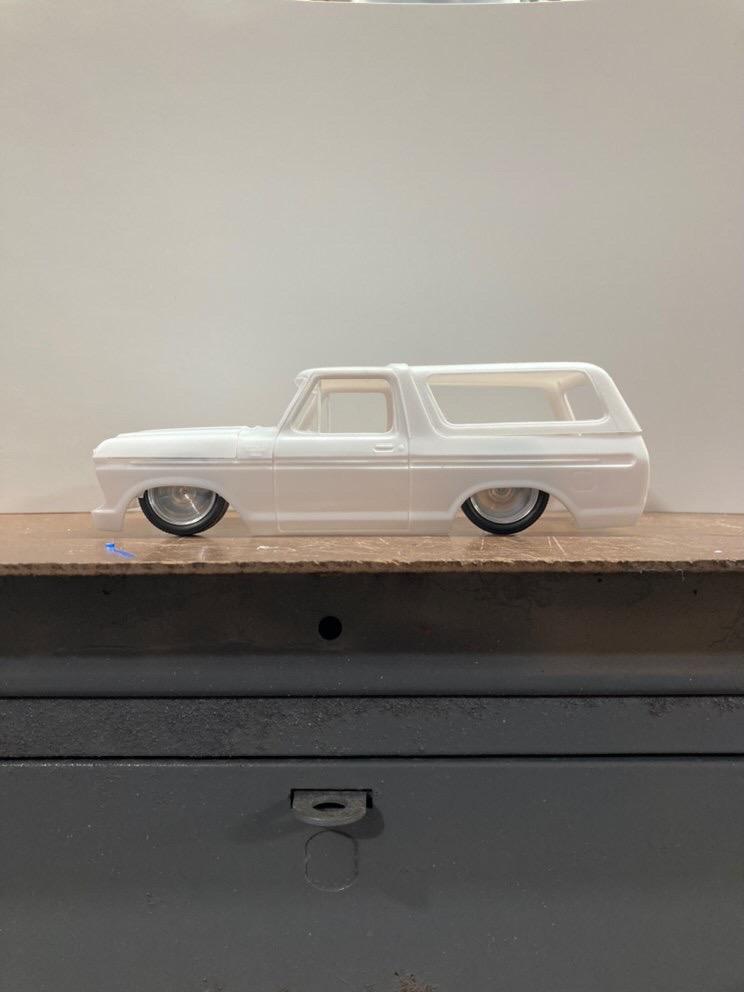
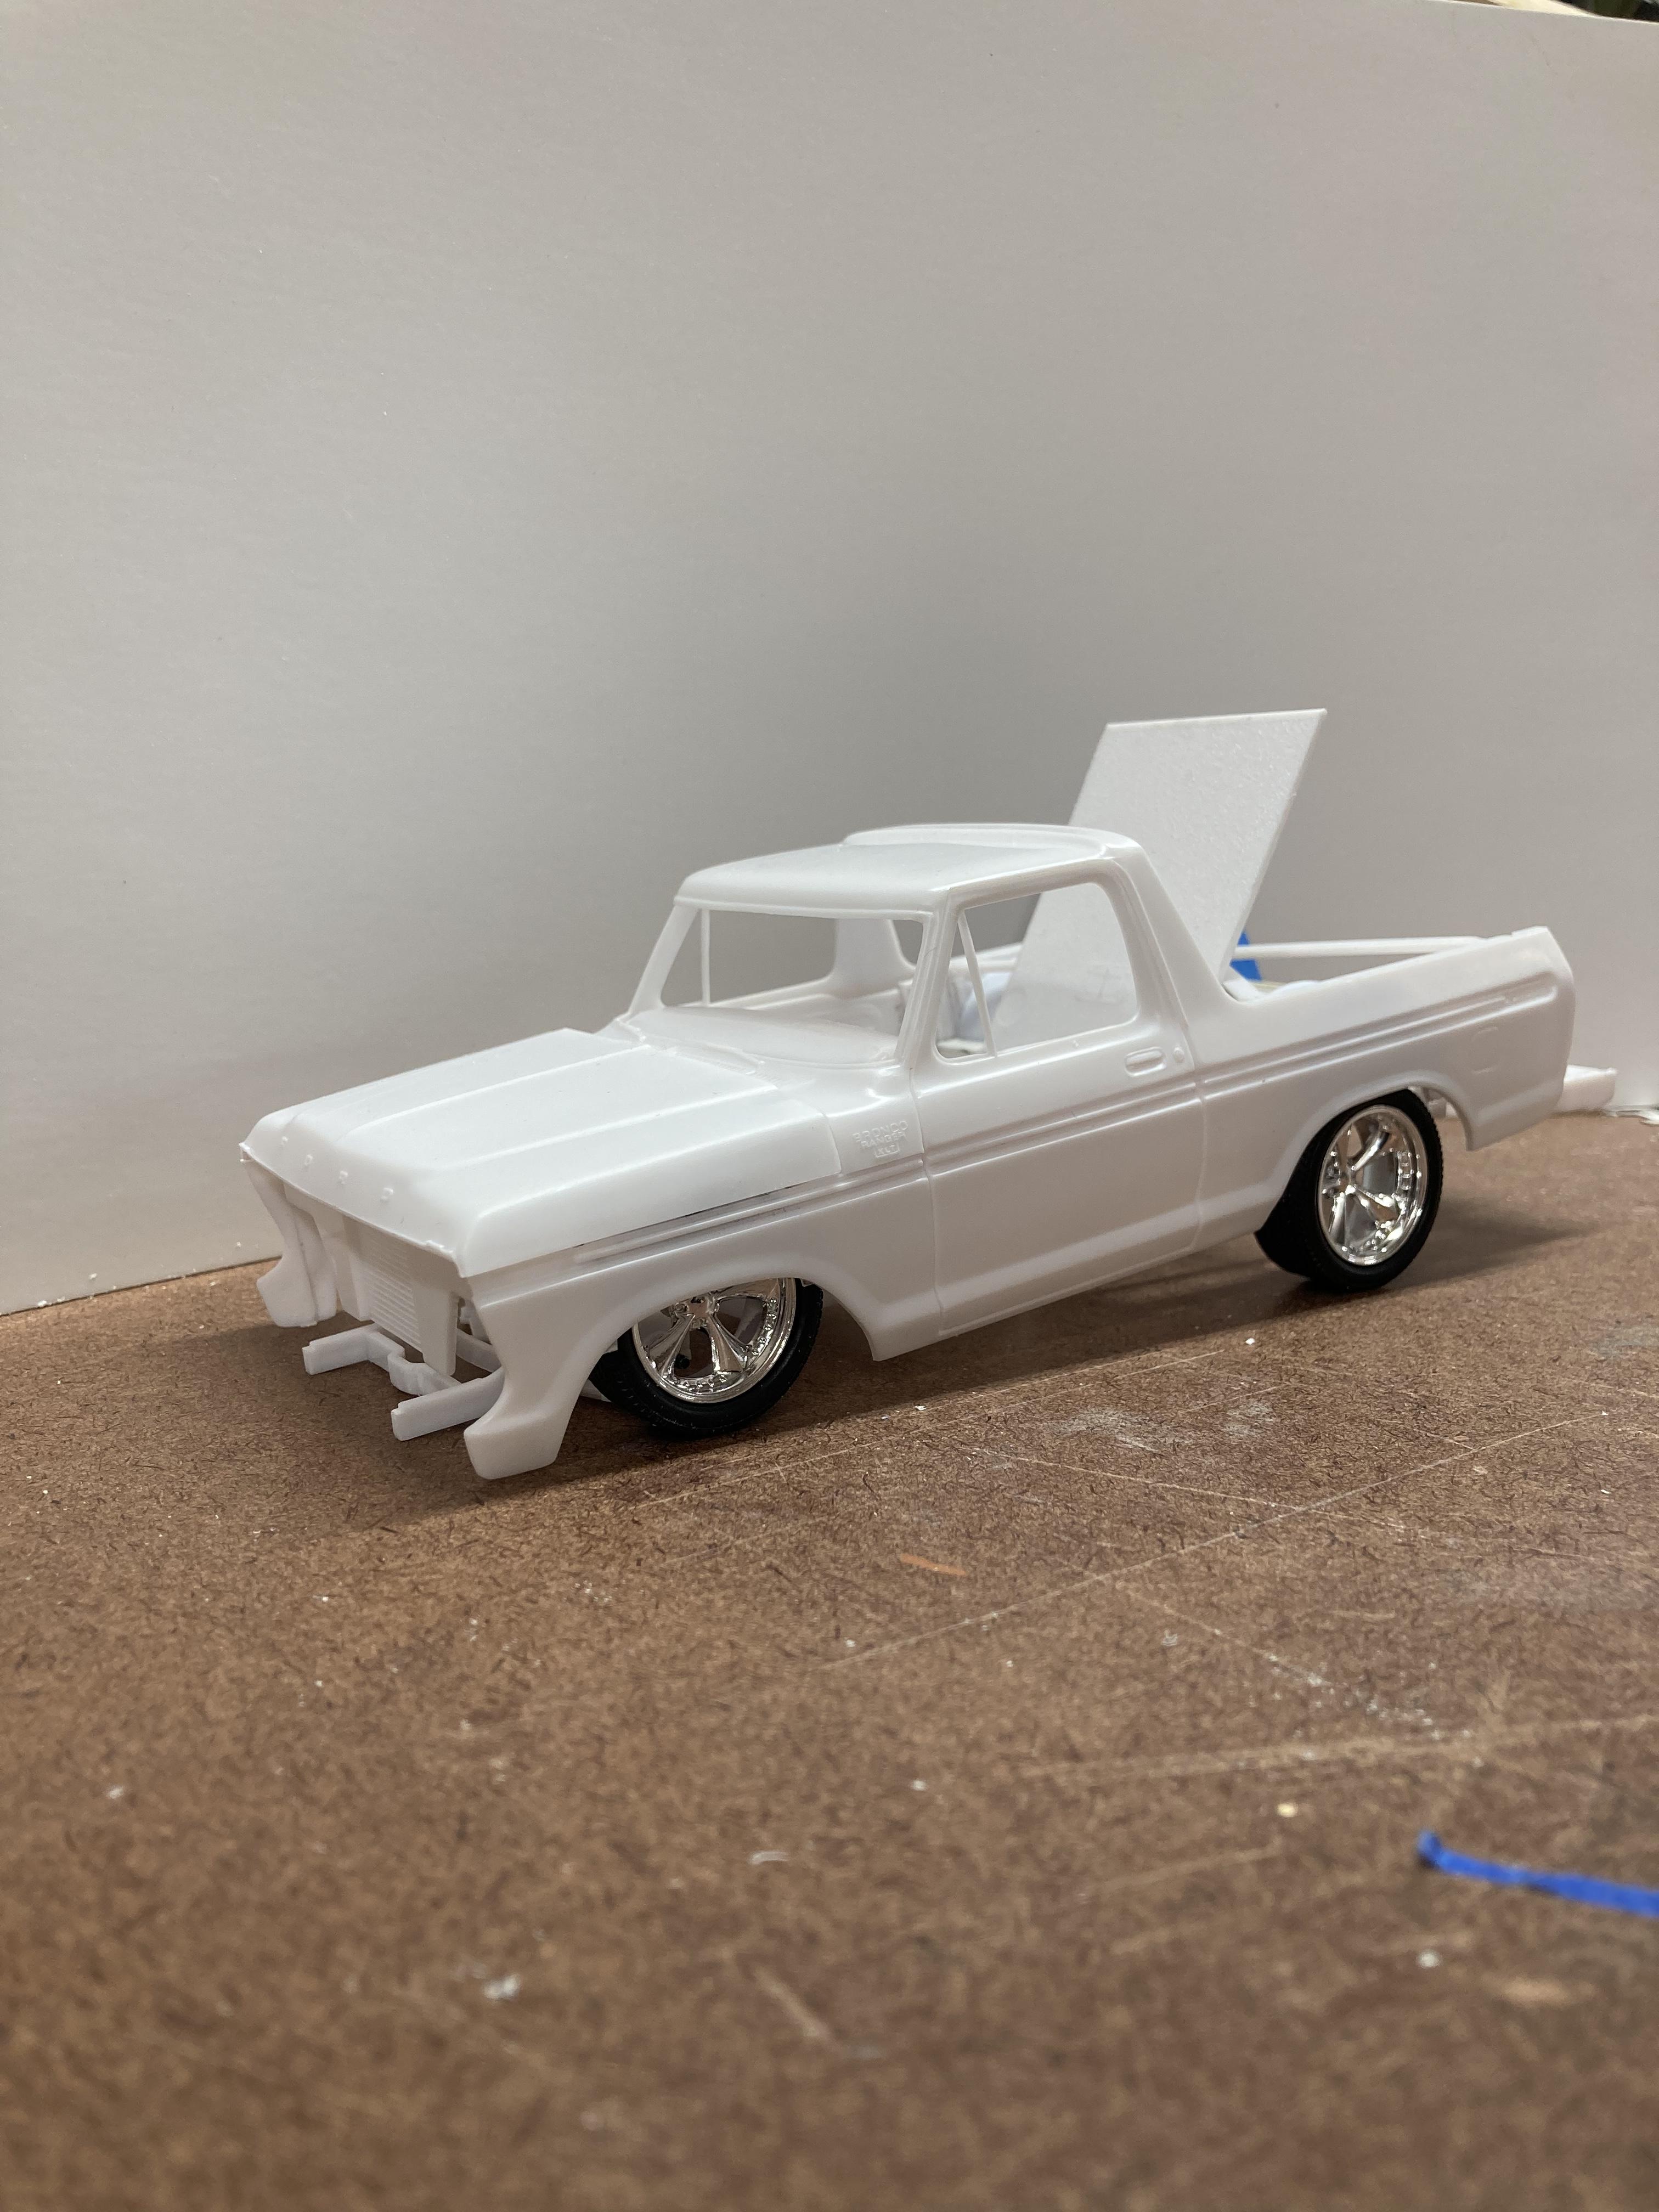
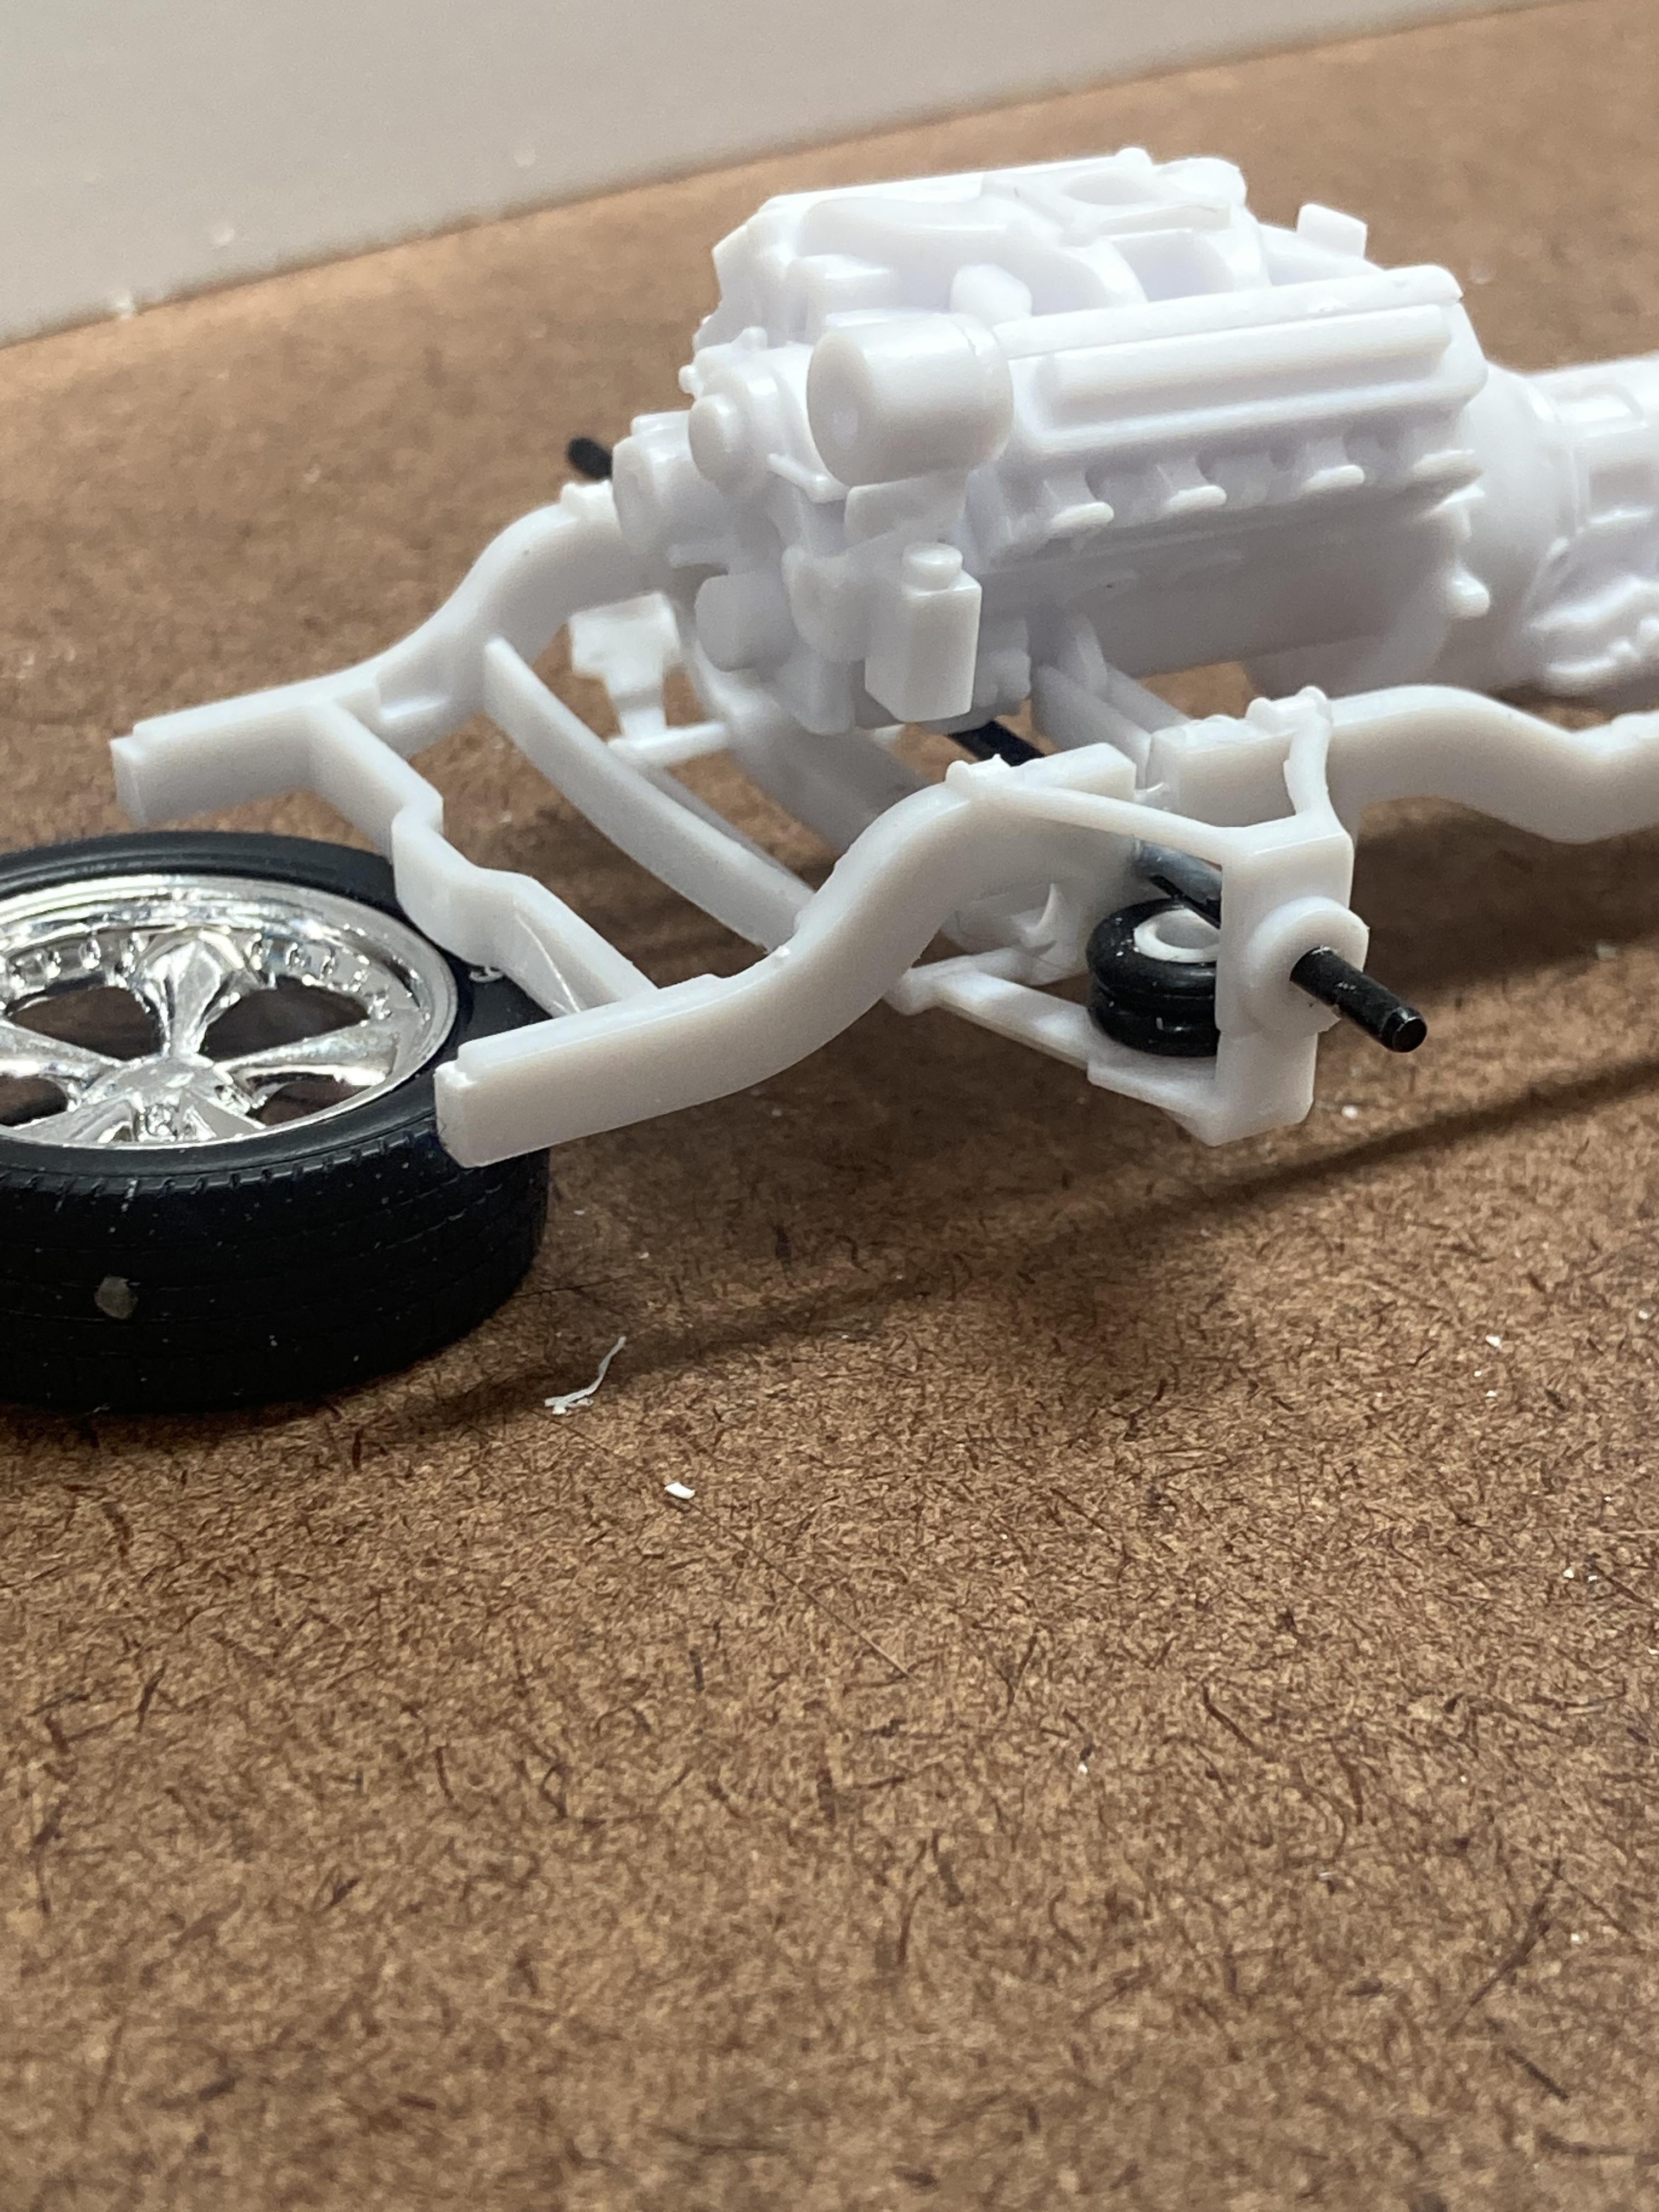
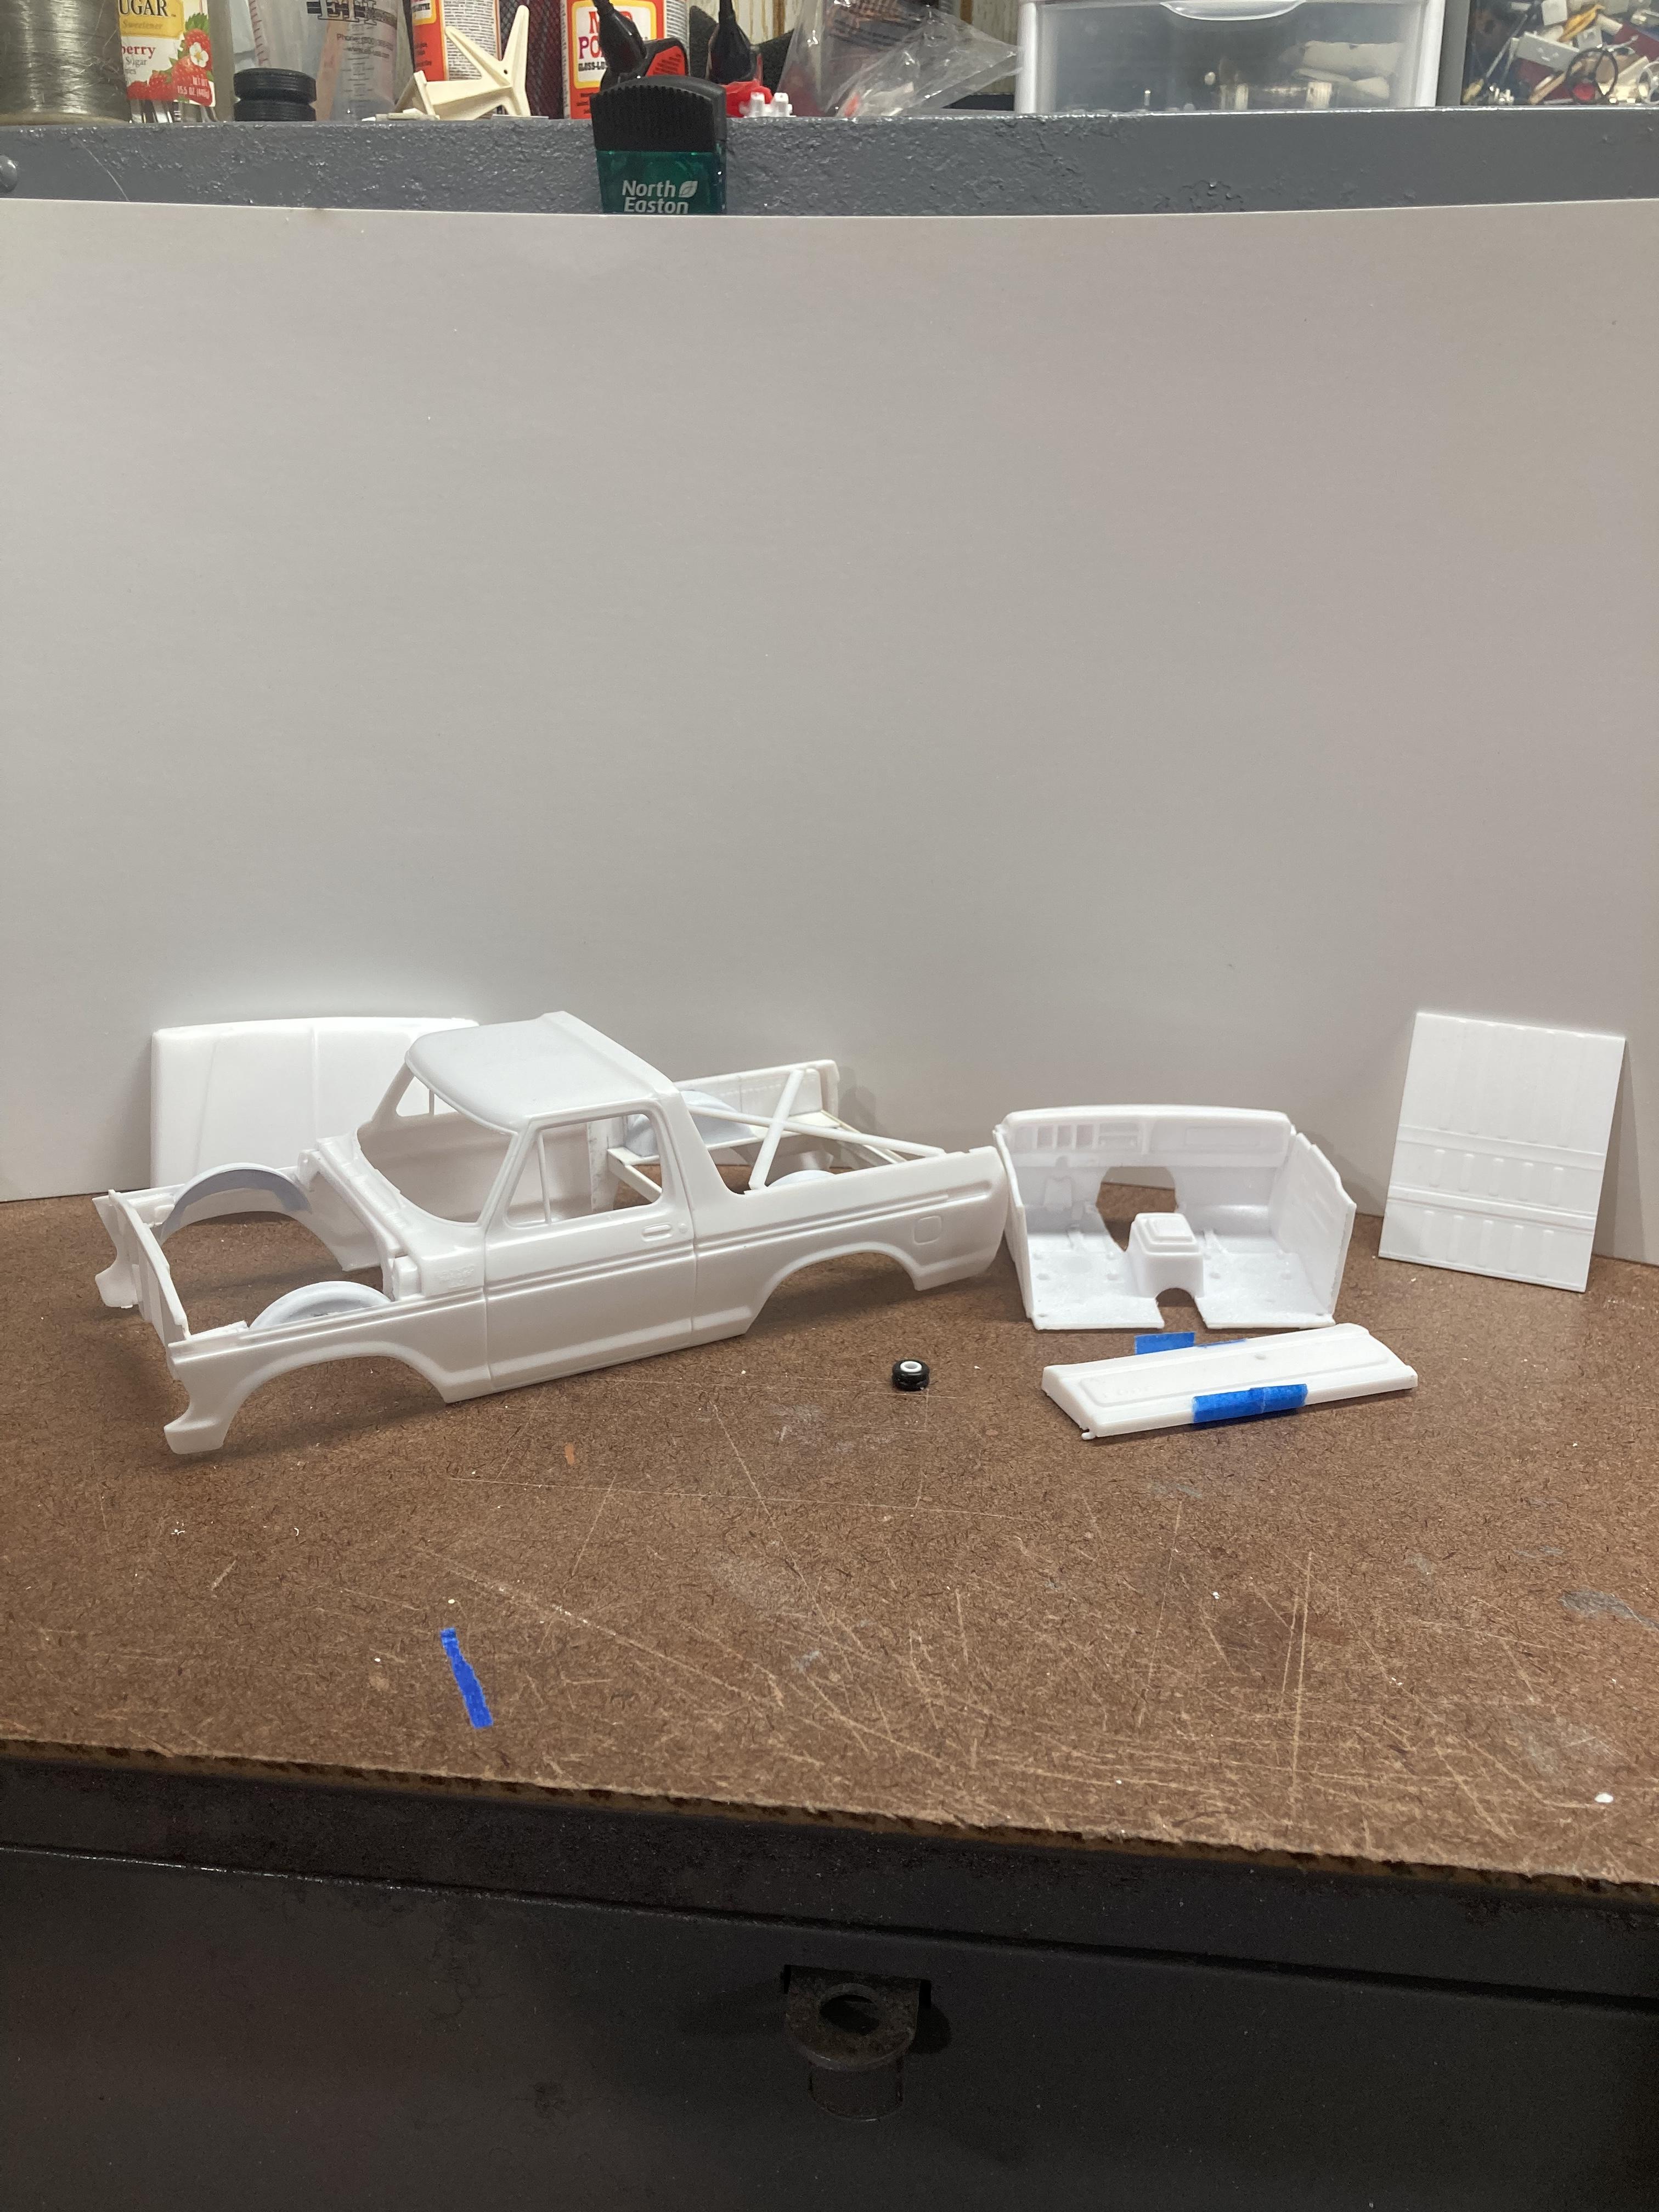
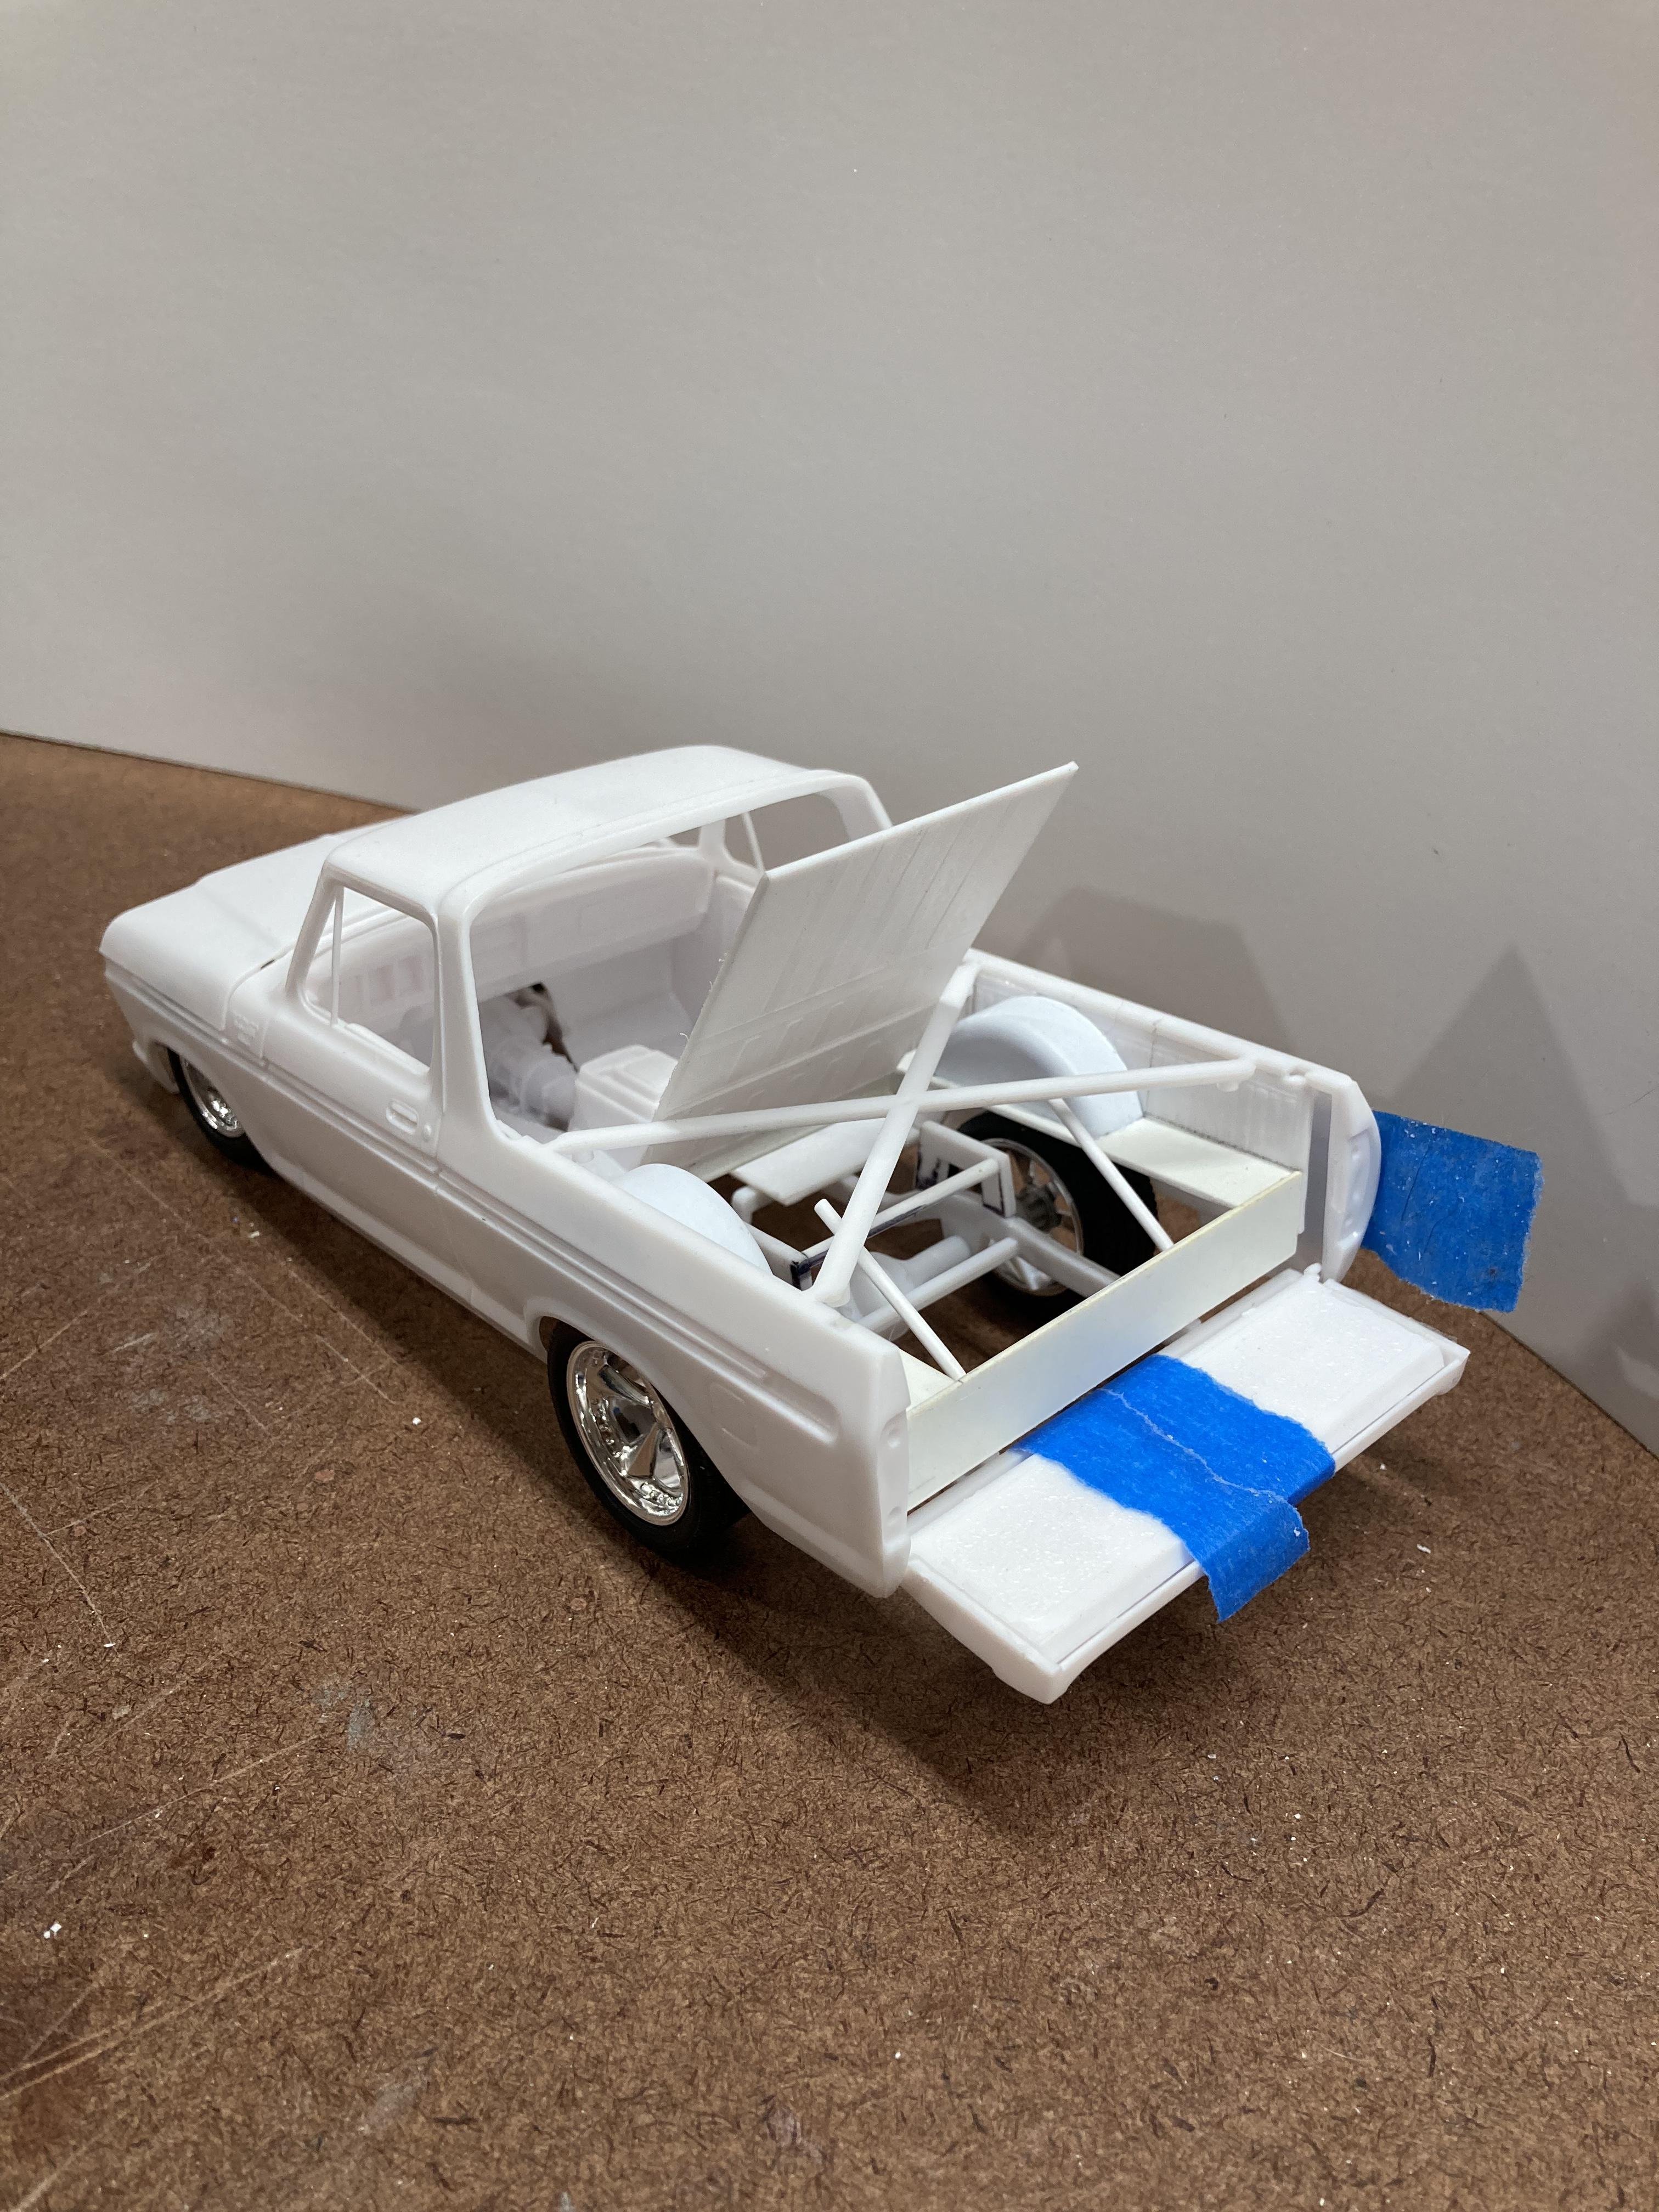
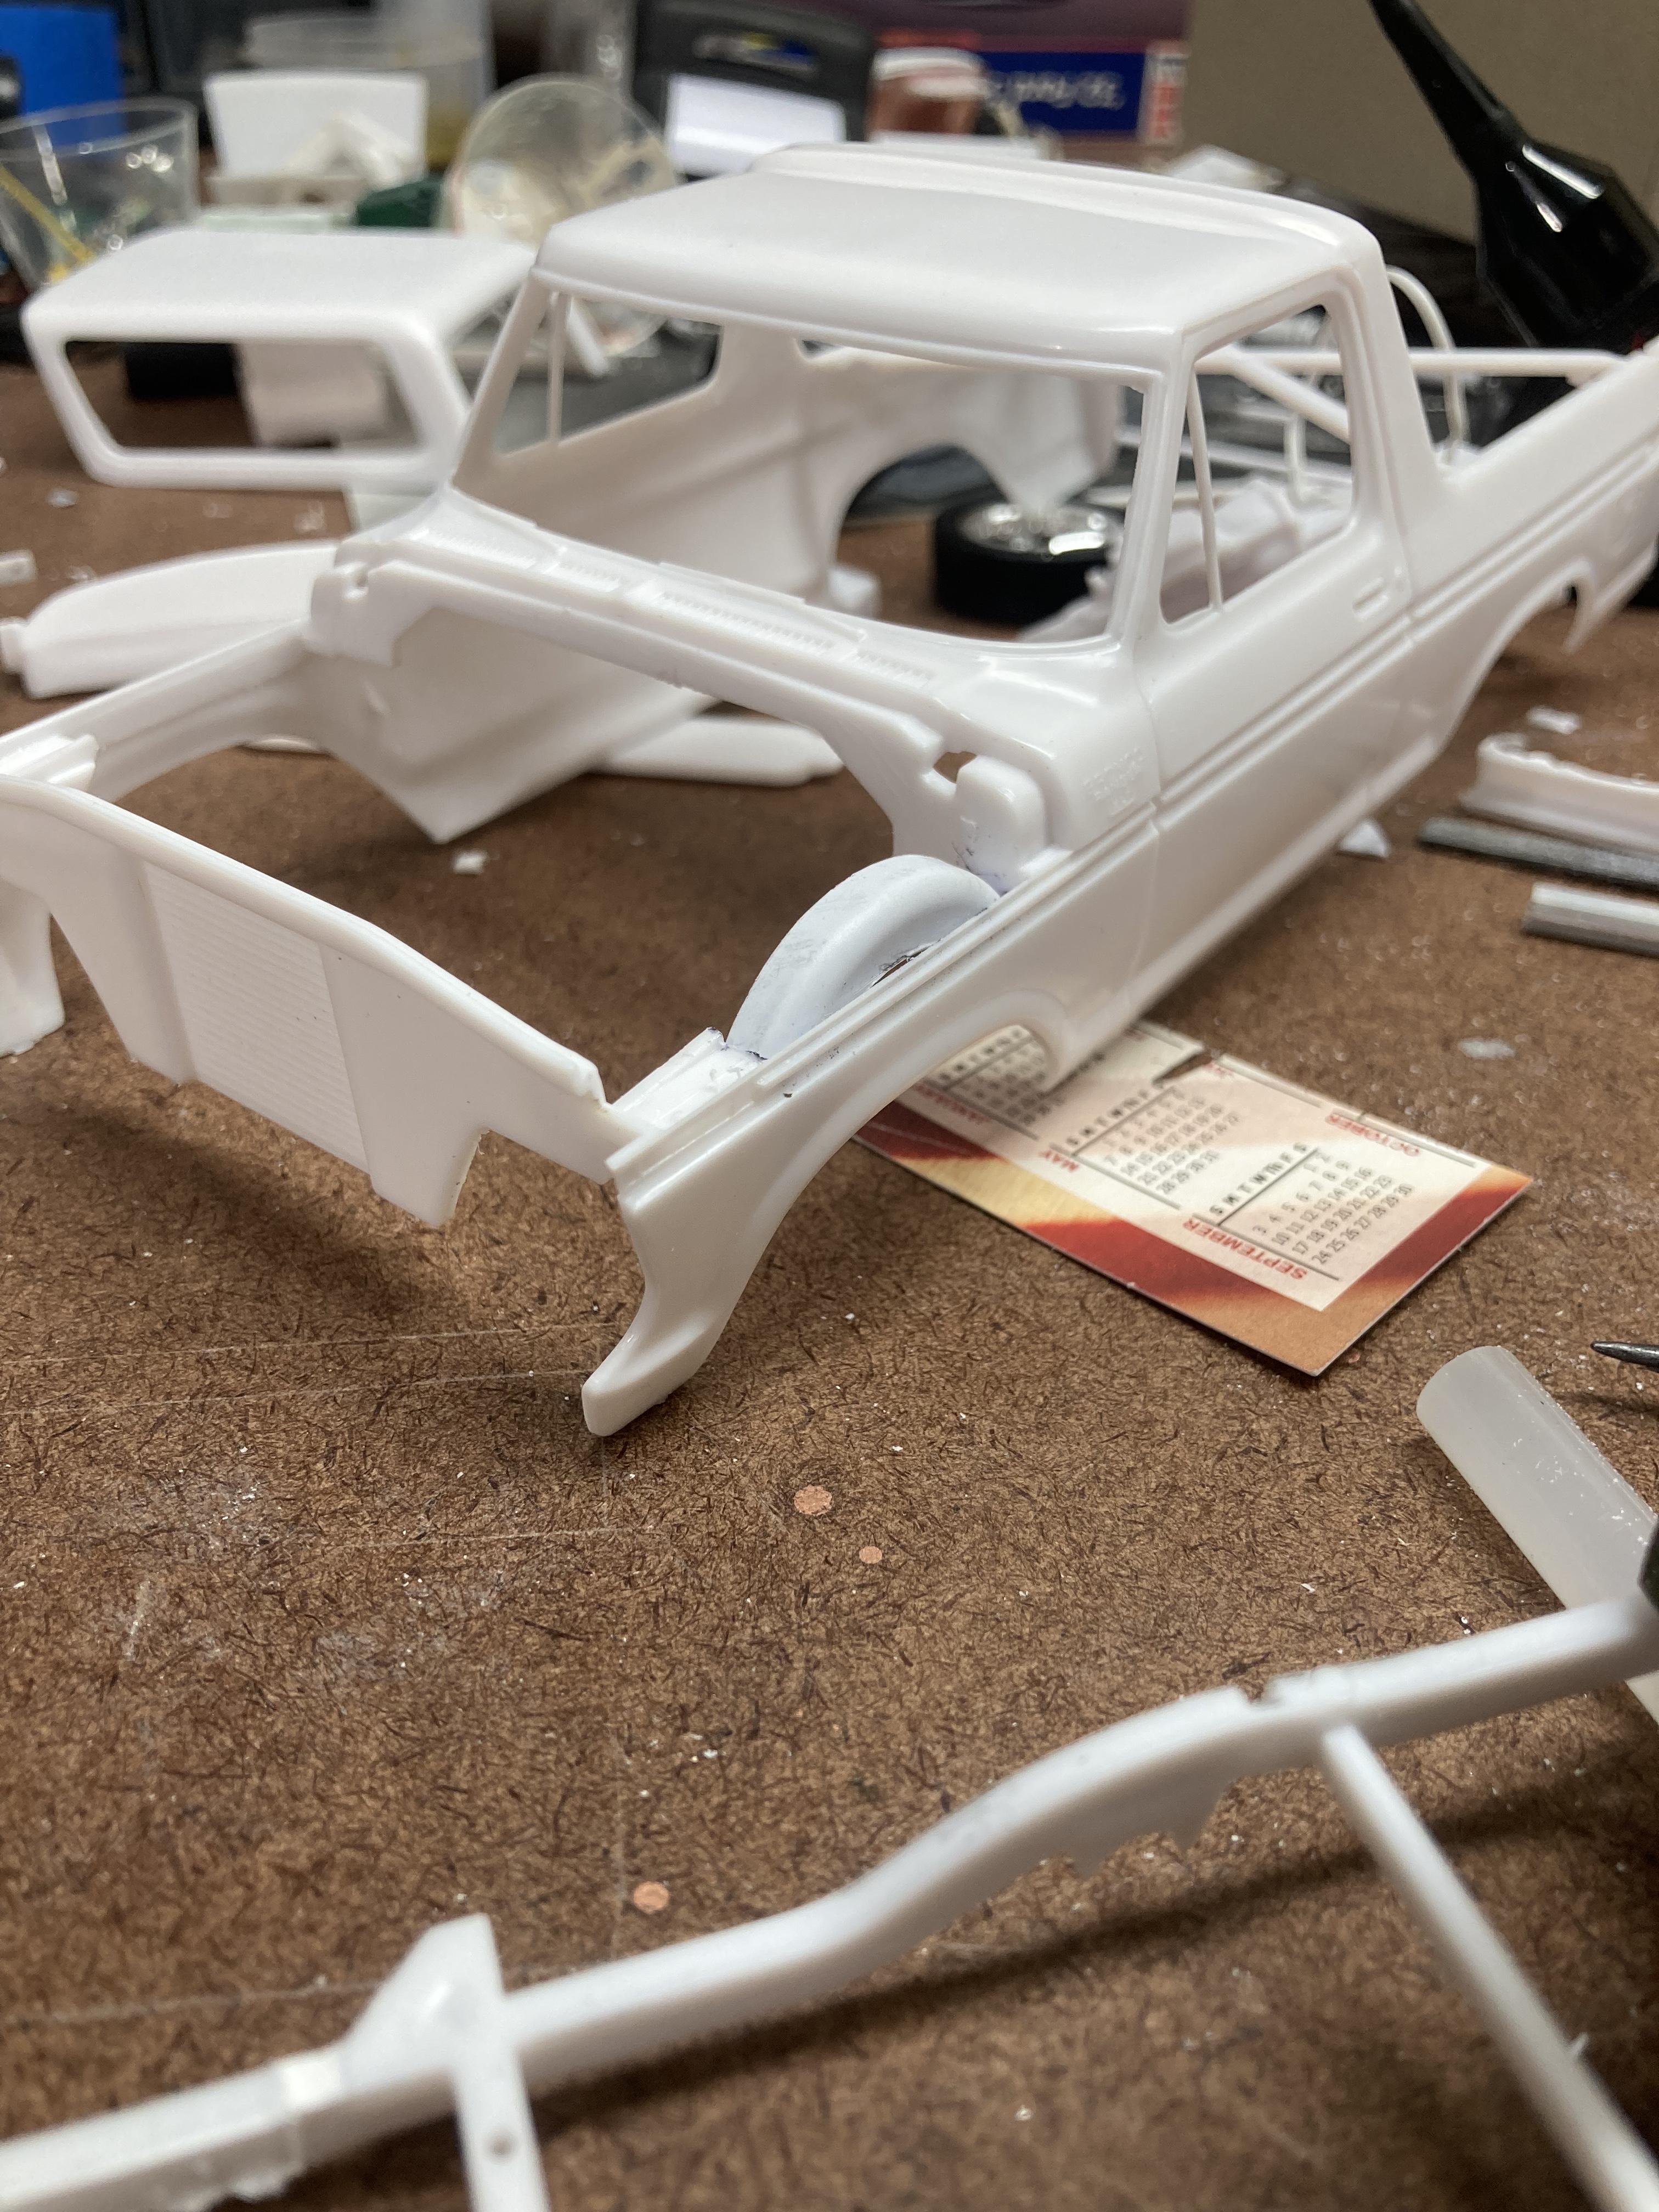
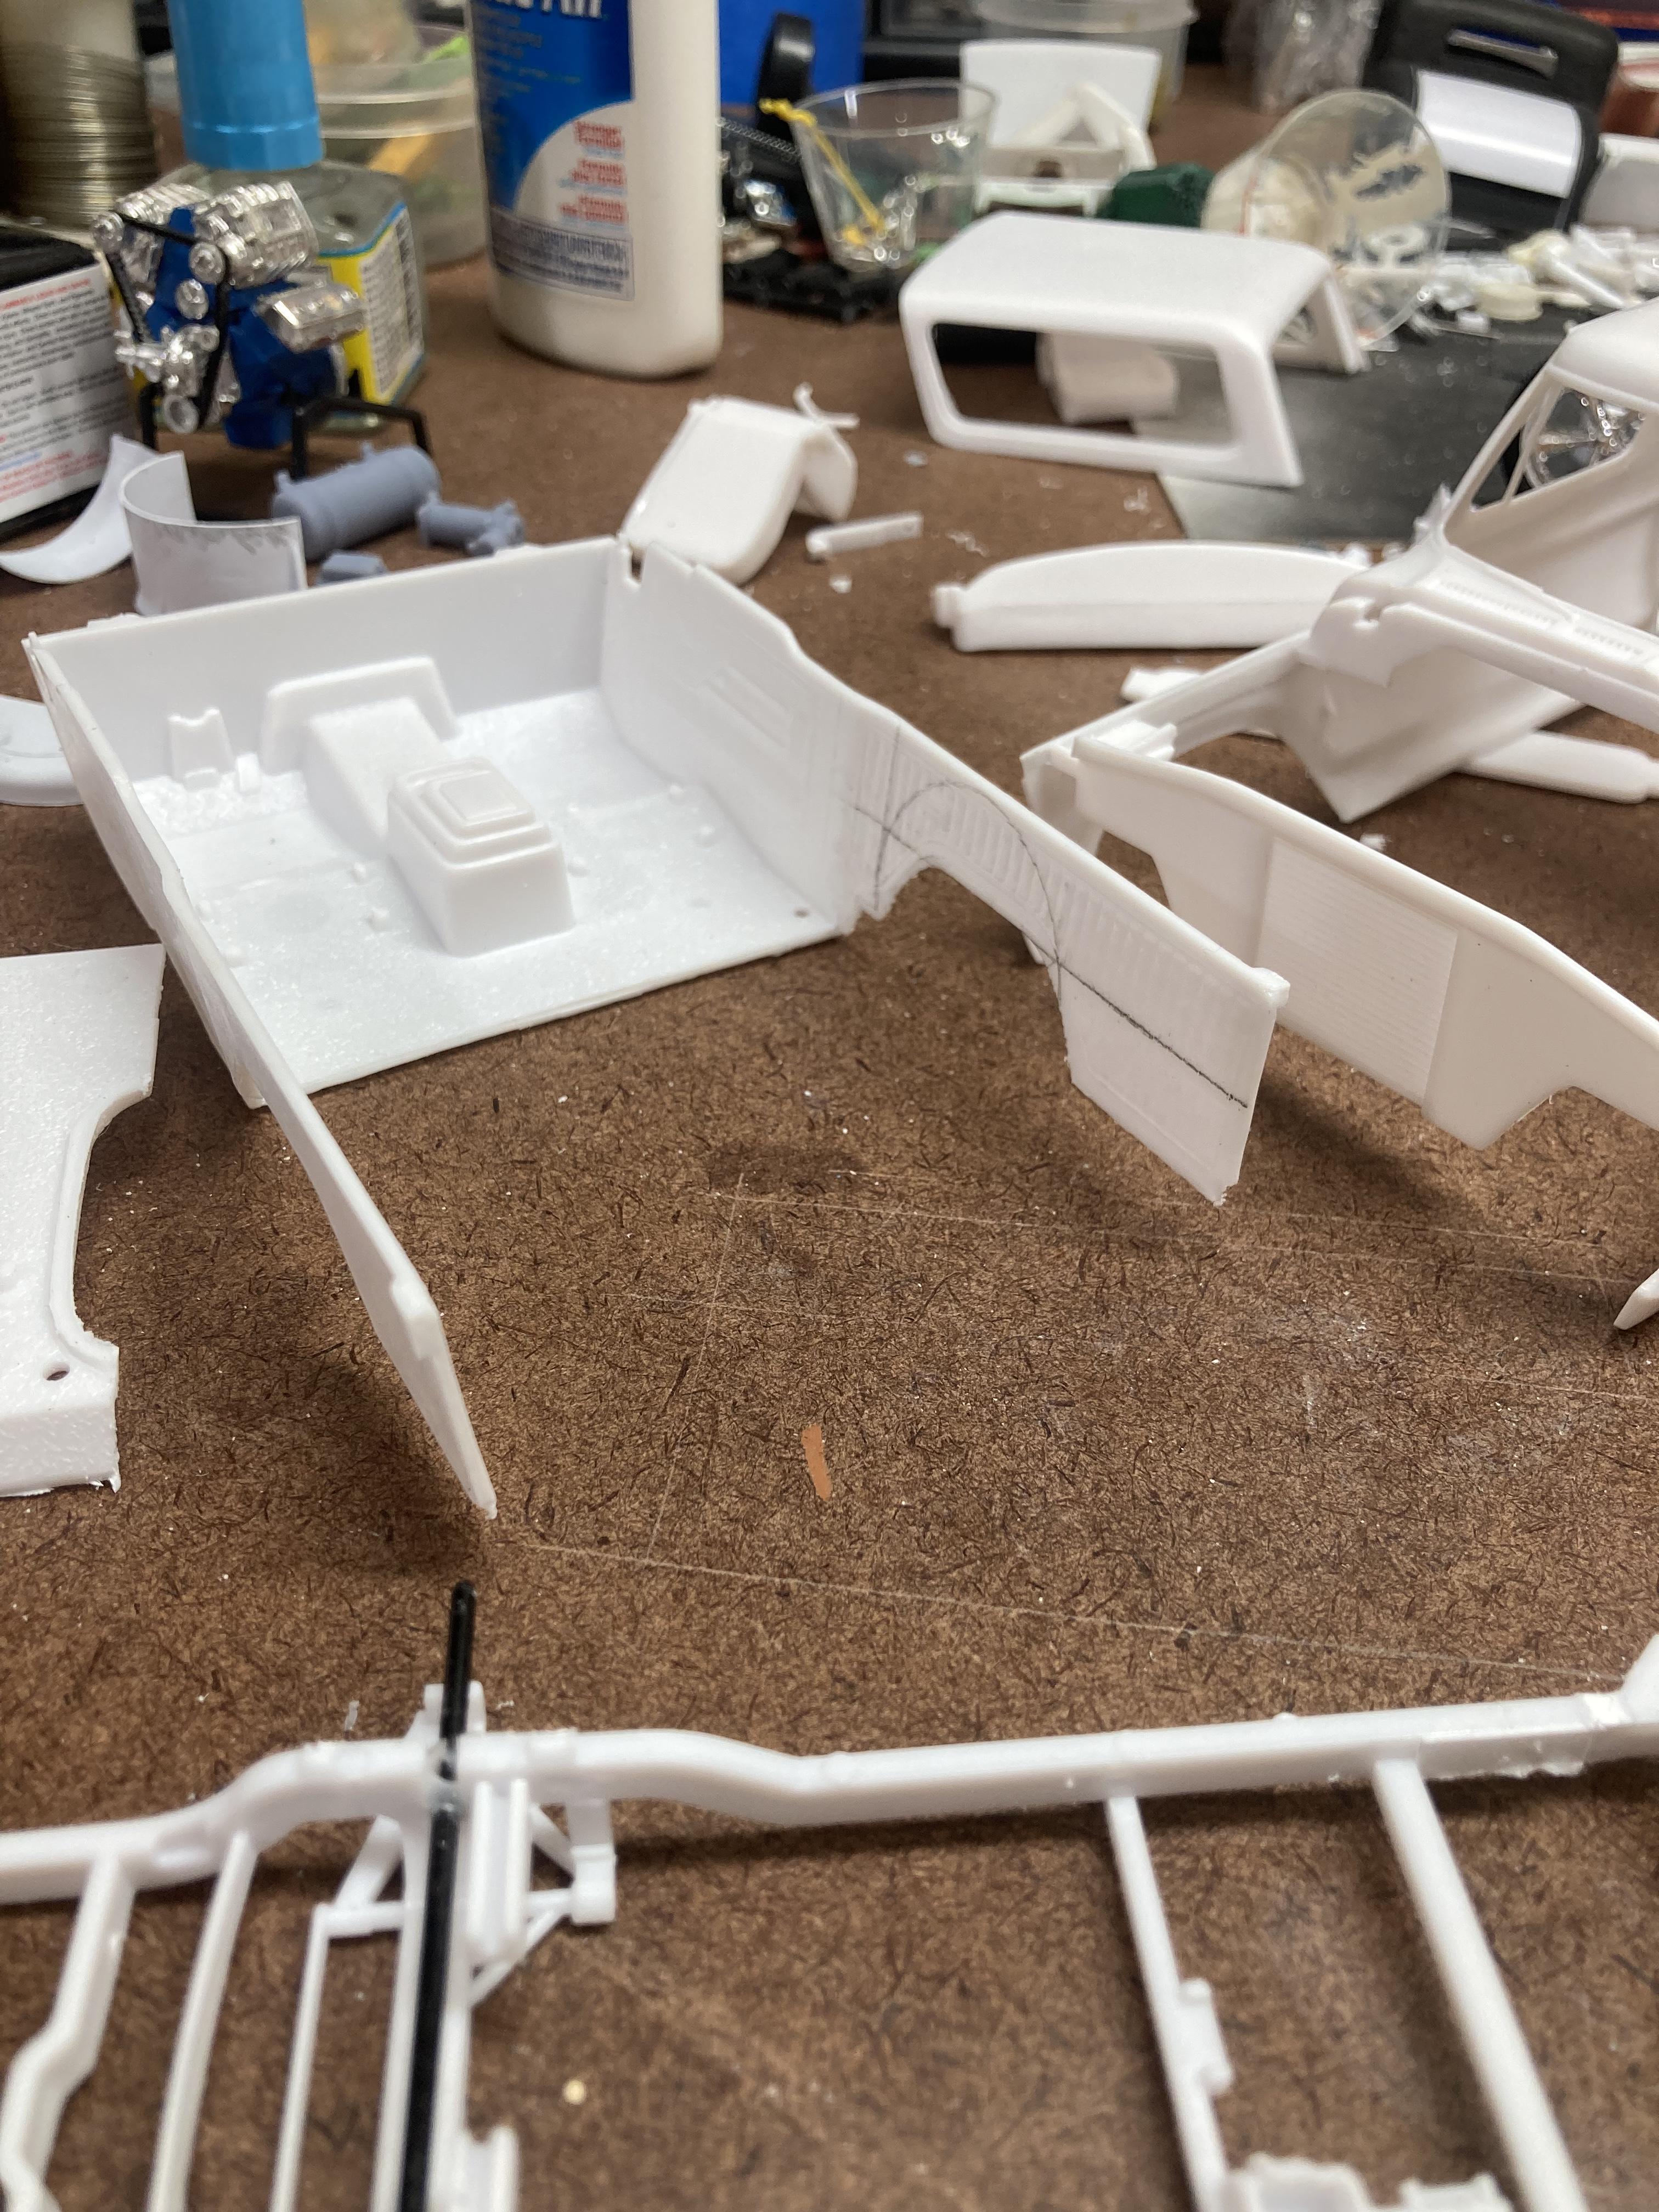
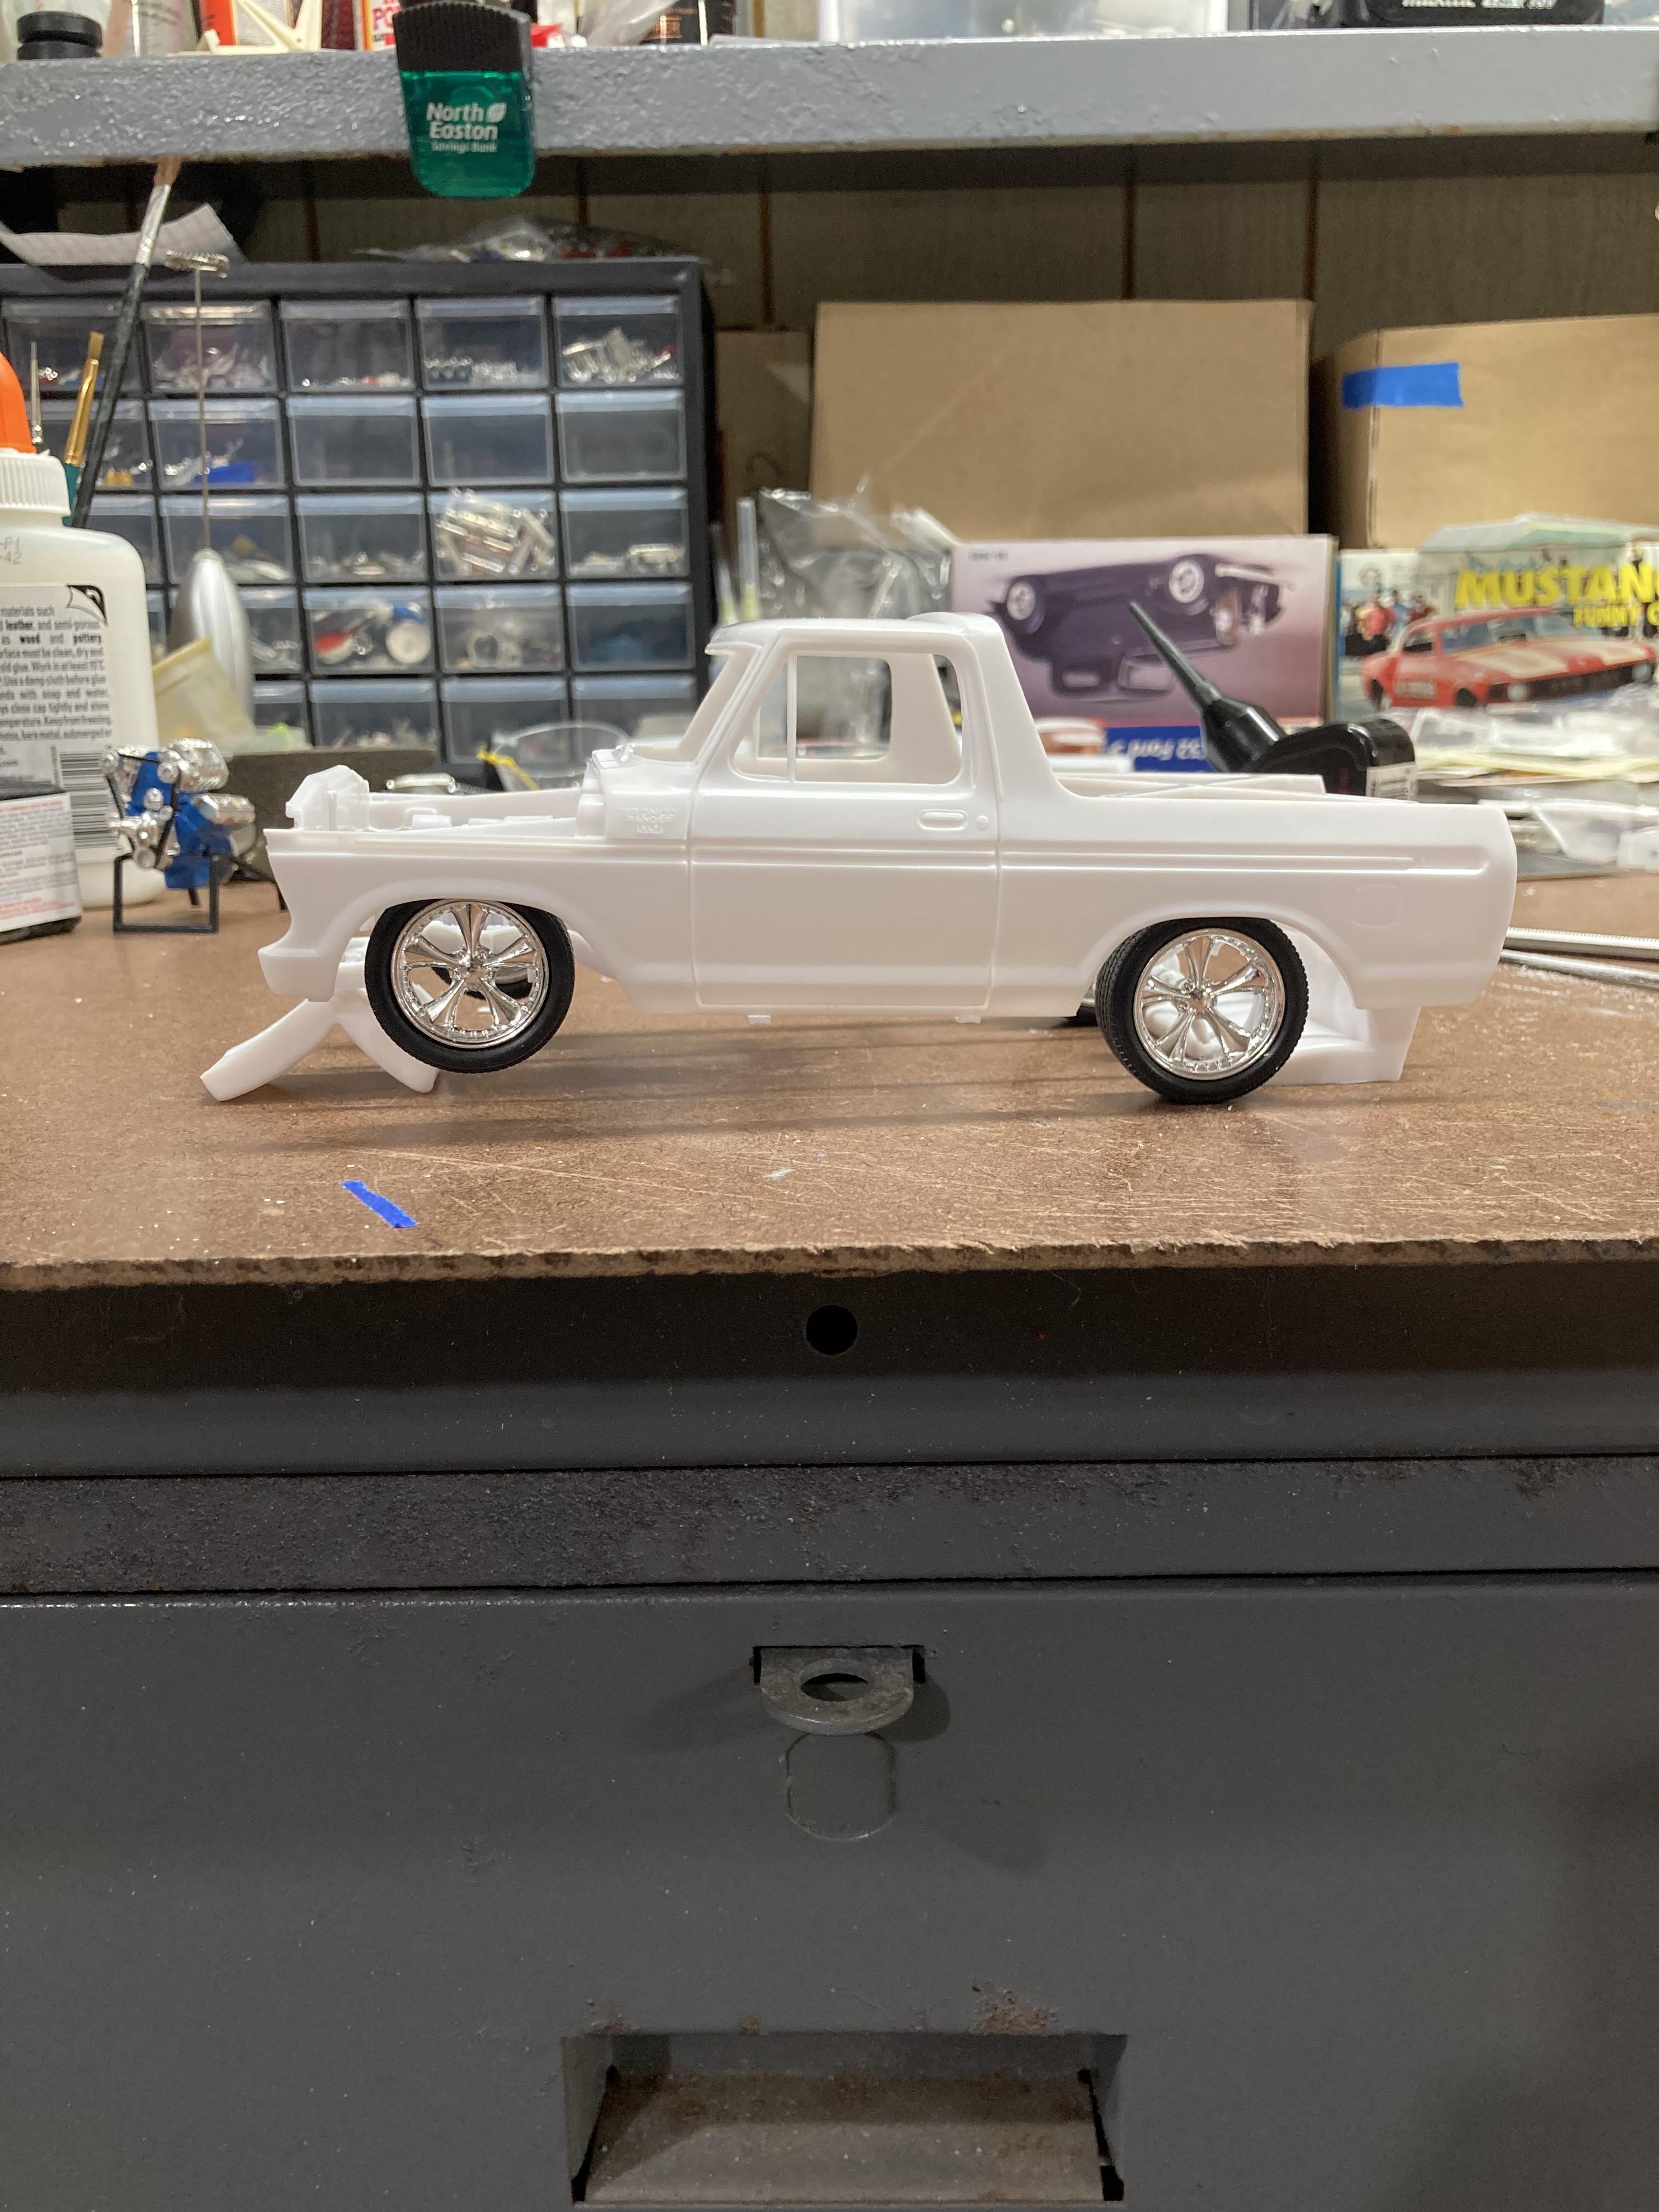
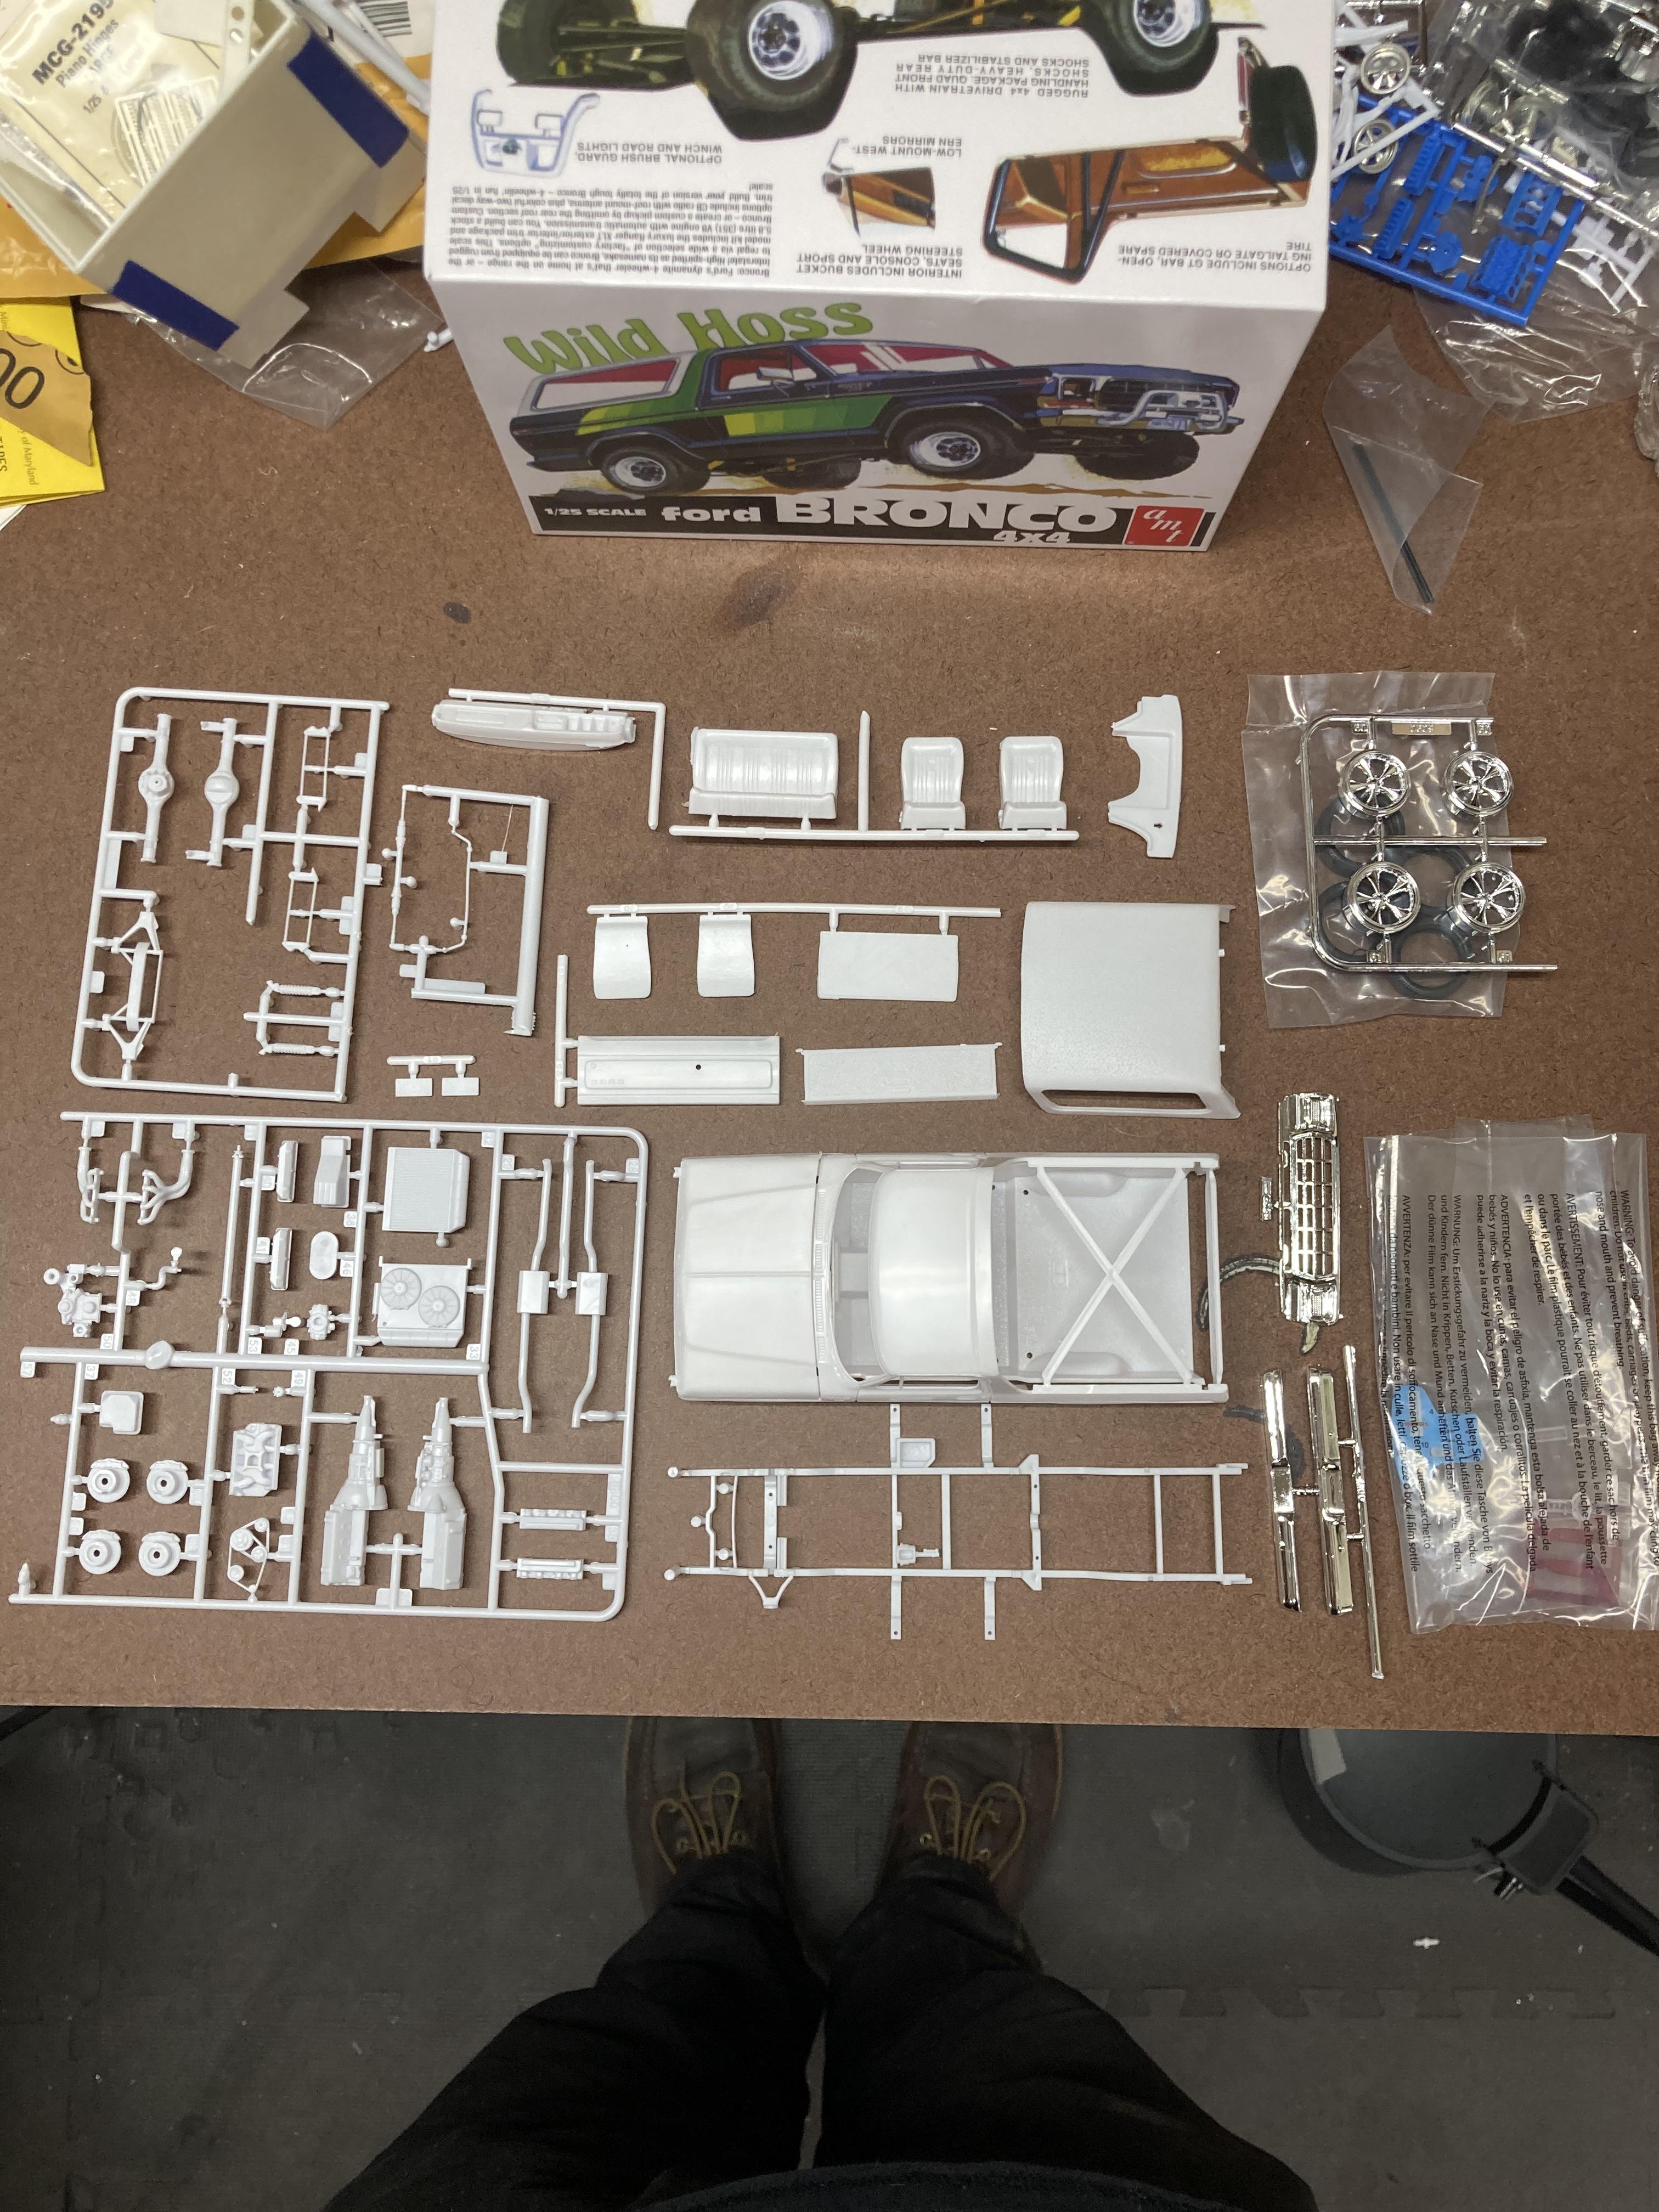
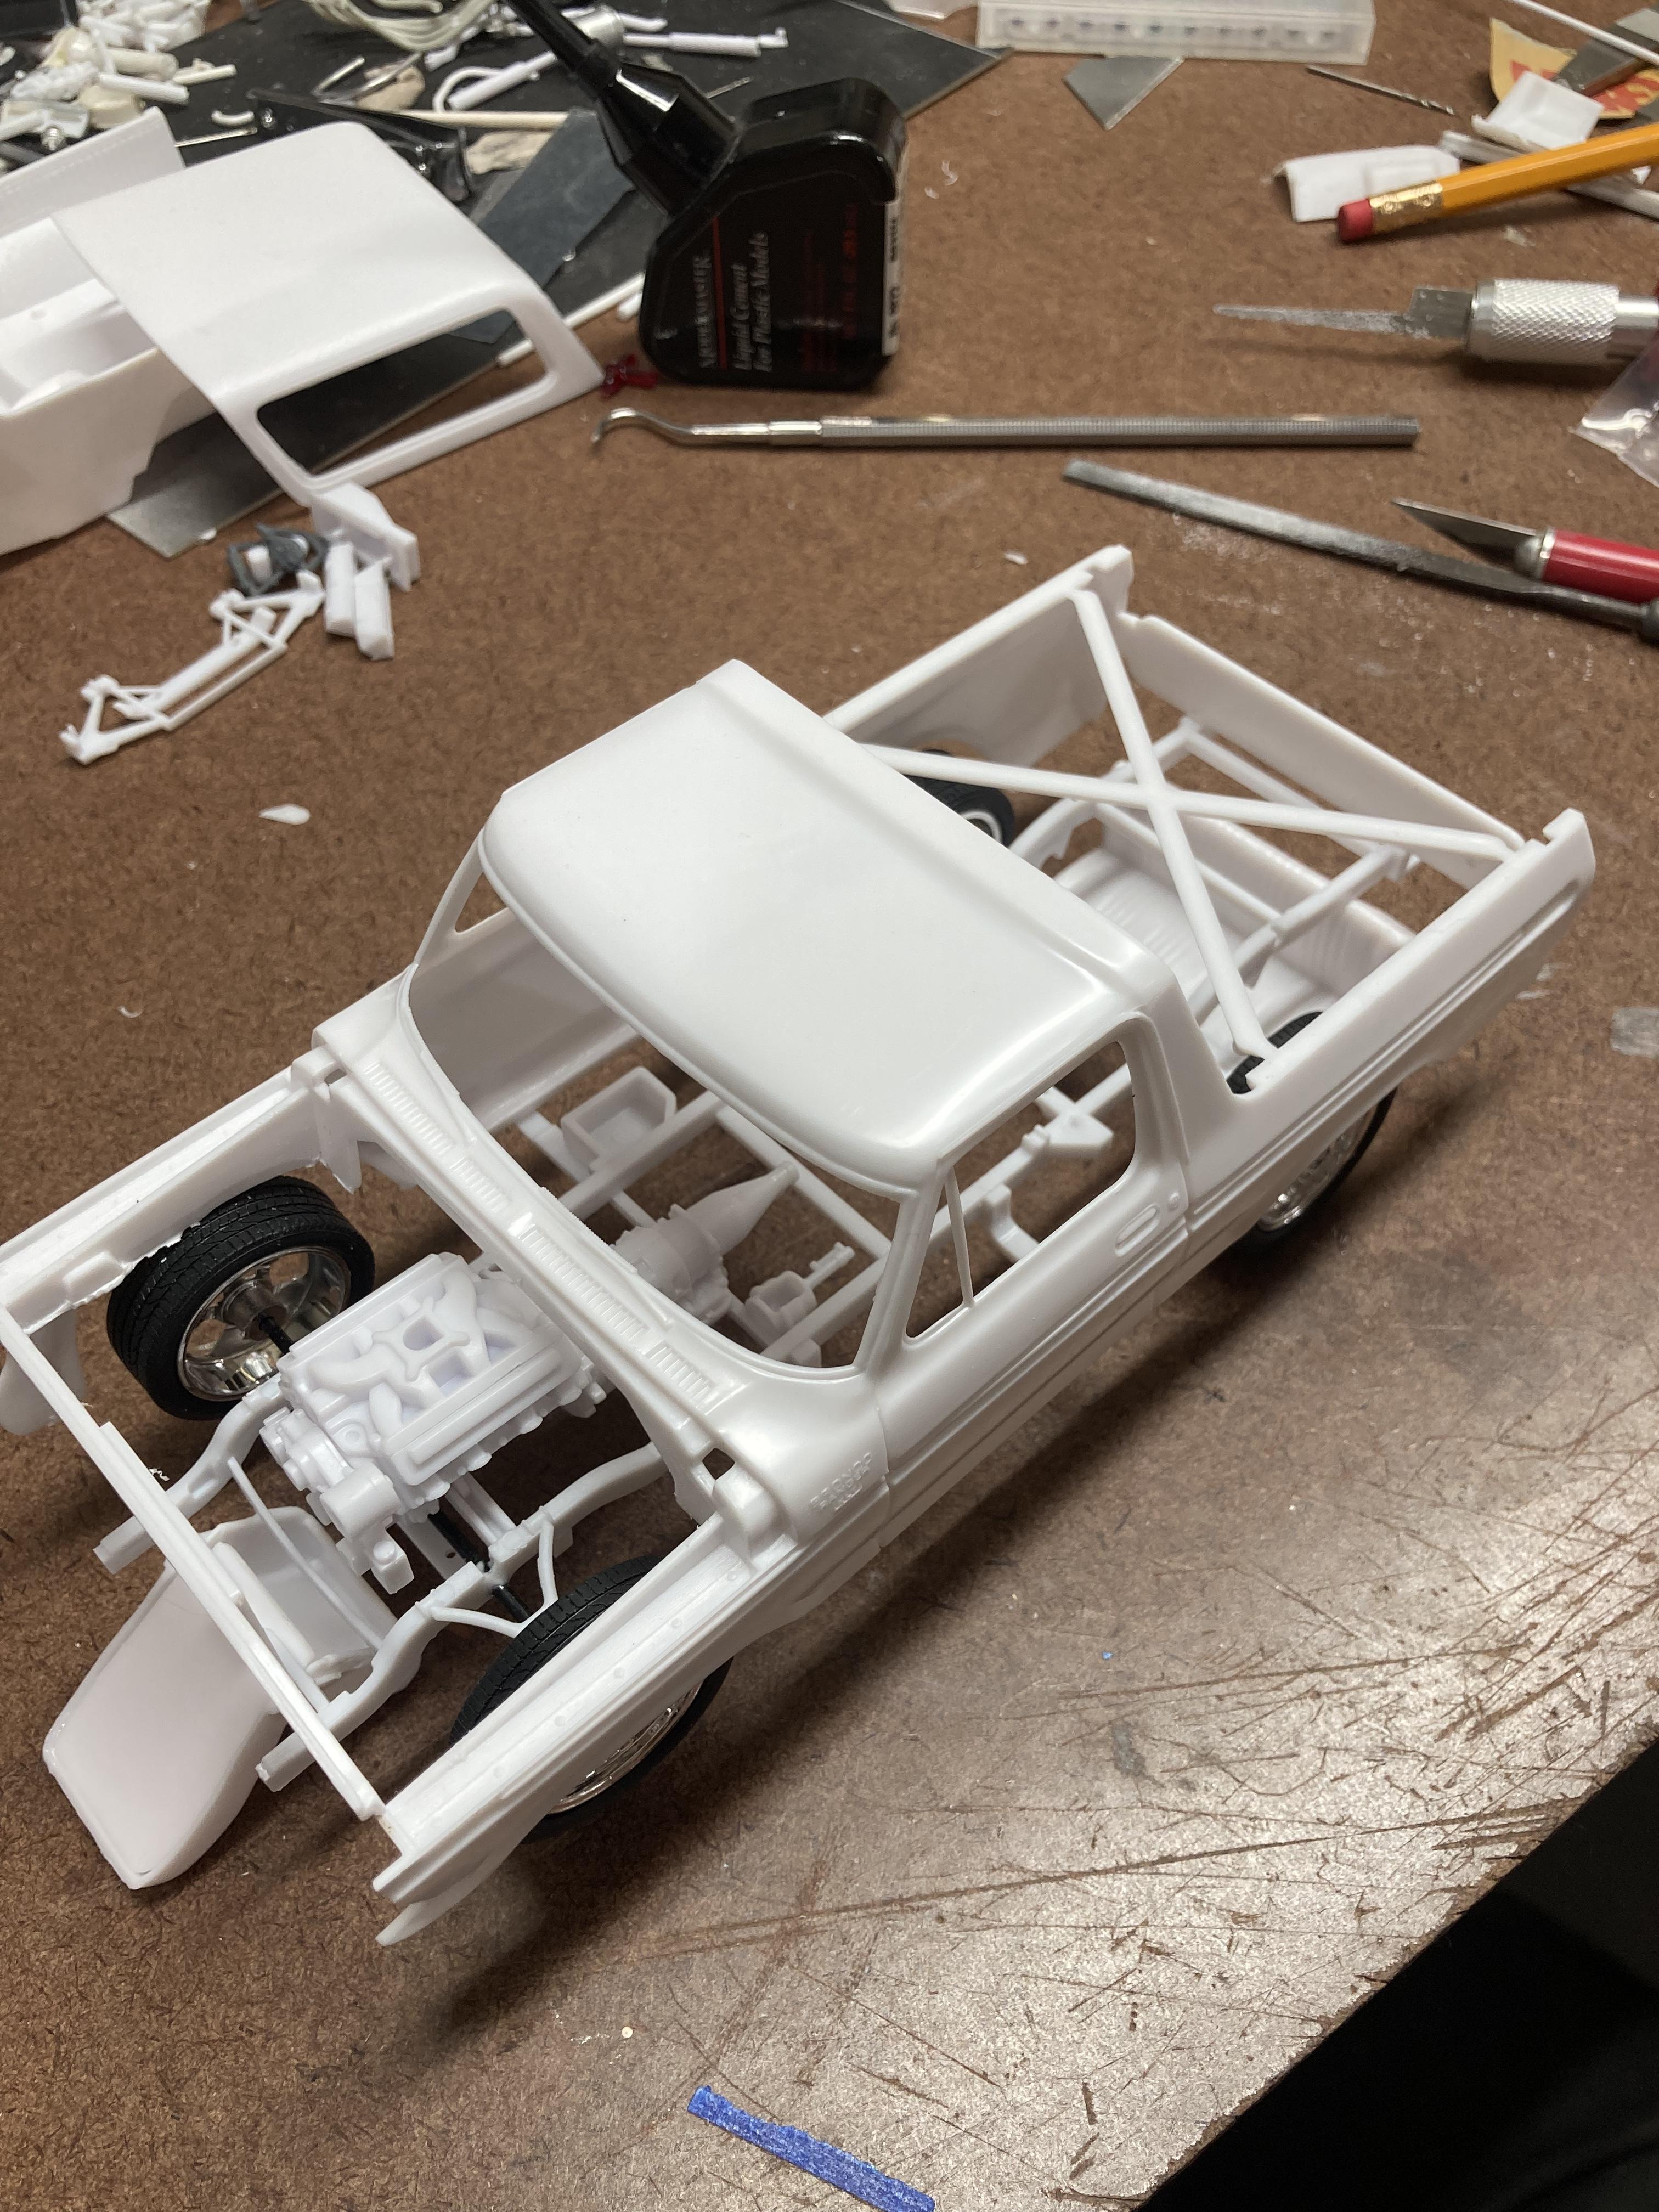
Joined another build off via Instagram. Here’s the start. Wild Hoss Bronco, full chassis swap from the FD100. Rough mock-up, cut the inner fenders out of the front. I don’t plan to use these wheels other than for mock-up. Frame needs to be shortened. That’s all for now. Thanks for looking.
-
Hot Rod Hauler
Tarkmucker replied to Tarkmucker's topic in WIP: Model Trucks: Pickups, Vans, SUVs, Light Commercial
Thanks Steve. I was thinking about trimming the tire but the detail is so beautiful on them and I can’t bring myself to do that. This one is on the back burner for now. -
Hot Rod Hauler
Tarkmucker replied to Tarkmucker's topic in WIP: Model Trucks: Pickups, Vans, SUVs, Light Commercial
Thanks Jim, I’d love to see what you do with a hauler. Always building some great stuff. -
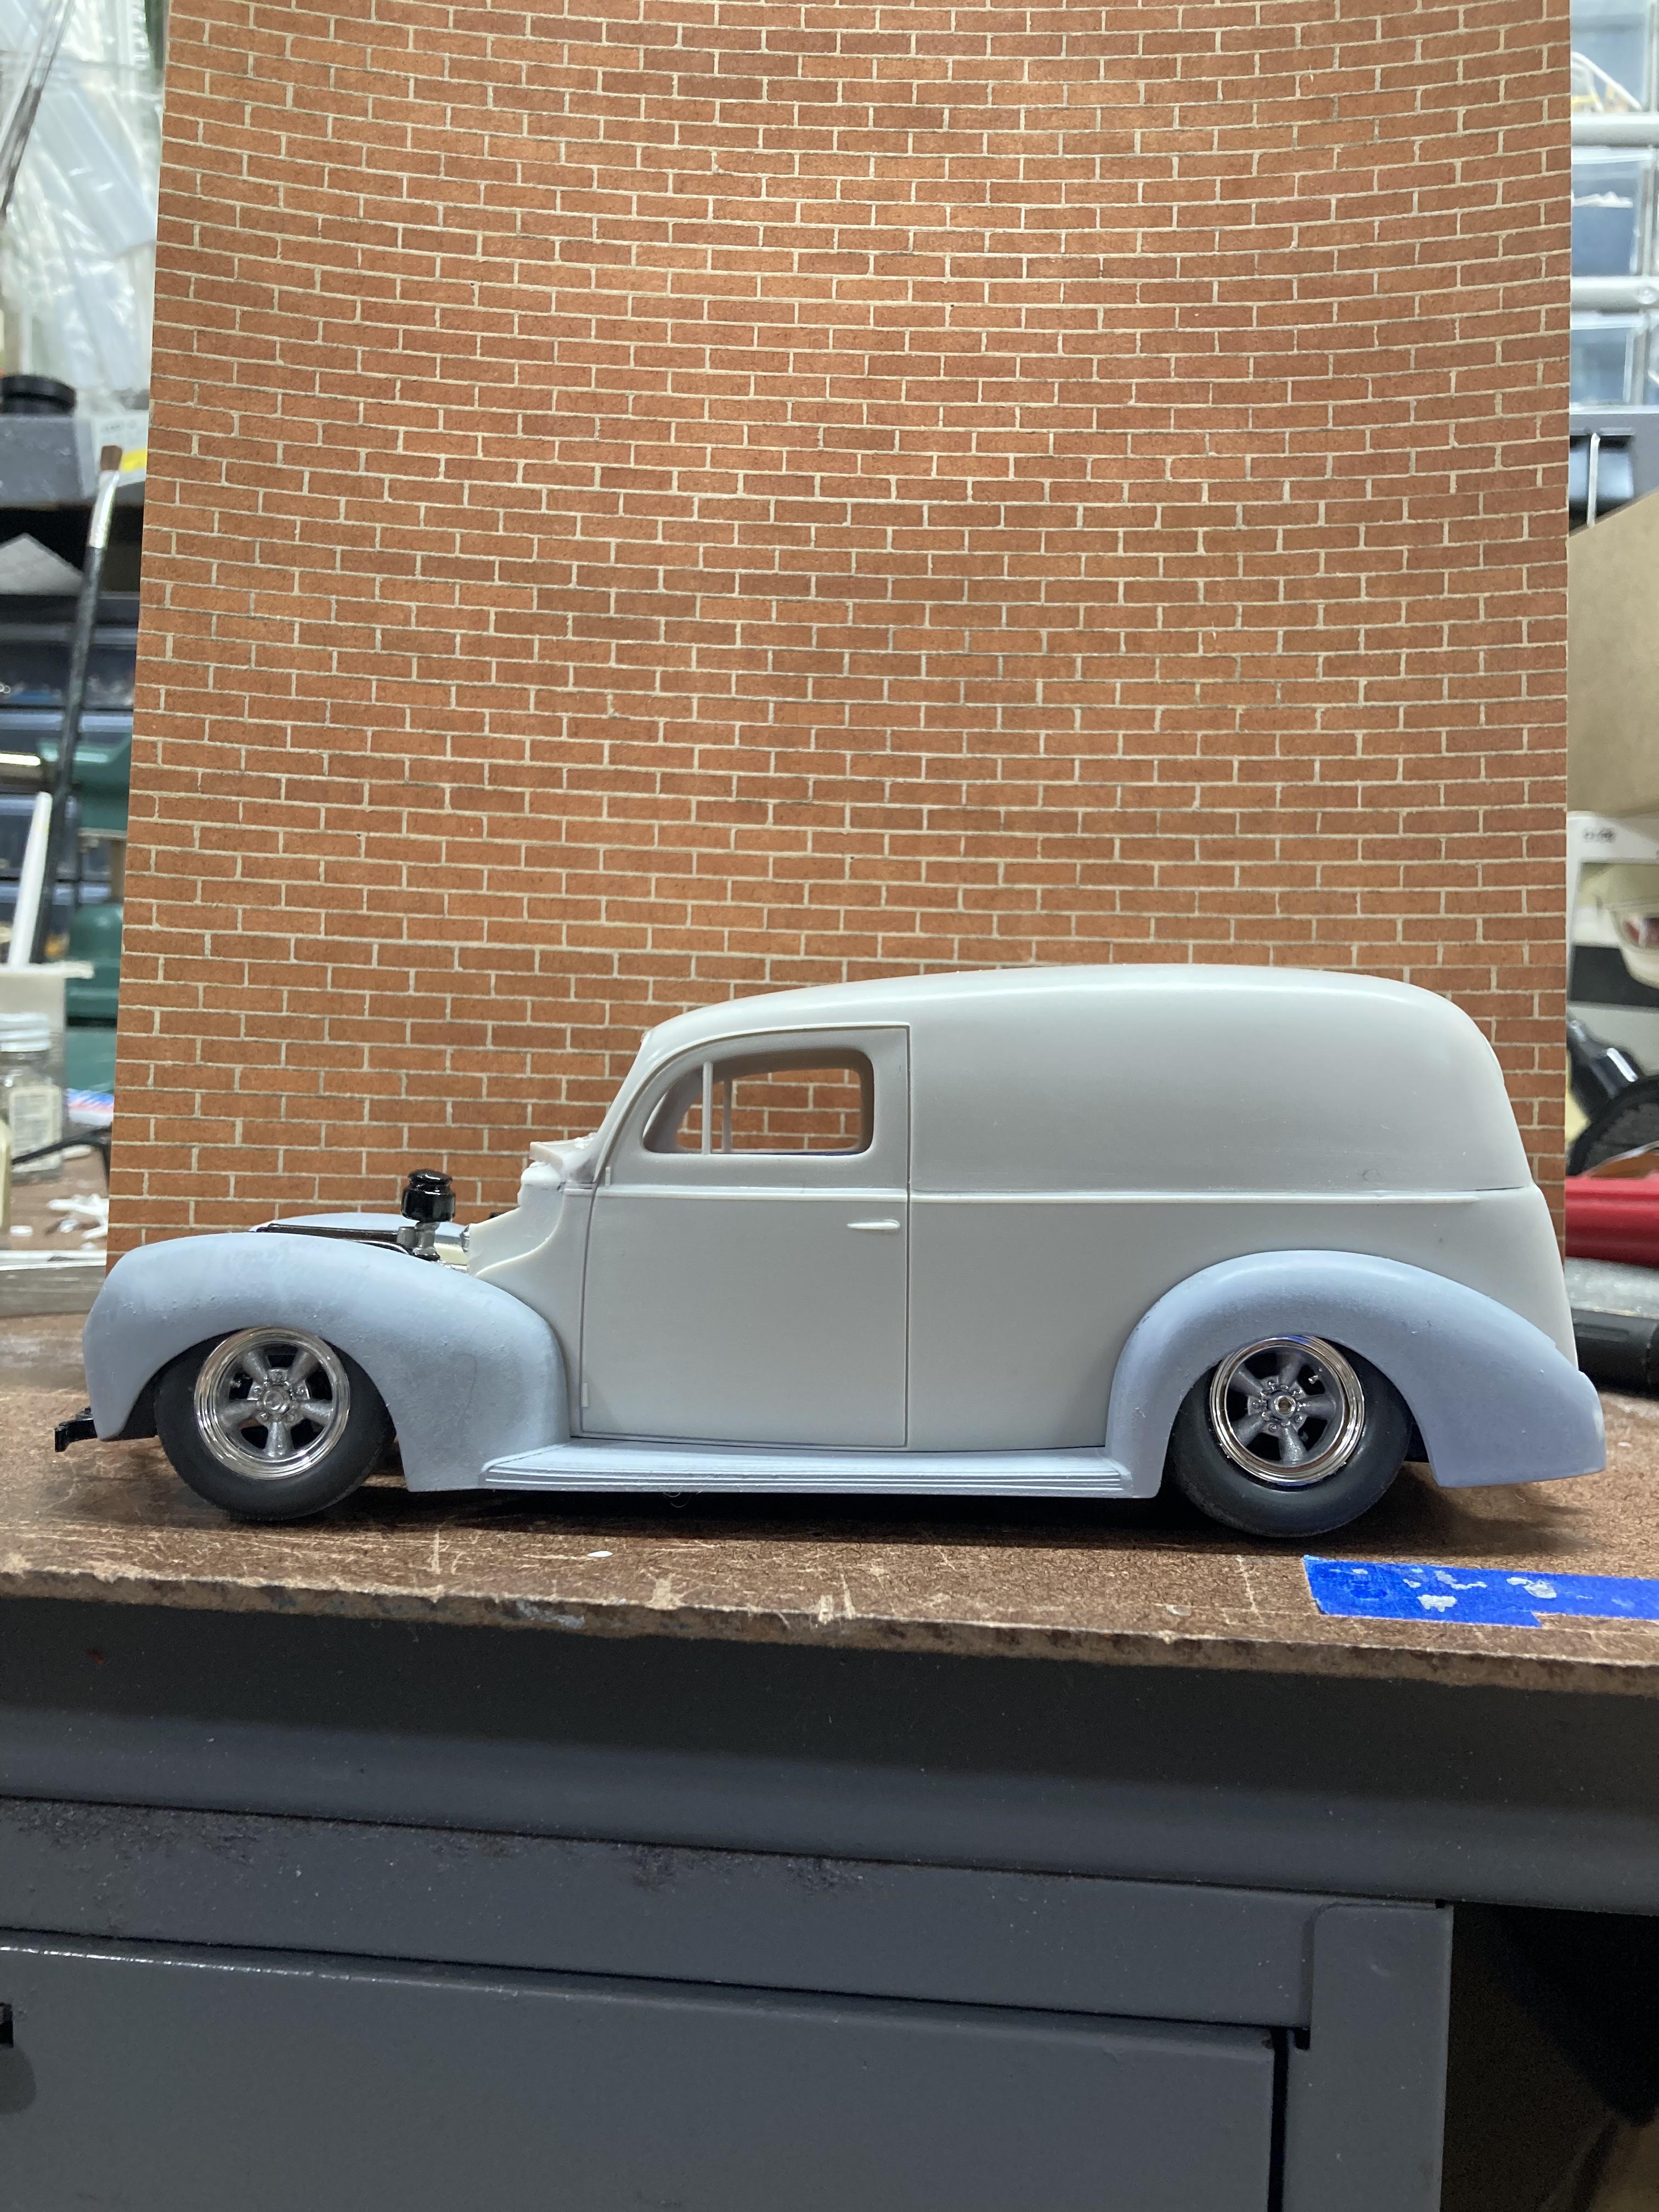
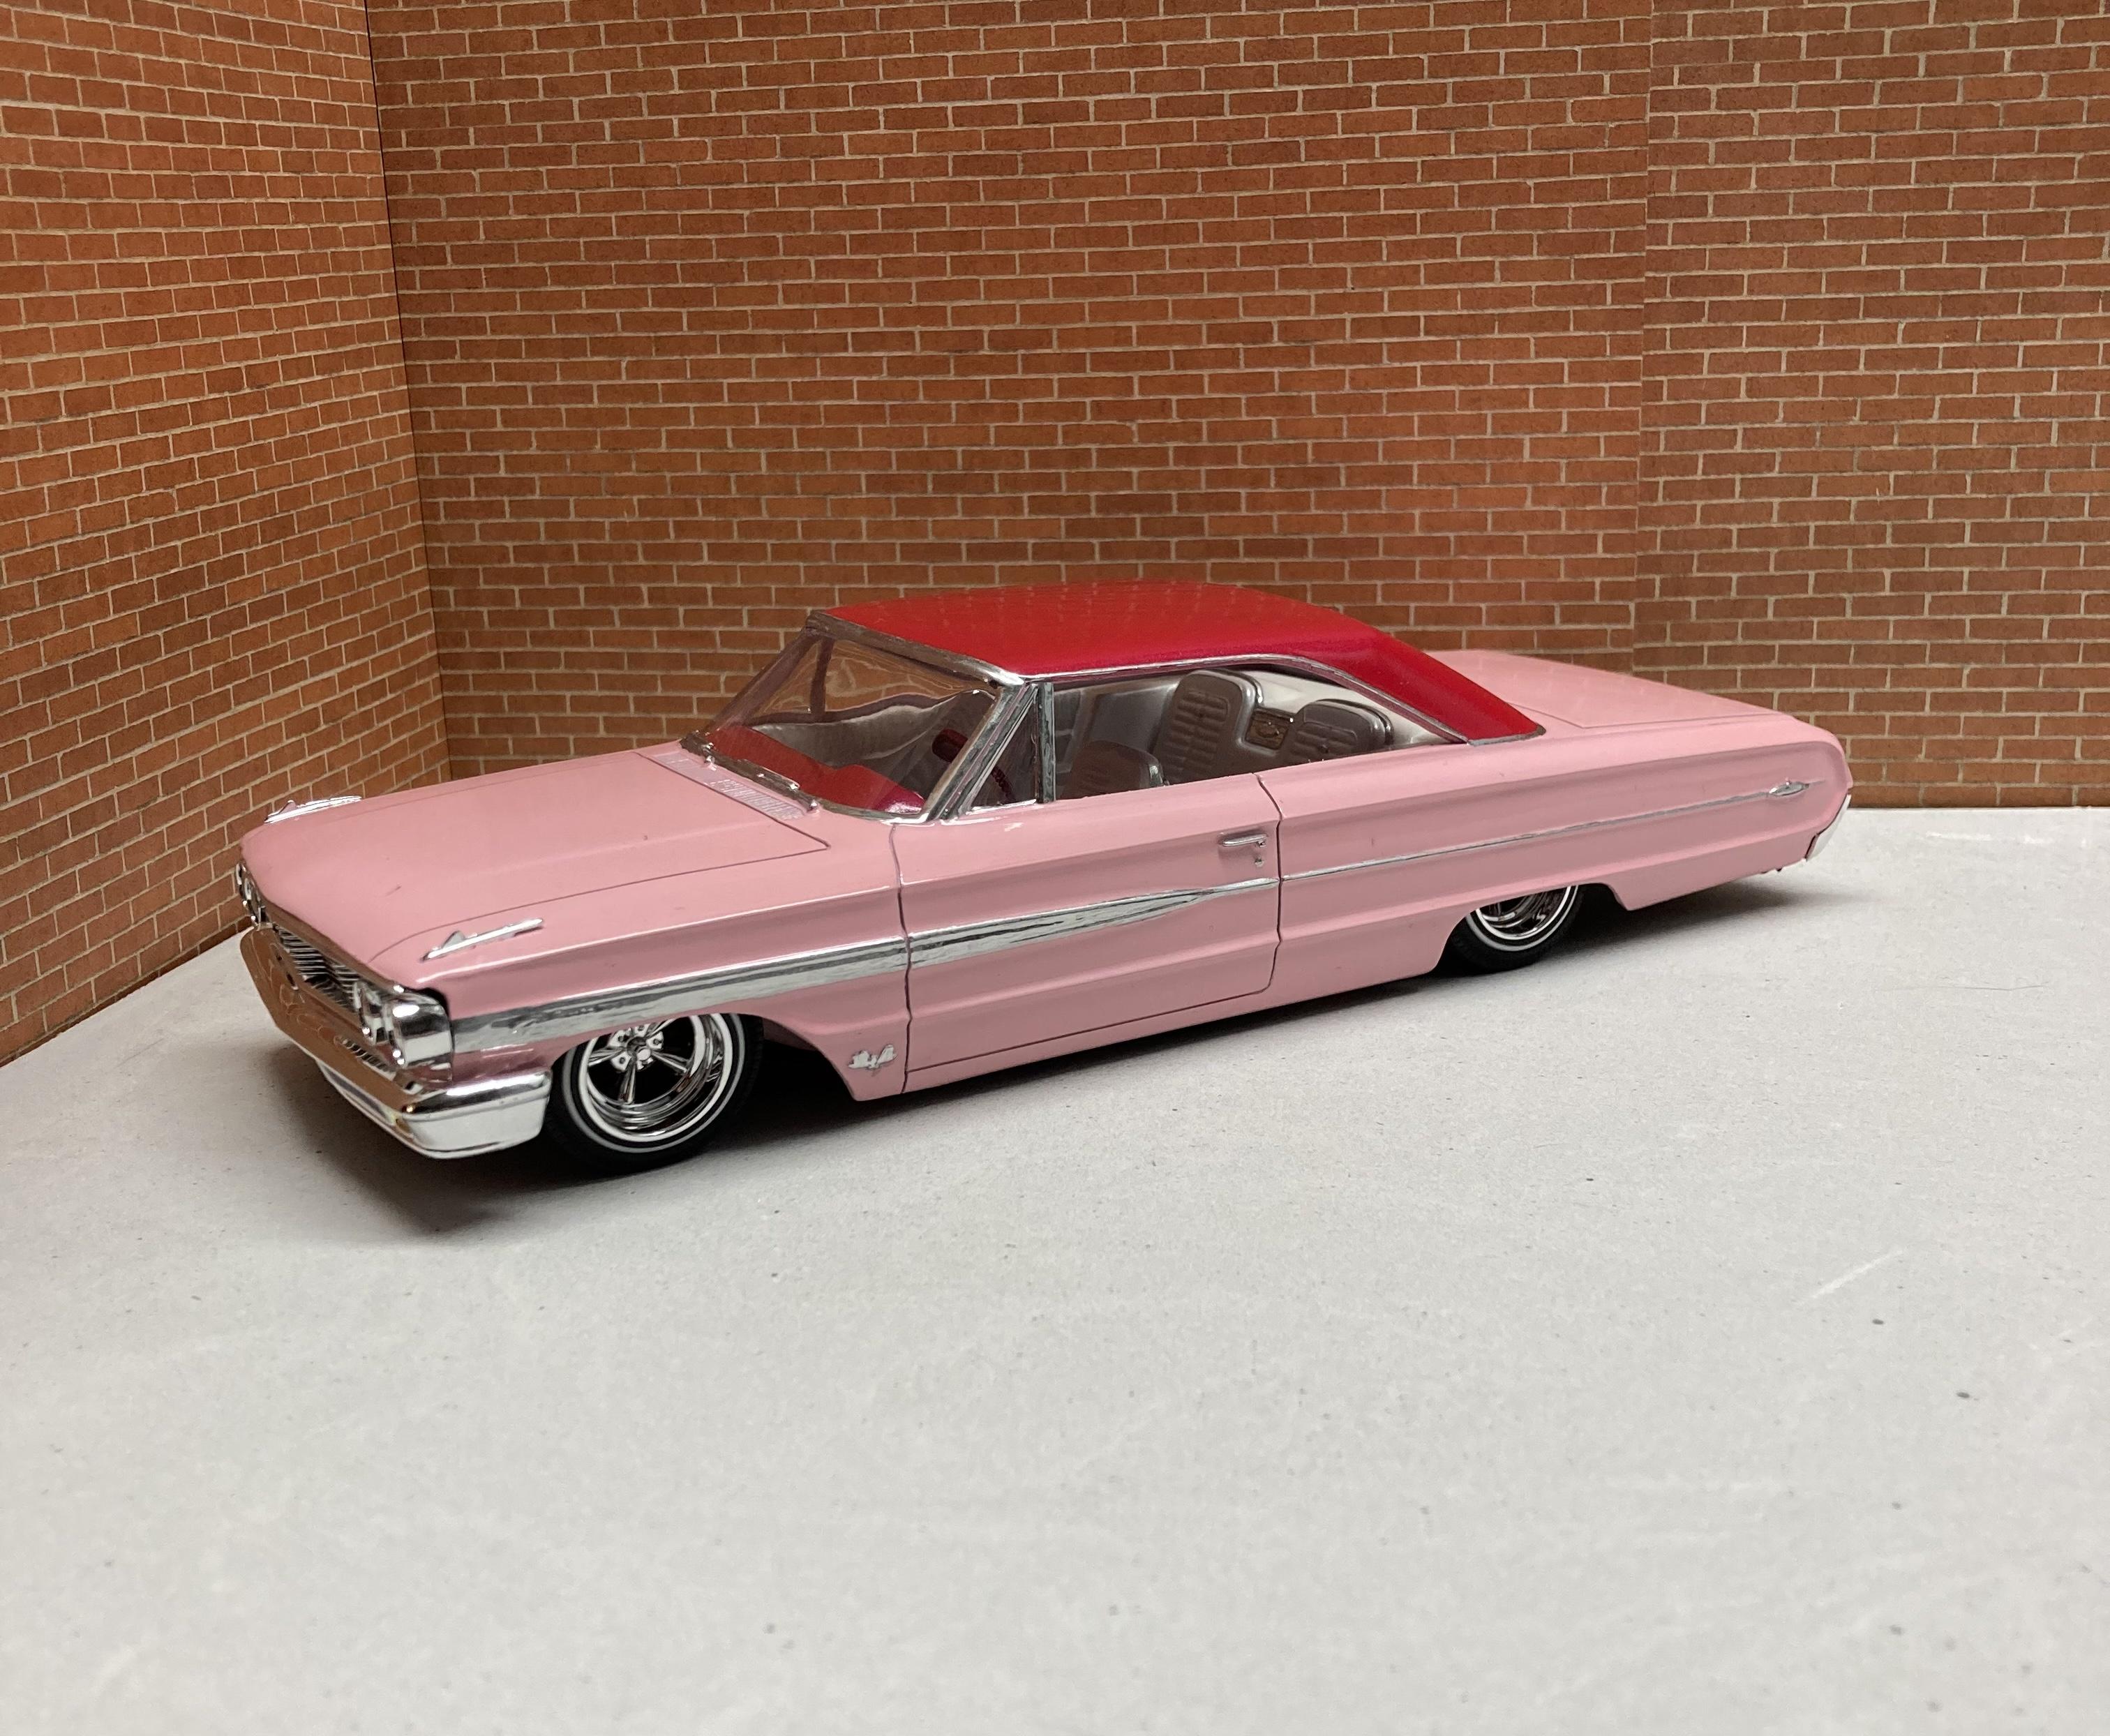
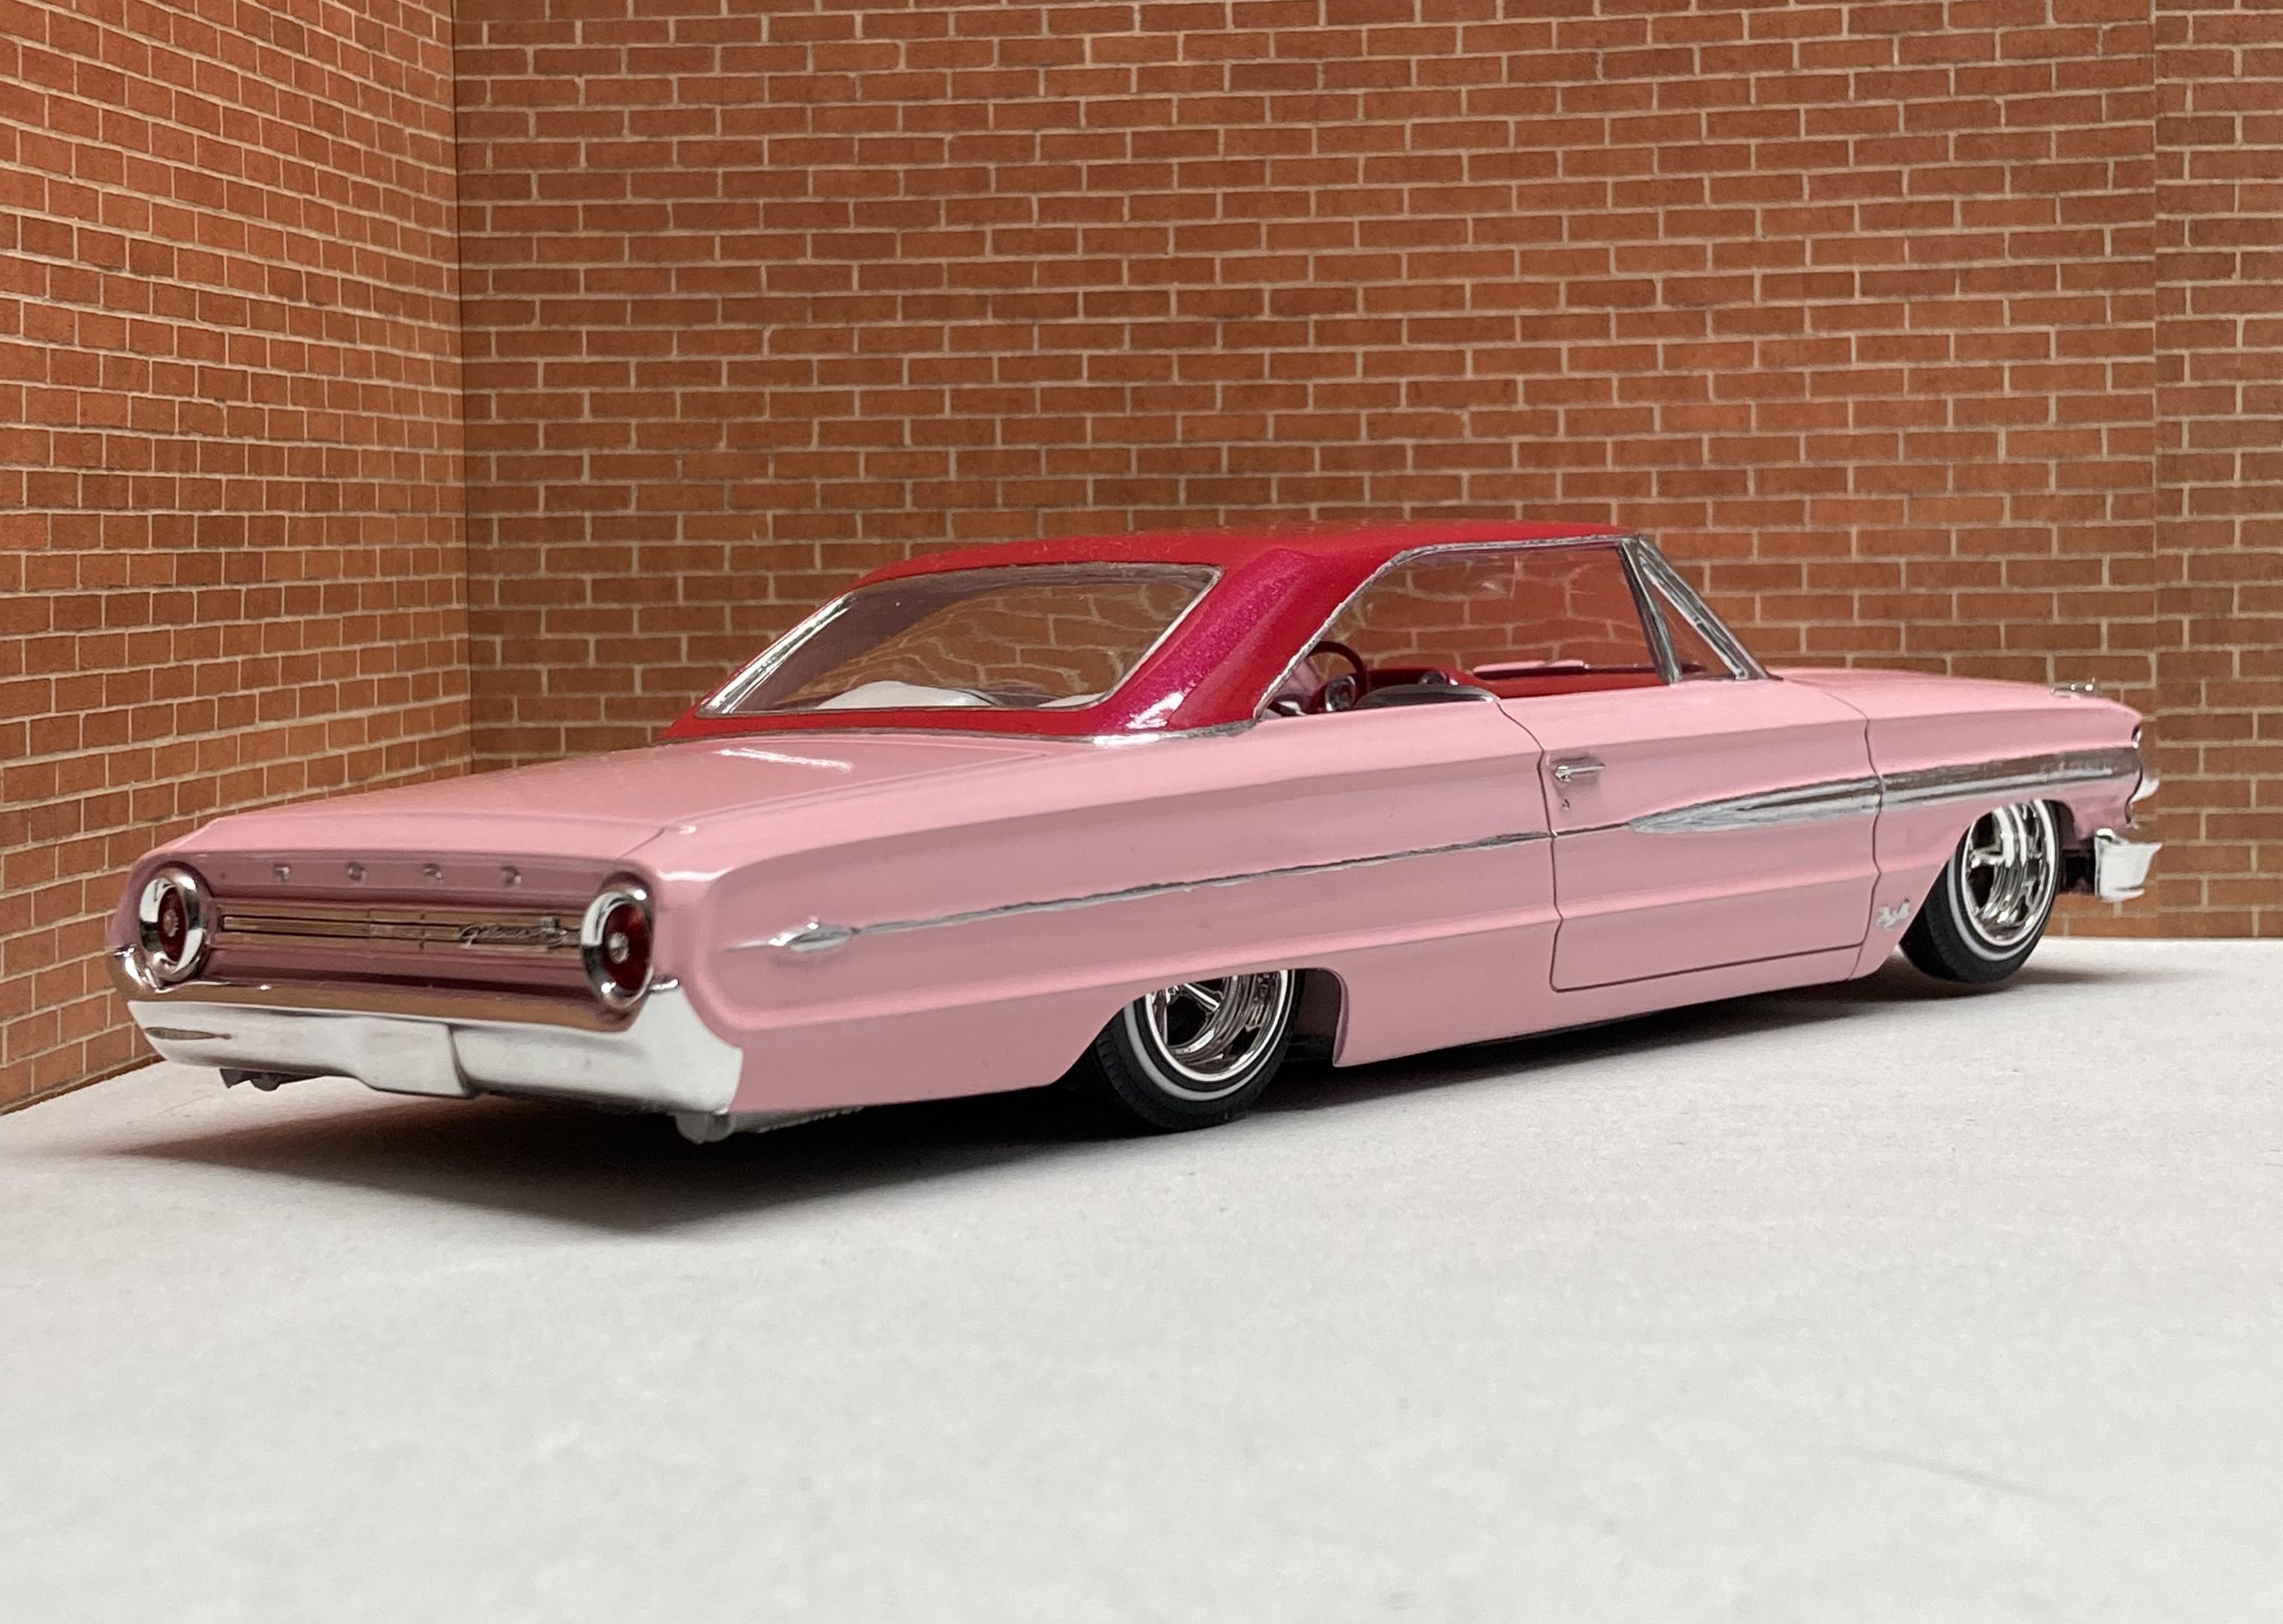
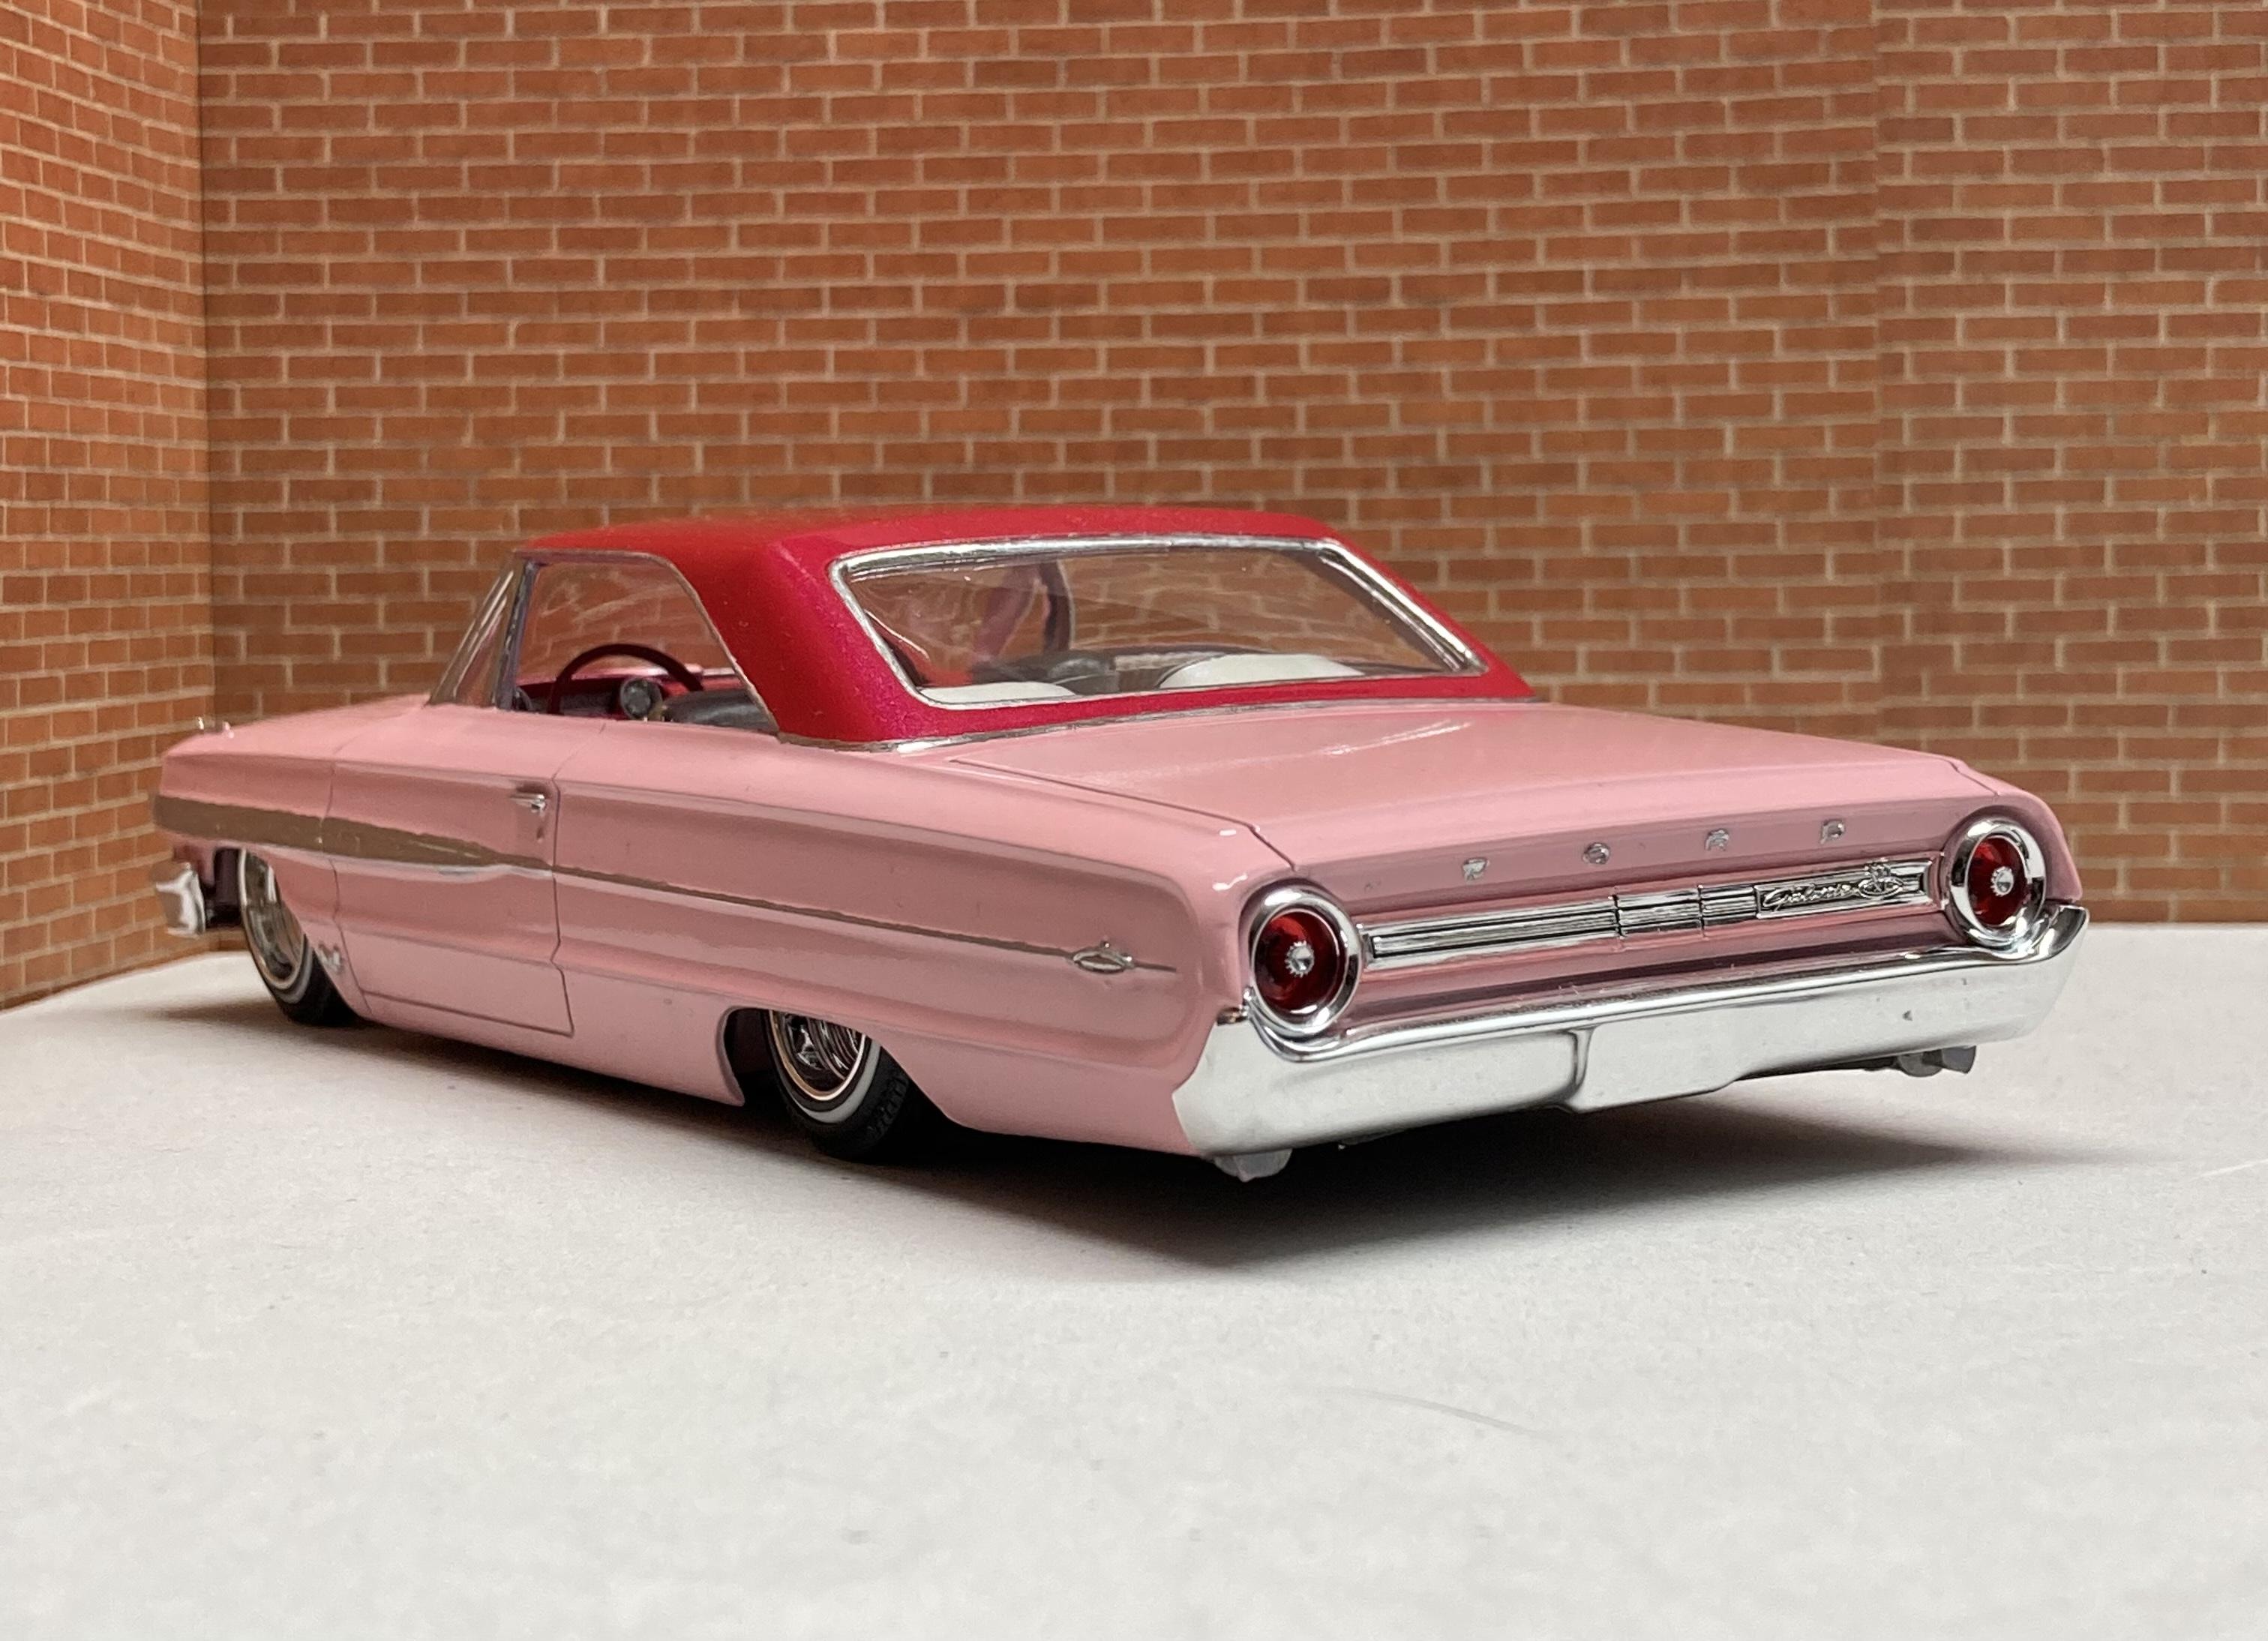
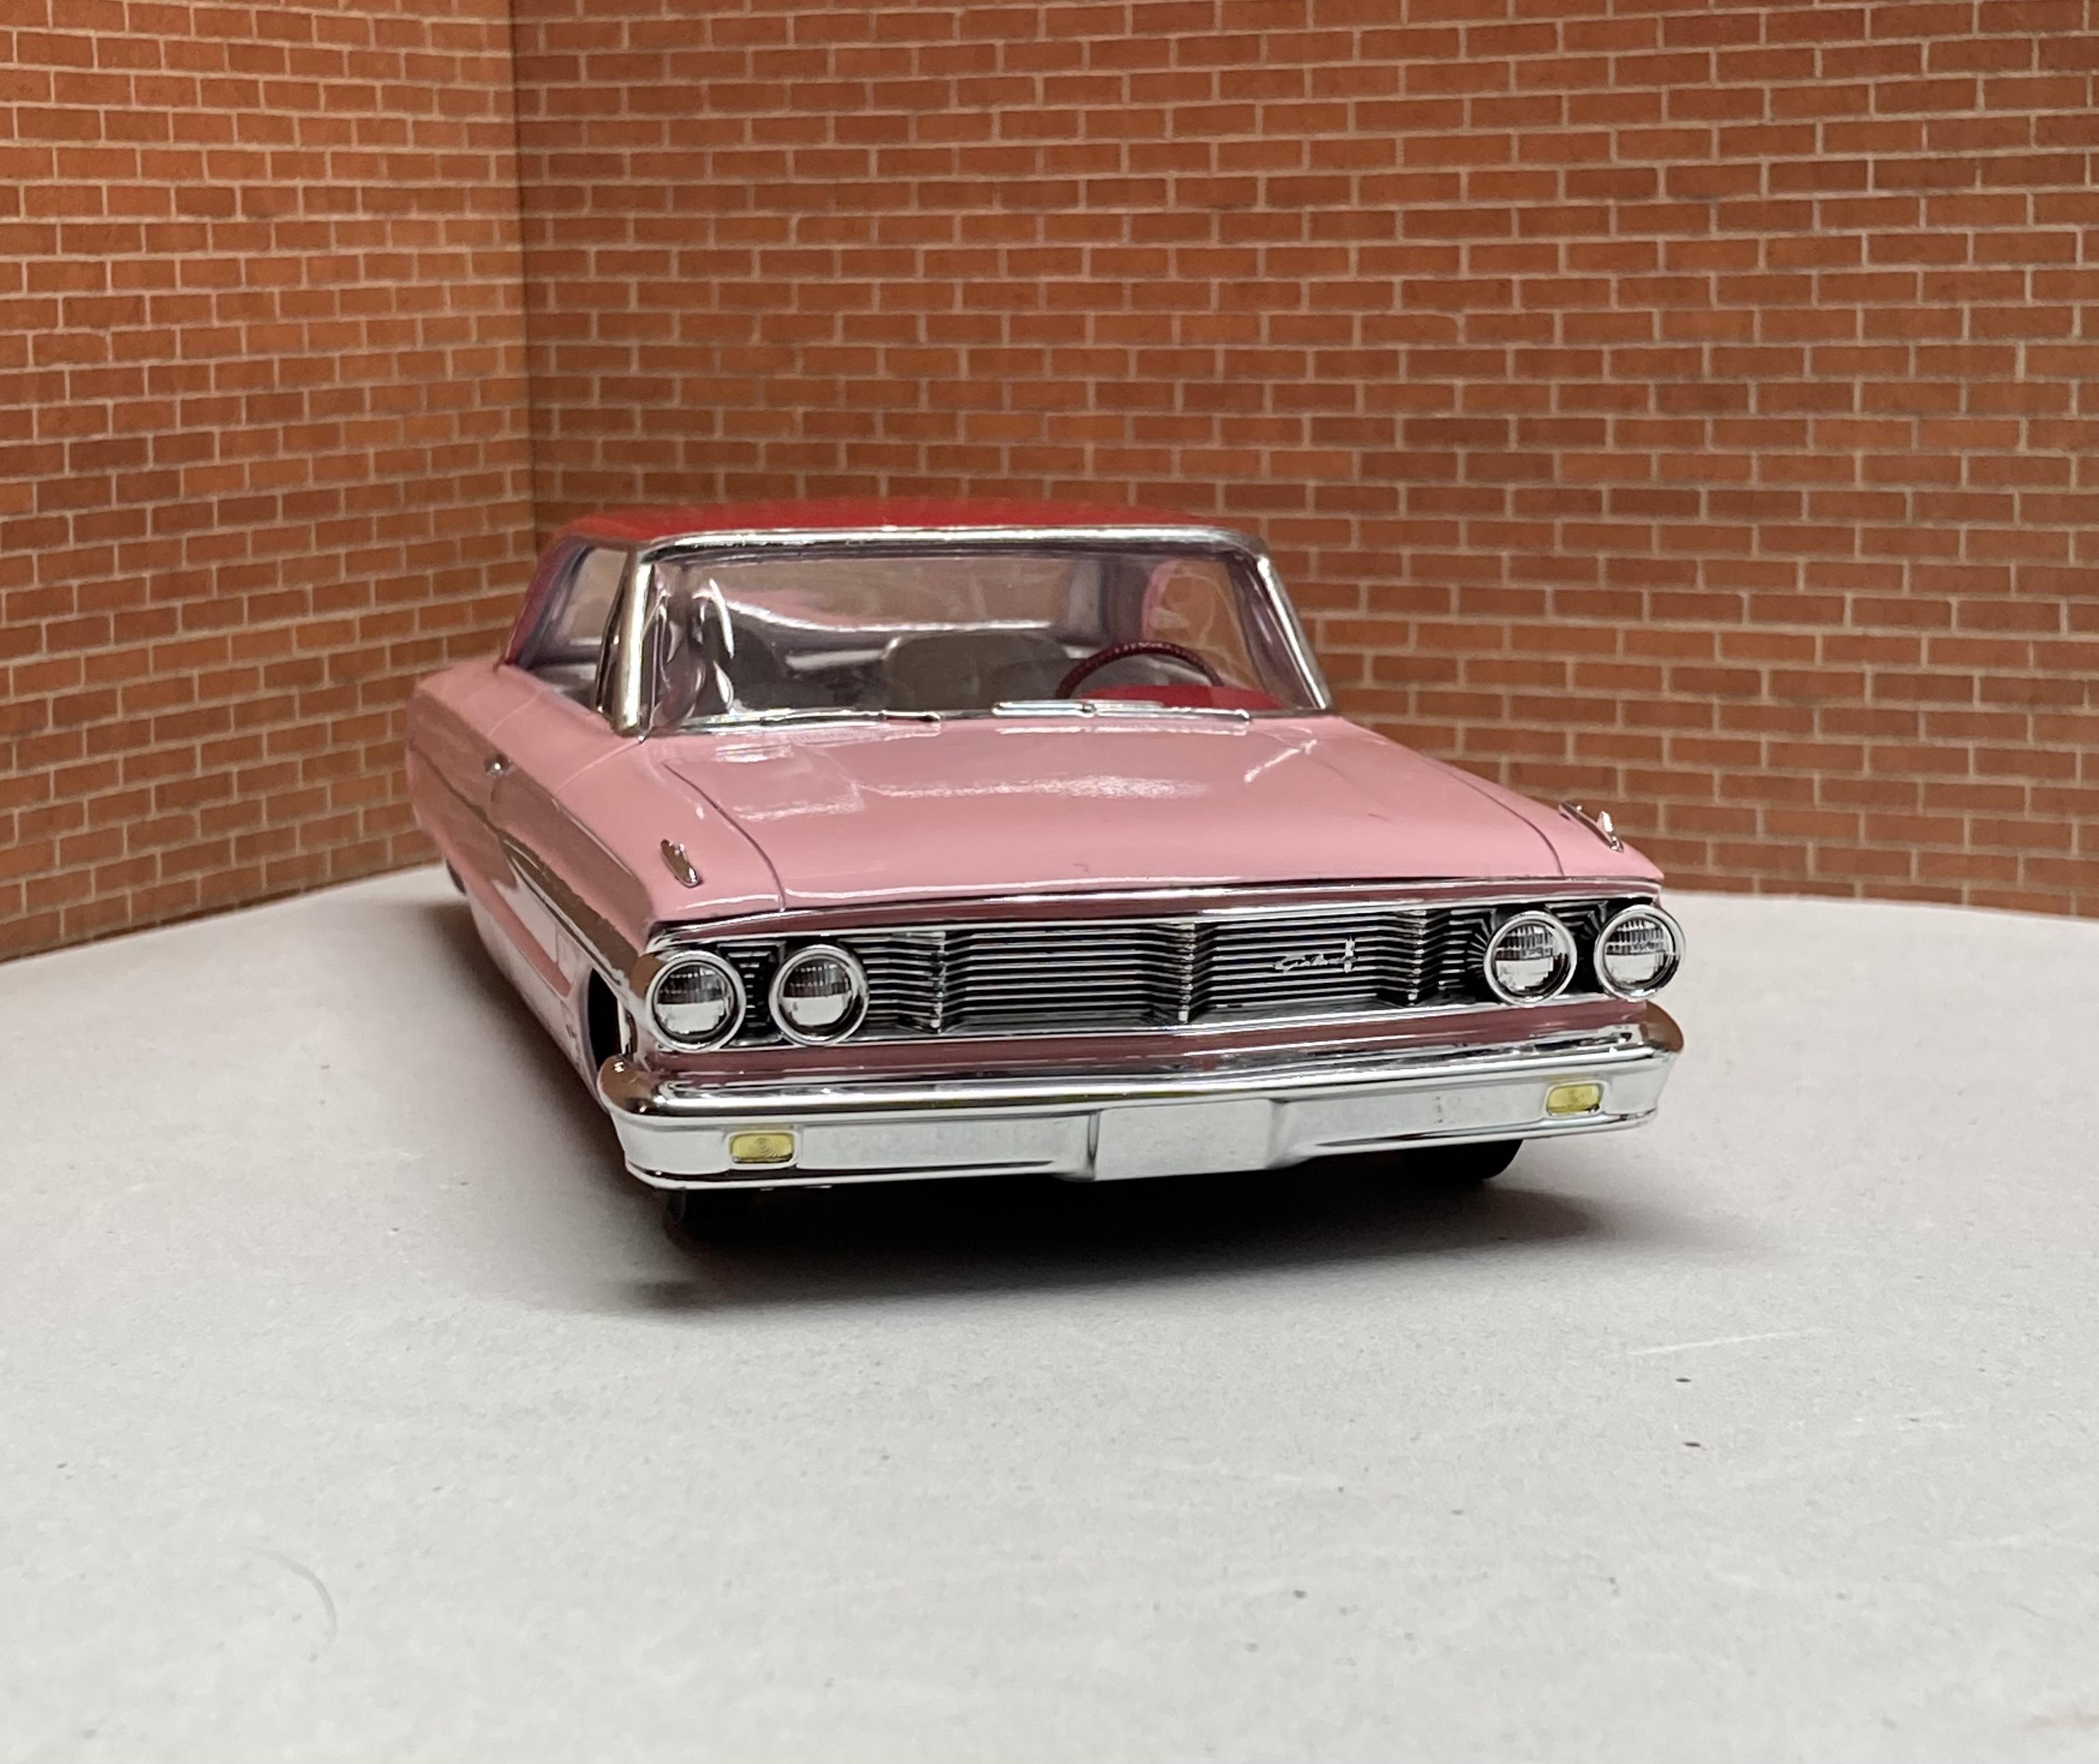
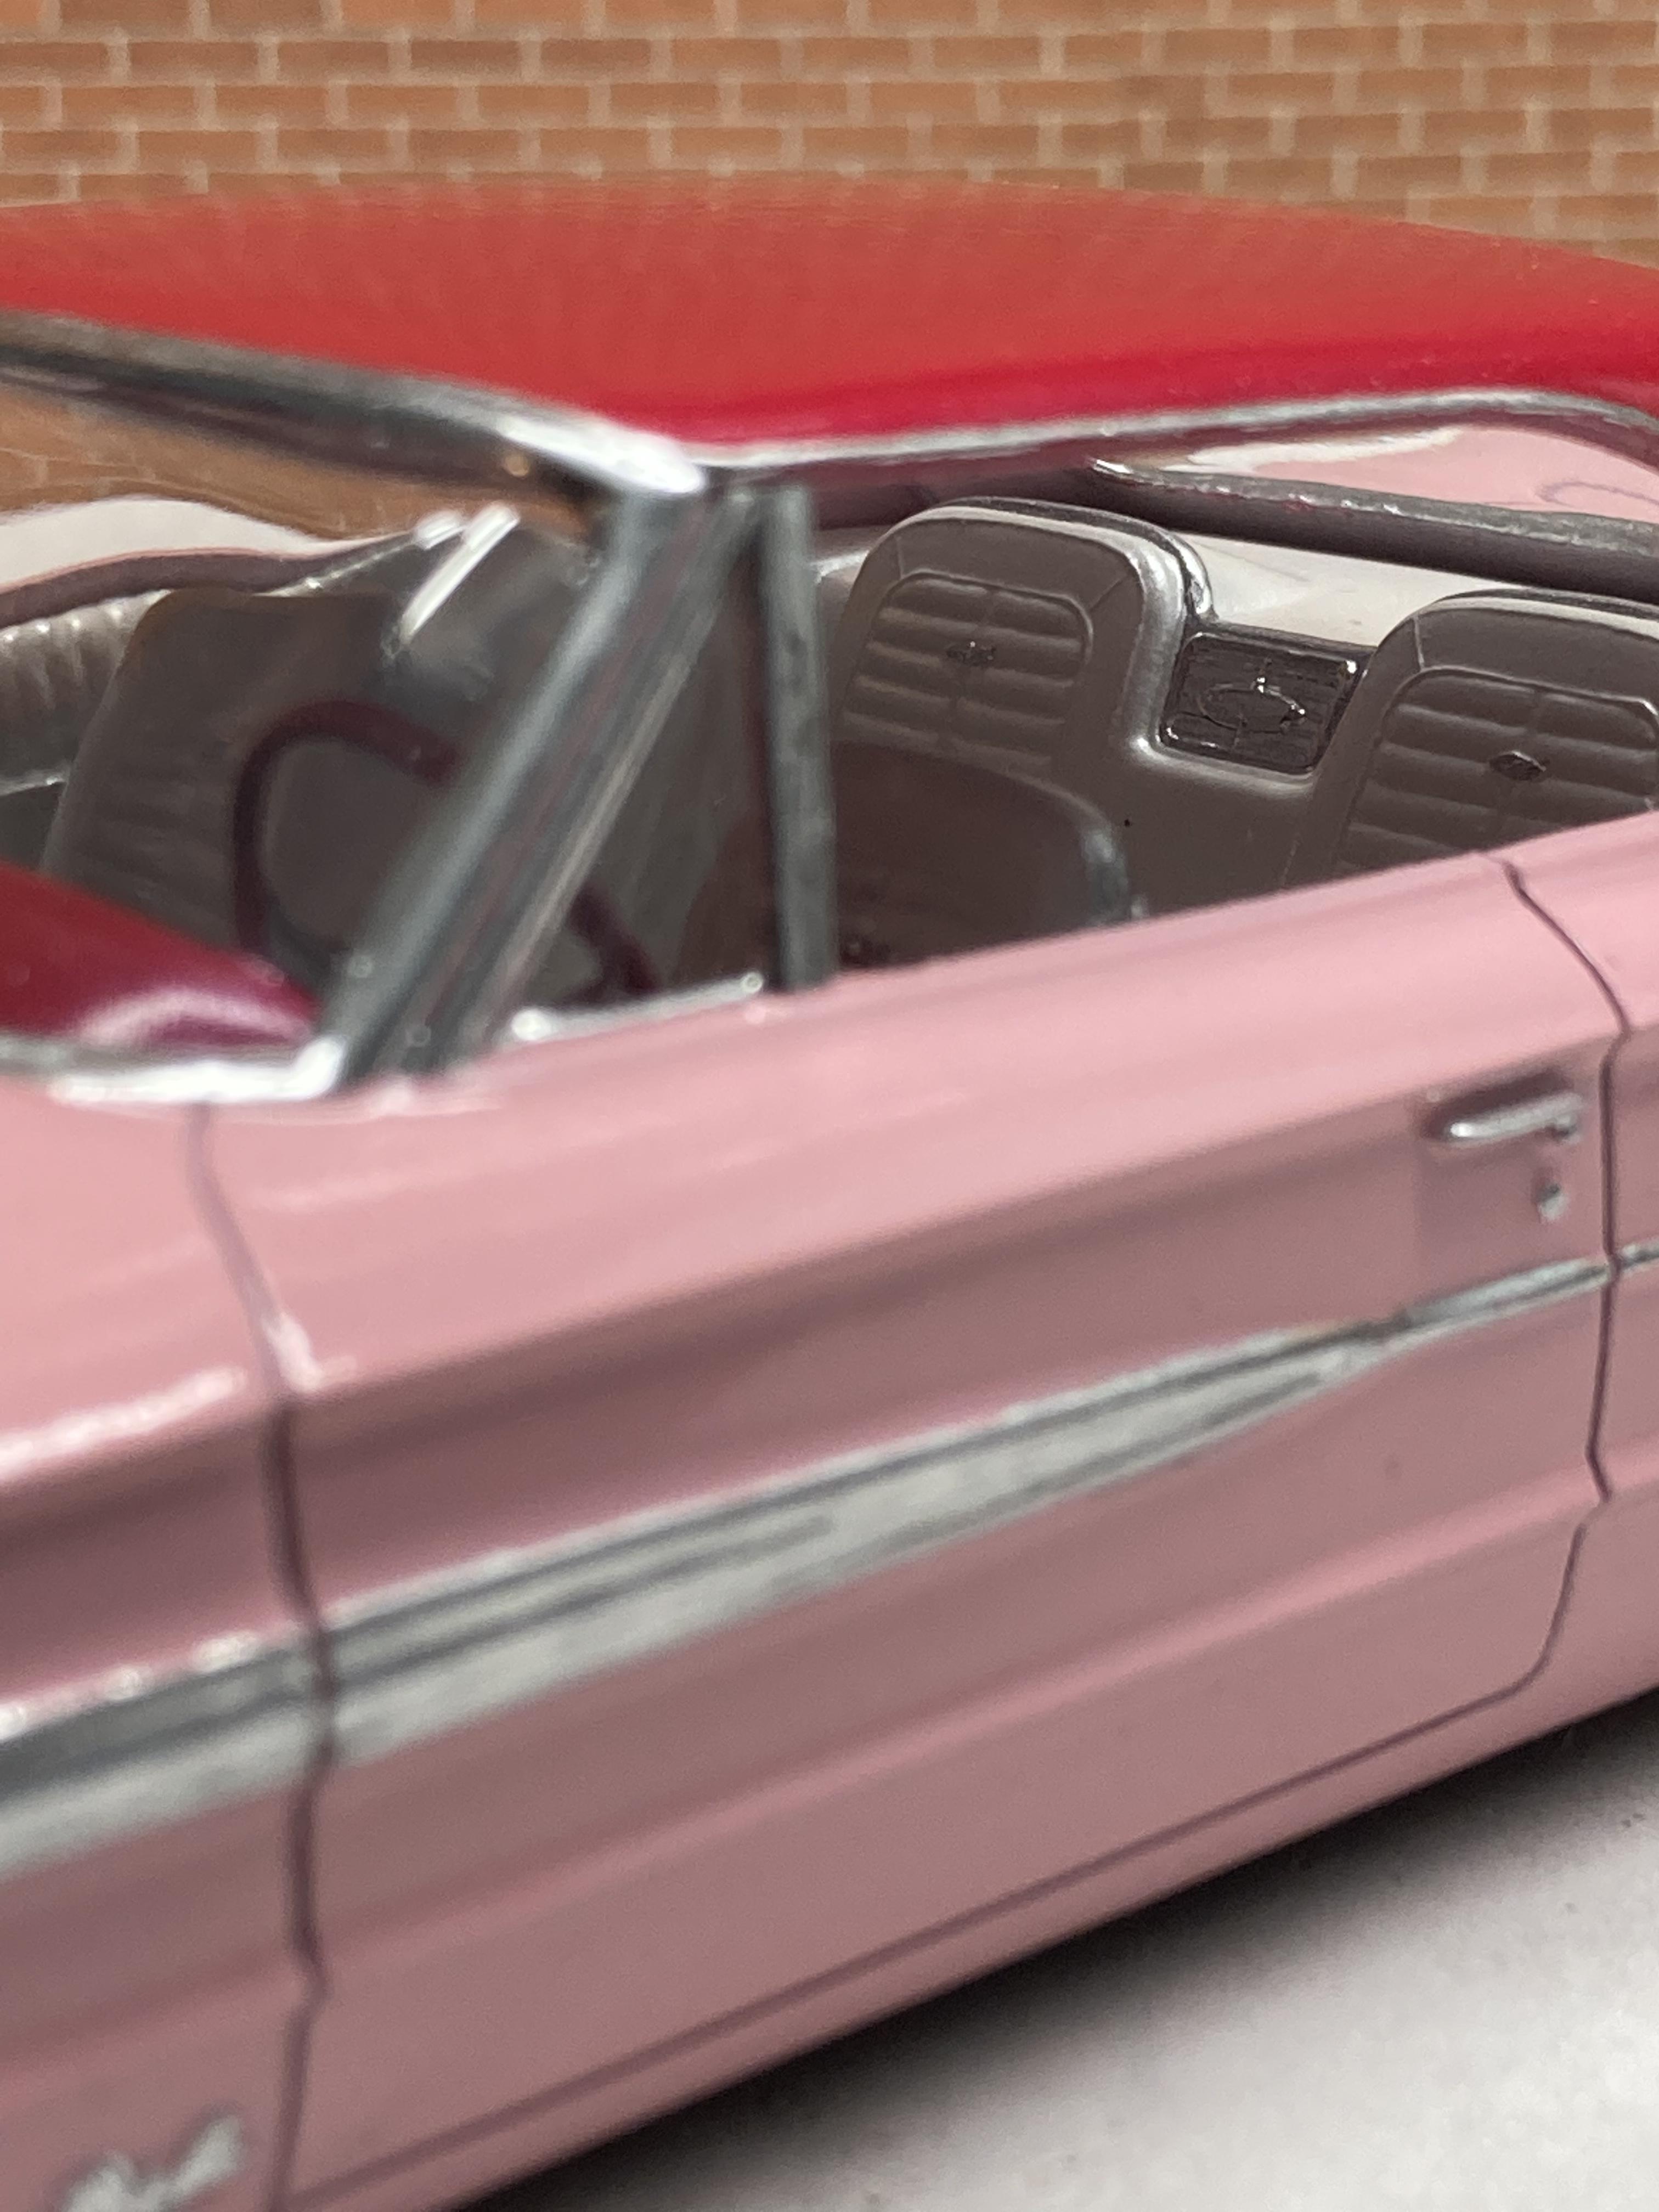
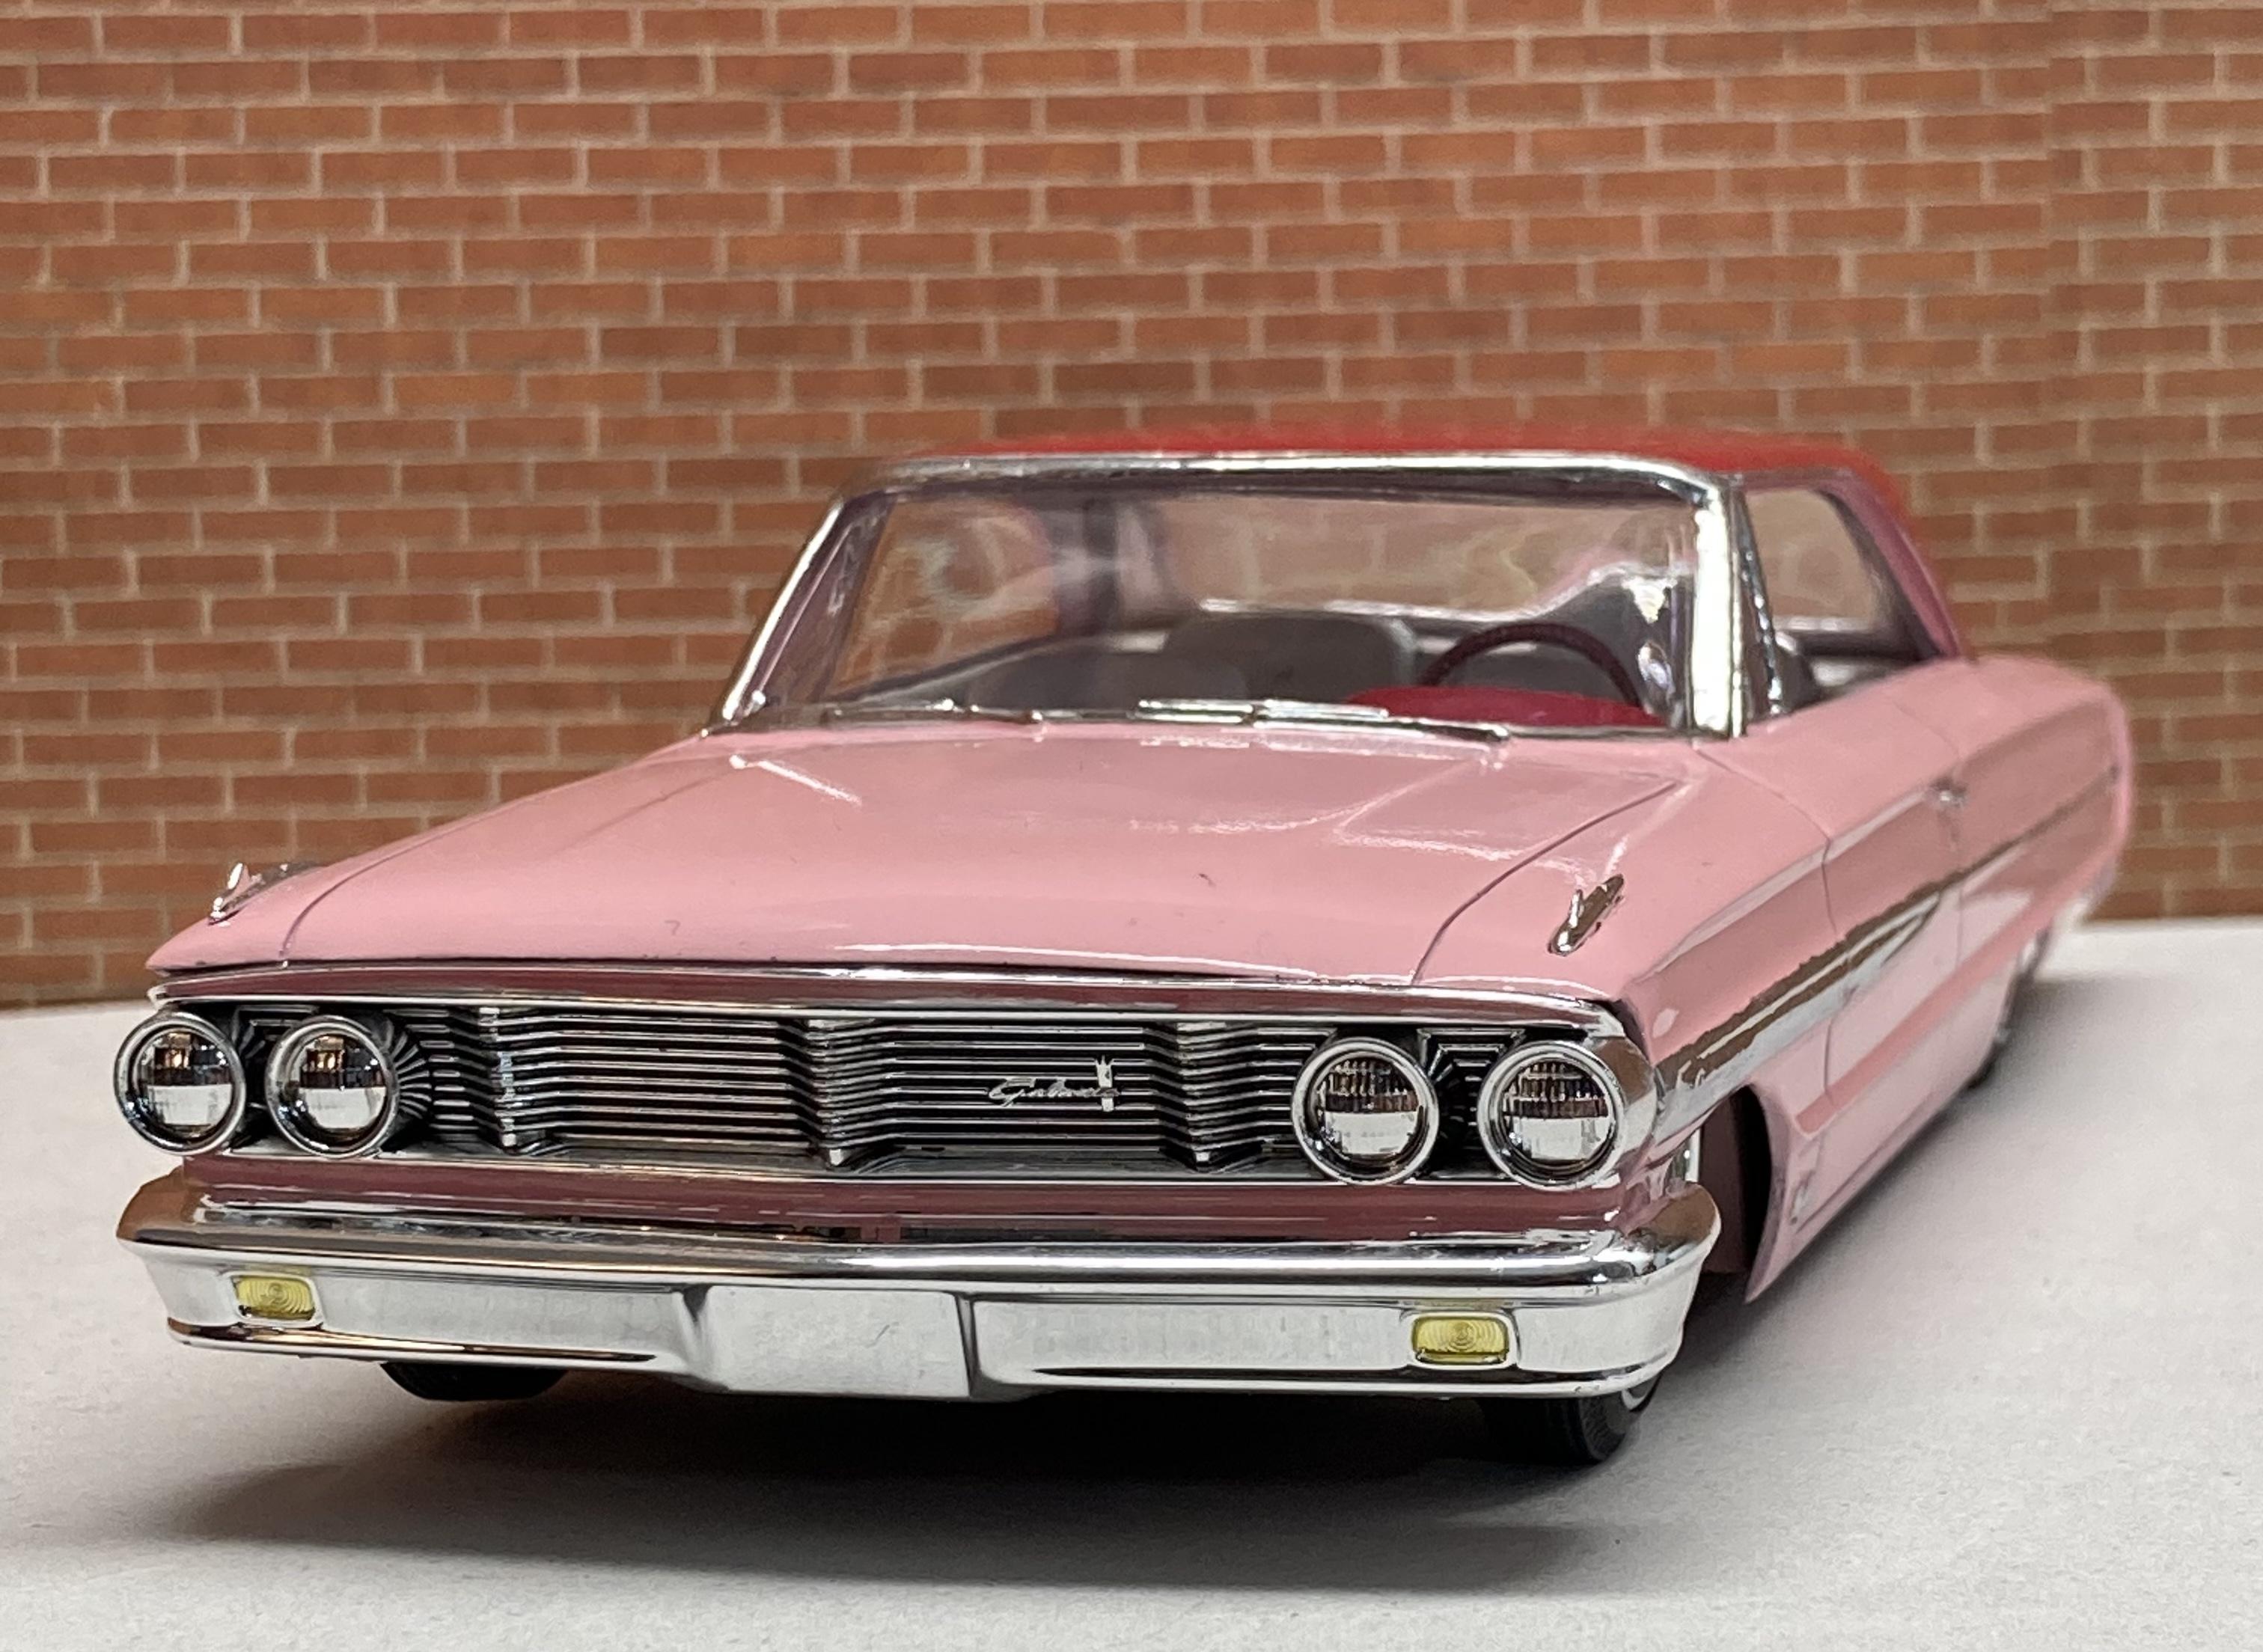
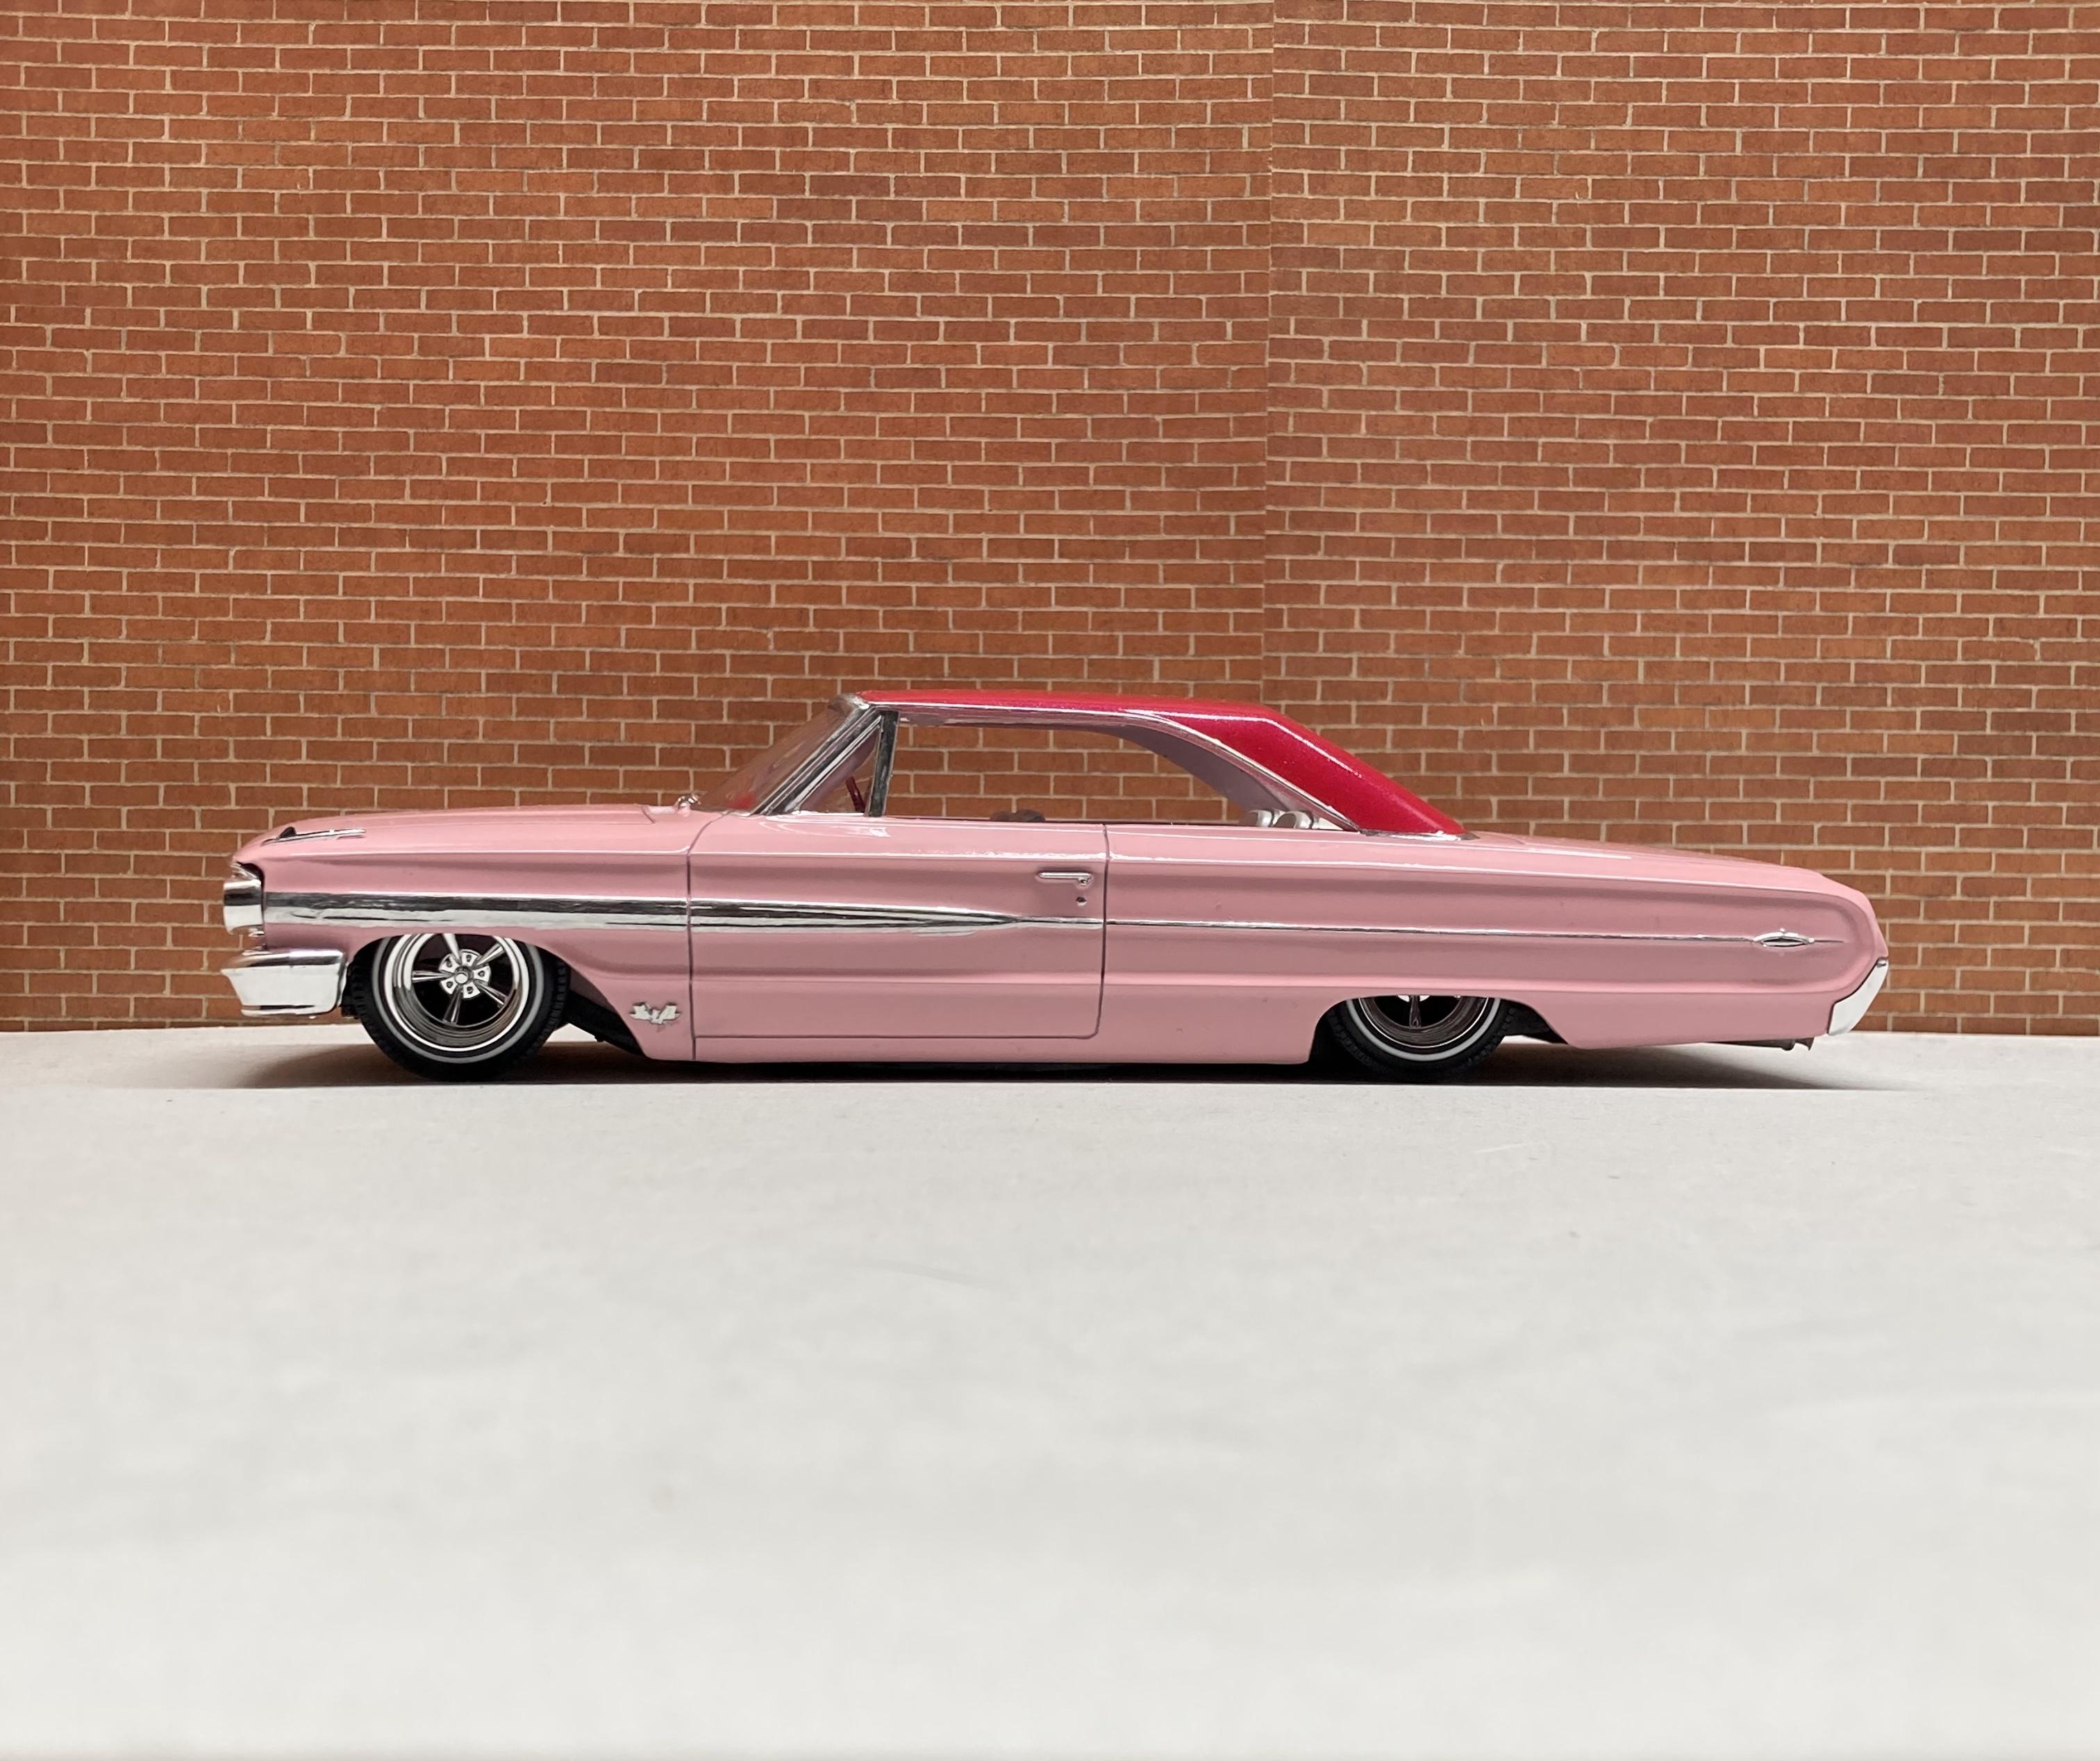
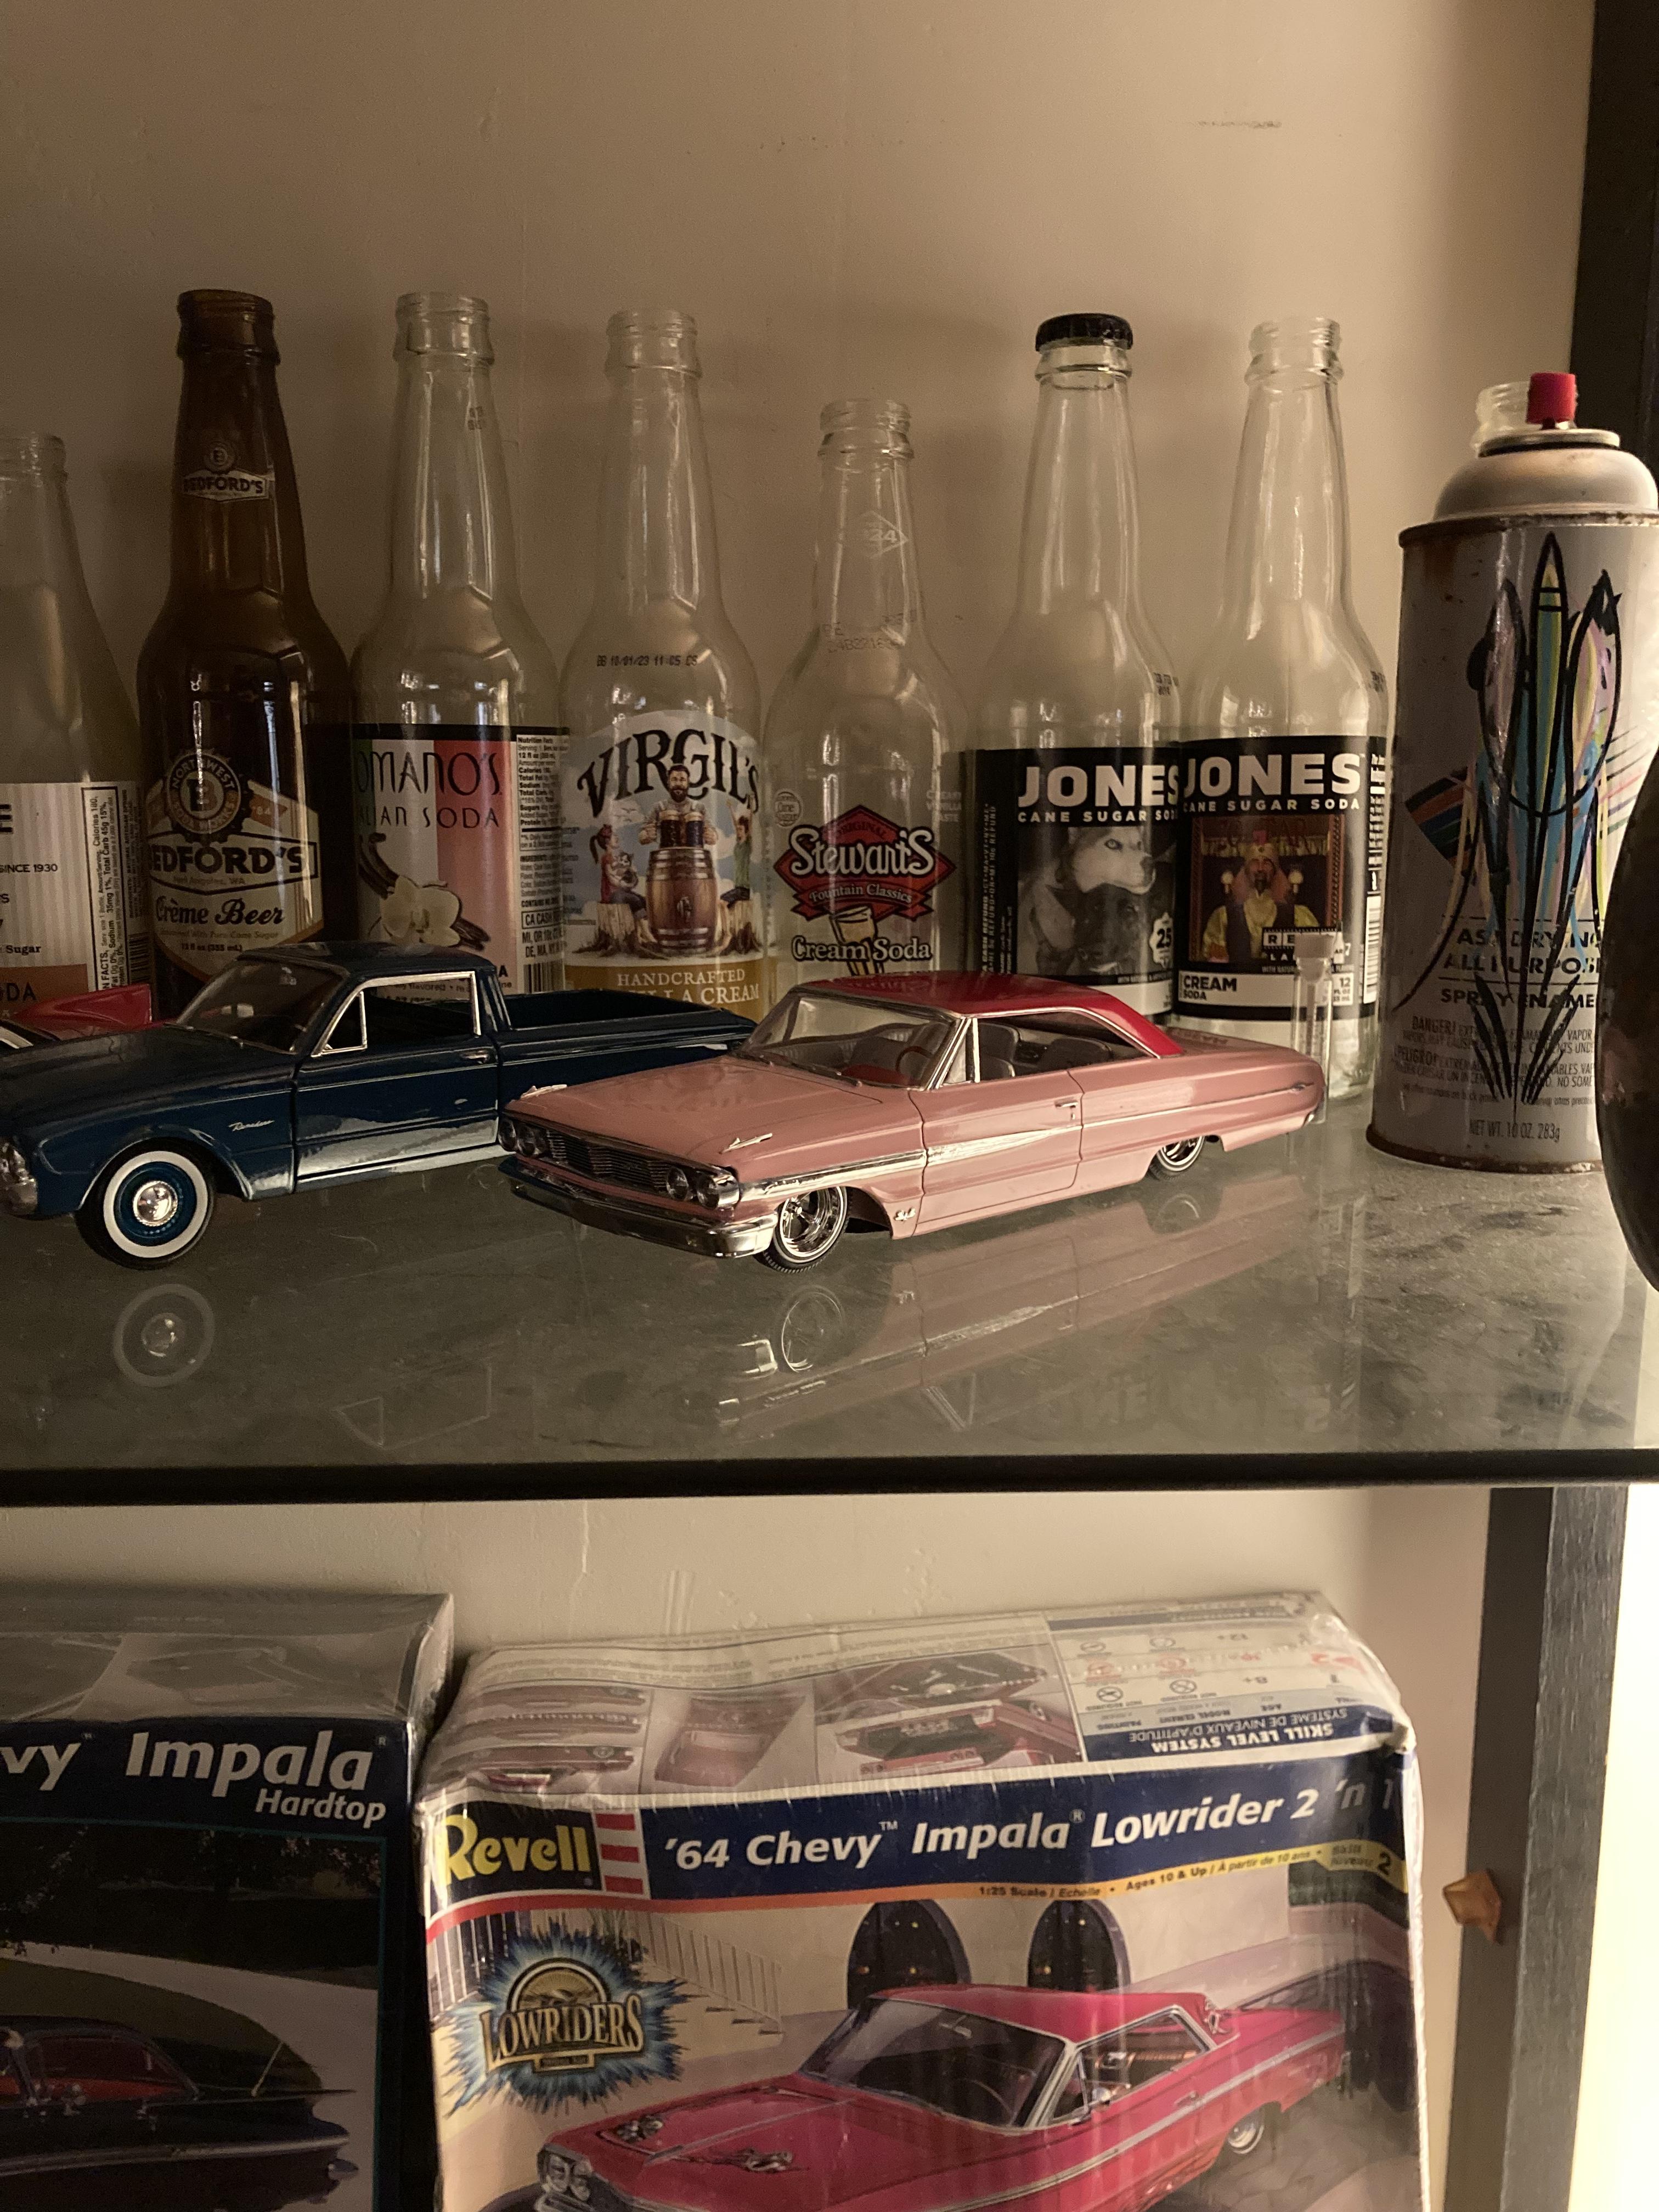
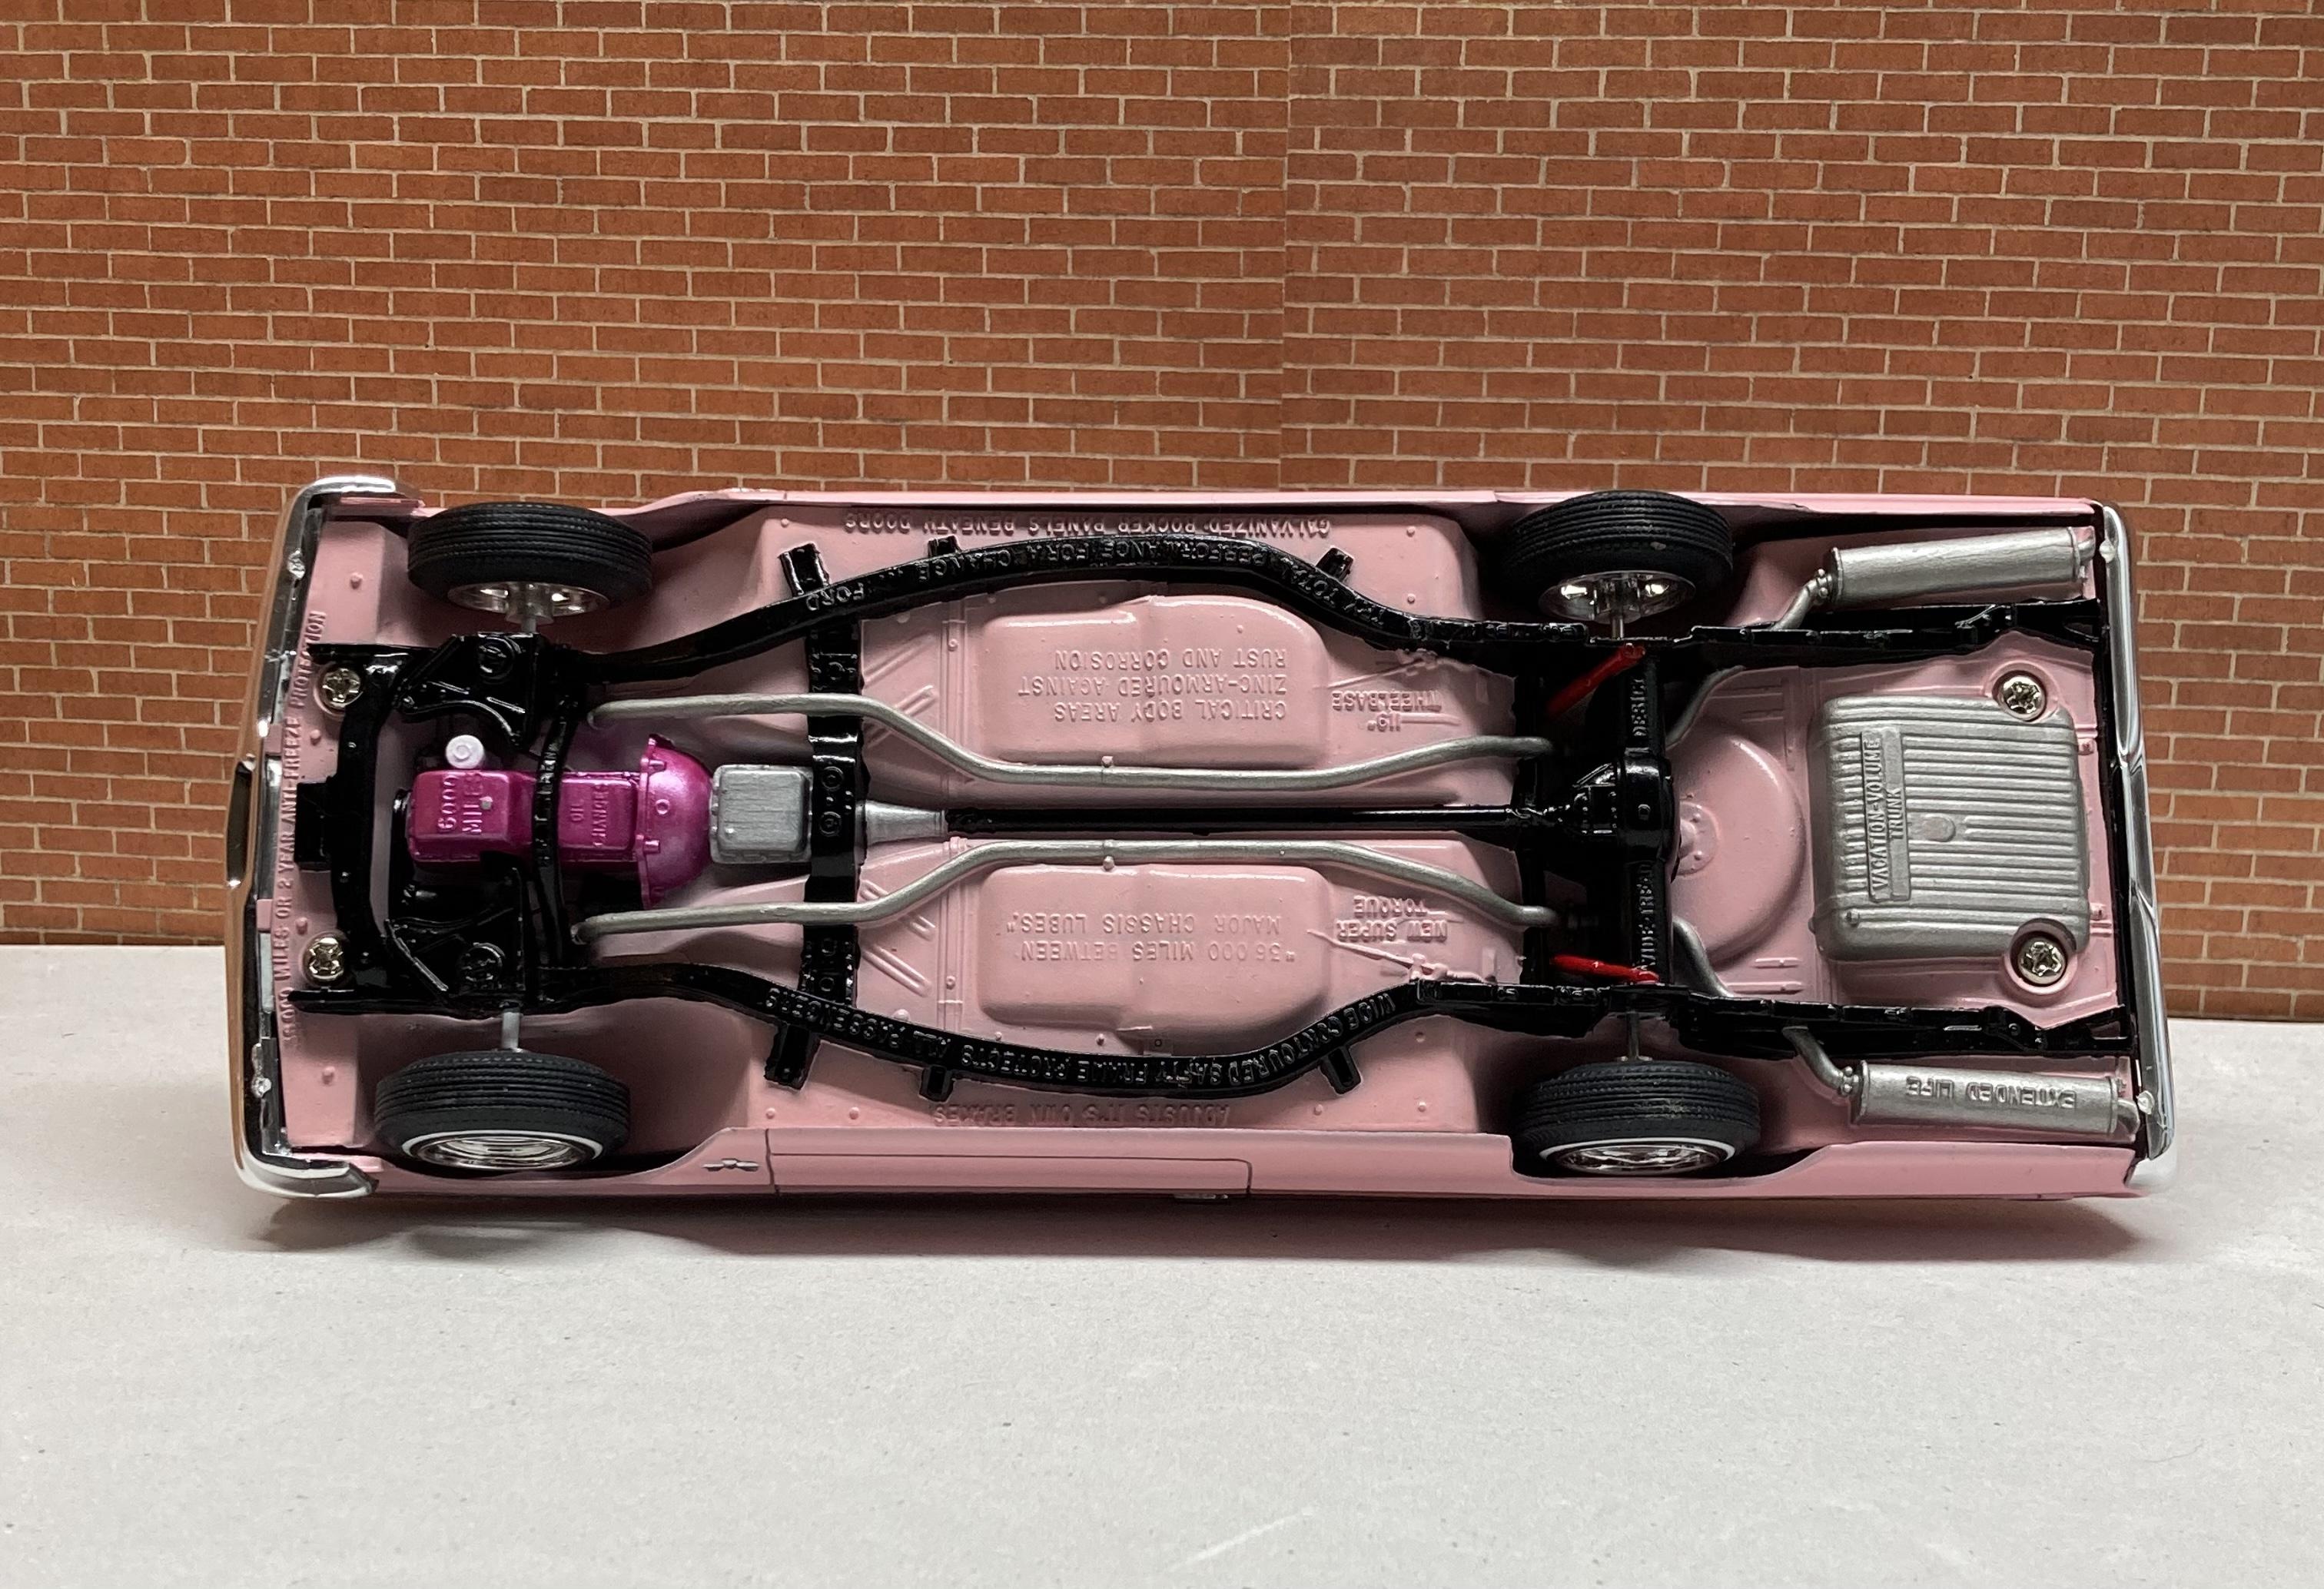
A super quick build. I wasn’t really planning to use this as the tow car in the Cal Drag Combo and didn’t think I’d build it but here it is. The paint is Tamiya TS-25 pink and Testors Electric Pink Lacquer on the roof. Interior is Createx Wicked Pearl White with fuchsia carpet, chrome and aluminum details, dash and steering wheel are the same as the roof. I drilled new holes higher up in the chassis to lower the car. Replaced the kit wheels with Pegasus Sovereign’s. I “detail” painted the chassis pan. The engine color is Createx Pearl Magenta. I did the chrome trim with Molotow Liquid Chrome on a brush, my hand was pretty shaky most of the time but I’m fine with it. I just want to fill space on the shelf in my living room so I can justify buying a new cabinet with doors that’s larger (and maybe not let it get so dusty) Thanks for looking.
-
Once I get the new flux in the mail I’ll probably put this back on the bench so I can make the hinges for the rear door.
-
Hot Rod Hauler
Tarkmucker replied to Tarkmucker's topic in WIP: Model Trucks: Pickups, Vans, SUVs, Light Commercial
That’s a damn fine looking hauler. I like the ribs in the sides a lot. I’m kinda aiming for more of a modern slammed hauler on bags but this is on the back burner right now while I wait on some stuff to come in the mail. You got it man, always great parts. I’ll be needing a few more sets of these for other builds. And maybe a couple engines -
Hot Rod Hauler
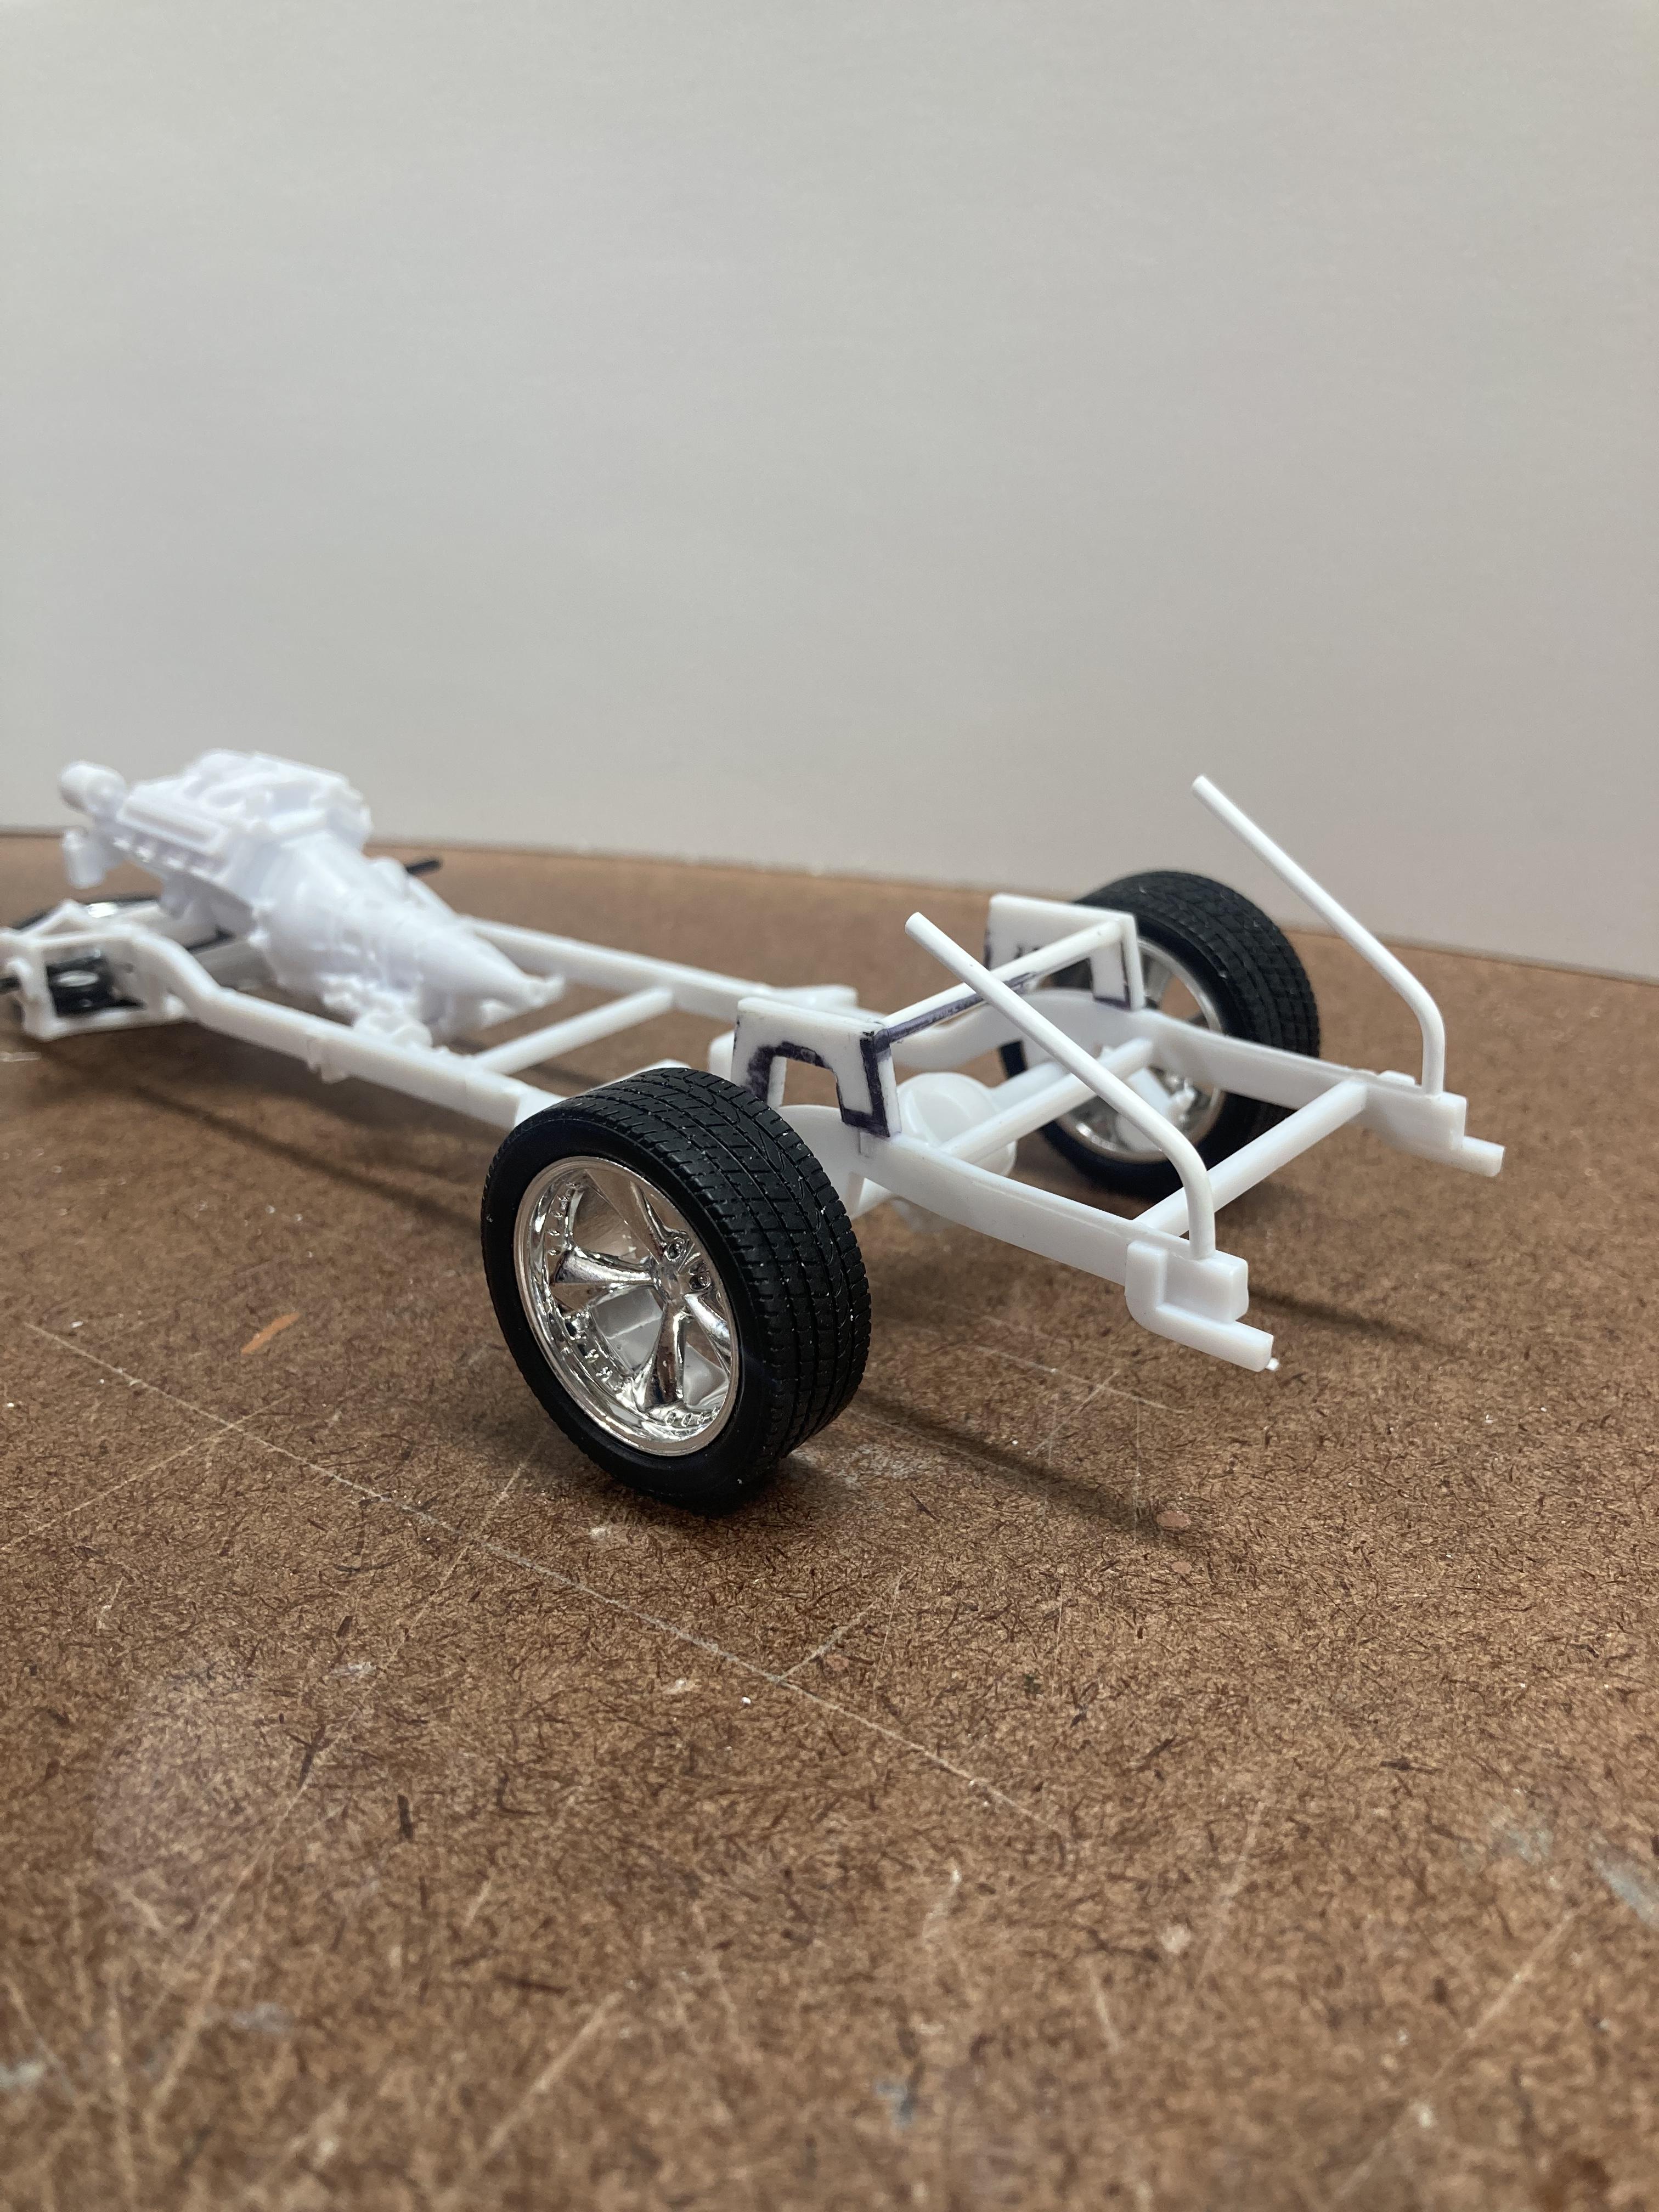
Tarkmucker posted a topic in WIP: Model Trucks: Pickups, Vans, SUVs, Light Commercial
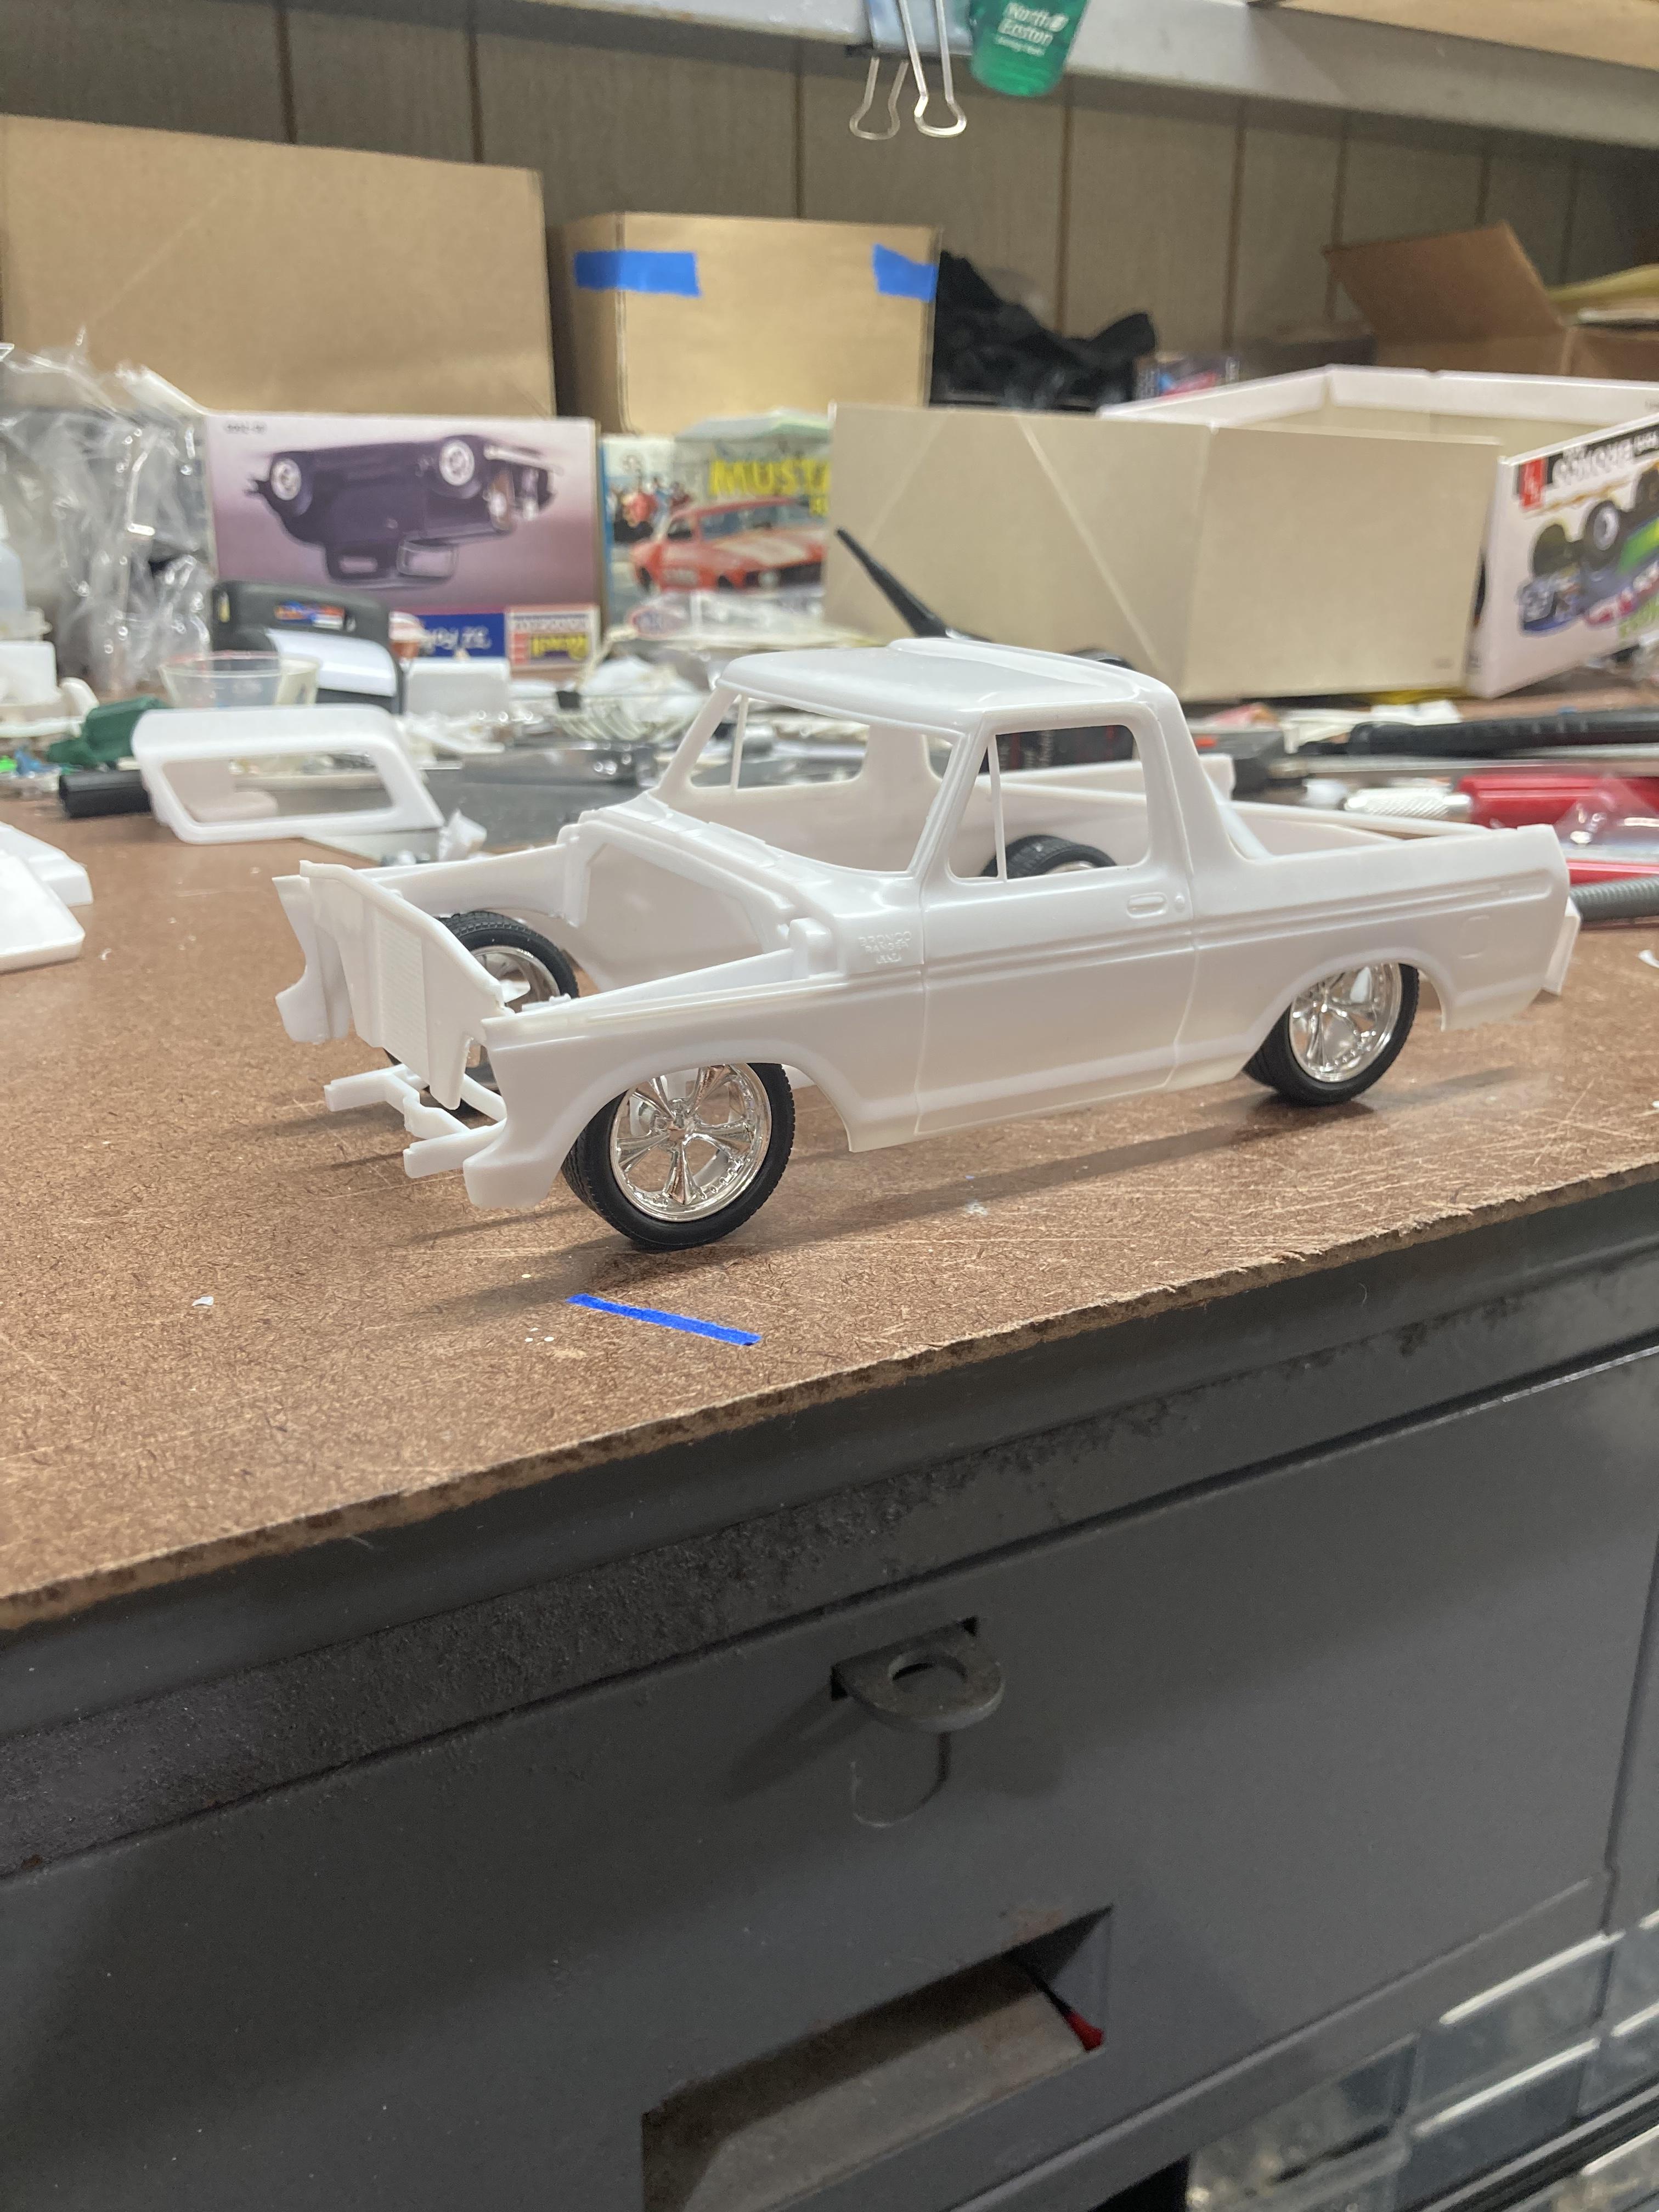
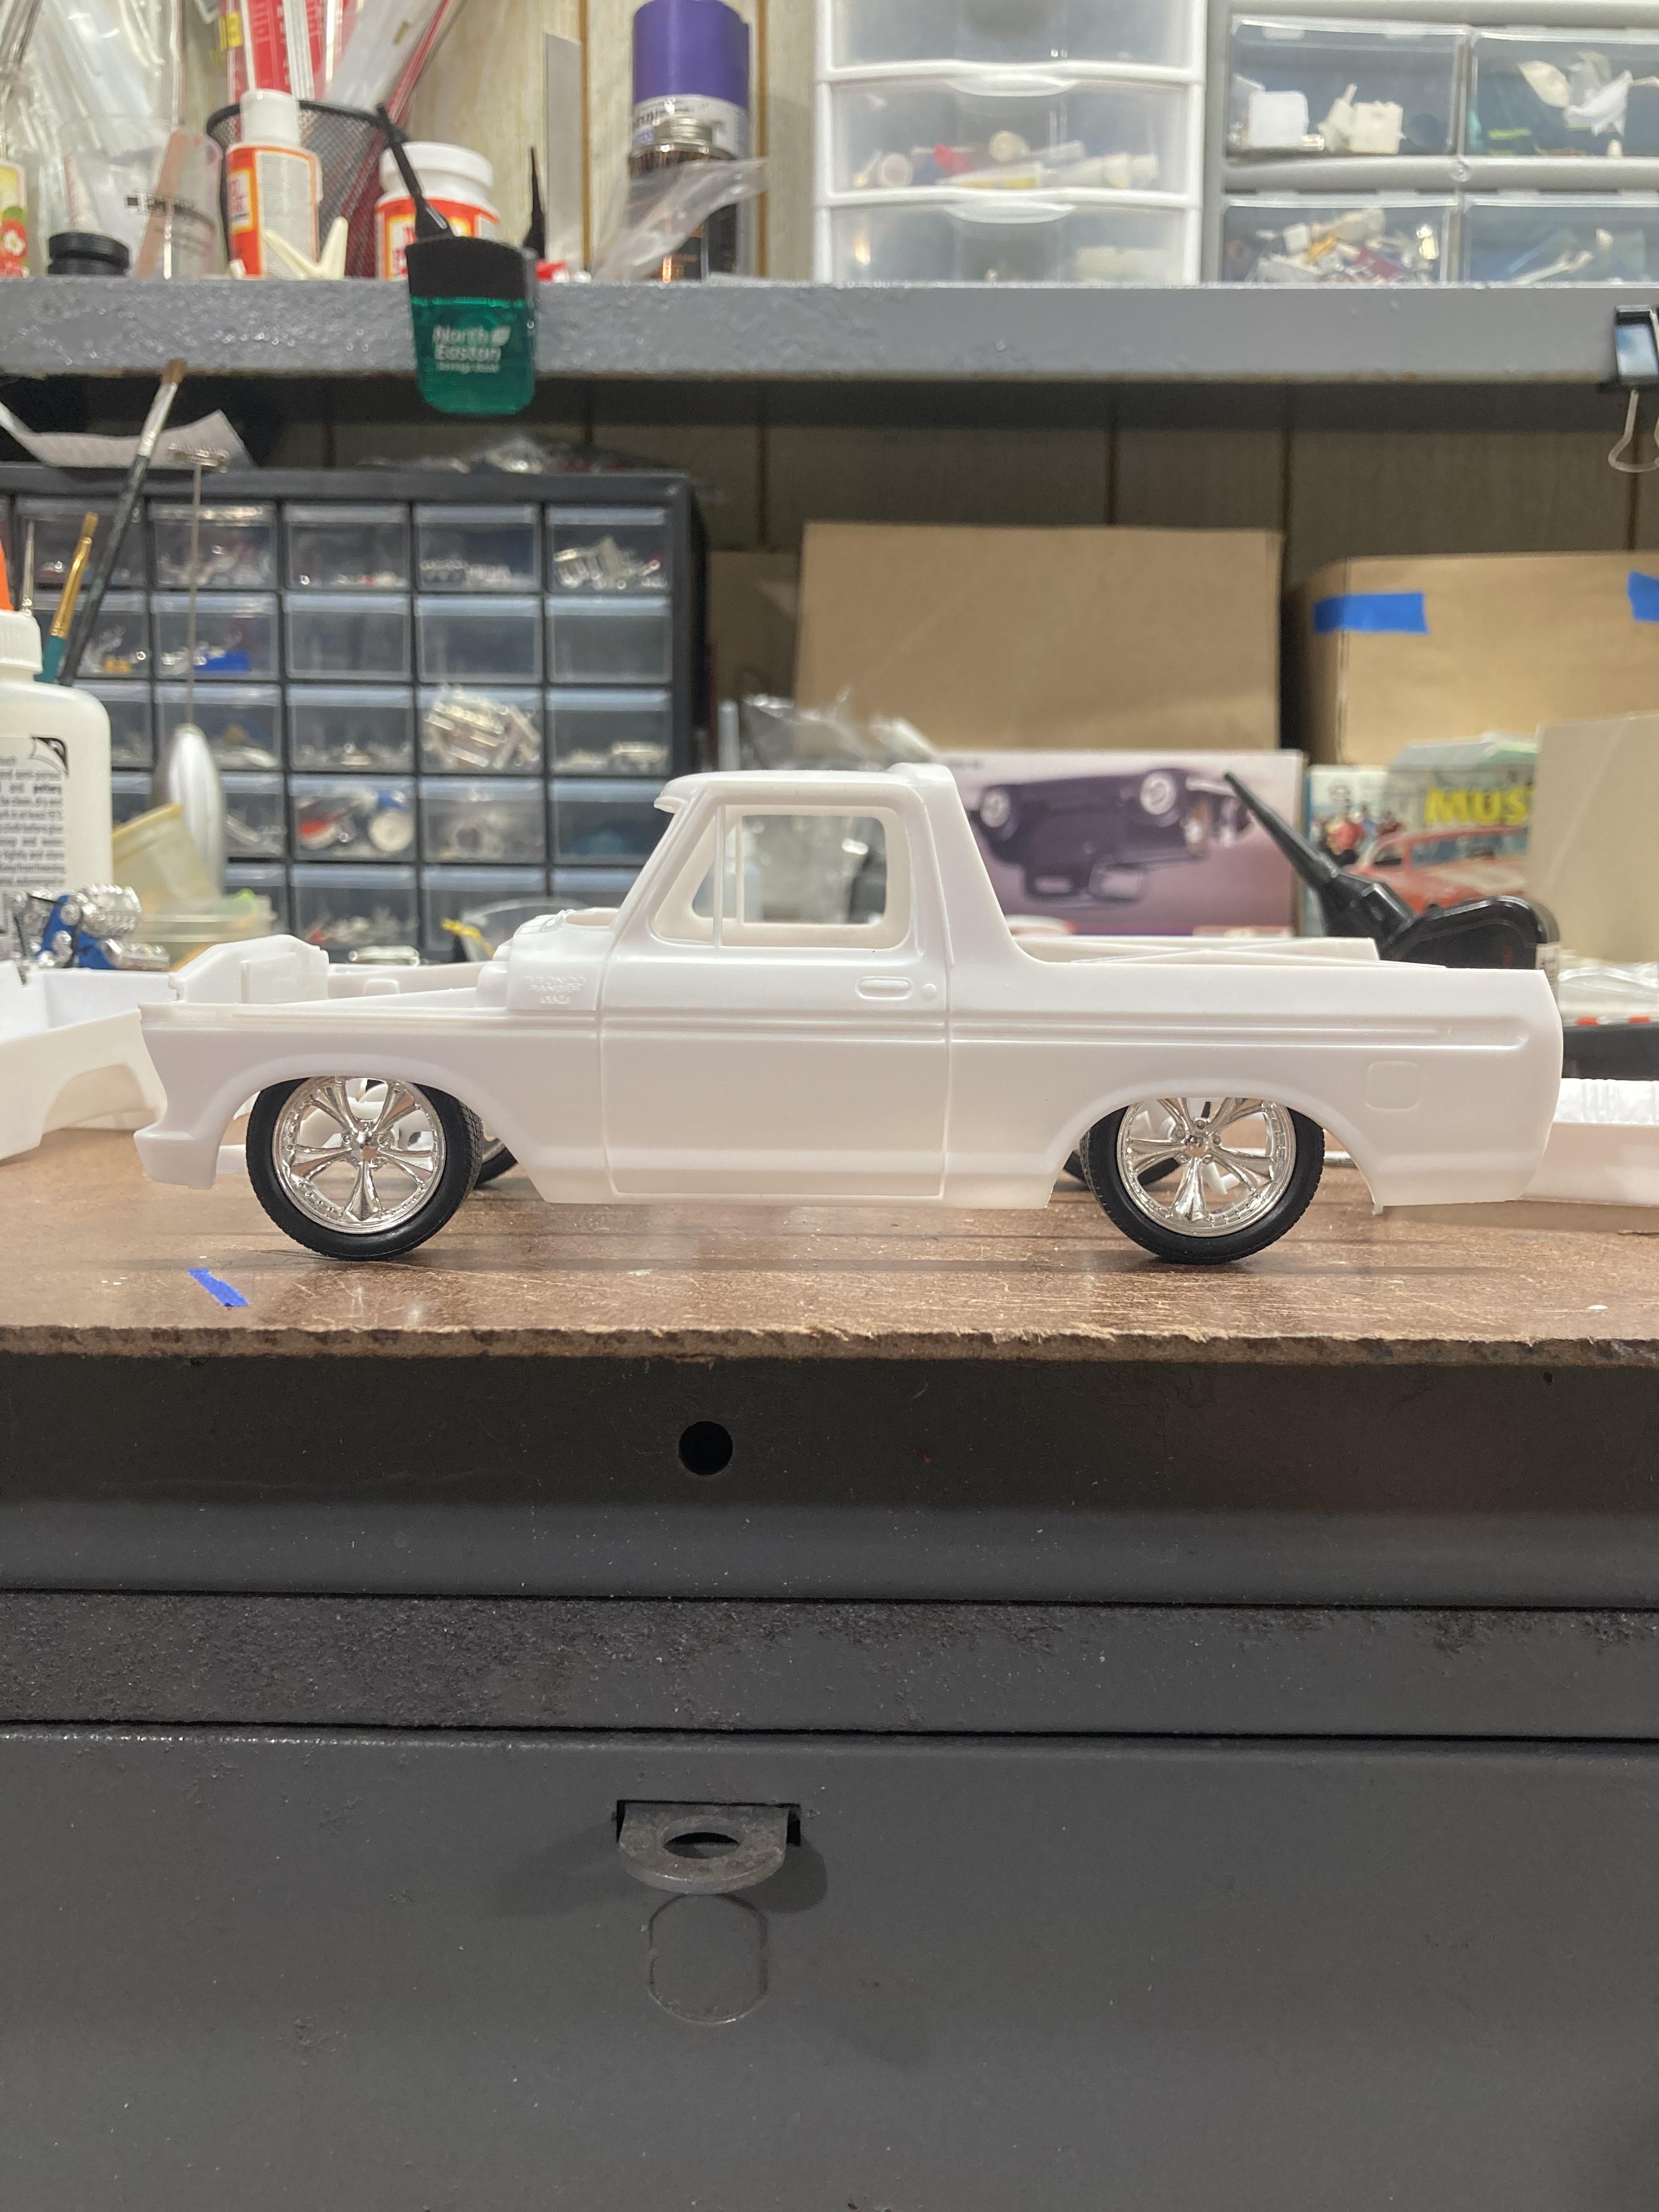
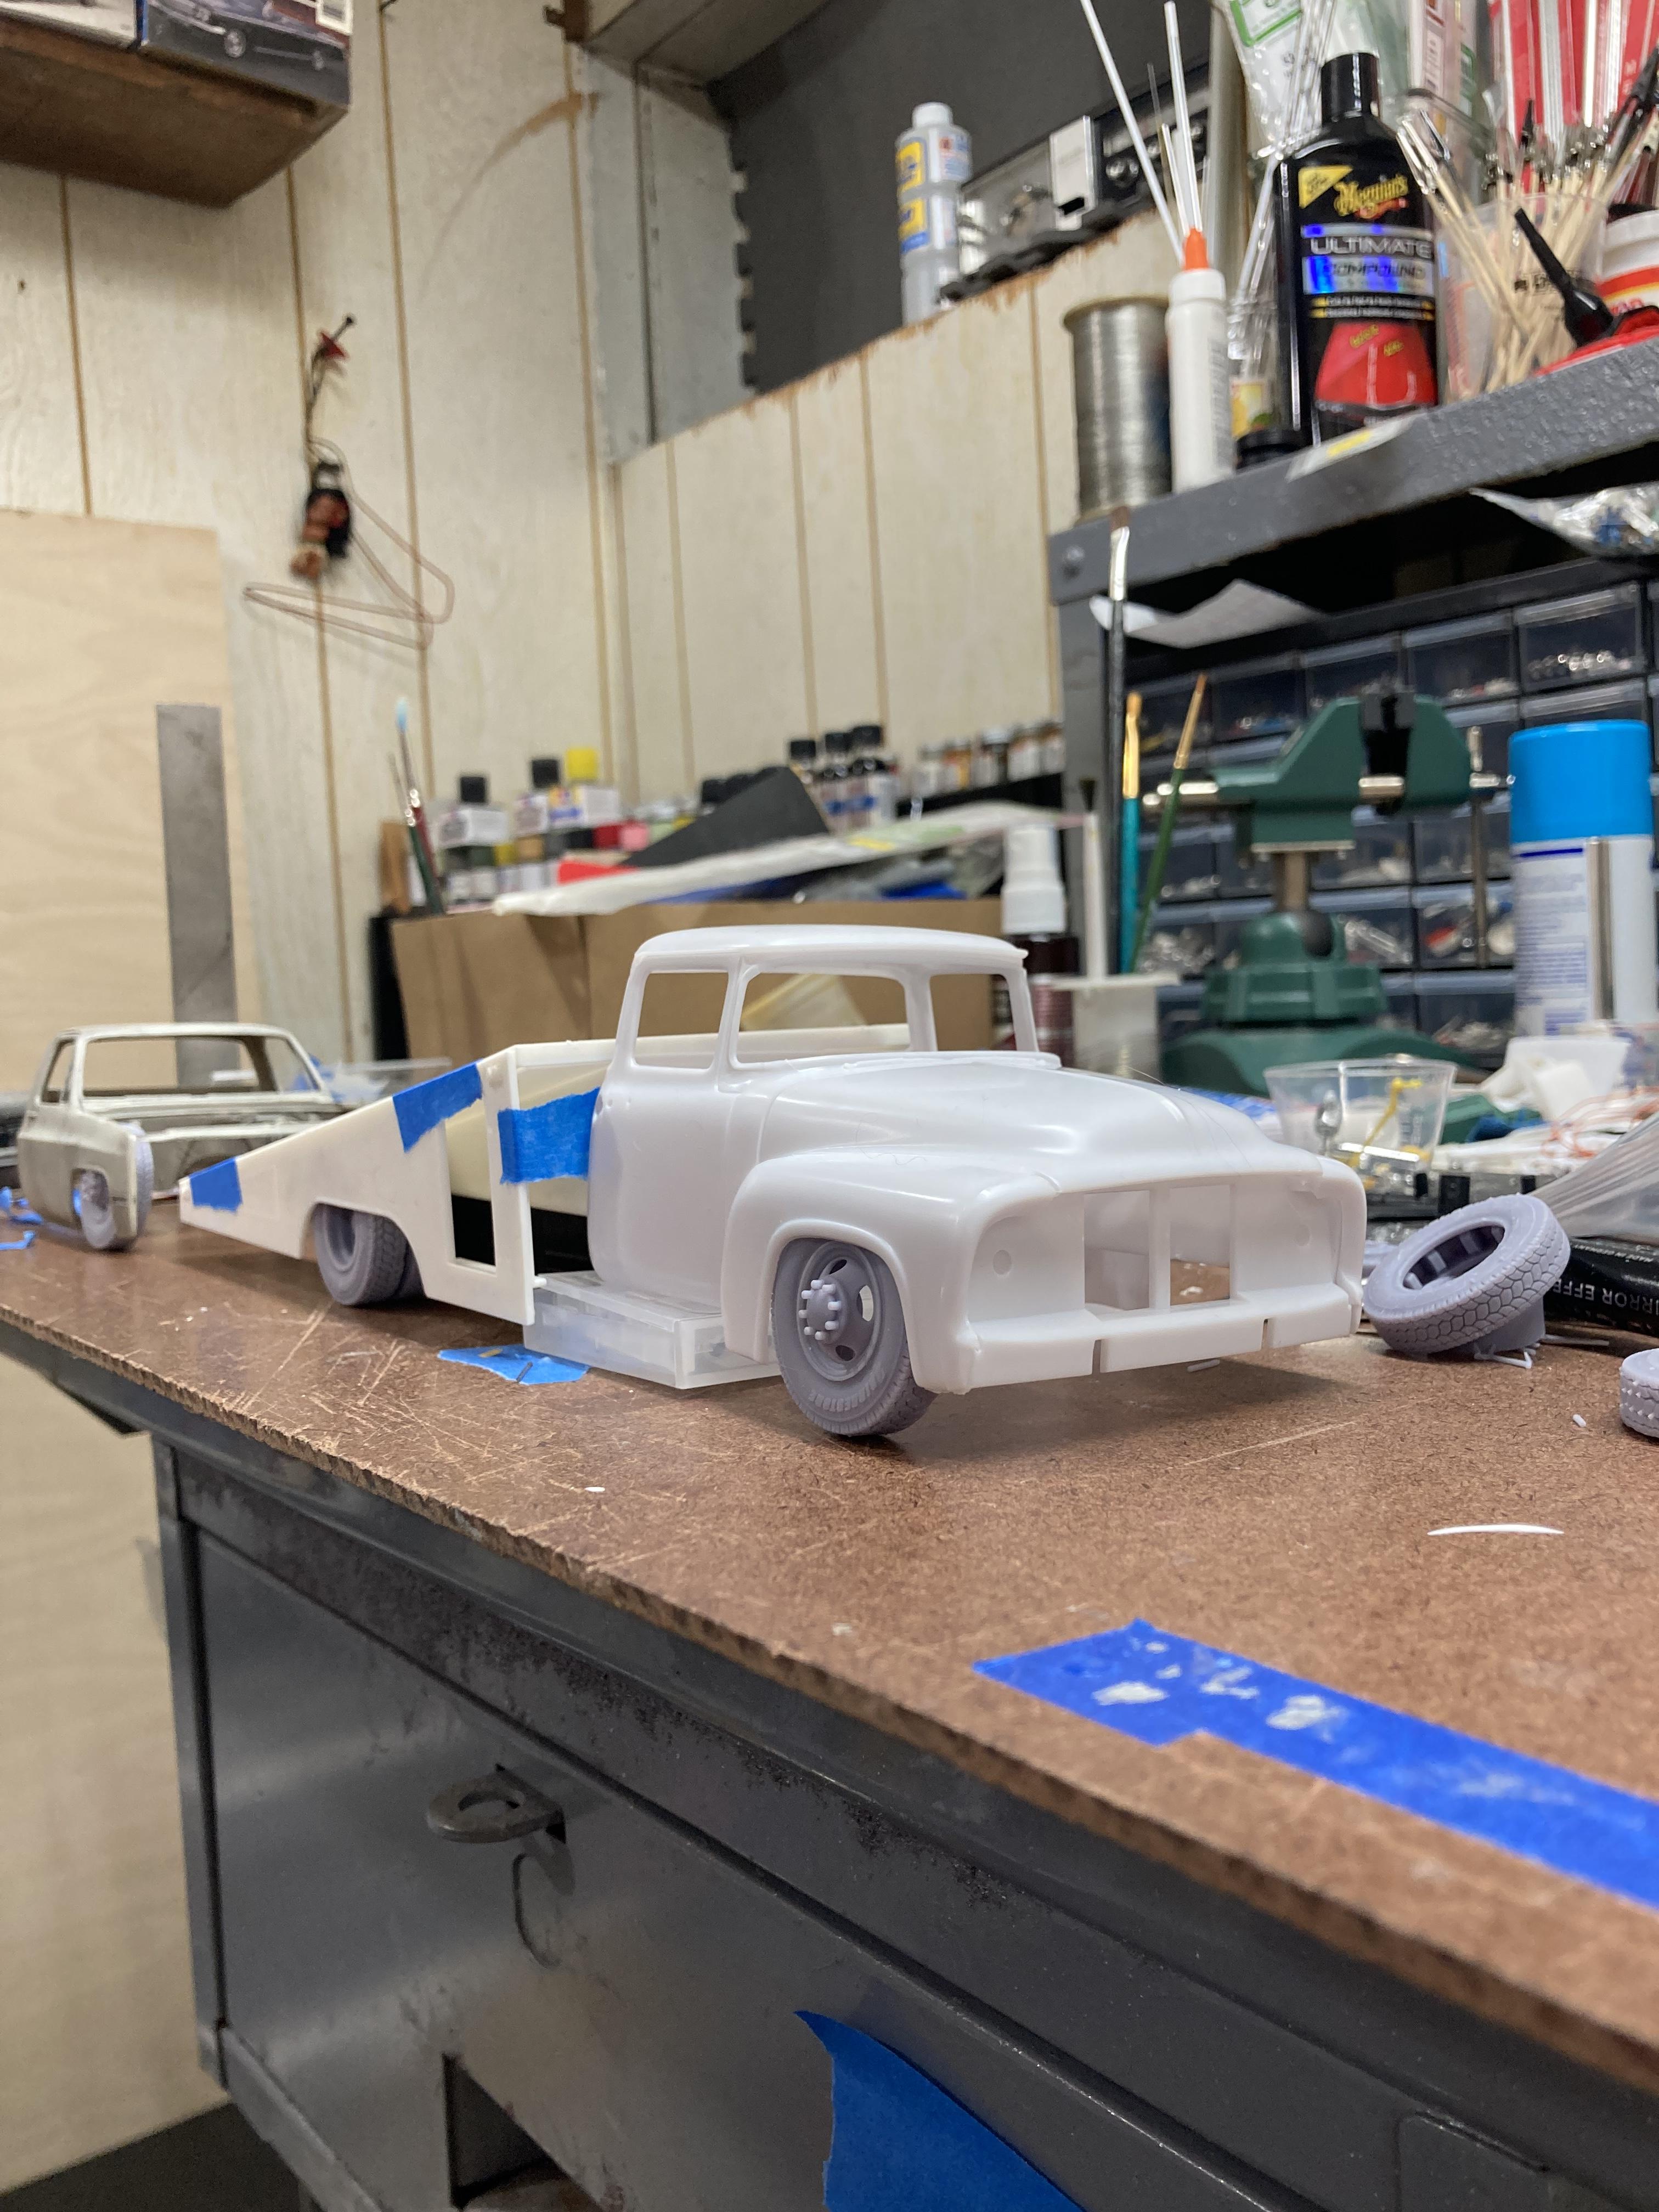
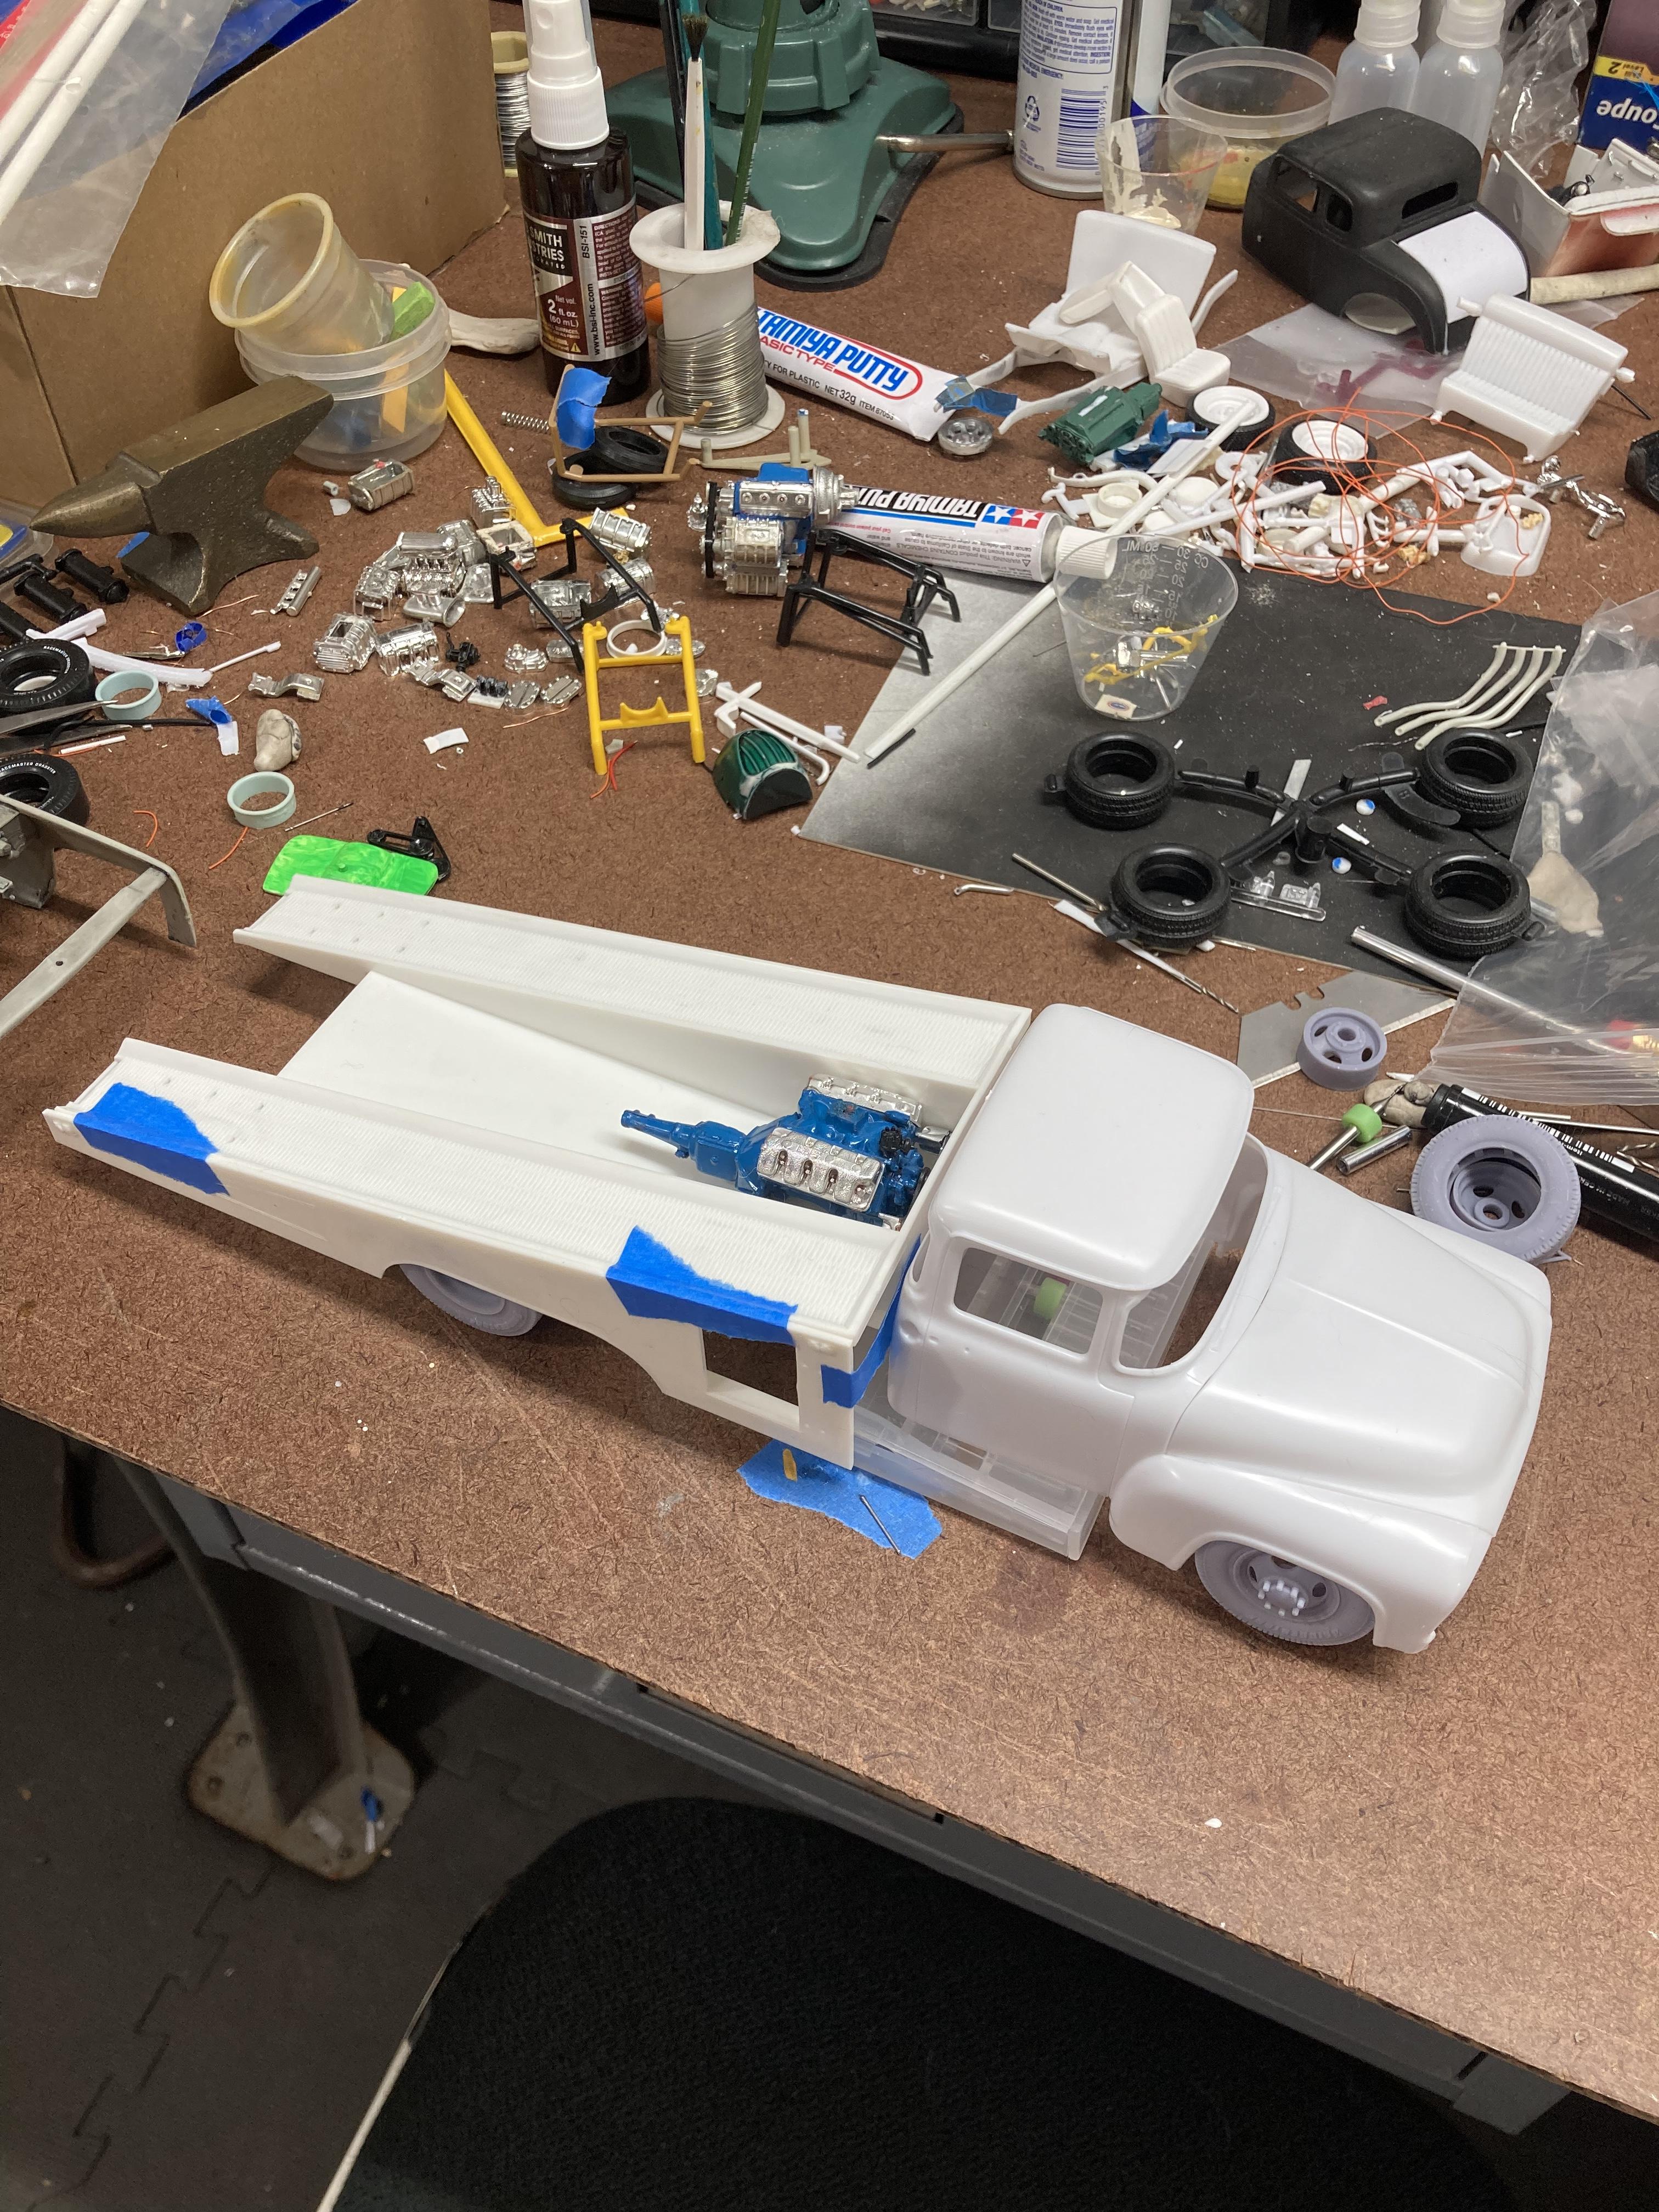
Still not convinced this is the cab or wheels I want to use for this but here’s a mock-up The wheels are from Iceman which are excellent wheels, I’m just not enjoying the ride height and can’t get the front much lower. I’m also debating on switching the cab but either way I’m fairly certain the 429 will live in the back to match my ‘29 I just finished. Also this is part two of that December Parts Box Build. That car needs a cool hauler to match.