

bh1701
-
Posts
385 -
Joined
-
Last visited
Content Type
Profiles
Forums
Events
Gallery
Everything posted by bh1701
-
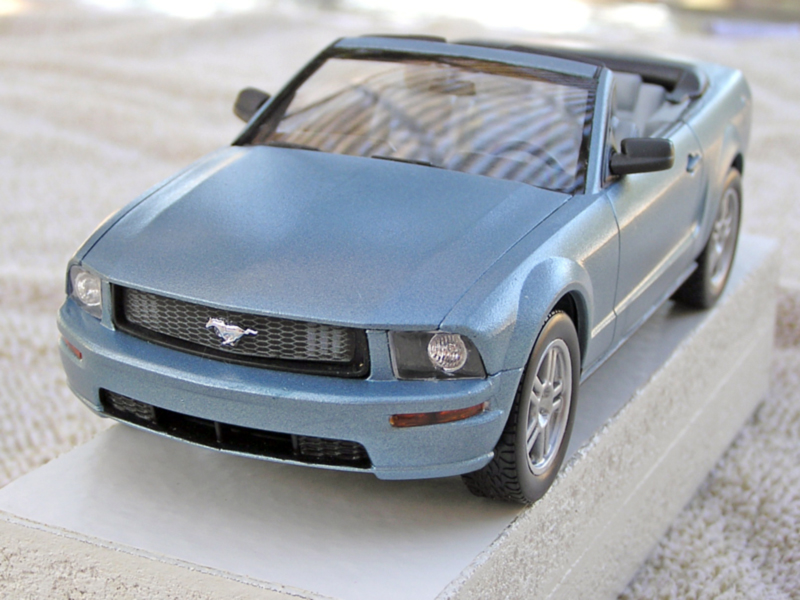
I'm working on the Revell 2010 Mustang convertible snap-kit. Trying to improve my painting skills with this one. The final color is Testor's One Coat Lacquer #1846 Pure Gold. Note: Questions are at the end. This is what I have done so far. Removed mold lines Wet sanded body (600 grit) Scrubbed with toothbrush and toothpaste A couple of mist coats of Tamiya Primer ( gray, then white) Final cover coat of white primer Wet sanding with 1500 grit (I only did the hood, but when the gray primer appeared on hood ridge, I stopped and repainted hood. Probably won't do this again with Tamiya Primer since it's so thin.) Scrubbed with toothbrush and toothpaste (worked better than wet sanding - no gray primer became visible!) Several mist coats of the gold. First wet coat of gold. Final wet coat of gold. Scrubbed with toothbrush and toothpaste Applied clear coat (Tamiya Gloss) The finish actually looks pretty good at this point. Smooth and shiny, at least to my eyes. I would be tempted to stop here, but I plan on following with polishing and waxing to try this out. Next up will be: Polishing (Meguiar's Ultimate Polish Pre-waxing glaze) Wash and dry Waxing (Meguiar's Deep Crystal Carnauba Wax) Questions: Do the steps I've listed make sense? Anything I have missed or have out of order? When would you paint areas of the car that have a matte black finish (Under the bumpers, rocker panels, etc.) or other areas that would get painted (Door handles, logos, etc.)? What about decals (if using any) - when do you put them on? Appreciate any advice or suggestions! Thanks, Bart
-
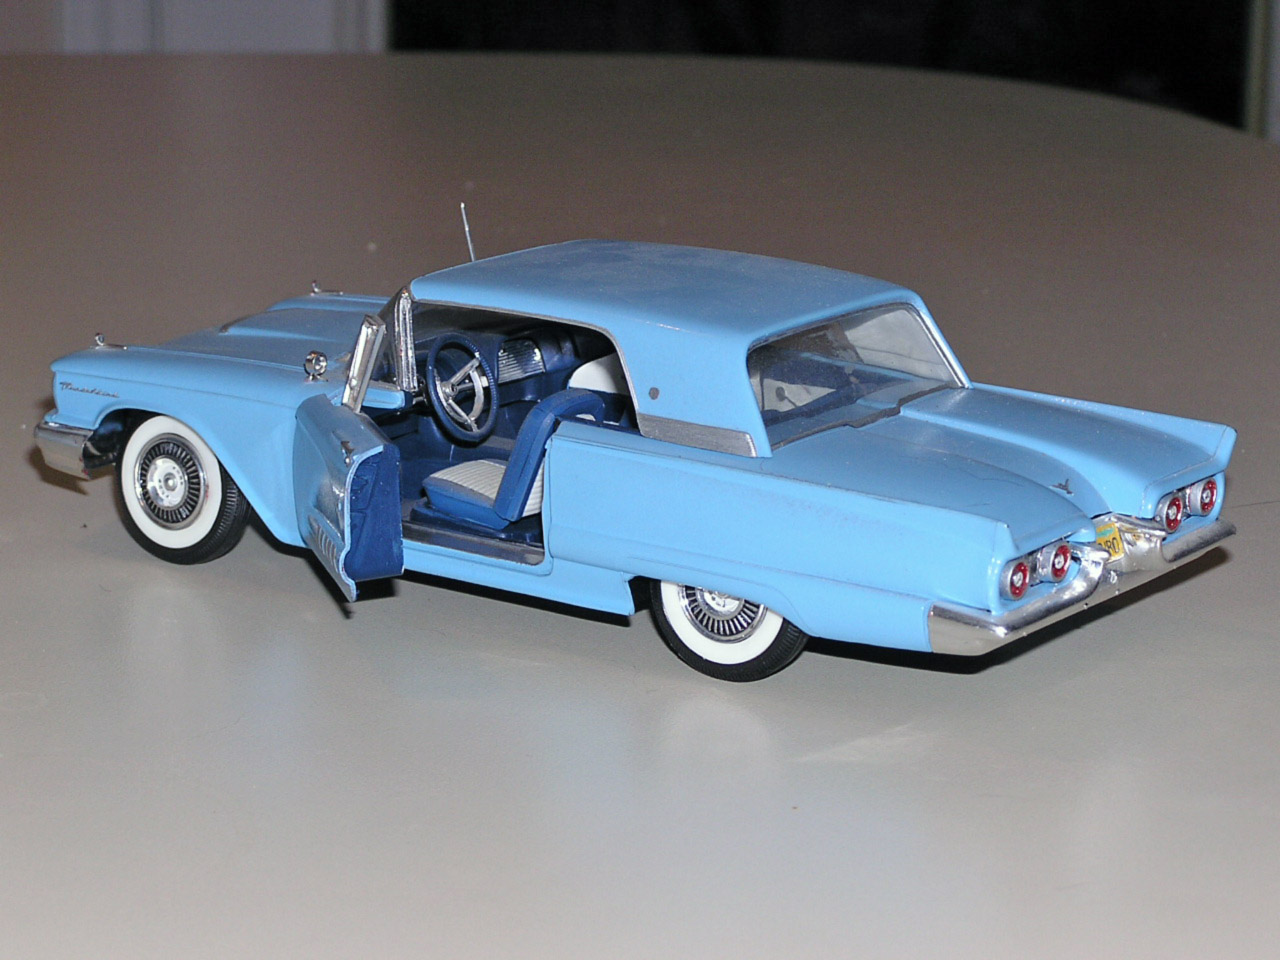
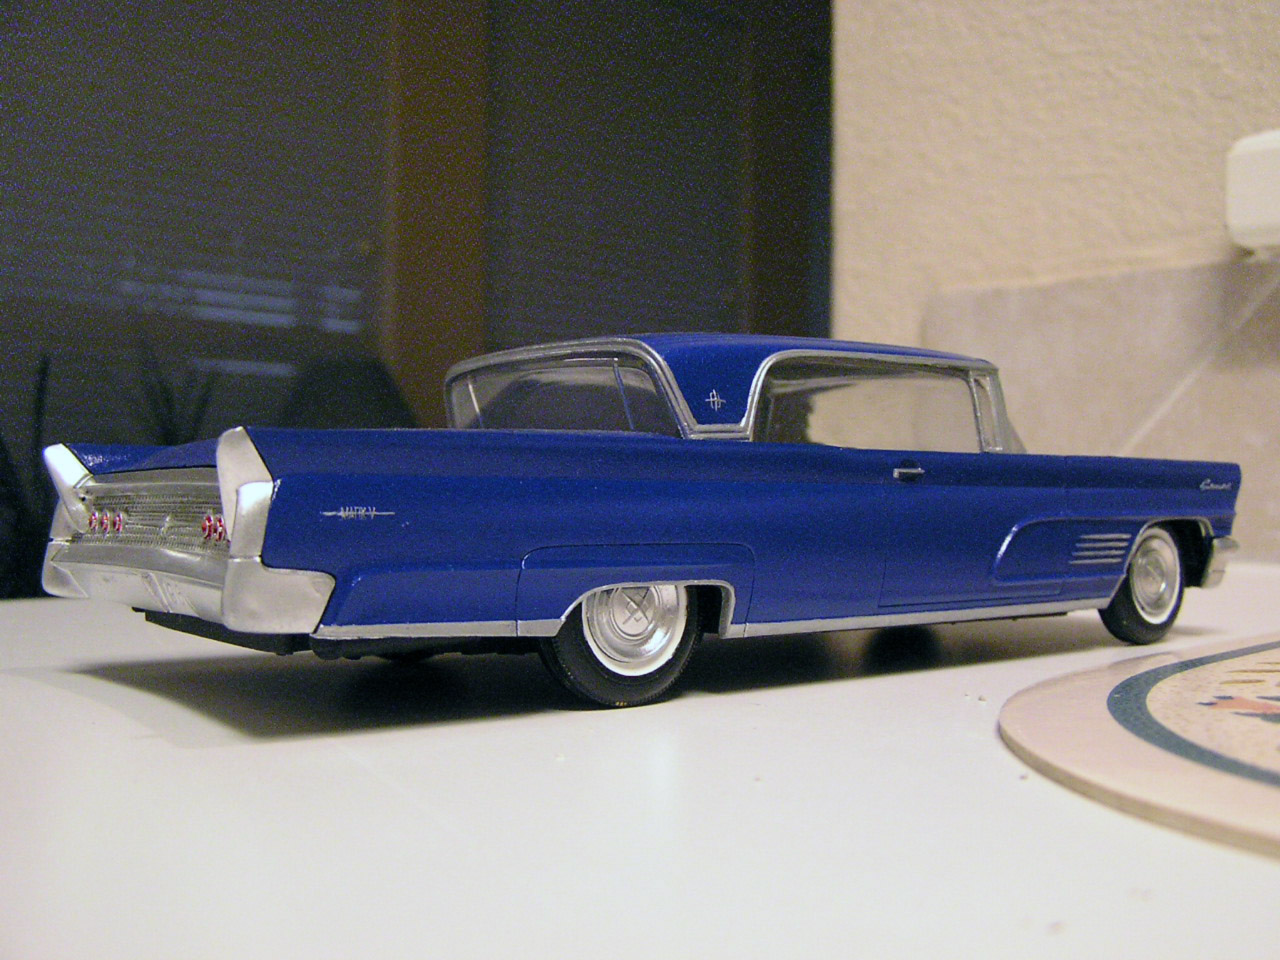
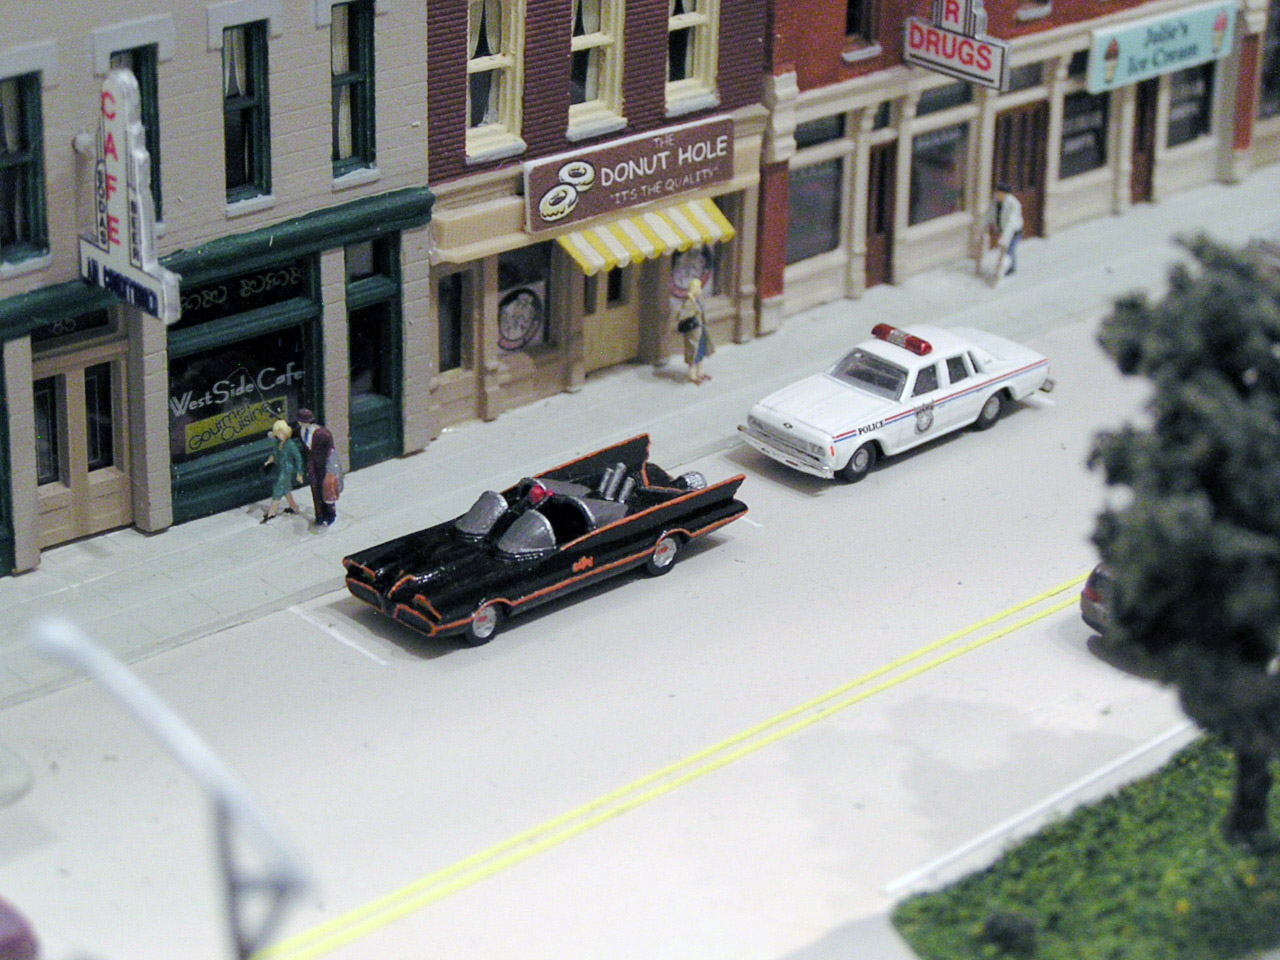
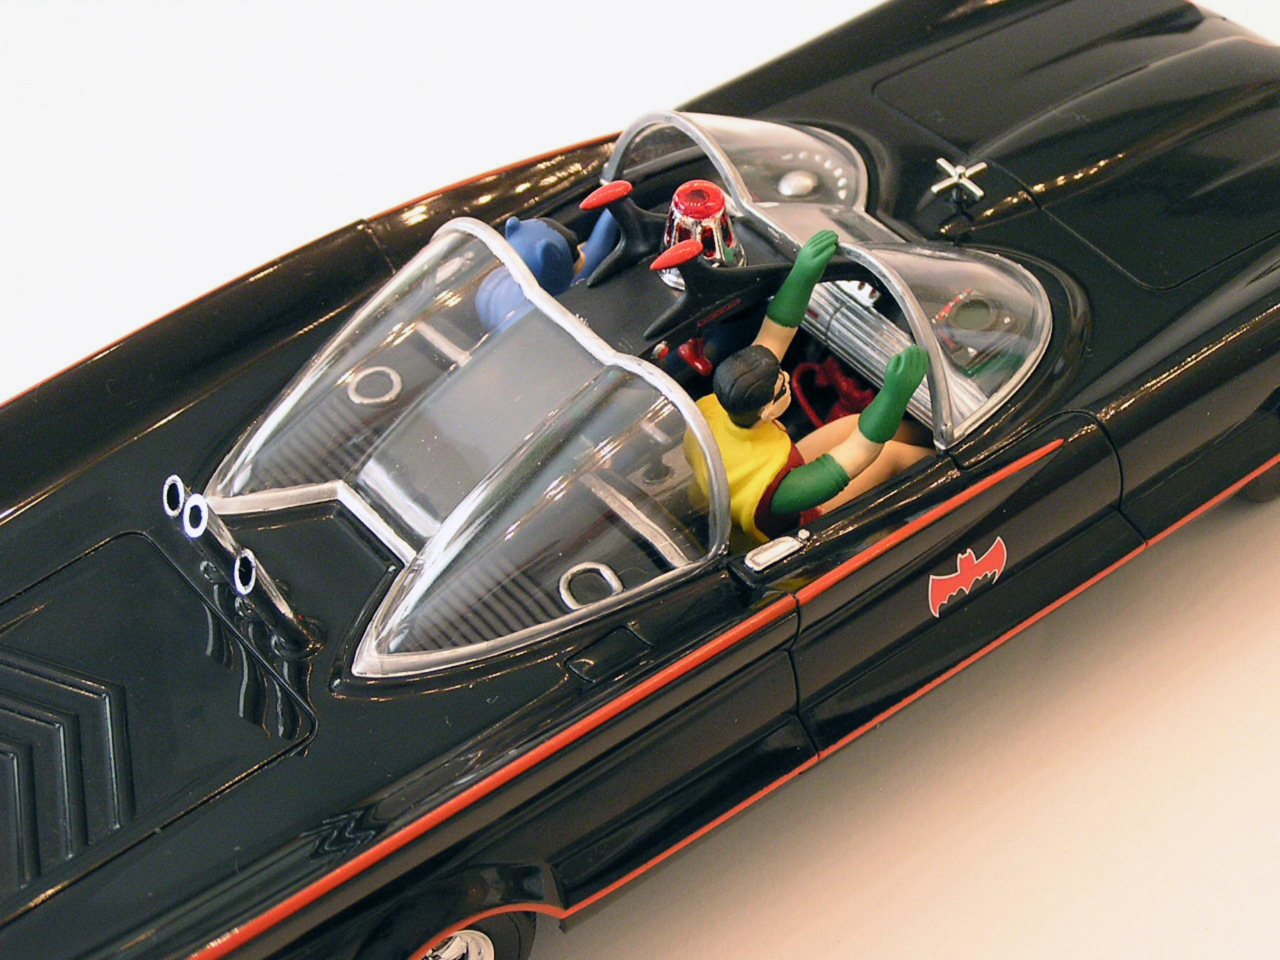
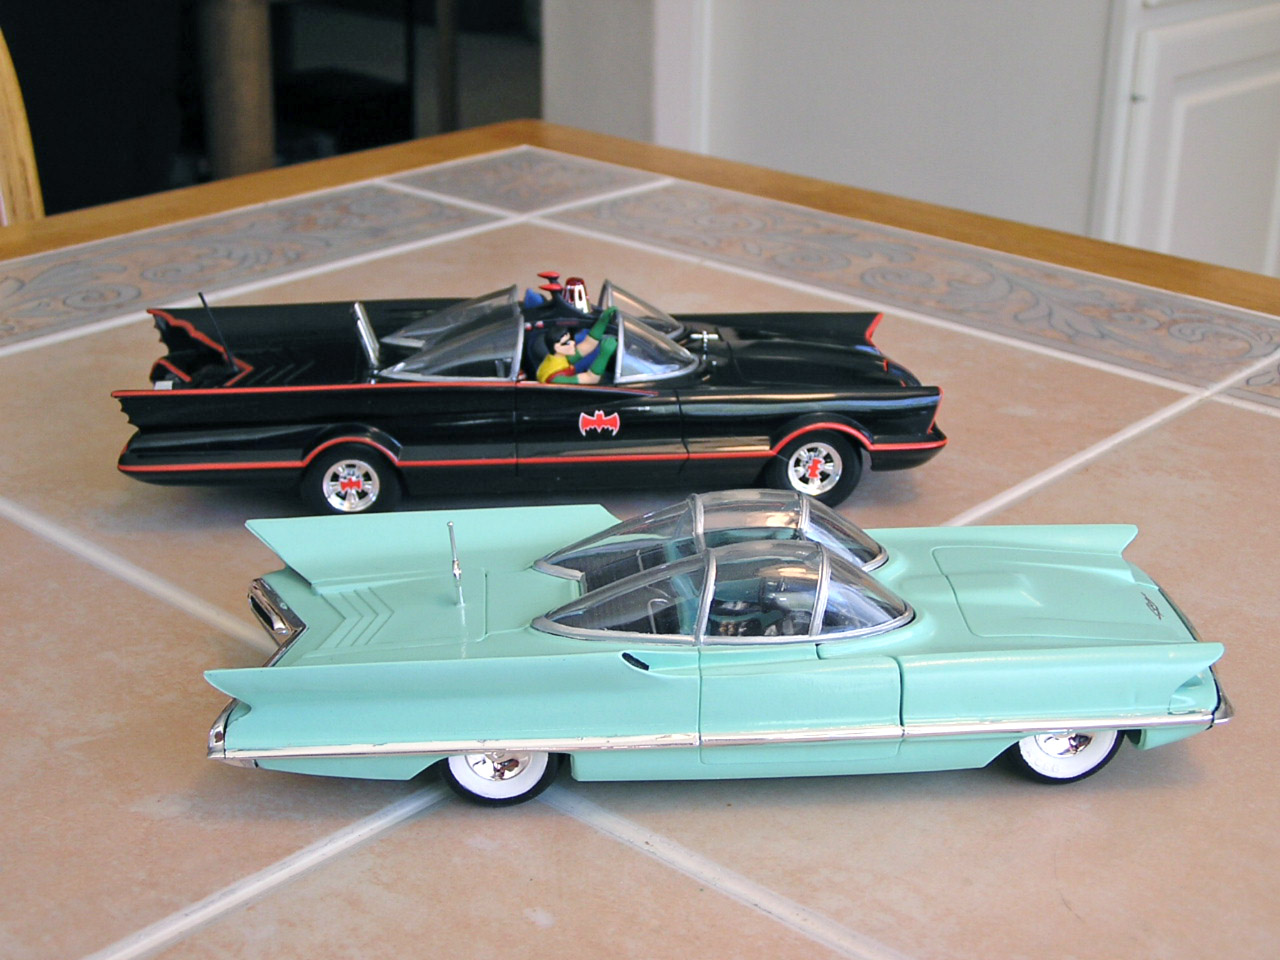
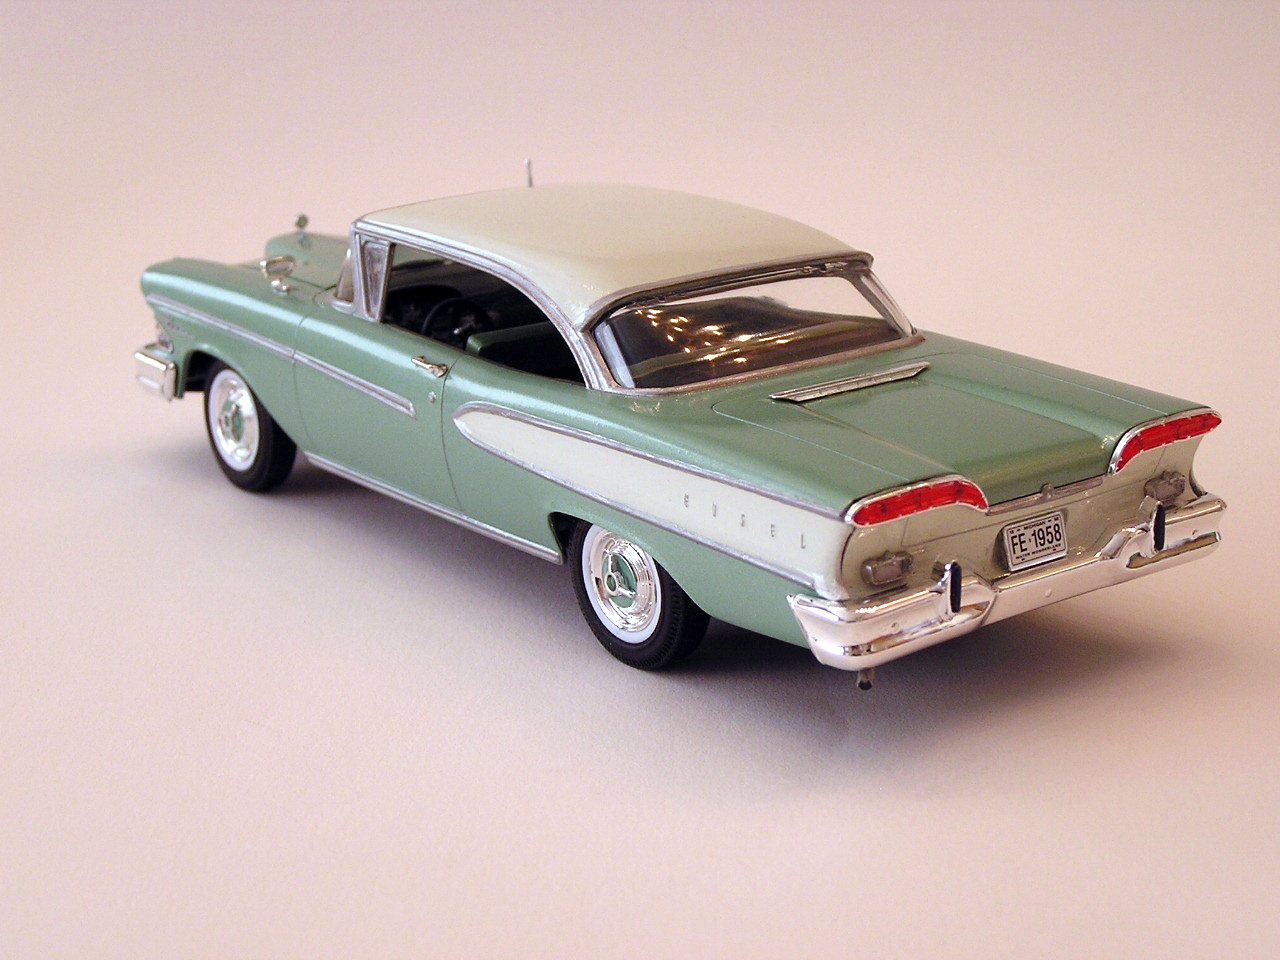
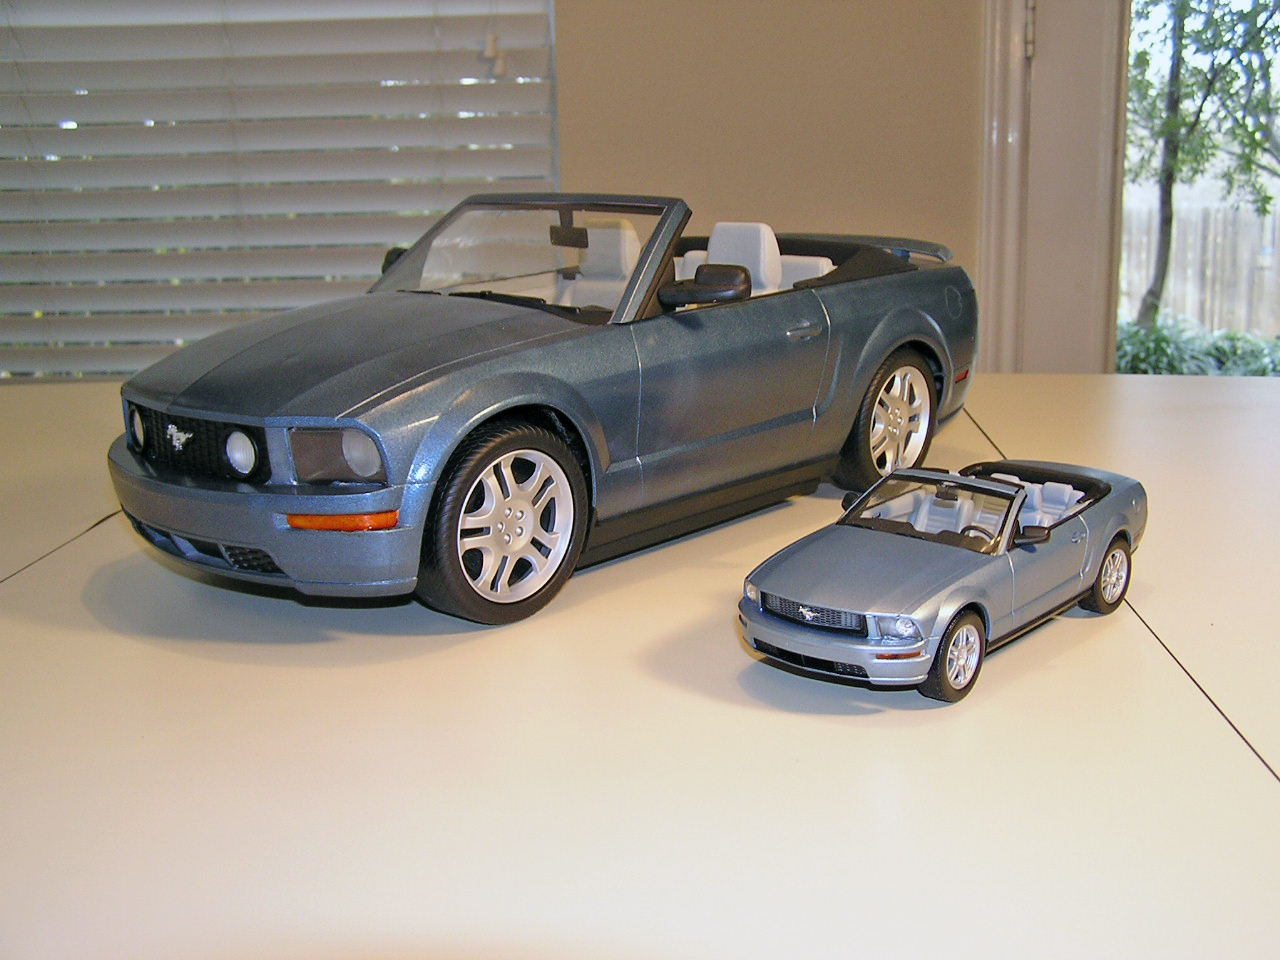
*** Edited to get the photos grouped together. Thanks for the tip, Patrick! *** Hi, everyone! I've been following this forum for quite a while and finally decided to post some samples of my work. I've been building models (mostly 1/25 autos) since I was a kid in the 50's and 60's. Hopefully my model building skill has improved with age. I've always used rattle spray cans and painted the chrome trim by hand. I have an air brush now that I will be learning to use, and bought some Bare Metal Foil so I can learn how to use that, too! Sorry for all of these photos...but I wanted to give you a good idea of what I've done! I've included some non-automobile models I have made, too. Thanks for looking! Let me know what you think! Bart The 2007 Mustang Convertible is a Mustang coupe that I converted into a replica of my car. To replace the GT grill, I took a photo of my grill and used that with the Mustang emblem from the kit added. Not the best painting effort on my part. It looks as rough in person as it does in the photos. My 1/25th Mustang, with a Barbie Mustang...which was originally bright Pink! A Model T The Polar Lights USS Enterprise (about 7" in length) - photoshopped over a star background. The Polar Lights Enterprise Bridge - with some modifications to the Turbolift alcove and the navigation console. AMT's 1958 Edsel kit The Polar Lights Batmobile Snap-Kit and the Lincoln Futura I'm also an N-Gauge modeler. Here is a 1/160th scale Batmobile on my layout. Batman and the Police Chief are having a meeting - at the donut shop, of course! Some other Mustangs I have owned - a 66 Mustang and a 75 Mustang II This 60 Lincoln was originally built when I was 8 years old. Using Q-Tips to paint the kit. Repainted many times after that, with paint getting on the windows. Later in life I stripped the paint and rebuilt it. Felt good to fix up a glue bomb model that I was responsible for! Revell's HO Scale Big Boy locomotive MPC's 1928 Lincoln Monogram's Caddy Kit. All chrome trim was hand-painted! Monogram's 1958 T-Bird Made this 57 T-Bird for the guy who owned it. Even added the fuzzy dice hanging from the mirror!

.JPG.37c63ed43ce2037dabbd1387c7a8e38a.JPG)


.JPG.0f96cb023338e43d9c635005c807bce2.JPG)
.JPG.2deac3f50a2214e3a6b95163bdcb5e6e.JPG)


.JPG.a522a77a1a7dae27779e2ebcf7eff3ed.JPG)


.JPG.a1963956ed5976842c4b1909c4caba7b.JPG)