Al Hoffman
-
Posts
83 -
Joined
-
Last visited
Content Type
Profiles
Forums
Events
Gallery
Everything posted by Al Hoffman
-
Thanks for all the positive comments.
-
I kinda lived on the Internet on this one because I was not that familiar with Model 'A's.

-
It was the pick-up, woody and bicycle.
-
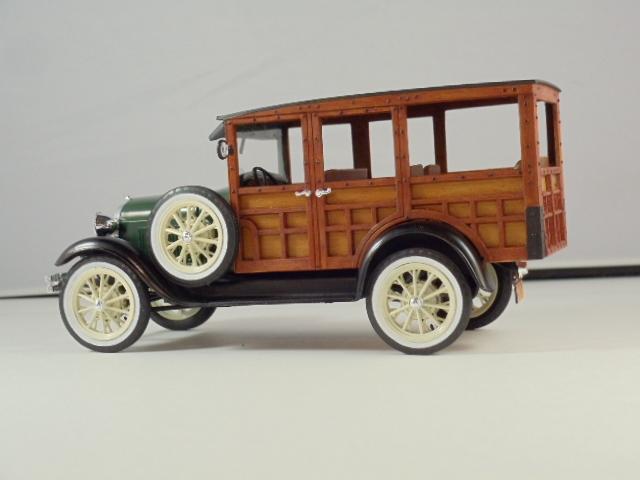
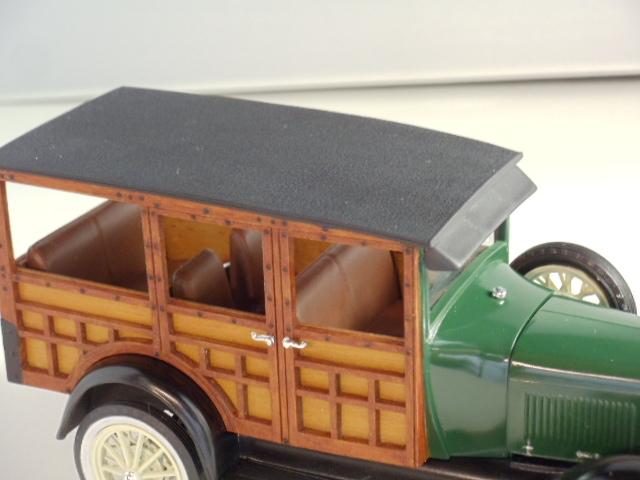
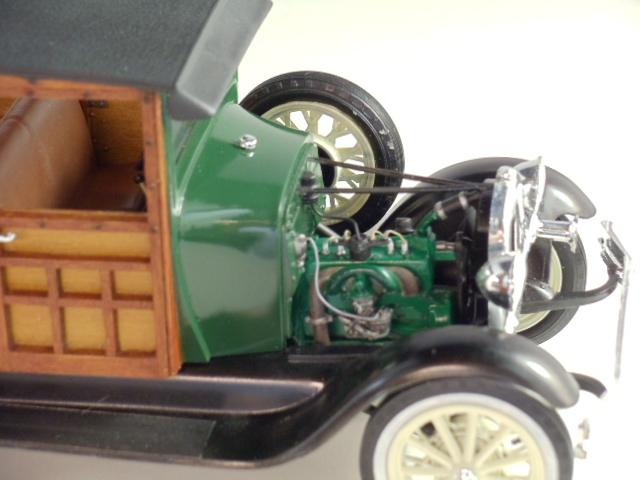
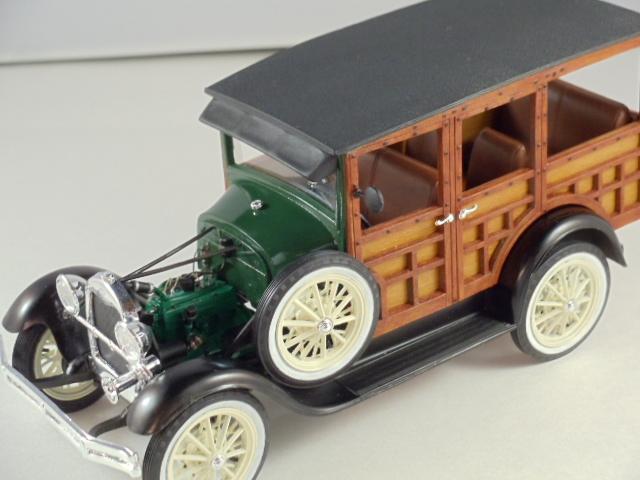
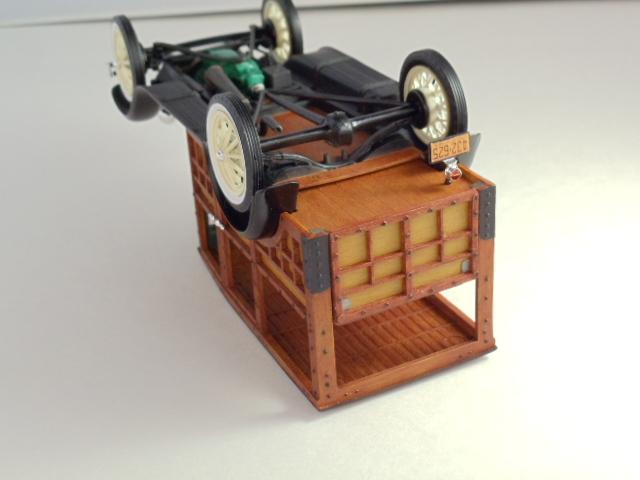
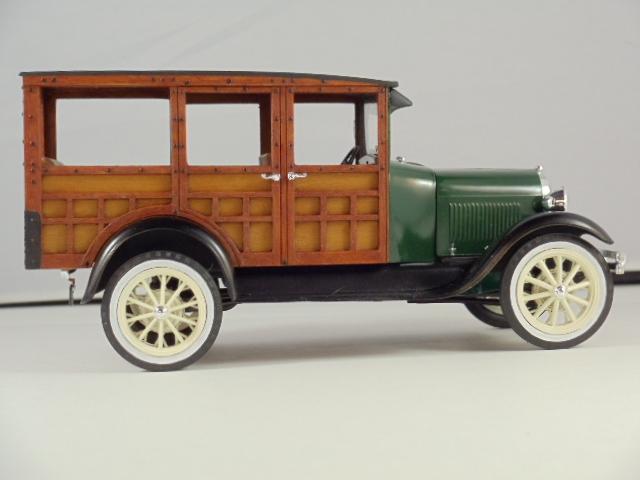
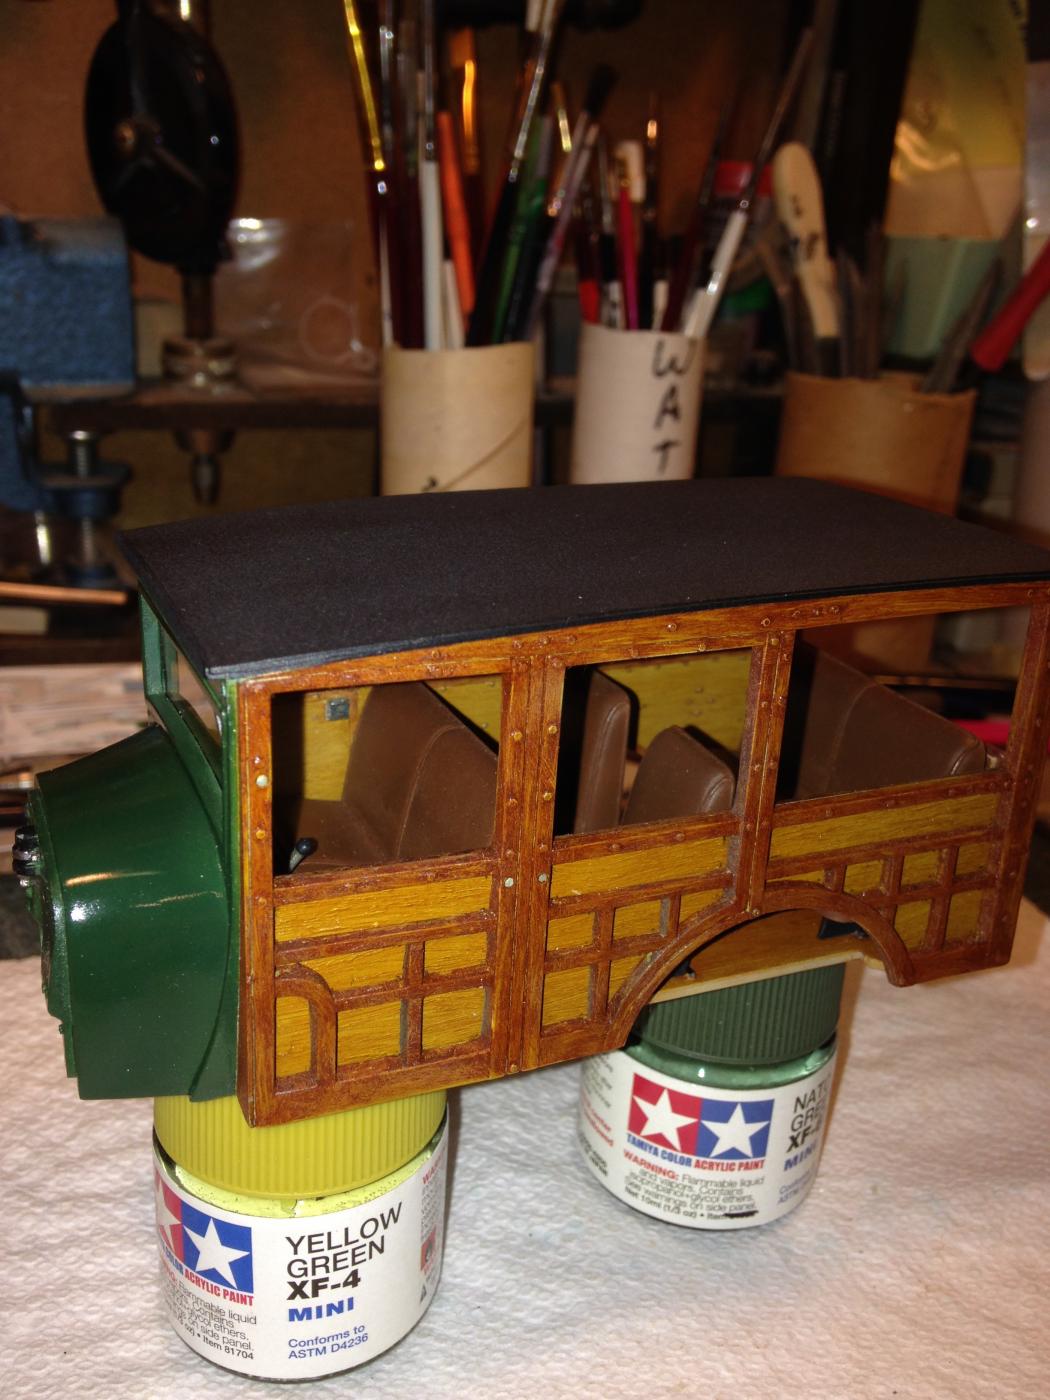
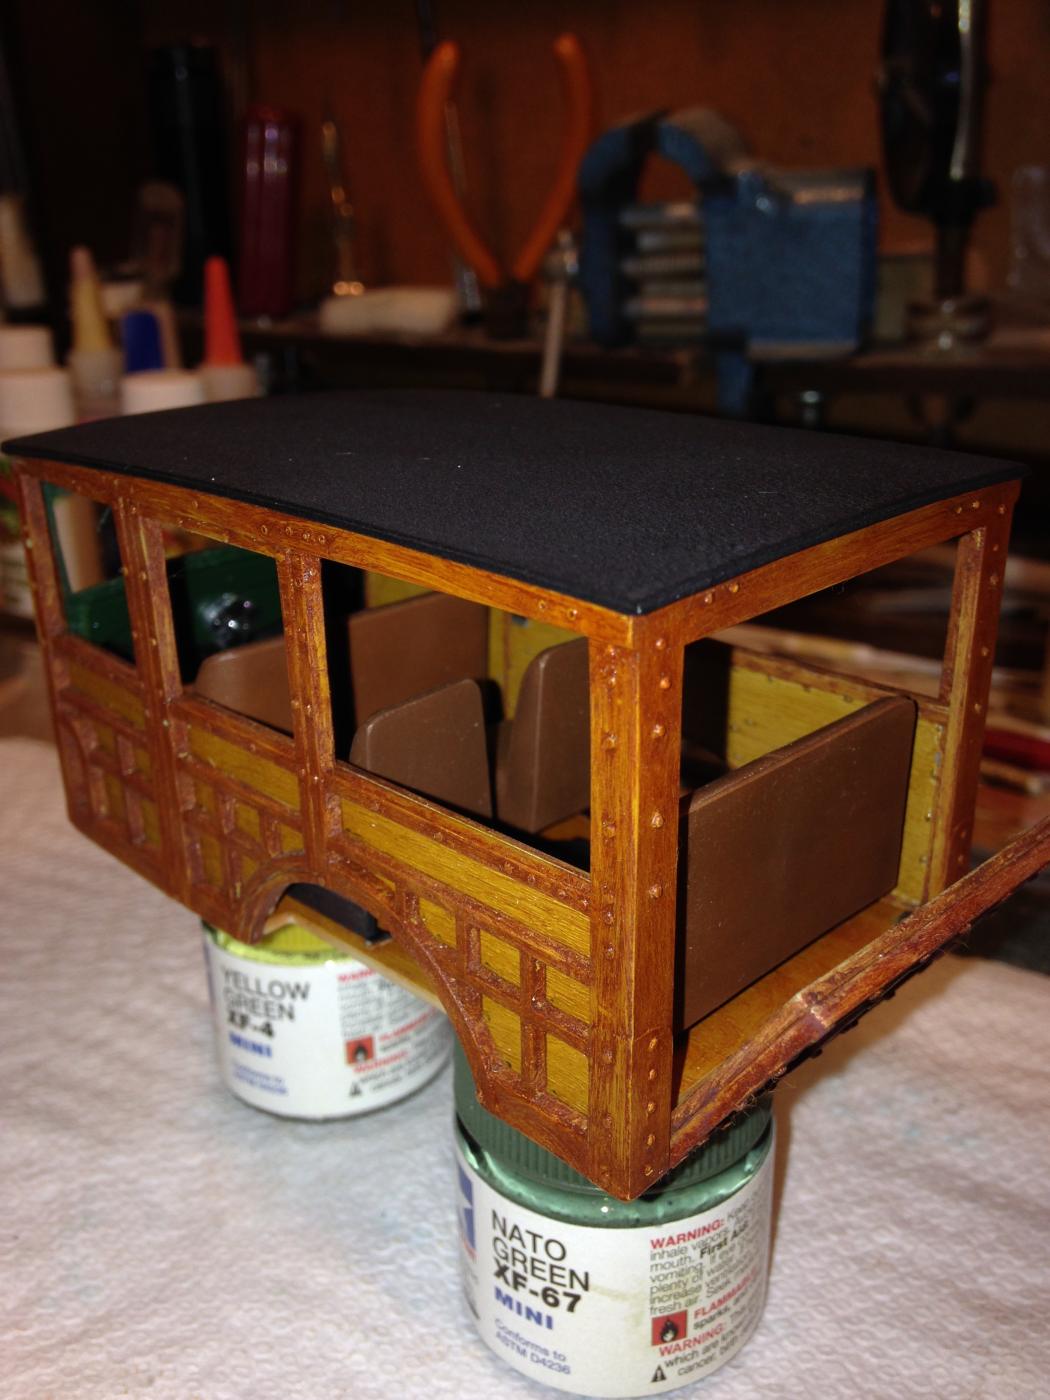
Got this one done for the our club contest last night. as usual I was working on it till I left the house AMT 1929 Ford Model 'A' Woody. Spent a lot of time mumbling to myself about the way the kit seemed to have been created from a collection of parts from different AMT Model 'A's but in the end I had to admit that the short comings were not all that great. Things like: driveshaft too short, no rear motor mounts and no radiator hoses. Nothing major. The kit was built about 90% OOB with the only additions including wiring the engine, modifying the sunvisor to represent a fabric covered style and correcting the above mentioned short comings. The finish on the wood work was done as follows: Tamiya Buff base coat, artist oils for the wood proper and then a wash of Tamiya Clear Orange which I felt added to the richness of the wood. Seats were done in Tamiya Red Brown with an over coat of oils to try to create a leather look. Fabric roof and visor were done with Model Master Chrome Black. The green metal is a mix of Tamiya colors, fenders a Tamiya Semi-gloss black. The white walls are hand painted with Gesso and the wheels with a Tamiya cream color. I took a little "artistic license" with the wood on the underside floor. I think it was actually a protective black finish of some sort but I was having too much fun doing the wood and got carried away. Now it's time to move on to our club's December same kit contest, the '57 Ford Del Rio. Hope you enjoy this one and feel free to ask any questions. Hope
-
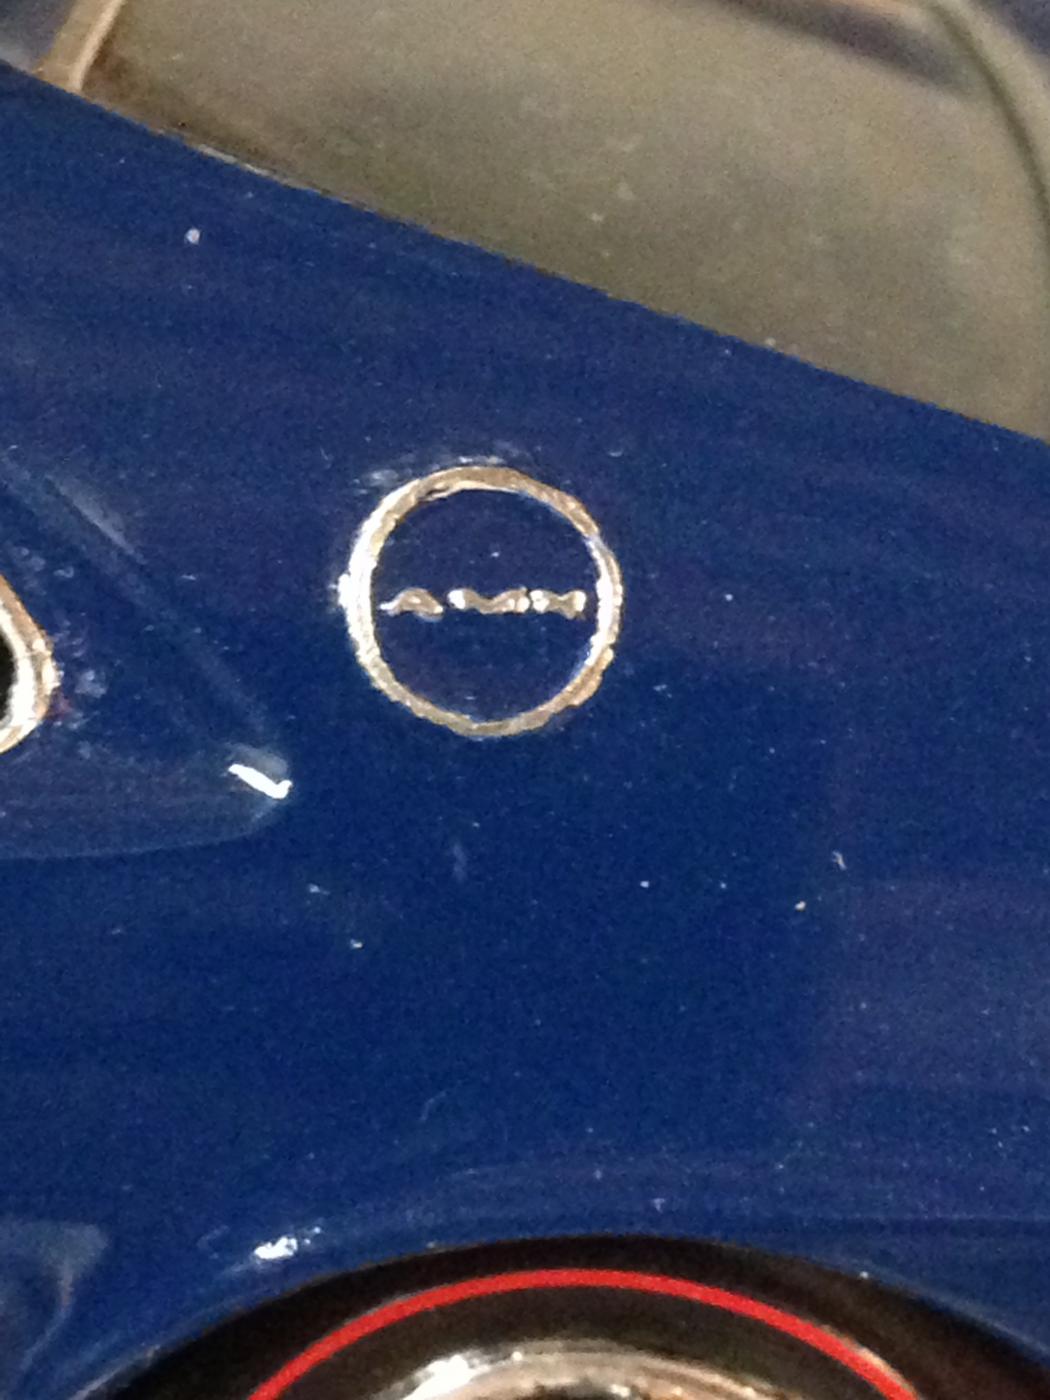
Looking mighty fine. How did you end up doing the pillar emblem?
-
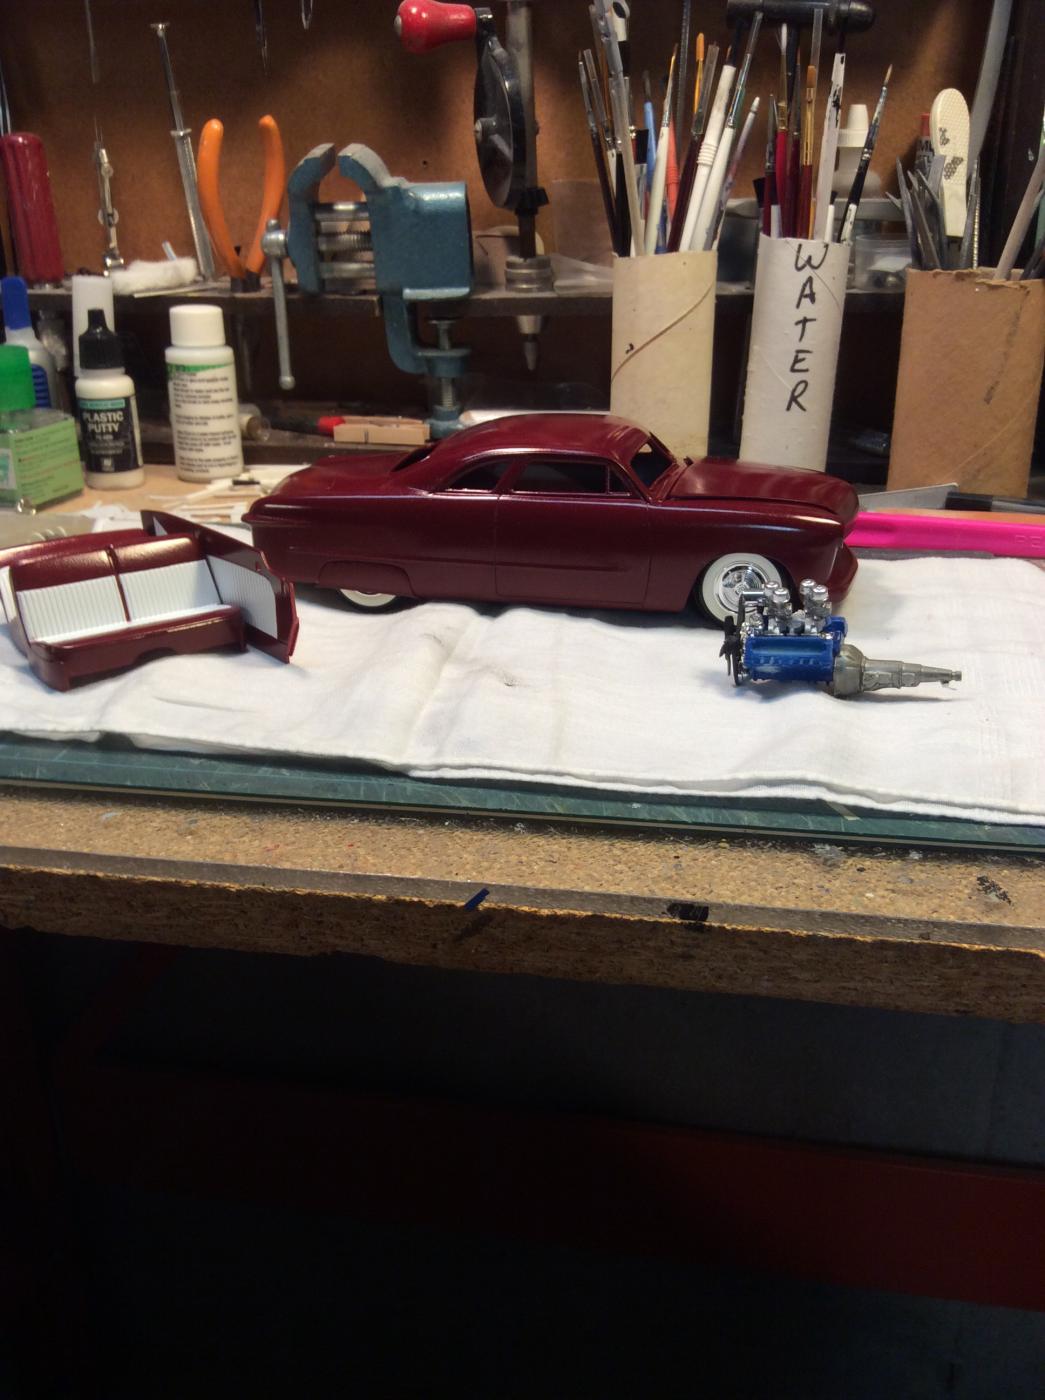
Small update on this. Another surprise. Kit doesn't have upper & lower radiator hoses. Top on should be easy but the bottom on has part of it molded into the side of the block & stops perfectly in line with the fan belt. Hmm. Might end up a curbside. On the plus side everything else is going fairly smoothly. Need to be done Monday night.
-
This worked for me maybe it will for you. I built a 1/25th scale & was working in a smaller area. Cover the full emblem with BM Foil. Trim the outside diameter as usual. Take your paint color & reduce it till it is a virtual wash. Flow that into the circle. It will collect around the edges. Then when dry you can go ahead & paint the rest of the foil. Like everything else it looks better sitting on the shelf than the close up. Hope this helps. BTW, you are building a car that is dear to my heart. My second new car was a '69 AMX, blue, 390/auto with the silver Go Package.
-
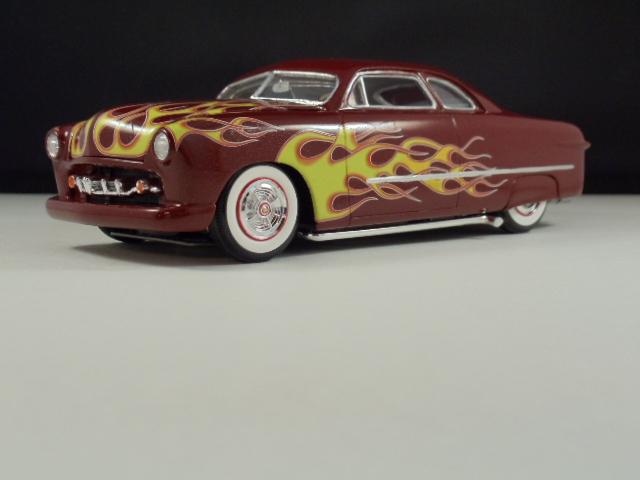
Thanks Ron but the only hard thing about the flames was making the decals from the Merc fit the Ford.
-
Nice work. I use this paint a lot. What did you use as a clear coat? I'm prone to brushing on Future. Here's a shot of that color using a dark base coat.
-
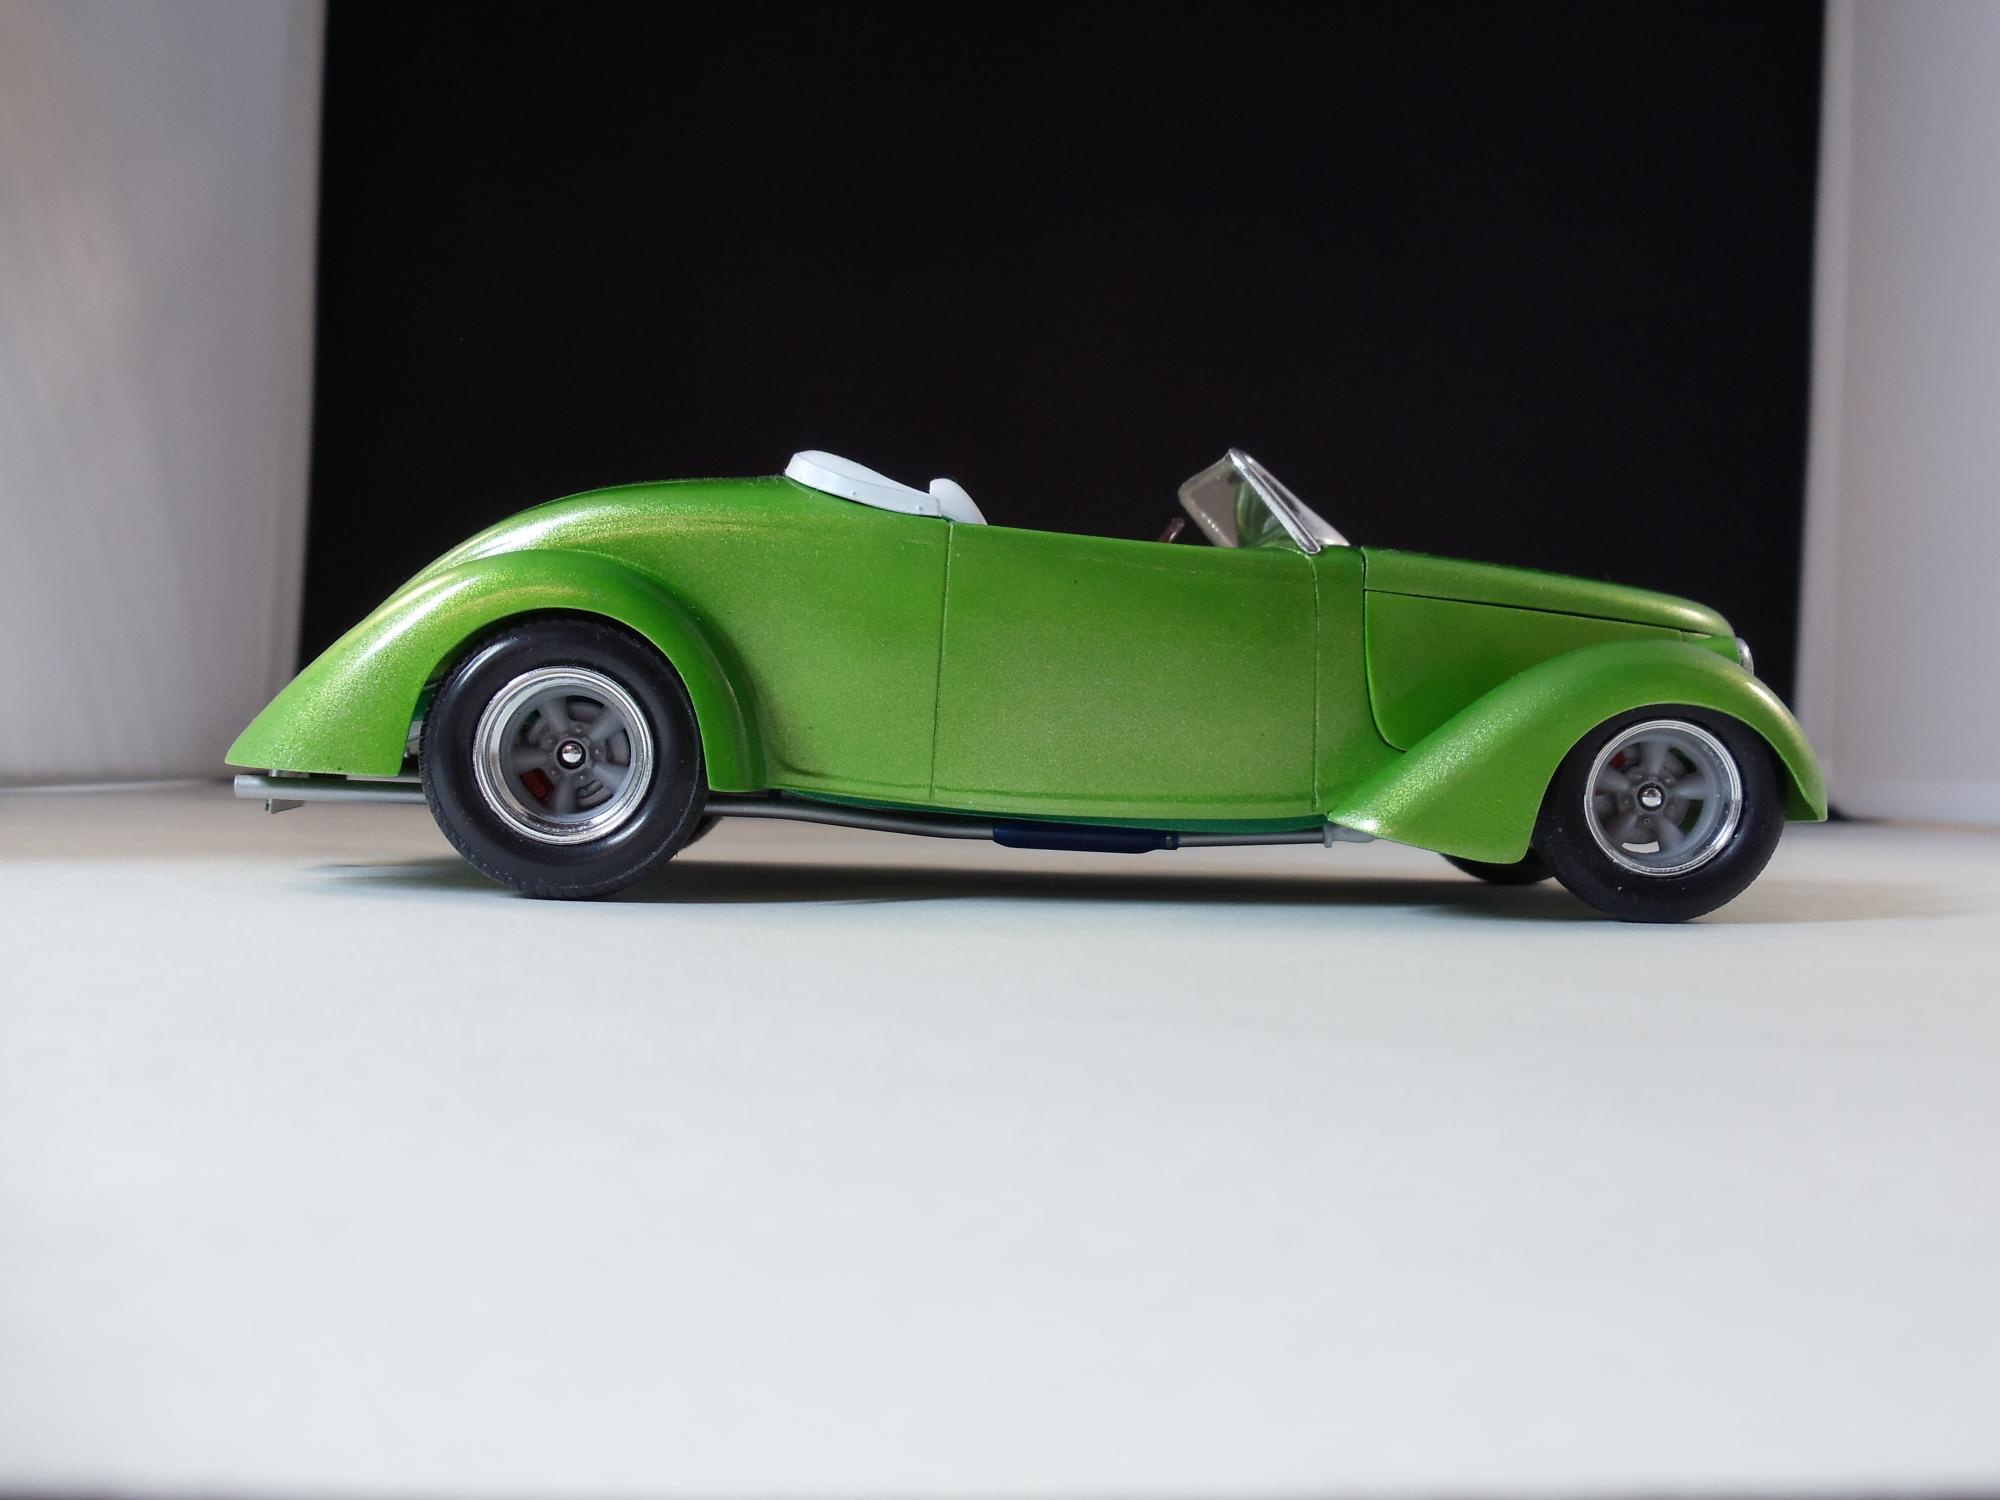
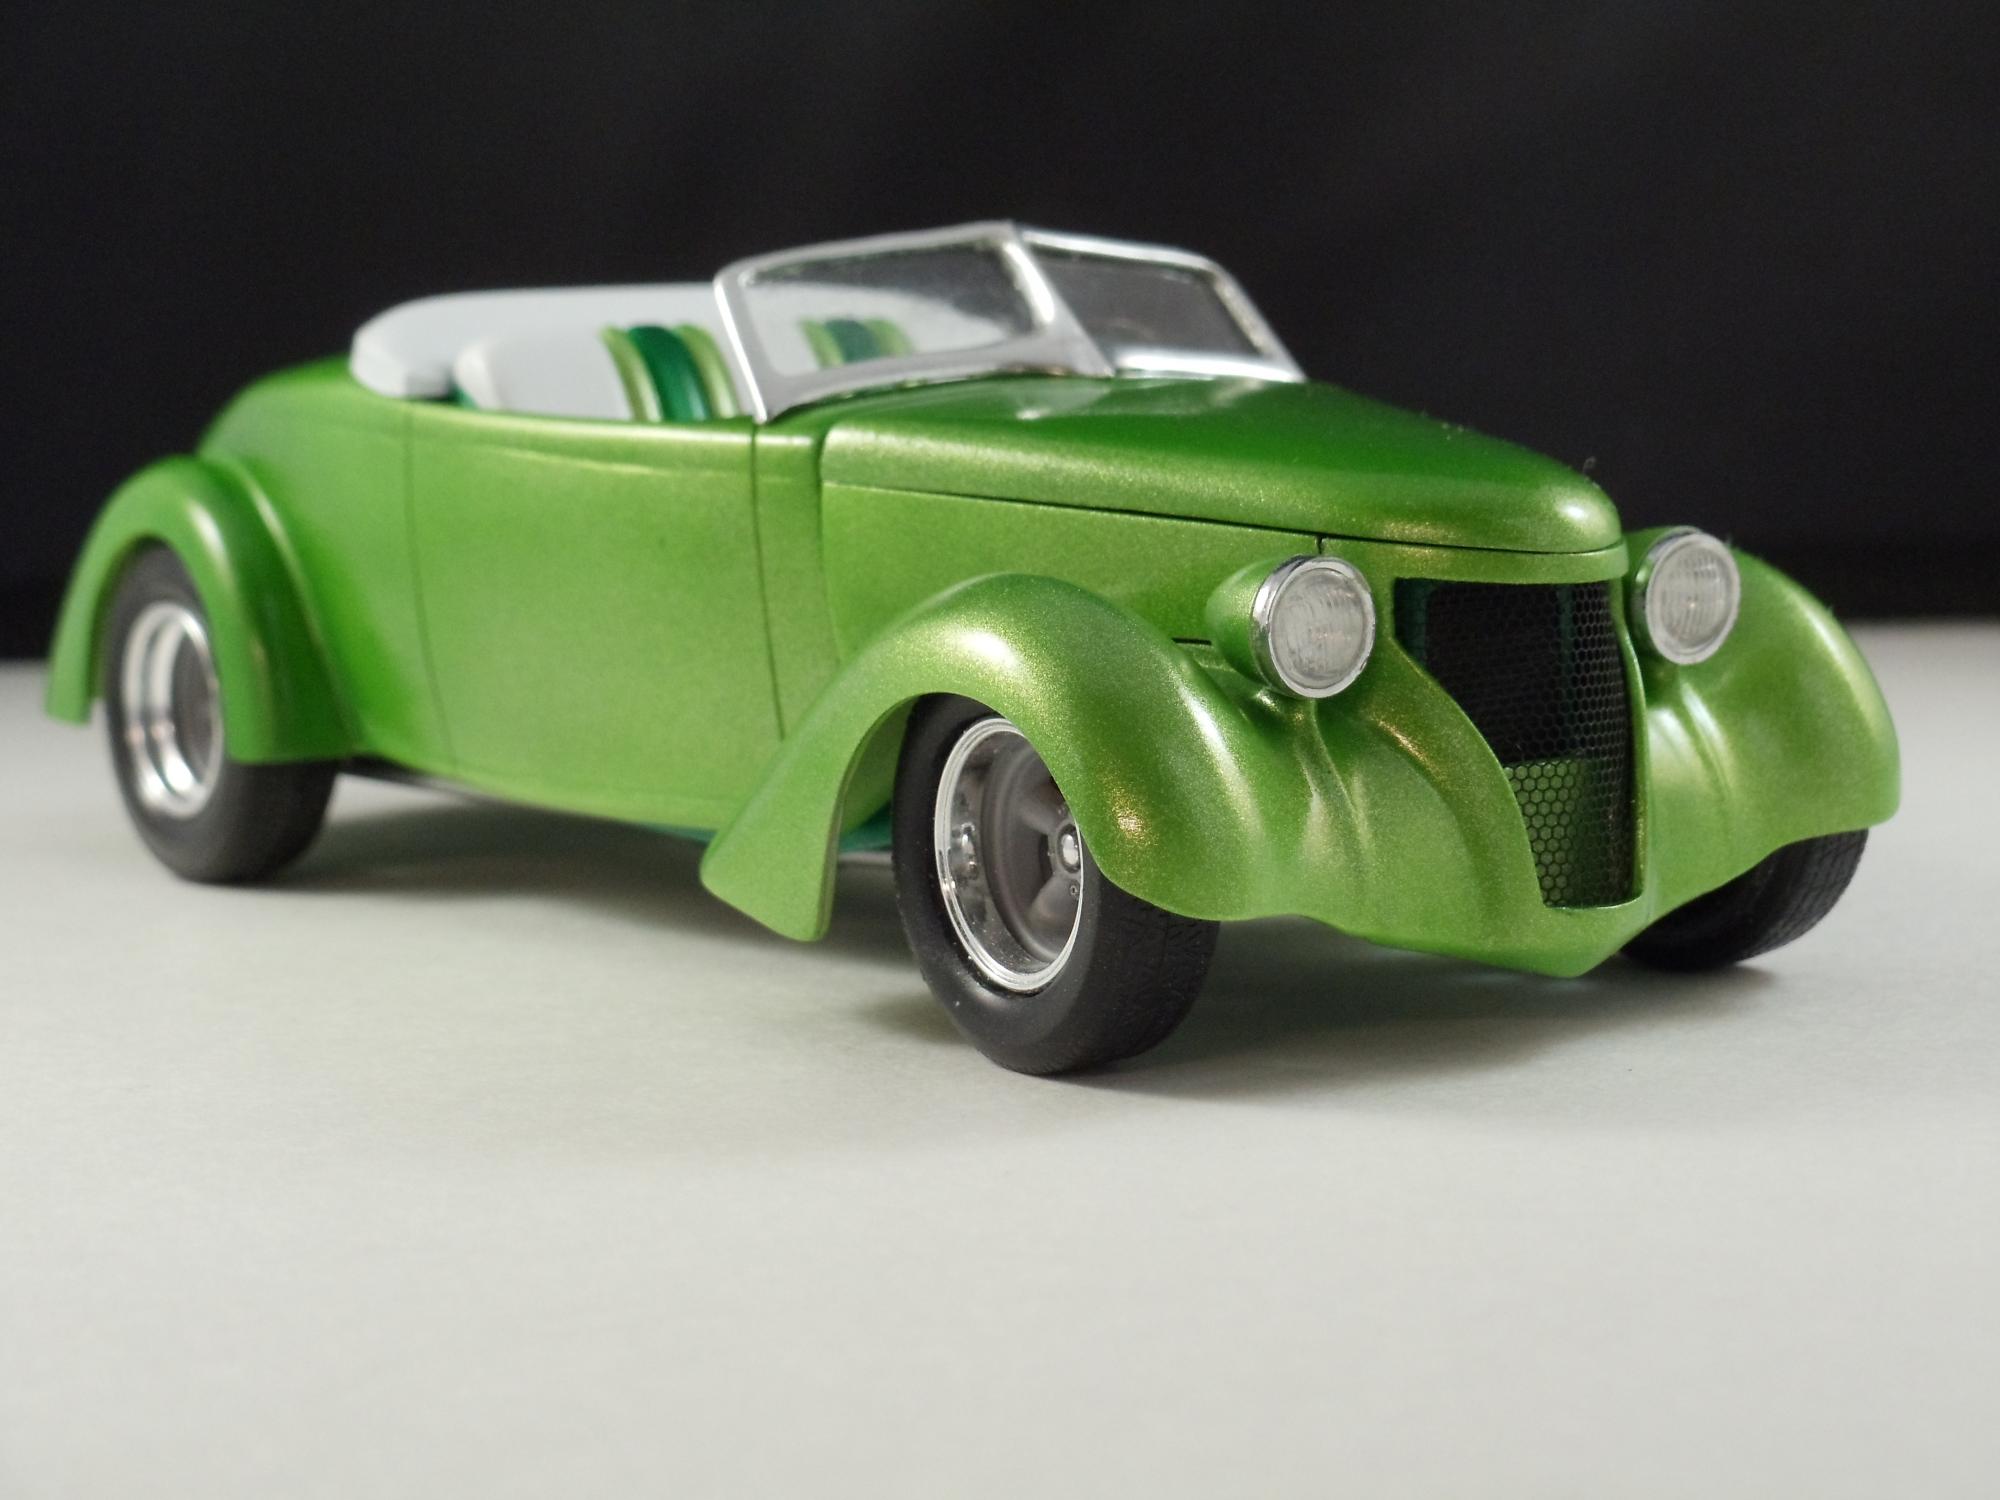
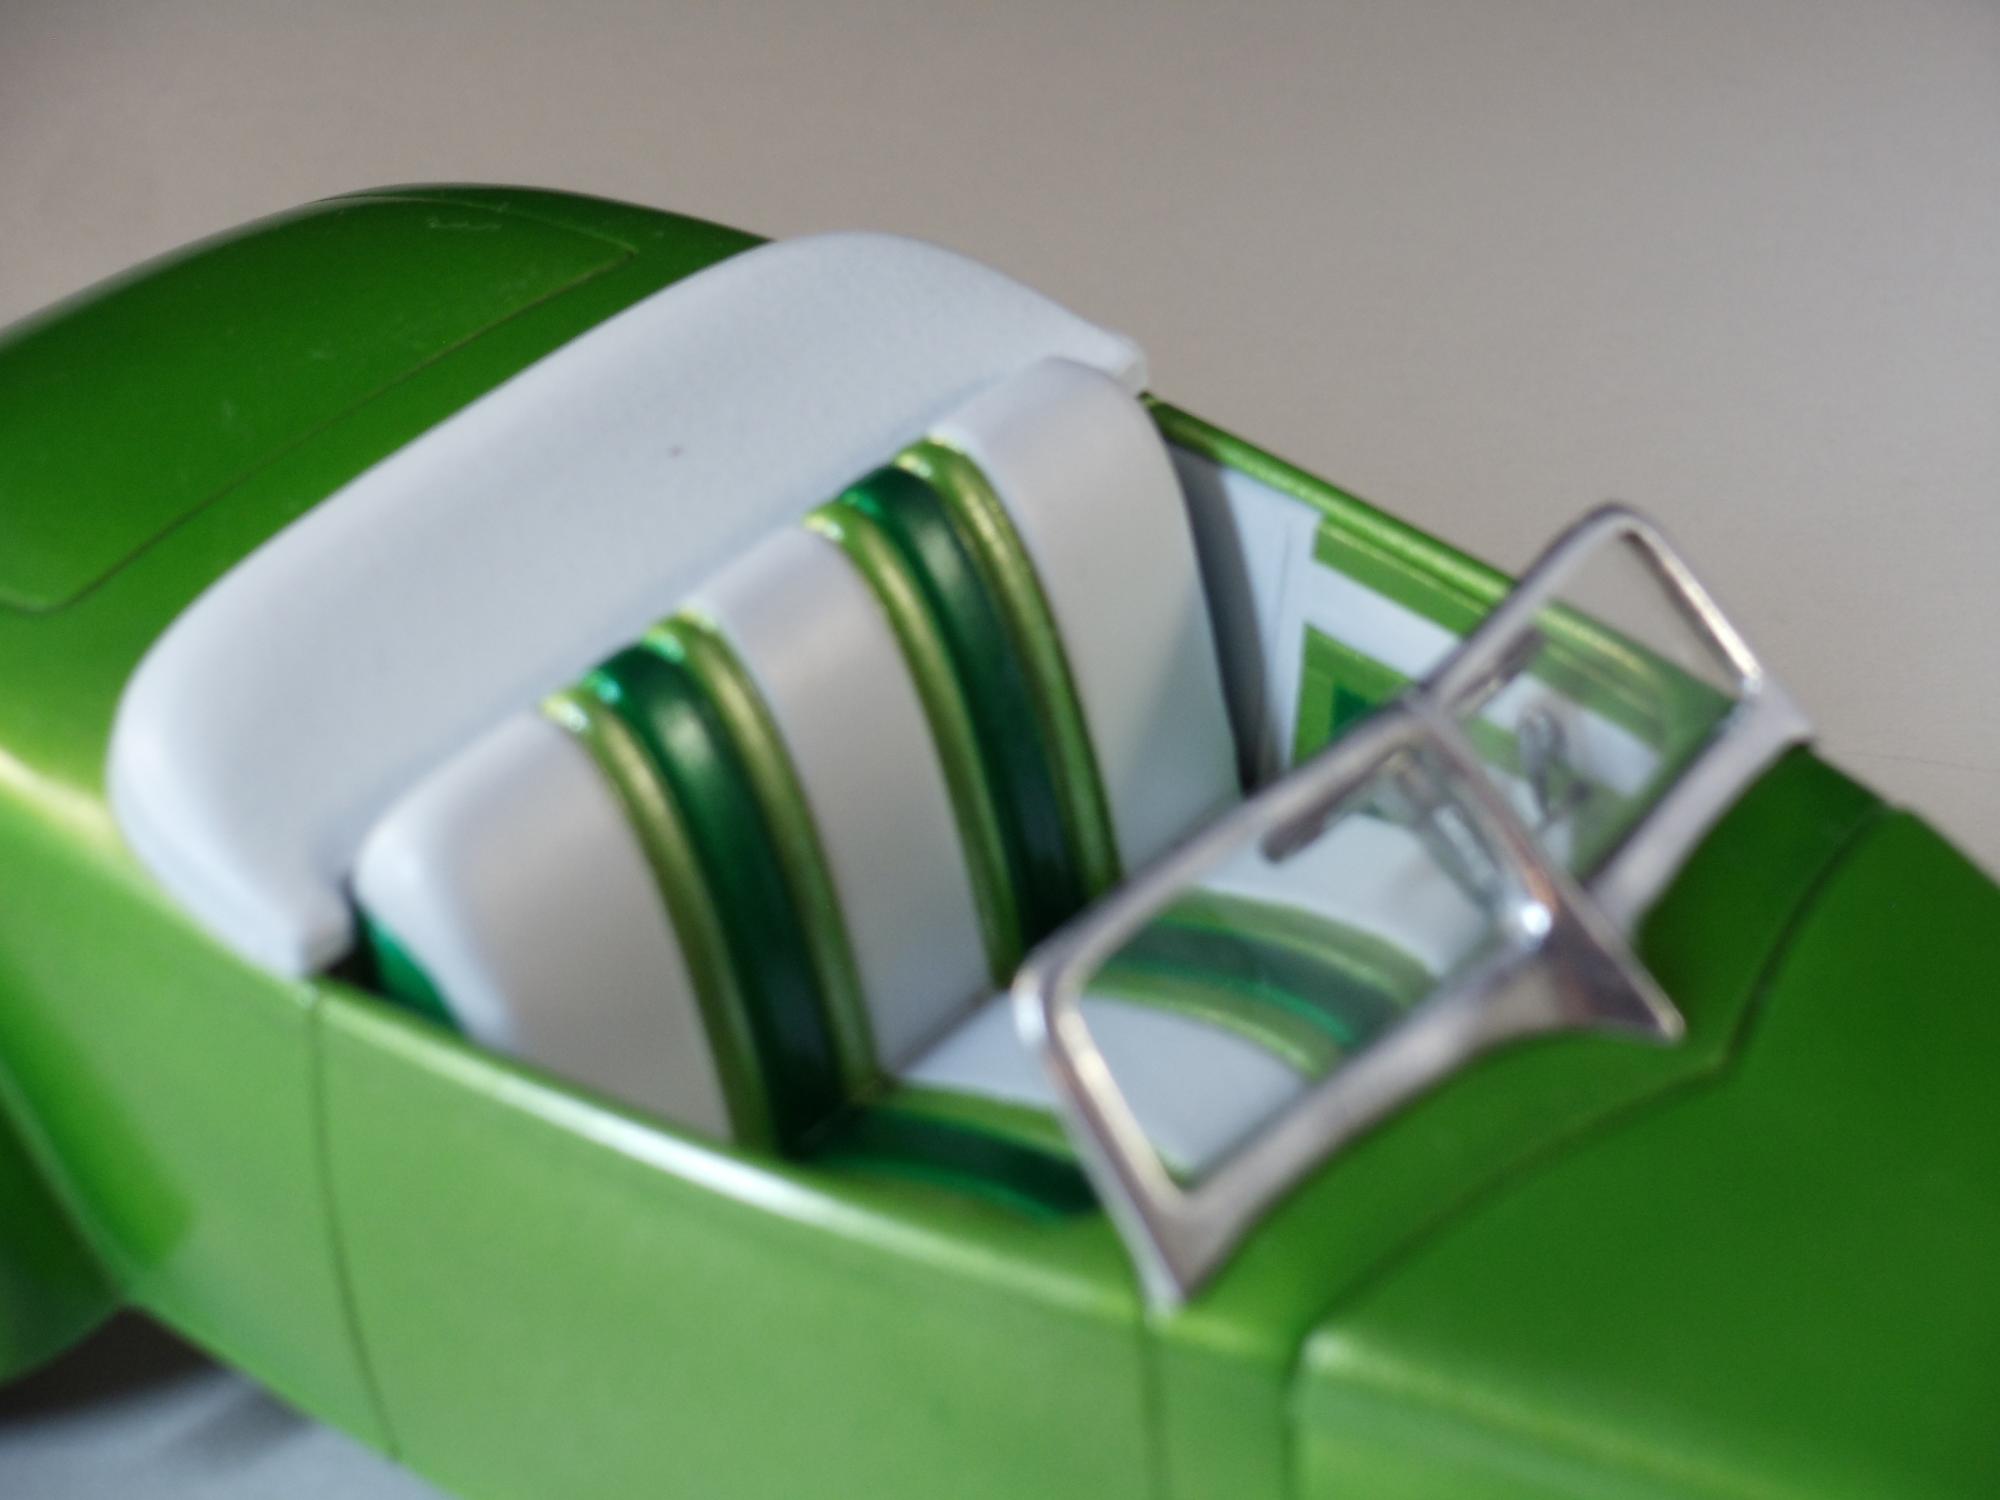
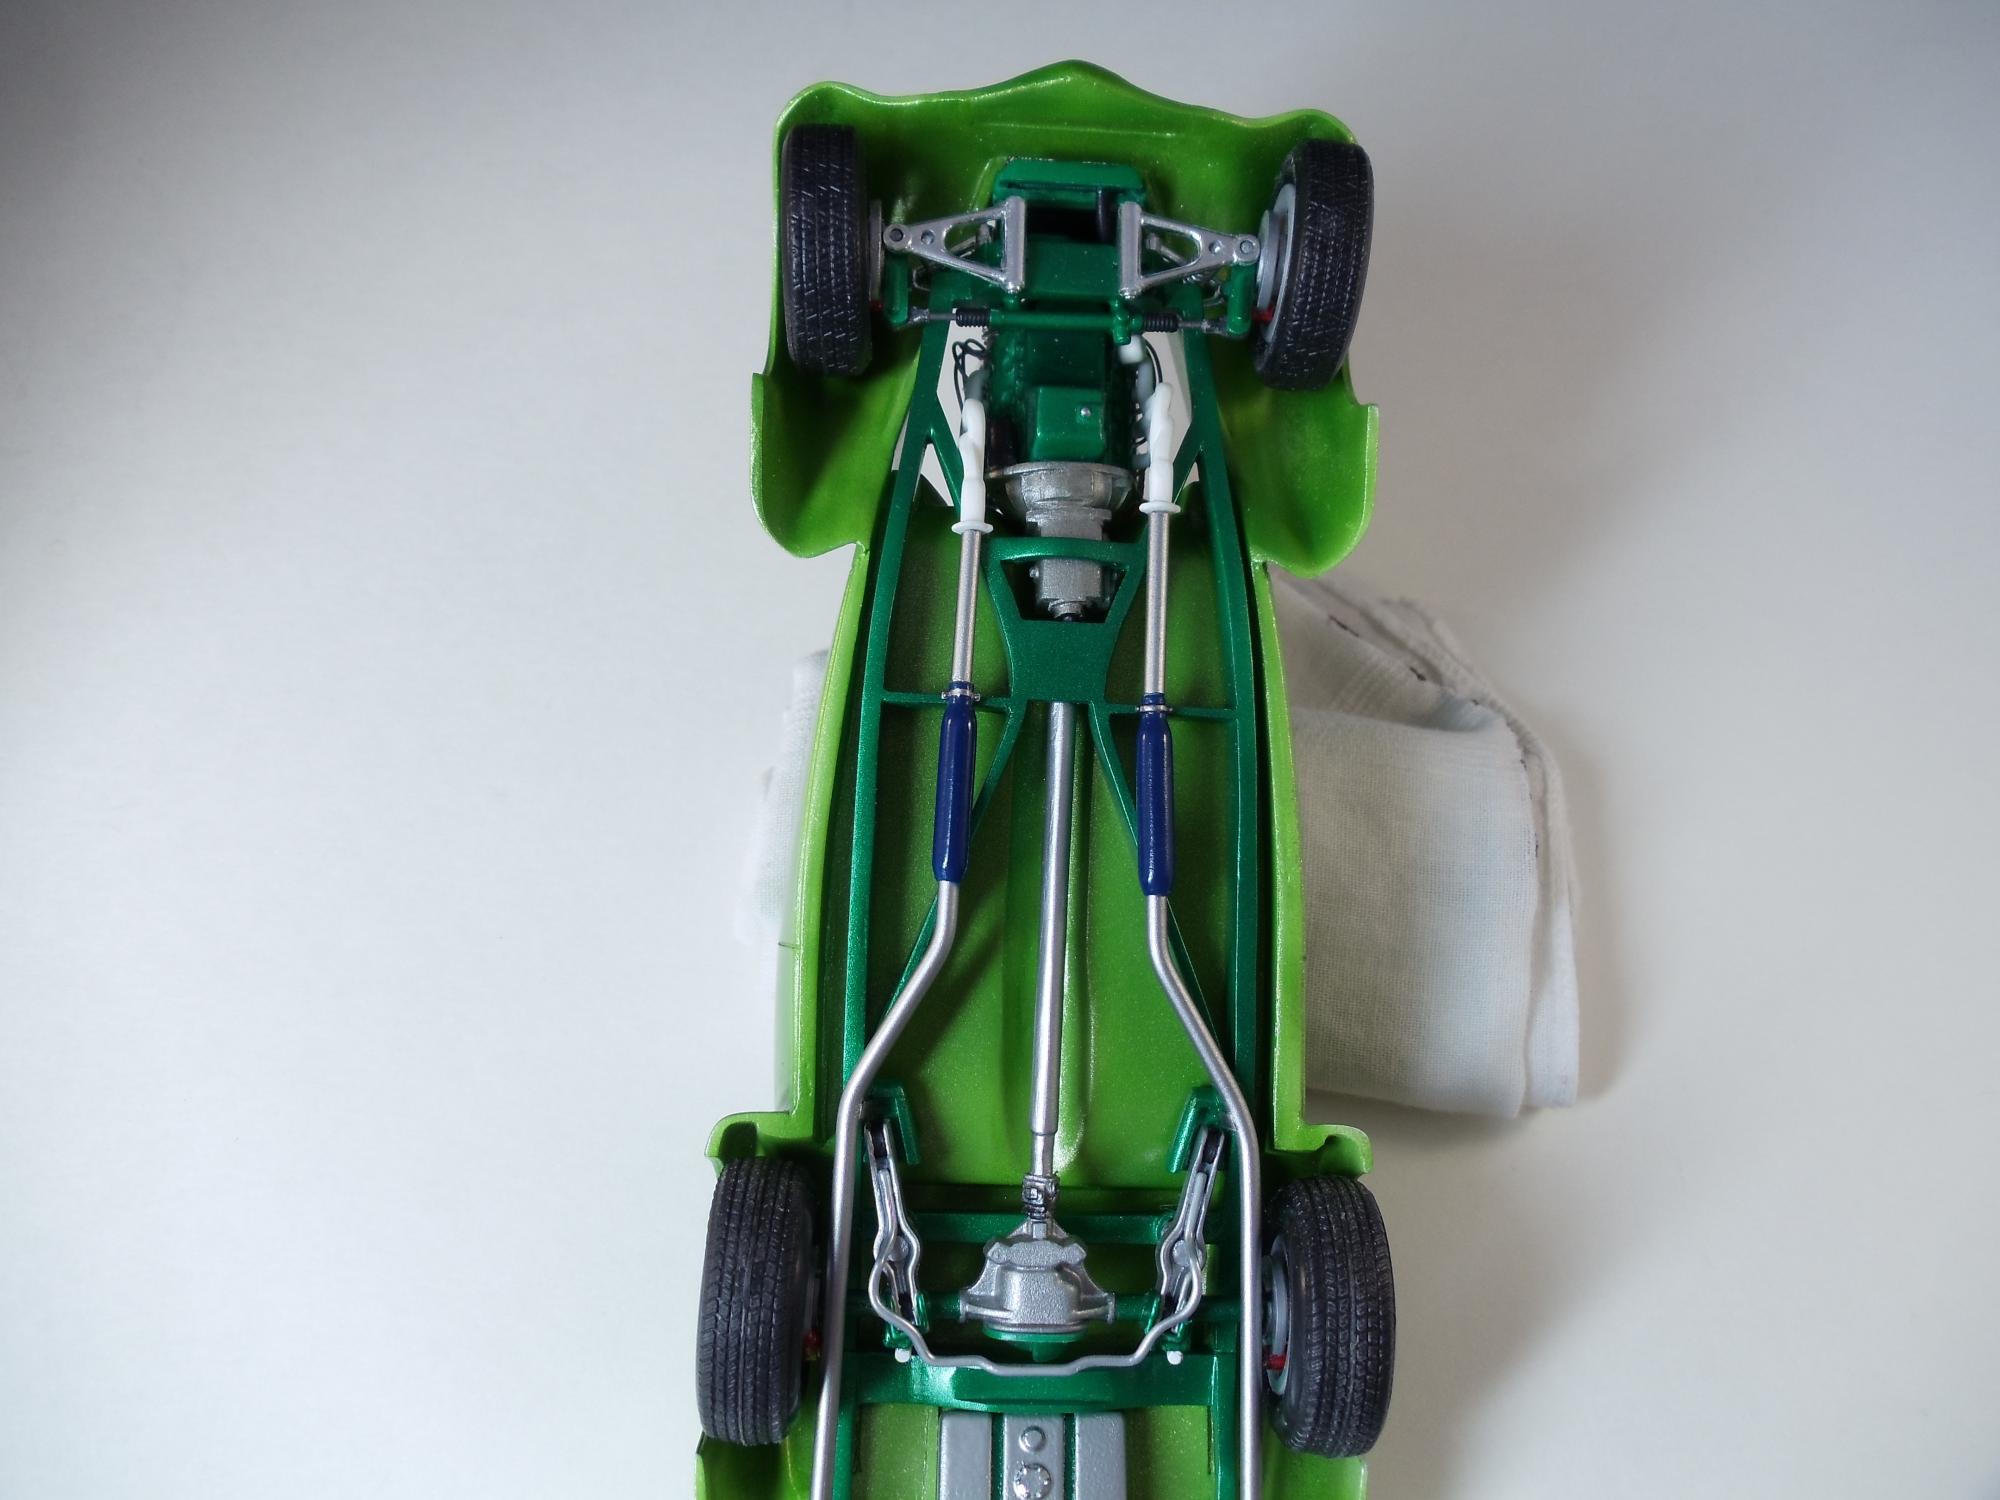
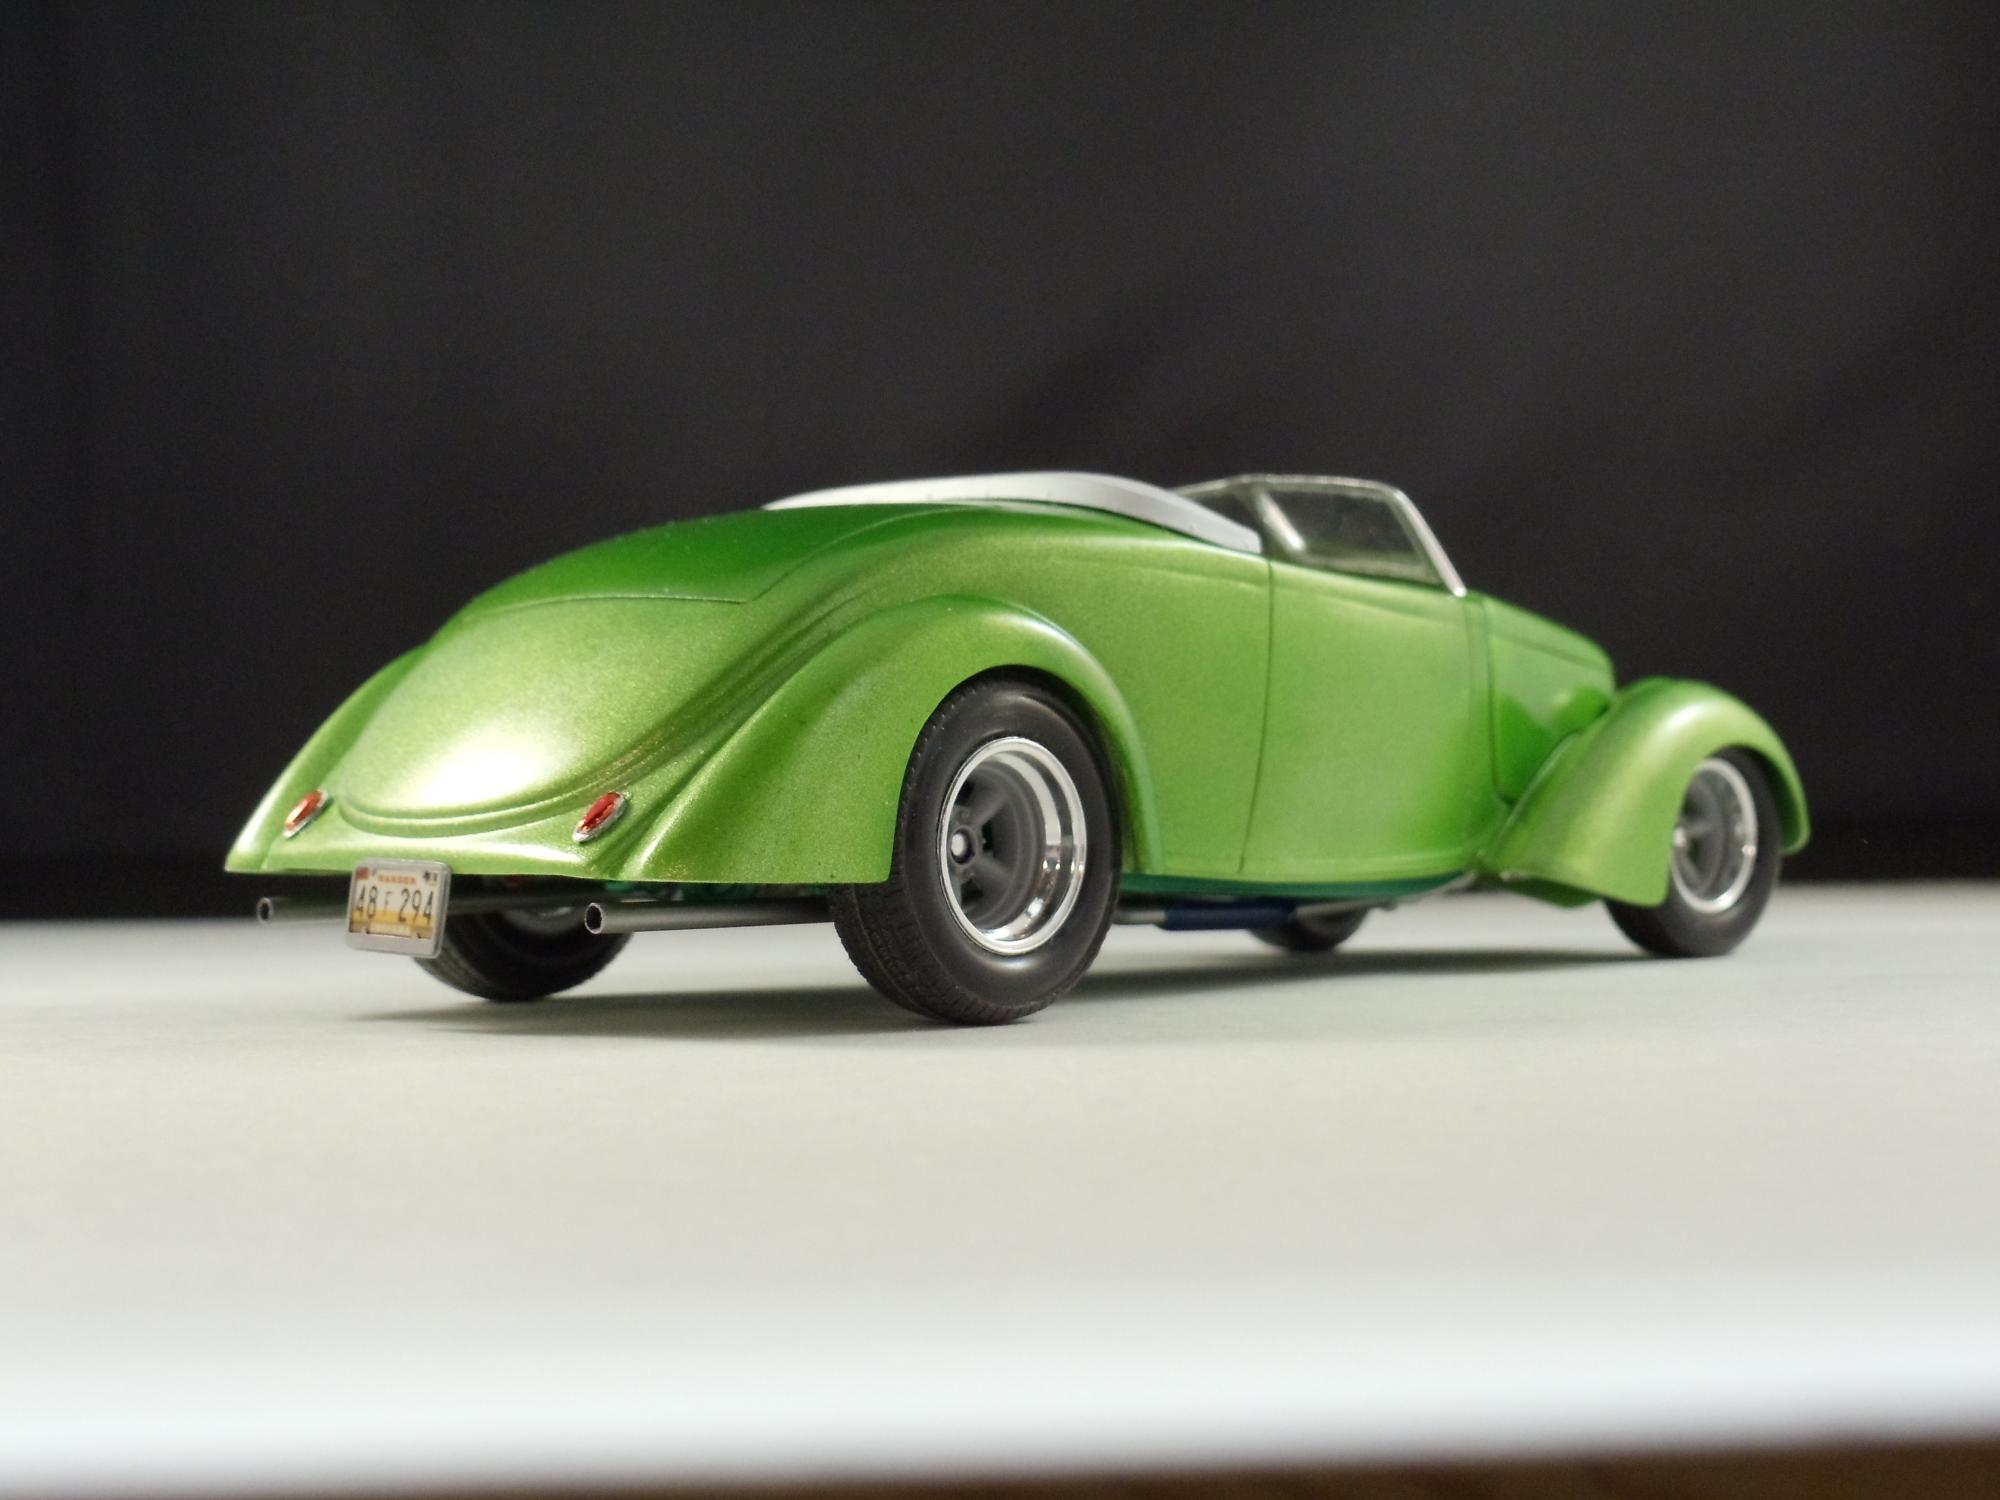
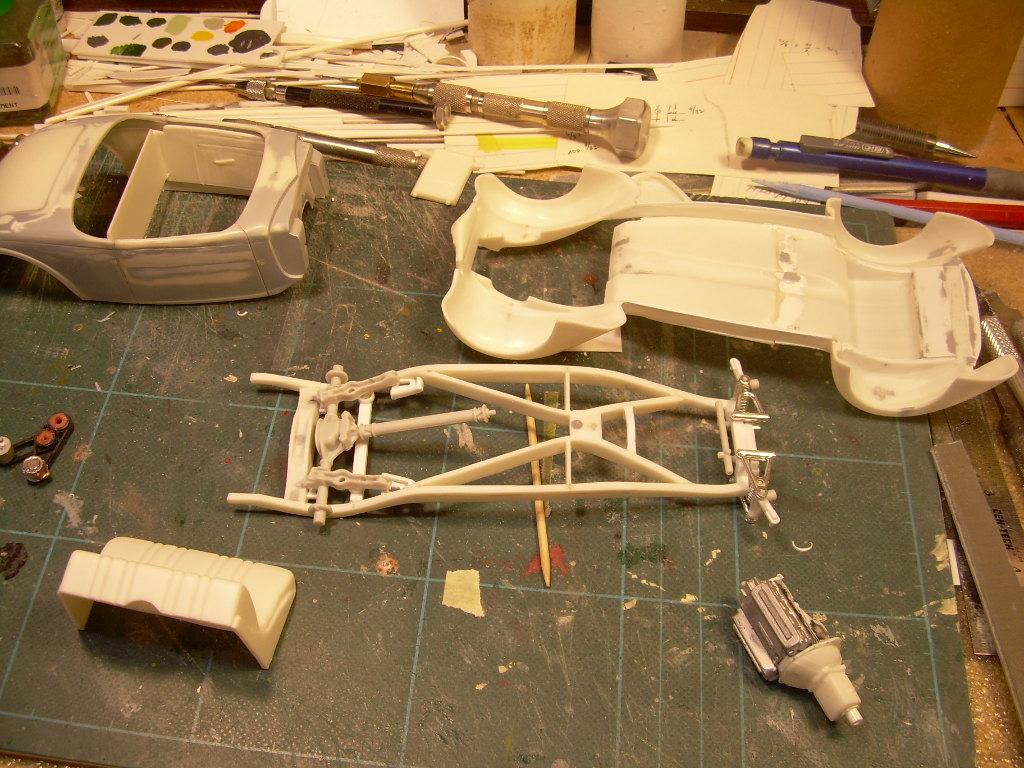
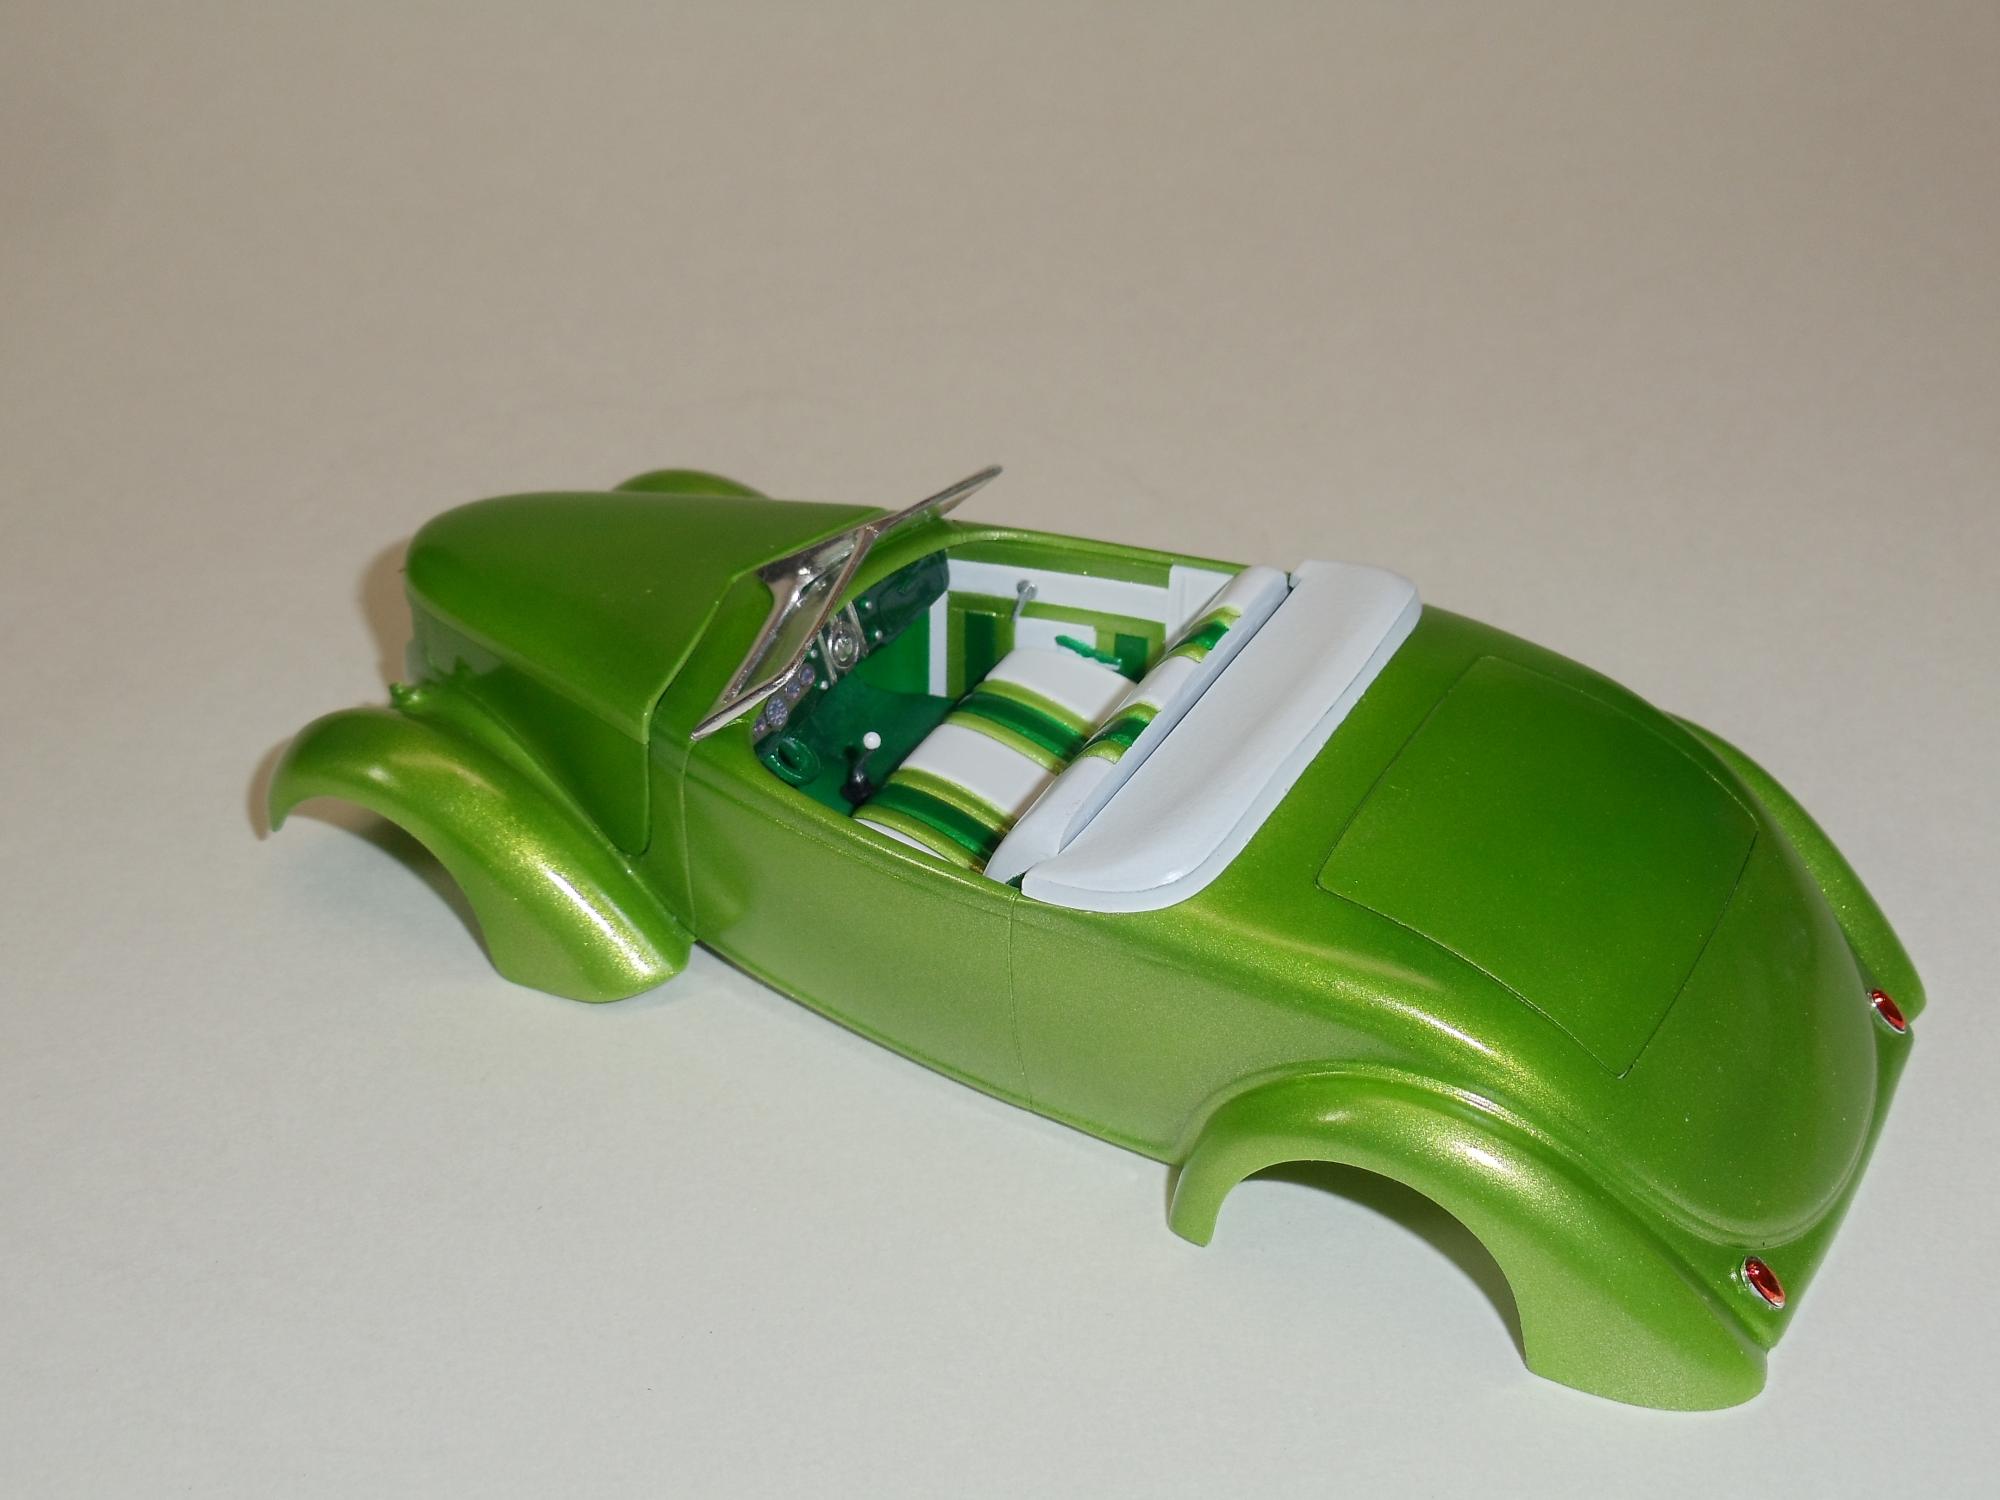
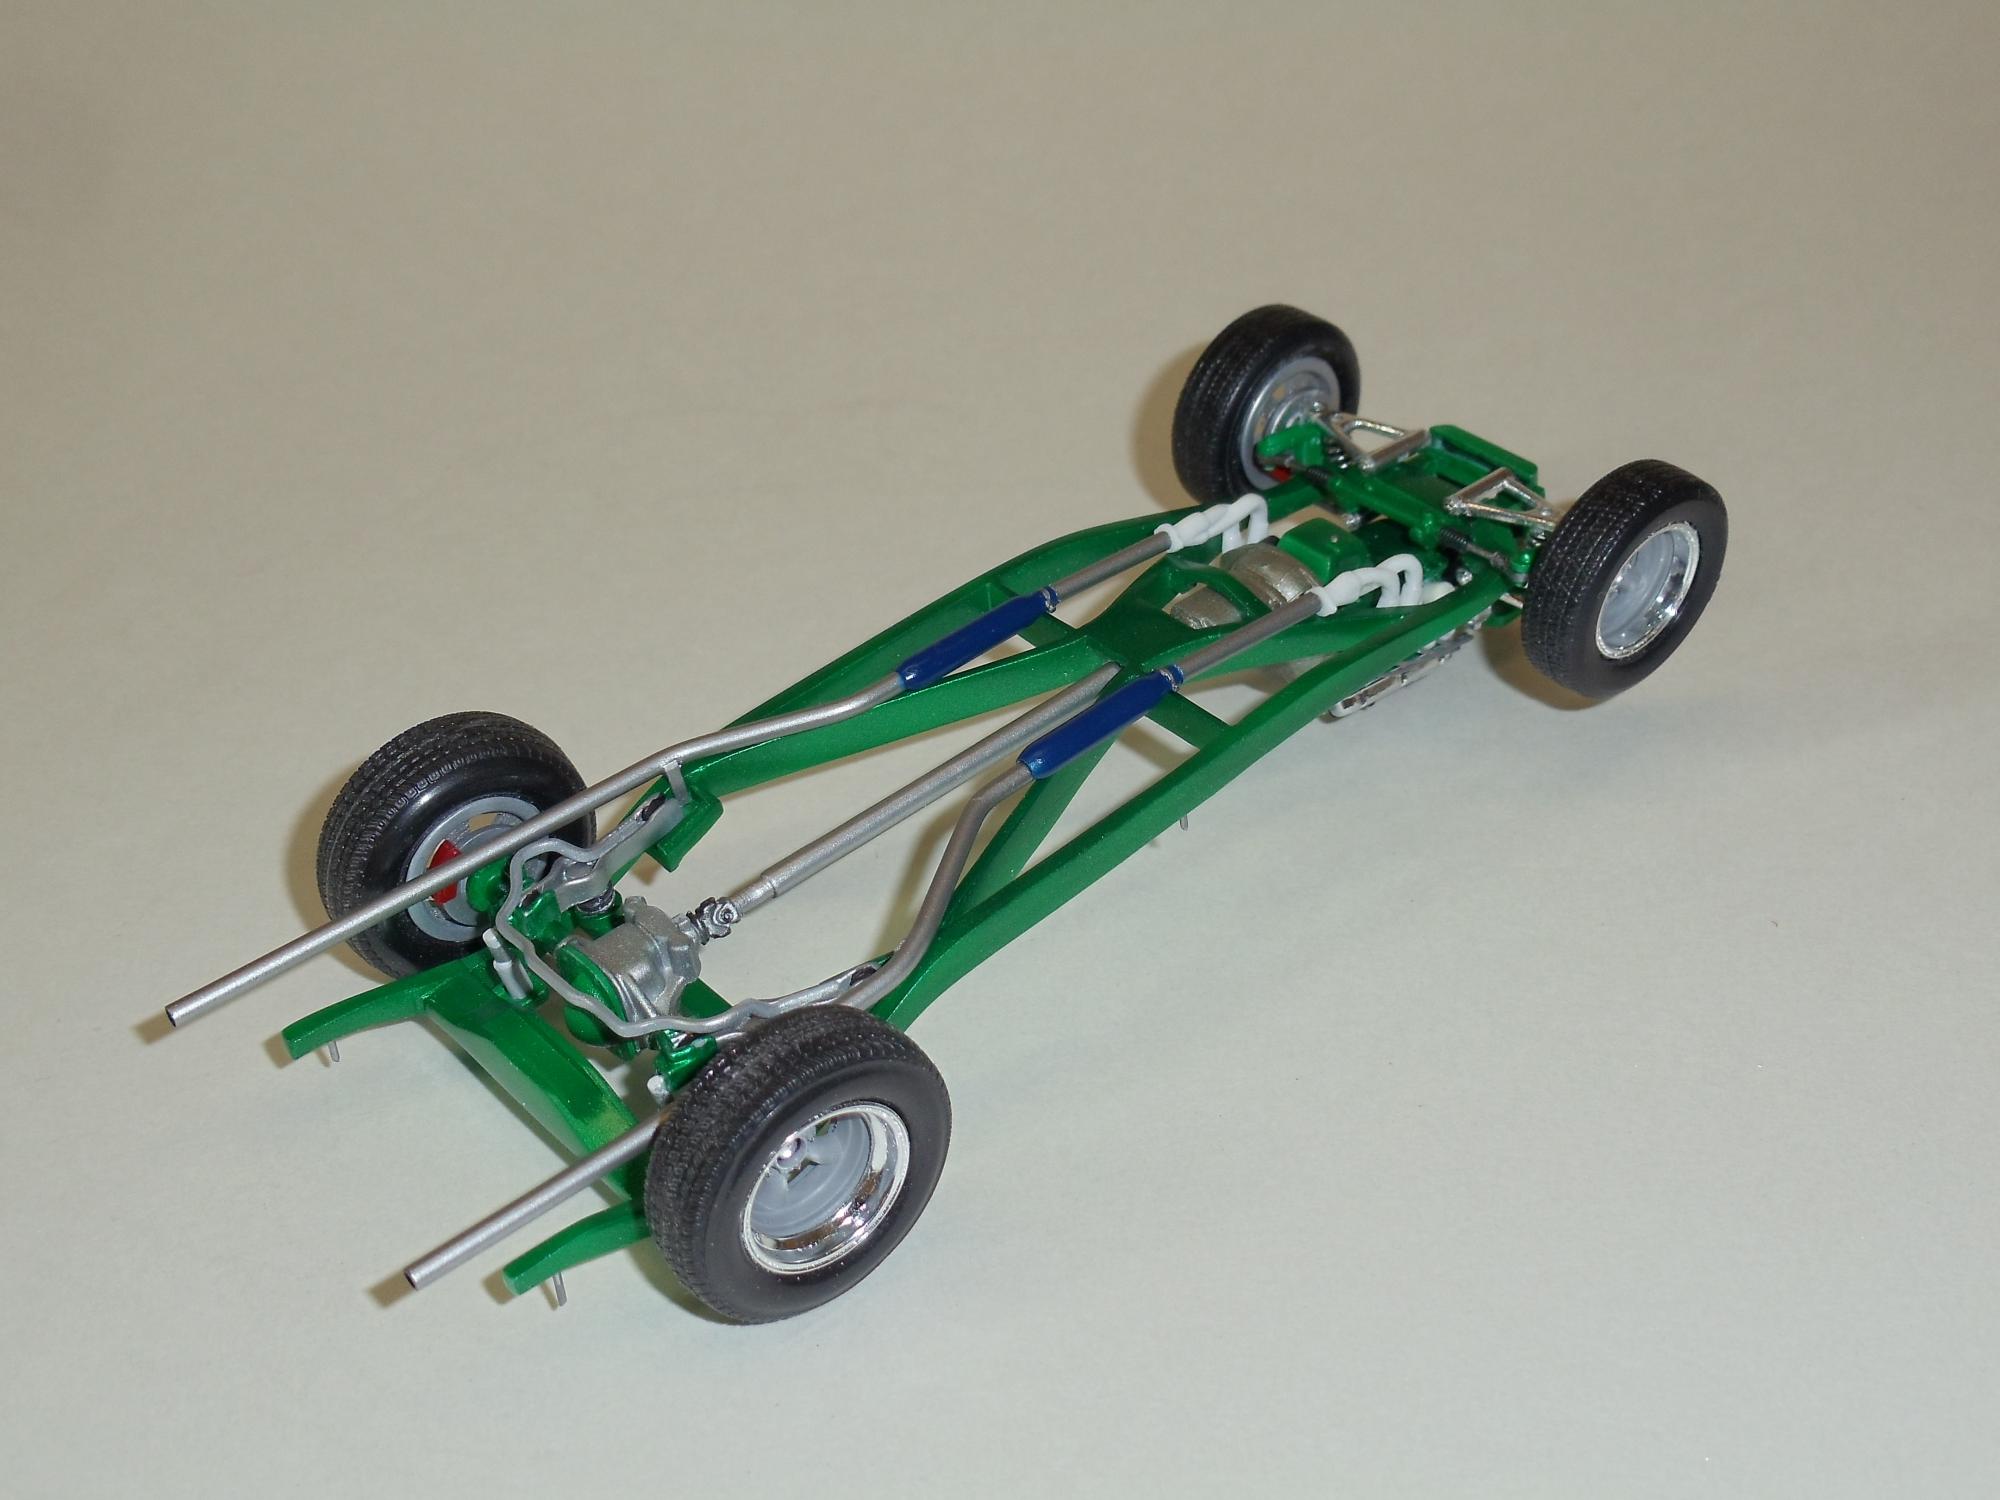
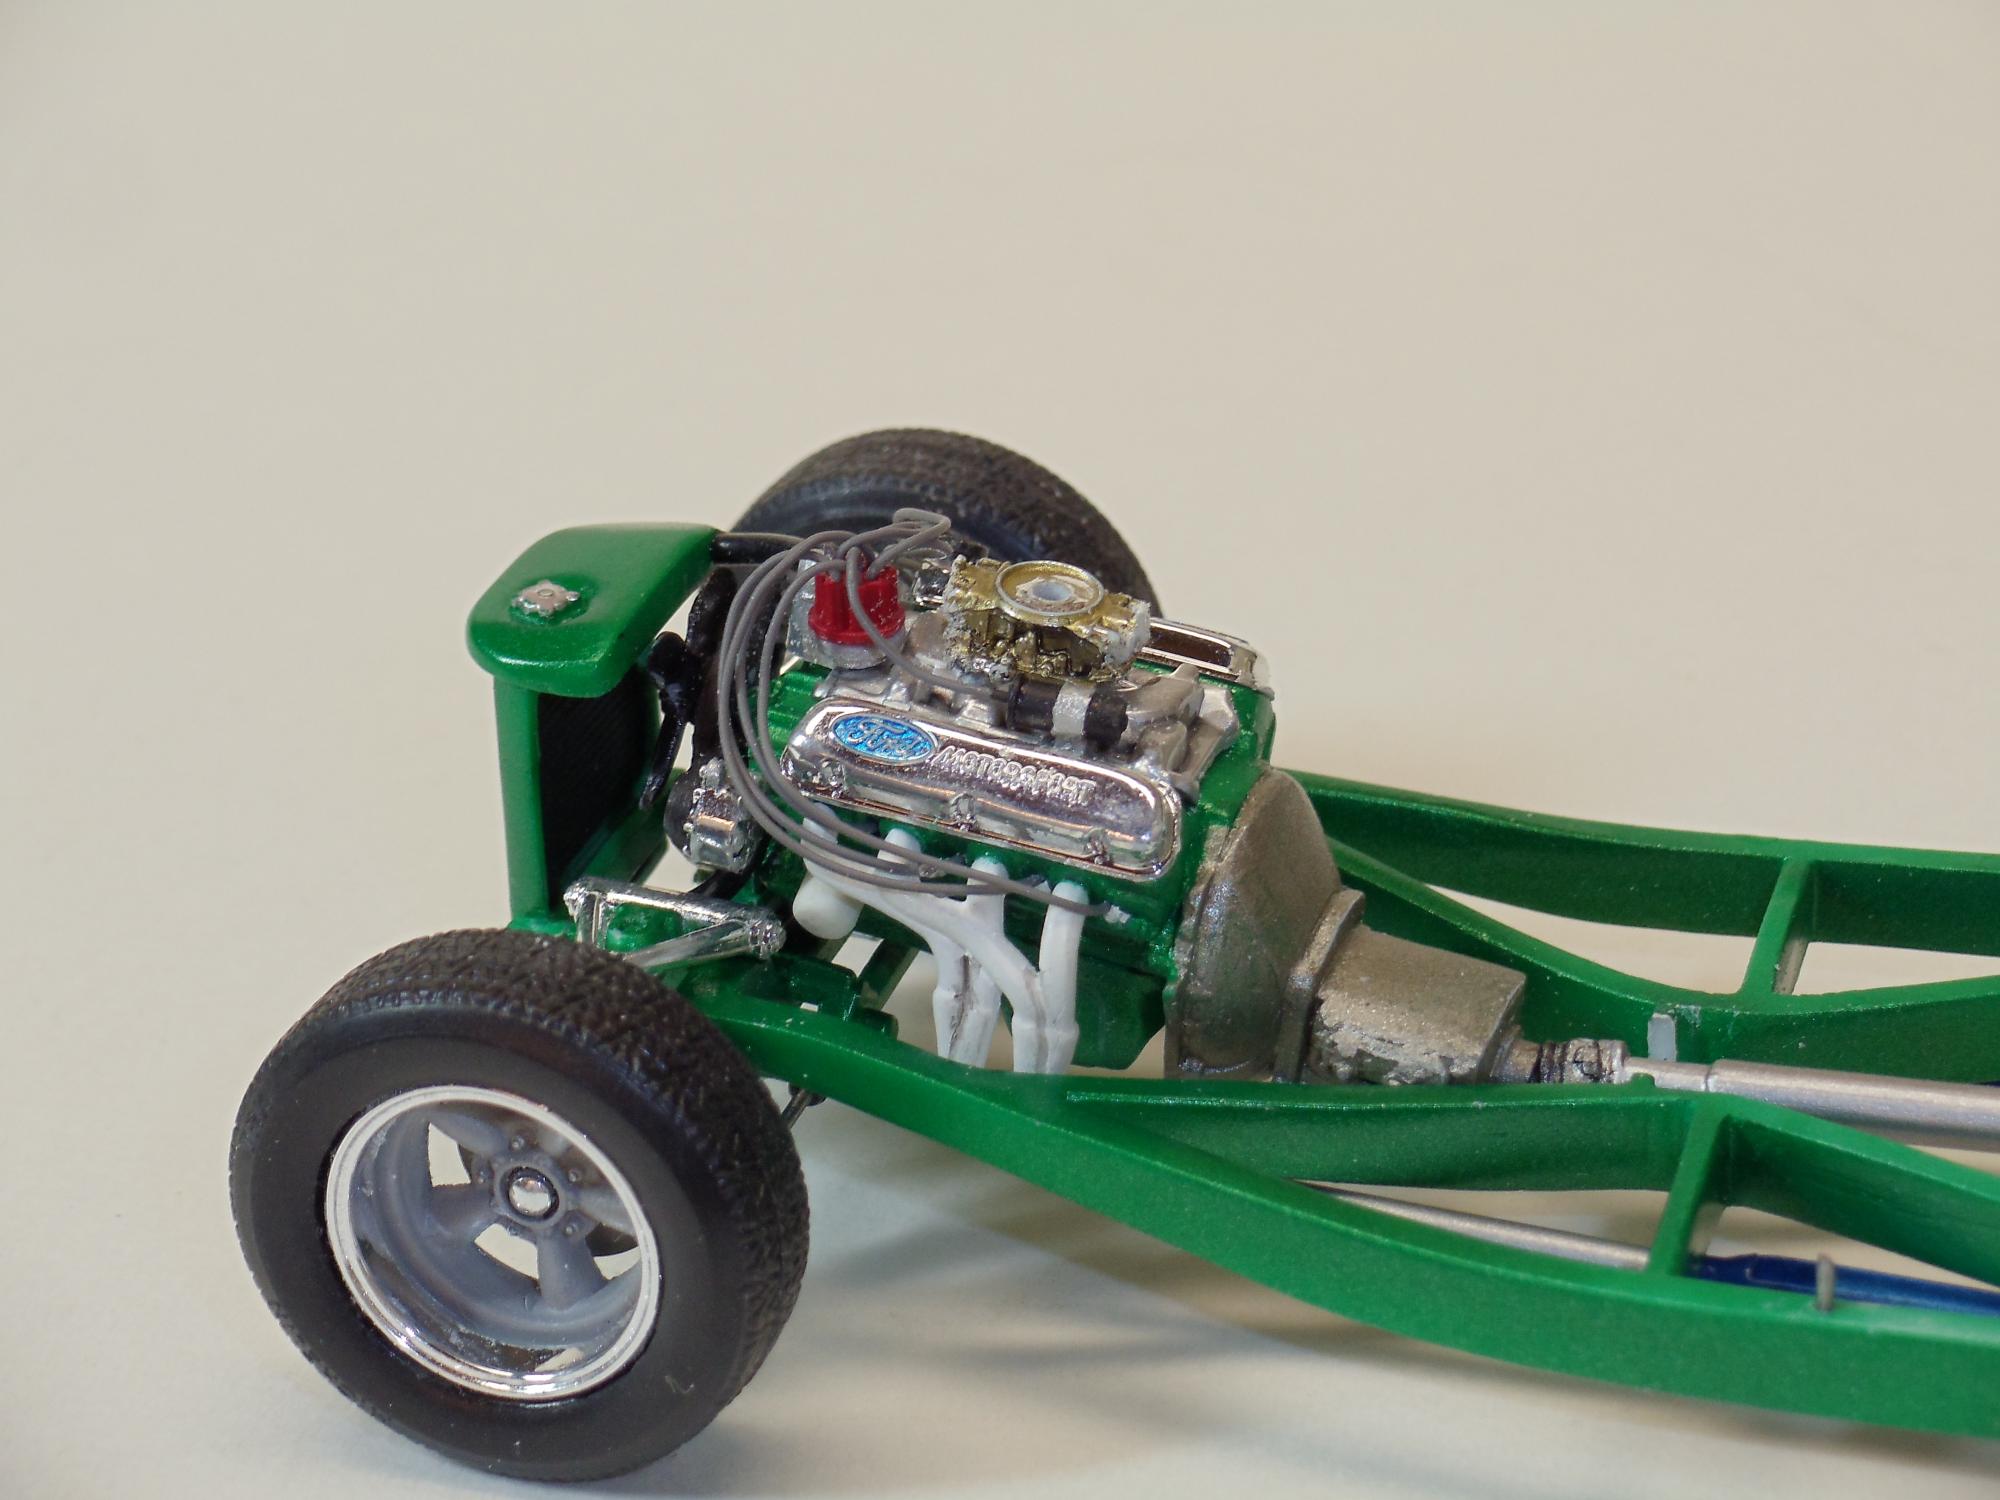
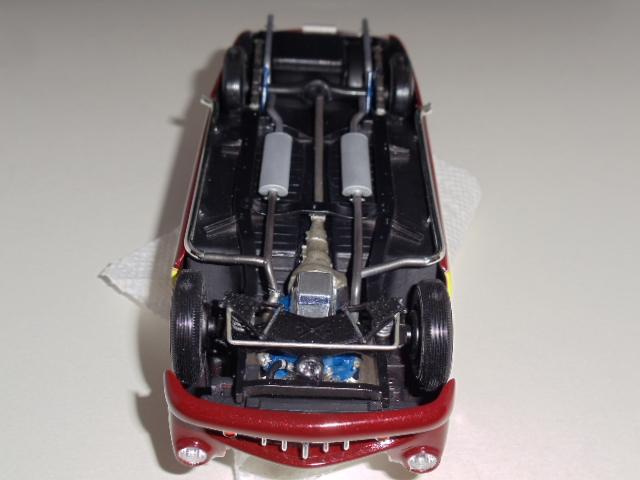
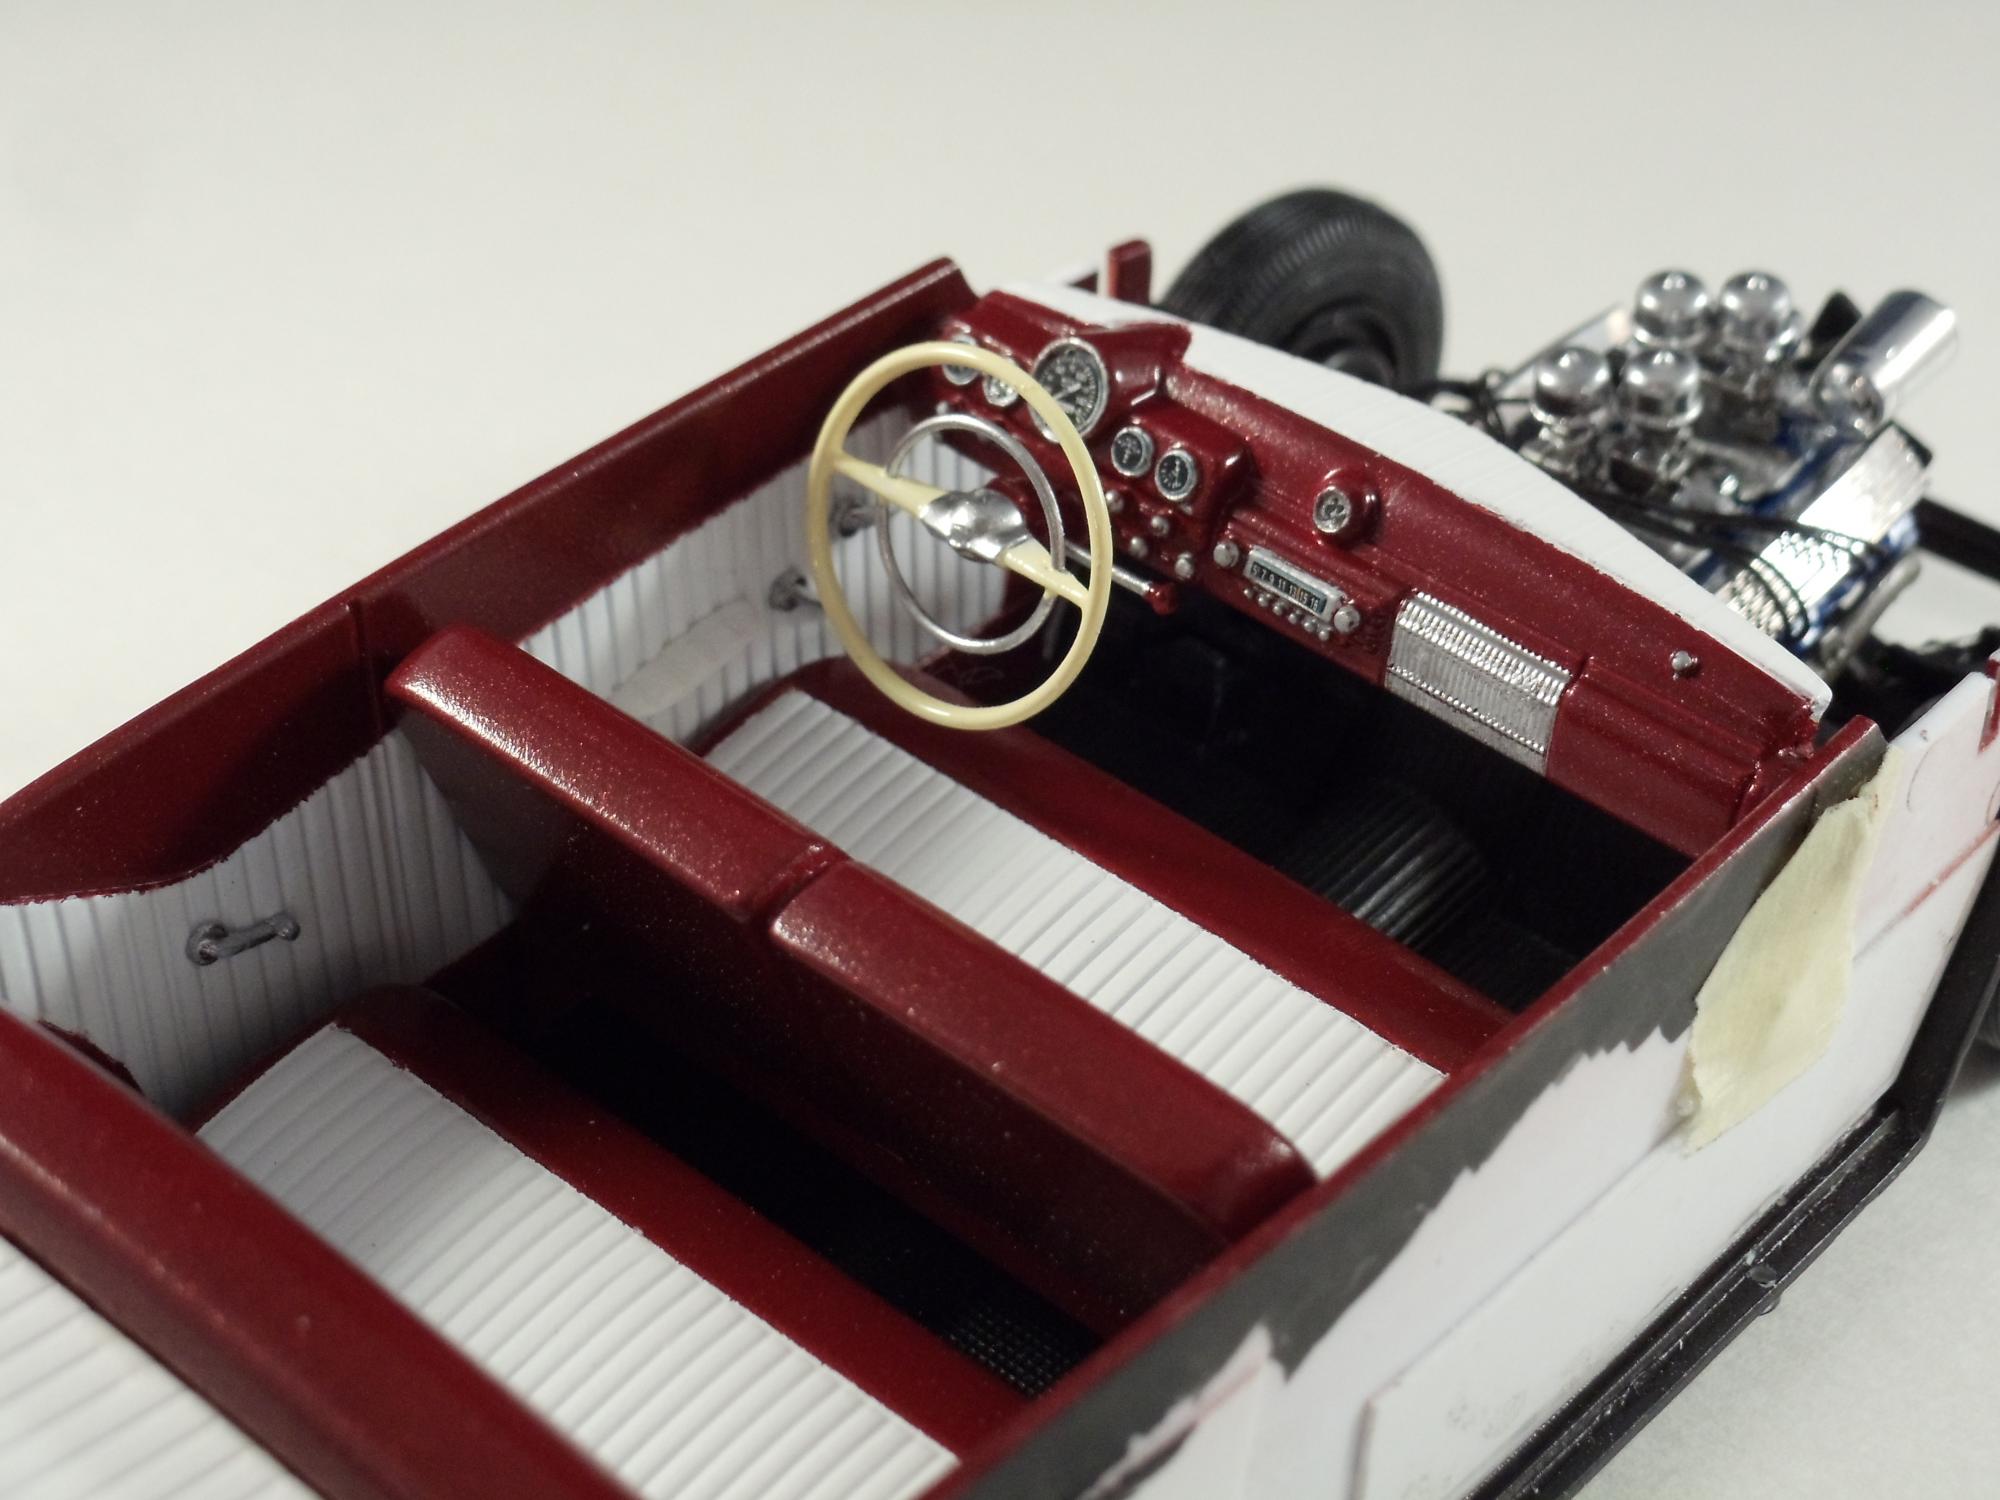
This is the finished product that I just posted on On the Workbench. It was built for our 2014 December same kit contest. Took about six months. A lot of that time was spent just correcting and cleaning up the kit. Covered a lot of the construction details in the On the Workbench post. Here's a short summary: 3" to 0" rear to front section, running boards removed, frame cut loose from floorboards, Phantom Vicky running gear adapted, Revell '32 Ford engine used with manual transmission adapted, scratch built exhaust system using the old Auto World plastic rod (still flexible after 50 years. Interior is basically stock with aftermarket gauges. Duvall windshield is soft metal covered with Bare Metal. Pulled it from the parts box. No idea who made it. Paint is Testors Green Lime One Coat lacquer, body and floor pan. First two coats decanted and sprayed with an air brush to get into the tight areas, then followed by two wet coats from the can. Finished up with two coats of brushed Future. Hope you enjoy it. Thanks for looking.
-
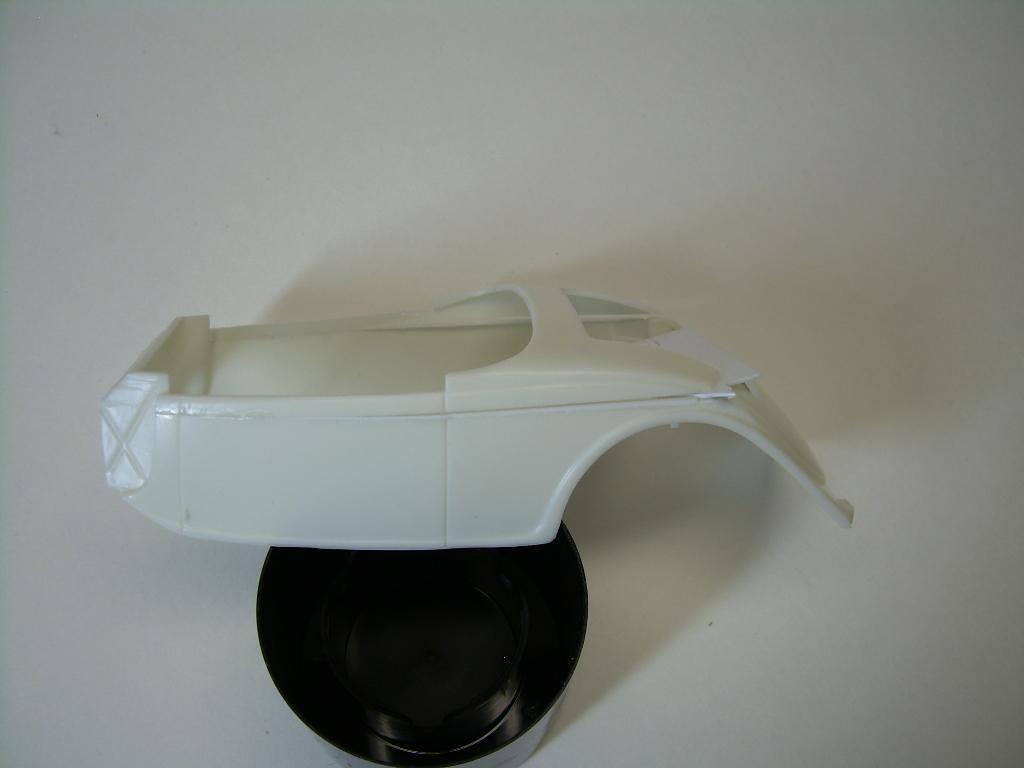
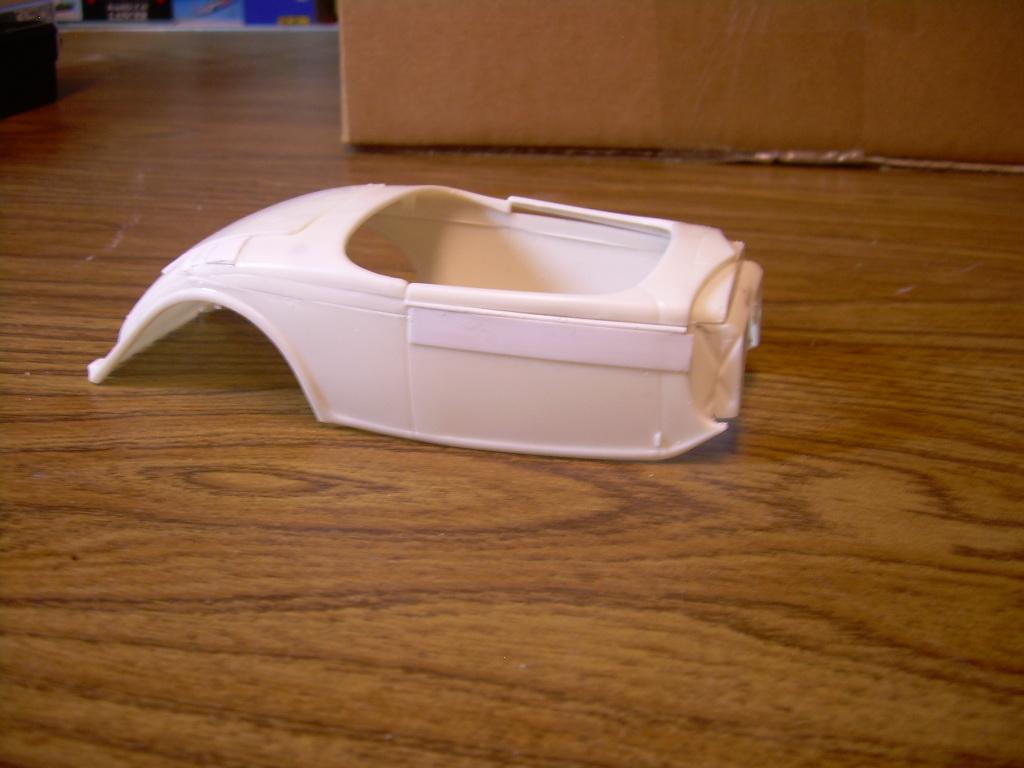
I had my camera set at its best exposure so my image size is too large to post many so I'm going to split the post between here and Under Glass. Any way this is my rendition of the latest release of AMT's '36 Ford. Wish I could say it is a good kit to build but as you can see by the images as much correction was required as modification in this build. The kit was built in the roadster version to keep everything down low. The body was sectioned on a scale 3" to 0" rear to front taper to give it a built rake. Frame was cut loose from the floorboards mainly to clean up everything underneath and make it easier to adapt the Phantom Vicky running gear and Revell '32 Ford engine. Firewall, radiator, interior shell, hood and hood sides all required modification to compensate for the body section and channel of the body on the frame. Manual tranny is grafted to the Ford engine. Running boards were removed. I'll cover the finish and post a few more pictures over on Under Glass. Thanks for looking.
-
Hope your happy. As a result of your build and post it's now on my "Gotta have list" Think I'll do mine without the skirts. Are those insert type white walls?
-
A really sharp, tight build. Like your idea on the Sharpie. I usually do my black vinyl with Testors chrome black but this sounds much quicker.
-
All that chrome and the 2-tone roof really speaks of the times. Glad you brought this one back to life and shared it.
-
-
You did a great job on this dog of a re-release. I built the kit when it first came out & the current version. Granted my expectations were not as high when this kit first came out but this latest version takes the cake. Glad you stuck with it.
-
Aoshima Lamborghini aventador roadster - new member
Al Hoffman replied to Keith D's topic in Model Cars
Looks pretty doggone good to me. I have another one of Aoshima's car kits that I haven't started. Tell us how it went together please. -
Like what I'm seeing here. Gotta love working with those Powerslide decals don't you? Might want to test fit your air cleaners over the throttle linkage. As it comes in the kit they didn't fit level on mine.
-
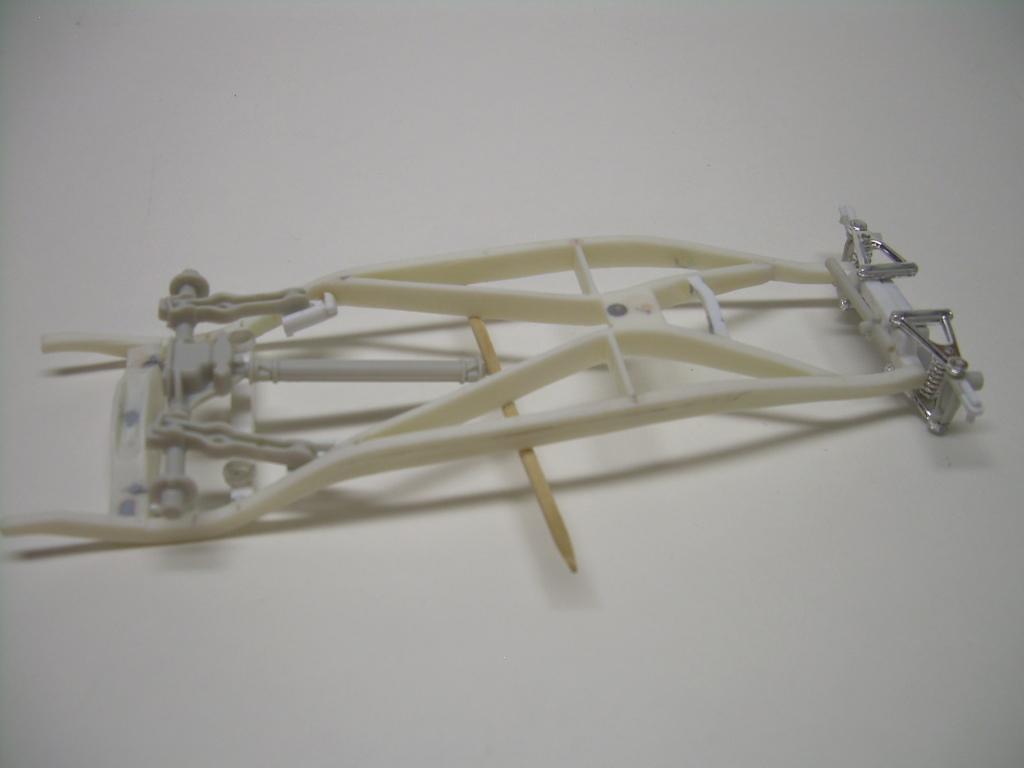
Need to have all these pieces put together in two weeks for our September club contest. I was trucking right along till I realized there were no rear motor mounts & the driveshaft was too short. Hopefully no more surprises.
-
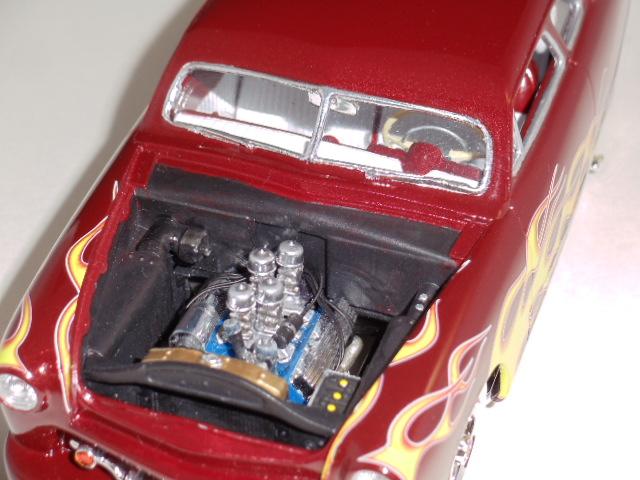
To answer a couple of questions: 1. The color is Testor's "Mythical Maroon" 2. Can't take credit for the chopped top. That was part of the Flintstone resin body 3. Trying to Bare Metal the side windows did get the best of me. I freehand painted them
-
Revell 57 Ford Sedan - Starting corrections
Al Hoffman replied to Sledsel's topic in WIP: Model Cars
Looks good. The paint laid down nicely. Whose paint did you use and is it base coat, clear coat? -
This is my latest. It is an AMT '49 Ford donor kit with a Jimmy Flintstone body and the following additions: 1. Complete Revell '49 Merc "Tuck 'n' Roll" interior with modified dash, padding, scratched package tray, Replicas & Miniatures handles & armrests. Rear seat needed to be narrowed about 3/16th inch. Used donor kit floor. 2. Parts Pack Cadillac engine with a trans/bell housing grafted on. Wired with the exhaust manifolds from the Merc kit. 3. Lowered using blocks in the rear & modified spindles up front. Solder coil springs. 4. Donor kit exhaust that have had the exhaust pipes extended to meet the manifolds. Stub pipes added to make the Lakes pipes functional. 5. Headlights & taillights frenched with scratched bullet taillamps & side chrome spear shortened. 6. Testors "One Coat Lacquer" decanted & shot with an airbrush for initial coats then wet coats applied from can. Coat of Future brushed on. Flame decals fro the '49 Merc applied. This takes a lot of setting solution & working to get them to conform. Two more coats of Future brushed on. Hope you enjoy it.
-
Got that look about it. Well done.
-
Looks like your getting close yo the homestretch. These things are a lot more enjoyable to put together when the frame is separate from the floor pan.
-