

LMDAVE
-
Posts
106 -
Joined
-
Last visited
Content Type
Profiles
Forums
Events
Gallery
Everything posted by LMDAVE
-
Cool, I like the idea of that, could either of you post a picture of the result of doing that? I don't think the 70 camaro had a chrome bezel though, but would like to see how it comes out.
-
QUESTION: What is the best way to make the small rectangular turn signal covers (Amber and Red)? There isn't any clear plastic ones provided in this kit, and there is molding into the body. Just painting it will look silly....not sure if there is a decal of it or not. BUt if I cut out the small molding, what is a good scratch method of making them?
-
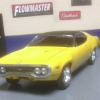
Starting this kit as my second build. I plan to make it look like the Camaro shown on the right: I'm not very pleased with the quality of this kit right off. The molds have an extensive amount of shaving and trimming needed. The lack of chrome rims is OK because I was going to paint them Aluminum anyway. Already shaved the body pretty good and put a coat of primer on.
-
Thanks, and yeah the garage will be an ever evolving thing. I feel I'm getting way to into this now doing a garage, but it definitely provides the perfect background for pictures and lighting with leaving the top open. Here's an update picture already after adding a door and some banners/posters to the wall.
-
Very nice model! Great detail.
-
NIce! I"m about to start the AMT 70 1/2 kit, I plan on doing white body with black stripe. Good luck, incredible car you own.
-
Started this project as a trial since it was my first "car" model, but had other modelling experience. Made a few mistakes along the way, like not to use CA (super) glue for window parts. Clamping the finished body on the finished chassis is a pain. Hoping the use of BMF for the trim will be easier than this EZ chrome I was using. And didn't even notice until I took the pic under the hood that the driver side suspension bracket must have popped of. All in all, I'm satisfied. I built a small scale garage for picture taking. Now, on to my next project.
-
Moving right along to the rear end....can start to see the light at the end already approaching this first build.
-
half a dozen 69 camaro's *new pic's 3-8* all 6 complete!
LMDAVE replied to tbill's topic in WIP: Model Cars
This is beautiful work...love that engine assembly line. -
and added the spark plug wires today this is a 1:1 pic of the original engine I'm going for:
-
Thanks! Moved on to engine work...still waiting on my spark plug wire to finish it up. I stuck with the traditional color of the Pontiac 400 engine, with a close match on Pontiac blue.
-
Finally got my flocking material so I can assemble the interior.
-
This is a 2 in 1 kit, so there are supplemental parts if you want to make a drag model (wider smooth back tires, roll bar, different ram air hood), but I'm building as original instead of drag. Yeah, I'm going to redo the belts.
-
I wish I could get my wife interested in this. She sits on the sofa playing her iPhone games saying she needs to find some hobbies. Where I'm wishing there were 36 hours in a day to fit all my hobbies in. Same with my step-son, he has no interest in learning my hobbies (models, wood working, guitar), just talks on the phone all evening. So, this a great you have going here. Love the interior!
-
Monogram 1970 Challenger T/A Rebuild-Under Glass 03-13
LMDAVE replied to mustang1989's topic in WIP: Model Cars
That interior and dash looks great -
Thanks, but that's not the BMF yet, that's the EZ Chrome. I'll be using BMF on my next build. Also, I attempted to scratch build seat belts for the first time. I think I got the scale off a little bit though, so may have to take these up and re do them.
-
Thanks for the advice on BMF. I decided to finish this one off with the EZ Chrome and save the BMF when it comes in for my next 2 builds. The EZ chrome went on a little easier this time. I"m wondering if I just didn't let the acrylic clear cure long enough. After another day of curing the chrome peeled off easier without residue, but still hard to press down and see lines. So, here's where I'm at with it:
-
Awesome work, yeah would love to see more pics, close ups of engine and interior would be nice. Great Job!
-
Thanks, I just ordered some BMF to try. Will probably have to wait a week or so to get it though. This EZ Chrome does say "A more aggressive adhesive makes it easier to get the job done fast"
-
I started my first foil attempt. One thing that I'm very disappointed in is the foil that is to be remove is either leaving residue or interacting with the clear coat and not coming up easy. I'm afraid it could be the clear coat. I'm using MINWAX acrylic Clear spray. The foil I'm using is EZ Chrome. I've been rubbing the area with water & Qtip right after and it seems to help. Of course, cutting the foil perfect is tricky. I don't seem to see the mold line to find where to slice good. Im afraid if I push down too hard on the part to be removed that it'll increase the amount of residue I'm seeing. Anyway, this is the job halfway done.
-
Great work Rich, I hope to get to that level detail one day.
-
I applied that molding I printed for the center console, it was more of a pain than I expect, but I feel I got it on and acceptable. Still waiting on my flocking material to come in to get all the seats and carpet in.
-
Thanks Jantrix. I should have known such a thing existed...That's why being on these forums is cool. I will definitely have get decal paper as I agree that's probably the better route to go.
-
Thanks! Well, I don't want to give the impression I have zero model experience, I came from a few model boats after getting back into this a couple of years ago. I'm 43 now. I remember as a kid attempting these kits, and it's so much more fun now when attention to detail is used. One little neat thing I was just playing around with at work over lunch was marblized woodgrain for dash paneling. I remembered Microsoft word/powerpoint has a standard fill pattern that matches the interior paneling I need, so I just printed a sheet of it (always nice to use the printer at work instead of home ), and covered both sides with clear package tape. Makes a nice firm piece of wood grain with a gloss. I'm sure there are fifty other ways discussed on this site already for doing this, but I'll be curious to see how this works out on my center console. Here's a pic of the sheet I made vs an actual console.
-
Well, I didn't have to strip the paint, but I wet sanded it pretty good, the second coat went on better, but I have some orange peel finish I need to wet sand out and try clear over it. It's hard to get a true picture, outside is where I get the closest results, but but looks better in person.