Ferbz
-
Posts
529 -
Joined
-
Last visited
Content Type
Profiles
Forums
Events
Gallery
Everything posted by Ferbz
-
You're probably right. A few well placed custom changes here and there often go a long way. Less is almost always more! I rarely go hog wild with my custom builds but this one is making me think a little more aggressively than usual with the restyling. There are quite a few things that bug me about the original styling of this car that I'll attempt to 'fix' if I can. I've been thinking about that rear end and yeah, it is indeed wacky. But there's got to be something I can do back there. I'm thinking whatever the solution ends up being it should include something that will relate it to the front end, even in some small way....
-
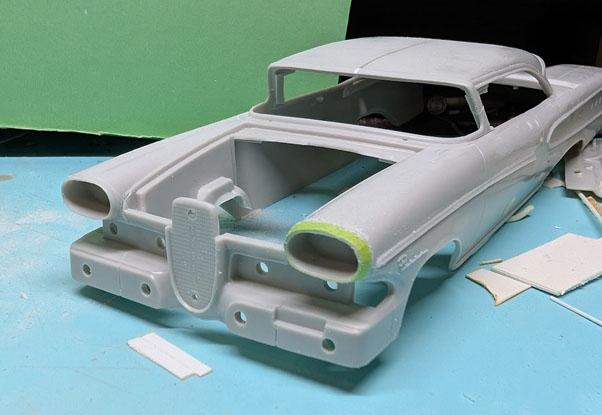
The mesh is some model railroad brass material. I wish I had a brand name for you but it was scrap material I found at a small local hobby shop back in Austin, Tx. I've been meaning to try and search for it online at some point. The ends of the light bar are the chrome 59 Caddy lens custom units that come in the AMT 49 Merc kit. I cut a pair of them away from the custom unit then glued them to the ends of the light bar:

-
Thanks! Early on I was double thinking the factory headlights/buckets as they dont look as cool as what other 1:1 custom car builders actually used, like the 58-60 Lincoln units. They are more space age-y and cooler, and I'm sure I could source some resin or 3D printed versions of them, but I want to see what I can do with the stock Edsel units. Ha! I'm sure a cut down 32 Ford grill would work, but the factory Edsel 'horse collar' is actually a pretty cool shape in my eyes so I'm going to keep it.
-
Thanks1 Yeah I was feeling like it IS alot of work only for it to feel almost factory looking and not full custom. Too late now lol
-
Yeah man, go for it! 👍 I dont have any pieces from the fenders since I used my dremell tool to grind away what needed to be removed. As I recall it was about 3/16" or more that got removed total. You'll want to measure on your own to ensure the amount that looks good to your eye. I also snuck up to the amount as well since I wasn't sure how much I needed: grind a bit, fit check, grind a bit, fit check again, etc. And yes, I didnt think about wheel/tire room until after I made my changes! lol The wheels/tires I want to use still fit, but it's pretty tight. All good tho I think since I plan for this to be a curbside model with no removable hood or engine/chassis detail. I may cut away the tight area of the inner fender wells, or modify them by cutting them and moving them inboard a bit.
-
Chopped/channeled 50 Ford Custom Pickup
Ferbz replied to Ferbz's topic in Model Trucks: Pickups, Vans, SUVs, Light Commercial
Thanks so much! 🙂👍 -
Thanks! I try to make my mods as clean as possible. I find that it saves me the extra effort of fixing a cut that was not executed or measured well or cleaning up a hastily done change. There are still unforeseen or unplanned things that happen, and that constant struggle of getting the left and right sides to be exactly alike lol
-
Thanks man! Onward and upward!😁
-
Thanks! I wasn't sure if it was going to work like how I processed it in my head. Sometimes reality slaps me in the face when I try to do something that seemed totally doable in my imagination lol
-
Thanks! Yes, its feeling very much like a prototype. Kind of like one of those period concept cars😉 Altho I dont like the big, blocky factory bumpers so I'll chuck those in favor of something else I like....😁
-
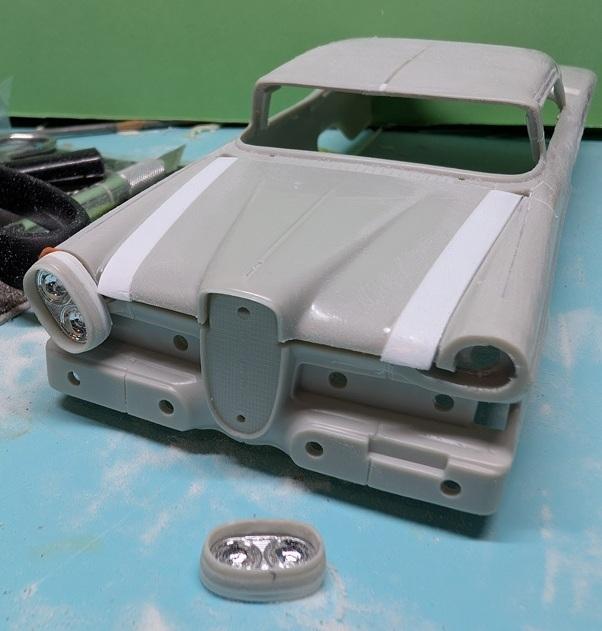
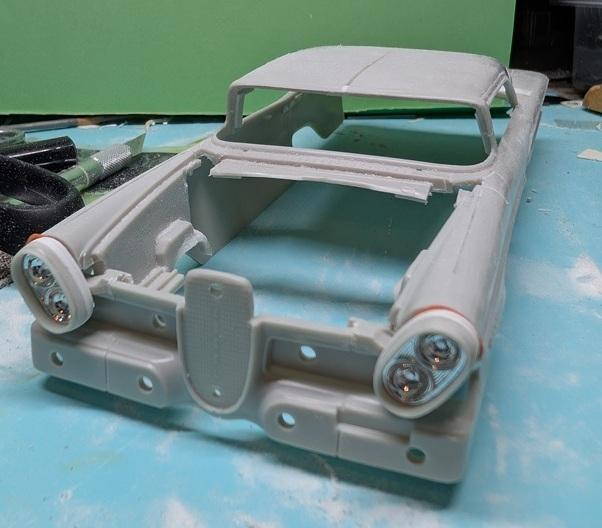
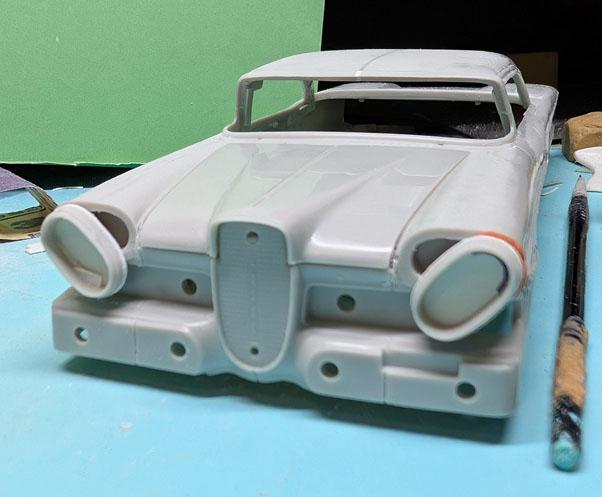
Update! Plan A of thinning out the front fender tops by cutting away the inner halves of the fenders, trimming the tops down and moving them outward is working out for the most part (whew!) The hood was widened using sheet styrene. Everything is just roughed in at this point. Smoothing the headlight buckets into the fender fronts and other fine tuning will be next. Oddly enough, this is not looking very 'radical custom' to me, but is feeling very stock-ish lol Will all this crazy work stand out in the end? Stay tuned...
-
This will be really cool! I think 55-57 chevys make killer traditional customs even tho they're not super popular custom subject matter these days. Looking forward to seeing this progress!👍
-
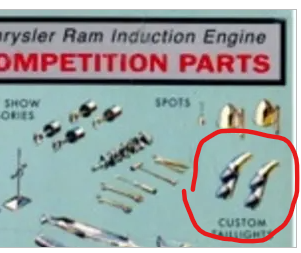
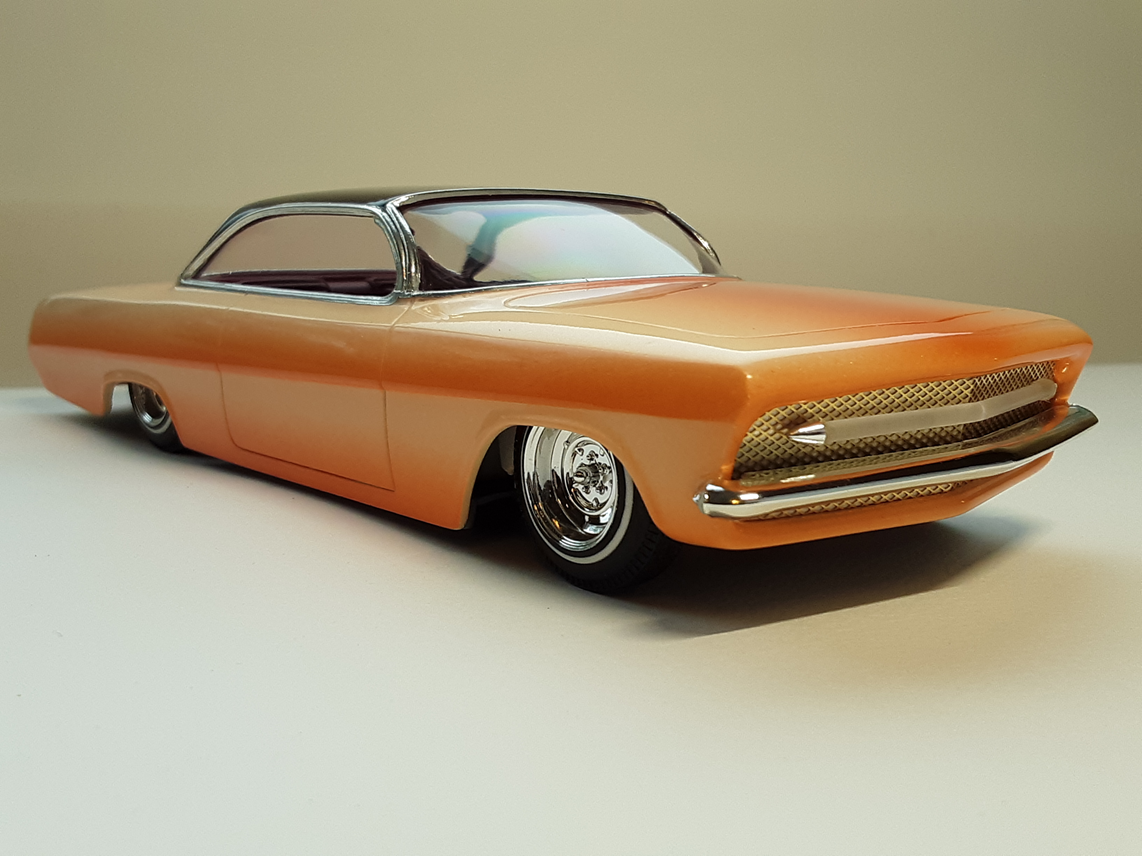
Thanks! I had to look up the Gene Howard car, but yeah, I'm familiar with Barris' Grecian. They are both a bit too far out for my style sensibilities, but I do love many details on both those cars 😎👍 Great article on plastics on Custom Car Chronicle! Let's see more 'plastic' and lucite details on scale customs! Speaking of, I also made a 'light bar' from clear sprue on my 62 Belair custom. I have no idea if would actually work in 1:1 world, but I think it looks cool🤪:
-
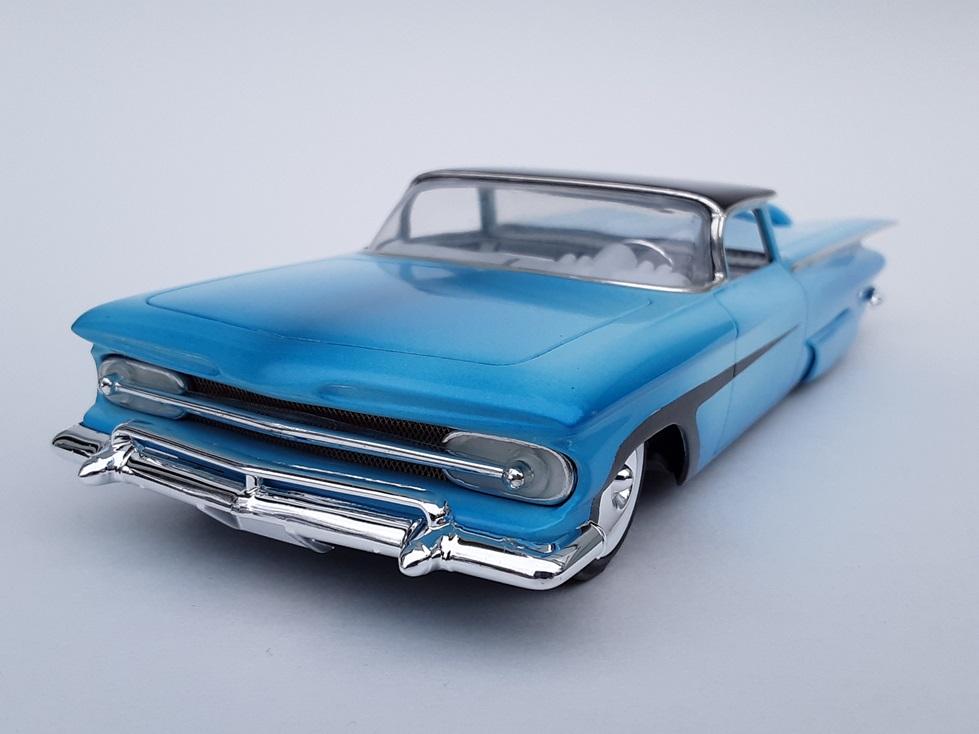
I like that! That's a very radical and still very traditional solution. Even the light 'panels' are era appropriate. I once made similar light panels for my 59 El Camino:
-
Isn't there a saying that there is a fine line between bravery and stupidity tho?🤪 lol Yes, the quads on that Chrysler are super cool 👍
-
Yes, that's something that would certainly work! Altho one of the things that bug me about the factory front end is how everything is placed at right angles. Angling the headlights shakes all that up a bit I think.
-
Not a bad idea! Spex84 mentioned they could also be scoops that have forward pointing antennas. Both ideas are very era appropriate 👍
-
Thanks🙂 Ha! I think you're right I could back out, but I've made my bed and now I have to lie in it lol Besides, if I chicken out now, I feel like I won't really know what I'm capable of achieving. I gotta take a chance and see what happens. 'Once more into the breach.......!'🤪
-
Lots of work, indeed. Ha! That's a great way to make lemonade out of a lemon-y situation 😉 But I'm going to hold fast to plan A and see if I can pull it off. With great risk comes great reward....potentially.🤪
-
Yeah I think they improve the front end quite a bit! I think what always bugged me about the stock front end design is that everything is at right angles. The angled headlights make it a bit more dynamic and makes that 'horse collar' grill a more purposeful focal point. How's that 'design speak'.....lol 🤪
-
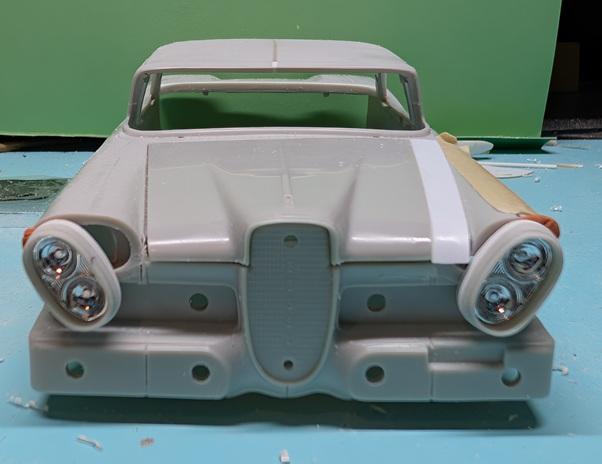
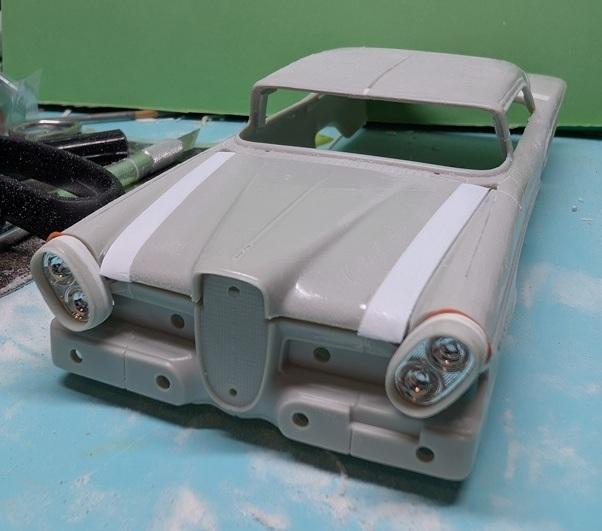
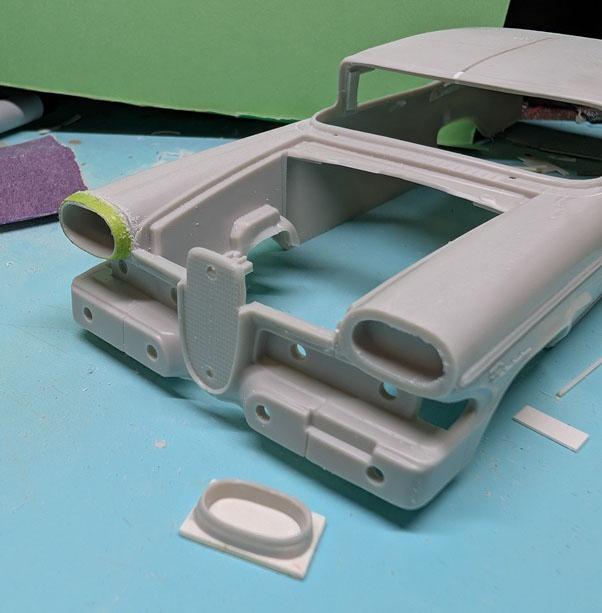
A little update: I've turned my attention to the front end at the moment. I've always thought that those quad headlights might improve that front end if they were canted! (This bodes well I think as it gives a design nod to the Edsel's sleeker cousin, the 58-60 Lincoln). I decided to hack off the headlight tunnels, and back them with some sheet styrene pieces. These backings will get hogged out and hollowed to allow the head buckets to sit deeper than stock depth. Here they are mocked up roughly where I think I want them to sit. (Admittedly, there are other things I want to resolve with the front end but I have to resolve this headlight mod first!). Next step will be to widen the hood and taper/integrate the headlight tunnels into the fenders. How do I do this? I'm not sure! lol 🤪 I think I have to cut away the inner portion of the front fender tops and trim them so they fit farther away from the hood. Then fill the gaps between them and the hood? Stay tuned as I try to figure this out...
-
Thanks! Let's see where it goes. I feel like my creativity/ideas are hit and miss, honestly. I do love a challenge tho, and mostly I just want to see if I can pull it off! 🤪👍
-
I will say that even tho I have issues with the body of Revell's 49 Merc, I think it's great that they produced a kit that was already chopped with lots of custom parts to go along with it. What it does is provide a way for younger folk (and anyone less experienced with chopping/modifying a stock body kit) to build a full traditional custom model car of their own. Same goes for their 48 Ford sedan kit.
-
Thanks! 😁
-
I thought the same thing when I saw that Revell had come out with their 49 Merc kit! I asked myself why would they make a 49 when we already have 1949 offerings that exist from both AMT and MPC? Also, aside from the extra custom parts, it's not a very good kit in my opinion: The body is not accurate, and the chop is not done very well as the top sits too high at the B pillars 😑👎