Ferbz
-
Posts
506 -
Joined
-
Last visited
Content Type
Profiles
Forums
Events
Gallery
Everything posted by Ferbz
-
Thanks! 😁
-
I thought the same thing when I saw that Revell had come out with their 49 Merc kit! I asked myself why would they make a 49 when we already have 1949 offerings that exist from both AMT and MPC? Also, aside from the extra custom parts, it's not a very good kit in my opinion: The body is not accurate, and the chop is not done very well as the top sits too high at the B pillars 😑👎
-
Ha! I feel the same way about it. On one hand, the 58 Edsel is a very unique design, which is what makes it 'cool' to me. On the other hand, it is also generally kind of weird and awkward lol As a result, I've challenged myself to see if I can turn this strange car into a slick custom that is rooted in the history of that late 50's era. In the recent past I was able to take a Revell 50 Ford Pickup and tastefully customize it (I think) and improve it's otherwise 'unhandsome' factory look. We'll see if I can do a similar thing with this Edsel:

-
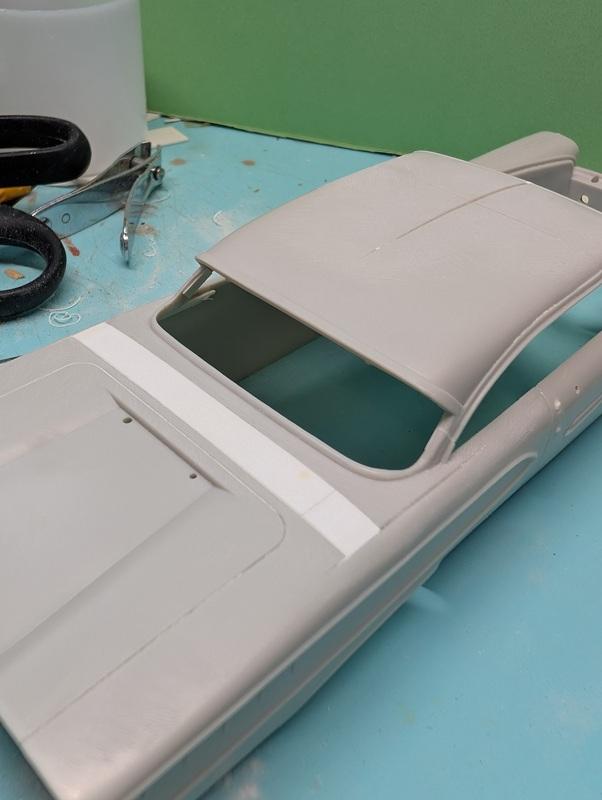
It does! I thought I was going to need to do the same for the rear window opening (I had planned on making two relief cuts in the top, one on each side of the main one going down the center for the windshield). Turns out I was able to nudge (slightly bend) the top halves of the C pillars outward and the bottom halves inward, in order to line them up again. However I still need to sand down the .020 thick styrene plating I used to strengthen the cuts at the pillars to confirm rear glass fitment. I'll wait to do this later. I probably should have switched to .010 thick styrene in this case....to late now! lol🤪
-
Fingernail wraps? I may have to look into that! I have been considering with using thinner styrene than my usual .020, like .010 but I wonder how strong it would be. Would I be able to go to any standard beauty supply store and find those fingernail wraps?
-
Thank you! I've learned over the years of cutting things up that the cleaner I can make my cuts and the more precise I can measure things out, the btter the overall job will turn out. Not to mention that cleaner mods make for an easier time with paint prep. I certainly will do my best to document the steps on this build! 👍
-
Thank you! 👍
-
Thanks! 😎
-
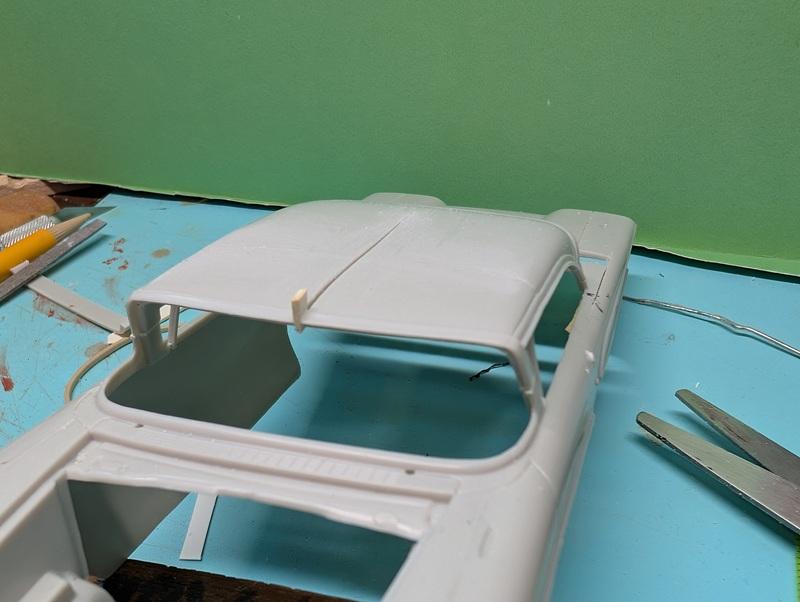
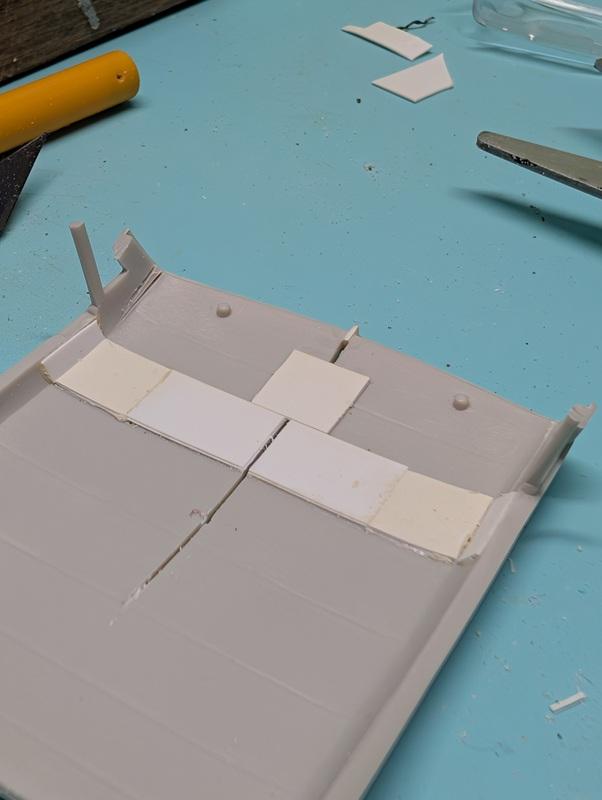
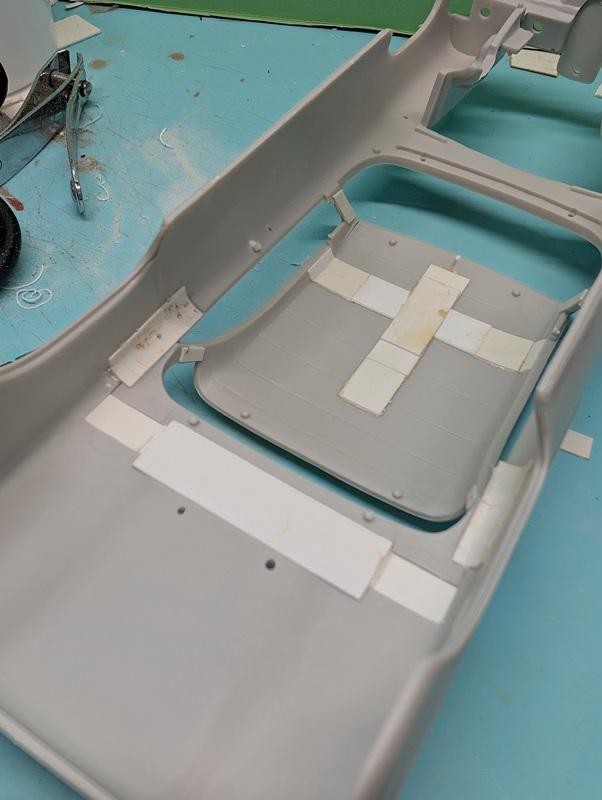
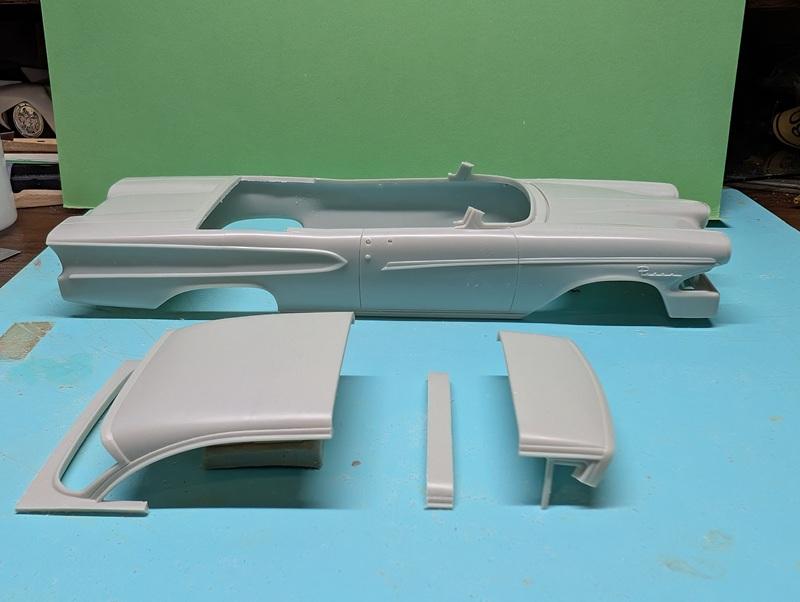
A little update: I made a relief cut down the center of the top to spread it slightly and wedged a piece of styrene at the front of the opening. This allows the A pillars to line up again after the chop. The amount is very minimal and will not affect the fitting of the windshield glass (I'll show this in another update). Underneath, I 'plated' the seam to give it strength (I try to do this wherever/whenever it is feasible). You can see that the plating was already previously done for the horizontal cut I made when I shortened the top. I'll sometimes sand all this plating down a bit later but I often leave since it wont be seen very well if at all in many cases. On the top surface, the cut was filled using the baking soda/super glue technique and sanded flat. Any further imperfections will get addressed later at the putty/primer stage of the build. At the rear deck, the gap that was created after sliding the rear window area forward got filled with sheet styrene. The plating for it has been started for it underneath. And the beat goes on.....🙂
-
That came out cool! I love the paint 😎👍 I feel like bright single colors like that would stand out nicely among the current popular multi-colored pattern craze. Very cool blast from the past 😁
-
Good tip! Altho I dont think there'll be a need to swap any of the glass. I'll double check to confirm.... 👍
-
😎👍
-
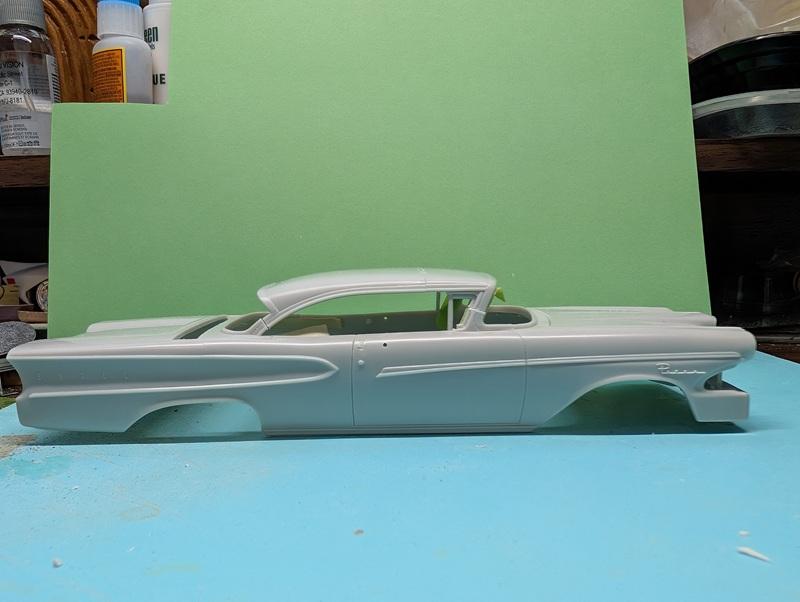
Figuring out the glass is usually the first priority with me when I do a chop. If the glass doesn't fit well after bringing the top down, I end up not liking the finished product very much. I do some test fitting of the glass before cutting and try to figure out how the glass will/should fit once the top is lowered. The way I chopped this one, the angles of the A & C pillars do not change. This way, all the glass needs to do is slide down (or up, whichever fits best) along the factory angle(s) behind the window opening(s). I will have to make relief cuts in the top to spread the top of the openings very slightly so the pillars line up again, but that should not affect how the glass will look too much when it's glued into place. Also notice that the top isn't chopped a whole lot. The more a top is chopped the more pronounced these alignment issues become. I rather dislike extreme chop jobs anyway (except when it seems appropriate like on a Bonneville race car or something). Customizing for me is usually about good proportion etc. I will try to post how I deal with all of this as I go. Hopefully it will help!
-
Thanks! Thanks for following! 👍 Altho if you've seen my previous builds, I do take a long time to get to the finish line. Patience is a virtue, right?😁
-
Thank you! 🙂
-
Yes! Now that I think about it, you're right it is very much like a coupe 👍 As I was looking at it, the shorter top feels more like the proportions of the 58 Chevy Impala where the top is fairly short making the hood and trunk seem very similar in length. Yes, plans call for some custom work on the front and rear ends! The front already looks custom with the crazy 'horse collar' center and horizontal wrap around grill. I'm going to try and change out the bumpers and figure out some unique looking tail lights. 😎👍
-
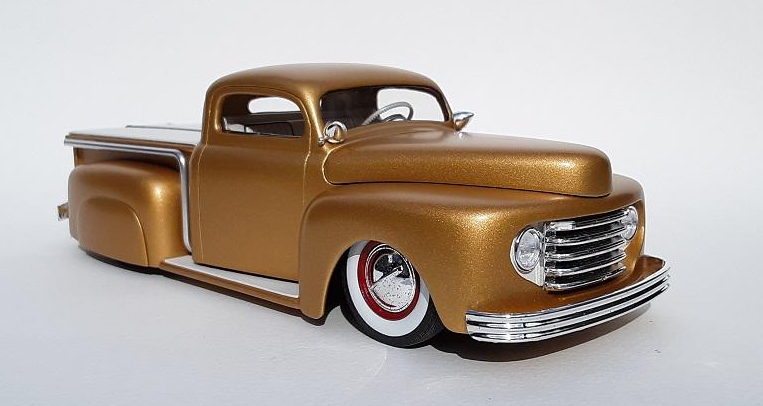
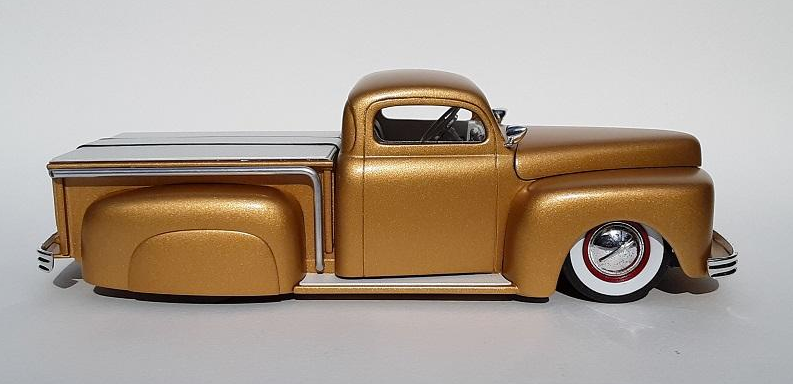
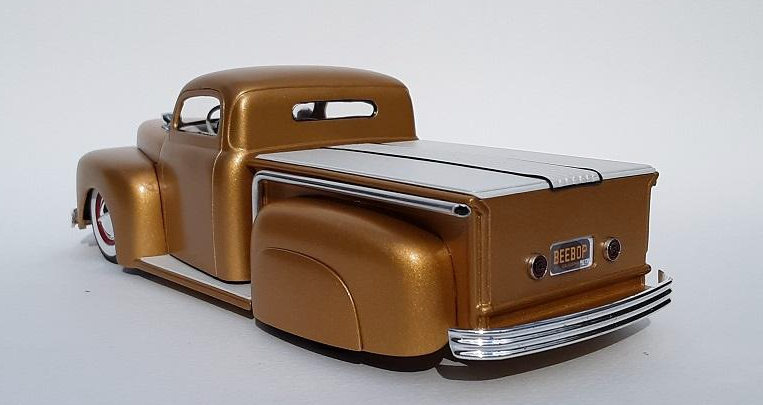
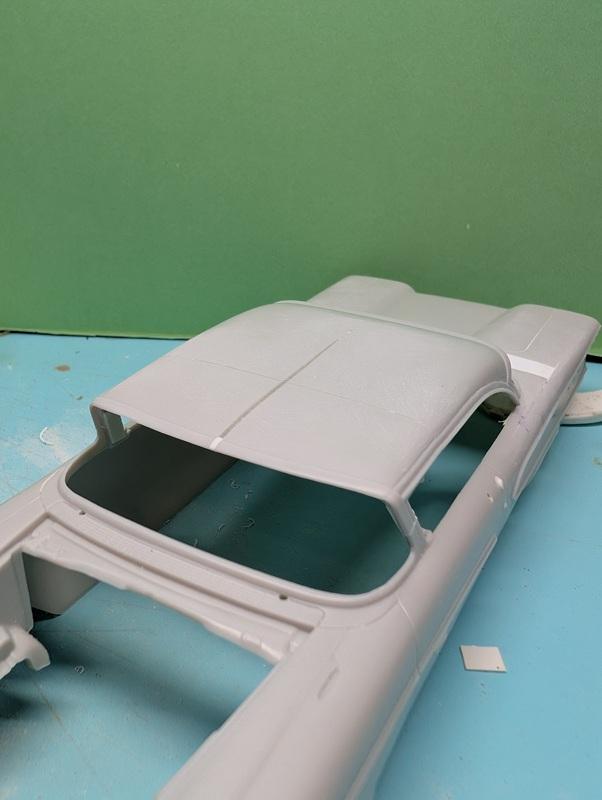
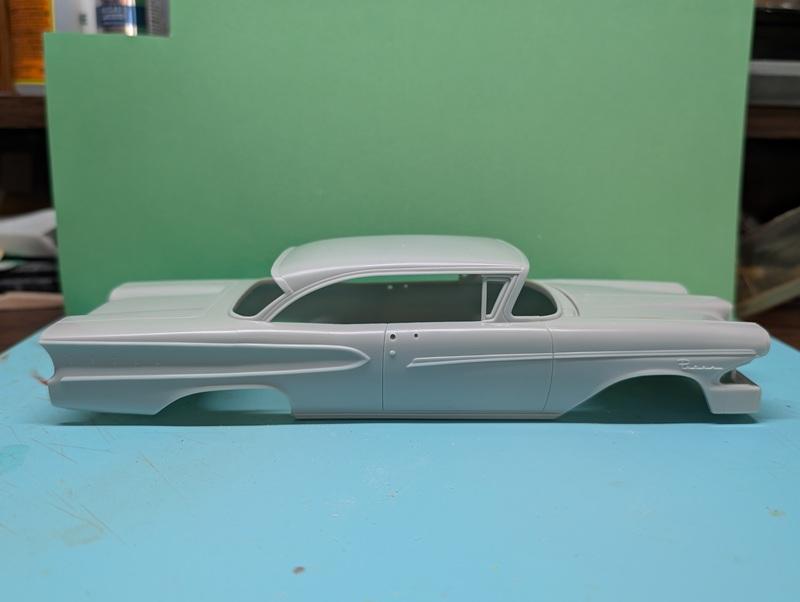
So I saw online that someone had built a chopped AMT 58 Edsel custom and it looked so cool it inspired me to start trying my hand at the ideas I've had rolling around in my head all these years on an Edsel of my own. First order of business was to chop the top. In my eyes the factory top looks too long so I took about a 1/4" section out of the length of it. The rear window area was cut loose and moved forward to reconnect the front and rear pieces of the top. At the same time the A & C pillars were cut (I took a bit too much to my liking out of the A pillars so I added some styrene back to them) to bring the top down. Nothing is glued back together here yet except for the two top pieces. The gap in the deck behind the rear window will get filled with sheet styrene. Some of the ideas I have for this project are things I've never done before so stay tuned and let's see where this goes....
- 34 replies
-
- 15
-

-
Great save! Yes indeed, Gene Winfield as well as all the 1:1 custom painters that can deftly throw down a fade job make it look SO easy. I've done a few scale fade jobs and I STILL feel like I don't know what I'm doing lol Looking forward to seeing your final result!
-
Fantastic work on this! Customs are very difficult to build, but they are the most fun in my opinion 😎👍 Very clean work and obviously well thought out!
-
Fantastic build! Great custom mods on an unusual subject 😎👍
-
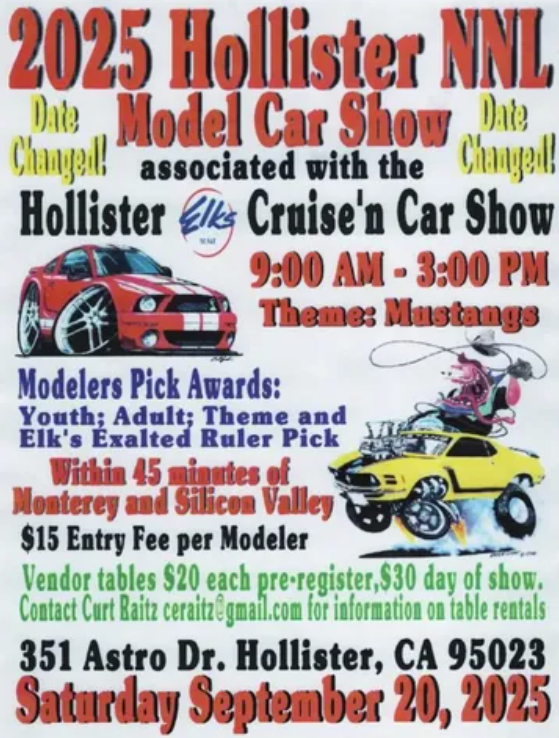
I dont know much about this show as this year will be my first experience participating in it, but it looks like a fun one to attend:
-
- 1
-
-
Thanks! Once I discovered the 1:1 High and Mighty, it didn't take long for my off-centered mind to come up with this idea 🤪
-
Hehe! Thanks man! 👍
-
Thanks so much! This is one the rare builds for me where all my wacky idea(s) came together nicely 🤪
-
I'm so glad you like it! Don't feel bad.....I find that exact replicas are hard to build. The pressure to get all the details as accurate as possible can be tough to navigate. Oh man, I would love to see a 51 chevy version! 😁👍