Ferbz
-
Posts
508 -
Joined
-
Last visited
Content Type
Profiles
Forums
Events
Gallery
Everything posted by Ferbz
-
Ha! Indeed. And you're probably right. Yeah, it's funny how I can stare and stare at something and not see anything odd until I take a pic of it. The camera tells all...... 🤪
-
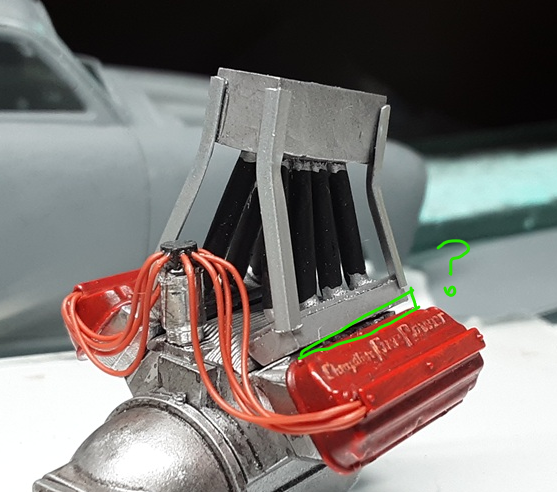
One more mockup to see where things are headed. I'm liking the vibe so far, but one thing I notice is that the intake is pointing downwards a bit. It's the result of an oversight on my part as I did not mount the engine at a high enough angle...bleh. I want to raise the whole intake system up at the front but I'm not sure how to remedy that at this point. The engine is already glued into place, but fortunately the intake is not. Maybe I can add thin 'gaskets' at the bottom of the manifolds and make them wedge shaped to cheat the height up in the front? It wont be accurate or realistic, but it might solve the 'nose down' attitude of the air scoop/carbs/plenum:

-
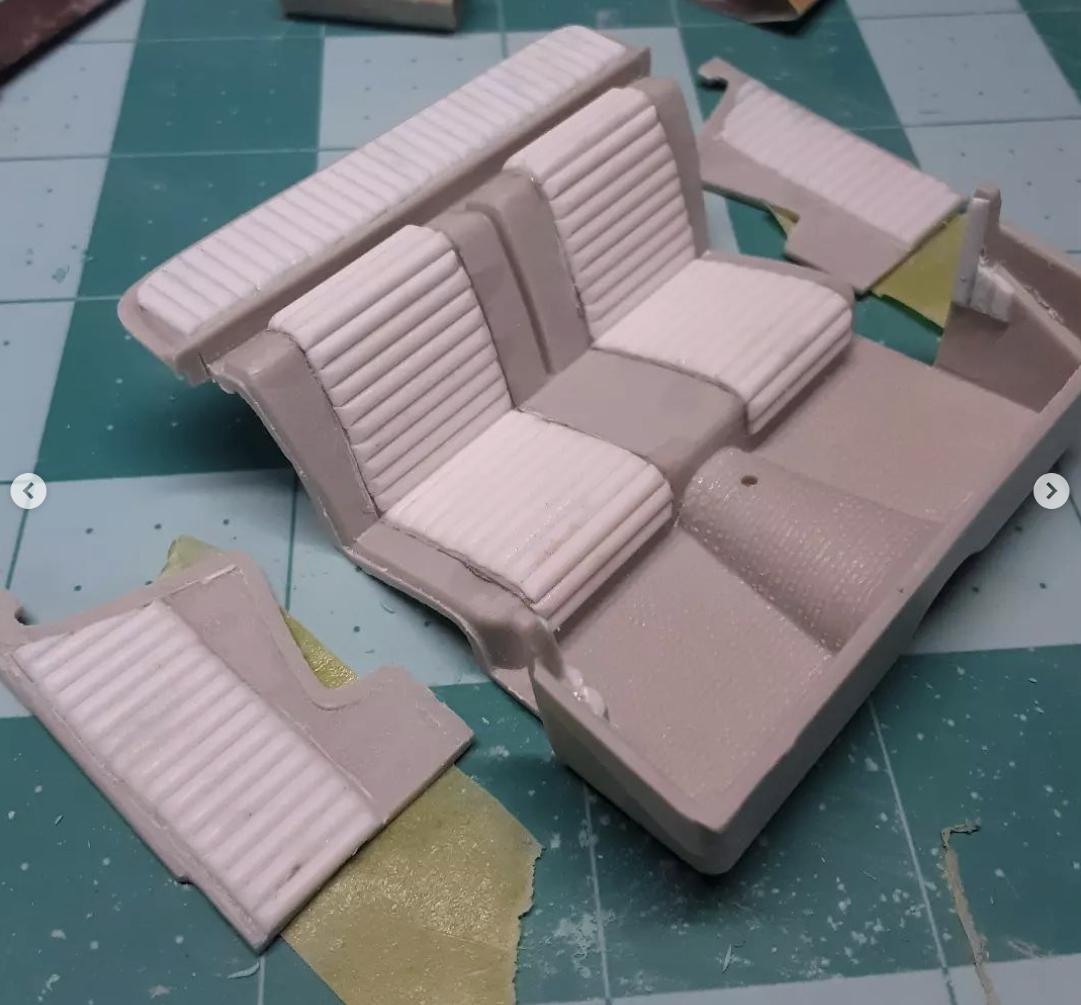
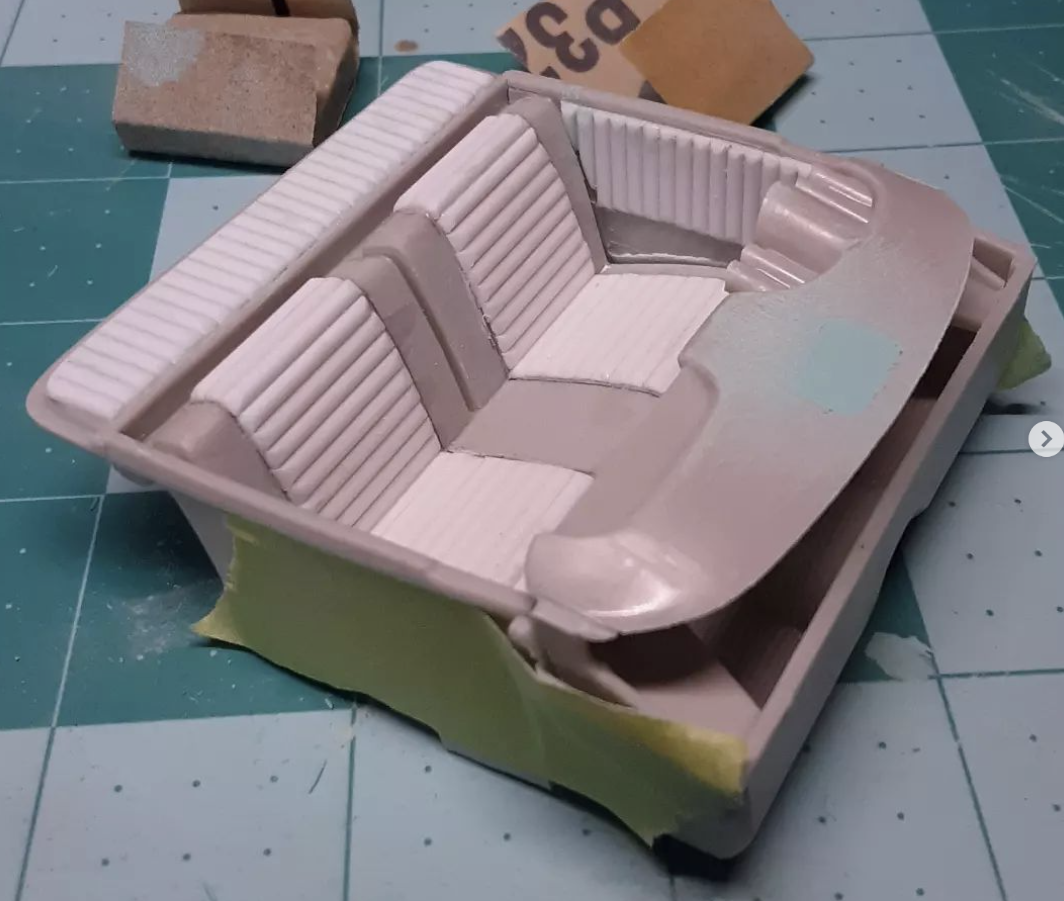
I've used 1.5mm, 2mm, even 2.5mm Evergreen half round for tuck and roll. I prefer the larger 2mm and 2.5mm size as it makes for a little less work 🤪 You can be precise with your build if you like and choose the size based on what custom car era you're going after with your build. I think in general that early 50s tuck and roll was larger than in the later 50s/early 60s? For any particular area, cut as many of your rods first to get them as close as you can to the same length. Then sand all the ends to curve them down giving them that 'sewn in' look once they all get glued down. I also use spark plug wire for piping along the edges. This gets glued down after all the painting is done. Here's the tuck and roll work I did on my custom 59 El Camino:
-
Well I'm glad it's not just me then lol It's a bit of a downer to have to address these problems instead of getting on with the fun parts of the build. We will continue to suffer with our craft I suppose....🤪 The newer 1/25 Monogram 40 Ford kit is much more consistent and cleaner, but there are a few things I dont like about that kit. One being the windshield trim being molded into the glass. The Revell 49 merc kit suffers from the same thing, but that's a whole other can of worms...... lol
-
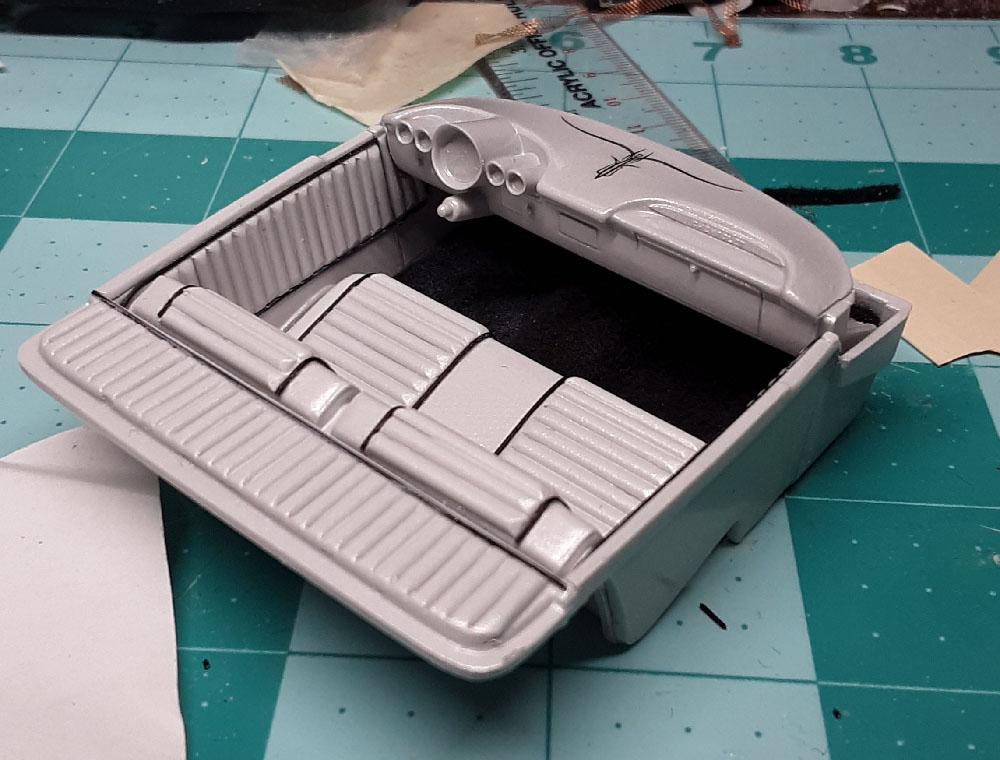
This delivery body was an old glue bomb, maybe from the era when american kits had less than ideal quality. As a result, the gaps between the hood and the cowl needed filling/fixing. It may also have something to do in small part with the fact that I'm using the hood and fenders from the sedan? I used sheet styrene strips to fill the gaps and am in the process of fine tuning them. I did essentially the same thing with the rear door, gluing styrene strips to the edge of the rear door and sanding/filing them to fit the opening better:
-
Feel free to send me a pic or two in direct message. Maybe I can help! 👍
-
Thanks! Yes, lots of custom body mods going on here for sure. My customizing skills did not develop overnight, but over MANY years of trial and error figuring out how to replicate what was being done to 1:1 cars. Luckily, I did pick up techniques from more advanced custom model builder pals(I still am!), and learned what tools/materials work best for this kind of work and figured out what works best for me. It already sounds like you have the desire to do custom body work...big plus! I would suggest these tips: I would get a good razor saw, small #11 xacto blade sized saws. Get a good set of hobby files. Use a good medium speed liquid styrene adhesive(WeldOn #3 and Tenax7 are two I've used and like, altho I've switched to using M.E.K. solvent the past few years. It's way cheaper and works really well! The fumes are stronger tho so use with care). Use a thin, clear plastic ruler for measuring. If you can't find one that's 6in. long, buy one that you can cut down to 6in. length. Learn how to 'plate' your body mods. Plating is the practice of backing up your cuts from behind/inside the body with sheet styrene to strengthen them. Learn to use the baking soda/super glue technique for filling imperfections like cracks, seams, etc. As much as you can, make your mods with plastic, rather than putty. When you DO use putty, use the good stuff! Avoid puttys like the green Squadron putty👎 When I need to apply putty thicker than 1/8in. depth, I use DAP Plastic Wood. It hardens relatively quickly, and doesn't shrink/swell under paint. I could go on, but this quite a bit of info already lol You also may already be using some of these techniques/materials so disregard if so. Dont be afraid to cut things up! But do smaller, simpler mods first like frenching headlights, shaving trim, adding scoops, molding details in etc. If/when you're ready to try chopping, try a 32 Ford or model A before doing chop top on say a 49 Merc. Us old glue bombs to practice on so in case things dont go the way you wanted you didnt mess up a fresh kit 🤪 Plan ahead as much as possible, sketch things out if you need to and study how the process looks with the 1:1 cars. If I can do it, you can too! before you know it, you'll only be limited by your imagination 😎👍
-
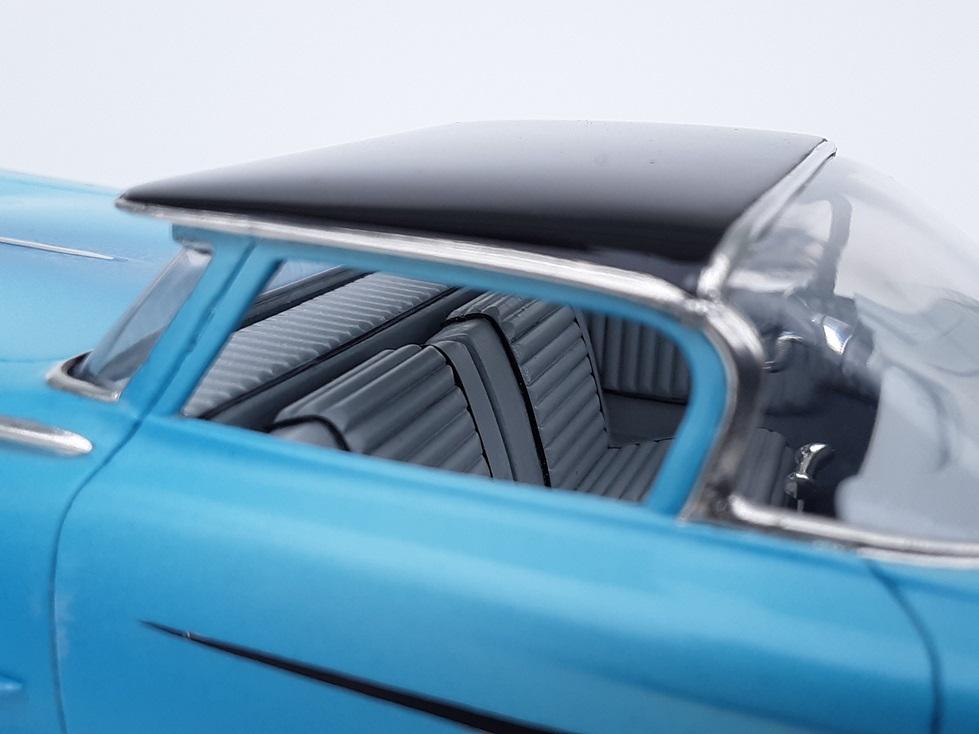
Welcome! I'm glad it helps 👍This is not how I would normally chop a top, especially if i was building a traditional 50s style custom, but it seemed a good way to roughly achieve the vibe of the original High and Mighty car's proportions 😎
-
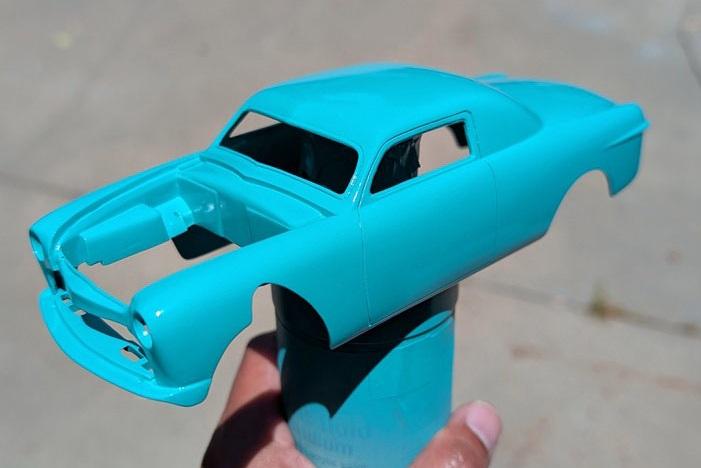
Thanks! Yeah, it's pretty close! And seeing as how this build is only meant to be an inspired version and not a replica of the real car, the color is totally fine. Also, the info I found online about the real car said the blue paint was a kind of primer. All the pictures I see if it shows it to be a satin/flat finish so I'll be attempting to spray a dull coat over the top of it.
-
Here's one of my favorites: my customized 50 Ford pickup, painted with Testors Metallic Gold topped with satin clear. This one came out surprisingly smooth for me 🤪
-
Great work on those tires/caps! Which kit did you rob for those wide whites?
-
Thanks! Those little Tamiya cans are pricey too for the amount of paint that you get! There doesn't seem to be a cheaper alternative out there tho of equal quality and variety that i know of.
-
Thanks man! It's a crazy idea but sometimes you have to follow them to their absurd conclusion lol It's part of the fun of being creative I think 🤪
-
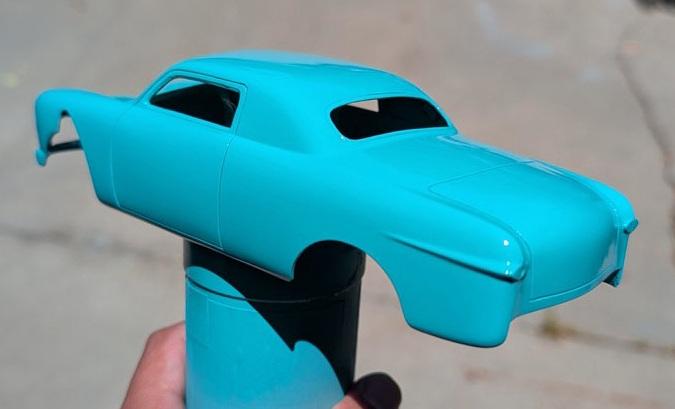
.....And we have paint! The color looks more saturated in these pics than in real life, but the Tamiya lacquer Coral Blue (TS-41) is a pretty close match to the 1:1 High and Mighty turqoise-y blue/green color. BTW I love the Tamiya quality, but anybody feel like those little cans are BARELY enough for a build? lol I'll let it cure before I do a light wetsand with 2000grit. After that, some tricky masking of the front/rear window trim and engine bay so I can spray some flat black is planned. Then some decal work and a satin clear coat before final assembly. (You guys ever get close to the end of a build only to realize there's lots more work to do to get it to the finish line?)
-
Thanks! Hopefully the overall result will be that early custom vibe I'm after 🙏😉
-
Yes indeed! I'm slowly getting better at ignoring that queezy feeling I get right before I start cutting lol It's also about trusting your gut when you get an idea. In your head you see it working out great but It's a matter of seeing if the idea can actually exist outside your mind and in the actual physical world. There is something to be said about studying what's been done, having a plan, then thinking things thru as much as possible. But at the end of the day there's no way to know for sure until you 'throw yourself in'! 😉
-
Thanks! I've never done this mod before so I wasn't sure if it was going to work or not, but I had to give it a shot 🤪
-
Front end update: the cut lines in the slightly sectioned hood has been filled, and I've filled the gap between the hood and the grill area (see previous posts) and cut open the grill area to accommodate a 41 Ford grill center piece. Lots of gap fine tuning and smoothing up ahead but I think my idea of using the unusual 41 grill just might work! It's a subtle but effective modification, a change that might require a double take: It's initial appearance might look like a 40 deluxe grill with the sides filled in, but the longer you look, the more you'll see: the grill bars are vertical and not horizontal, and it's wider and more round with no sharp peak down the center. More to come!
-
Yeah the LaSalle grill was/is a popular option for sure, but I wanted to try something not only era appropriate but a also a little unusual. I'm also up for the challenge! (I think lol) 🙃
-
Thanks! Yes, the 39 grill was sanded smooth and glued into place. What I plan to do is cut an opening into the center of it so that it will house the 41 grill. Essentially, I used the 39 grill to fill the space(s) that will surround the 41 grill. Some of the early customs of that era had sheet metal to fill the factory grill opening when an alternate, smaller grill was used. Here's a pic of the front of the Jack Calori coupe as an example (pic borrowed from CustomCarChronicle): I'll also have to fill the gap above the grill on my model with styrene(the empty space right below the hood lip). I may have bitten off more than I can chew here lol Stay tuned to see if I pull it off! 🤪
-
Thanks! The ride height still needs to be dialed in once I get going on the chassis but yeah, the goal is to get this robust pig looking lean and low 😎👍
-
Thanks!
-
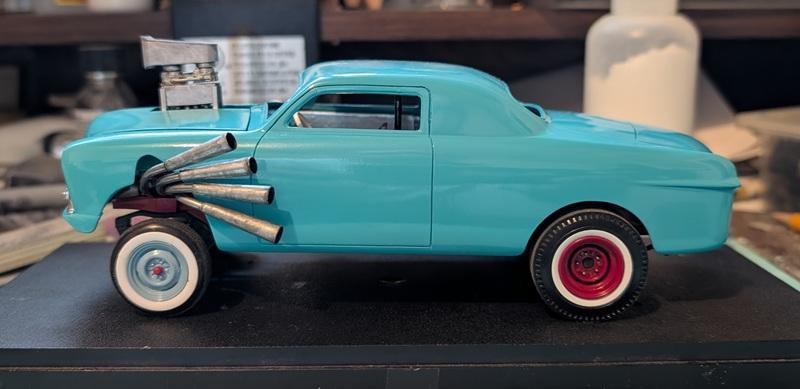
So I'm back tinkering on this project while I wait for a good day to paint my High and Mighty Ford. After staring at it and staring at it I realize the thing that was bugging me about the proportions was how high and thick the sides of the hood looked to me. I did not want to section the whole car so I considered sectioning the just hood (a very small amount) and raising the front fenders similar to how some of the Valley Custom cars were done. After sectioning the hood (a little more than the thickness of my razor saw) and mocking it up in place it improved the looks of it quite a bit to my eyes without looking too radical. I proceeded to channel the rest of the body to lower it just enough to line up again with the slightly thinner hood. Lots of fiddling with the gaps between the hood and the cowl is needed but I'm liking the proportions alot better overall. The effect is not as dramatic as a full section job or a front fender raise, but the result is a cleaner, slightly less bulky look which these tall sedan deliveries tend to have, even after a chop job 😉I also decided I really want to capture the early post war 1940s look with this custom. As a result, I chose to not use whitewall tires and popular 50's era hubcaps and went with black walls and flipper hubcaps, similar to the Jack Calori 36 Ford. In keeping with this late 40s aesthetic, I cut a hole in the rear door for a sunken license and am considering these tail lights from the Revell 1948 Ford kit. I'm not sold on them tho and may end up sticking with 39 Ford teardrops. The fender skirt is from the same Revell kit which I thought I'd try out. I like the thin-ness of the skirt, but not the shape so I'll likely scratch build a set that will flow better with the rear fenders. I'm on the fence about either hinging the rear door to open/close, or gluing it closed. I spent quite a bit of time fine tuning the gaps of the door so we'll see.... Plans also call for polished rear fender guards and spotlights, and maybe 41 Plymouth bumpers. I'm going to attempt to mount a 41 Ford grill into the front, which I already have a stripped and sanded down AMT 39 Ford grill piece glued in place to wrangle it into. Stay tuned!
-
Show your iconic Custom Car/Hot Rod replicas
Ferbz replied to Koellefornia Kid's topic in Model Cars
I remember going to an NNL West many years ago and saw on the primer table someone had a Cadzilla build in progress! It looked like they started with an AMT 51 chevy Fleetline. I never found out who was building it nor did I ever see that build again.... 😕 -
Show your iconic Custom Car/Hot Rod replicas
Ferbz replied to Koellefornia Kid's topic in Model Cars
Thanks! Chopping and customizing the AMT 49 Merc kit is not easy, but with careful planning, measuring and attention to detail, it can be done! 🙂👍