keviiin86
-
Posts
238 -
Joined
-
Last visited
Content Type
Profiles
Forums
Events
Gallery
Everything posted by keviiin86
-
1963 Corvette current day nhra Stock Eliminator
keviiin86 replied to R. Thorne's topic in WIP: Drag Racing Models
No problem, maybe its not warped but looks like the roof got a little smashed while in the box? I've seen alot of newer molded AMT/round 2 models that have been deformed from the way they were packed in the box. -
1963 Corvette current day nhra Stock Eliminator
keviiin86 replied to R. Thorne's topic in WIP: Drag Racing Models
Have you test fit the body on the chassis? I dont know if its just a weird angle but that body looks pretty warped. Might want to check that before you go any further. -
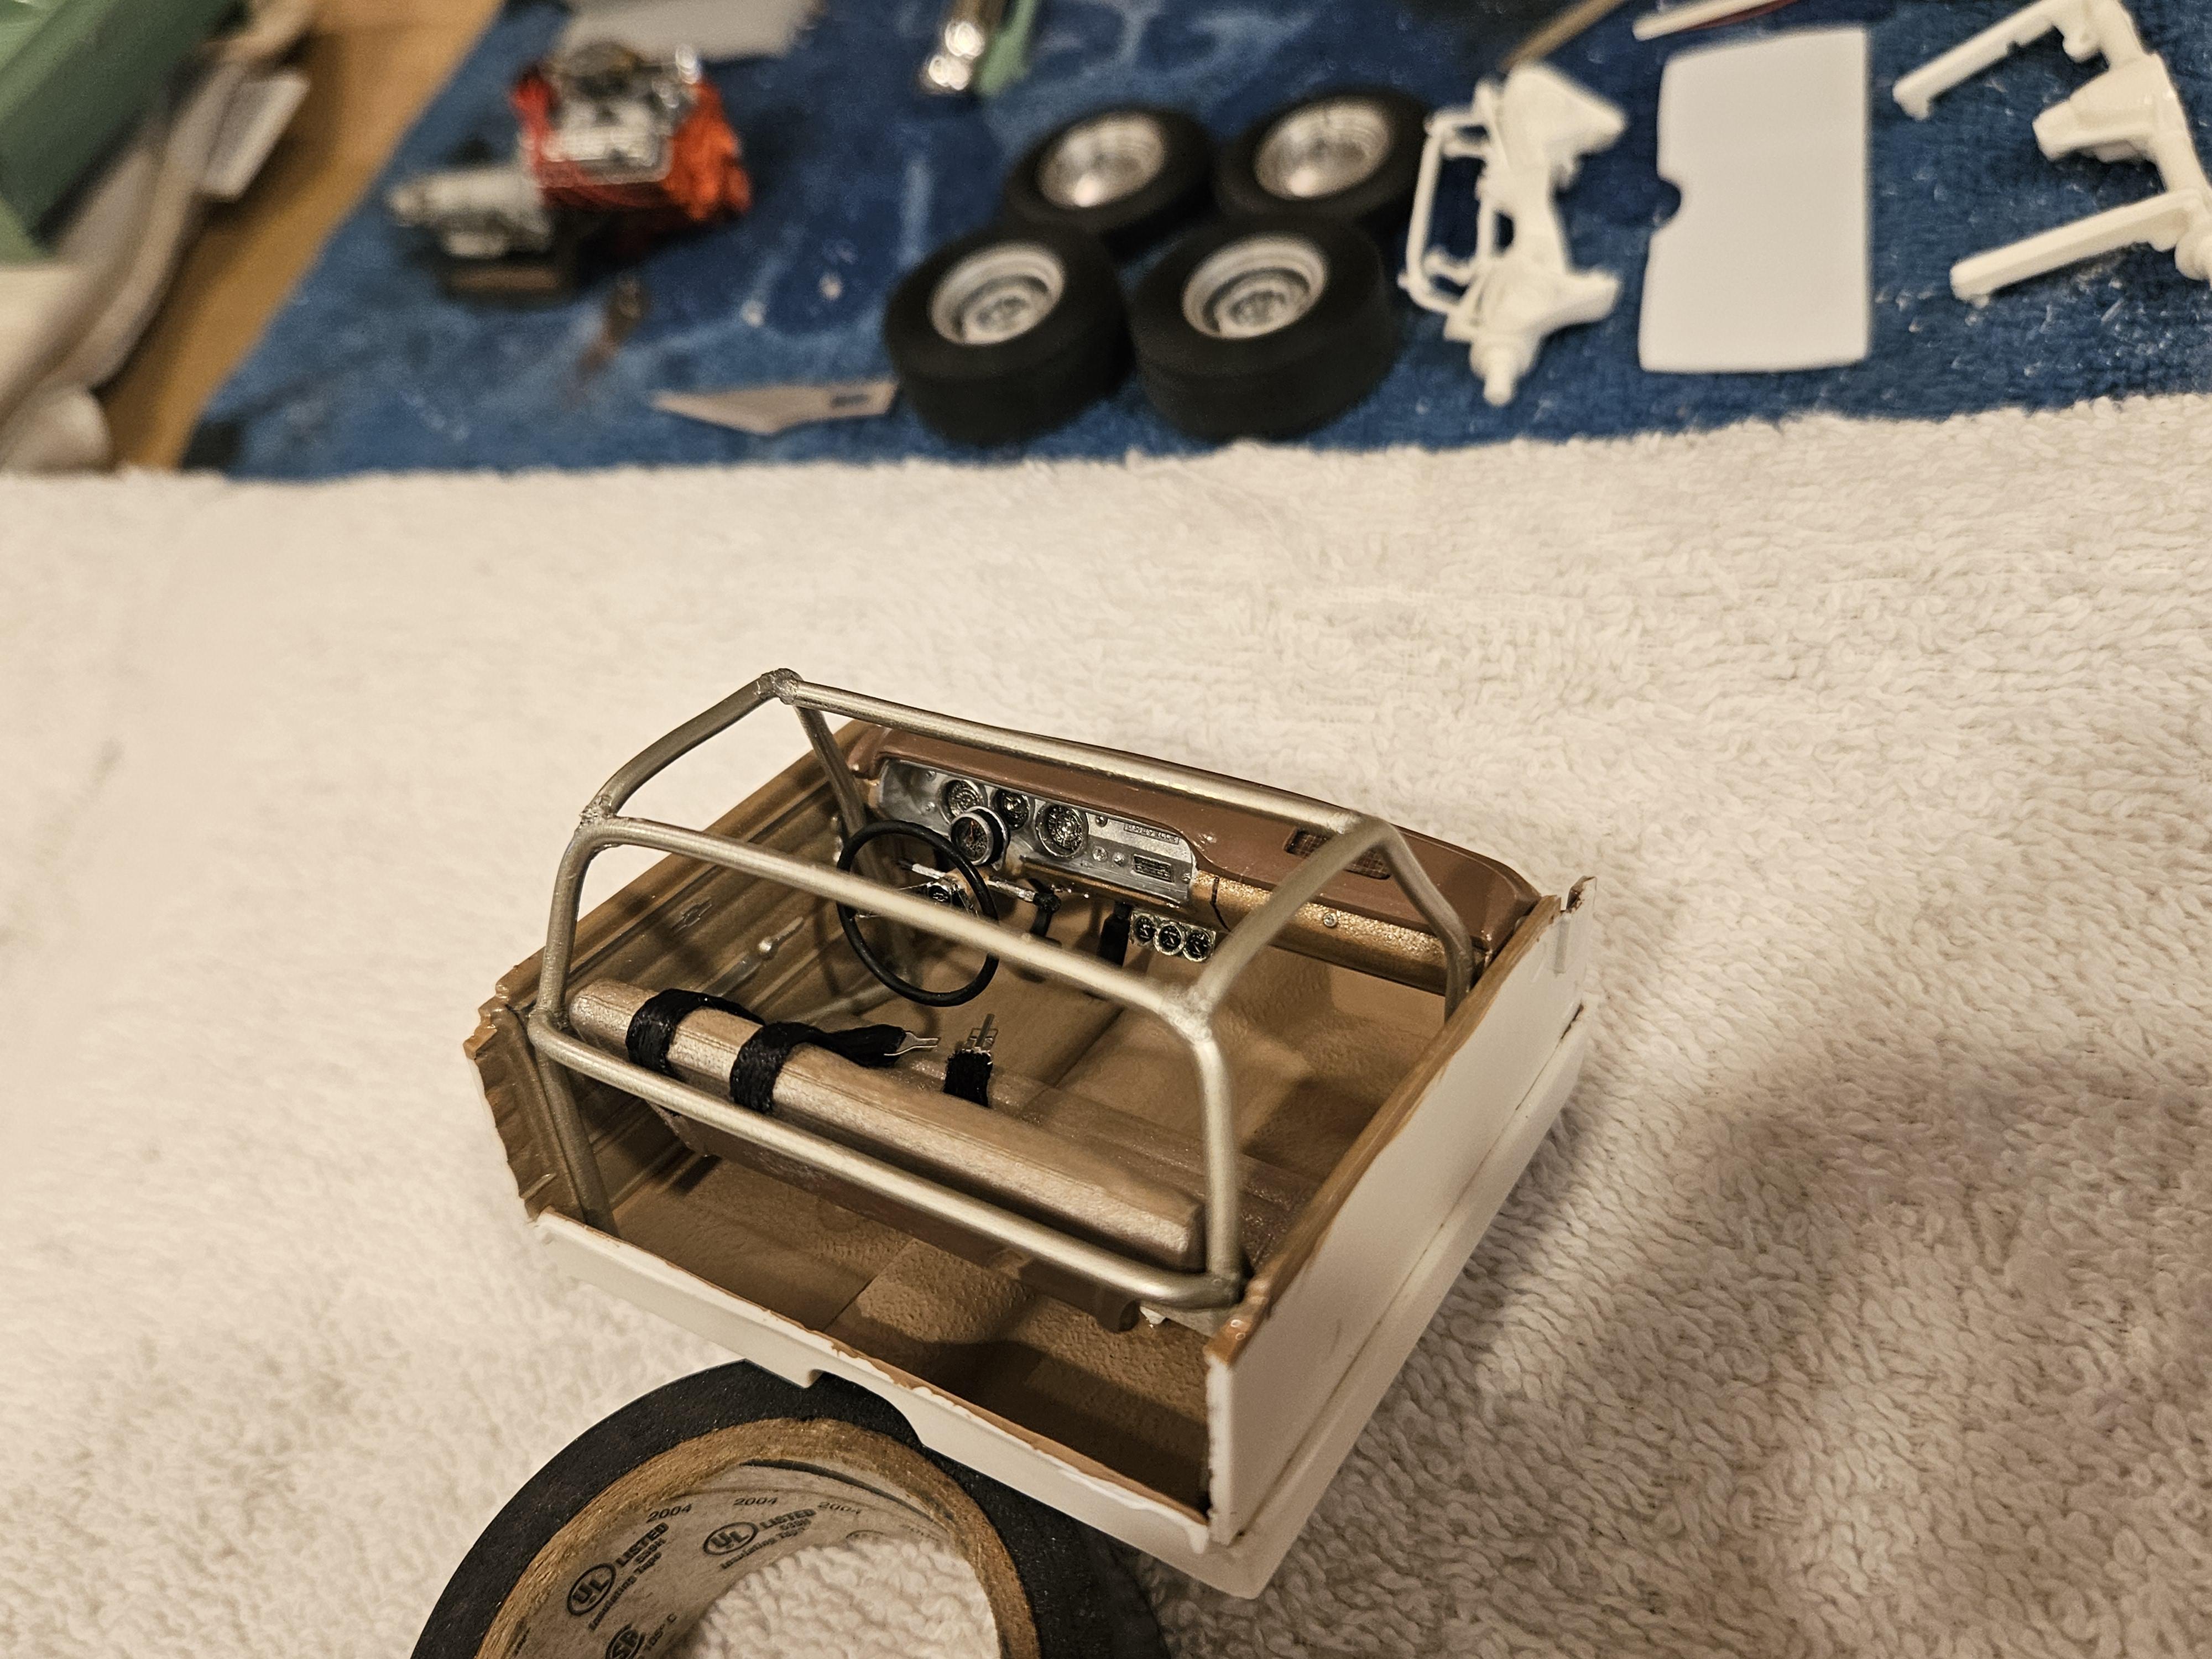
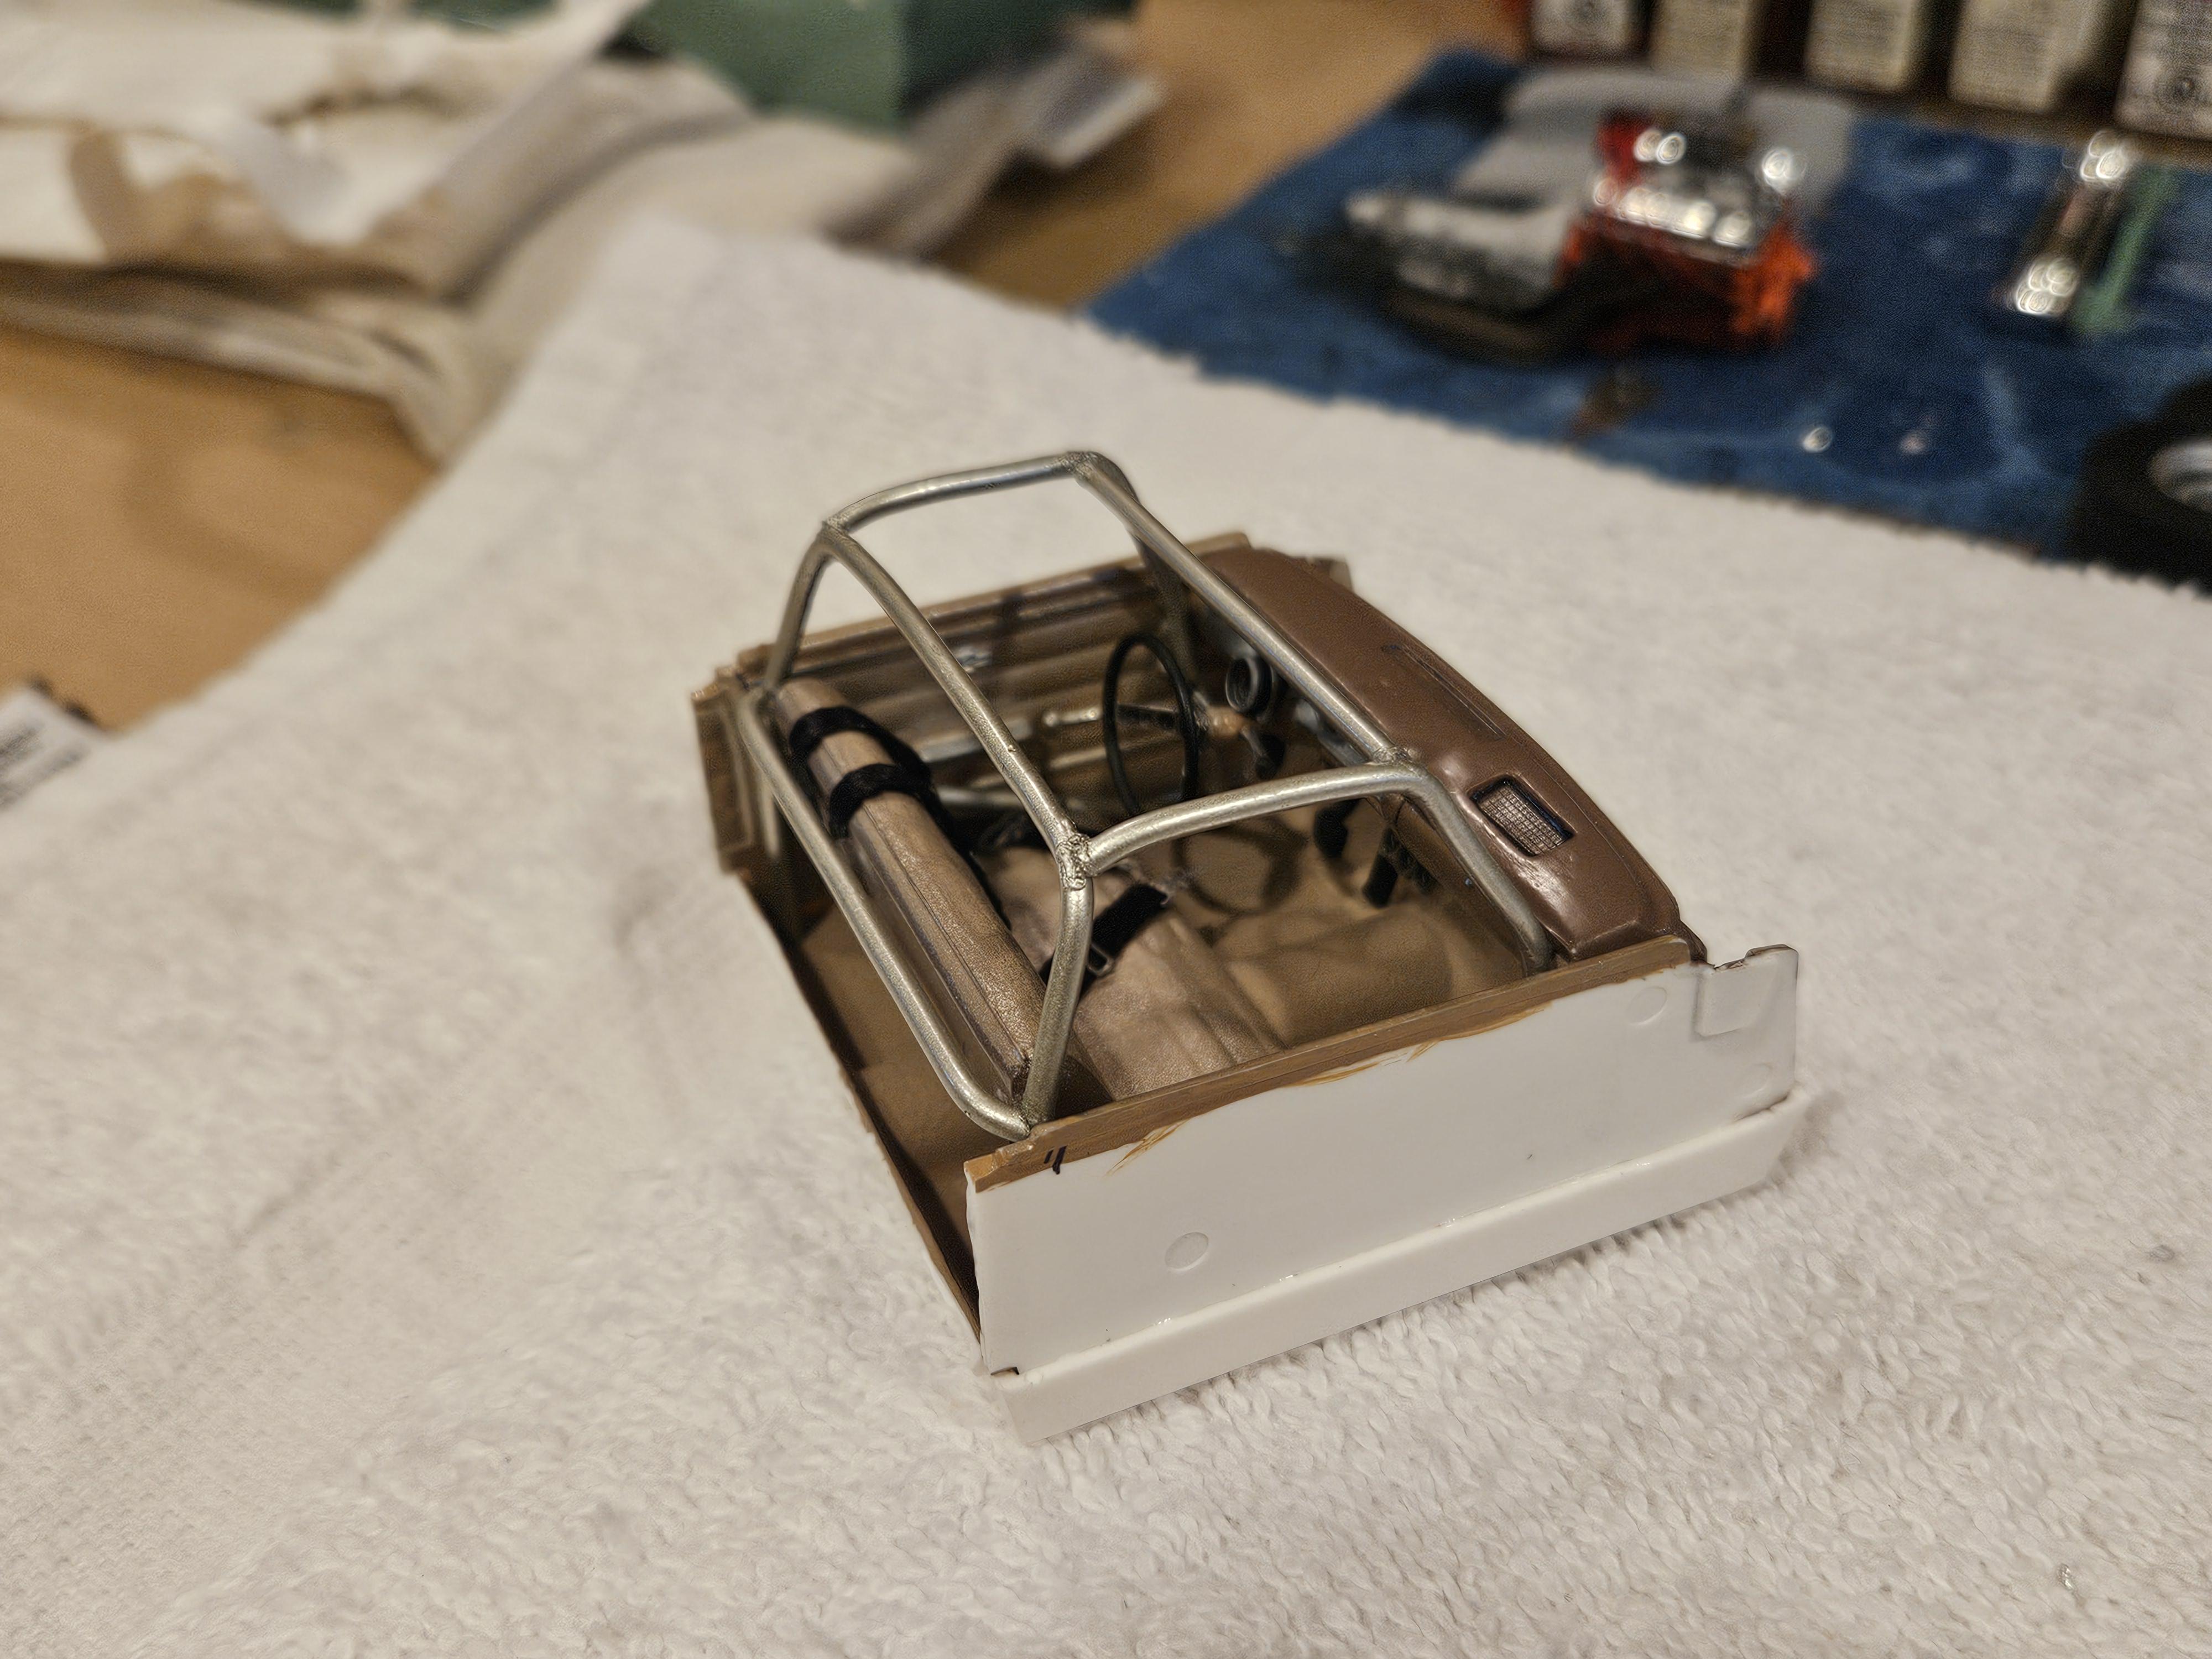
Roll cage is done and painted and interior bucket is complete..onto the chassis now.

-
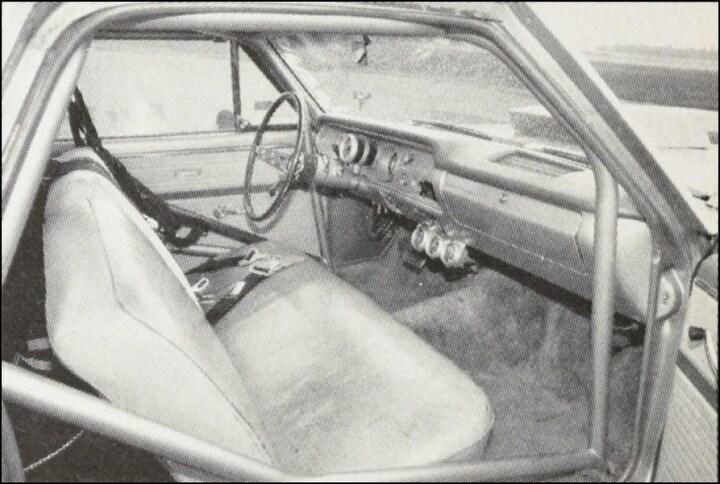
Thanks! I think it was 12 gauge jewelry wire from Michaels.
-
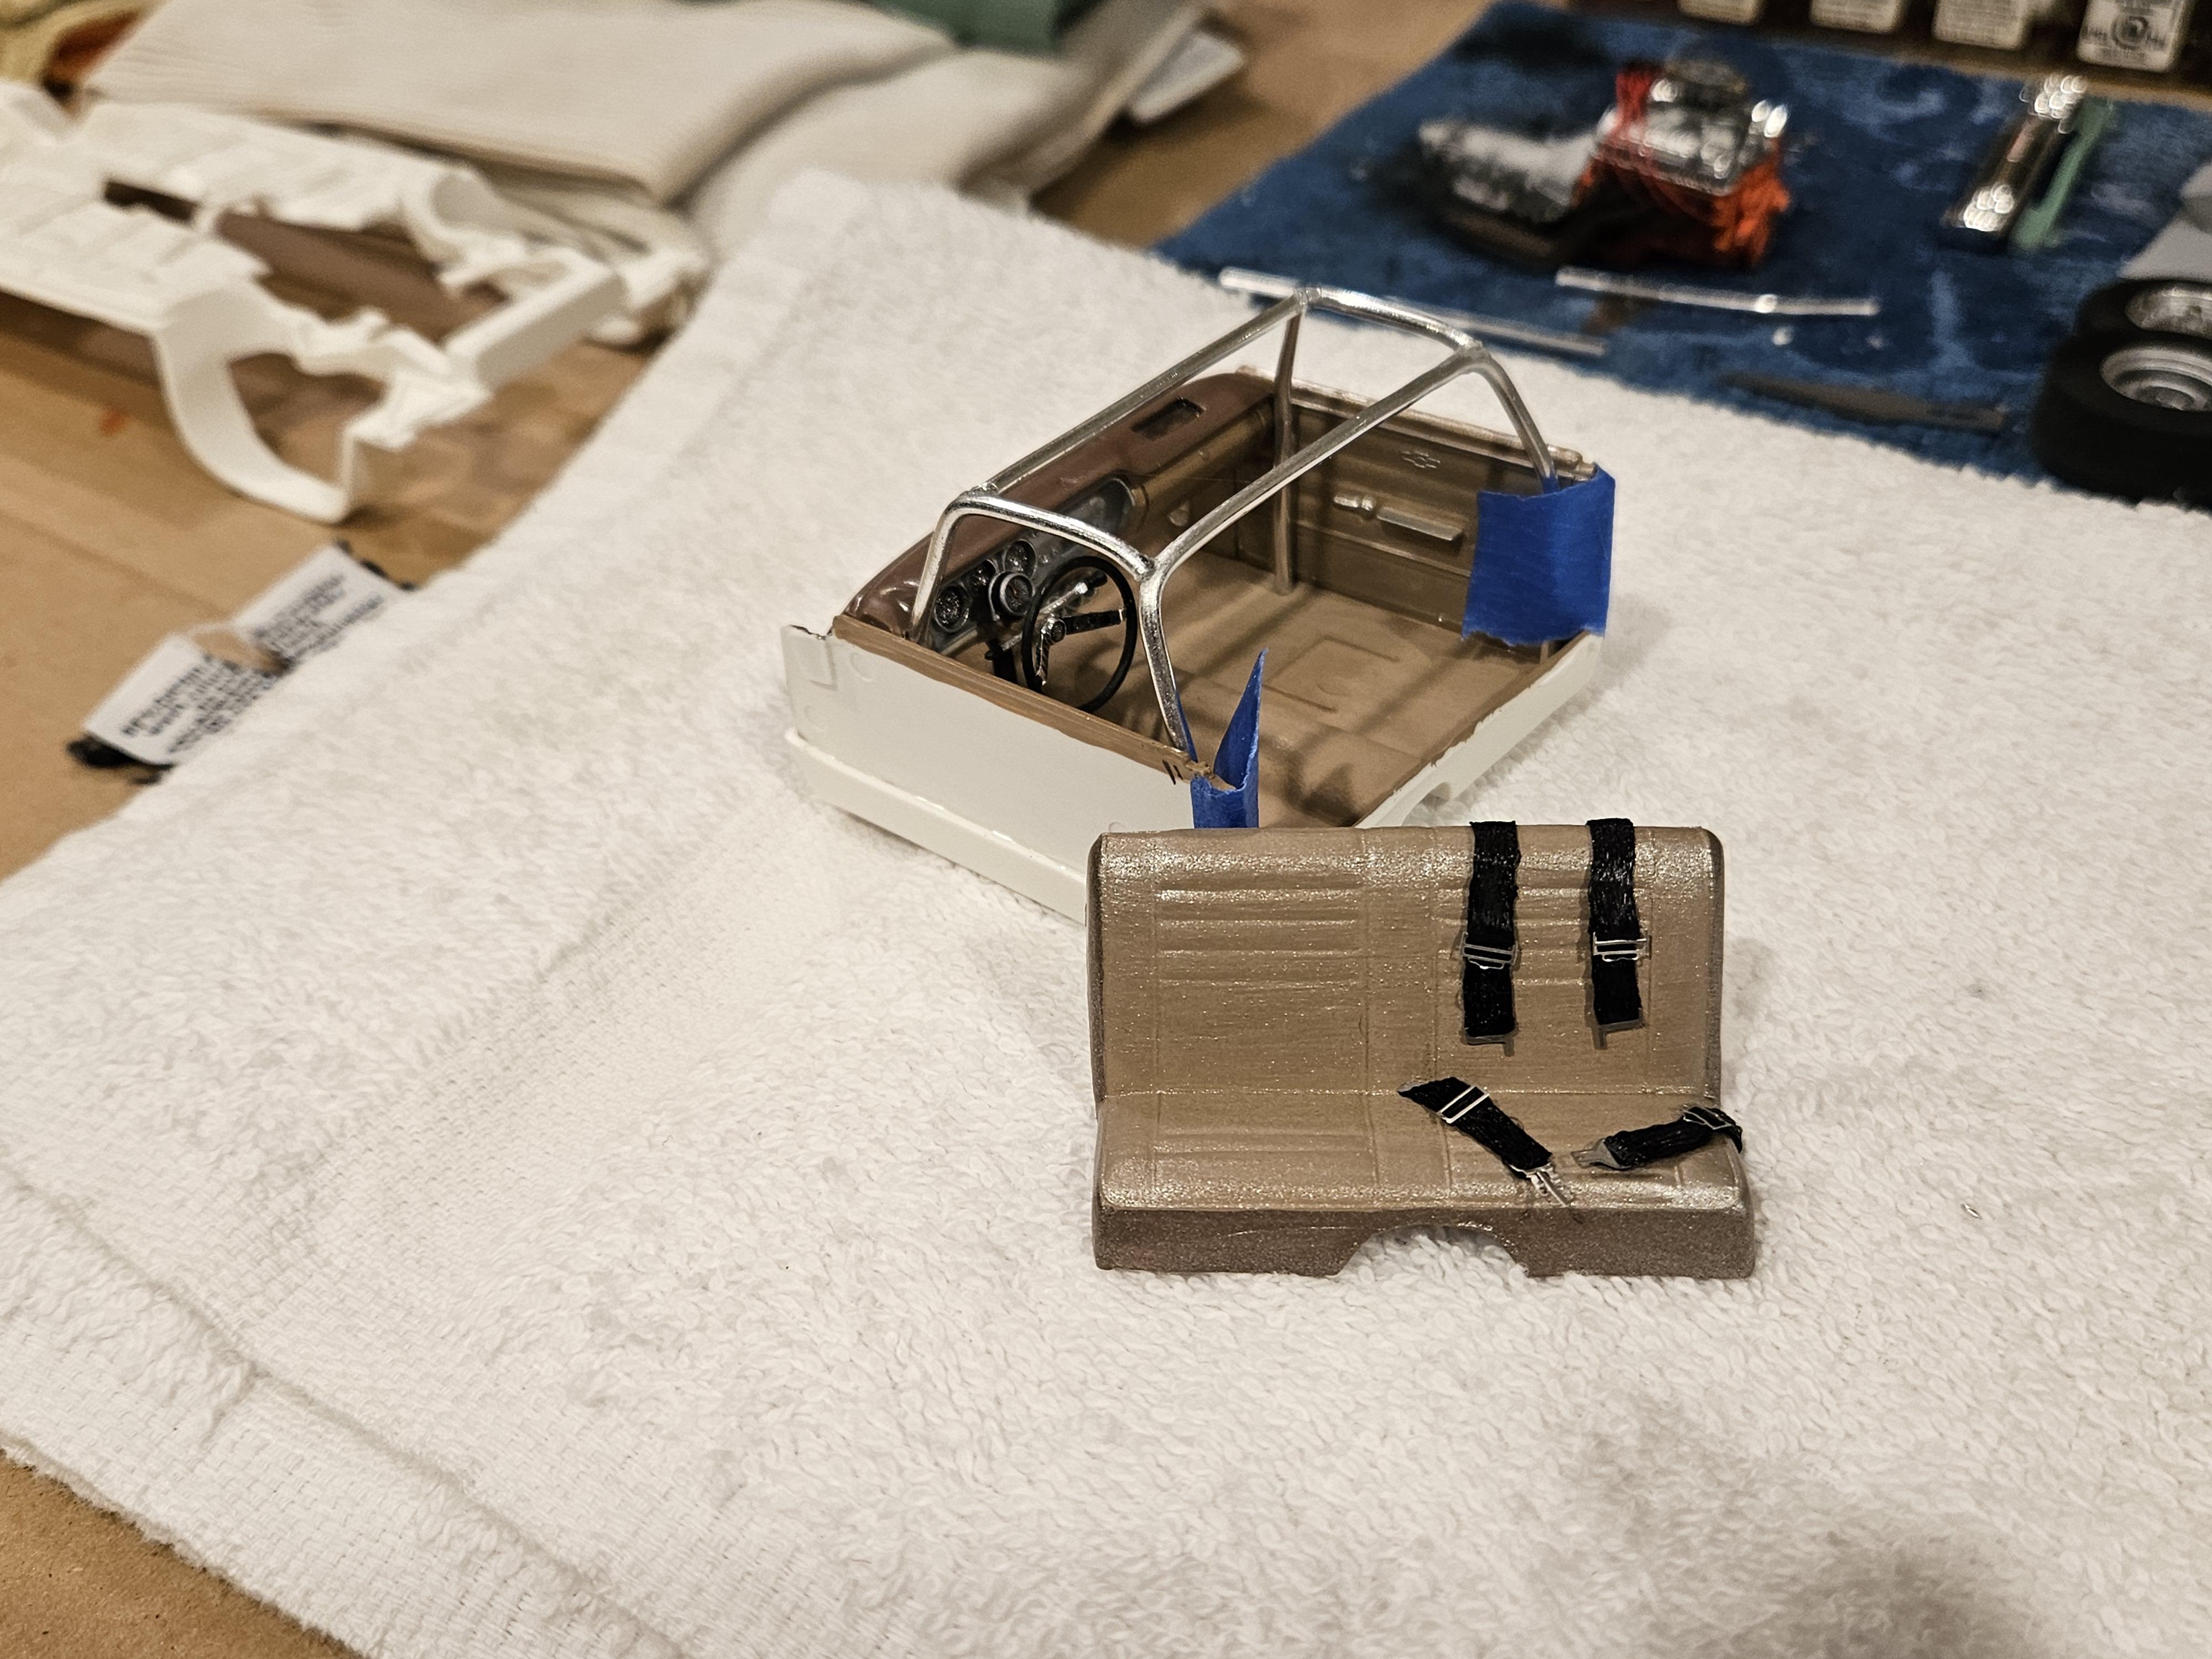
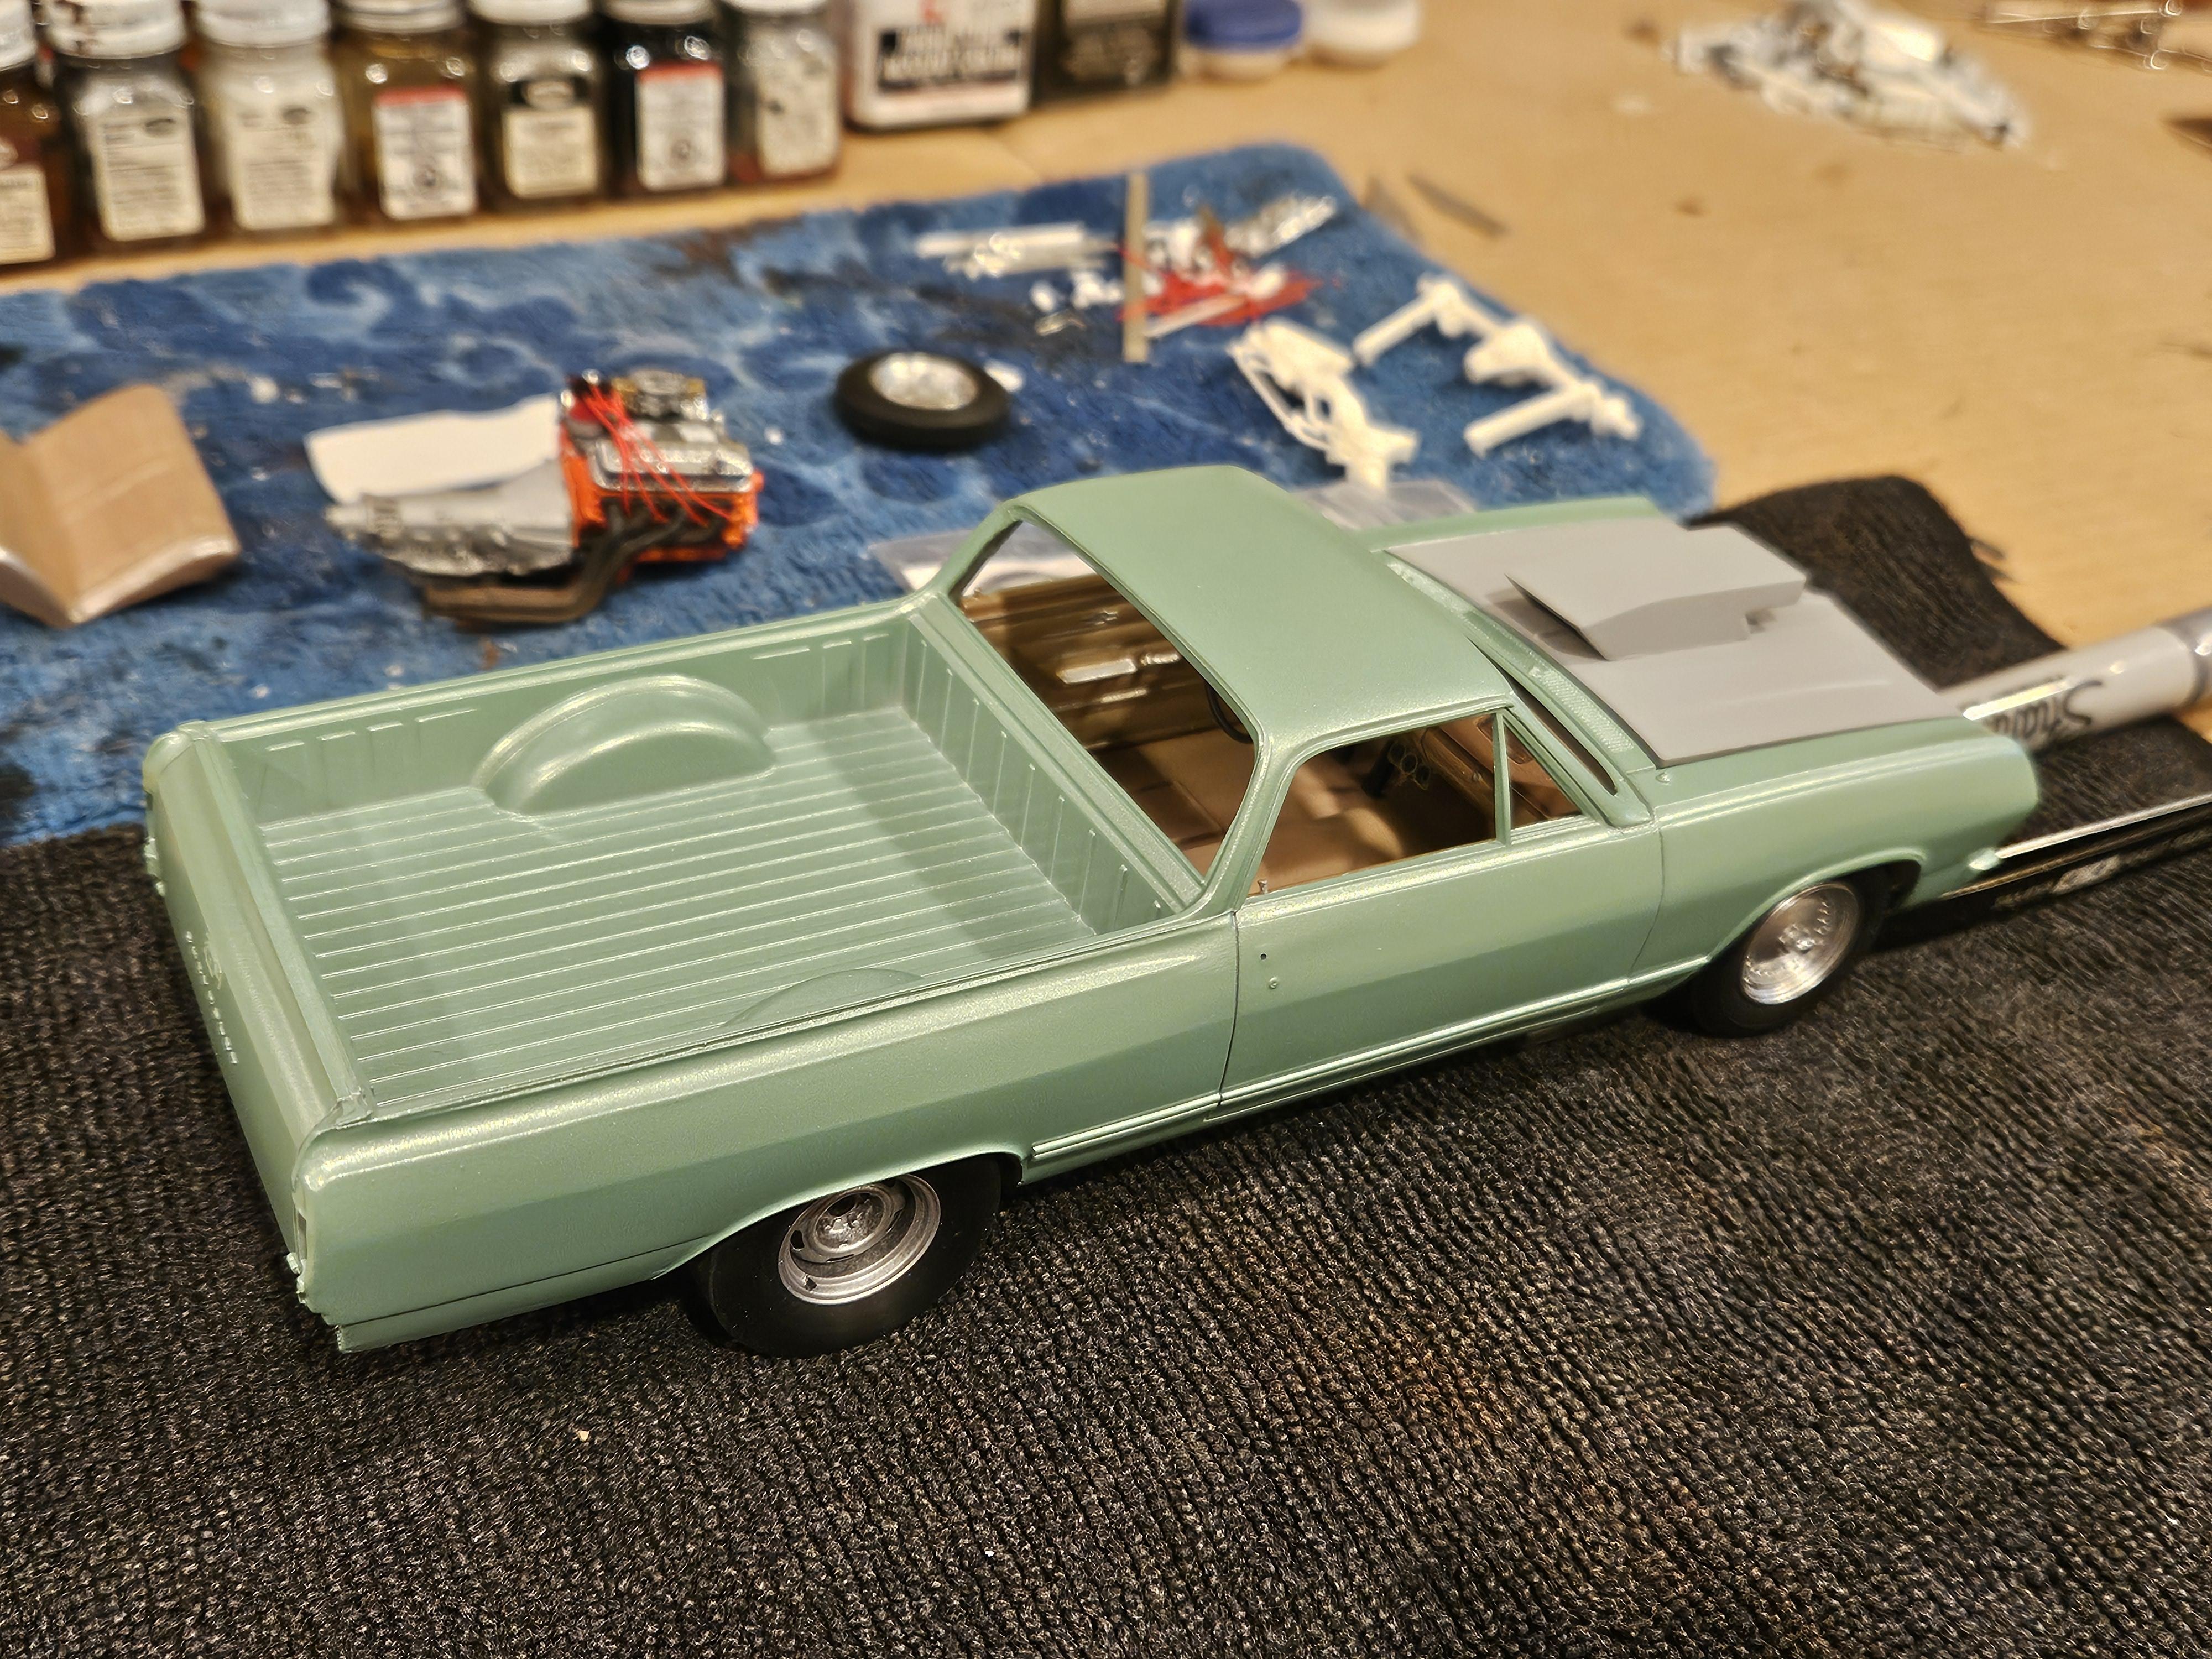
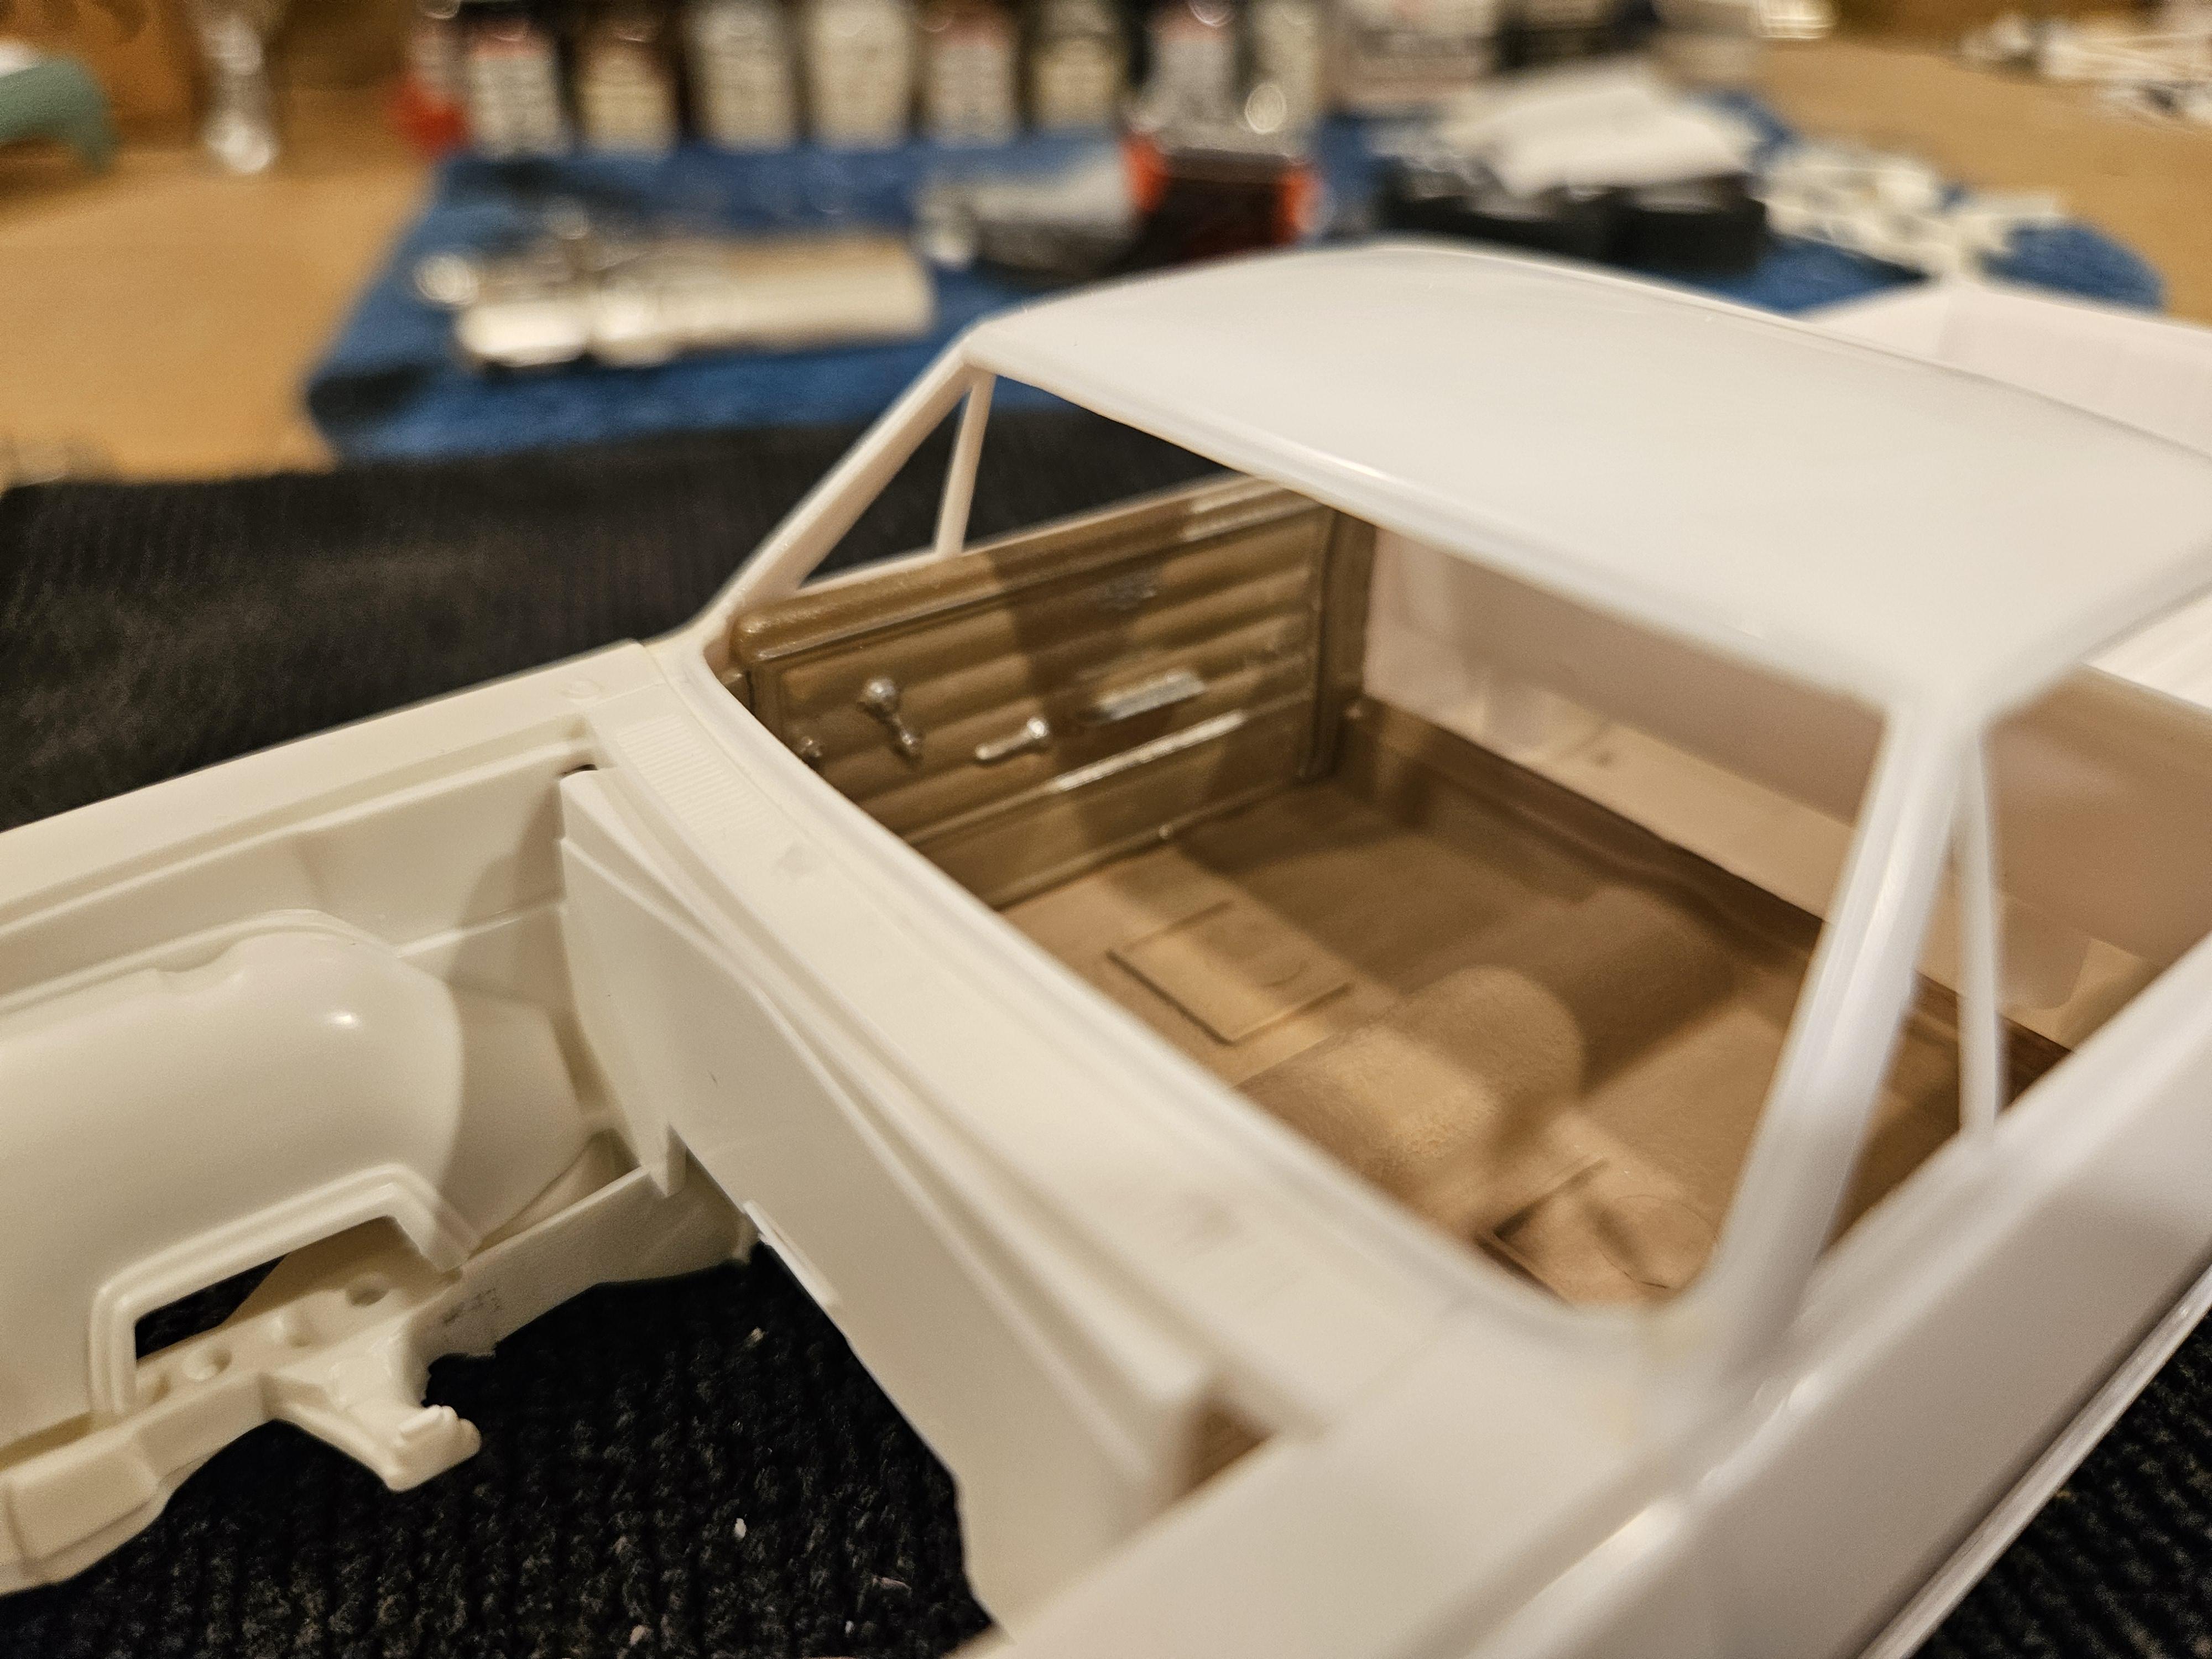
I added some BMF around the windows and glued in the glass to figure out how much room i have to the headliner for the cage. This roll cage has been kicking my butt, keep needing to tweak and cut and rebend the bars to get it to tuck up close to the headliner. I must have test fit the body chassis and interior together 30 times to get to this point lol. While I was waiting for the glue to dry on the roll cage I added a basic 4 point harness to the bench seat also.
-
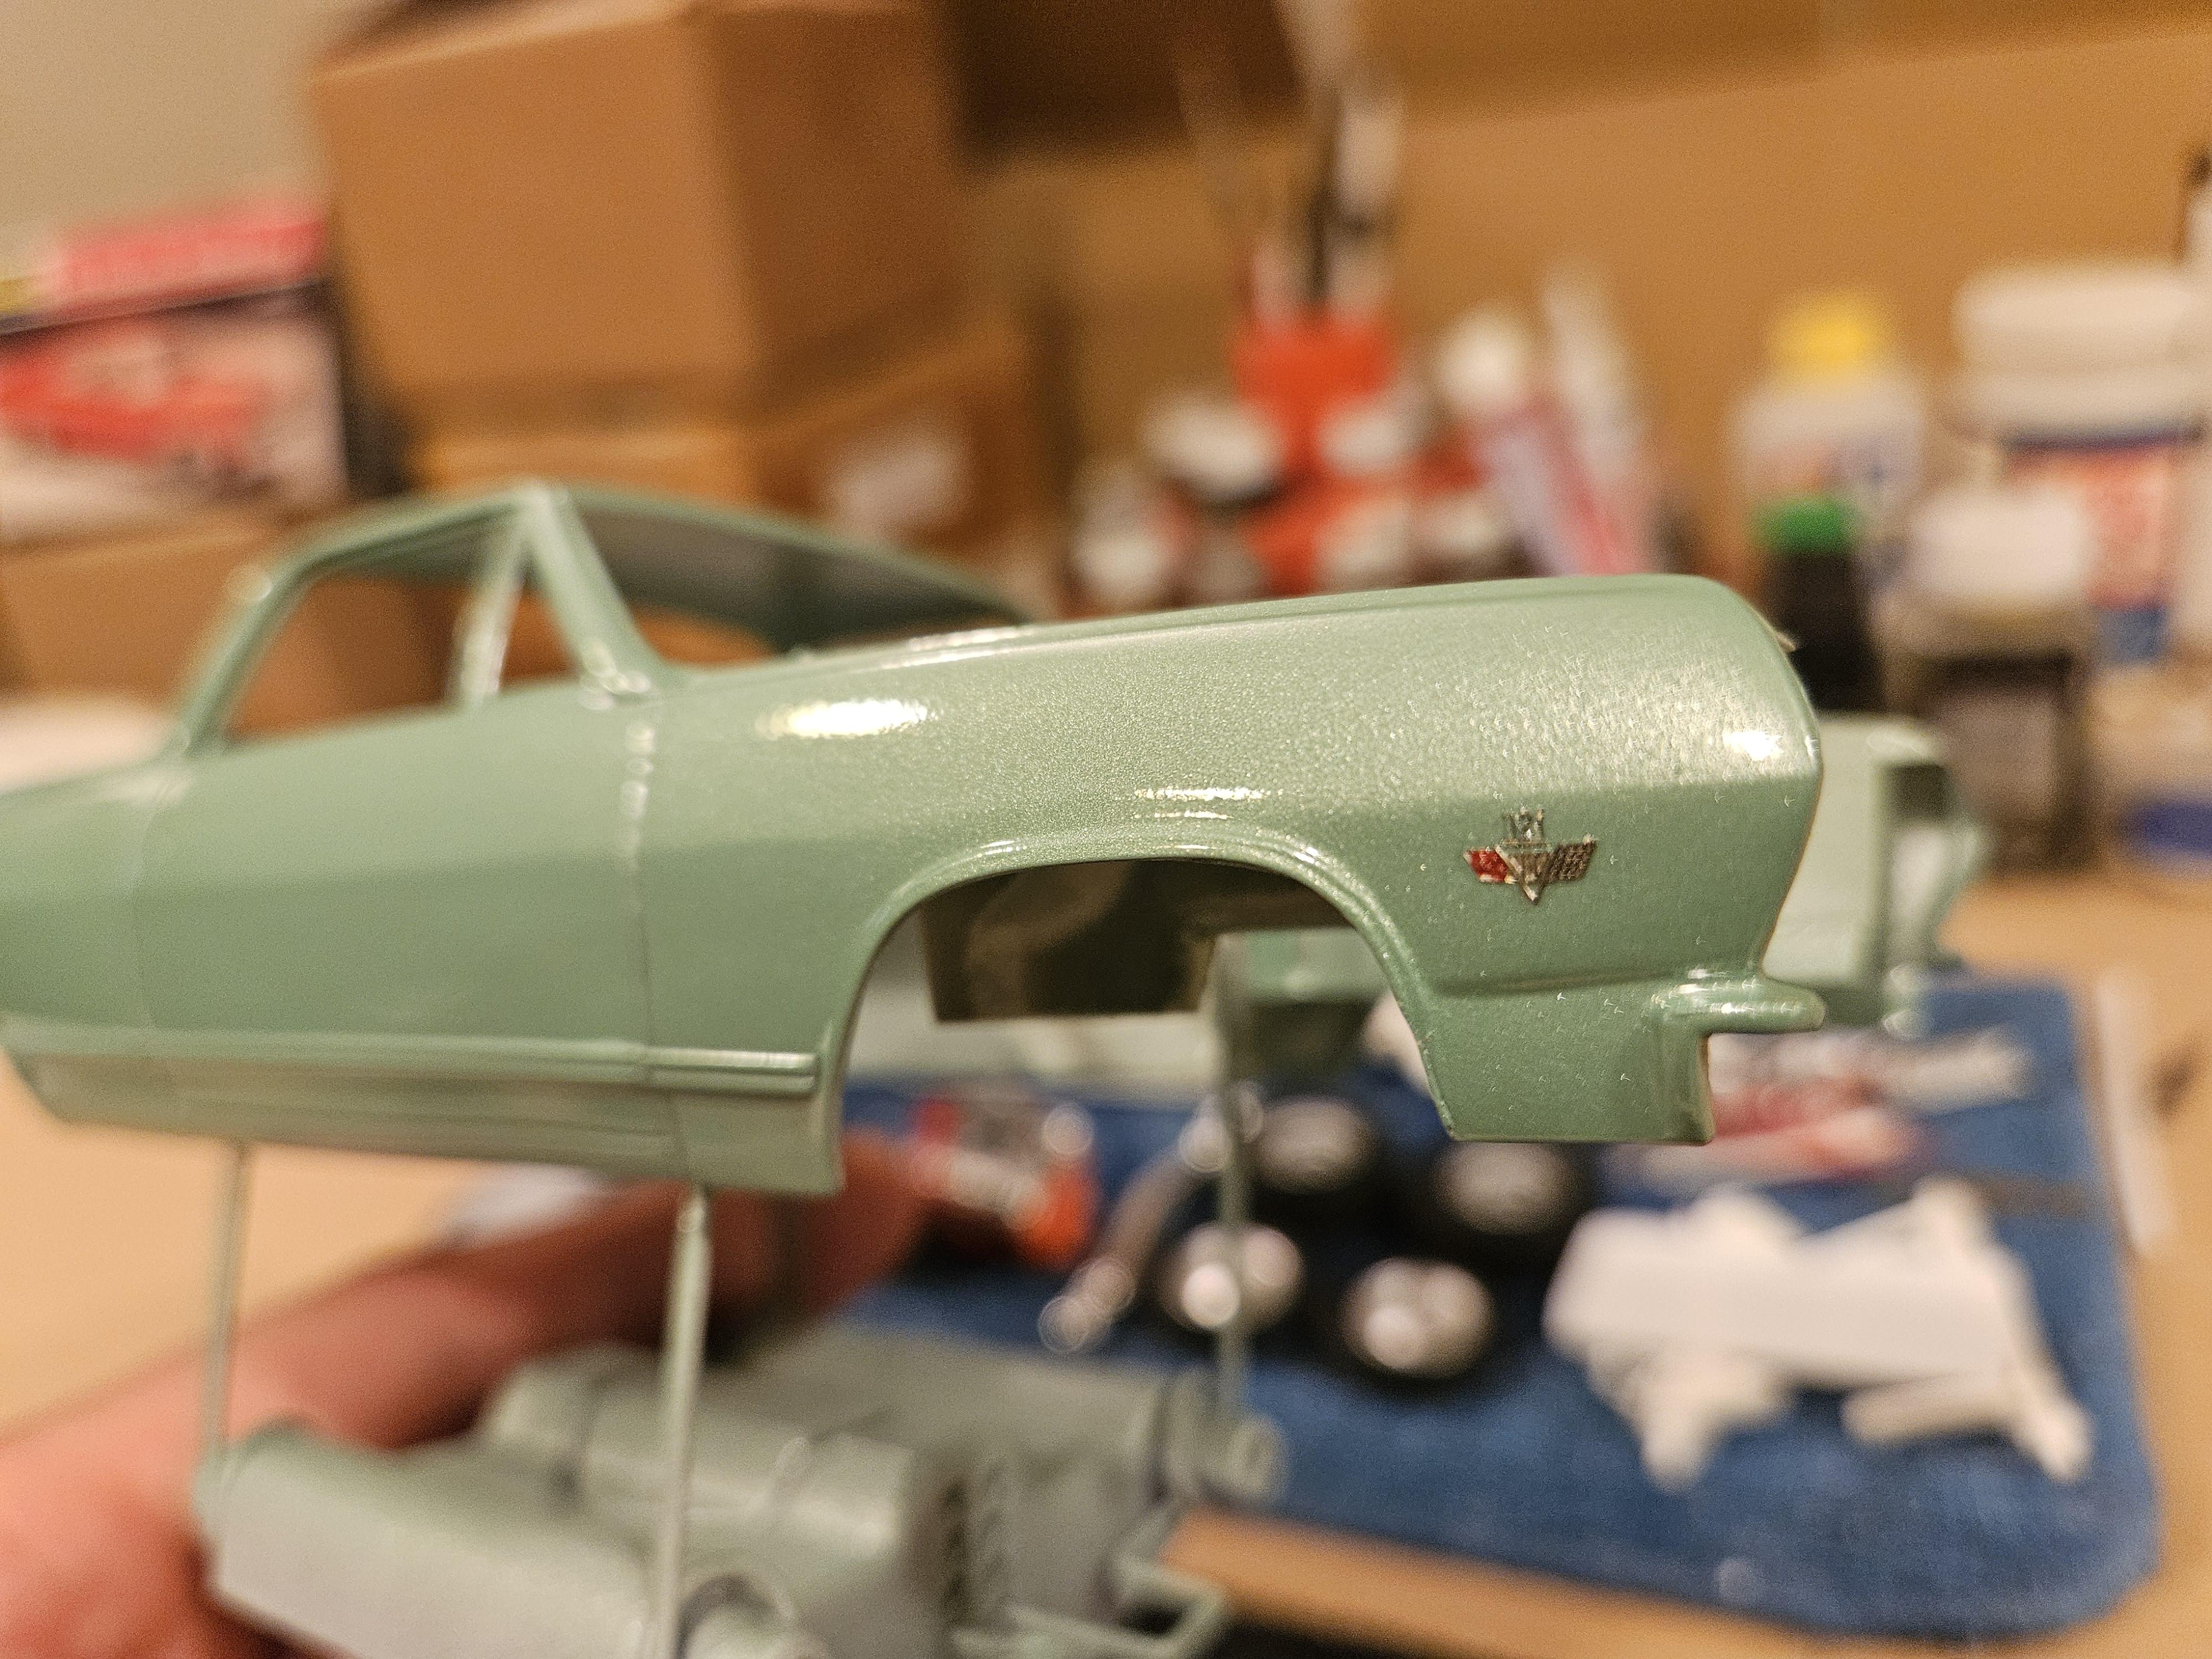
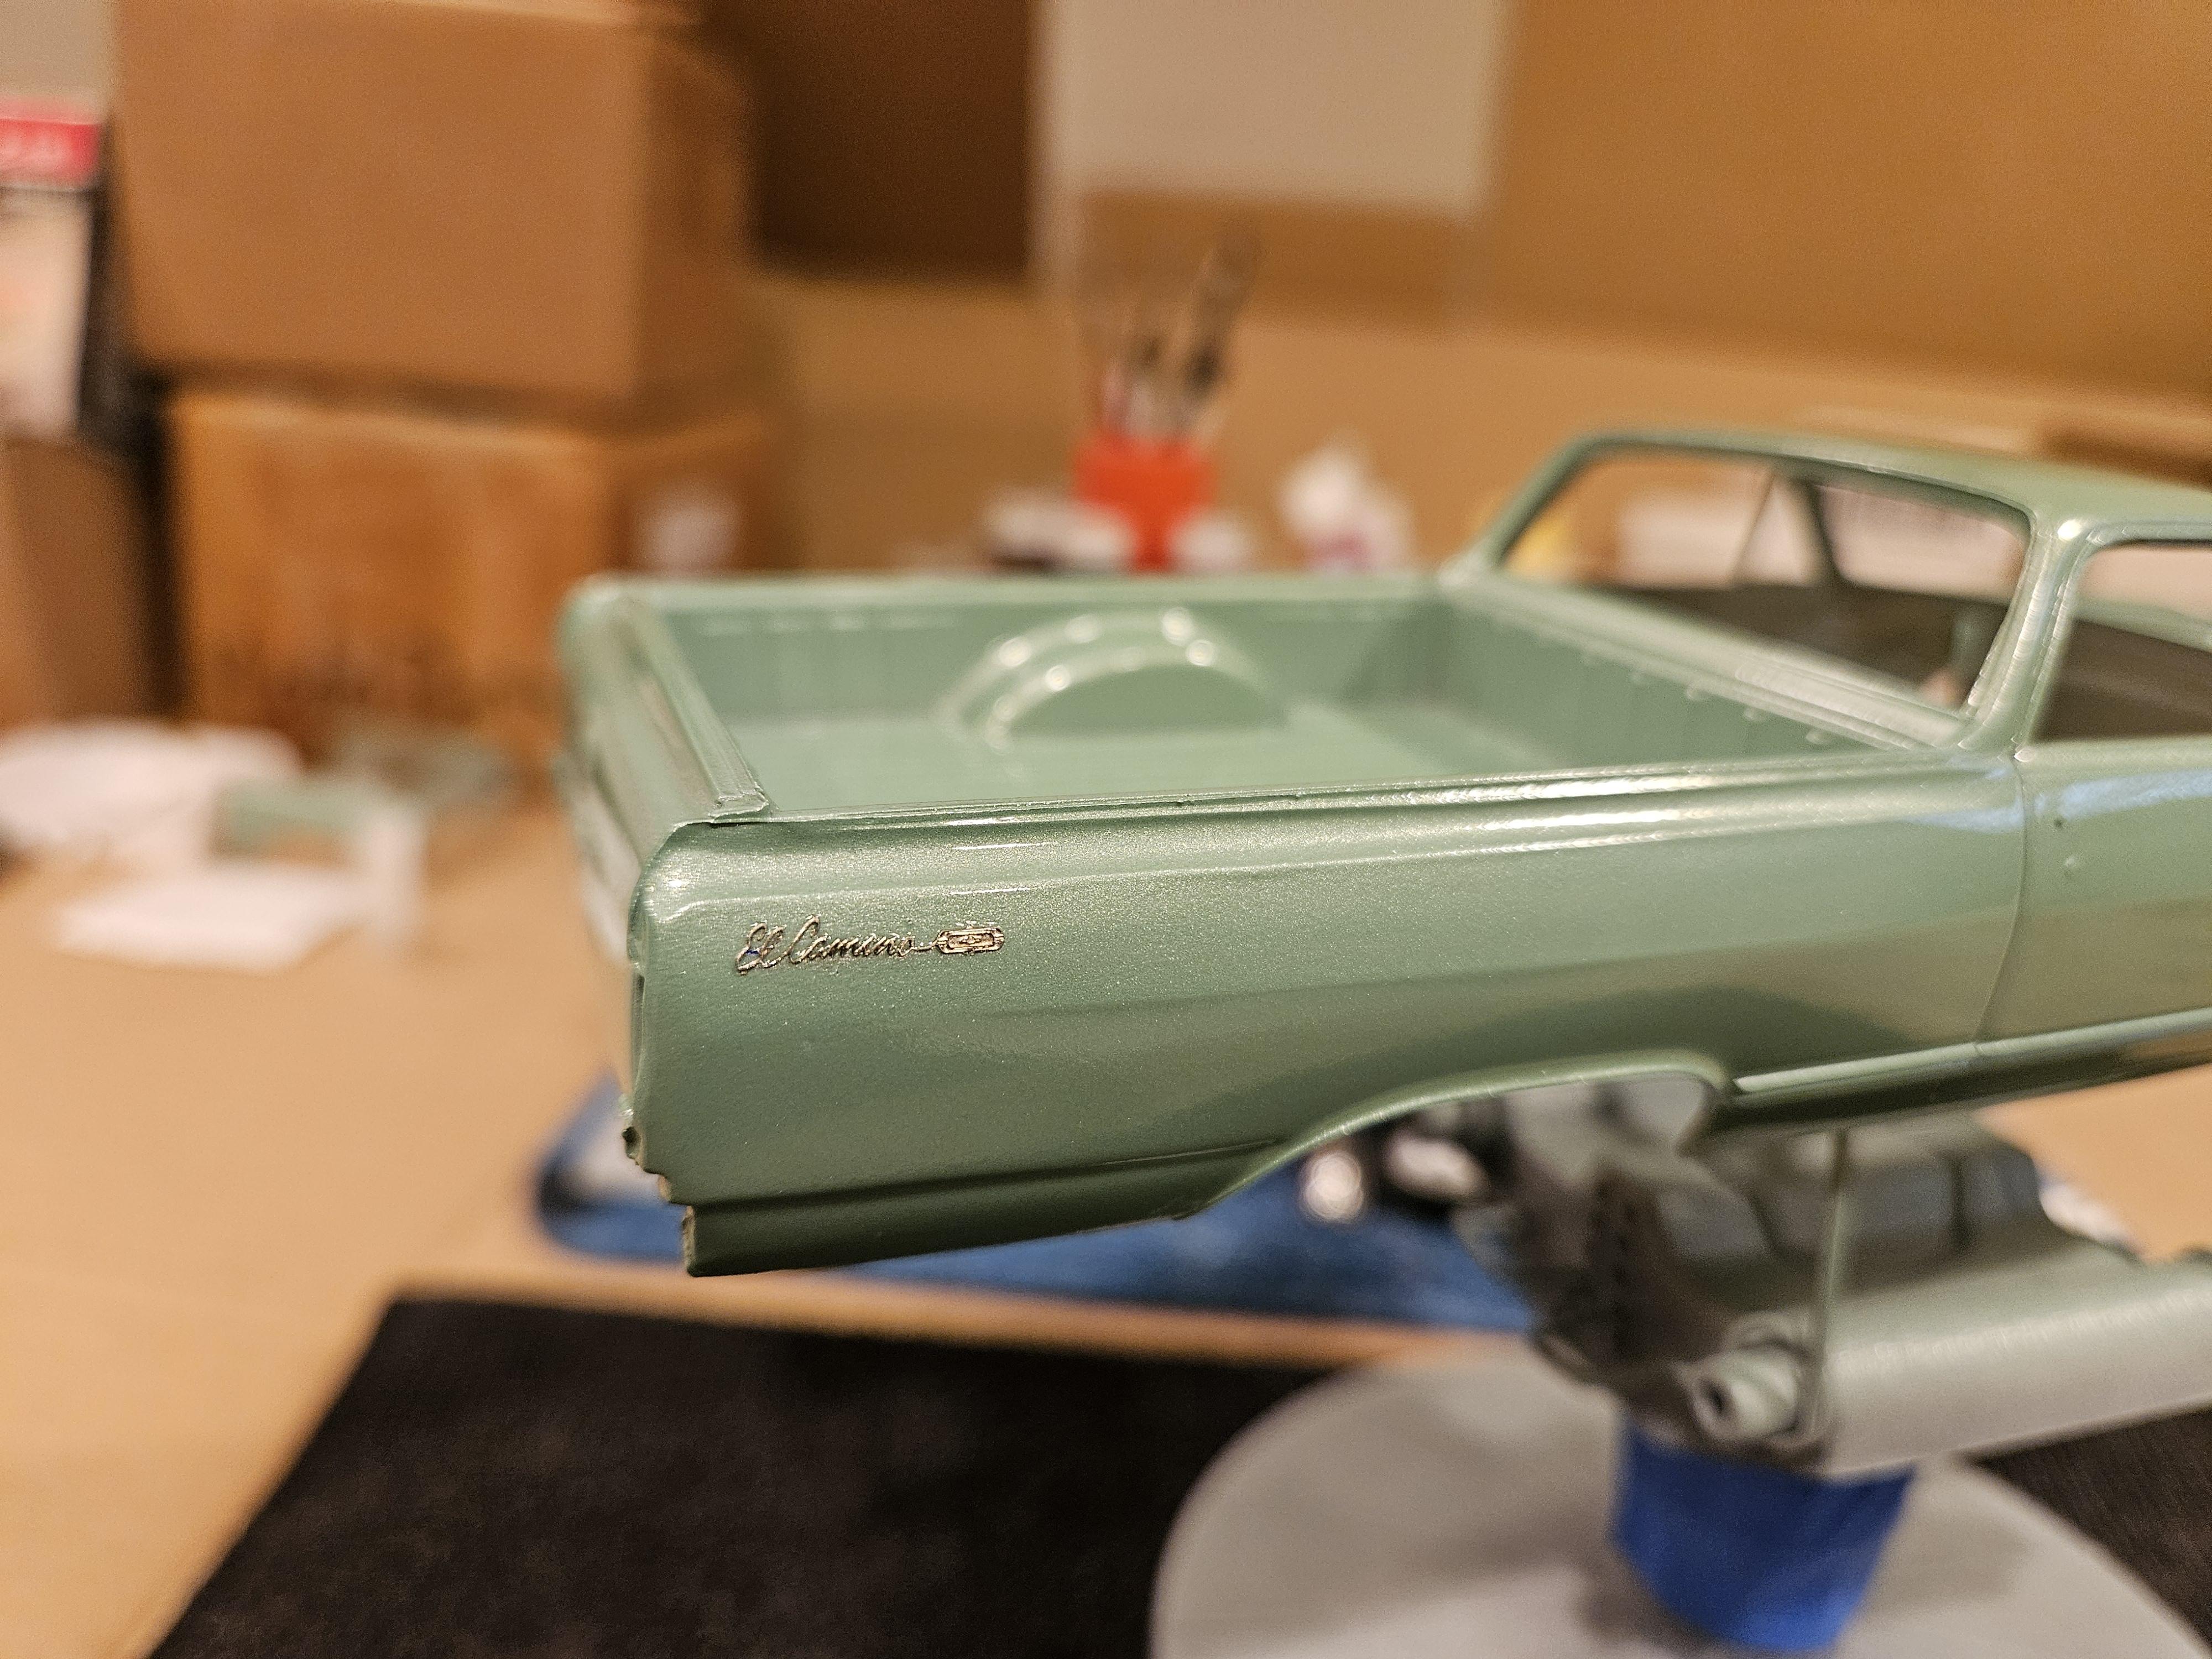
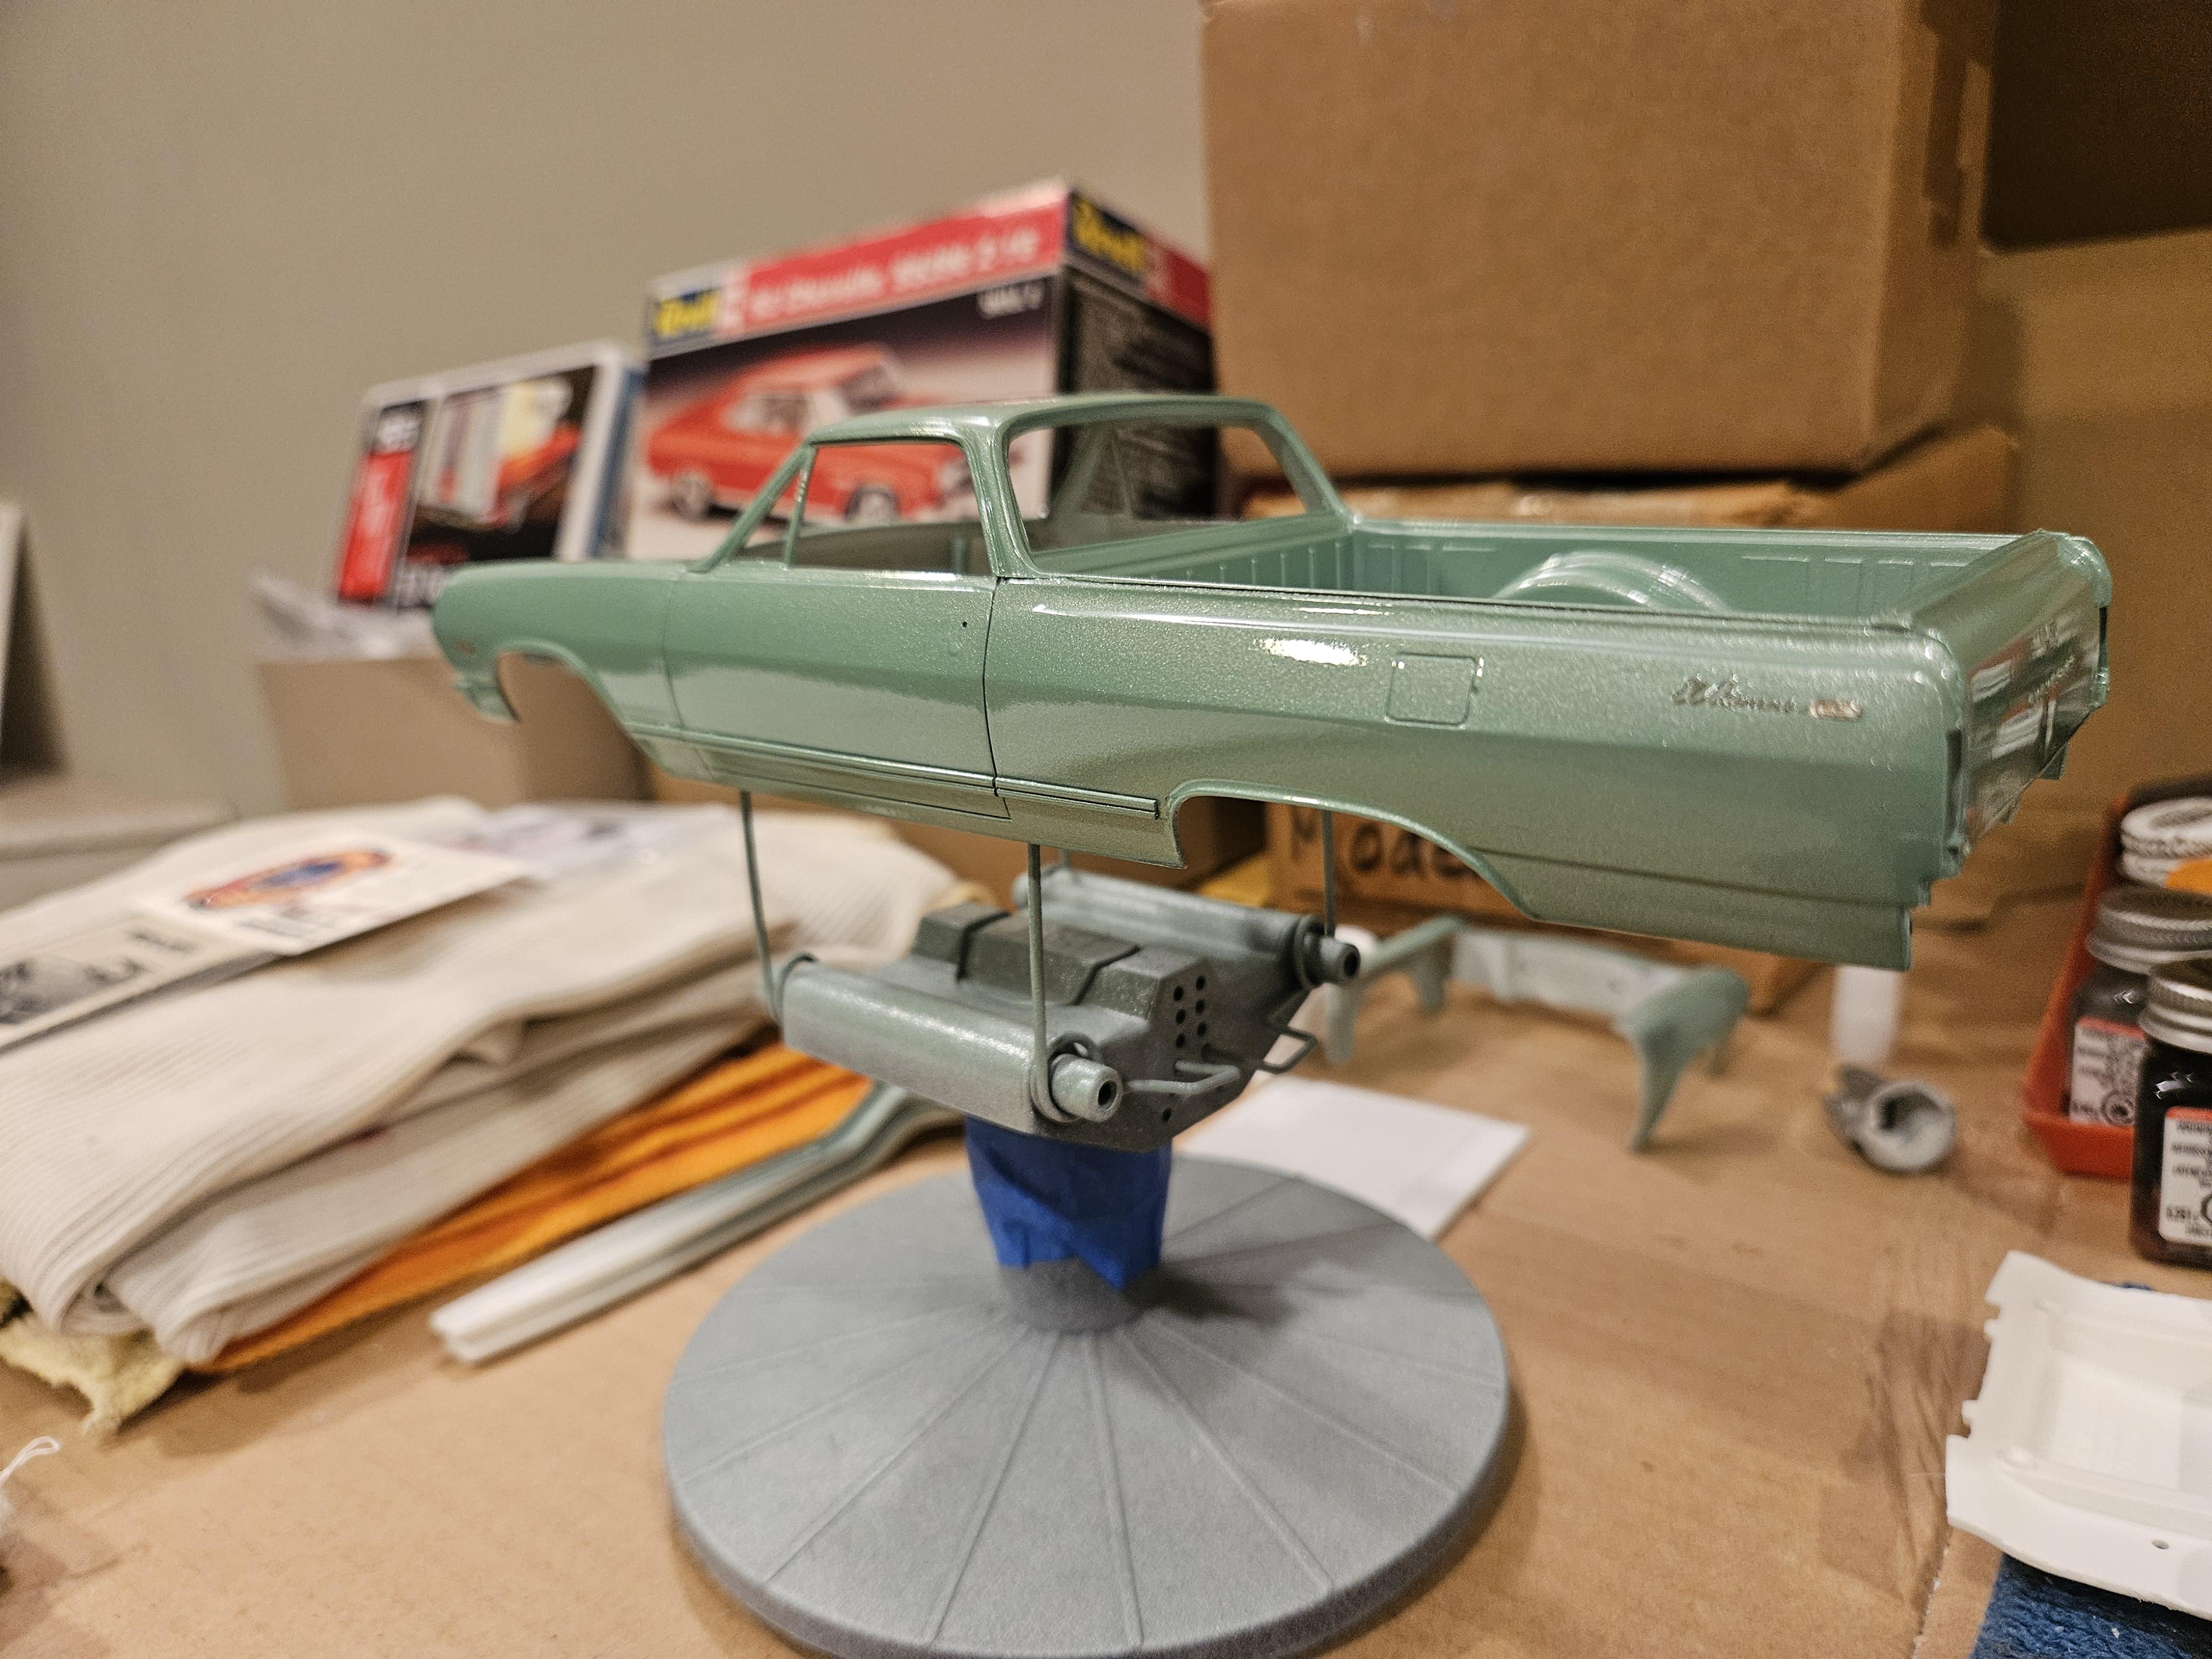
Got my photoetch set in the mail and put the emblems on. Those tiny fender emblems with seperate engine size script really tested my patience lol..but got them on. Then laid on some duplicolor clear coat.
-
Haha yep tried to make them look a little used and rusty.
-
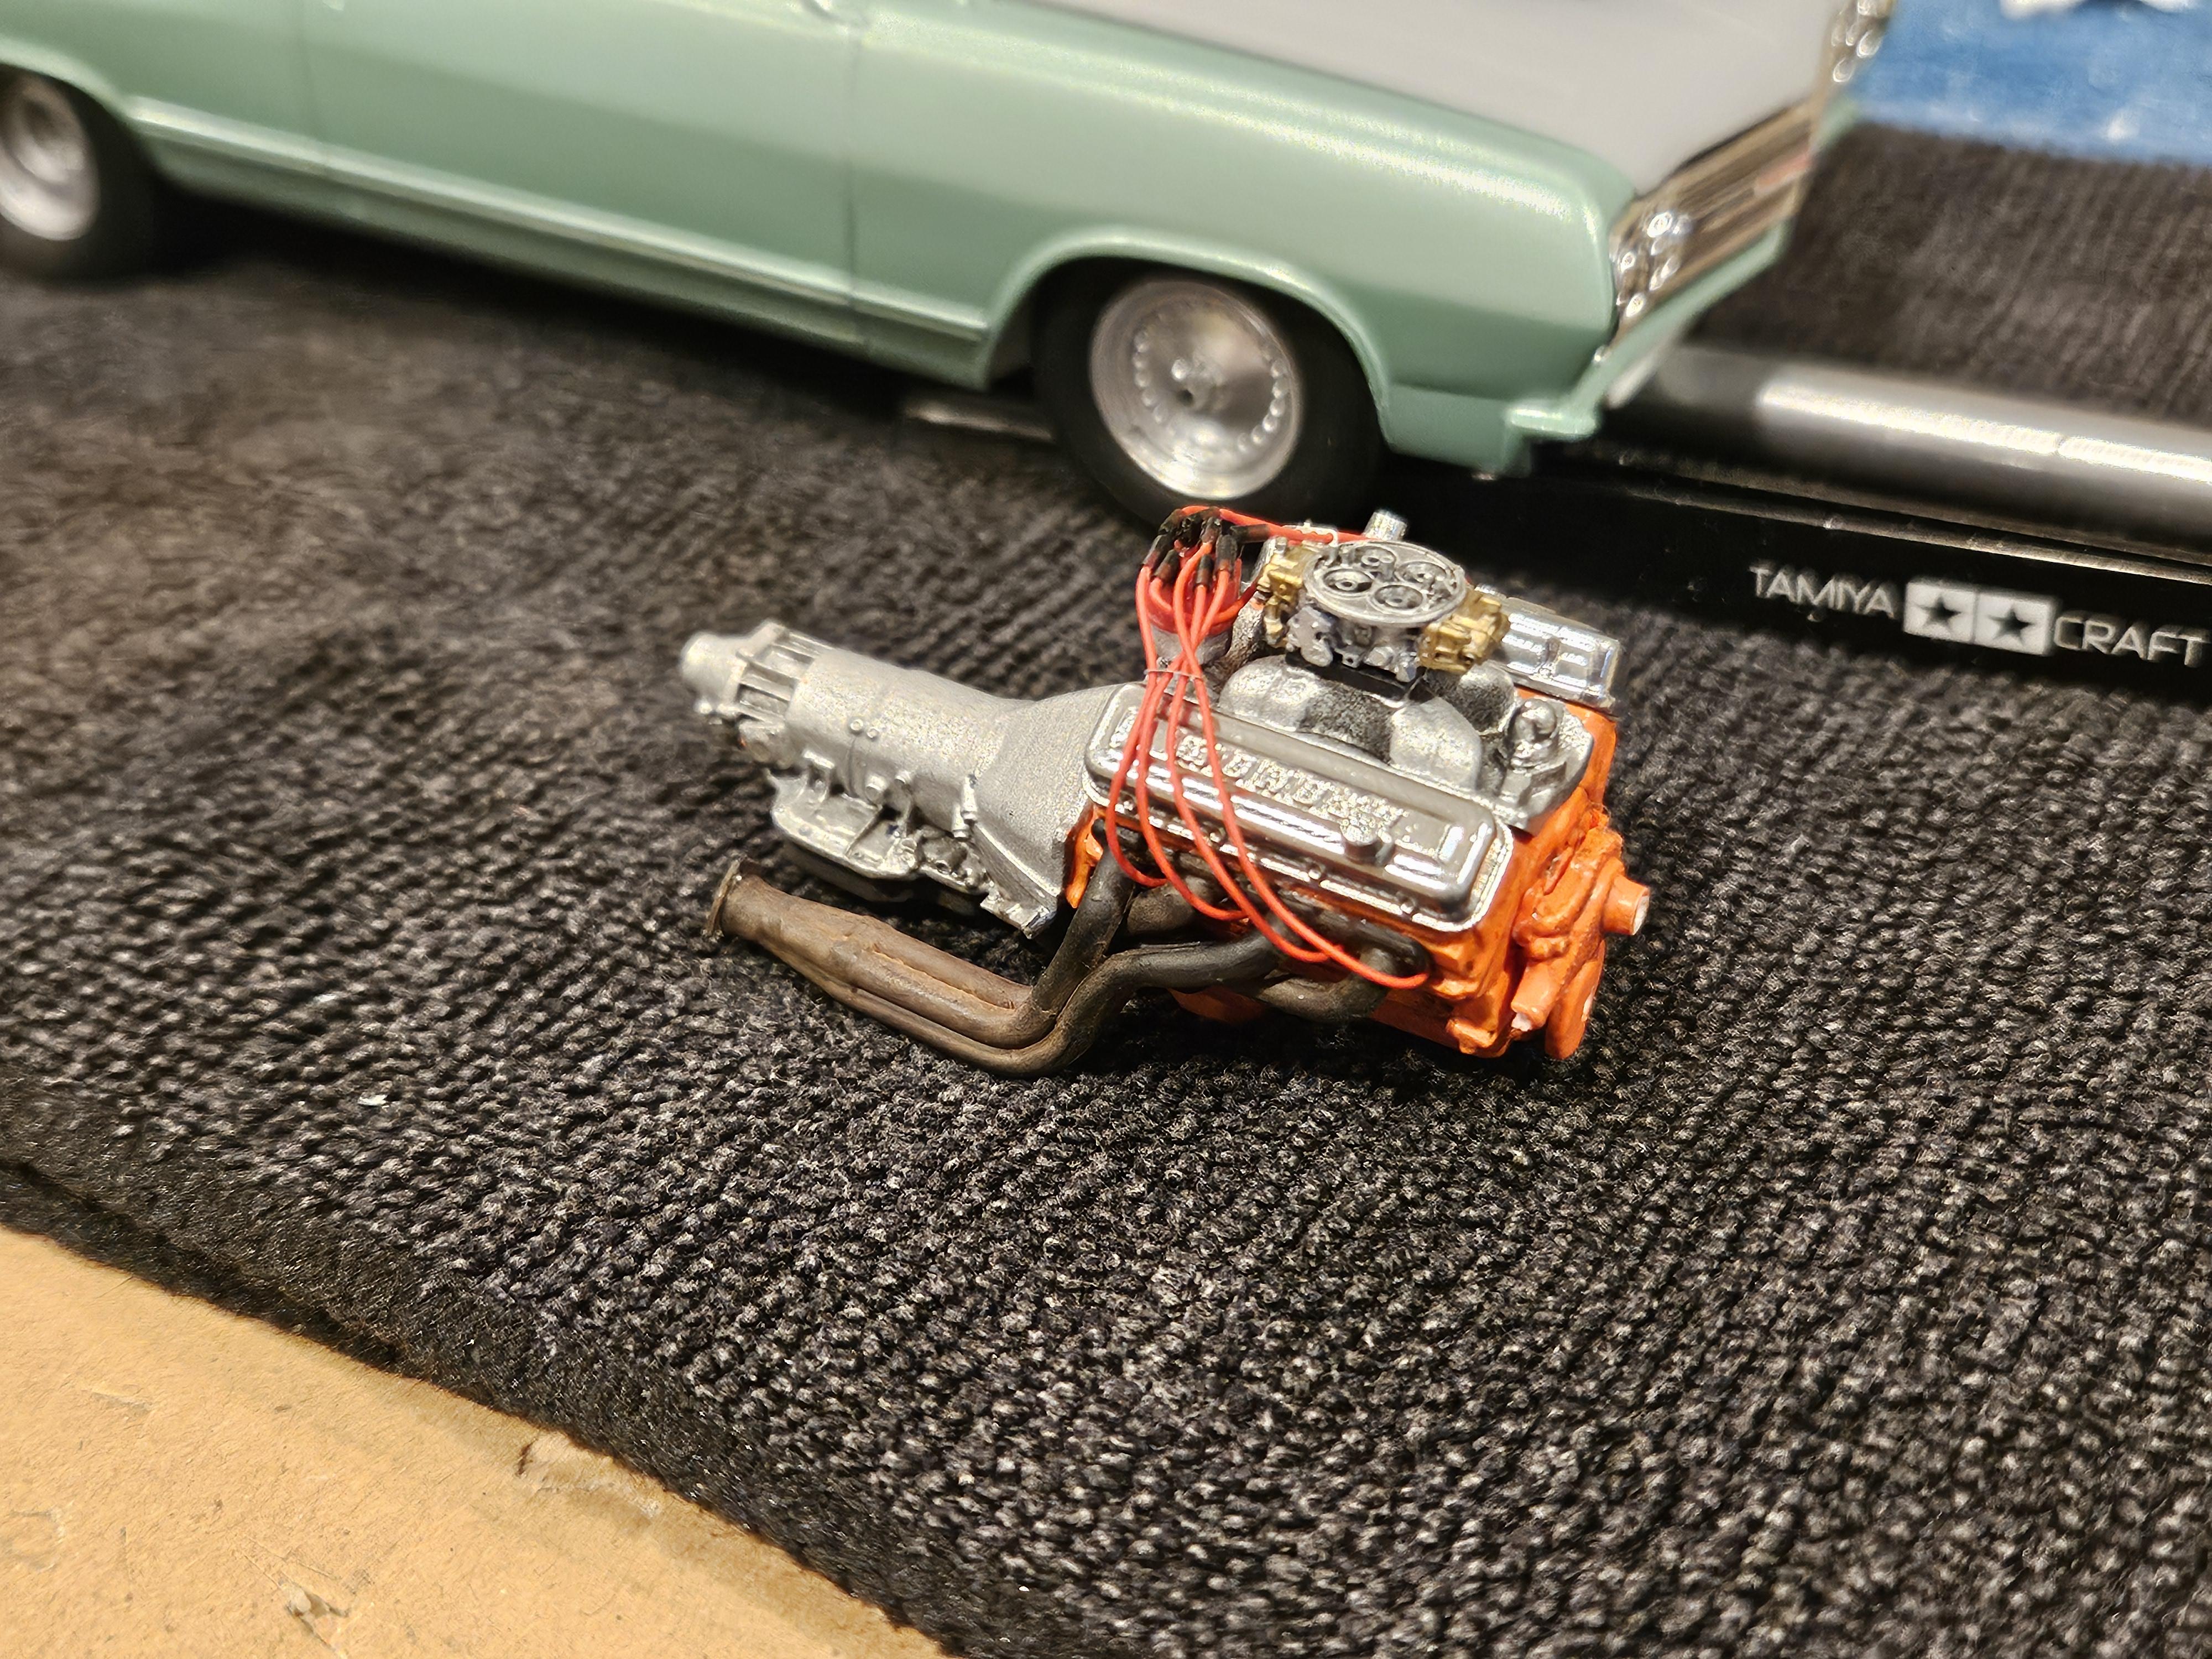
Another mock up to stay motivated..also wired the engine. Used Greg's scale model accessories distributor with 90° plug boots and wires, really nice stuff!
-
Thanks! That came from Texas 3D Customs. Not sure if he sells them separately but it was a package deal with a small block chevy that I bought.
-
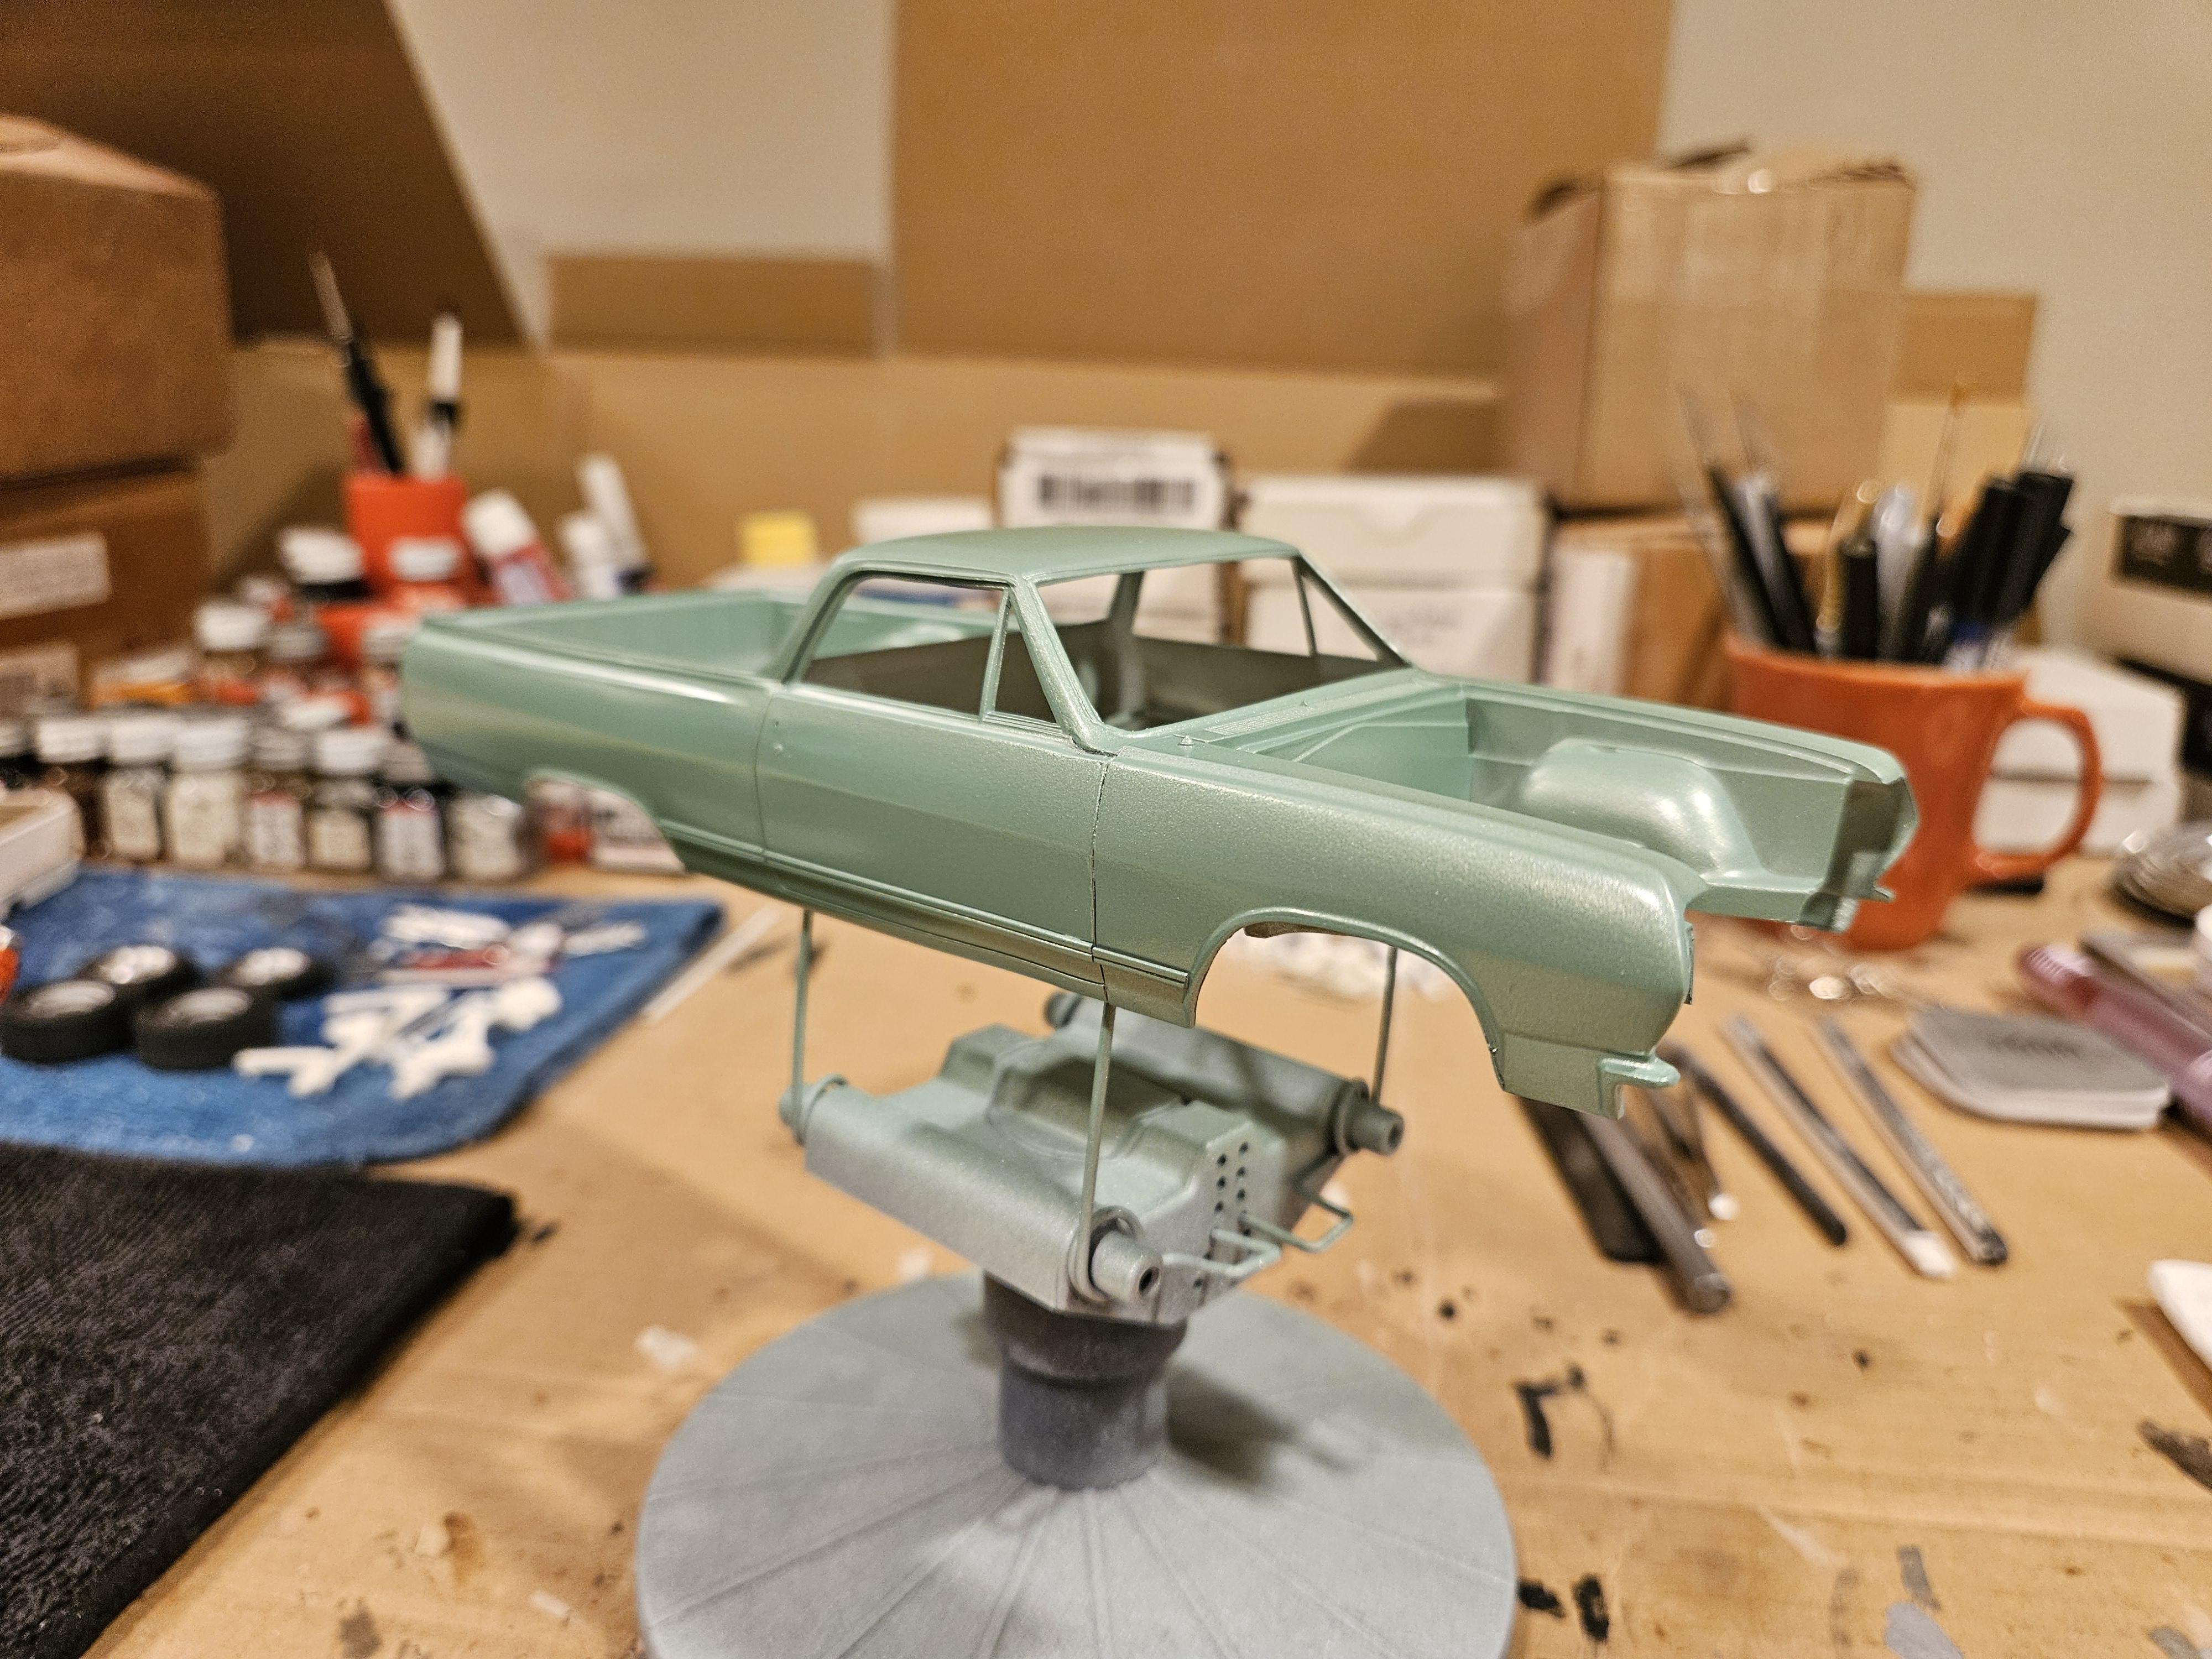
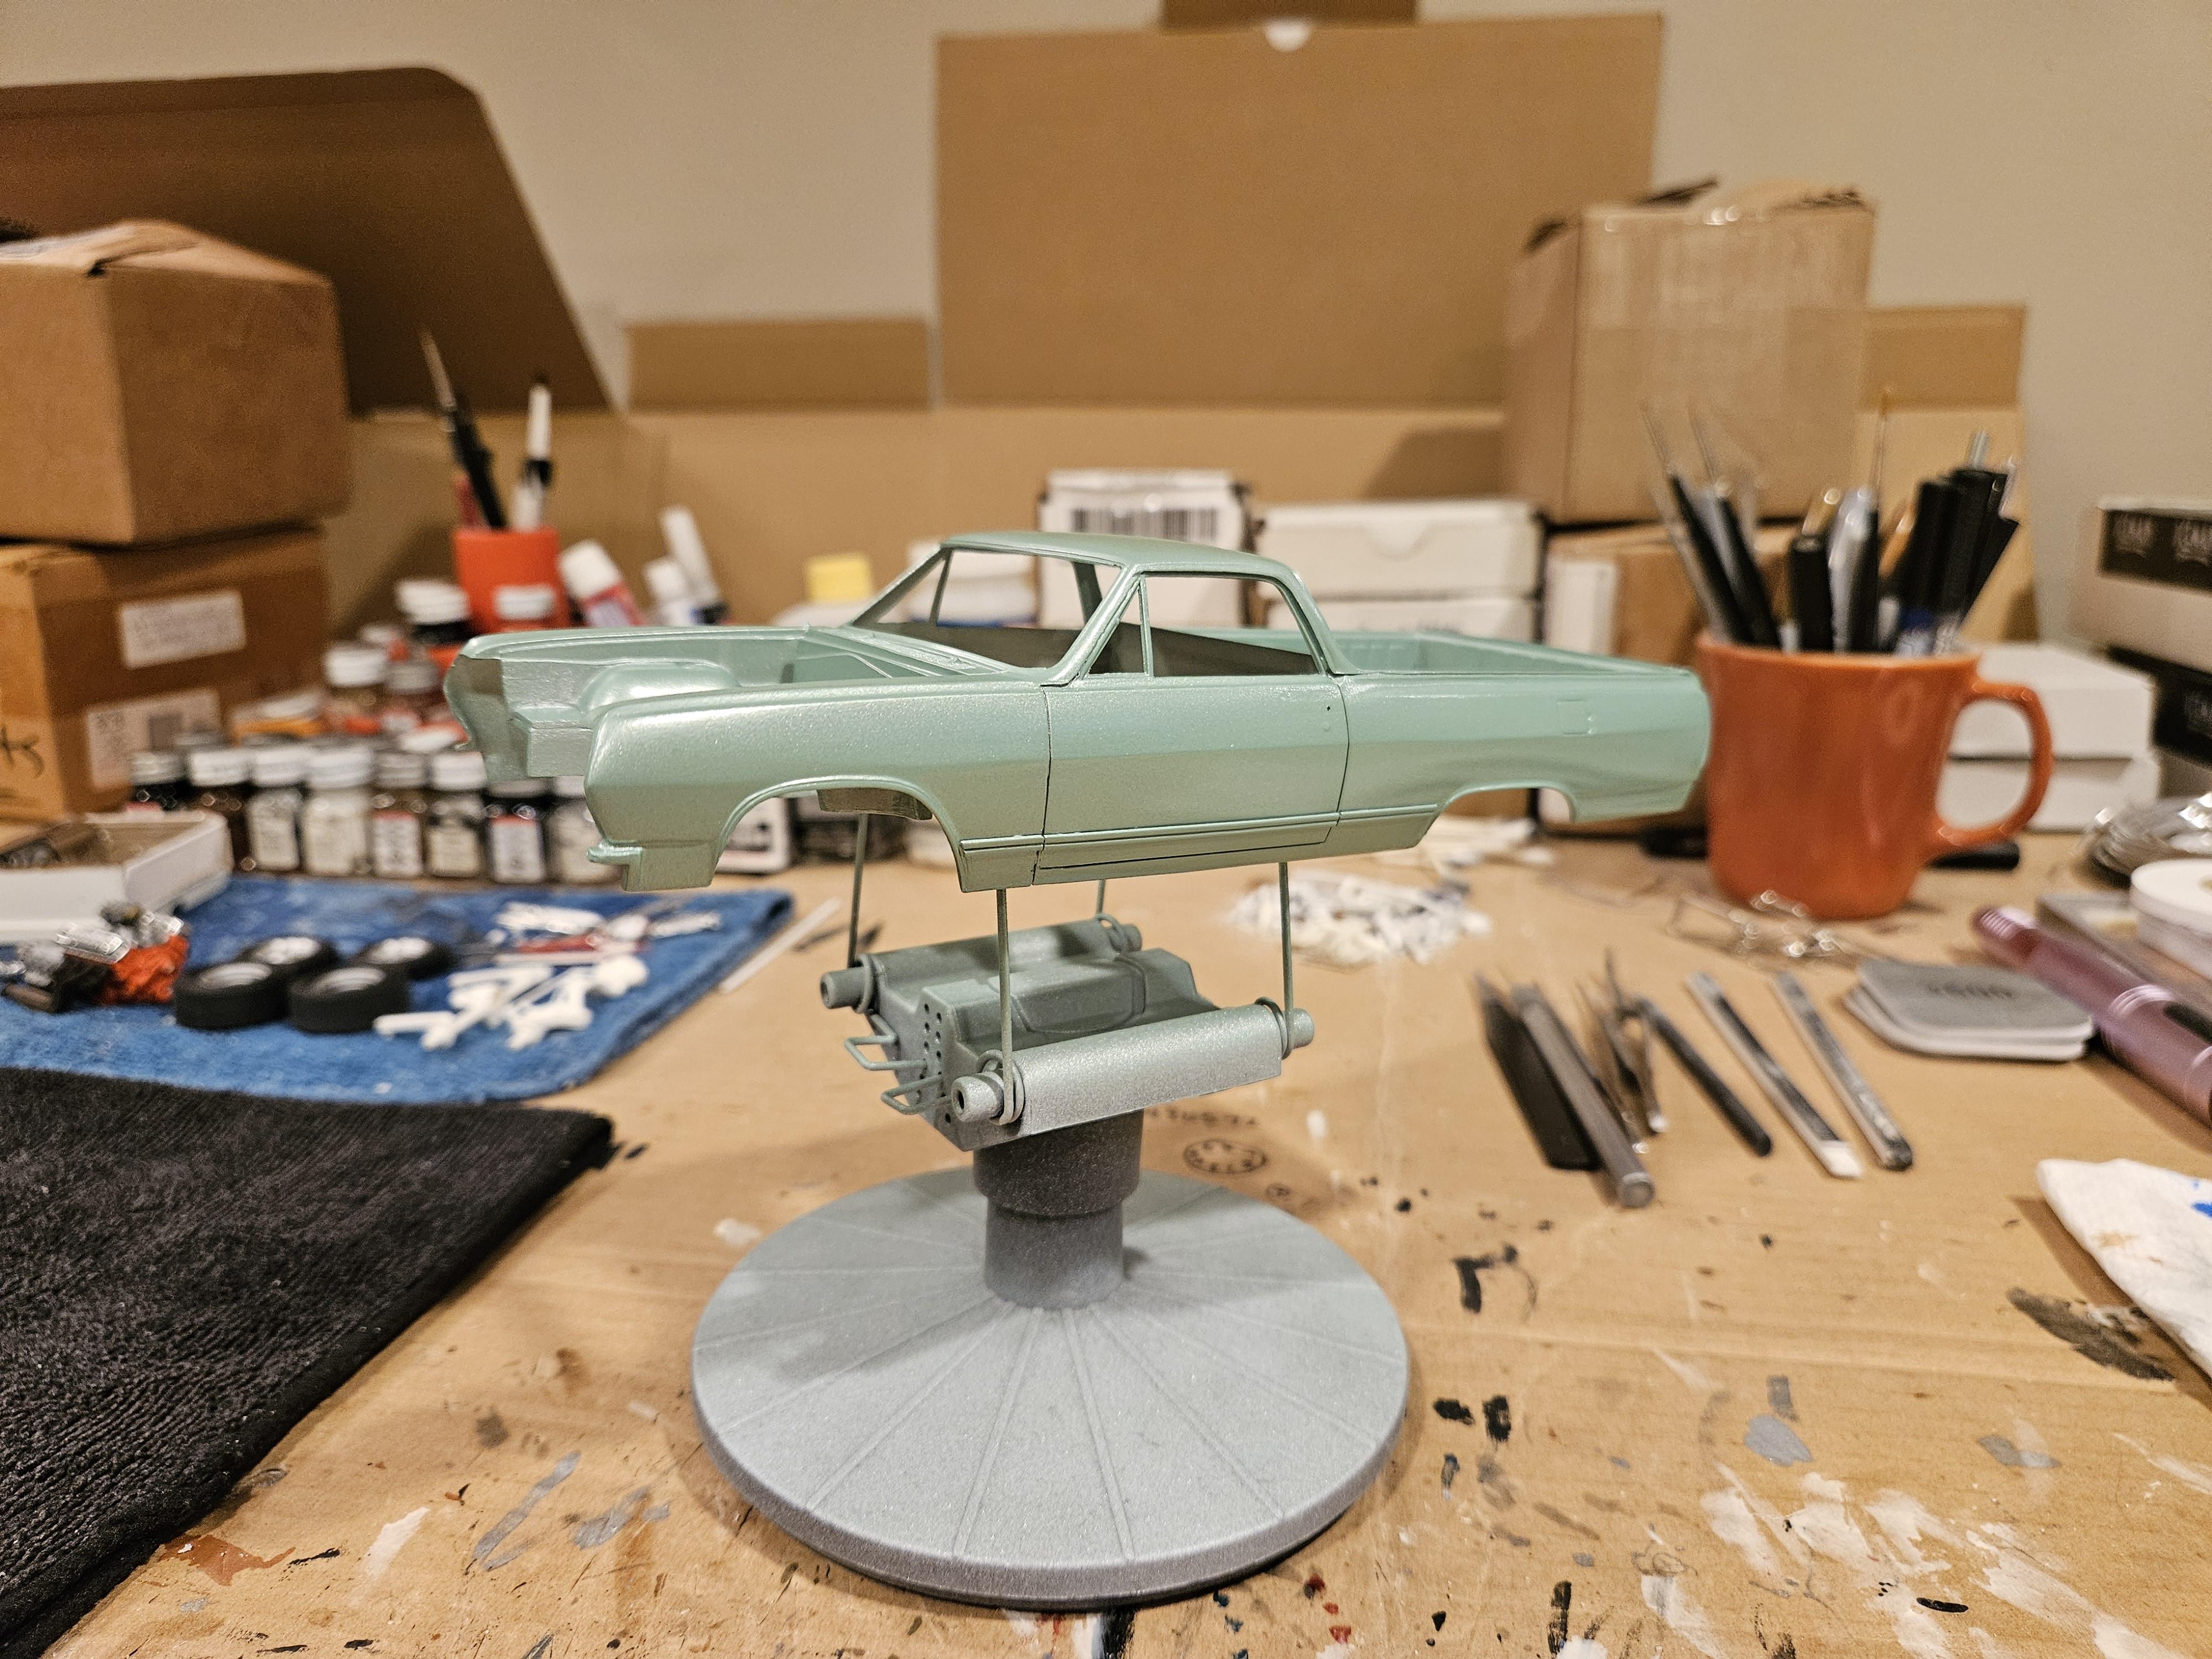
Yeah I like the color too, makes me want to build some other 60s GM cars in this shade down the line. I've seen other people use this color though and it turns out alot brighter of a green. I think the combination of silver base with light coats of the green gives it more of a pale metallic green like this.
-
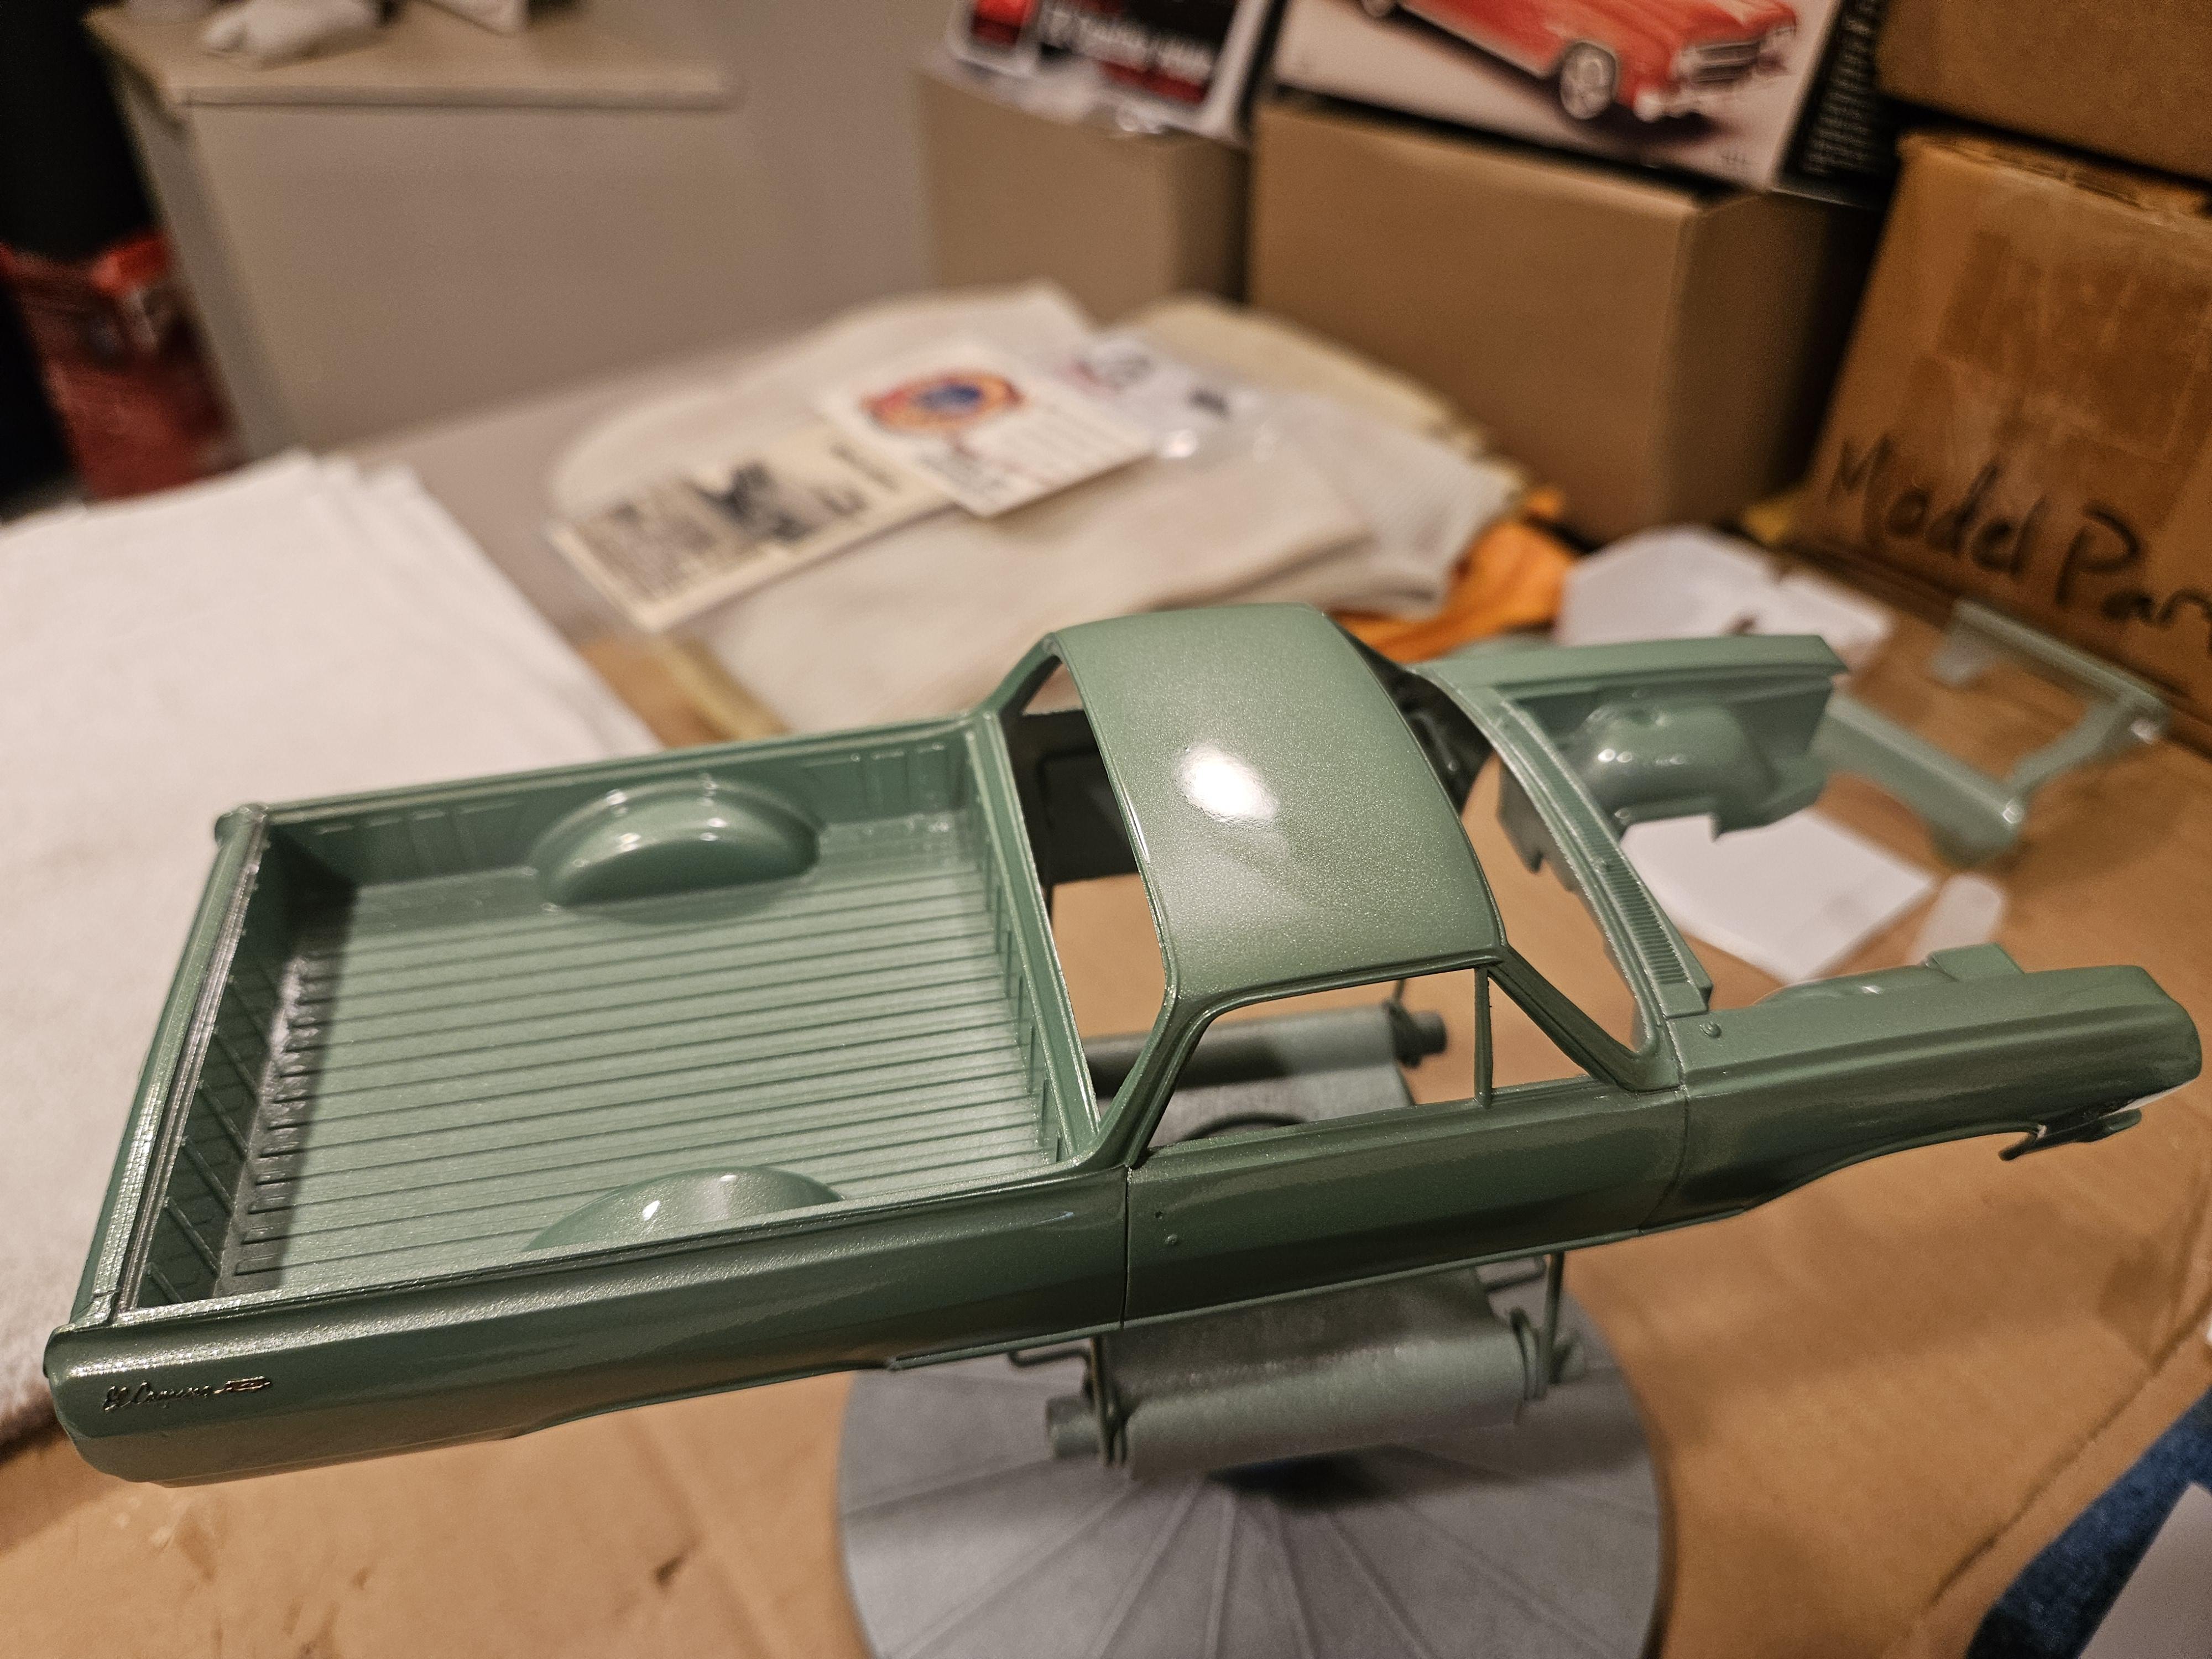
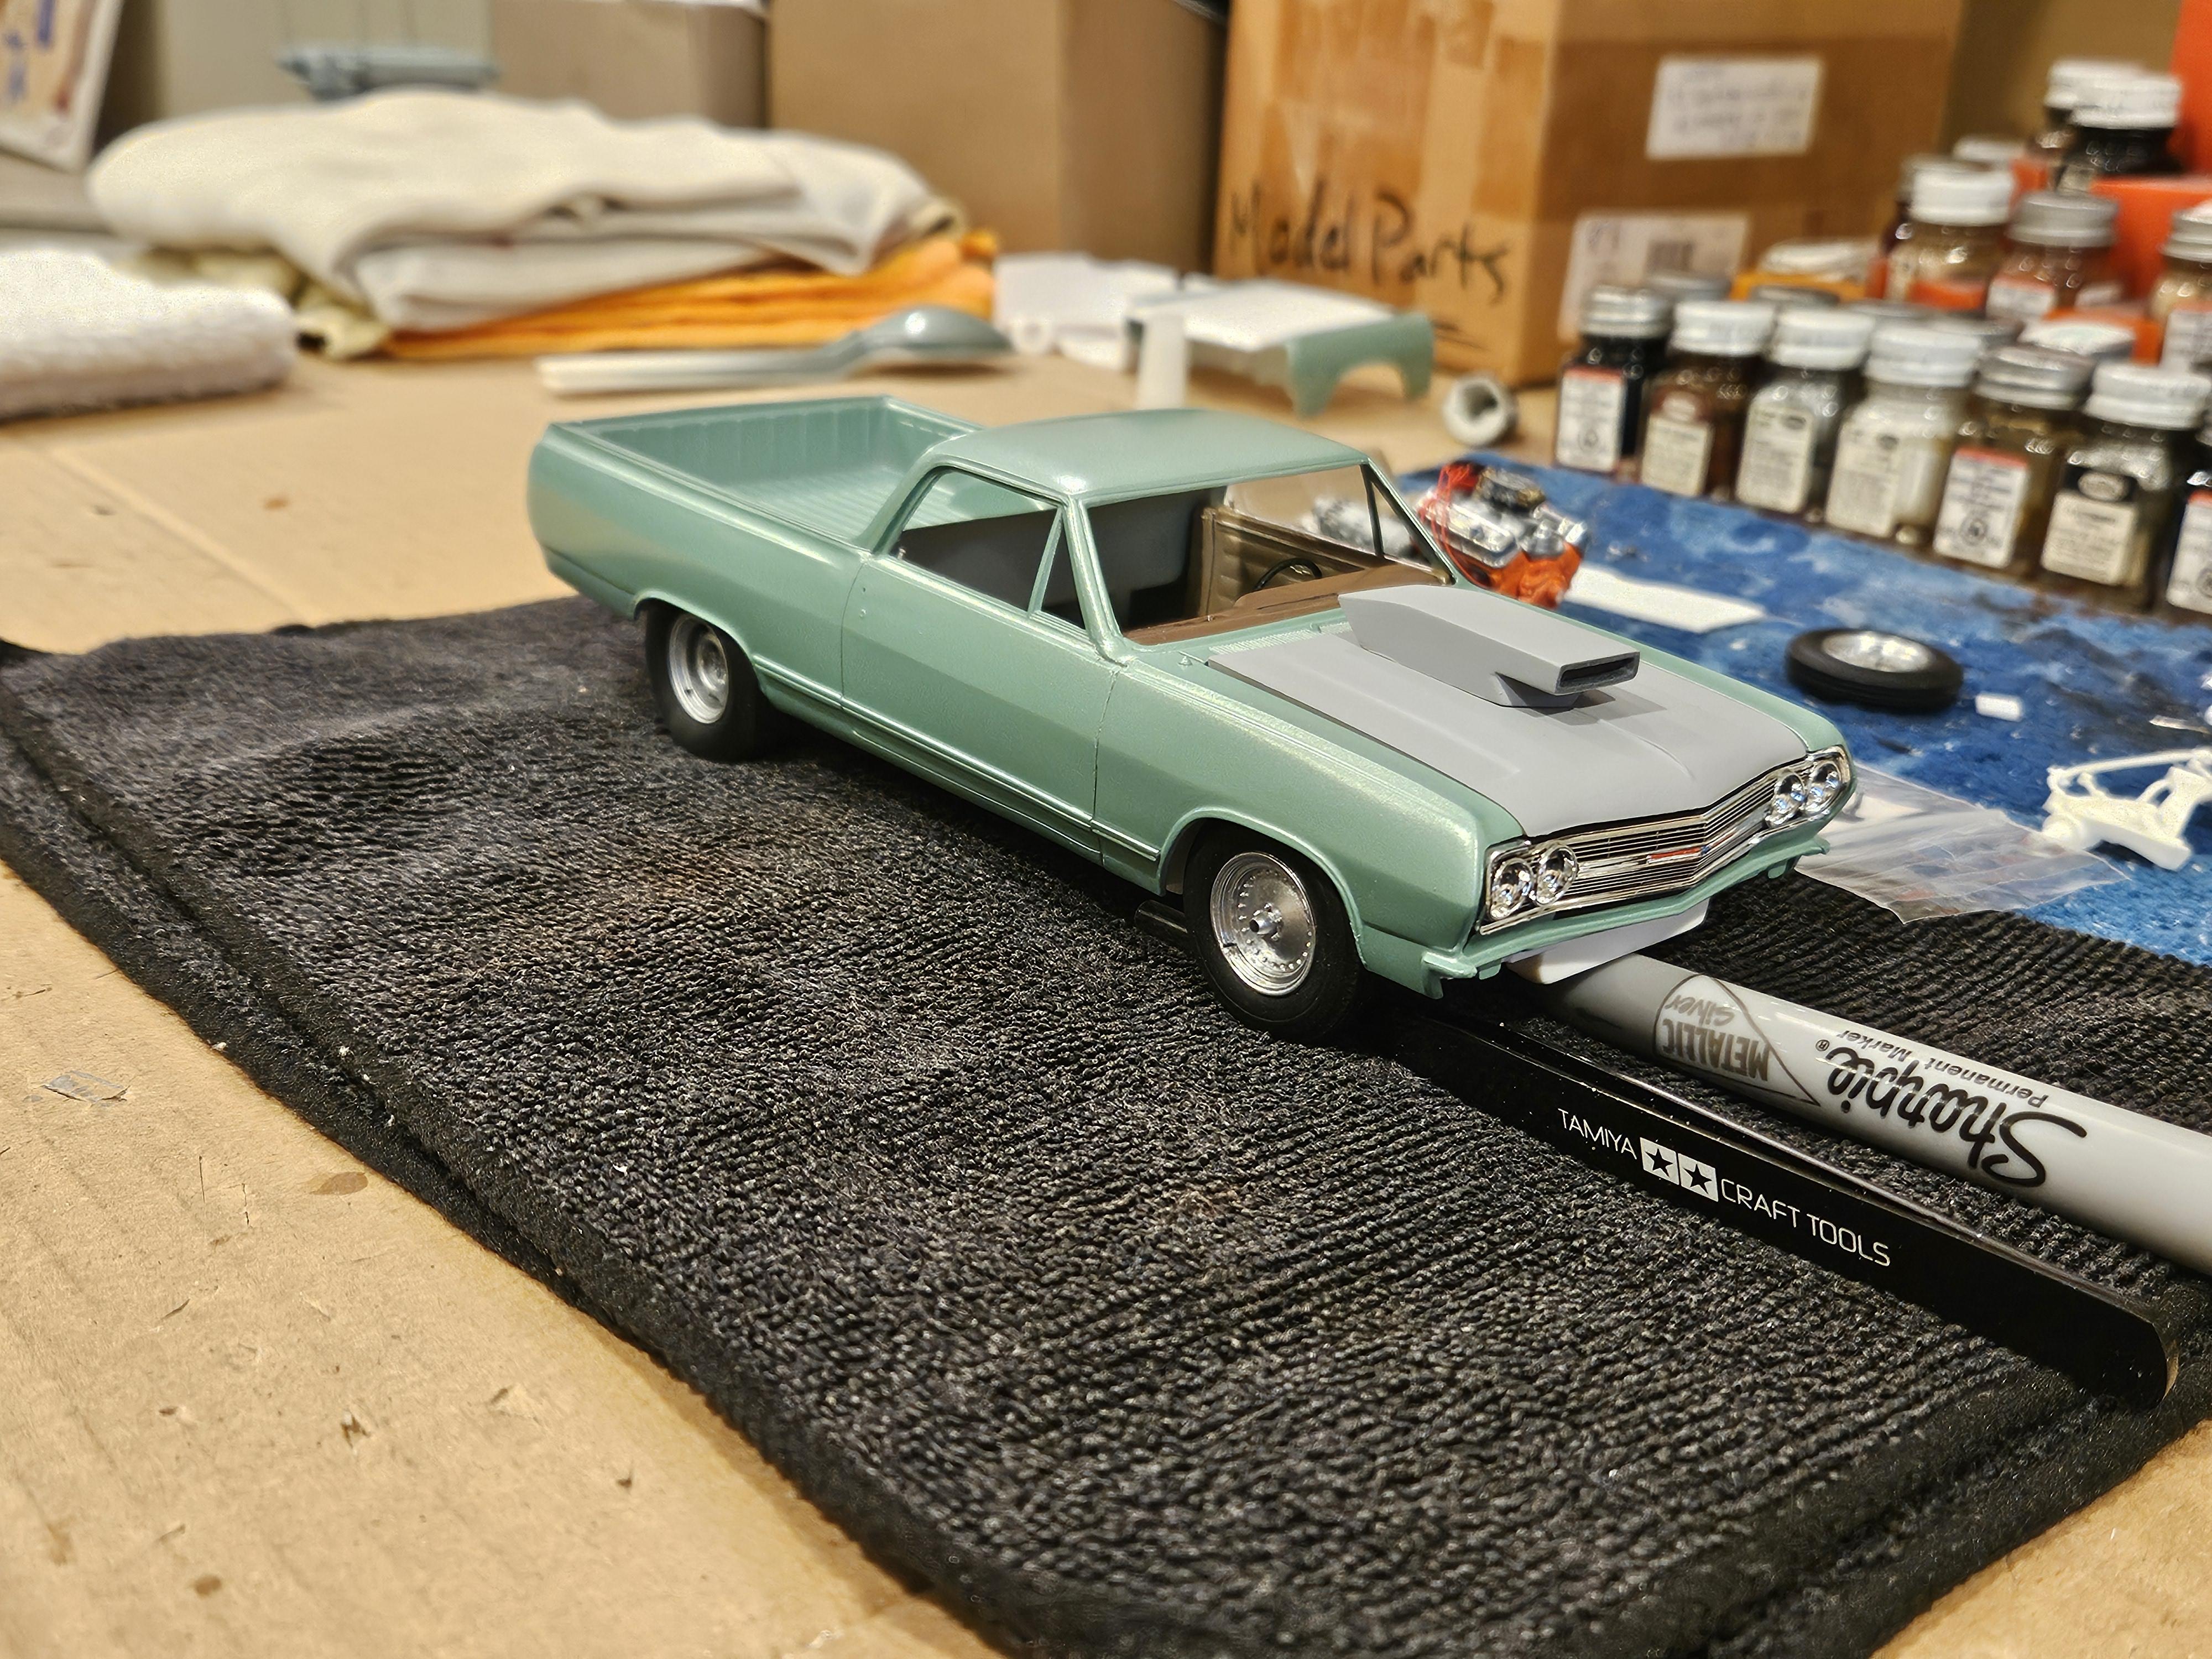
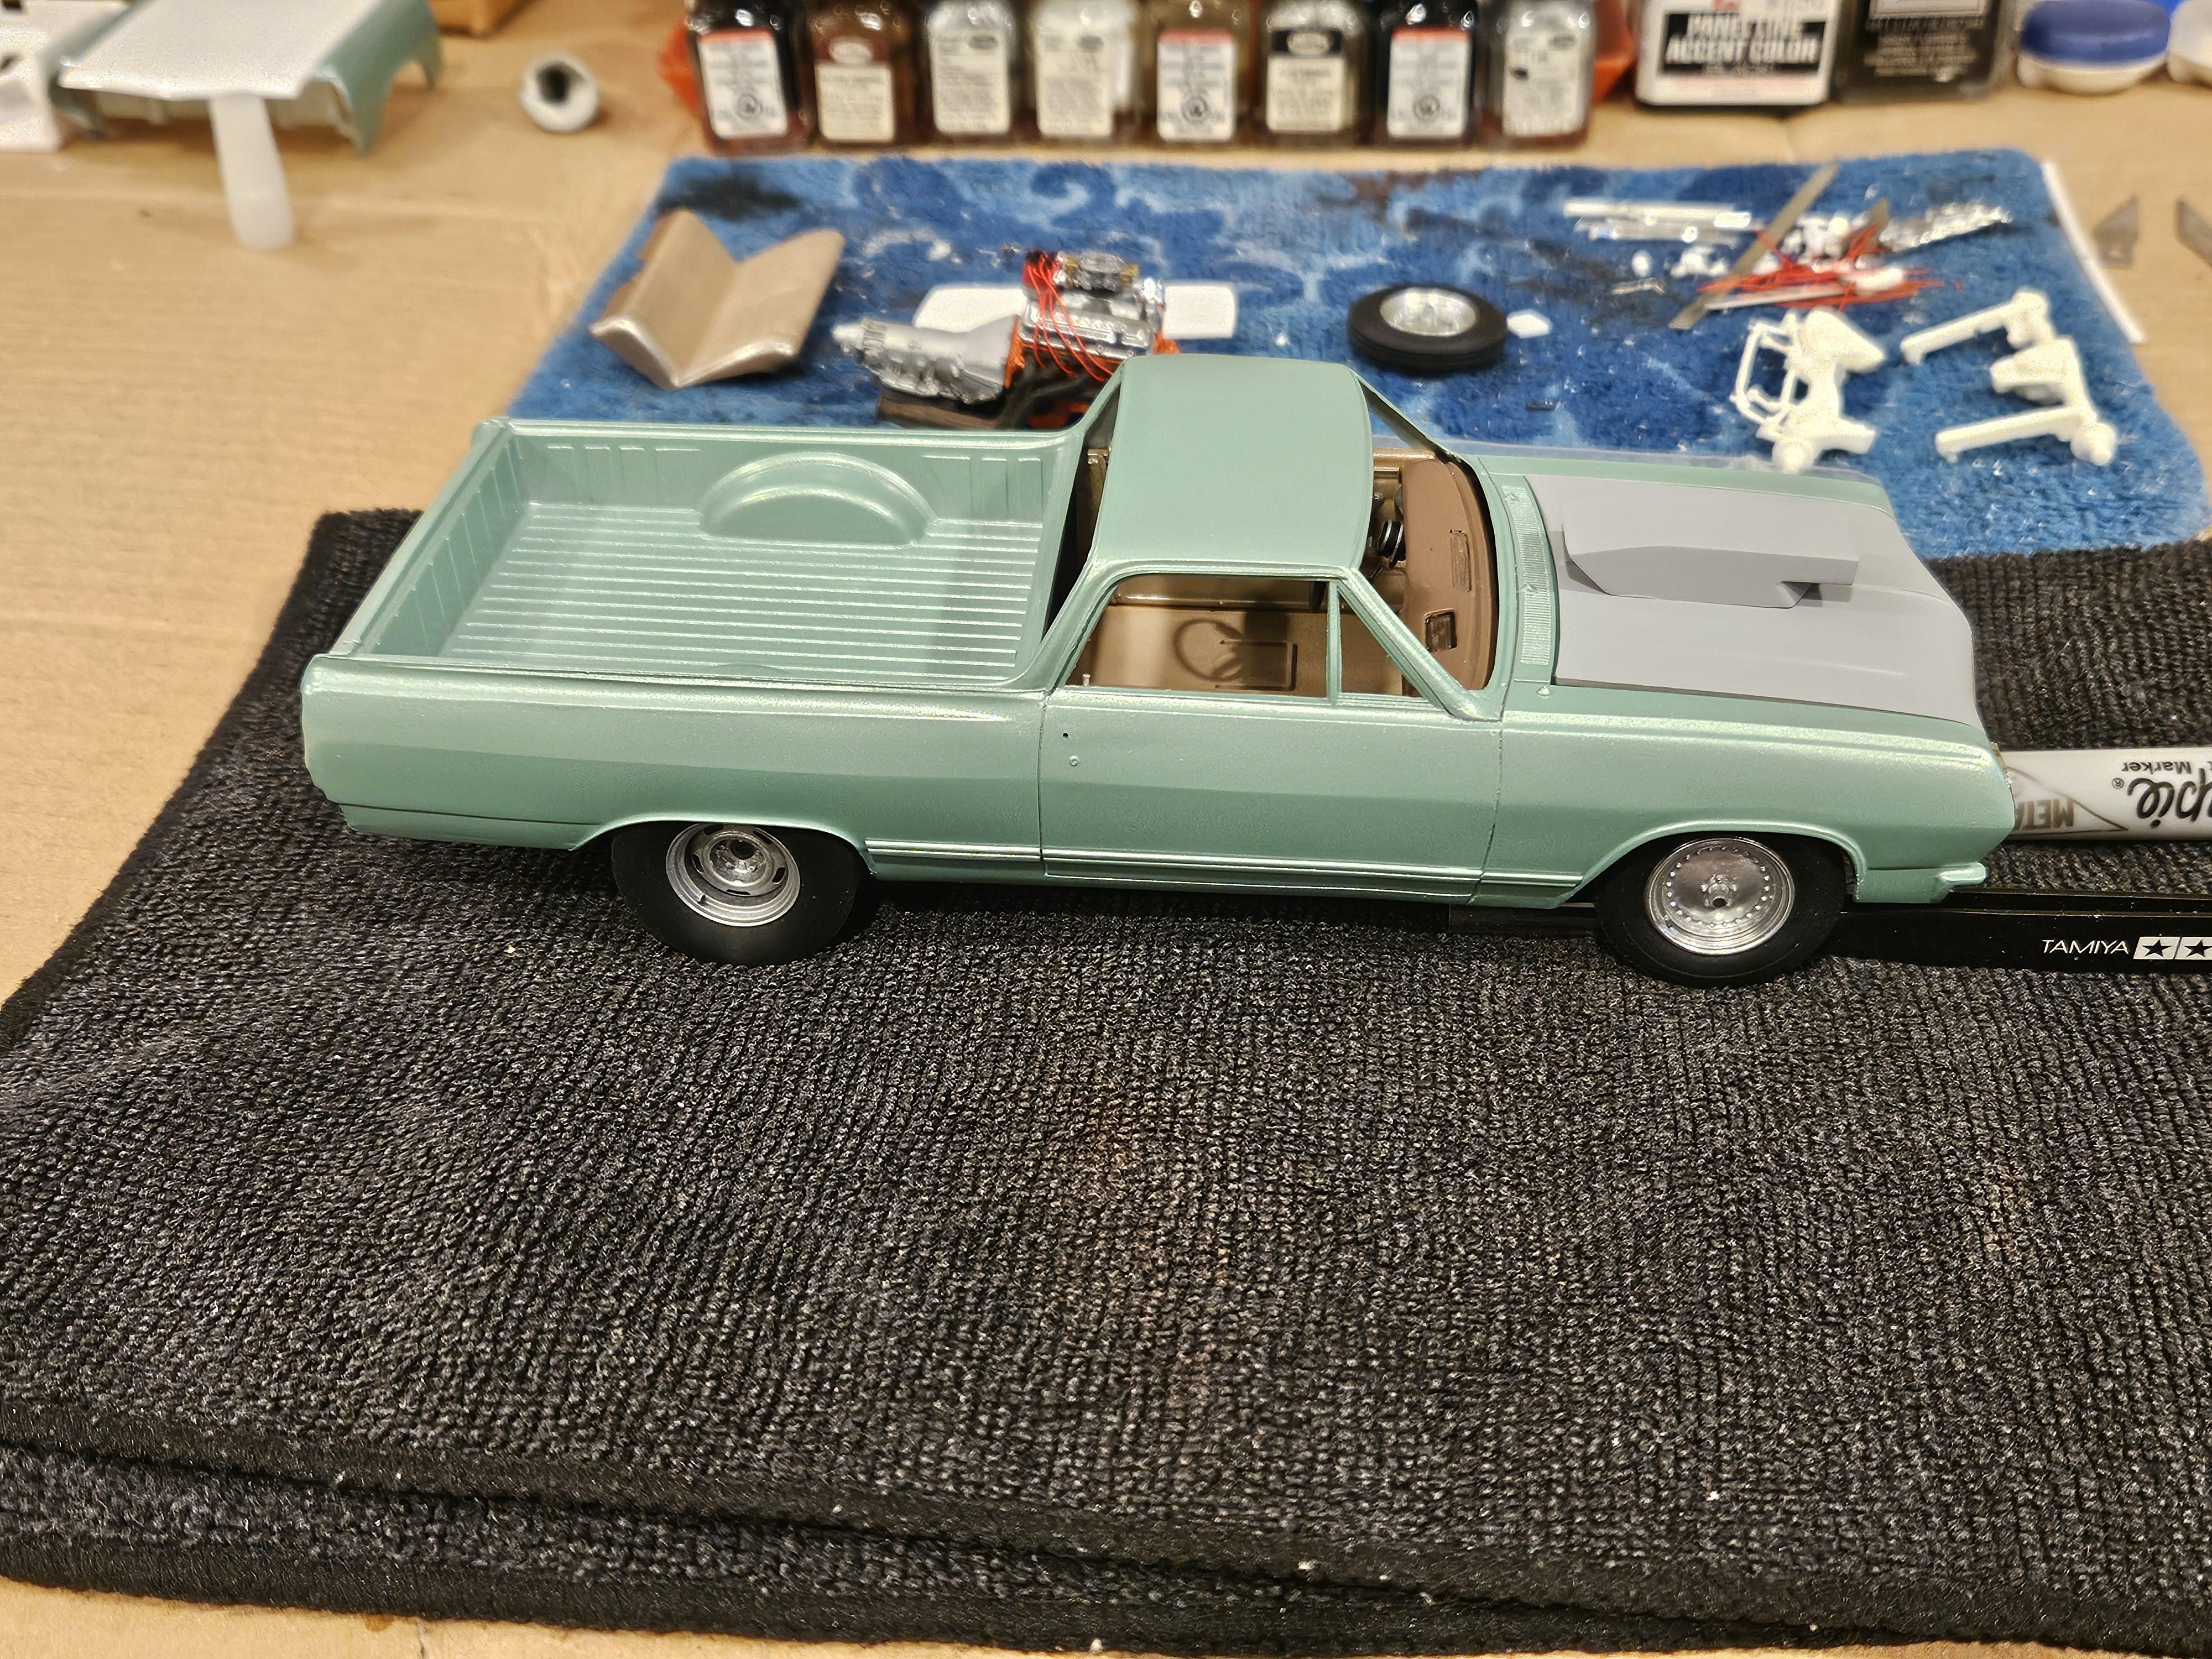
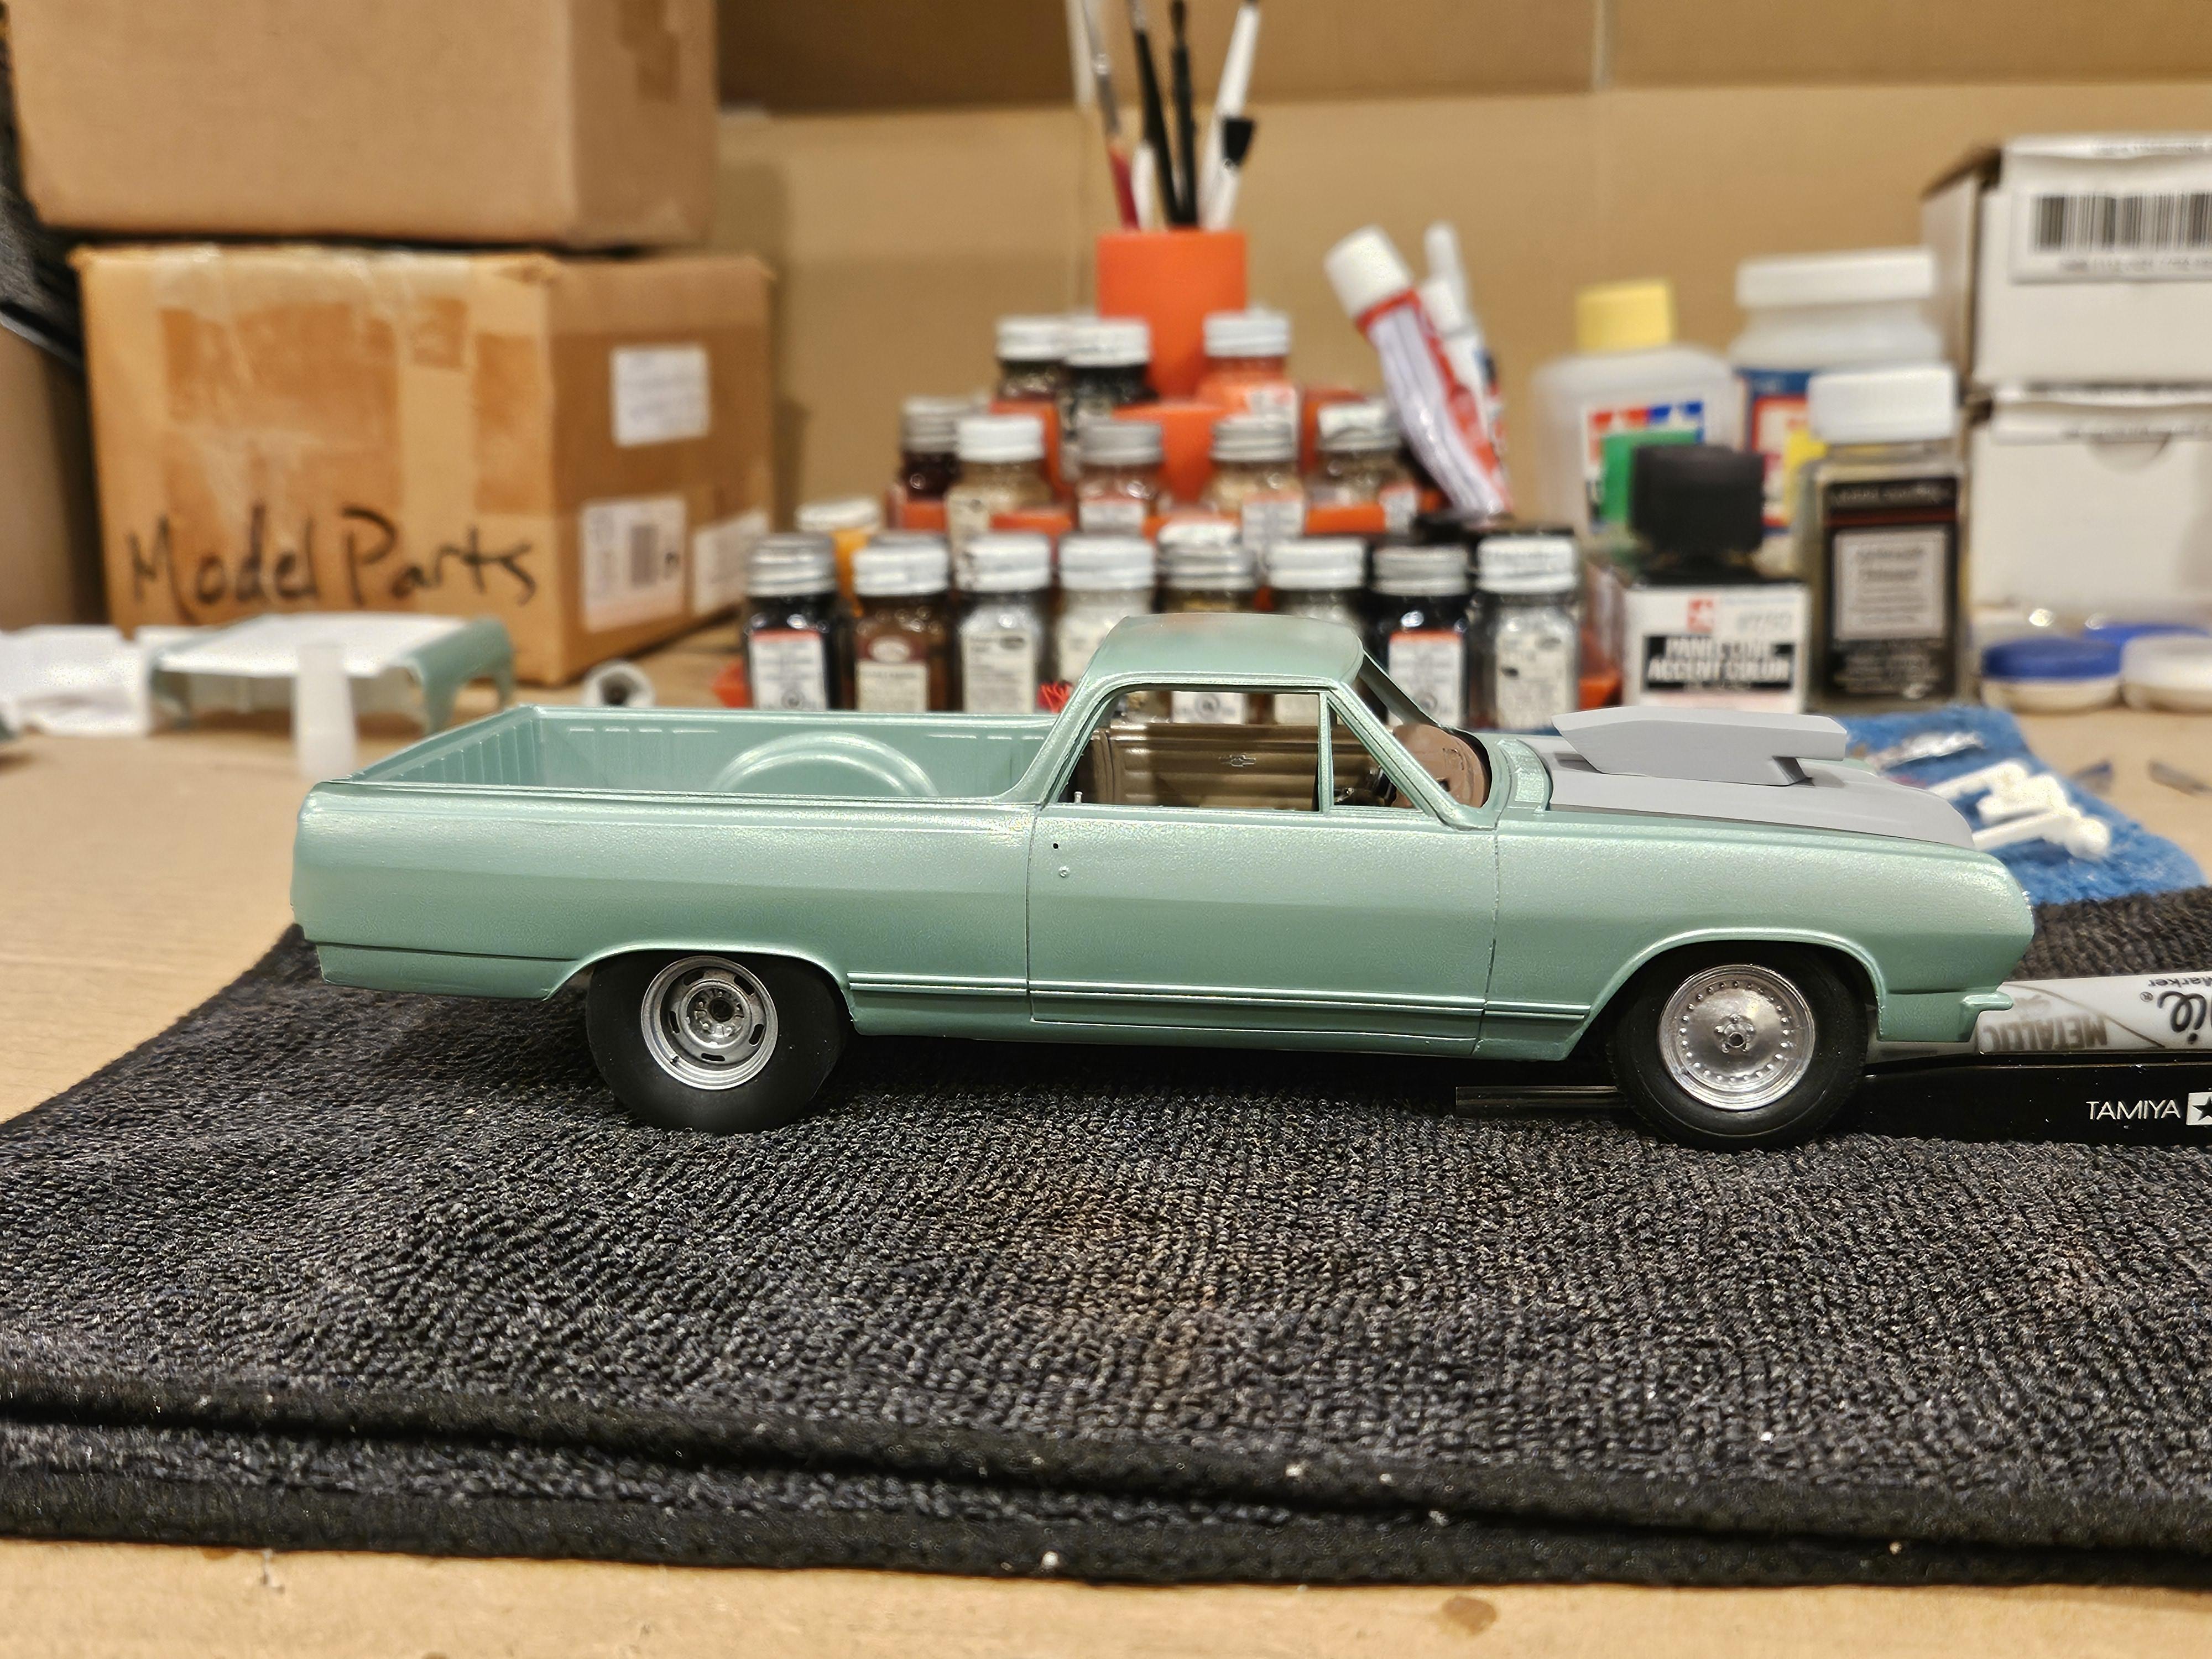
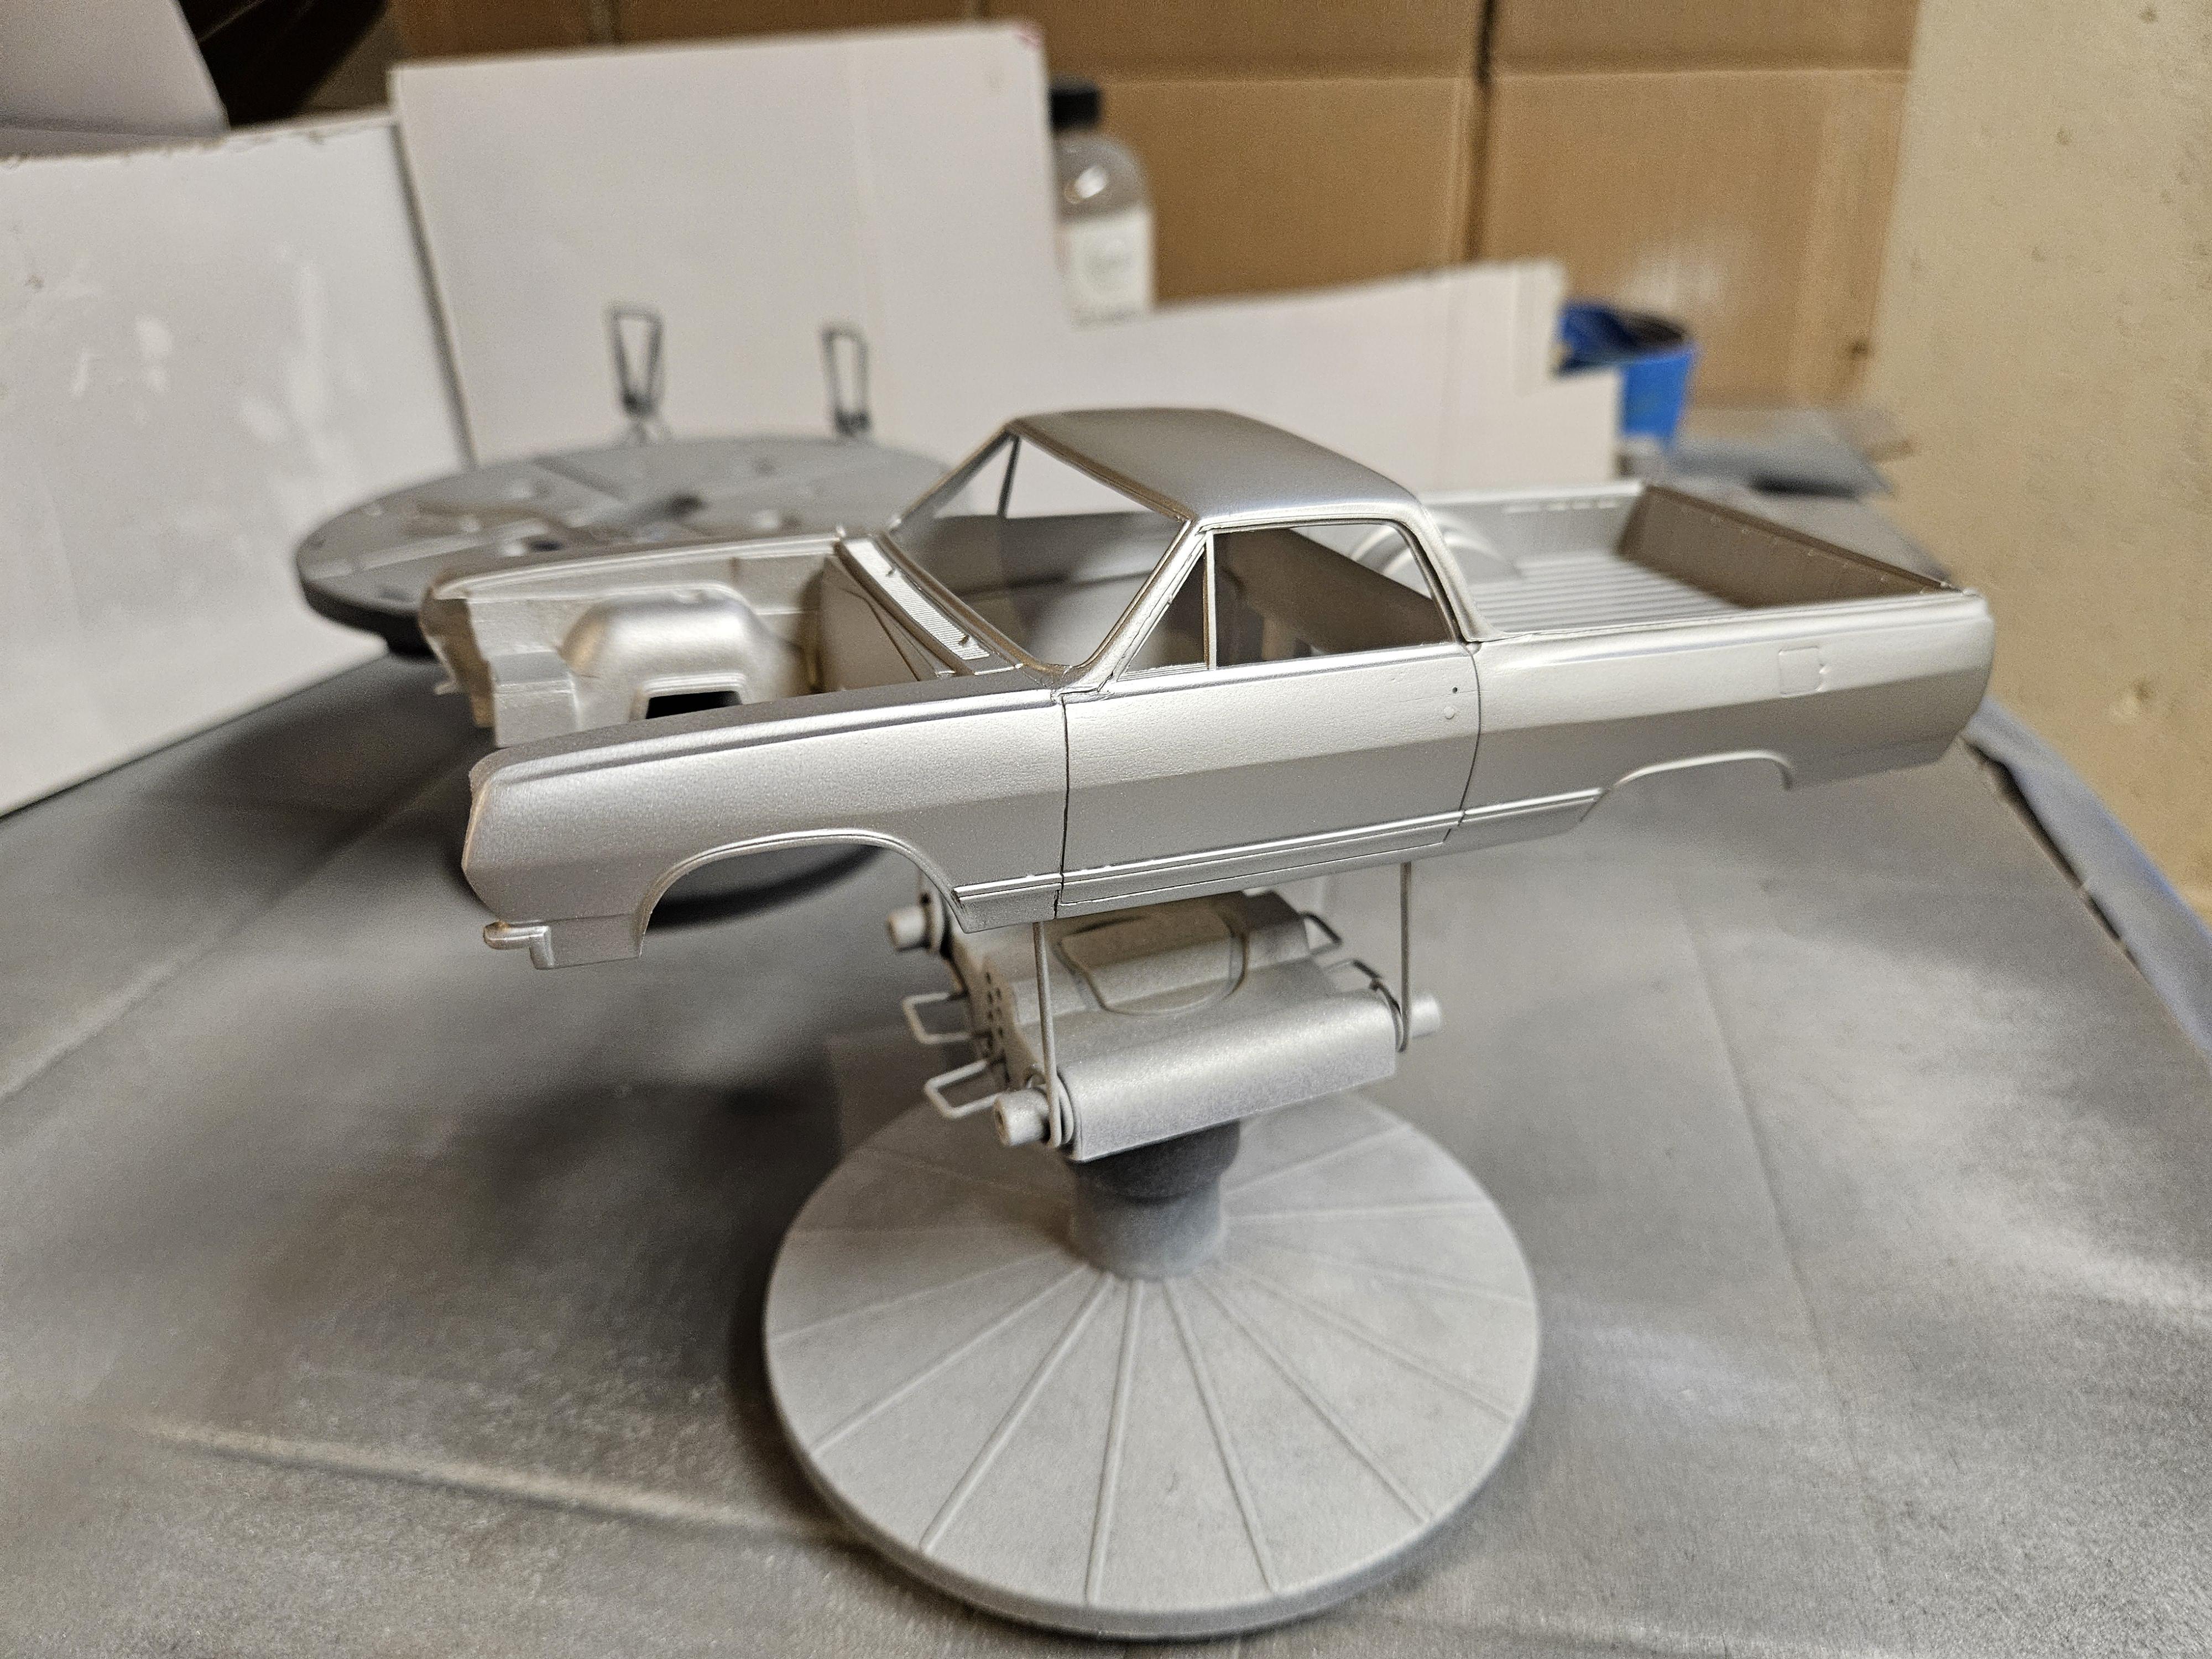
Got some paint on it today. Primed it, then tamiya gloss aluminum, and then mist coats of tamiya pearl green. Came out looking pretty good. Going to wait a day or so to put some clear on it. Leaving the hood in primer since thats how the car was in most of the pictures.
-
Thanks!
-
Thanks! 70s, 80s and 90s are definitely my favorite eras of drag racing.
-
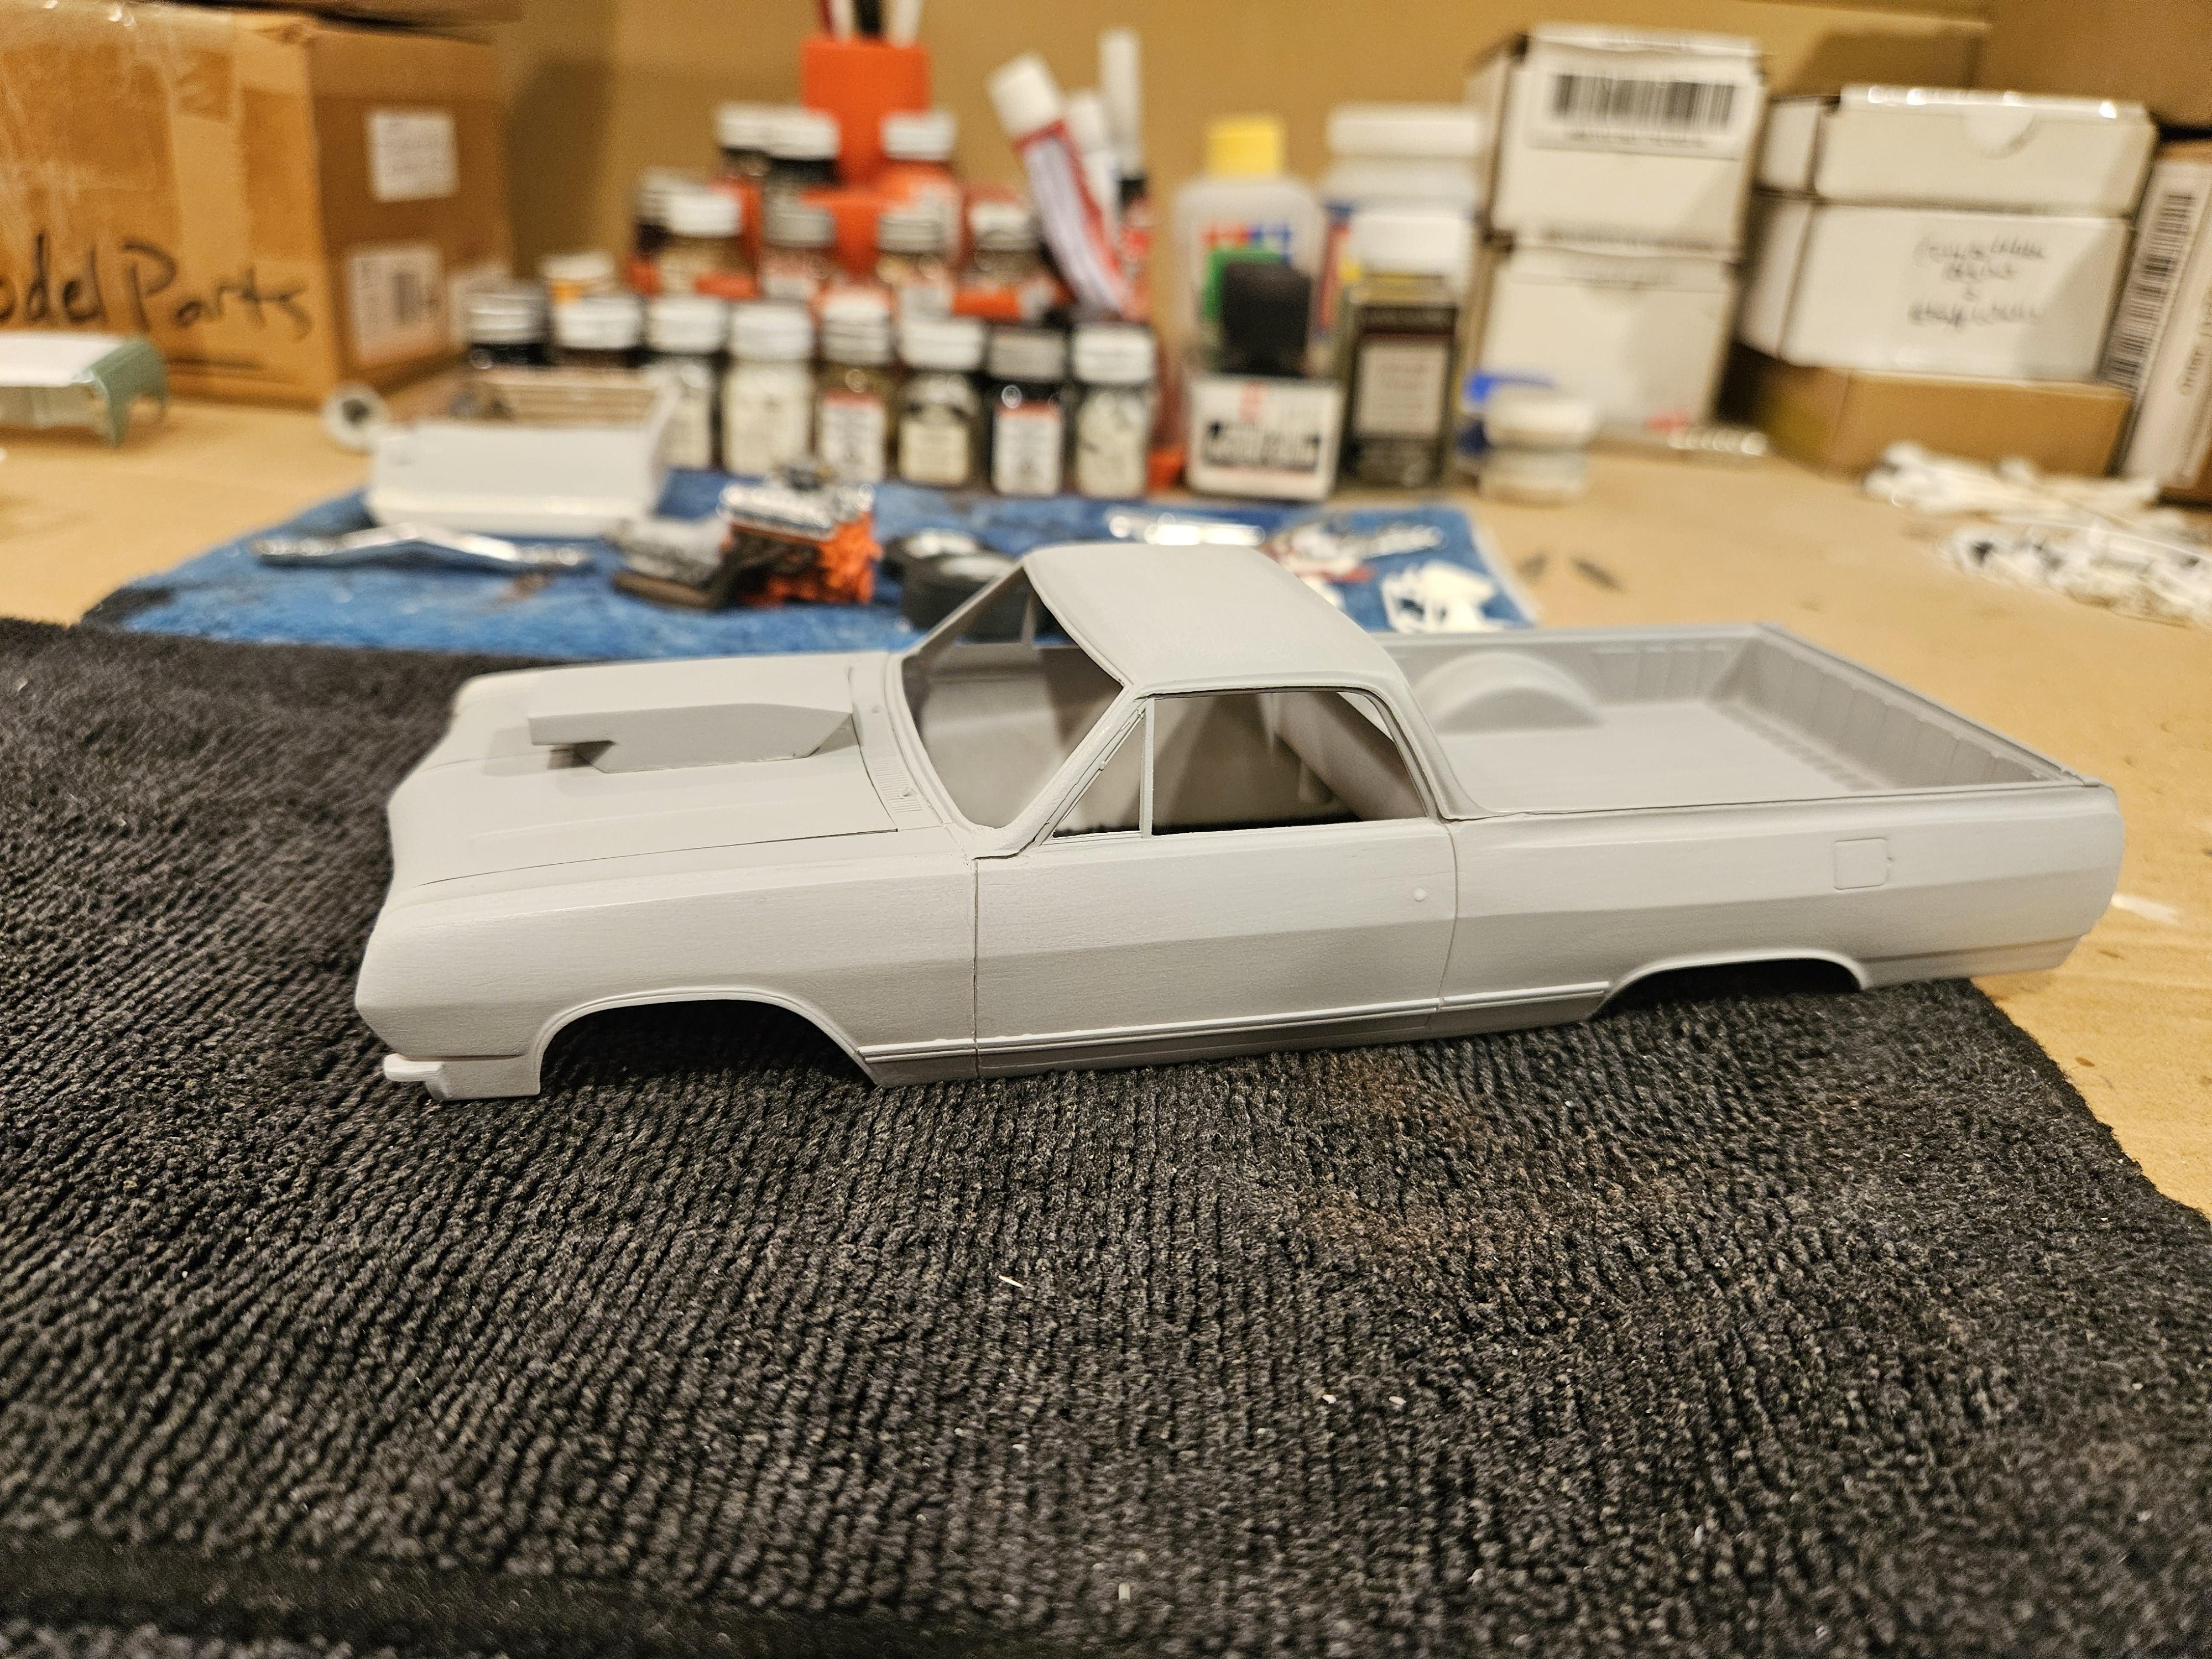
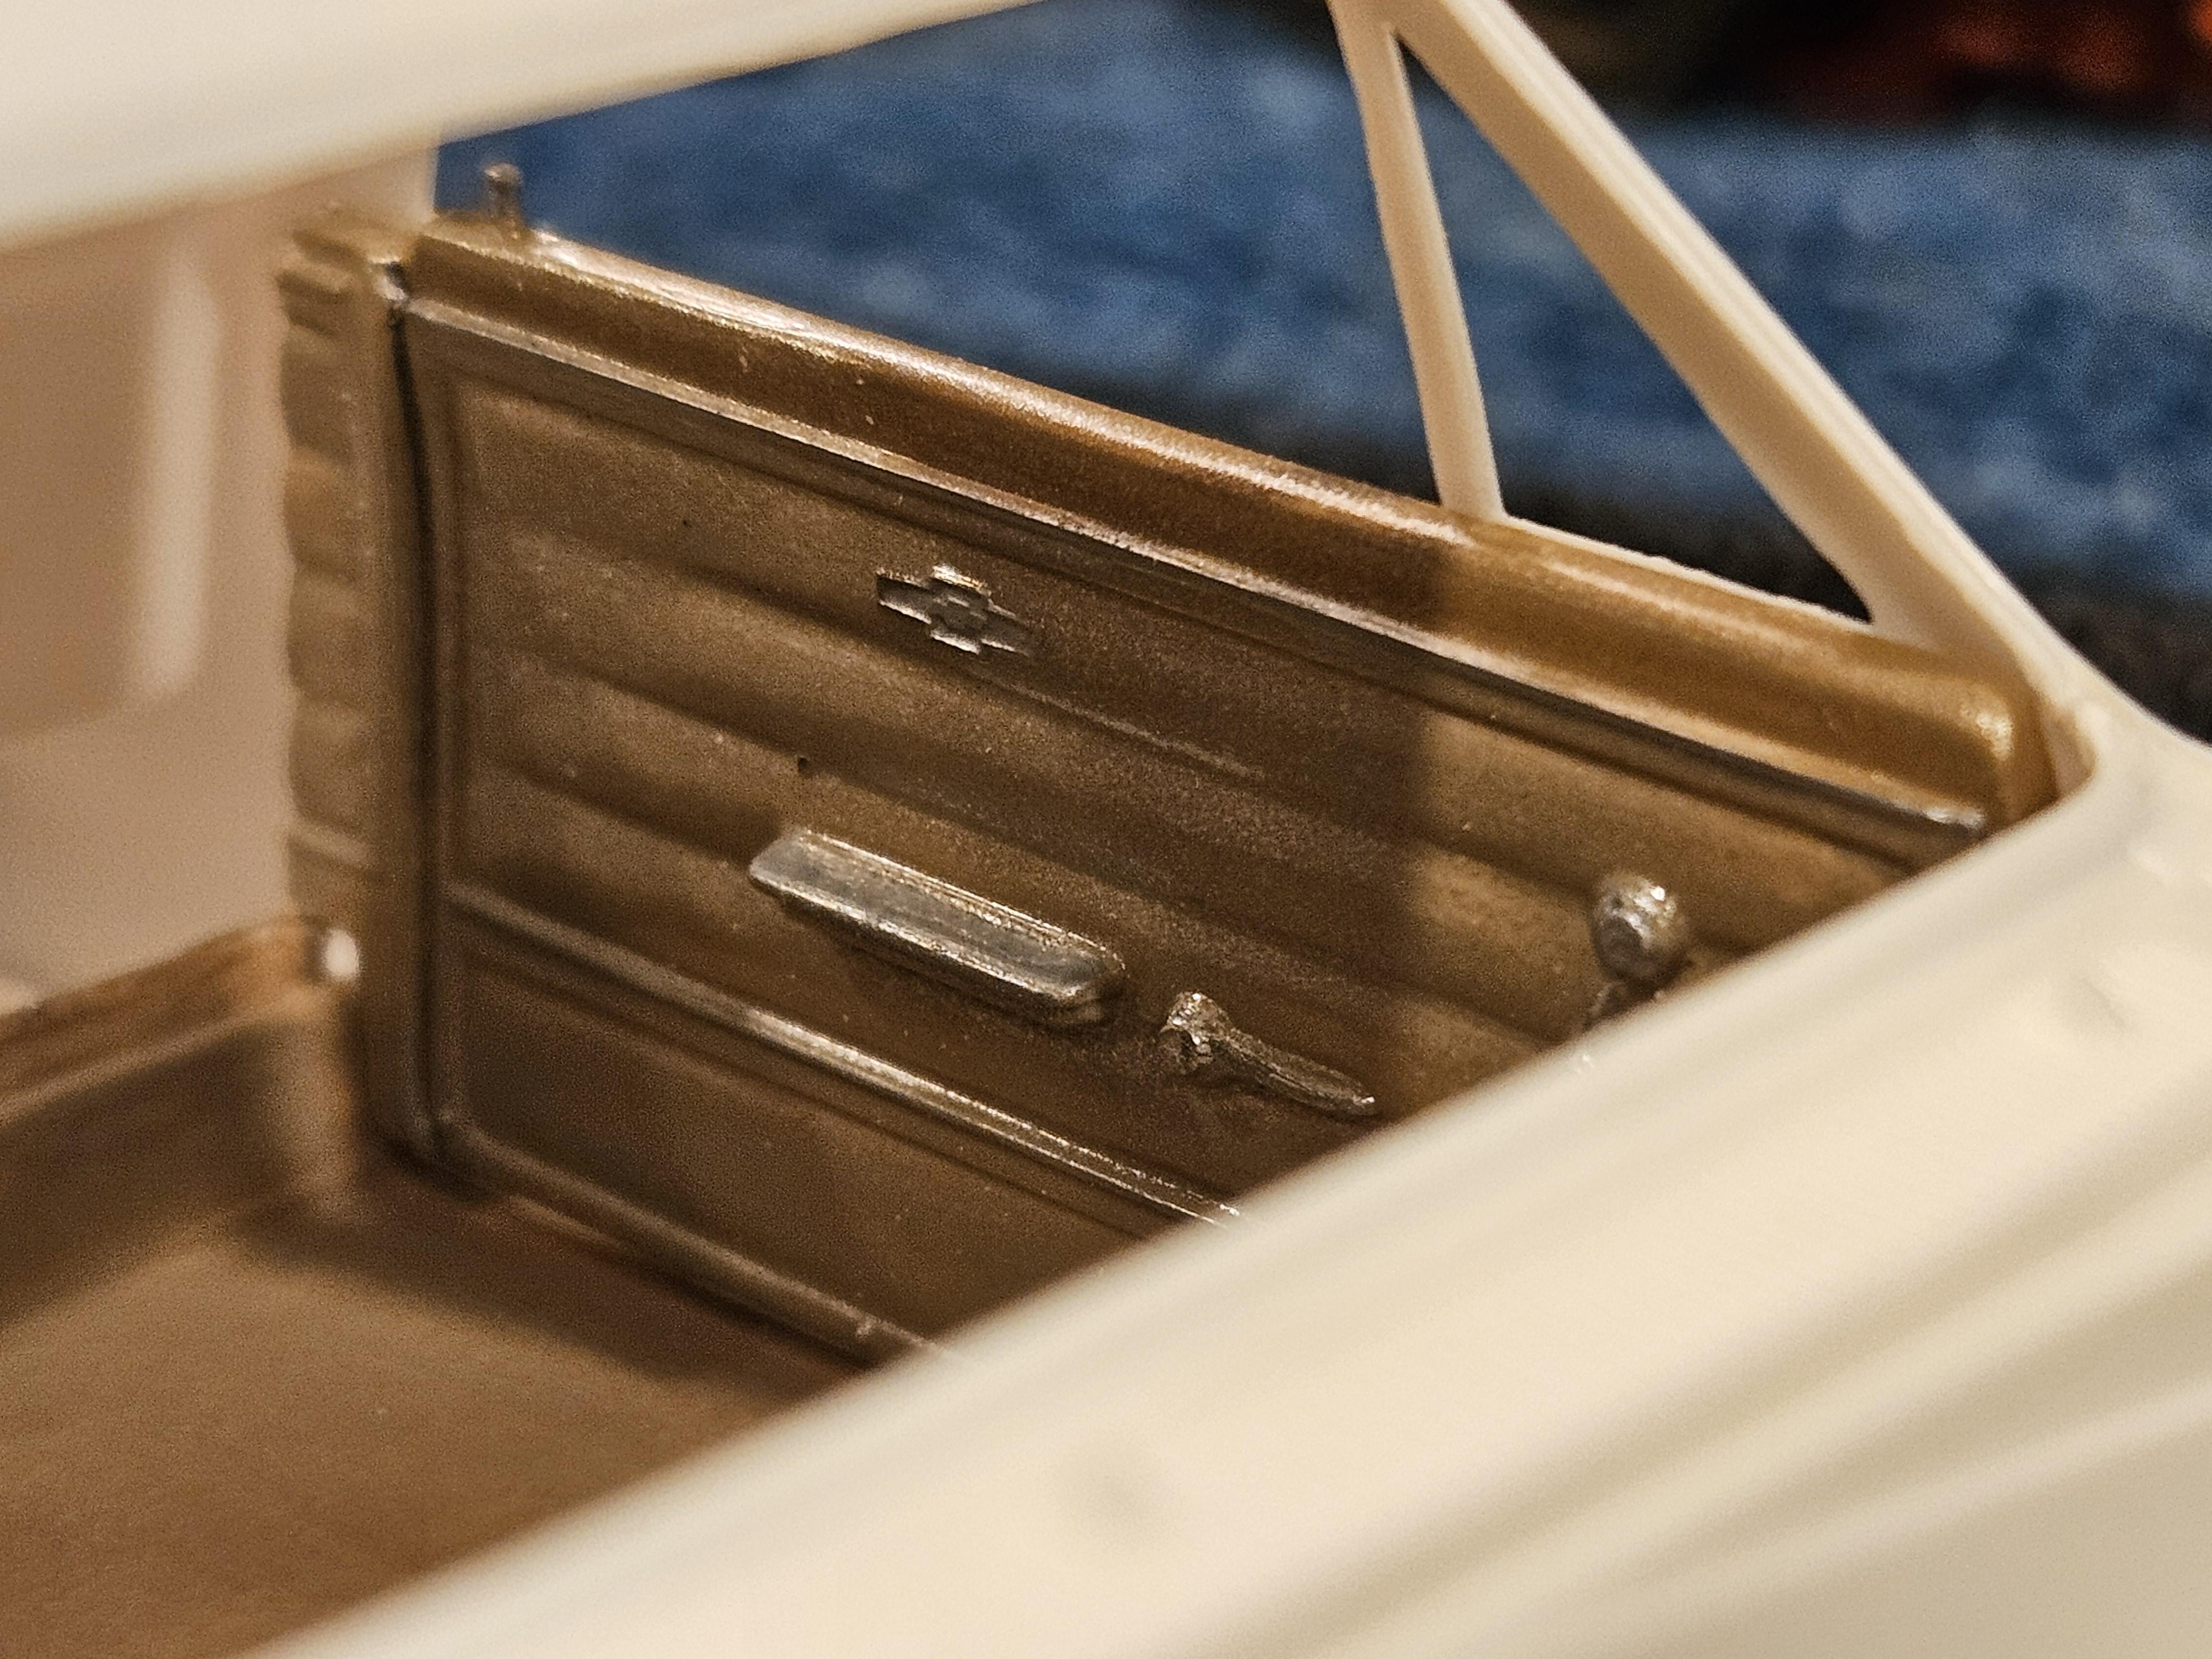
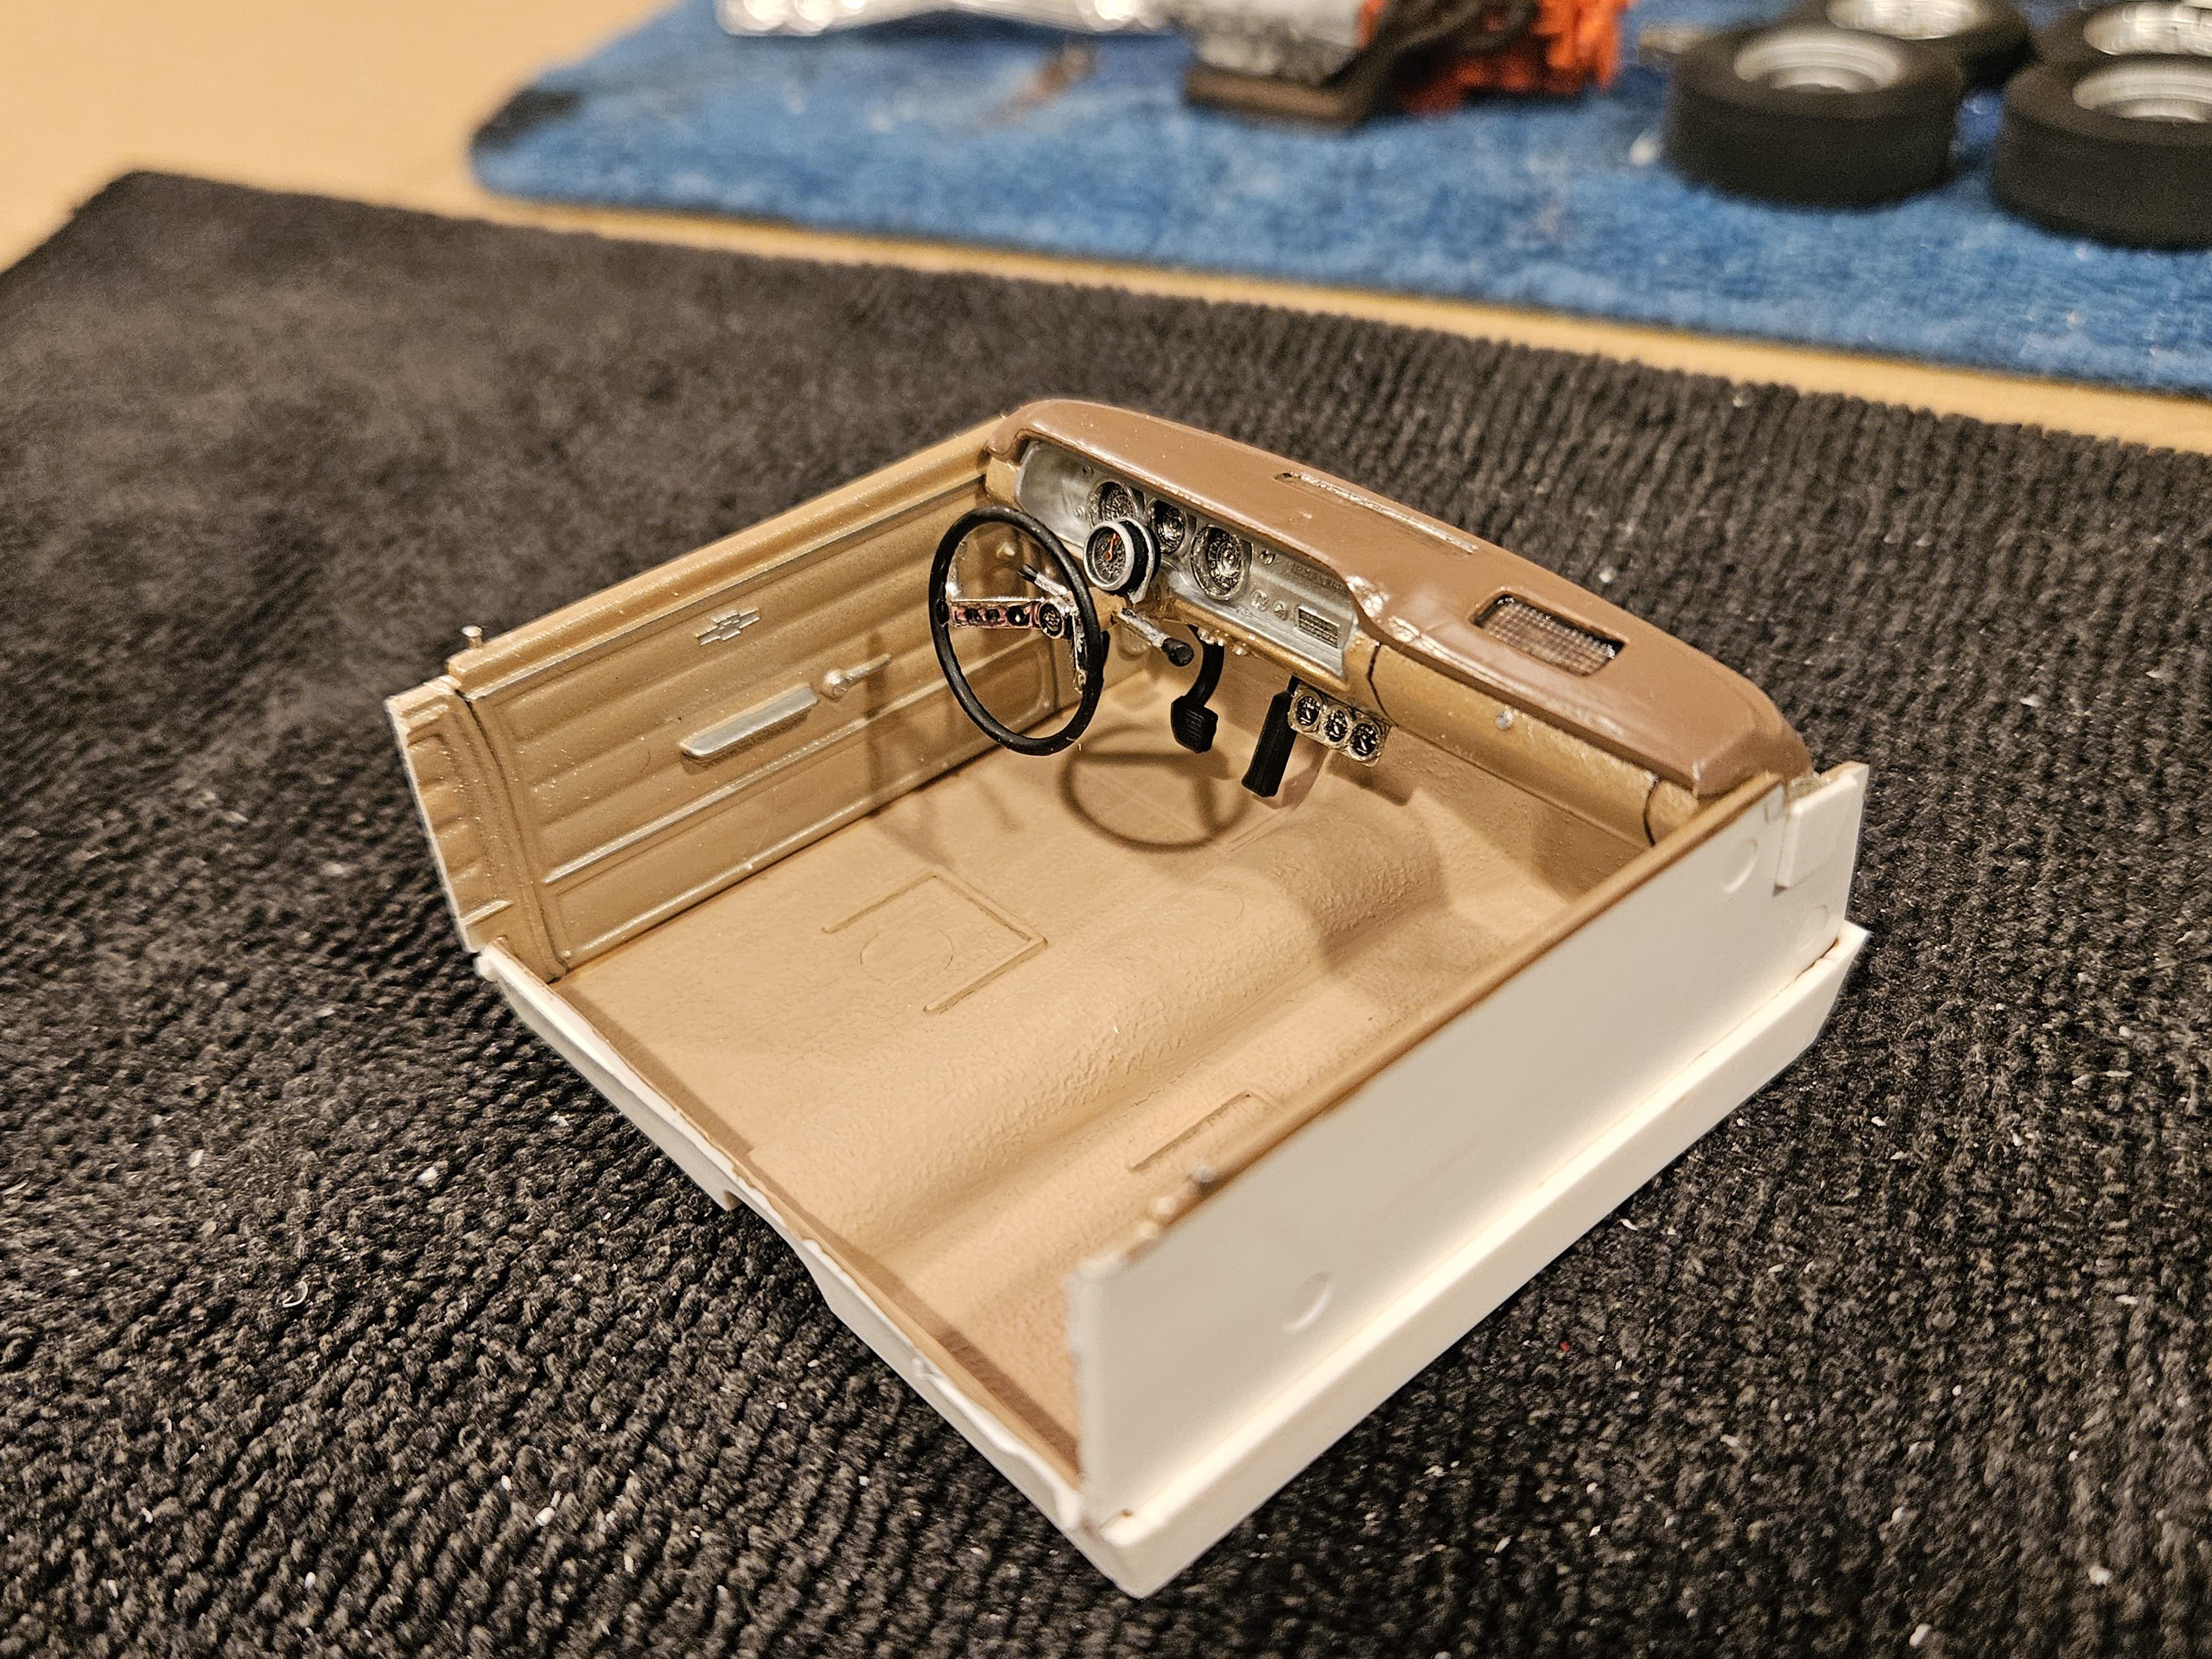
Started fitting and painting the interior. I used all of the revell 65 chevelle interior components since it all lines up with the chassis. Set the interior floor and door panels in to see where they needed to be cut off to fit, and they drop right in and sit perfectly in the AMT body. Still need to find an acceptable bench seat..leaning toward the AMT 65 chevelle wagon back seat to use as a bench..once thats in I will make up a roll cage out of aluminum wire. I'll also end up cutting off the back of the AMT interior tub to make a close out panel behind the seat Stole the floor shifter out of the revell kit and modified it to make it a column shifter. Also added a tach on the column and a 3 gauge panel under the dash.
-
Painted the wheels and detailed them a bit. Tried to replicate the brushed aluminum look on the centerlines. I have revell chrome paint but for once that was a little too reflective for what I was after so I tried some duplicolor "chrome" paint which was a little more on the dull side. I think thats closer to what the satin finish looks like. Rears were painted with flat black then some VHT flat aluminum paint.
-
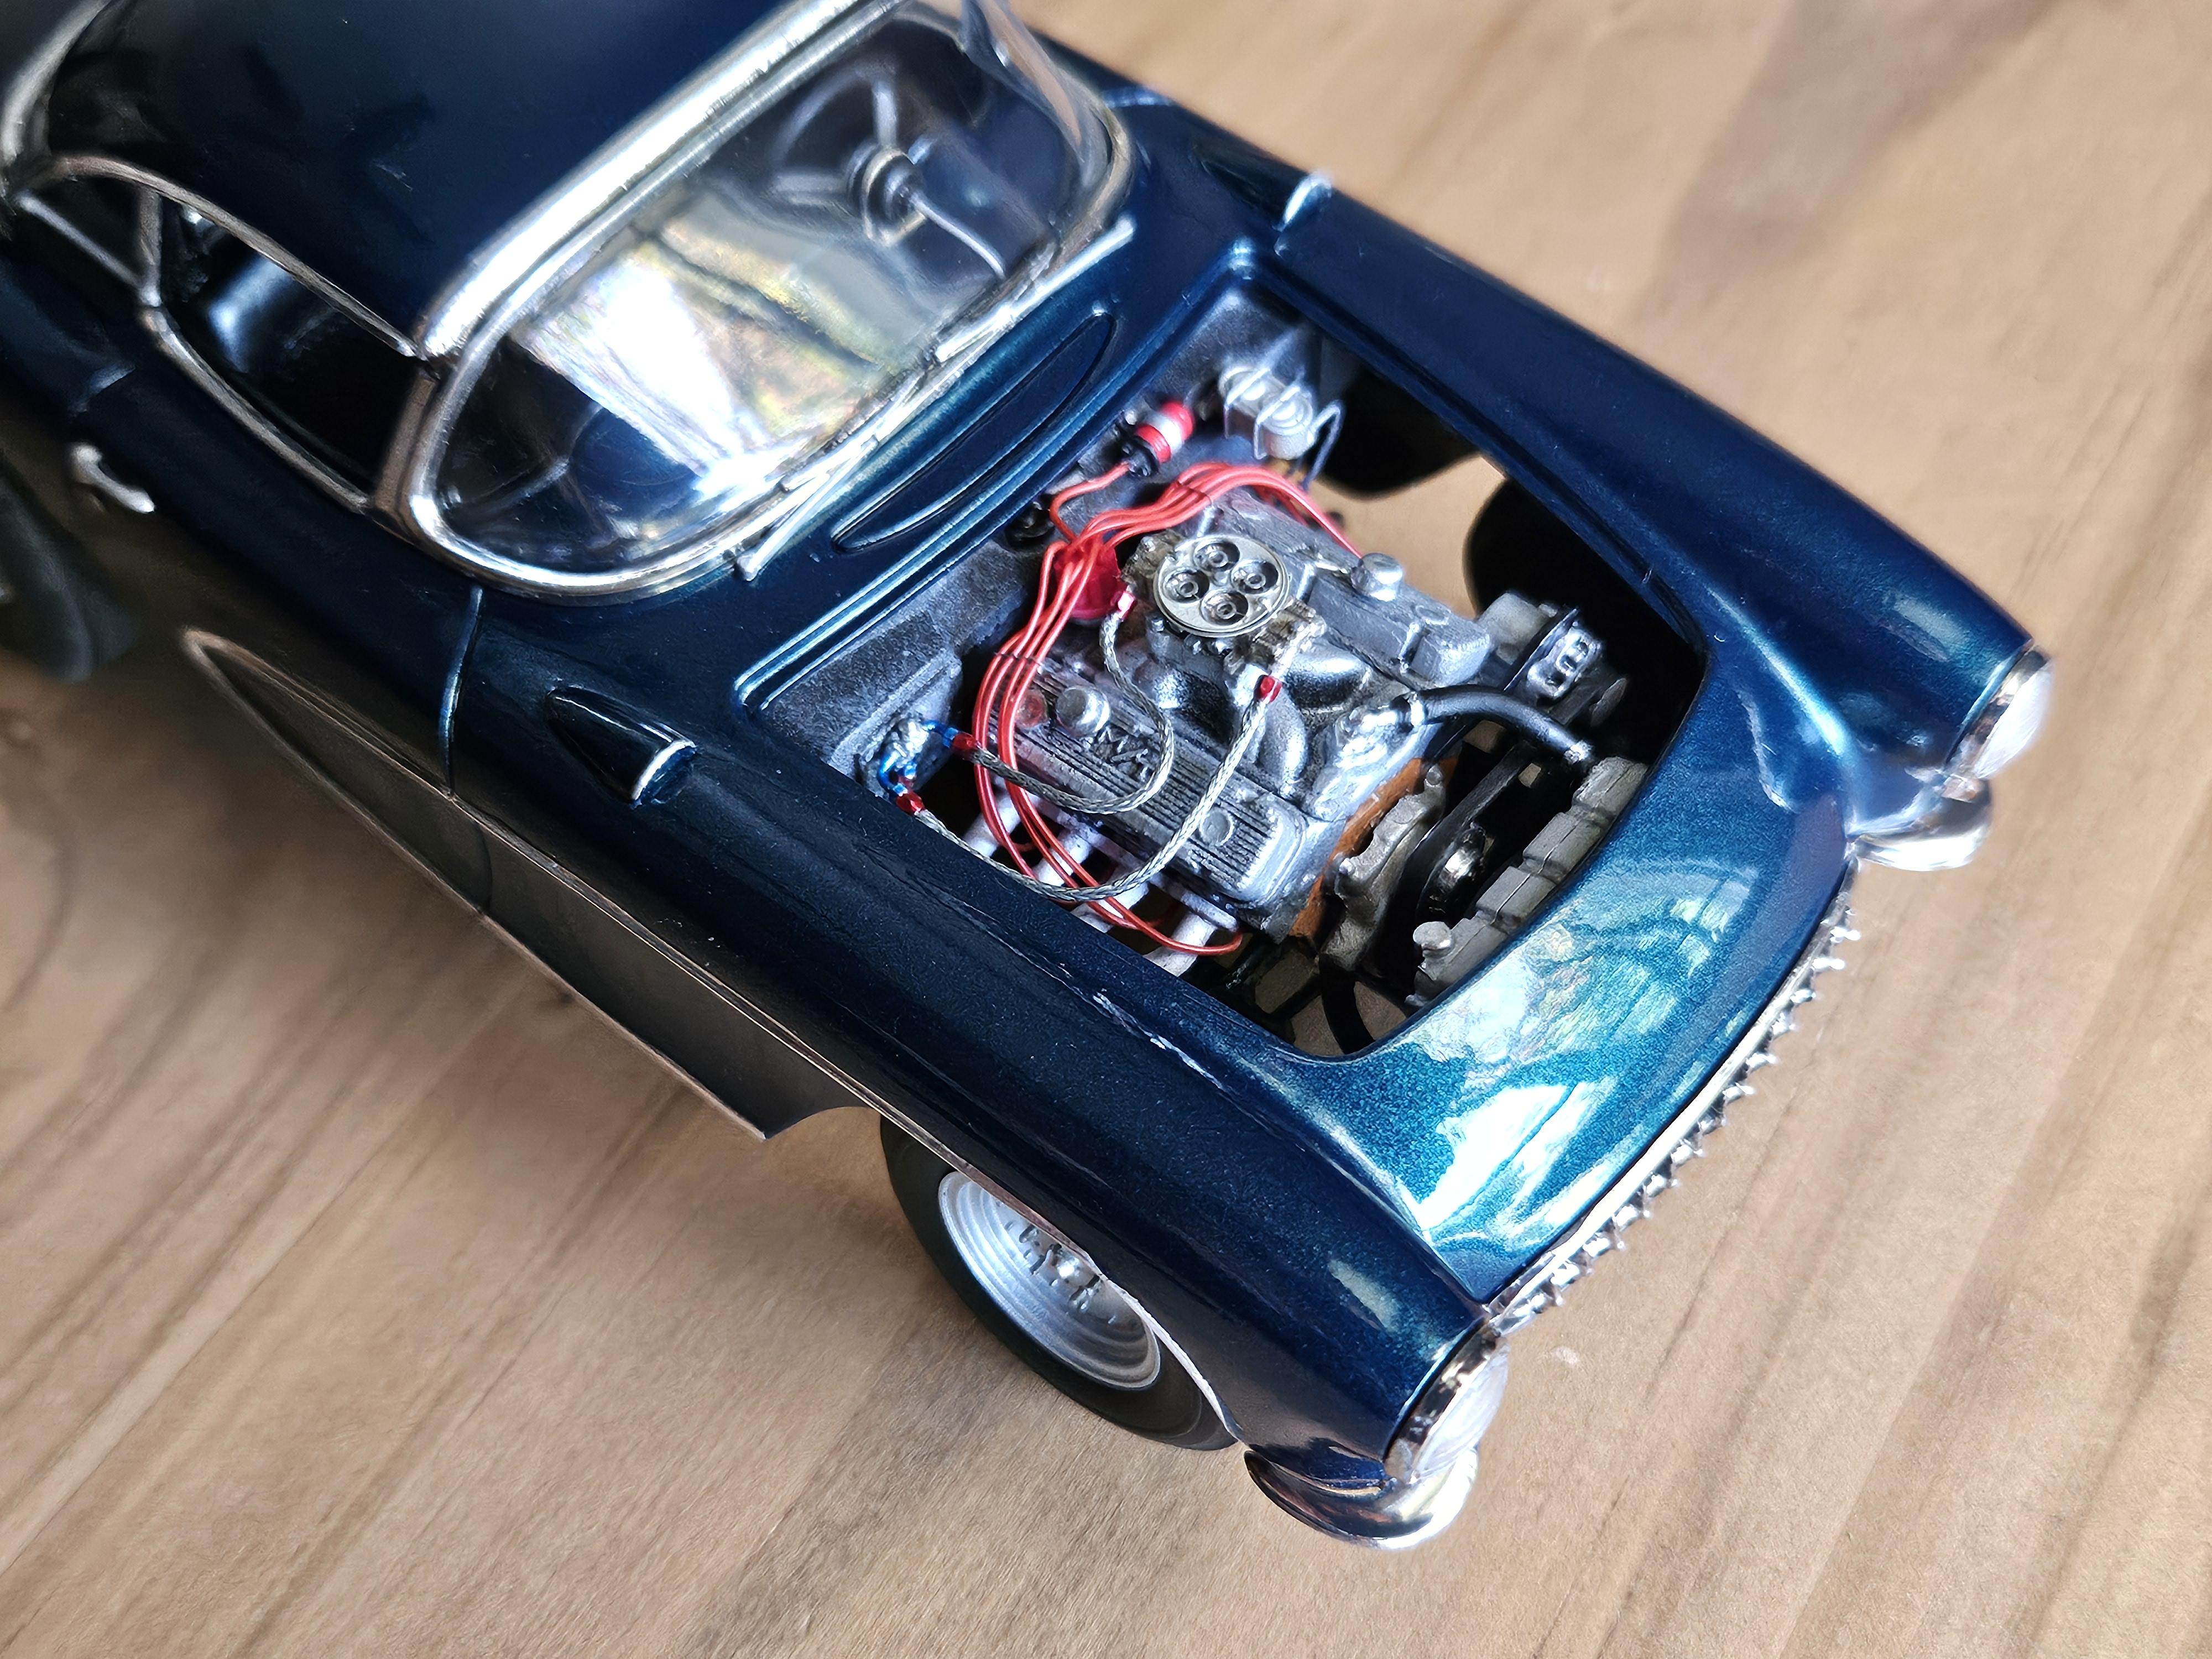
Painted the valve covers with Revell chrome, turned out nice and dried to the touch within 24 hours..was able to glue them on the assembled engine. Still have to put the distributor in and run the plug wires and the engine will be pretty much complete.
-
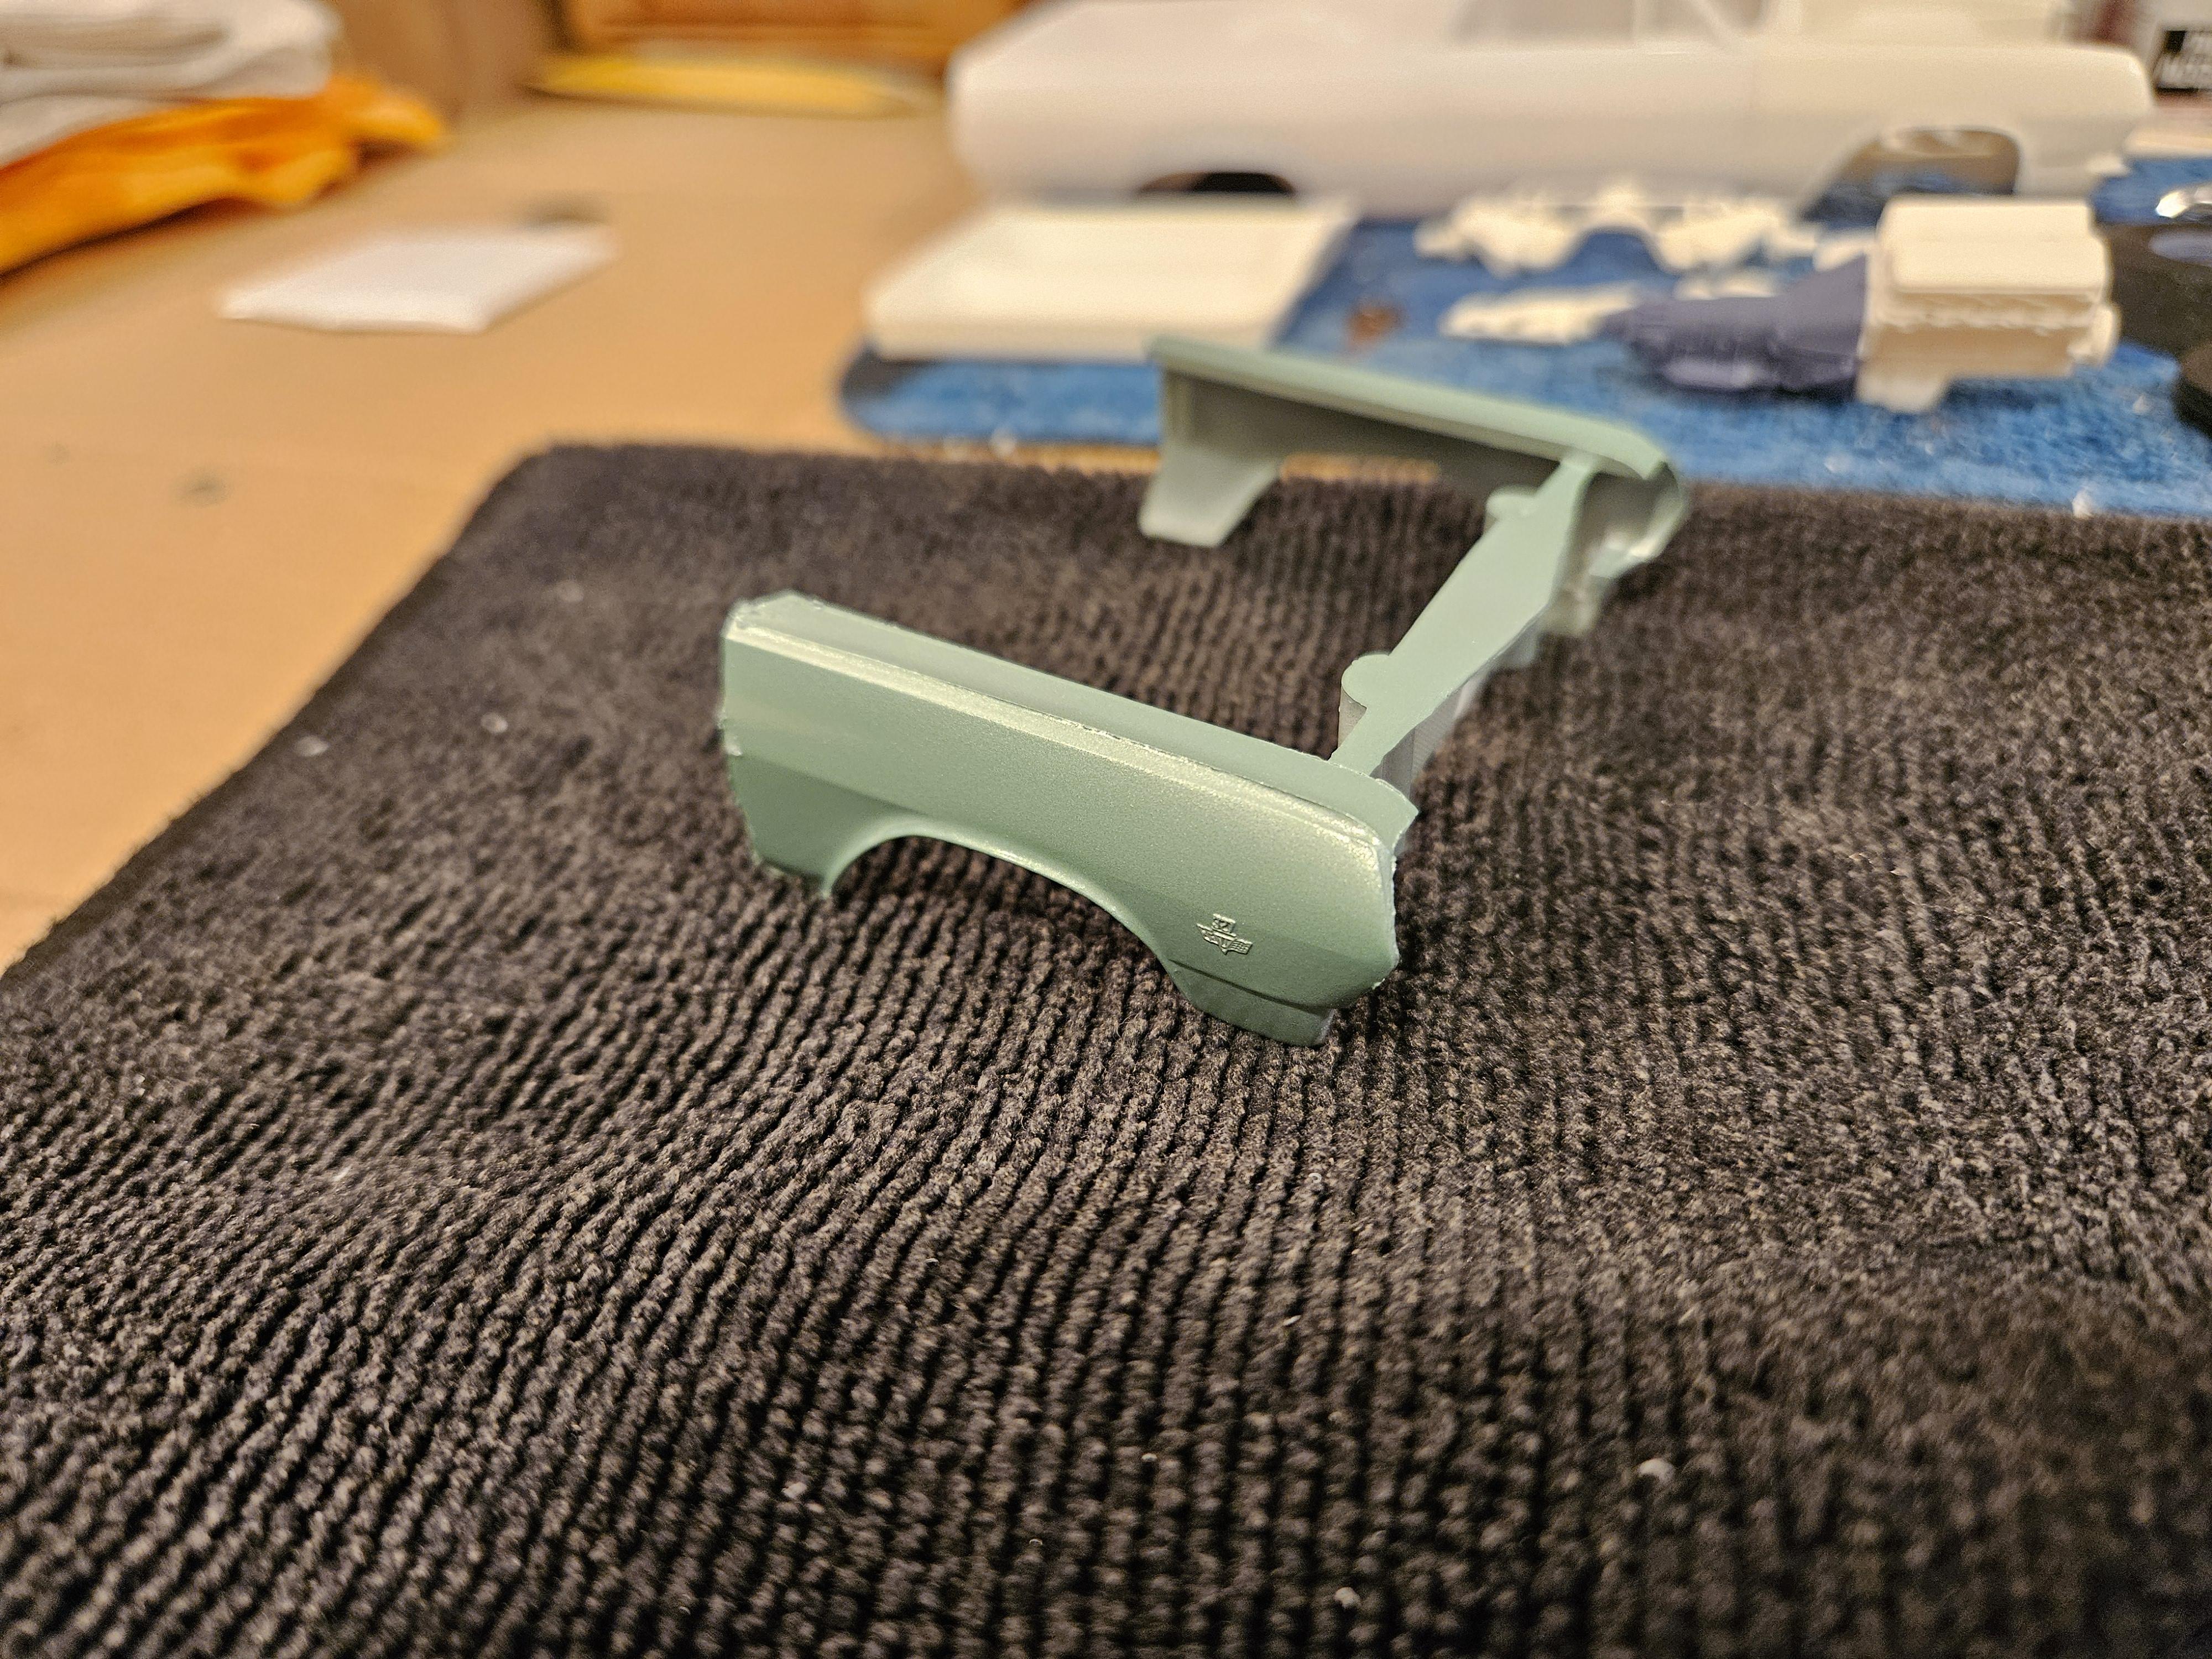
Made some beltline trim out of half round, glued them side by side to replicate the trim on the fender, door and 1/4. Also deleted the battery from the engine bay and made an empty "battery tray" in place of it.
-
Sox and Martin 1967 GTX, the 440 car
keviiin86 replied to gtx6970's topic in WIP: Drag Racing Models
Looks good! Only thing I'd be a stickler over is the headers. I know you used the hemi headers but the inside exhaust ports and primary tubes on a wedge/440 mopar are siamesed like a small block chevy. -
I went out and got some paint today, I think I have the color figured out. Since I dont have an airbrush I'm stuck with rattle cans but I've seen Tamiya has a light metallic green that looks close so I figured I'd try a basecoat of another color to achieve the shade I'm after. I shot some on the old junk fenders I cut off. Used Tamiya TS 17 gloss aluminum as a base and a couple light mist coats of TS 60 pearl green. Looks close to the factory 1965 color "willow green". The pics I have of the car are all from the early 90s and not the best lighting or quality so its tough to get an exact match, but after googling the color on other chevelles I think its pretty close.
-
Thanks man! was a fun one to build.
-
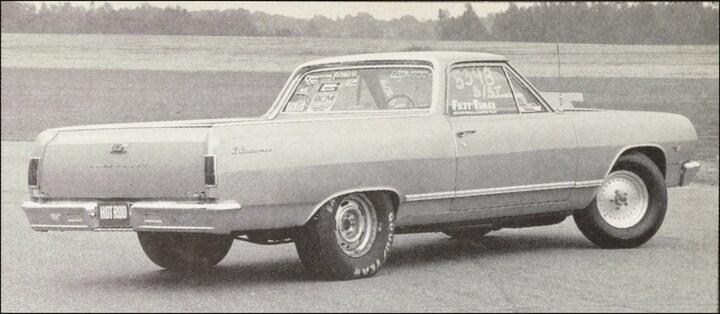
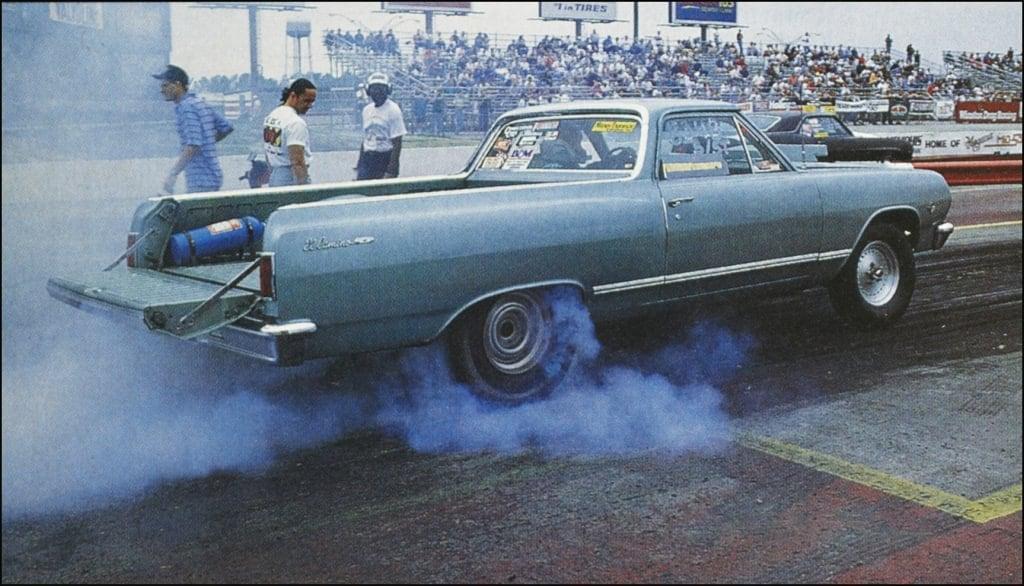
Hahah! So you know of this car is see?! I've heard those stories of the pea gravel/cement in the tailgate before and considered opening up the tailgate to make it just a bit more realistic...but the bed floor is molded too high on this model, just wouldn't look quite right. I just recently talked to a guy this weekend who is friends with the current owner of Chuck's old Elco..its sat untouched since probably the late 90s to early 2000s, looks the same just no motor/trans.
-
Thats super generous of you, I appreciate it! I've got a plan for the "top end" of the motor and pretty much have what I need to make it accurate. I did a similar built big block in a 57 corvette which will look the same minus the valve covers..same single plane intake and dominator. I picked up some moroso valve covers from Iceman that I'll use on this car. Here's how the corvette looked.
-
Thats better..
-
Yeah those mufflers were a short lived trend lol..but the model companies sure latched on to them..there were a few other pro street kits I remember that used them.
-
Worked on it a bit more today. Cut out the inner part of the frame rails behind the engine mounts and moved them out a bit for header clearance..will get sanded and smoothed out before paint. Also decided on the AMT 67 chevelle pro street headers but cut and shortened them up since they would hang pretty low otherwise, and don't worry the goofy super trap mufflers will go bye bye. Change of plans for rear wheels, got these rally wheels from Fireball modelworks which look awesome, so that's what I'm going with.