keviiin86
-
Posts
238 -
Joined
-
Last visited
Content Type
Profiles
Forums
Events
Gallery
Everything posted by keviiin86
-
1962 Corvette street/strip build (replica)
keviiin86 replied to keviiin86's topic in WIP: Drag Racing Models
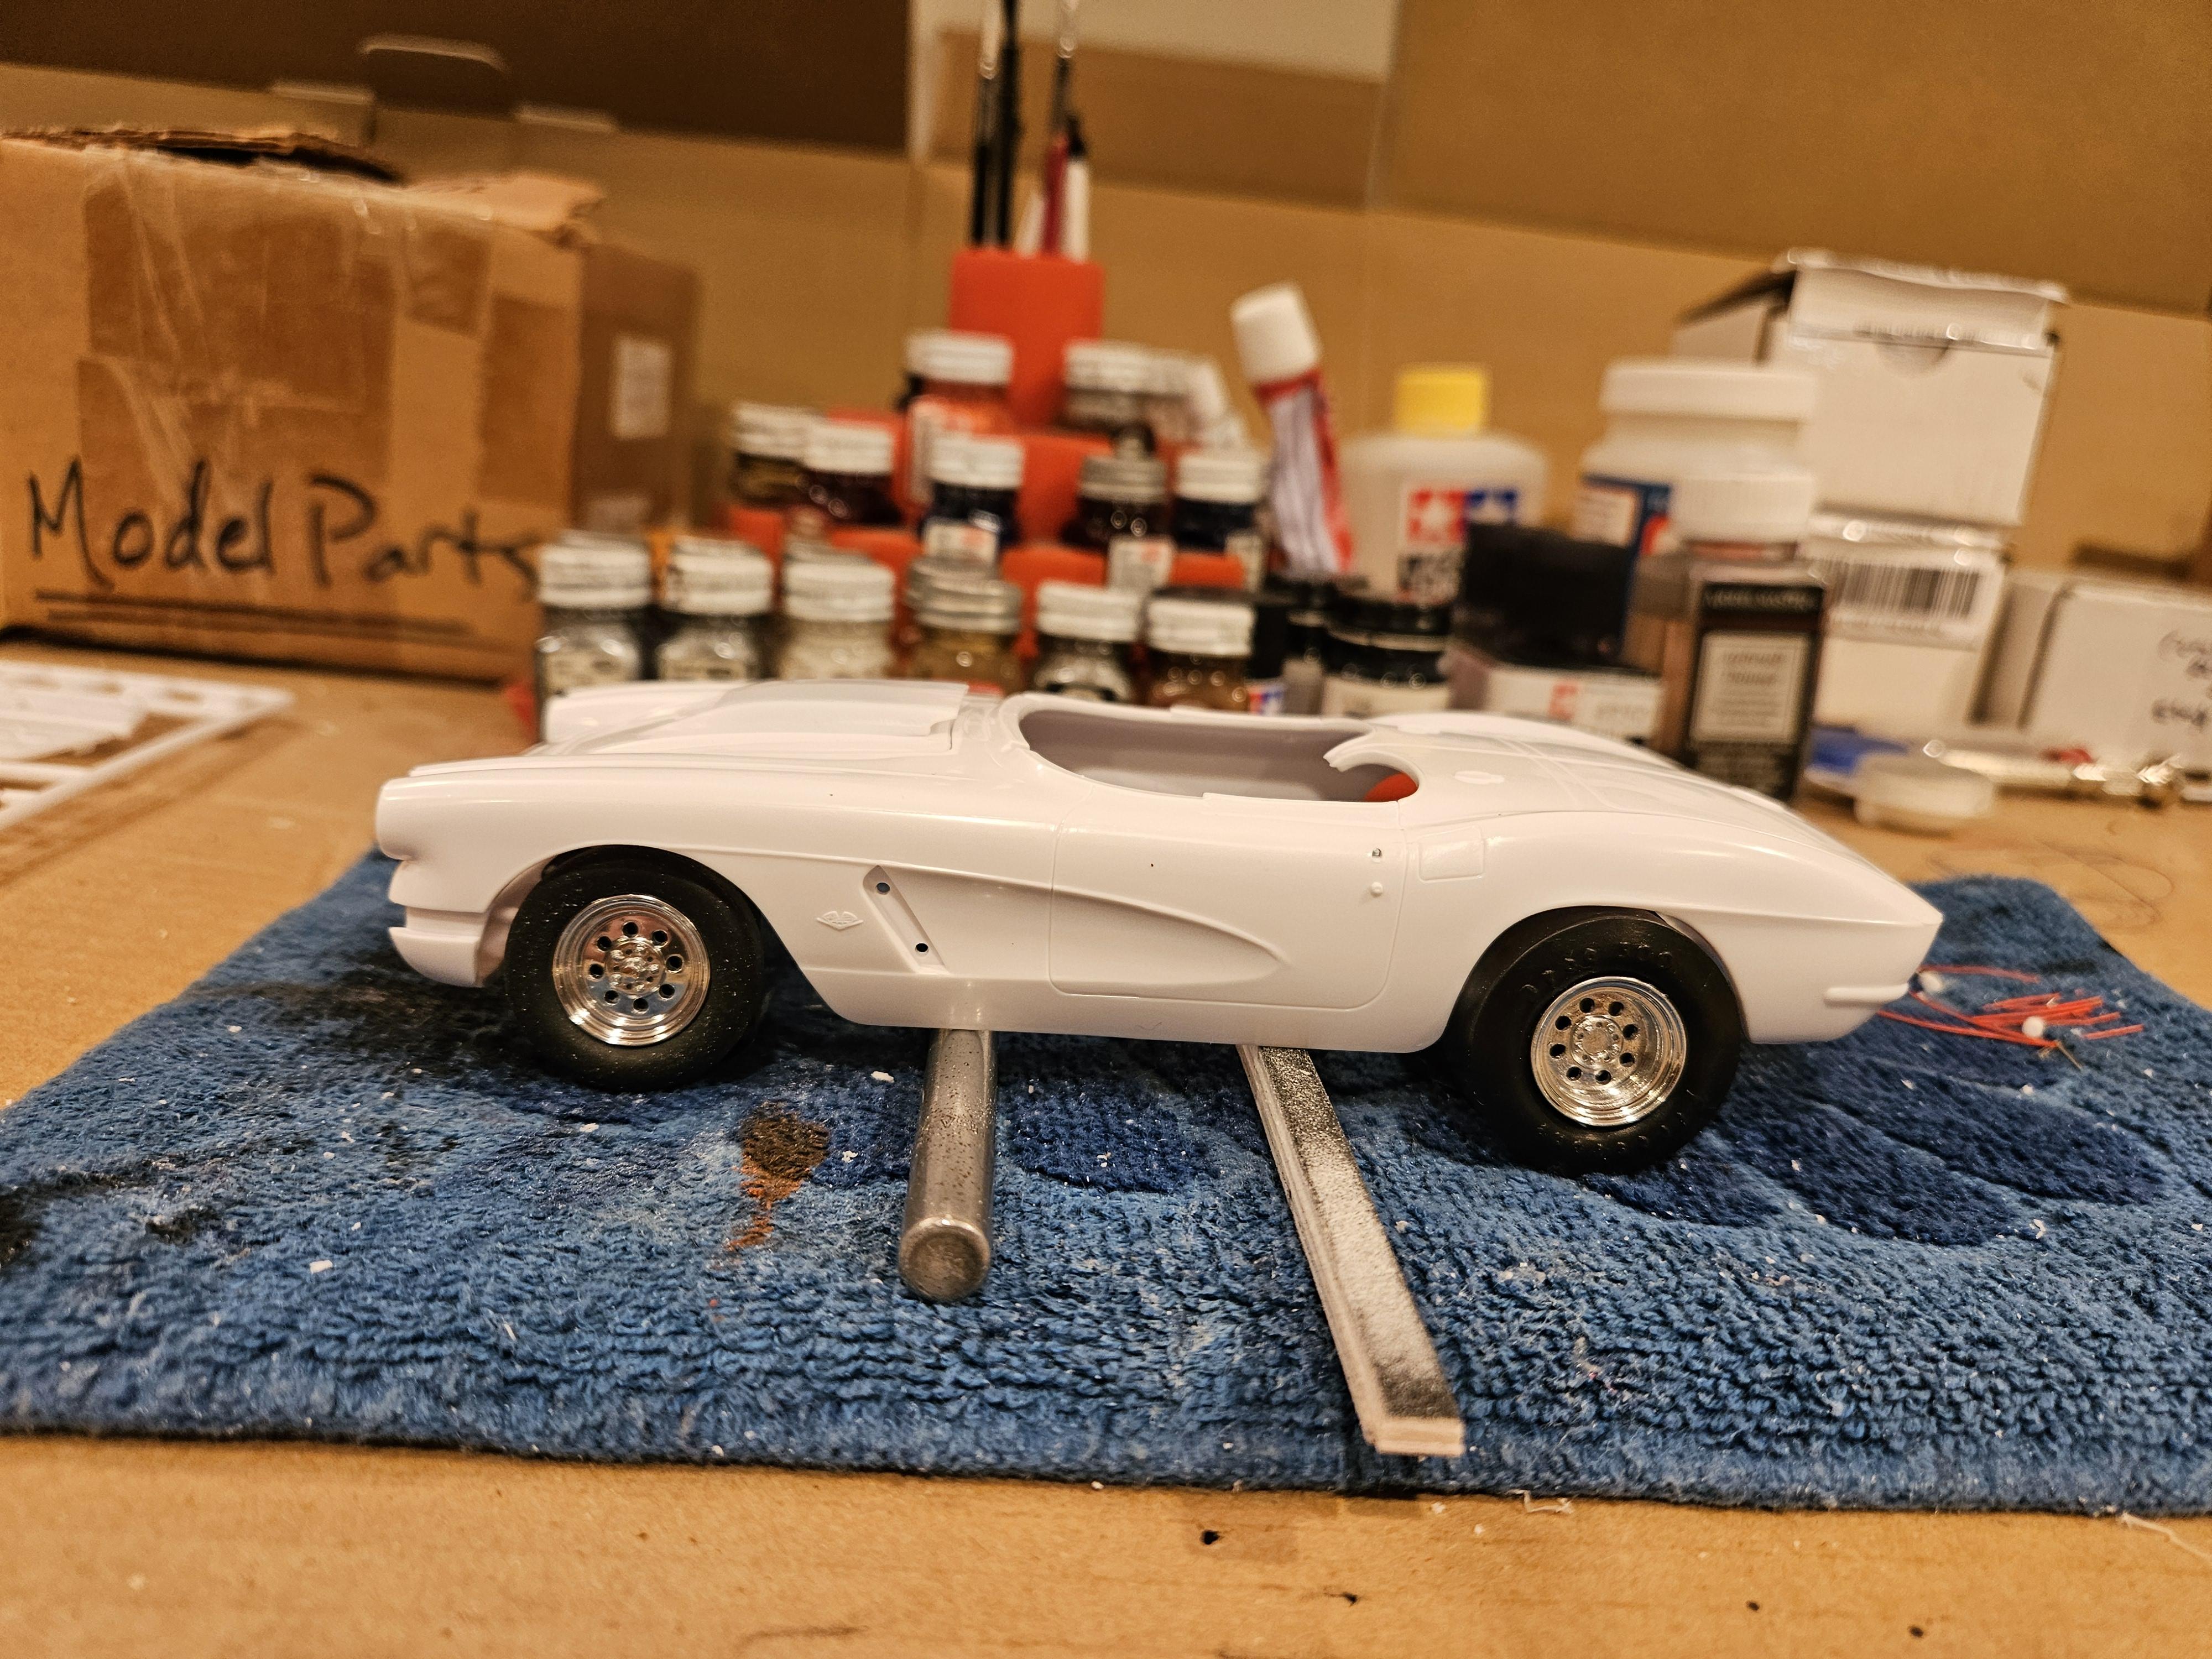
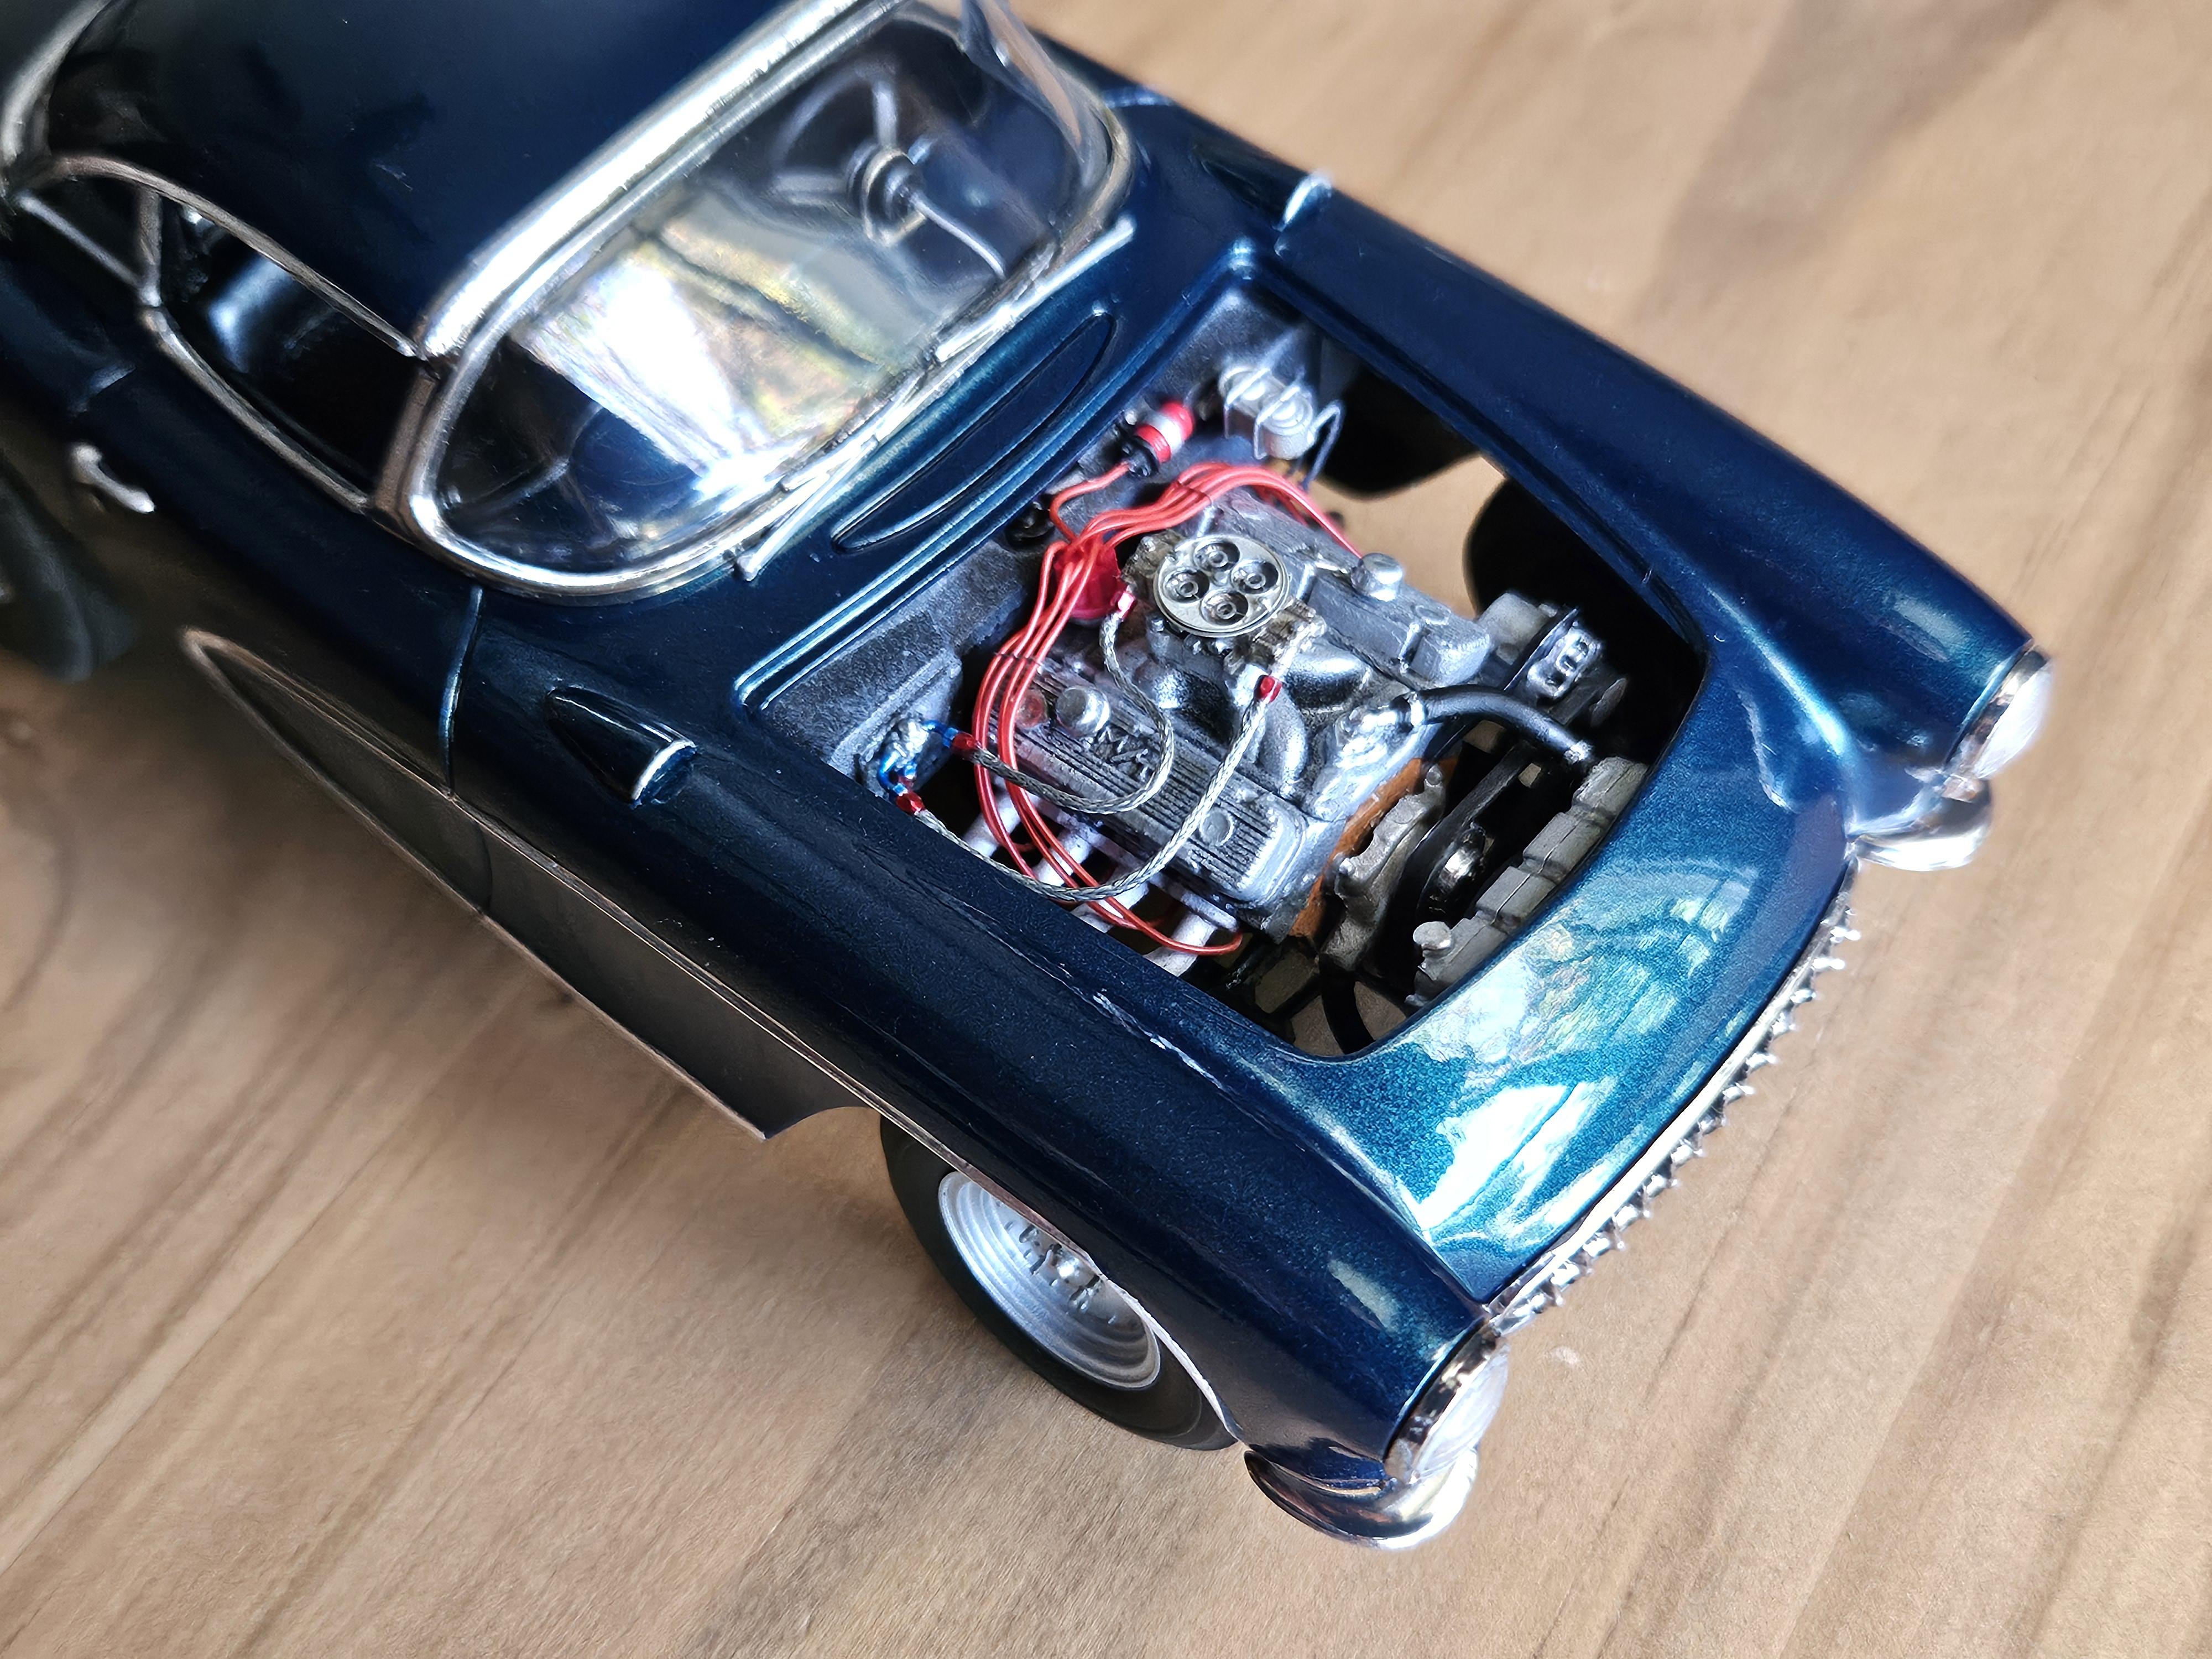
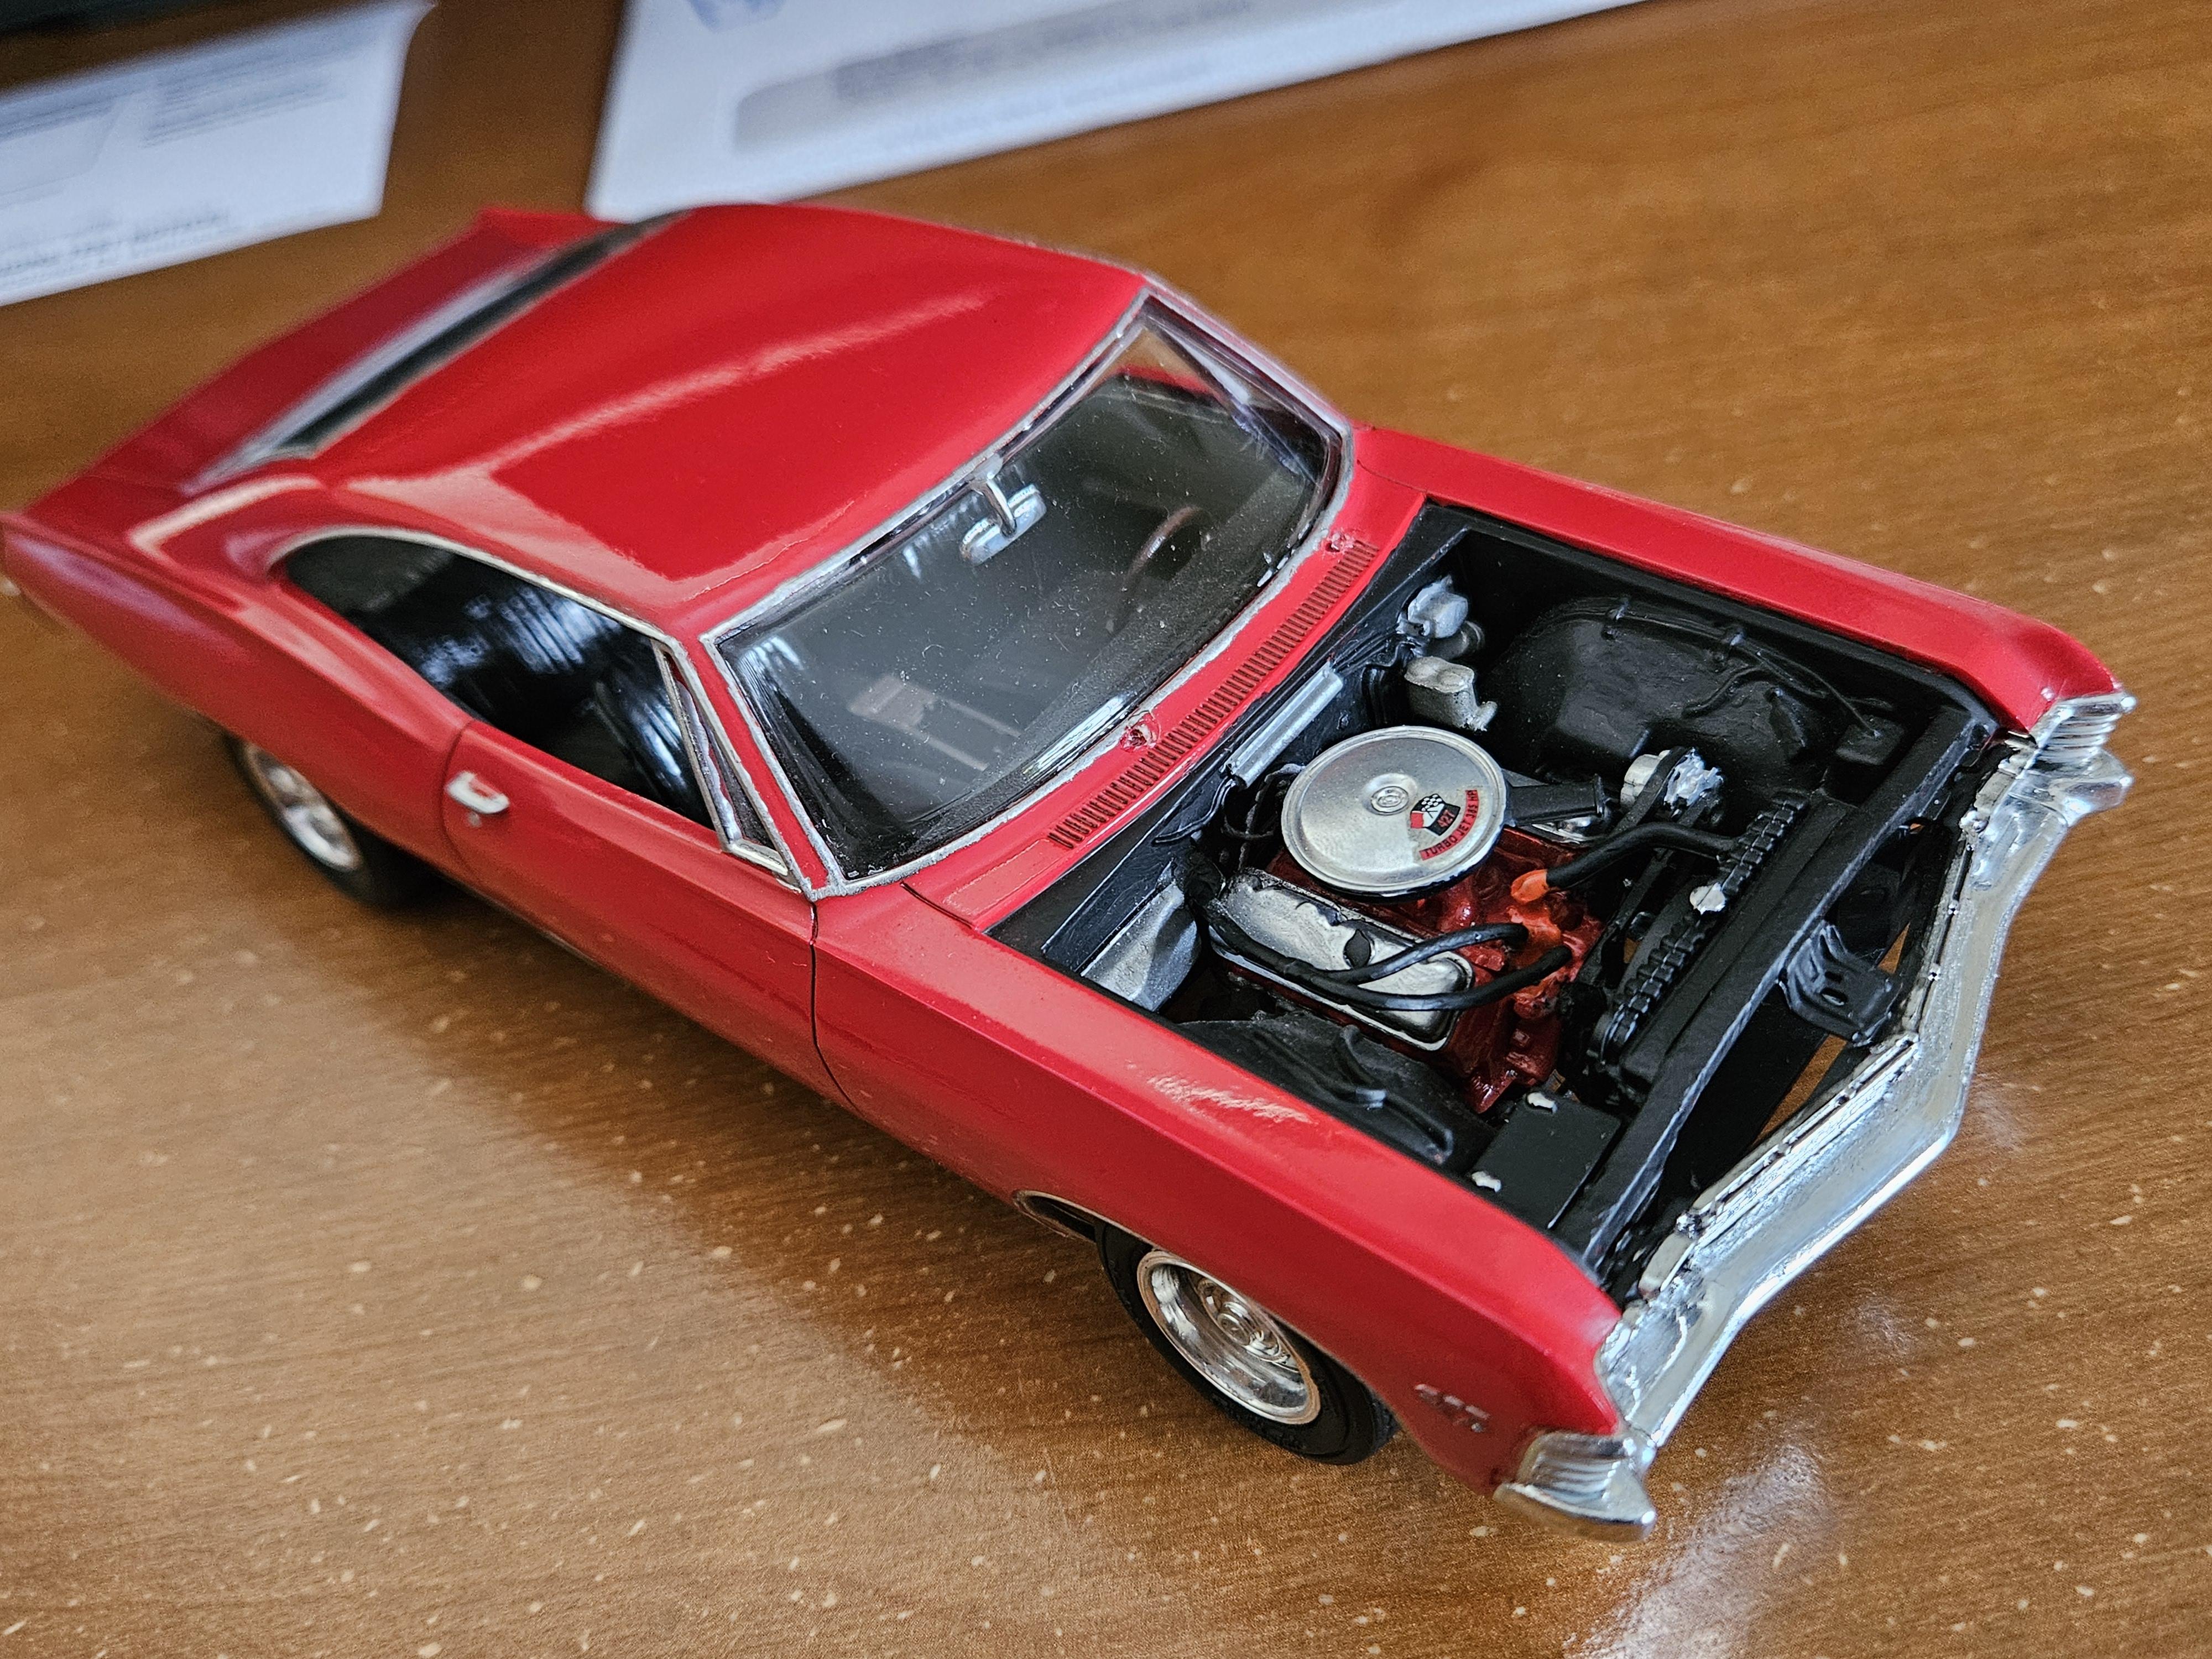
Painted most of the engine and mocked it up temporarily to see how it'll look. And got some primer on the body and hood. Decided to sand off the corvette lettering and emblem from the front since there was a mold line going right through it..and the decals from the kit didn't line up well with the molded in emblem and letters. So need to prime it again and make sure it's all smooth and then paint to follow.
-
1962 Corvette street/strip build (replica)
keviiin86 replied to keviiin86's topic in WIP: Drag Racing Models
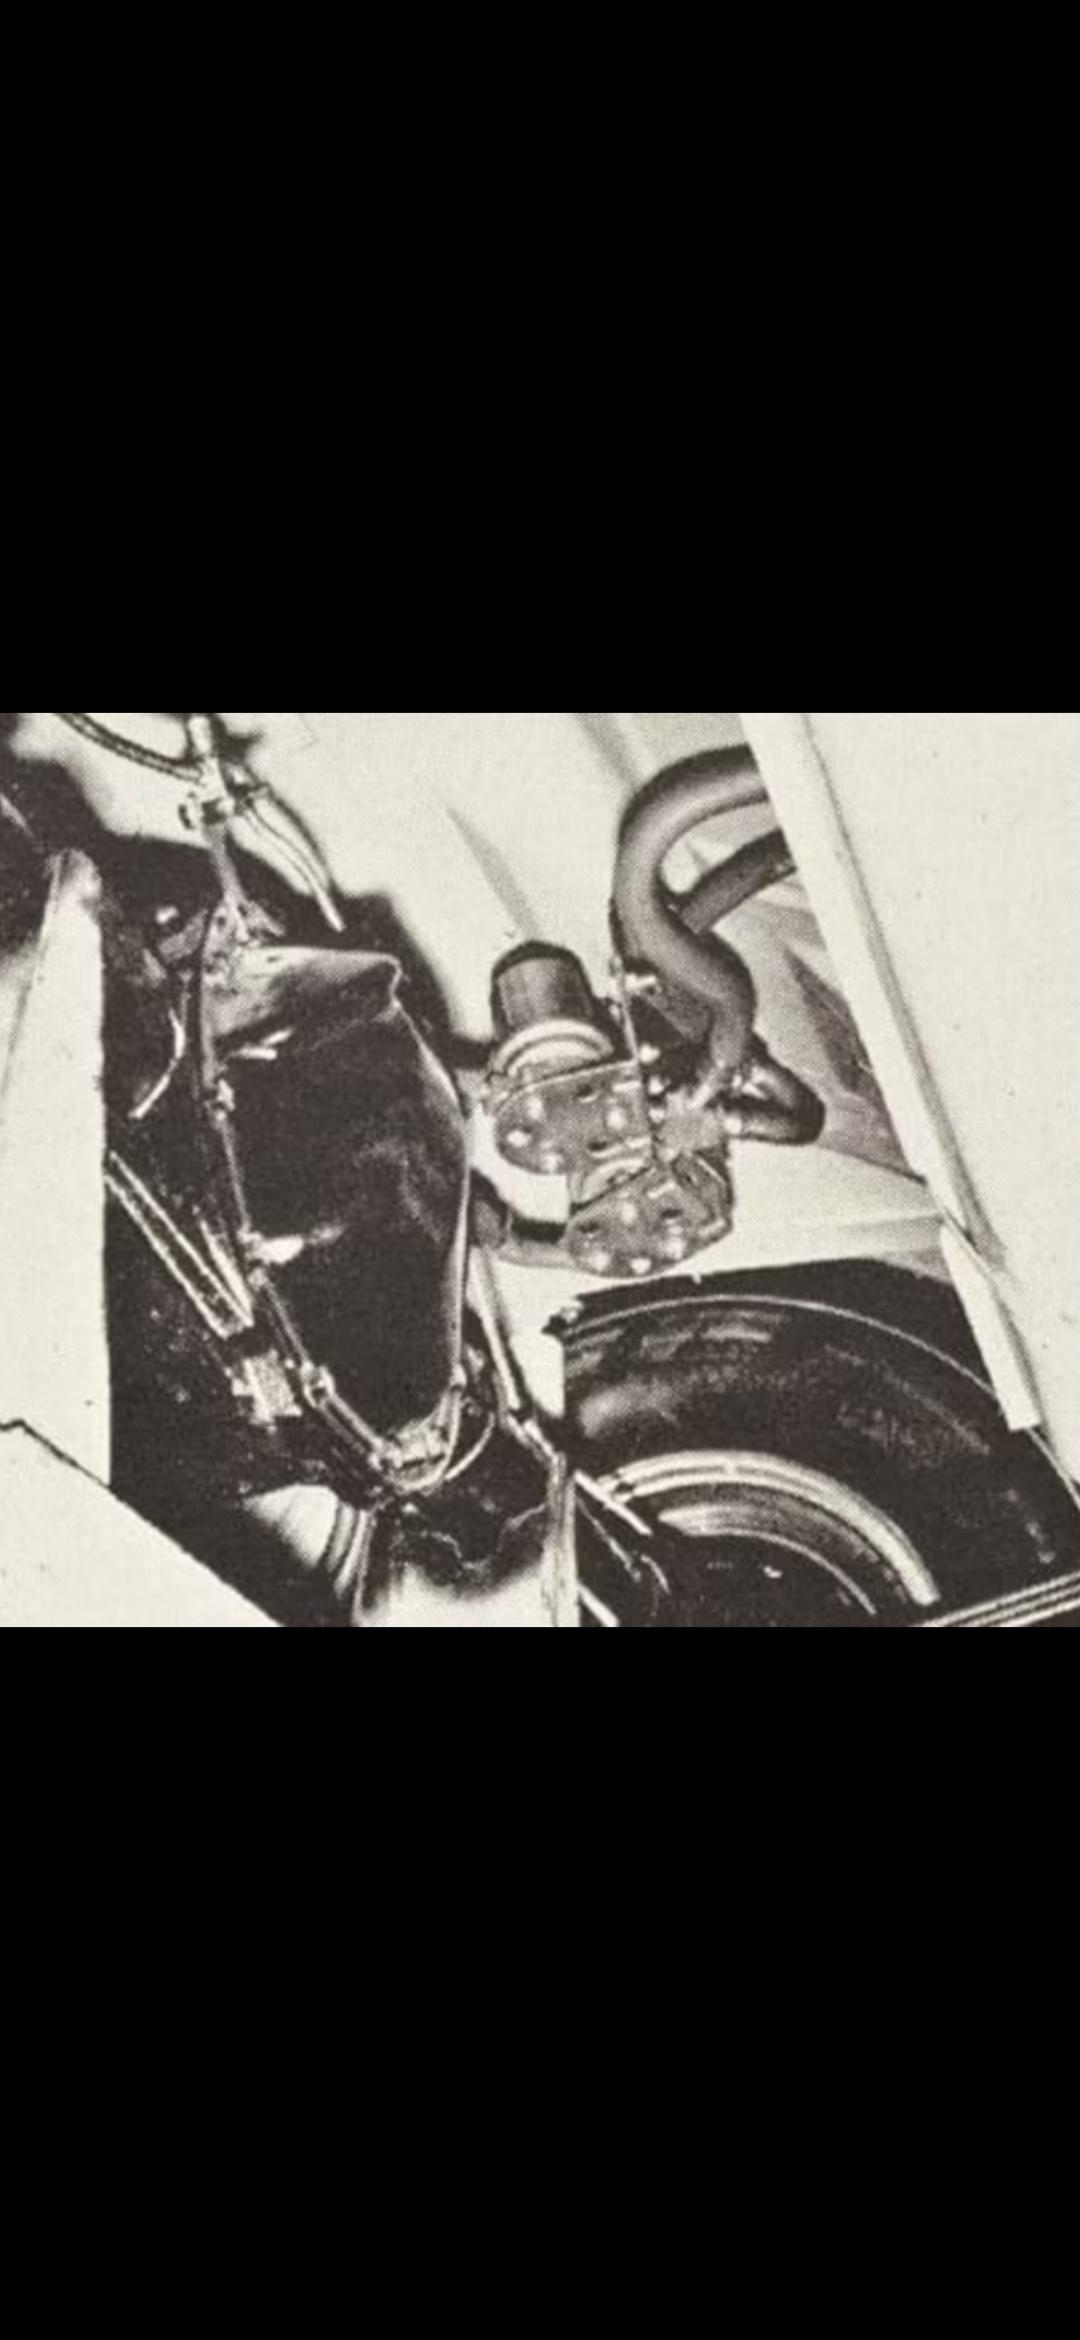
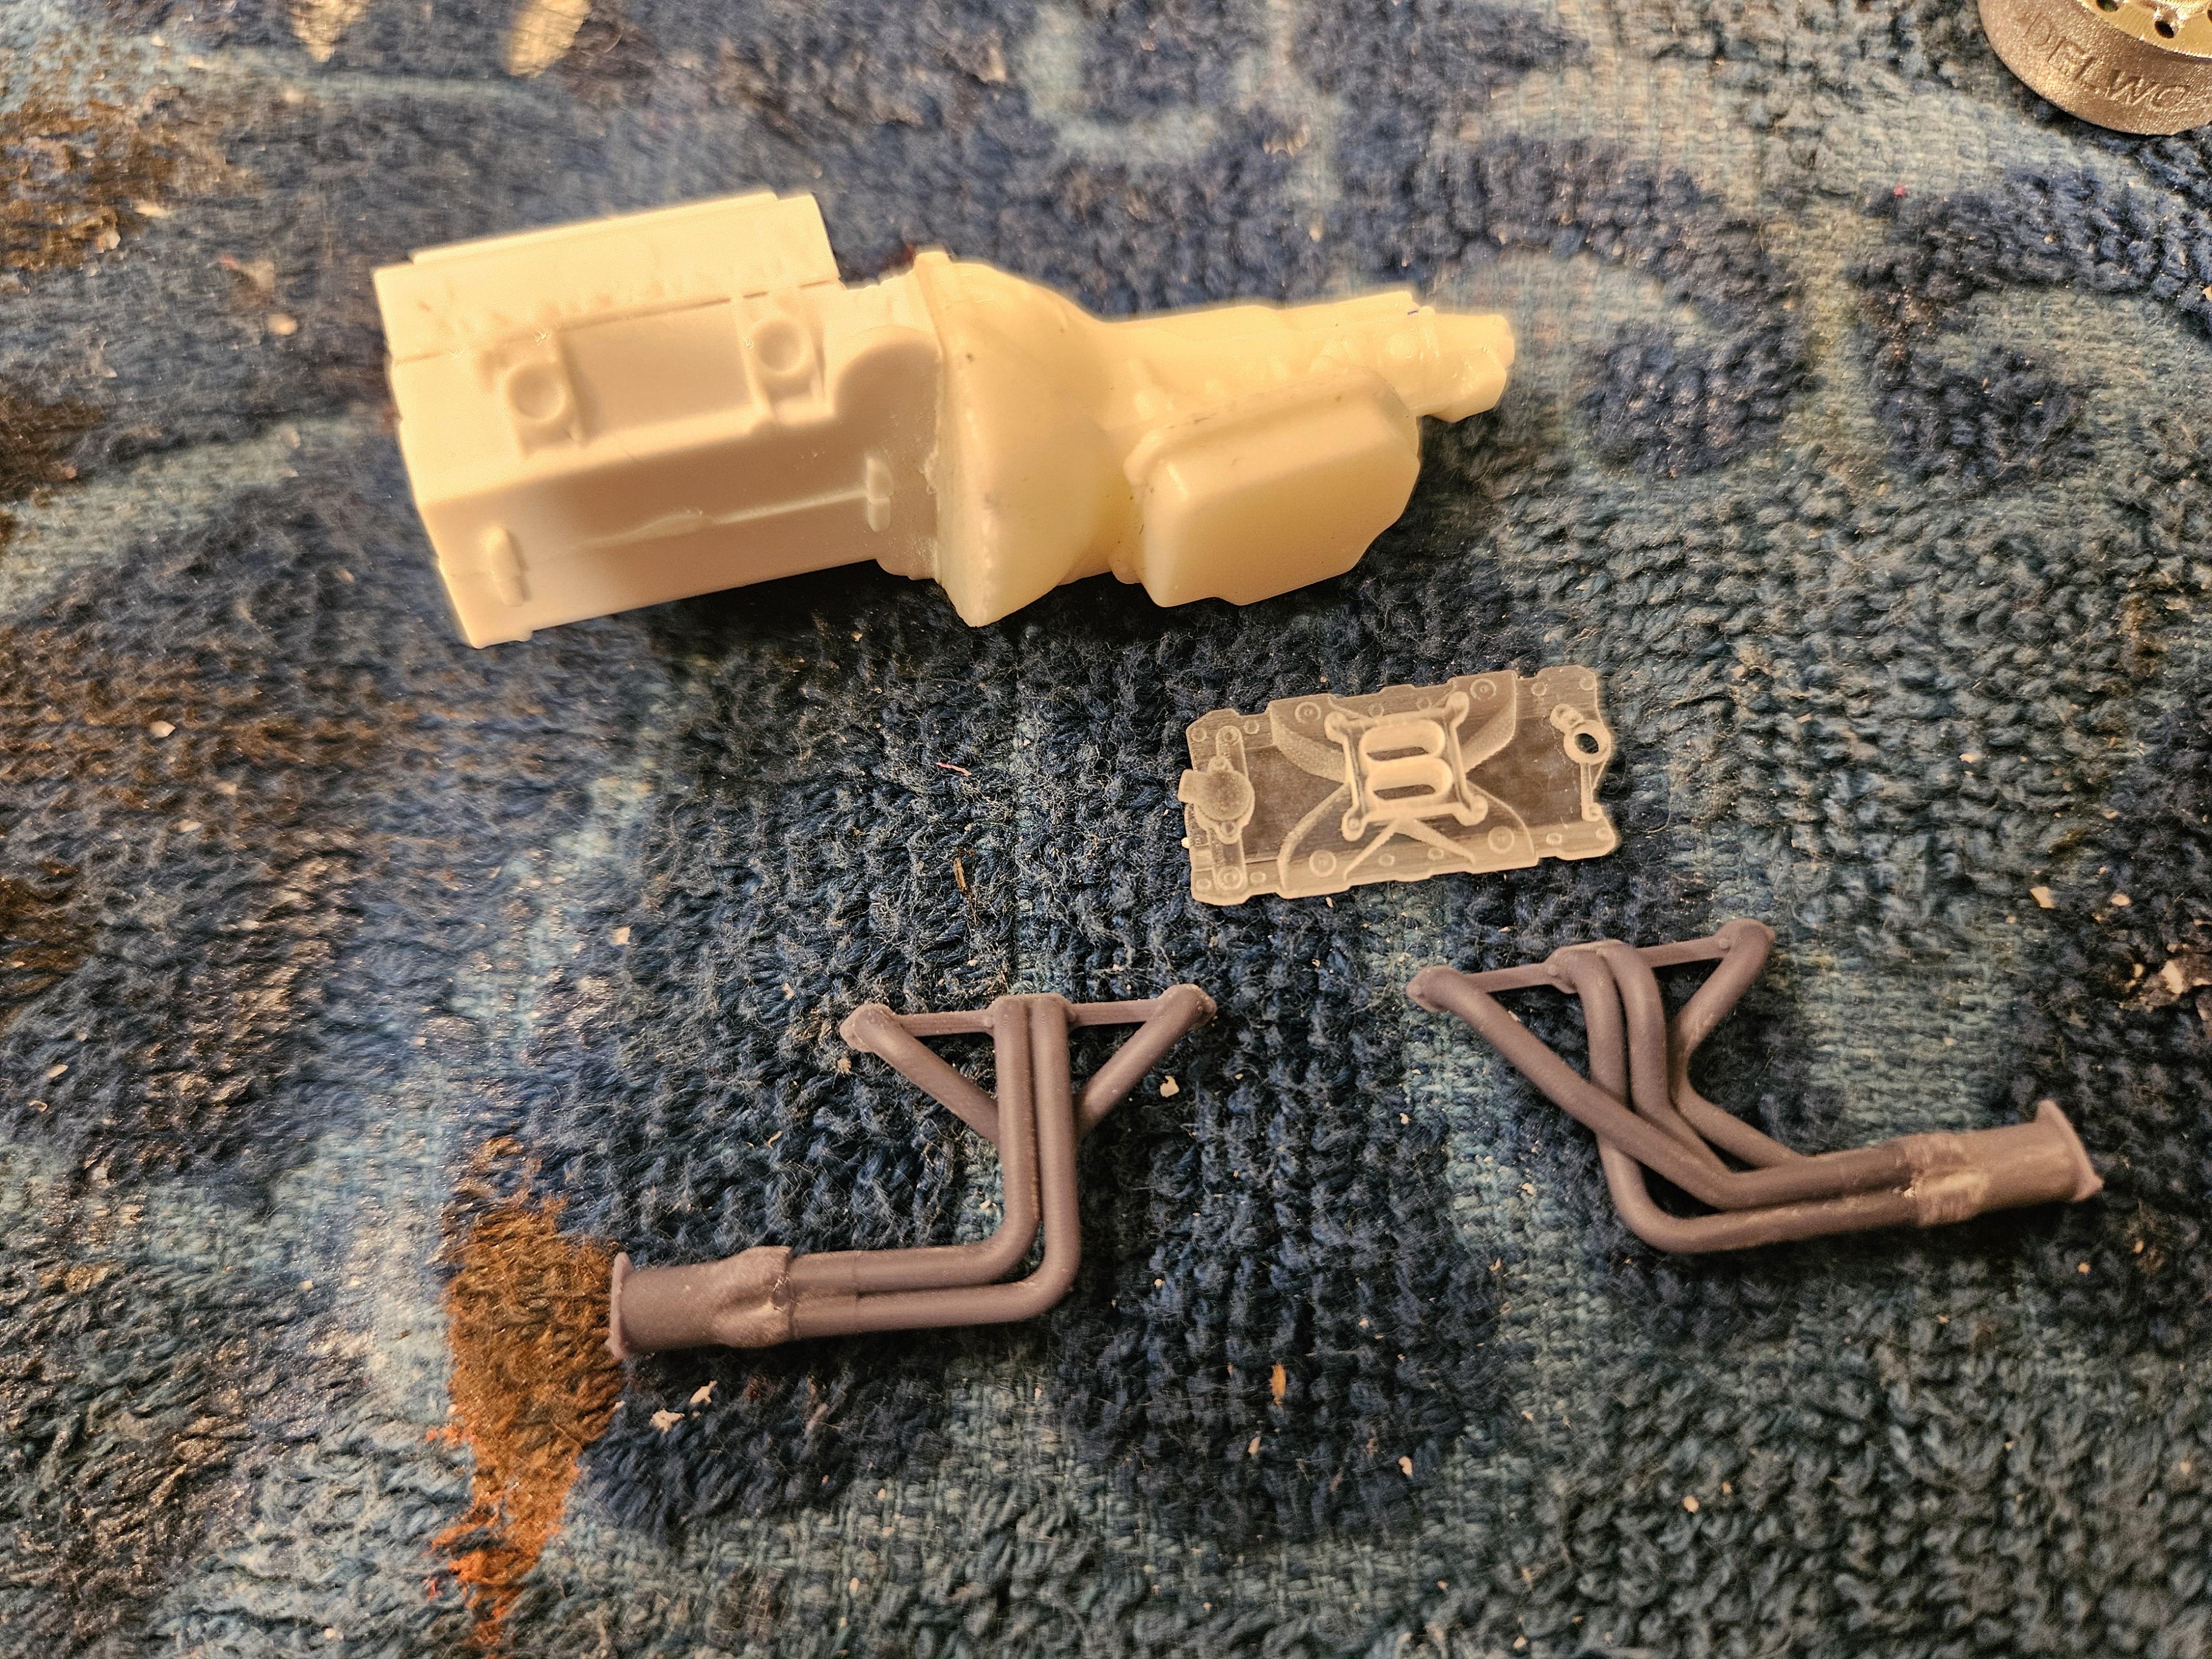
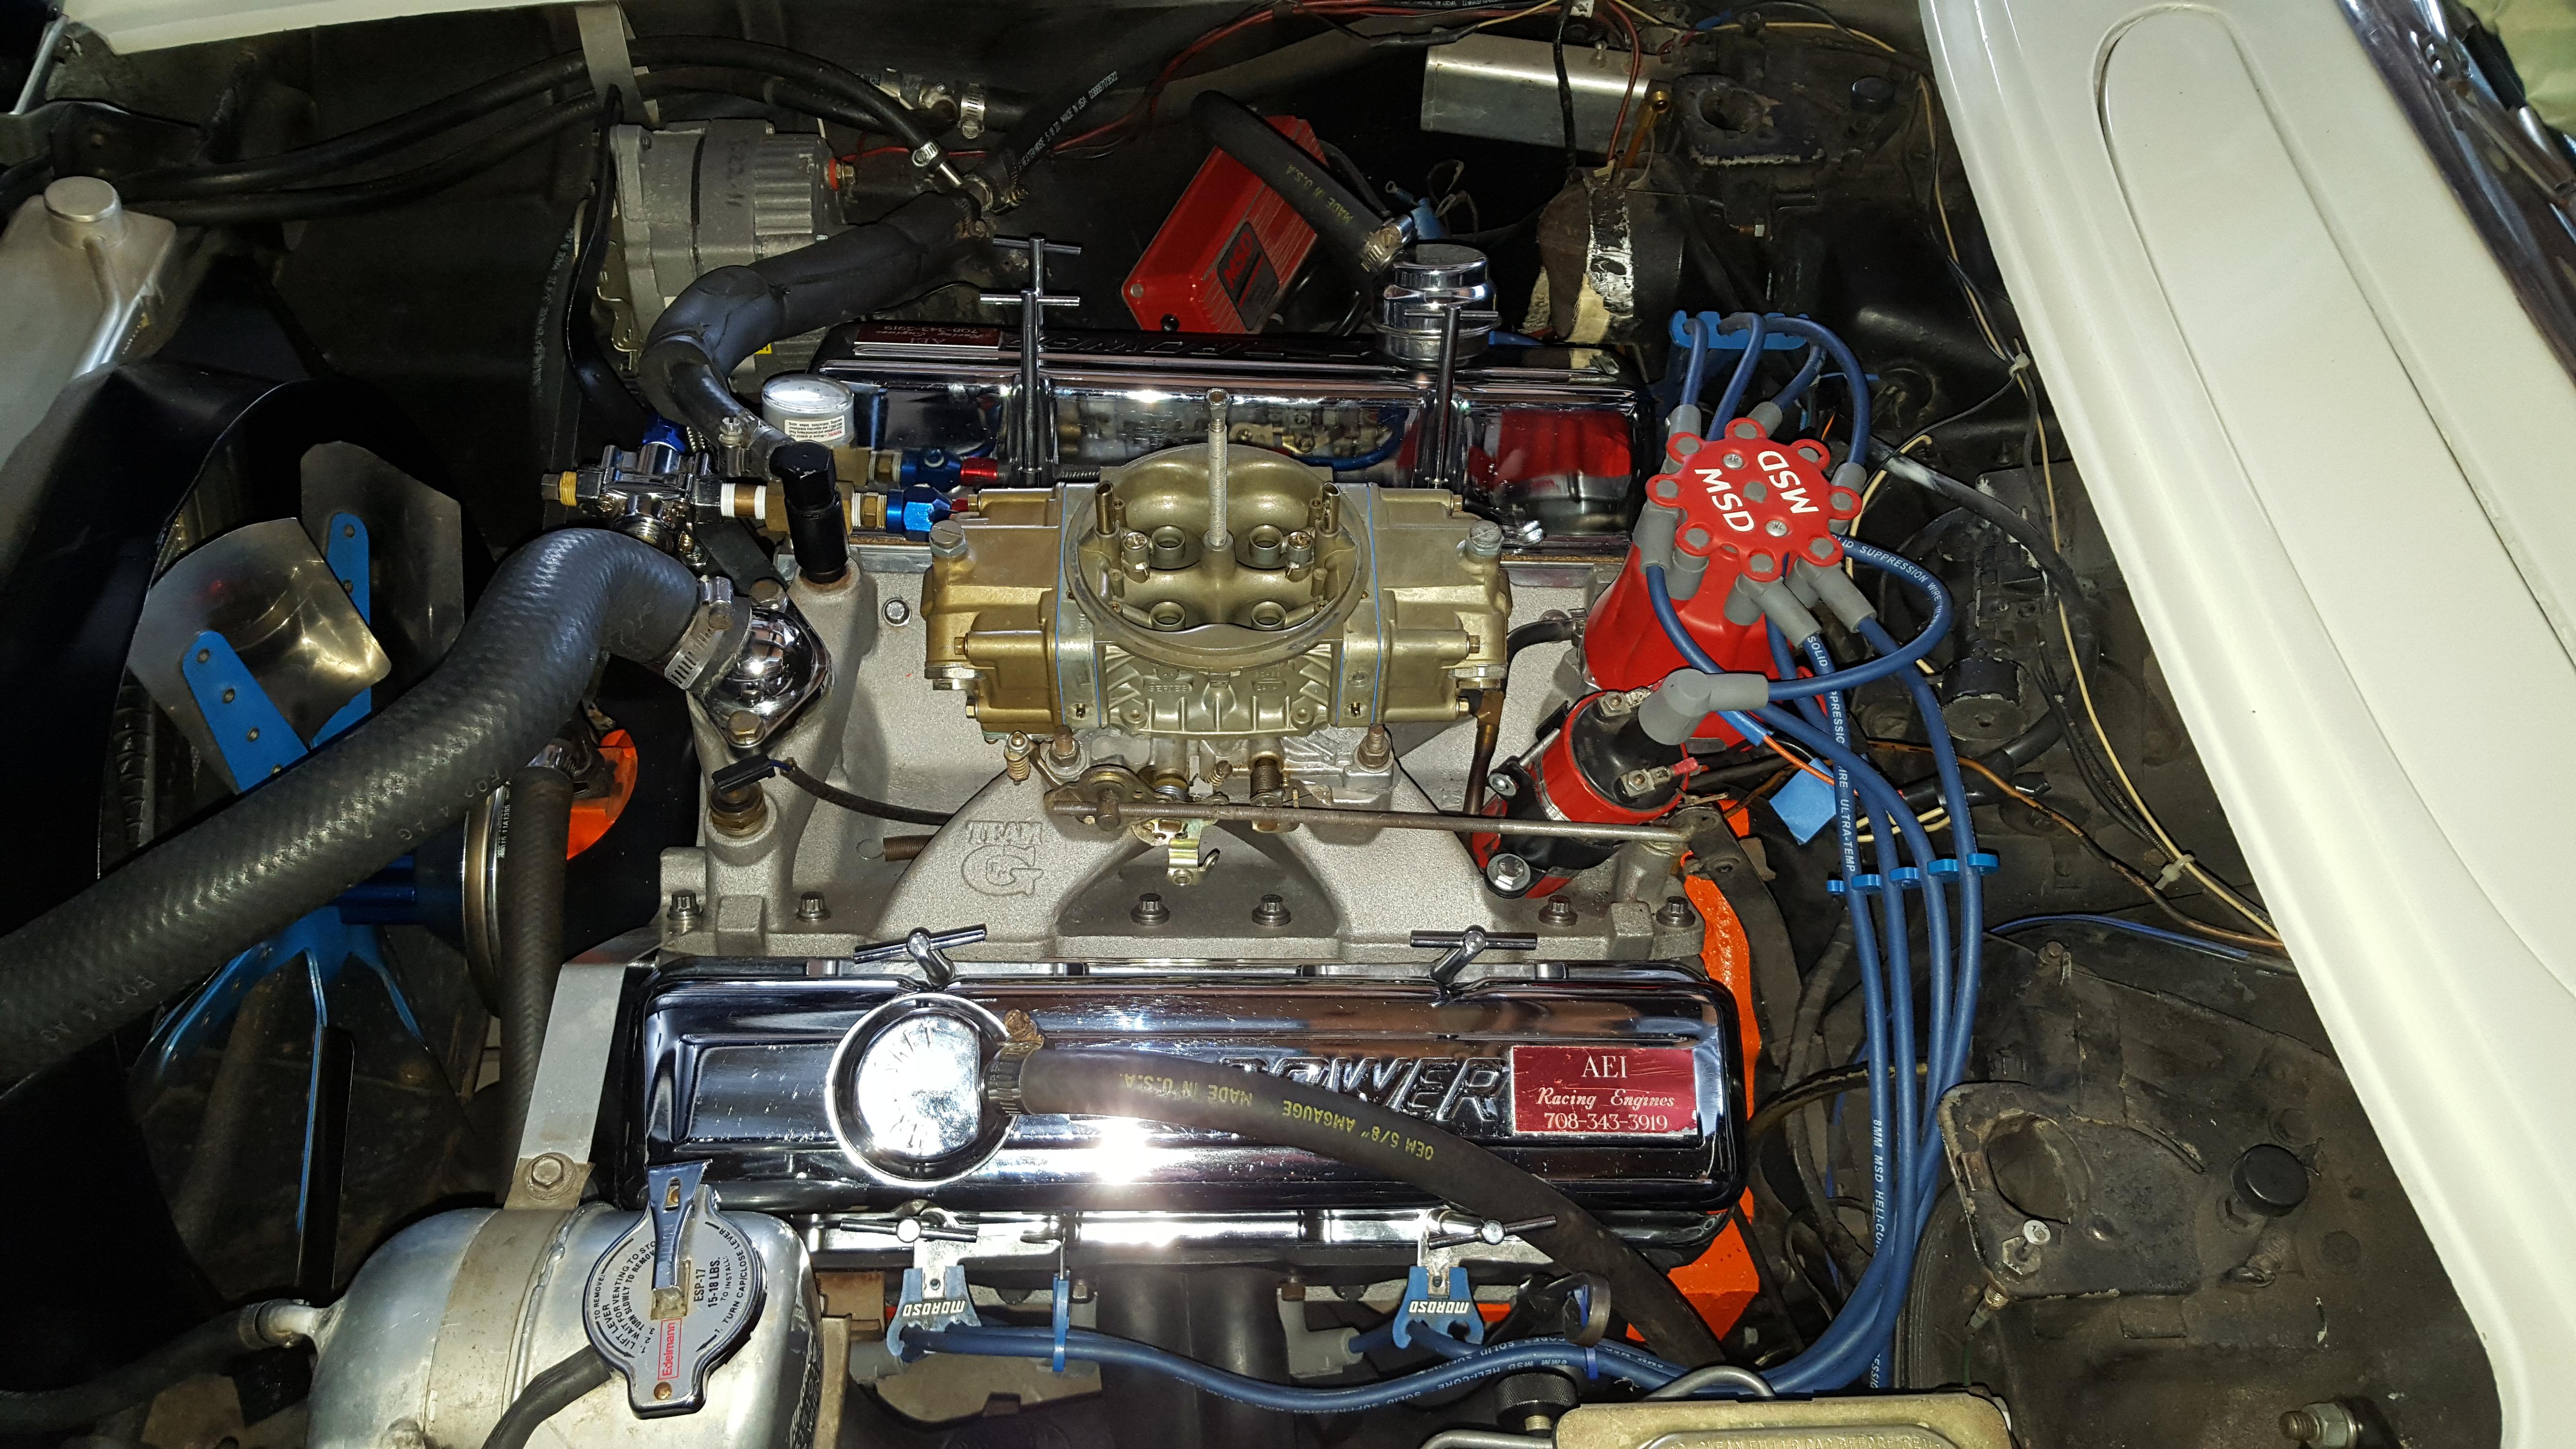
Little more progress today. Got the trans cut off and the resin th400 glued on. Been collecting parts for the past year, got a single plane victor jr intake from Ron Olsens shapeways page (close in design to the weiand team G that's on the car). And headers are from VCG. Those headers had to have been scanned from an actual set of hooker C1-C2 corvette long tube headers because they look nearly identical to what's on the car. Also got the wheels painted and finished up and tires sanded down.
-
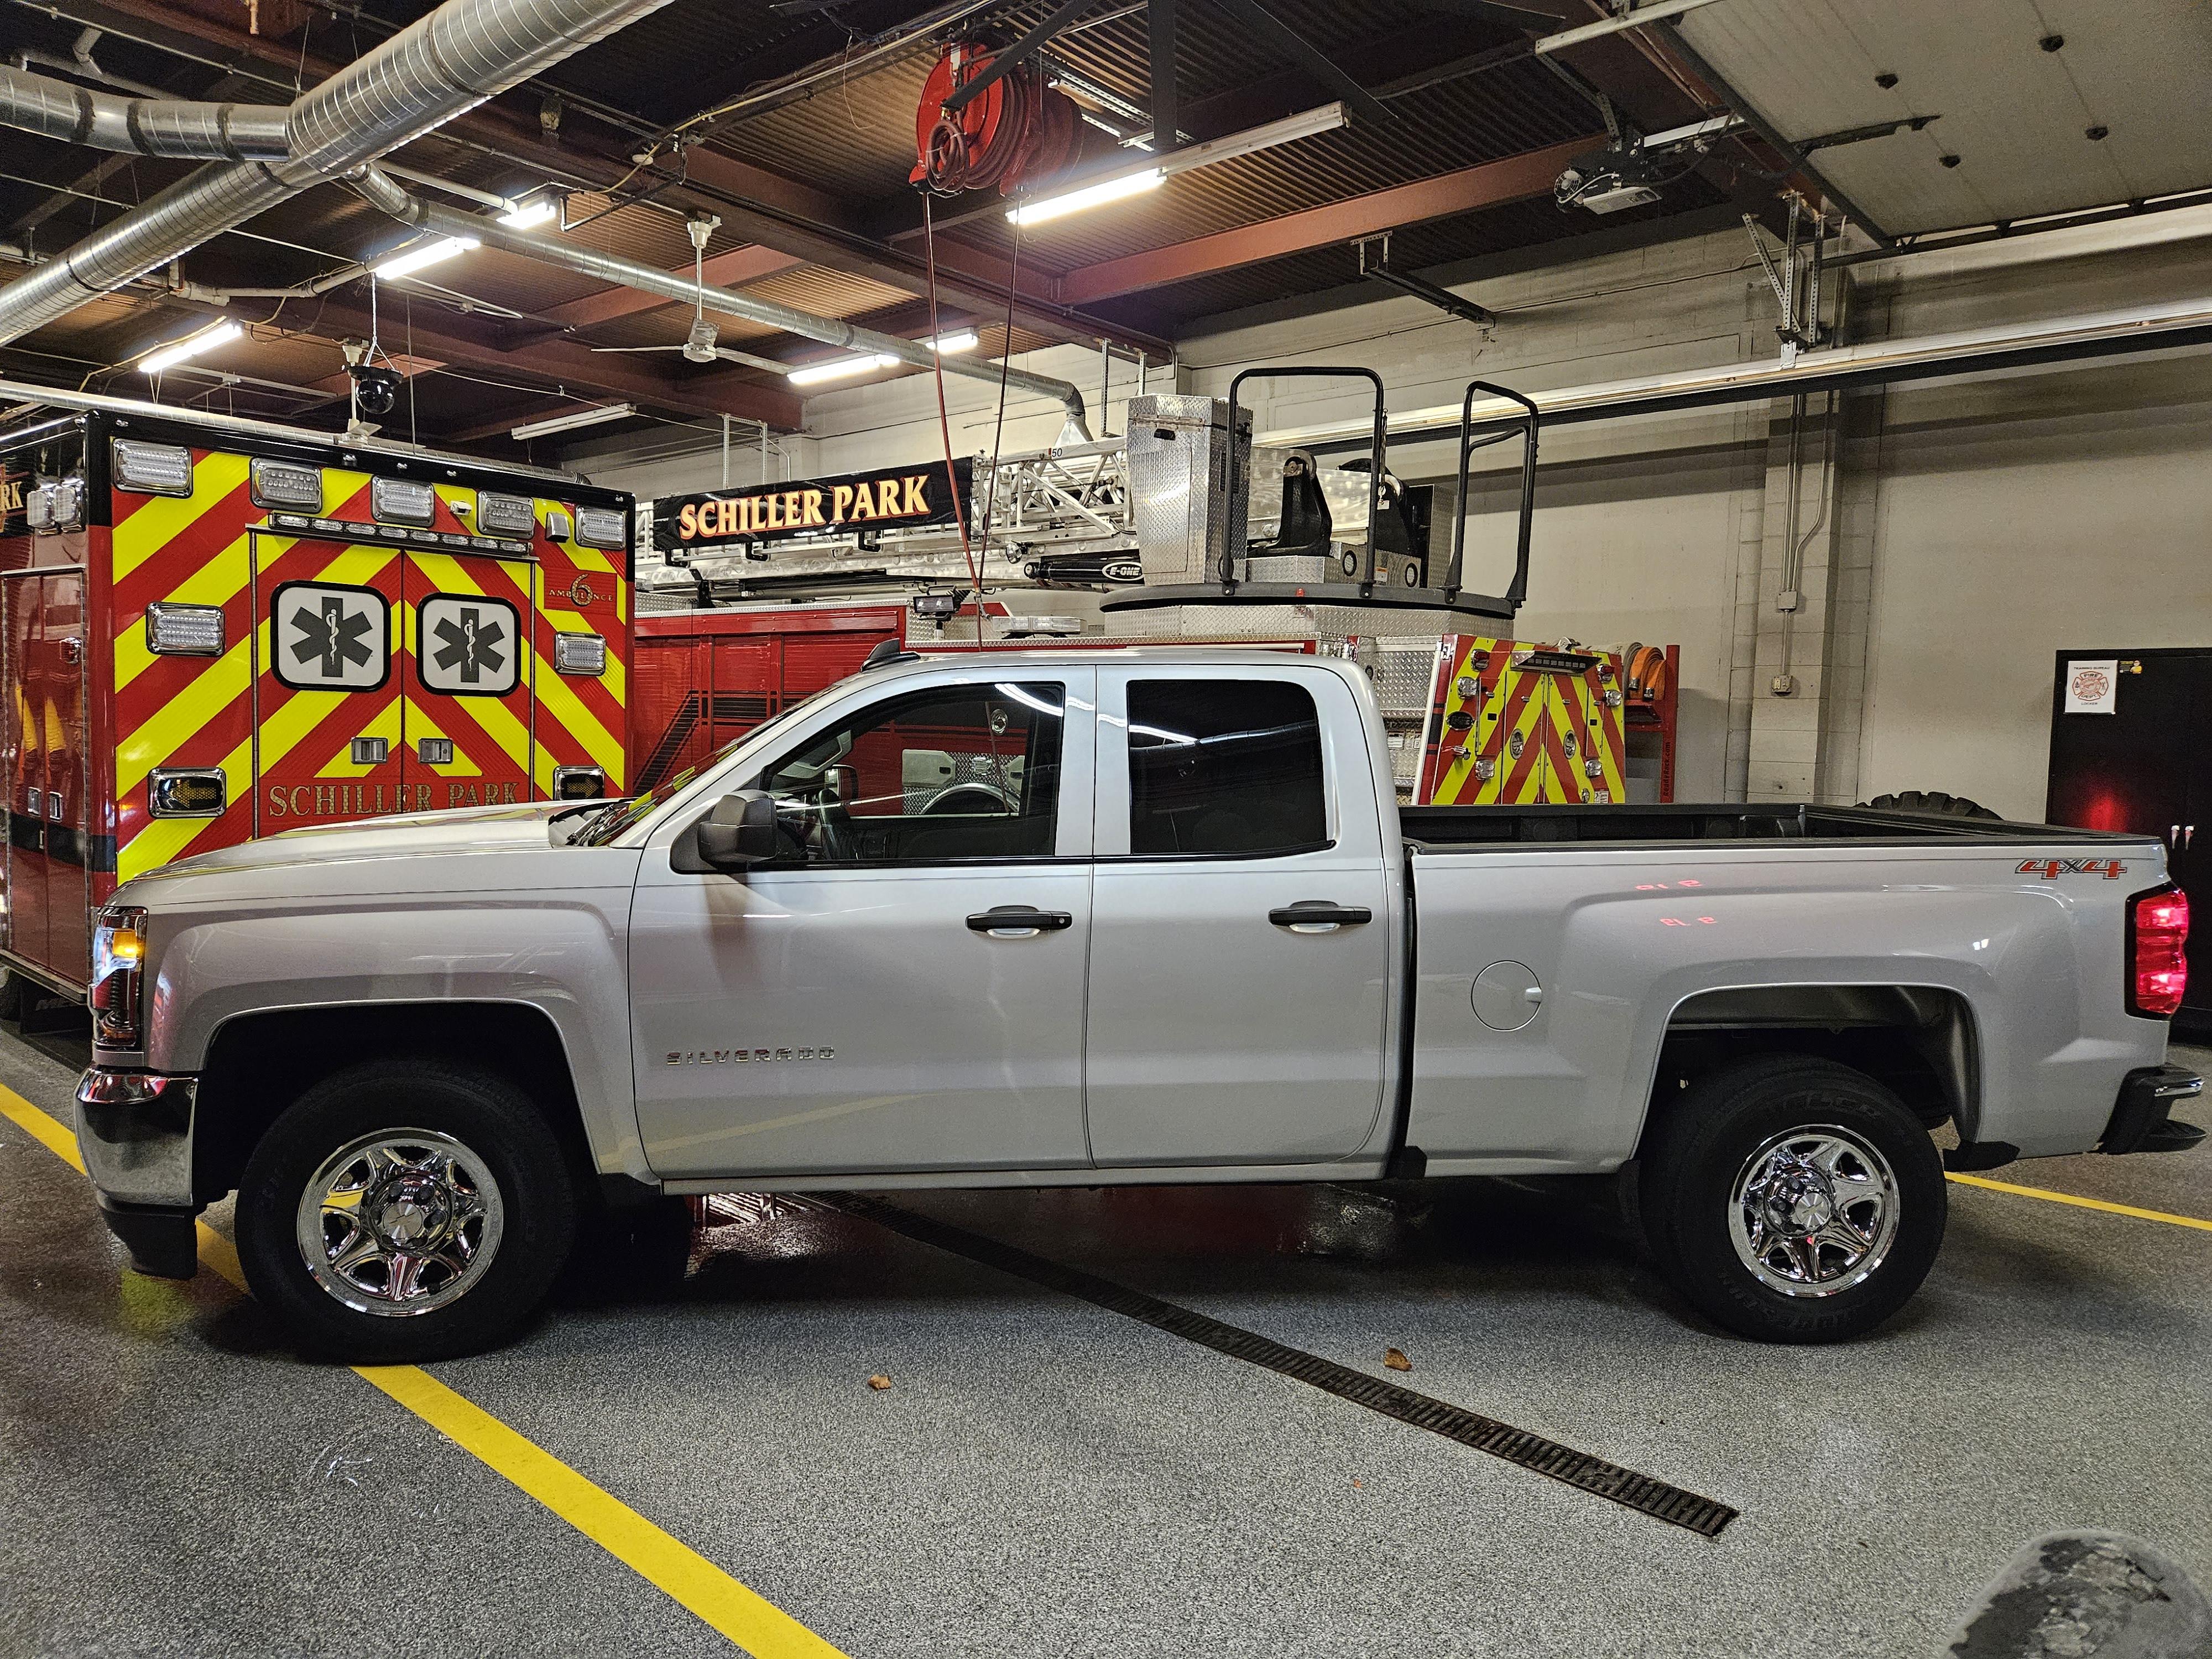
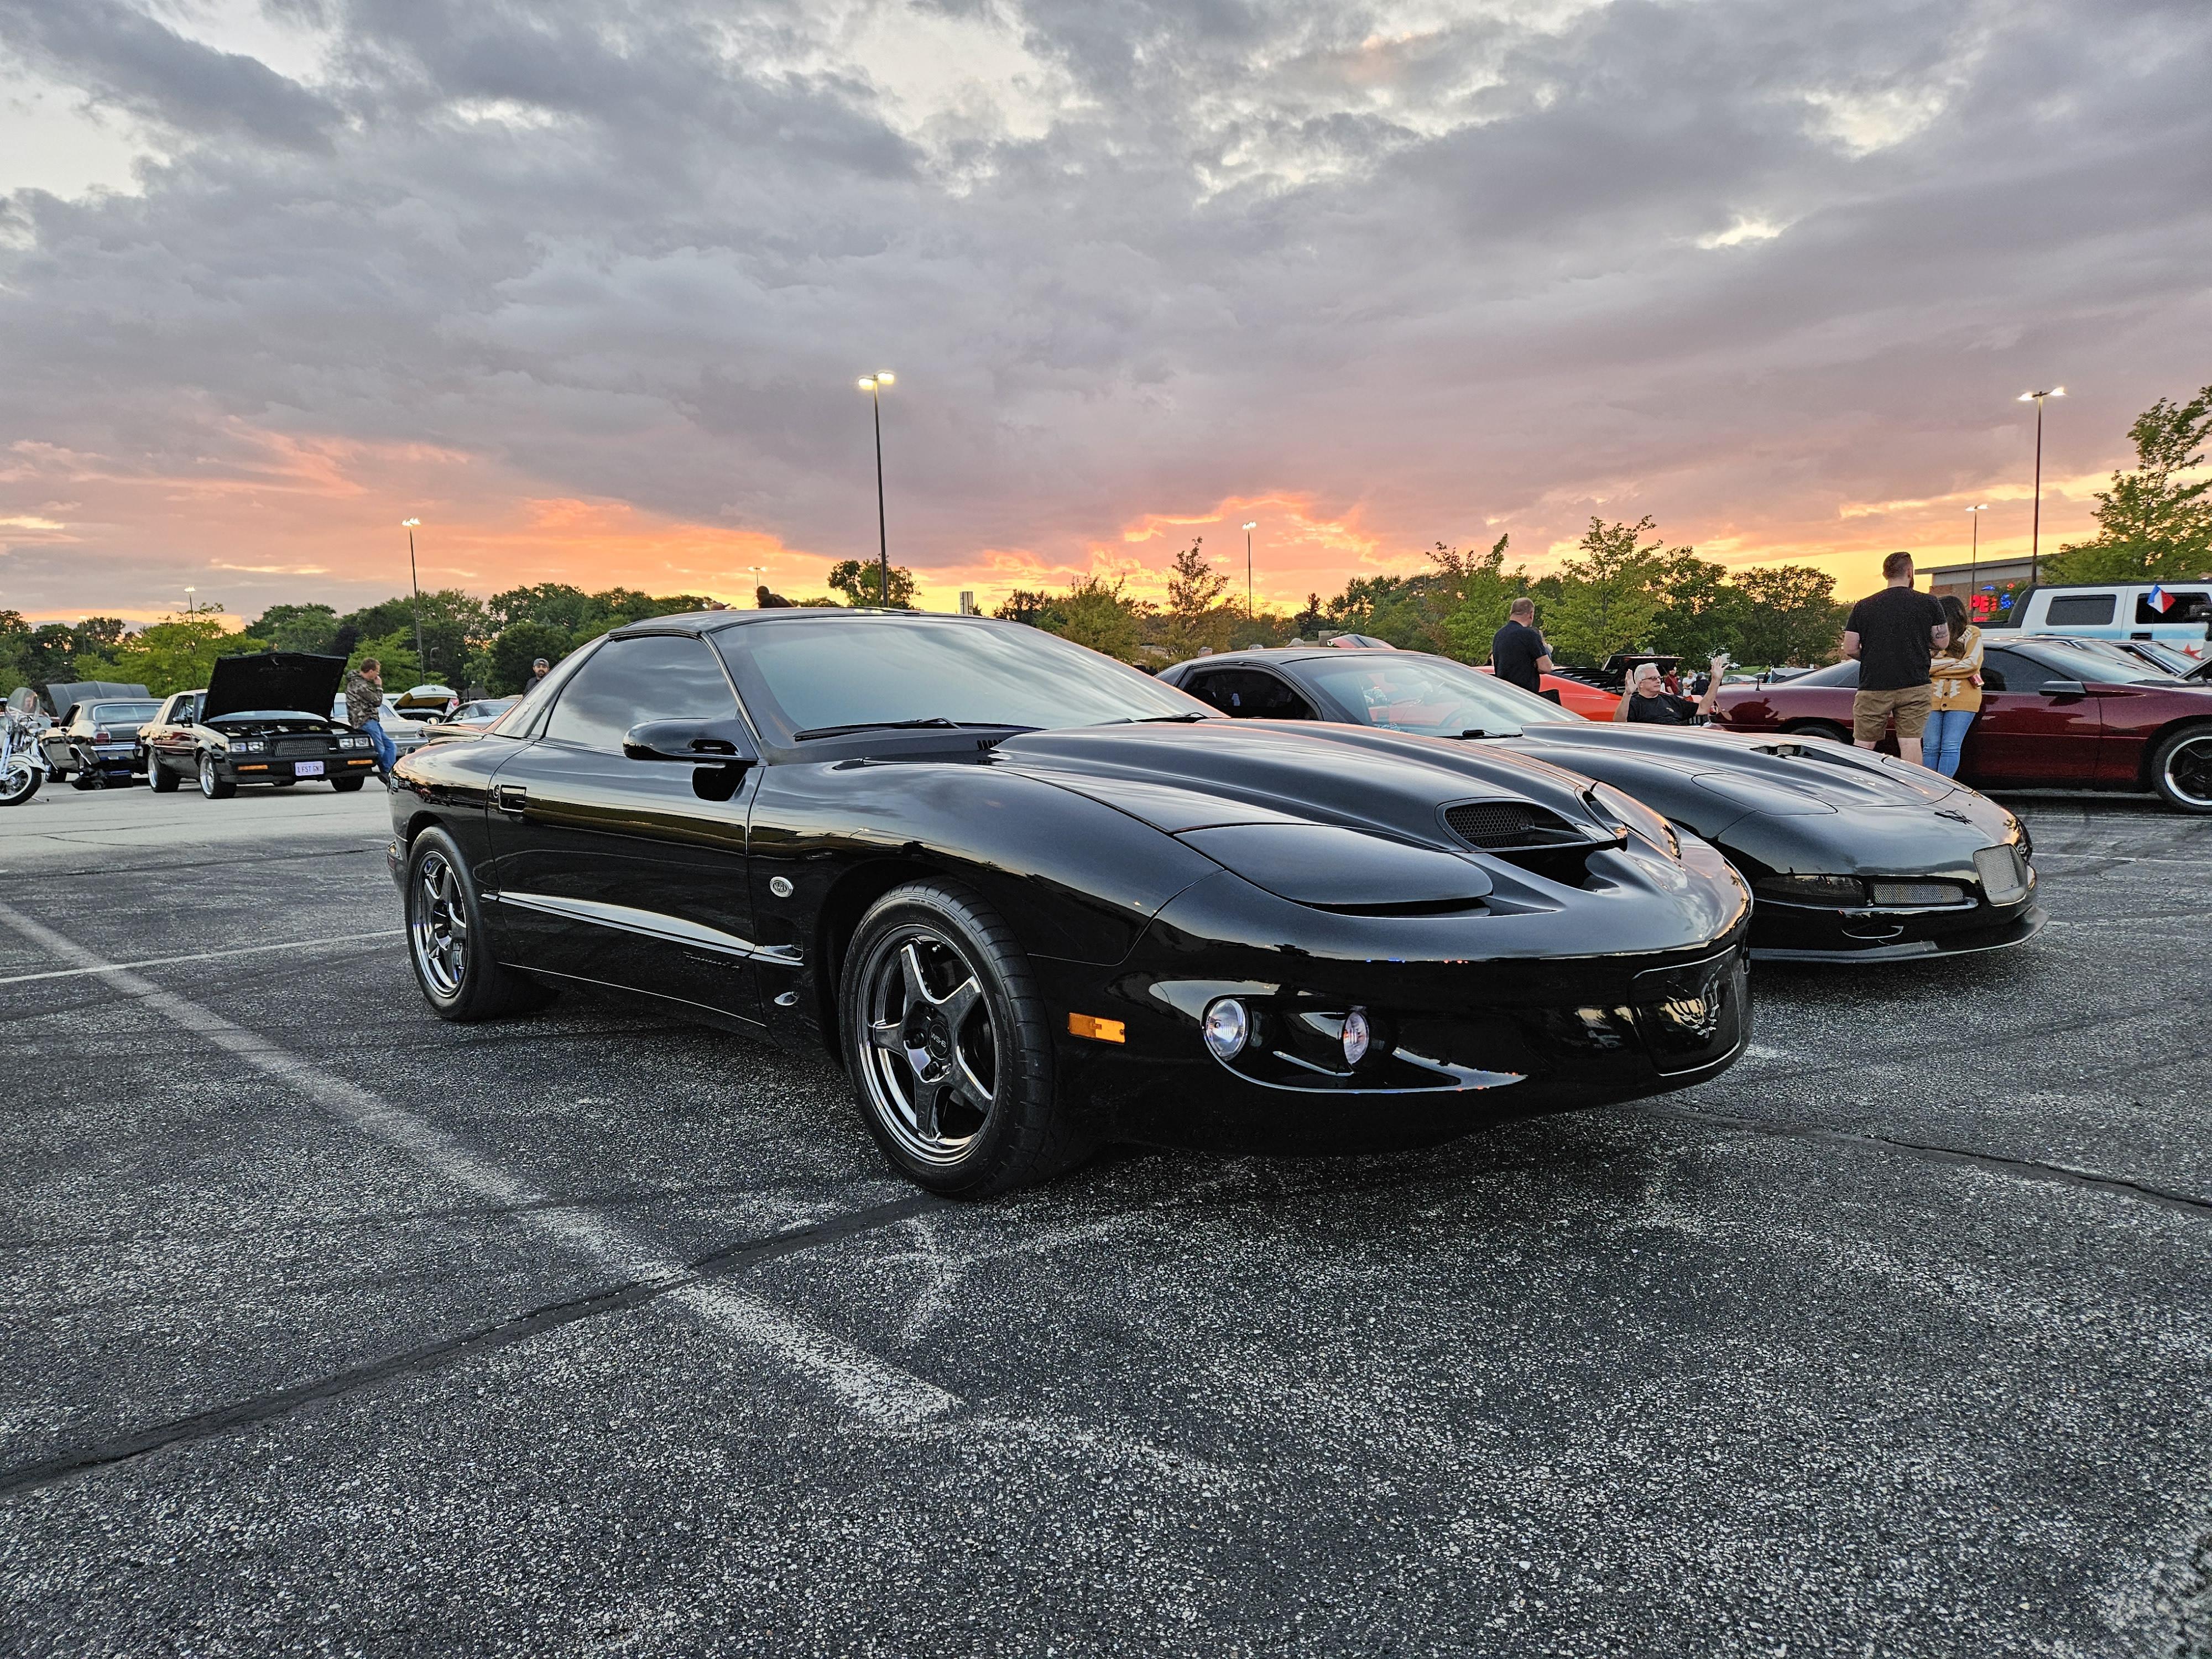
Here's my two..2017 silverado LS 5.3 and a 2002 firebird formula
-
1962 Corvette street/strip build (replica)
keviiin86 replied to keviiin86's topic in WIP: Drag Racing Models
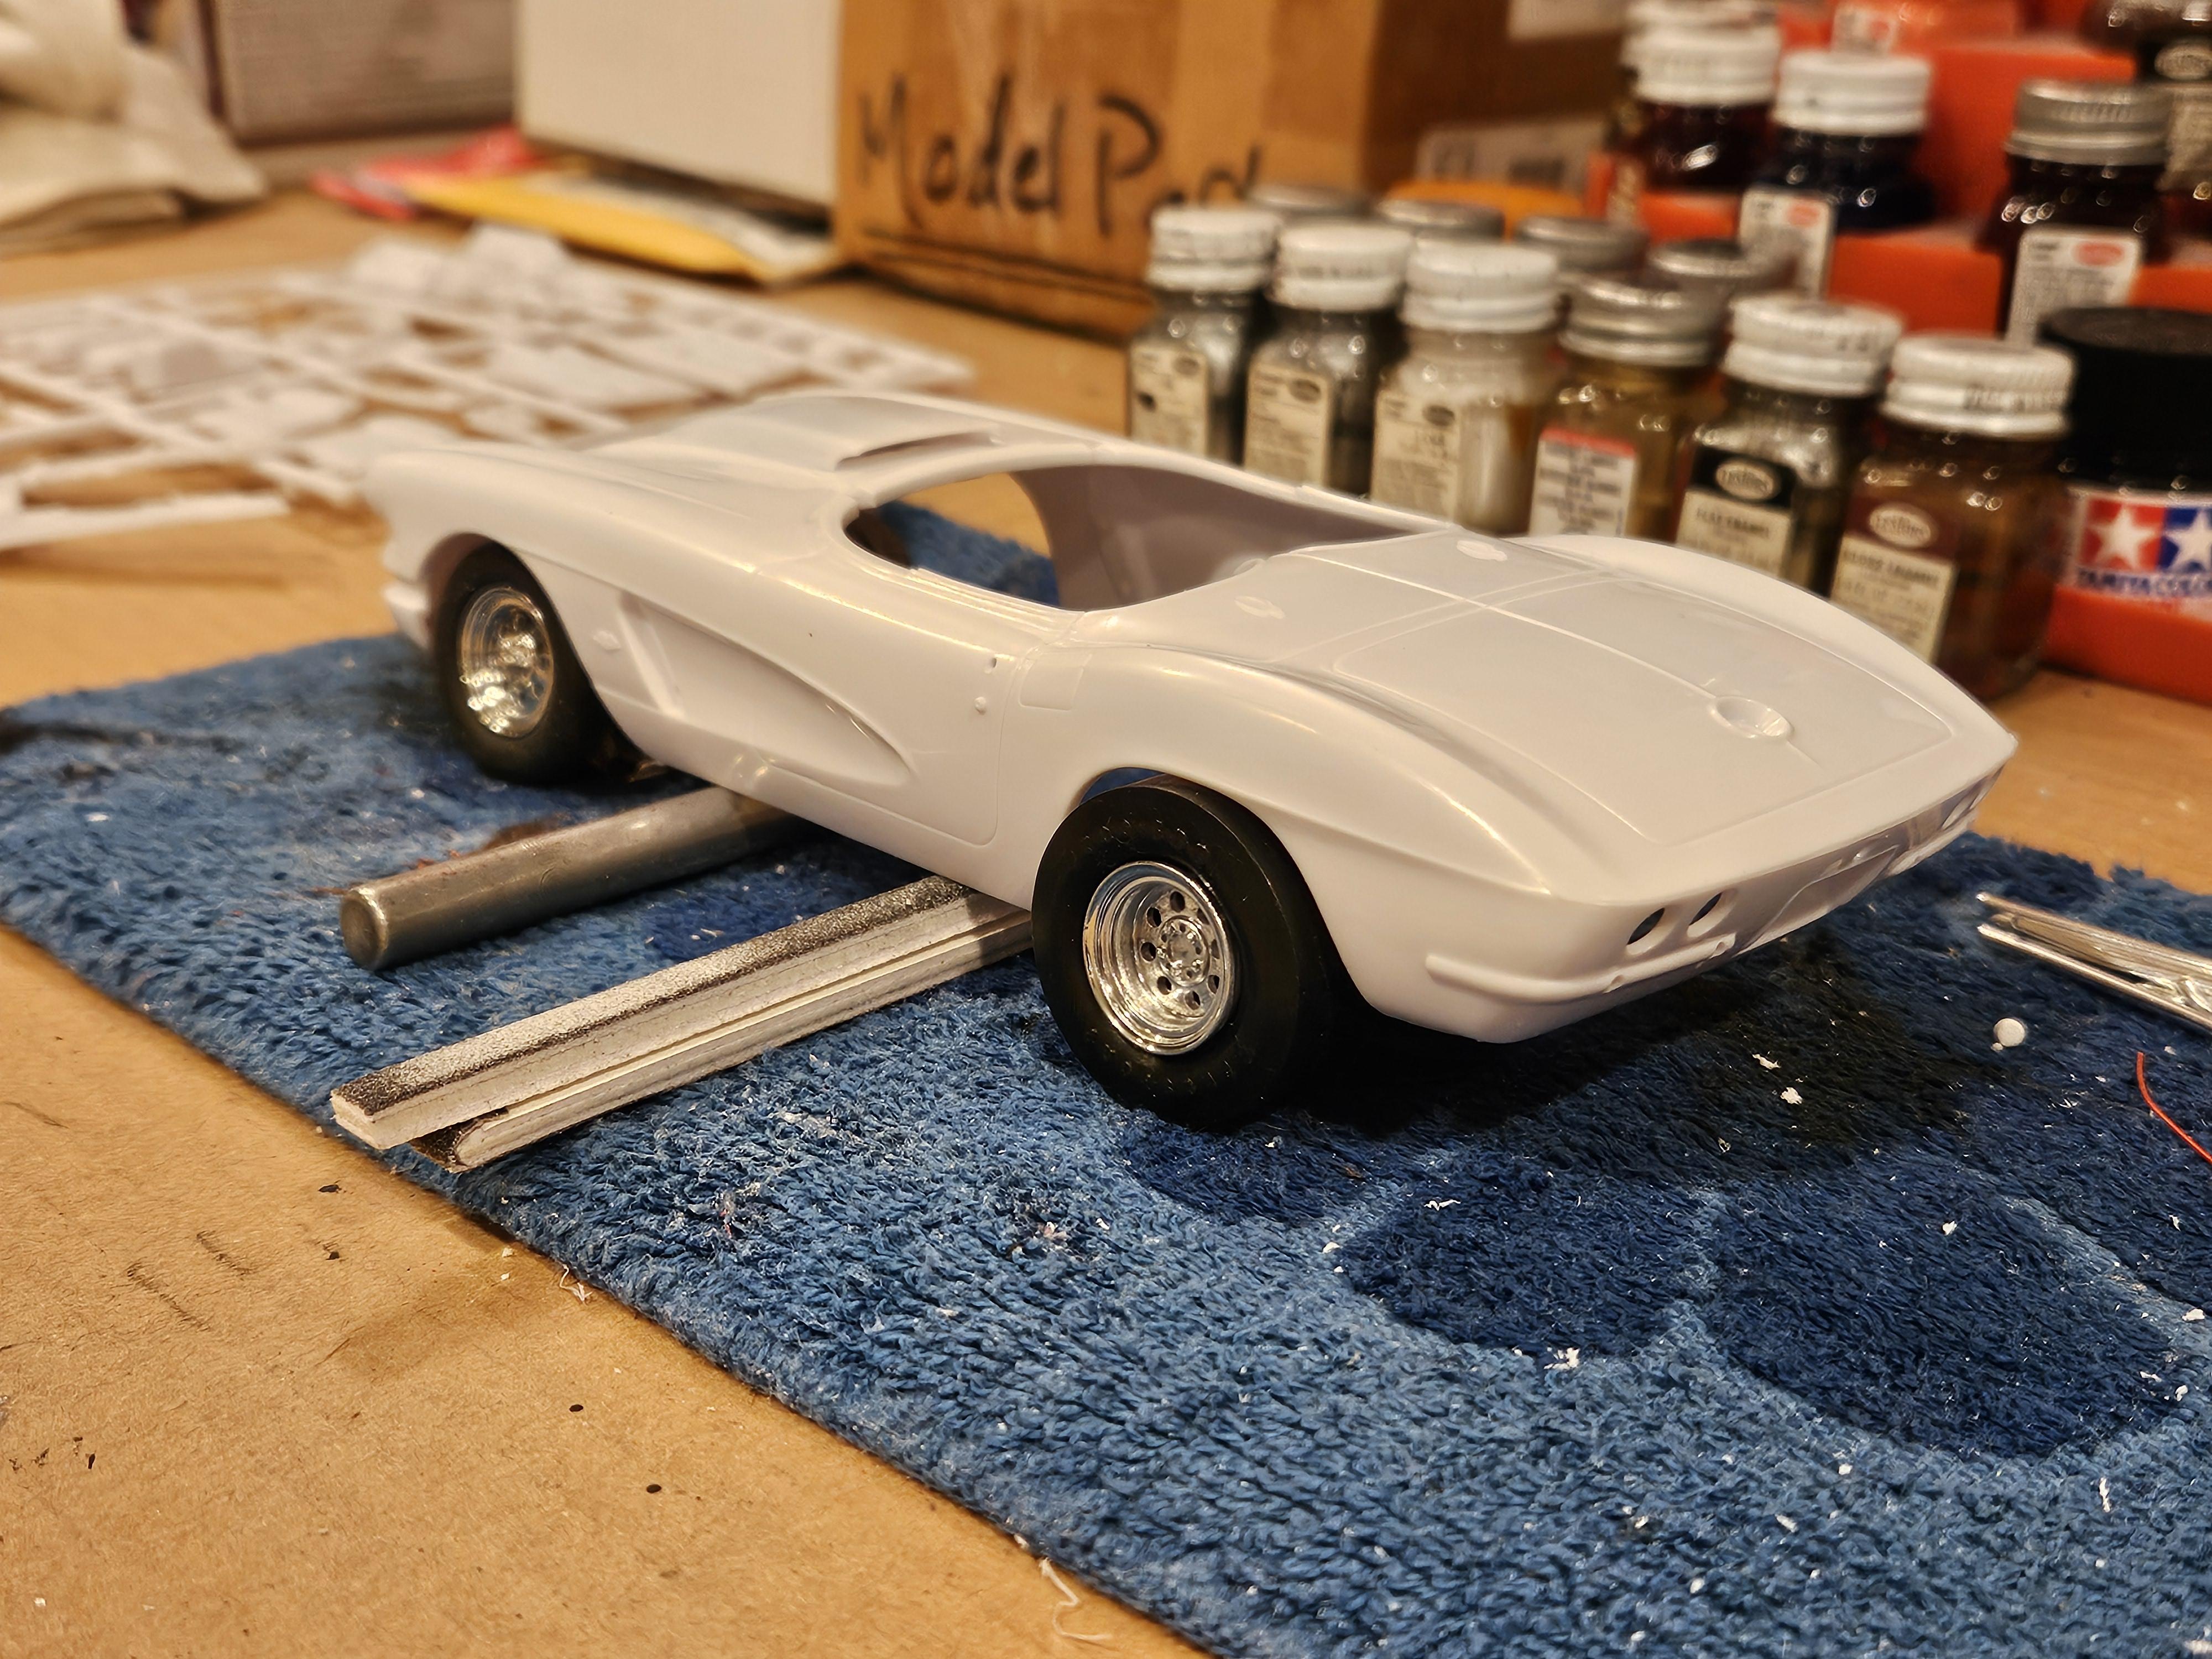
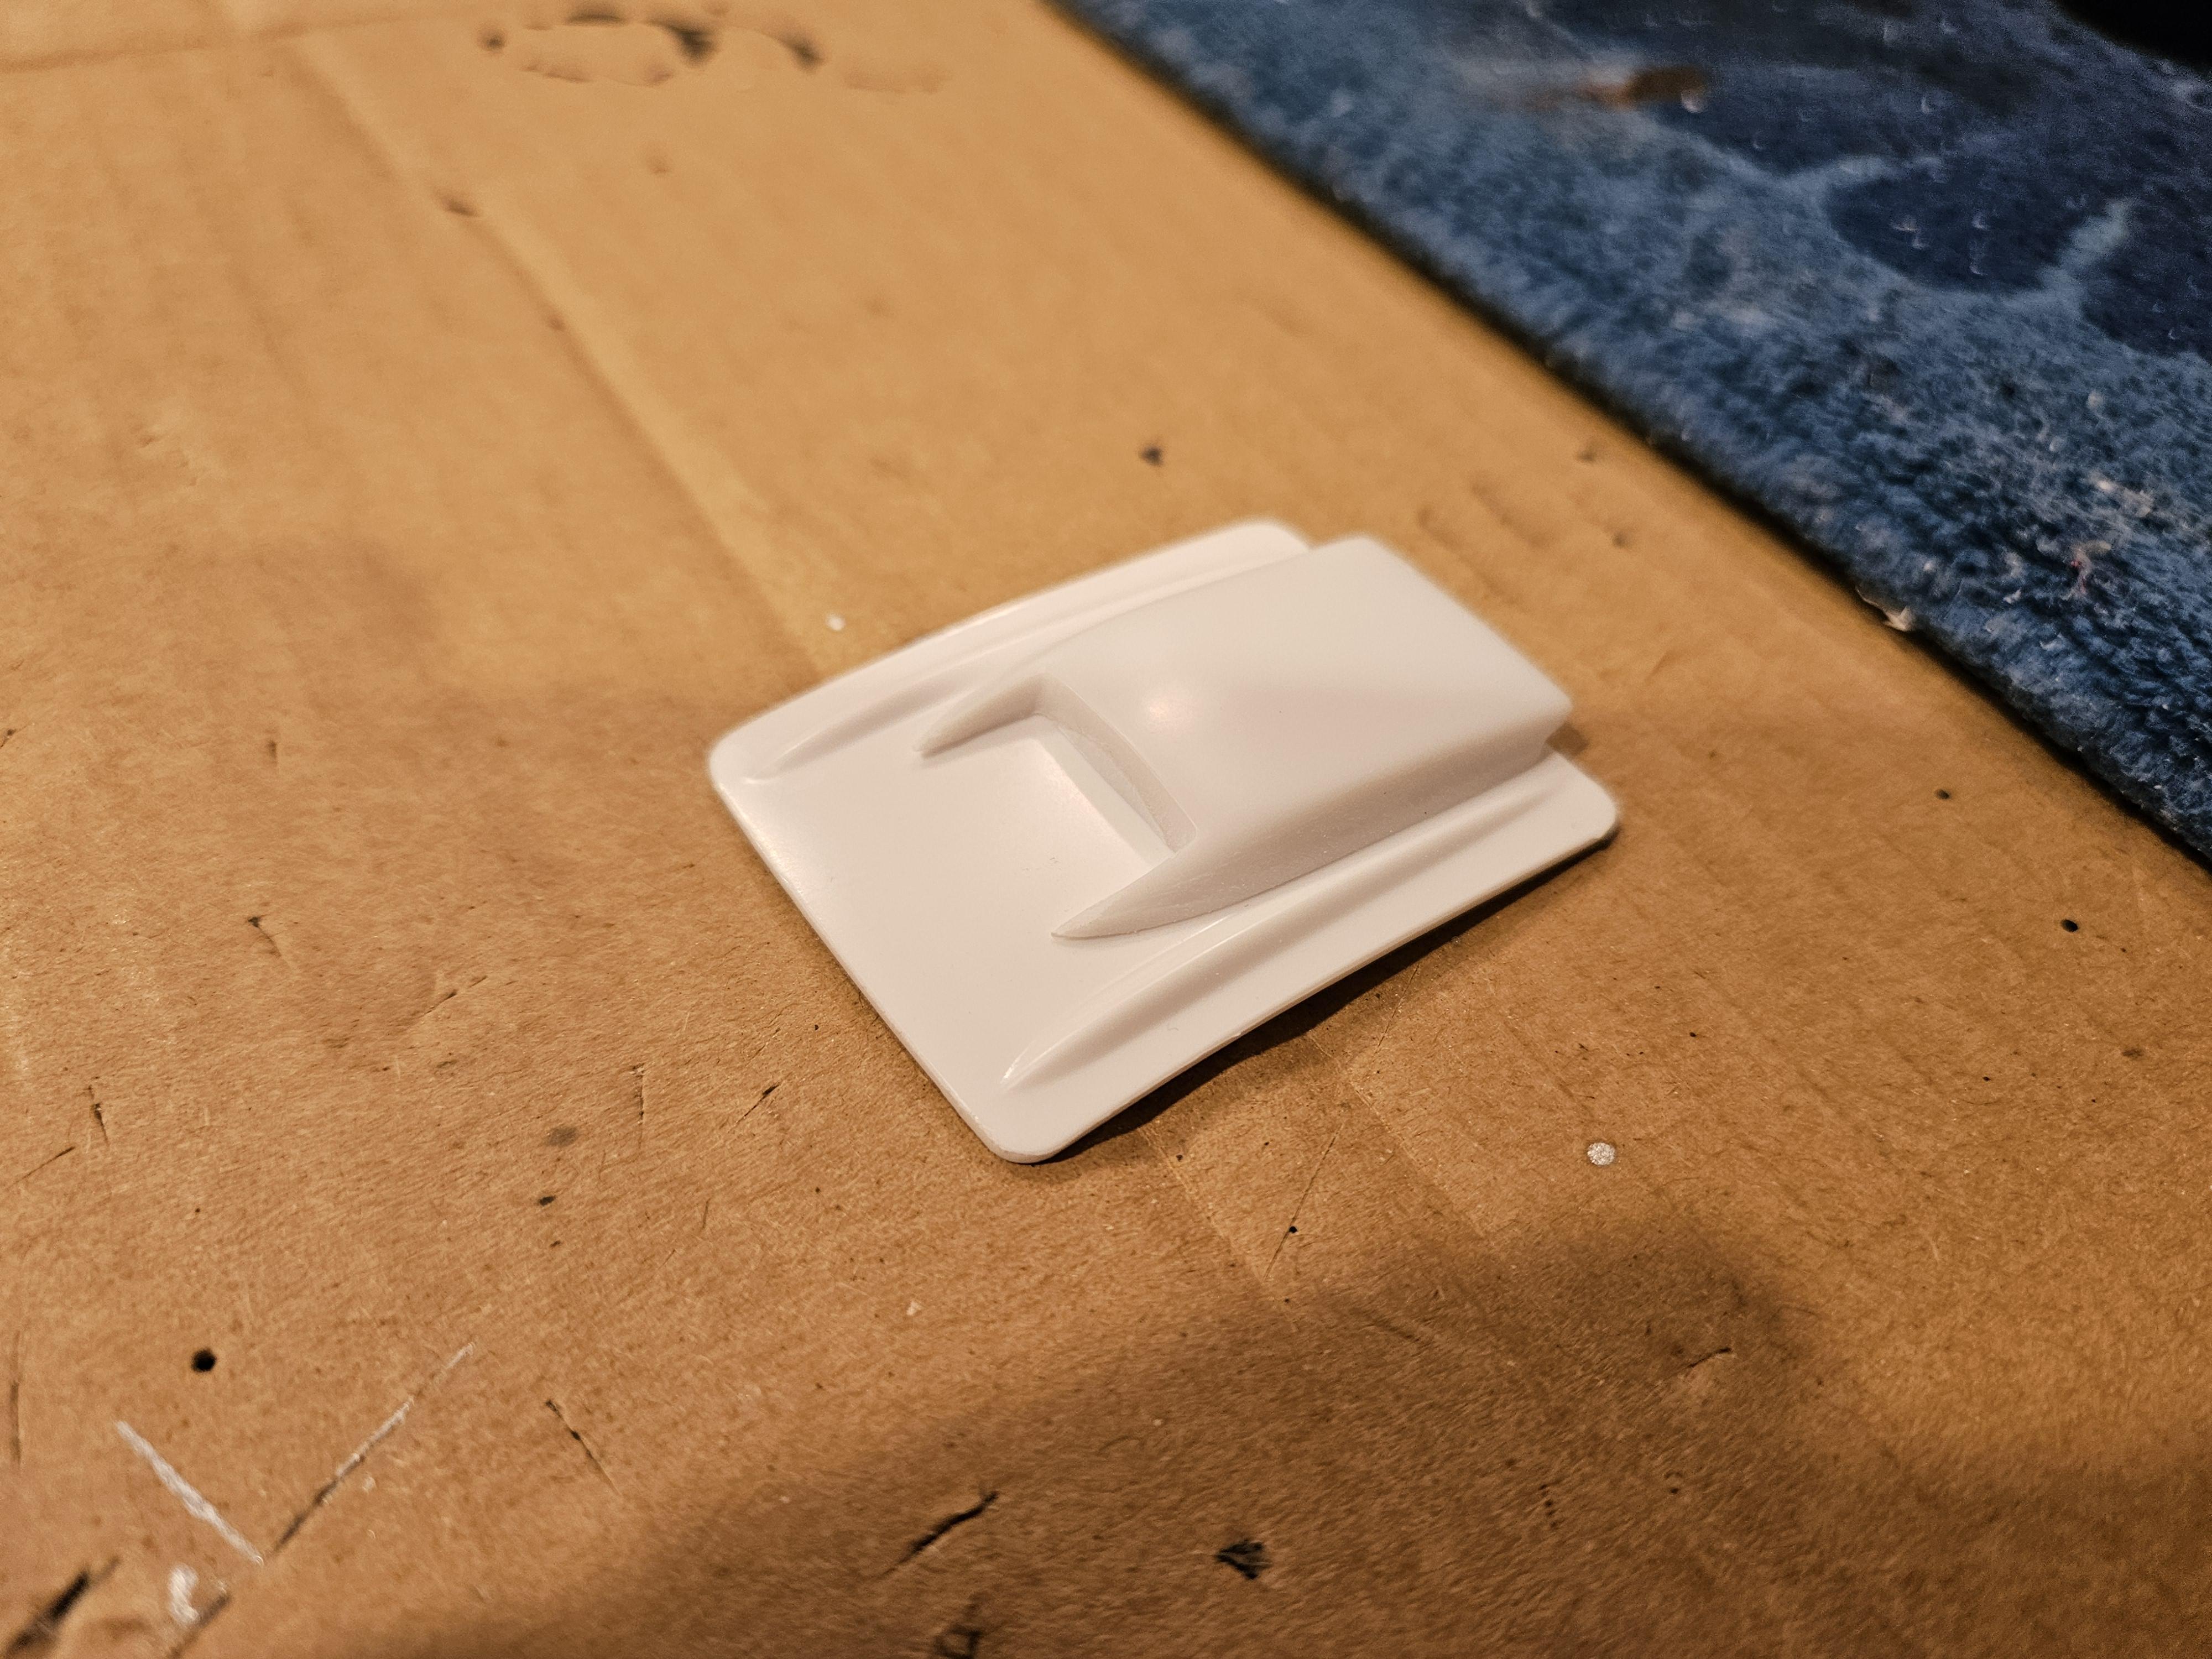
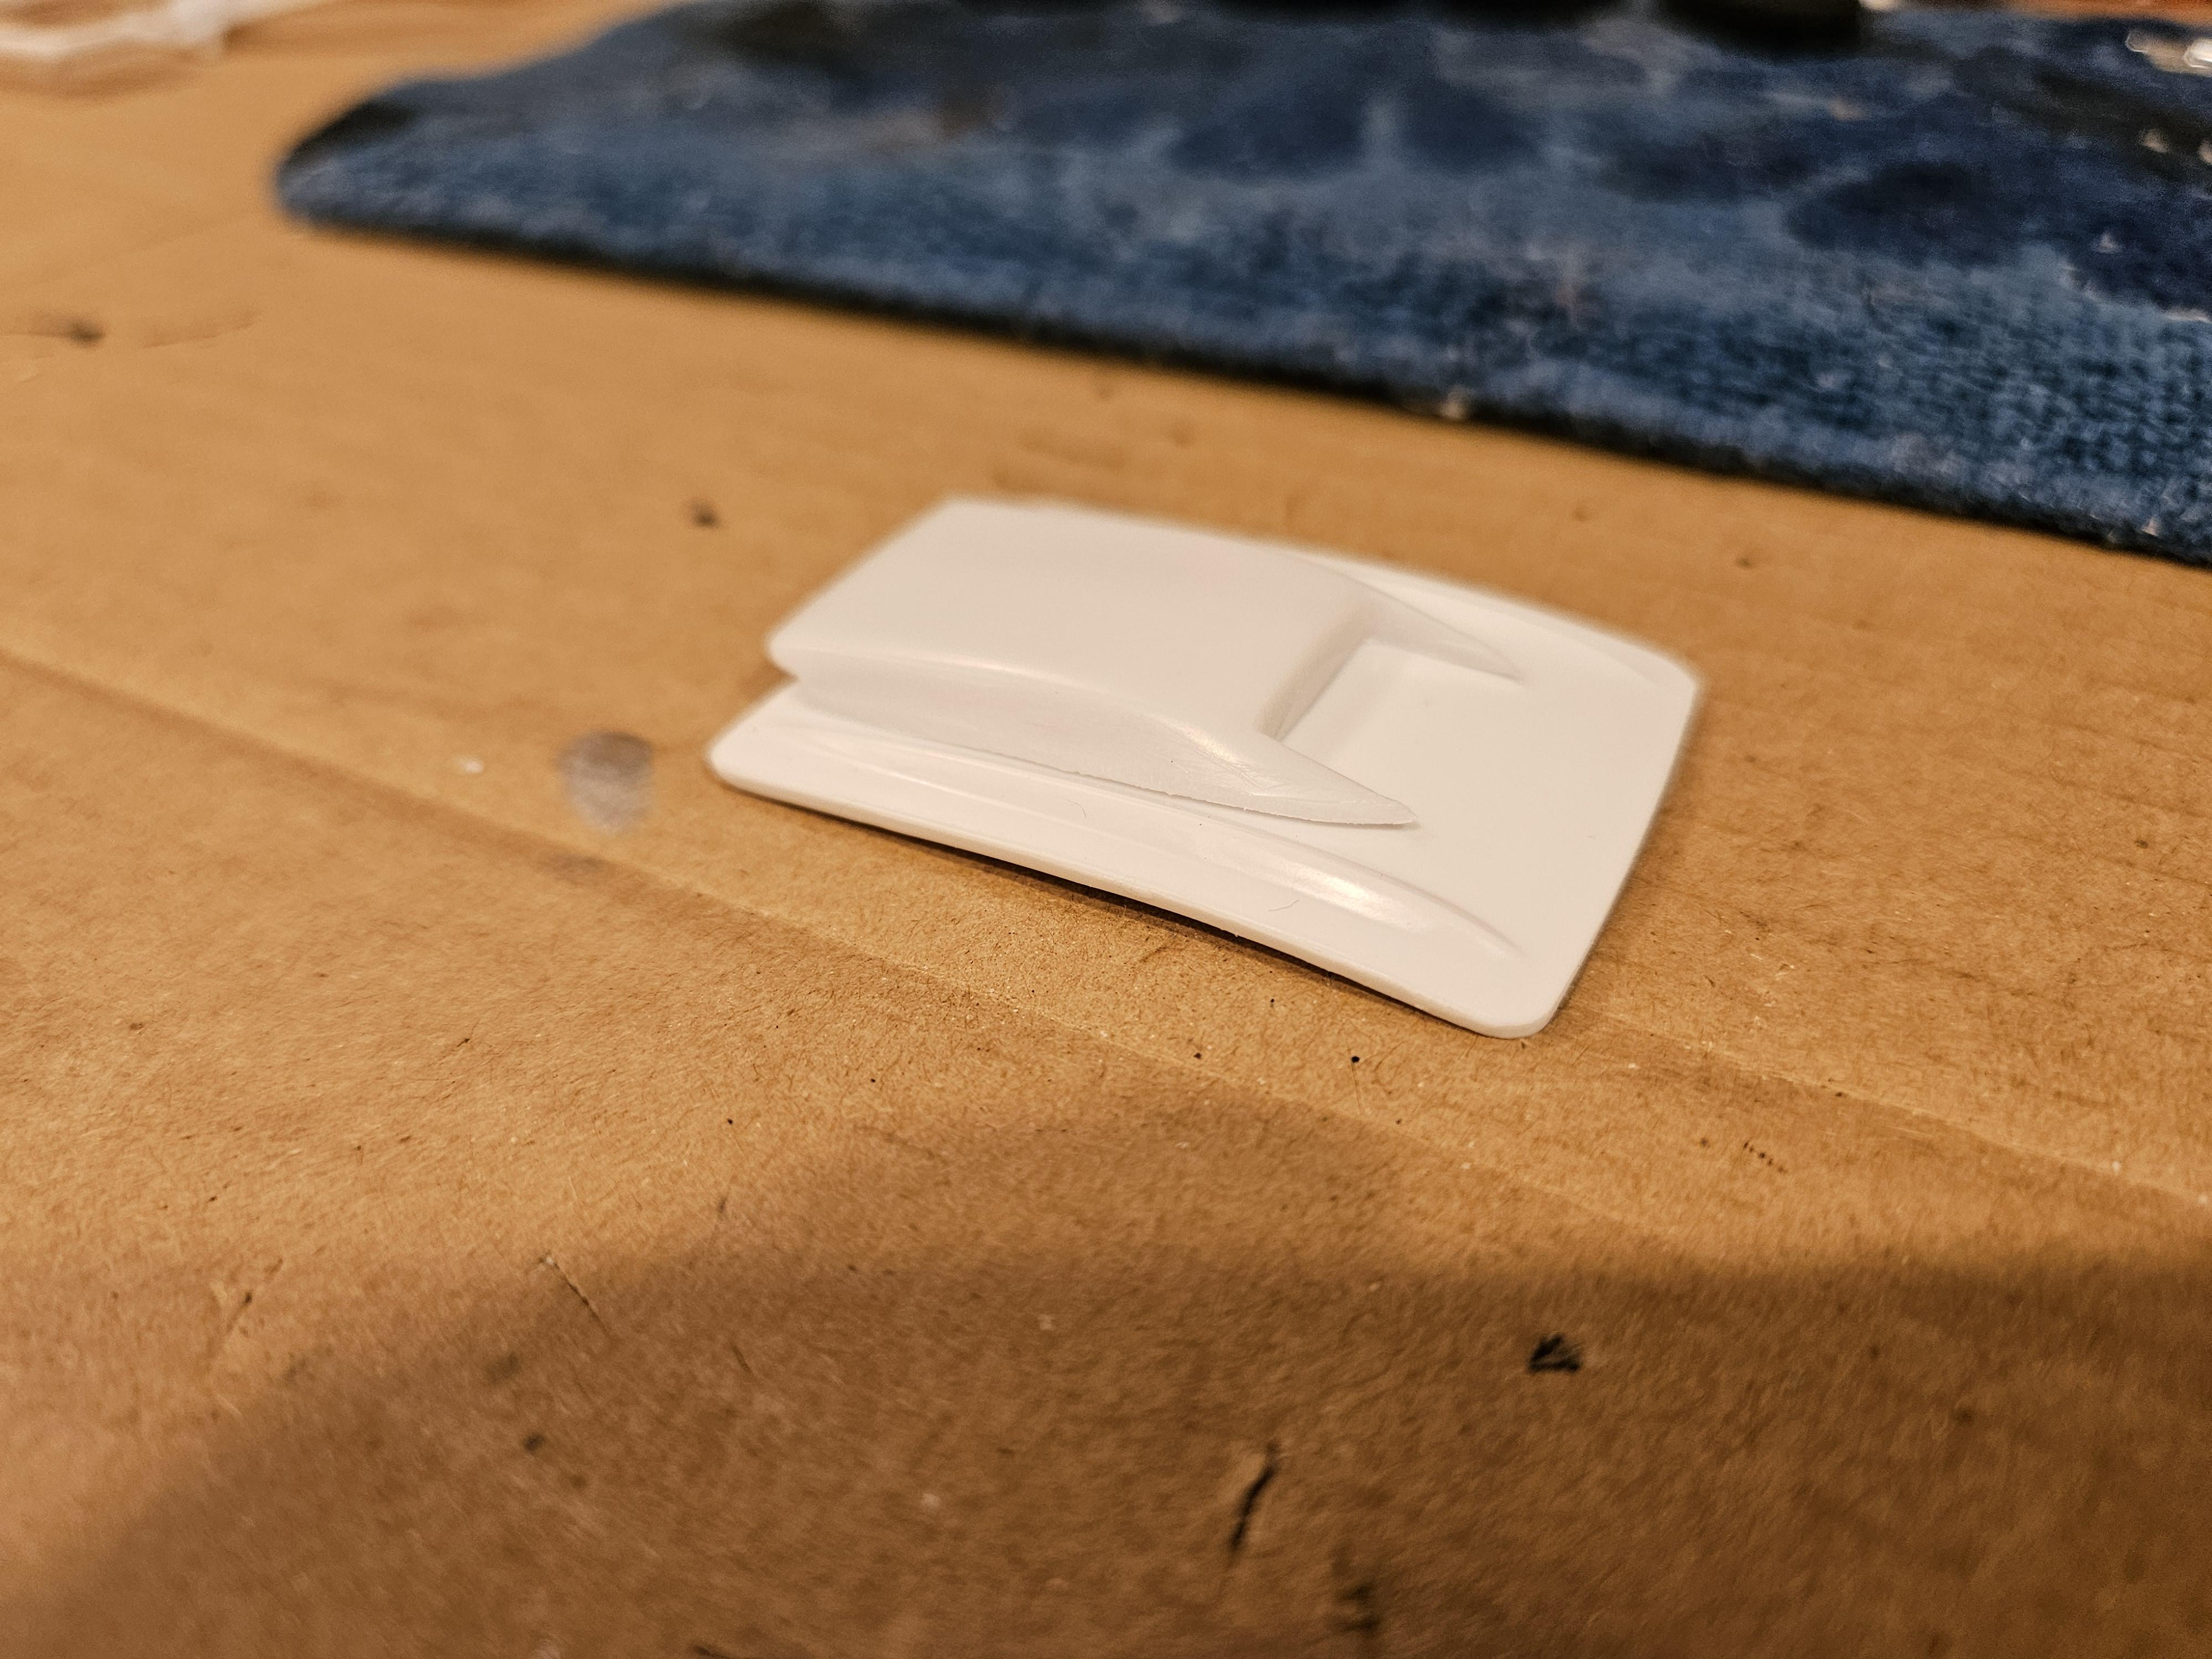
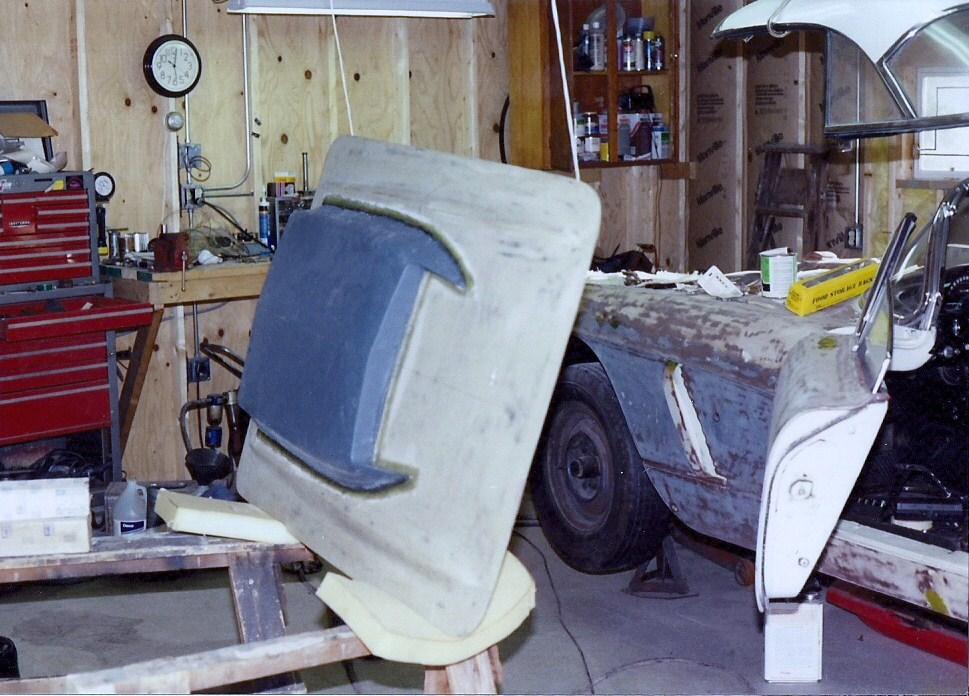
Hood scoop is glued on, waiting for that to cure then I'll add some filler to smooth it out a bit. Did a little mock up, cause why not?
-
1962 Corvette street/strip build (replica)
keviiin86 replied to keviiin86's topic in WIP: Drag Racing Models
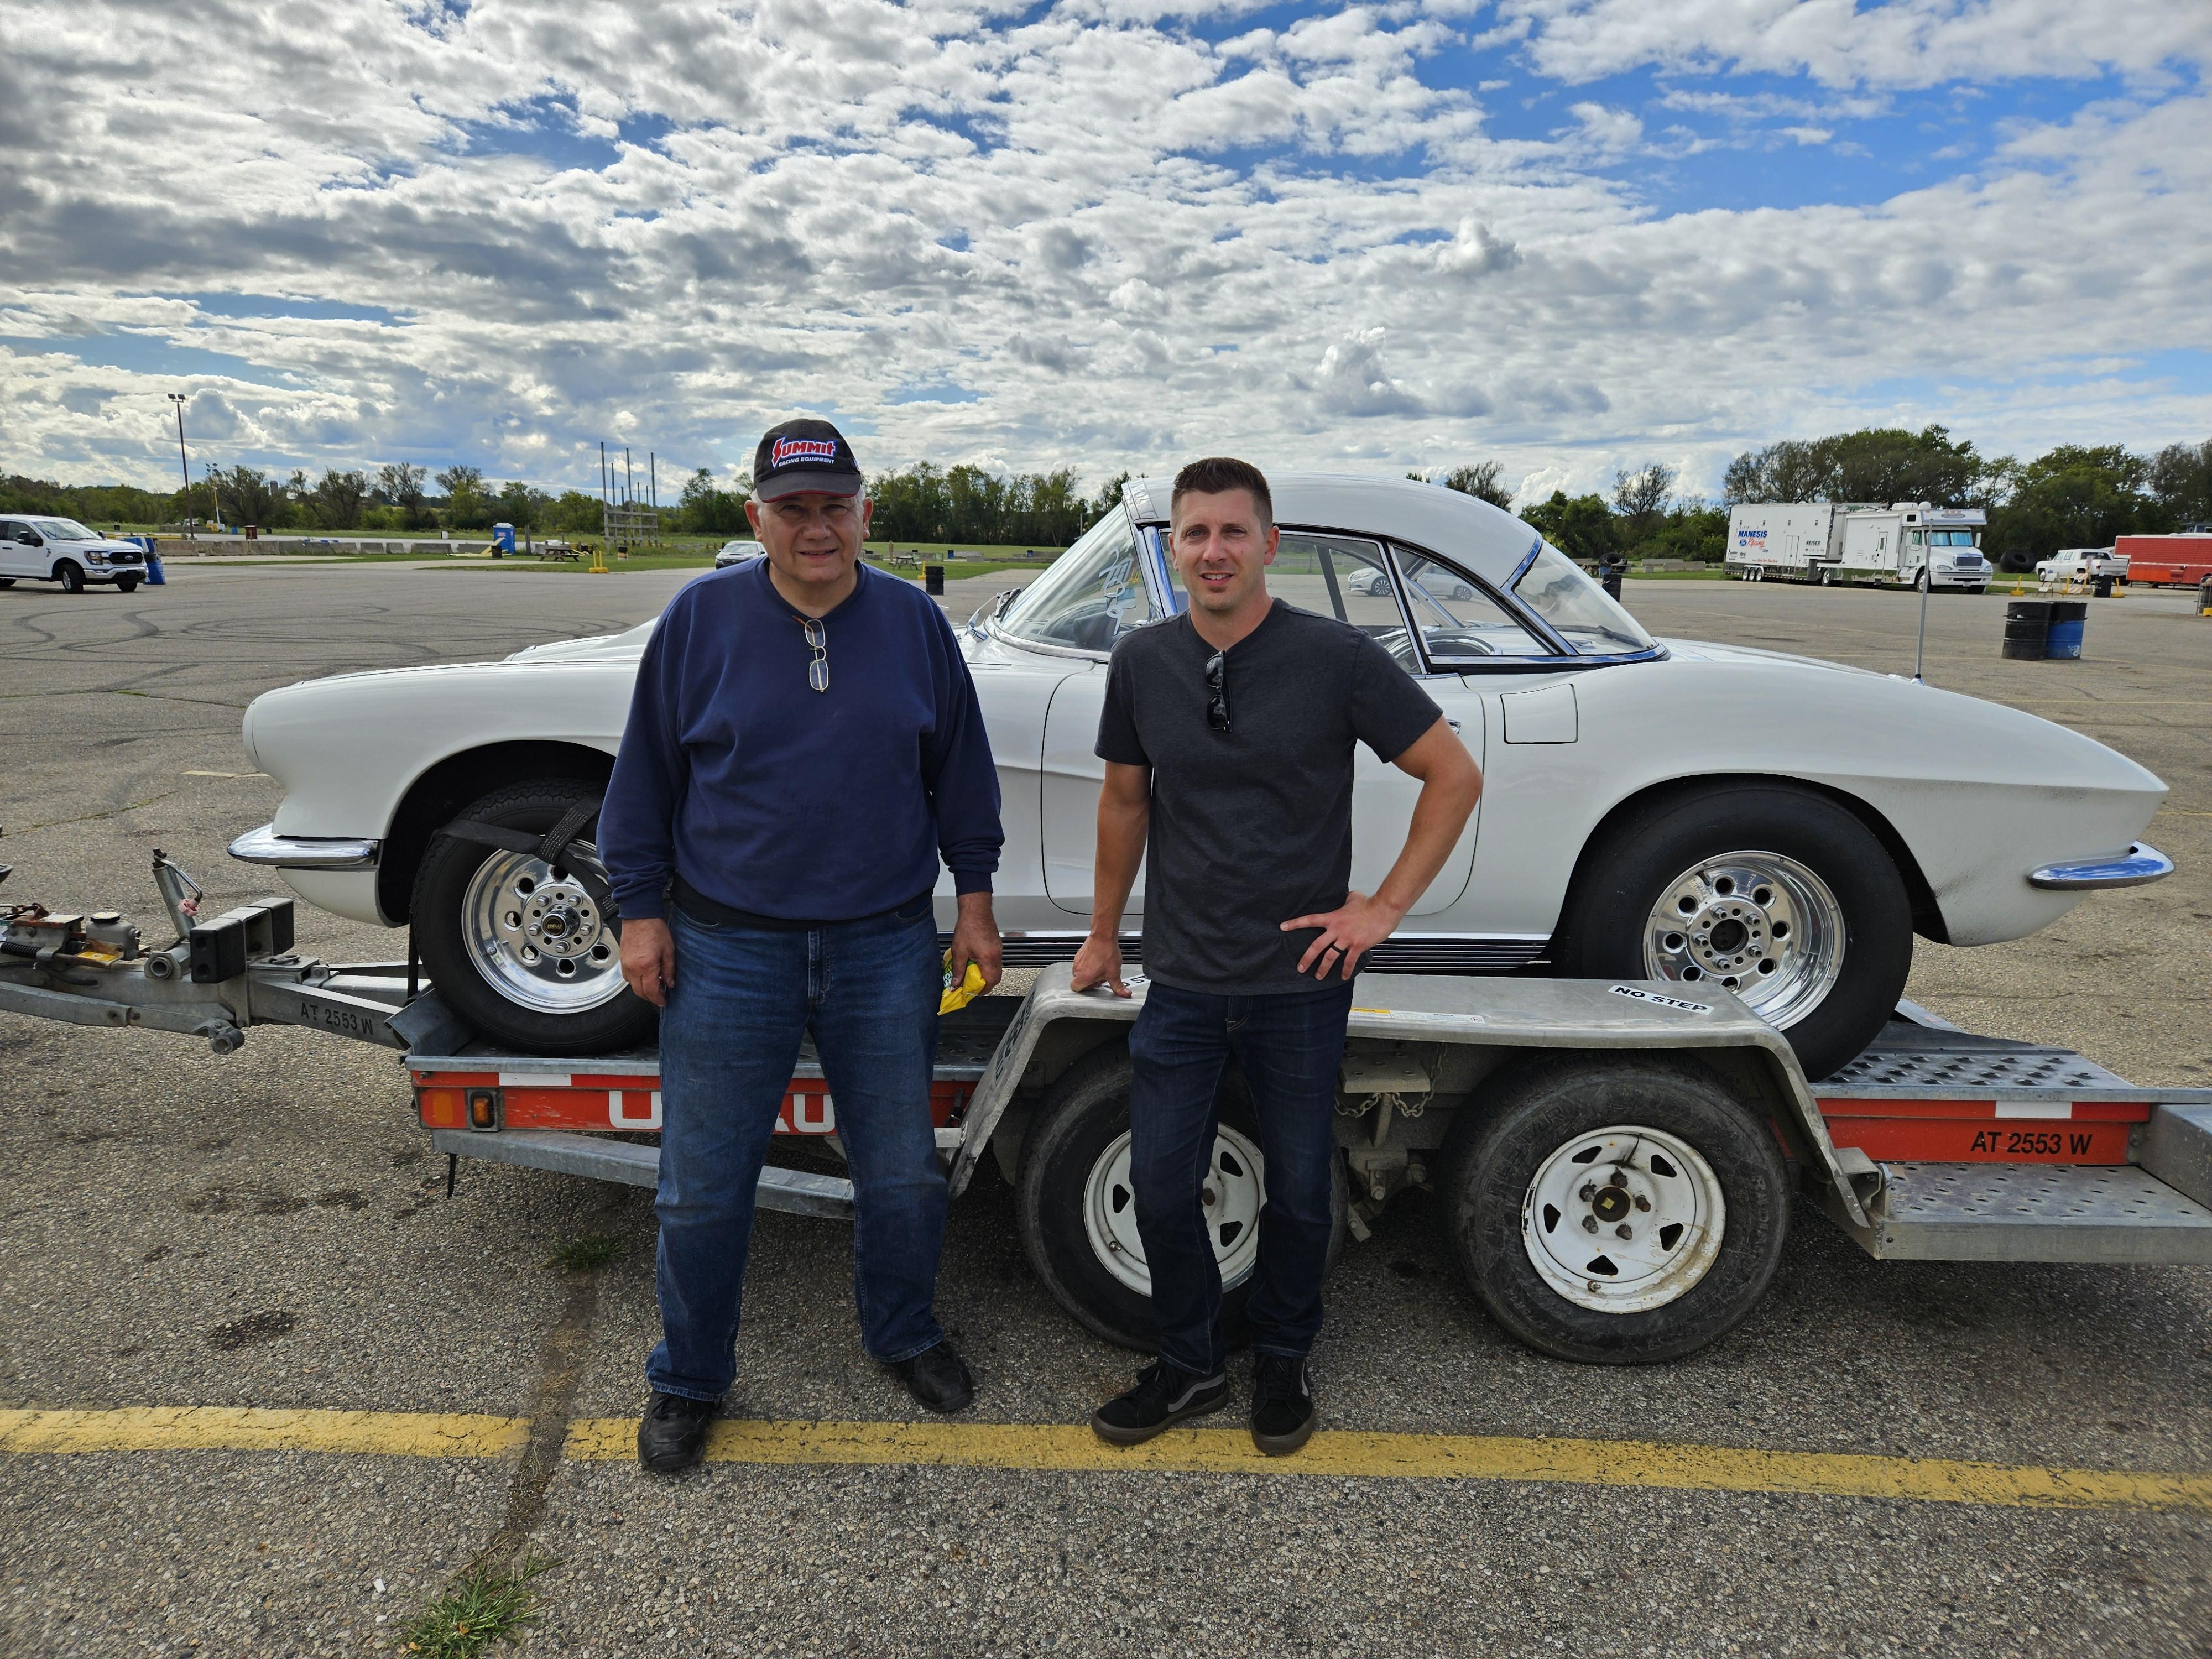
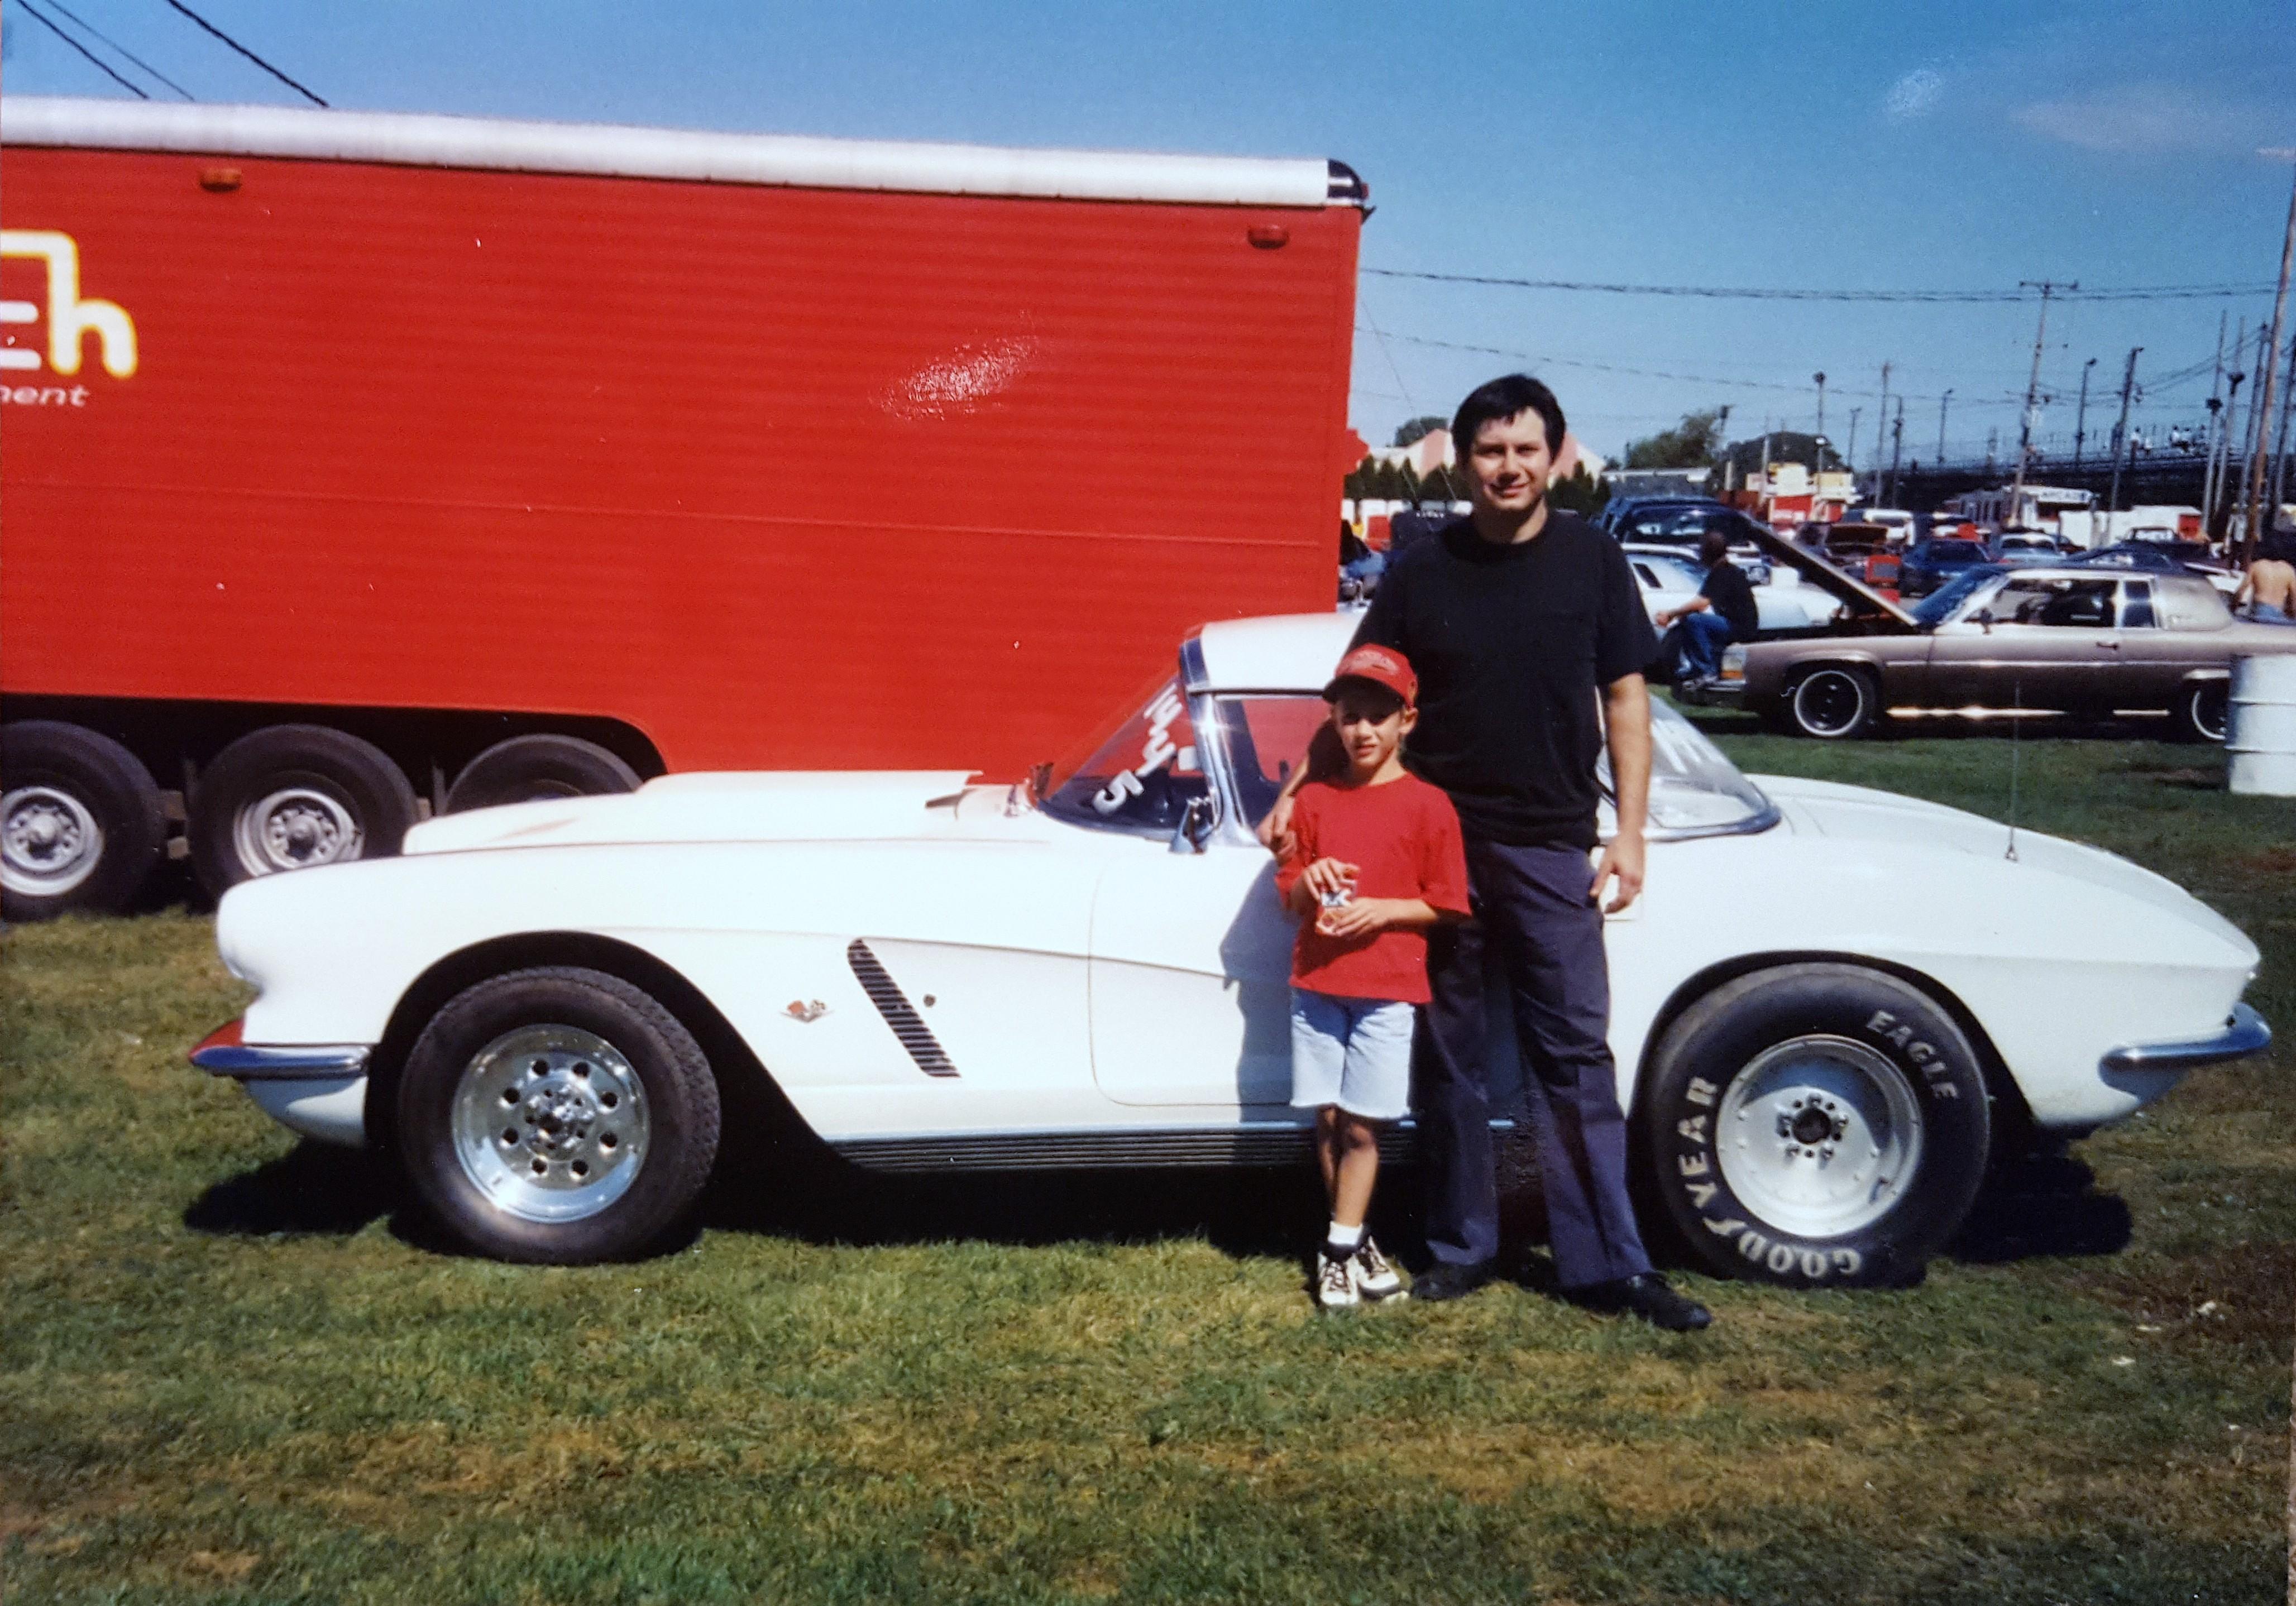
Thanks! He still has it, this was us at the track in September.
-
1962 Corvette street/strip build (replica)
keviiin86 replied to keviiin86's topic in WIP: Drag Racing Models
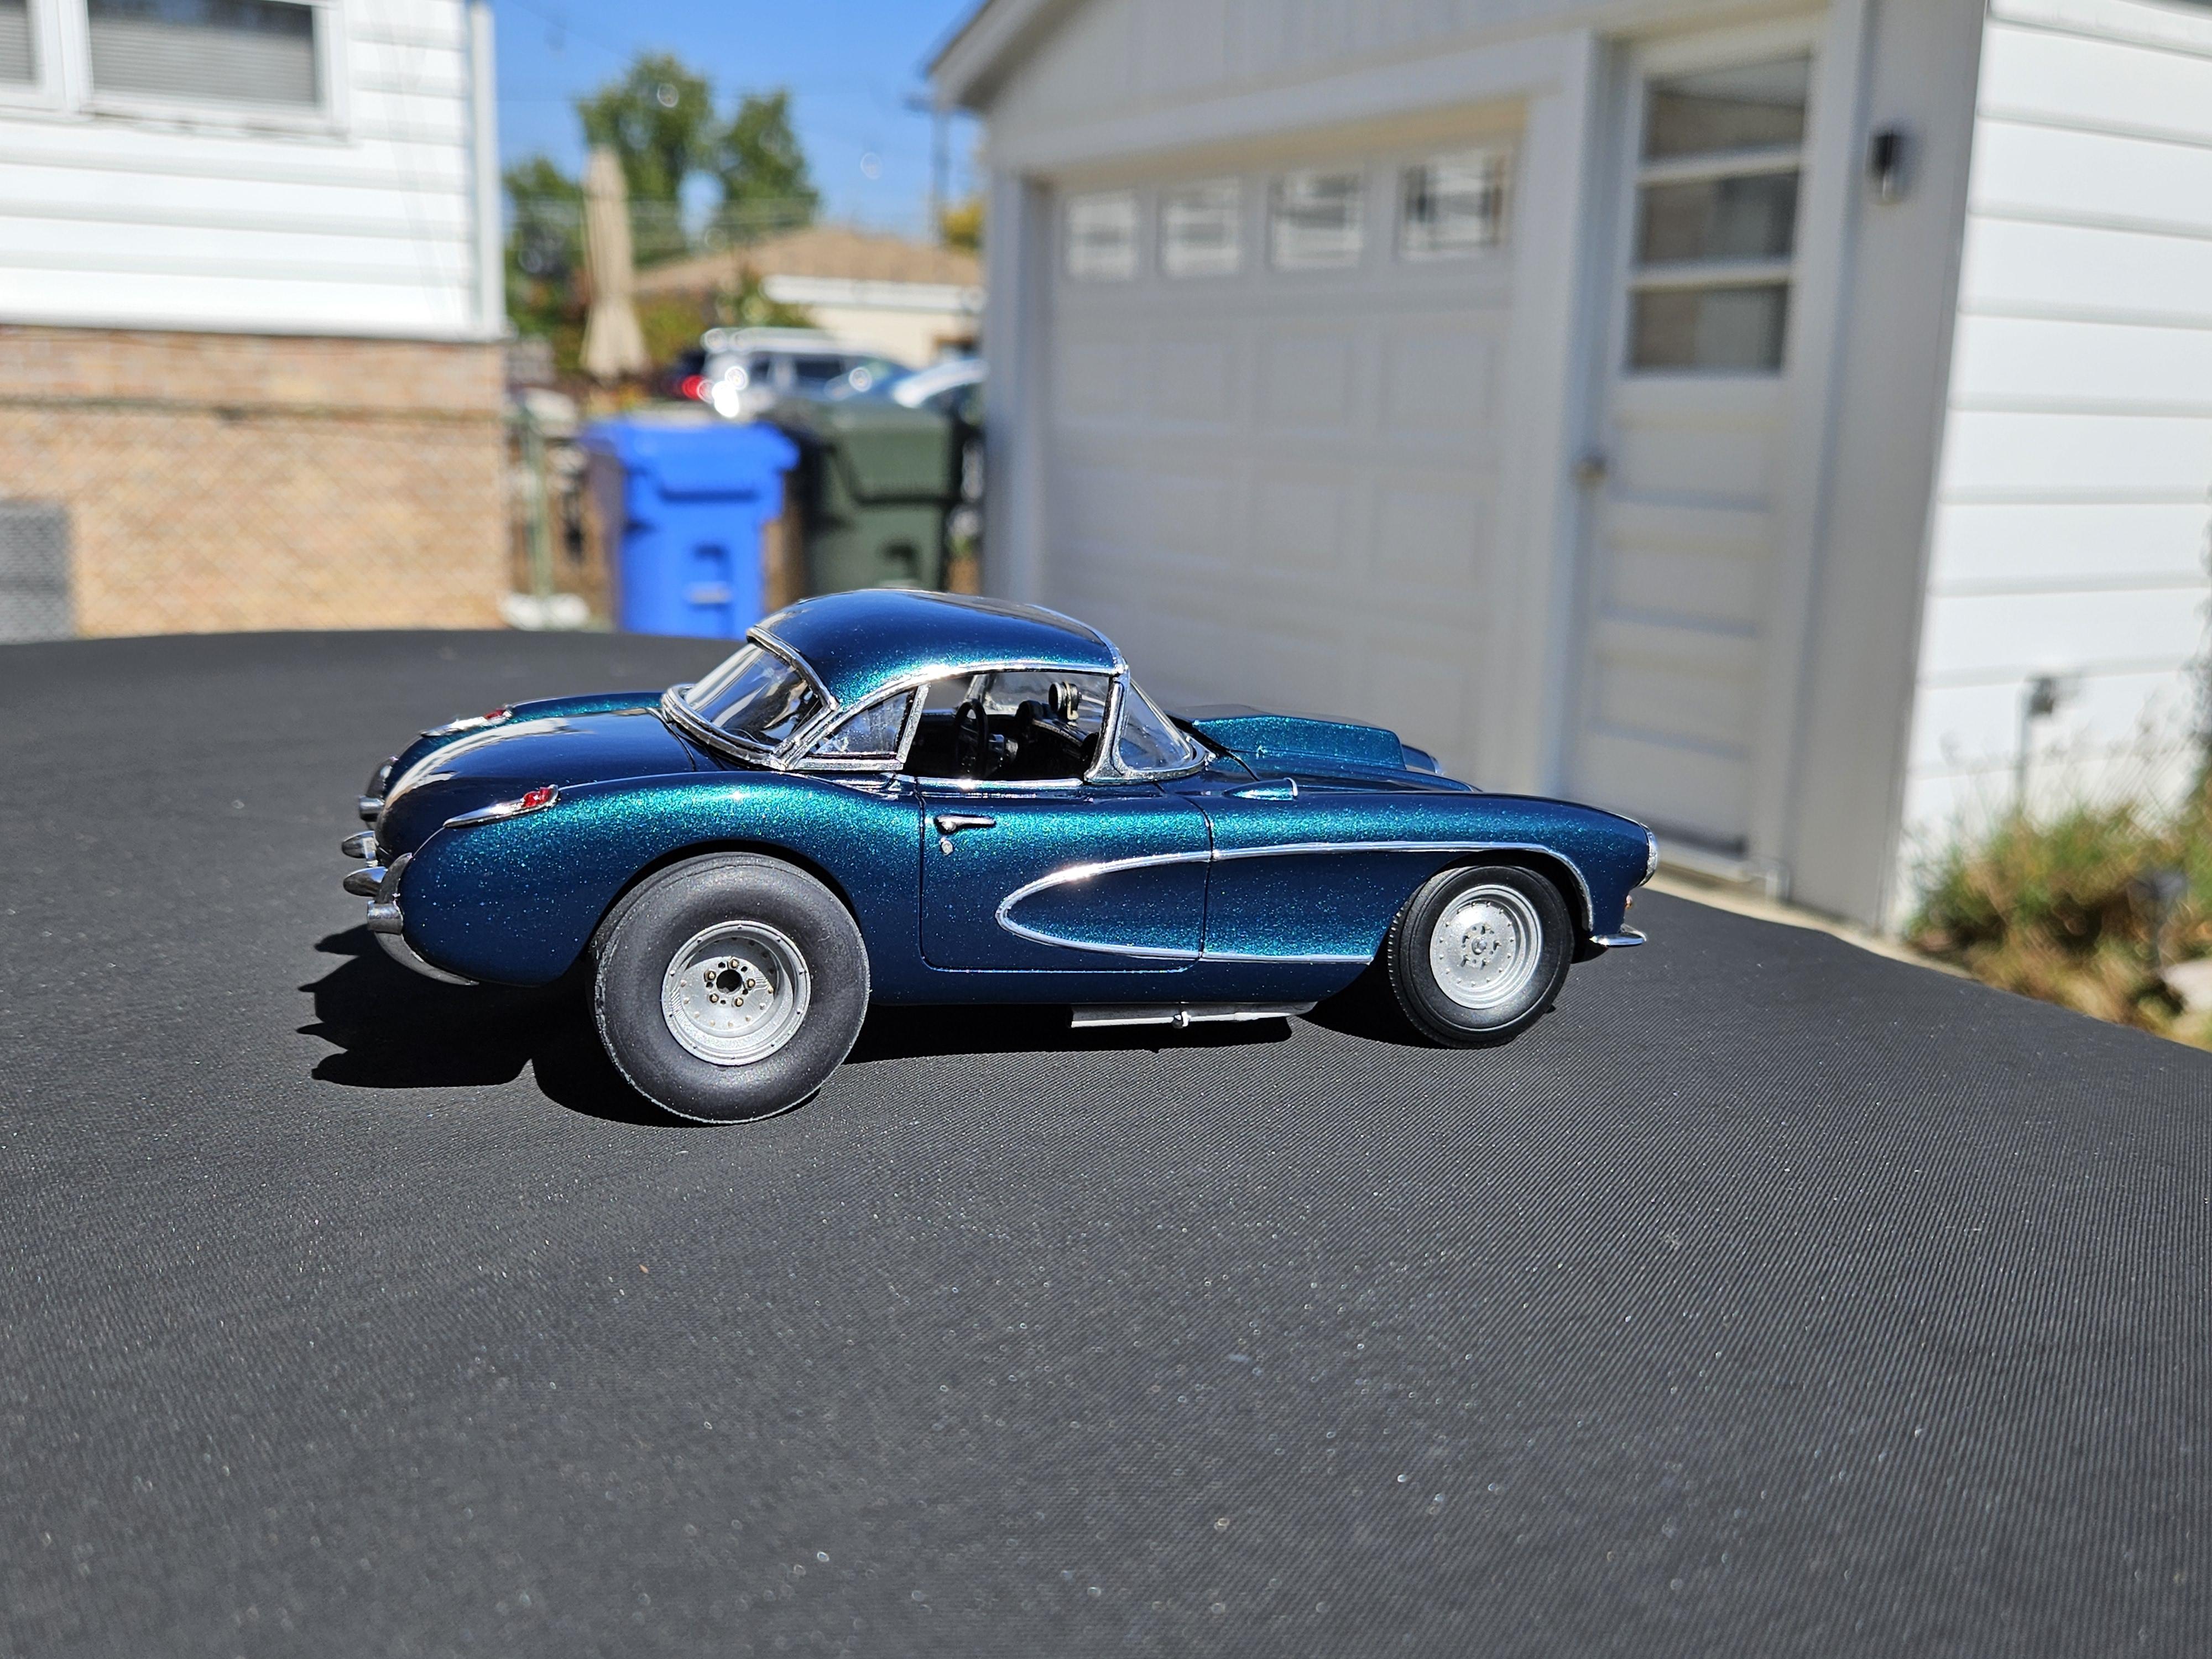
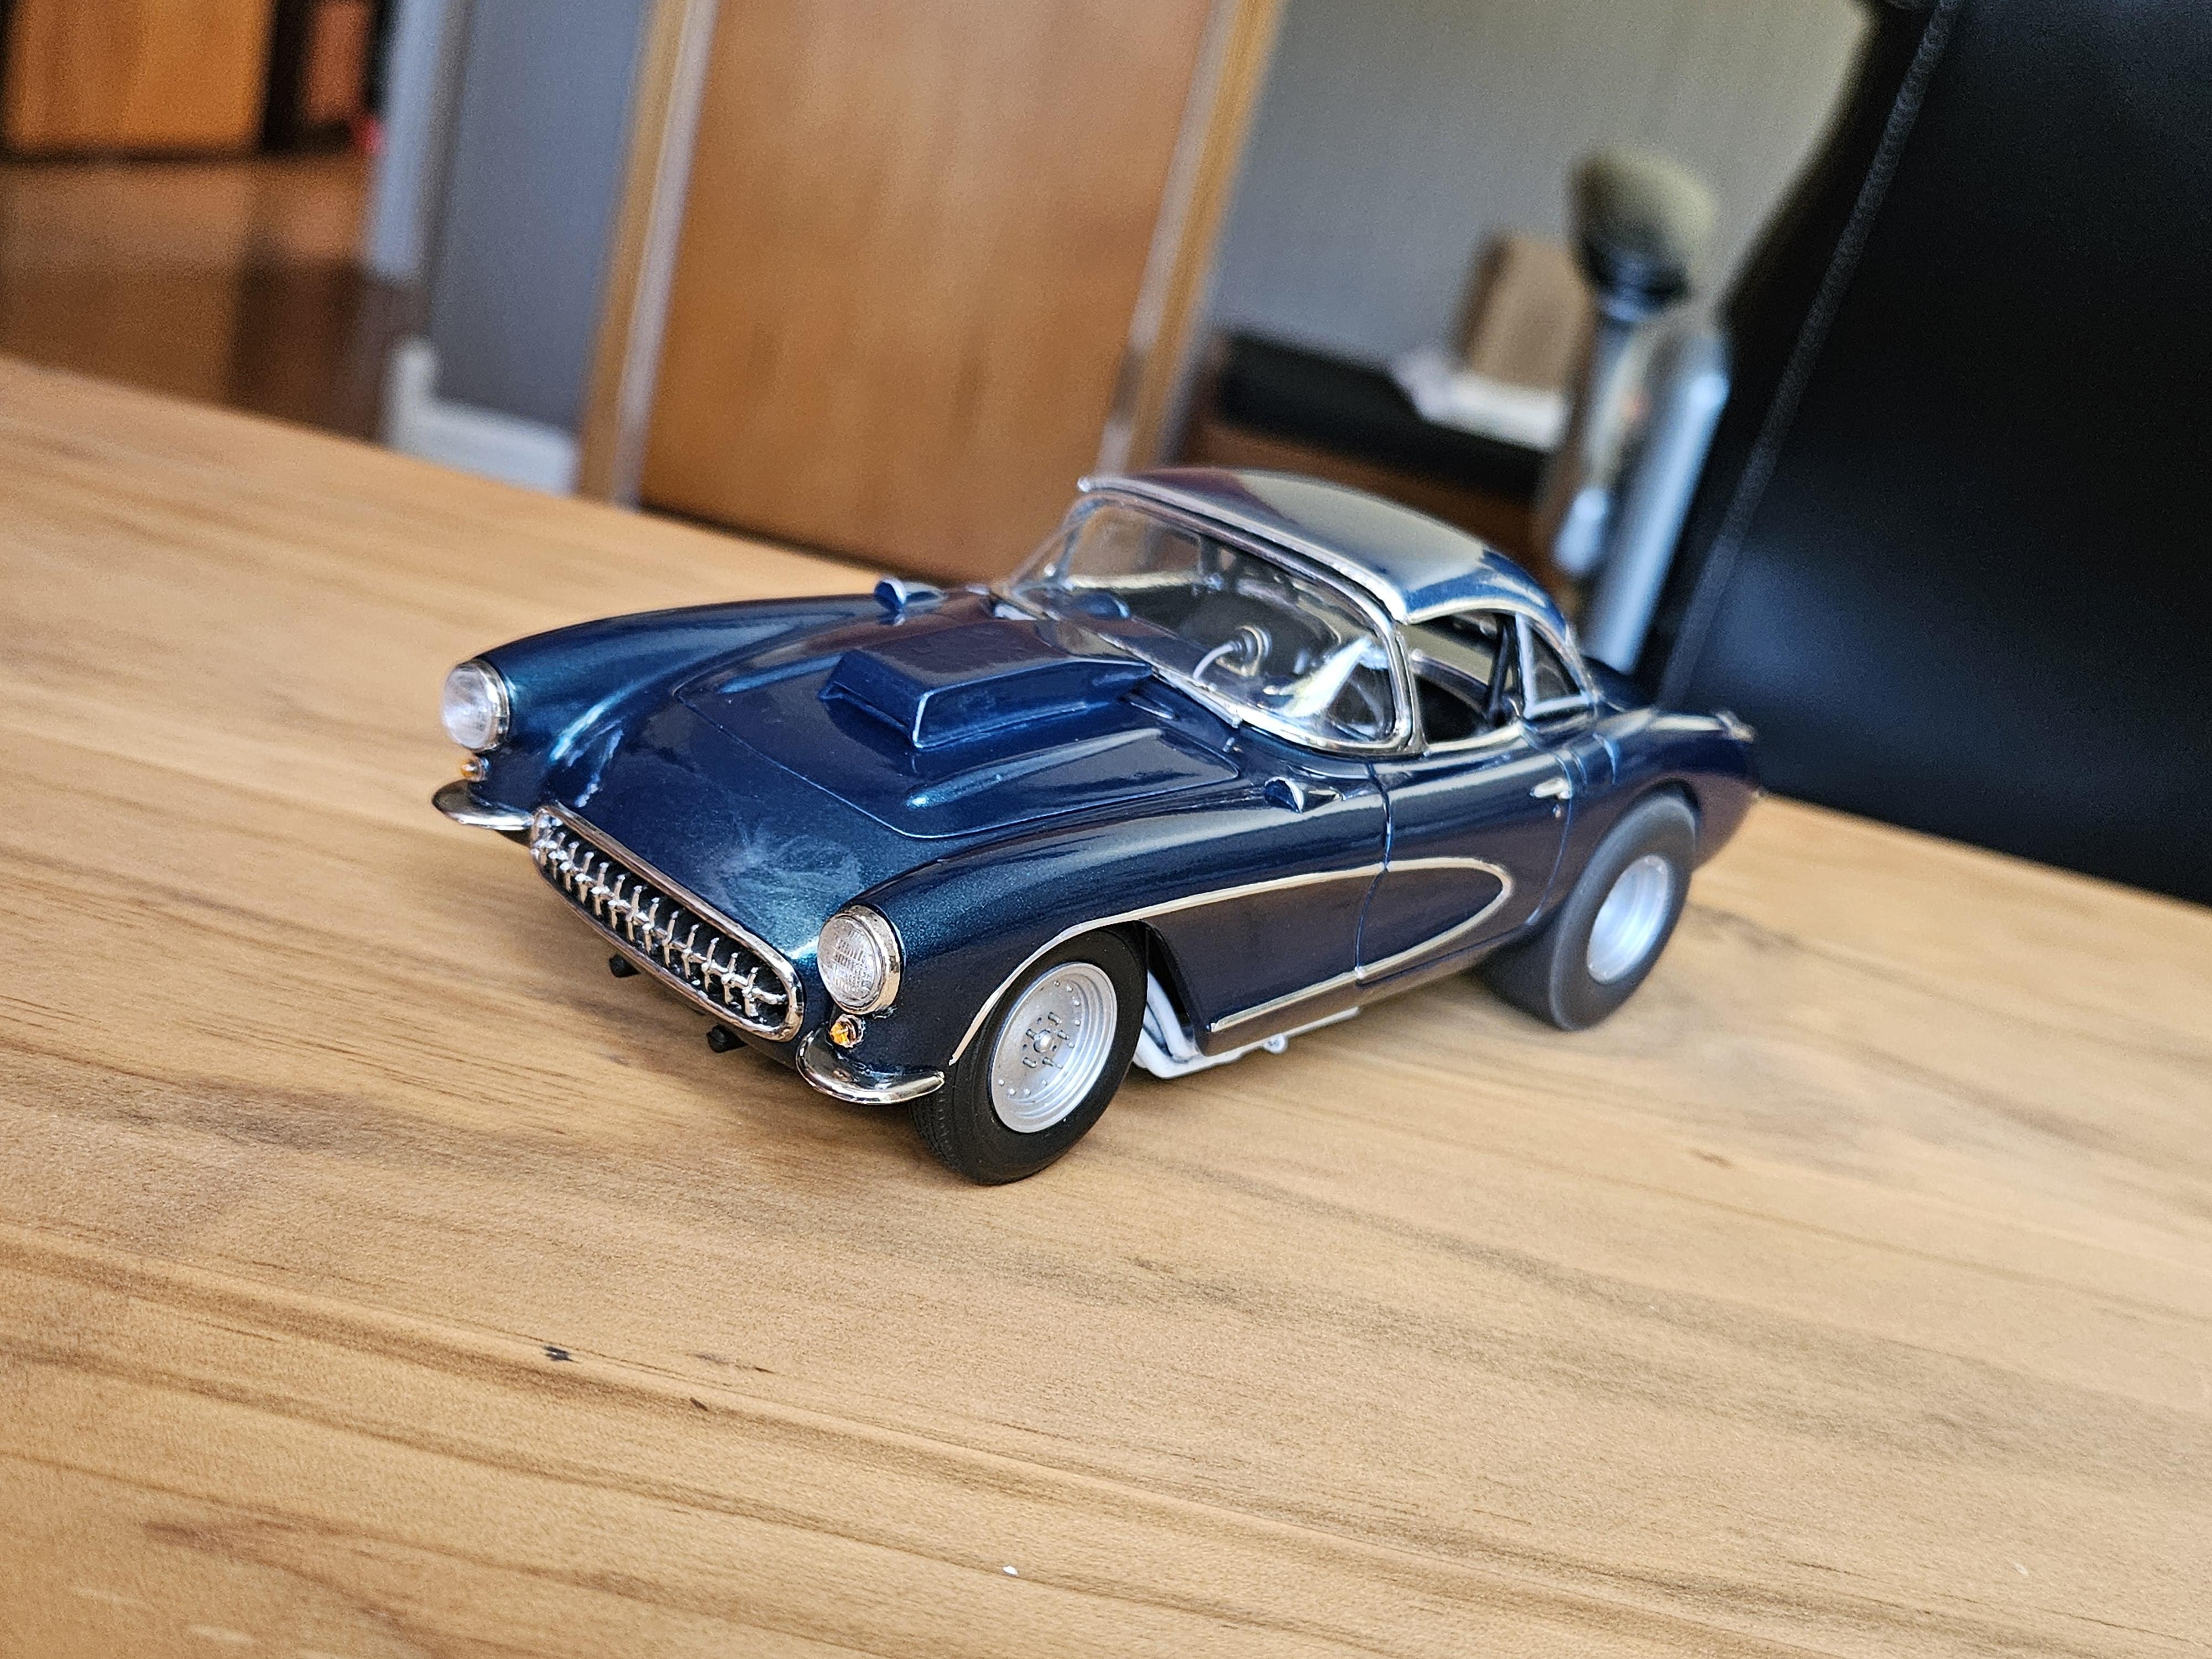
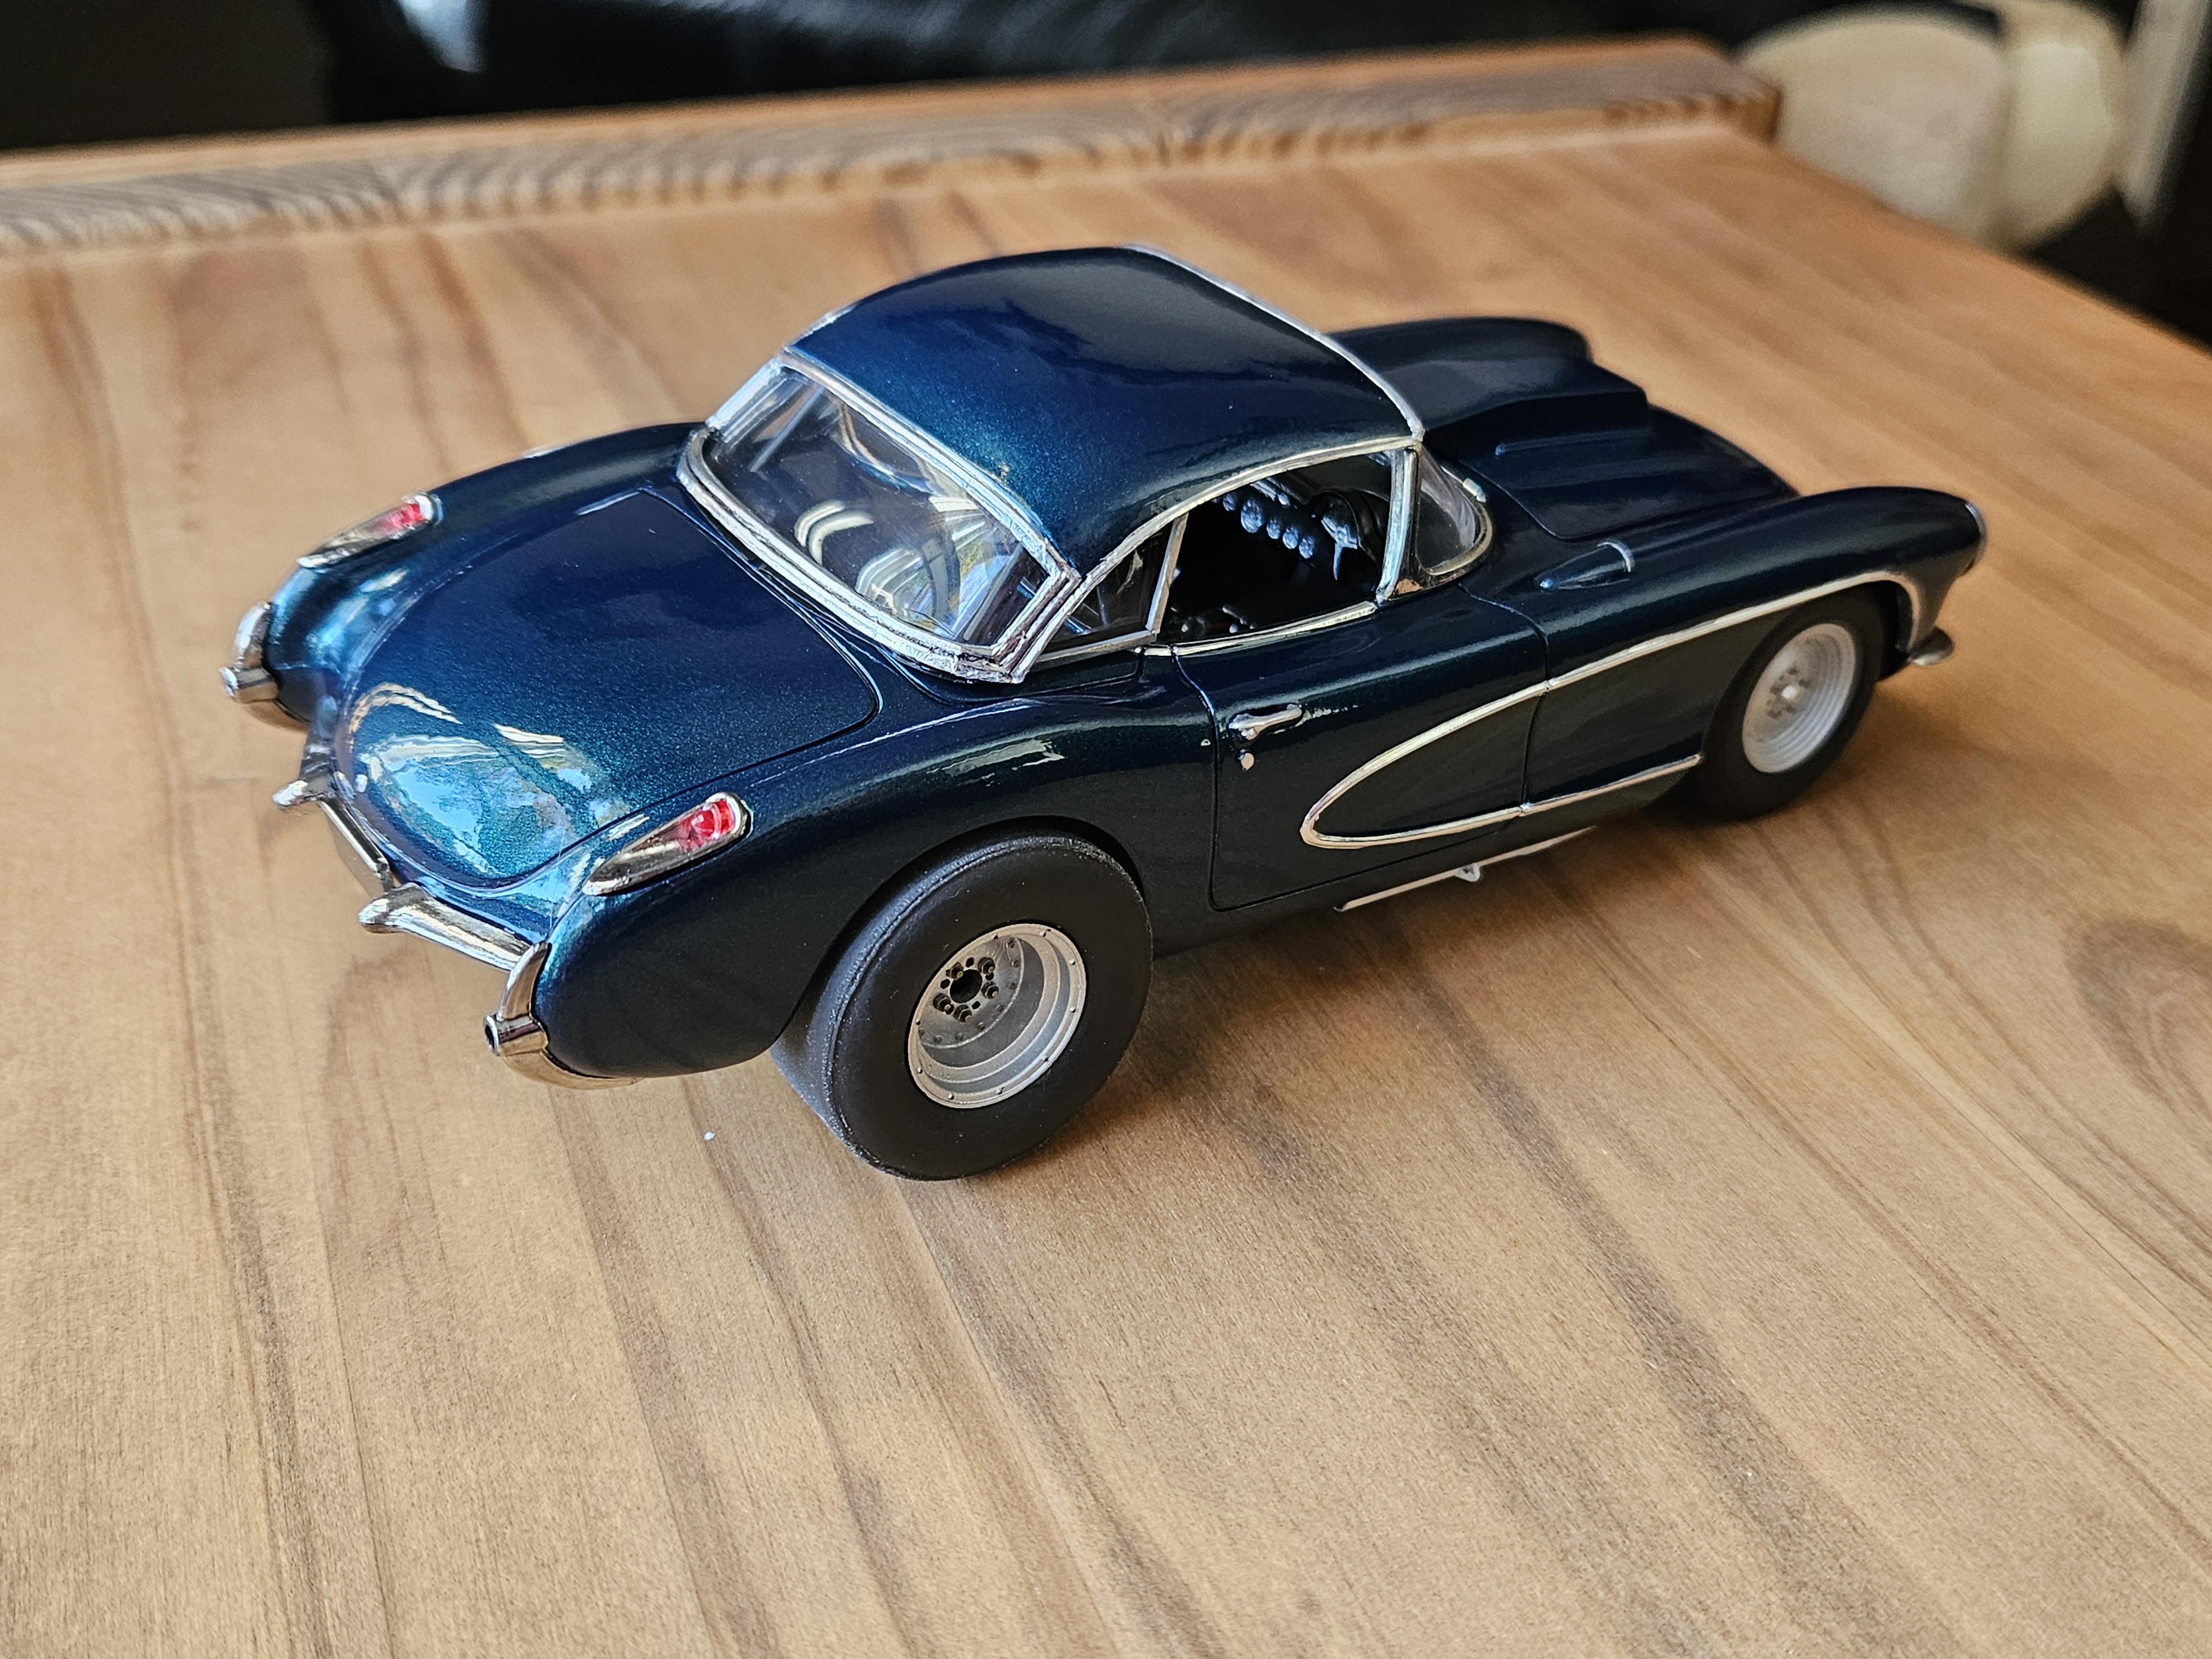
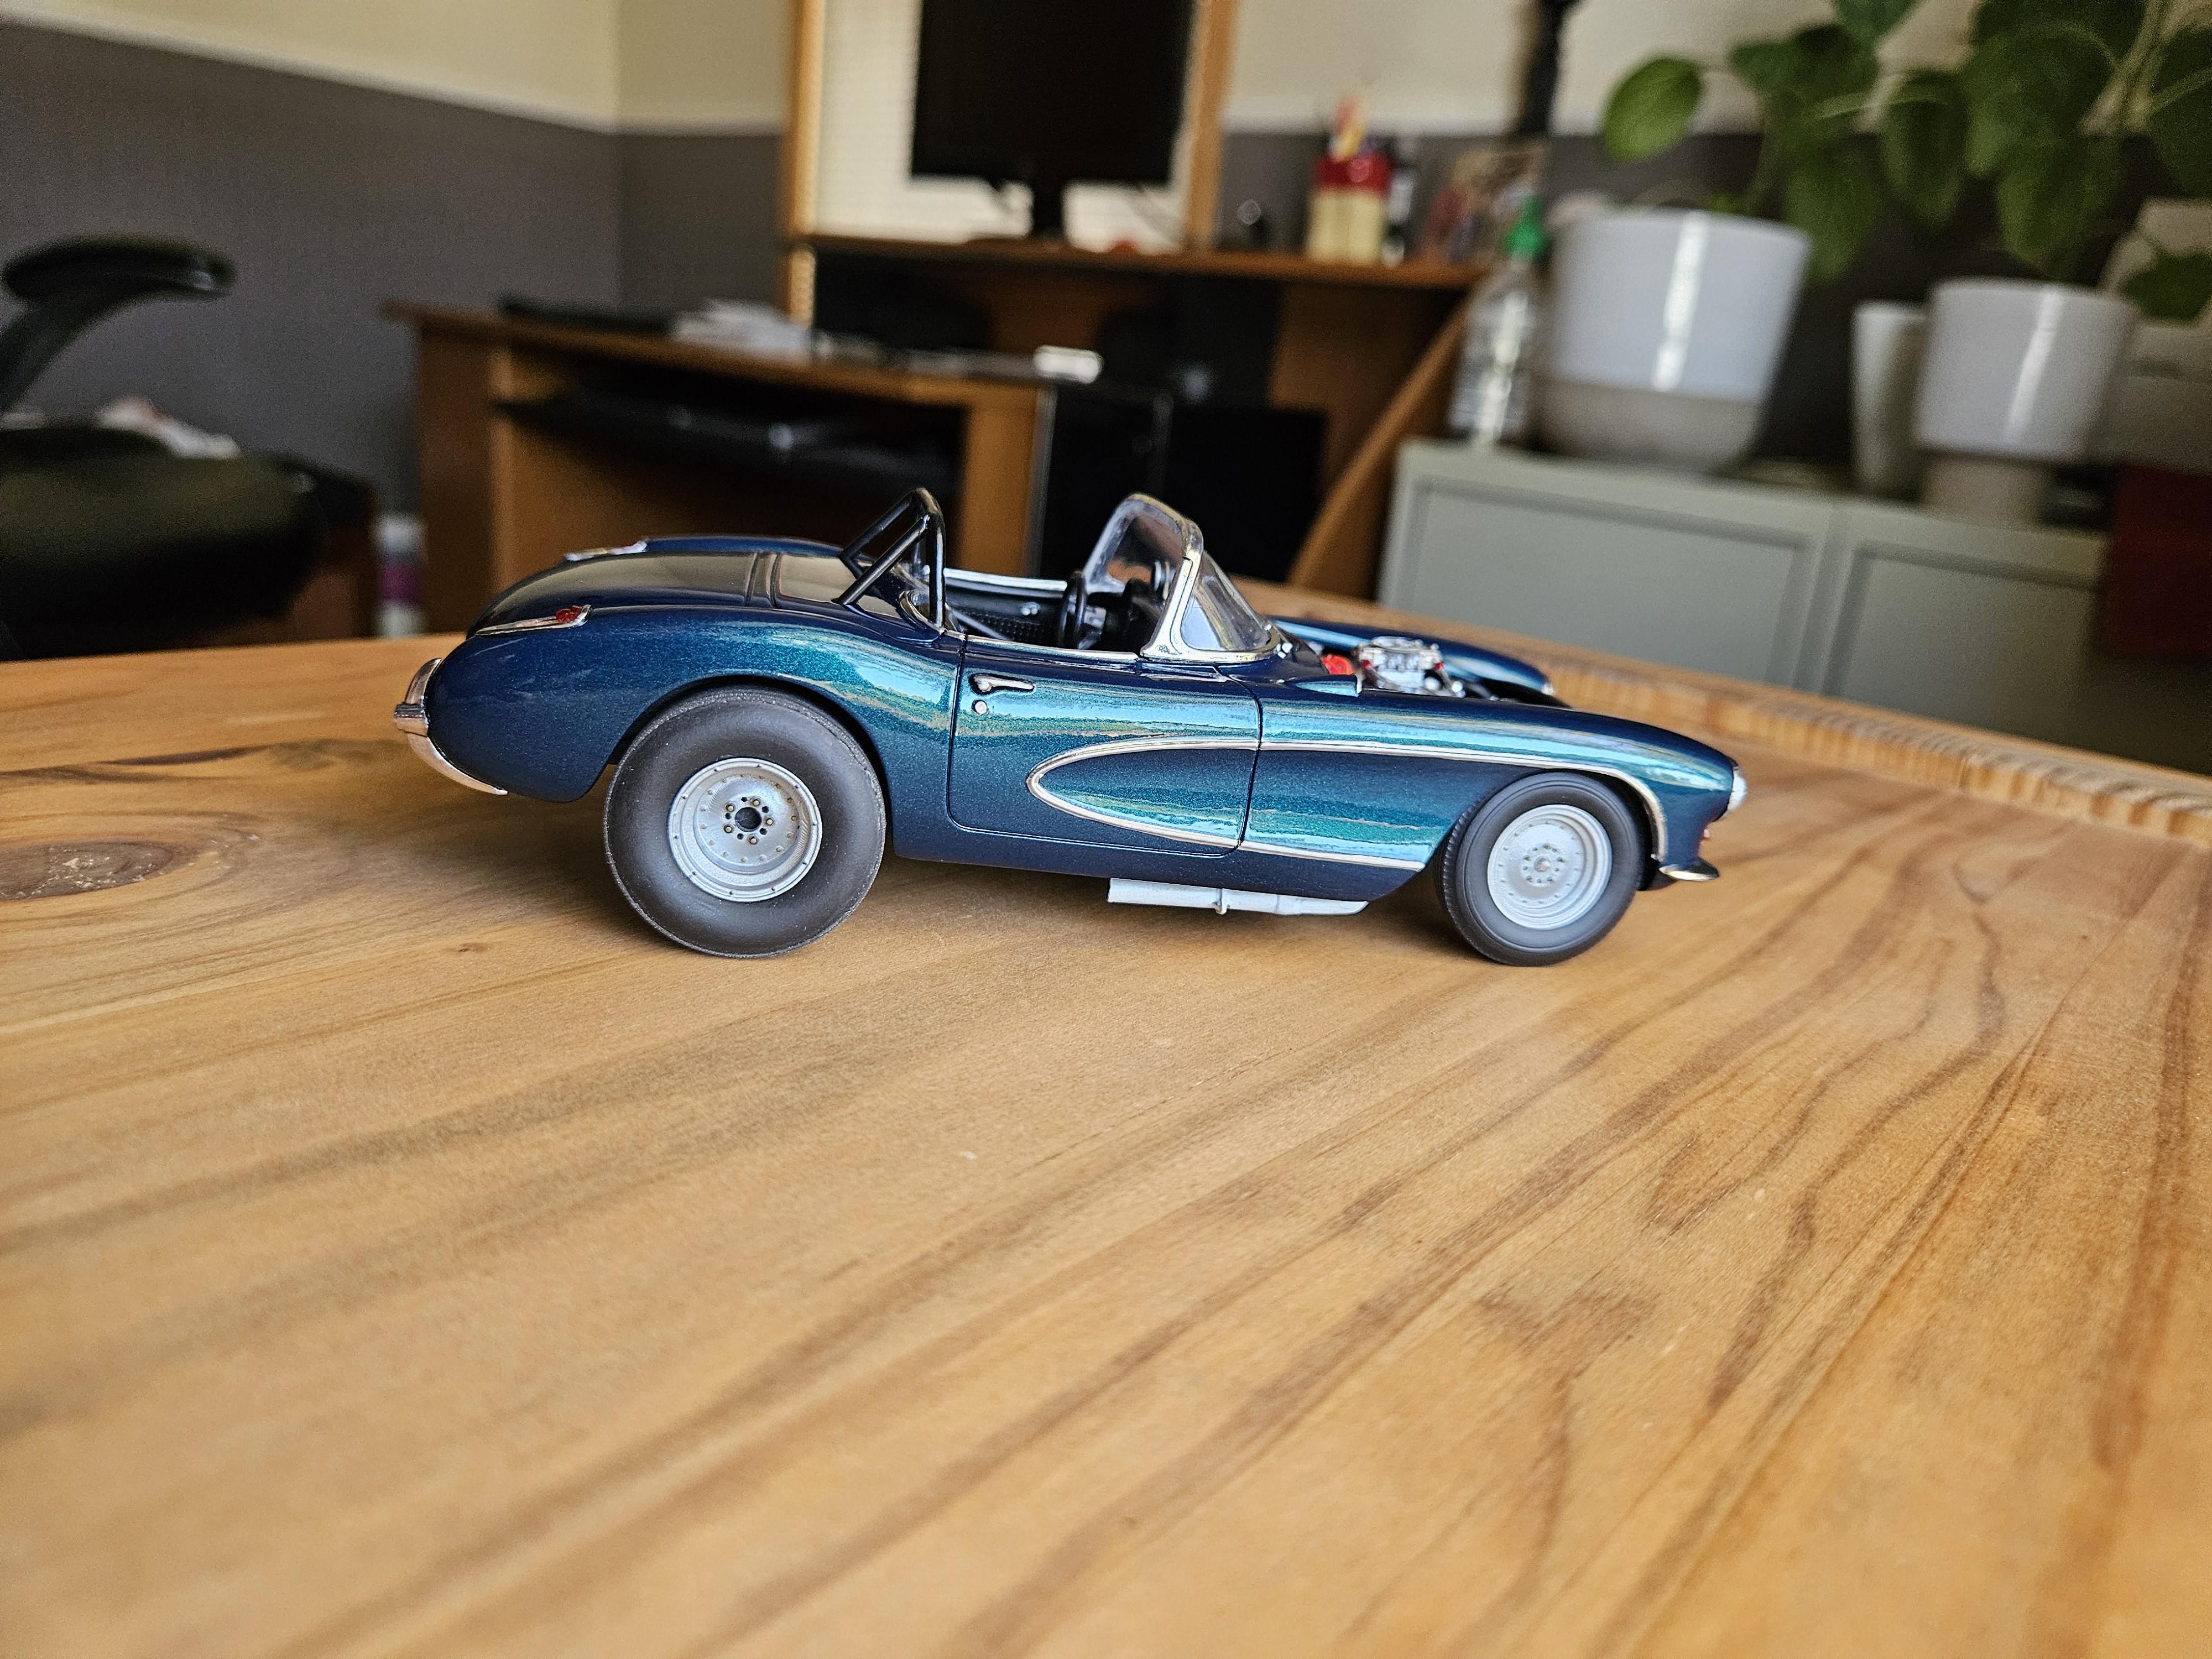
Got the scoop cut off the 67 corvette hood and about ready to glue down, still have to cut a hole in the hood though. Set the wheels in the tires to see how they look, I'm pretty satisfied with how they turned out.
-
1962 Corvette street/strip build (replica)
keviiin86 replied to keviiin86's topic in WIP: Drag Racing Models
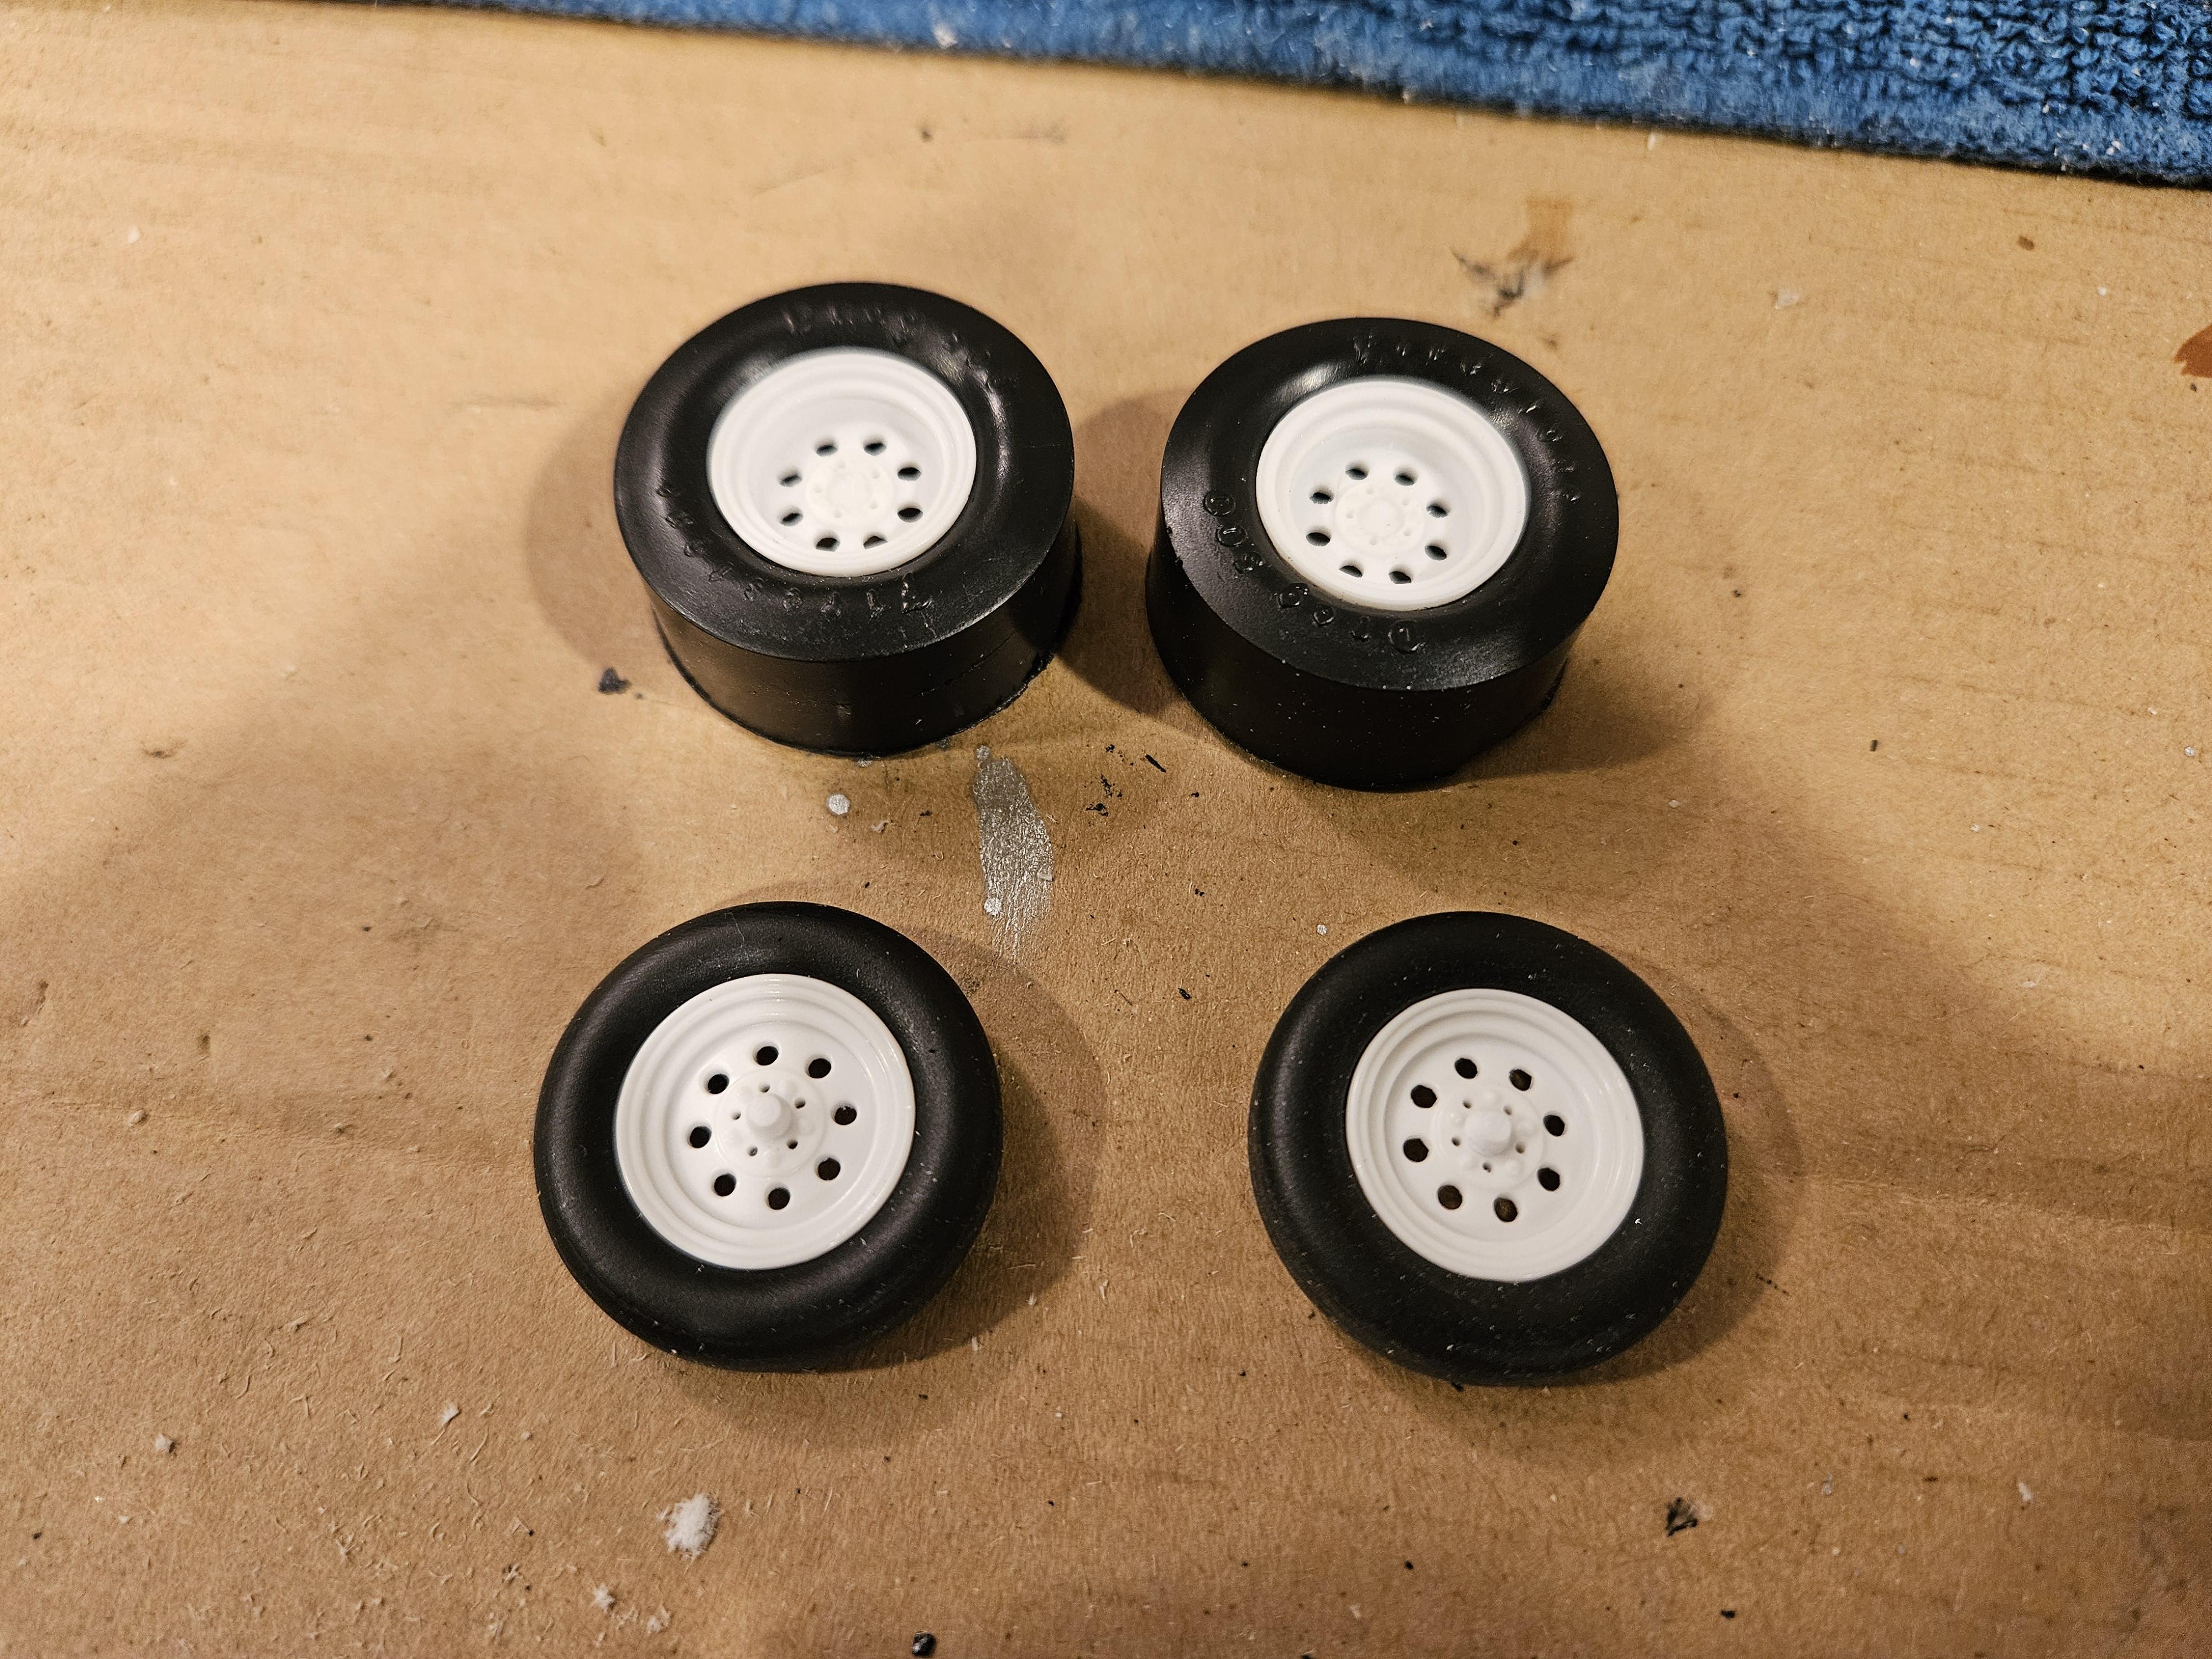
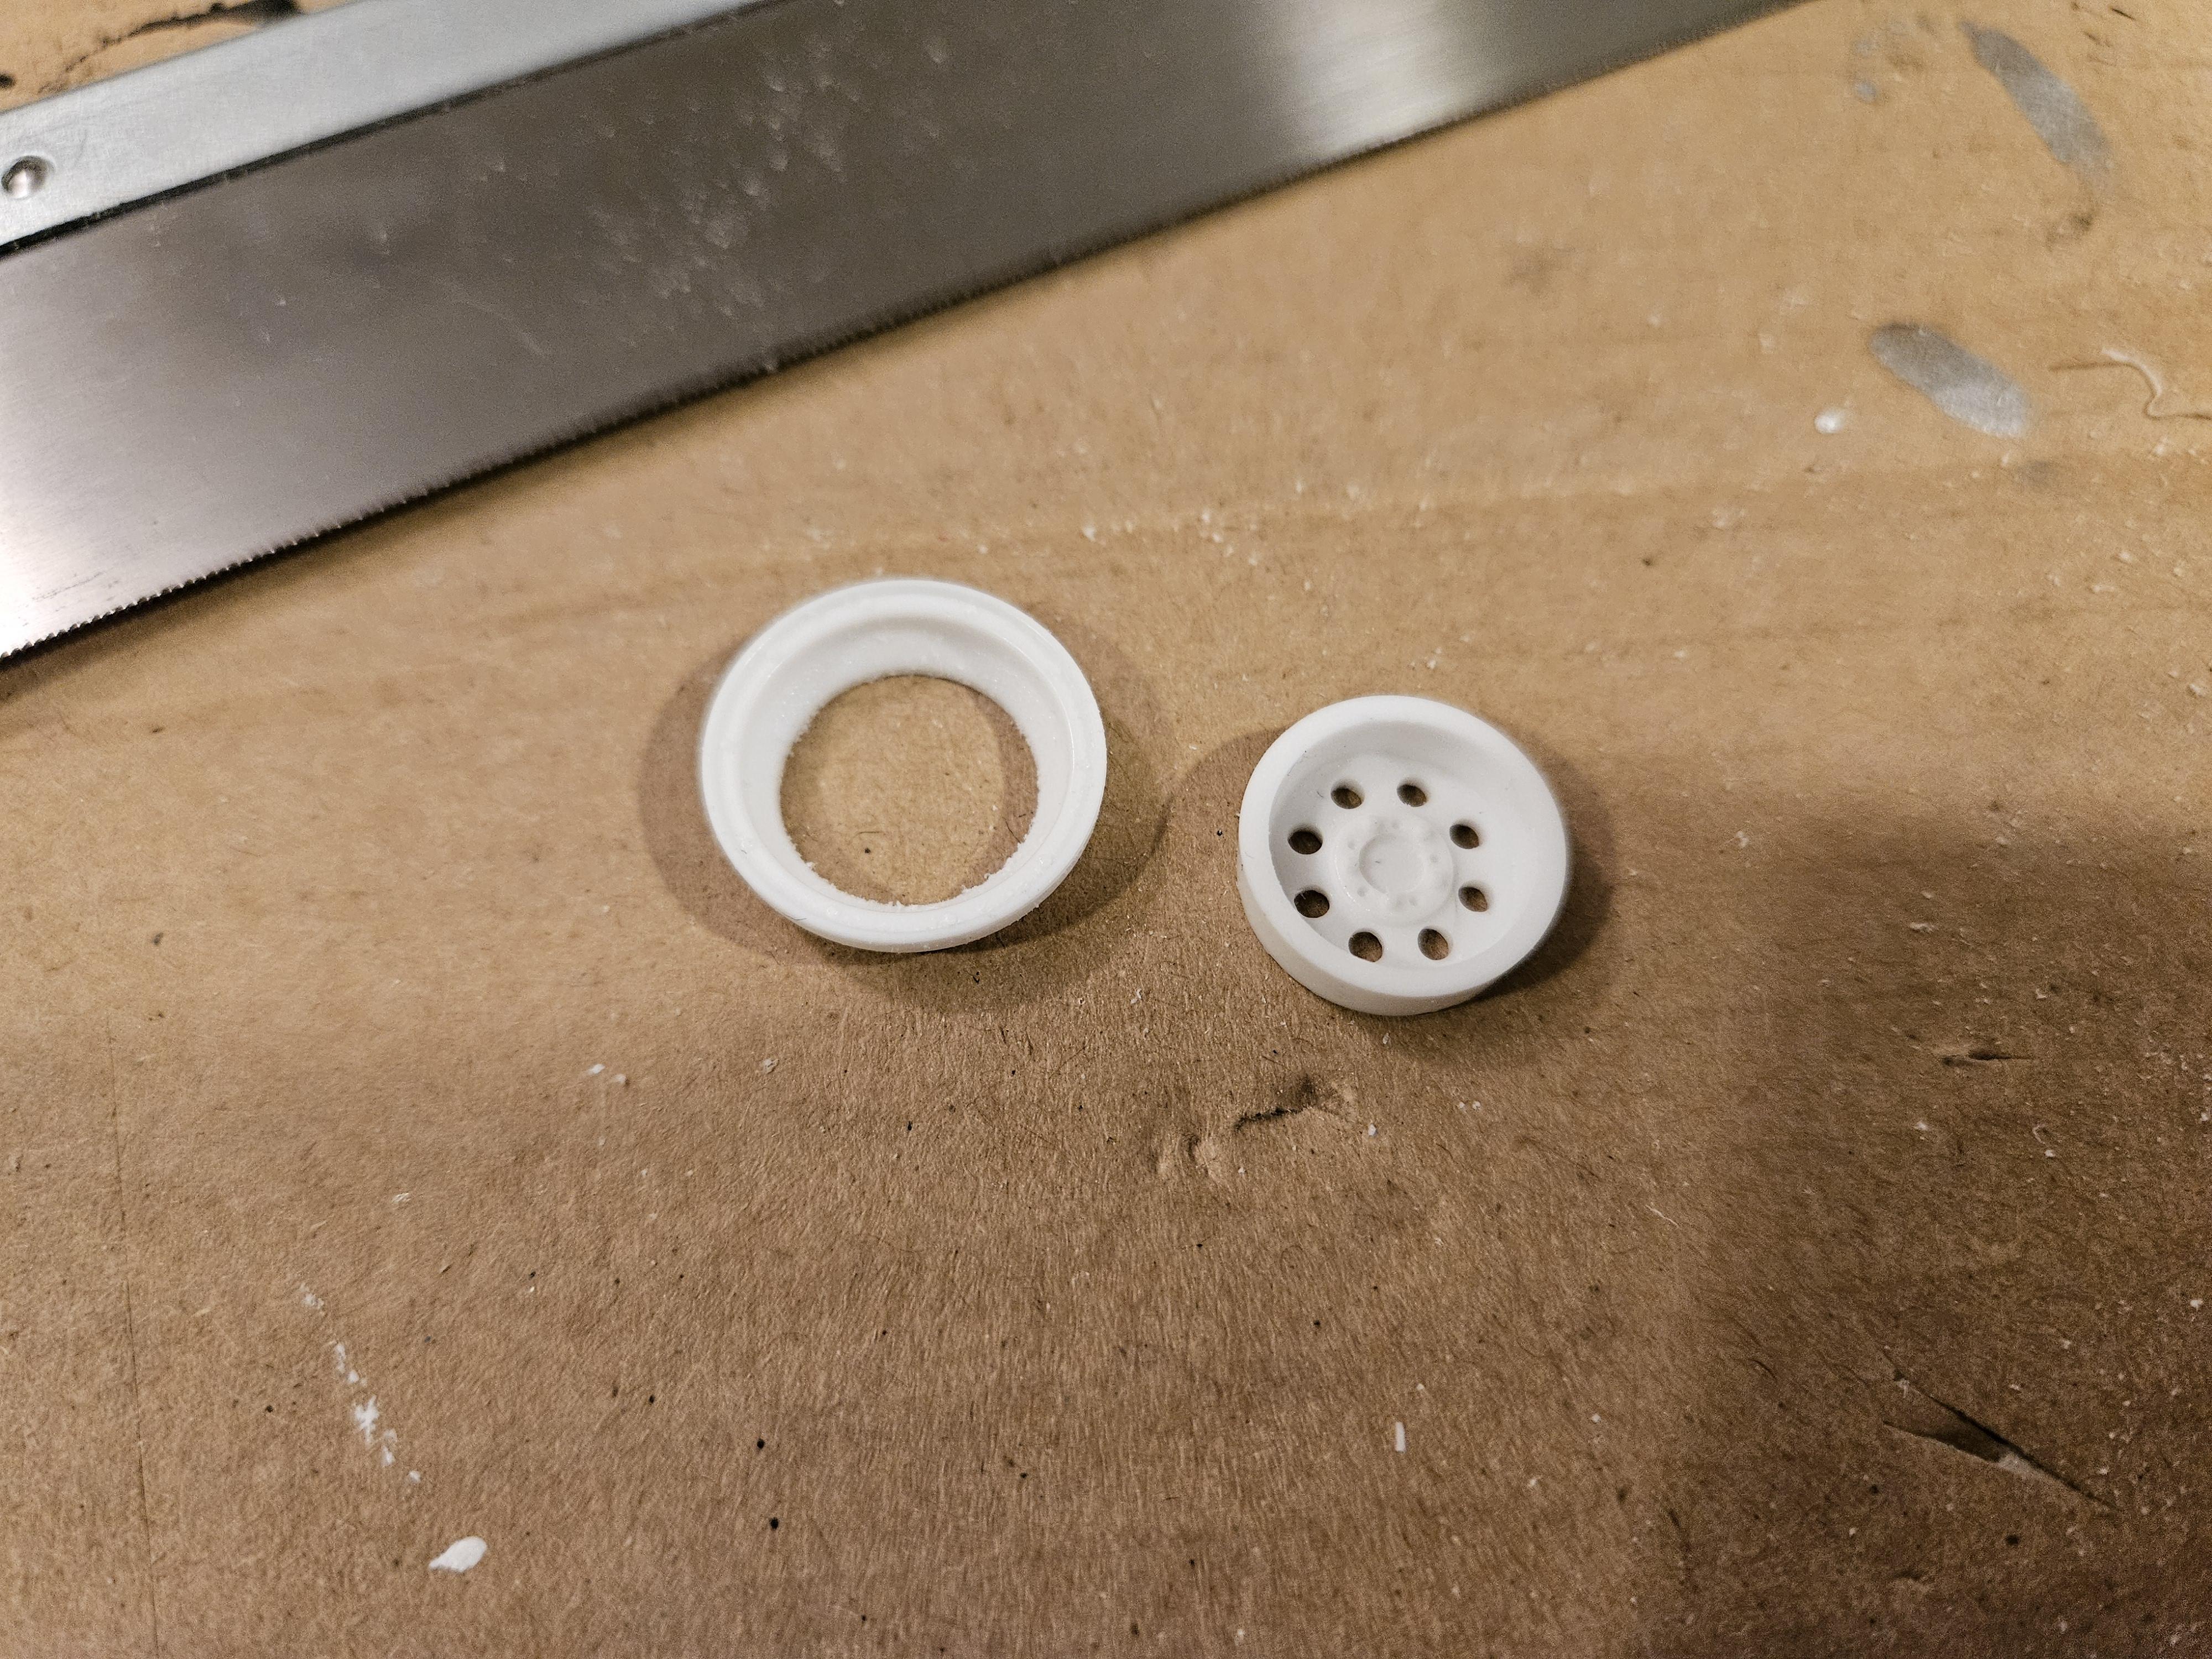
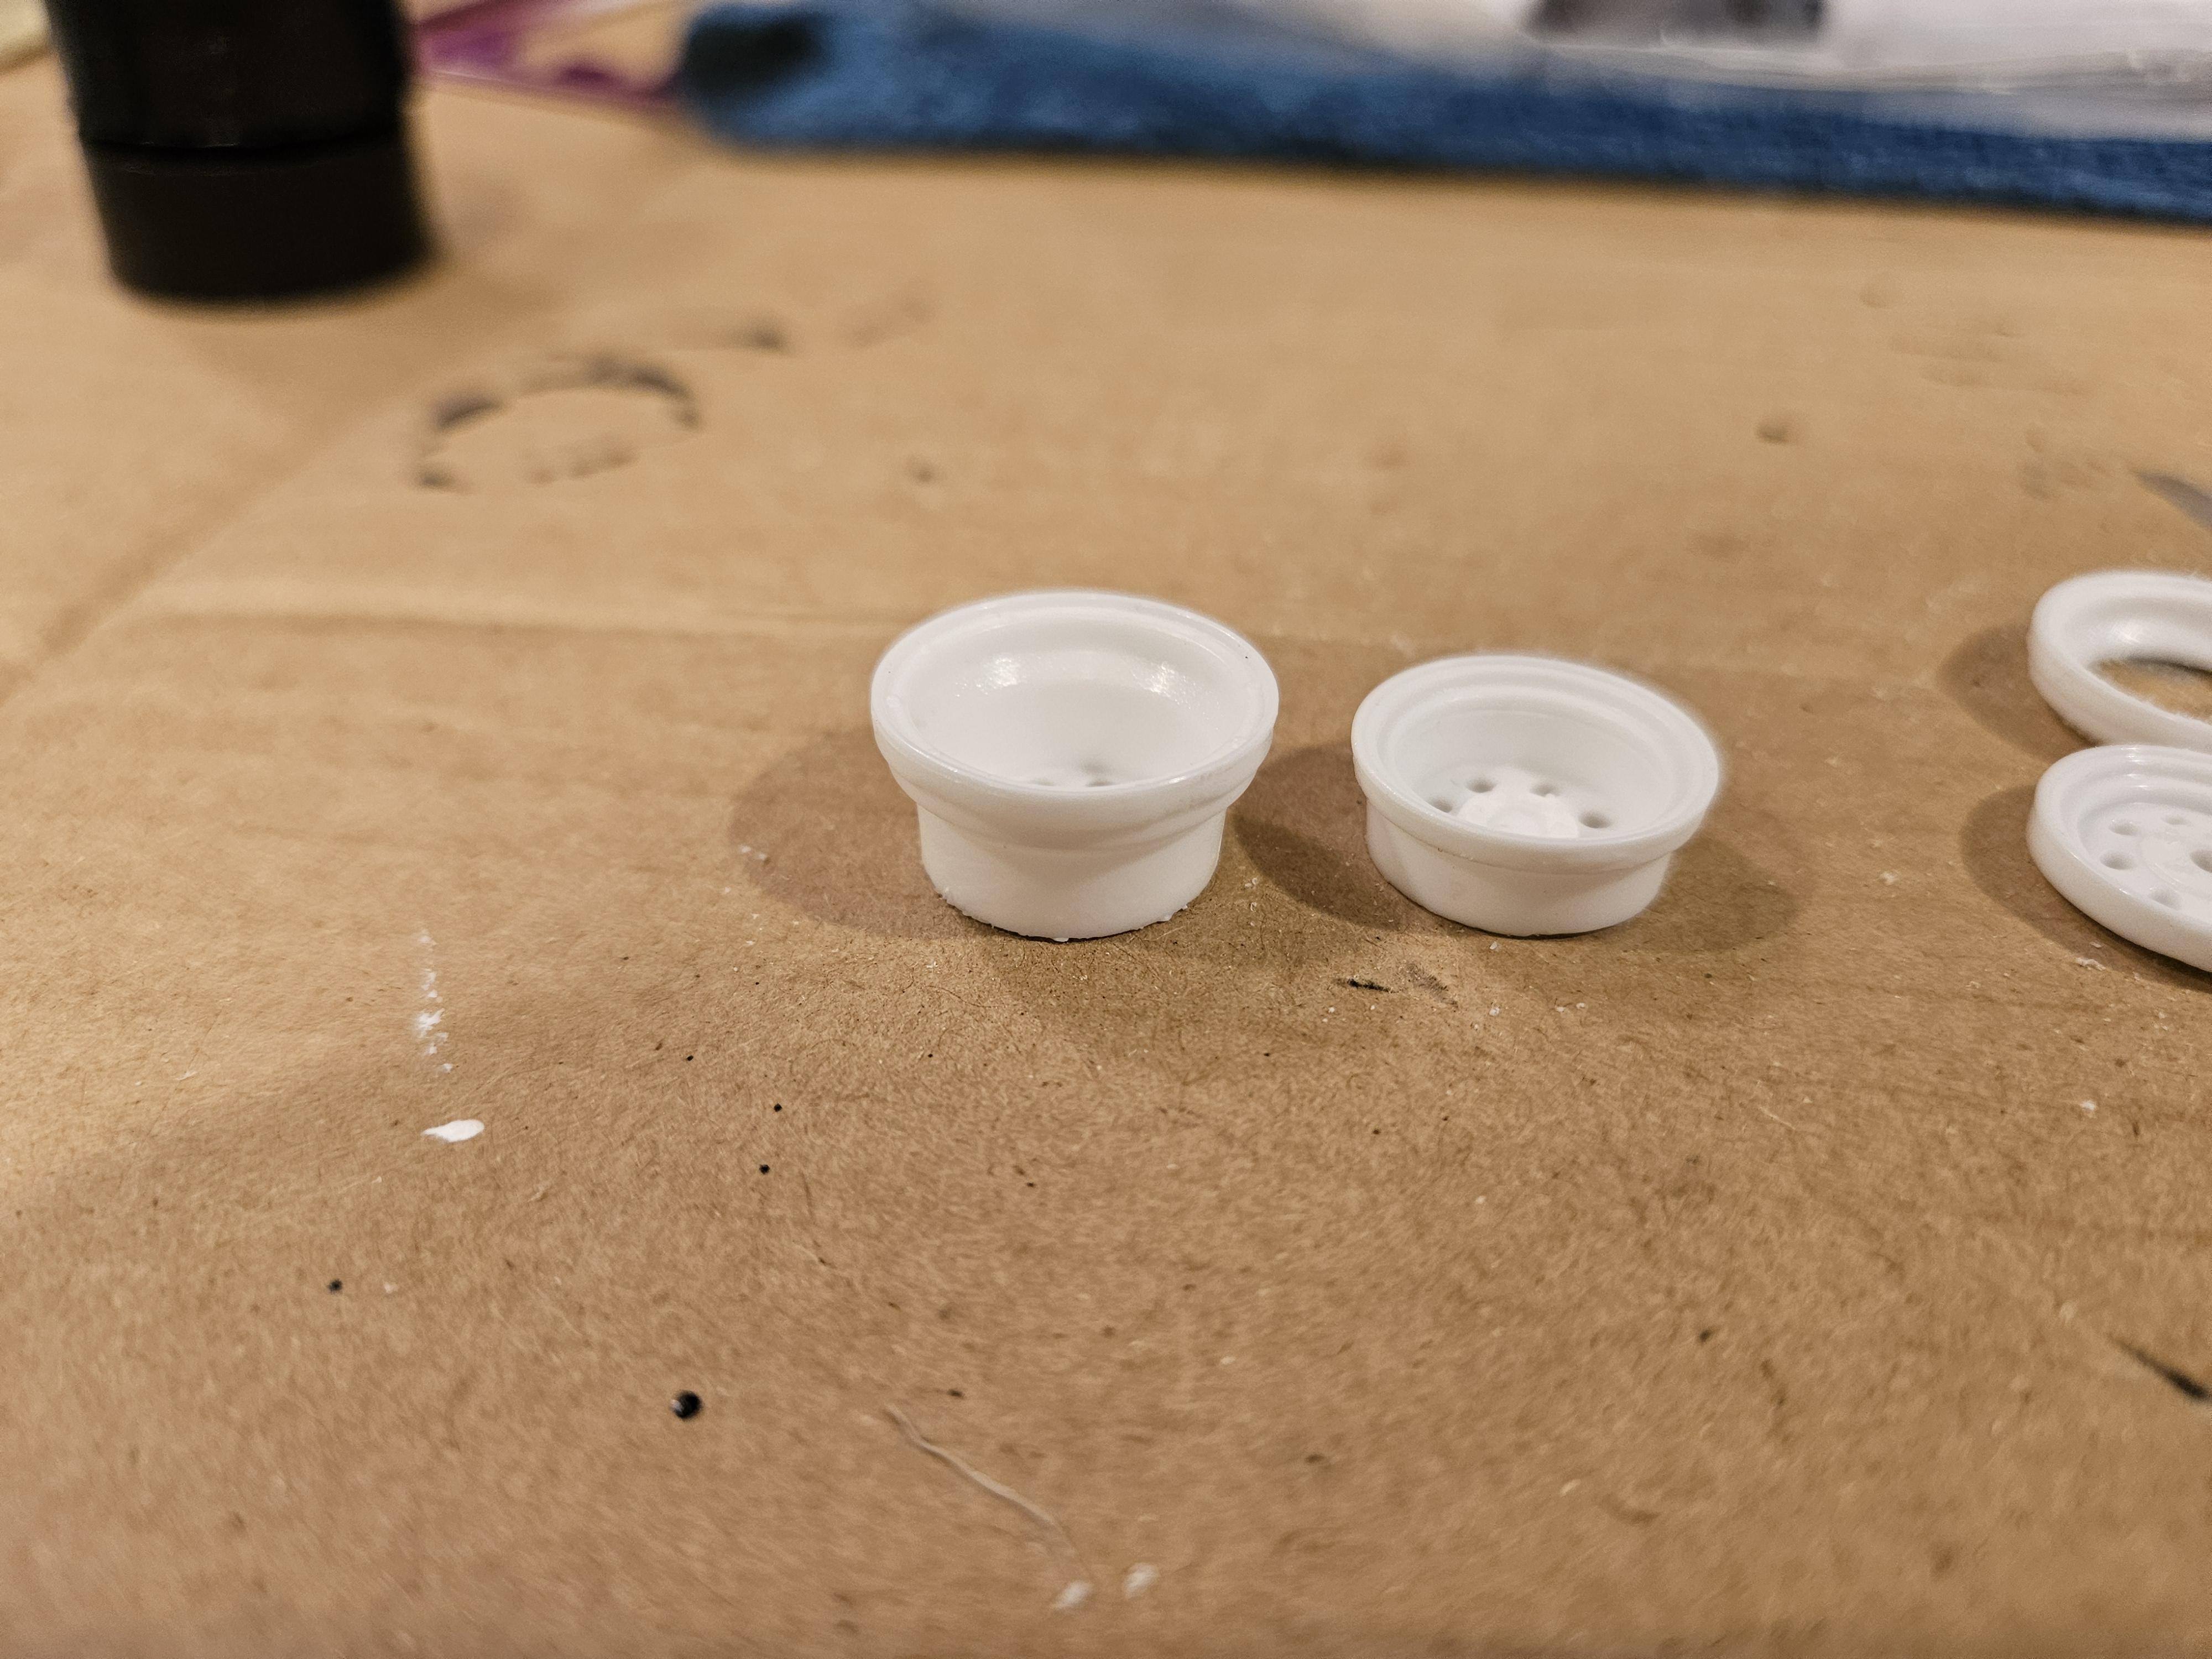
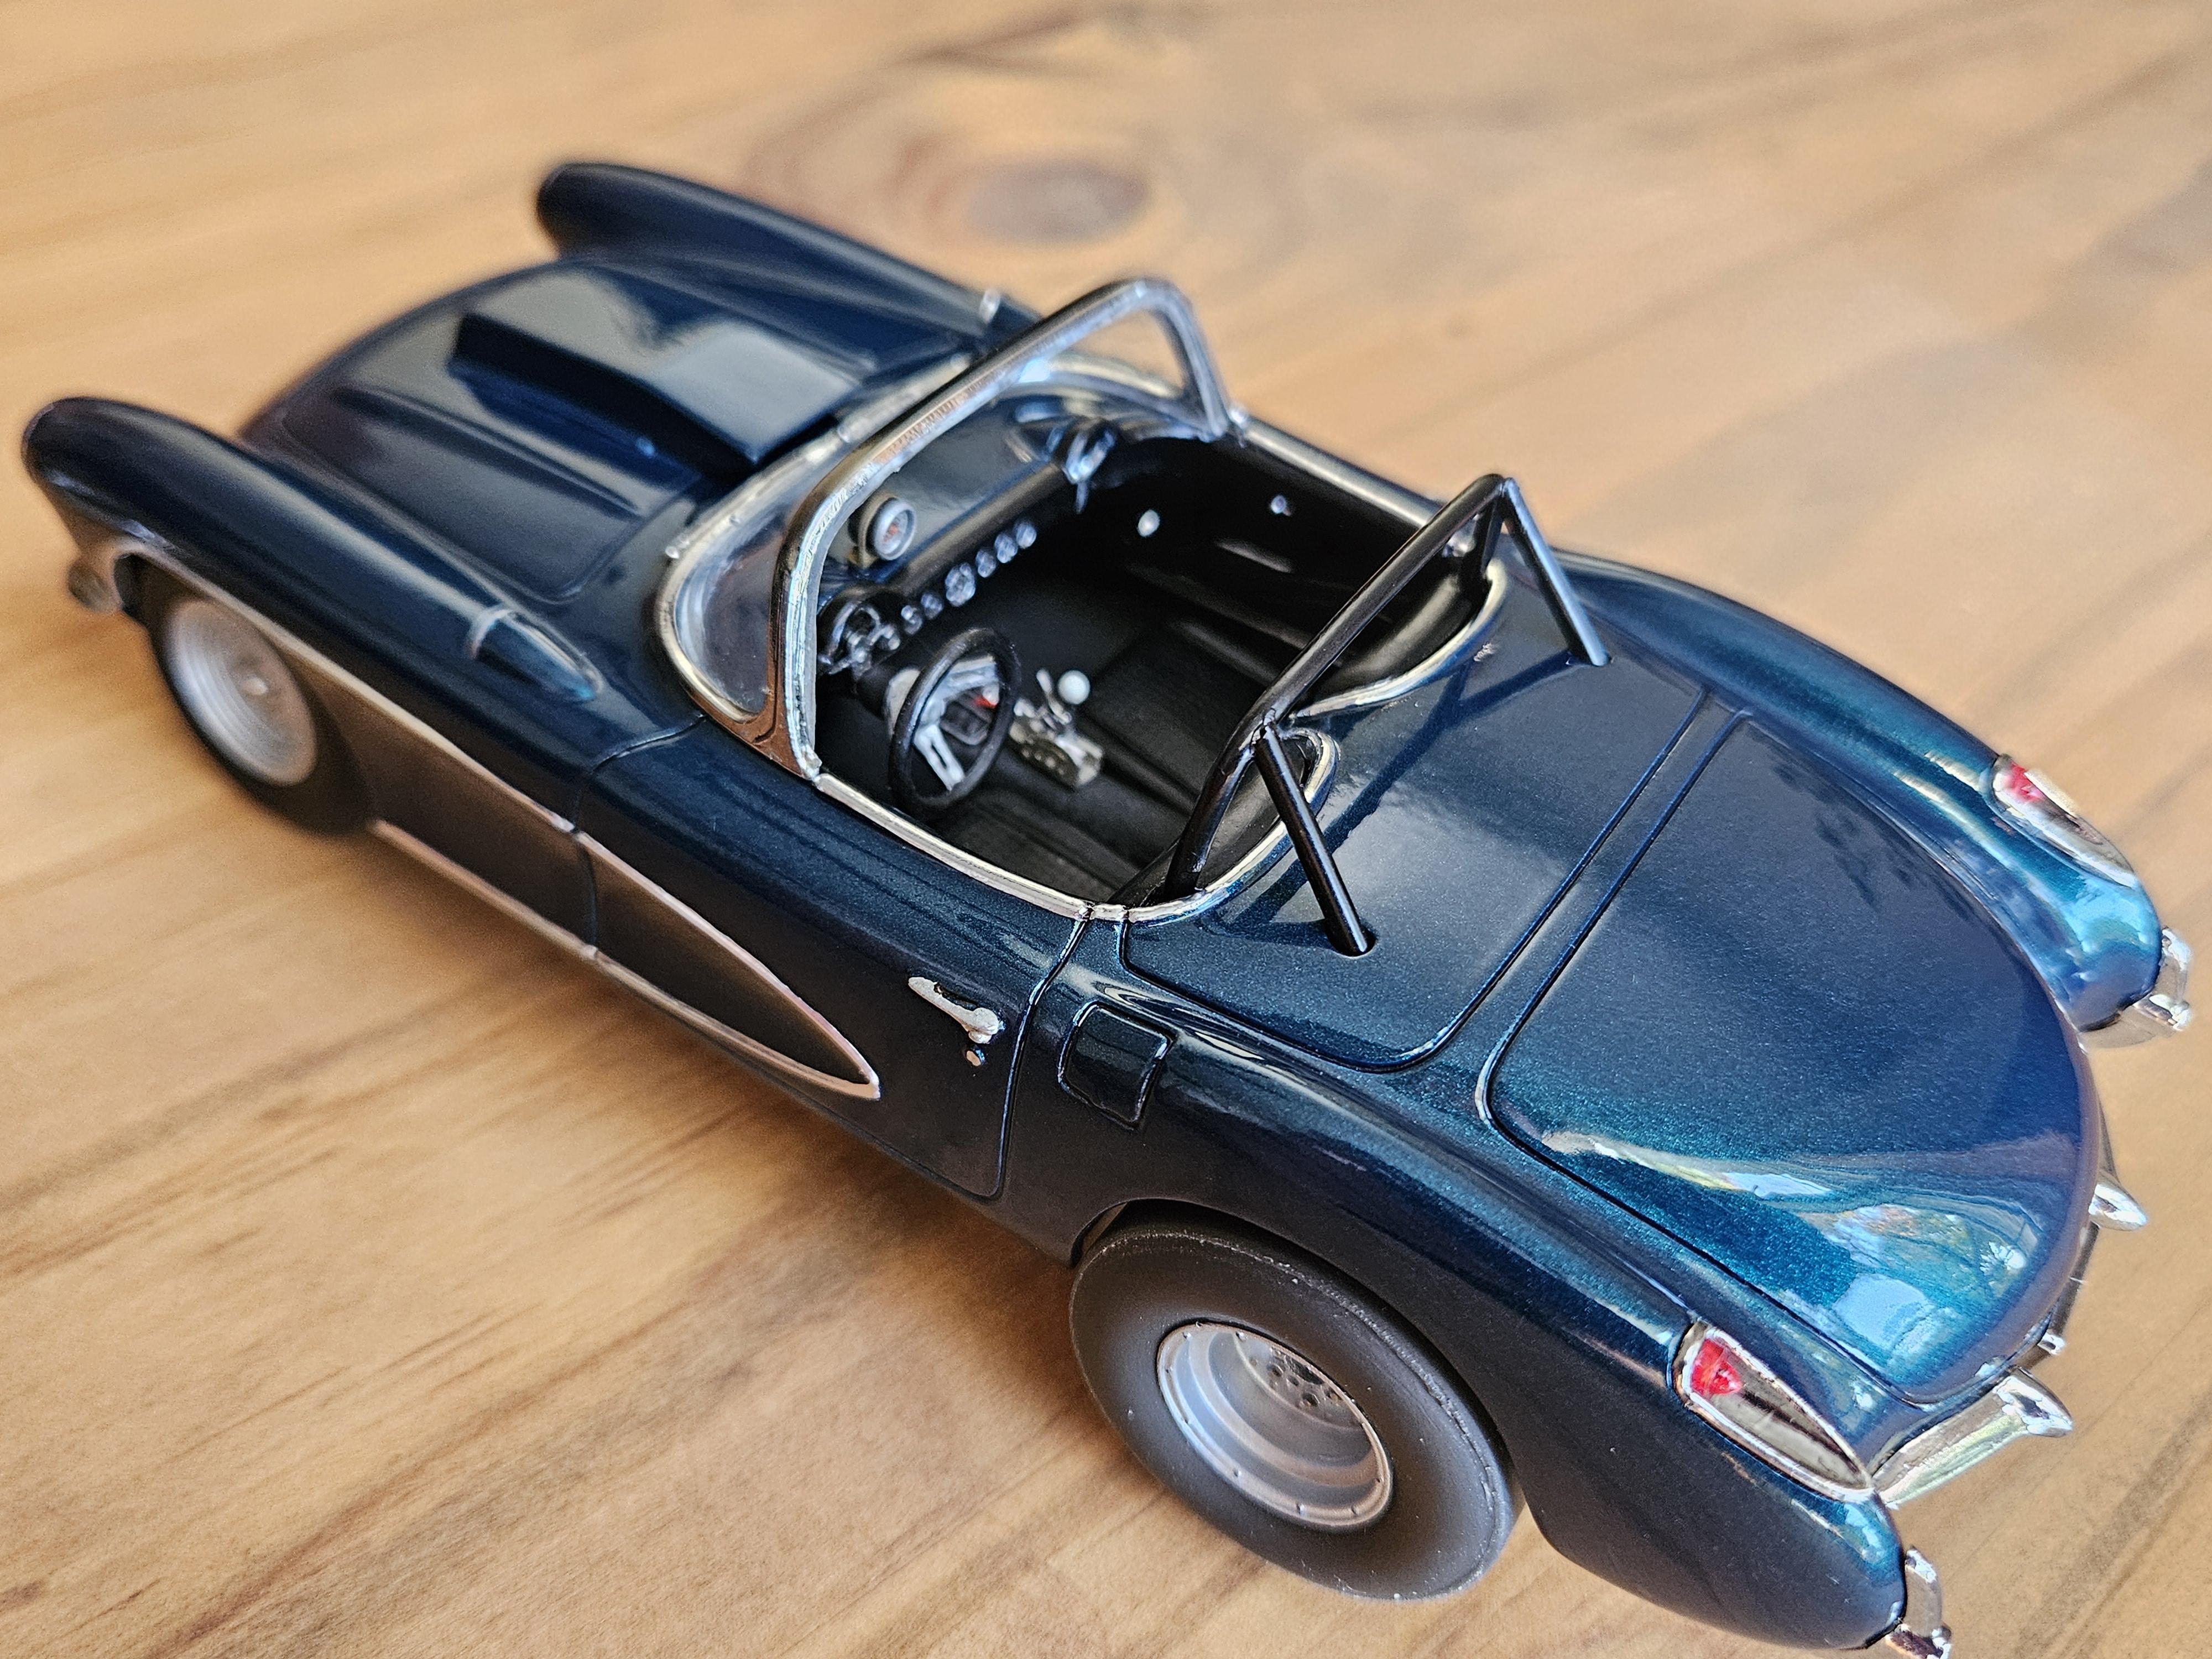
Finished up the wheels, drilled out the lug holes and made up some center caps for the front wheels. Shot them with revell chrome spray. First time using this stuff and man it gives a nice finish. Wanted to get this out of the way to give it ample time to dry. I've heard Spaz Stix clear coat doesn't dull the finish so I think I'll buy some and test it out on a spoon to make sure. Also just received a parts tree in the mail with a revell 67 corvette big block hood, so that'll be the next project.
-
1962 Corvette street/strip build (replica)
keviiin86 replied to keviiin86's topic in WIP: Drag Racing Models
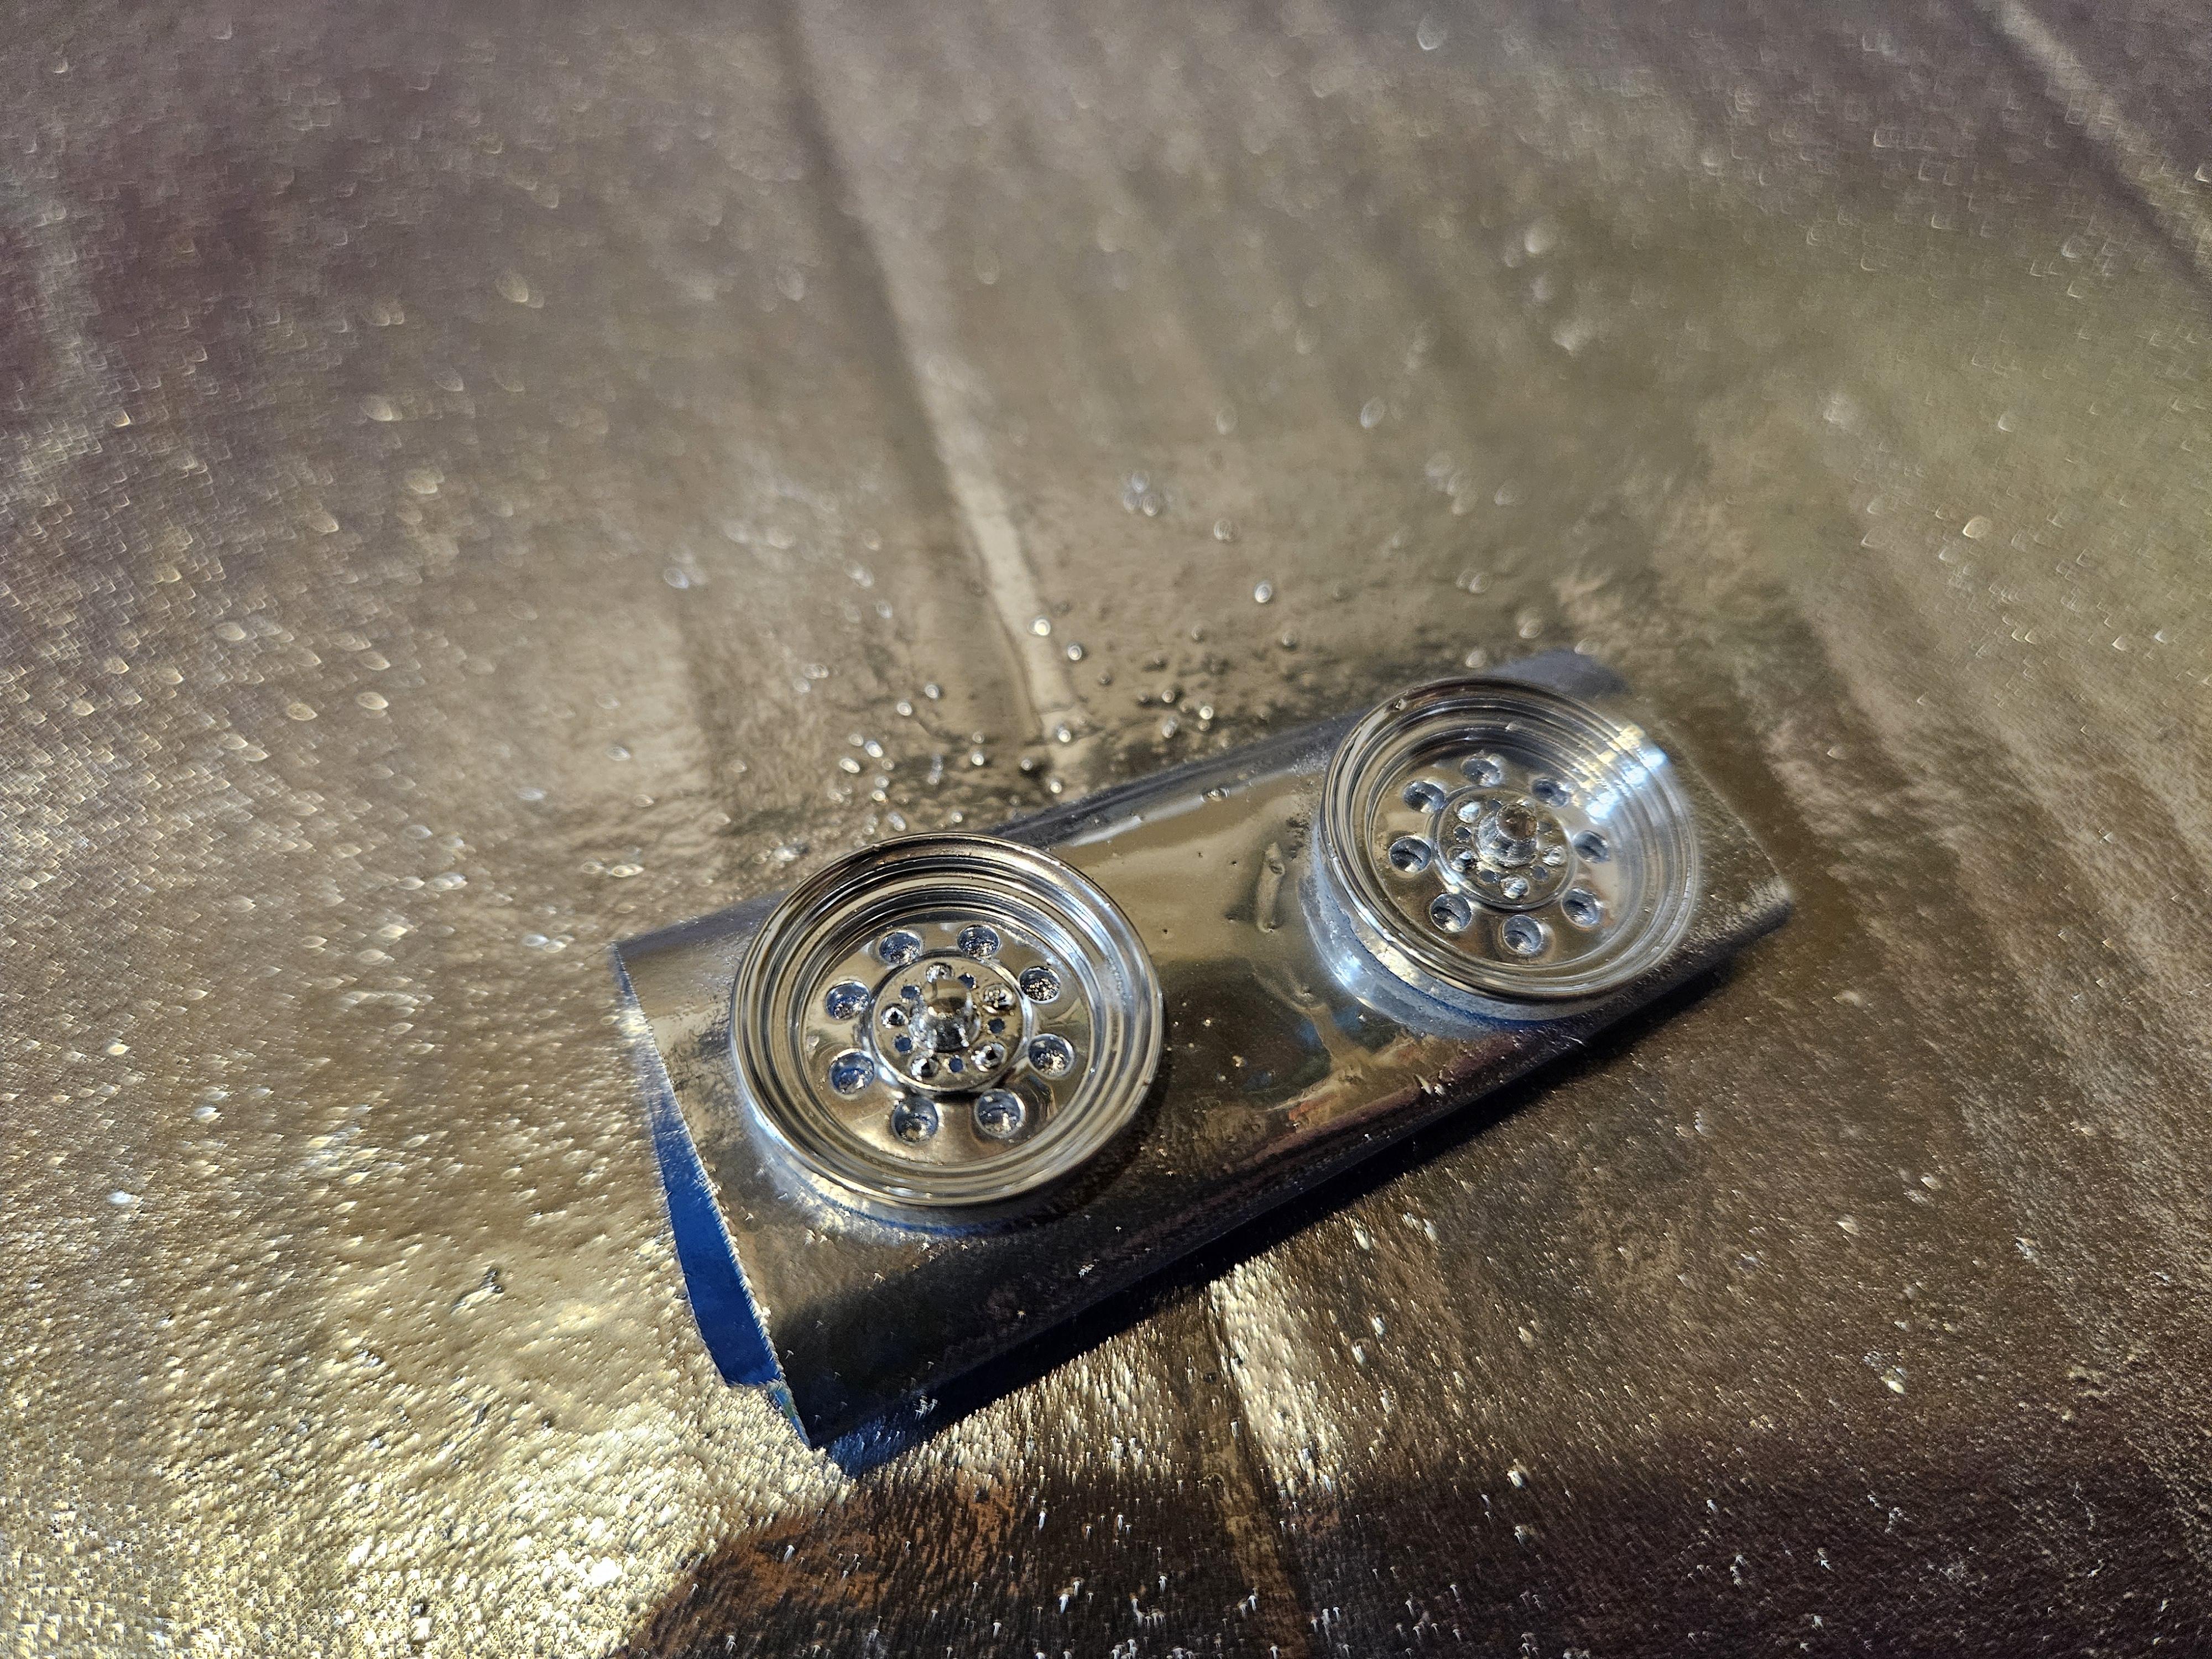
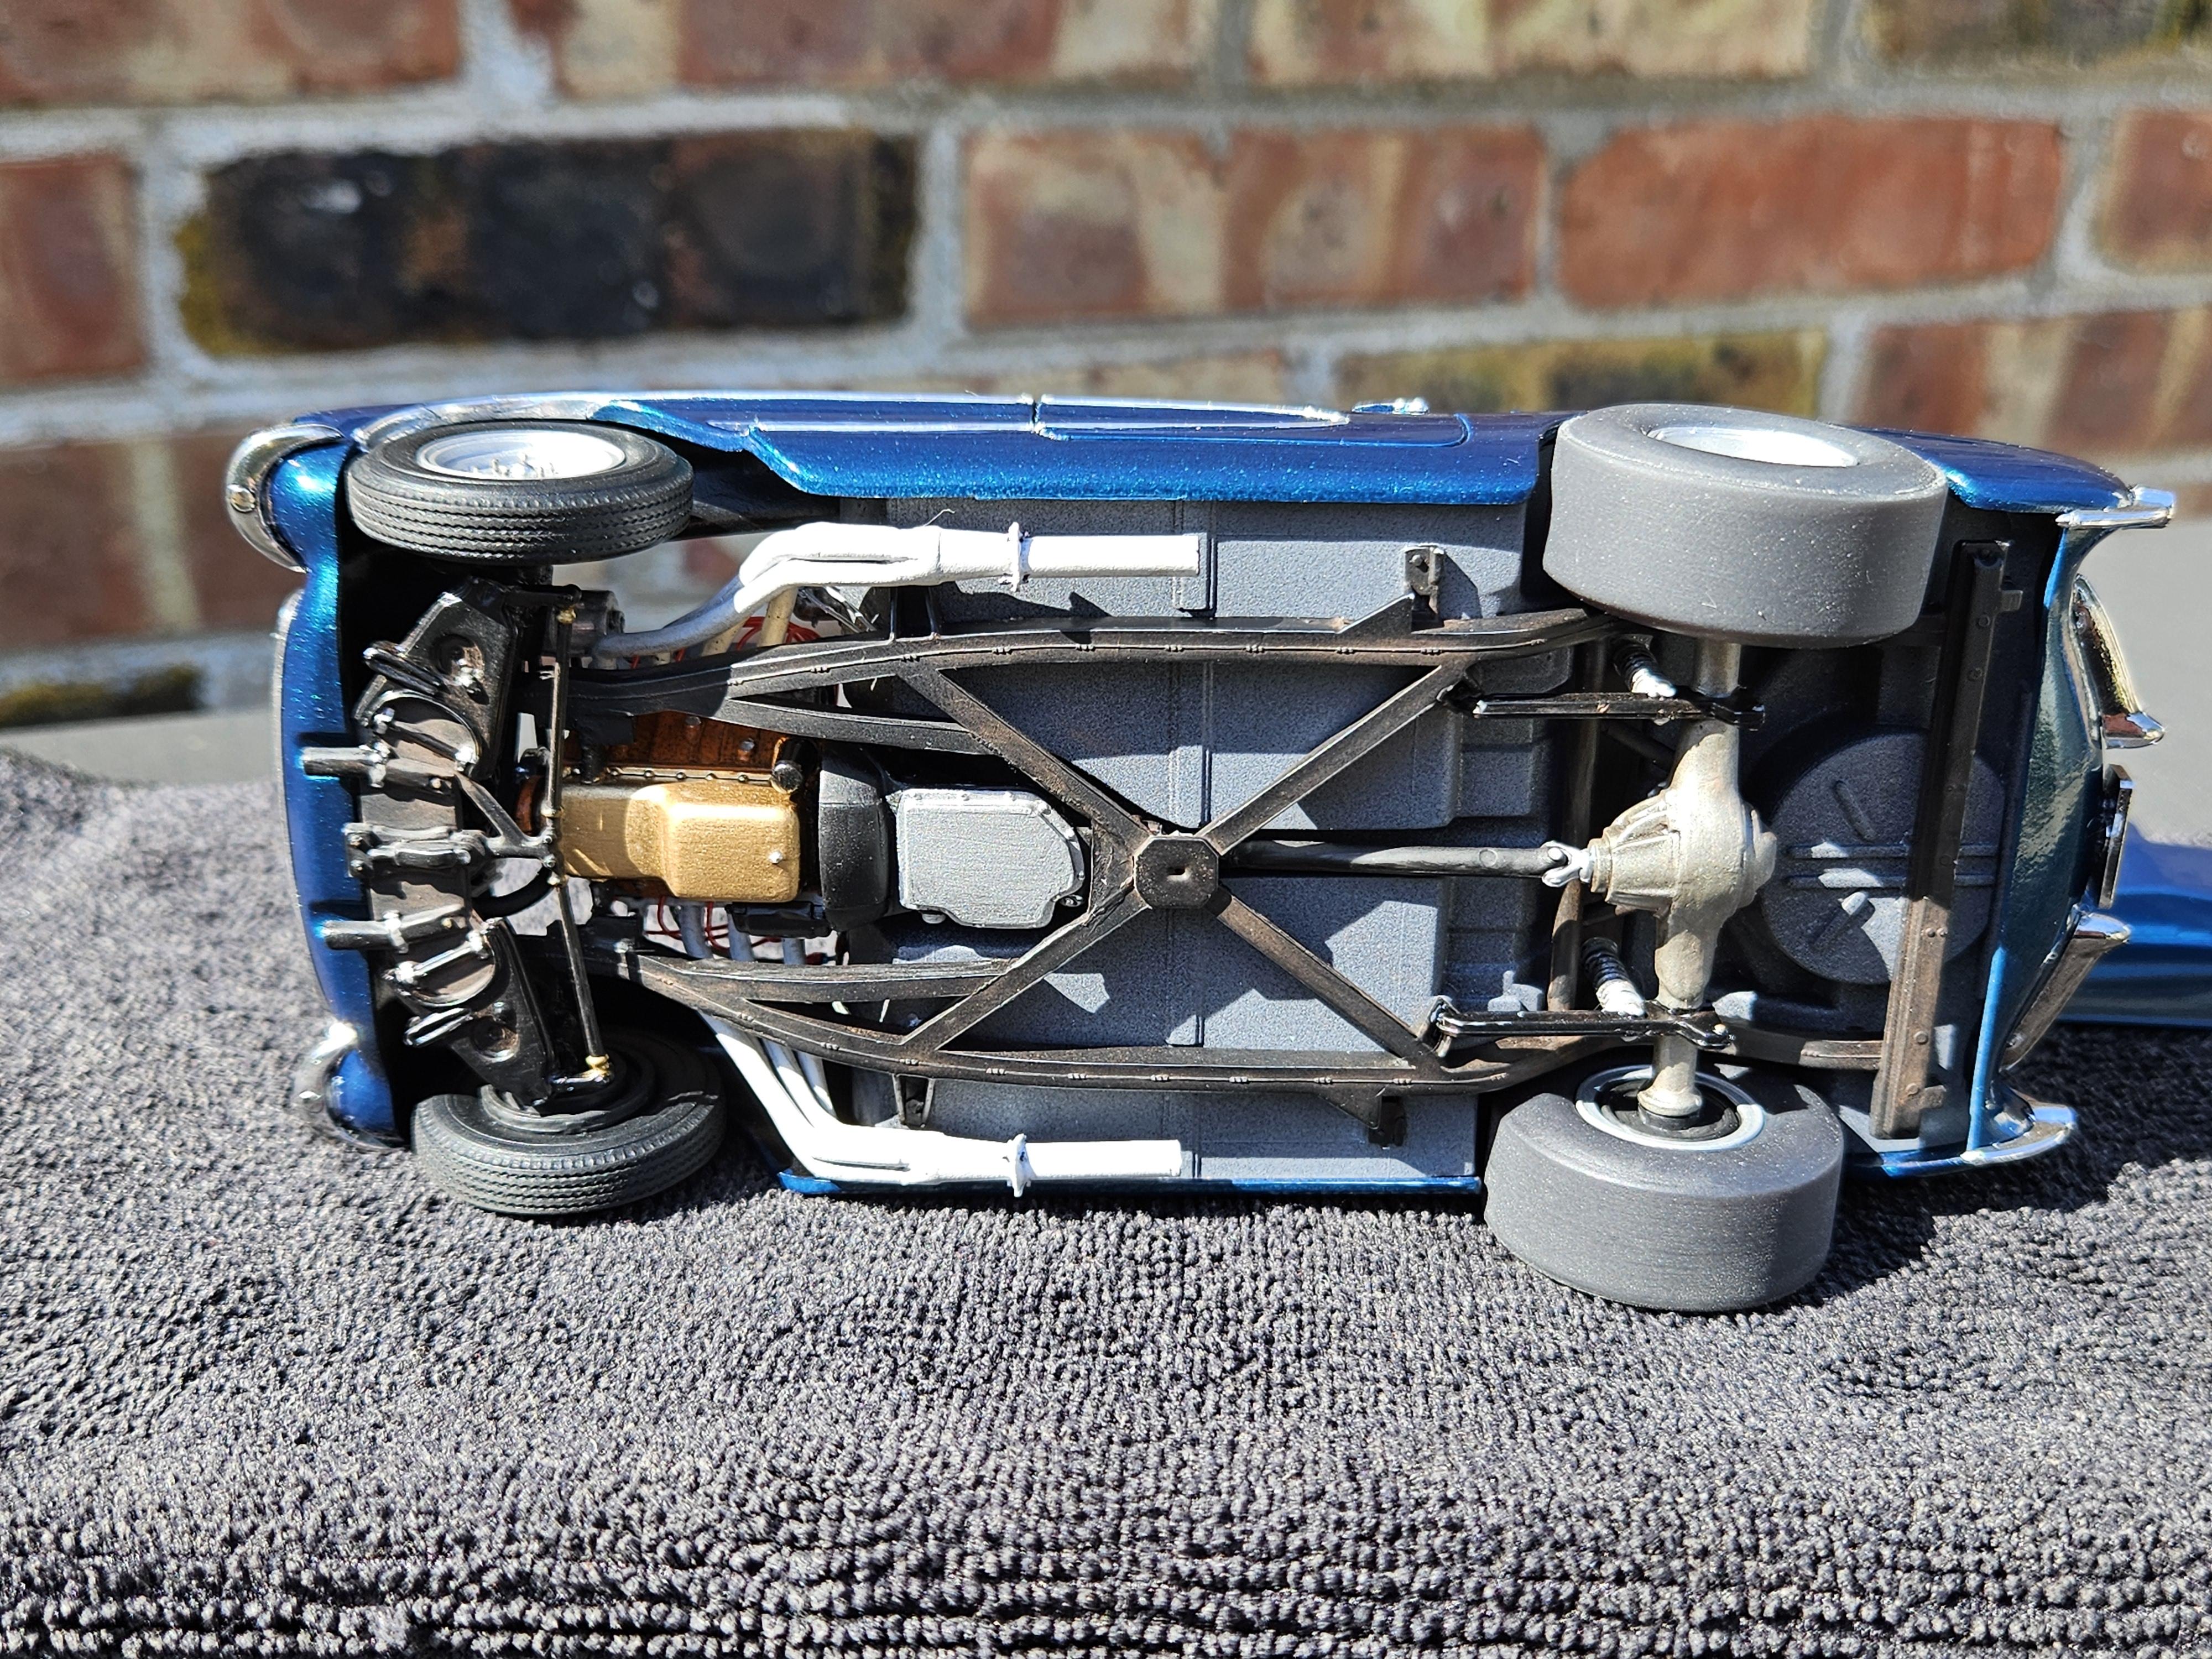
First order of business is wheels. I bought these resin weld draglites from futur attraction..i believe they were cast from one of the revell funny car kits so the rears are 16" diameter meant for huge slicks. Cut the outside ring off and used the inner rim that came with the front wheels to bring it back to a 15" wheel. Sanded down the inner rim until it looked right to me. Looks more representative of a 15x8 now. Not sure on which rear slicks I'll use yet, but I have some old firestone drag 500s from an old Johan maverick kit that are rock hard and shrunk a little..kind of want to put them to use since I like the size/scale of them, I'd say they're pretty close to an 28"x11.50" Hoosier QTP which is what my dad runs on his car.
-
1962 Corvette street/strip build (replica)
keviiin86 replied to keviiin86's topic in WIP: Drag Racing Models
Oh nice, yeah I like Byron just a little farther away than GLD. I'm in Mount Prospect, where are you? Not many people in the model car hobby that I know of in the Chicago area. -
1962 Corvette street/strip build (replica)
keviiin86 replied to keviiin86's topic in WIP: Drag Racing Models
Yep, that's my home track. He never ran in any classes with it, just mainly bracket racing. -
1962 Corvette street/strip build (replica)
keviiin86 replied to keviiin86's topic in WIP: Drag Racing Models
Yeah I'm looking forward to starting it..but no, no name for it. He has a 67 corvette also, so this one is referred to simply as "the 62" lol -
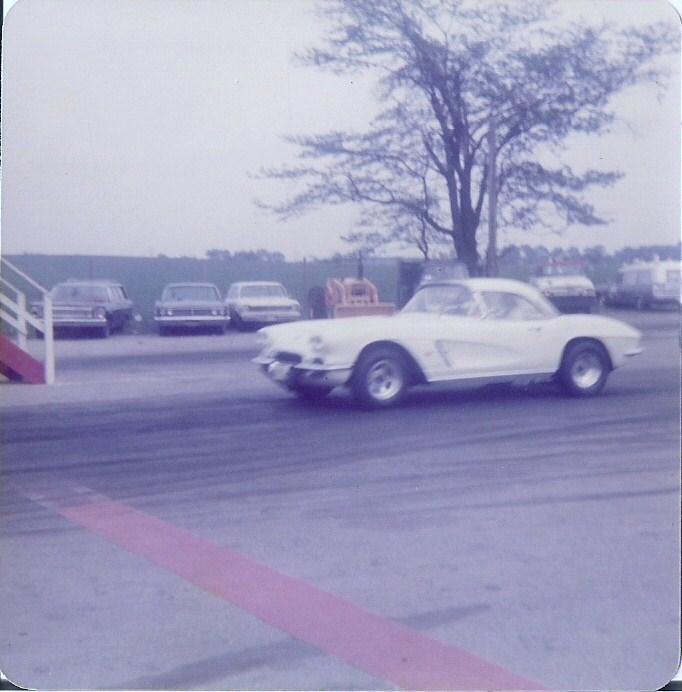
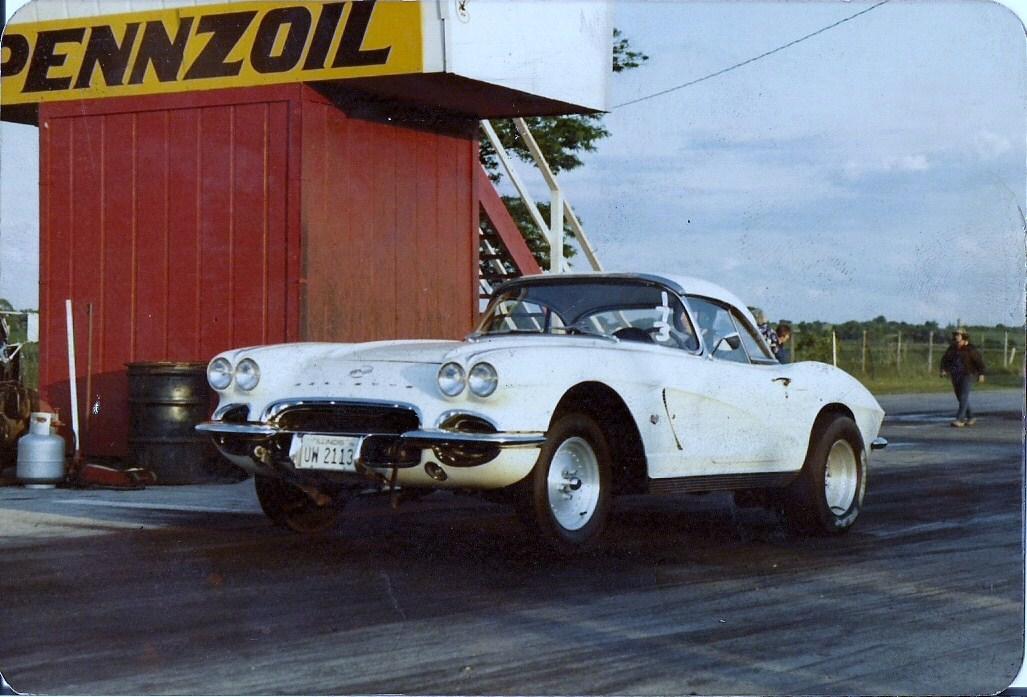
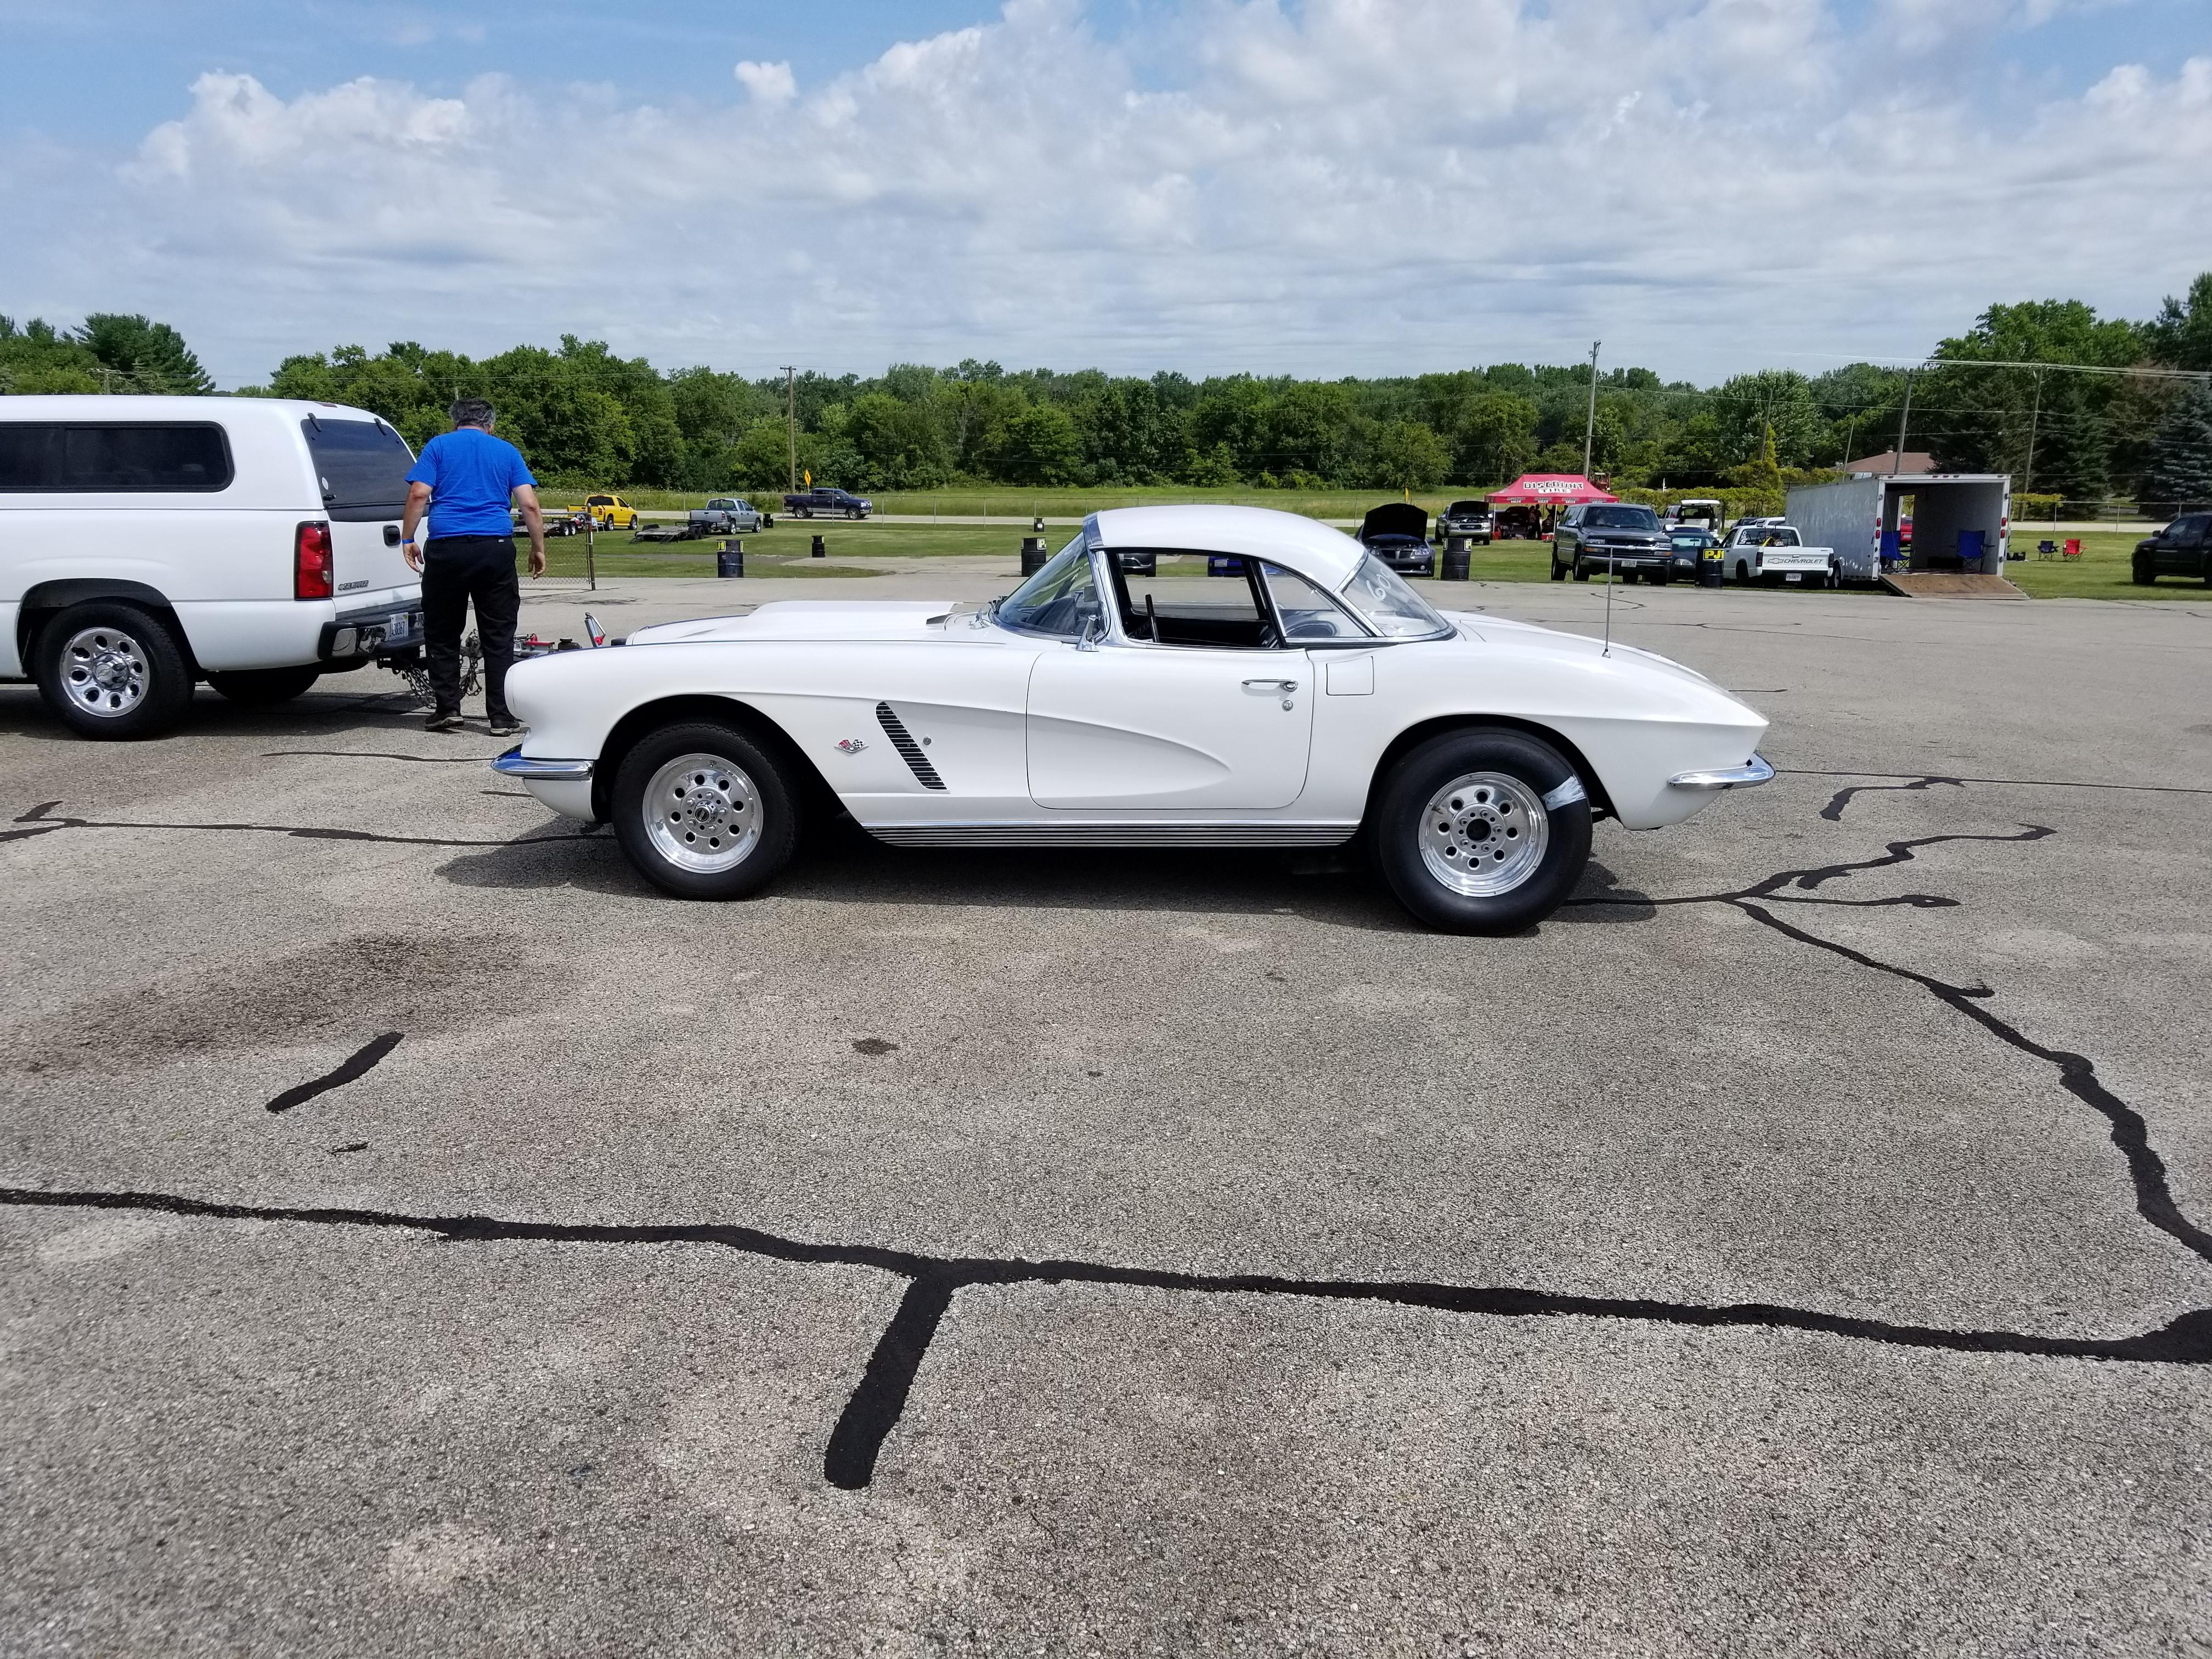
I've wanted to build a replica of my dad's corvette for 20+ years but never had the necessary parts until more recently. I've been collecting parts for the last year and finally want to take on the challenge. I picked up both the revell 62 corvette roadster and the revell 62 corvette gasser (for the hard top) and various other parts that are unique to his car (weld draglite wheels, carburetor, headers etc.) I have two old 67 corvette models that I built years ago that I may steal the hood from to cut up for the stinger hood scoop, or possibly find one on ebay that someone is parting out. I was torn on how I wanted to build it, either how the car looked in the 70s and 80s with a flat hood and centerlines/super tricks or how it looks today with the draglites and hood scoop, but I've decided to build it how it looks now. He's owned the car since 1973 and have pics of it going back to the 70s..so here's some photos of it over the years. For anyone curious it's got a 400 small block with a th400 and 9" ford with 4.10s. Car was raced alot in the 70s and 80s but didn't do much racing with it after that. We have gotten it back to the track in more recent years and this past fall ran it's best time of 11.07 @ 122..getting close to a 10 second slip.
-
Thanks man, that's definitely my favorite style of build.
-
Thanks man! Those two are the ones built this year..that impala was a an old dusty disaster from when I first started building..just cleaned it up and made it look presentable.
-
yeah it's got the best stance of them all that's for sure!
-
Thanks, it was a fun build!
-
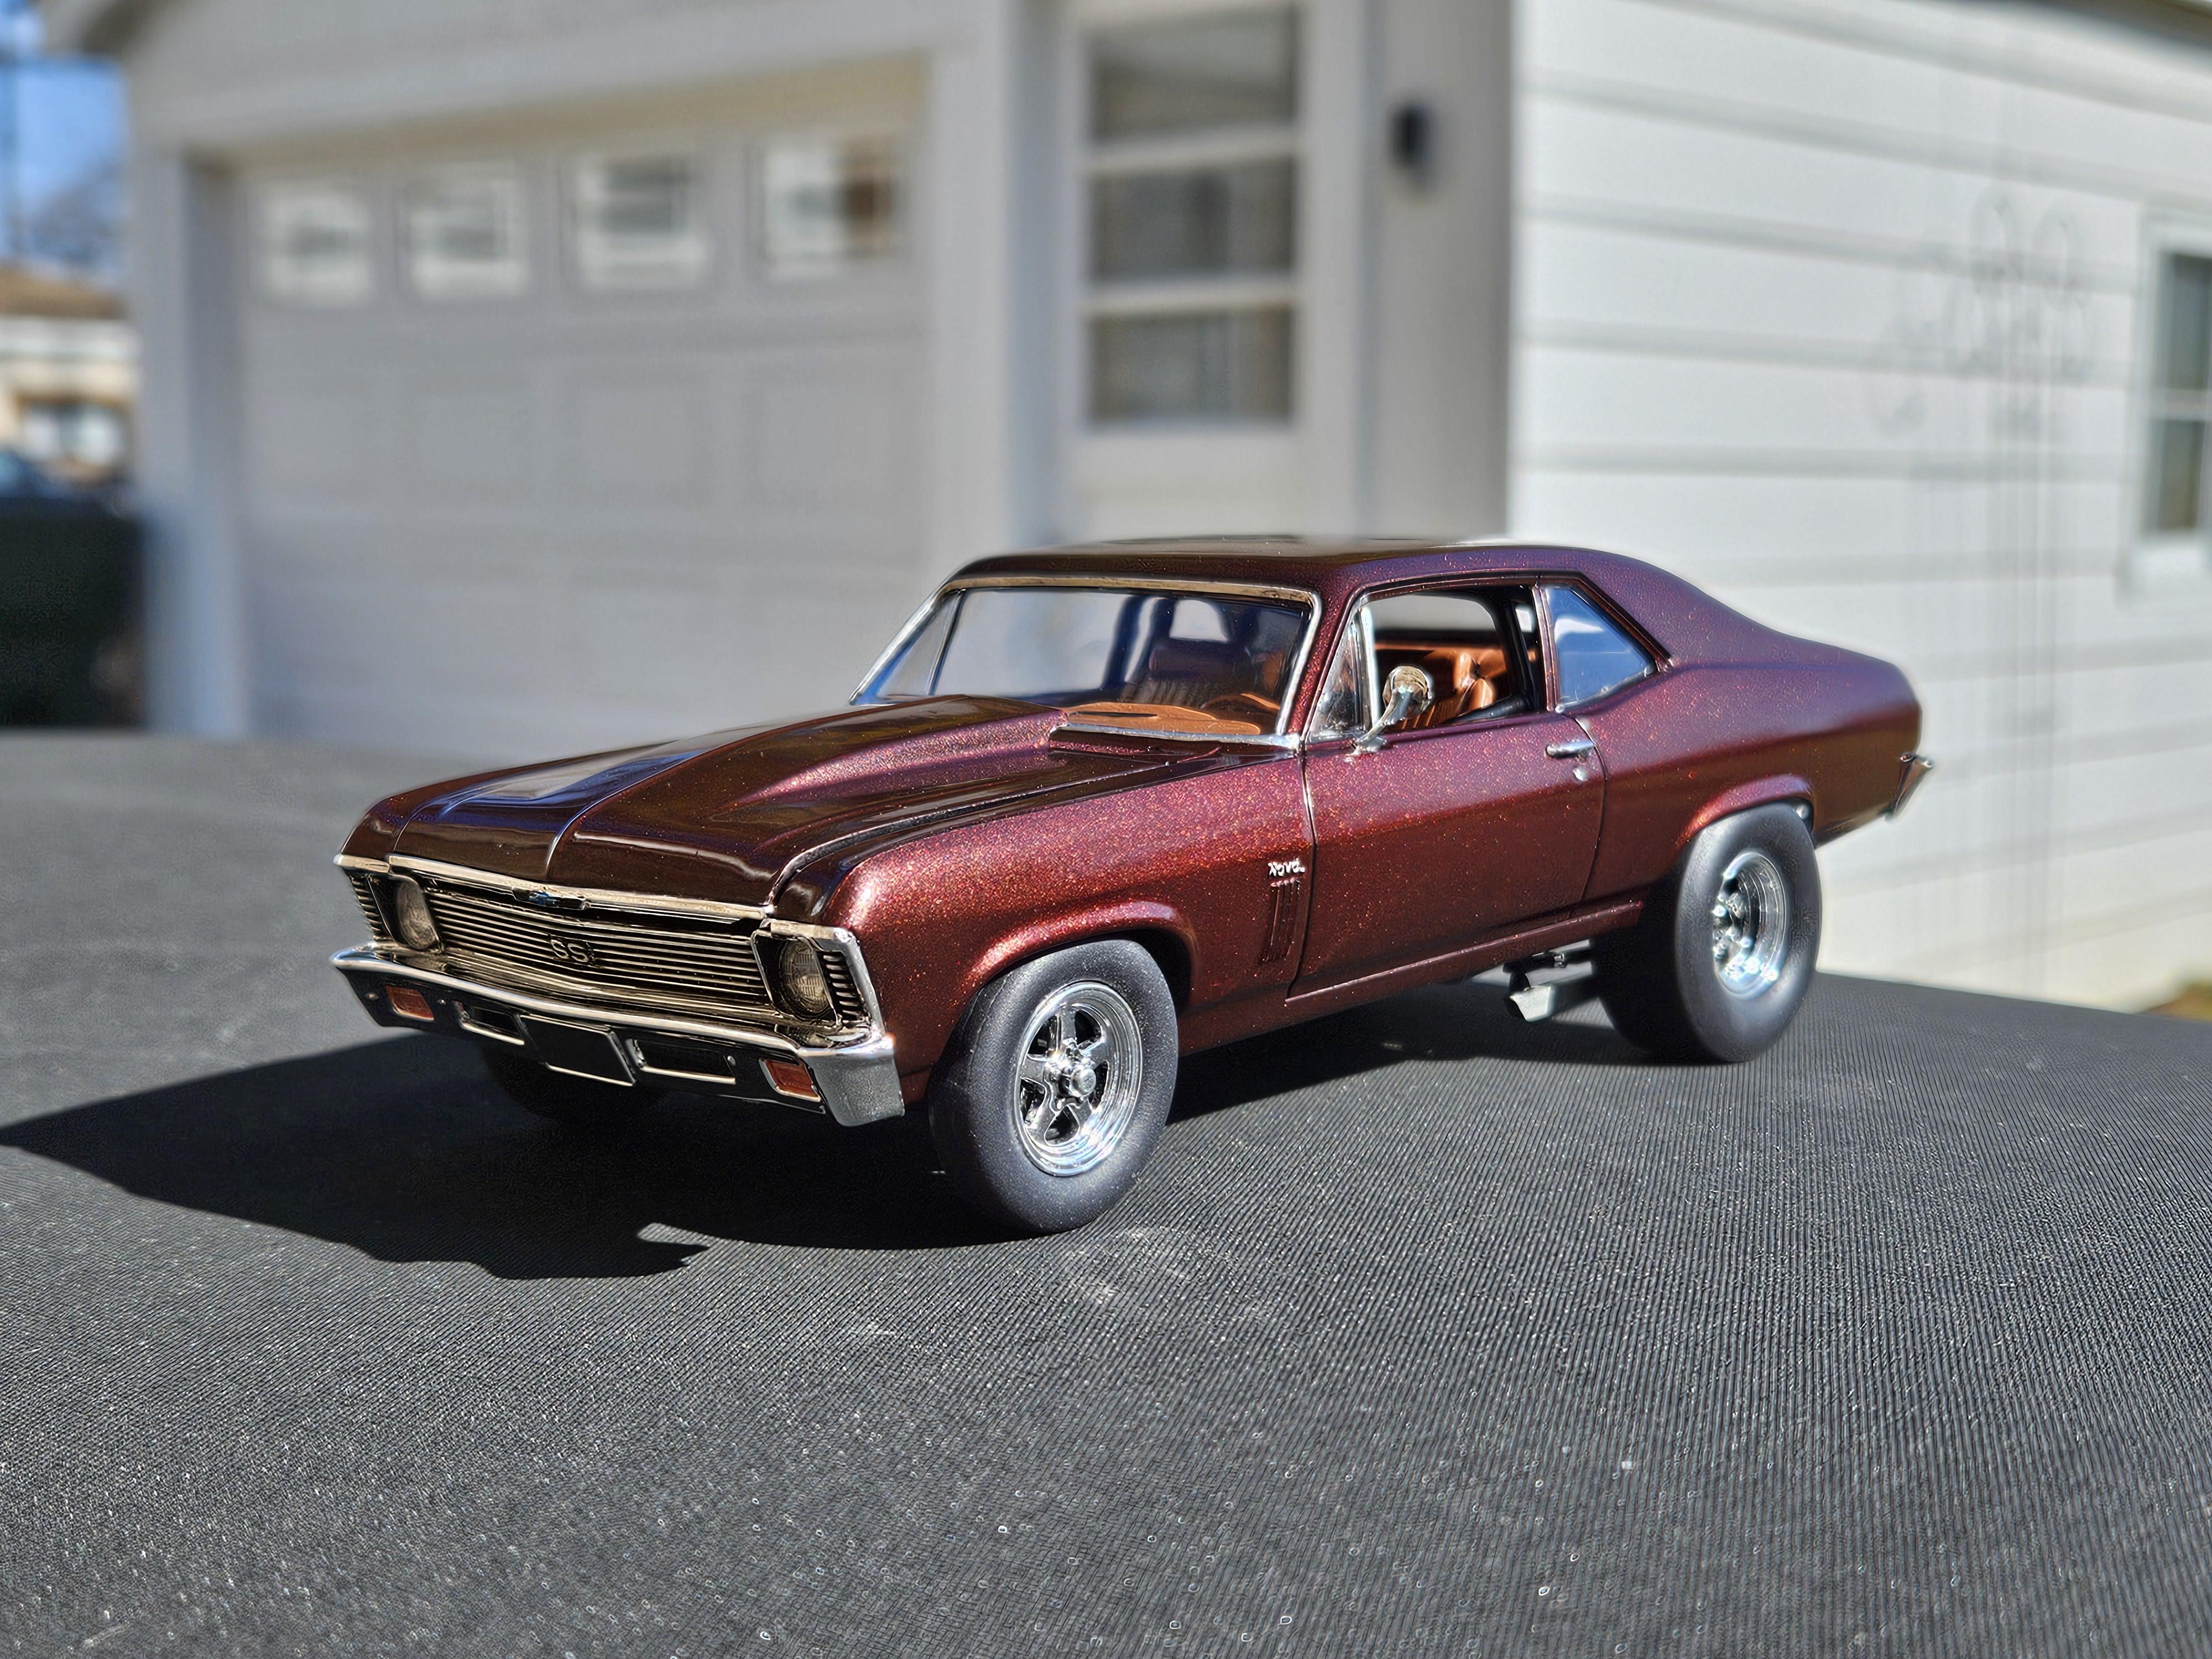
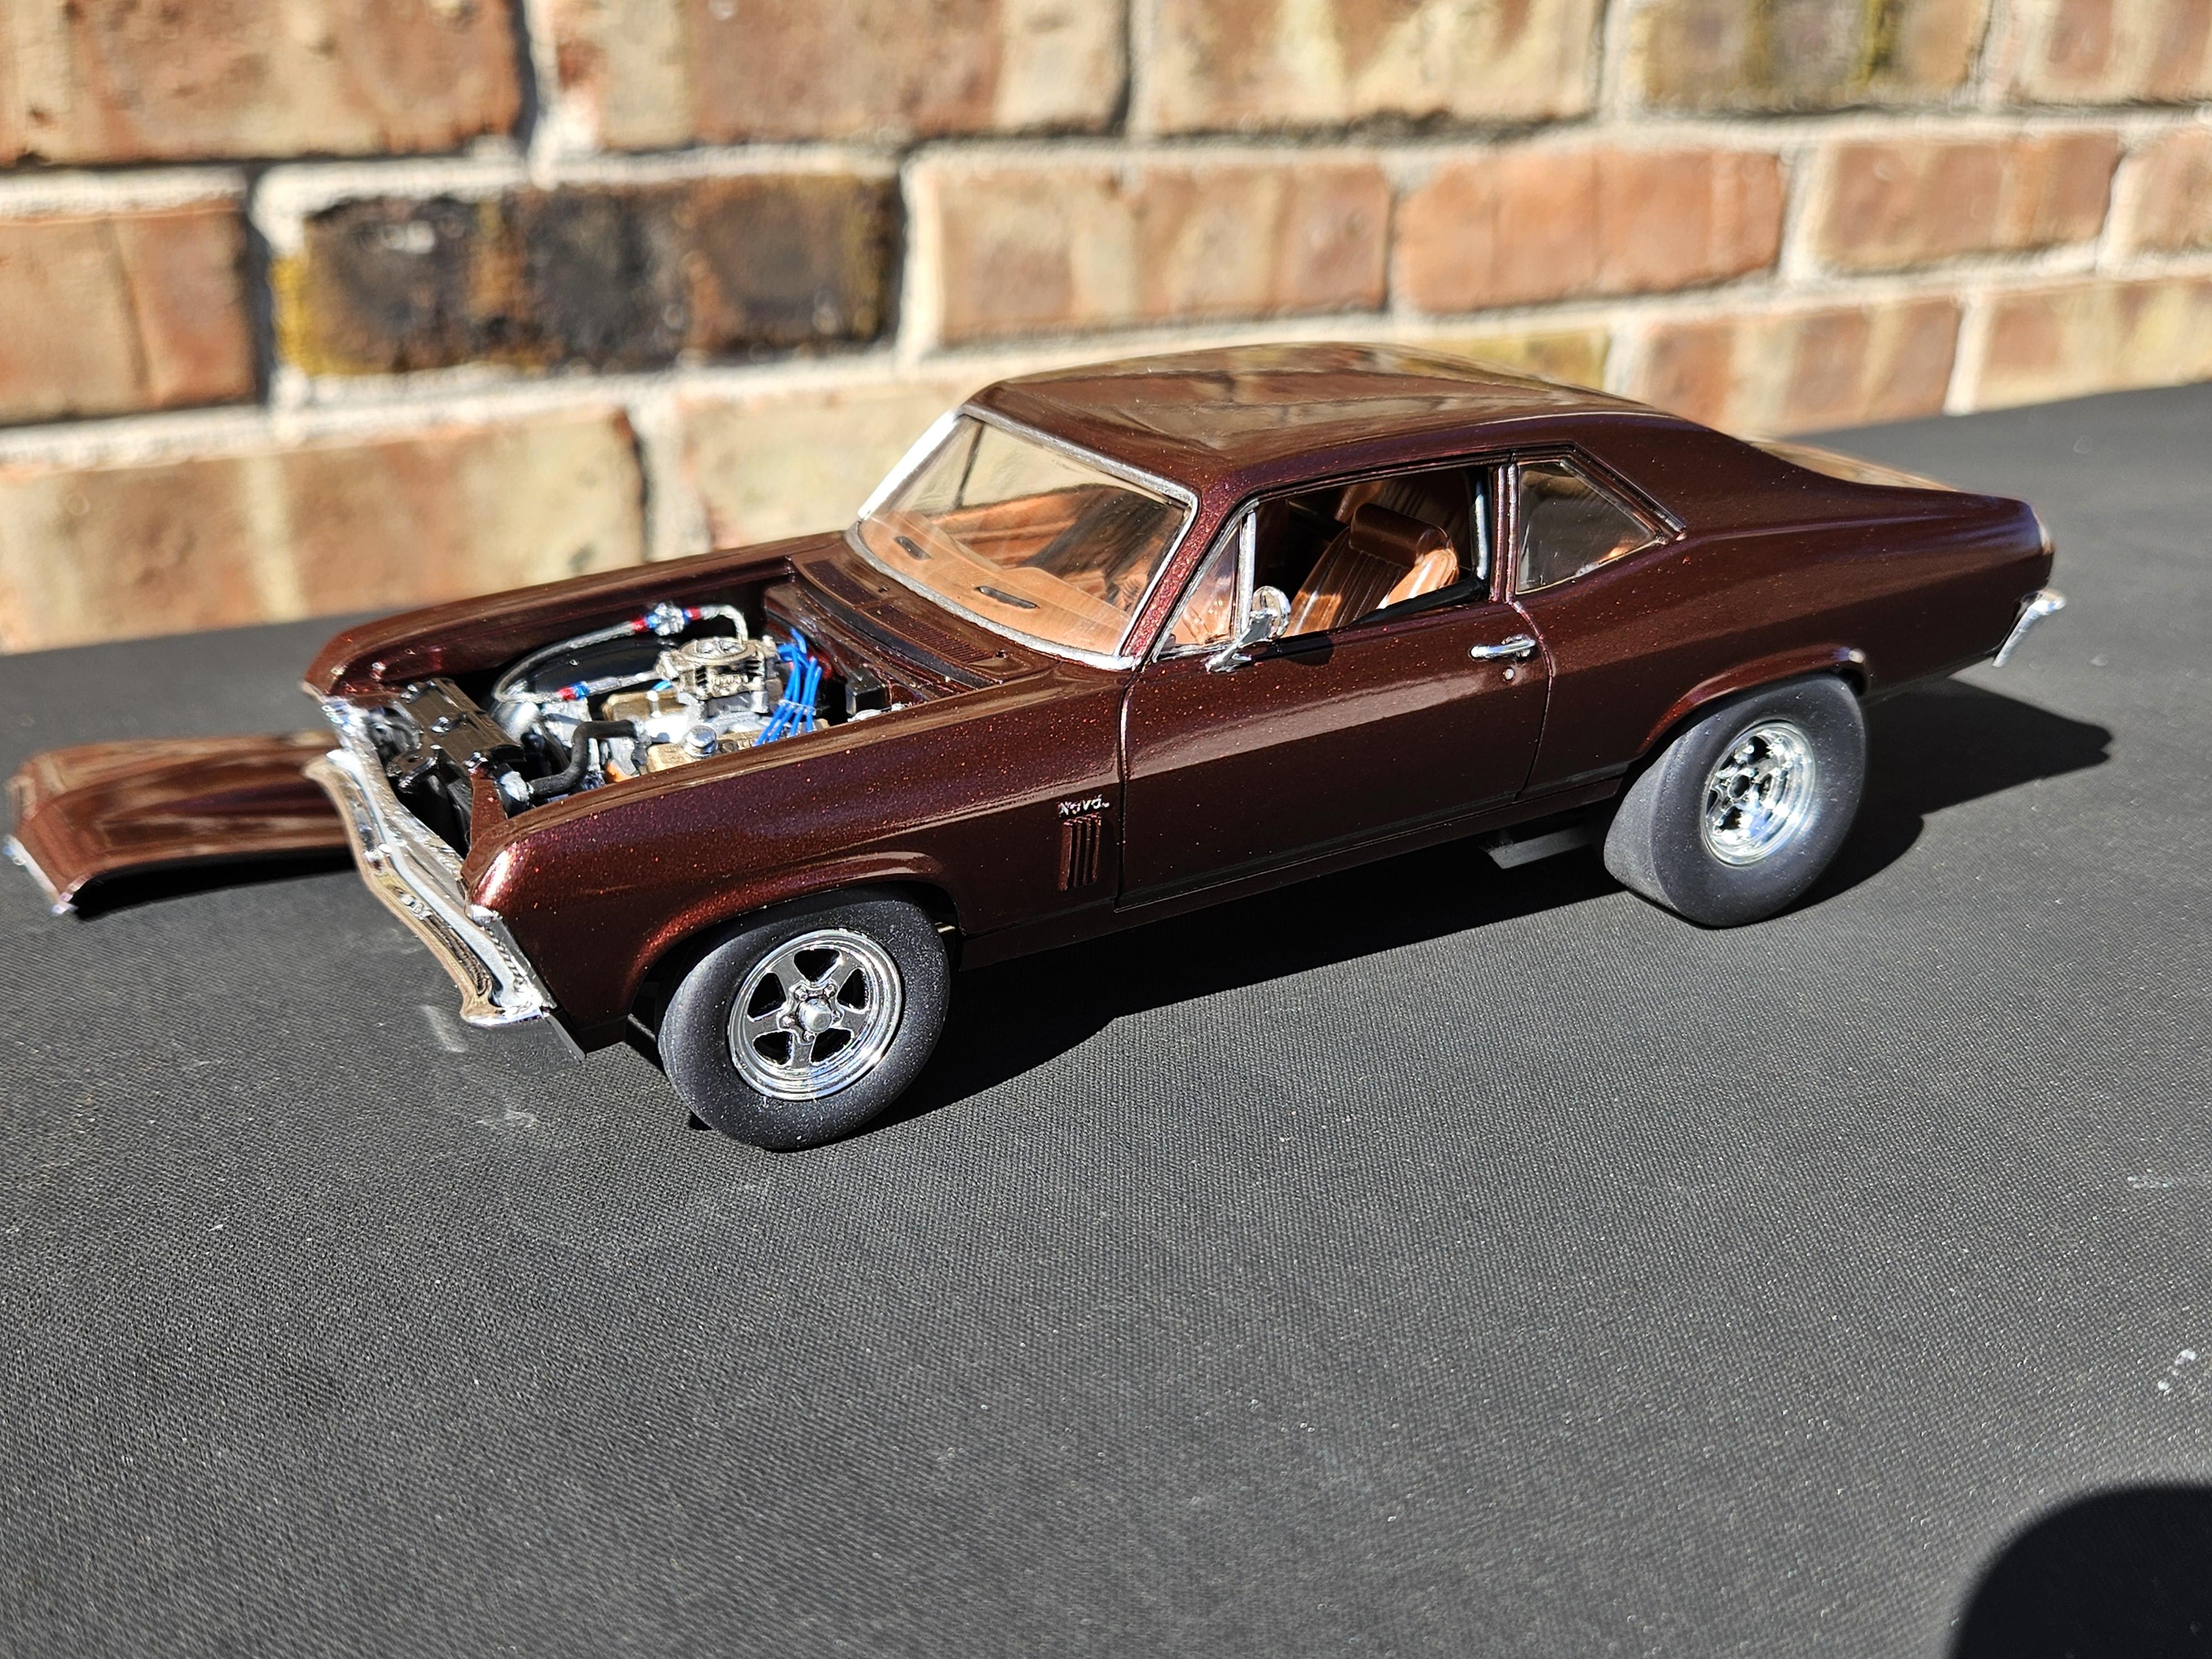
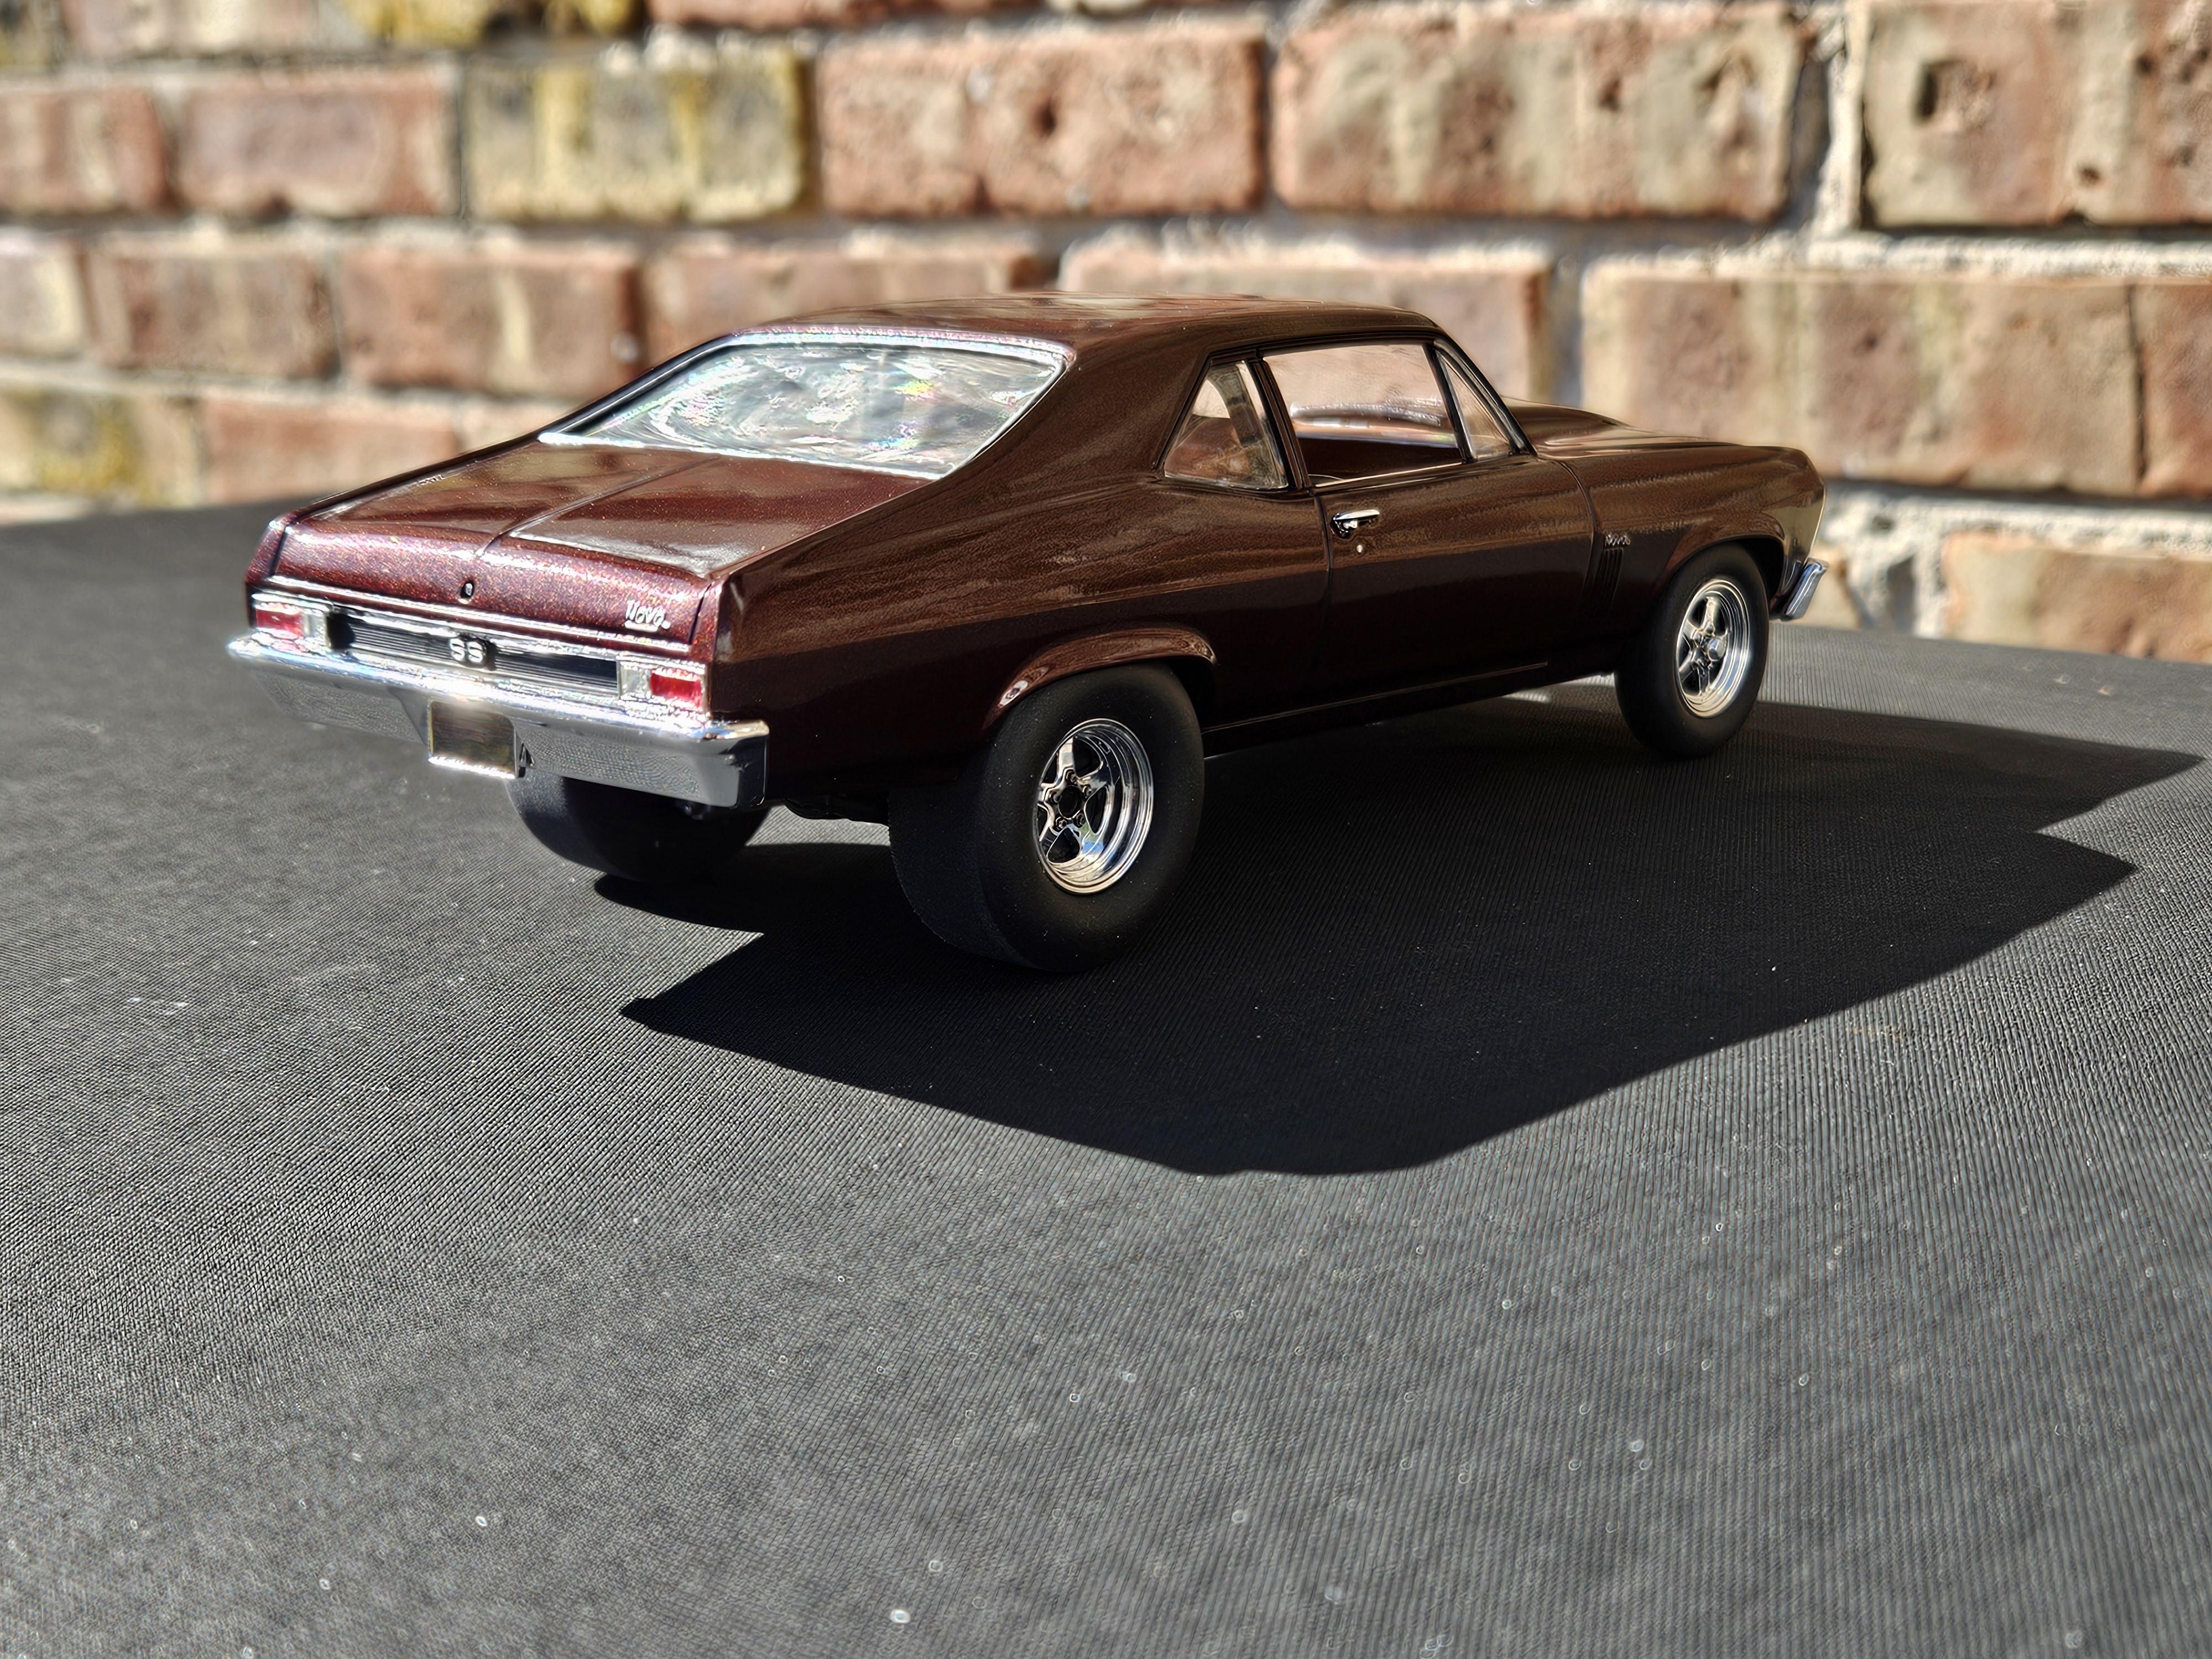
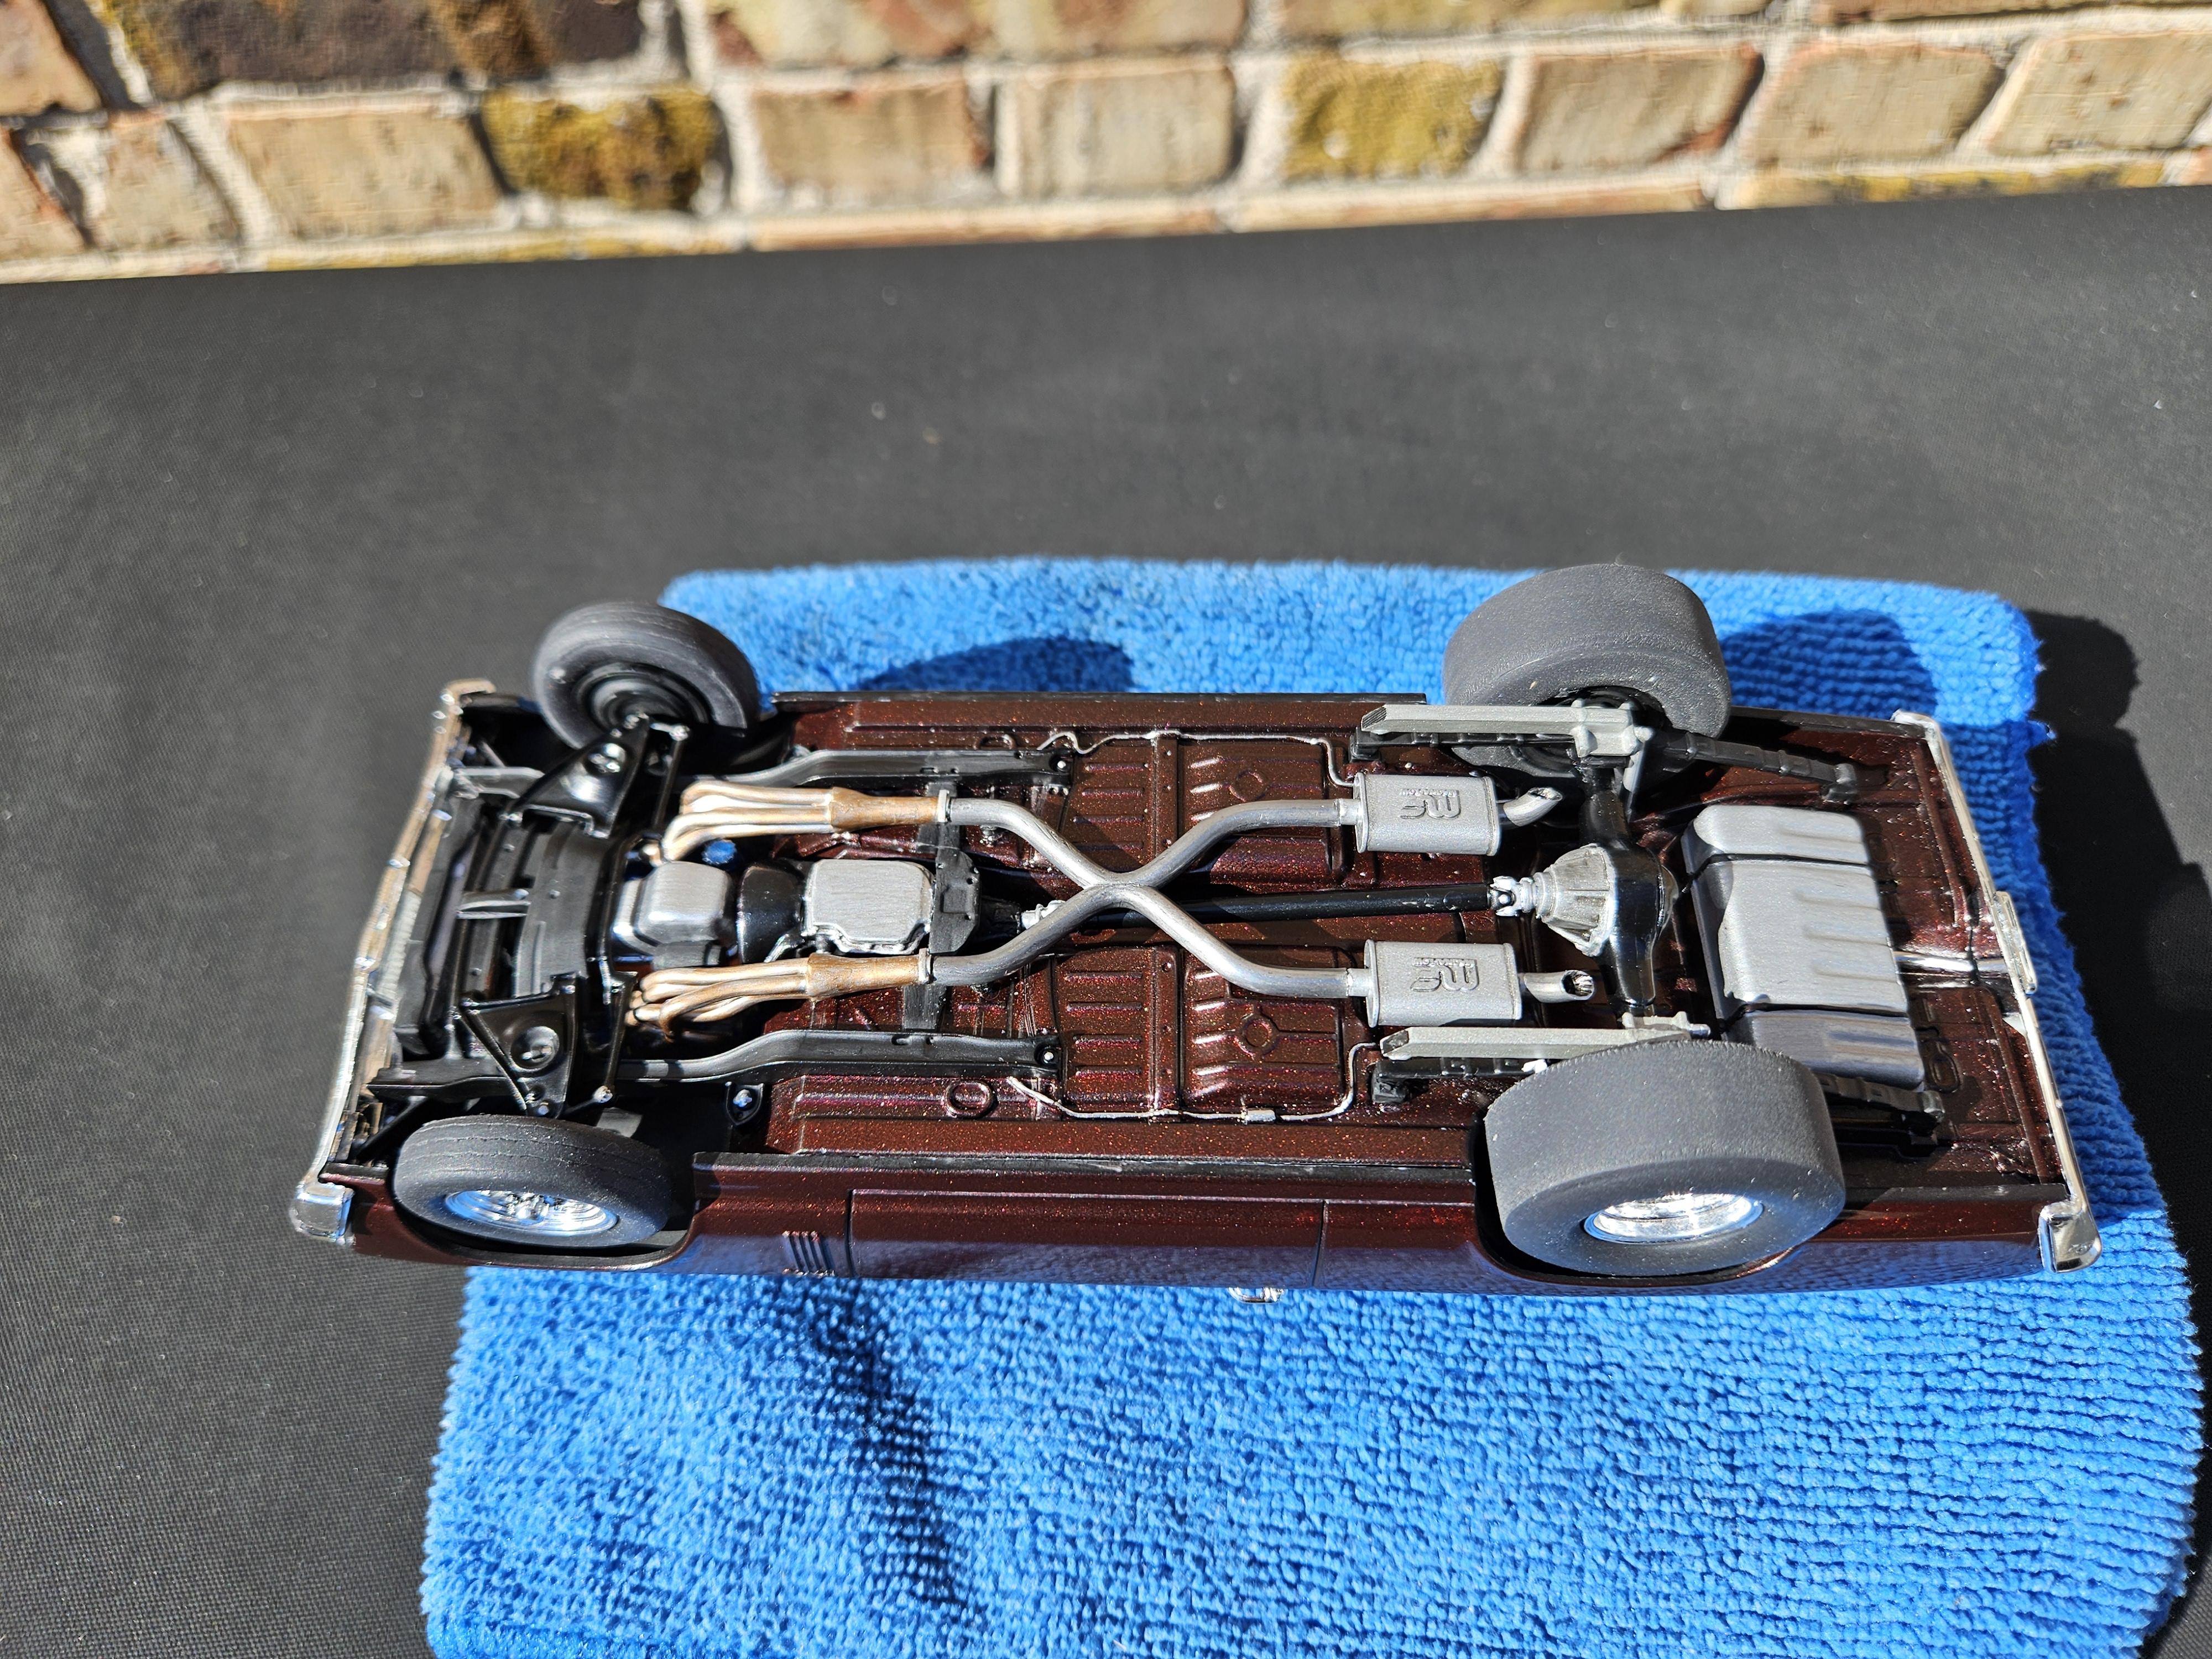
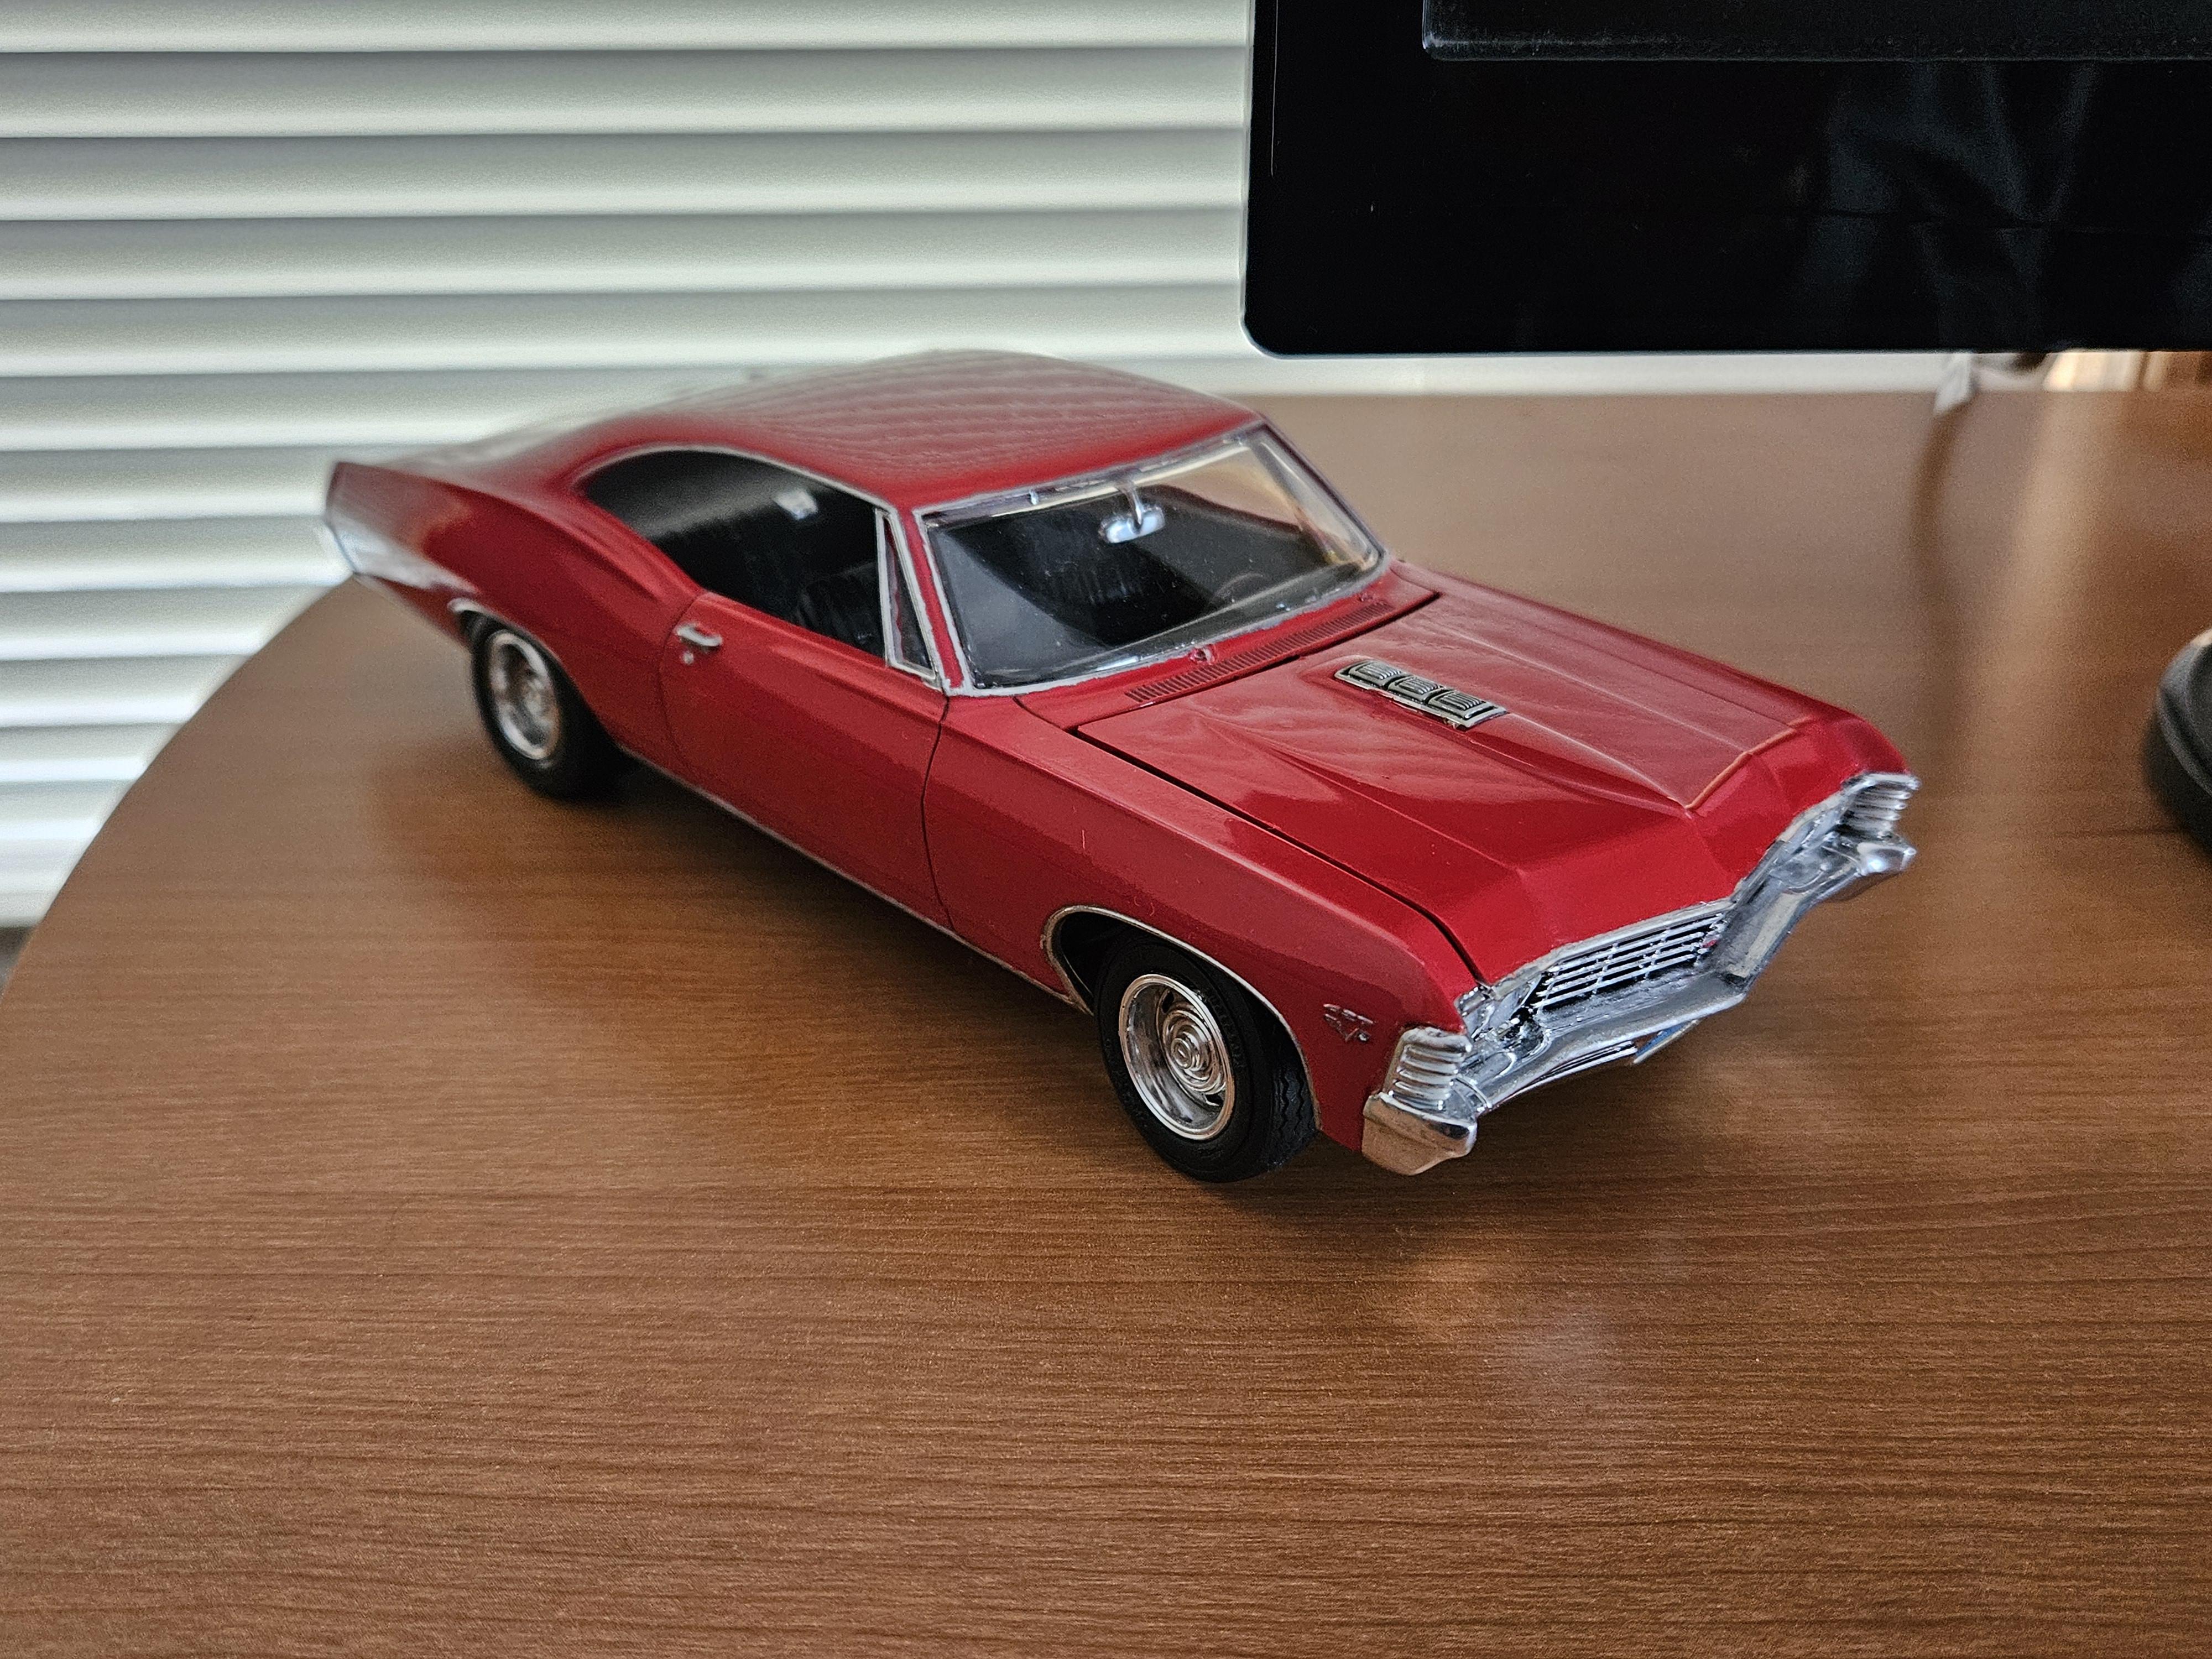
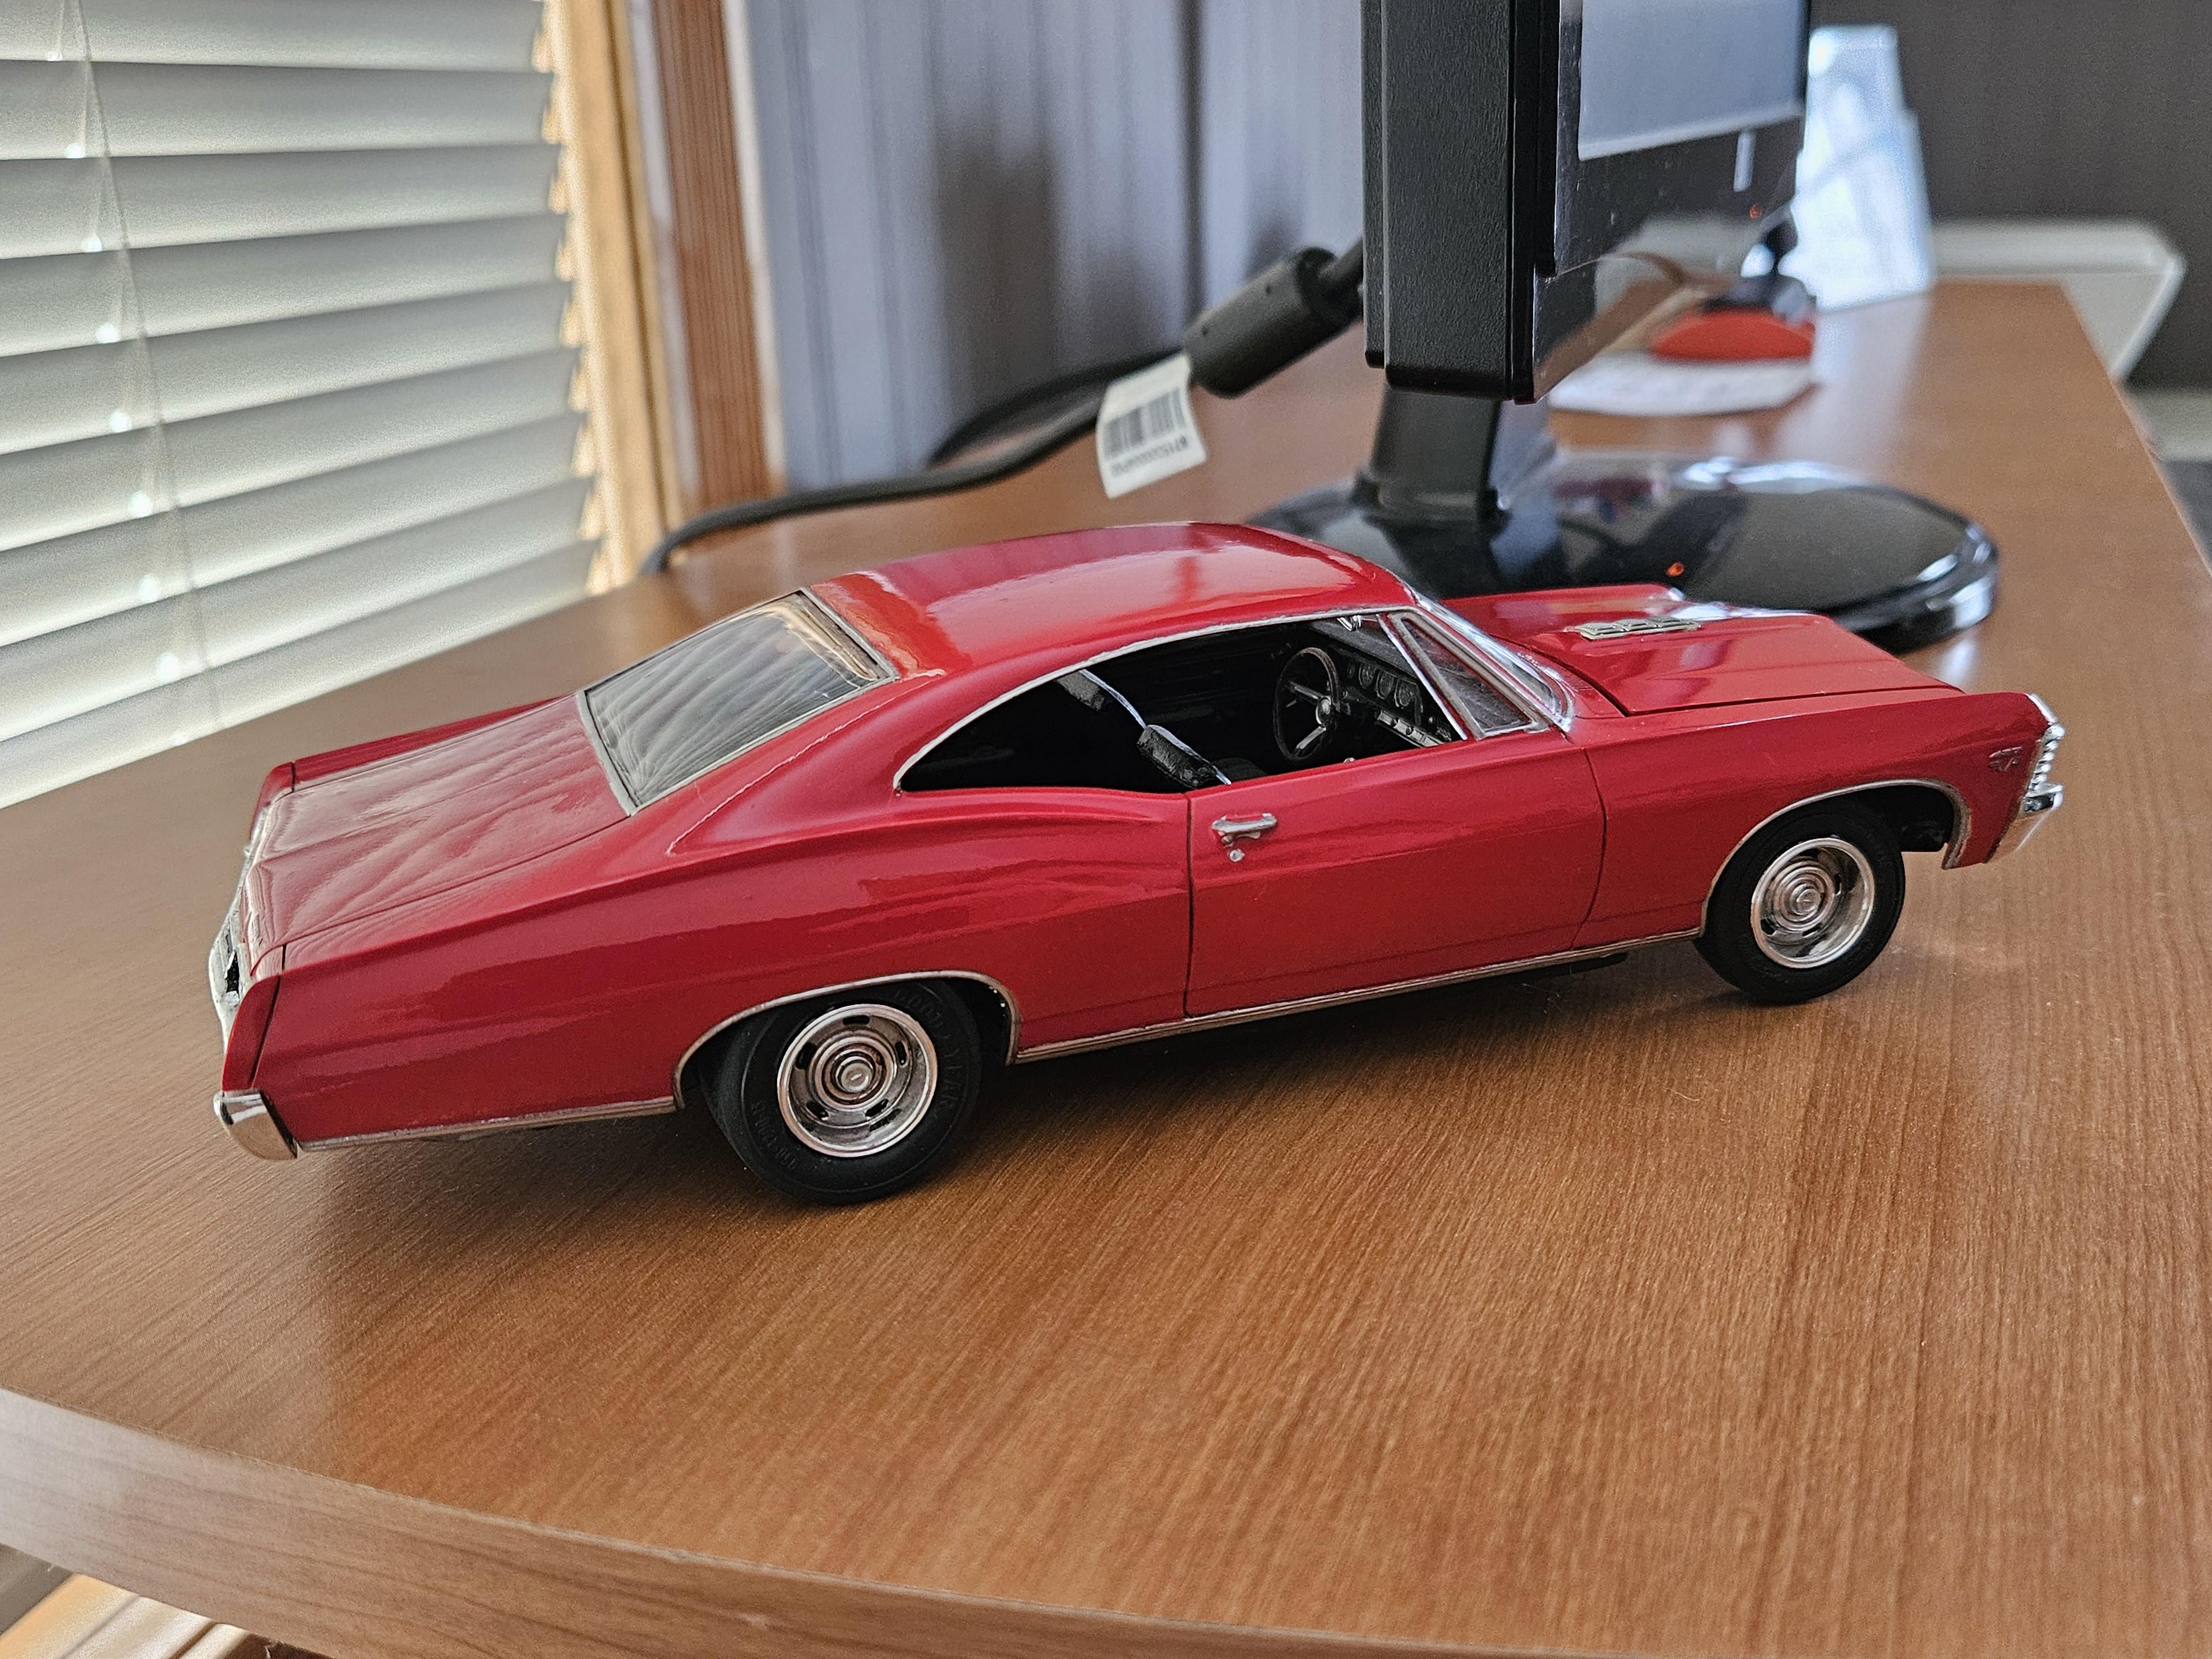
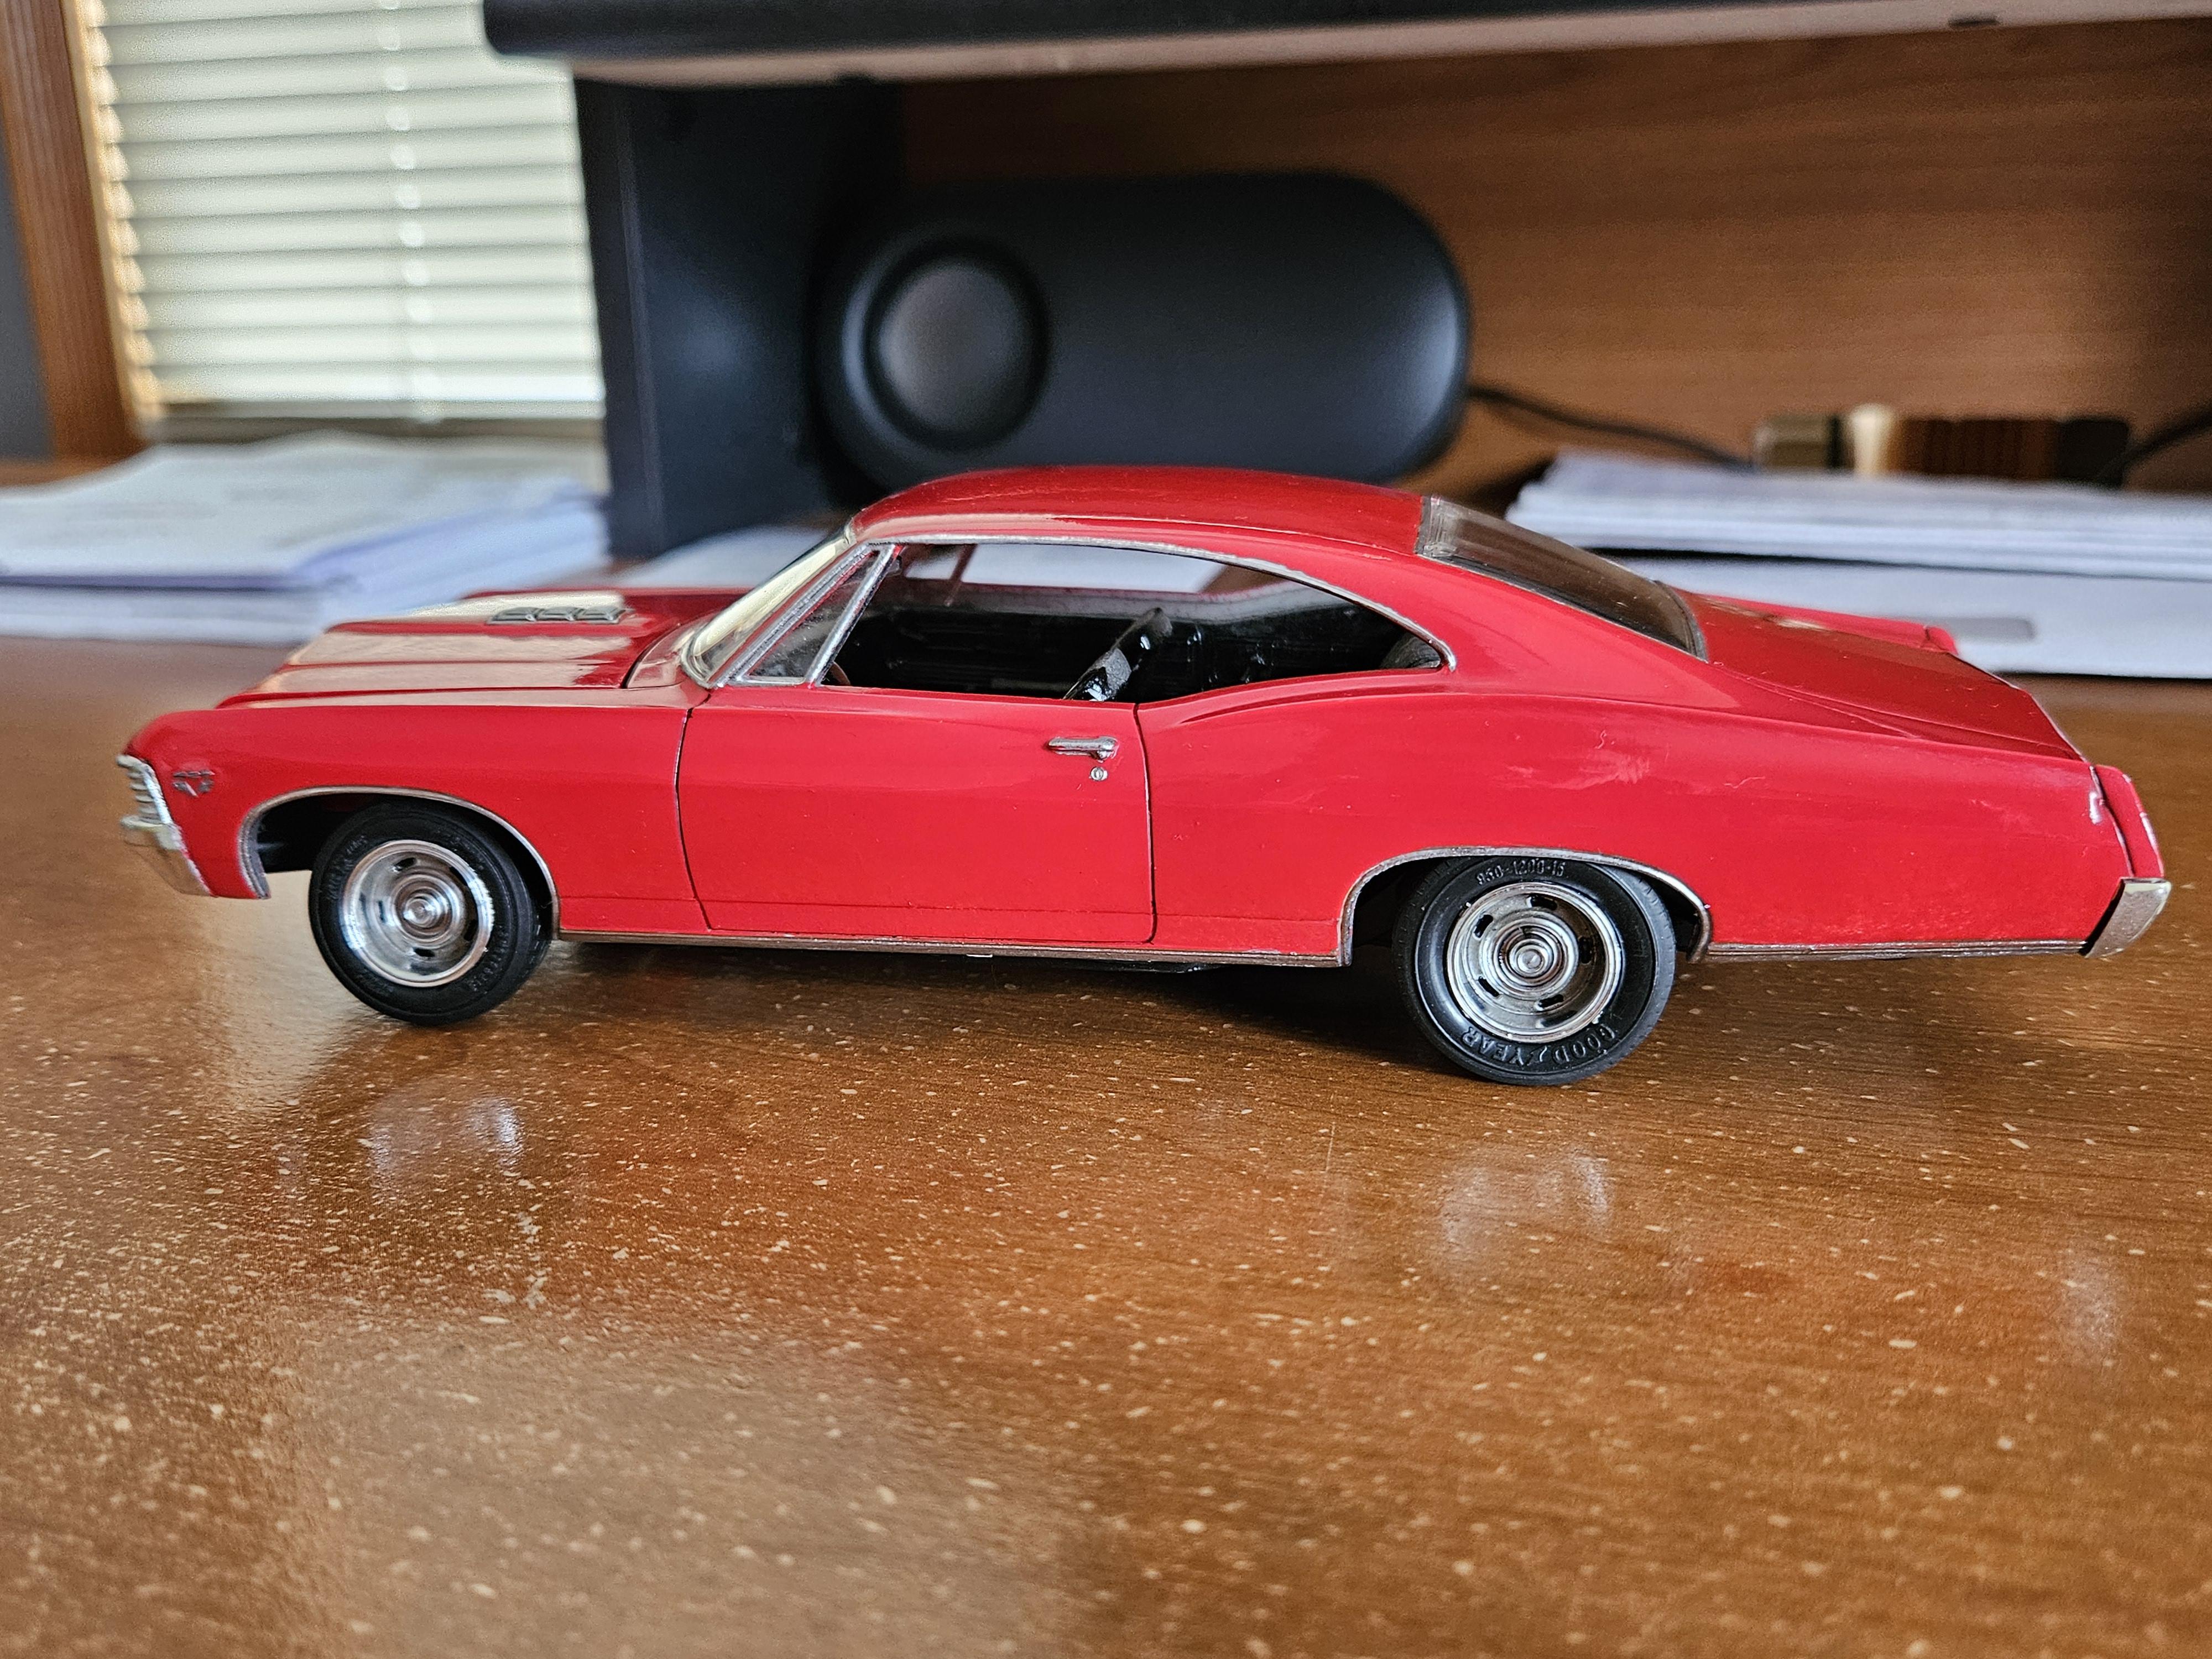
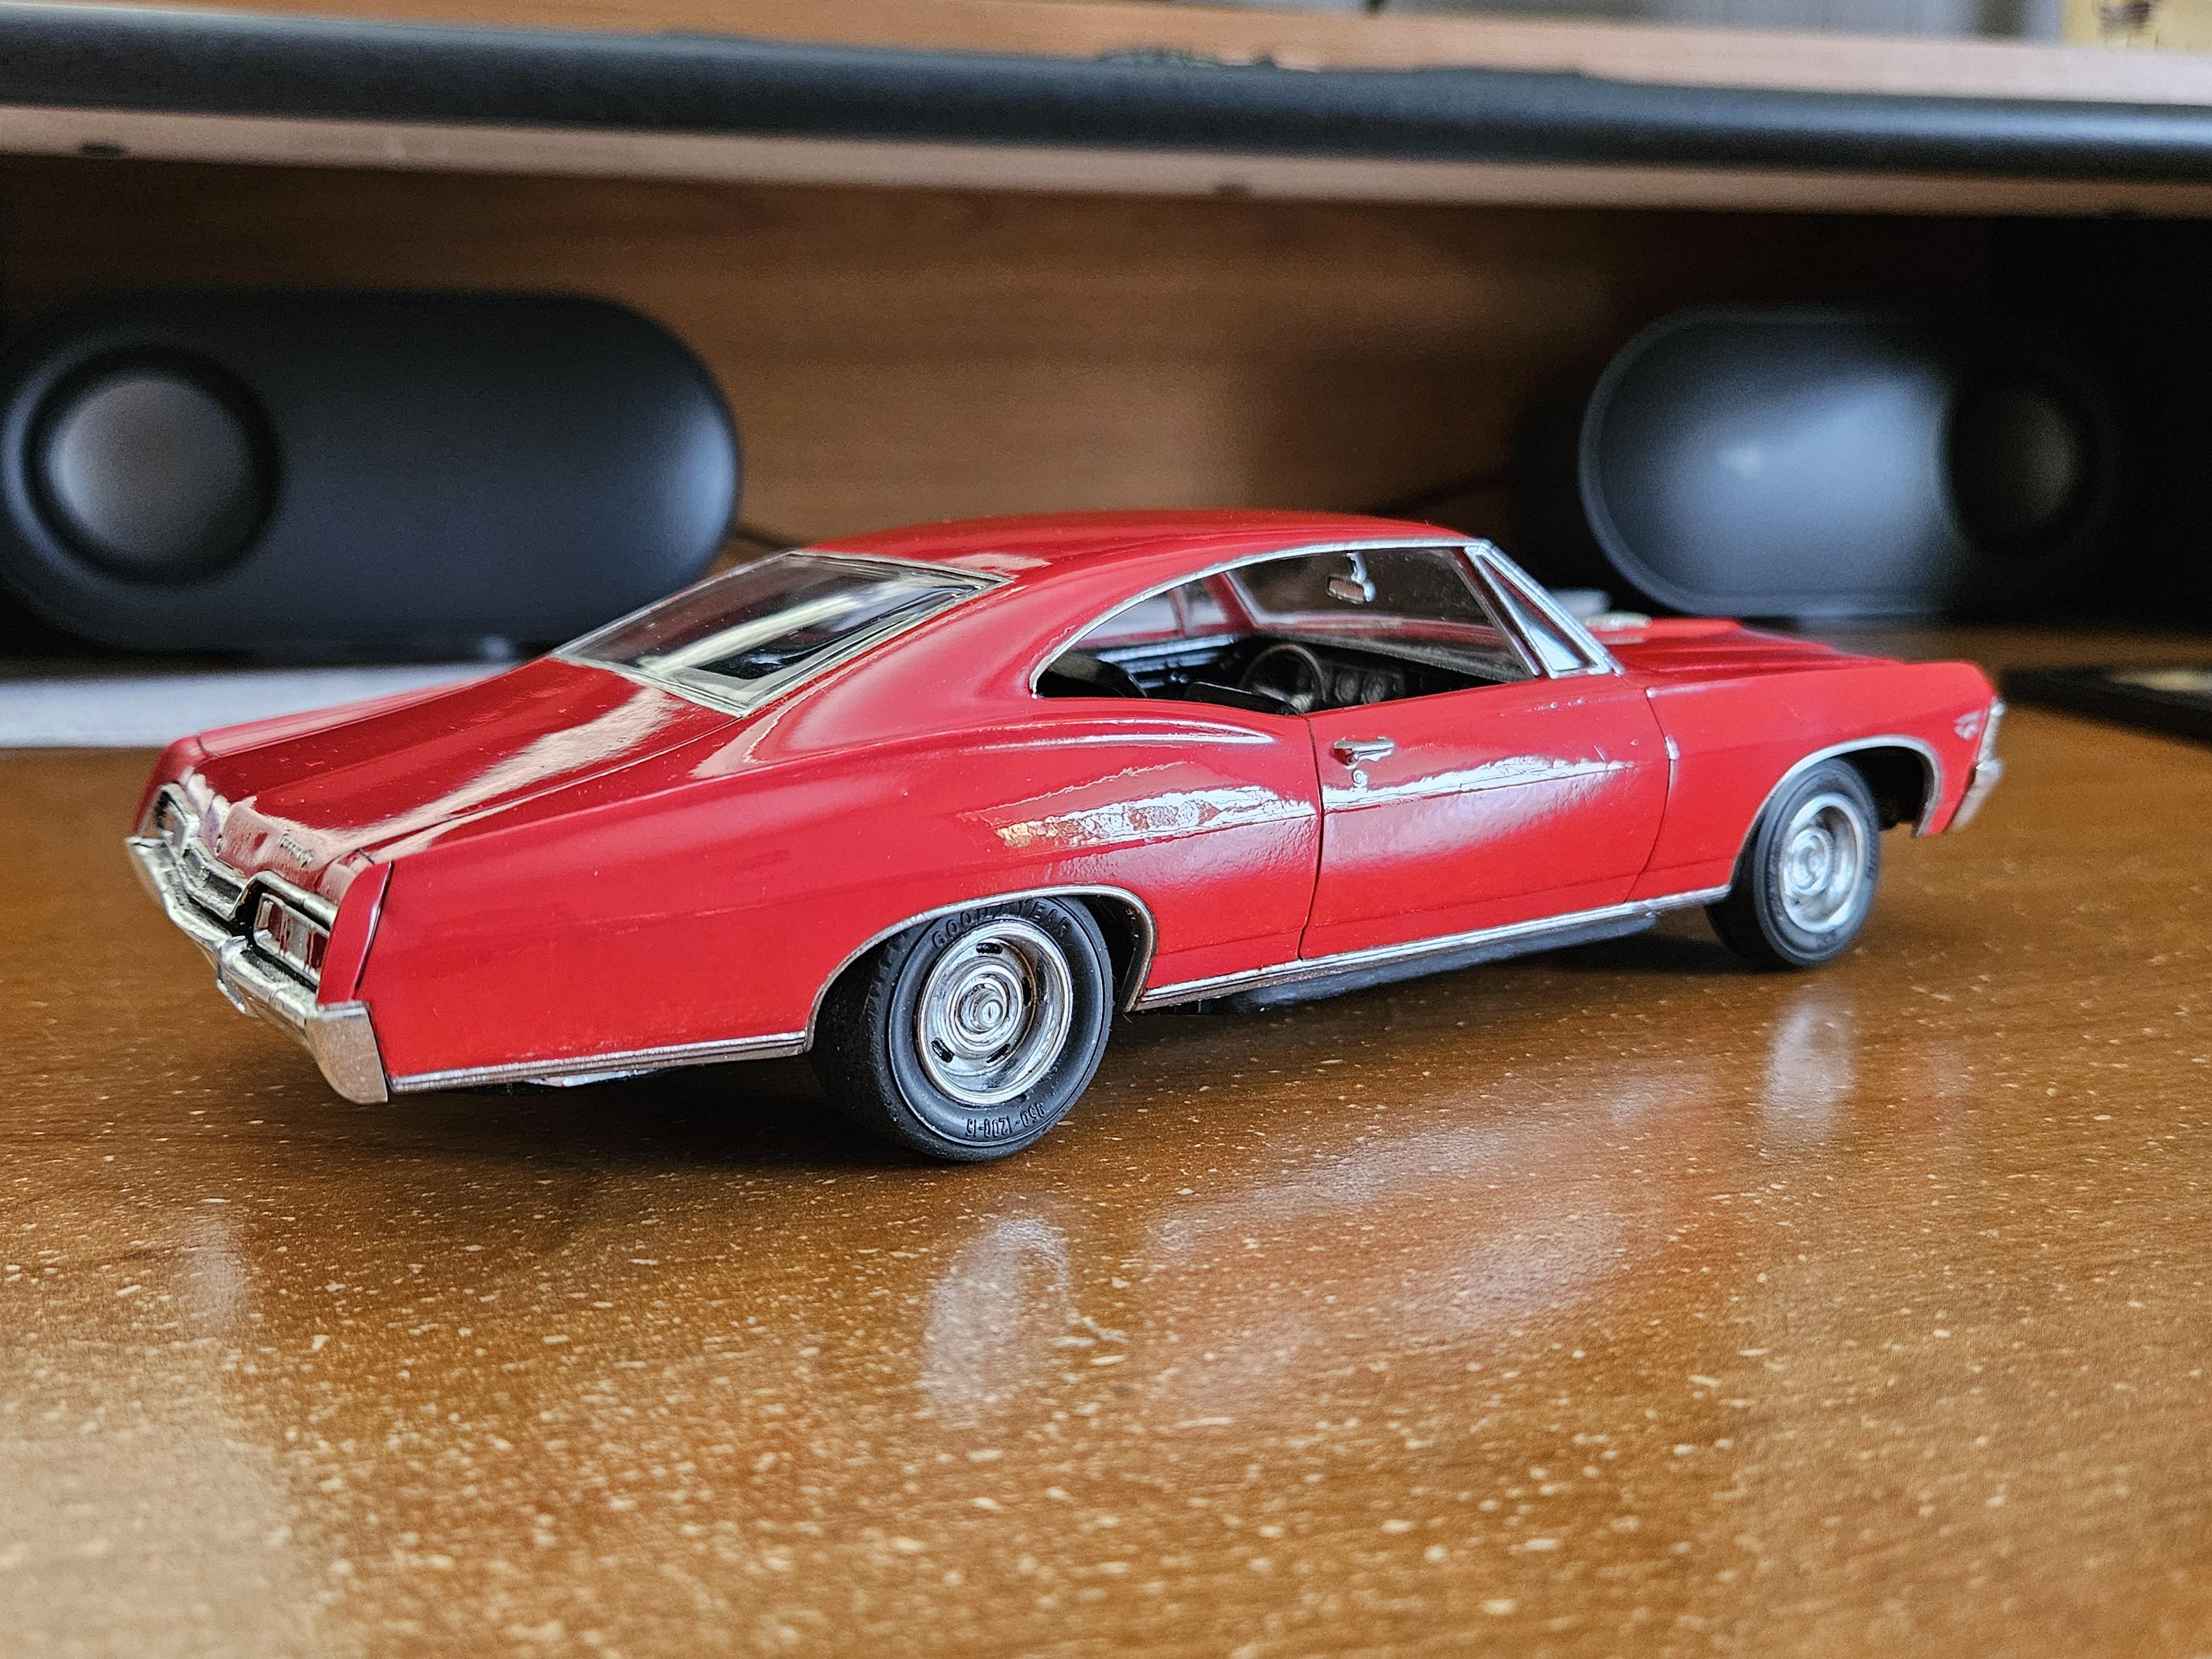
2024 kicked off a rebirth into the model car hobby for me. The last time I built anything prior was in about 2002. So it was a slow start back into the hobby but I started with a Revell 69 Nova in the beginning of the year which took a couple months. Then took a little break and picked back up in the summer with an AMT 57 corvette which I completed in October. I work slow and try and plan out in my head what the next project will be. I've got a few ideas and have been collecting kits and parts to do them. Lastly I dusted off an old build (AMT 67 Impala) from the late 90s and spent a couple days buffing the paint and touching up some trim and adding a few small details here and there just for fun.
- 19 replies
-
- 12
-

-
MPC Flip Nose '57 gasser converted to......well, a gasser.
keviiin86 replied to roadhawg's topic in Drag Racing
Nice 57 you got there, looks the part for sure! I'm interested in your upcoming nova gasser you mentioned, have not really been too impressed with any of the box stock builds of that kit..more of a modern "show car" gasser than an actual race car. -
I'm not up on all the nhra stock/super stocker rules but cal track bars are designed for leaf spring suspension setups, these s197 mustangs used 3 or 4 link rear suspension i believe. Awesome build though, very nice detail.
-
Yeah I just call it an L88 hood scoop because that's where it appears the design was taken from, since they used that similar style scoop first on the 68 L88 corvette. I've been meaning to get a copy of that book, sounds like it has some cool info in it, are those photos of the hood from the book or just found off the internet?
-
The #8 car started with a 430" can am aluminum big block, then went to a 500"+ "mountain motor" at some point.
-
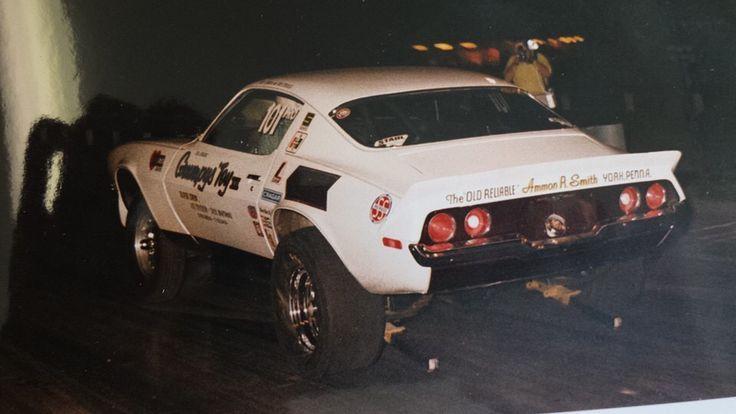
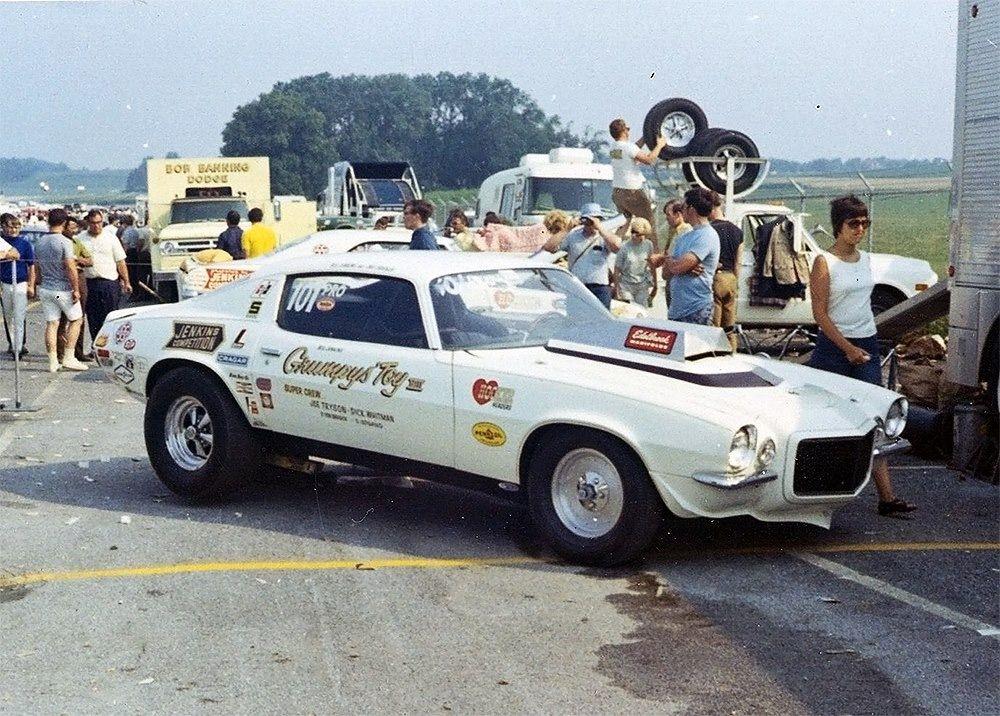
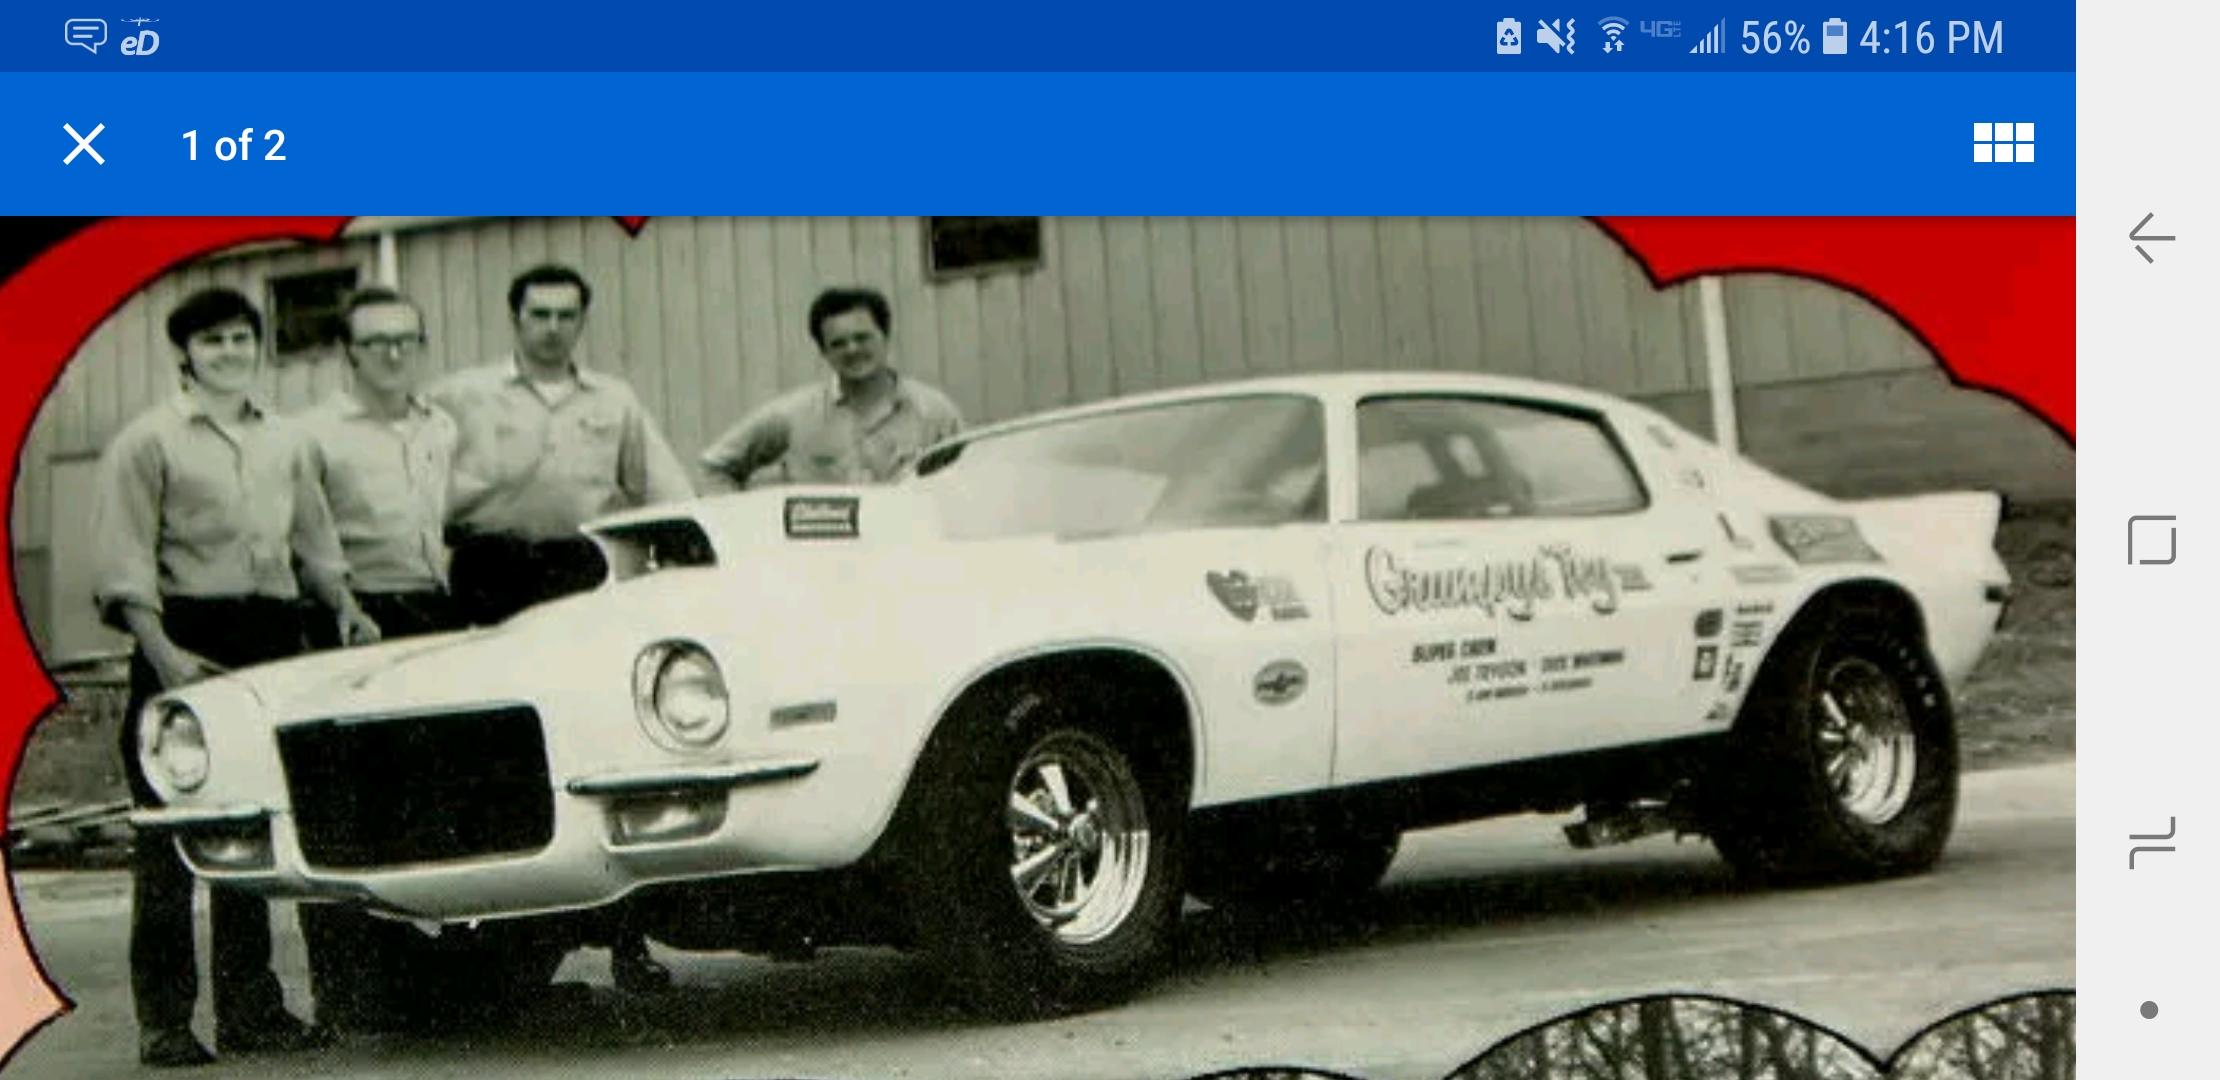
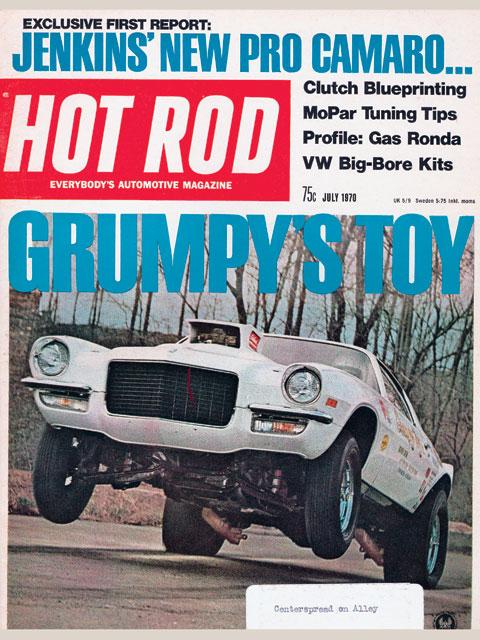
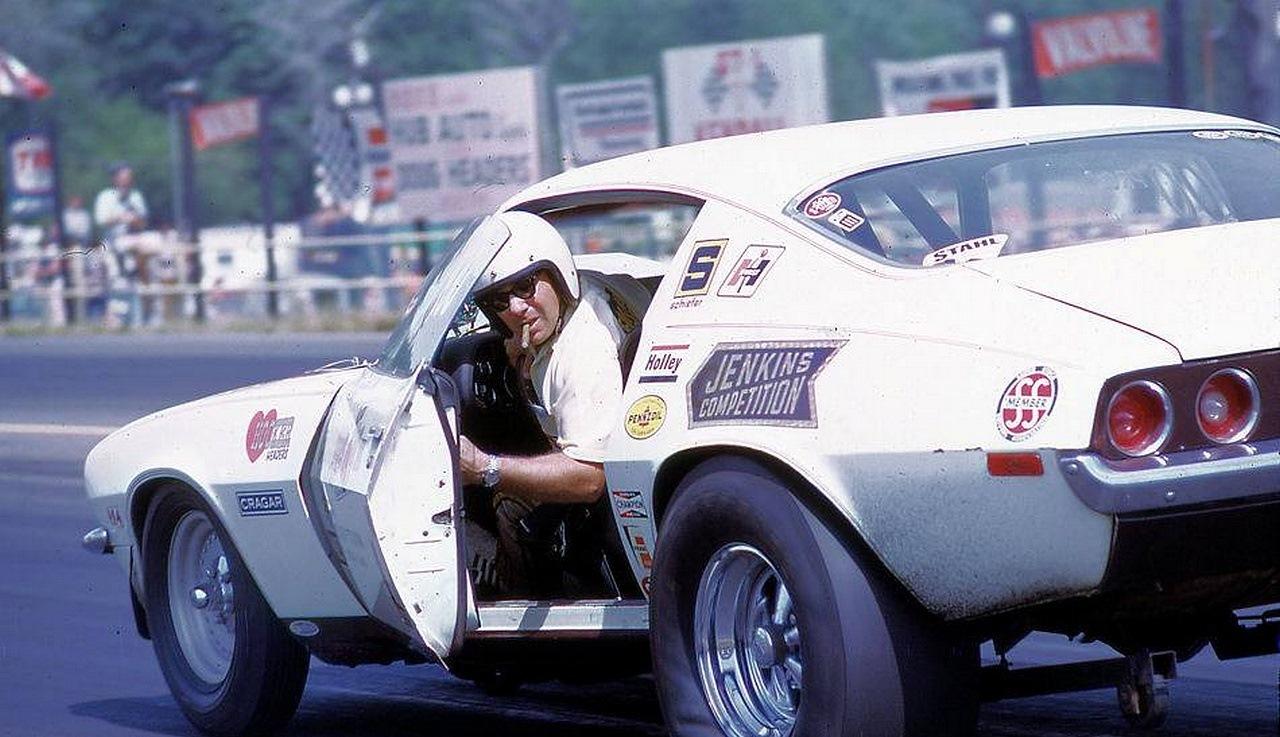
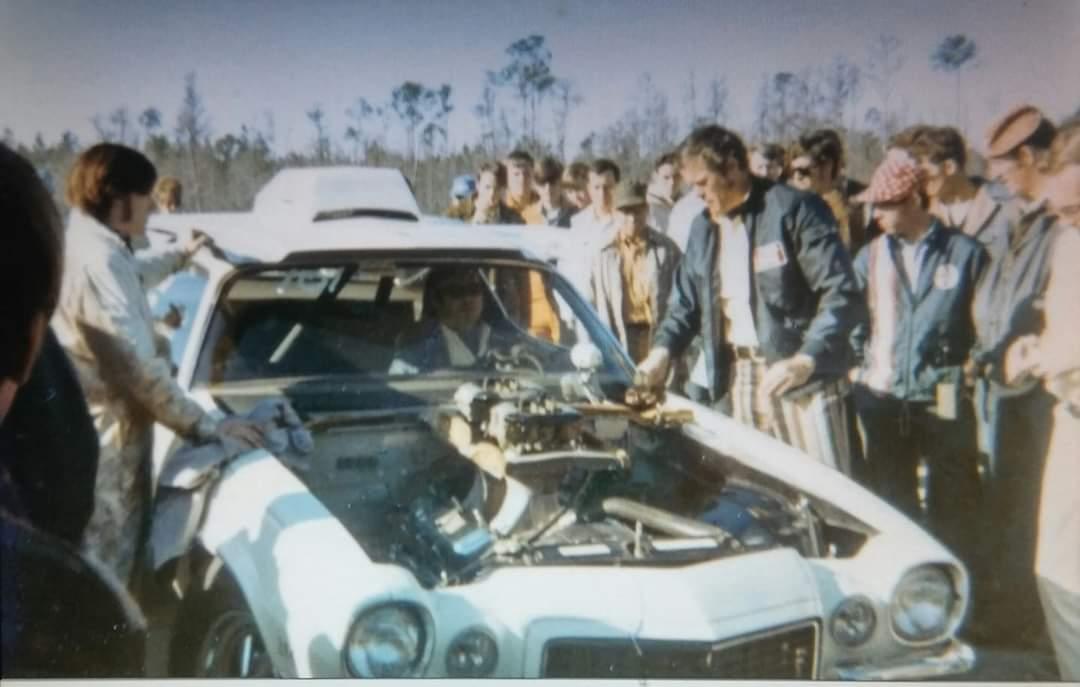
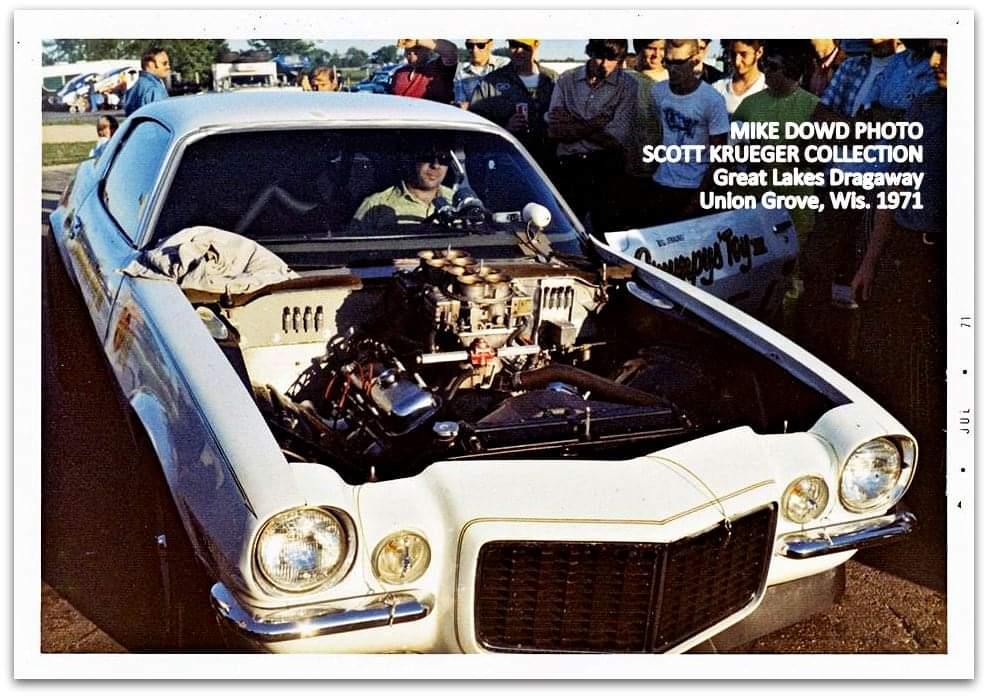
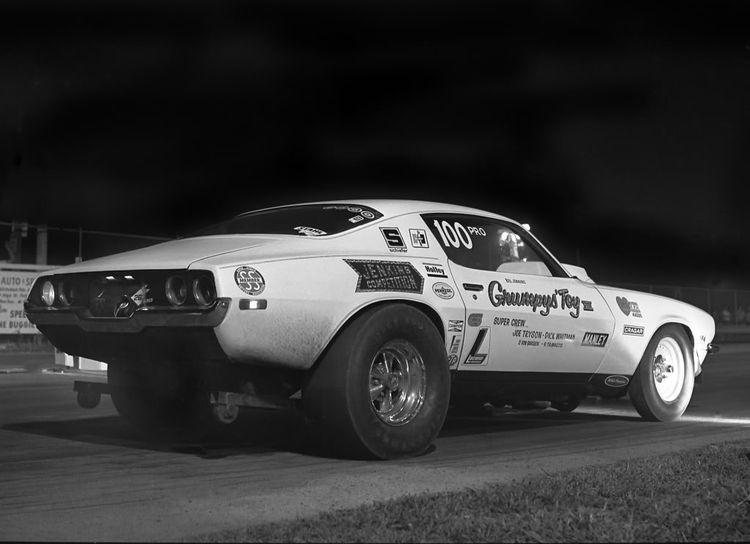
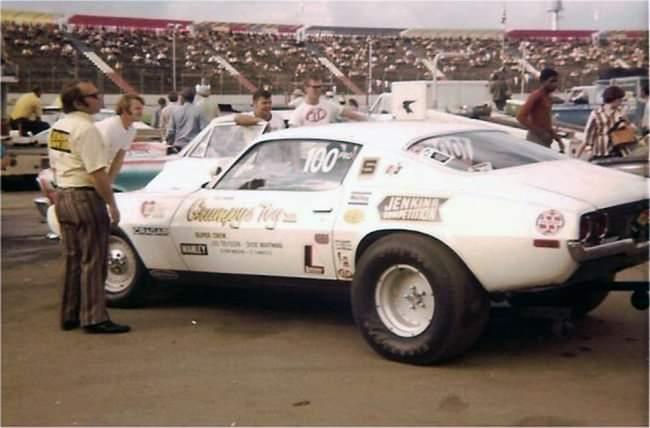
I've collected a ton of pictures of this car over the years because I've always been interested in it and it's story..also want to build a replica of it some day. Any new picture of it I i find I save to my phone or computer. There were many different renditions of the car over a short 2 year time span when he ran it in pro stock. The early version of the car on the hot rod magazine cover still utilized the full bumper nose (just without the full bumper), then later went to the fiberglass "split bumper" nose. He ran multiple hood scoops from the open front scoop to 2 different versions of the grump lump, one atop the L88 style hood scoop, then a taller early 70s style pro stock scoop..all of which are pictured above. Here's a few I've saved over the years that aren't posted above. Here is the infamous HRM cover shot of it in the beginning with standard nose and bumperettes Early on it was converted to a RS nose but a fiberglass copy, note the large fiberglass integrated chin spoiler and deck lid spoiler with forward facing and open hood scoop. this is a little later, note the cut down chin spoiler and different sheet metal grump lump scoop on top of the L88 hood, and short deck lid spoiler. Also somewhere along the line here the car was mini tubbed for larger tires. Later on, flat hood with 3rd version of the "grump lump", no spoiler on deck lid, factory style chin spoiler added back. Note the carbs that he used during this time frame. This is the last version of the car before he leased it to Bruce Larson, 4th scoop, what I'd refer to as a "70s pro stock" type scoop, running dominator main bodies with holley 4160 style float bowls (only time I've ever seen someone do that)..and toward the end ran cragar super tricks on all four corners. here's a few random up close pictures of the car (these seem to be early on)
-
I've read that later split bumper nose was a fiberglass replica of the endura bumper..so it looks a bit different and you can see in some pics of the car it isn't the best fitting either. The grille is the one thing that poses a challenge though since you can see in some pictures of it that it isn't inset into the nose like the factory split bumper cars.
-
Looks great! I love how it sits with the drag race setup in the last pics, where did you get those cragar super tricks?
-
Nice and clean build! Love it


.jpg.2617bcd3e18171163b65810768d65d37.jpg)

.jpg.8afd0e32e3d8496e23d64582c0264df2.jpg)
.jpg.f9ef78b78ae42d6b3e5475ef41f73547.jpg)