Steve Osbourne
-
Posts
145 -
Joined
-
Last visited
Content Type
Profiles
Forums
Events
Gallery
Everything posted by Steve Osbourne
-
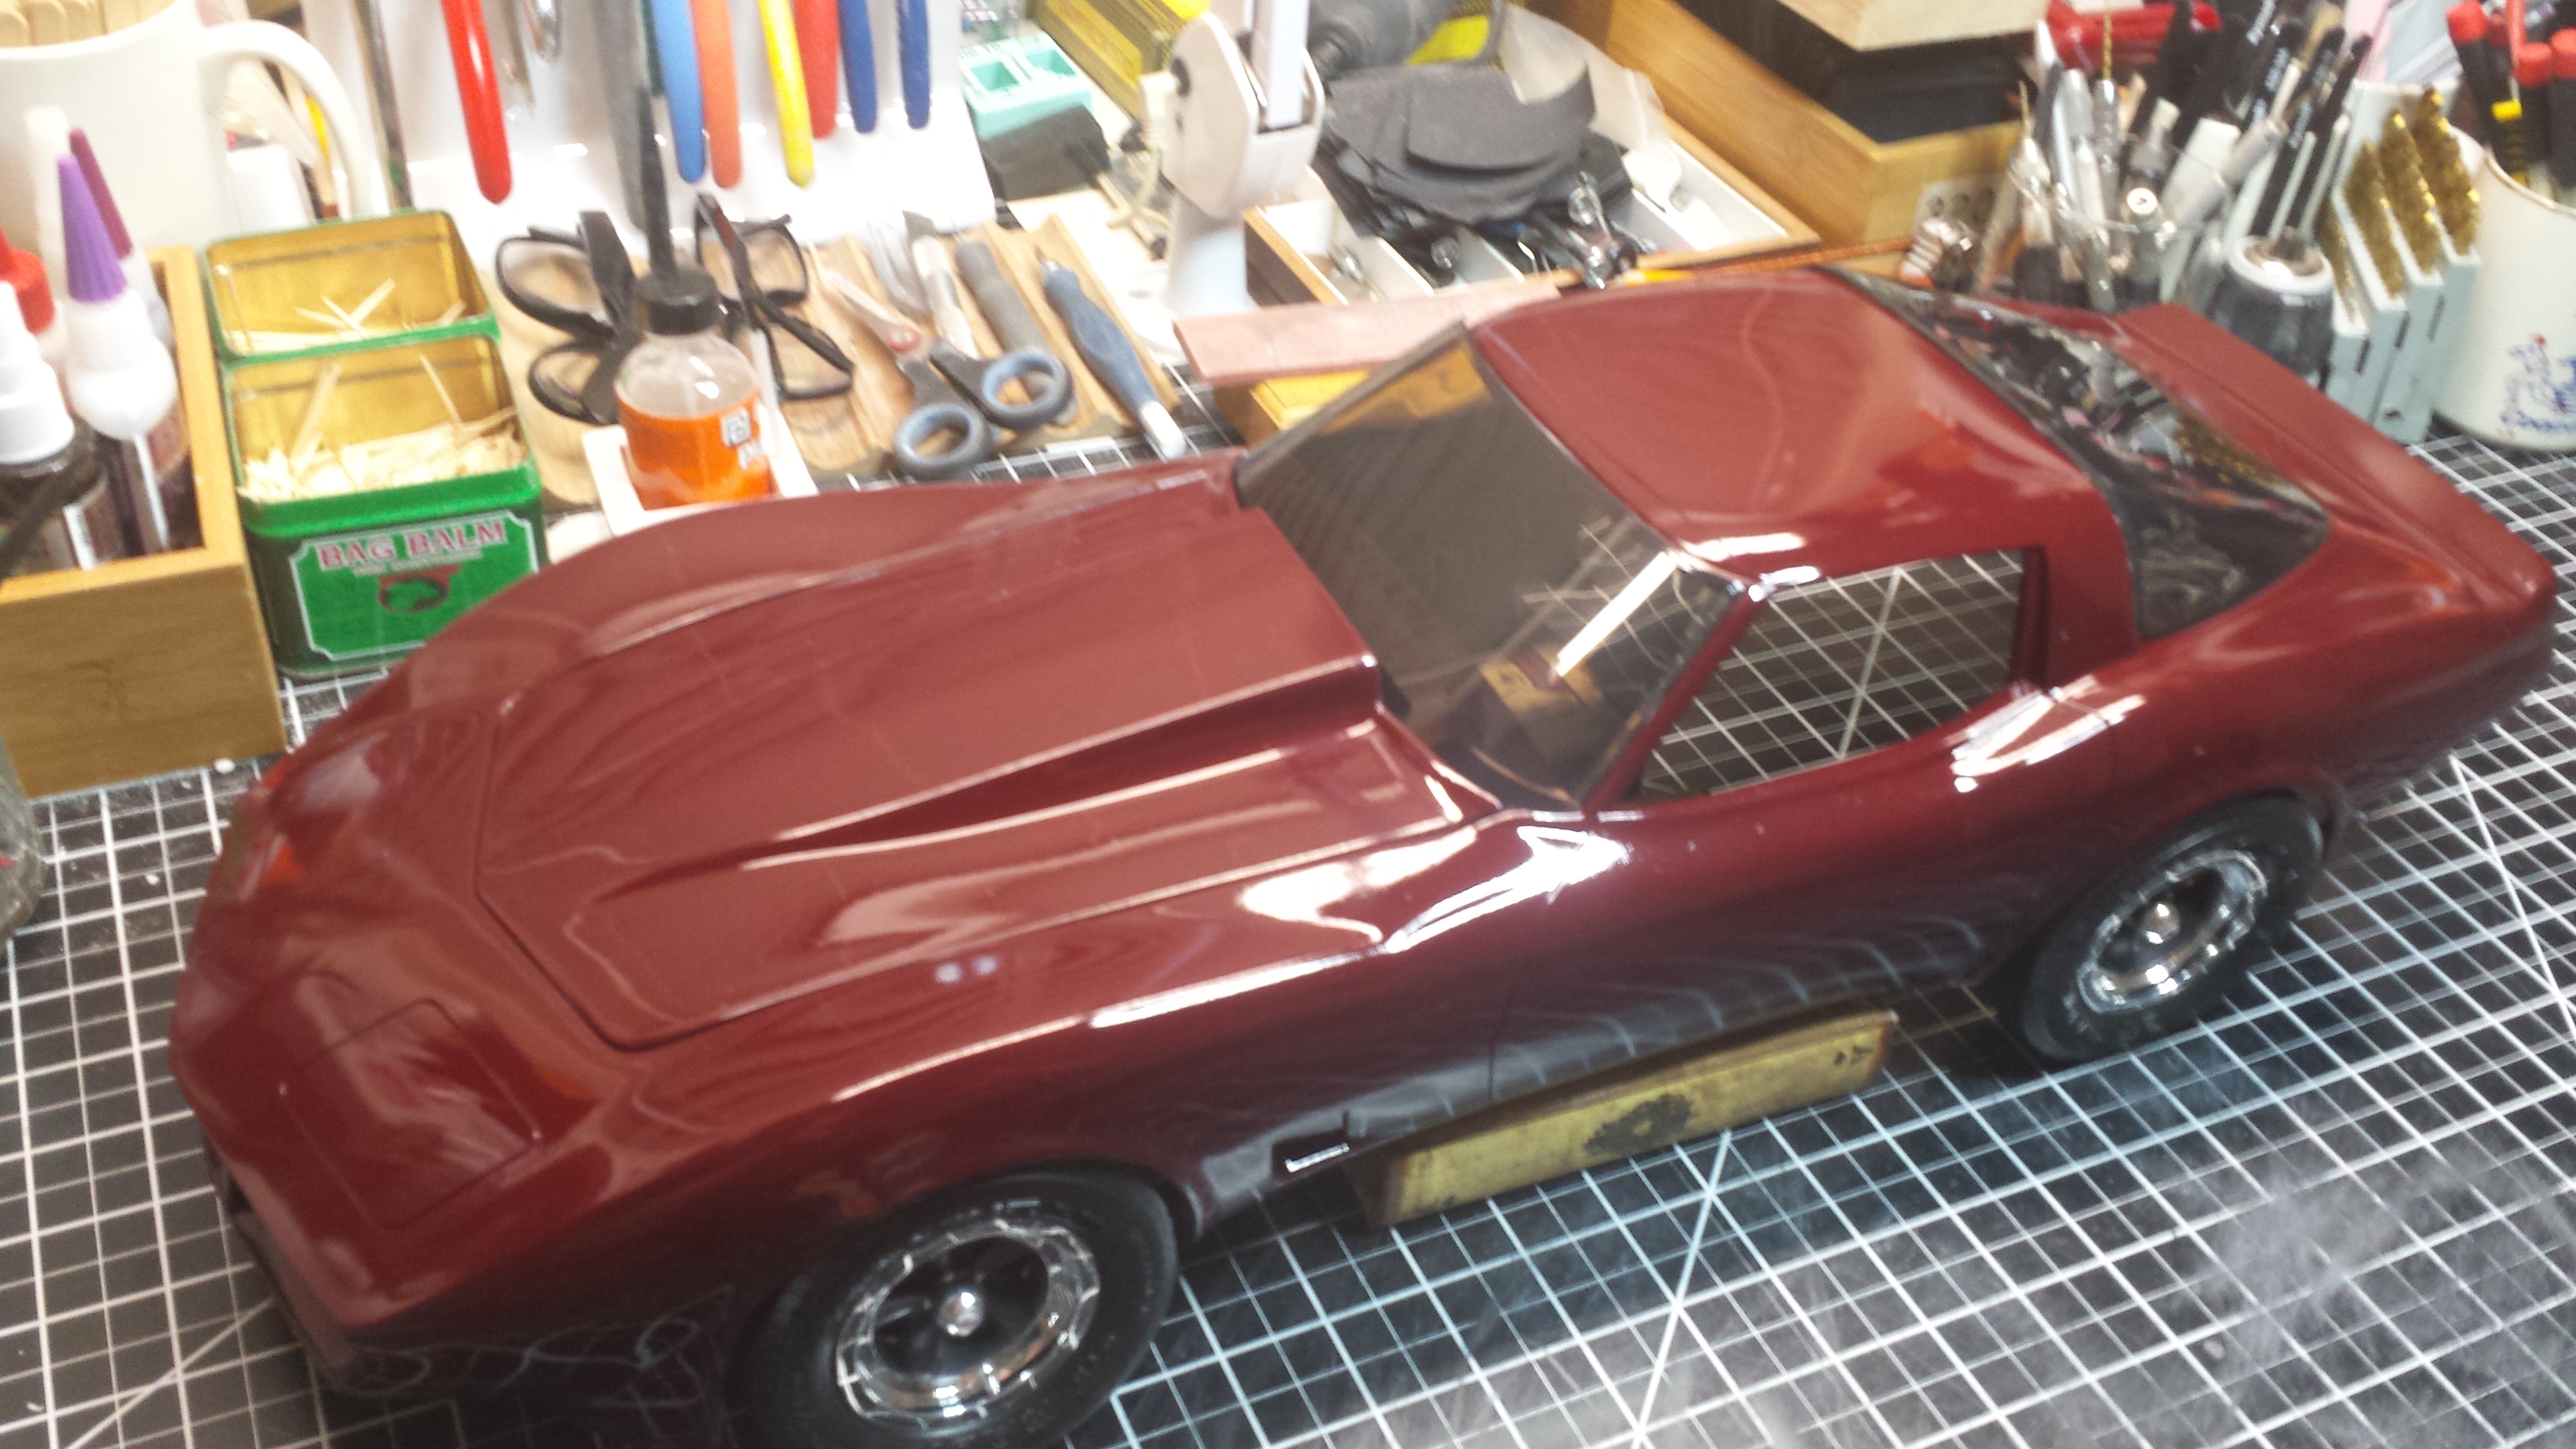
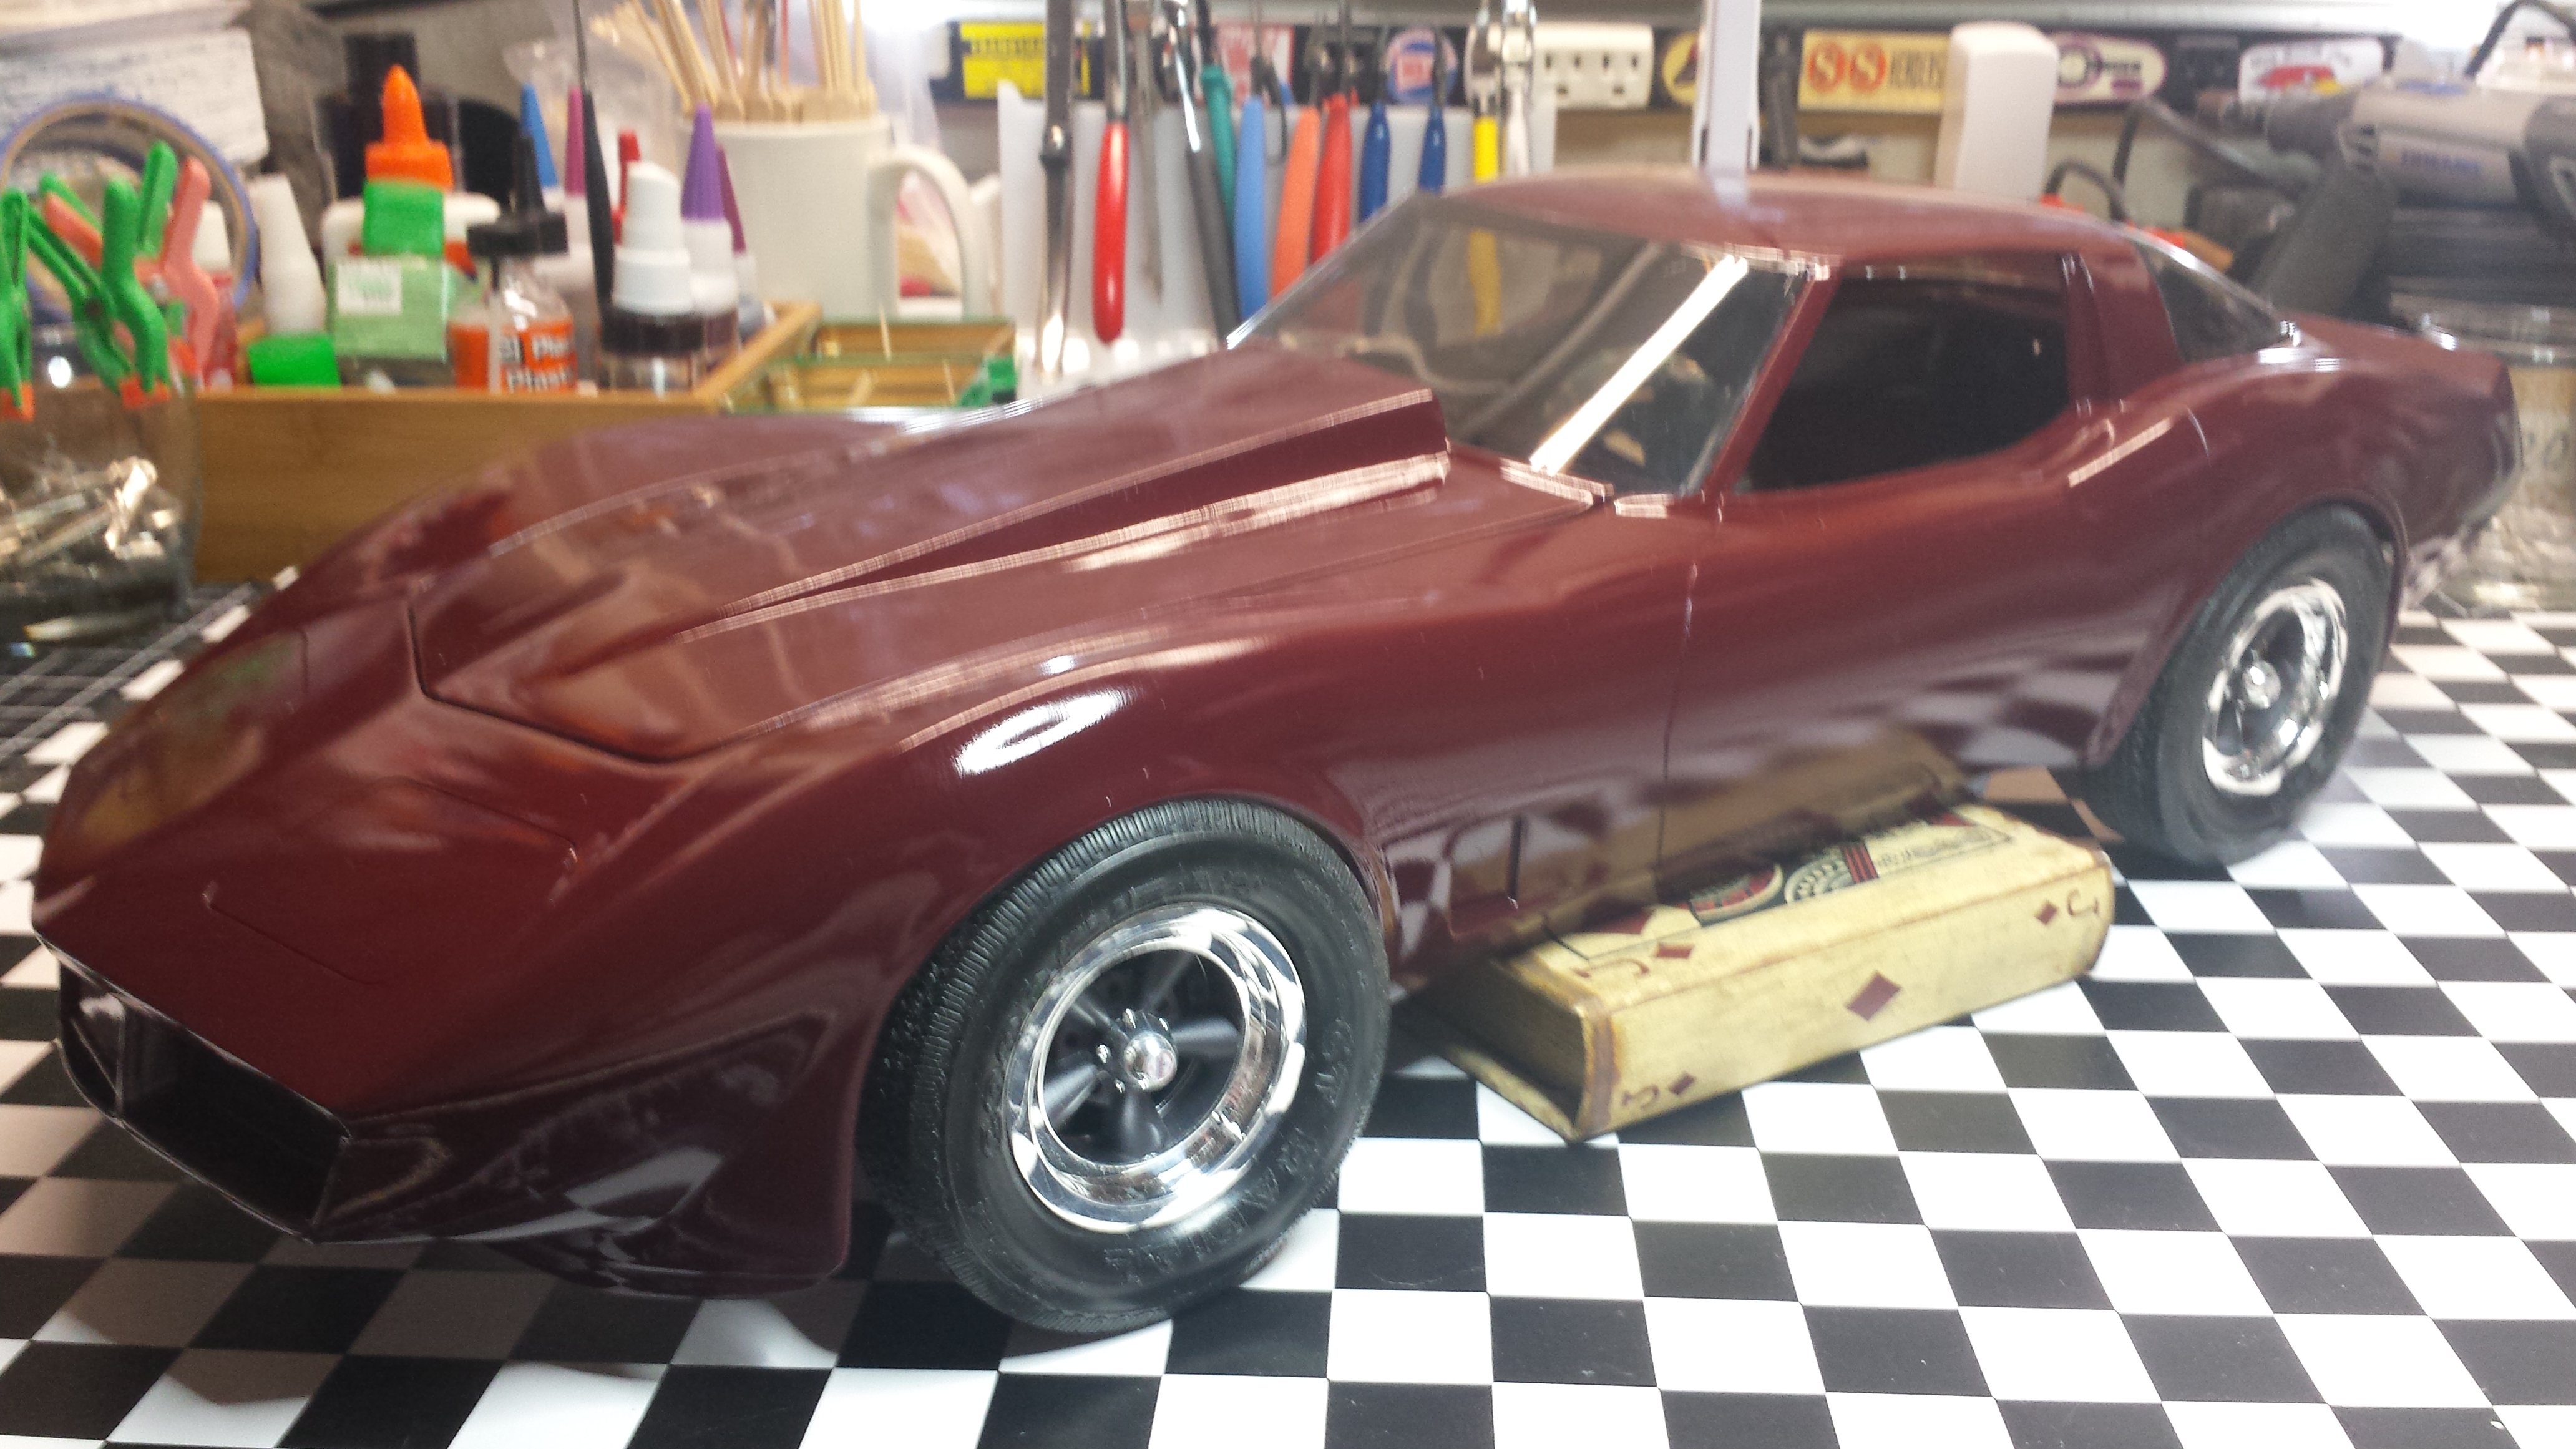
Thanks. I didn't have to wait as long as I thought I would for the next paint session. I sanded the entire body with 600 grit wet dry. I didn't re-score the panel lines. I'll do that before the next paint session. The paint is starting to look deeper.

-
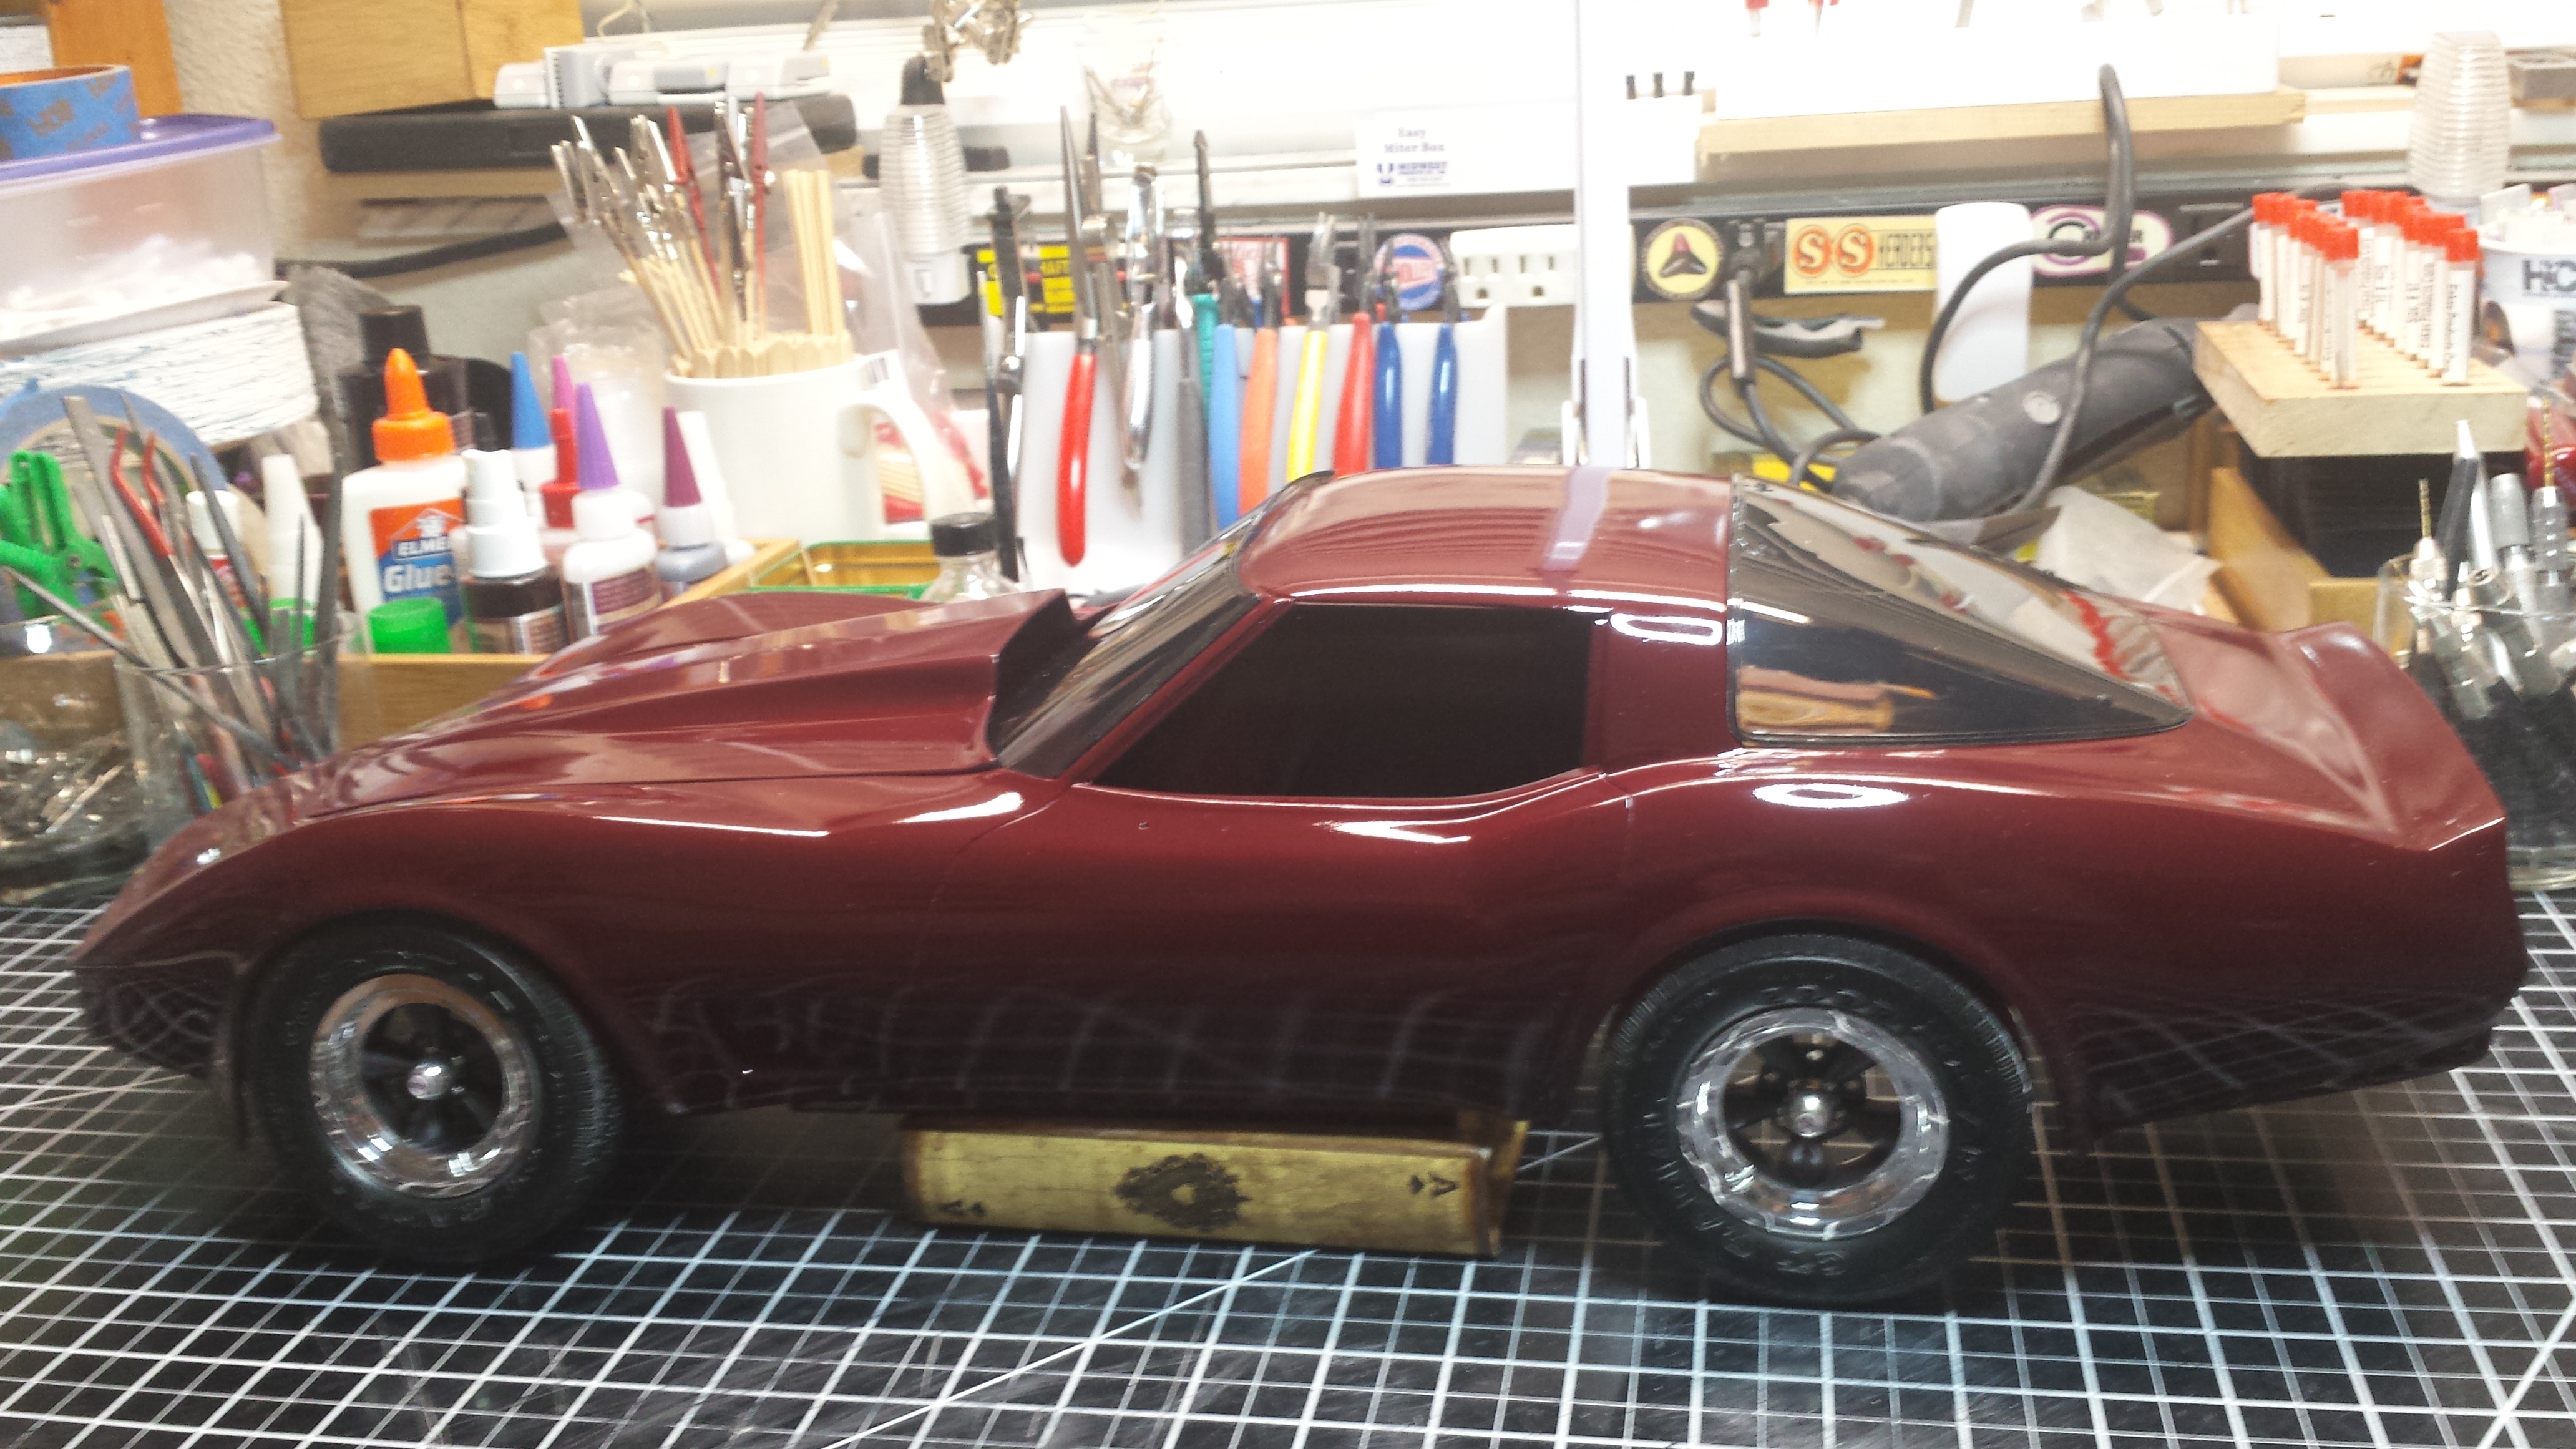
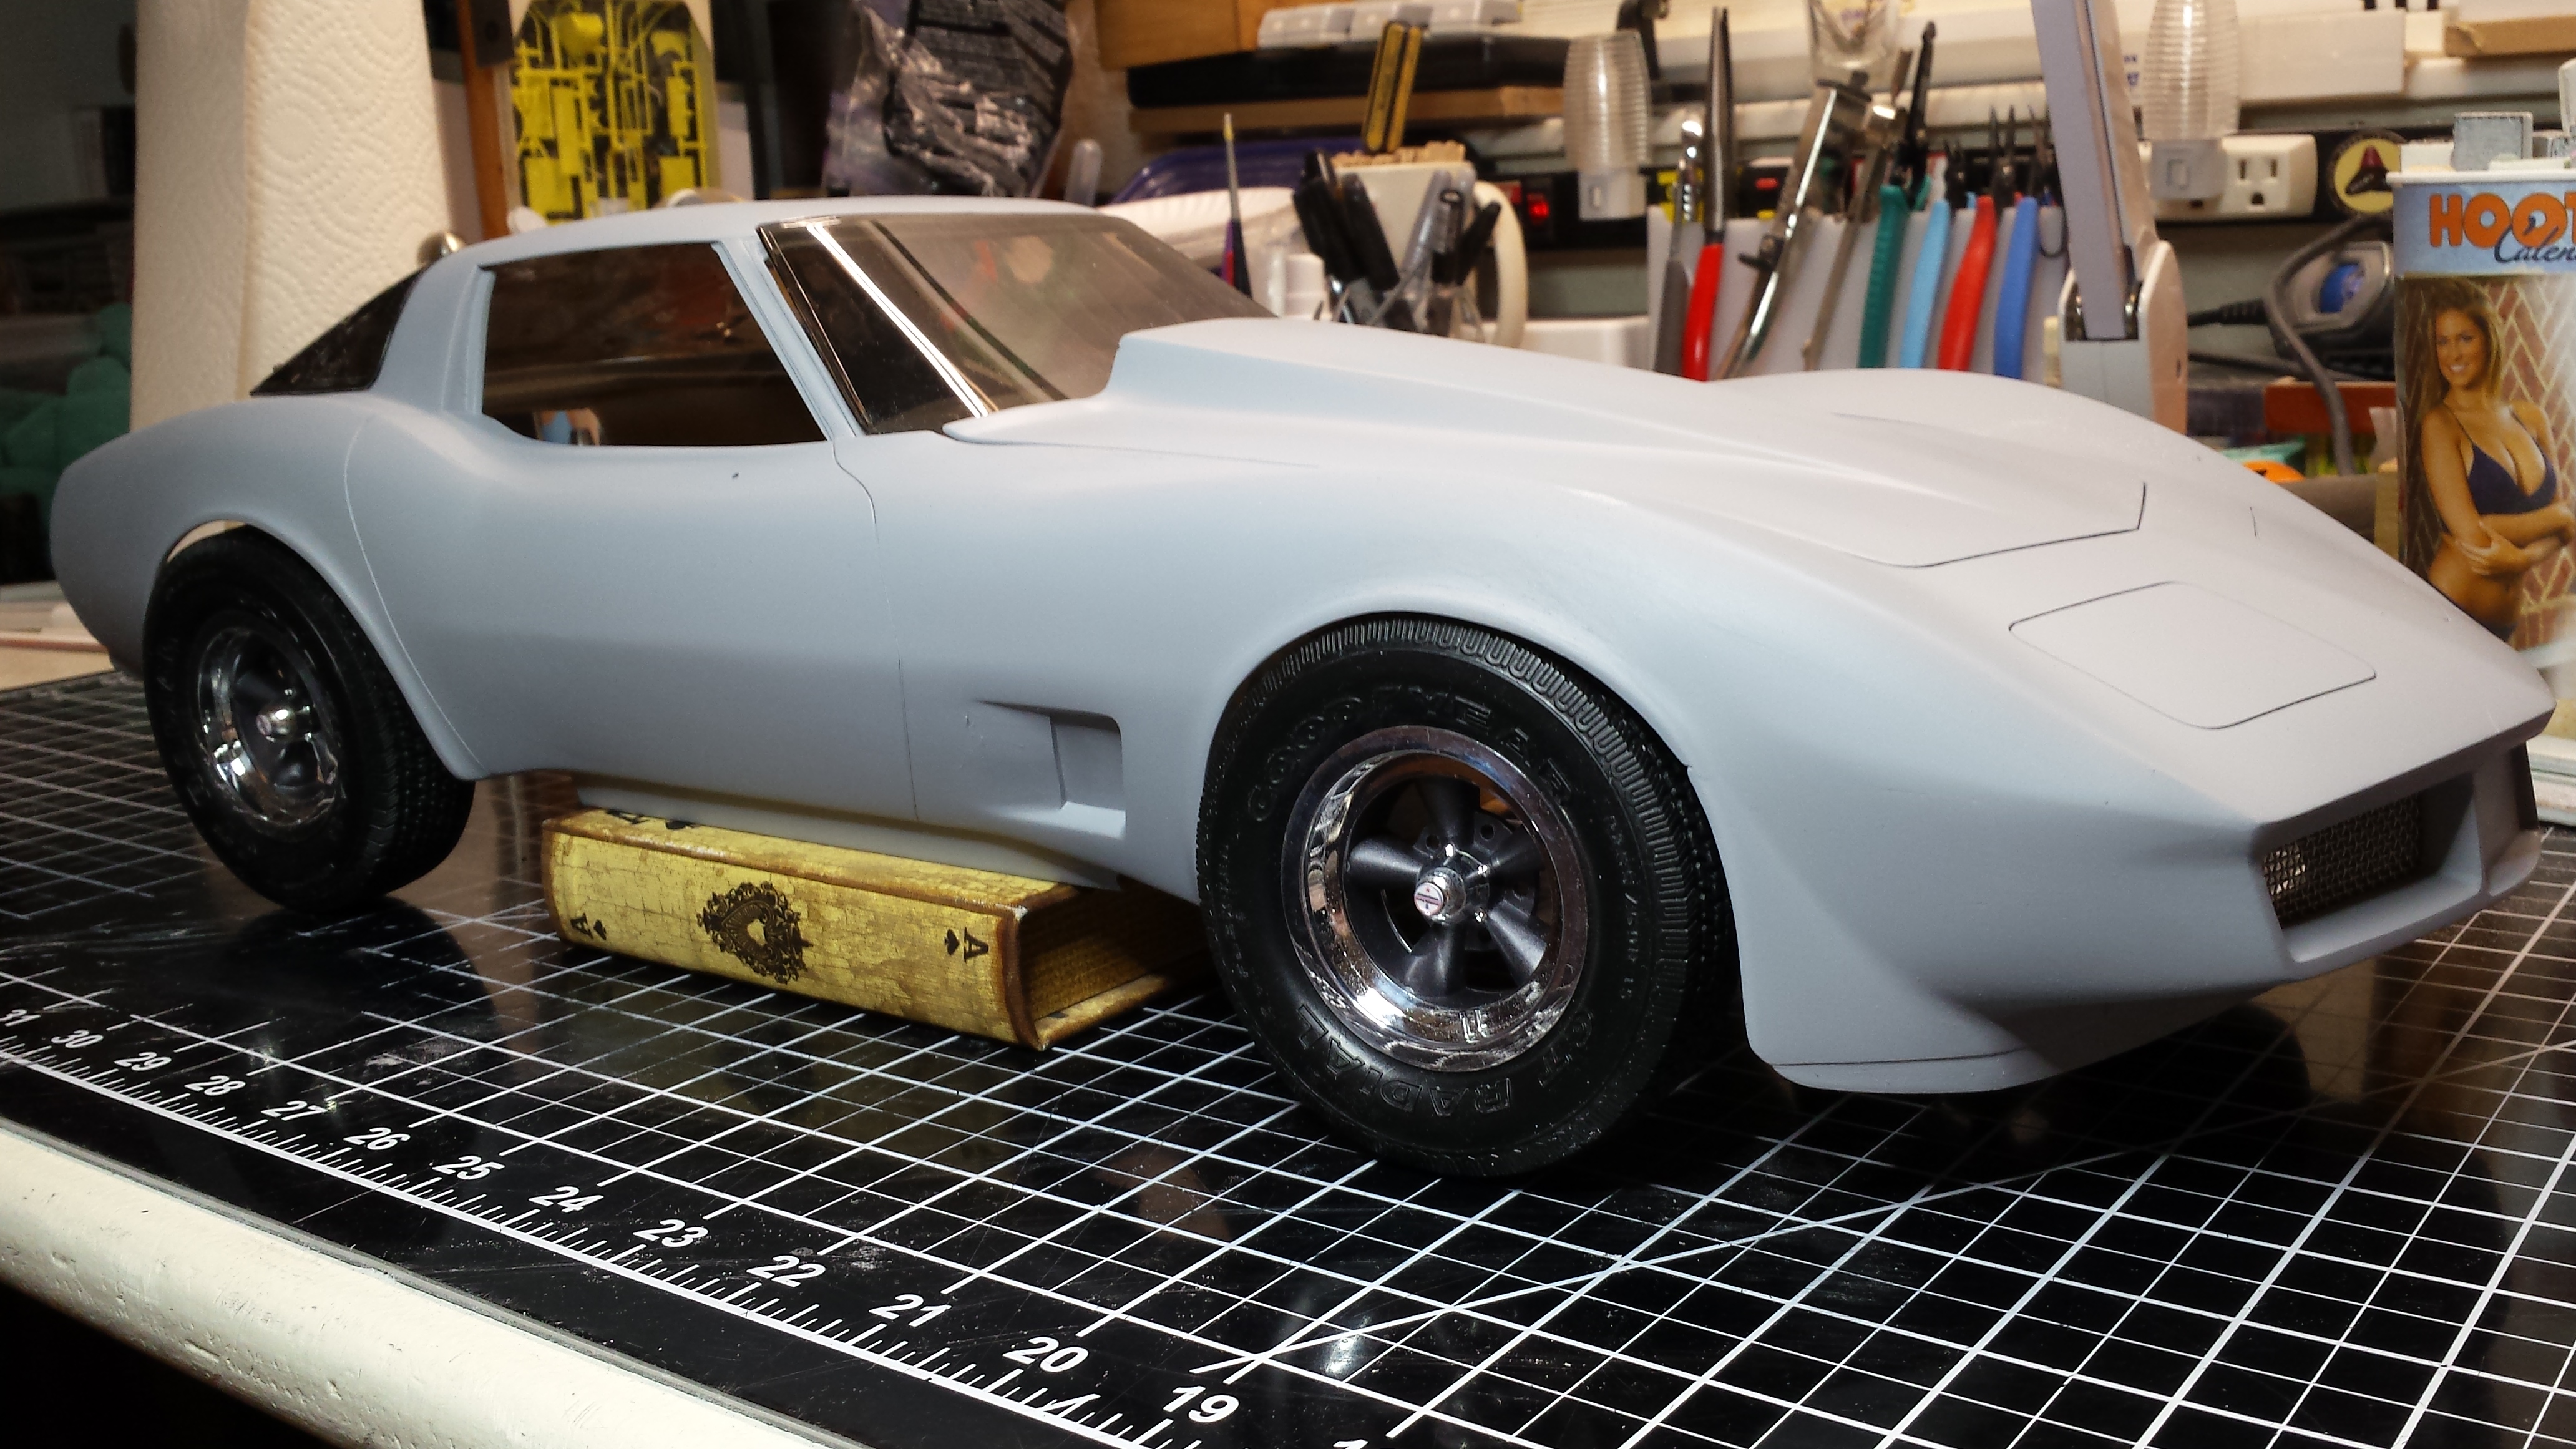
It has been too cold to paint but this weekend it warmed up so I was able to shoot the first few light coats of Tamiya TS-11 Maroon. I also heat the paint up by placing the can in hot water before using and shaking the can after every pass. Makes a huge difference. Afterwards, I couldn't resist posing with window glass and two Torq Thrusts. I'll let this sit for a week and then wet sand with 600 grit and repeat the light coats of maroon.
-
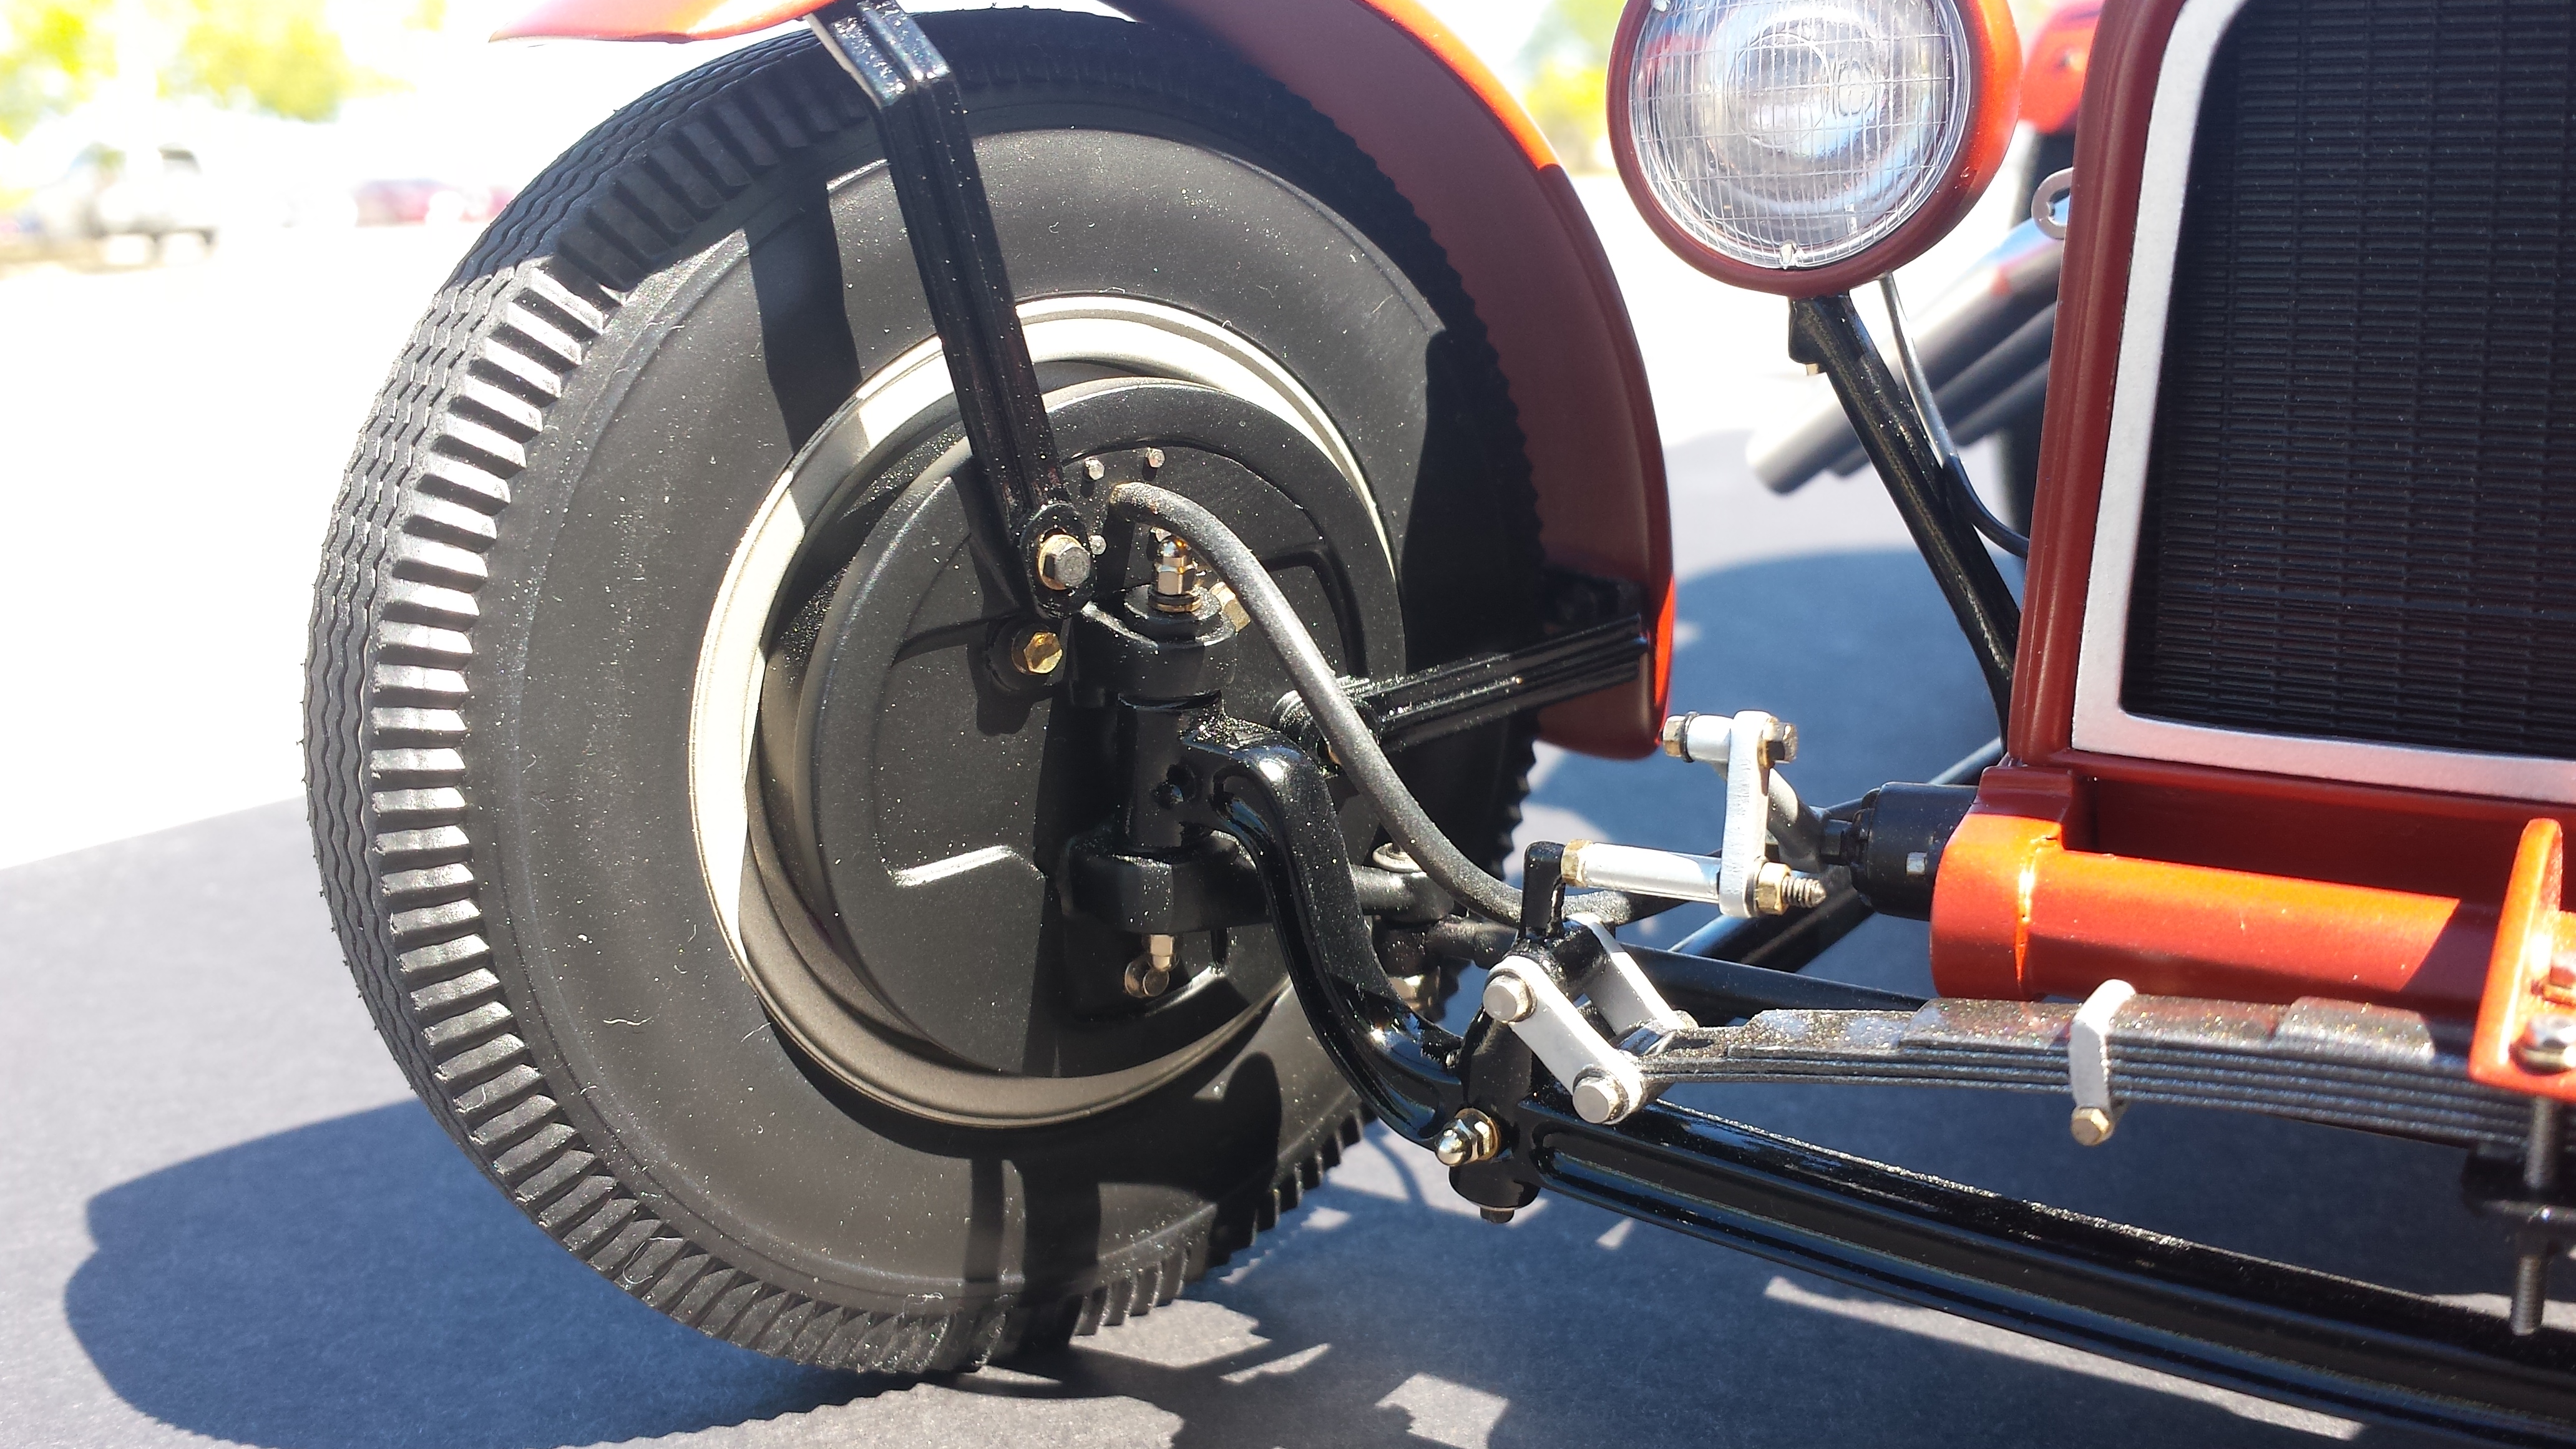
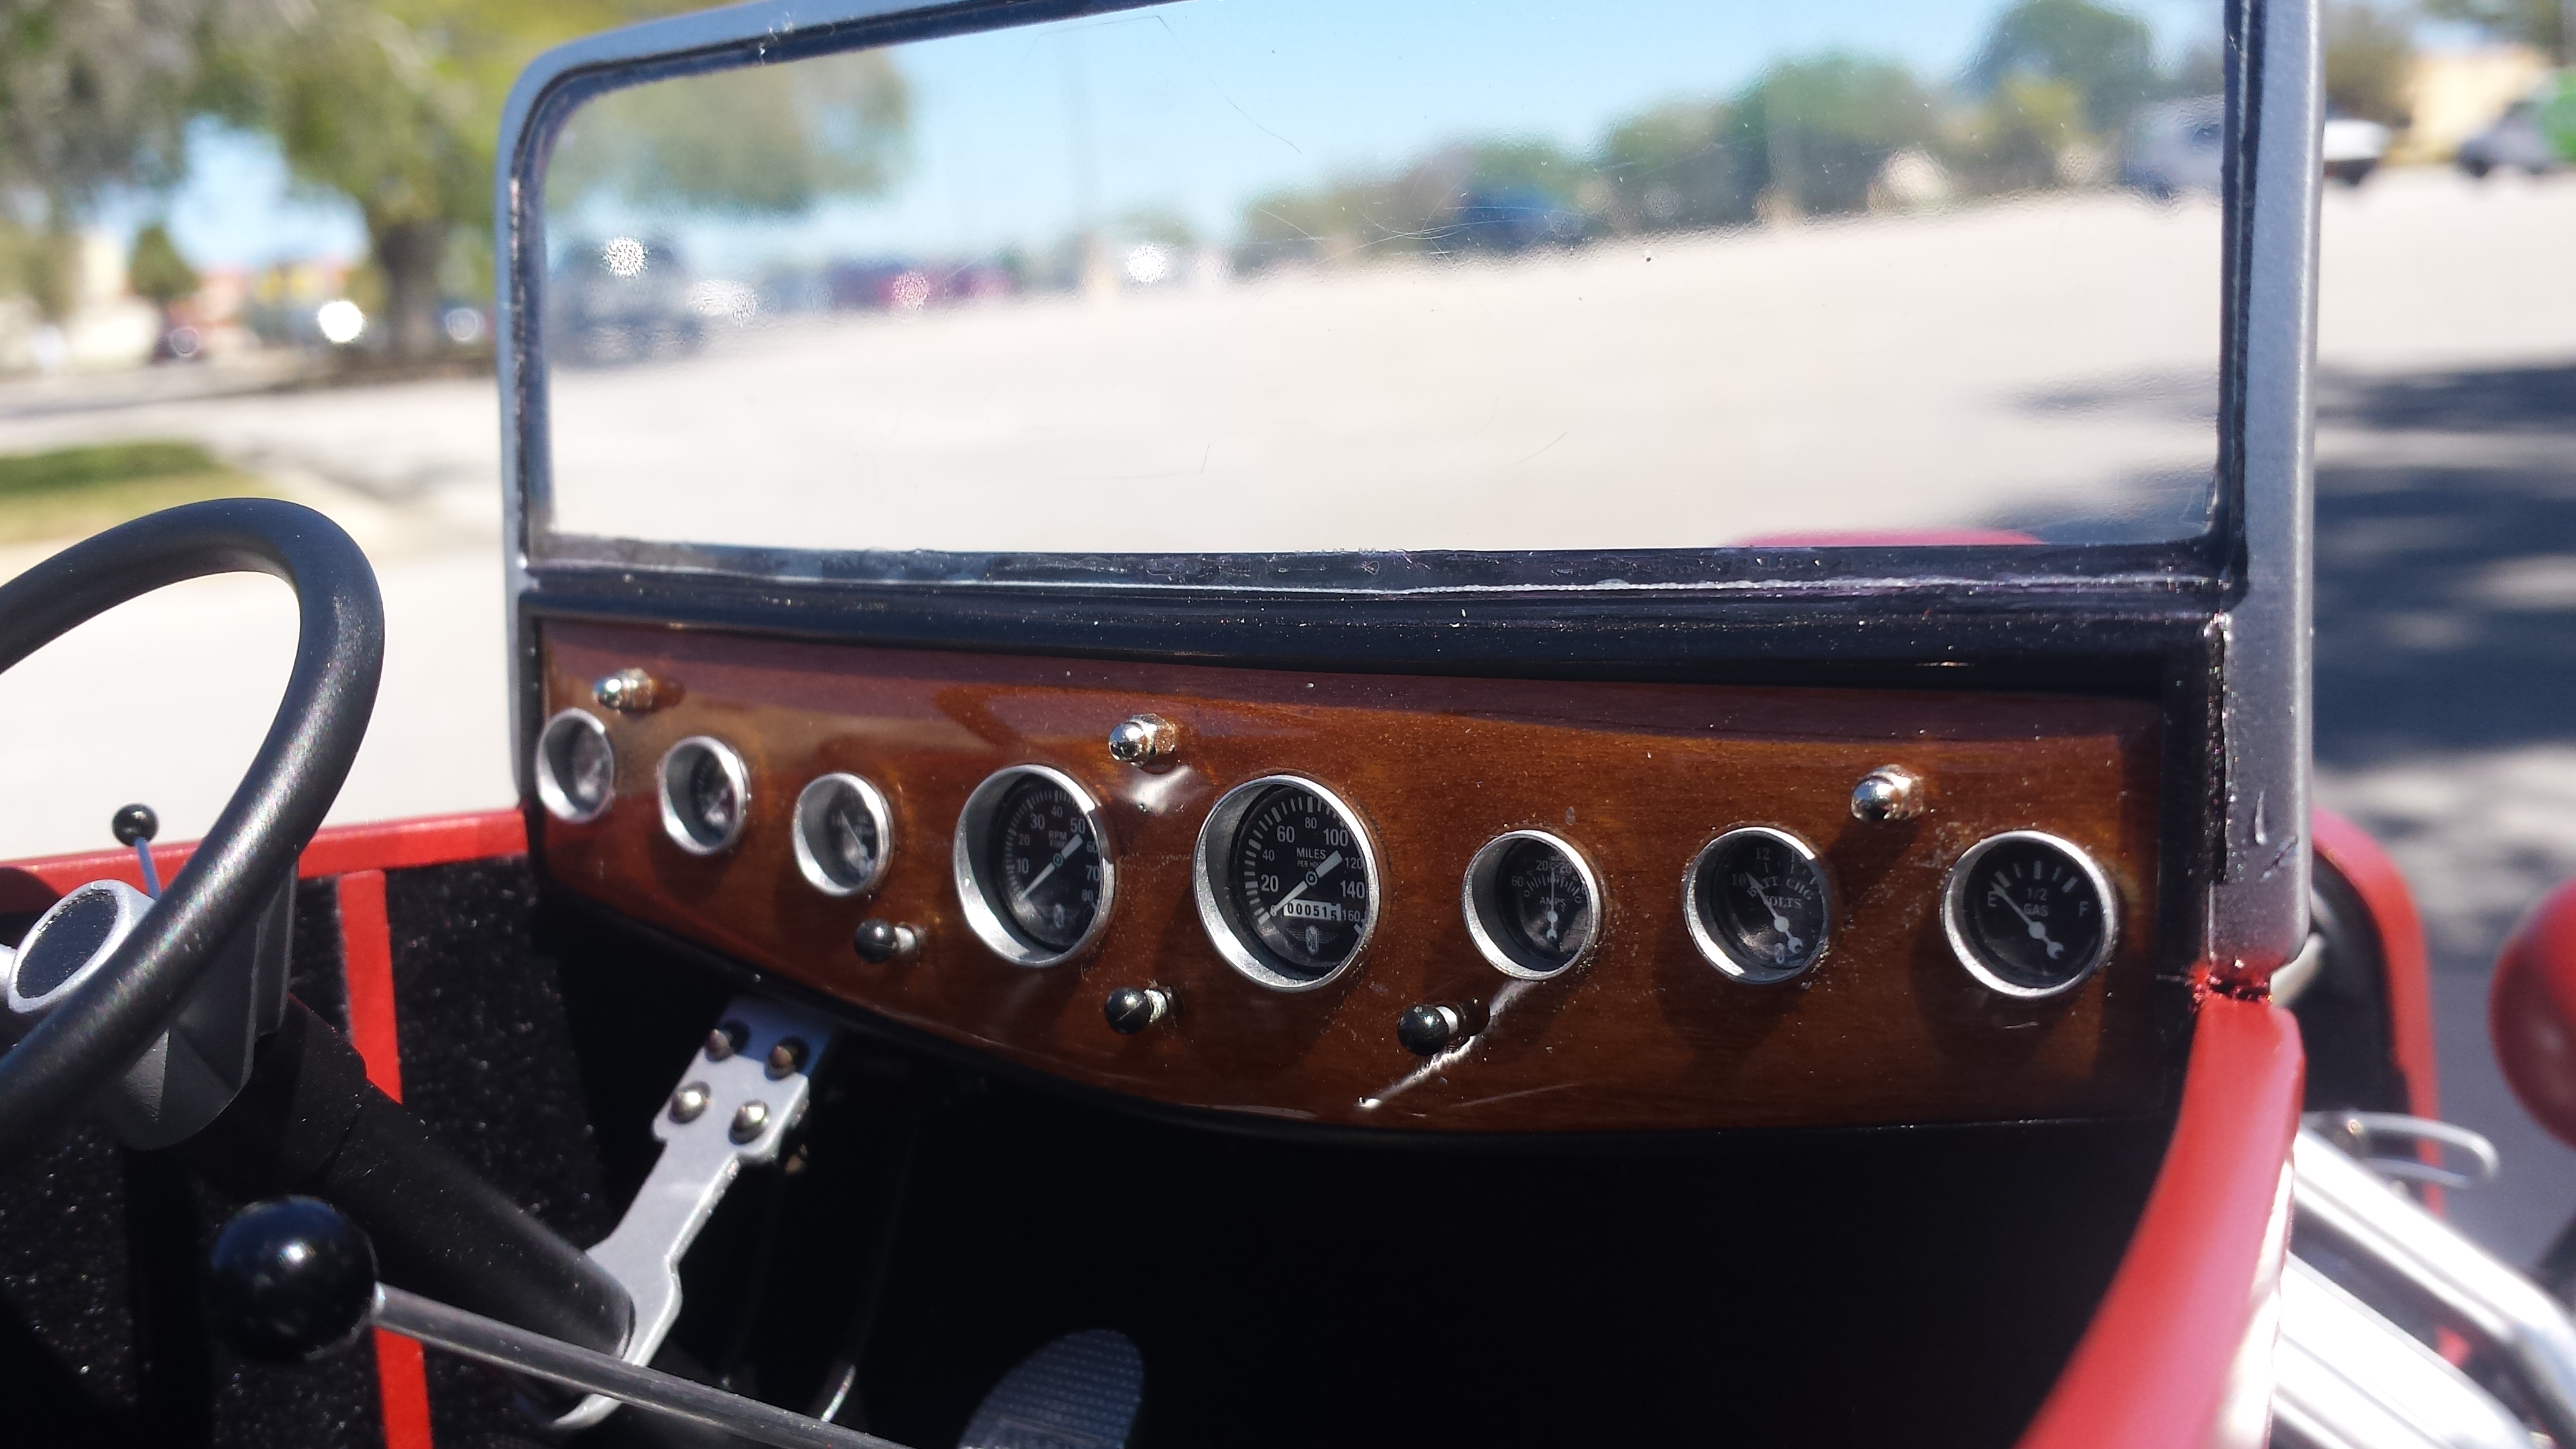
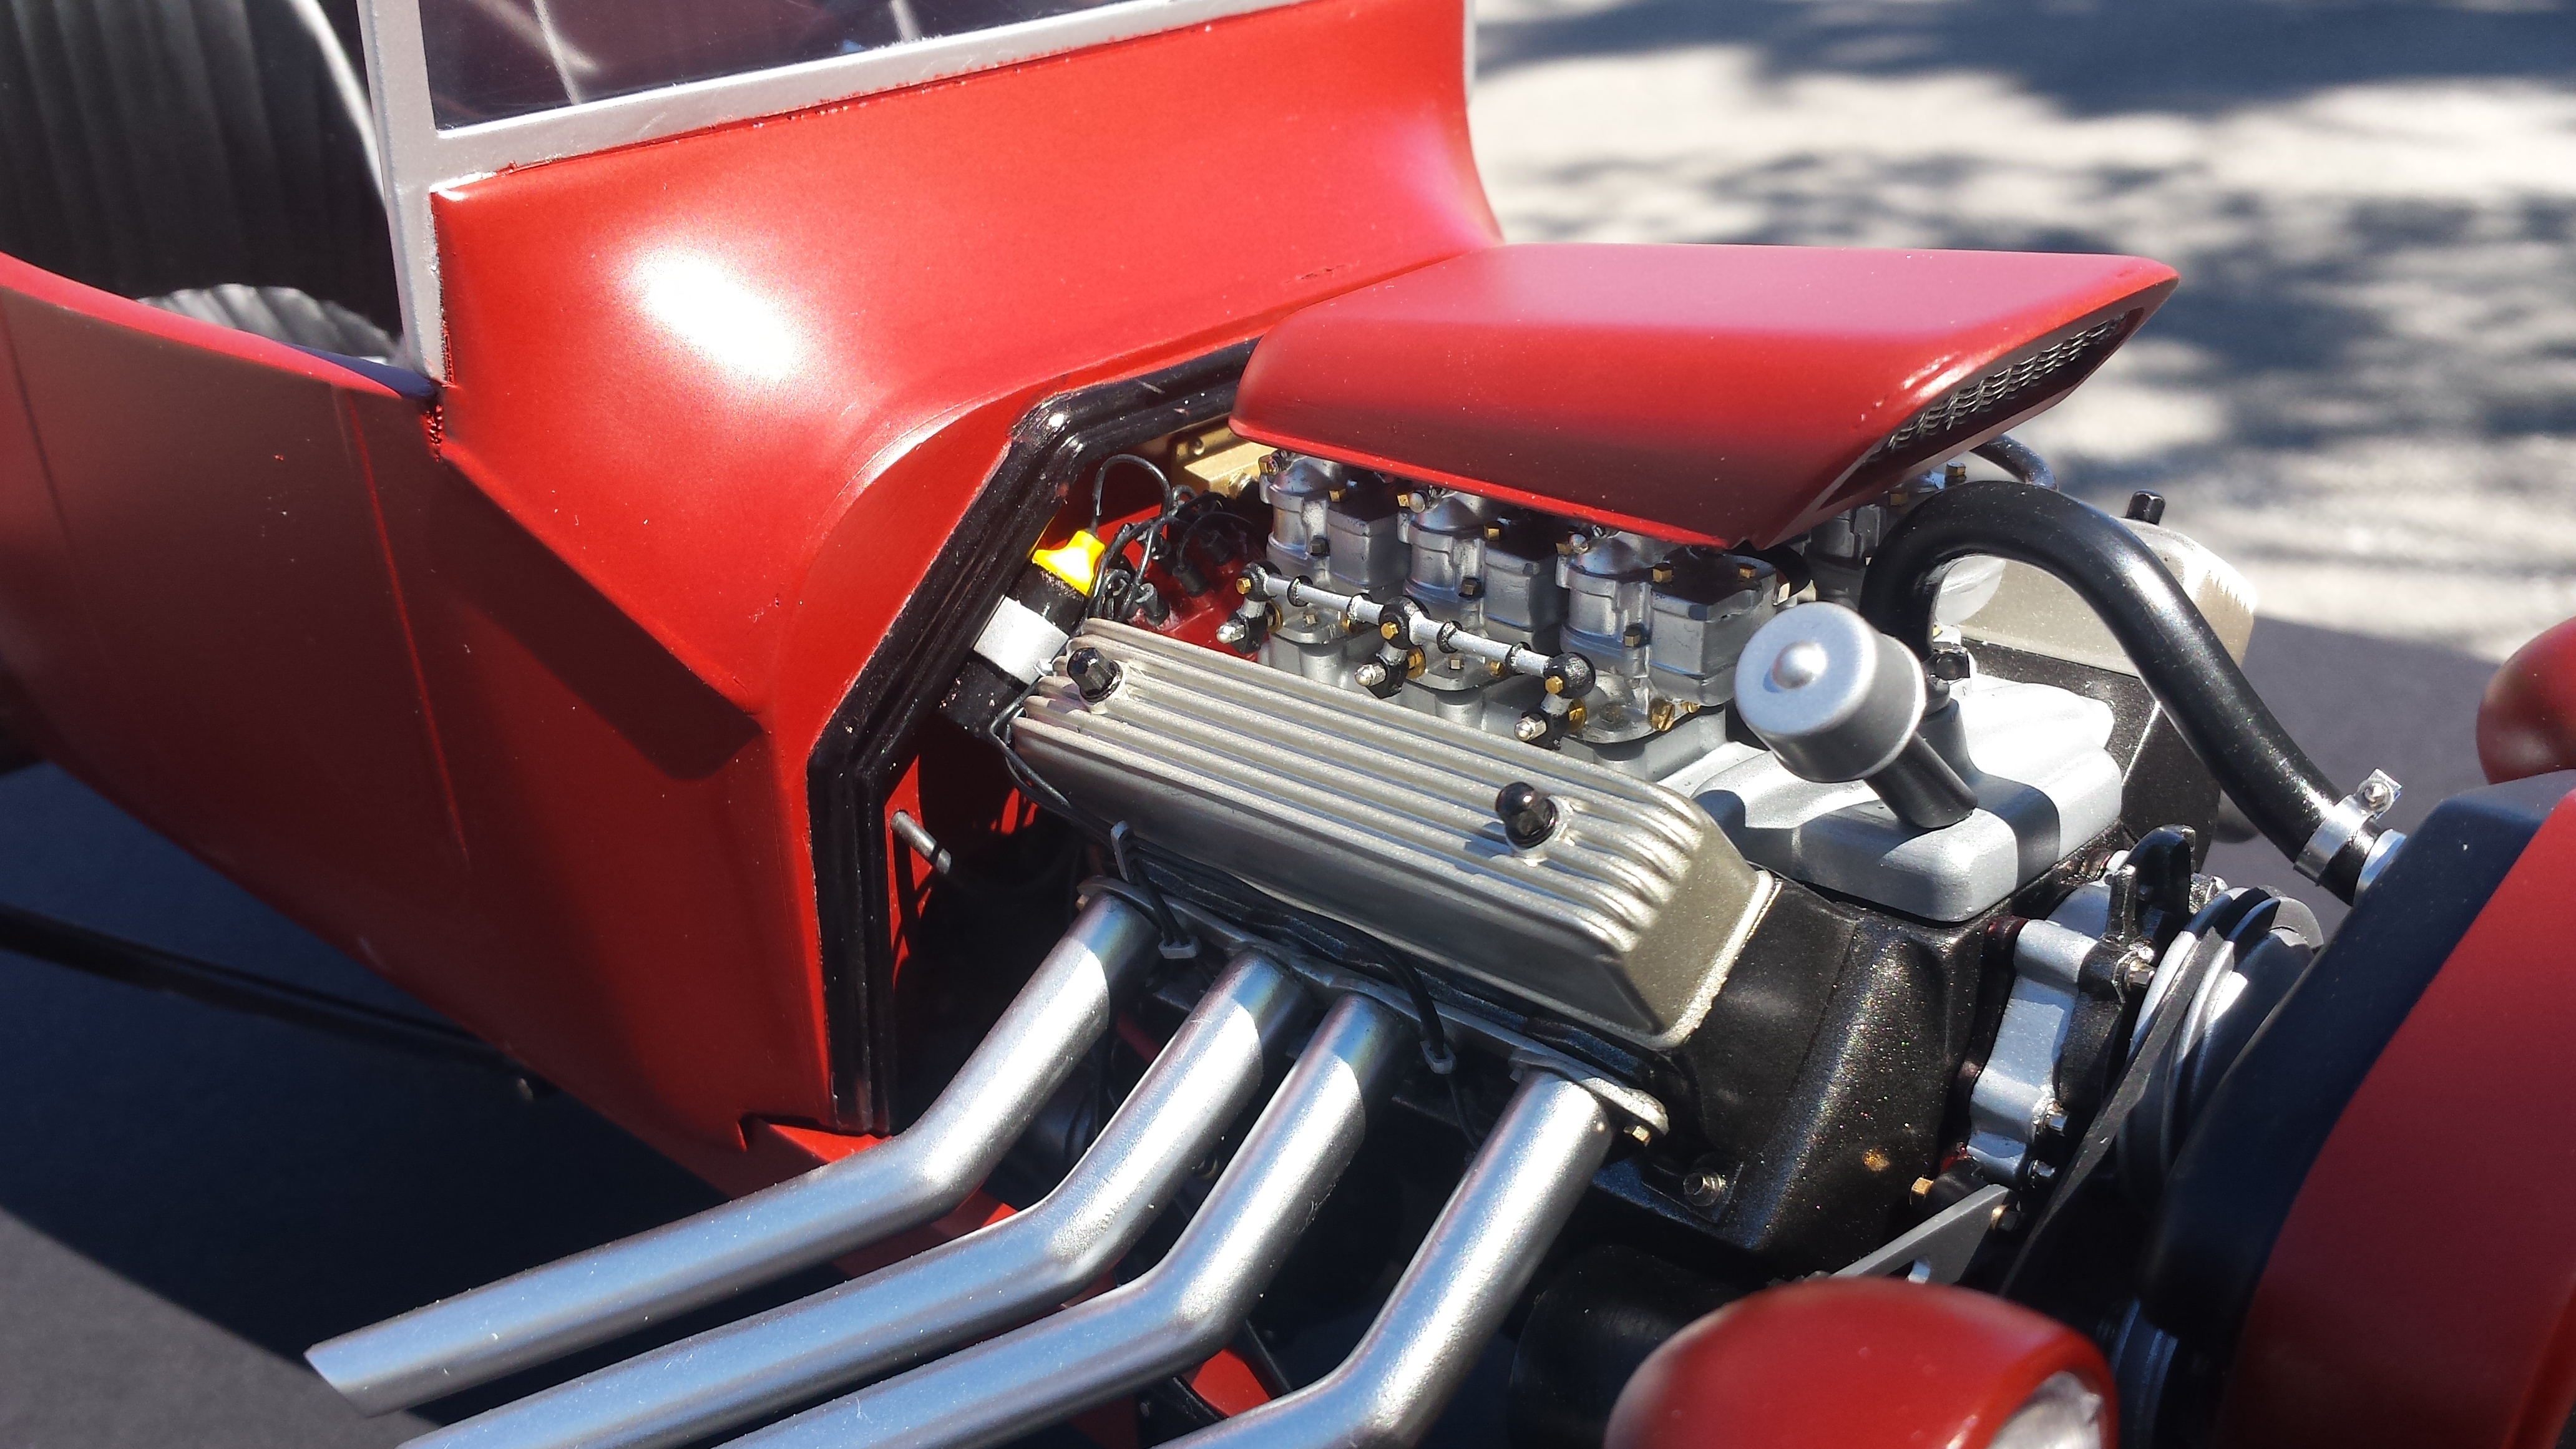
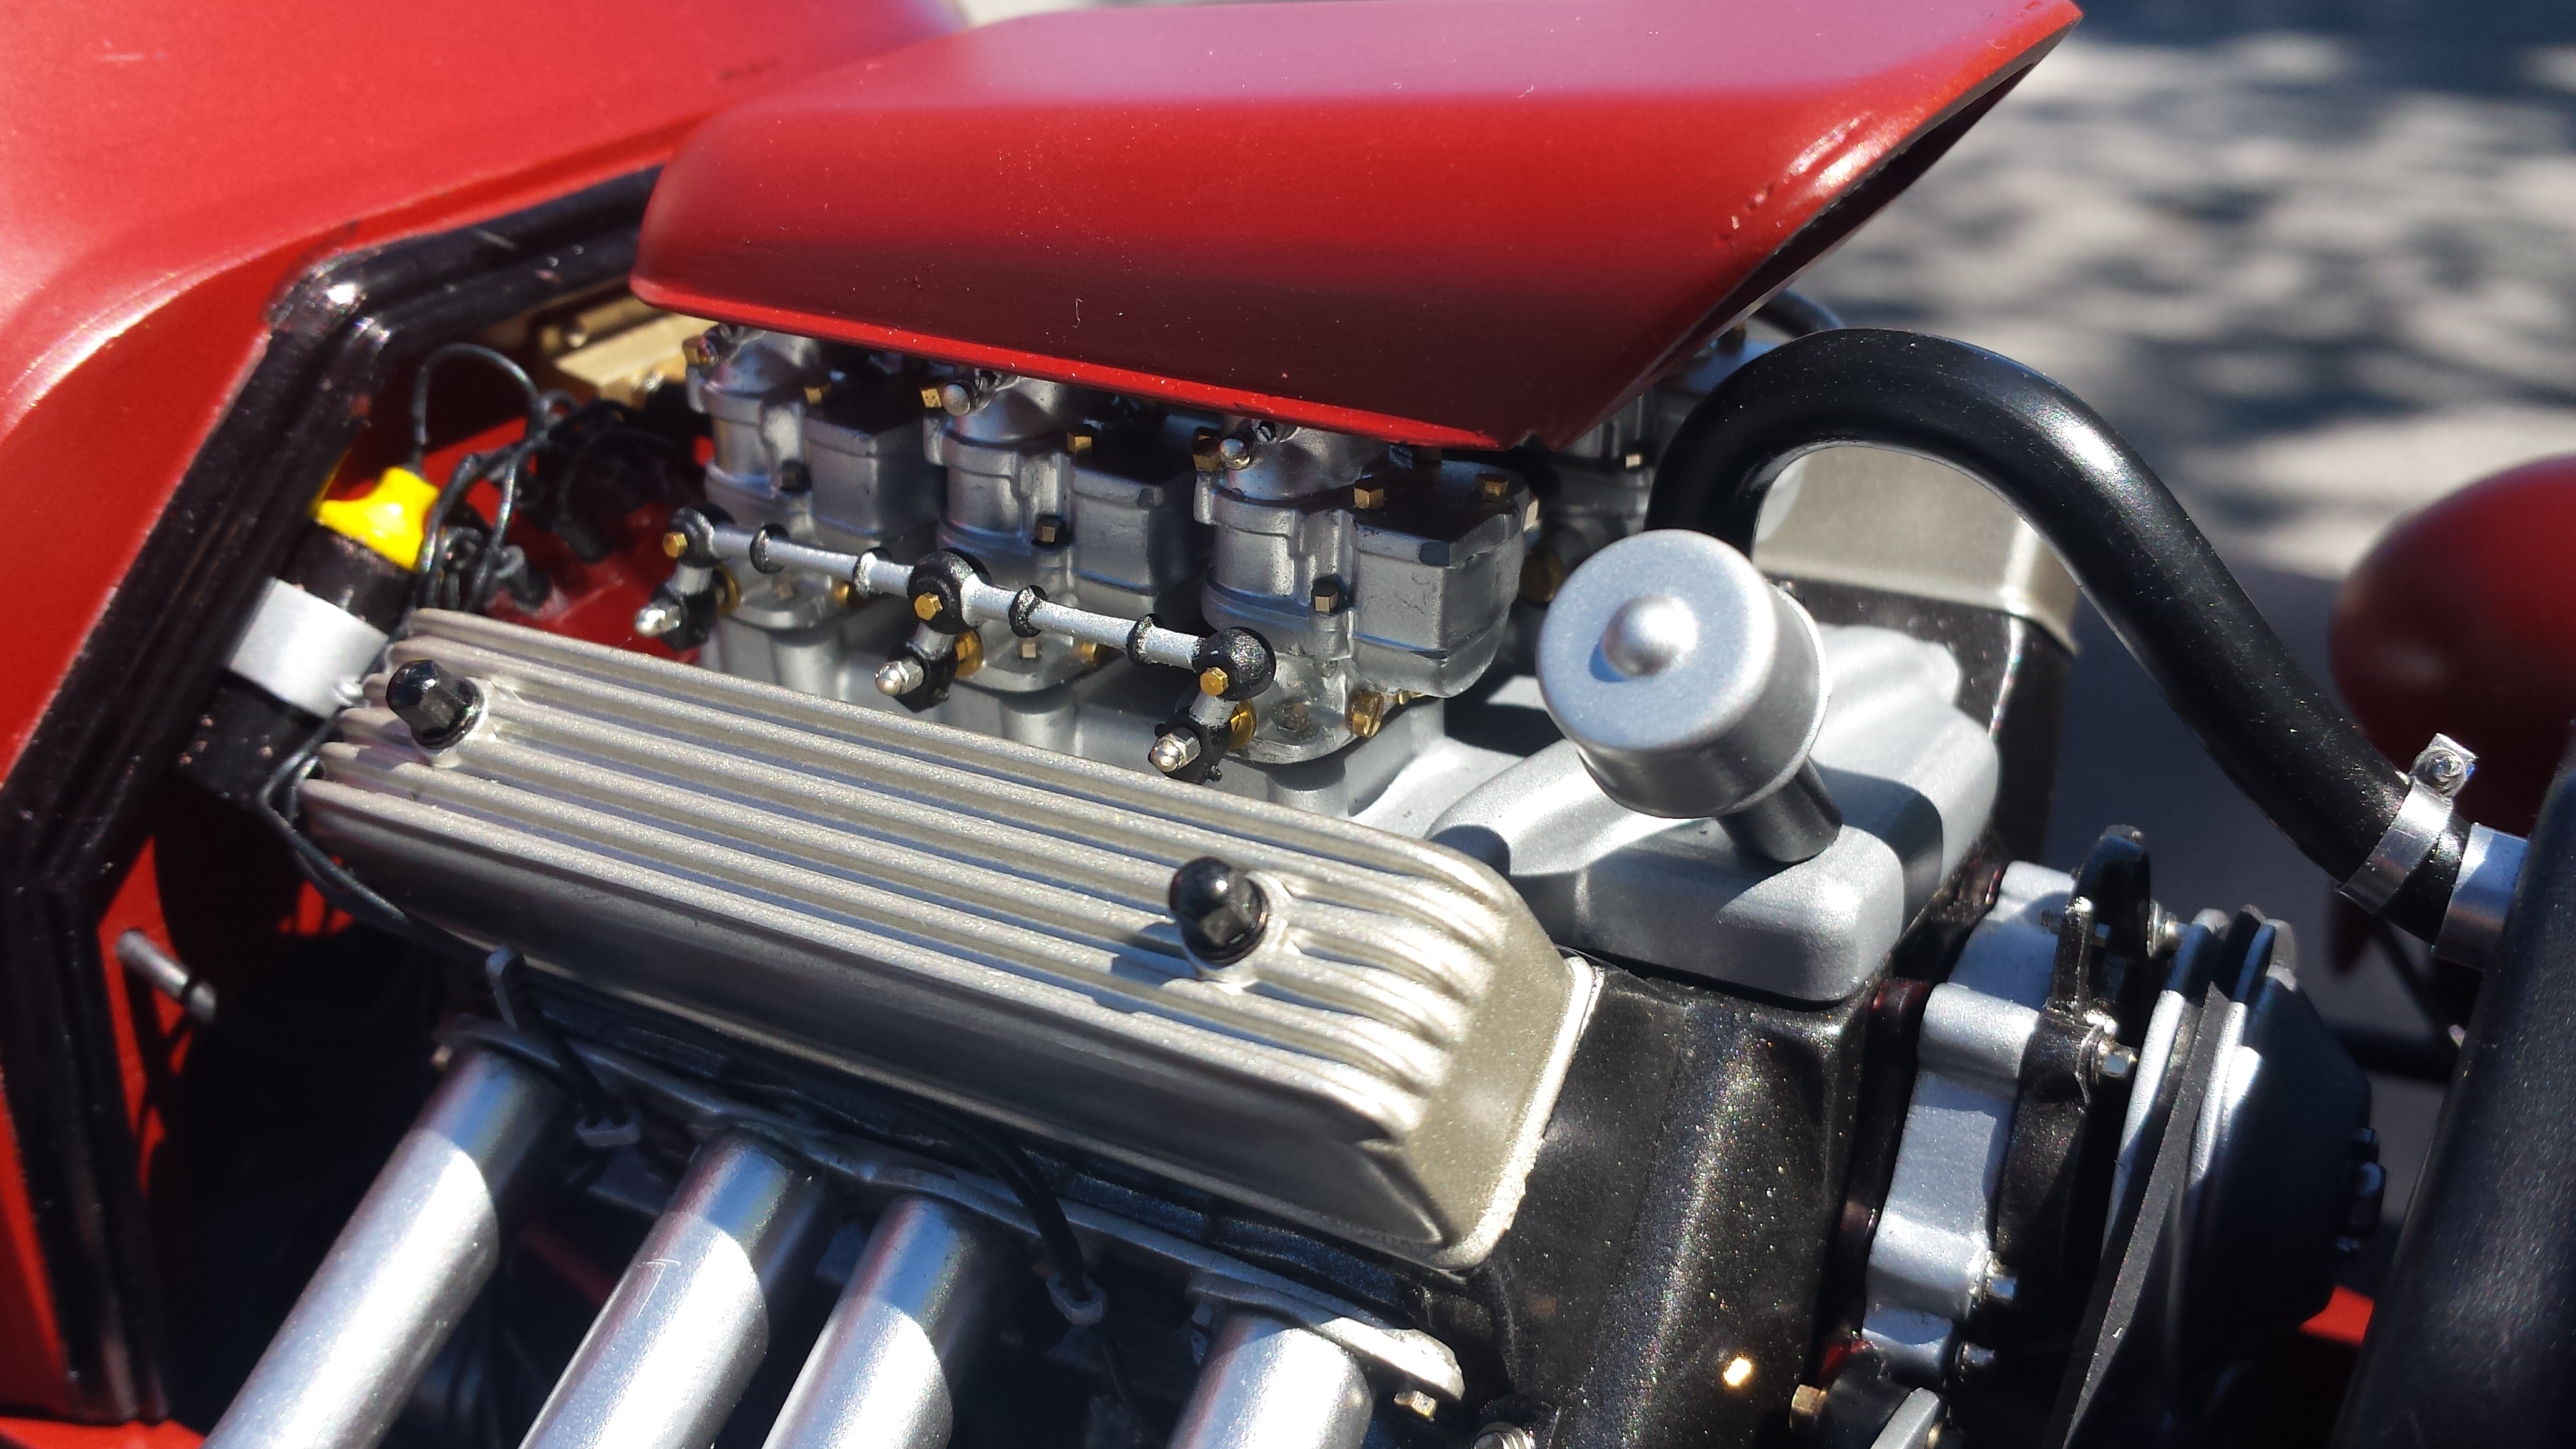
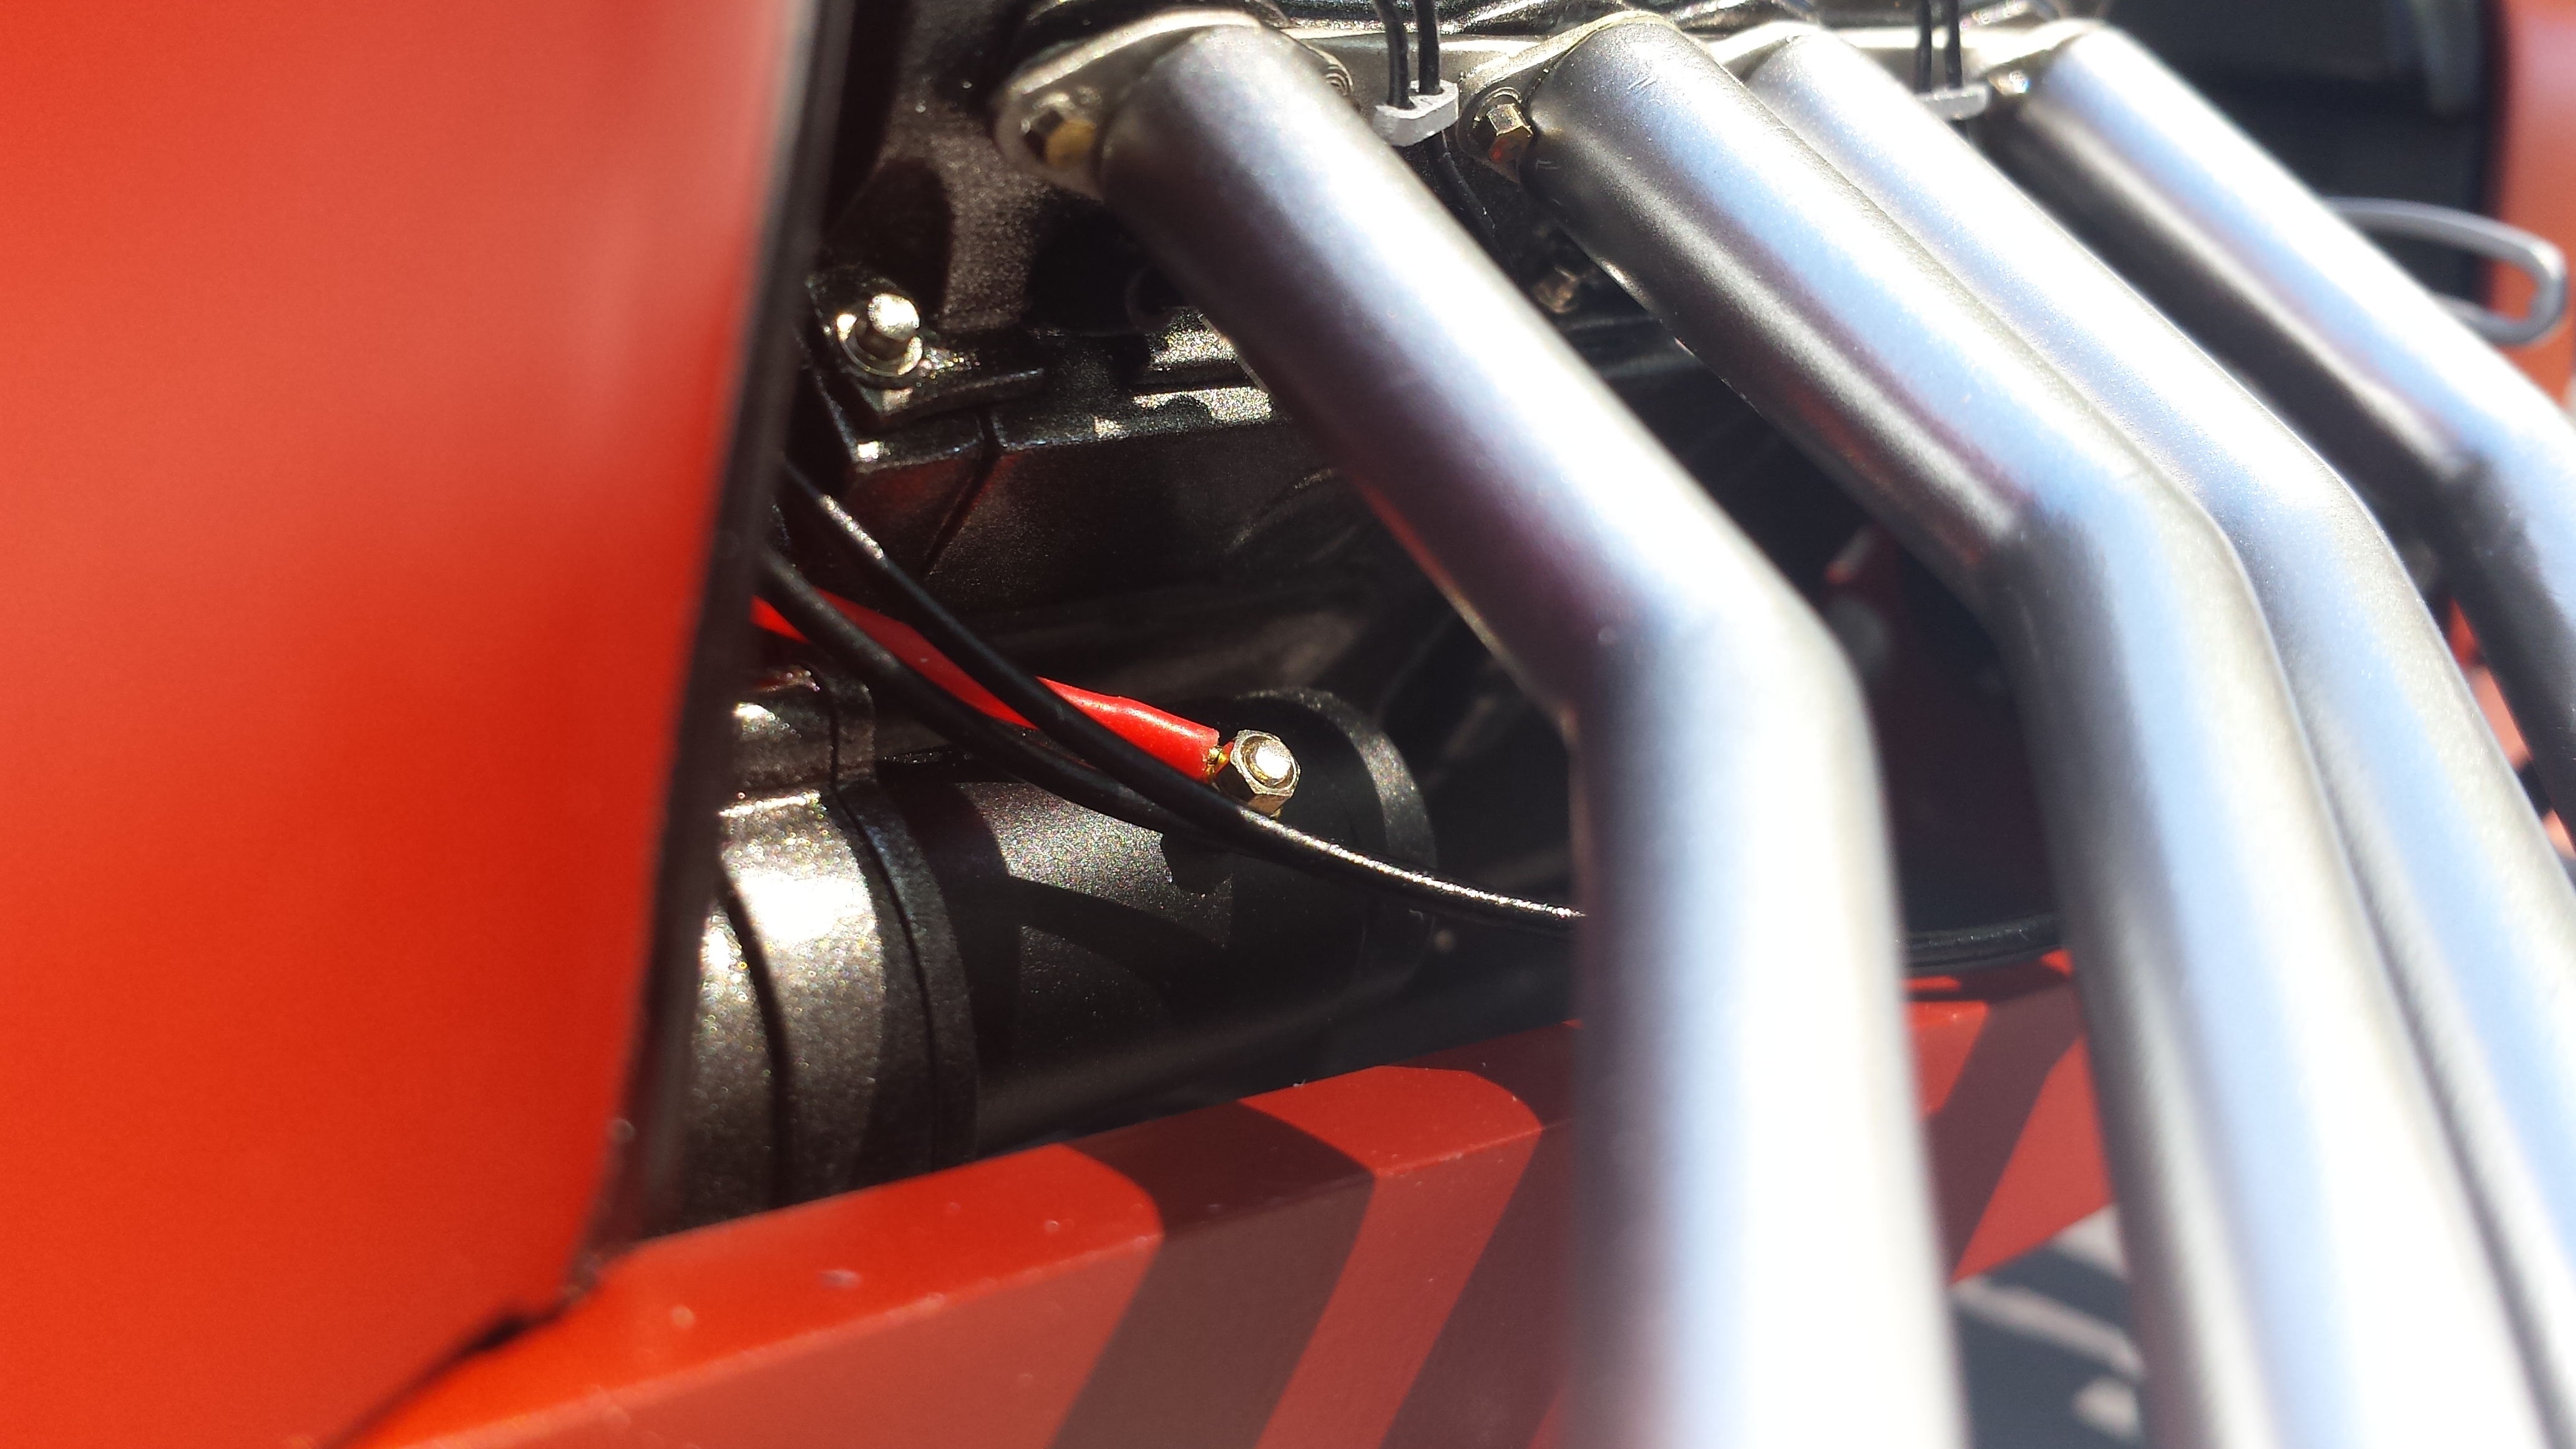
Hey, thanks Bob. I got a late start on my road trip today and it was really too hot and bright to shoot pictures. I did get a few close-ups of the engine and other parts. You can see a lot more detail in natural light. I apologize if some of the photos seem redundant. I'll try another road trip tomorrow morning.
-
I'm going to take her out on the road tomorrow and get some outdoor shots. Thanks again for all the comments and suggestions. It has been a fun build.
-
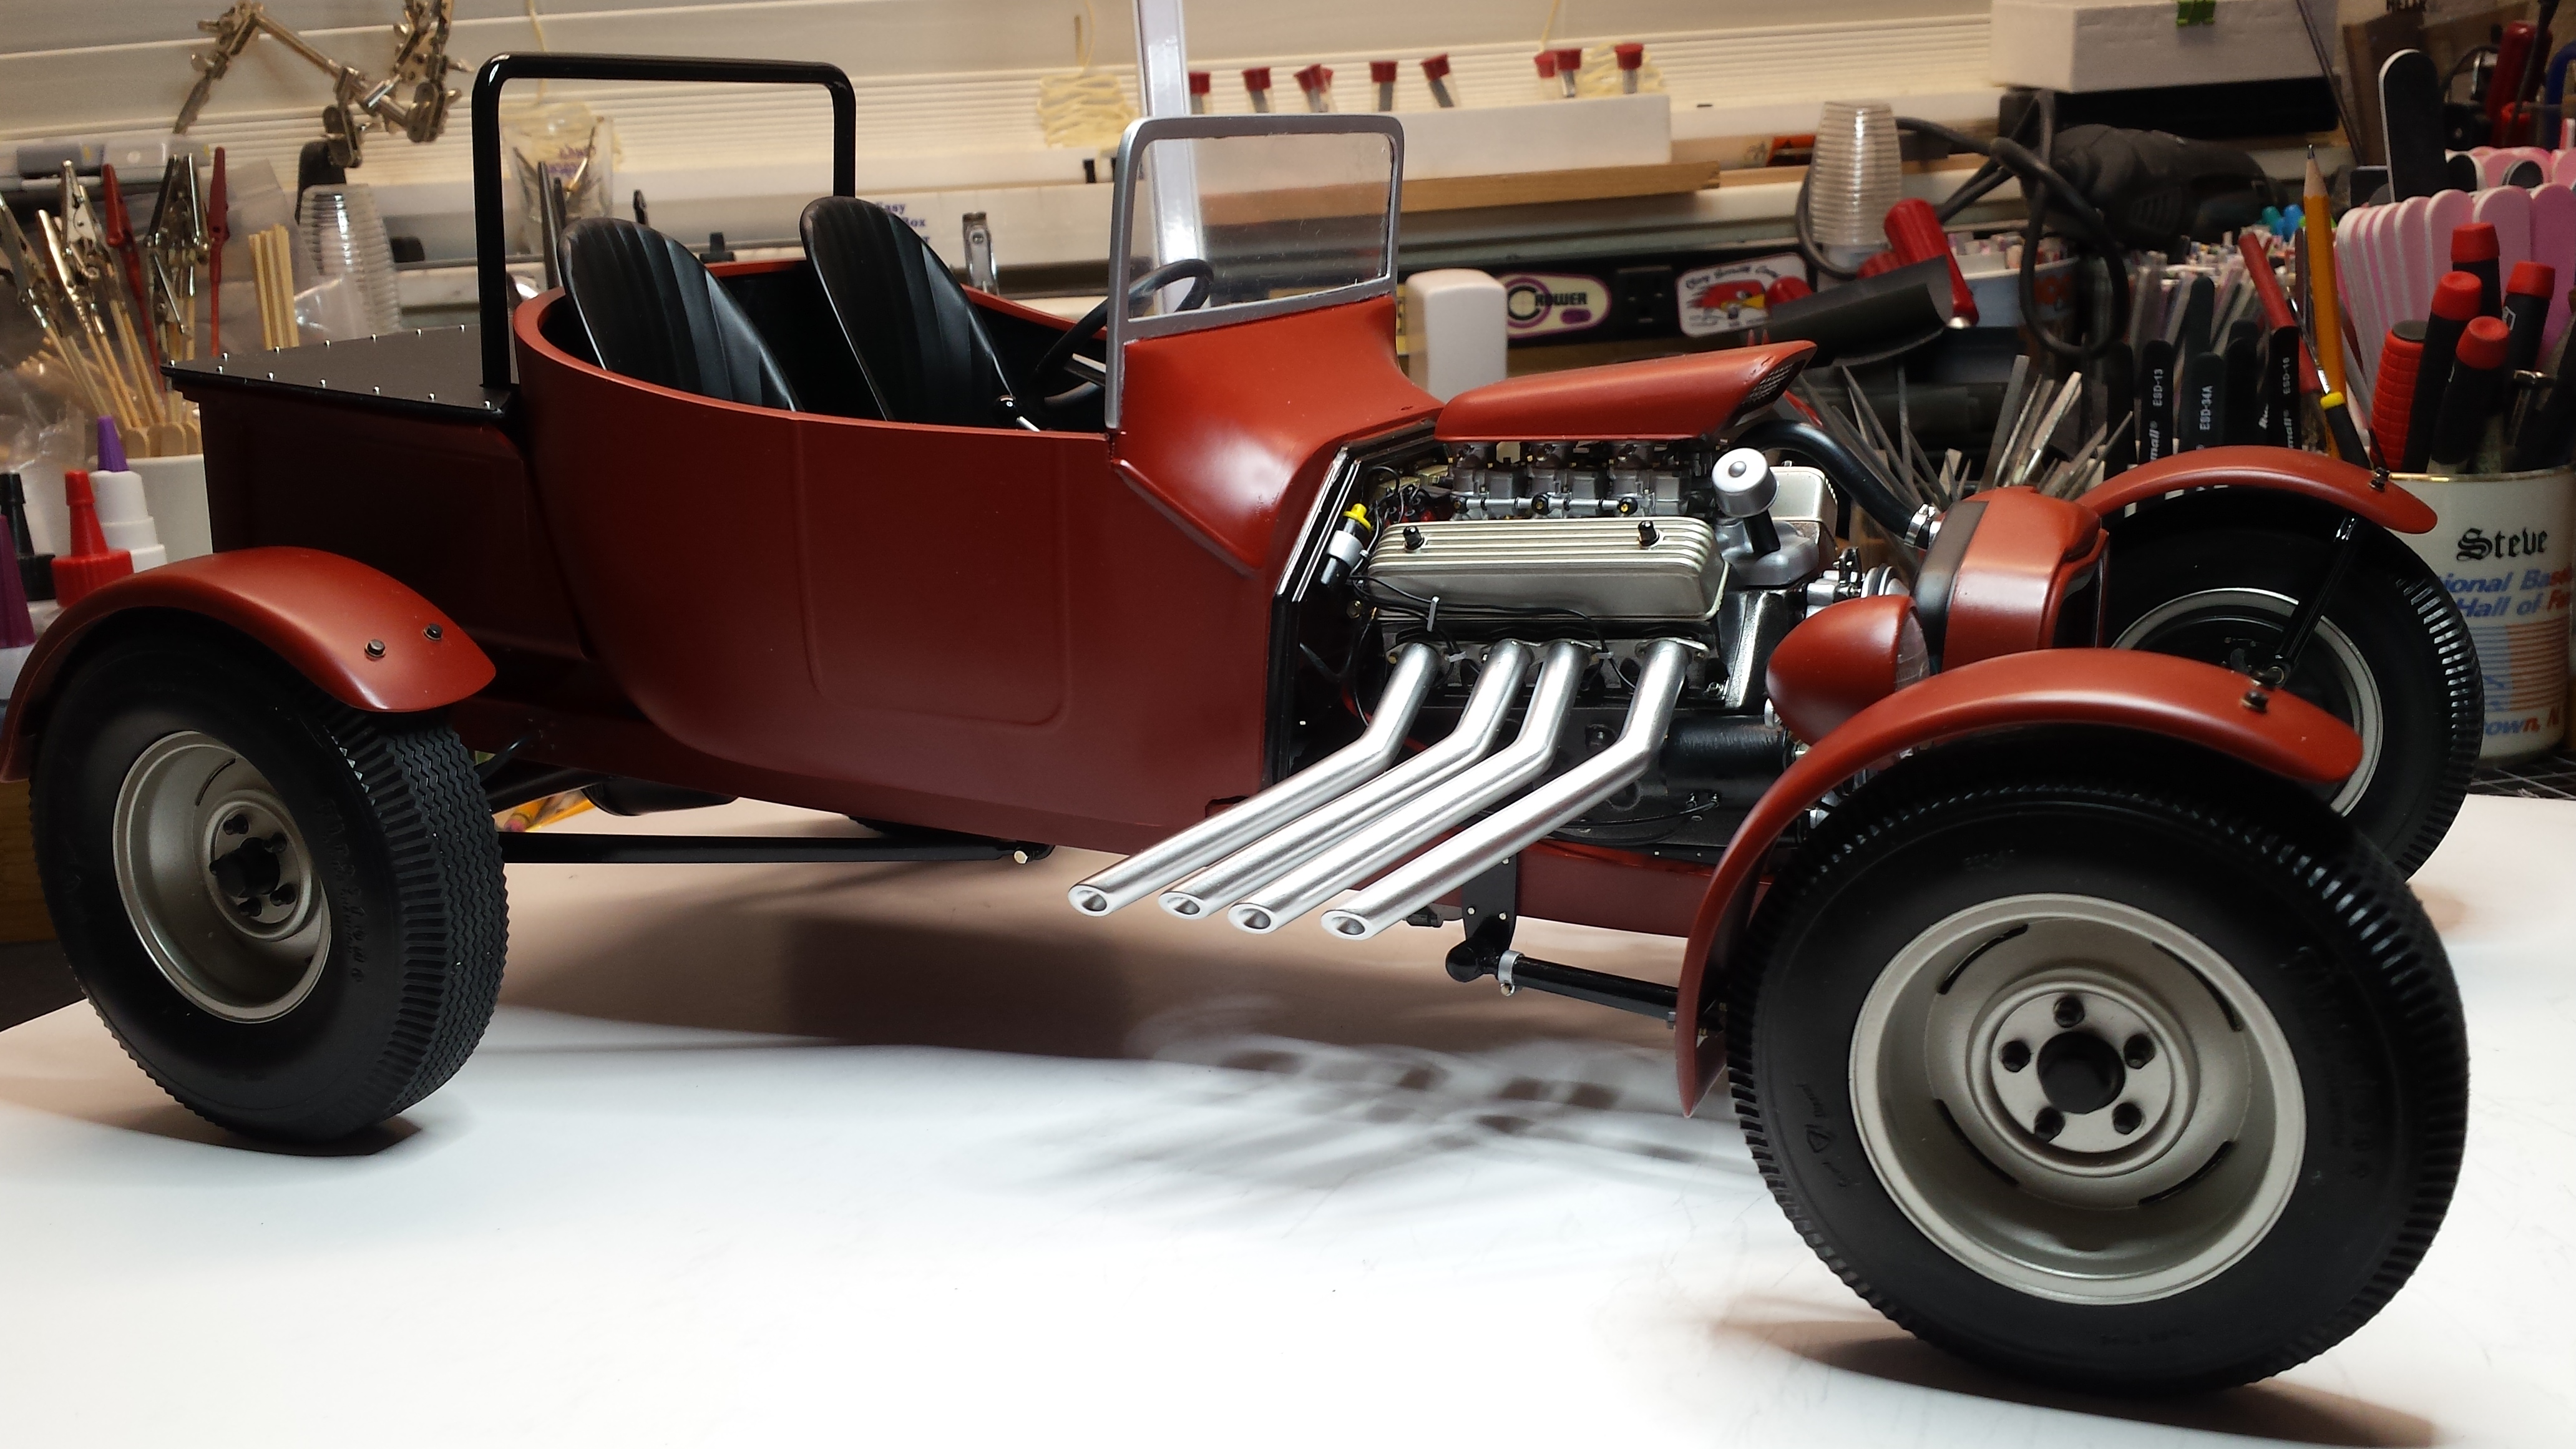
Assembly complete
-
Engine mounted
-
Engine mounted
-
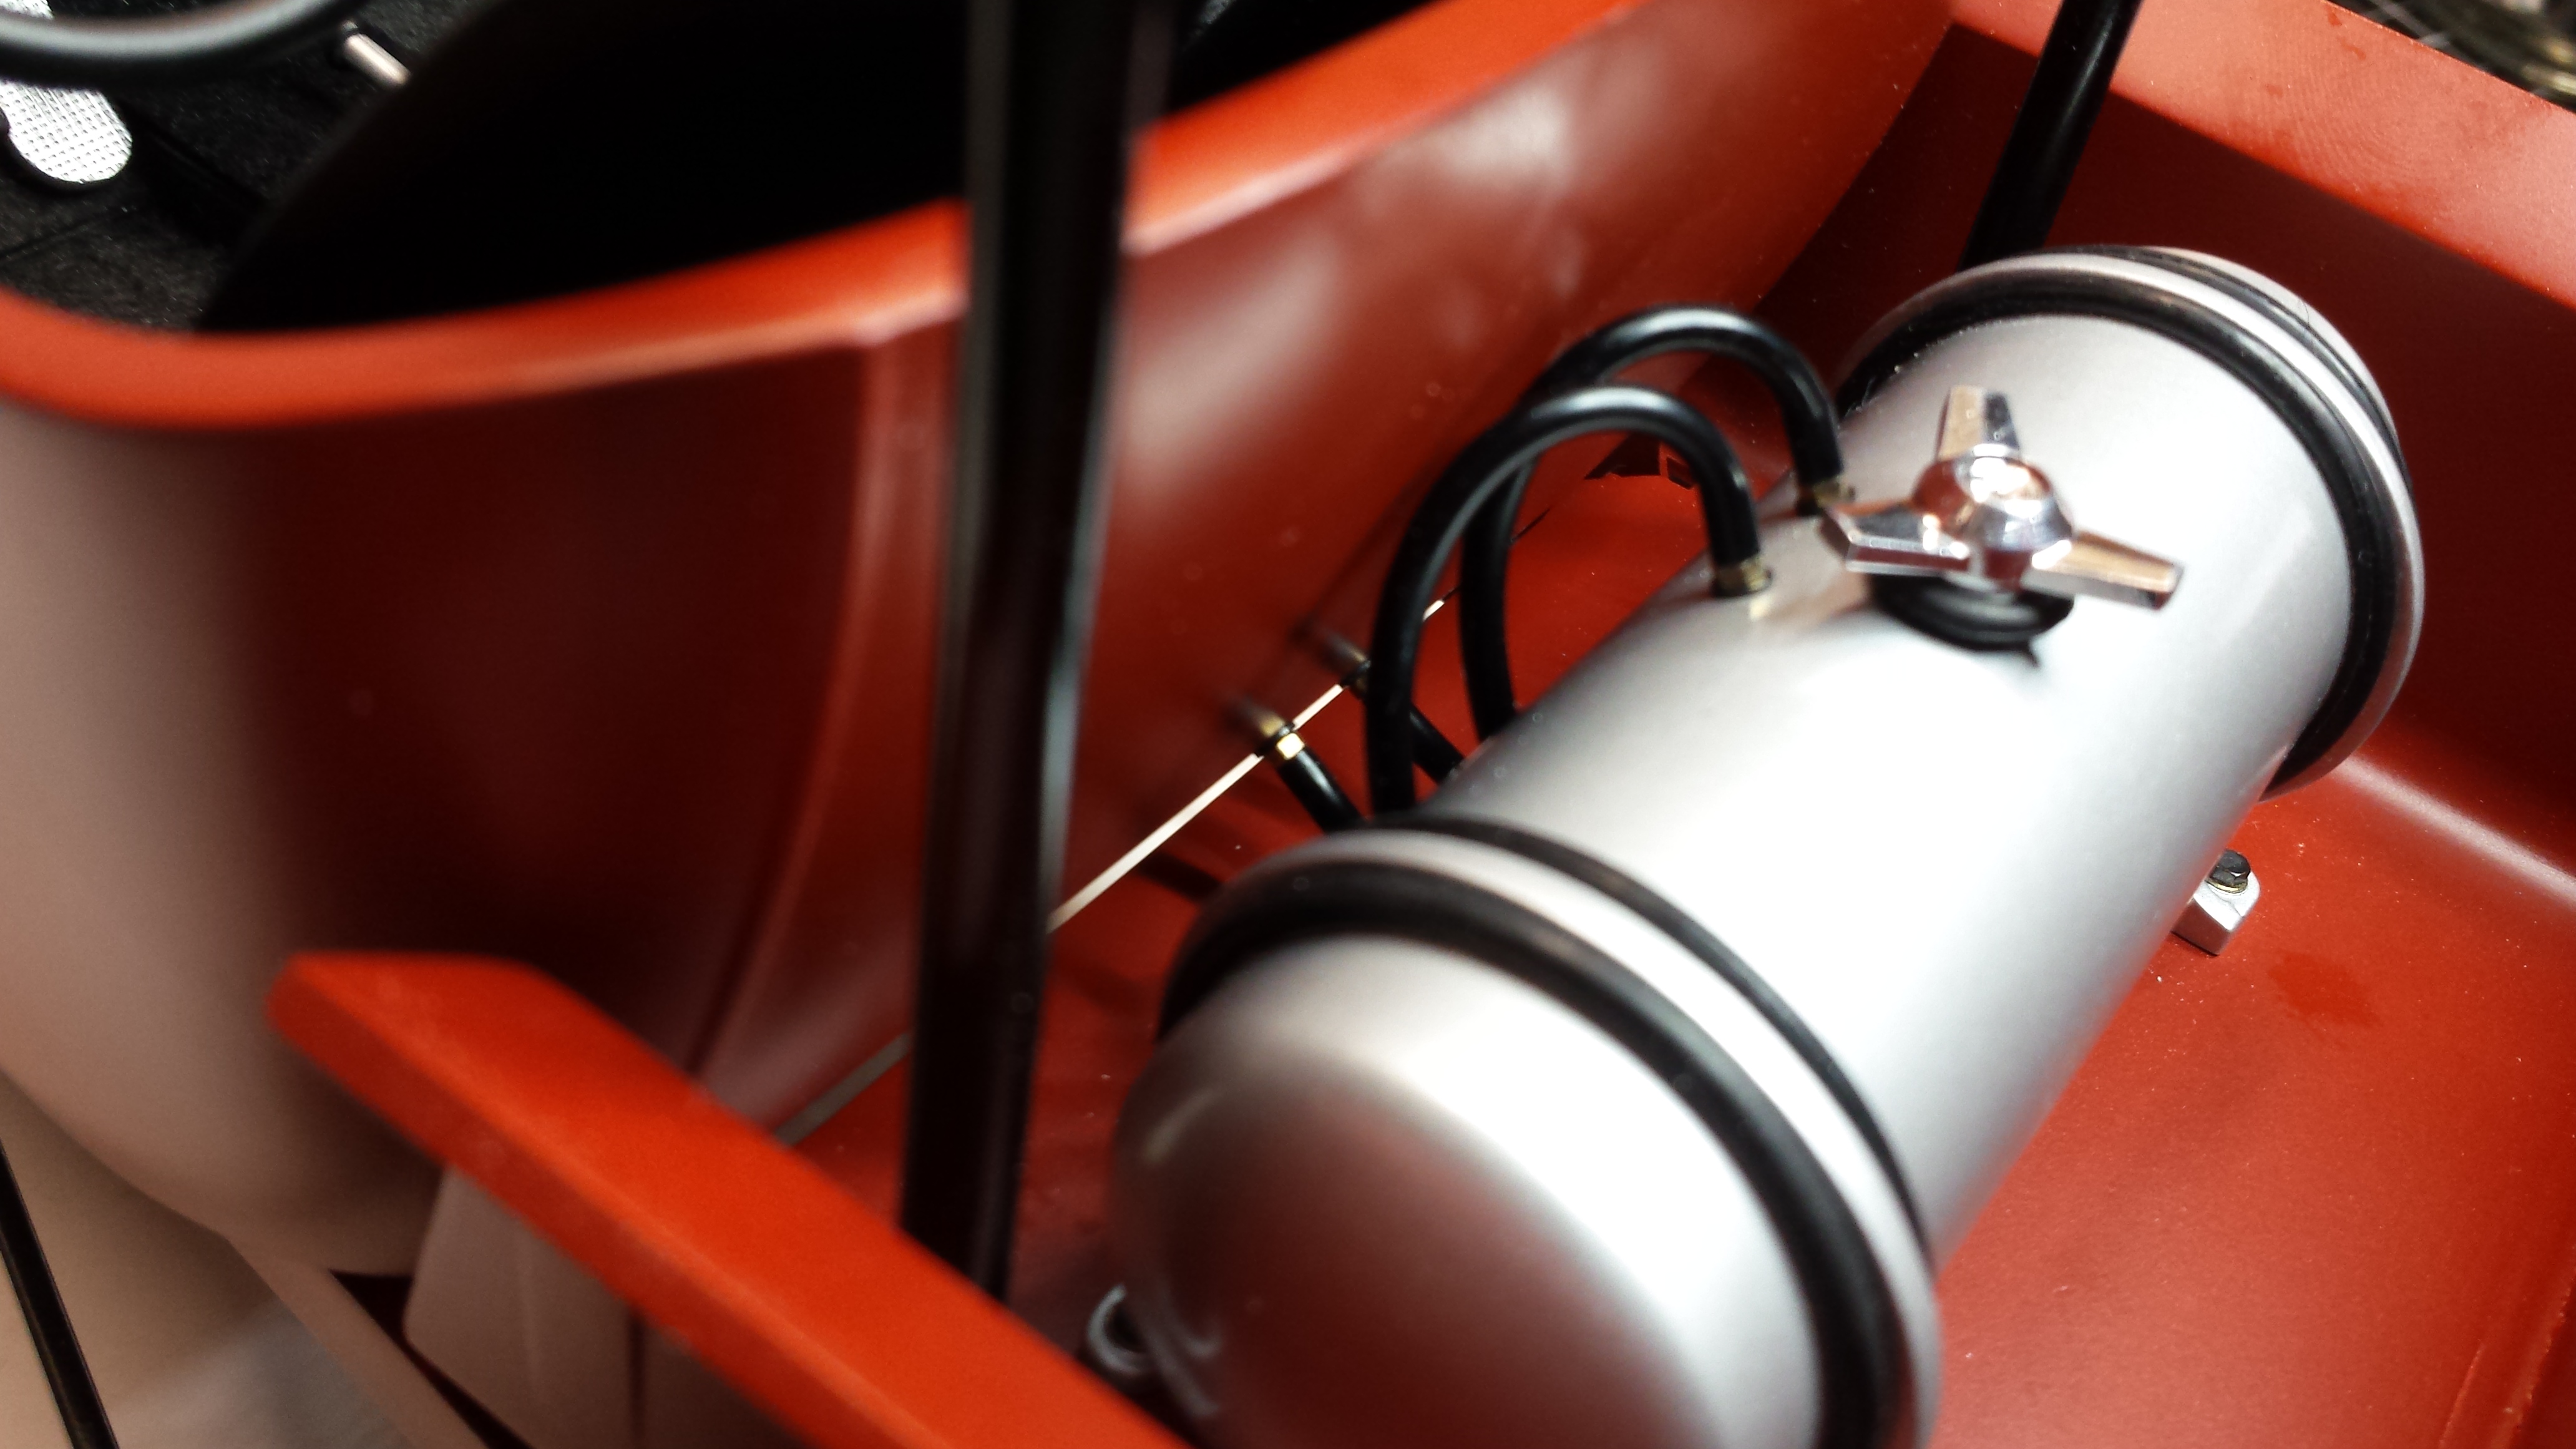
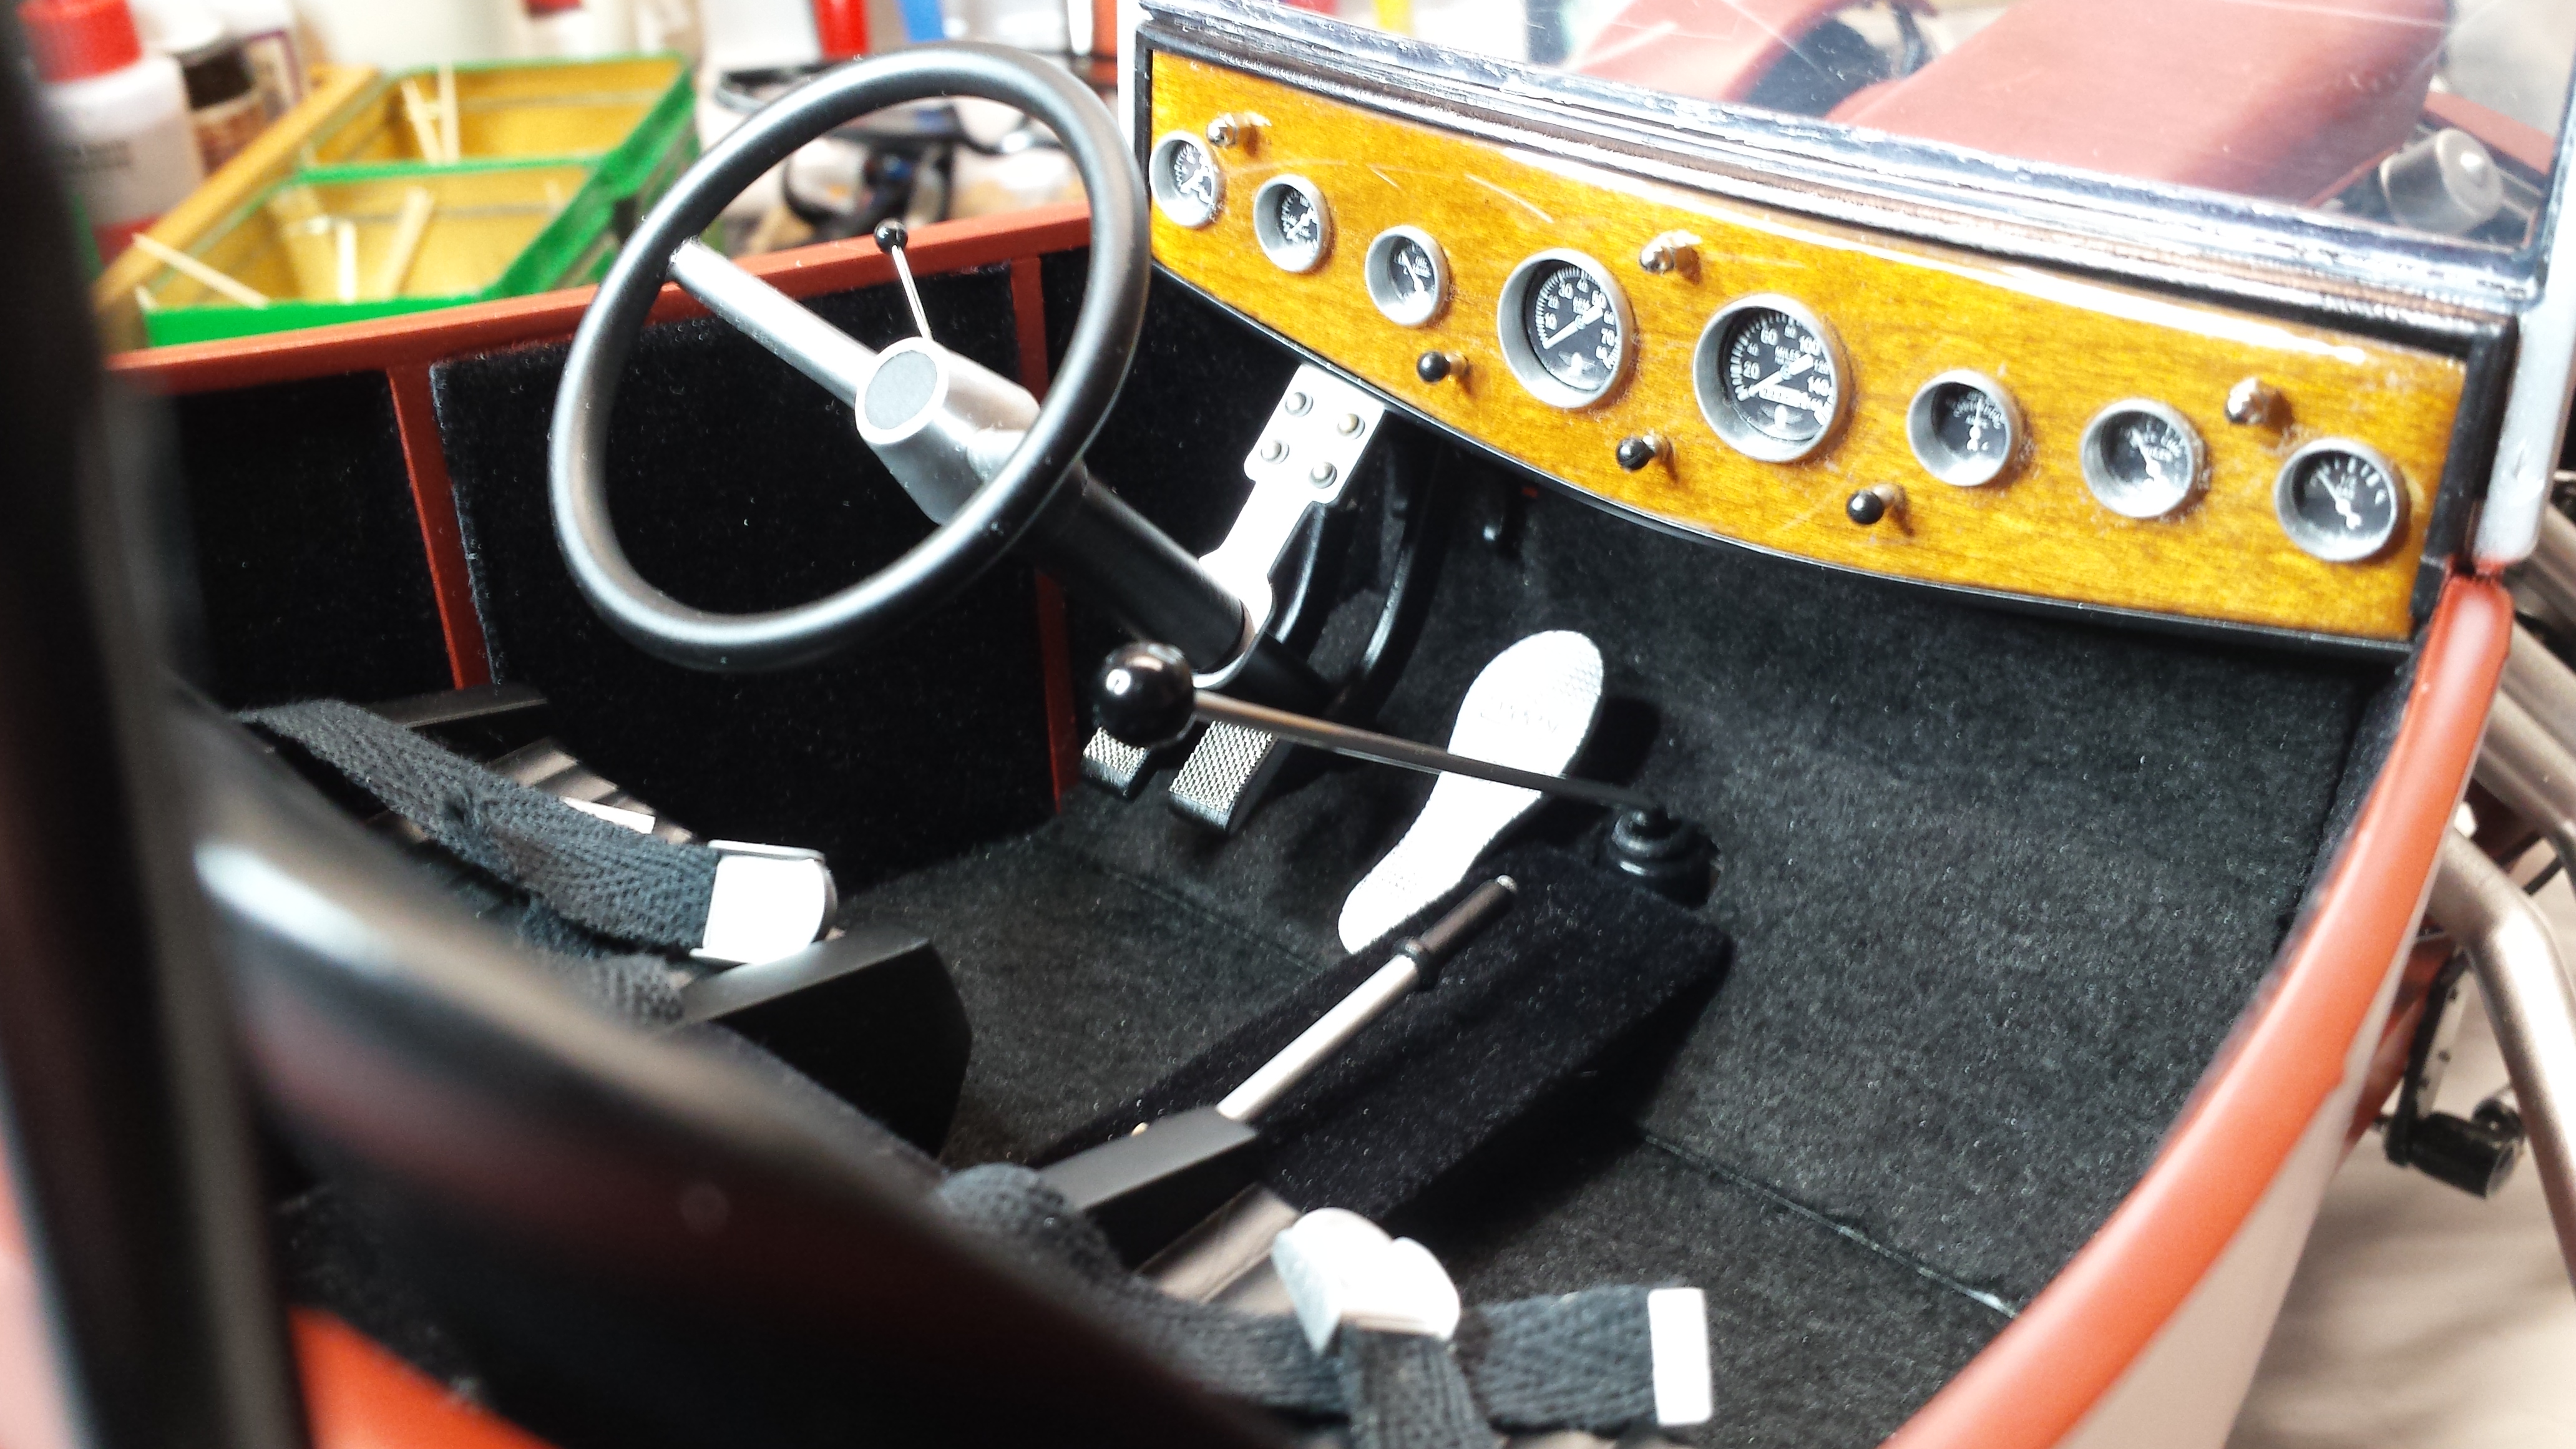
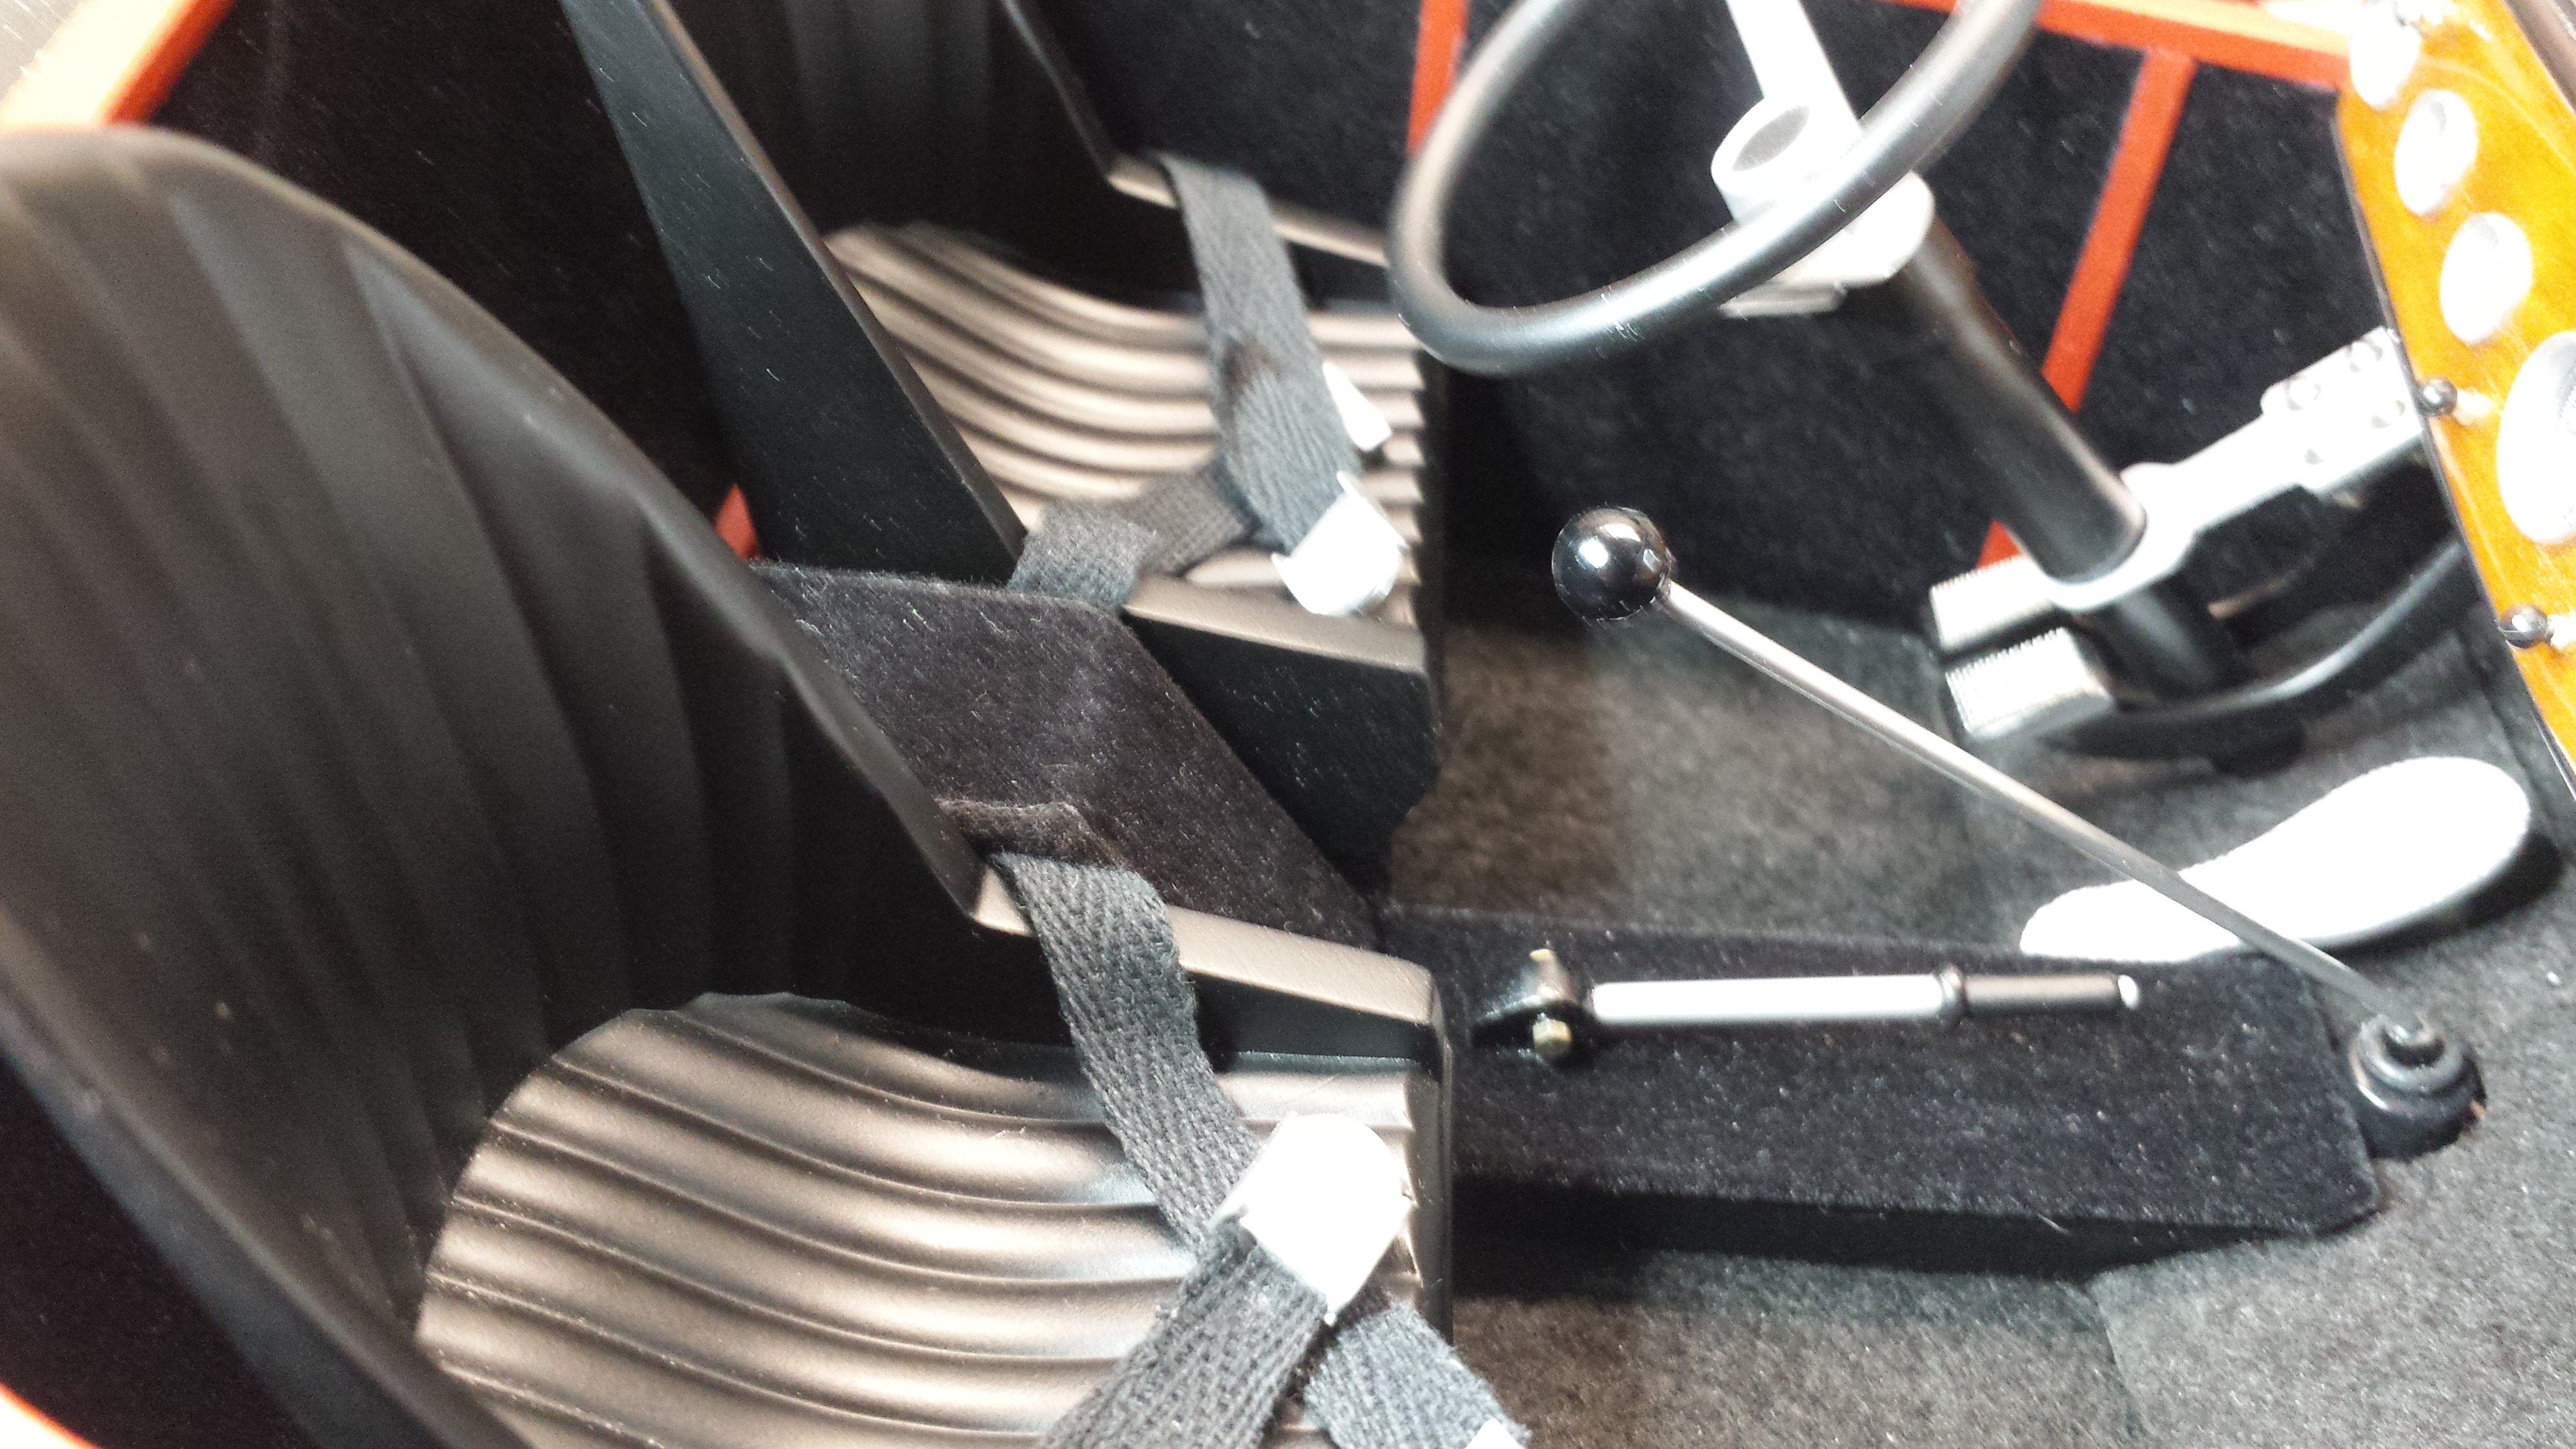
I'm able now to show how the body mounts to the frame during final assembly. Scratch-built brackets on frame, screws through the floor and hidden by a false floor covered in black felt.
-
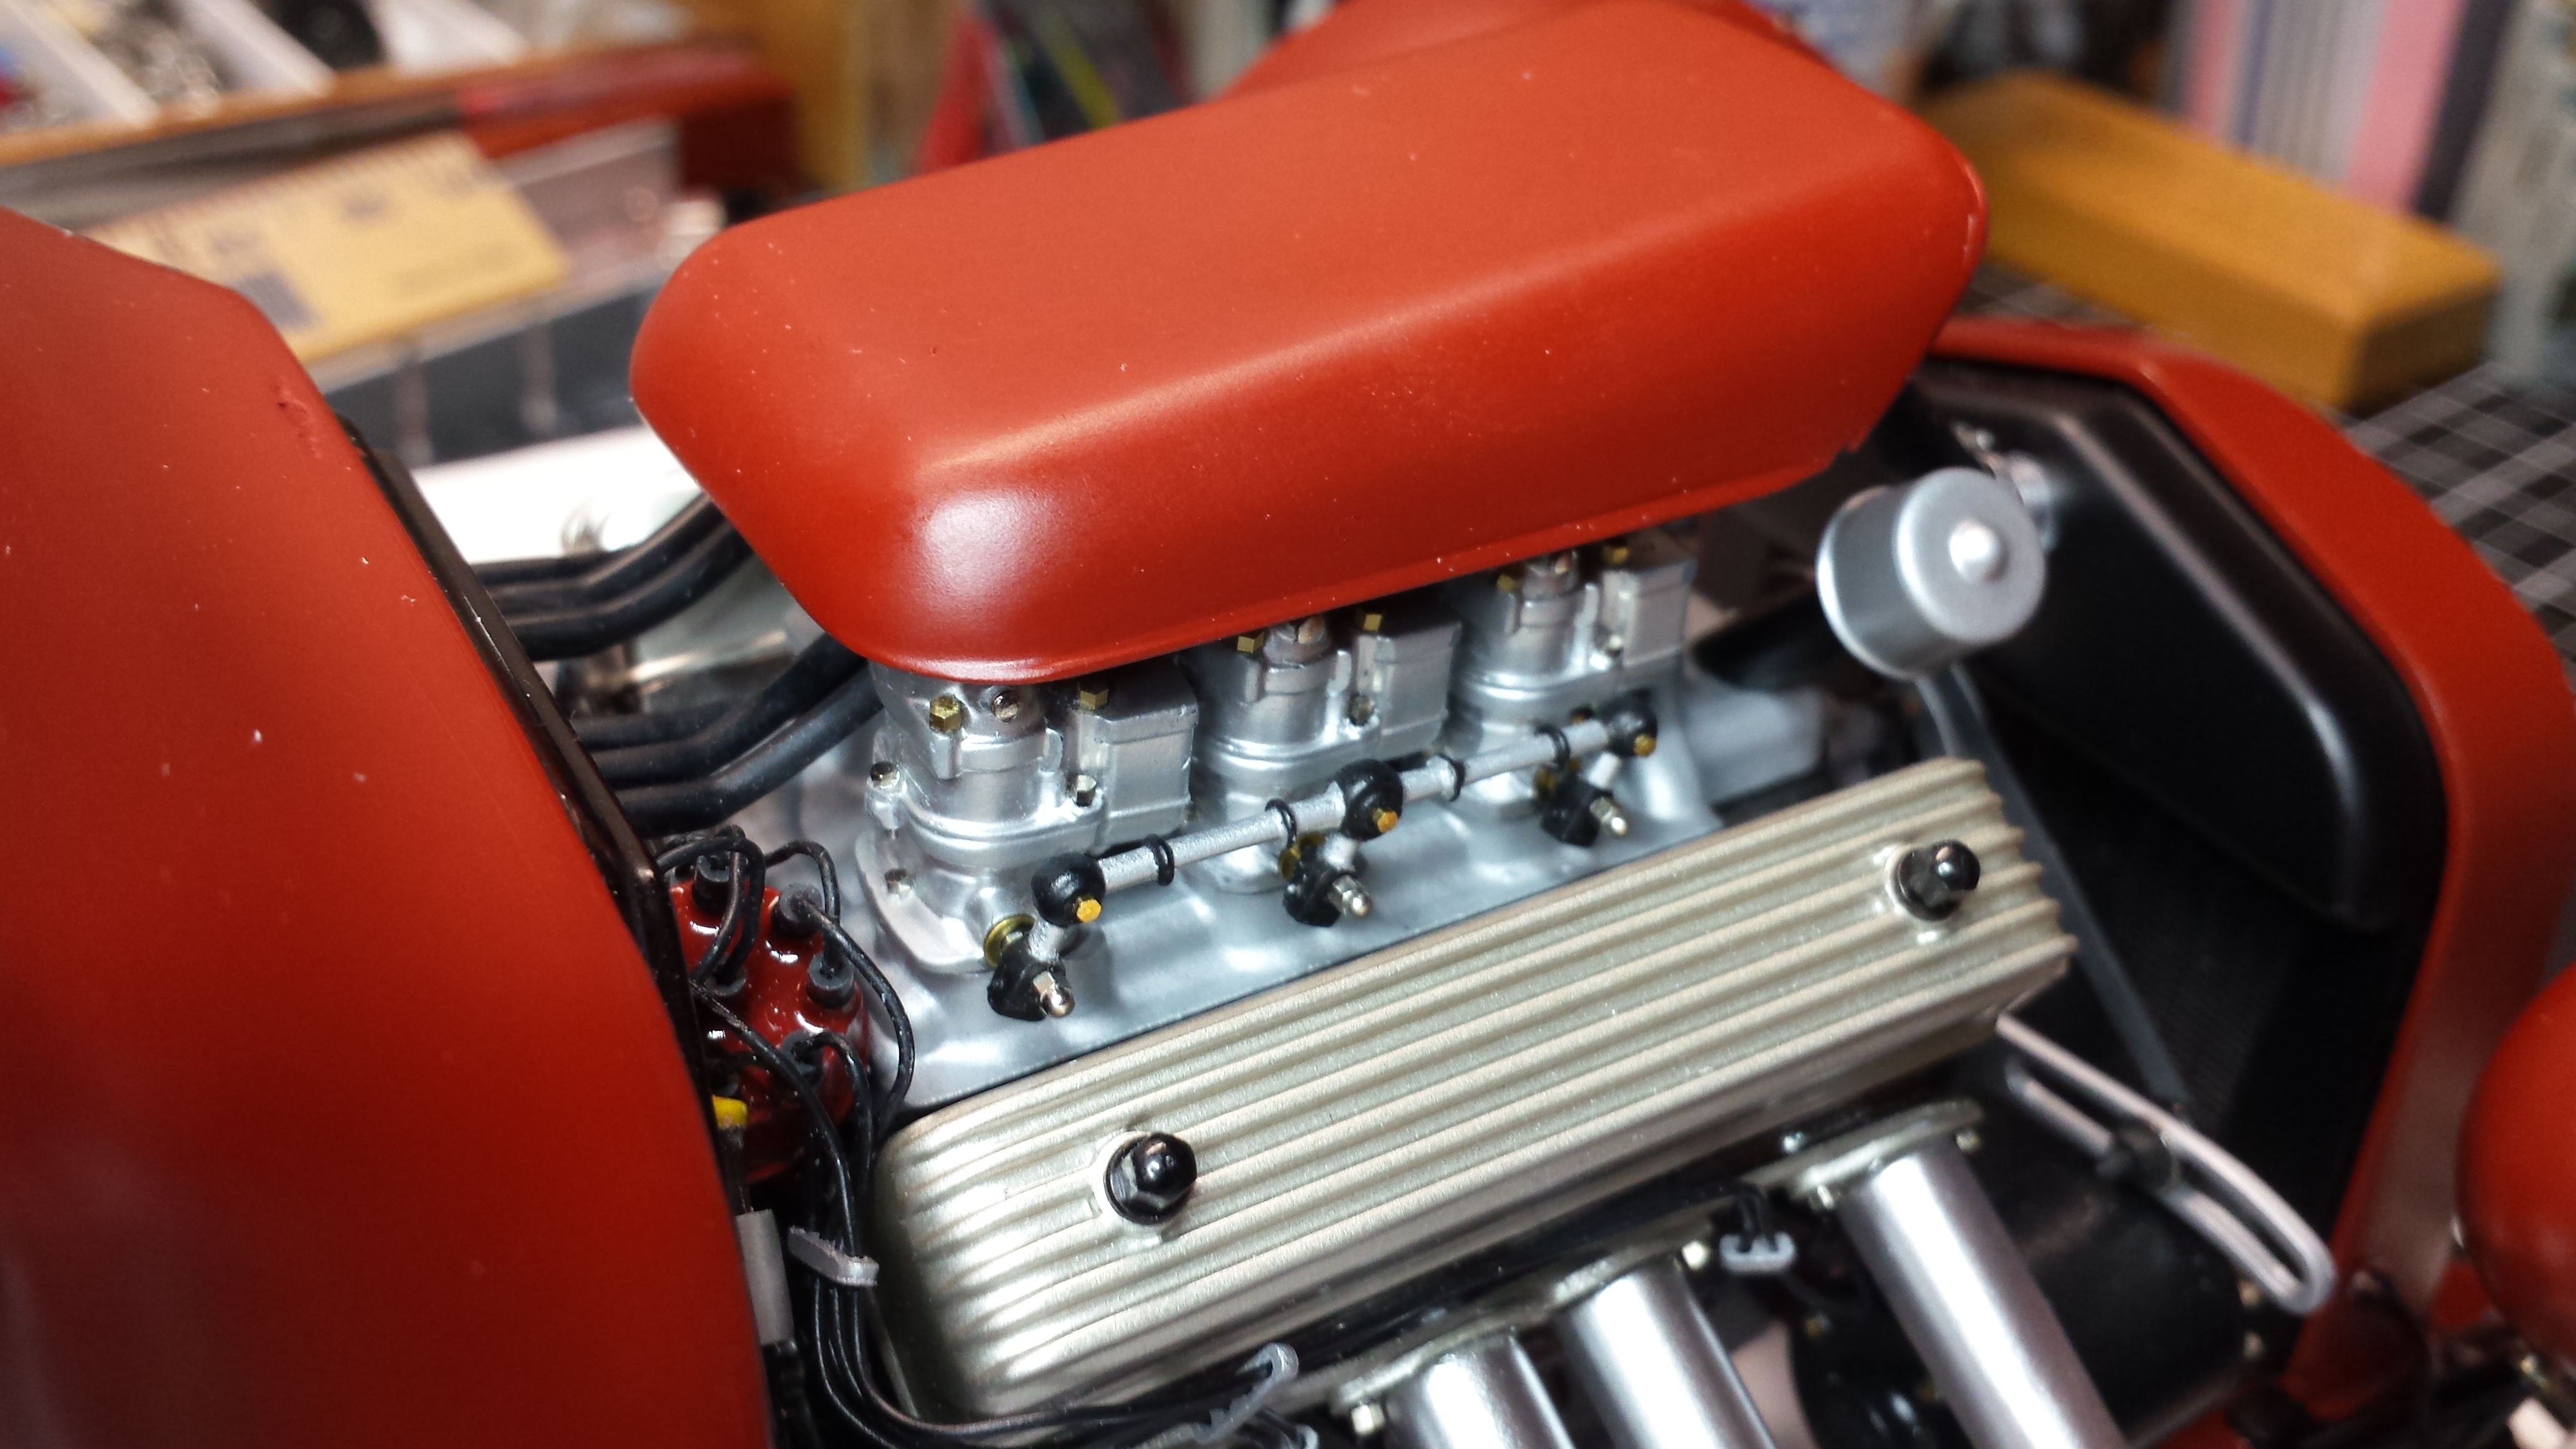
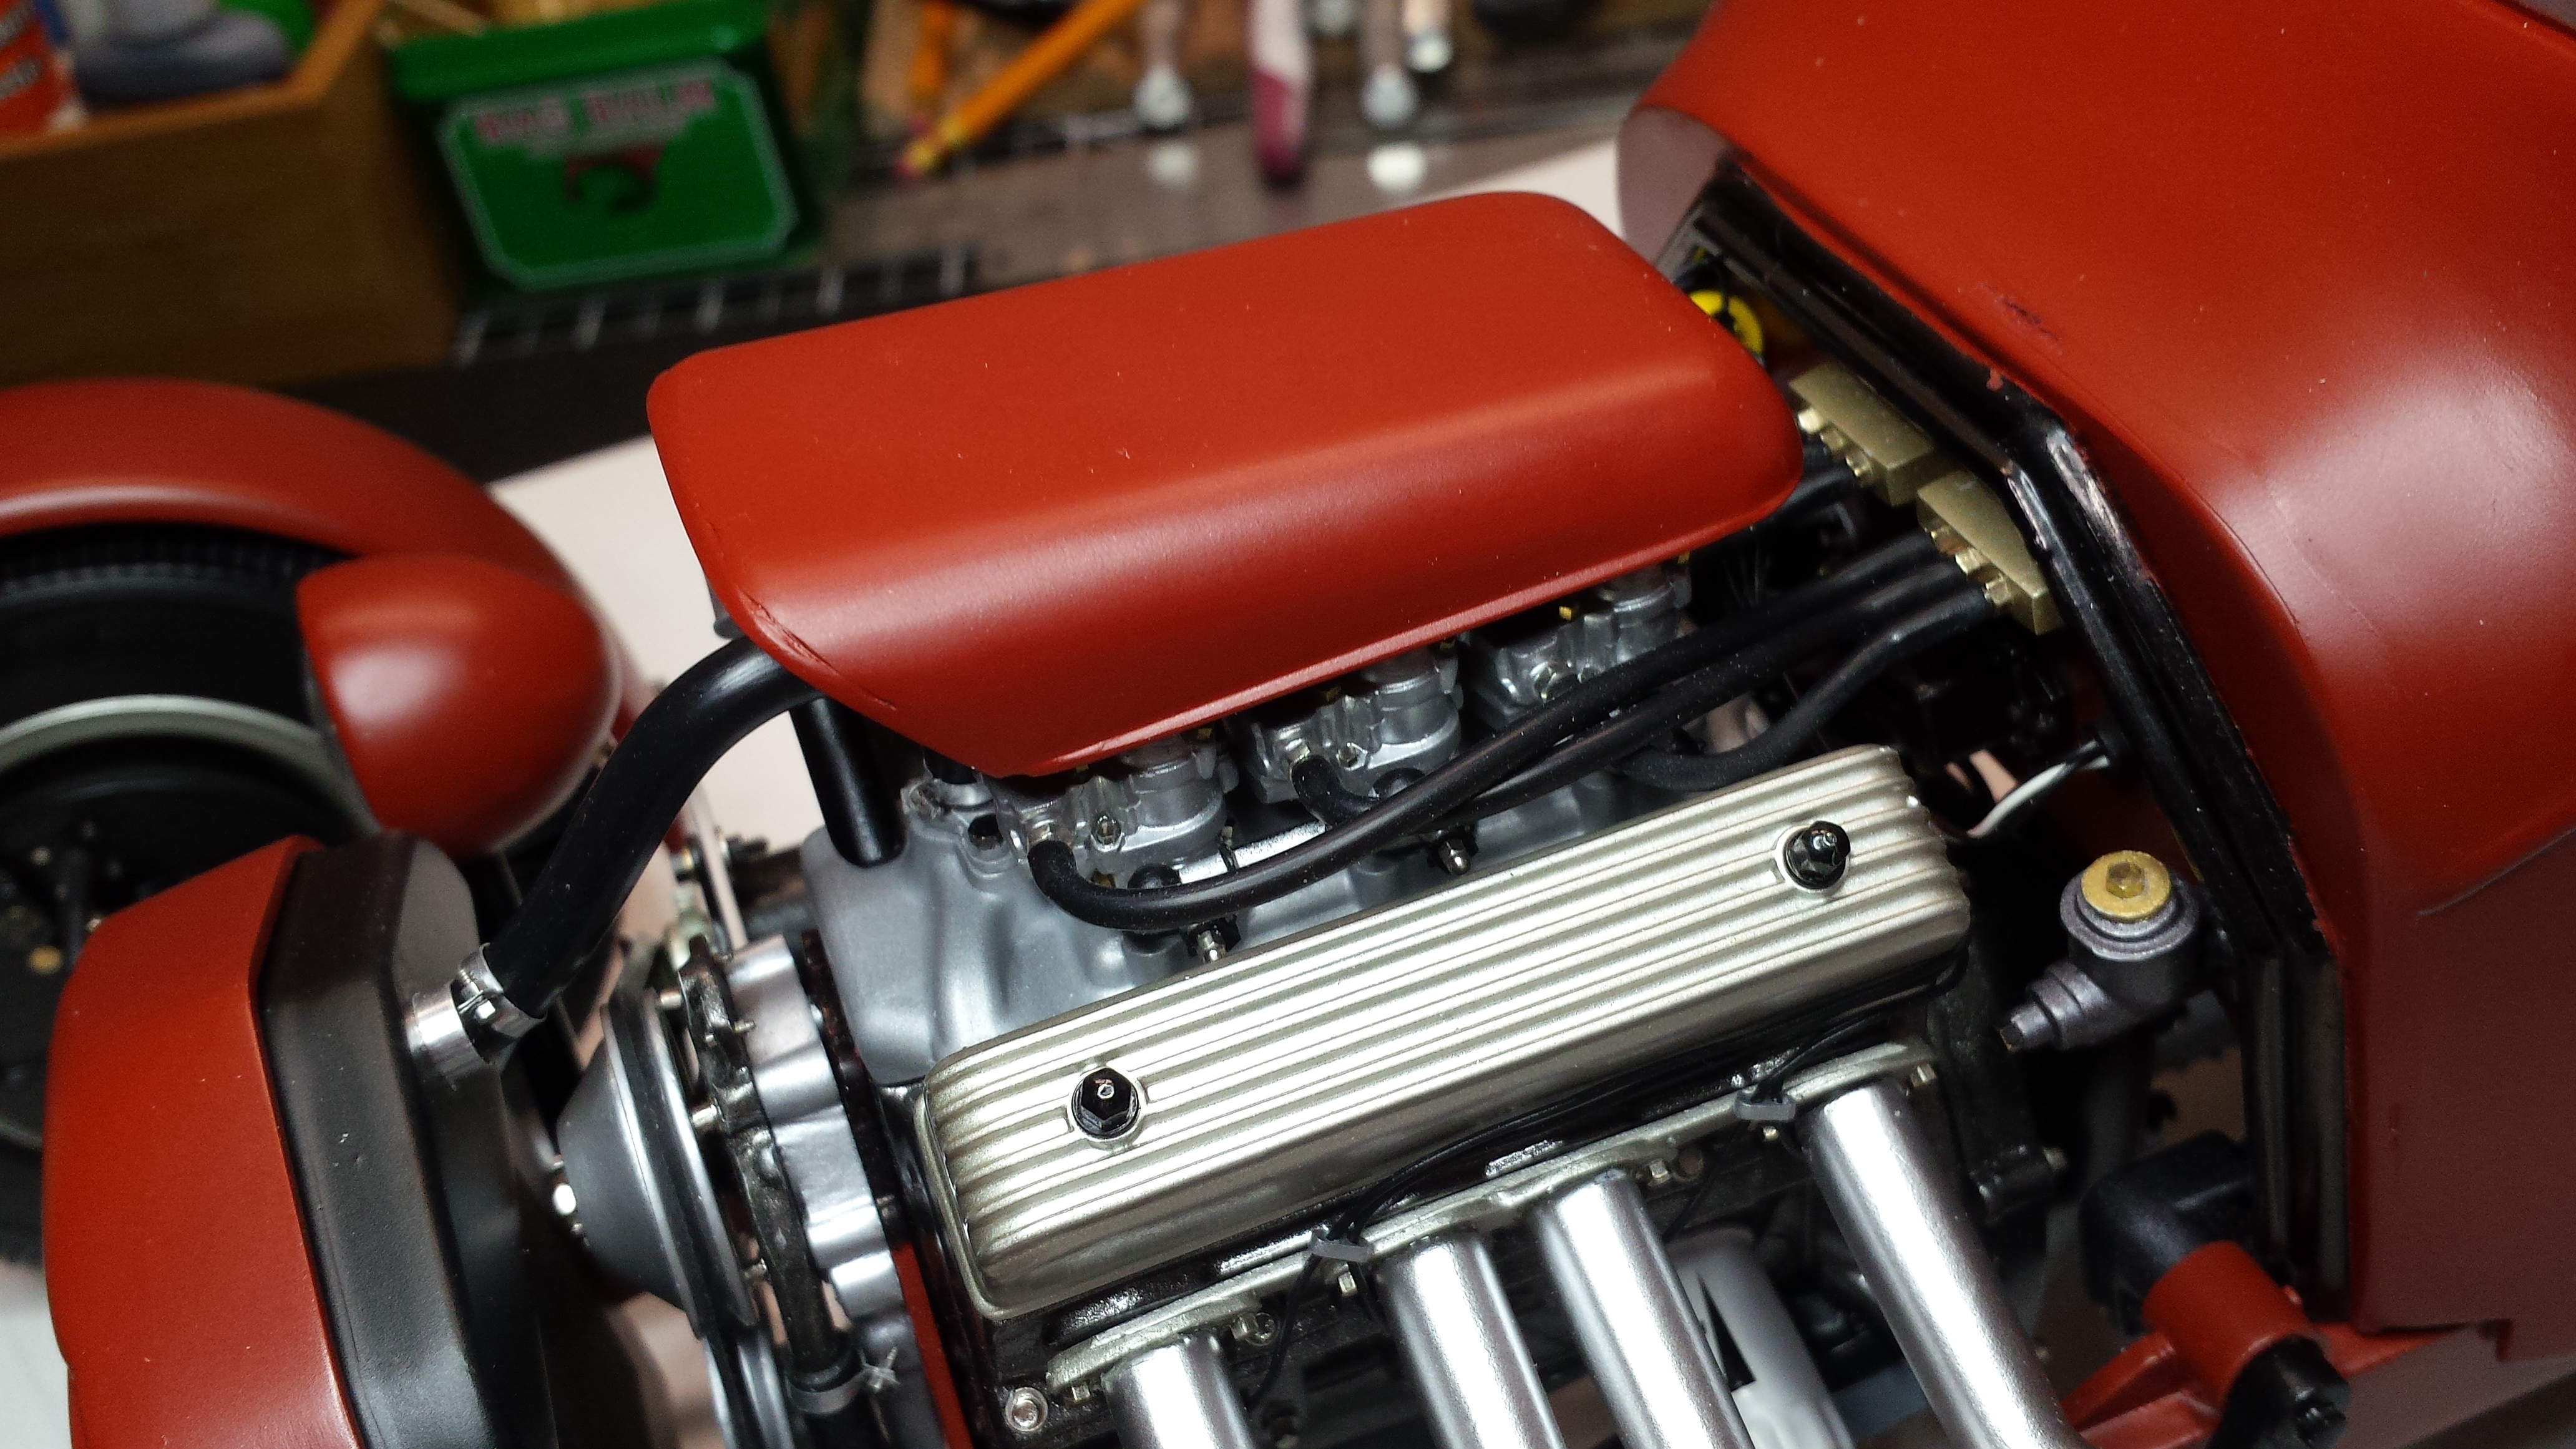
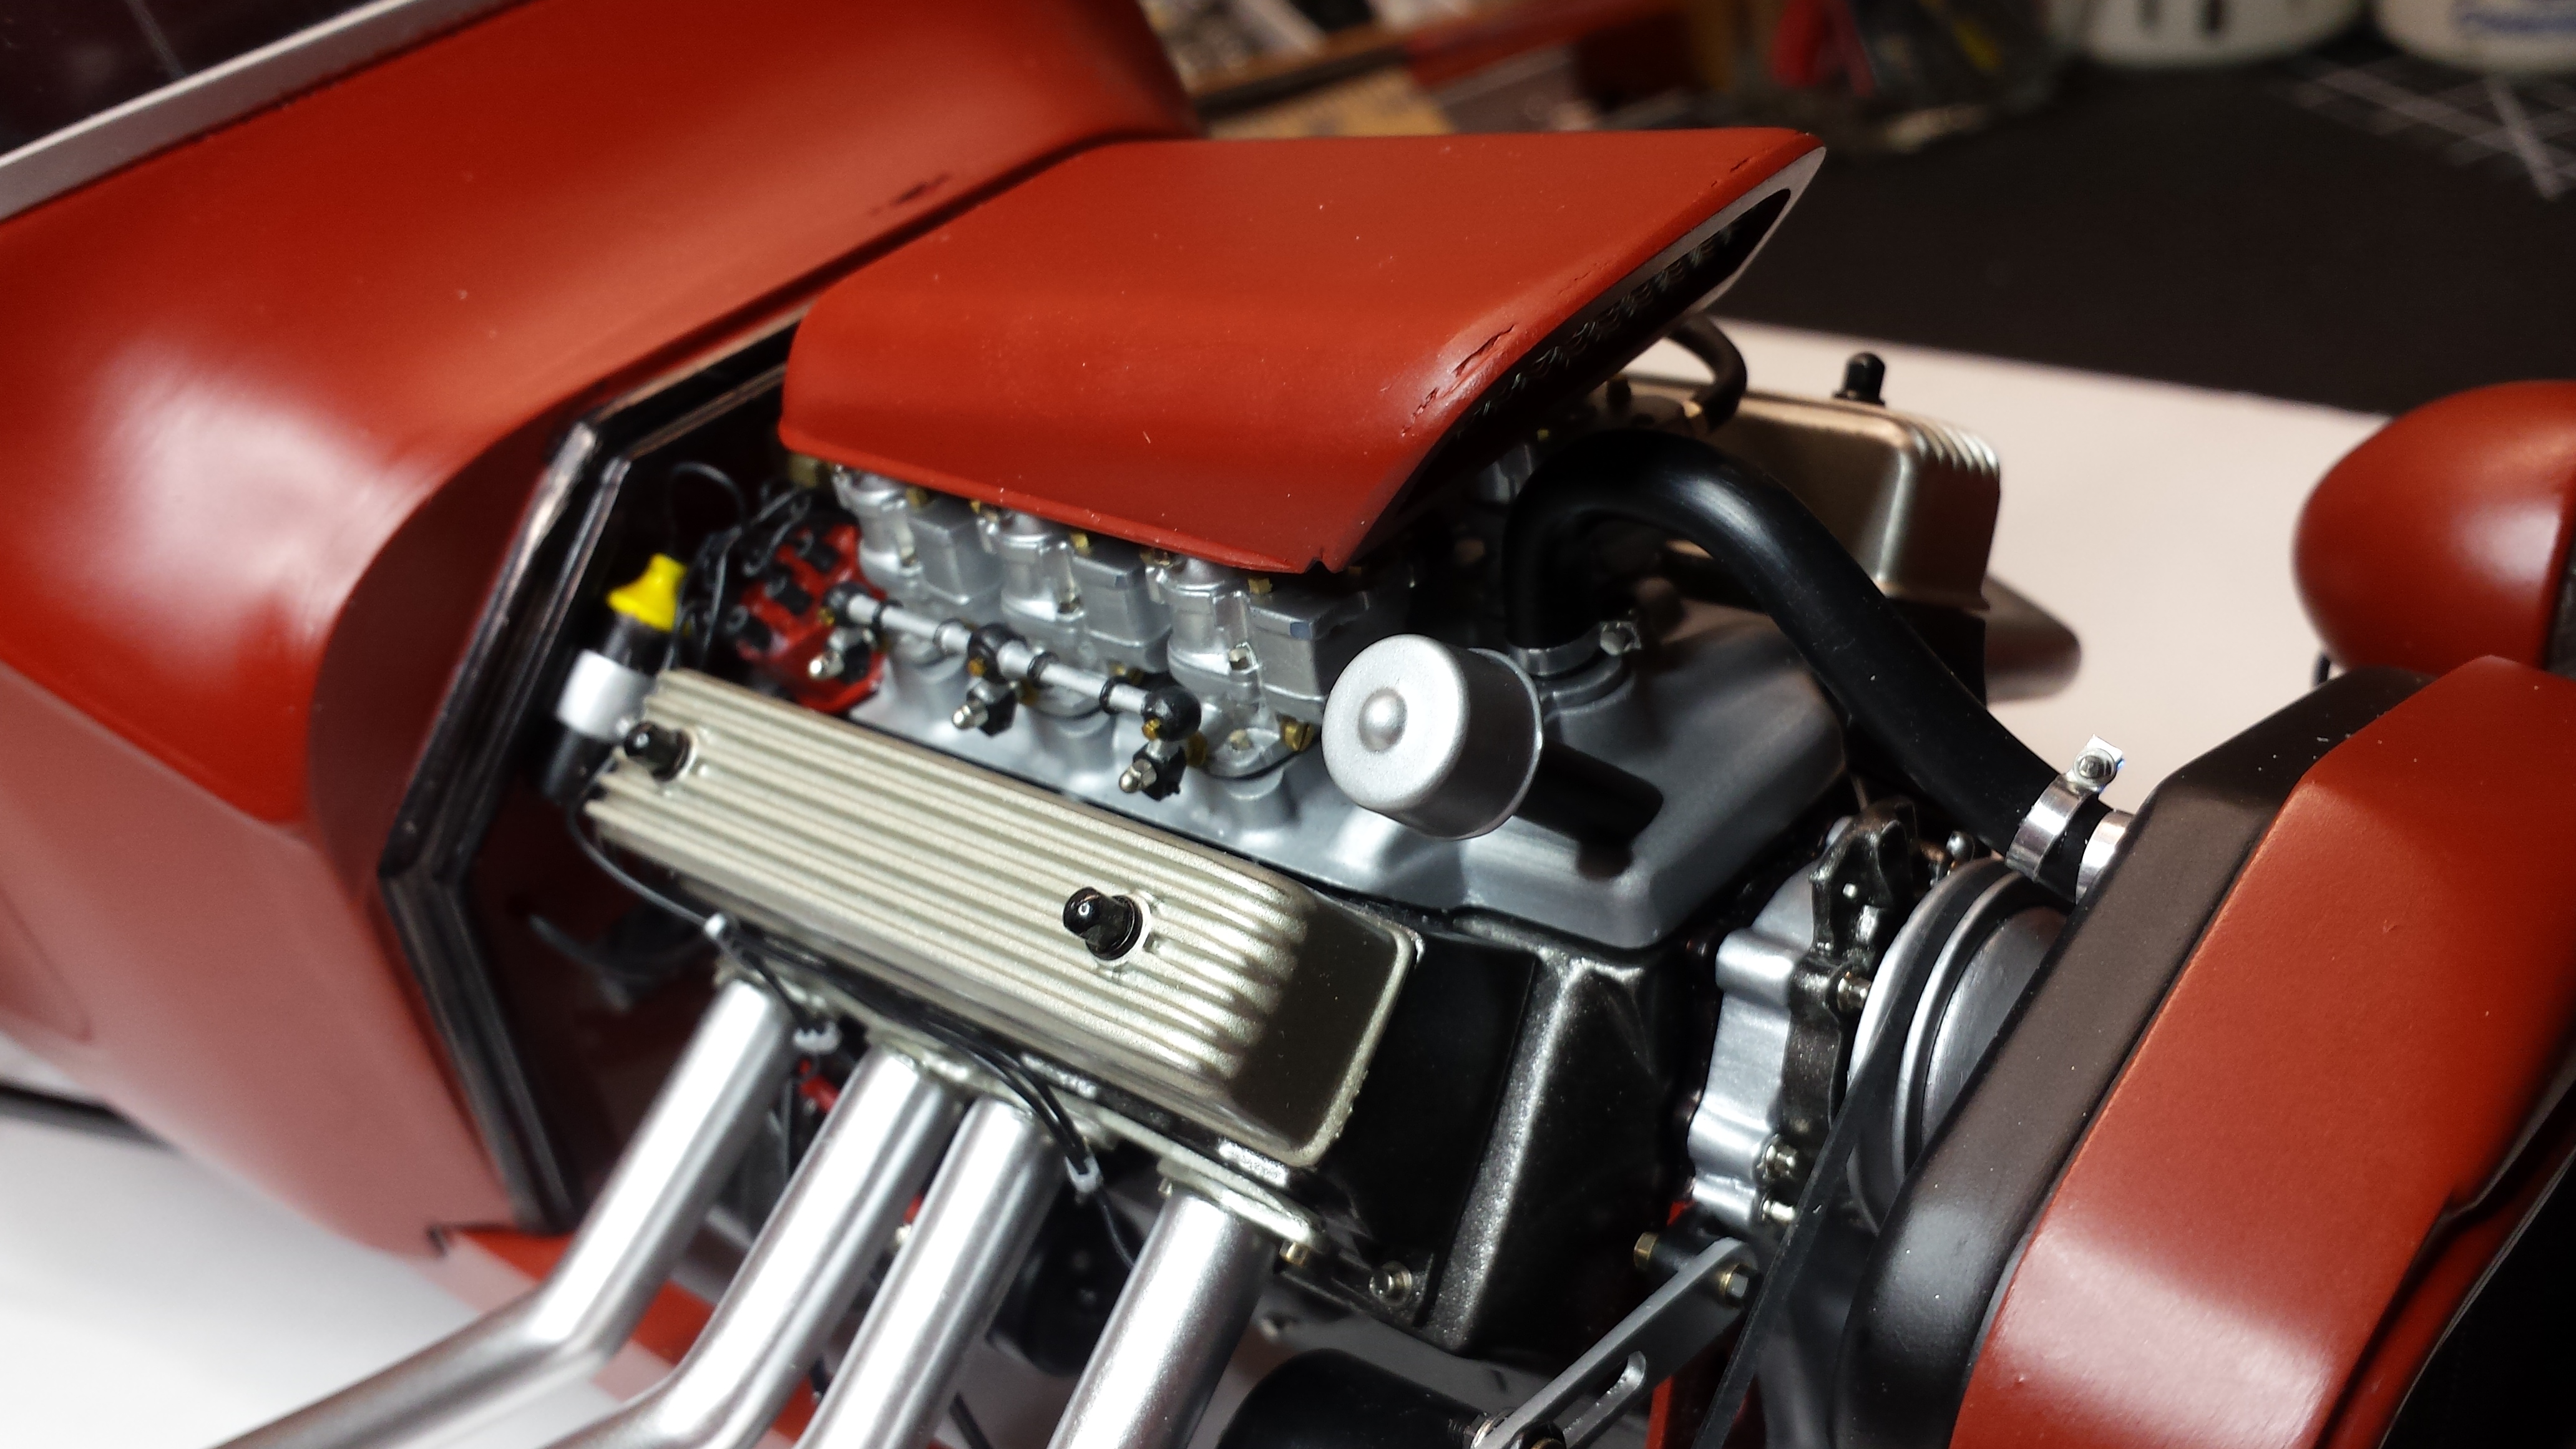
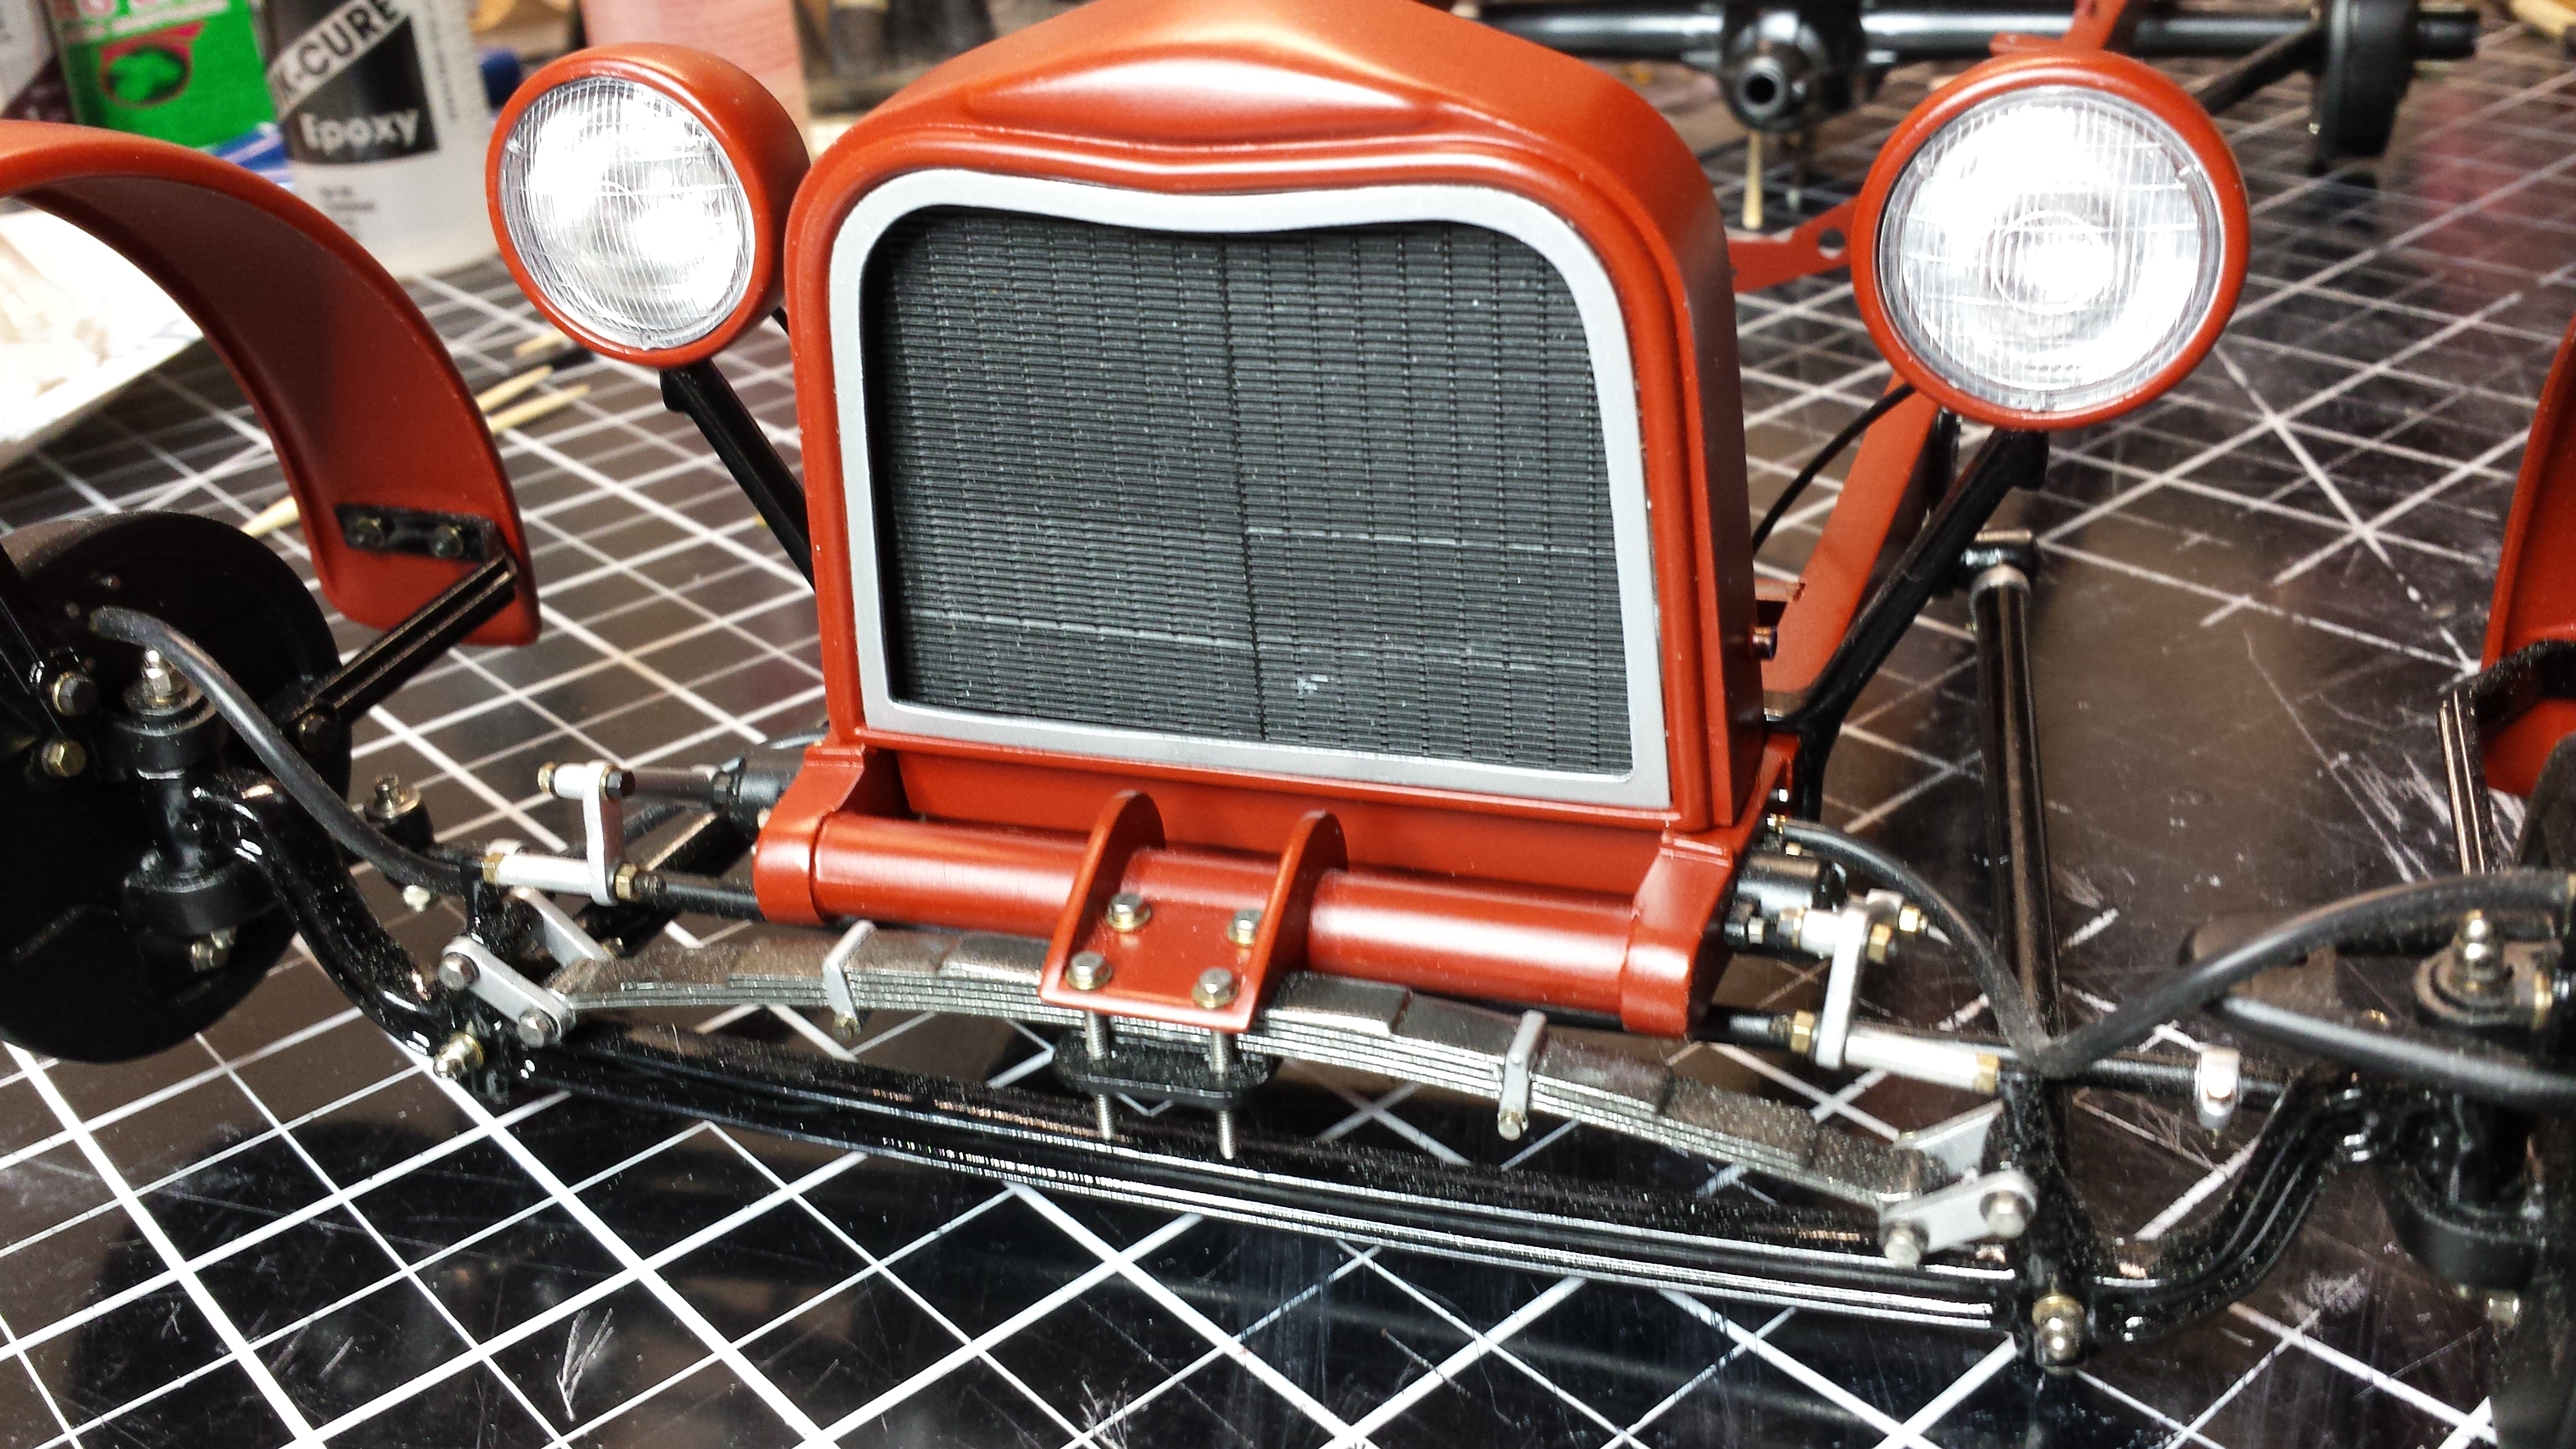
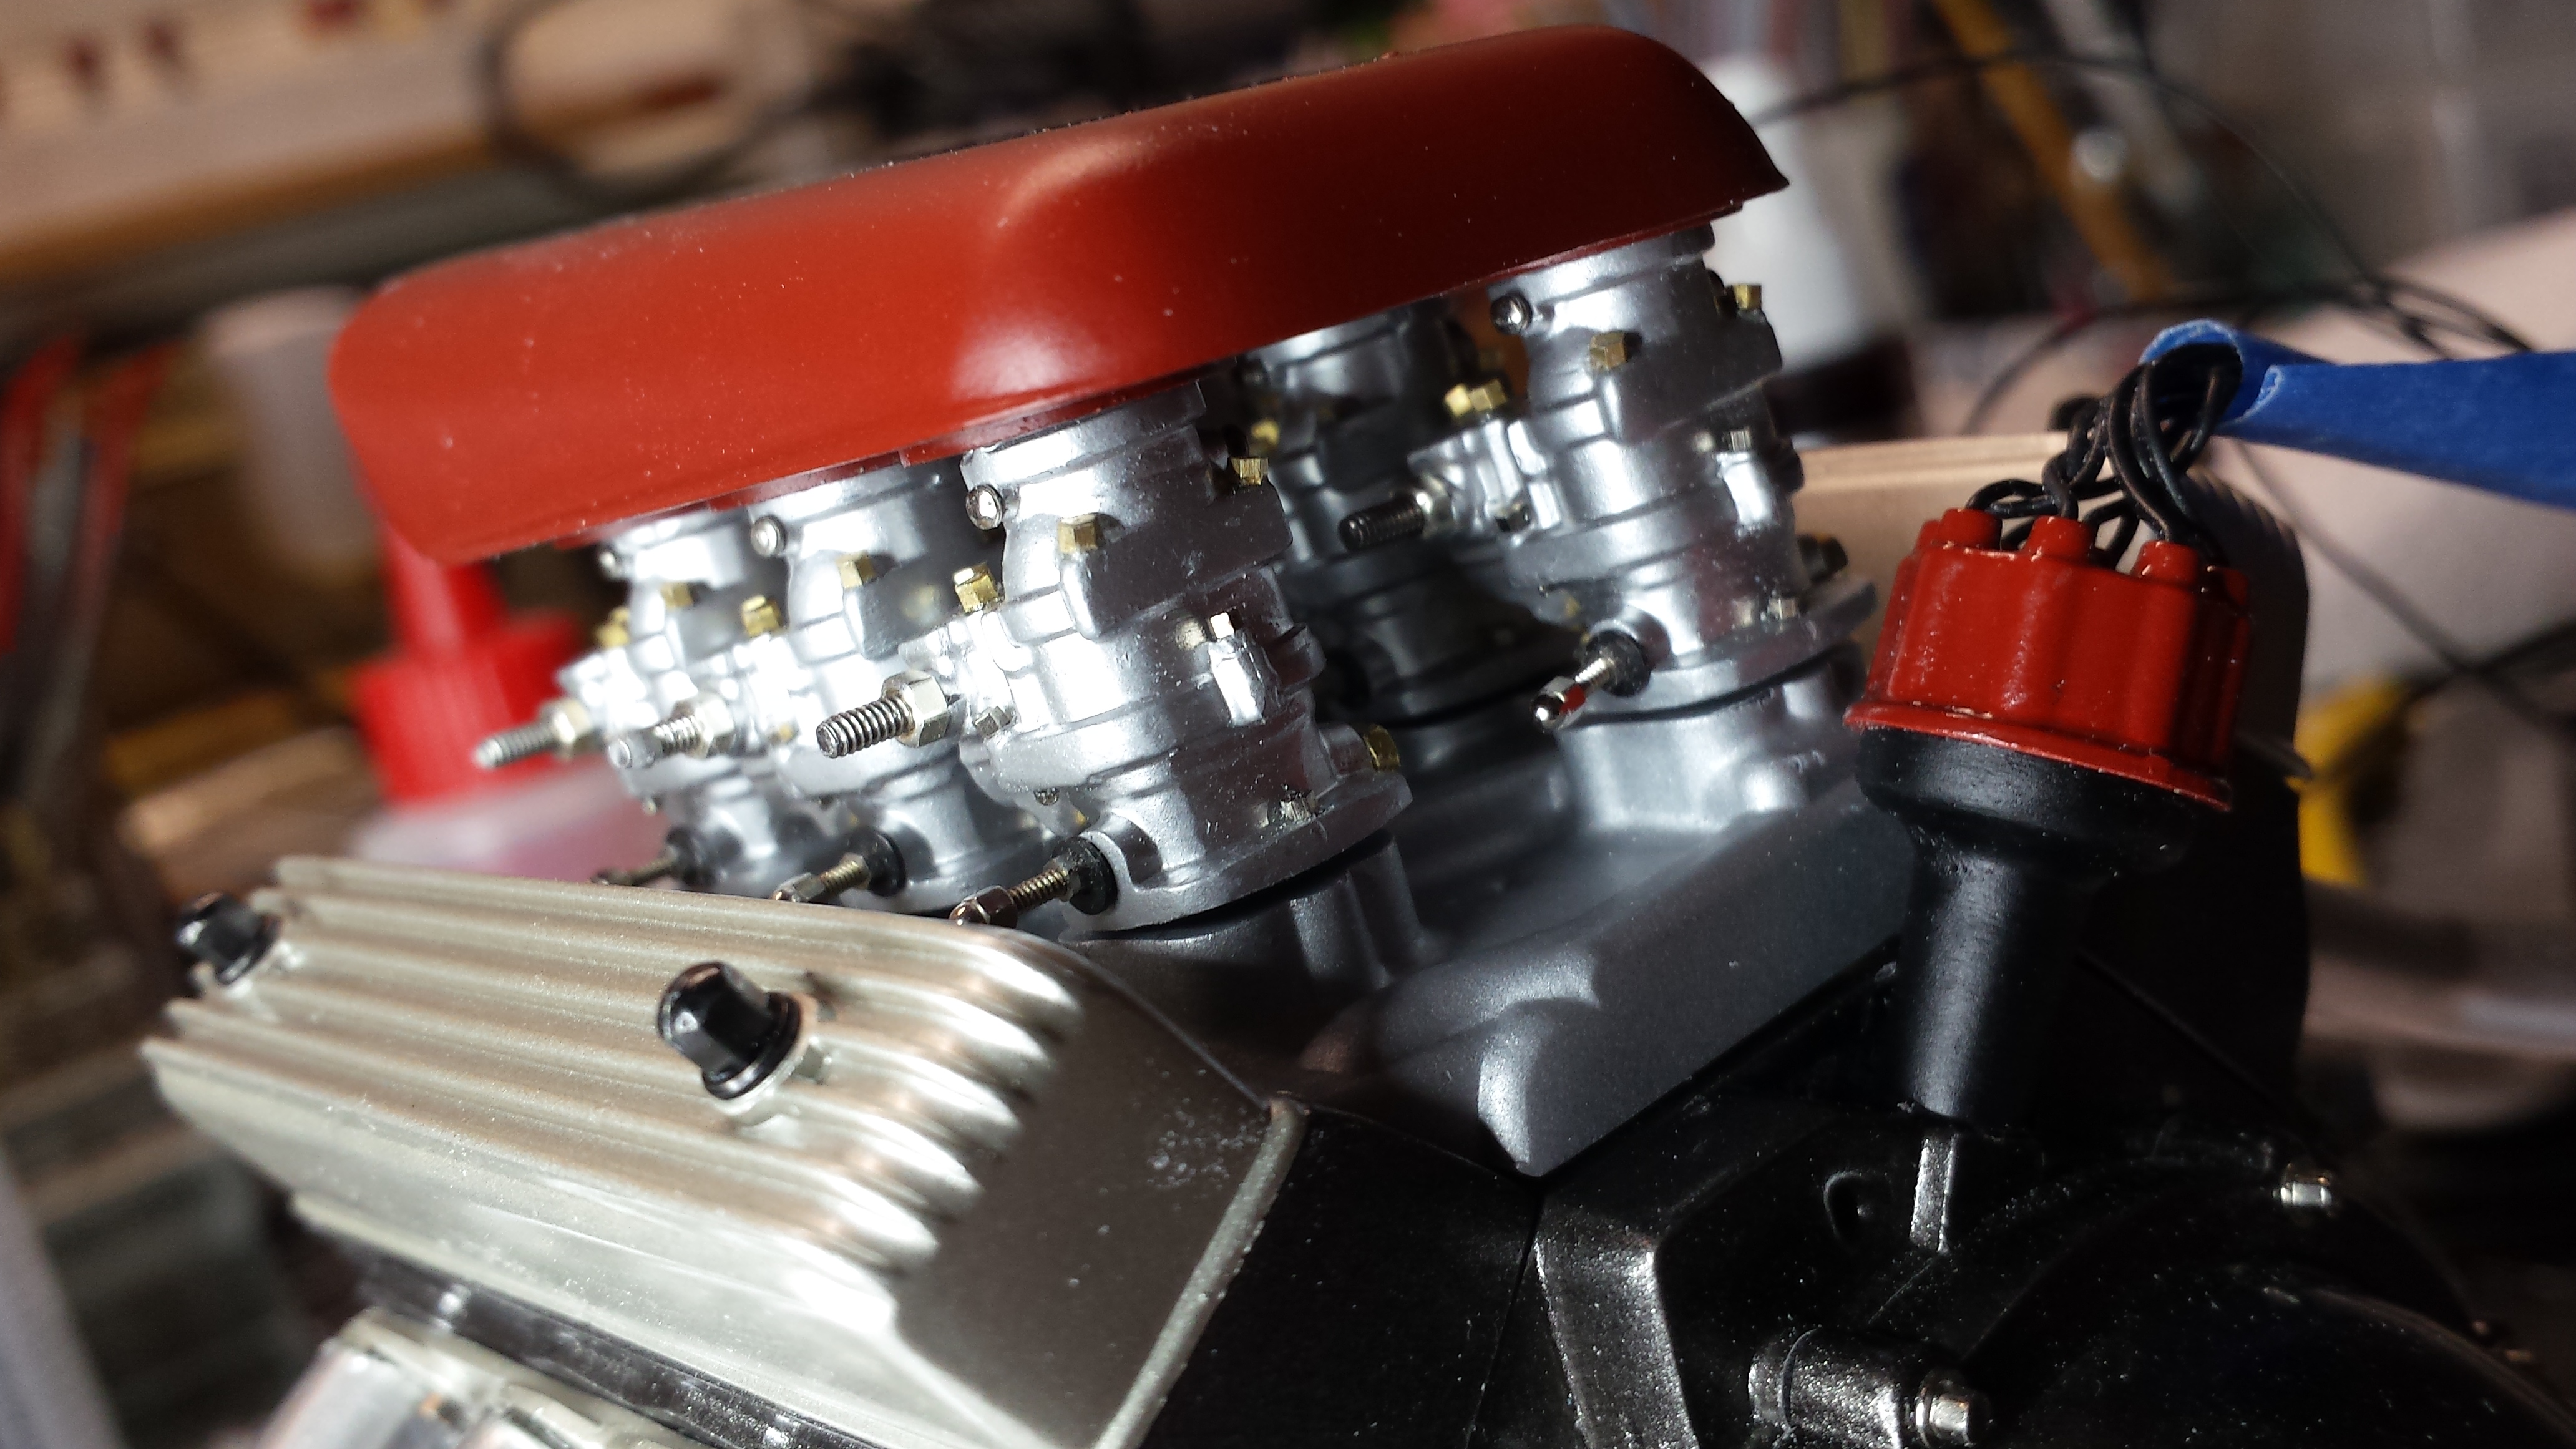
I wanted to show a picture of the plumbed carbs before I covered everything with the scoop. I went ahead and installed the radiator and headlights. That's it for tonight.
-
Thanks Mark. Thanks for hanging in there. I finally installed the 6 Stromberg 97's. I also re-did the radiator hoses (with hose clamps) and found a better rubber band to use as a fan belt. This means I am officially ready for final assembly. Watch this space...
-
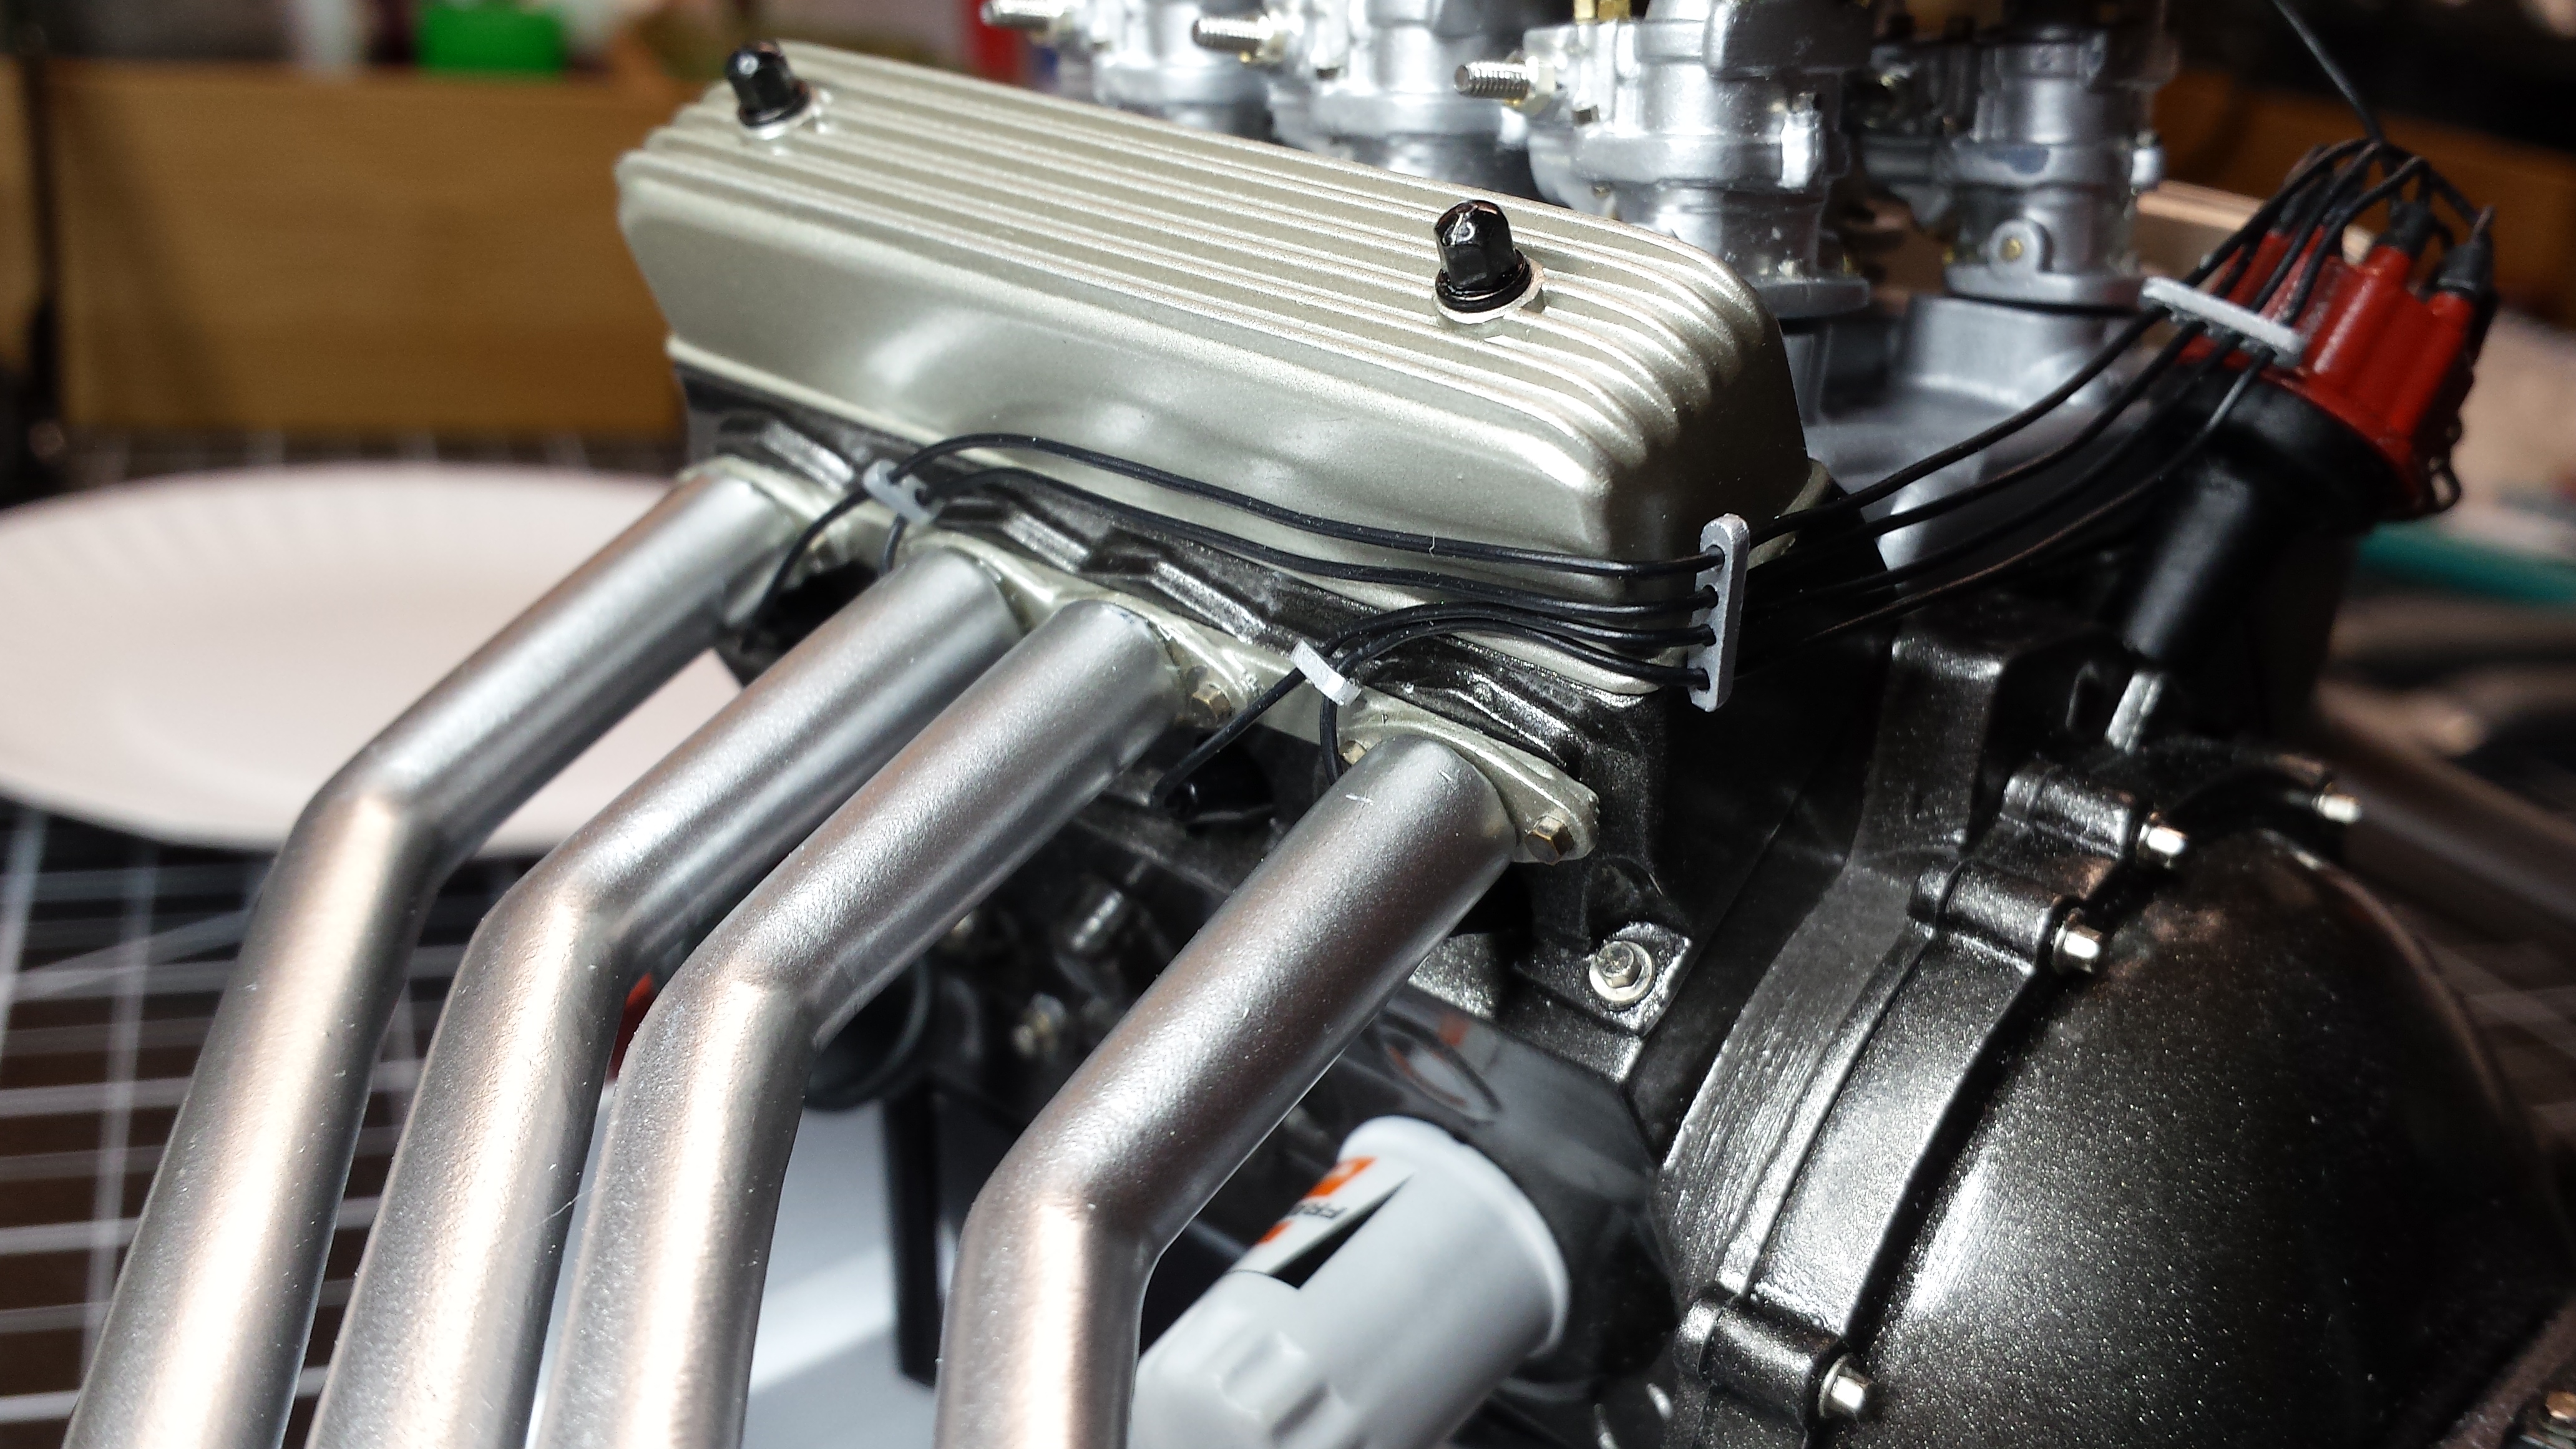
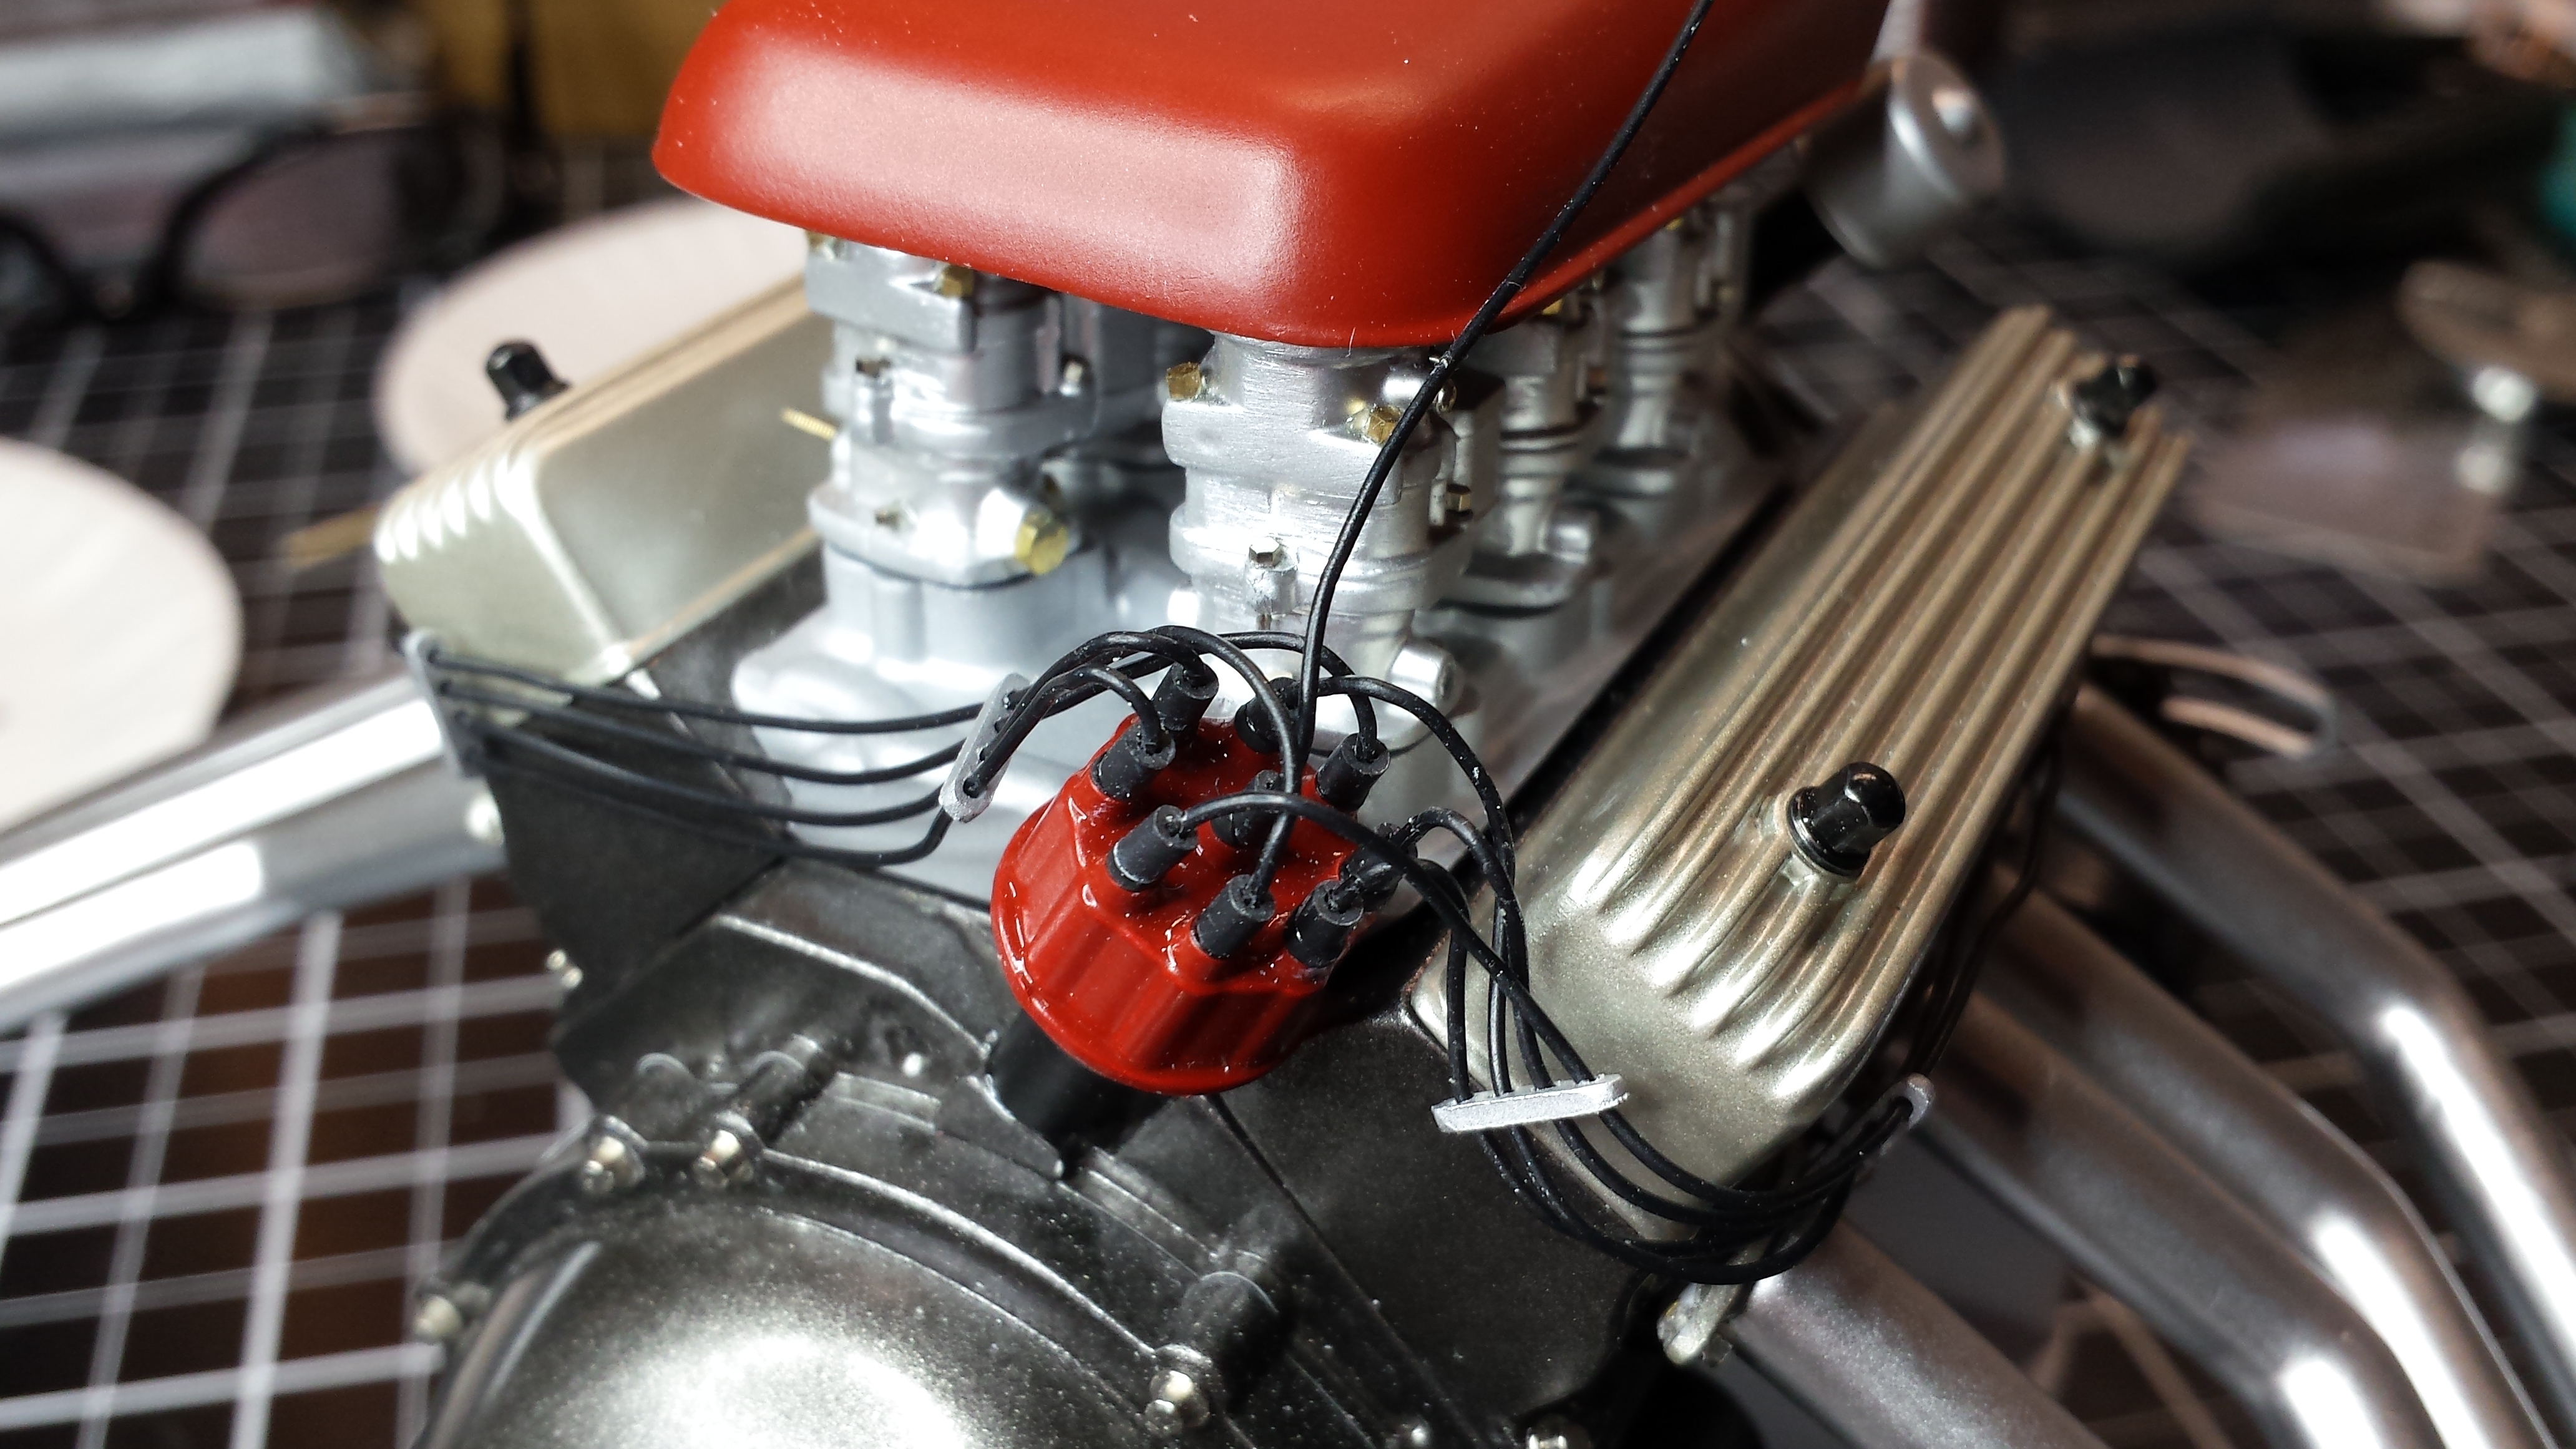
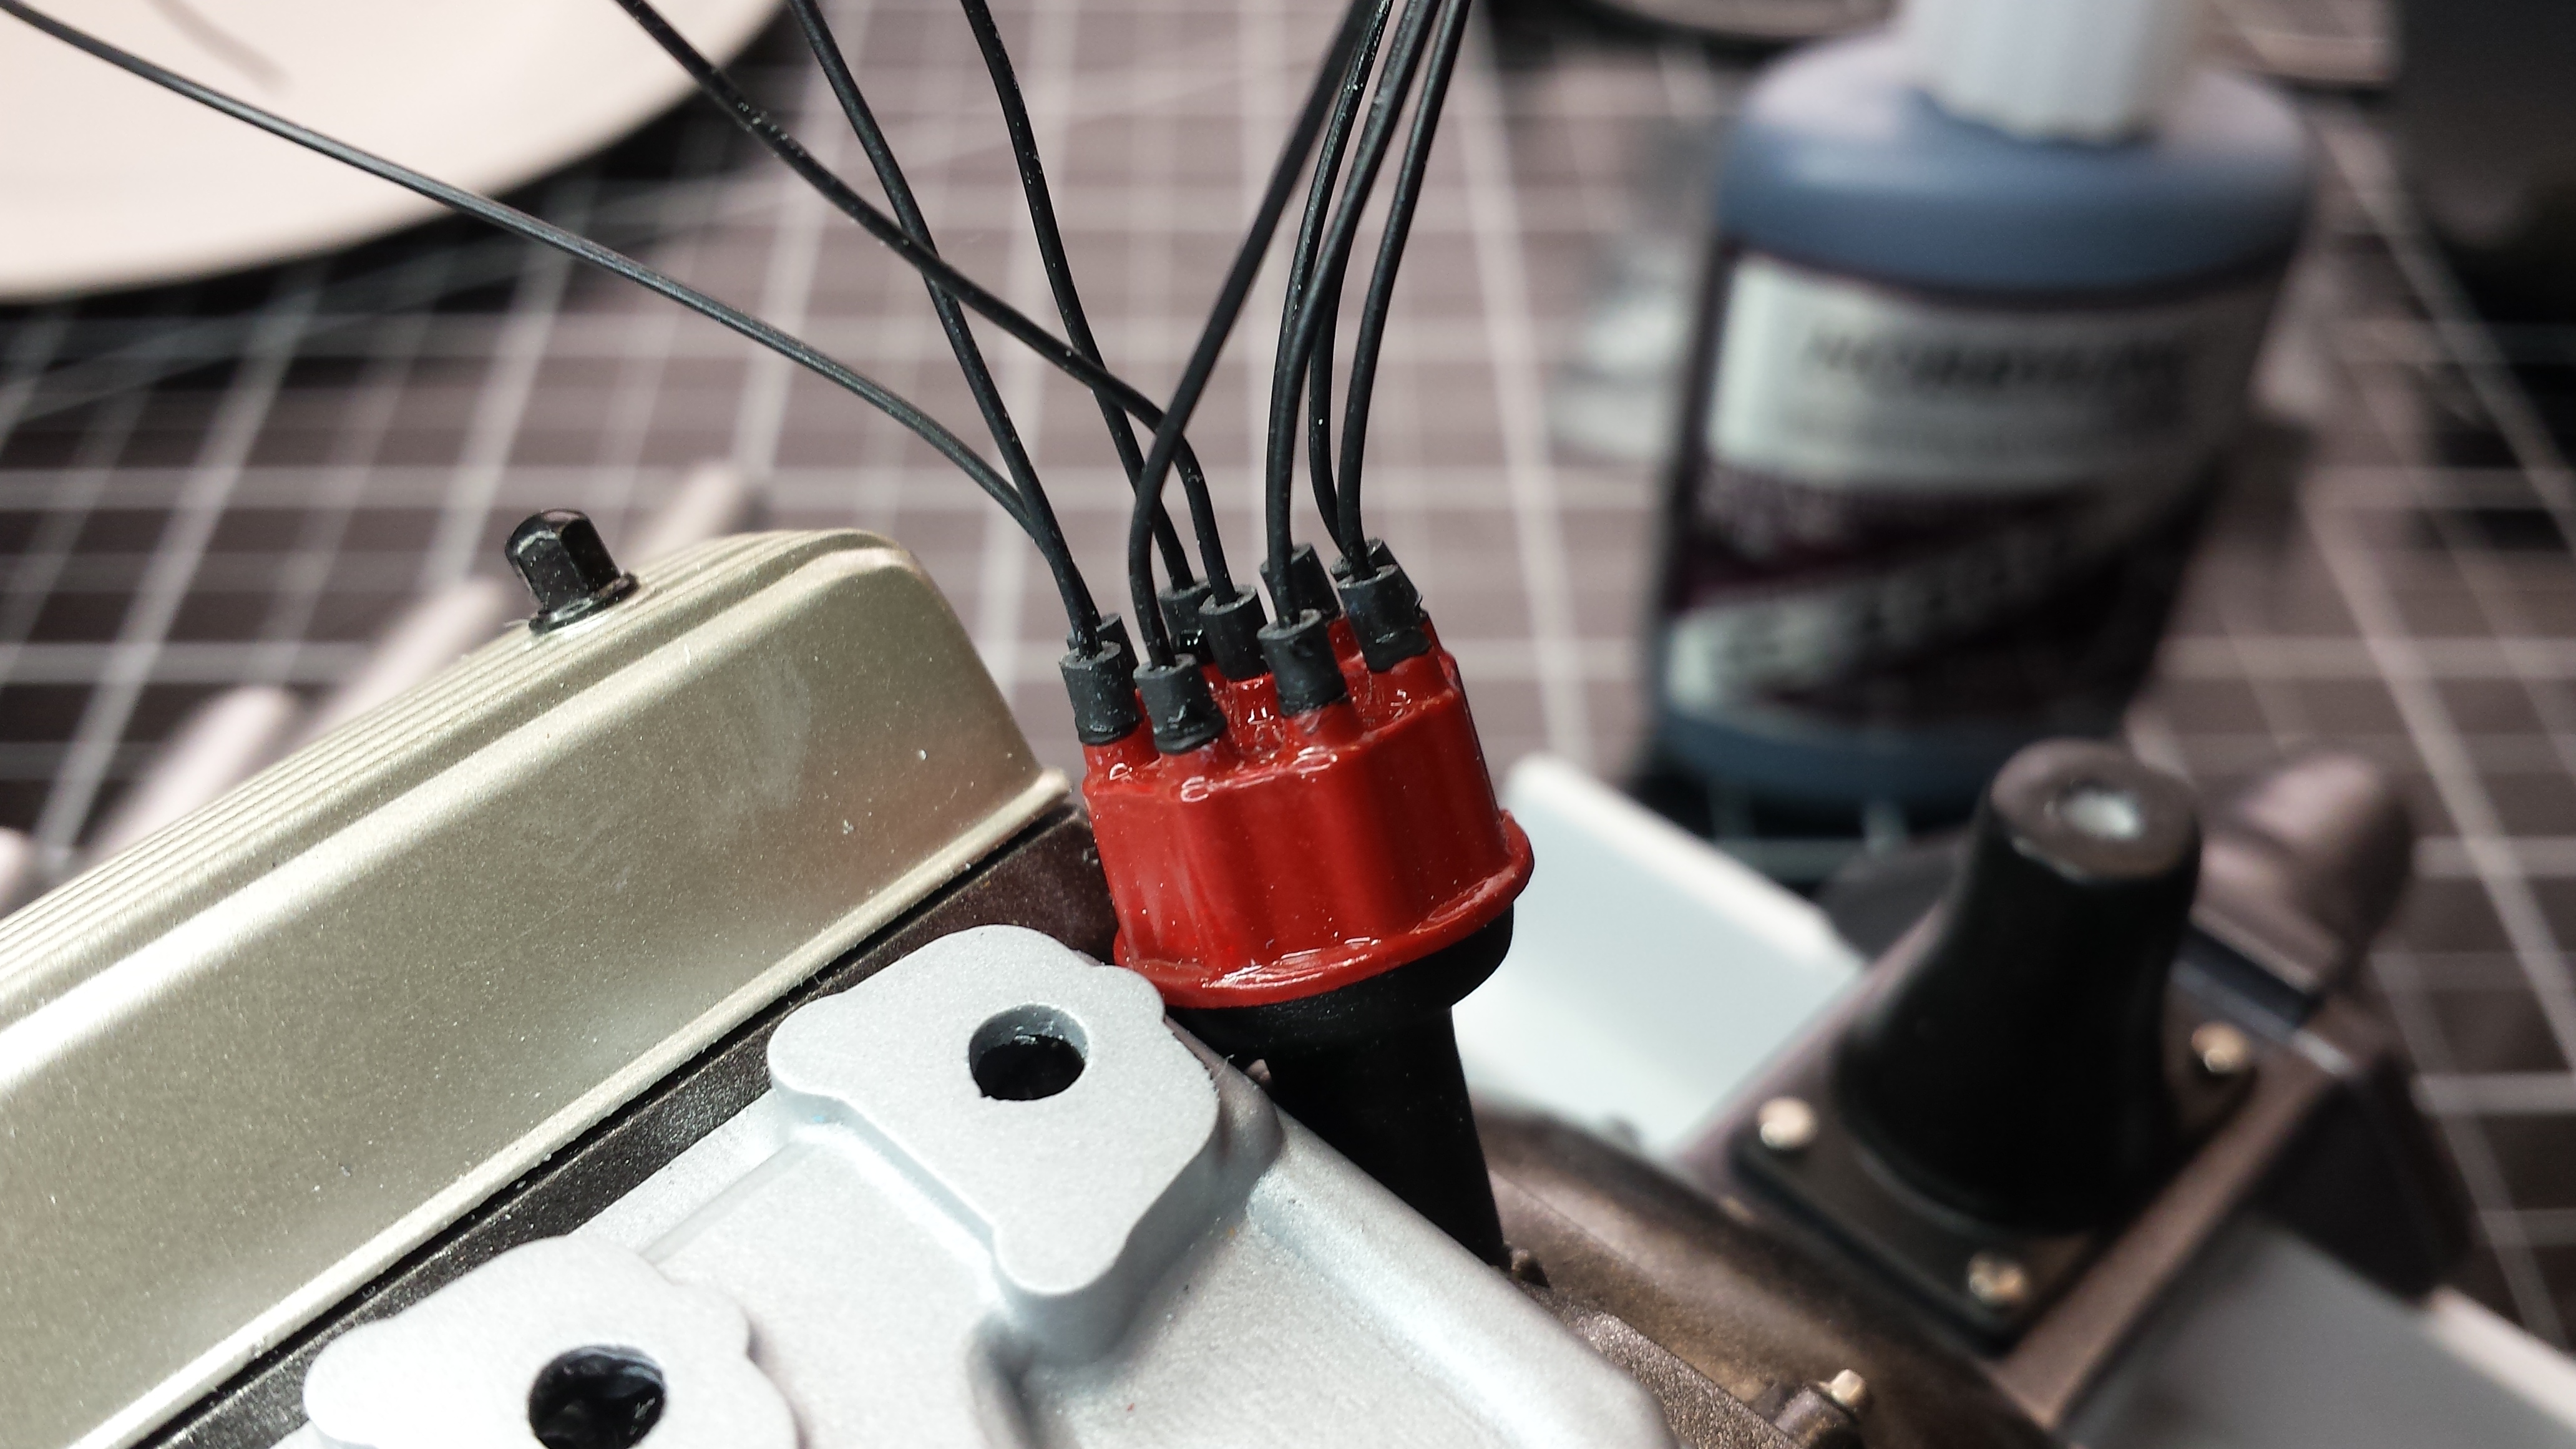
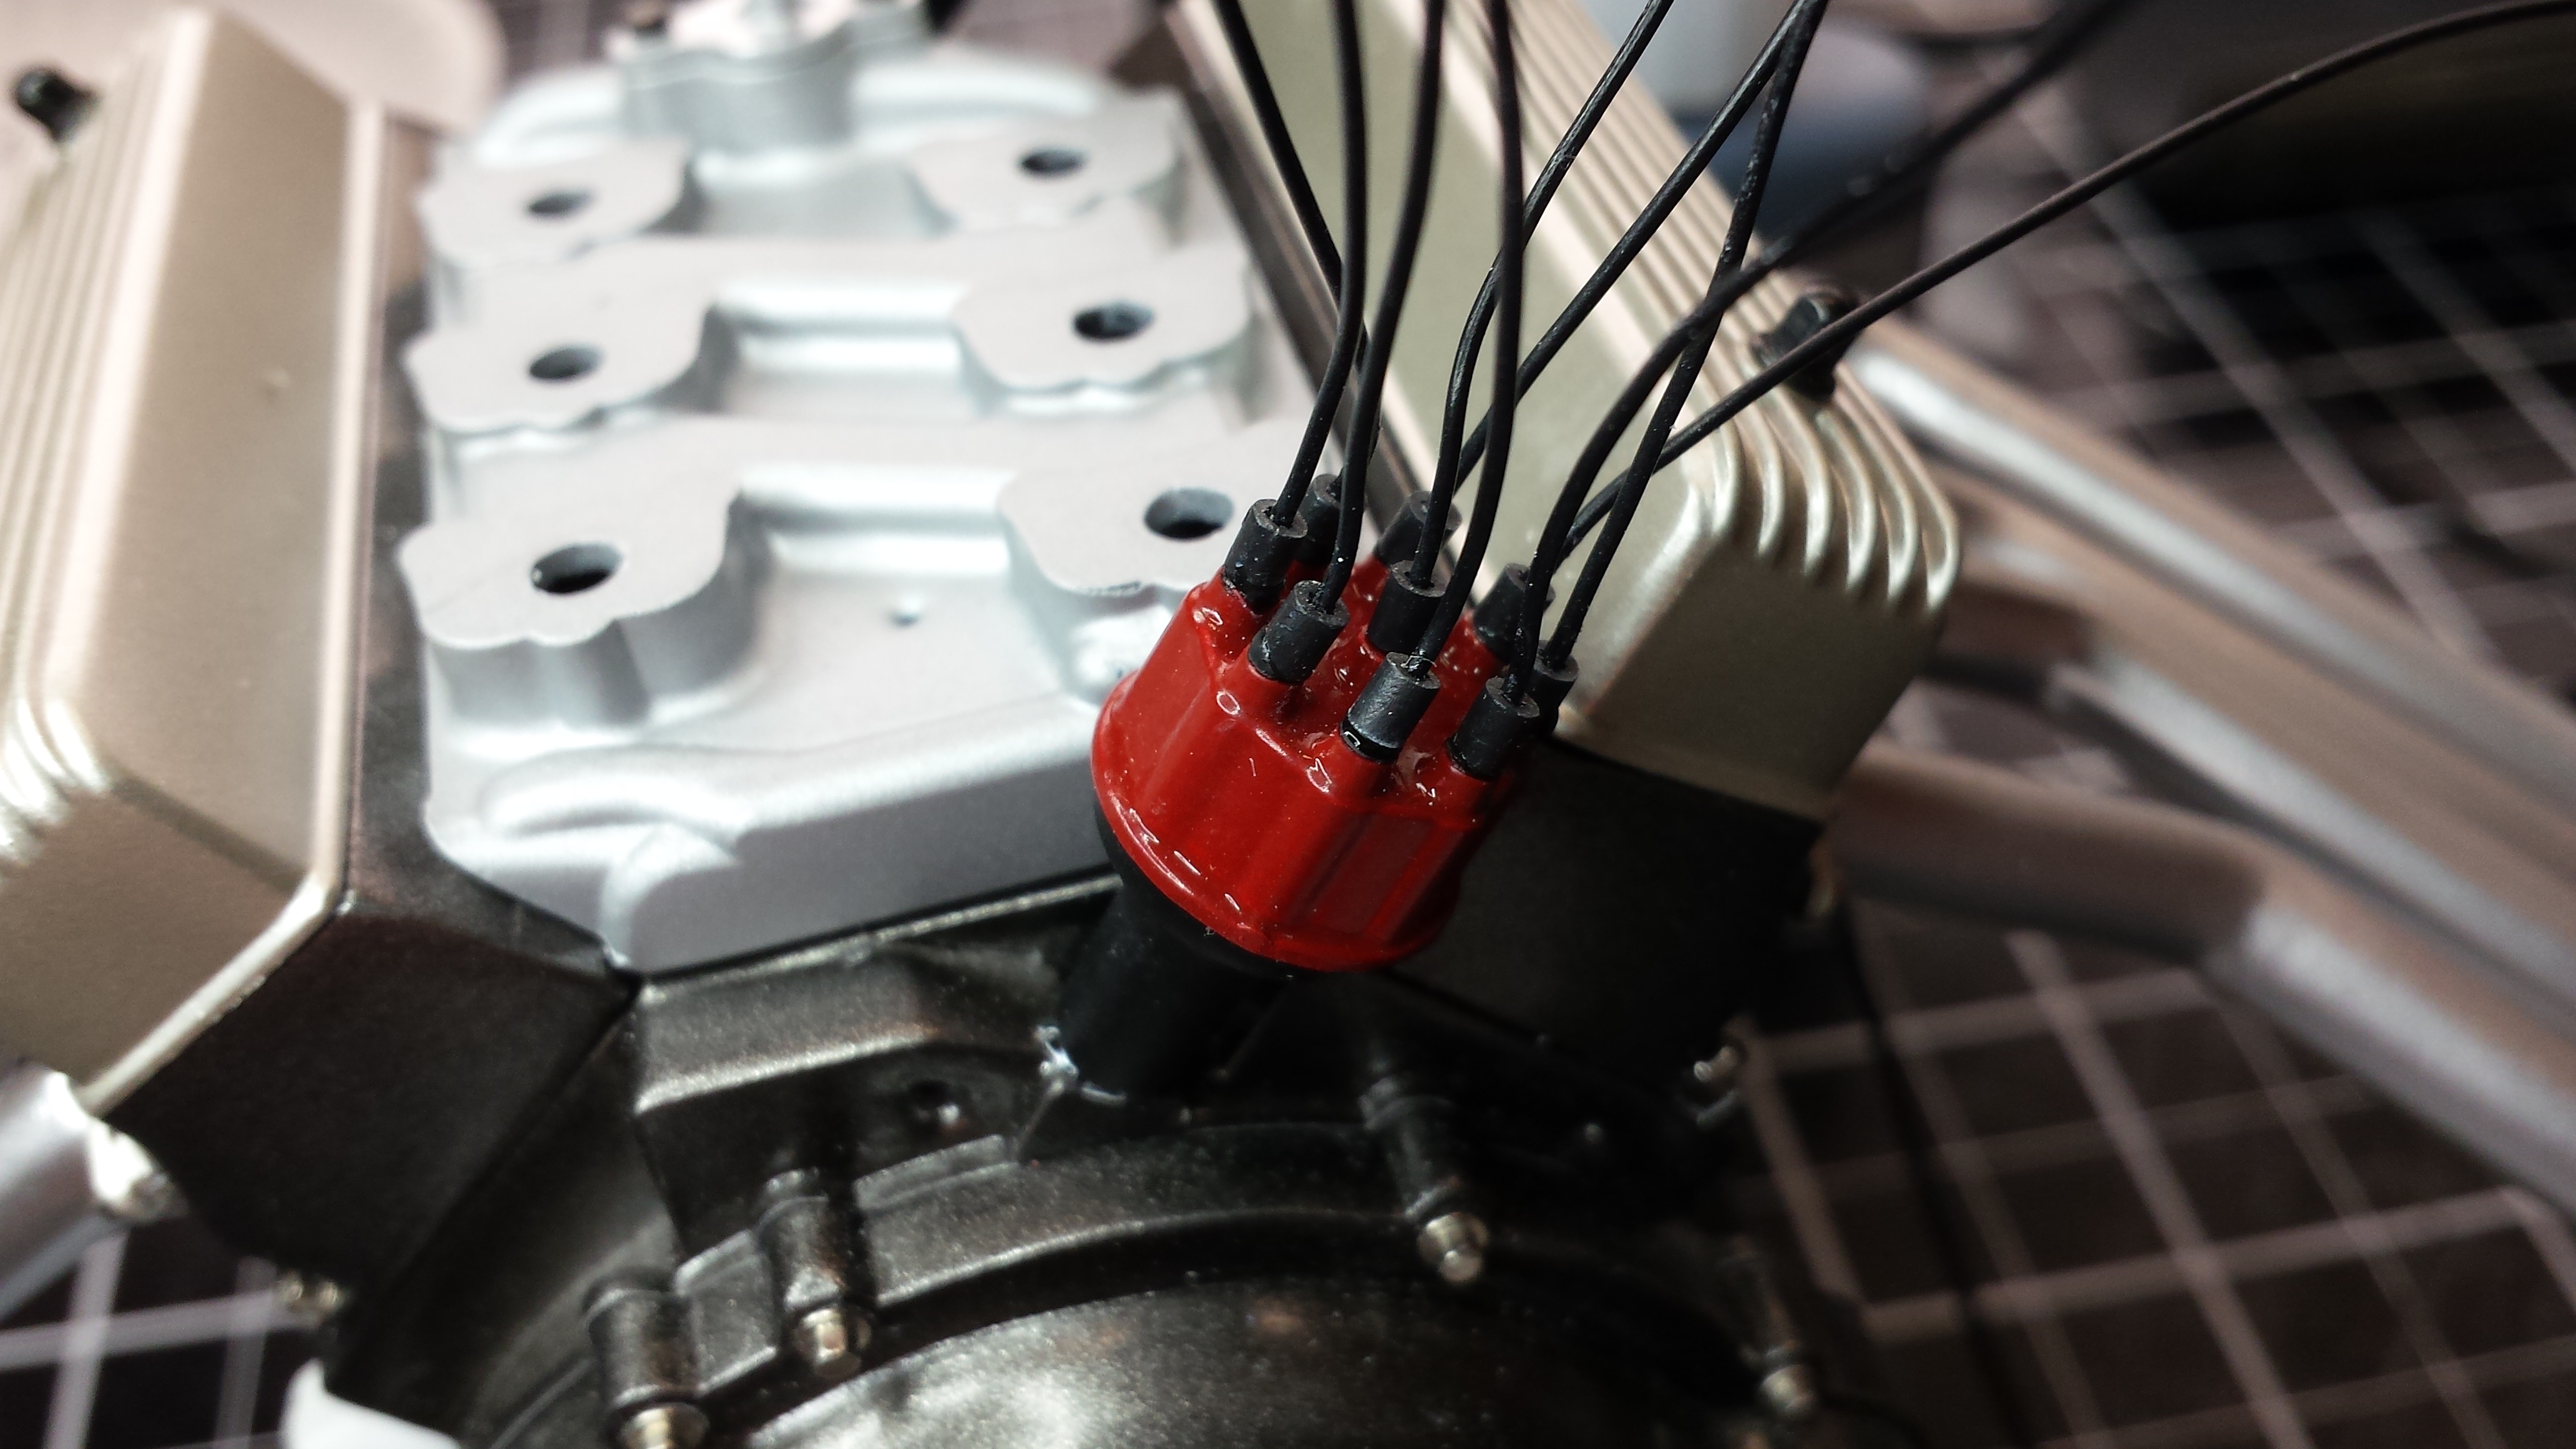
Finished wiring the spark plugs.
-
That sounds interesting. I'm doing the rocker panels in matt black. With the tinted windows, black interior and dark Torq Thrust rims I thought it would look cool. Once I get some color on the body I'll look into the stripe idea.
-
Thanks John. Yes, they are big. I'm pretty much ready to start spraying on the maroon body color.
-
Here are the distributor boots. Just slightly larger wire insulation. I used that Bob Smith black CA for the first time and it works great.
-
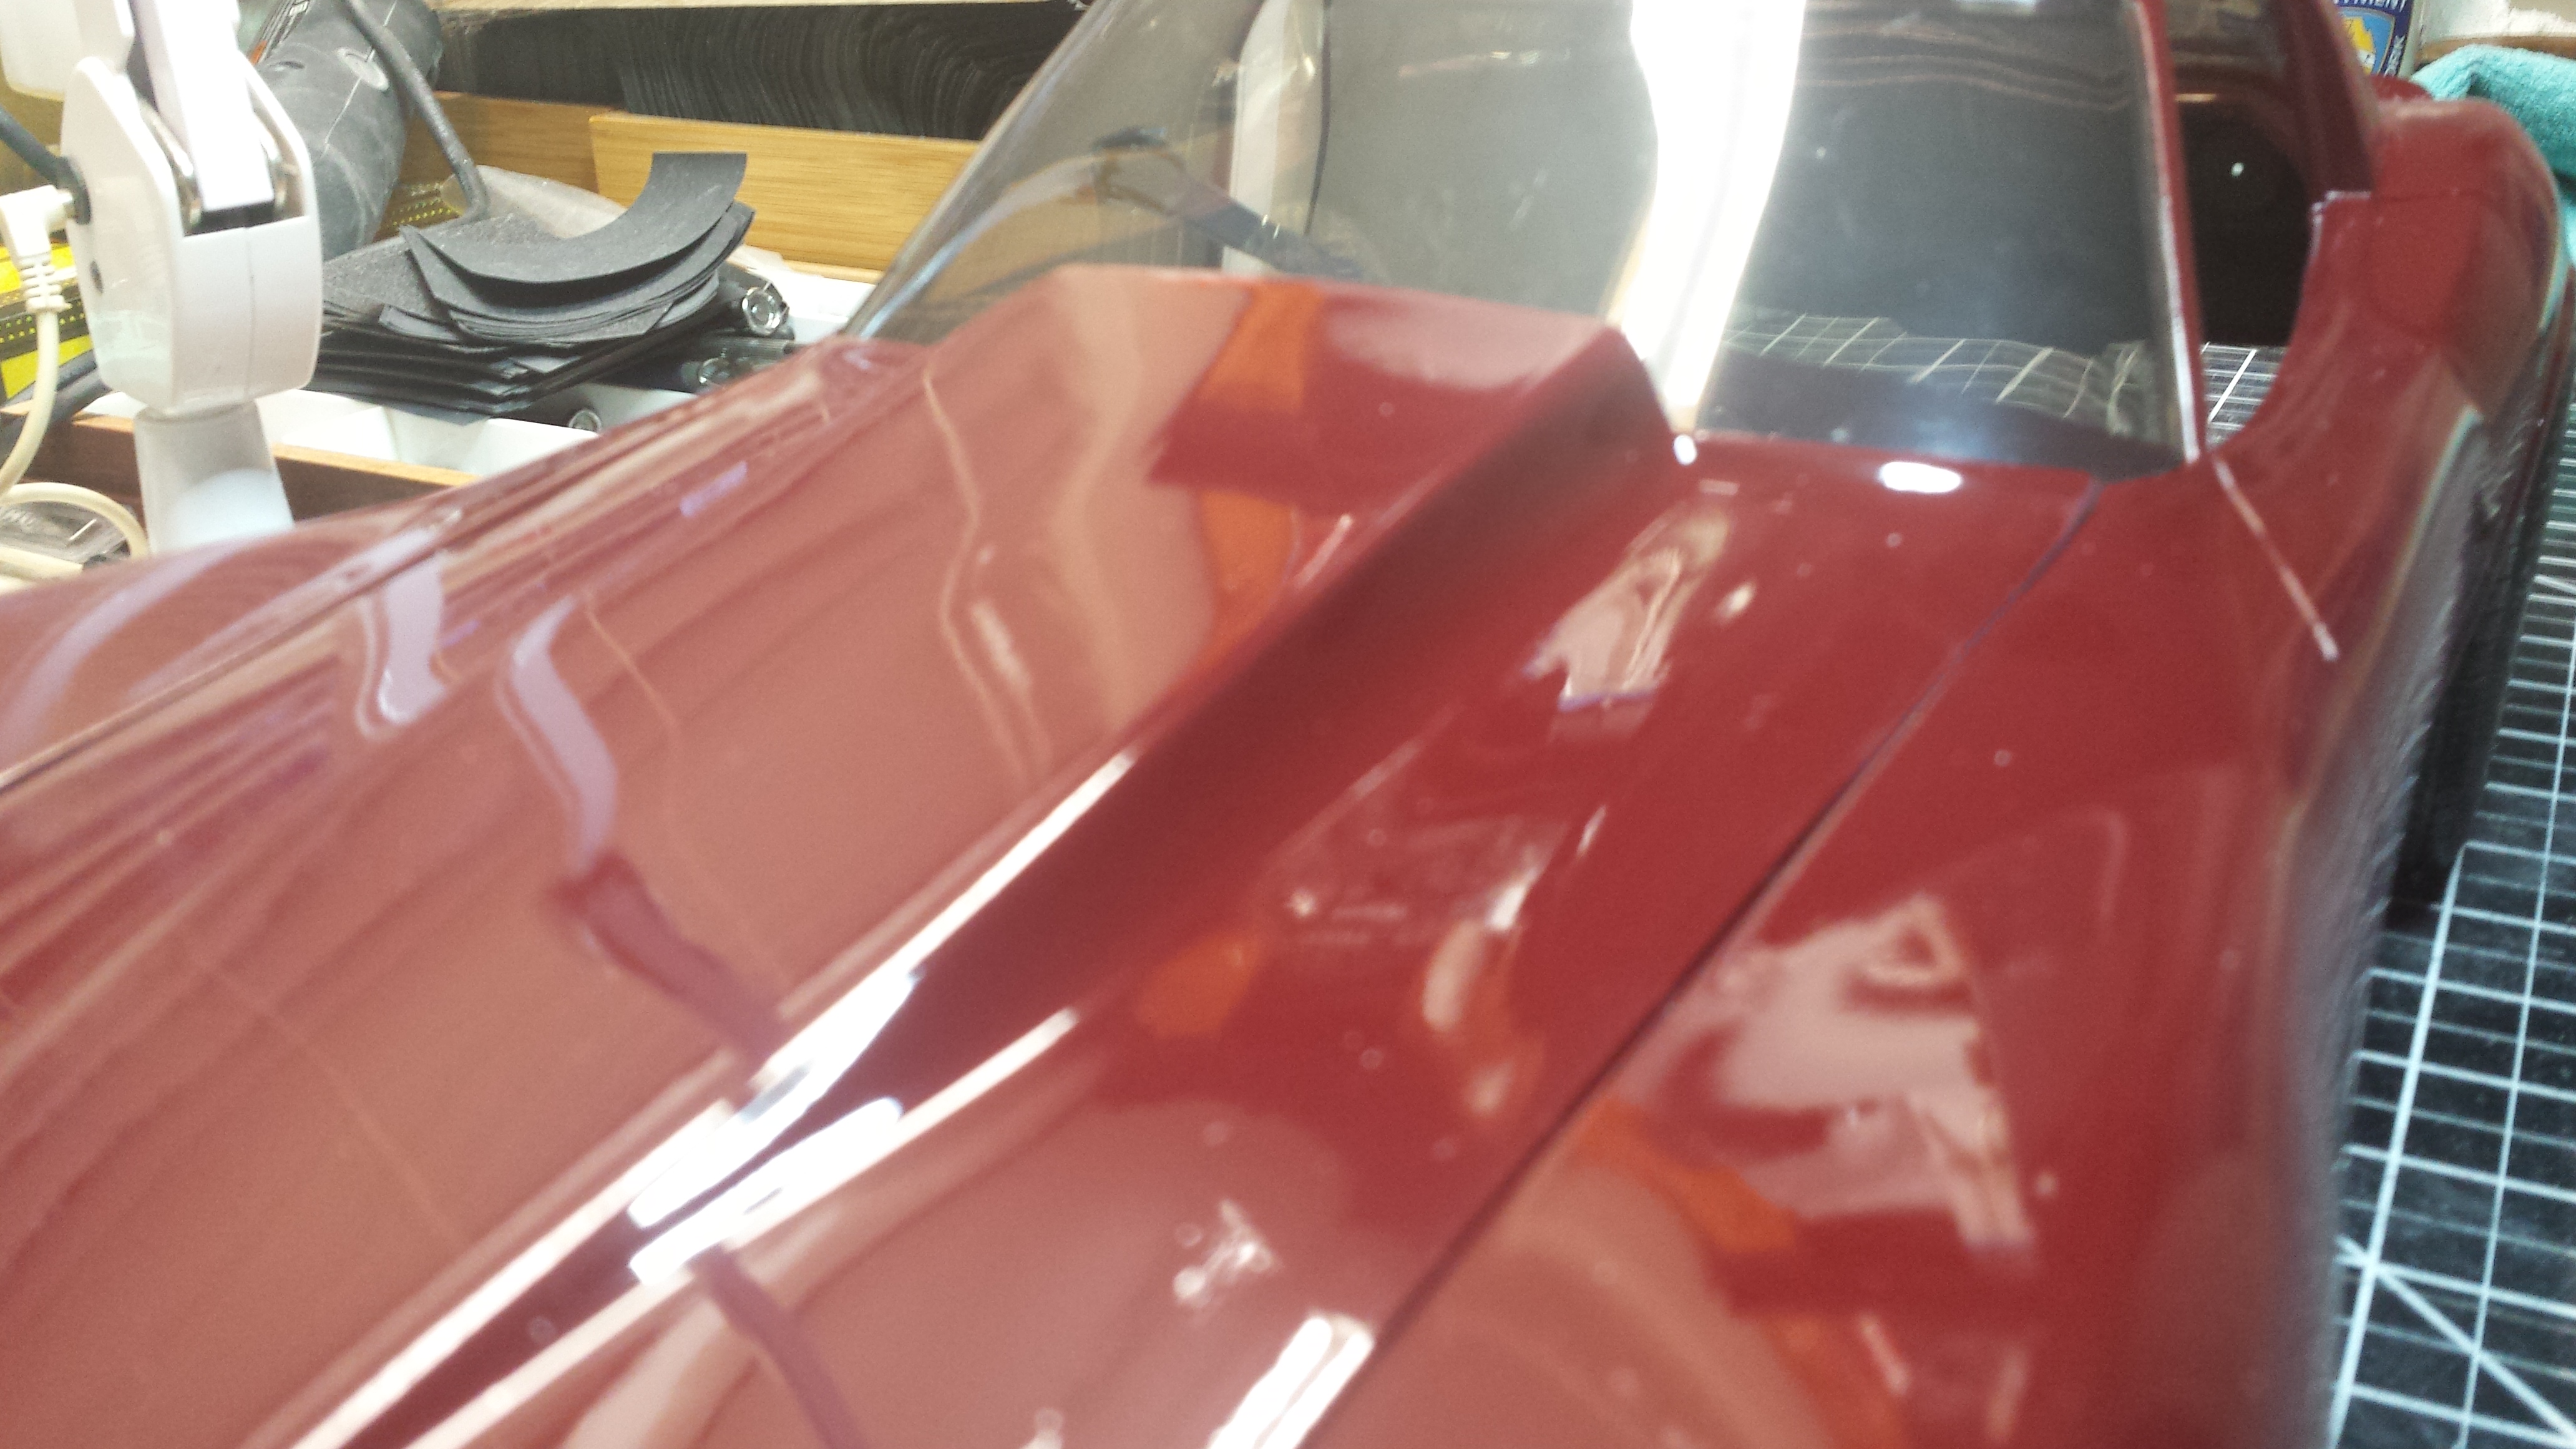
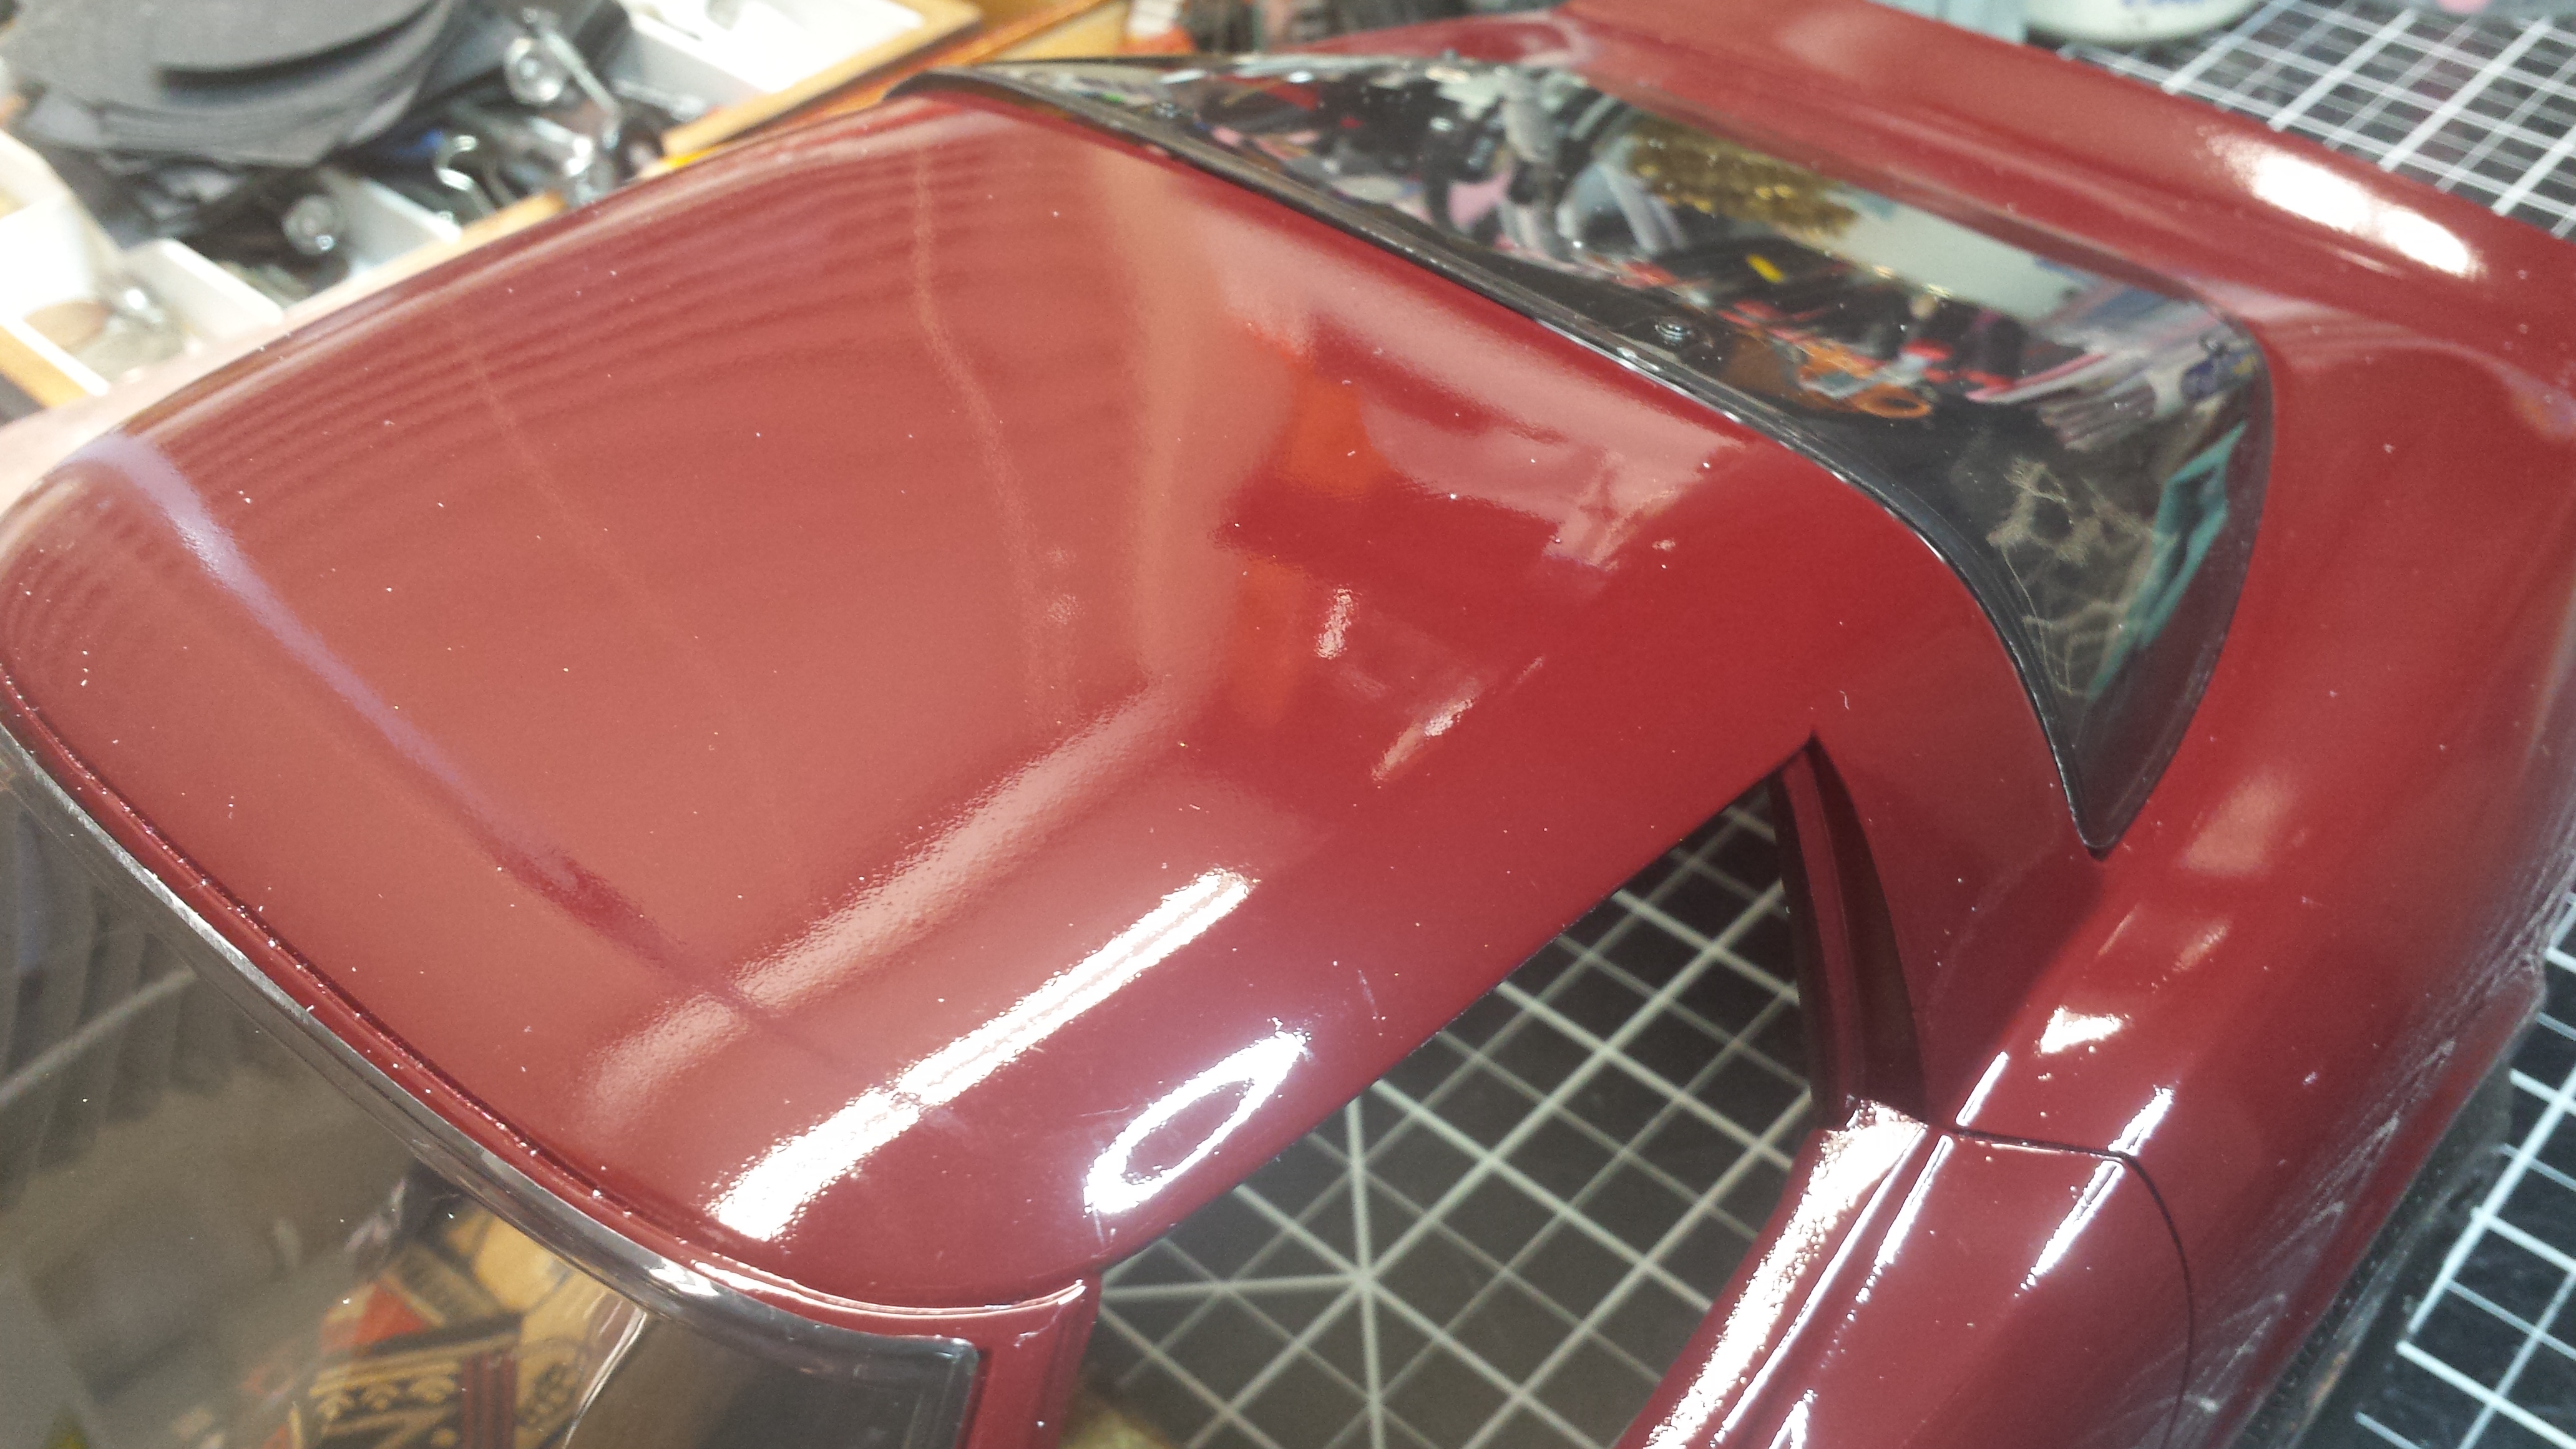
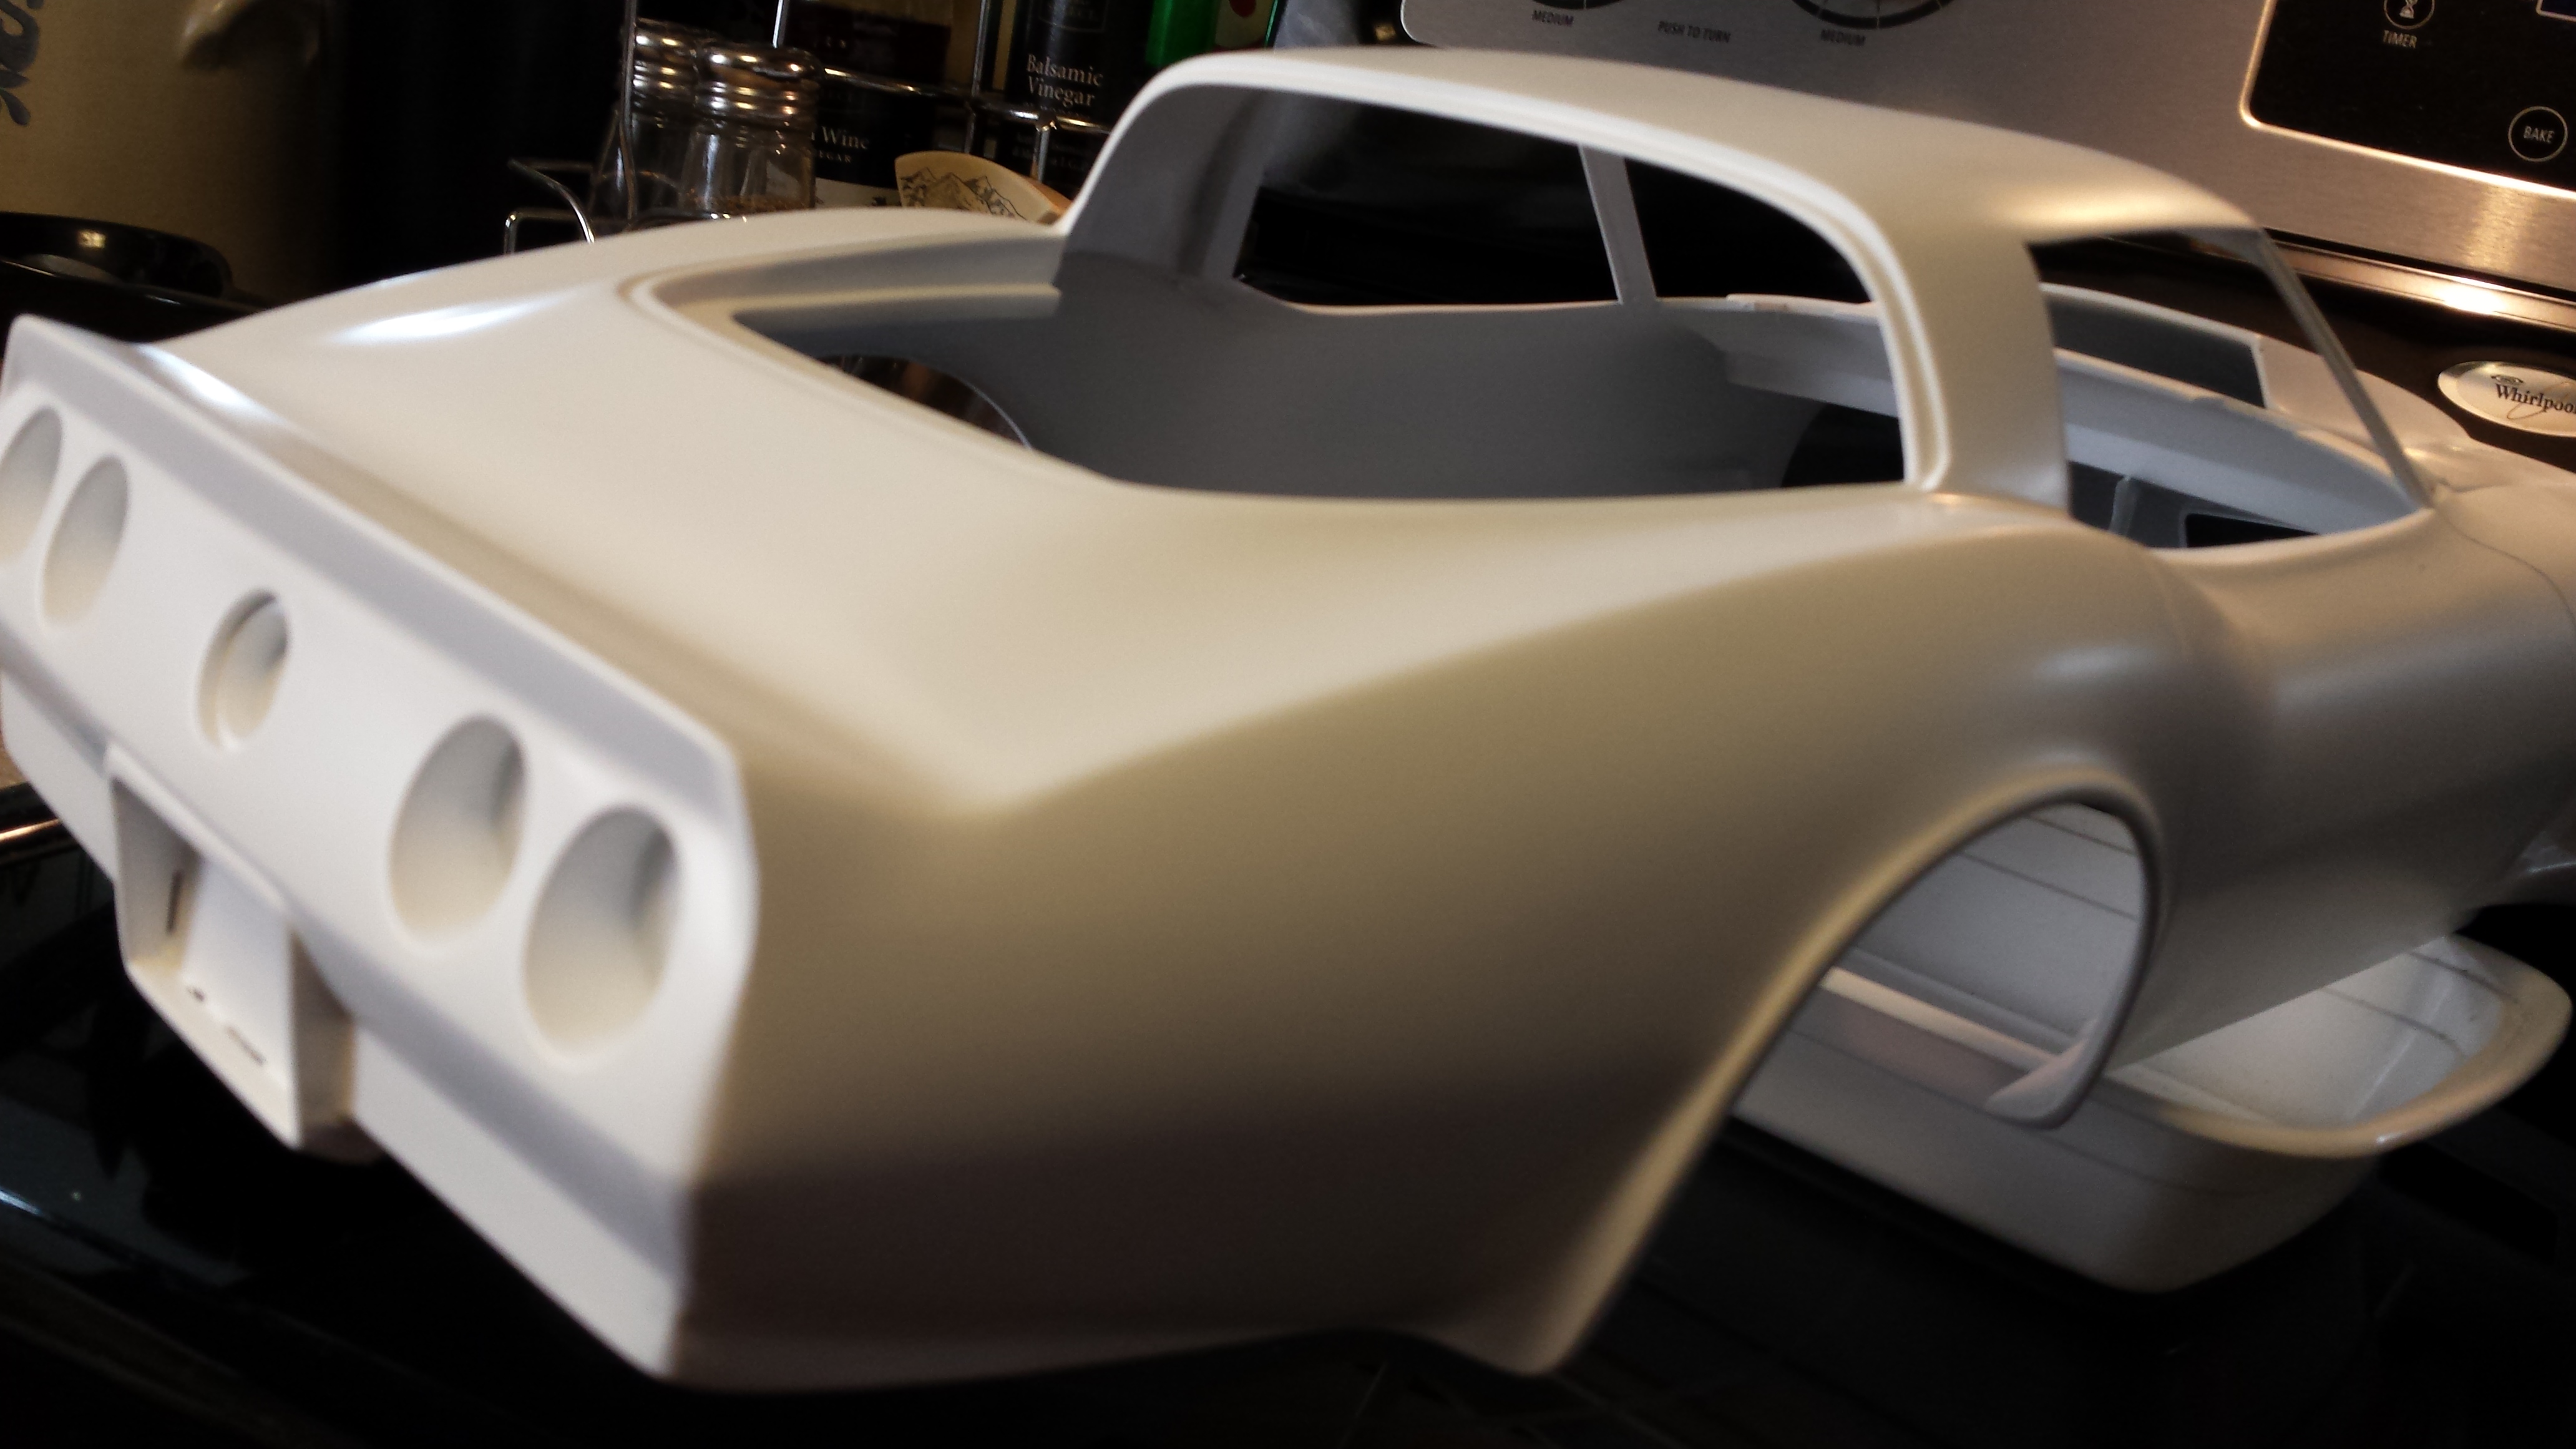
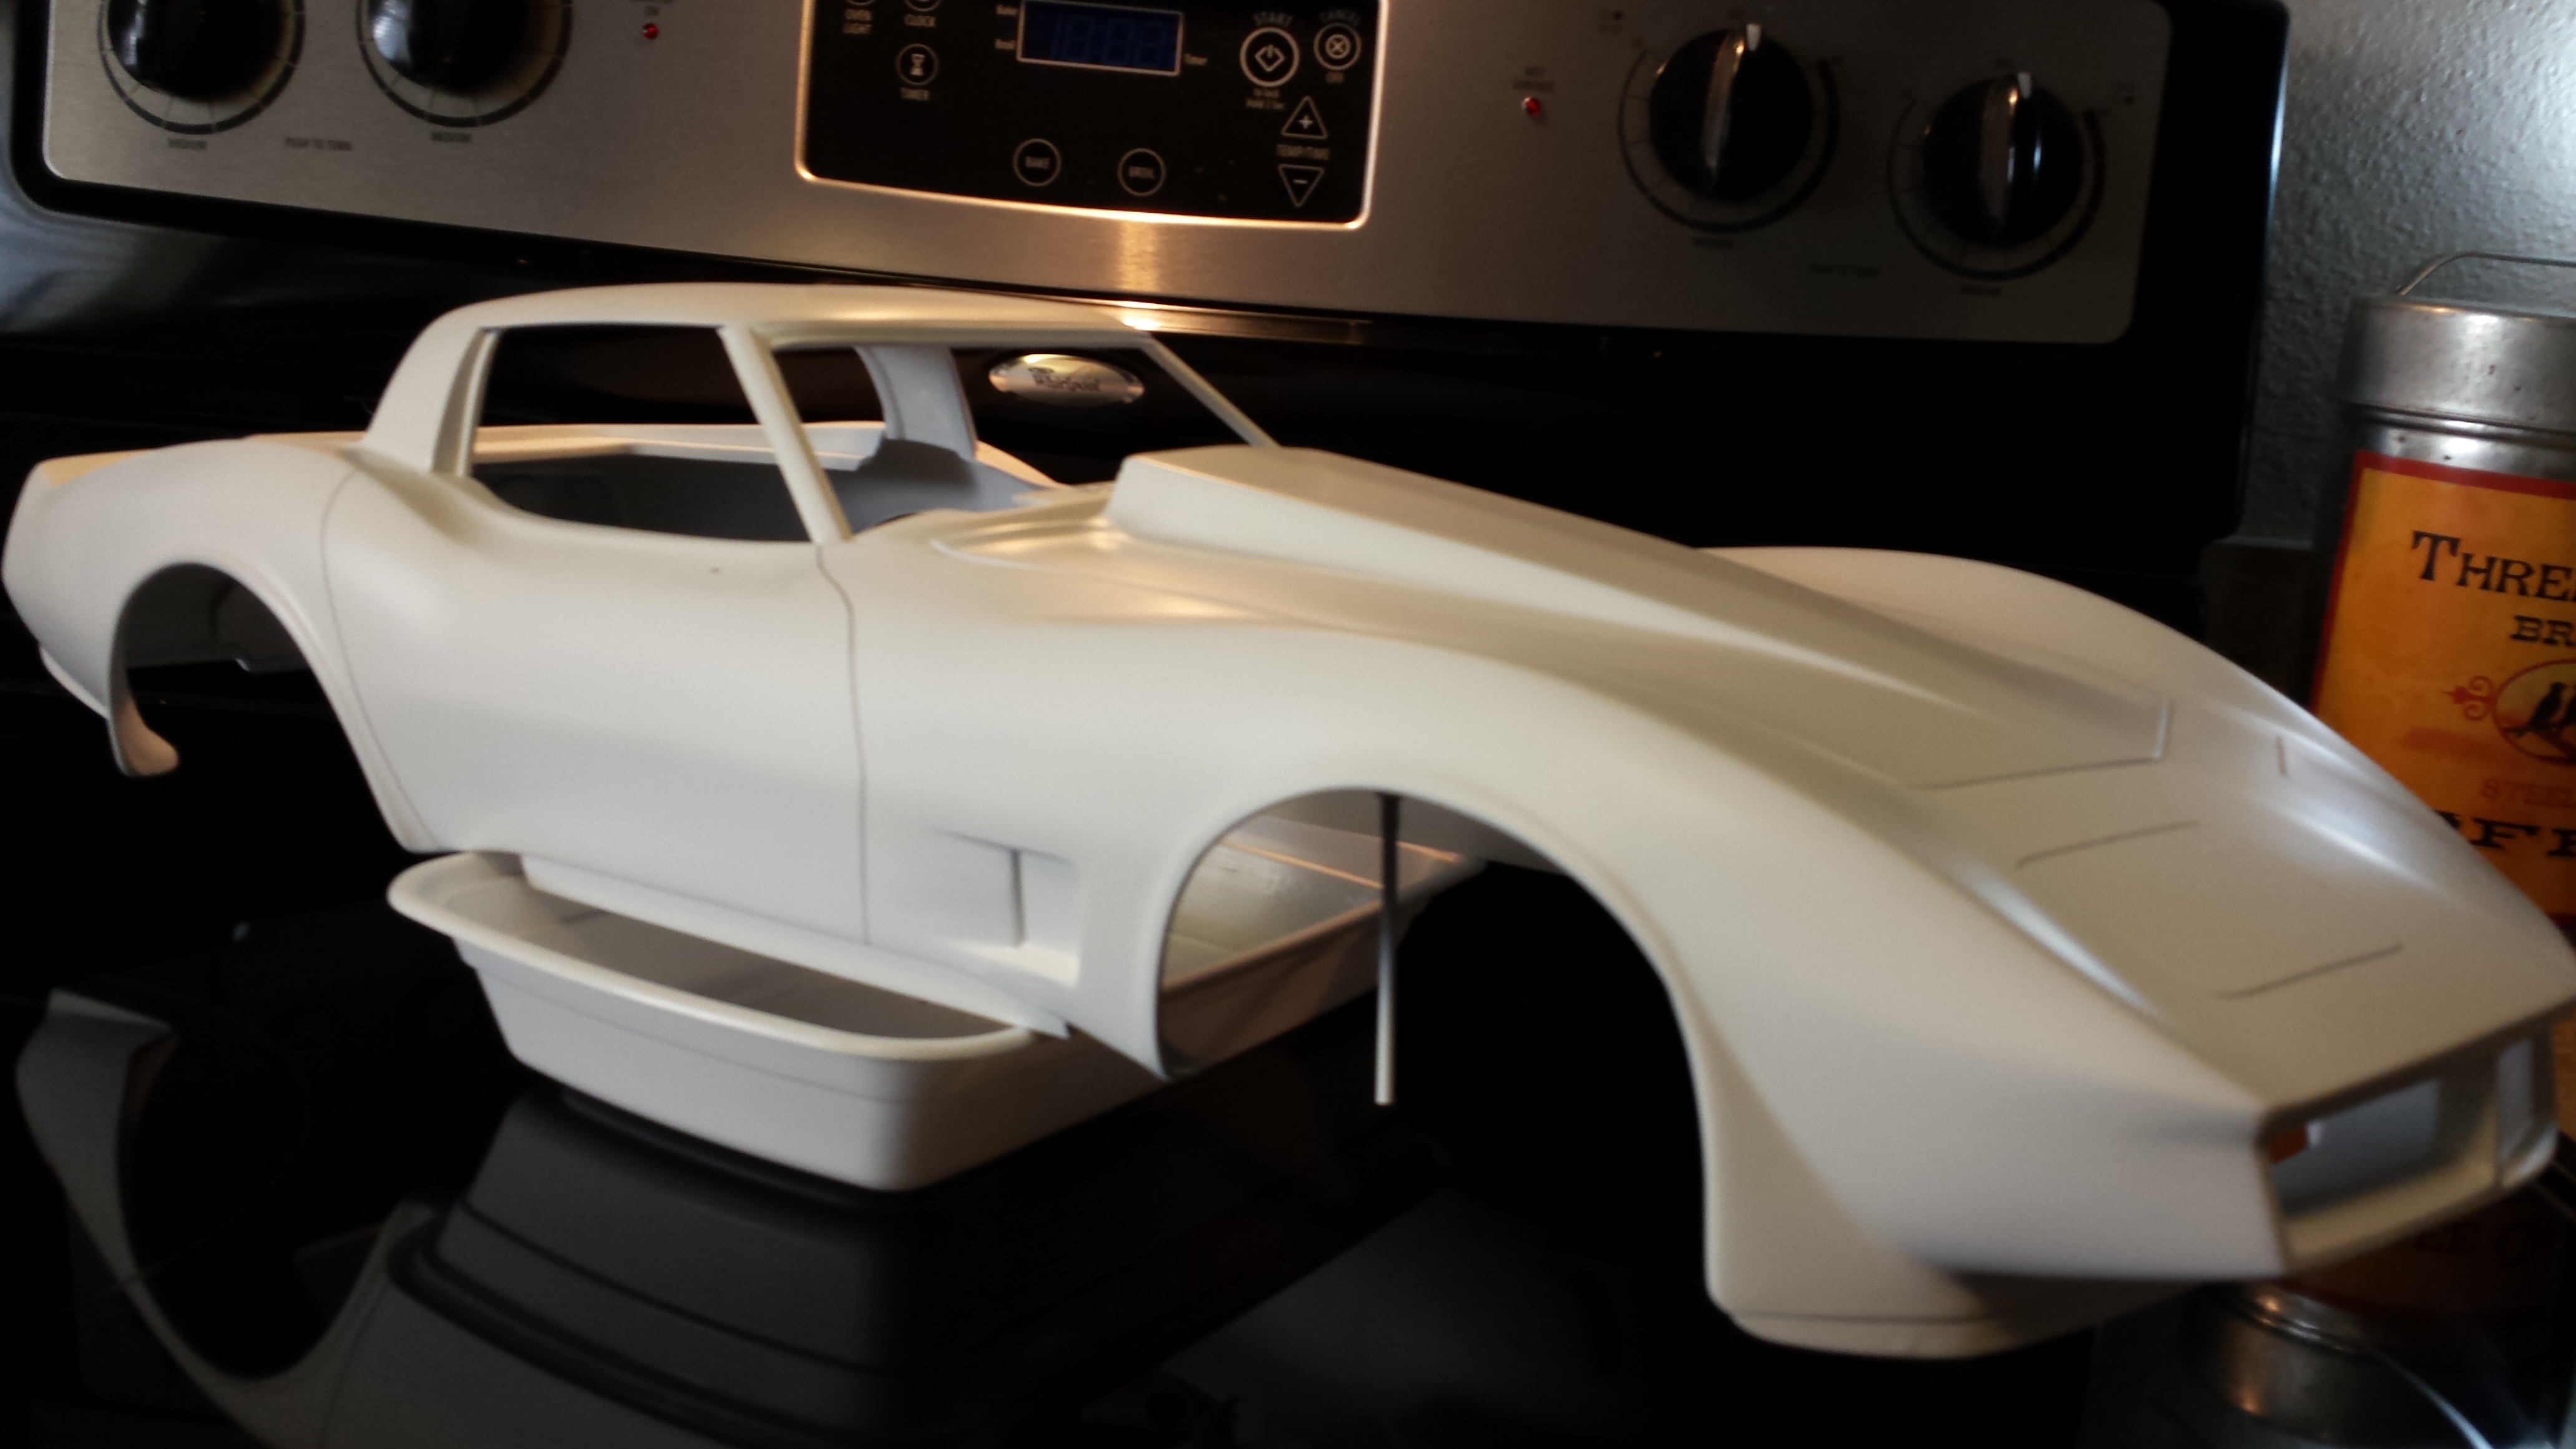
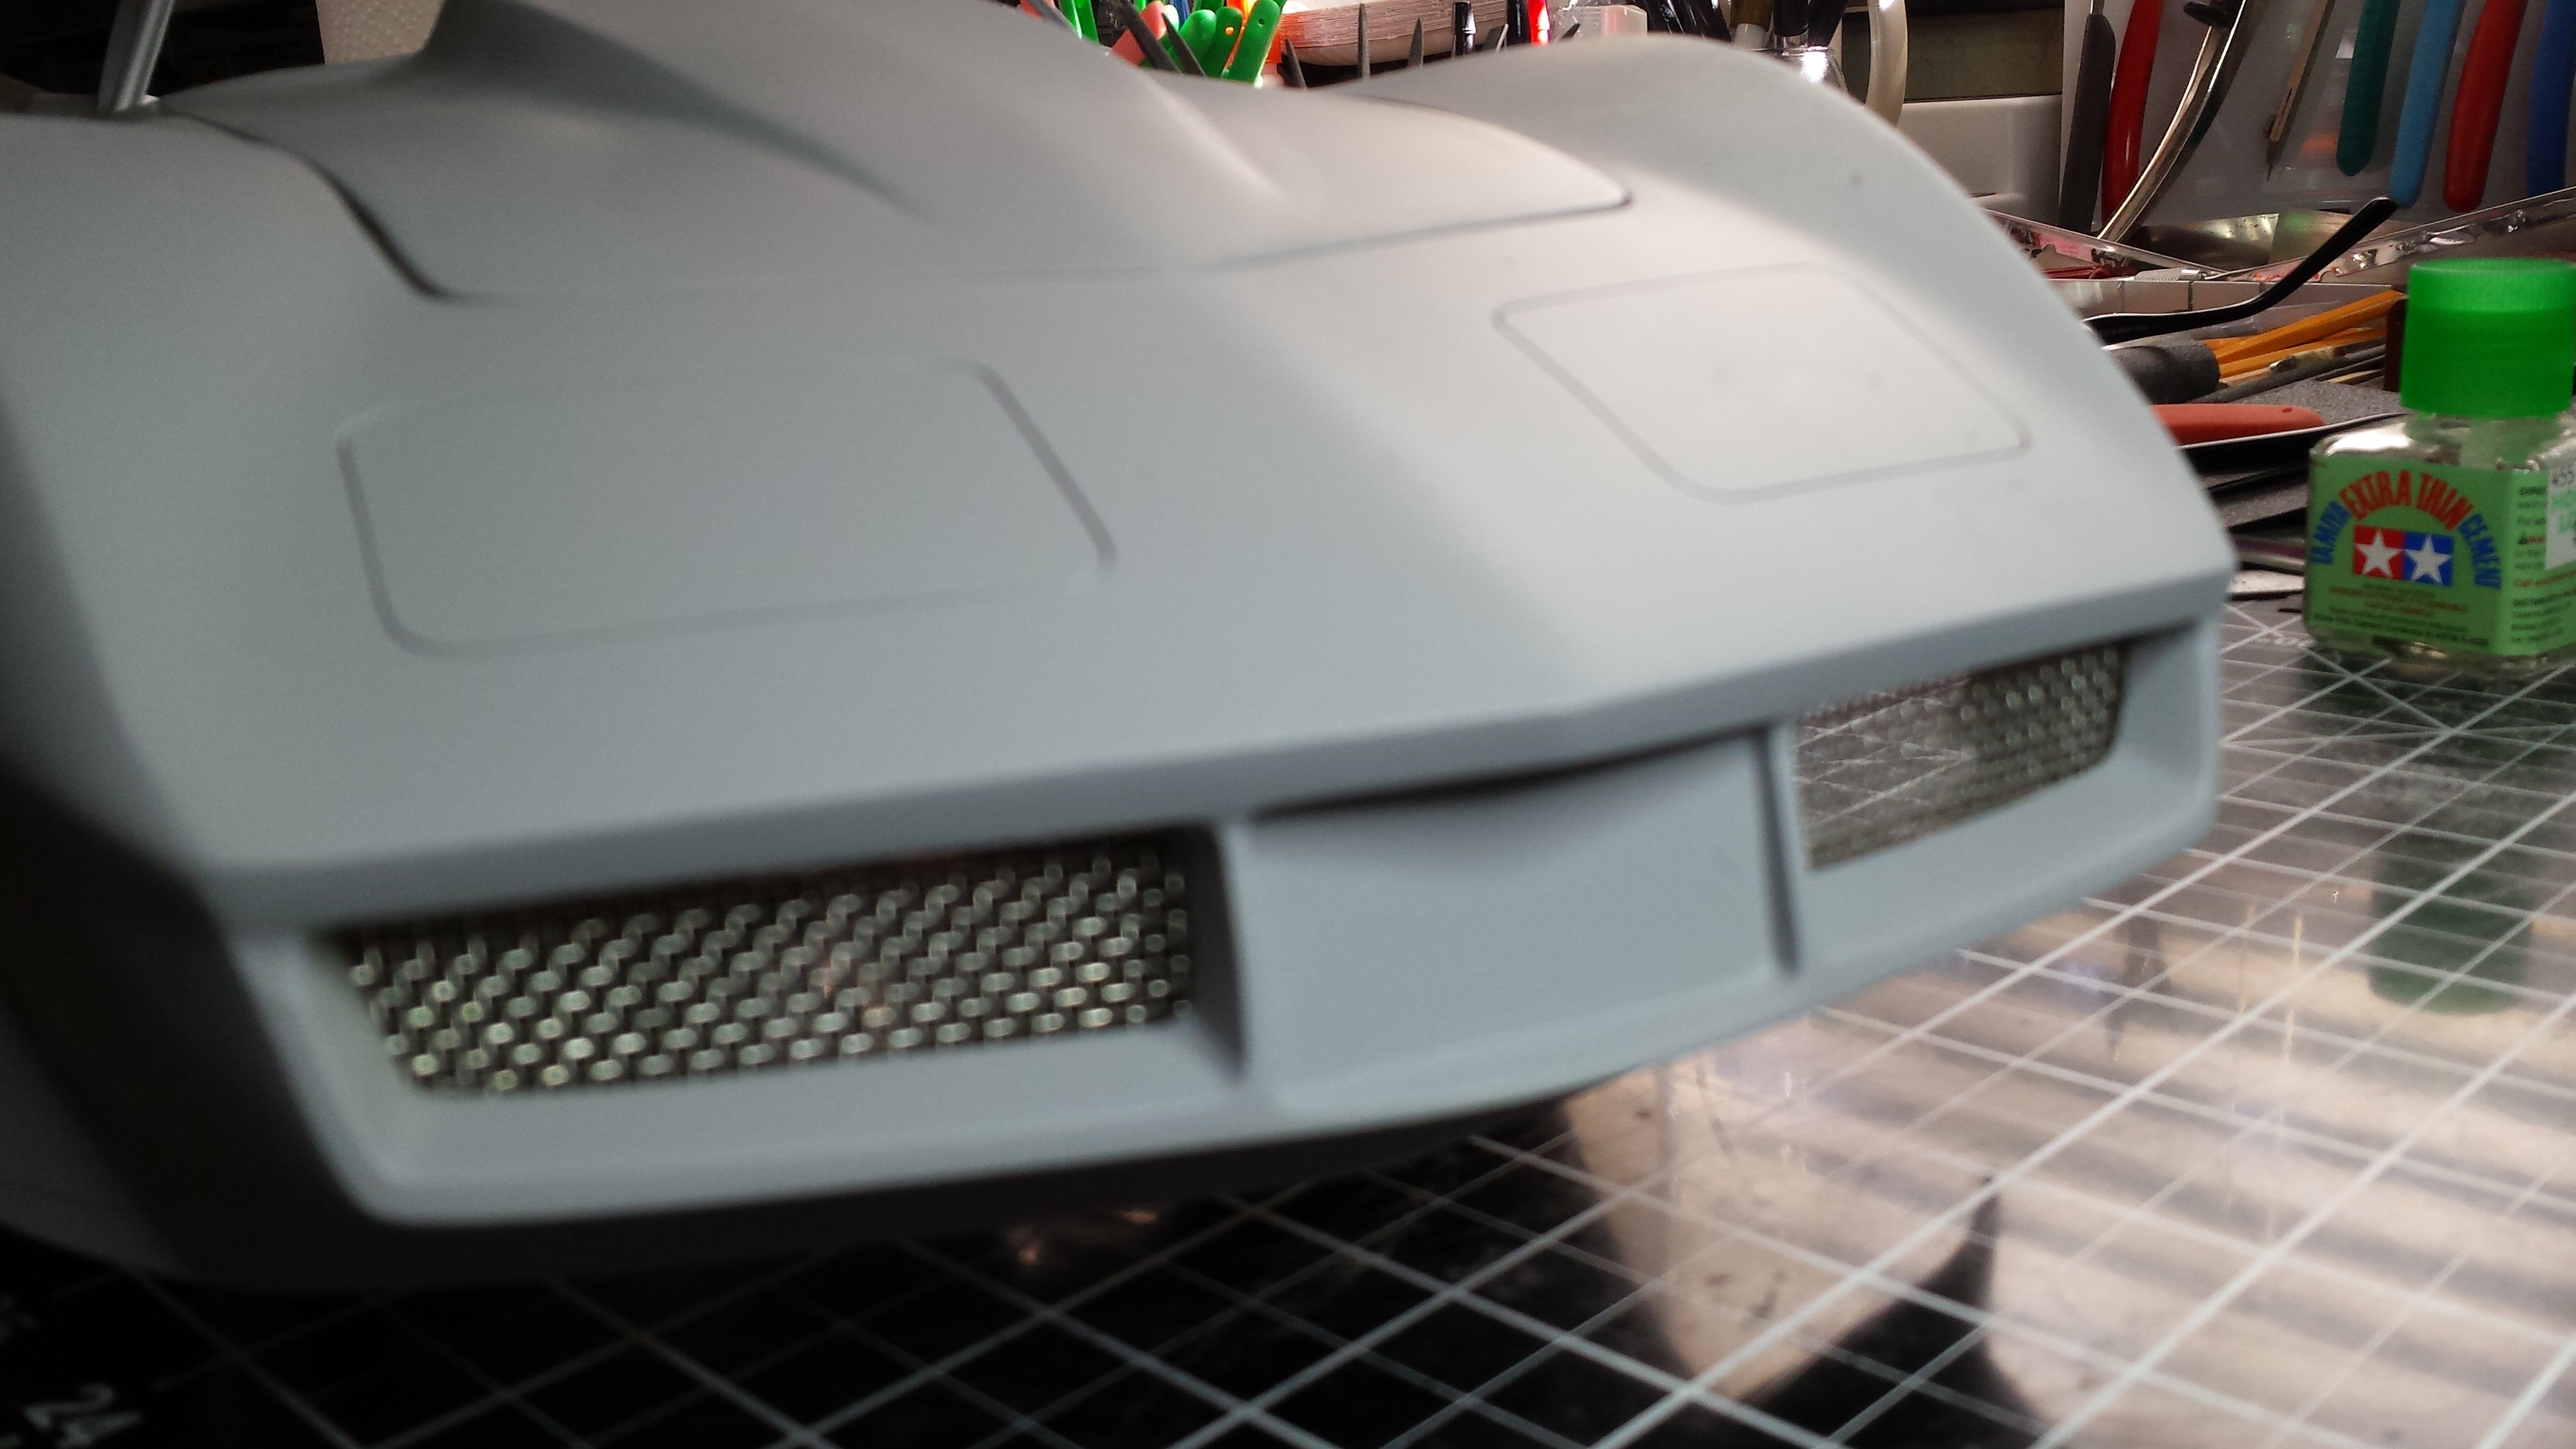
And here are the latest photos having just shot the primer this morning. Note the t-tops are filled and it is now a hardtop. Side signal lights also filled. Gas cap relocated to rear panel. I also added screen material for the front air inlets (older photo, grey primer)
-
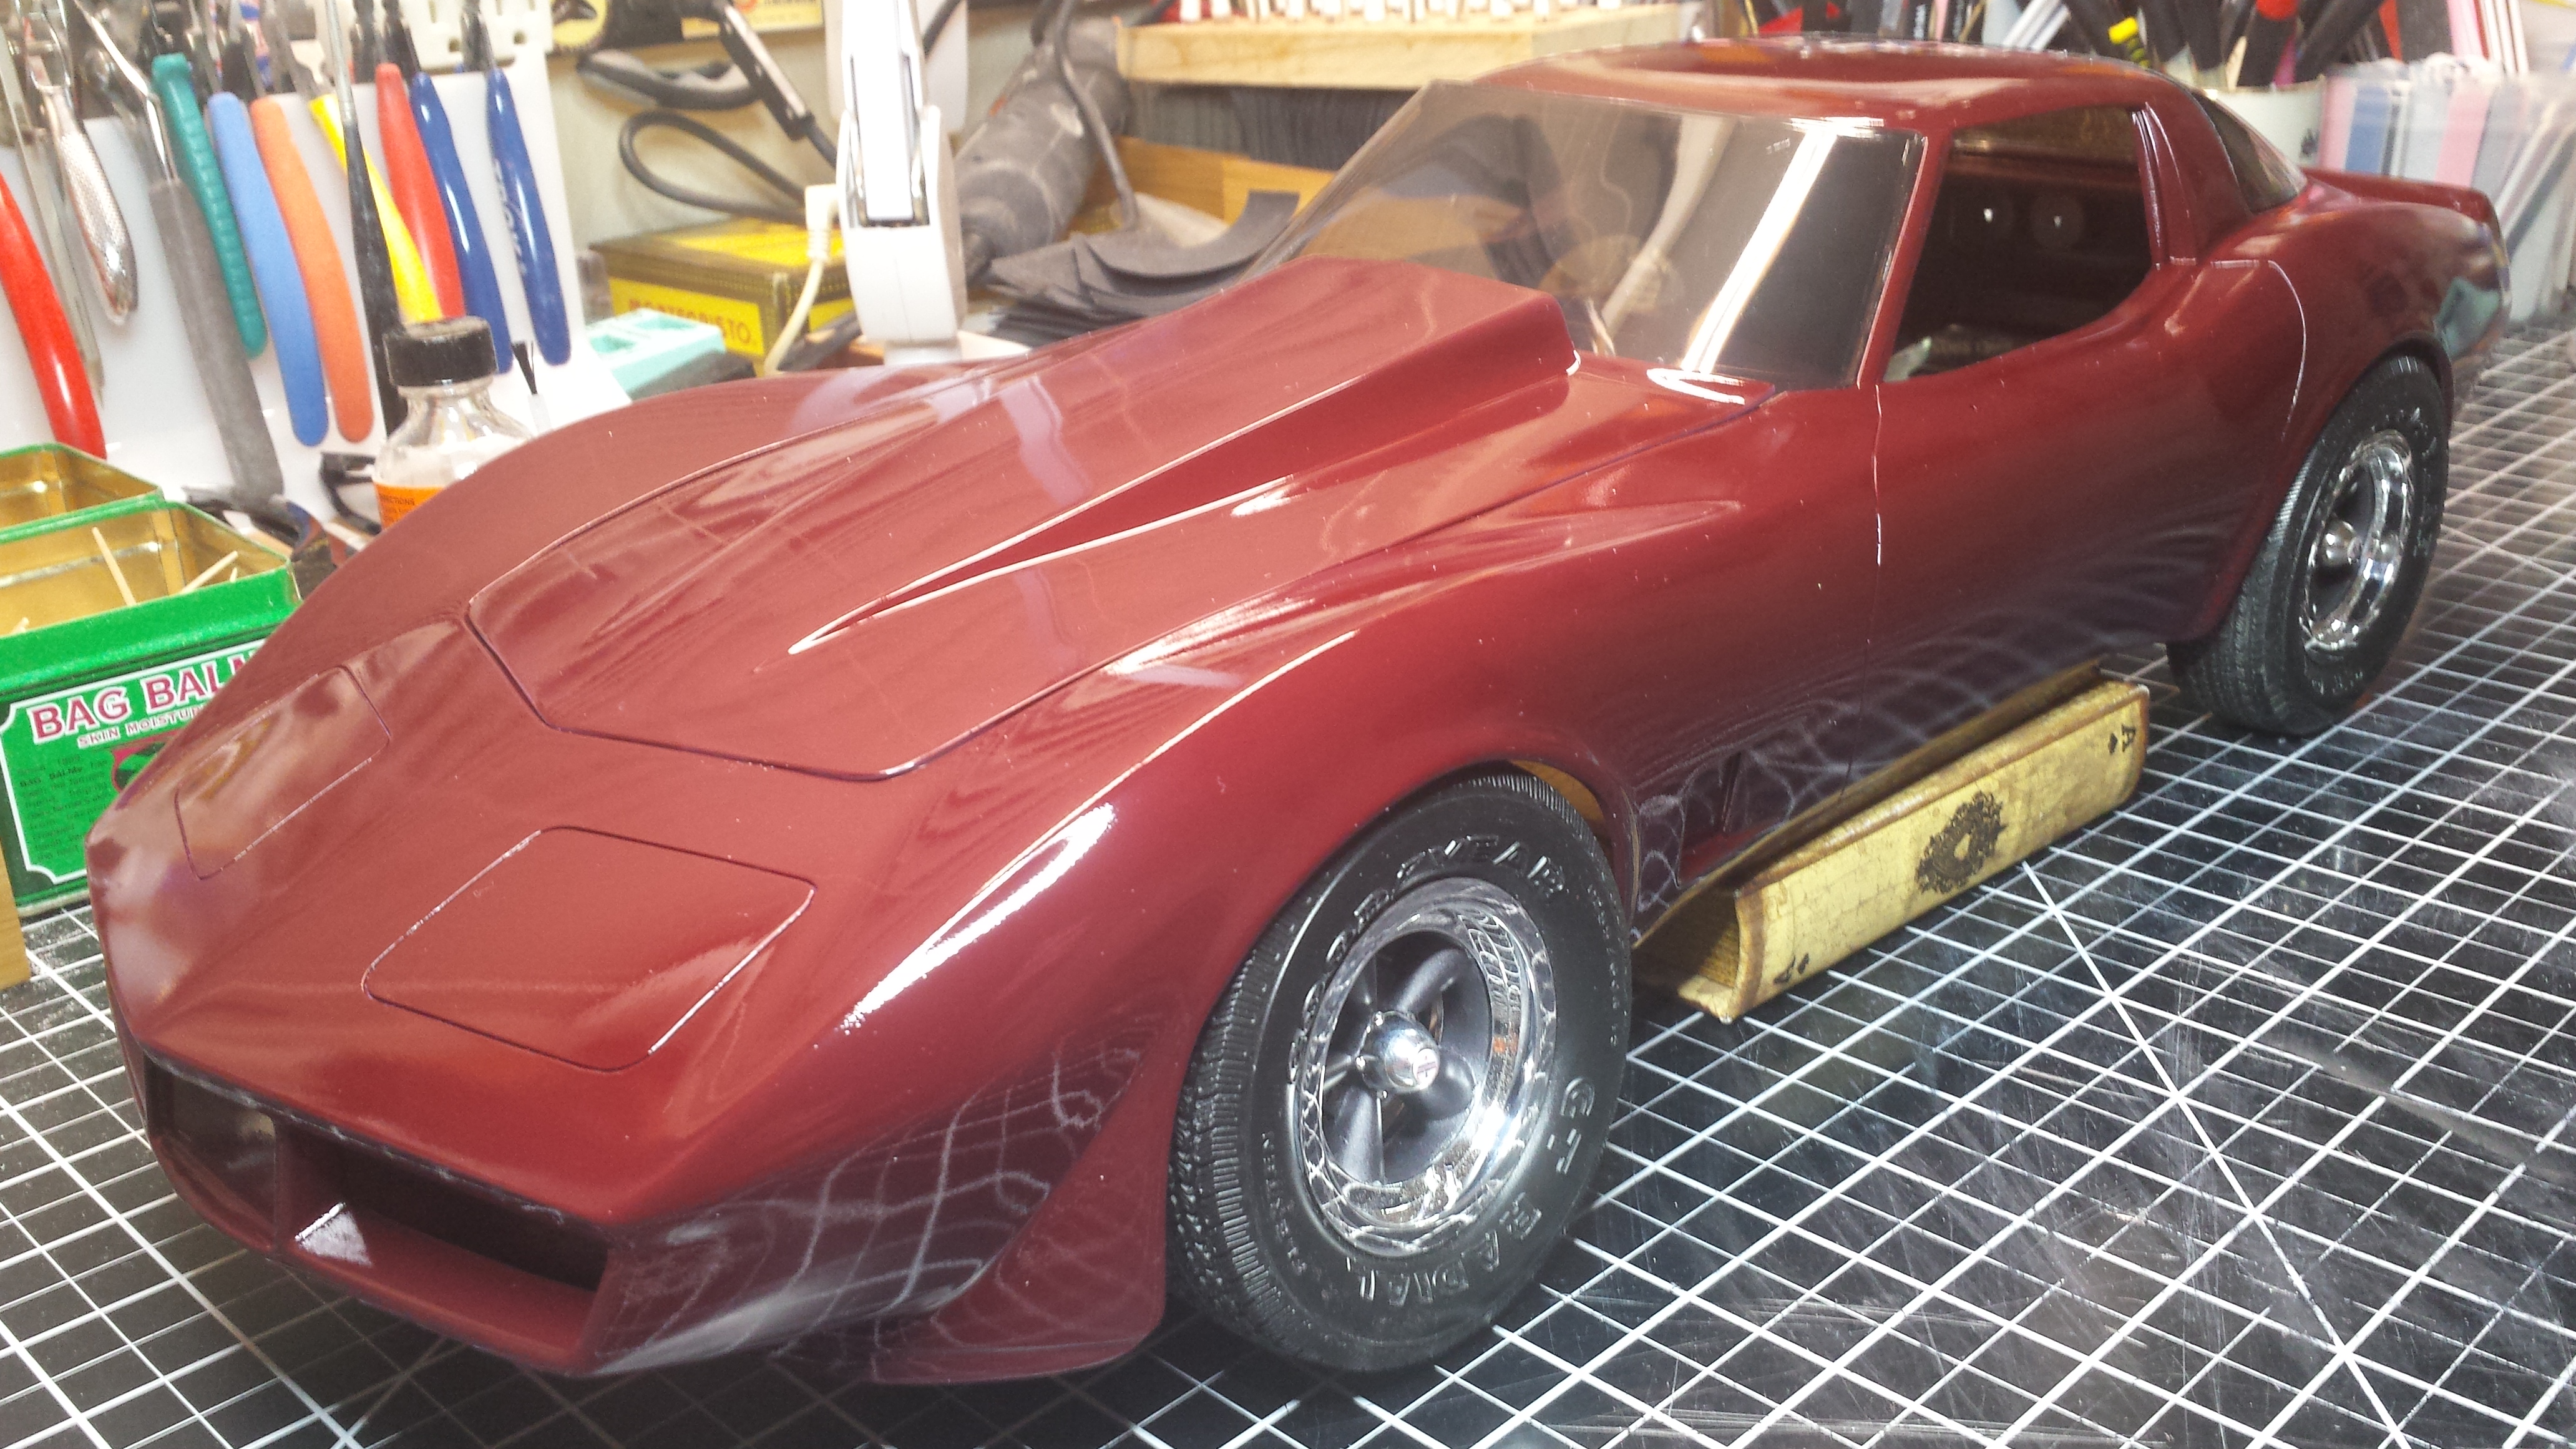
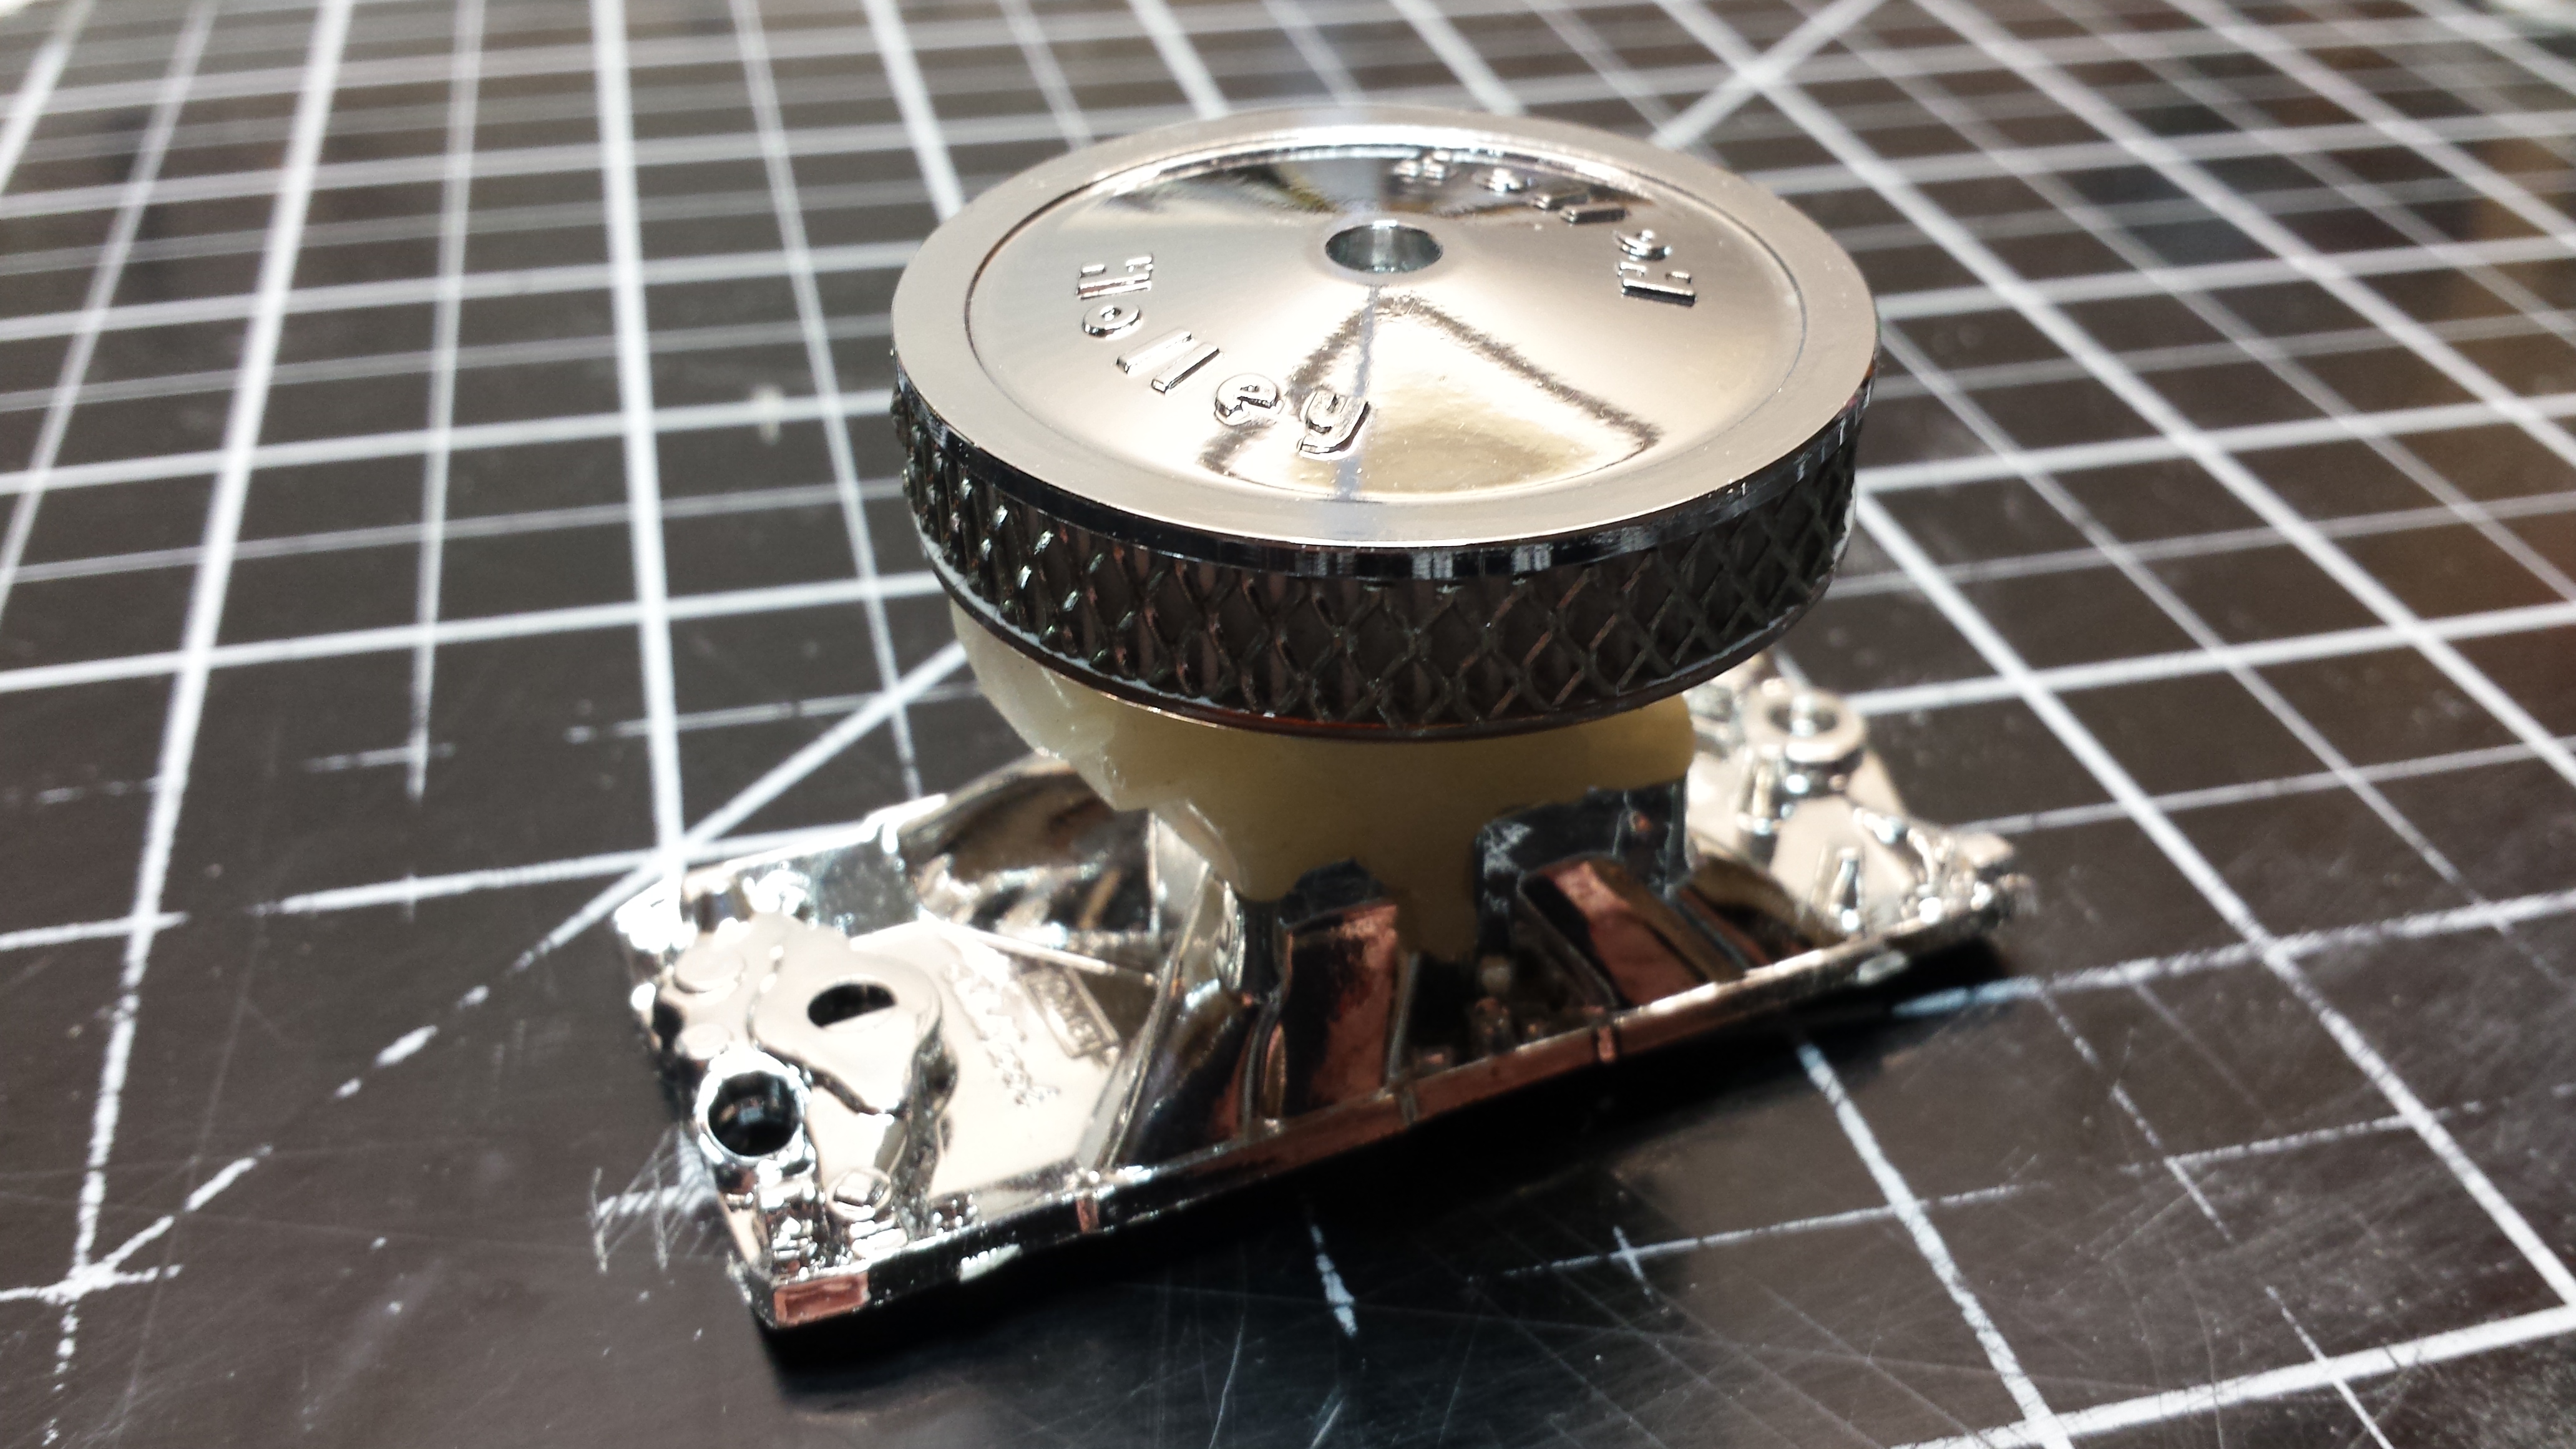
And this is why I had to modify the hood - to fit the high-rise manifold and Holley carb from one of the Monogram T Buckets (which use SBC's). The Holley air cleaner is from RC4WD.
-
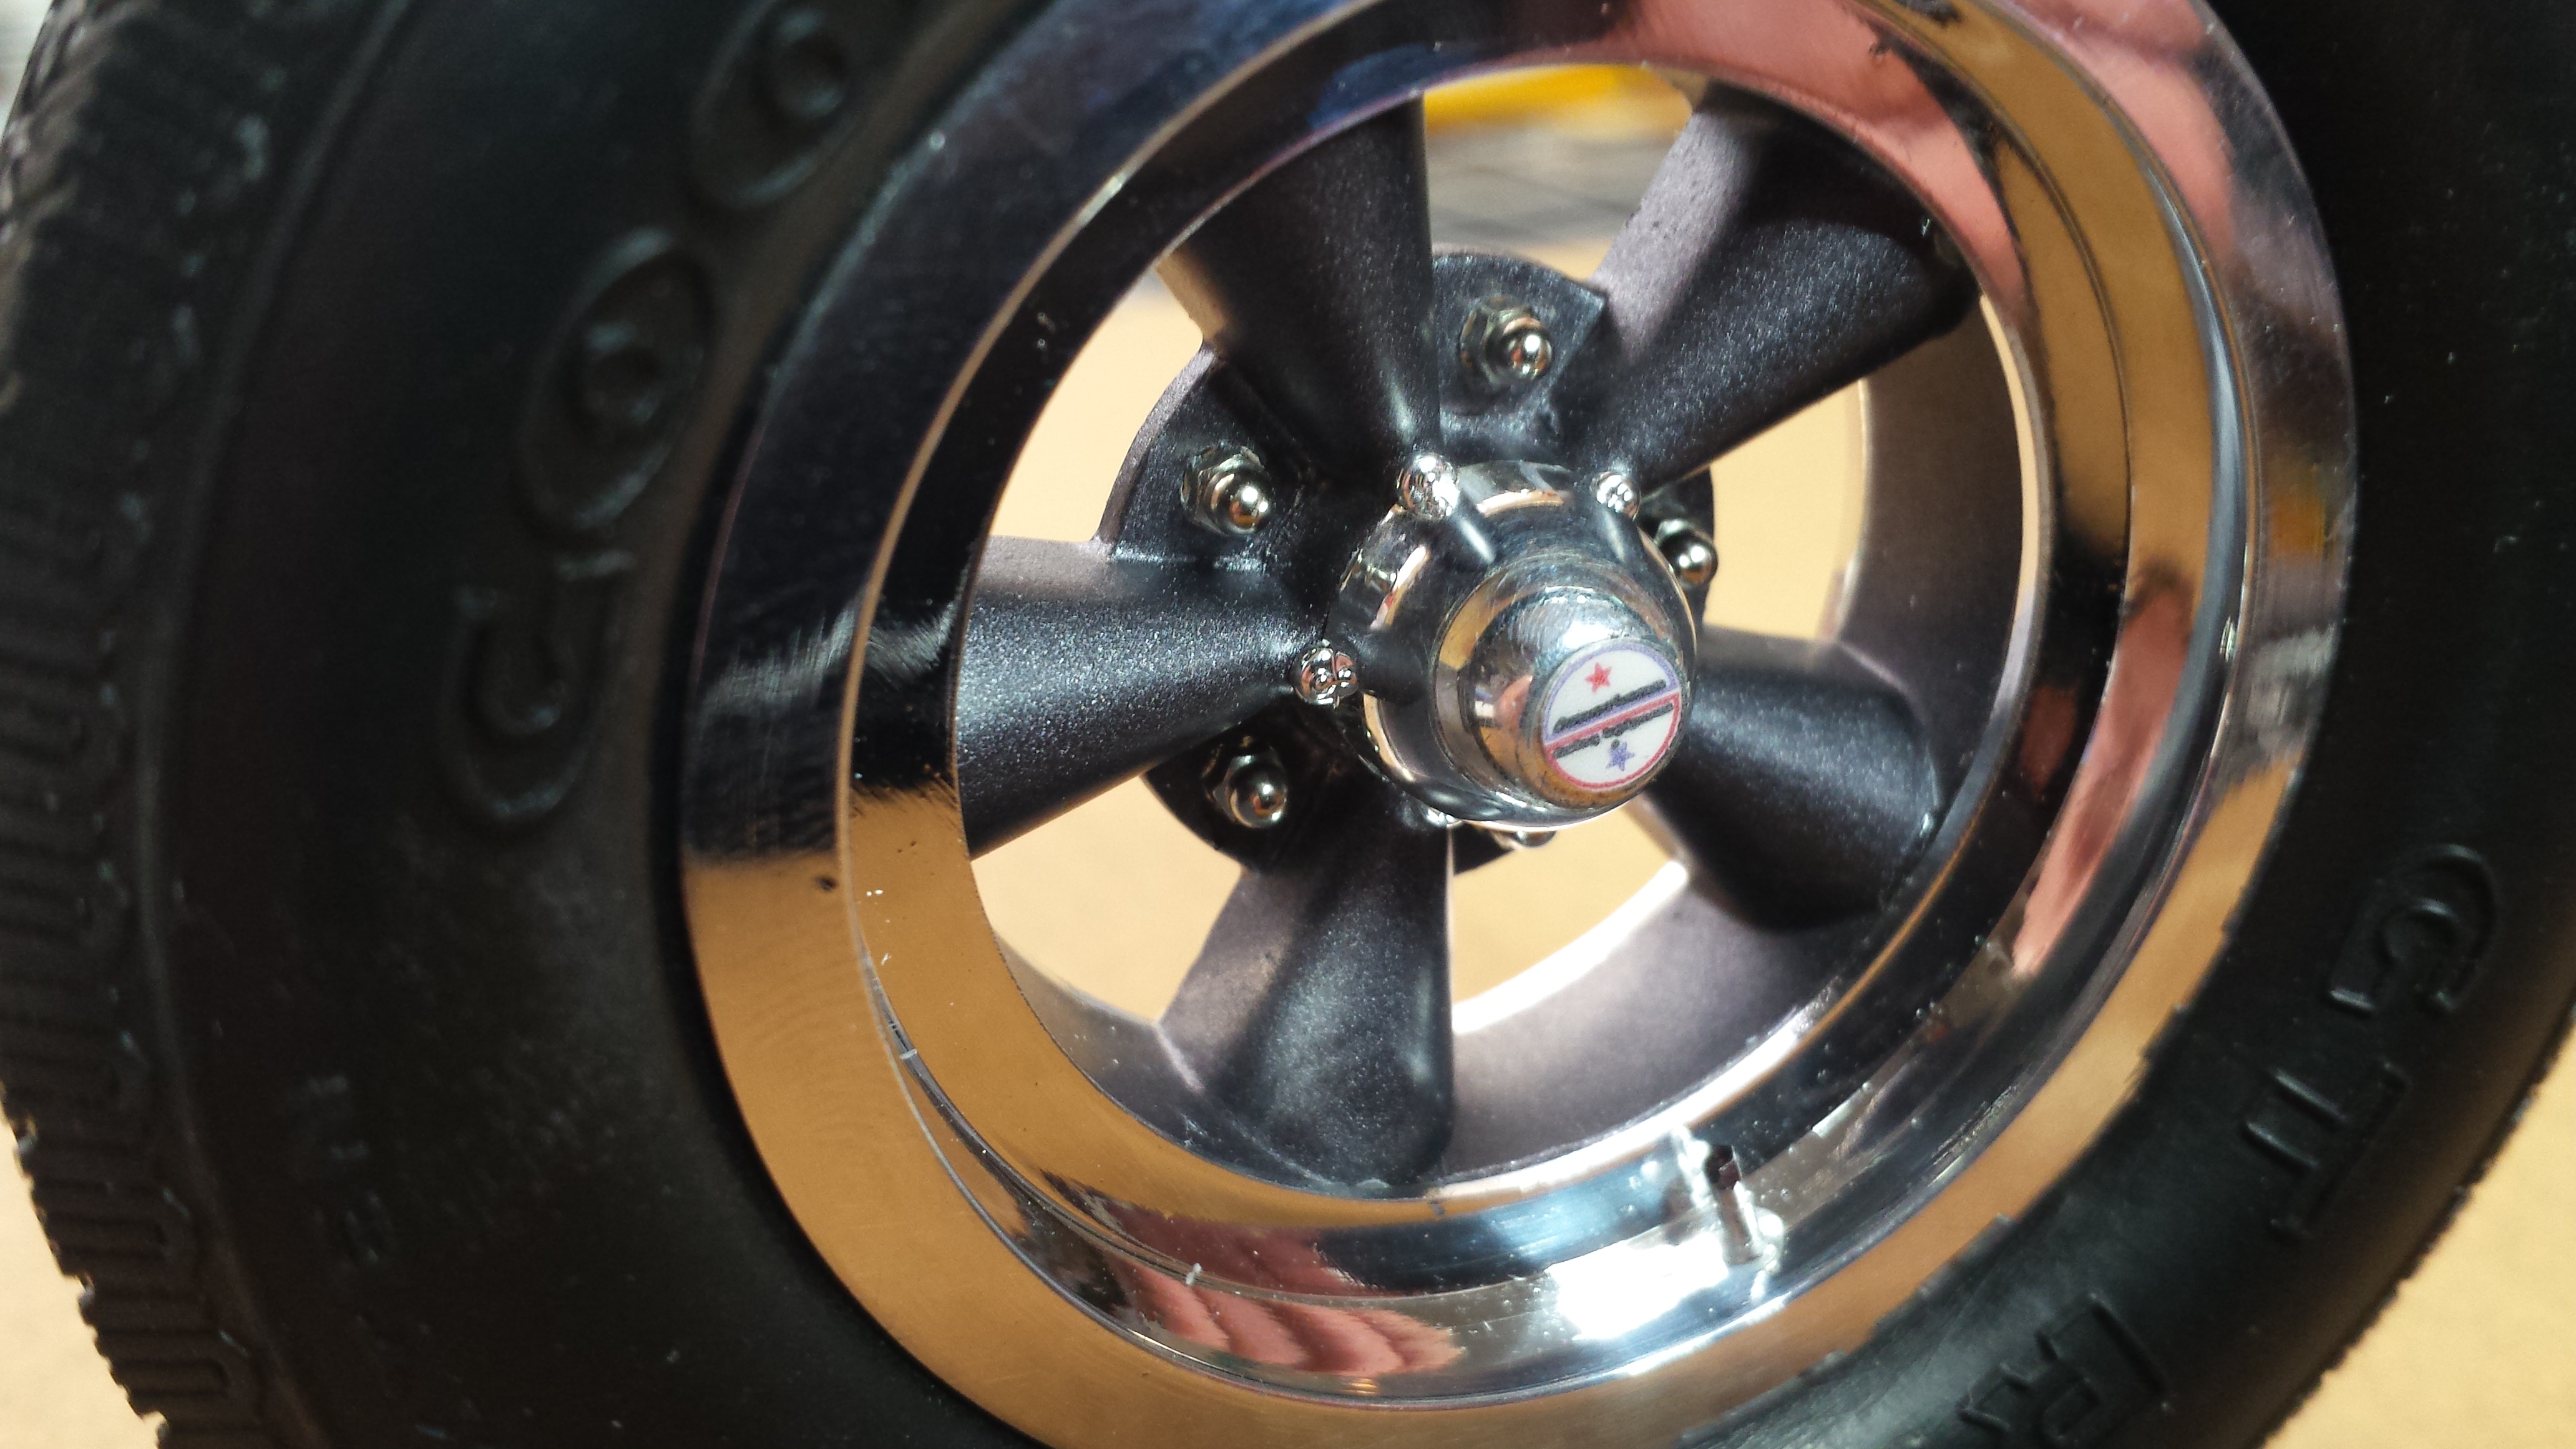
The wheels are American Racing Torq Thrust. They are very easy to make using the wheels from the Big Tub or Big T. I added valve stems and custome printed wheel cap logos.
-
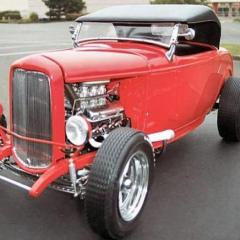
I've been building this Corvette on the side while I'm finishing up the Lindberg T pickup. I actually have all 4 Monogram Vettes and my goal is to build them each with mild modifications or custom add-ons. These kits are short on working features if that's what you are looking for but have oodles of potential. If you want to show off a really cool paint job, these large models are great. I'm sticking to simple body mods, engine upgrades, wheels and interior. I'll start posting my progress here.
-
Things seem to be moving slower as I near the finish line. The spark plug wires now have boots and should be connected to the plugs today. The carbs are ready to mount next with a minor modification to the kit linkages. I want to finish this so I can devote more time to my next project, the '82 Monogram Corvette. I'm doing it as a mild custom with wheel and engine upgrades. Here she is with the first working primer coat, posing with window glass and wheels. Note hood modification to fit the hi-rise manifold and Holley carb from one of the Monogram T's.
-
I finished adding the hardware to the carbs. I pretty much used what I had so some screws may be out of scale and others might be incorrect. Next up is to spiff up the kit linkages. They will mount on the shaft with the removable acorn nut.
-
-
o
-
carbs
-
I stayed up late watching the Olympics so I was able to drill out the Strombergs. Even though I was trying to keep it simple and basic I still ended up drilling 21 holes per carb. I sprayed them with silver leaf and did another test mock-up on the engine. My plans are to get this thing done and on the road by the weekend.
-
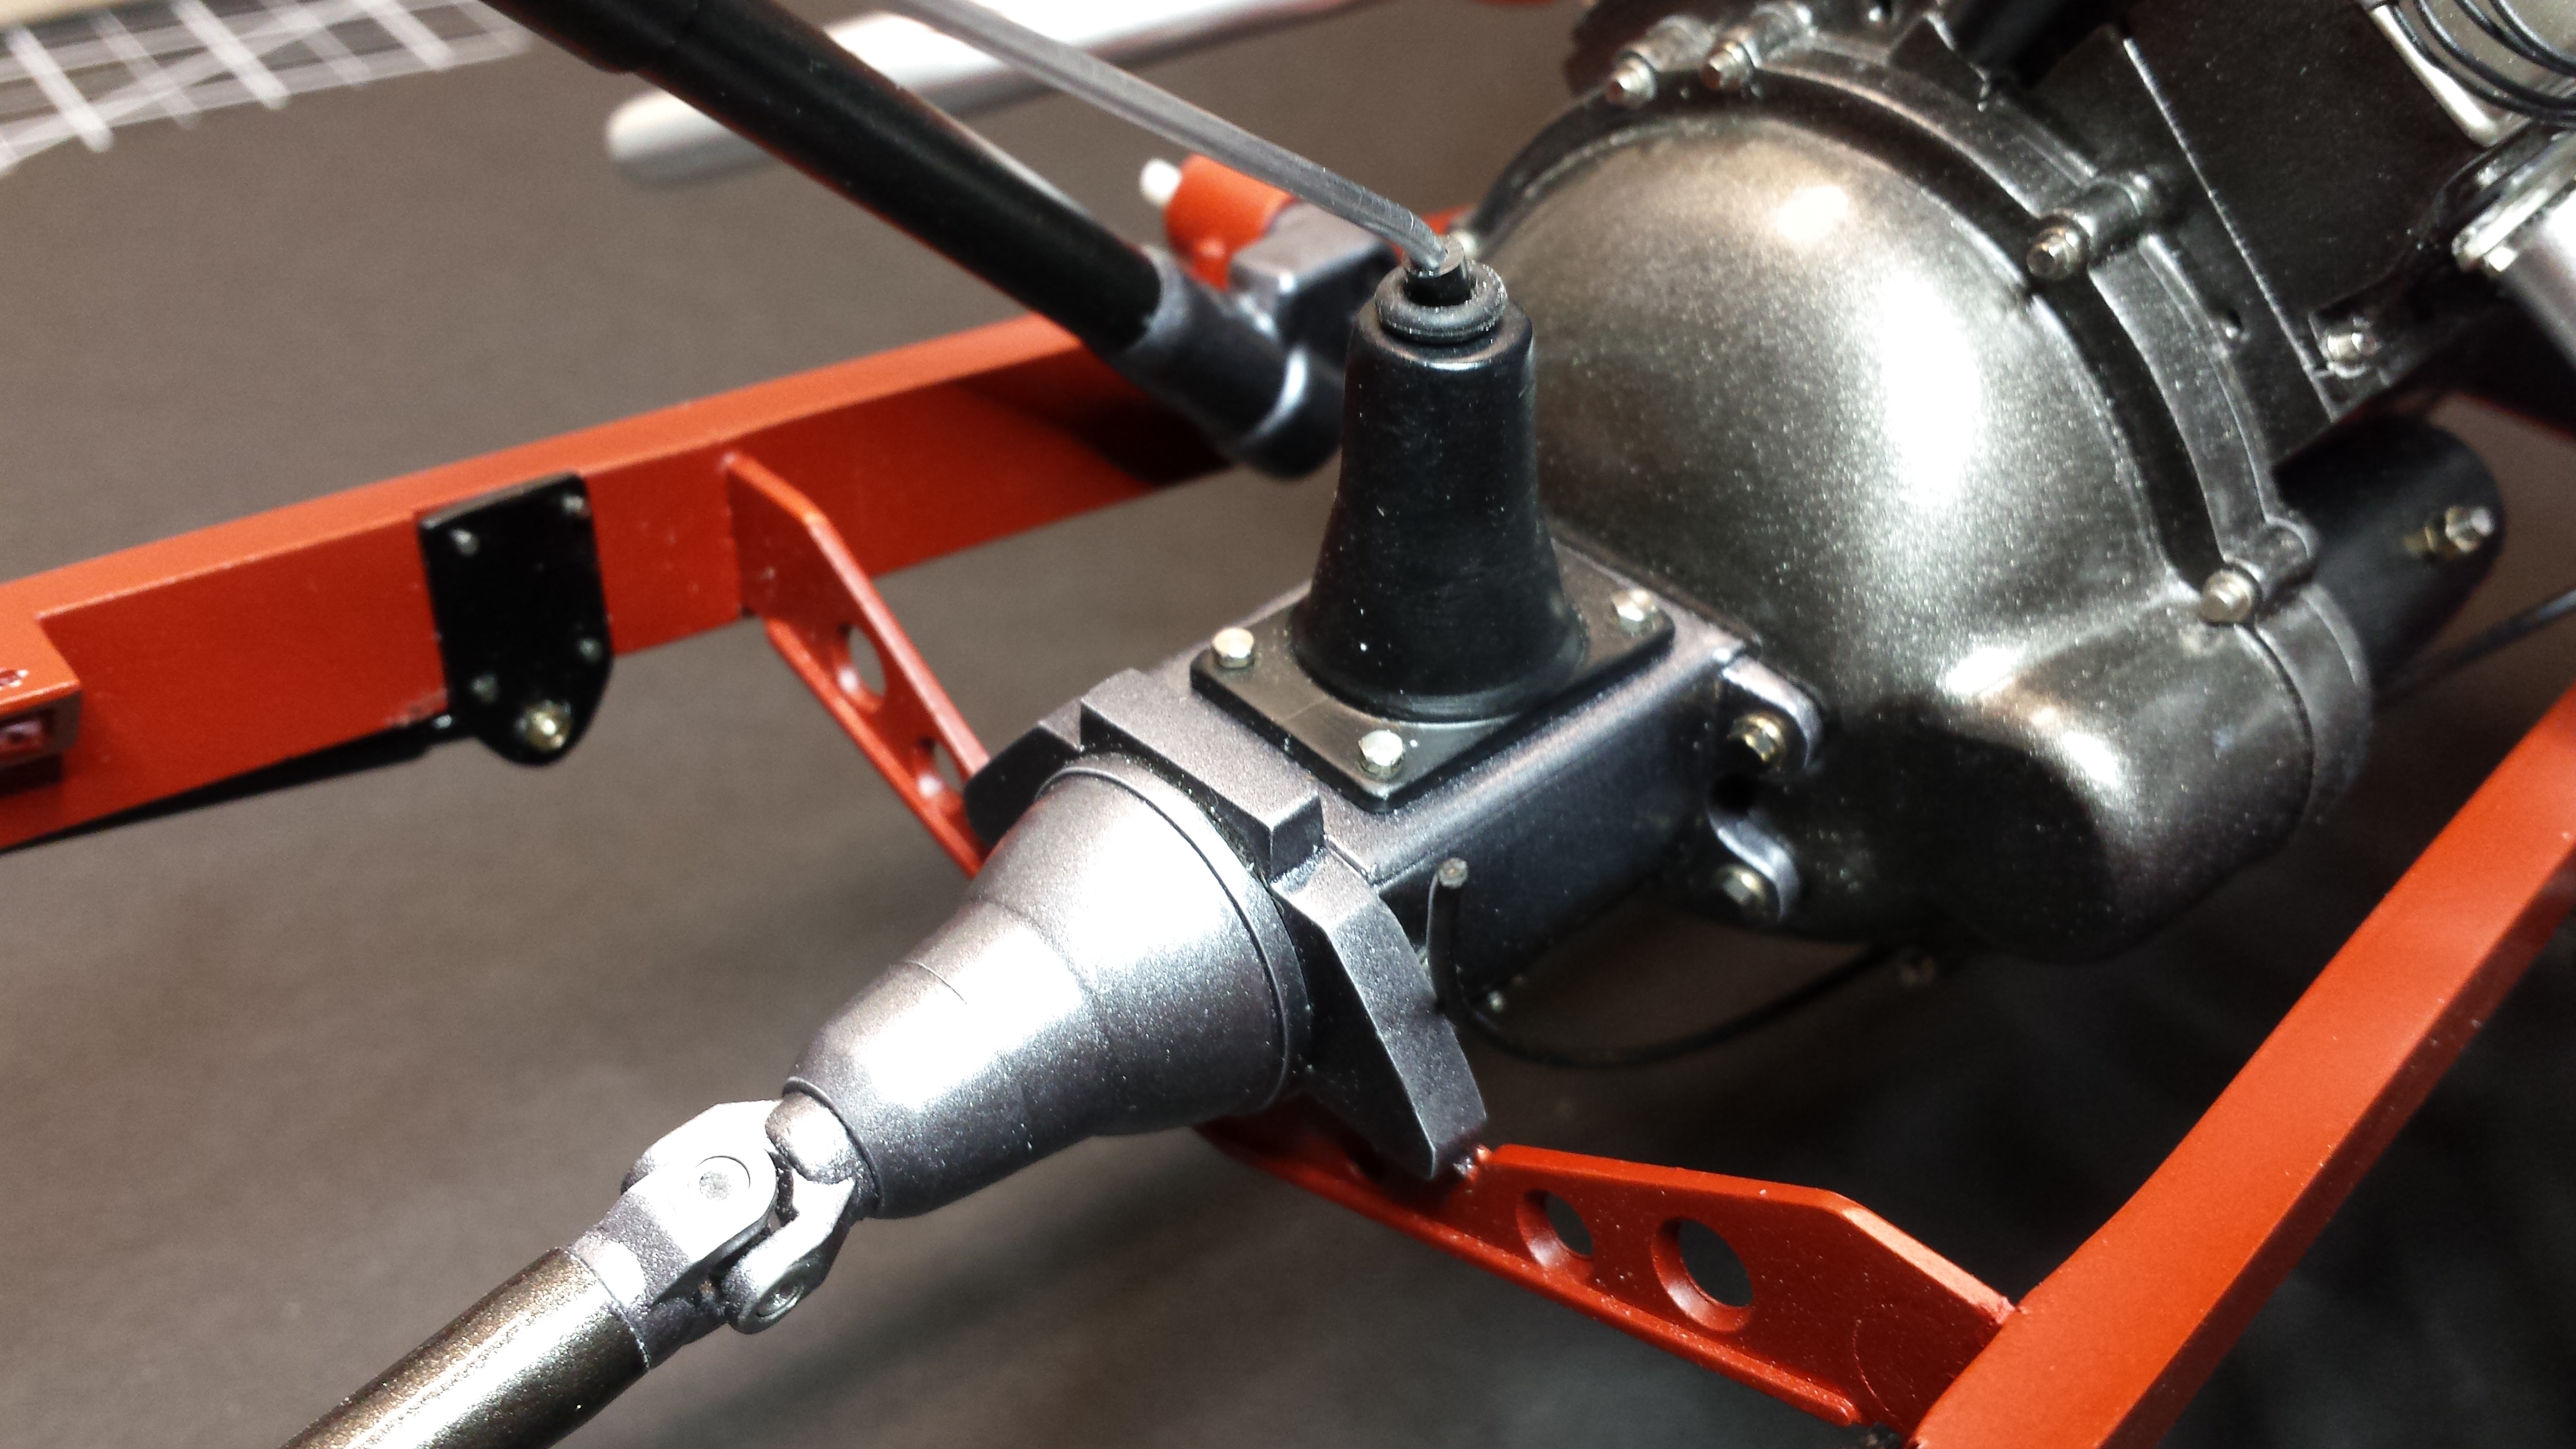
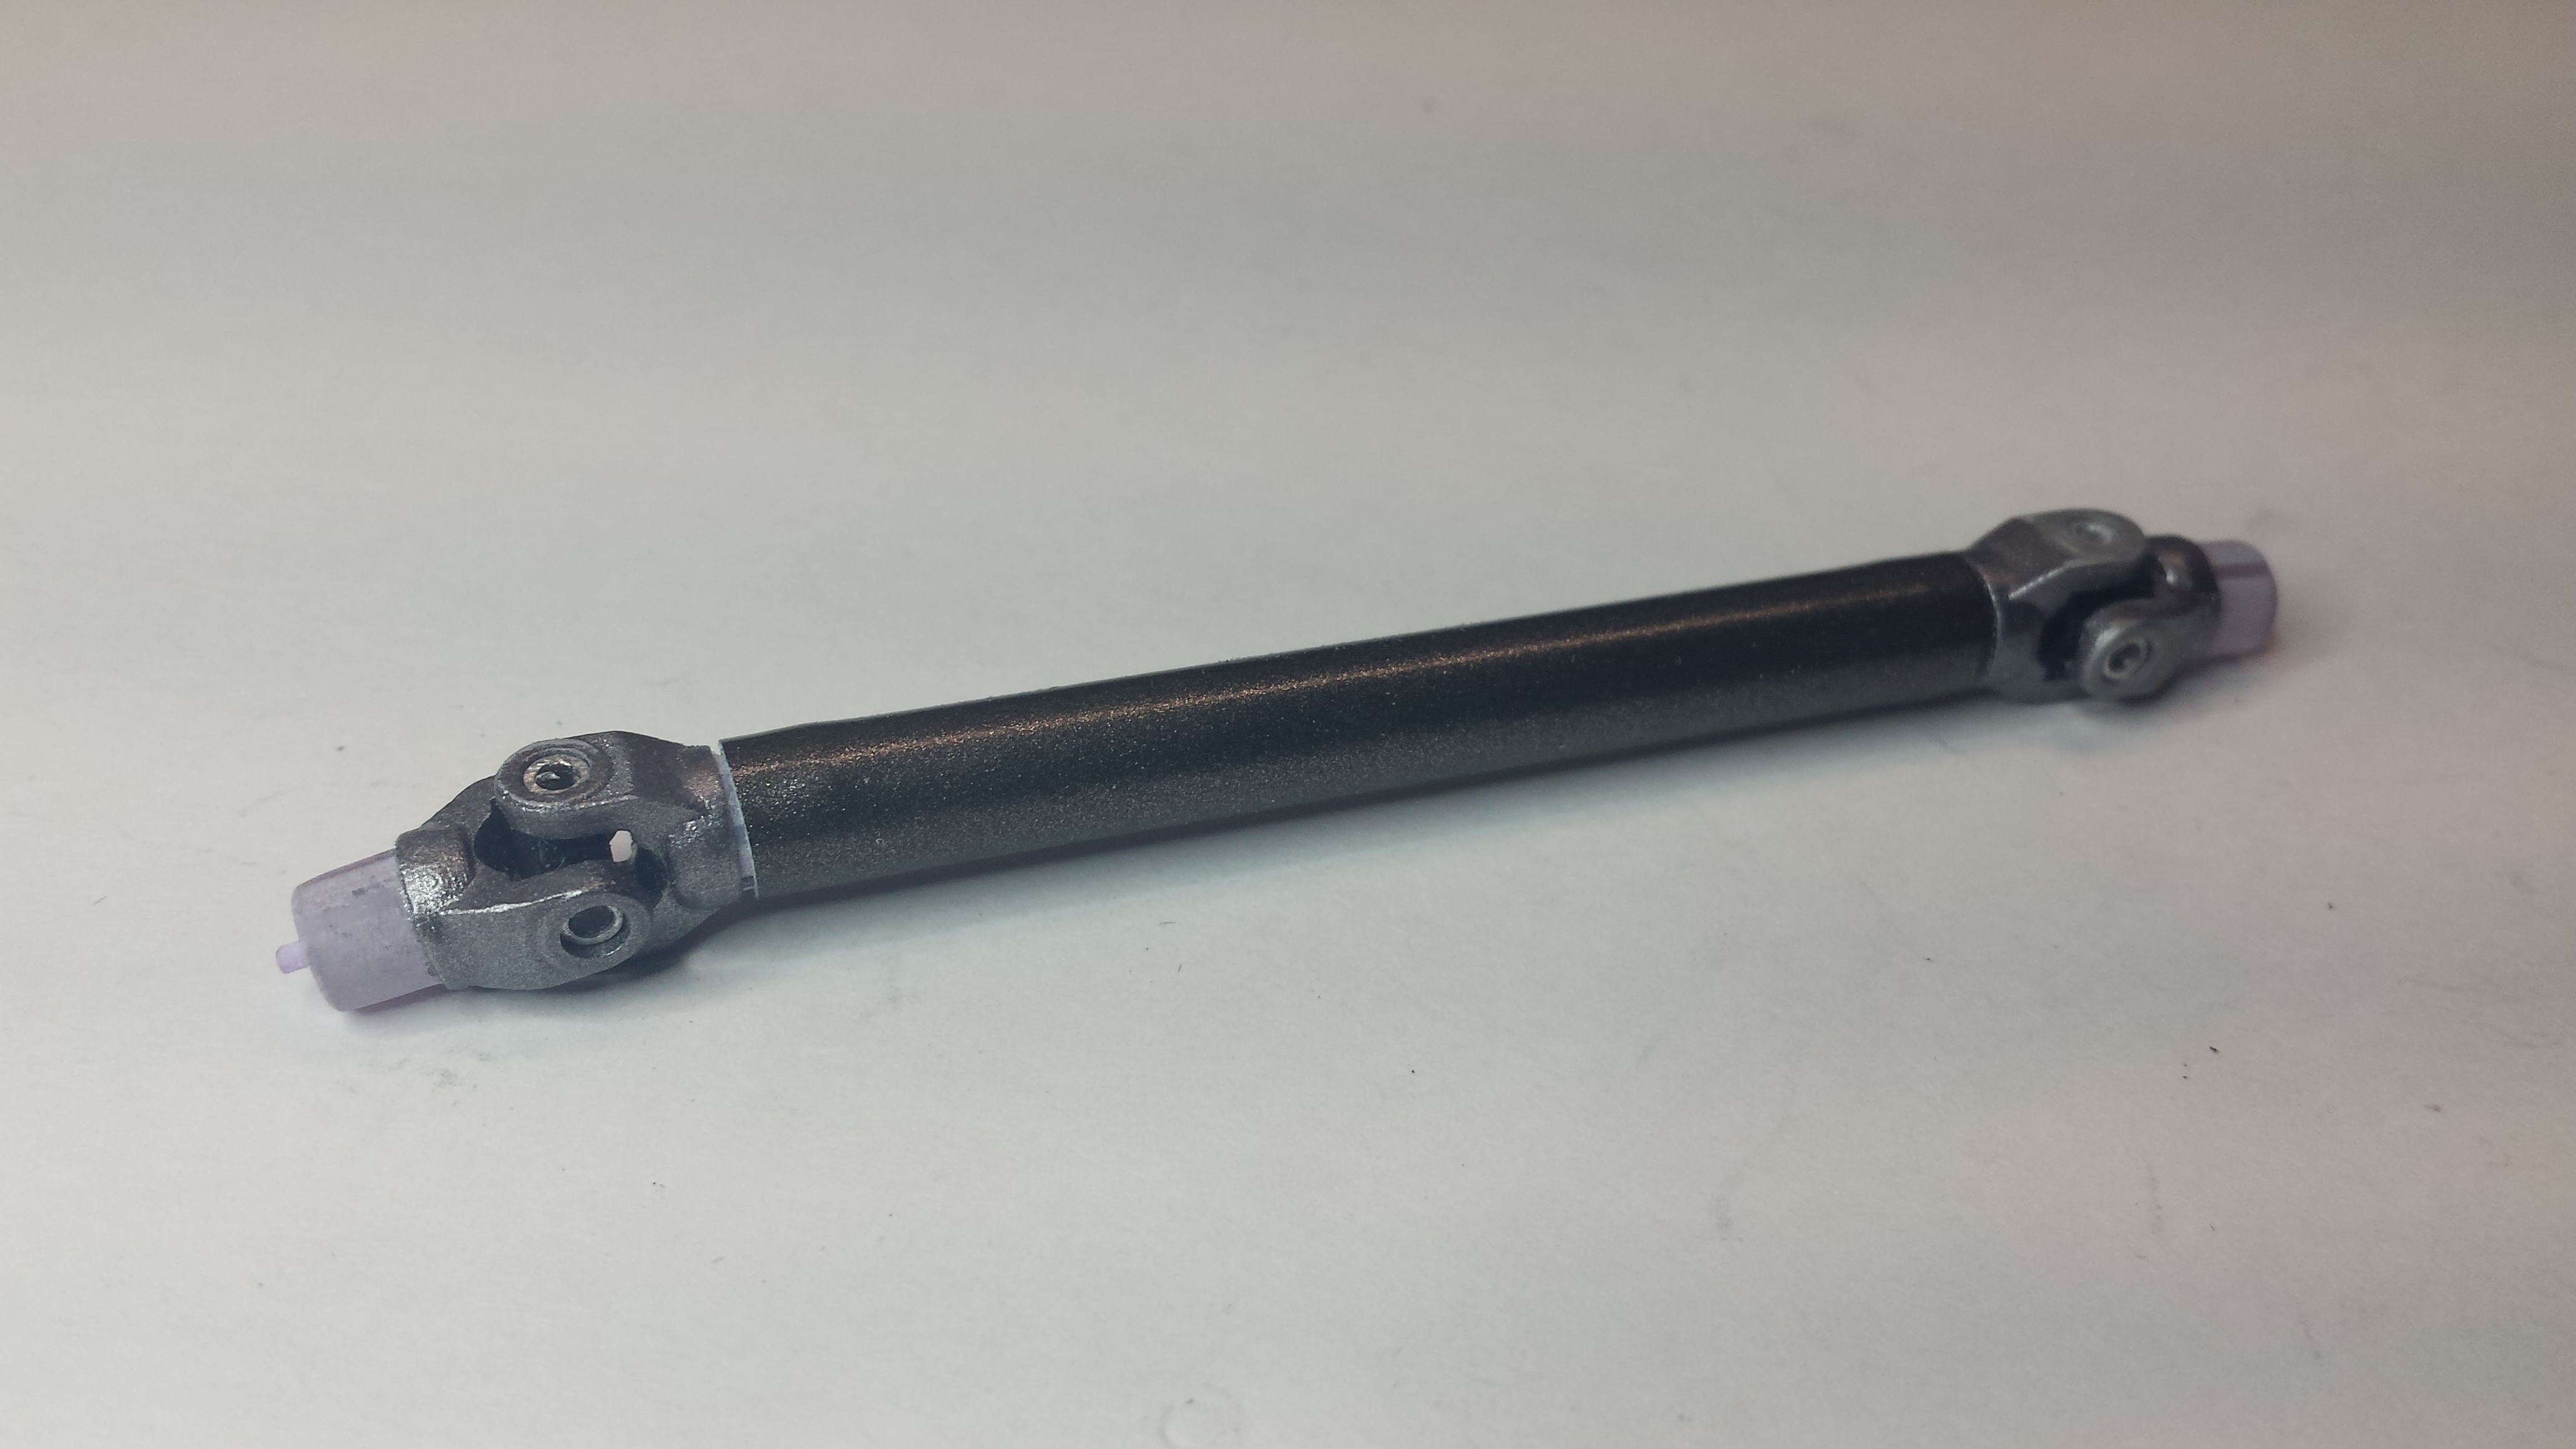
Finally, I finished assembling the universals on the driveshaft.