Steve Osbourne
-
Posts
145 -
Joined
-
Last visited
Content Type
Profiles
Forums
Events
Gallery
Everything posted by Steve Osbourne
-
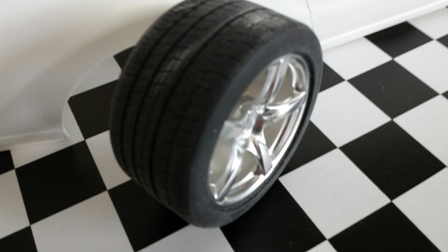
And here is one of the aforementioned Porsche wheels (rear). I plan to strip them and repaint with Tamiya titanium silver.

-
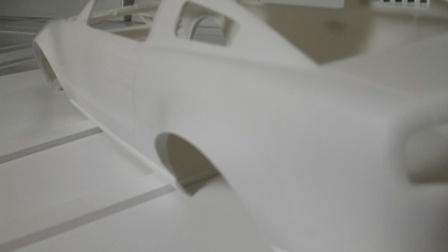
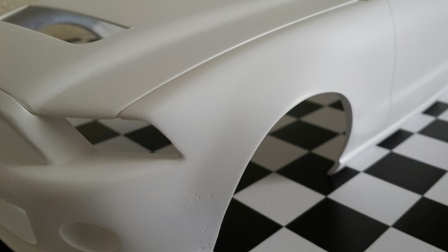
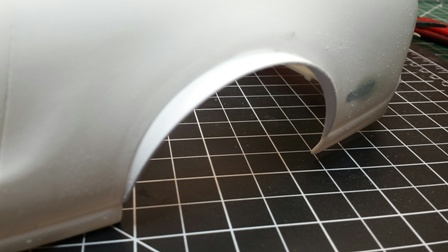
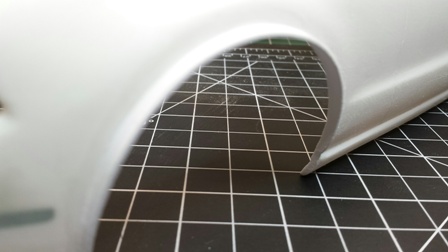
Thanks Ray. Things are moving right along. I was able to apply a few coats of Tamiya fine white primer and wet sand with 600 grit sandpaper and I like the results.
-
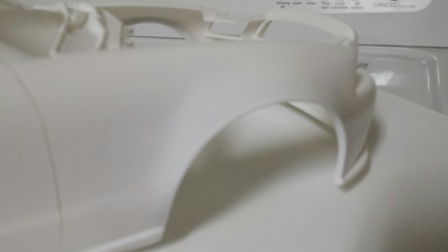
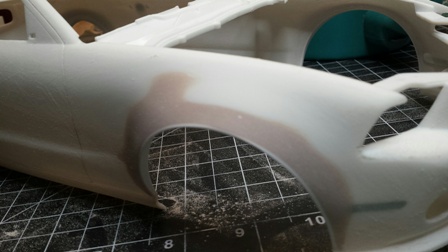
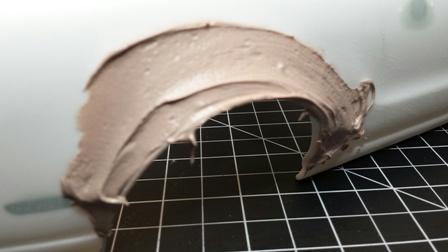
Here I’ve smoothed out the Bondo and the flares have taken their shapes. Only need some minor filling in spots before primer. It’s quite noticeably here how much wider the Porsche tires are. I’ve also gone over the entire body with 120 grit wet-dry sandpaper and smoothed out the ridges and sharp edges.
-
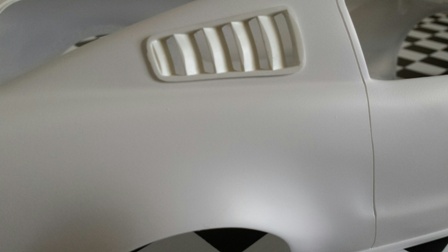
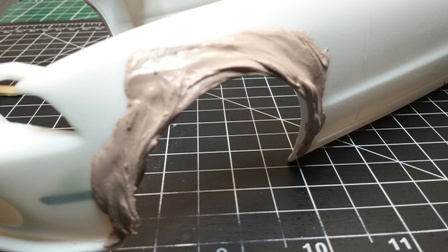
2010 SHELBY GT500 CUSTOM I’ve finally decided to get one of these after seeing so many nice build-ups here - although I hadn’t really decided about the direction I would take the build. I had a few ideas but nothing concrete. About a year ago I had picked up a set of 1/12 Porsche Carrera GT wheels and tires off eBay not knowing at the time what I would use them on. After measuring the Porsche tires I found them to be the same height as the Shelby tires but decidedly wider, which would be cool. That was all I needed. I would build the Shelby around the Porsche tires and rims. Of course, that meant widening or flaring the fenders but that shouldn’t be a problem. I want to make a few other minor body modifications – shave the door handles, fill the side marker lights and third brake light on the trunk and fill (delete) the stock gas filler door. I also want to smooth out most of the sharp edges on the Shelby. I’ve already filled the rear quarter windows and cut out a new opening where I will install the vents from the ’65 Shelby GT350. I also want to delete the large round Shelby logo on the trunk and make that the gas filler, perhaps frenching it in. I’m going to also delete the Shelby emblems on the front quarter panels. There will be other minor modifications, scratch-building, kit-bashing and after-market parts. I think I want to remove the rear seat and build a 4-point roll bar. I will add racing seats in the front with 4-point harnesses. Interior will be carpeted. Perhaps more speakers in the rear package tray area. That’s about it. I hope that anyone that decides to follow this build will enjoy it as much as I expect I will enjoy building it. Feel free to make suggestions or comments. For now, here are the fender flares – stage 1, made by gluing a strip of Evergreen plastic inside the wheel well and then applying a generous amount of Bondo to be shaped into smooth flares. The rears were a little bit wider. Also seen here is the filling of the side marker lights and door handles. You can also see where I filled the rear quarter panel windows and then traced around the ’65 vents and cut out.
-
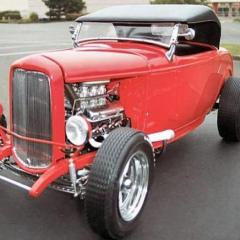
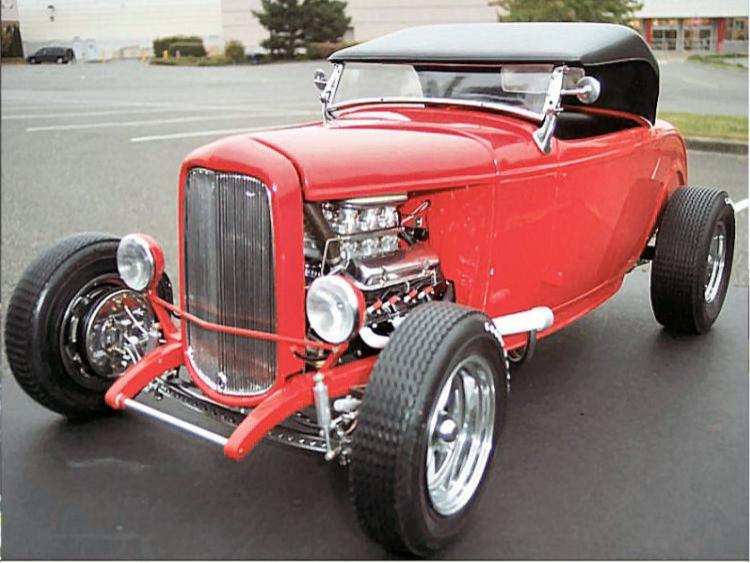
Always one of my favorites. You can go mild, wild or something in between. Here's a few of my deuce builds...
-
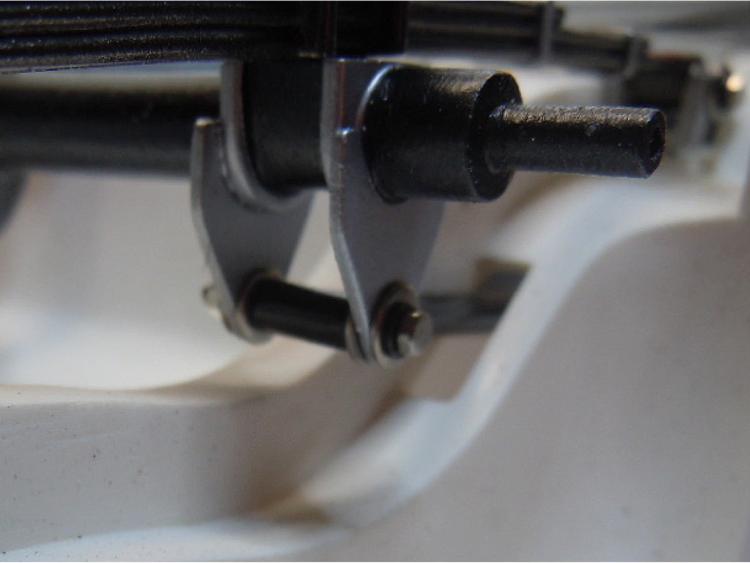
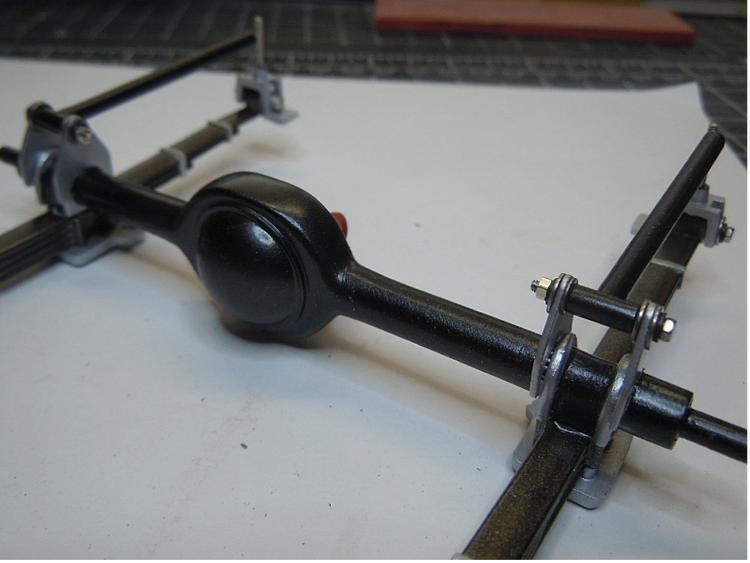
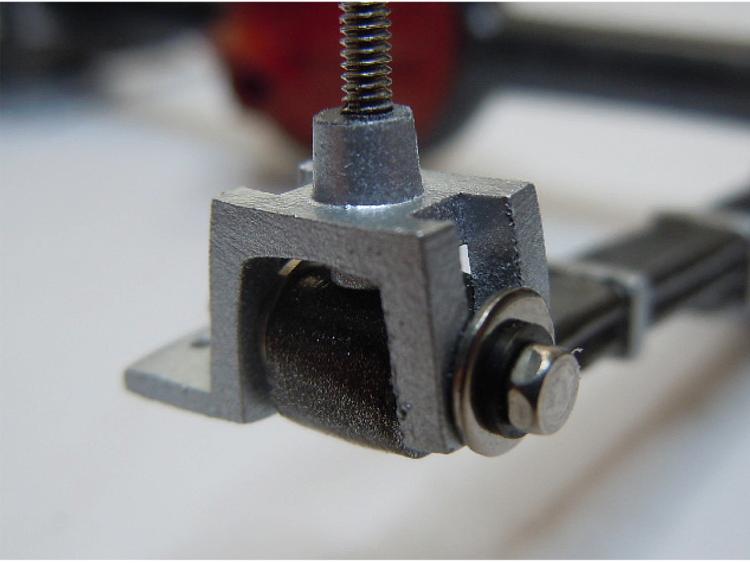
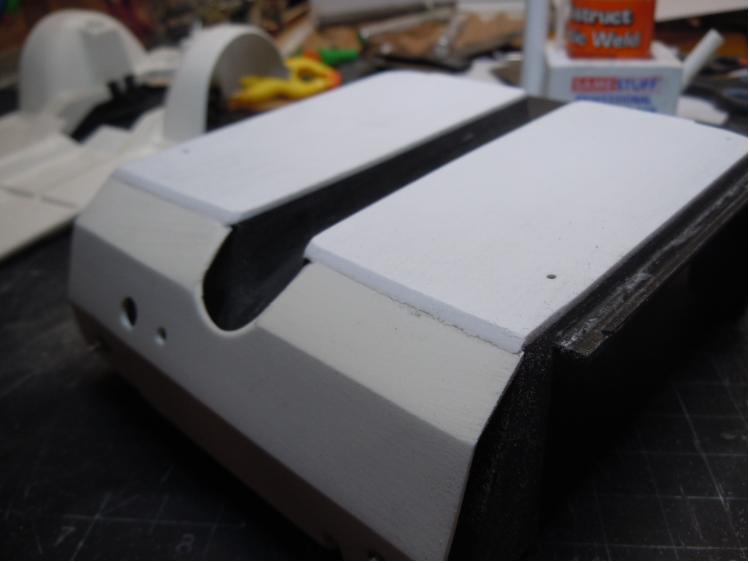
And here are the aforementioned shocks in place and a photo of how everything mounts through the chassis. The shock screws will be trimmed down once they are permanently installed. Until then they are easier to handle with the screws kept longer.
-
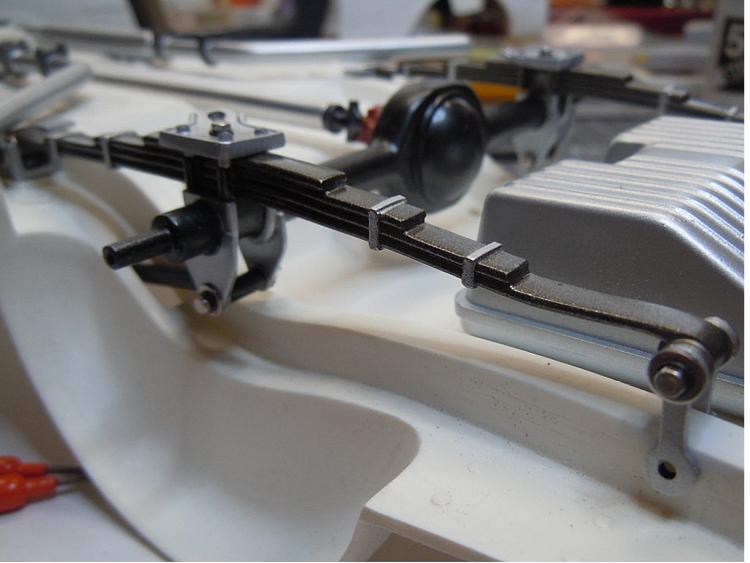
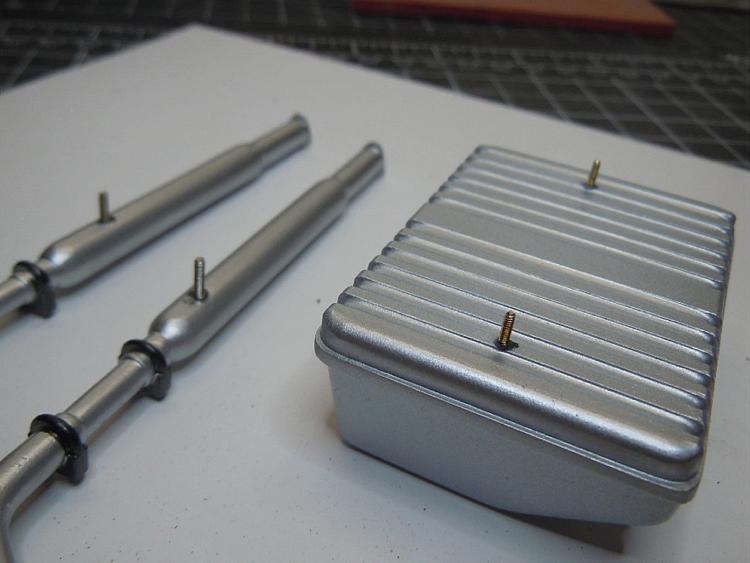
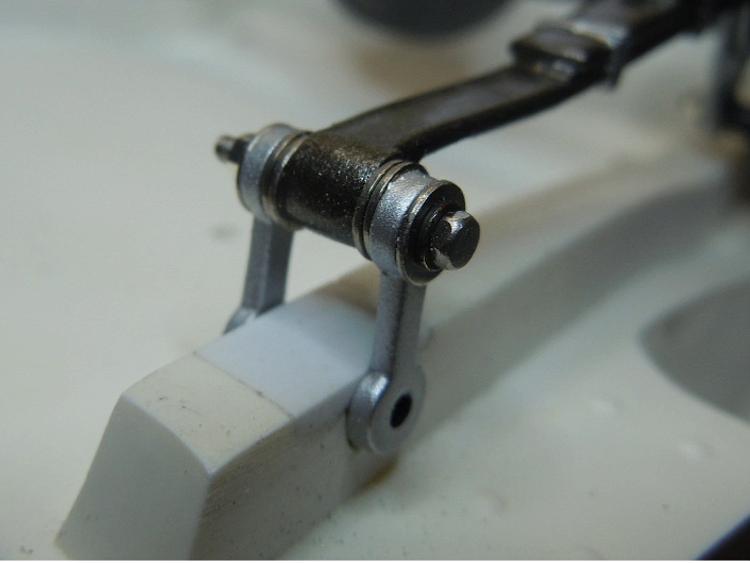
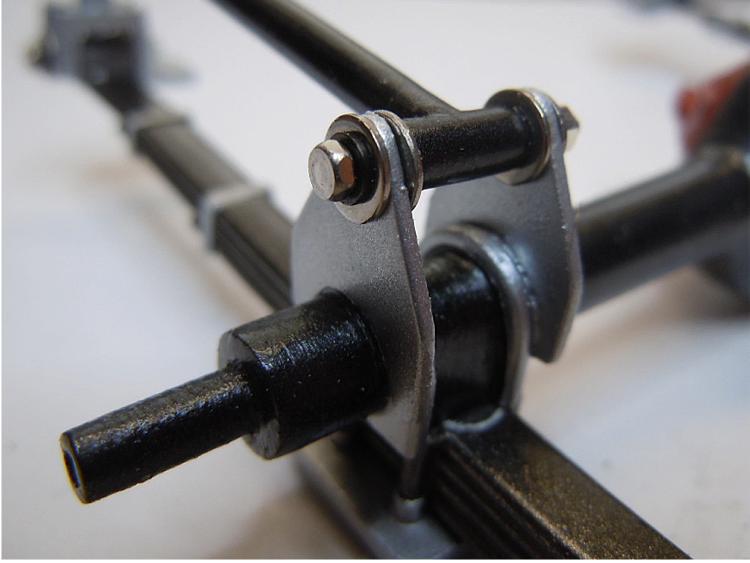
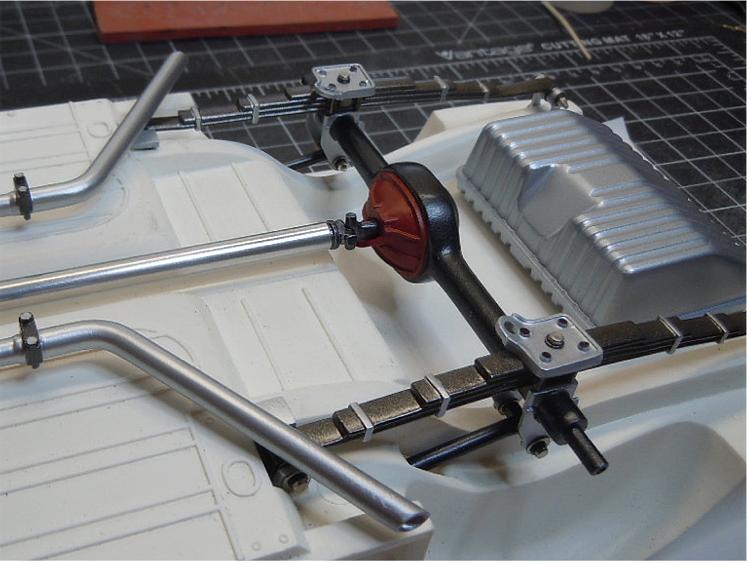
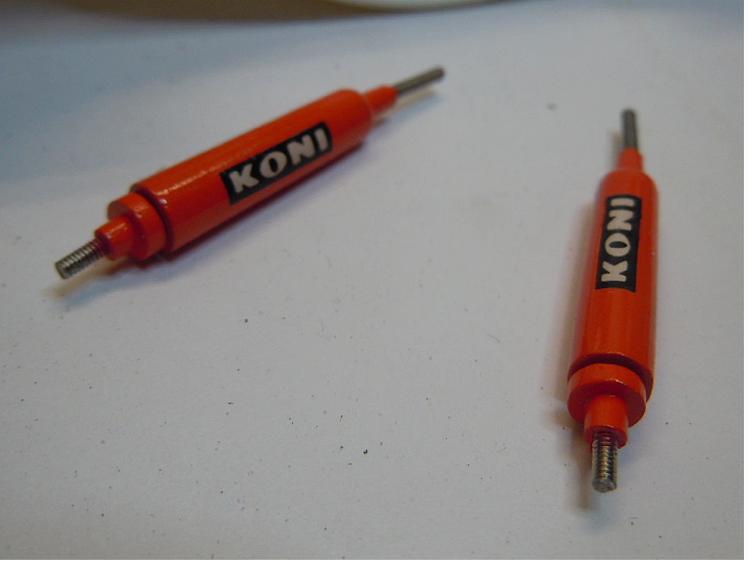
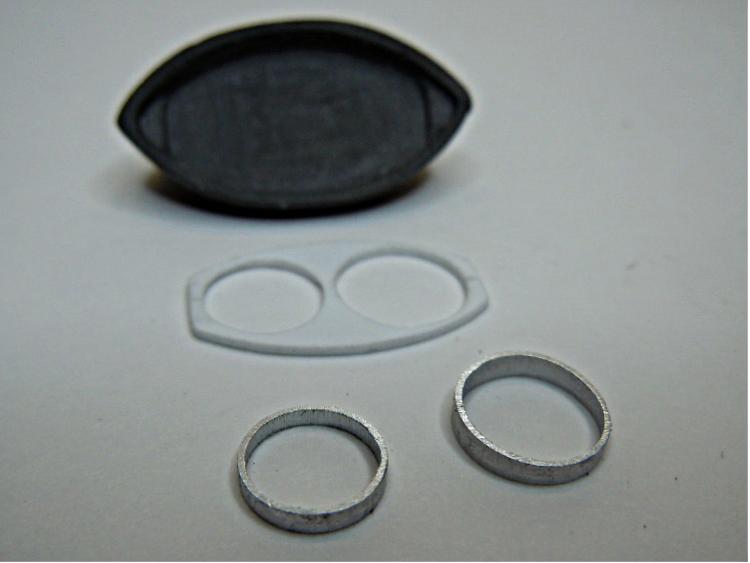
Hey, thanks for the comments guys. Today I mocked up the rear end, having previously modified, painted and detailed these parts. Everything seen here attaches with miniature hardware through the chassis assembly where the screw heads will be hidden, including the gas tank and exhaust pipes. It sure makes things easier and cleaner during final assembly. I didn't care for the kit traction bars, especially that they didn't have a defined location to attach to the frame. So I made some new versions out of plastic tube and then cut a couple of rectangular holes in the chassis assembly for them to insert in to. The gas tank and exhaust pipes were. The pictures should show how everything was modified. The shackles were drilled out to accept 0-80 screws as were the shocks - which were treated with a Koni decal from the parts bin. The driveshaft was cut in two and then inserted into an aluminum tube. Thanks again for viewing and for your comments.
-
I agree with the points you guys have made and David's build is in a word - stunning. But like I mentioned earlier, my overall goal is just trying to fix few of the design features in the way the kit was meant to be built as that was my biggest hurdle when I made my feeble attempt at building it years ago. I've looked at the door fit and it is definitely going to take some work but opening doors is really what this (my) build is all about. Without opening doors the fit issues (body to interior) would not be as noticeable so the need to marry the body to the interior prior to paint would not be as important. Personally, I think the operable windows feature was a mistake and won't be included on my build As far as the gauges issues brought up by Rex, I agree. There's not much you can do with the stock dash. For starters I painted the glove box and other parts of the dash in matt black. I want to add some other minor details too. You can do more with the gauge pod that sits on top of the dash. I removed the molded in gauges with the back of a chisel blade and made a new panel out of Evergreen sheet, drilled out to accept two bezels made from K & S Aluminum tubing. I'll find a tach & oil pressure gauge from the parts bin or print them myself. I really do appreciate all the comments and suggestions. Thanks.
-
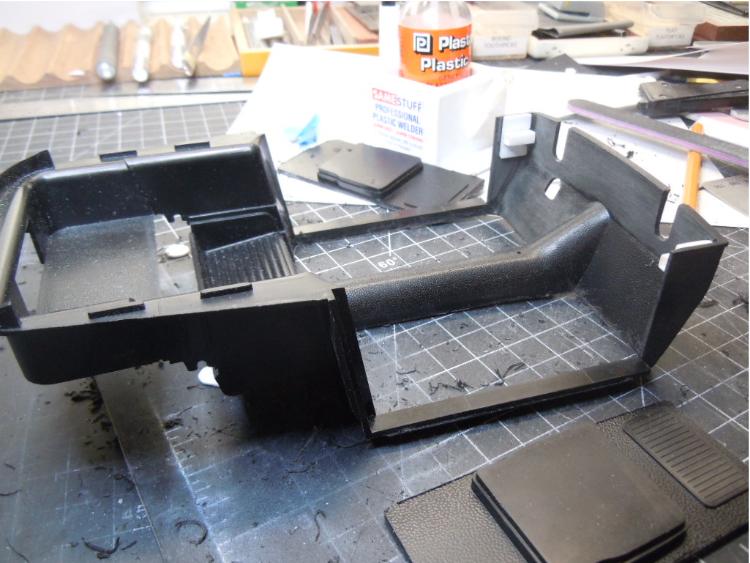
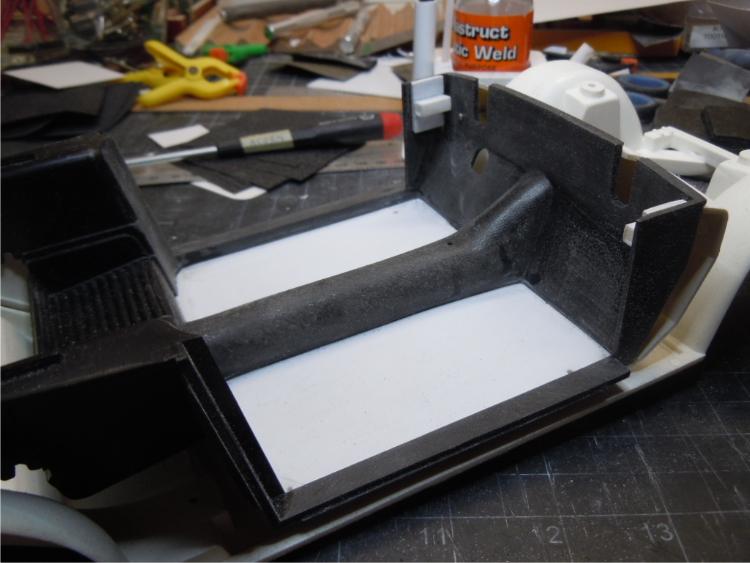
And here's the firewall. Molded in details were removed and wiring details will be added later. The plan is for the firewall to be inserted through the engine bay and attached with 2 screws to the interior tub. I've also attached photos of the new pedals, '57 Chevy parts from the parts bin. A major improvement over the molded-in kit versions. Floor mats will be attached to carpet with 2-sided tape.
-
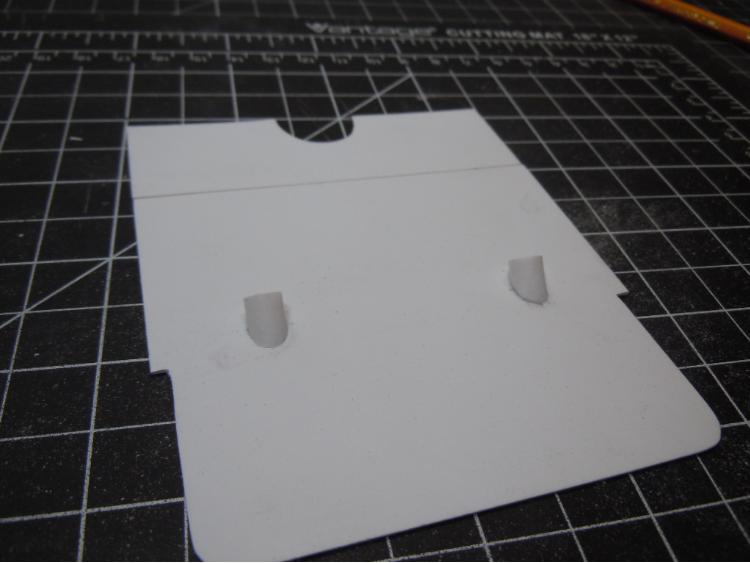
False floor. Each side is 3 pieces, held together with masking tape from behind. The carpet material will be applied in one piece to each side, with enough excess to fold the edges under and hide the seams. The small pieces of tube are the roll bar "brackets", required to have a positive locating device without the use of adhesives. The rear deck section is two-piece, also with roll bar brackets. You may also see that I've filled in the escape hatch at the rear of the interior tub. Roll bar is made from Plastruct tubing. I did practice installing the roll bar through t he open door and it works fine,
-
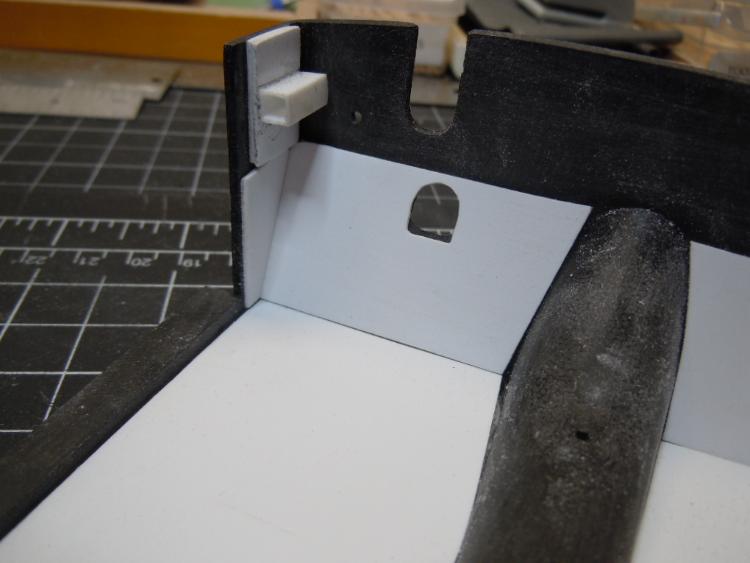
Here's how I'm going to attached the dash. I used Evergreen square tube on the interior section and smaller square strip on the dash. The dash just slides into the tube. I've also attached a photo of the new floor sections. Later I'll post photos of the false floor. That should explain what my plan a little better. Remember, all the interior parts will be installed after the body/interior has been painted.
-
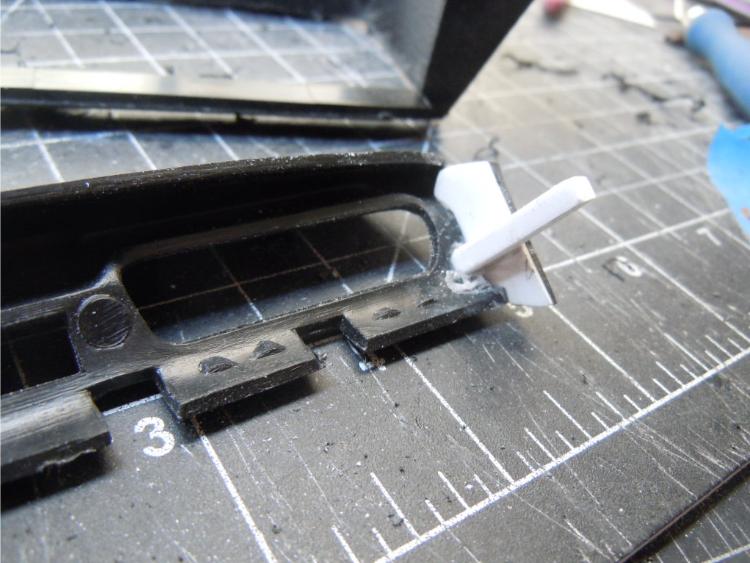
Thanks Cato. I did notice some of the flaws you pointed out. That's one reason why I decided not to build it as a Shelby or even as 100% Ford (I'll be using many parts from the ol' parts bin and some folks will notice that they aren't correct for this model). To my knowledge, the tooling for this kit was originally for a stock GT fastback and was later adapted to a Shelby - probably for marketing reasons. While I have seen some really good builds as a stock Shelby, and building an accurate Shelby would be an entirely different challenge - my issues were with the way the kit itself was constructed. The way the sub-assemblies connect to each other, the lack of detail, etc. My hope is that if I can make it all come together better with many detail upgrades that results will be something I could be proud of. If I can overcome the issues I've brought up that may lead to a Shelby build down the road. I hope this makes sense. You mentioned the cowl area...I thought the way the firewall assembly seemed like an after thought to the design engineers so I'm working on a way to attach it that will allow easier construction, more detailing and also allow me to open up the vents on the cowl. I've been working late unto the night jumping around from assembly to assembly as an idea comes up. So far I haven't seen any roadblocks but I know I have a long way to go. Thanks again.
-
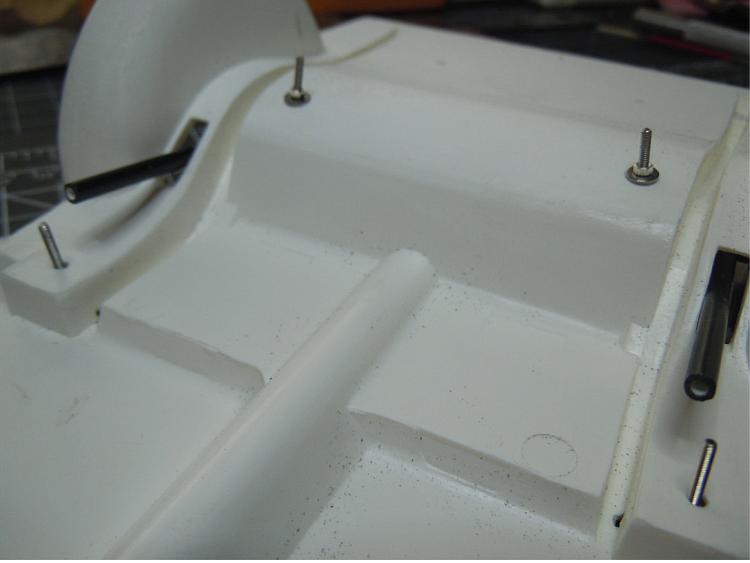
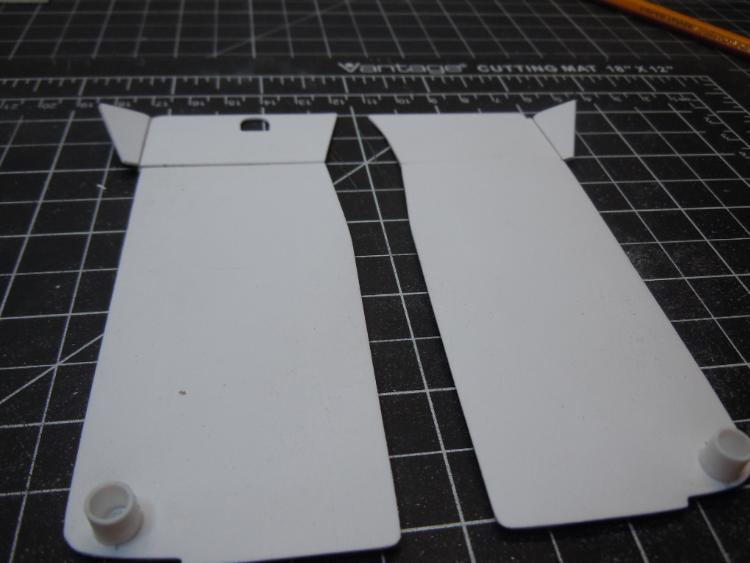
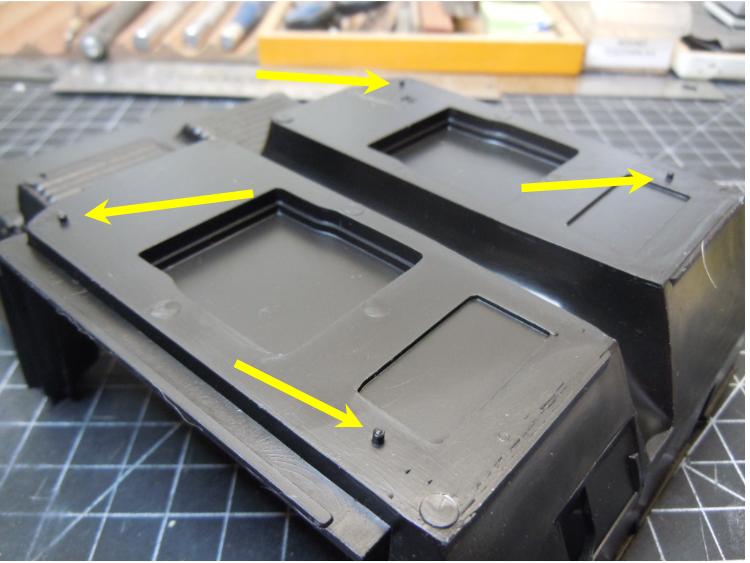
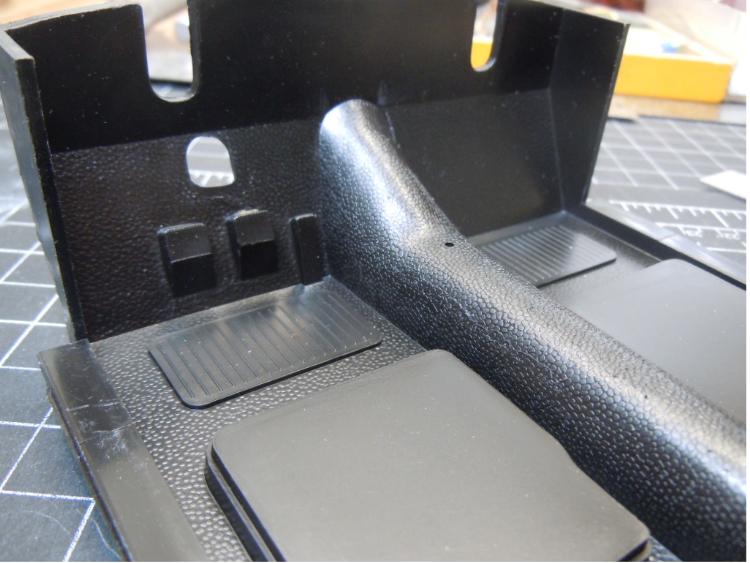
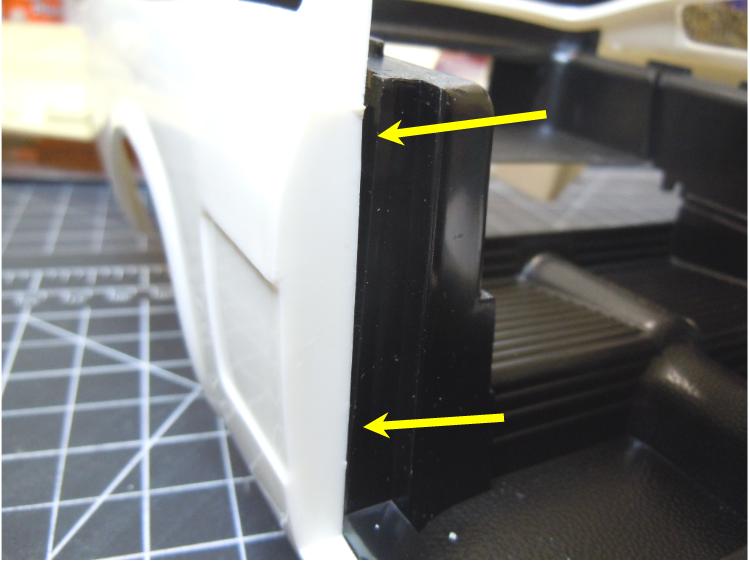
Here’s a photo of the underside of the interior section. The arrows point to the mounting pegs that locate the interior to the chassis. My plan is to use remove these pegs and then drill 1/16” holes in the same locations. The interior will be glued to the body and later affixed to the chassis through these holes during final assembly using 0-80 hex head stainless steel bolts and nuts. The bolt head will be on the chassis (under) side with the nut in the interior, hidden by a false floor. The false floor sections will be individually ‘carpeted’ using adhesive backed material. The kit interior floor will be removed and replaced with styrene sheet, retaining the seat mounts and floor mats for use on the new floor sections. The transmission and drive shaft hump will stay in place and be carpeted also. The molded-in pedals will also be removed and replaced with something more believable from the spare parts bin. I’ll have to figure out a way to mount the dashboard without using glue. The dashboard will be painted and detailed separately and attached during final assembly with the other interior parts. I’ve also attached a couple of photos showing the transition points between the interior and body. These locations in the door sill and jamb were the main reason I decided to join the body and interior first and then join to the chassis later. They just aren’t very positive joints and would be difficult – although not impossible – to join without gap or alignment issues. I’m currently building a 4-point rollbar from plastic tube that will fit through the open doors. I’m also going to replace the rear seat and deck with a full length deck which will also be carpeted. I will also fill in the hole in the rear section of the interior that the spare tire mounts through. The spare will go in the trunk or won’t be used at all. I appreciate any comments or suggestions.
-
I remember "trying" to build this kit many years ago, and never actually finished it. I recently bought another one off eBay and hope to do a better job this time. I remember having issues during final assembly in the way that the chassis, interior and body come together. I've seen a few great builds on this forum and I'm hoping I can get some insight and ideas from others who have built this kit. I don't plan on building it as a stock Shelby but more as a standard GT fastback with a few upgrades, including Shelby parts. I'm looking at perhaps attaching the interior section to the body before painting and then attach that entire assembly to the chassis during final. Has anyone attempted that? Obviously, all interior details will have to be installed through the door openings but it appears to be possible. I've had success doing this on other large scale projects, including the 1:8 scale Big Deuce. I look forward to any comments or suggestions and I will track my progress here. Thanks in advance to all. Steve
-
here's a couple more pictures...
-
This is a work in progress. Body smoothed out, top chopped, door panels with wood trim, etc.
-
Hello everyone. Steve Osbourne from Florida here. I've been following this forum for awhile as I've been away from the hobby for several years now and was hoping to get a feel of the current status of our hobby. Besides finding out that I am definitely not alone by making a return to the hobby after several years off I found that the hobby is as strong as ever. So I'm excited to be back and building again and to be a part of the forum. Right now I'm limiting myself to building large scale (1:12 & 1:8) plastic non-F1 cars. I like to customize, modify, scratchbuild, kit-bash and use aftermarket parts whenever possible. Like many others, I like to photograph my completed models in real world backdrops and present them not retouched. Large scale offers many more opportunities for super detailing which photographs well. I just started a 1:8 Big Deuce which hopefully I can start posting updates soon.