

ibj40
-
Posts
352 -
Joined
-
Last visited
Content Type
Profiles
Forums
Events
Gallery
Everything posted by ibj40
-
Updated - 12/06/18 - 1/18 1969 IMSA Big Block Road Racing Camaro
ibj40 replied to ibj40's topic in Diecast Corner
Now,the firewall.This is what a stock GMP Trans Am Camaro firewall looks like. This what it looks like when you put a Big Block in the engine compartment and then move it back a scale 4.5 inches. I had to cut it in the middle to allow a more simple means of grinding away the plastic. I knew that the middle was going to get really thin, and wanted a controlled cut, versus a jagged break. The problem, then, is how do you reconnect the two sides, and then also, how do you seal the hole.I decided I would use a technique that I developed when building my custom race trailer, so I got some 1/8 inch square styrene shape, and formed a channel using a Dremel plastic cutting blade. I then Superglued that piece across the top of the firewall. And now the fun part. How do you fill in that hole, but also making sure that you don't impose into the passenger compartment and interfere with little things like the driver. I decided that I would try to create the new infill by laying in JB Weld, knowing that it will adhere to the plastic of the original firewall (but also knowing that it will take quite a bit of grinding to smooth it up). Test fit of the body to make sure it will all work. And ready for the JB Weld. -
JB Weld is what I use, as well. I created this custom Mustang hood from a combination of a Camaro Z28 hood, and JB Weld bonding it to the original Mustang hood.
-
Updated - 12/06/18 - 1/18 1969 IMSA Big Block Road Racing Camaro
ibj40 replied to ibj40's topic in Diecast Corner
Not sure how clear these pictures will be, but I found another fuel filler cap (in a lot better condition, and made of chrome-plated diecast in lieu of plastic).This picture, more or less, tells the story.From left to right, original cap, original adapter, original ID of fueling tube, sourced brass tubing, revised ID of fueling tube (with brass insert), and new cap.The new cap fits perfectly into the brass tubing, and with a heavy duty pin vice, I "drilled" out the fueling tube to accommodate a brass insert.Here's the two, more or less, side by side (old on the left, new on the right).I think it makes for a better looking detail.Still waiting on the new flares, so started working on repairing the firewall after I moved the engine back. Might have some pictures tomorrow. -
So both of those guys work primarily in 1/24? Plus, didn't see where either did custom decals. Thanks, nonetheless!
-
Updated - 12/06/18 - 1/18 1969 IMSA Big Block Road Racing Camaro
ibj40 replied to ibj40's topic in Diecast Corner
Clearly this was going to be a problem.So, while waiting for the new bodywork to show up, I have moved the engine back about .25" (in reality, which would equate to about 4.5 inches in the real world).Re-established the front mounting point for the engine, and very glad I had not glued the custom driveshaft together yet.Had to cut some firewall and transmission hump for clearance, which will require some cosmetic fabrication, but did manage to improve front/rear weight distribution. Played around a little more with the fuel filler, more pictures tomorrow. -
I'm always on the lookout for someone to make custom decals, can you provide contact information for both Fireball and Mike's? Thanks!
-
Updated - 12/06/18 - 1/18 1969 IMSA Big Block Road Racing Camaro
ibj40 replied to ibj40's topic in Diecast Corner
So, working up a fuel filler set up. Many of the 1/18 scale GMP 60's Trans Am Camaro models have a quick fill device in the middle of the rear deck lid.Here's one, for example.The GMP Street Fighter Camaro body donor for this custom didn't have the deck lid cut-out, so I thought I would create a filler similar to the one on my first '69 Camaro racer. Picture's a little grainy but I think you can make it out.Here's a picture of that same rear spoiler, now painted flat black, hanging in my garage/workshop.I took the fuel cell body, and added a center section (resin cast by Mike Kotwick - Swede70).Fabricated a neck out of aluminum tubing, and added a flip-type fuel filler cap (attached it to a smaller piece of aluminum tubing for ease of installation and positioning).Then took a Dremel to the deck lid until I had enough clearance for it to sit flush.Might shorten up the neck just a bit when everything is final, but right now, we've got it pretty much roughed in. Also need to add a vent, pondering a combination of aluminum tubing and shrink wrap (like I used on my custom dump cans). -
Updated - 12/06/18 - 1/18 1969 IMSA Big Block Road Racing Camaro
ibj40 replied to ibj40's topic in Diecast Corner
Okay, got into fabricating the front axles with which I will be widening the track to get the tire out to the edge of the flare. So, this is the stock stub axle coming off the upright. Remember we are trying to accomplish two things here, widen the track, and locate a set of non-standard wheels onto the model. I am going to create a two piece apparatus. One to fit over the stub axle. The other to fit into the wheel (although I did drill out the wheel to allow this piece of tubing to fit inside the stub axle piece. The wheel adapter is about the same length as the stub axle adapter, owing to the amount pressed into the wheel being about the same length as the stub axle. Going to run a screw down through the center of the wheel into the original plastic stub axle, so that the wheels will roll. Next, moving back to the rears. Here's a teaser. -
Updated - 12/06/18 - 1/18 1969 IMSA Big Block Road Racing Camaro
ibj40 replied to ibj40's topic in Diecast Corner
Made some progress on fabricating the driveshaft.Took delivery of several sizes of aluminum and brass tubing.Measured the OD of the original driveshaft, and the ID of what appeared to be the most appropriately sized tubing. In this case, a brass thin wall.ID needs to be 5/32, so I chucked the front and rear u-joints up in my "lathe", and dispatched the appropriate machine tool.And now here's the front and rear, ready, and then jointed with the brass tubing. Attaching the wheels to the front and rear axles next. -
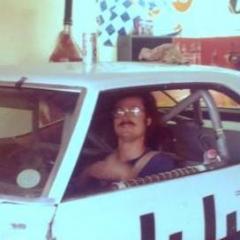
Taking an inspiration from Gene Felton's efforts in road racing in his 1969 Camaro. In the rough and tumble early years of "run-whatcha-brung" IMSA road racing, Felton stuffed a Big Block Chevy engine into it, with moderate success. Taking that concept to the workbench, here are the early results. 1/18 scale GMP Streetfighter body and chassis, and some custom 3D-printed Corvette wide-body fender flares. Putting a Big Block from a Carousel 1 L88 Corvette, with crossflow 4x2 Webers (I think from a GMP Lola). Quick Change rear end from a GMP Winged Sprinter, which will require a custom drive shaft (details on that later). Wheels and tires from a GMP Can Am McLaren, as well. Going to be an interesting build to get the wheels and tires to mount, but I think I have that already figured out, just waiting for some parts to arrive. Stay Tuned!
-
Lola T70 Coupe?
-
You got the chassis correct, and yes, that is a Franklin Quick Change (we ran one just like it in both our GT-1 Corvette and our Trans Am-spec Camaro) out of a GMP Winged Sprinter. Engine is actually a Big Block out of a Carousel 1 Corvette. Last night I worked on creating a custom drive shaft (stock Camaro piece was too long) out of some aluminum tubing. Waiting on some custom 3D printed flares for the body (yes, but what body?). Wheels are out of a GMP kit (the one that comes in the window pack with the screwdriver), which will be mounted also using aluminum and/or brass tubing. This one has been simmering for about a year, but the success of the 71 Mustang project has reignited my desire to pursue a conclusion. The final product won't quite meet the Swede70 level of detail, but for an old kit basher/racer like me, close enough. Stay tuned!
-
-
Here are some final pictures next to one of the "stock" Welly/GMP/ACME 69/70 Boss 302 Trans Am racers.
-
Done! I hate decaling, it is the most stressful (for me) part of modeling.
-
Since this is a from-scratch build, I don't have a lot of precedent to rely on, so creating some techniques along the way. Hopefully the pictures speak for themselves. The trunk configuration of battery on the right rear and dry sump tank on the left rear duplicates the set up we used on the '86 Trans Am-spec Camaro my partner and I built. Before dry break, we simply put the hose from the dump can over the stock fuel filler. Here I tried to create a fuel cap to finish the look. Not fully satisfied, but as I noted, this is a work in progress. Still needs a fuel vent line, and working on a couple of ideas for that. Stay tuned, there's still a lot to be done, such as a rear view mirror and window net, to mention a couple of details.
-
Adding an oil cooler to the front. As you can see from the photos, required quite a bit of Dremel effort (actually more than what the photos show). Also adding a little more detail to the trunk. The Welly chassis donor has a sealed deck lid, where the SunStar body donor has an opening one. Going to paint the new floor Flat Black, and then thinking about plumbing. There will definitely be a fuel filler tube running from the back of the car into the fuel cell, but not sure how much further I will go with the other detailing.
-
Some interim refinements as I do a walk-around the model. Front Ride Height. As opposed to the "stock" Welly Boss 302, the SunStar body sits much higher on the chassis. The first picture has one front adjustment washer in it, the second one not only has that one removed, but also the mounting spindle was shaved. Rear Hatch Gap. The Welly interior interfered with the hinge mechanism of the SunStar body, so a little more Dremel action, and it's all good! Still some more to go, including finishing up the roll cage installation. The Welly interior has a horizontal door bar that I haven't installed yet.
-
Still some detailing to do, but pretty pleased with where it is right now.
-
And here are a couple of updated pictures of the engine compartment. I think I made an improvement to the intake manifold appearance. Fitted up an engine compartment export brace. Some of the Welly's came with them, some didn't. My donor chassis for this model was a mid-term (when they put the cold air box on to fake a conversion to proper carburetion), and when they did the "fix", they deleted the export brace because it interfered. As you can see from the pictures above, there are no mounting holes drilled in the shock tower, so I had to drill them to make the brace fit.
-
Here are a few more pictures. So, as the Brits post in the Tube stations, "Mind the Gap". Well, I had a similar problem between the Welly engine compartment firewall and the base of the SunStar windscreen. Fabricated up a piece of Styrene angle, carved it to fit a curvature in the SunStar firewall where the molded-in brake master cylinder unit was, and here you go. Going to paint the new piece silver to match the Welly color. Notice, also, between the two pictures, the front windshield is in place, as is the dashboard from the Welly. To make a lot of this work I had to take a Dremel to the dogleg door hinges, and skinny them up by about half for clearance. Will have to remind my driver to not slam the door when he enters (although us real men climb in through the window). Also added the Welly front spoiler under the nose of the SunStar, however this front shot shows me that my cold air box may be just a little too tall.
-
So, when blending major pieces, such as a body and a chassis in this case, we all hope for uniformity, but as most of us who have tried to build custom models know, that is rarely the case. Here's a photo of the bottom of the model, chassis fit up snugly into body. The object, for me initially on this build, was to have at least two mounting locations line up, so that I could secure the model together. Here's a picture of the bottom of the SunStar body (admittedly with the Welly interior installed), notice the two screw mounts. The notches in the interior are the giveaway. In my efforts to have the mounting locations to line up, I had to move the chassis back, causing me to have to remove some of the rear of the chassis (as seen by the multiple saw cuts that I have tried to cover with filler and paint) in order to reduce the interference with the molded in rear of the SunStar body. Here is how much misalignment there is between the two manufacturers. In reality, the solution was to create a relief in the chassis so that the wheelbases aligned. And once I made this reliefs, I got to glue the back of the chassis back together. Again, we are still in the prototyping stage, and things will be cleaned up for the final, but just wanted to give an update, and show what it takes to pull one of these off.
-
I was looking through some old photos, and found a picture of 1971 Mustang Trans Am and IMSA racers, and thought I'd try my hand. My version is going to be a cross between the one raced in Trans Am and the one raced in IMSA, neither of which were very successful. Here are early shots of the chassis/body blending. The chassis donor is a much-maligned (by me) Welly Trans Am Boss 302 Mustang (in this case, the wrong color yellow #15) and a SunStar drag racing version (I bought the body through an eBay auction). I had previously shown this in the "What's On Your Bench" thread, but suffice it to say, quite a few Dremel wheels were sacrificed to take these two pictures. I thought as a variation to my prior induction correction process, that I might try to see if this one could accommodate a high rise intake manifold. Here is the rough results to date, adding in a fabricated cold air box. And it fits nicely under a custom hood created by blending a Z28-style scoop from a GMP '69 Trans Am Camaro into the Mustang hood (which came with a hole in it for some reason). Sorry about not having progress photos, but again, numerous Dremel cutting wheels died to make this hood a reality. Plenty more detailing left to do, such as blending in firewalls between the two donors, raising the A-pillar cross bar on the cage, and fabricating a front spoiler, just to name a few.
-
Extraordinary work, as usual, Mike! You and I seem to be Don and Sancho when it comes to attempting to crash build using 1/18 scale diecast. Keep it up!
-
That's a great looking cage. Did it come with the model, or did you scratch build it?