

ibj40
-
Posts
352 -
Joined
-
Last visited
Content Type
Profiles
Forums
Events
Gallery
Everything posted by ibj40
-
You could also try the stuff designed to buff and clean plastic headlights.
-
1:18 ACME/GL '68 Shelby Racing Co. Trans Am Mustang revised
ibj40 replied to swede70's topic in Diecast Corner
Mike, I don't think the real cars were subject to as much effort as you put into them. Great work, as usual! -
Looking for 1/18 scale whitewall tires for Corvair
ibj40 replied to Vietnam Vet67's topic in Diecast Corner
PM coming your way. -
New here, so I apologize for the late contribution. Biante, a brand out of Australia, took this mold and created a racing version. Not sure how many are familiar with the success that the Falcon had in Europe, as well as Australia and other British countries. Here are some comparison pictures between the domestic SunStar version, and the pond-crossing Biante version. I have a spare of the Biante, and the decal sheet, to turn it into this Alan Mann version.
-
Mike - Genius is never understood or appreciated.
-
Porsche, as they contemplated entry into the North American Can Am Series (and then ultimately into the European Interserie), created prototypes of their 917, to determine how they might compete. This is a picture of a prototype, that appears to blend the nose from the Longtail version of the endurance 917 and the evolving sprint turbo-charged 917 chassis. I thought it might be an interesting project to try to create, in 1/18 scale, something similar. Mind you, my end product will not look exactly like the example, due to availability of parts, but I will try to get as close as I can. This project to put an AutoArt 917 LongTail nose on a Minichamps 917/10 chassis. I hope many of you are familiar with the Porsche 917/10 Can Am/Interserie model. Both Minichamps and Exoto made them, although Exoto's were limited to those prepared by Penske and driven by Mark Donohue. Minichamps made several liveries and a couple of different versions of bodywork. Here's what I started with. Actually, they are pretty easy to modify, if you want to remove the front bodywork, it's just a couple of screws, and a jeweler's saw. And with that, you have both a body and a chassis. And then let's look at what an AutoArt Longtail front nose looks like mocked-up onto the chassis. As is obvious from these pictures, the AutoArt nose is 3/8" narrower than the Minichamps chassis (not sure how this happens, and haven't researched it, but either the tub of the real 917/10 was wider than the endurance version, or there was a little bit of license taken by either AutoArt or Minichamps). Regardless, this requires an additional surgical step to "widen" the nose of the AutoArt. That will be the next installment.
-
1:18 ACME/GL '68 Shelby Racing Co. Trans Am Mustang revised
ibj40 replied to swede70's topic in Diecast Corner
You are the King, Mike. I love to watch the updates. -
1:18 ACME/GL '68 Shelby Racing Co. Trans Am Mustang revised
ibj40 replied to swede70's topic in Diecast Corner
Keep plugging away, Mike! I love watching your process. Let me know if you need another donor body, I think I have a spare Gurney. -
1:18 ACME/GL '68 Shelby Racing Co. Trans Am Mustang revised
ibj40 replied to swede70's topic in Diecast Corner
Yat Ming Firebird Trans Am is in the background. Got my one "mule" chassis in play; replacement GMP Trans Am Camaros are starting to get a little pricey. I just wish I had the patience and talent to create the details you produce. -
1:18 ACME/GL '68 Shelby Racing Co. Trans Am Mustang revised
ibj40 replied to swede70's topic in Diecast Corner
Hey Mike! Little bit of a hijack, but fooling around with a GMP Trans Am Camaro chassis, and an Ertl 1970 Camaro body. Looks promising! -
1:18 ACME/GL '68 Shelby Racing Co. Trans Am Mustang revised
ibj40 replied to swede70's topic in Diecast Corner
Keep it going MIke! Jim -
1:18 ACME/GL '68 Shelby Racing Co. Trans Am Mustang revised
ibj40 replied to swede70's topic in Diecast Corner
Great stuff, as usual, Mike! I've been kit-bashing my Maier version, played with it a little bit over the past couple of days. Added a battery and cables to the trunk, and a rudimentary fuel cell (one of the drag versions you see on eBay occasionally), and added a fuel vent and filler tube out to the standard Greenlight outlet, and also a fuel line. I like your back seat idea, need to look closer at mine (hadn't even thought of it). Looks like you cut off the interior behind the roll bar? Keep it coming! -
1:18 ACME/GL '68 Shelby Racing Co. Trans Am Mustang revised
ibj40 replied to swede70's topic in Diecast Corner
As usual Mike, you are not a customizer, you are an artisan working in a scale model world. To date, my daliance with this model has been to solely swap the racing components contained in the recent Gurney version to the three other Greenlight "Tribute" Trans Am Mustangs. Clearly, mine will only pass the 10 feet away test; yours, however will pass Tech Inspection at the next SVRA race weekend. -
If it's one of yours, Mike, it's going to be spot on.
-
Swede Savage Trans Am AAR 'Cuda Hwy. 61 based project
ibj40 replied to swede70's topic in Diecast Corner
It is simply amazing to see all the custom pieces (I love that they are in white as compared to the original pieces in their "factory" colors) as they overlay into these models. They are a true testimony to the level of effort you are putting into them, and a source of awe for those of us who think we do custom work. Congratulations, and keep it up! -
Where to find 1:18 Detail Upgrade and Accessory kits
ibj40 replied to tedd60's topic in Car Aftermarket / Resin / 3D Printed
Search Legende-Miniatures. He has a wide variety of parts, but not necessarily specific to an MGB. -
Back when I was building real racers, such as this one; this is how you would do it. You started with a tubular chassis, built to your specifications (wheelbase, track width, type of suspension, etc.). And (for simplicity, as much of this would be performed simultaneously) then you would put a cage and interior on. Mount the engine (and other key components of the drive train). Then mount the body (the one in the picture of the Camaro above is all fiberglass except the roof). And the finish it up with all the other essential details. Alas, such is not the case in 1/18 scale diecast, but I just thought I'd show you some of the process that I am going through to complete this one.
-
So, it all started when my wife "allowed" me to trade my 2009 Pontiac G8 GT in for a 2013 Chevrolet Malibu. Fortunately, I was able to find an 1/18 scale Malibu diecast model, and started to consider what it might look like as a racer. My first inclination was to make it Front Engine/Rear Wheel Drive (versus the stock Front Engine/Front Wheel Drive configuration). So, I found a small displacement Chevy racing engine (out of an R&R Midget Dirt Track racer). And then started to try to find a Rear Wheel Drive chassis to go under the bodywork. This has proven to be a major stumbling block in this project. Here are a few shots of attempts and failures. I fabricated this front clip, out of an Ertl 2004 Pontiac GTO donor. And thought that I could use the IRS from that same donor for a rear suspension (after adding a Quick Change Differential to it). Was looking promising for a while, but then I wasn't satisfied. Even almost had an interior, complete with cage installed. And an exhaust fabricated. Then I tried a different donor chassis. But still didn't like the look or fit. Plus the donor didn't have enough detail in the engine bay. So this project has been sitting on the shelf for quite some time. Recently, I acquired a body kit to see if I could add some spark to the project. What do you think? While the flares aren't specifically for a Malibu, I thought the fit was close enough for some serious consideration. Note that there's another donor cage sitting inside the bodywork. Now if I can just find a proper chassis donor, I think I might be in business. Stay tuned!
-
I've been working on this project for quite a while, although the first photos might not appear to support that. And, before anyone else points it out, these are the wrong year (but the right color, so I defaulted to not having to repaint to models). Got the decal sheets in hand, about to ship them off to an expert for application. Eventually, they should look like this. Primary modifications from a standard "street" Carousel 1 L88 Corvette include the obvious headlight conversion as well as swapping in the racing interiors from the two Heinz #57 donors.
-
Extraordinary job, as usual. P1800 was reasonably represented in it's day on the race track.
-
Swede Savage Trans Am AAR 'Cuda Hwy. 61 based project
ibj40 replied to swede70's topic in Diecast Corner
As always, Mike, in awe of your attention to detail. -
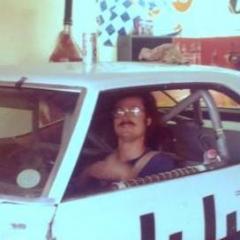
Looking for a place to discuss 1/18 scale diecast, including customs and modifications, and wondering if there was anyone here involved in the same. Here's a picture of a new one I'm working on. When it's repainted, it will look something like this.