avidinha
-
Posts
585 -
Joined
-
Last visited
Content Type
Profiles
Forums
Events
Gallery
Everything posted by avidinha
-
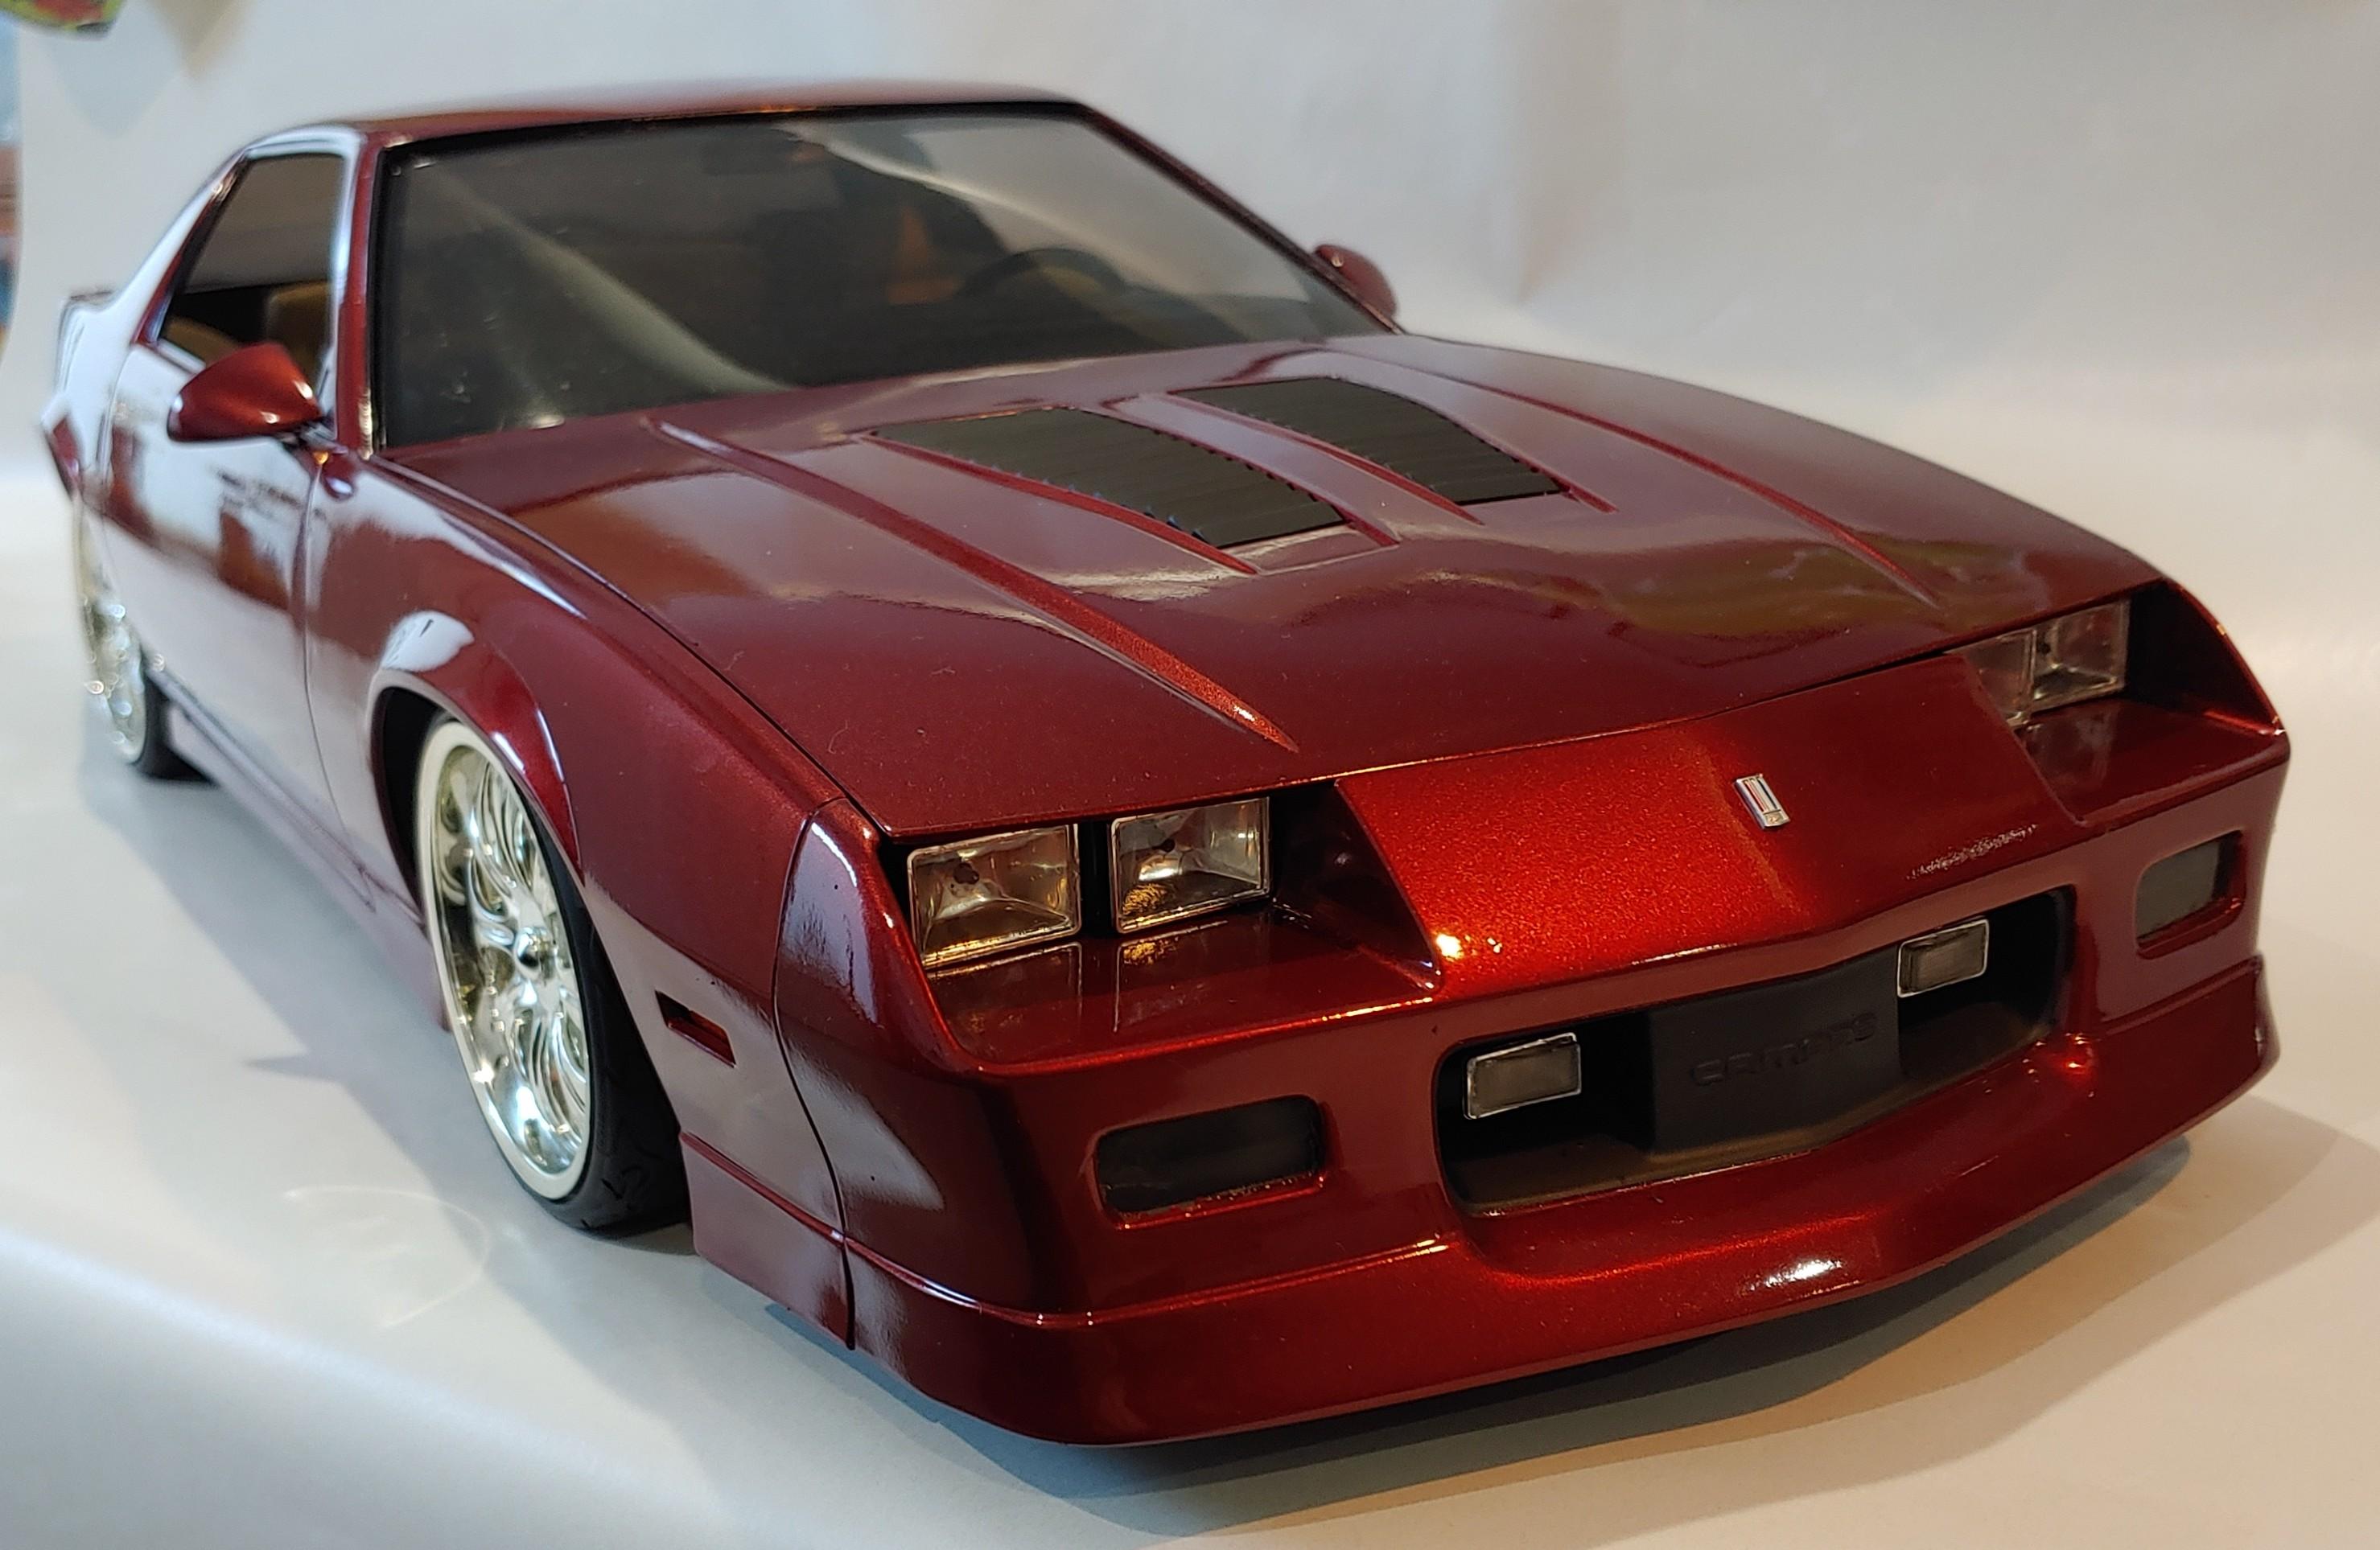
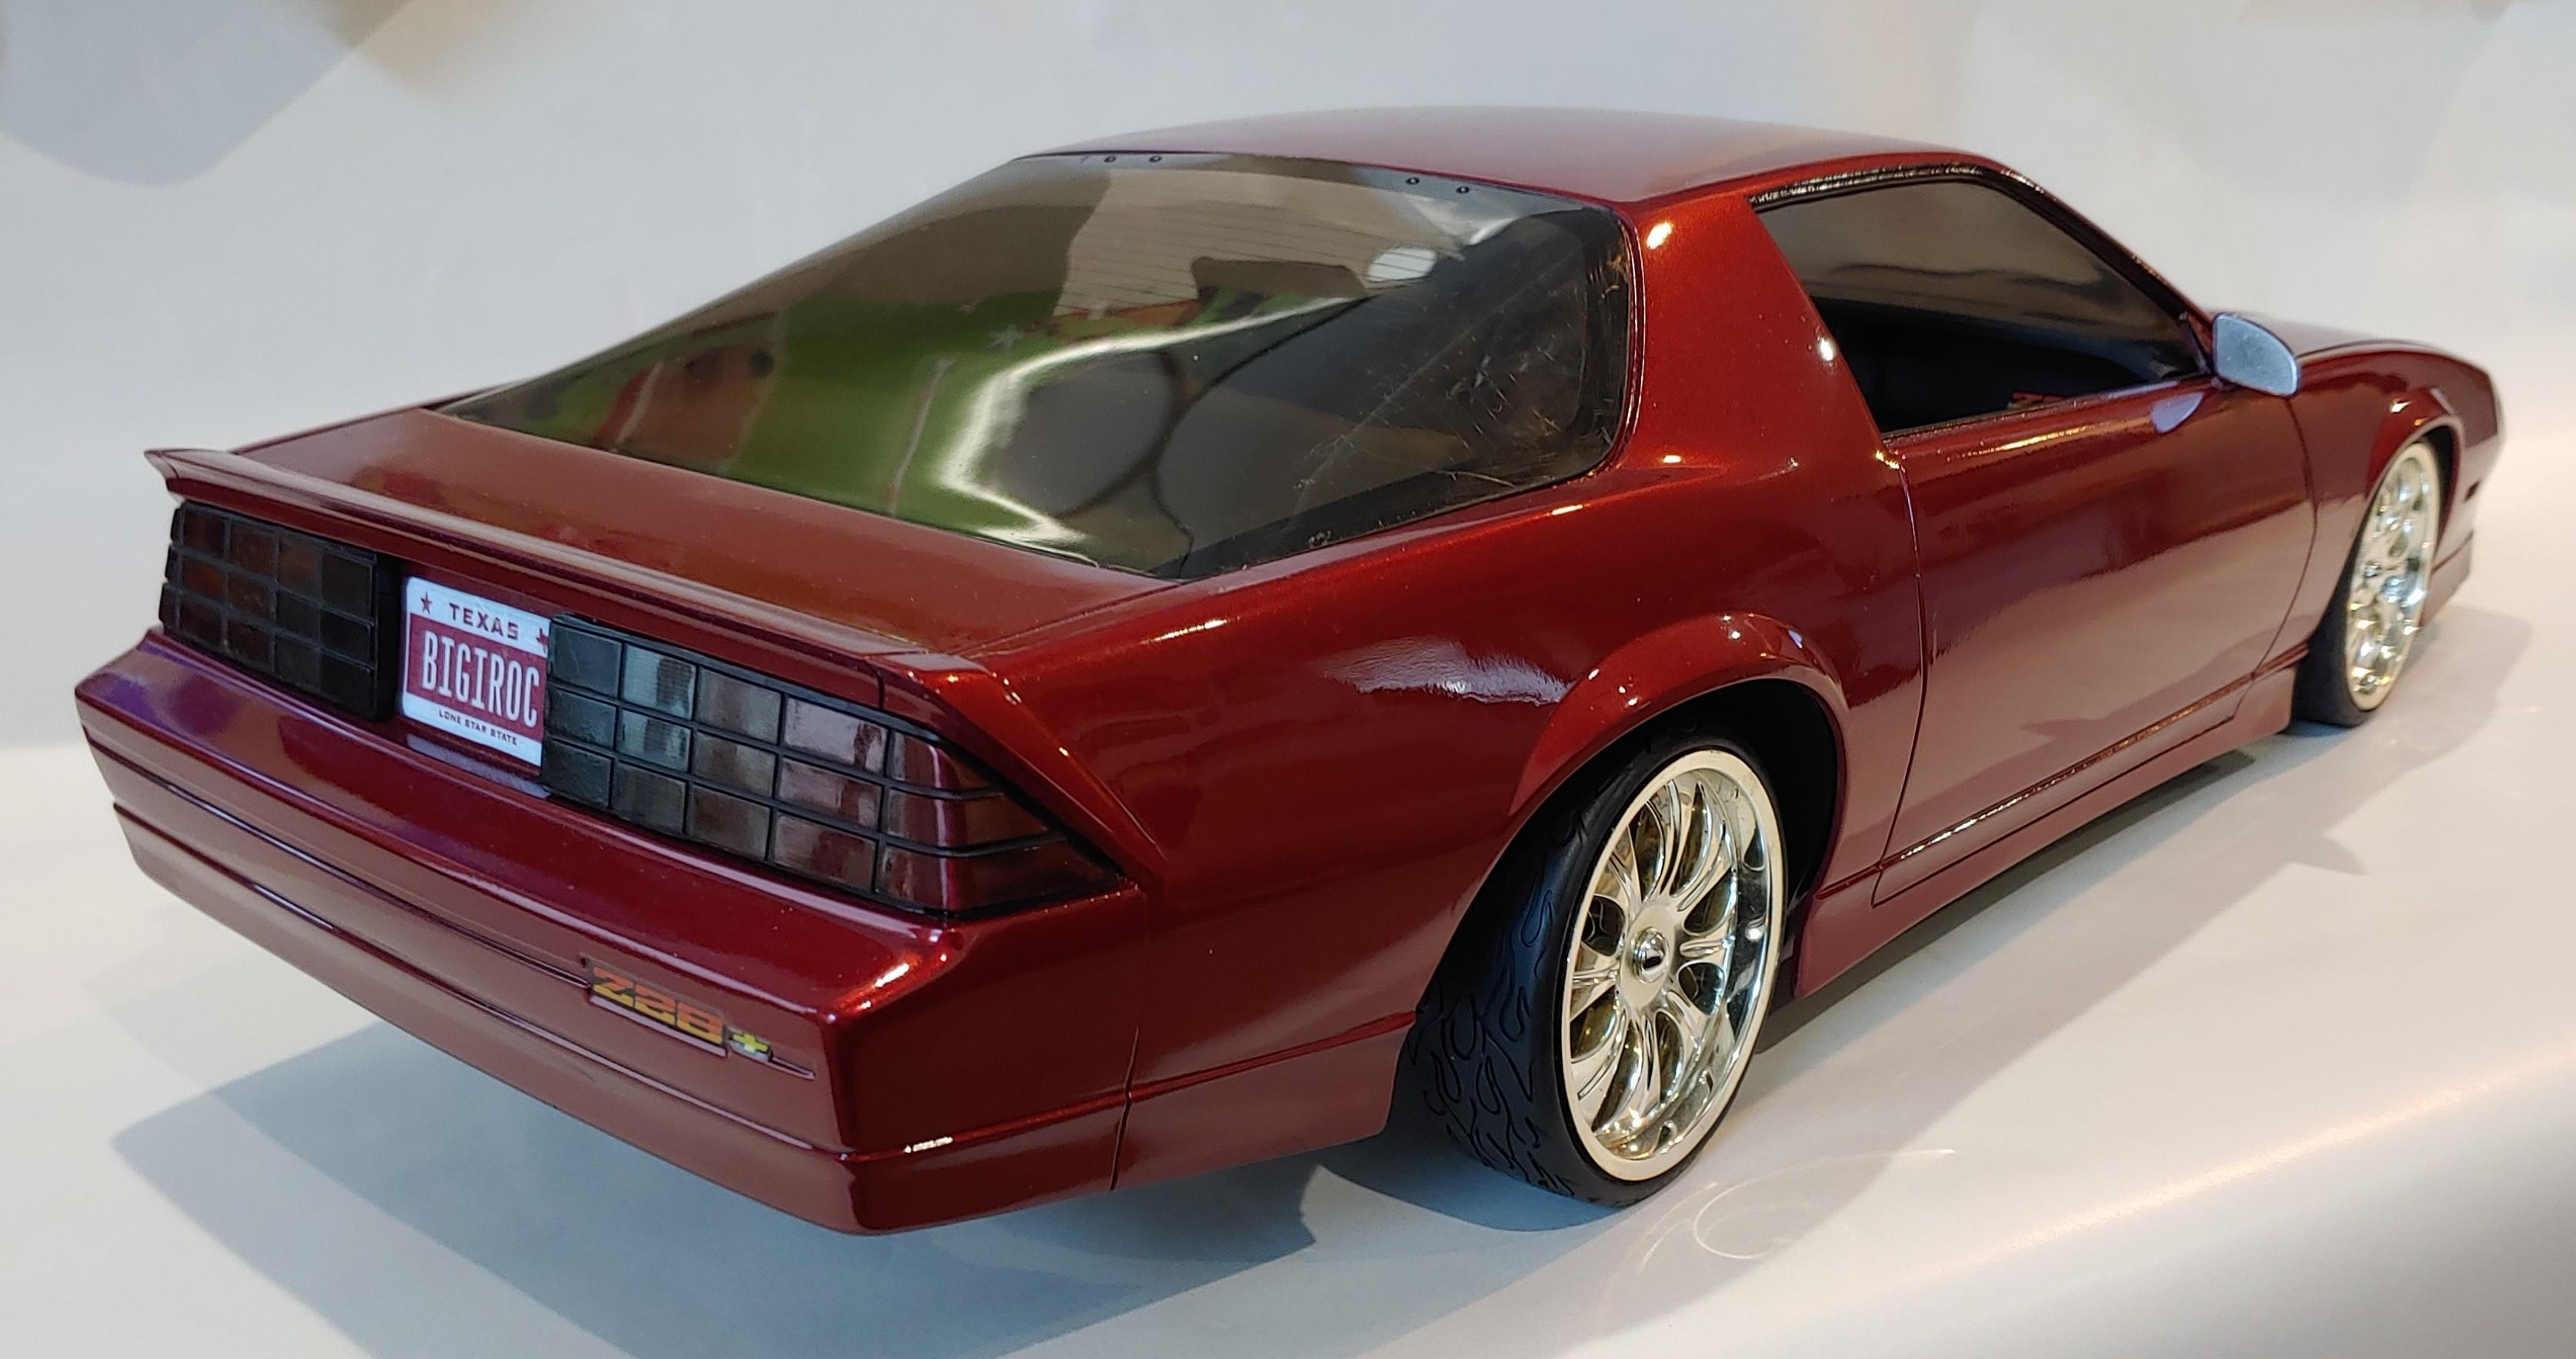
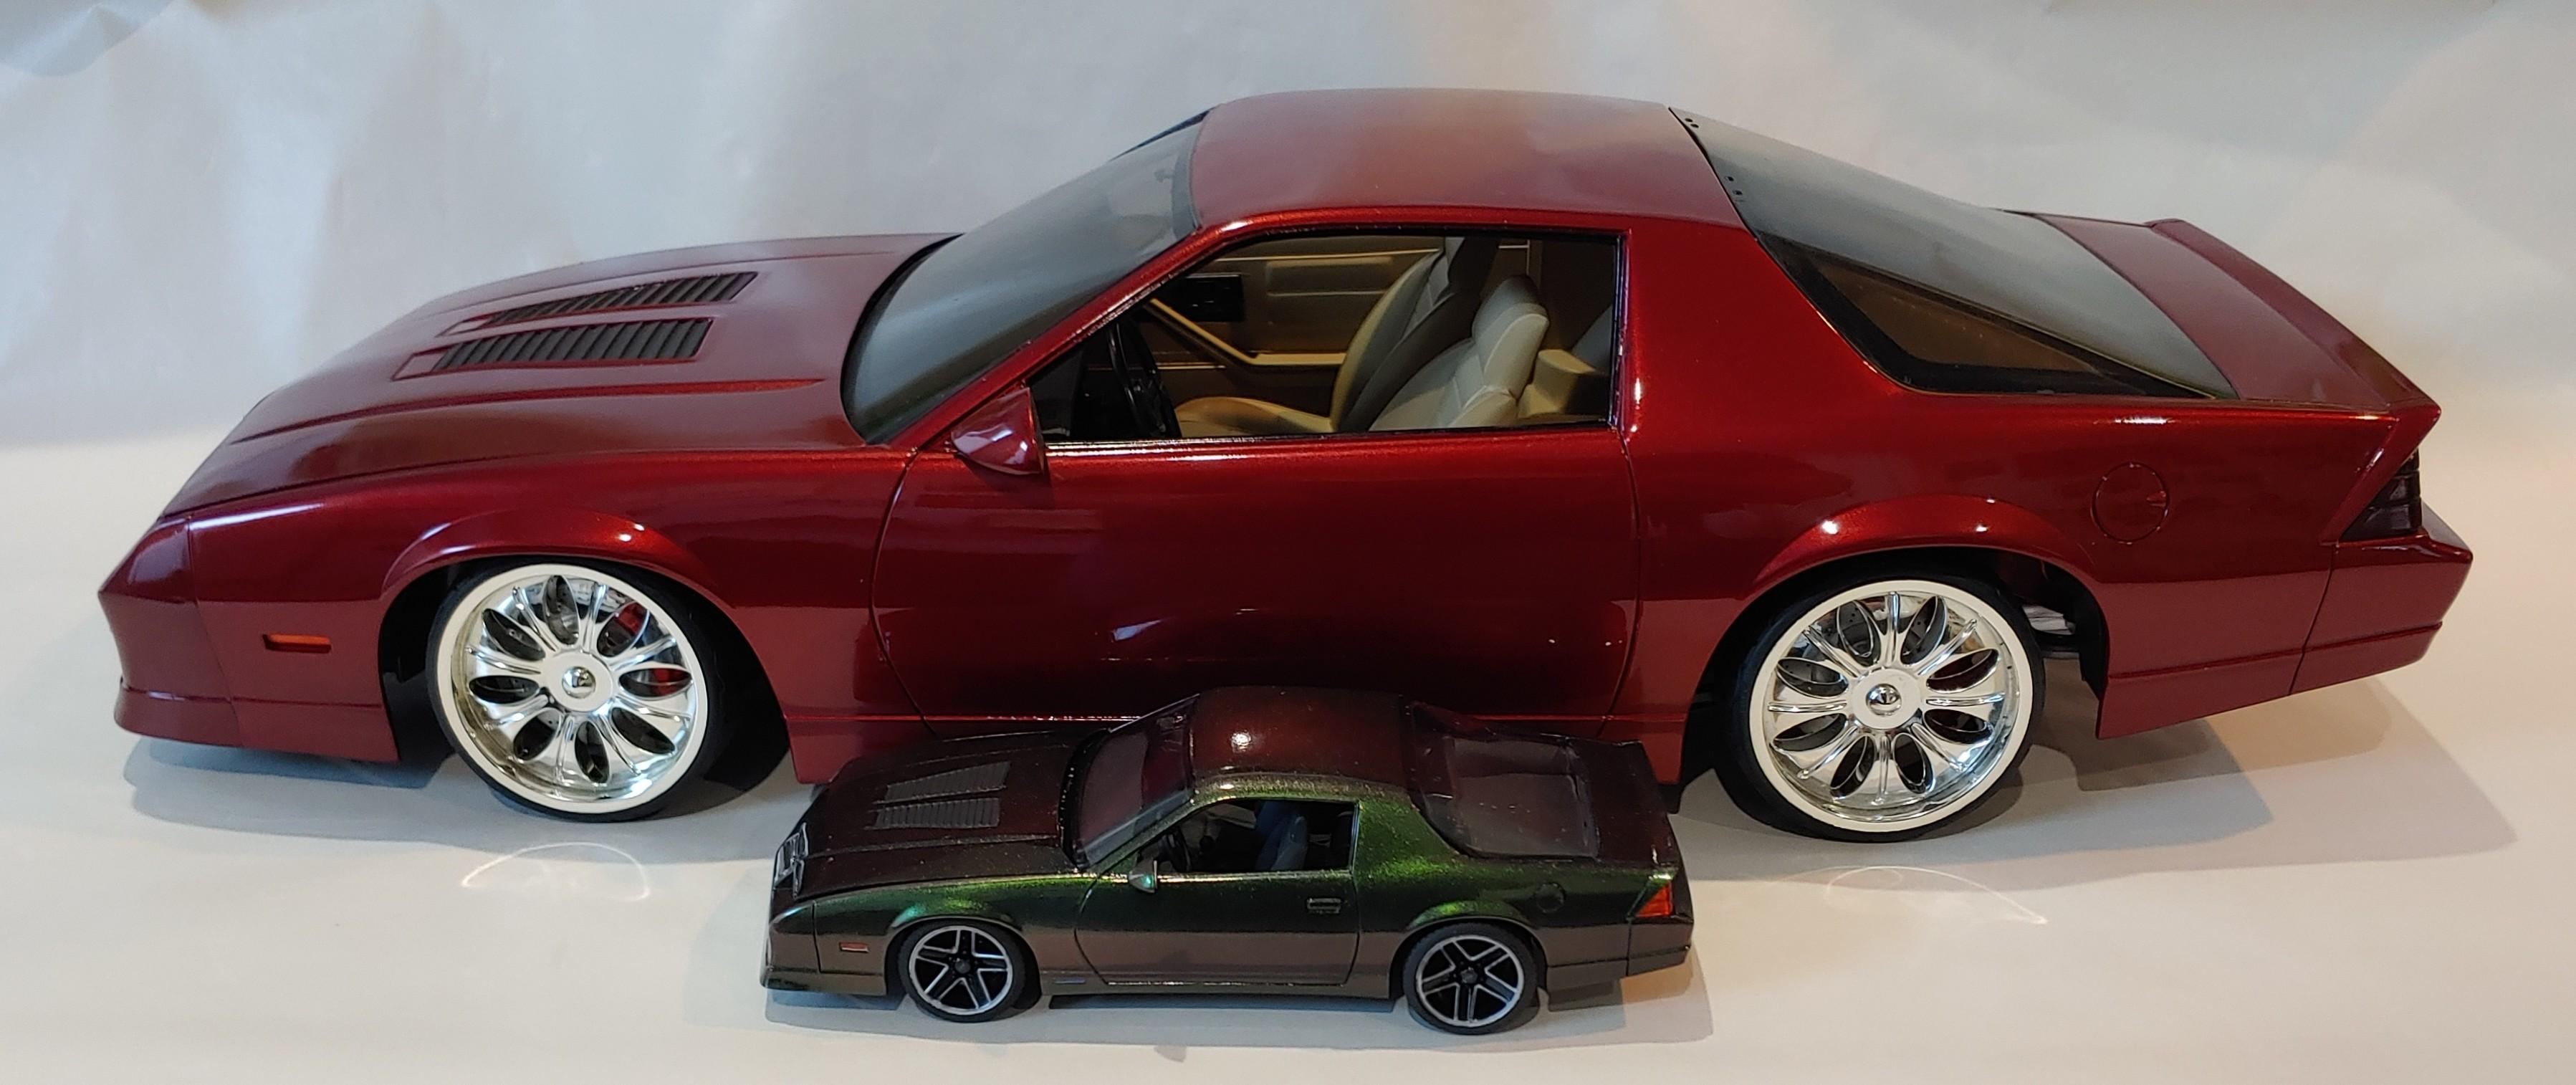
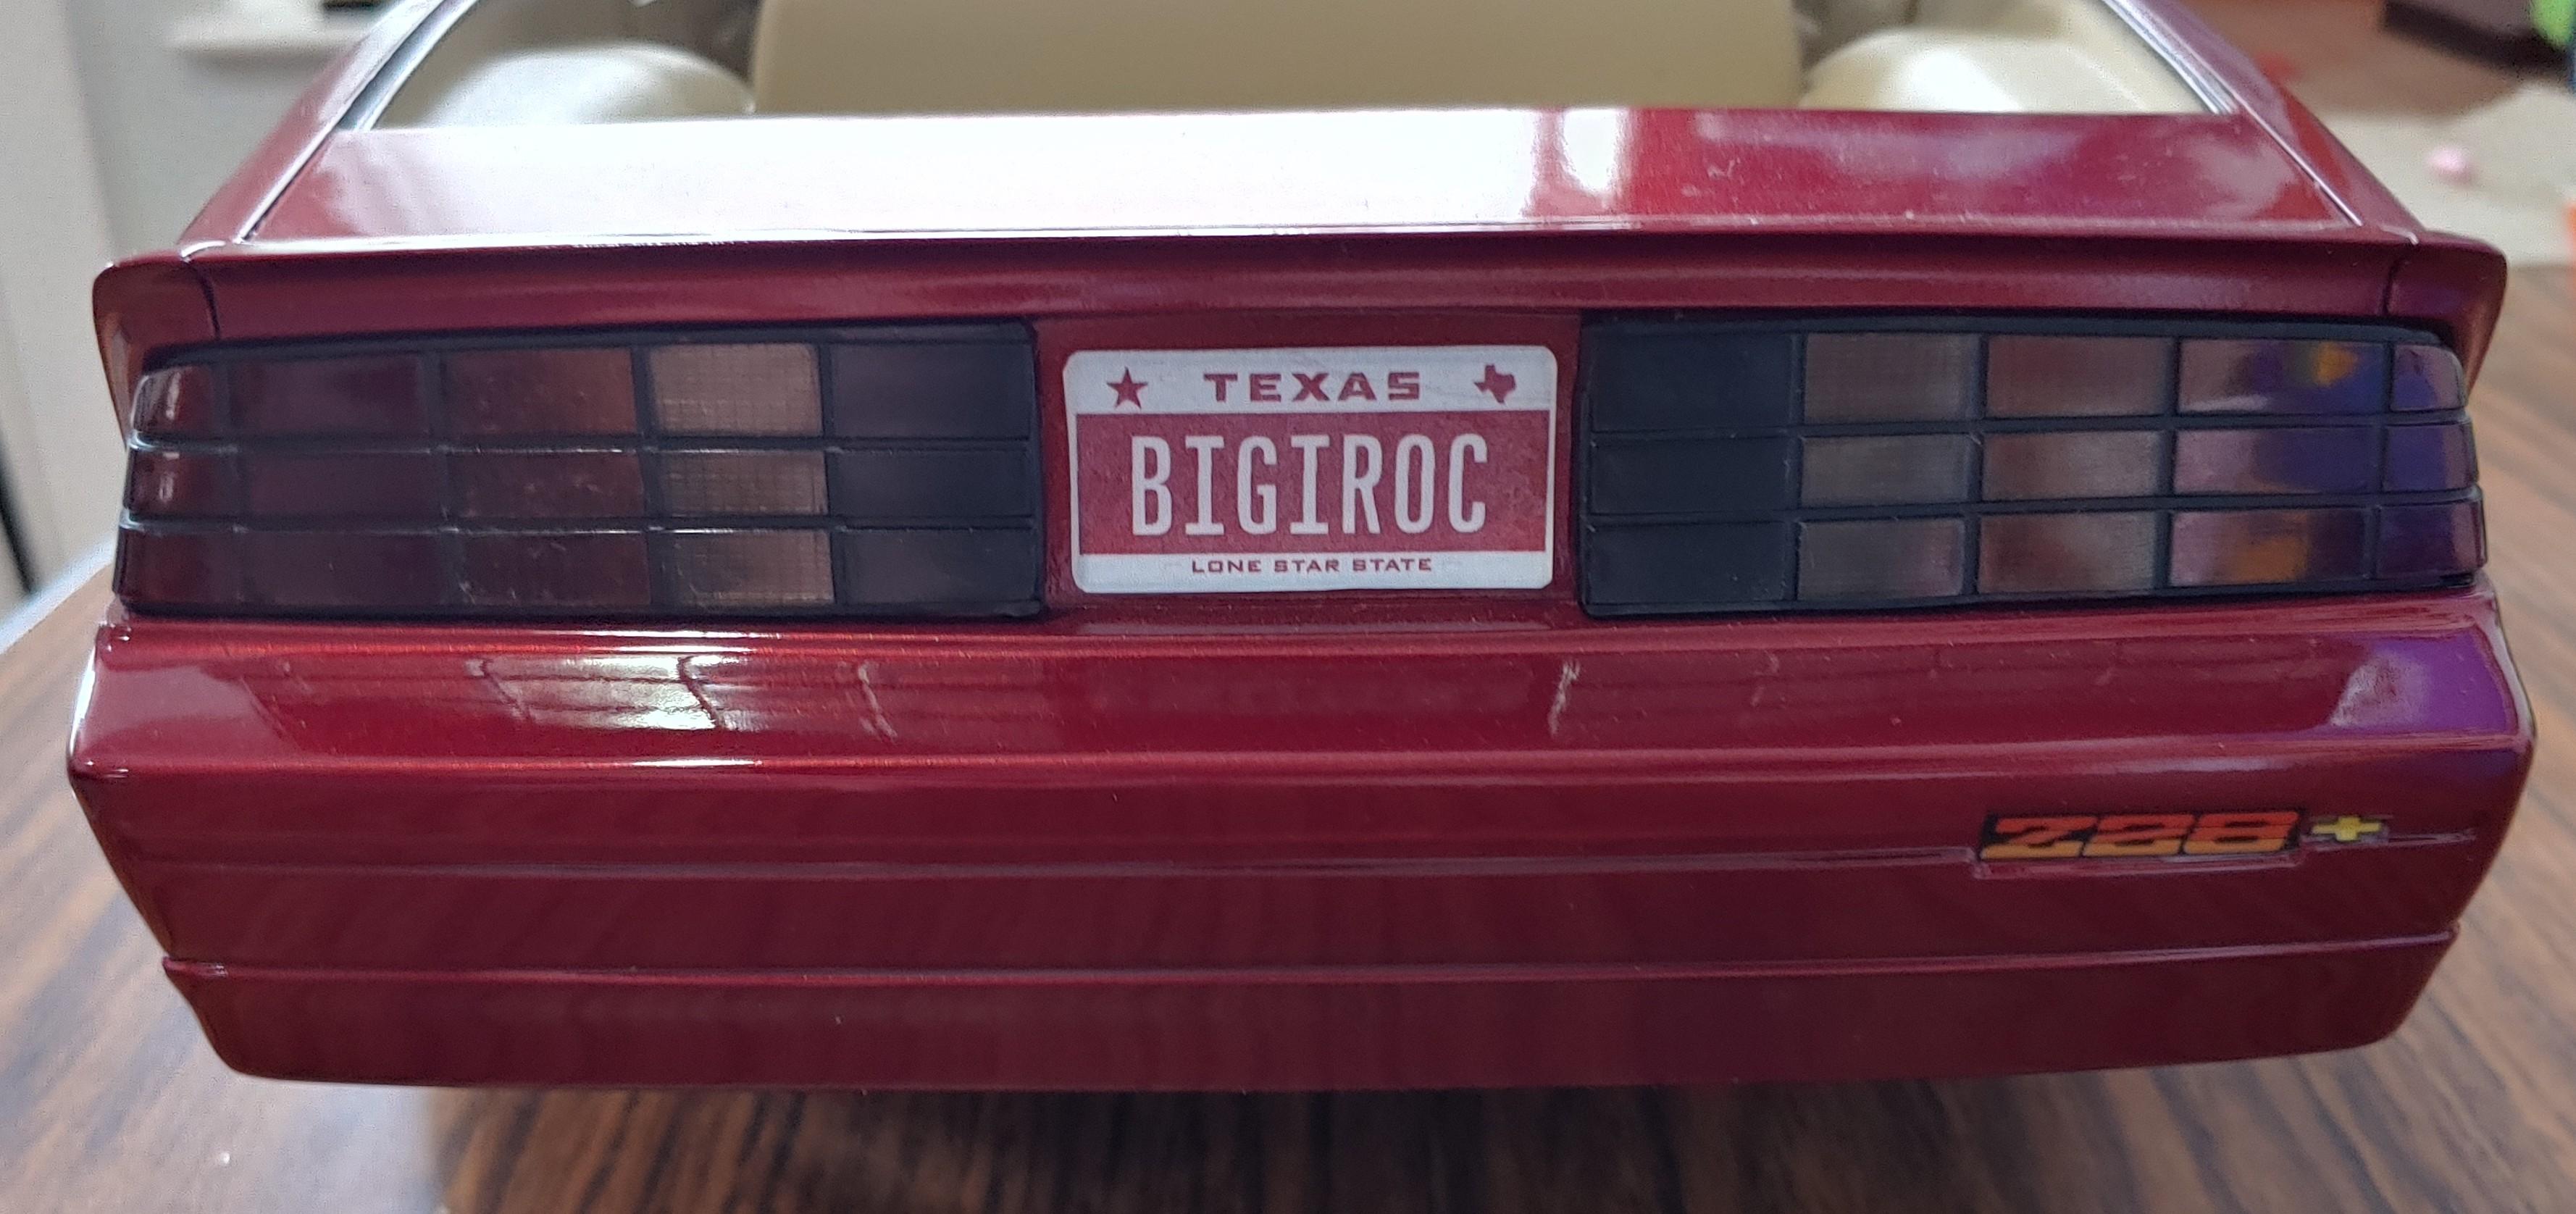
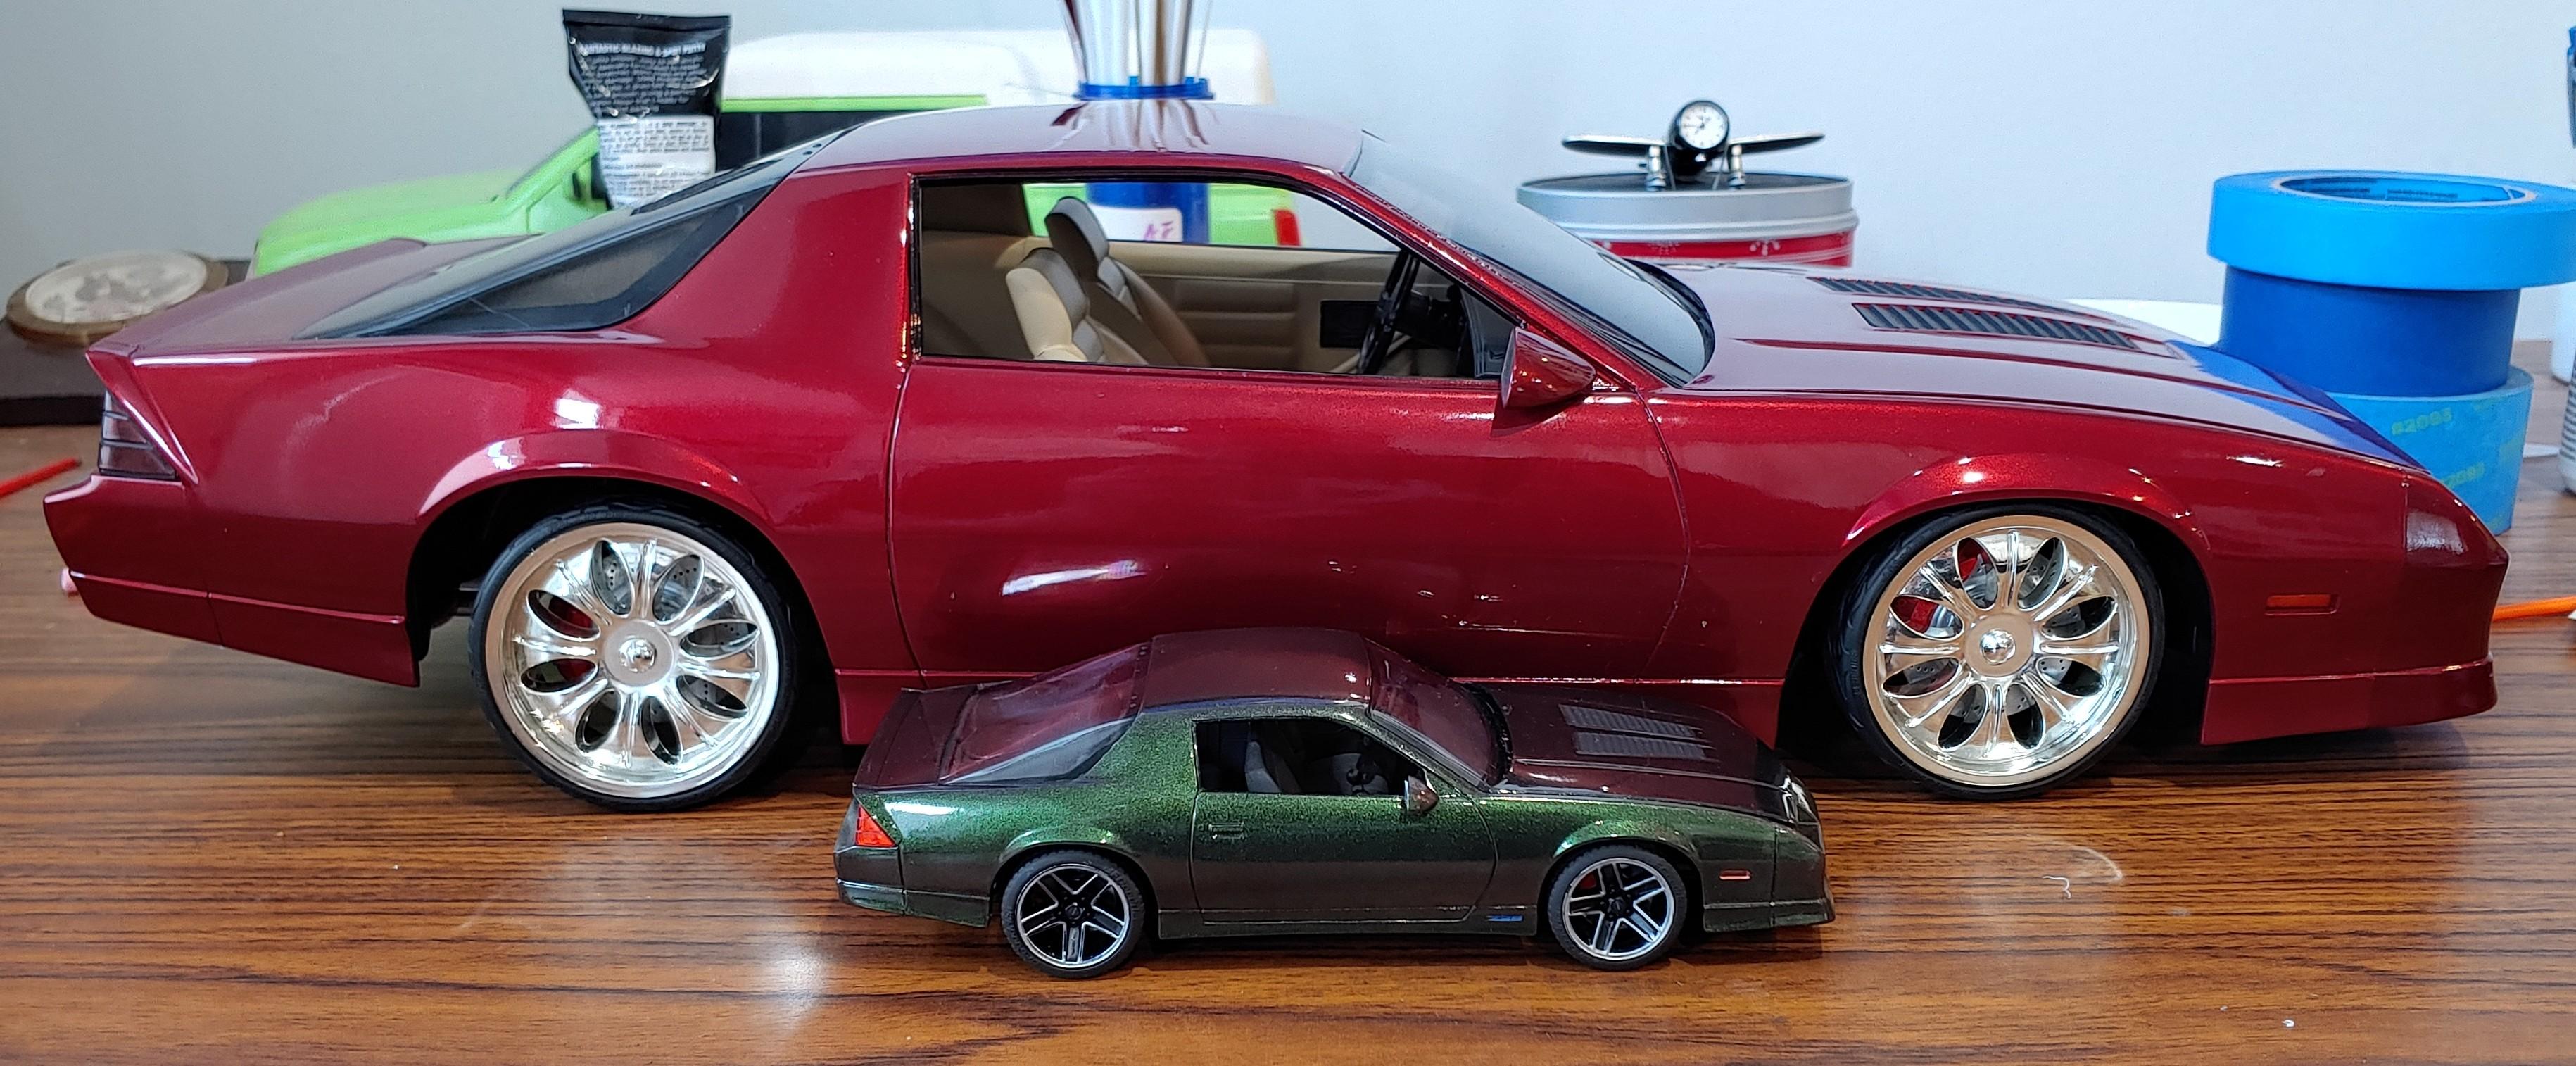
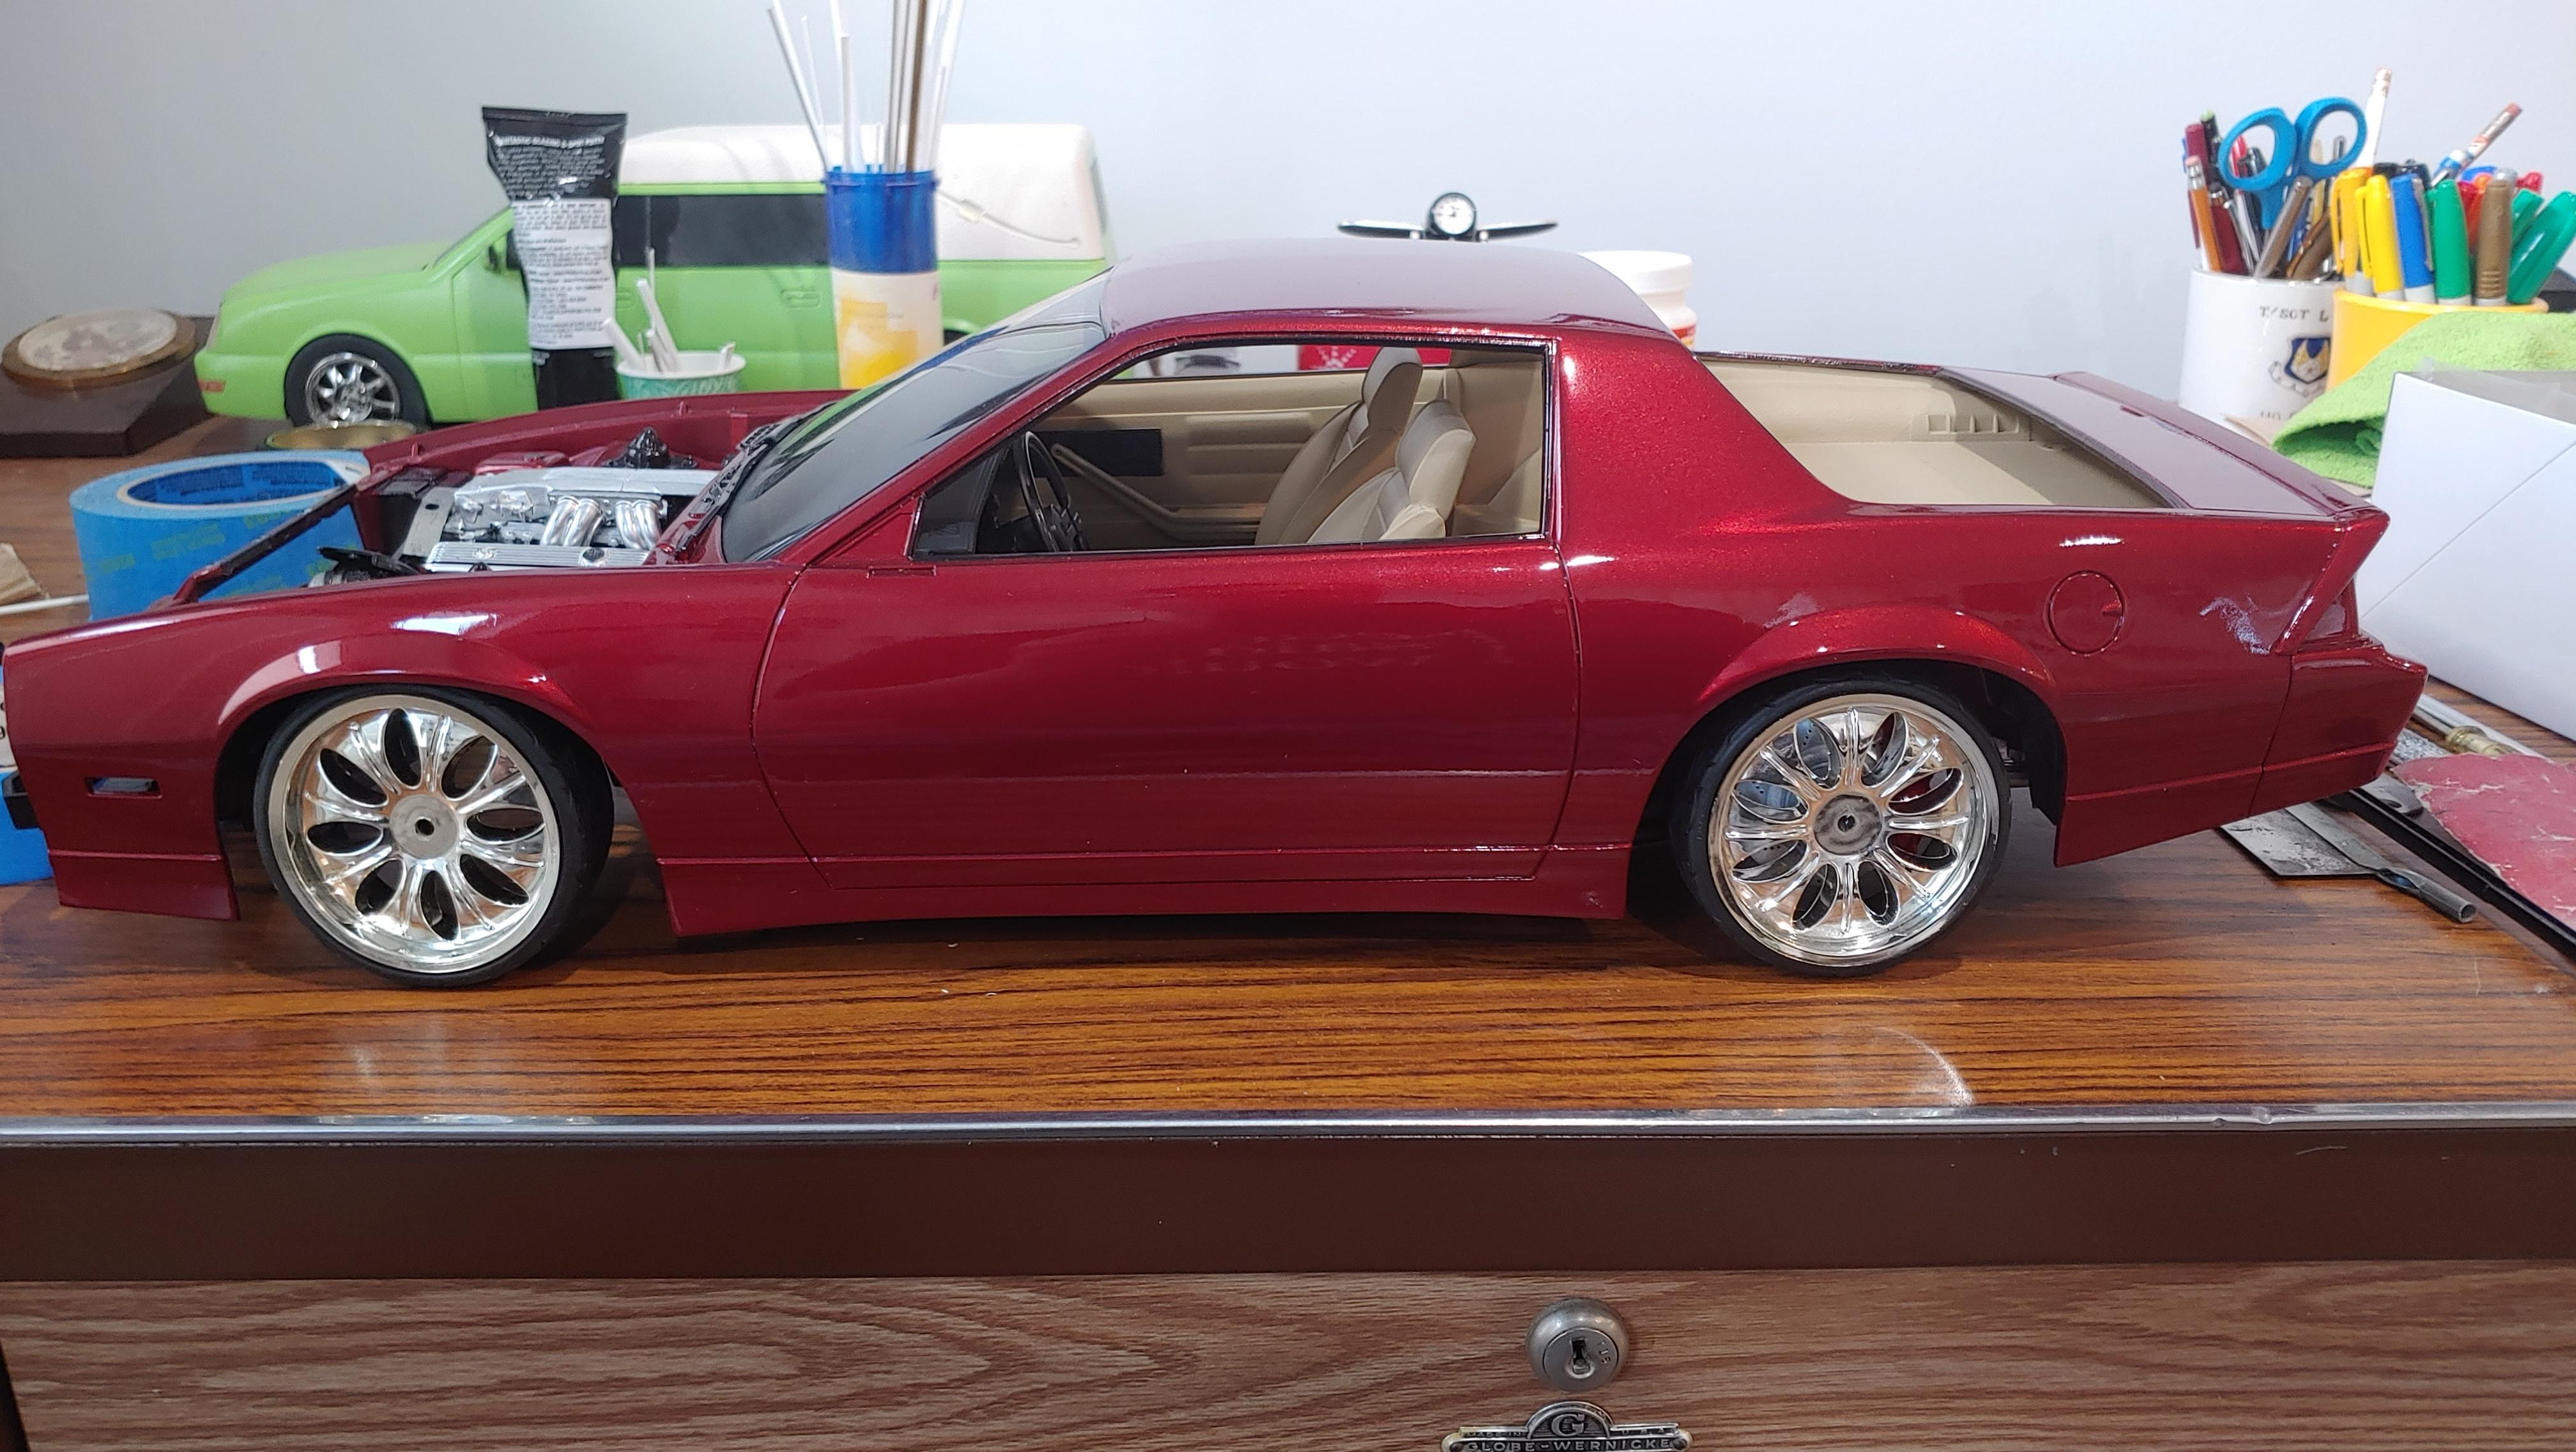
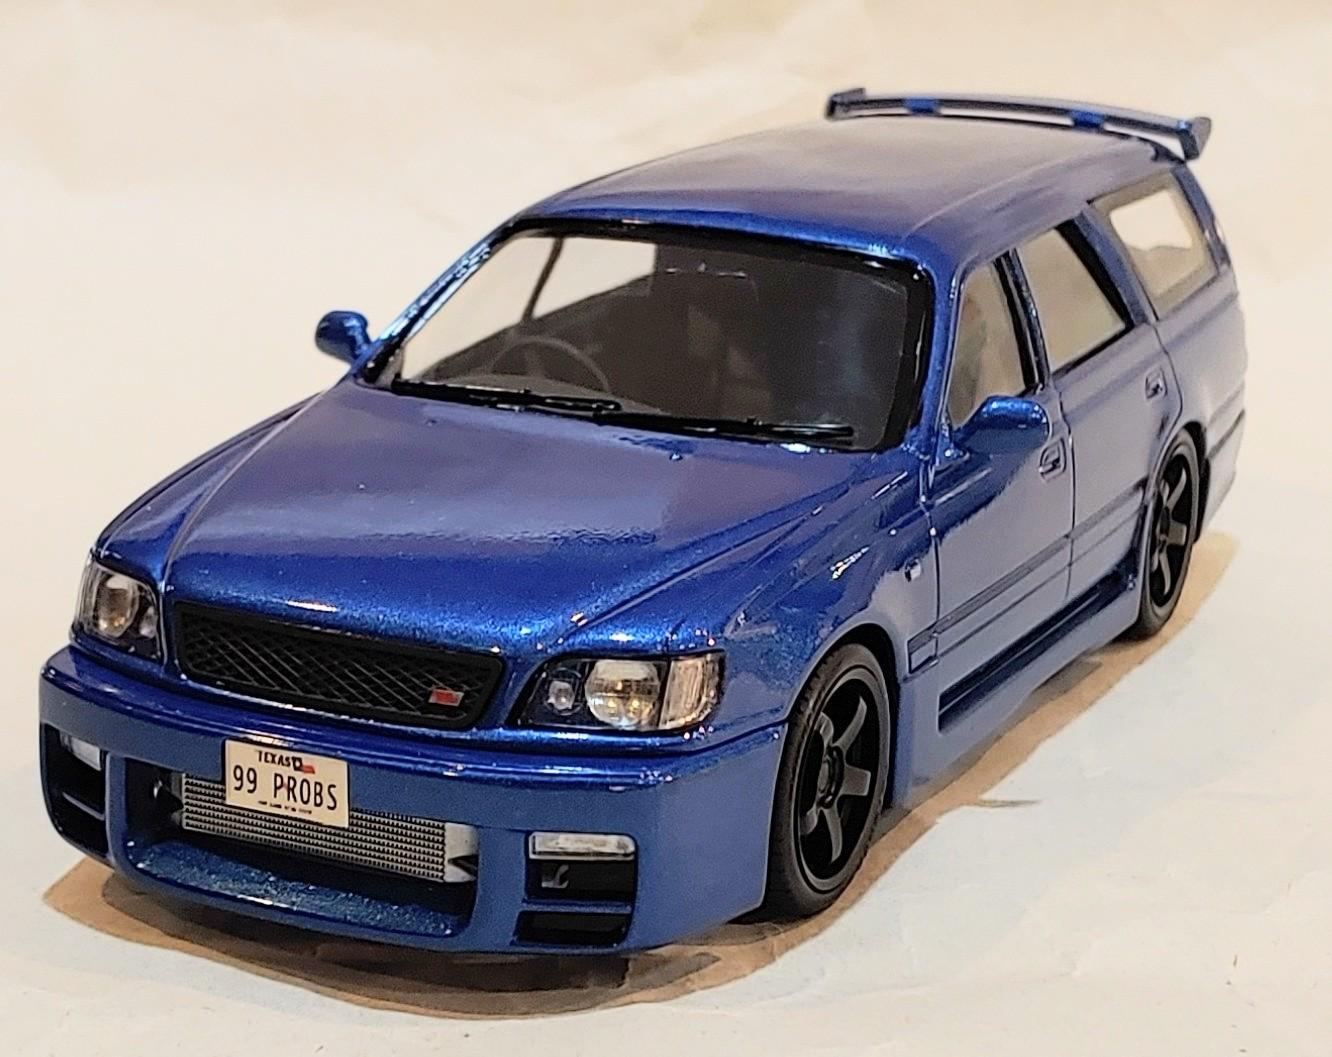
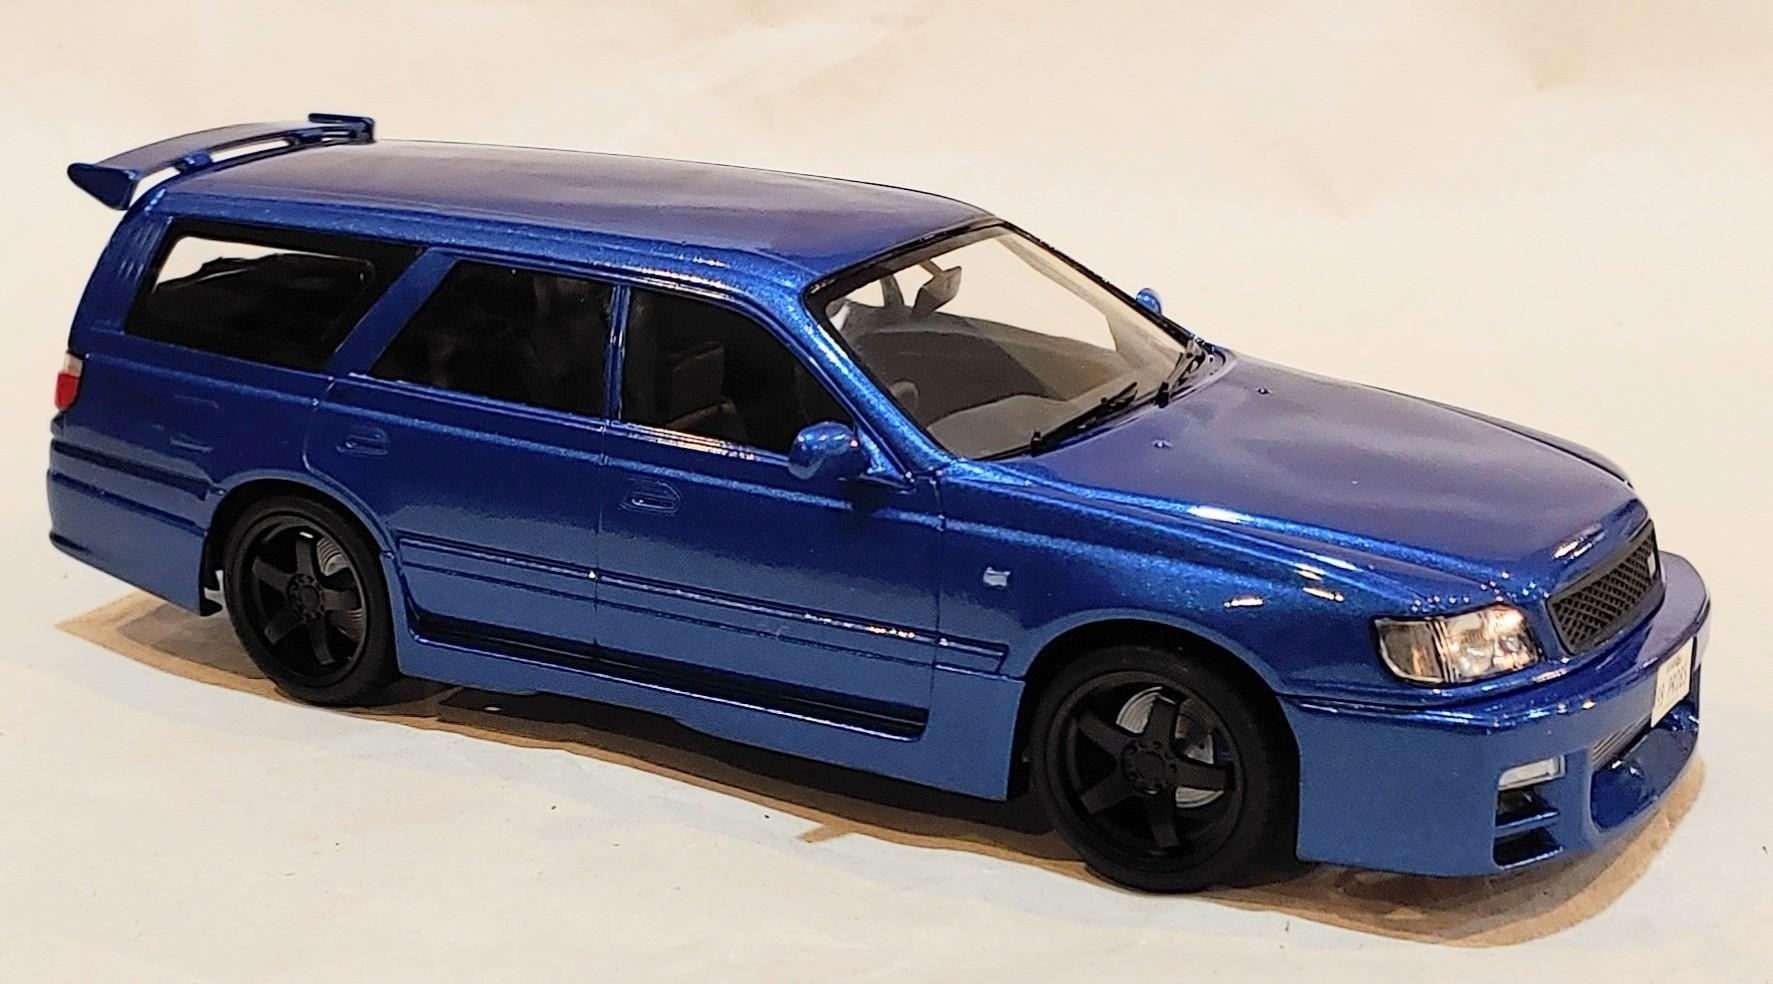
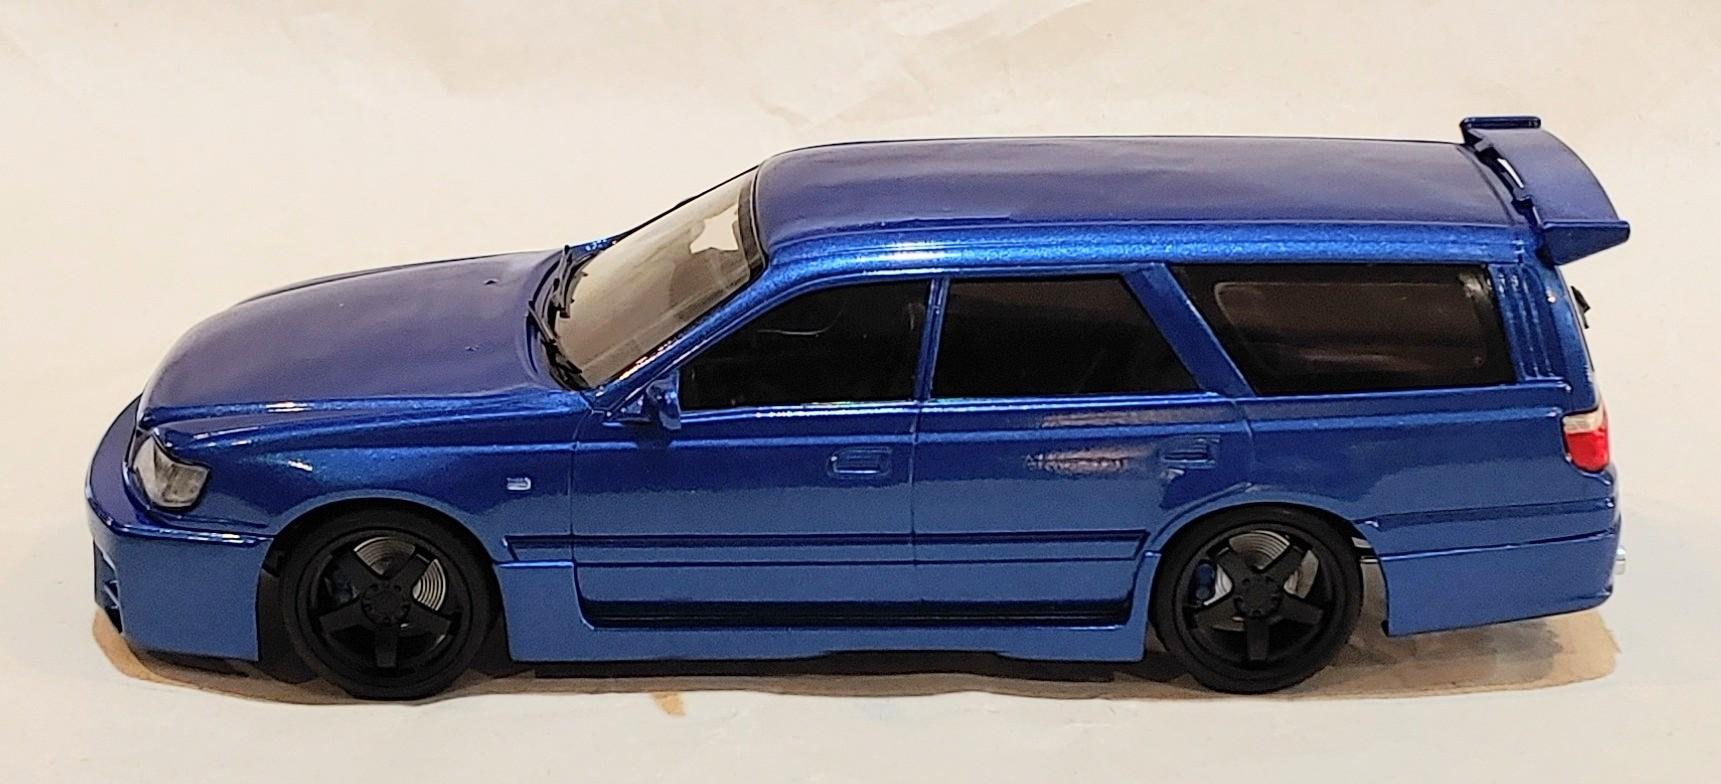
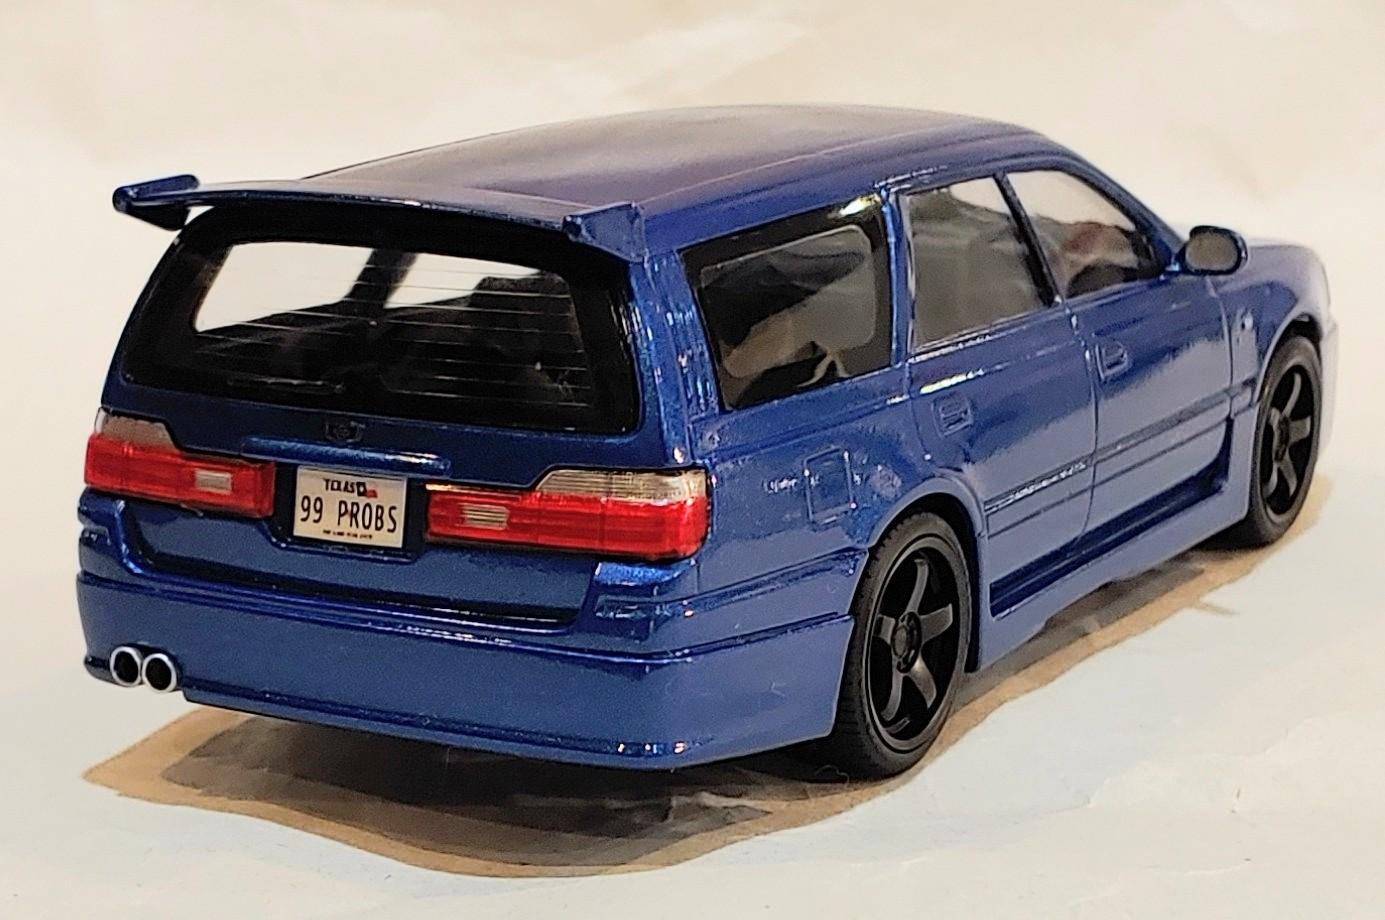
I built this from a pretty rough used kit. It was missing a few parts that I had to replace. I shaved the door handles. The wheels and tires are from an r/c car with resin brakes. I lowered the suspension a couple scale inches and printed the plates. And here it is with a 1/24 for comparison Here's the link to the WIP thread.

-
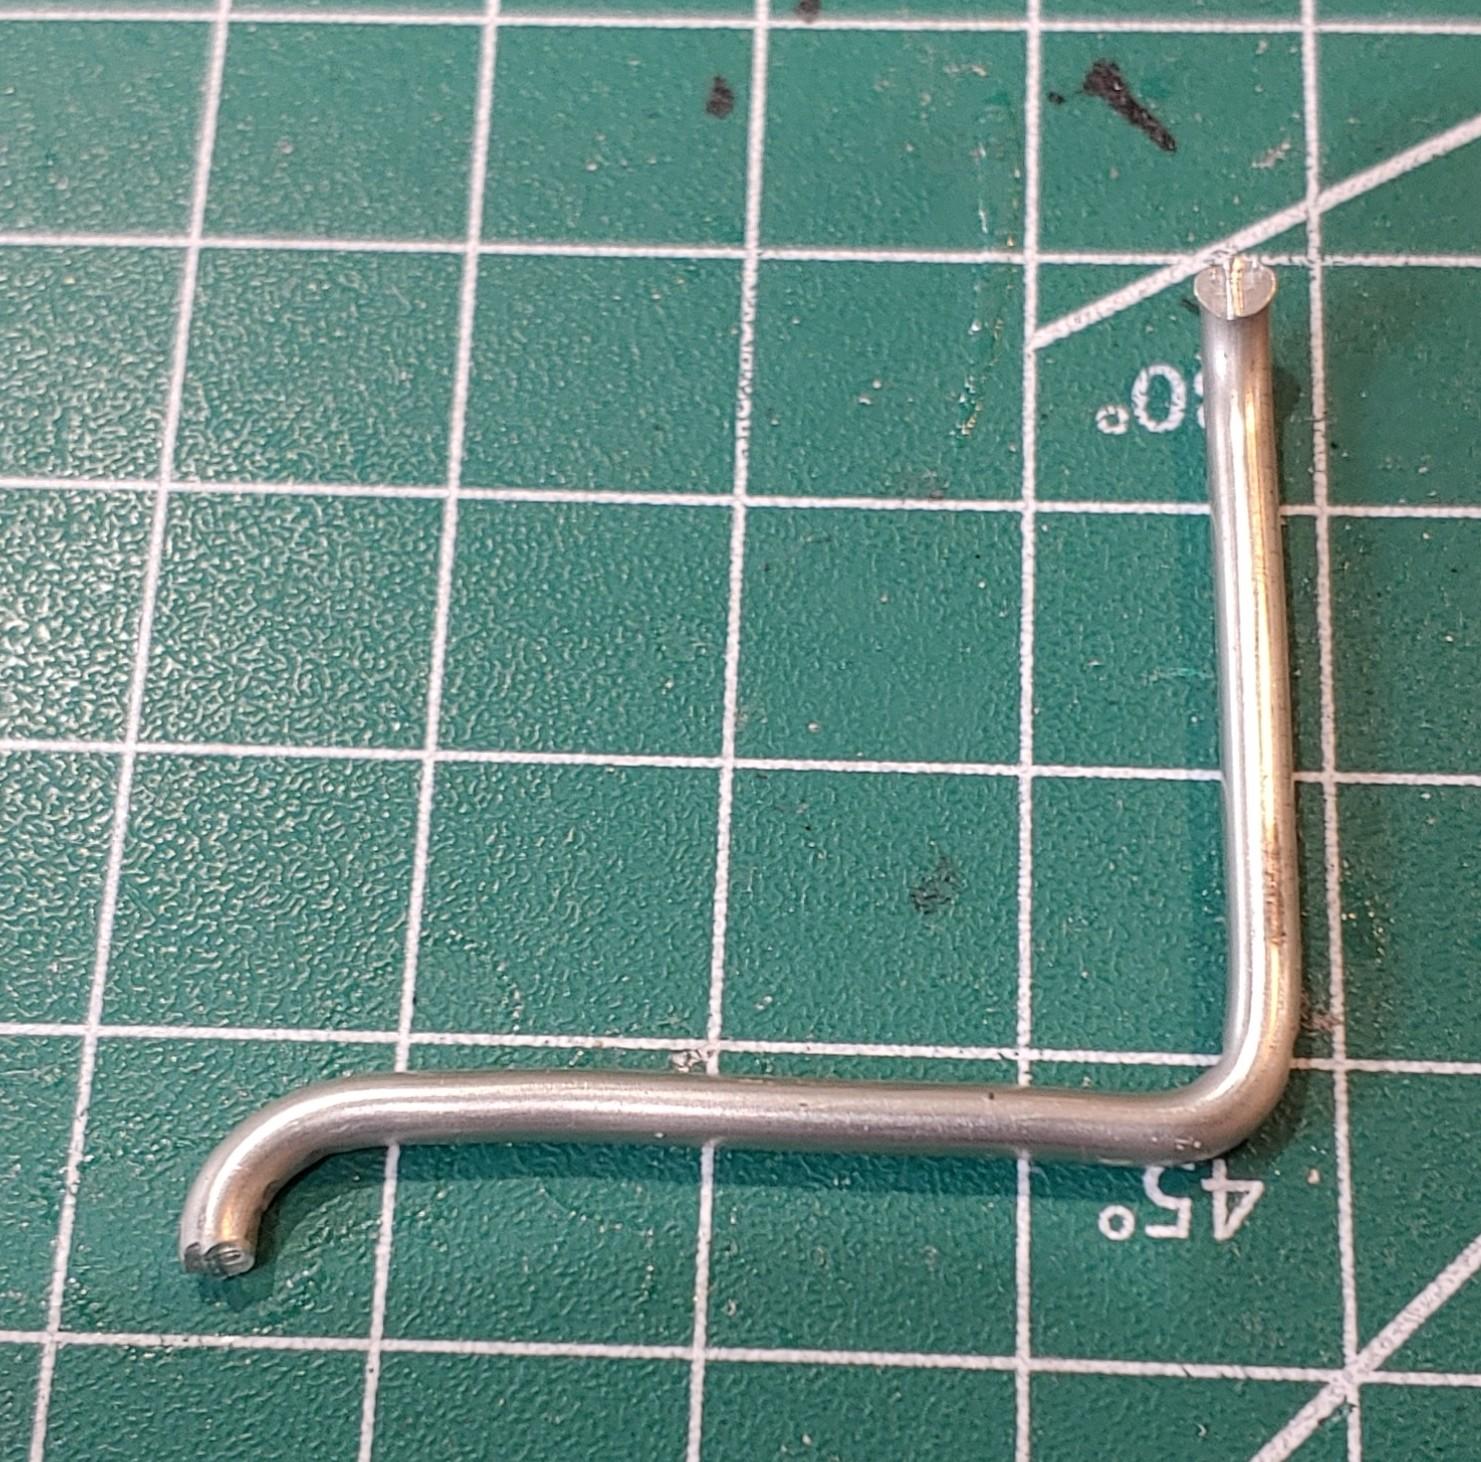
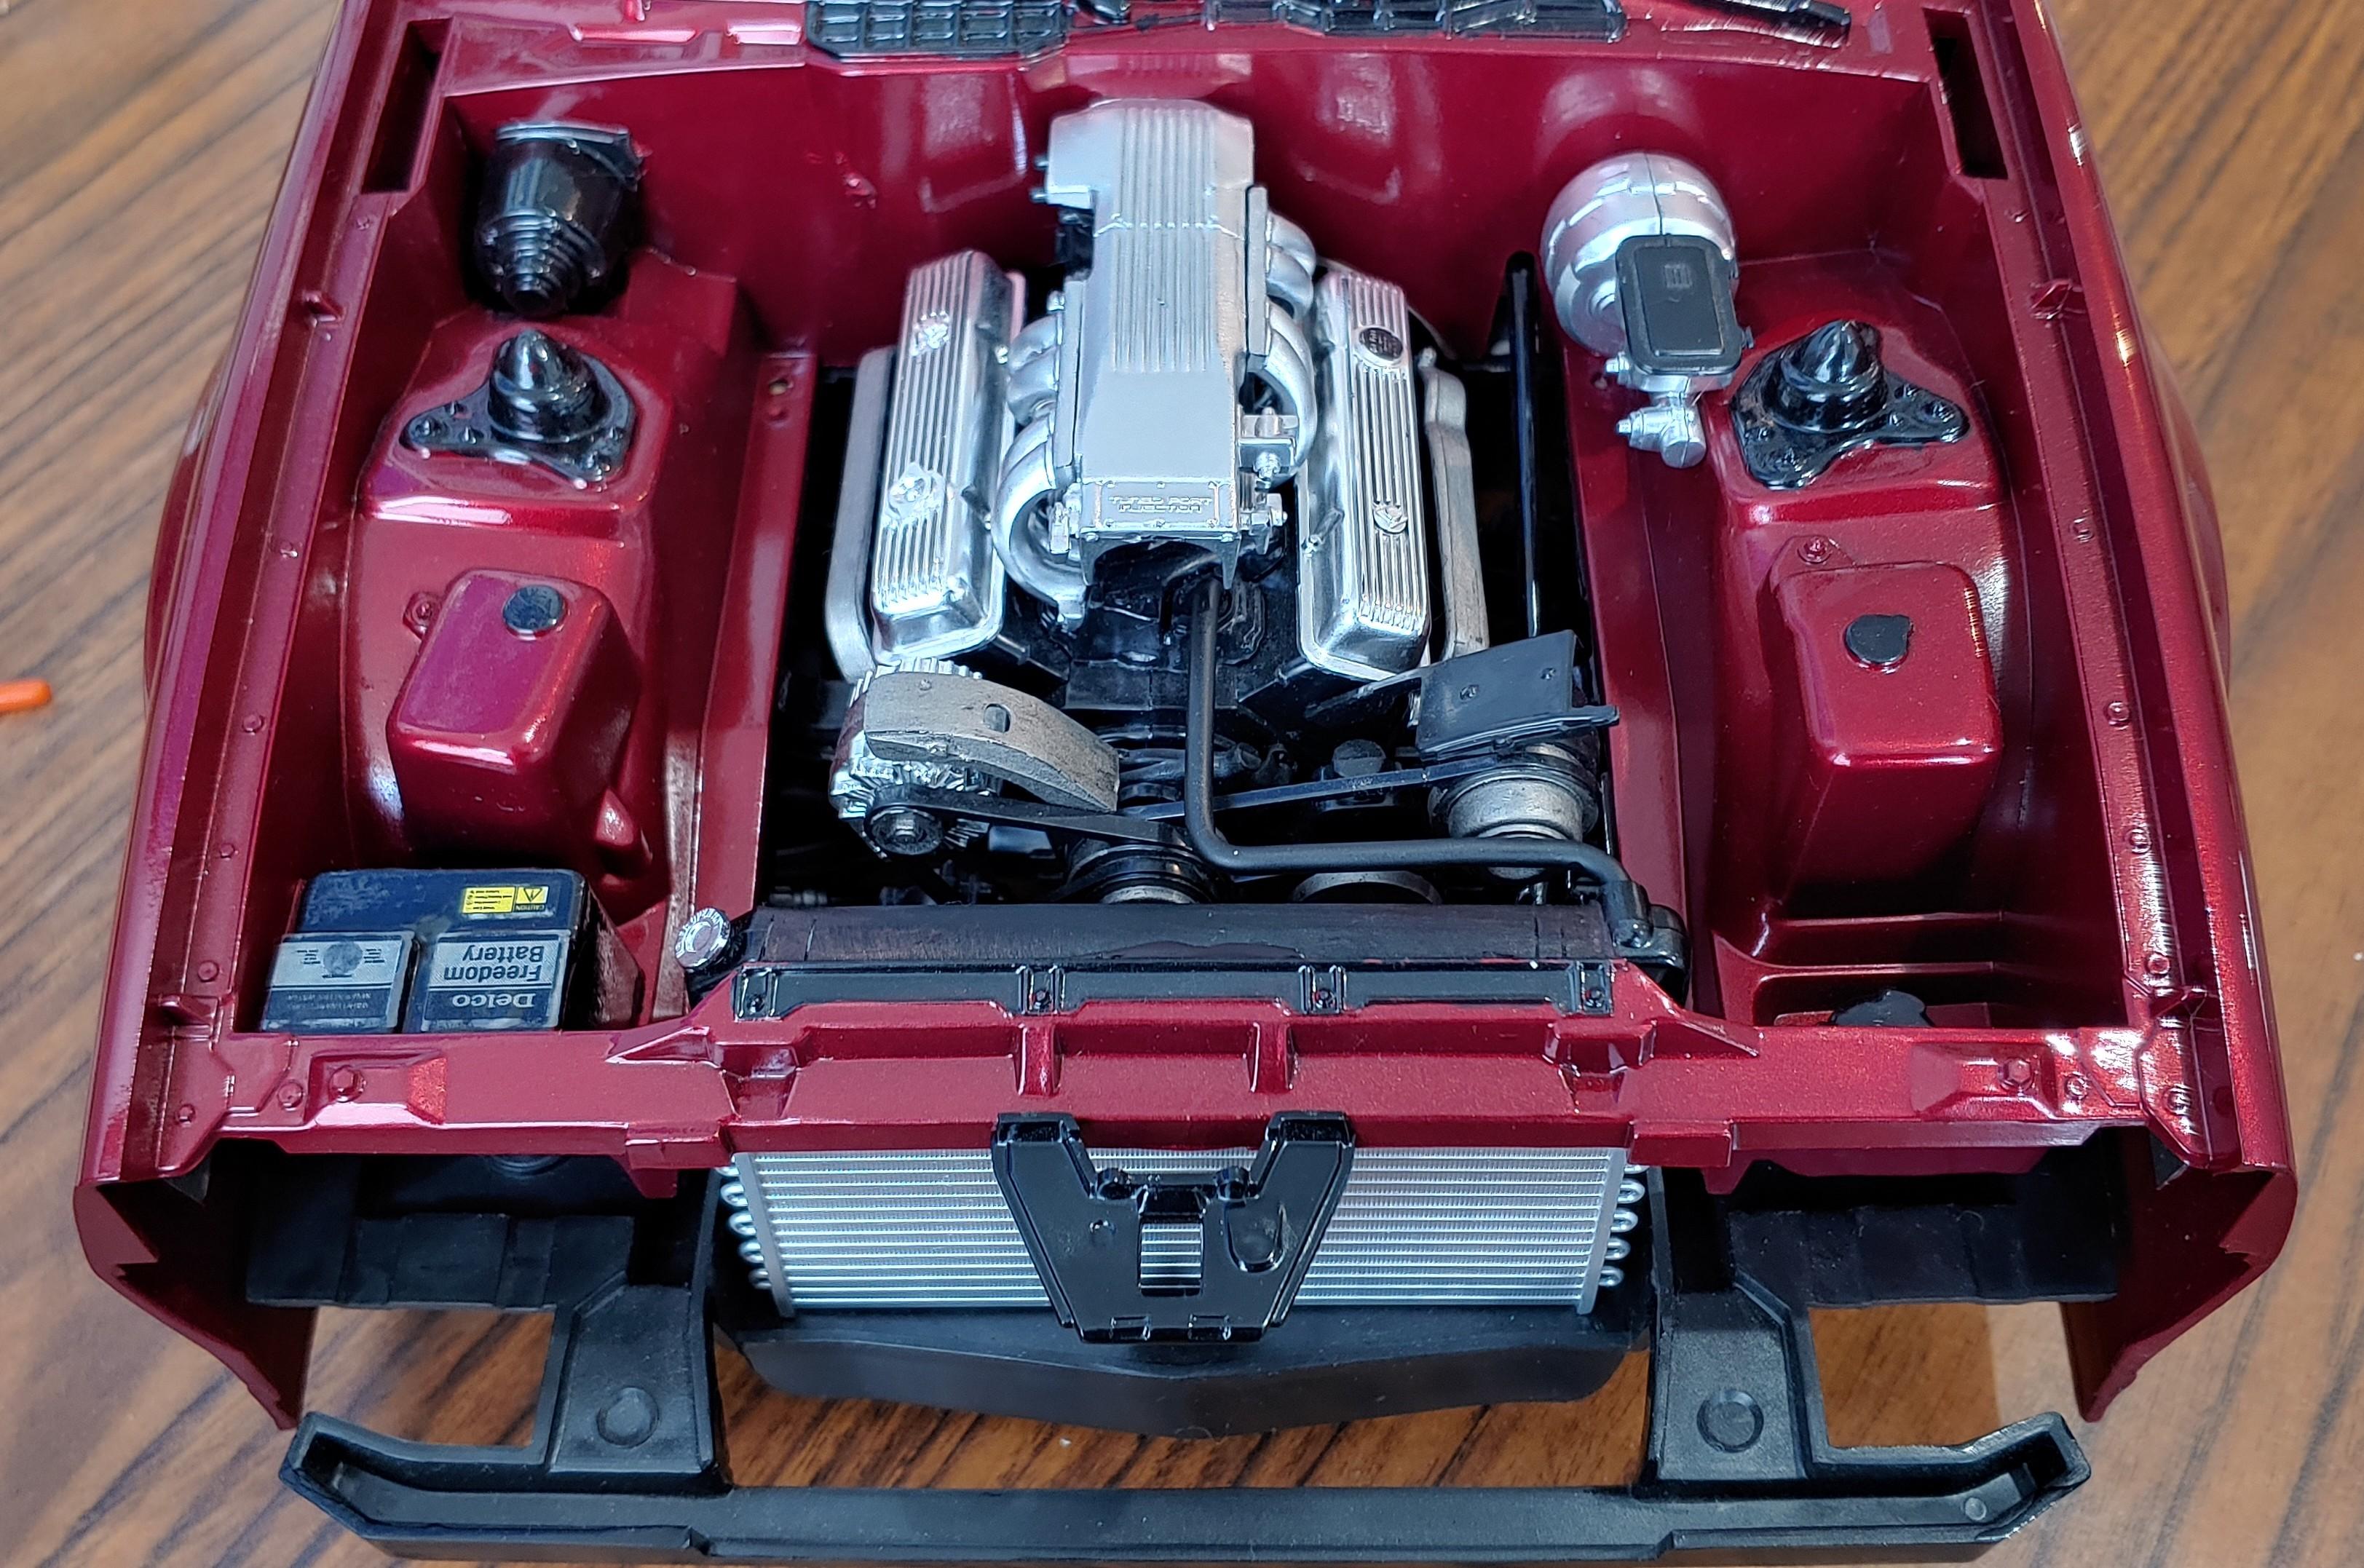
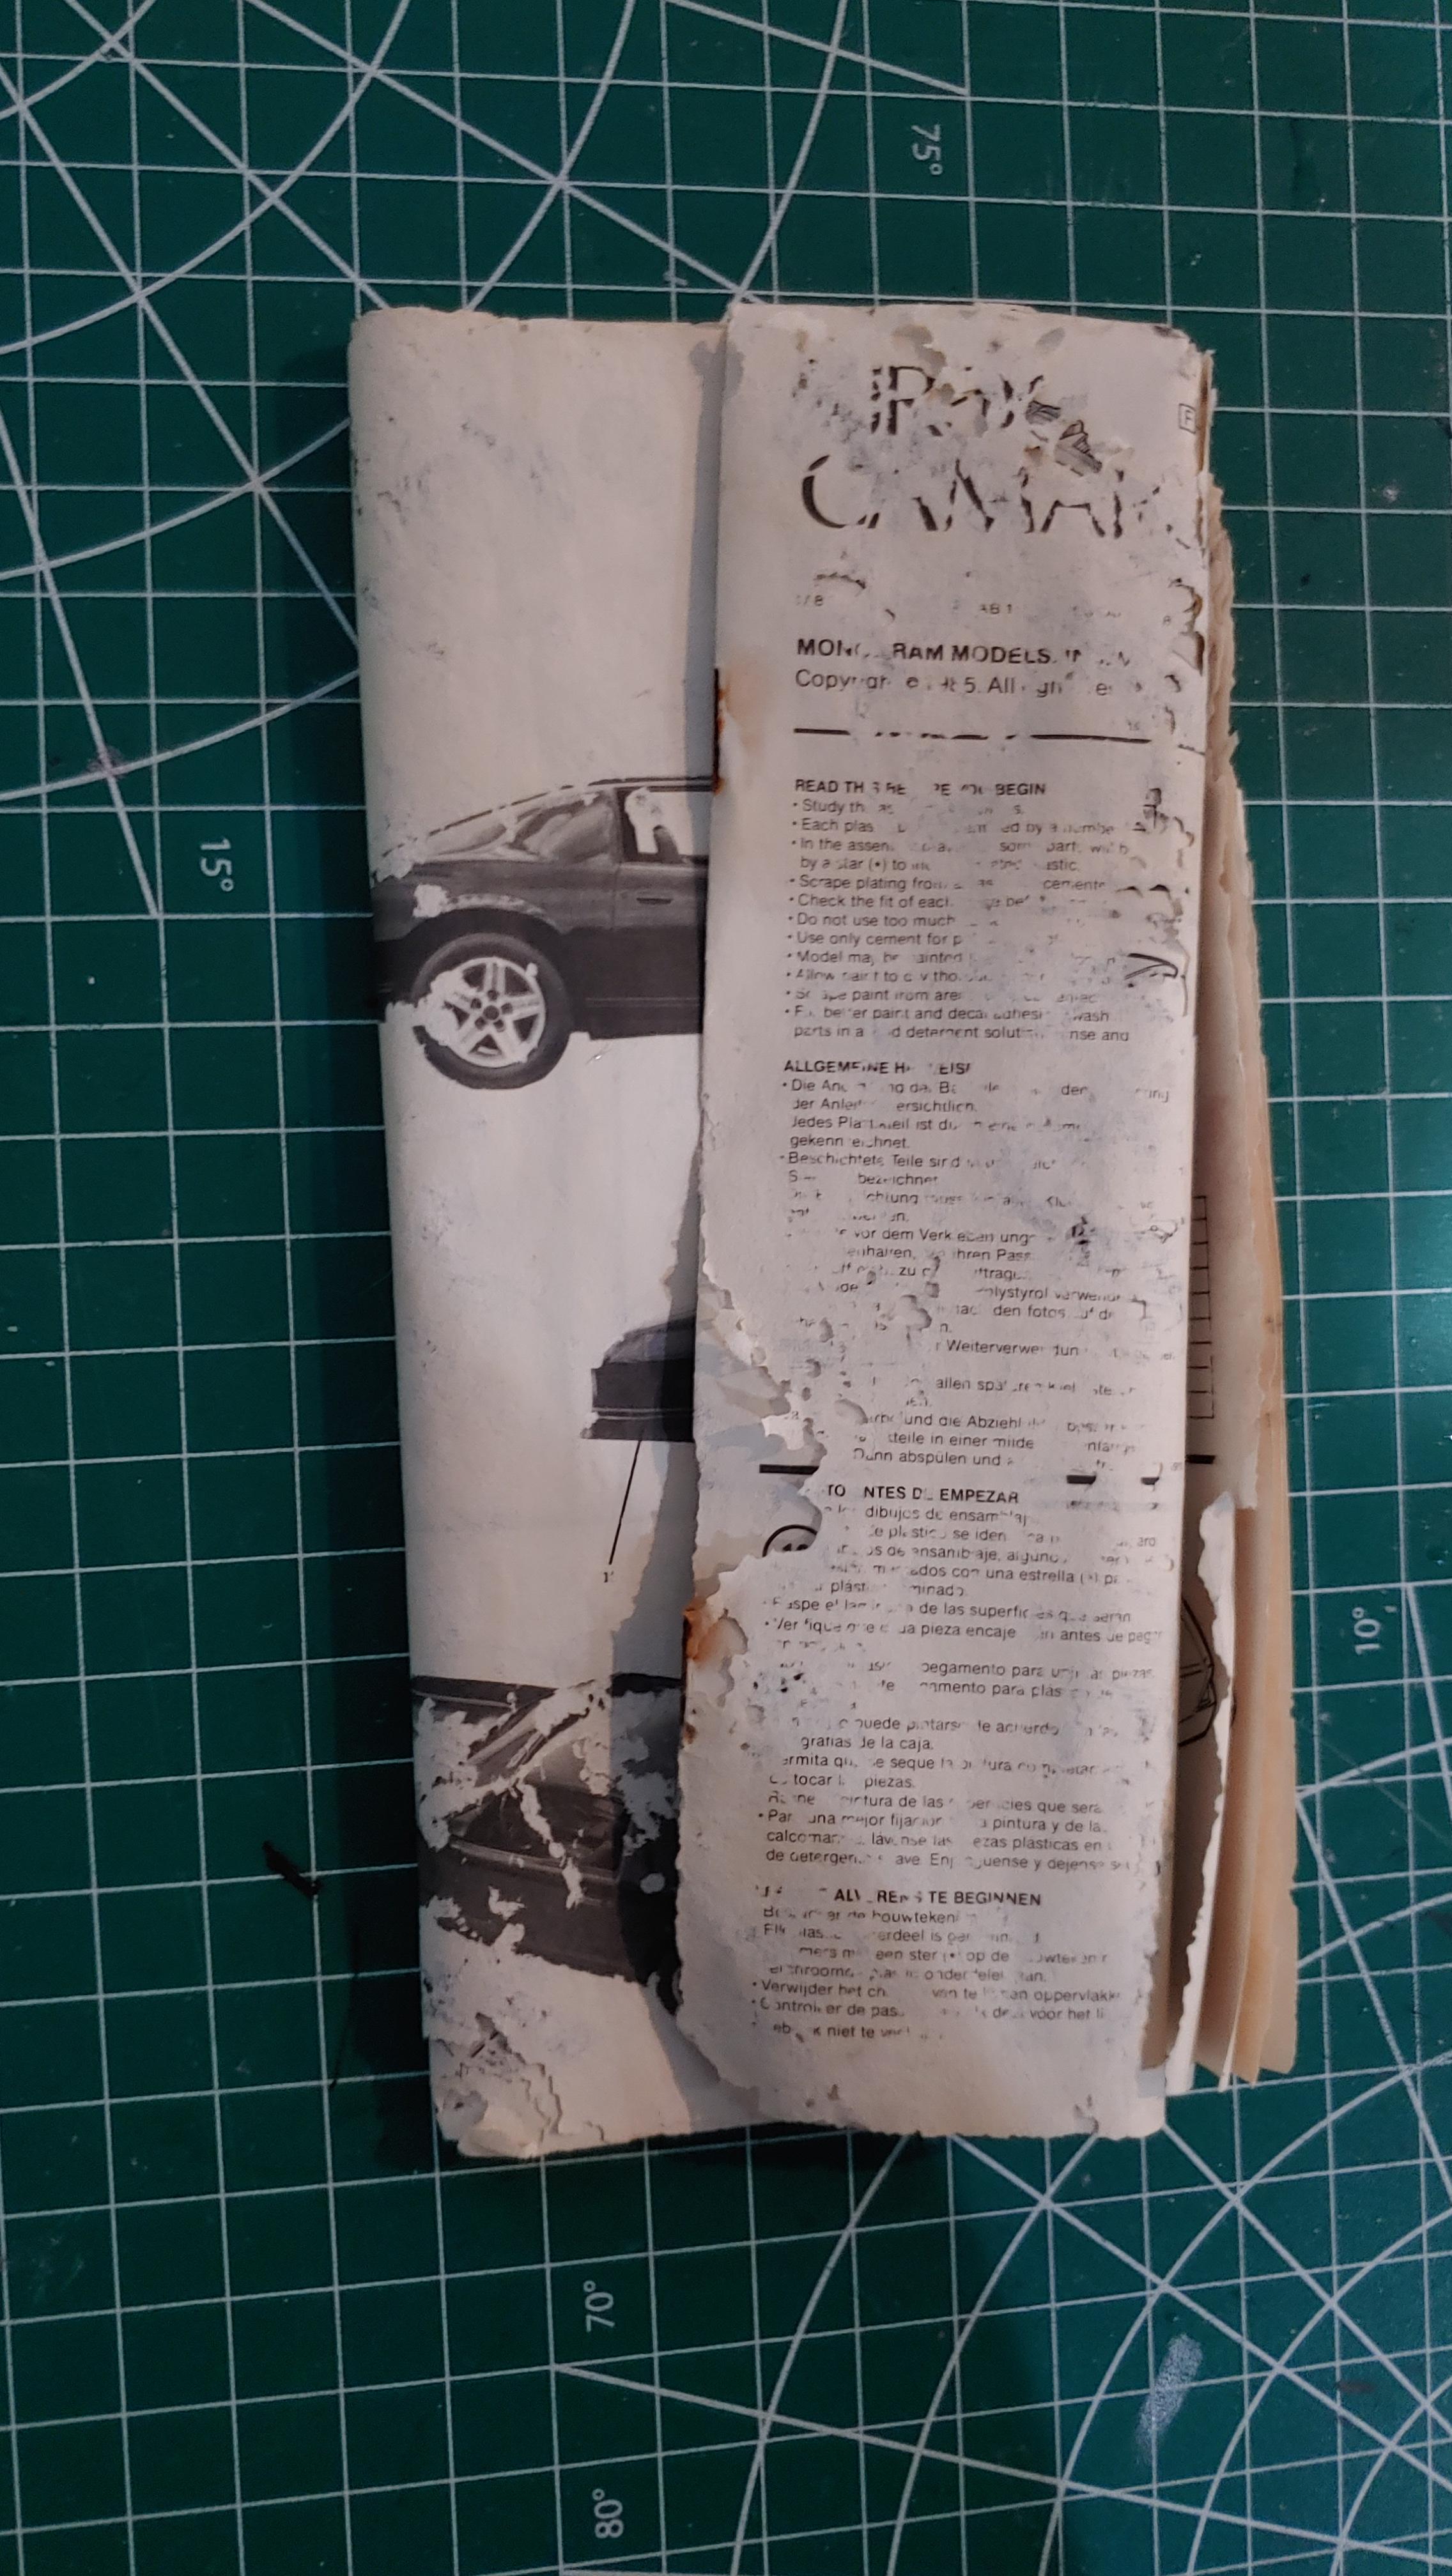
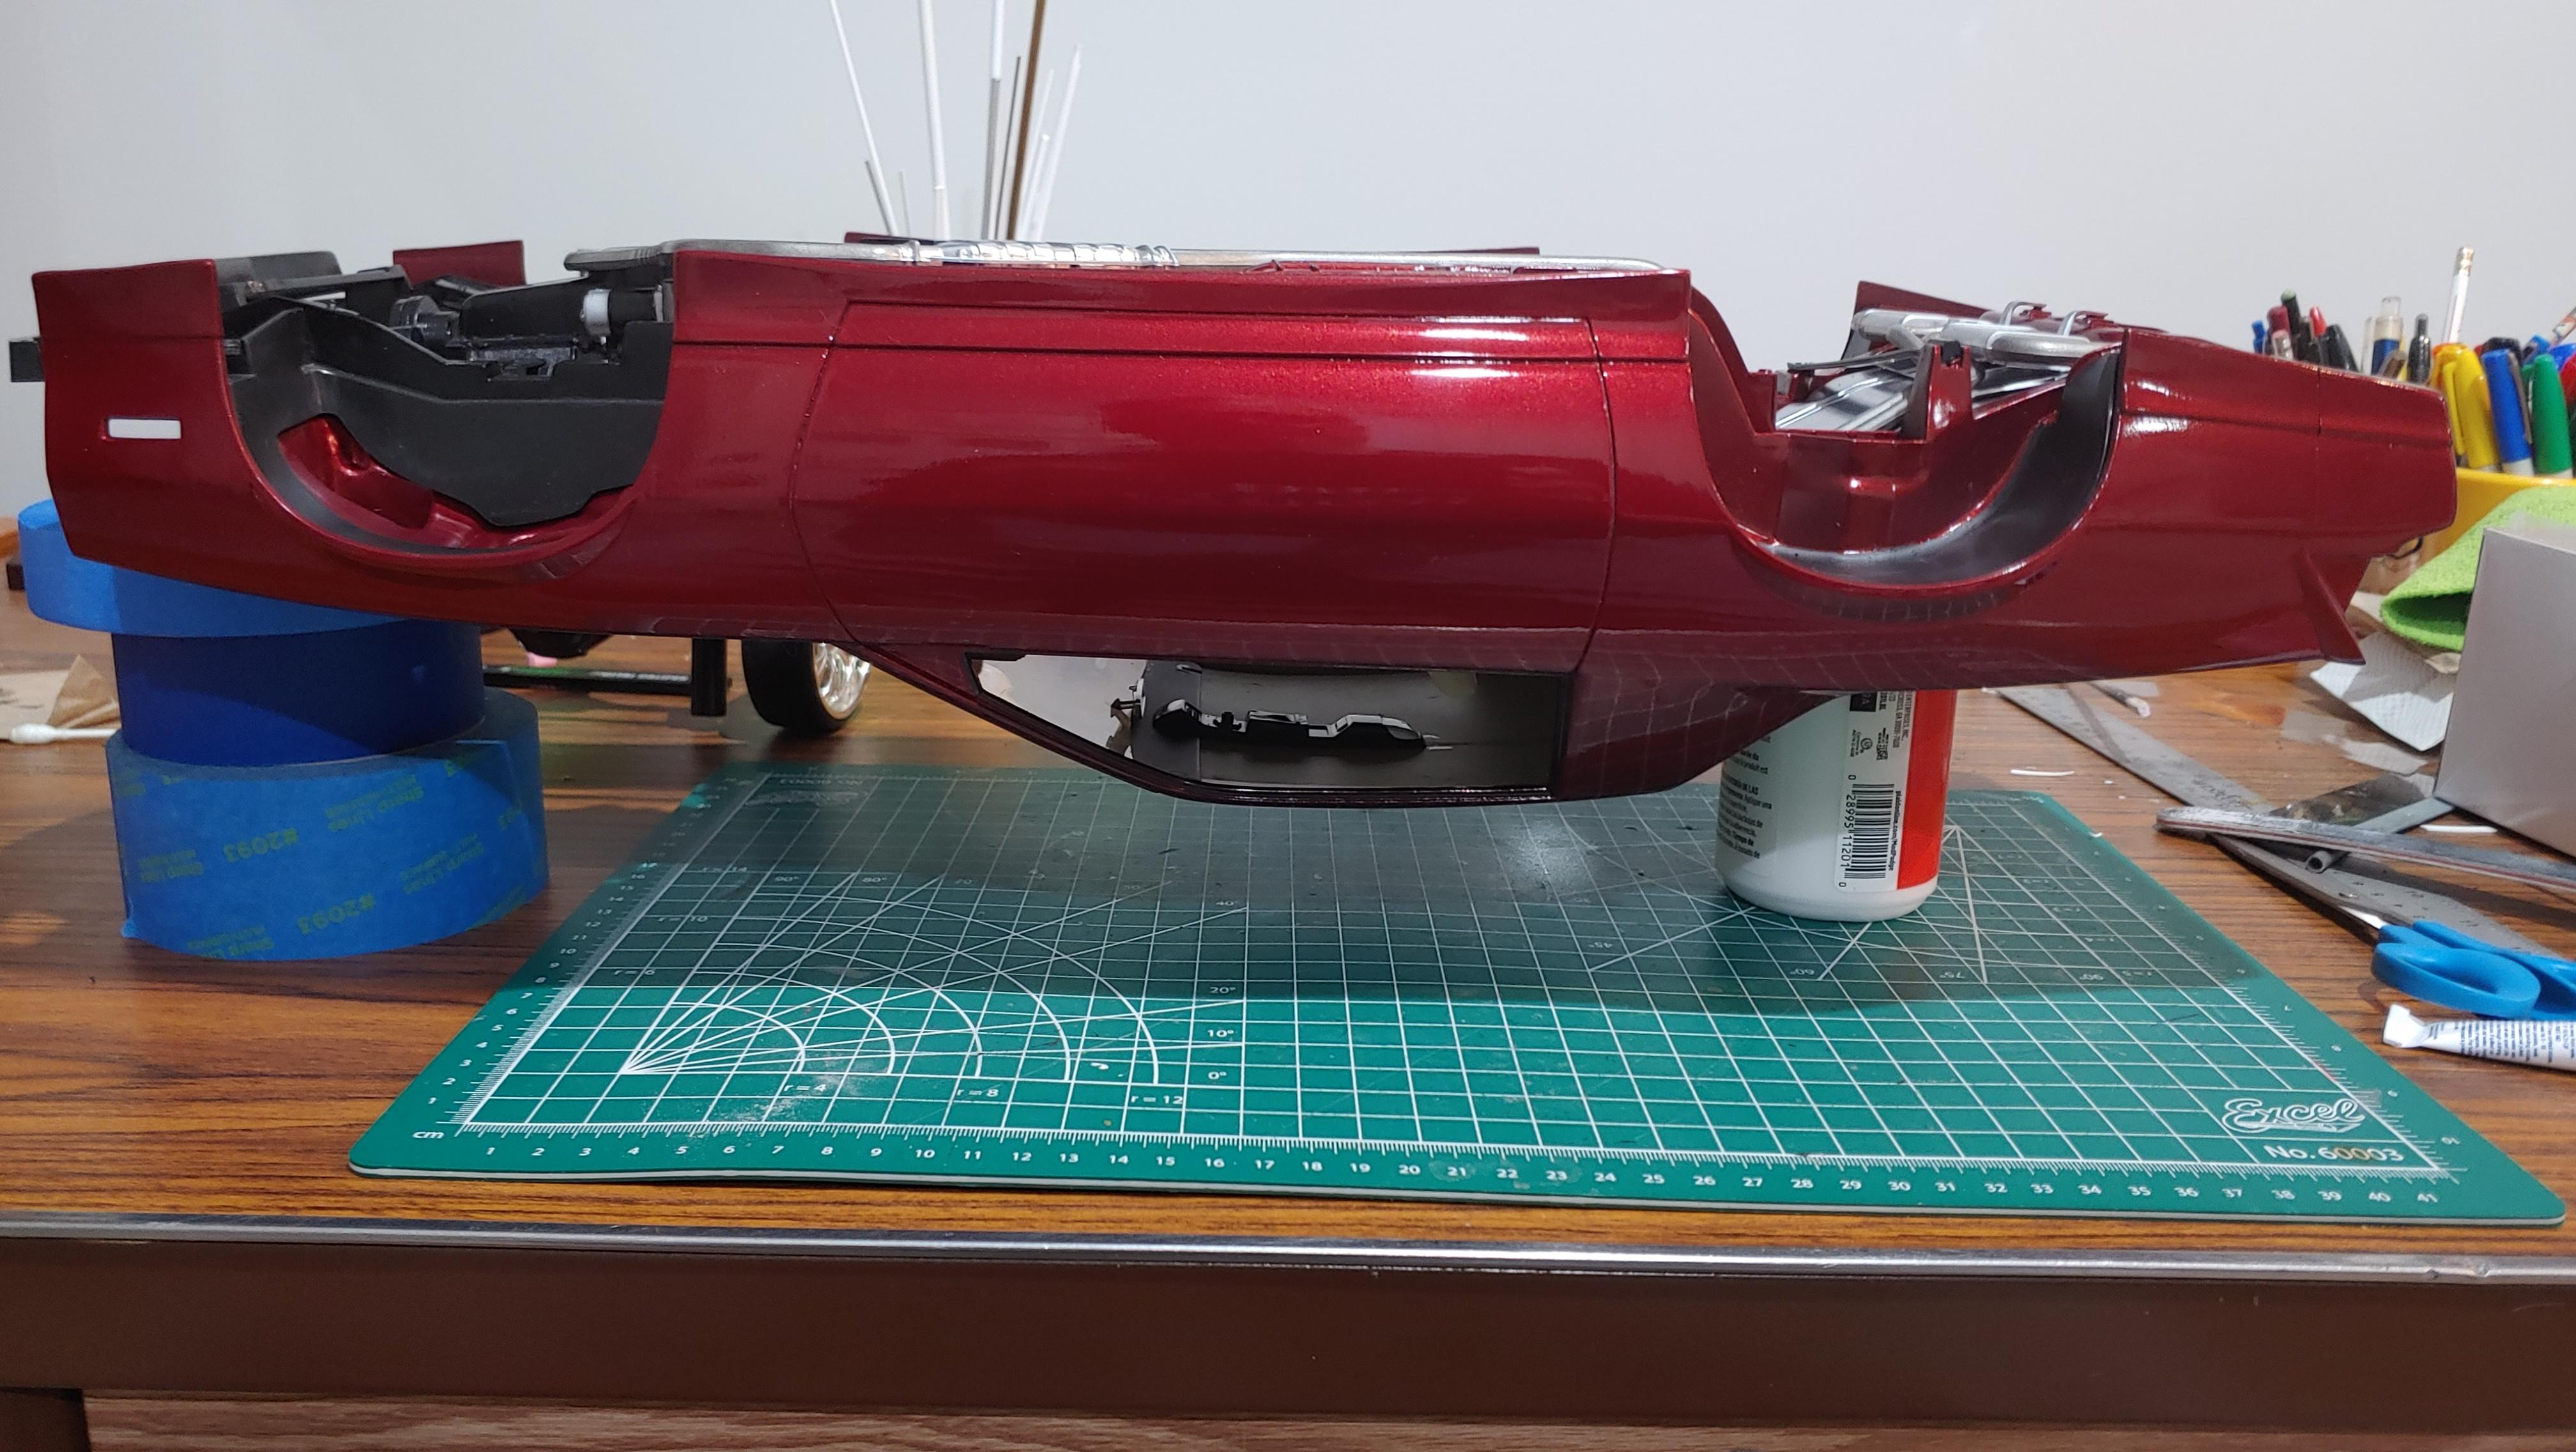
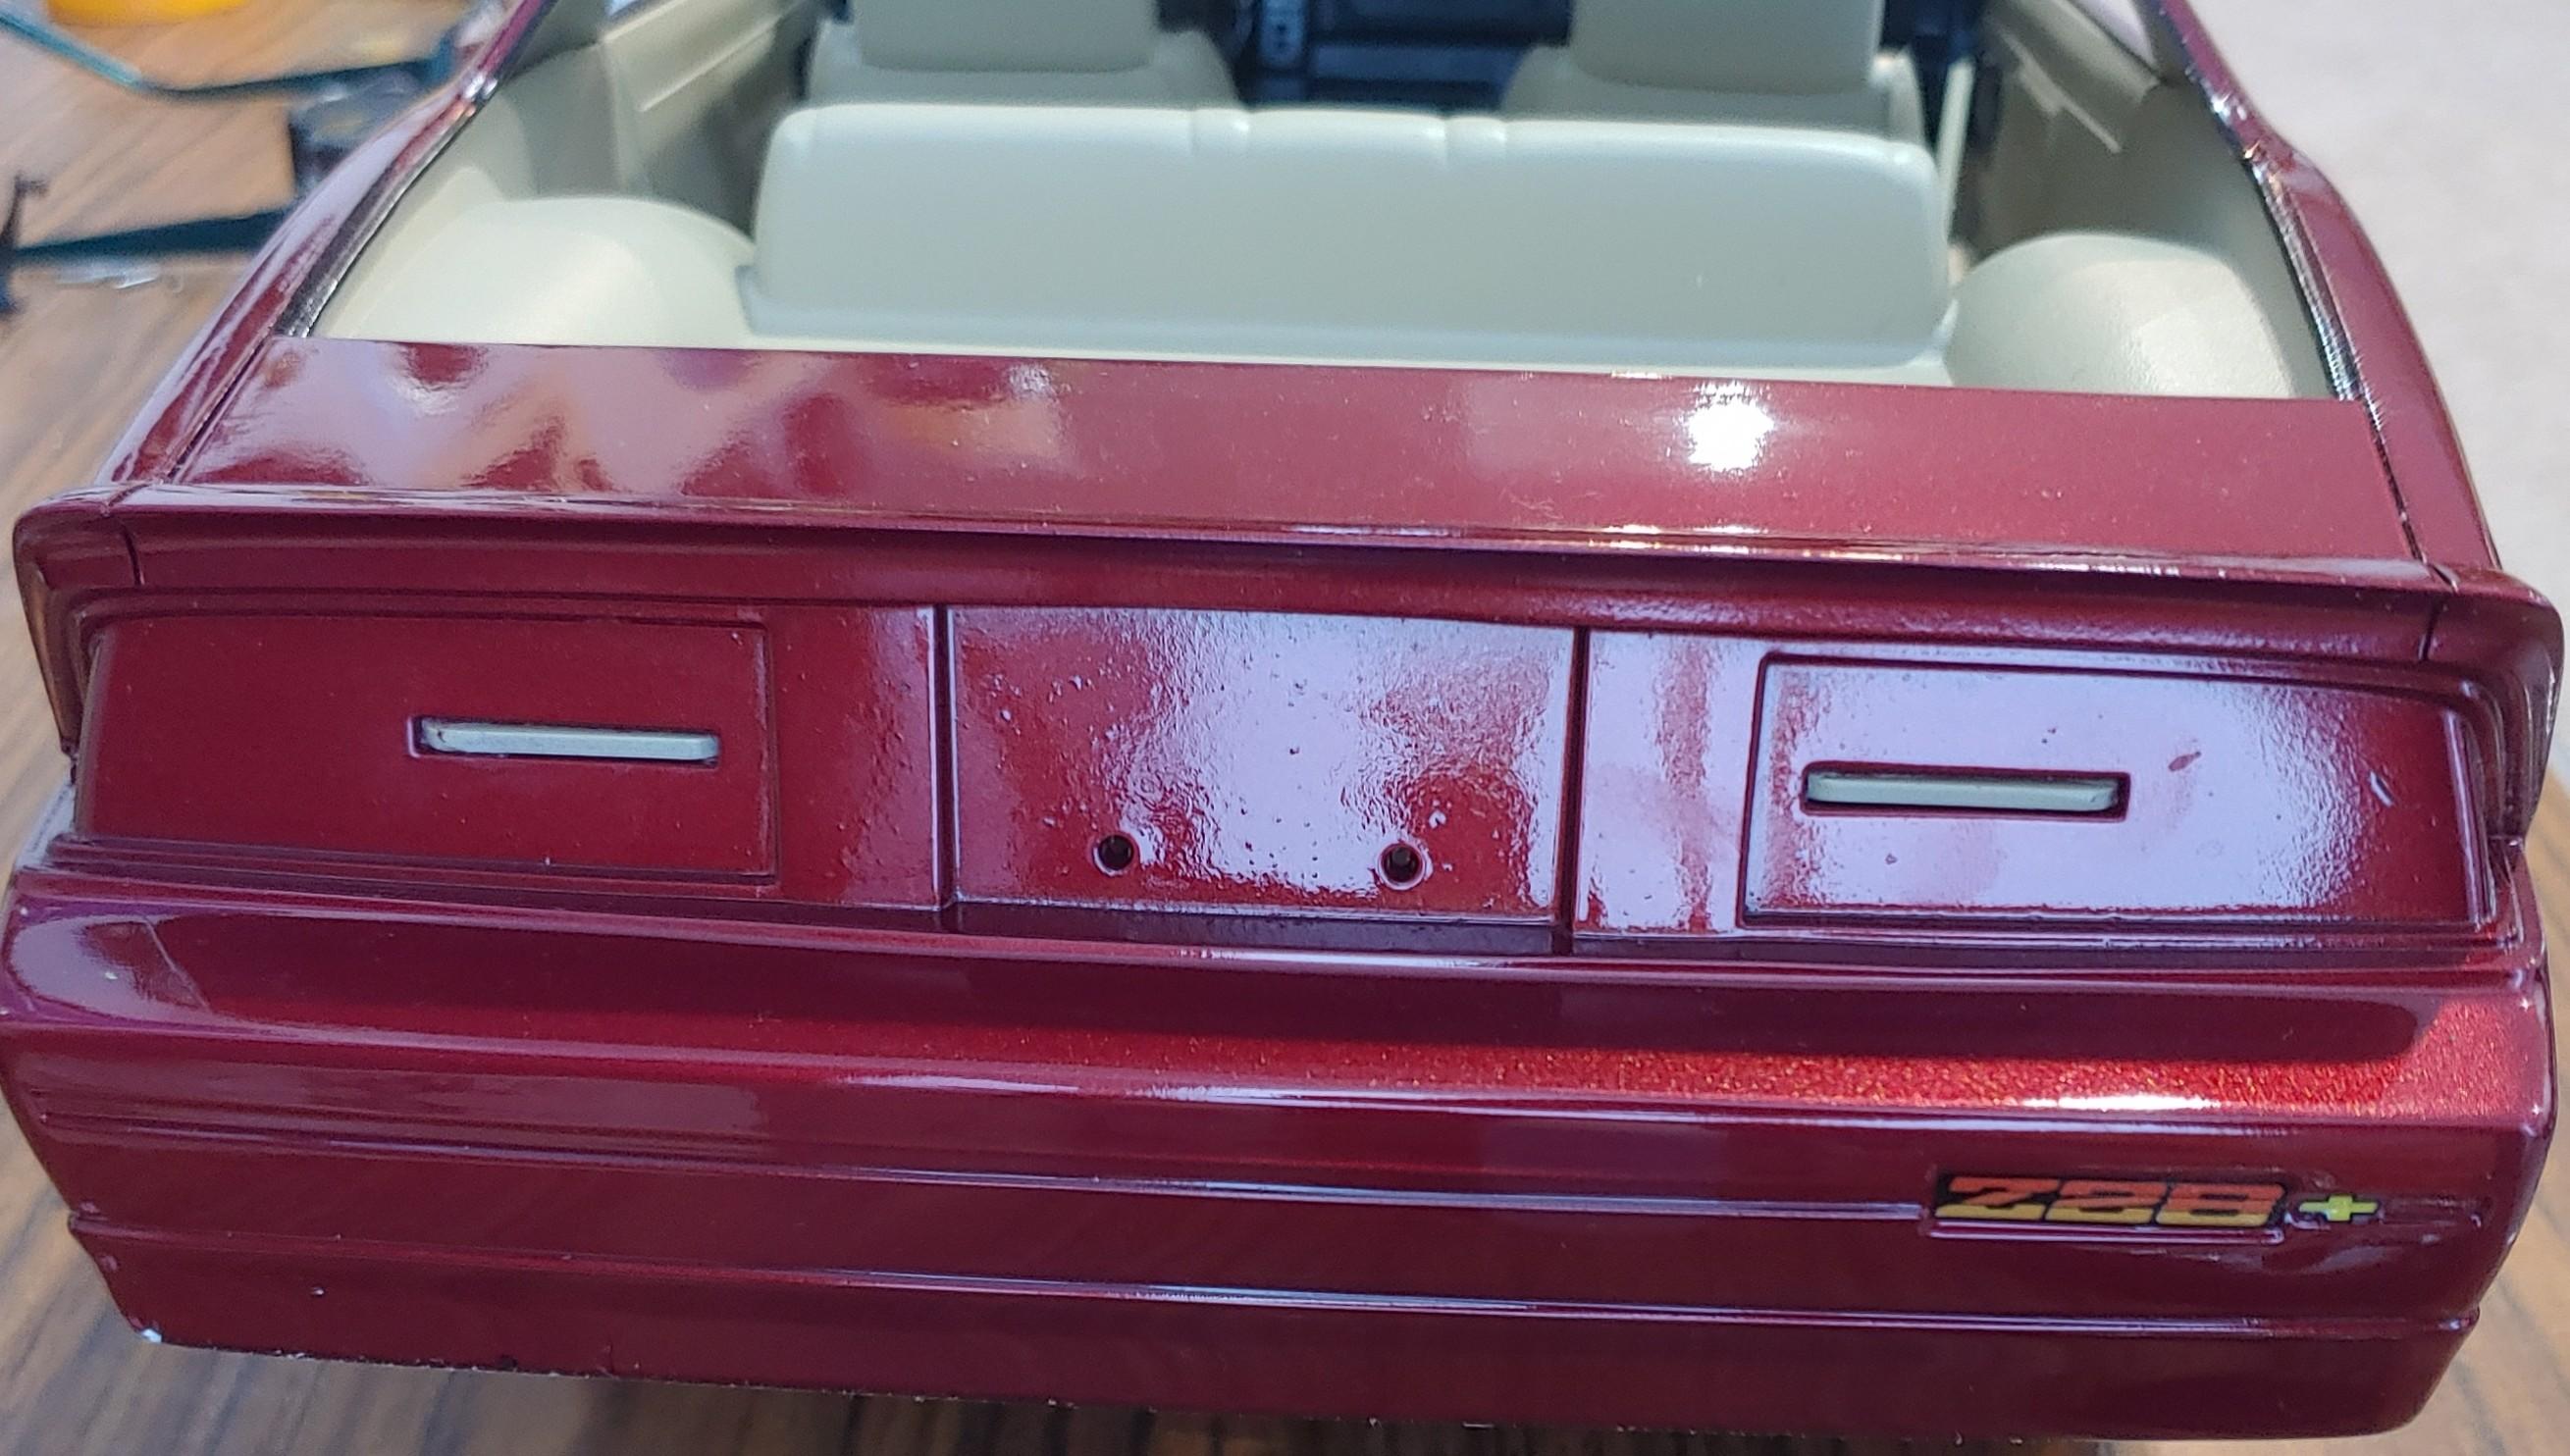
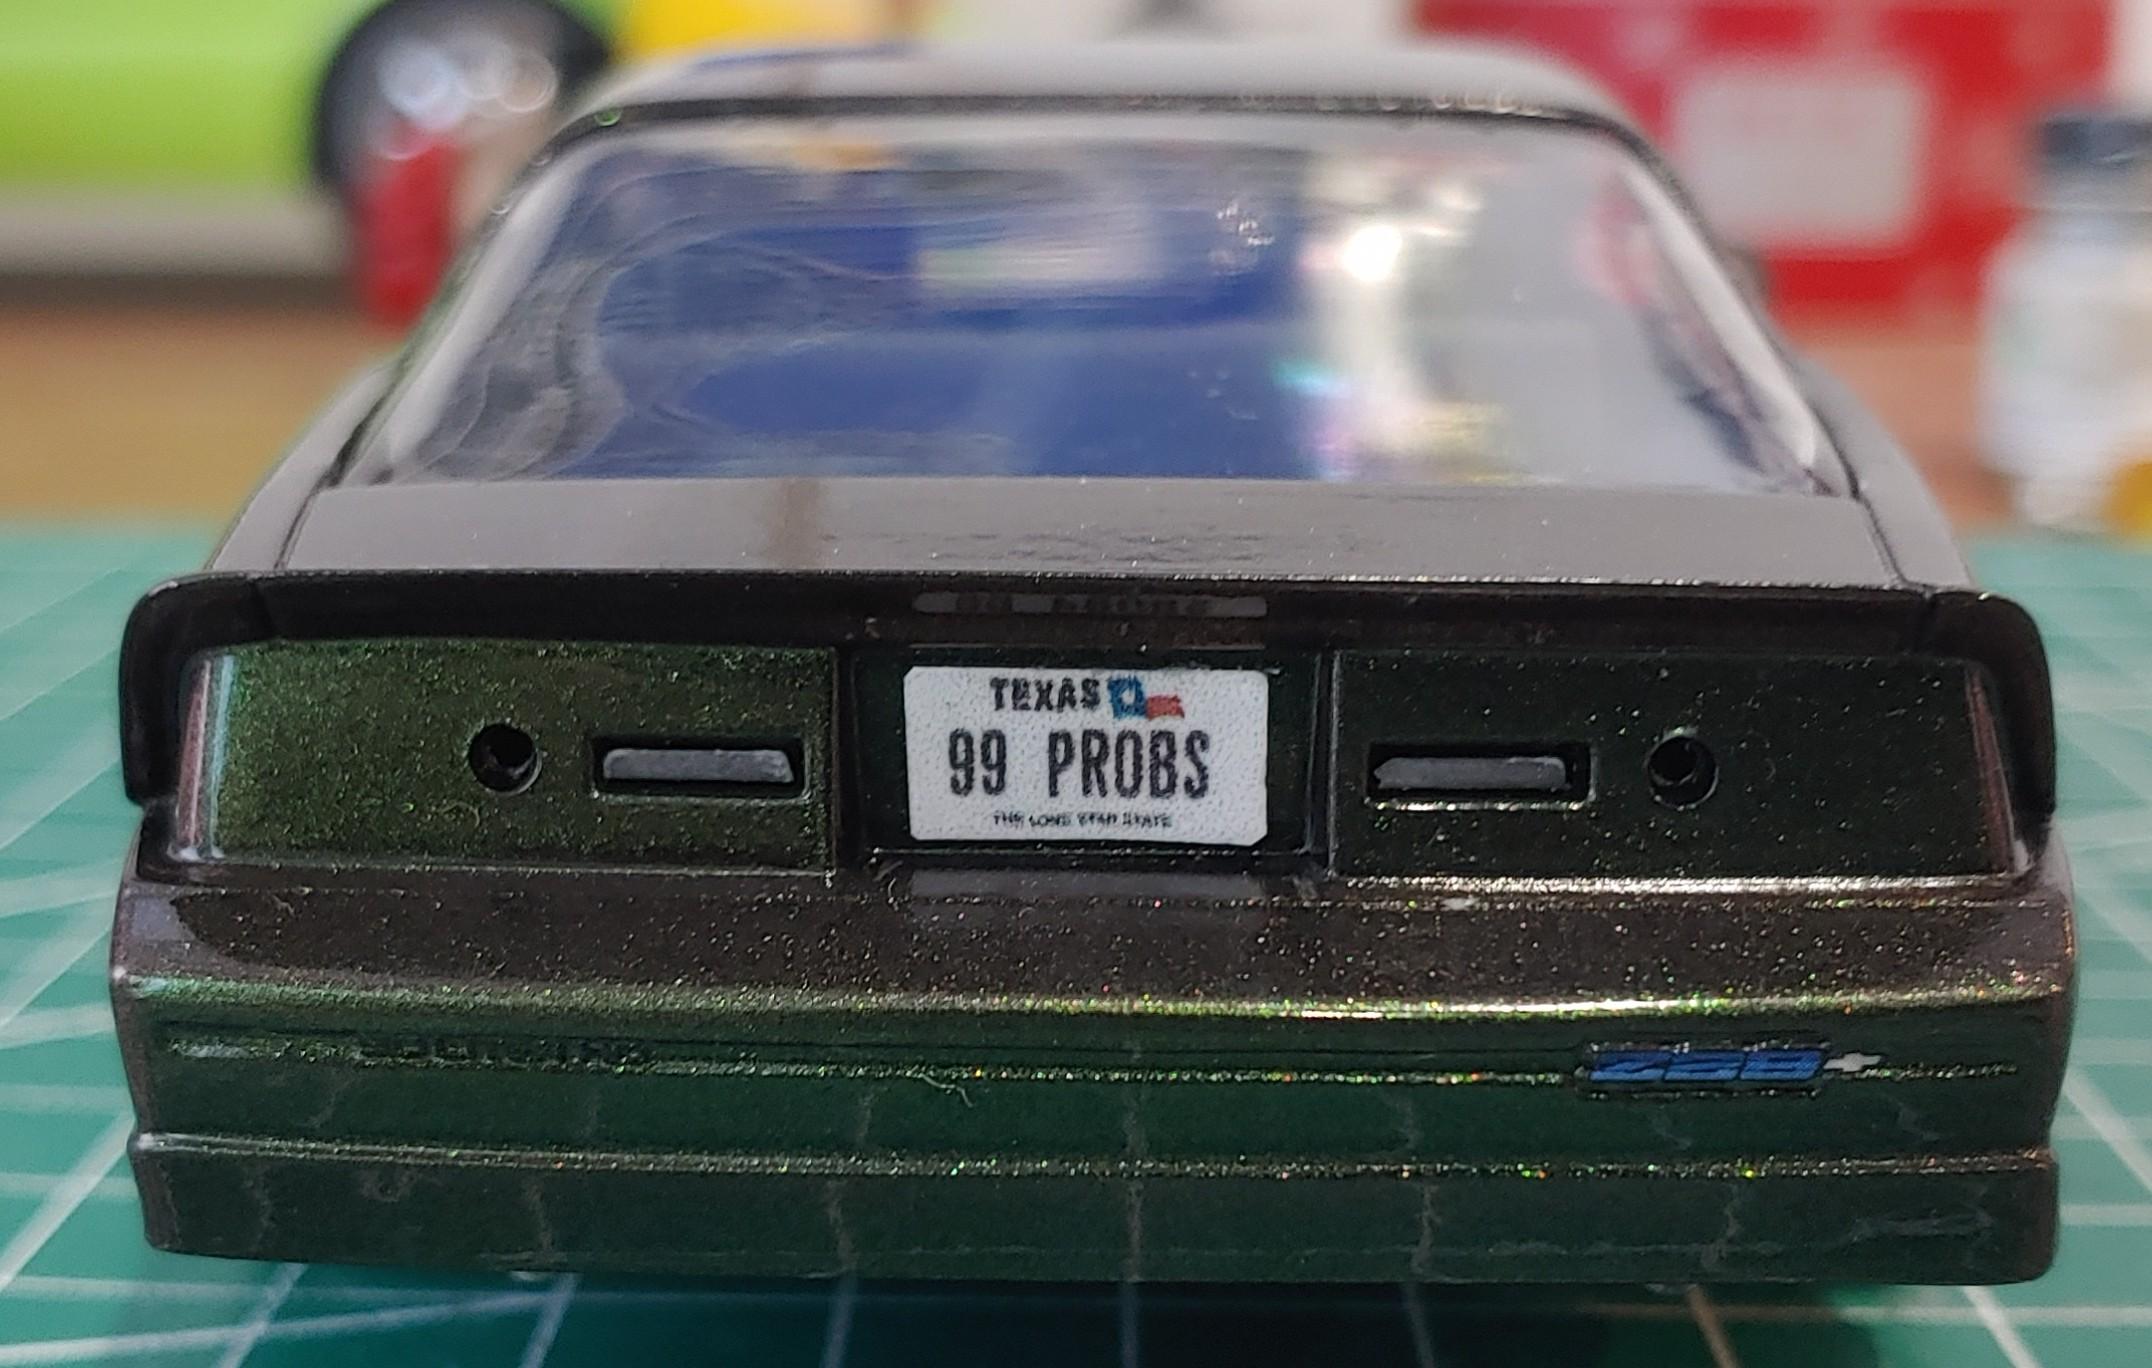
I got the front suspension painted and installed. While it was upside down I made some turn signals out of some clear plastic, BMF and an orange sharpie. I figured out why the radiator wasn't fitting. When the previous owner installed the pulleys they didn't push them in all the way and they were hitting the fan and pushing the radiator forward. I decided to solve the problem by just leaving the fan off. After I installed the radiator I ran into the next surprise missing part, the radiator hose. Easy fix, I just mad a new one by bending up some solder. After I got the radiator hose painted I installed it, the master cylinder, the core support bracket and the battery decals to finish off the engine bay. With the engine bay complete it was time to install the front bumper. Then upside down 1 last time to install the bumper support bracket. Then the tail lights and custom plate that I made. Then I finished up by installing the mirrors and rear window and putting on the hood. I used some bullet caps from my parts box to cover the holes in the center of the wheels. She's all done. The instructions were pretty deteriorated, but they lasted long enough to get me through the build. Now comes the hard part, figuring out where the heck I'm going to put it!
-
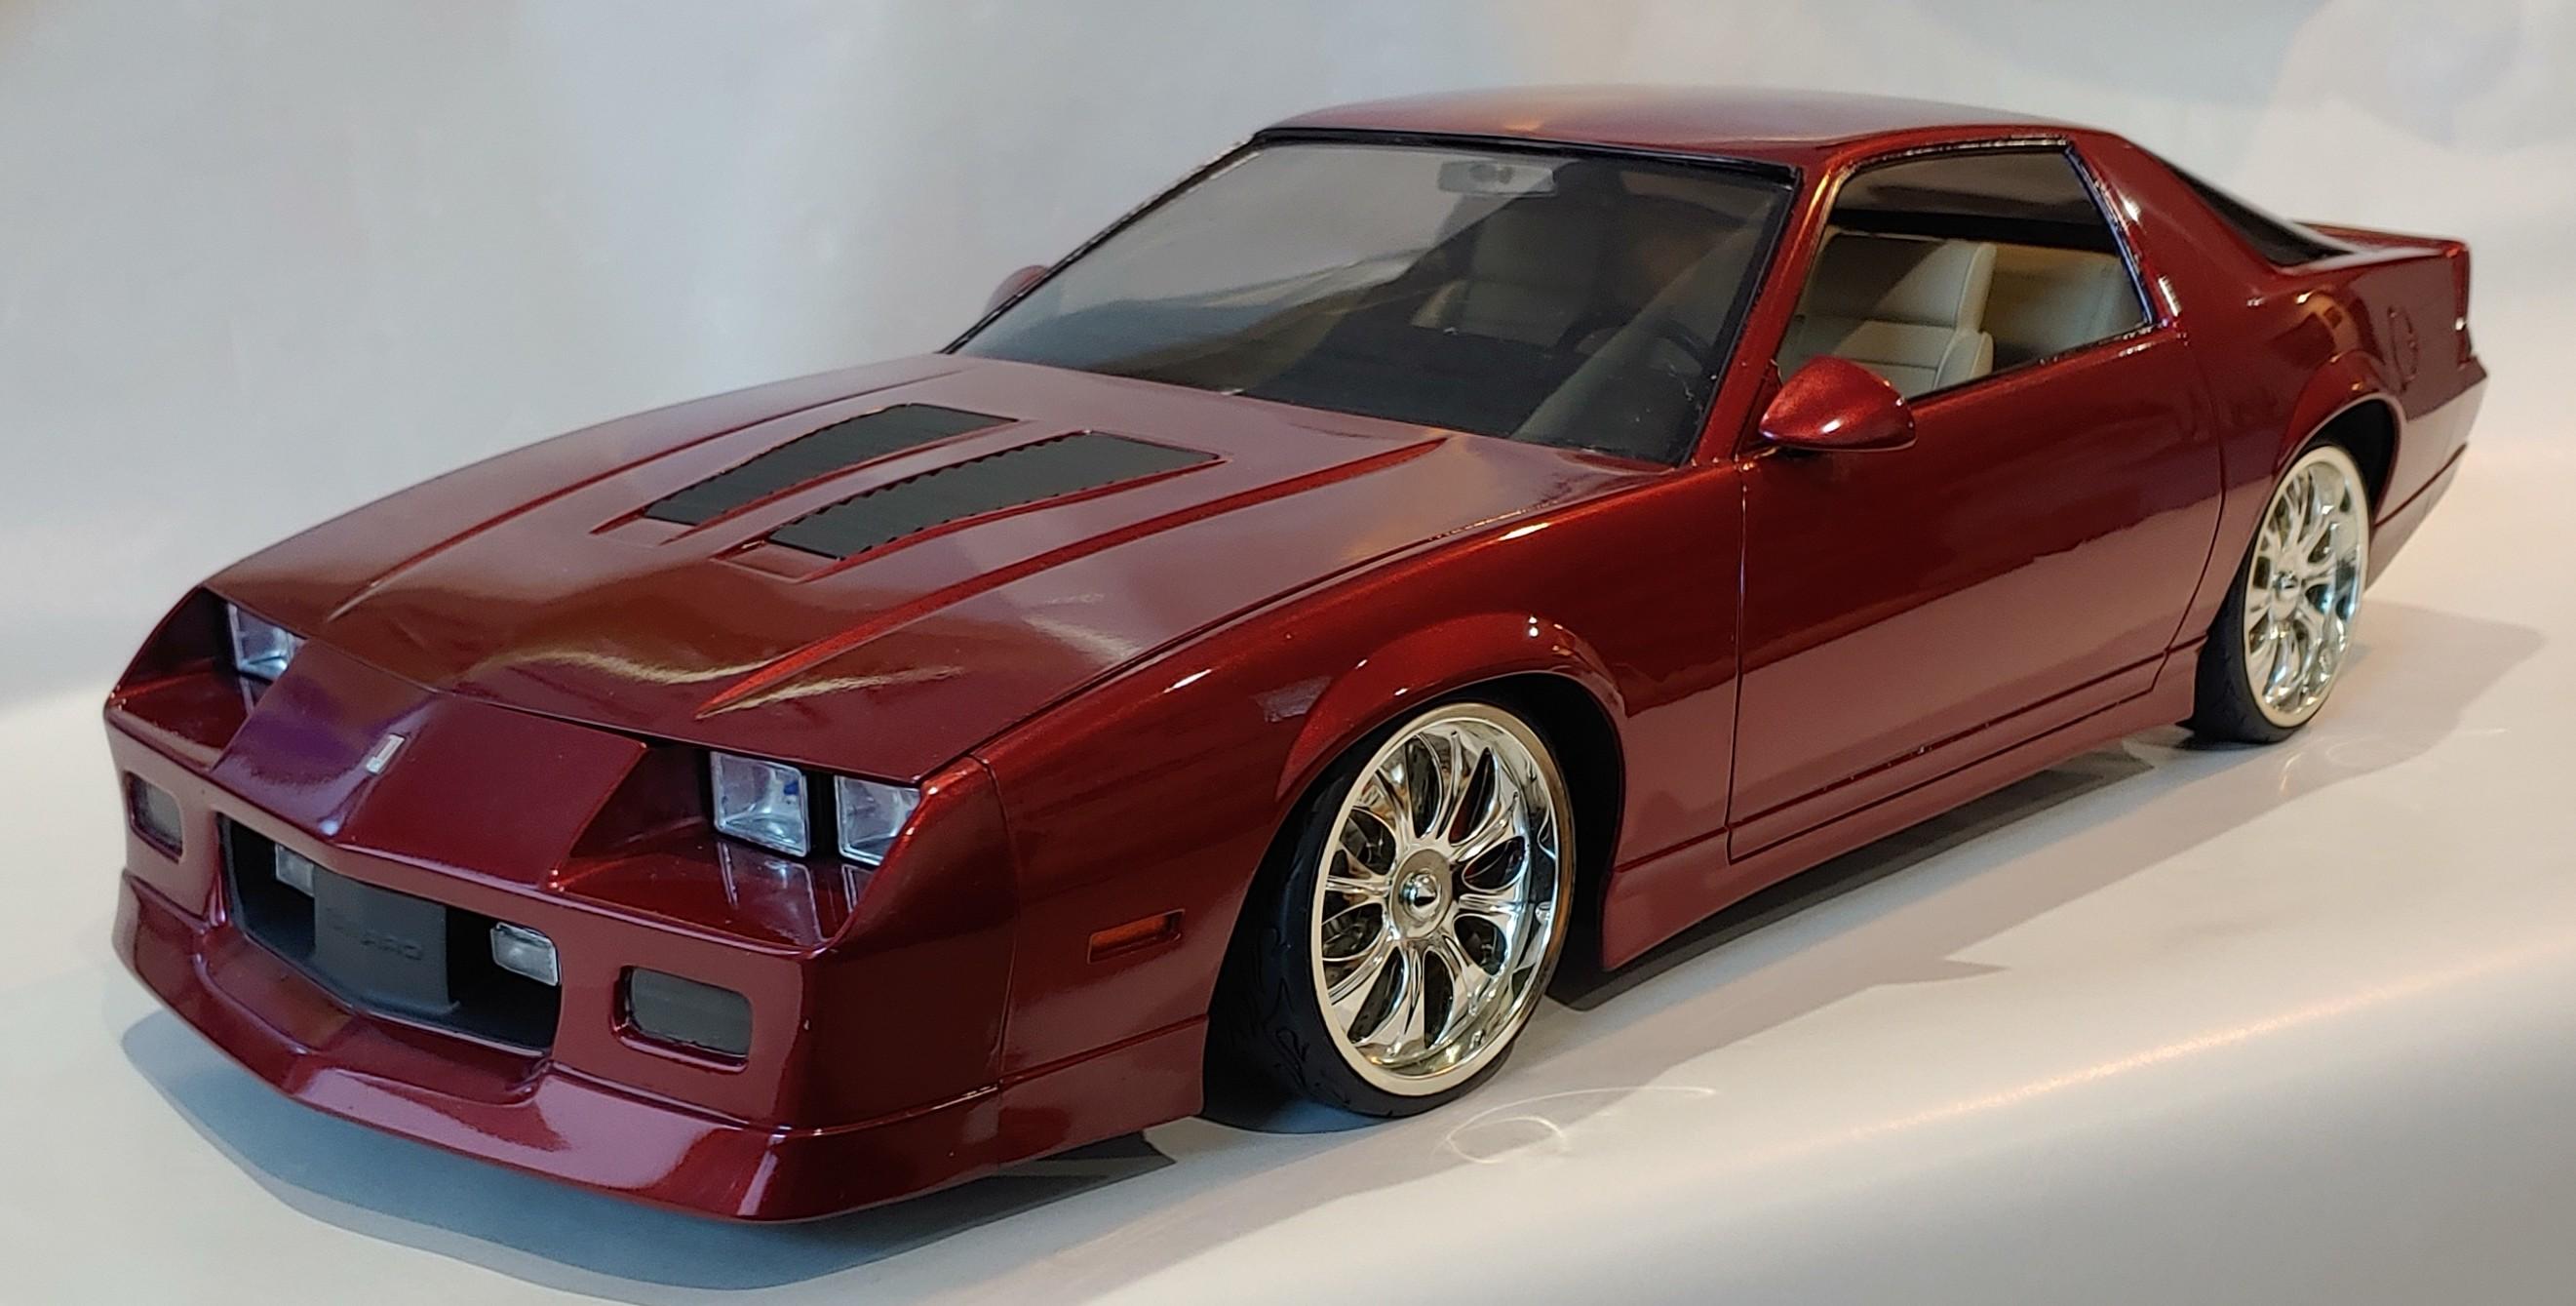
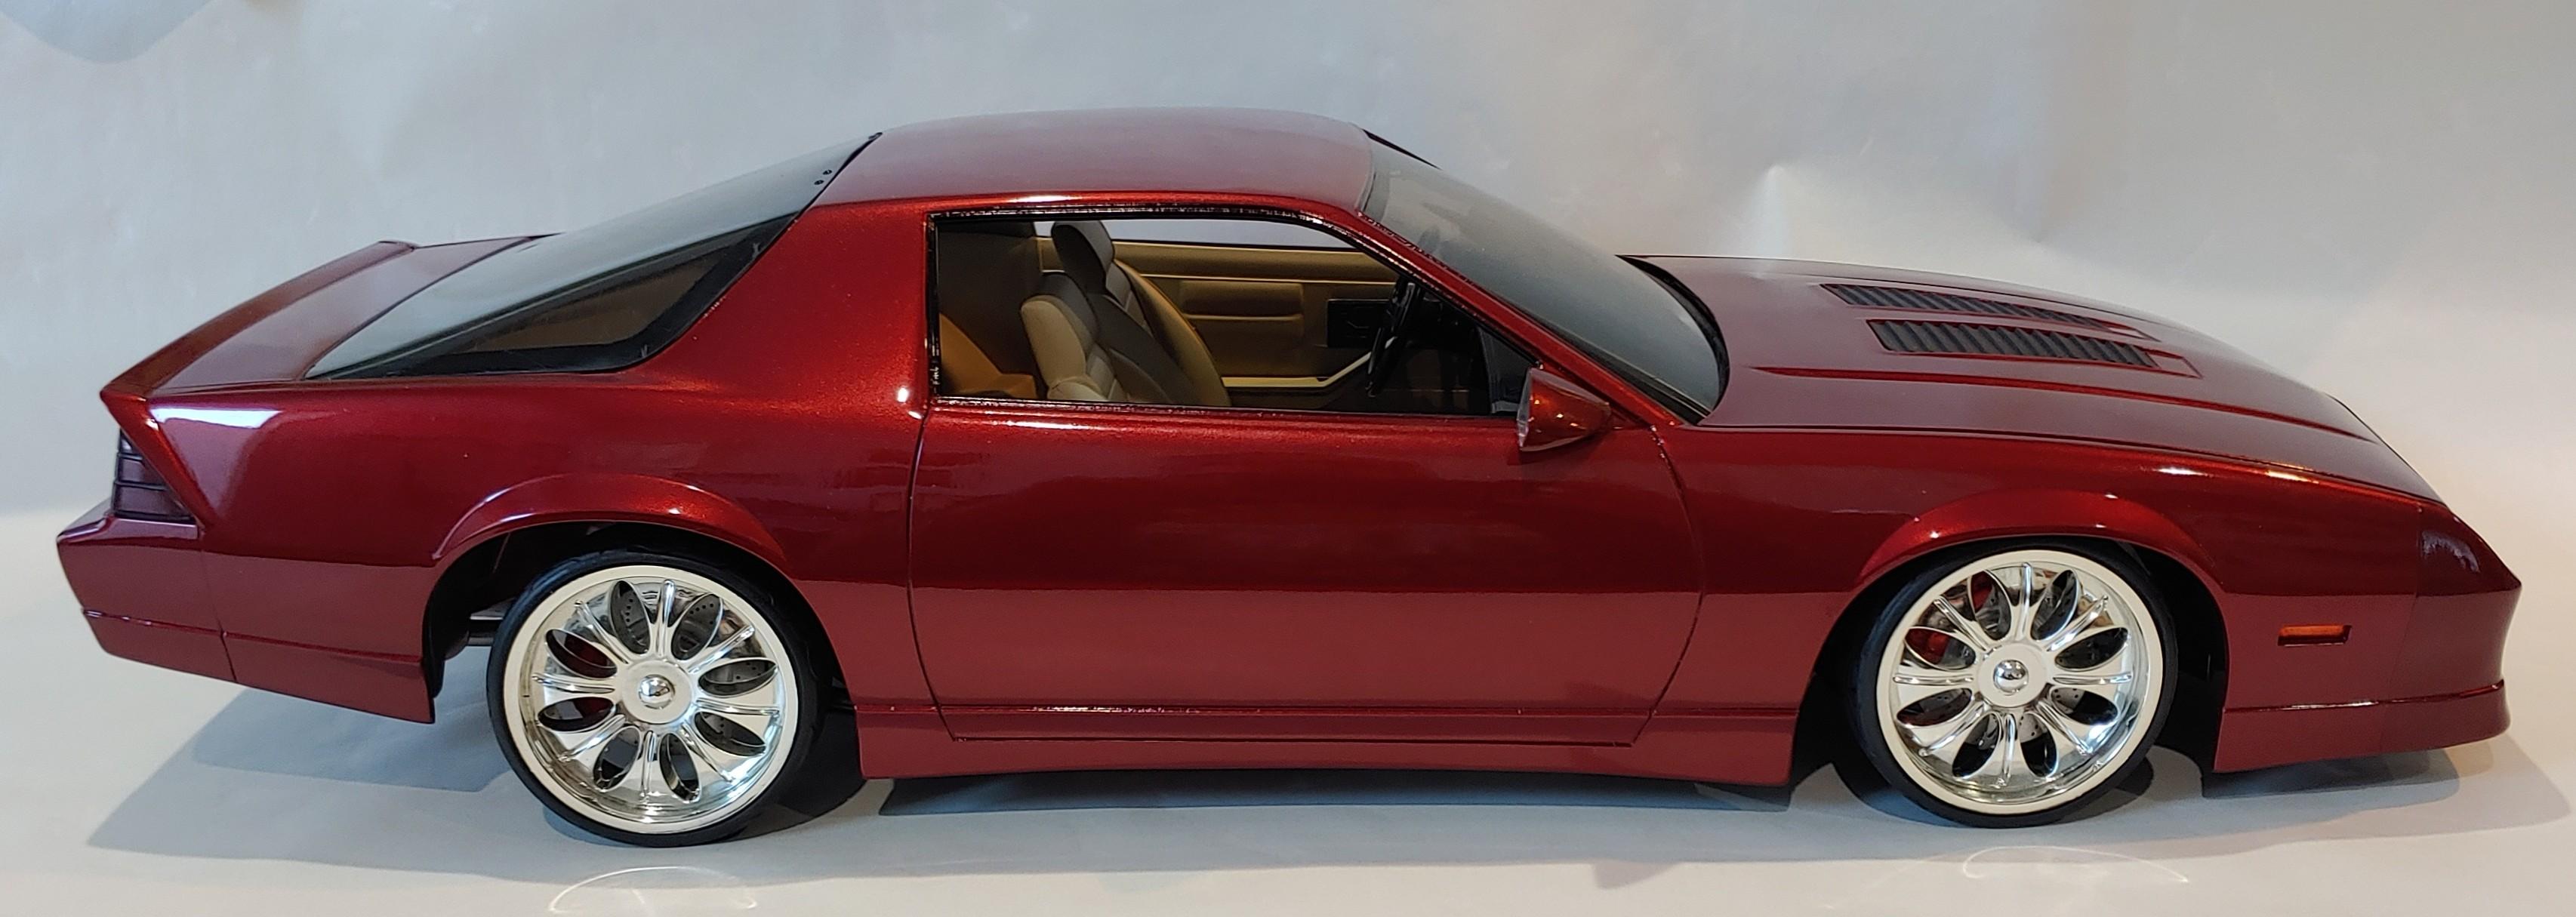
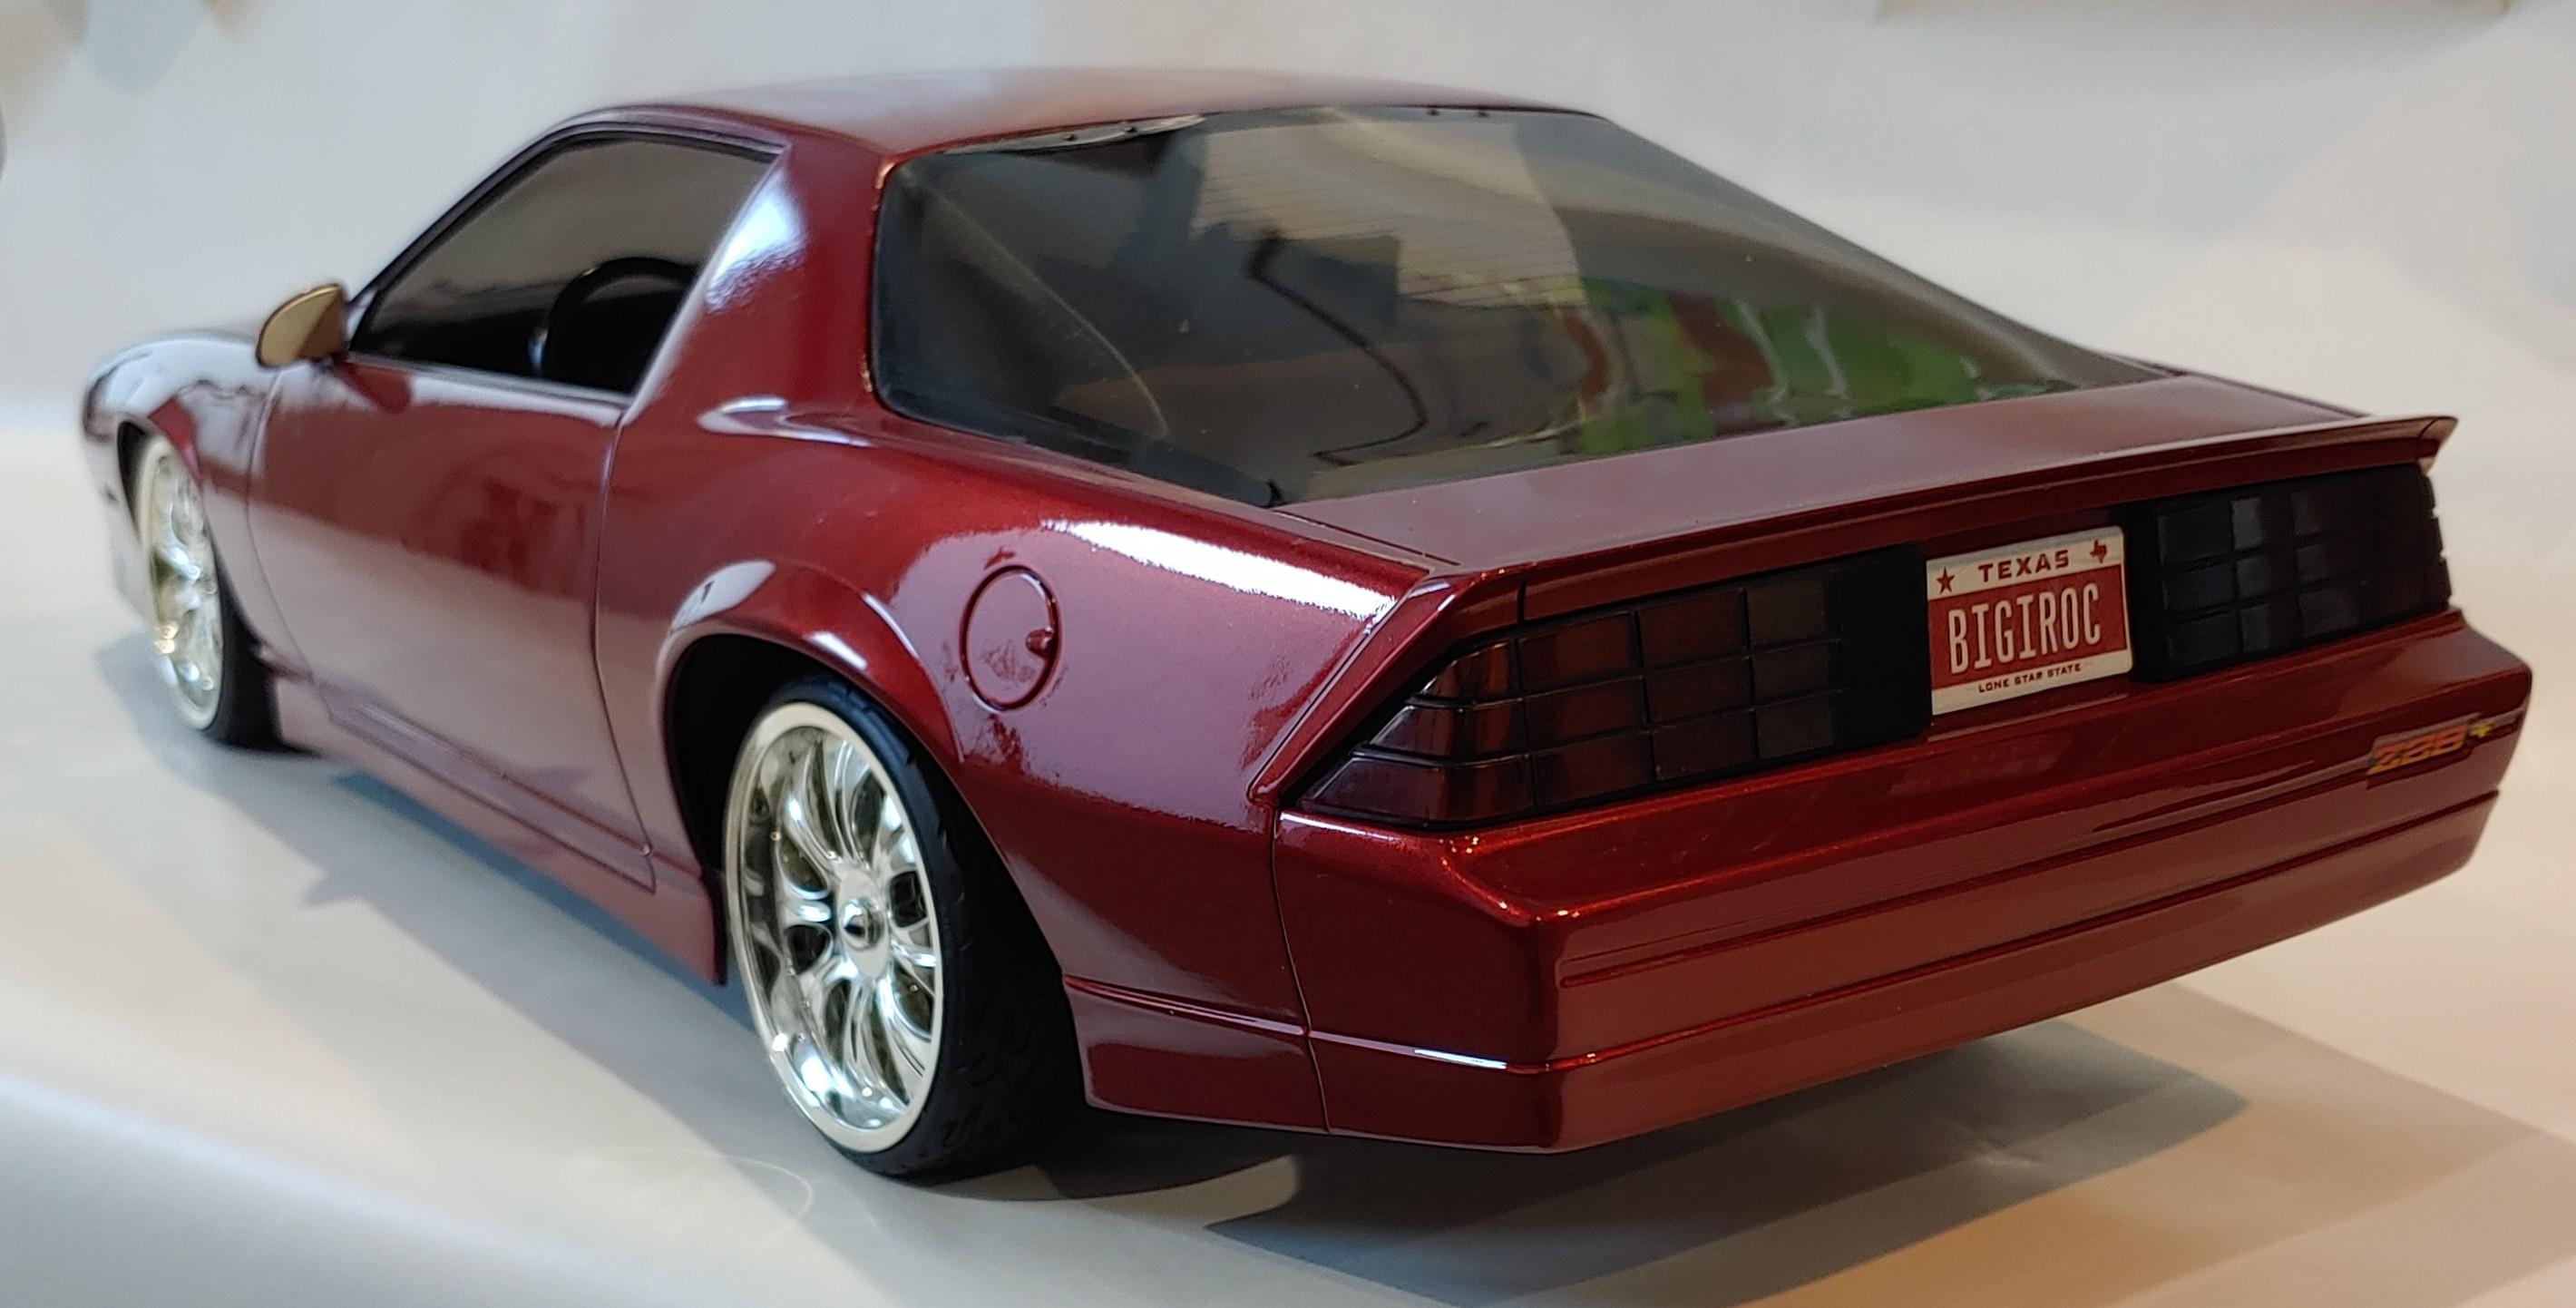
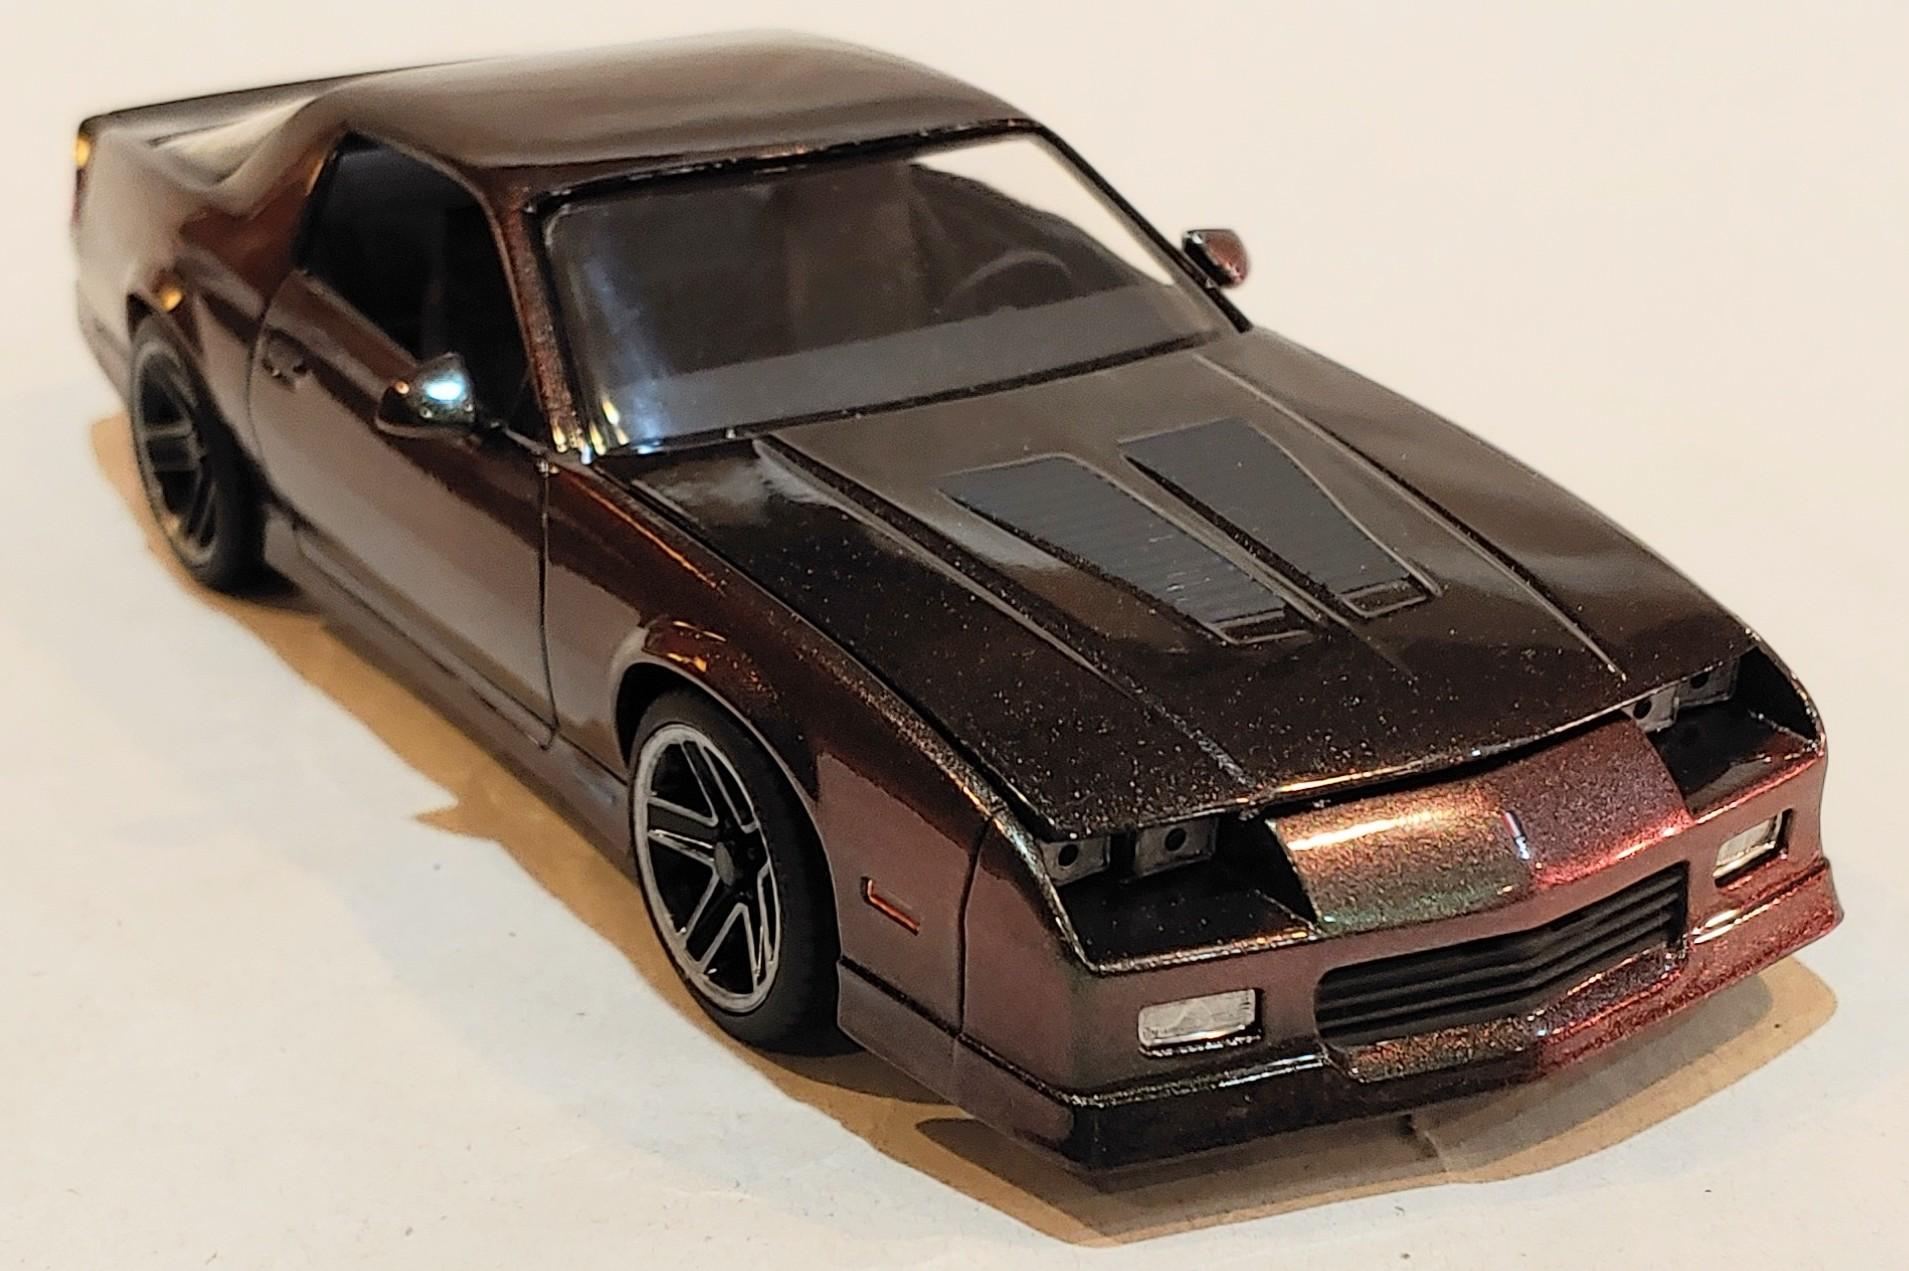
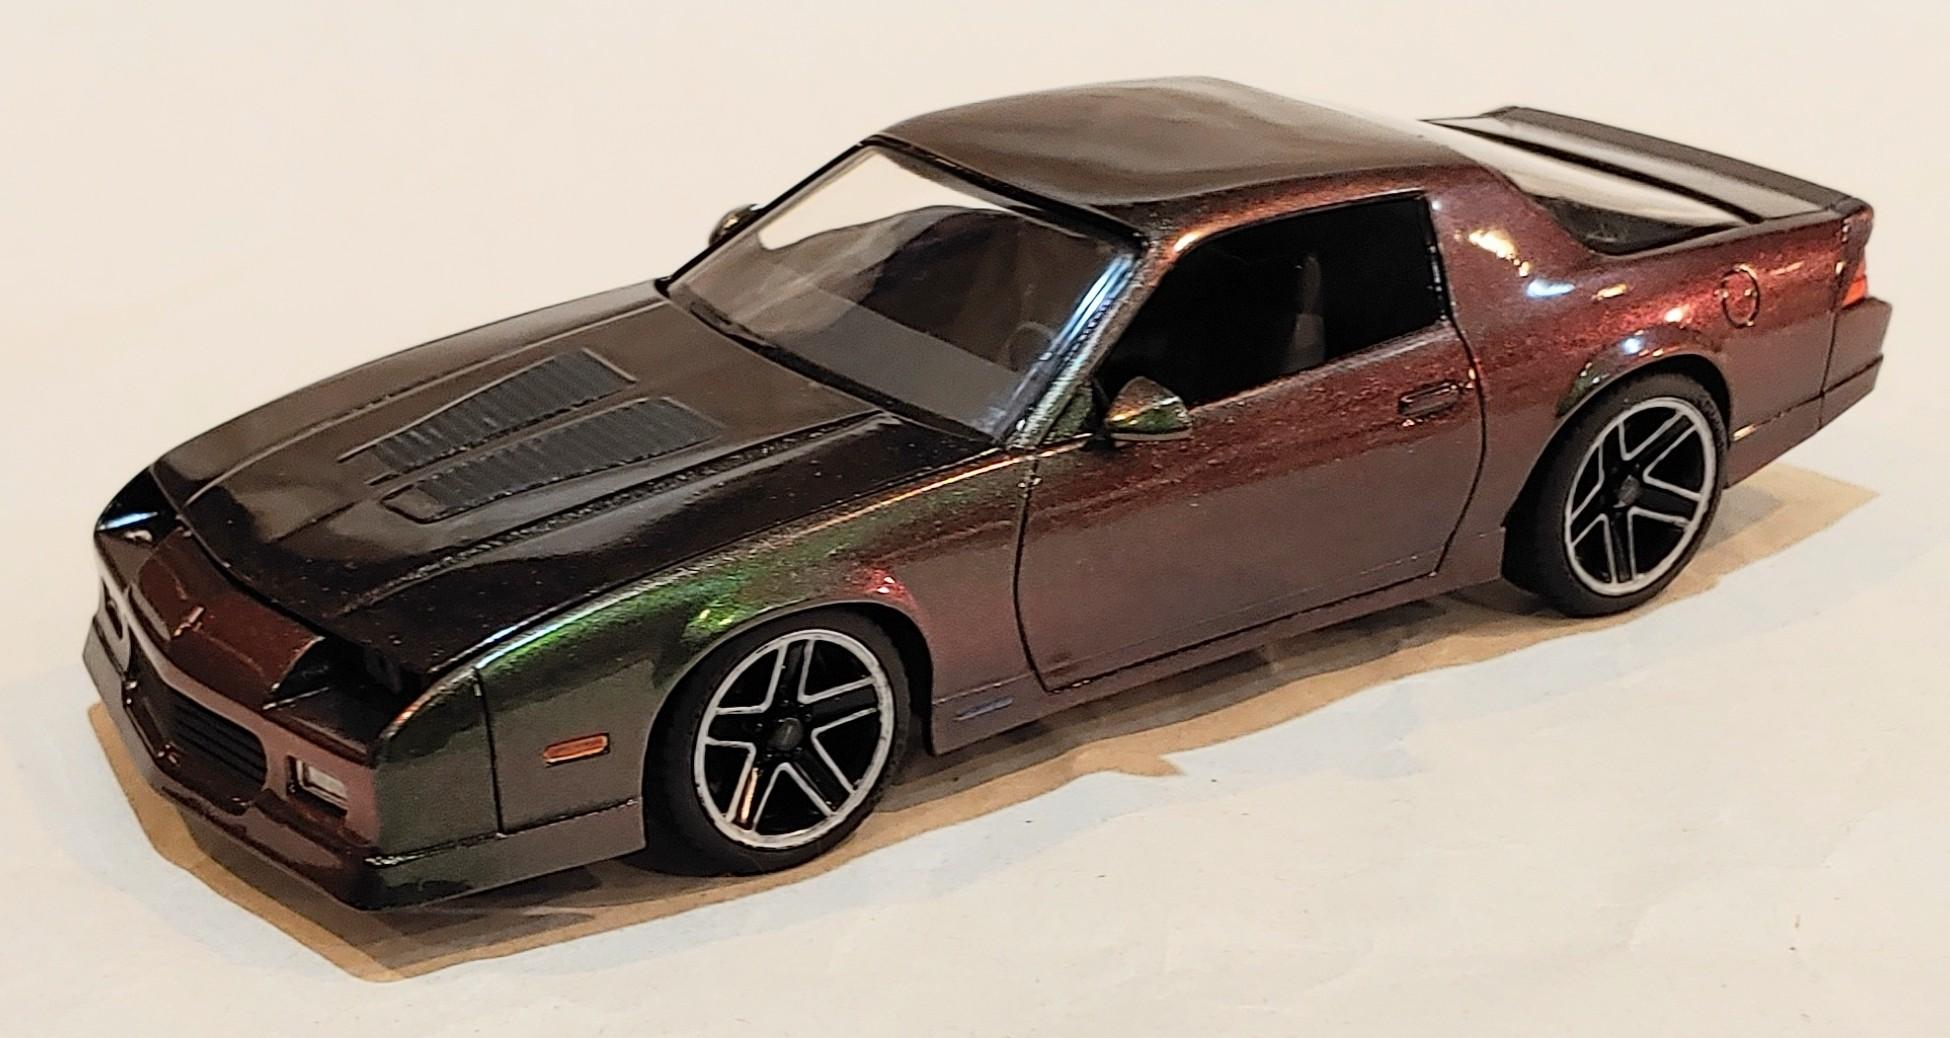
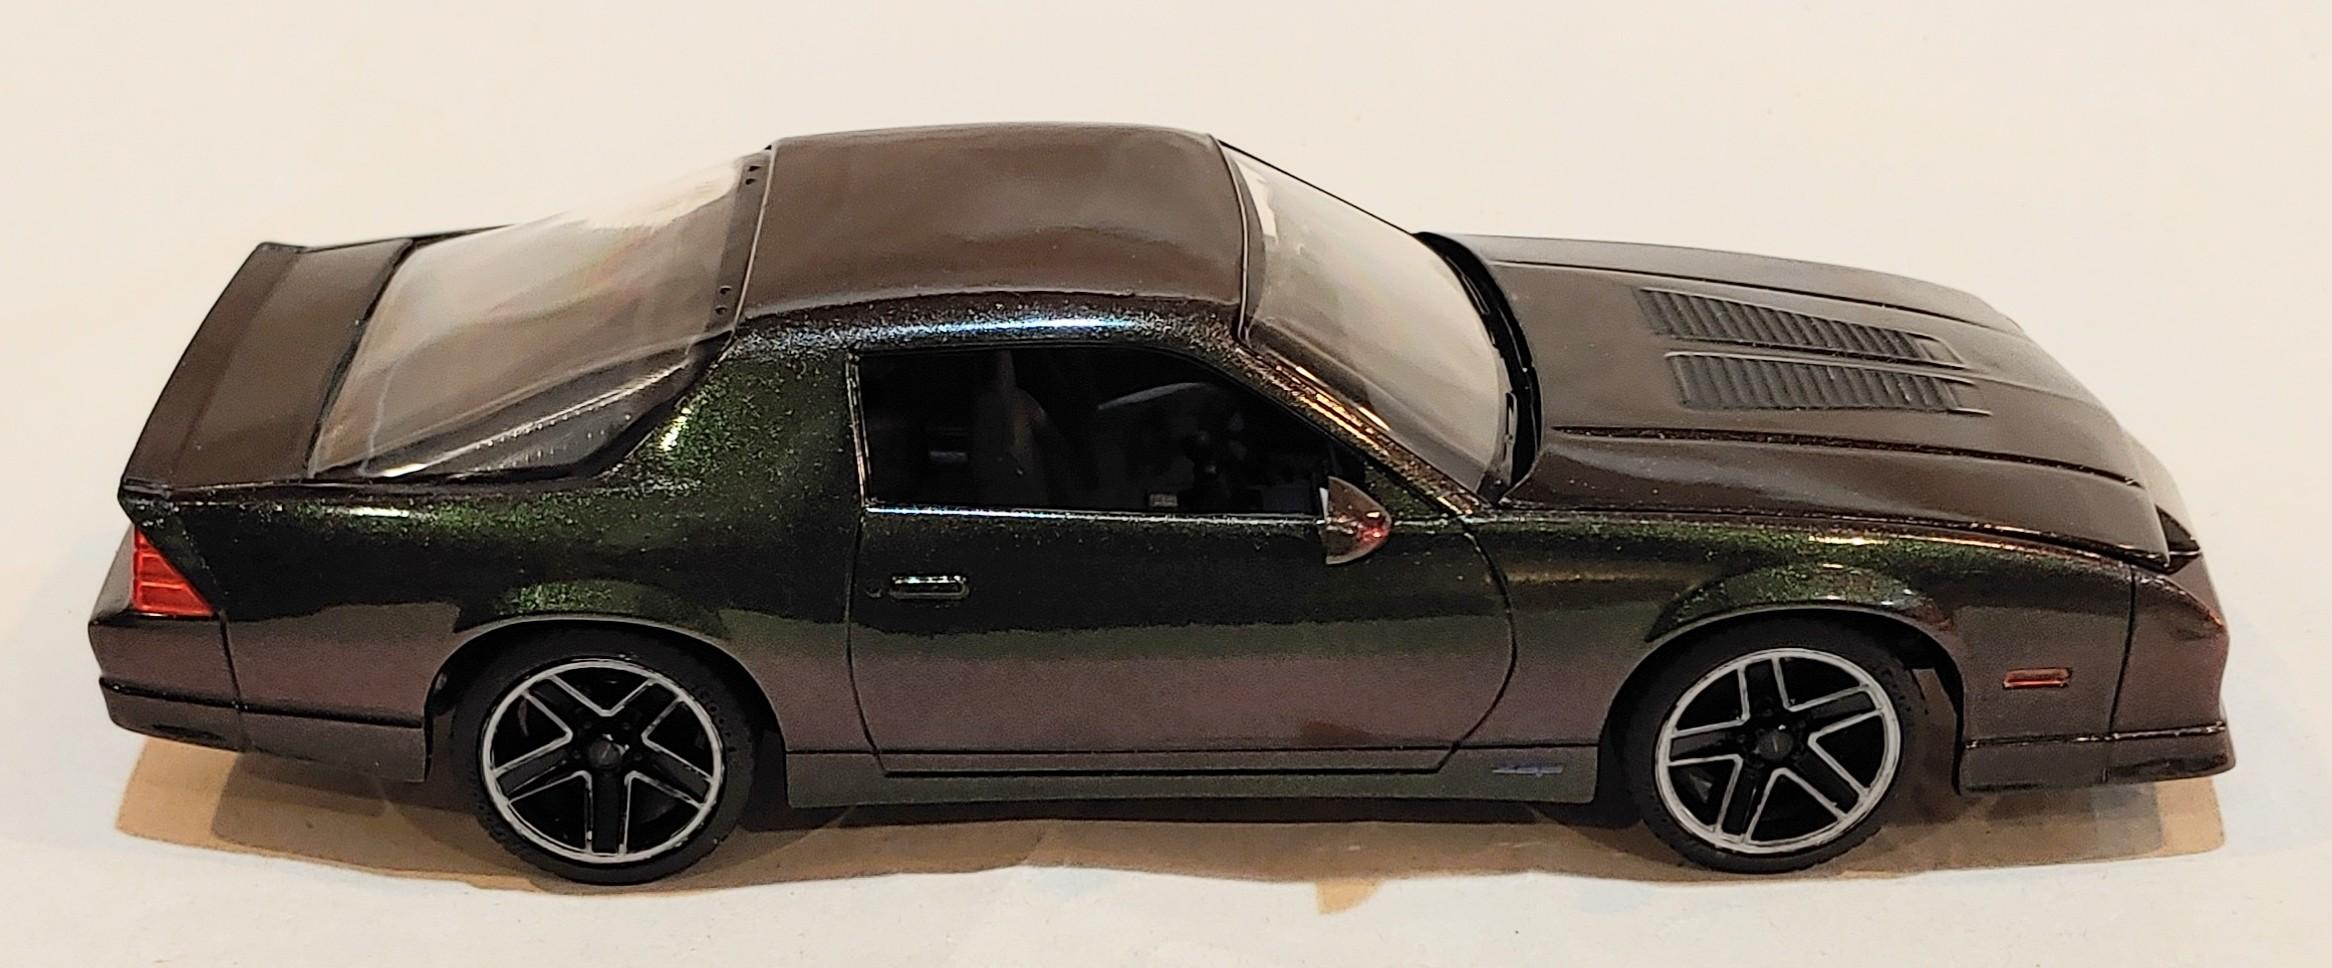
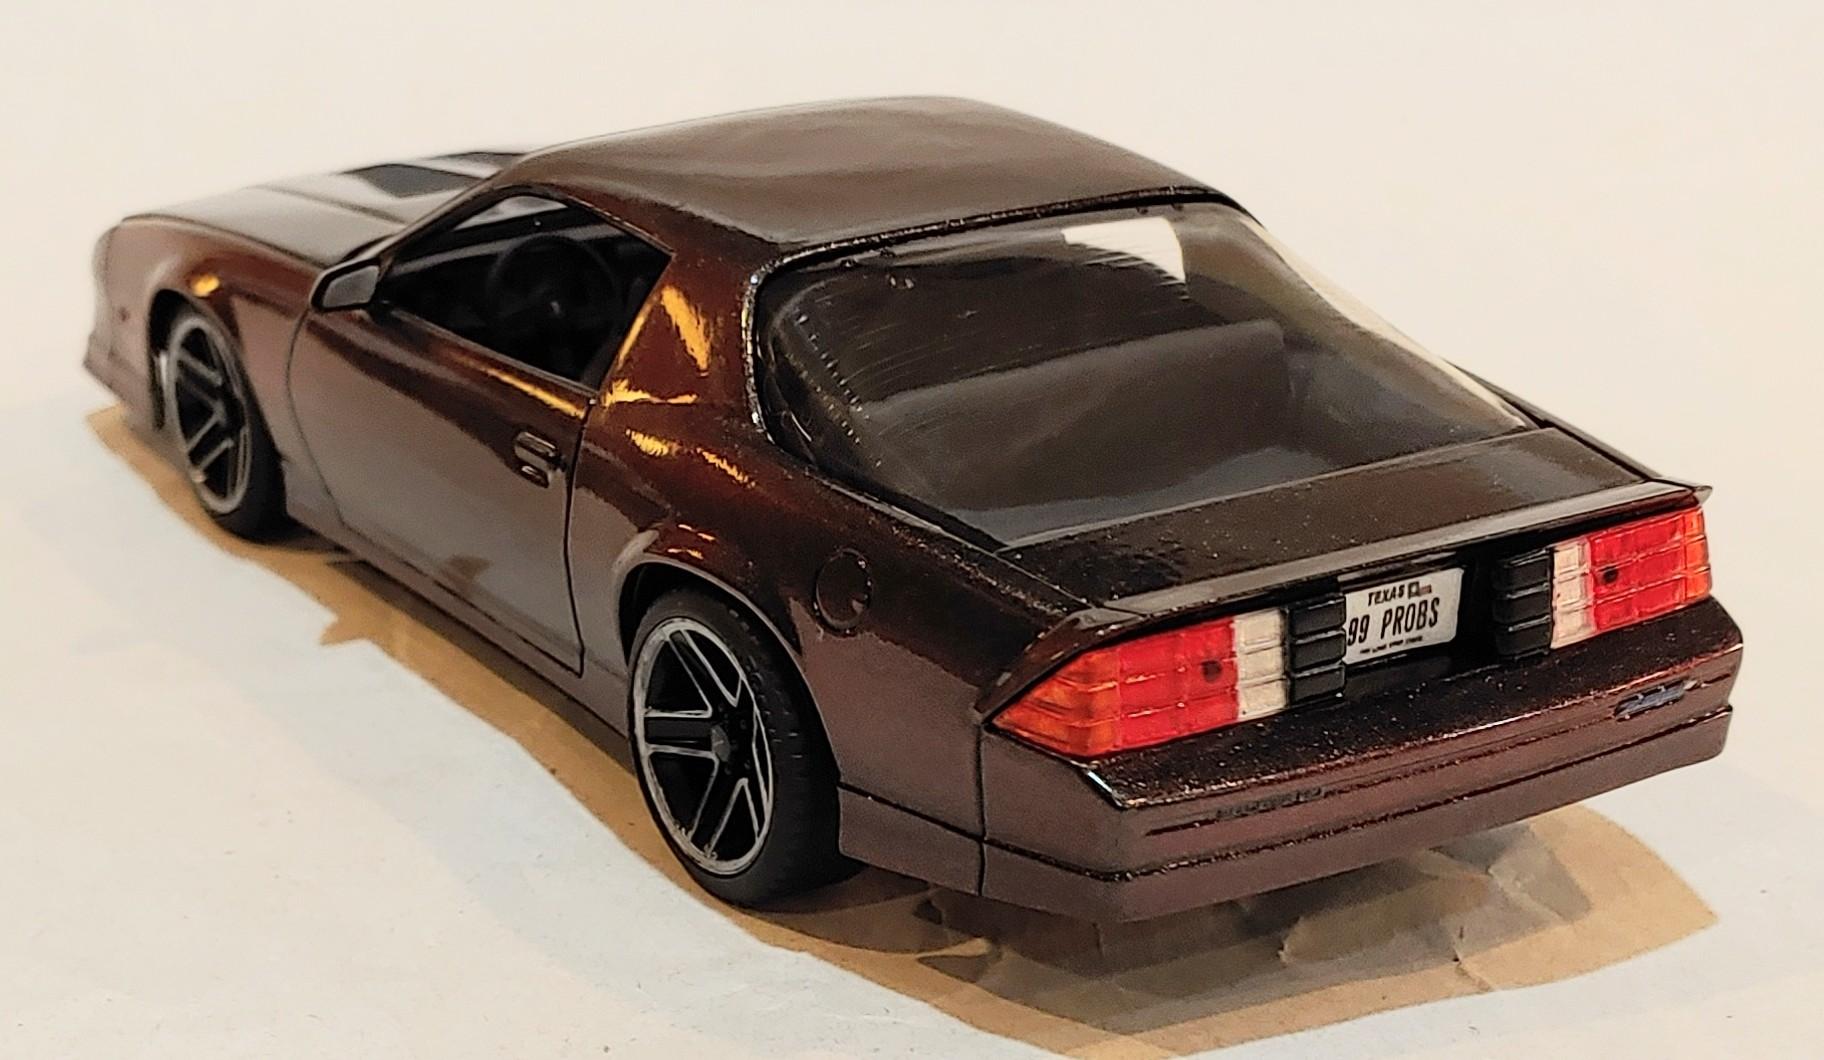
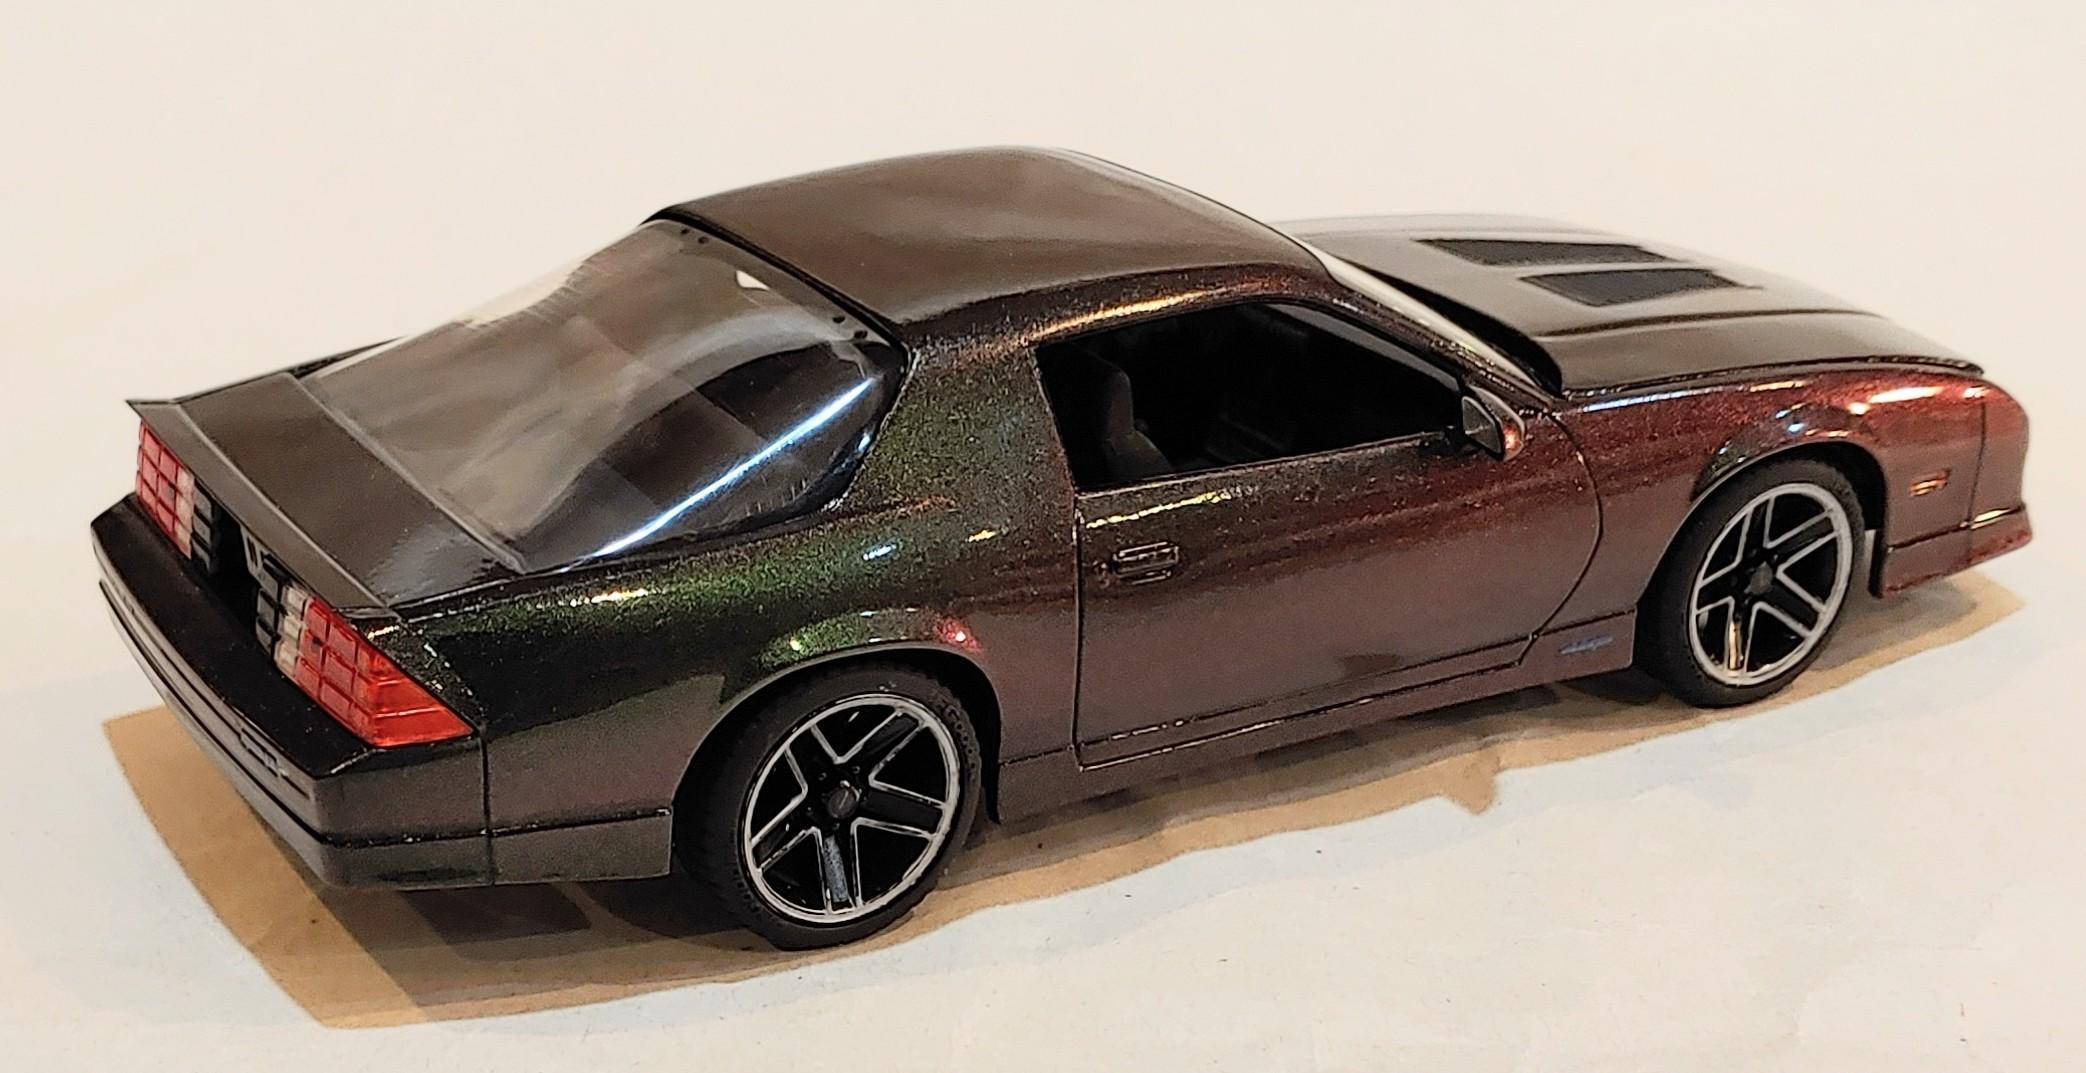
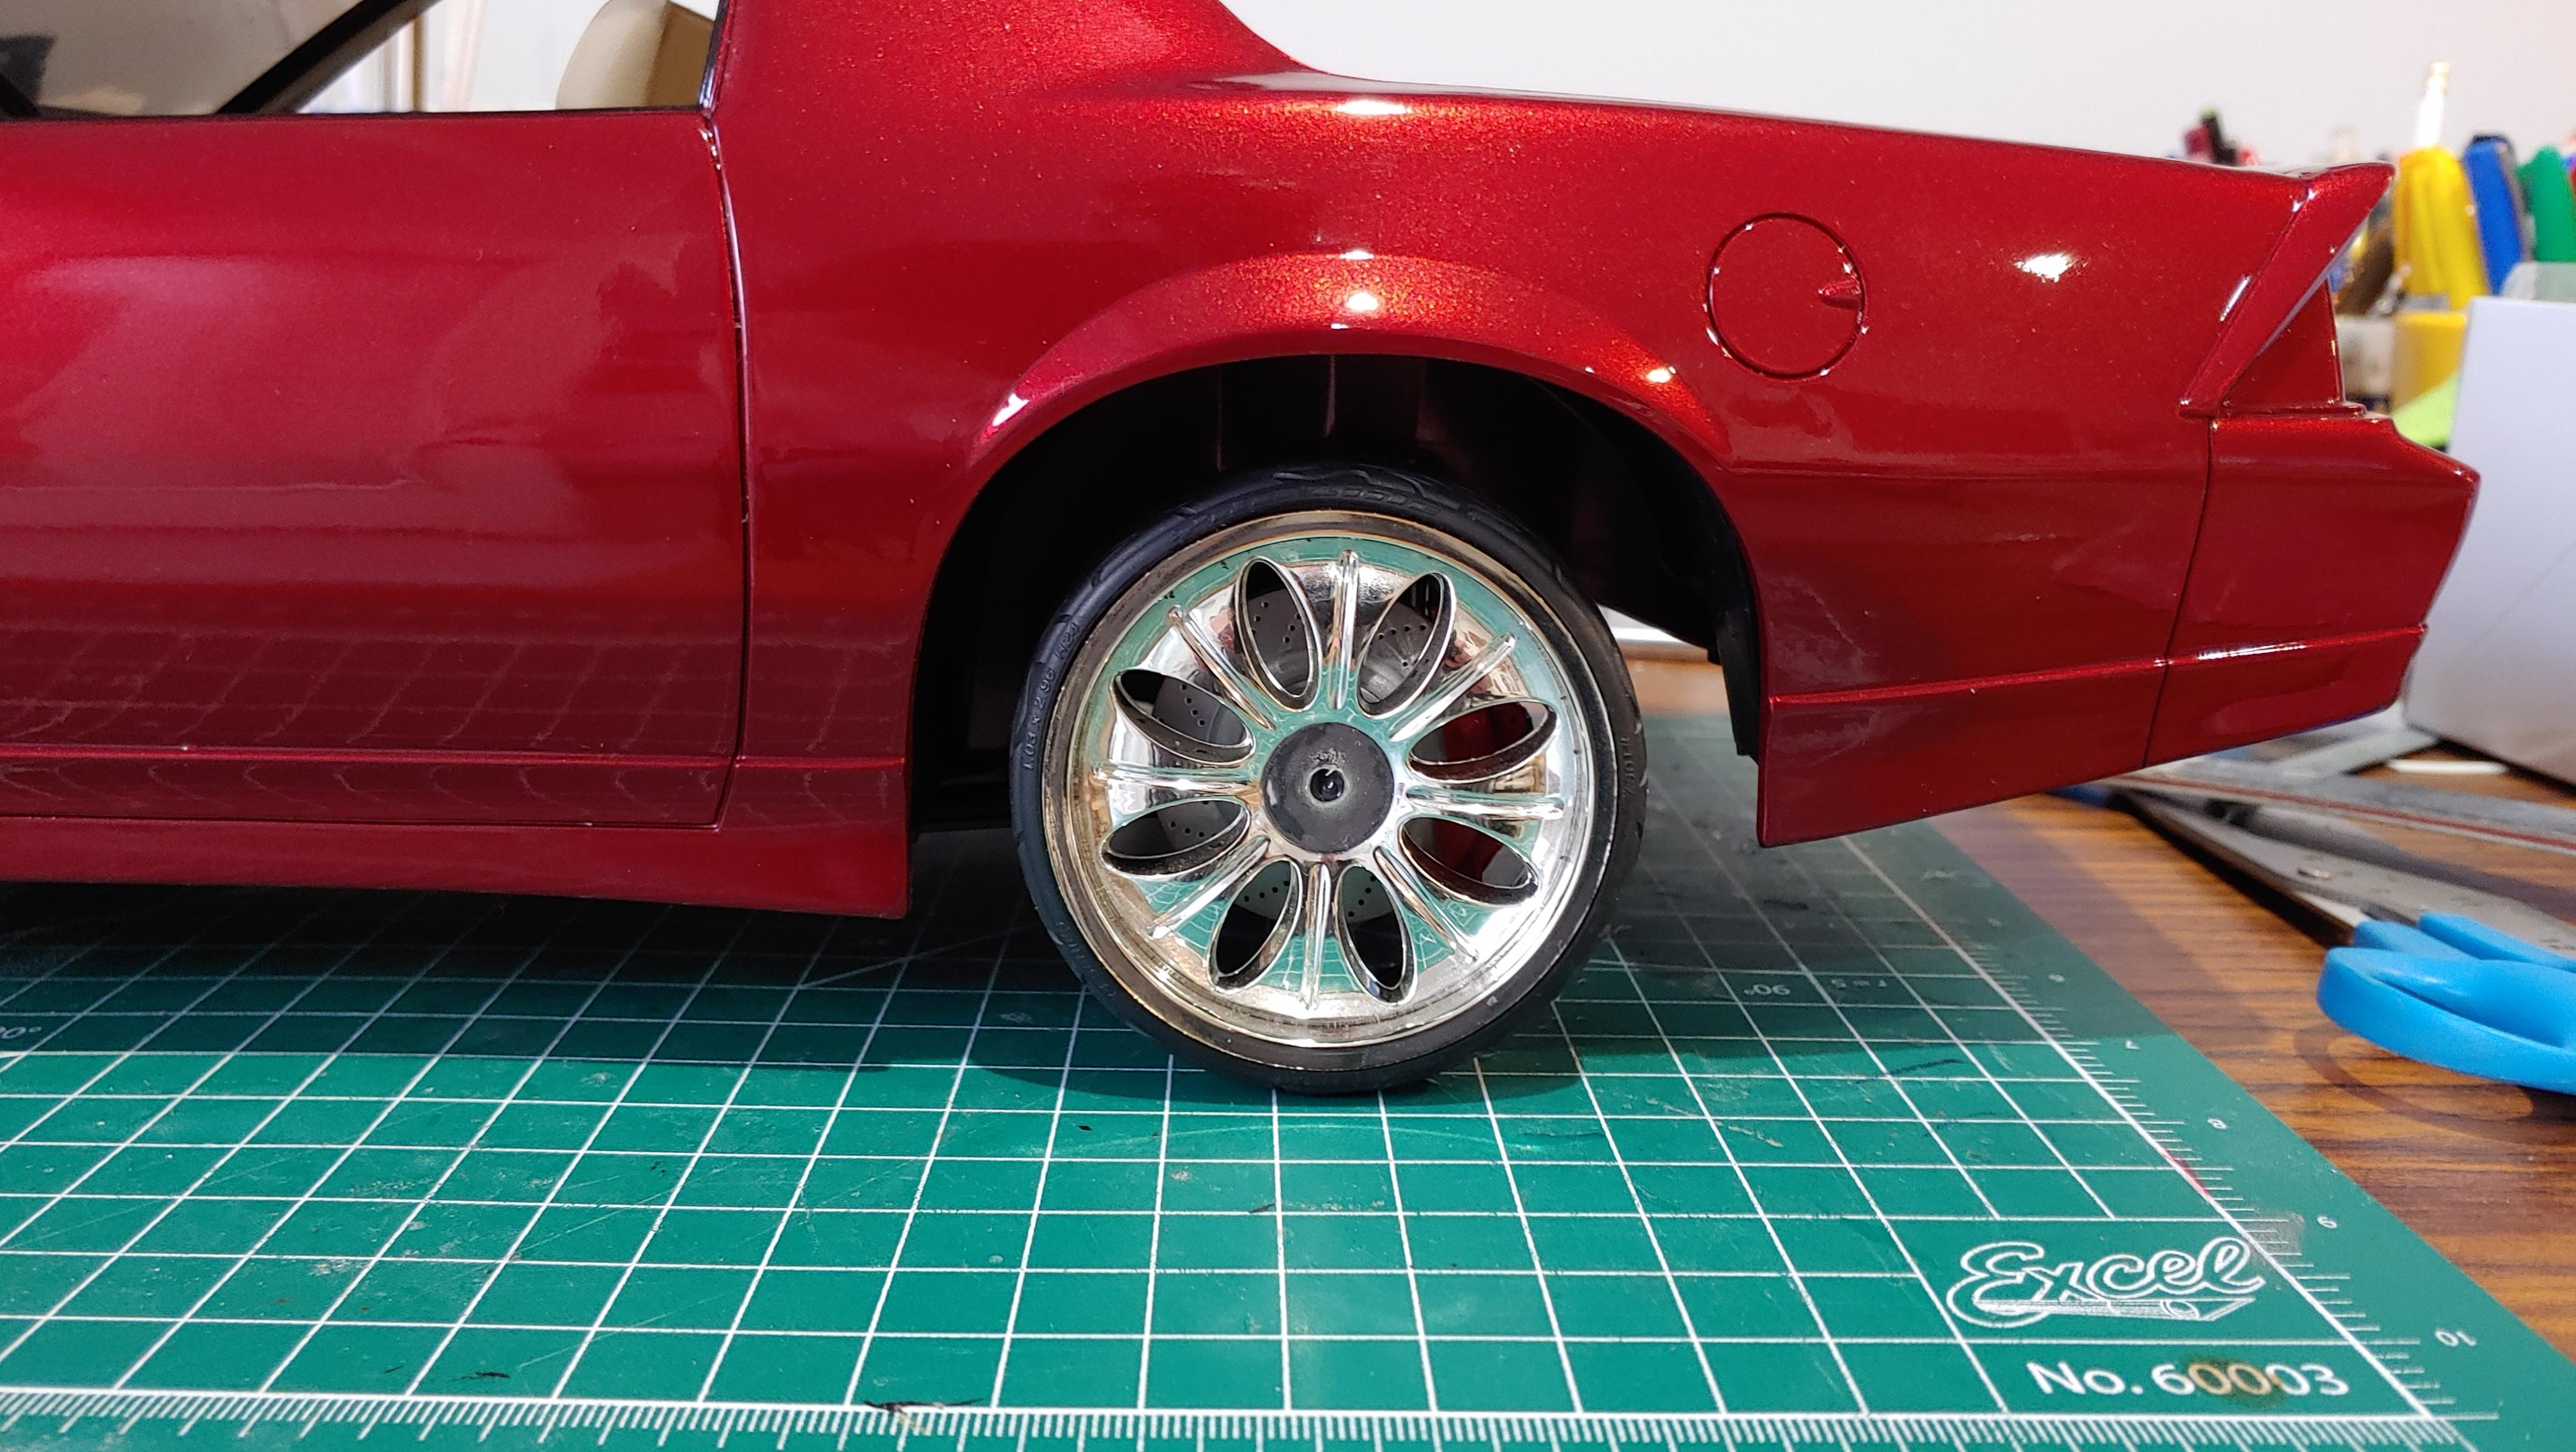
I made this Camaro from the Monogram kit. I lowered the suspension about 2 scale inches. It has resin wheels/tires and brakes from Jay's Resin Wheels. I made the license plate. Everything else came in the box.
- 1 reply
-
- 6
-

-
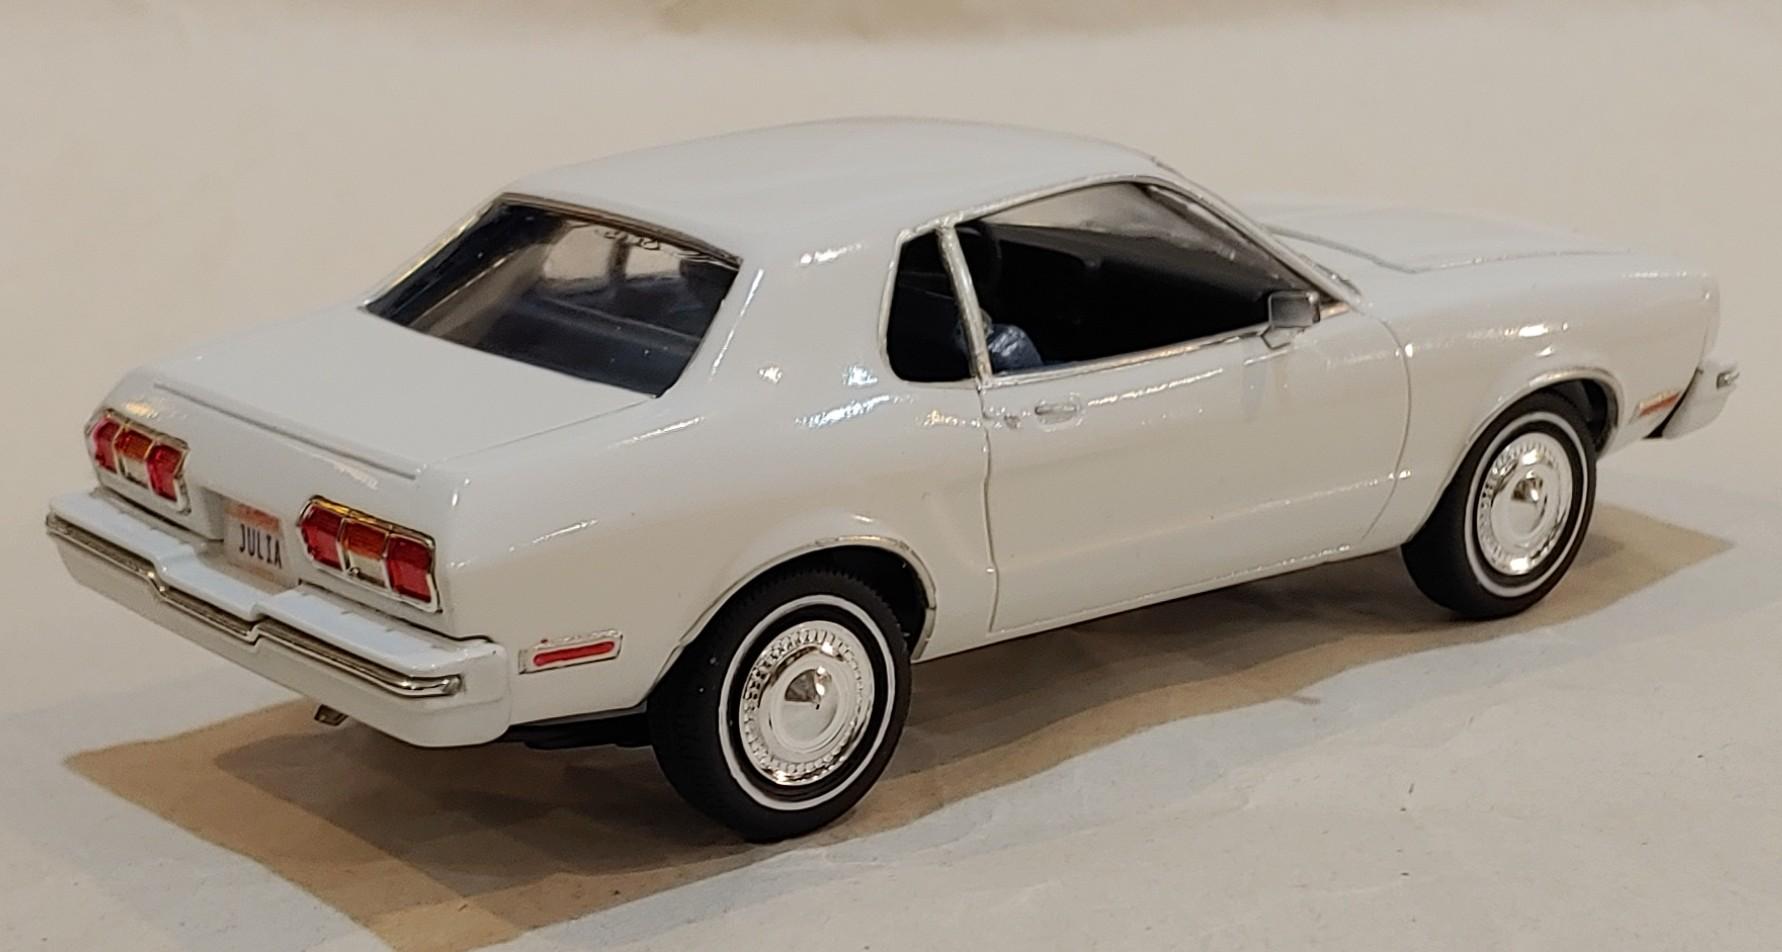
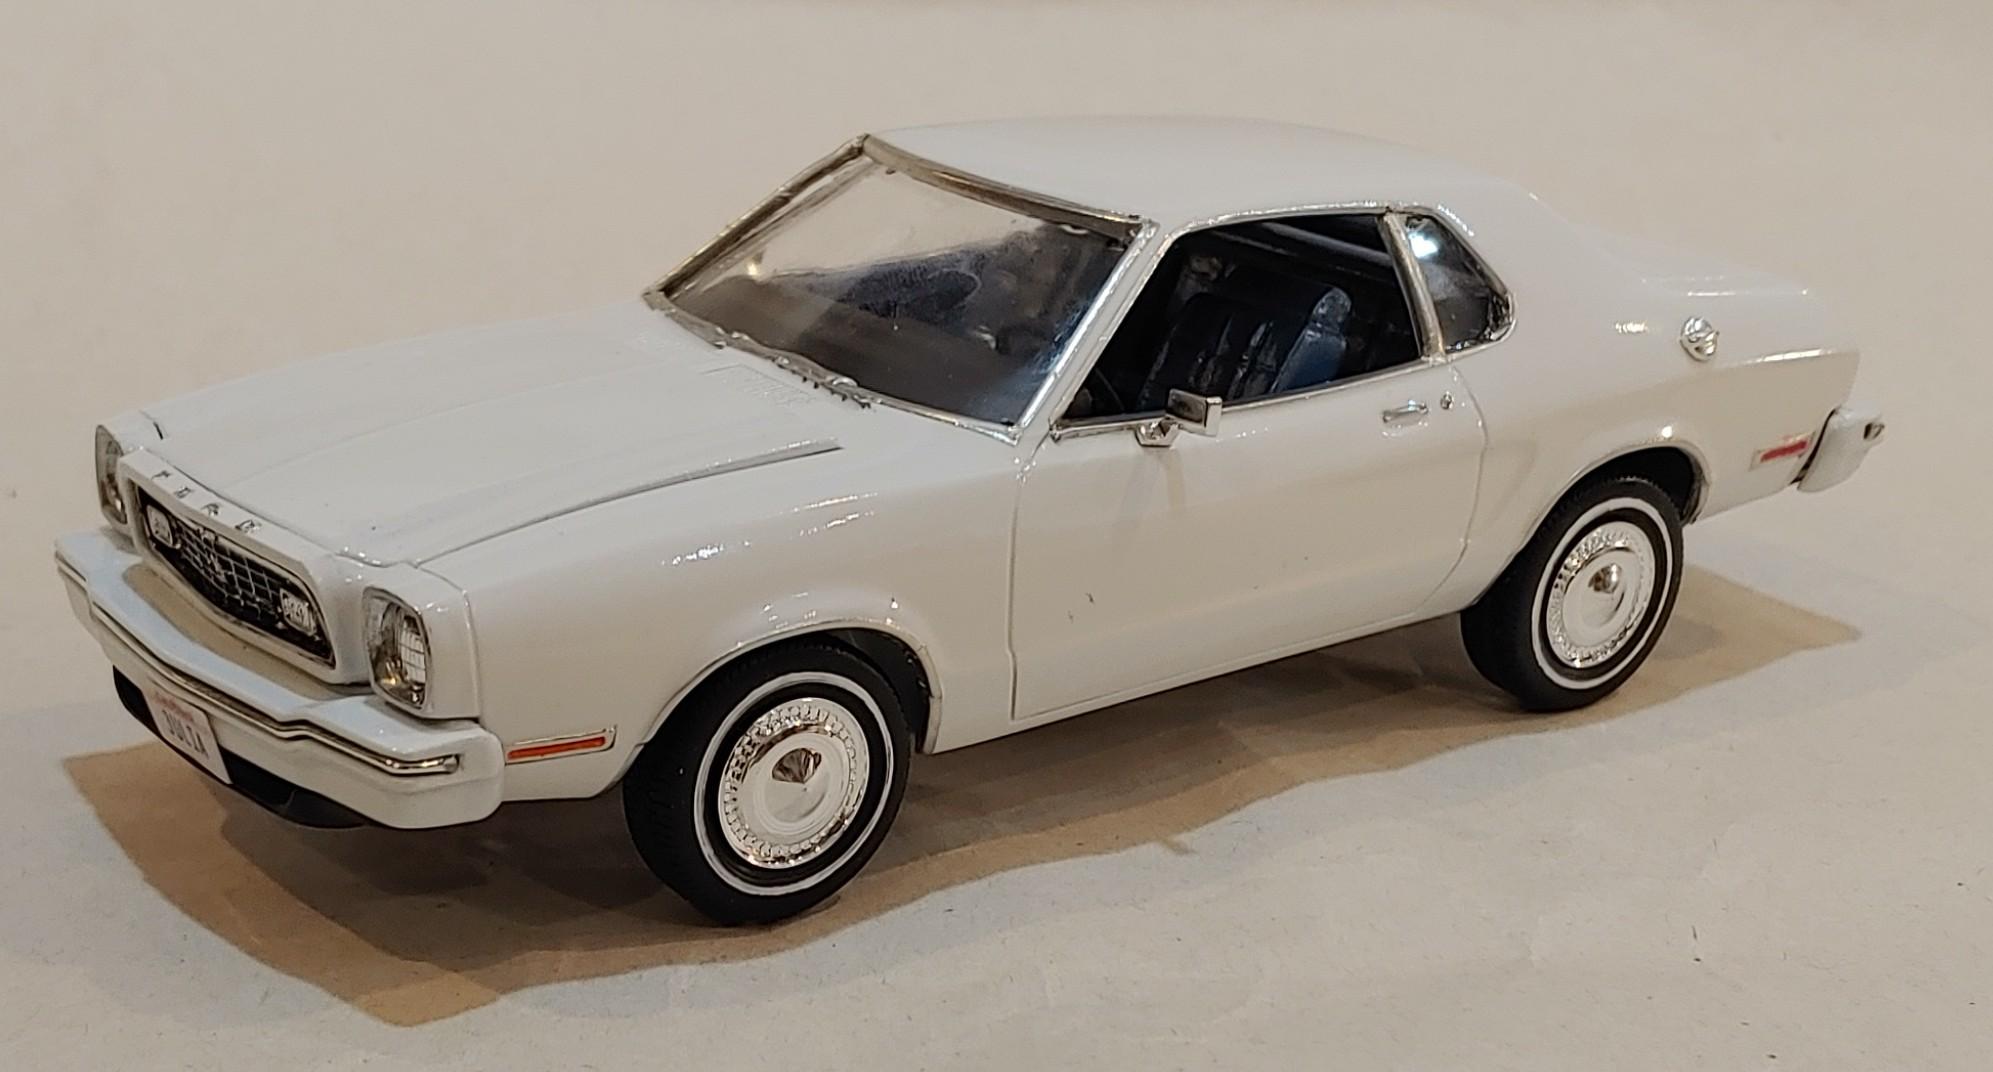
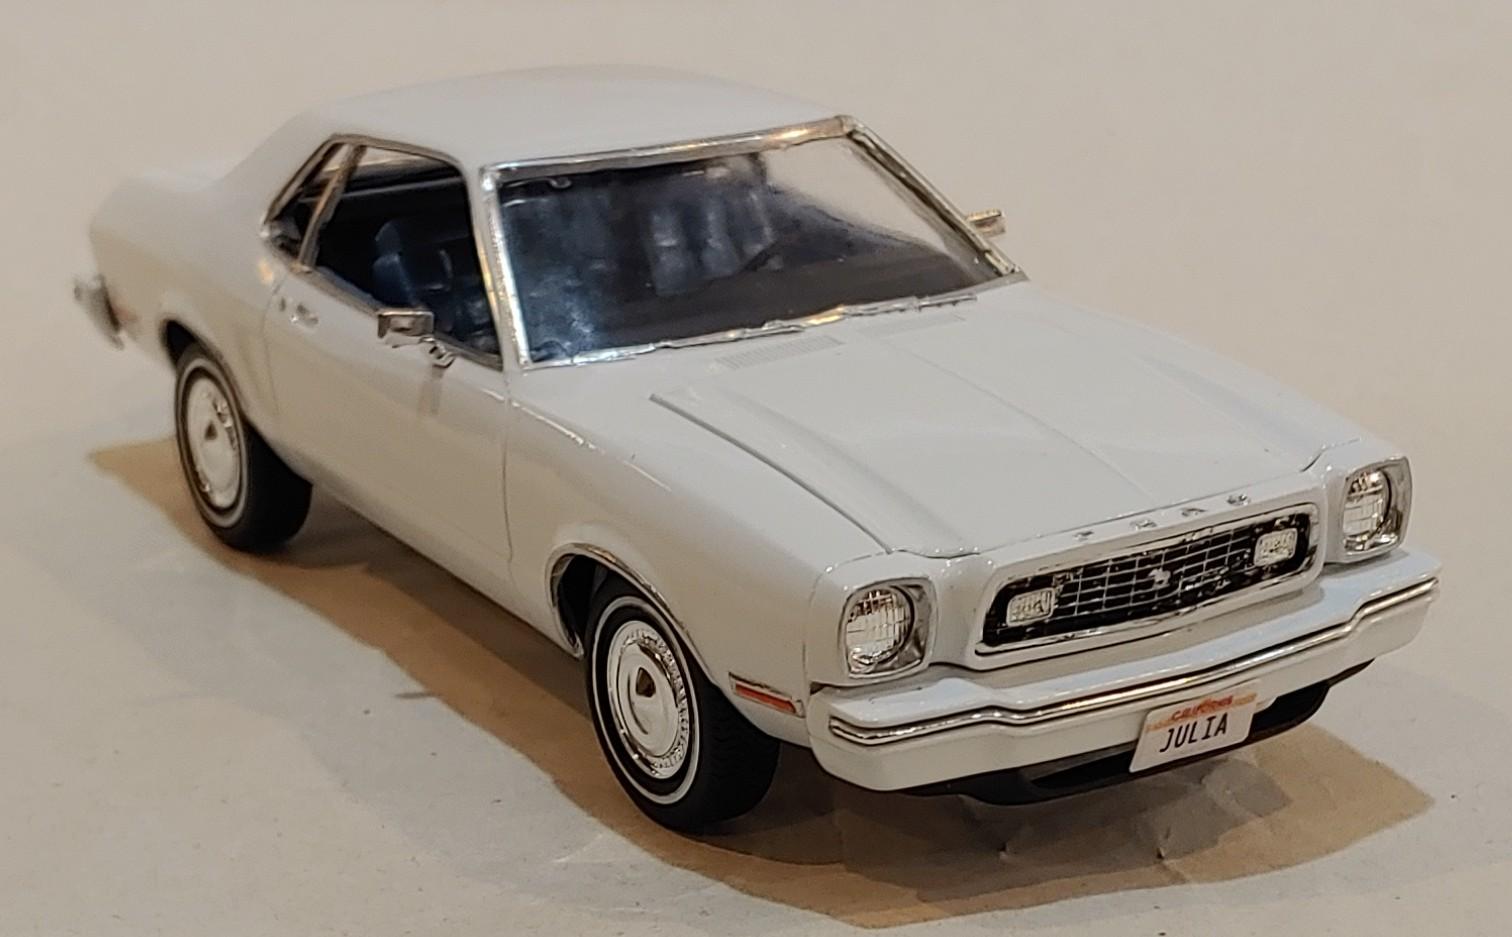
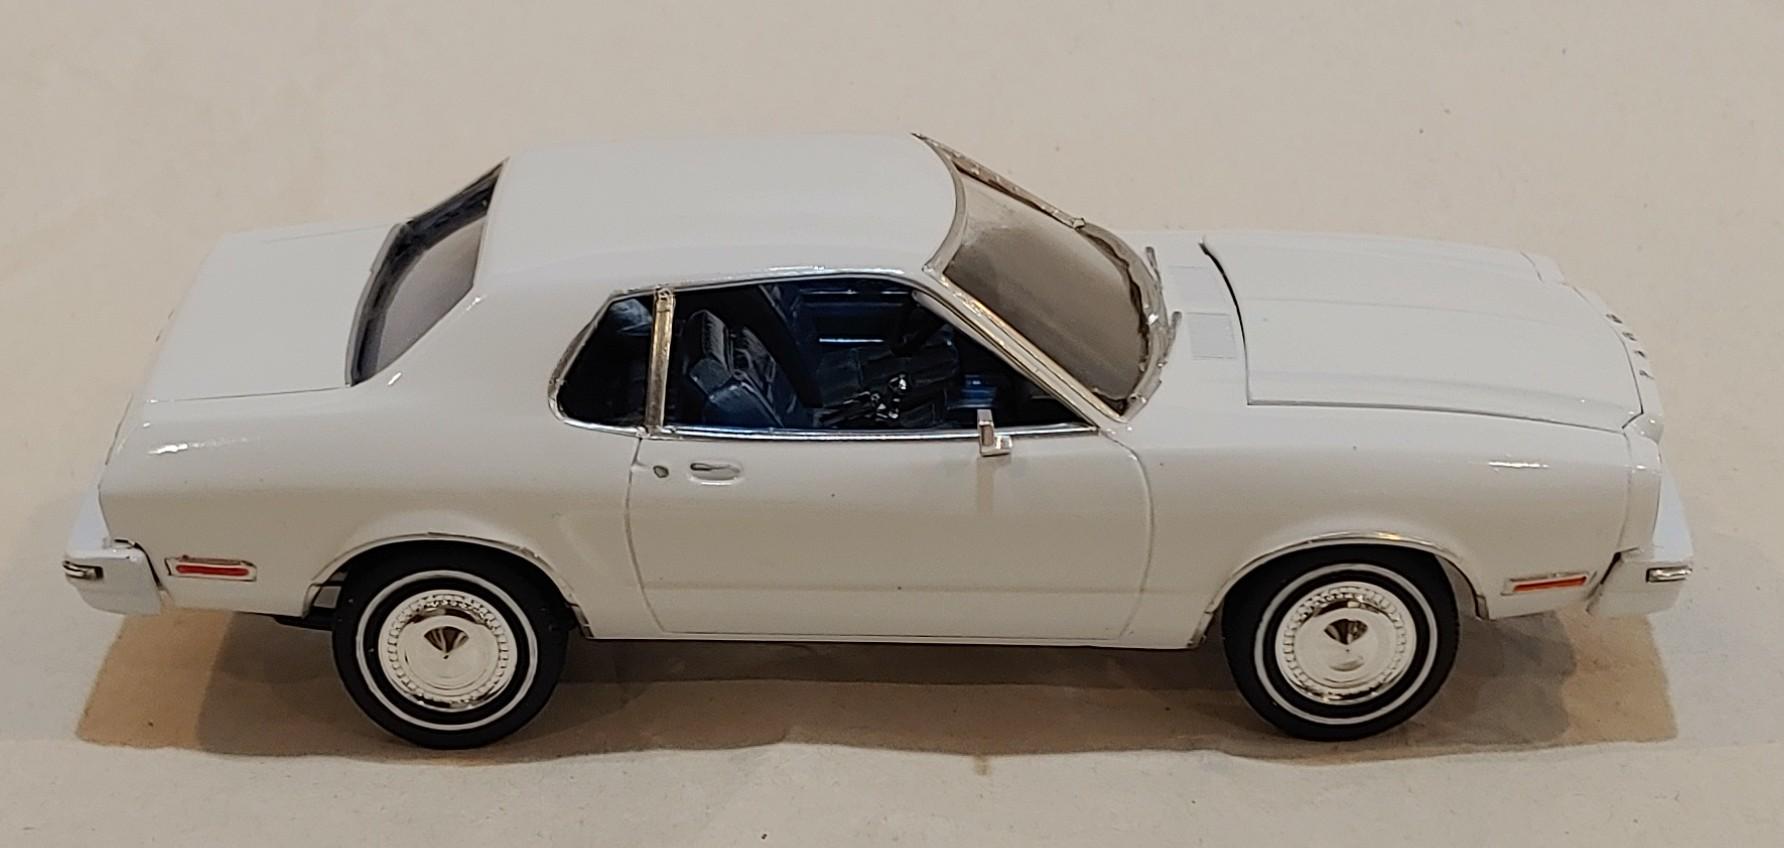
I made my a replica of my aunt's old Mustang. I have vague memories of her taking me and my older sister to see the Rose Bowl parade in it. I made it from the AMT '77 fastback kit. I cut the roof and trunk off a resin kit to convert it into a coupe. The closest things to the hubcaps I had were the wheels from a Prince Skyline. The tires are from a '70 Monte Carlo Lowrider with white walls drawn on with a gel pen. I printed the plates. The mirrors and gas cap are from my parts box.
- 14 replies
-
- 16
-
-
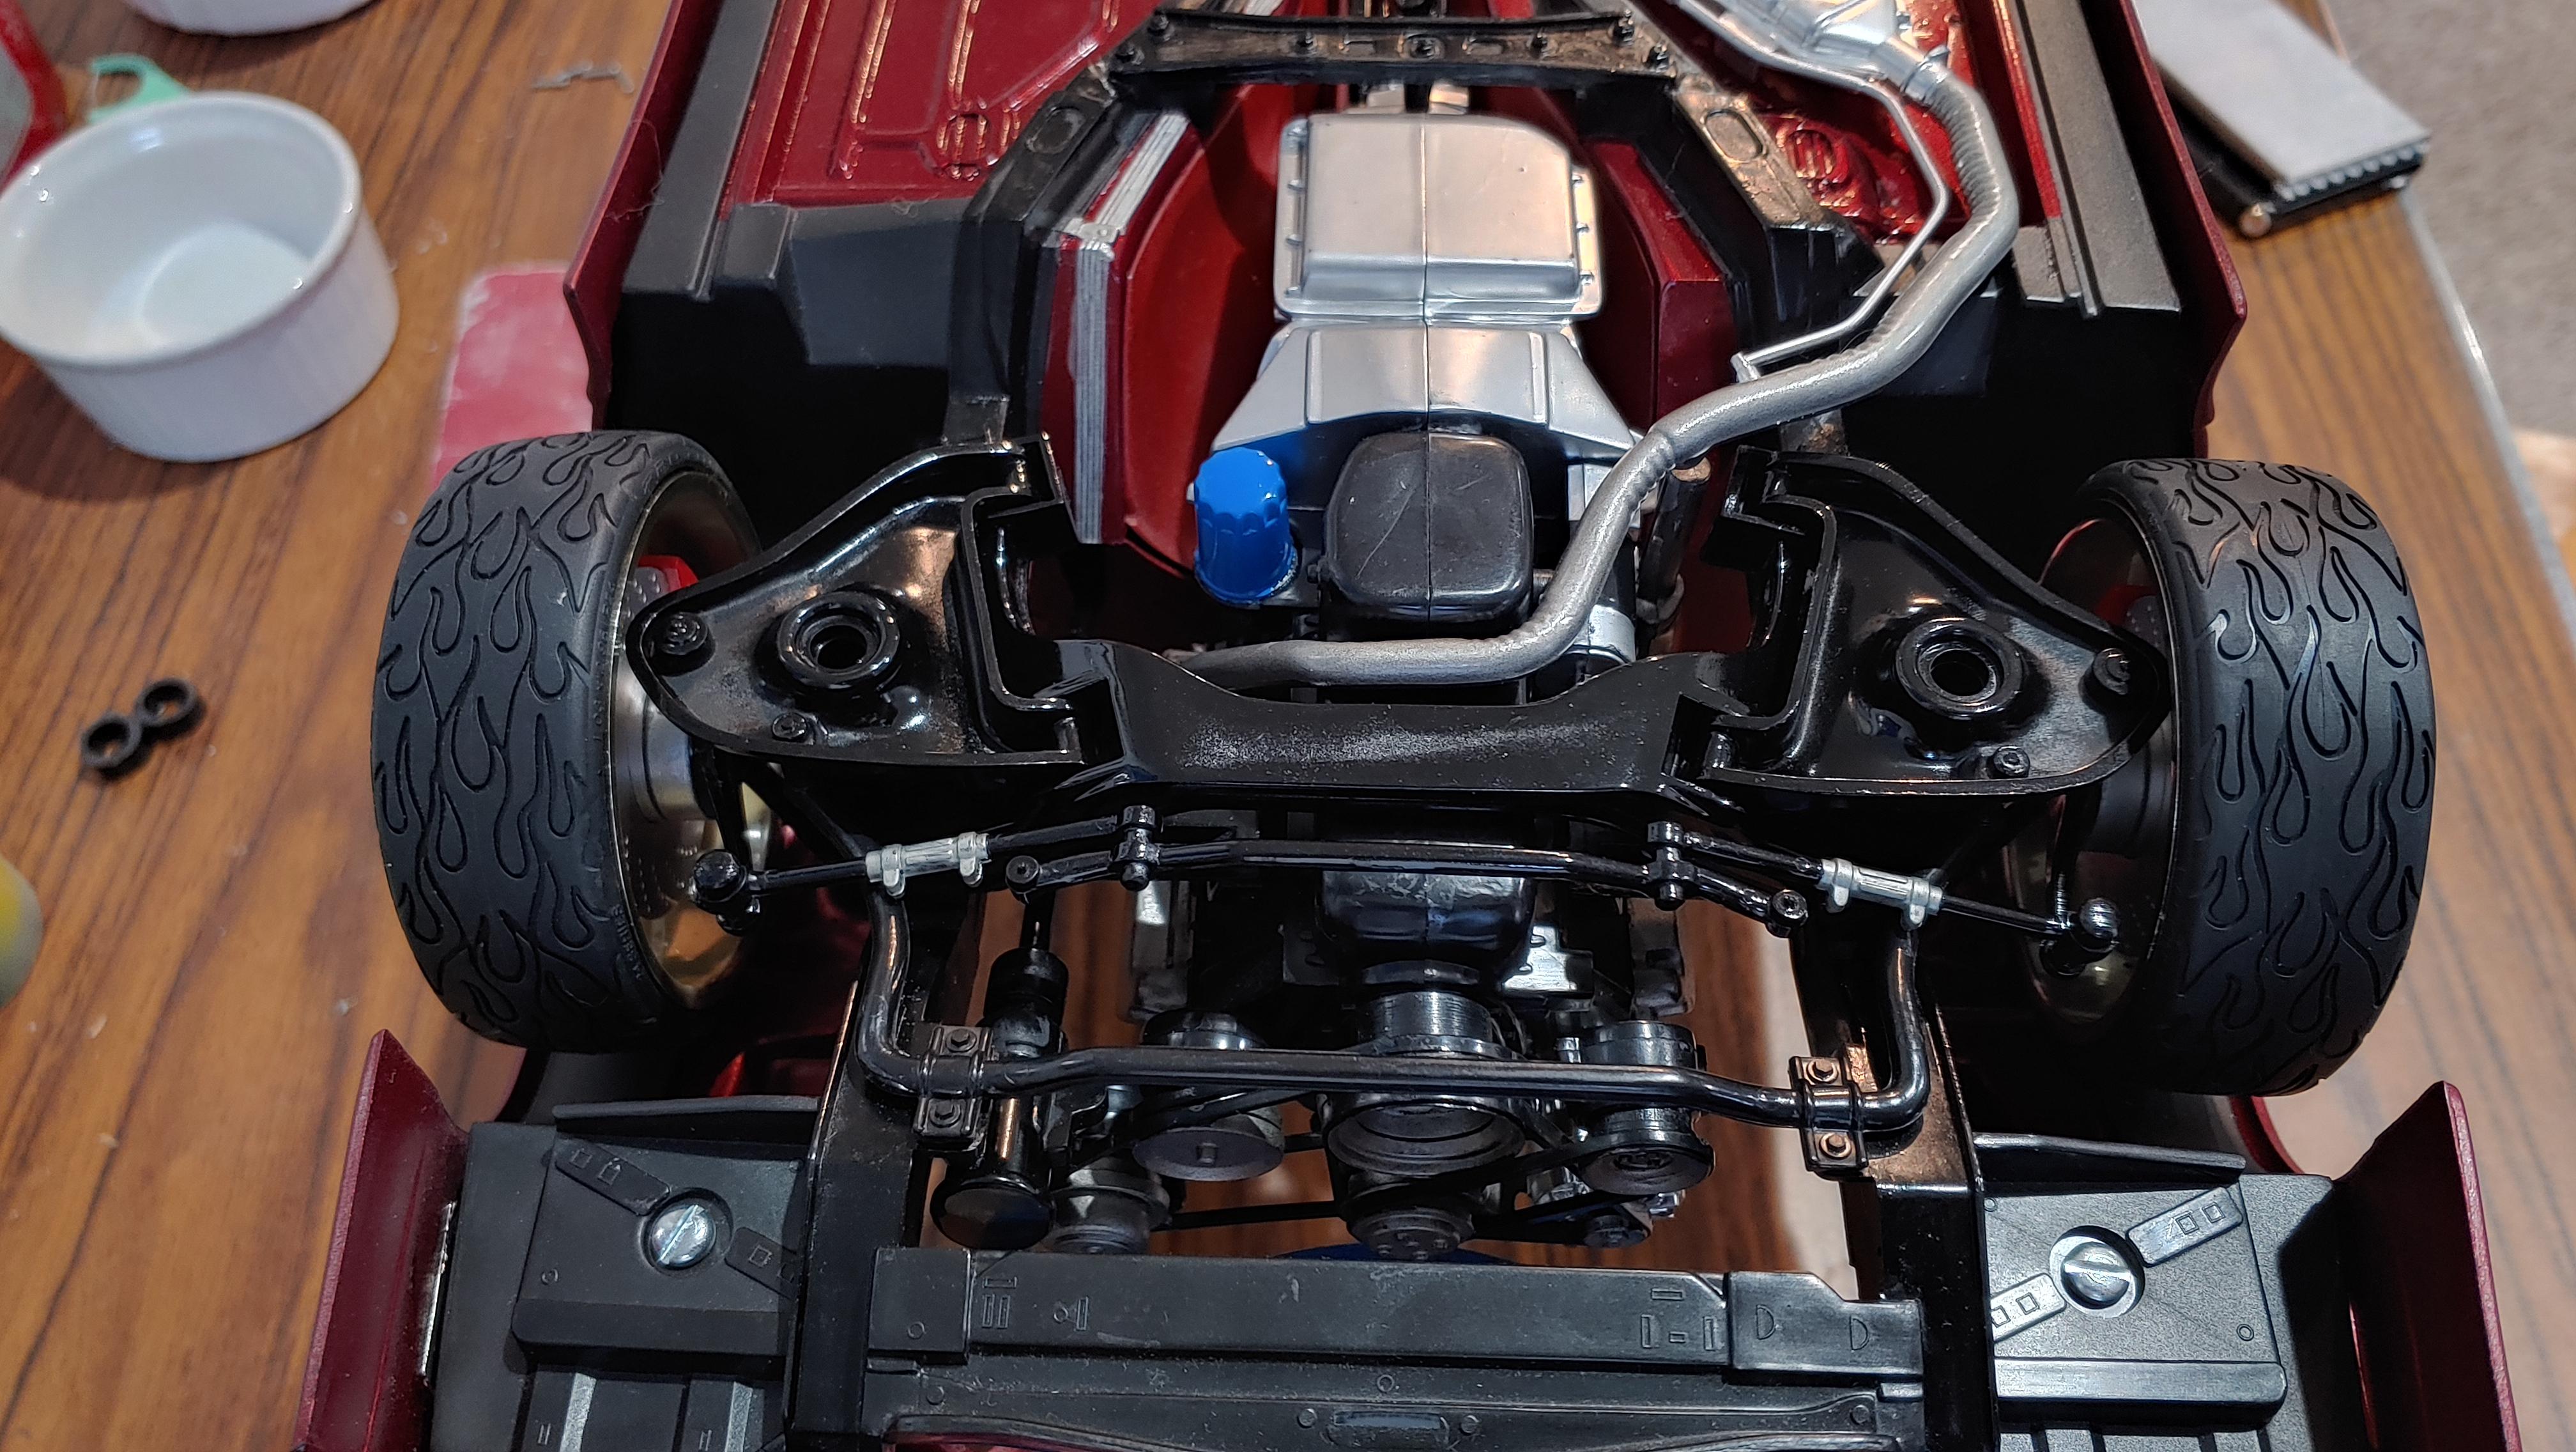
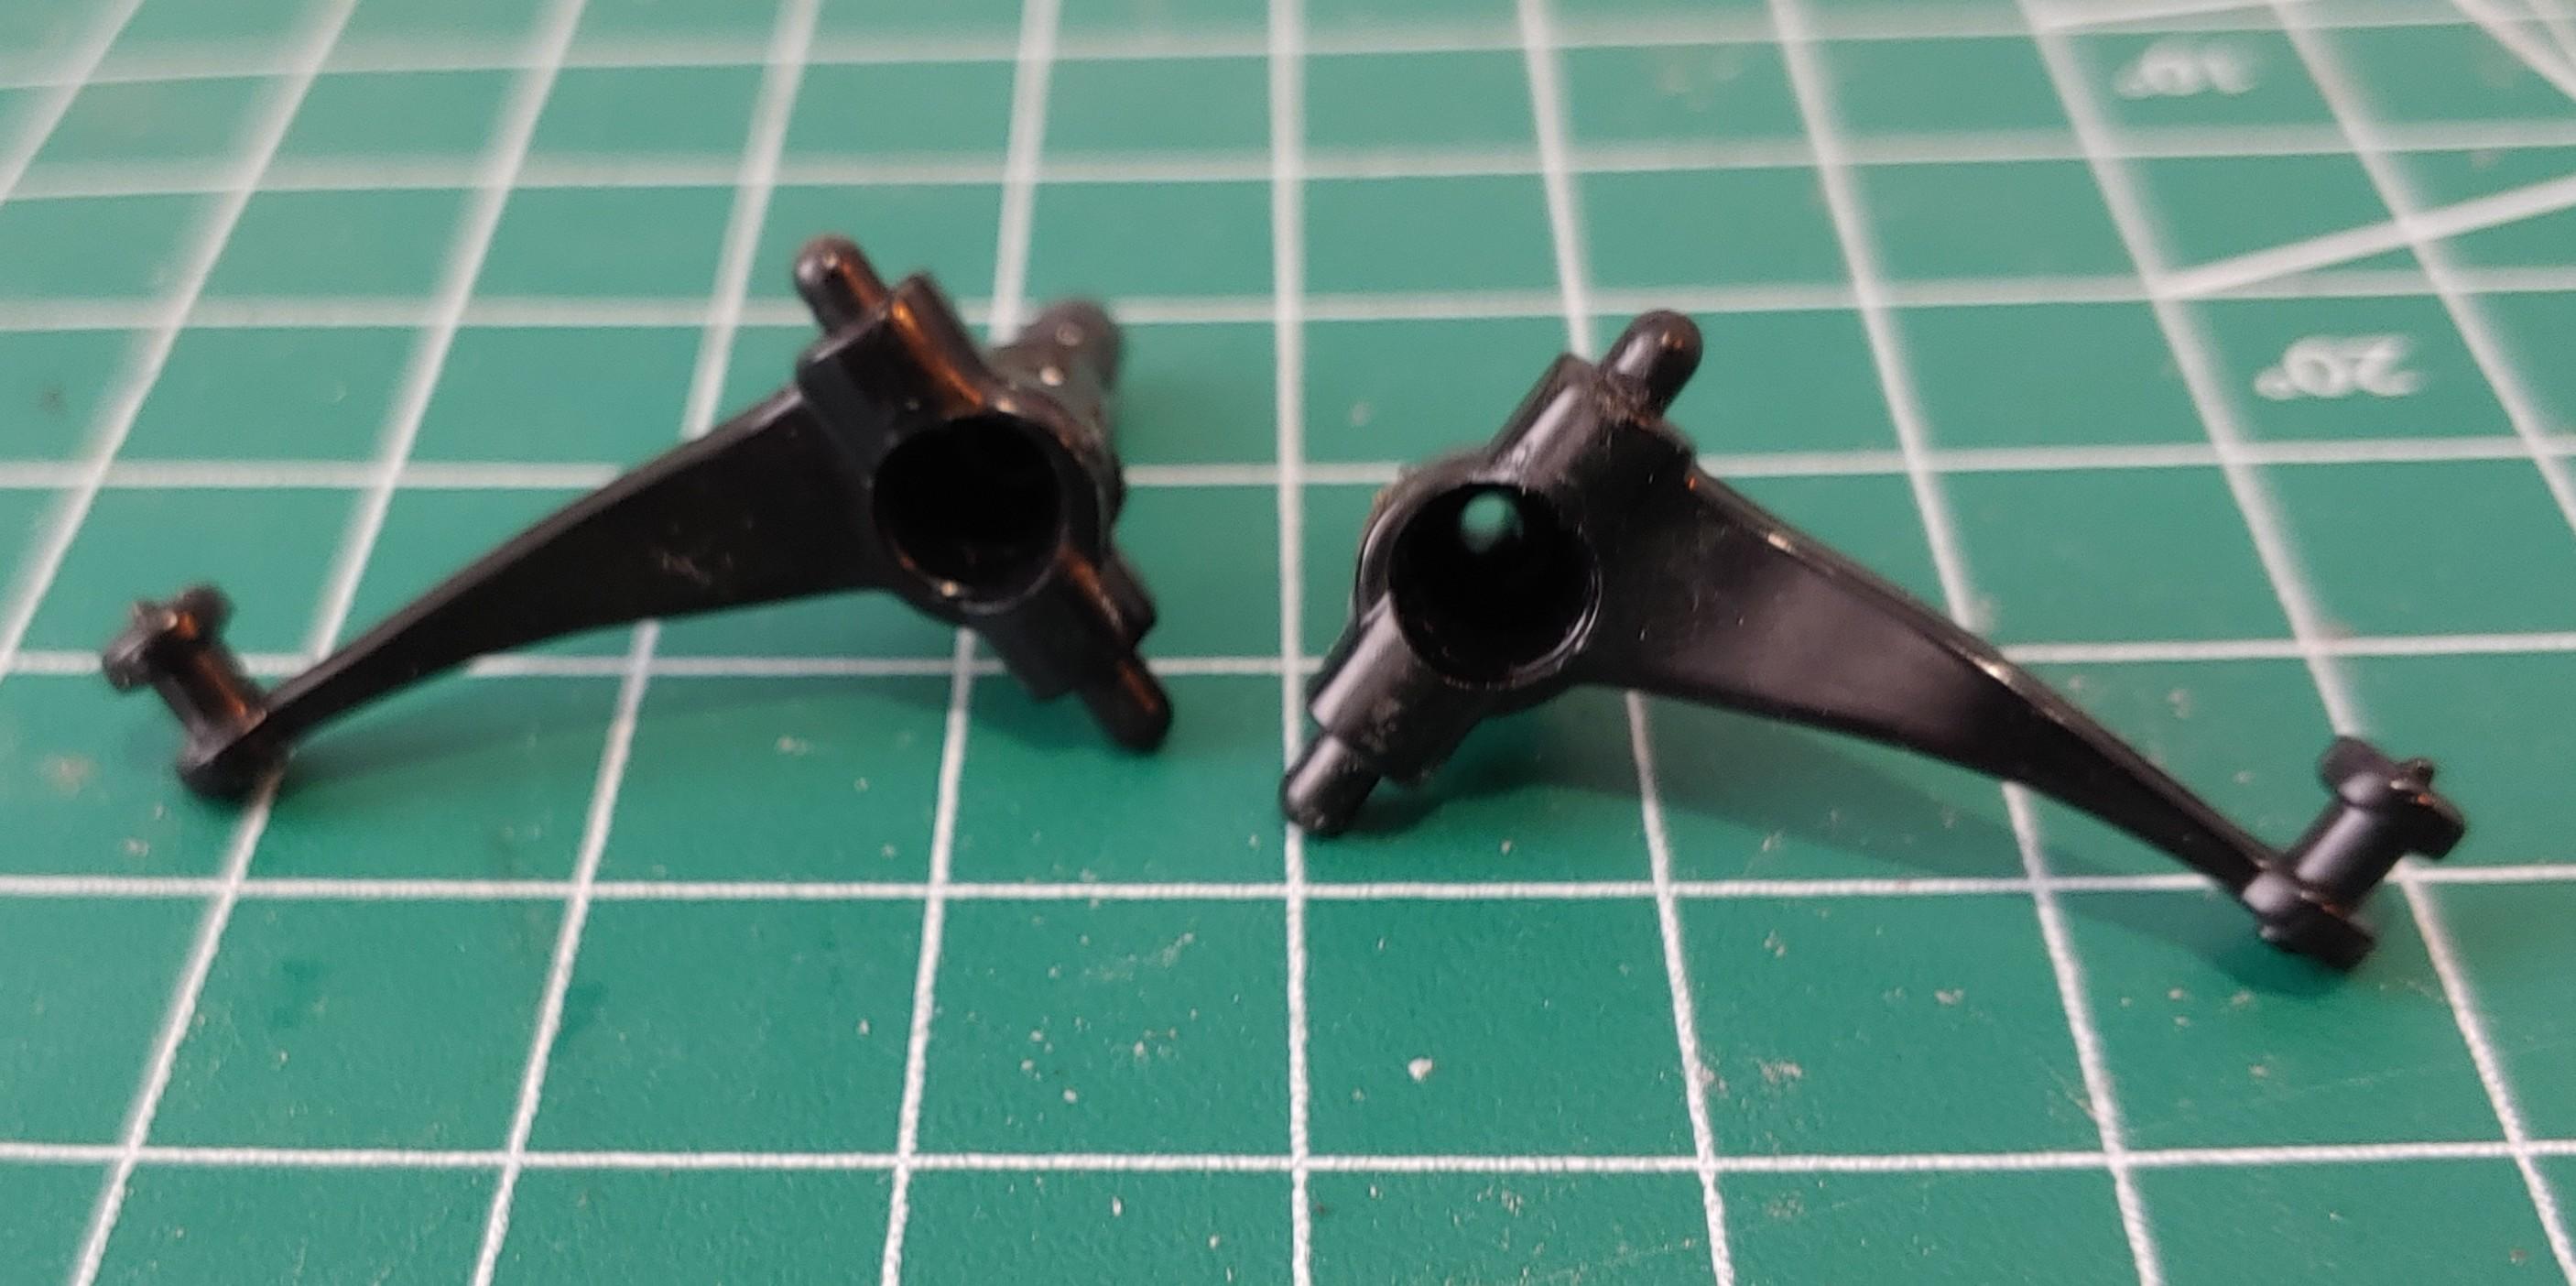
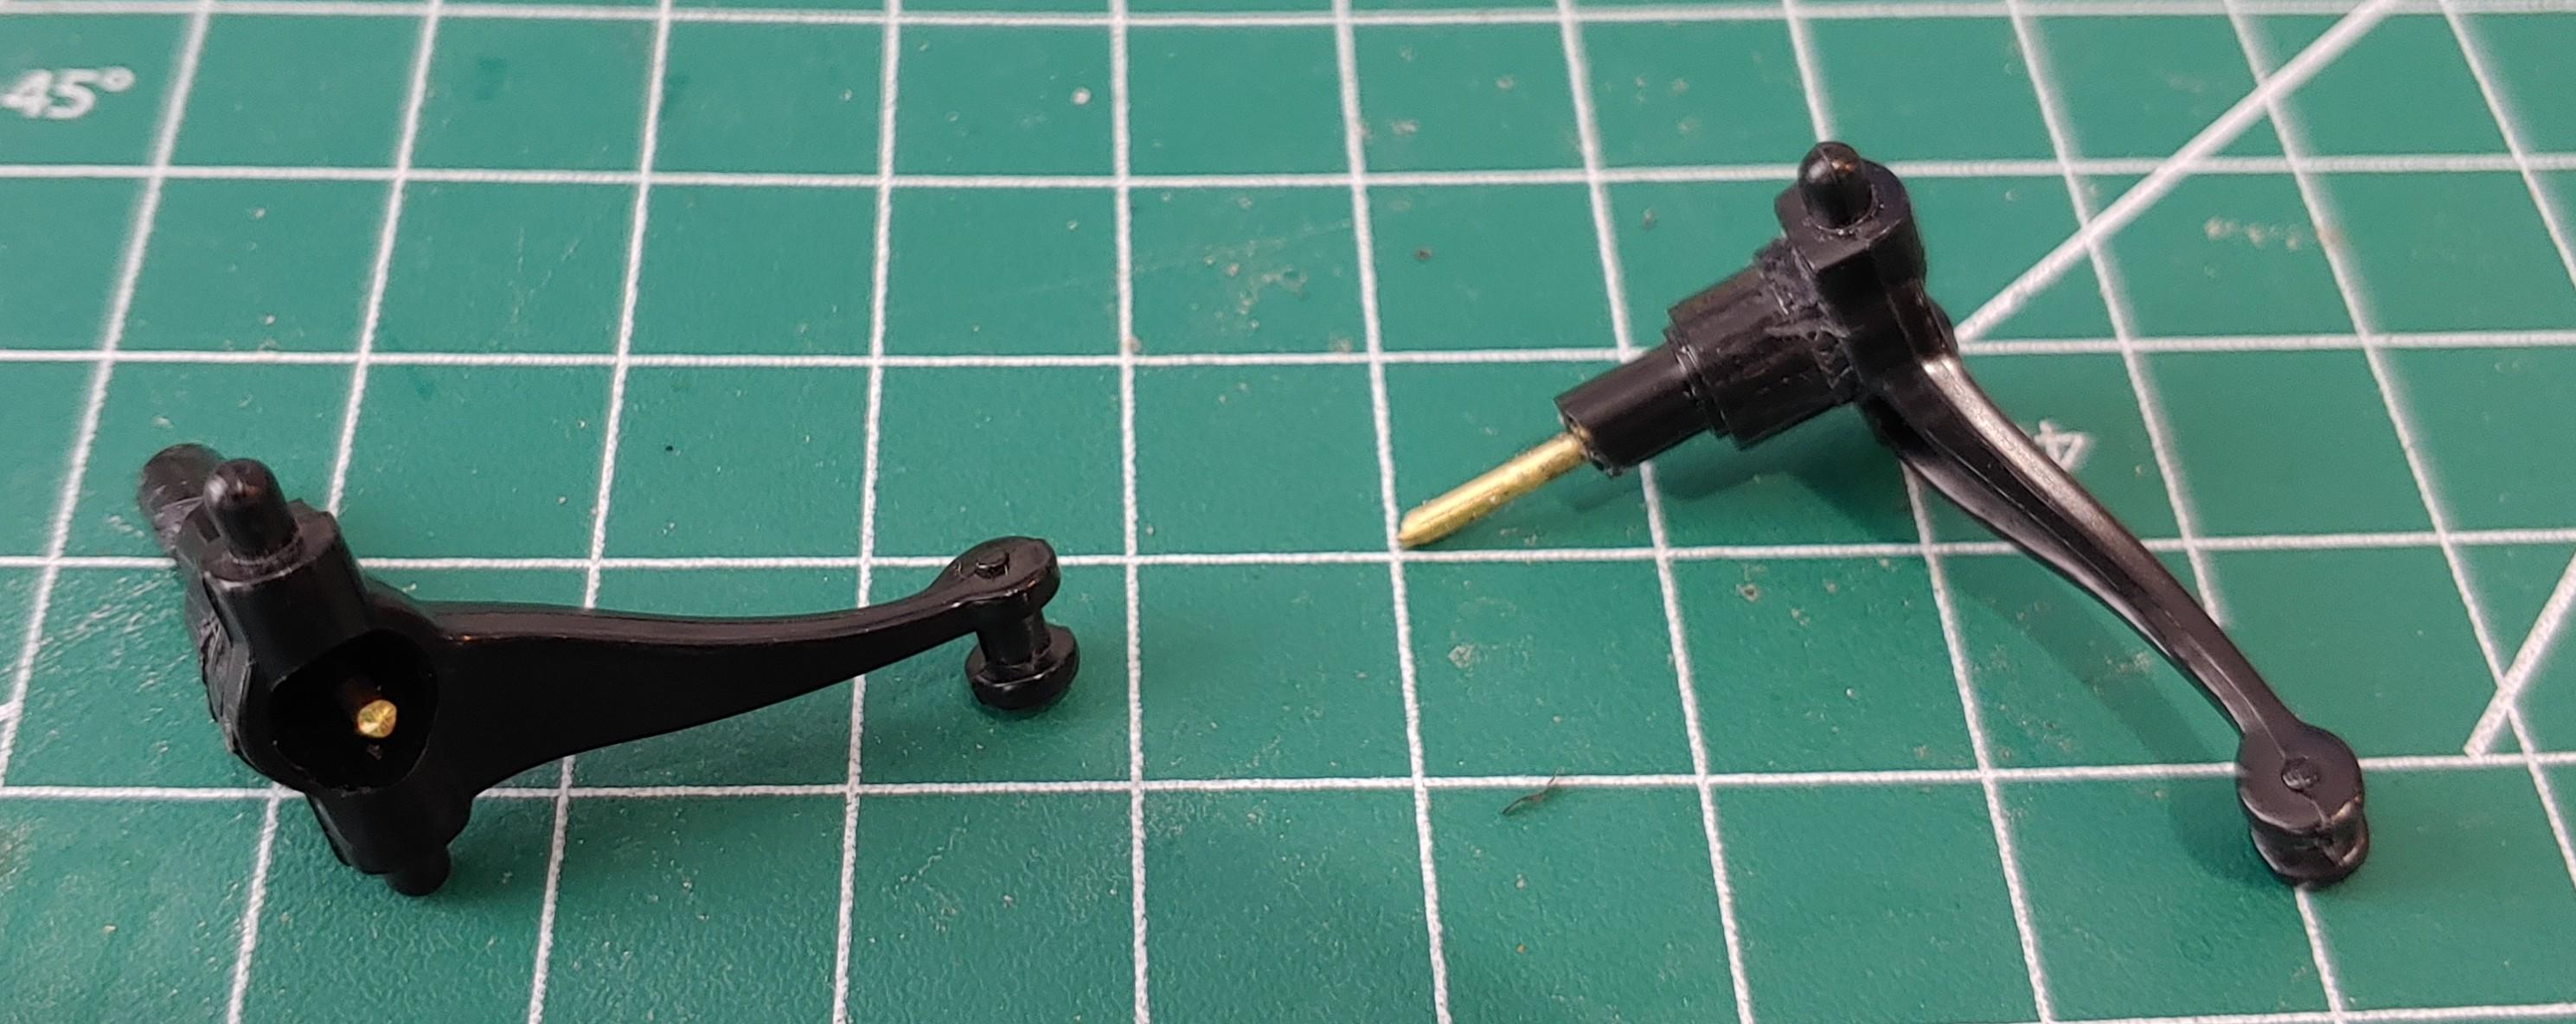
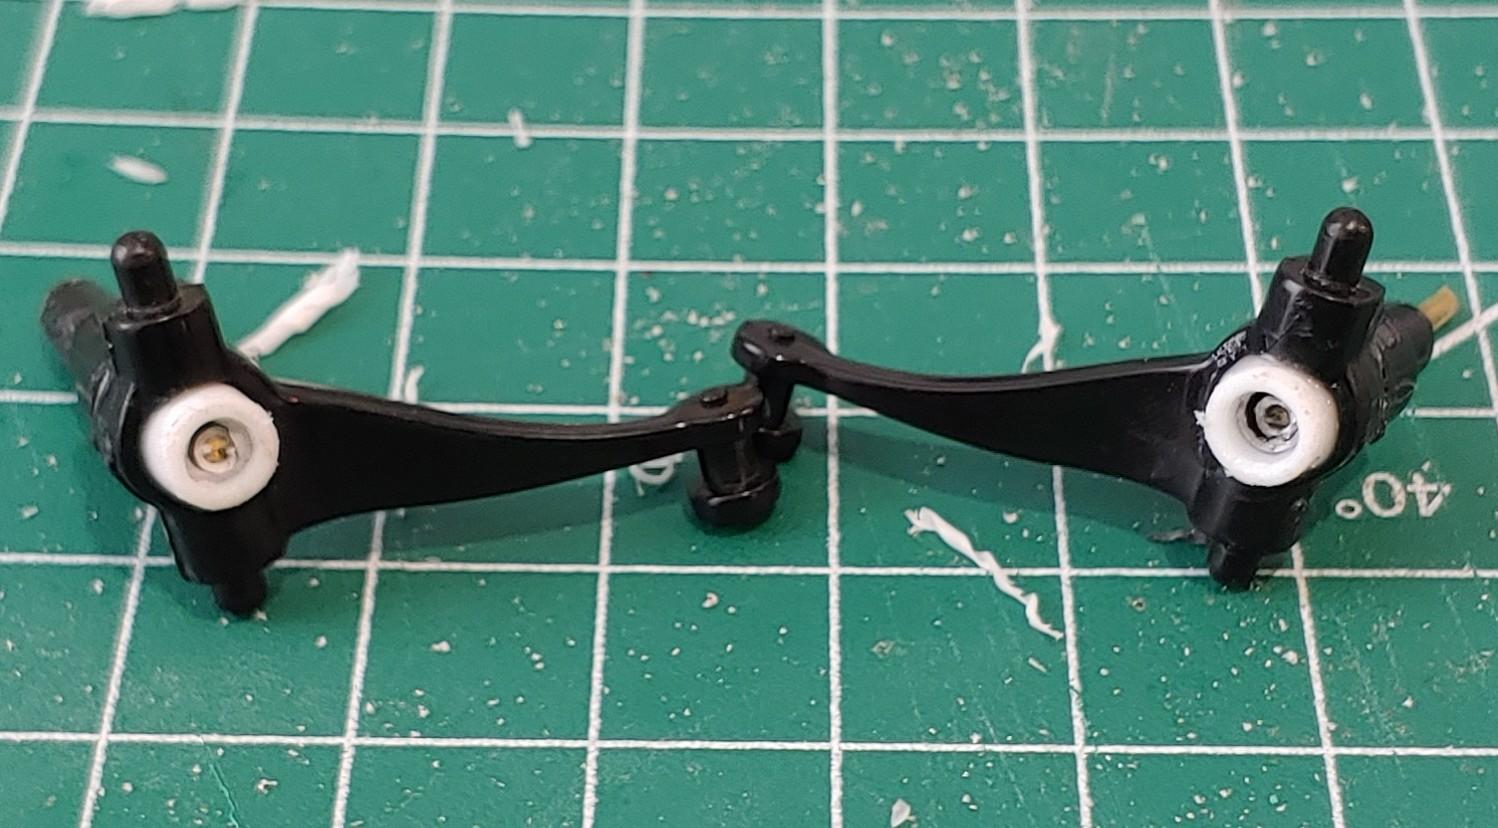
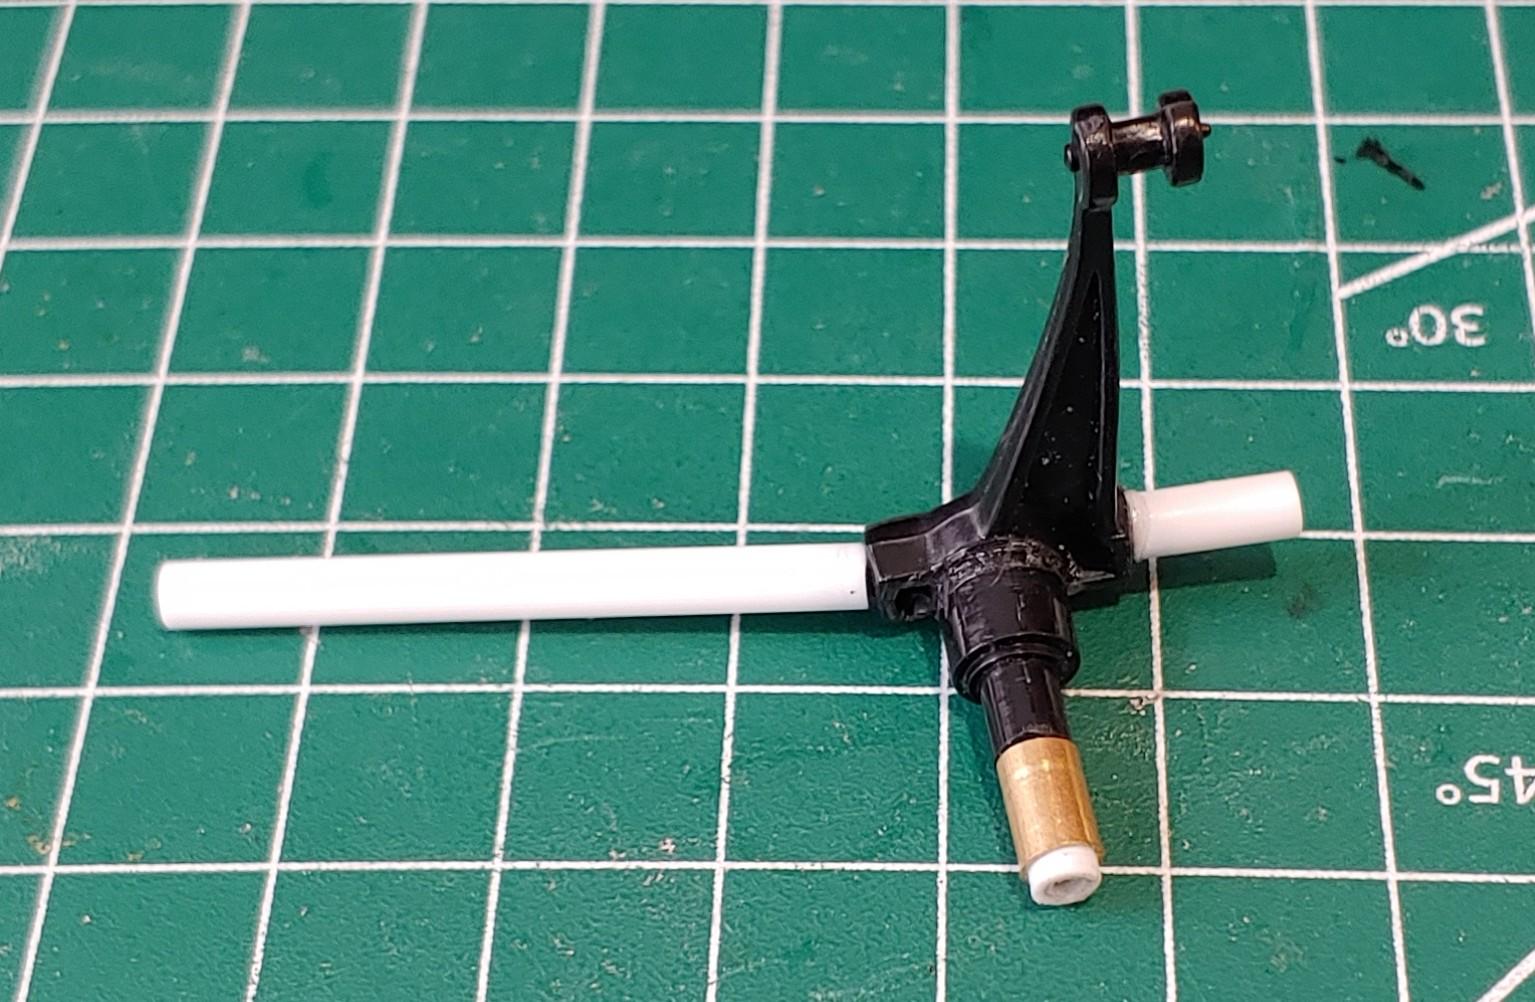
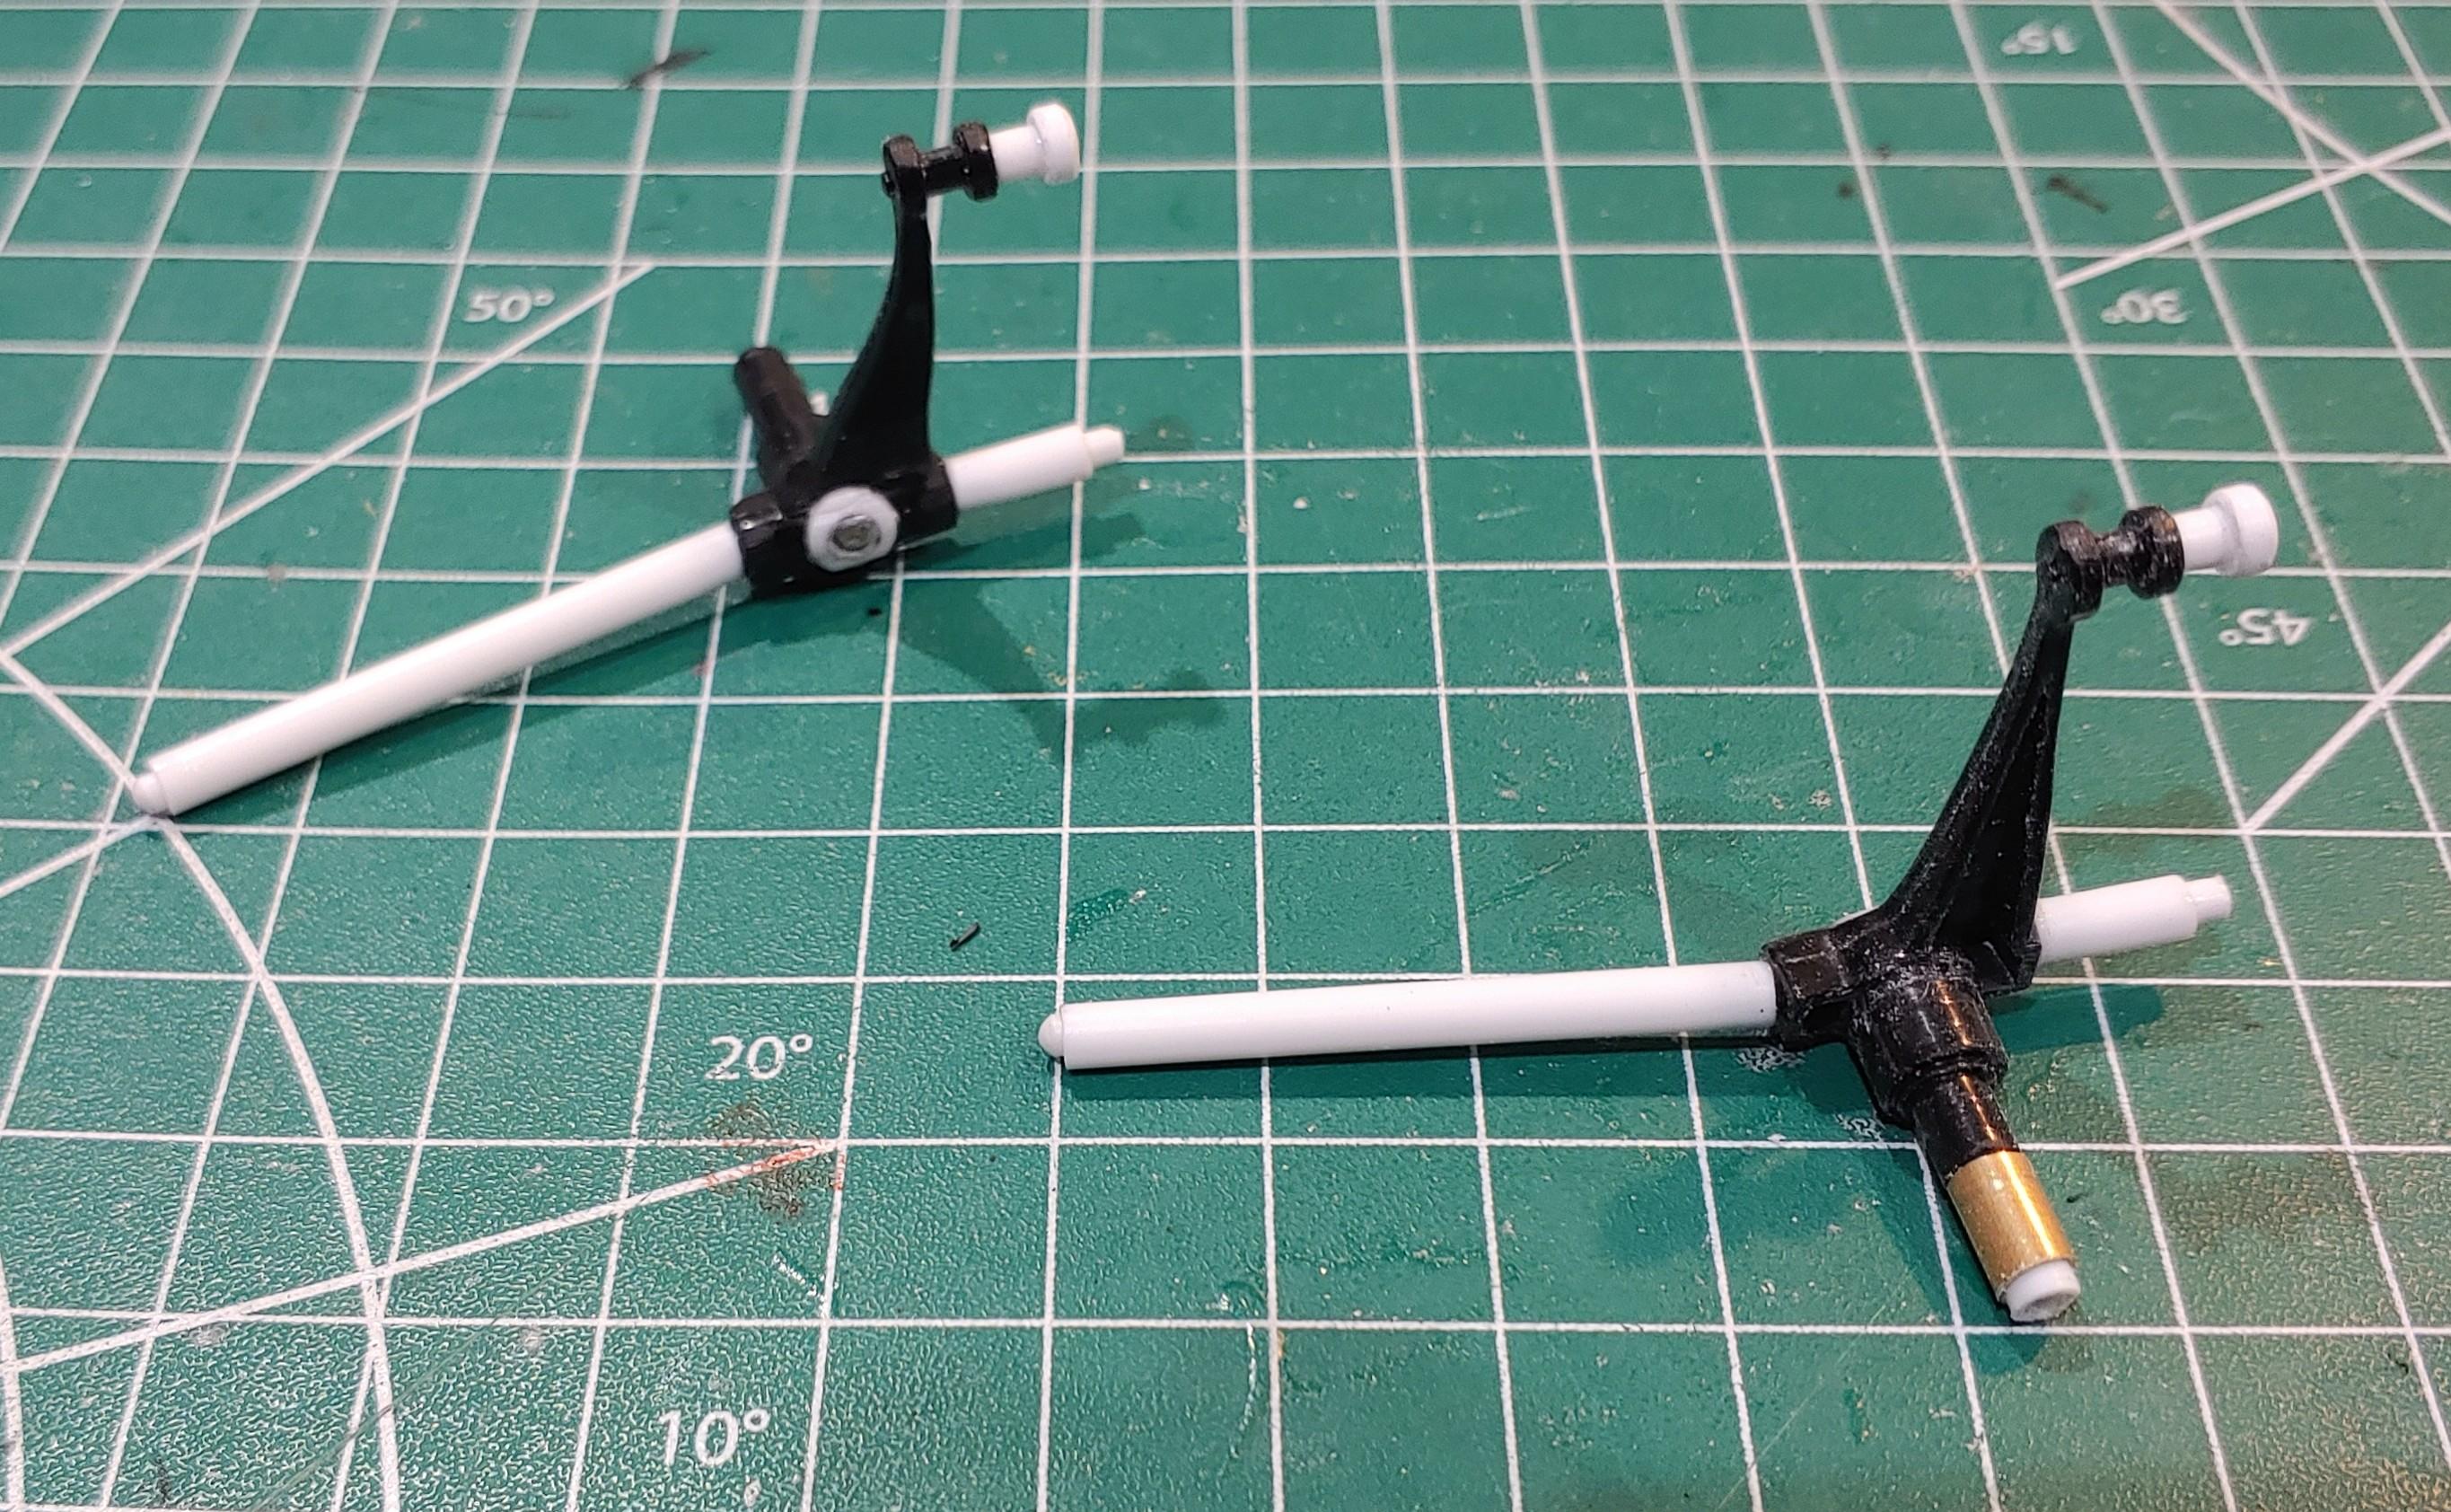
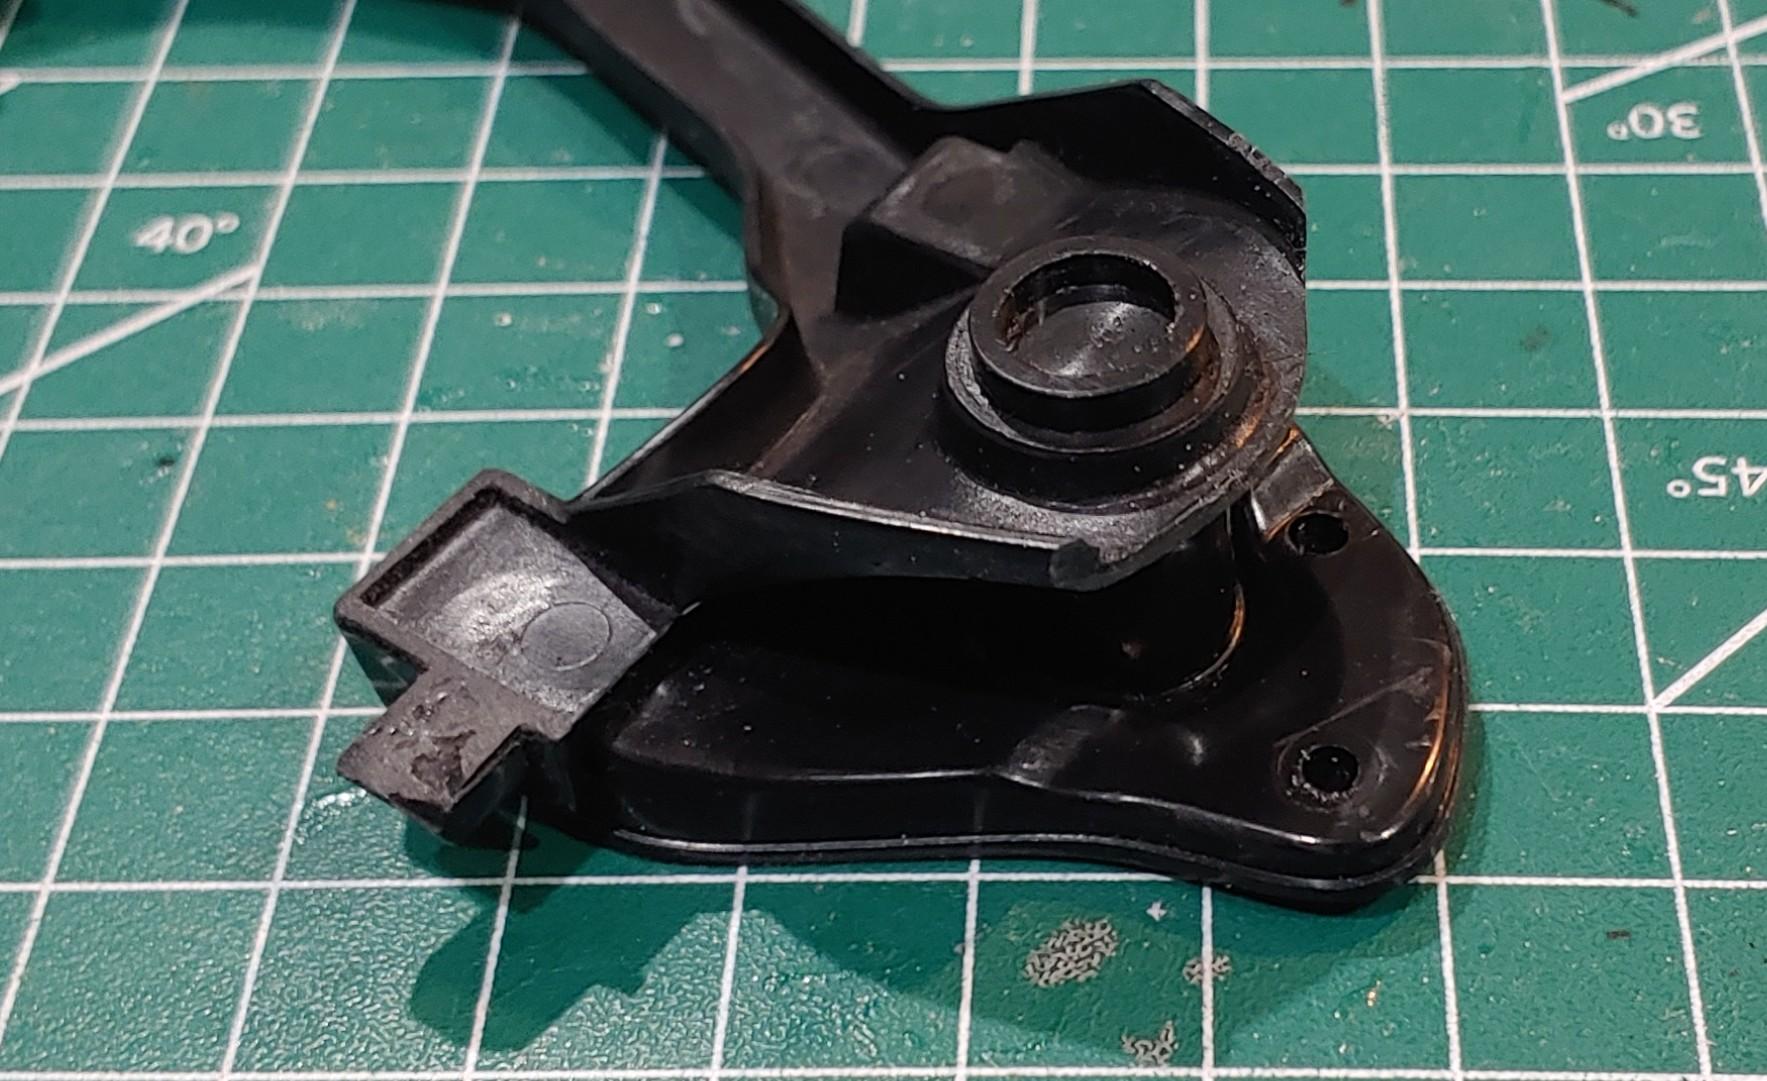
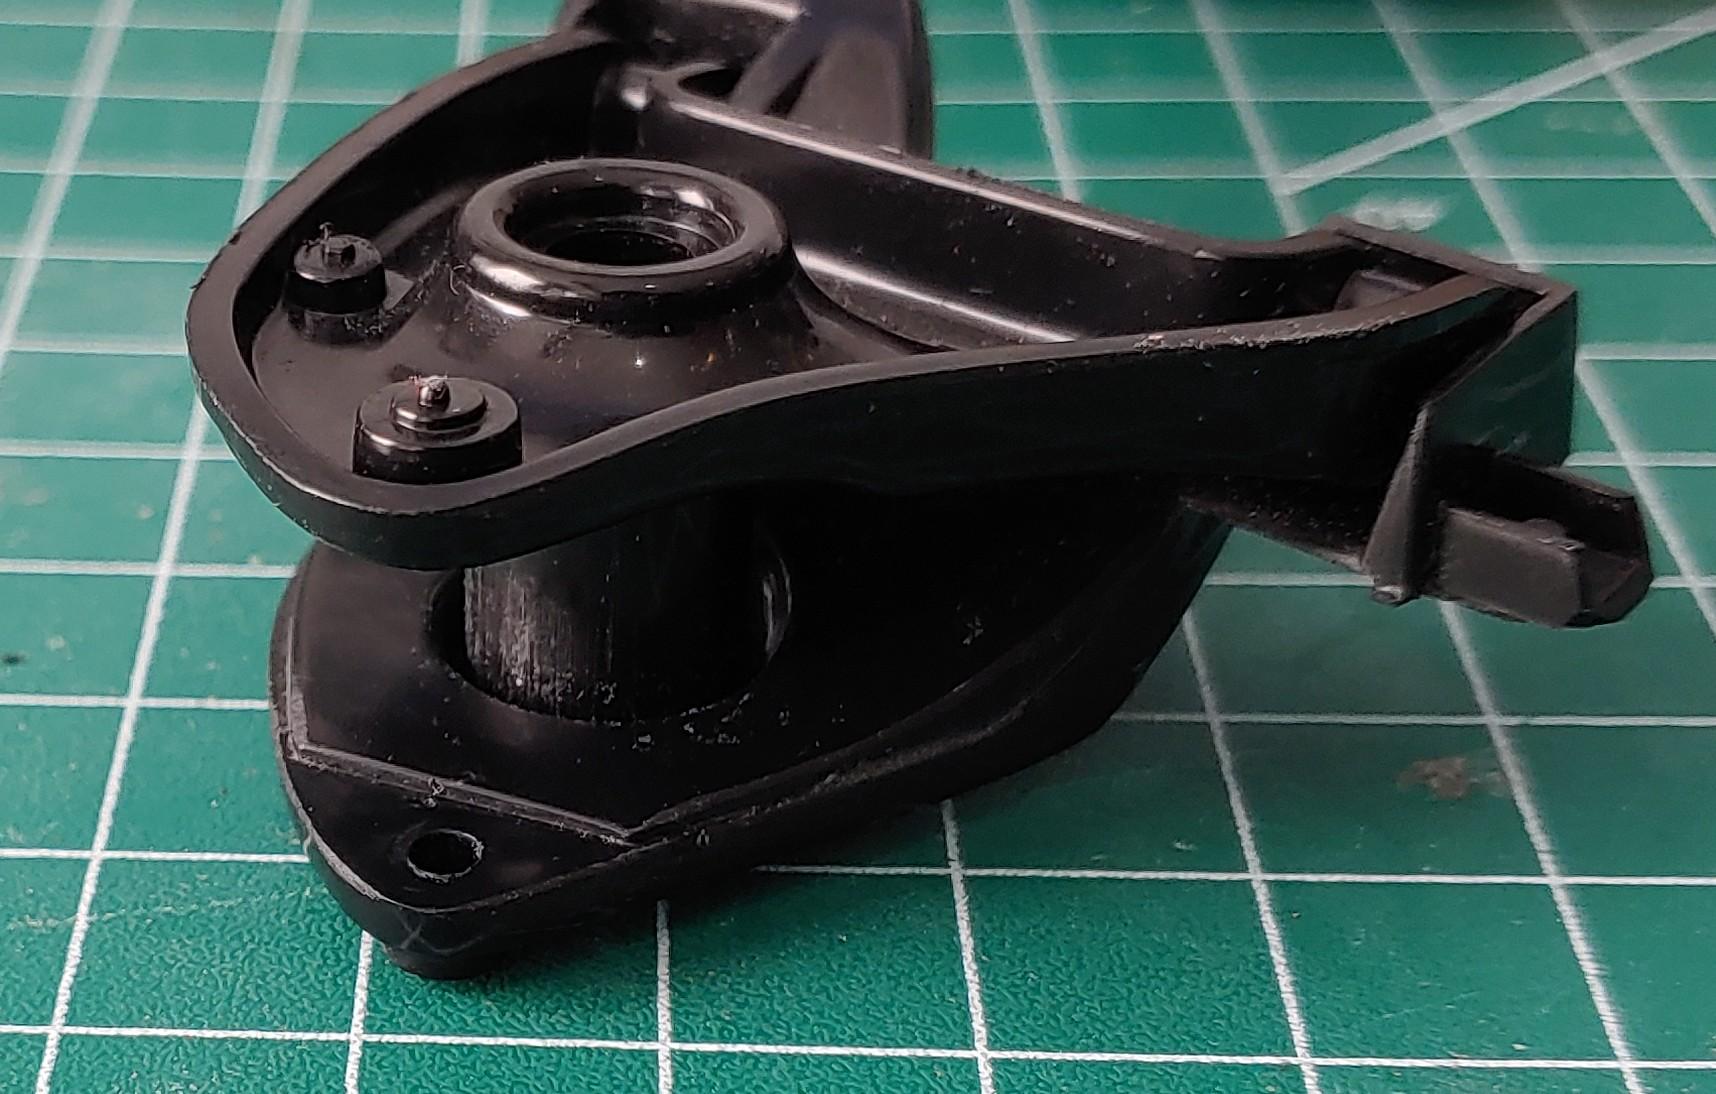
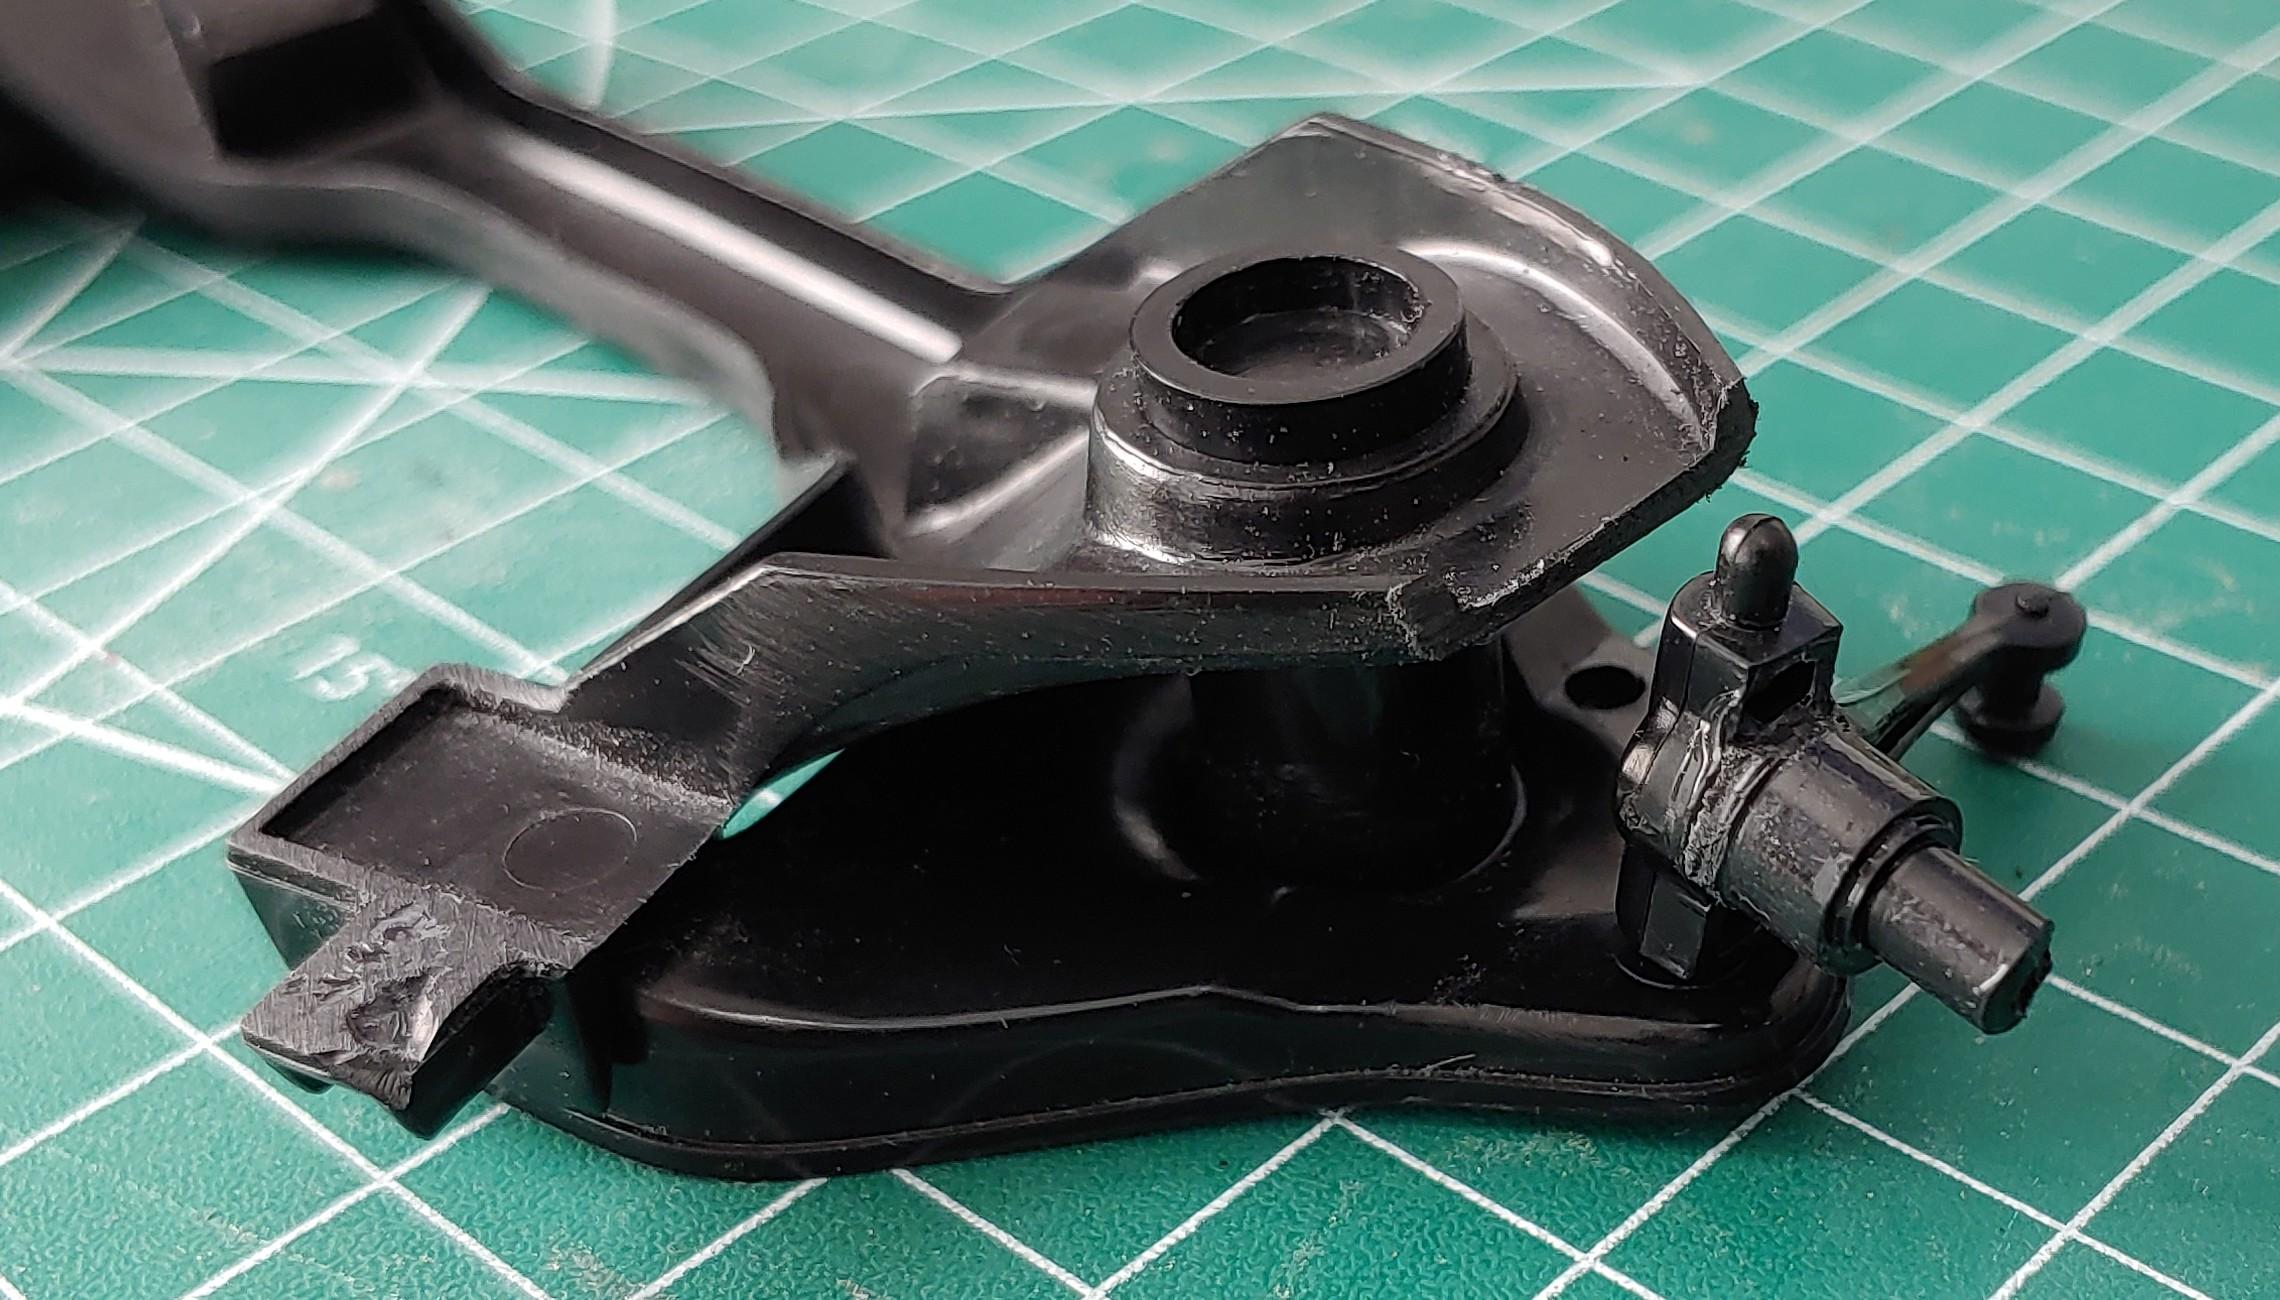
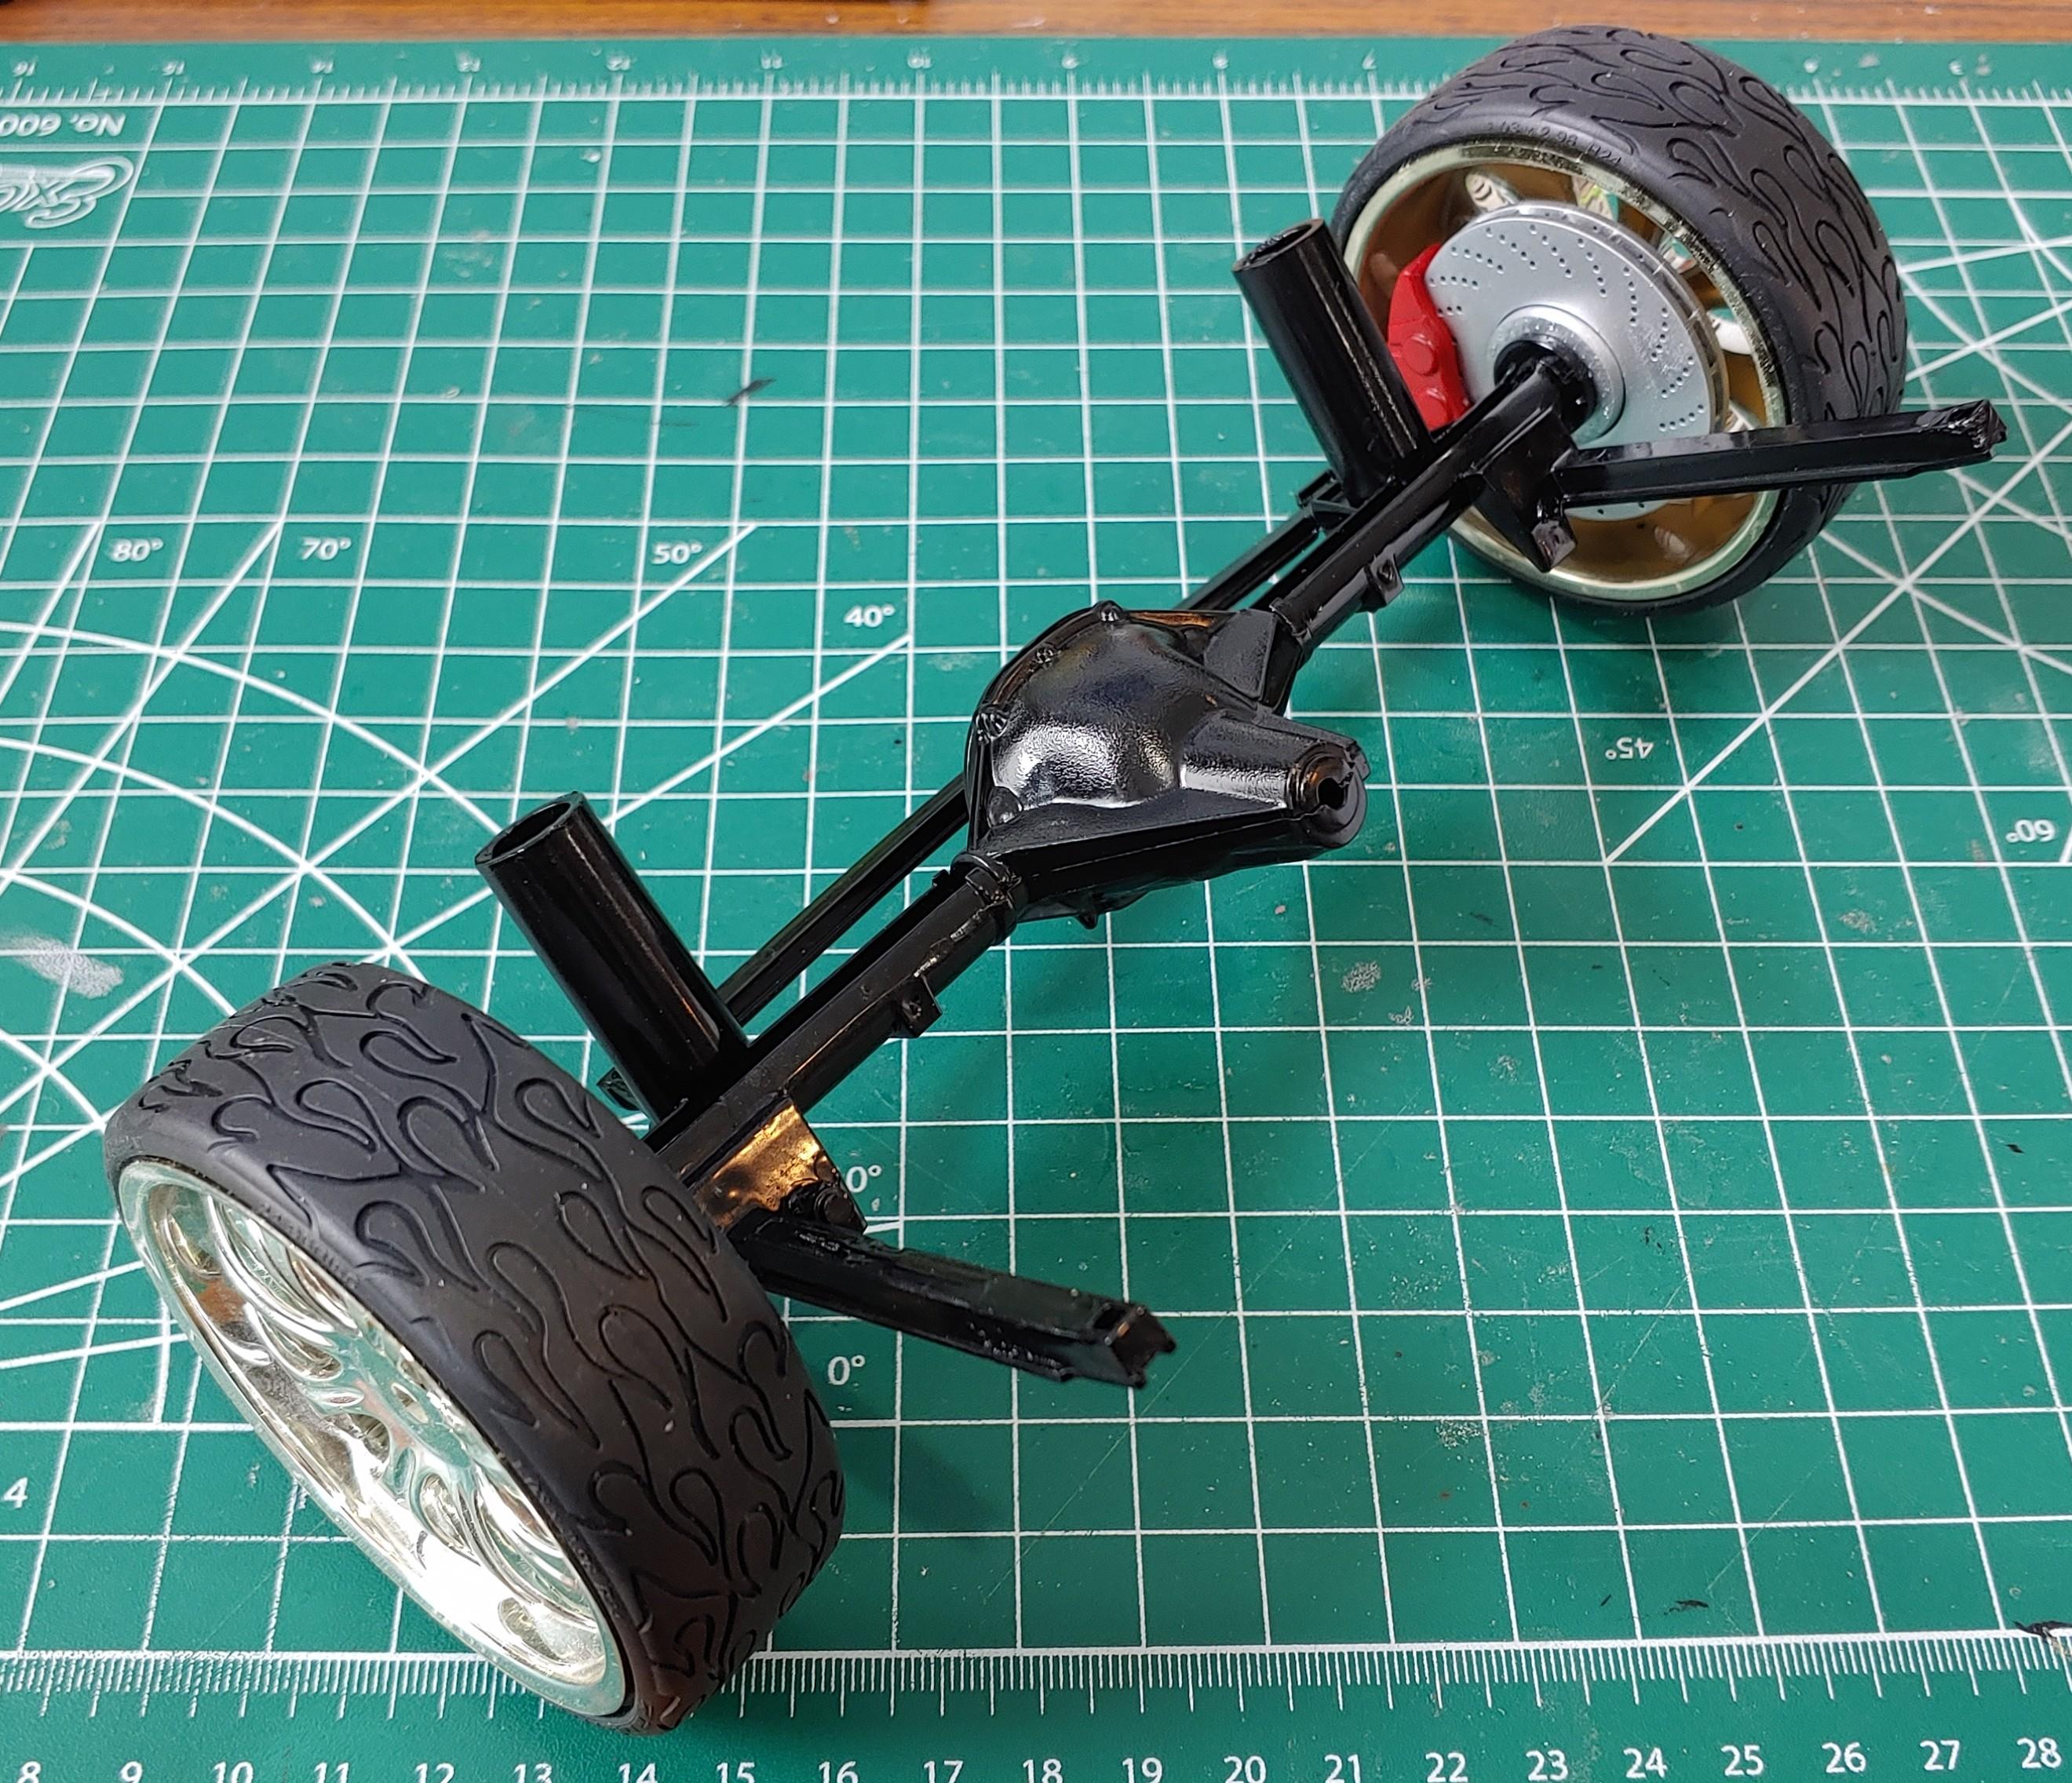
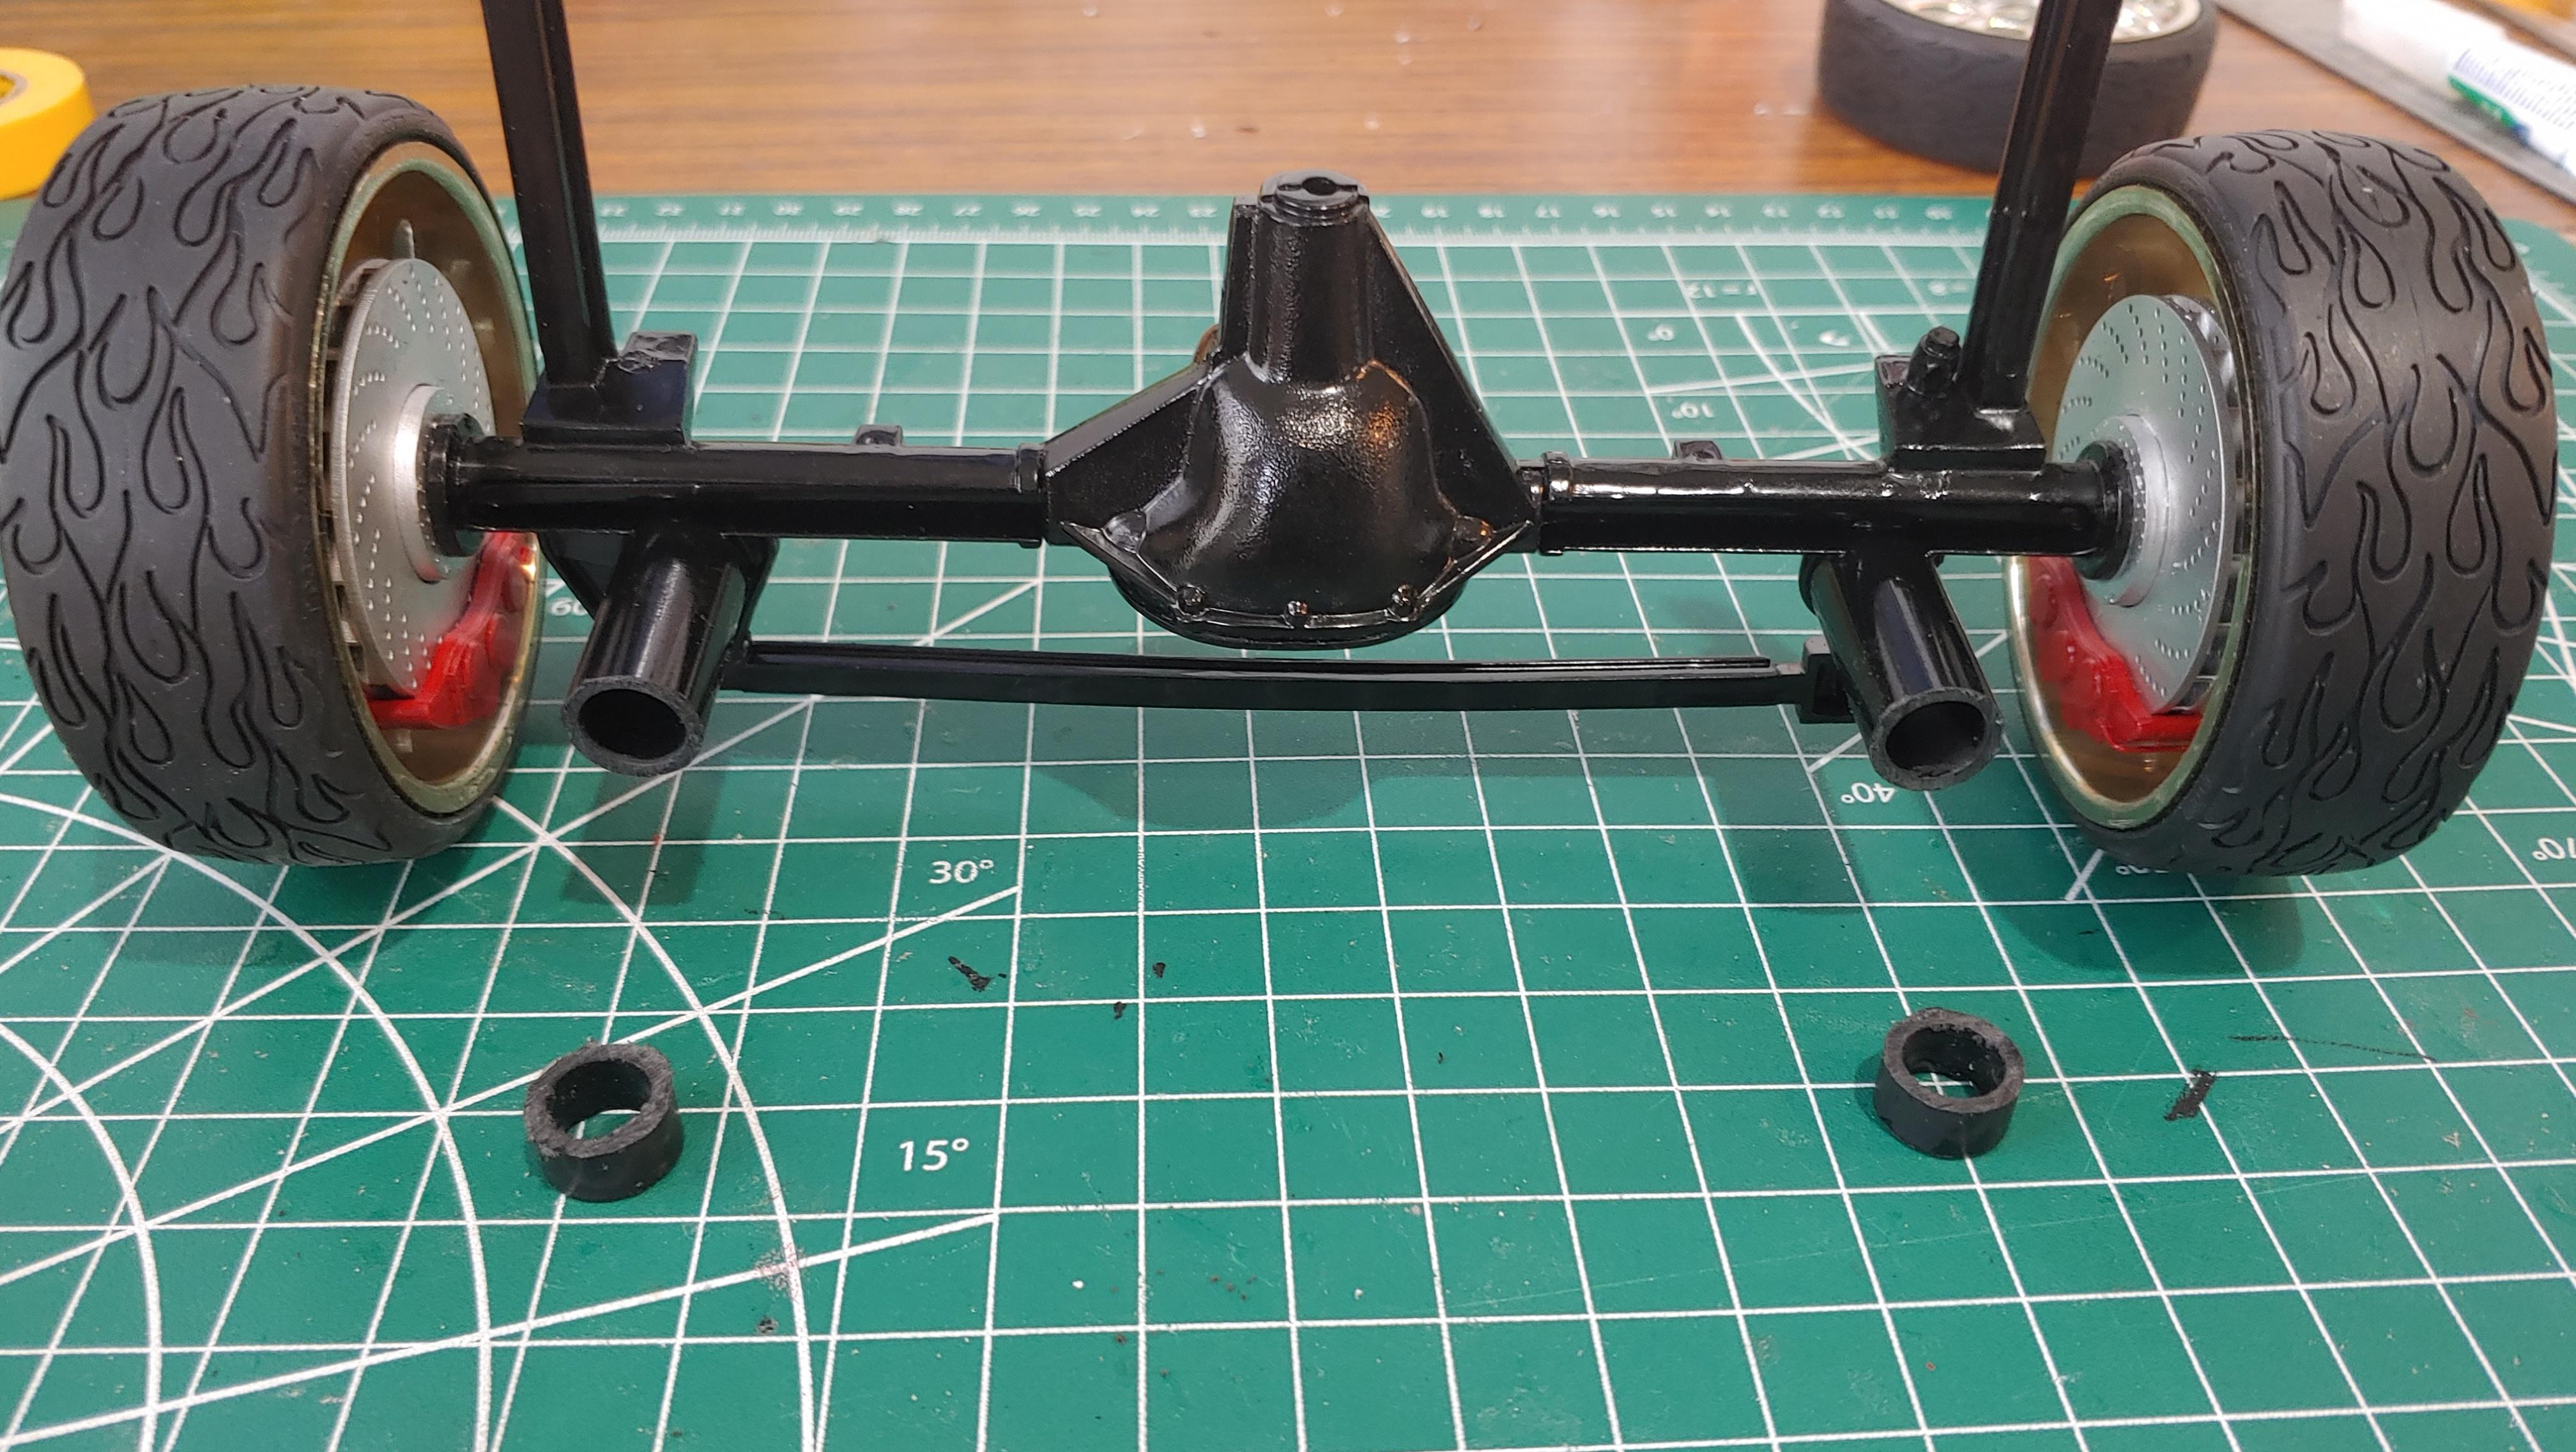
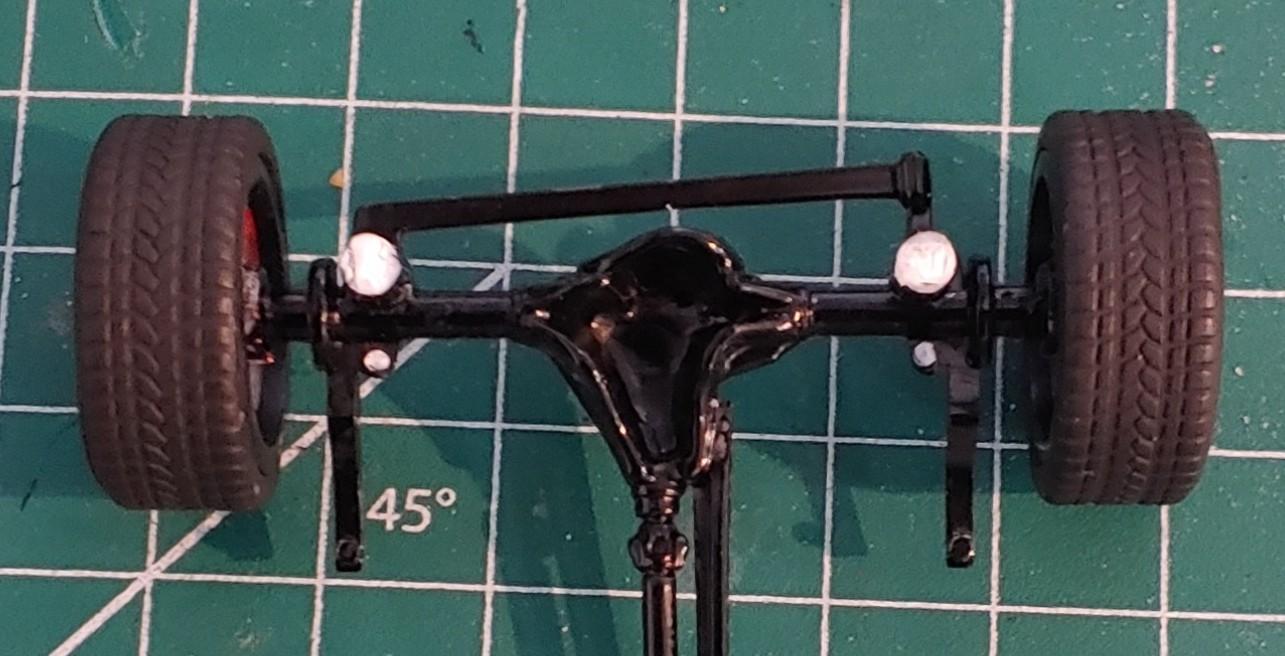
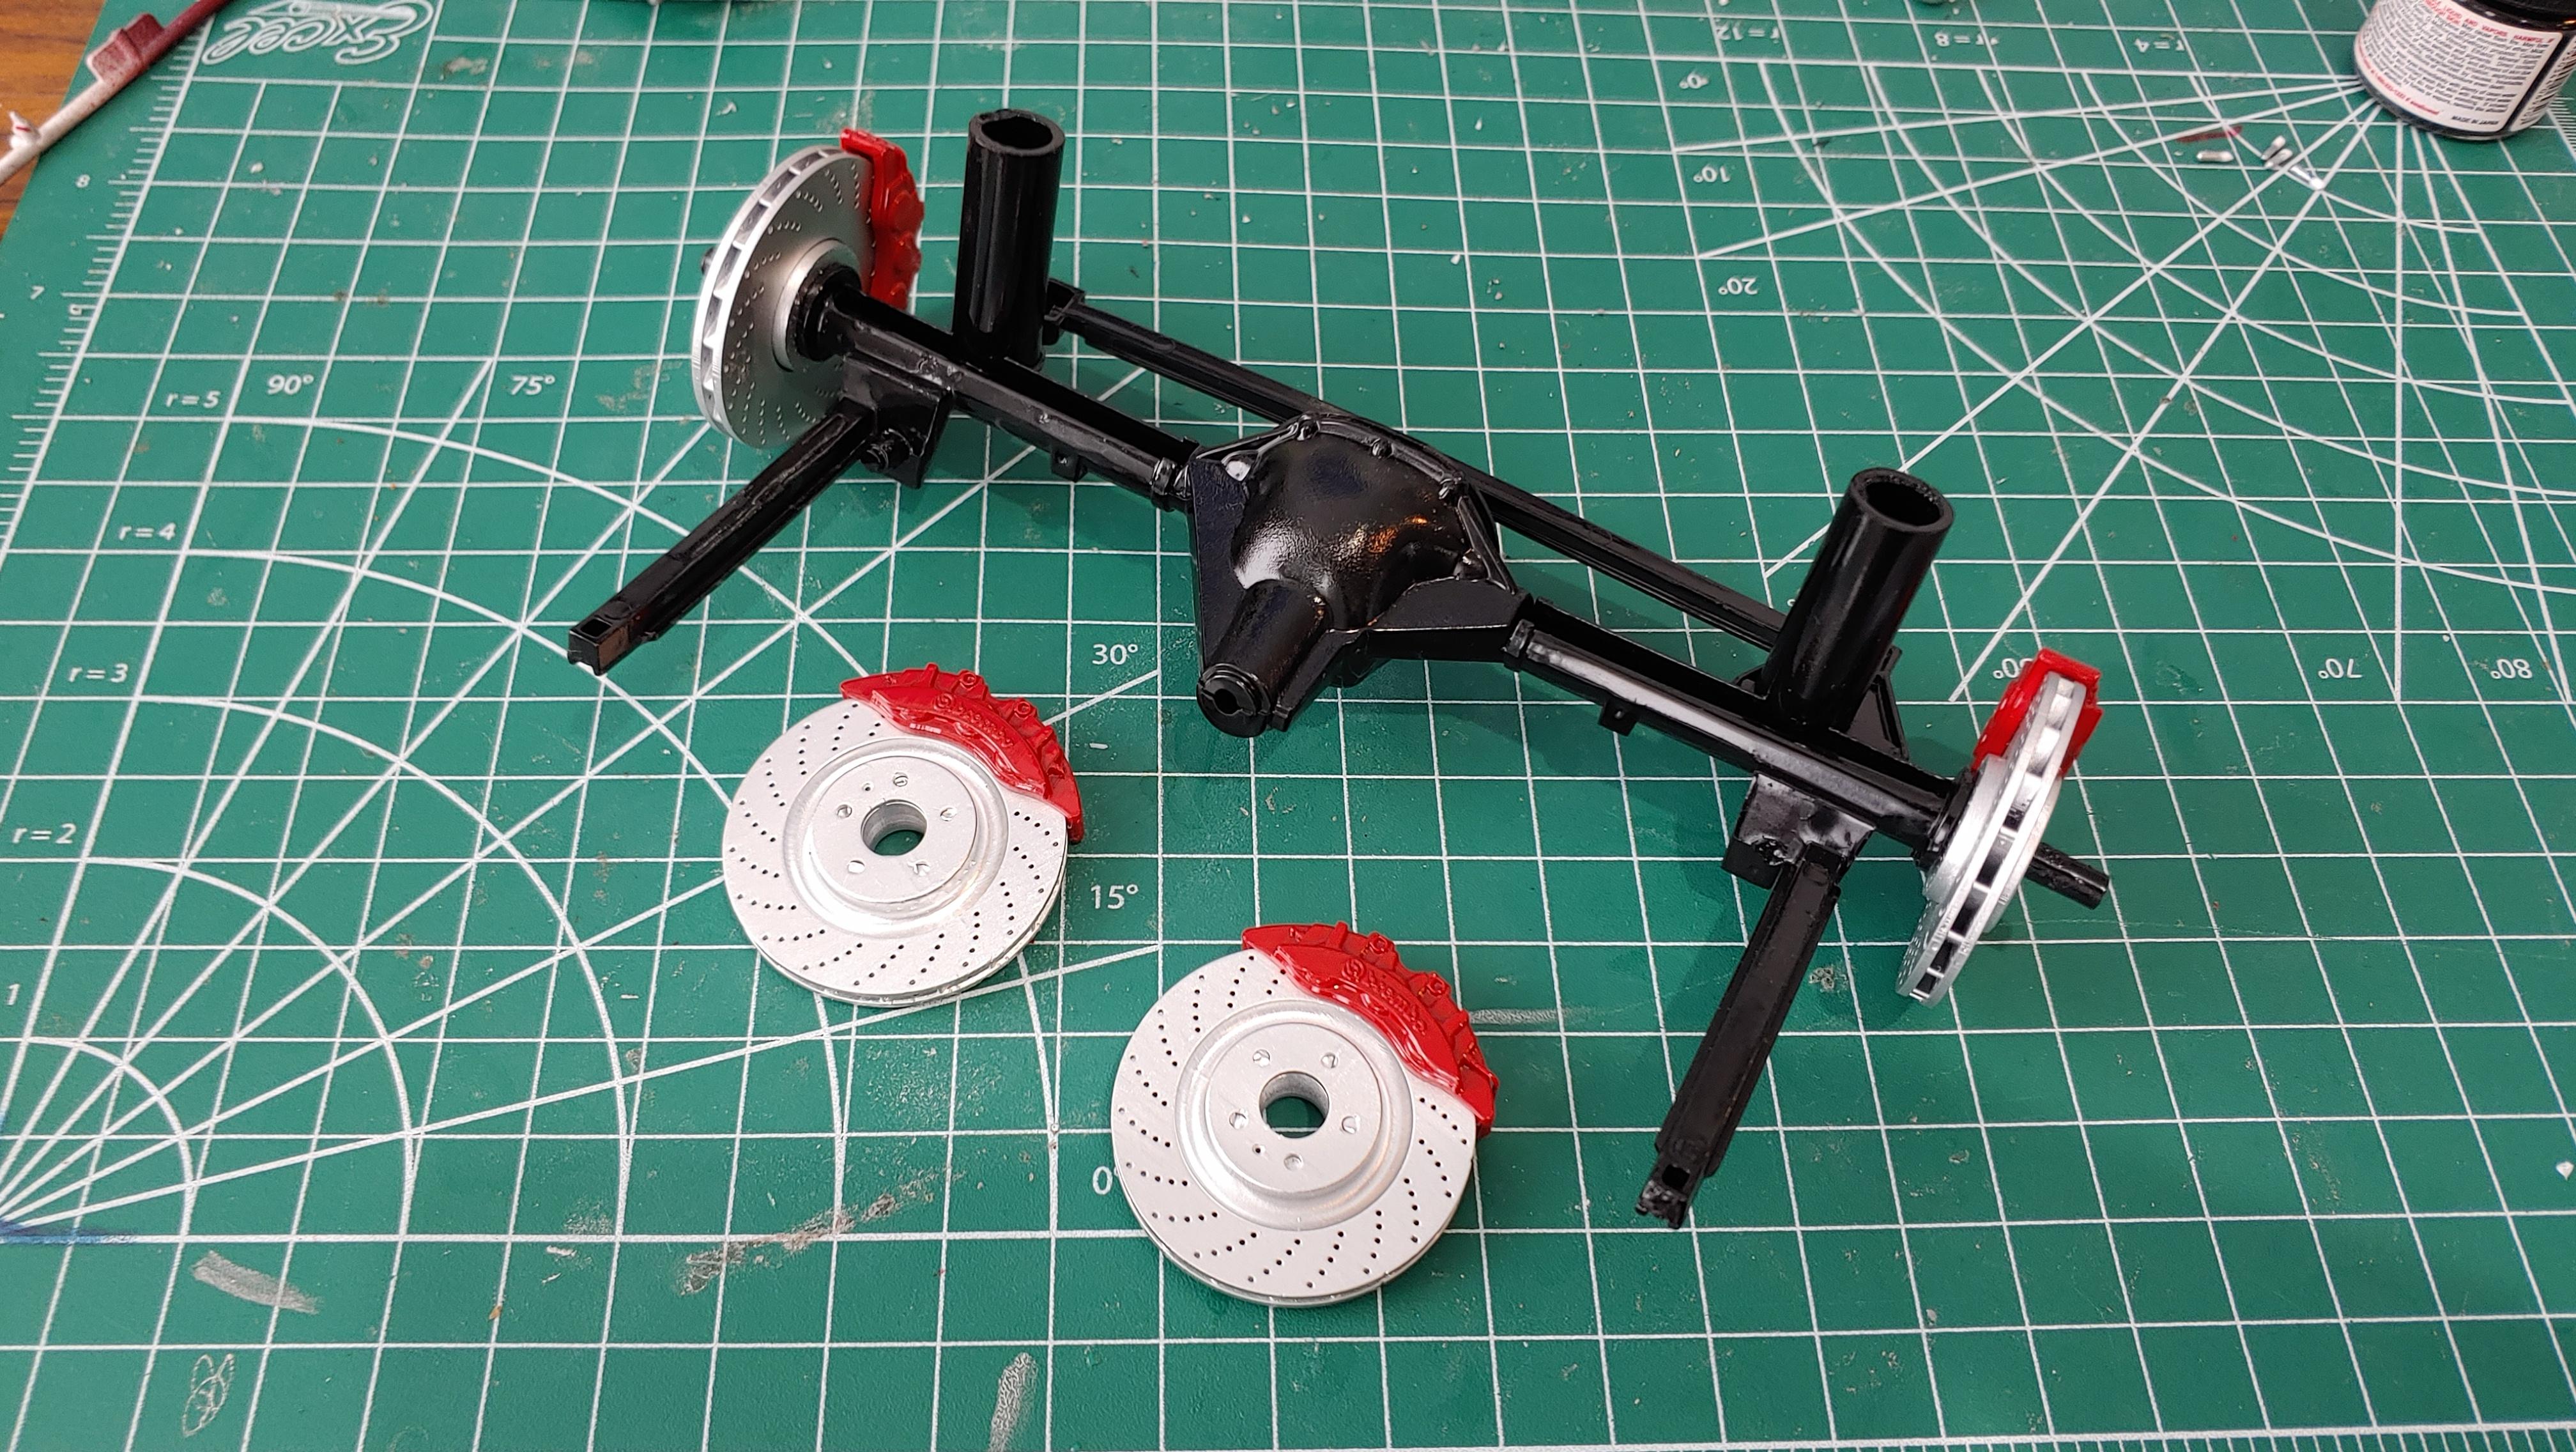
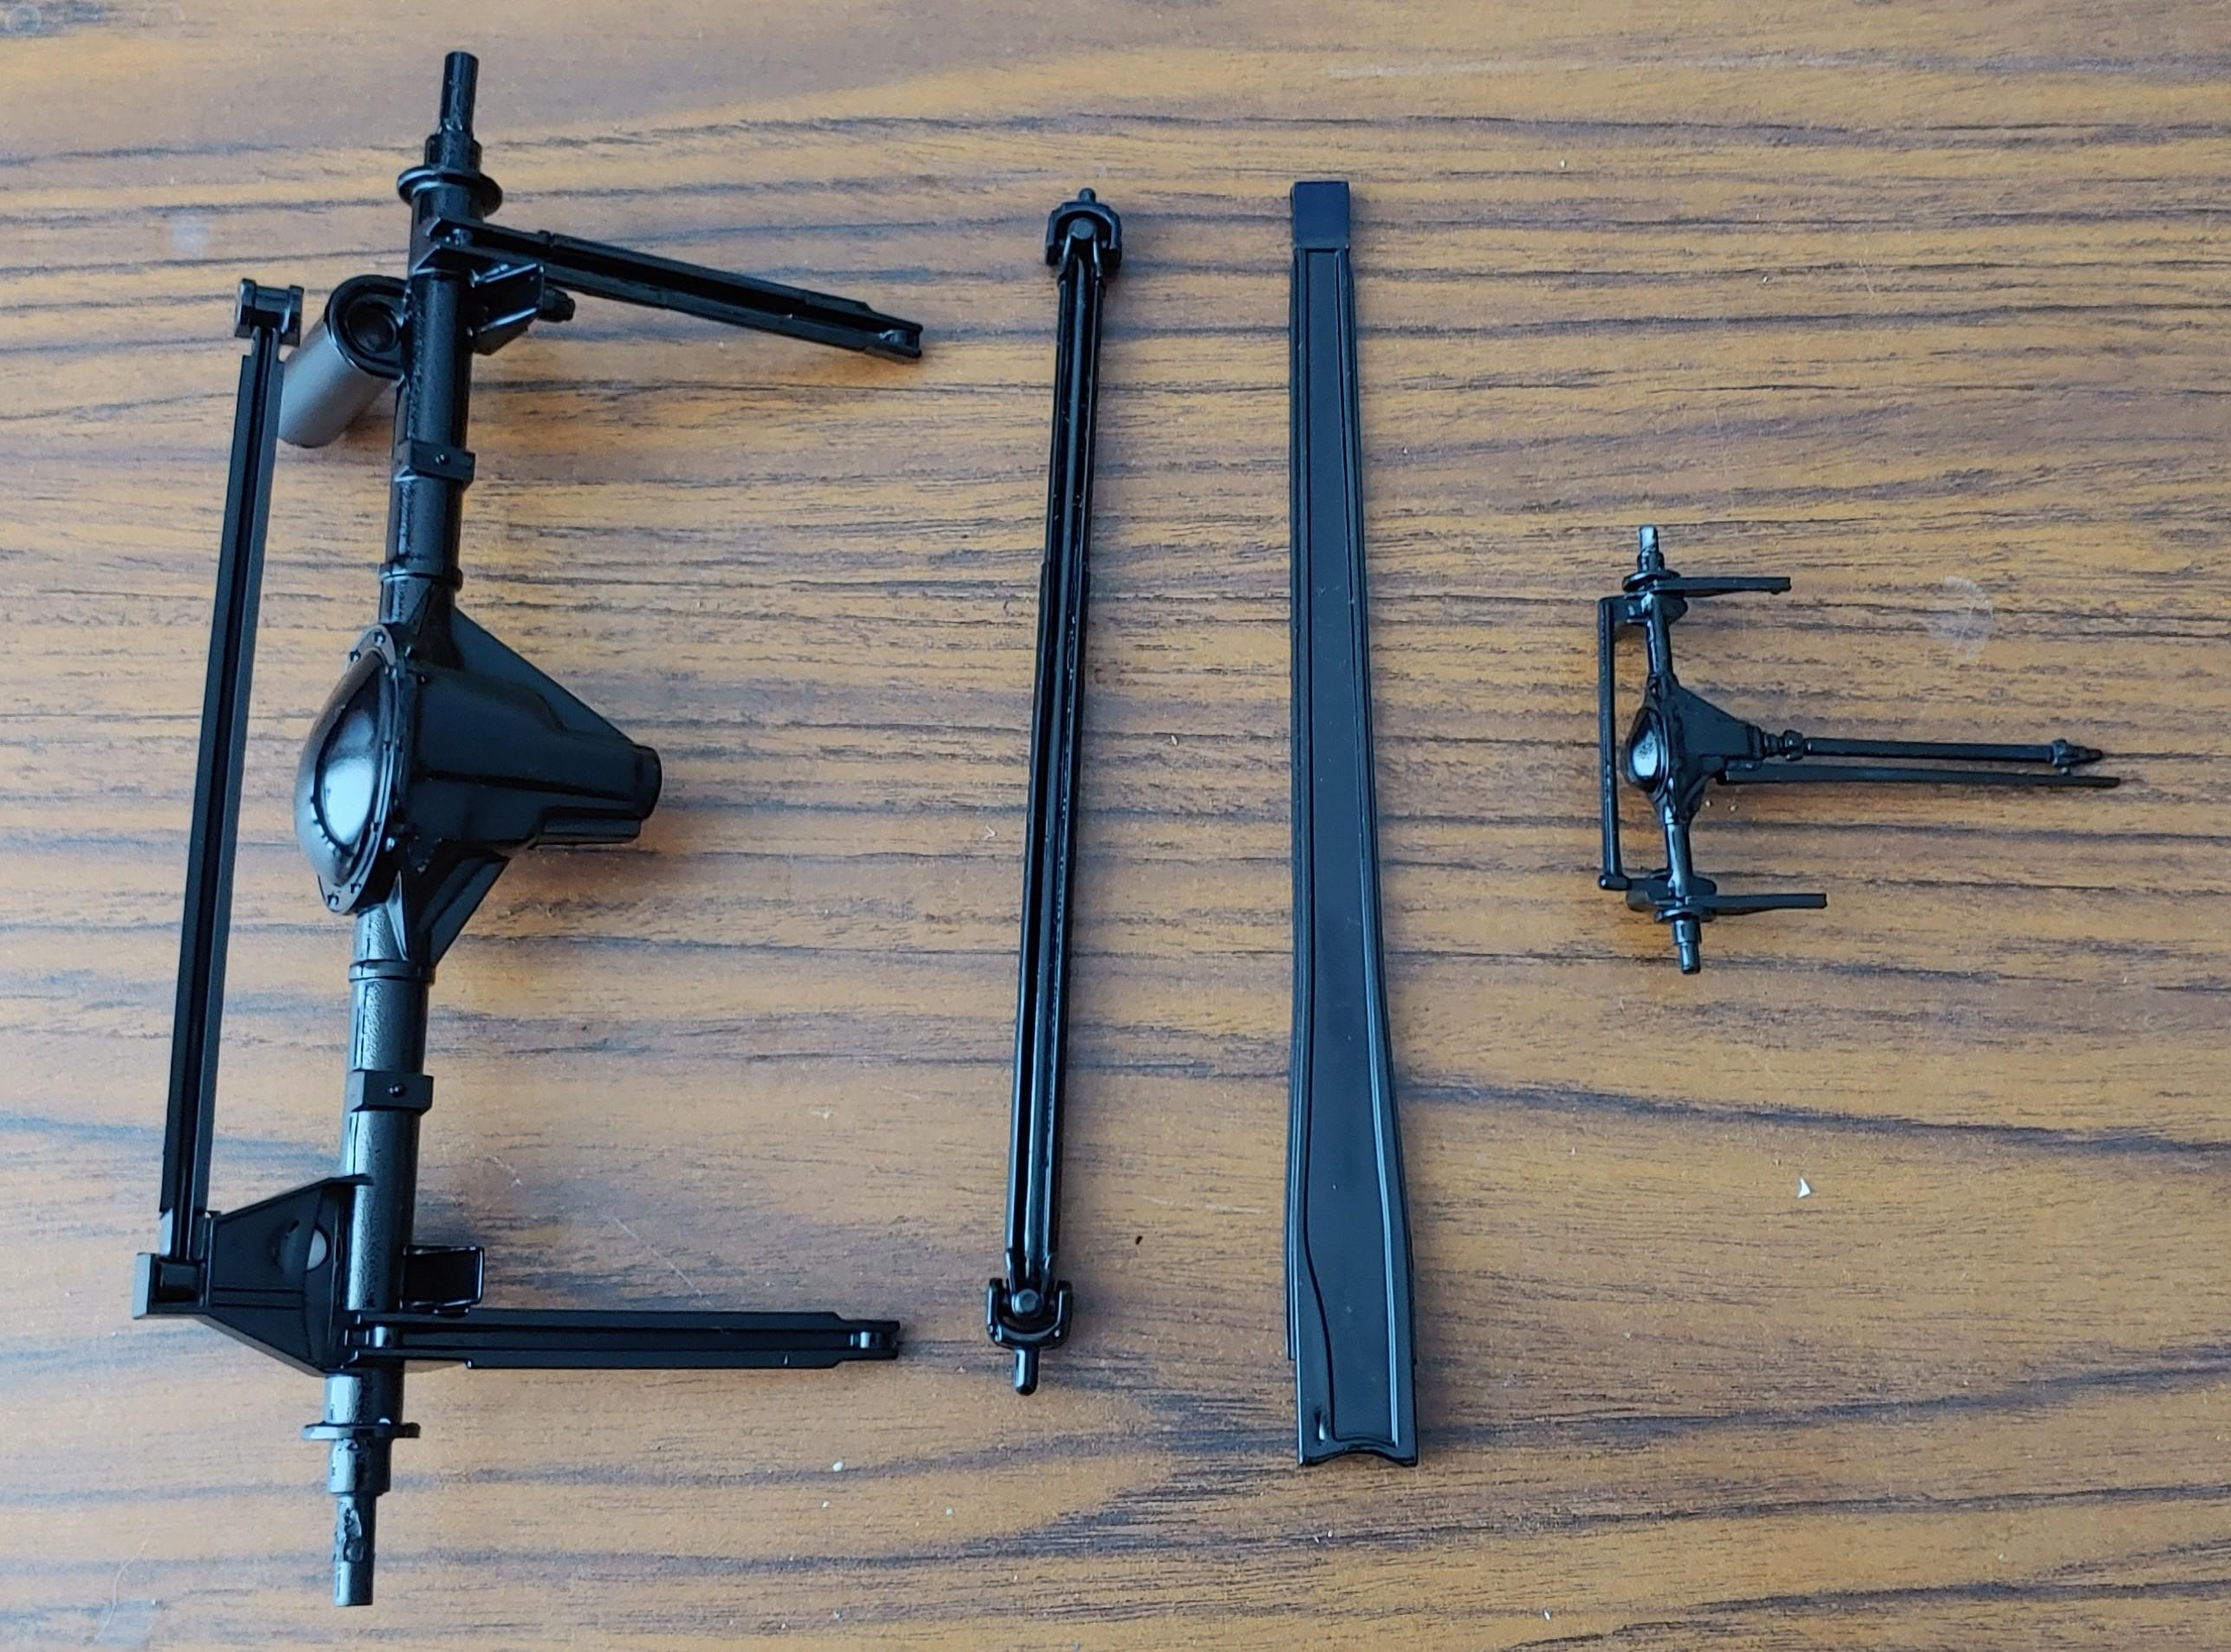
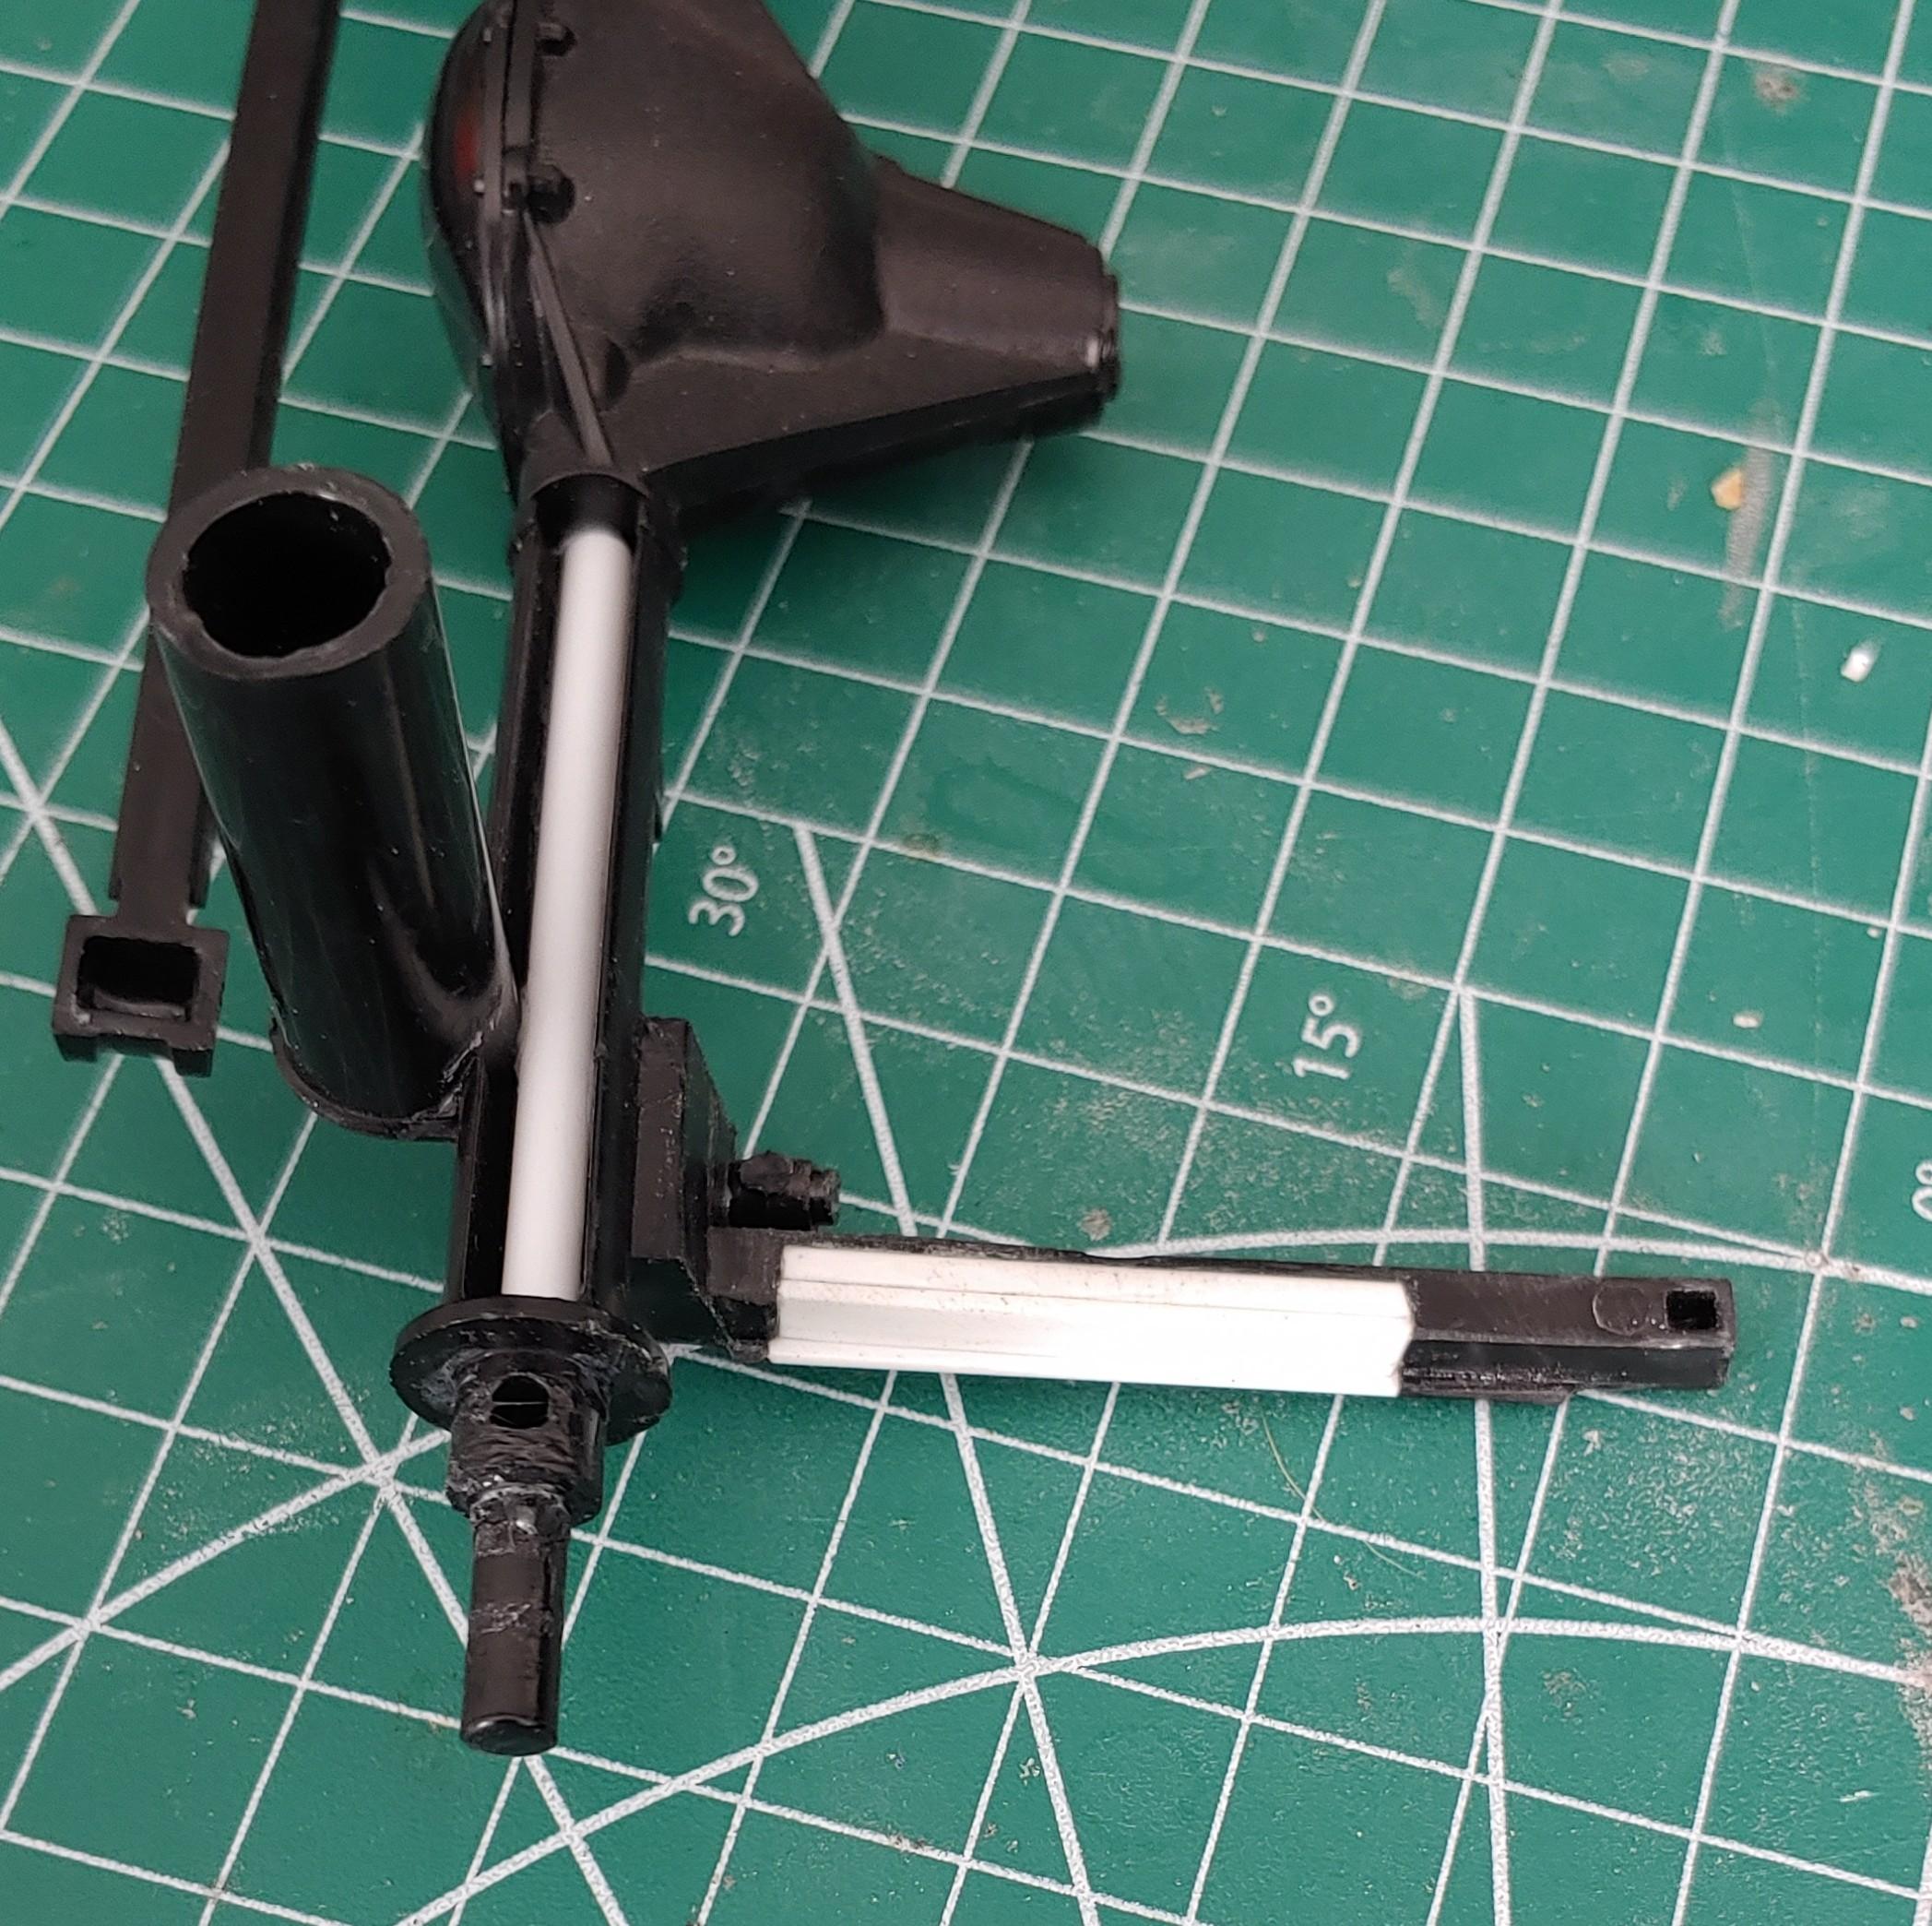
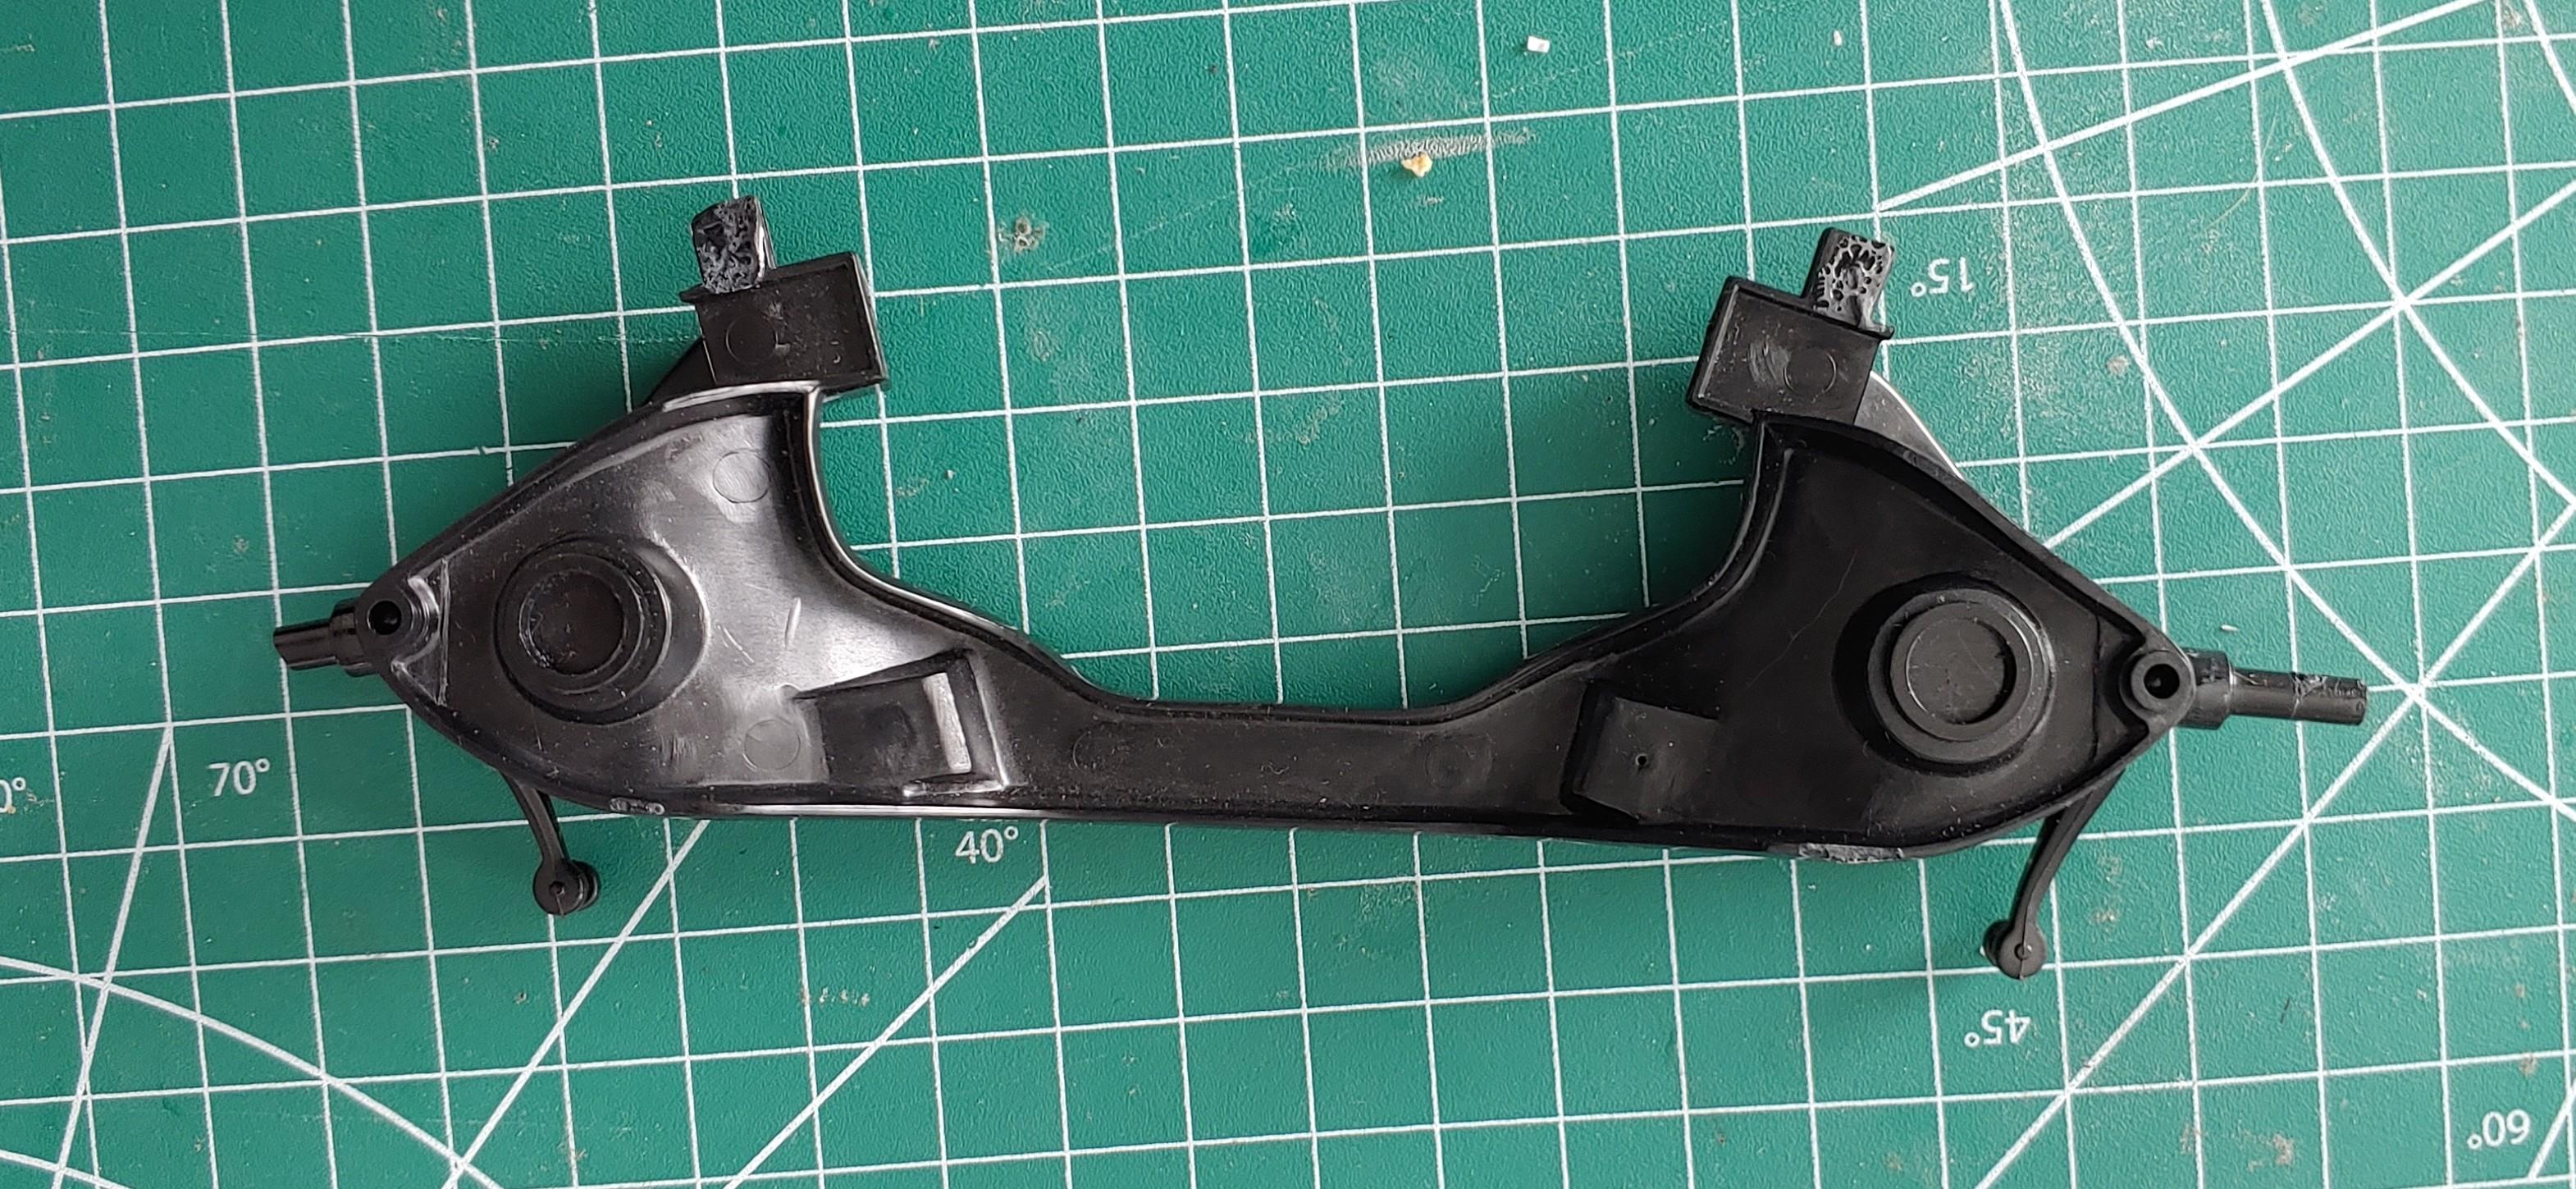
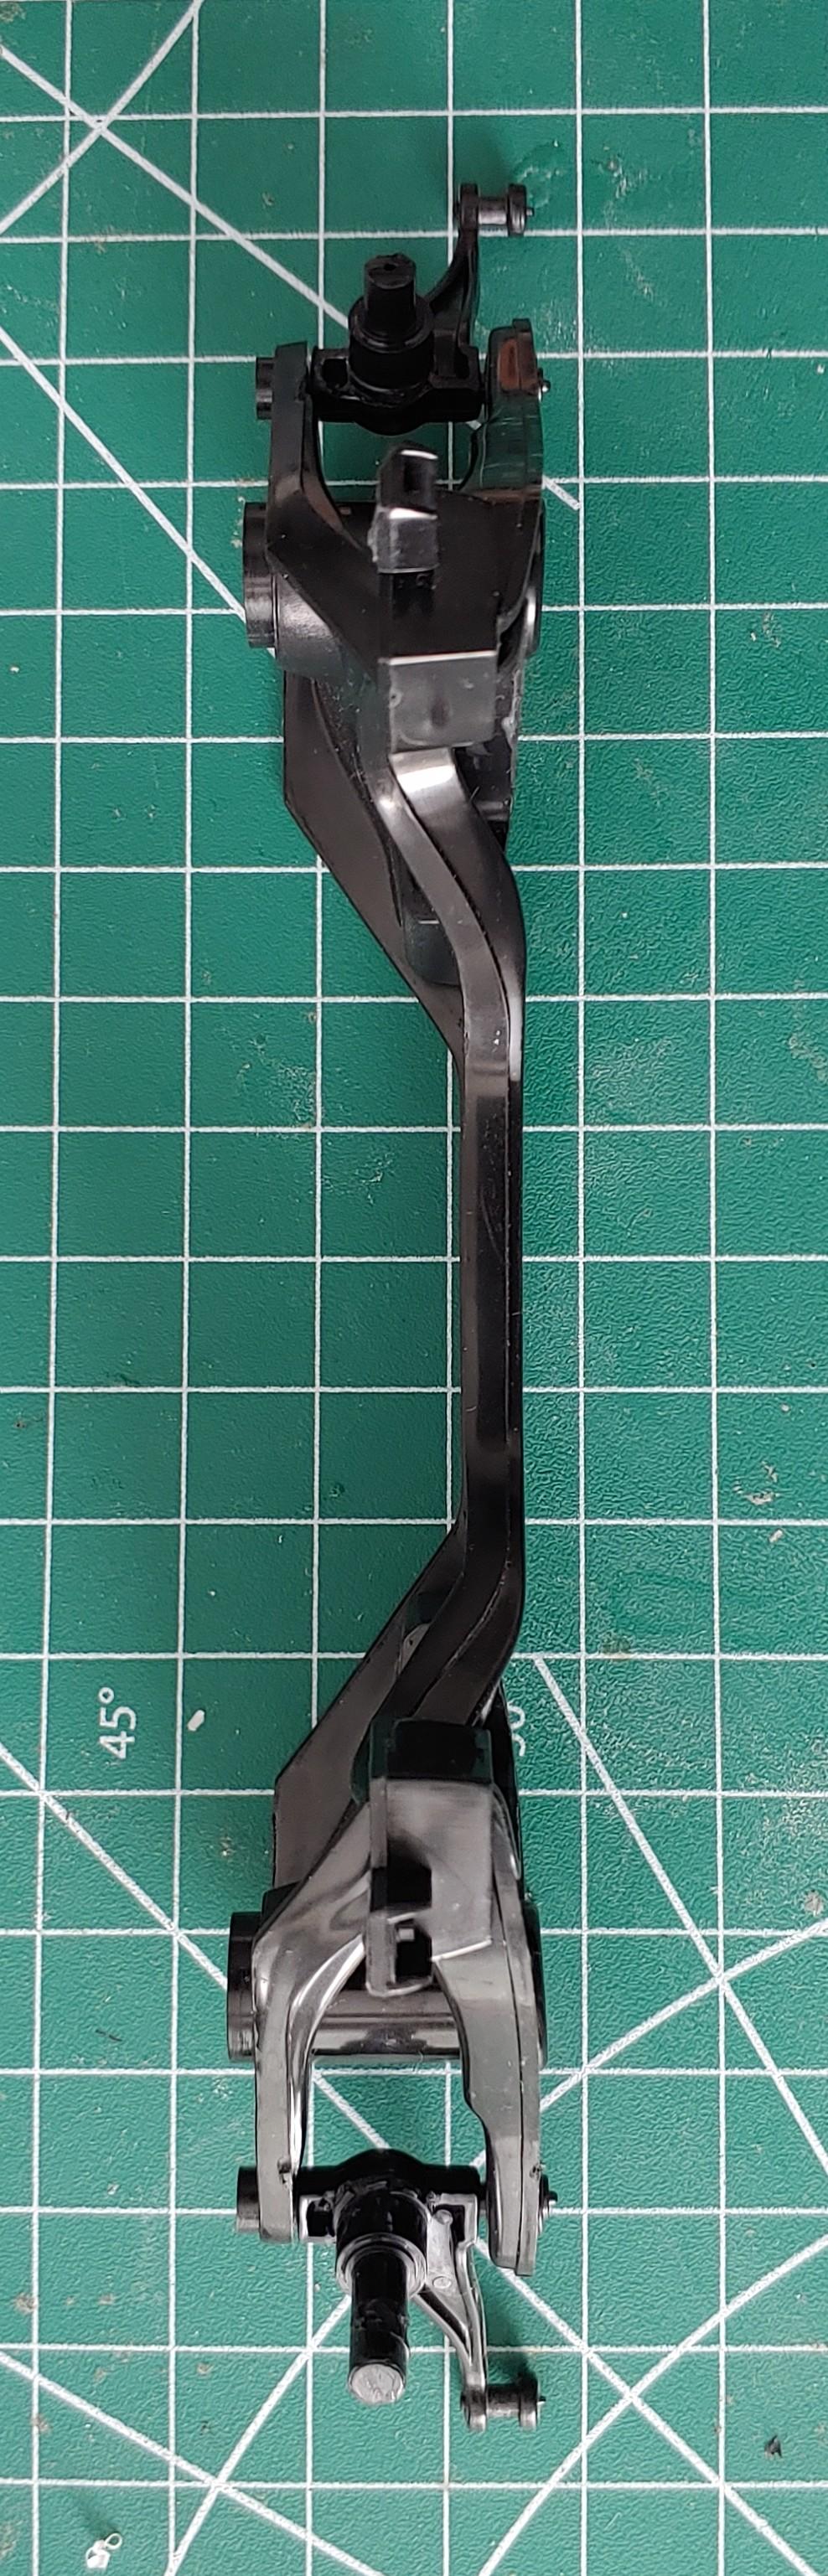
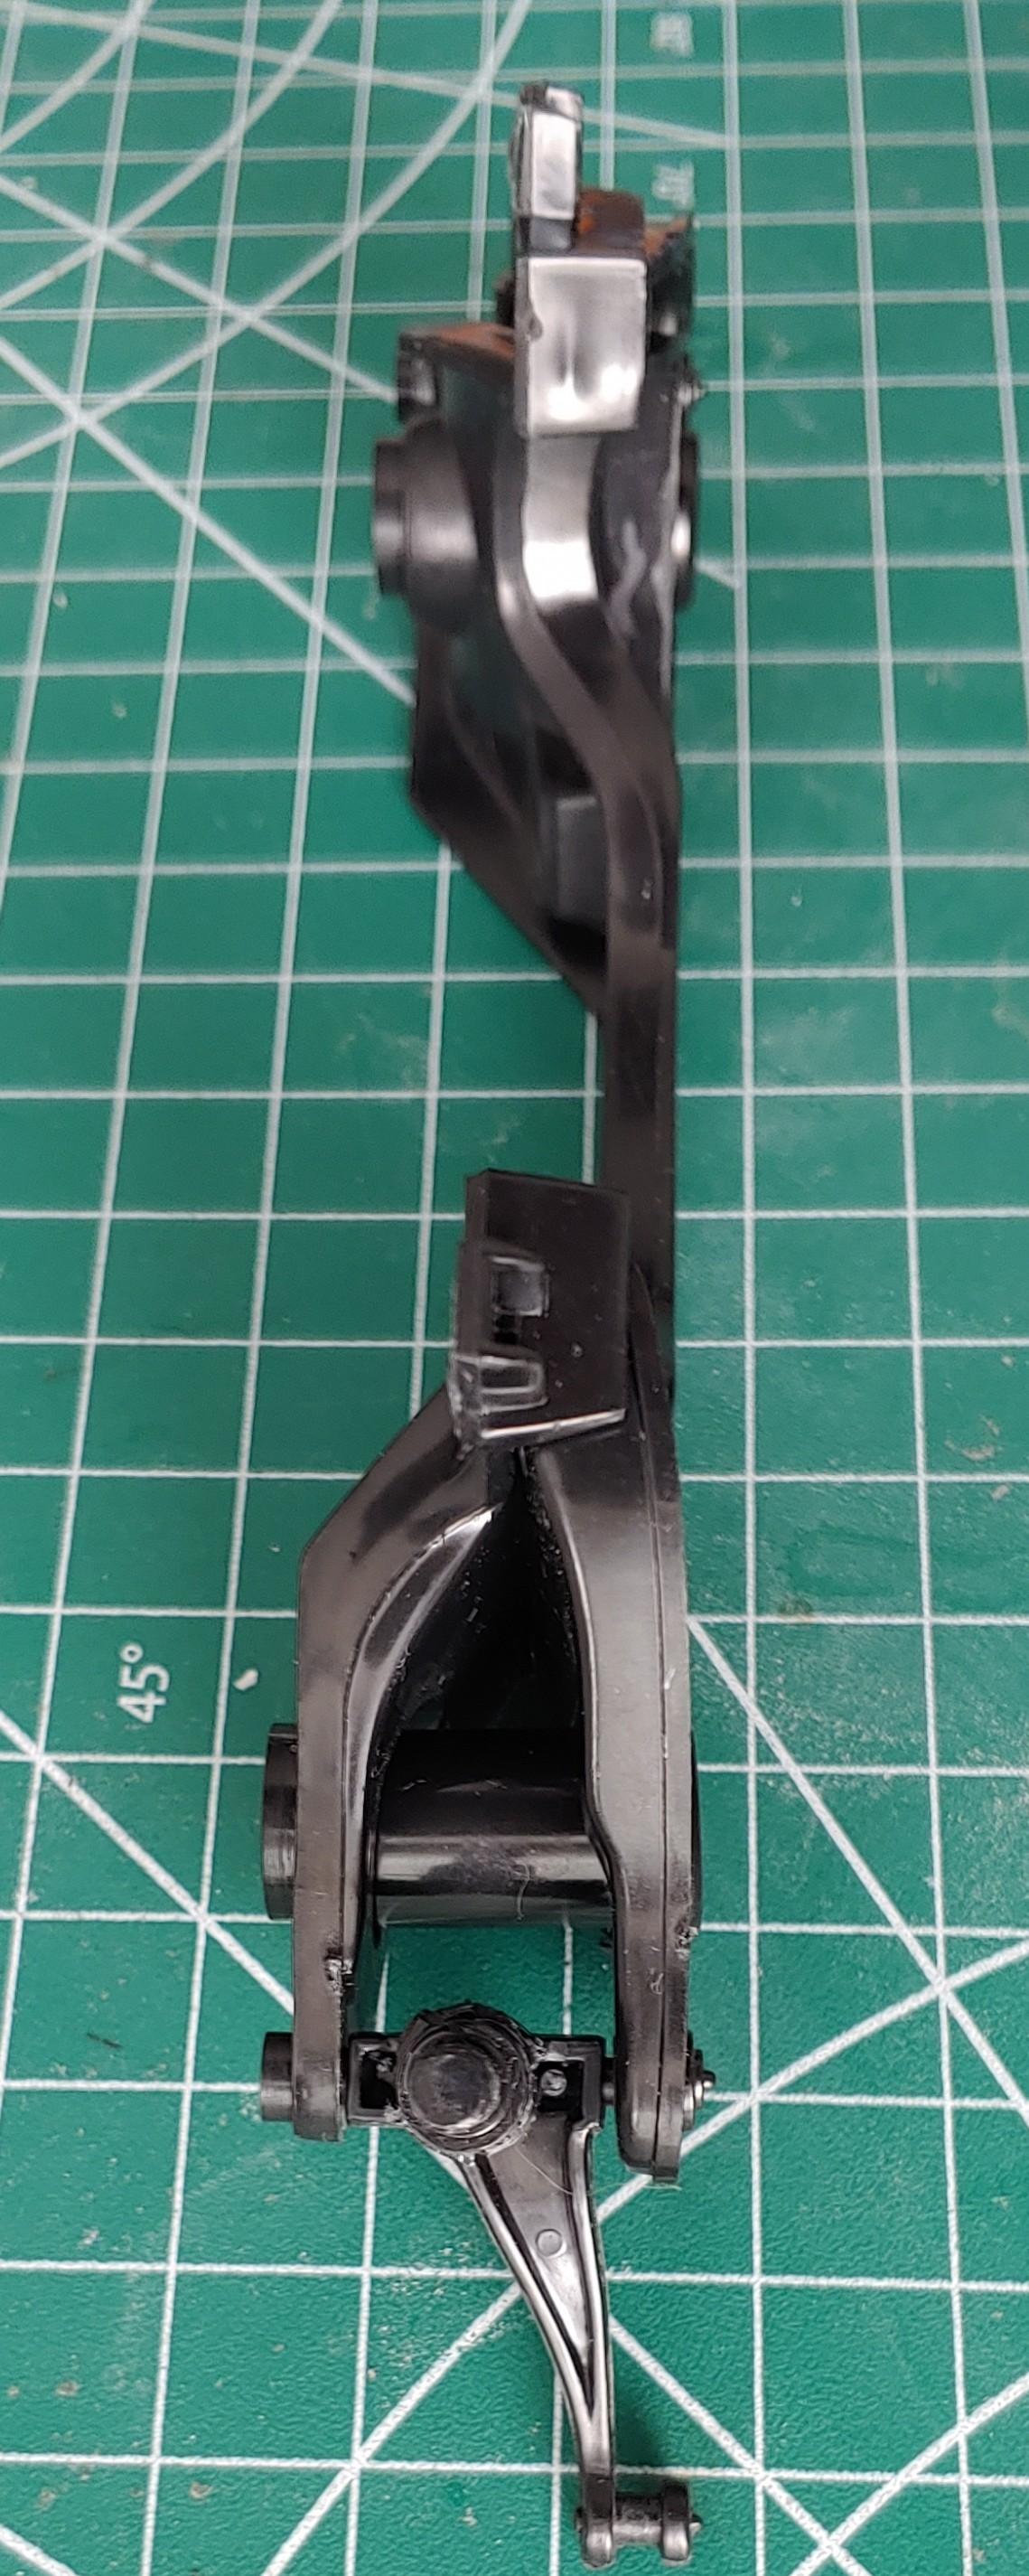
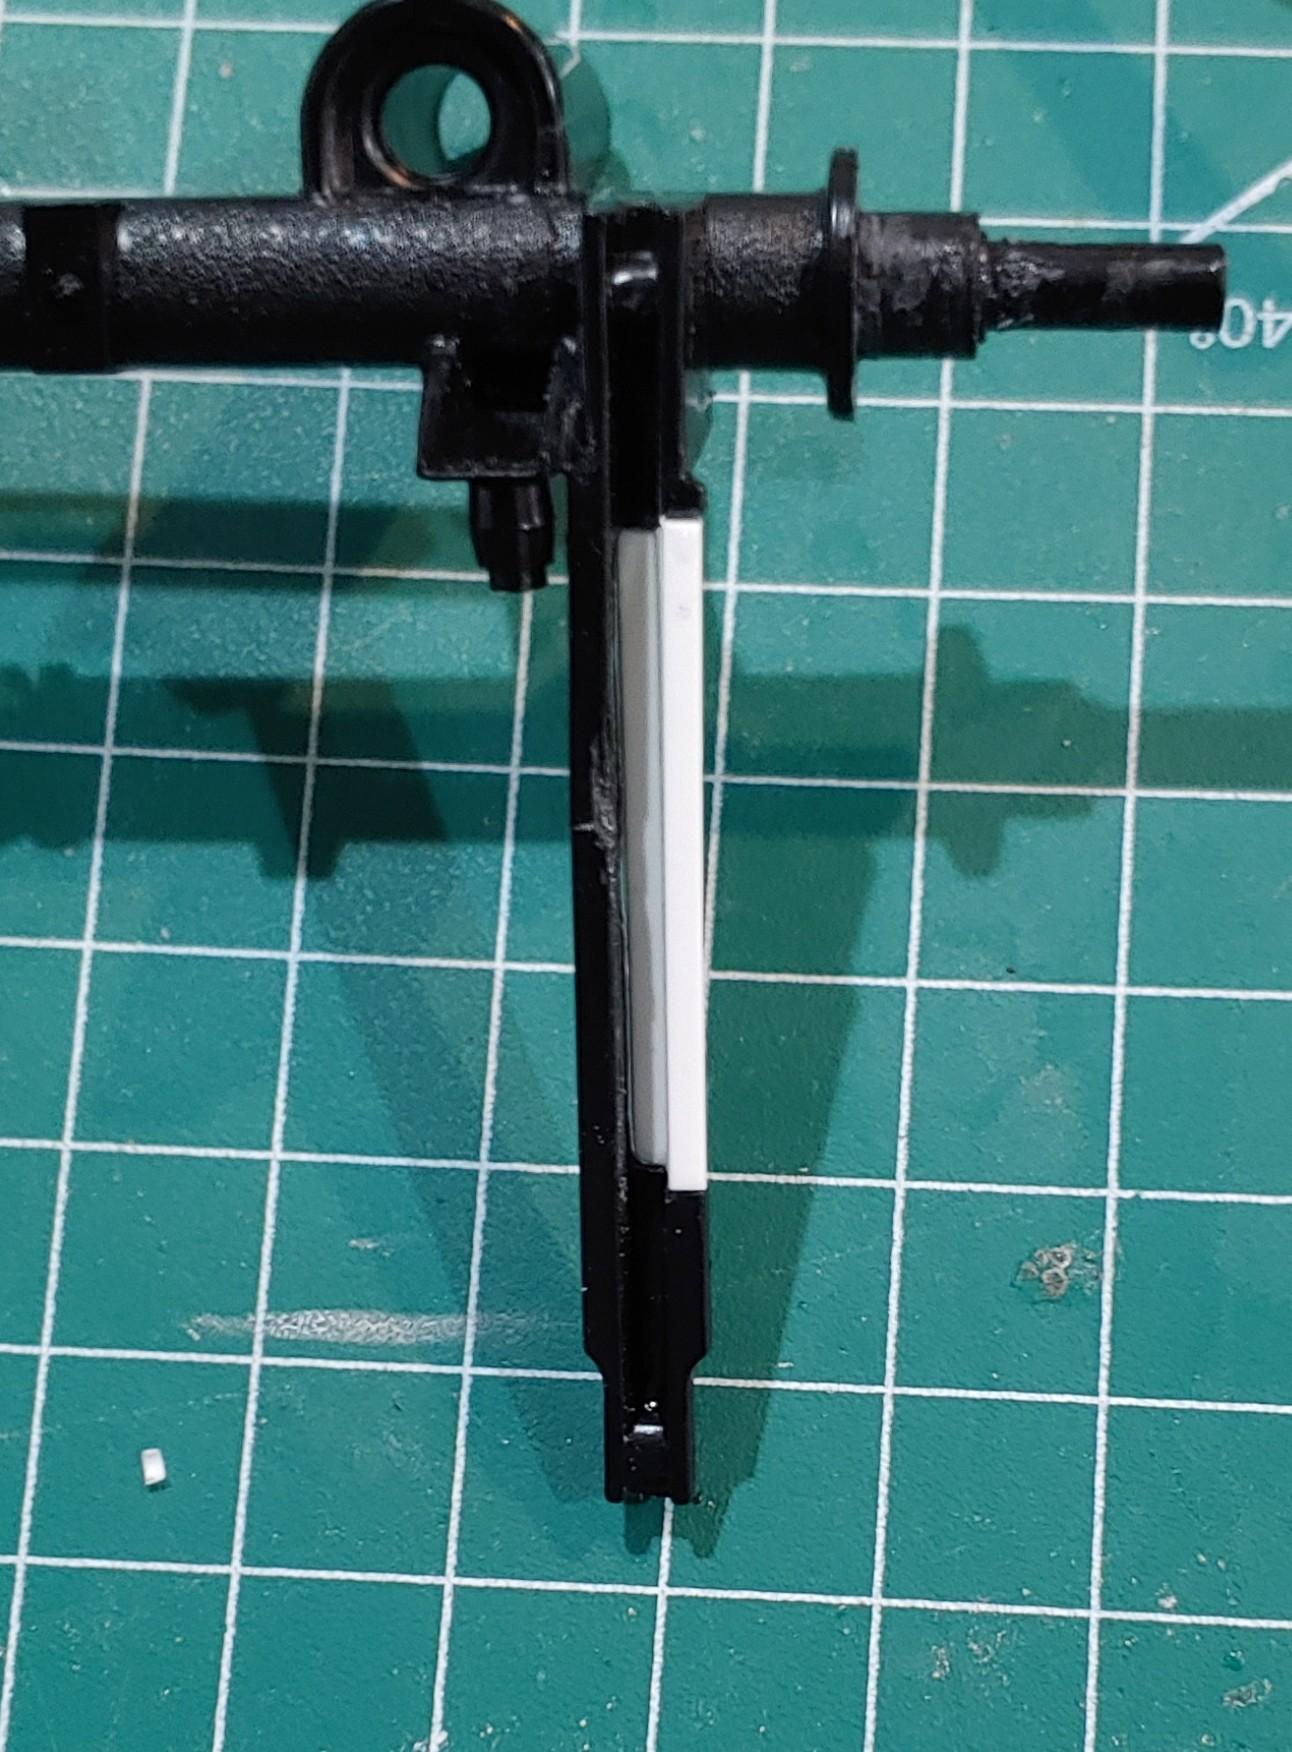
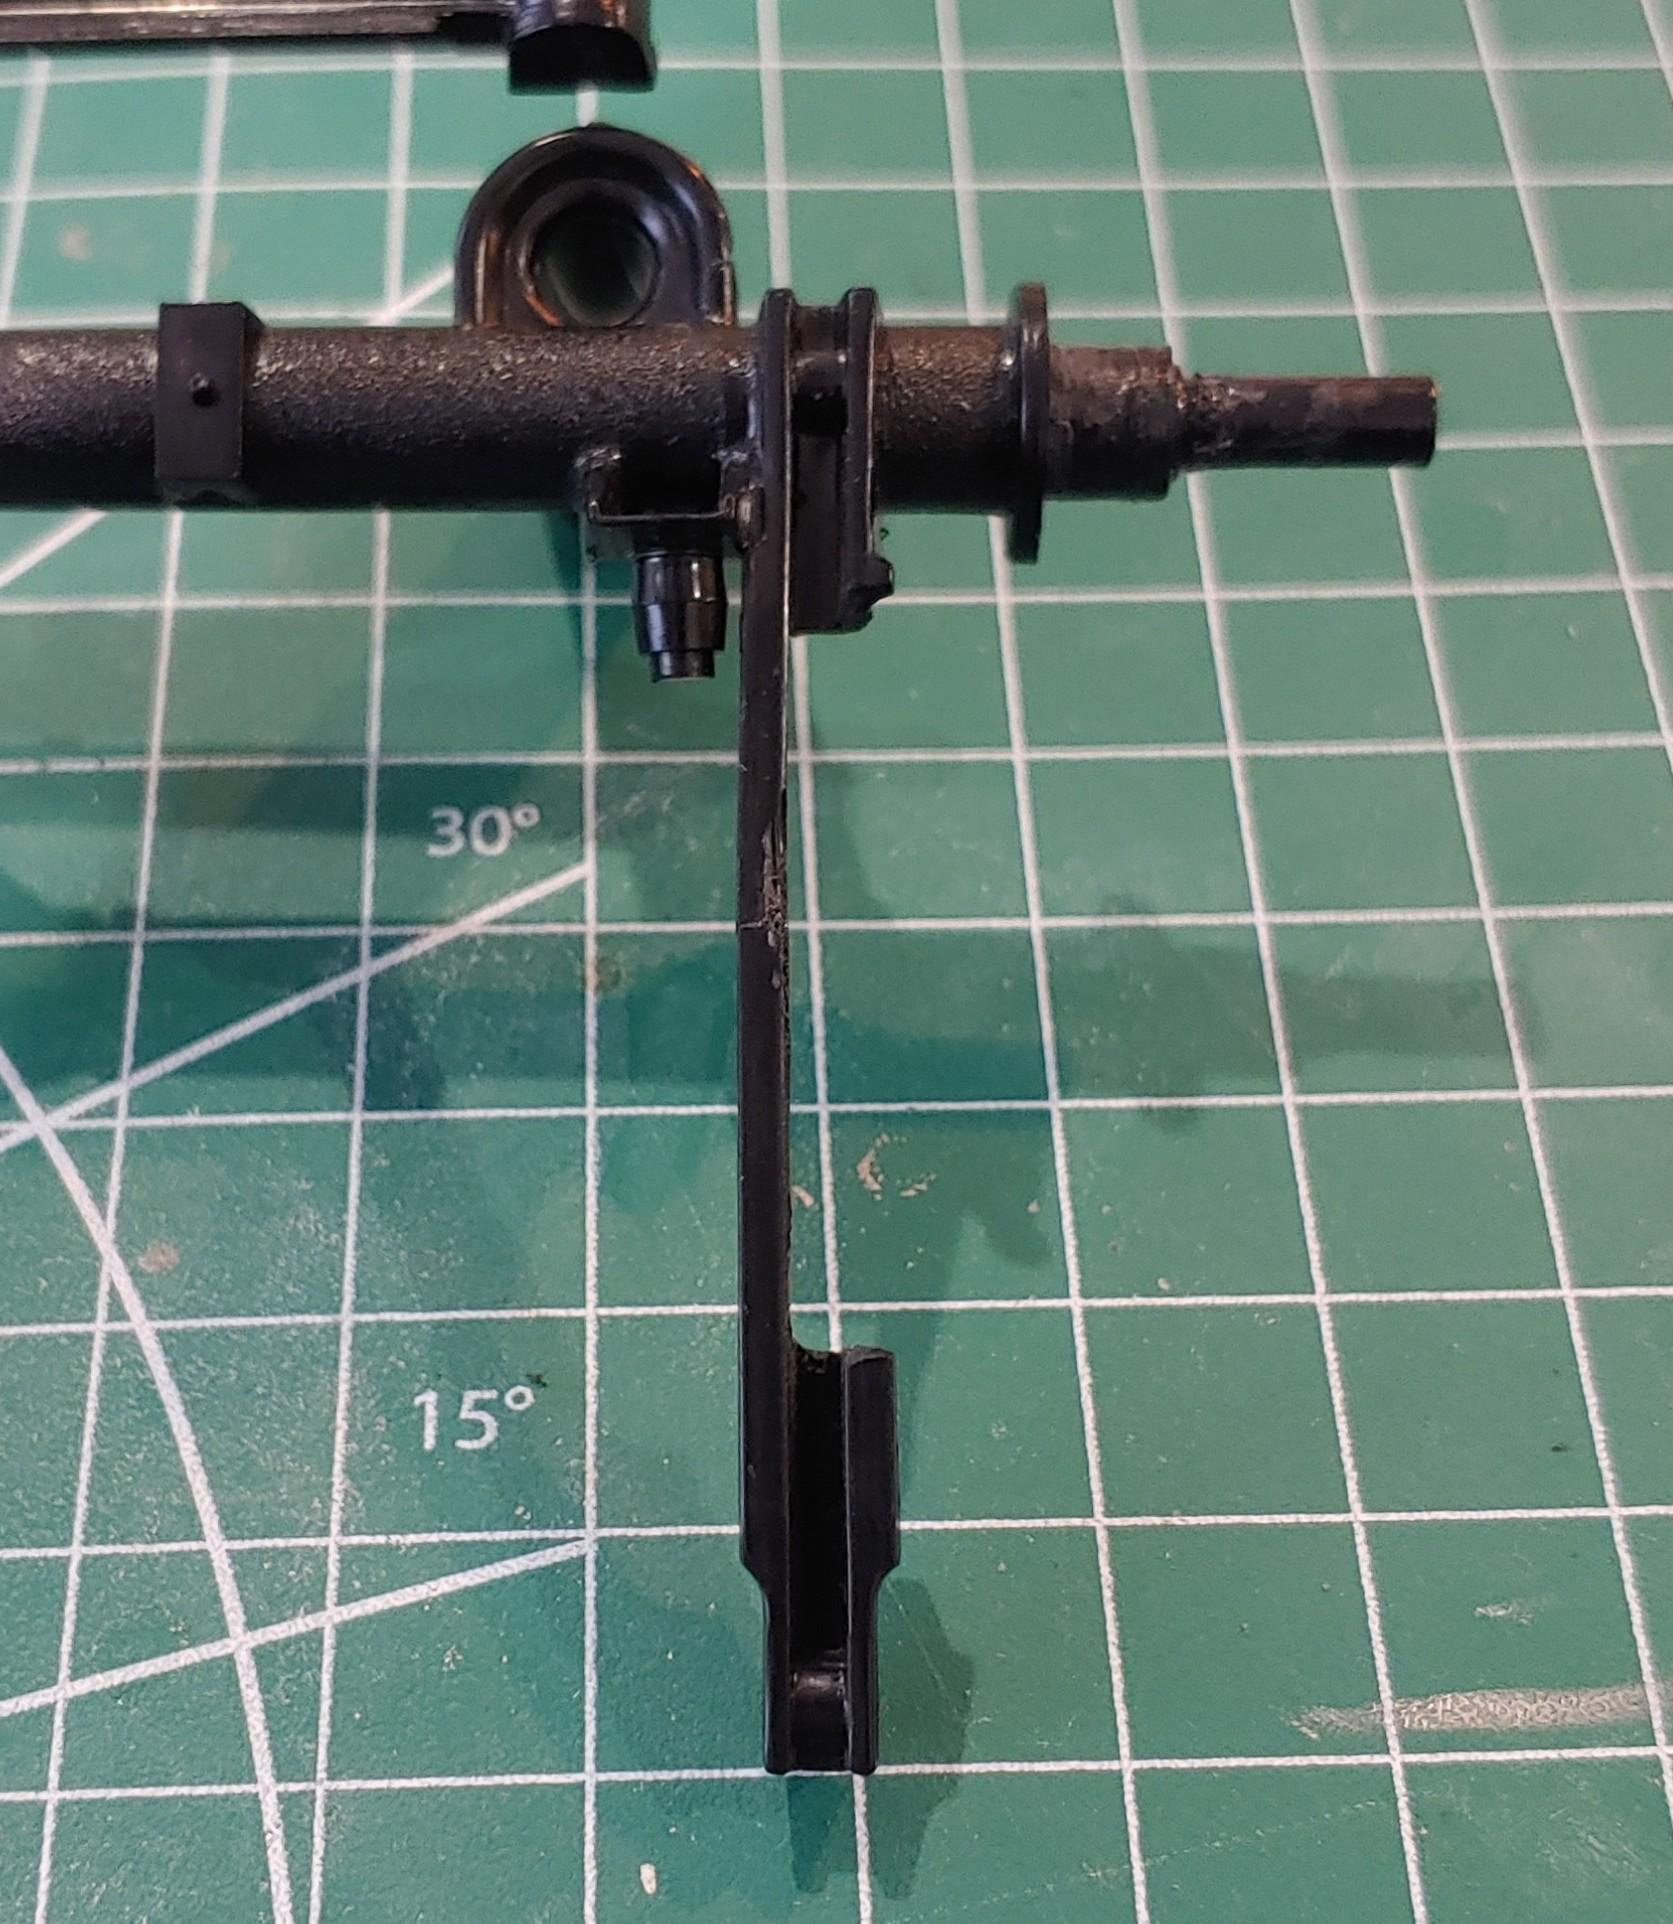
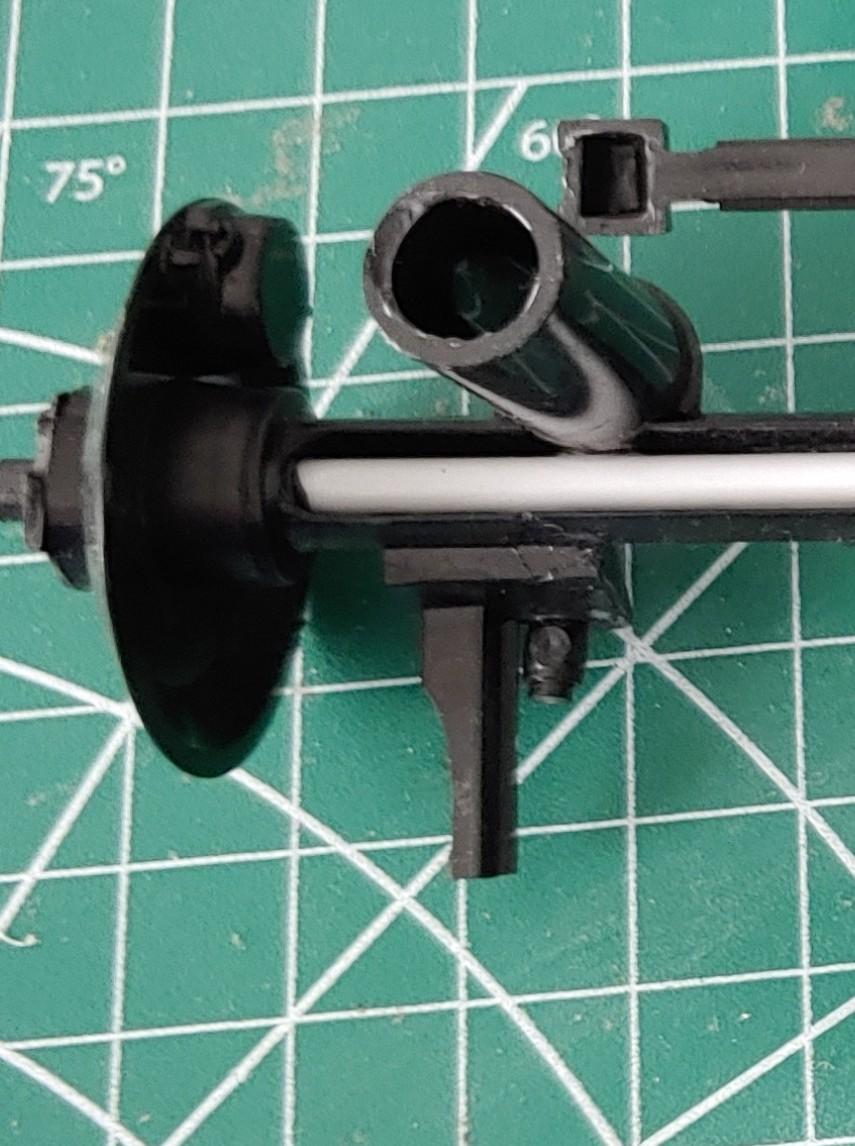
Now it's time to tackle the front suspension. The spindles are hollow and I wanted to beef them up. I used a couple different diameters of tubing to fill in the gap with a brass rod in the center to add strength. The passenger side spindle broke so I fixed it with some brass tubing. Then I converted the spindles into struts. Converting them into struts made it much easier to lower the front. I simply added some tubing to the bottom equal to the amount of drop I wanted, about 2 1/2 scale inches. I also made some spacers for the steering knuckles to give the tie rods some clearance. The tie rods were going to need a little more clearance. I modified them by drilling out the joints so I could change the angle and rebuilt them with some styrene rod. Because I converted the spindles into struts I was going to have to modify the mounts too. I started by cutting off the upper mount where the lip is. Then I rounded them off for some clearance. Here's everything mocked up. The 1/25 was much easier. It has posts coming from the wheel wells that go through the frame that the front suspension mounts to. I simply cut 2 scale inches off. Then drilled them out and made new mounting points with some styrene rod. That's about as low as I could get it without major surgery. More next time.
-
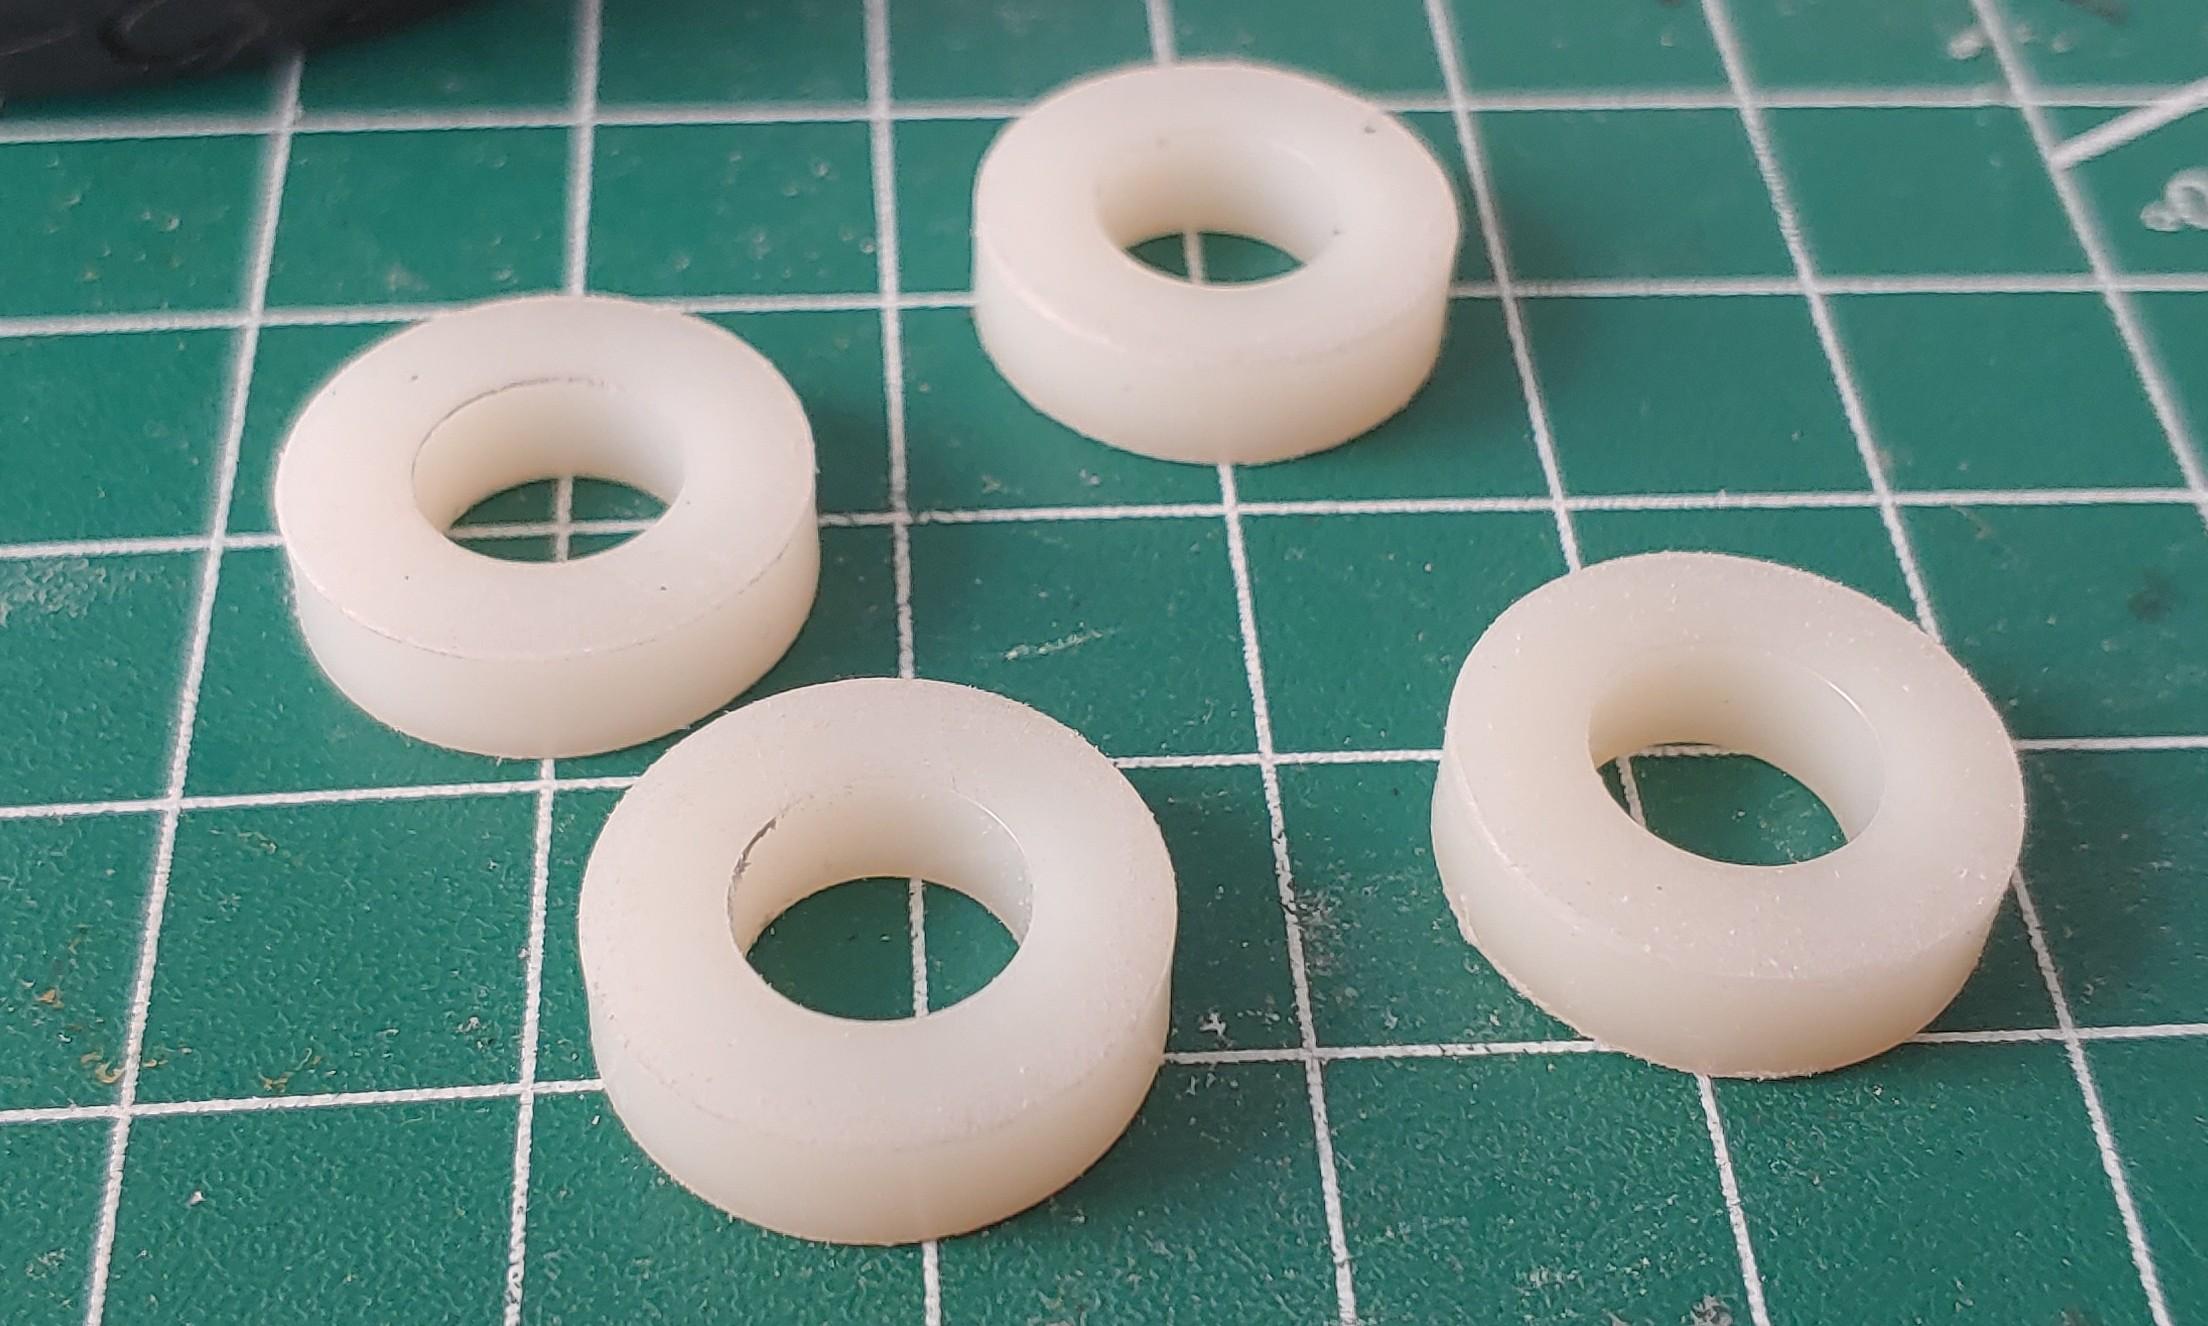
I decided I'd just leave the radiator out for now so I can continue working on other parts. Since the chassis screws on, I can always unscrew it and add the radiator later. I rigged up a stand with some rolls of masking tape and a bottle of Mod Podge so I could work on it up side down without putting pressure on the already fragile roof. The exhaust had to be installed after the chassis was mounted because it hides the rear screws. To mount the wheels onto the rear axle I was going to need a spacer. In order to figure out how thick of a spacer I used some modeling clay and pressed the wheel against it then measured it. I found these nylon spacers at the hardware store that were perfect for what I needed. I painted them to match the brakes, then glued them in place. Then I mounted the wheels. Here's the axle in place with the stock height suspension, way too high with the low profile tires, let's fix that. I was thinking I wanted to lower it about 3 scale inches, but didn't want to cut too much off on the first go, so I removed 2 scale inches off the "springs" Much better. I'm glad I didn't cut 3 inches off, I think it looks just about perfect like this. It lowers it enough so the tires don't look way too small but it's not so low that it's sitting on the ground. I lowered the 1/25 the same way, I cut 2 scale inches off the rear "springs" to get it sitting just right. And here's a mock up of how it's going to sit. Now that I have the rear sitting where I want it, I can get to work on the front. More next time.
-
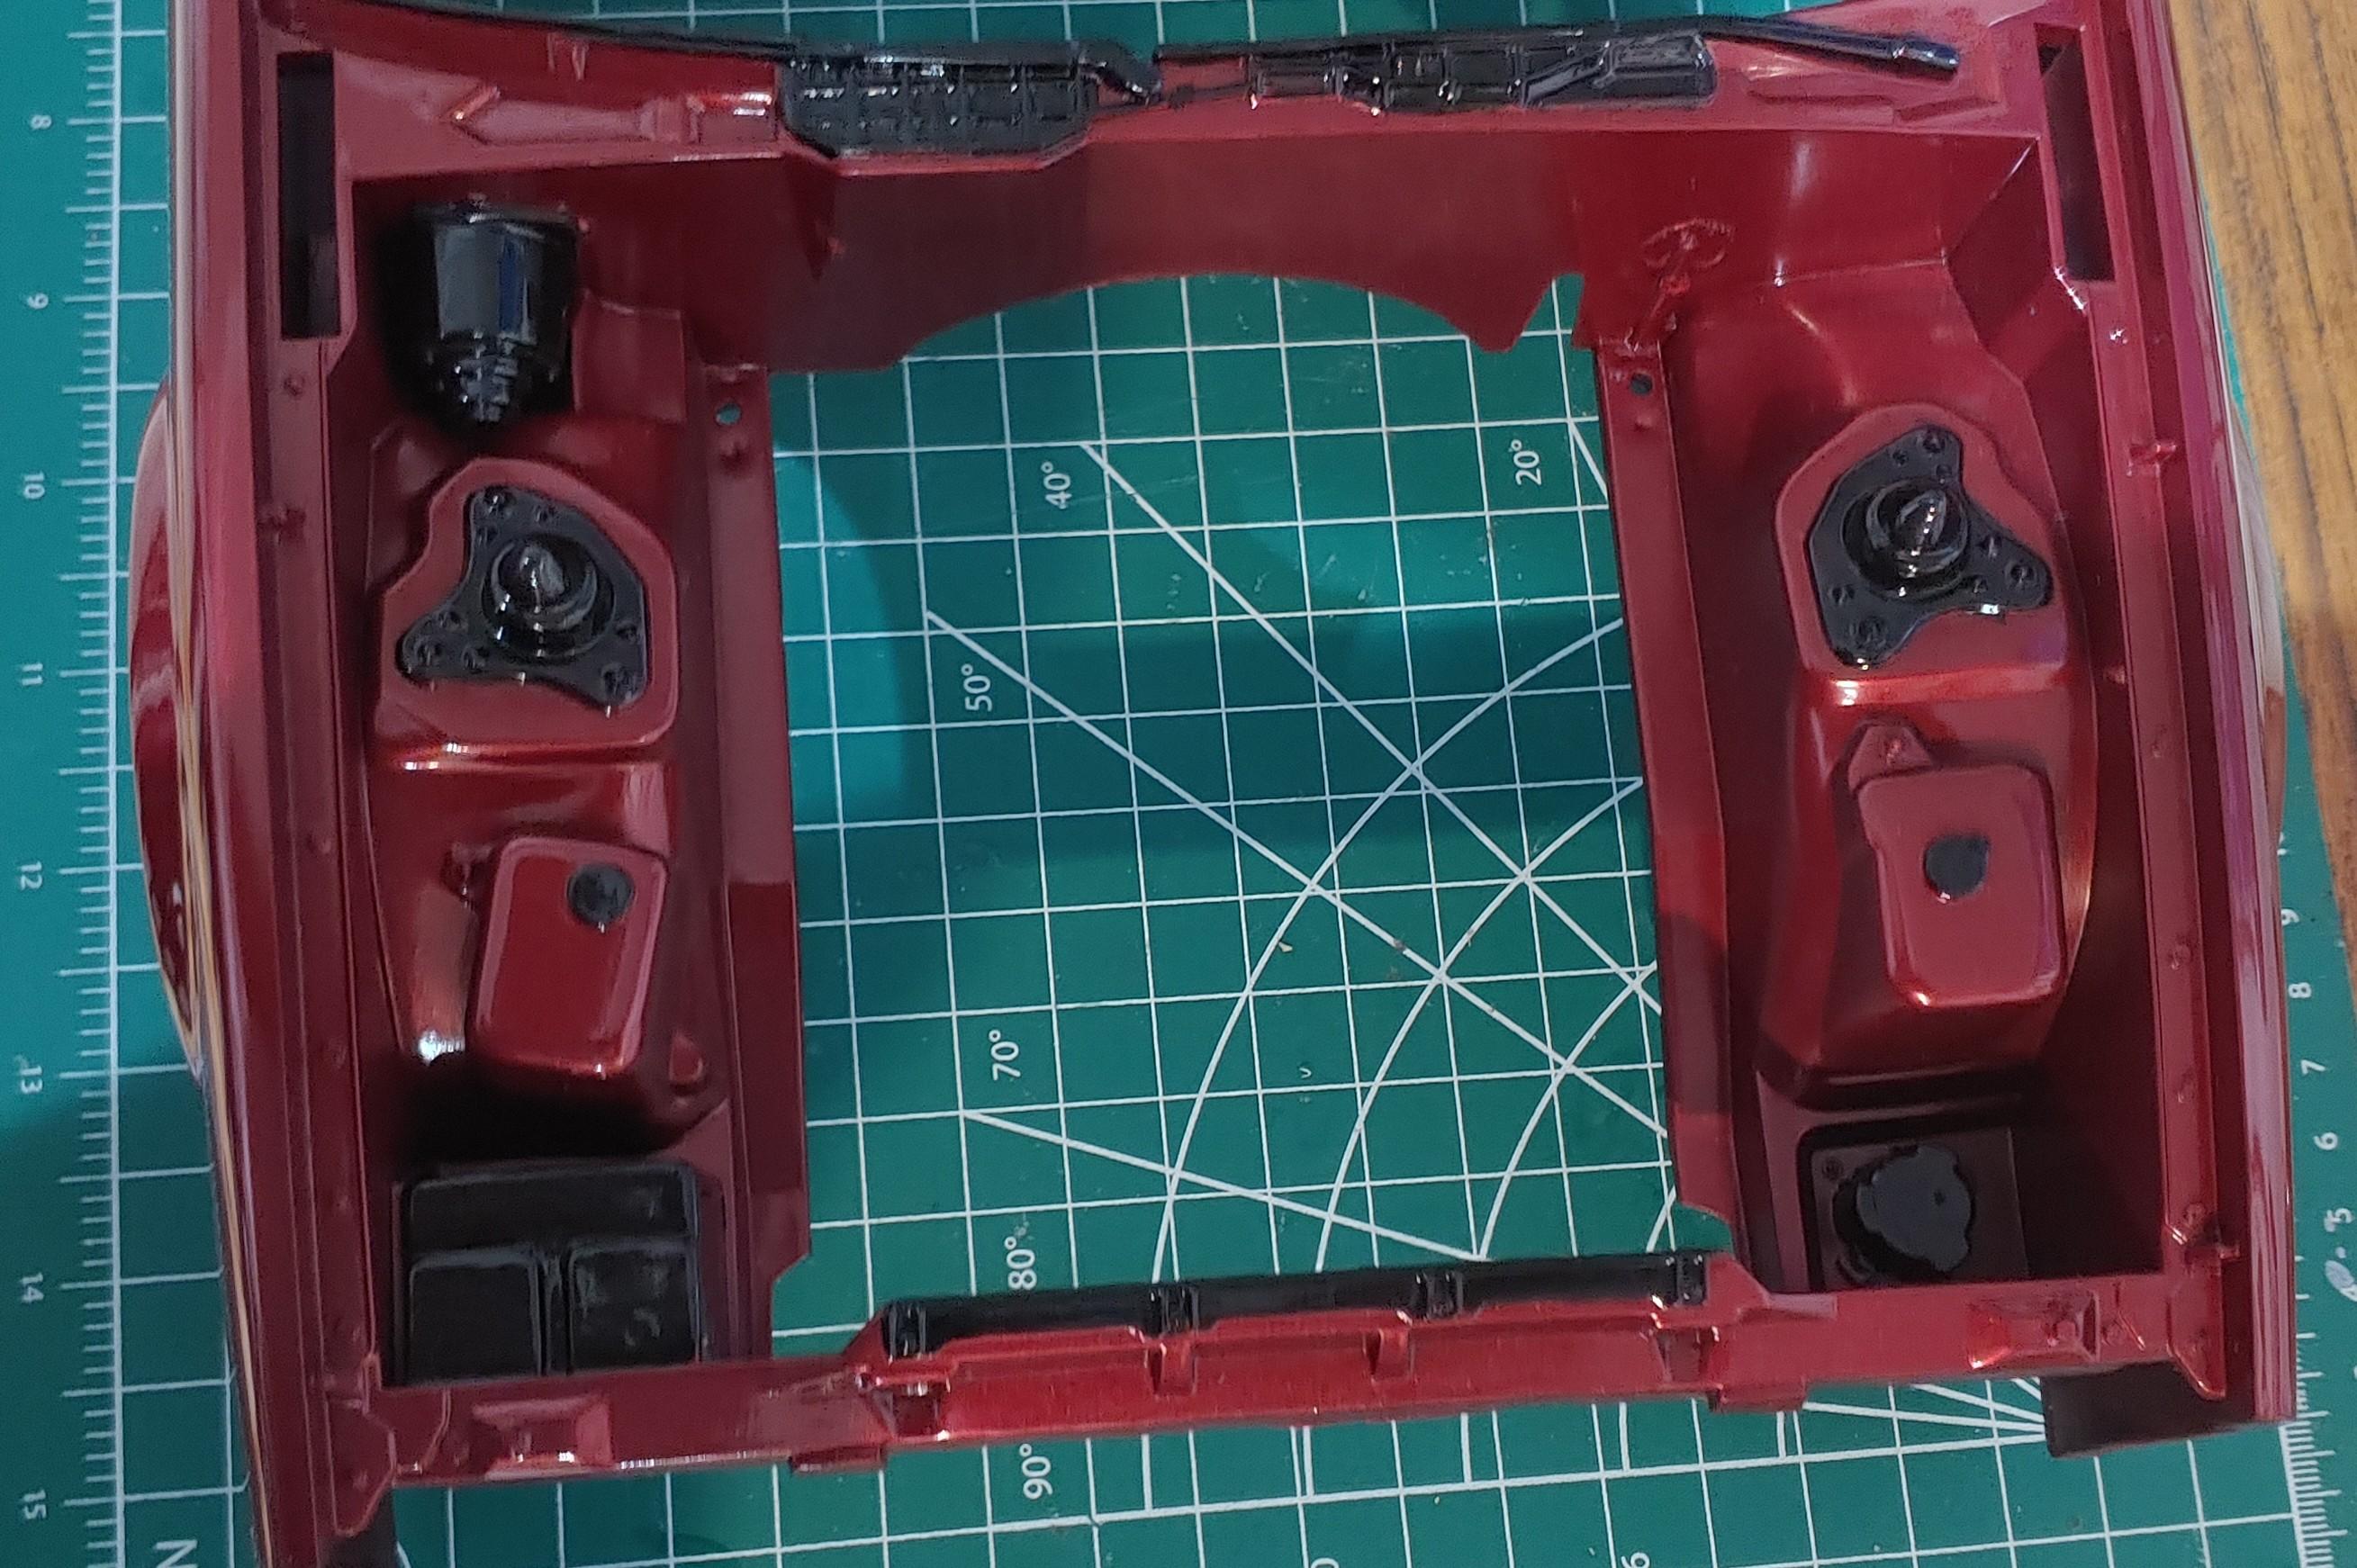
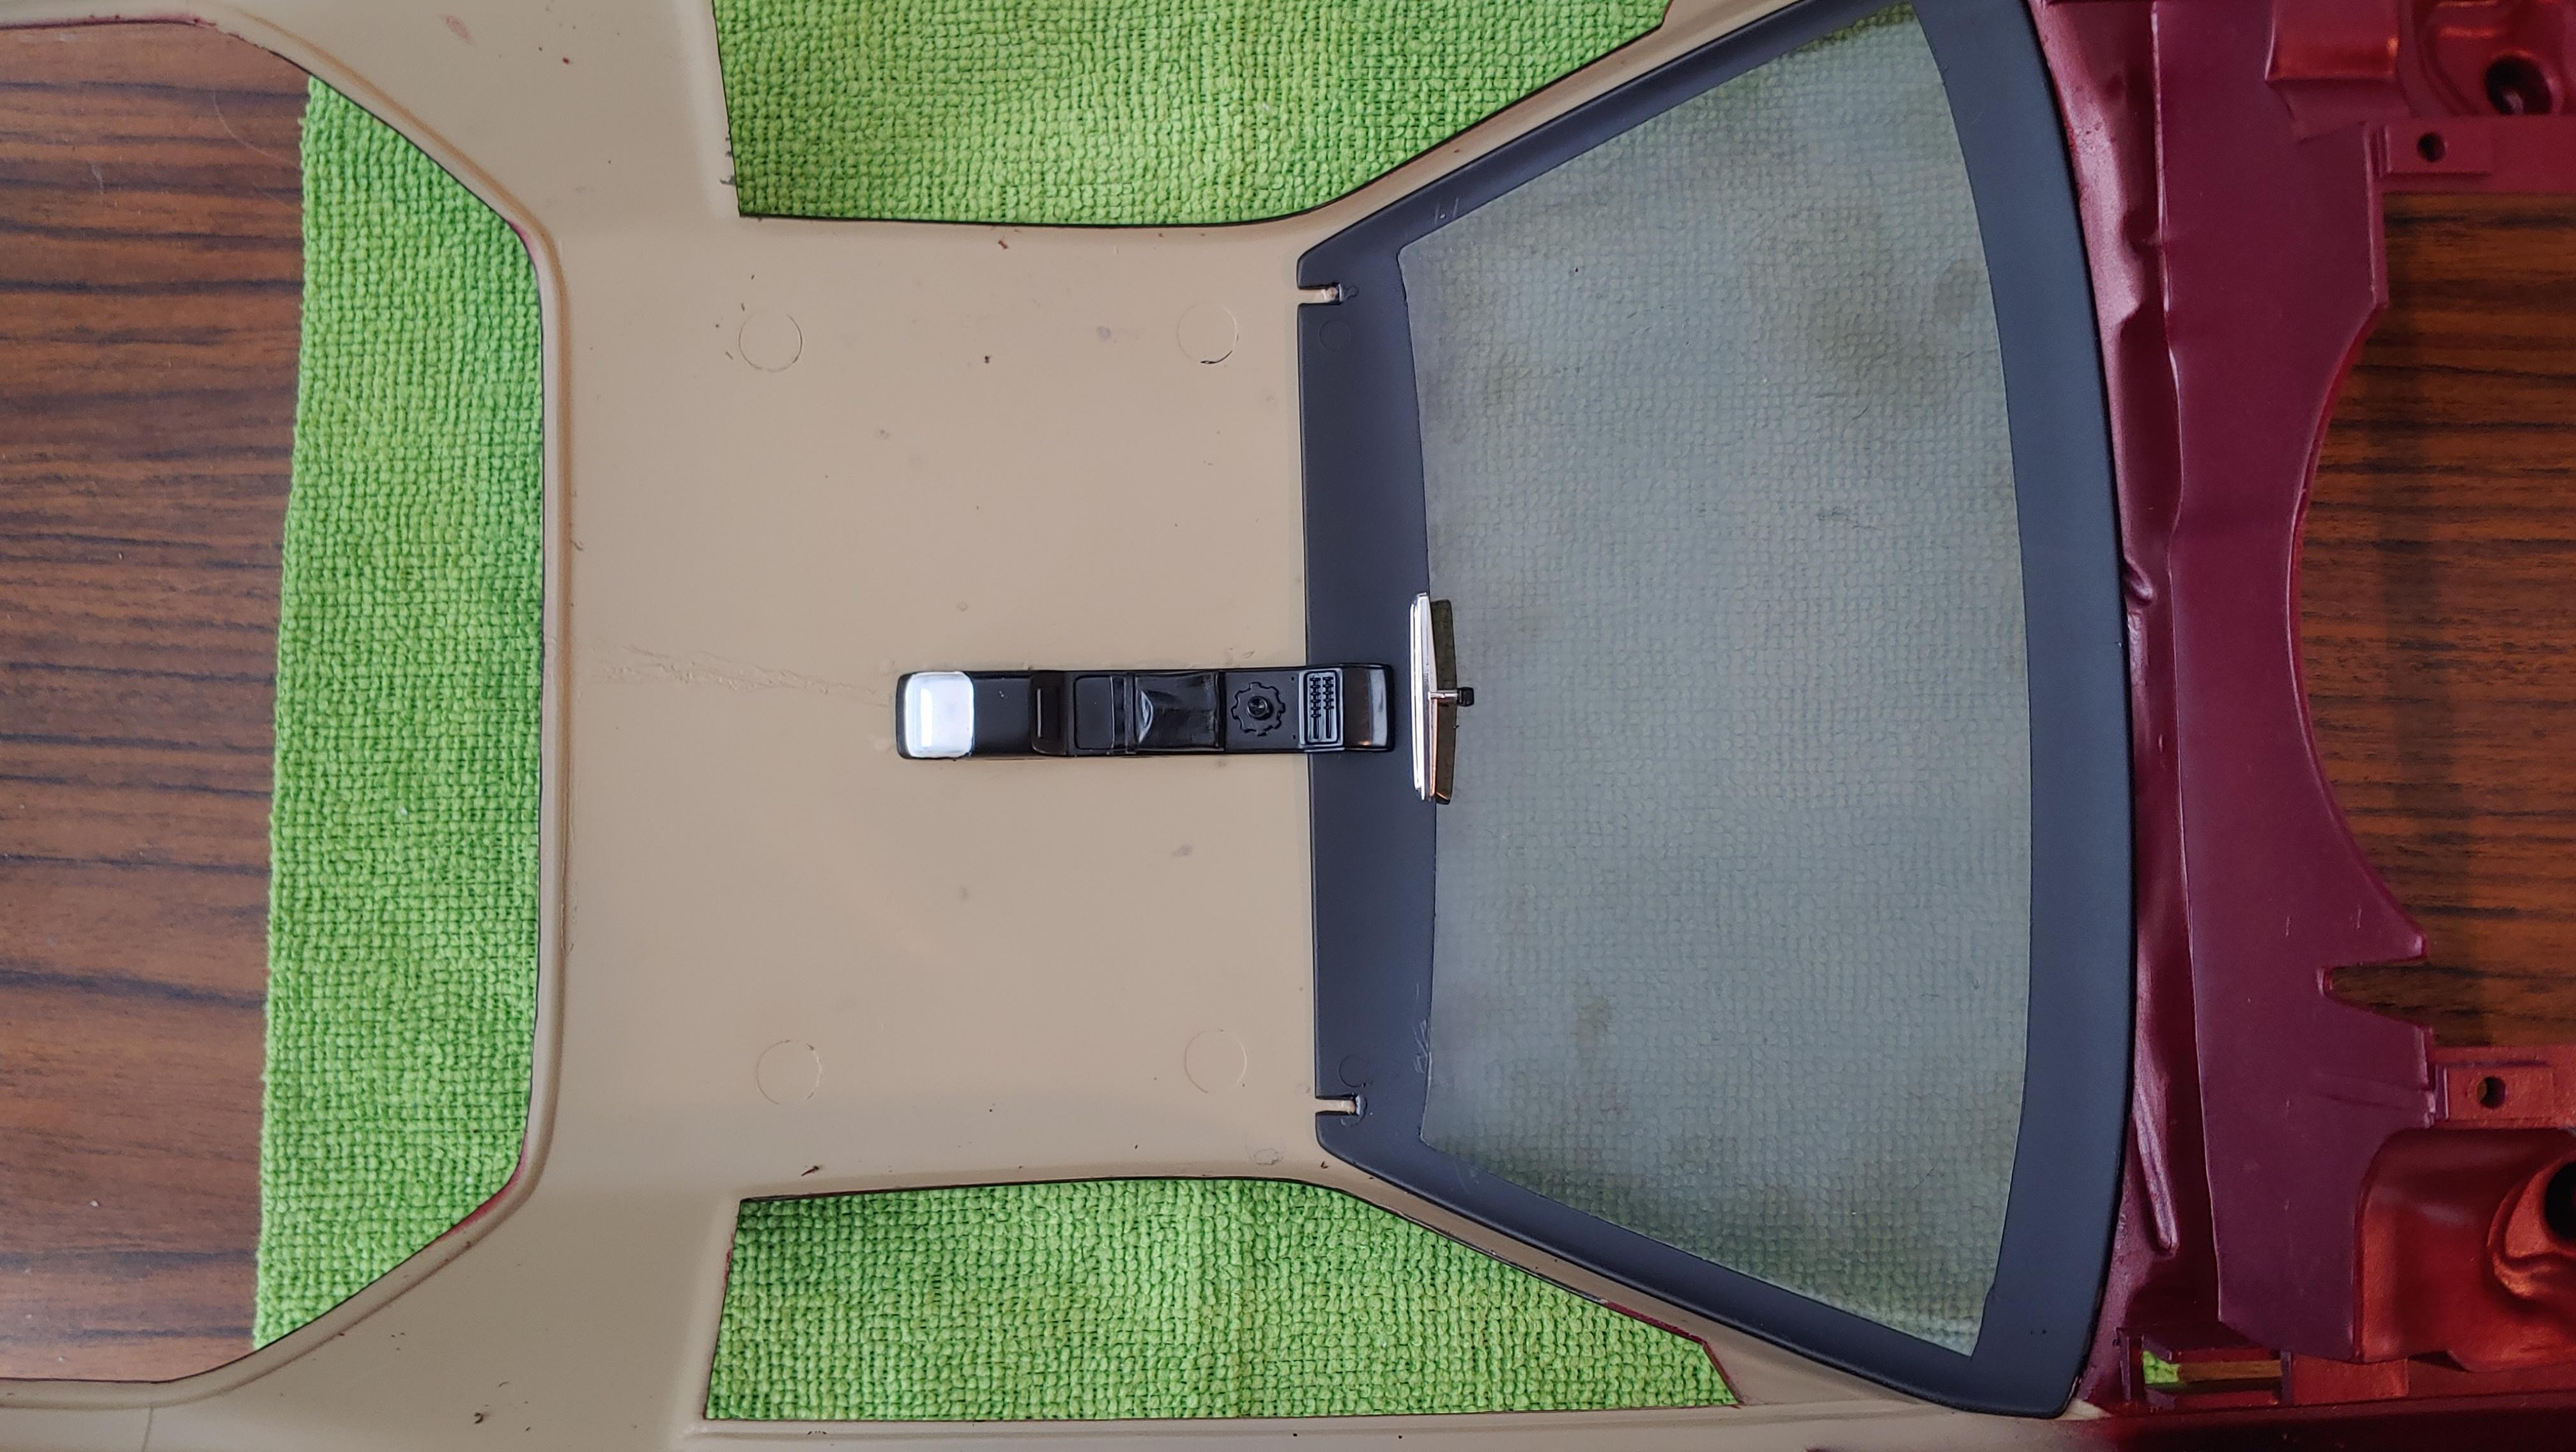
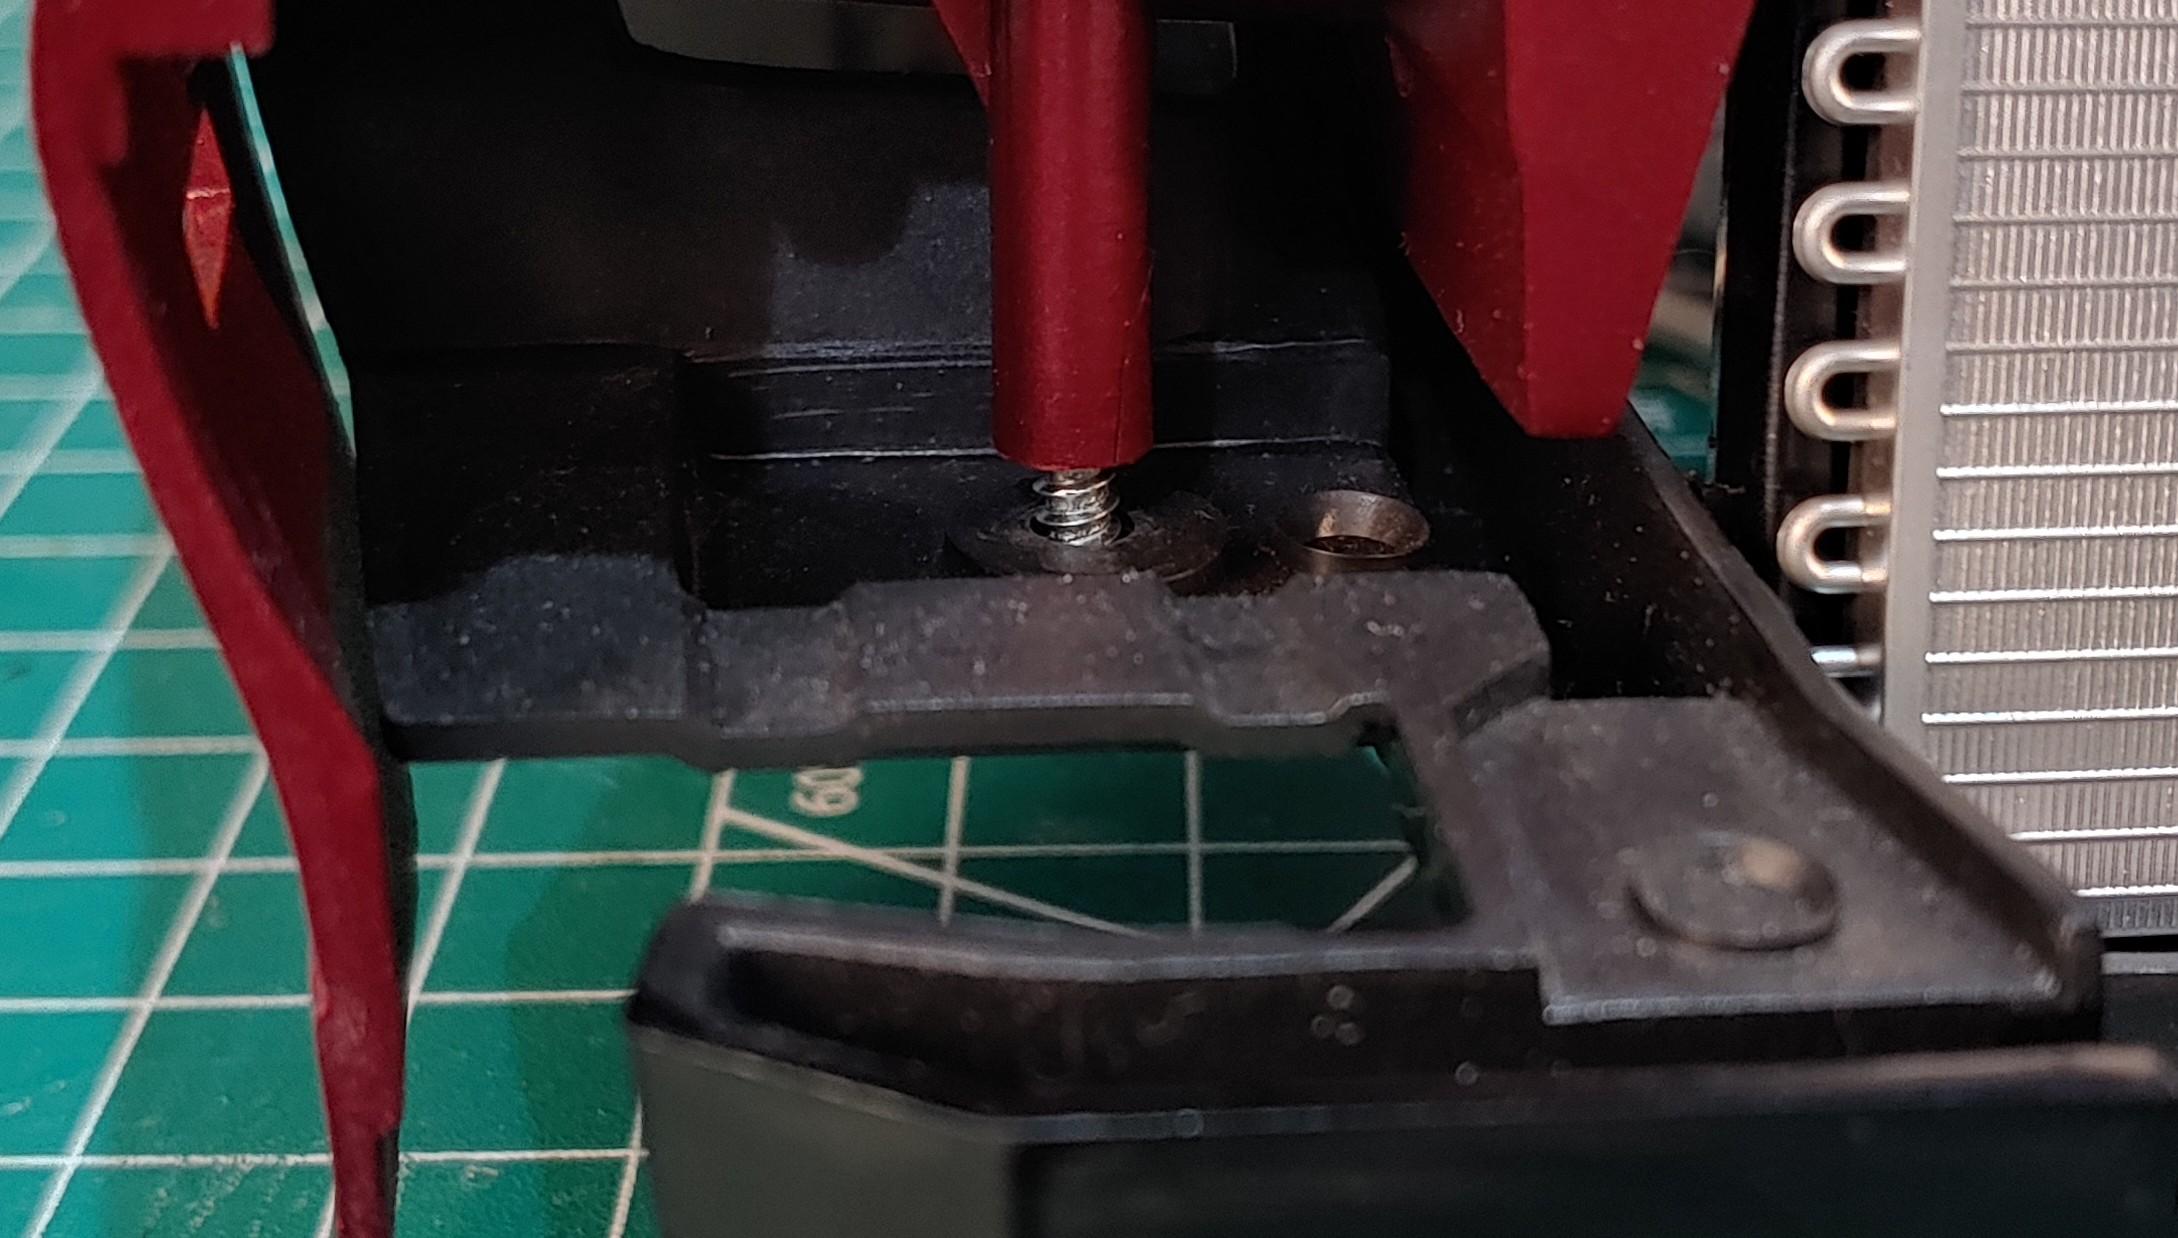
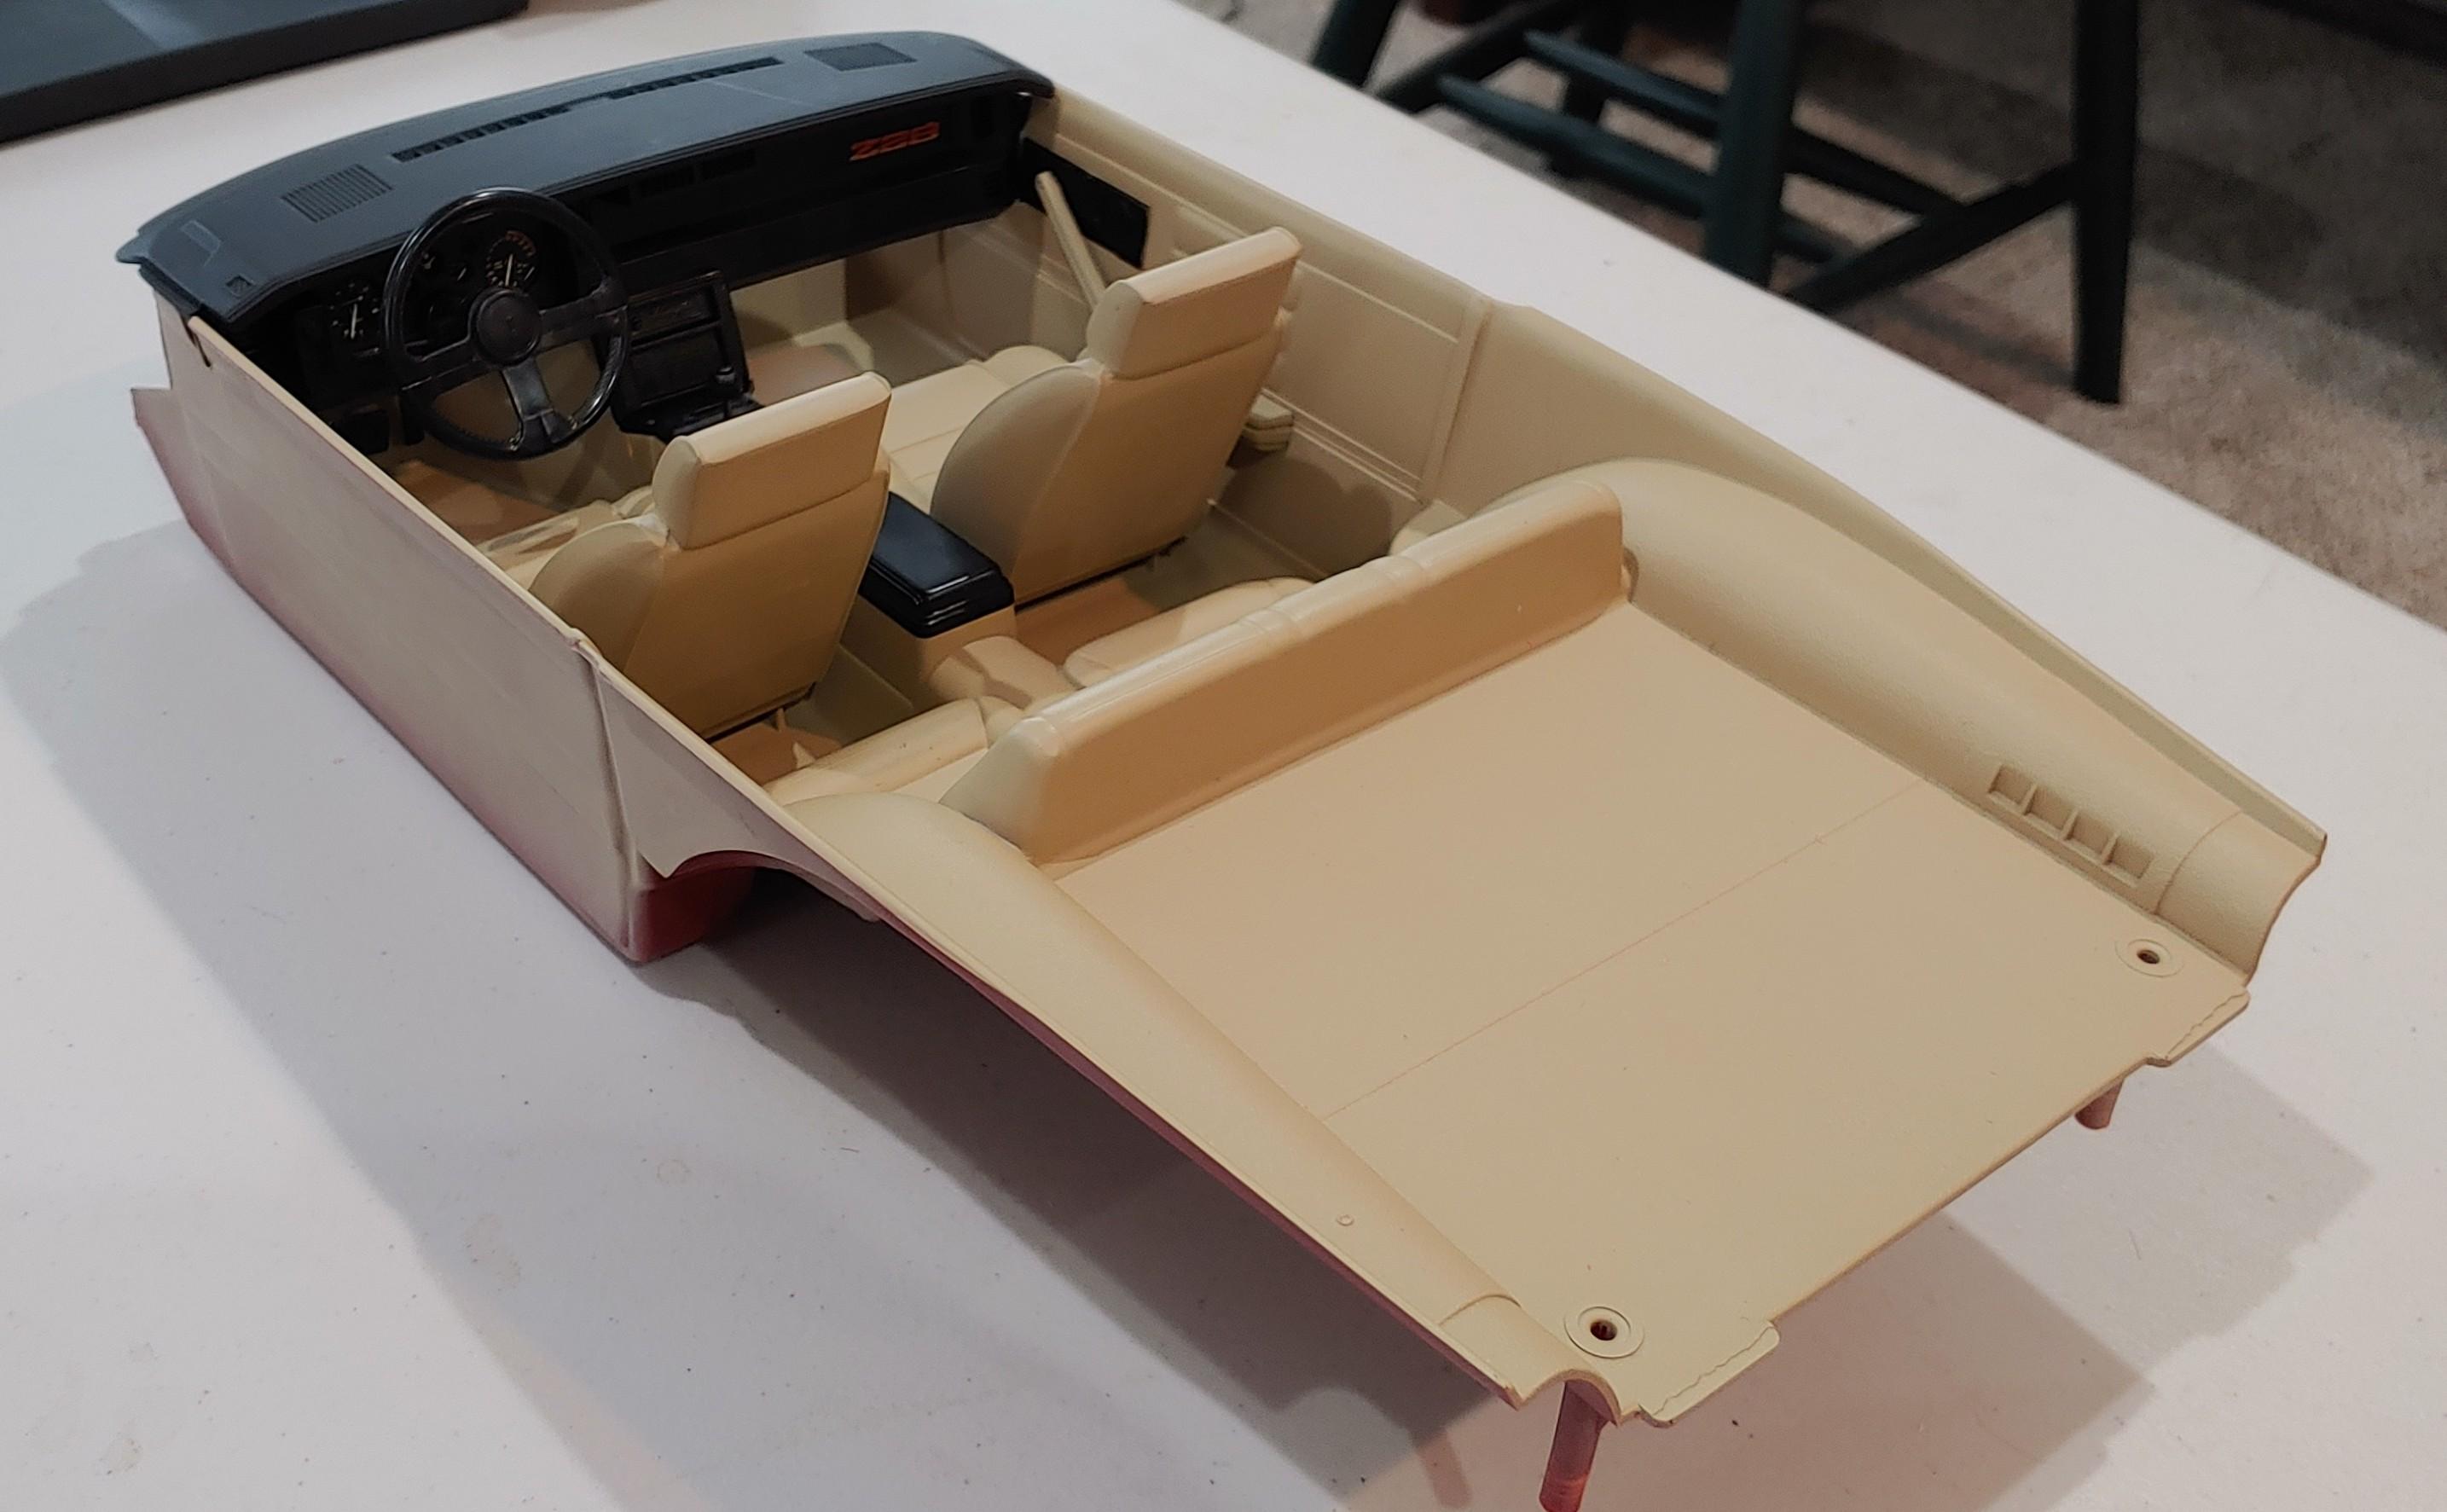
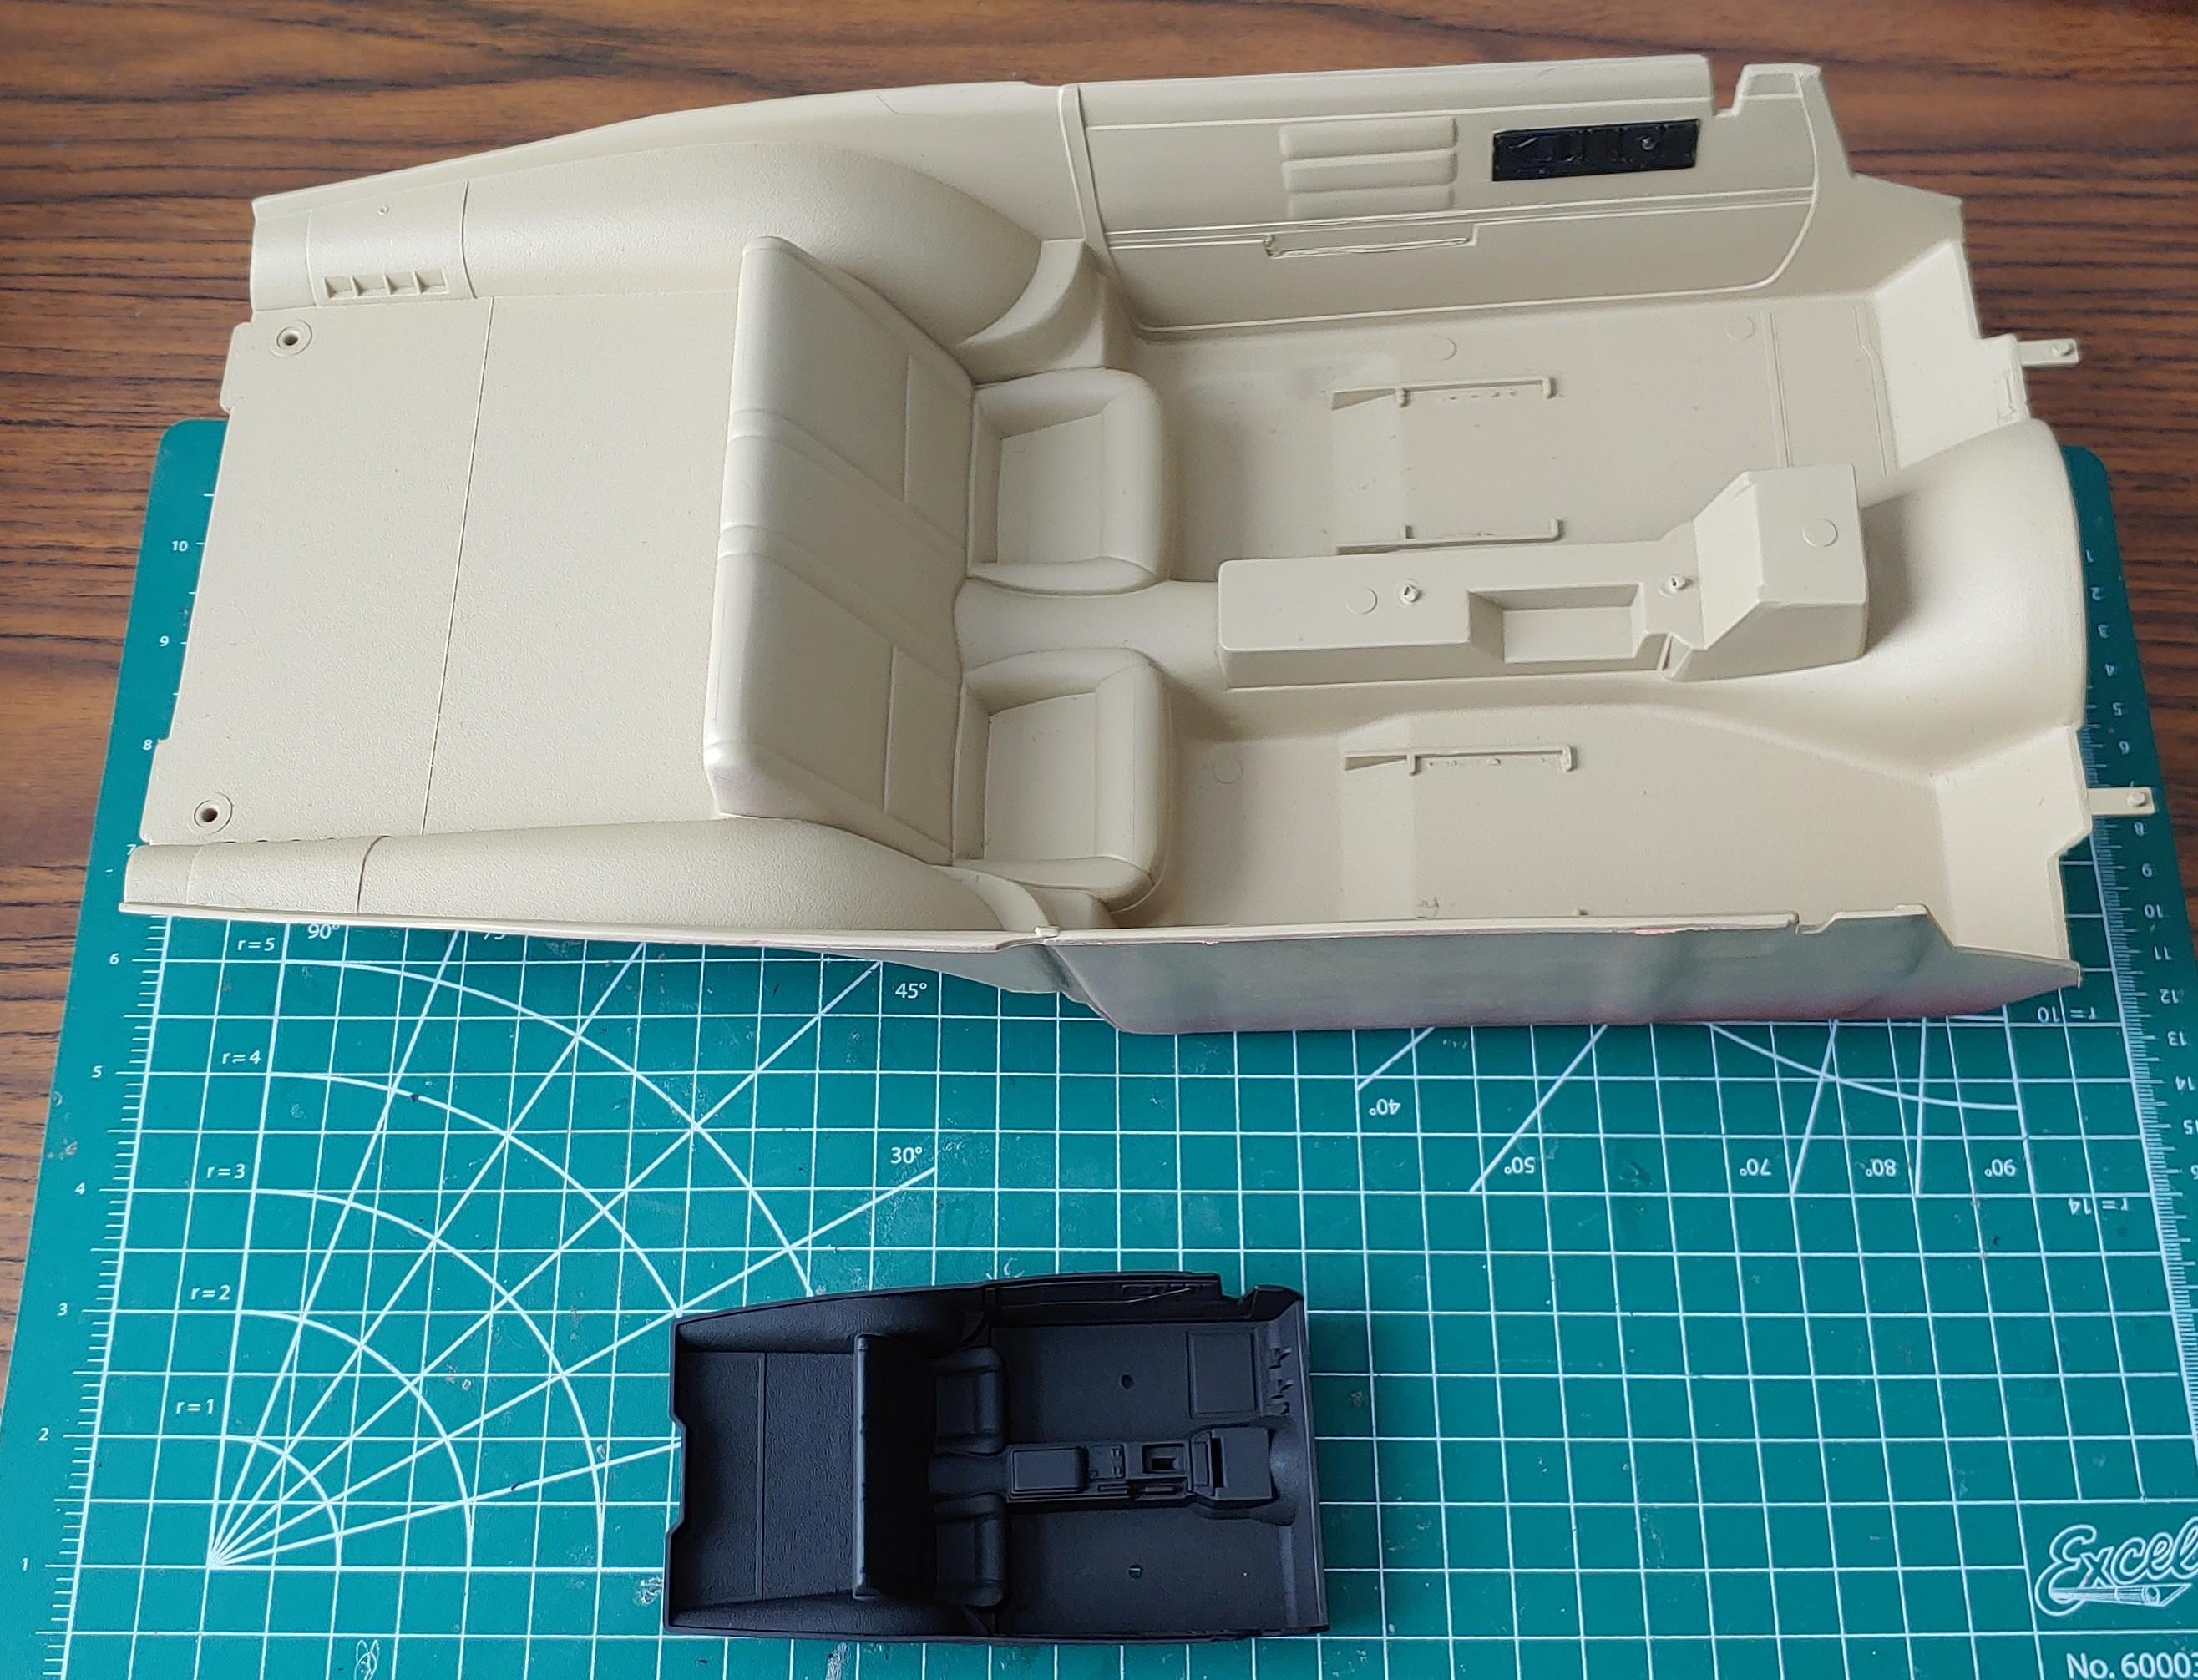
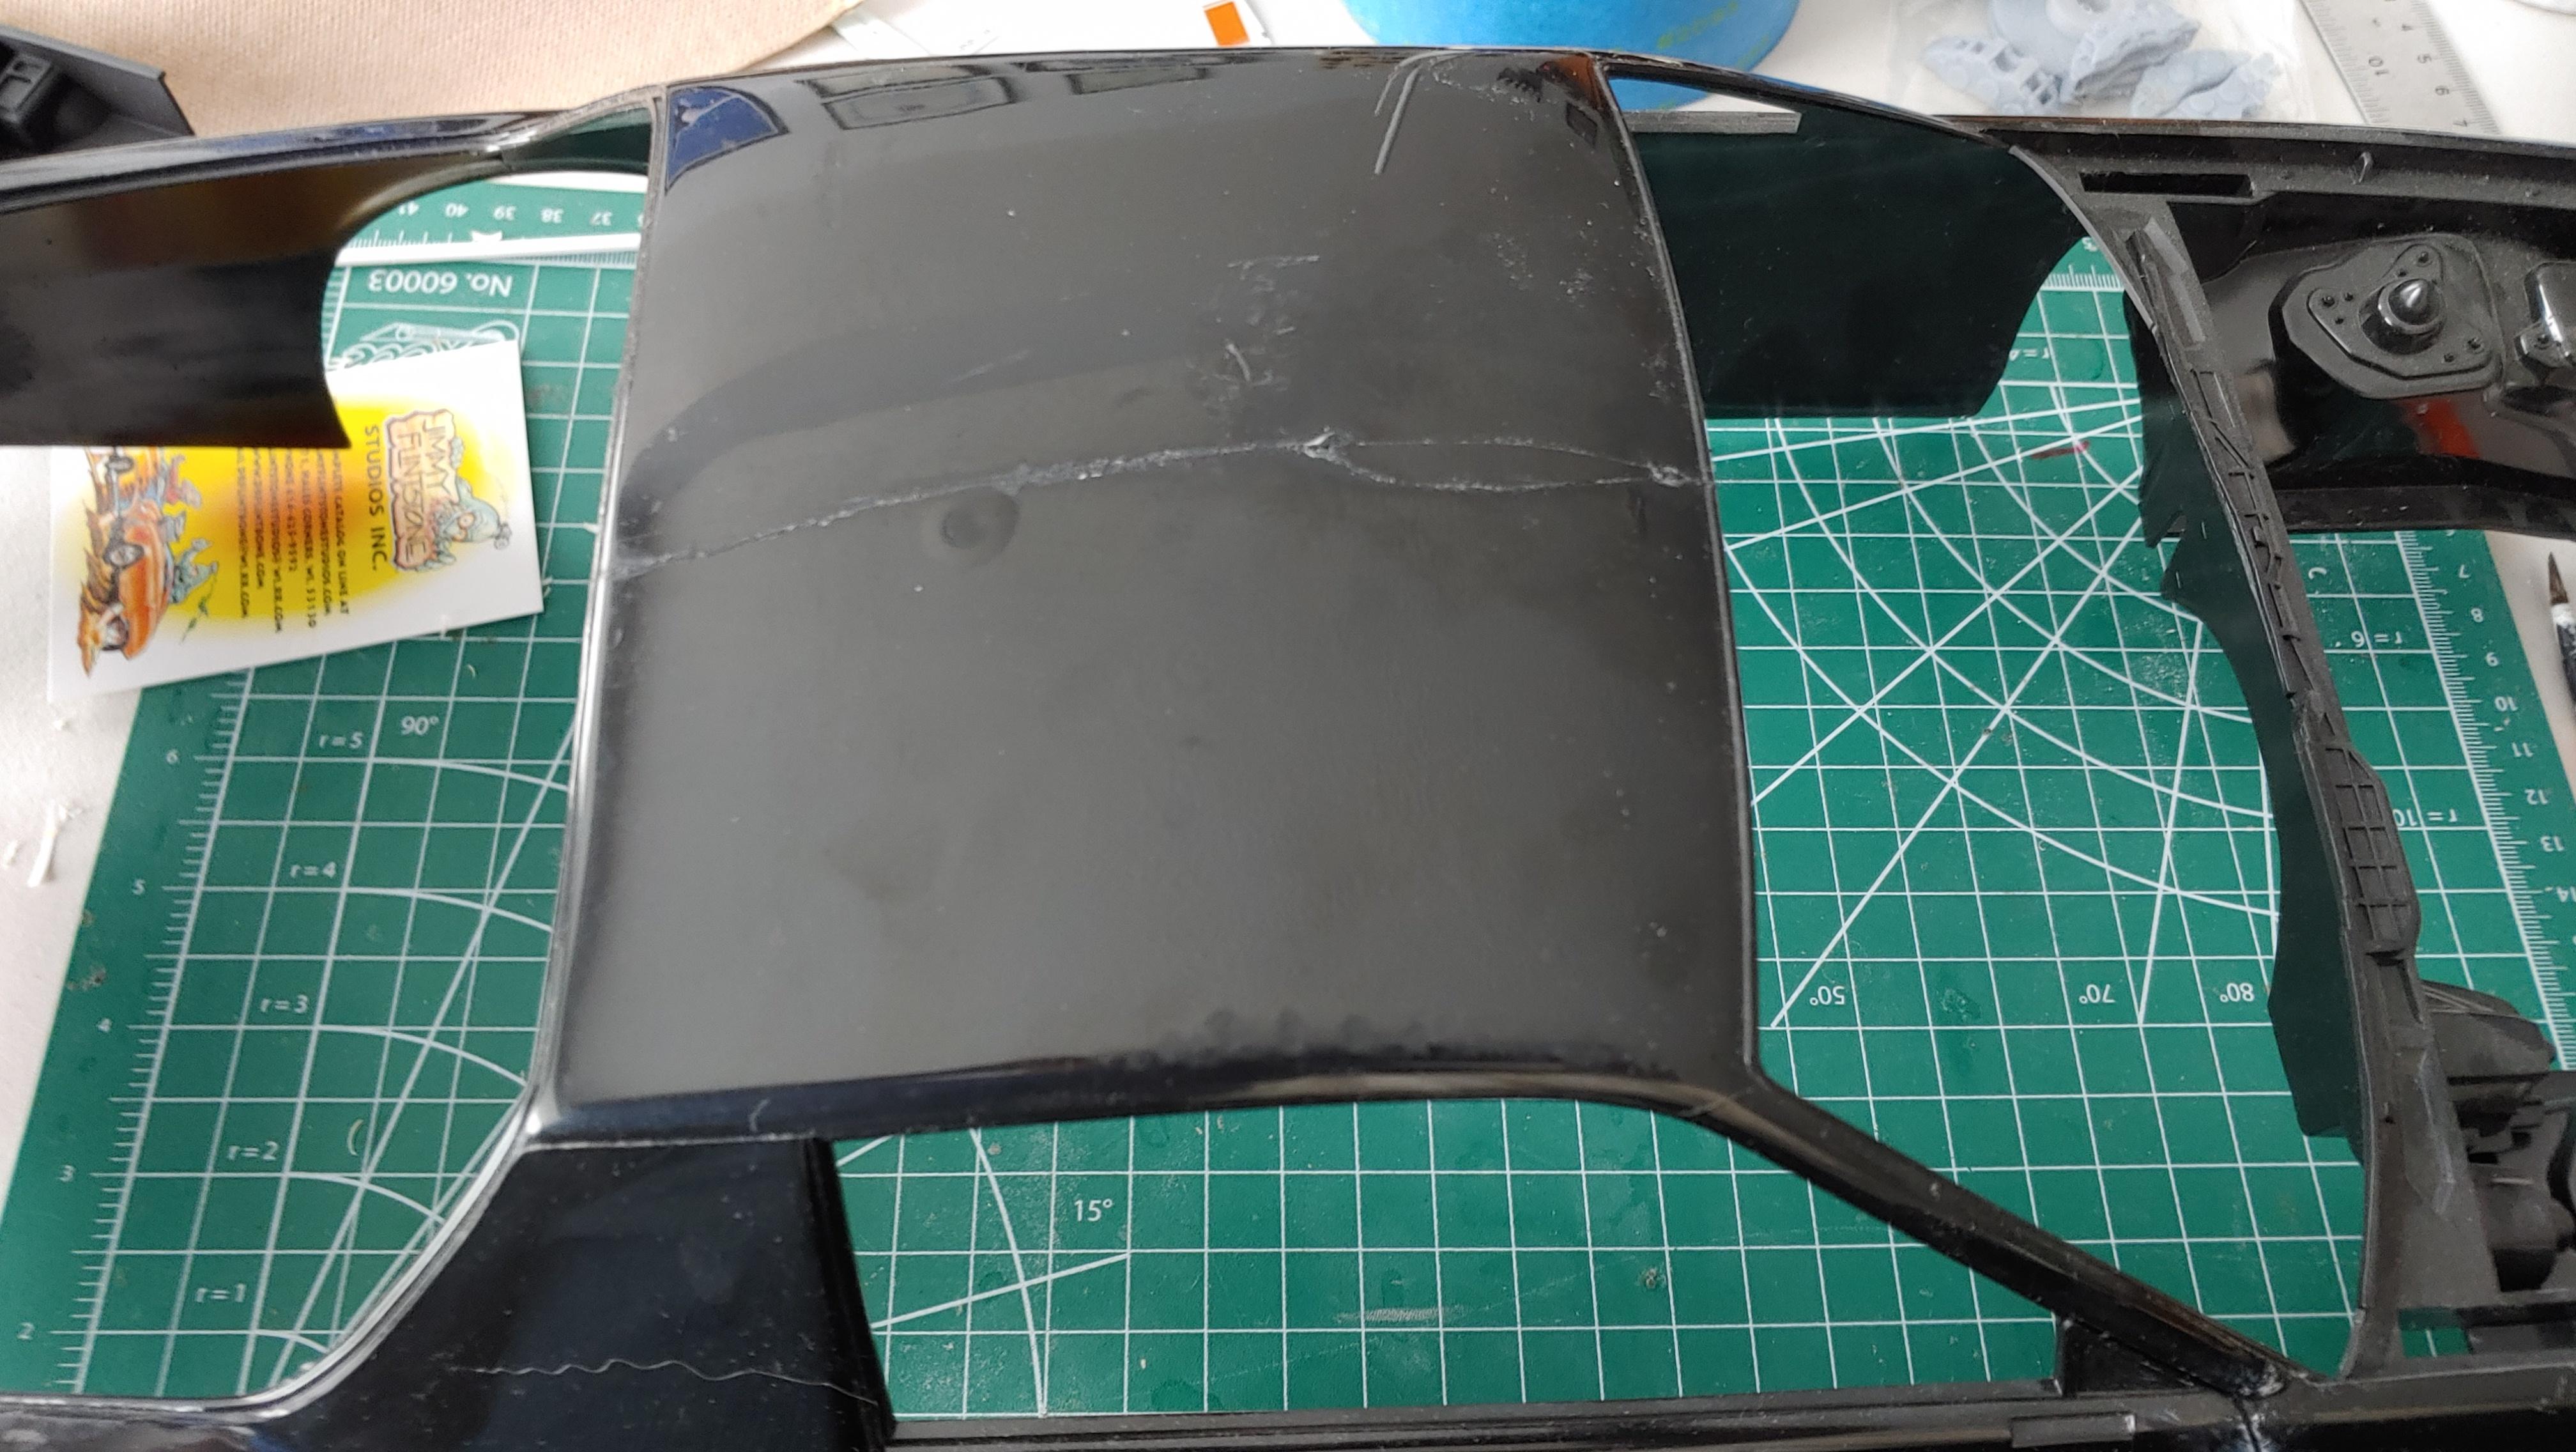
I'm getting the sub assemblies together when I ran into a problem. I did a little detail painting in the engine bay first. Then I had to mount the windshield and ceiling console before I installed the interior. The rear window mounts from the outside, so I'll install that later. While installing the interior I noticed that both cars have mounting slots that are hidden by the taillights. Now that the interior is in I can mount the chassis. That's where I ran into the problem. The chassis mounts to the body/interior with 4 screws. The front 2 screws won't screw down all the way with the radiator installed, I even removed the fan shroud for more clearance and they still won't screw down all the way. I'll have to do some thinking to figure out what I'm going to do about it. More next time.
-
Thanks. Here's a link to the short, I guess I should have included it in the original post.
-
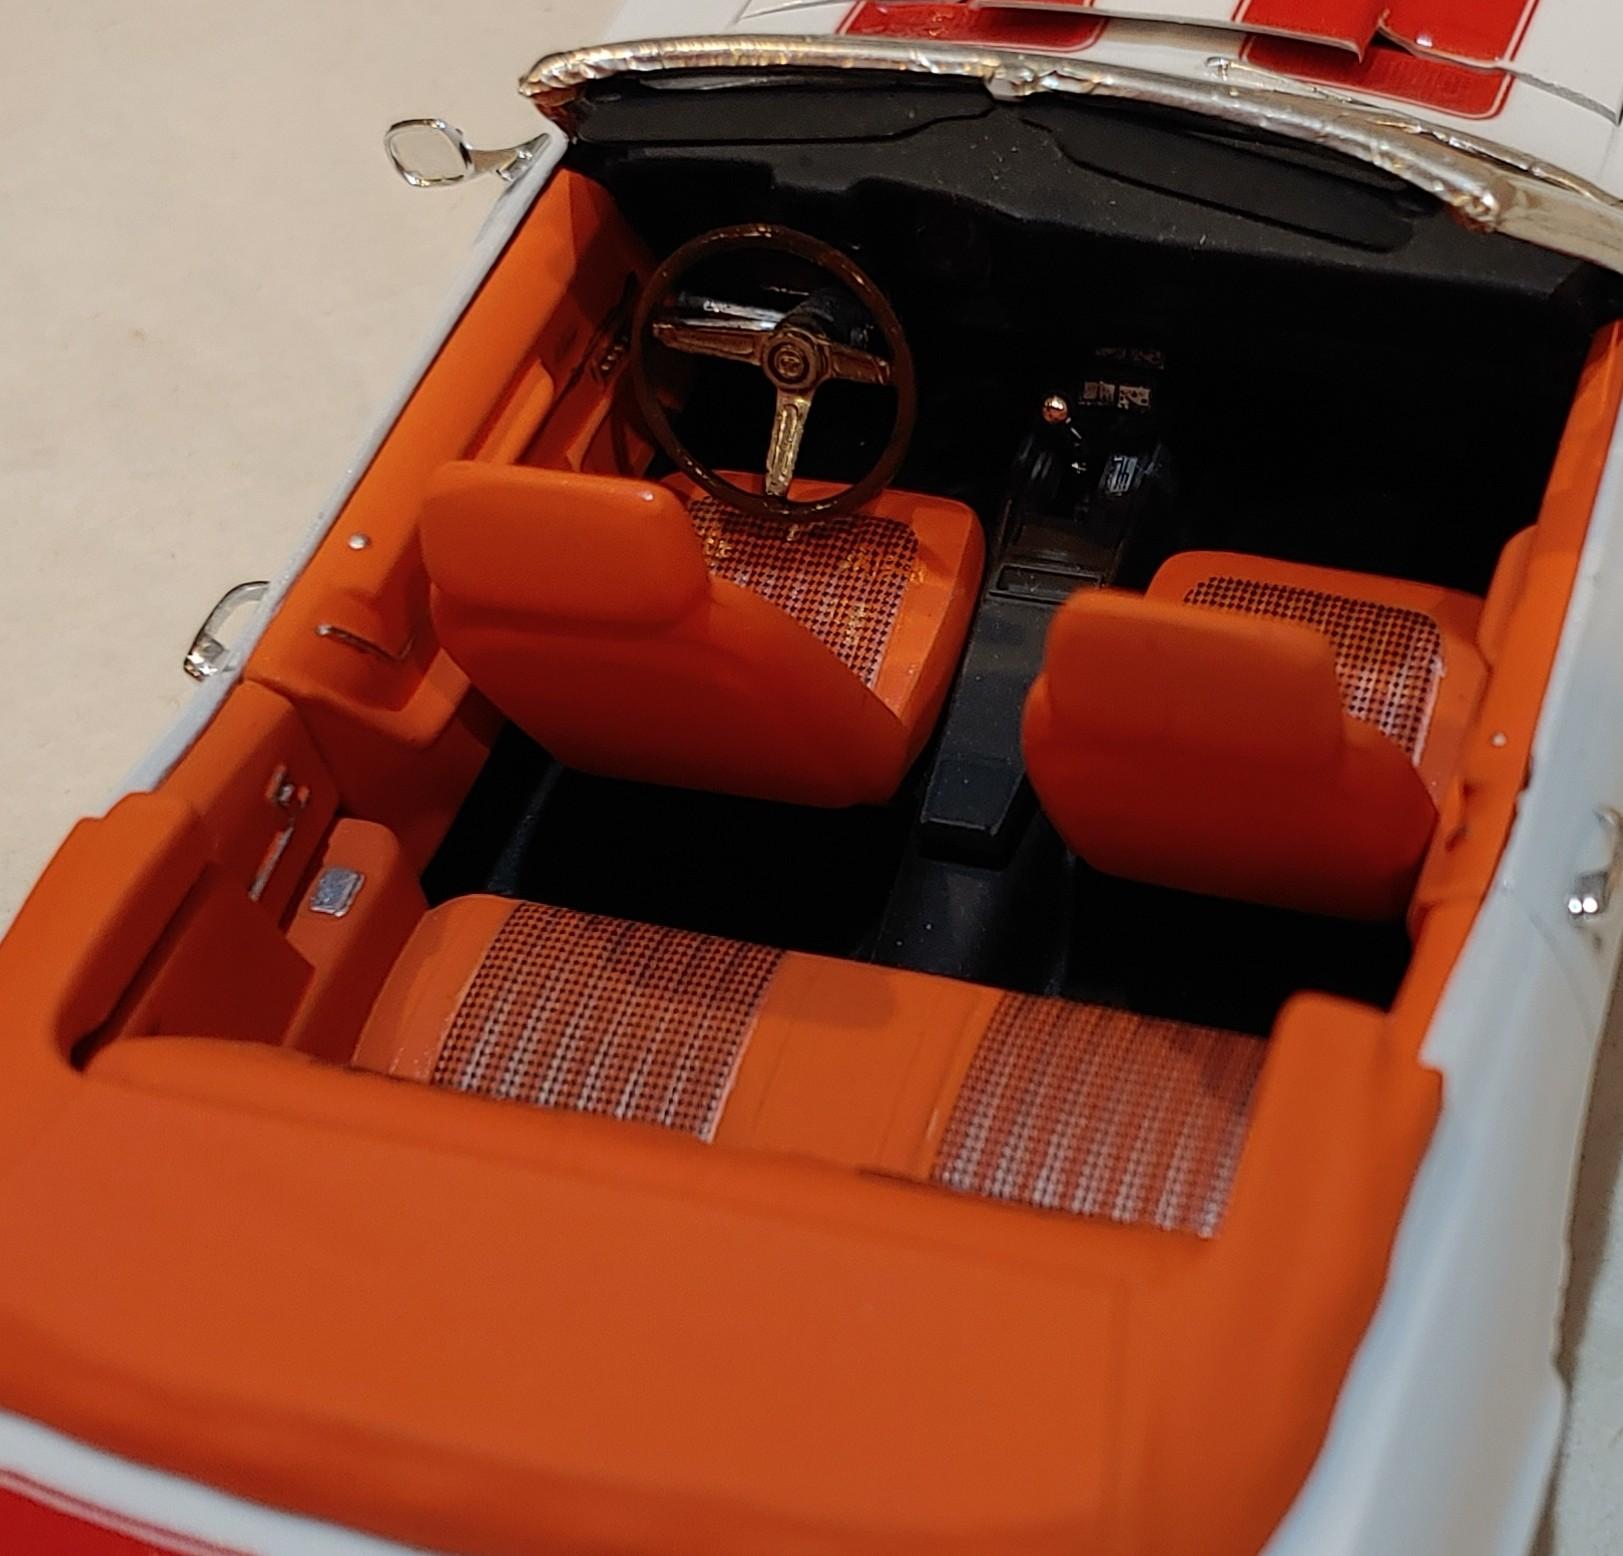
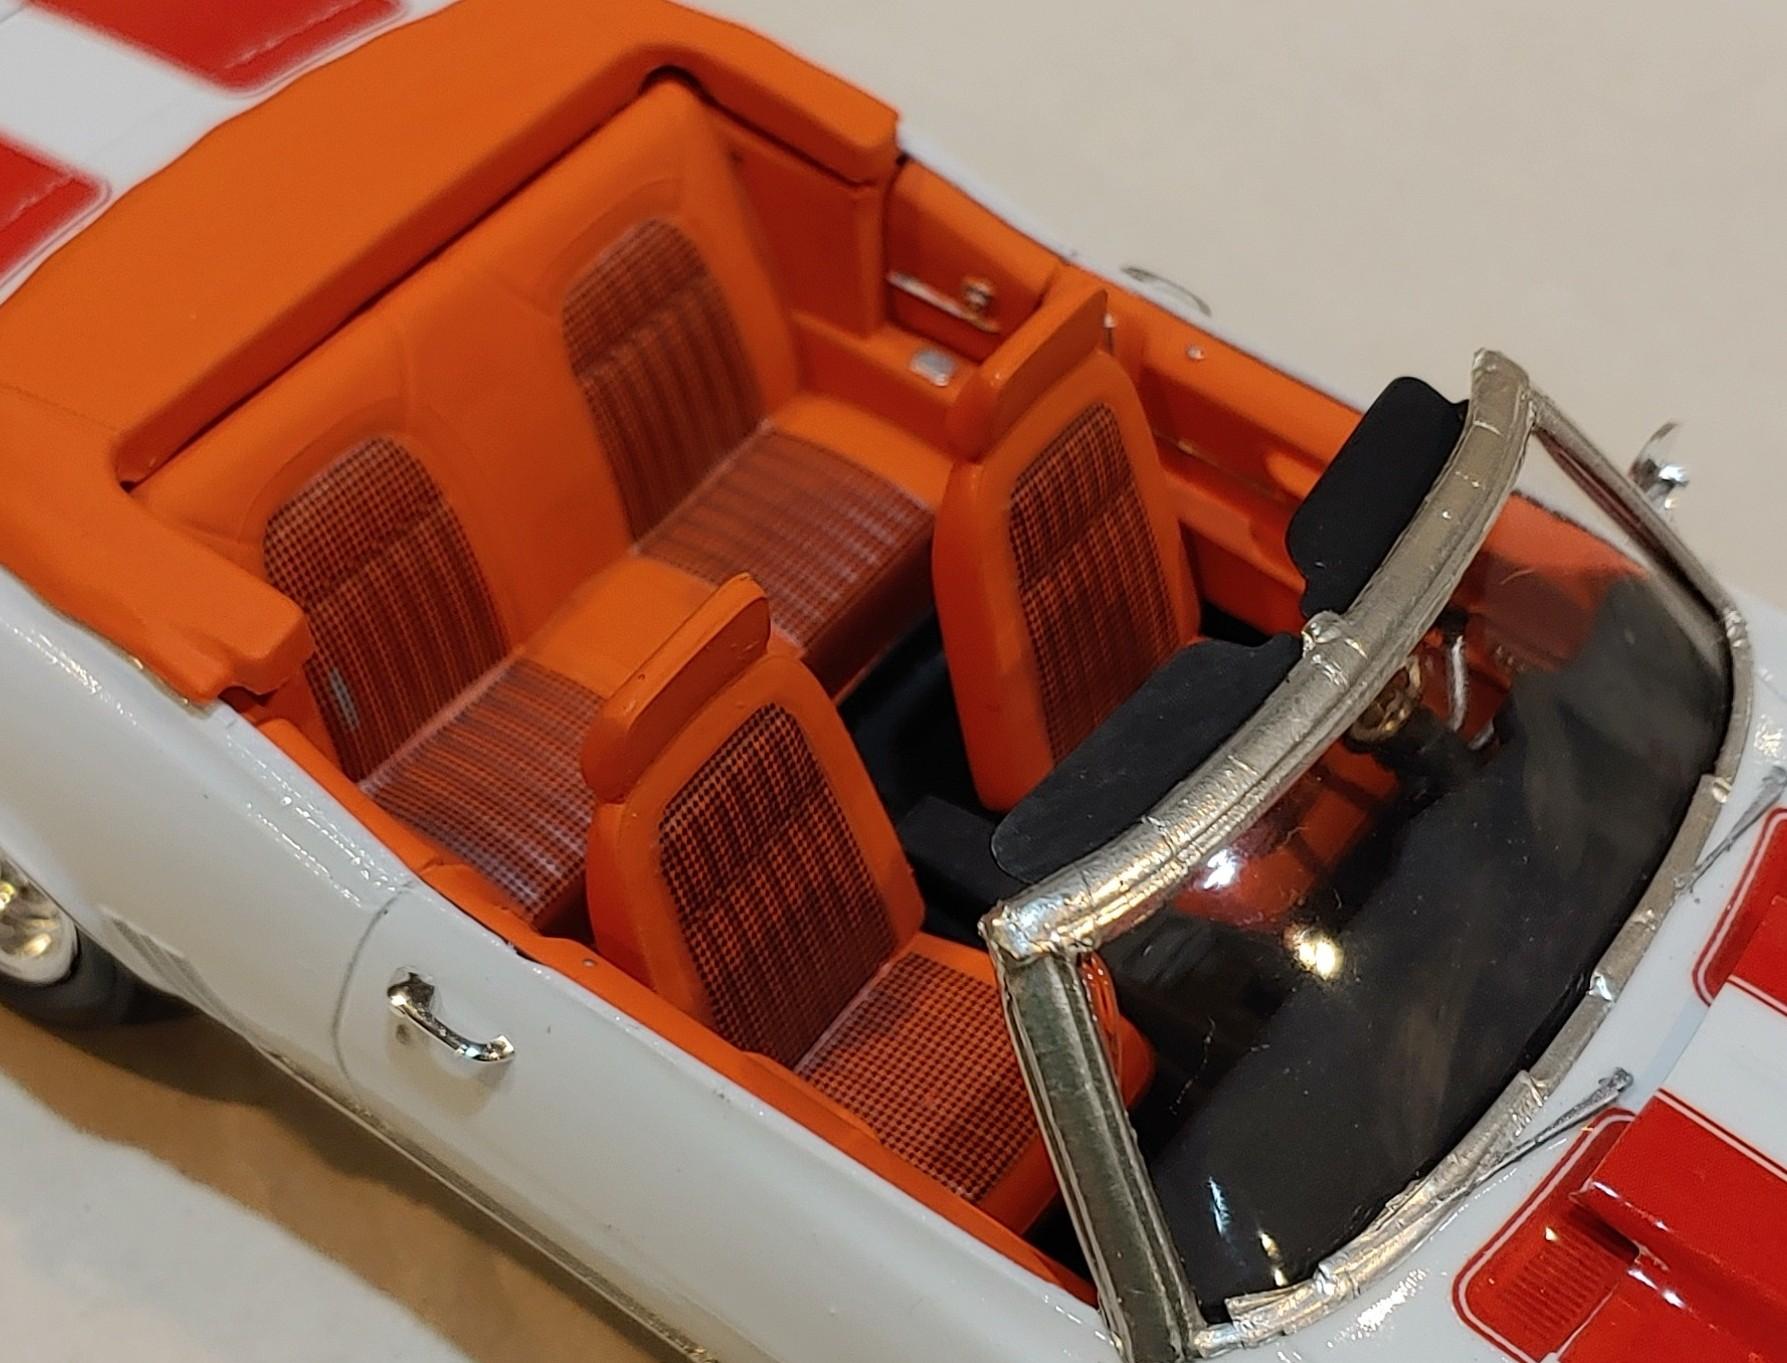
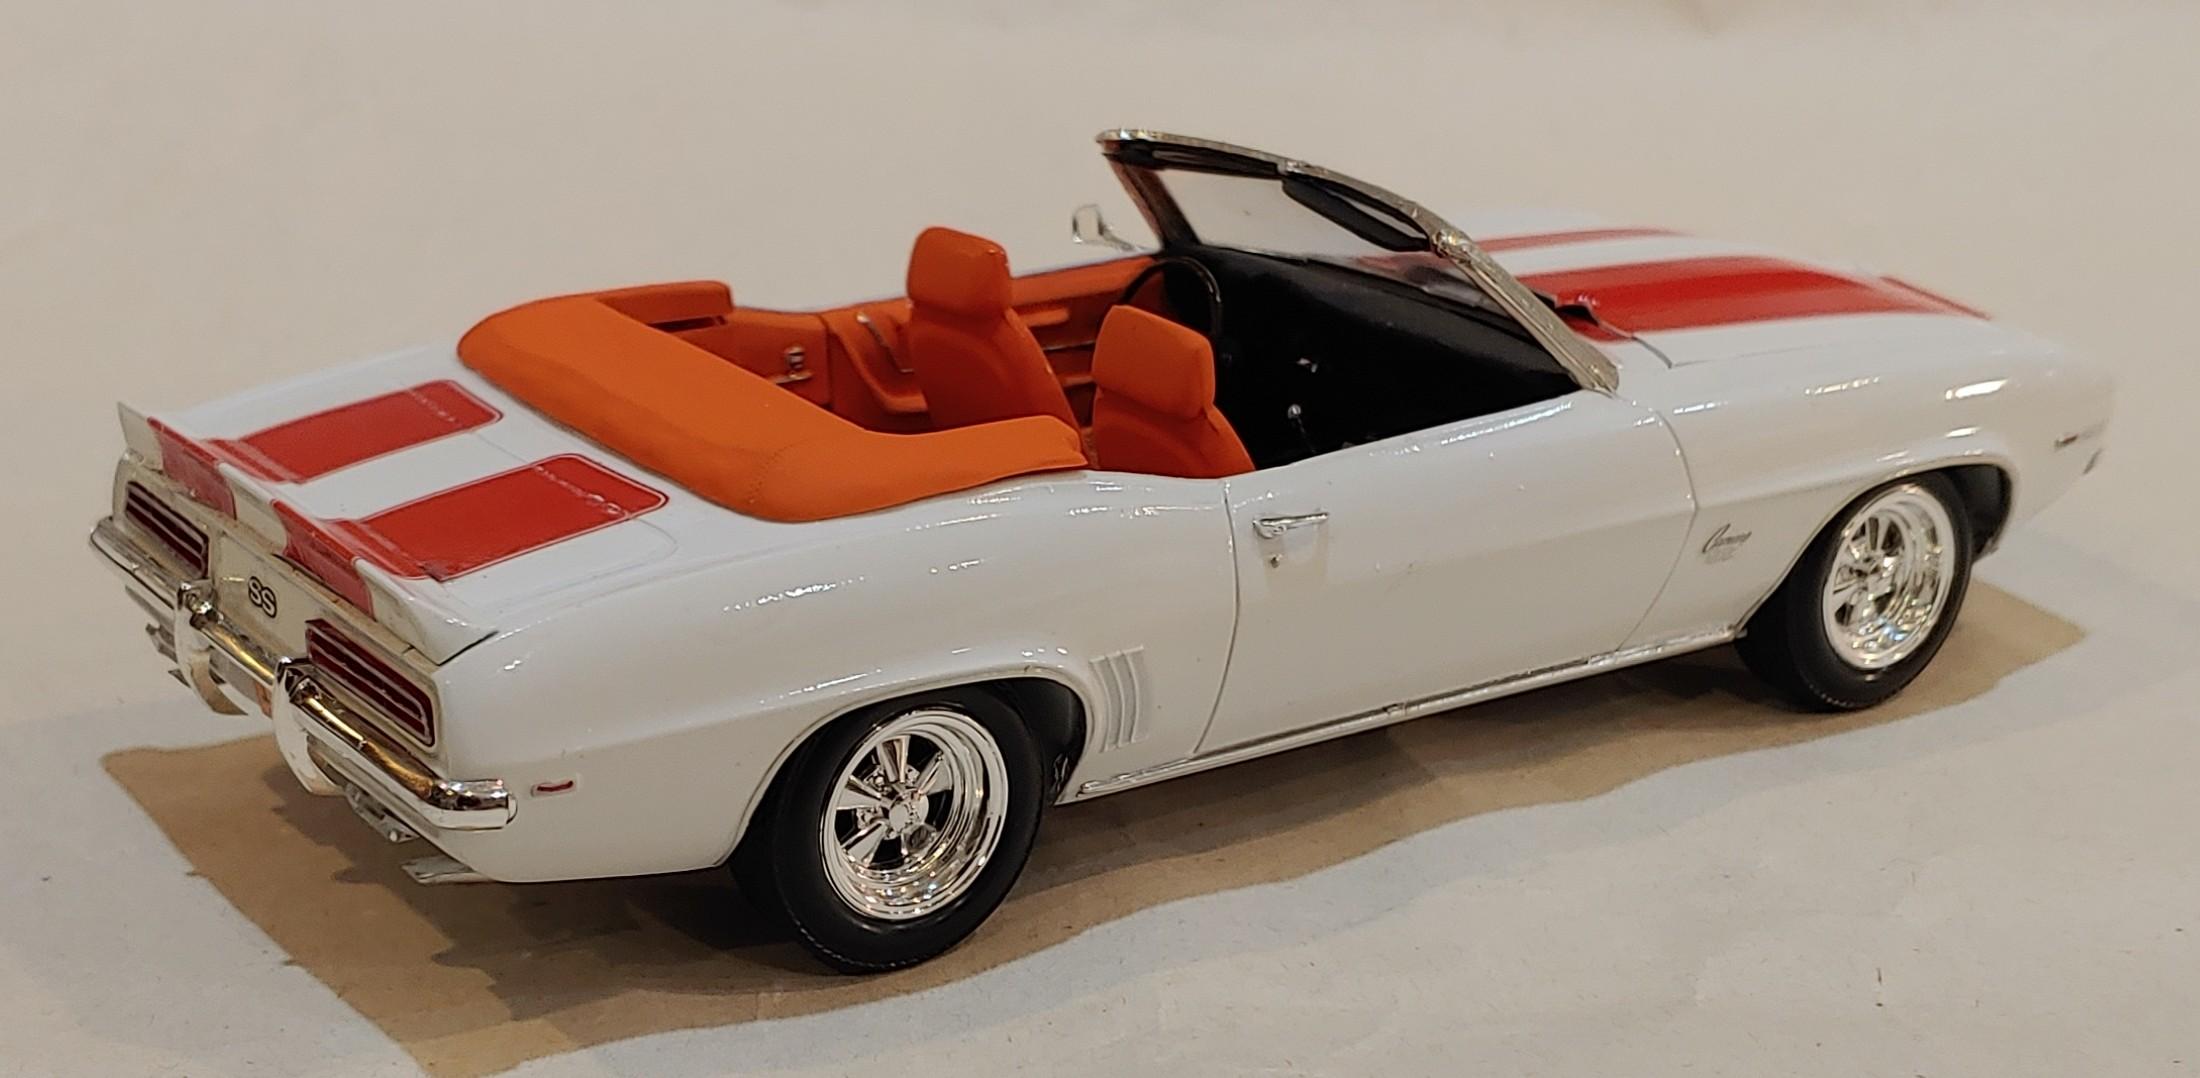
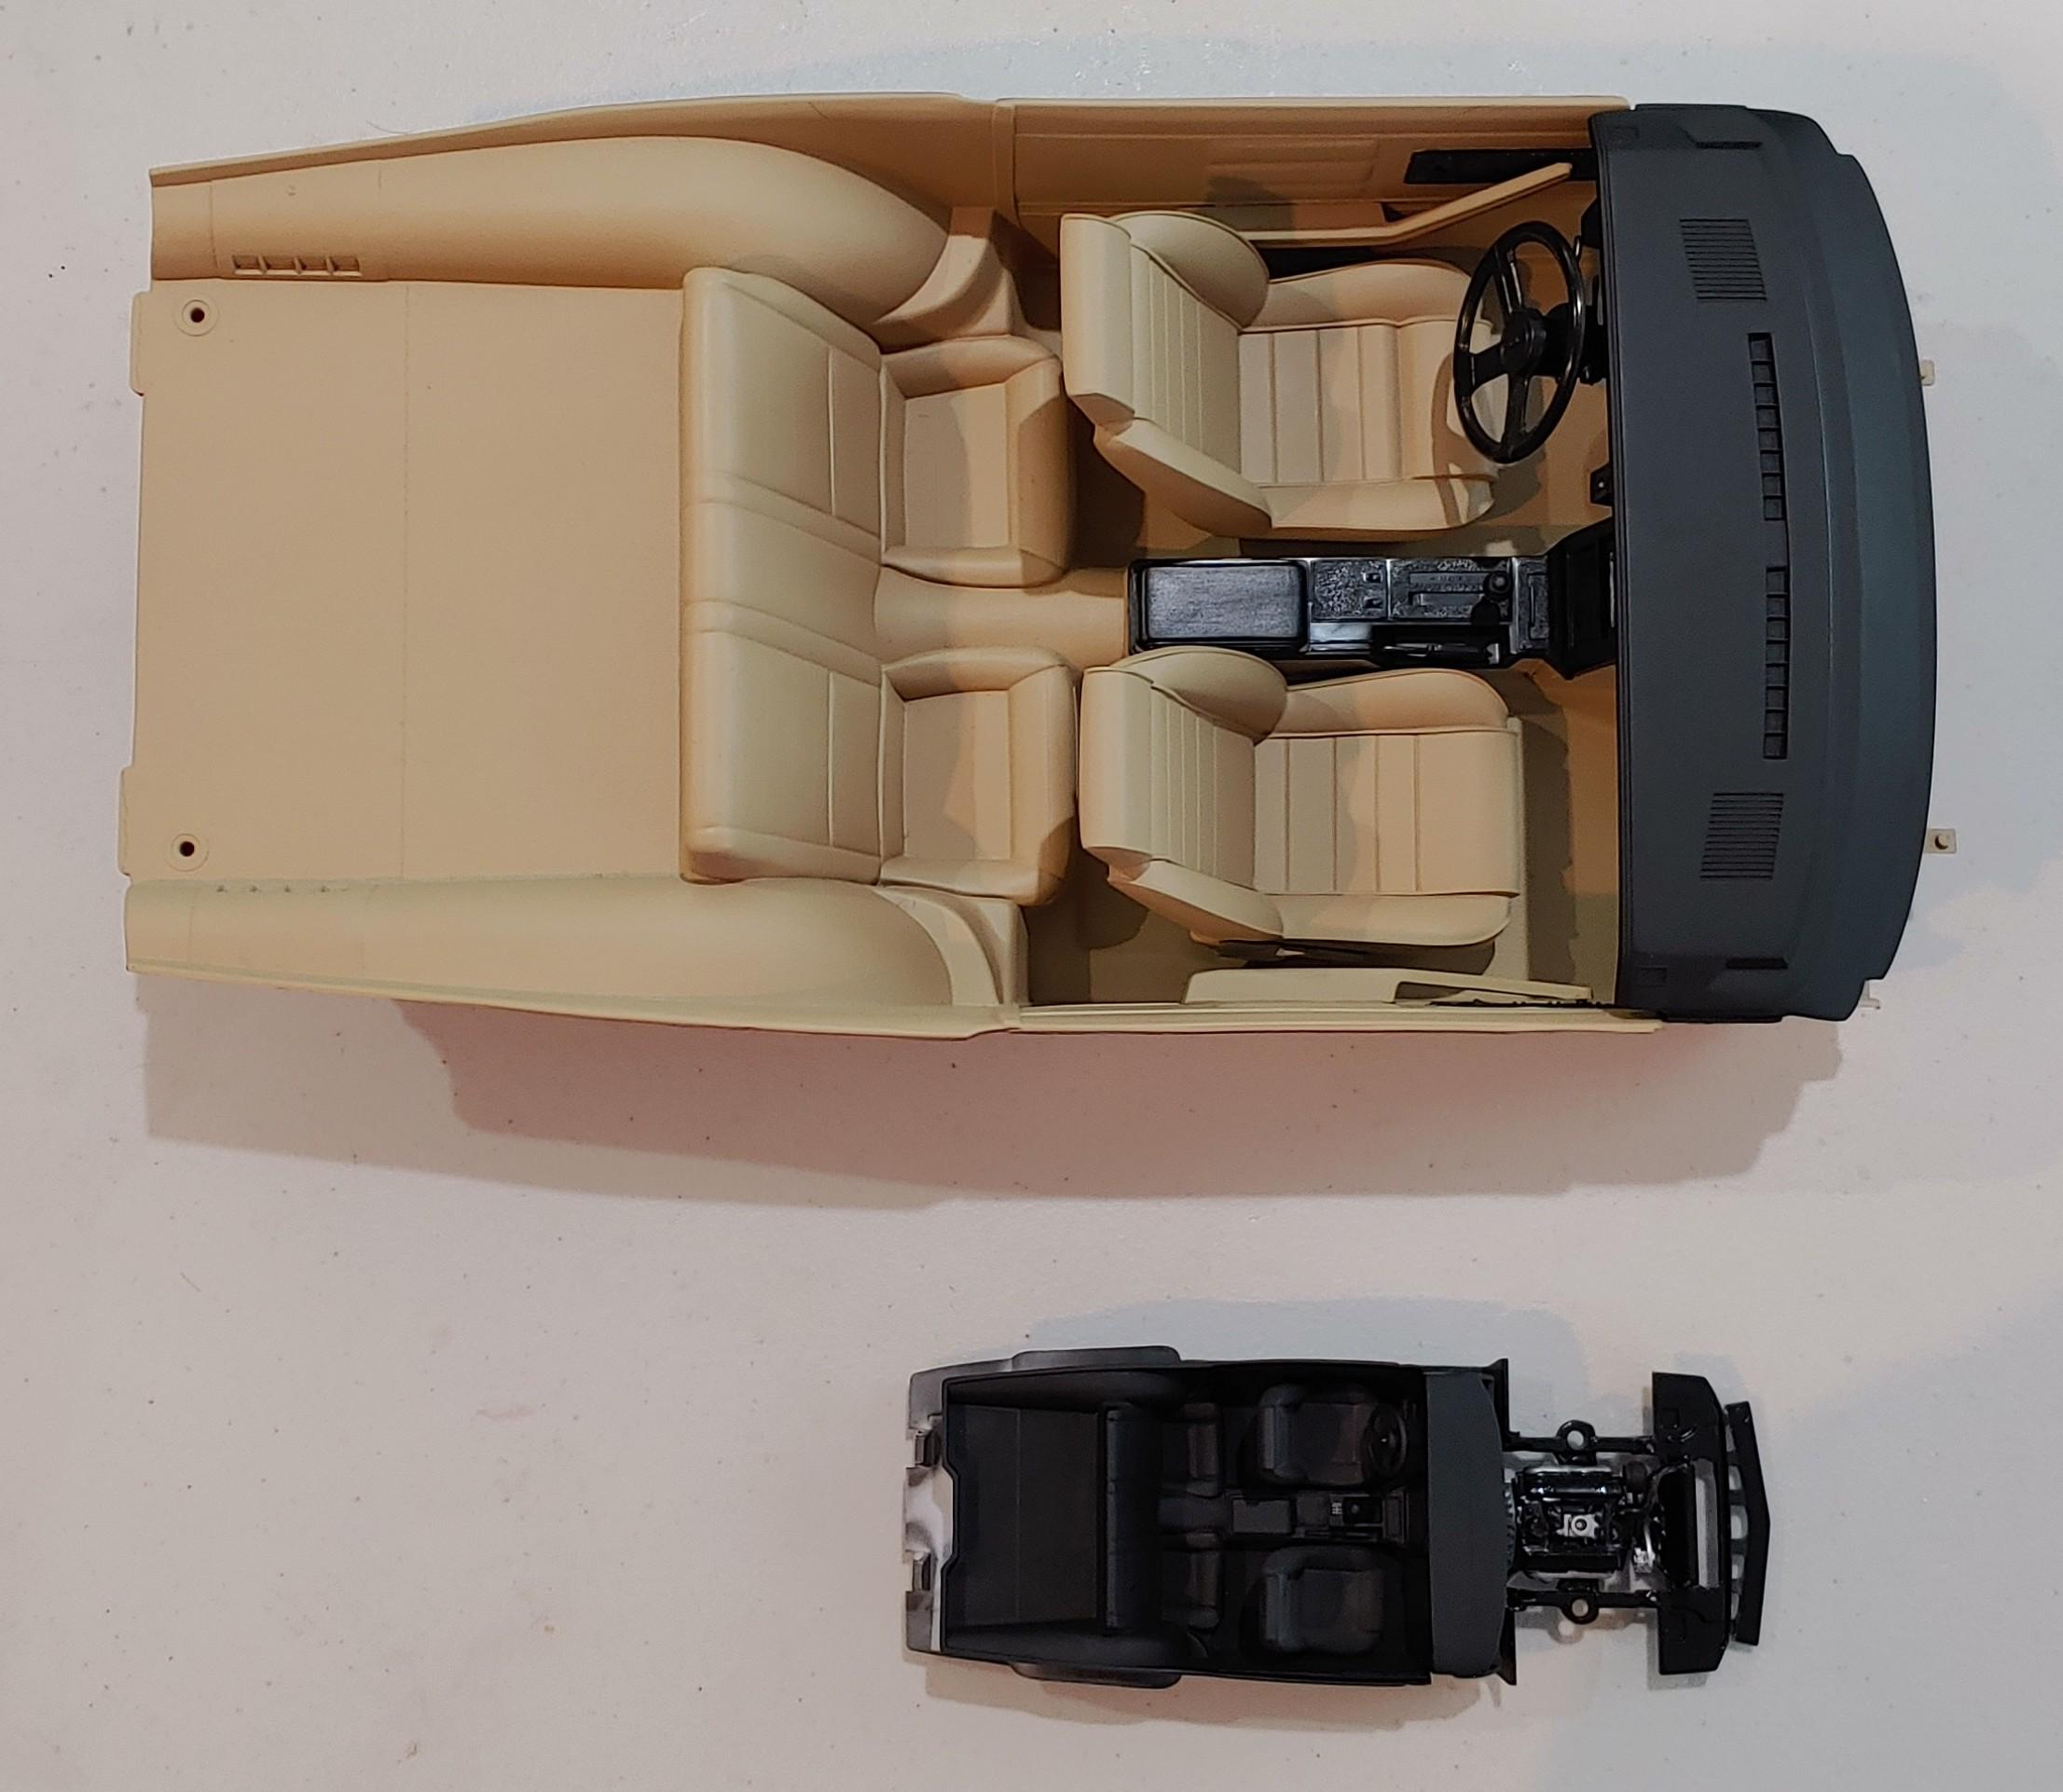
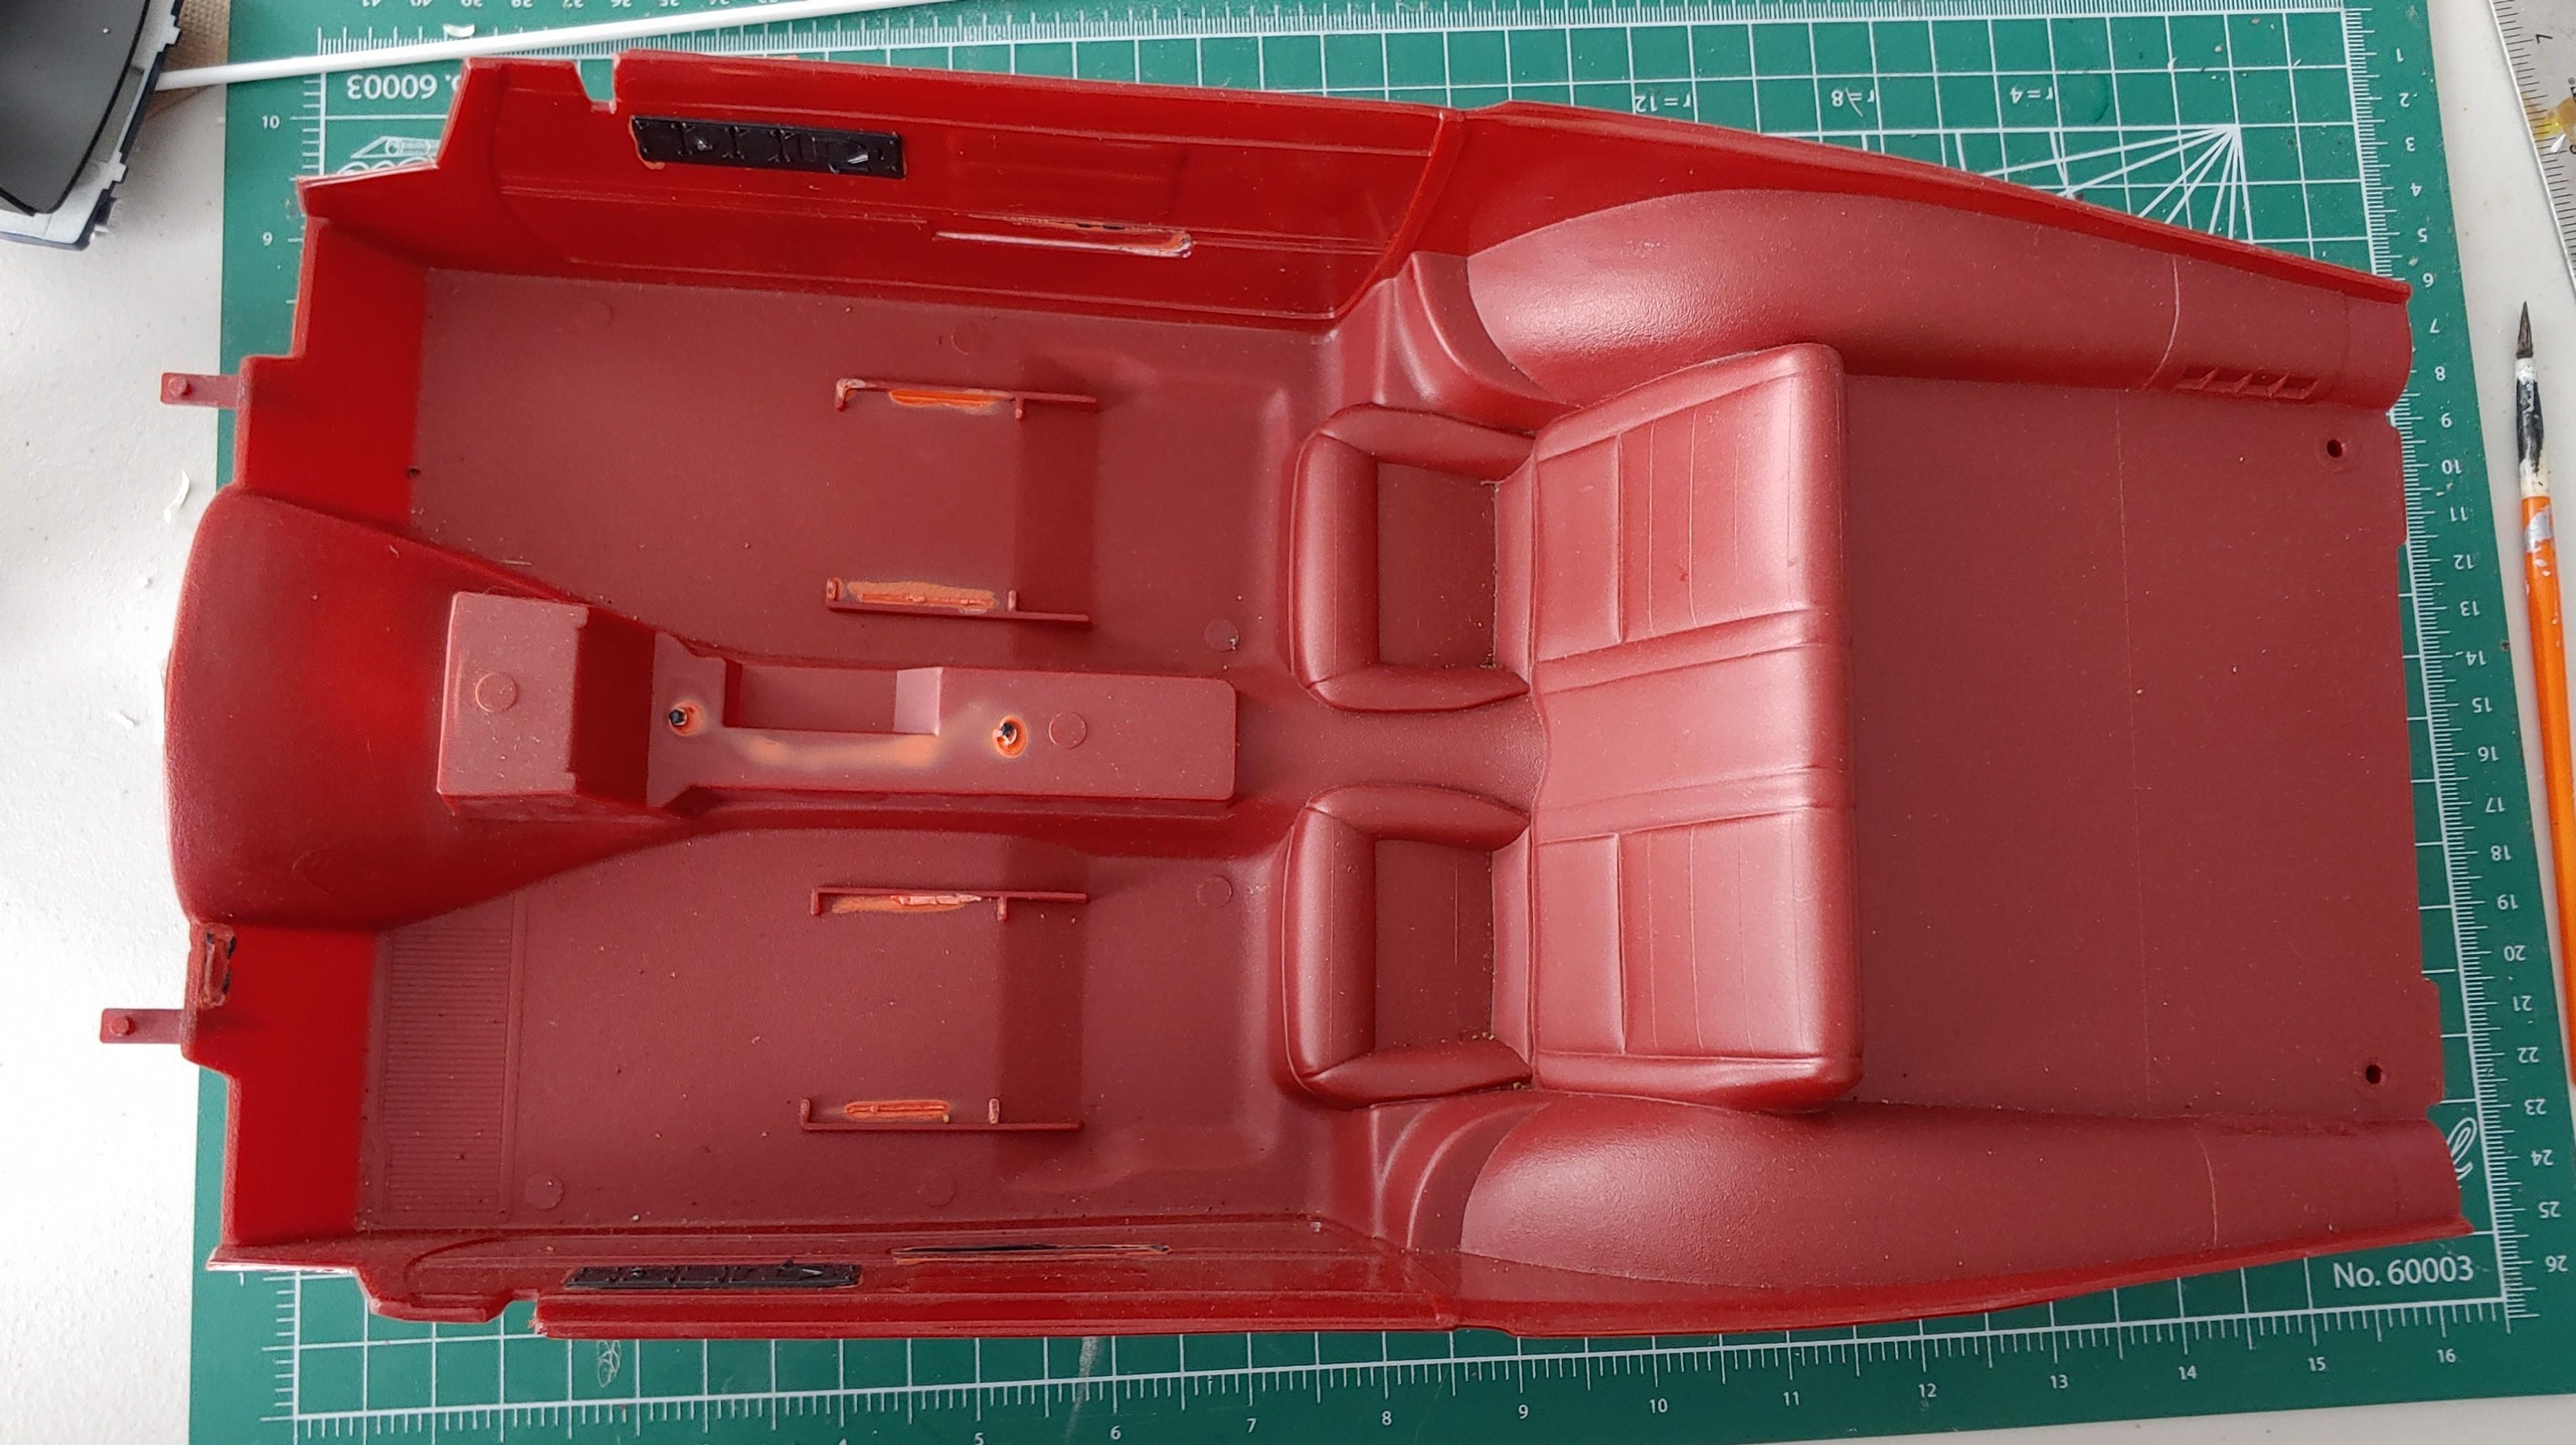
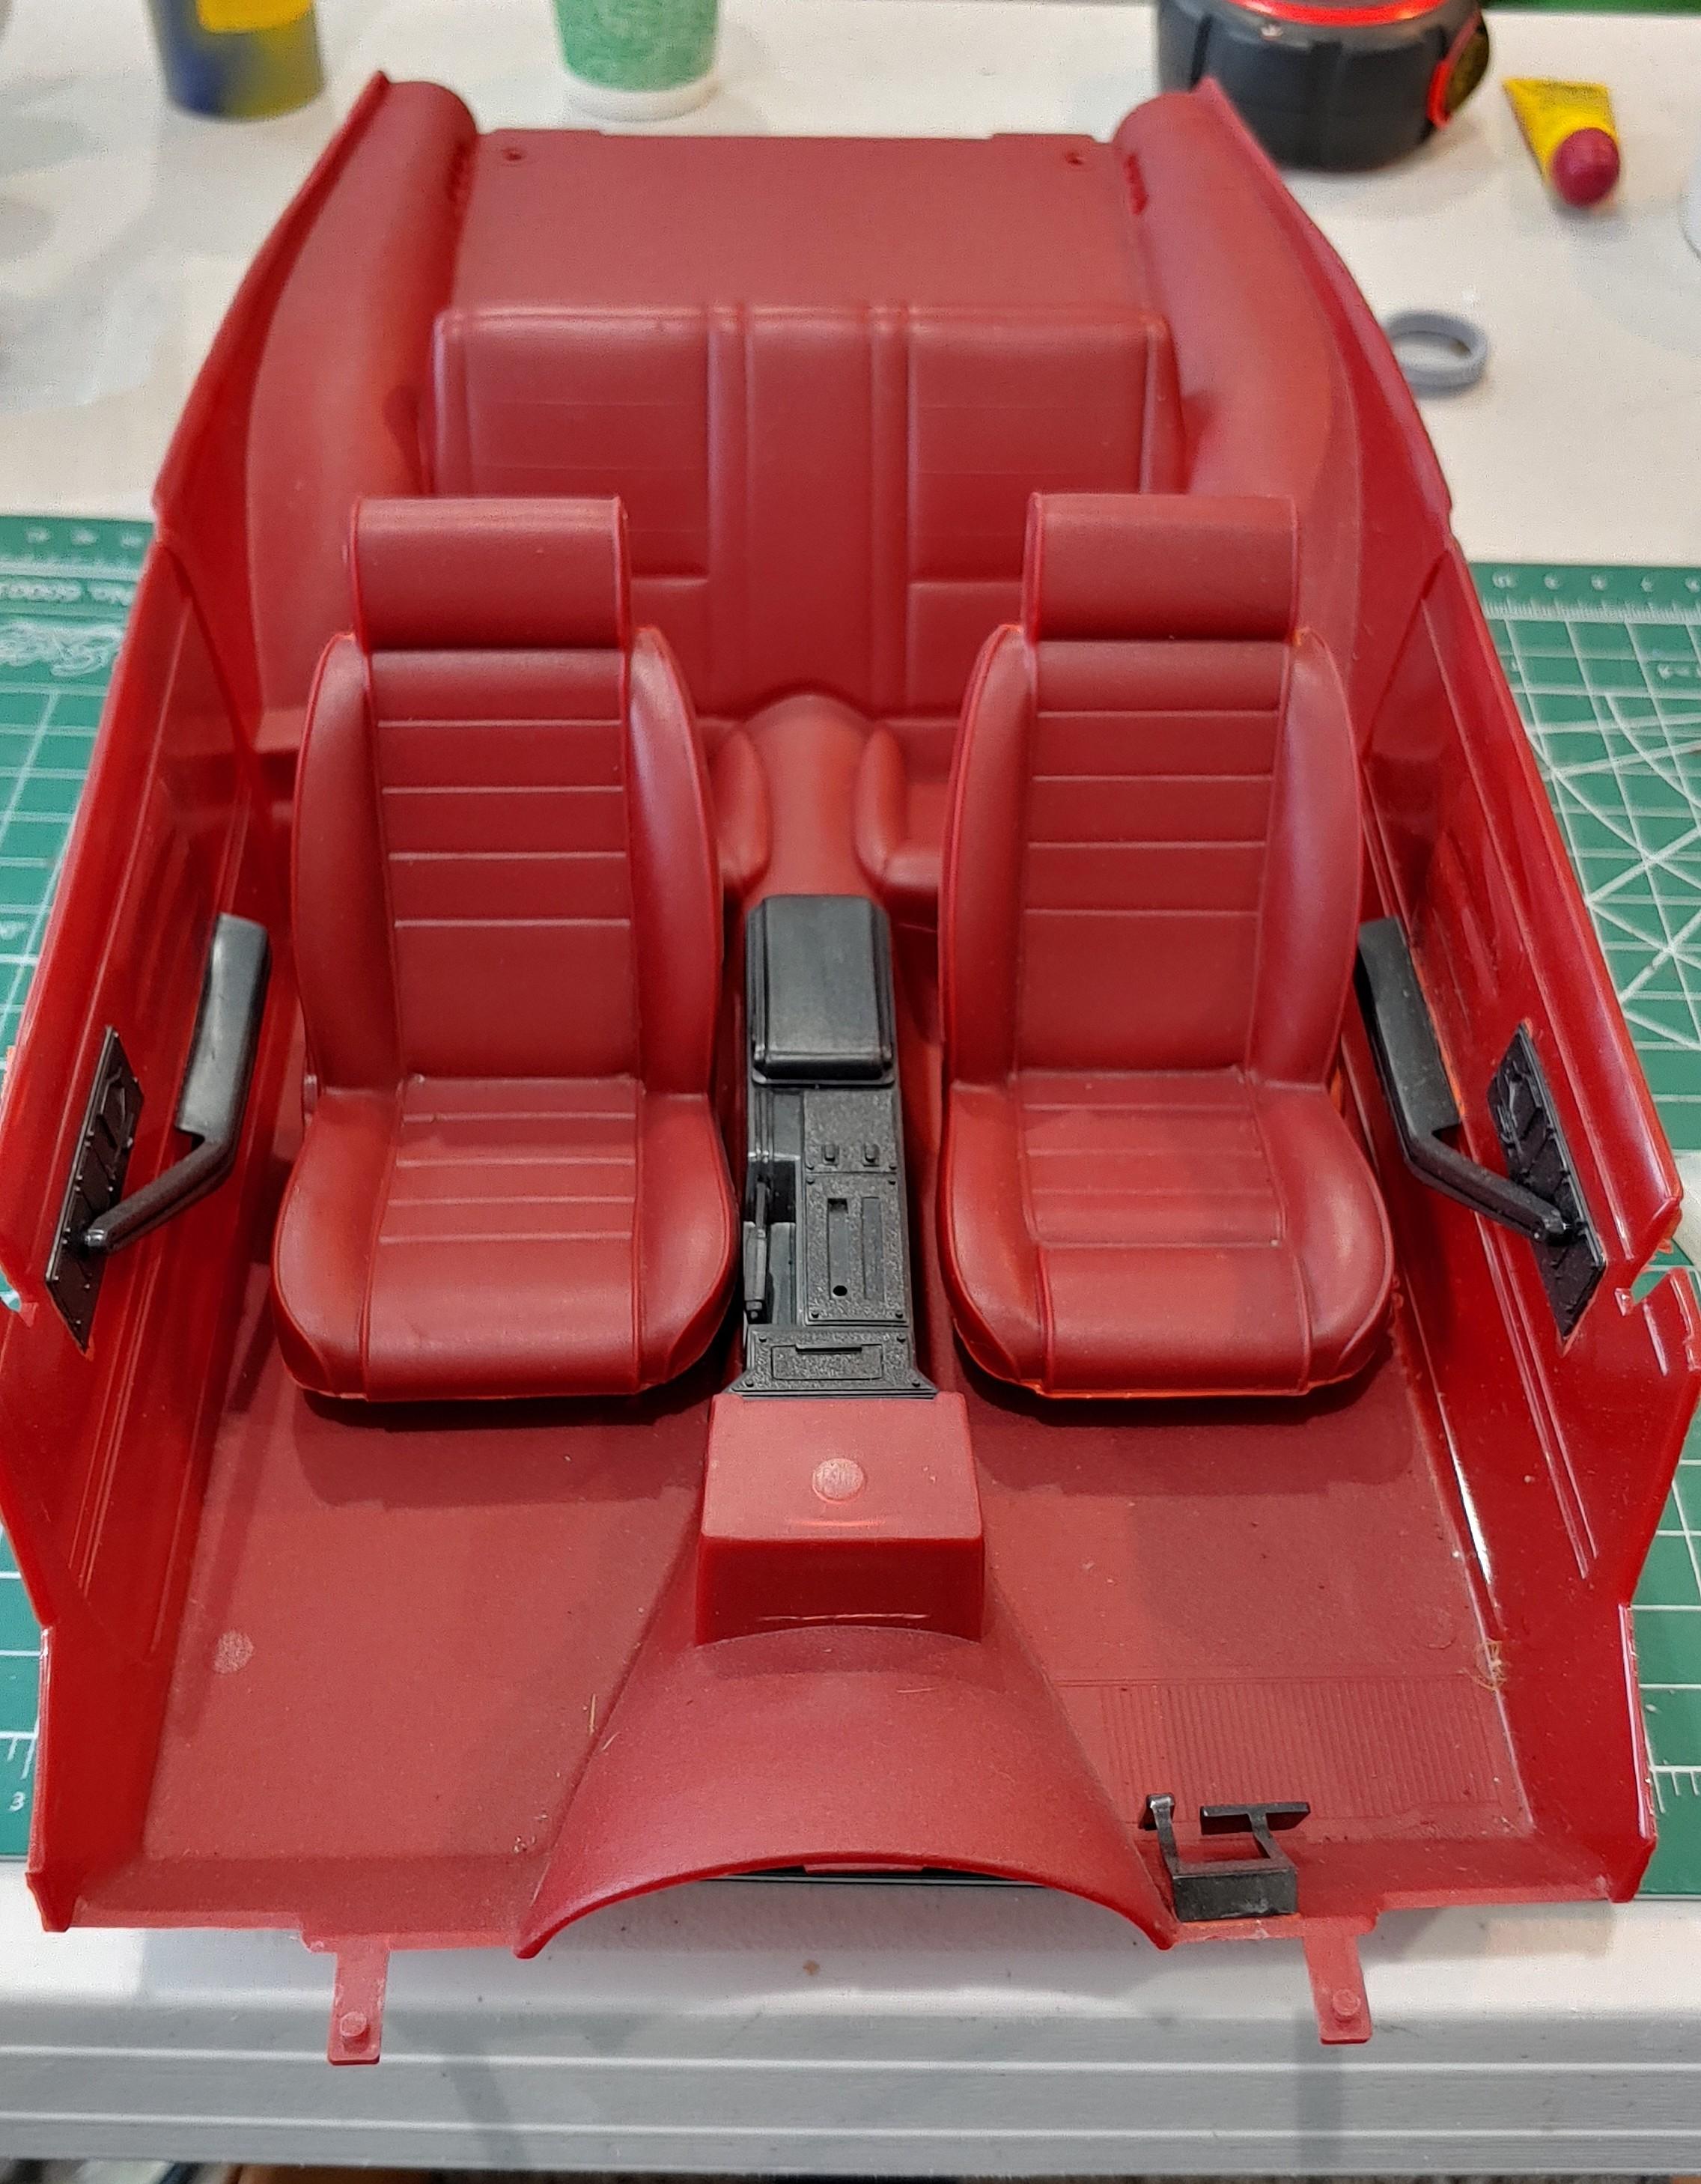
Thanks. Here are a couple pics of the interior.
-
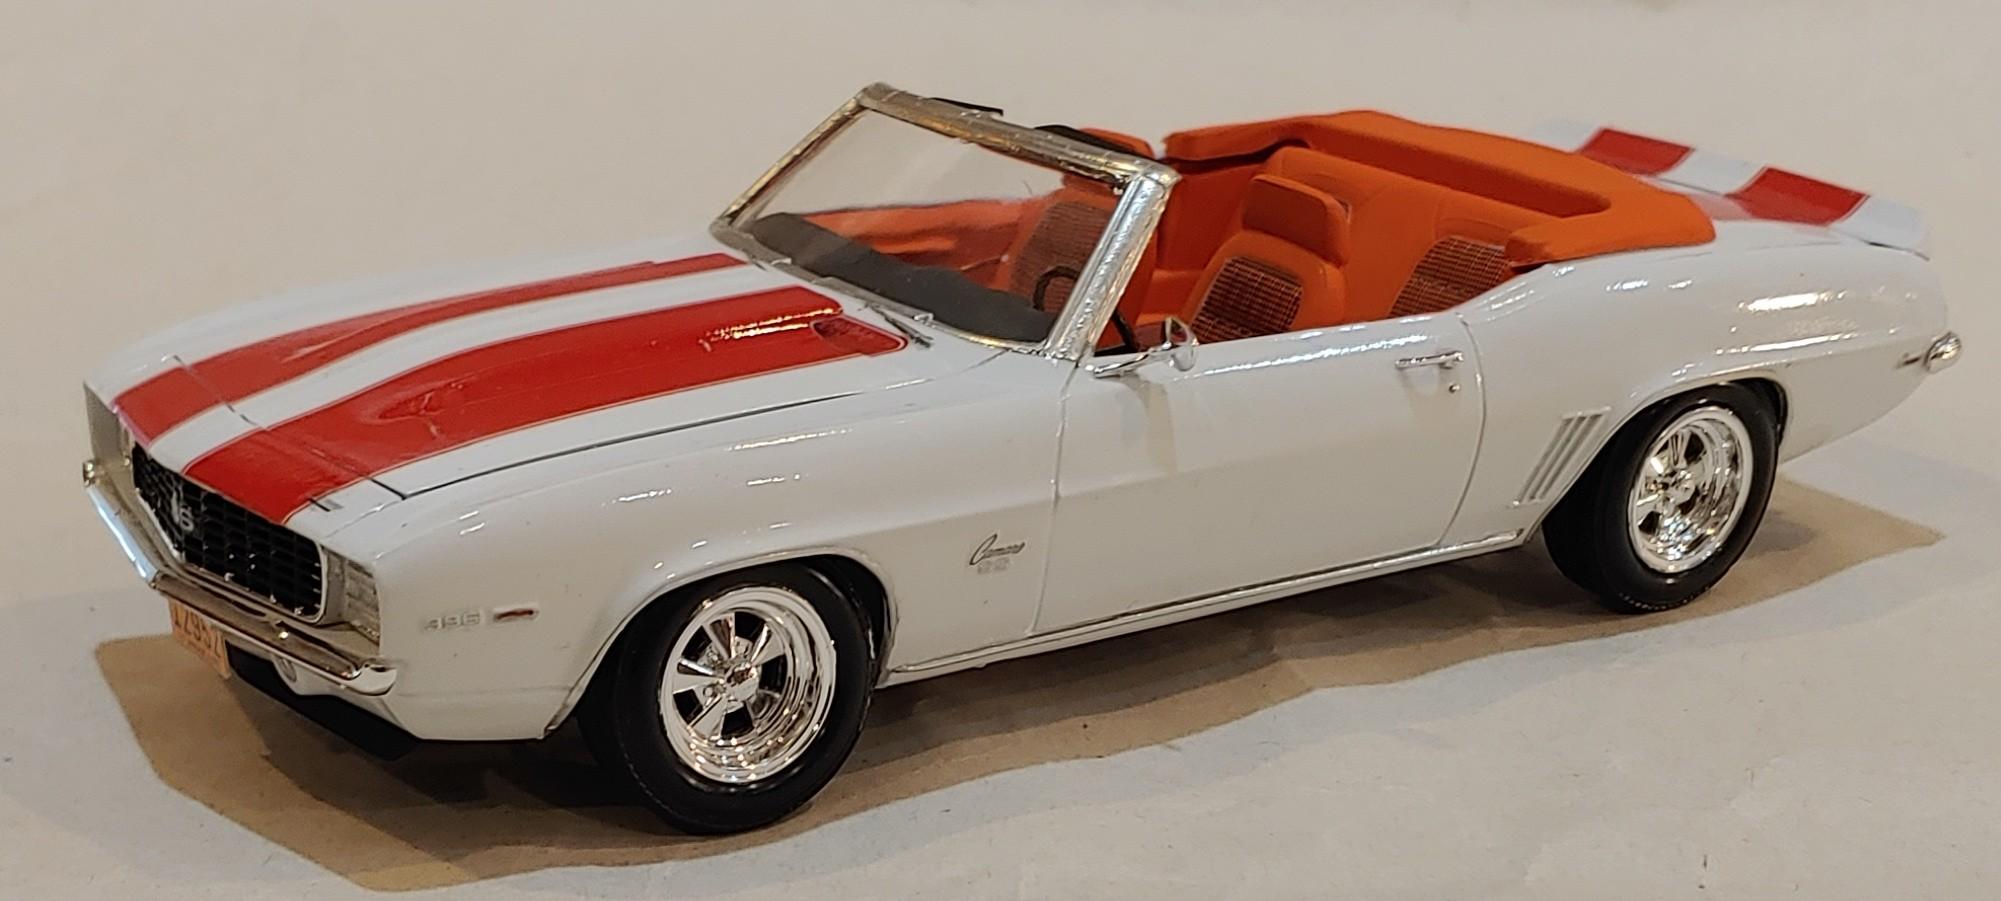
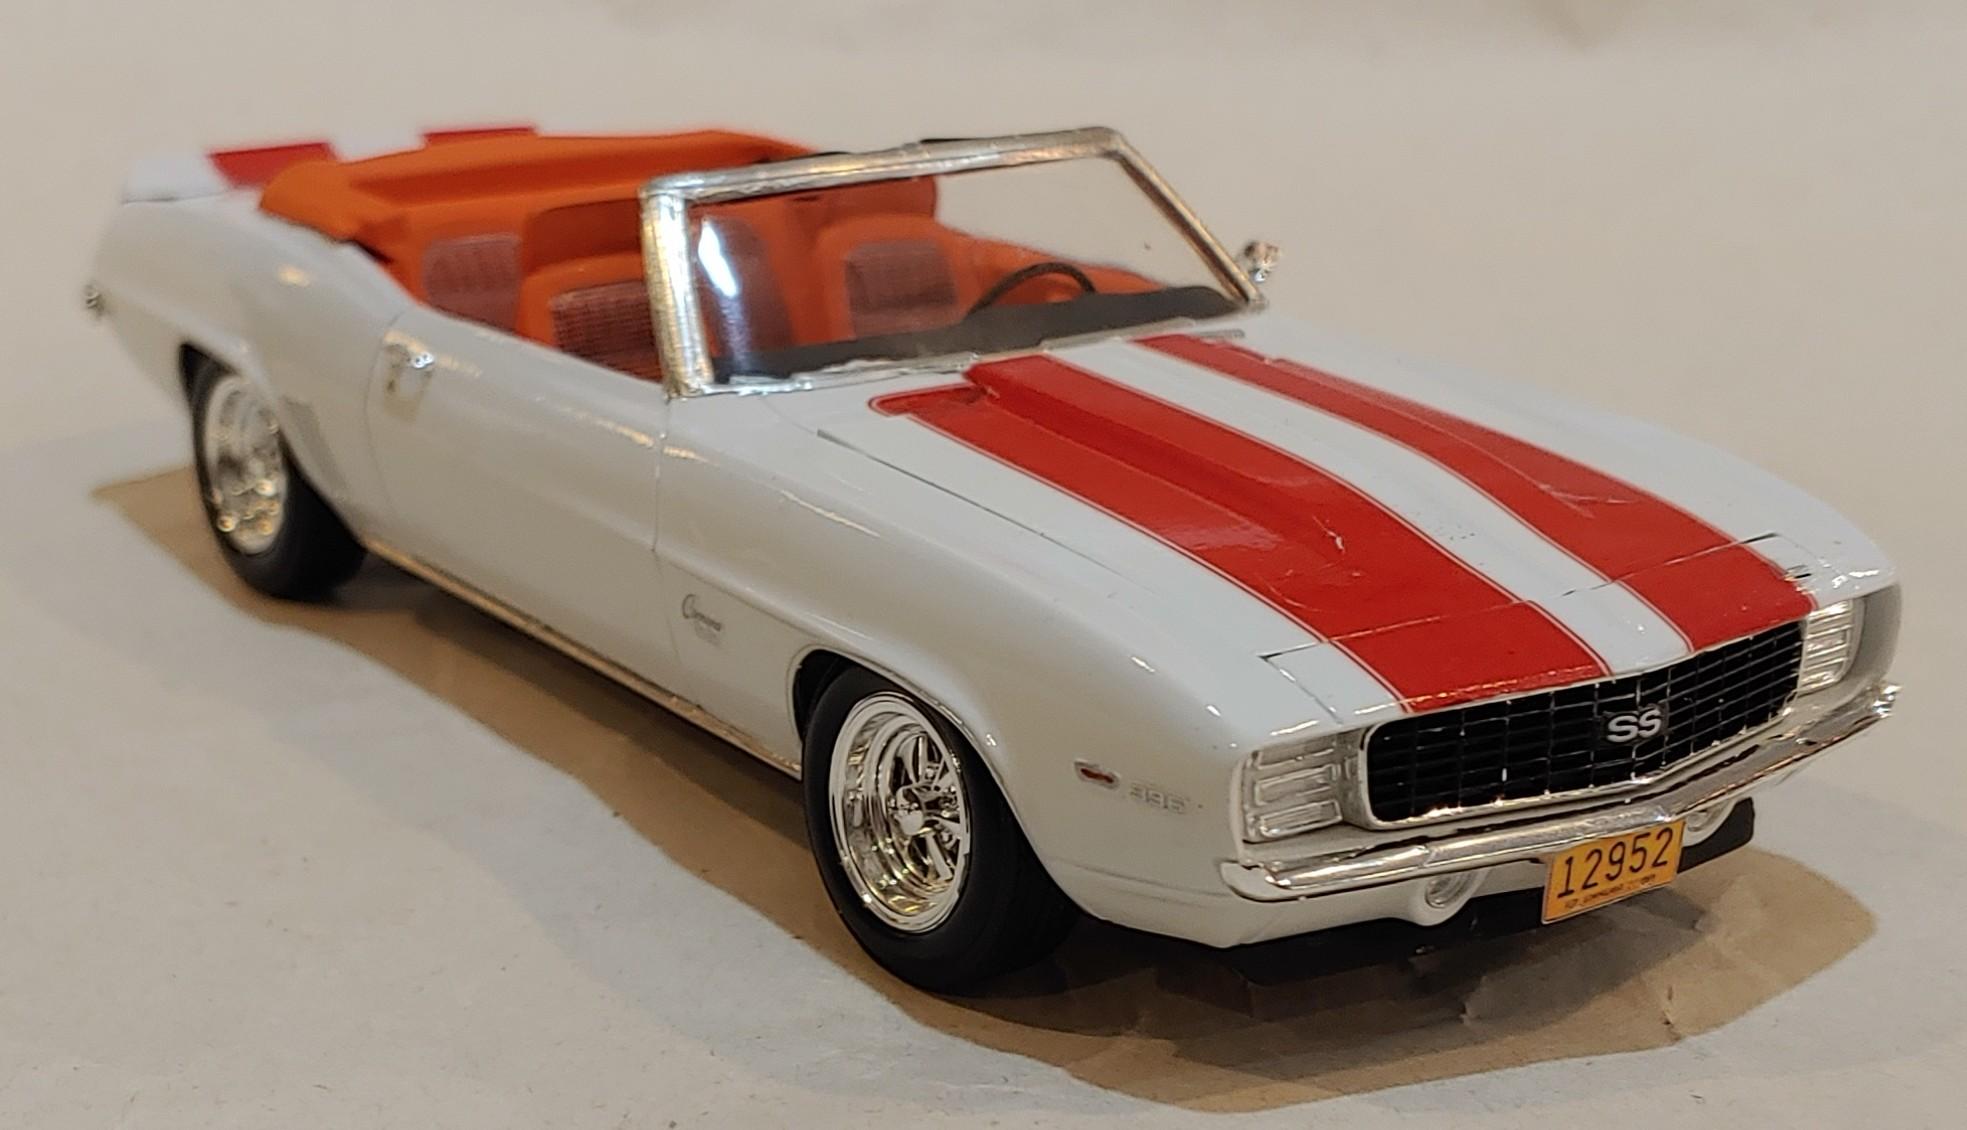
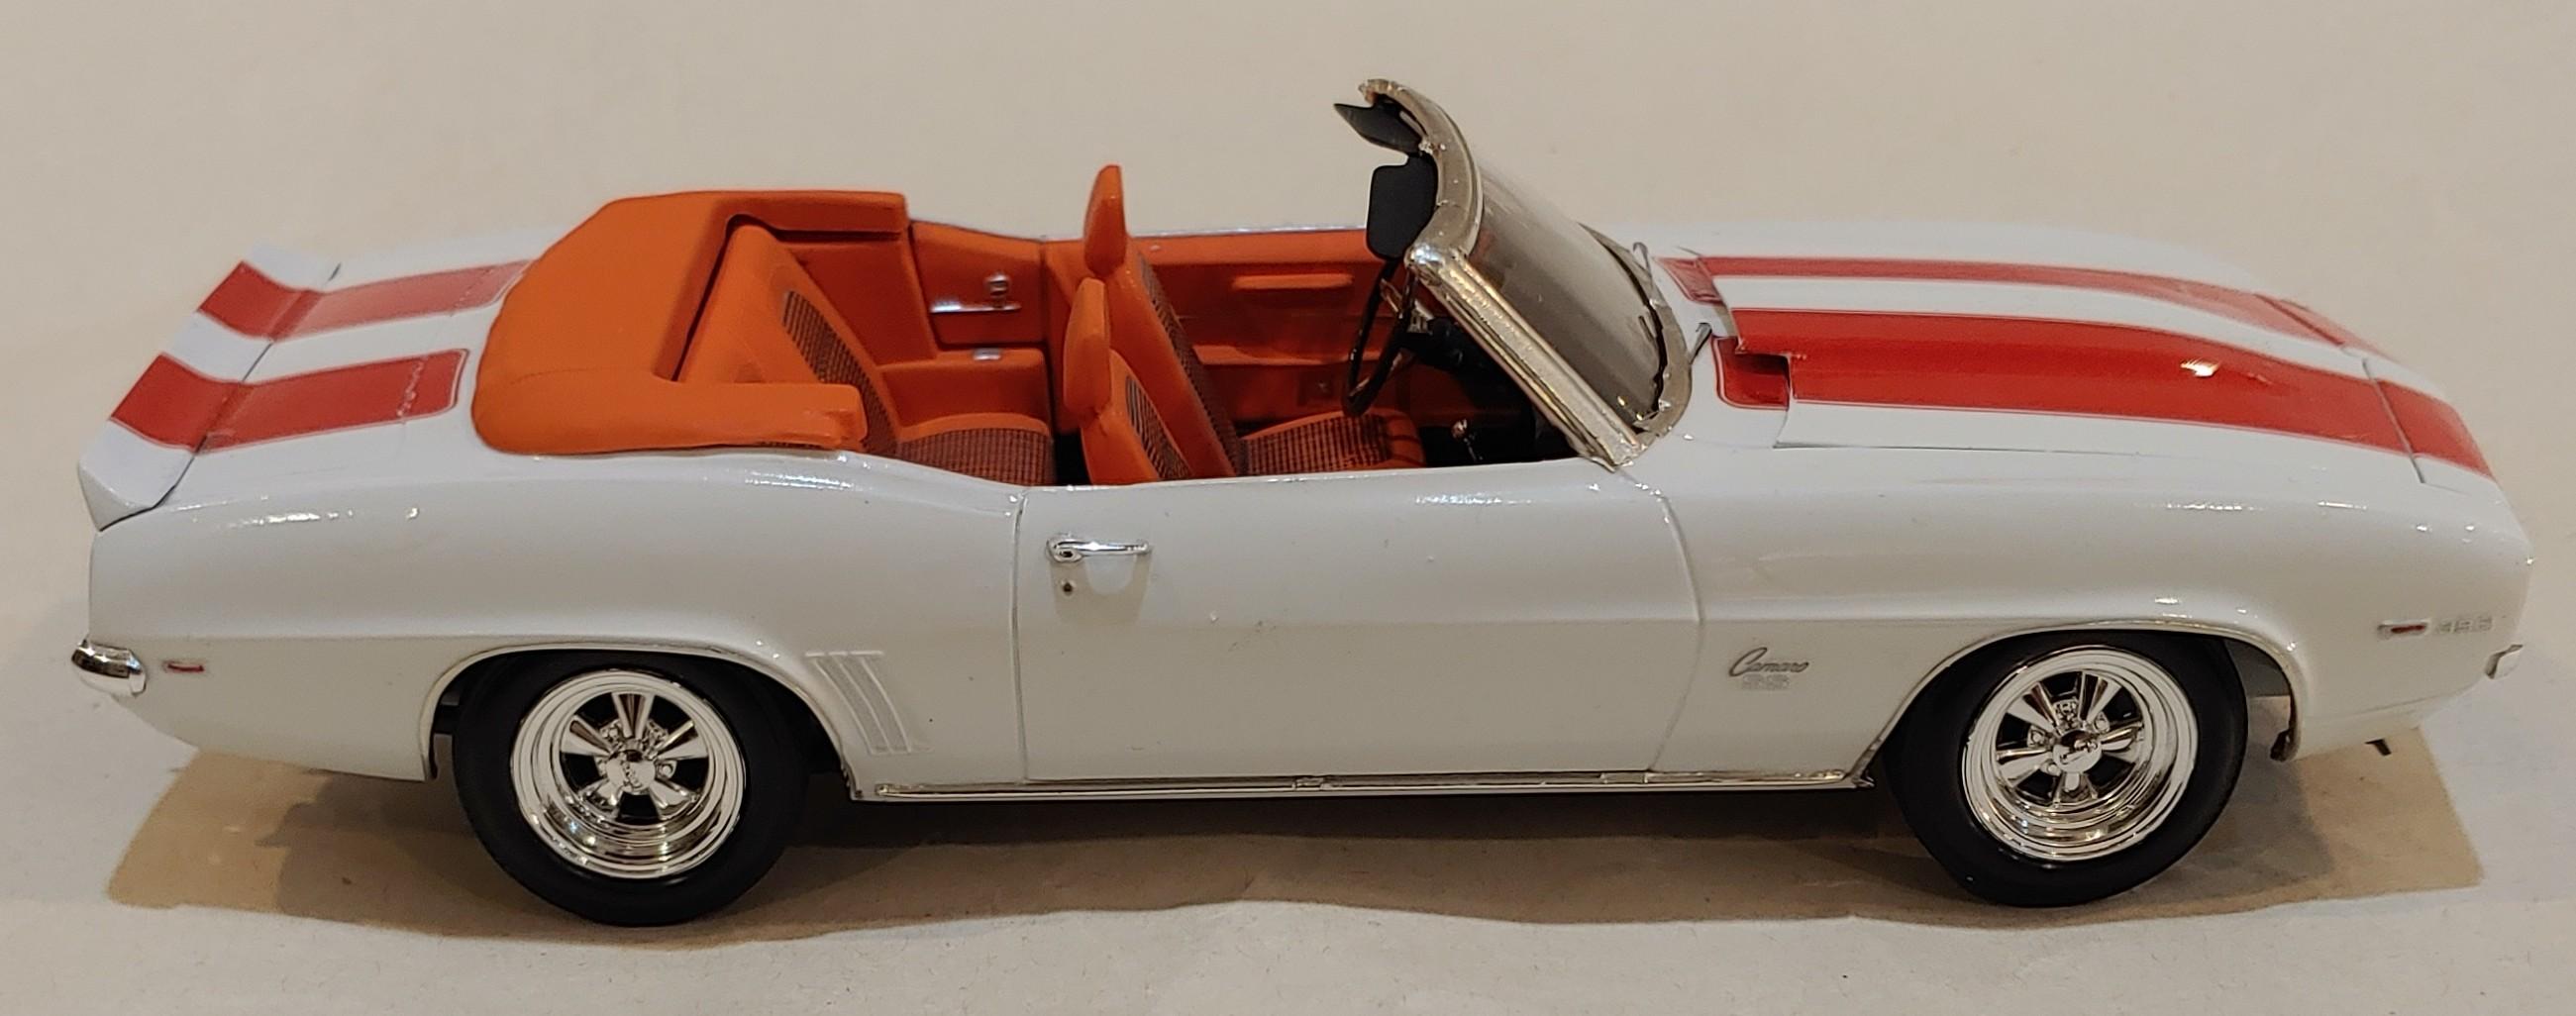
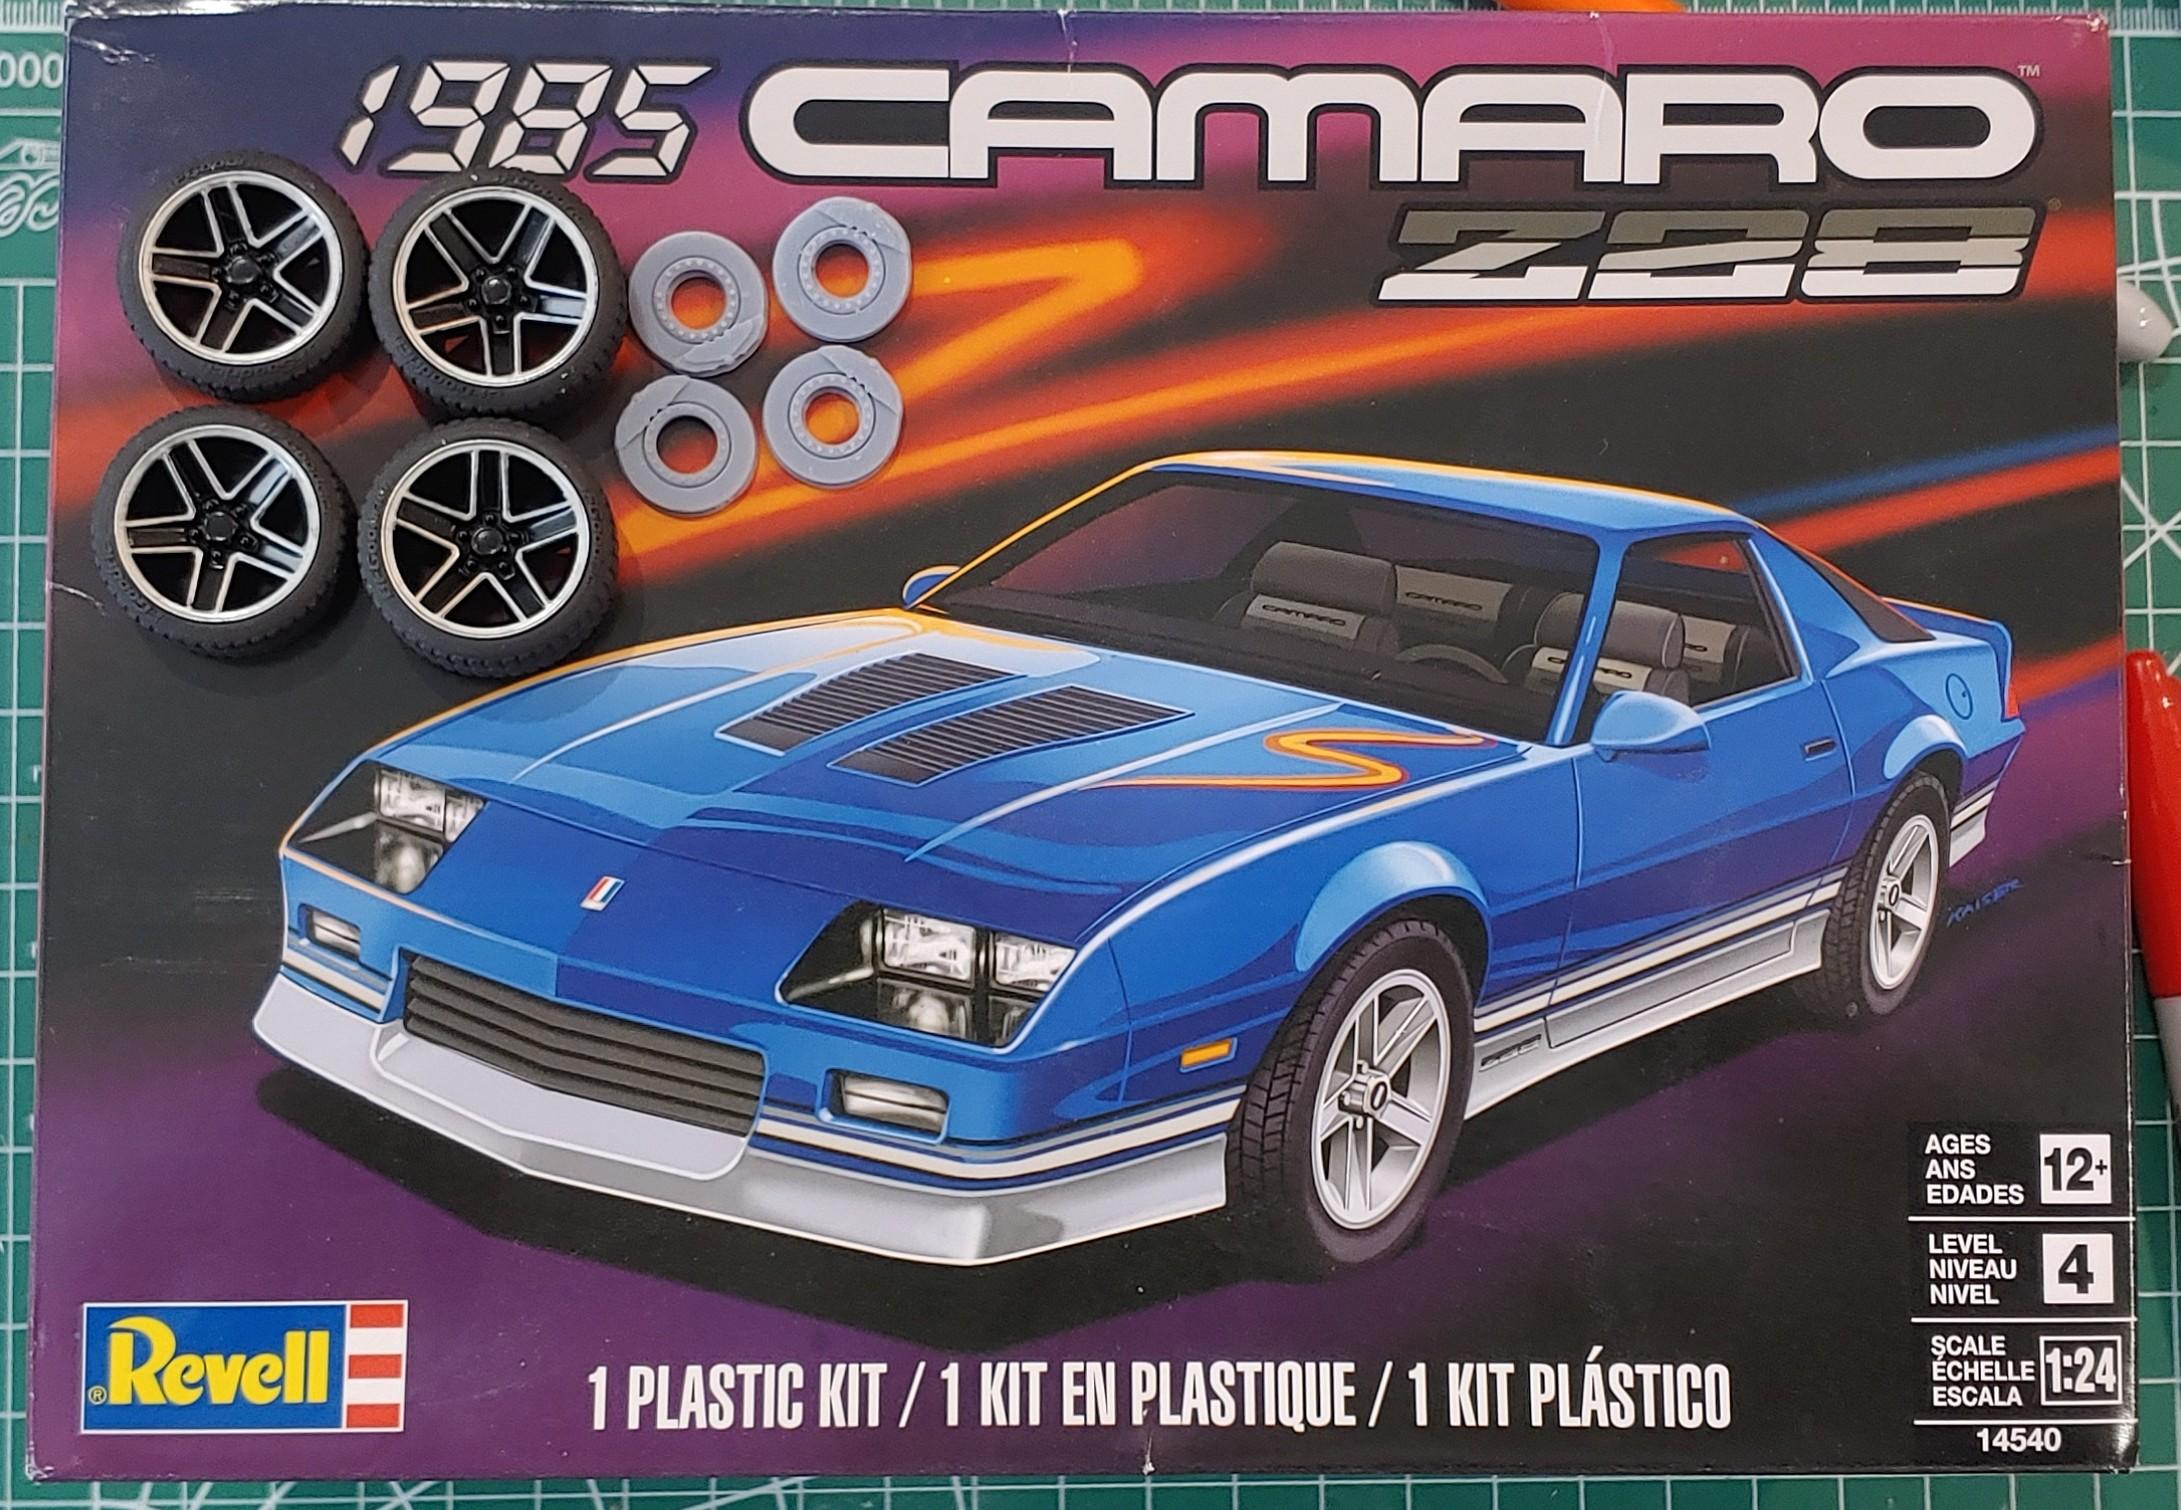
I built this replica of the '69 Camaro from the Fast & Furious short Los Bandoleros from a Revell kit with aftermarket stripe decals and wheels from my parts box. Here's the short. It takes place right before the 4th movie.
- 15 replies
-
- 18
-
-
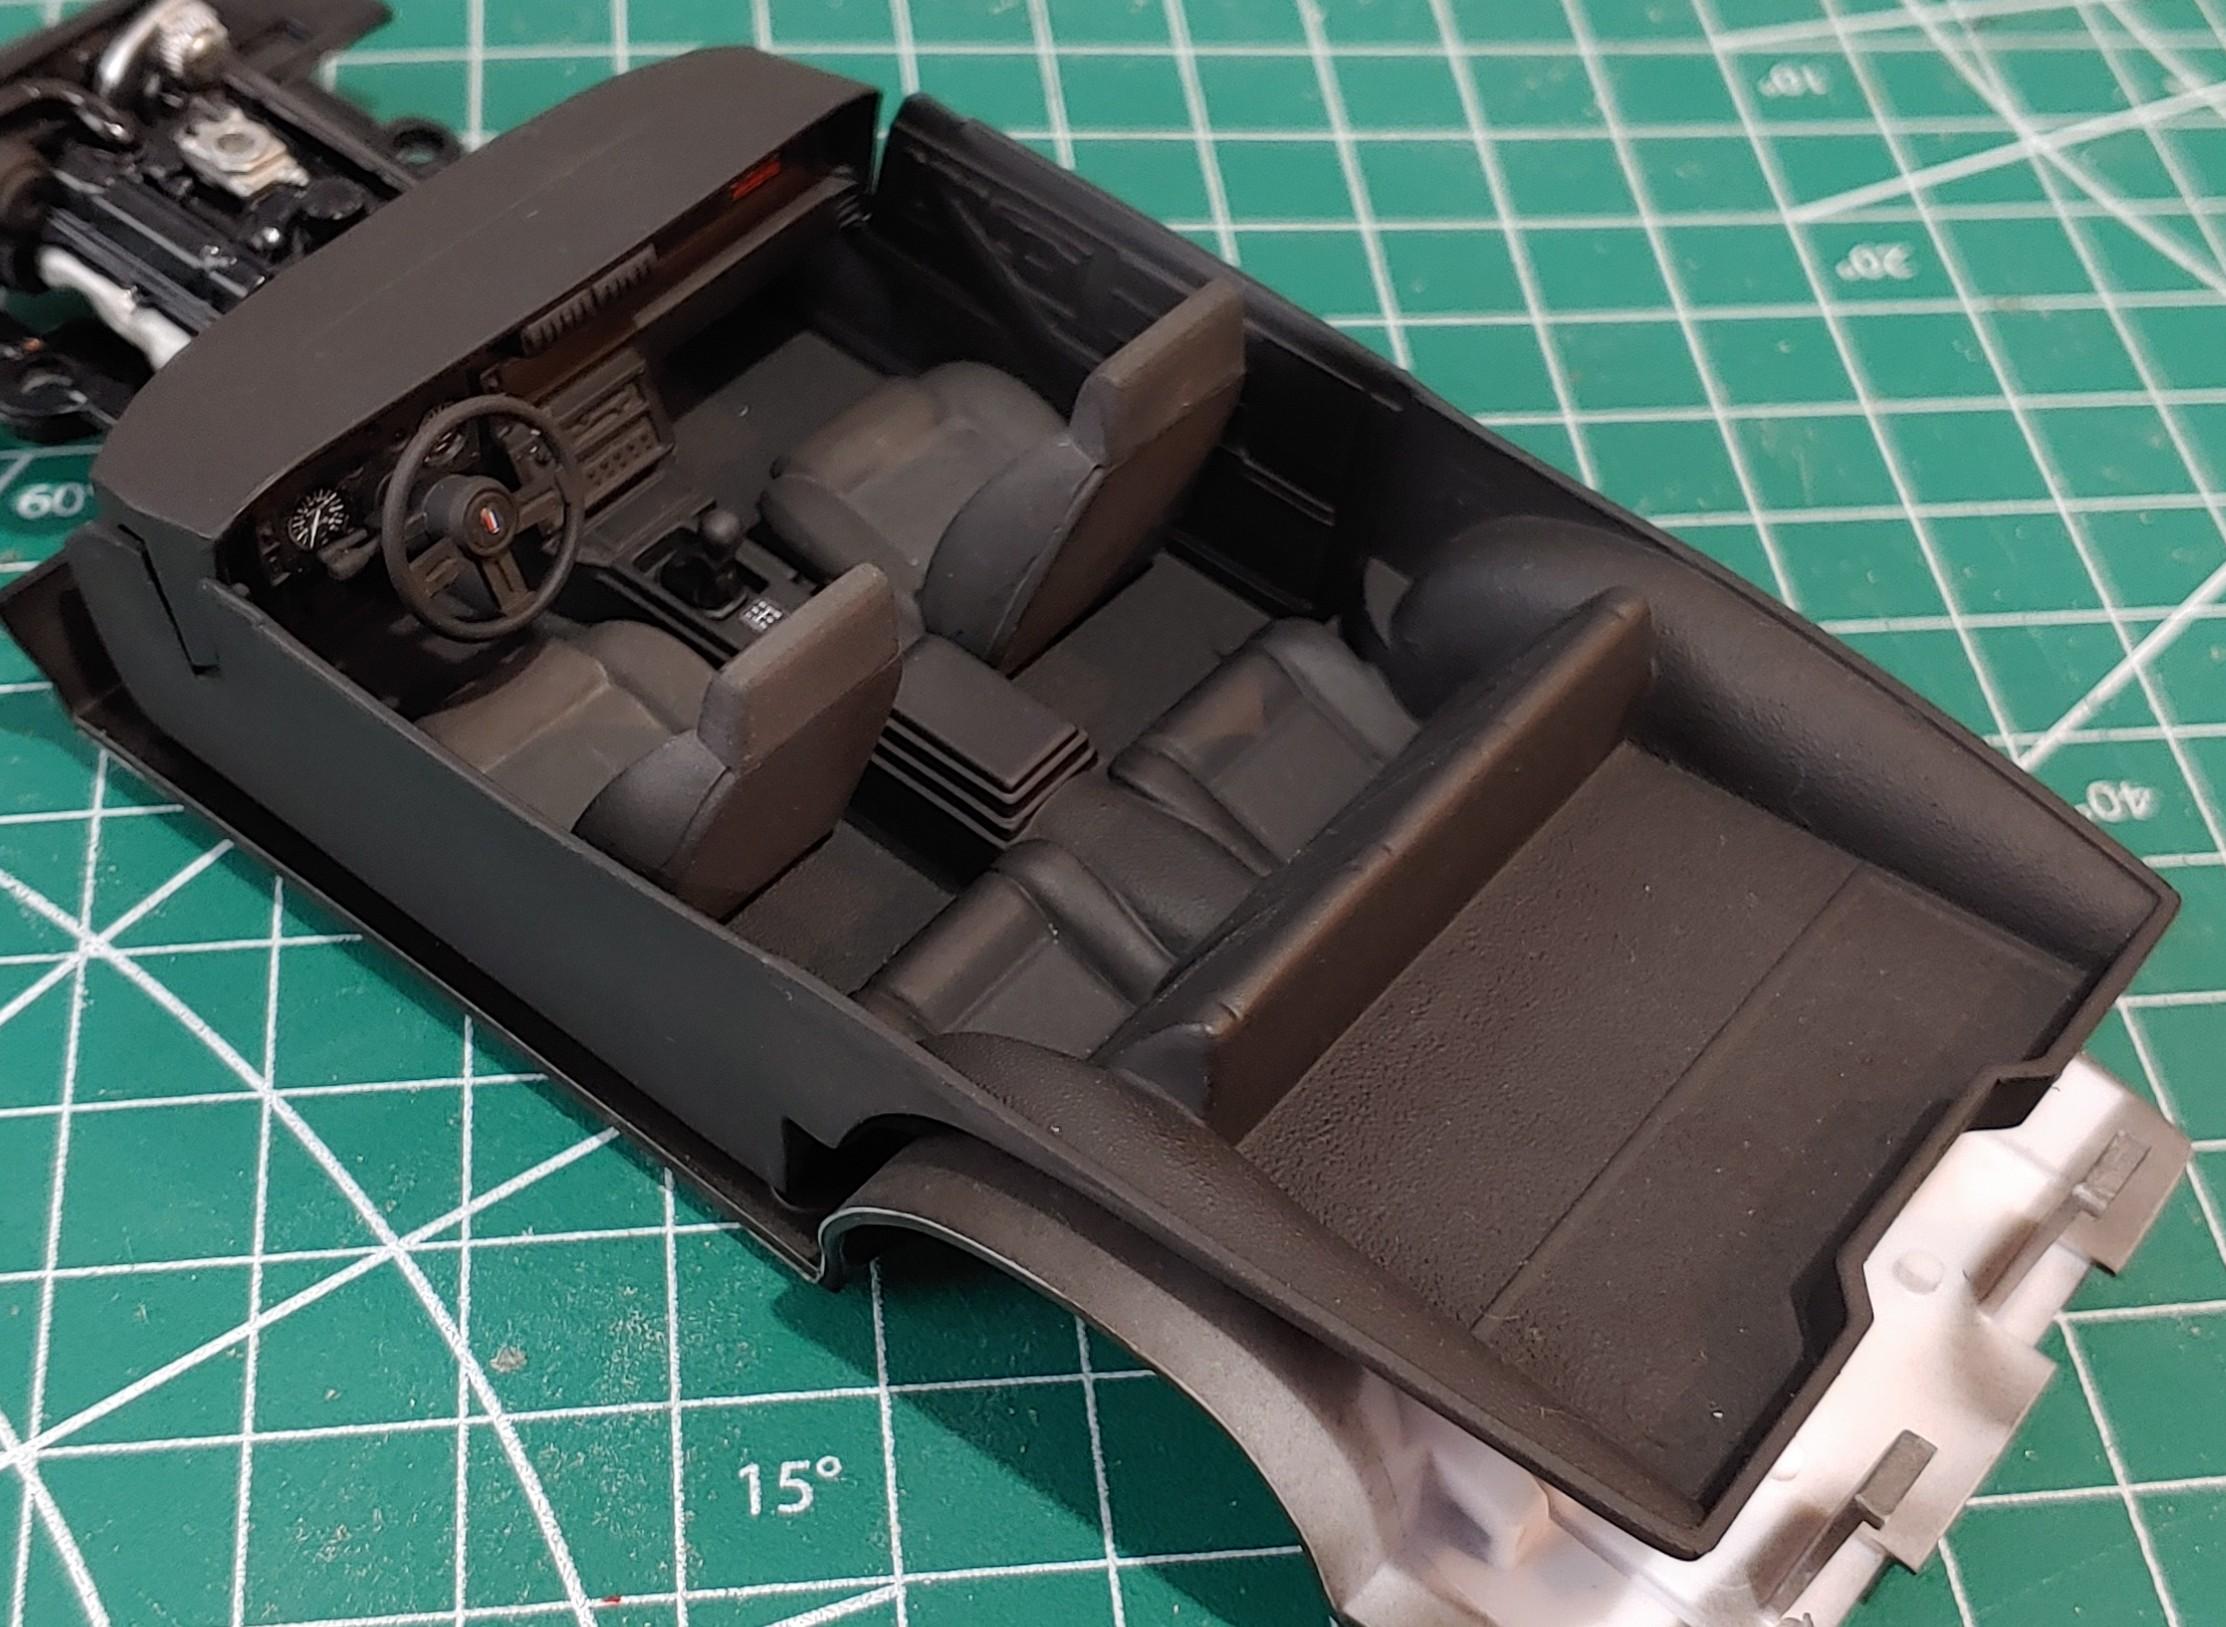
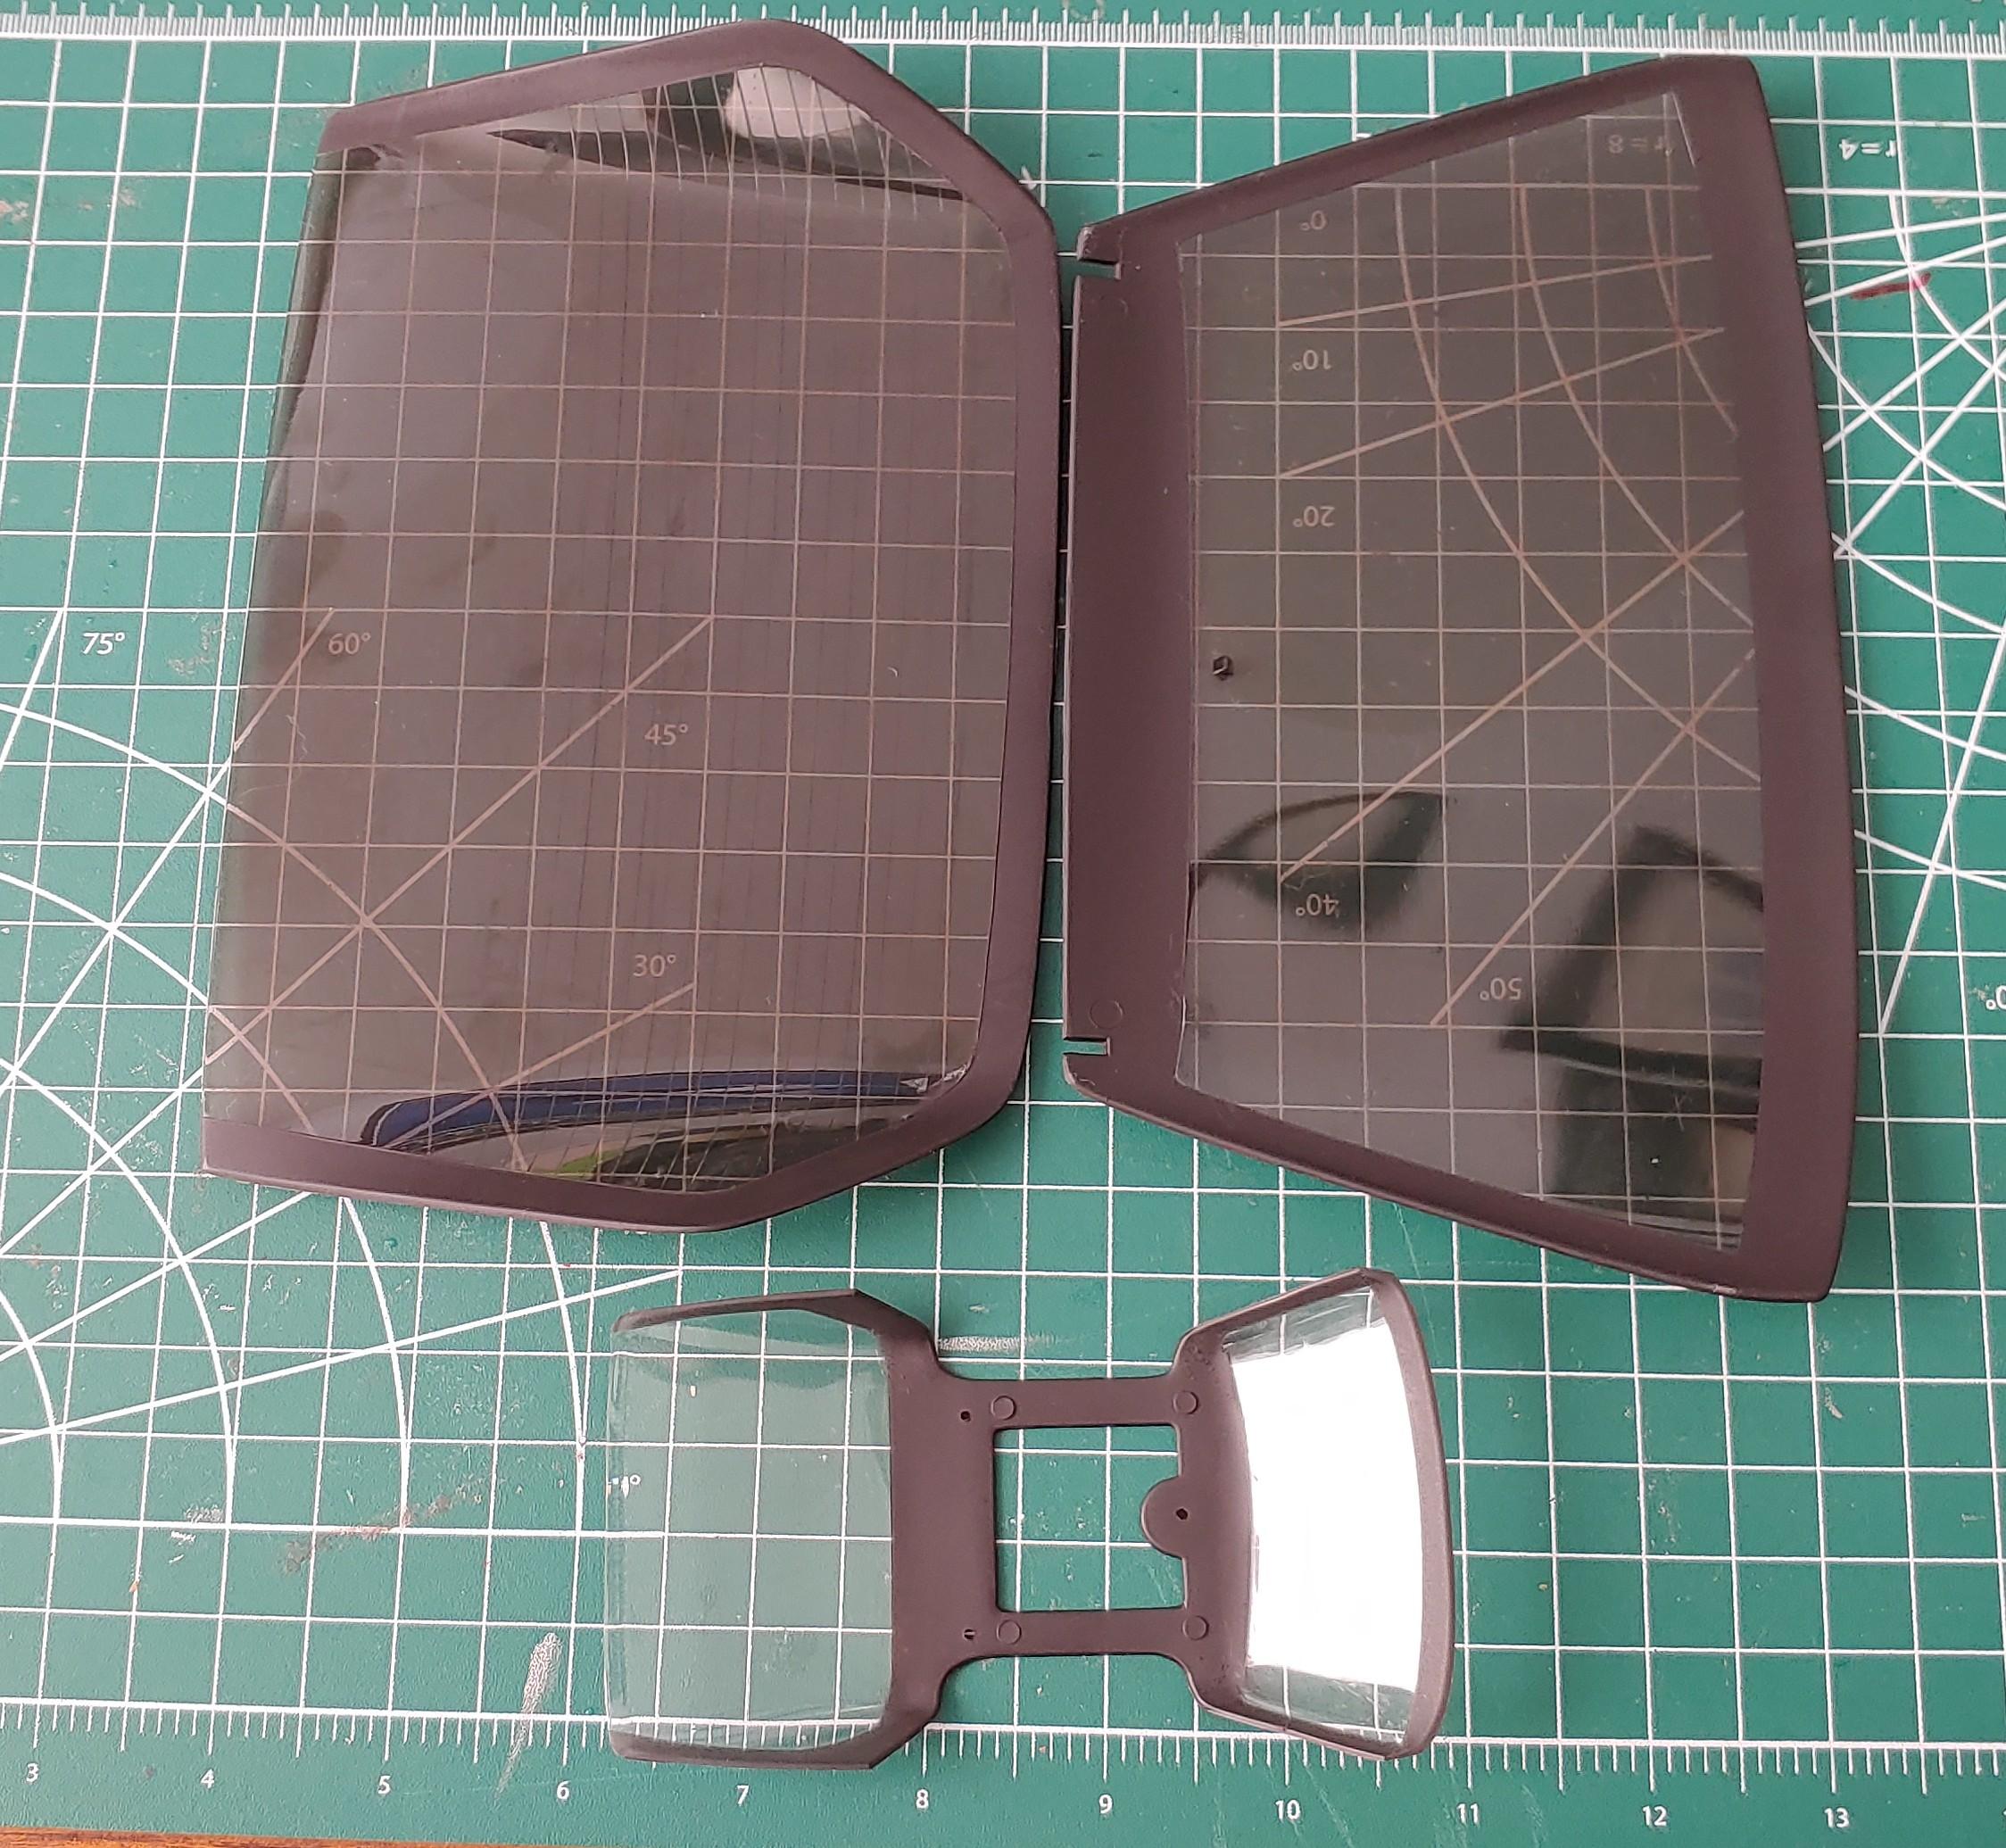
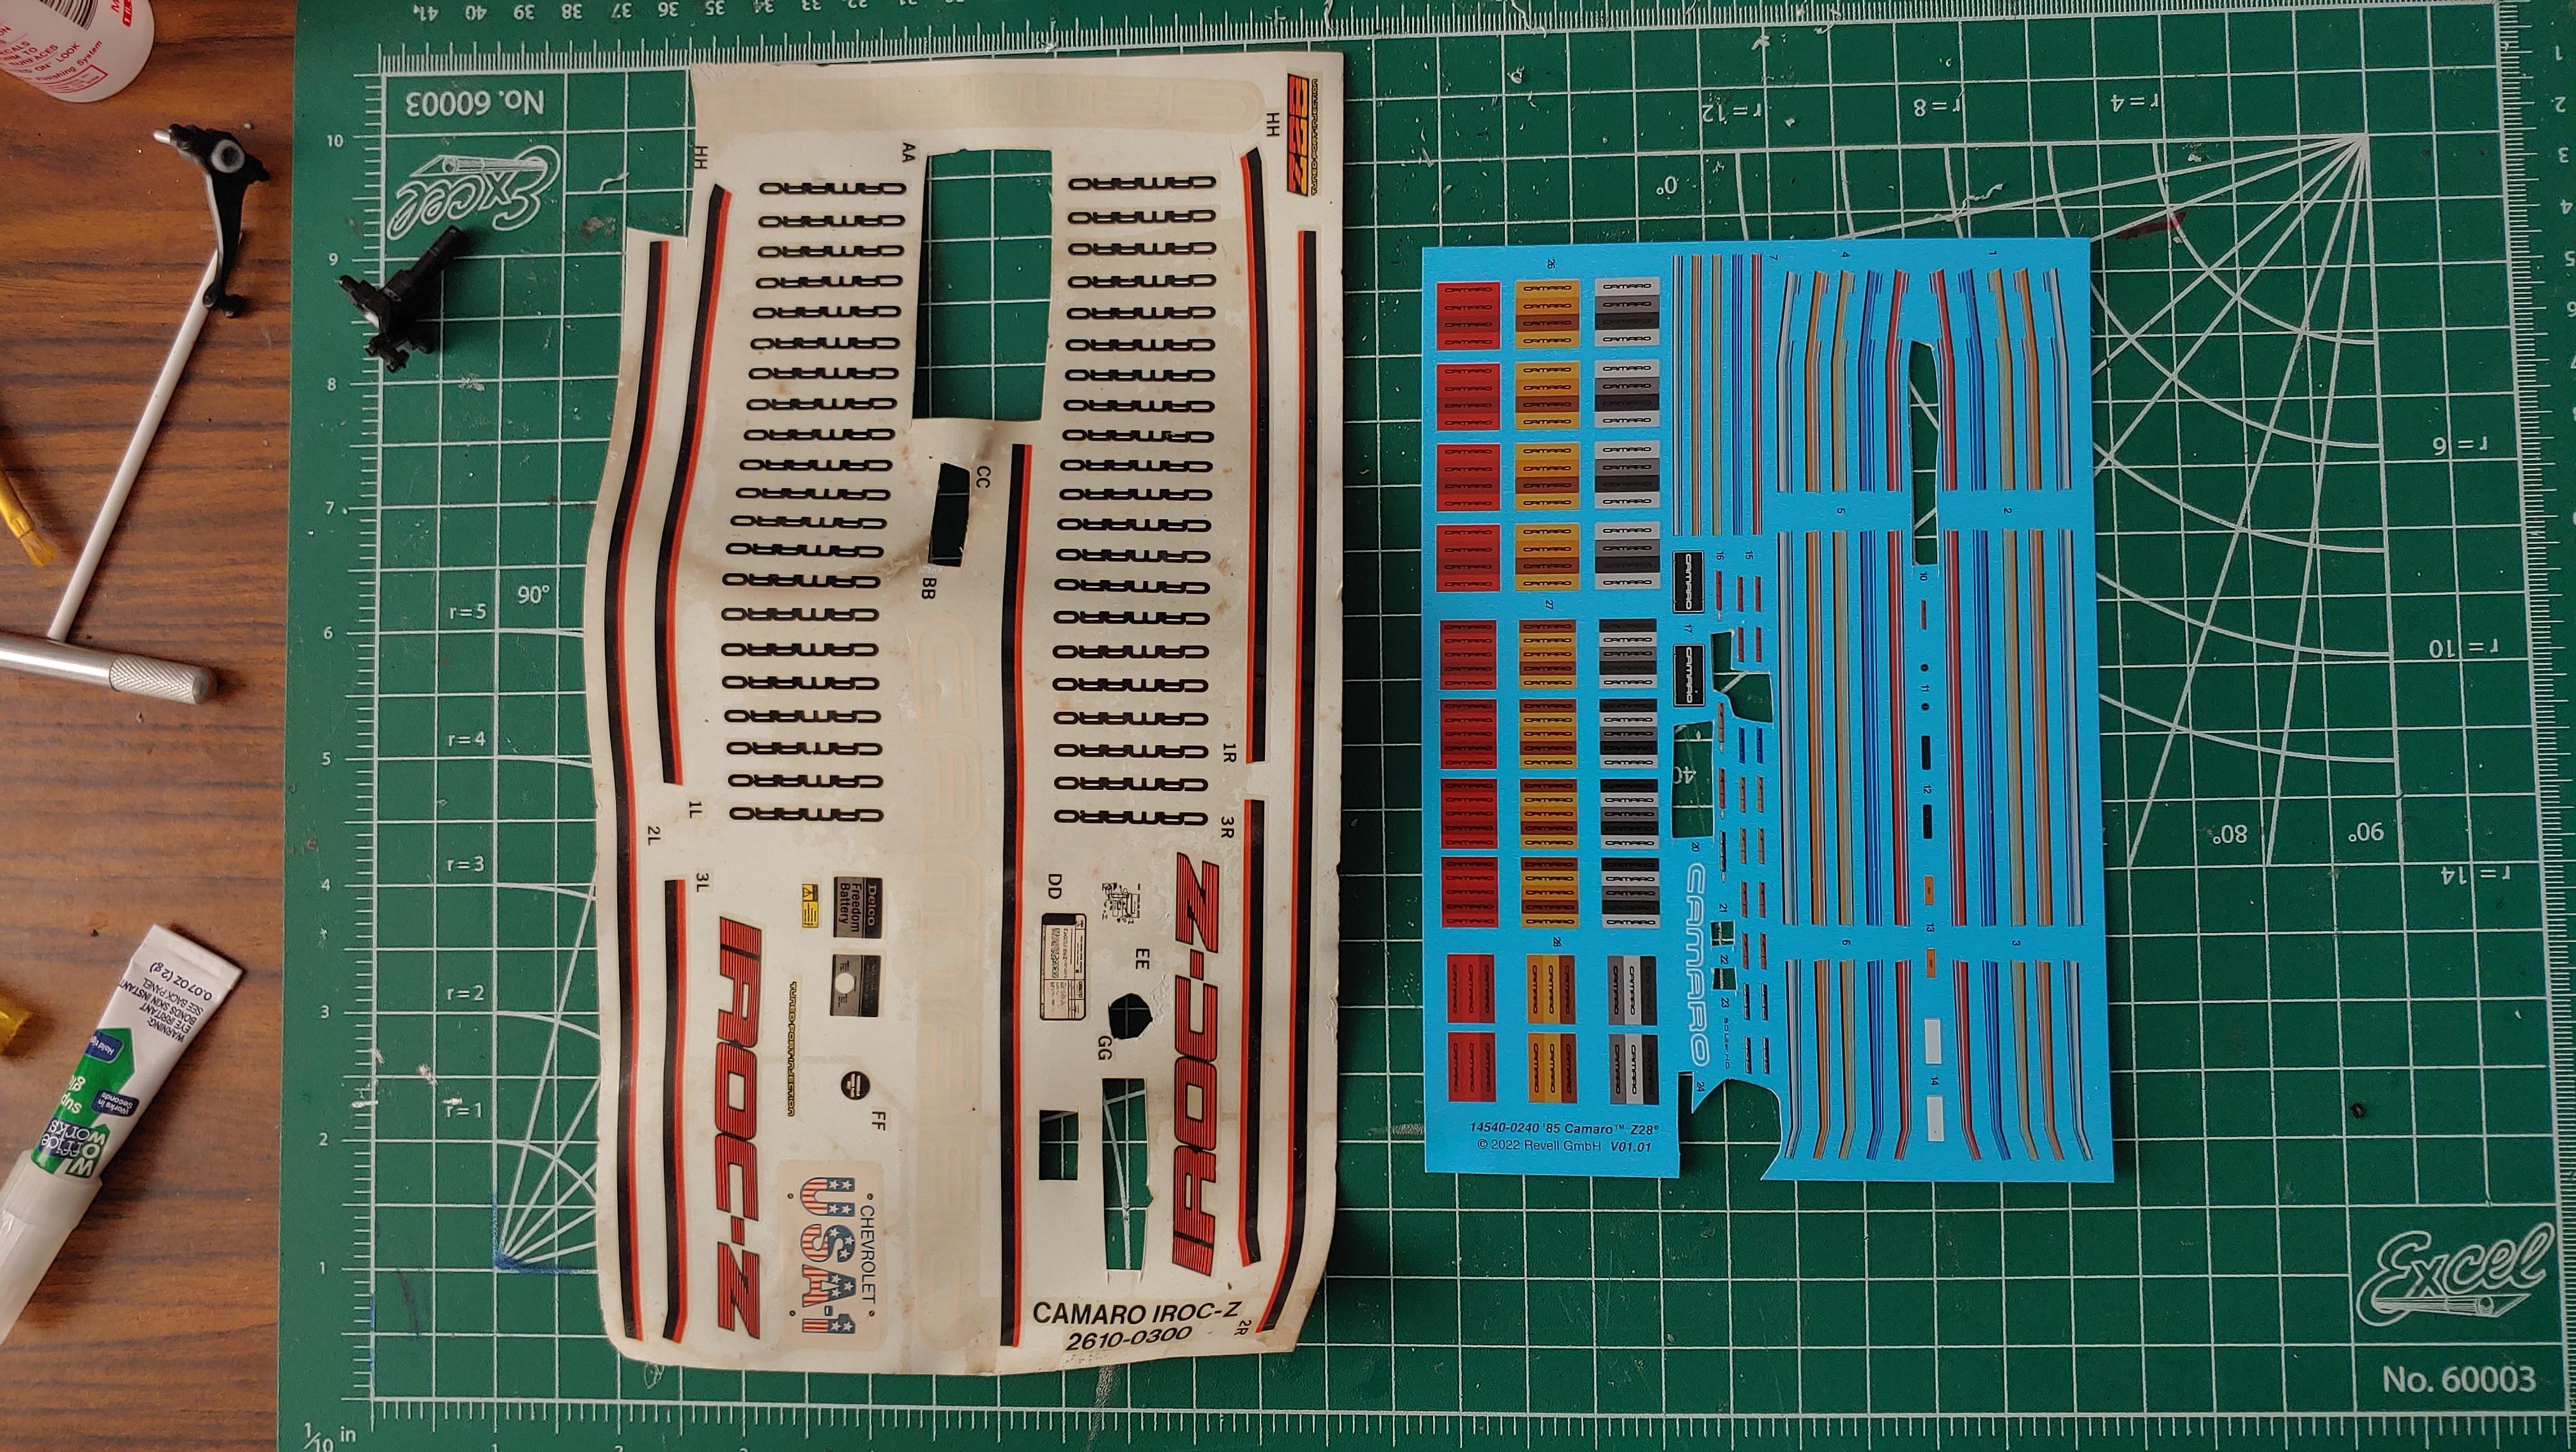
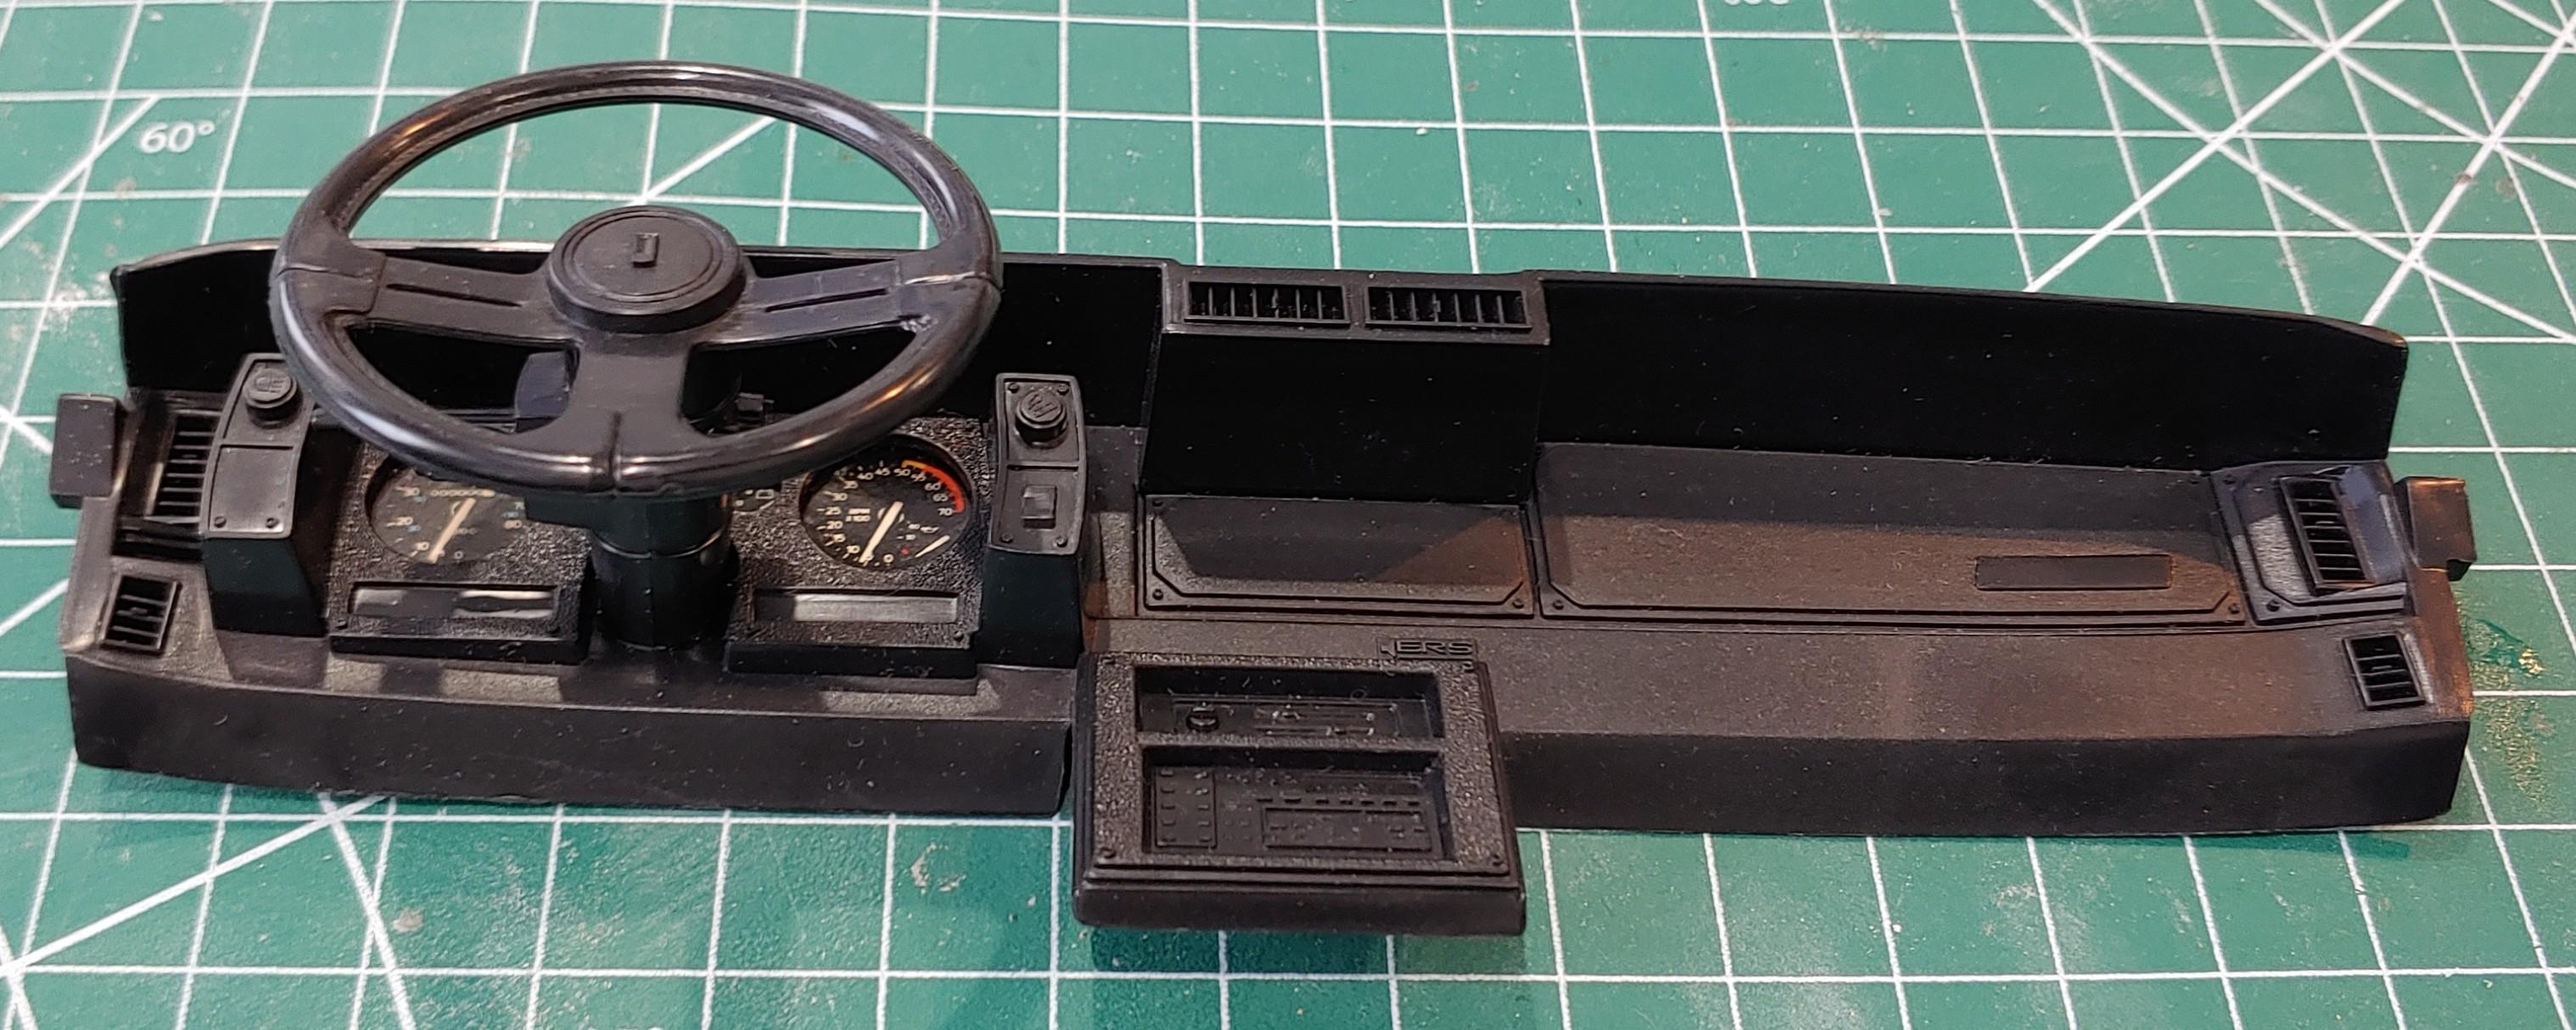
I got the interiors done. That's when I ran into the next surprise missing part, the shifter. Luckily the shifter knob was there so I just made the new shifter out of some round stock. I thought it was interesting that the 1/8 is an automatic and the 1/25 has a standard transmission. Both kits came with gauge decals that are pretty nice. The 1/25 kit had posts that go from the chassis through the floor pan that the seats attach to, which I thought was clever. And here they are side by side. I got the frit painted on the Windows. The 1/8 was super easy, it had nice crisp separation lines. The lines on the 1/25 were kinds vague, so I had to wing it, but I think it turned out okay. I got the paint jobs done. I had to buff out a couple runs from the 1/8, I'm just not used to painting something that big. Here are the decal sheets, the 1/25 has so many options, it's almost as big as the 1/8. Now that I've gotten the major sub assemblies and the windows done, I can get the chassis mounted to the bodies and get to work on the suspension. More next time.
-
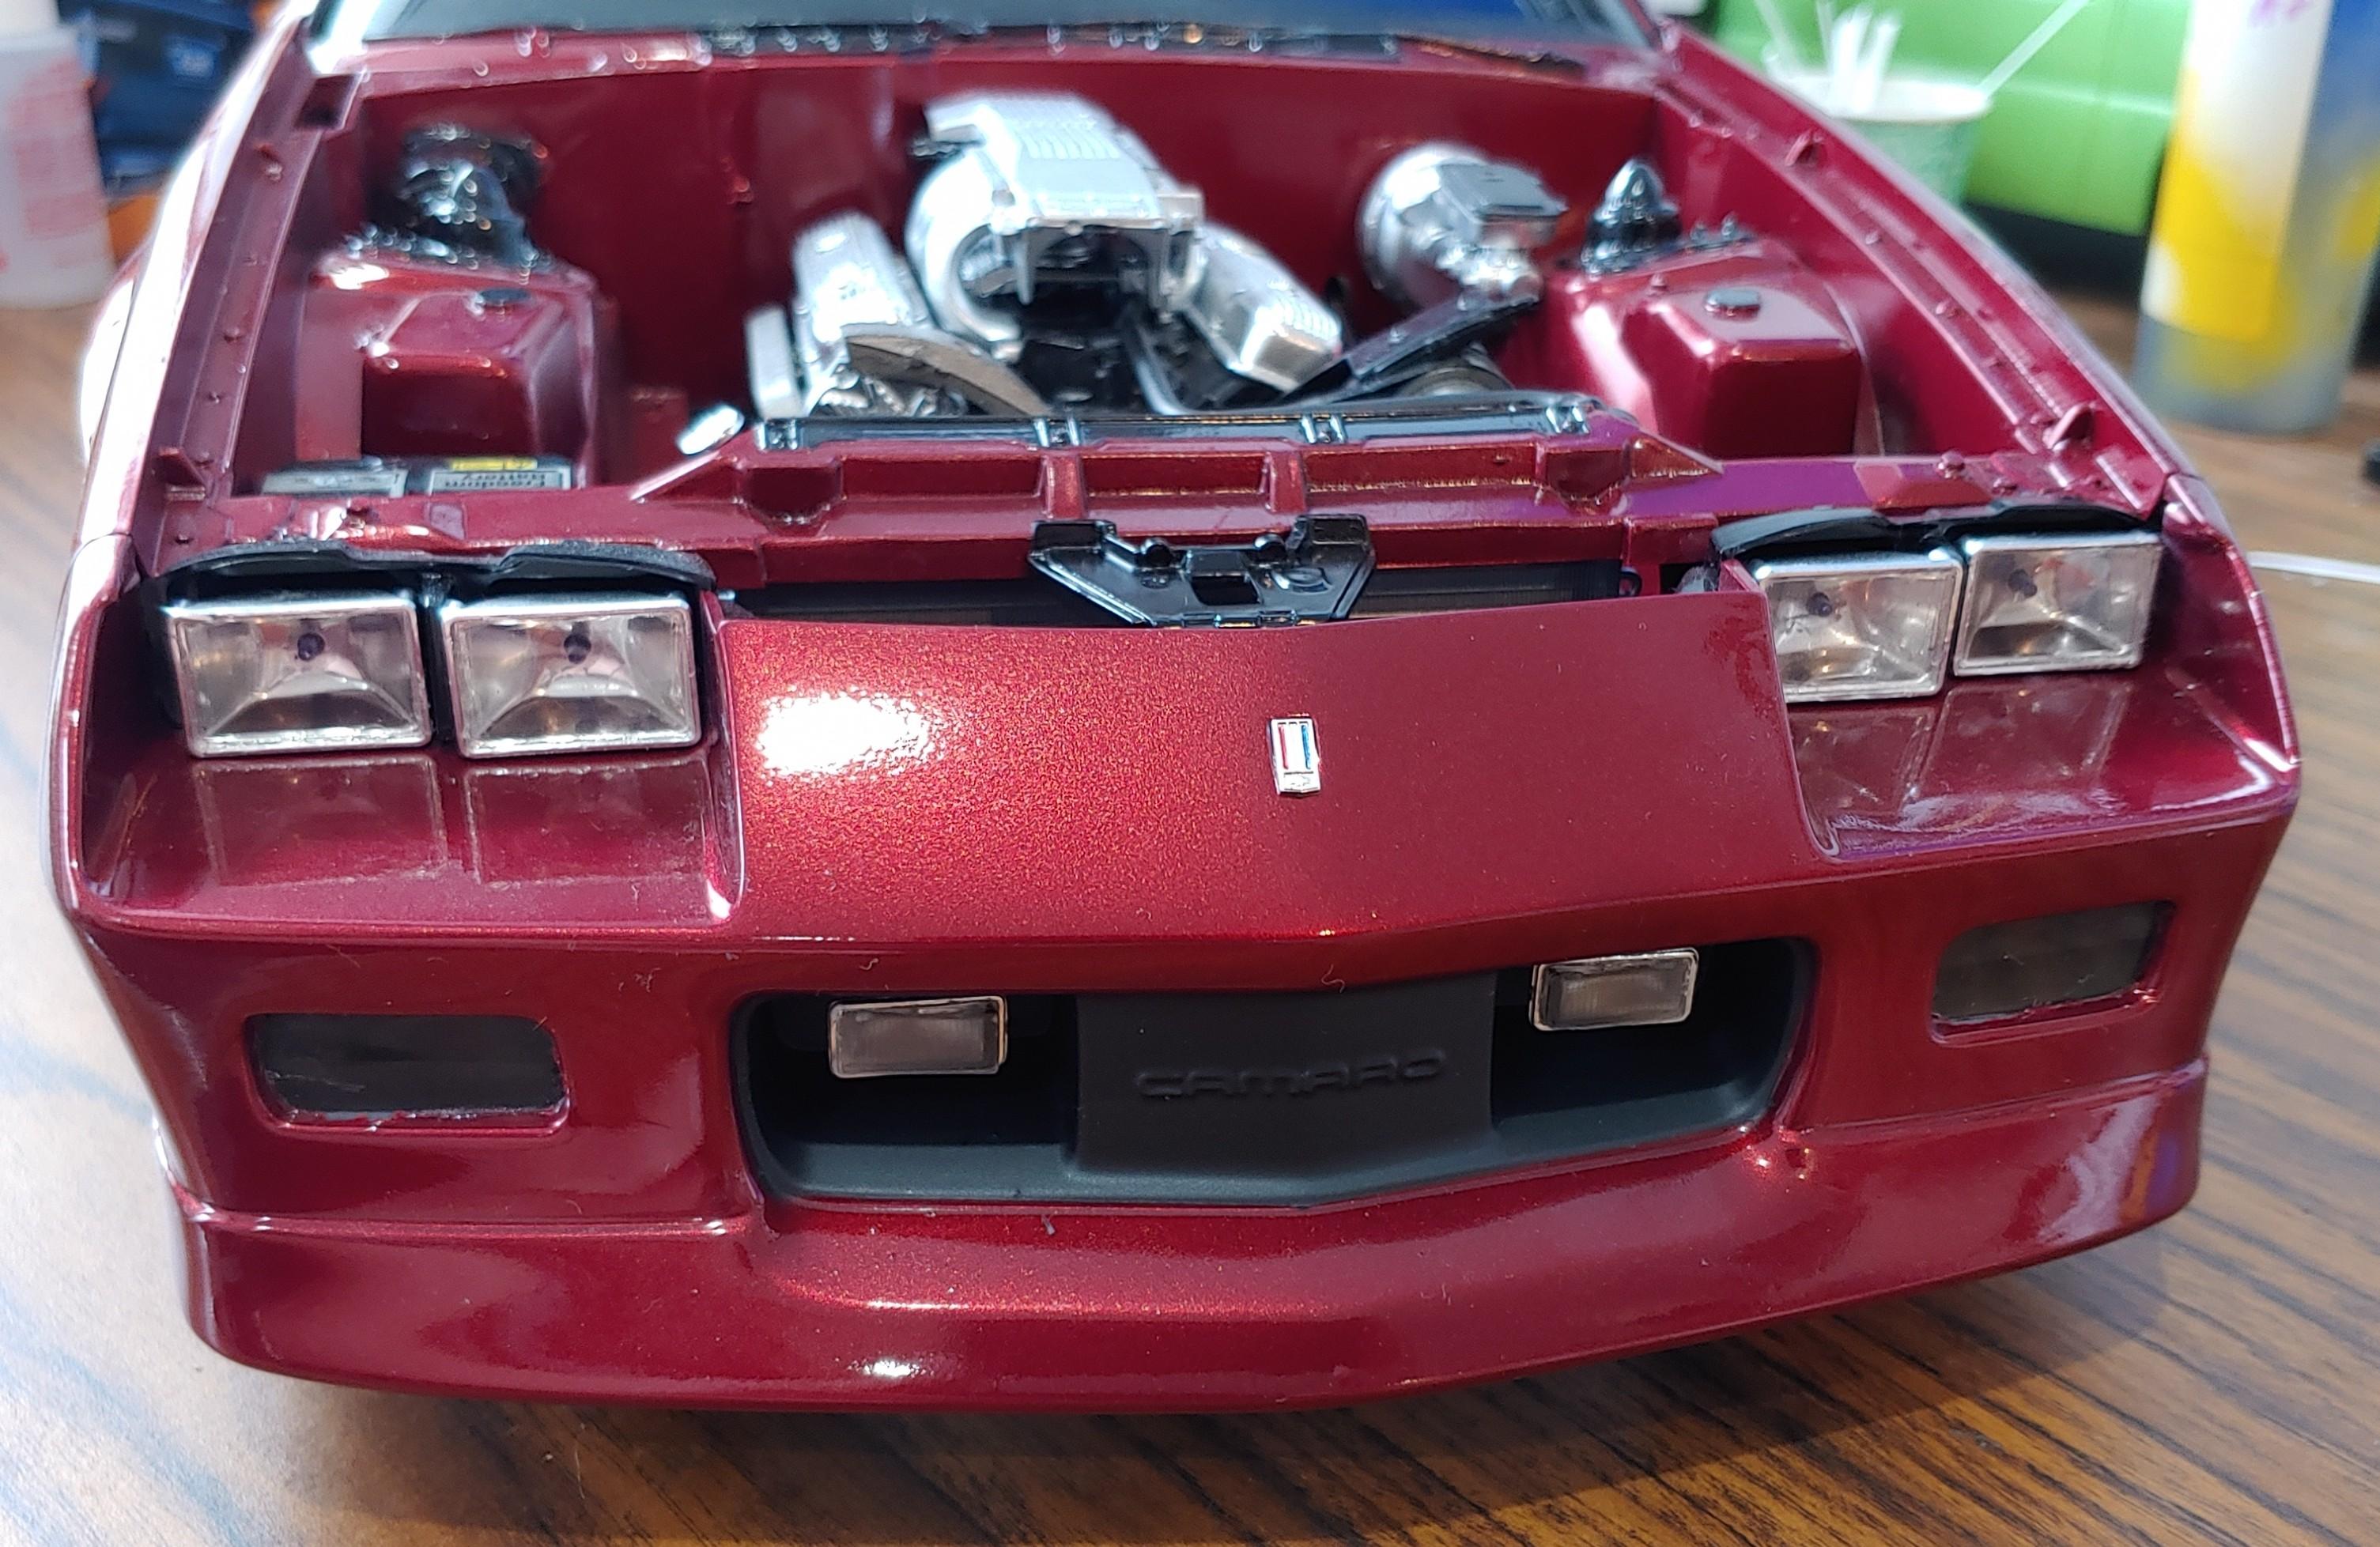
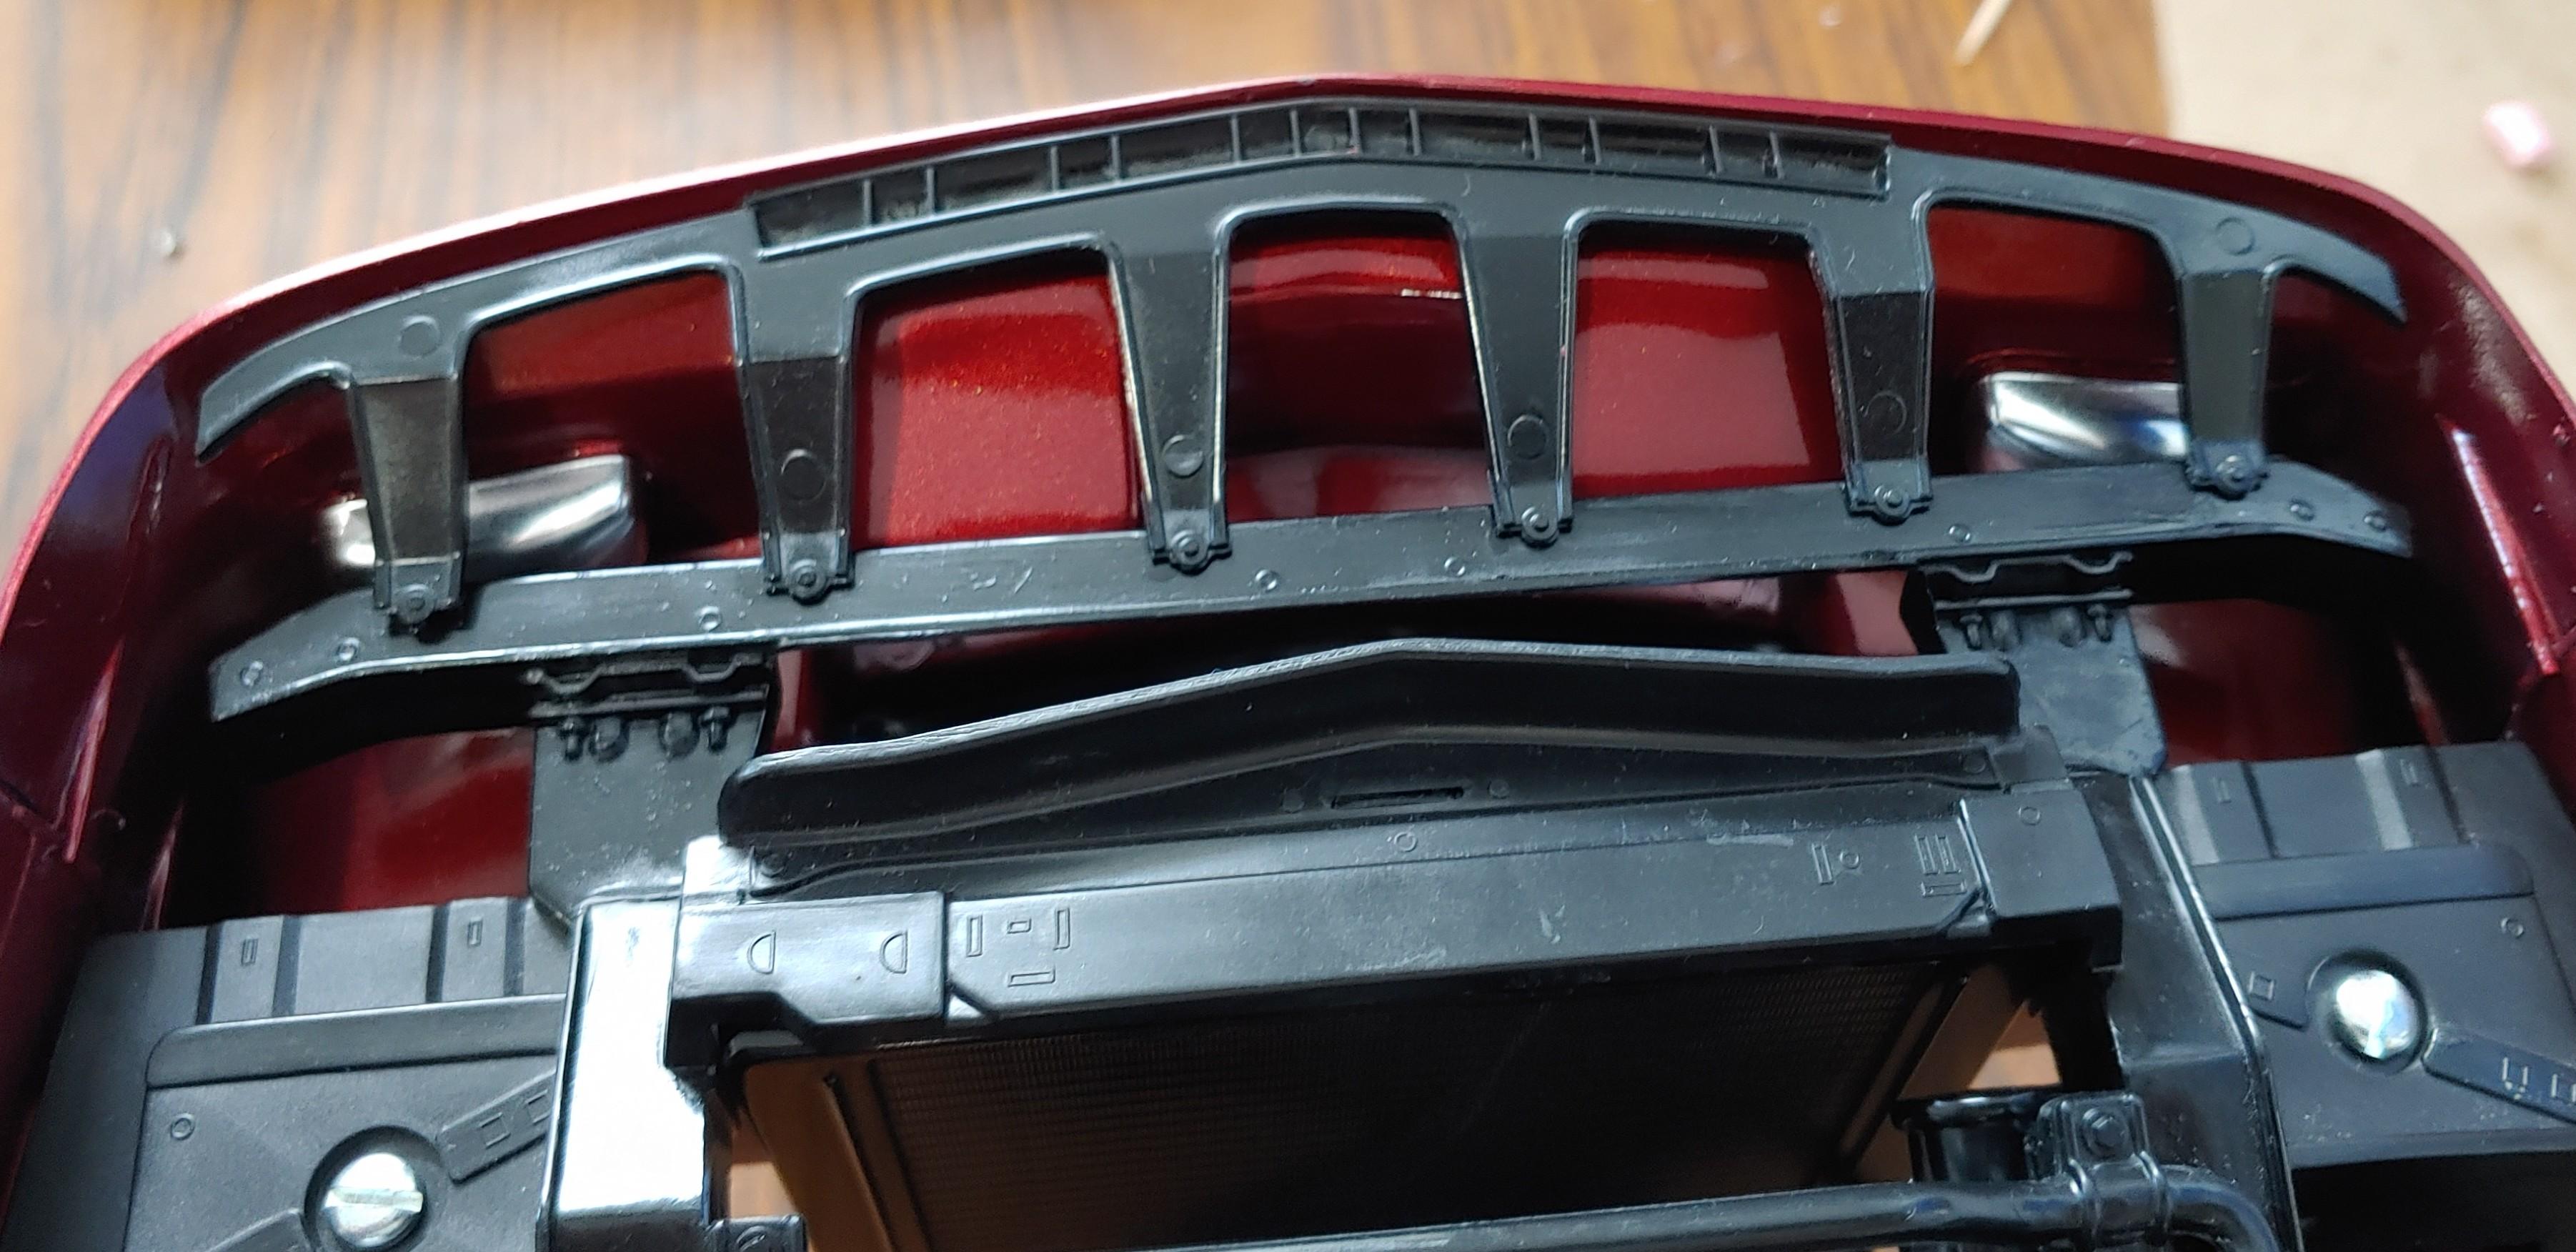
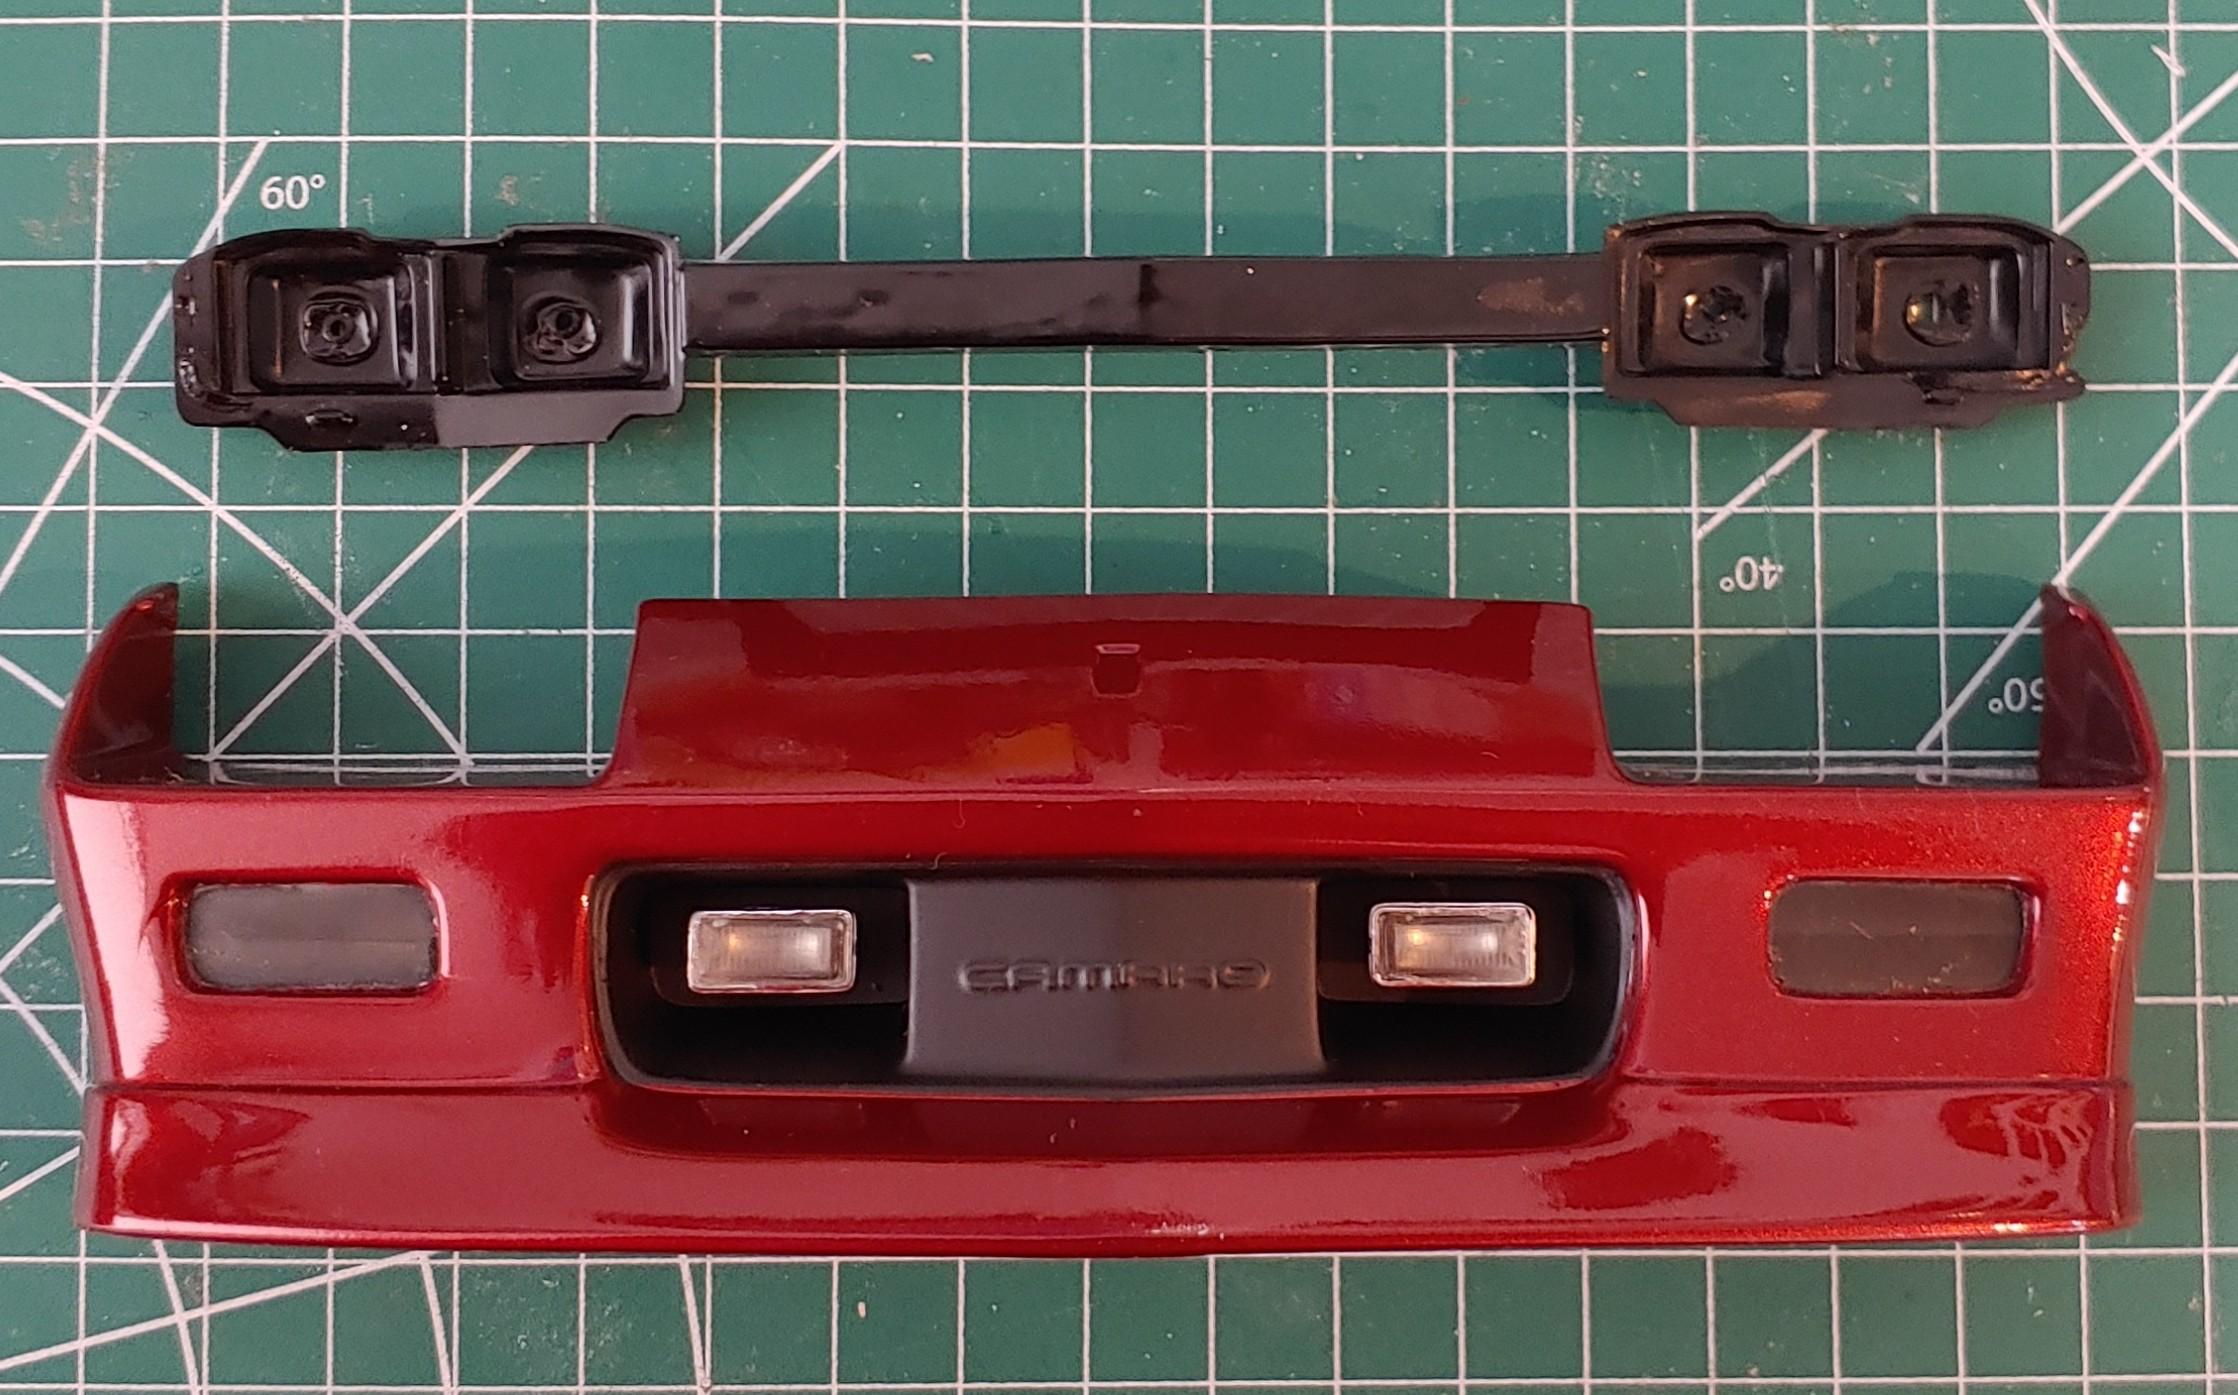
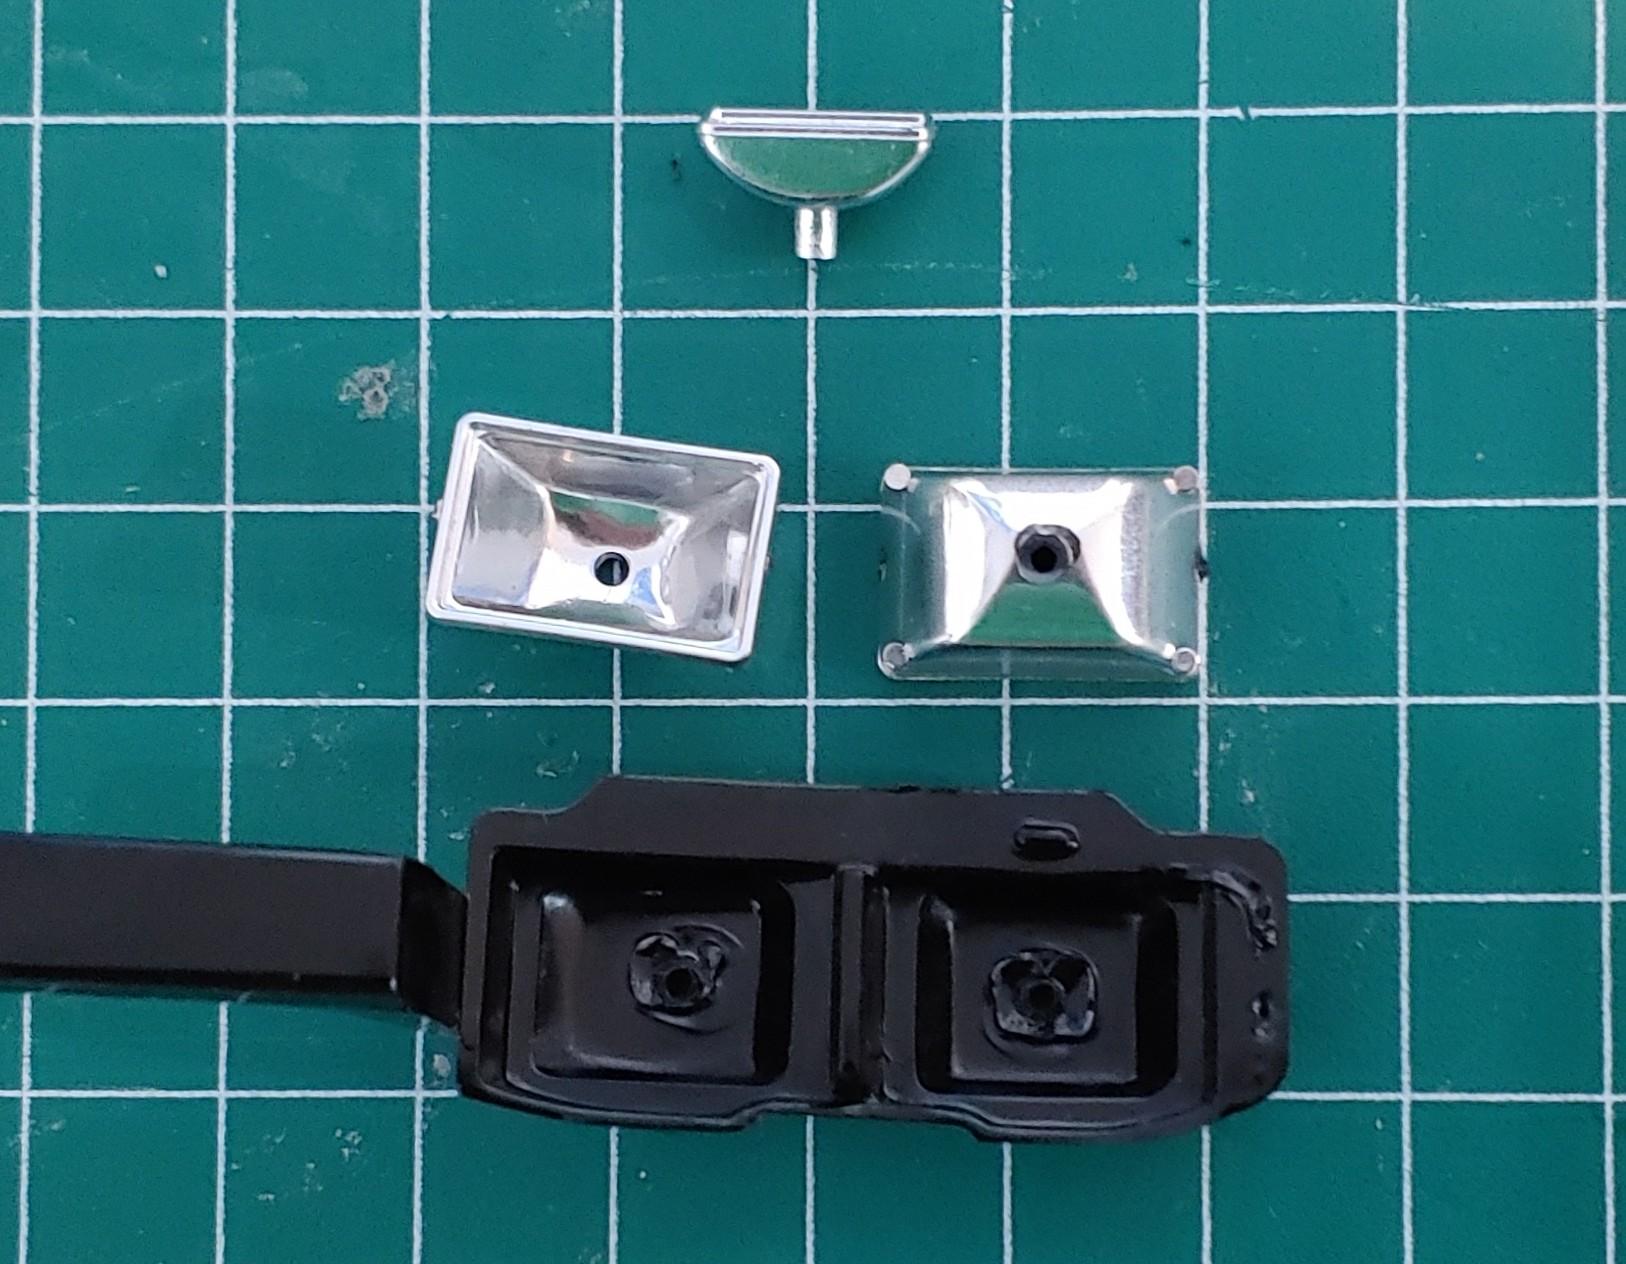
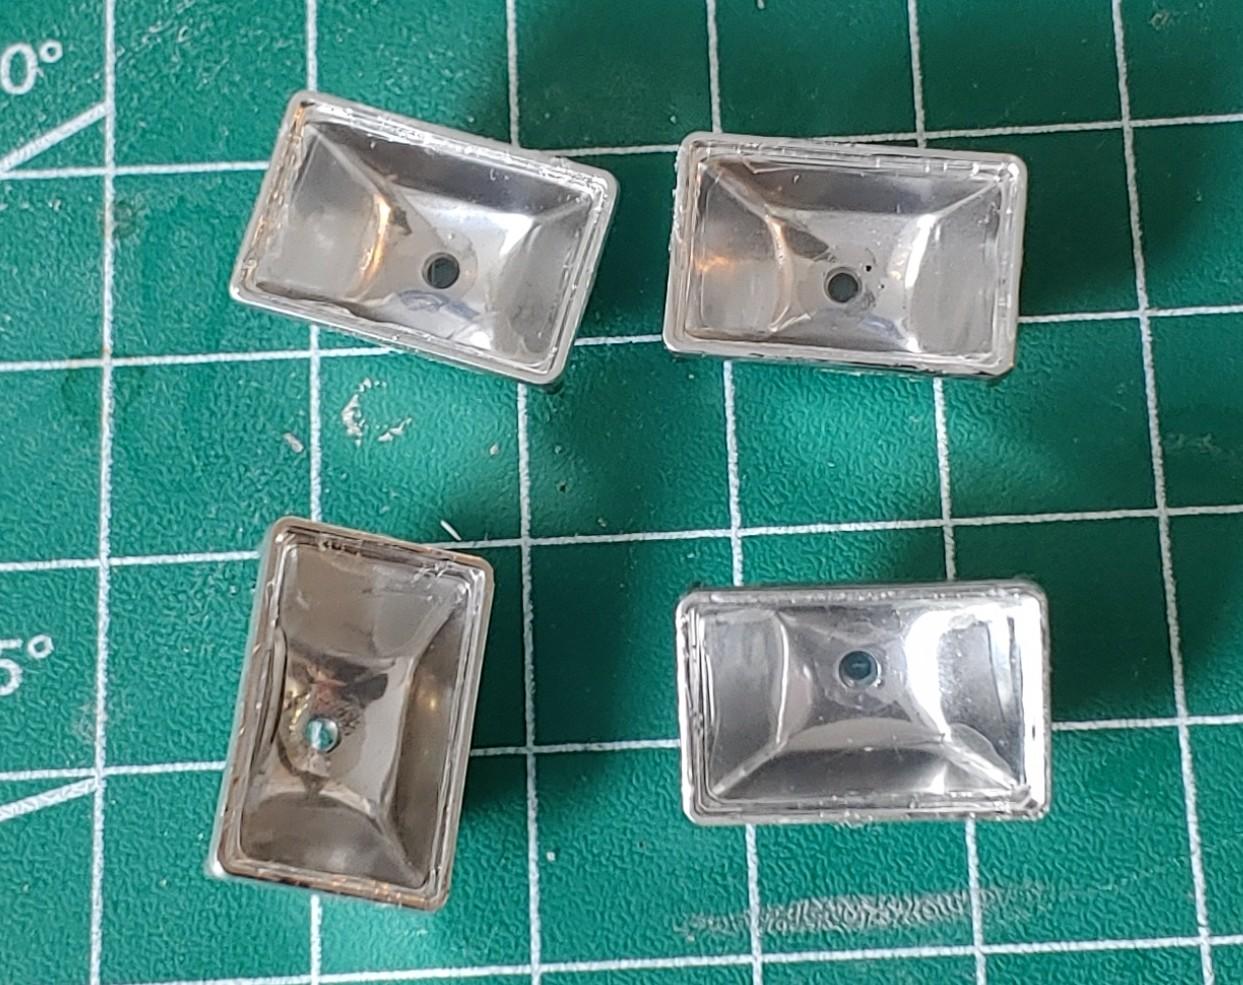
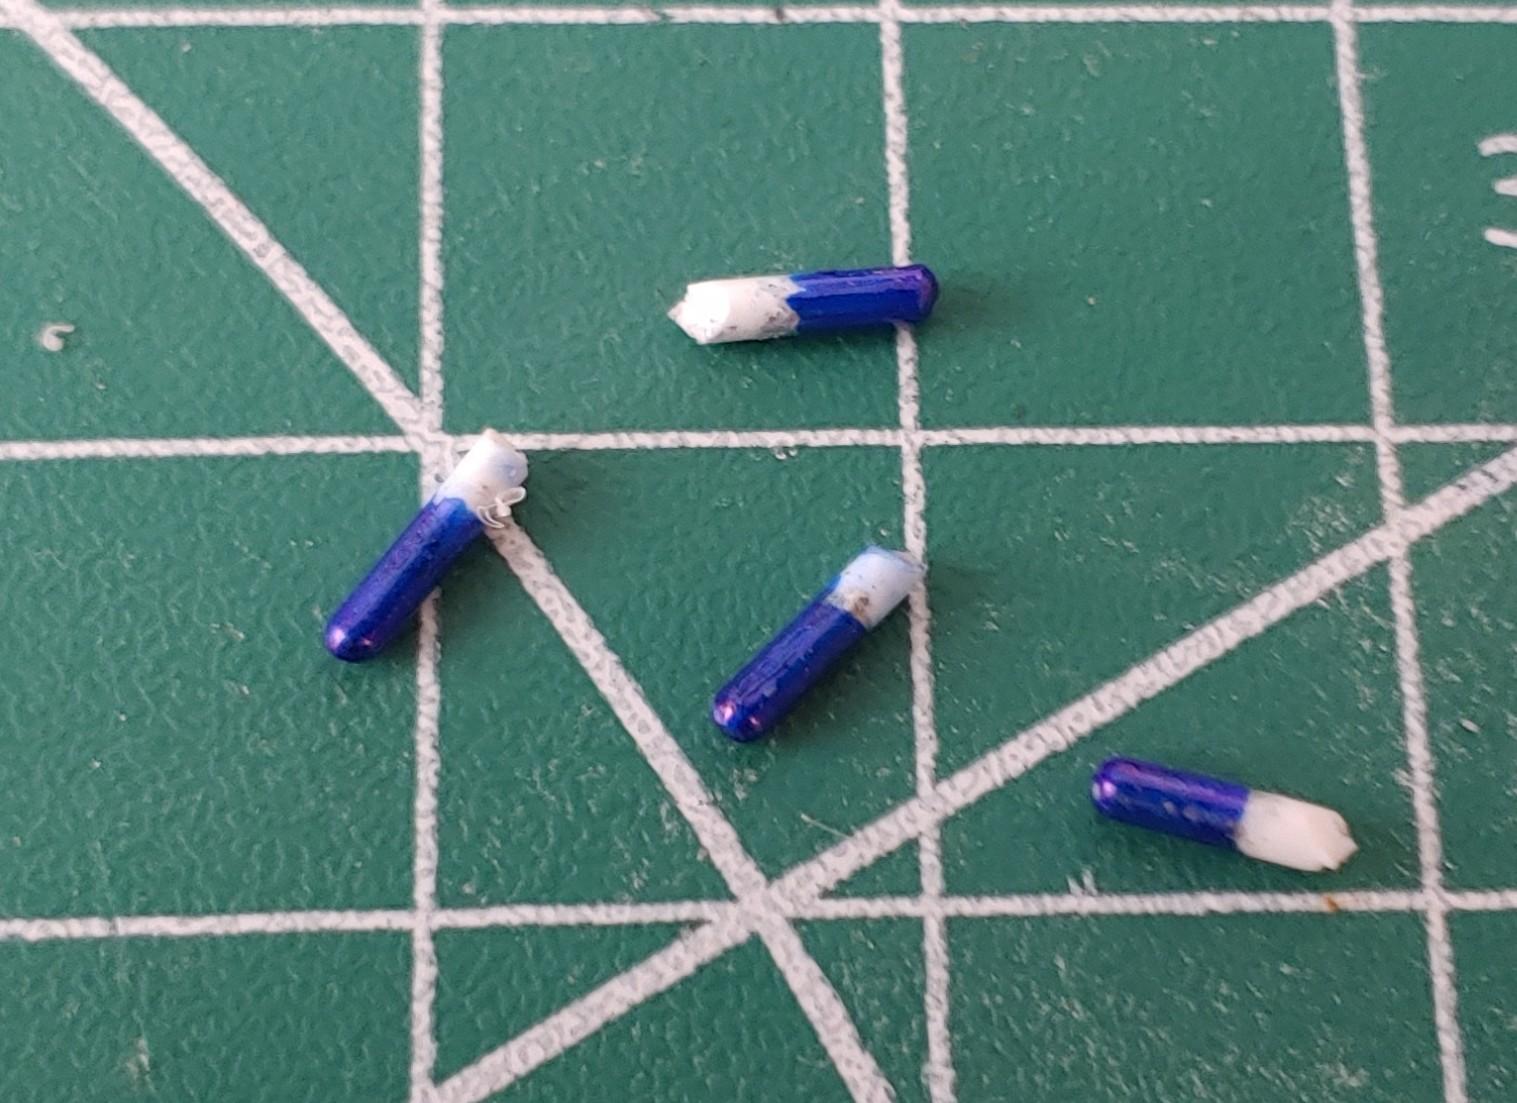
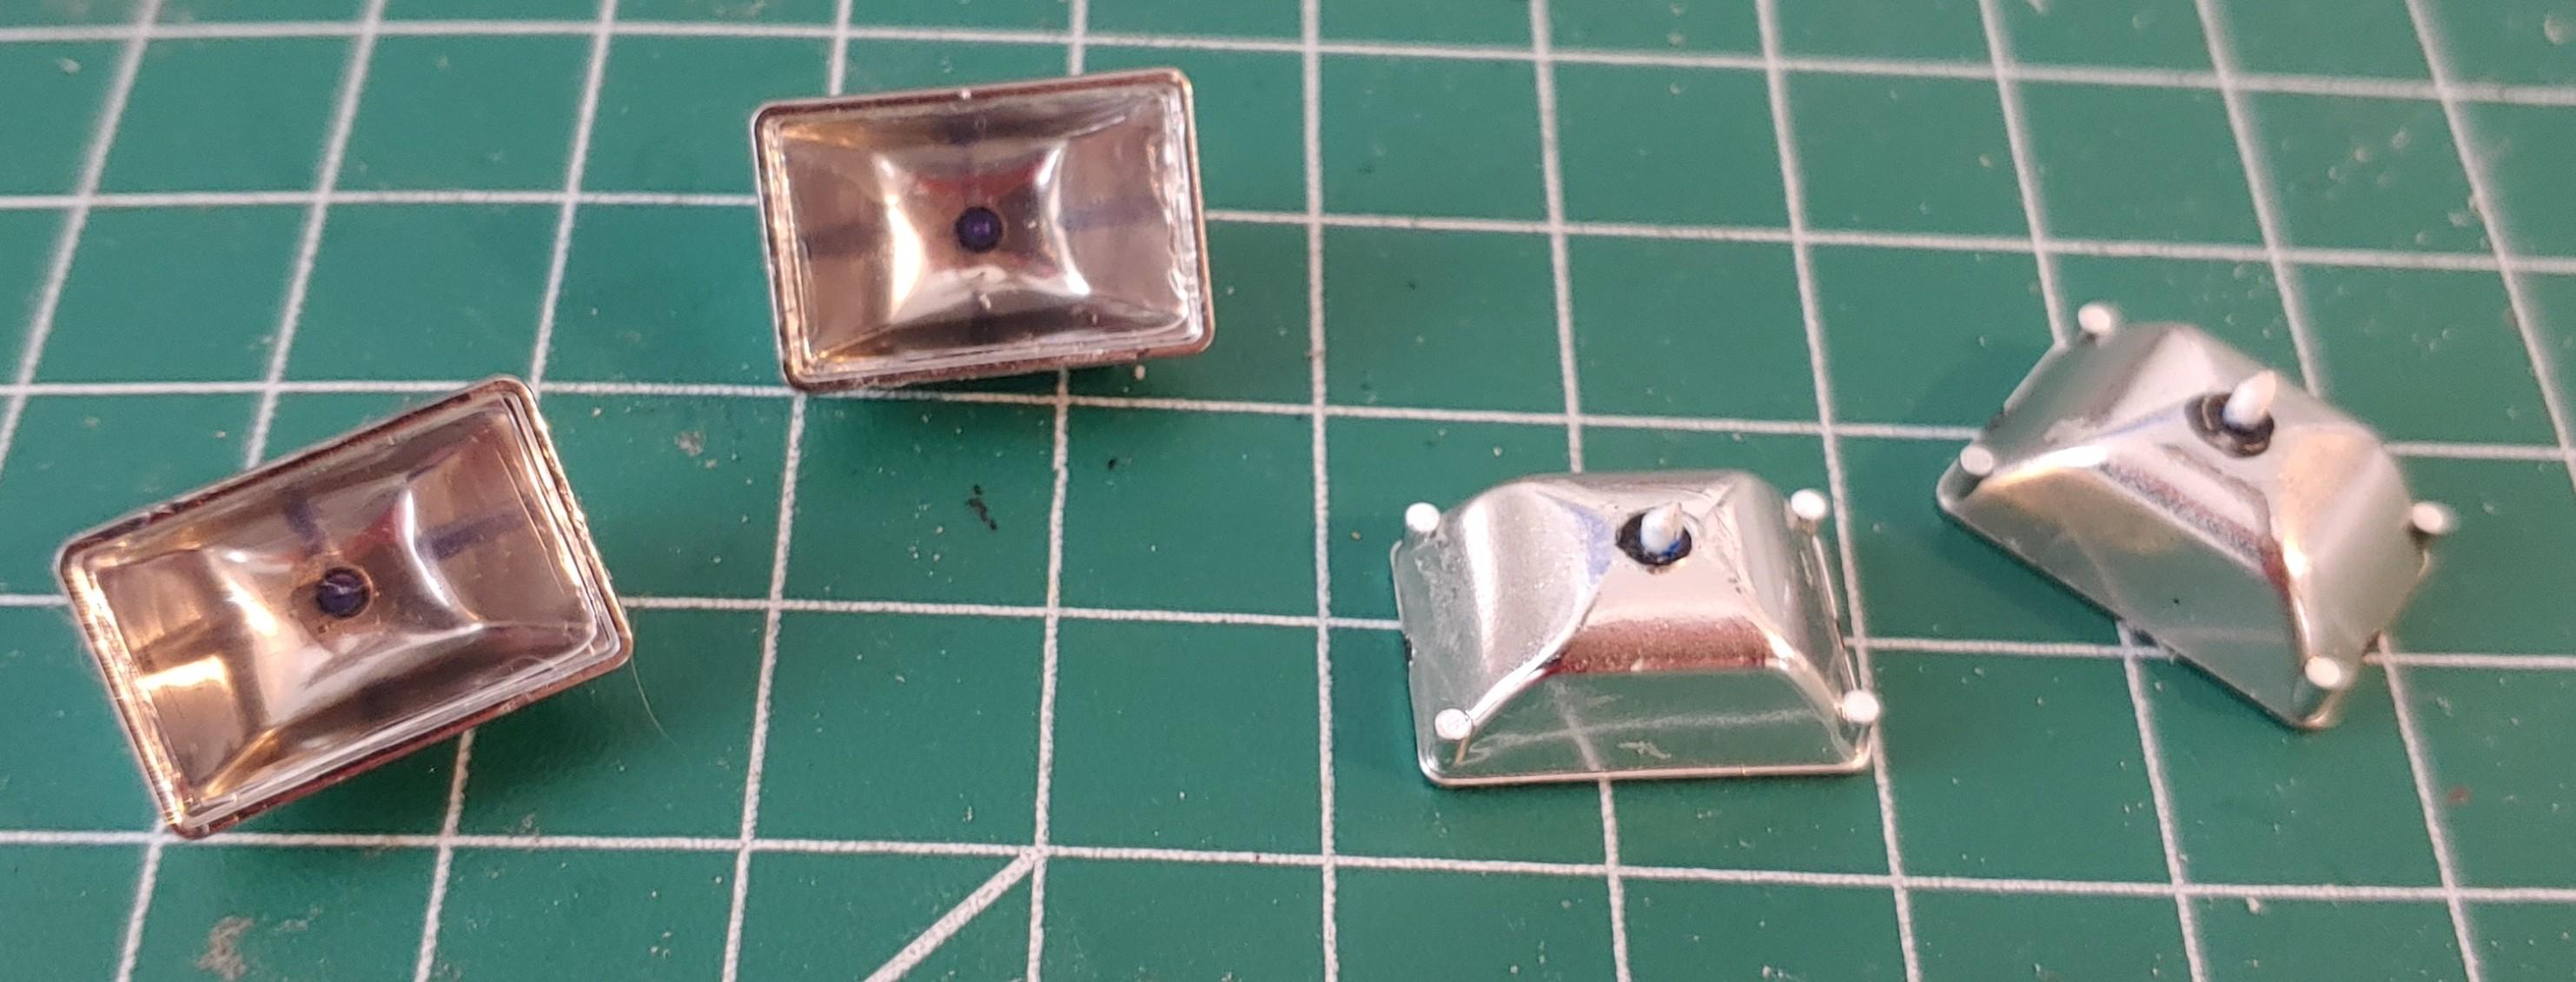
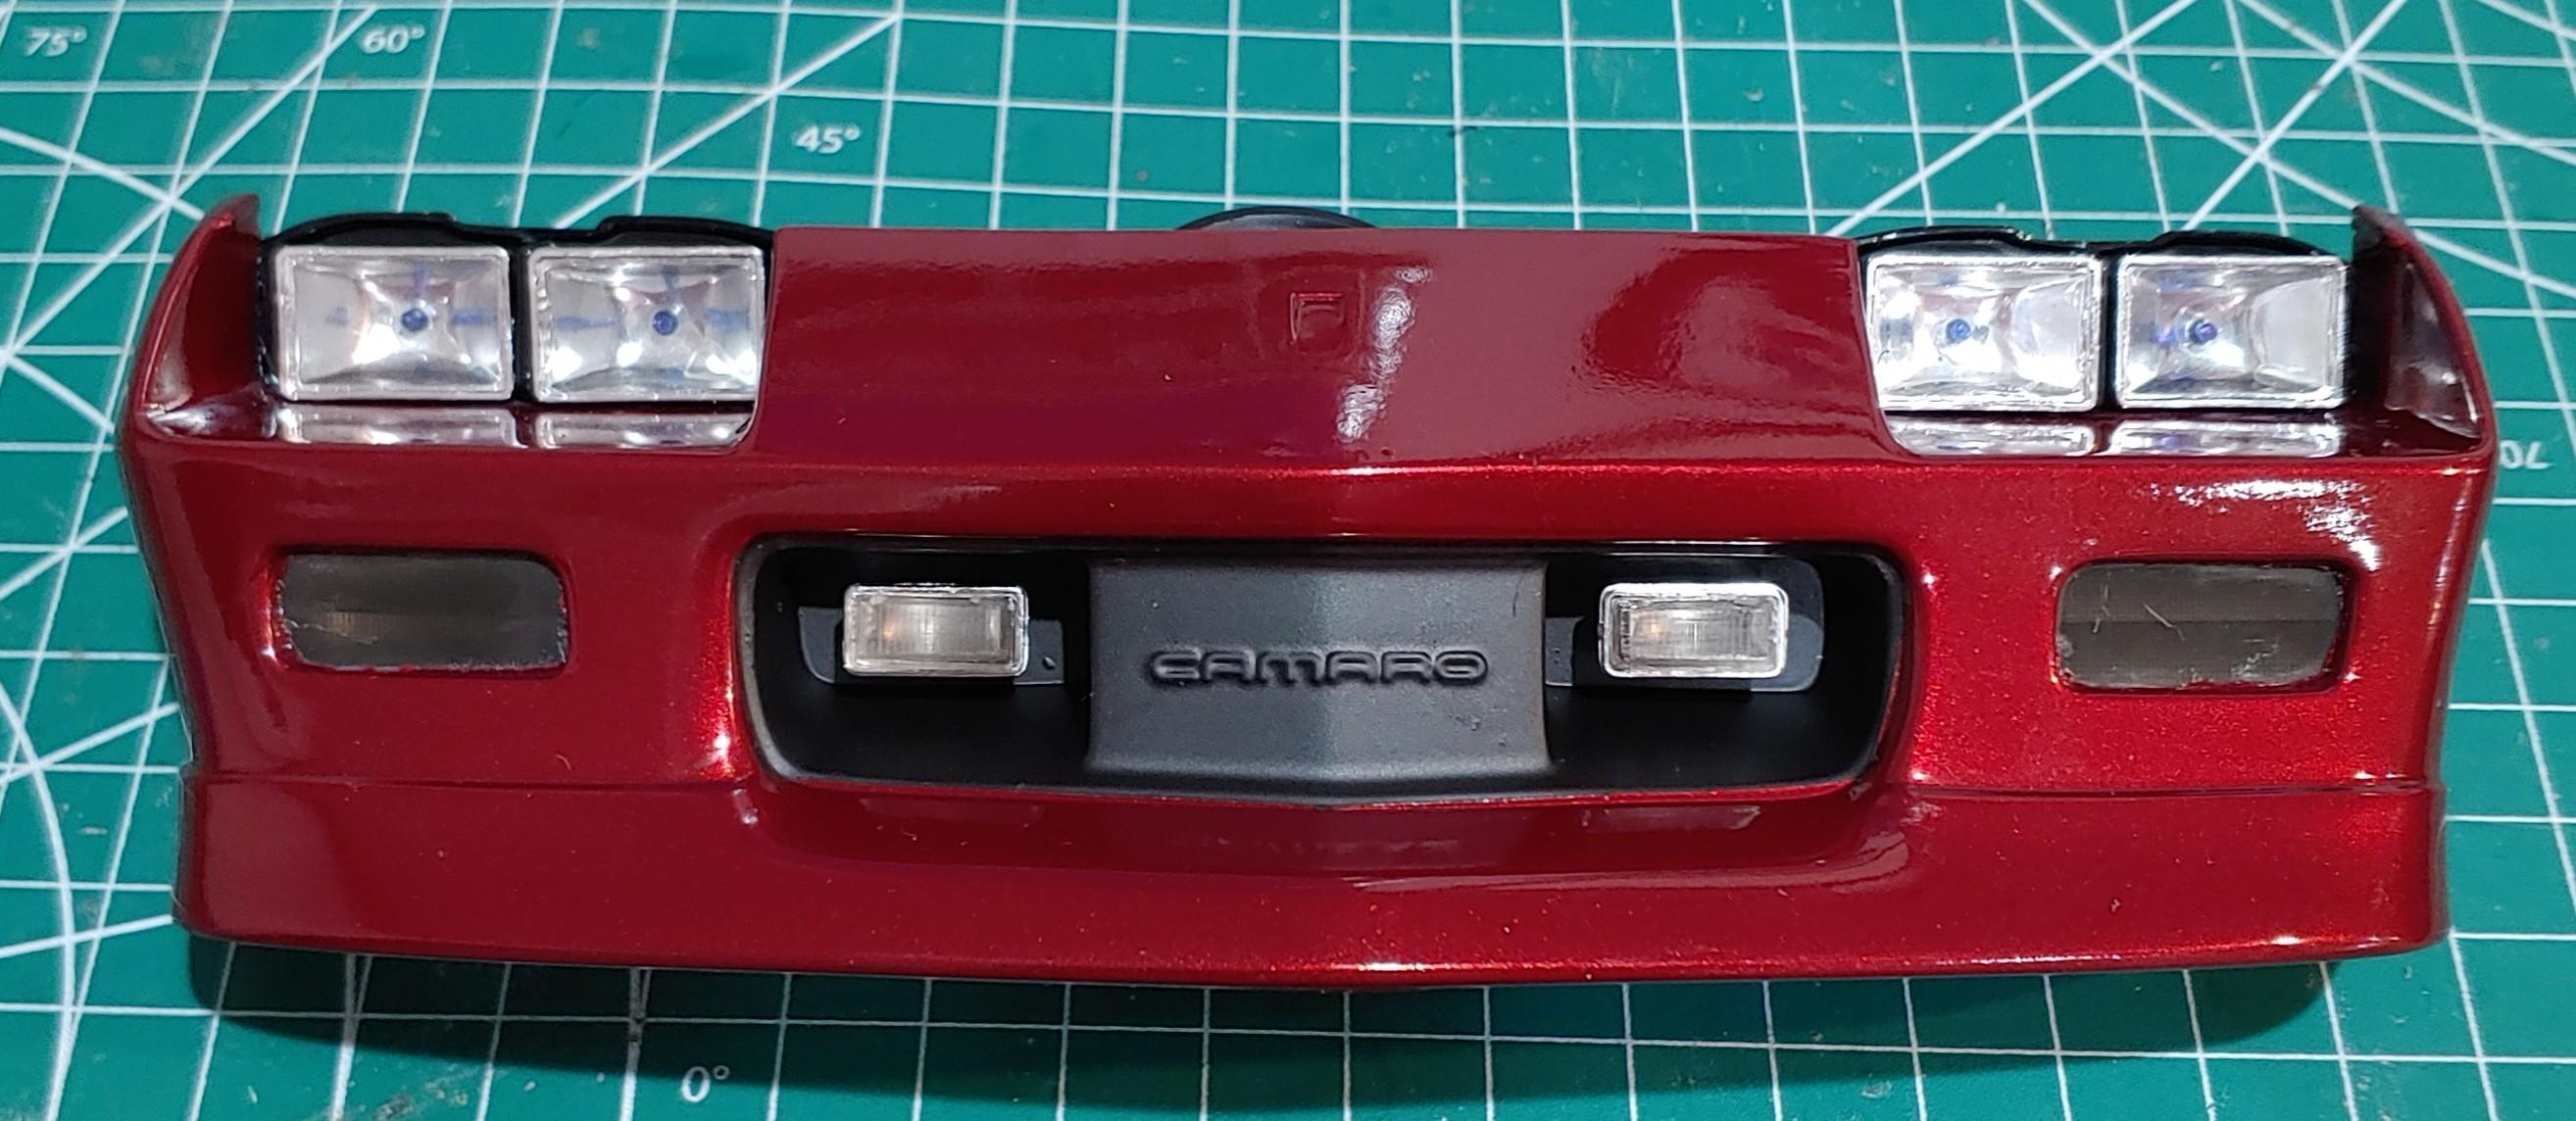
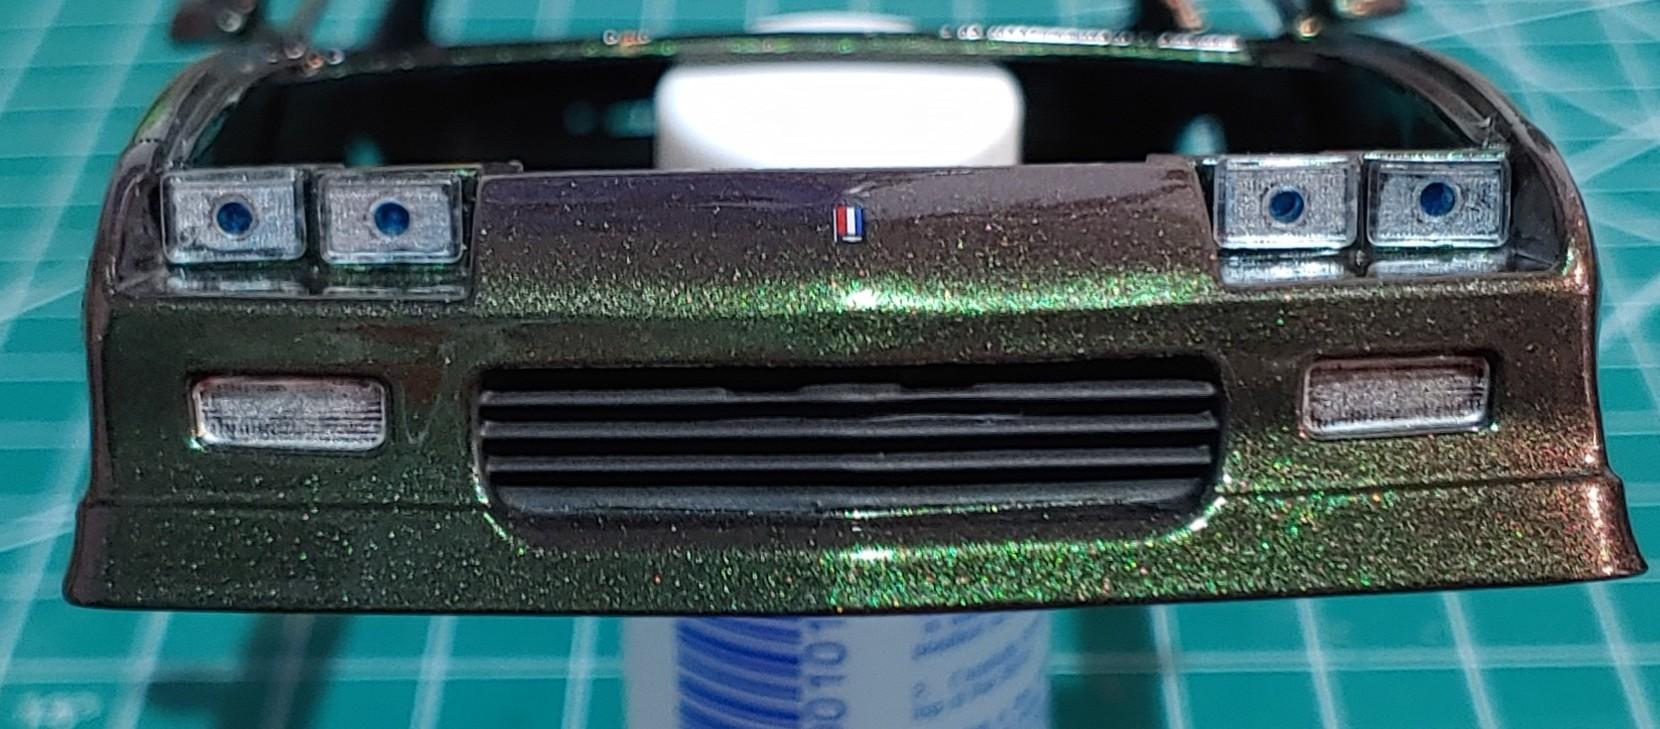
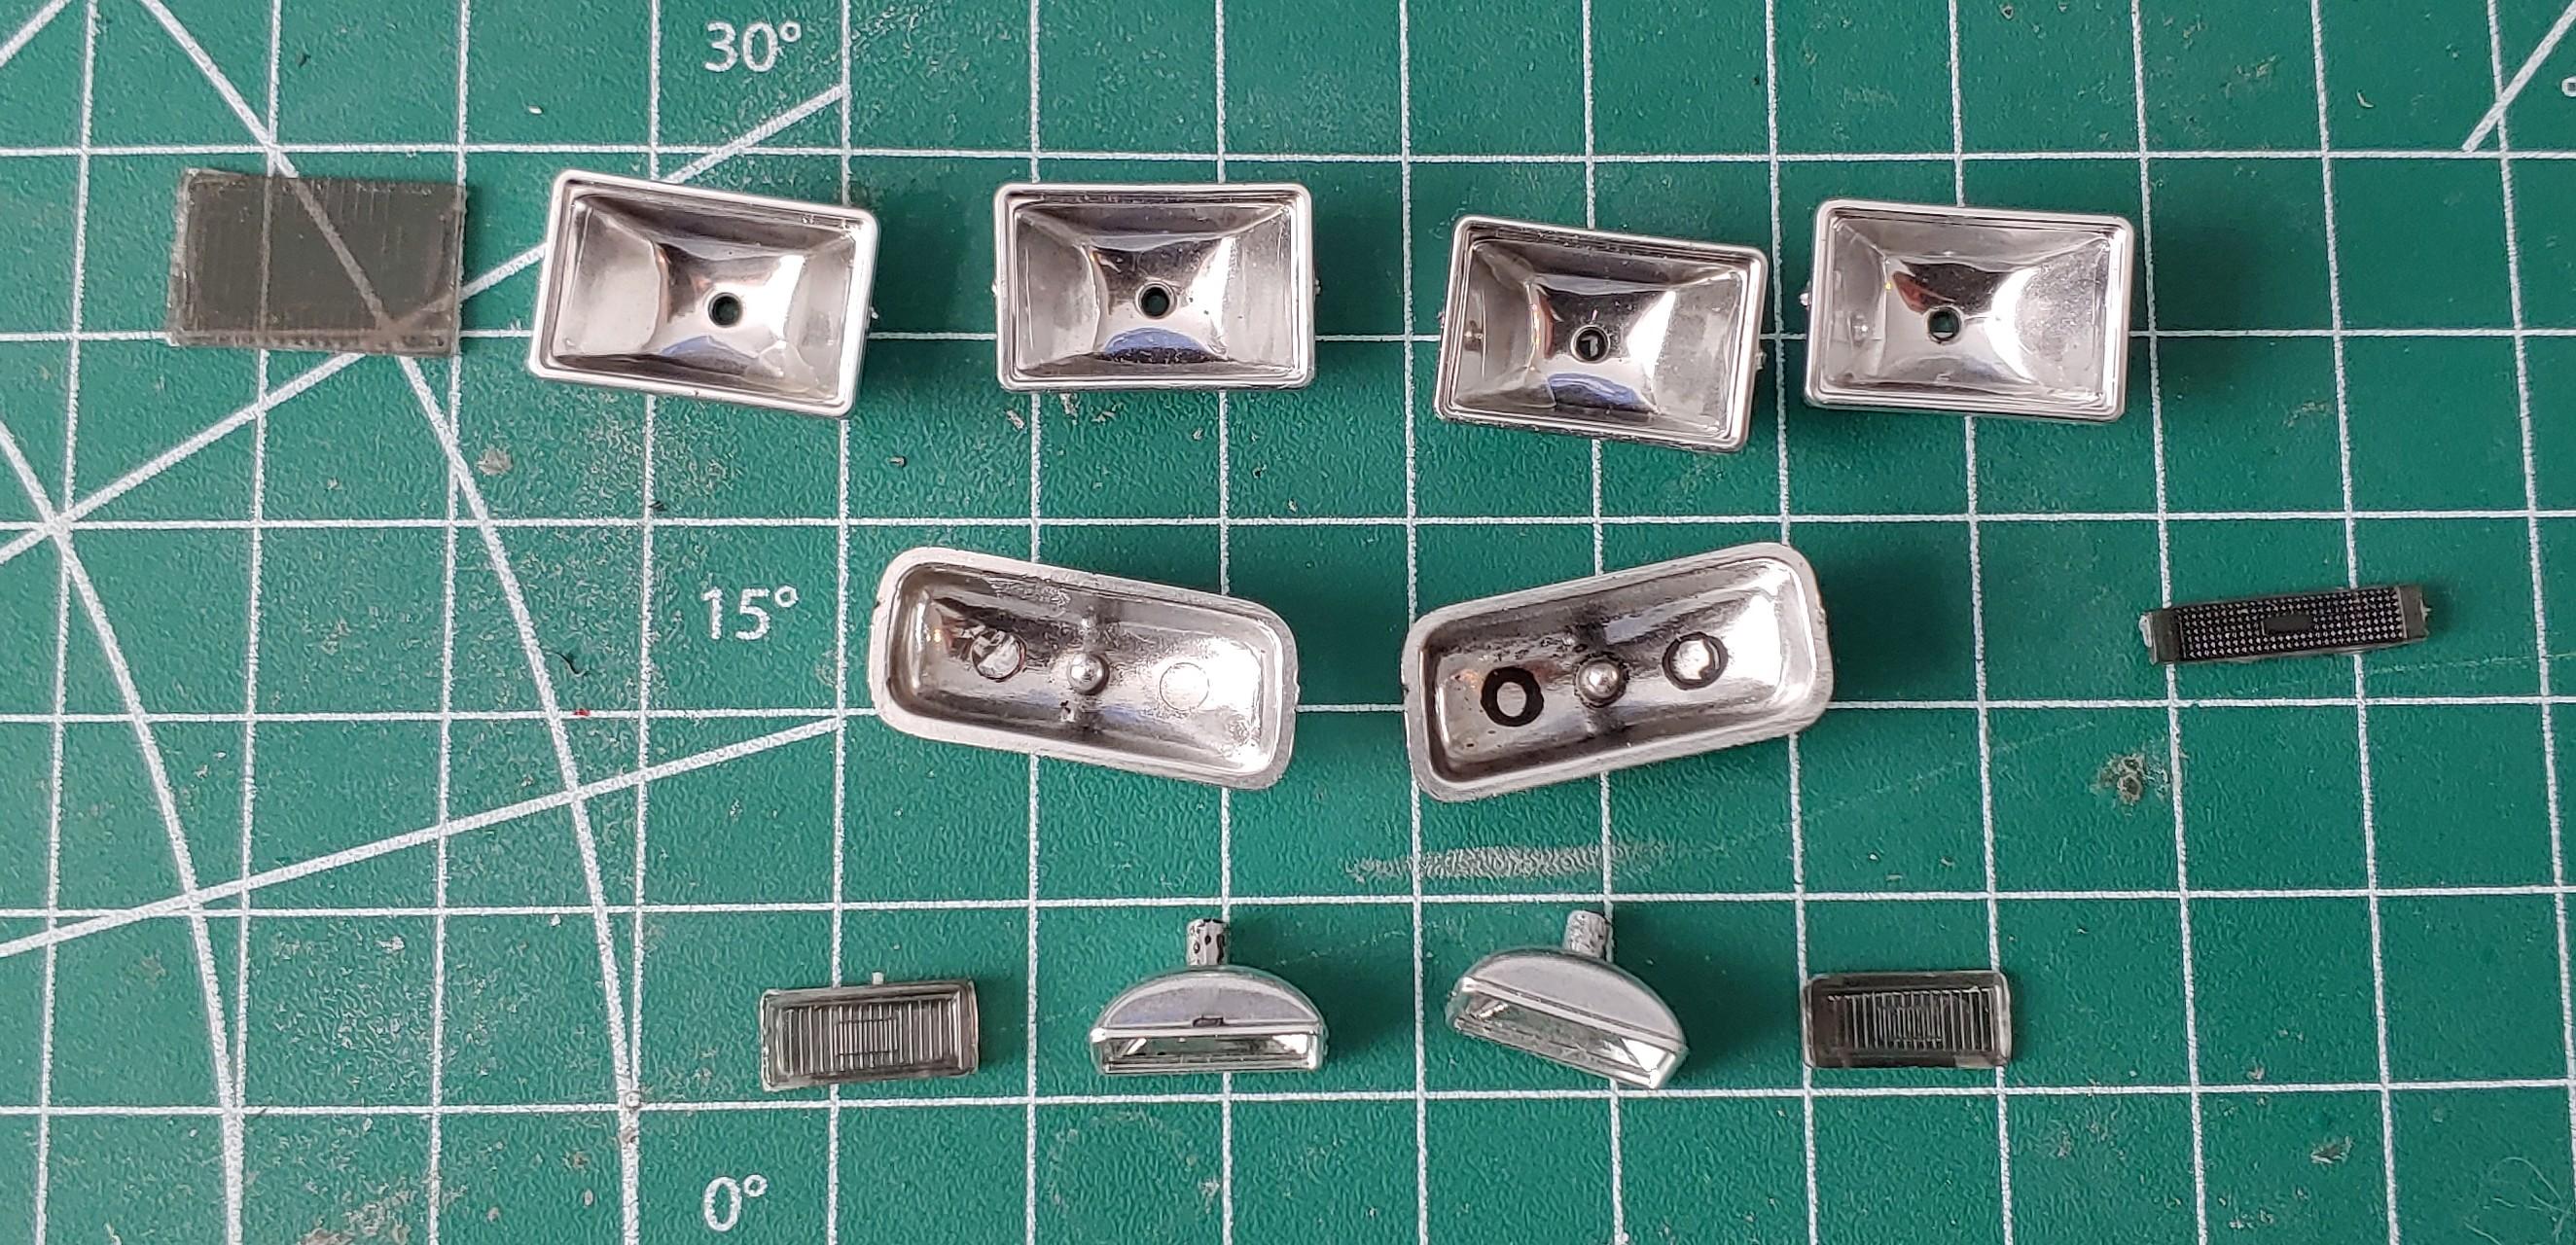
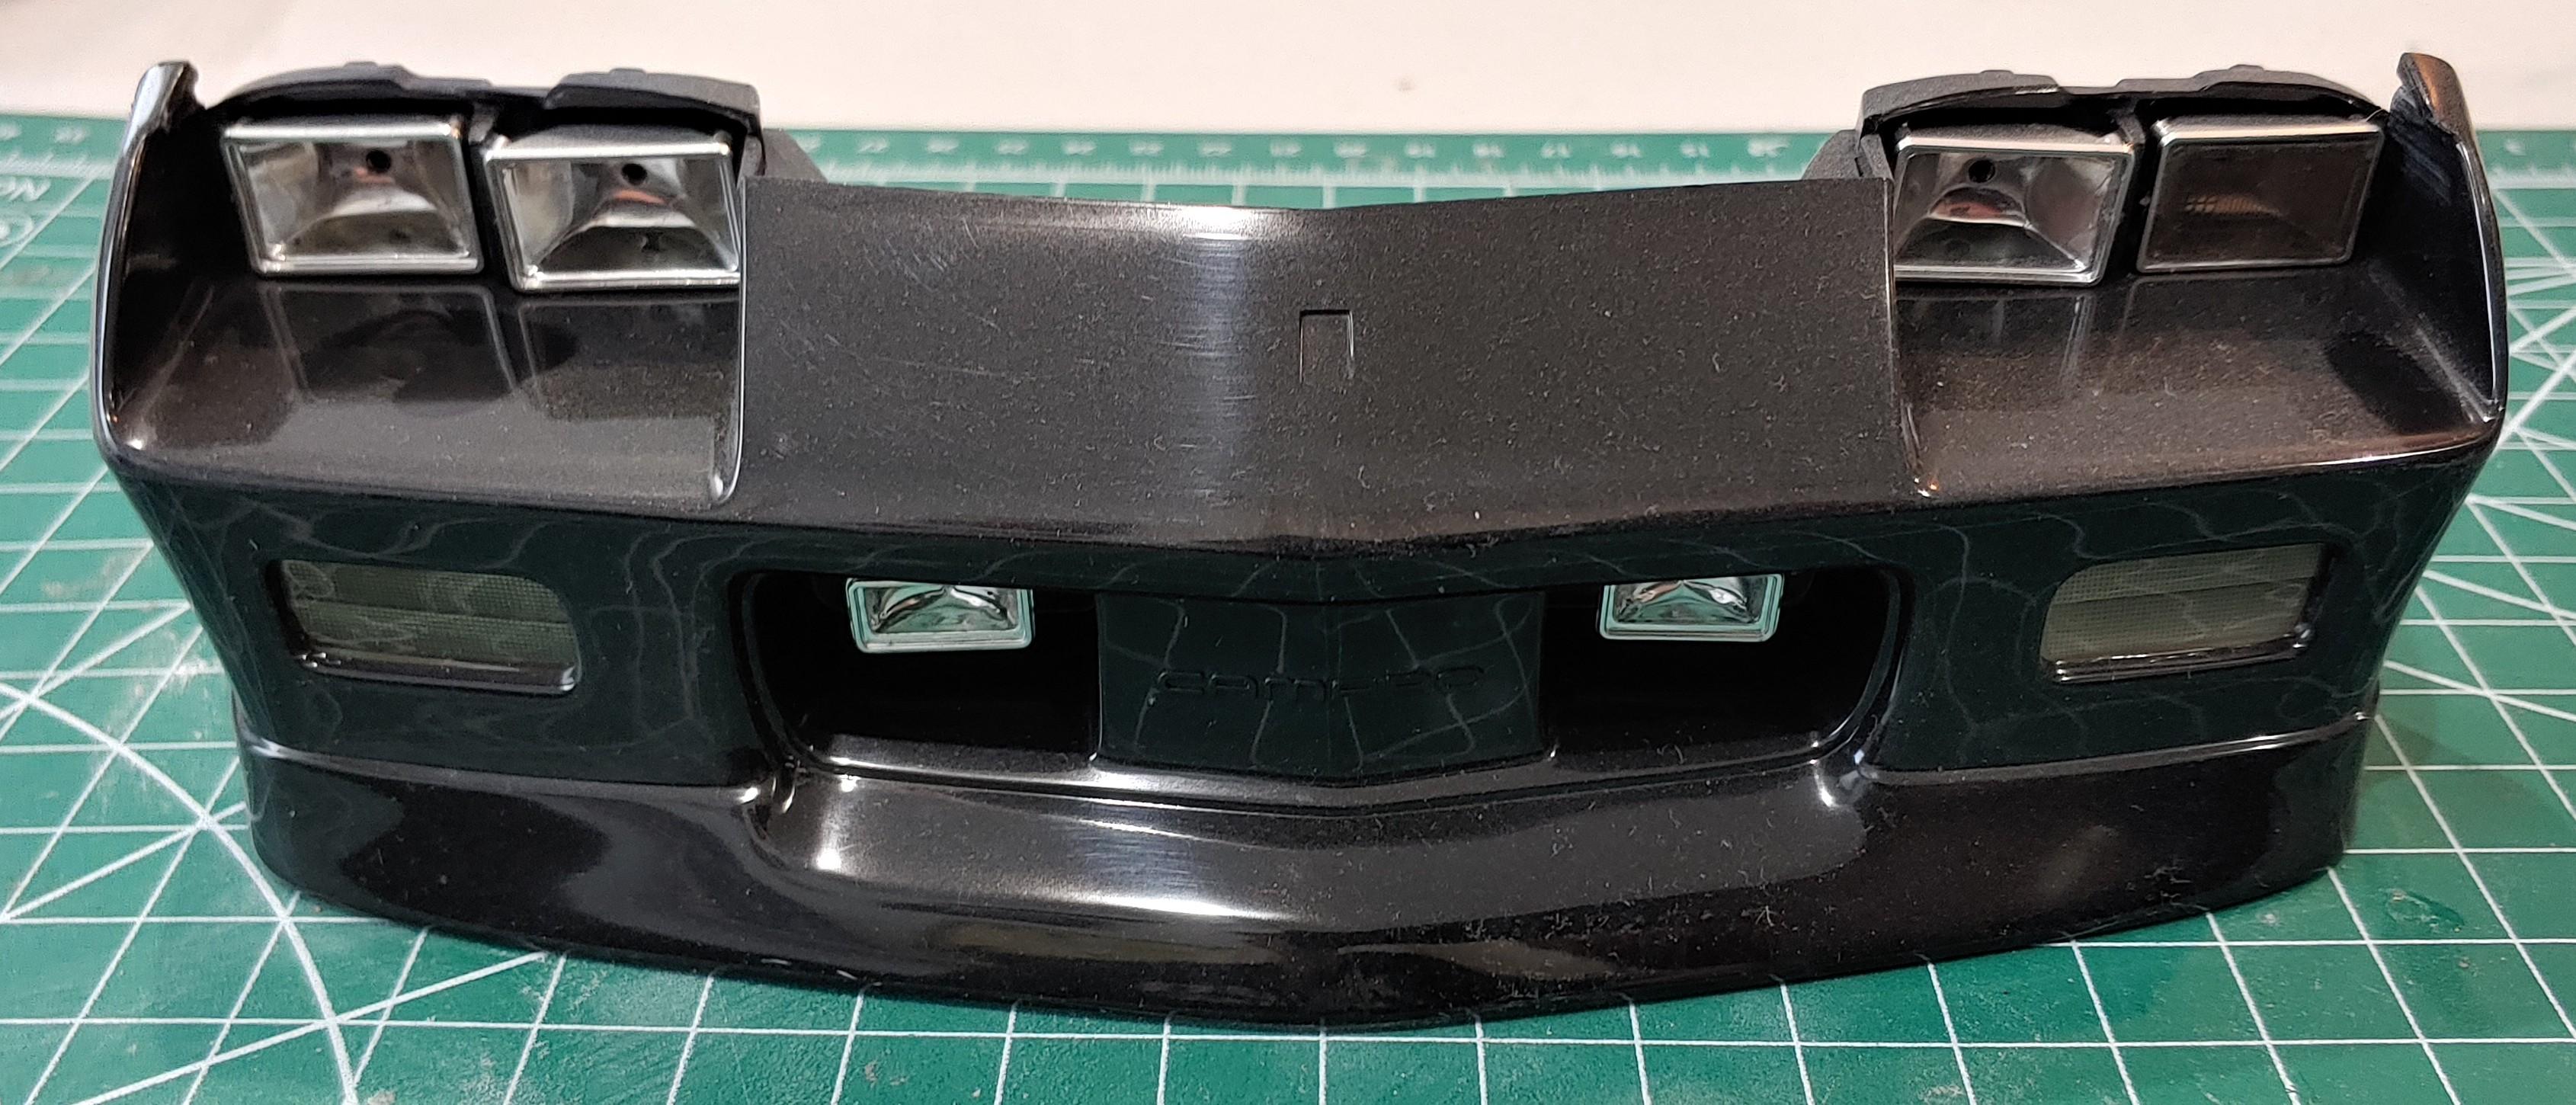
I got the front bumper painted and I wanted to get the lights mounted to it, all 8 of them. I wasn't able to get the turn signal lenses off so I had to mask them off and paint with them installed. The fog light lenses had a lot of glue on them, but I was able to sand them smooth and put some clear coat on them to make them look a bit better. The headlights were a little more troublesome. The headlight buckets had been modified. The bulbs had been drilled out and the mounting post had been removed and glued into the bracket. They should look more like the fog light also pictured. Seems like the previous owner might have been trying to install LEDs like SpikeSchumacher was saying. The first thing I needed to do was replace the missing lenses. I made some clear lenses from an old food container for an H4 conversion look. Then I made some "bulbs" out of some round stock I painted with a chrome marker then went over with a blue sharpie for an H.I.D. look. The back of the bulbs are now the new mounting points. I mounted the bracket first, then the lights so I could make sure they weren't crooked. The 1/25 was much easier. More next time.
-
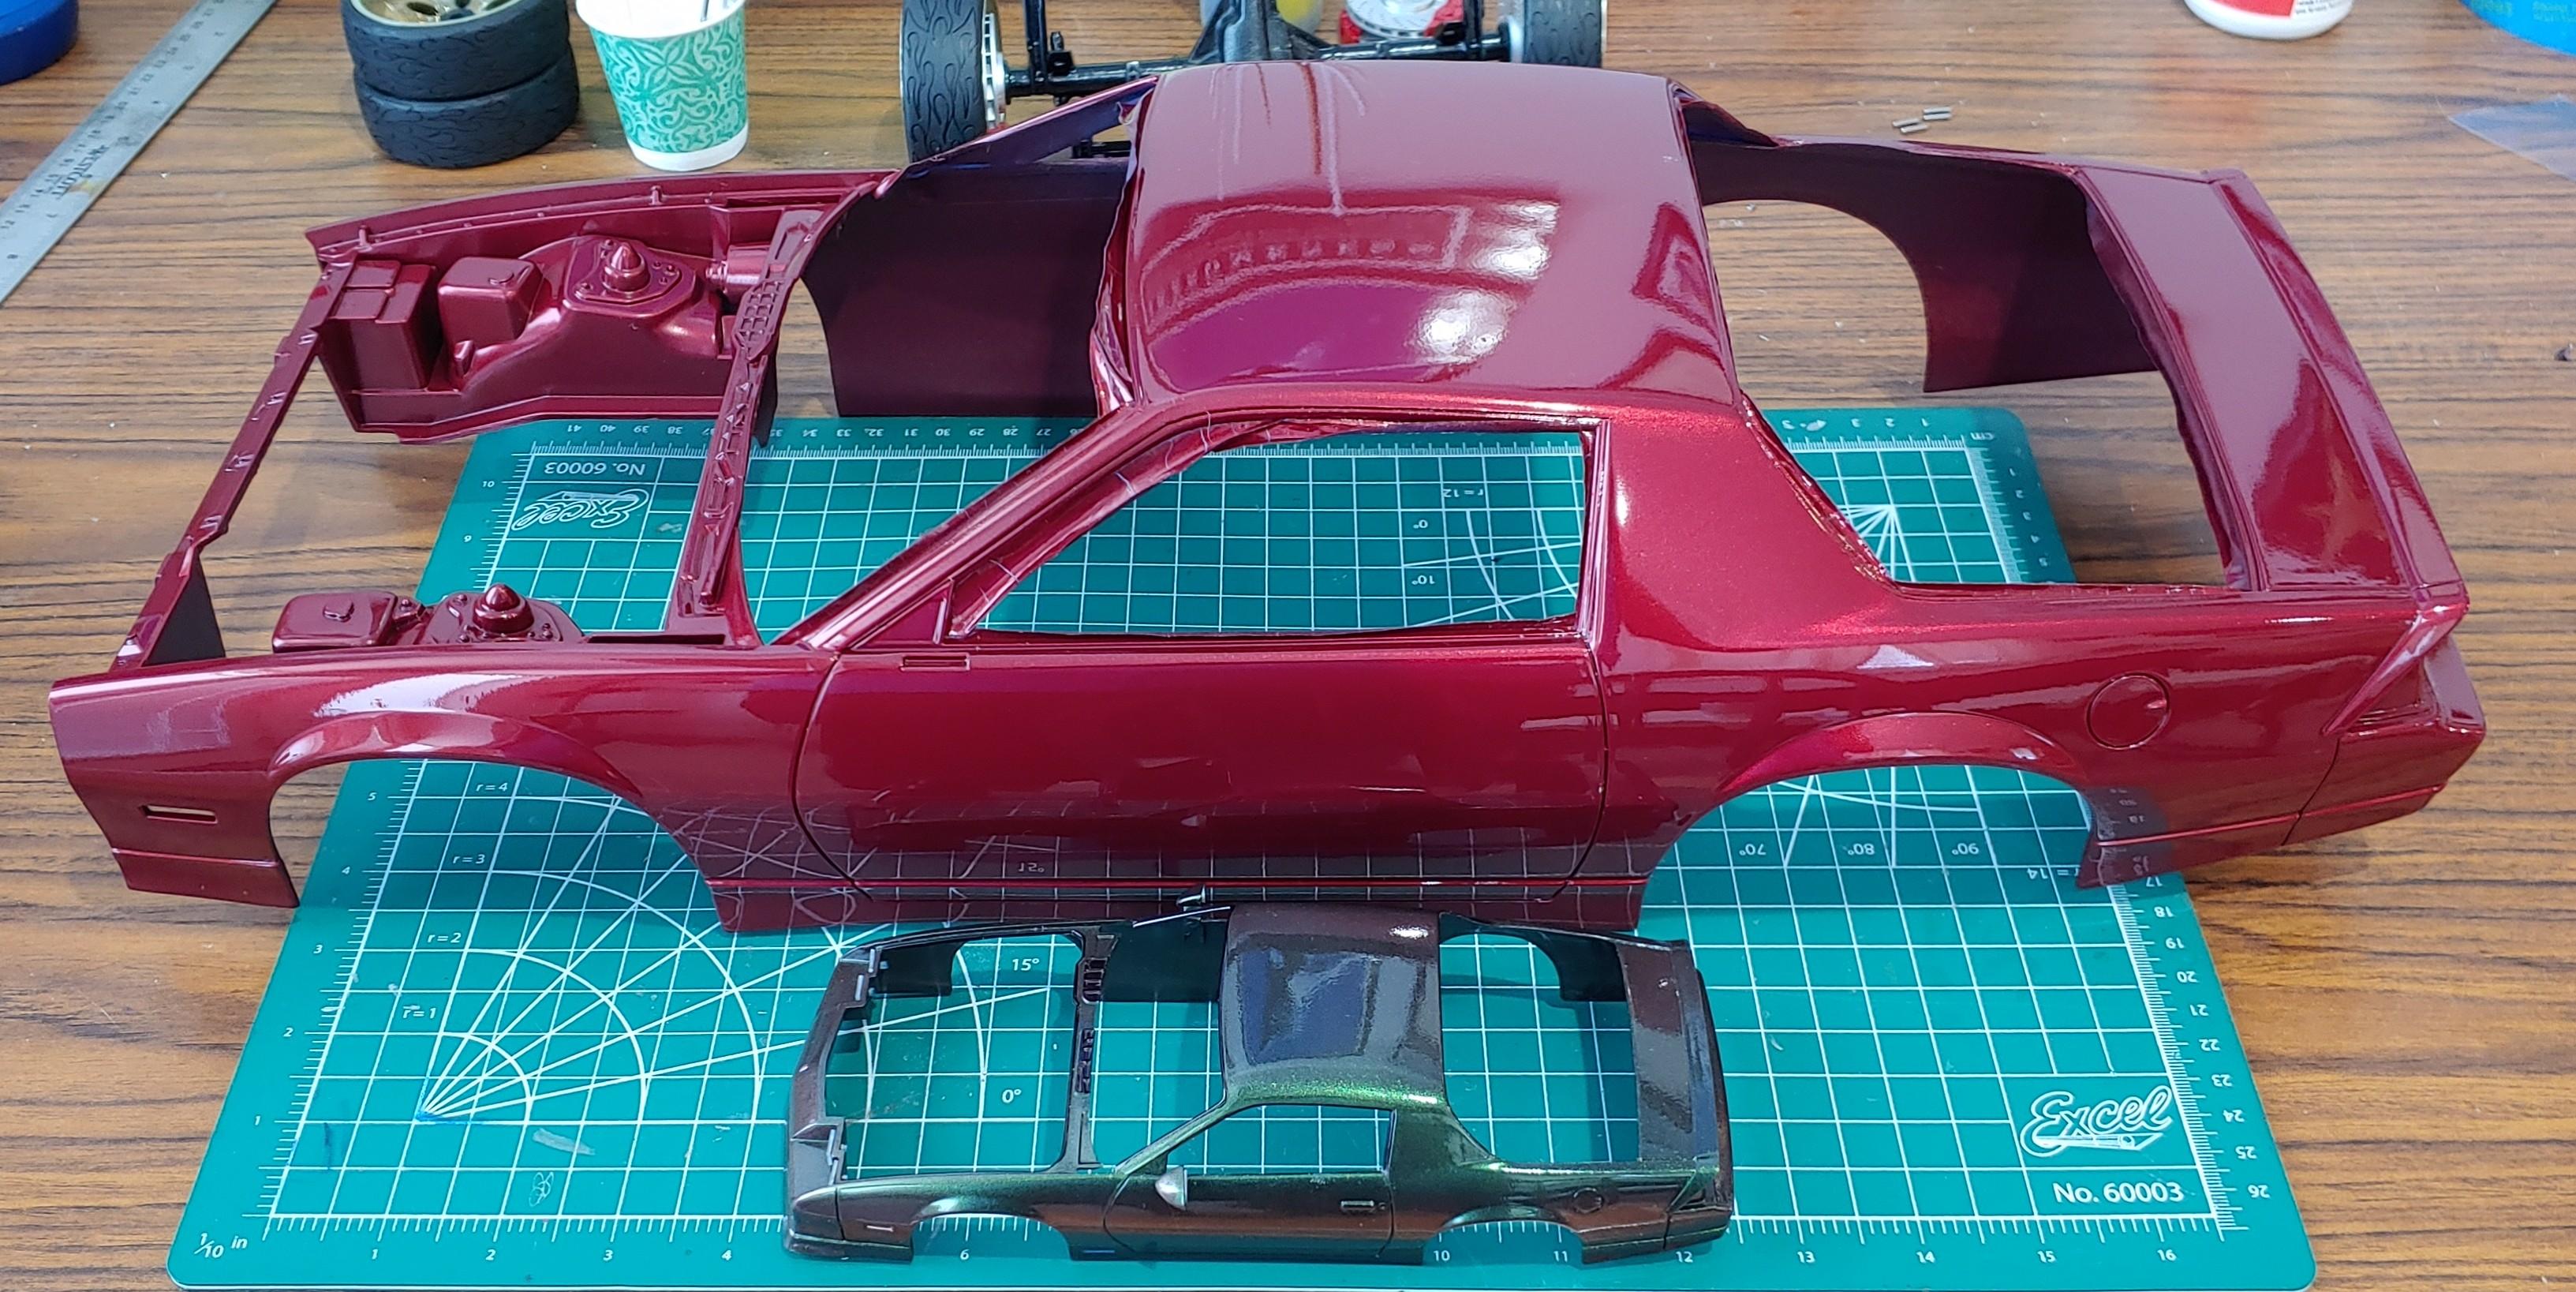
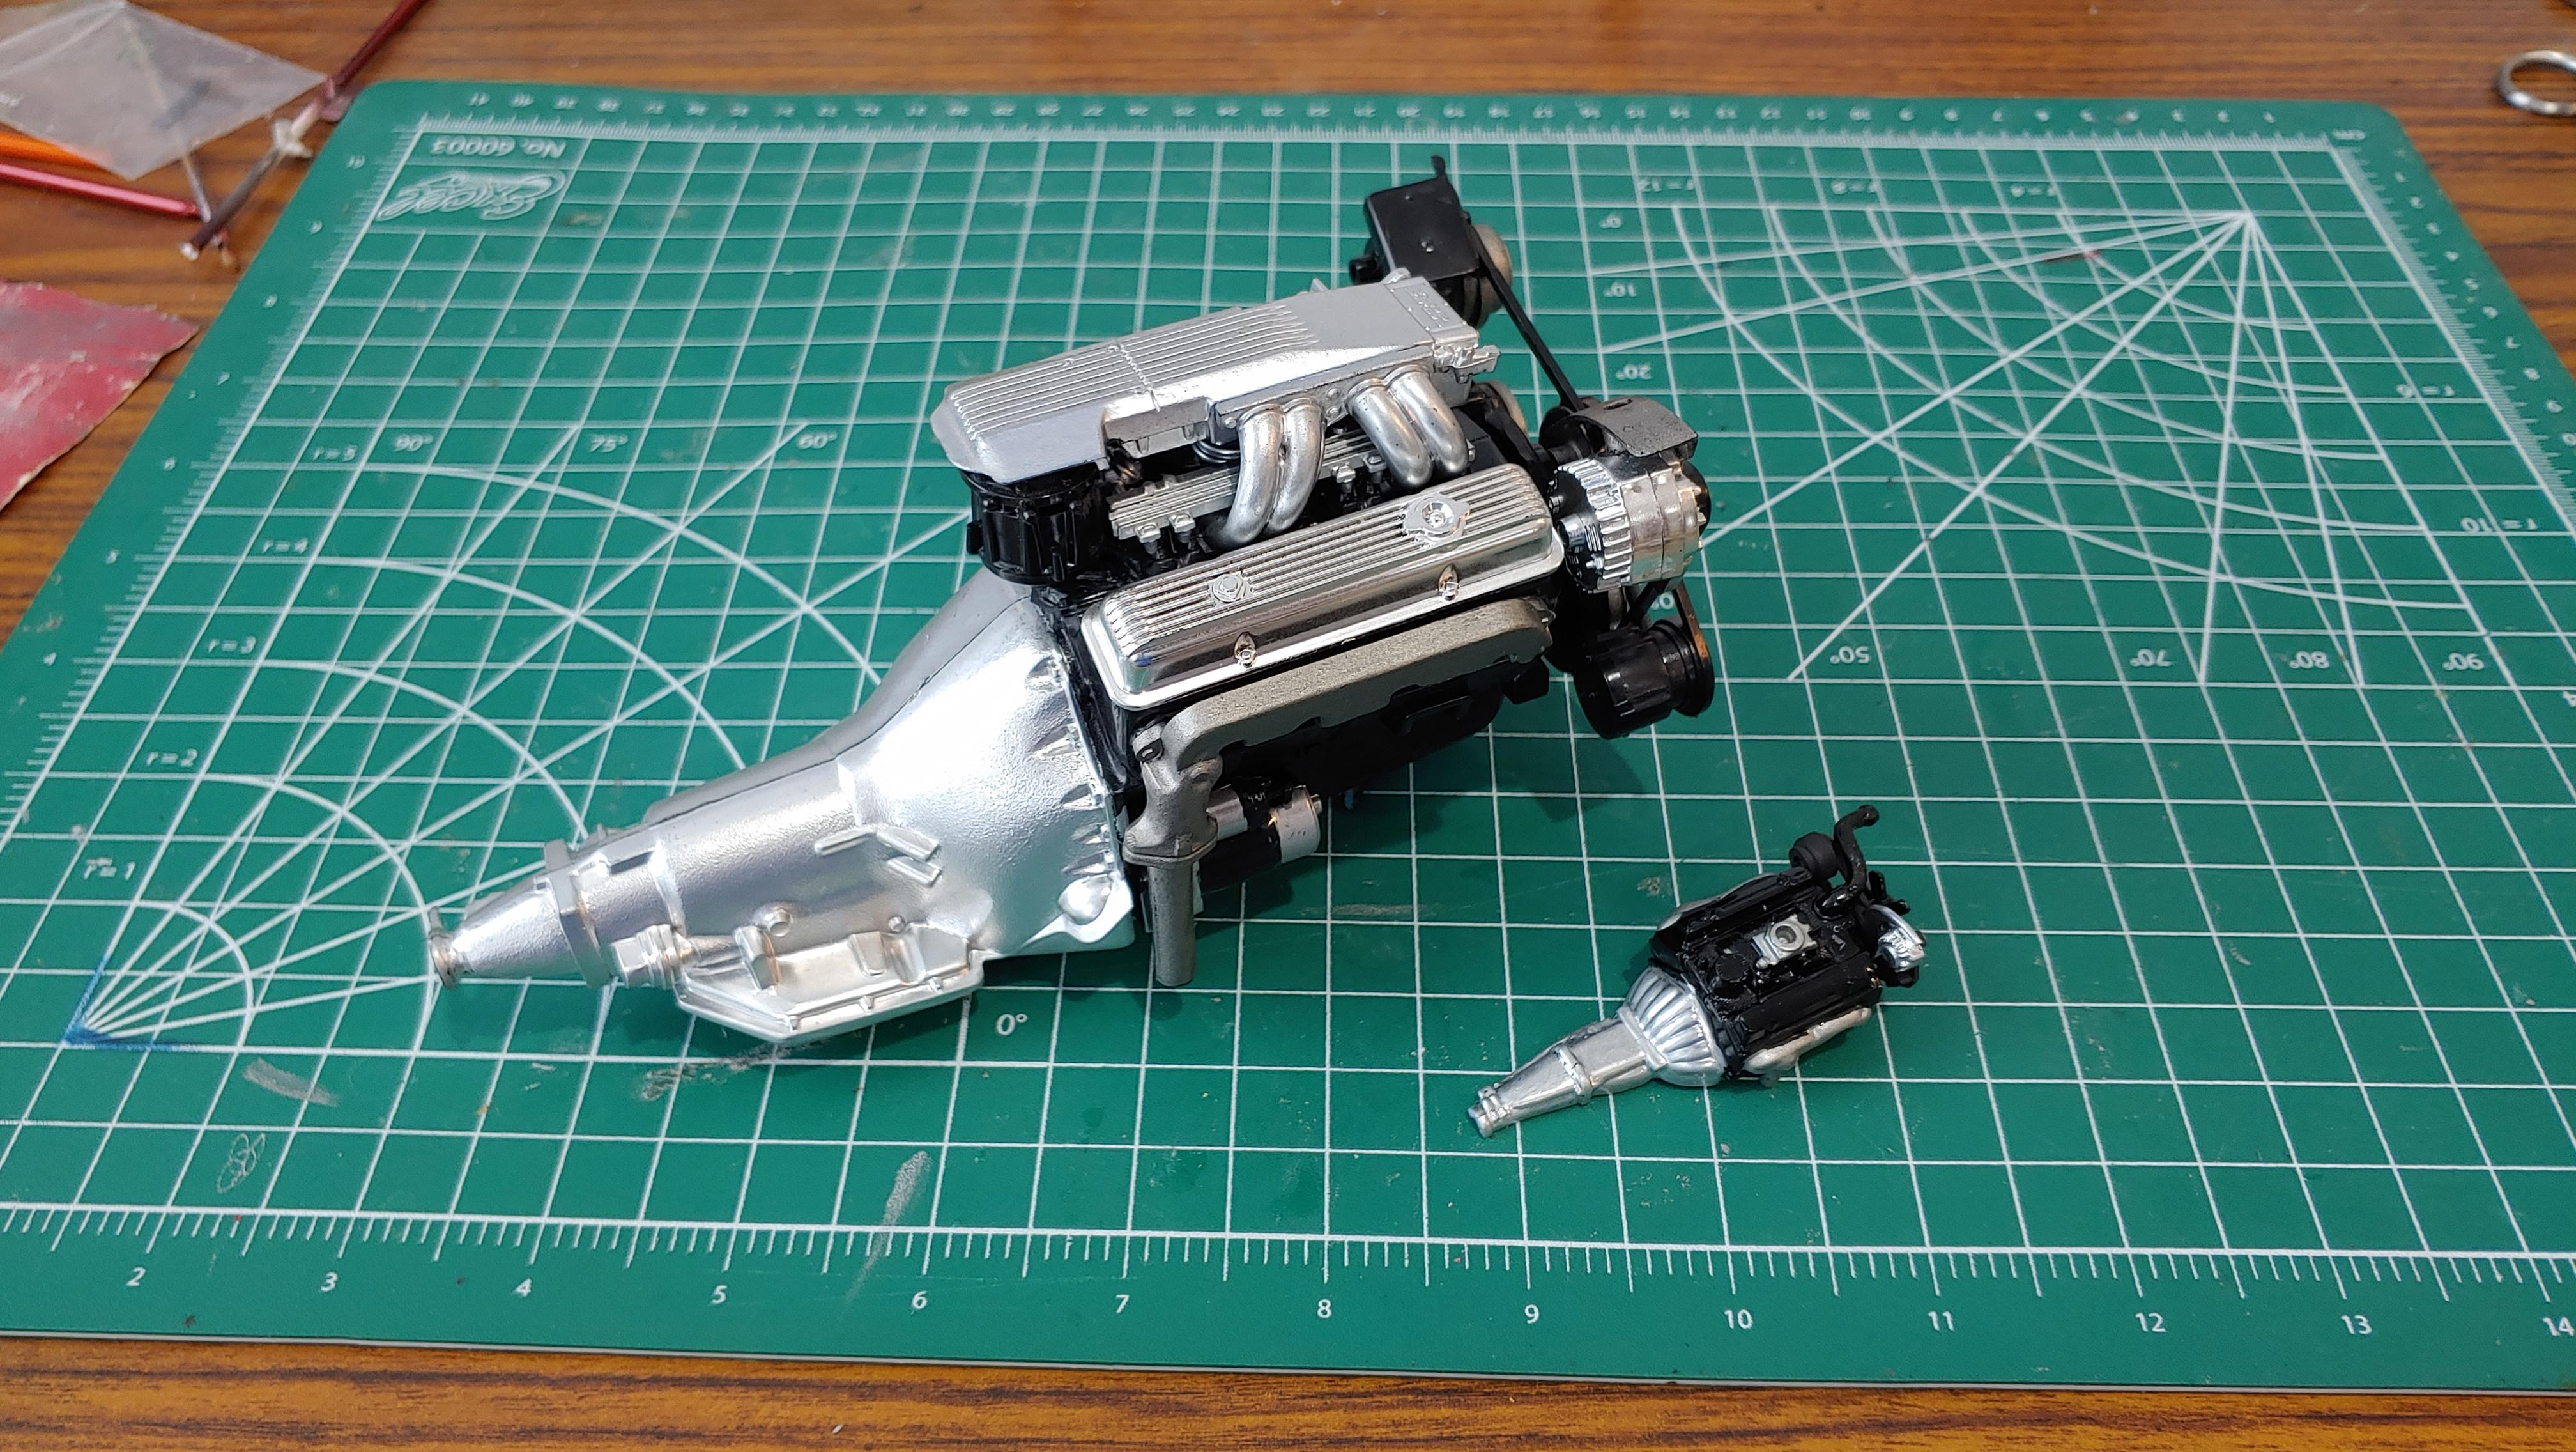
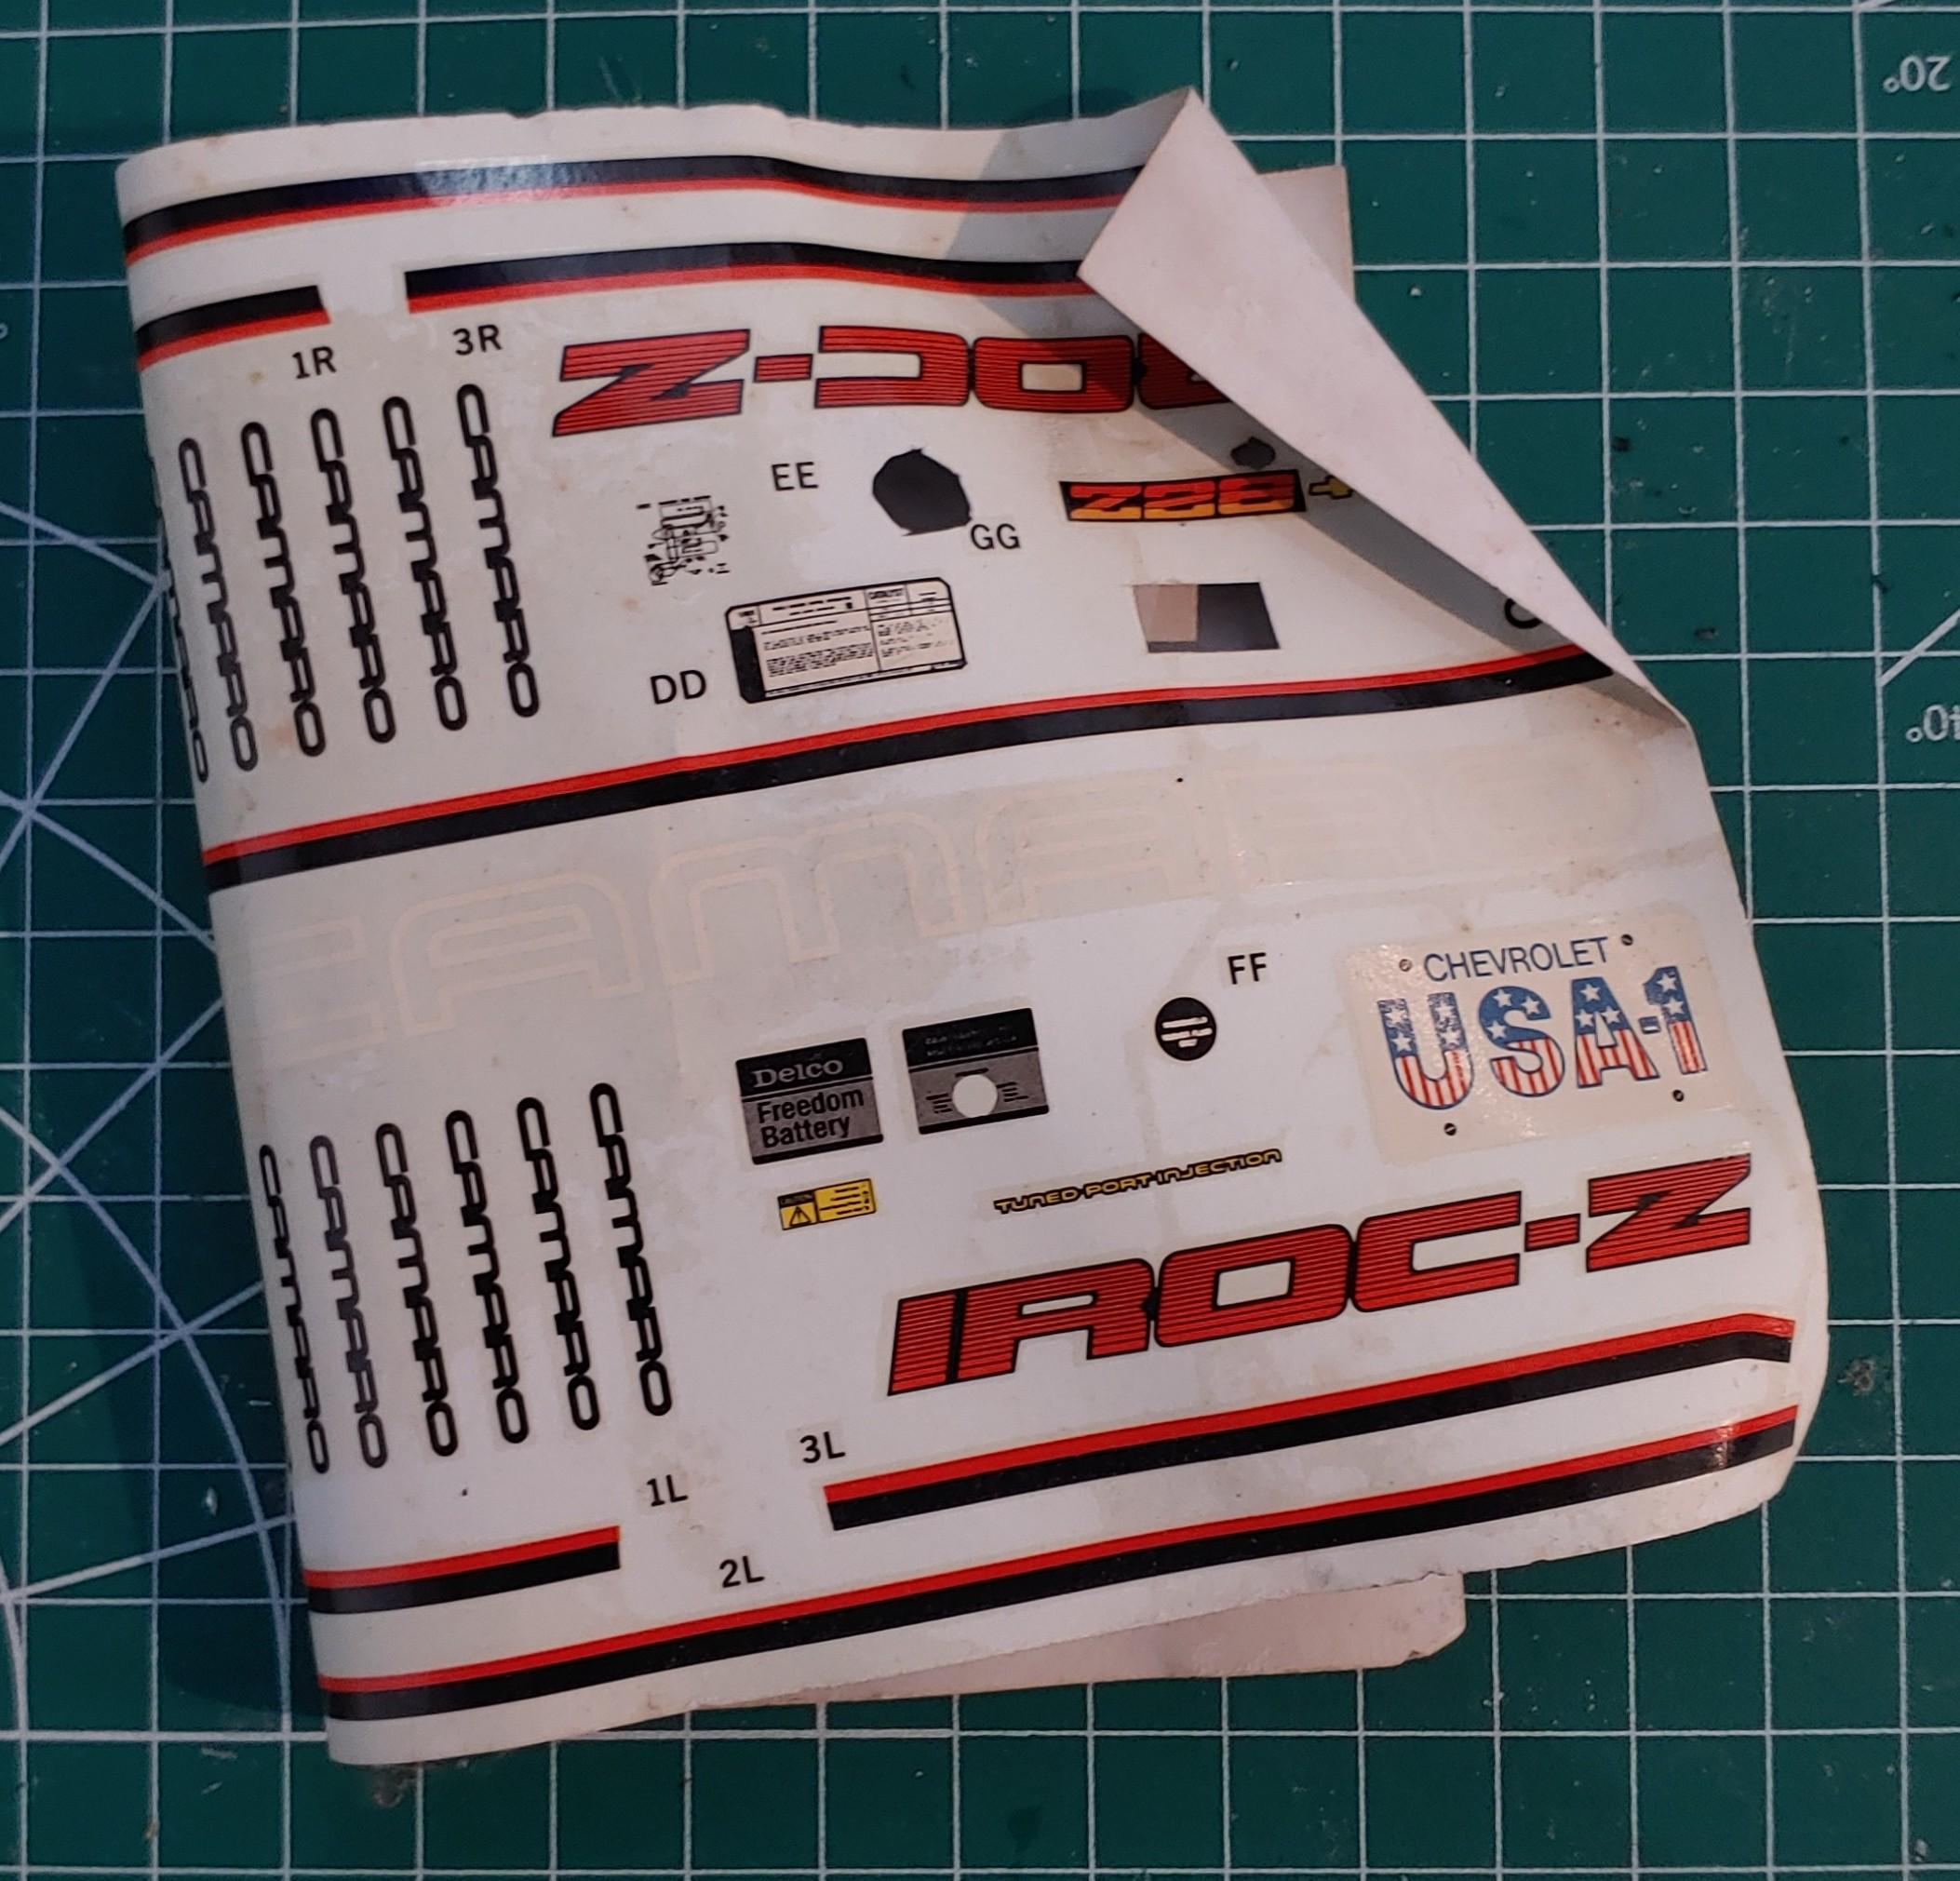
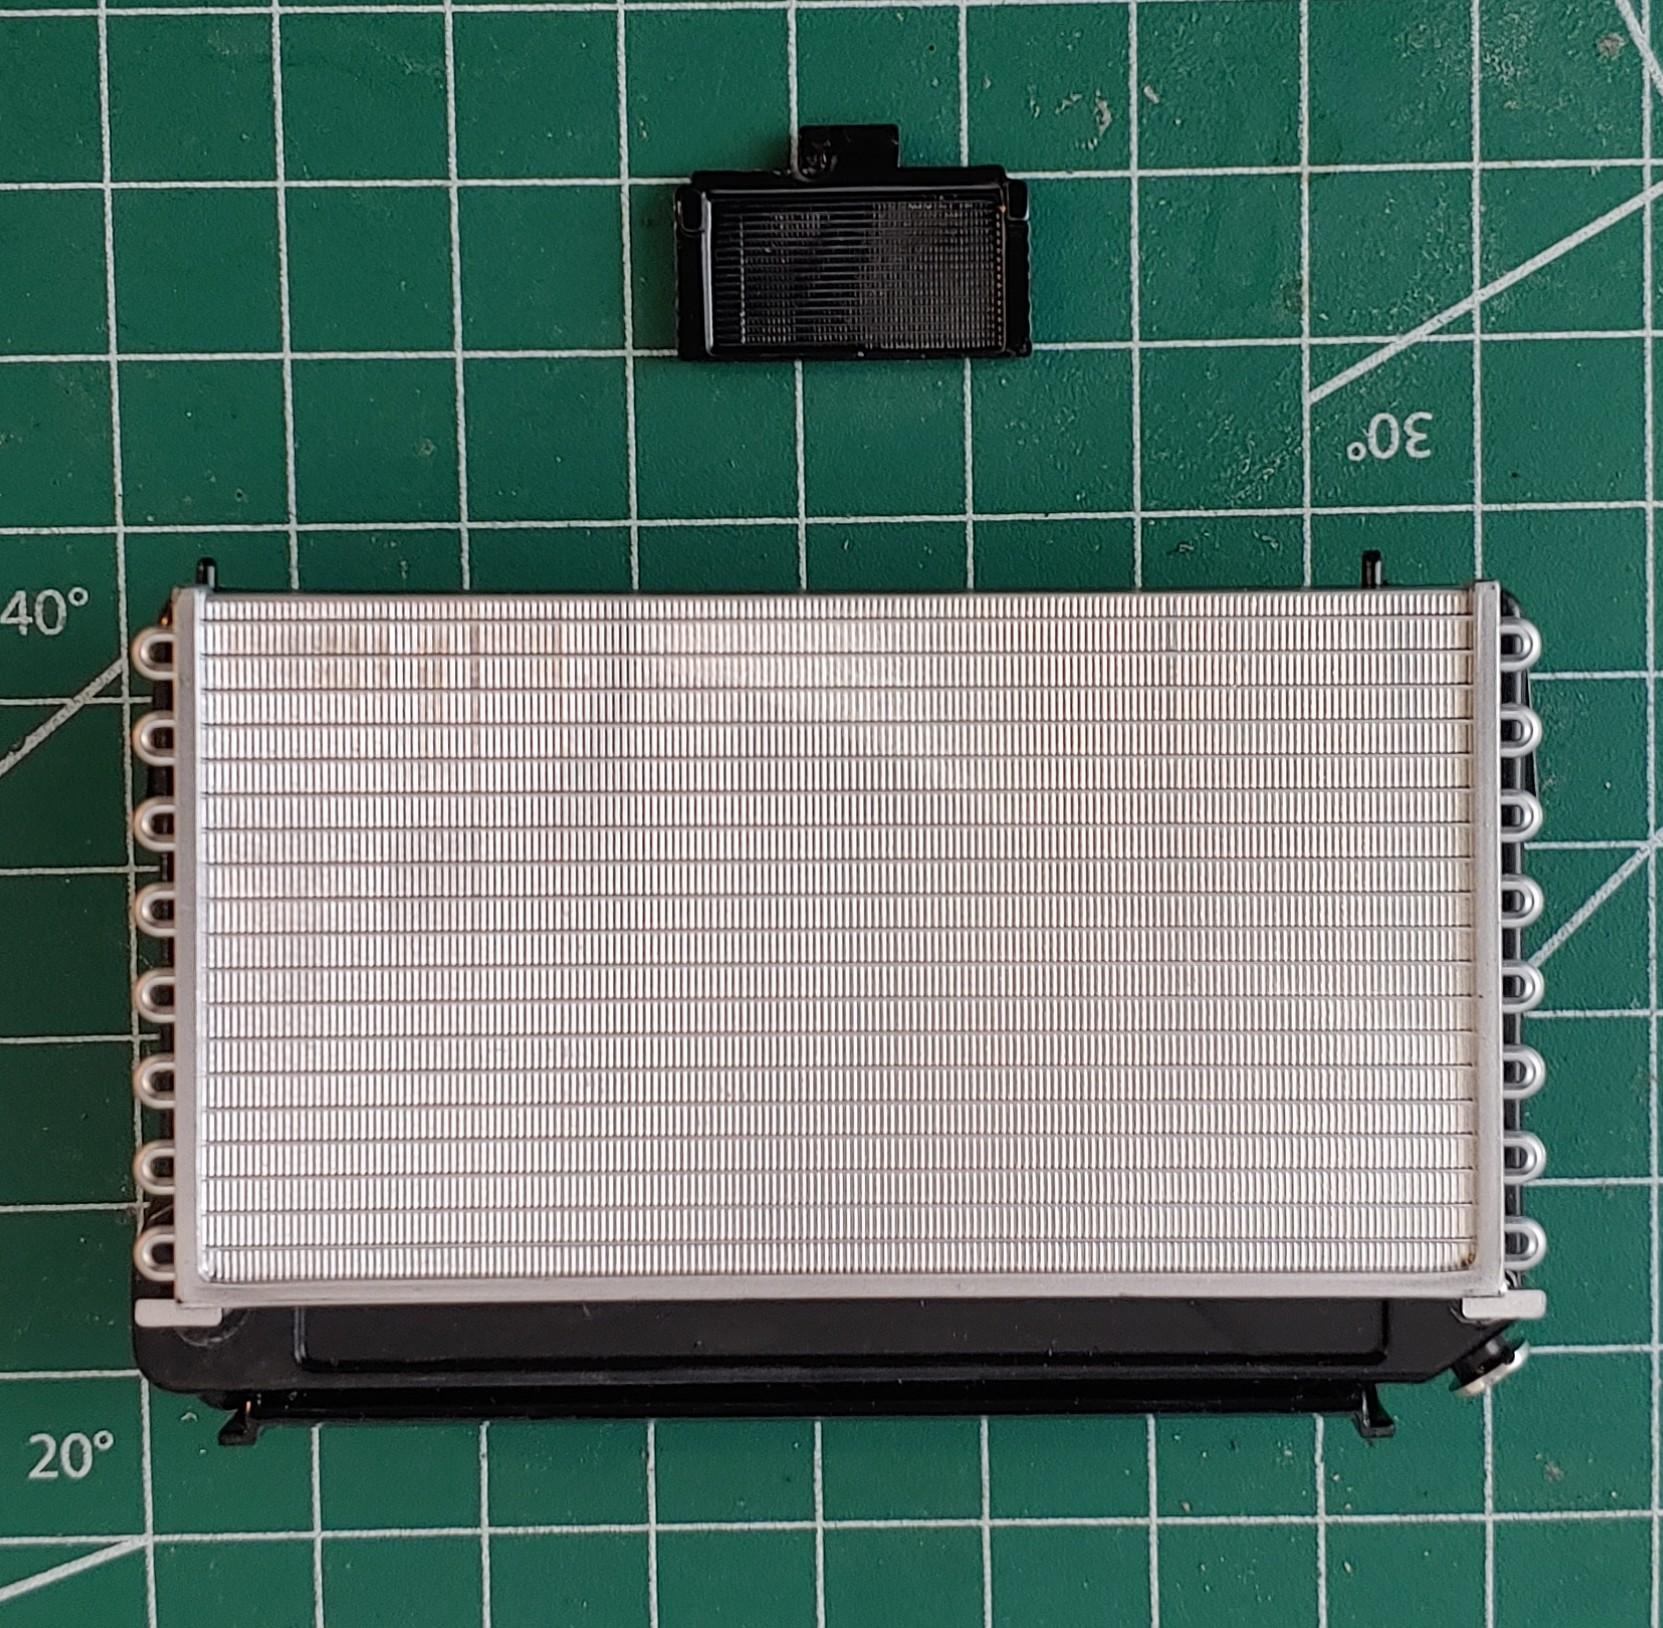
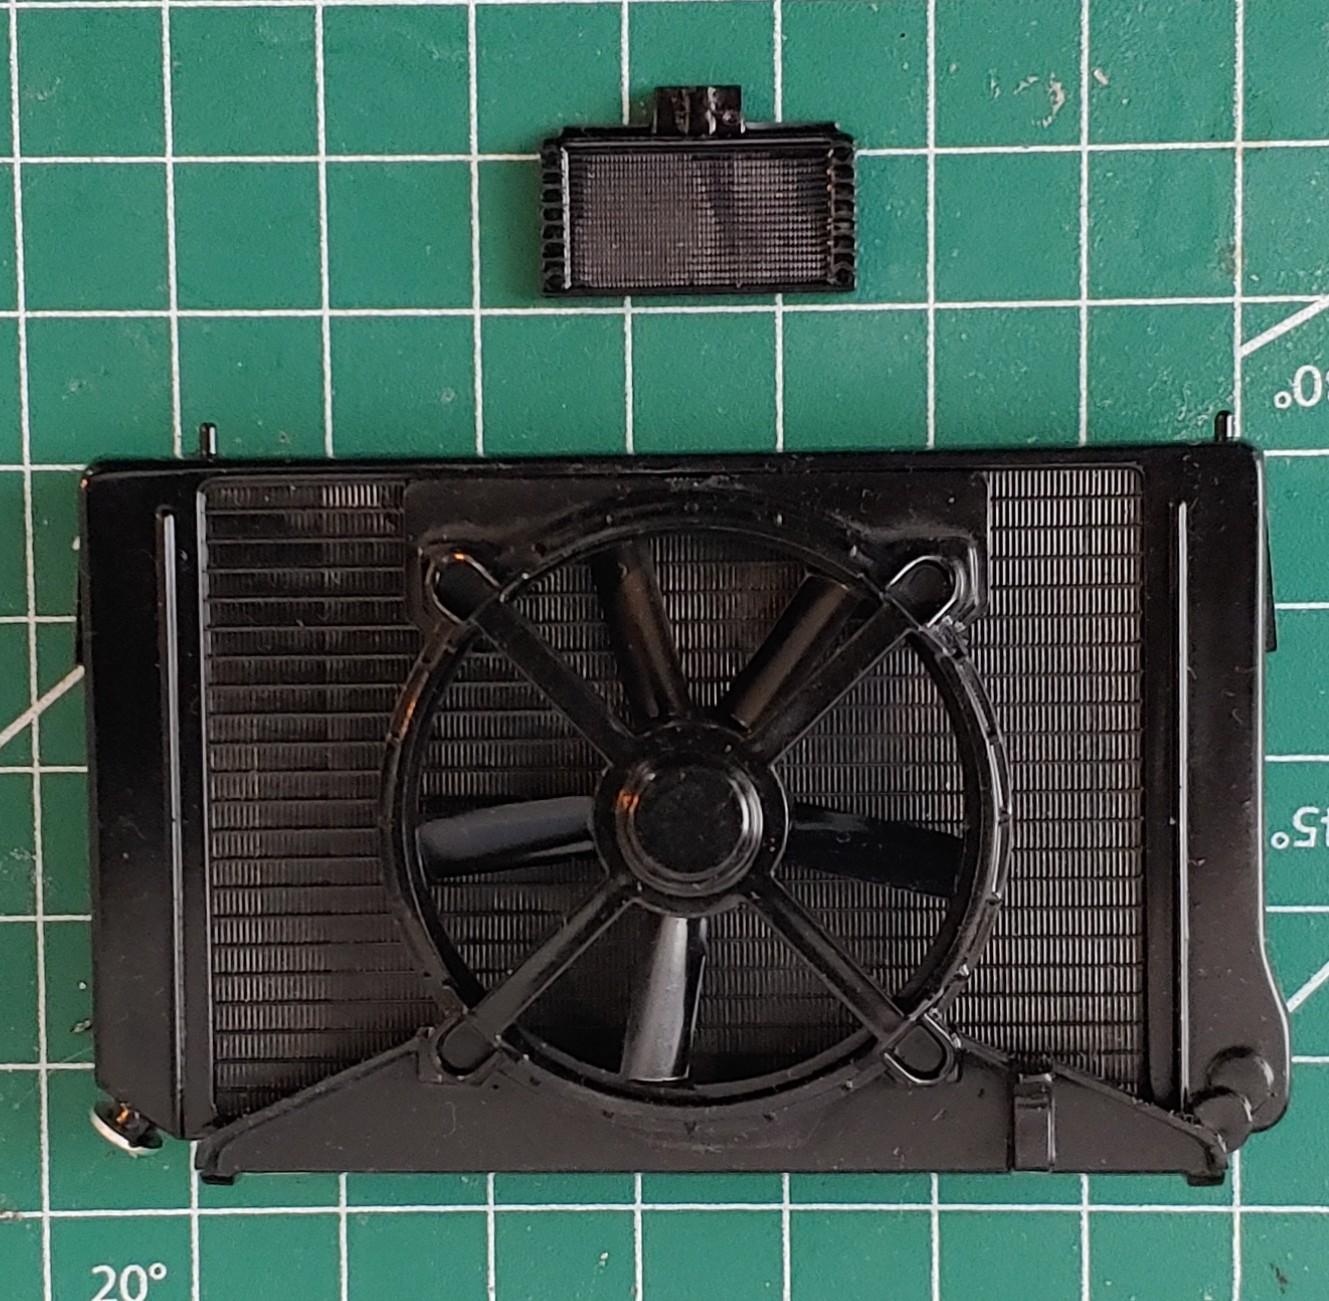
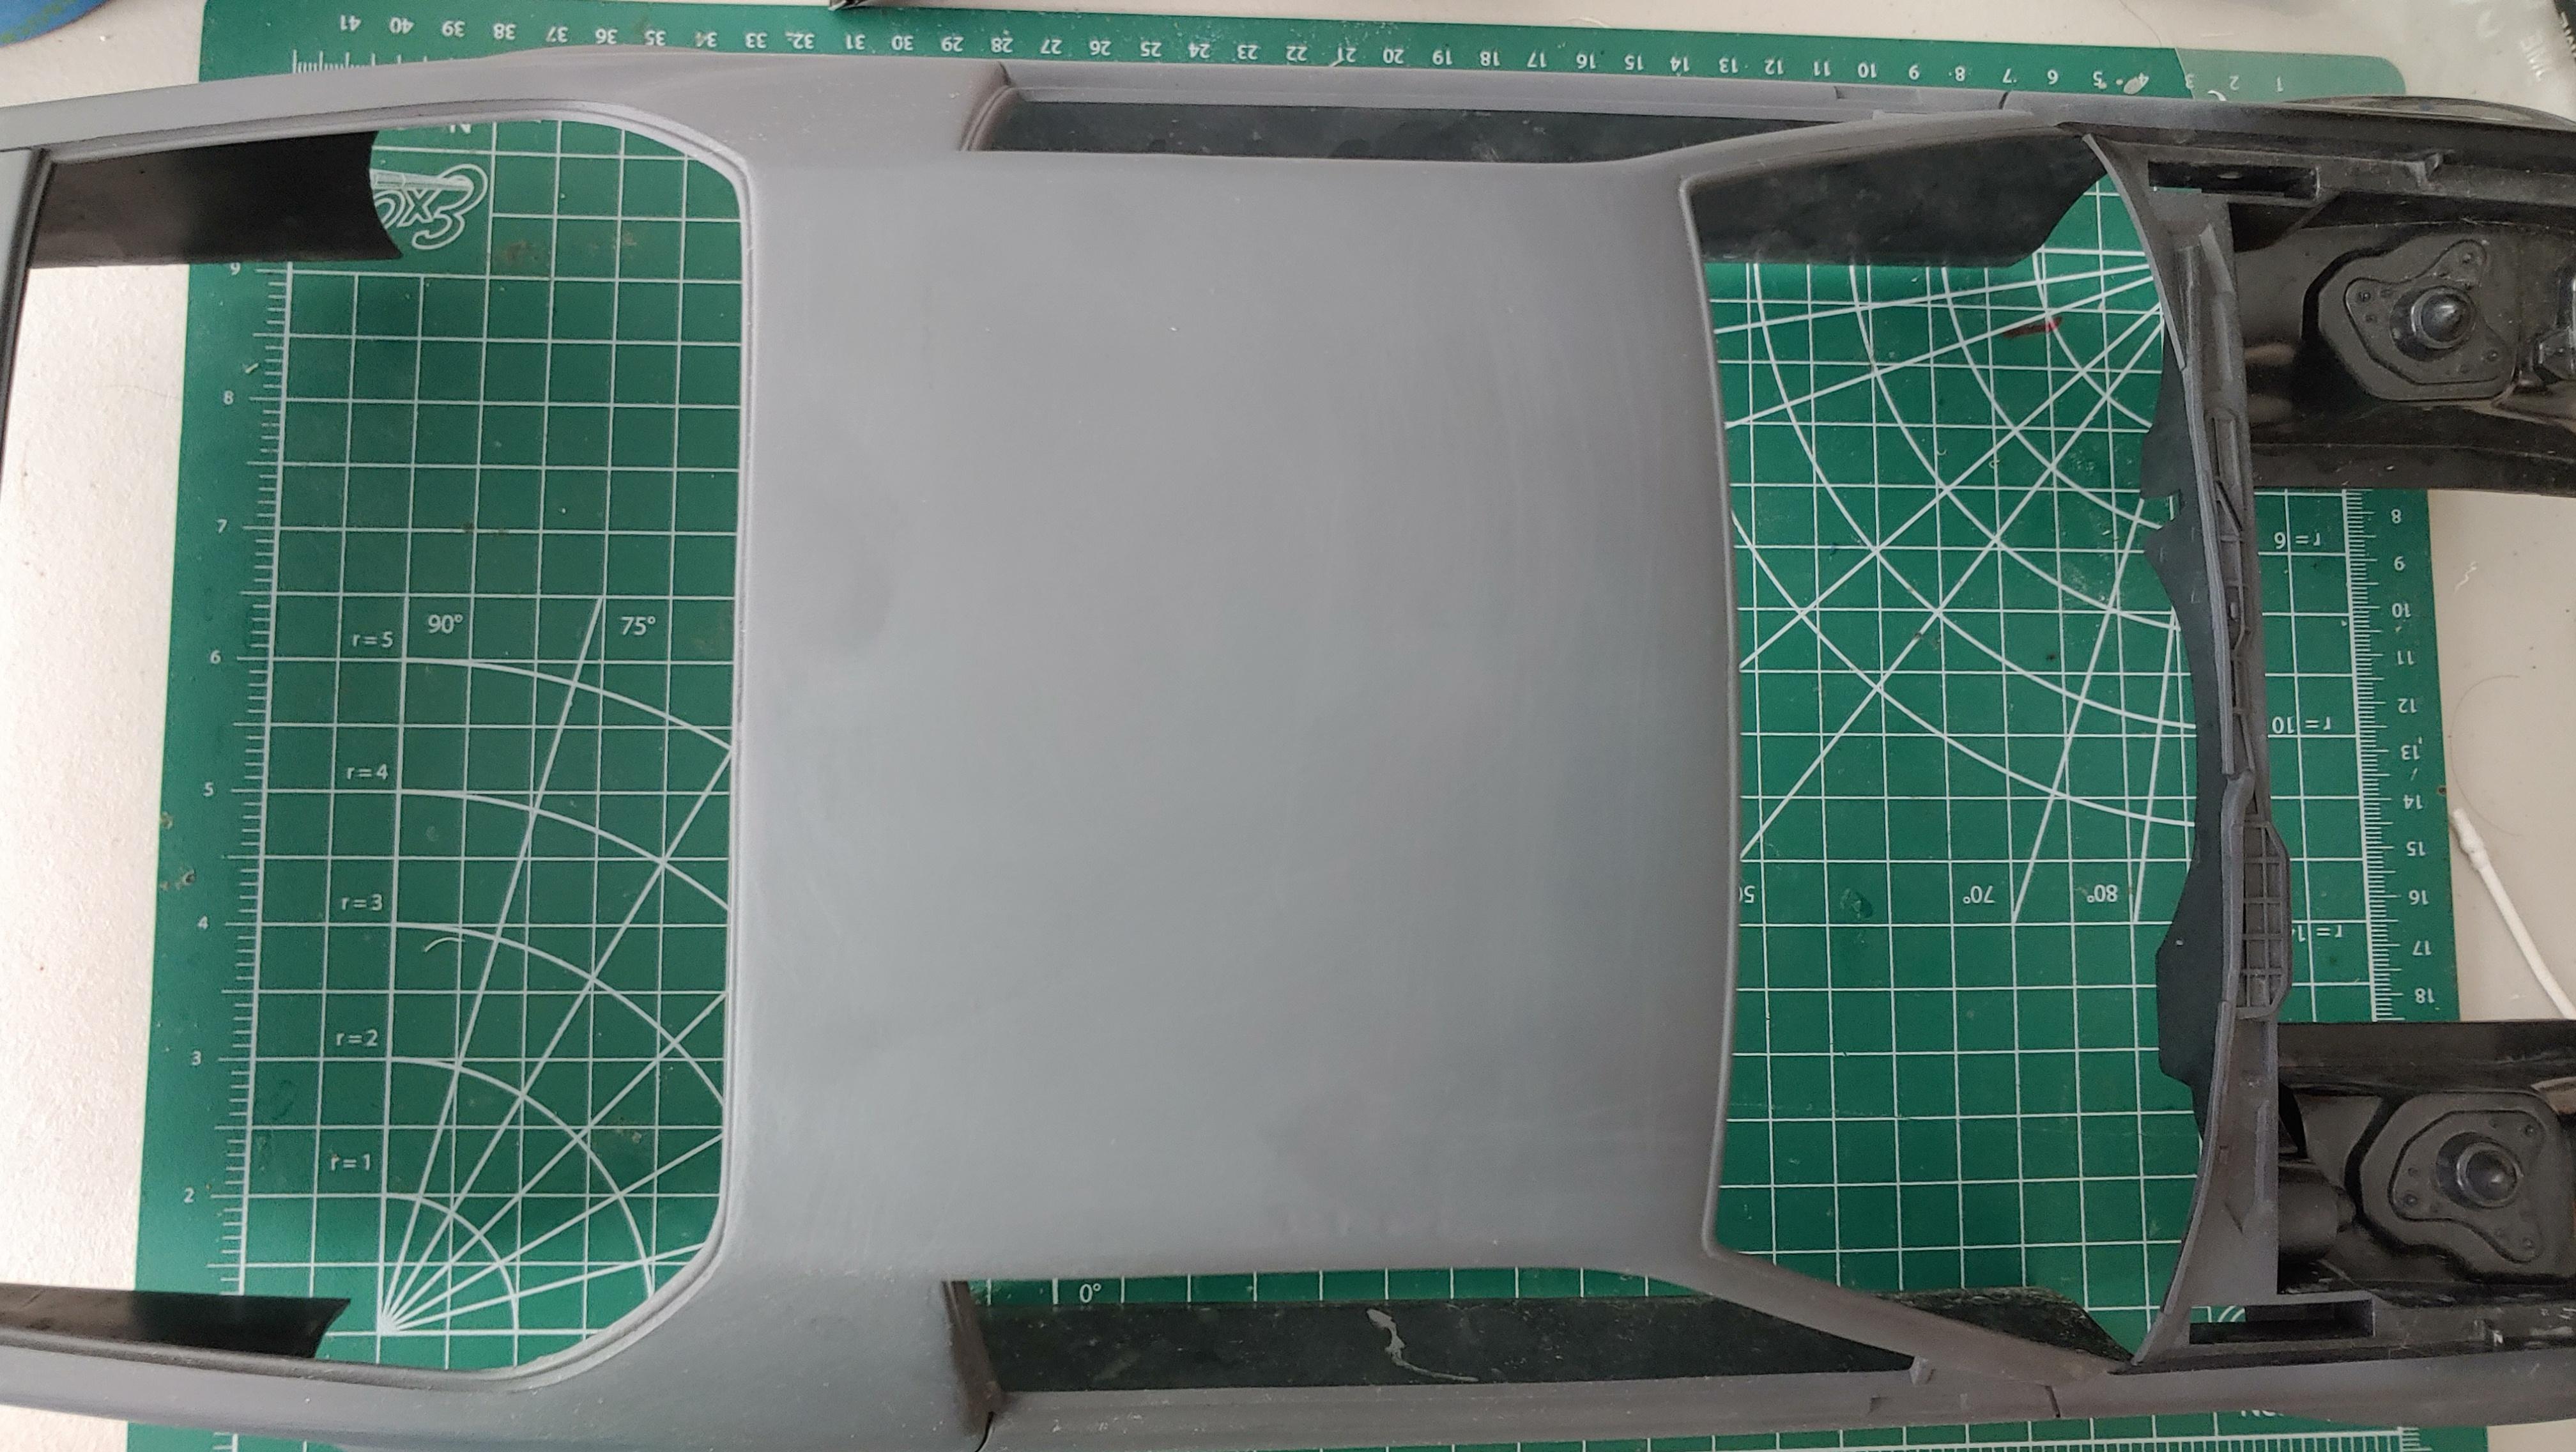
Some of the body work on the roof ghosted through, so I sanded that area until I hit primer, then repainted. I got both engines finished. The 1/8 engine was mostly built and mostly painted. I was able to get the oil filter off and paint it separately and I did a little detail painting on the starter, everything else was already painted in colors that I was okay with. The a/c compressor had broken off and I had to reattach it. The 1/8 has an electric fan and the 1/25 has a mechanical fan. The first decal I tried went on the valve cover. It came out pretty good considering the decal sheet looks like this. I also got the radiators painted and assembled. The 1/8 has a separate condenser that had already been glued to the radiator, I was able to get them apart to paint separately. The 2 piece fan shroud had already been glued together and had the fan installed, so I painted those as 1 piece. The 1/25 radiator is pretty simple with the fan on the engine and the fan shroud molded into the engine bay. And here they are installed on the chassis. More next time.
-
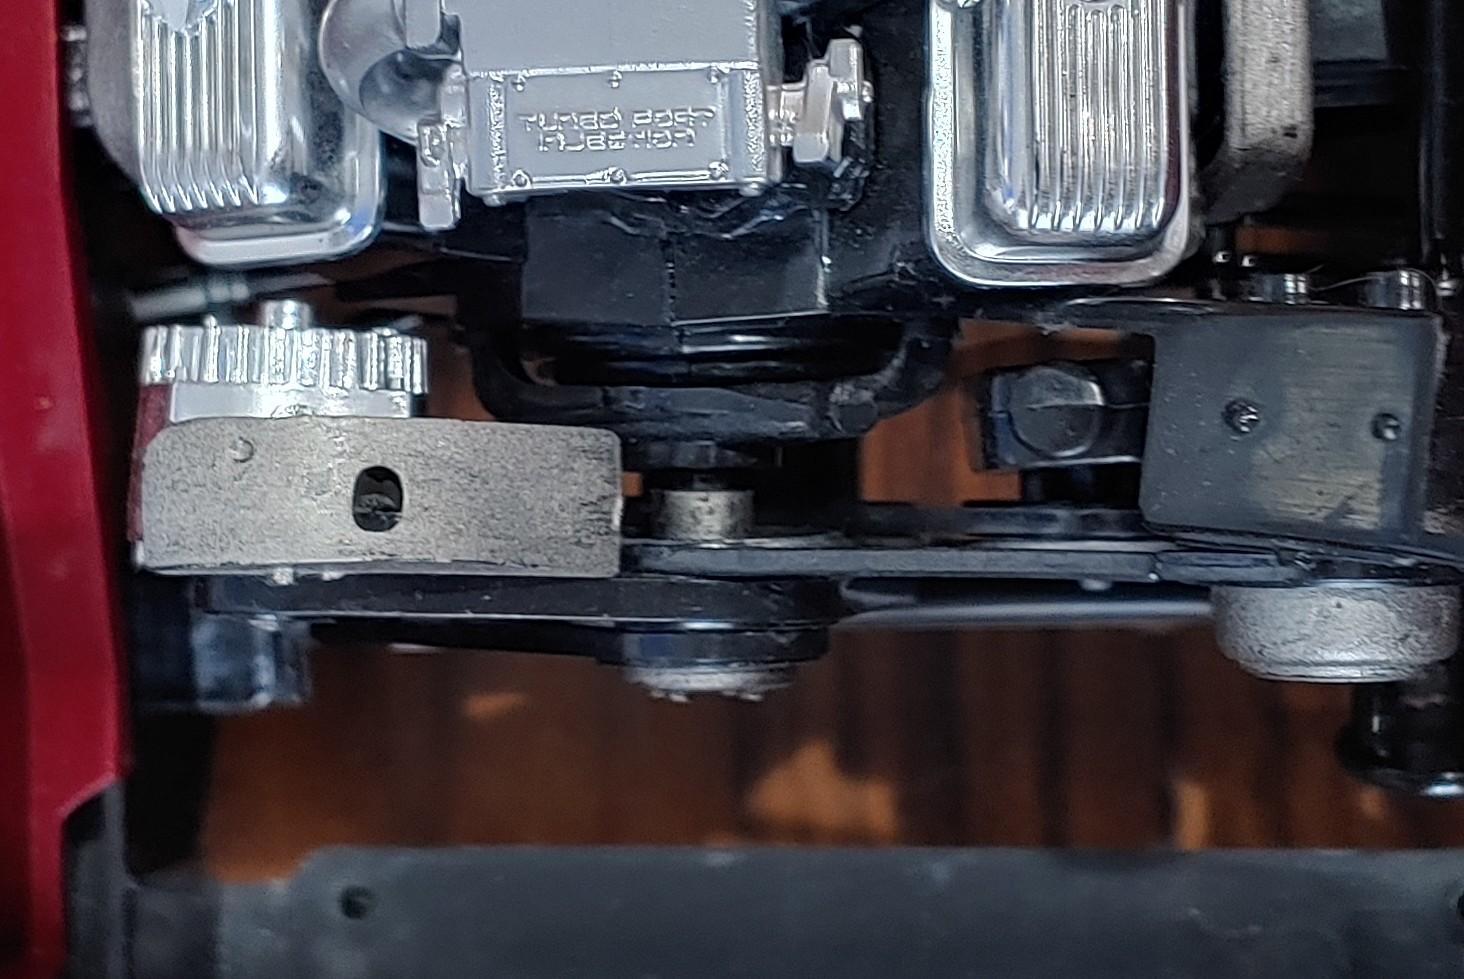
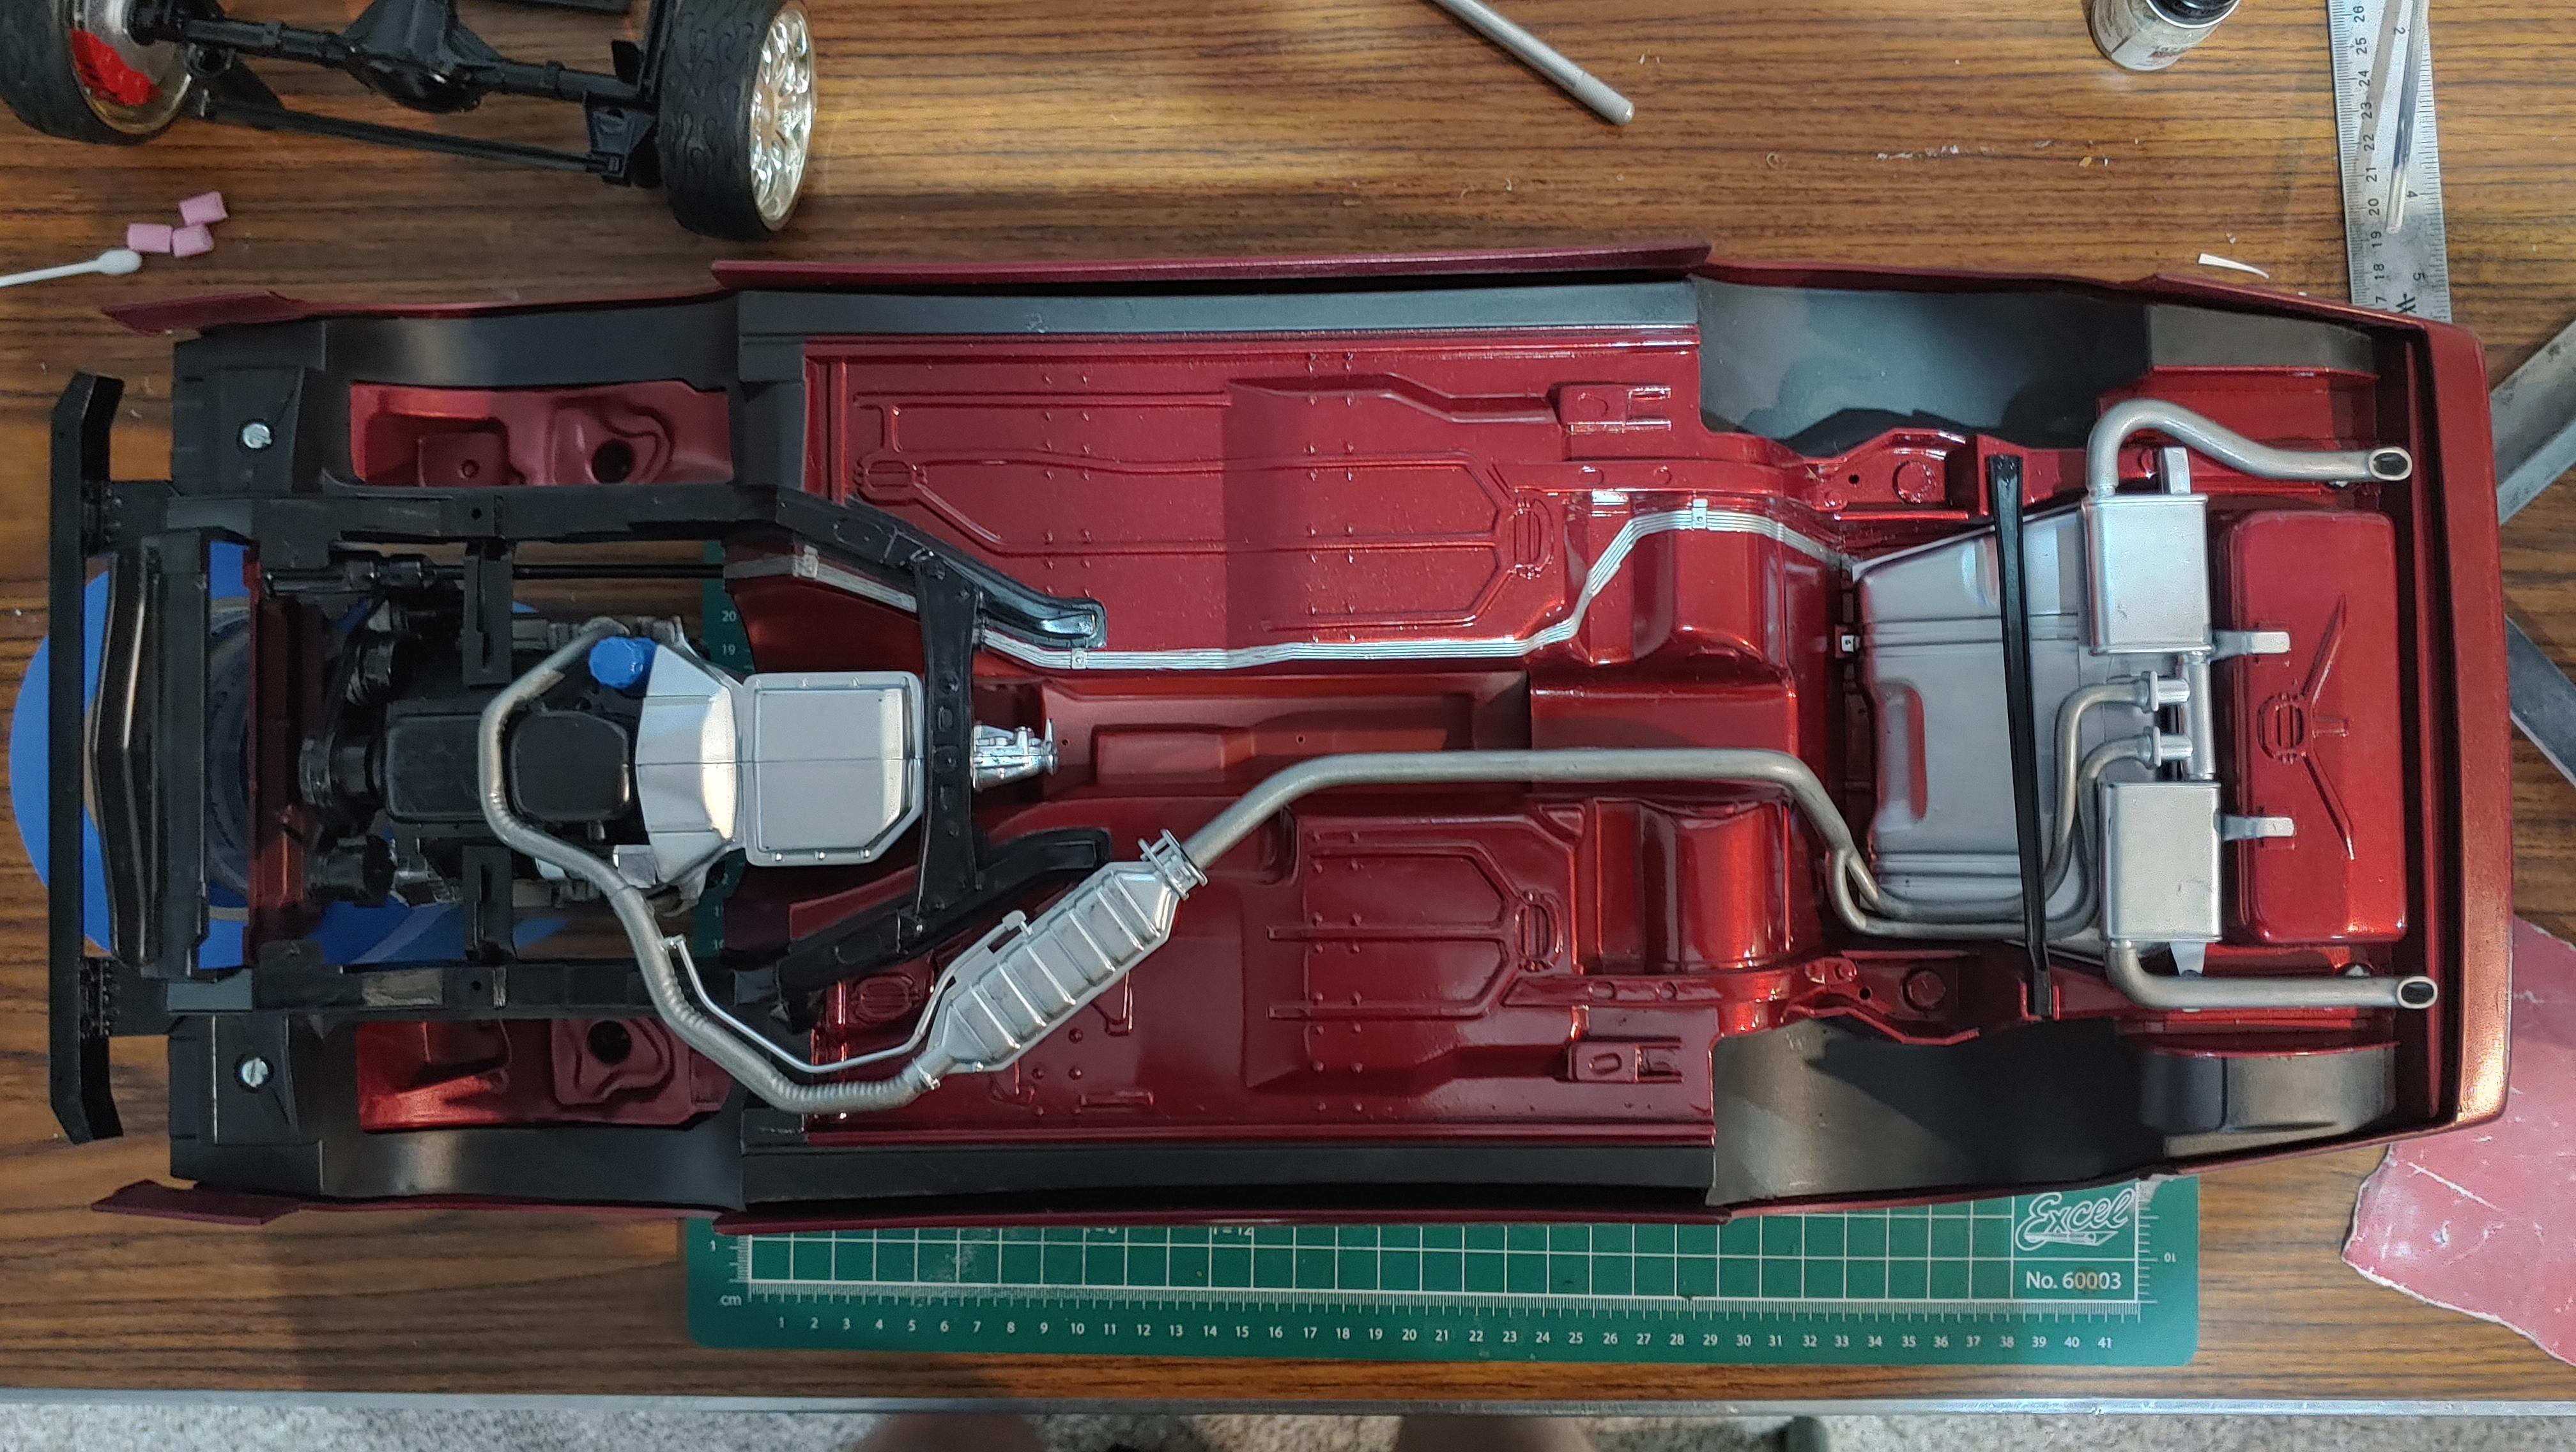
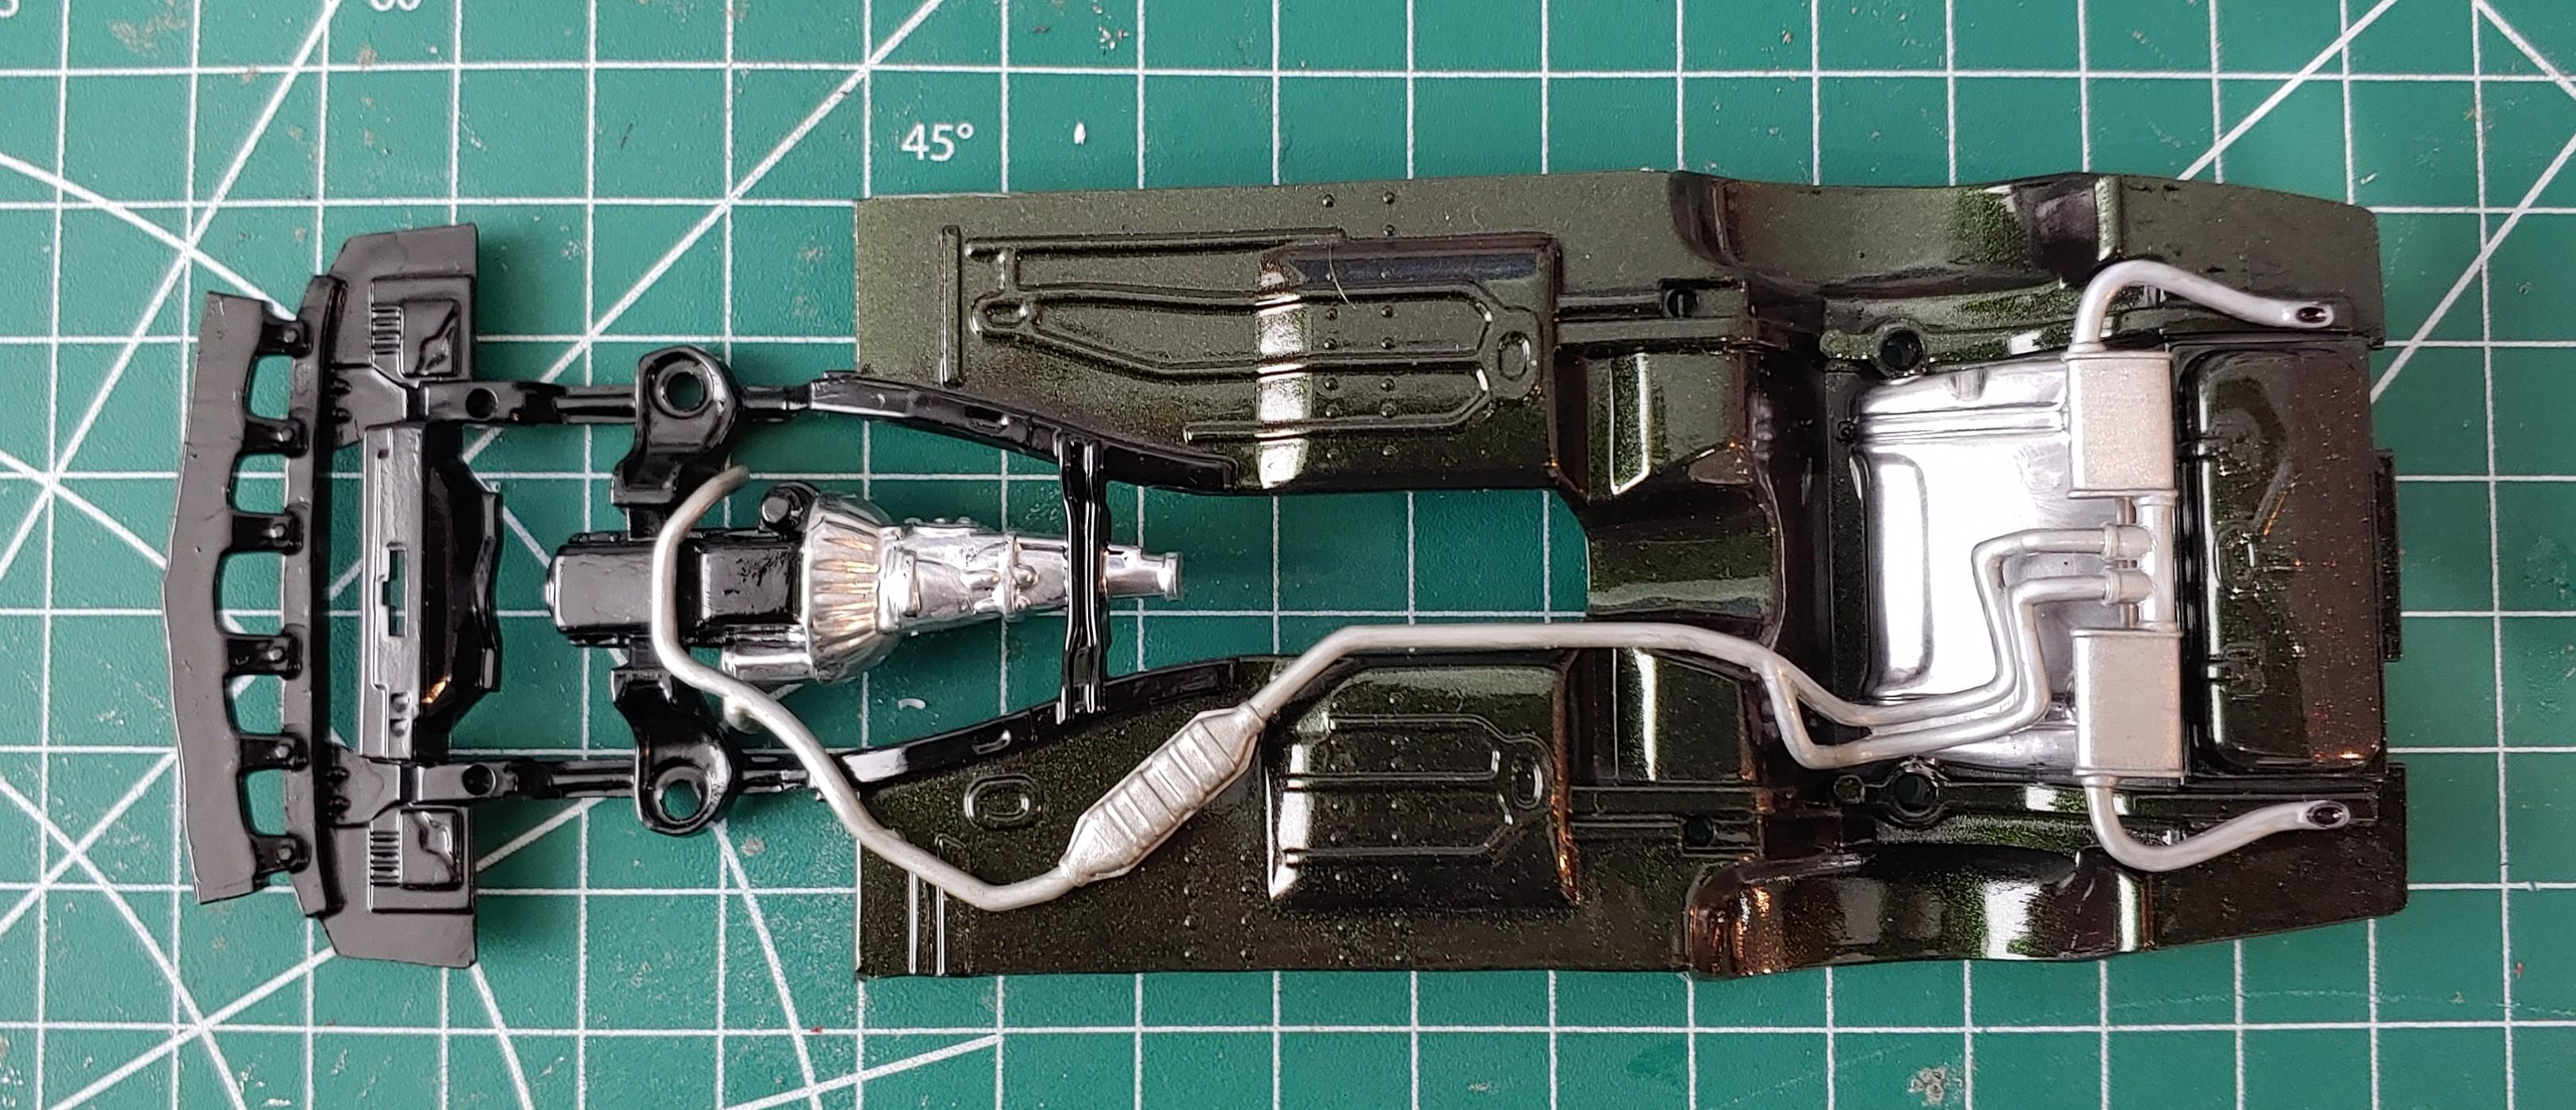
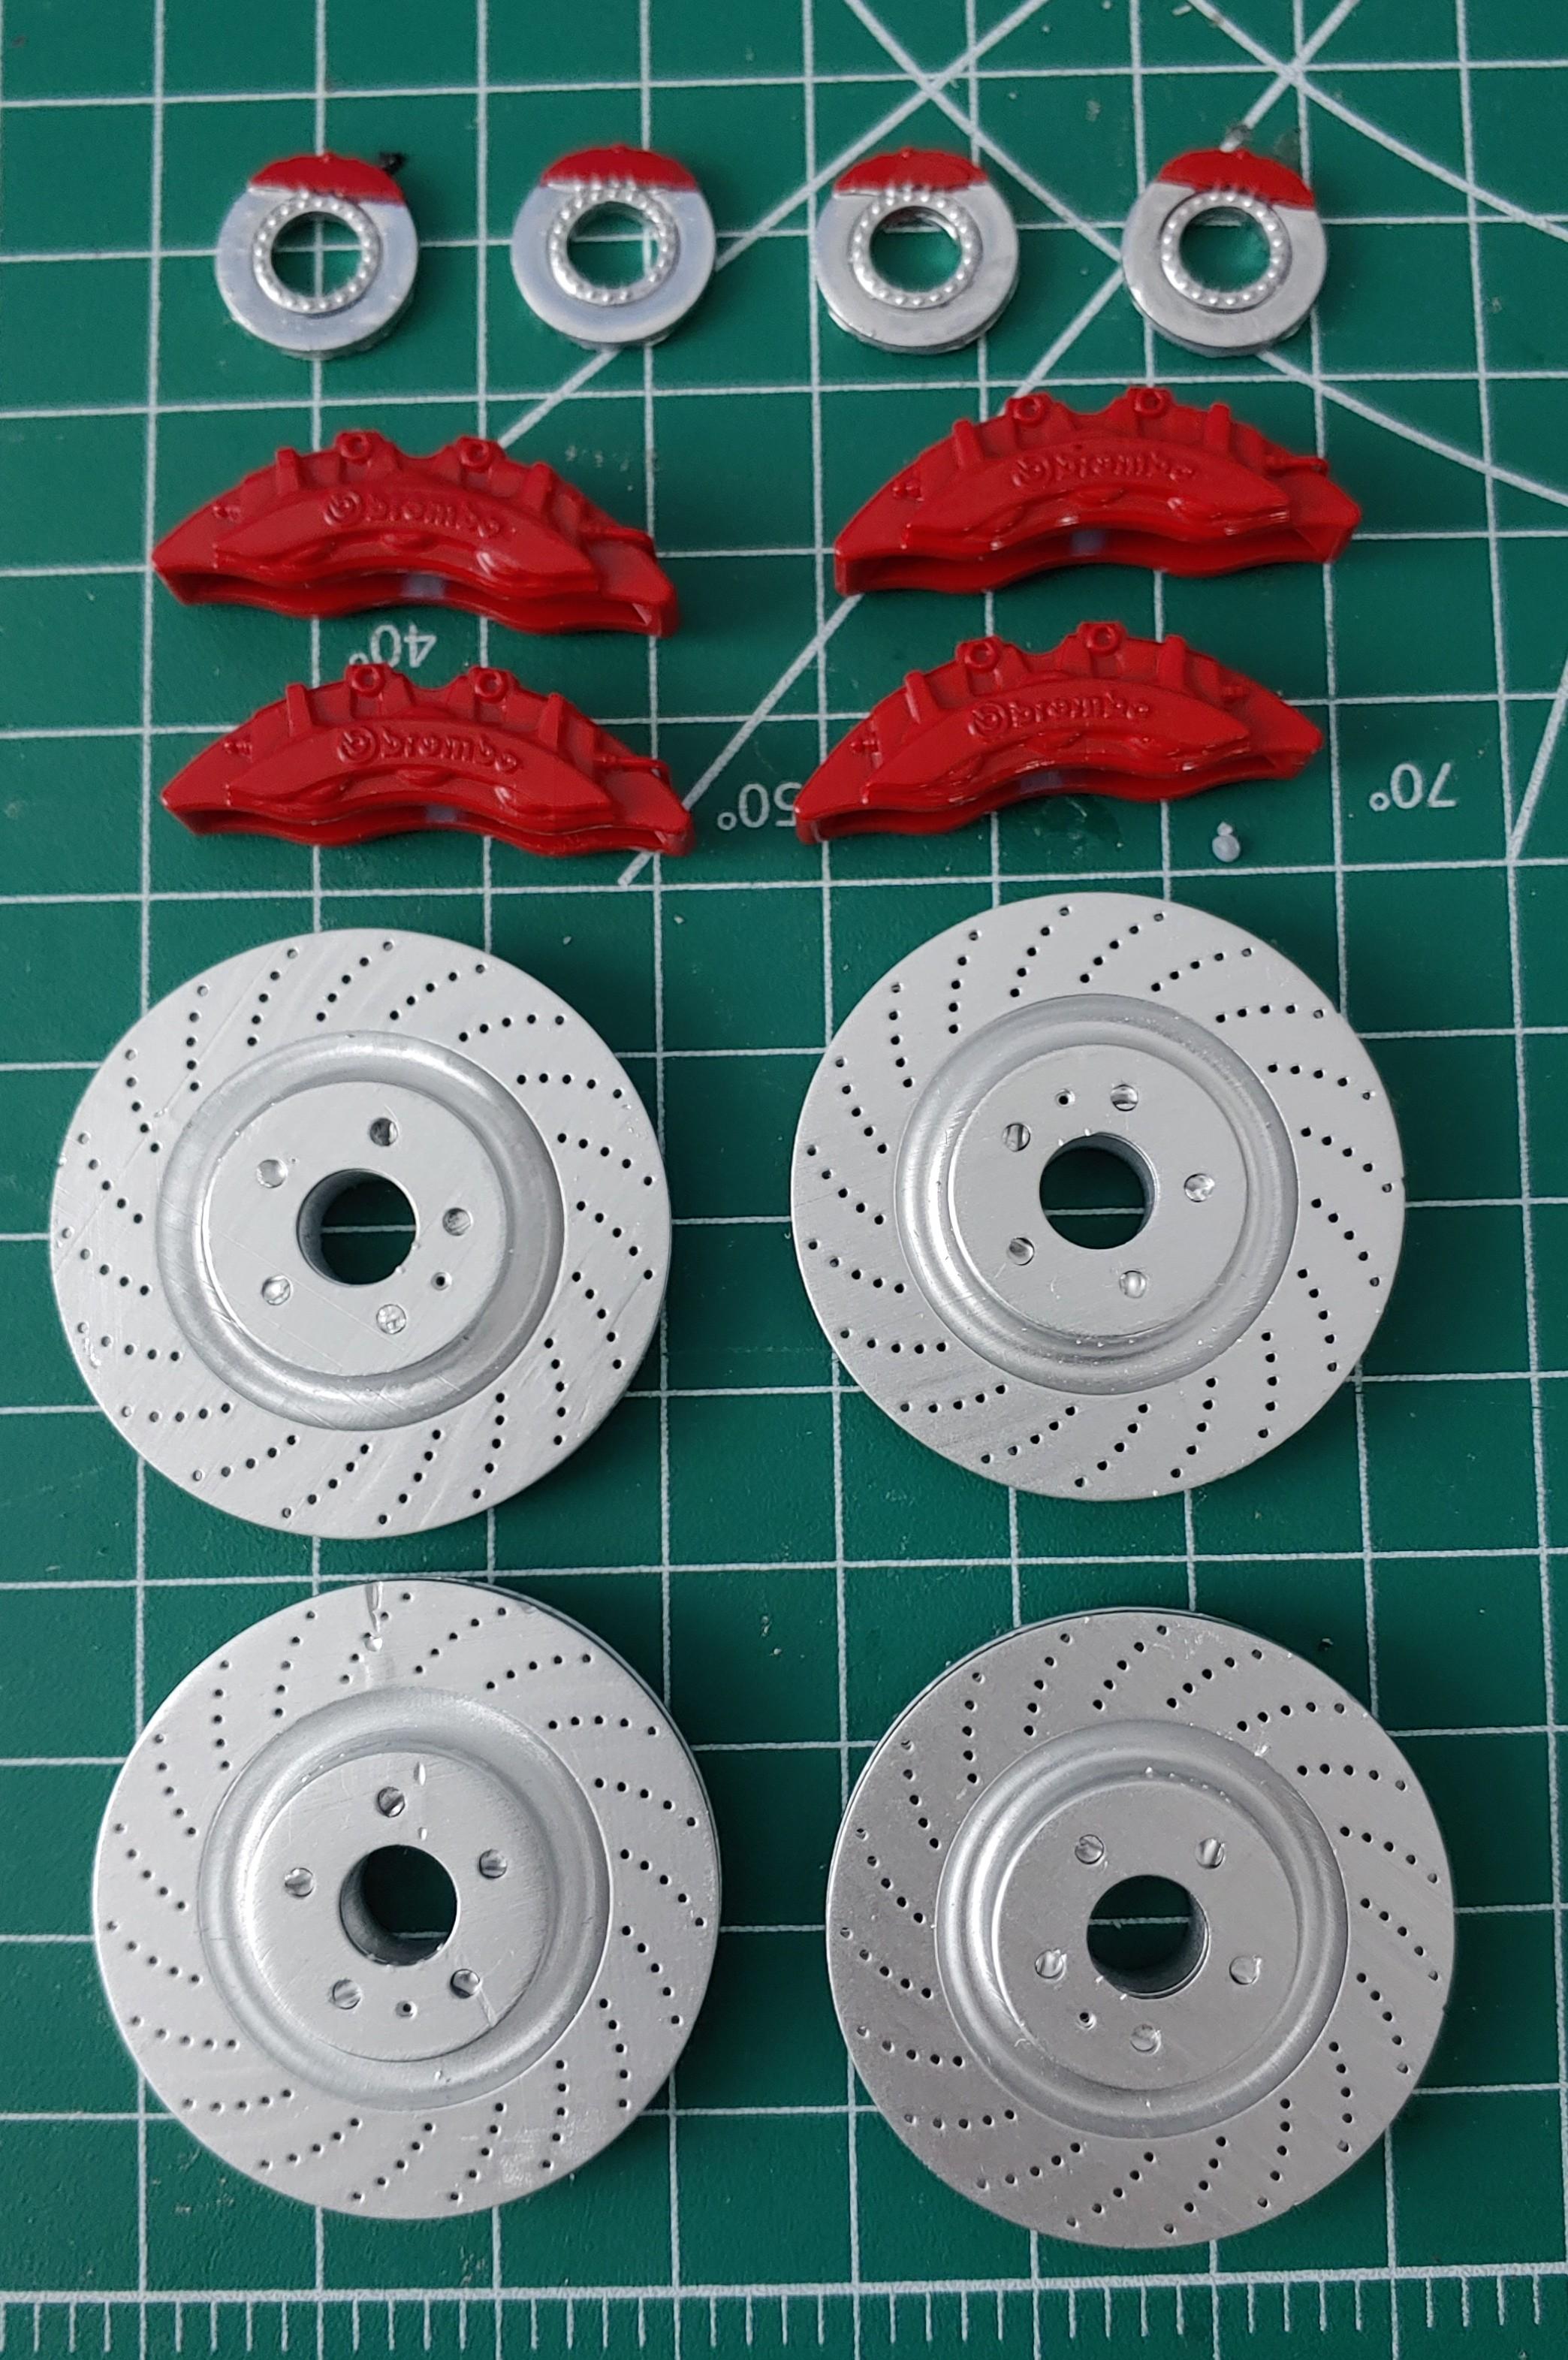
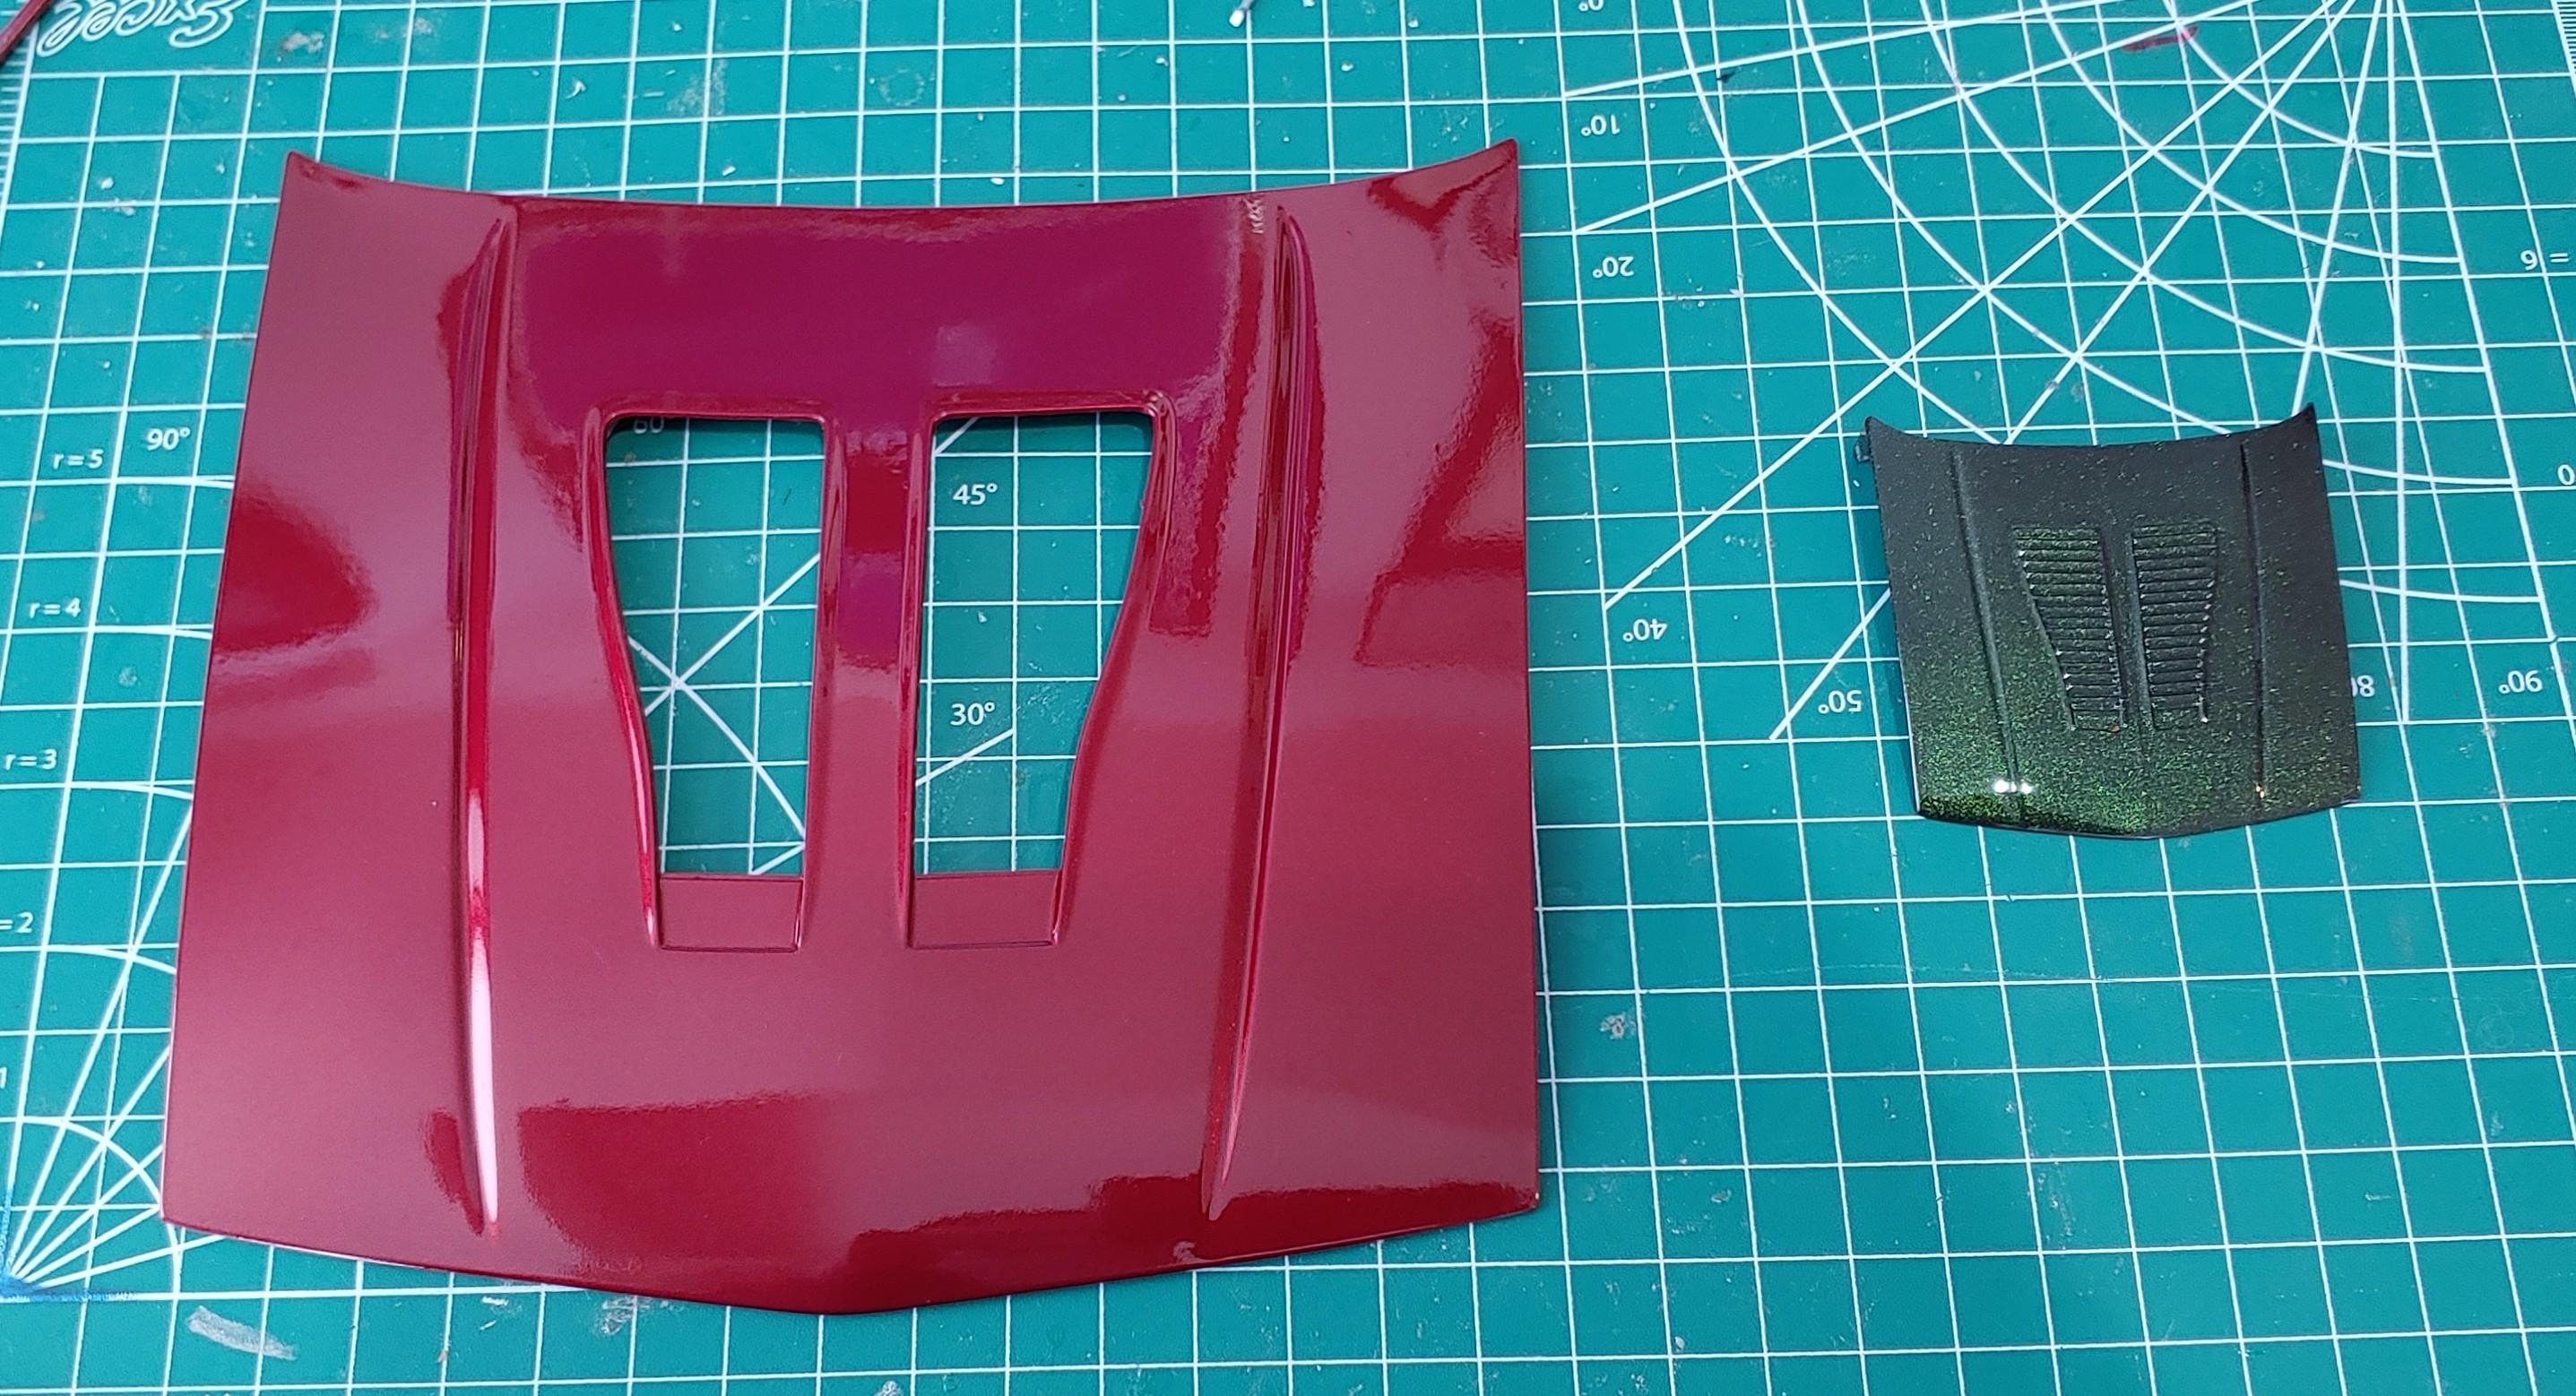
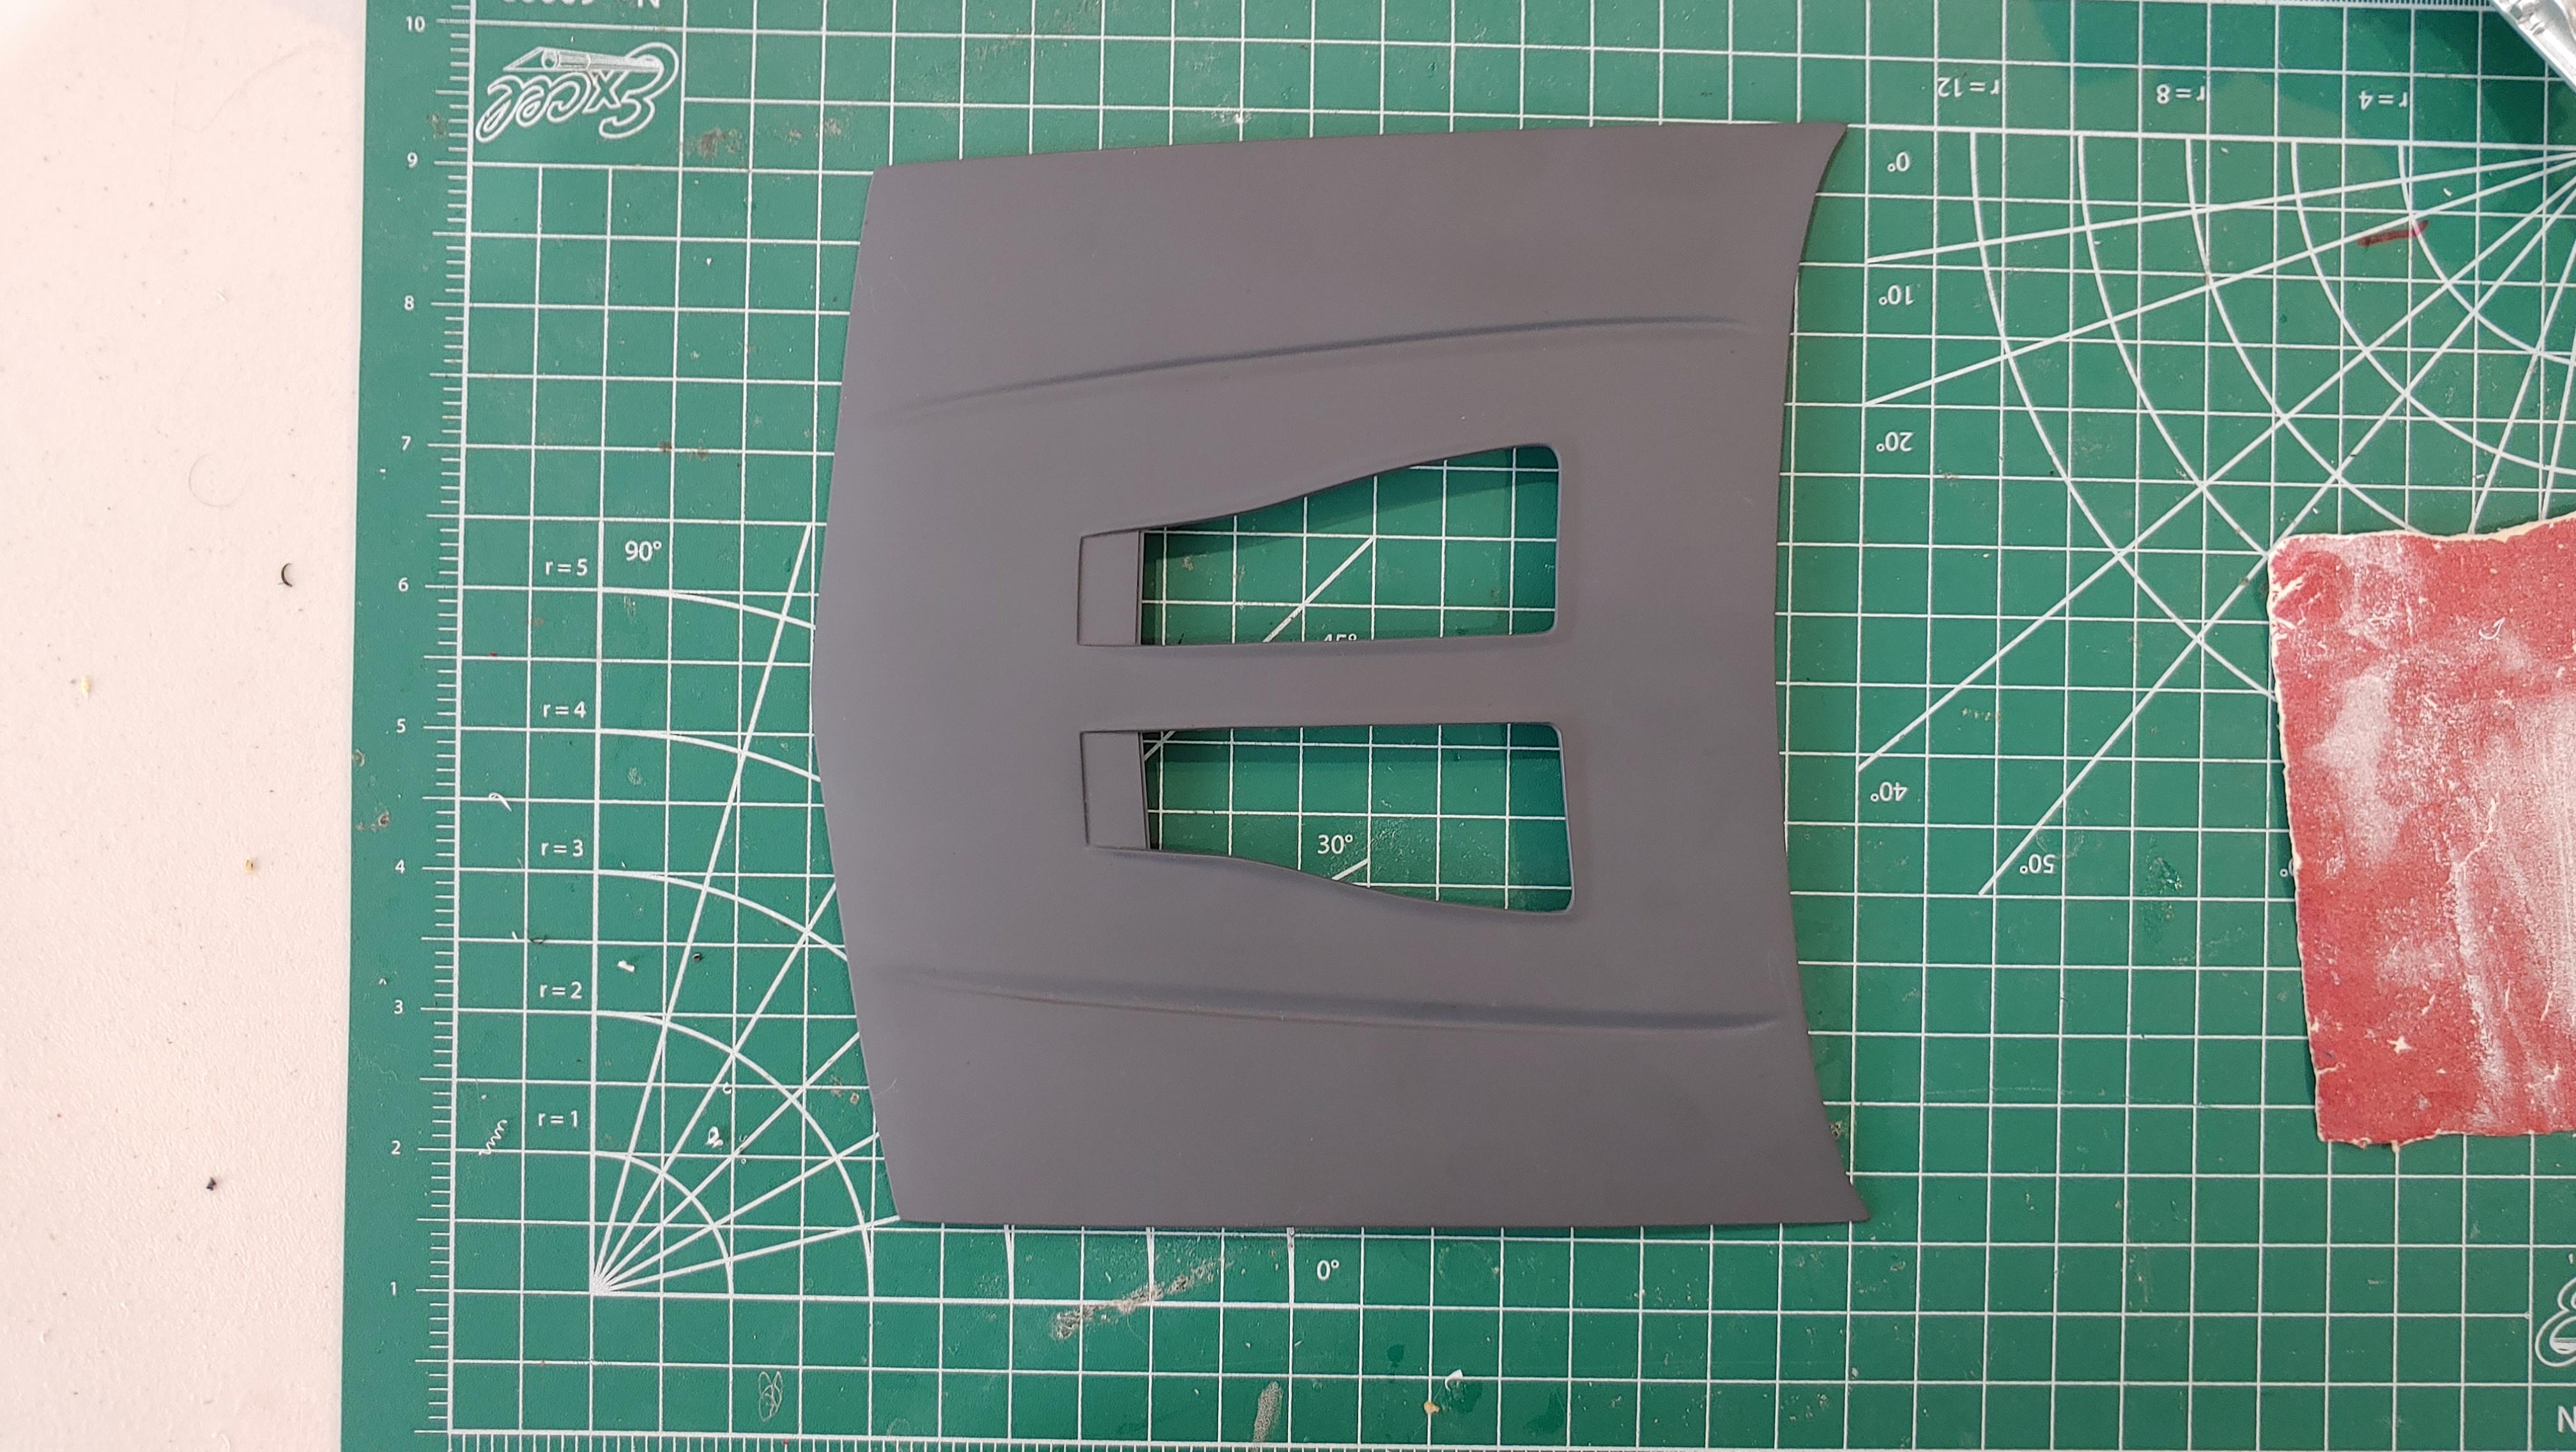
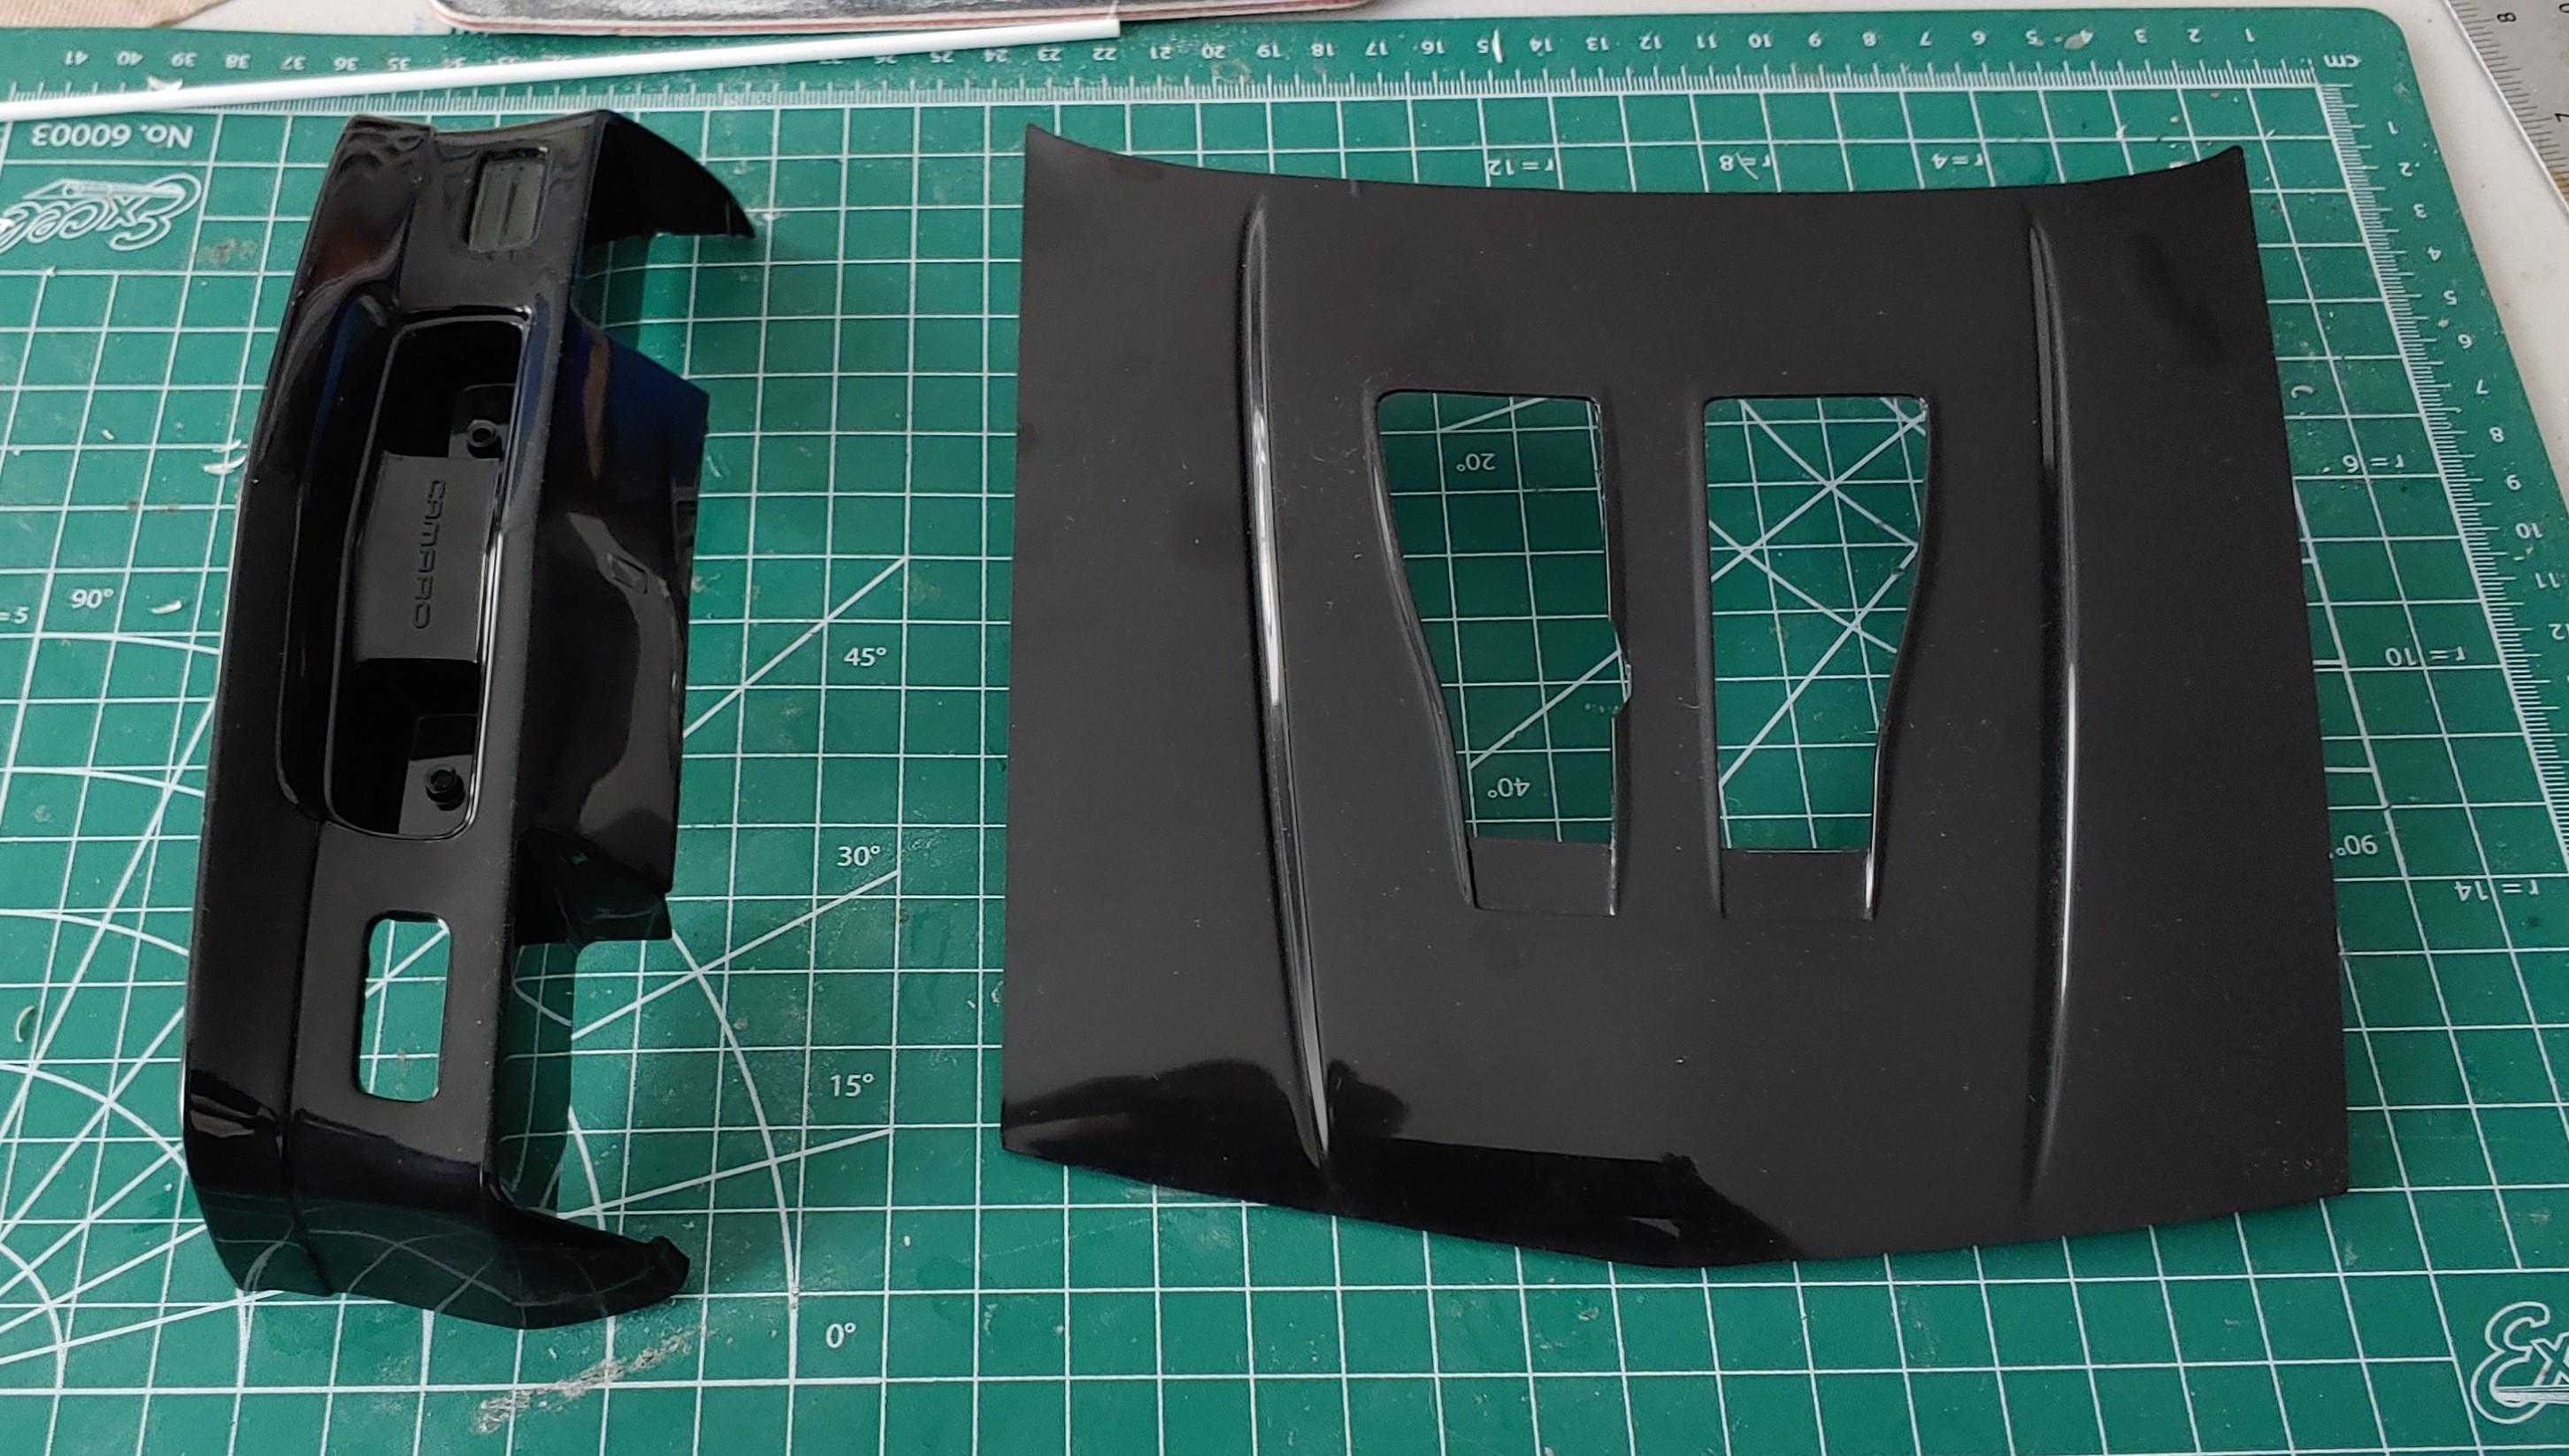
I got some detail painting done on the 1/25 chassis and installed the exhaust. I got both sets of brakes painted. I didn't realize until I was about to paint them that all the 1/8 brakes were righties. Here are the 1/25 brakes mounted in the wheels. And the 1/8 with the calipers installed and mounted on the rear axle. I also got both hoods painted. I'm going to let the clear cure a while longer then get the 1/25 hood vents painted and the 1/8 hood vents installed. More next time.
-
Thanks. The exhaust was painted by the previous owner and I liked the color, so I just used it as is.
-
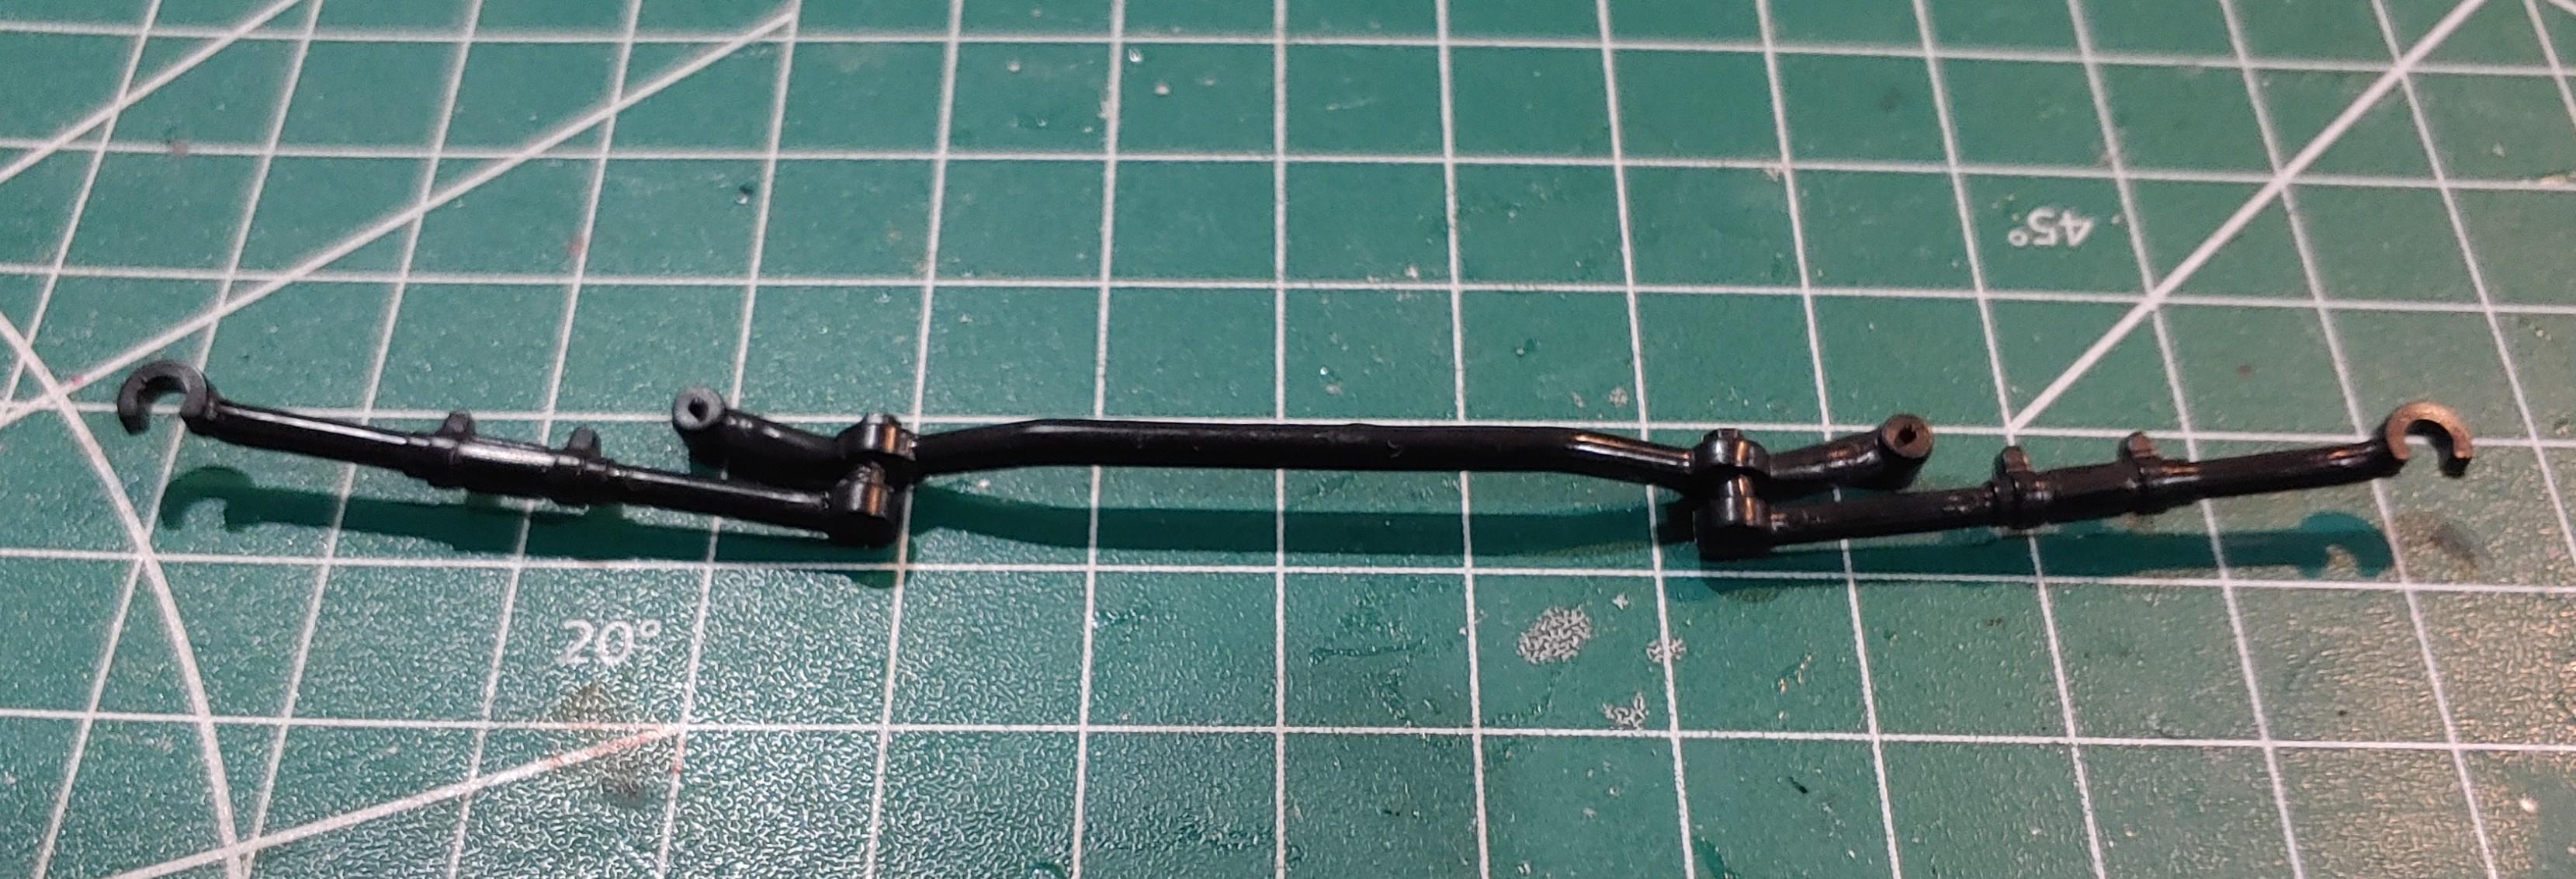
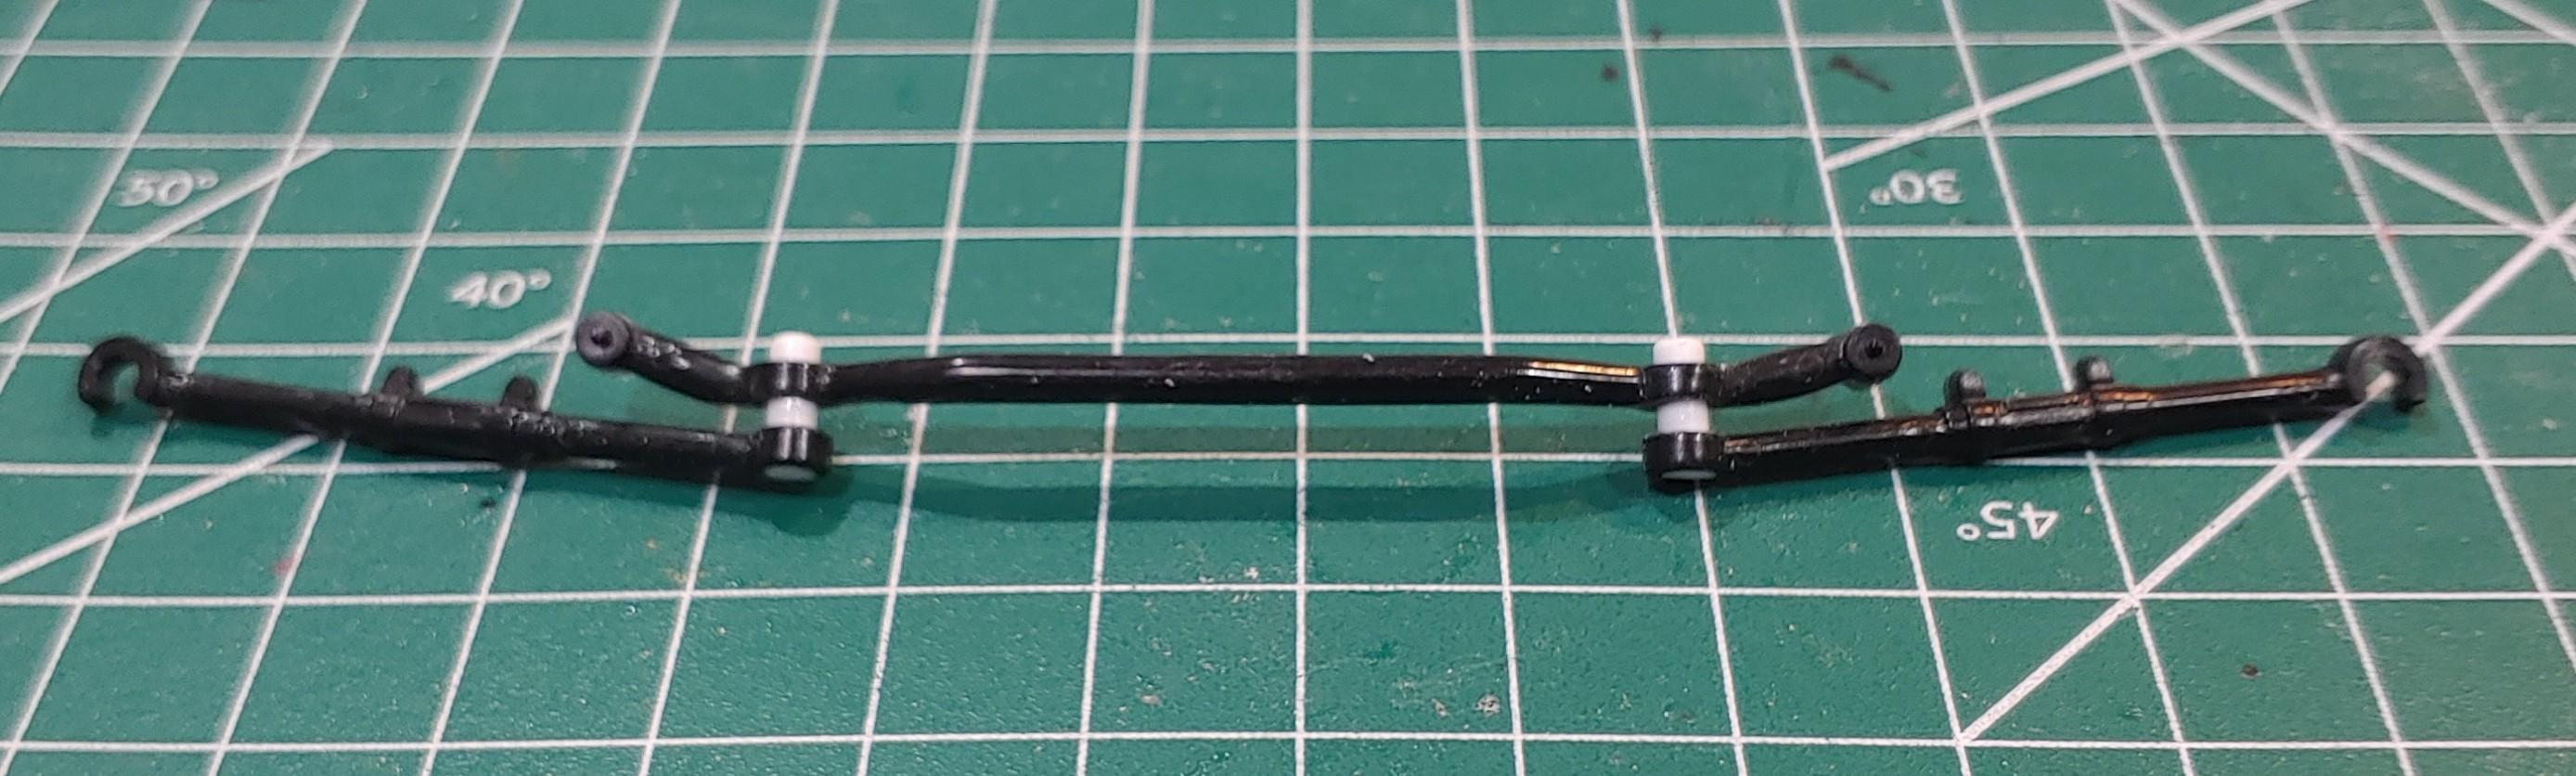
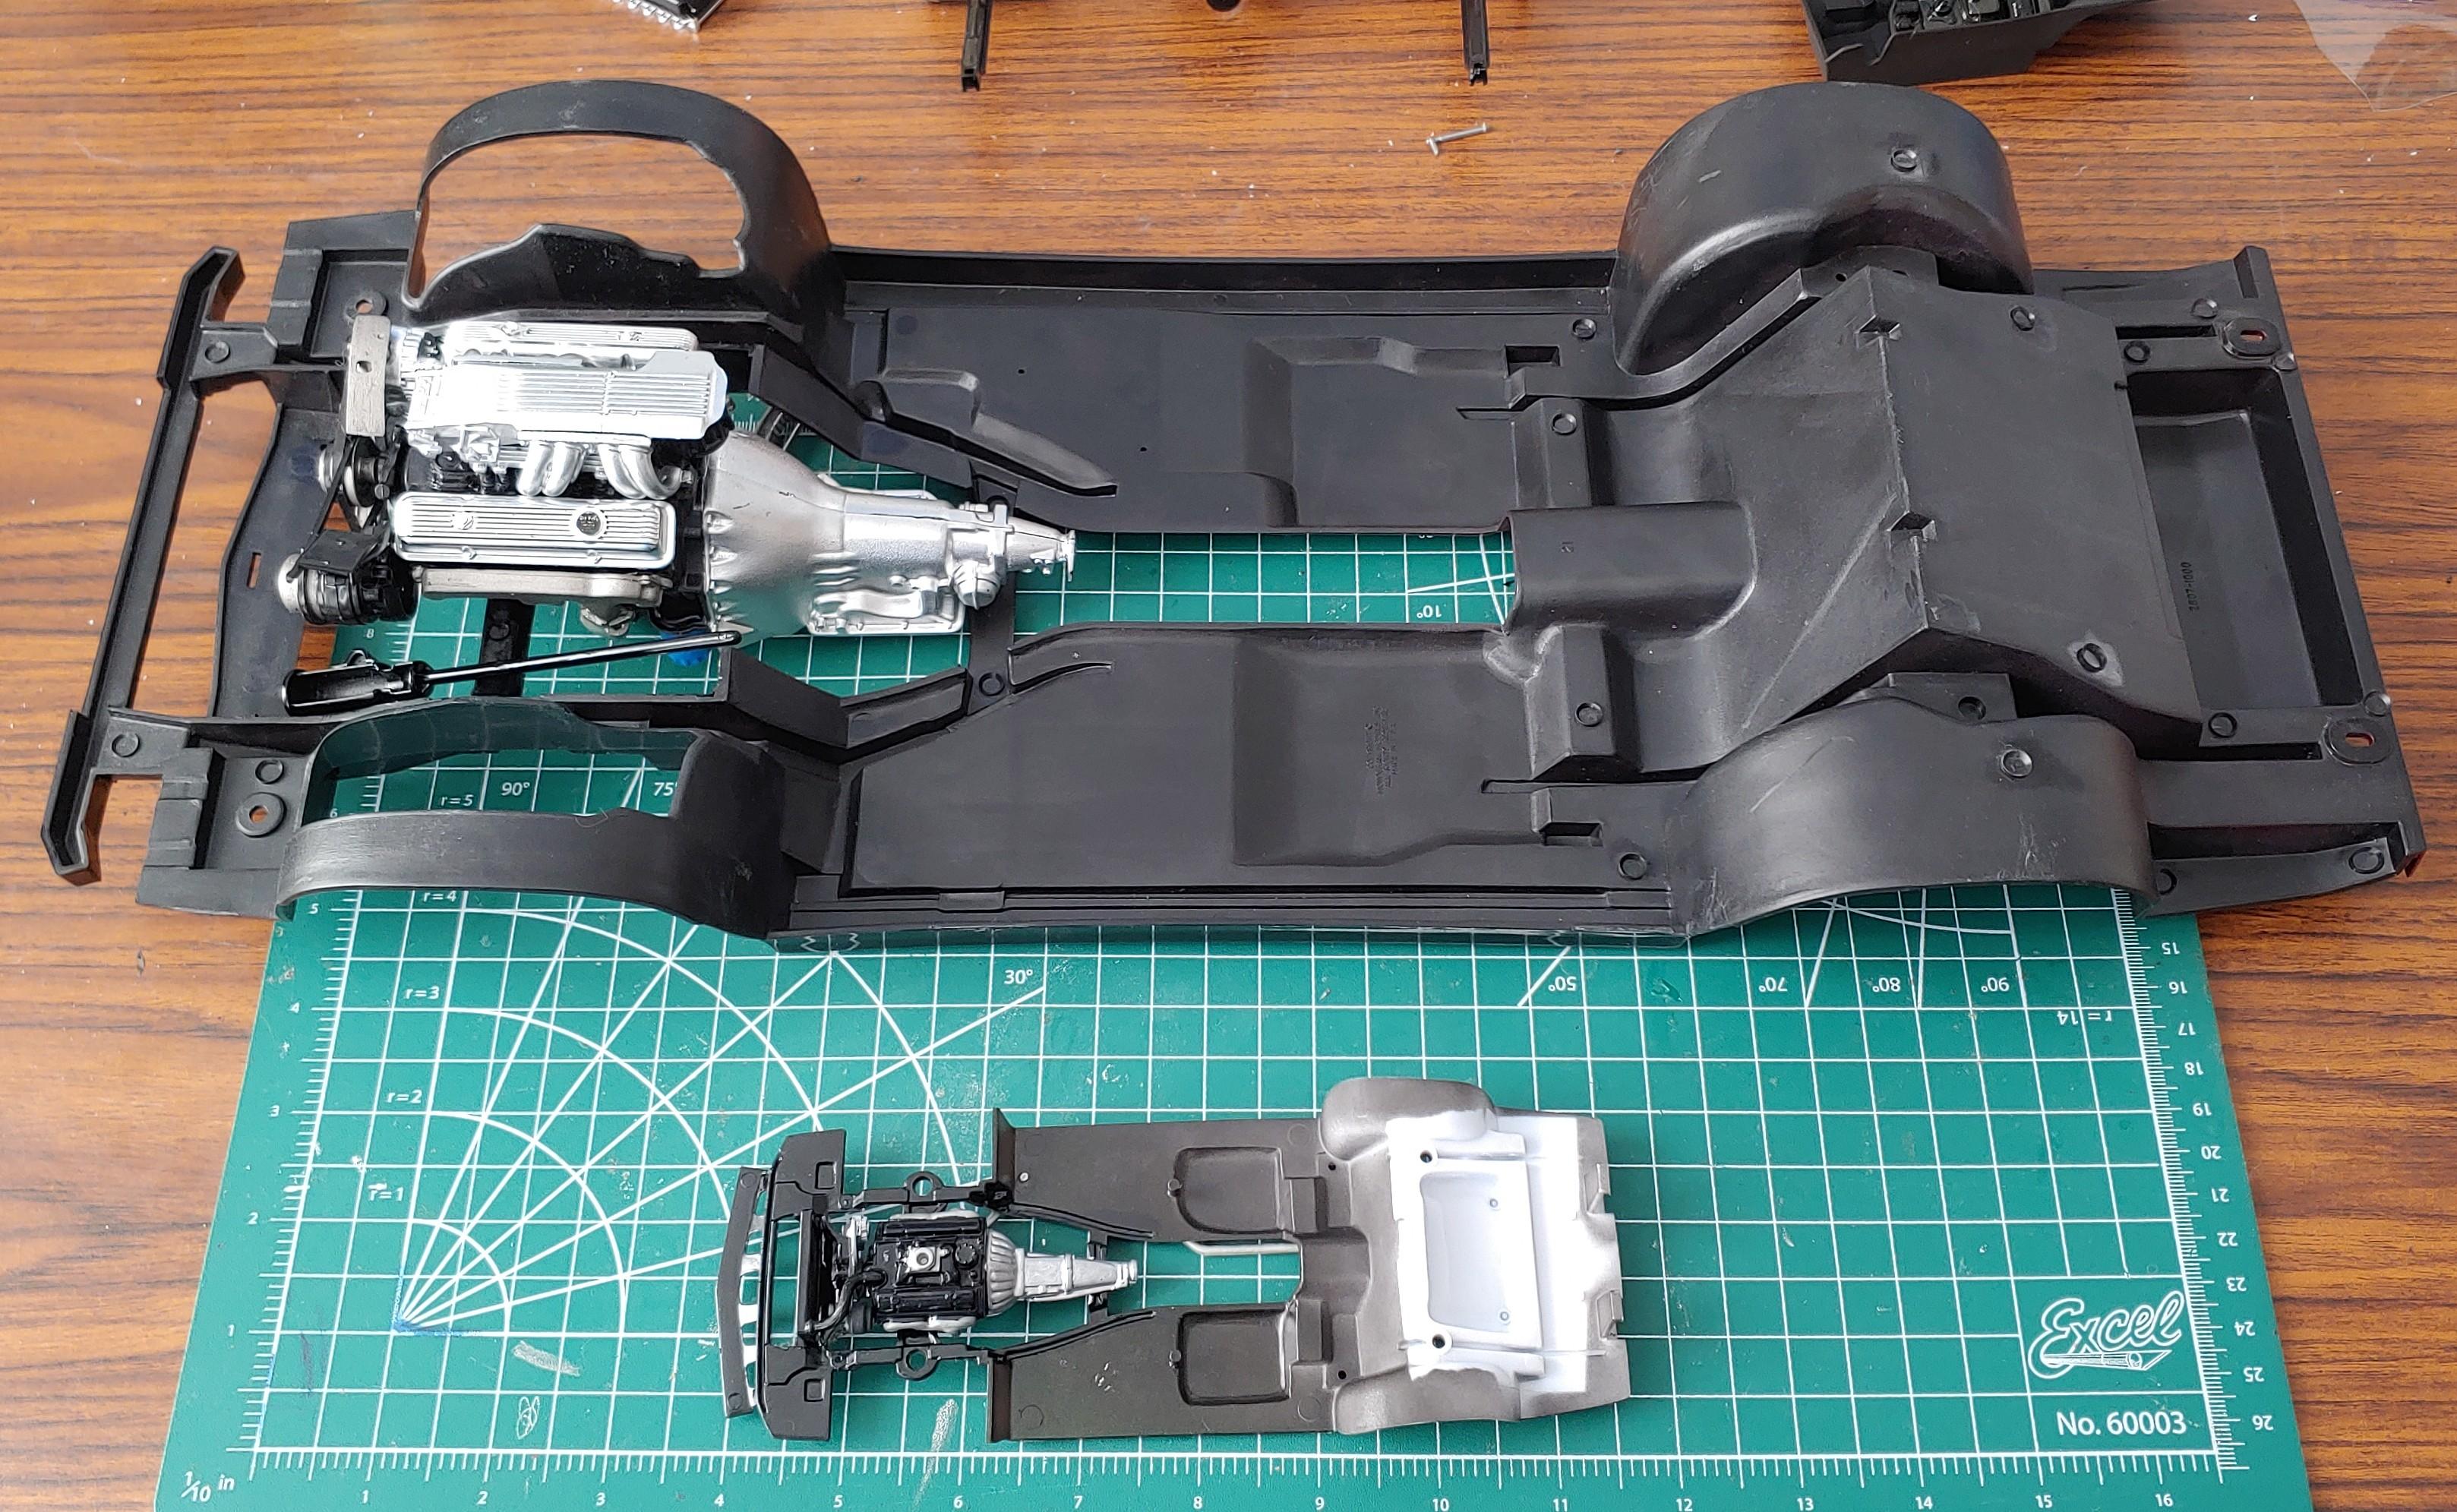
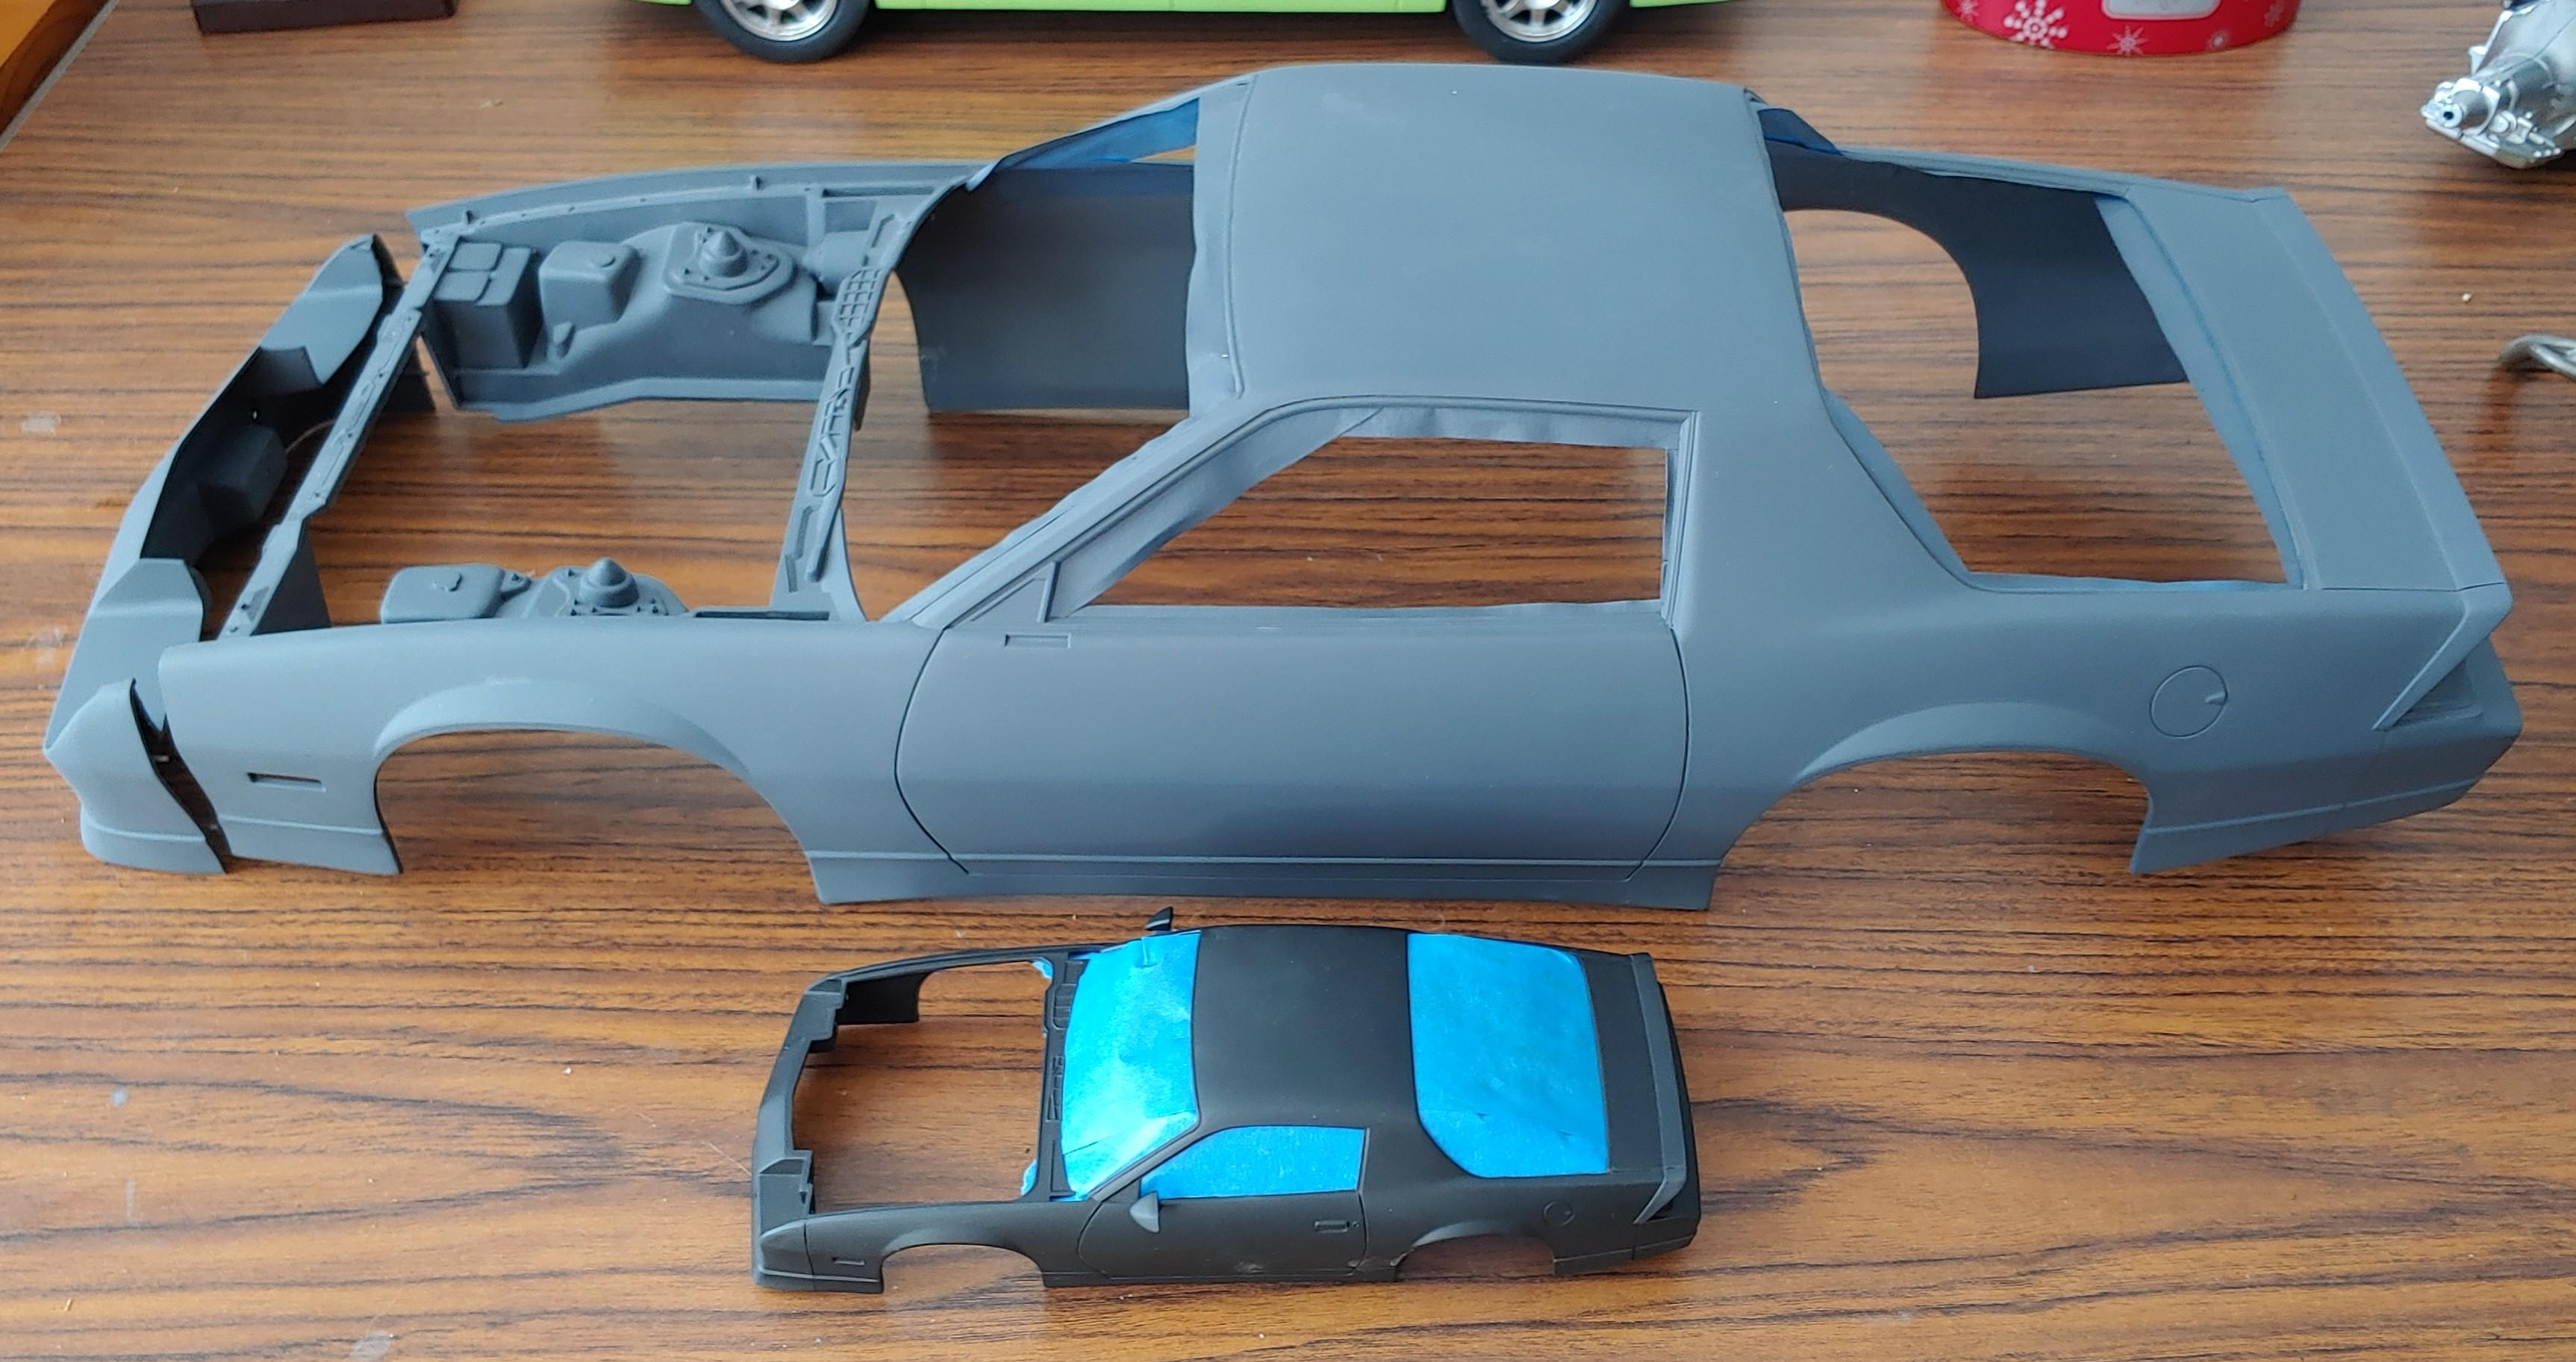
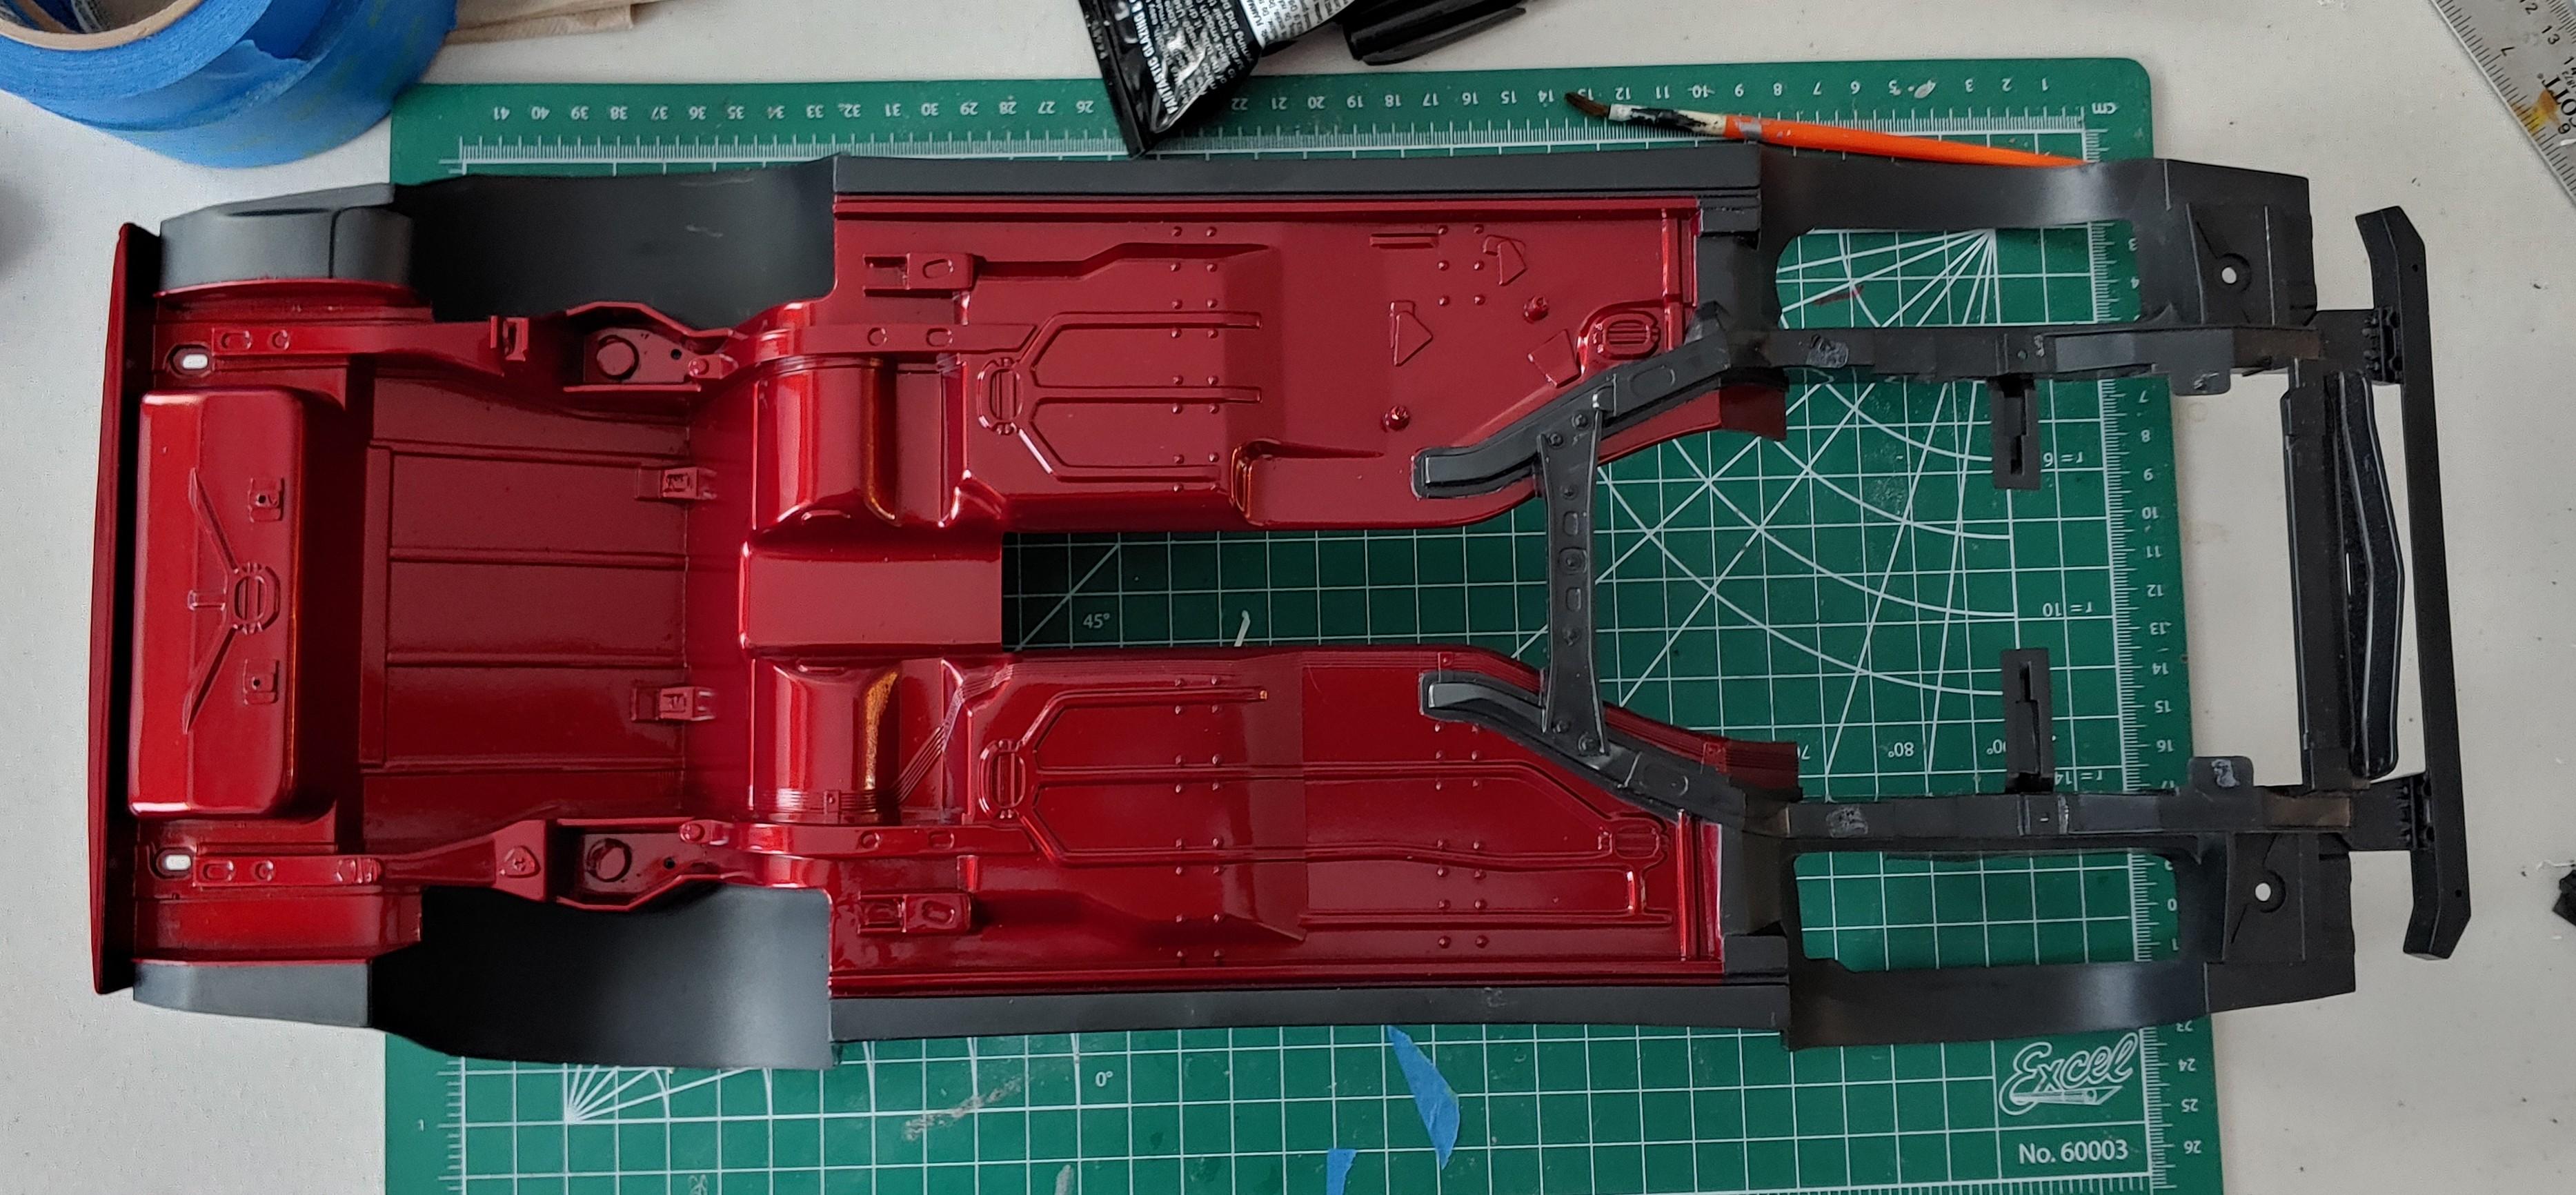
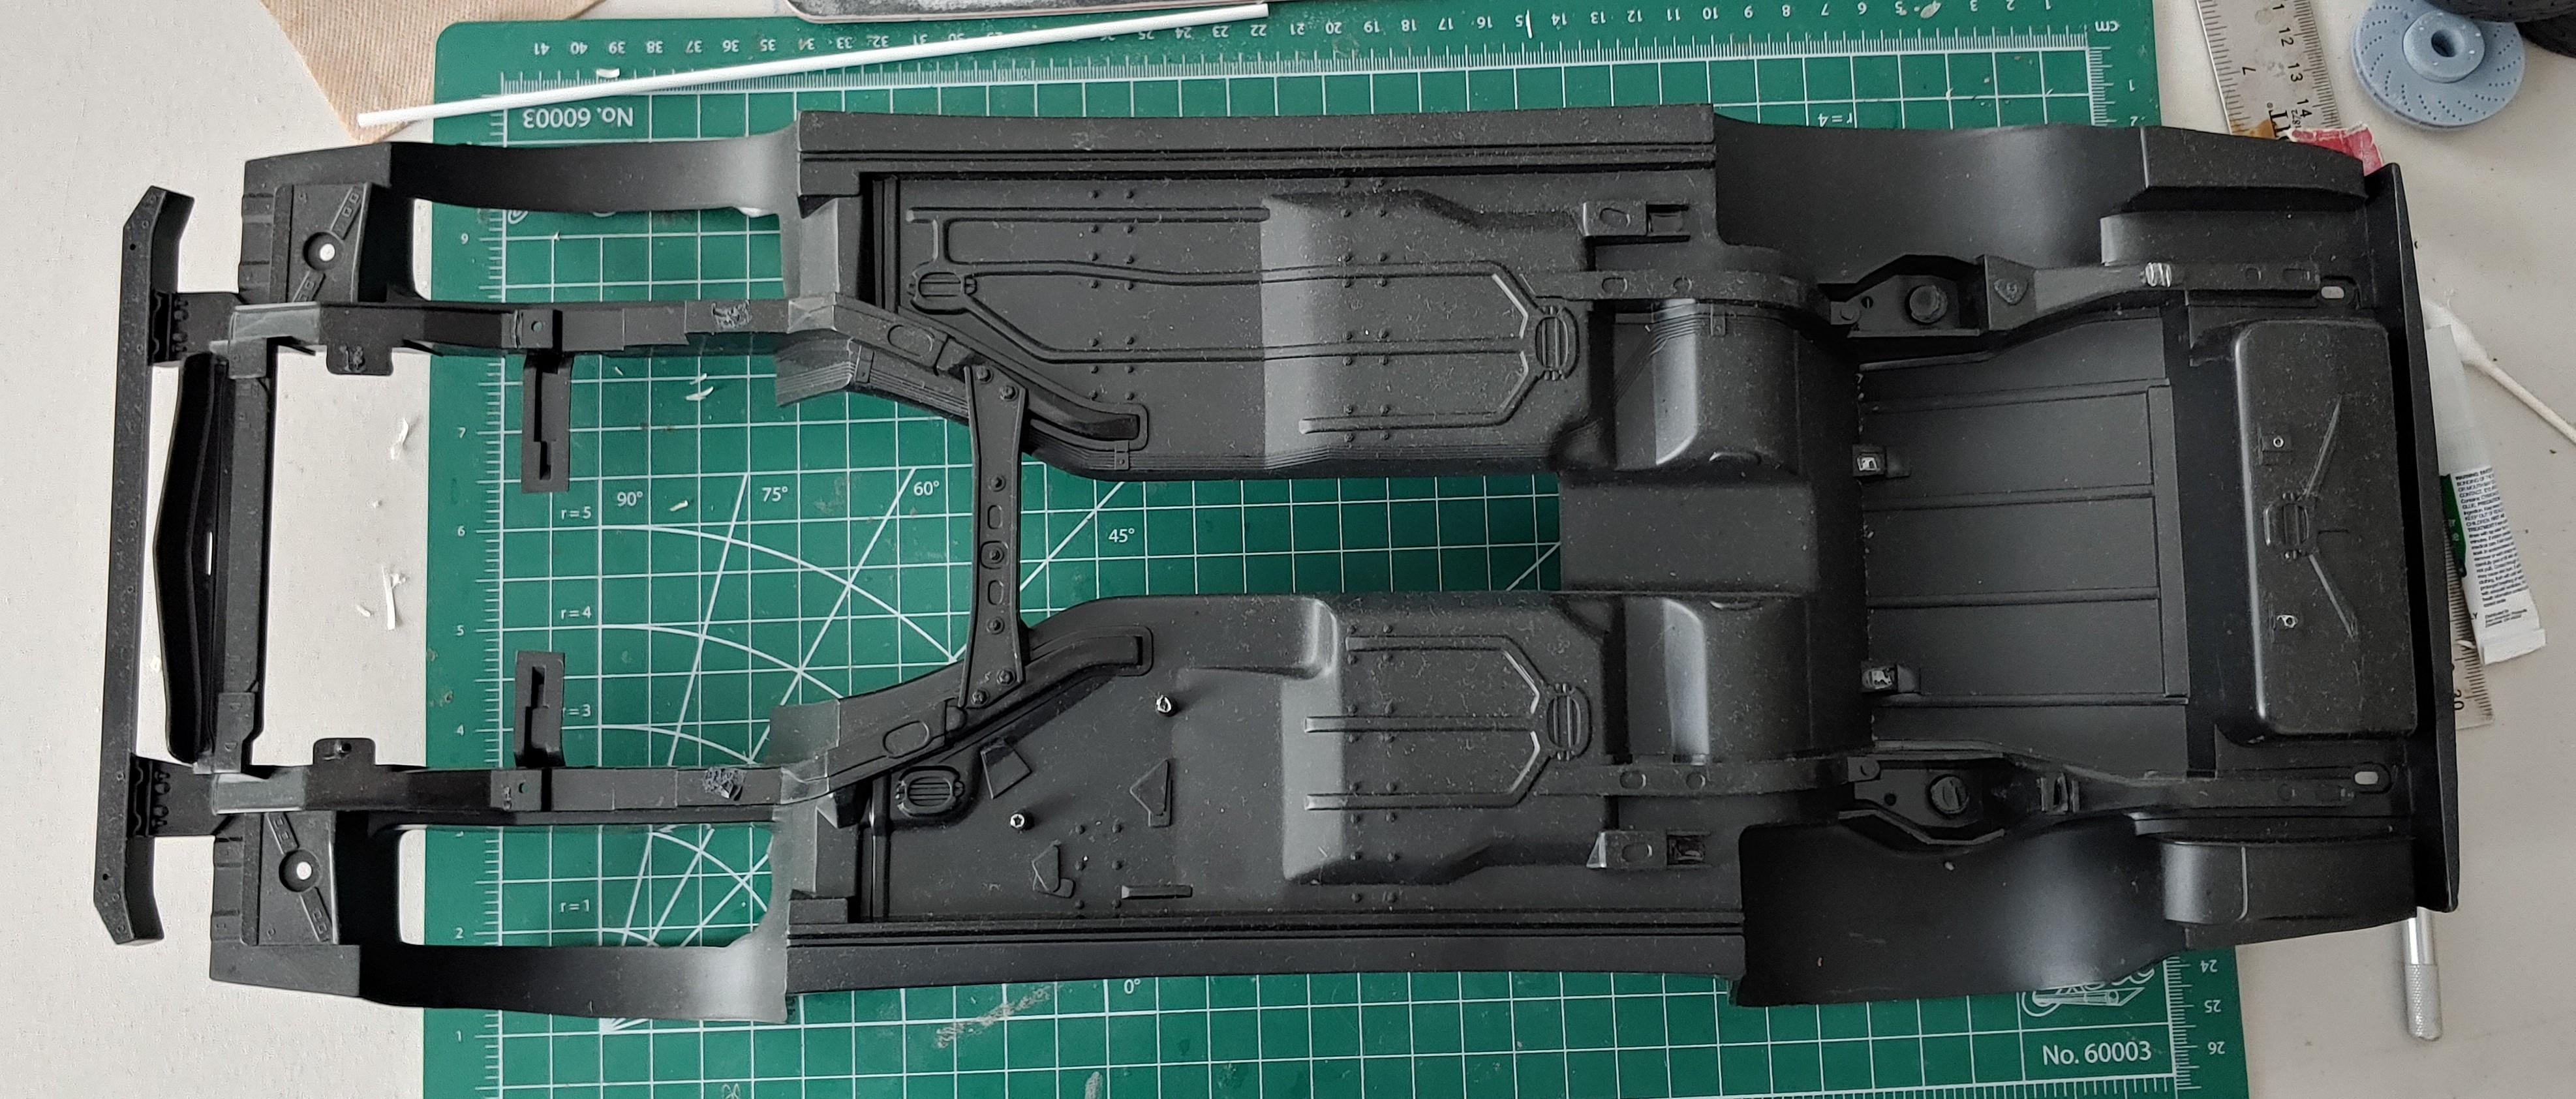
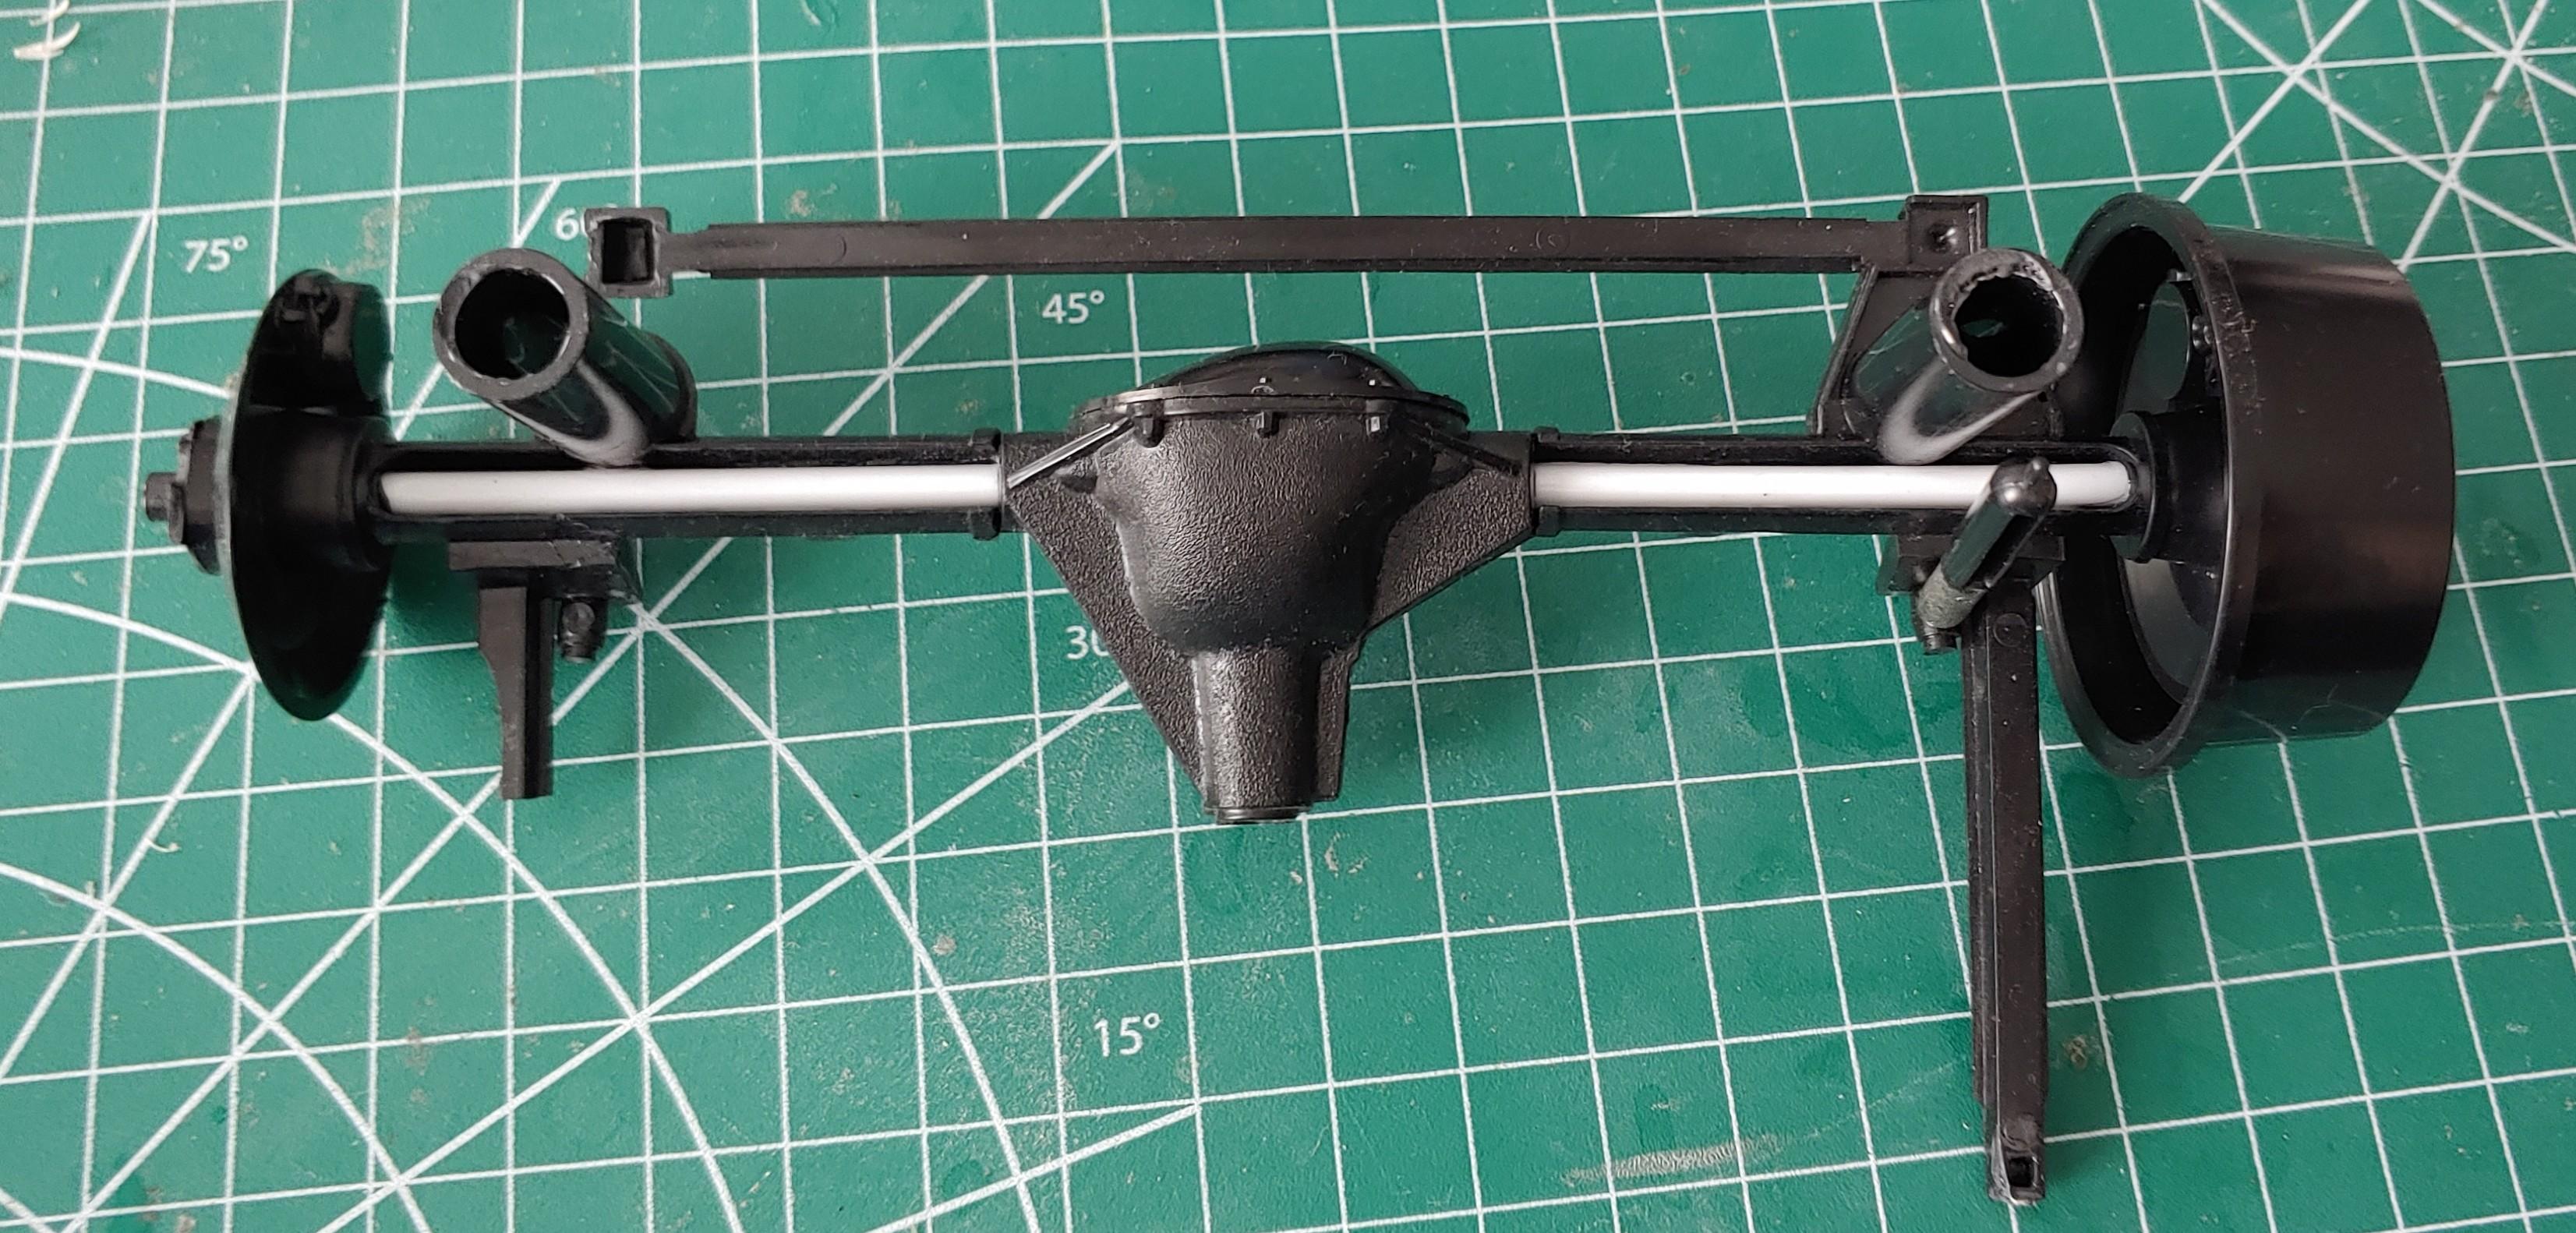
I got the rear axle/suspension from both kits painted semi-gloss black. Both kits have the panhard bar molded in place. The 1/25 kit has the drive shaft and torque arm molded in while they're separate pieces on the 1/8 kit. I got both interior tubs painted. The door handles are separate pieces on the 1/8 kit and I wasn't able to get them unglued, but since they are simple rectangles, they were easy to mask. The previous owner of the 1/8 kit painted the fuel tank, heat shield and exhaust. I like the colors, so I went ahead and installed them. I got the chassis of the 1/25 painted. The trunk pan was molded separately, so I installed that before paint. The fuel tank and bottom of the engine/transmission are molded in place, so it's going to take some careful detail painting. Both bodies are ready for paint. The 1/8 body has the front bumper molded separately while the 1/25 body has the inner fenders molded separately. I ran across the next surprise missing parts. There was only 1 headlight lens and 1 side marker lens. All the clear parts came tinted and I didn't care for the tinted headlights anyway. I think I'll just make some lenses out of clear plastic sheet and make them look like an H4 conversion. More next time.
-
Ahhh! That makes a lot more sense. Thanks for the picture. Now I'm thinking I could trim off the top spindle mount and turn the spindle into a strut. I think that would make lowering it easier while making it more accurate. I'll just have to make sure I design something that will hold the weight of a 1/8 model.
-
It just made more sense to have the turn signal on the corner. If I was building a 1:1 Camaro I would do the same thing.
-
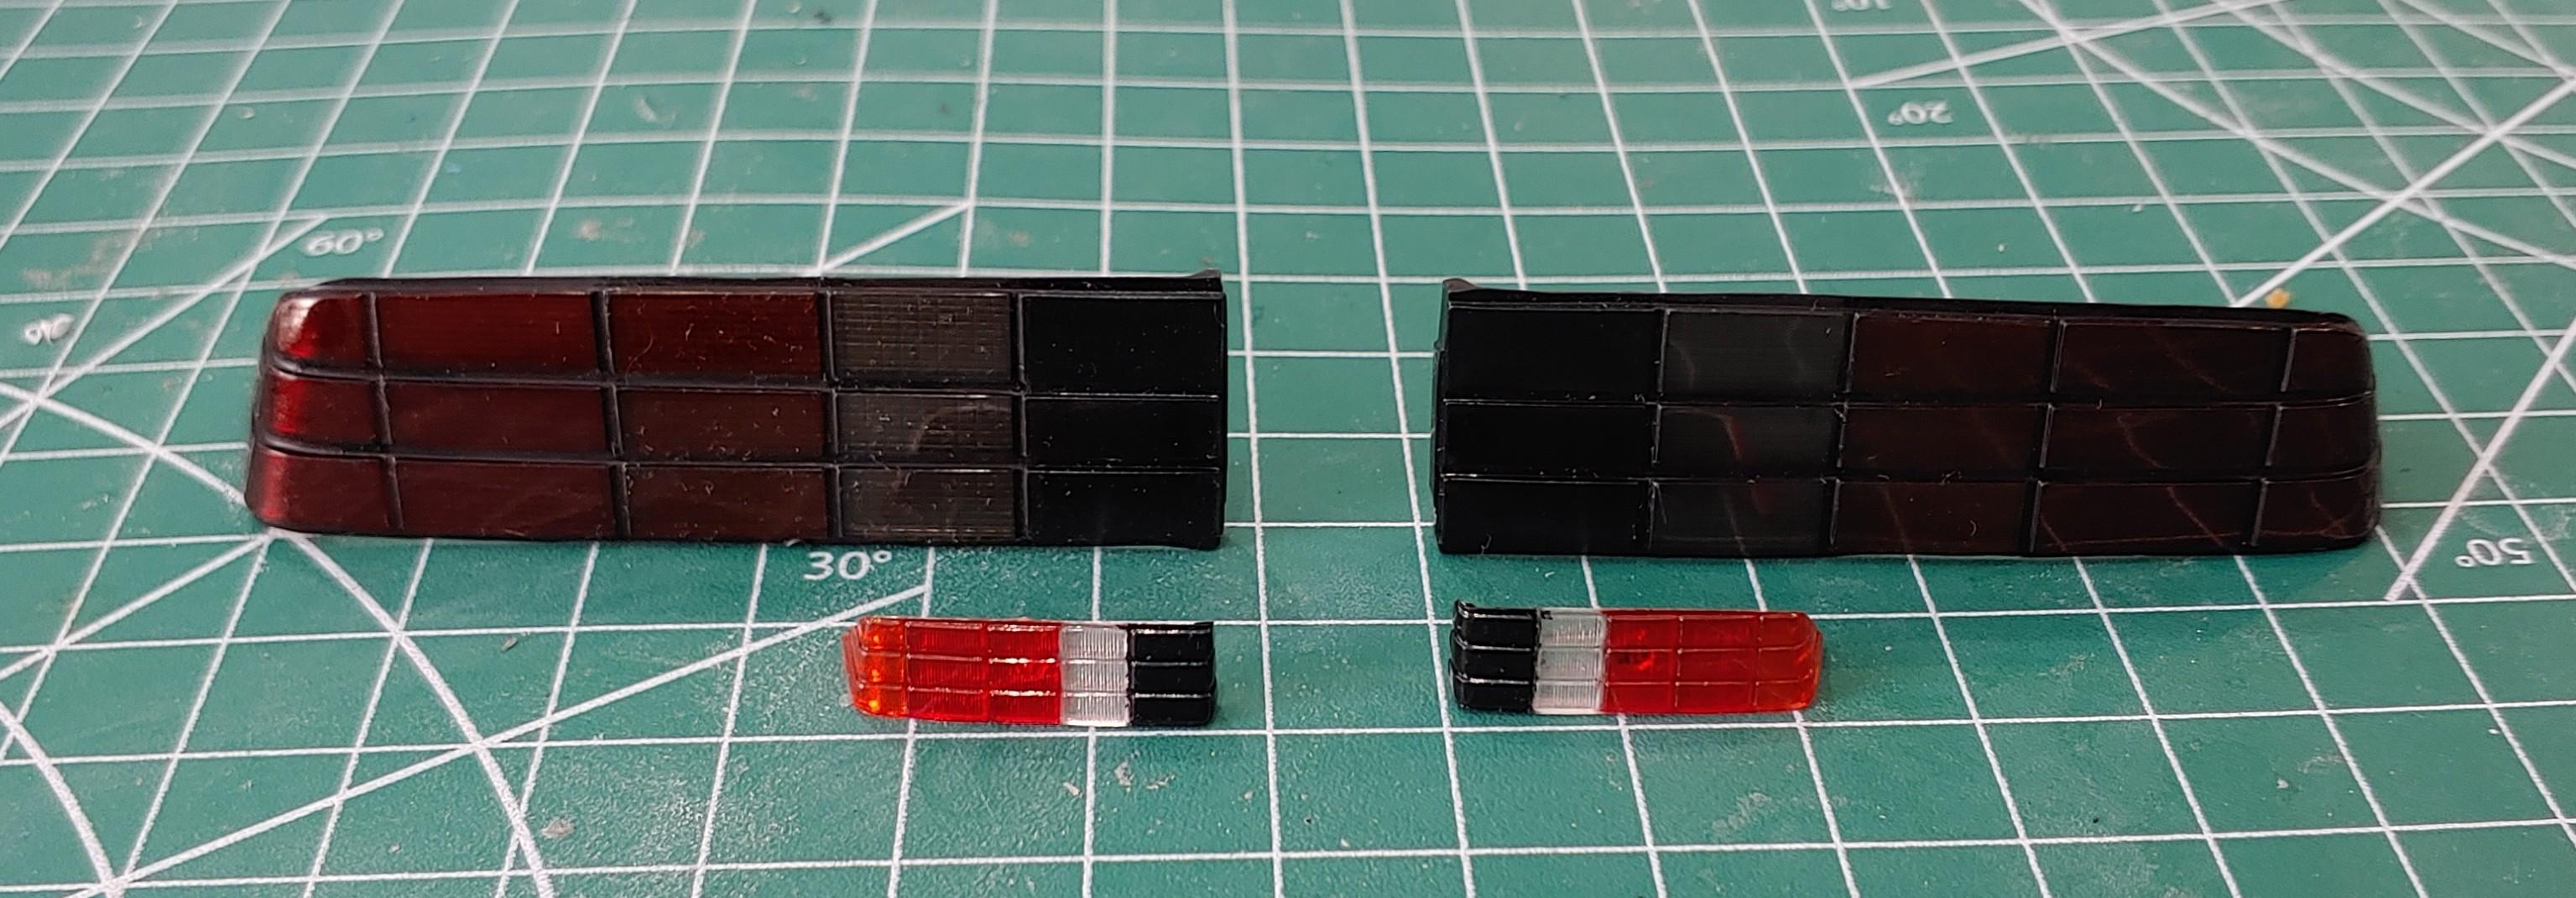
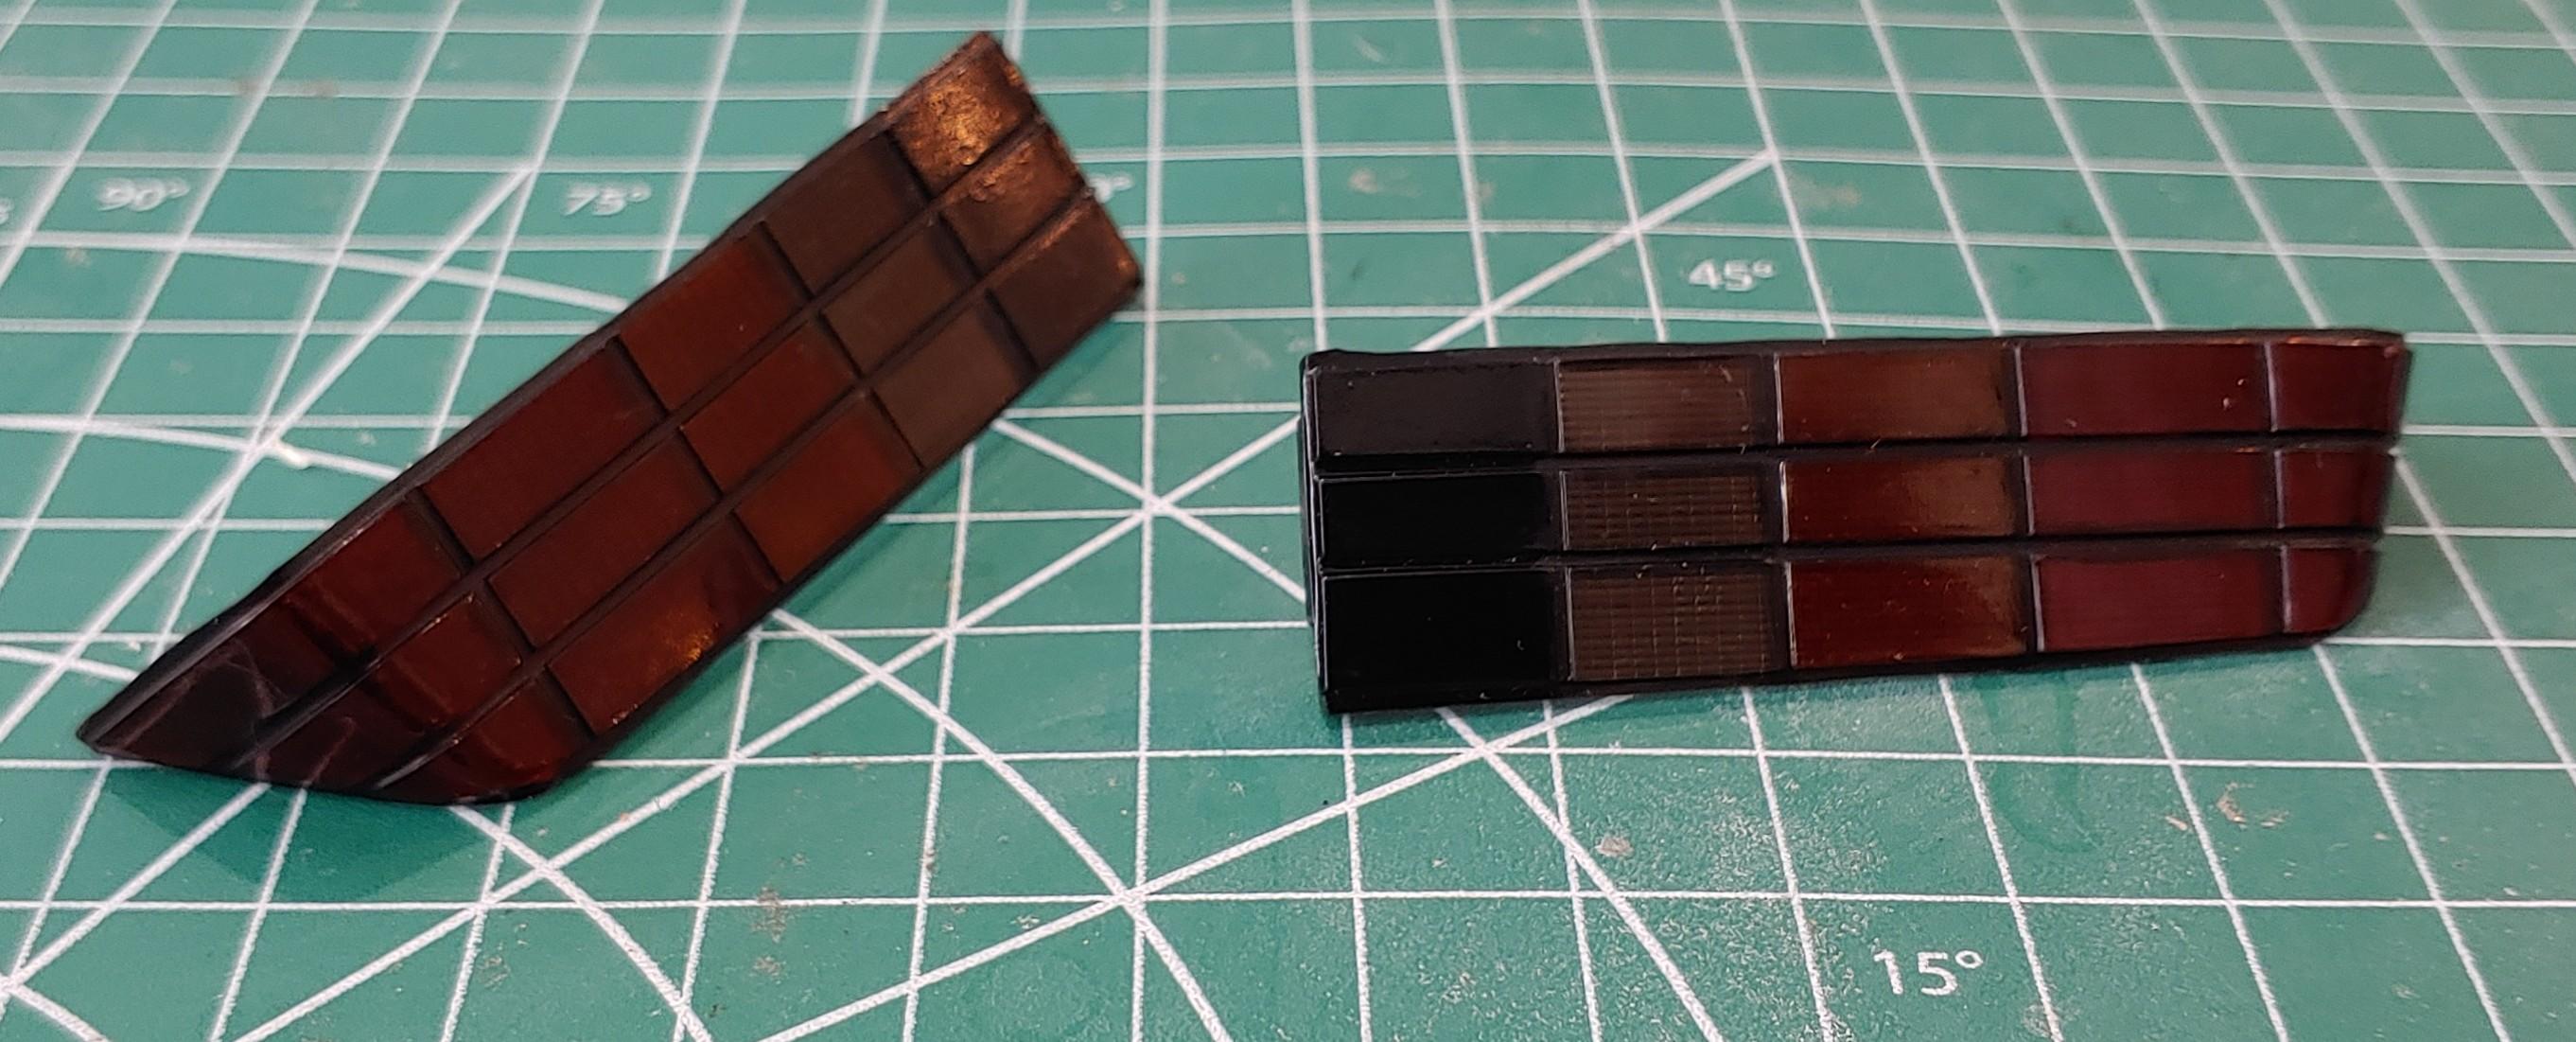
When I got the kit the passenger side trailing arm was broken. I was able to find a piece of it and glue it back on, but a chunk of it was still missing. I trimmed it so everything is strait to make the repair easier. Then I used some styrene strips to make the repair. I want to lower the suspension because the tires are so much smaller. The rear will be easy, I just have to cut the "springs" down. The front however, is a different story. The front upper a arms are molded to the crossmember and the springs are directly in between the a arms instead of having a spring pocket. I can move the king pin up on the spindle and if I sand a couple of key points on the upper suspension I can move it up towards the frame a bit, but that only gets me about an inch and a half drop and I'd like at least double that. Hopefully I can think of another way to get it in the weeds. I also got the 1/25 tail lights ready, here they are compared to the 1/8 ones. More next time.
-
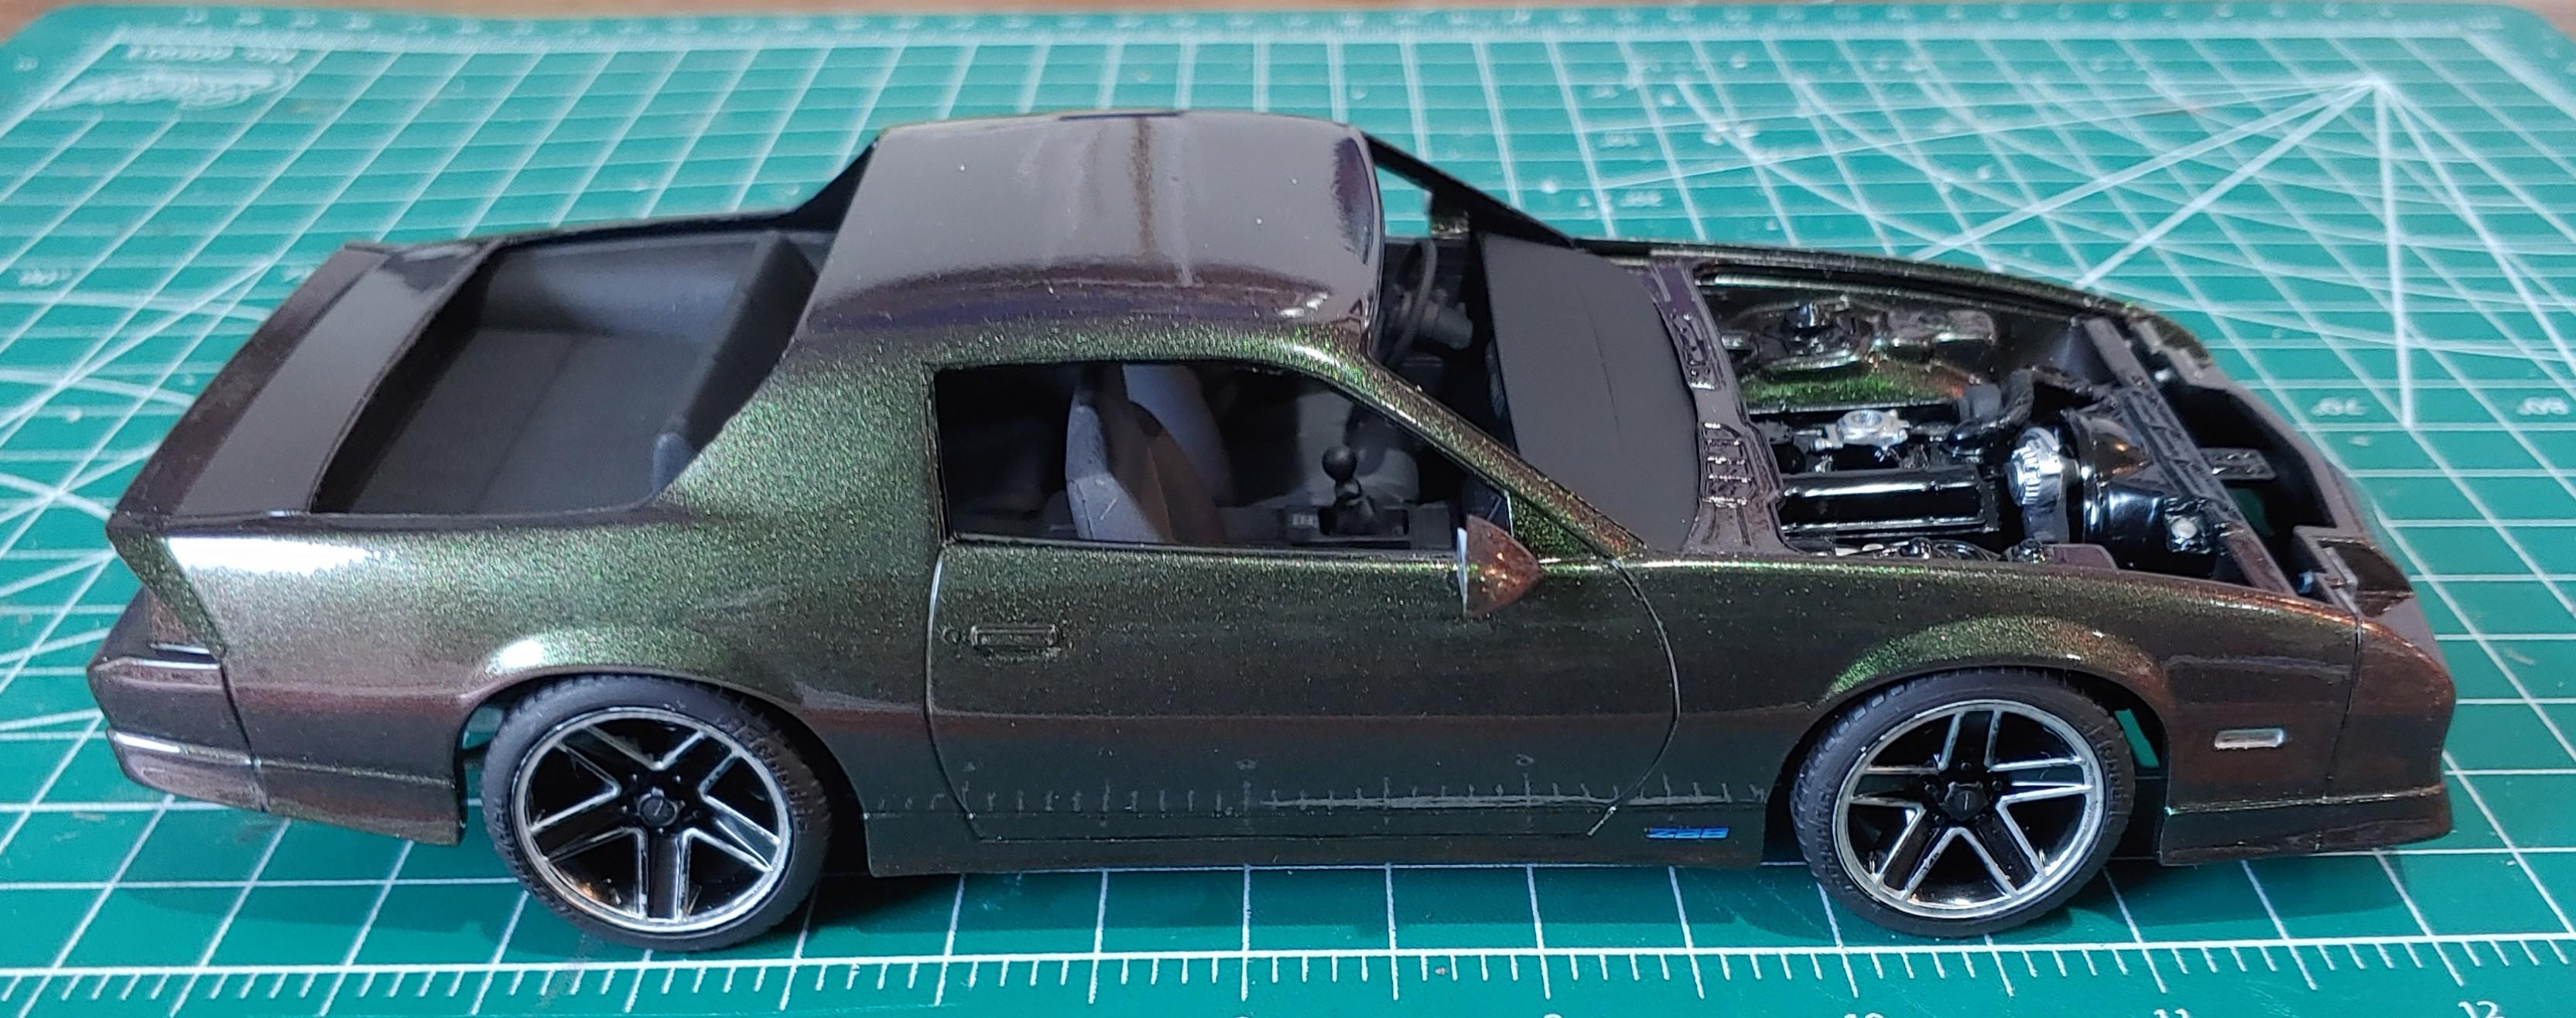
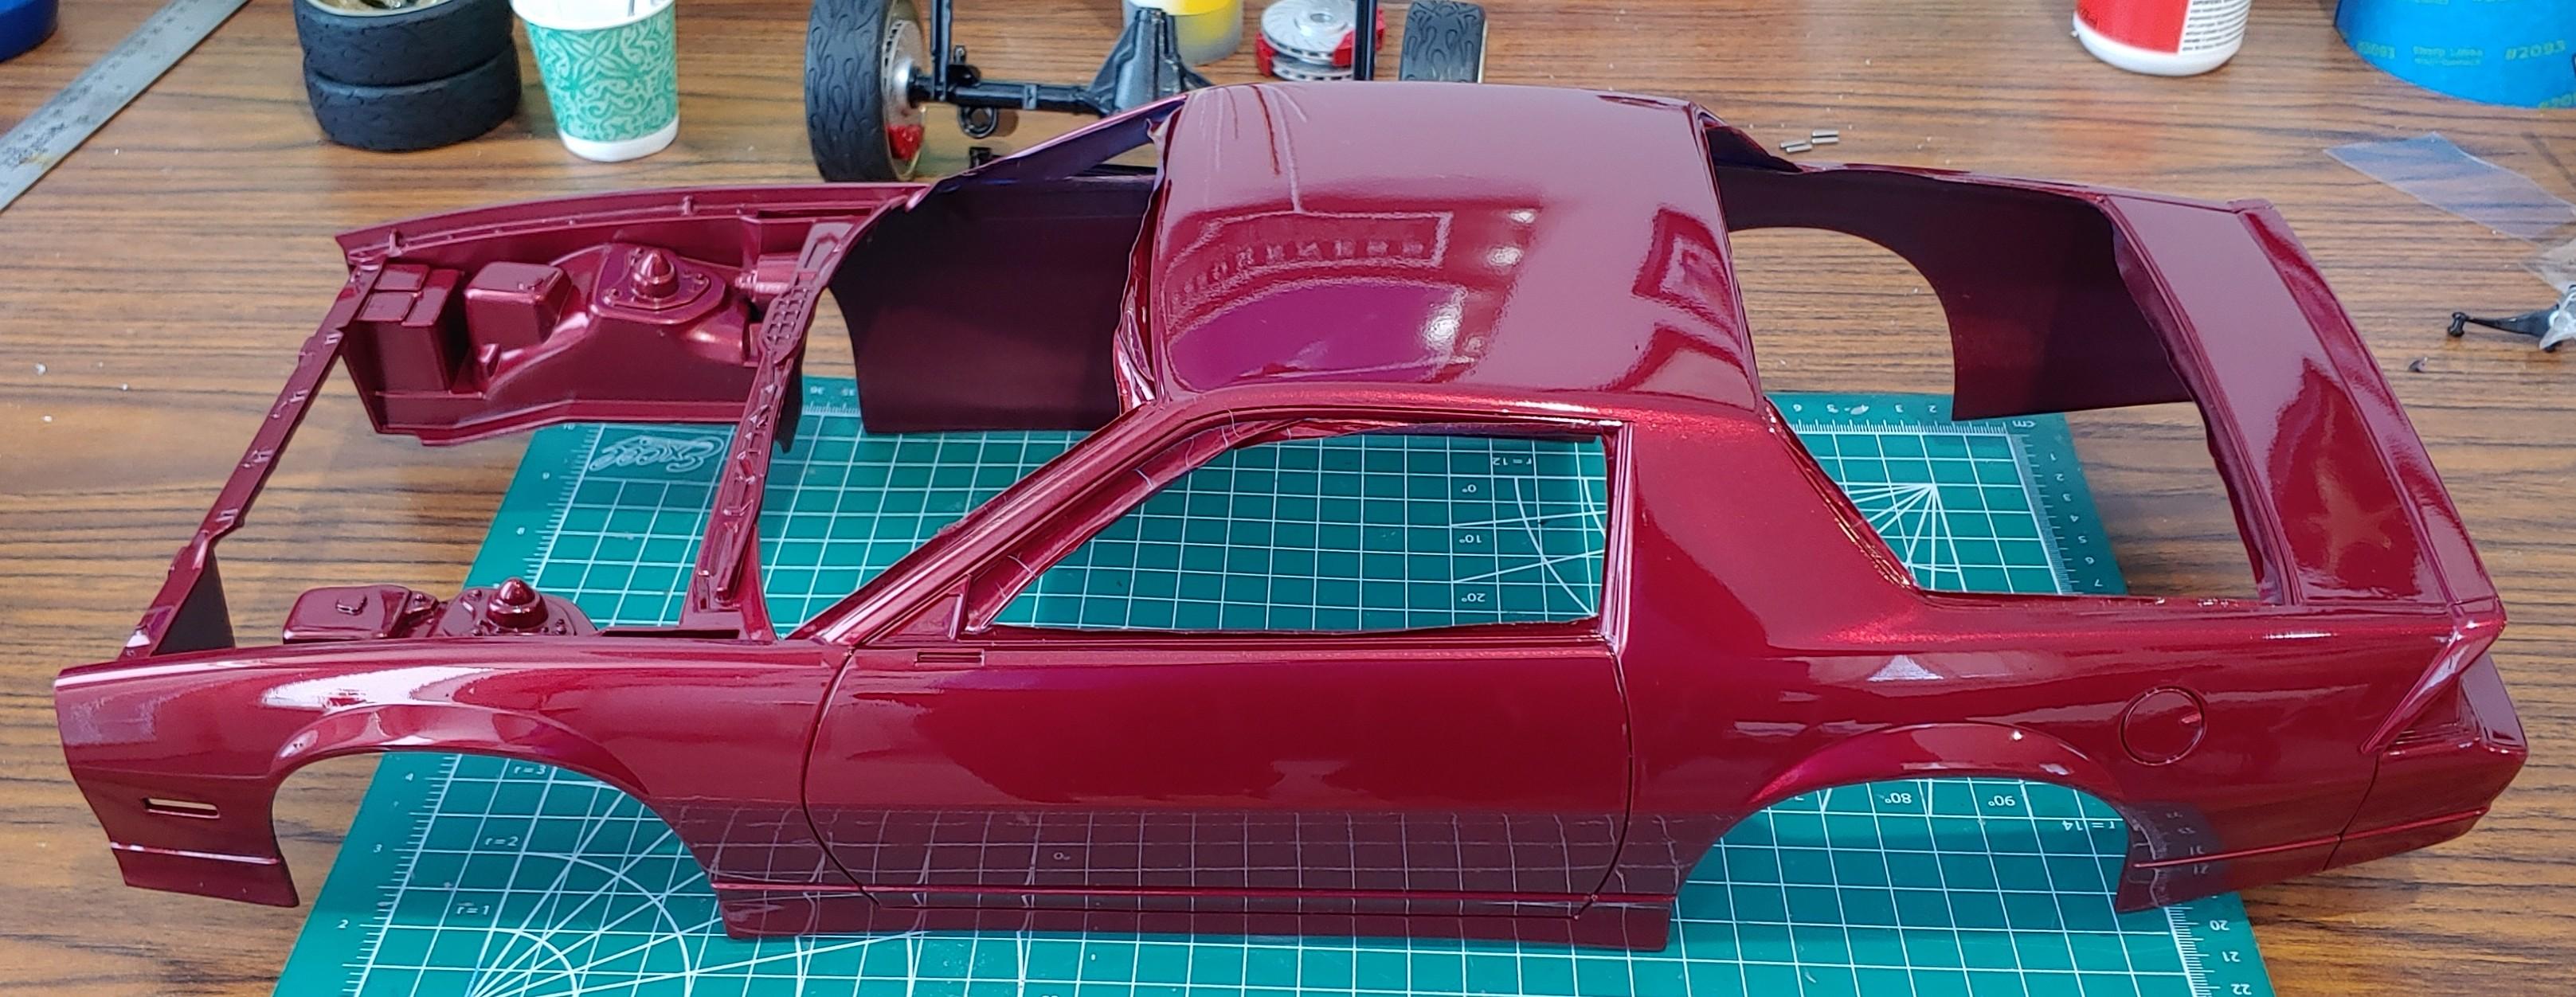
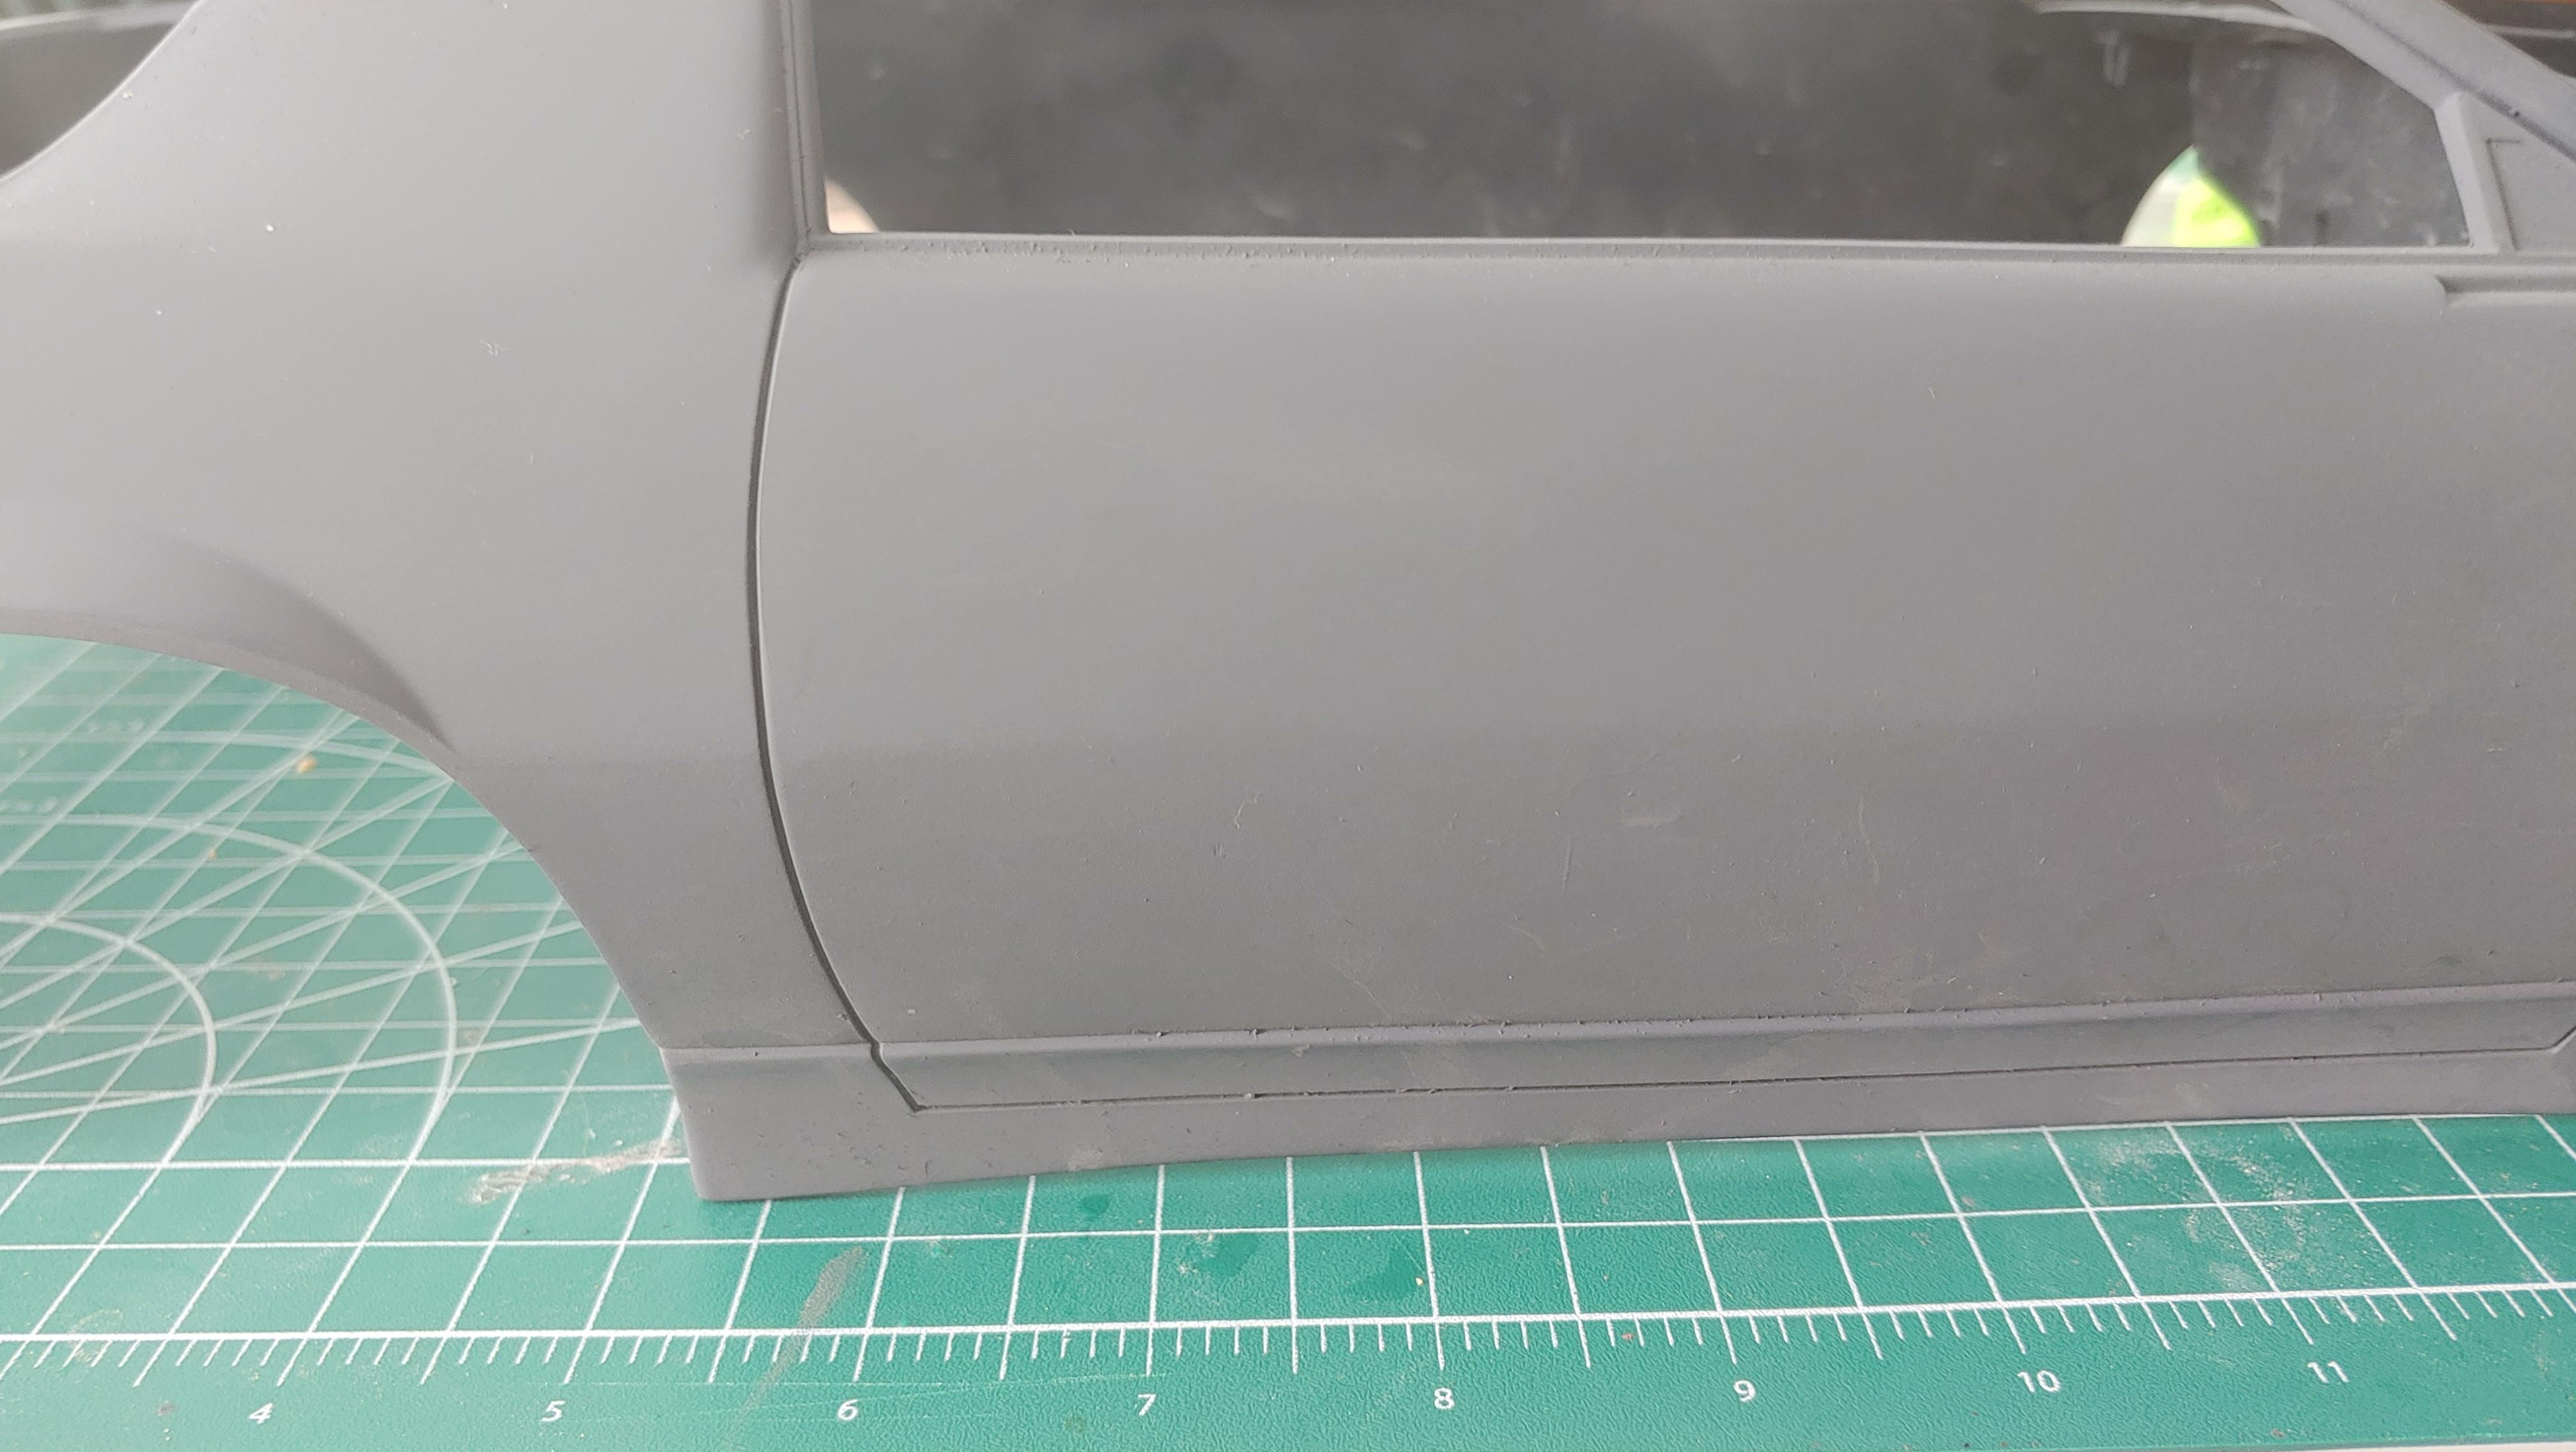
I made fillers for the door handles with some plastic sheet. Then body worked them smooth. I got the chuck of hood that came off on the hood vent back in place. It fit so well that it only took a couple of coats of filler primer and some wet sanding. Now the body is just about ready for paint. As I'm working on this it seems like it's not much more detailed than a 1/25 kit and I remembered that I have a 1/25 Z28 in my stash and thought it would be fun to build them side by side to compare. The Z28 will be built mostly box stock with some custom wheels and lowerd suspension. More next time.
-
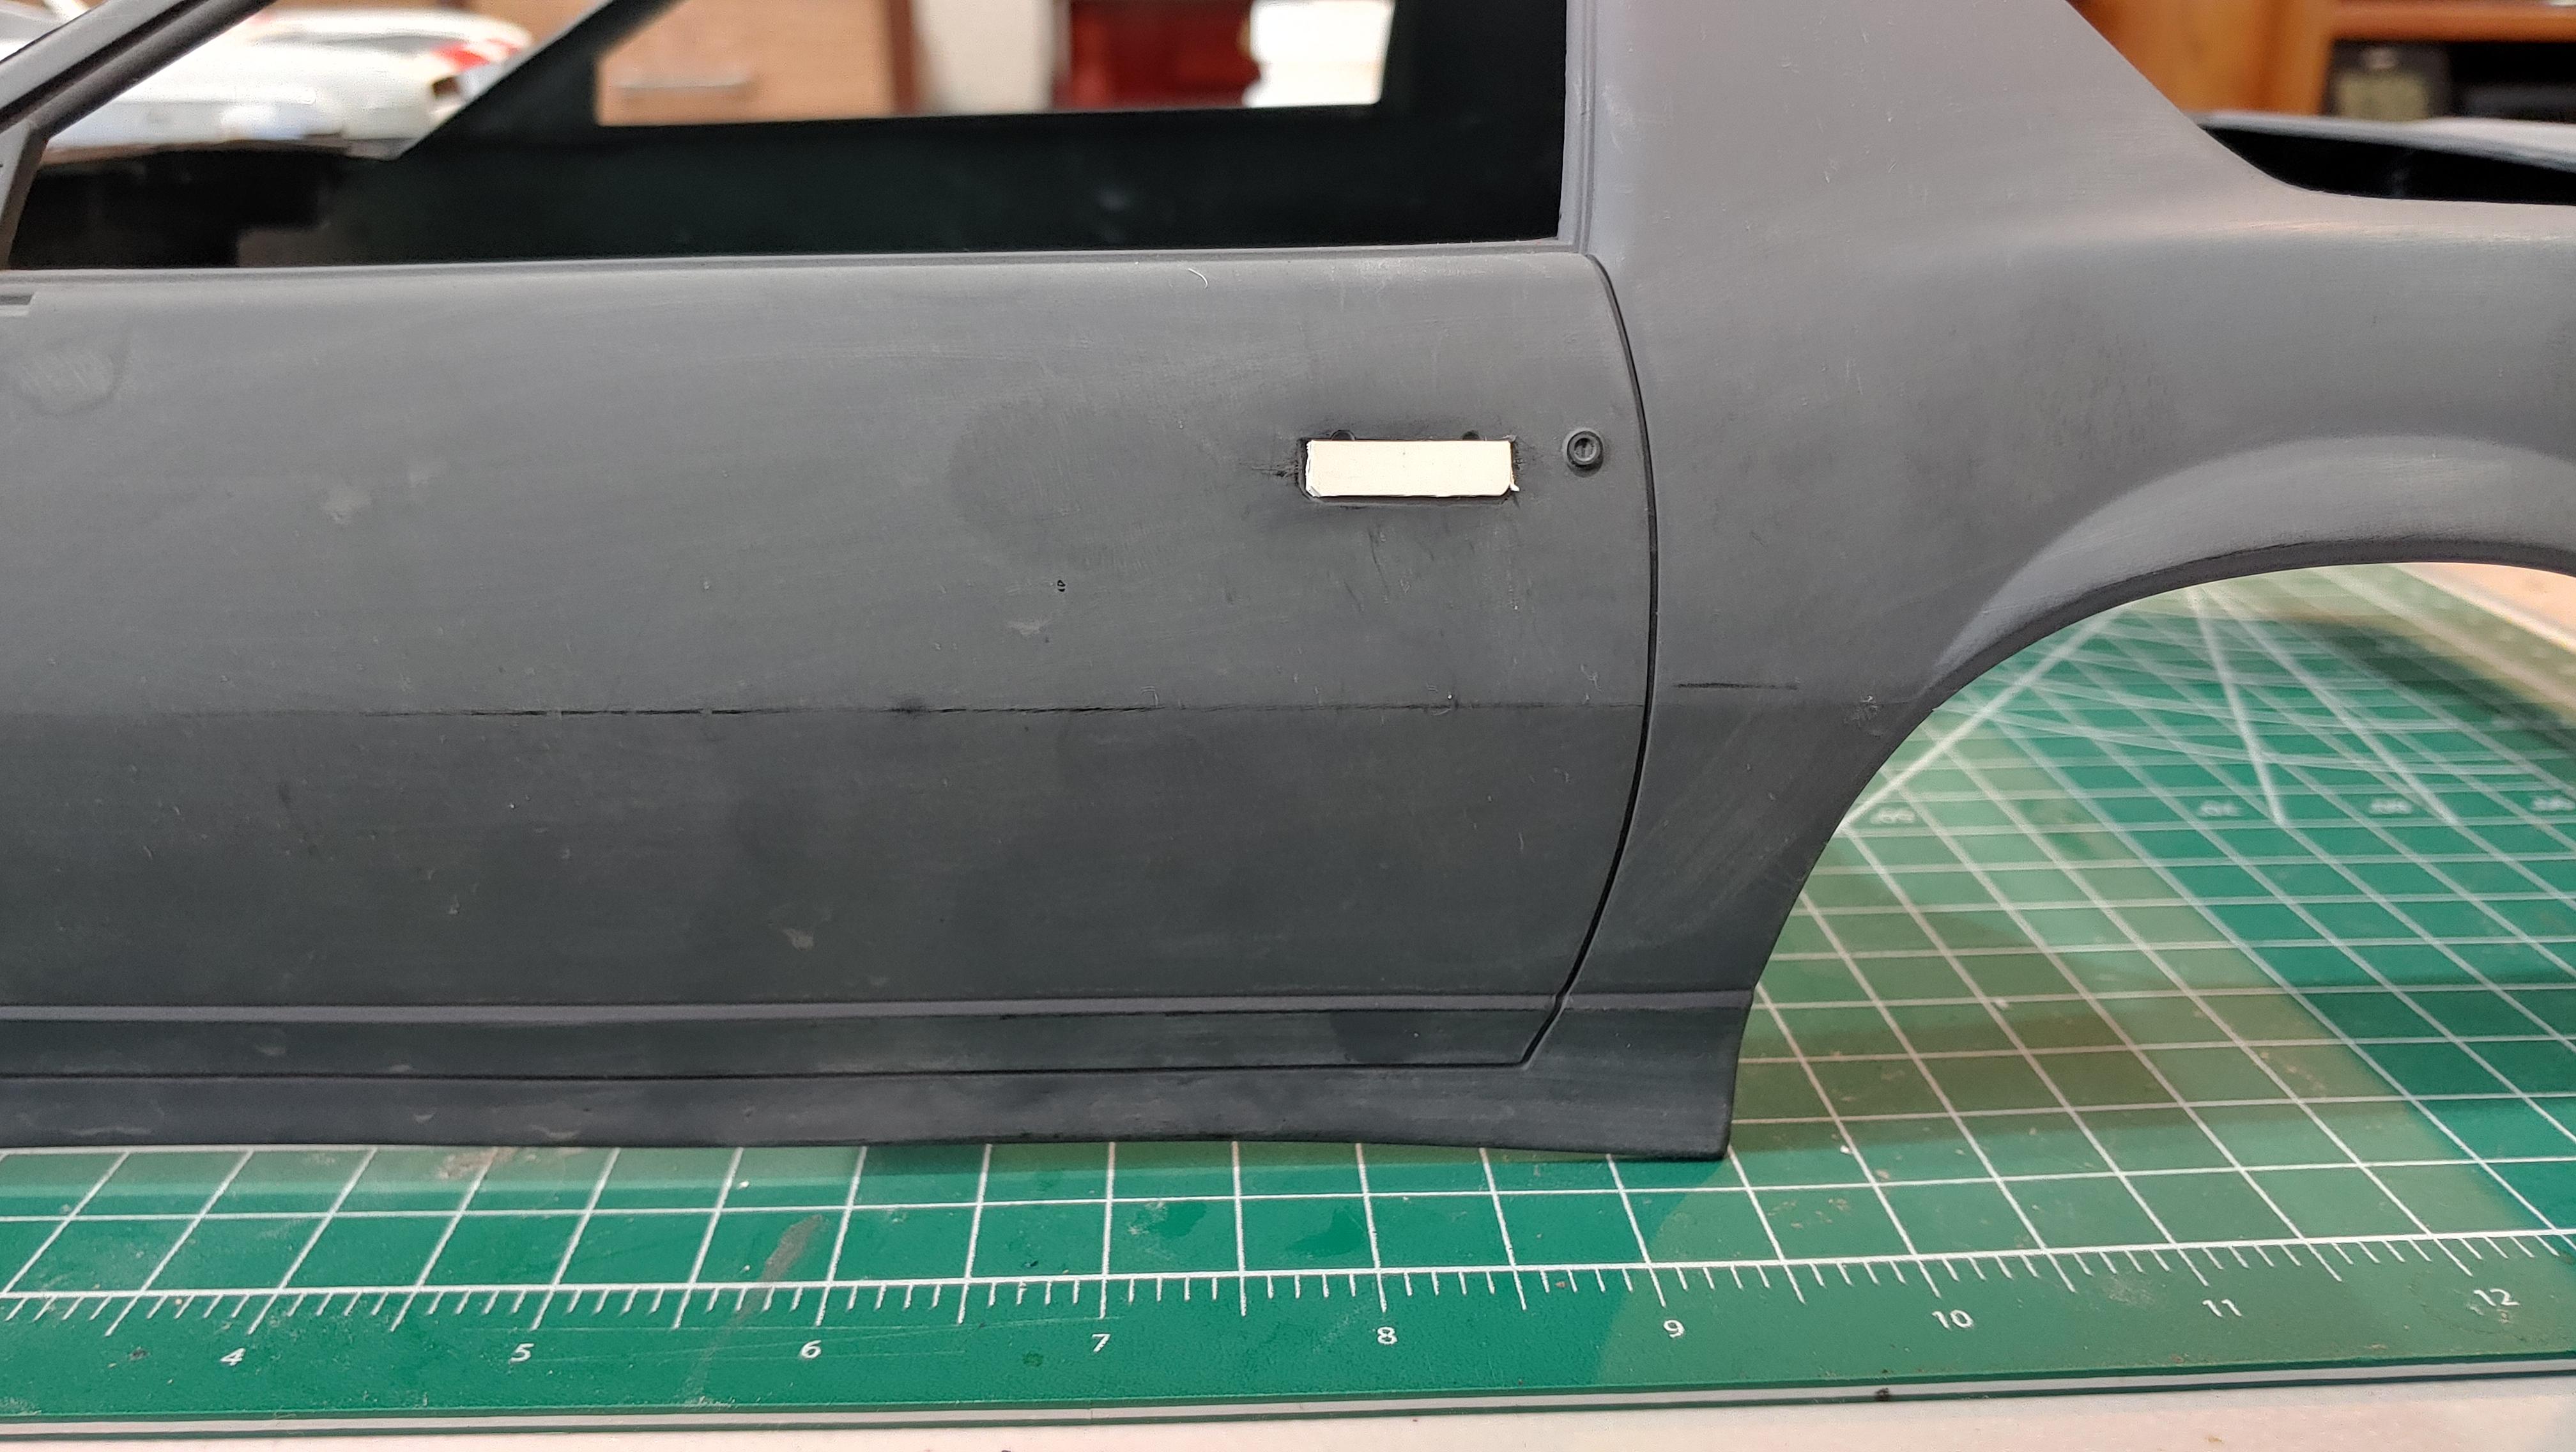
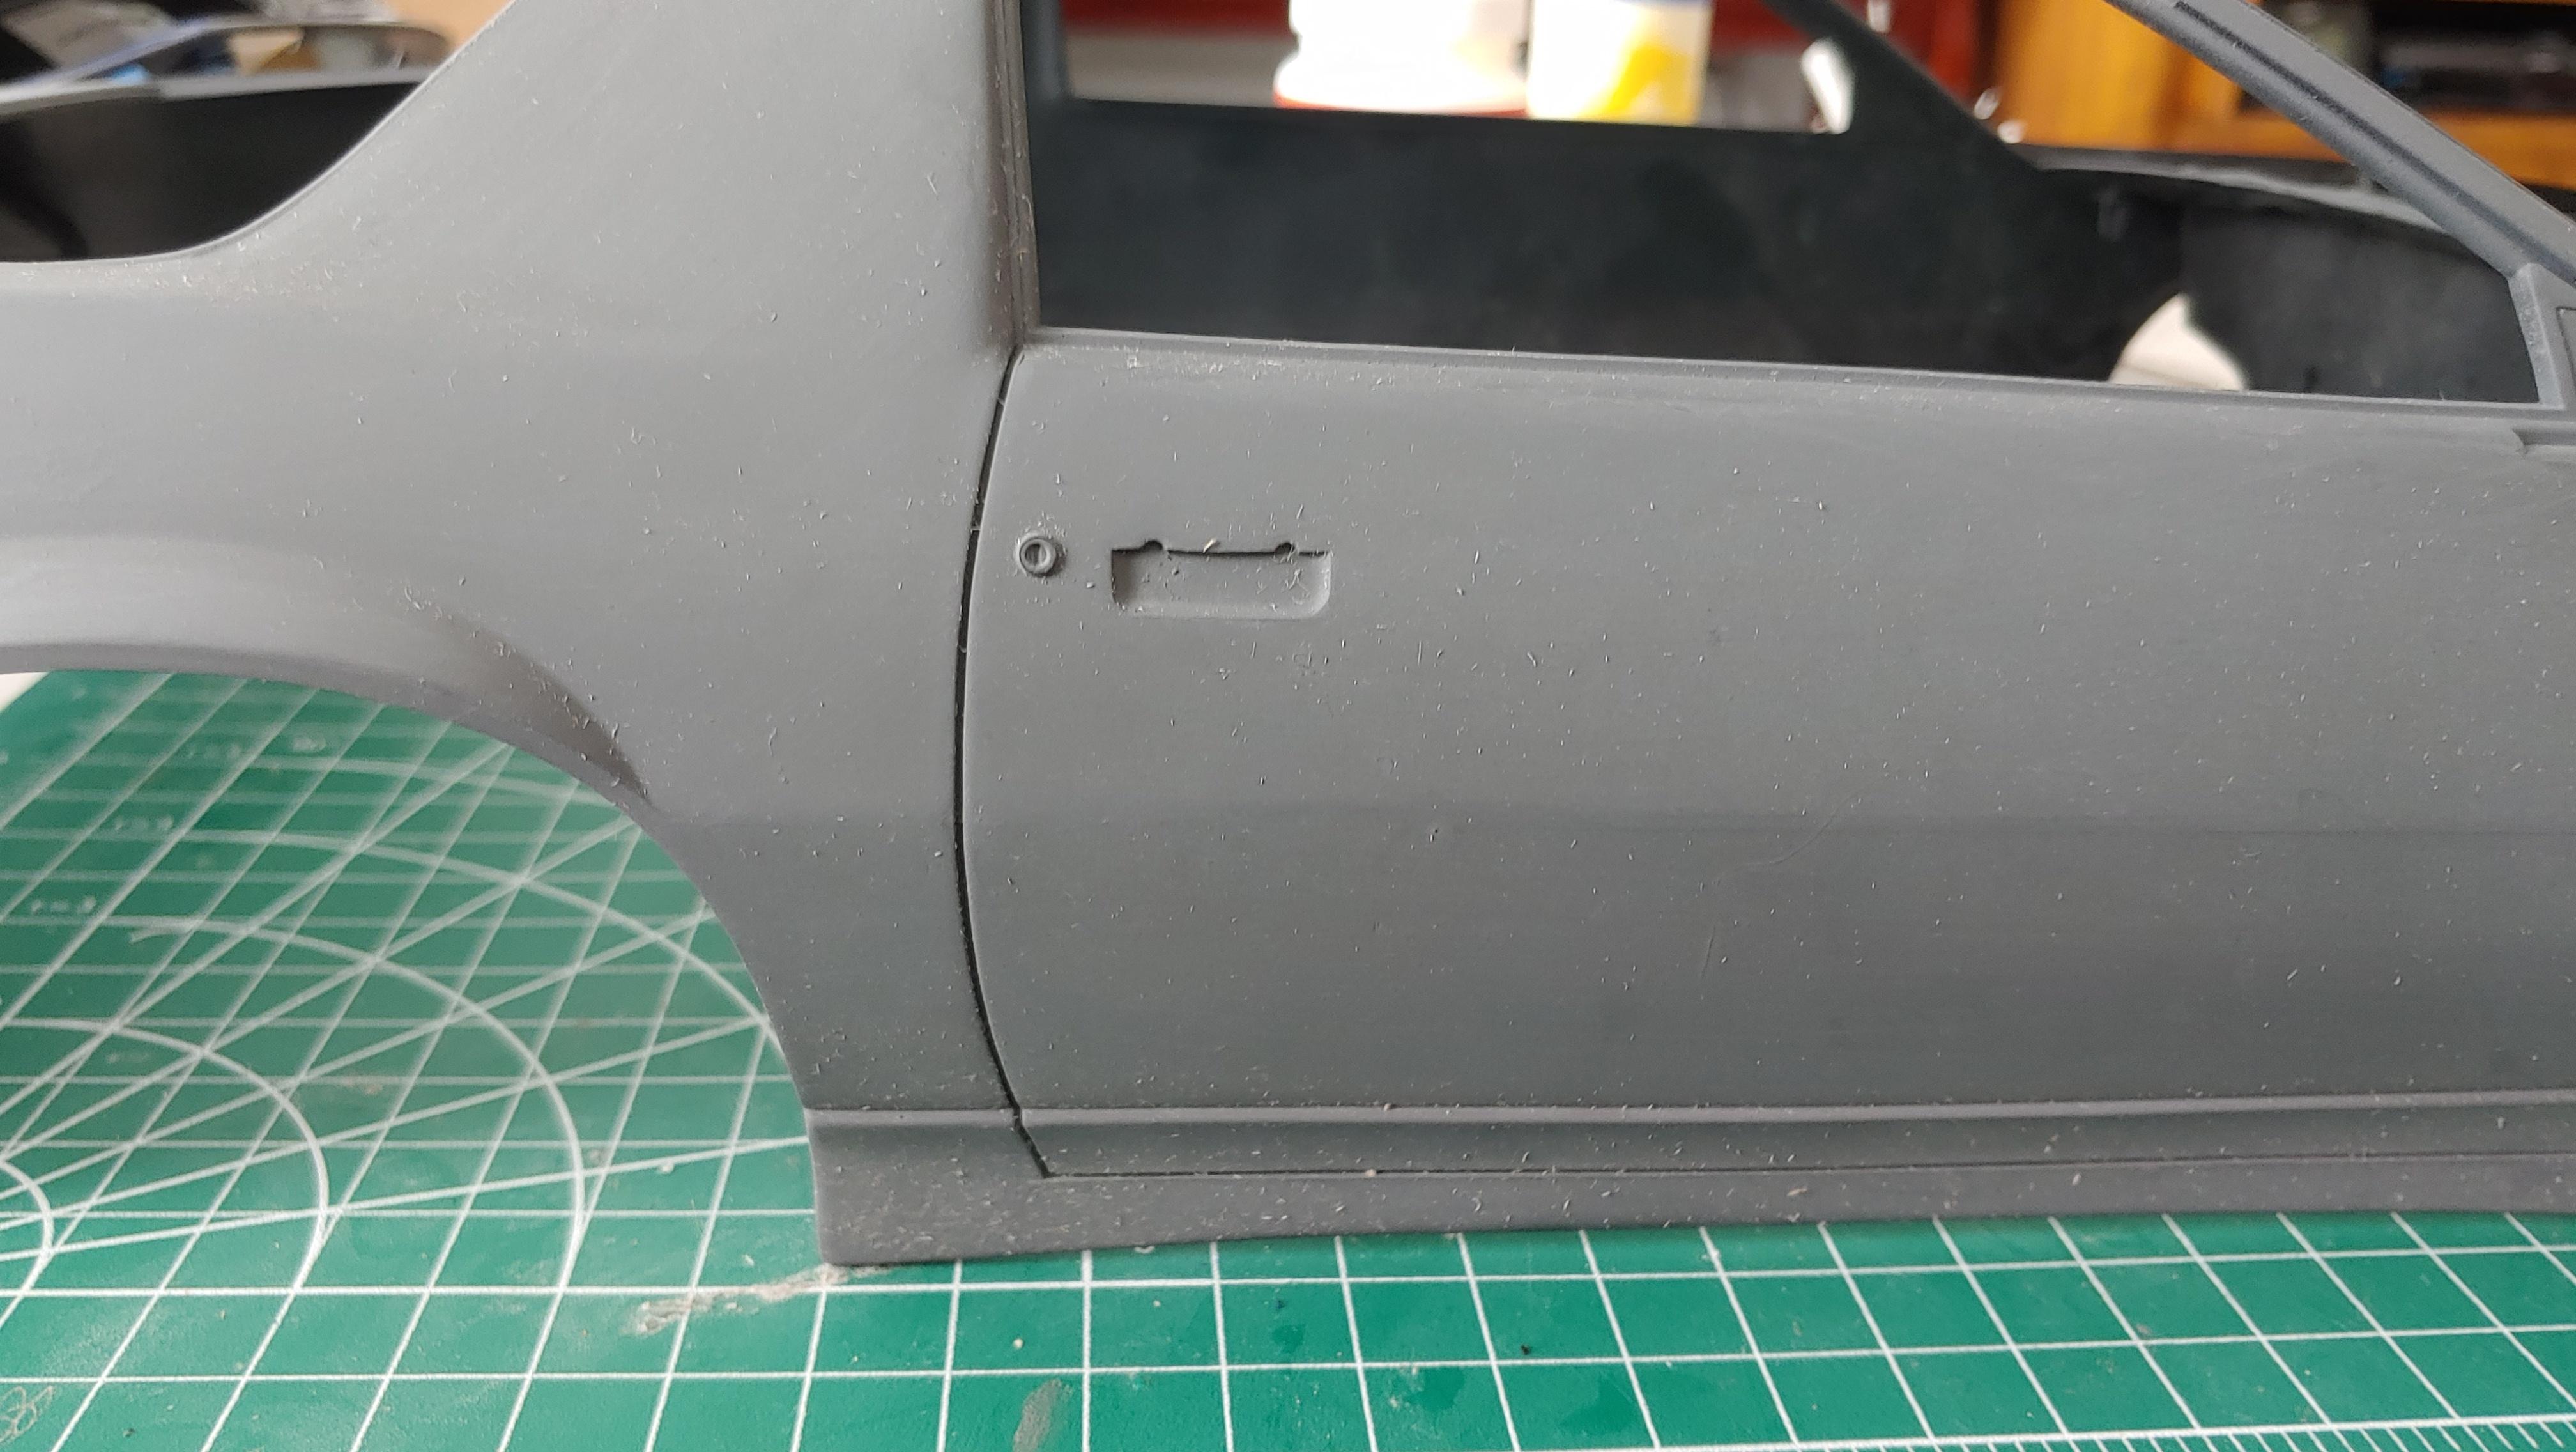
I got the chassis painted. And the body work done on the roof. While I was waiting for paint/putty to dry I detailed the tail lights. While getting the body ready for paint I ran across the first surprise missing parts, the door handles. Luckily since I'm customizing it, shaved door handles wouldn't be out of place, so easy fix. More next time.
-
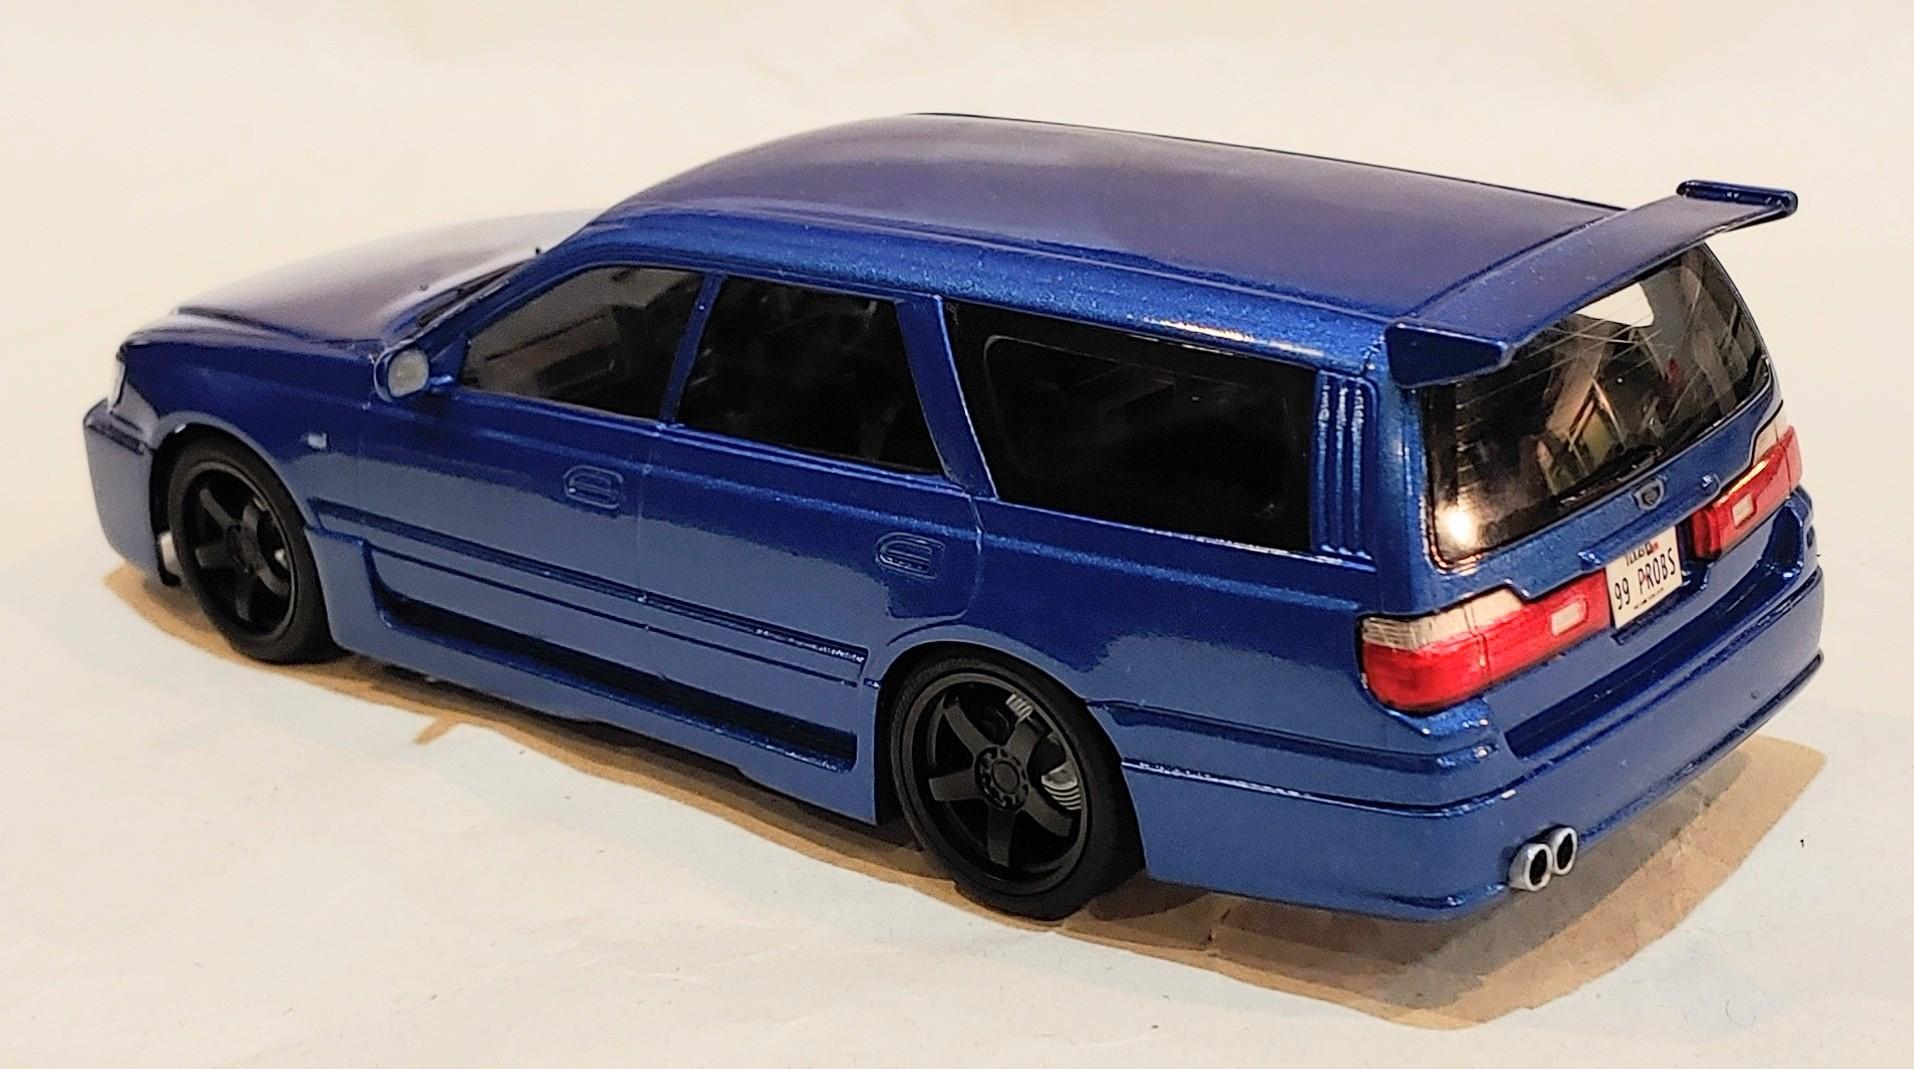
I built this from a Fujimi kit. I shaved the roof rack, added an intercooler, GTR wheels, exhaust tips made from aluminum, license plates that I made, and painted it Bayside Blue.
-
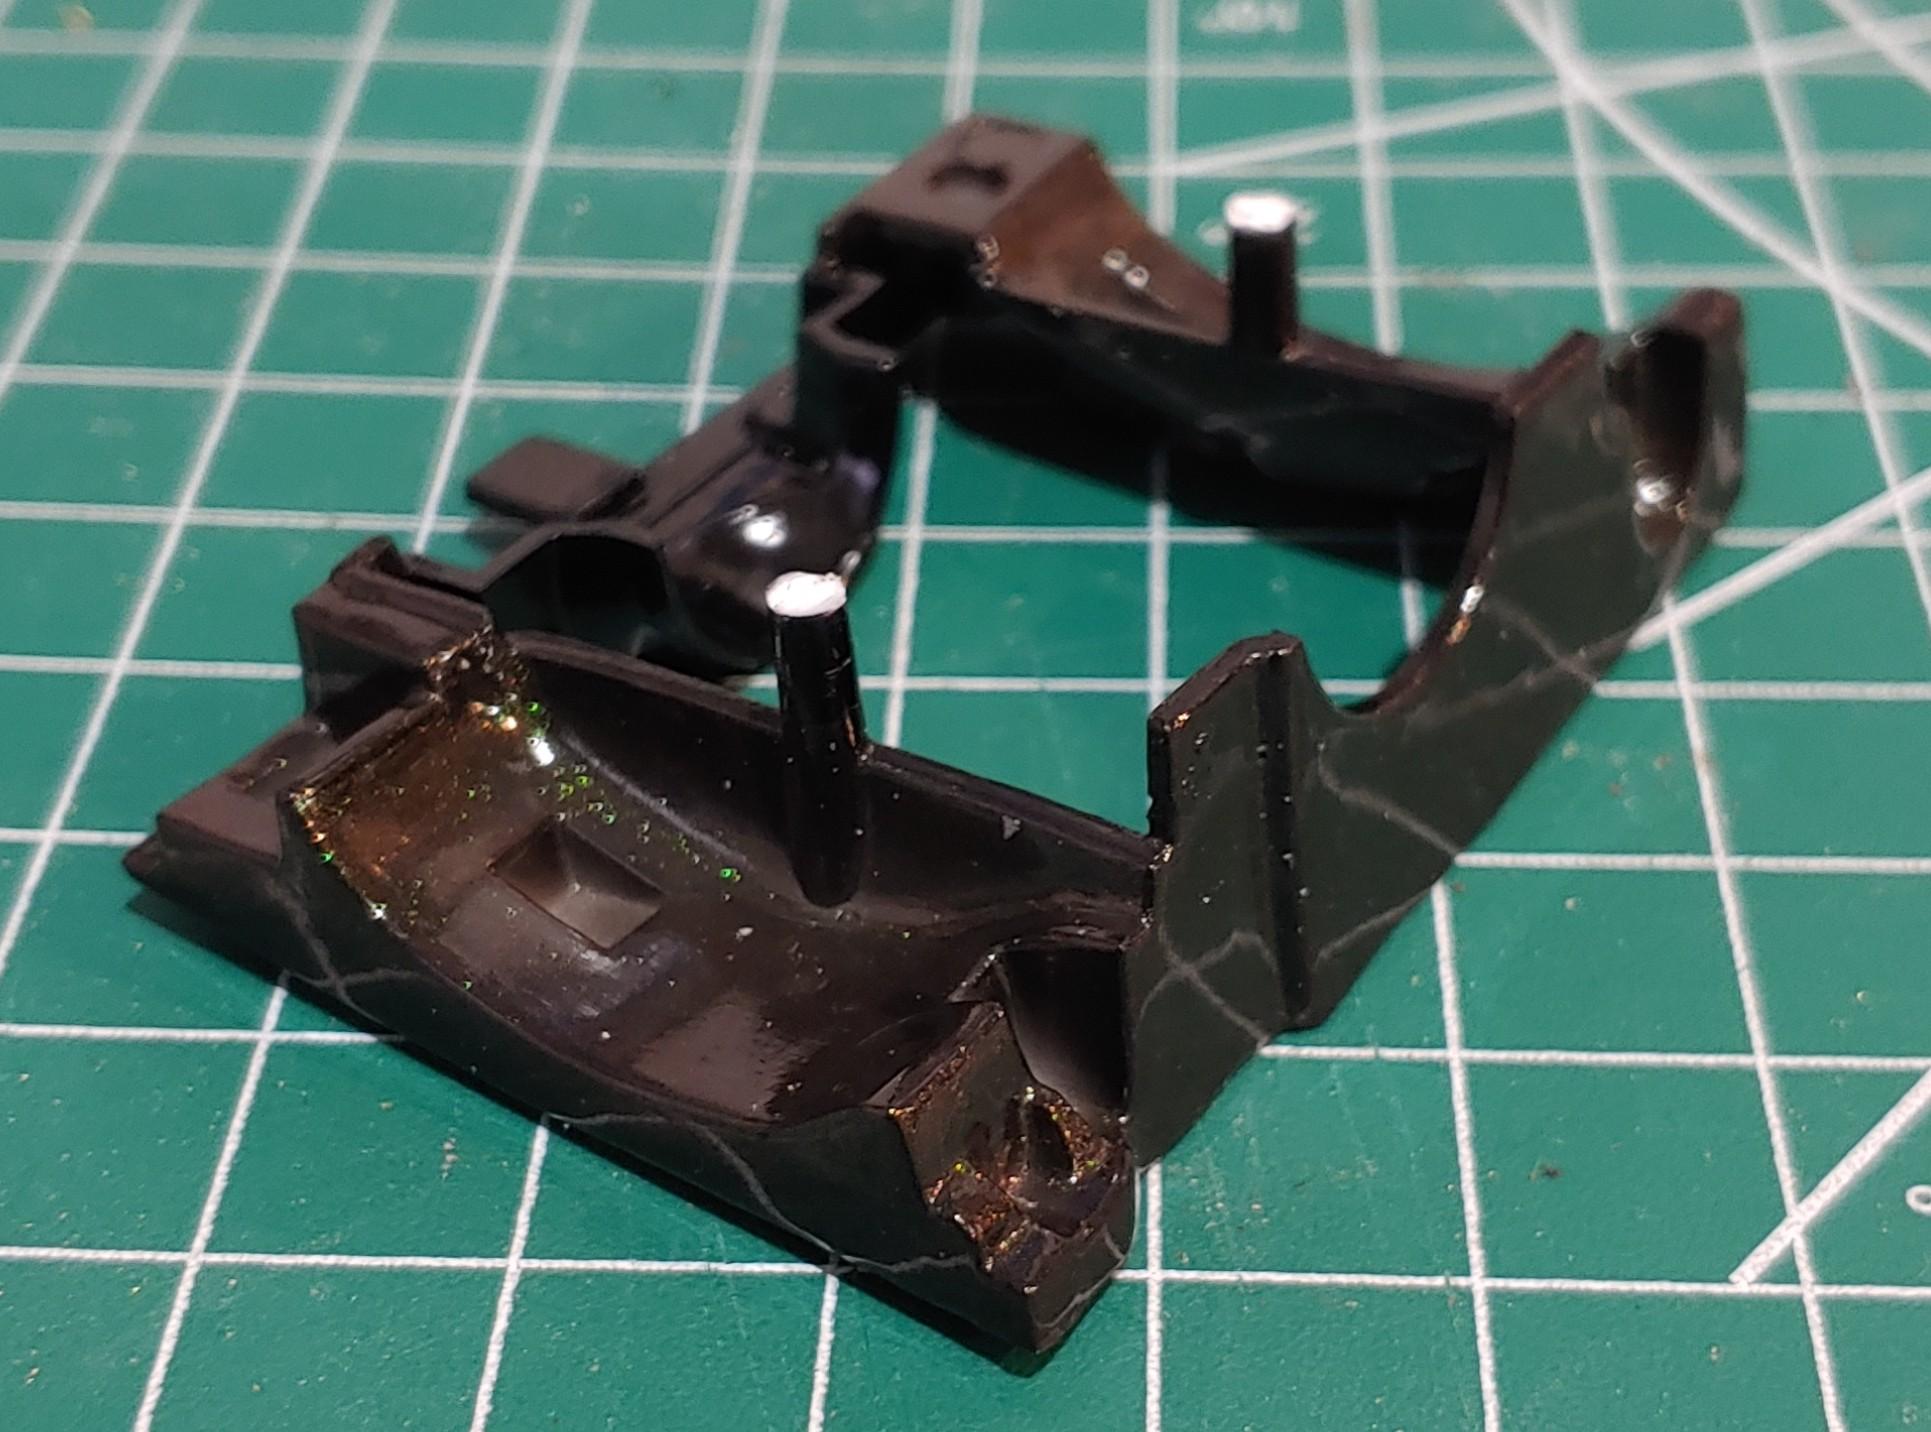
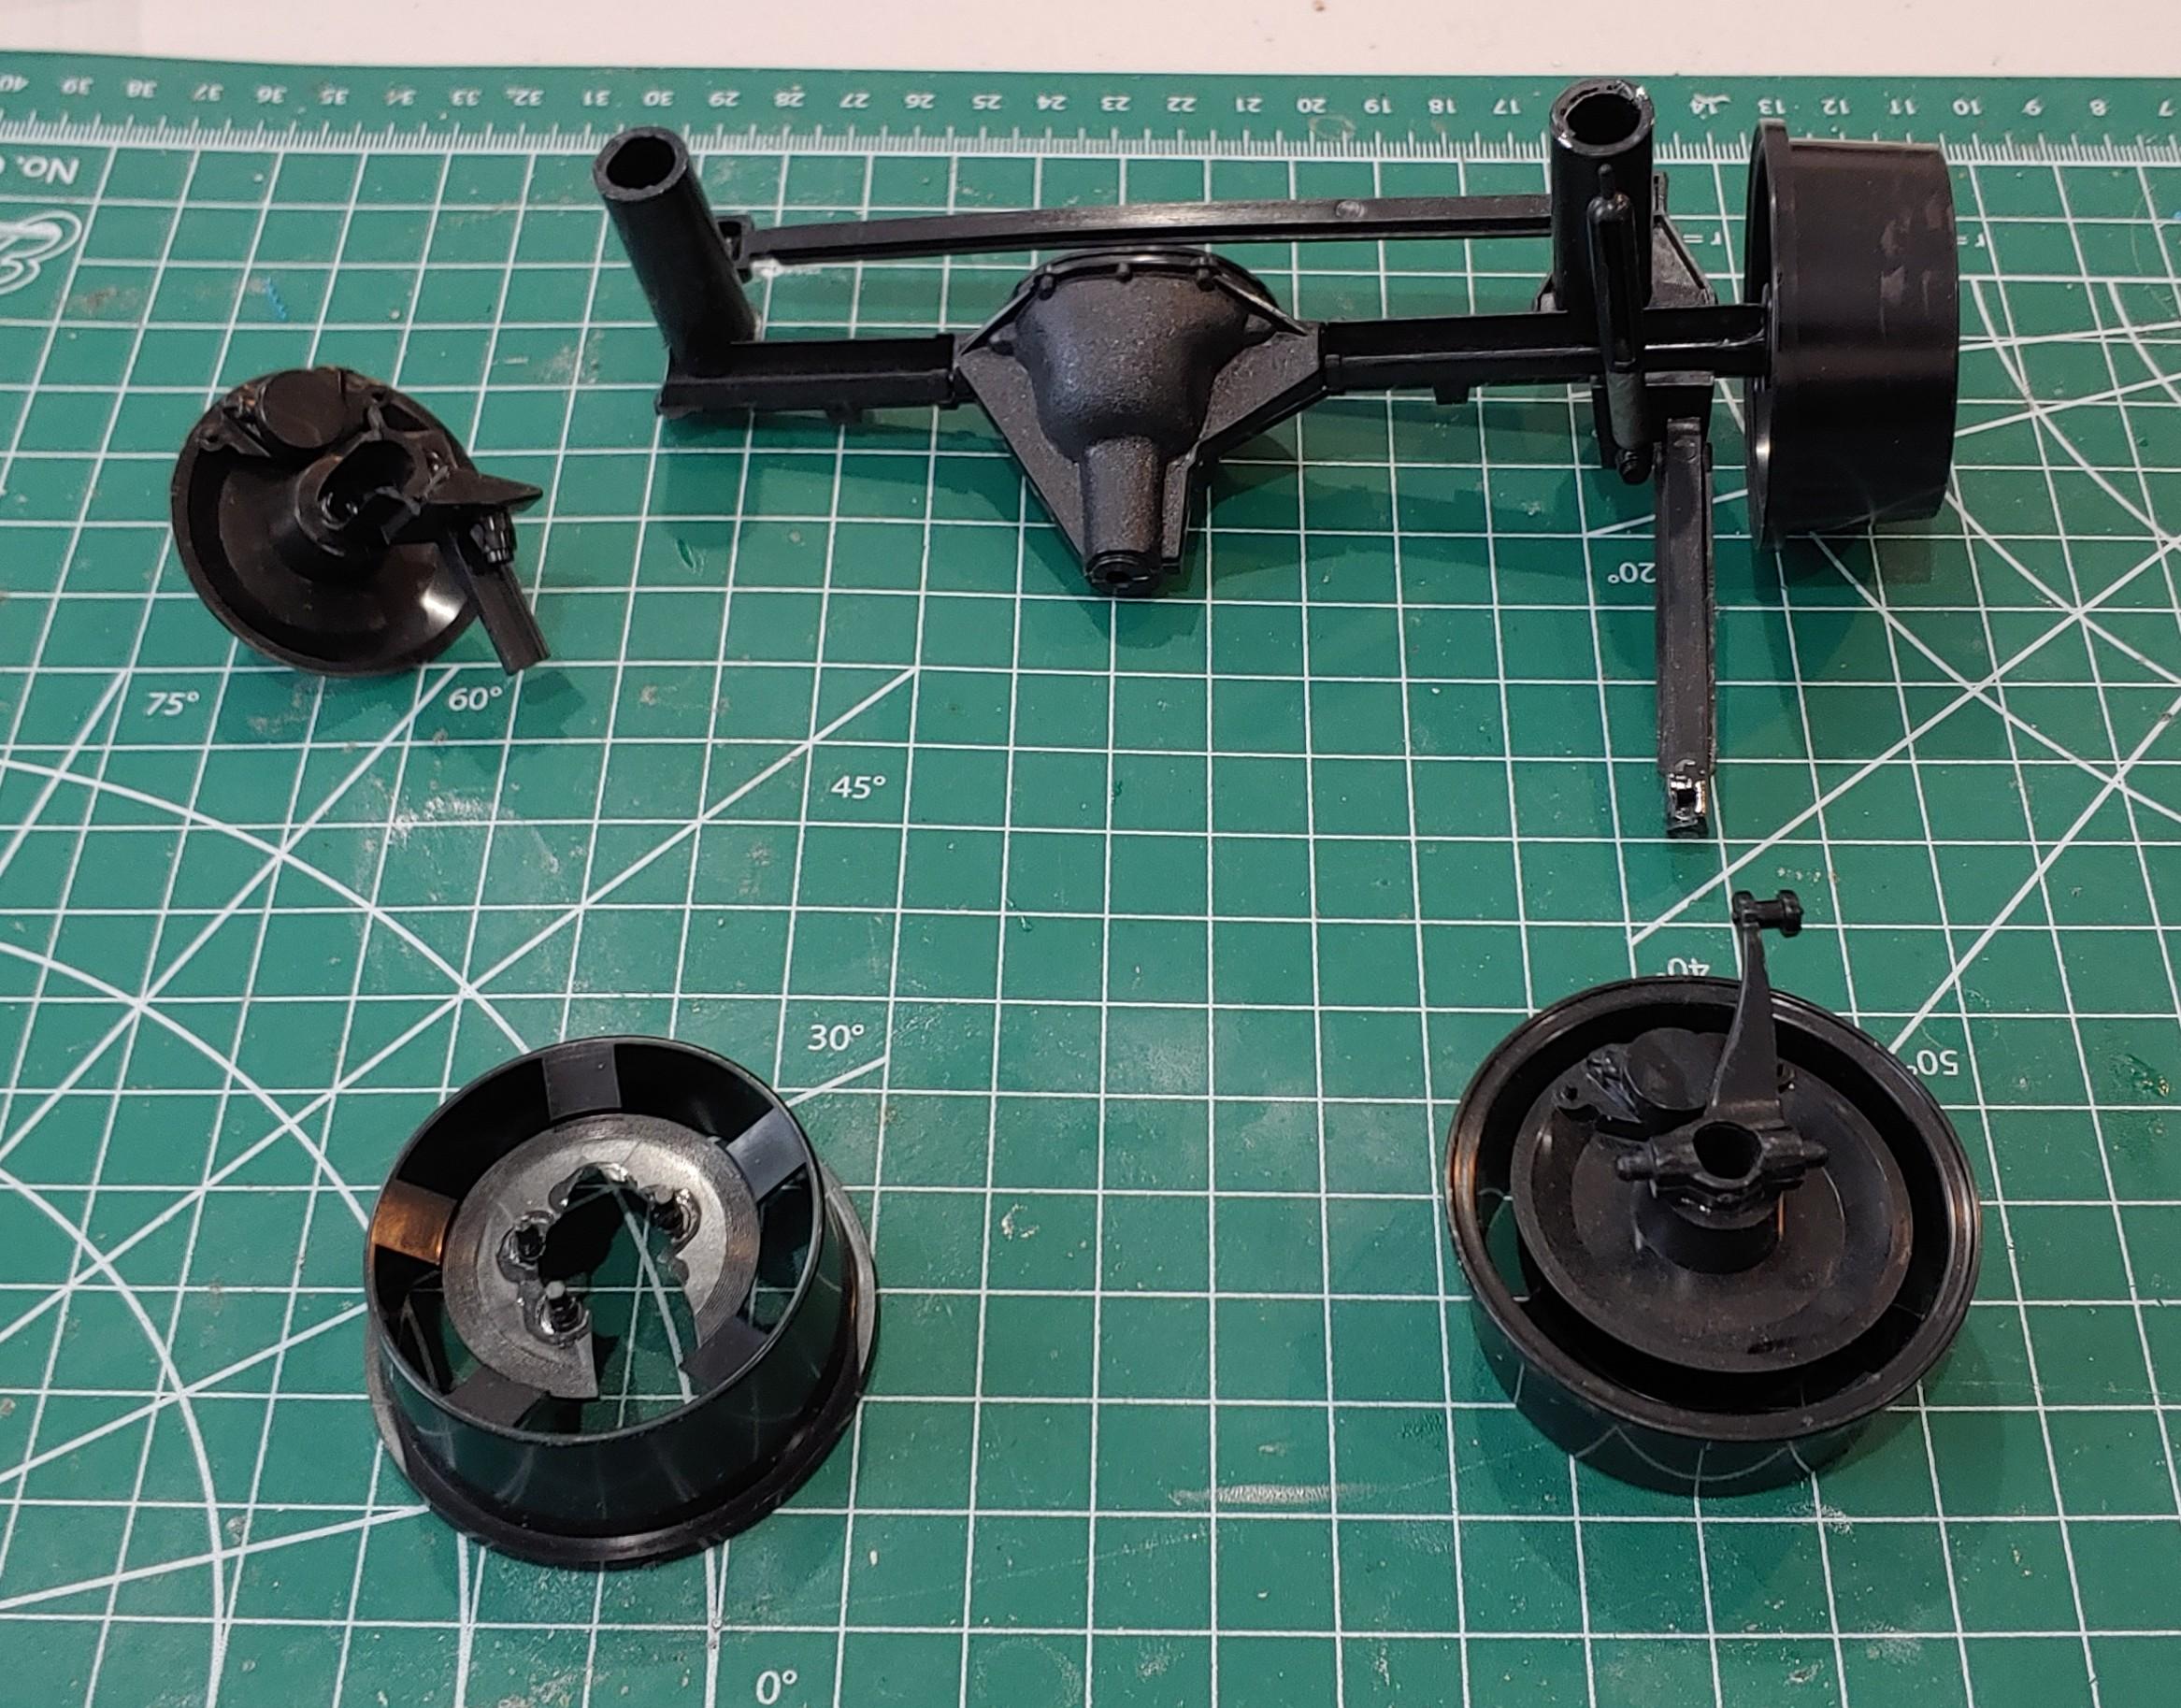
After some time in the freezer I was able to get some of the parts apart. There was a little damage, but nothing I can't handle. I glued the rear axle back together and used some evergreen tubing to add some support. I glued the roof and was able to find the missing chuck. The kit comes with an overhead console, so that will add some support. More next time.
-
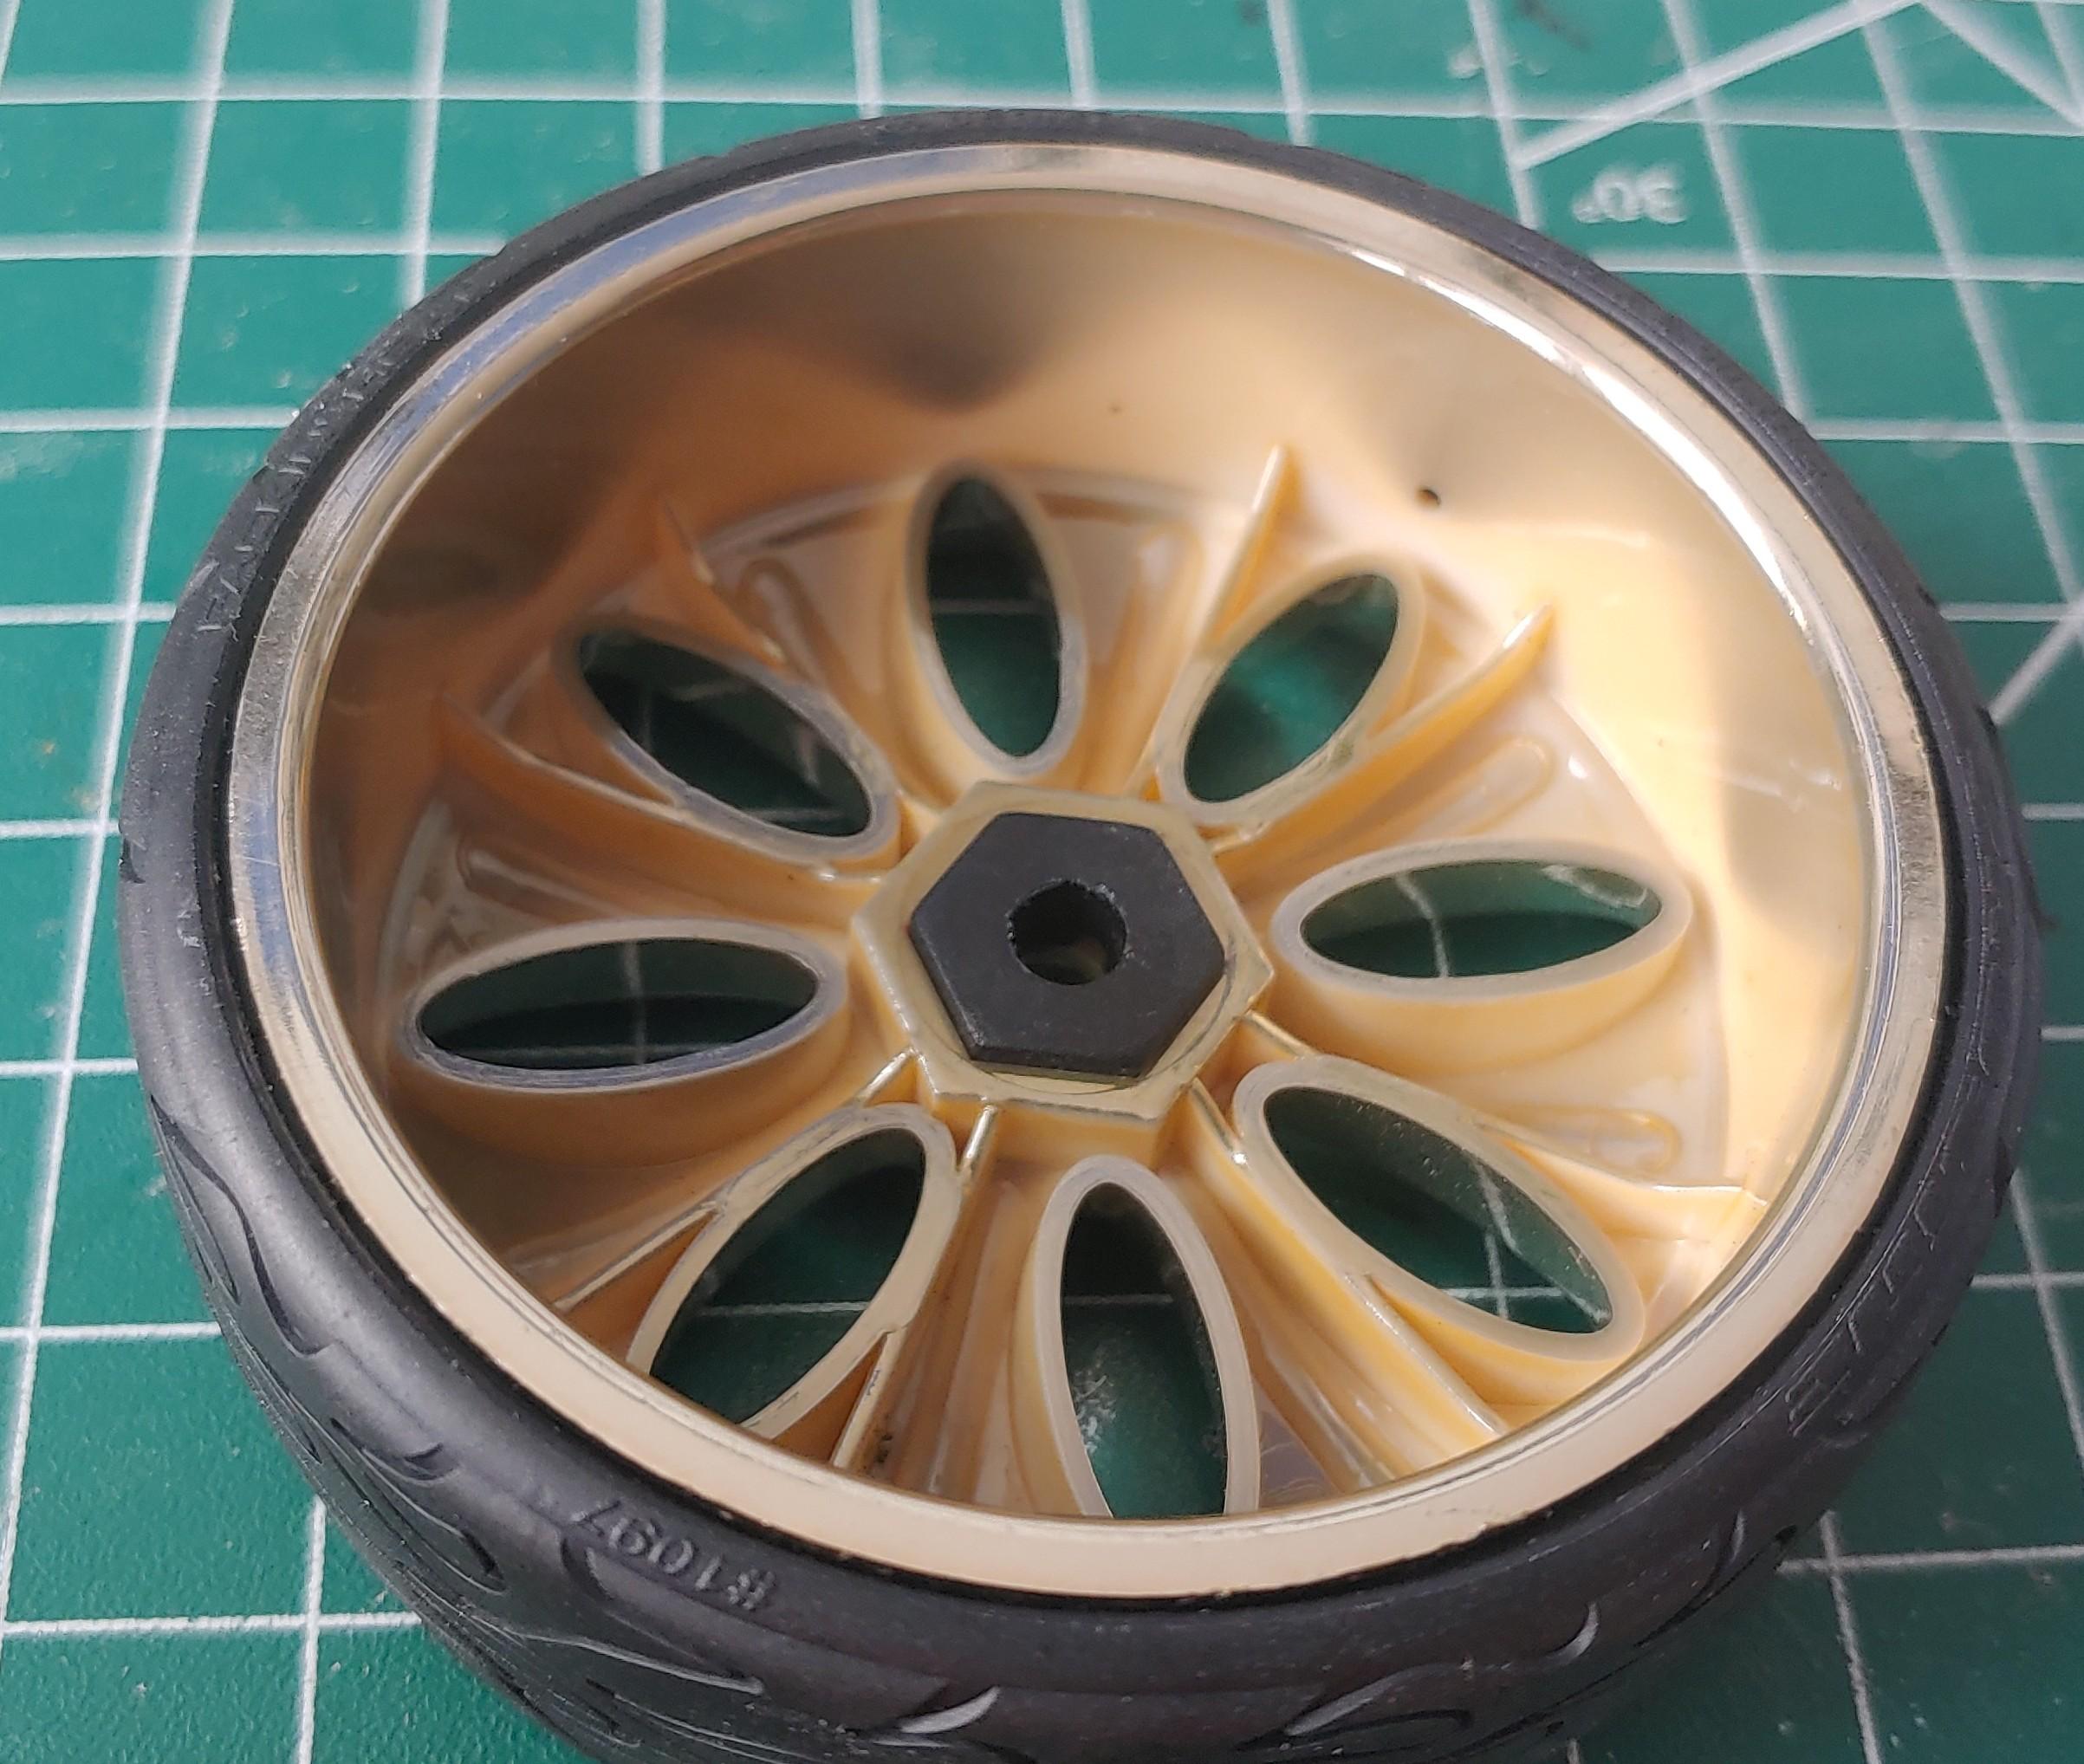
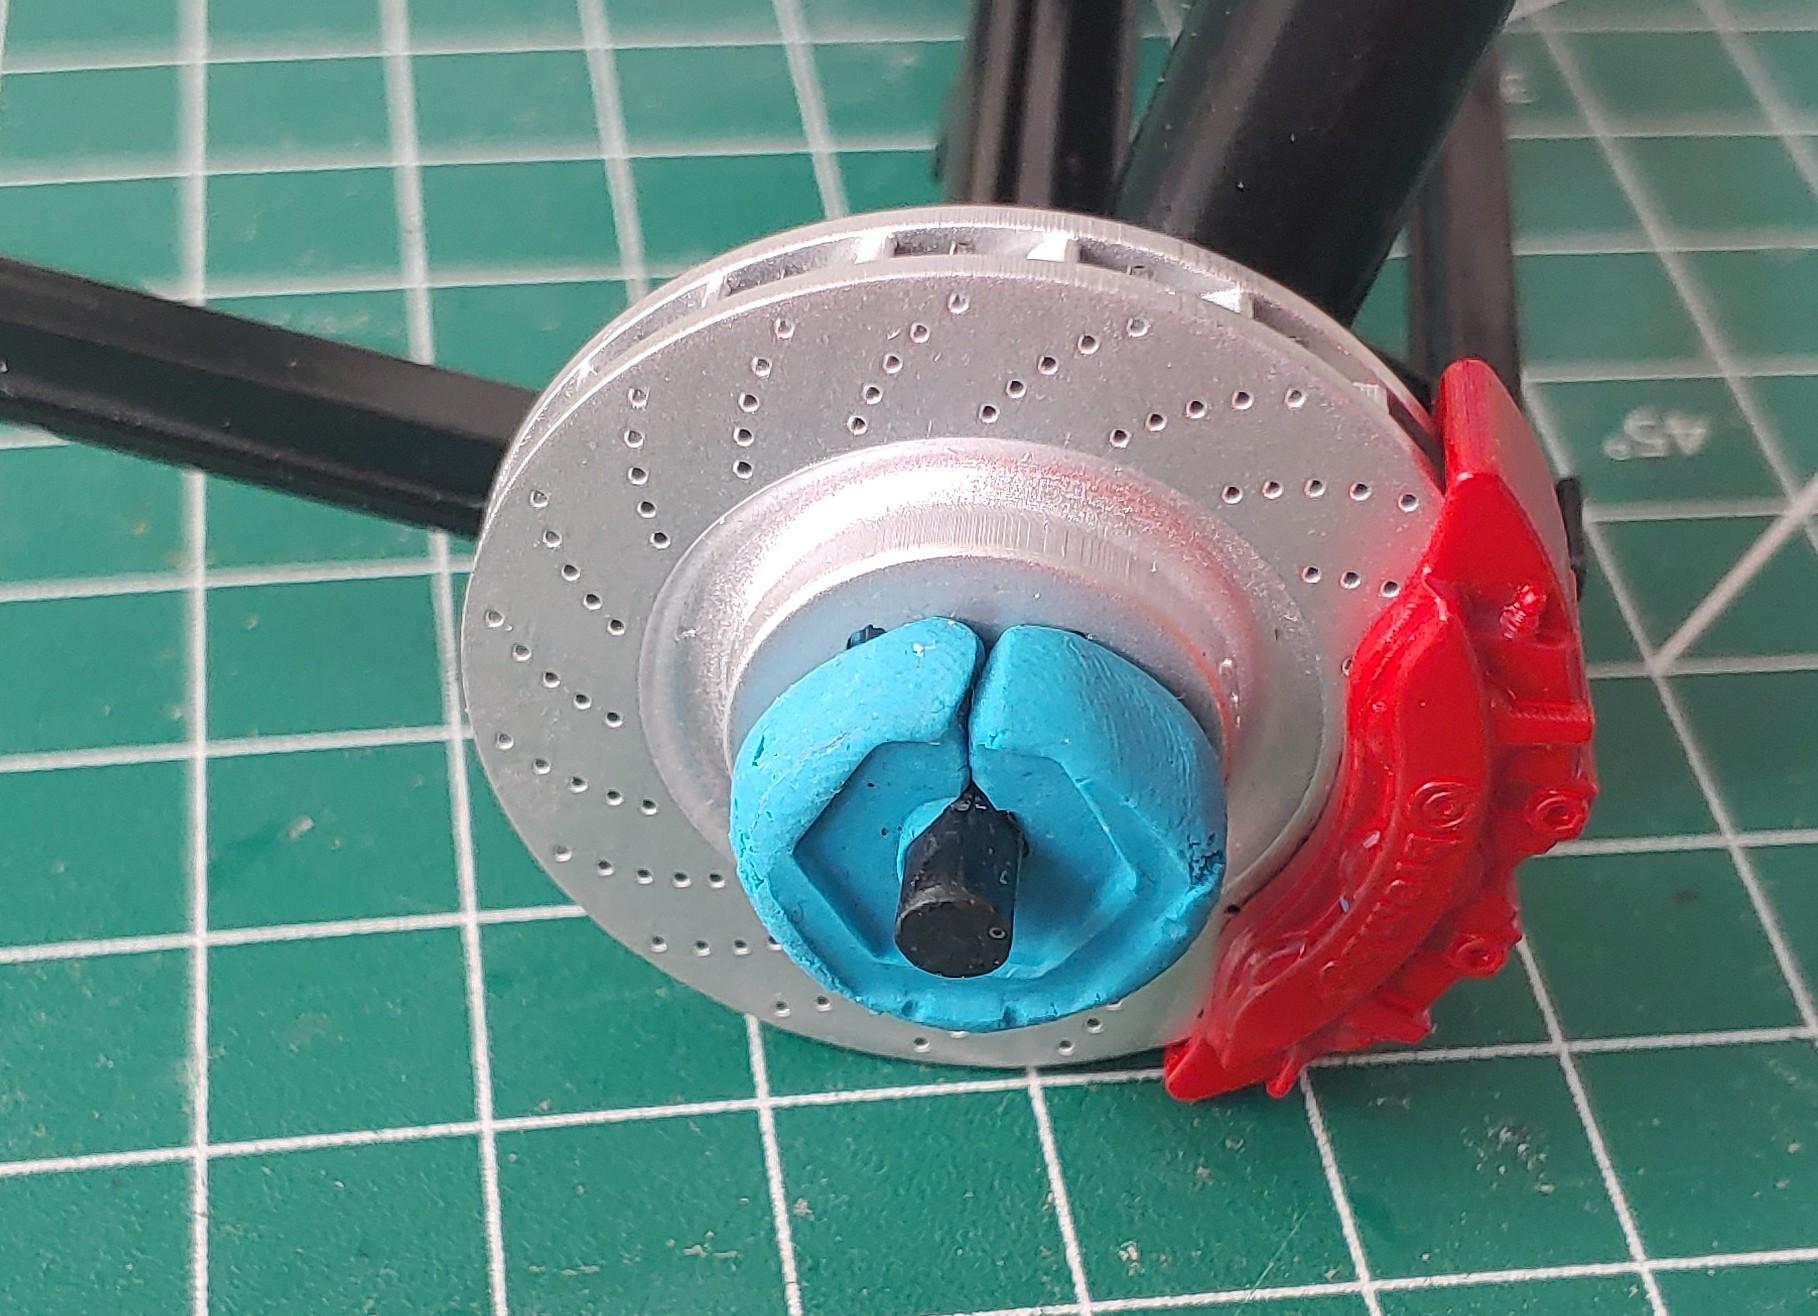
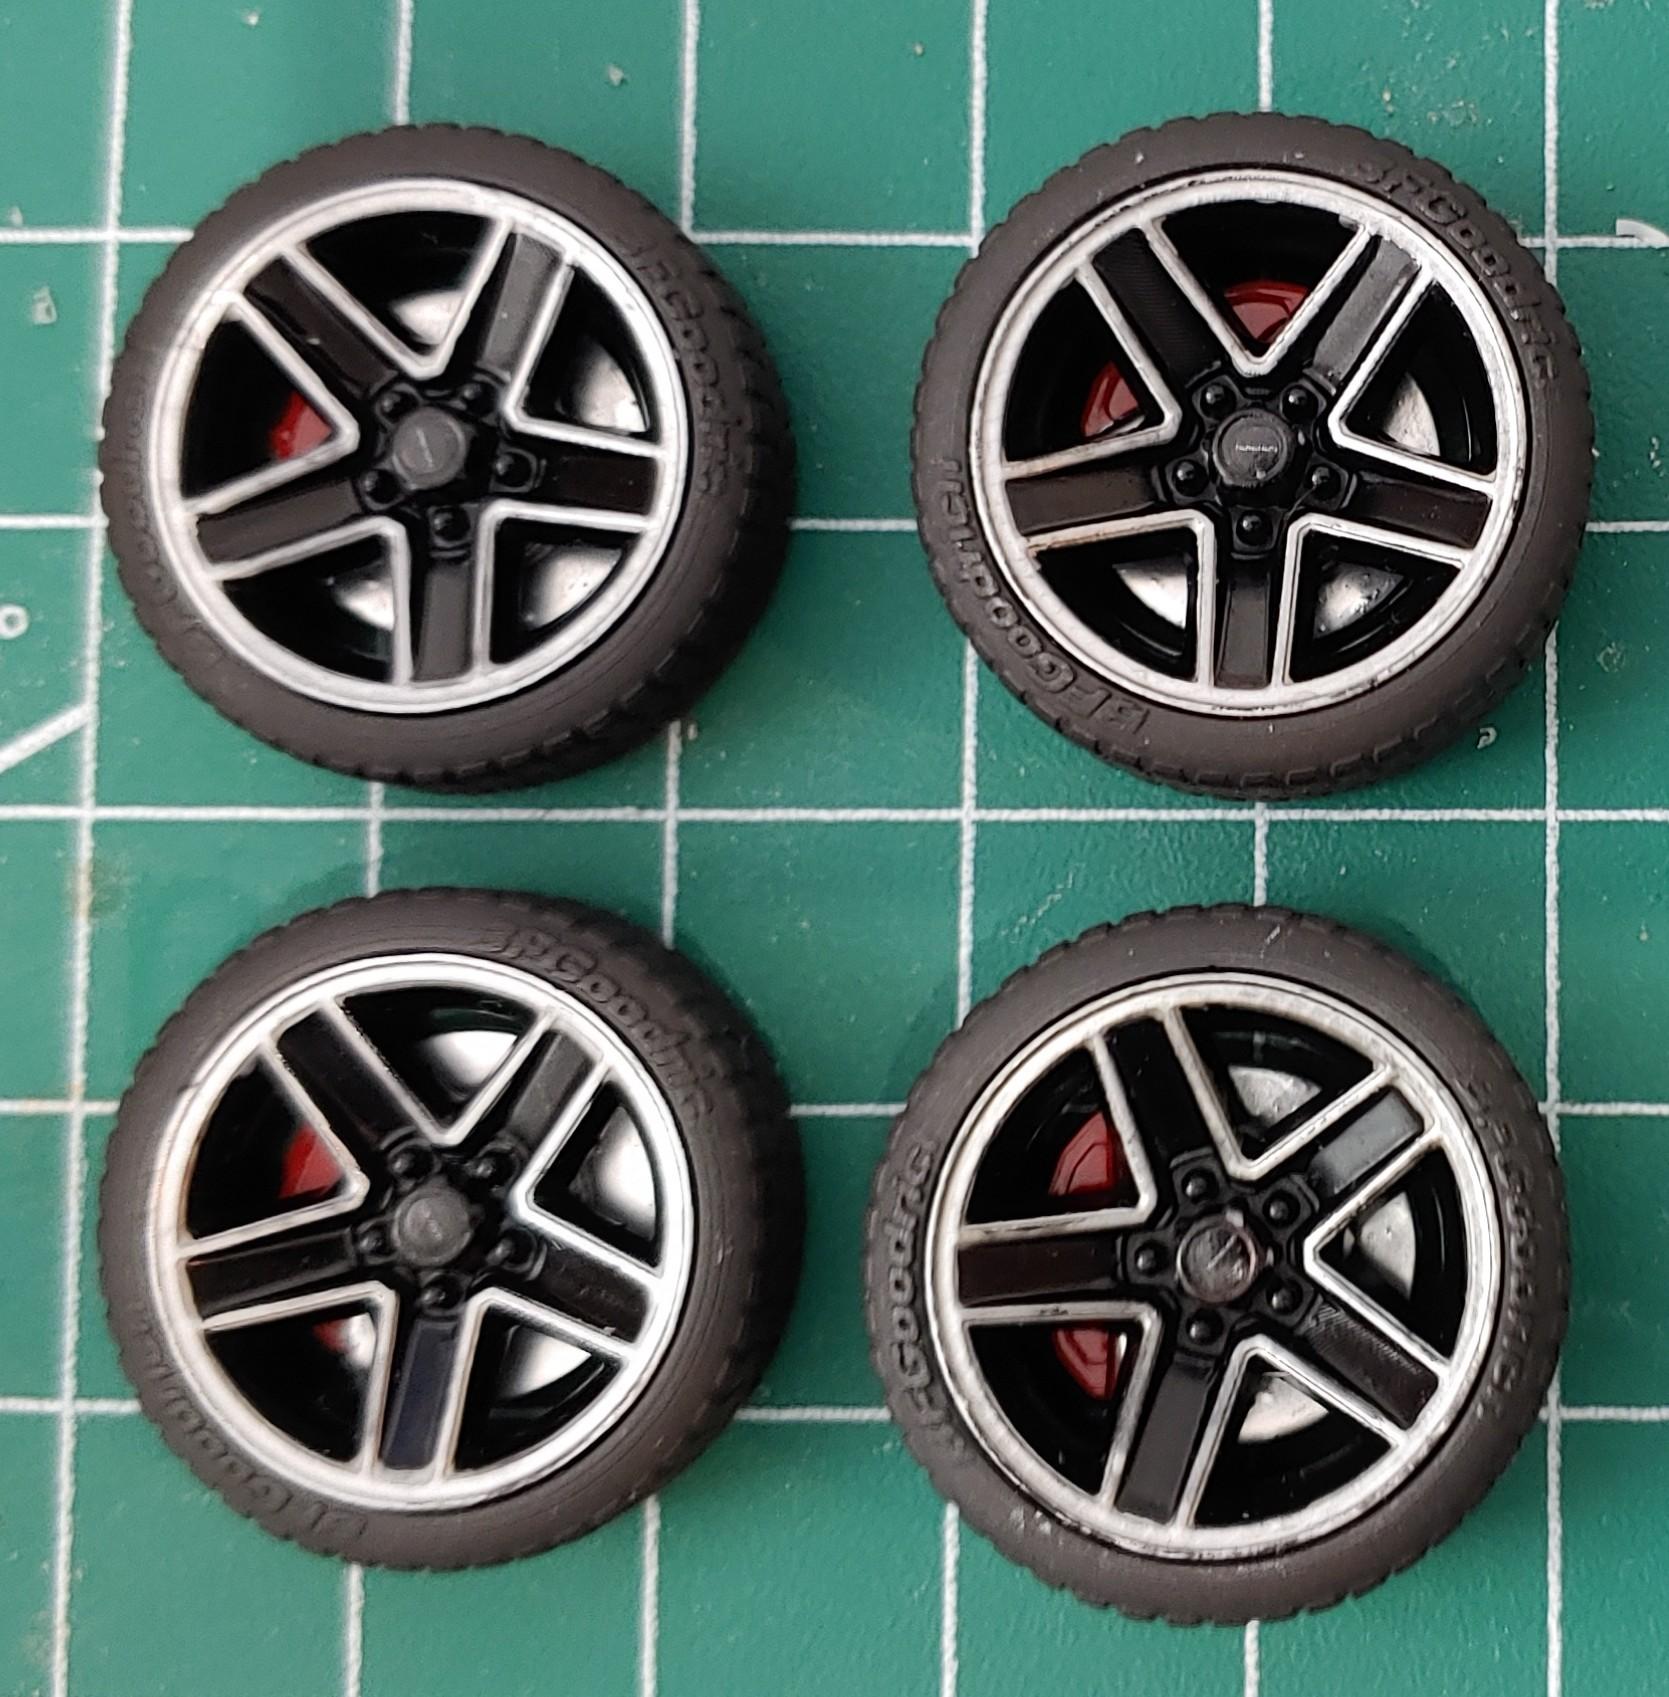
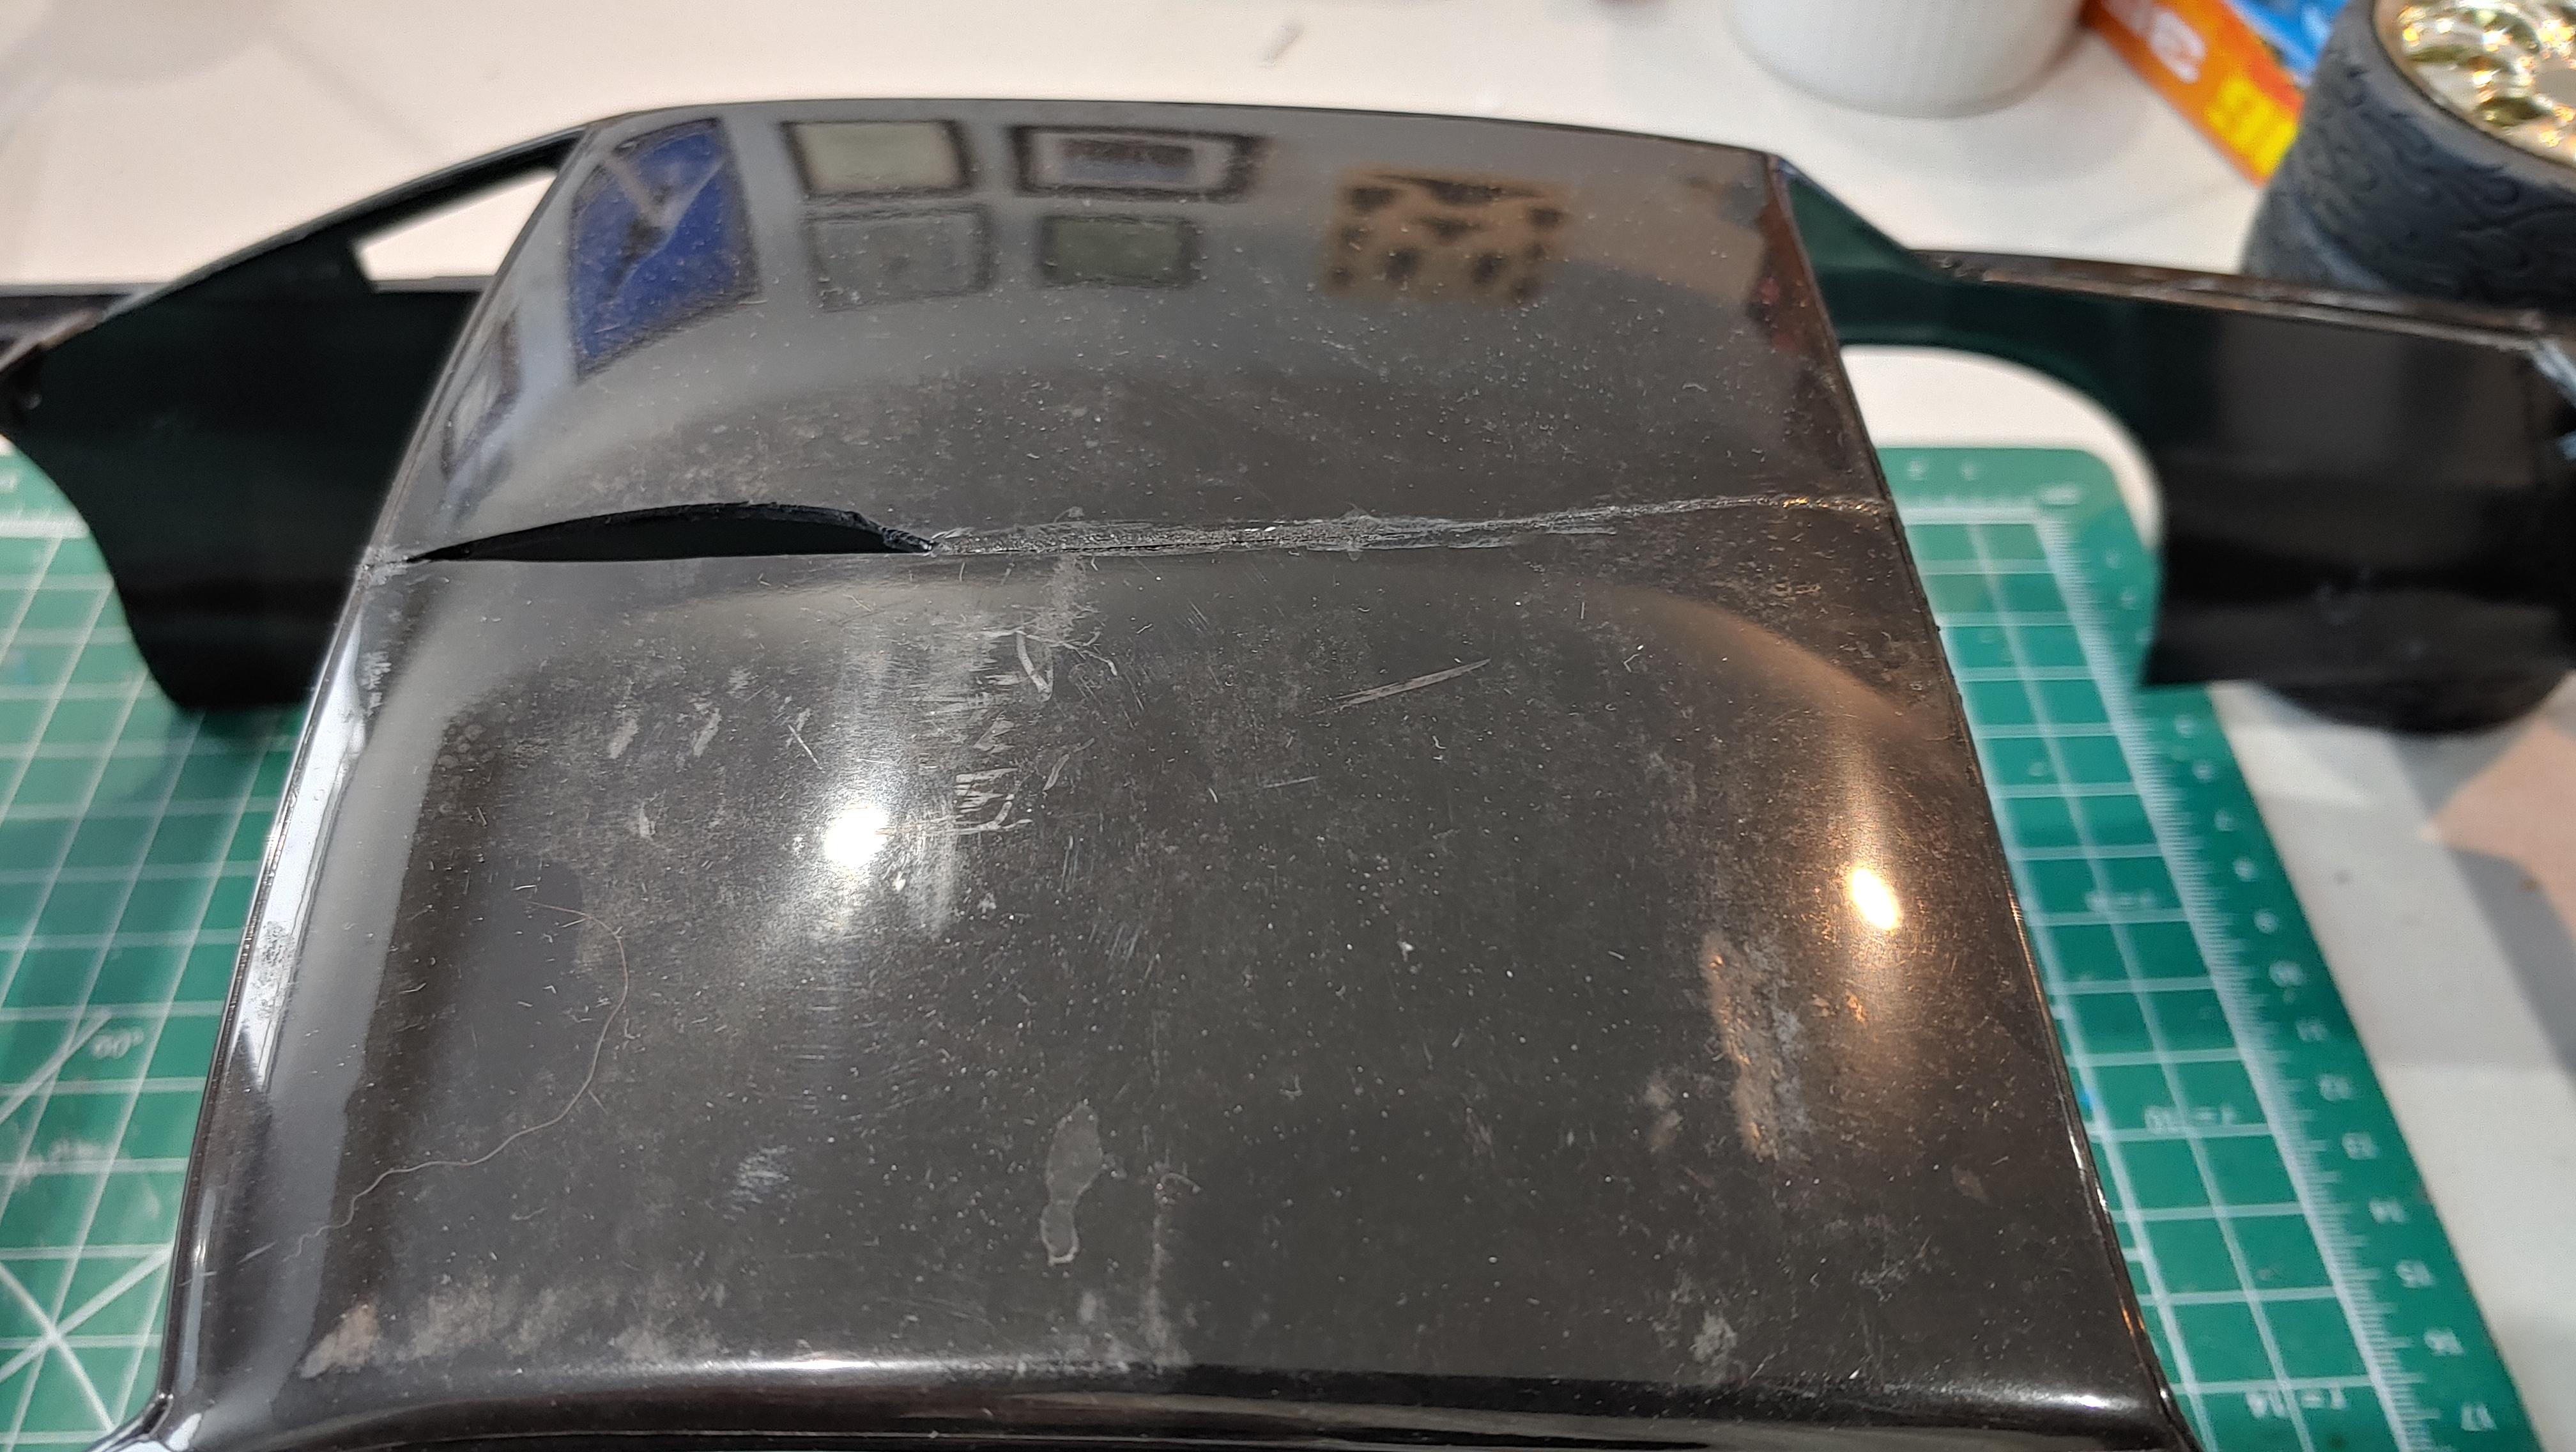
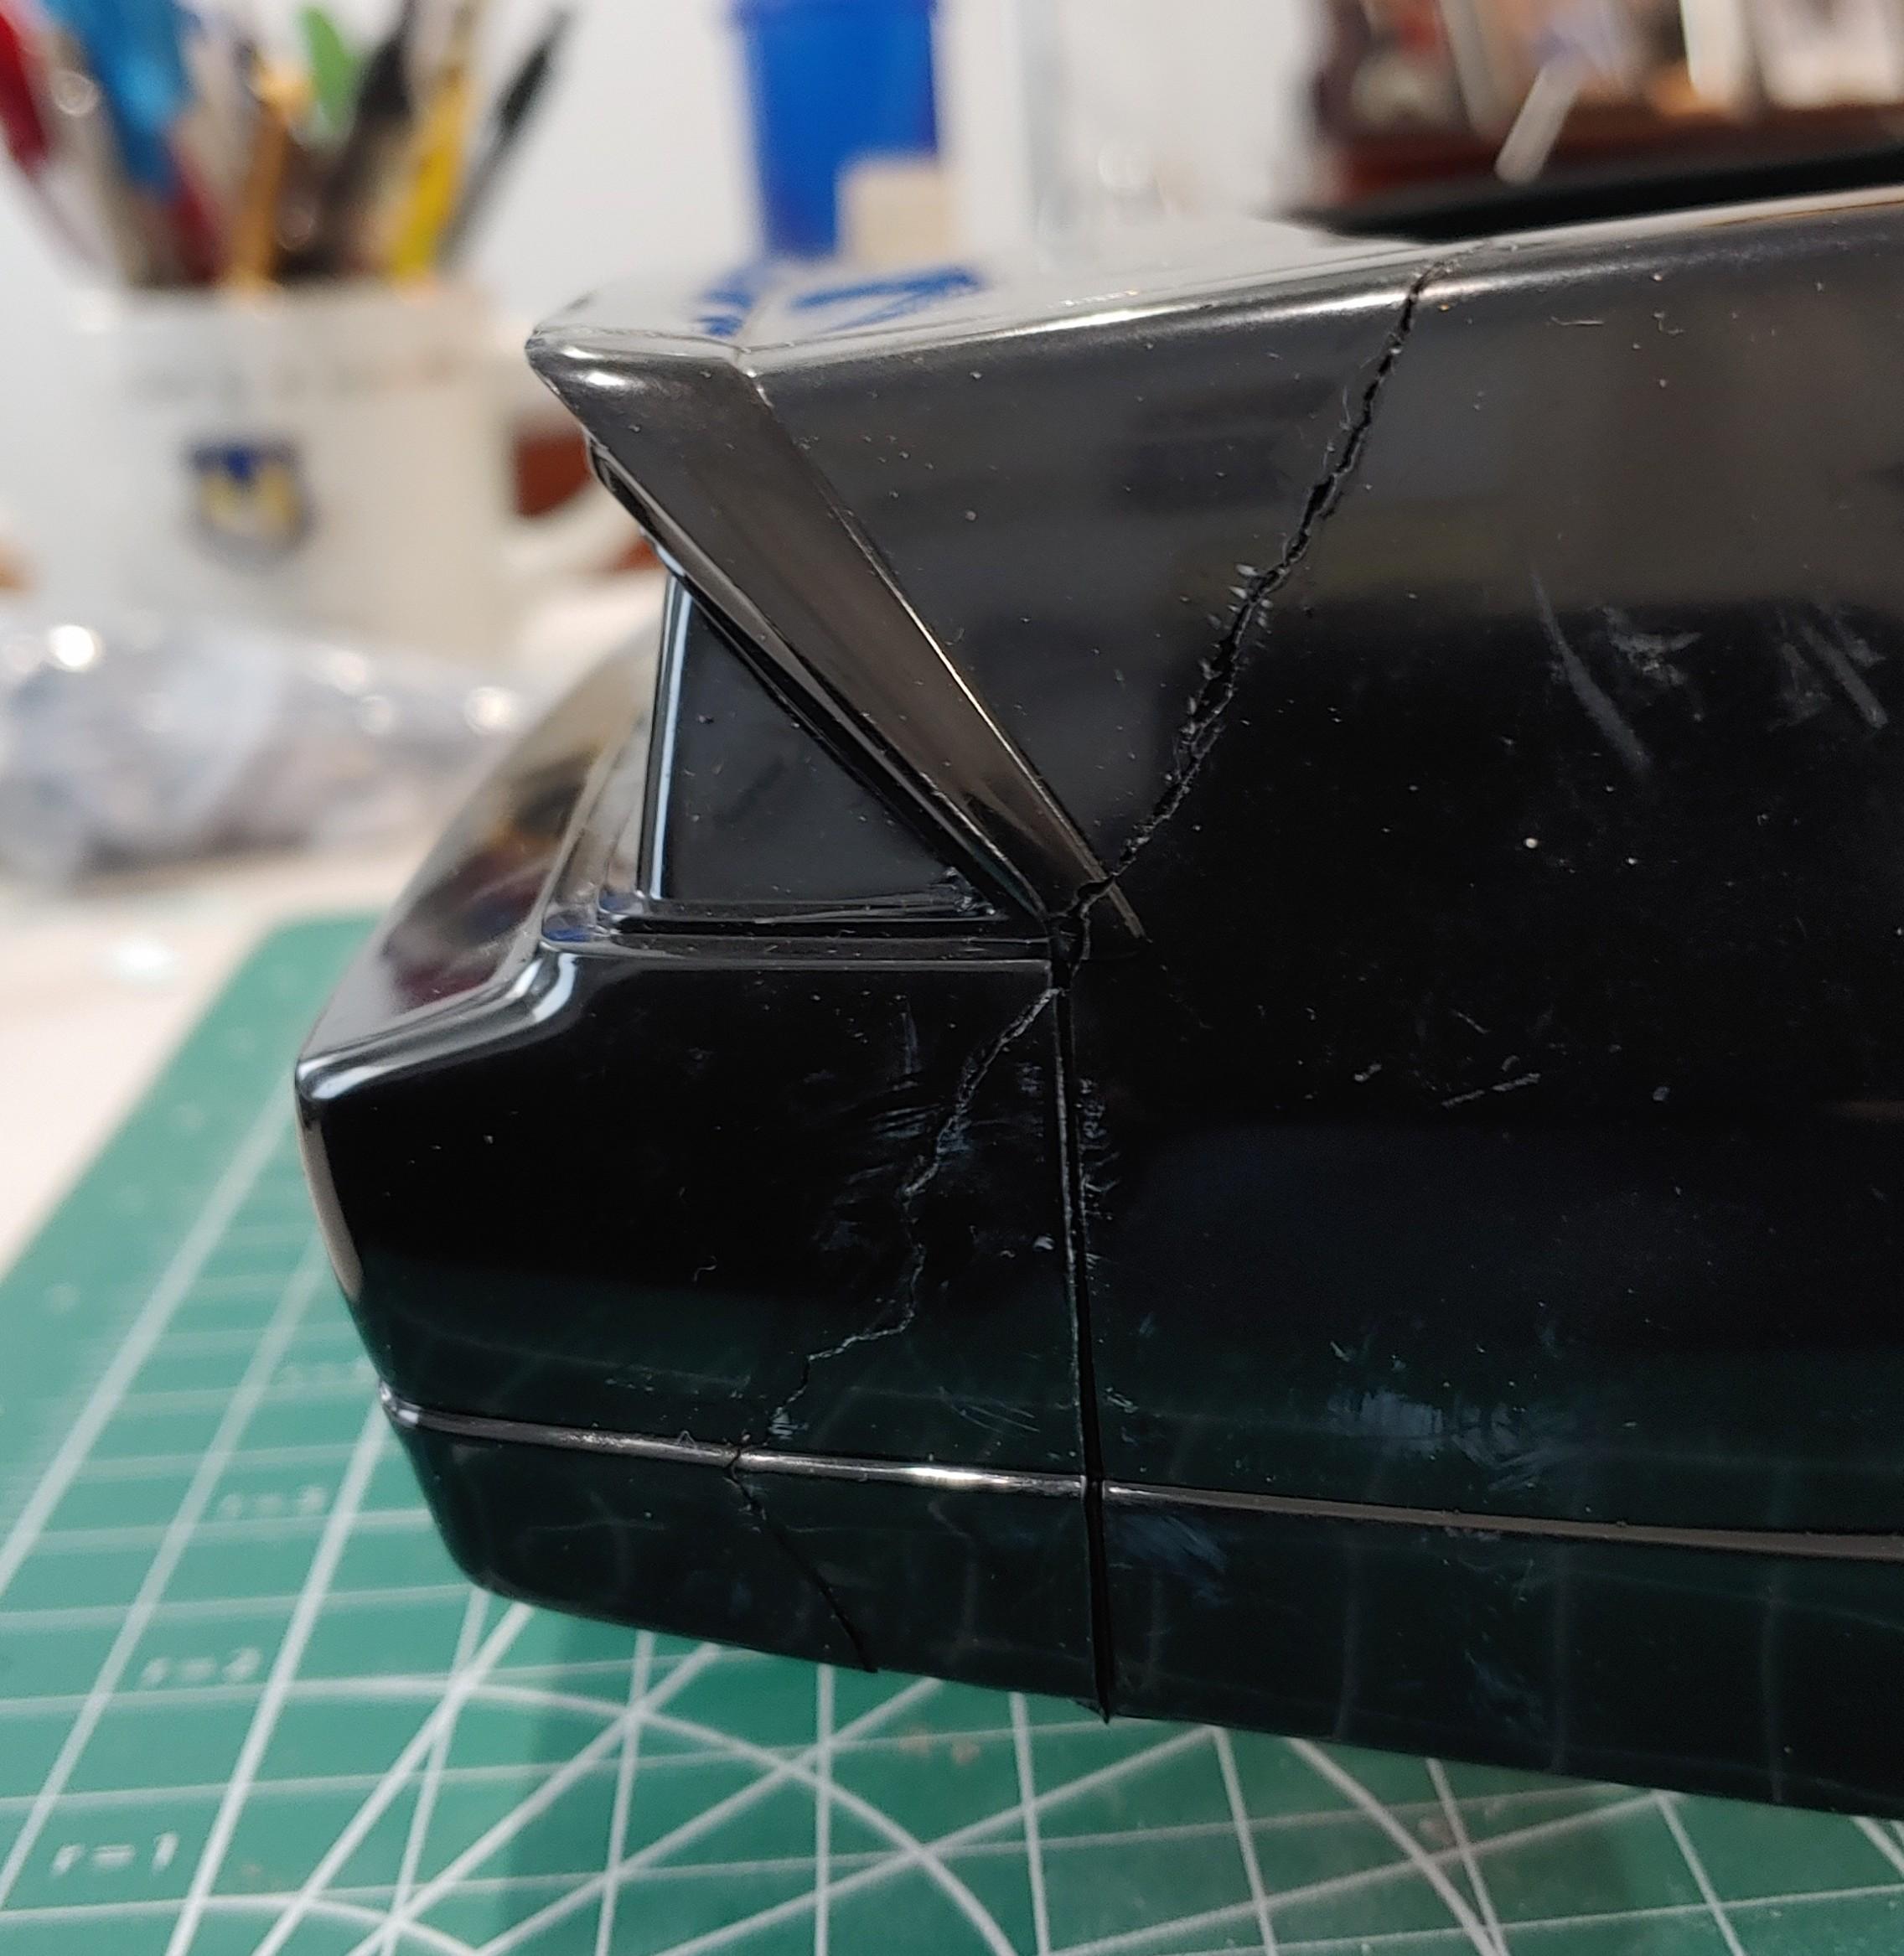
I bought this kit used. It was partially built and partially painted. It was in pretty rough shape. The roof was broken down the middle and had a chunk missing out of it. And the quarter panel/bumper was cracked. The rear axle was also broken. The tires were missing so I got these wheels/tires from an r/c car and some 3d printed brakes. I'm going to stick the sub assemblies in the freezer and try my luck at getting them apart. I'm sure there will be some more missing parts as I go, I'll just have to deal with them as I discover them. More next time.
-
Thanks, but I specifically want the Revell stripes. I'm not building a pace care, the car I'm building a replica of has orange stripes and the too orange stripes from the Revell kit are just about right.