Tommy124
-
Posts
1,651 -
Joined
-
Last visited
5 Followers


Recent Profile Visitors
6,613 profile views


Tommy124's Achievements
MCM Ohana (6/6)
-

McLaren MP4-12C (Bburago metal kit, 1/24 scale - stripped and re-painted)
Tommy124 replied to Tommy124's topic in Model Cars
Thanks Carl! -
McLaren MP4-12C (Bburago metal kit, 1/24 scale - stripped and re-painted)
Tommy124 replied to Tommy124's topic in Model Cars
Many thanks guys! -
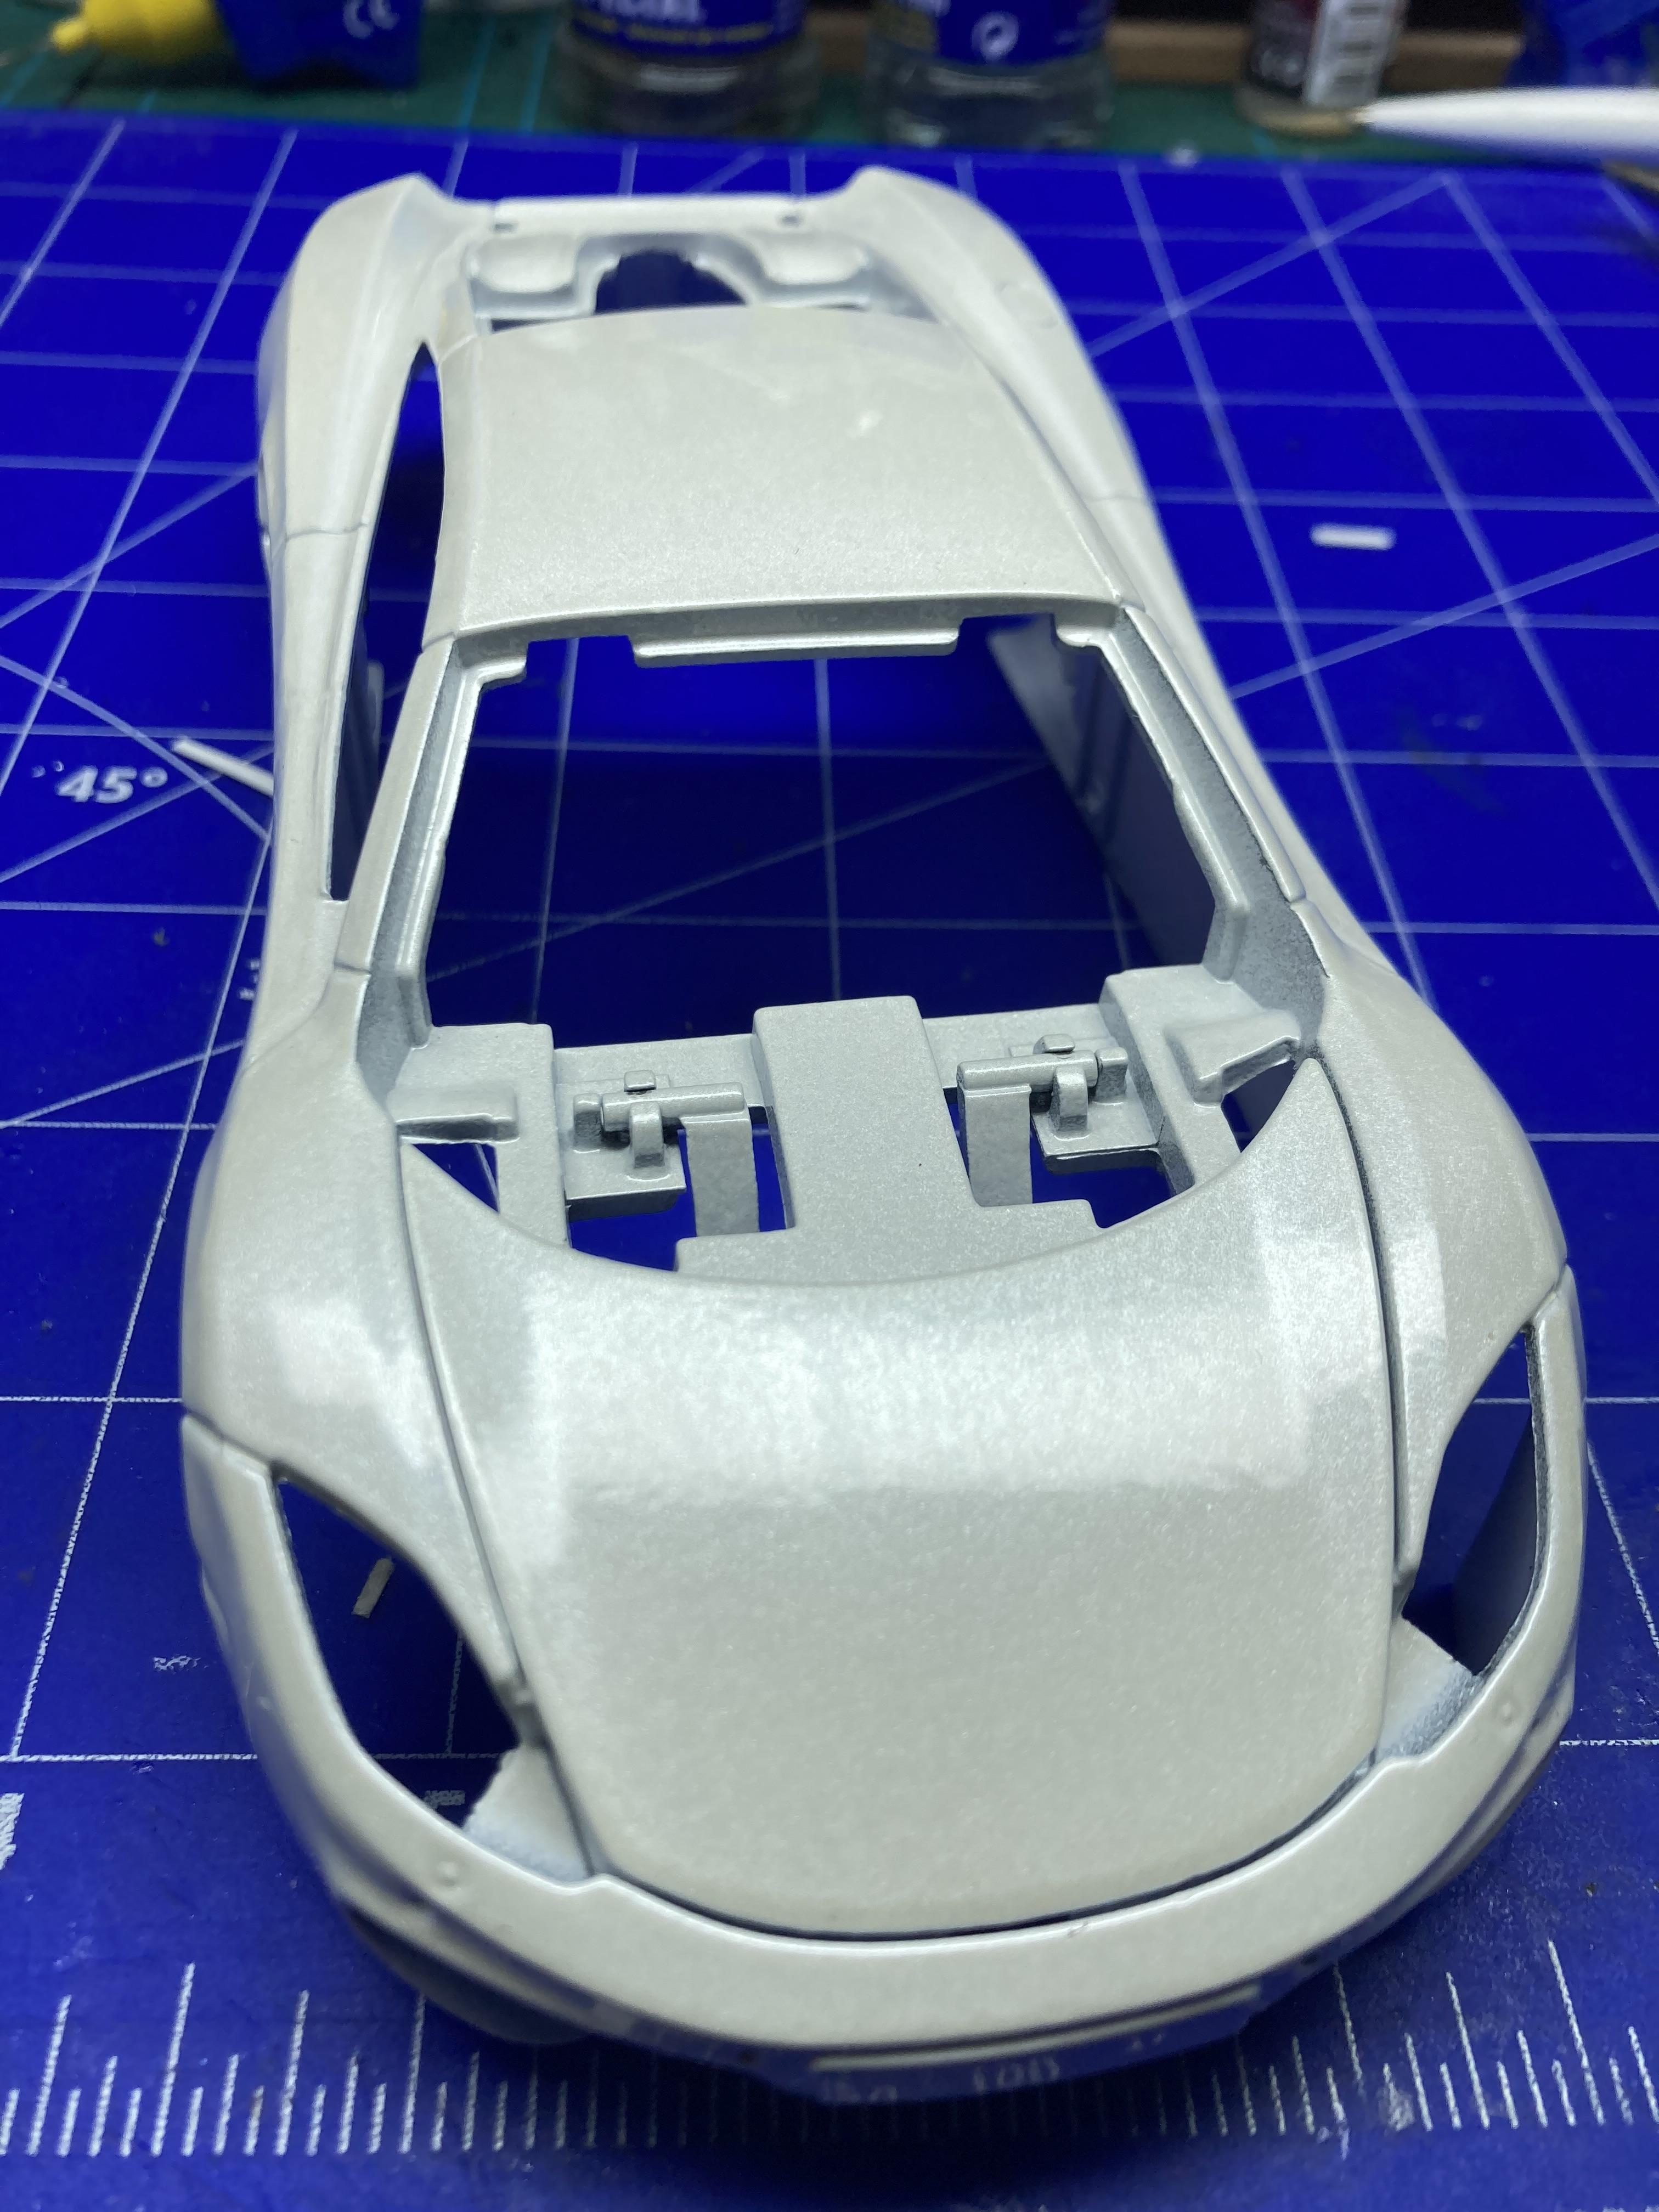
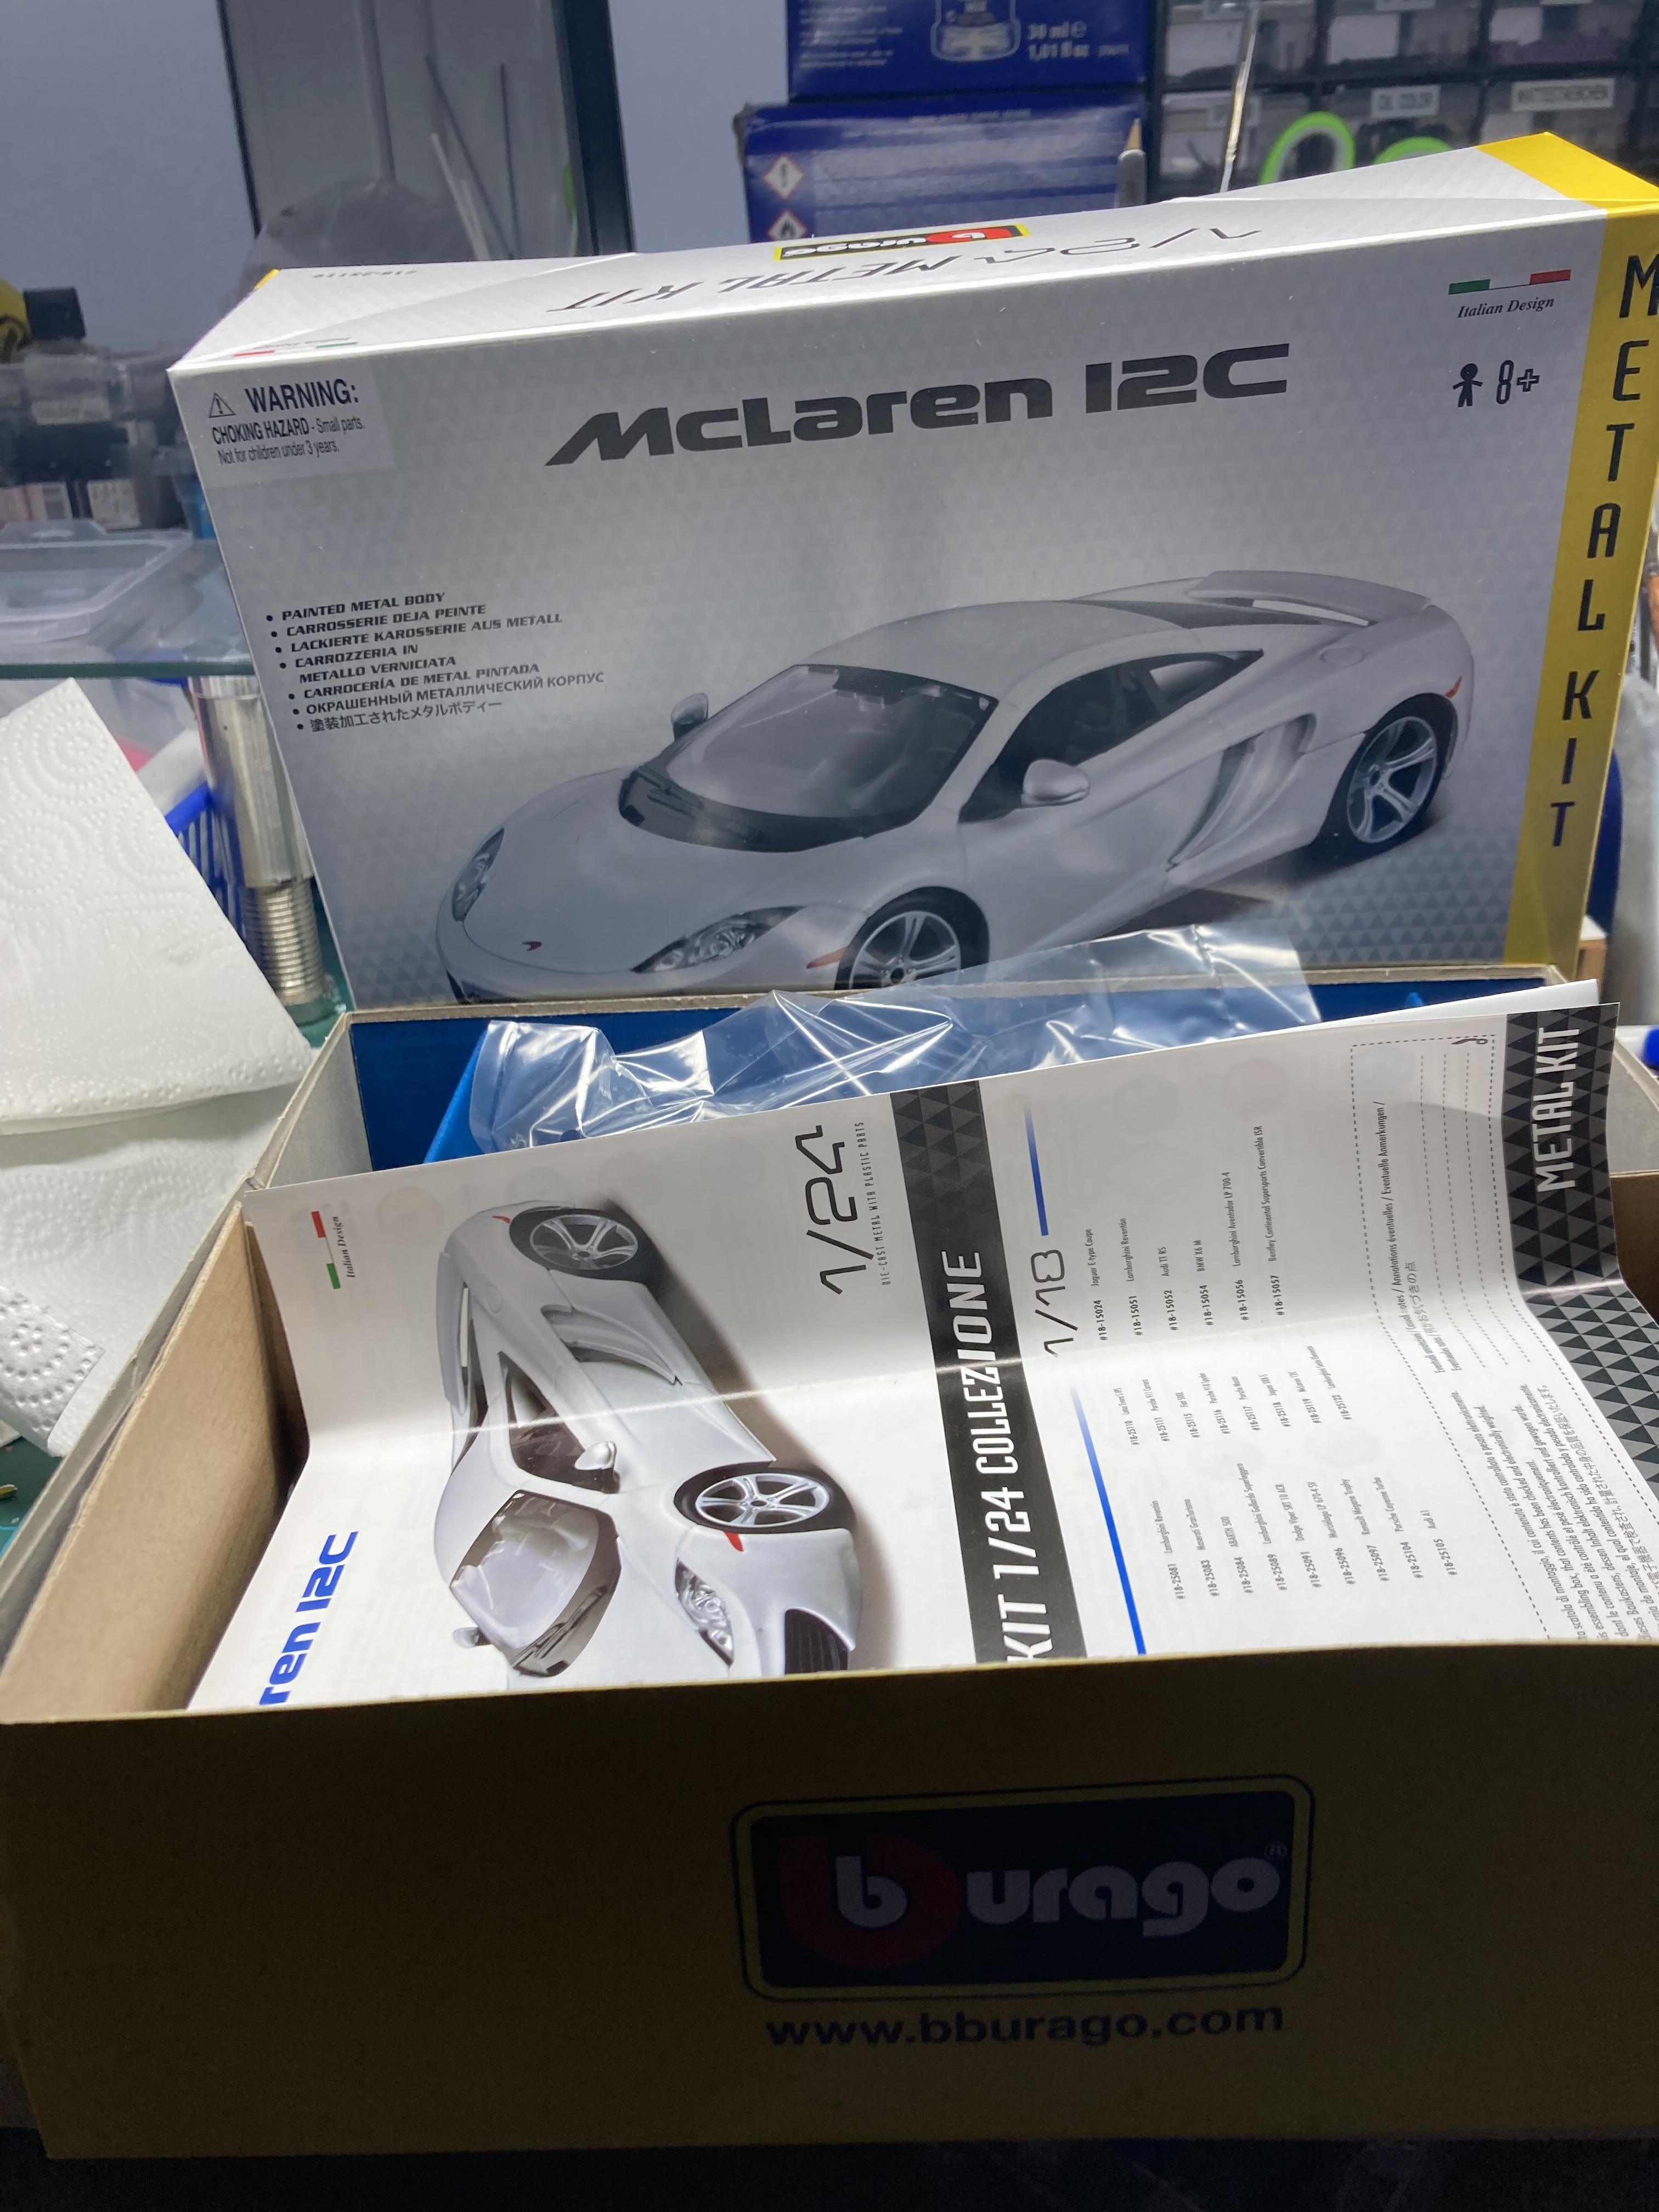
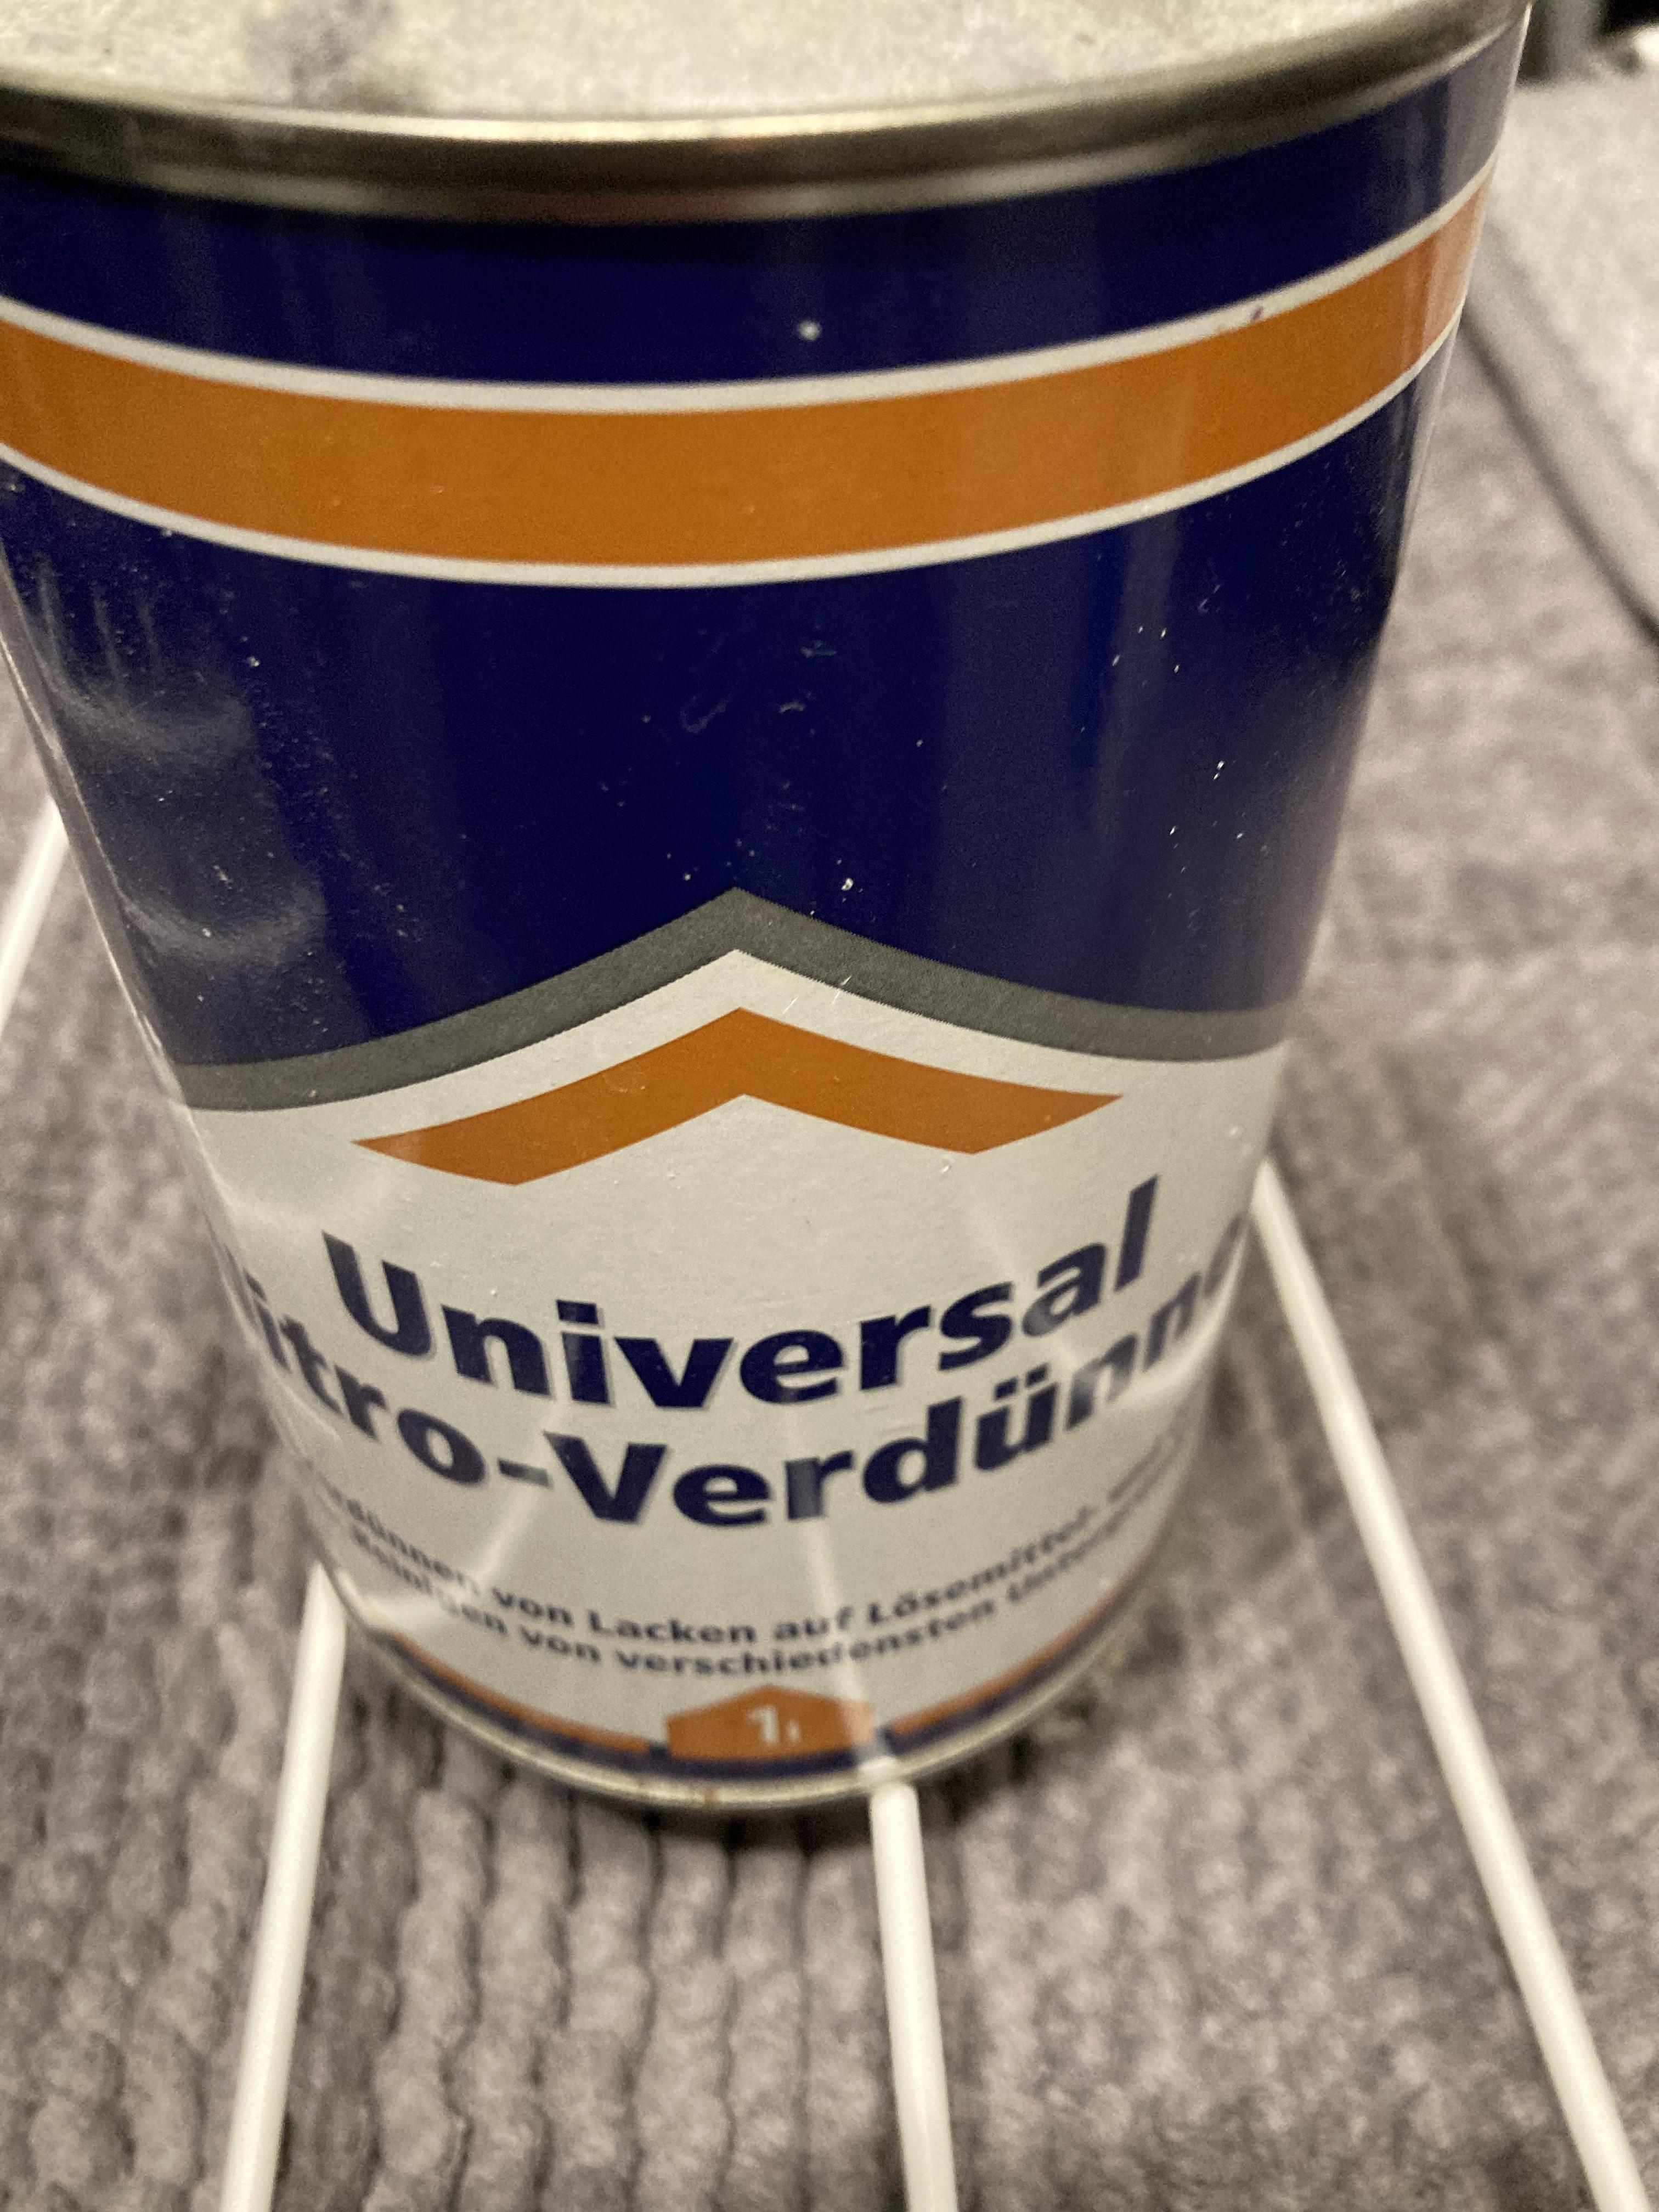
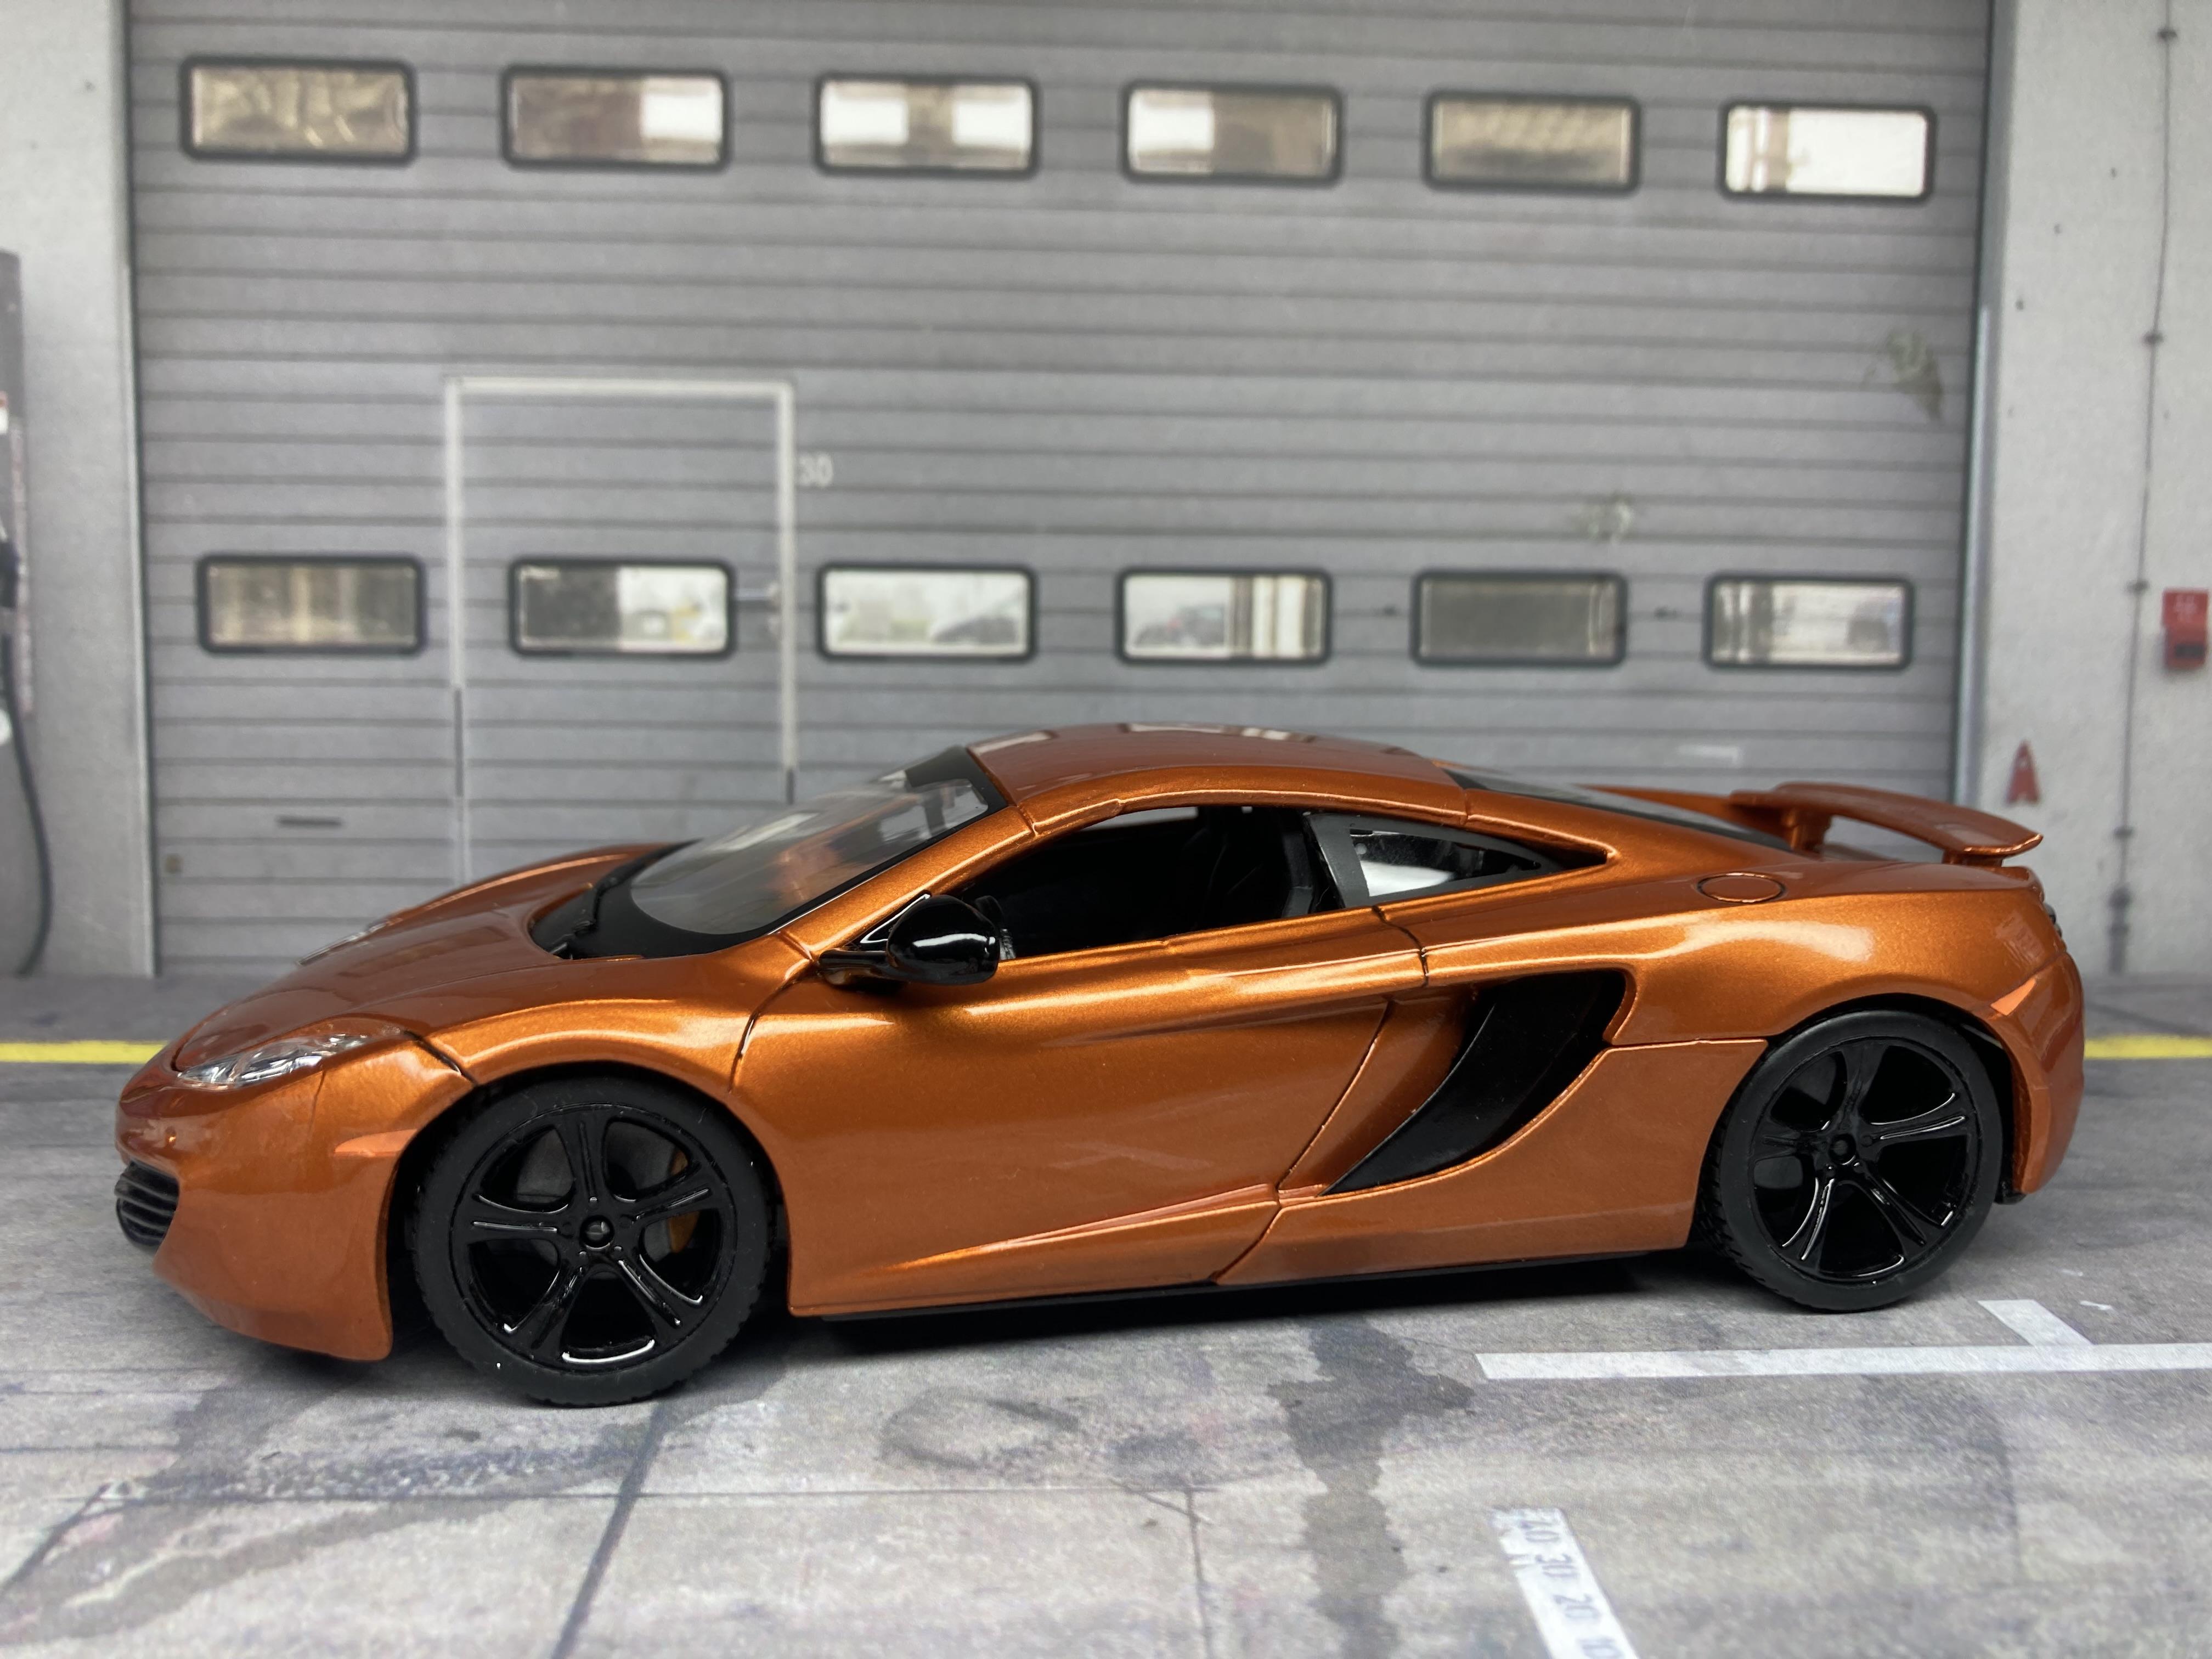
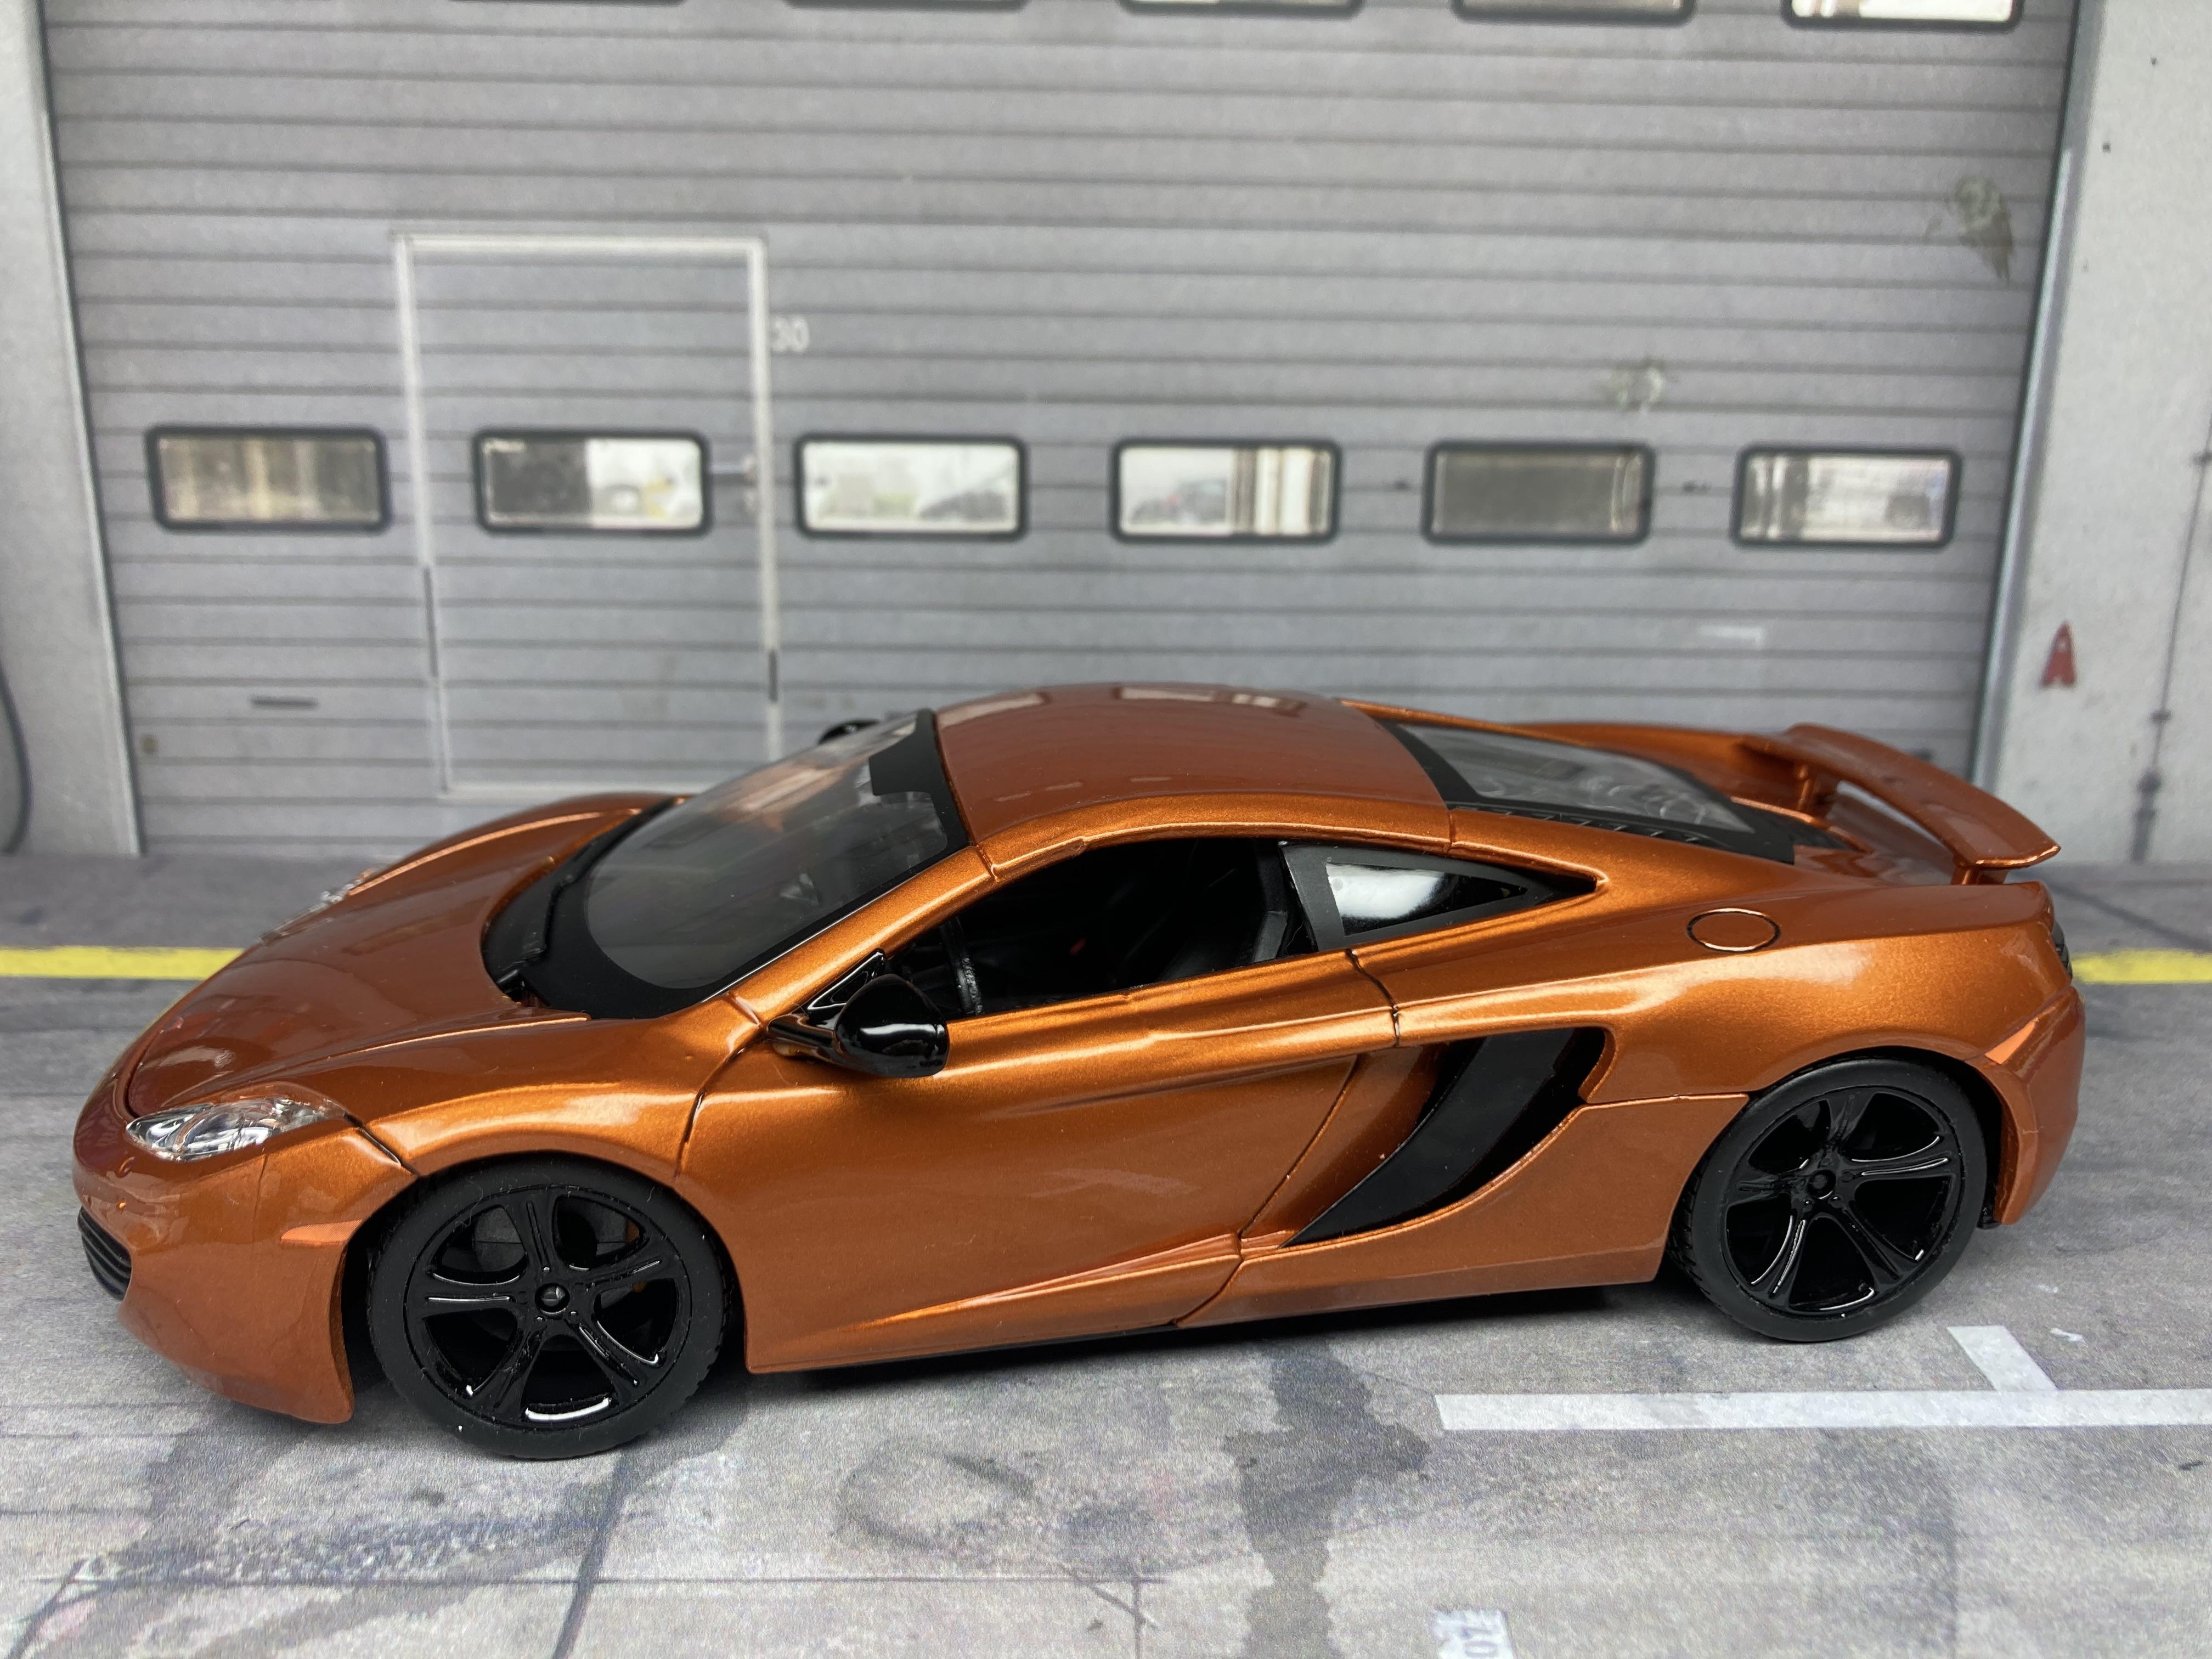
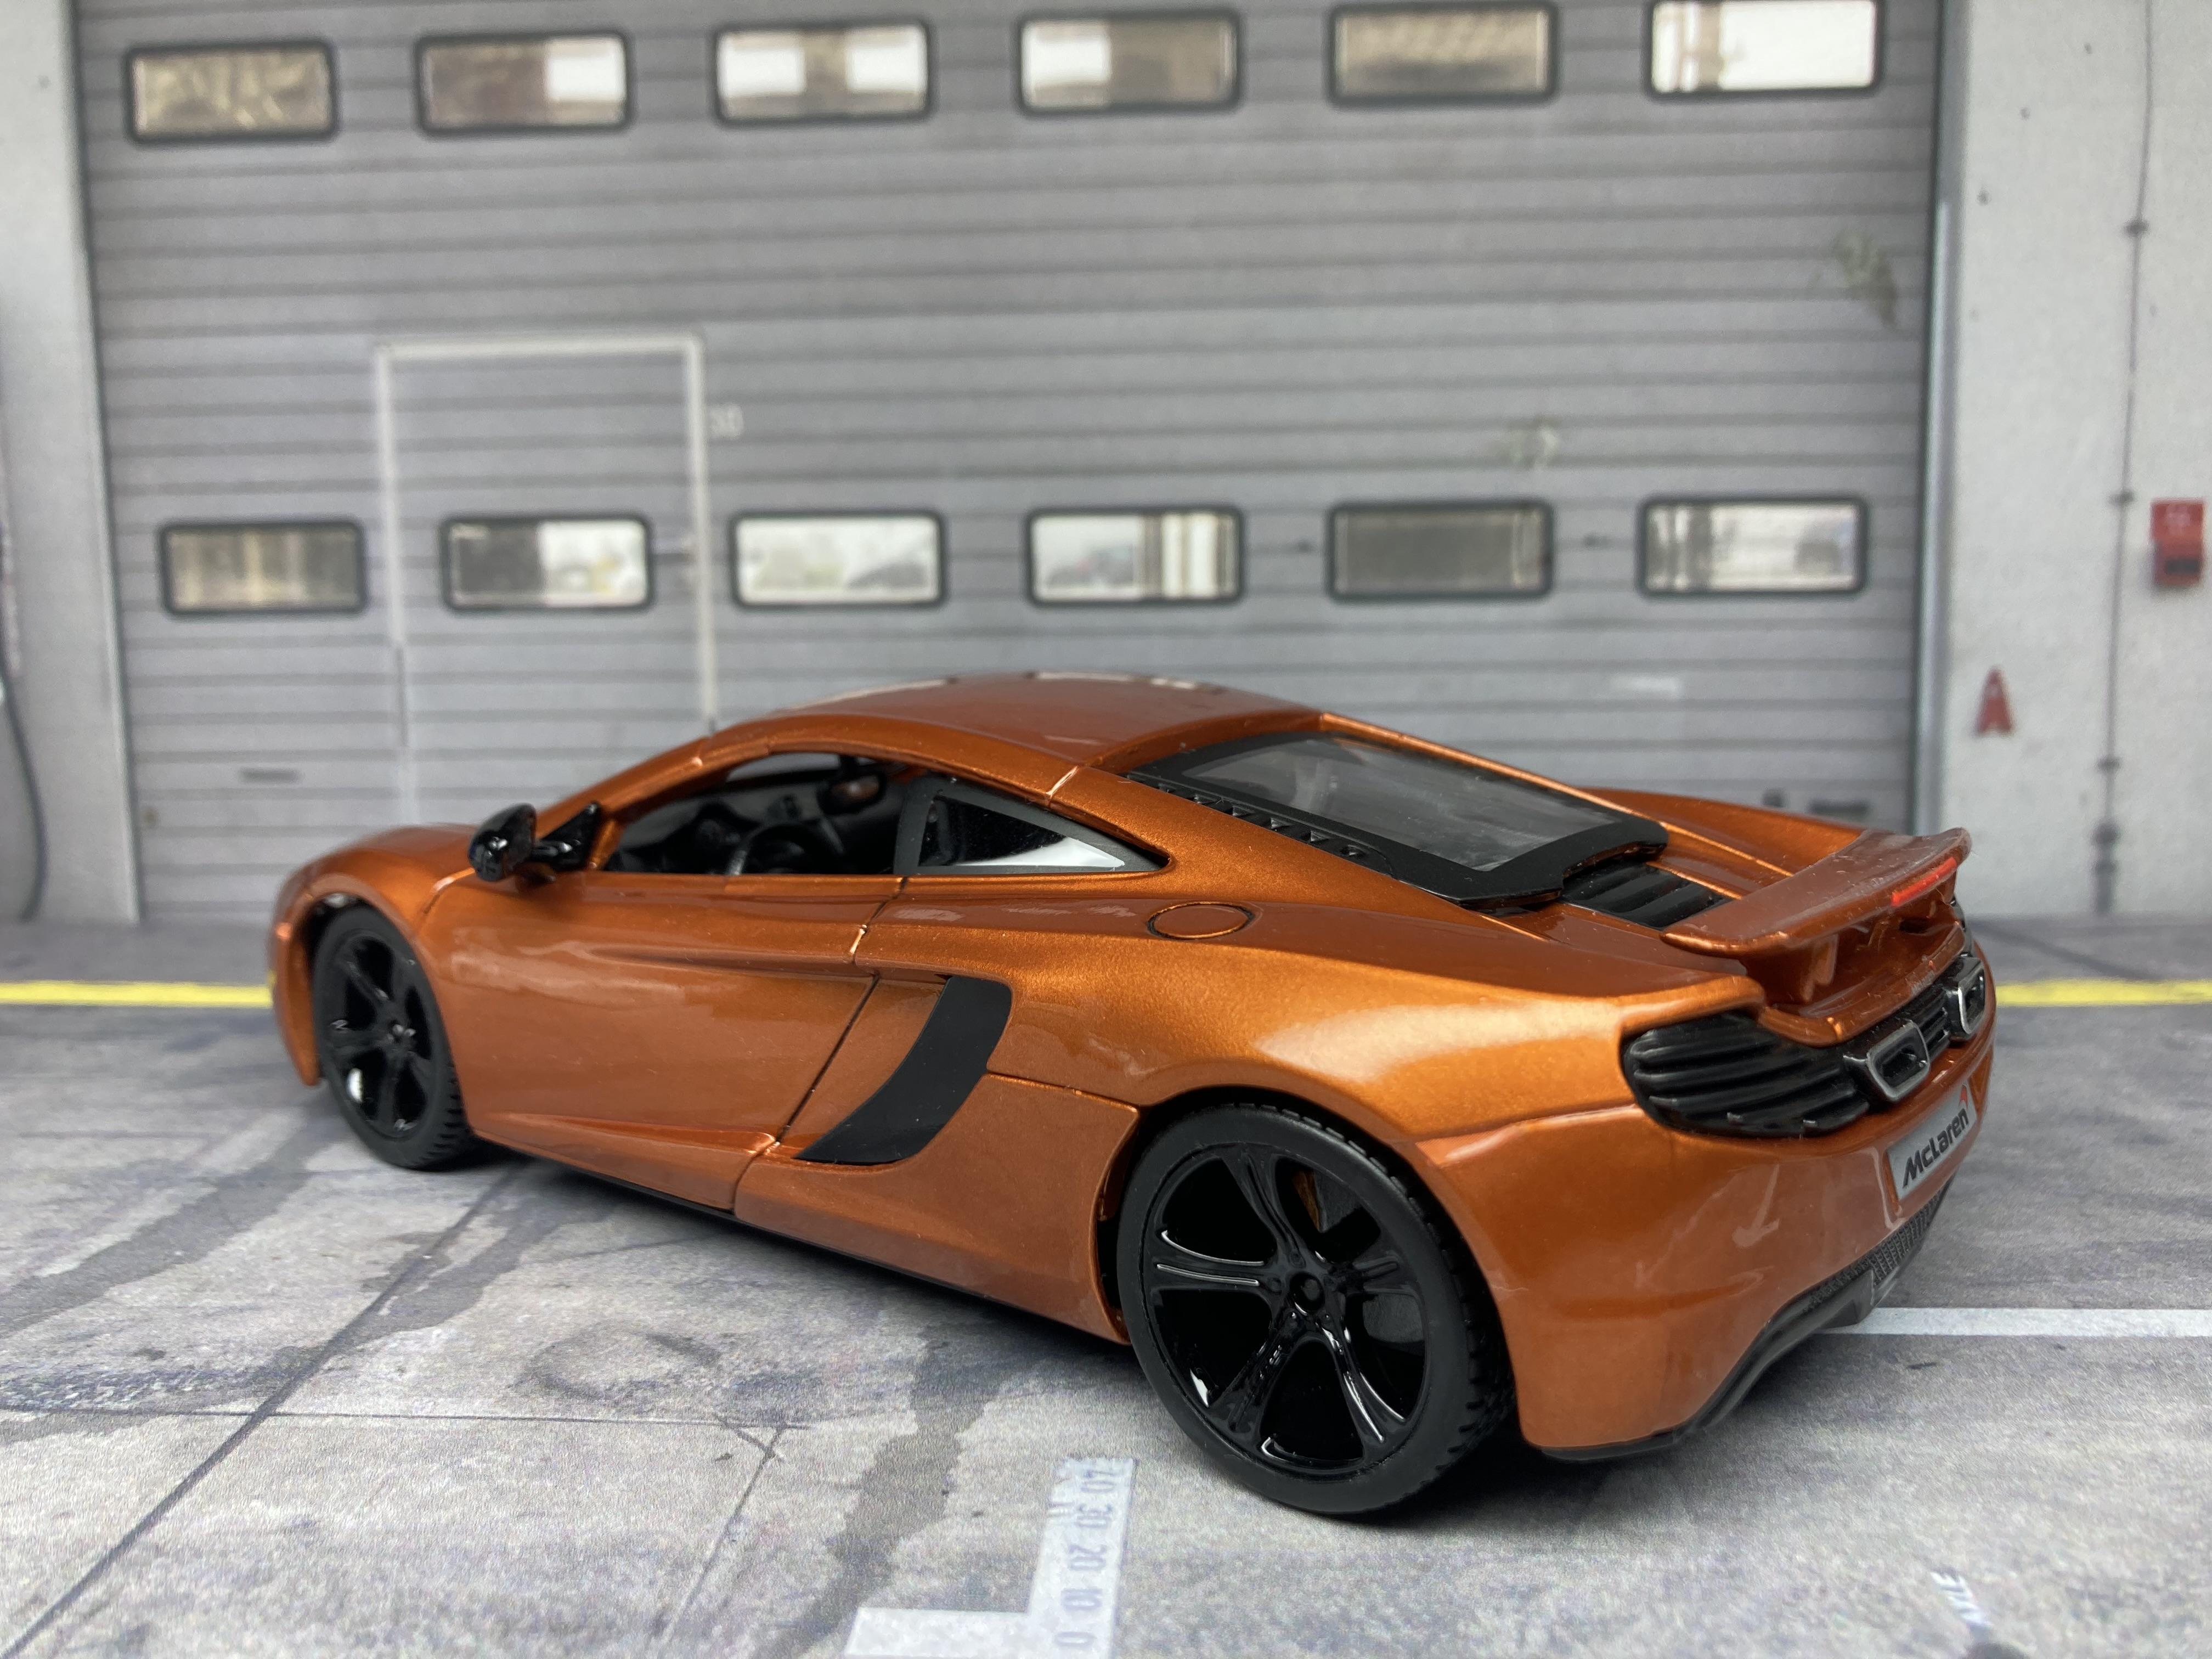
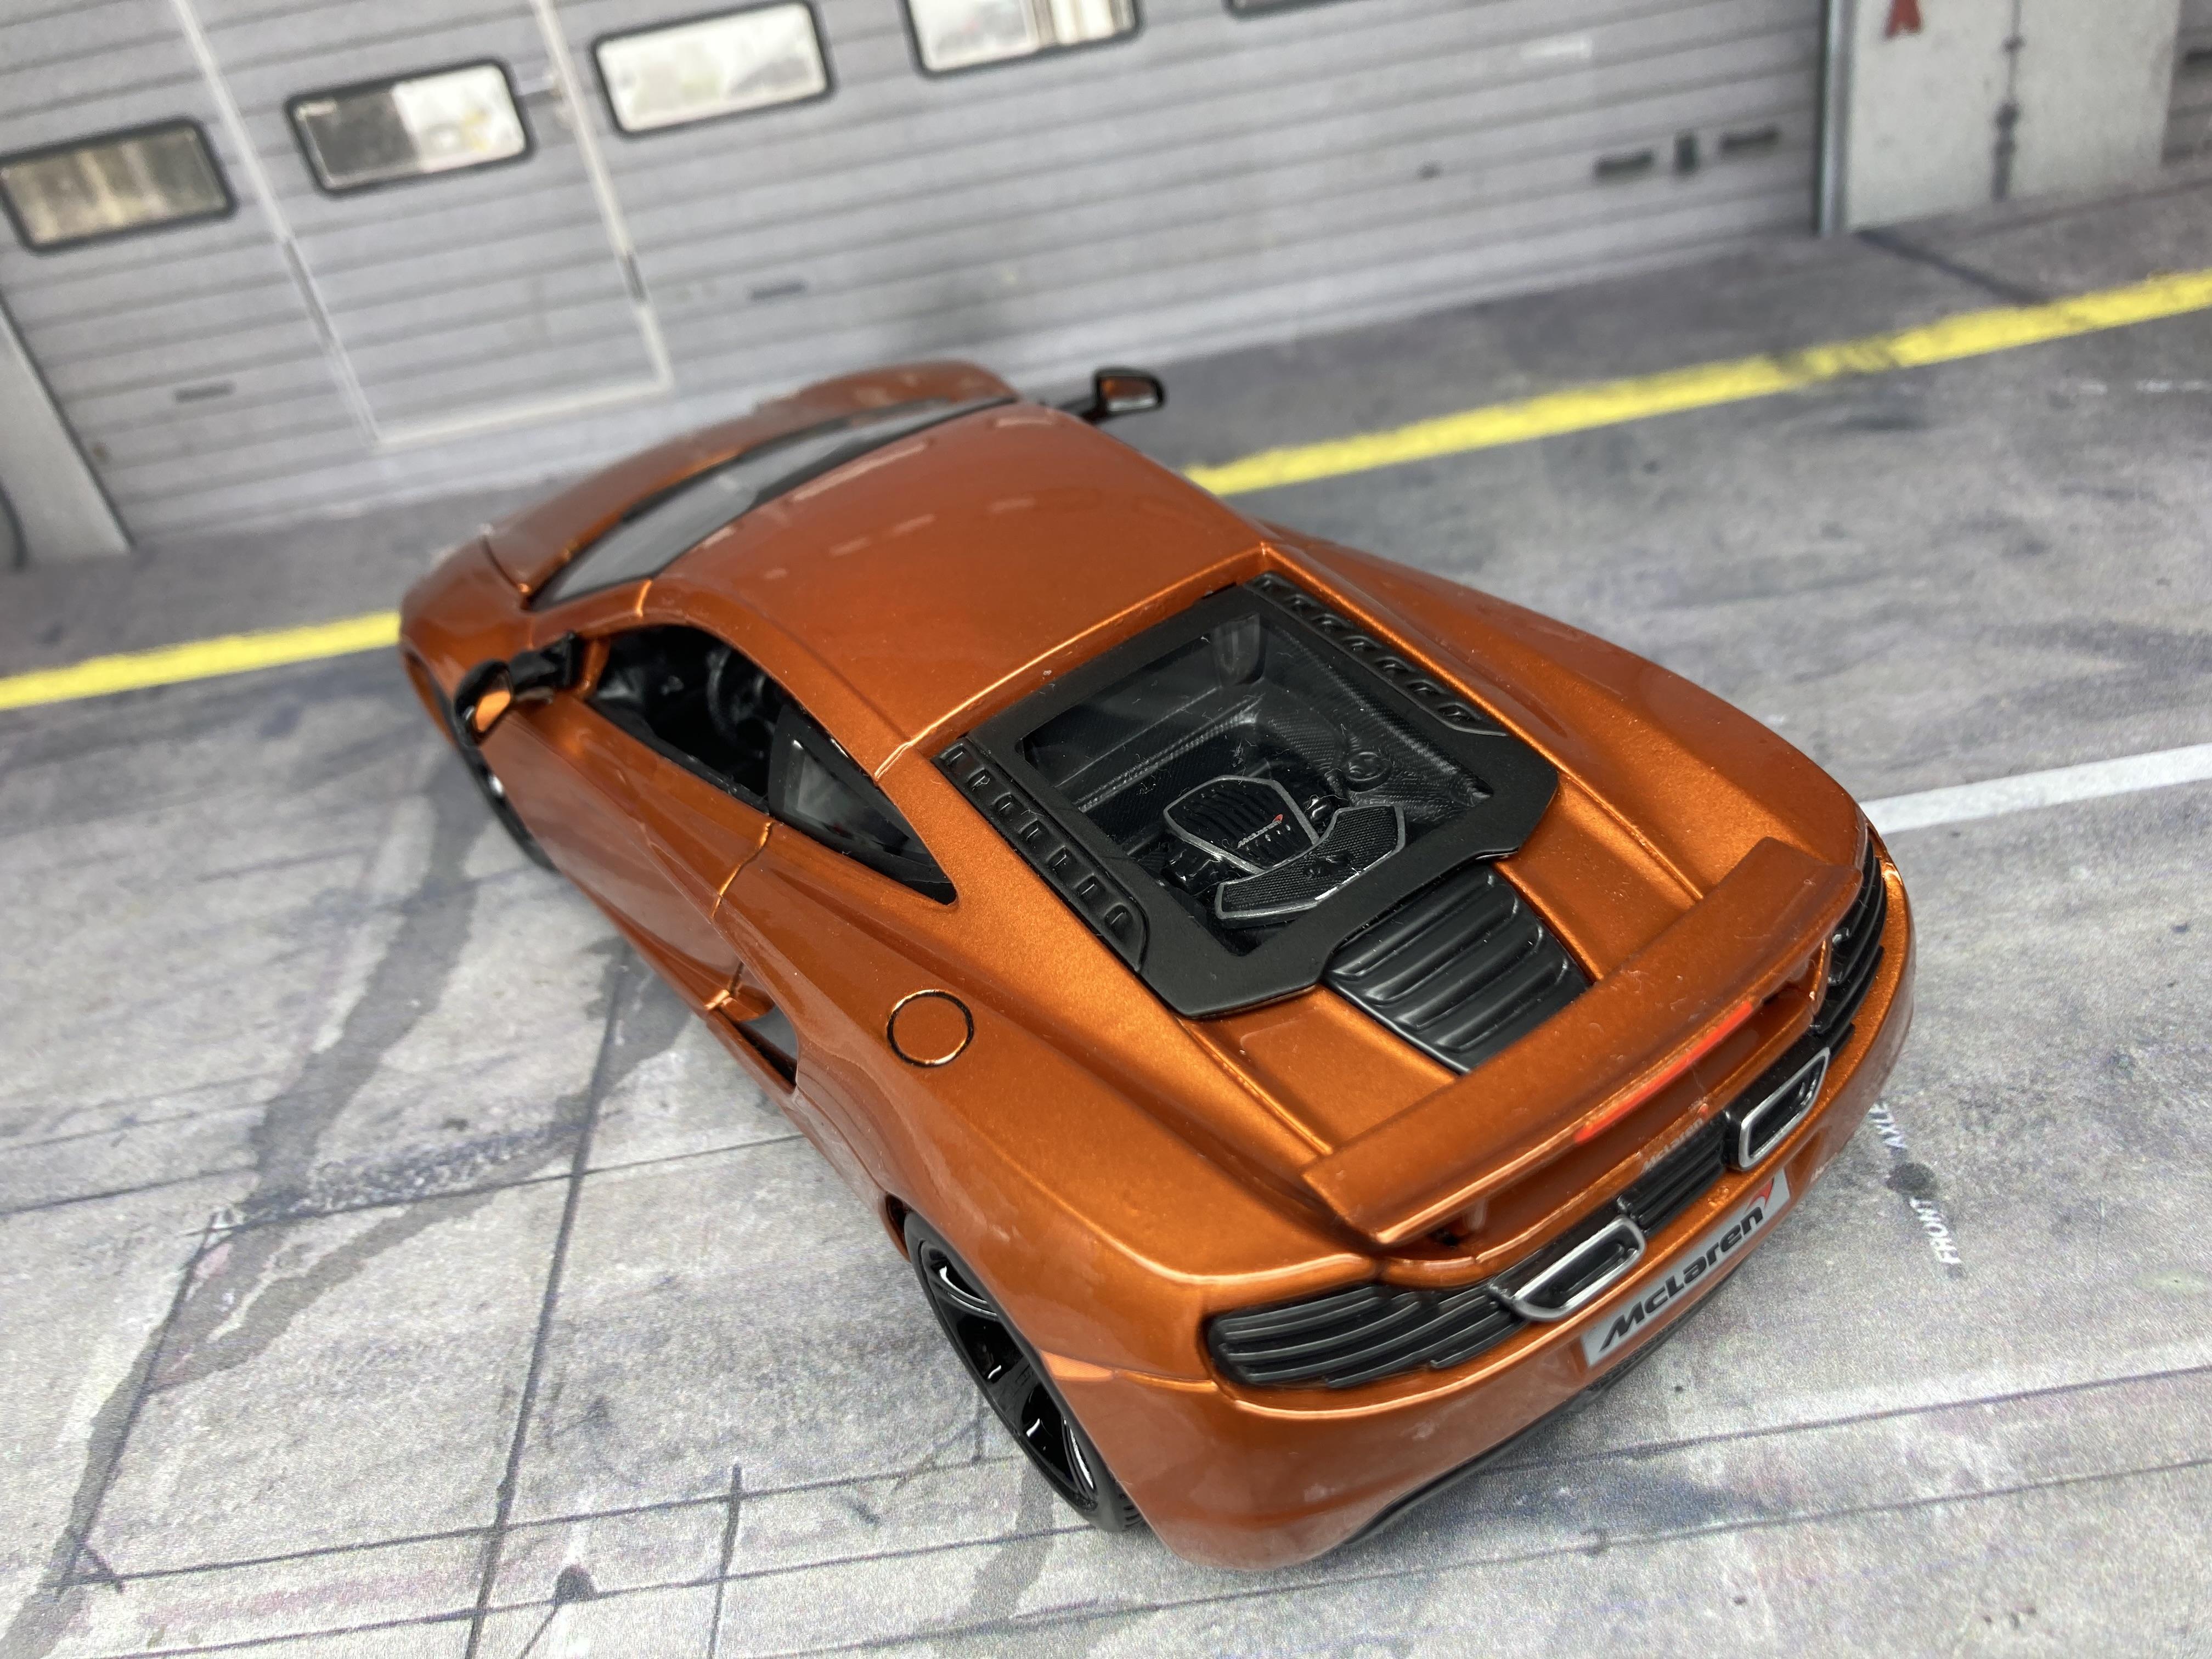
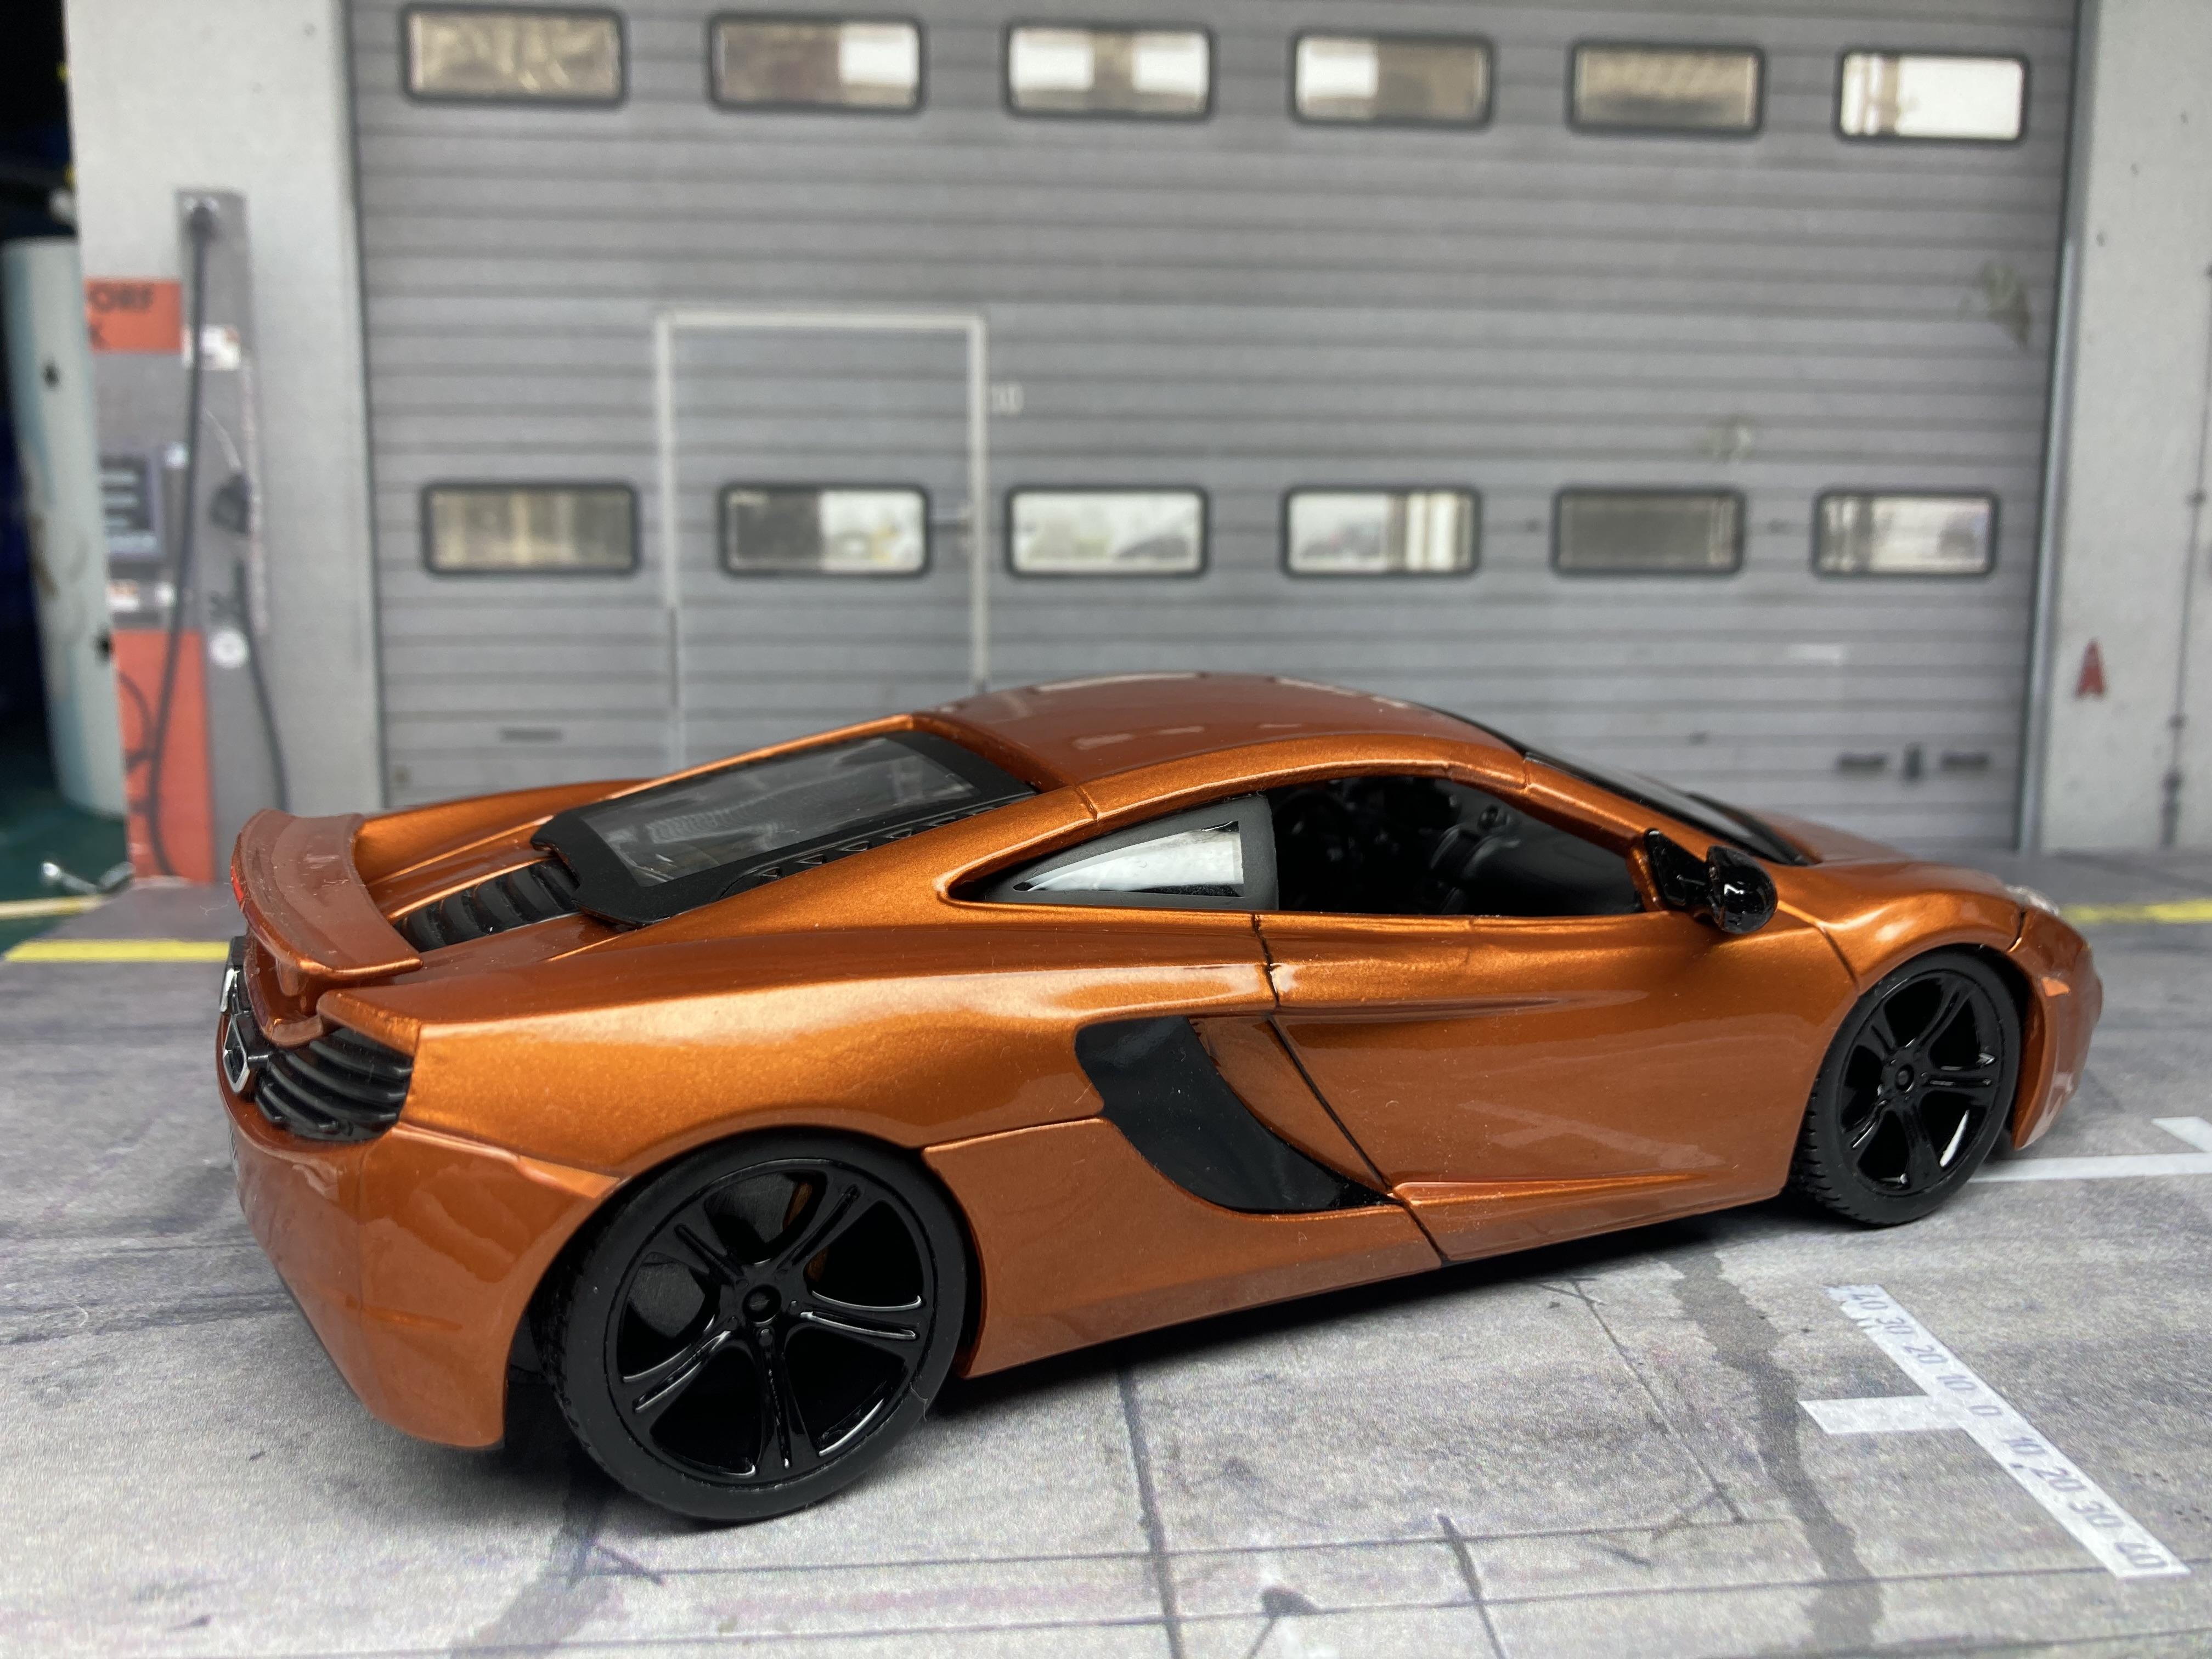
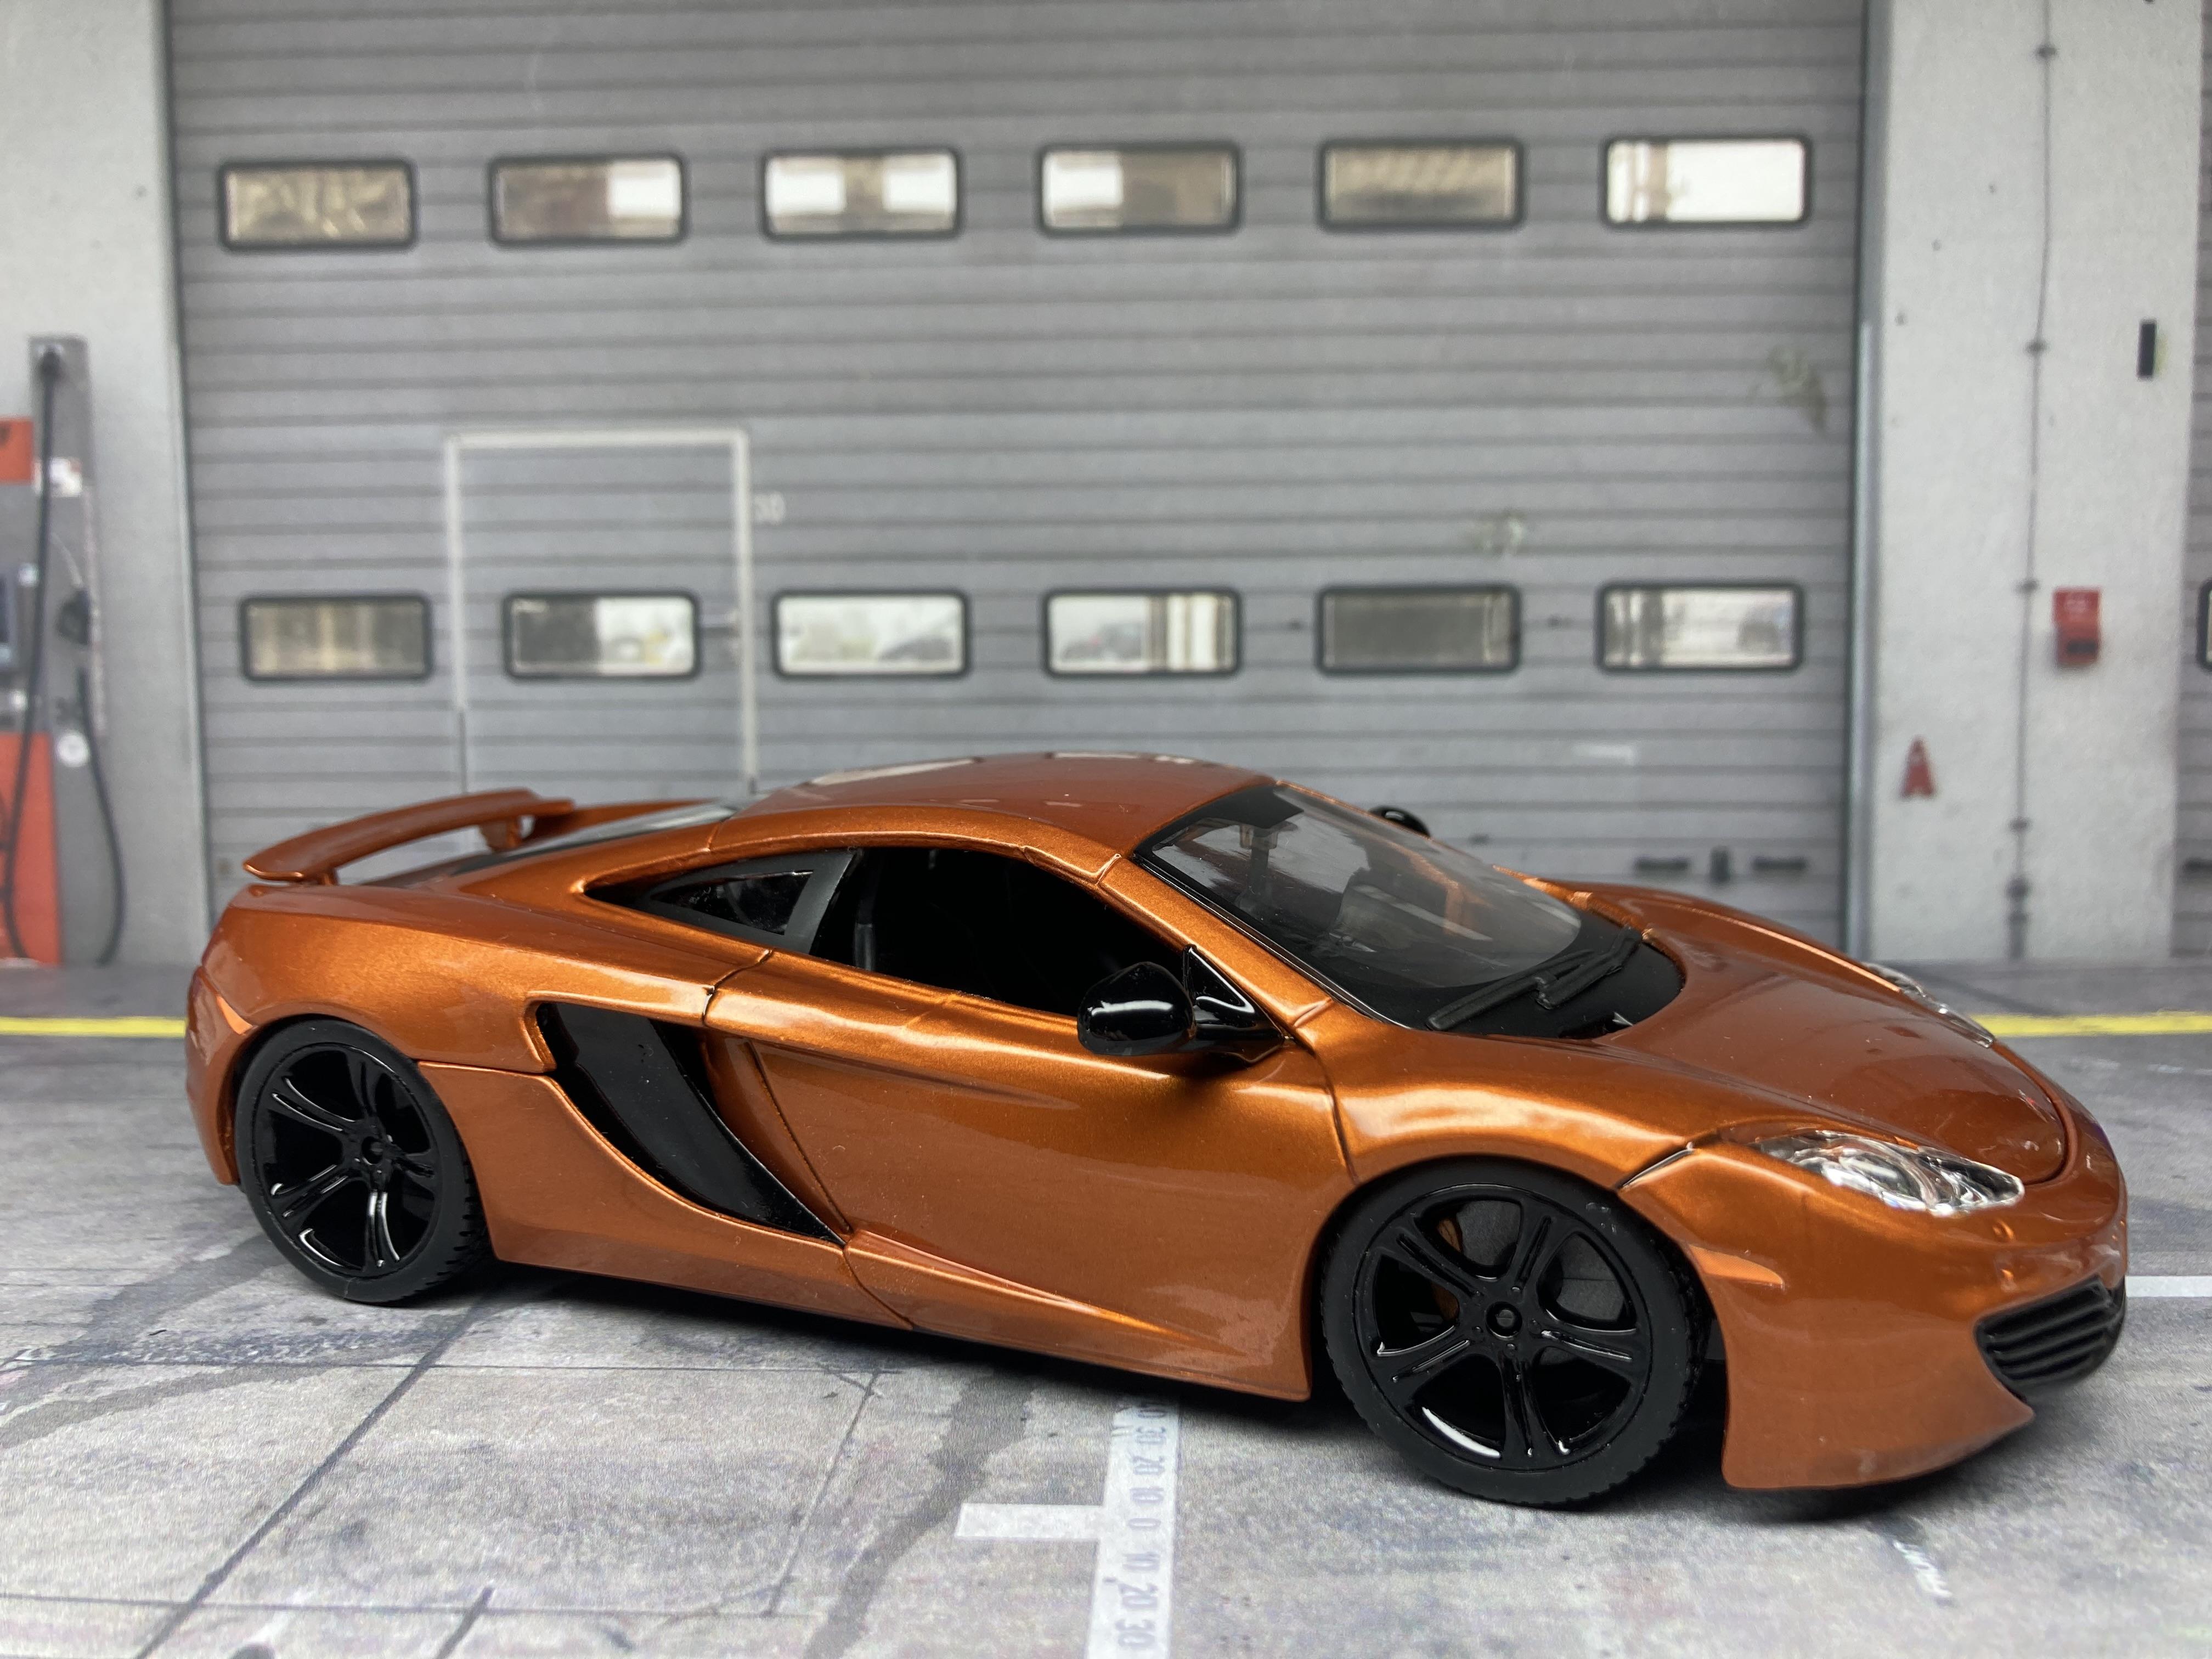
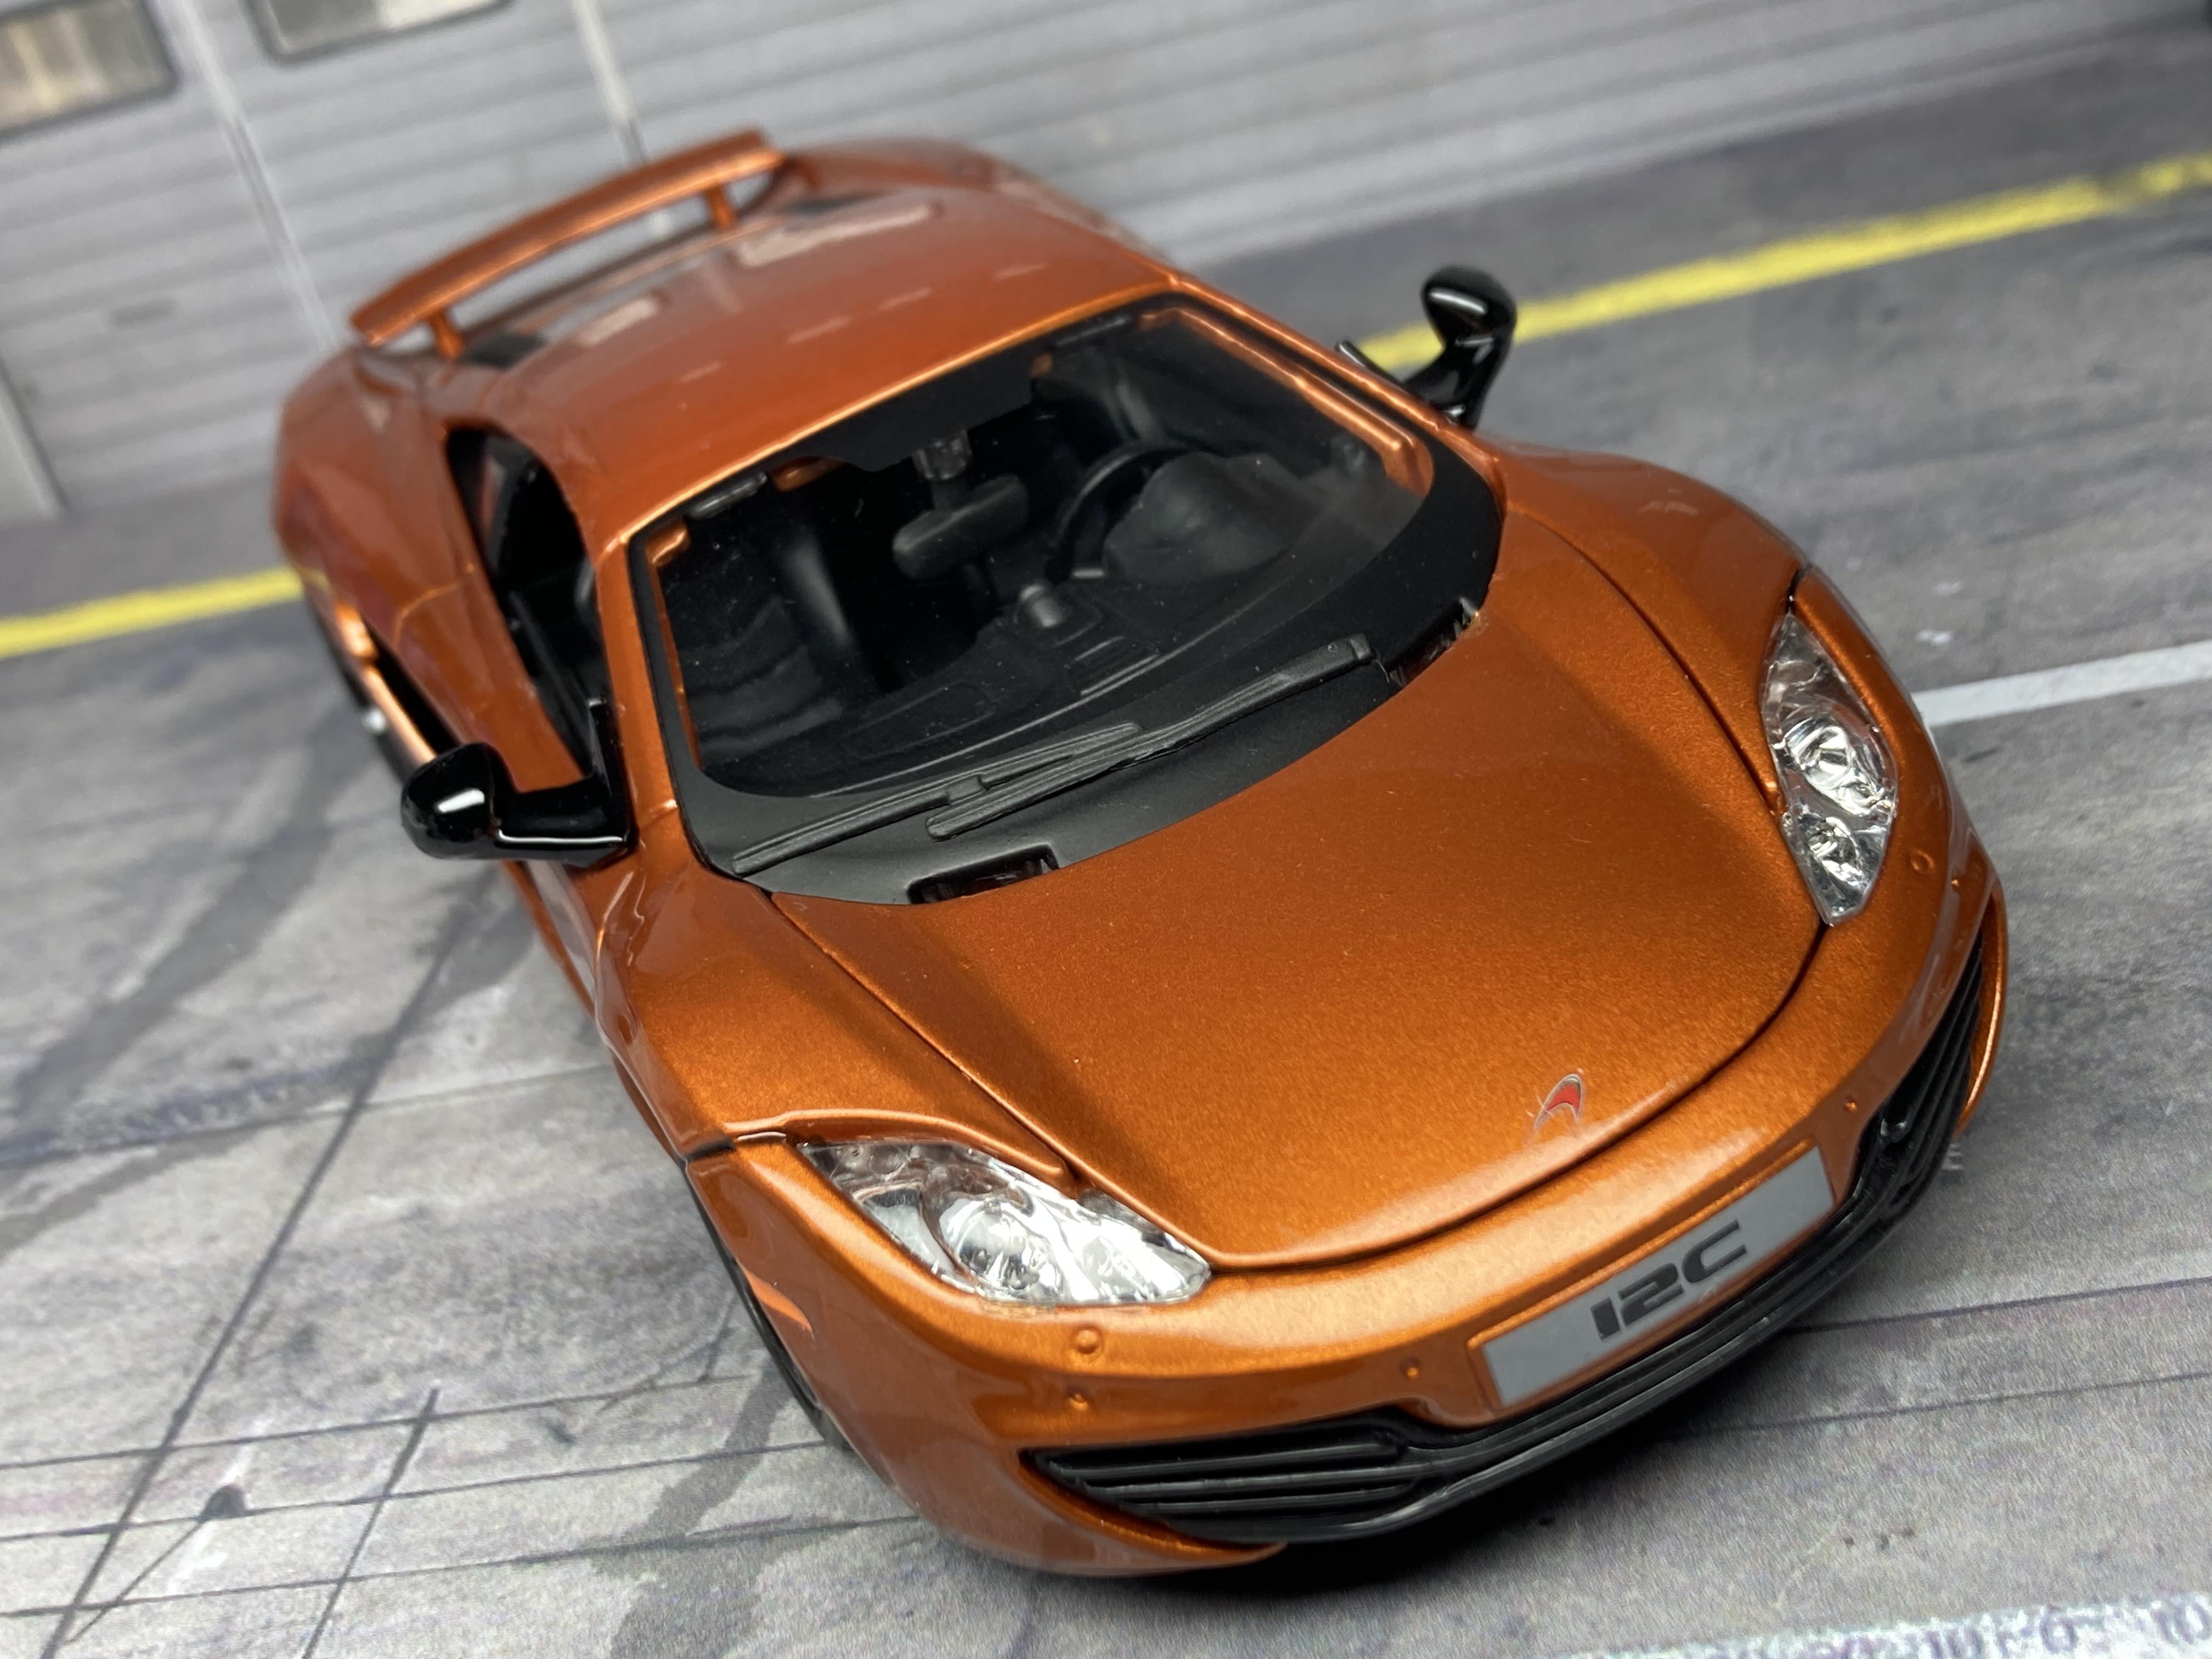
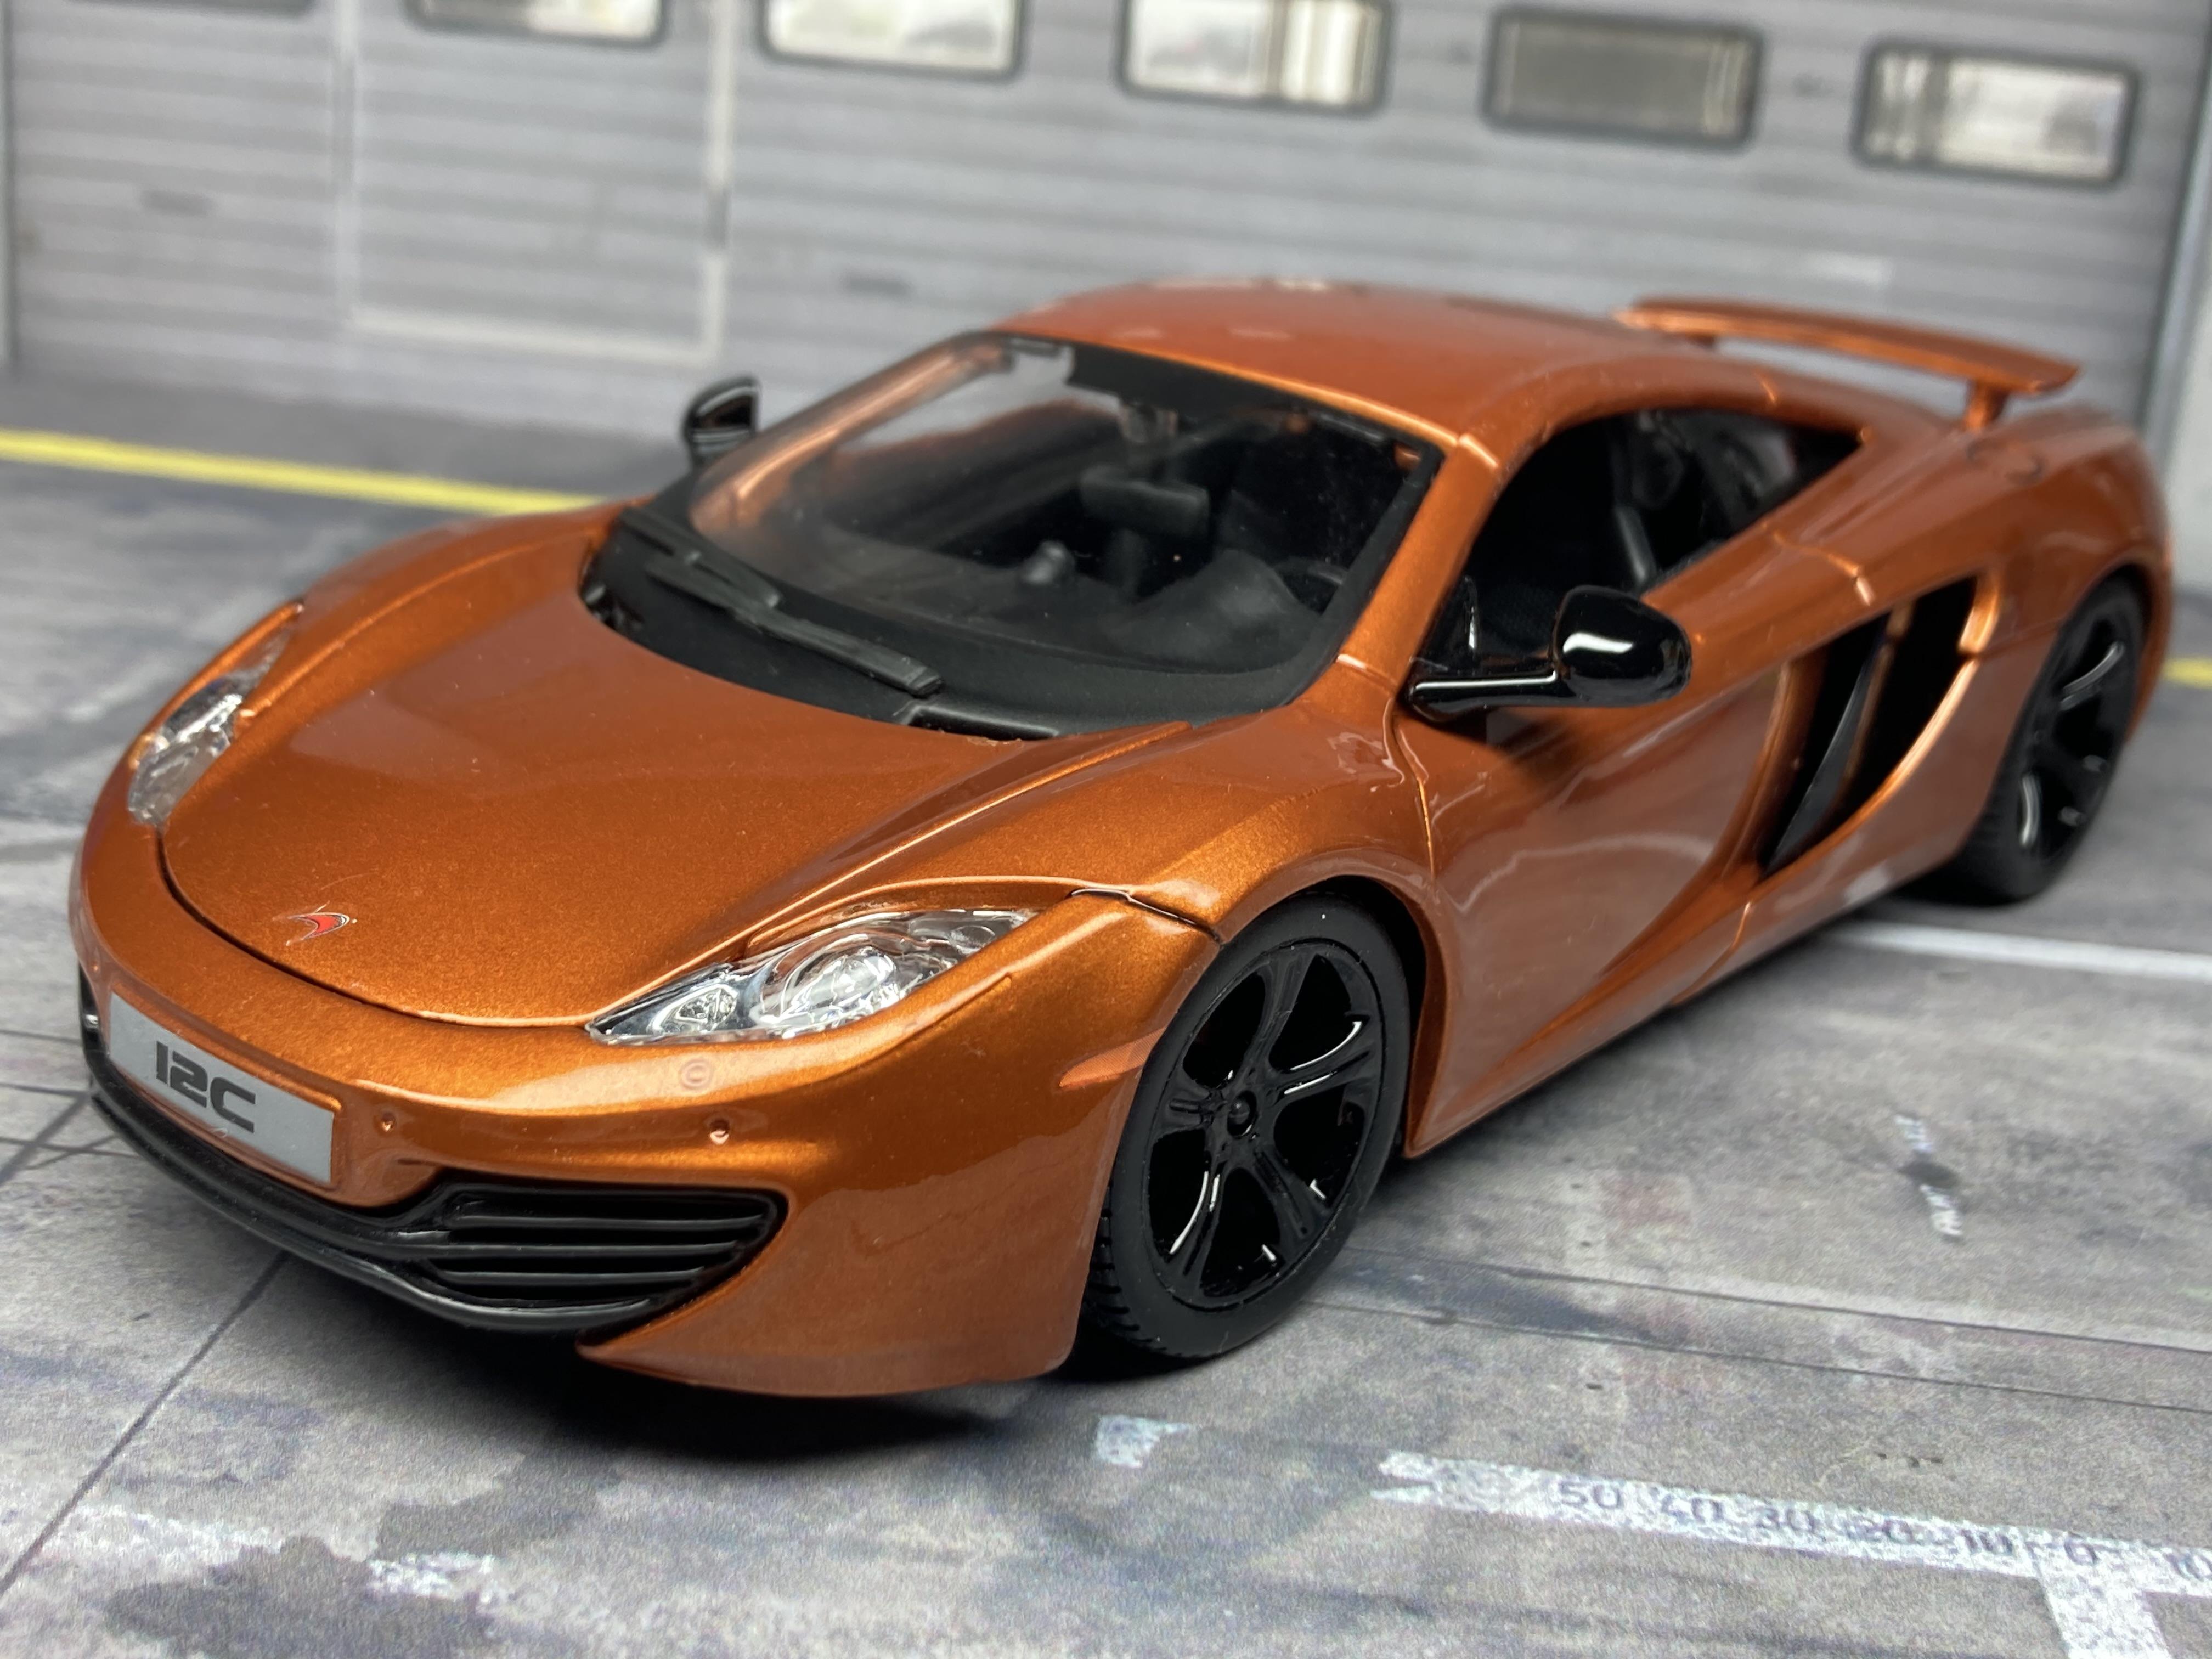
Hi there, since I wanted a model of this McLaren in its street version (the only other option is the GT3 racing version from Fujimi), I chose this metal kit from Bburago. The construction is similar to other metal kits; the internal components, such as the interior and chassis, simply need to be snapped or screwed together, decals to be applied – and it's done. However, I really didn't like the pearl white paint job, which was also quite uneven. Therefore, I decided to strip the body shell using nitro thinner. This is quite a chore compared to the usual paint stripping for model paints. After a few days and some additional work, the body shell was finally stripped and ready to be primed and painted. I chose the Corvette C6 colour "Atomic Orange", sealed with regular 1k clear from the spray can. The side air intakes on the kit were very clunky, therefore I replaced them with Evergreen parts. Otherwise, it's straight out of the box. Here are the before and after photos of the "transformation."

-
Thanks Atin!
-
Thanks Bob, I really recommend these new generation Bburago metal kits!
-
Many thanks guys!
-
Thanks Bill.
-
Many thanks guys! I don't suppose Tamiya has a license to do Ferrari kits currently. There are resin kits for the 499P, but it will perfectly do for me to build the Bburago one. If you want to see one built by a German fellow modeller, here's the link: https://www.modellboard.net/index.php?topic=70398.0
-
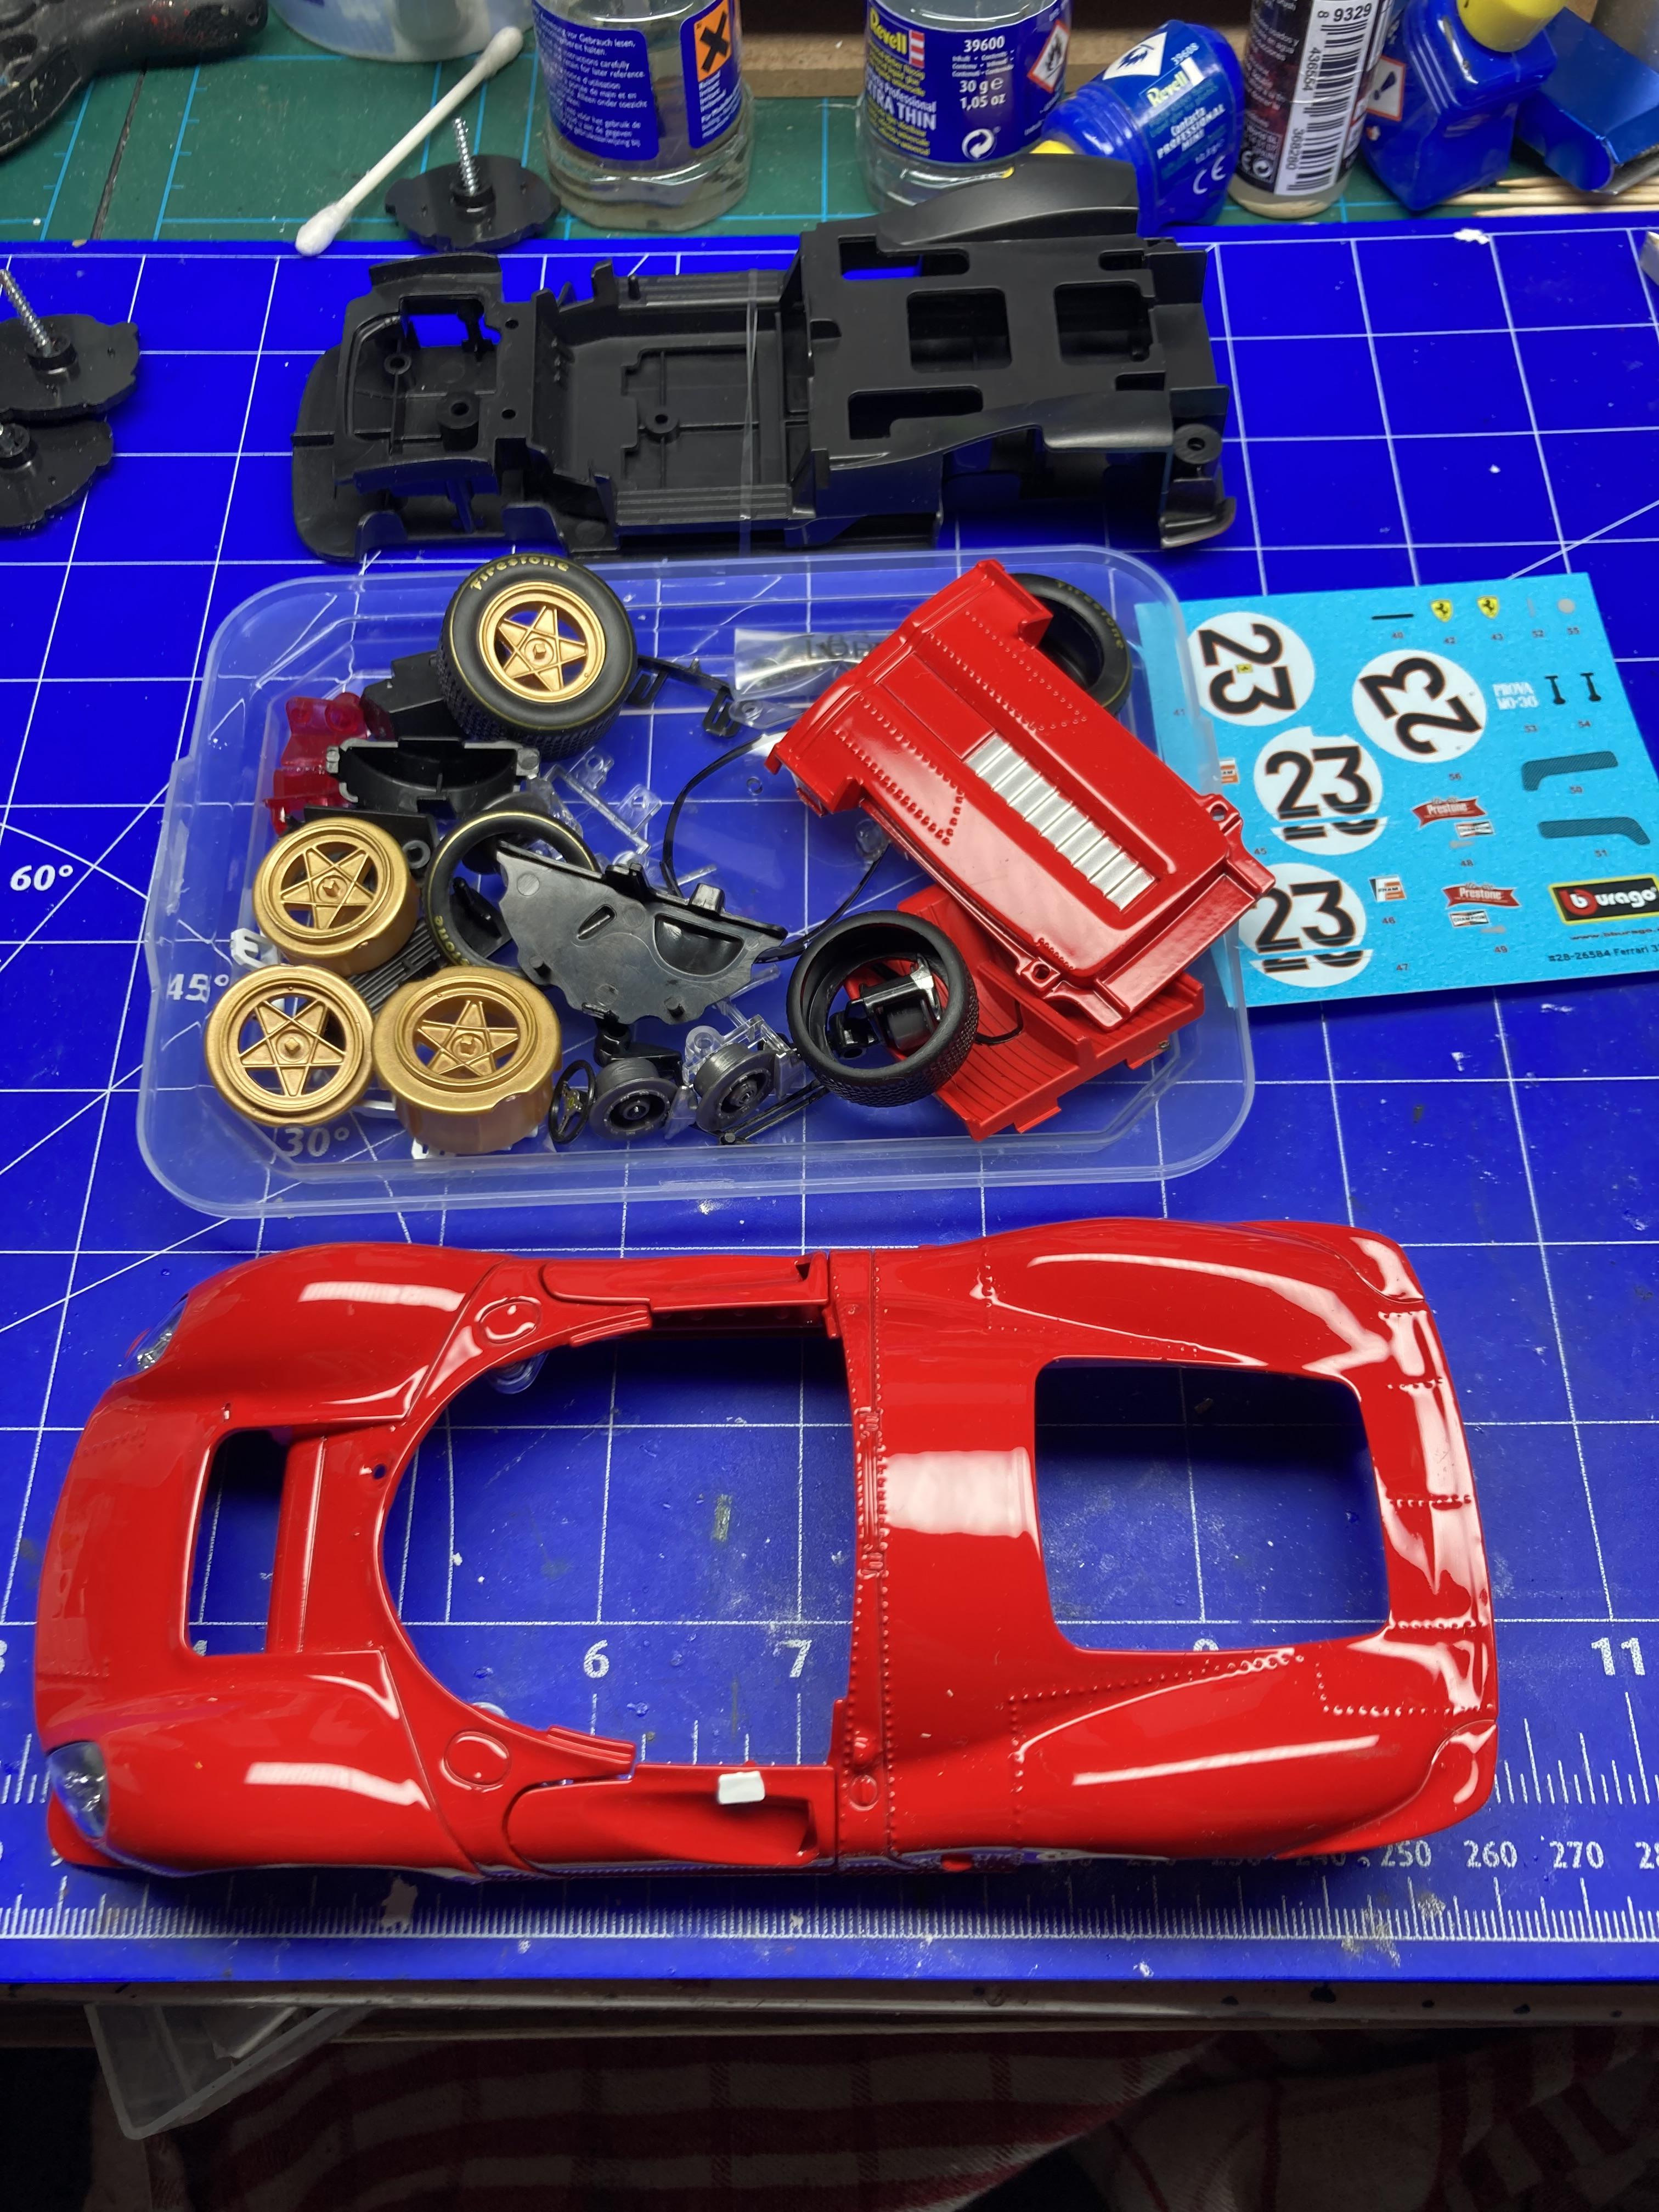
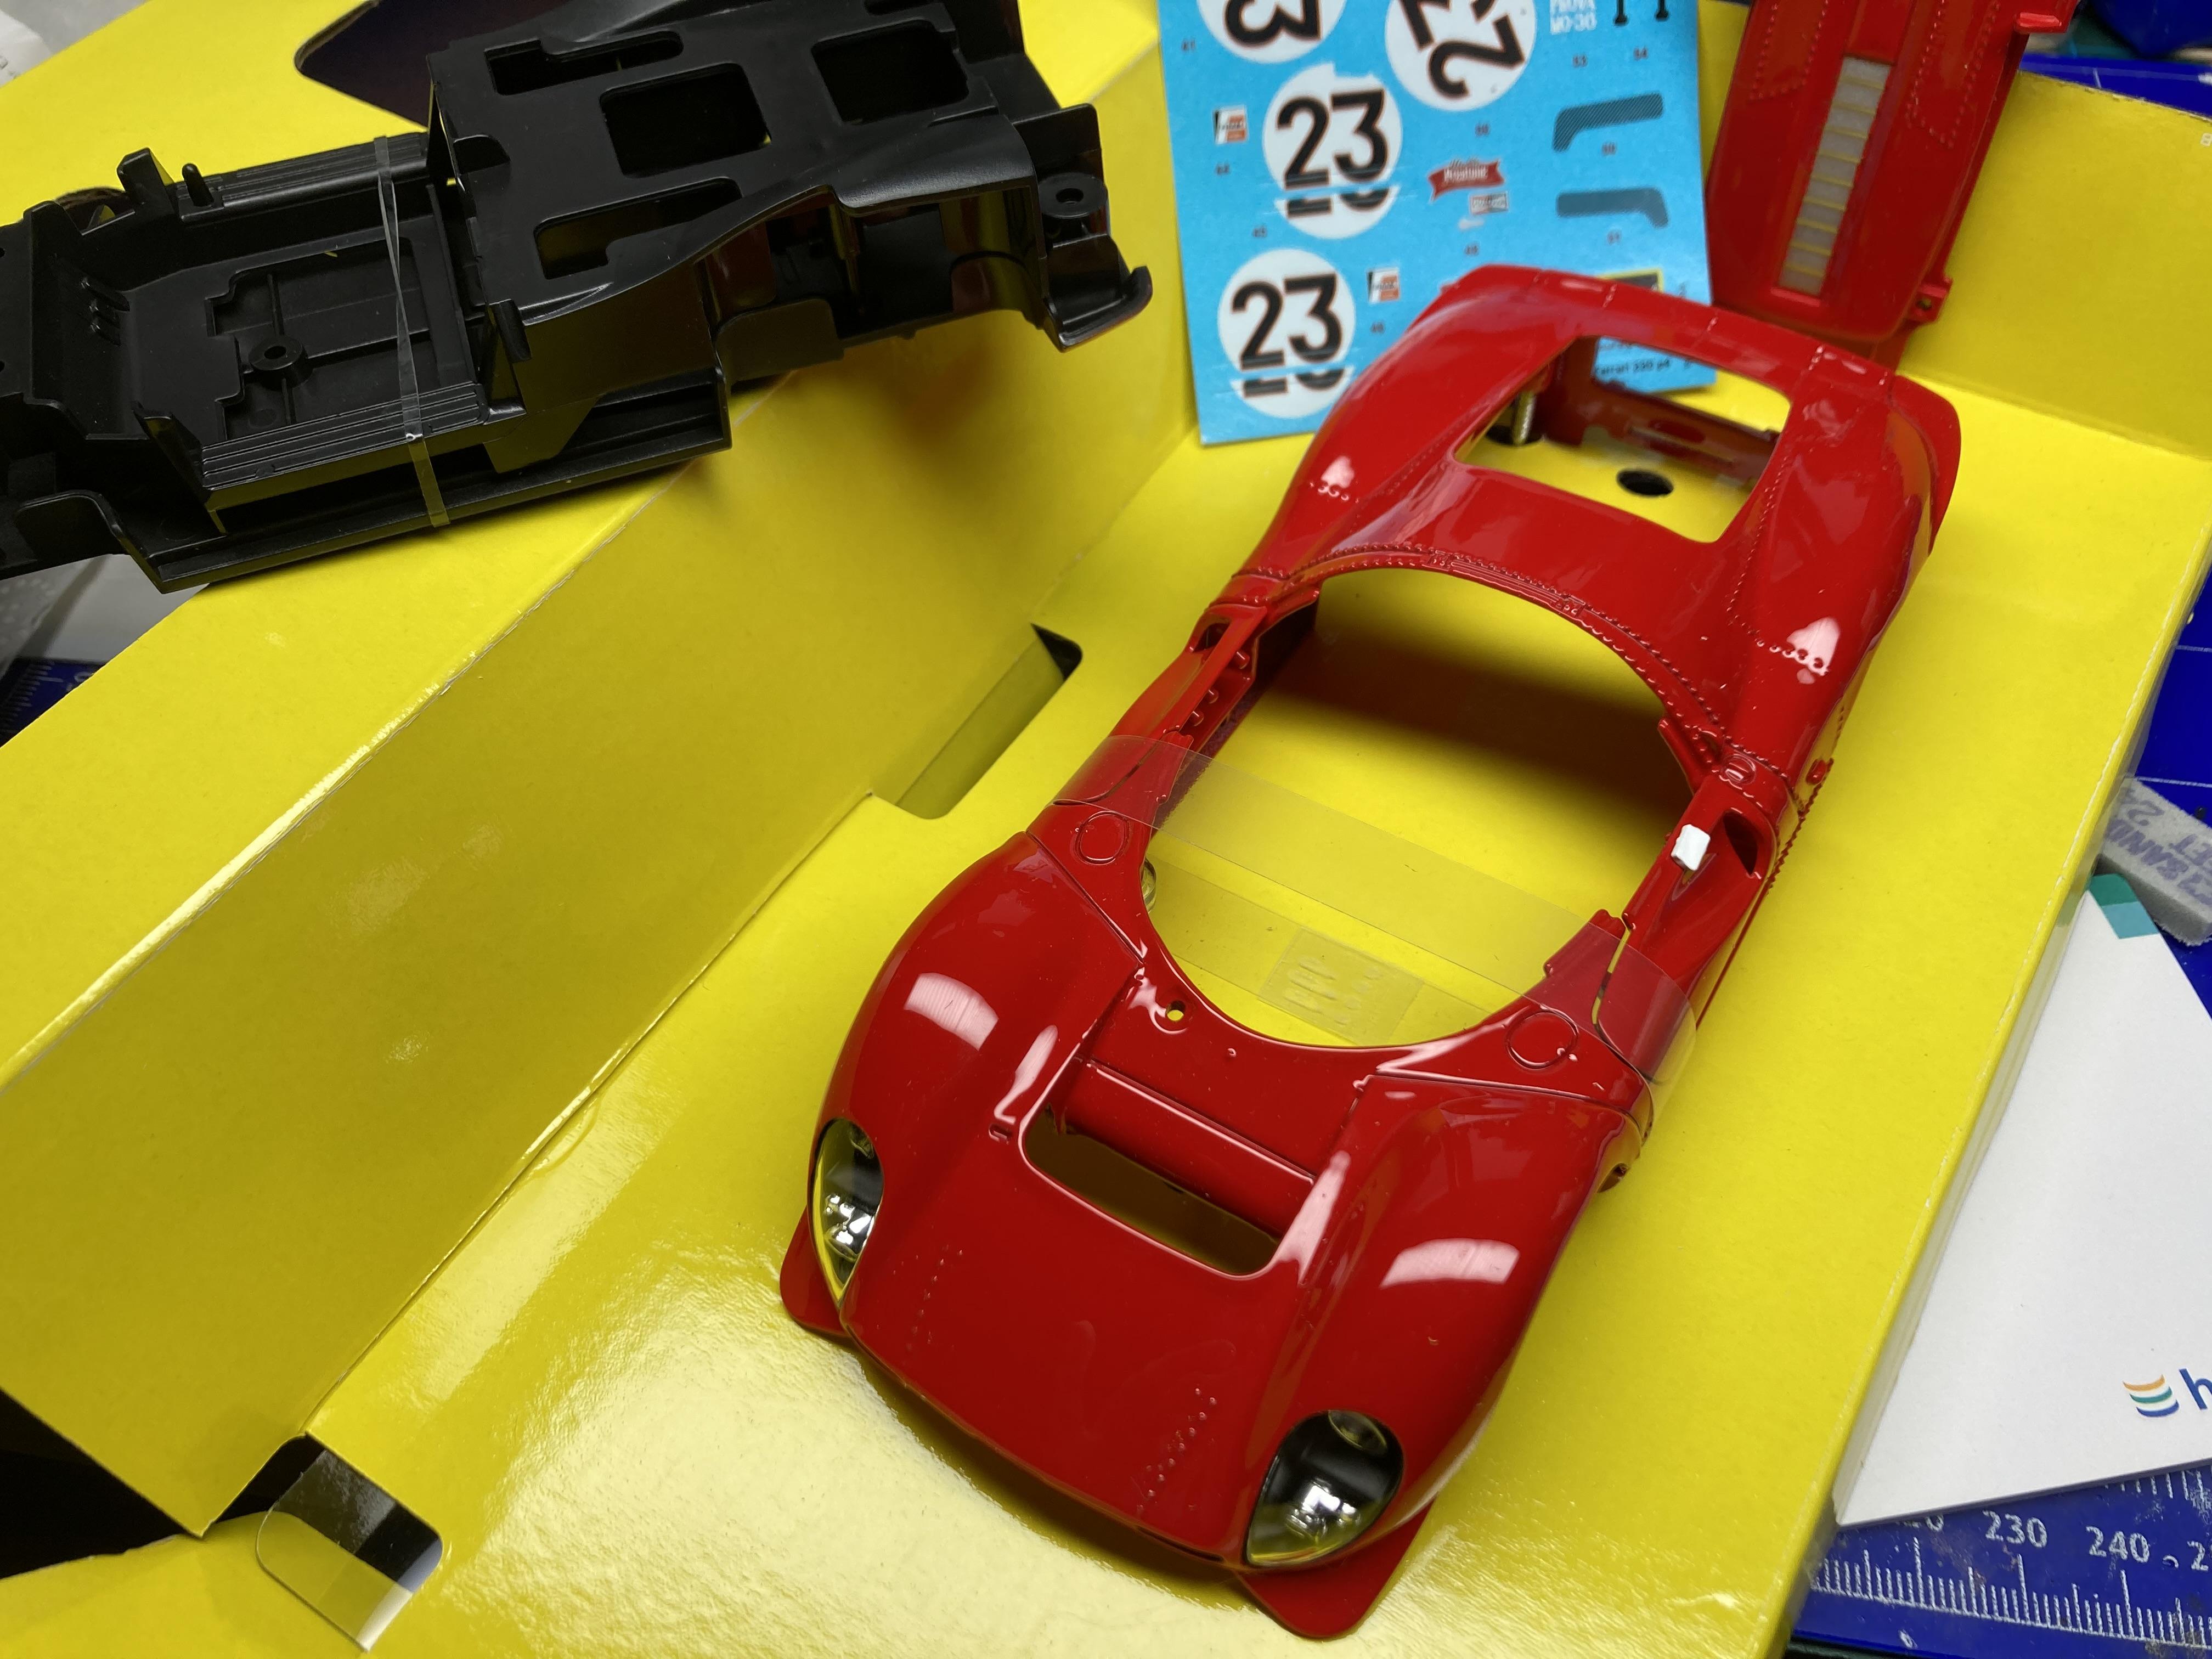
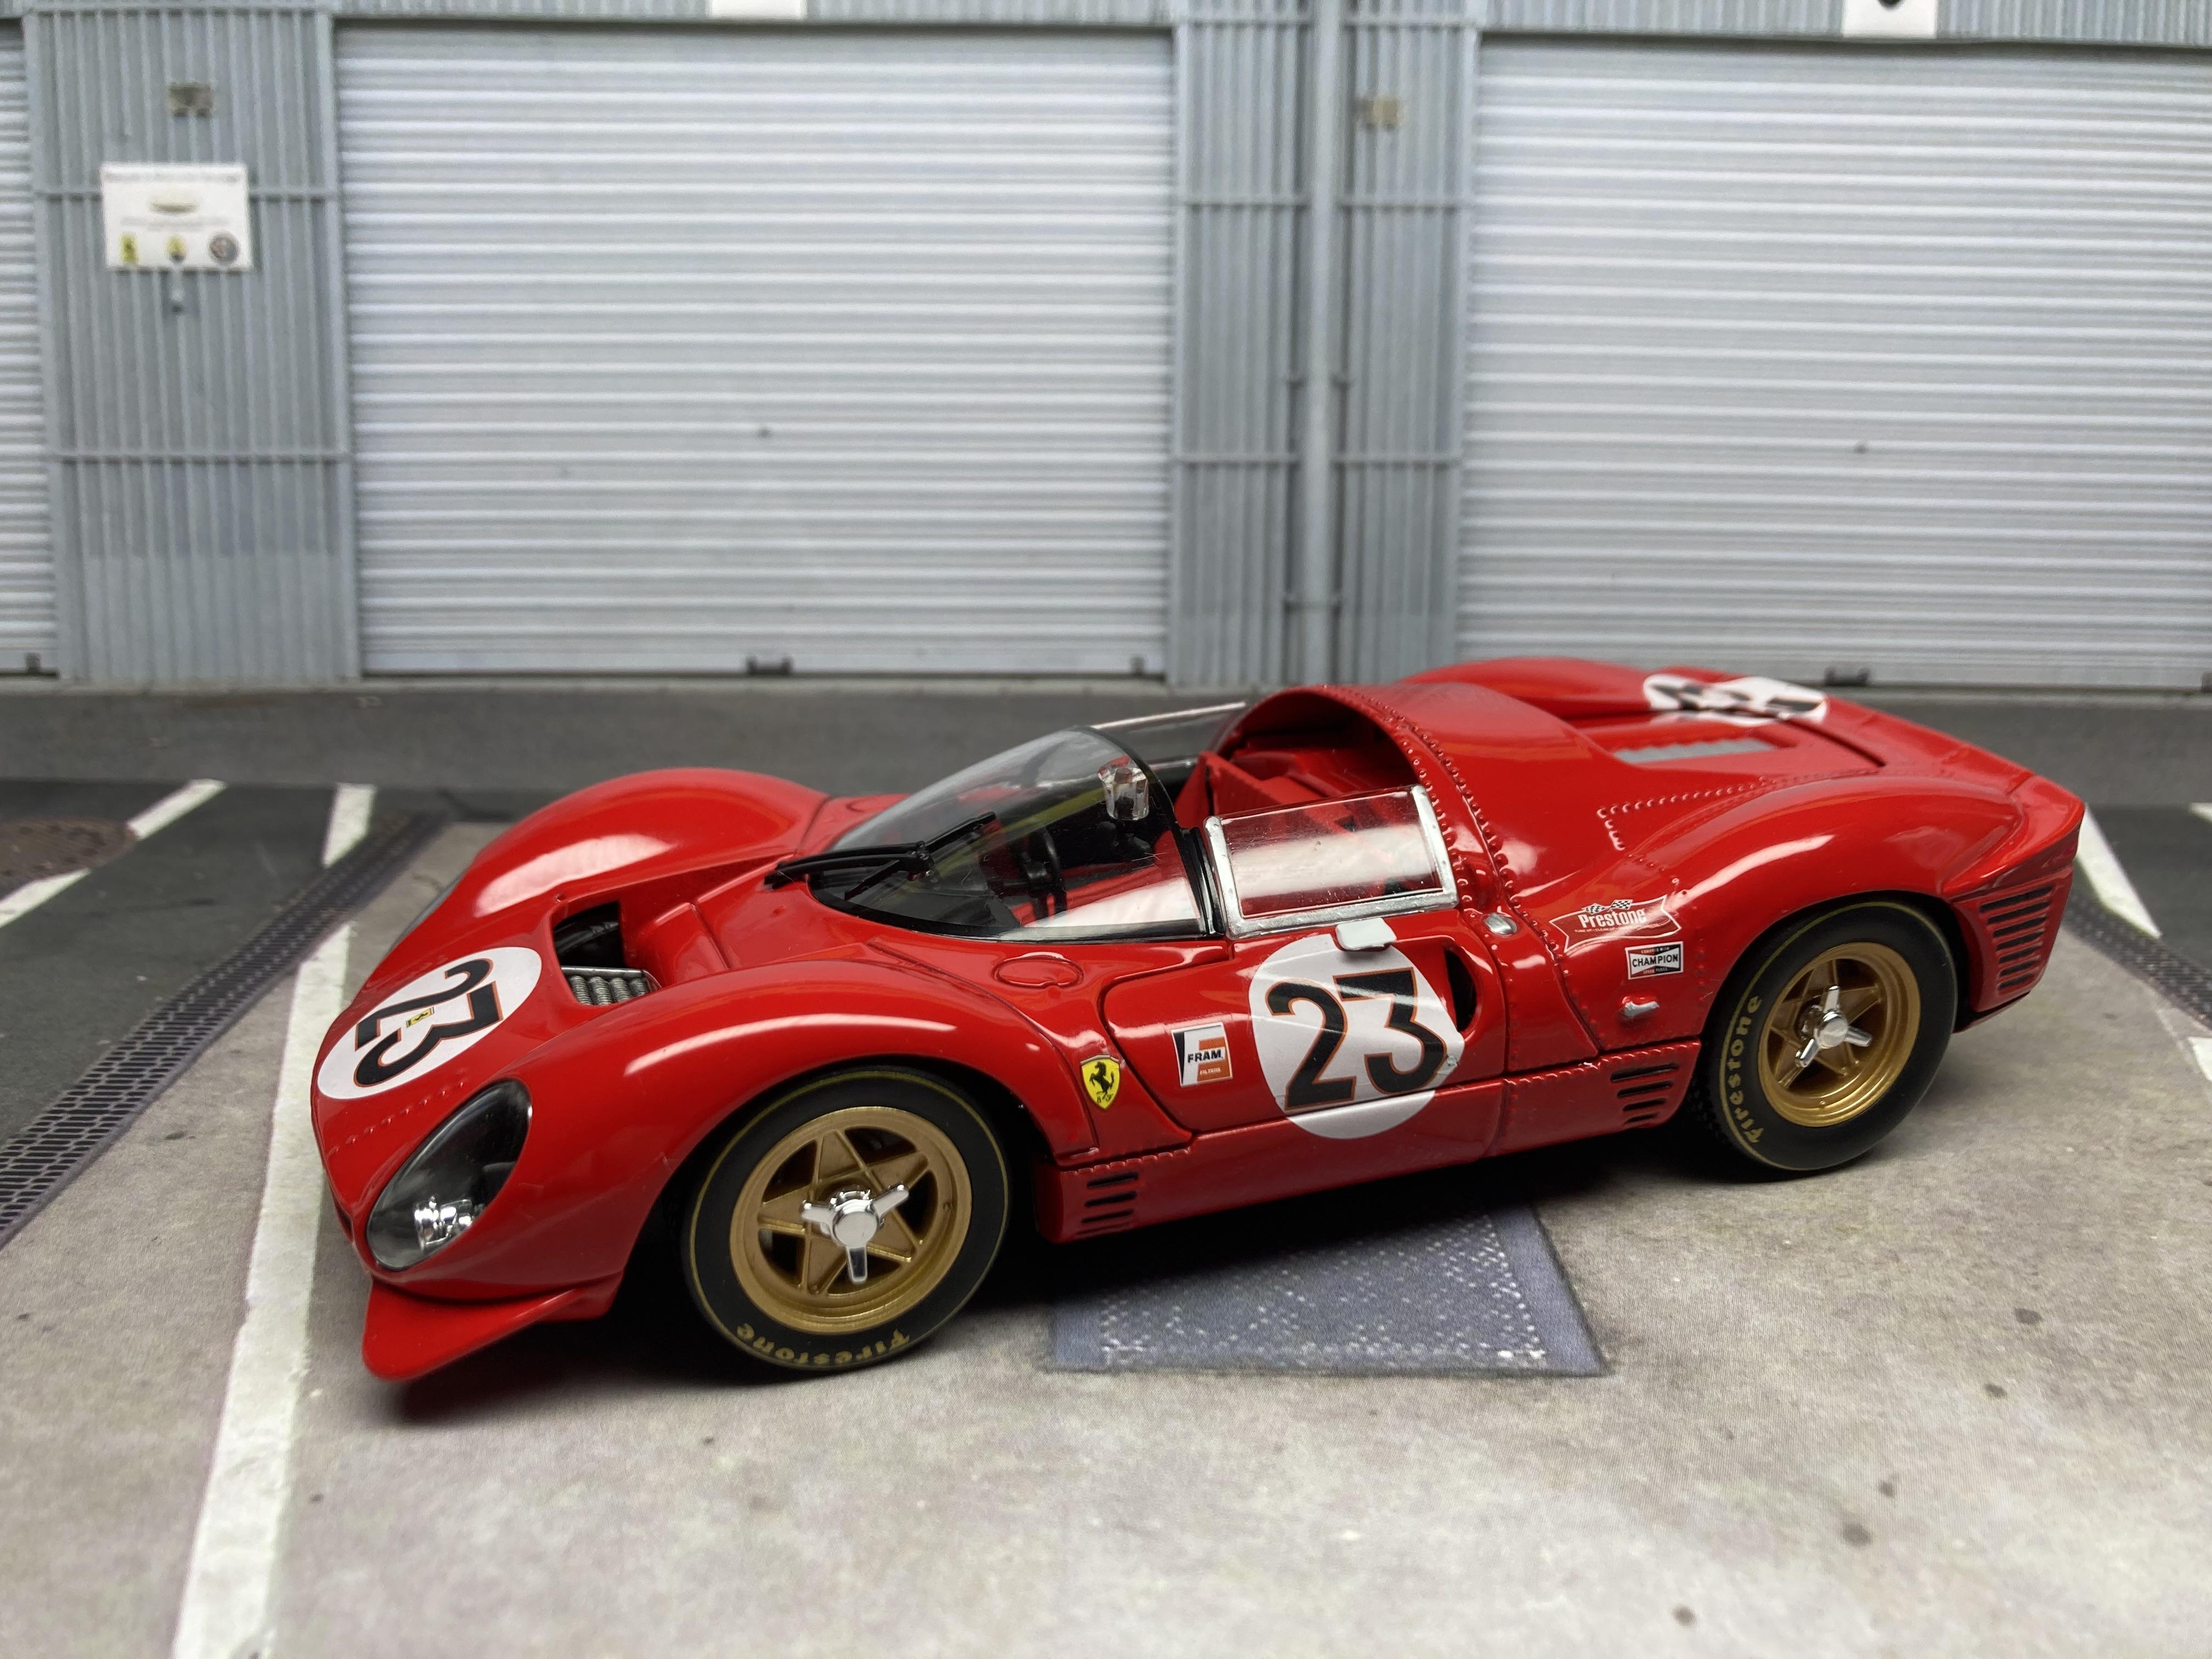
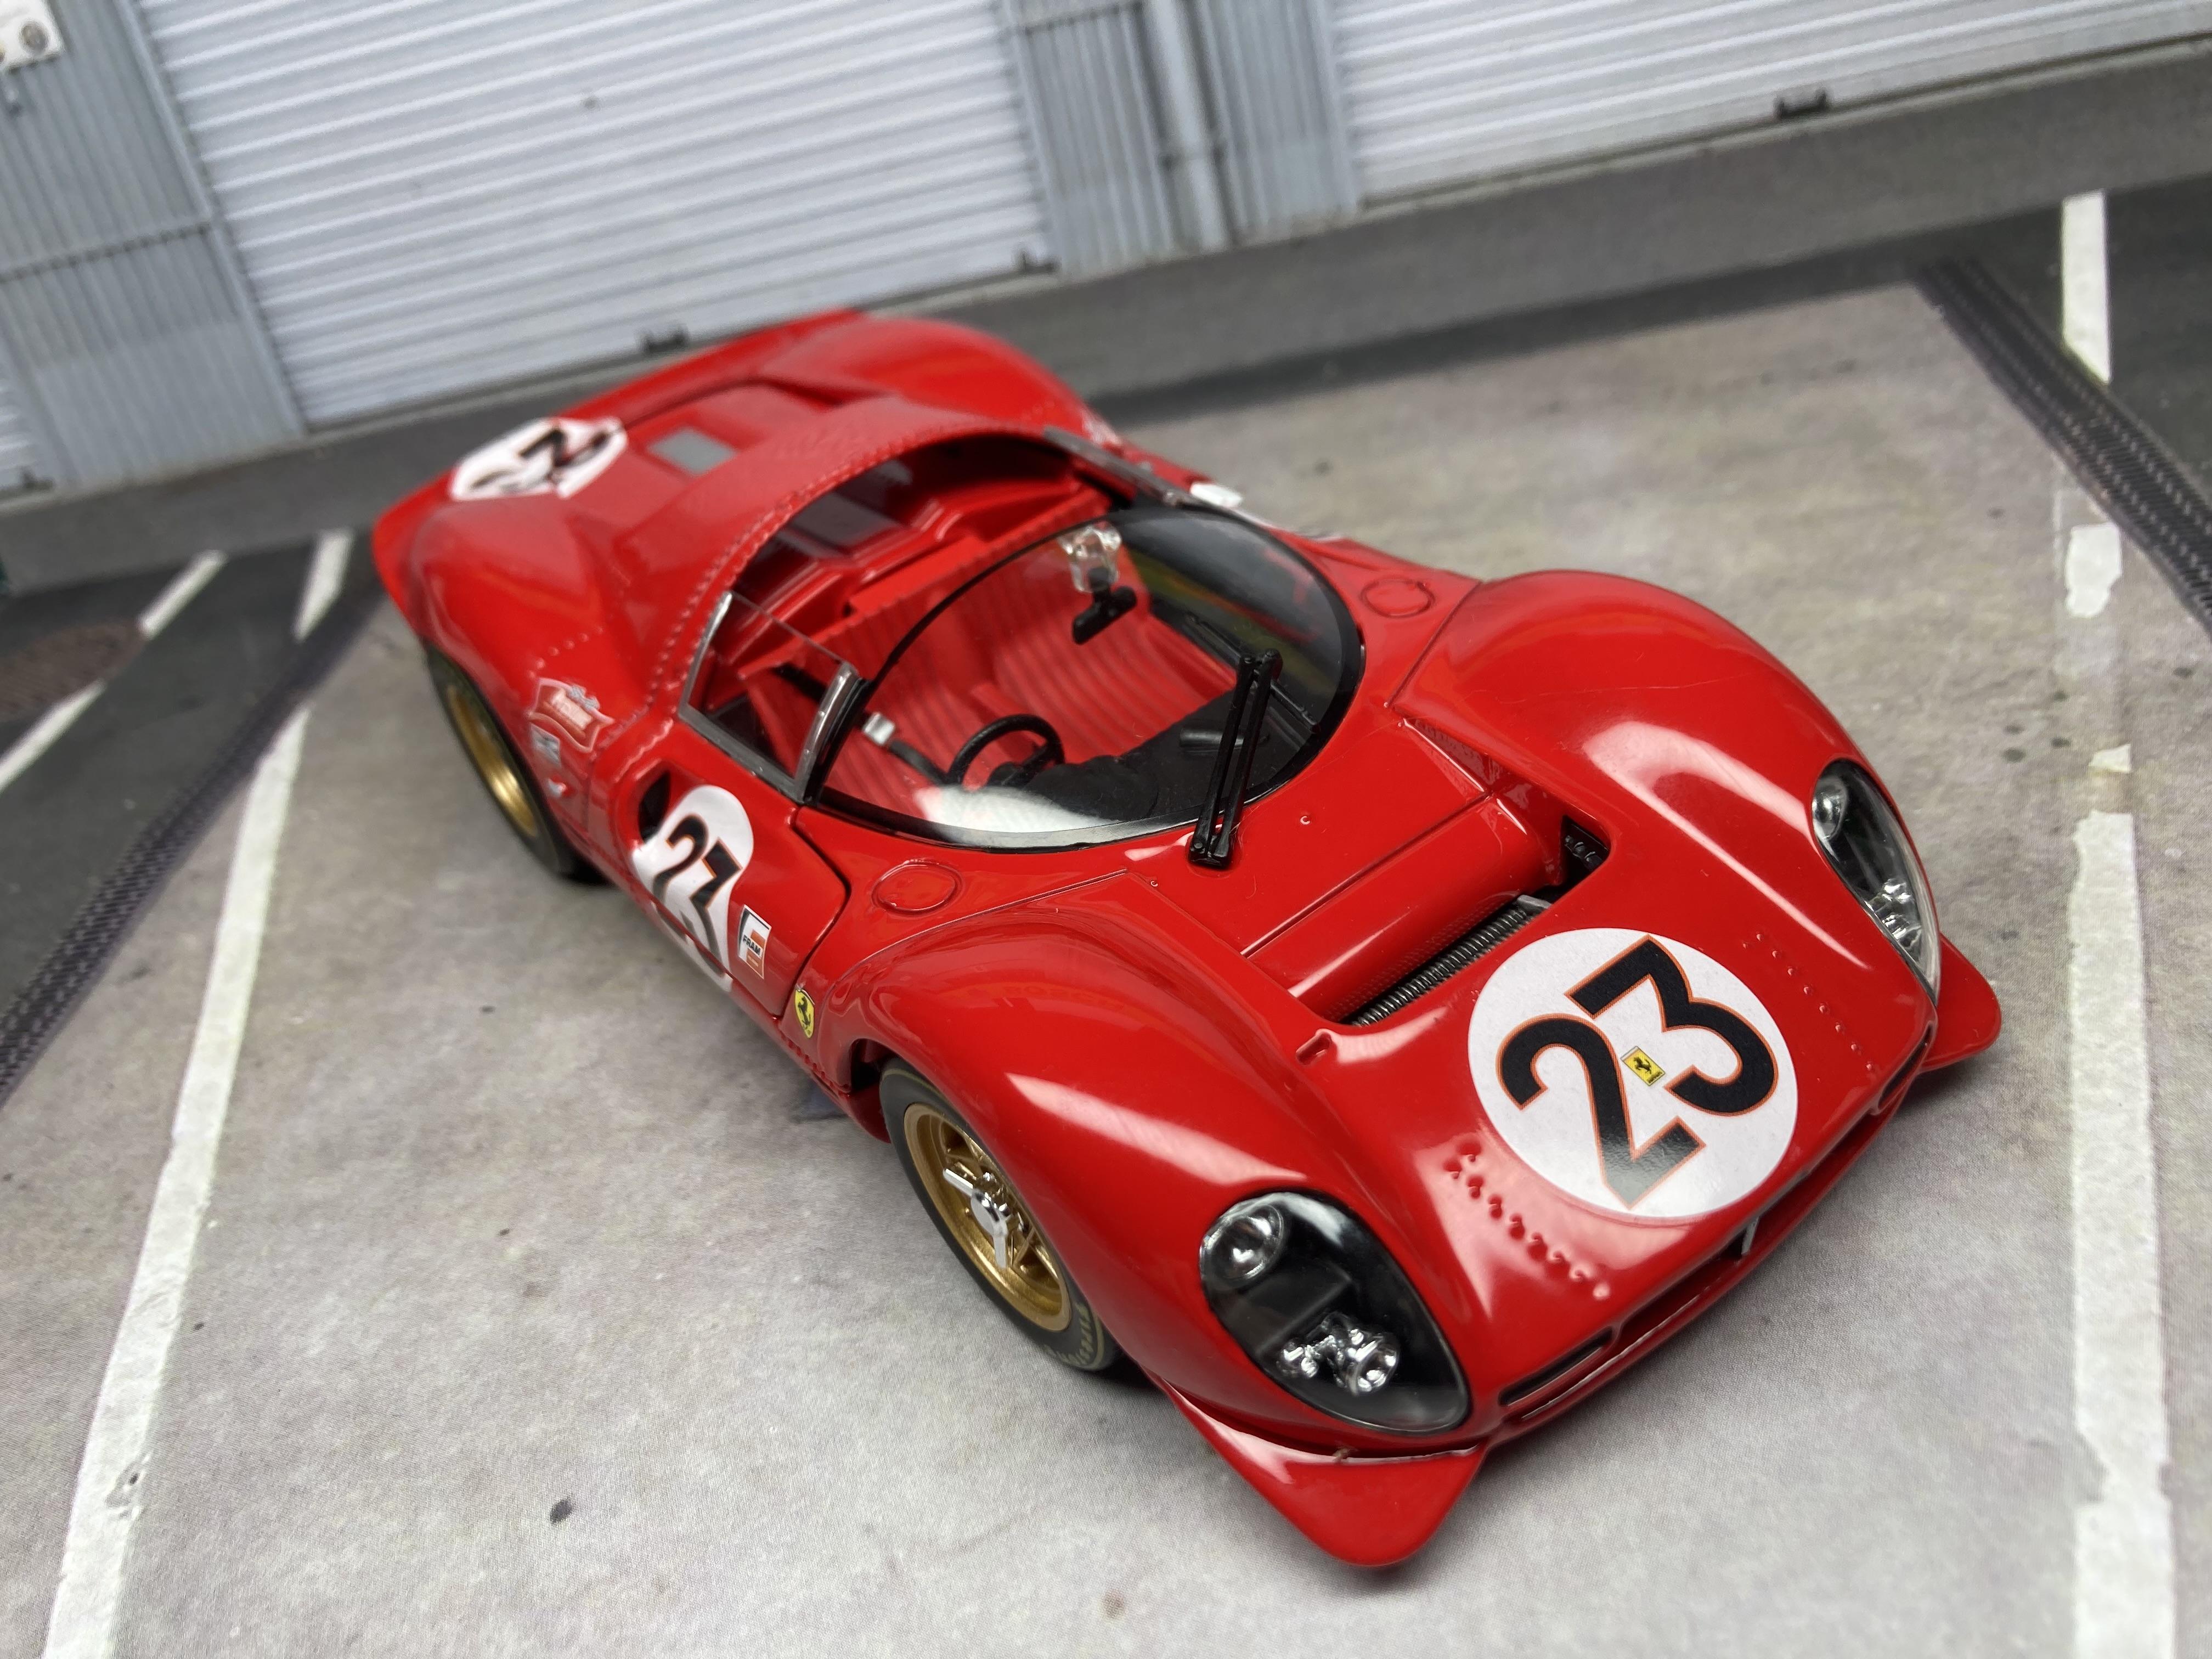
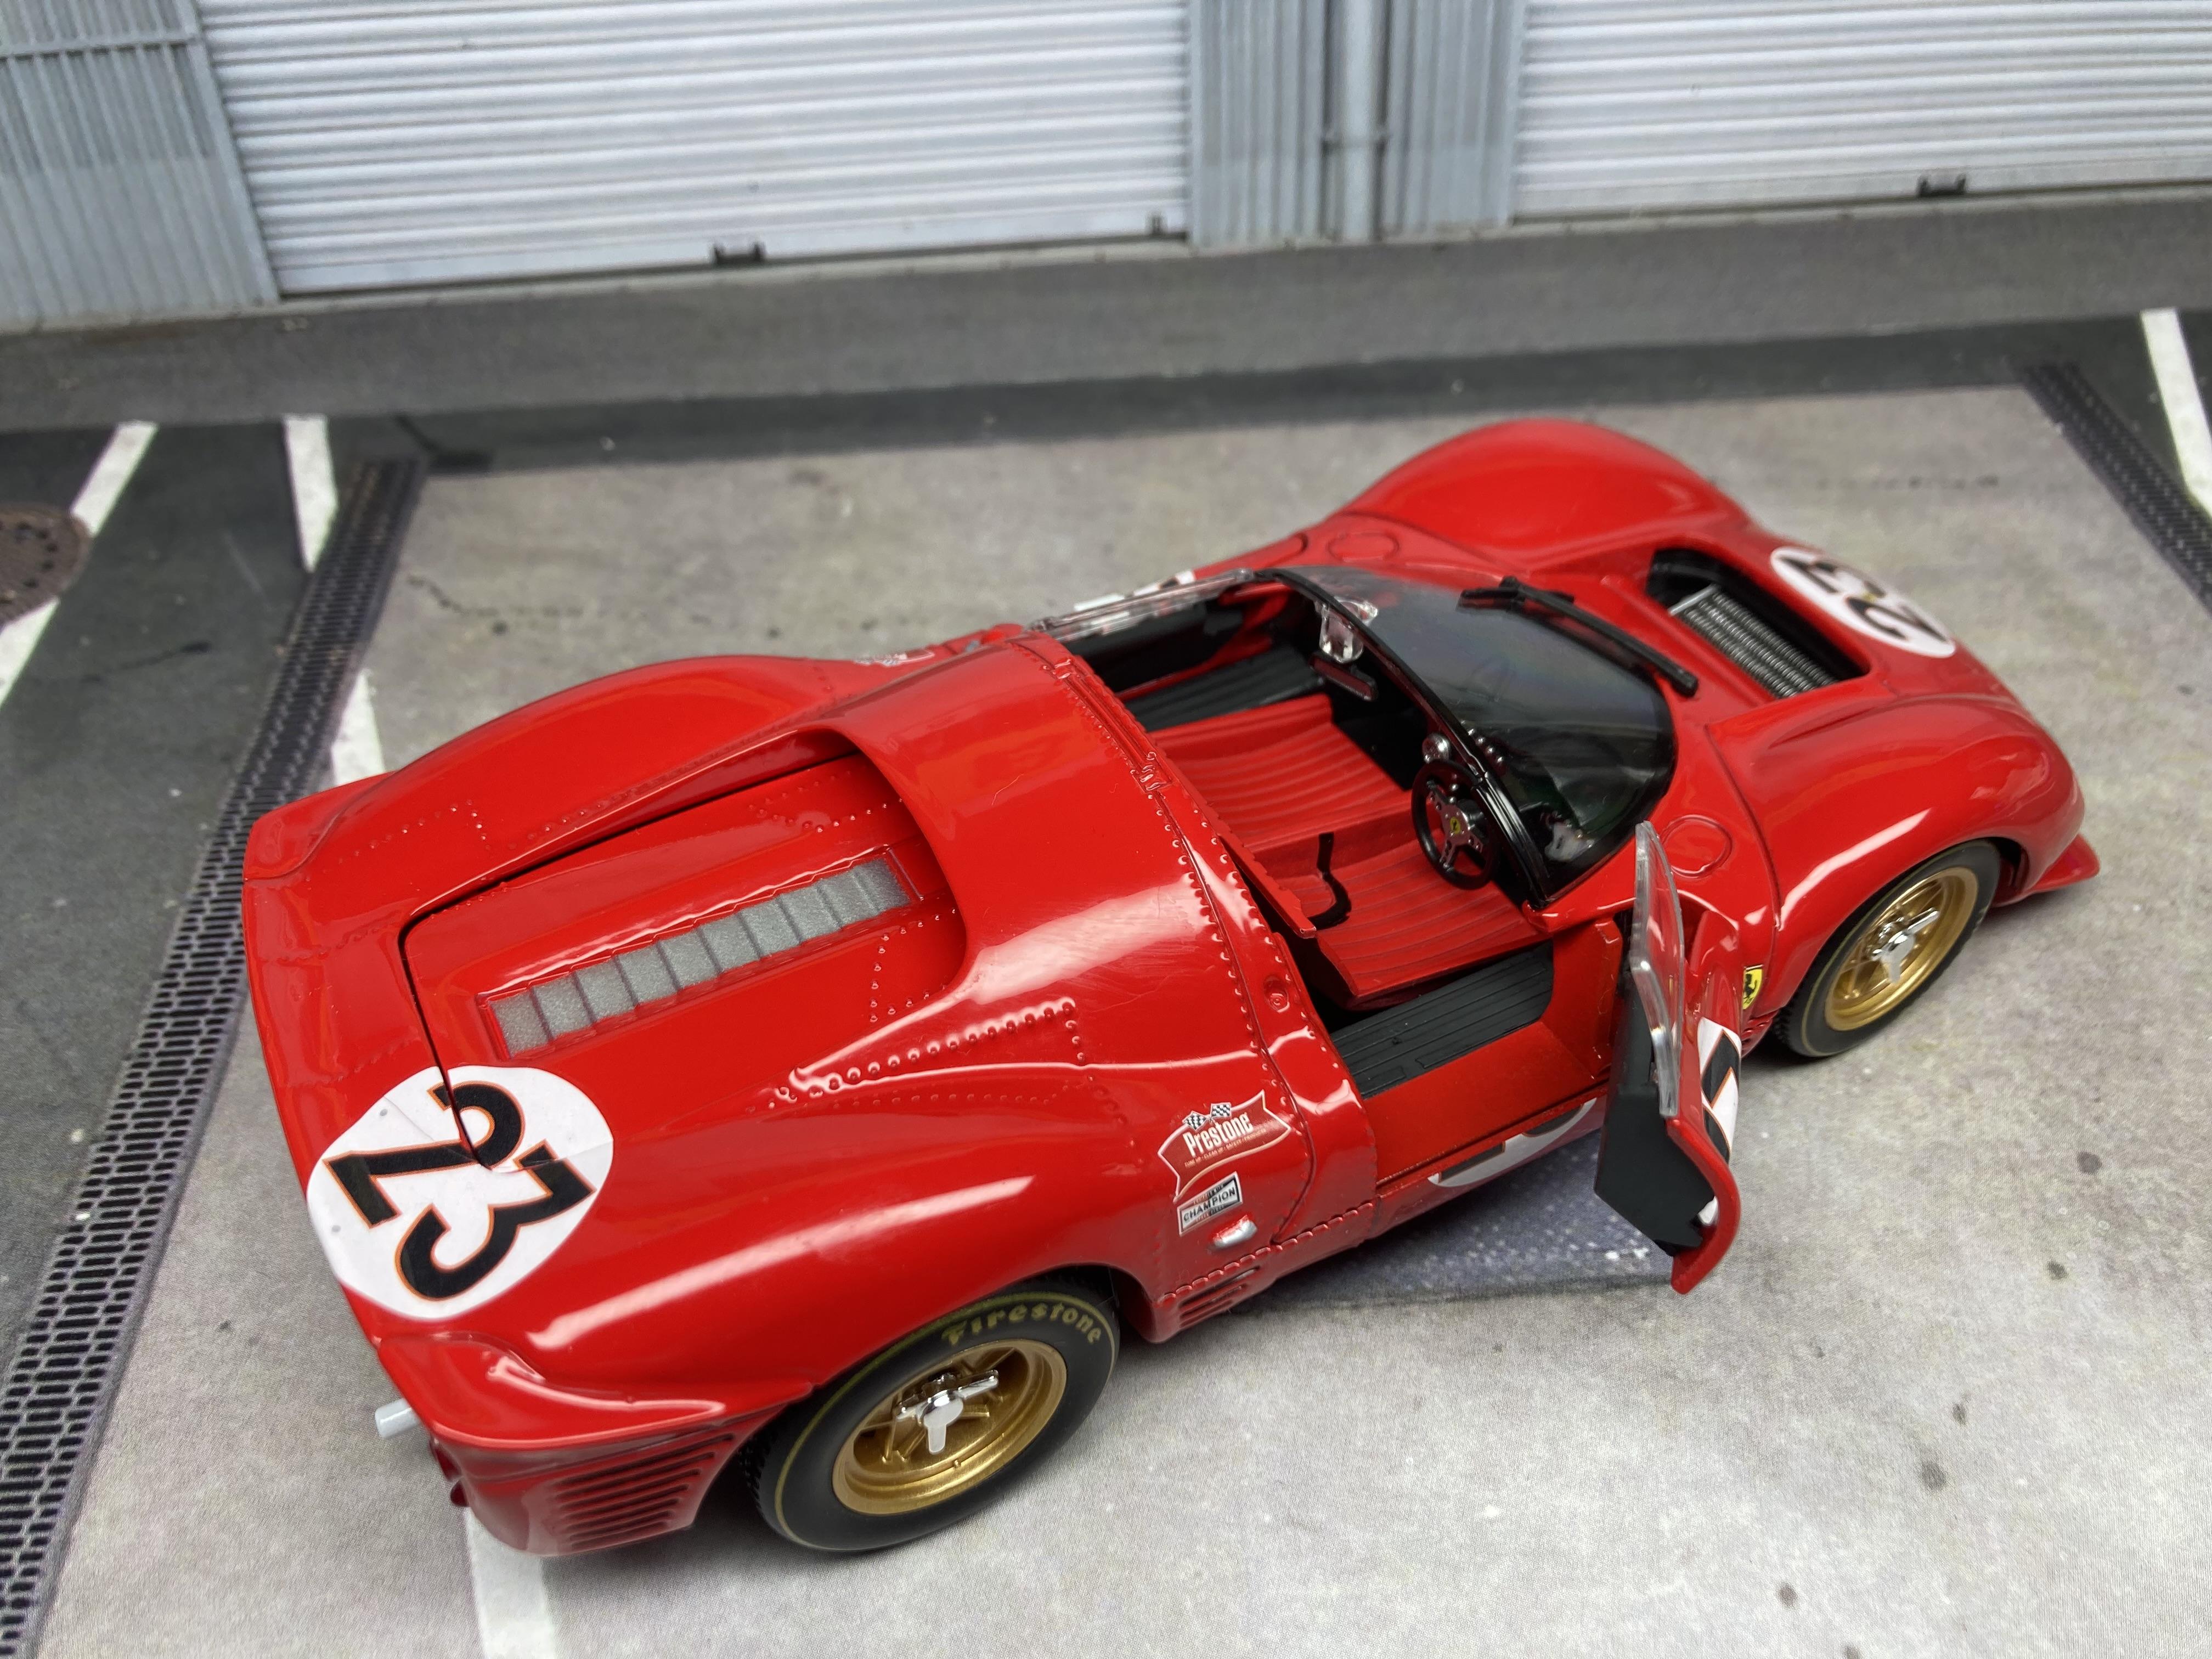
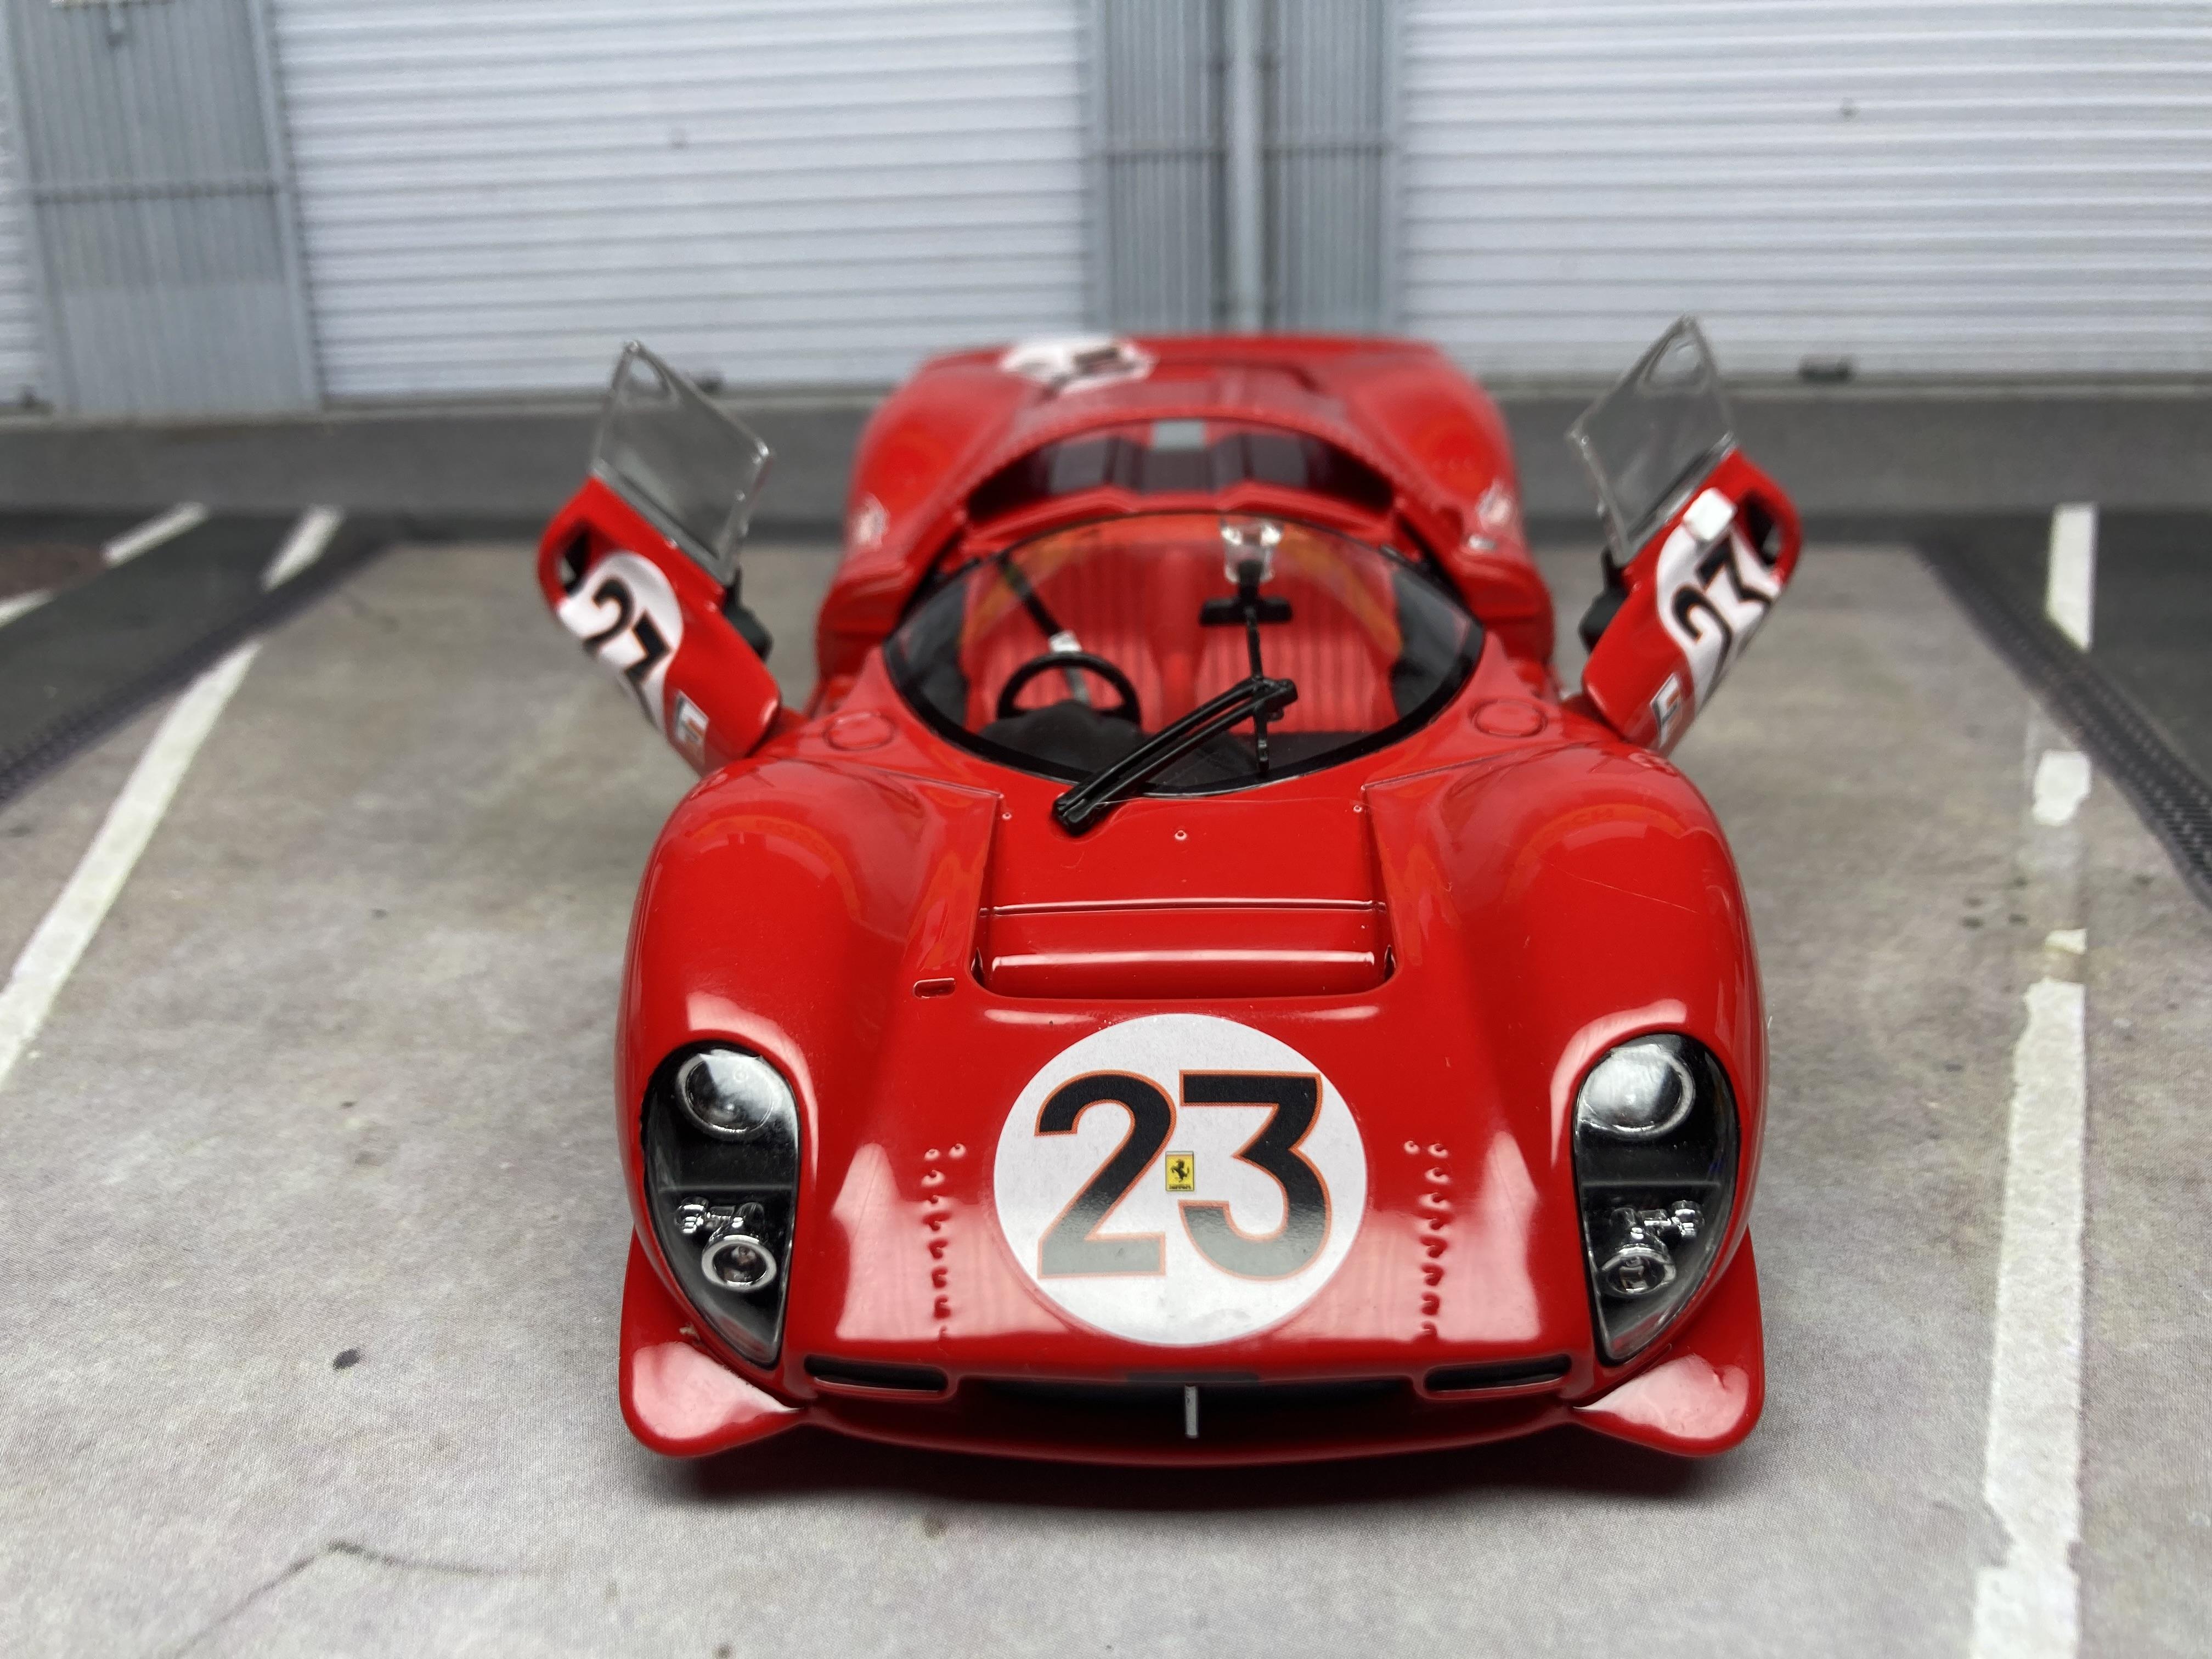
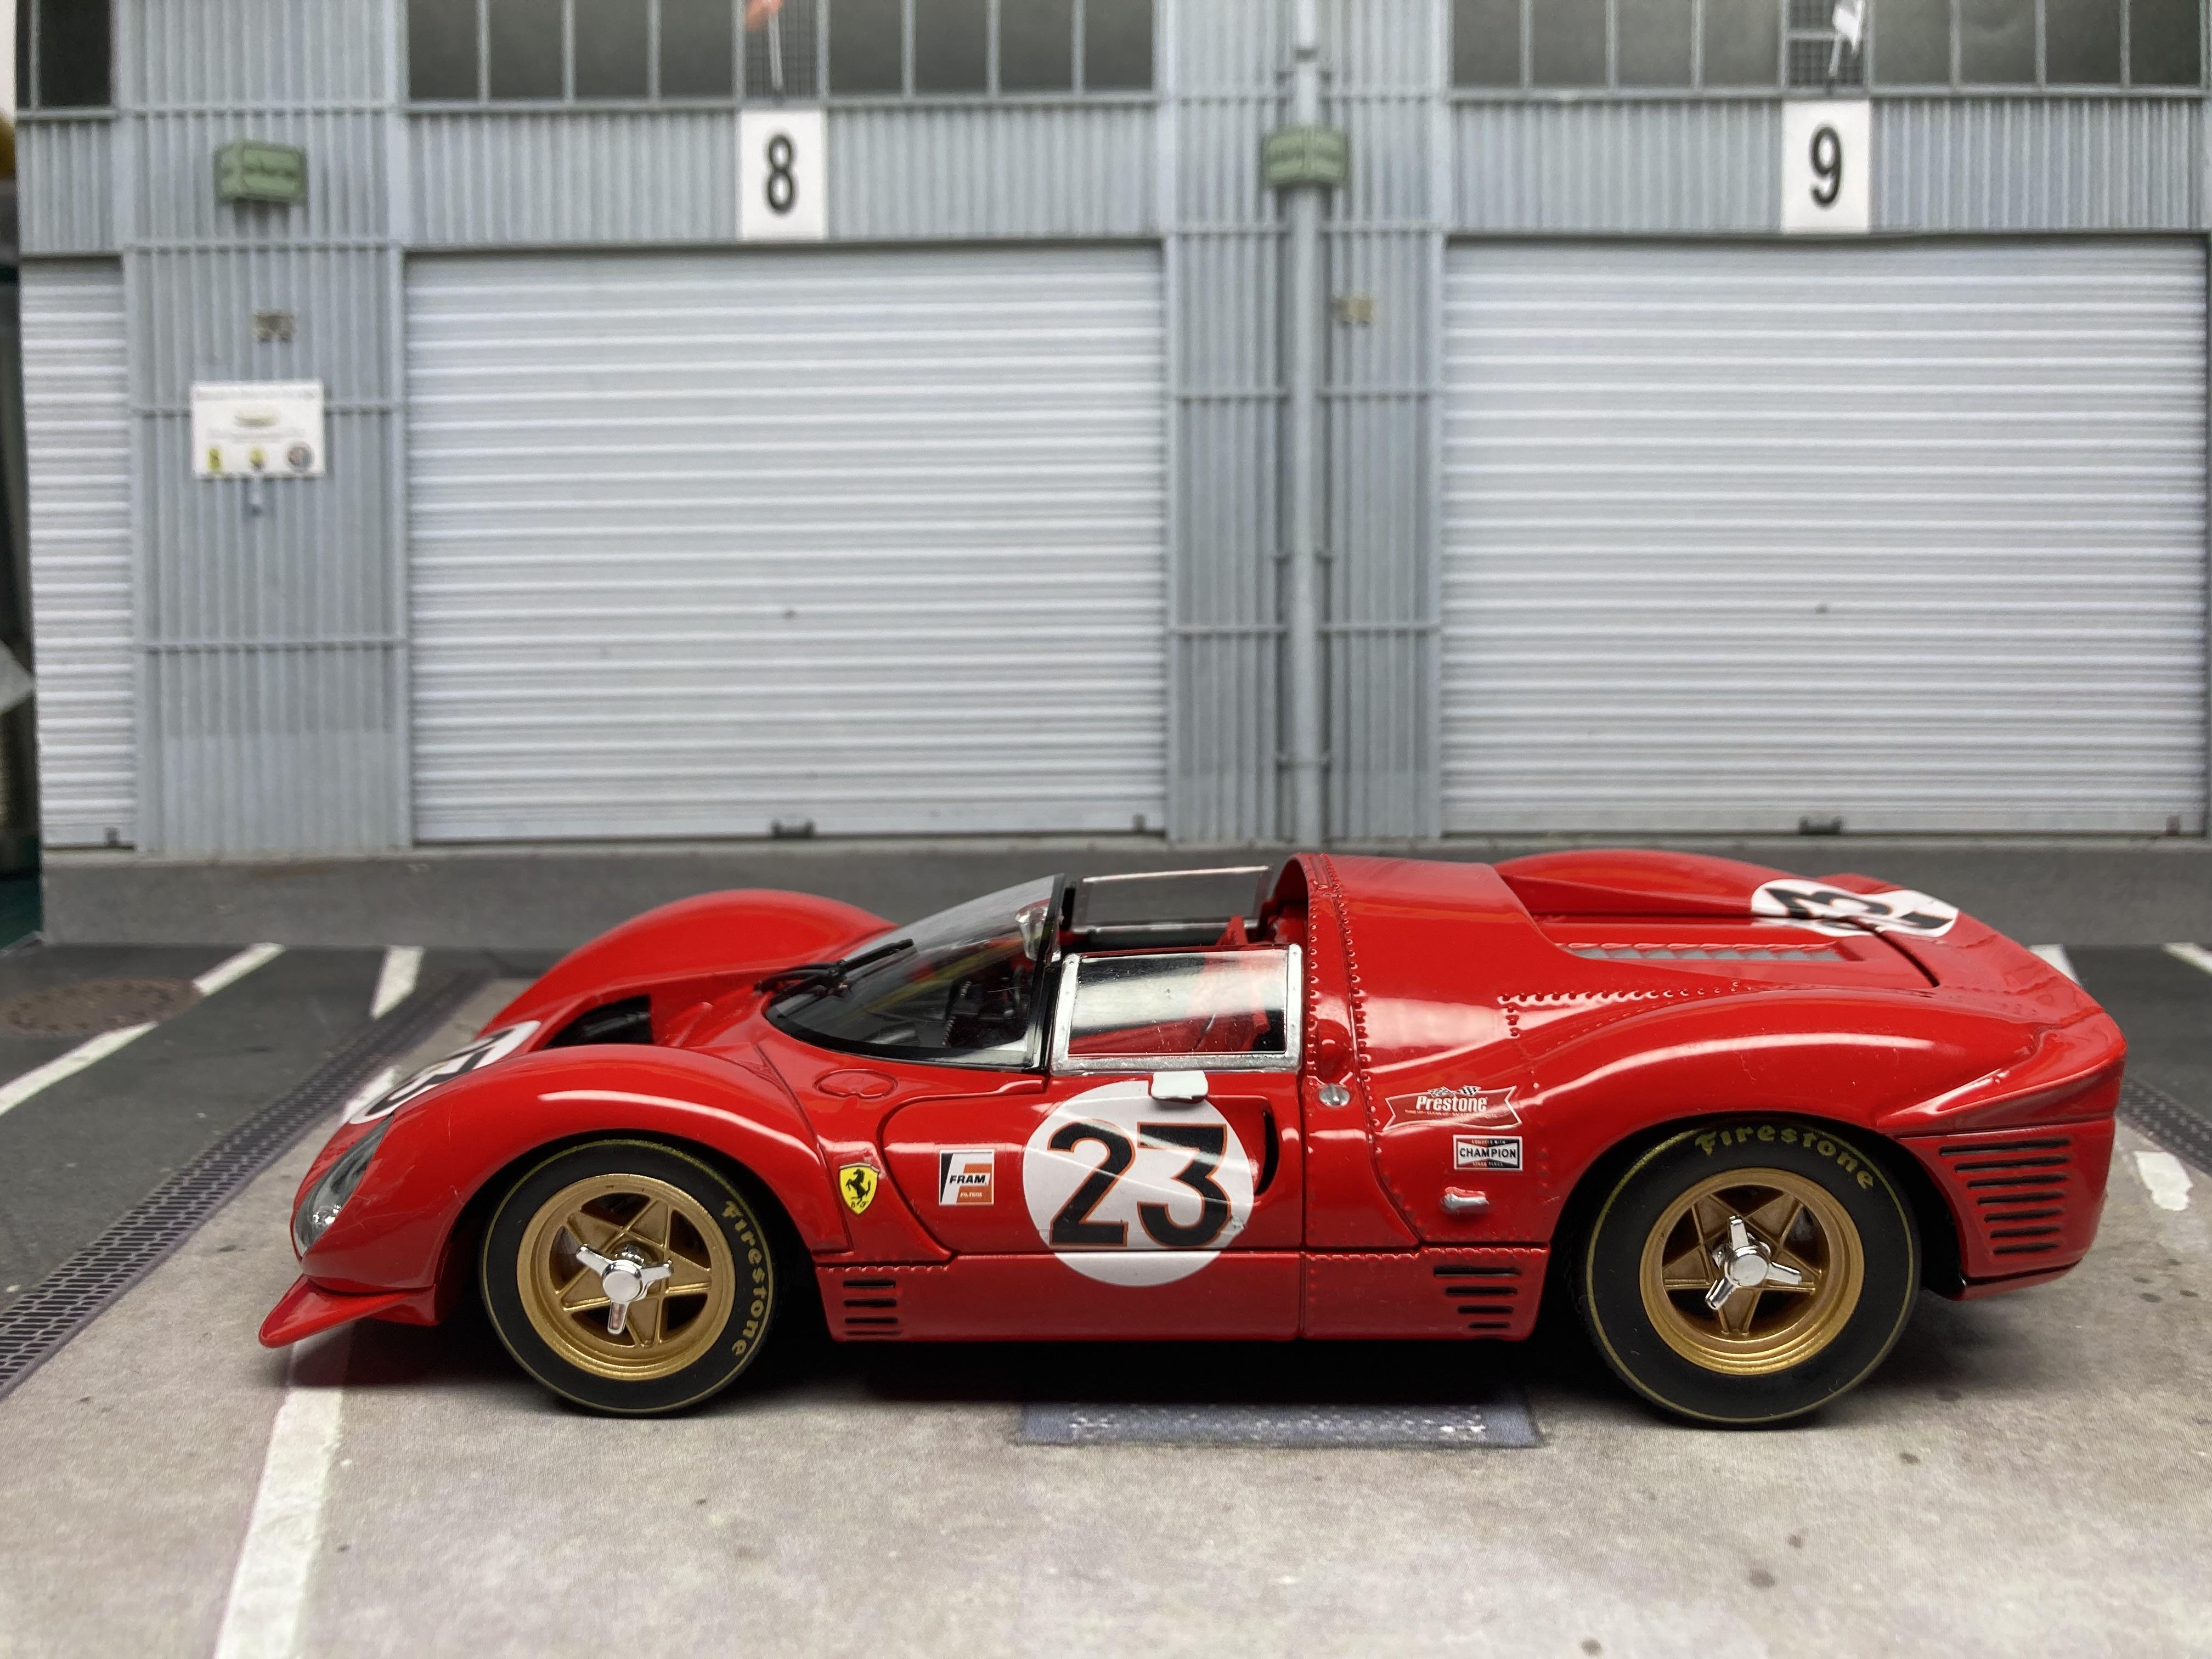
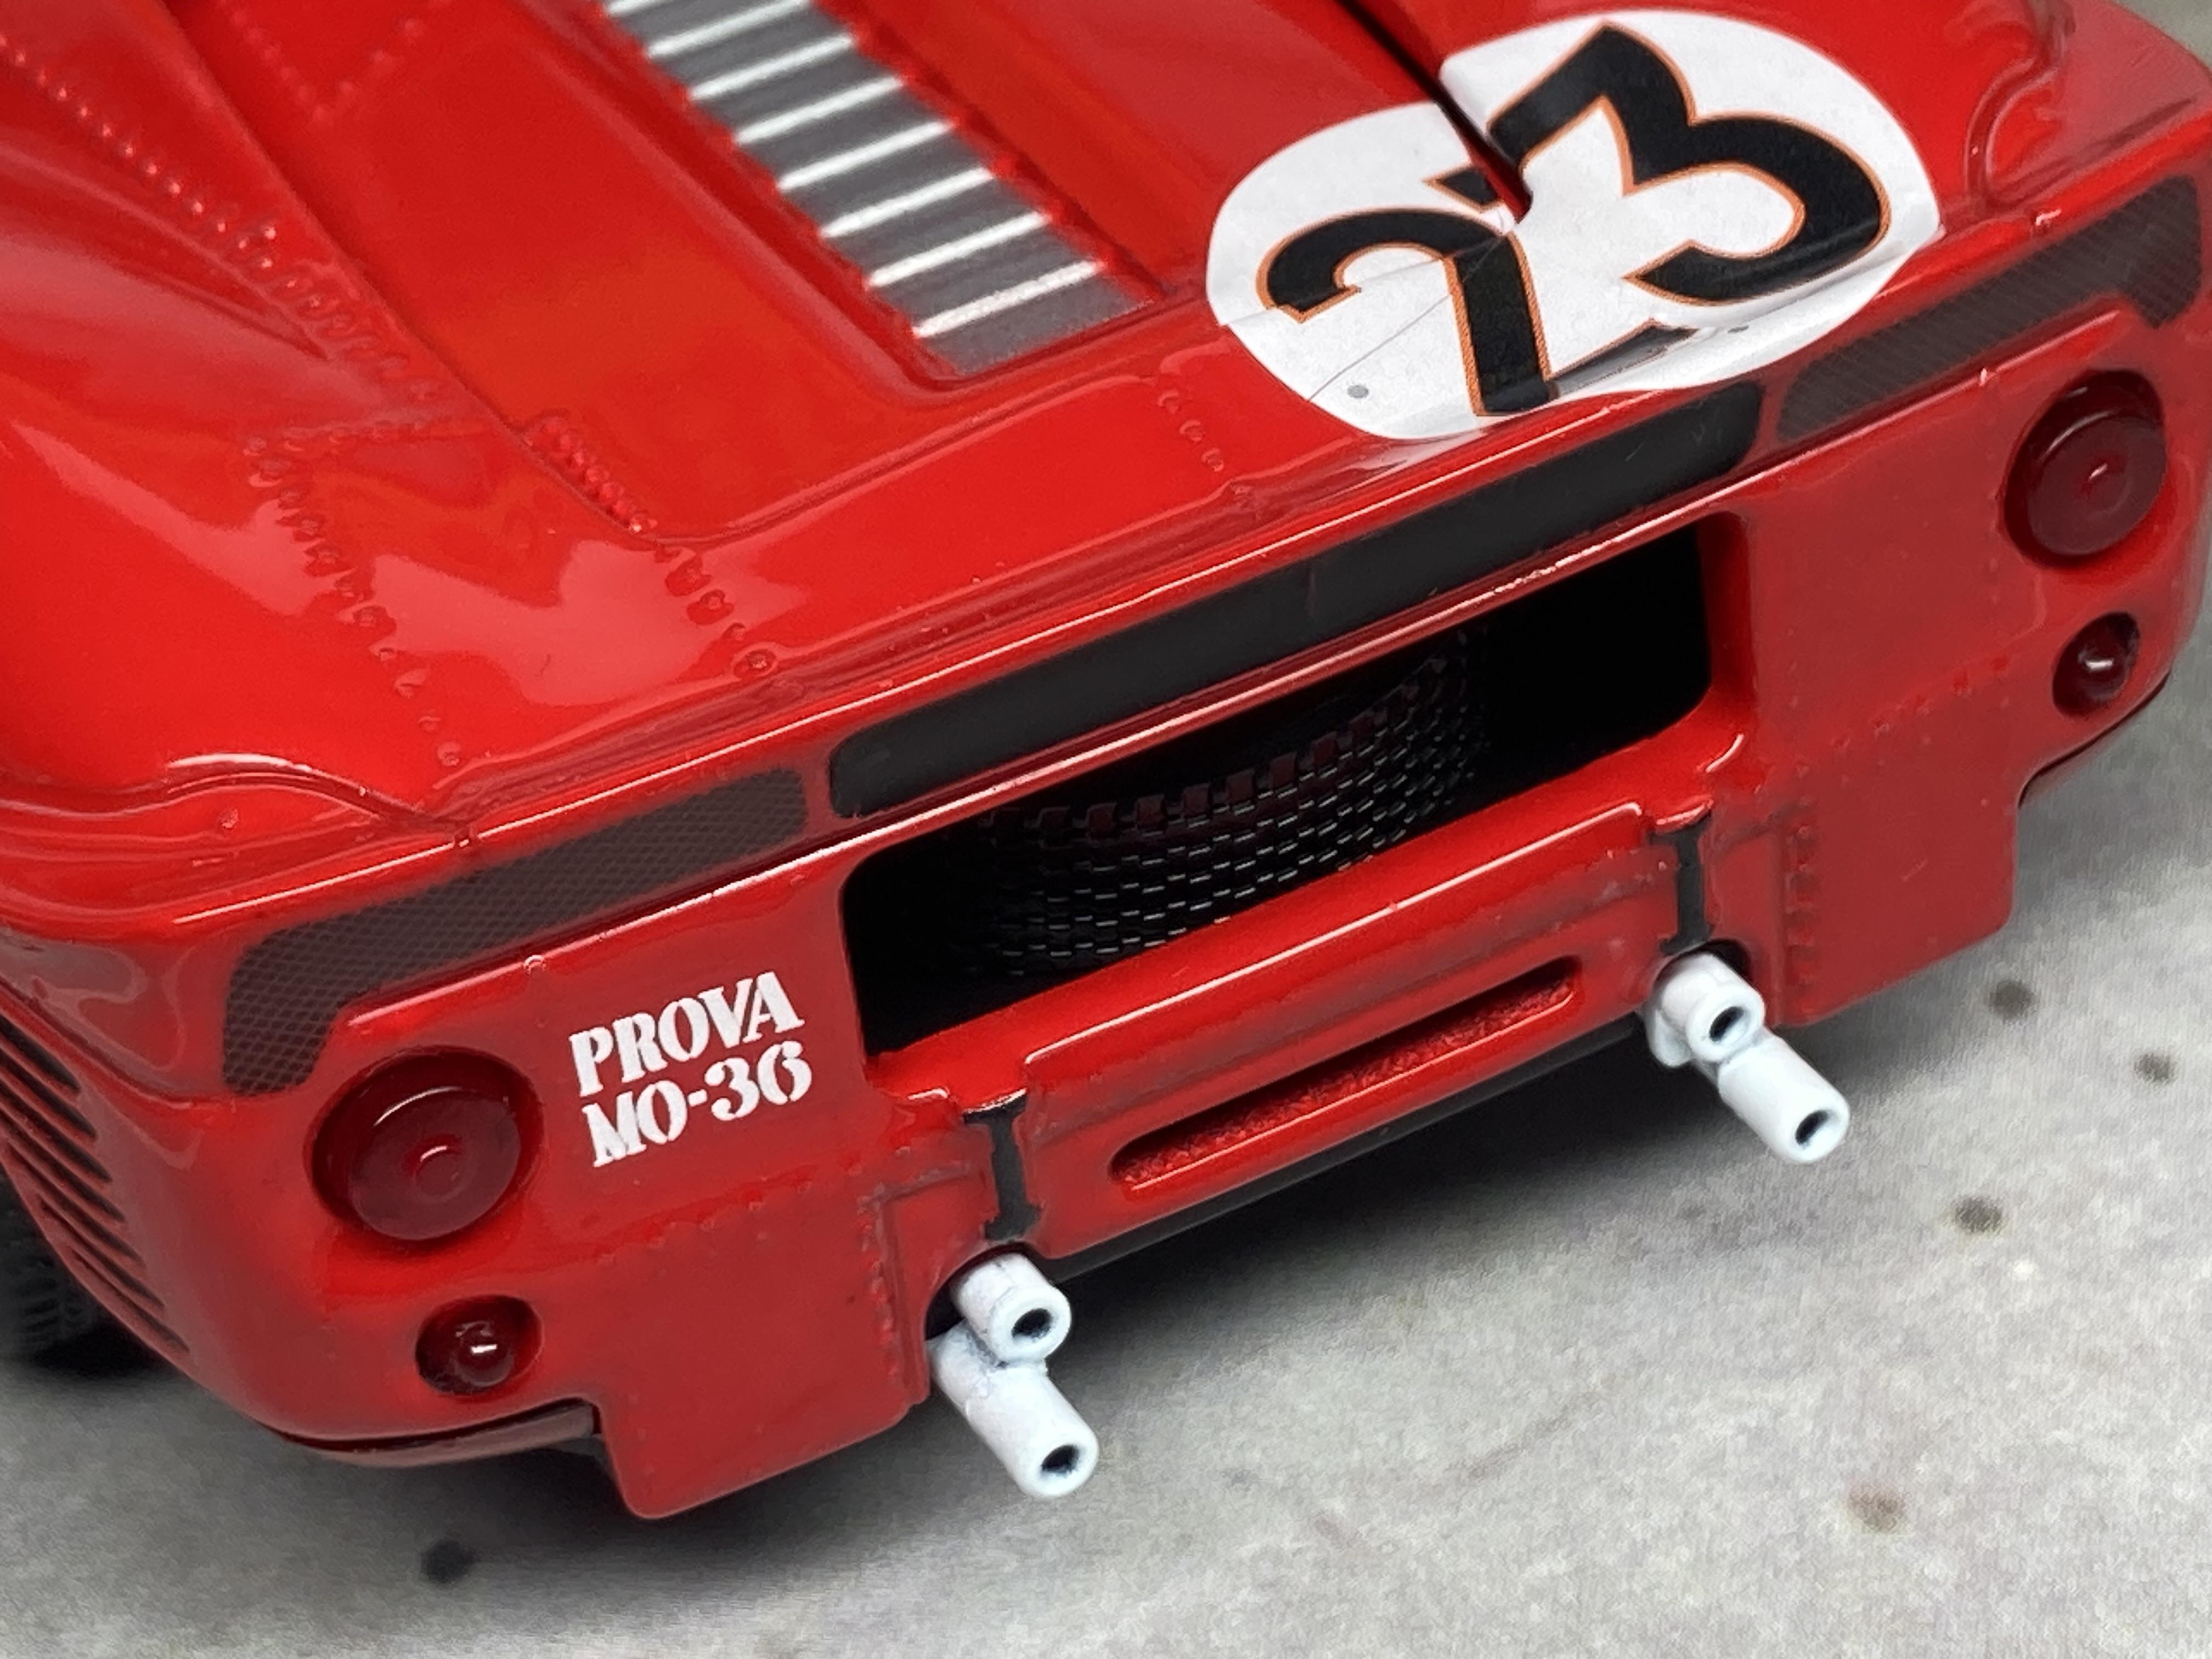
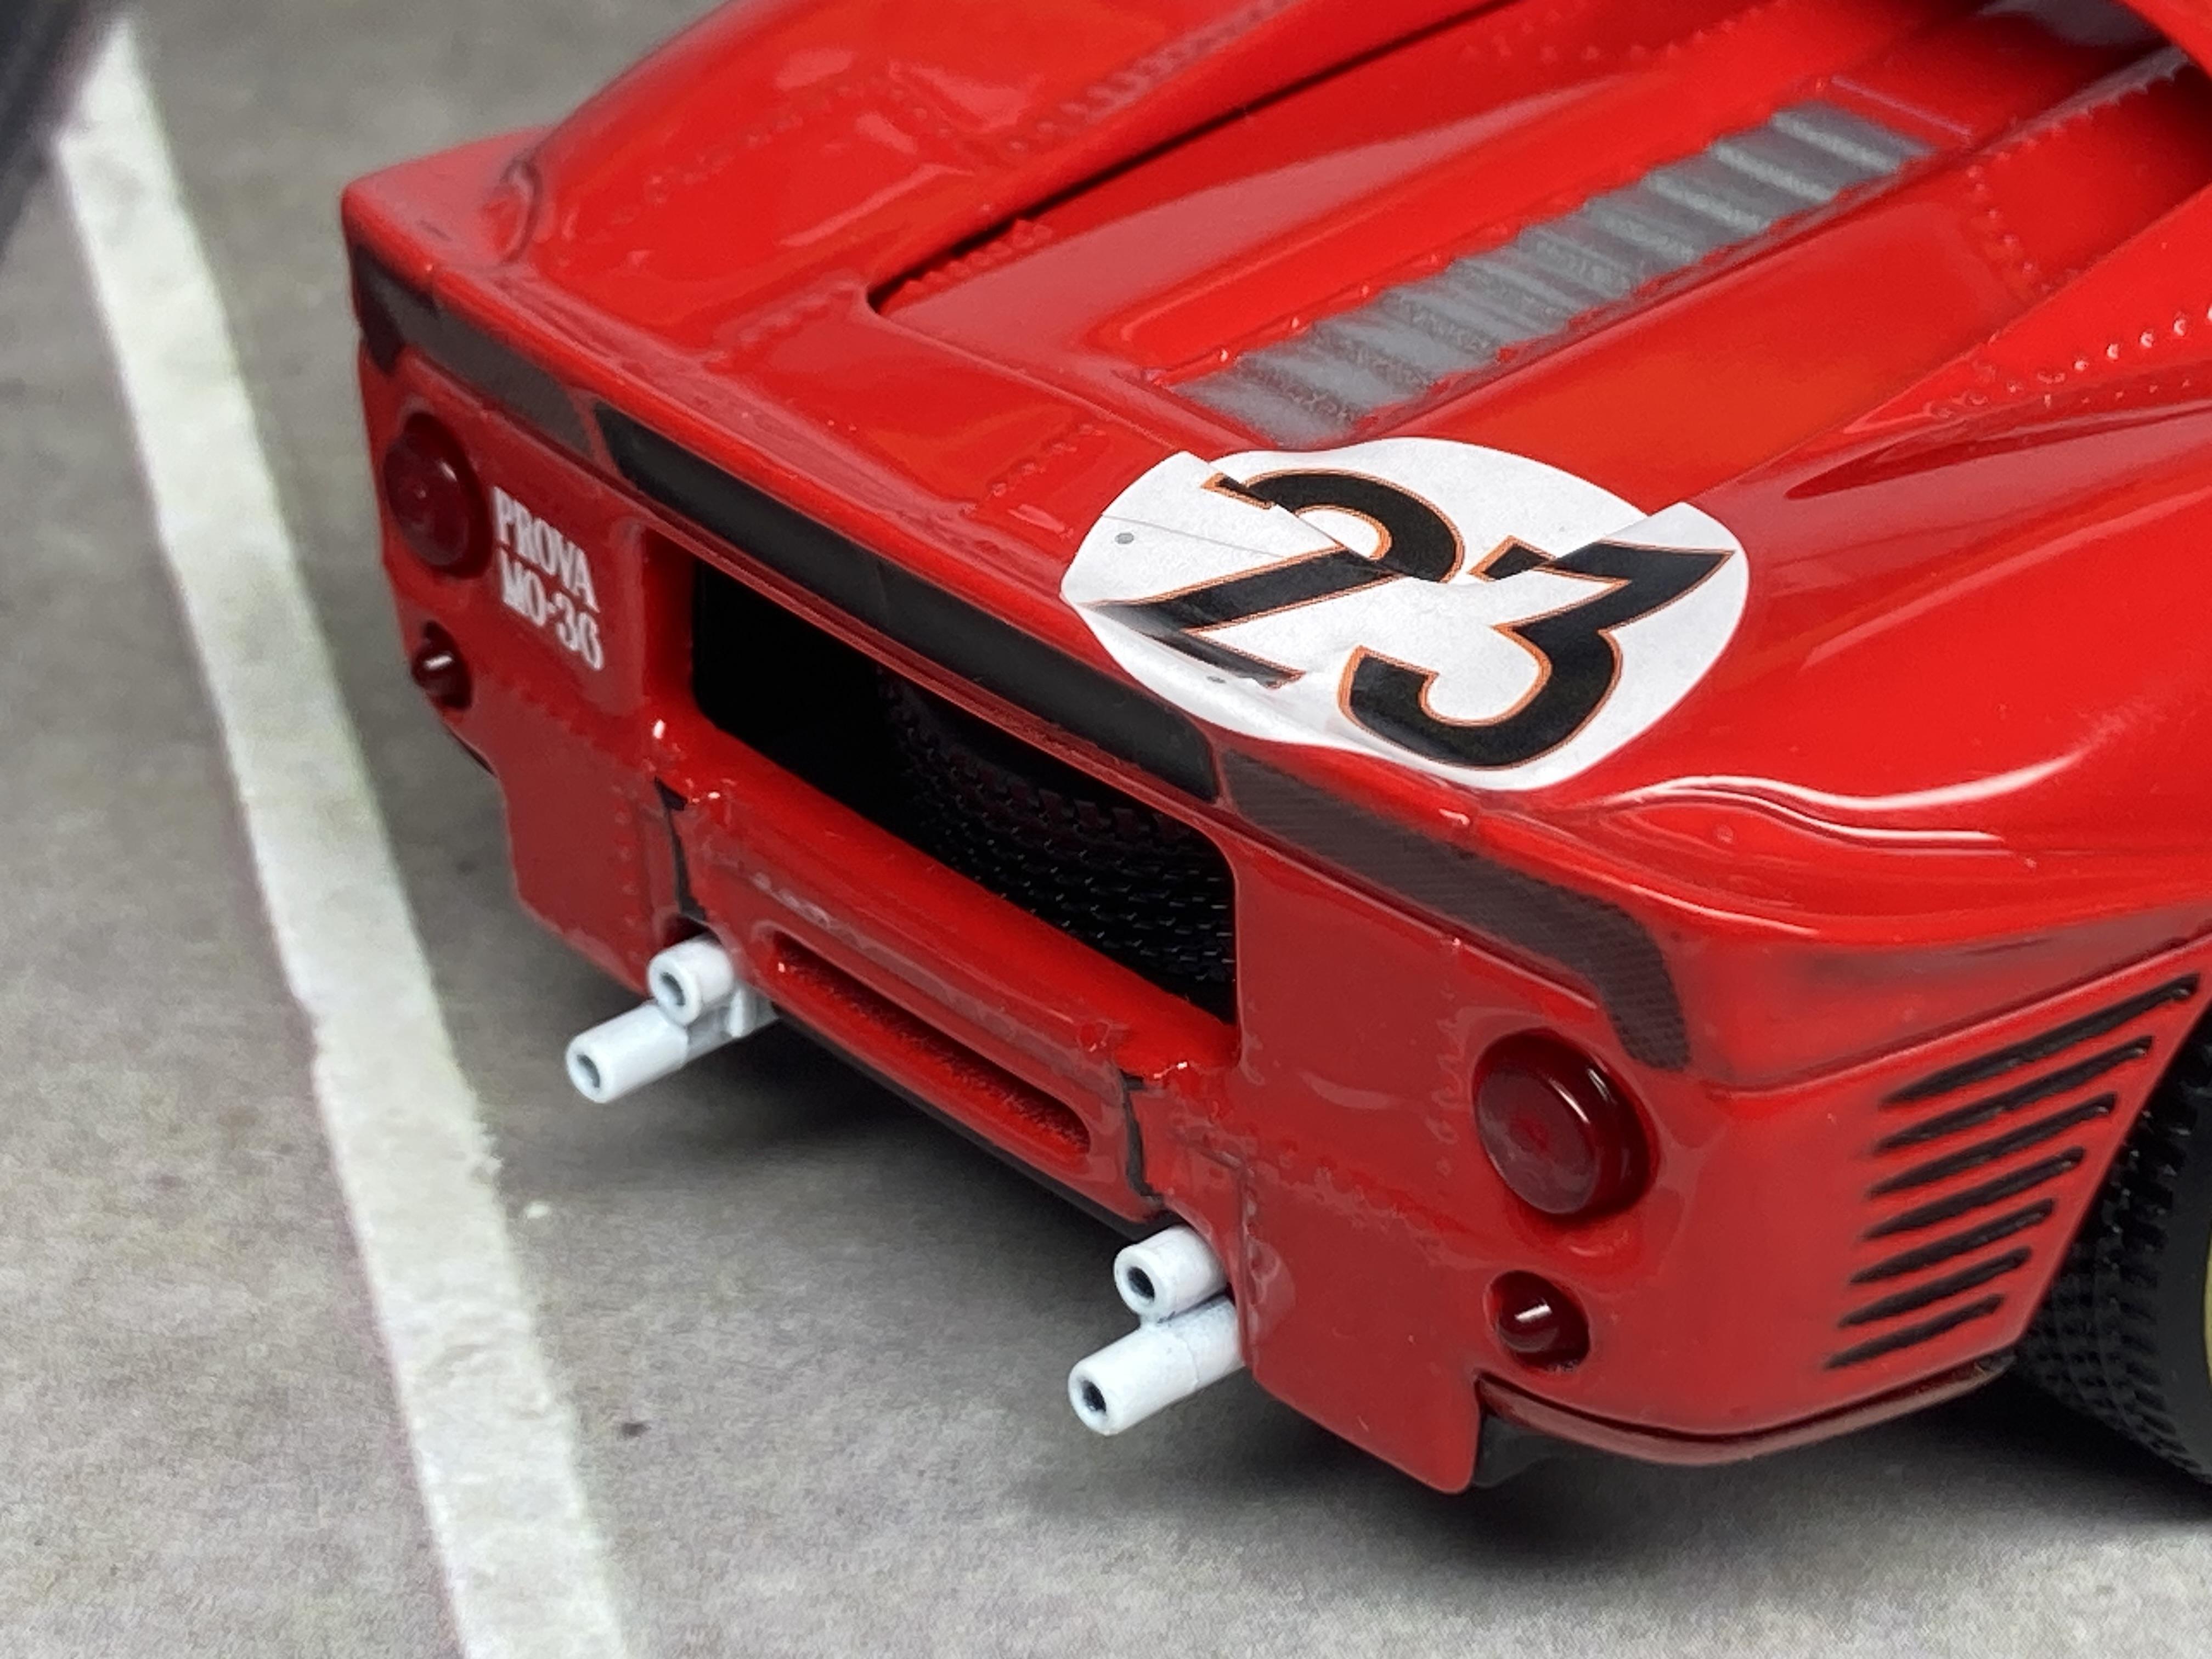
Hi there, I saw one of these modern Bburago metal kits on a German forum some weeks ago. These kits did exist before, but back then they weren't up to today's standards. I find kits of this kind particularly interesting especially for cars that aren't available as regular plastic kits. The (open-top) Ferrari 300 P4 shown here is one such example, but so are the also available Ferrari 488 Challenge or the Le Mans-winning Ferrari 499P. For around €25-30, you can get kits with a properly pre-painted body and around 30 parts. Let's face it, these are the same parts used in Bburago's finished models. They're just putting something together here to appeal to people like me – who don't put anything in their display case that wasn't at least partially "built" by themselves. But it's also fun to do these as a quick alternative in between more difficult builds. You need to apply the decals. I sealed them with Pledge for protection. Futhermore I added some painting for interior detail, other than that this is OOB. This is what's inside the box:
- 14 replies
-
- 11
-

-
Many thanks again!
-
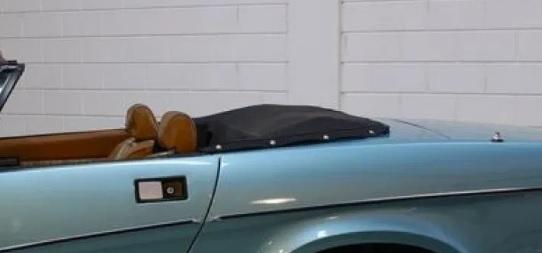
Hi there, it's not the first time that I am thinking of making a hardtop into a convertible. The problem so far has been how to source a fitting boot. I am thinking of something more complex than a piece of Evergreen sheet with a piece of masking tape on it (although for some cars that would work). Something with a bit of height, structure, but that should also be "uneven" in a realistic way. See the example below: I have yet to do some testing, but I would like to feel out what you guys think. Wouldn't be the first time that I could explore some good practical ideas on this forum! Thanks ahead for any feedback!
-
Thanks Larry and Chris!
-
Many thanks guys!
-
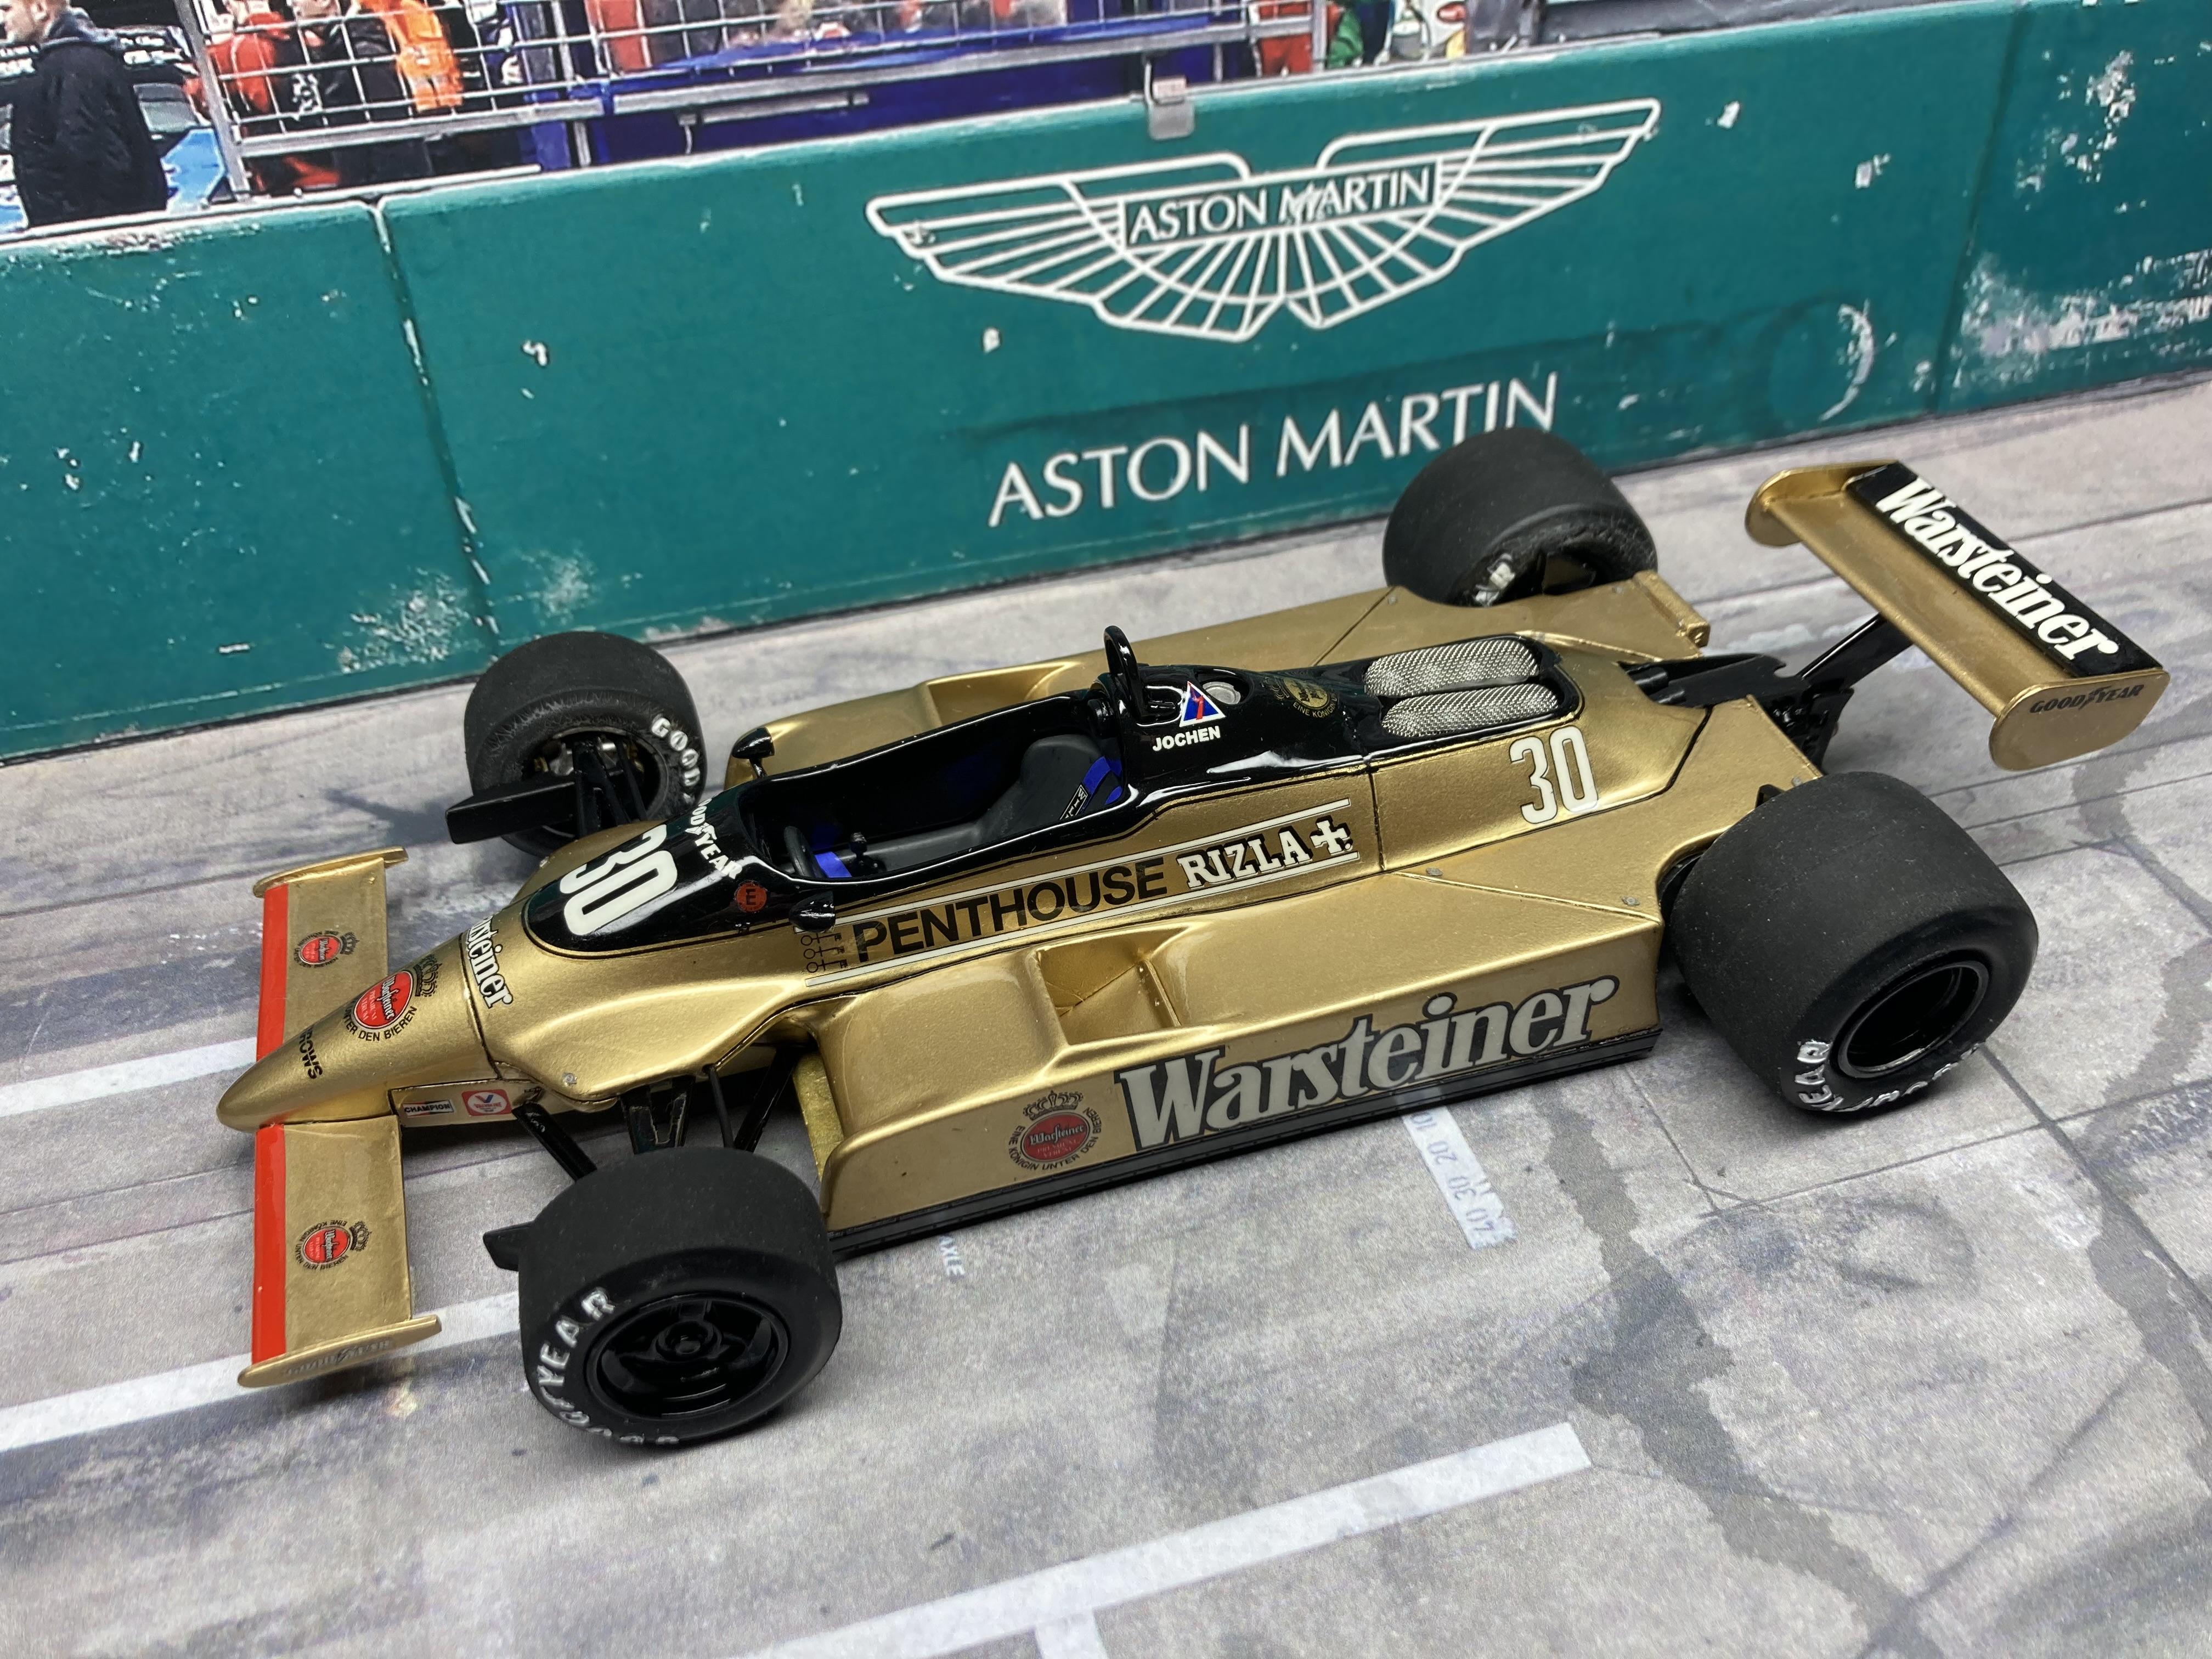
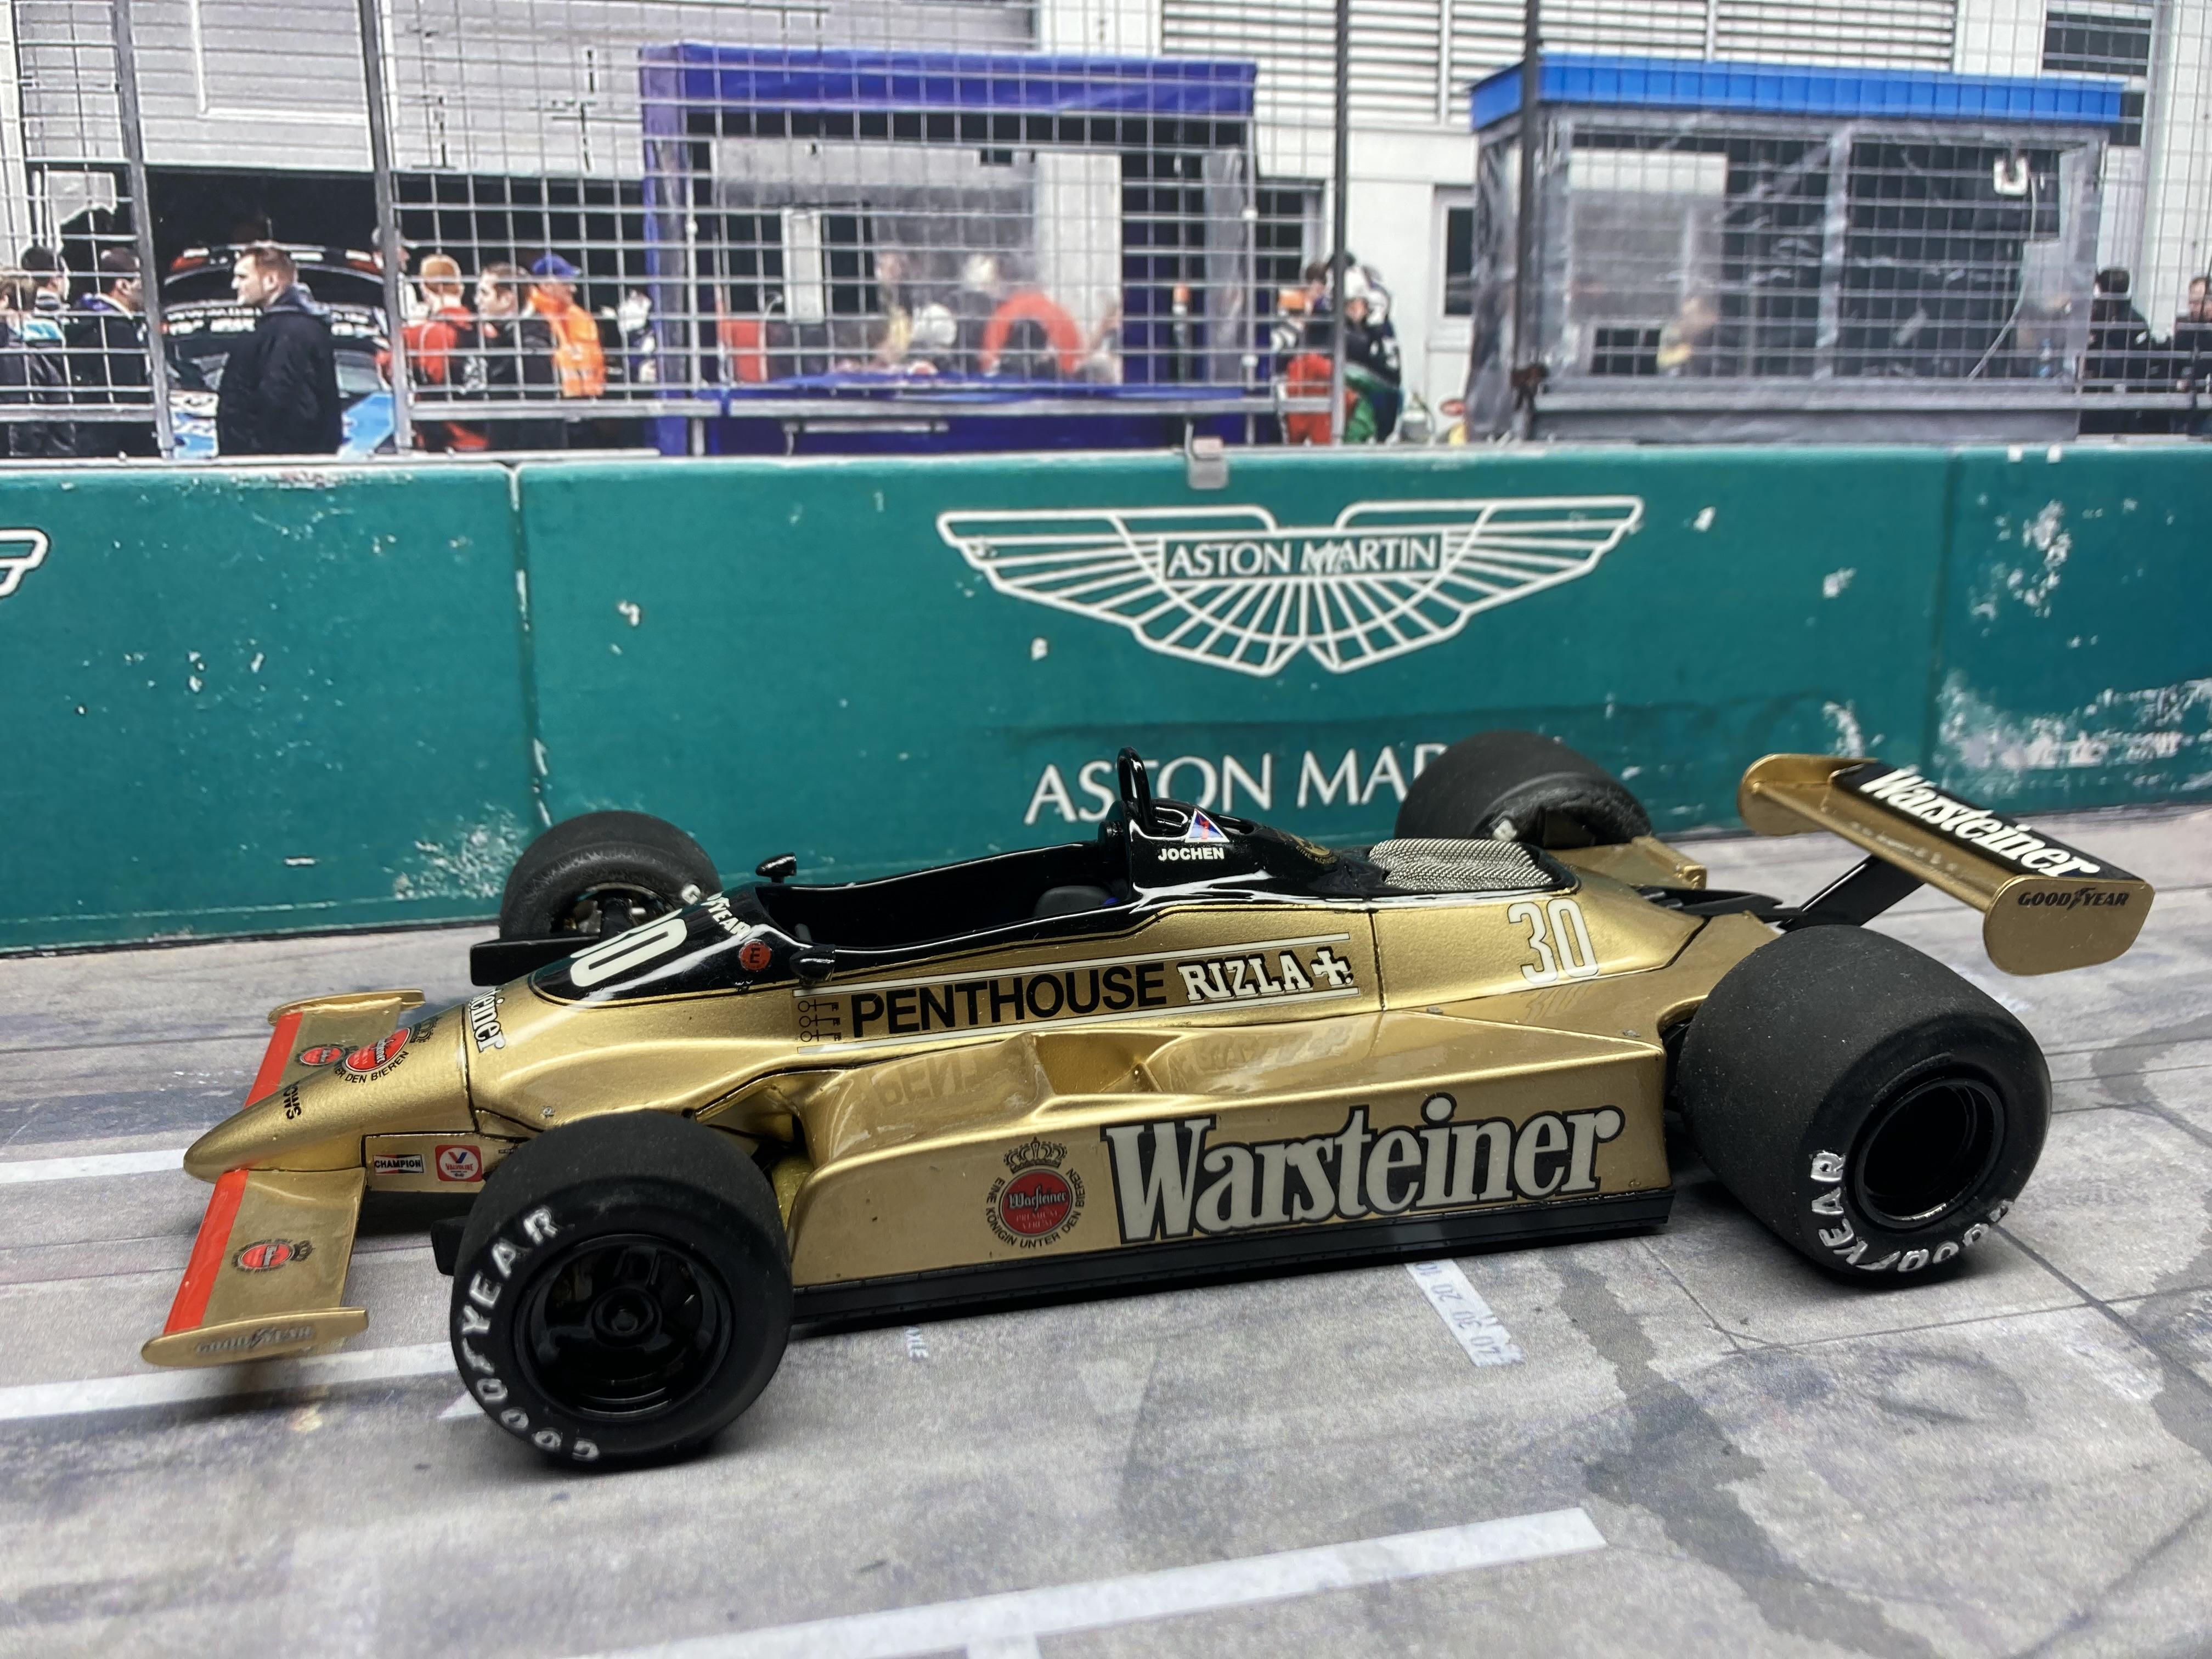
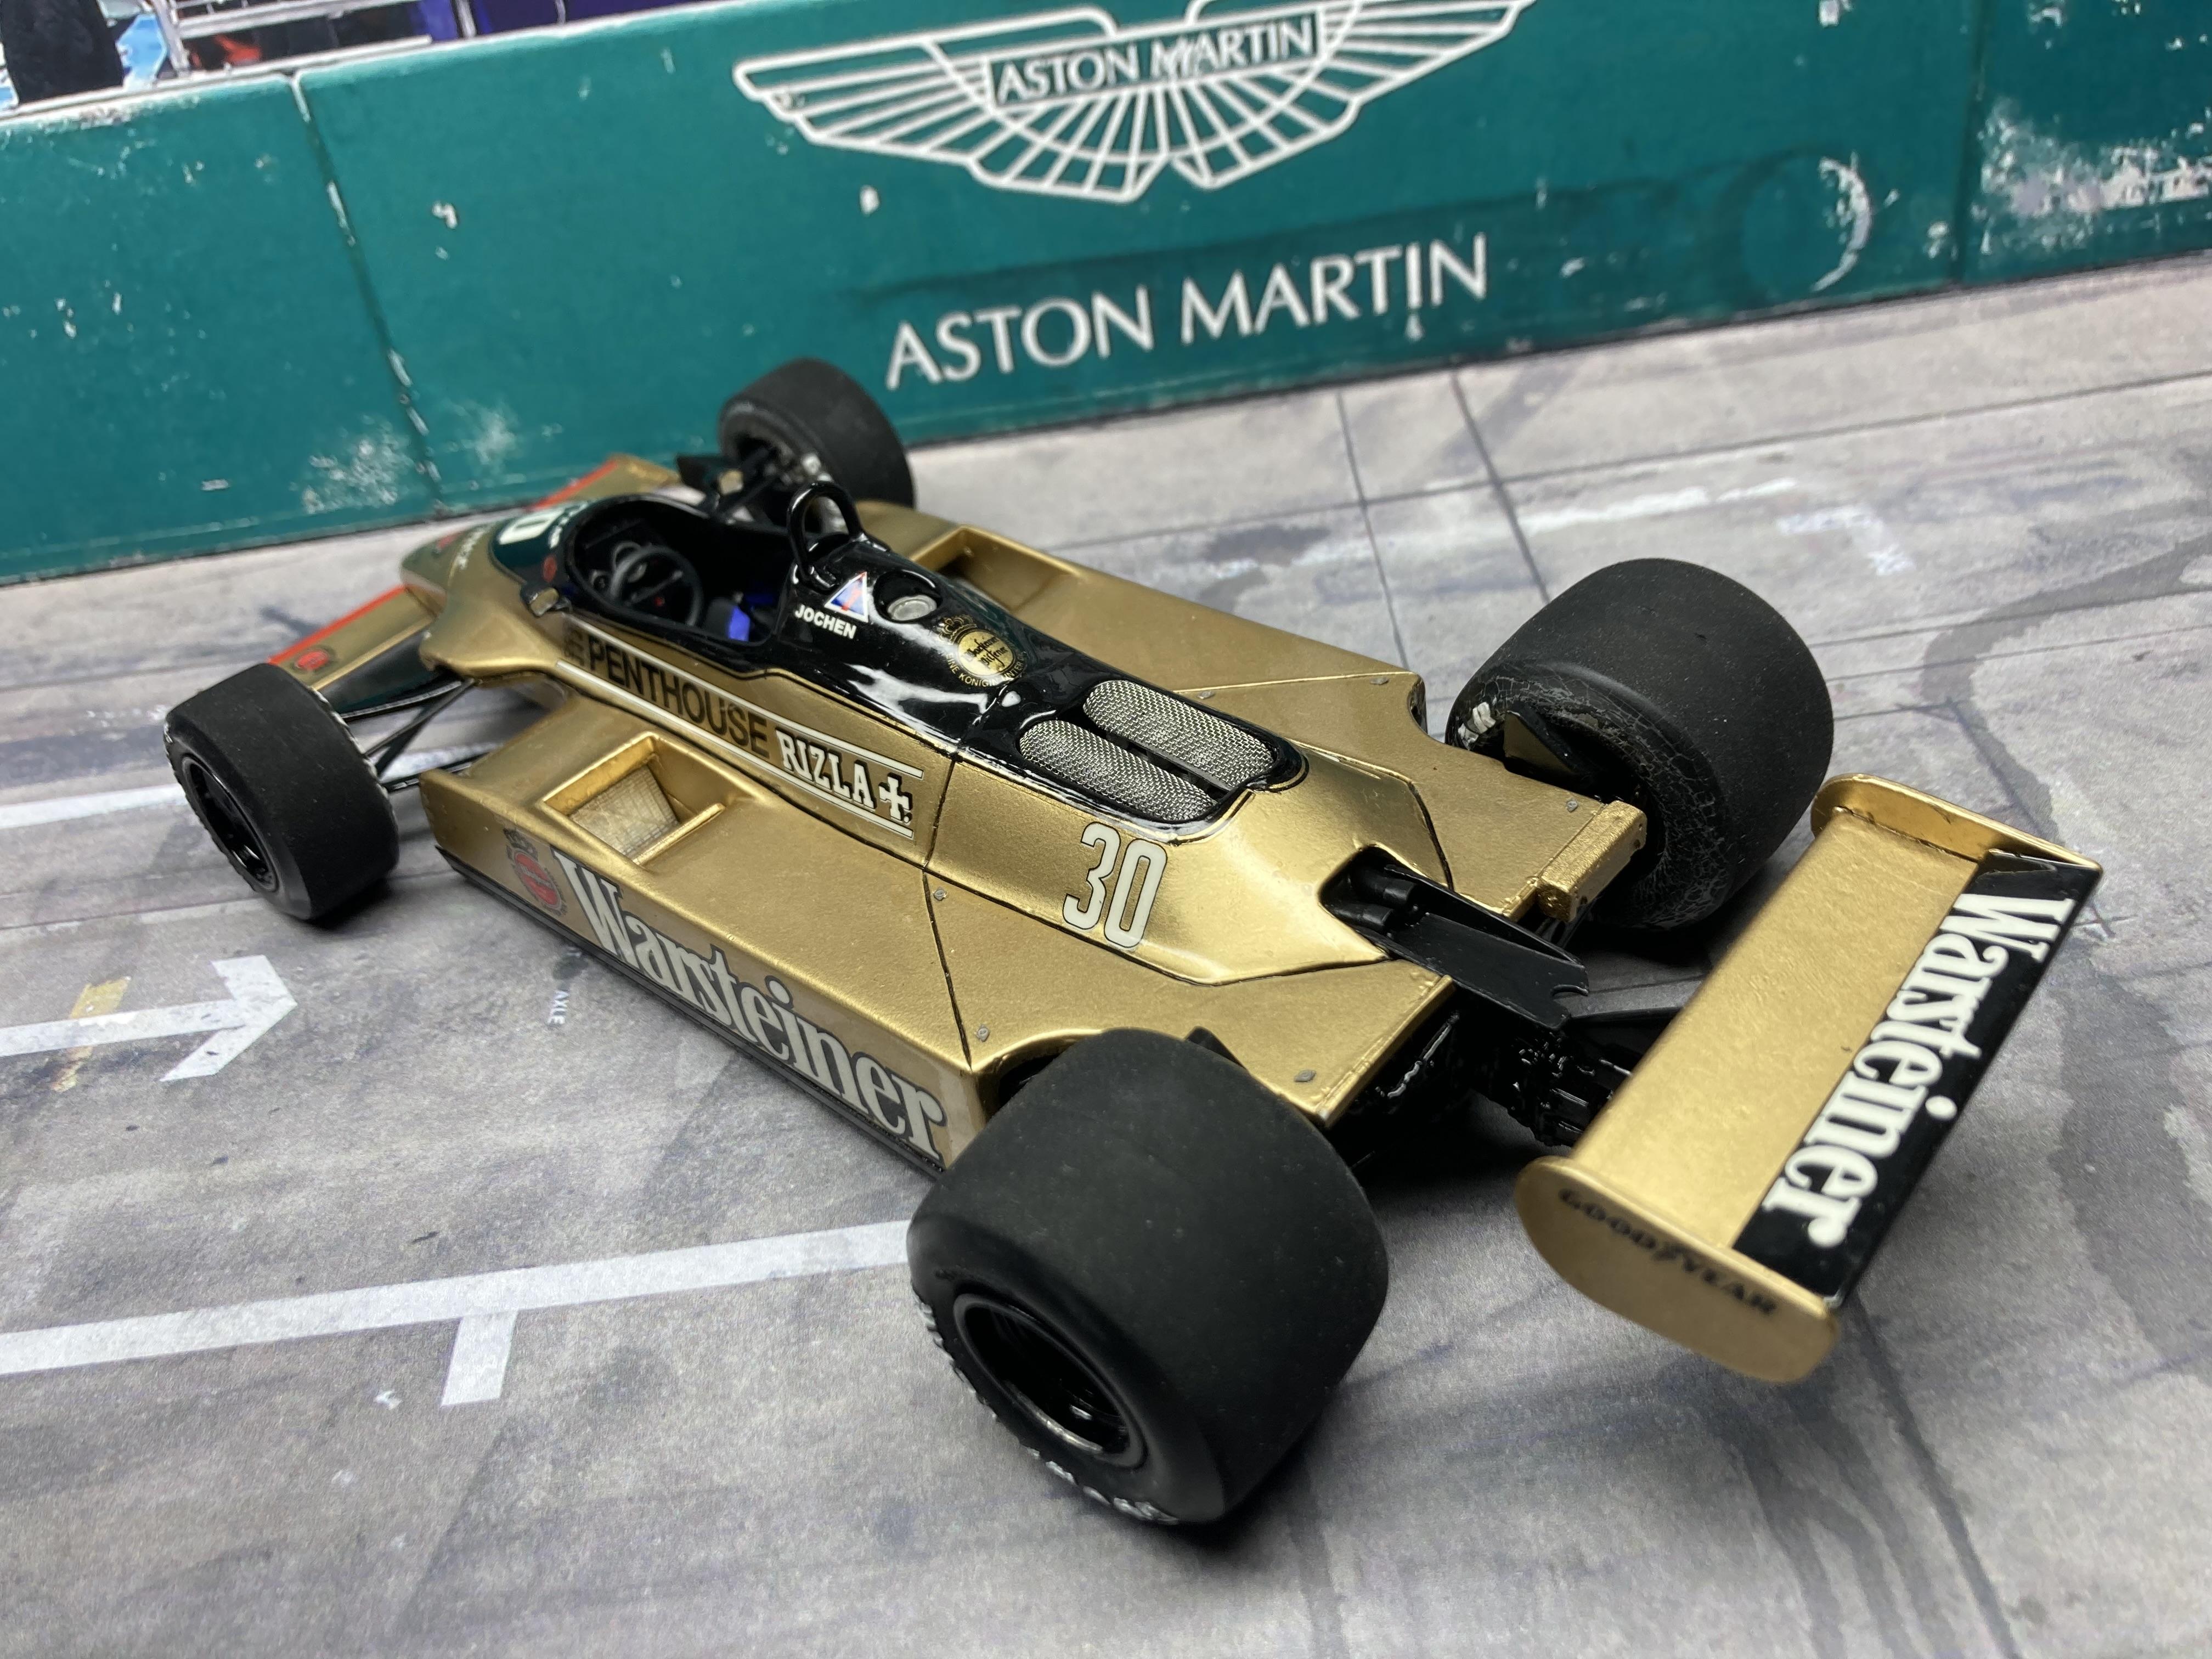
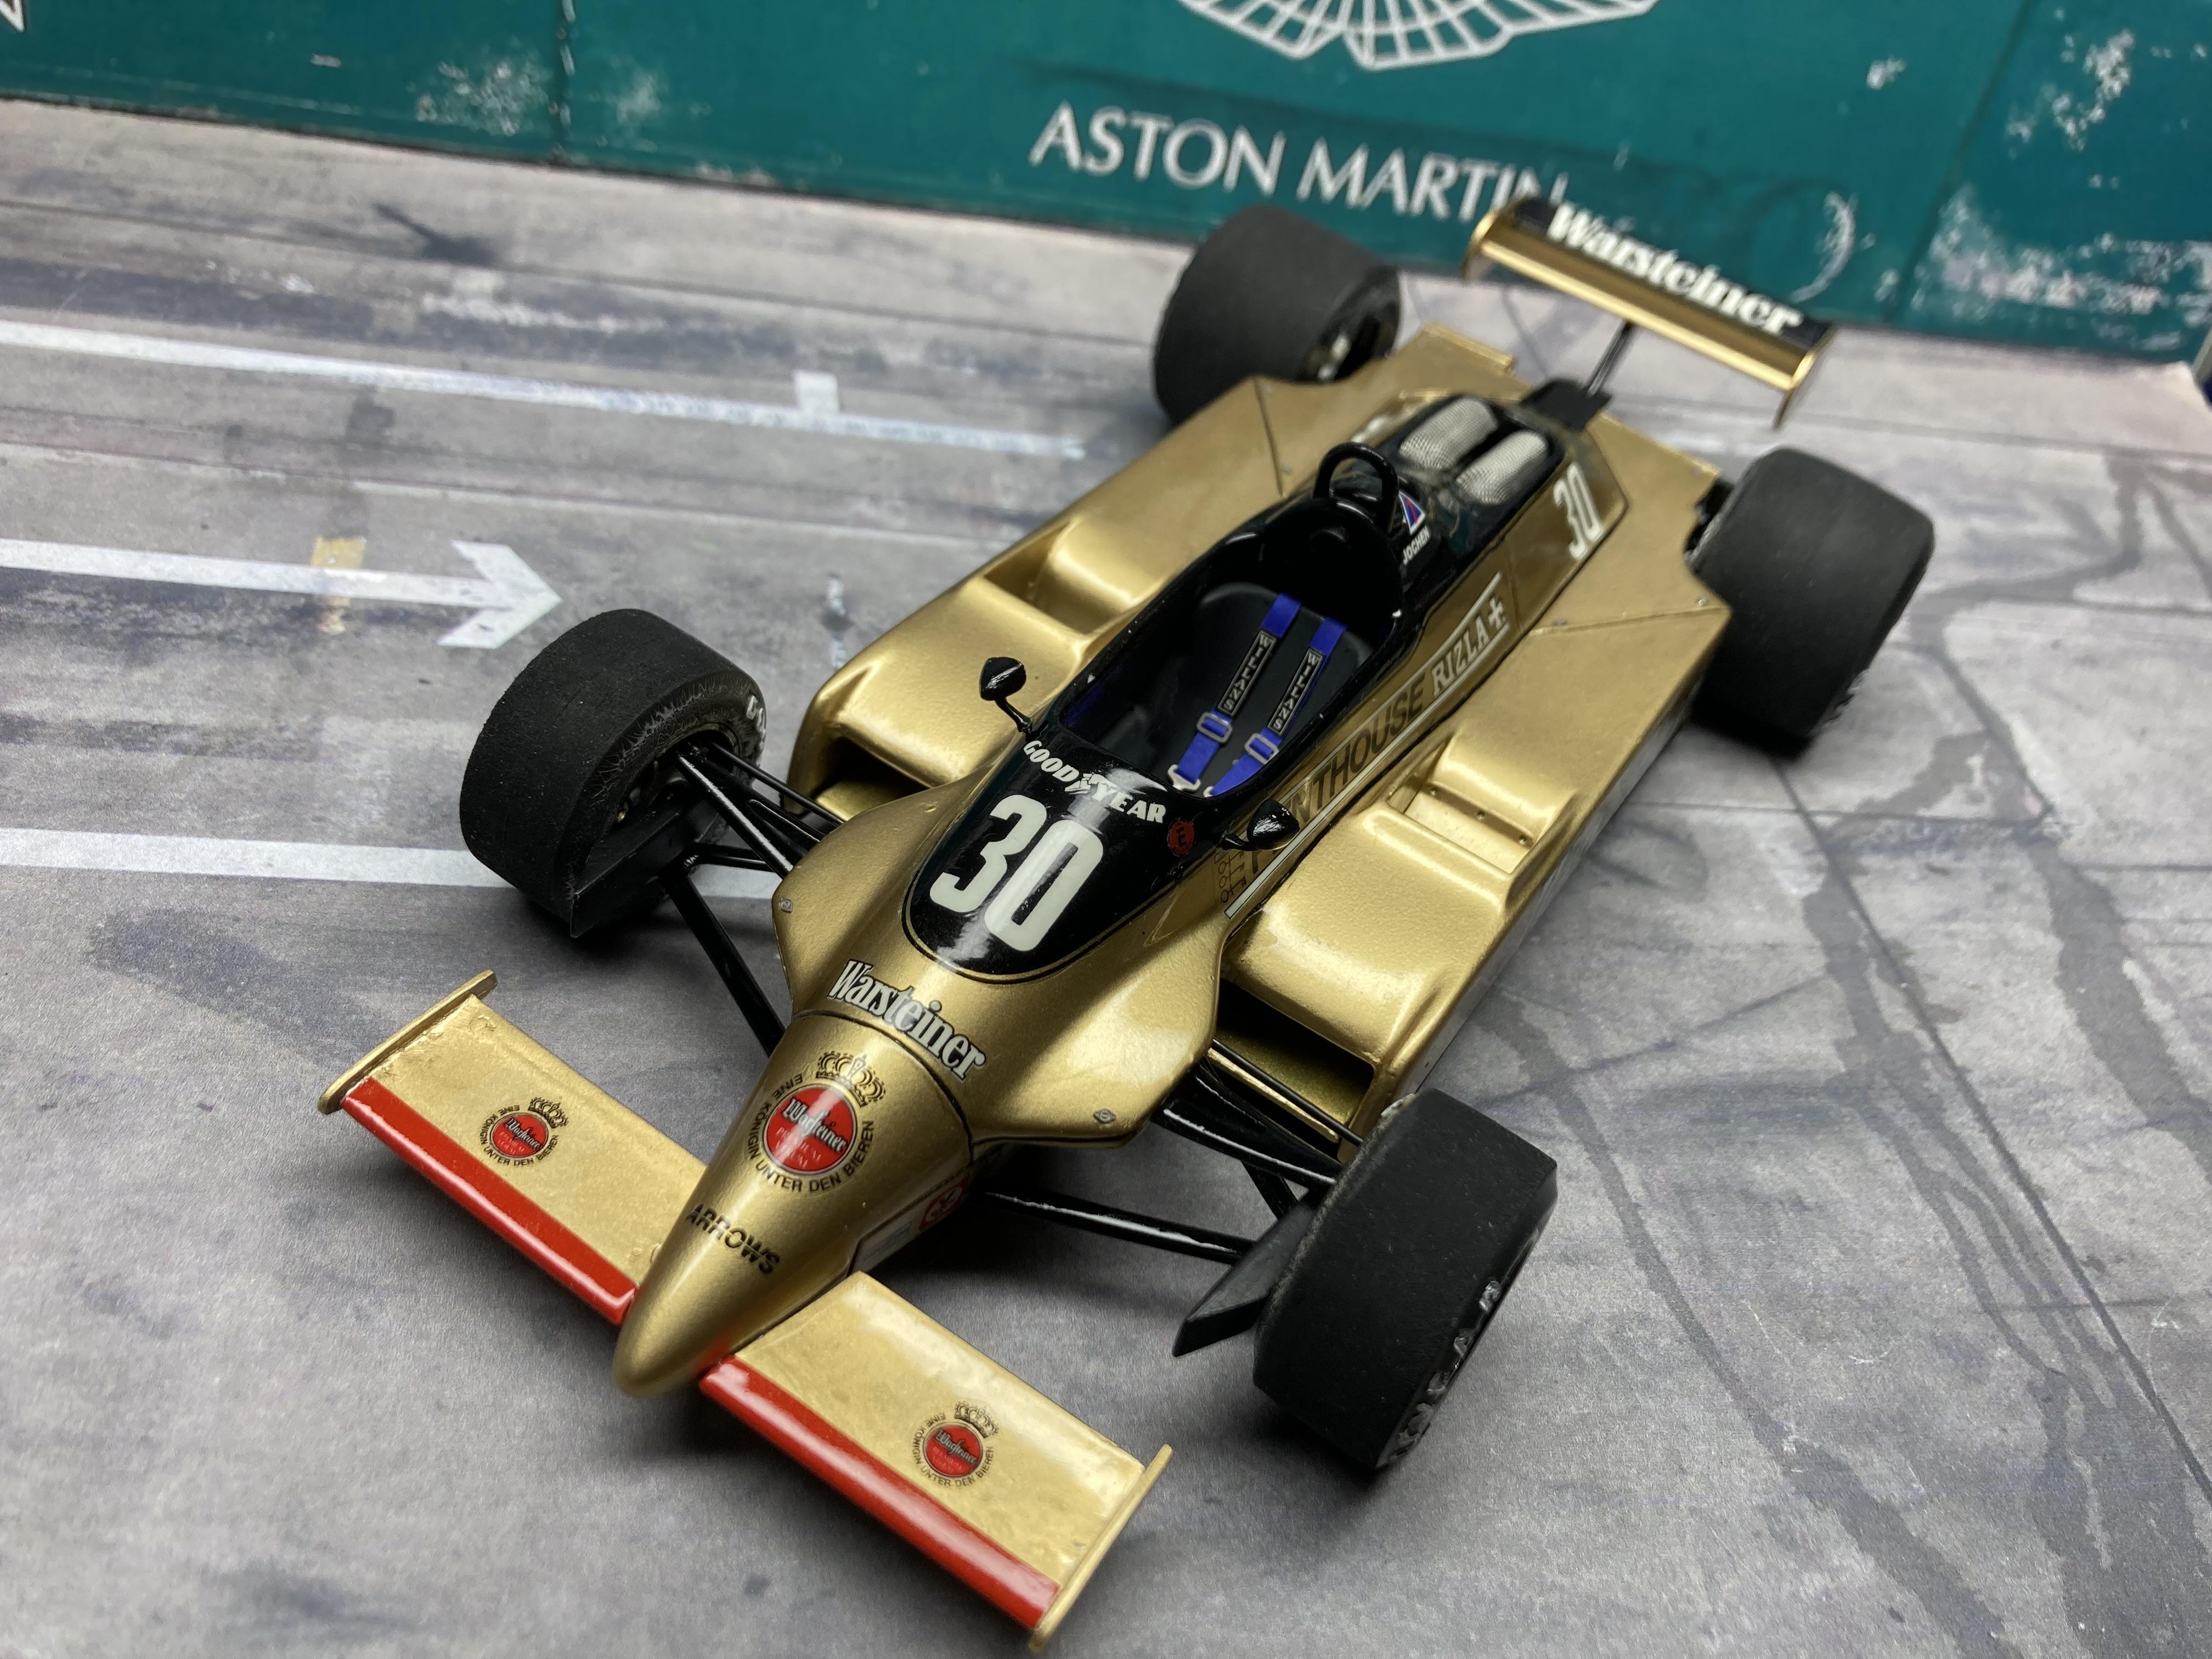
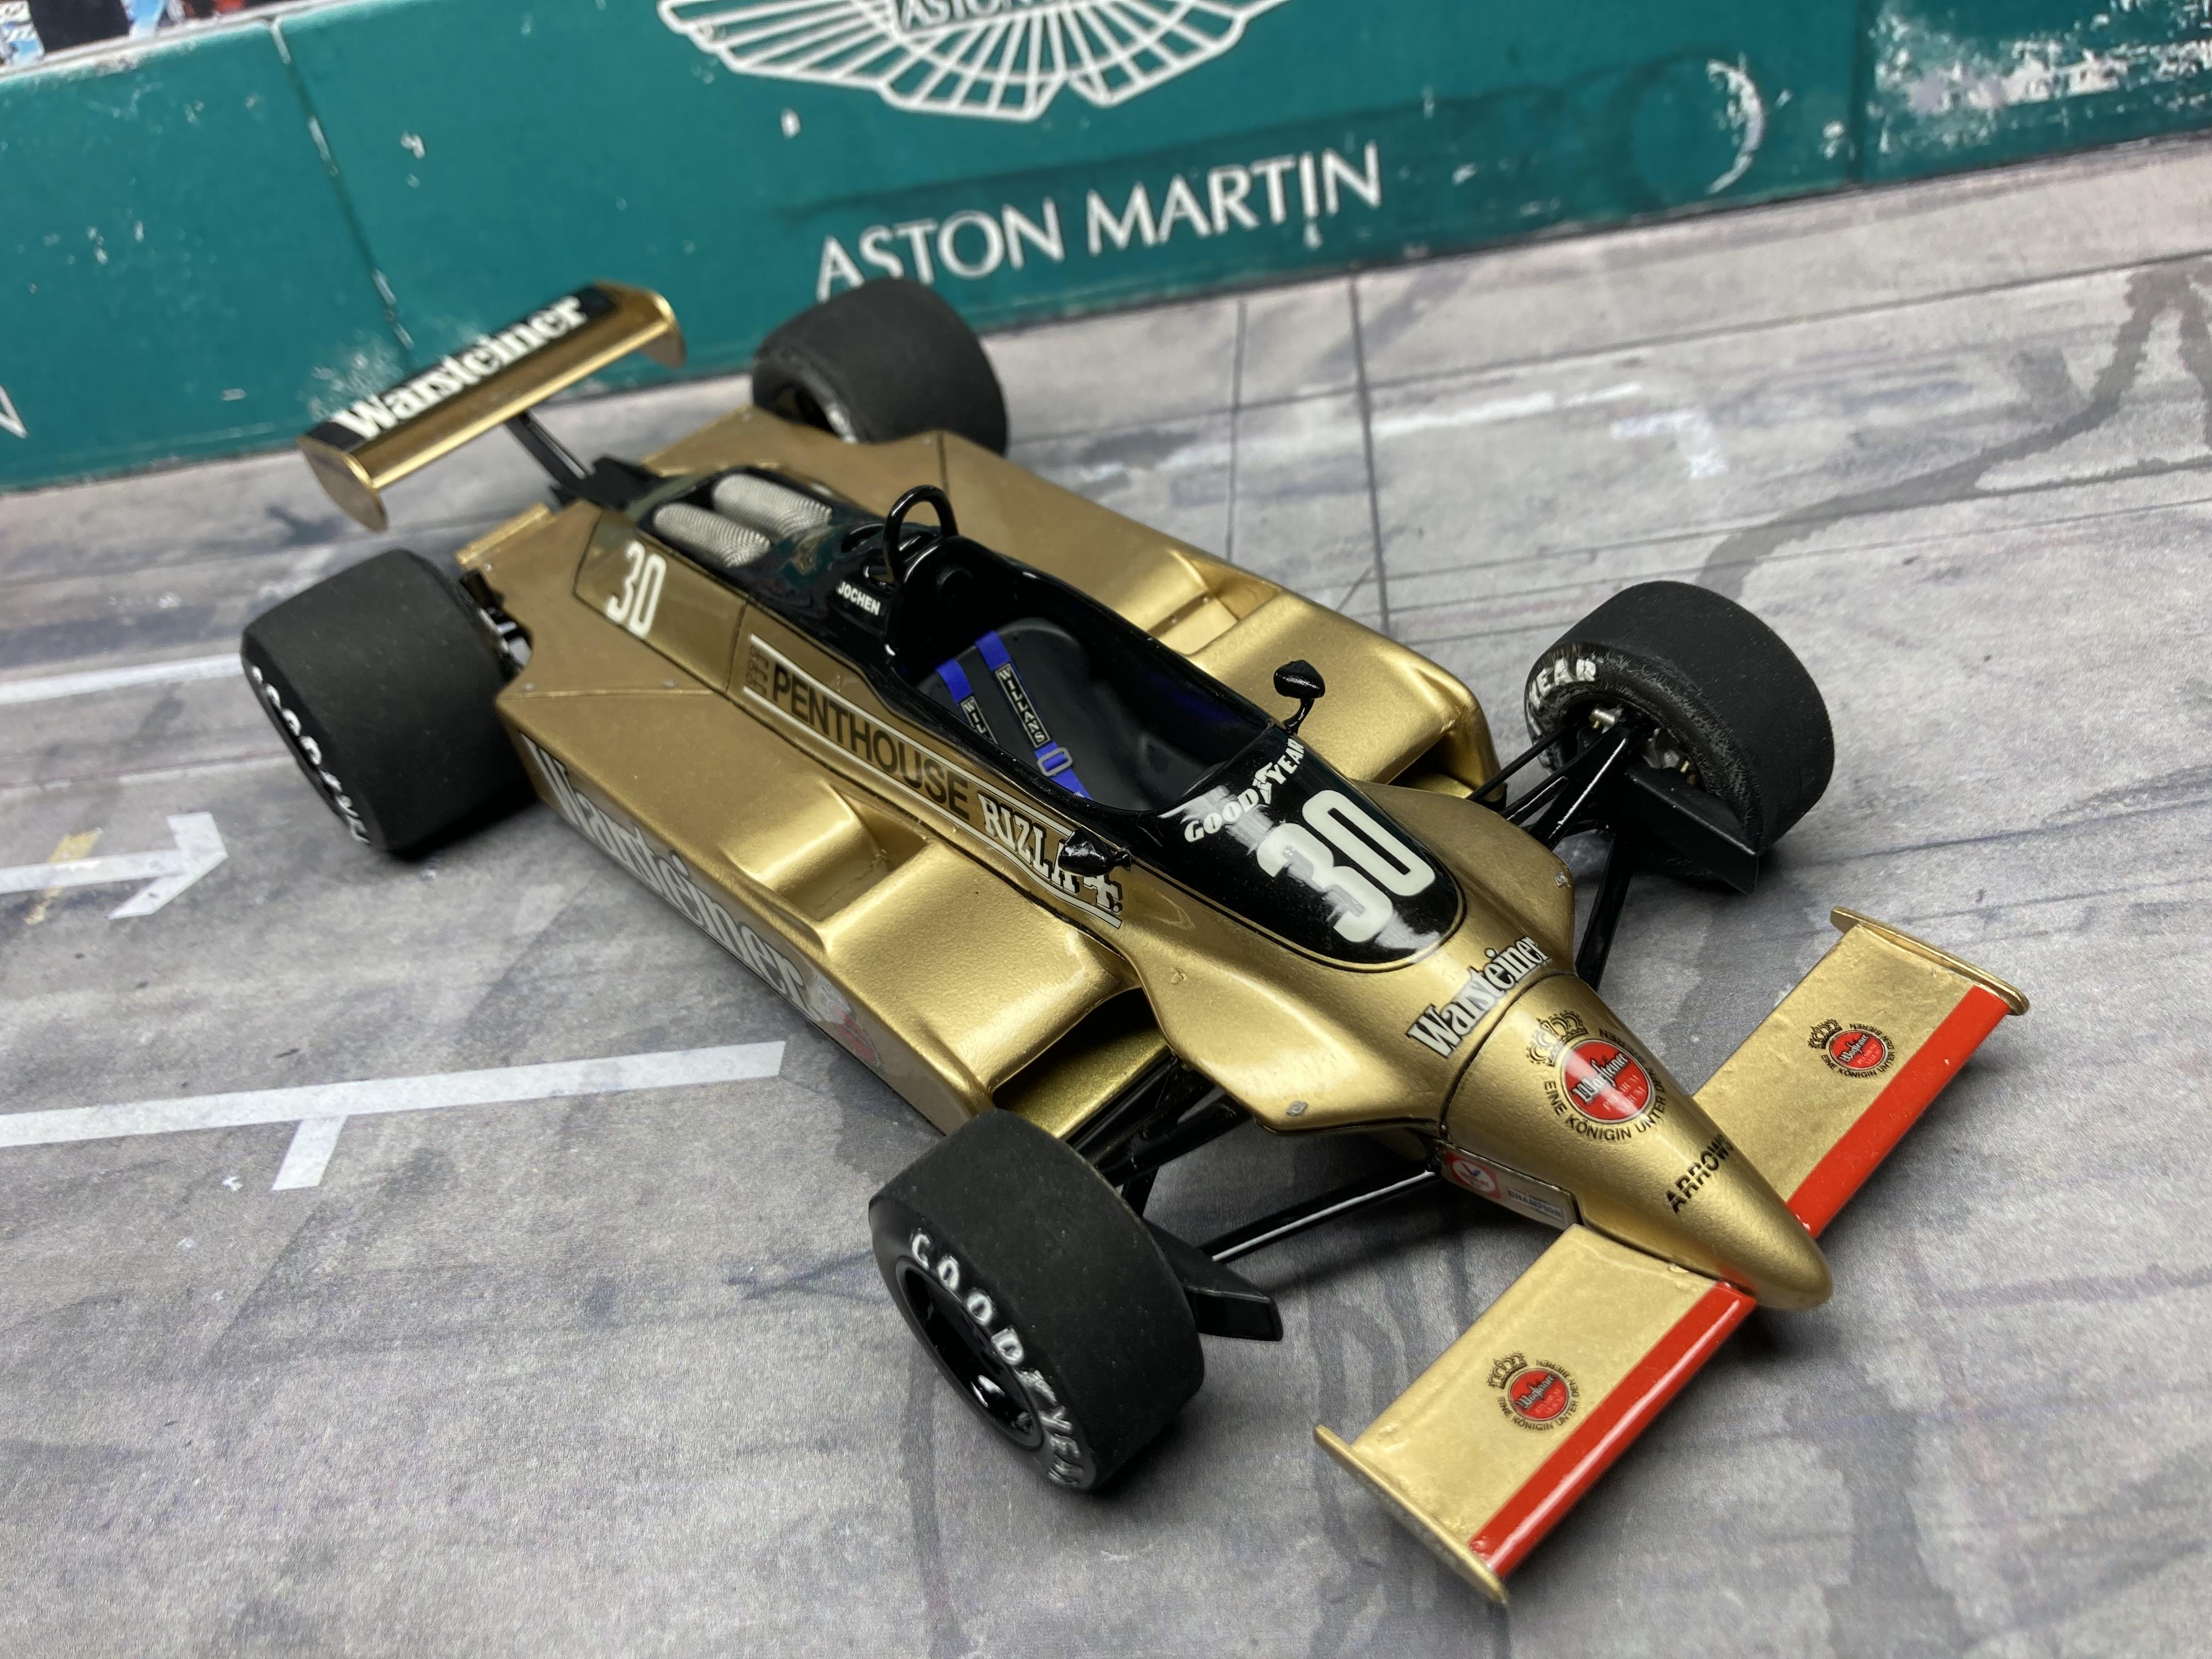
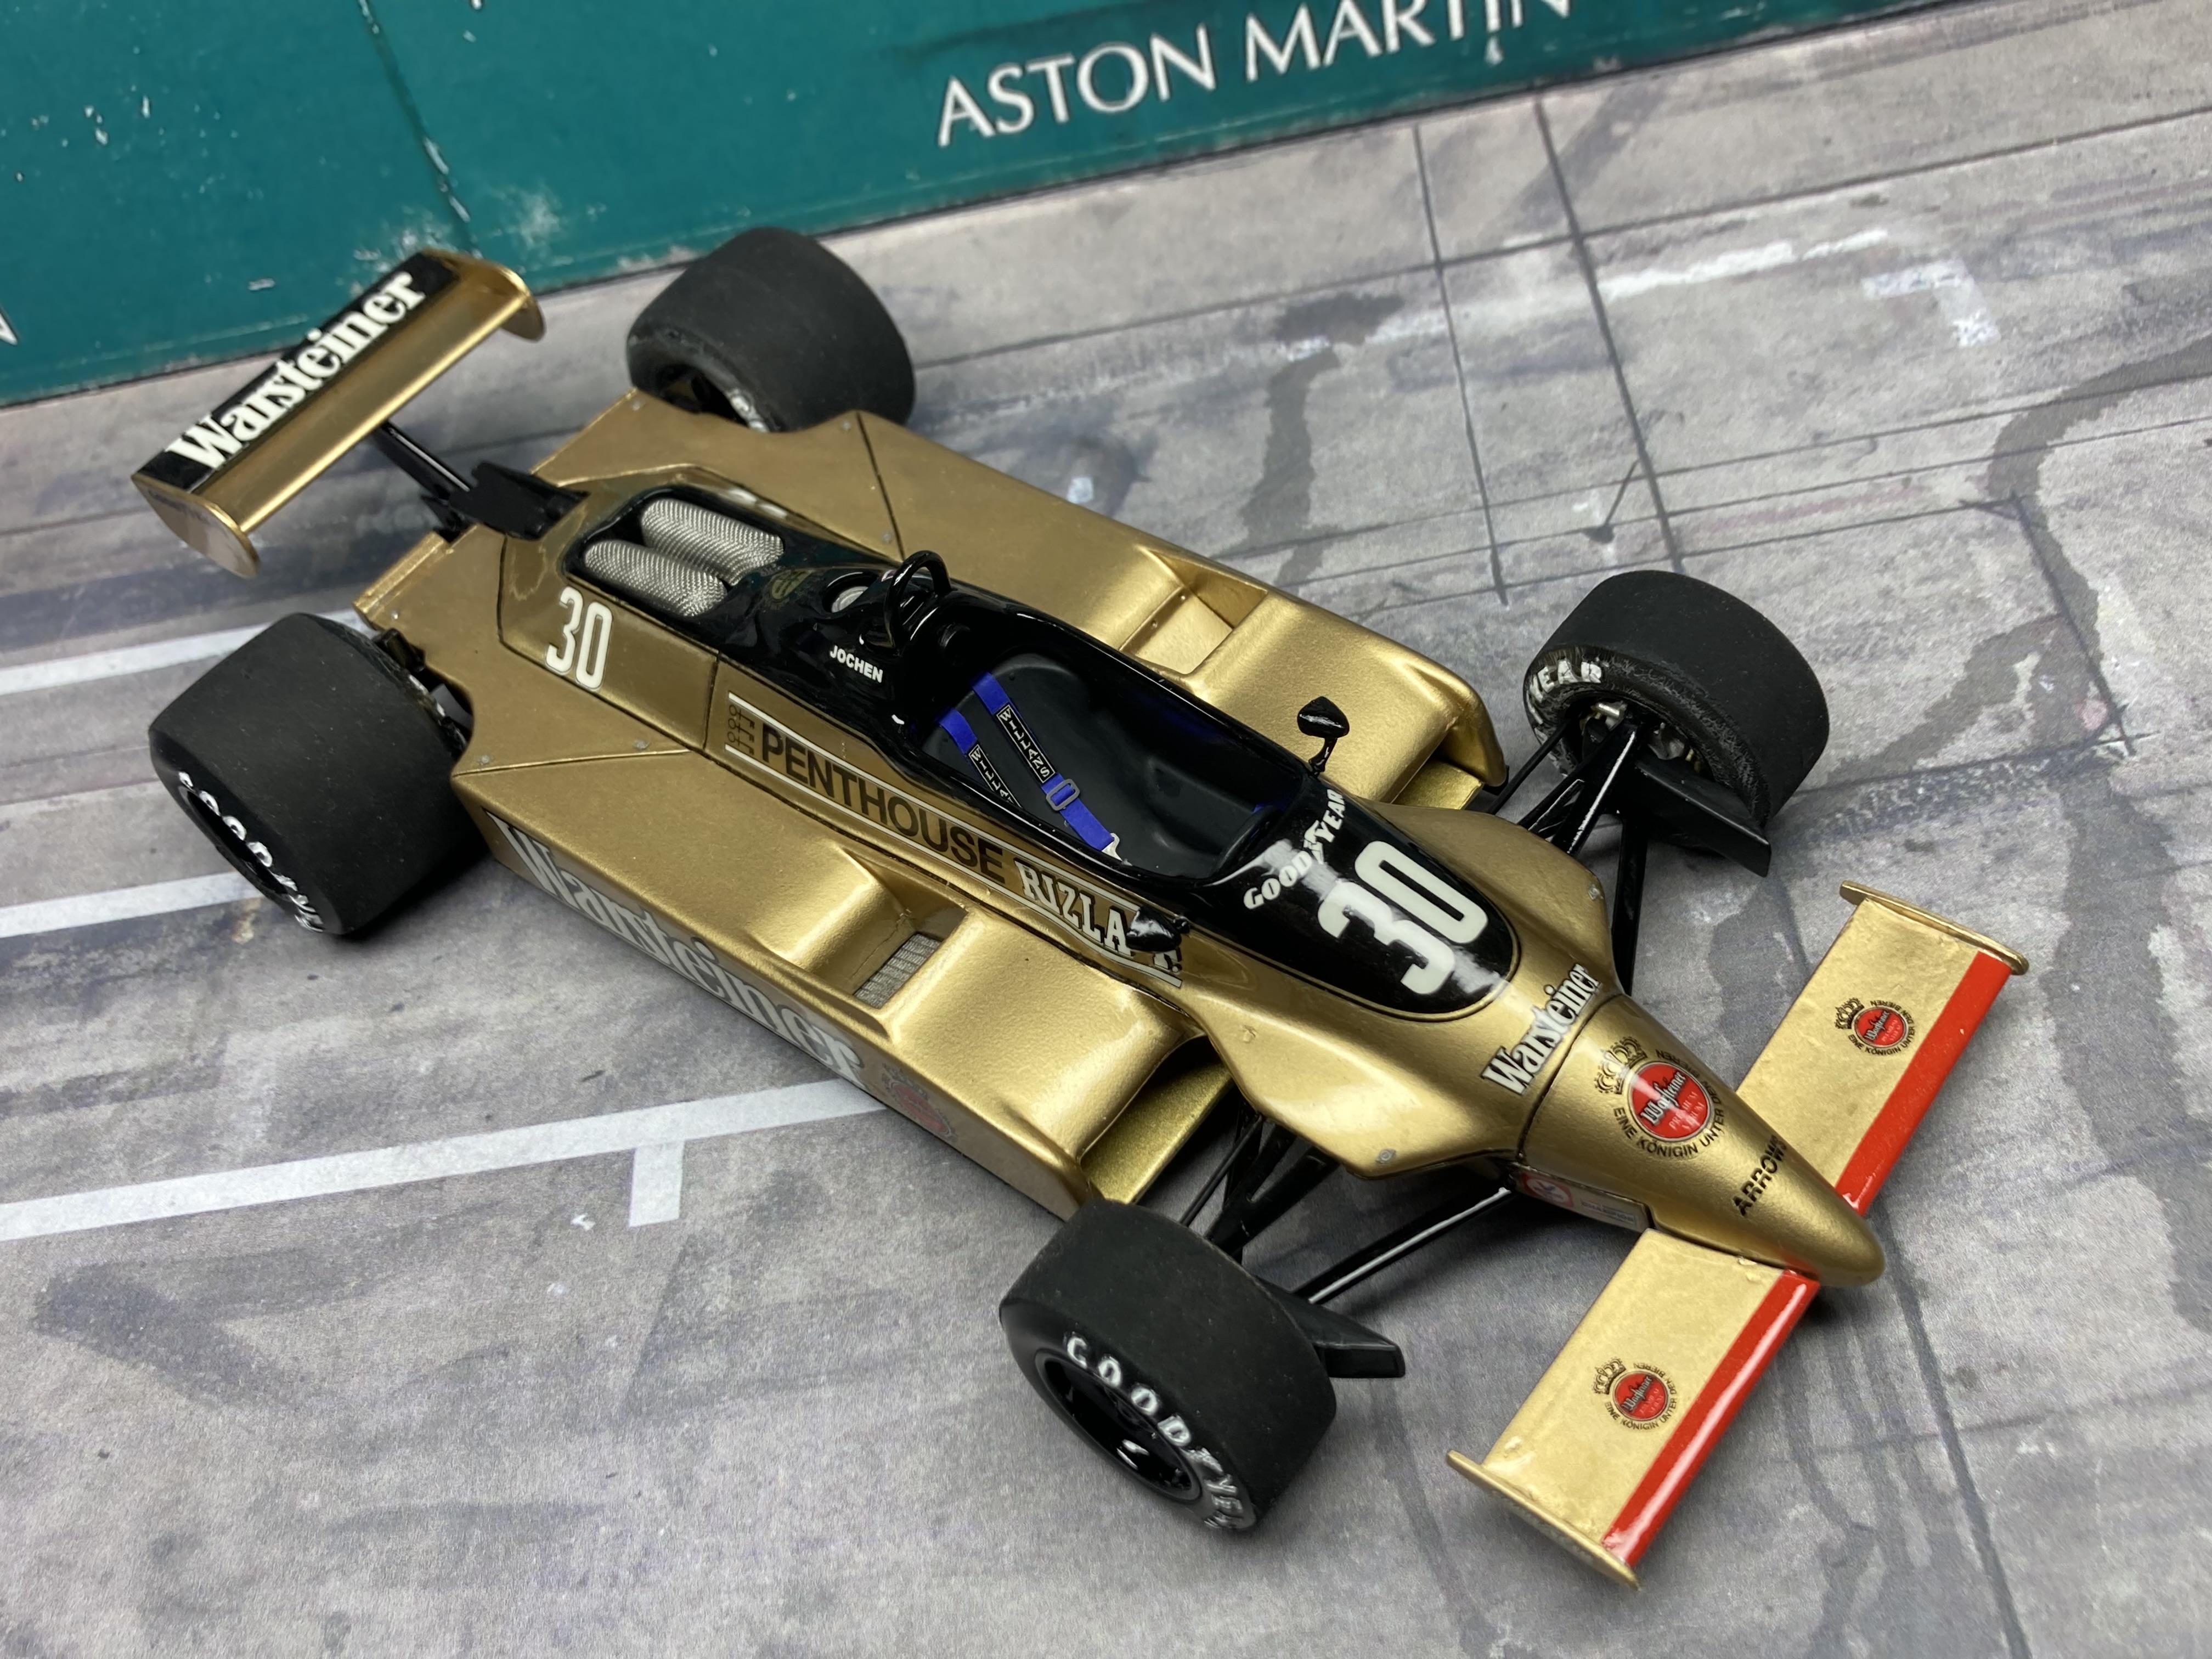
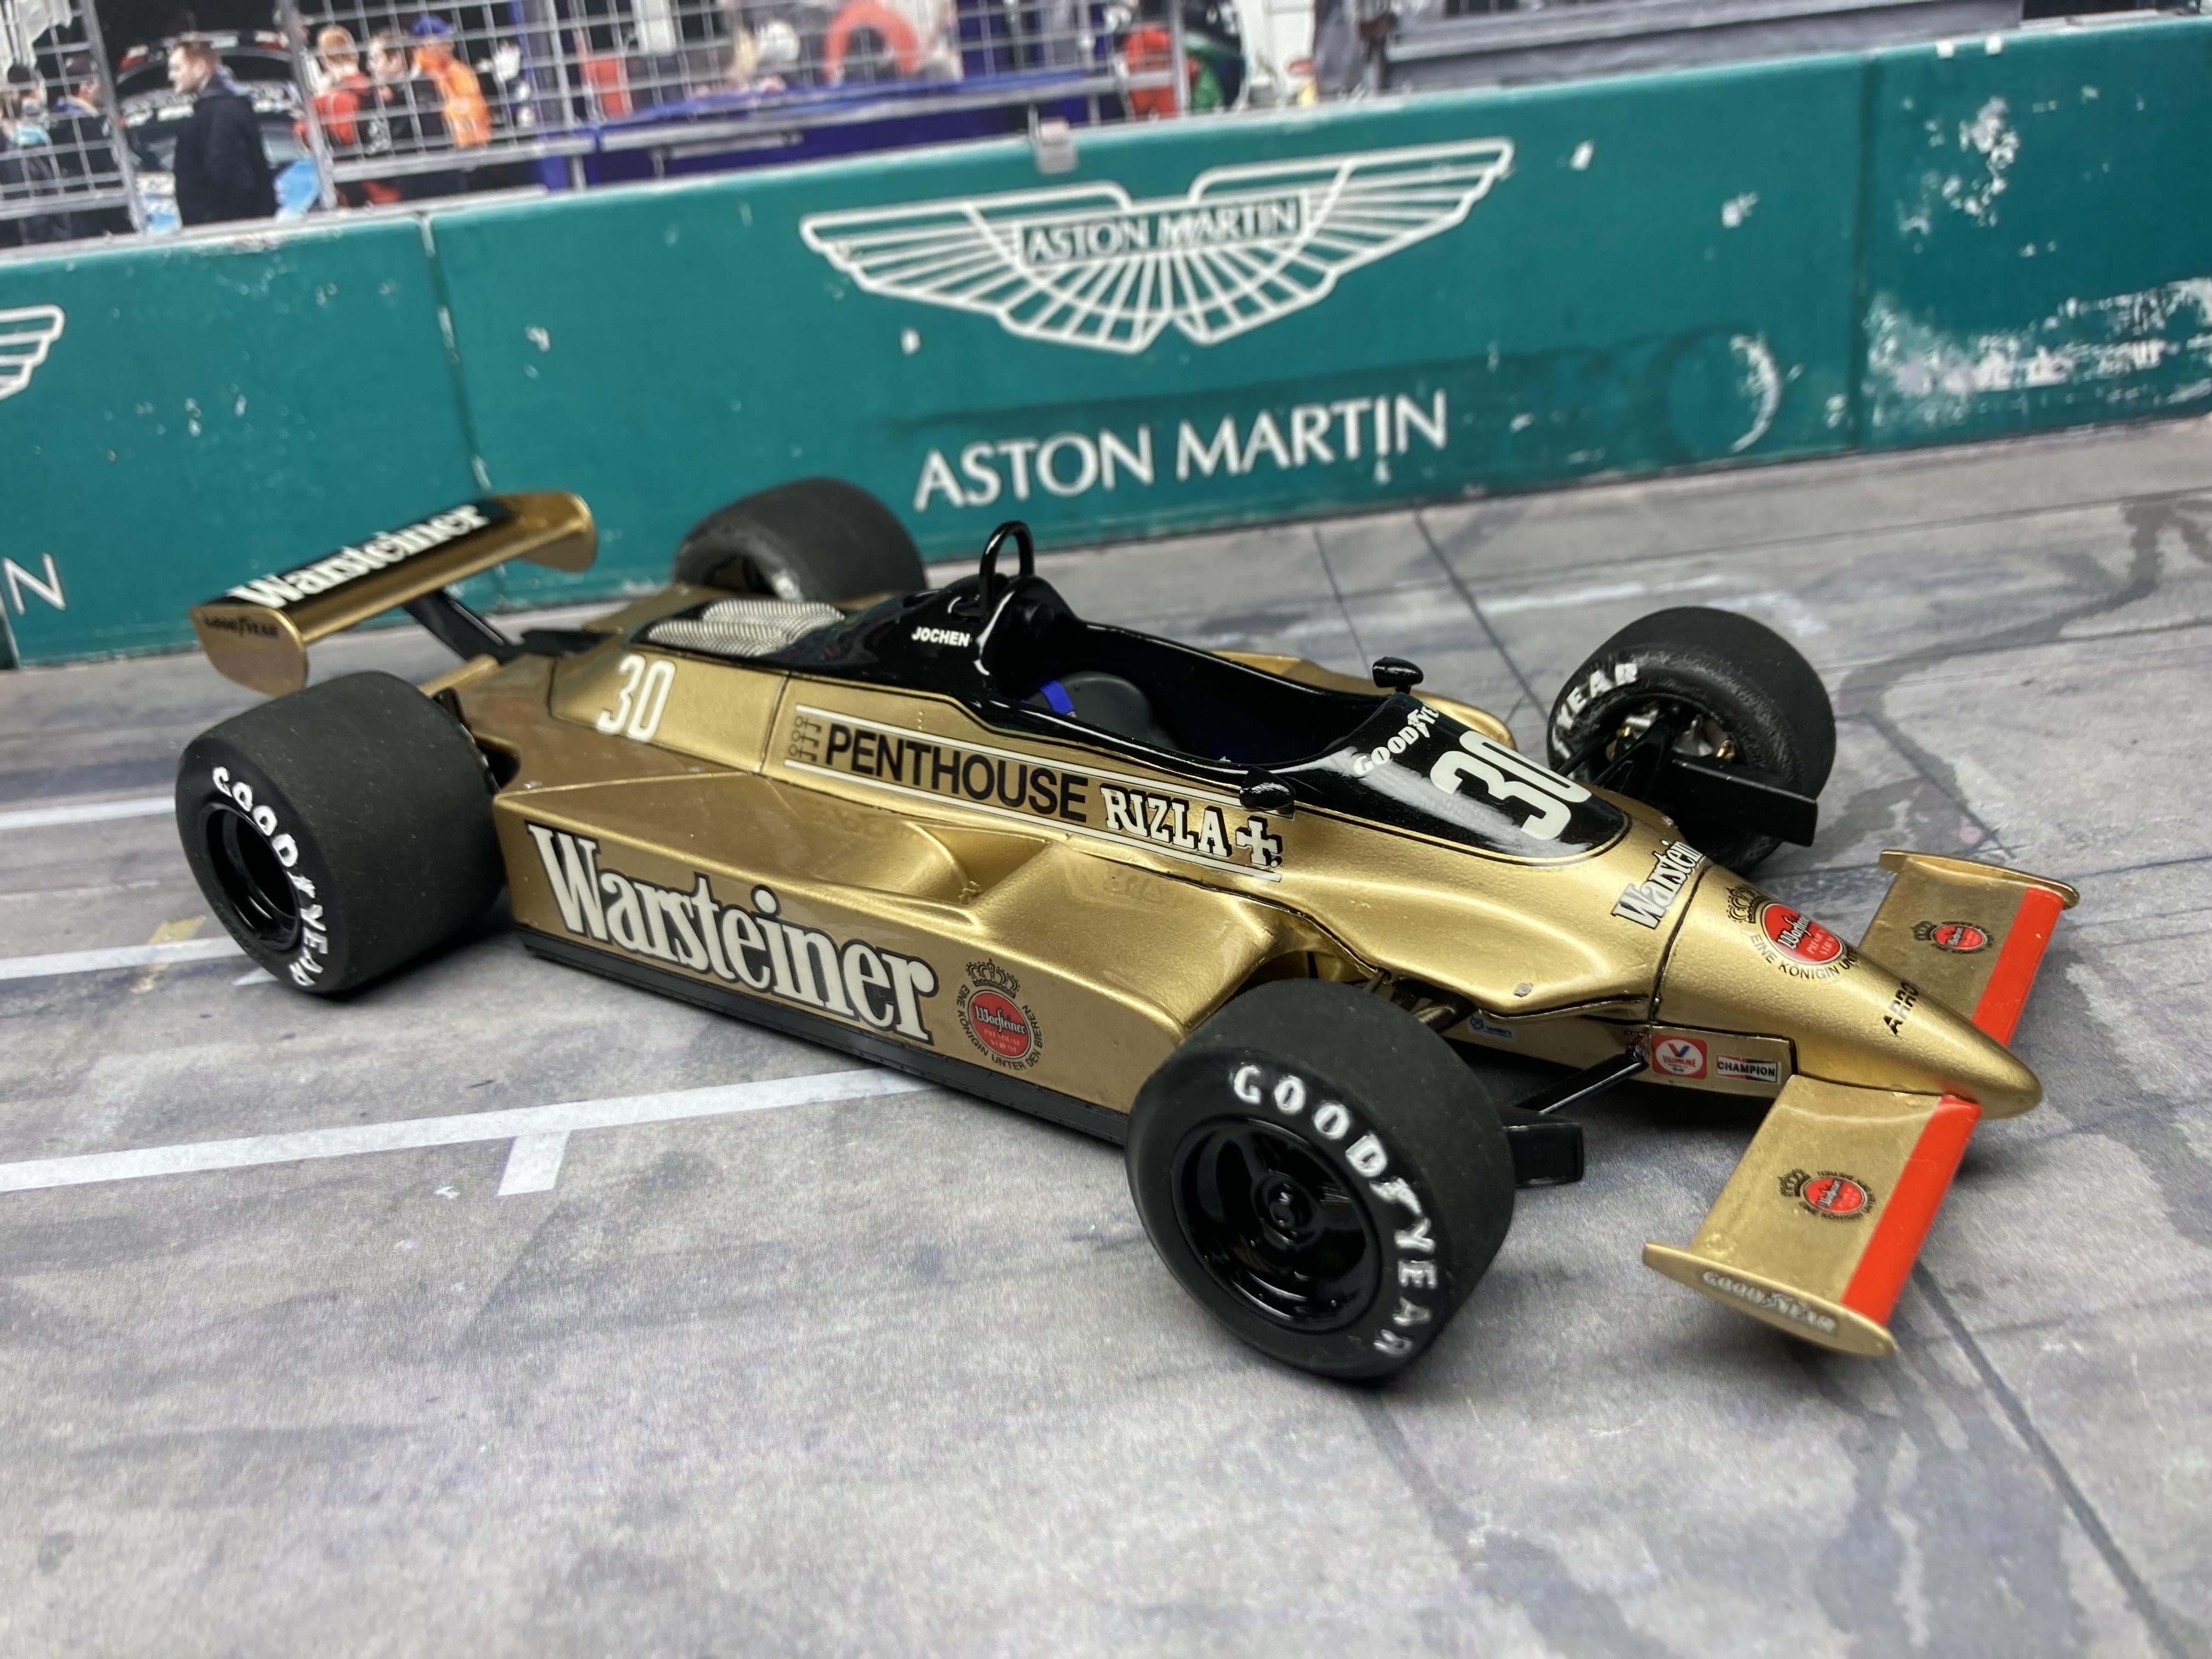
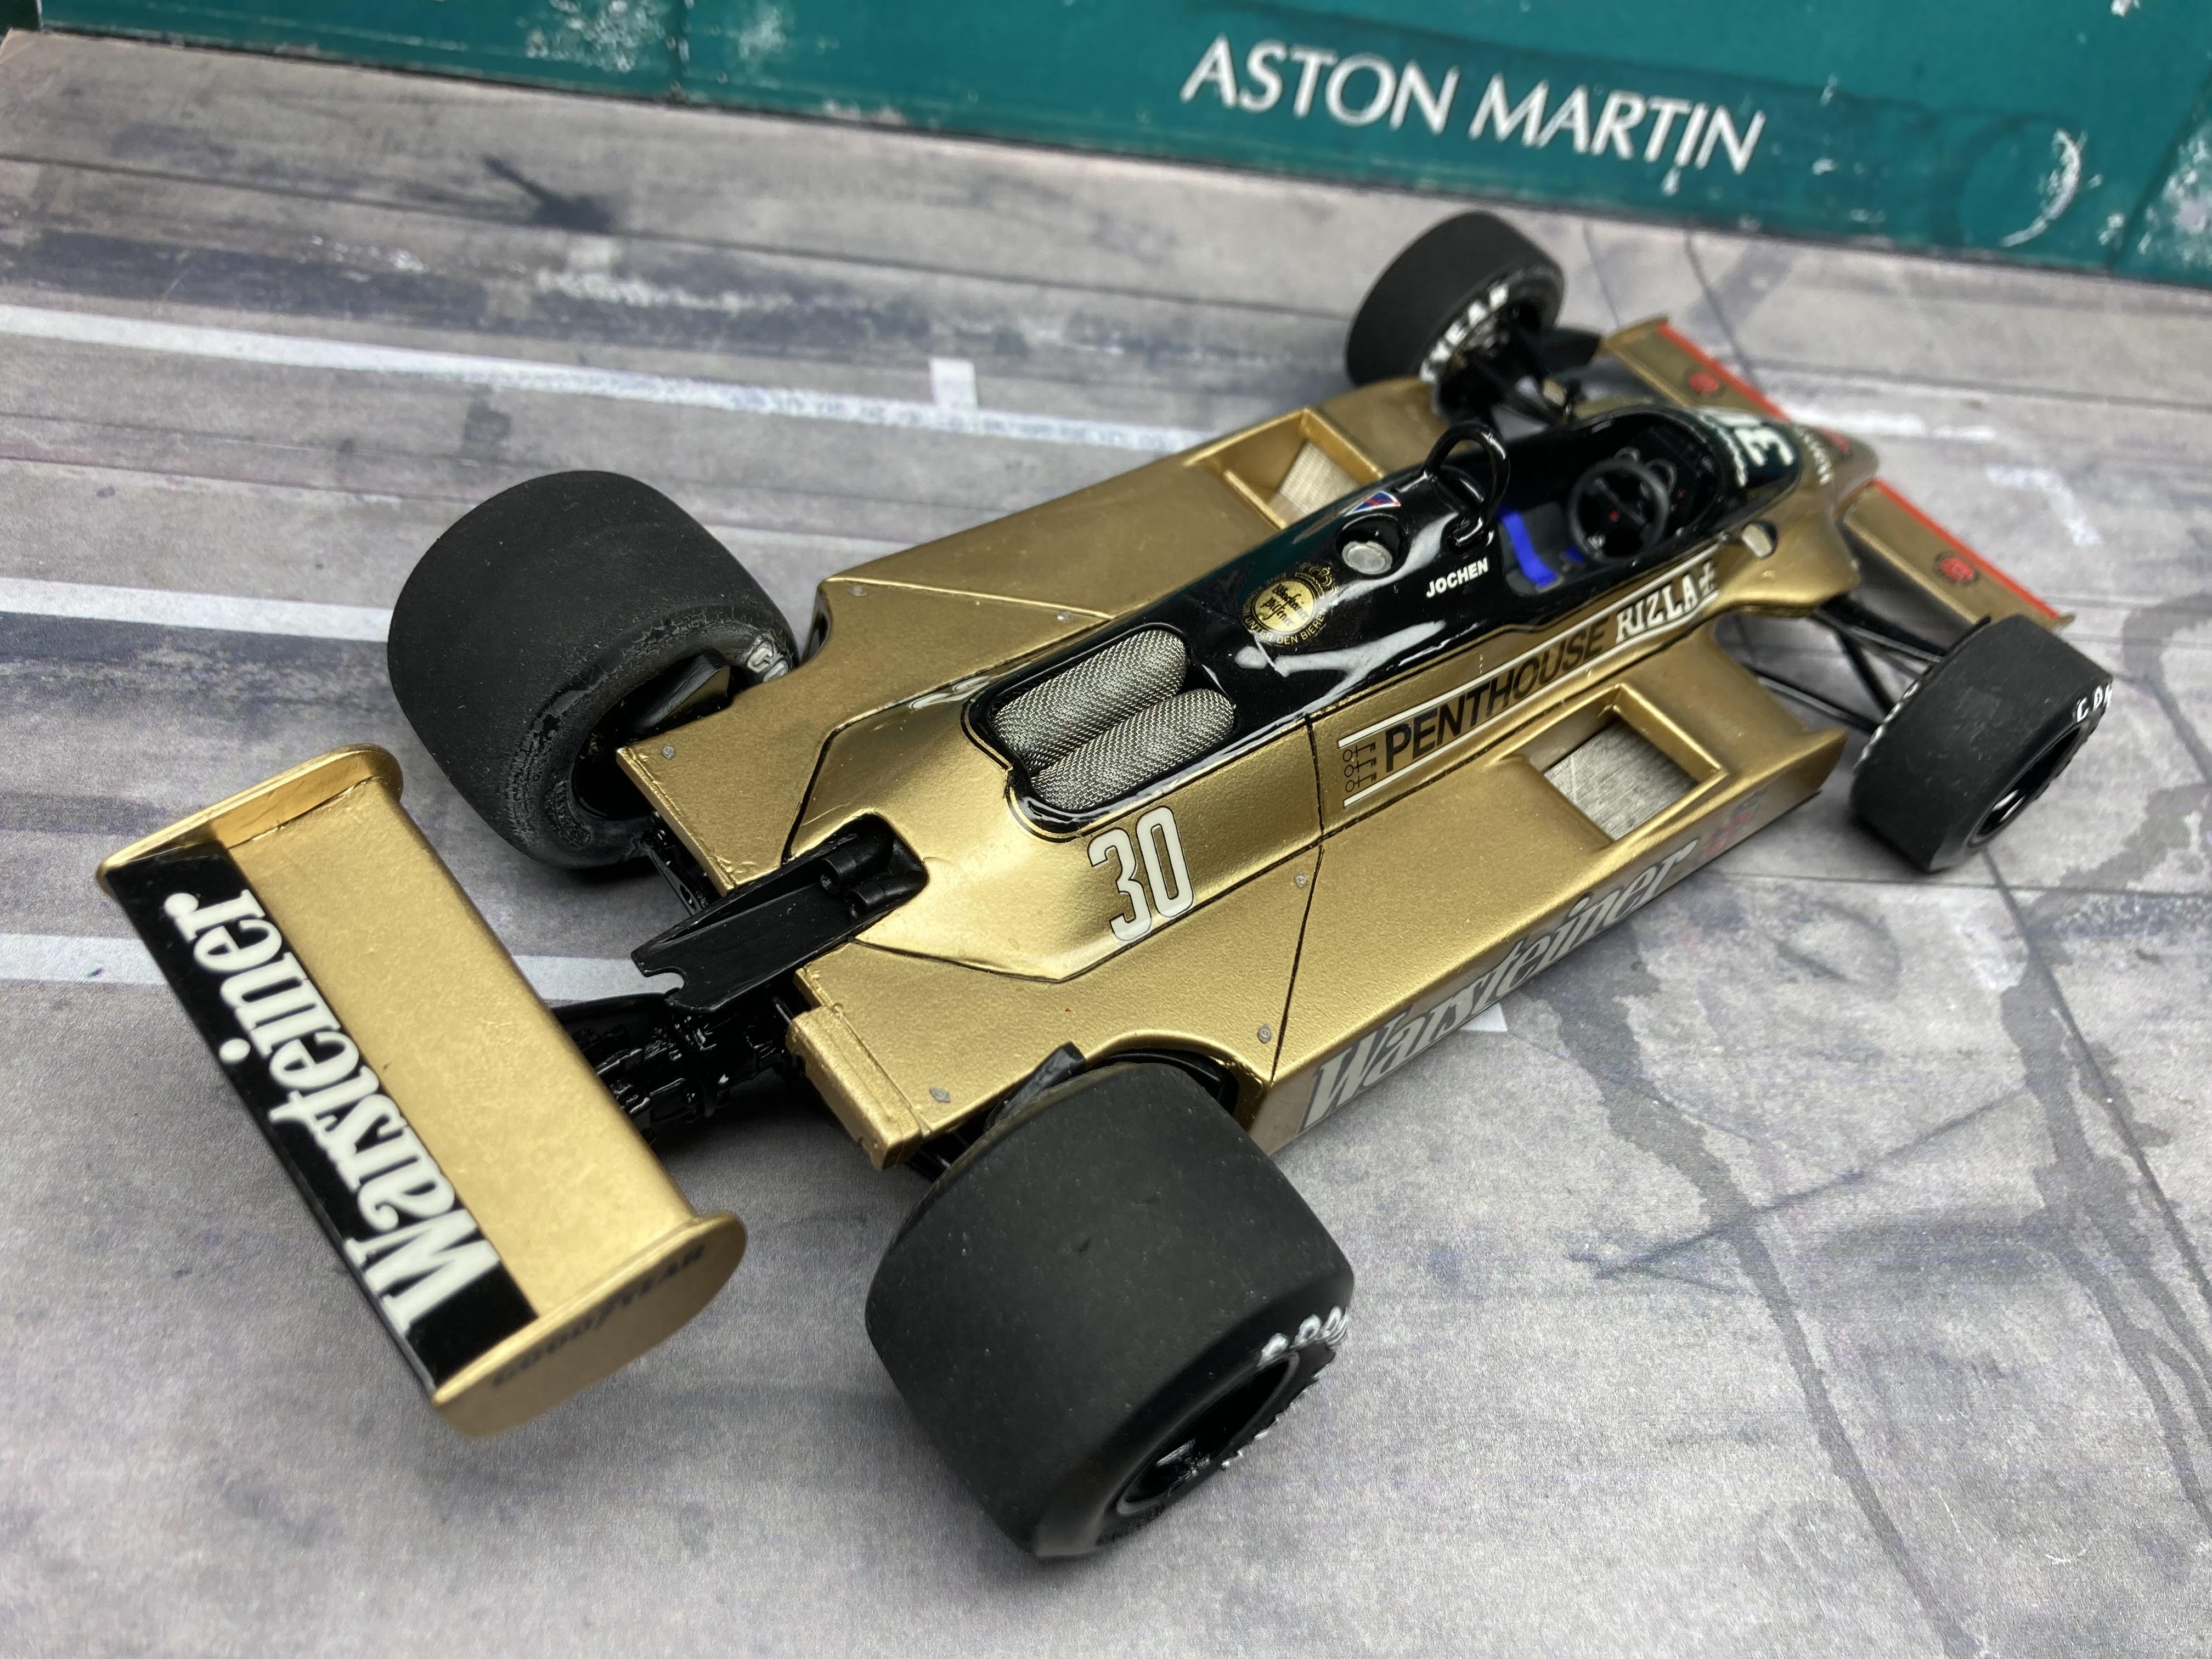
Hi there, I got this one done. Not a great kit, I wouldn't recommend it (not to my friends at least...). 😉 But I wanted to build this car in the iconic Warsteiner livery, driven by Jochen Mass, who passed away earlier this year.
- 11 replies
-
- 11
-
-
Thanks Phil!