1320
-
Posts
127 -
Joined
-
Last visited
Content Type
Profiles
Forums
Events
Gallery
Everything posted by 1320
-
Been building tonight, man the decals are as thick and unconforming as everyone says! I couldn't get the back window decal to work, it stayed off. Old and tough at least, no tears and the ones I really needed went on ok. I'm feeling grateful I wasn't building a replica and this orange version didn't 'need' too many decals. Jim

-
’72 Dodge Demon Drag Racer 1/25 scale
1320 replied to AmericanMuscleFan's topic in WIP: Drag Racing Models
Keep at it Francis, I get great inspiration from your builds. I'm looking forward to seeing the Dana's next steps. Jim -
Thanks Zippi, I'm enjoying it. Jim
-
I started this Mongoose kit 3 years ago after a friend asked me to build it for him Orange and modified. I don't have any earlier pics of it, but it's time to build on it some more so I'll do a WIP. The body is painted in 2k GM 'Lone Oranger', I'm about to mask up for the painting of the front bumper and other silver bits and pieces on the body. The chassis is mostly stock with a bit more detail put into the engine. Some parts box parts, PE bits, wiring and plumbing. I'm not 100% decided on wheels yet, I have a few to choose from. Jim
-
Another willing victim on the bench tonight, the Hasegawa 1/12 nsr500 from 1989. The quality of the kit looks great so far, I'm just getting sub assemblies together to start with. I have ordered the 'Rothmans' tobacco fill in decals from Europe, hopefully I continue to be impressed by the kit, I have a few more of them to do. Thanks for tuning in again Jim
-
Edited.
-
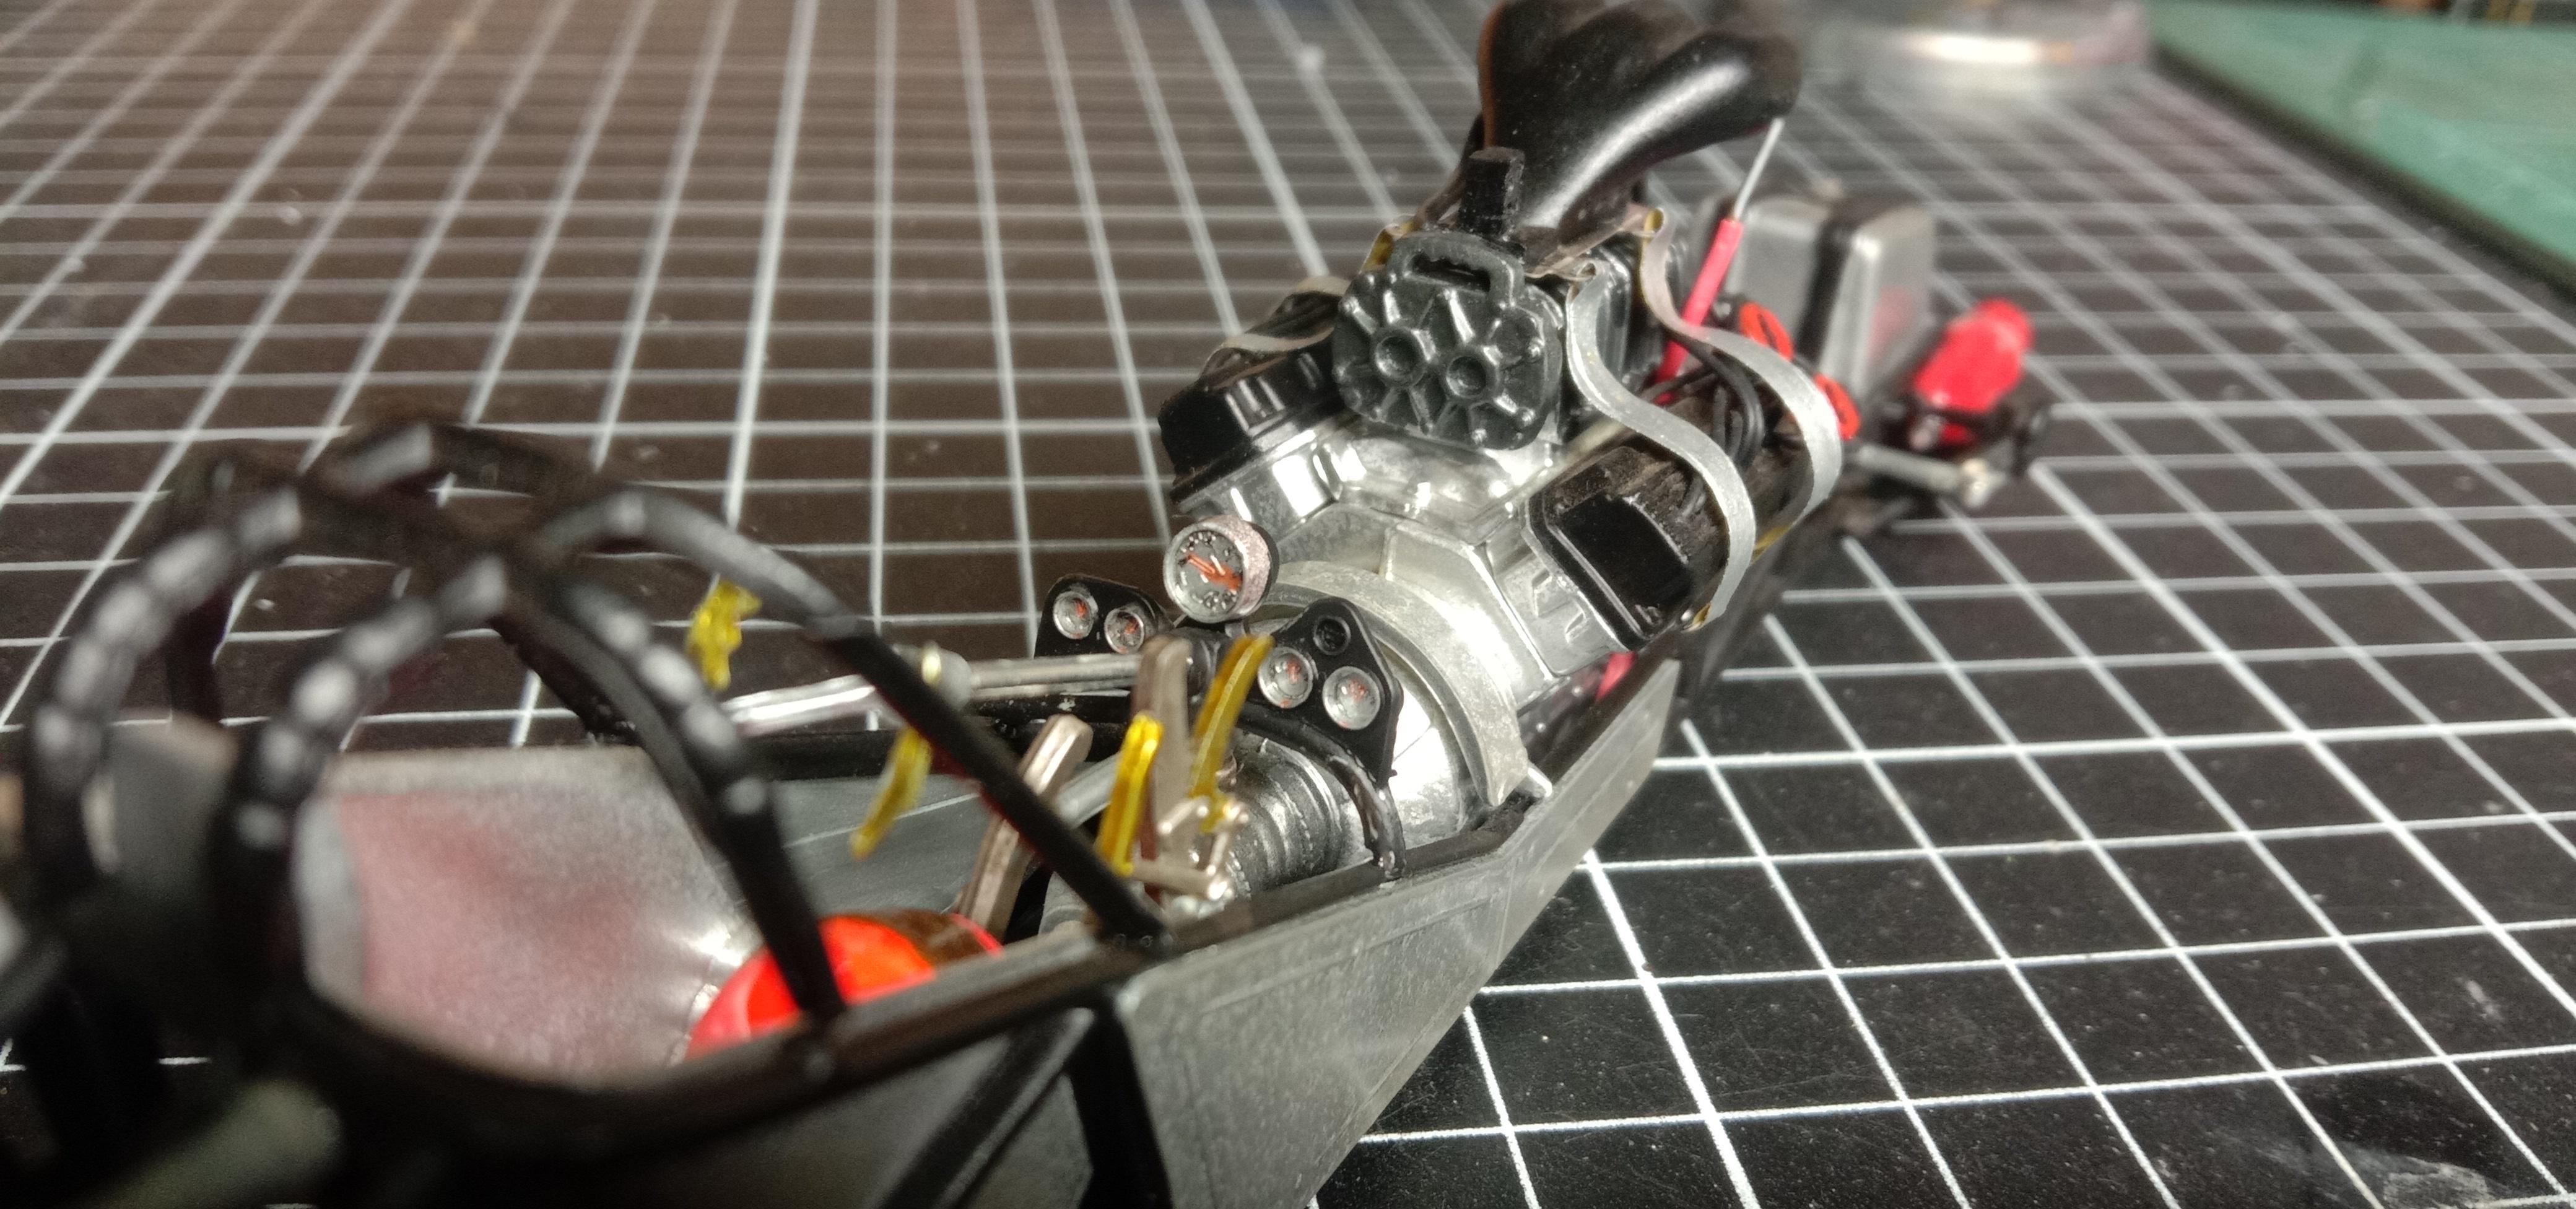
I'm back into this one for a while, I started assembling the forks and continued painting and weathering the engine and rear shock. Sometimes I think I weather too much, sometimes it looks VERY old and dirty. Its great to get back into one for me again, I do enjoy building for others but it is good to be able to change along the way. I'm just looking at the ECUs on this one, I could drill the ends and run a heap of wiring. It could be a straight forward addition! Jim
-
Thanks, it's come up great! Thanks everyone for following along, these are the last pics for this one. No rider is being displayed to fit in with other models so it's all done. Jim
-
Thanks! It's coming along great. I've fitted up the forks, fairing dash and remaining bits and pieces, it's progressing well. The bike now is about done, back into Kenny the rider figure! Jim
-
Thanks again Roy, yes I love decaling too - there's been plenty in my last builds. I got some 2k clear on the tins and sealed in the decals. Then fitted the tank, seat and tail. Have also been doing some work on Kenny the rider, his helmet has come up well so far.
-
Tamiya Tom's Toyota Supra GT
1320 replied to 1320's topic in WIP: Other Racing: Road Racing, Land Speed Racers
Hahahaha nice curves Thanks Zippi, I like the Mark 4 shape as well, they look fast even when parked. Gift delivered! My friend Mark loved it! He sent me this picture next to his 1/10 Tamiya R/C version. Jim
-
That's looking like a boat! Keep it up Jim
-
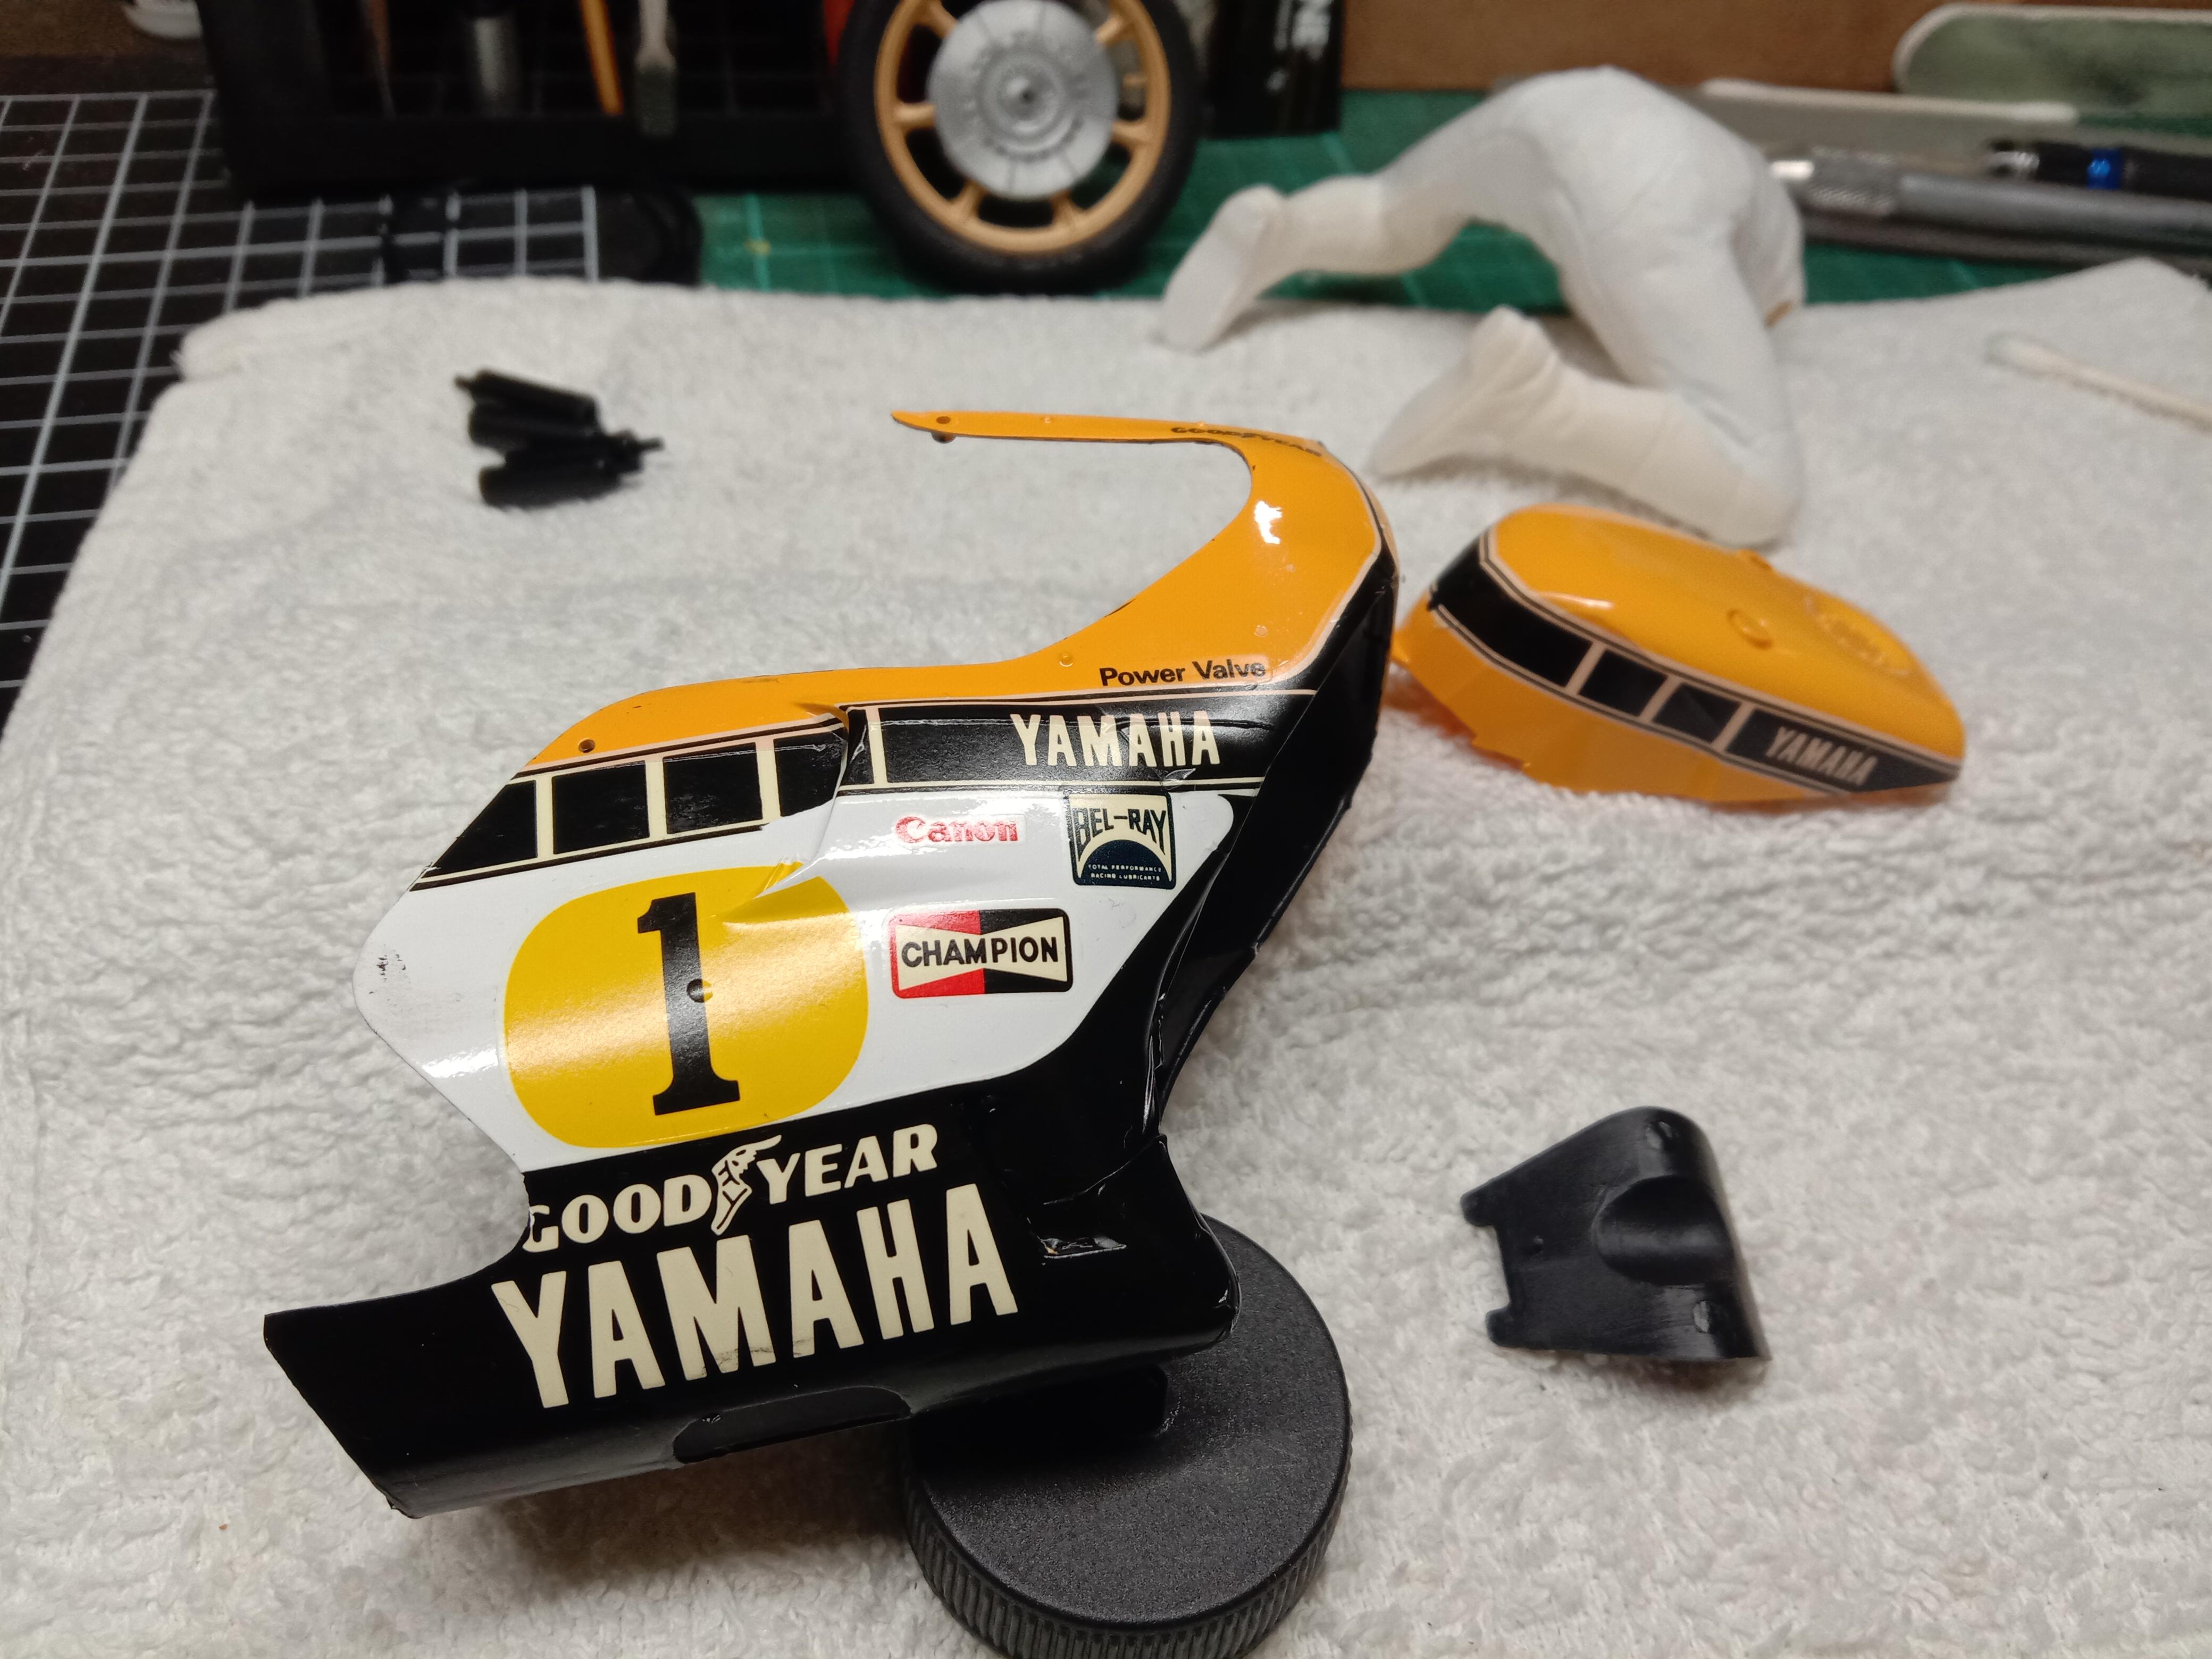
Great work Roy, that's some great results! I've been taking my time with these 40 year old decals but they are going on alright. I've also started on the Kenny riders body and helmet. Jim
-
Tamiya Tom's Toyota Supra GT
1320 replied to 1320's topic in WIP: Other Racing: Road Racing, Land Speed Racers
Thank you, they took a long time to get right, probably 45 minutes each wheel! Don't let decals spook you too much, the more you do, the easier they get, if you avoid them, you're missing out on valuable experience time! Hahahaha get into it! Jim -
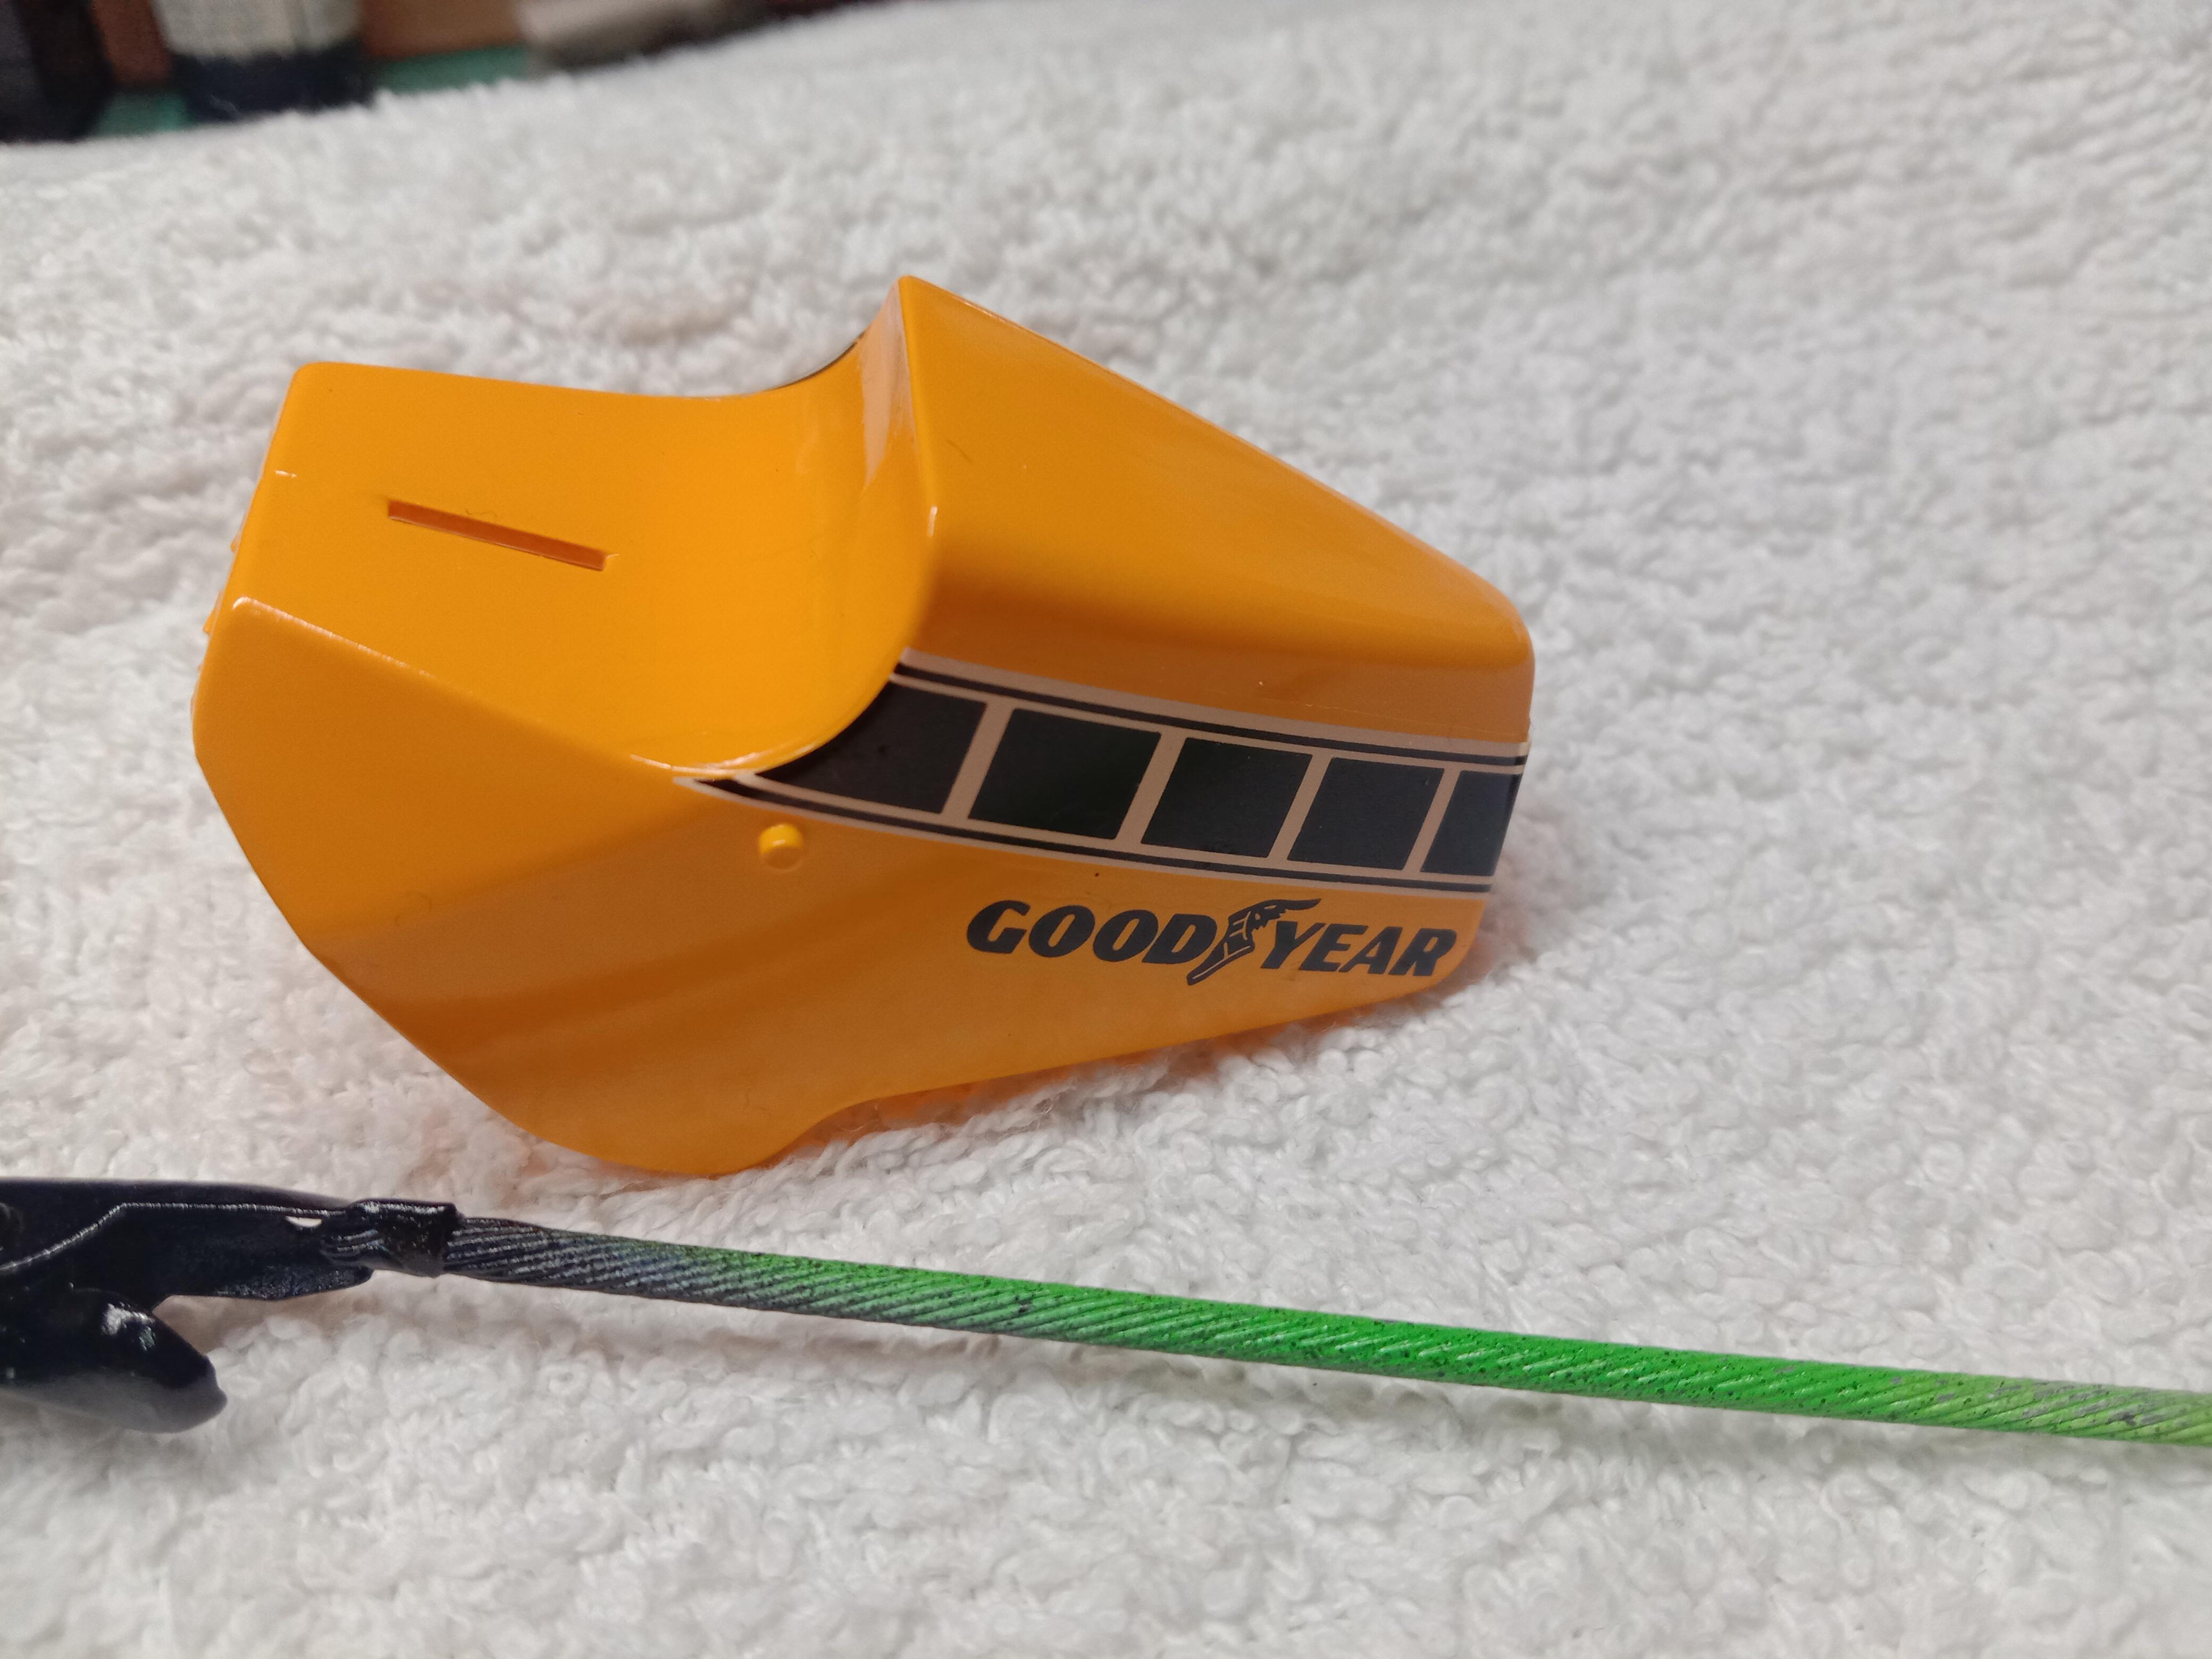
I painted exhaust parts, mufflers and other small parts and fitted the radiator and hoses. I then started painting and decals on the tank, tail and fairing. Tamiya chrome yellow and some 'appliance' white. Been a bit busy since my last visit, thanks for following along. Jim
-
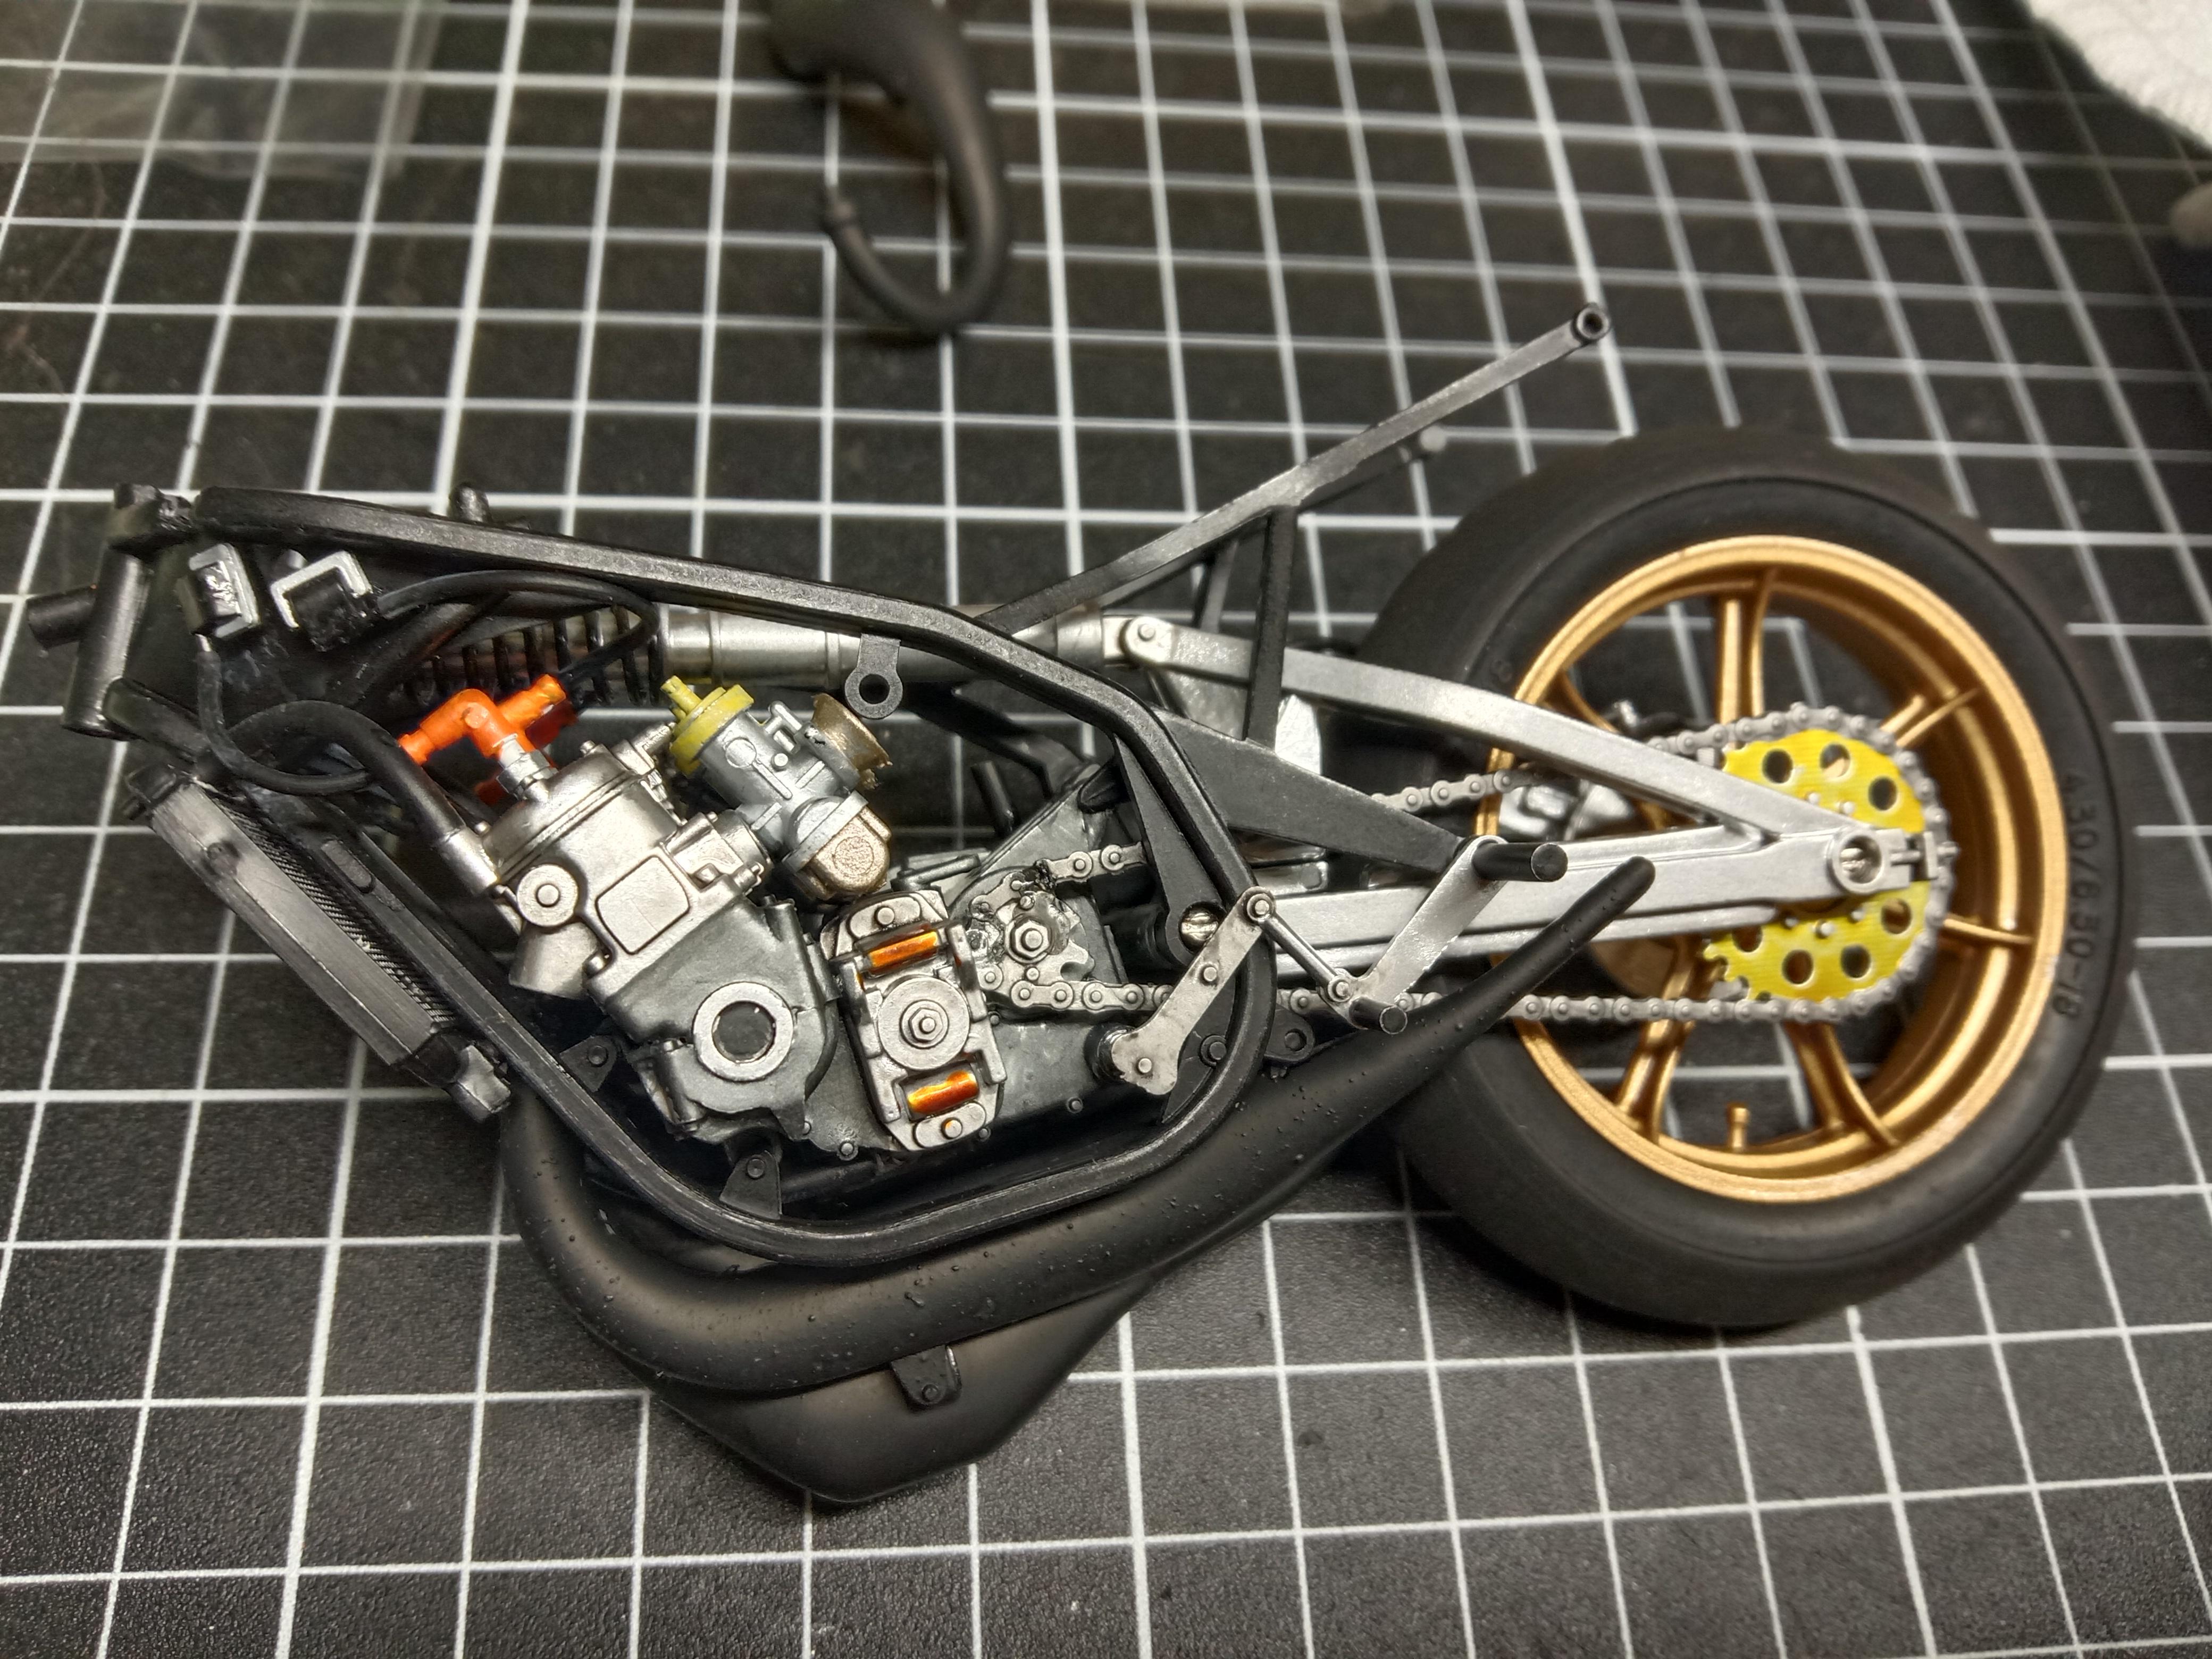
How was the contest Roy? I have been moving along, painted wheels, carbs and other bits, then assembled engine into frame and swingarm in. Jim
-
Like so many others, I have a partly build Dumas wooden boat as well! Keep going with it, you never know, you might just inspire the rest of us to do the same! Jim
-
Hey Brock, Splatty who then went on to start dragway wheels (Rachelle's dad Ian) made those back in the day I think. I don't reckon you'll find something exact but maybe an American kit had something close. Looking forward to your progress, at least there's plenty of reference pics now since they restored it. Jim
-
Thanks Roy!
-
Thanks Roy, I did like the Rossi rider they did a little while ago. Finding one that doesn't cost drug money is impossible now! I've been filling and sanding the joins on the main fairing and tail and roughing out a few other bits. I also got a start on the engine and swingarm assembly and painting. Jim
-
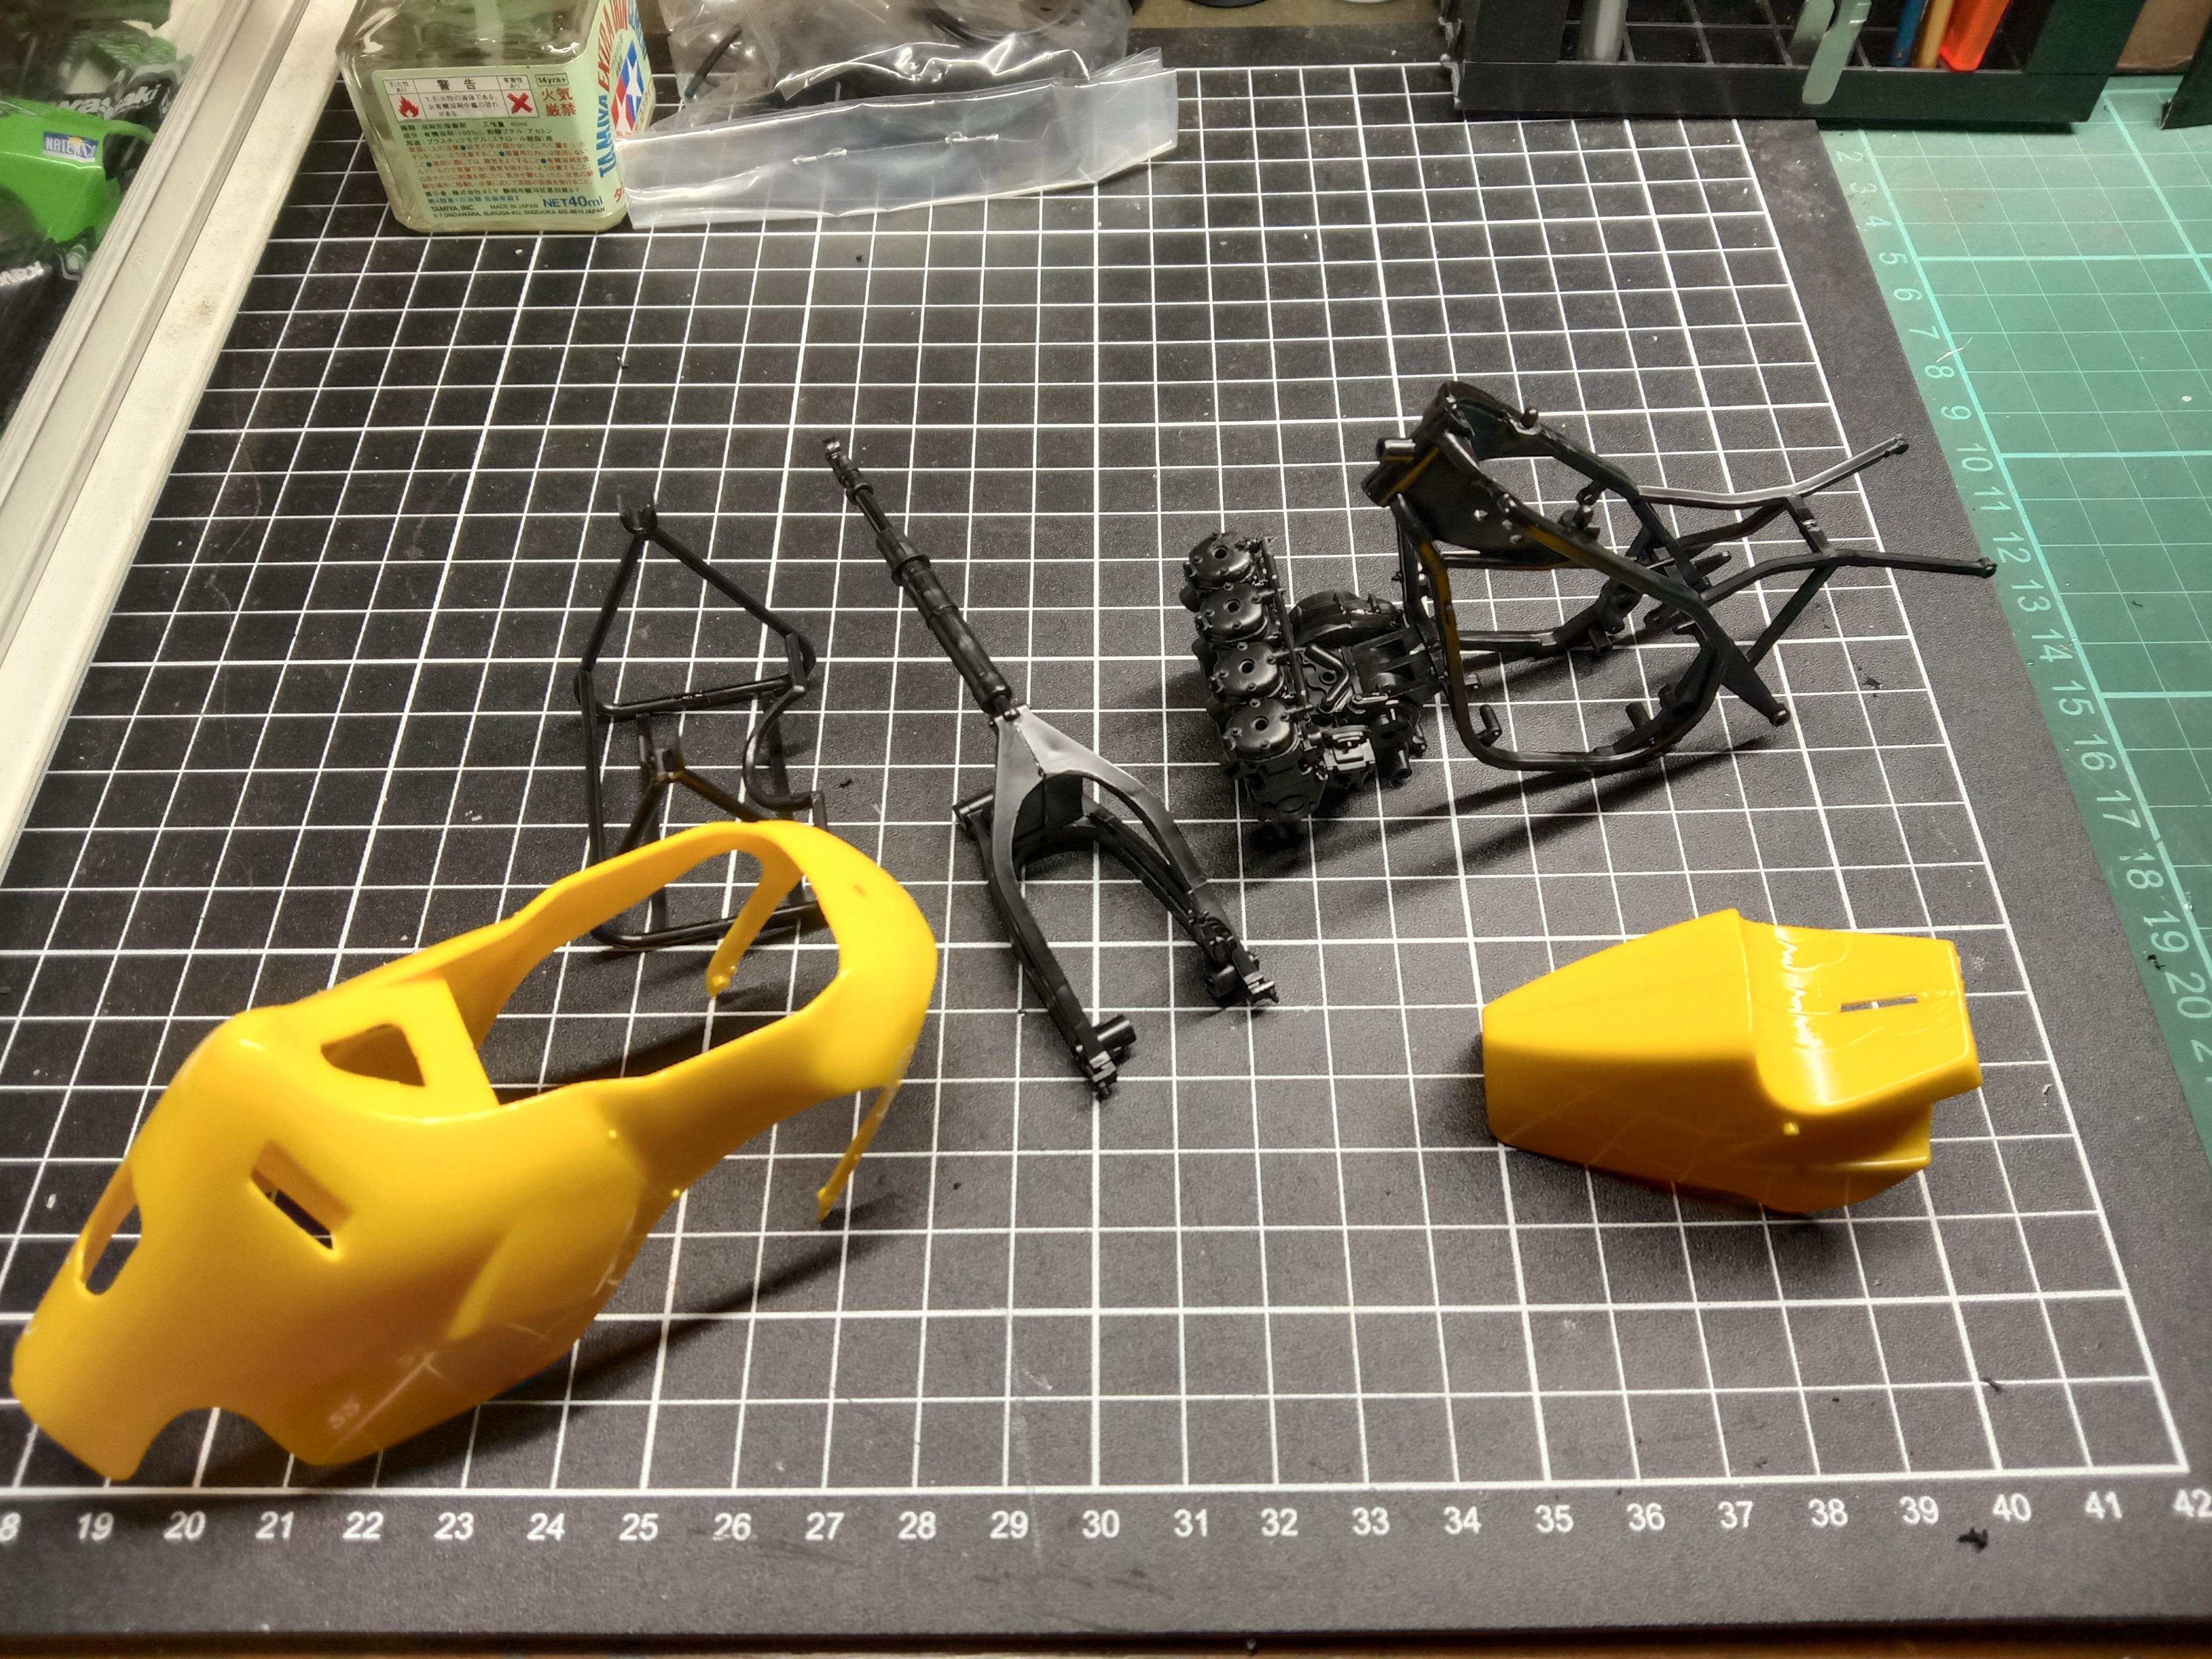
A new project started! Although this version is the 26th 1/12 bike kit that Tamiya produced, the bike kit itself was the first. Kit 14001 is the bike only and kit 14026 was the bike with Kenny riding it. This one is from 1983. I had sold this kit a few years ago, but was recently asked to build it up so I will be doing it as a commission. Due to it being so early, the parts count is low so it makes for a straight forward build if done out of the box. I'll add a little here and there without going too crazy. I started by getting the main sub assemblies together so I can get some primer flying over the next few days. Jim
-
More decals, a little touching up will be needed in between the black ones, then some clear to seal them in. Jim
-
Evil Iron Trike
1320 replied to Nacho Z's topic in WIP: All The Rest: Motorcycles, Aviation, Military, Sci-Fi, Figures
Cool as! I'll enjoy following along. Love the colours. Jim -
And more decals! The panel on the right side has 6 separate parts to the decal. Also more fab work and prep for further painting. Jim
-
Tamiya Tom's Toyota Supra GT
1320 replied to 1320's topic in WIP: Other Racing: Road Racing, Land Speed Racers
Thanks Dan Jim