1320
-
Posts
127 -
Joined
-
Last visited
Content Type
Profiles
Forums
Events
Gallery
Everything posted by 1320
-
Awesome job Mike! Jim
-
Model King A/FX ‘65 Plymouth Satellite “Golden Commandos”
1320 replied to Matt T.'s topic in WIP: Drag Racing Models
Looking great! Jim -
Nothing revolutionary in this update, just painting little plastic parts and sticking them on. Made a chute release handle and started the fuel shut off lever then run cables for both. Thanks for looking Jim

-
Thanks John!
-
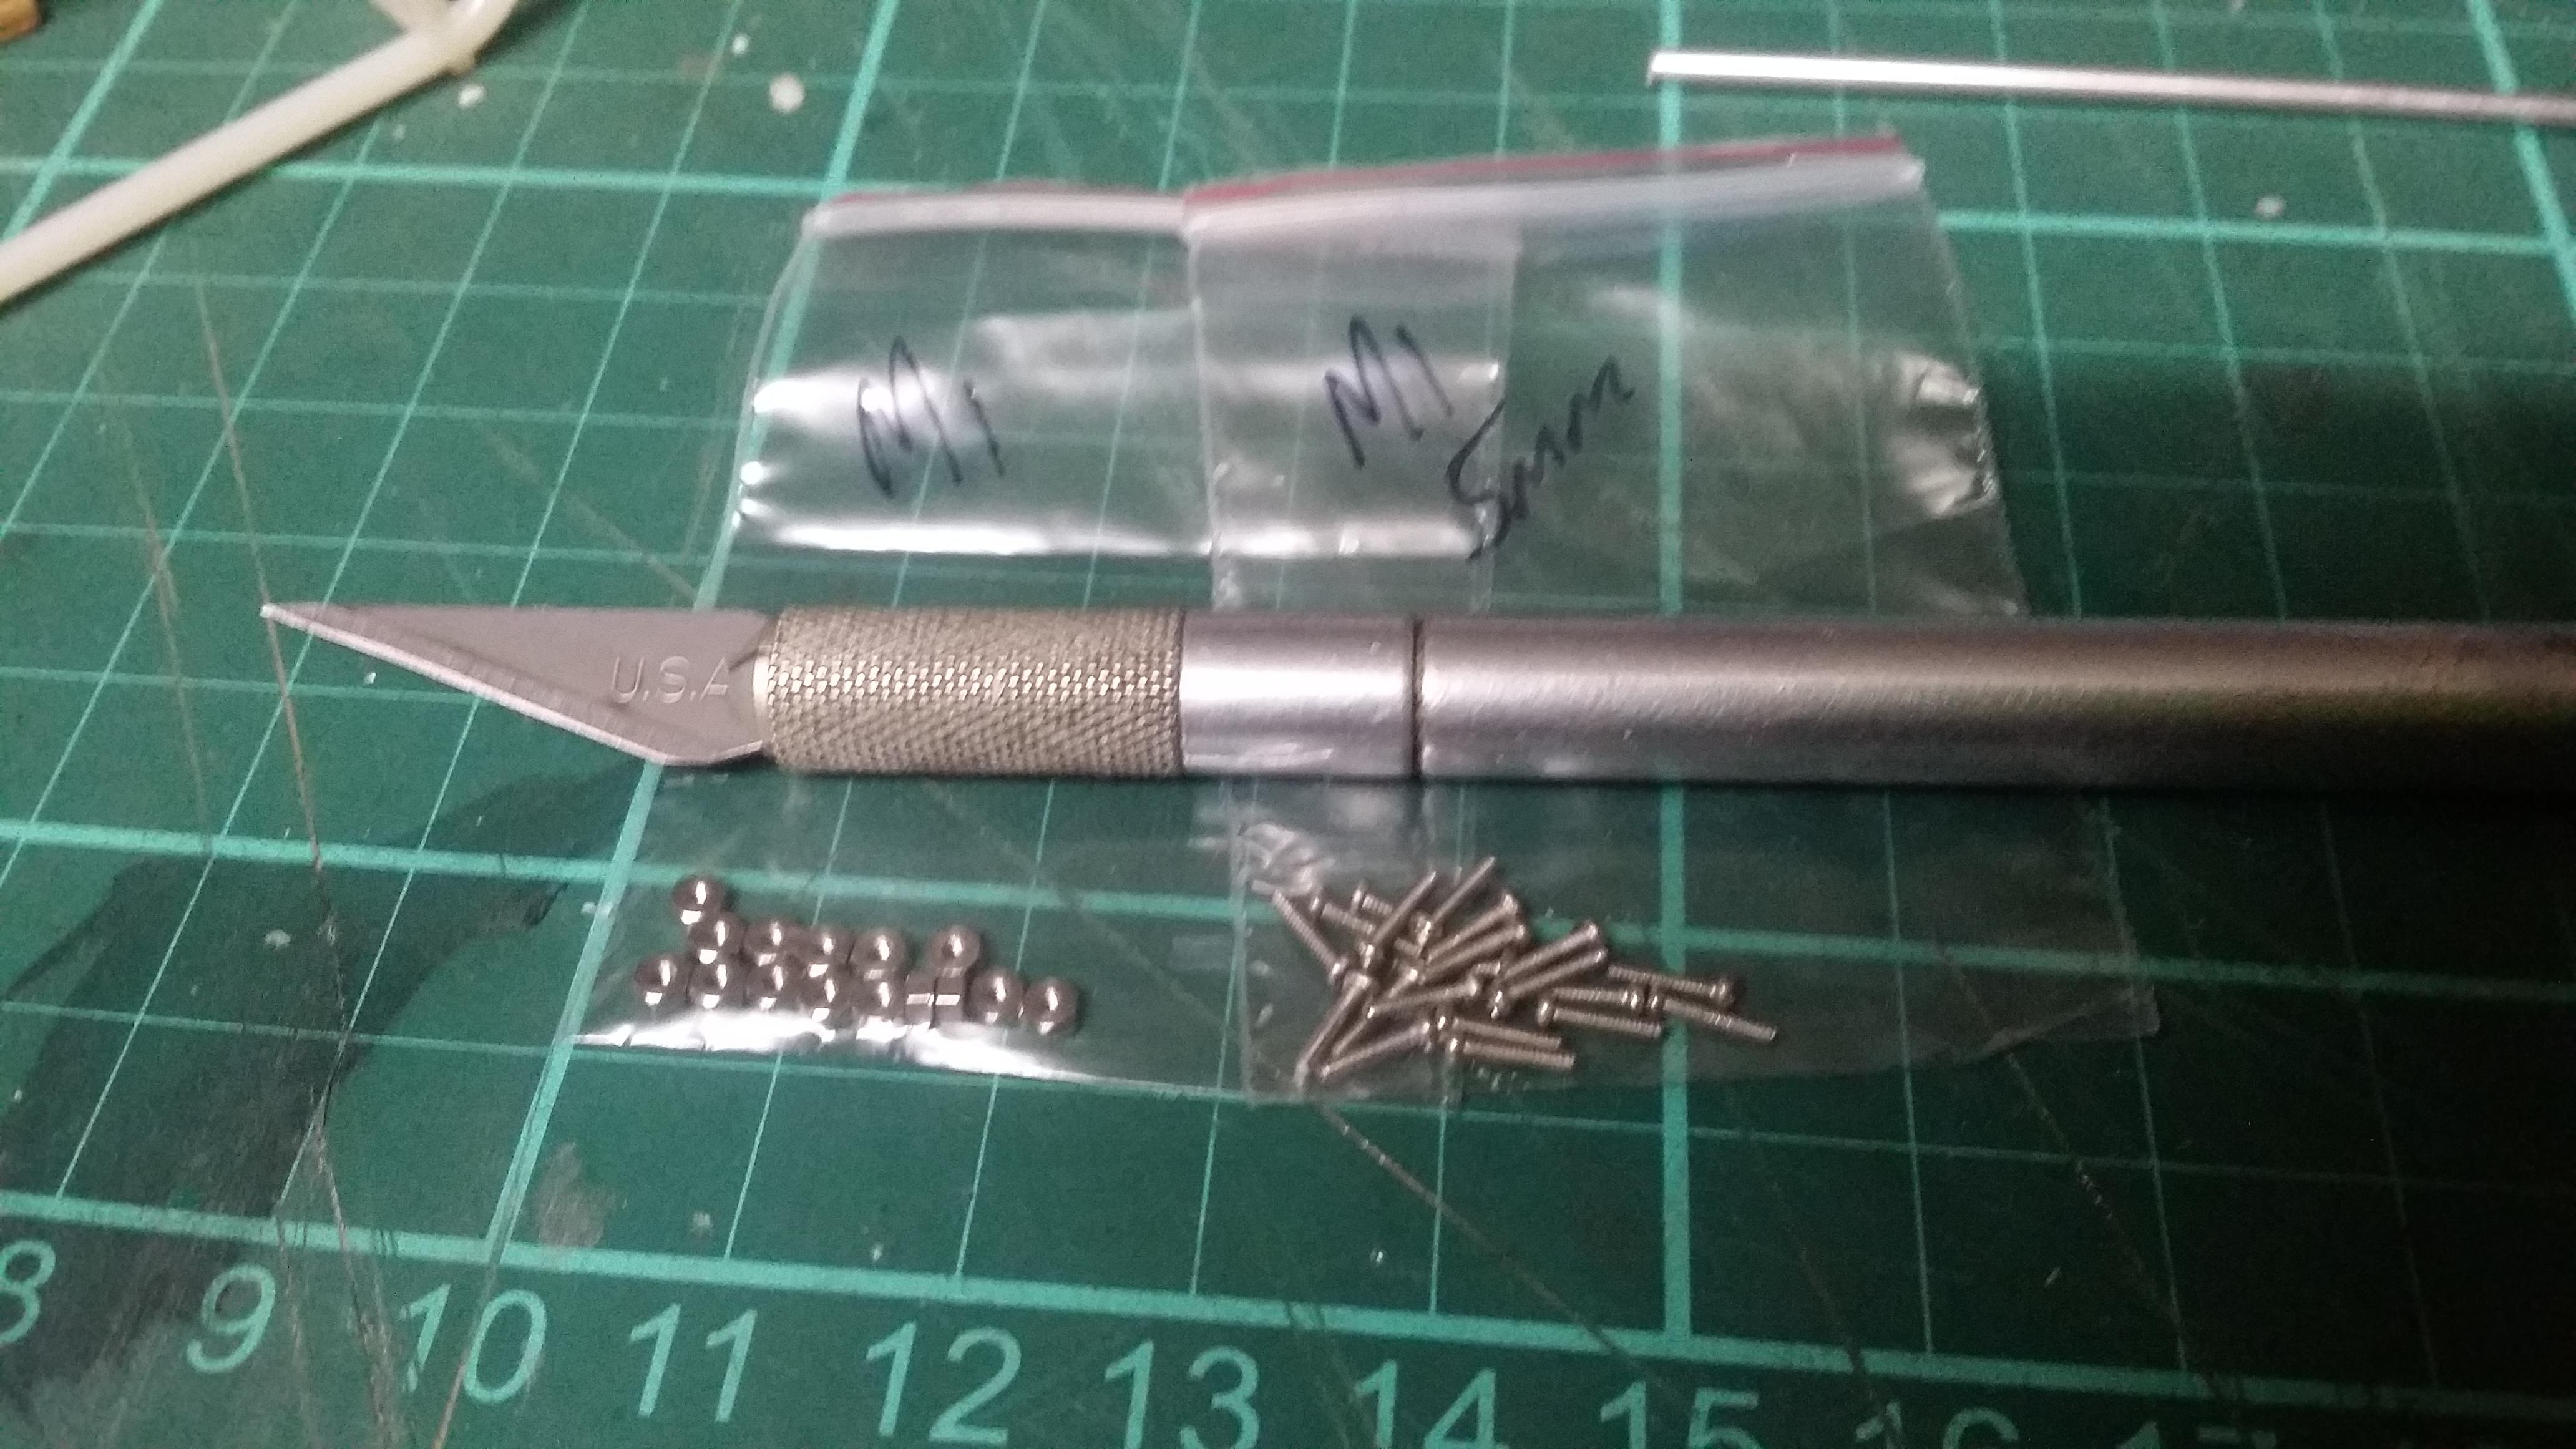
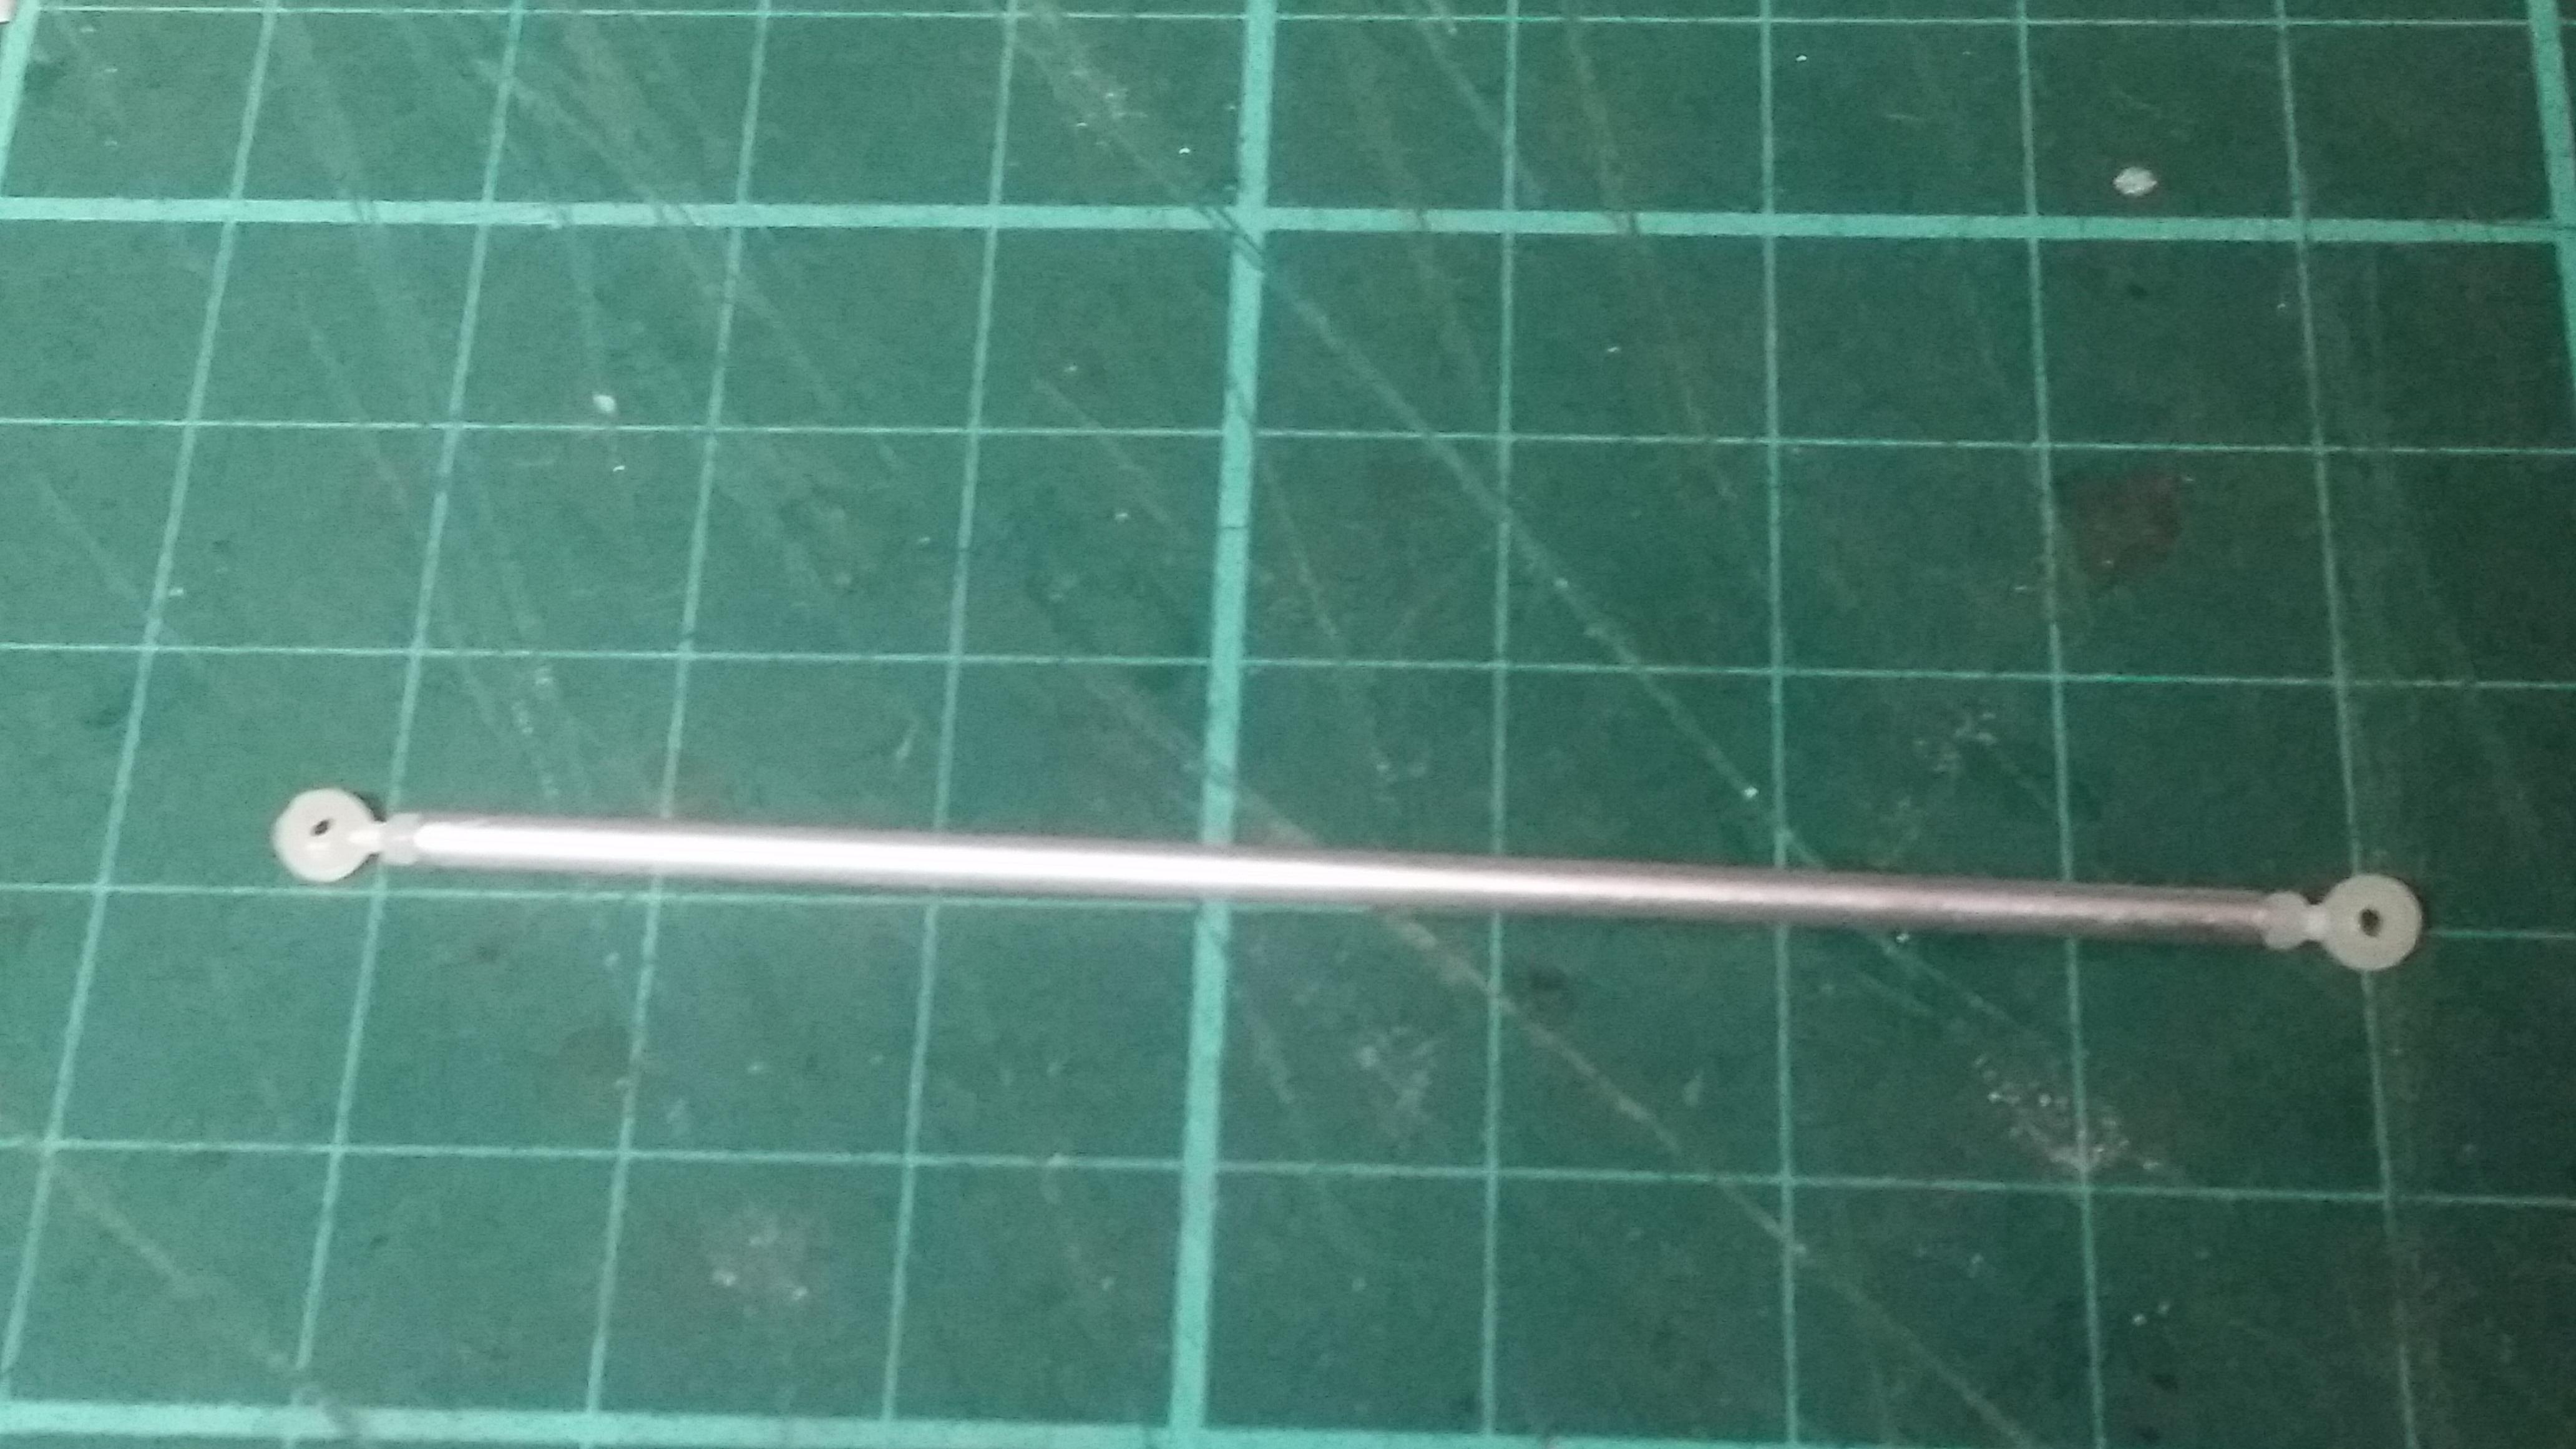
Thanks Sflam and GoatGuy, I appreciate your kind words. I've had a heap of 'normal' work to do lately so the funny car isn't getting as much love as I'd like but I've still been able to knock over some more. Got wheel studs and nuts done for the rear, the size is metric M1 x 5mm. I just drilled the brake hats using the wheel as a guide. Got a start on steering arms and radius rods. I measured the kit arms by mistake ( they don't fit this model and found out the hard way) so instead trial fitted each to see how far different to make them. Then cut the kit arms leaving a little of the original arm and joint. After this I cut .080" aluminium tube the the length needed and glued the joints in the tube. I think they look much better. Then trial fitted before painting the ends. I also drilled the ends to use nuts and screws. Metric M1 again. The pictures are of different arms at different stages so I hope it makes sense. A length of the .080" tube replaced the steering box shaft as well. Thanks for looking Jim
-
Love that hahahaha
-
Saw this on FB the other day. Super cool job man! Jim
-
Very impressive John! You don't muck around. Jim
-
Loving the detail, man that shifter is off the hook! Very cool. Jim
-
Thanks Mustang! I've been into it a bit so another update isn't far off. Jim
-
Glad it clicked a gear for you! Being an engine and carb guy day to day means quite a few tools that cross over to models! Jim
-
Thanks Don. Your picture doesn't come up but I know what you mean. Jim
-
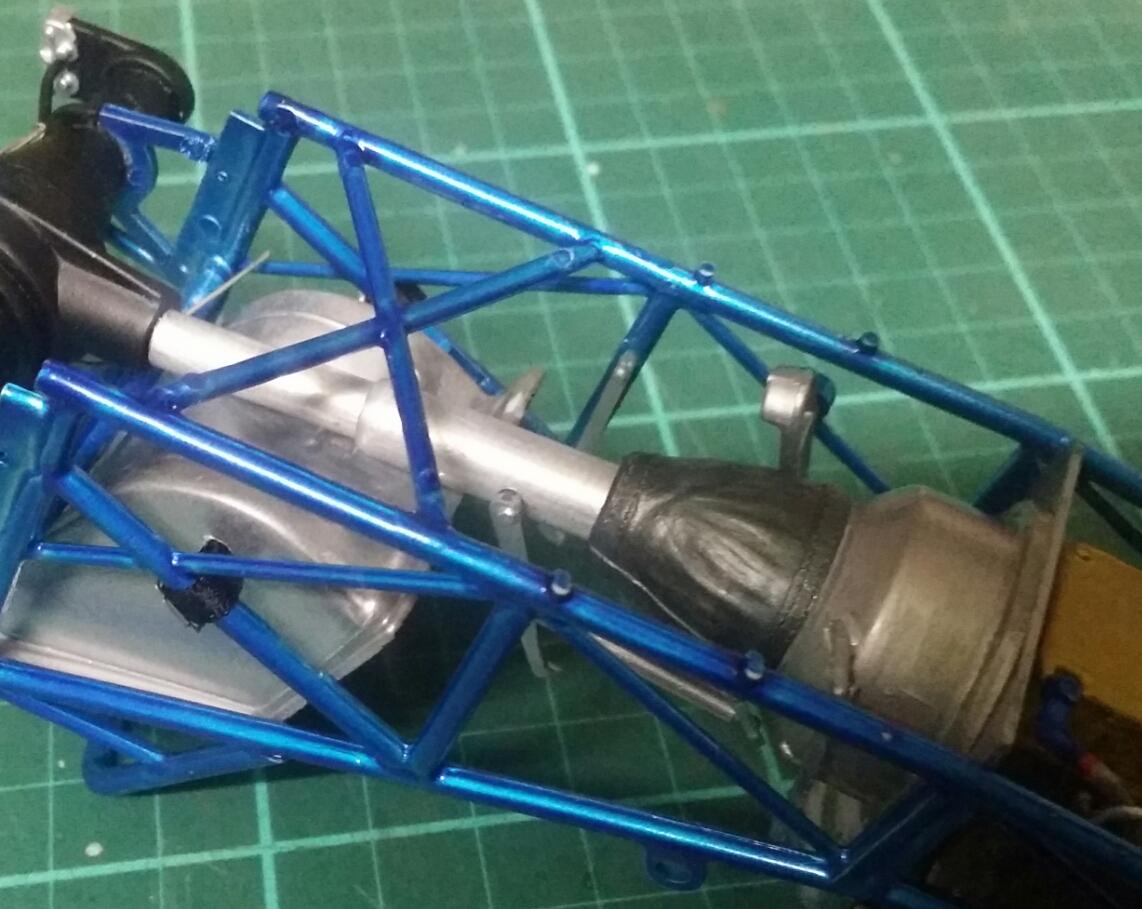
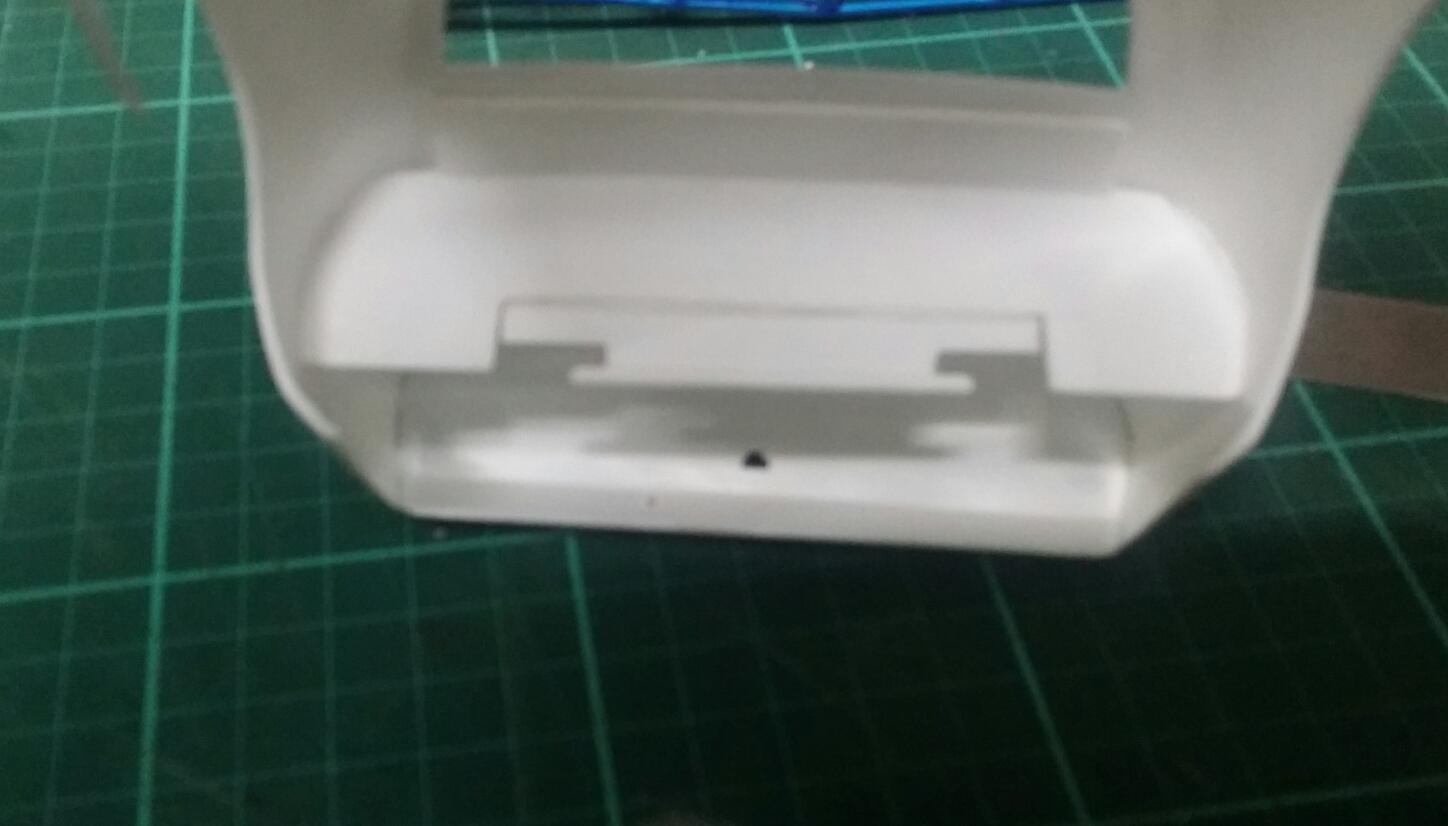
I haven't been back to the lathe yet to finish the remaining wheels but haven't been without results. I fitted the engine oil lines, filters and fuel tank, then made a supply line to the fuel pump. I made a fuel tank hold down strap from a coke can and tried bead rolling. It came up just ok but I'll keep it on there otherwise this build will take years. Because I changed the ride height the seat needed modifying for drive shaft clearance. You can see the relief in the front of the seat and I pushed the base up also. I didn't like the kit drive tube much so found two aluminum tubes that would telescope and fitted those. Thanks for looking. Jim
-
Thanks Roadrunner and DPNM, I really appreciate the kind words. DPNM the kit isn't 'off' as such but when built has a very high ride height. If you look at reference pics of funny cars from this time, they sat pretty high but these kits build up really high! I'm not usually someone who builds for historical accuracy but more about building what I think looks good. For that reason this kit will sit as low as it can which will definitely be lower than the real deal ever was. I'll post some pics of the areas I've changed so you can compare to your kit. The rear end mounts, the cage drop and the rear body mount are the start. After that the front body mount and seat need fixing.
-
Thanks Tim! I've followed your builds for years and builders like yourself inspire me to go to greater lengths Jim
-
Thanks Sflam. It's about time for another update and thanks for looking guys. Jim
-
It is a rough kit when in the box. You did wonders! Jim
-
Thanks Pappy, I'm trying to stay motivated! Jim
-
64 Dodge D100 Pickup Pro Street
1320 replied to AmericanMuscleFan's topic in WIP: Drag Racing Models
Very impressive Francis! I machine a few things so I can imagine perfectly how long this must take. If you're like me though it's methodical and relaxing at the same time. Bravo! Jim -
Thanks Majel, I'm really happy with the wheels so far, hopefully I can match the other two because I do it freehand. The brake line is .025" stainless safety lock wire with the kit black rubber hose on each end. The brackets are 3 x 1.12 moto GP exhaust spring hooks. Thanks for looking Jim
-
Thanks Nazz!
-
Hey guys, I'm really enjoying this build. The following pics show what I've been up to. Made a rear brake line which came up ok. Took a few tries but it will do. I drilled wheel stud holes in the rear wheel then moved onto the front ones. So I now I have one of each. No stud holes on the fronts, I used some PE bolt heads instead. Also got the harness finished in the seat area, now I have to attach it to the chassis. It's a 1.12 scale MFH harness but it looks ok I think. Not too large. Thanks for looking Jim
-
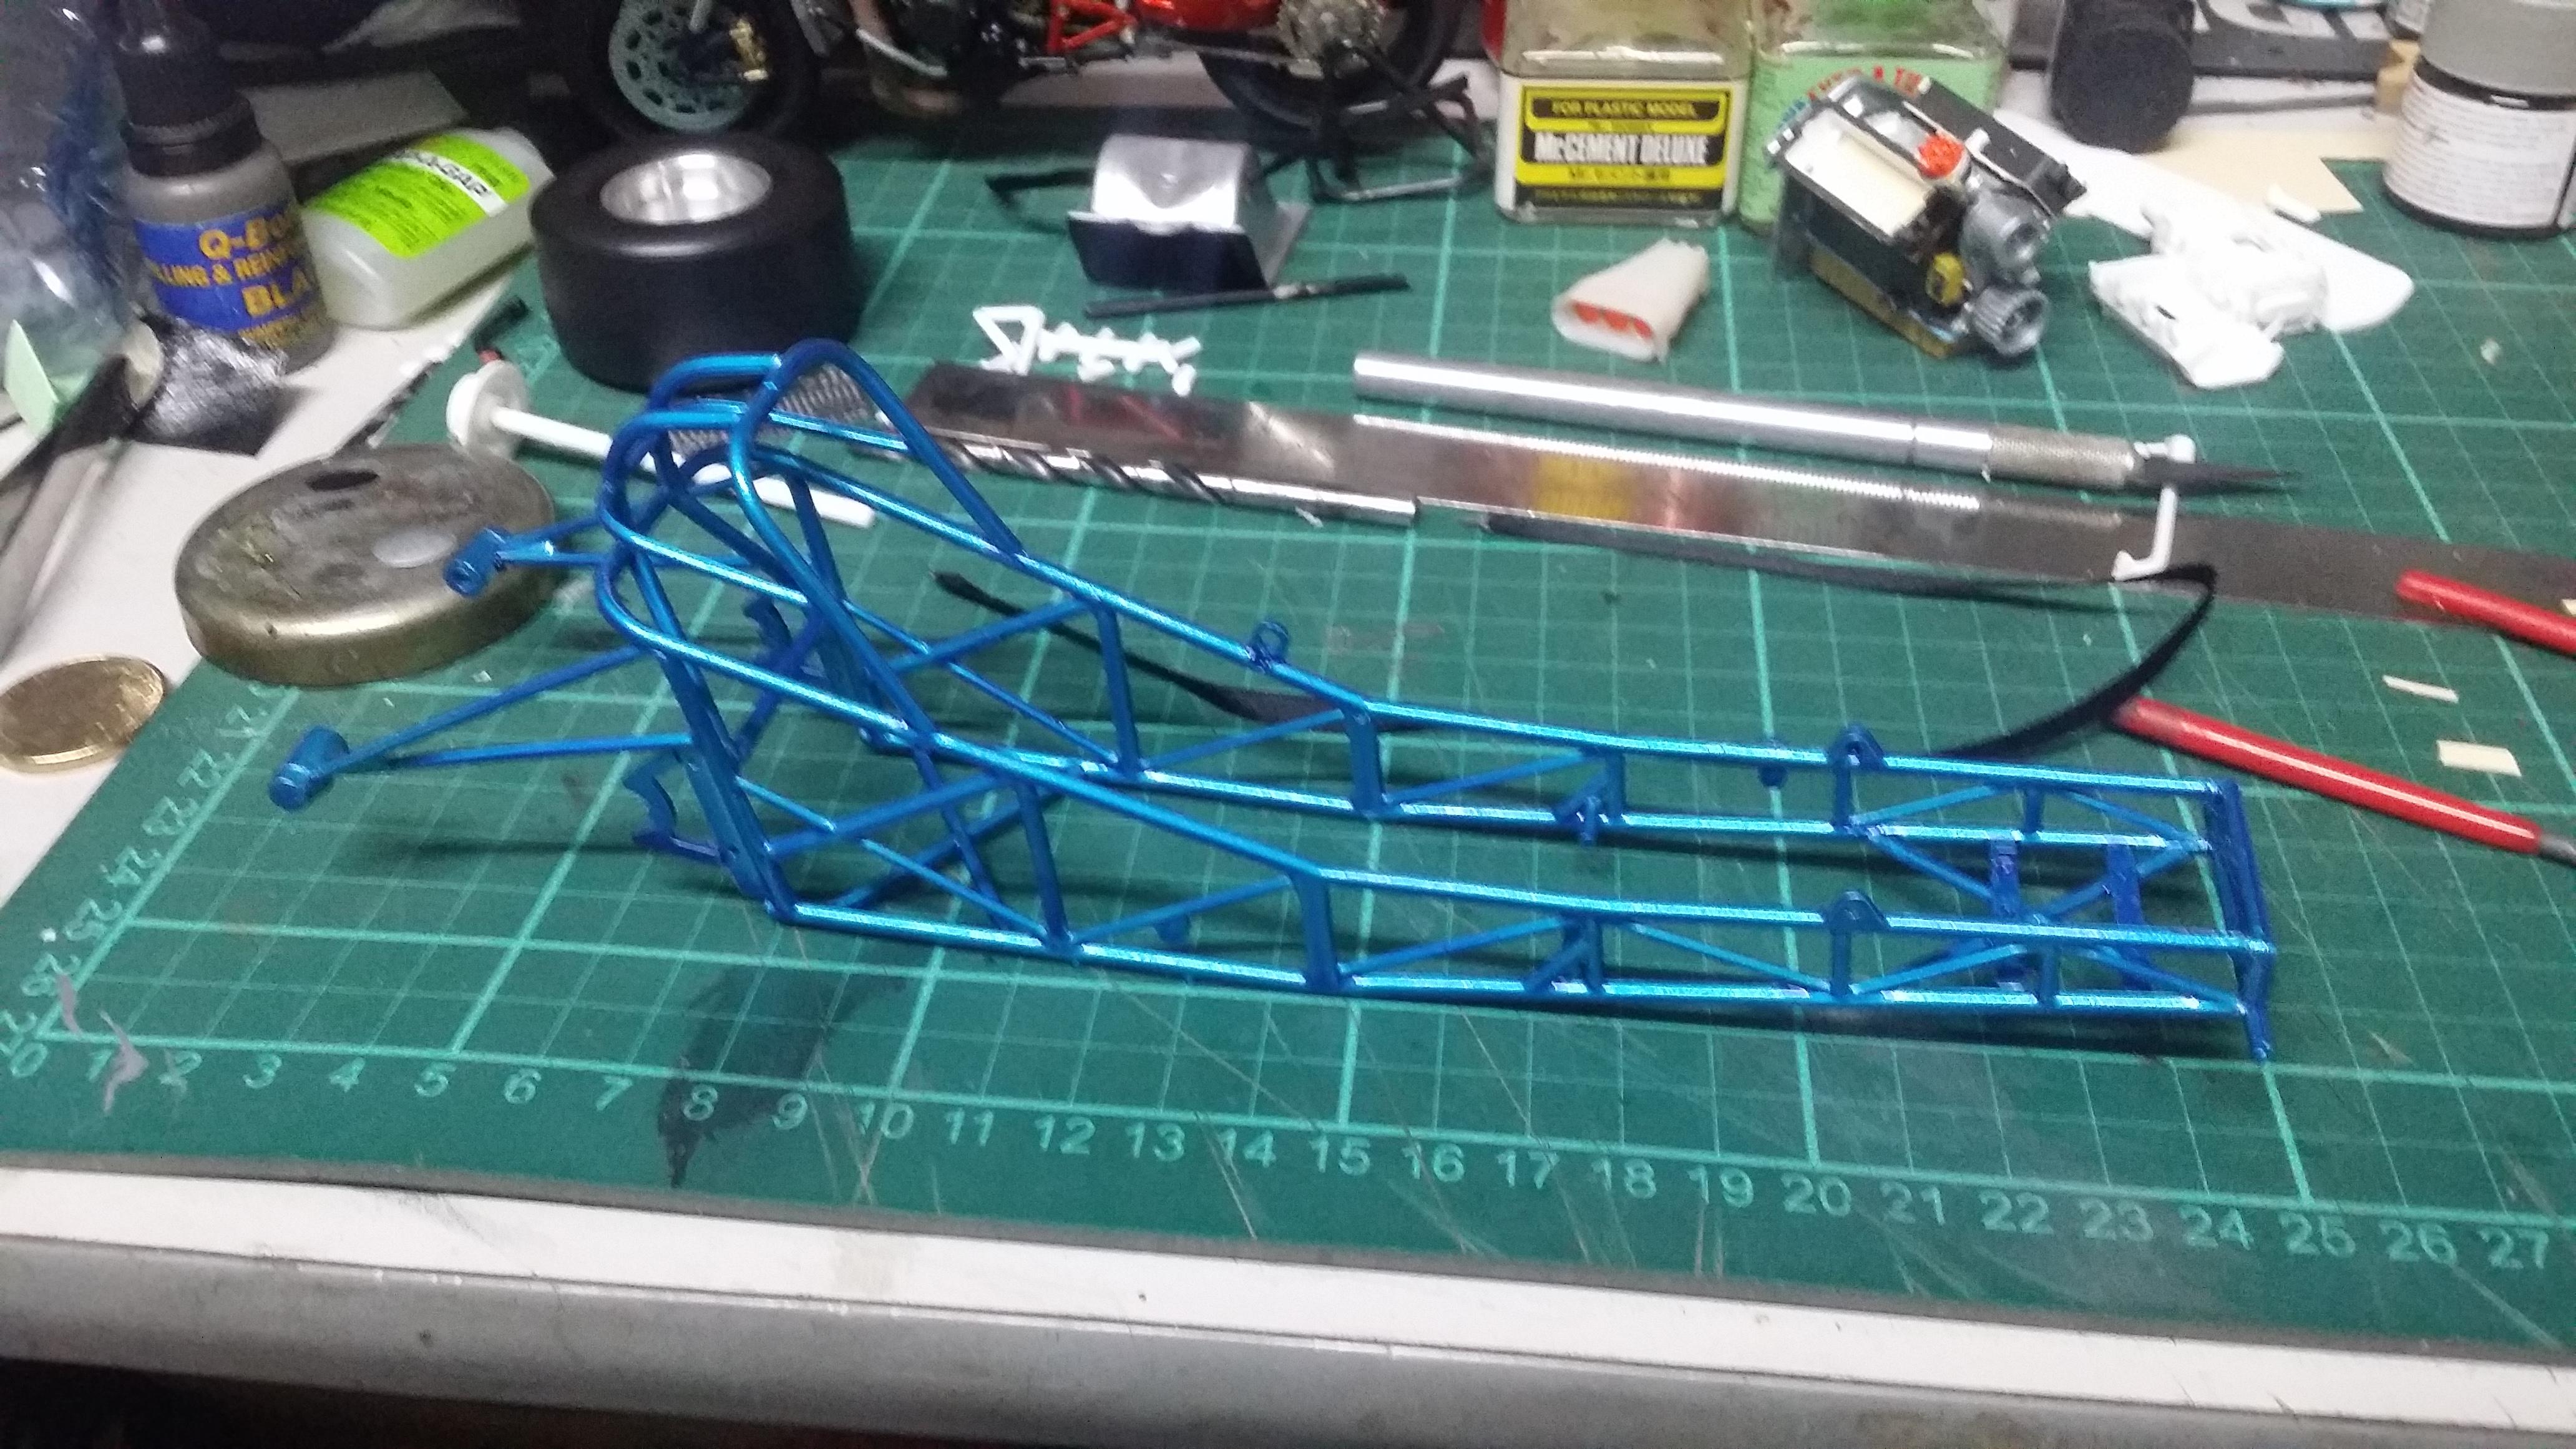
Hey guys, I just started a new build, Revell's 1/16 hawaiian kit. I assembled the chassis and while doing so dropped the height of the roll cage and raised the rear end mounts to fix the ride height issue these kits have. I also started on the engine and added gaskets to the oil pan and heads. I also wanted to make the wheels as I hadn't done a 1/16 set before so I started on those. They'll be a satin centreline in aluminium which I'll do in my 60 year old wobbly lathe. I roughed out one of the rears and I might do a front next. It won't be nearly up to the standard of some of the projects here but I'll keep the build realistic for me to do in a reasonable time frame. Thanks for looking. Jim
-
I Hear that! Ever sat an LS and ford head gasket on top of each other?
-
Great start! Nice car although your LS looks funny? Jim