

Rich Chernosky
-
Posts
1,623 -
Joined
-
Last visited
Content Type
Profiles
Forums
Events
Gallery
Posts posted by Rich Chernosky
-
-
5 hours ago, 2whl said:

Thank you Paul for granting my request. That engine, just like the rest of the model is fantastic. Thanks again.
-
Very nice build Paul...would luv to see what you did with that engine and rear suspension.
-
23 hours ago, kelson said:
Nice build!👌,i have a few in my stash but yet to build one.
Thanks....I gotta bunch of Beemers in my display case, you really should.
23 hours ago, karbuildr said:Very nice build, excellent stance, well done.
Thank you kindly
17 hours ago, ea0863 said:Wonderful build Rich, and thank you for the info on the kit. It looks like one I will have to pick up!
You should and I am quite sure you will enjoy it and do a great job.
17 hours ago, Jim B said:Great looking BMW. Very well done.
Than k Jim
12 hours ago, PappyD340 said:Very nice!
Thanks
10 hours ago, 1hobby1 said:Very nice build !
Thank you
4 hours ago, espo said:Beautiful looking paint color and finish. The interior contrast looks great.
Thanks David, I like to match the exterior whenever I can. This interior was very well detailed.
-
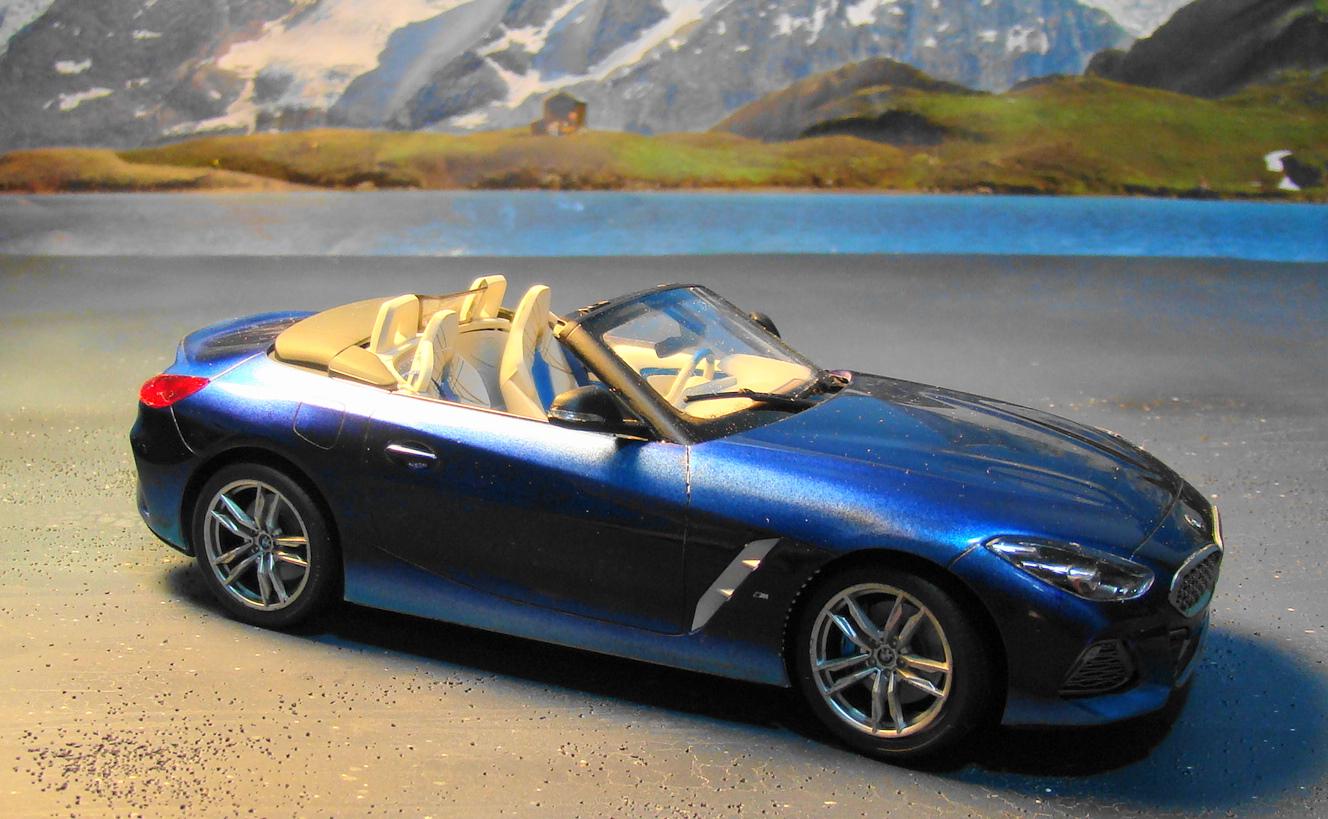
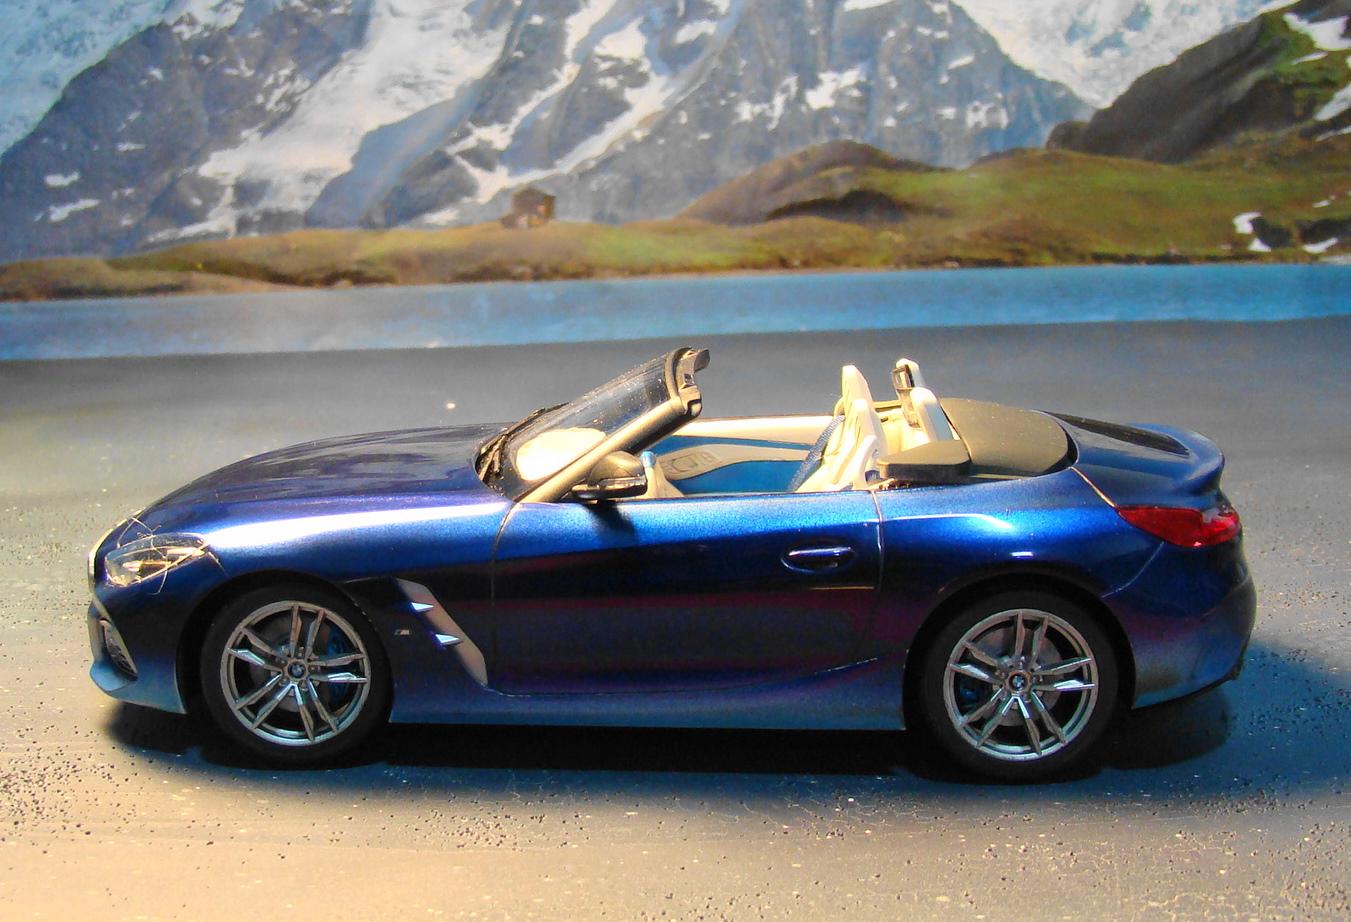
Been almost 6 months since my last completion. Moving everything will do that. This is my first project done at my new location. Mengs 1/24 BMW Z4 M40i. What a wonderful kit. Everything fit to perfection. A joy to build. color is Alclad 711 Candy Indigo over Alclad 701 silver and 122 Mirror gold. Only problem here was the clear coat. Alcads own clear just didn't make it. Finally resorted to Krylon latex clear. Advantage to this is the solvents in this clear do not etch into the base coat. Disadvantage is this takes a month and a half to cure before it can be sanded and polished. But it dries rock hard and polishes to a very hi shine. Other than seat belts and a lot of paint detailing this was done box stock. Particulars are in the captions below the pictures. Thanks for looking and comments welcome.
Trying out a new background and photo location. Like the stance of this model
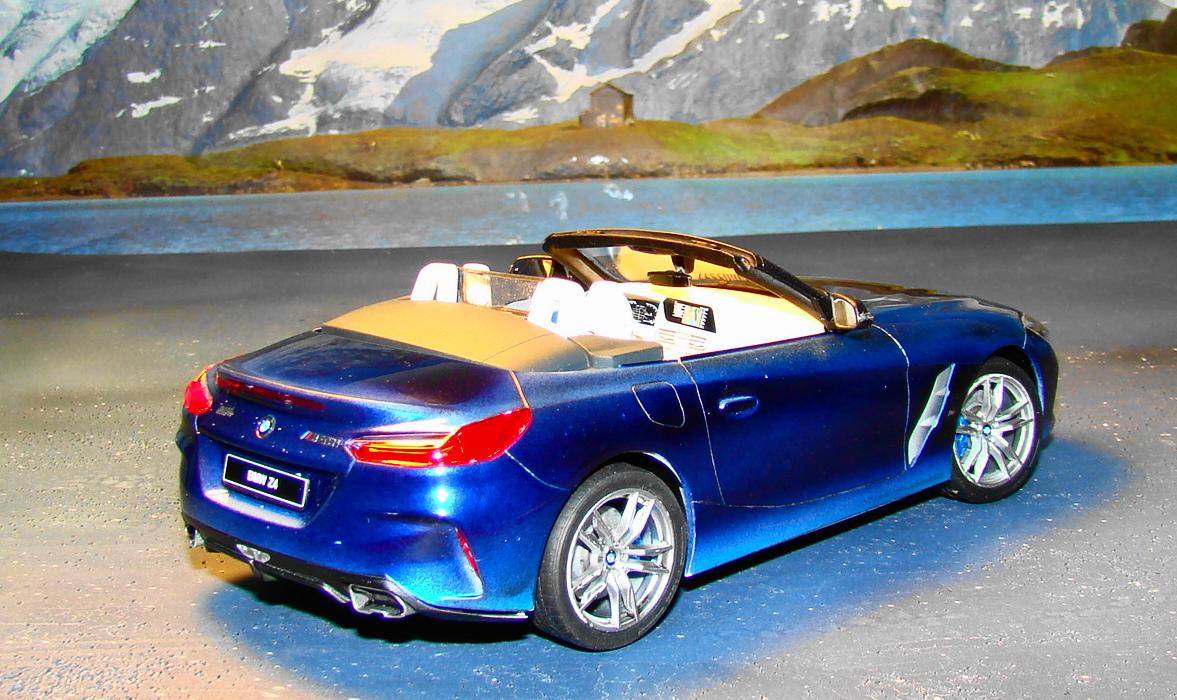
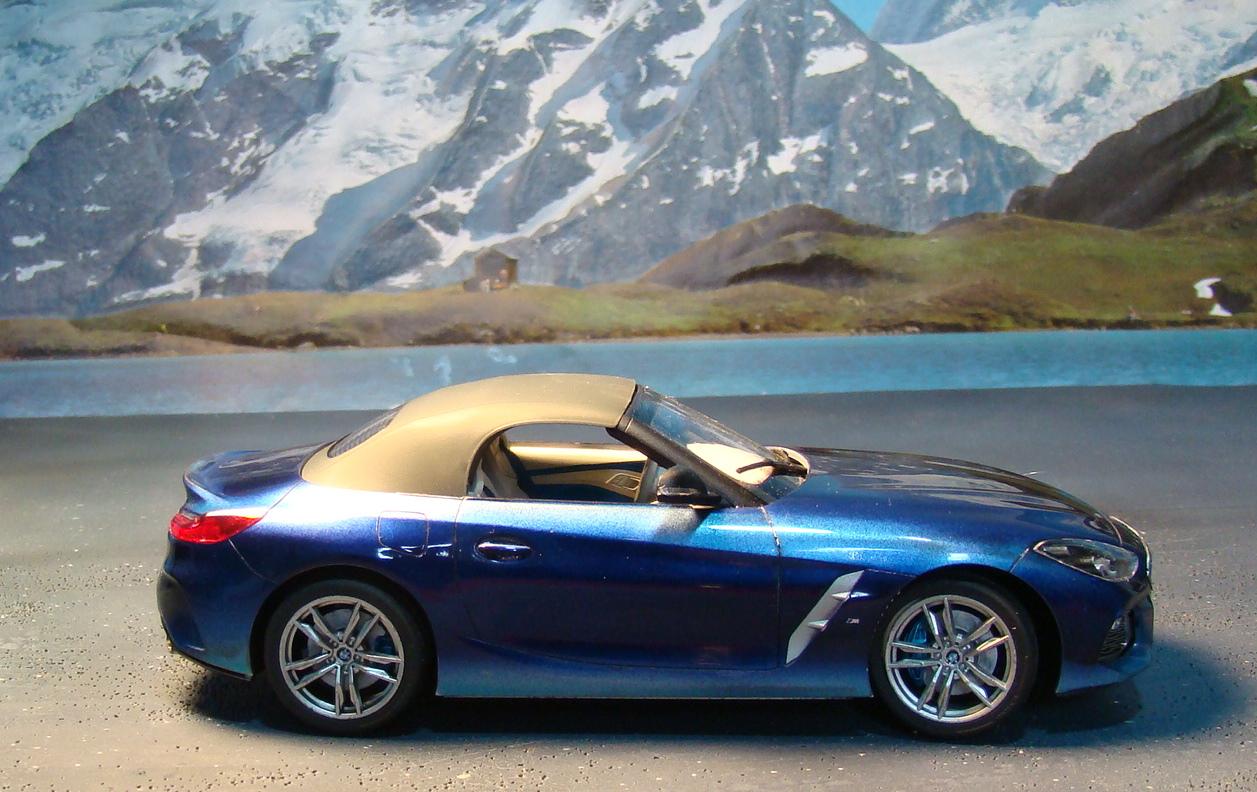
rear shot shows off a lot of the detail Meng put into this kit. It is also the best phot to show off the two tone effect that was achieved with the airbrush
side veiw and a little better view of the background.
This kit came with an optional soft top in the up position. I omitted the side windows.
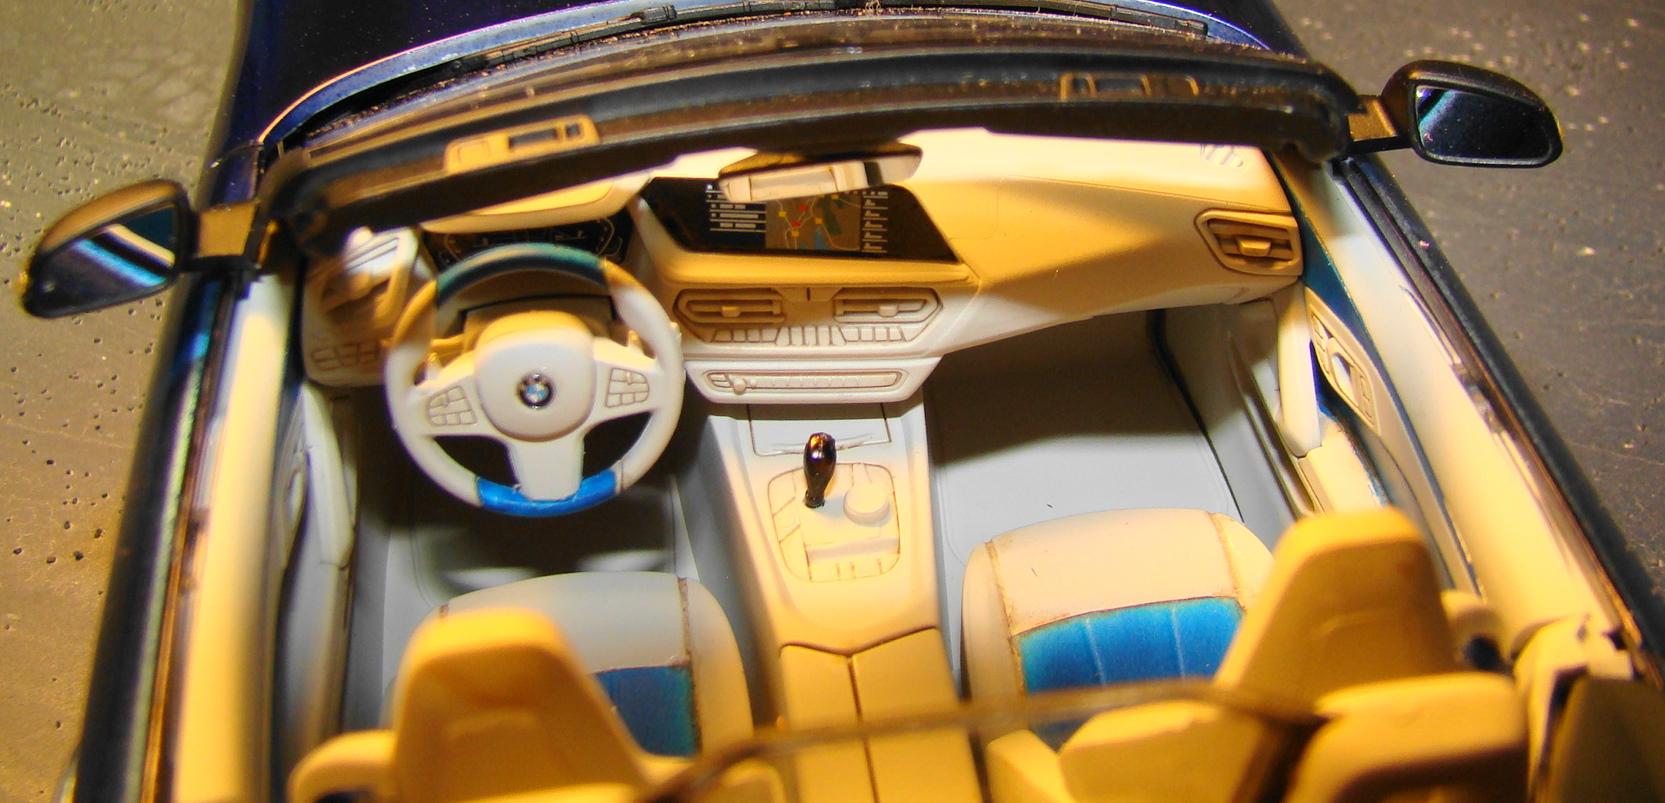
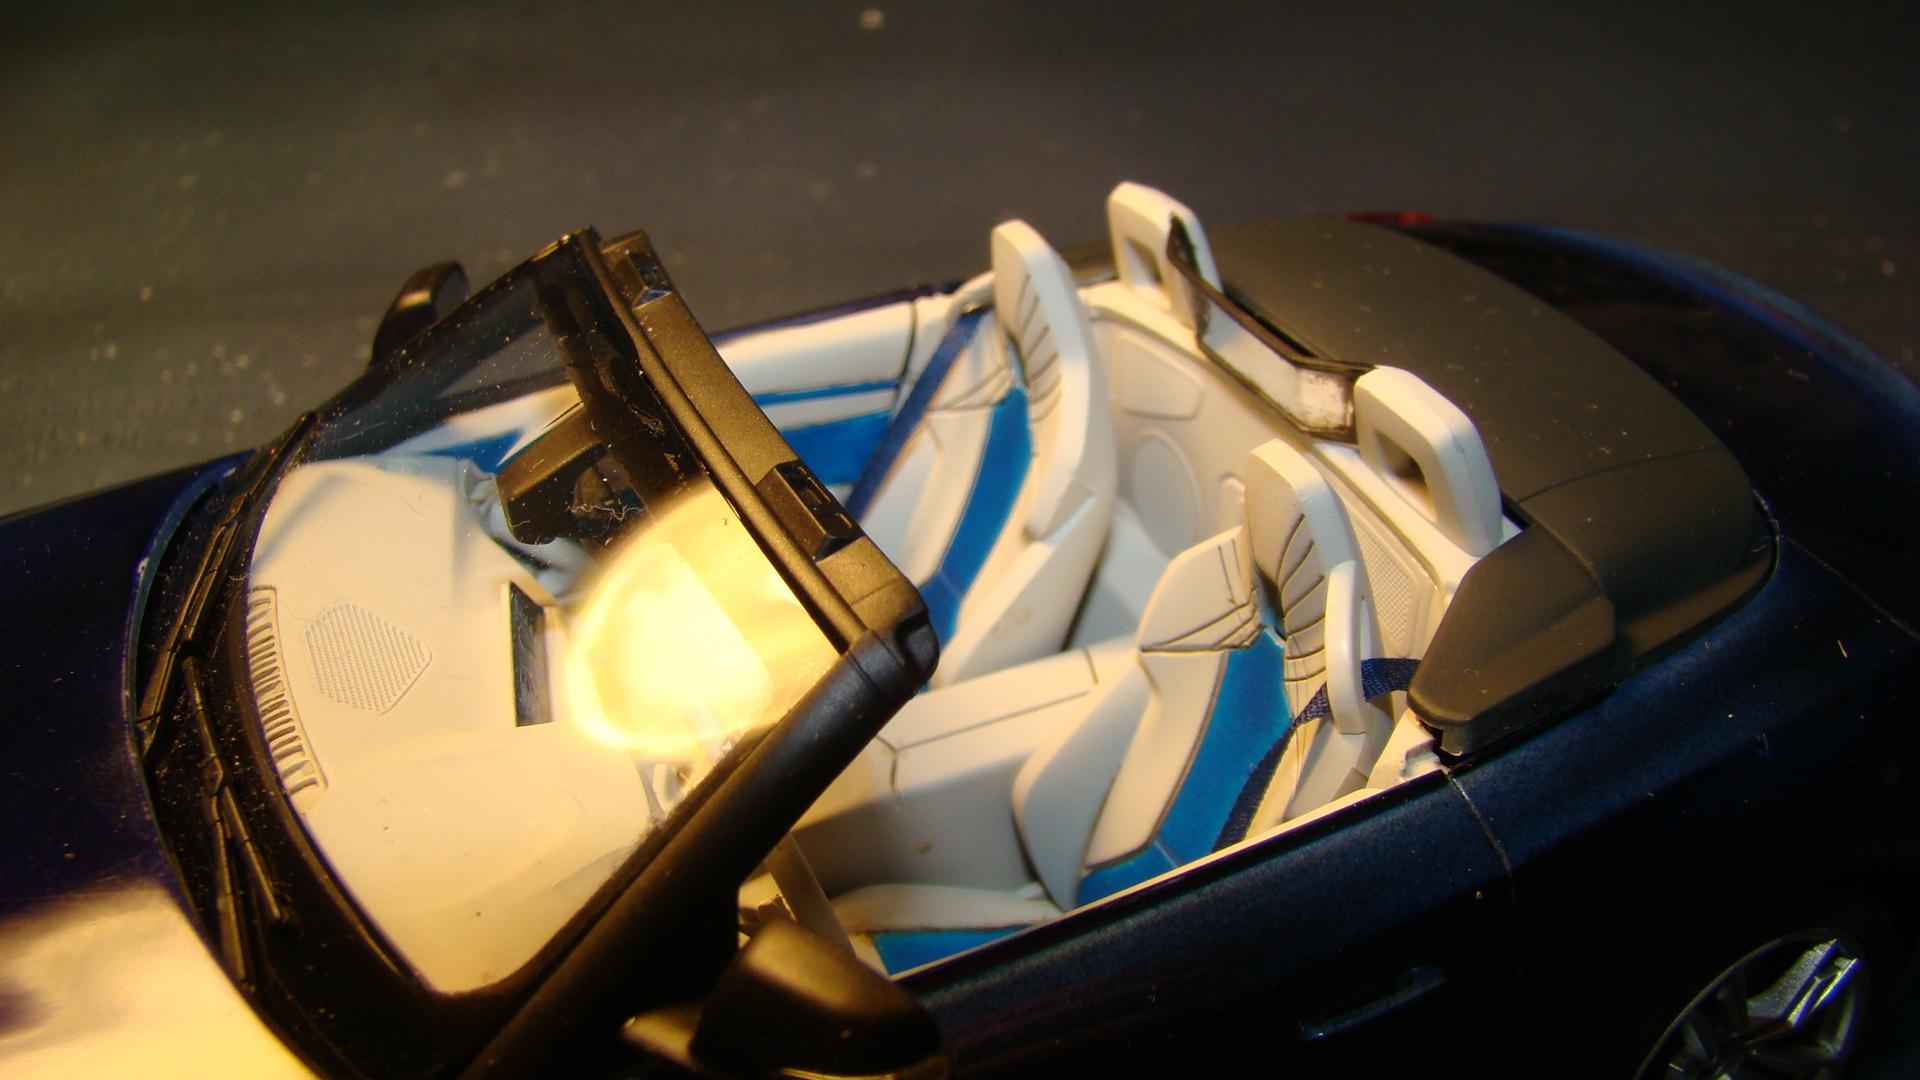
Had a lot of fun with the interior. Color is Tamiya LP34 which is a light grayish blue. Insert color was done using Tamiya LP to match the exterior. Tamiya brown panel liner did the dark accents.
Another veiw of the interior and the great effect the Tamiya panel liner had. Gotta luv this stuff.
-
 10
10
-
-
Welcome to the forum Bill....nice to see another exotics builder here..
-
1
-
-
Very well executed. Those ventilator rings in the seats must have been a real terror.
-
23 hours ago, IanH said:
Hi Rich,
Thanks, yeah I'm really chuffed with it, put in a lot of work into such a small kit!
I am thinking of perhaps adding the helmet alone to rest on the seat, with my changes to the steering column I don't think the hands will align with the steering wheel, so am probably not going to add the full driver.
I was seriously considering making the steering work, but the connections of the tierods are so small I could not figure out a way without taking away from the look I had planned, so the steering is fixed and not movable.
Ian....the biggest problem I had with that kit WAS the driver figure. I had to do some serious grinding on poor Ayrtons butt just to get him to fit into the seat. His feet lined up with the pedals OK but the revisions I did to his arms caused the right hand to not touch the steering wheel. Pictures didn't really show it but I guess its OK since often times a driver will lift his hand off the wheel during turns. I'm a big Senna fan so having him in the cart was part of the plan. You will probably save yourself a lot of work going the way you are.
-
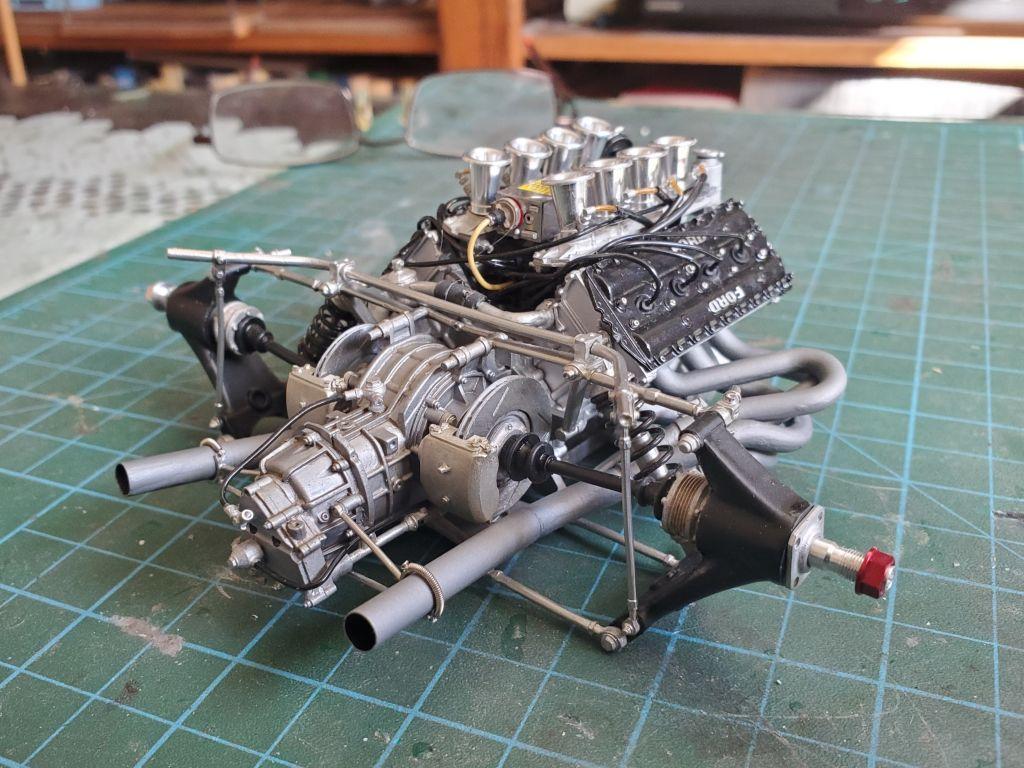
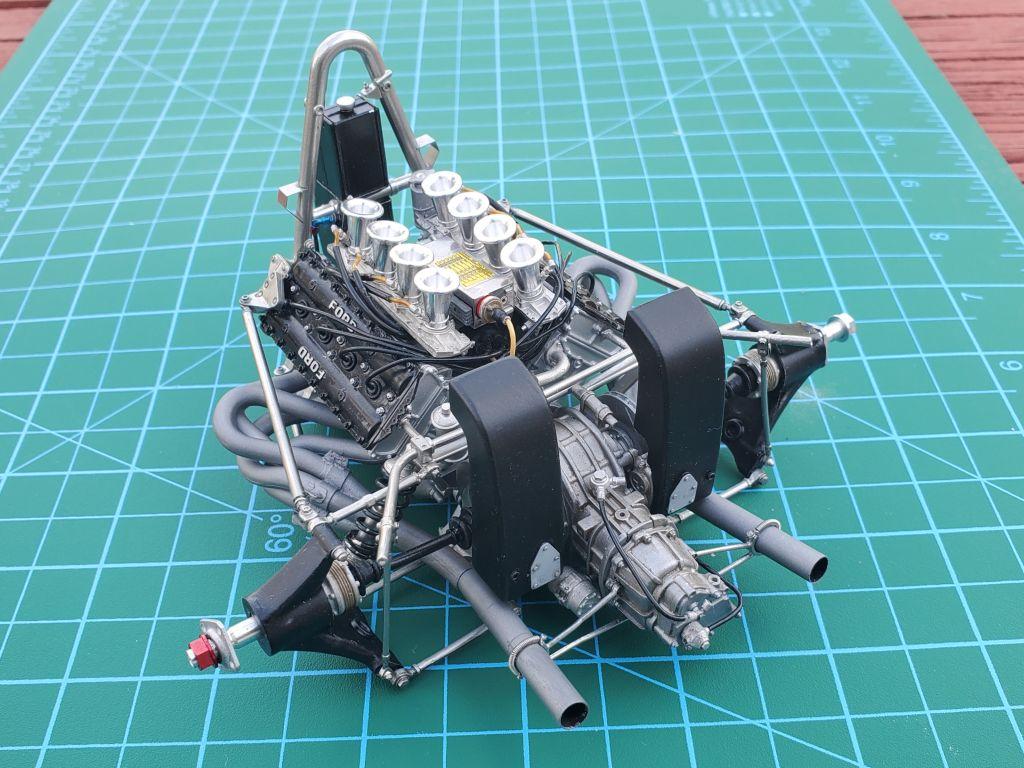
Incredible...and that engine is spectacular. Thanks for posting.
-
Another masterpiece Mario. Beautifully done. I can understand your reluctance on this kit. Mine has sat in its box since it was bought new many many moons ago. But bravo to you for finally tackling it.
-
Ian...this turned out really nice. Those added details really make this. Are you planning on adding the driver (Ayrton Senna) or is this it. In any case its a super model. I really liked the steering too...did you decide to make it work ?
-
Very nice job Phil...and thanks for the history. Always follow your posts.
-
I agree with you...it is an exceptional kit and you have done an exceptional job. Interior is my favorite.
-
Gary...I have this model and did it many years ago...probably box stock. Didn't think much of it as it sits in the back of the case. But you have done a wonderful job of turning this kit into a very decent model. Might have to dig mine out and re-do it after seeing yours.
-
 1
1
-
-
Doug...thank you for the kind words and mention in you post. It looks like you have really stepped up top the plate. All three of those are great builds. The F-2 Brabham is a particulary nice kit and was one of my first posts on this forum. Very glad to be your inspiration. I just moved and it has taken me months just to get set back up but I am almost there. Was looking at the stash just yesterday so hopefully there is more to come. Thanks again.
-
18 hours ago, ferrari87 said:
That's a gorgeous build there! I've actually just got this one in after finding it on eBay for pretty cheap. It was semi started and in really rough condition. The A and B pillars were broke and soon upon trying to repair them, the C pillar broke as well. The other issue was that the kit didn't have its directions anymore.
Would you be able to hook me up with the directions from your kit, digitally?Yes...I would. Just got done moving and am currently sorting all my directions. I save all of them plus all the box art. My new digs have a lot more room so I am better organized. I can PM them to you if you are in the mail portion of this forum.
-
Gary...what did you use for the paint this time. Looks much better. Closer to the pic Rex posted from the LeMans museum. I found my original formula for my paint job. I matched the box art. (not accurate but I liked it) Still up in the air on mine. As for my original post from Aug 19,2023, the move is now all complete and am fully installed in my new digs. Workbenches and model cases are all up to speed (except for the paint room and booth). What a job... took more than a month to unpack and repair all the models. Glued lots of mirrors and wheels back on. Never again.....glad its done. Will be back to modeling shortly. New place is so much cleaner and now better organized. Post pics soon.
-
2
-
-
Incredible detail, amazing carbon fibre work, I am completely blown away.
-
1
-
-
-
Joe...never seen this Corvair variation and would luv to add one to my collection. I have posted a couple Corvair projects on here and am working on another now. So i have some parts left over. Cool engine, like what you did with it. This whole project looks like it is coming together. Great work so far. Here is the link to my builds: https://www.modelcarsmag.com/forums/topic/171608-a-tale-of-two-corvairs/#comment-2575081
-
2 hours ago, Chinacar said:
I saw a post in another forum that there are aftermarket decals available for these kits. This is great because you won't have to deal with 40 year old decals!
There is a way of saving old decals that I have been using for a long time now. But it is not as good as new... Indycals has this set and that is the direction I will be taking. Thanks for the reply.
-
This kit was no walk in the park. You really did a great job with it. I built this one many years ago and eventually built the entire line-up. I was never happy with the fit and finish of my project and you just may be the incentive for me to re-visit this kit.
-
The passion for cars runs very high here Alex . You will be in good company.
-
4 hours ago, Rich Chernosky said:
Hard to believe that is 1/43. What a nice model.
Sorry...should have read the post better. Its still a darn nice model.
-
Hard to believe that is 1/43. What a nice model.


The Eagle Has Landed (Patrick Eagle That Is)
in Other Racing: Road Racing, Salt Flat Racers
Posted
Gotta luv a good Indy car build and this is one of them. The original car was a very bright red almost flourescent. You have captured the look very well. What color red did you use ...if I may ask?