Rich Chernosky
-
Posts
2,123 -
Joined
-
Last visited
Content Type
Profiles
Forums
Events
Gallery
Everything posted by Rich Chernosky
-
What a great build of a kit that is hard to get right. On many formula kits the top body panel rarely fits so it is not you. If you can force those panels to fit you can make tiny clips out of thin steel wire (size of a #77 bit . Once in place you can touch the them up with the body color and they will be barely noticeable but still do the job.
-
Welcome to the forum Jeff. I built that Simil'R kit (mine was stock) and can tell you it was no walk in the park. You did a killer job on it. It doesn't have to be accurate, it just has to look good and it does that indeed. Am with you on that. Here is a link to my build: Pescarolo Judd 01 LMP - Other Racing: Road Racing, Salt Flat Racers - Model Cars Magazine Forum
-
Tamiya Ferrari FXX
Rich Chernosky replied to harti20's topic in WIP: Other Racing: Road Racing, Land Speed Racers
Urs...I have used both Tamiya and Mr Color laquer thinner on Alclad. Works fine, No reason Leveling thinner shouldn't work also. Mr Color Leveling thinner is my "go to" for spraying, especially Tamiya's LP line and the Mr Color. Lately it has been in very short supply here in the US and that is worrisome. -
1967 Ford GT MKIV Gurney/Foyt
Rich Chernosky replied to Rich Chernosky's topic in Other Racing: Road Racing, Salt Flat Racers
-
Kyle Larson 2024 Indy car
Rich Chernosky replied to bbowser's topic in Other Racing: Road Racing, Salt Flat Racers
Bruce, that looks real sharp. You did a great job. Been wanting to get my hands on a couple of these kits. Too bad they are so pricey. Been awhile since anybody made some decent Indy cars. -
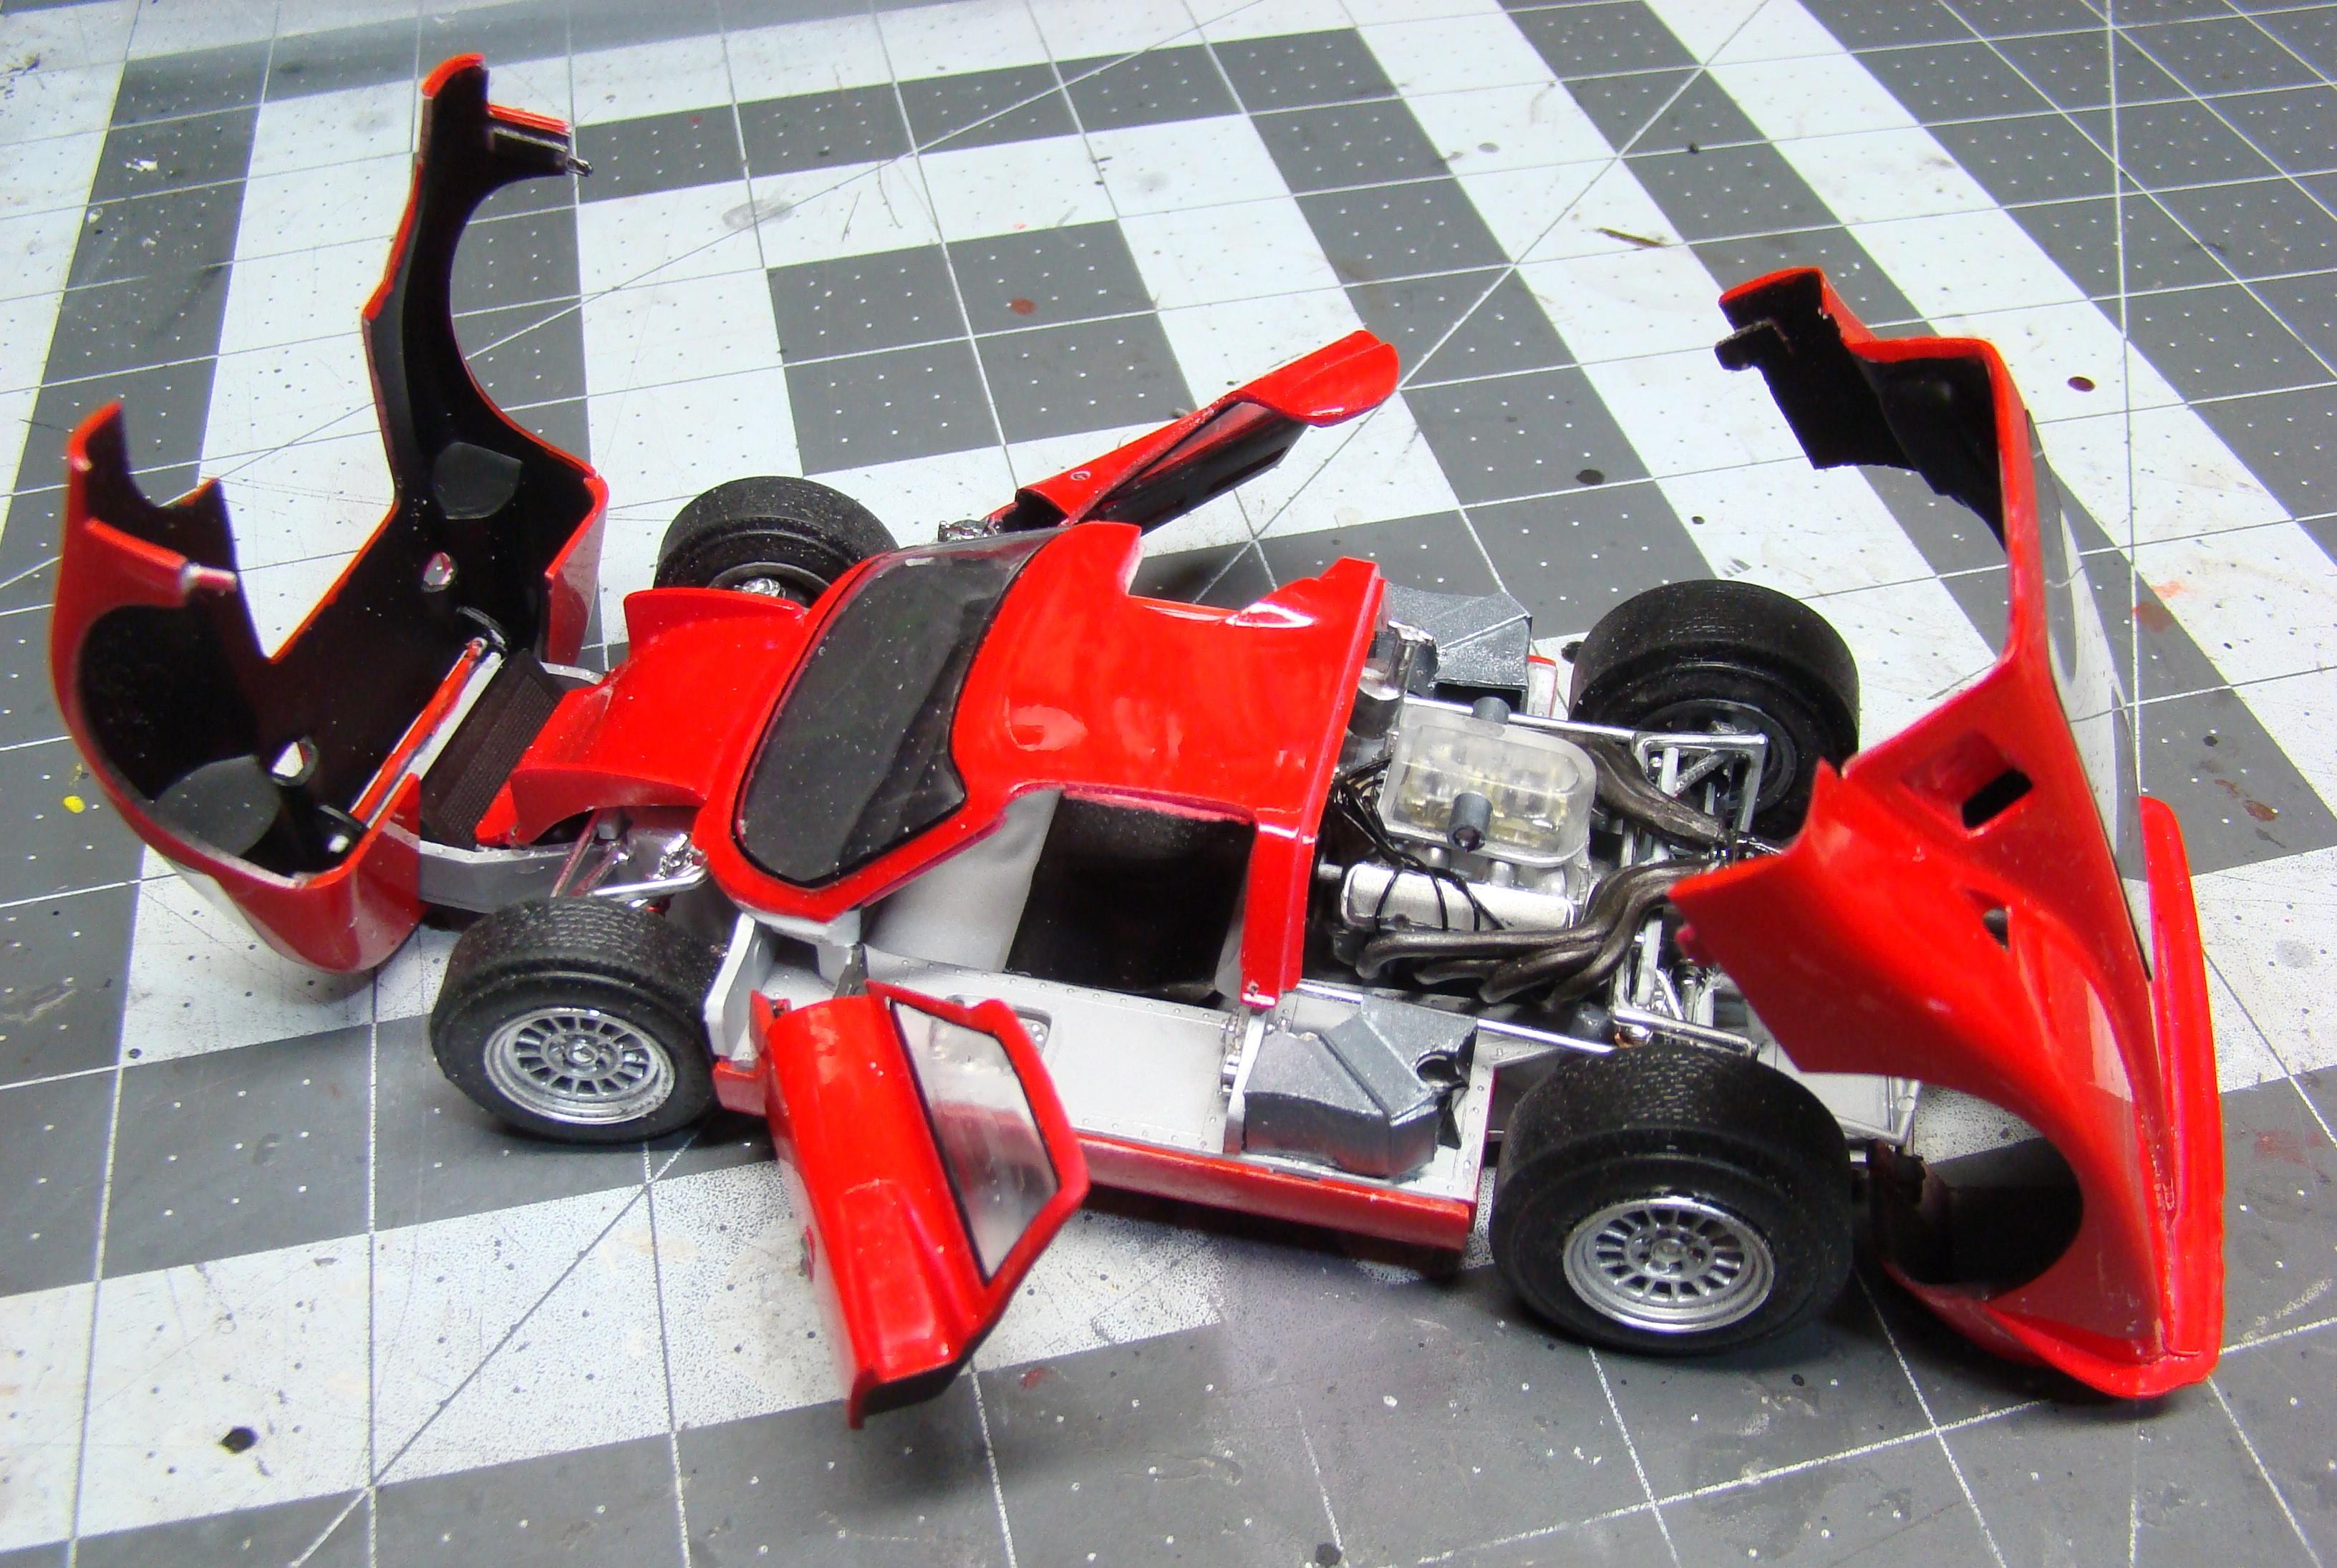
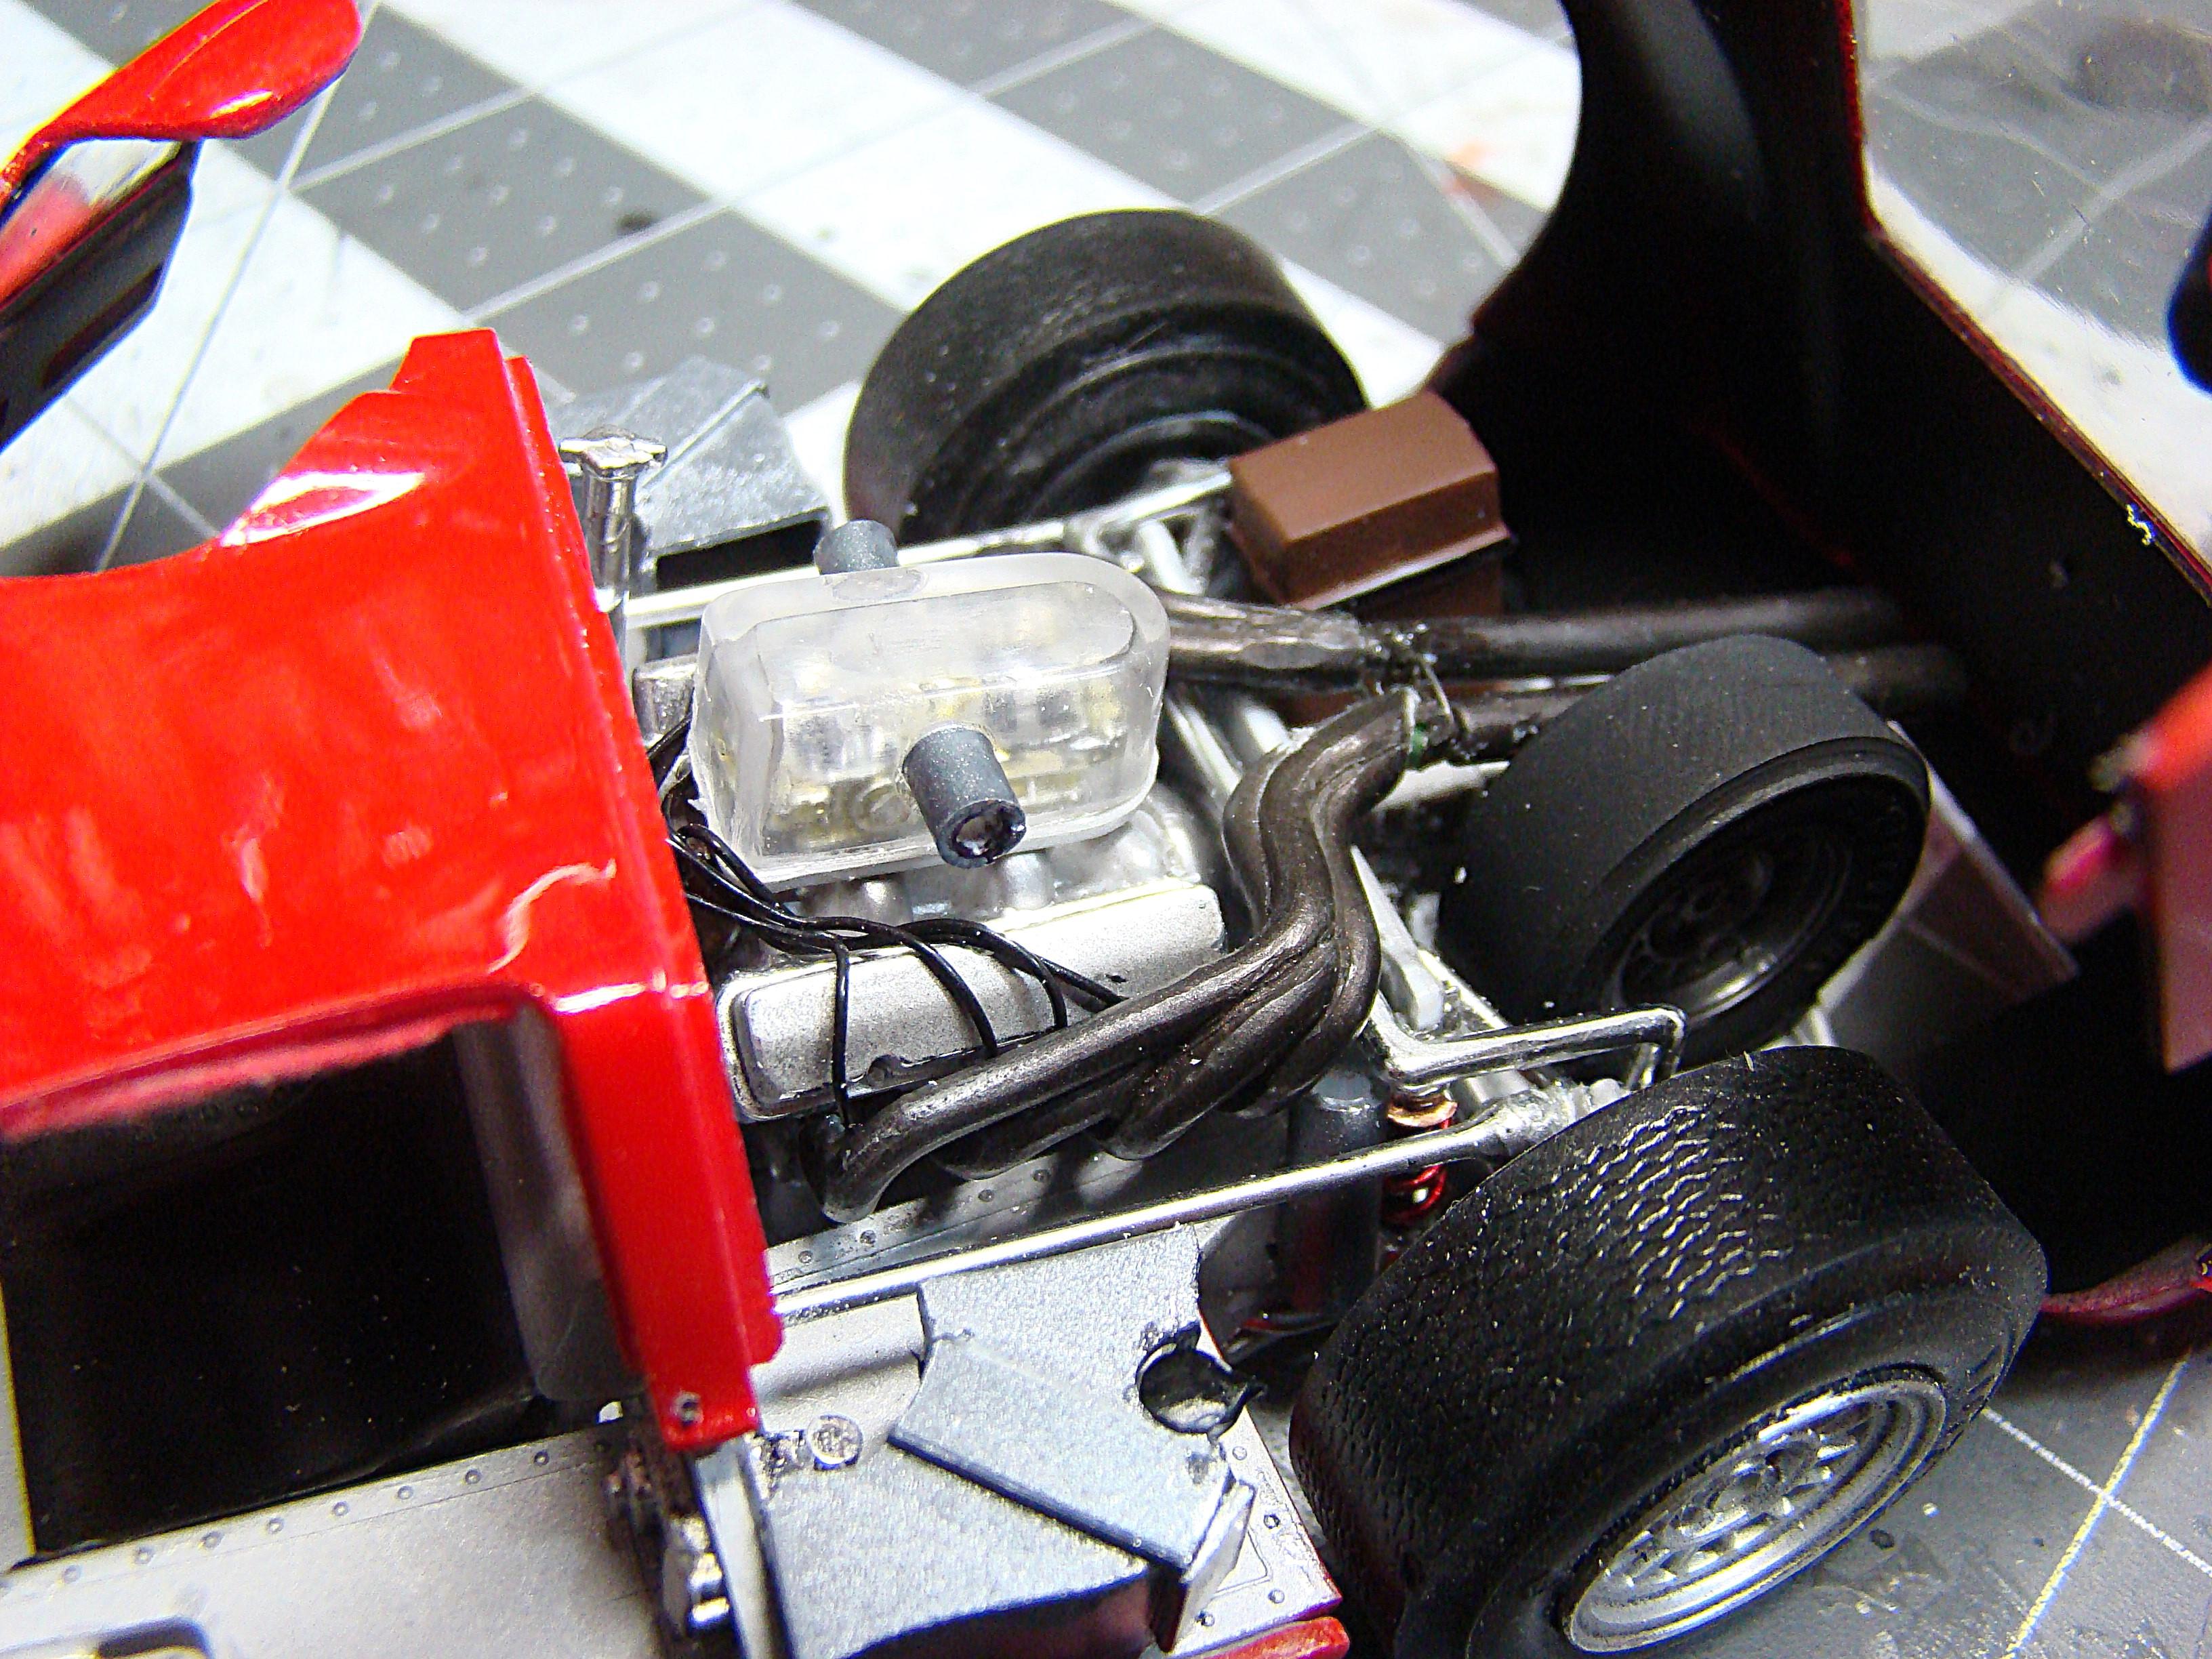
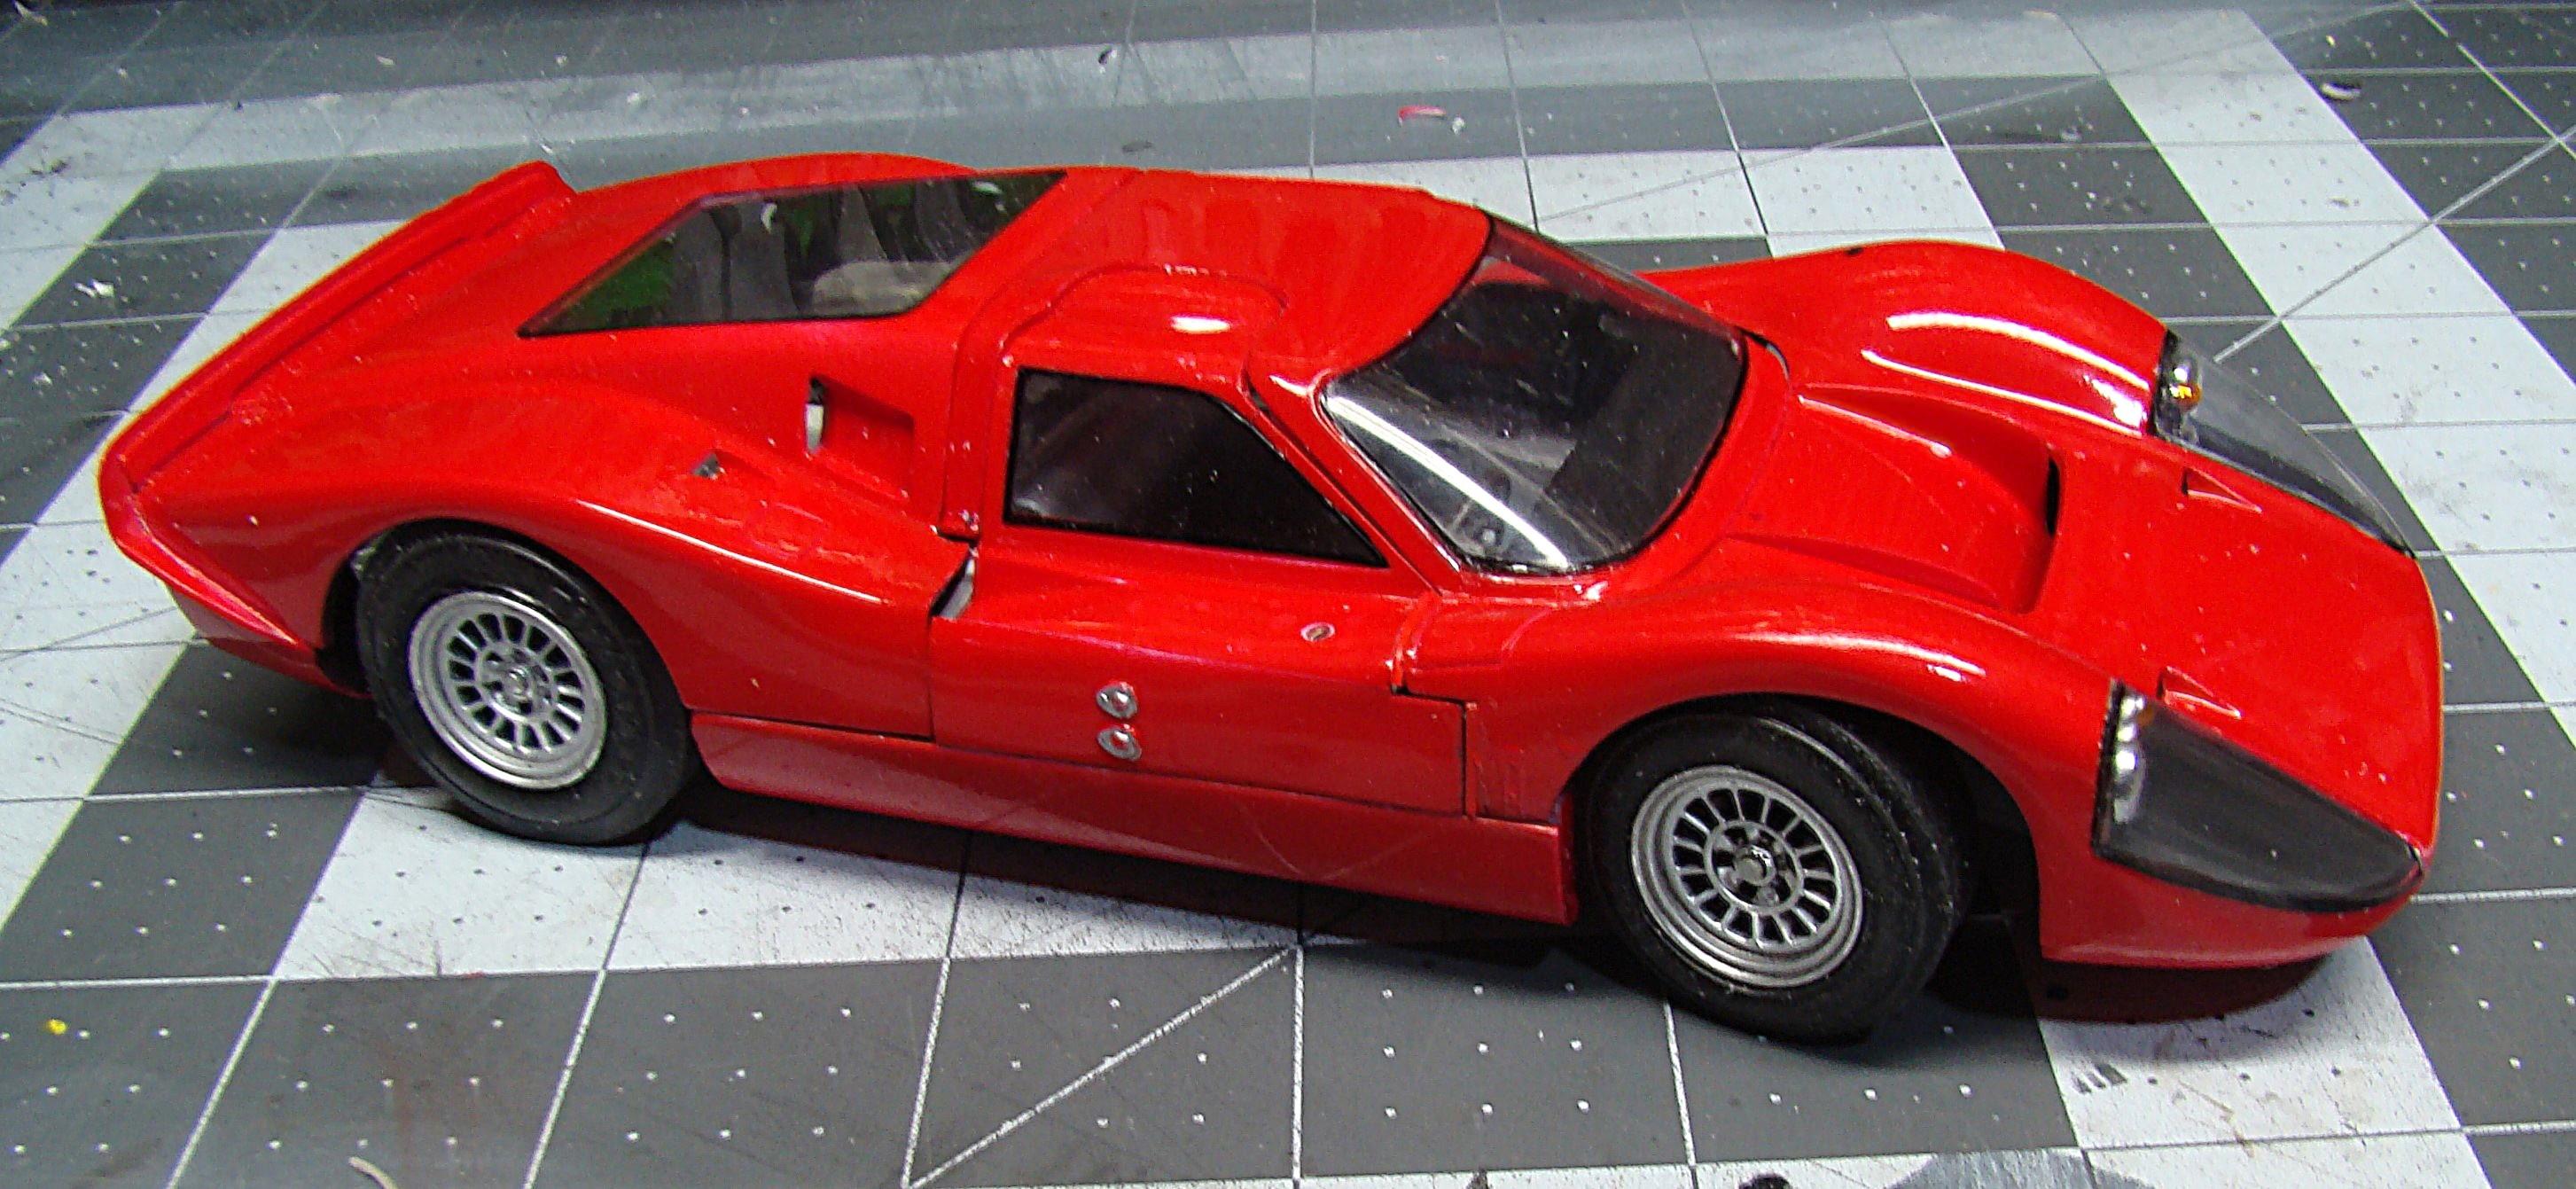
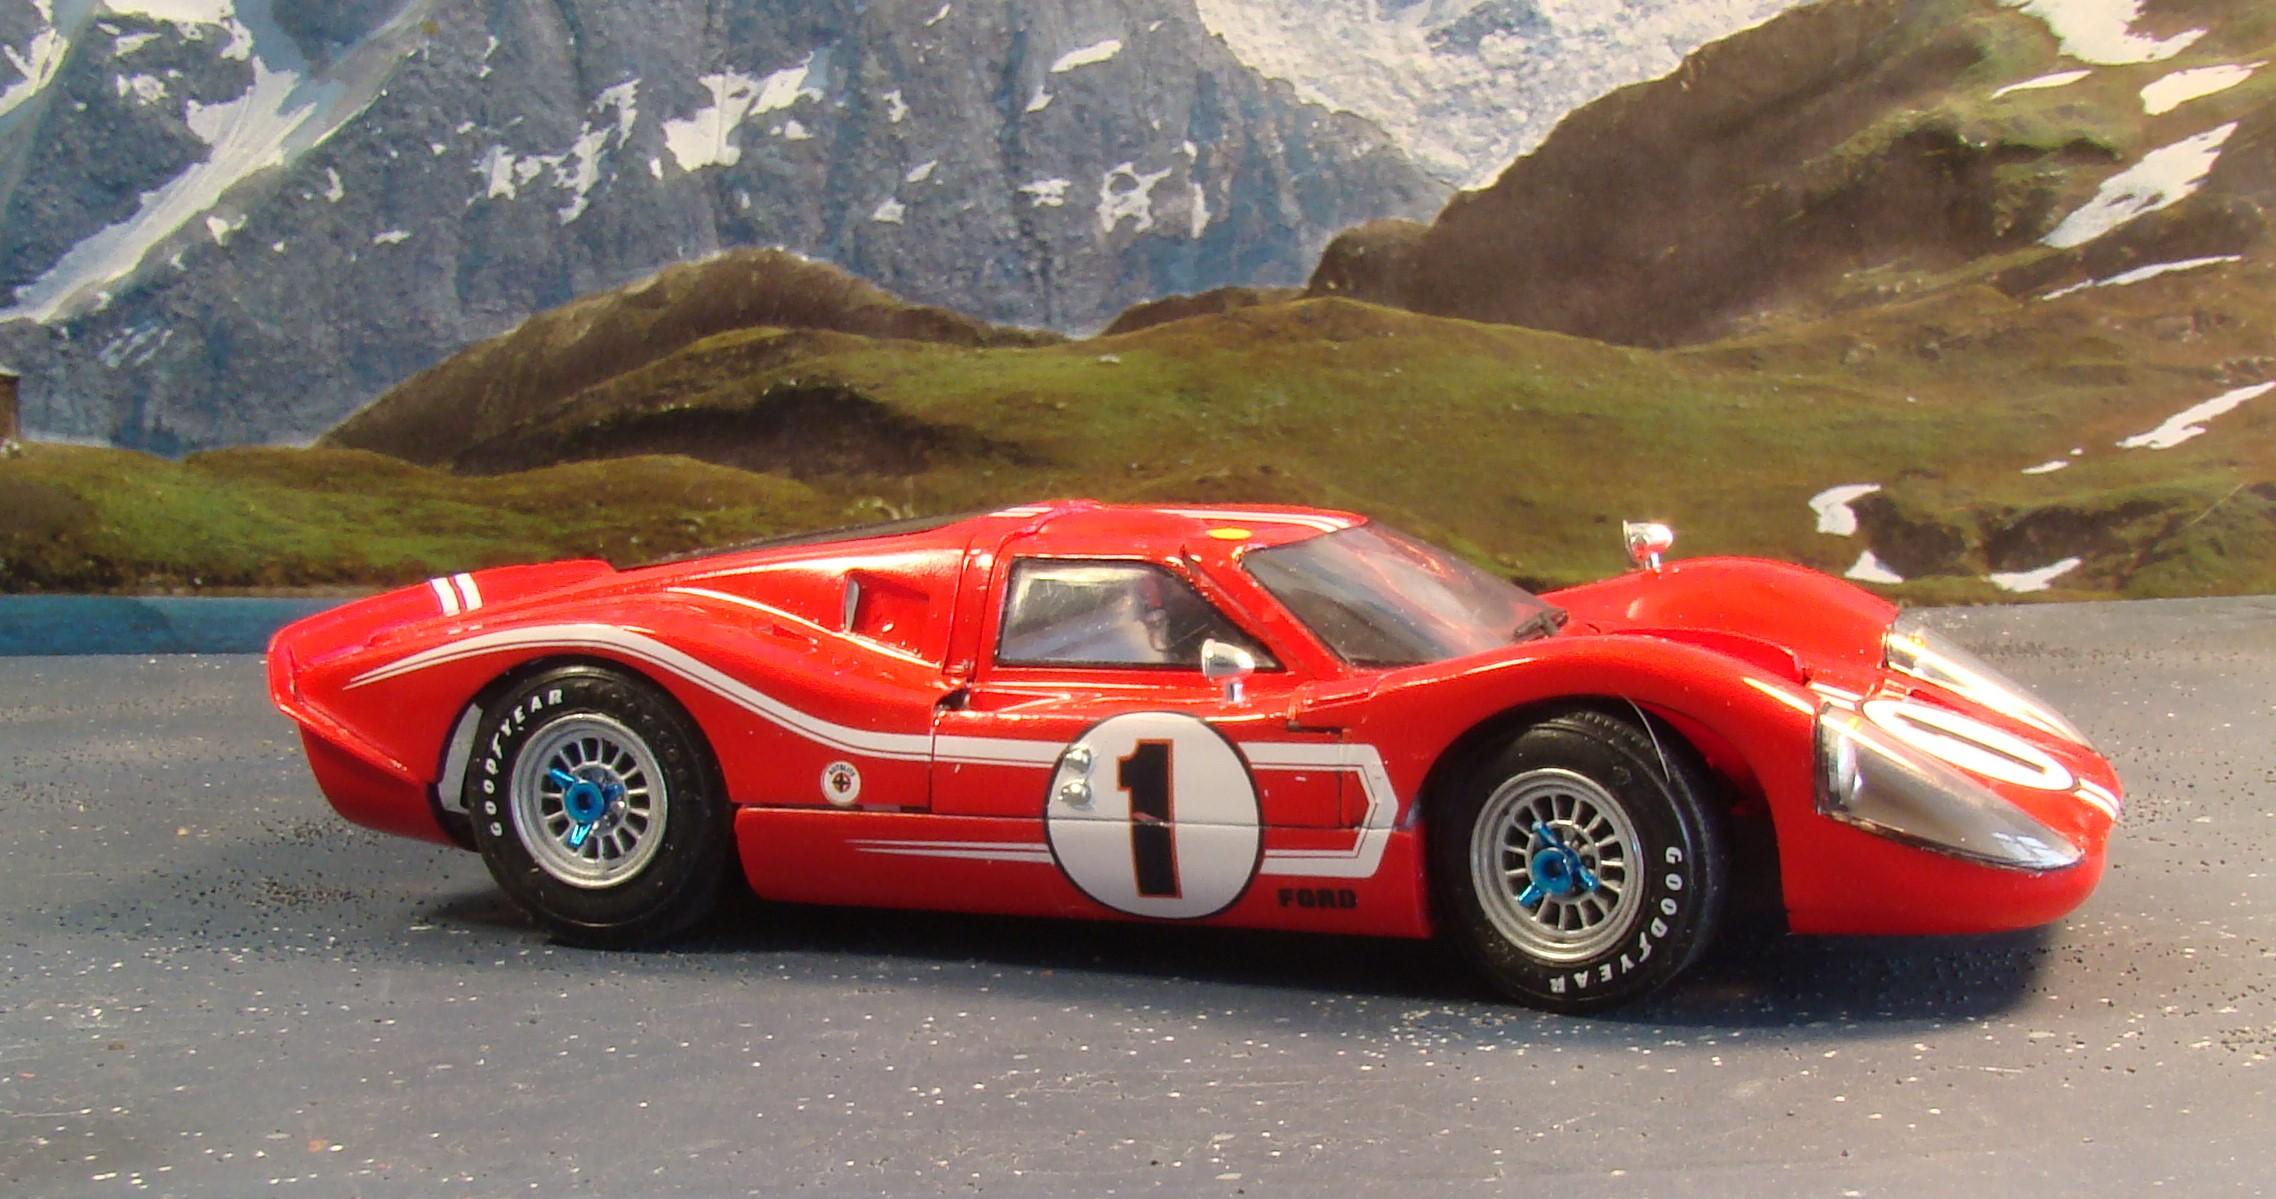
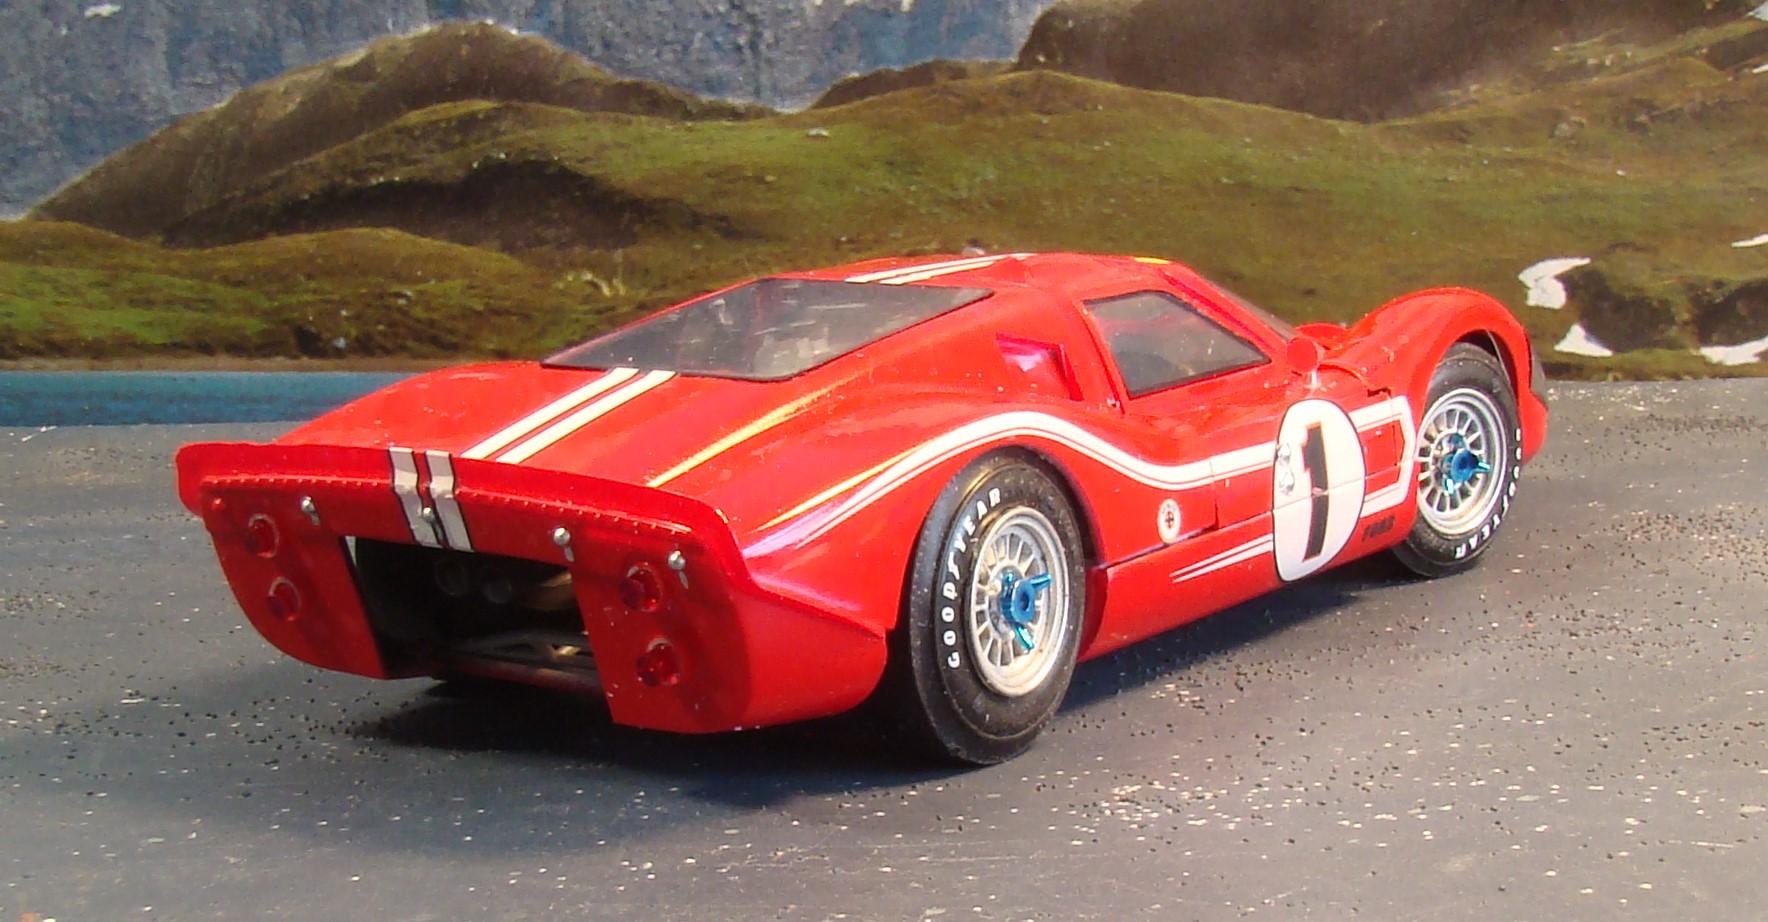
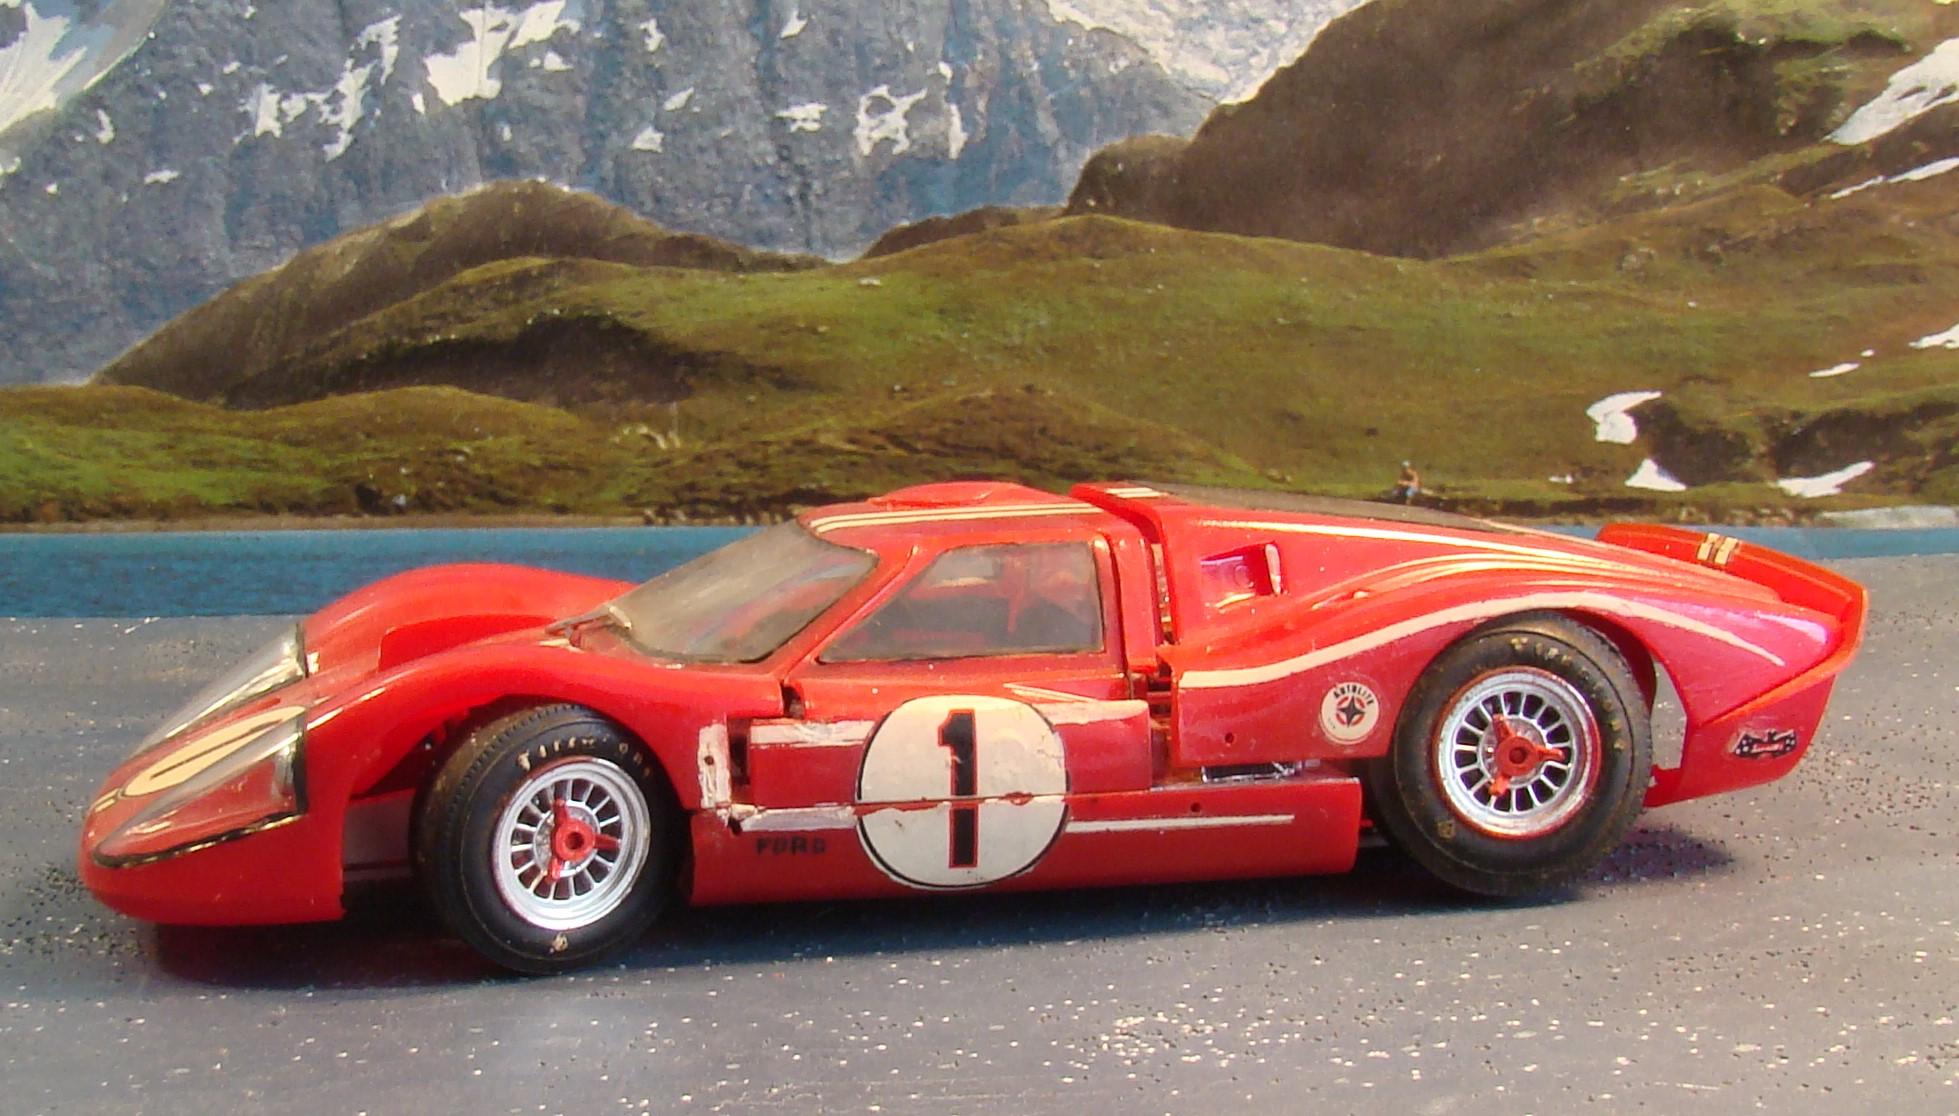
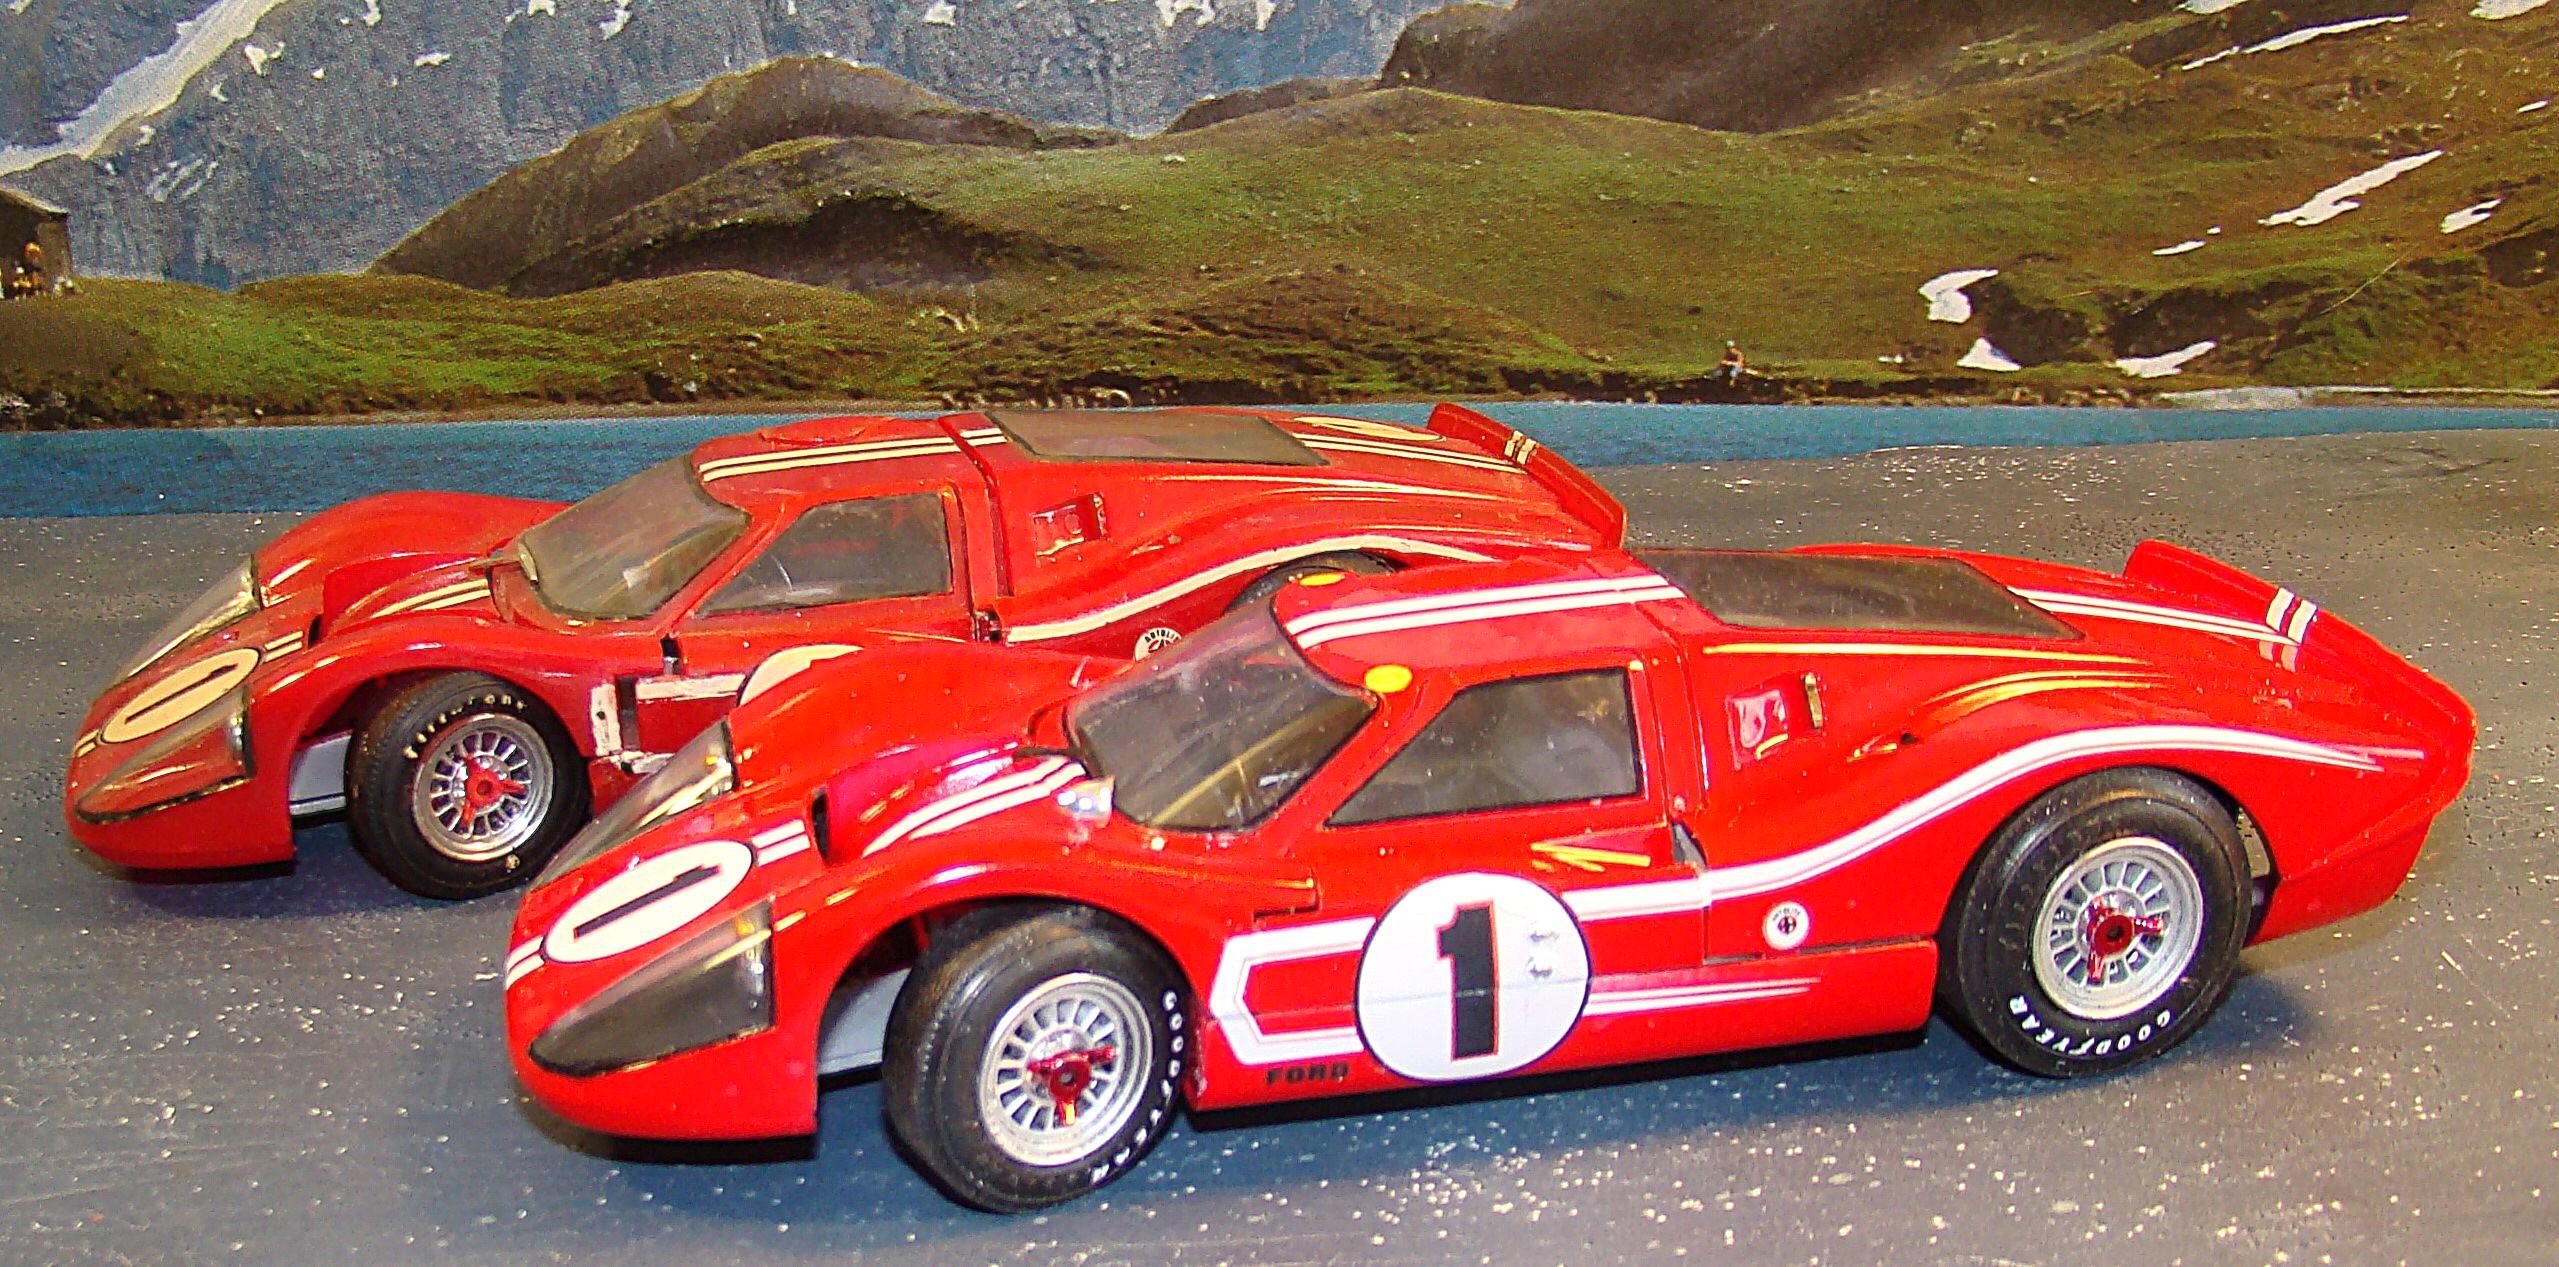
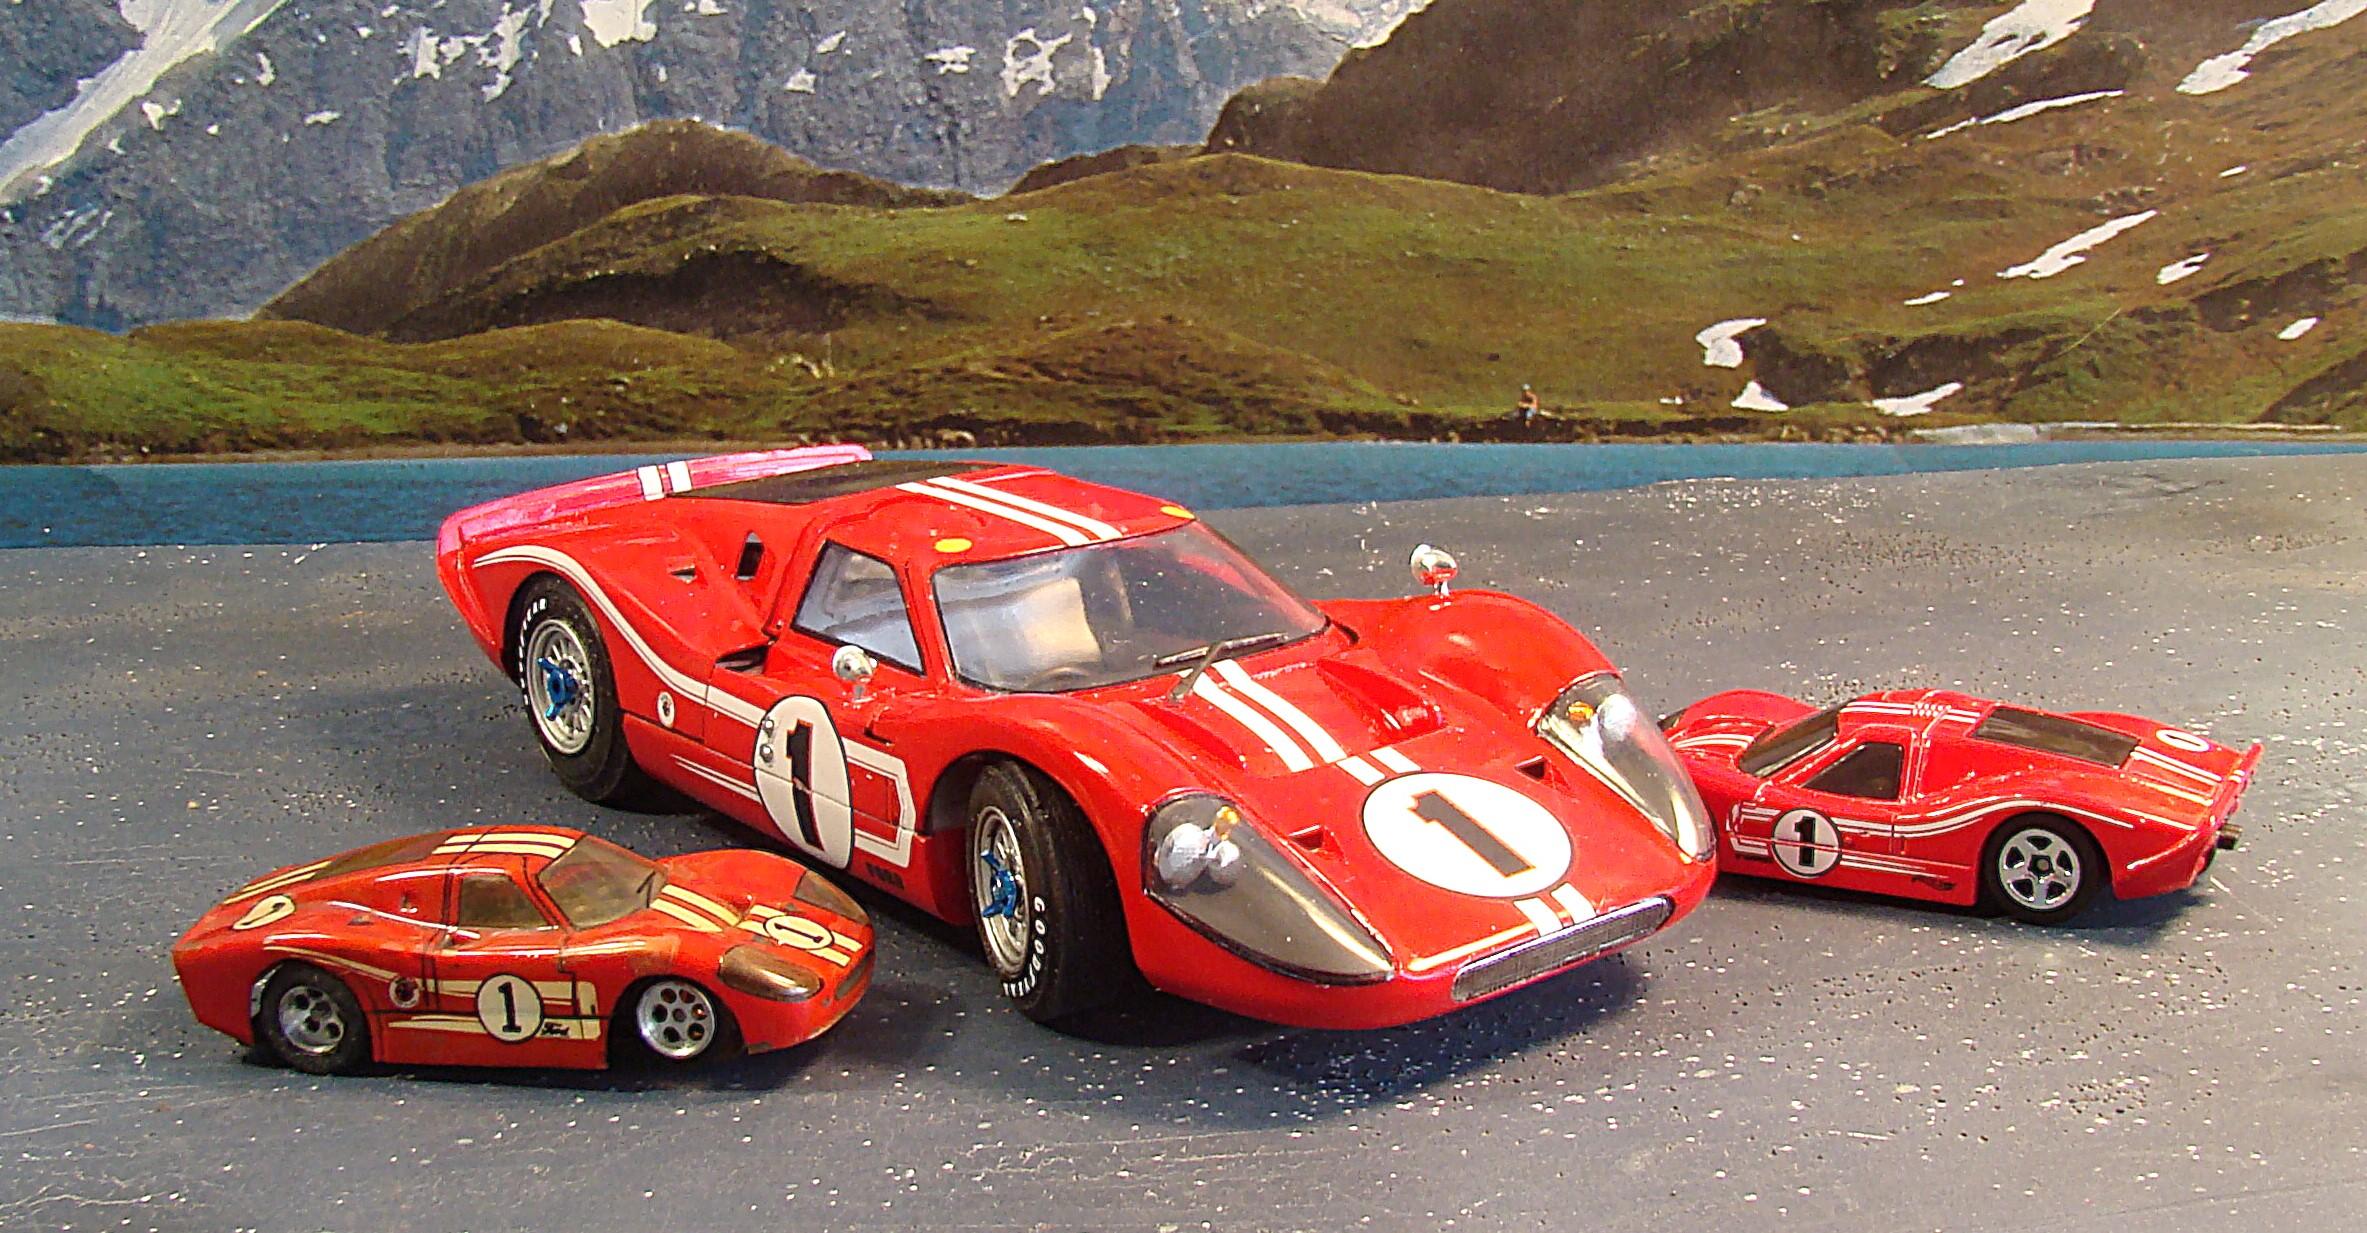
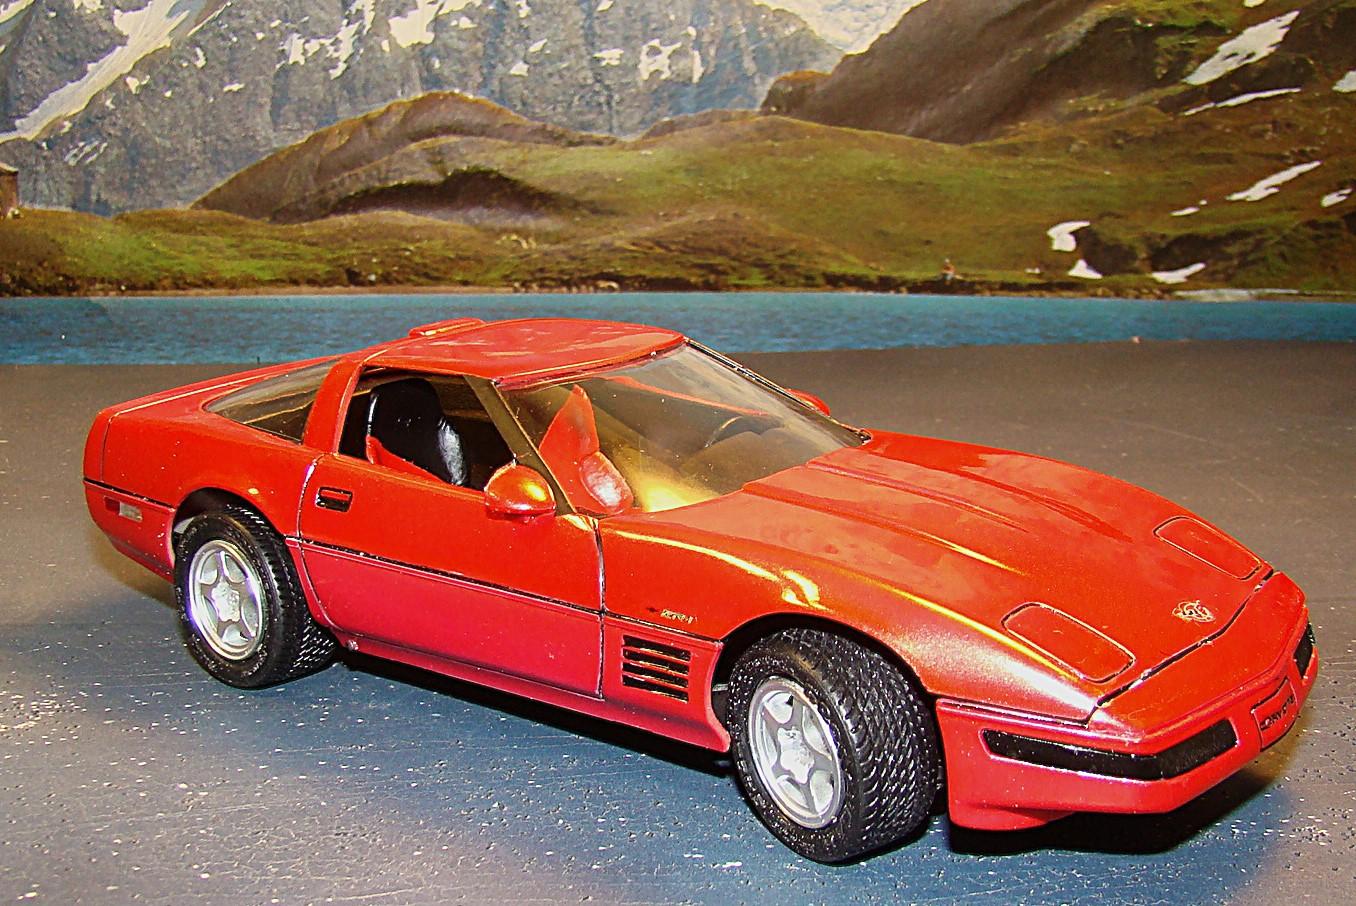
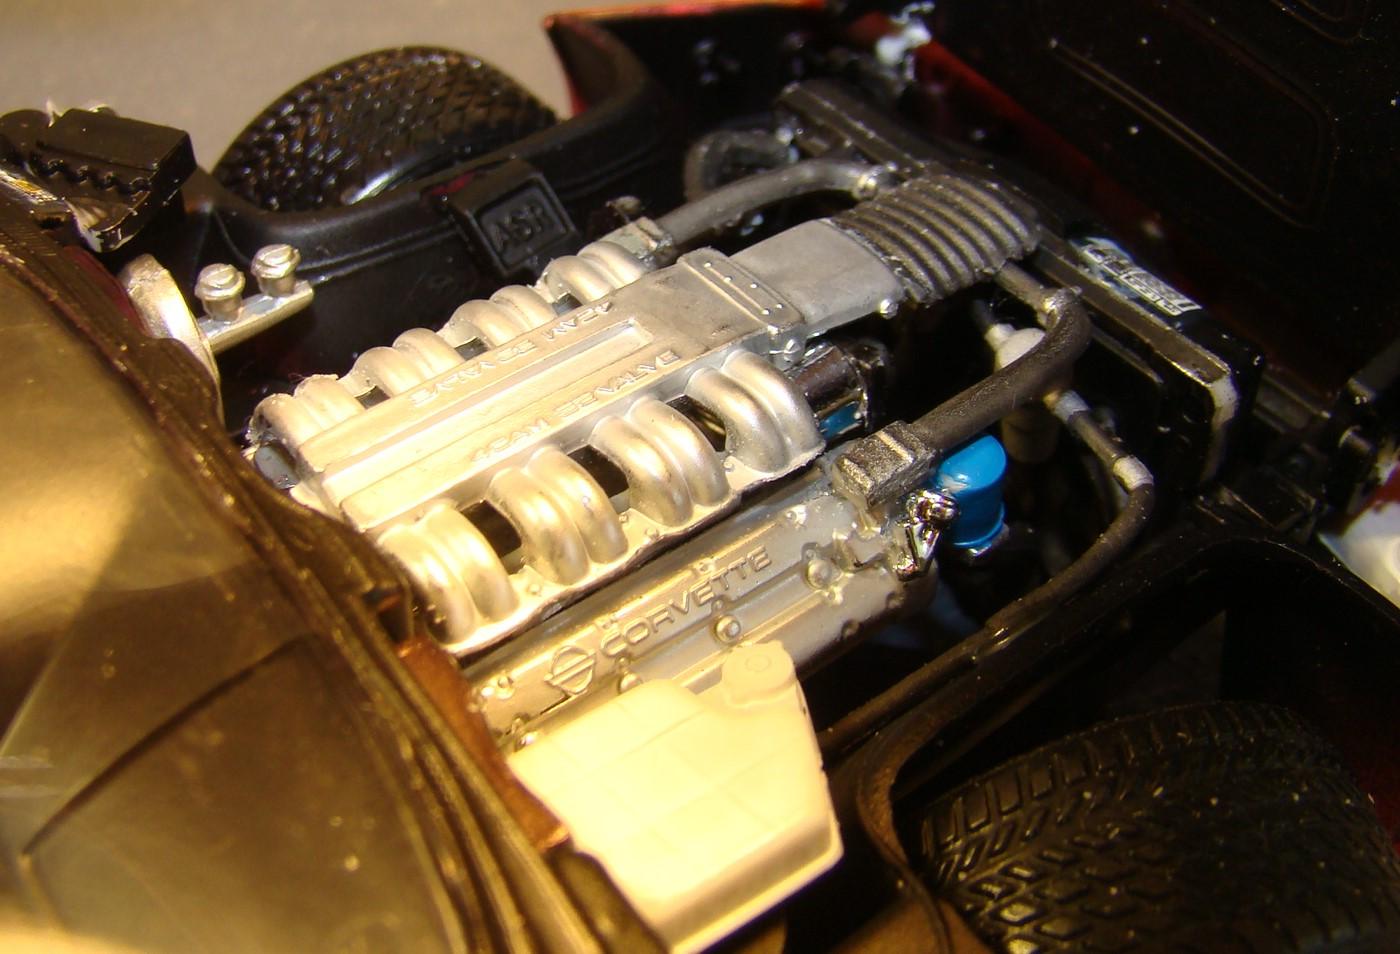
Time for a re-visit to an old friend. I built this kit as an IMC back in the early 70's. Never was happy with the build as I messed up the decals and the body never fit well anyway. Aquired the kit as a Union some time ago and finally decided it was time to replace the old one. Paint is Tamiya LP50 Bright Red. Many changes were made and plenty of additions. Details are below the pictures. Feel free to comment. Here is a shot during final assembly to show all the working features. Hinge points were all re-located and careful fitting trimming and filling were required. Never was really happy with the engine in this kit. Thought it was out of scale (too small) I added a lot of scoops, ducts and wiring and this helped fill the engine bay up. At least now it is a little more presentable. Body work all buttoned up and ready for decals and final detail pieces. Took a lot of work to get to this point. Finally the finished piece. Decals are Indycals and despite having to be trimmed close they laid down very nice and responded to solvent quite well. Kit came with Firestone tires but all my research showed they started the race on Goodyears. Decals from the extras. Rear view shows some of the nice detail. Getting it to fit...another story. Side view. During the race they taped up those nasty gaps in the body. It actually fits better on the model. This is my original build circa 1970ish. It certainly shows it age. Comparison of the two builds. I think I have come a long way in the 50+ years since this was built. I have a Ford GT junkyard and am afraid the old model is headed there. The engine and wheels and tires may find a new home. Finished car with some of its smaller companions. The diecast to the right is a 1/64 Hot Wheels that was unusually hard to find. To the left is a very early and highly modified aurora Thunderjet slot car. It has a hand painted clear body made by Lancer. It was done when I could see a lot better than now. It still runs and was raced in a couple of enduros where it won one of them.

- 10 replies
-
- 6
-

-
- 1/25 union
- imc
- (and 1 more)
-
Tamiya Ferrari FXX
Rich Chernosky replied to harti20's topic in WIP: Other Racing: Road Racing, Land Speed Racers
A good start Urs. Glad to see that you have not lost the creative urge although I don't feel any of us really do. Really like what you have done with the engine and seats. I have this kit (started of course) so I will be following closely. Keep up the work, its good. The Alclad can be thinned with hi grade laquer thinner by the way. Tamiya or Mr Color will do. -
1/16 Ferrari Testarossa Koenig Special turbo
Rich Chernosky replied to Rich Chernosky's topic in Model Cars
Mark...thanks for the long post and story. I luv these. Got one of my own. I live close to Watkins Glen NY. The track is actually a couple of miles out of town on top of a hill. During the 1967 Can Am Team Mclaren kept most of their cars in a garage downtown. They kept the race stuff at the track. I got passed by one of the cars going up the hill to the track. Don't know who was driving it. He had on sunglasses and no helmut. It was loud and fast. Seems the team had to have one of the cars at tech inspection and it was in the garage downtown. . No time to load it on a trailer so they drove it on the street to the track. My thrill of a lifetime. They won the race too. Good luck on your build and I am glad some of those tips will help. -
ARII Chaparral 2C
Rich Chernosky replied to Mark W's topic in Other Racing: Road Racing, Salt Flat Racers
Mark, you finally got this one across the finish line. And its a winner. The attention to detail really makes this model. Great job. -
1/16 Ferrari Testarossa Koenig Special turbo
Rich Chernosky replied to Rich Chernosky's topic in Model Cars
-
1/16 Ferrari Testarossa Koenig Special turbo
Rich Chernosky replied to Rich Chernosky's topic in Model Cars
-
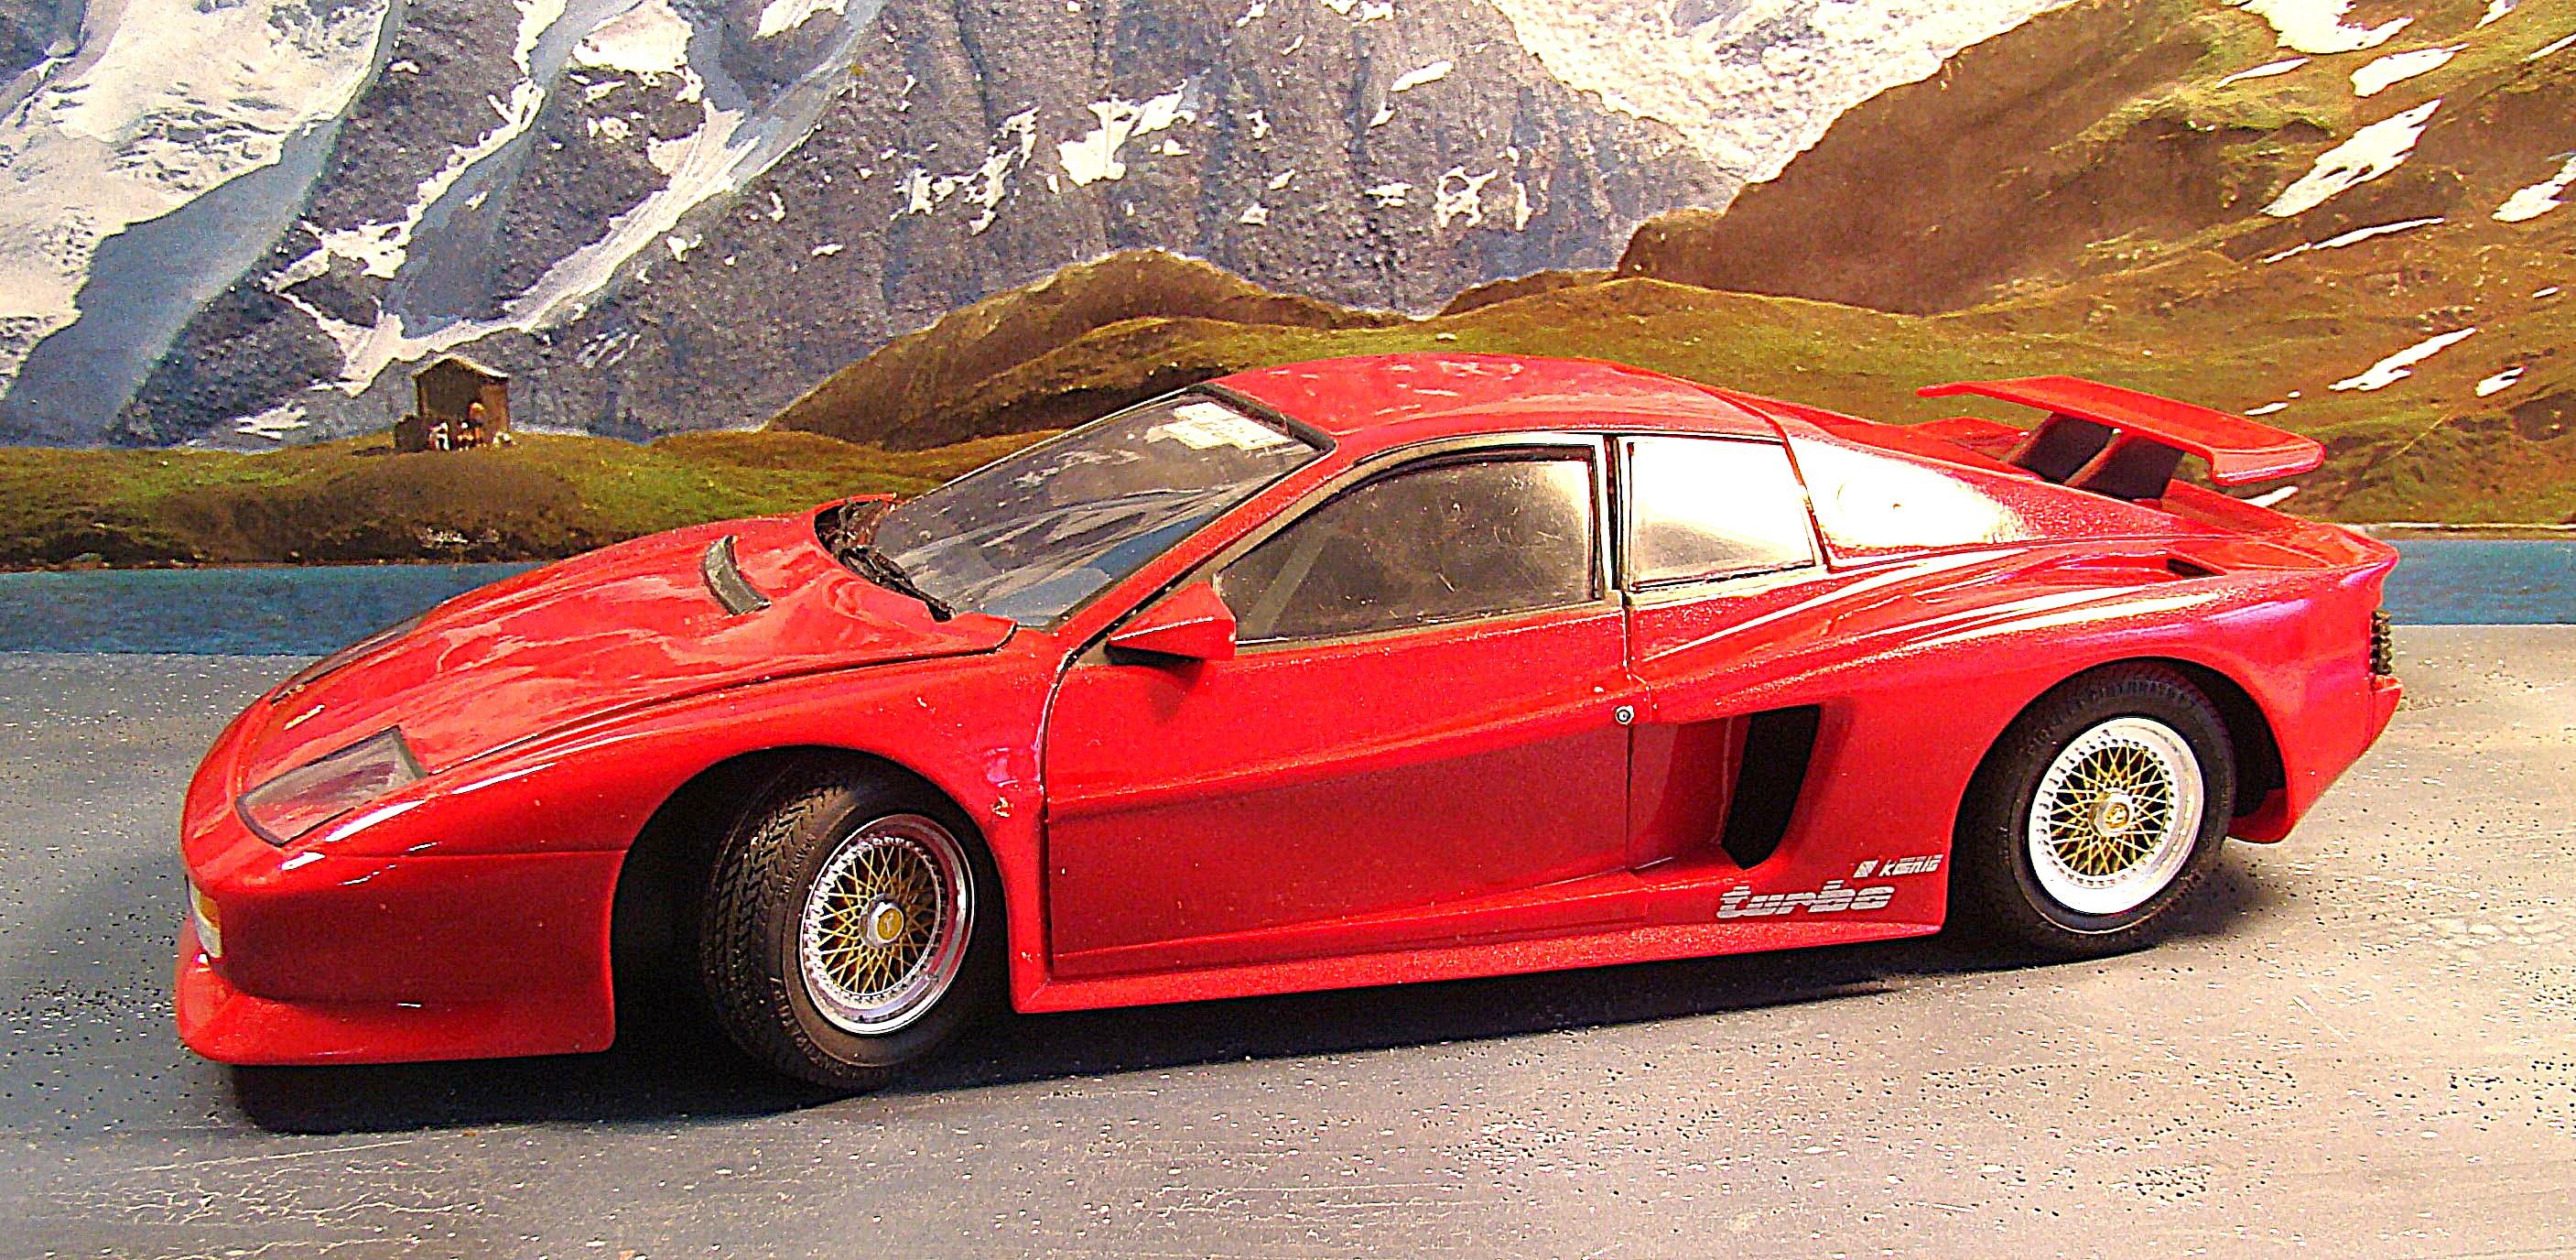
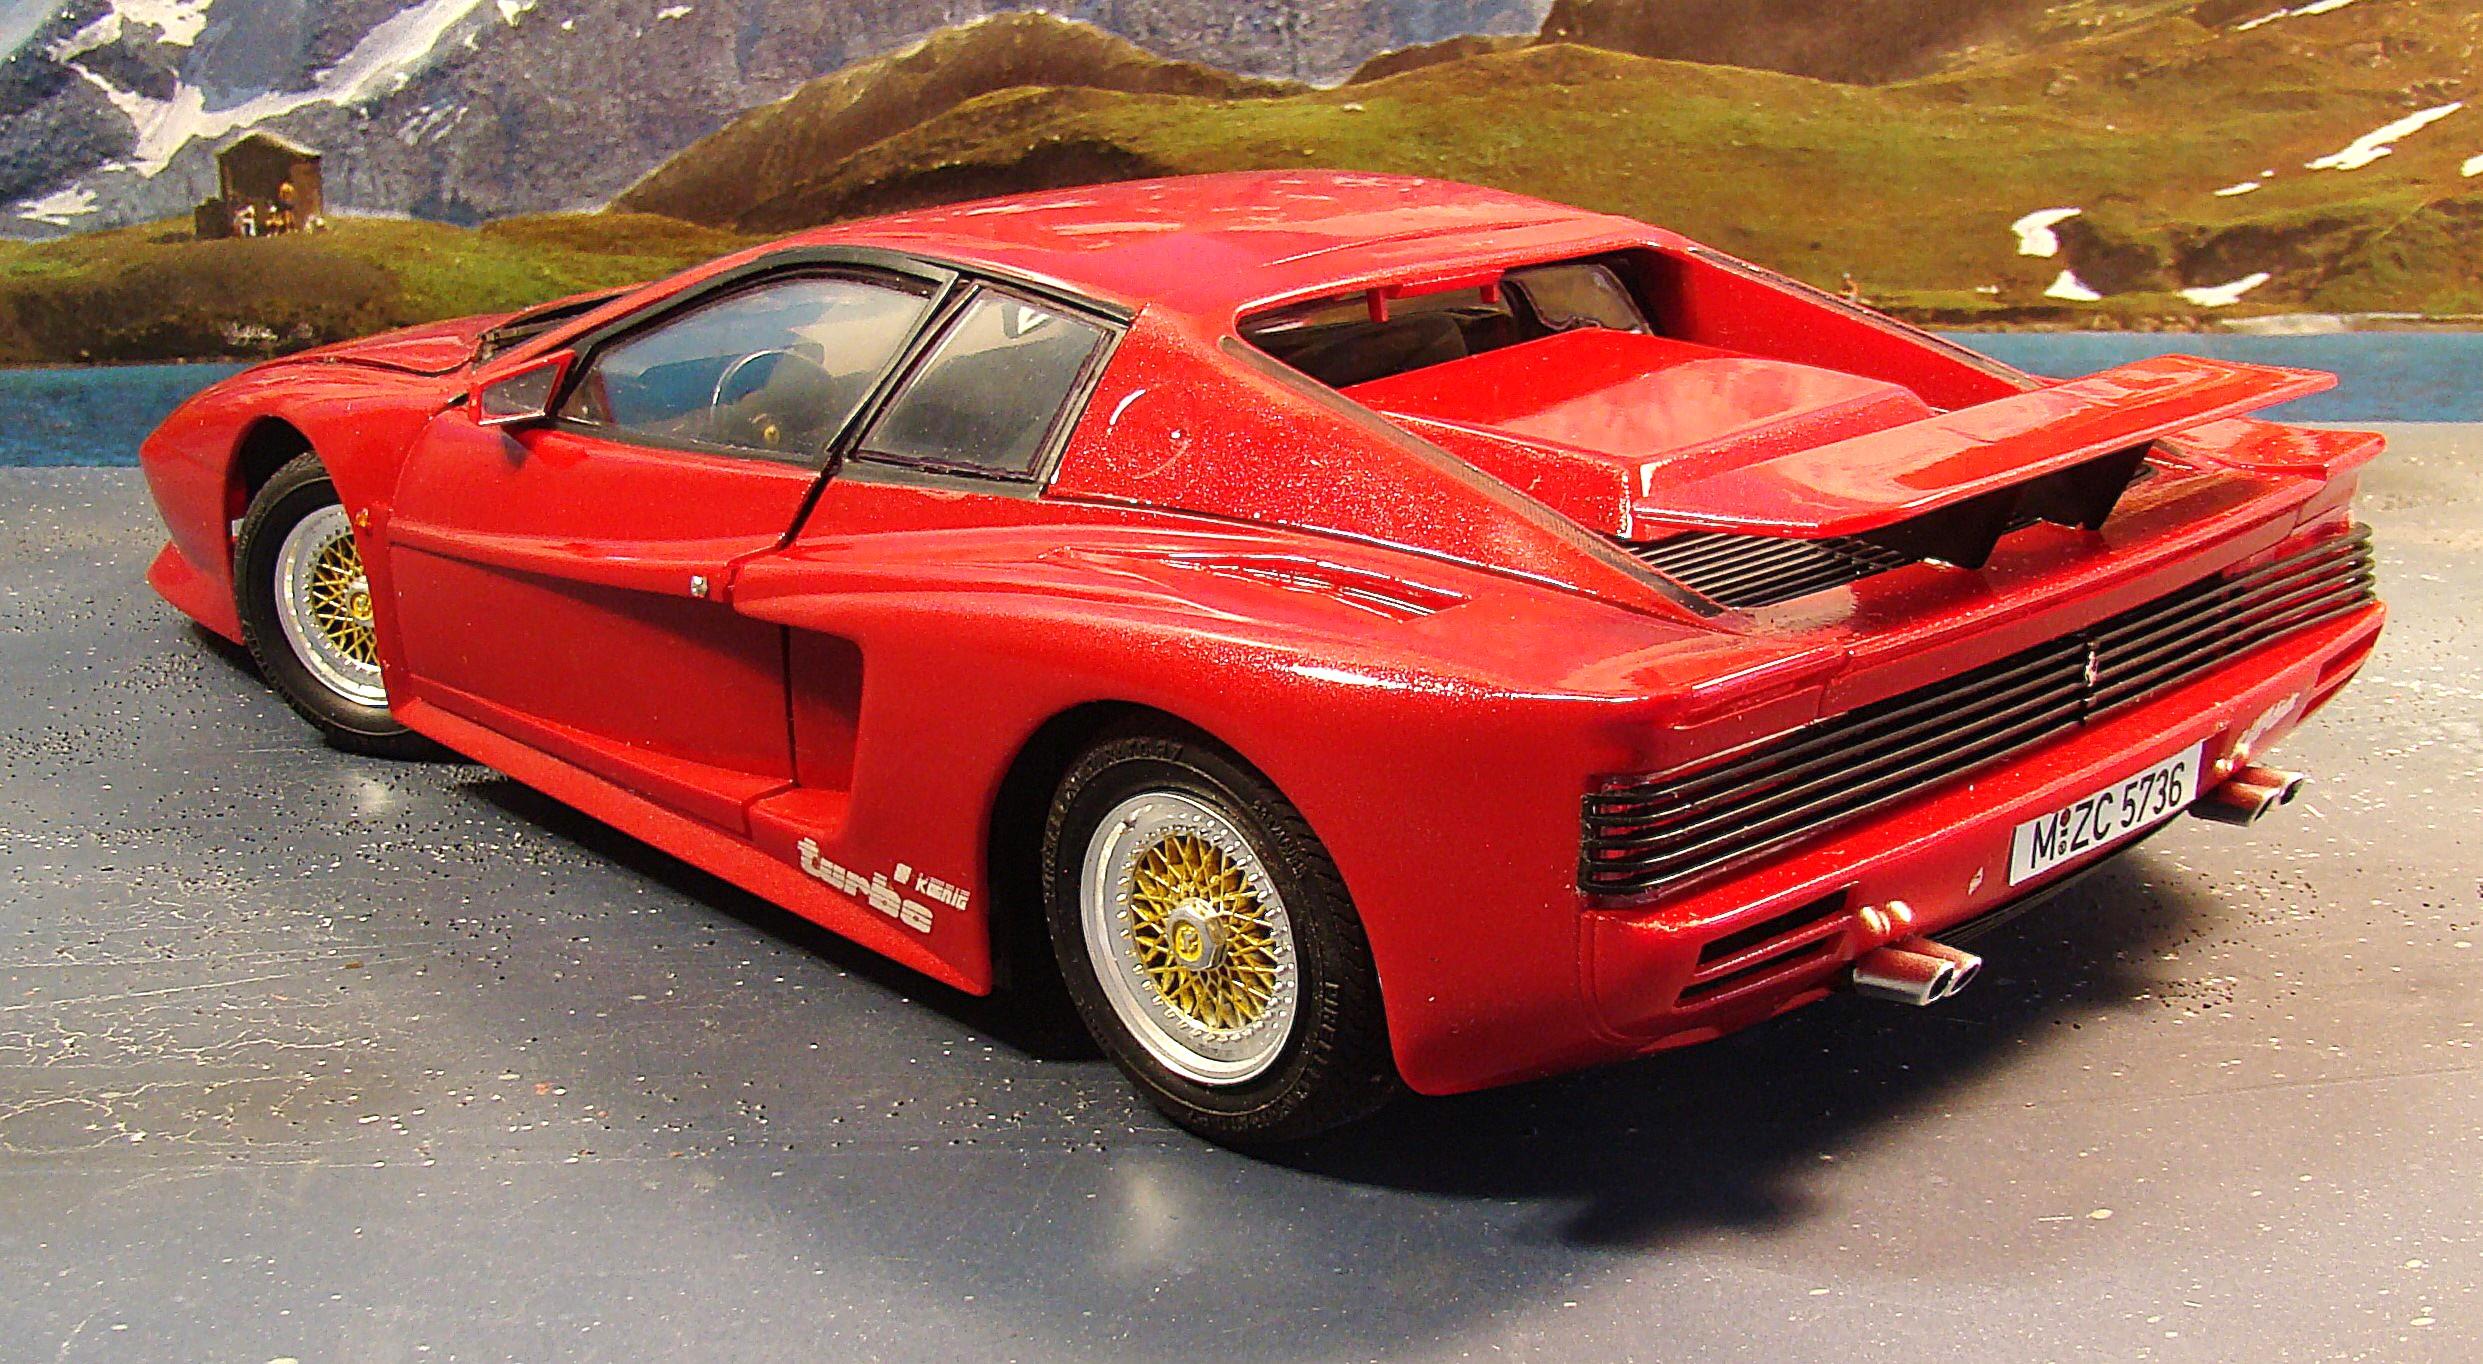
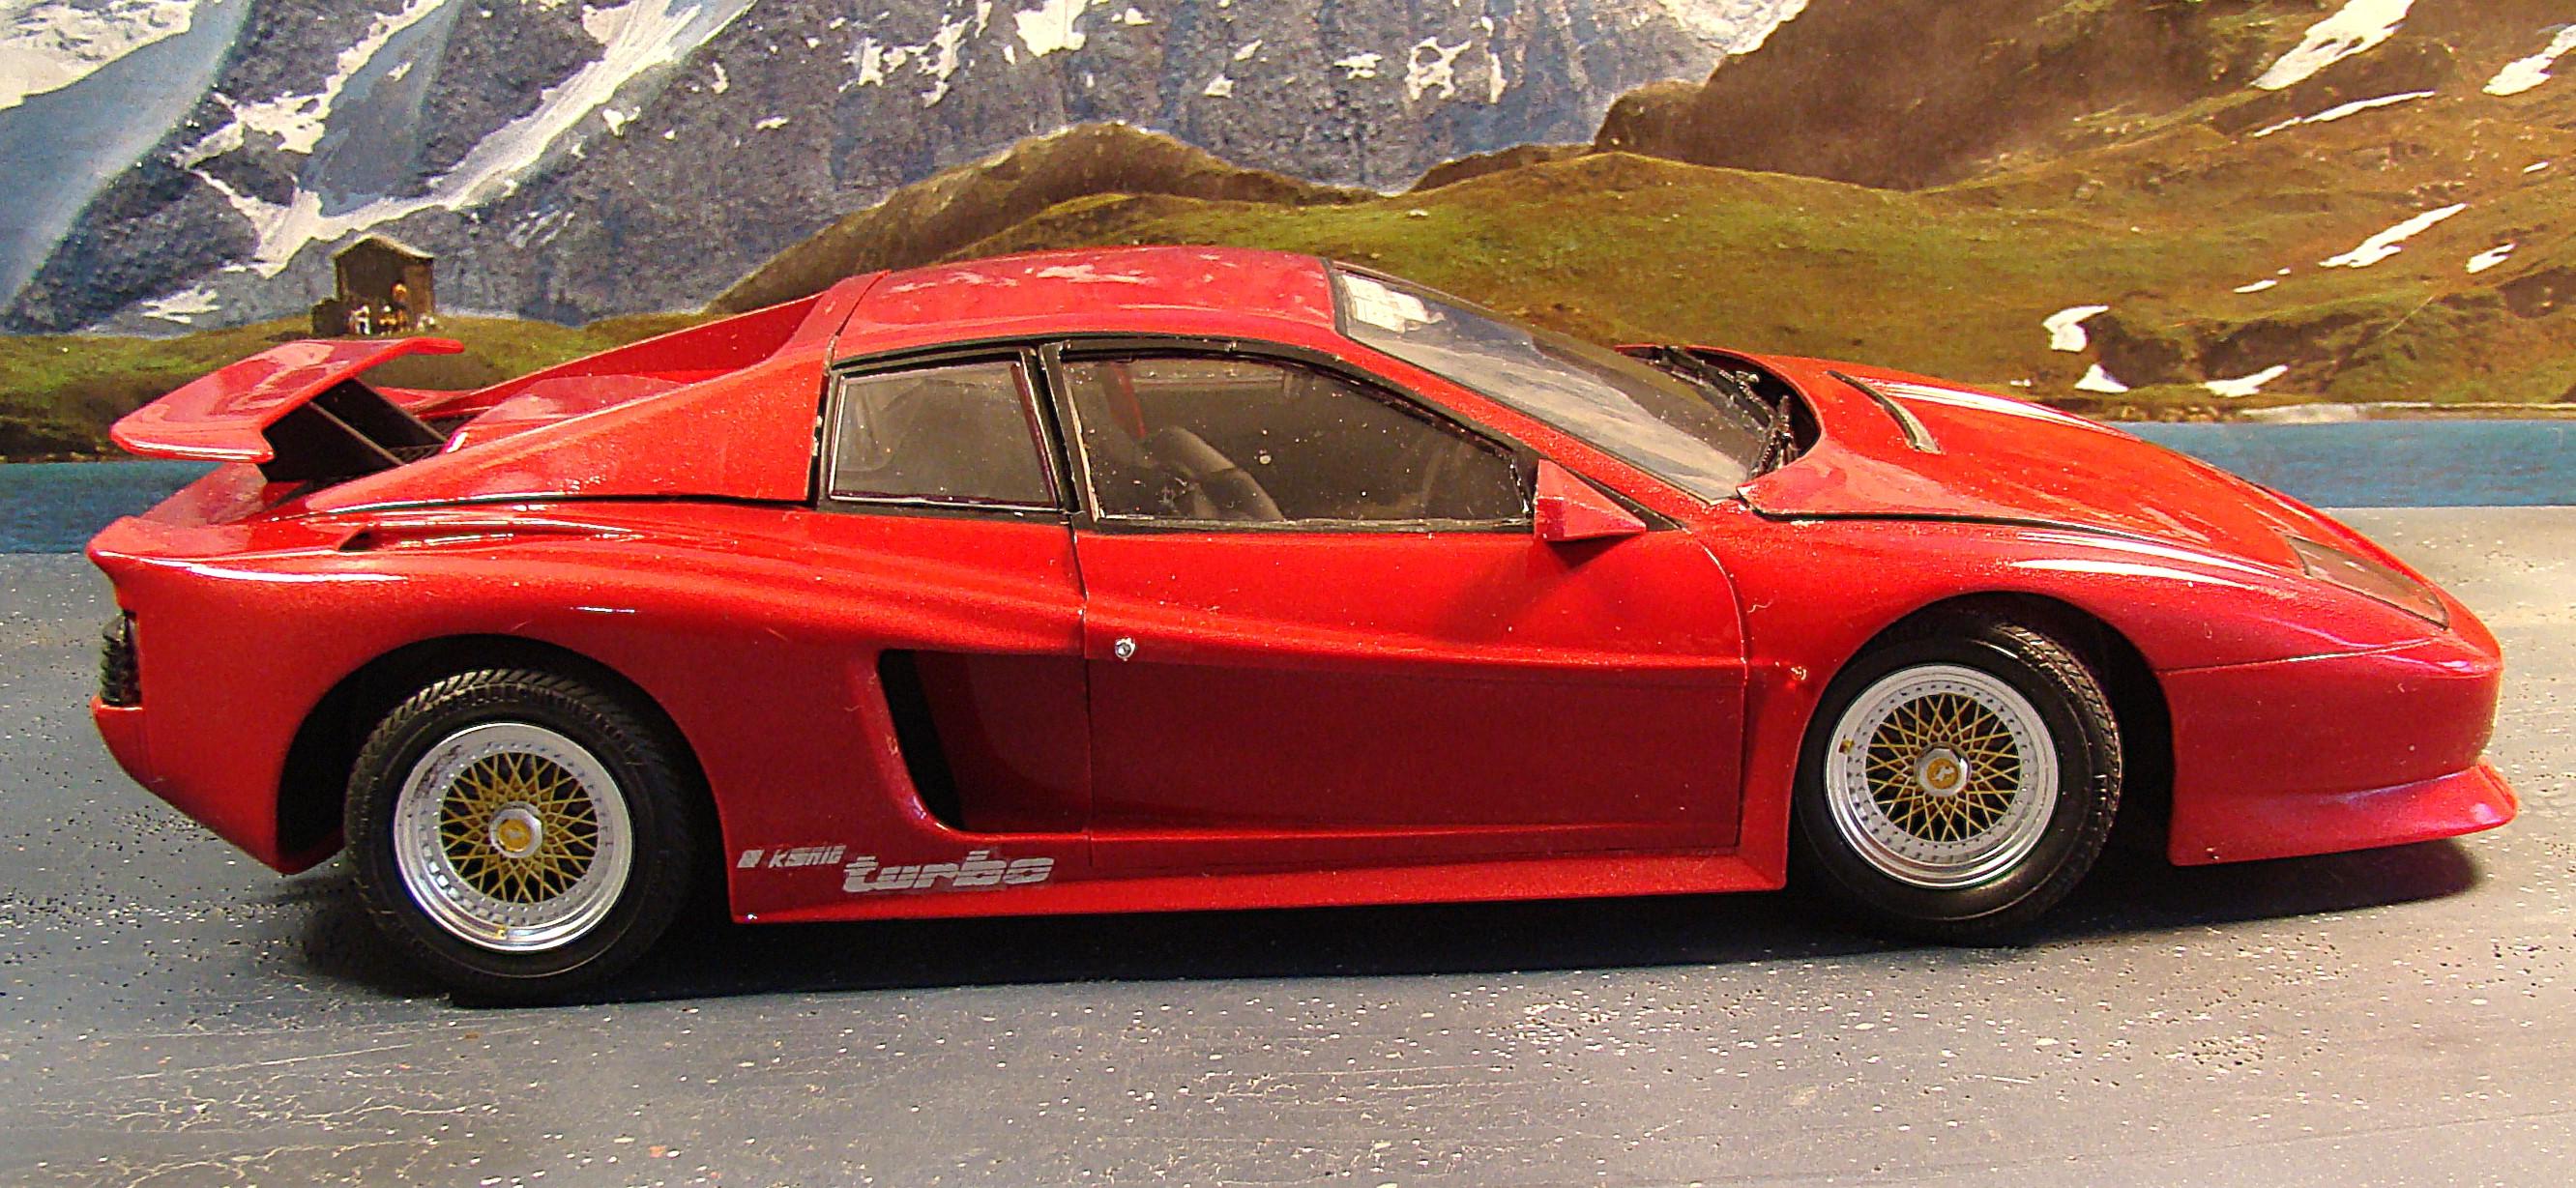
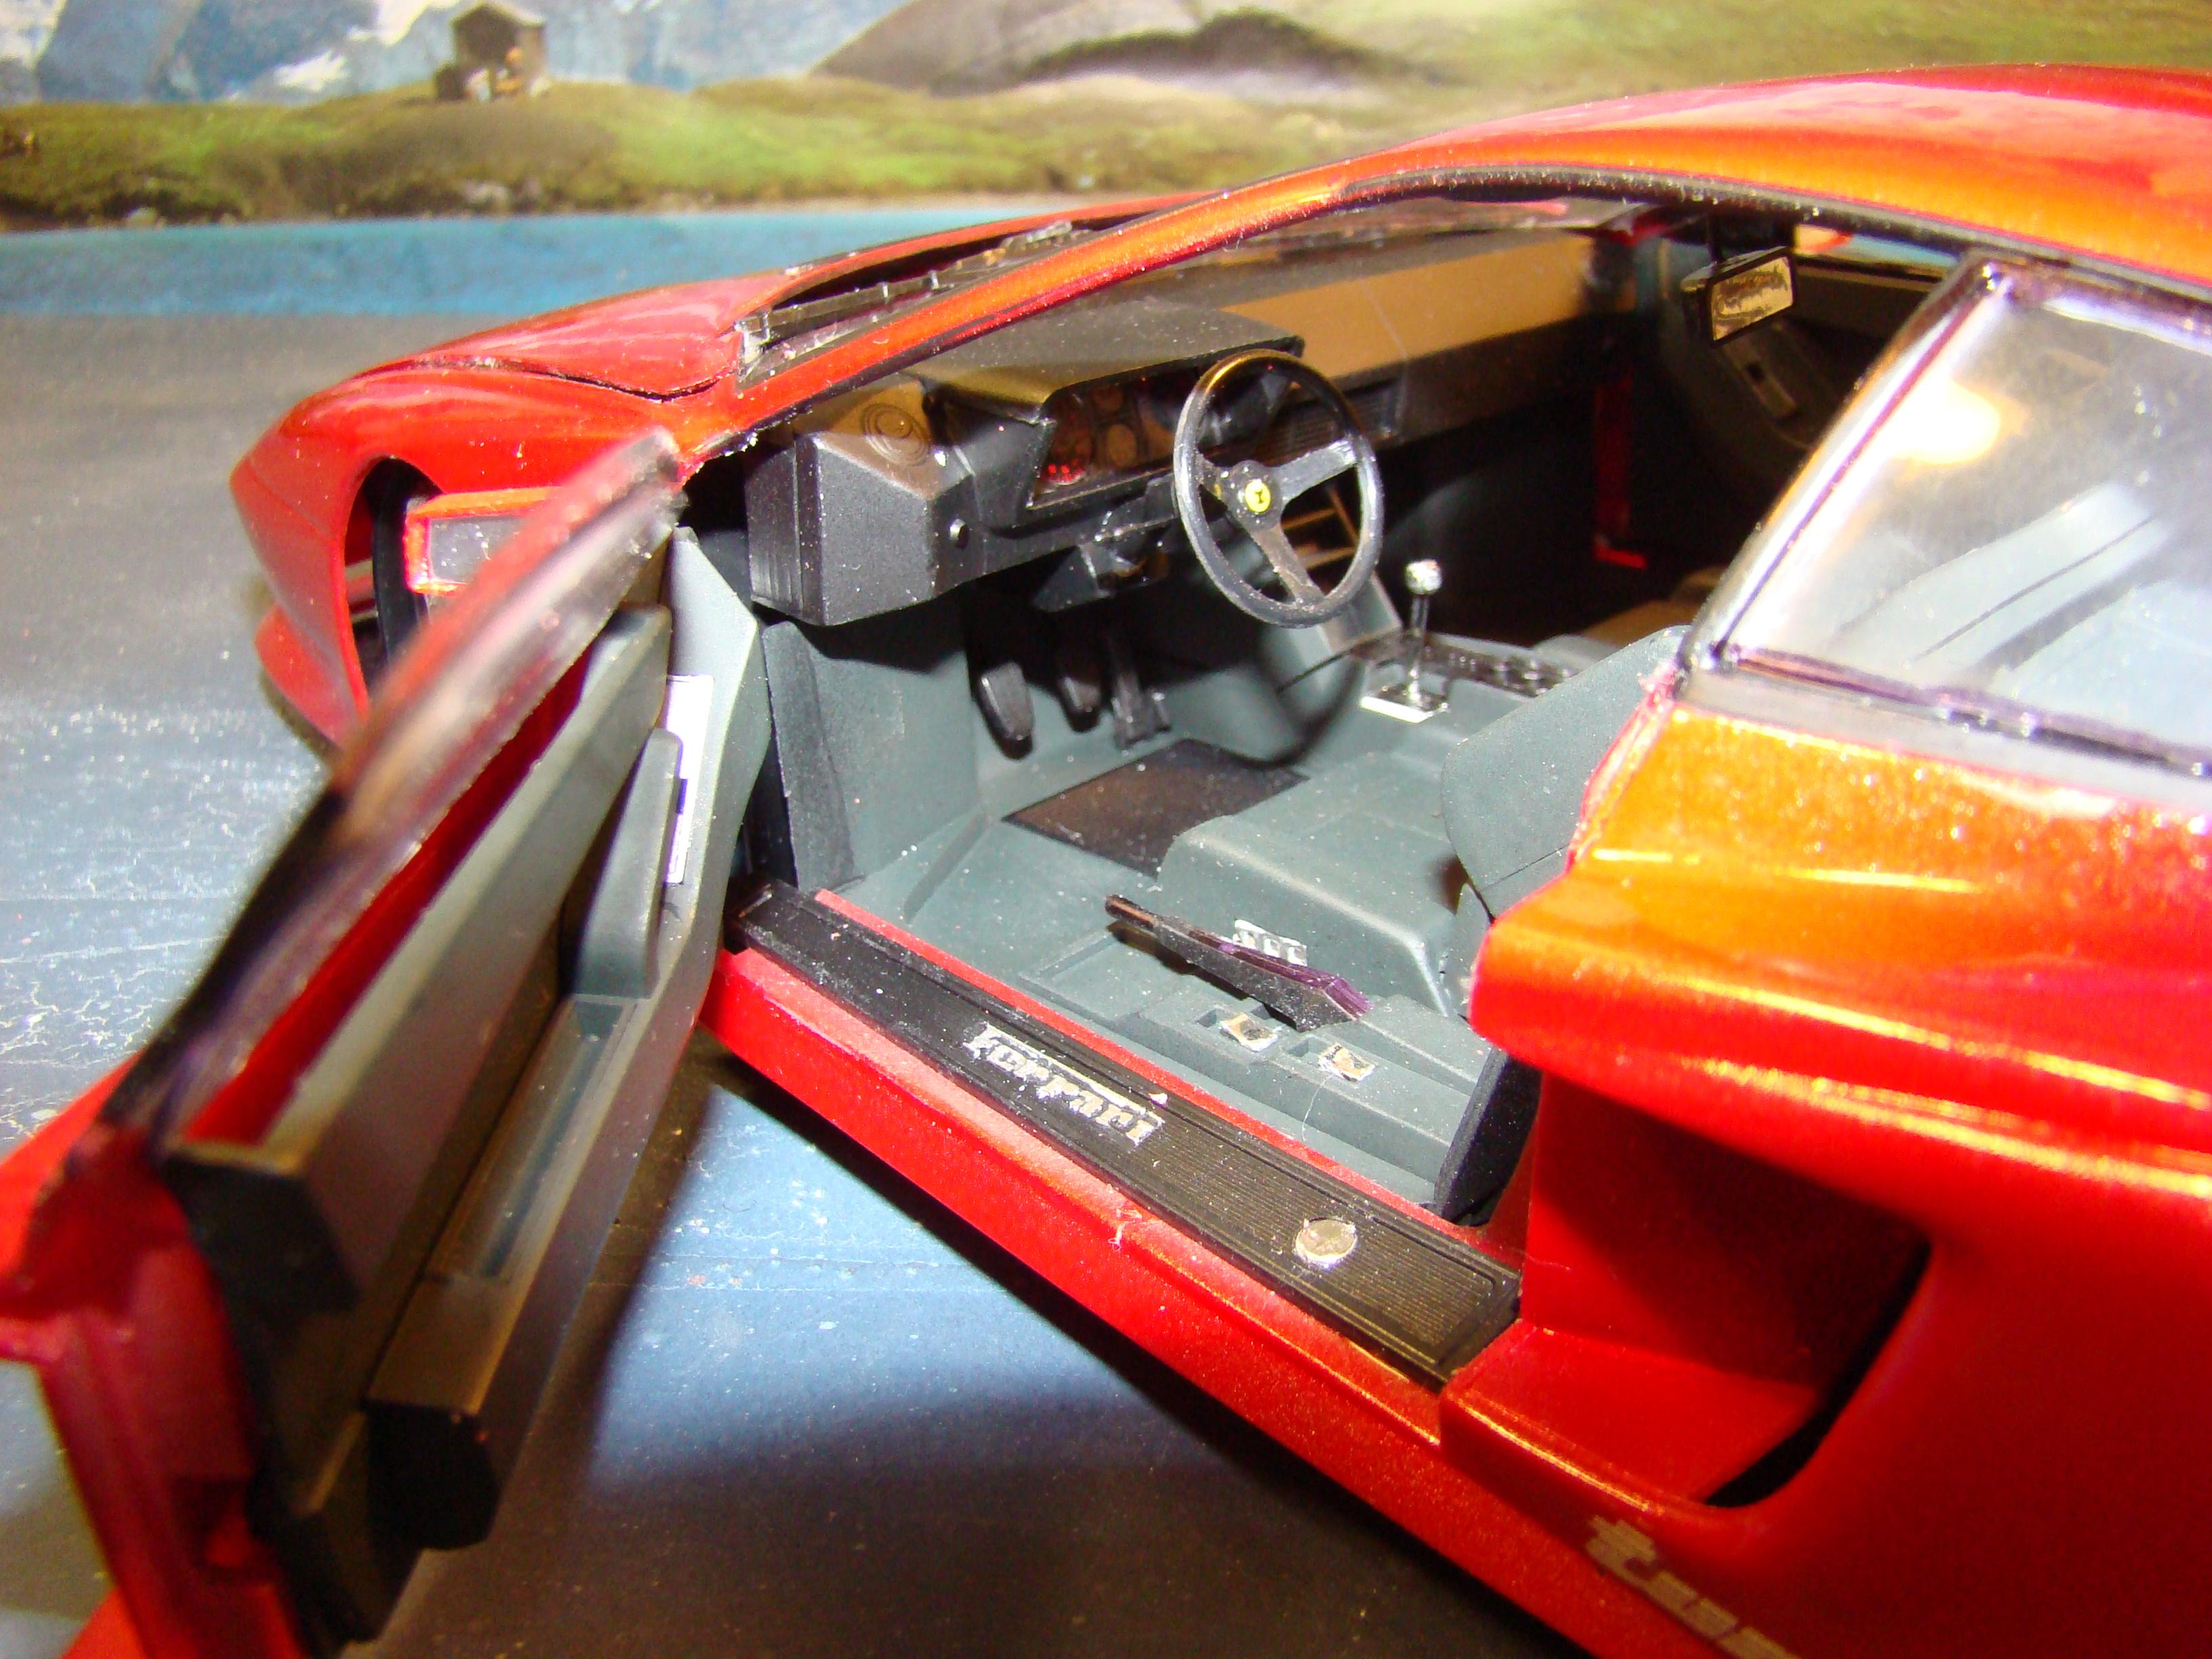
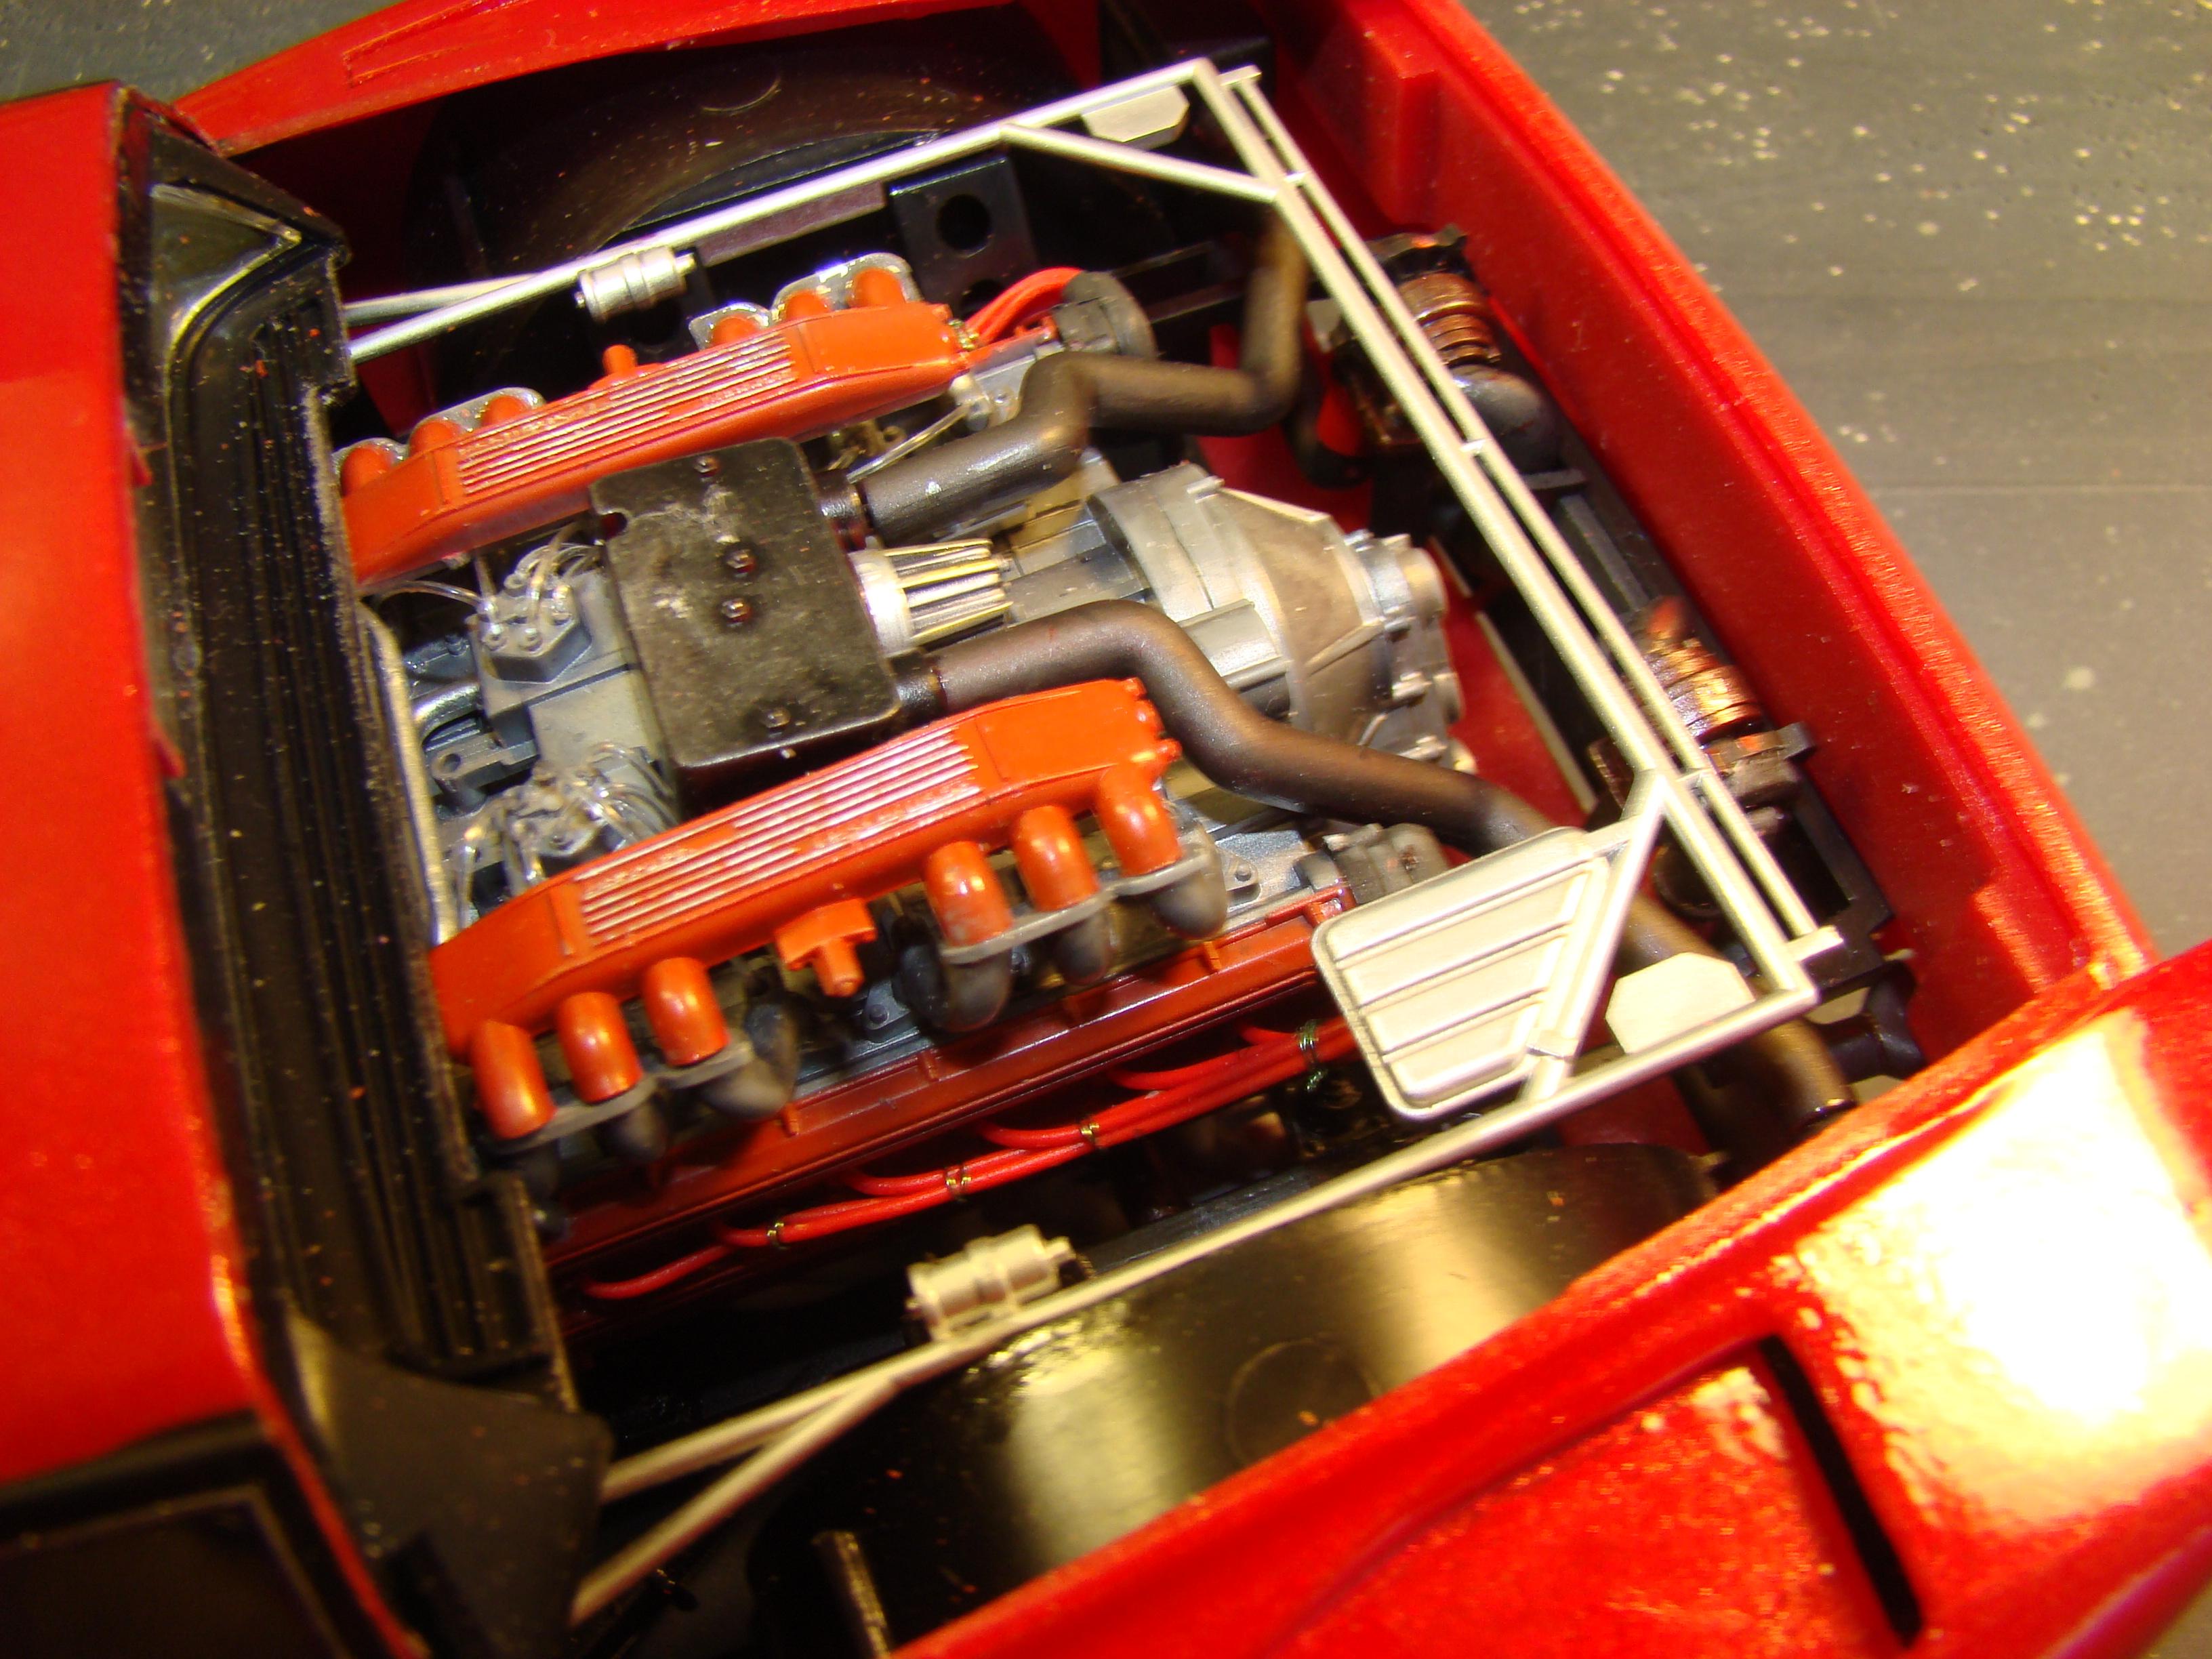
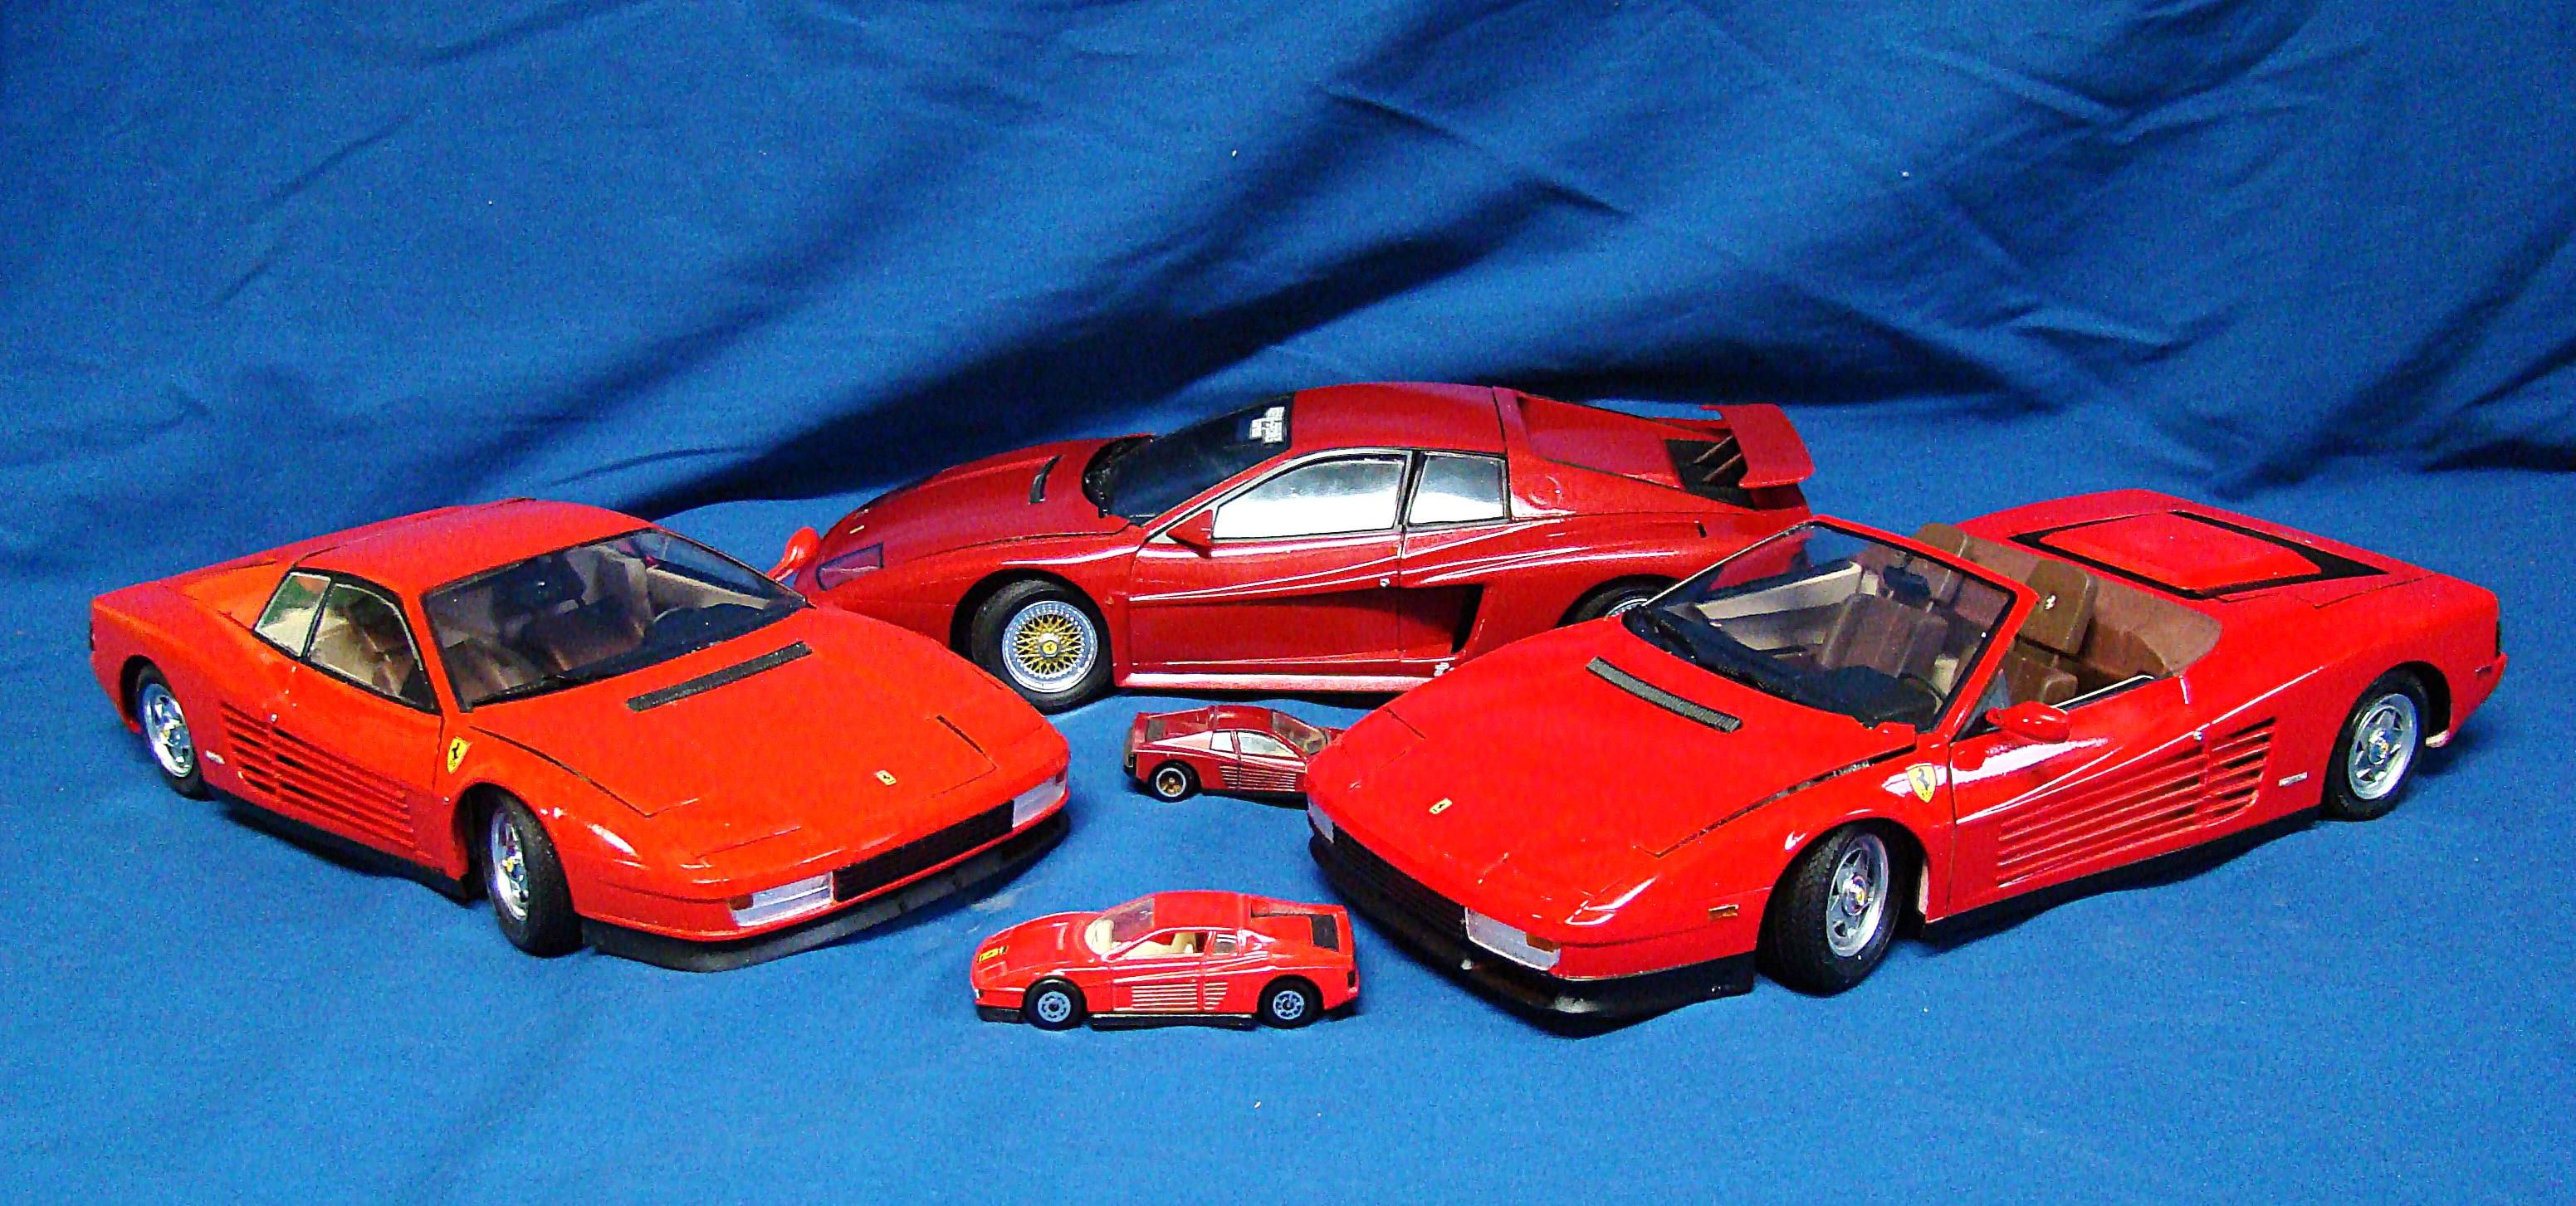
This is the last of my 3 1/16 Fujimi Ferrari Testarossa's. The chassis, interior,engine were all finished and the body painted. Just had to finish the body, add the glass and intall. So it went pretty quick. This kit was issued by Revell but the casting is all Fujimi. Color is Testors Laquer Revving Red #1837 and it was cleared with Tamiya LP9. Sure am glad this one is done as there were problem with final assembly. See comments below pictures. Leave your own comments if you like. Once done the car sat nice. Biggest problem was the glass. Front window had to be clamped and sat overnight as the body was slightly warped. Side glass on the working doors was the same. Frames were very thin and didn't fit into the body. Special care had to be taken to get the doors to fit and the glass in place. All took some time. Koenig removed the side strakes on the Testarossa body for better cooling. Rear had some nice detail but getting all the pieces to fit was something else. rear wing looks nice but had to be pinned and glued into place. Underneath that removab;e engine cover sits a plumbed and wired flat 12 engine with twin turbos that put out over 650 horses. It was very fast. The body did eventually fit over the chassis. There were four glue attachment points on the body and chassis. I drilled these out and threaded jeweler screws in their place and this made it much easier without the usual gluing and clamping. A very small pin (just barely visible) on either side of the front clip, holds the body in place as well. Interior was well appointed but the seat headrests had to be lowered to clear the roof. Just one more headache in many. Doors close nicely and are held in place with magnets which are clearly visible in the rocker panel. forgot to take this in the original post. Here is that flat 12 engine. The twin turbos are visible just in front of the rear bodywork. This is where the exhaust would normally have been so i bet this is loud. Here is a picture of all three of my Fujimi Ferrari Testarossa builds. Thank you Dan Clark for the suggestion.
-
Nice build on this Corvette. Like the color. How were the decals in your kit. I had to spray the silver on mine and use just the red and gray stripe.
-
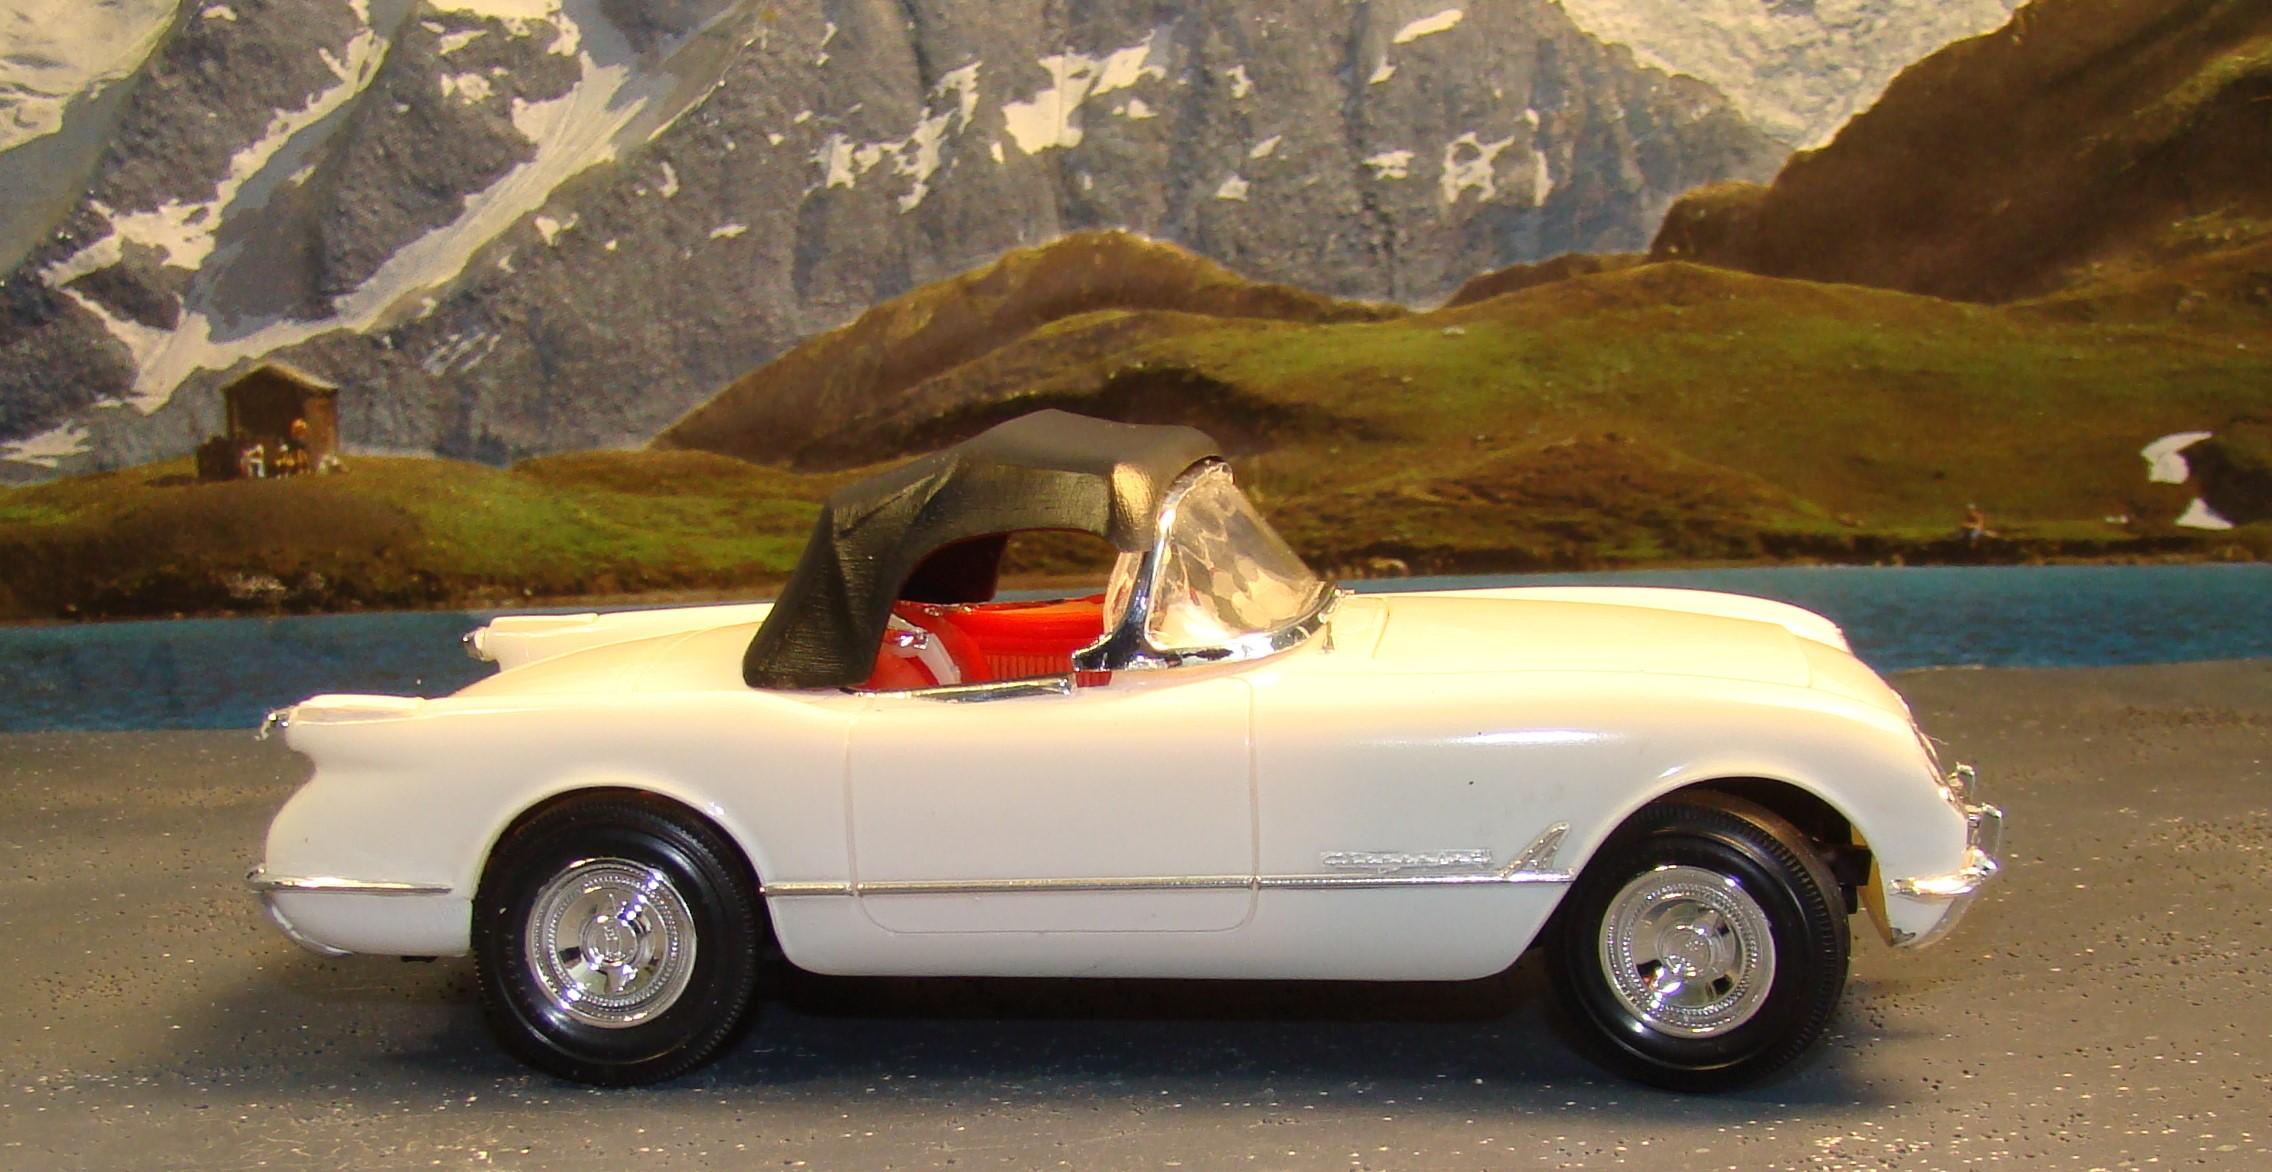
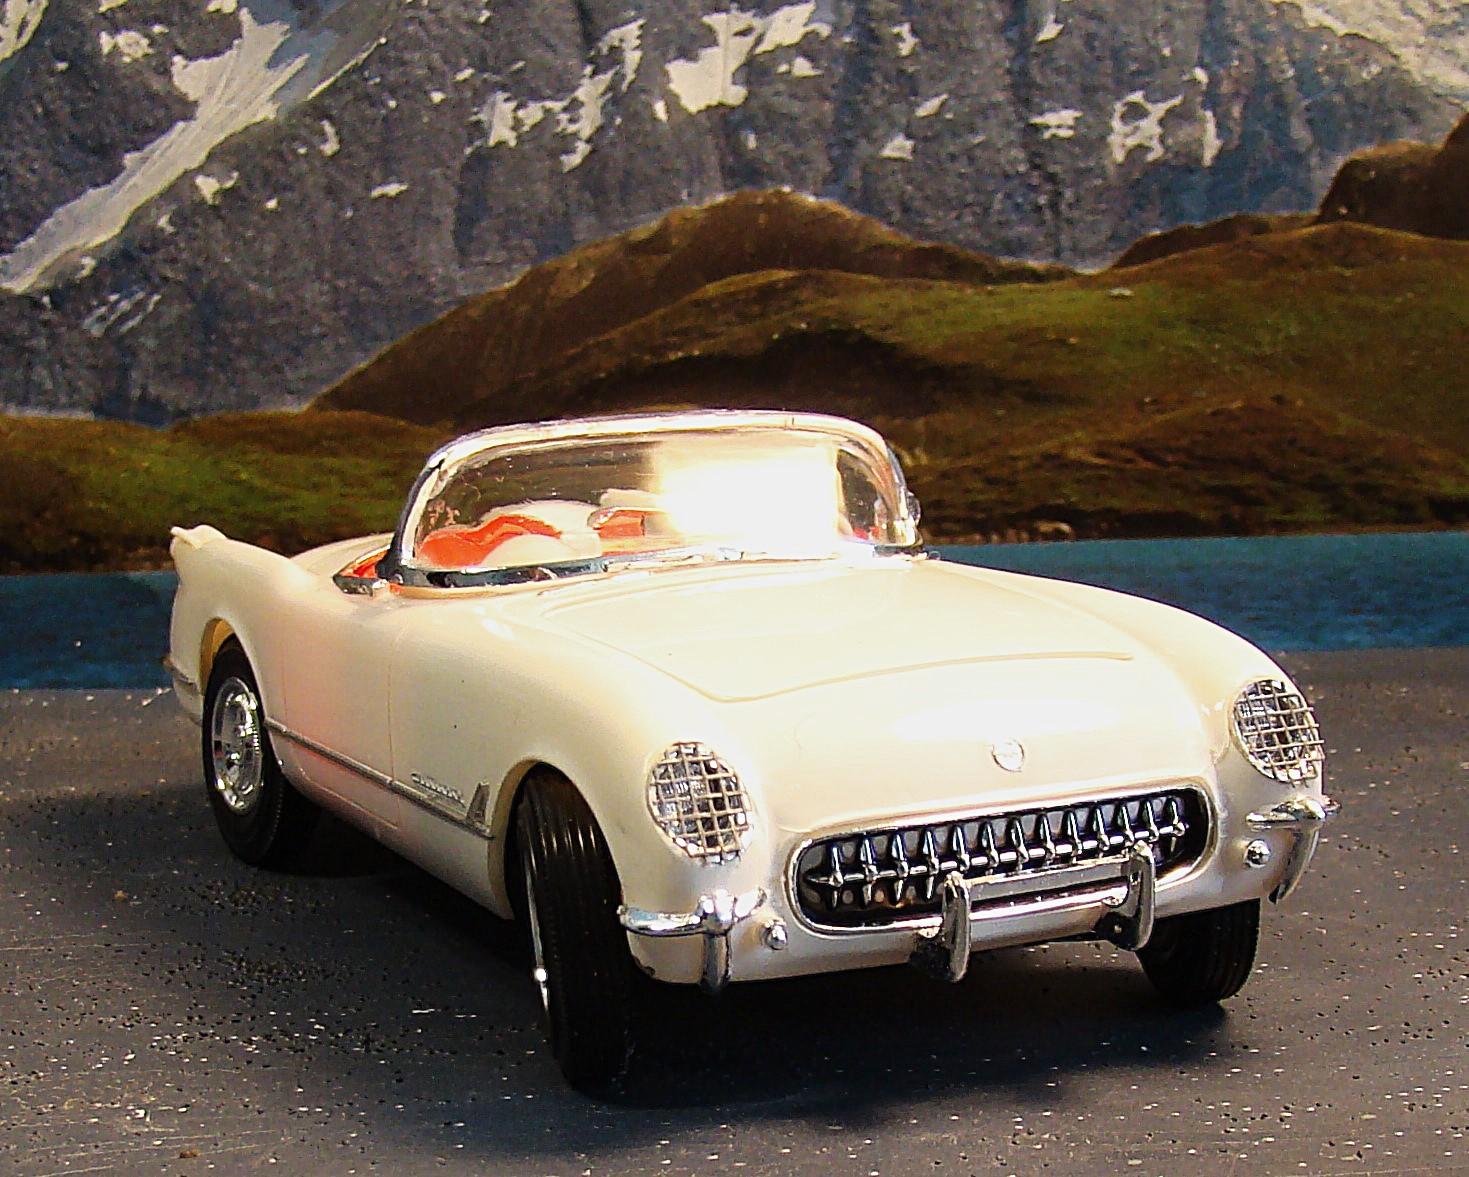
1953 Corvette....the start of a legend.
Rich Chernosky replied to Rich Chernosky's topic in Model Cars
-
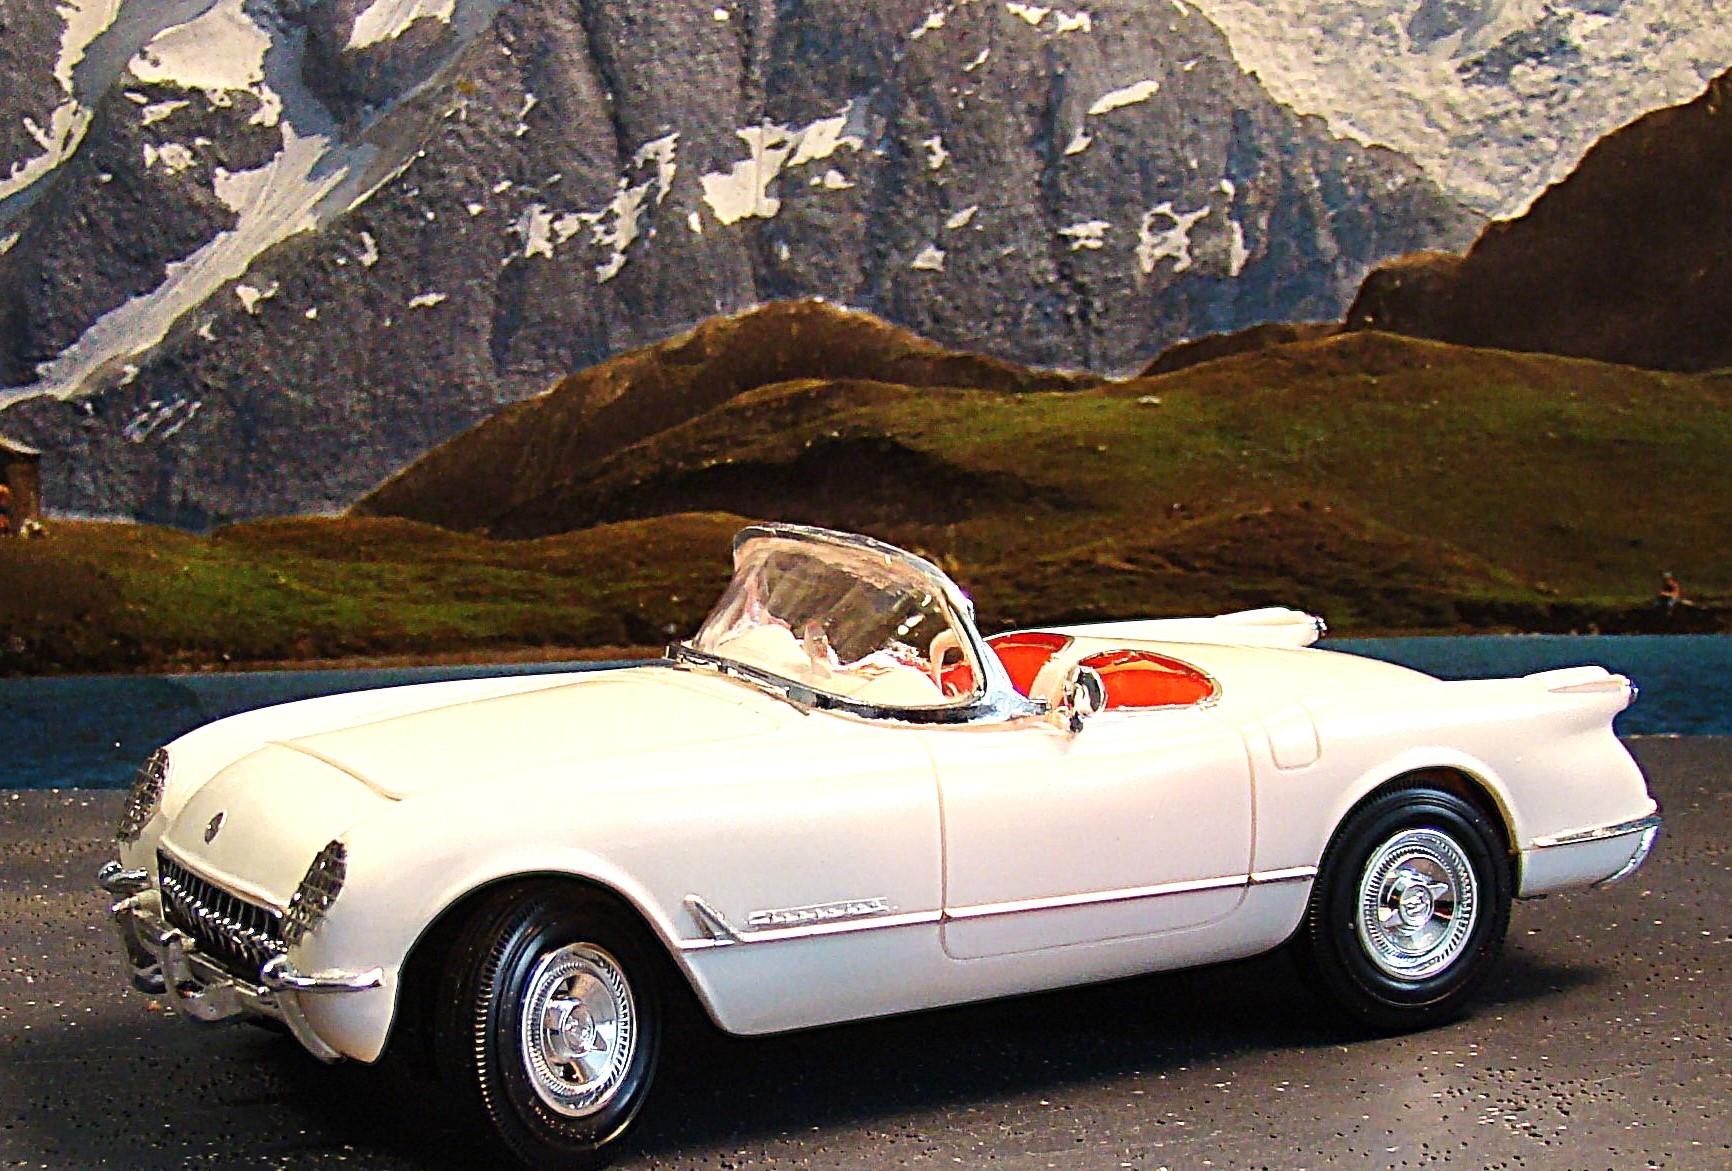
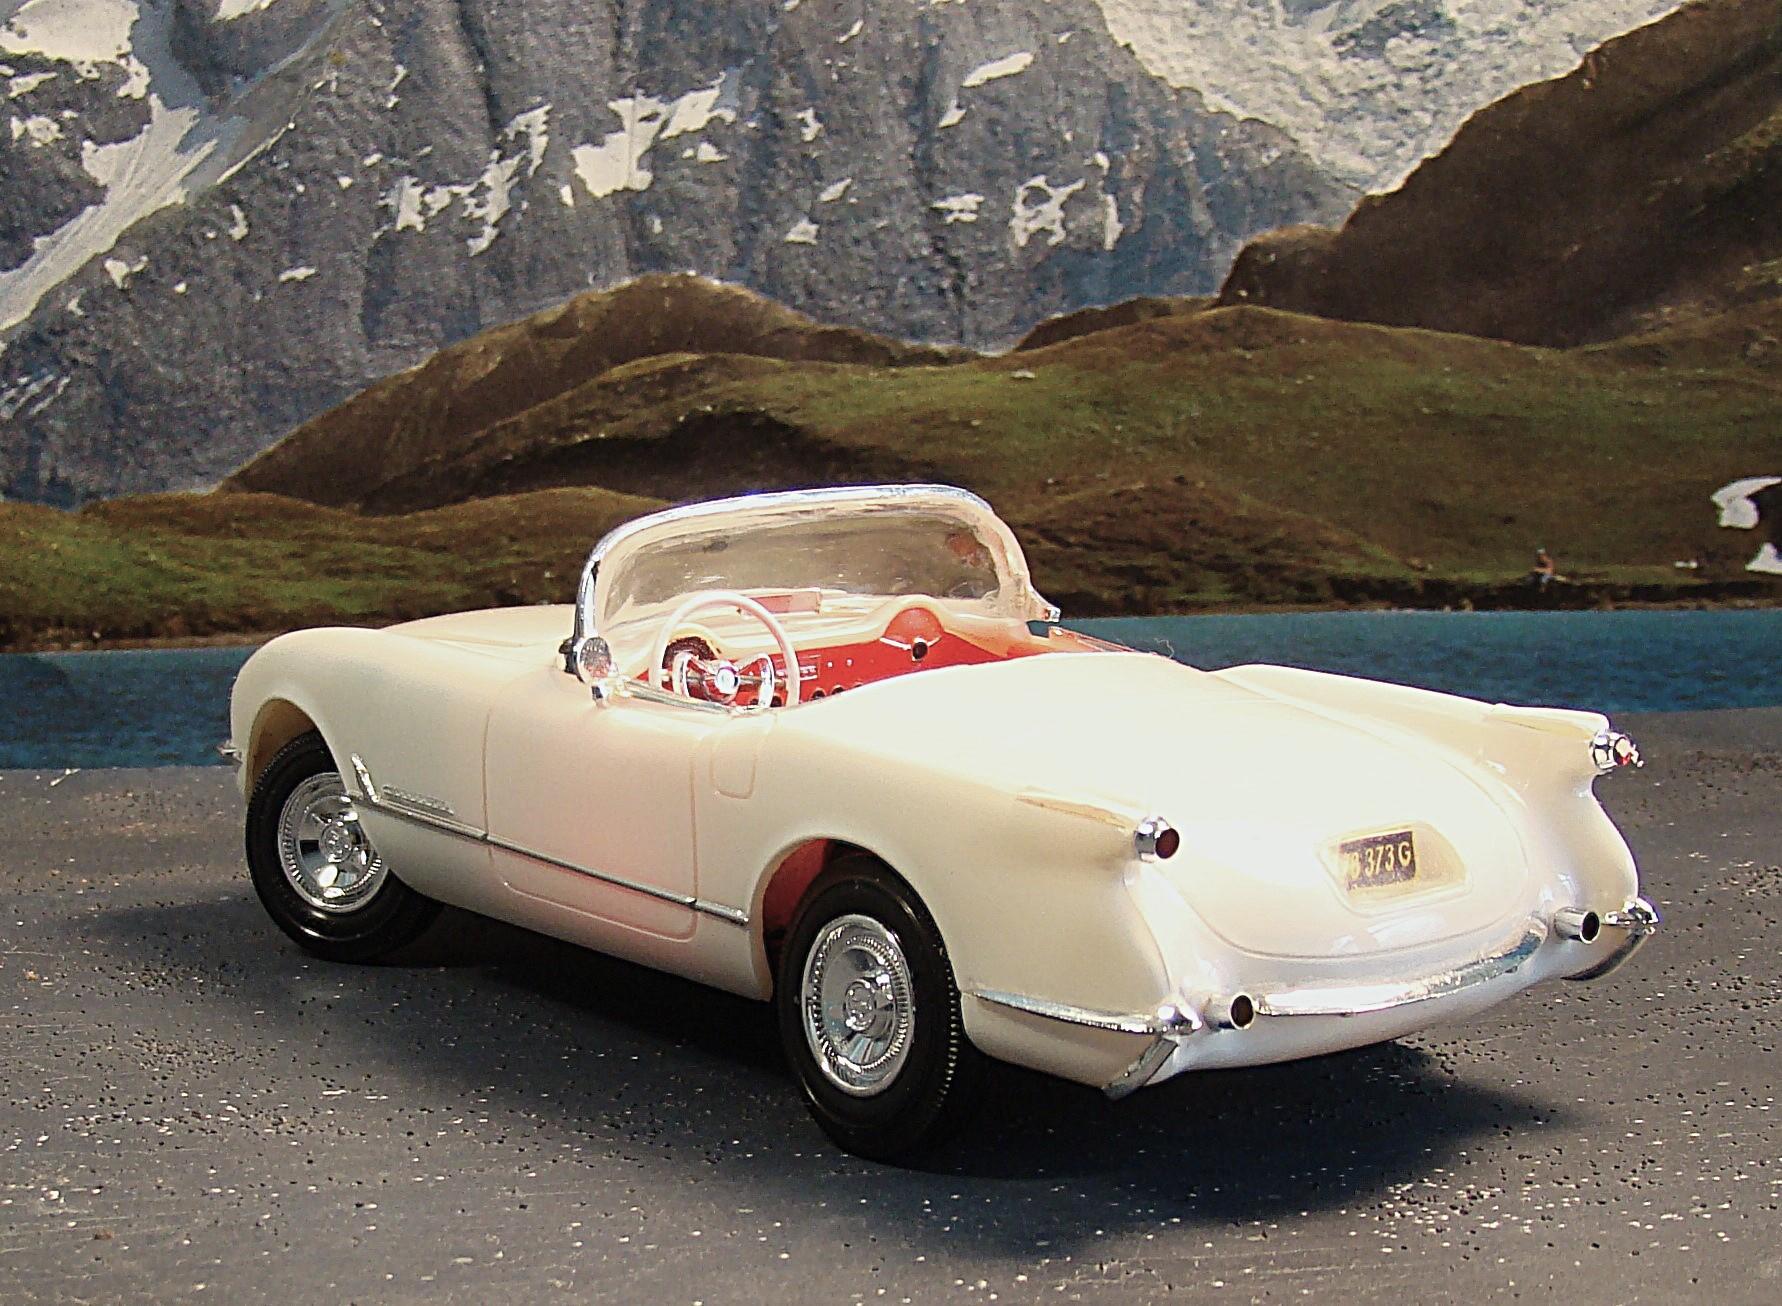
This is the last of my series of Corvette builds. And the only one I hadn't previously painted. This is AMT's 1953 Corvette. Color is Tamiya TS26 white. Not a bad kit it for AMT. Everything went pretty well except for the chassis which had to be pinned and wired in to place to get the ride height right. And a lot of flash and ejection pin marks, par for the course for and early AMT. Other than that, I am fairly pleased with the result. I want to thank everyone who commented on my last 14 posts of Corvettes. Thanks for looking and feel free to comment on this one. Lot of nice exterior detail on this iconic Vette. Interior color is MR Color 108 character red. Kit hweels steered but the tie rod had to be hinged. Interesting feature of the back end is the glass covered licence plate. Exhaust pipes are chrome antenna tubing. The soft top was included in the kit and was sprayed with a combination of Nato black and gloss black from Tamiyas LP line. This car was powered by Chevrolets Blue Flame 6 of 236 cu. and rated at 150hp. It was mated to a powerglide 2 speed auto transmission. It was no speed demon but was unique with its handmade fiberglas body. Only 300 of these were made in the Flint MI plant. Production was eventually moved to St Louis. I replaced the clear lenses with real mesh, a feature found on Corvettes until 1955.
-
1933 MG K3 Magnette, Auto Kit/SE Finecast, 1/24
Rich Chernosky replied to Matt Bacon's topic in Model Cars
Matt, white metal kits can be a real challenge. Looks like you were up to the task though. This is a killer build. Those wheels really caught my eye and they were the right call. Very impressive. -
-
IMSA Mustang (Folgers)
Rich Chernosky replied to dougwintz's topic in Other Racing: Road Racing, Salt Flat Racers
Doug this is one tough kit to get right but you nailed it. Great job. Indycals are great and I have used them several times. Now that I know they have these decals I may re-do mine. Thanks for the heads up. -
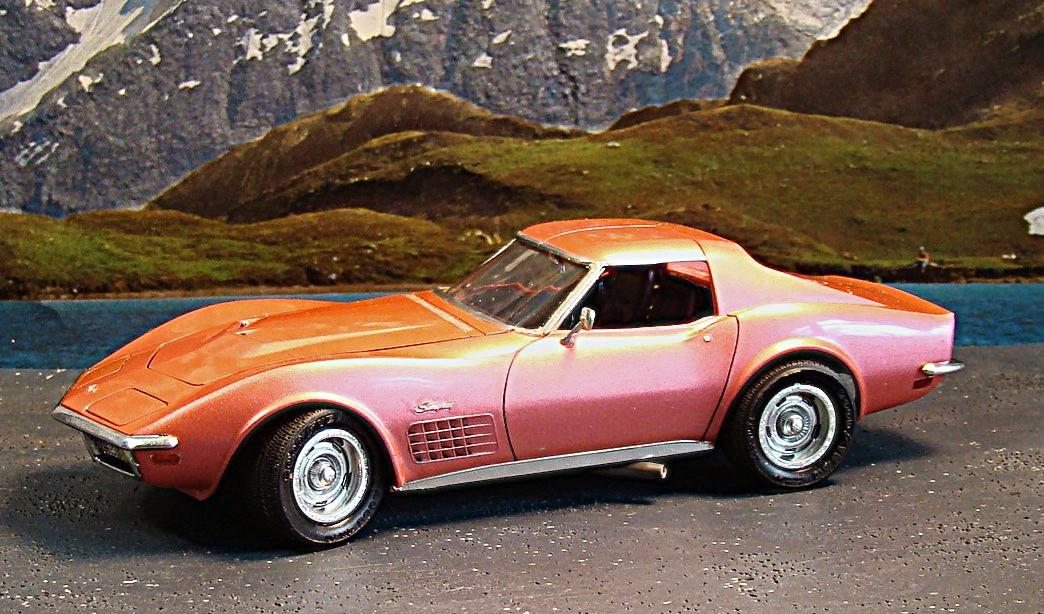
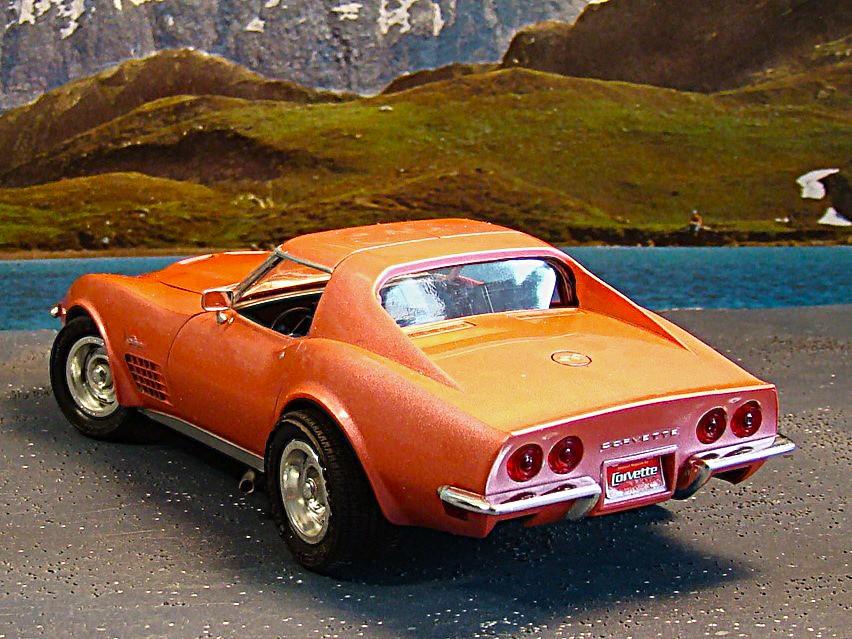
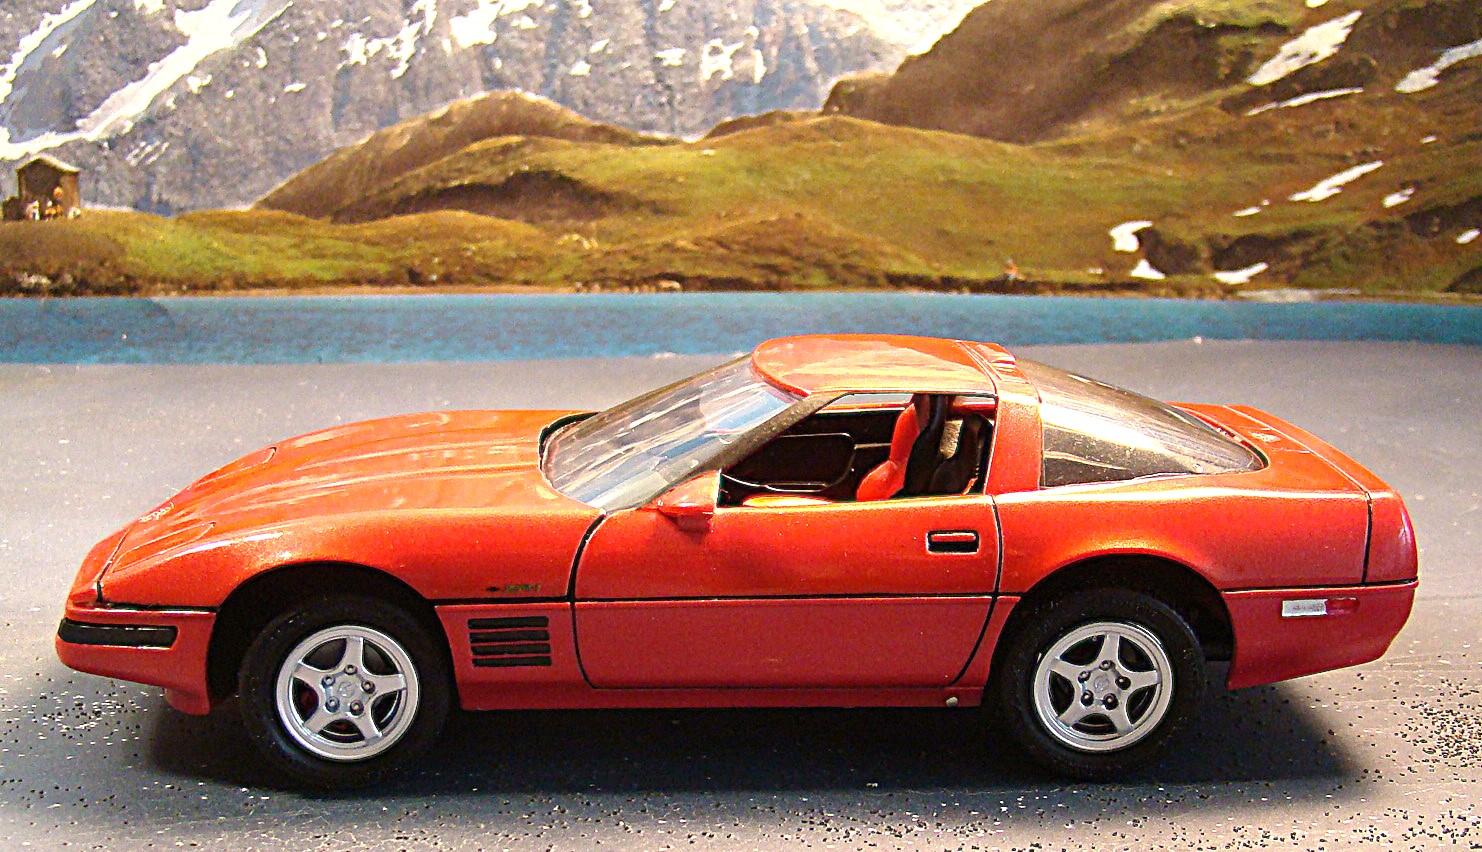
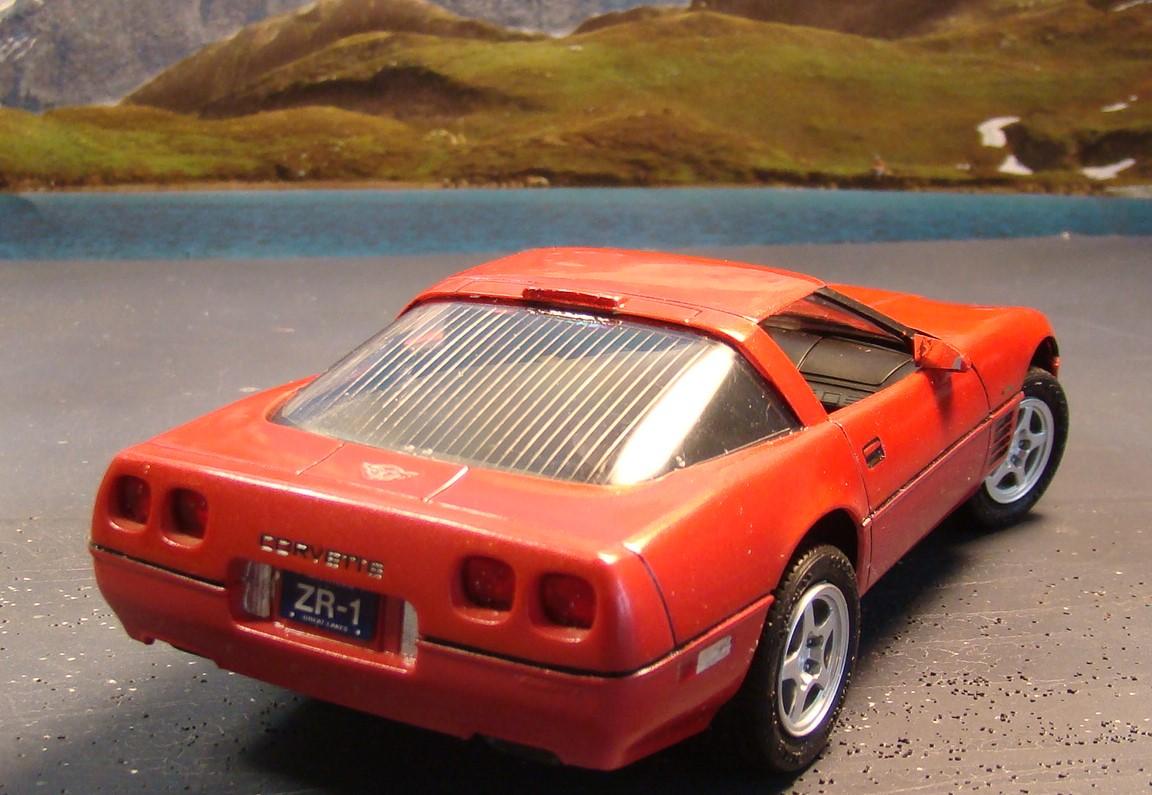
This is the next to last Corvette in my series of 14 completions. An AMt/Ertl 1/25 that was painted in March of 2000. Color is a Liqui Acrylic pearlescent ink called Volcano red. Latex clear was used and this has been heavily polished. As an AMT kit this was not half bad quality wise and it built quickly and easily without too much fitment issues. My only complaint is the box art labeled this as a street machine and AMT modified it as such. As a result it was naything but stock. Wrong wheels, wrong exhaust and the rear suspension was a 9" Ford rear end and not the usual independent set-up. I changed the wheels as they were the most obvious but left the rear end and exhaust as i wanted this one done and didn't have the proper parts anyway. All in all it turned out pretty decent and I am pleased enough to present it here. More comments below. Not really red and not really pink. GF says its Coral. Still difficult to photo with the amount of pearl in the finish. I attaqched the fronts with a jeweler screw as it was better. Was lucky to find the correct wheels in the spare parts. The oversize tires were part of the kit and I left them. Overall the body looked correct. Stance required no modification and the chassis fit nice. I messed up initially and installed the inner fenders in the body. Had to slice some off the radiator to get it to slide in place. The 350 fuel injected engine was well detailed and worth a photo. I aprayed most of the engine chrome flat clear and then added panel line to highlight the details. I remember a day when I just luved chrome parts and judged a kit by how much chrome it had. Now I cover it up or dull it down. Tastes change I guess. Thanks for looking and feel free to comment.
-
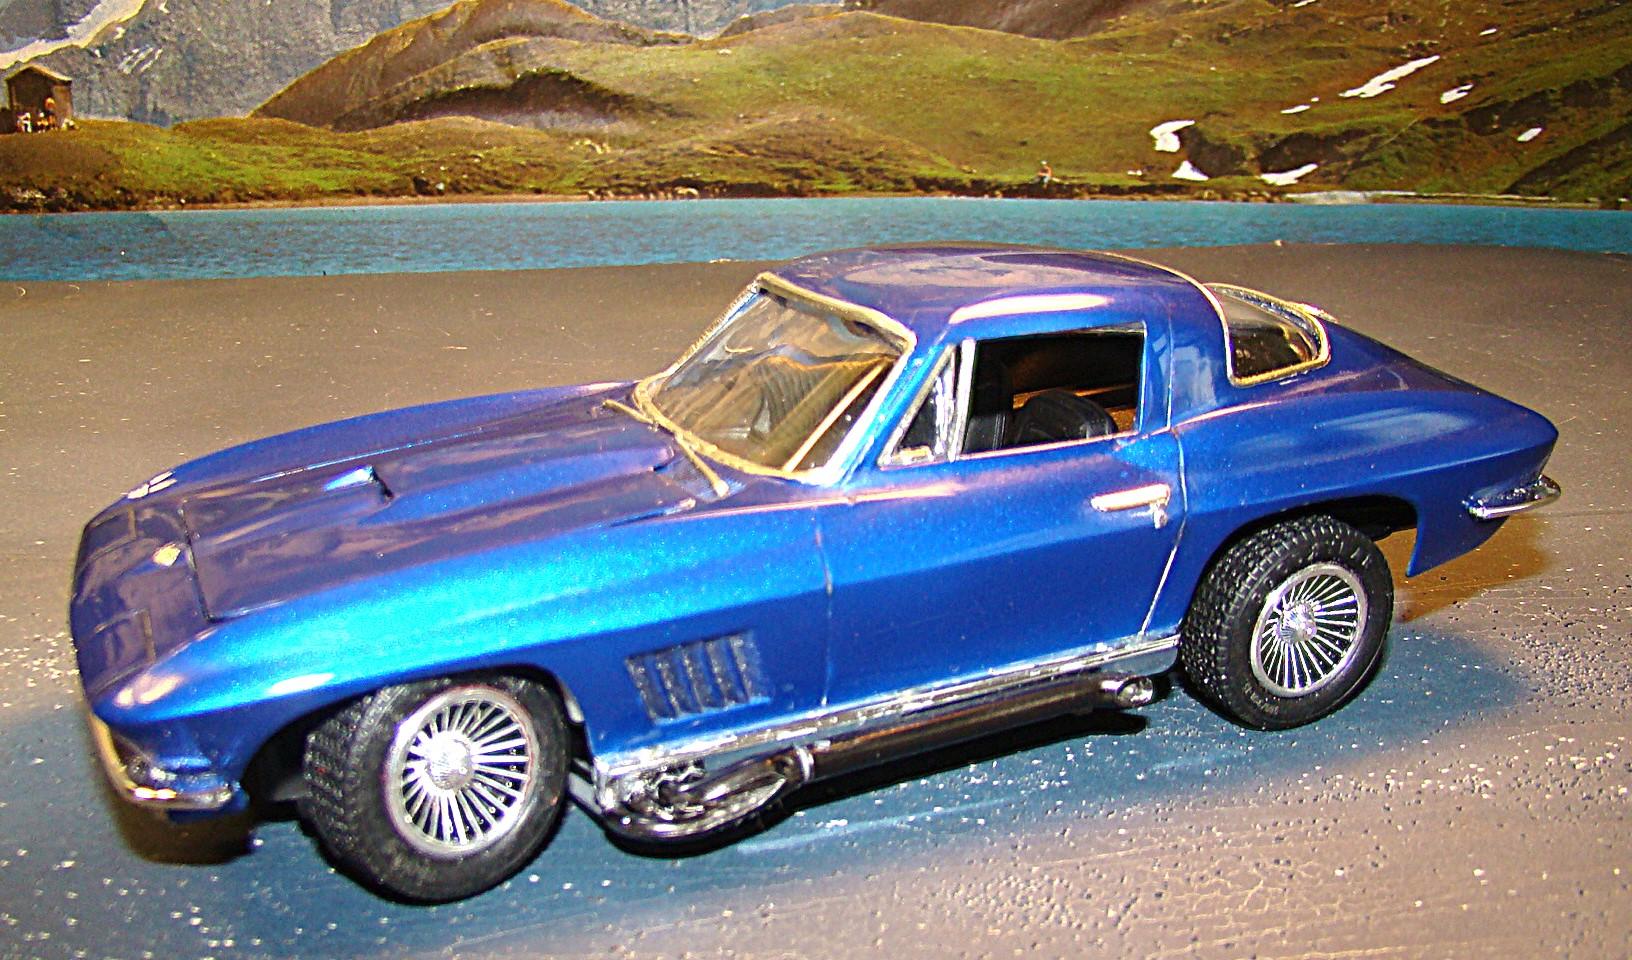
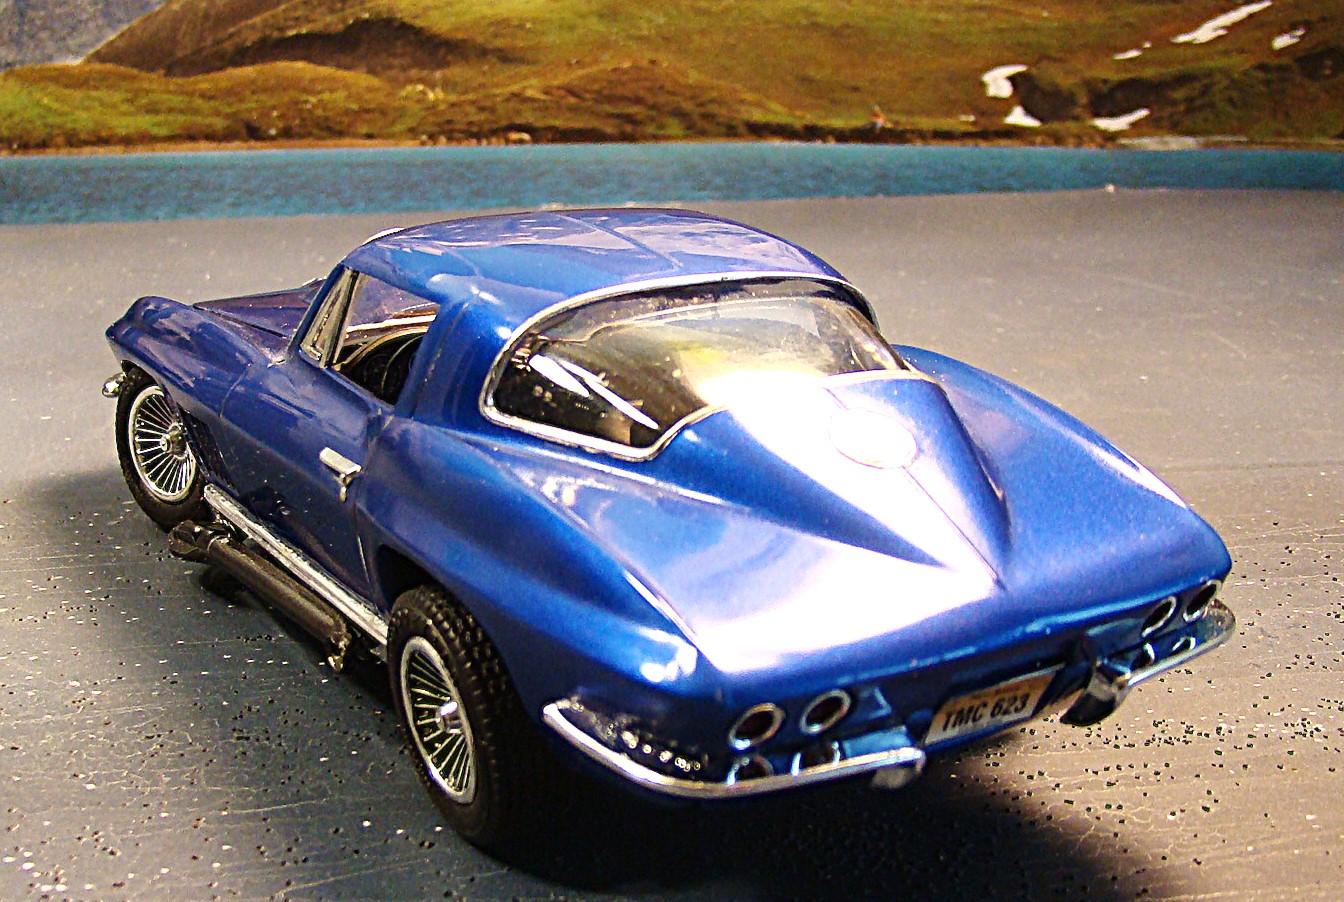
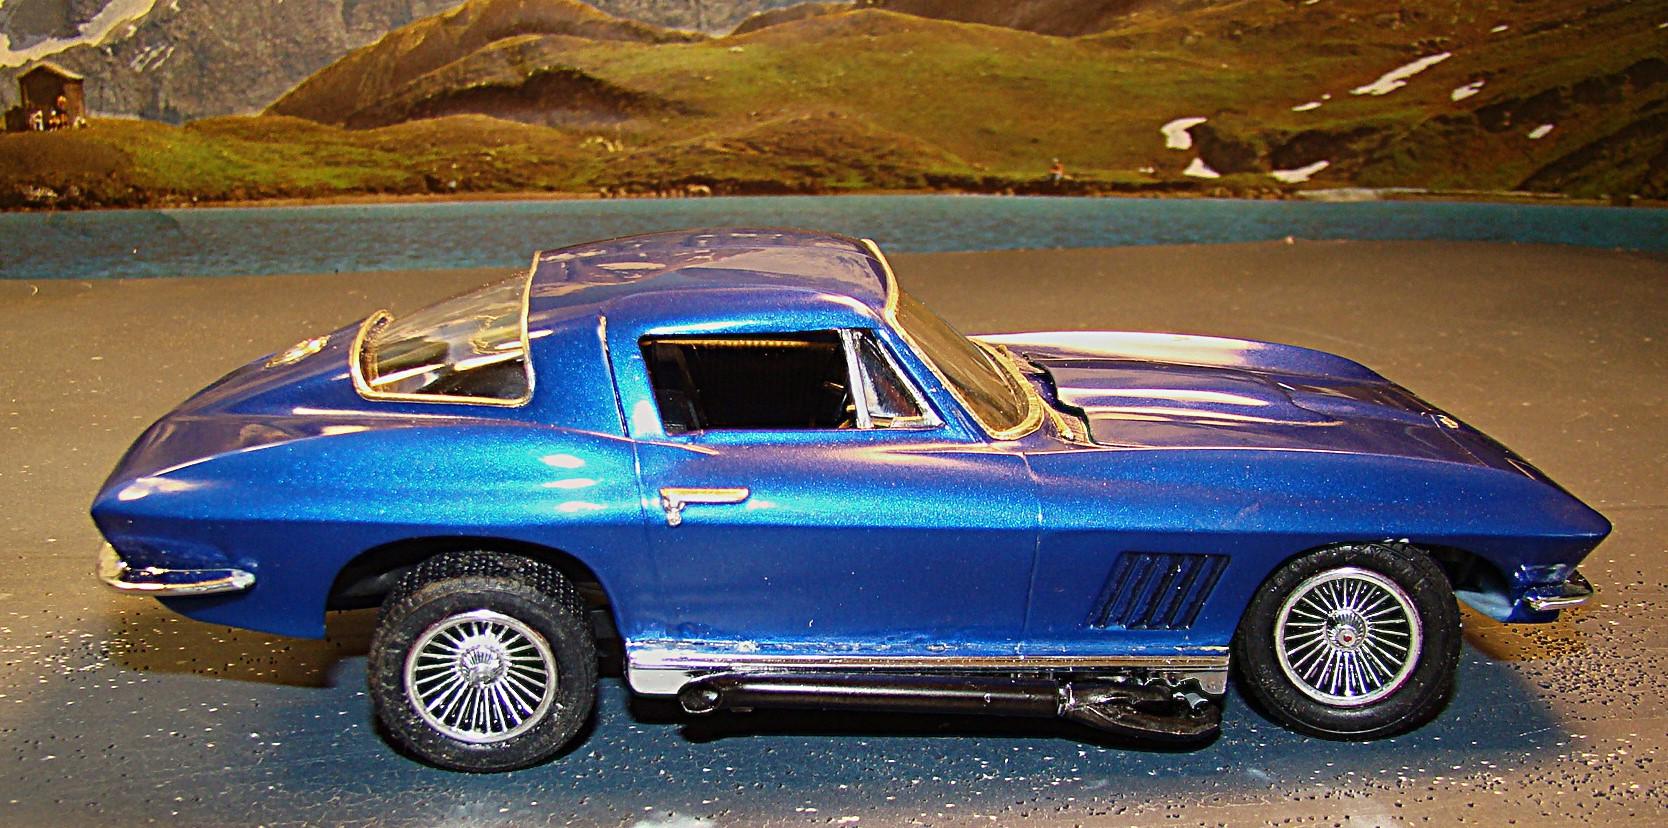
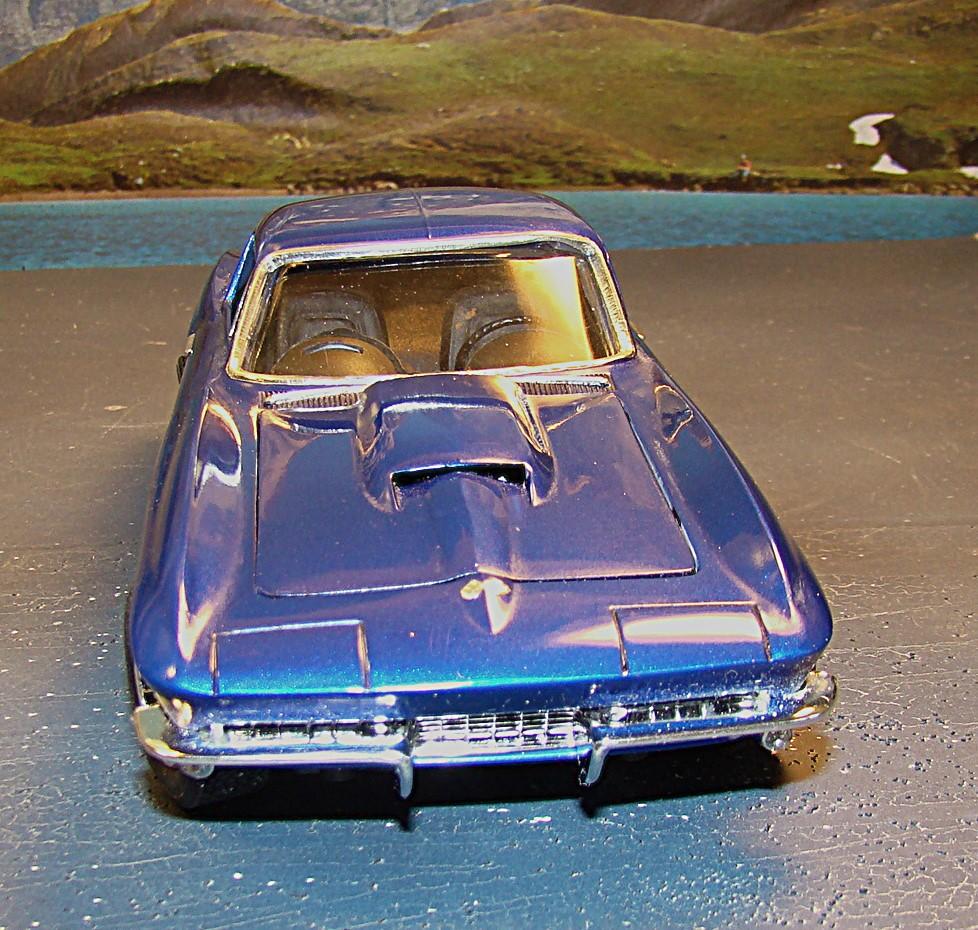
The 12th completion in my Corvette series. Getting towards the end here. This is MPC's 1967 Corvette Stingray hard top. This was sprayed in Jun e of 2001. Color is a nail polish called Wet N Wild Deja Blue over a silver base. Cleared with Tamiya TS13. This was one very badly engineered andf poorly made kit. Nothing fit and every part had to be massaged into place. Much flash and some bad castings required a lot of carving to get right. About the only good thing I can say was the body looked right although it was warped. But glad its done and reasonably pleased with the result. Commnet below the pictures. Feel free to add your own and thanks for looking. Kit wheels already steered. Had to dig into the spared for the correct wheels as they did not come with the kit. Like the stance of this one. Always seem to get a good rear veiw. Paint was heavily polished. For some unknown reason about 5 yrs after it was painted it mildewed in the box. Only paint job I have ever had do this. You would think a waterbase paint would as it cured in a humnid area but this was not the case with this one. Its laquer. The side pipes required the most work. They are pinned and wired in place. Pipes were re-worked and re-chromed then sprayed . with Tamiya LP5 Semi black and LP9 clear (a 50-50 mix) This lets sdome of the chrome show through and gives a nice effect. Hood fit nice and opened easily....about the only thing that did. Engine was OK but sadly lacking a lot of details so not worth showing here.
-
-
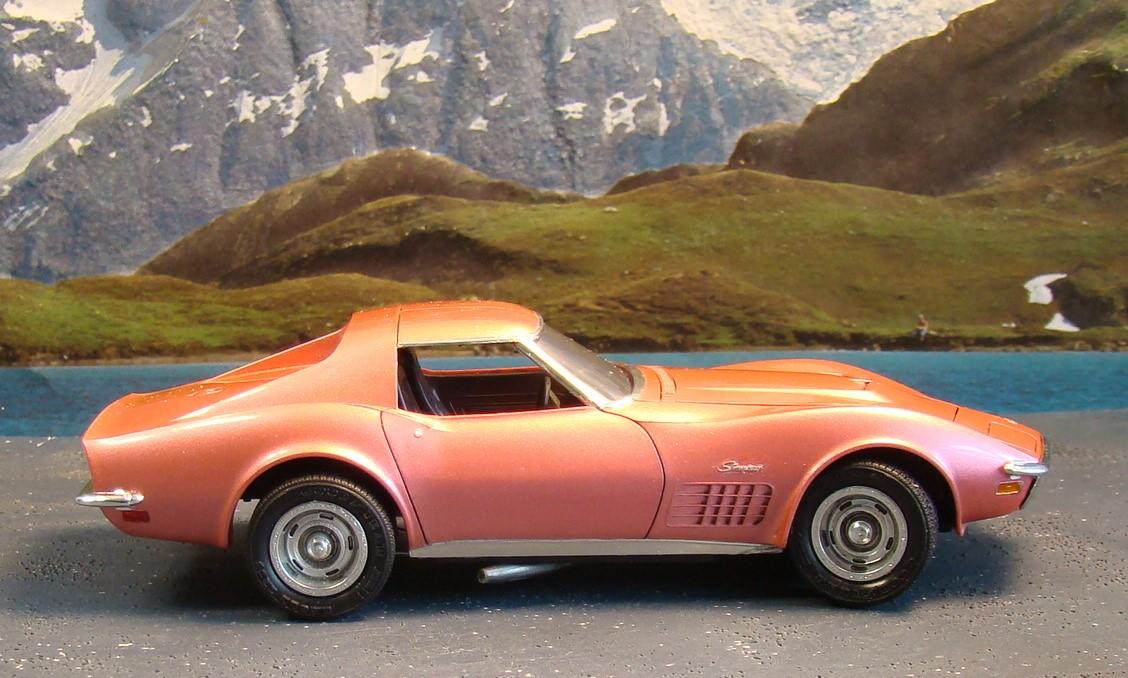
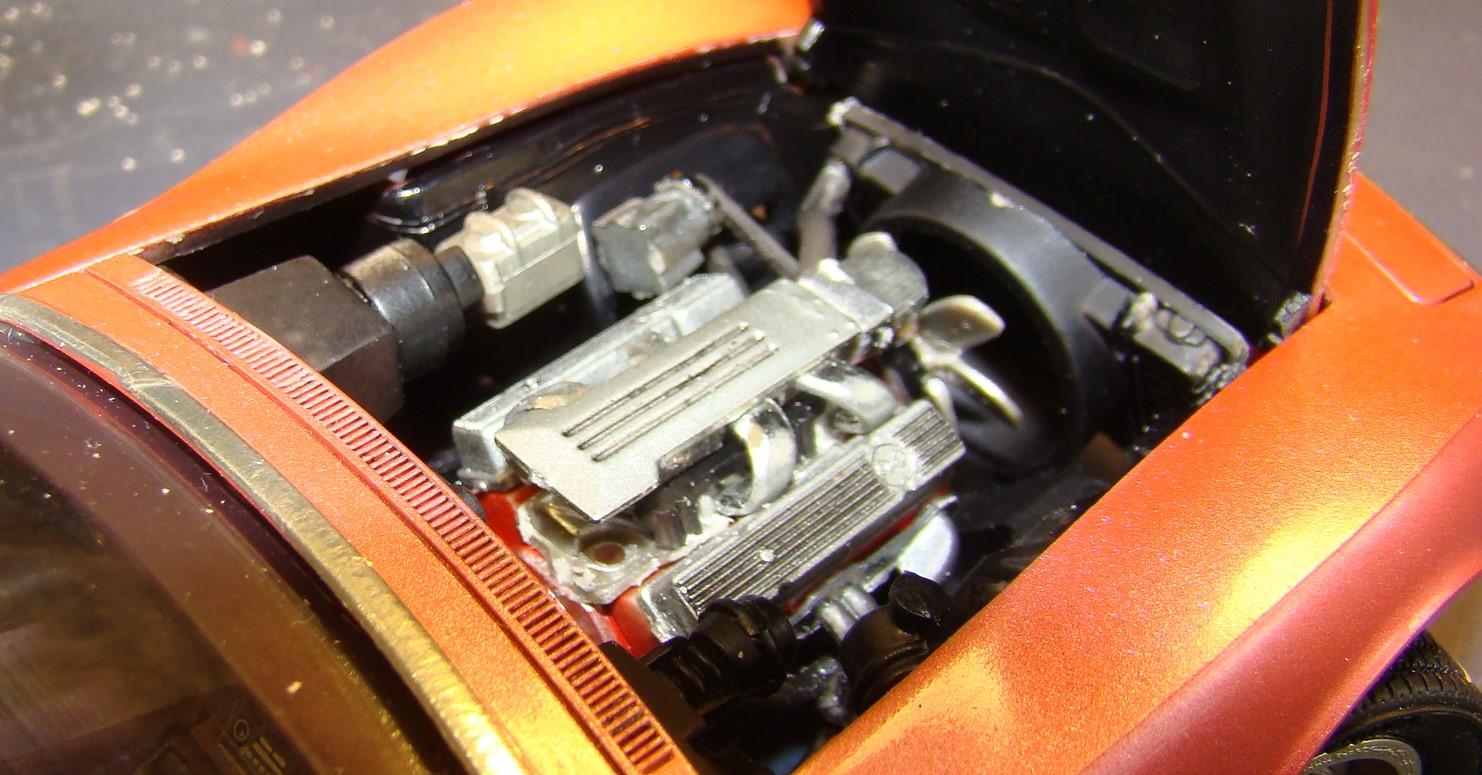
Another Corvette off the assembly line. Only 3 to go now. Don't know when this was painted but it is more than likely 12yrs or more. Color is Liqui "acrylic pearlescent ink called Volcano red. Krylon latex clear was used and a little red was added to darken the color slightly. Kit was fairly well detailed but there were some fit issues that were easily overcome. Build went quick. More details below. Hood fit on this was great until the chassis was installed. Hood hinged on two tabs of the chassis. Some grinding on the hinge and re-adjustmnet of the front body were required to get this look. Making the wheels steer was not too much of a problem. Liked the tires. I lked the detail of the back. The glass fit well. Overall stance of the model was good so no adjustment needed. Interior is semi-gloss back and I found a red for the seat insert that came close to the body color. There was a lot of engine detail. Most of the parts were chrome and had to be toned down with a mixture of clear flat and smoke. Instructions were very vague on the placement of some parts so some guess work had to be used. Luckily this is not my first Corvette model. Thanks for looking and comments welcome.
-
-
Porsche 914 Uprated
Rich Chernosky replied to martsky's topic in Other Racing: Road Racing, Salt Flat Racers
Very creative to combine both kits into one. And very well finished. I'll bet this car is a beast on the track. -