LL3 Model Worx
-
Posts
1,081 -
Joined
-
Last visited
Content Type
Profiles
Forums
Events
Gallery
Everything posted by LL3 Model Worx
-

Dodge Viper RT/10?
LL3 Model Worx replied to LL3 Model Worx's topic in Model Building Questions and Answers
I've got an incomplete kit ? oh well I guess. -
Brushing prices, my stuff looks bad
LL3 Model Worx replied to Milo's topic in Model Building Questions and Answers
A compressor will definitely help... need to maintain correct and most importantly consistent psi. Also make sure that the paint is thin enough to atomize correctly If all you have is the propellant can... you can also warm that can in hot tap water for a bit to help build and maintain pressure. I would recommend for the meantime to strip what you have and get yourself a good tamiya rattle can... you will be amazed at the difference! I really wish I could help more. -
Dodge Viper RT/10?
LL3 Model Worx replied to LL3 Model Worx's topic in Model Building Questions and Answers
Definitely no brake light, but has the cutaway for it, or so it seems.
-
Brushing prices, my stuff looks bad
LL3 Model Worx replied to Milo's topic in Model Building Questions and Answers
I'm gonna guess you are talking about the Aztek? Good results can be had from it. Are you using a compressor/ or one of the cans of propellant? -
Dodge Viper RT/10?
LL3 Model Worx replied to LL3 Model Worx's topic in Model Building Questions and Answers
Thanks, I'll snap a photo when I get home. It's the roadster not the GTS... and I knew it had a removable window, just couldn't figure out why the pins were there and the brake light is missing. -
Looks great Steve... I don't have much luck with the duplicolor clear out of the can though... always seems to orange peel to hell and back on me no matter what. Wich is nuts because I use it on guitars and other various car parts all the time with fantastic results... but oh well ? I bought a couple of quarts of it at Ollie's a while back for $6 a can and now I just blow it through the airbrush. Works well.
-
Brushing prices, my stuff looks bad
LL3 Model Worx replied to Milo's topic in Model Building Questions and Answers
Strip it ans start over would be my suggestion. Perhaps use a spray can? ? instead of using the paint brush. Is there a specific reason why you are brush painting body panels? -
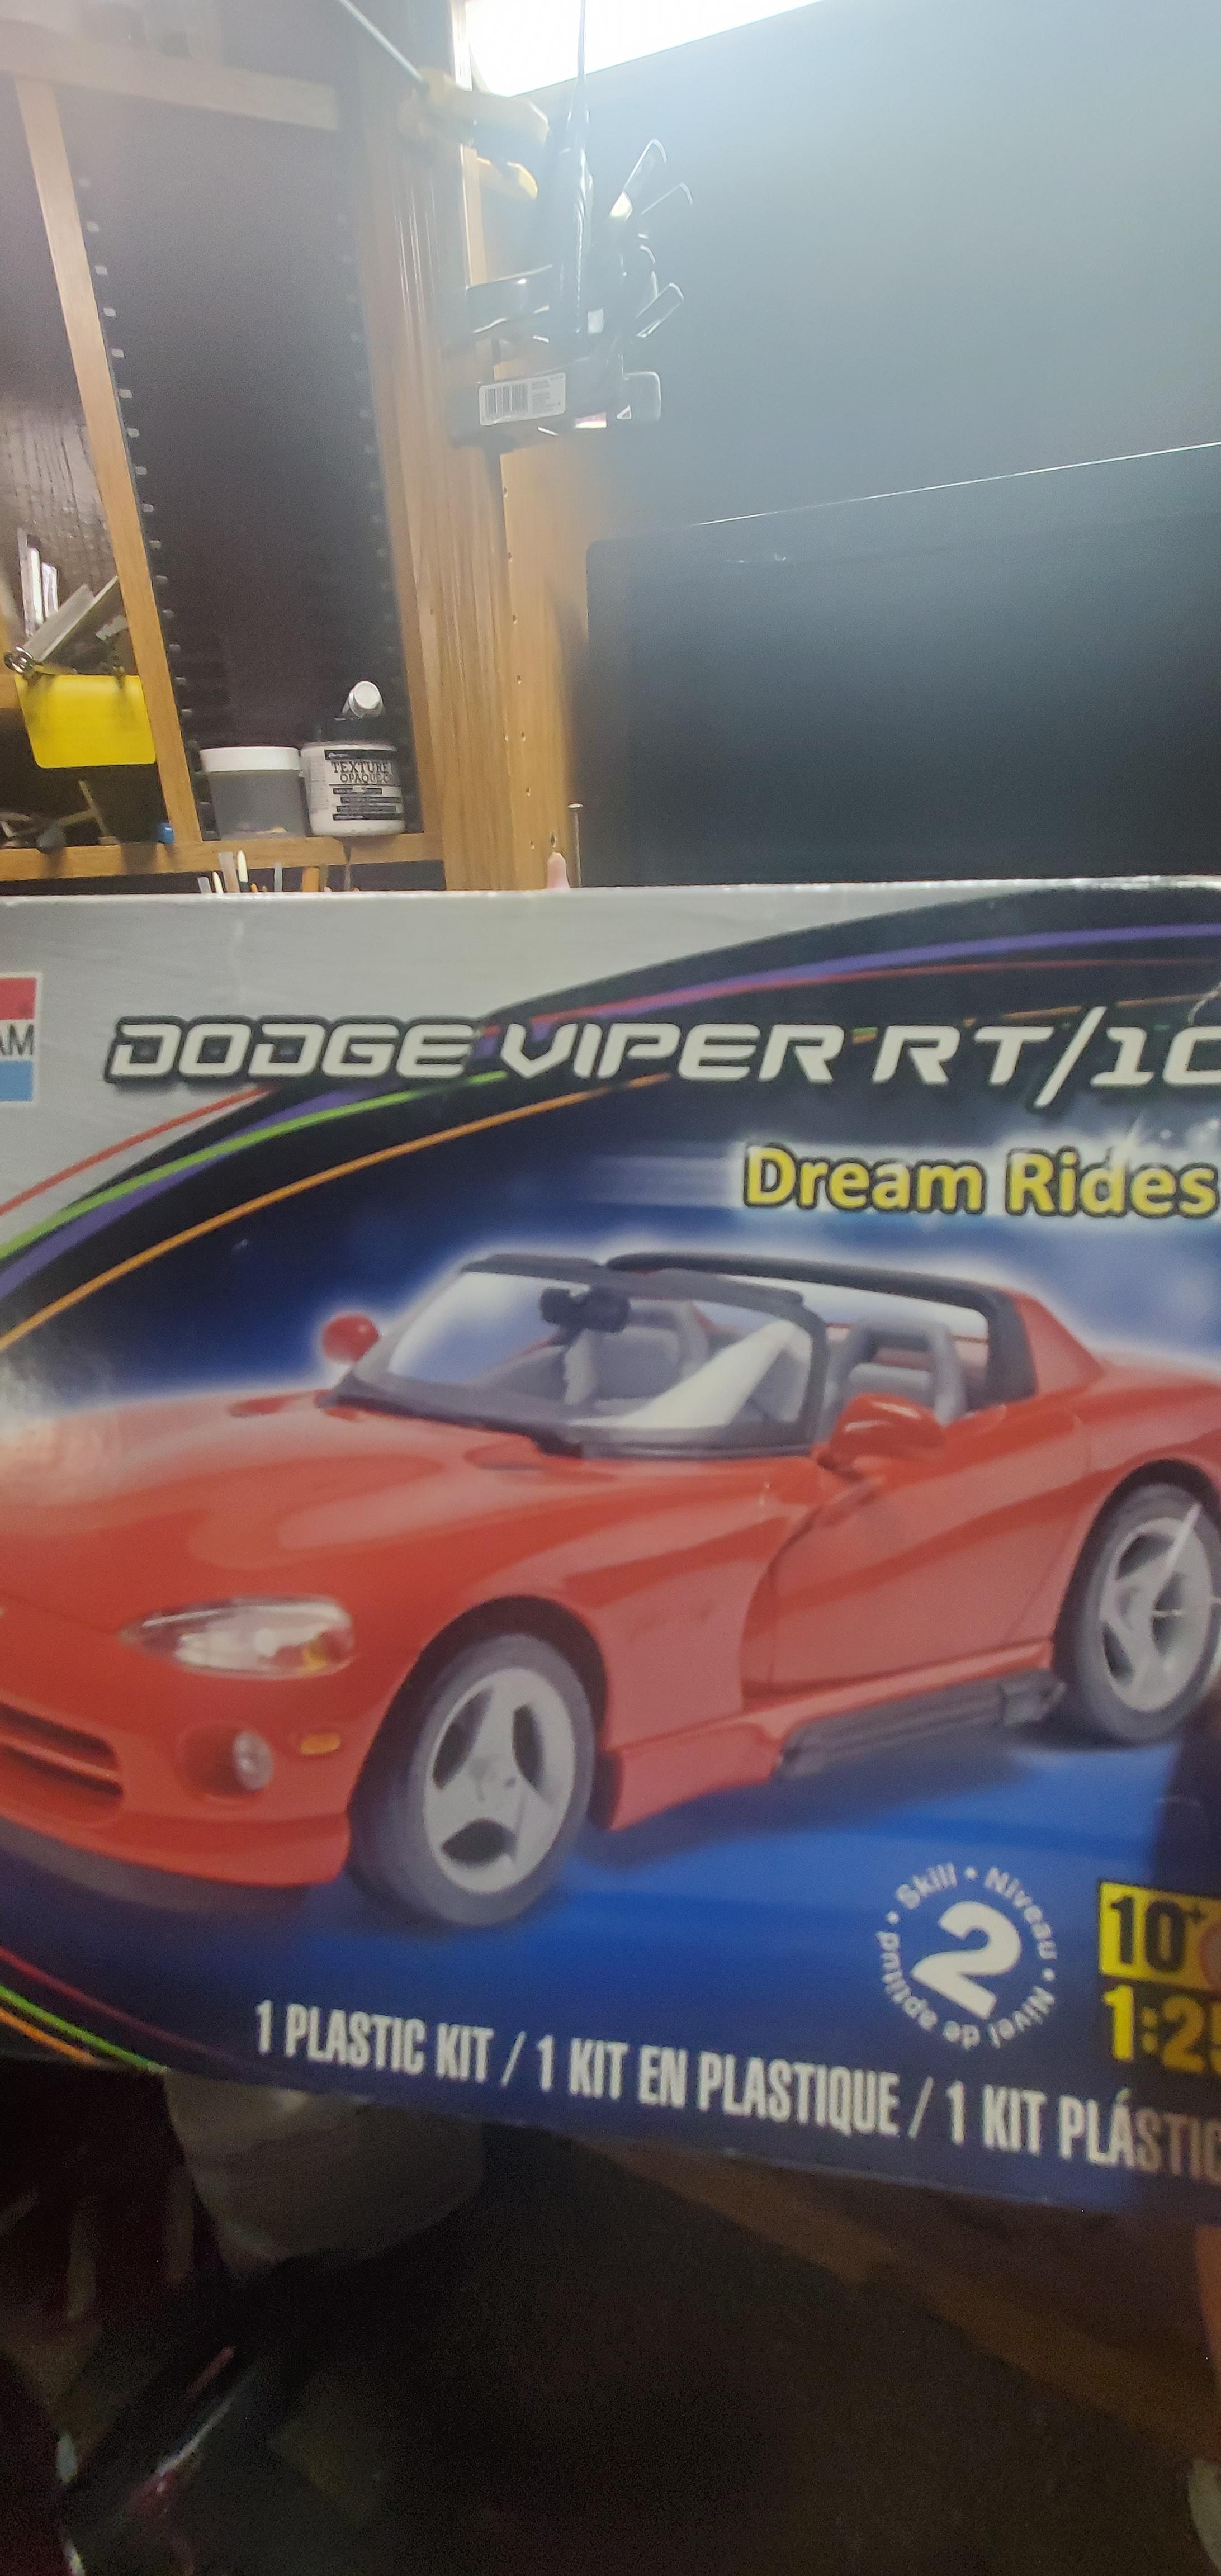
I started on my Cannonball entry yesterday a Monogram RT/10 My question is, does this kit not come with a back glass or the upper center brake light, or is my kit just missing parts ? Doesn't show in the instructions that I can see, but has locator pins in the top of the "roof" so it seems something is/was supposed to go there. I will say that overall the kit looks fairly nice and is obviously a repurposed Snap kit... the rear drive tail light is a little wonky and some of the mold lines on the body take some serious sanding/shaping but comes out decent. Never dealt with this kit before... all help appreciated.
-
Brushing prices, my stuff looks bad
LL3 Model Worx replied to Milo's topic in Model Building Questions and Answers
I can't load this picture, but if you shot it with the same testors enamel you were hand painting with, you can absolutely wet sand it smooth, hopefully you have enough coats to get it flat then buff it back up. If you are seeing bumps in the paint, its either not thin enough, your spray tip is too small, psi too low or spray distance is too far or any combination of the above. What exactly are you spraying and what are you spraying it with? I'm happy to help, just have to know what you are working with. -
Use a piece of flannel and do it again... micro fiber sucks for buffing on models and 1:1. Viva Cloth paper towels work half decent also. But 100% flannel is the way to go for sure.
-
2023 Cannonball Run-What-You-Brung Build Thread
LL3 Model Worx replied to White Rabbit's topic in Community Builds
I came SO close to doing this for my entry as well... even opened the kit and looked It over... but then decided on the viper. Looking forward to seeing yours complete! -
What do you use for spark plug wiring?
LL3 Model Worx replied to customline's topic in Model Building Questions and Answers
I'd be willing to bet Igus company could dig something up... or point someone in the right direction, they have never failed me before when I've looked for oddball things. -
What do you use for spark plug wiring?
LL3 Model Worx replied to customline's topic in Model Building Questions and Answers
I'm sorry, I was being a little facetious in my post. ? I've ordered plenty of hard to find wire and cable for work. Usually they sell at a certain price per foot. I ordered 120' of a cool wire called "chainflex" it's designed to withstand bending in automation applications. It's great stuff. Before I ordered the 120' I needed I ordered 6ft for testing.... no problem. They get more business that way...(their words, not mine) none of us would ever use a 1000'ft roll of wire and most industrial applications wouldn't either, at least most of the time. -
Primer for Createx or Craft Paints
LL3 Model Worx replied to Miatatom's topic in Model Building Questions and Answers
I usually use one of a few Grex tritiums Yea I've noticed that leaving some in does help a bit. And I've tried multiple things... soapy water, Alcohol, Lacquer thinner.... window washer fluid, Windex... All sorts of stuff. 91% Alcohol seems to work pretty good as well as lacquer thinner. It's just a bear to remove... wich is basically the point of the primer anyway. -
Primer for Createx or Craft Paints
LL3 Model Worx replied to Miatatom's topic in Model Building Questions and Answers
I love stynelrez primer under acrylic paints for miniatures as I rarely use true acrylics for model cars. But I have to admit it is a MAJOR pain to clean out of the airbrush in my experience. Vallejo primer sprays well, and cleans easily but adheres terribly and thusly isnt durable, ? though it still has its uses. Just my personal opinions/ experience. -
Brushing prices, my stuff looks bad
LL3 Model Worx replied to Milo's topic in Model Building Questions and Answers
You don't... you put the paint on a pallet of some sort... preferably metal so solvents don't react with plastic. Put a small amount on a pallet, and then thin and mix, and your all set. -
Here's one slightly smaller I found... kivcmds 1:18 Scale 3-Tiers Model Car Display Case with Parking Lot Scene for Sports Car and Lego Models Collector, Display Stand for Alloy Car Toy with Light (3-Tiers Convenience Store Parking Lot) https://a.co/d/bAdgFVI It goes together quickly and easy and looks pretty cool in my opinion.
- 39,242 replies
-
- 1
-

-
- johan
- glue bombs
- (and 1 more)
-
Brushing prices, my stuff looks bad
LL3 Model Worx replied to Milo's topic in Model Building Questions and Answers
Keep it wet with paint. Make sure the belly of the brush can hold enough paint to go from one end of your surface to the other without running out of paint. -
Brushing prices, my stuff looks bad
LL3 Model Worx replied to Milo's topic in Model Building Questions and Answers
I use glass eyedropper bought a pack of 10 for like $2 on Amazon and I still have 9 left after about 6yrs. Testors enamels or some of the best brush paints there is in my opinion. I have painted hundreds of miniatures with some of the most high end miniature acrylic paints available and while they are great they have one fatal flaw. They cannot be altered once dry and drying happens fast! Enamels dry very slow and can be altered with a little solvent as long as it's not completely cured. Thin with mineral spirits and keep the brush wet! The brush doesn't have to be some high end Windsor series 7 or nothing... regular ol synthetic brush will work fine, just keep it wet ans make 1 stroke. And if you have to make another pass thin it even more and lay it on even wetter that way it levels and blends to the existing coat. -
What do you use for spark plug wiring?
LL3 Model Worx replied to customline's topic in Model Building Questions and Answers
So, I've acquired lots of various wire over the years in various sizes and colors and materials... The real question is where do the hobby specific vendors get their wire? That can't be that much of an arcane secret. I'm willing to bet it's from industrial supplier that we could all call and order from... I don't really have the need as I have plenty (bought from hobby suppliers and salvaged from electronics) but it would be nice to know why no one can seem to find where the hobby vendors source their stuff. Baffling. -
My wife got me this awsome "parking garage" display case. I just put it together and I think it looks awsome! Now need to dust off a few builds to go in it.
- 39,242 replies
-
- 7
-
-
- johan
- glue bombs
- (and 1 more)
-
2023 Cannonball Run-What-You-Brung Build Thread
LL3 Model Worx replied to White Rabbit's topic in Community Builds
My starting point.
-
2023 Cannonball Run-What-You-Brung Build Thread
LL3 Model Worx replied to White Rabbit's topic in Community Builds
I'll be doing this... it just screamed at me and said America! ? seriously one of the most important vehicles to come out of Detroit and one of the most dangerous perhaps barring the Pinto. Such a visceral experience driving one of these.
-
The Zen of Model Building
LL3 Model Worx replied to afx's topic in General Automotive Talk (Trucks and Cars)
Well said! That's it exactly. -
The Zen of Model Building
LL3 Model Worx replied to afx's topic in General Automotive Talk (Trucks and Cars)
I fully understand this feeling. The therapeutic nature of the process is what always attracted me to the hobby.... thats why i don't care much about my completed models. Just relaxing and trying new things is what really does it for me.