

Doug 1061
-
Posts
399 -
Joined
-
Last visited
Content Type
Profiles
Forums
Events
Gallery
Posts posted by Doug 1061
-
-
That looks nice. Especially like the look of the exhaust system. Good weathering all around. Just needs about 800 scale pounds of mud on it😁😁. I'm still trying to get up the nerve to do some weathering on a truck.
-
41 minutes ago, zaina said:
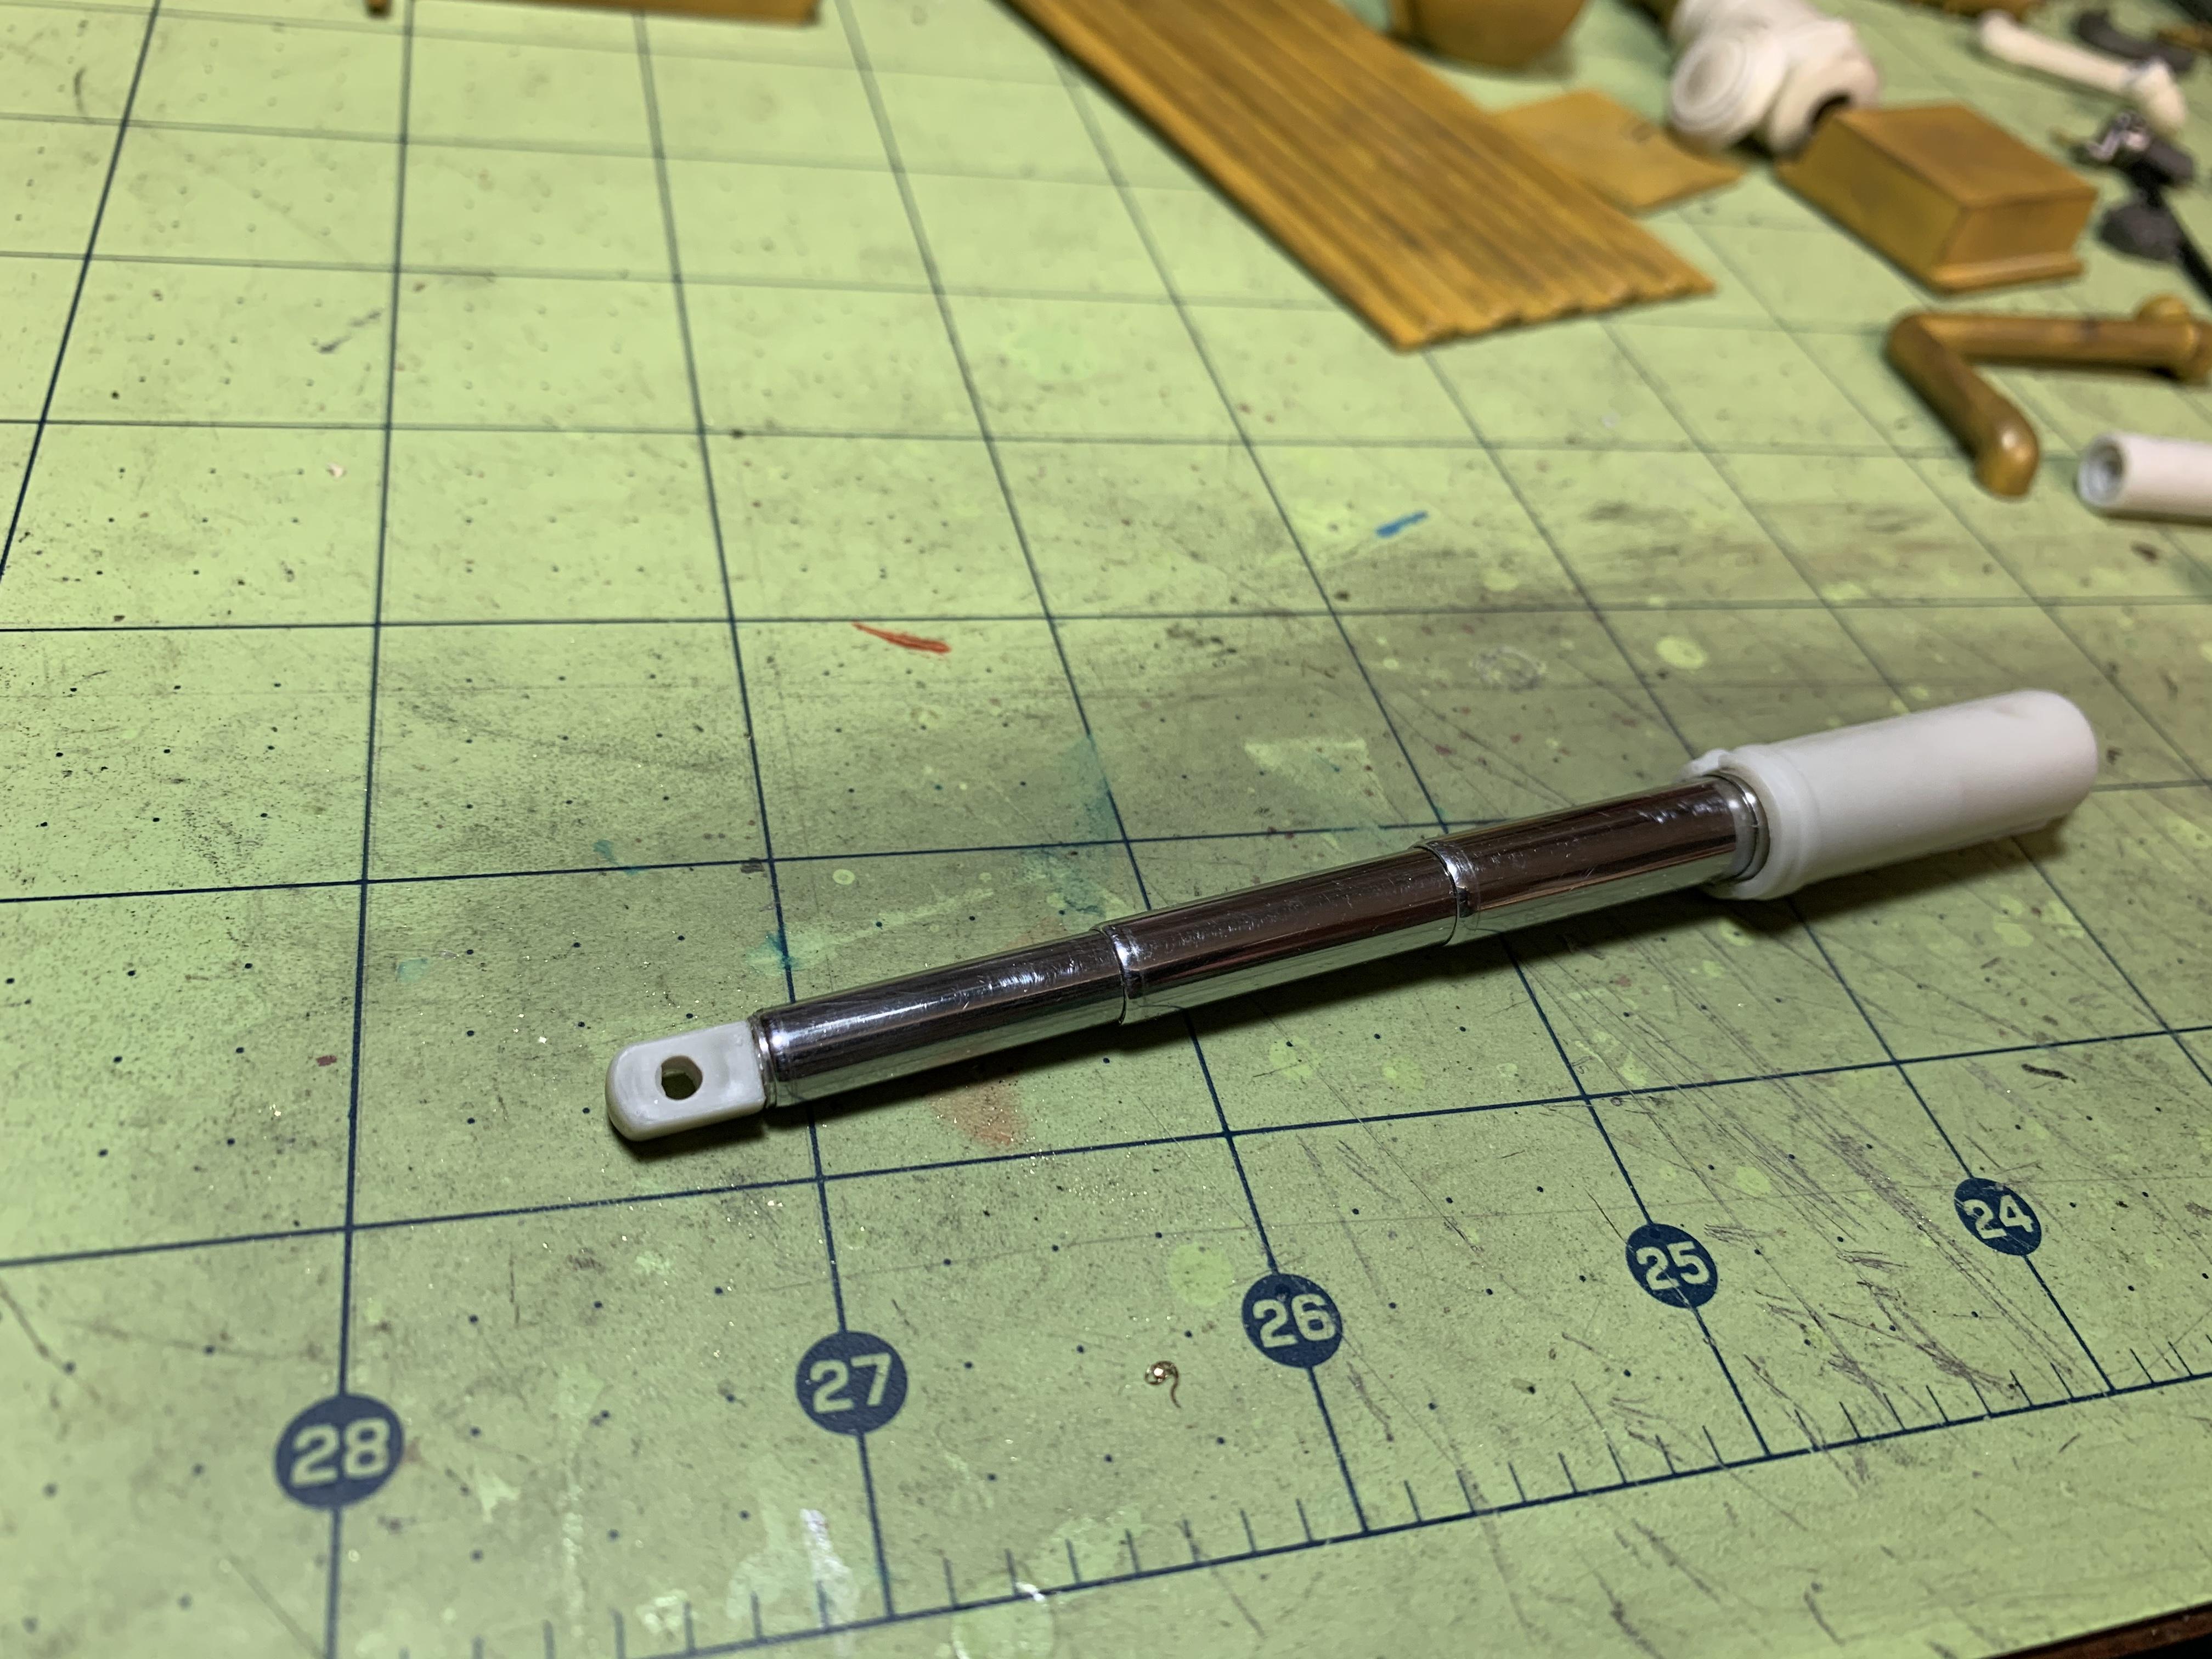
Great work!! This might help for the cylinder. I used these on my current payhauler build. I found some telescoping alligator clips and cut them down to size. You can find them at most hardware stores with a clip, mirror or magnet on the end of them.
 Quote
QuoteThanks for that idea. Will have to check into that. I am pretty much making it up as I go. This is the last hurdle for this build before I can put the finishing touches on it.
-
Got my order from Scenes Unlimited today. Budd wheels for that KW mixer whenever it arrives. Will have 6 left for that Ford short hauler when I get around to it. Looks like good quality parts.
-
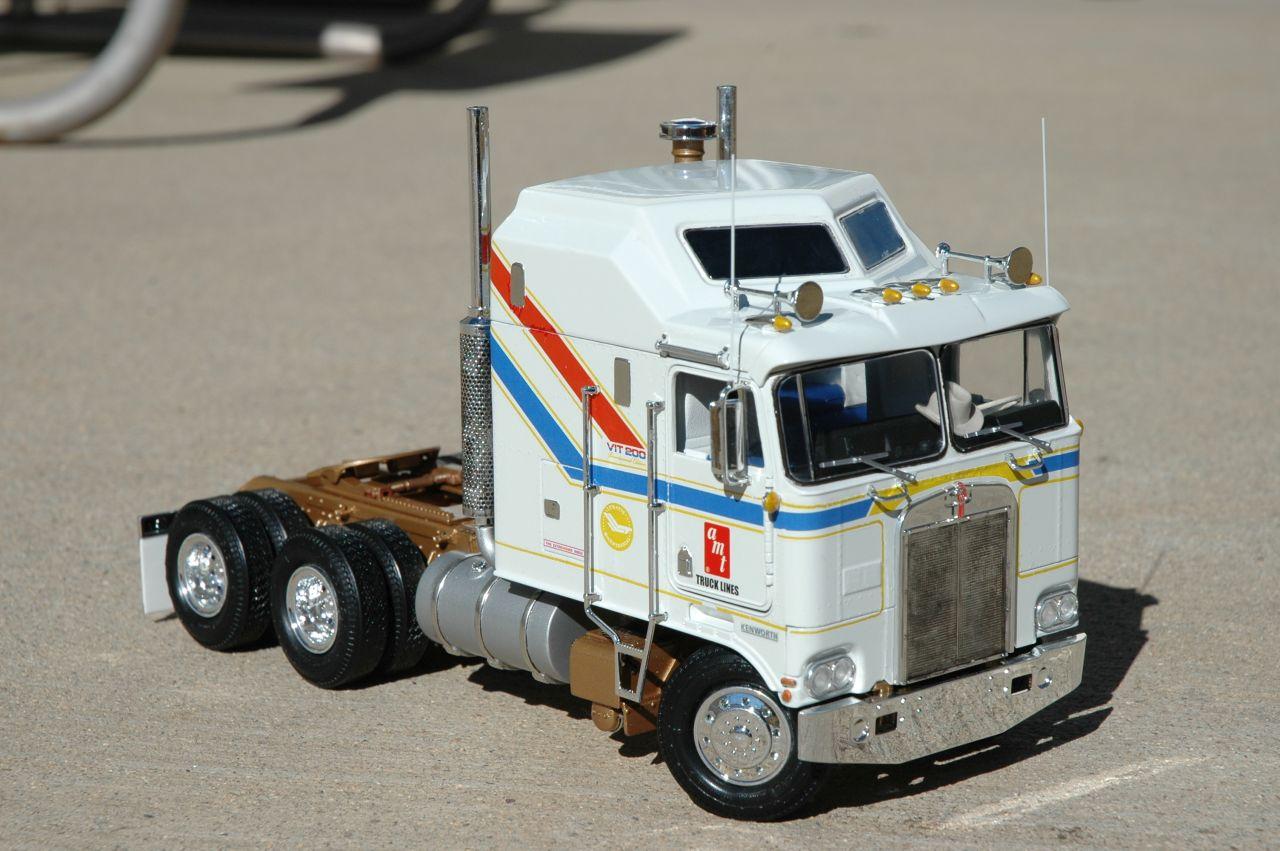
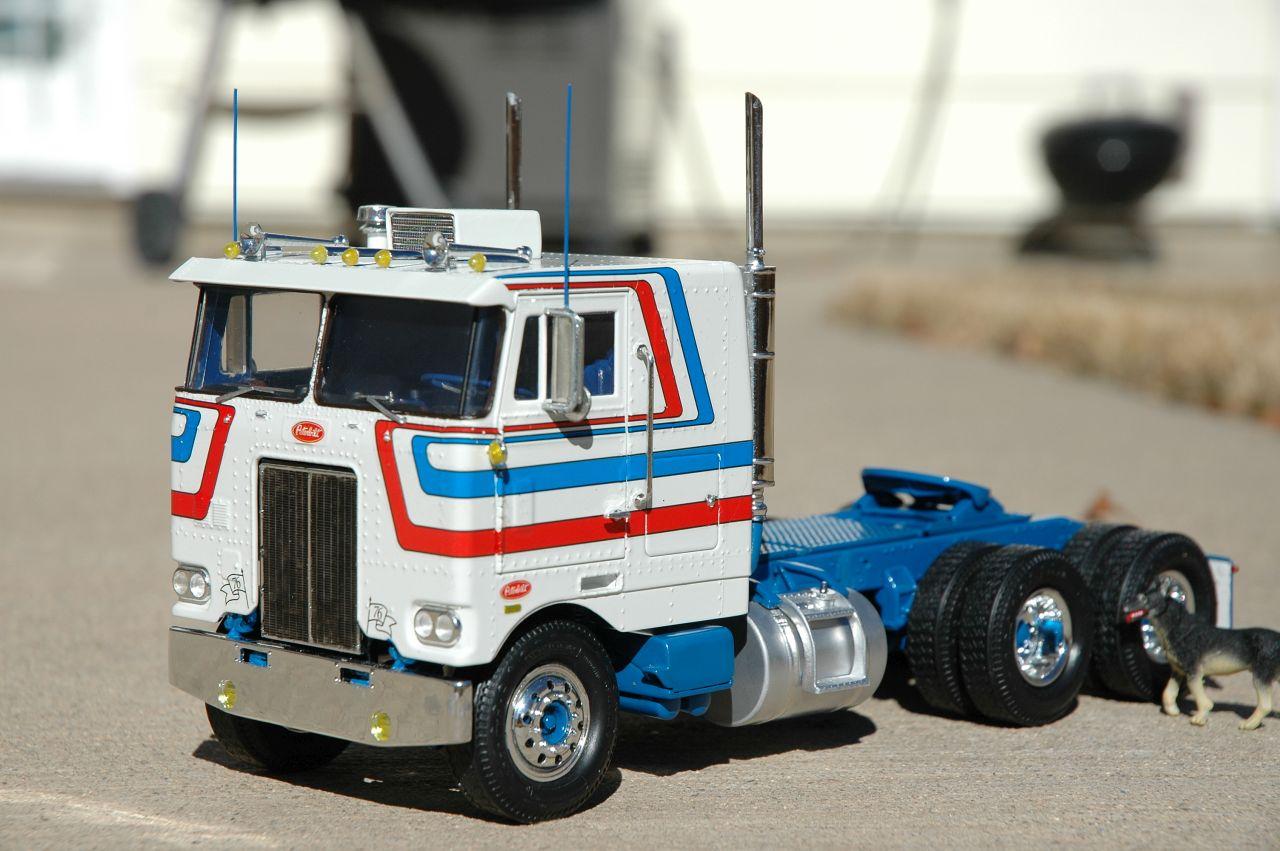
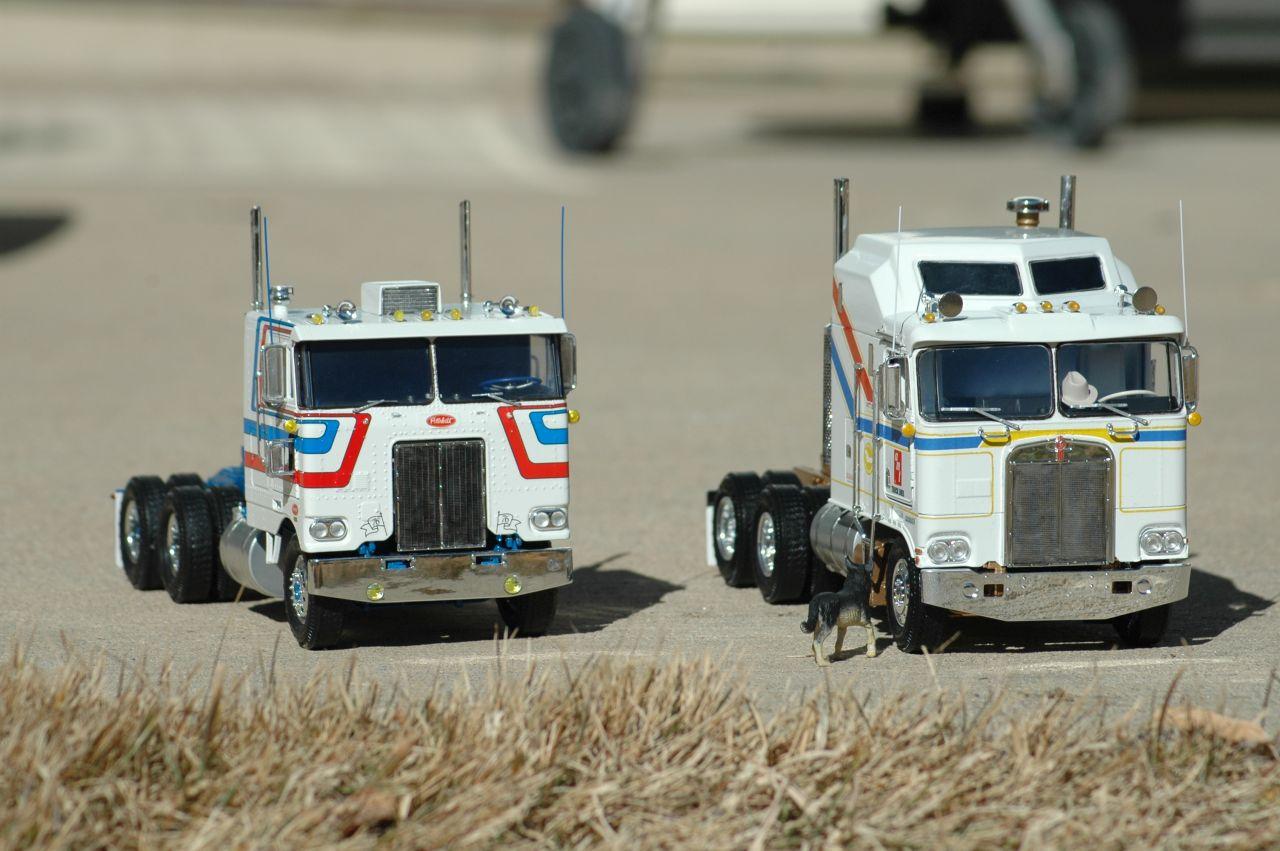
A couple I built a couple years back. AMT Pete with 1 in frame stretch and tanks from a Freightliner cabover. KW is Revell K100 the last reissue. KW is a nice kit aside from heavy flash on every part. Only build issue was the steer axle, had to make king pin bushings/ pins out of brass so tires would stand up straight. Box stock except for decals from Model Truckin.

-
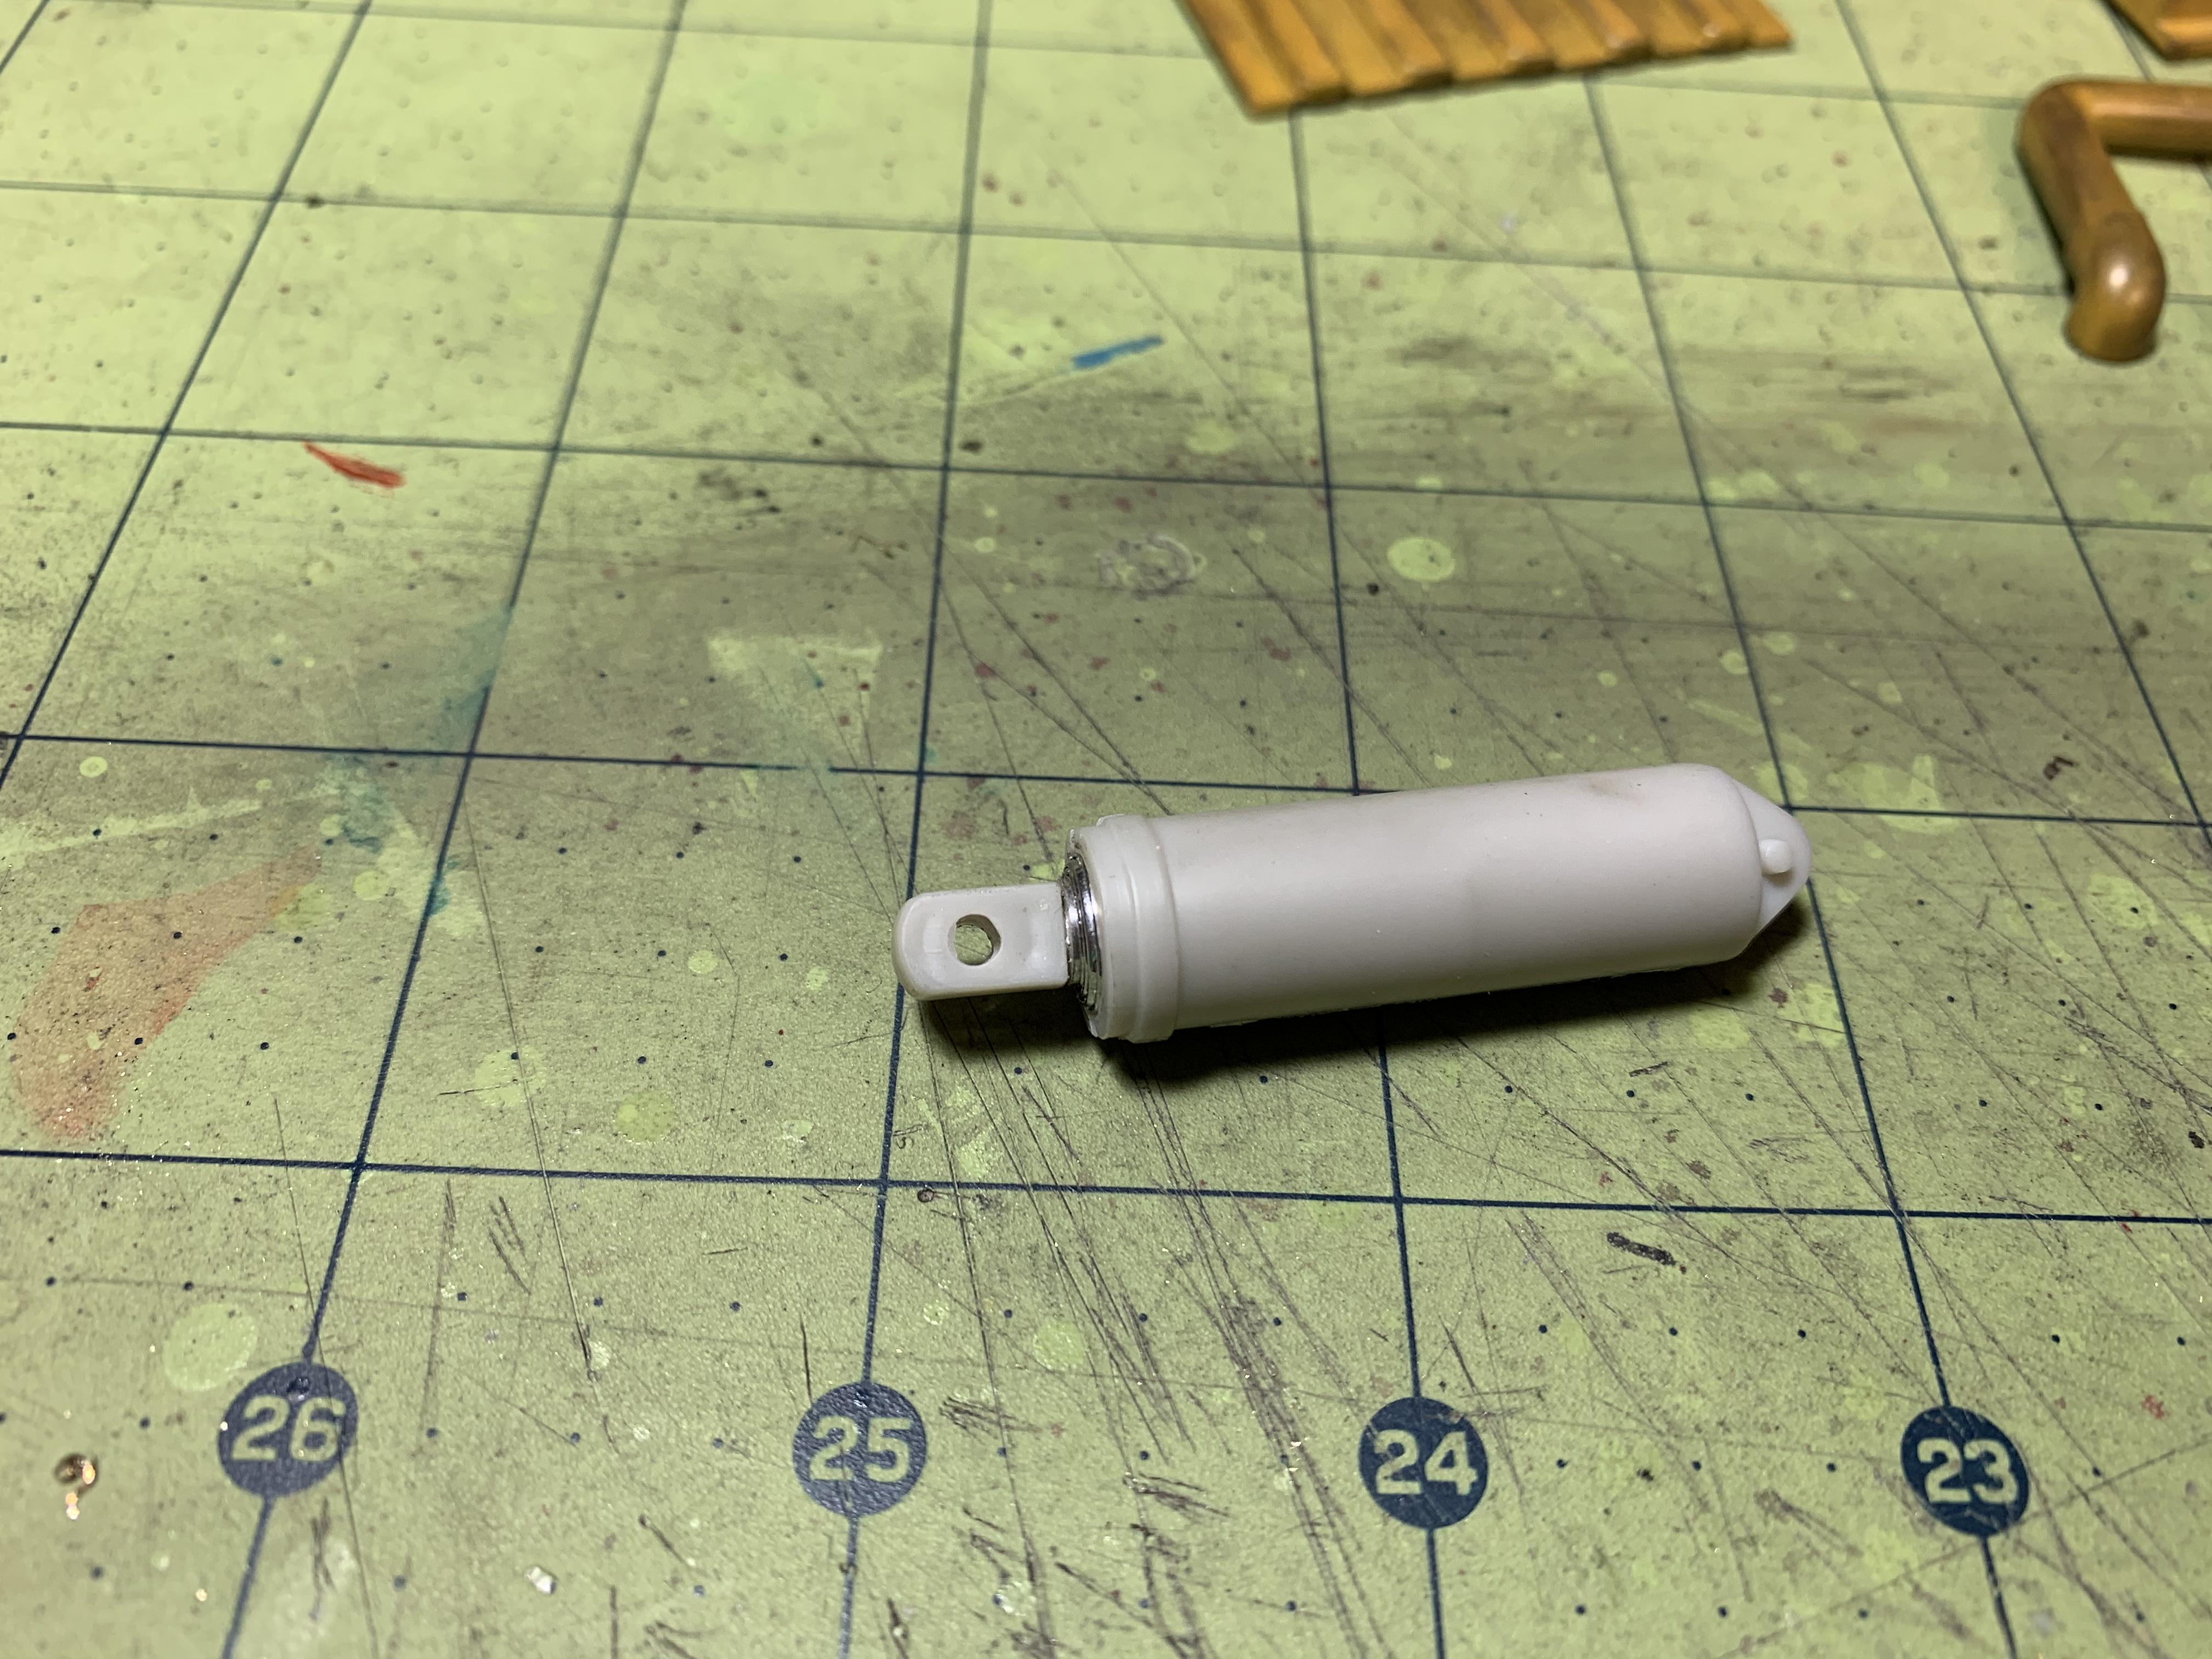
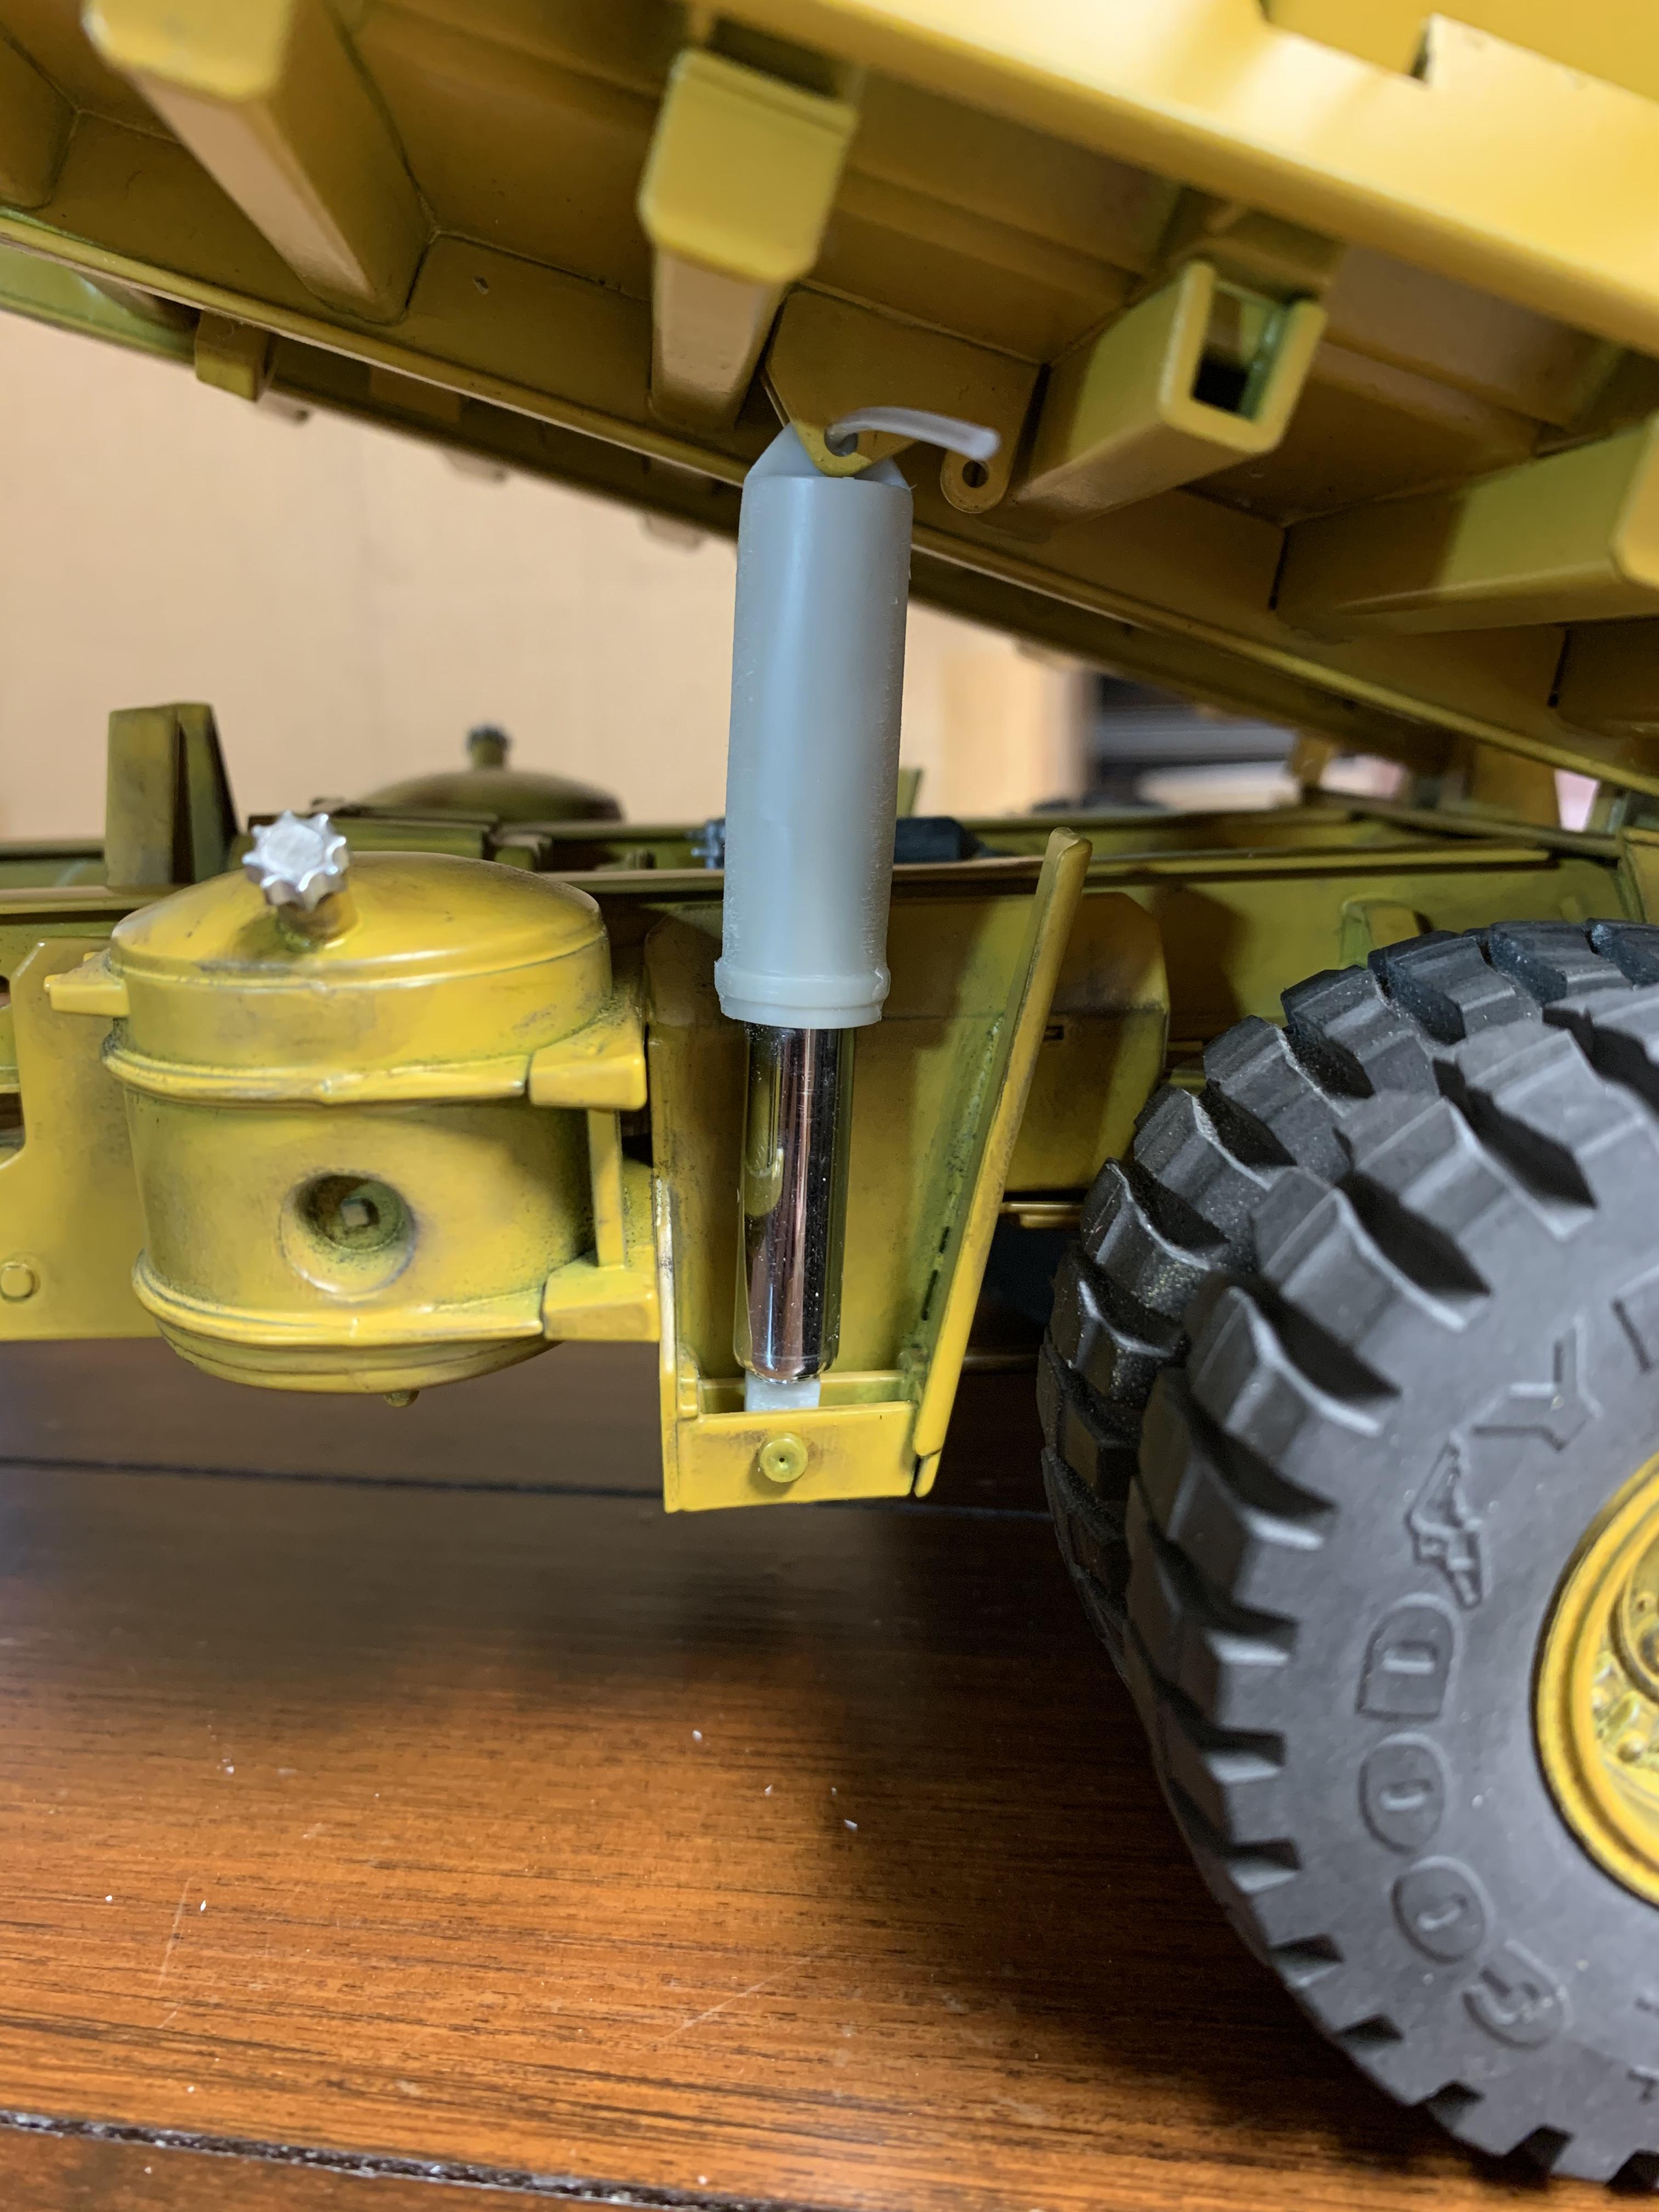
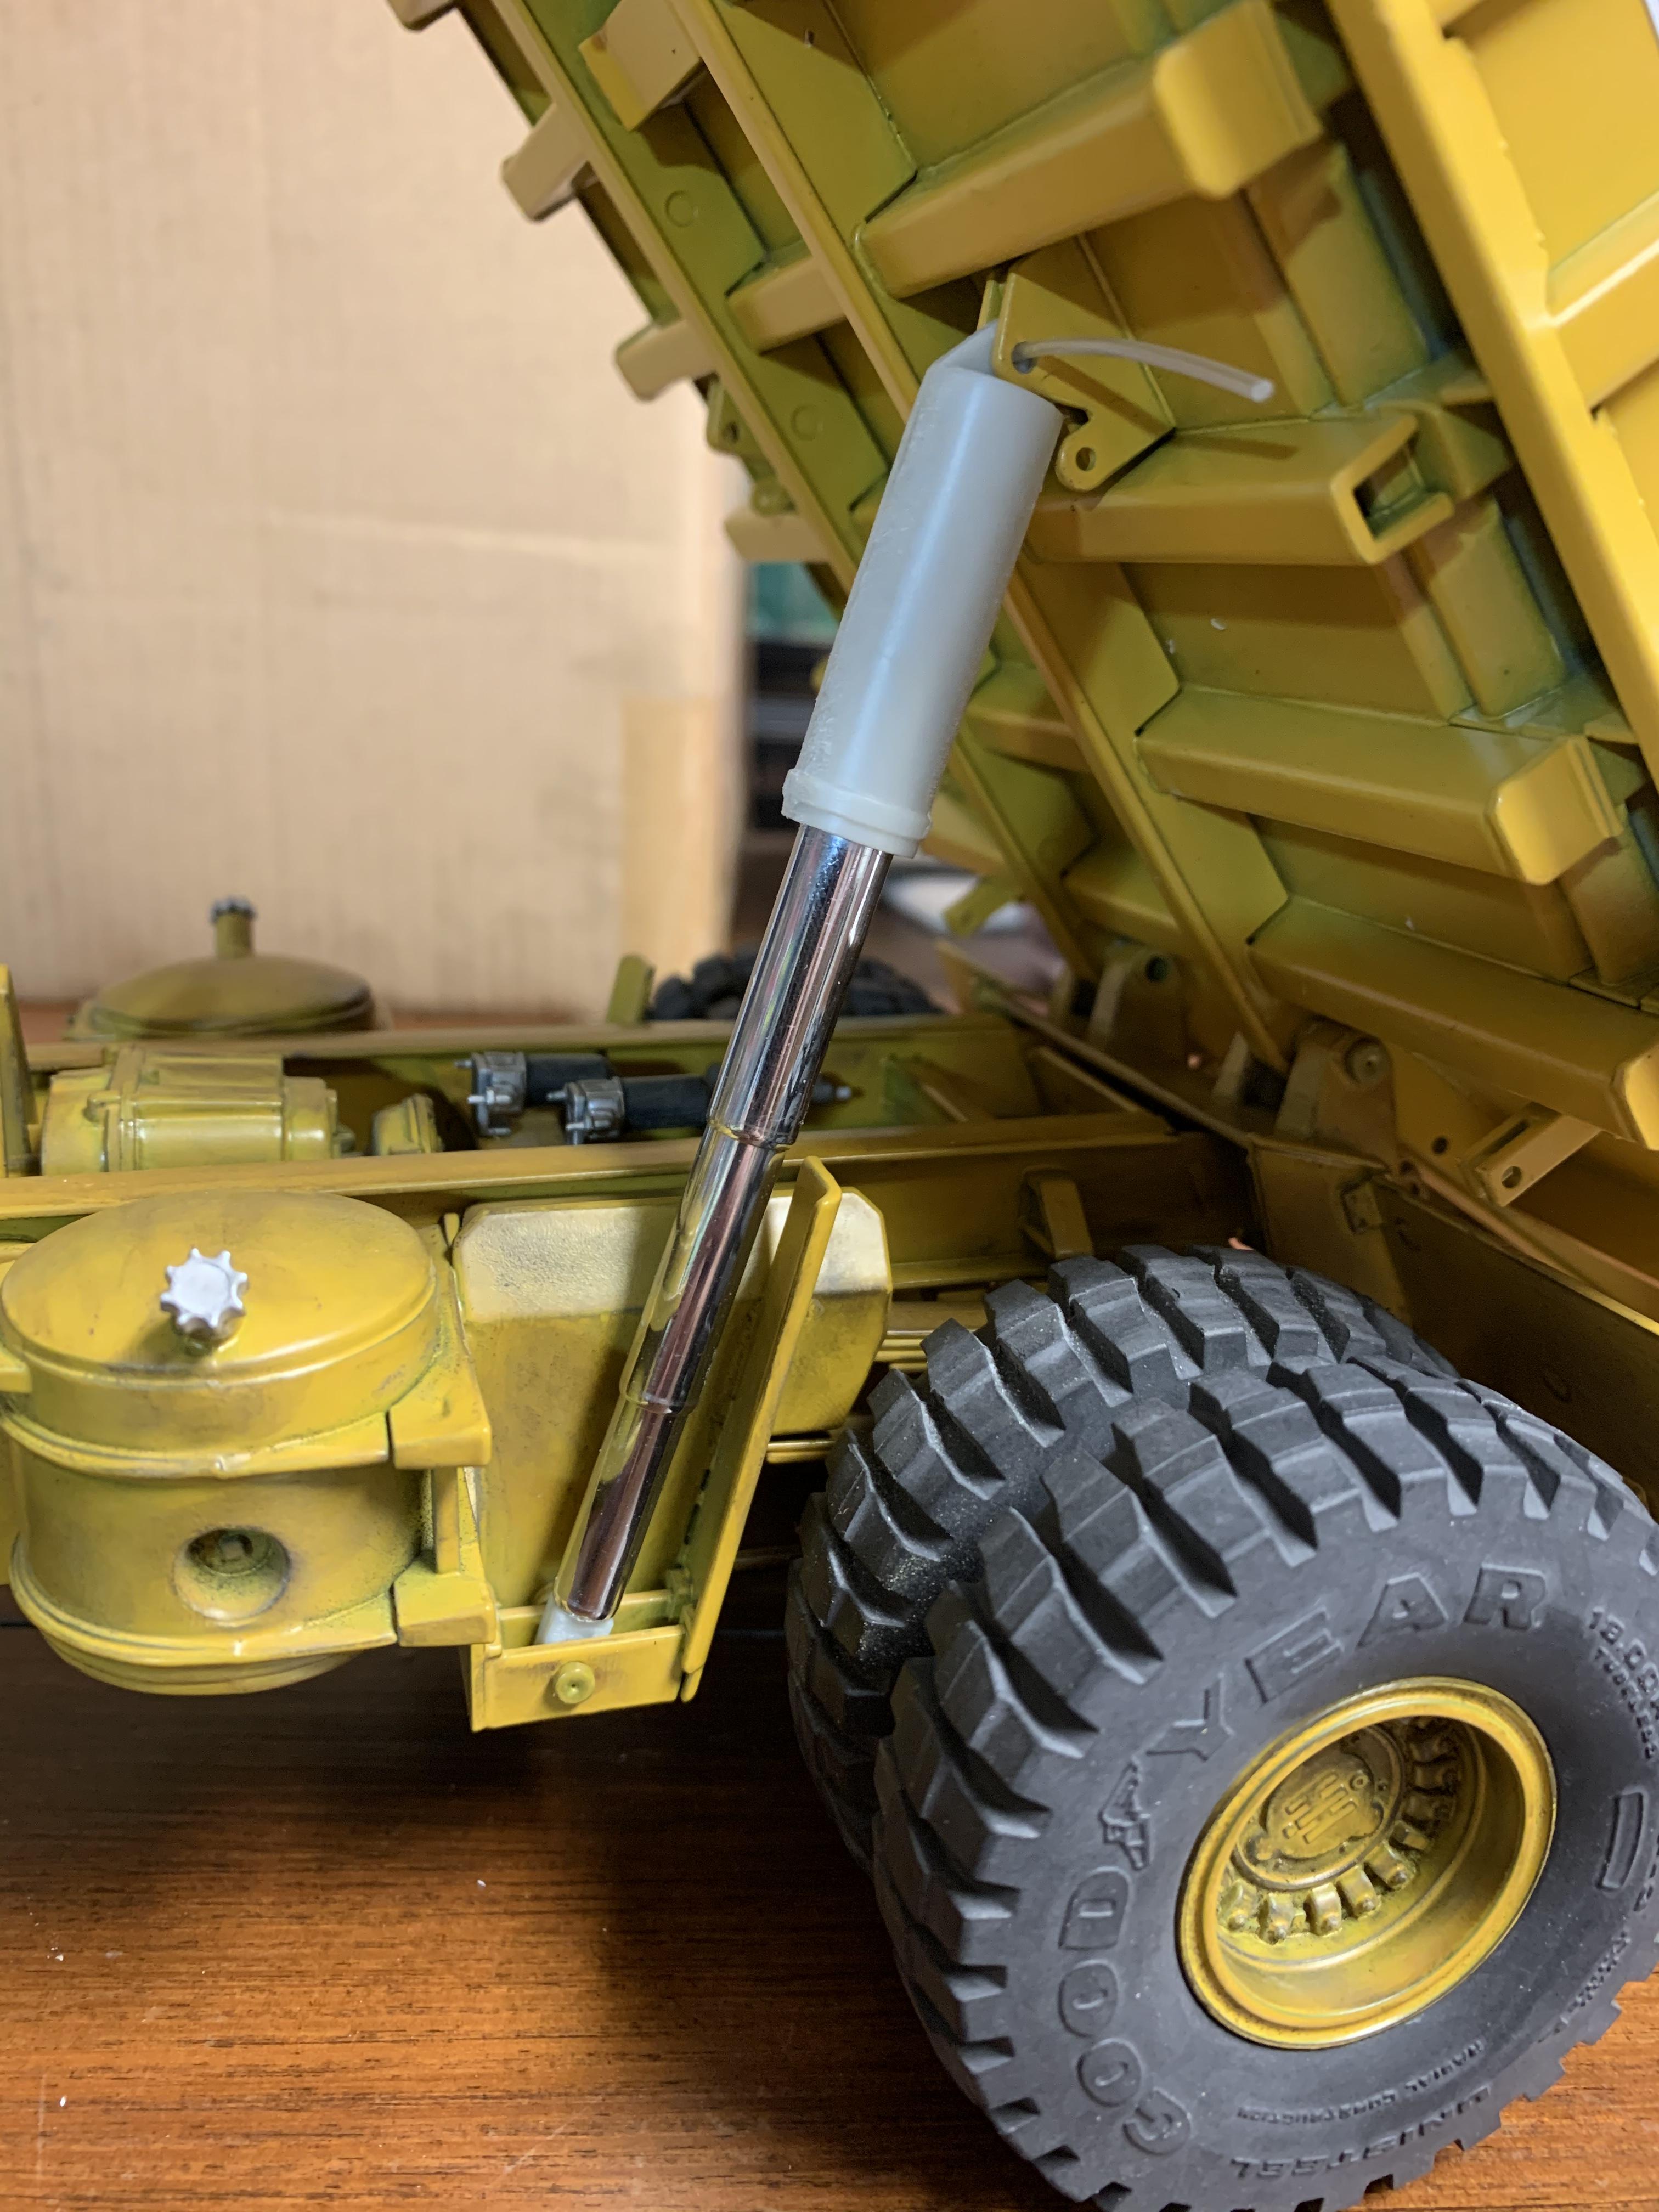
Made more forward progress on this ongoing project. Finally got it painted. Done with that 98 cent spray bomb from Home Depot. These weren't built to be show winners, just keep it from rusting. Still have a way to go on it but I like how it's looking so far. Still have to do something for a cylinder, kit supplied unit is now too short. This is the most ambitious model project I have ever attempted, I am totally happy with how it's looking so far. It has been a fun build but will be happy to get it behind me..... Hope you like...
-
13 hours ago, 1959scudetto said:
Very nice, Doug - I built this one almost 40 years ago, and its wheels were too small back then - this one looks much better (look like the former ERTL wheels)
Thanks Helmut. If I remember right some of these AMT truck kits had 2 piece tires that were really bad. Tires seem to be a weak link with a lot of models.
-
On 1/29/2021 at 4:57 PM, DRIPTROIT 71 said:
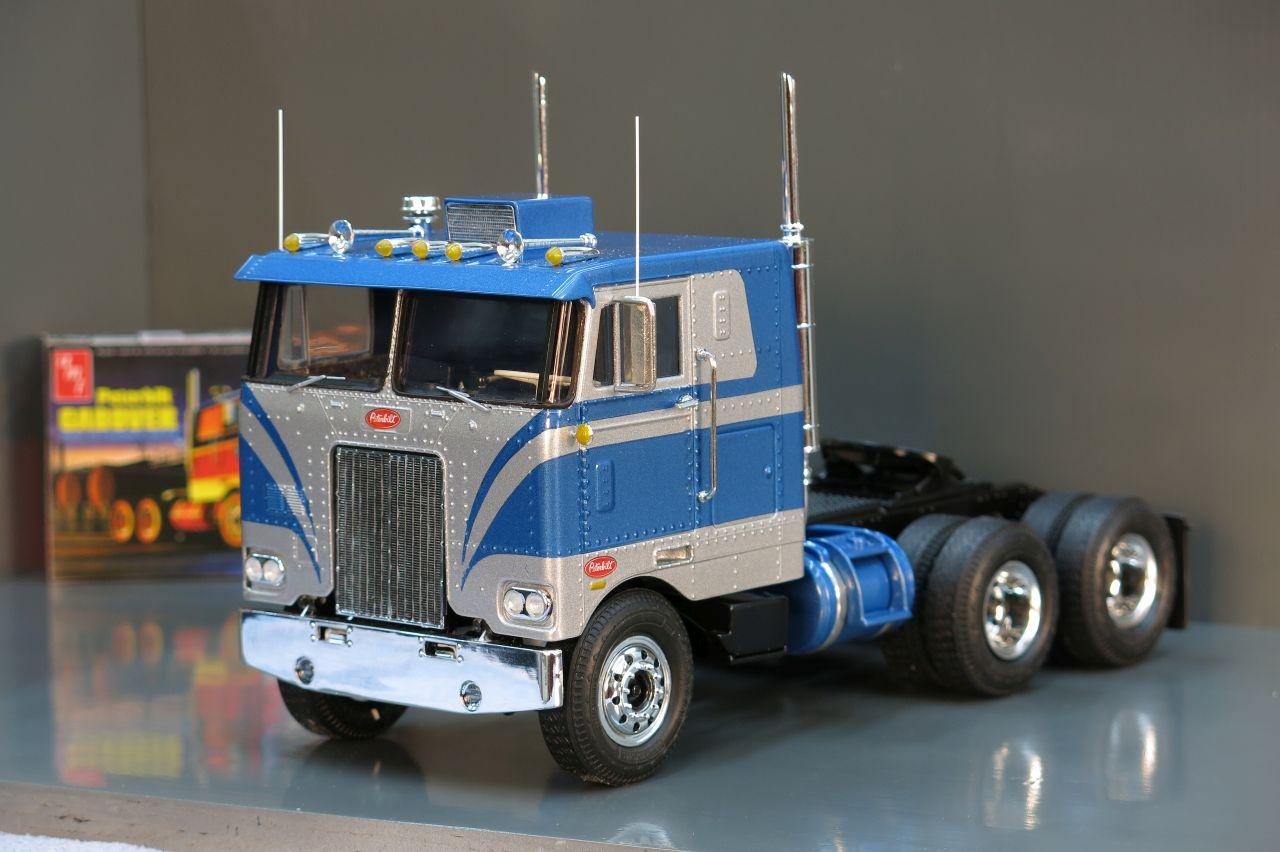
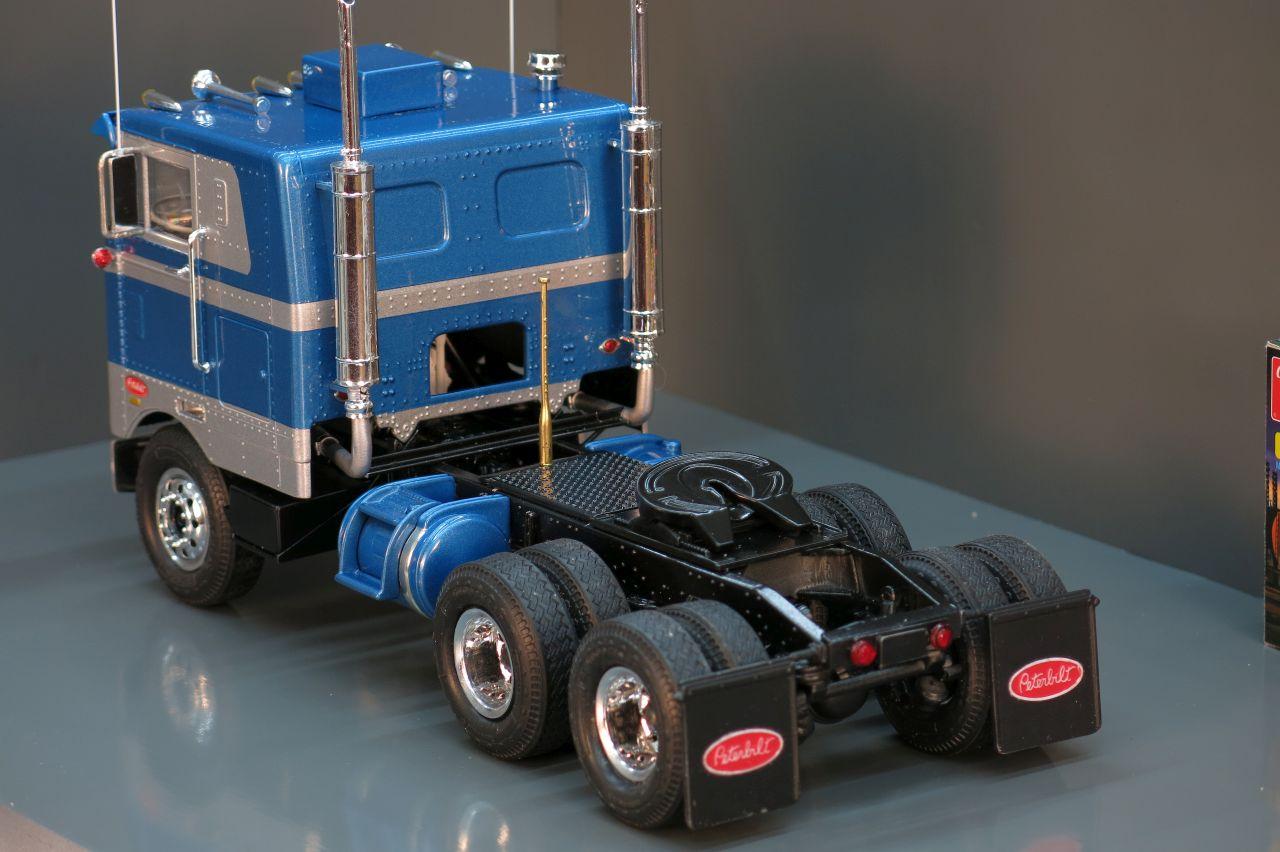
Doug that is a beautiful Peterbilt!
NIce fleet! It’s hard to pick a favorite! But it is between the Peterbilt and the Transtar.
Thanks Brian. This is a bit of a tricky kit, but I was happy with how it came out.
-
This is the first truck model I did after getting back into the hobby, to make up for the one I butchered when I was young 'un. I'm happy with it. Built box stock.
-
Way cool. I can picture that carrying a load of hay bales.
-
Just because you can doesn't mean you should.
-
Nice. I especially the two West Pac birds.
-
Very nice. You're a much faster builder than I am. I don't think I could do that in a whole year.
-
Woo hoo!!!! Been hoping for one of these for years. Actually I'll be good for 2 of them. I built one back in the 70s and remember it going together very nice. That's one I wish I hadn't blown apart with fireworks.......
-
That looks great. It gets easier after 4 or 5 times. Do a 50s car and after that it wont seem so bad. Sometimes I get it good the first try and other times I gotta do it over a few times. Eventually you'll wonder how you ever got by without it.
-
Would like to see a good 73-79 Ford Truck kit. Preferably a factory Hi Boy version. Also a modern day big rig of some sort.. A garbage packer would be nice also.
-
That's a great looking bunch. Really like that logger. Like others, I wish Round2 would scare up the tooling for that CO4070.
-
I know the feeling. Once you tear into it you're in deep. It's like, what did I do? That is a huge improvement and will be well worth the effort when finished. Looks like you're off to a good start here, gonna have to follow this build.
-
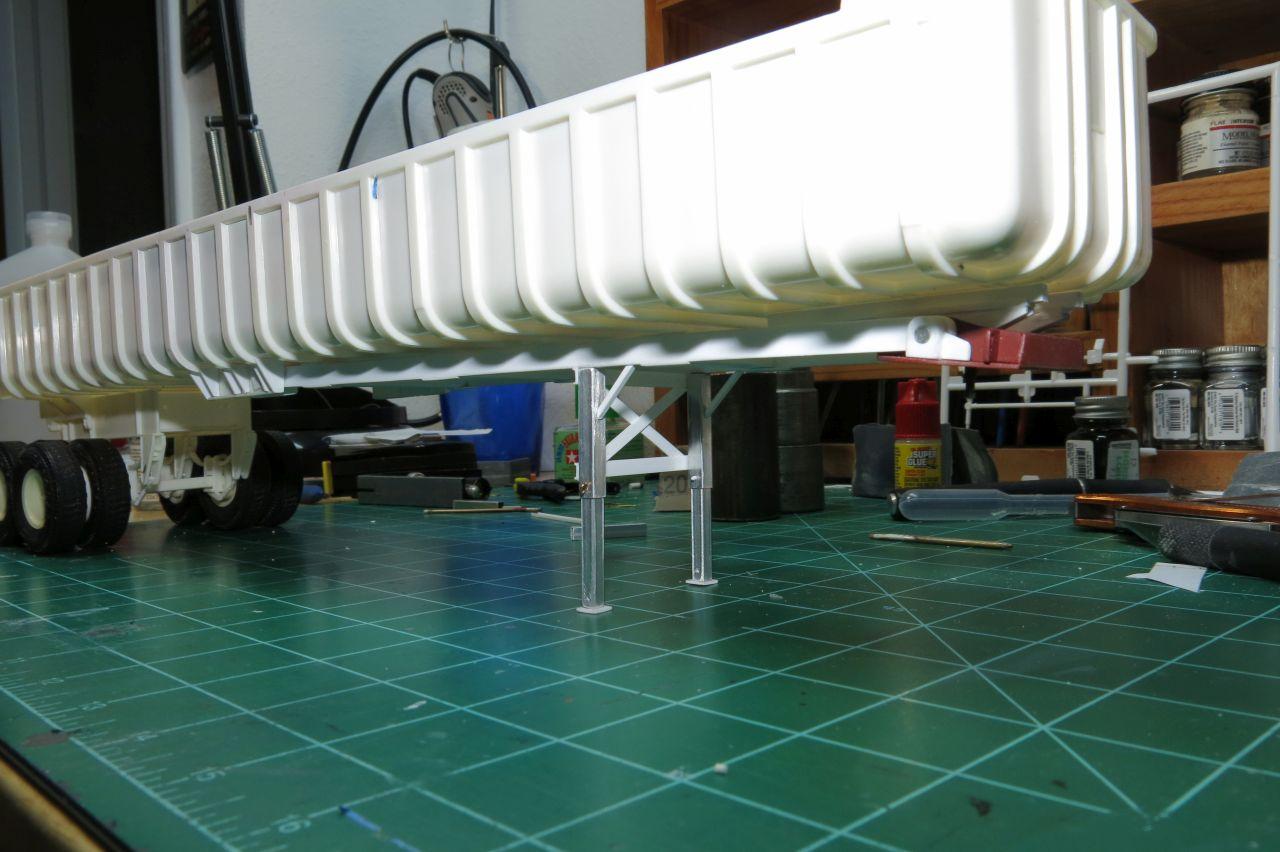
I finally made a bit of progress on this. Got the cross members in the subframe and fabbed up the landing gear. Of all the pics I found of these, no two were the same as far as the landing gear setup went, so I guess any way you make it is accurate. I'm thinking a lot of these got busted up on the job and got rebuilt in the field however the fabricator saw fit. That's my story and I'm stickin' with it....... So now "all" I have to do is suspension/ brakes and tailgate assembly and should be able to send it over to paint. Should be a bit more straightforward from here, as always comments and suggestions welcome.
-
I built this about 1.5 yrs ago. Box stock except for decals from Model truckin and headlight buckets that were in a Pete 352 kit. Never did like the square headlights.
-
Beautiful work there.
-
4 hours ago, Classicgas said:
Actually I was referring to your 59 ford
Sorry, my mistake. Mostly it was that multi piece body that I found tedious as could be. Don't care to do another one. Never could get the top to work. I think part of it was when I corrected the body to get rid of the cutouts behind the trunk lid. That made it look better but after I could not get the linkage for the top right. It didn't help that the guy I was building it for started asking if it was done yet, causing me to rush it a bit more towards the end. I did end up getting it back, but then I dropped it. I need to spend some time on it one of these days.
-
12 minutes ago, Classicgas said:
Wow! I hope mine is half as nice. Doug, what troubles did you have? Mine is going quite well.
Lee, there was the usual sloppy fit of some of the parts. Biggest thing for me was the cab and hood sat too high. To remedy this I cut through the rear cab mount with a razor saw so the cab would sit down on the frame rails, dropped it roughly 1/8 in.. That required having to cut the front cab mounts down to match. Then had to rework the hood hinges to match. It kinda snowballs from there a bit since I had to grind a bit of the frame out where the radiator mounts and whittle some off the bottom of the radiator and sand some off the top of it to clear the hood. Also have to alter the exhaust since the stacks are now a bit lower, and I believe the steering linkage. Can't remember on the battery box, think it was OK. Biggest pain was the hood hinges/radiator fitment. Pretty much whatever I had to do to make it work. Also the small vertical part of the air intake tube in front of the intake turbo.. It was a good bit of extra work but I feel it was worth it in the end. Hope this helps.
-
You had a good year. Nice collection.
-
Nice wheelbarrow..... That came out very nice. Good color choice, like the dirtied up look of the top of the seat and door panels. Had to do a double take on the wheels, good idea having different wheels on each side. Are those resin tires or did you cut them flat to keep it from driving itself off the shelf?


MPC End Dump
in WIP: Model Trucks: Big Rigs and Heavy Equipment
Posted
That looks really good. I have a few ideas to work with now. That's a nice IH you built there. Is that tarp scratch built or a resin piece. I was thinking of doing that on my trailer.