xs650shawn
-
Posts
94 -
Joined
-
Last visited
Content Type
Profiles
Forums
Events
Gallery
Everything posted by xs650shawn
-
The four speed that comes in both the Roadrunner and GTX kits is the same, just using it.
-
Awesome work so far! Looking forward to the finished product.
-
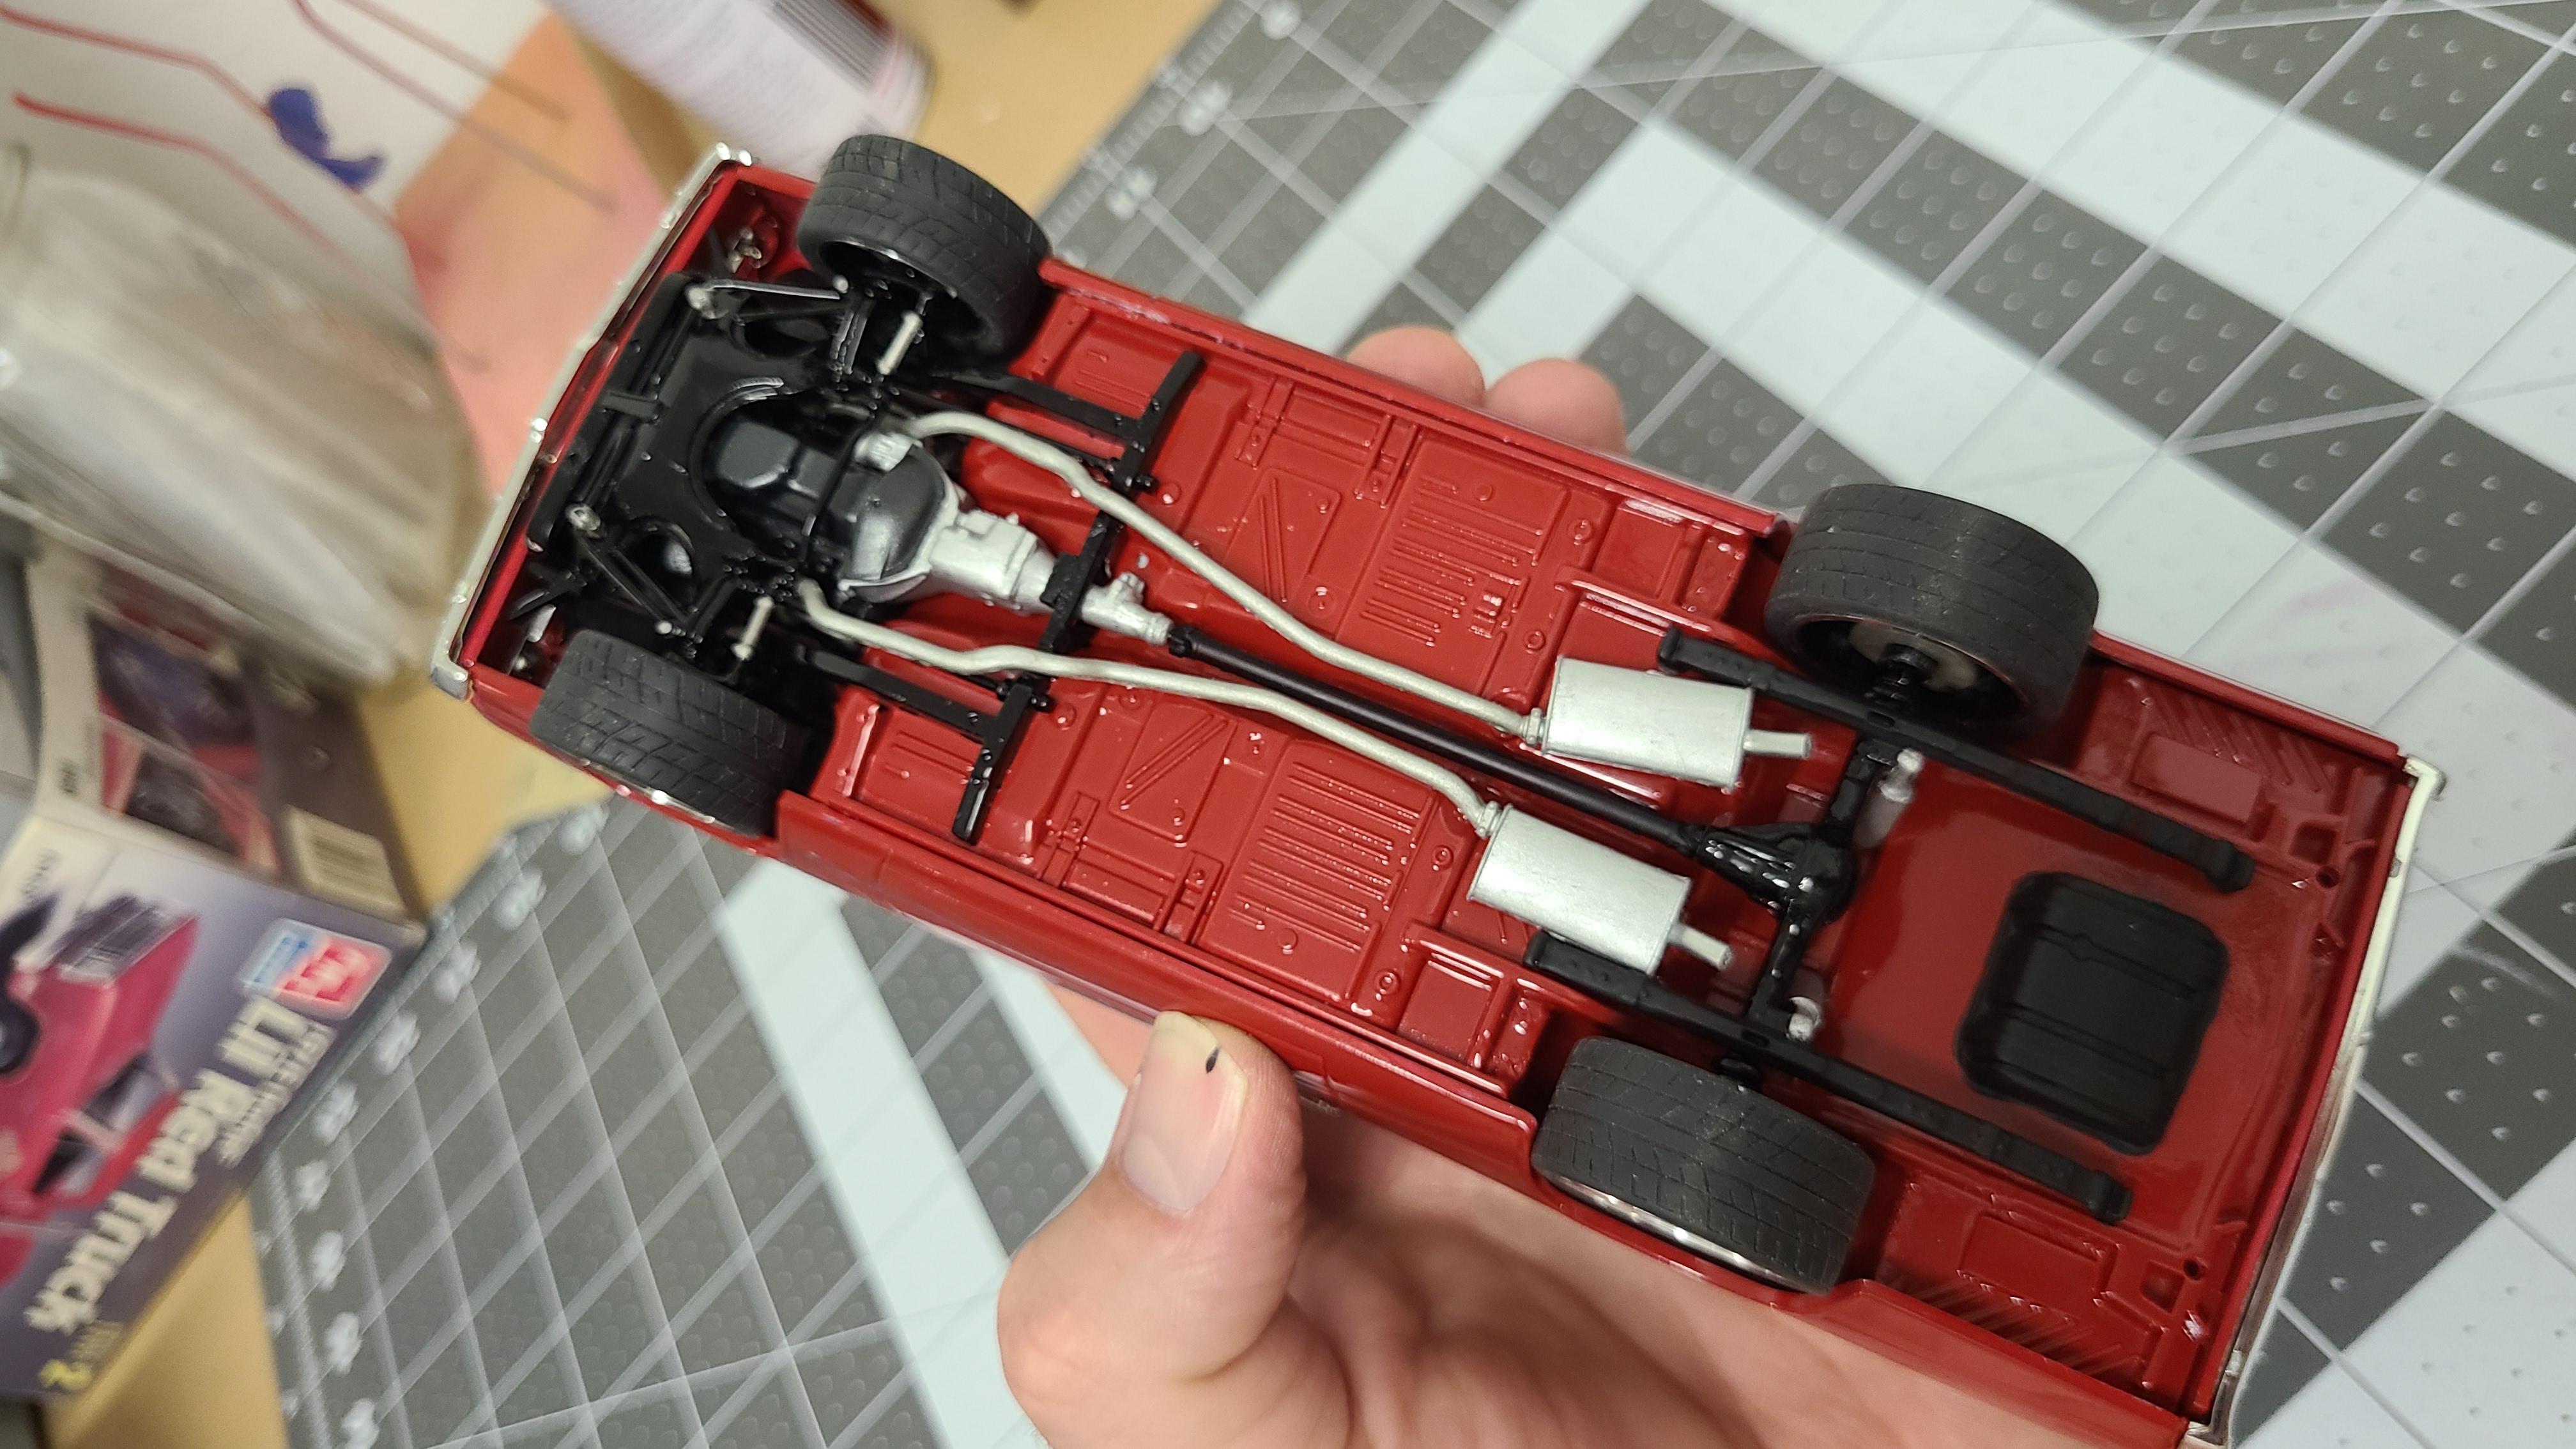
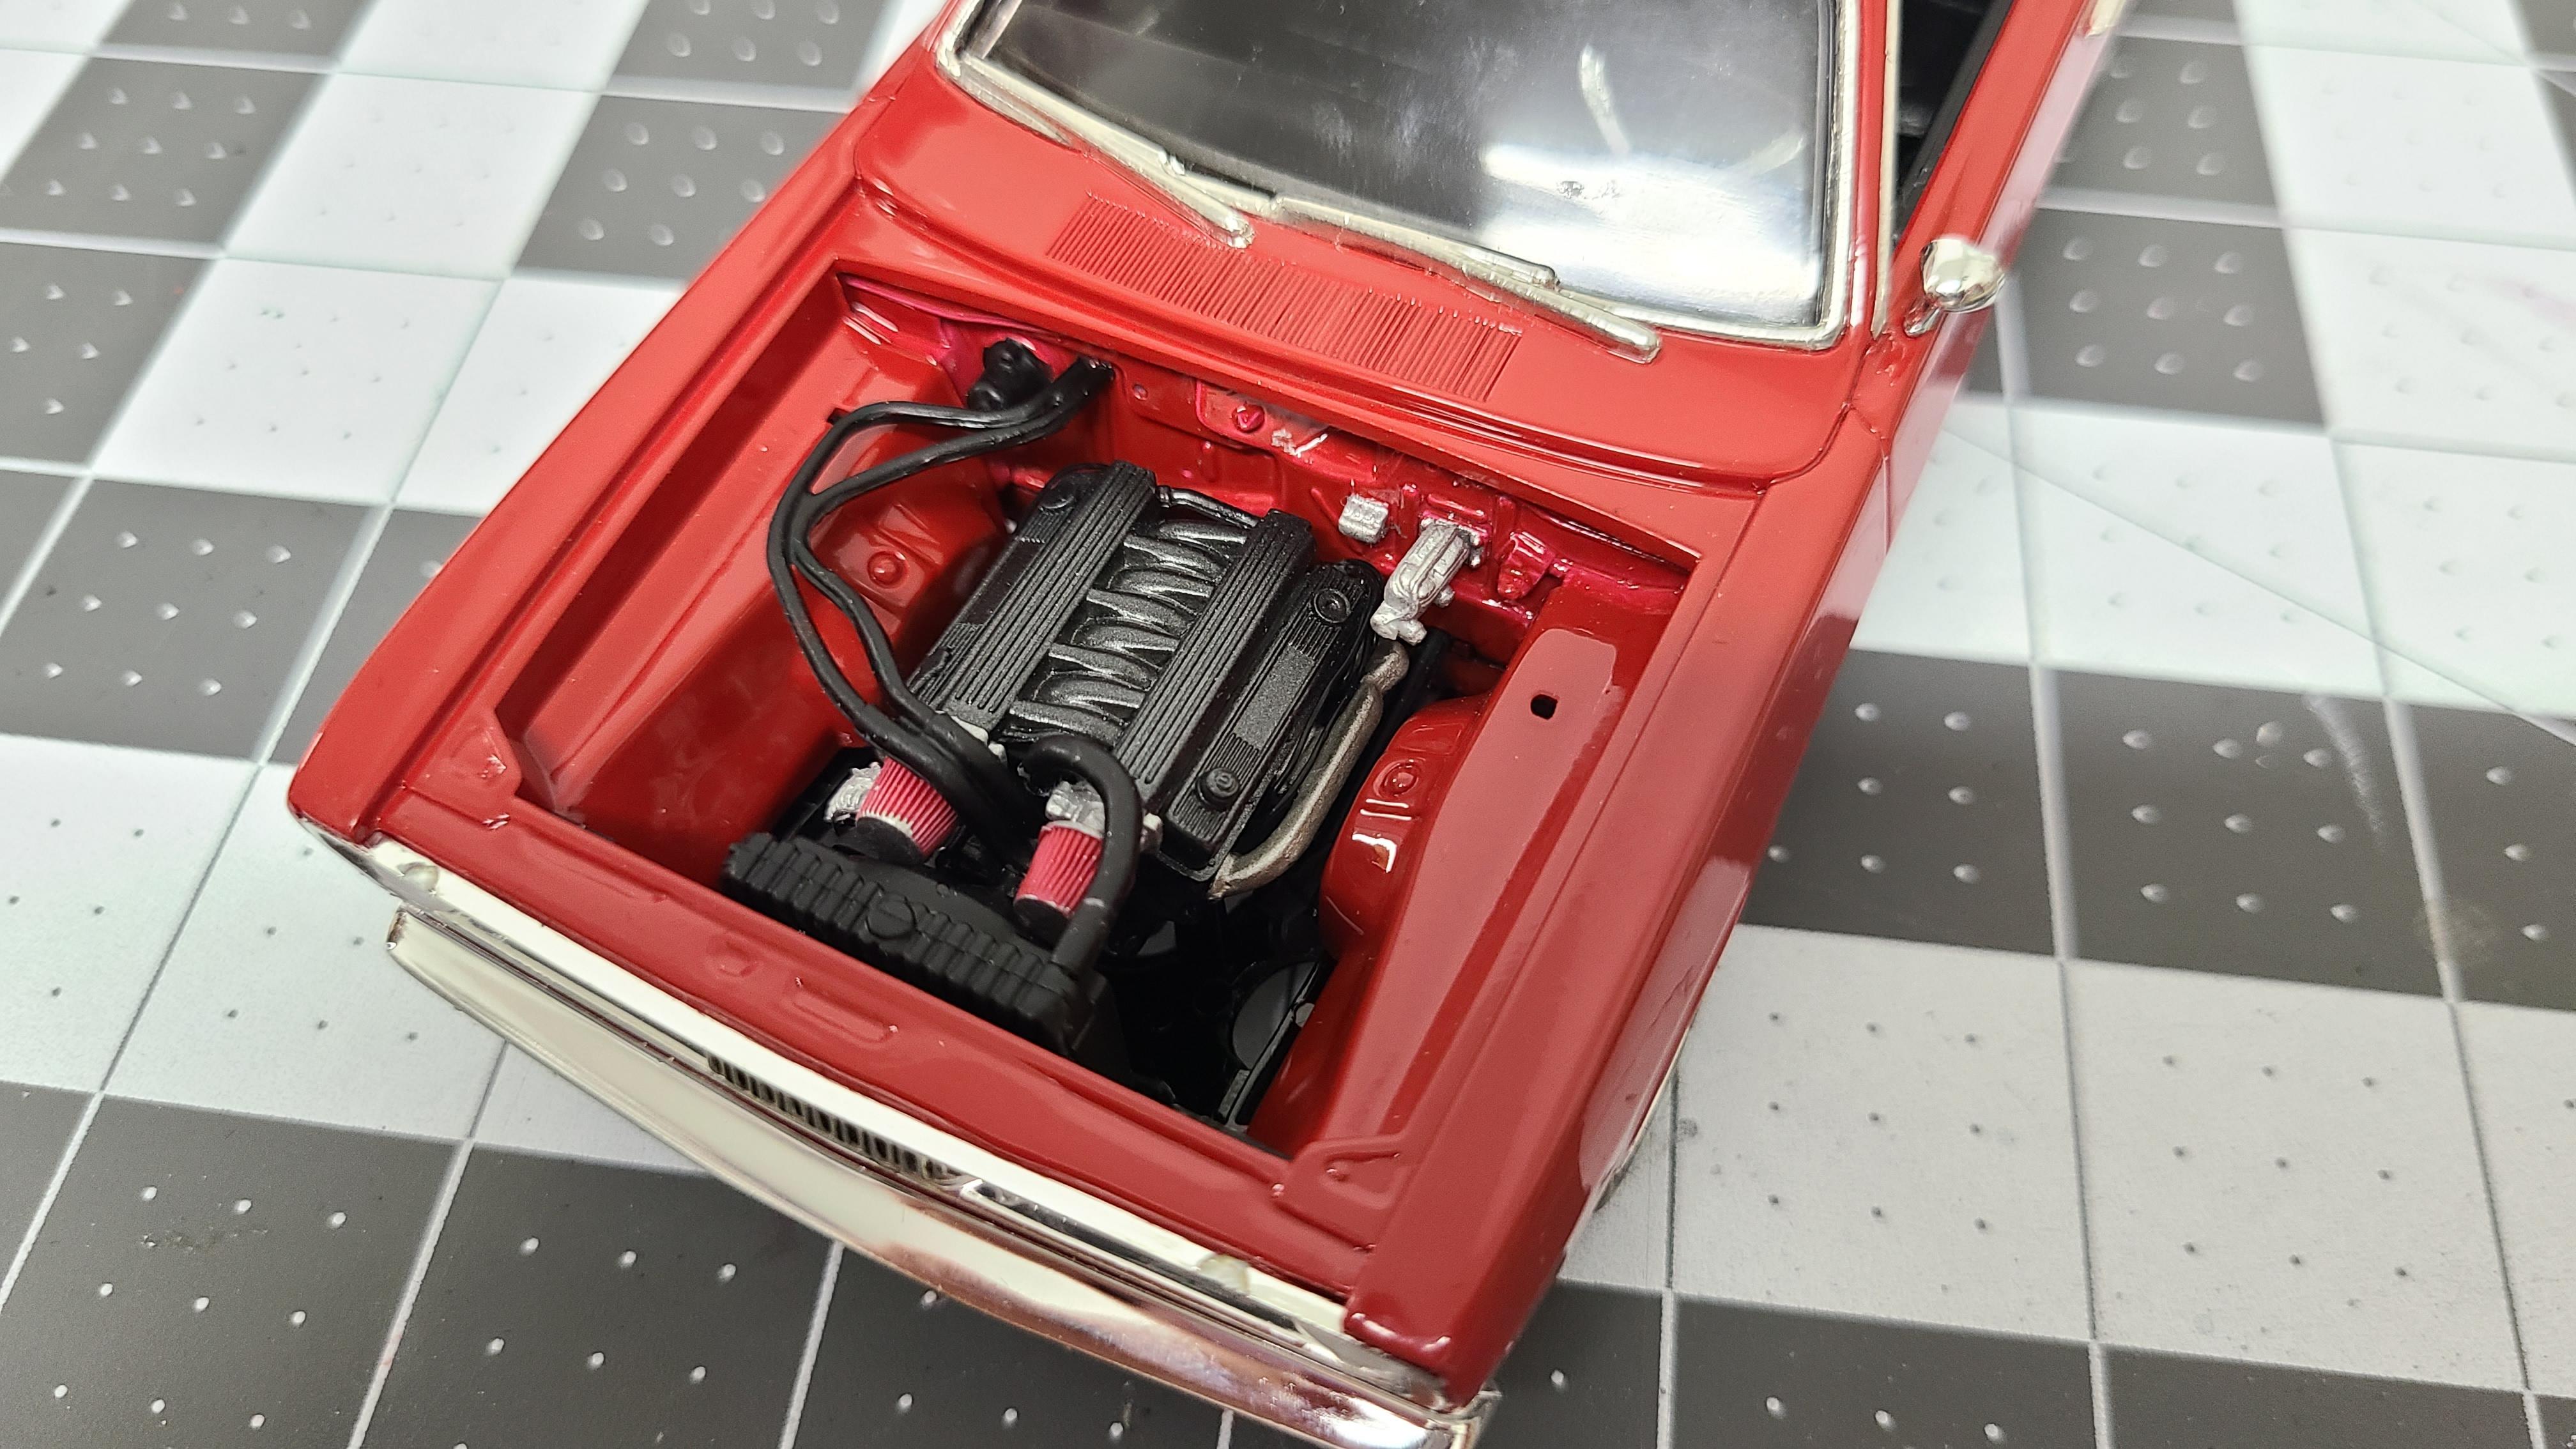
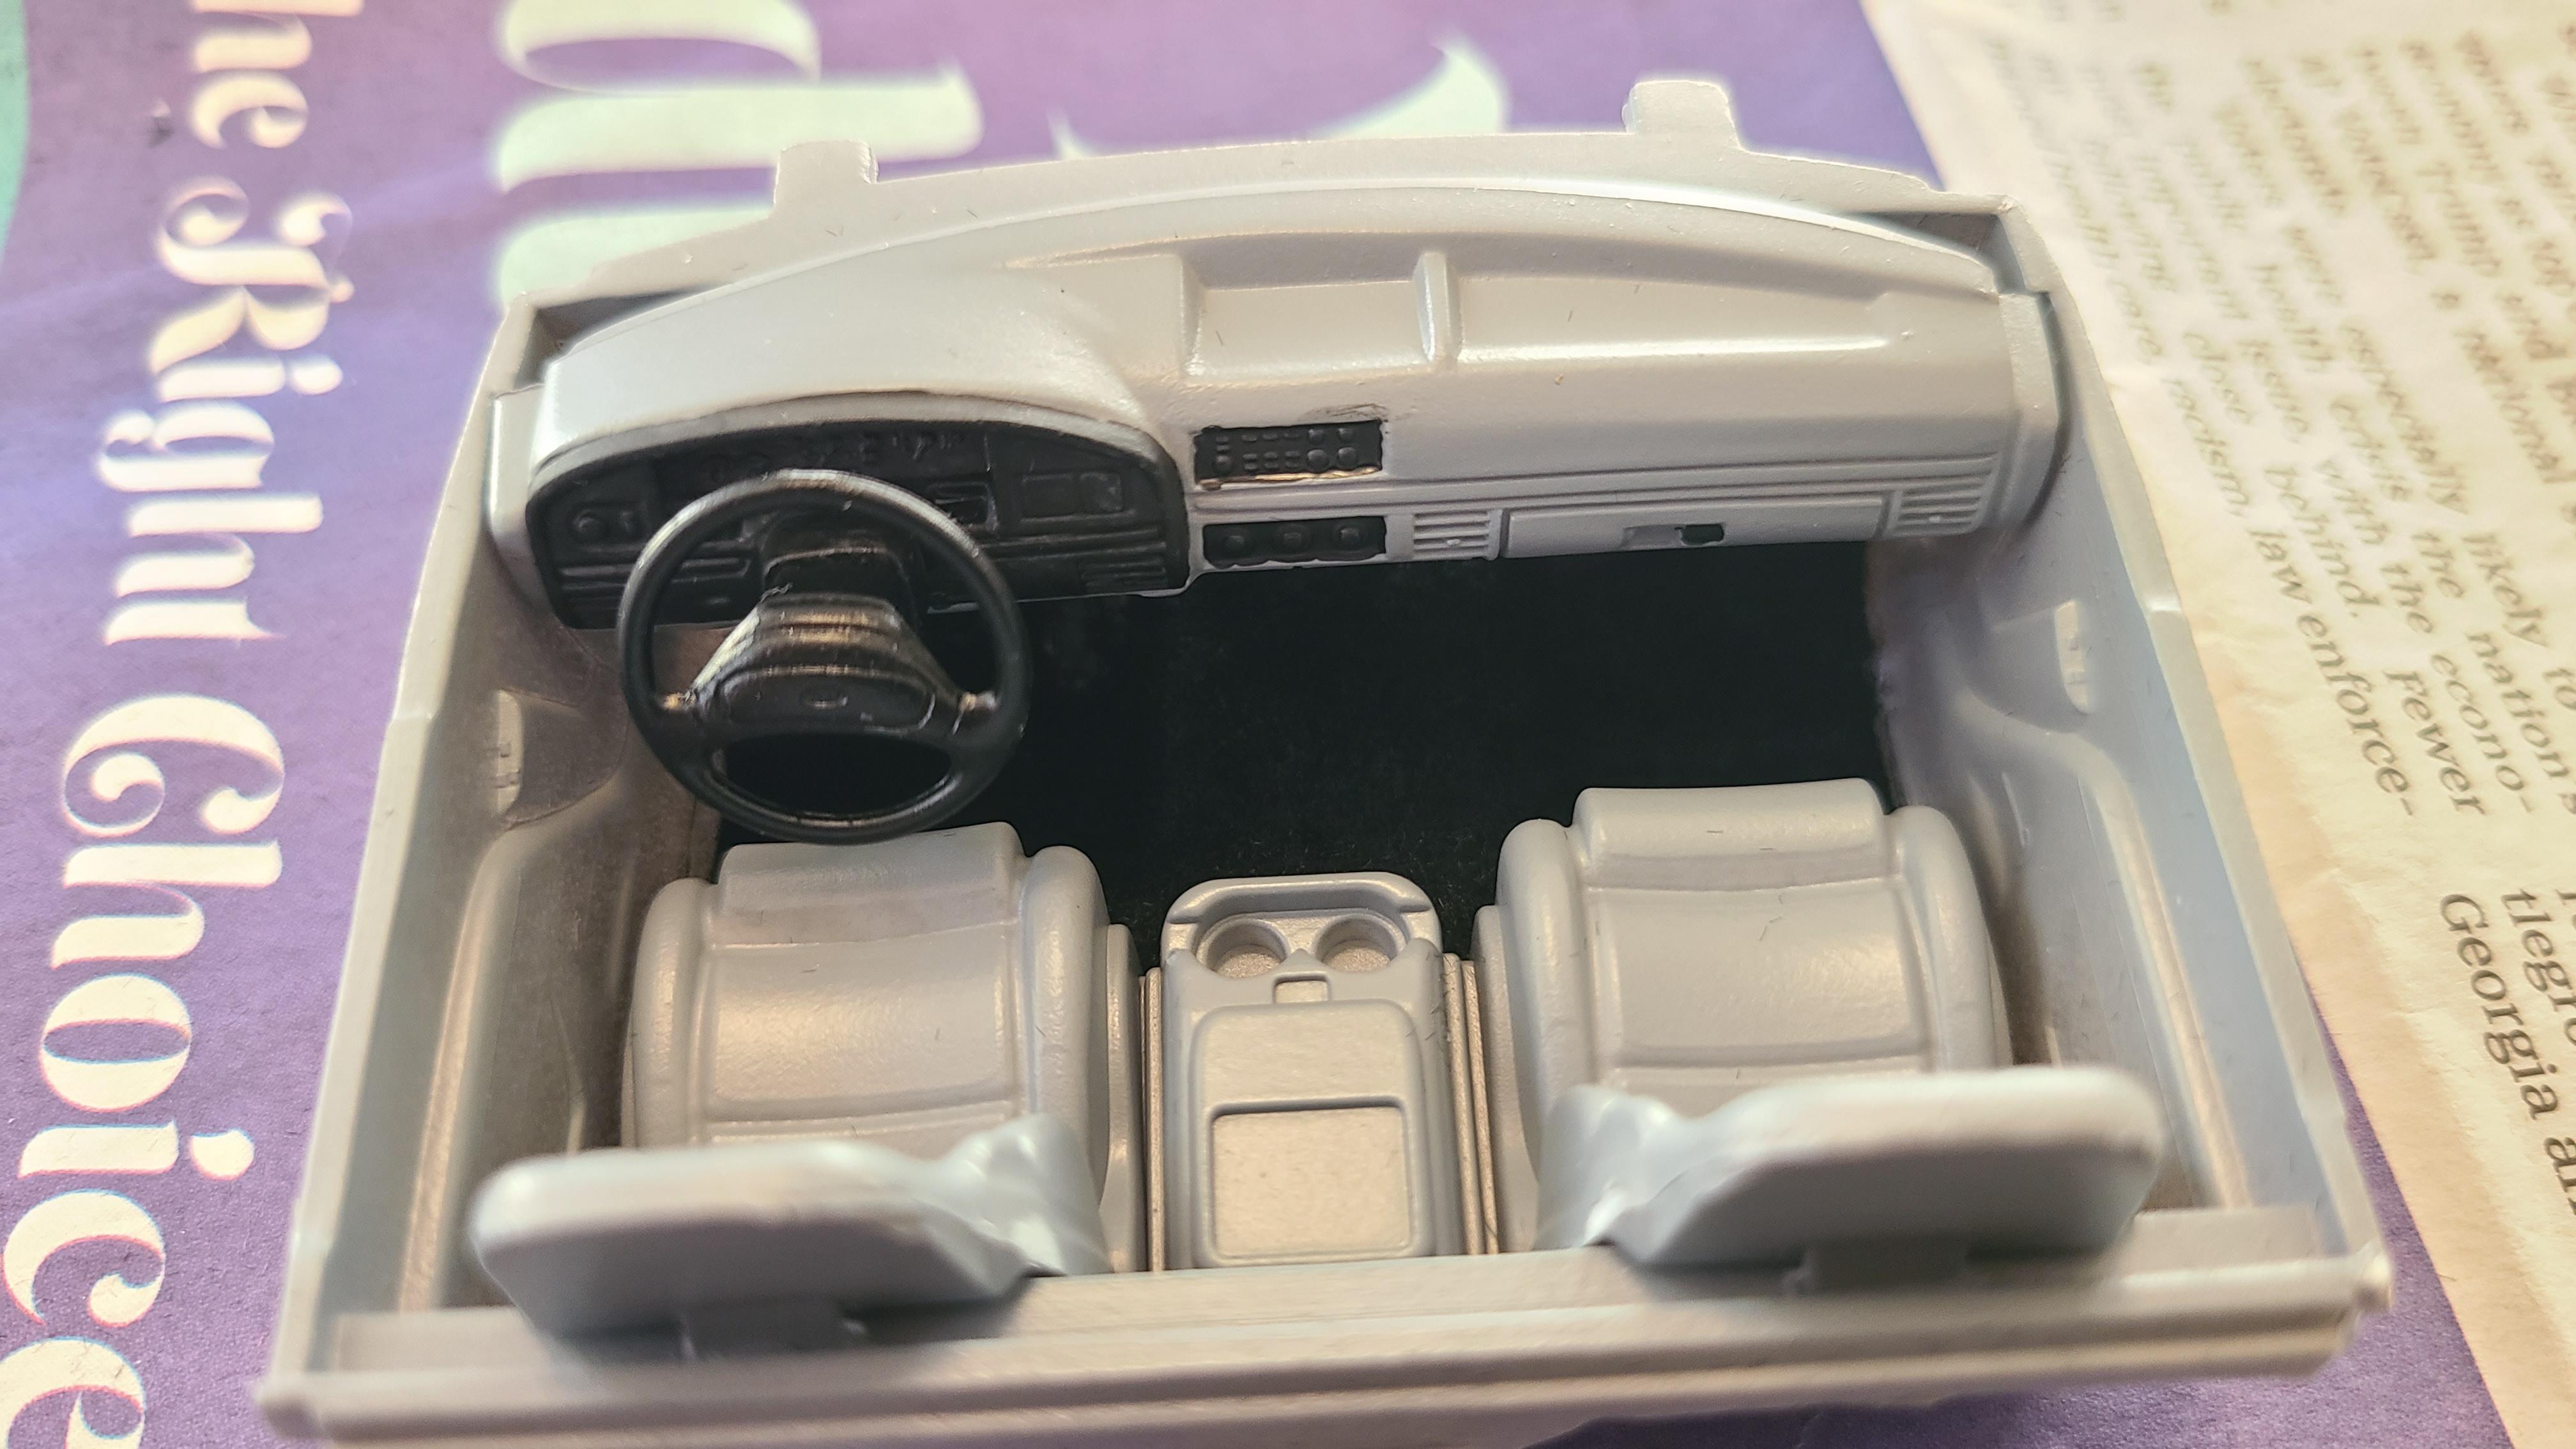
Started this recently. Going for a mild custom/pro touring look to it. Swapping in a 440 from the '68 GTX kit. Wheels from Revell Dodge Sidewinder show truck. Made some lowering spindles for the front end.

-
AMT Dodge D100 Styleside
xs650shawn replied to xs650shawn's topic in WIP: Model Trucks: Pickups, Vans, SUVs, Light Commercial
Pulling this one back off the shelf. I had never been happy with how the frame was coming out so it got shelved. I was cleaning out some spare parts, and found this Revell Dodge Sidewinder frame stashed in there, and the wheelbase is dang near perfect. So I think I'm going to try my hand at it again, modifying this frame instead.
-
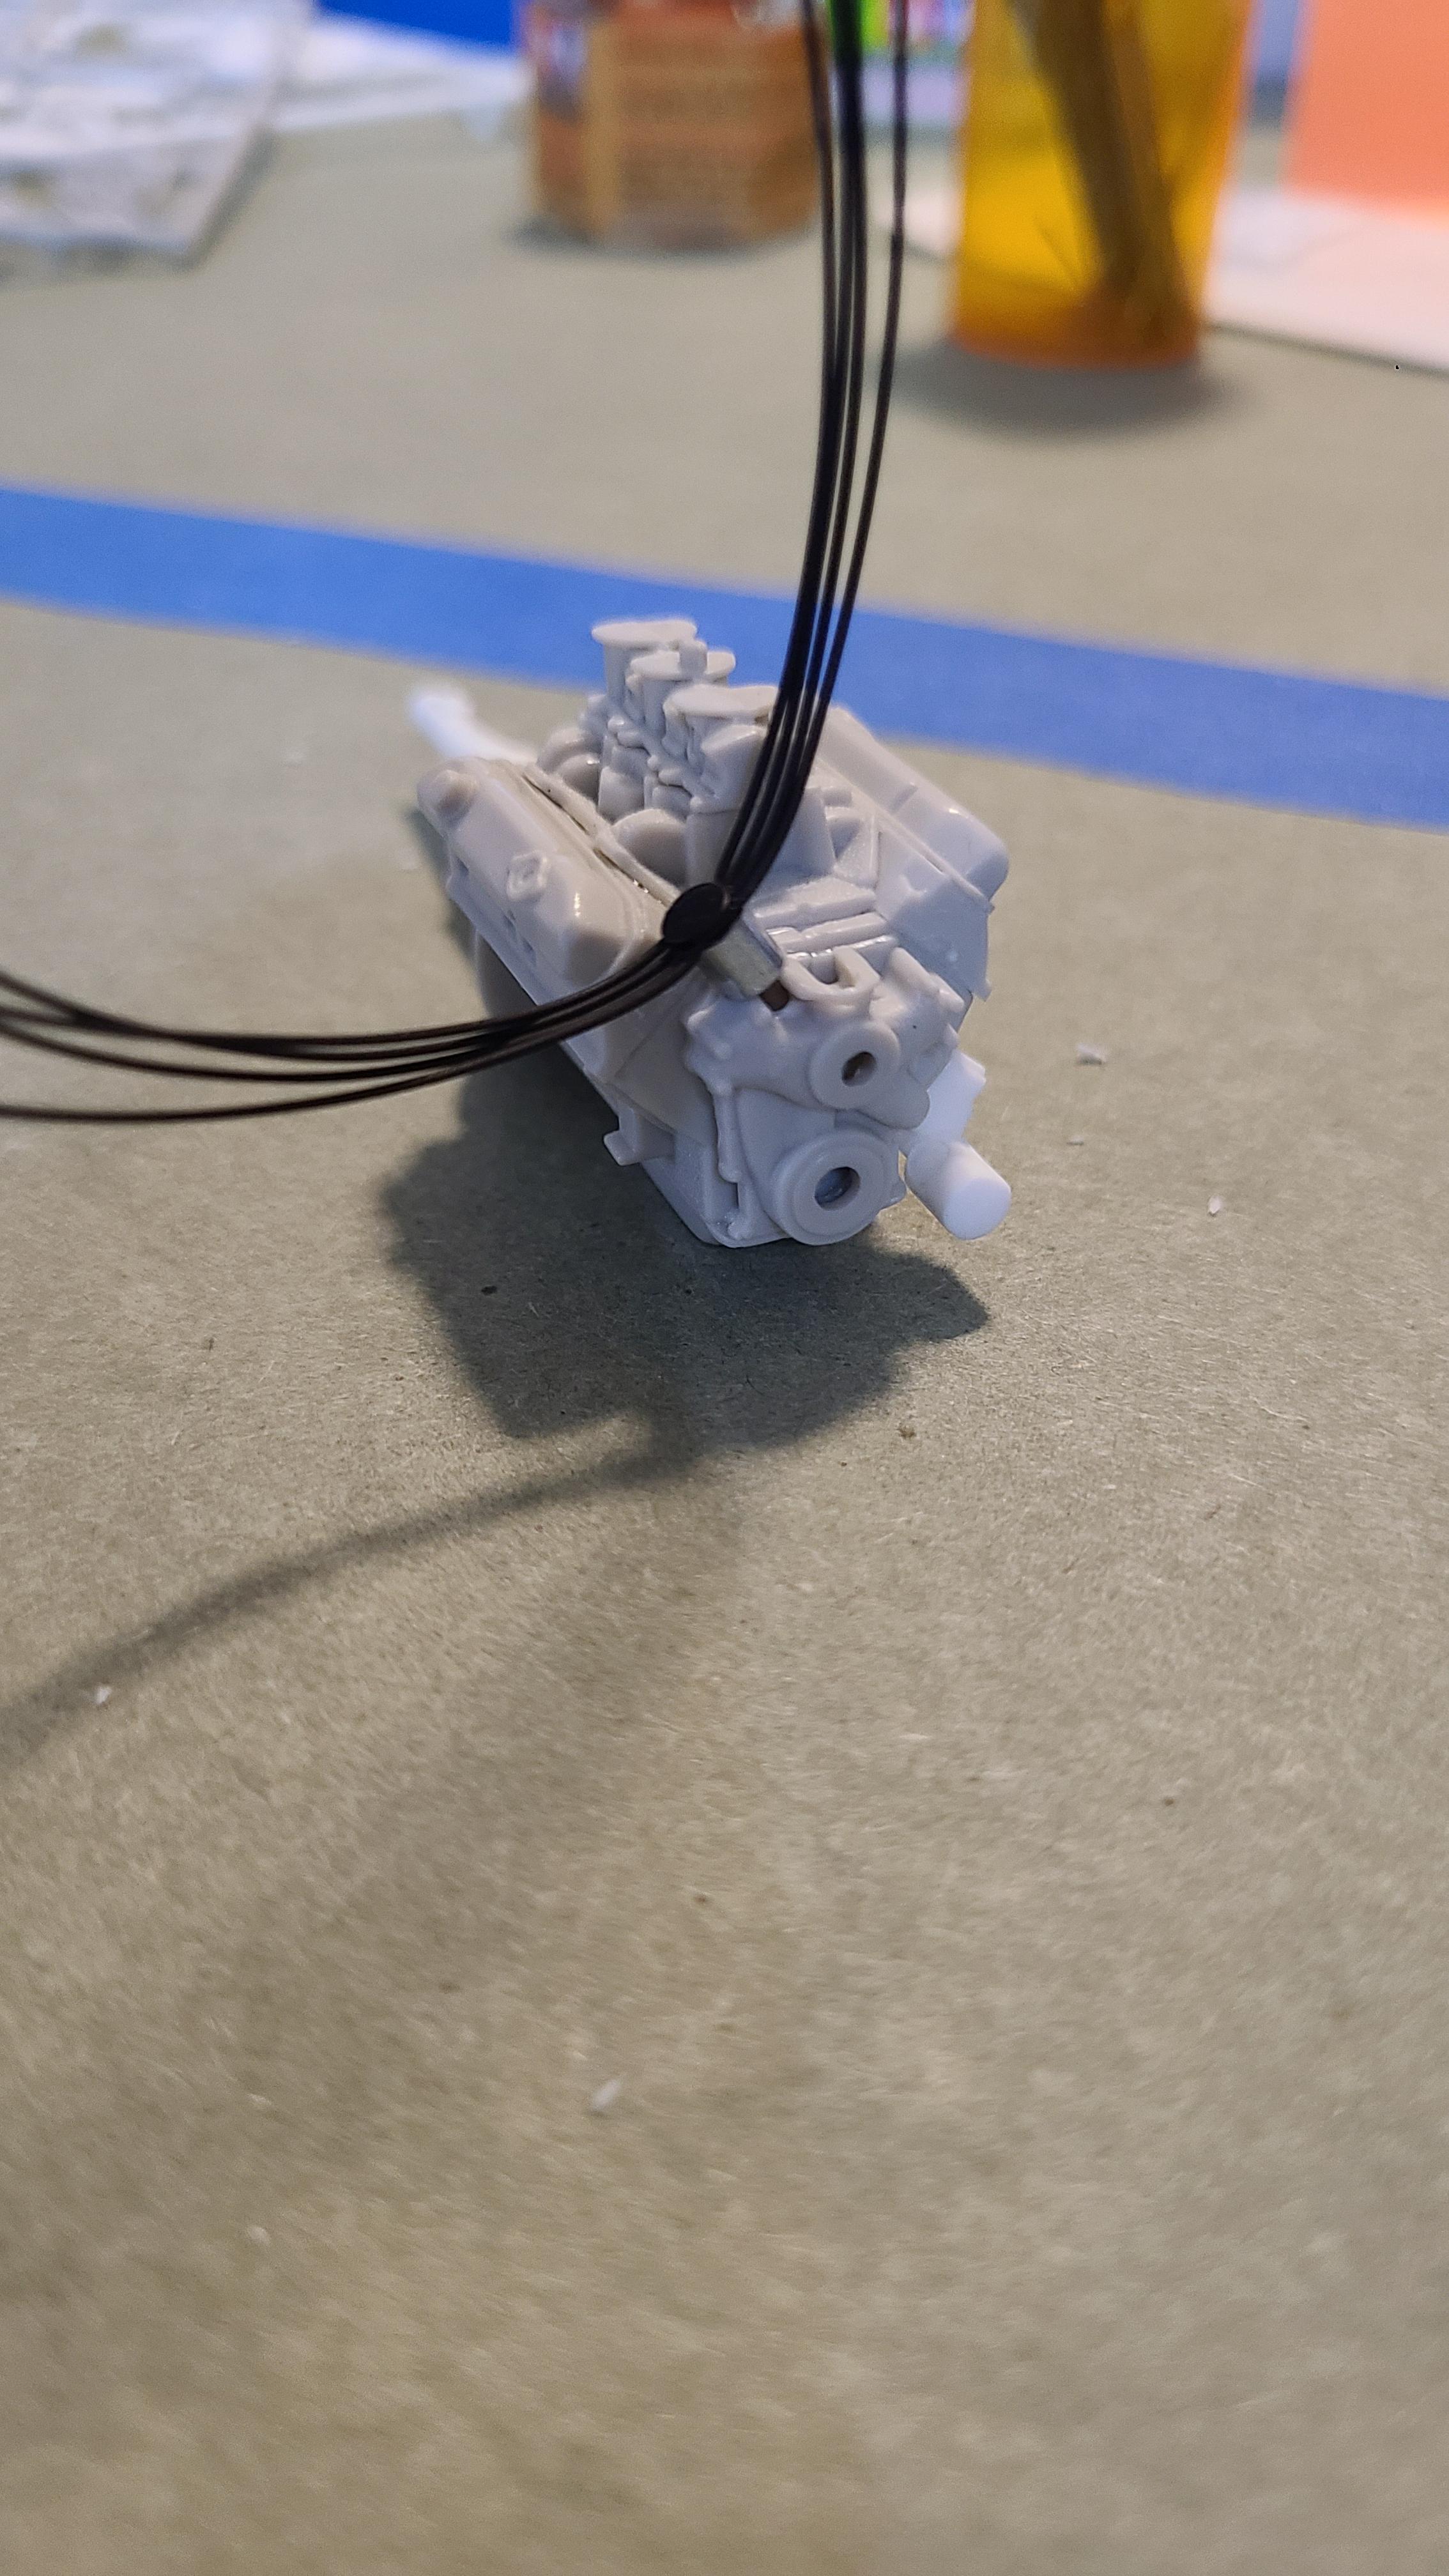
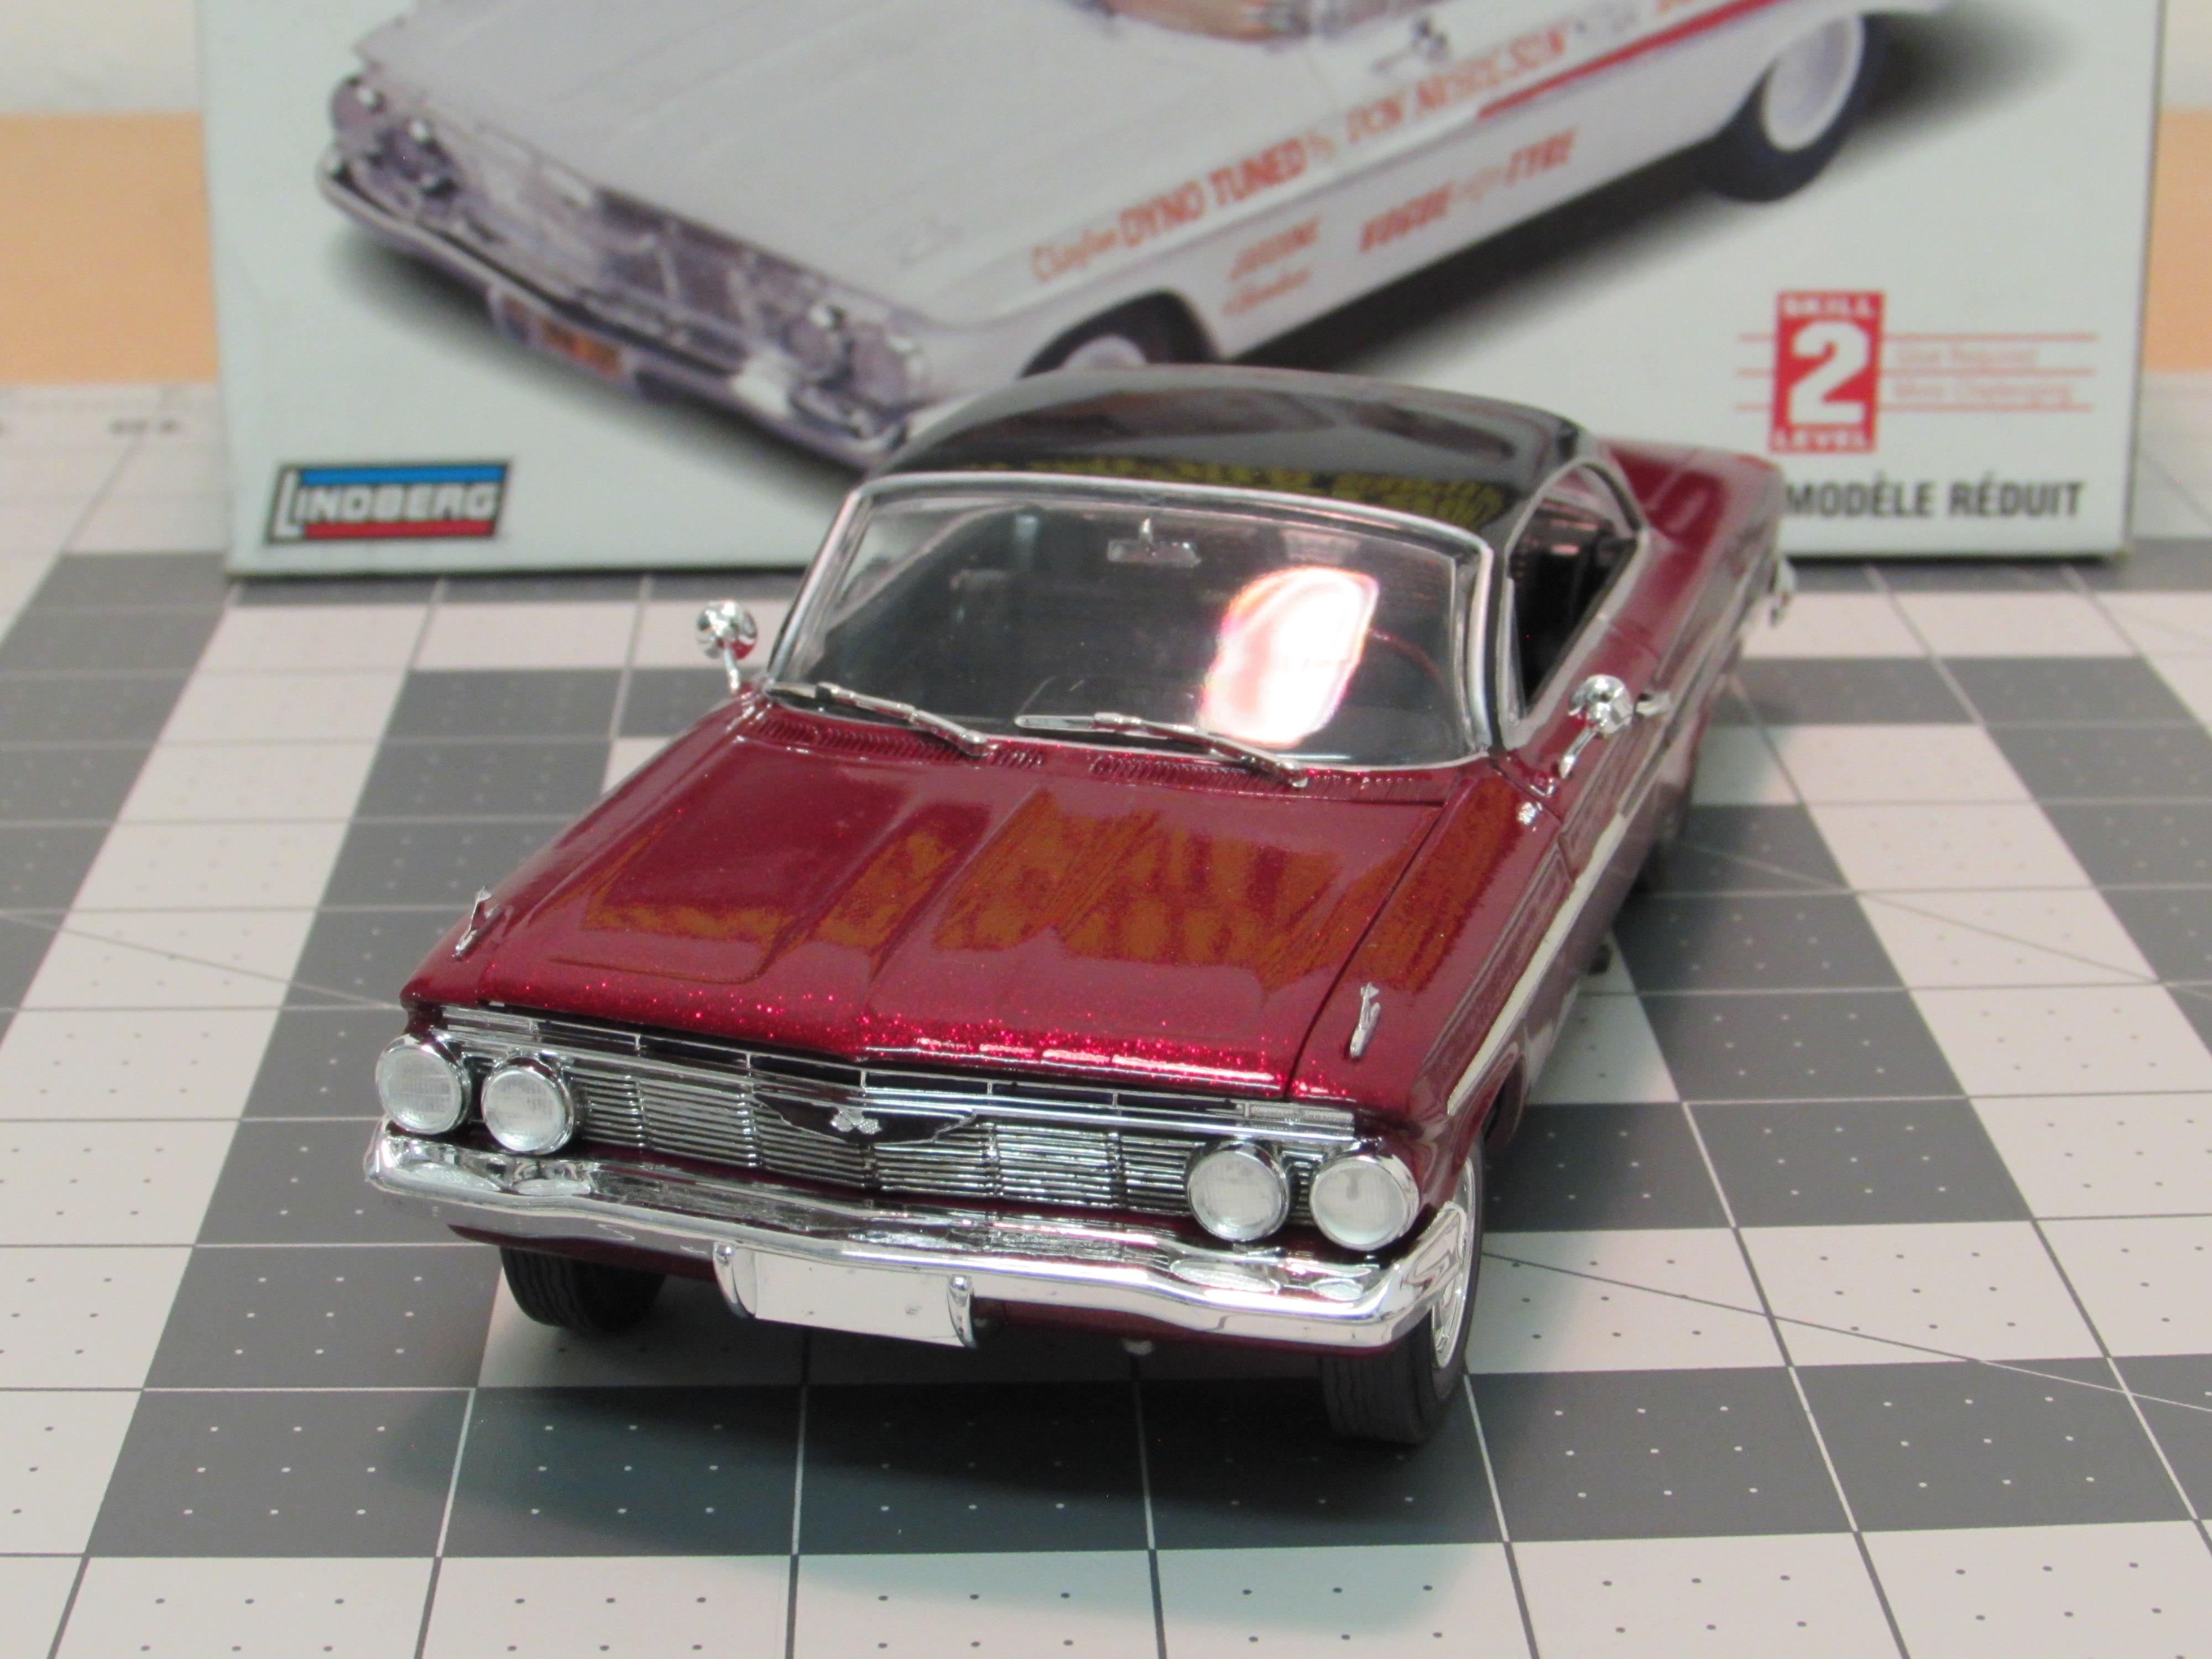
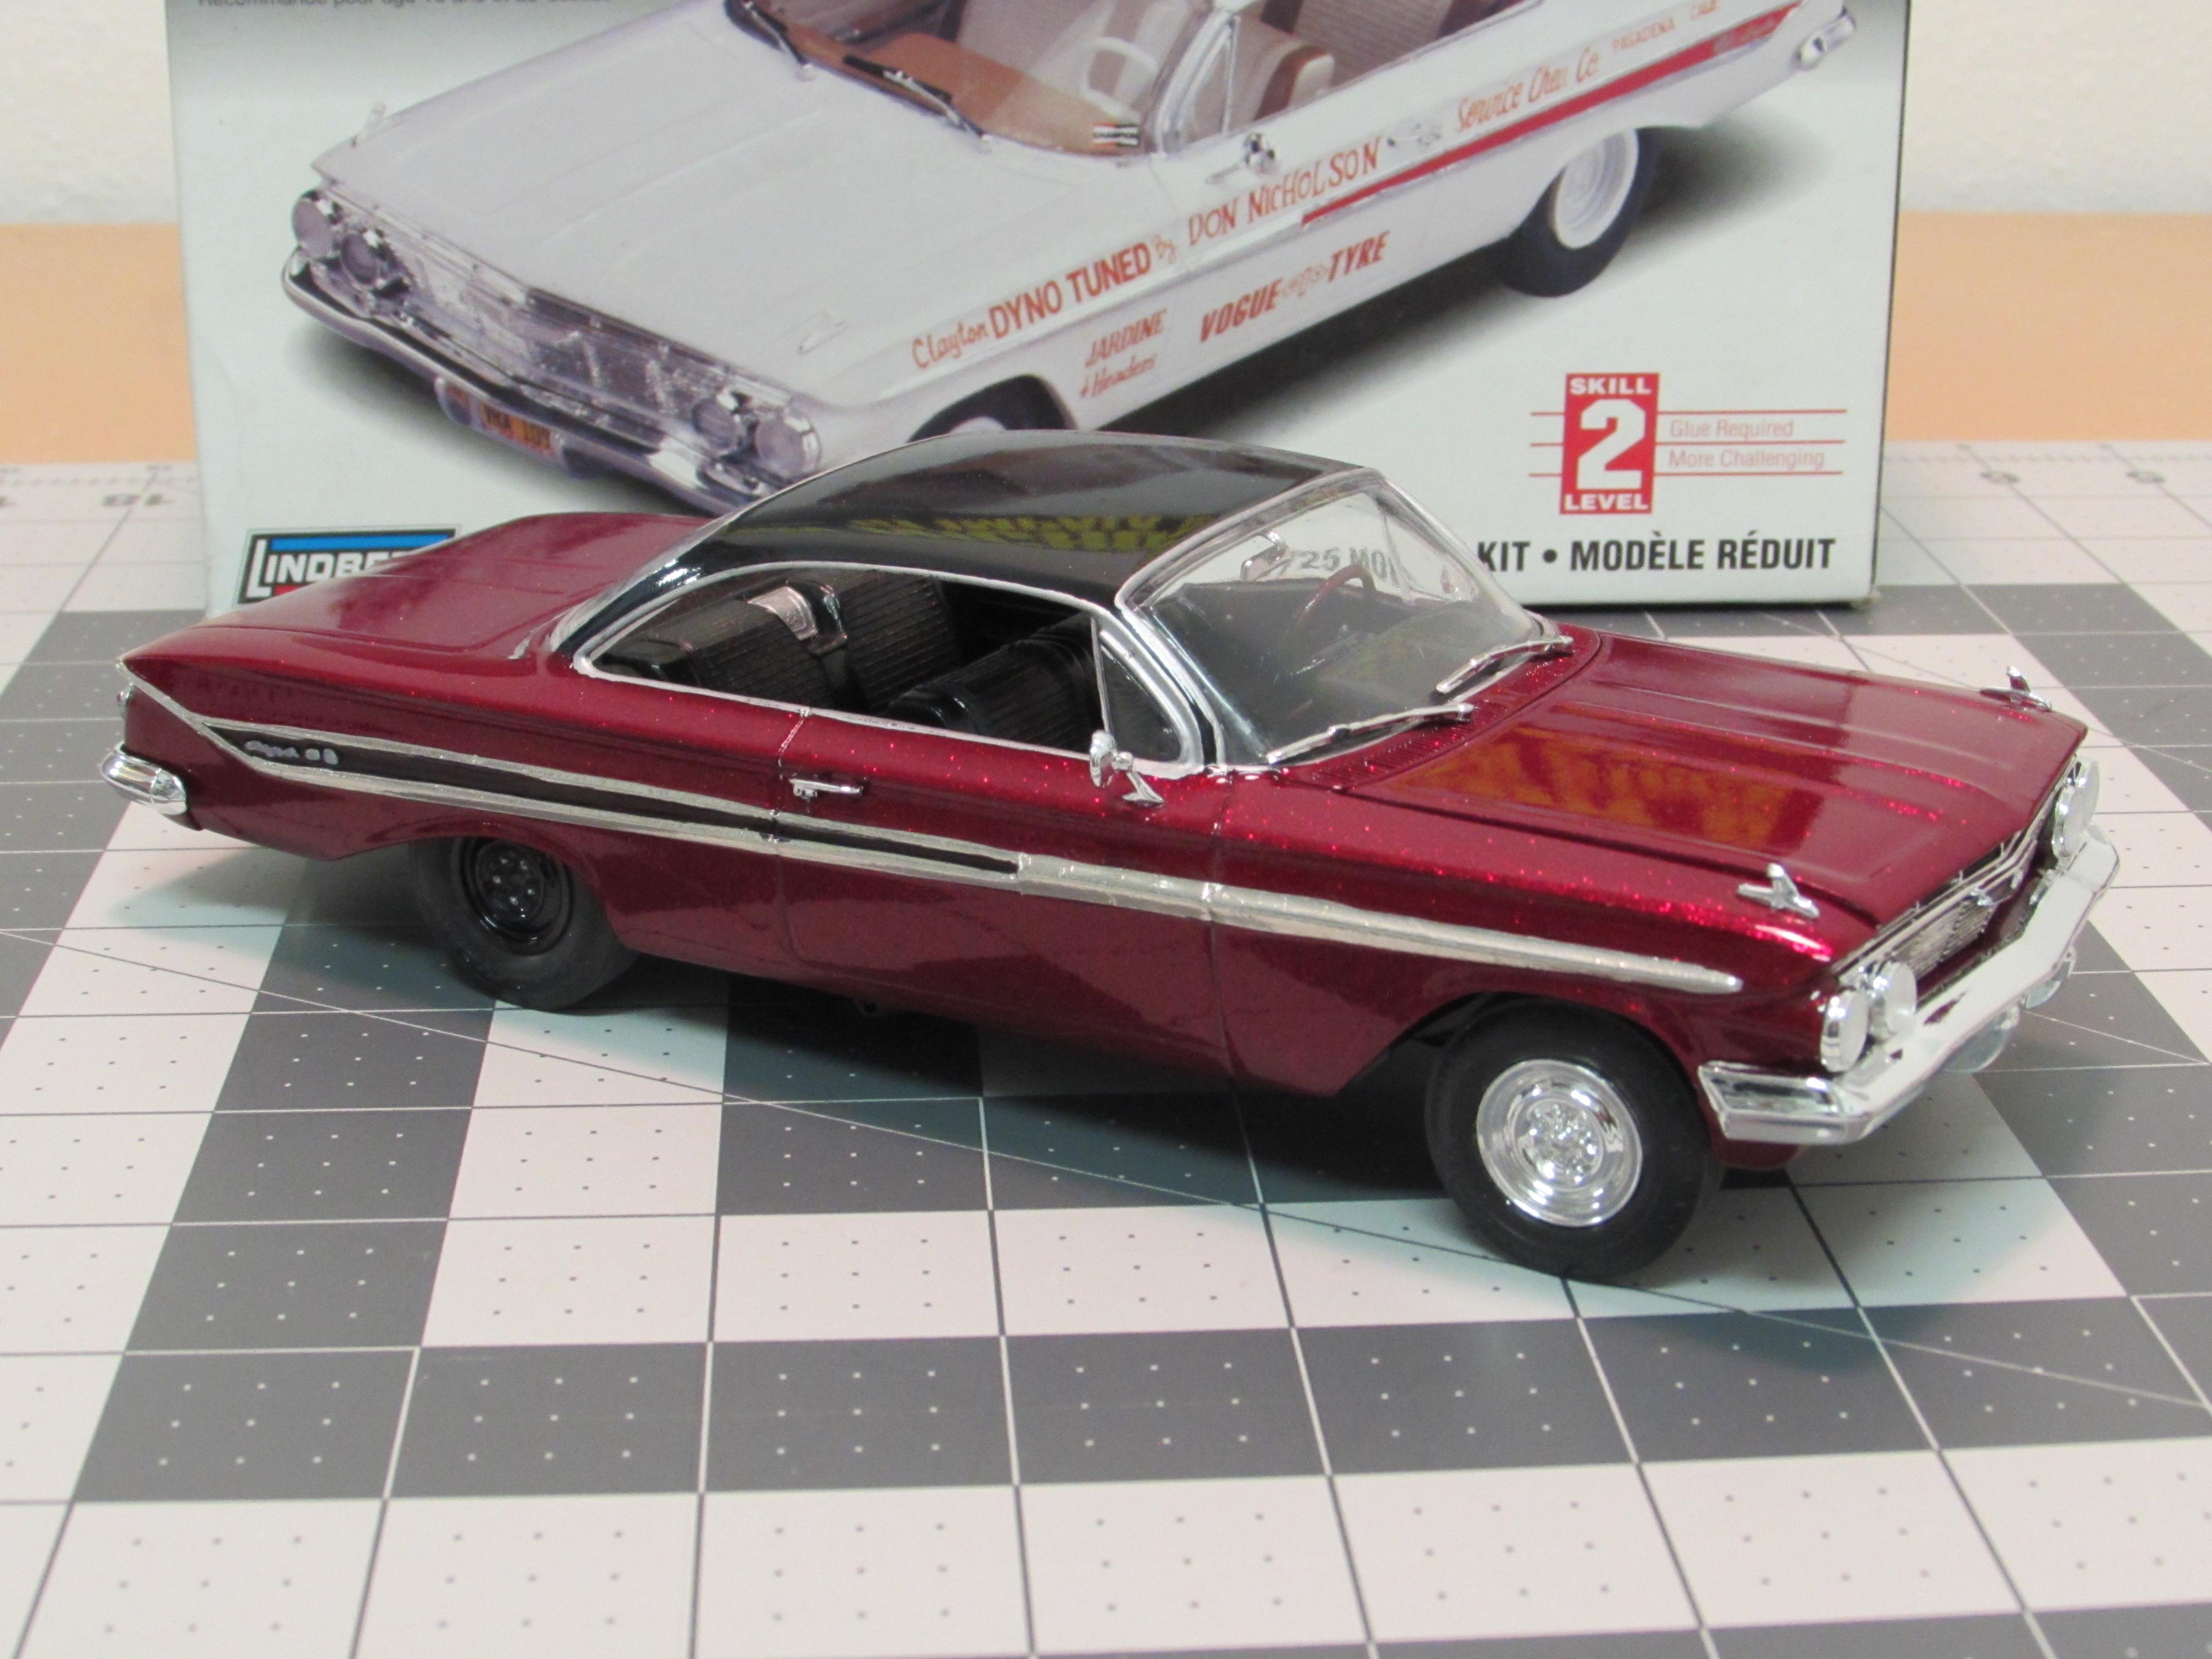
This started out as a junkyard slump buster. It was parts of 3 incomplete Lindberg 1961 Impala kits, the most complete being the Dyno Don Super Stock racer, so I was going to build it box stock as that. Between the 3, I had enough to build one complete car. Believe it or not, reference photos of the Dyno Don racer are not that easy to come by, and I didn't feel like the box photos were accurate at all. So after one failed attempt at painting the body white, I decided to go another route, sort of gasser tribute or street freak. And, I had this red nail polish called "Ruby Pumps" screaming to be used on this model. I decided that it needed another color to set it off, so the back roof was done. I also wired the engine and plumbed in a fuel line.
-
Really, that's a disappointment.
-
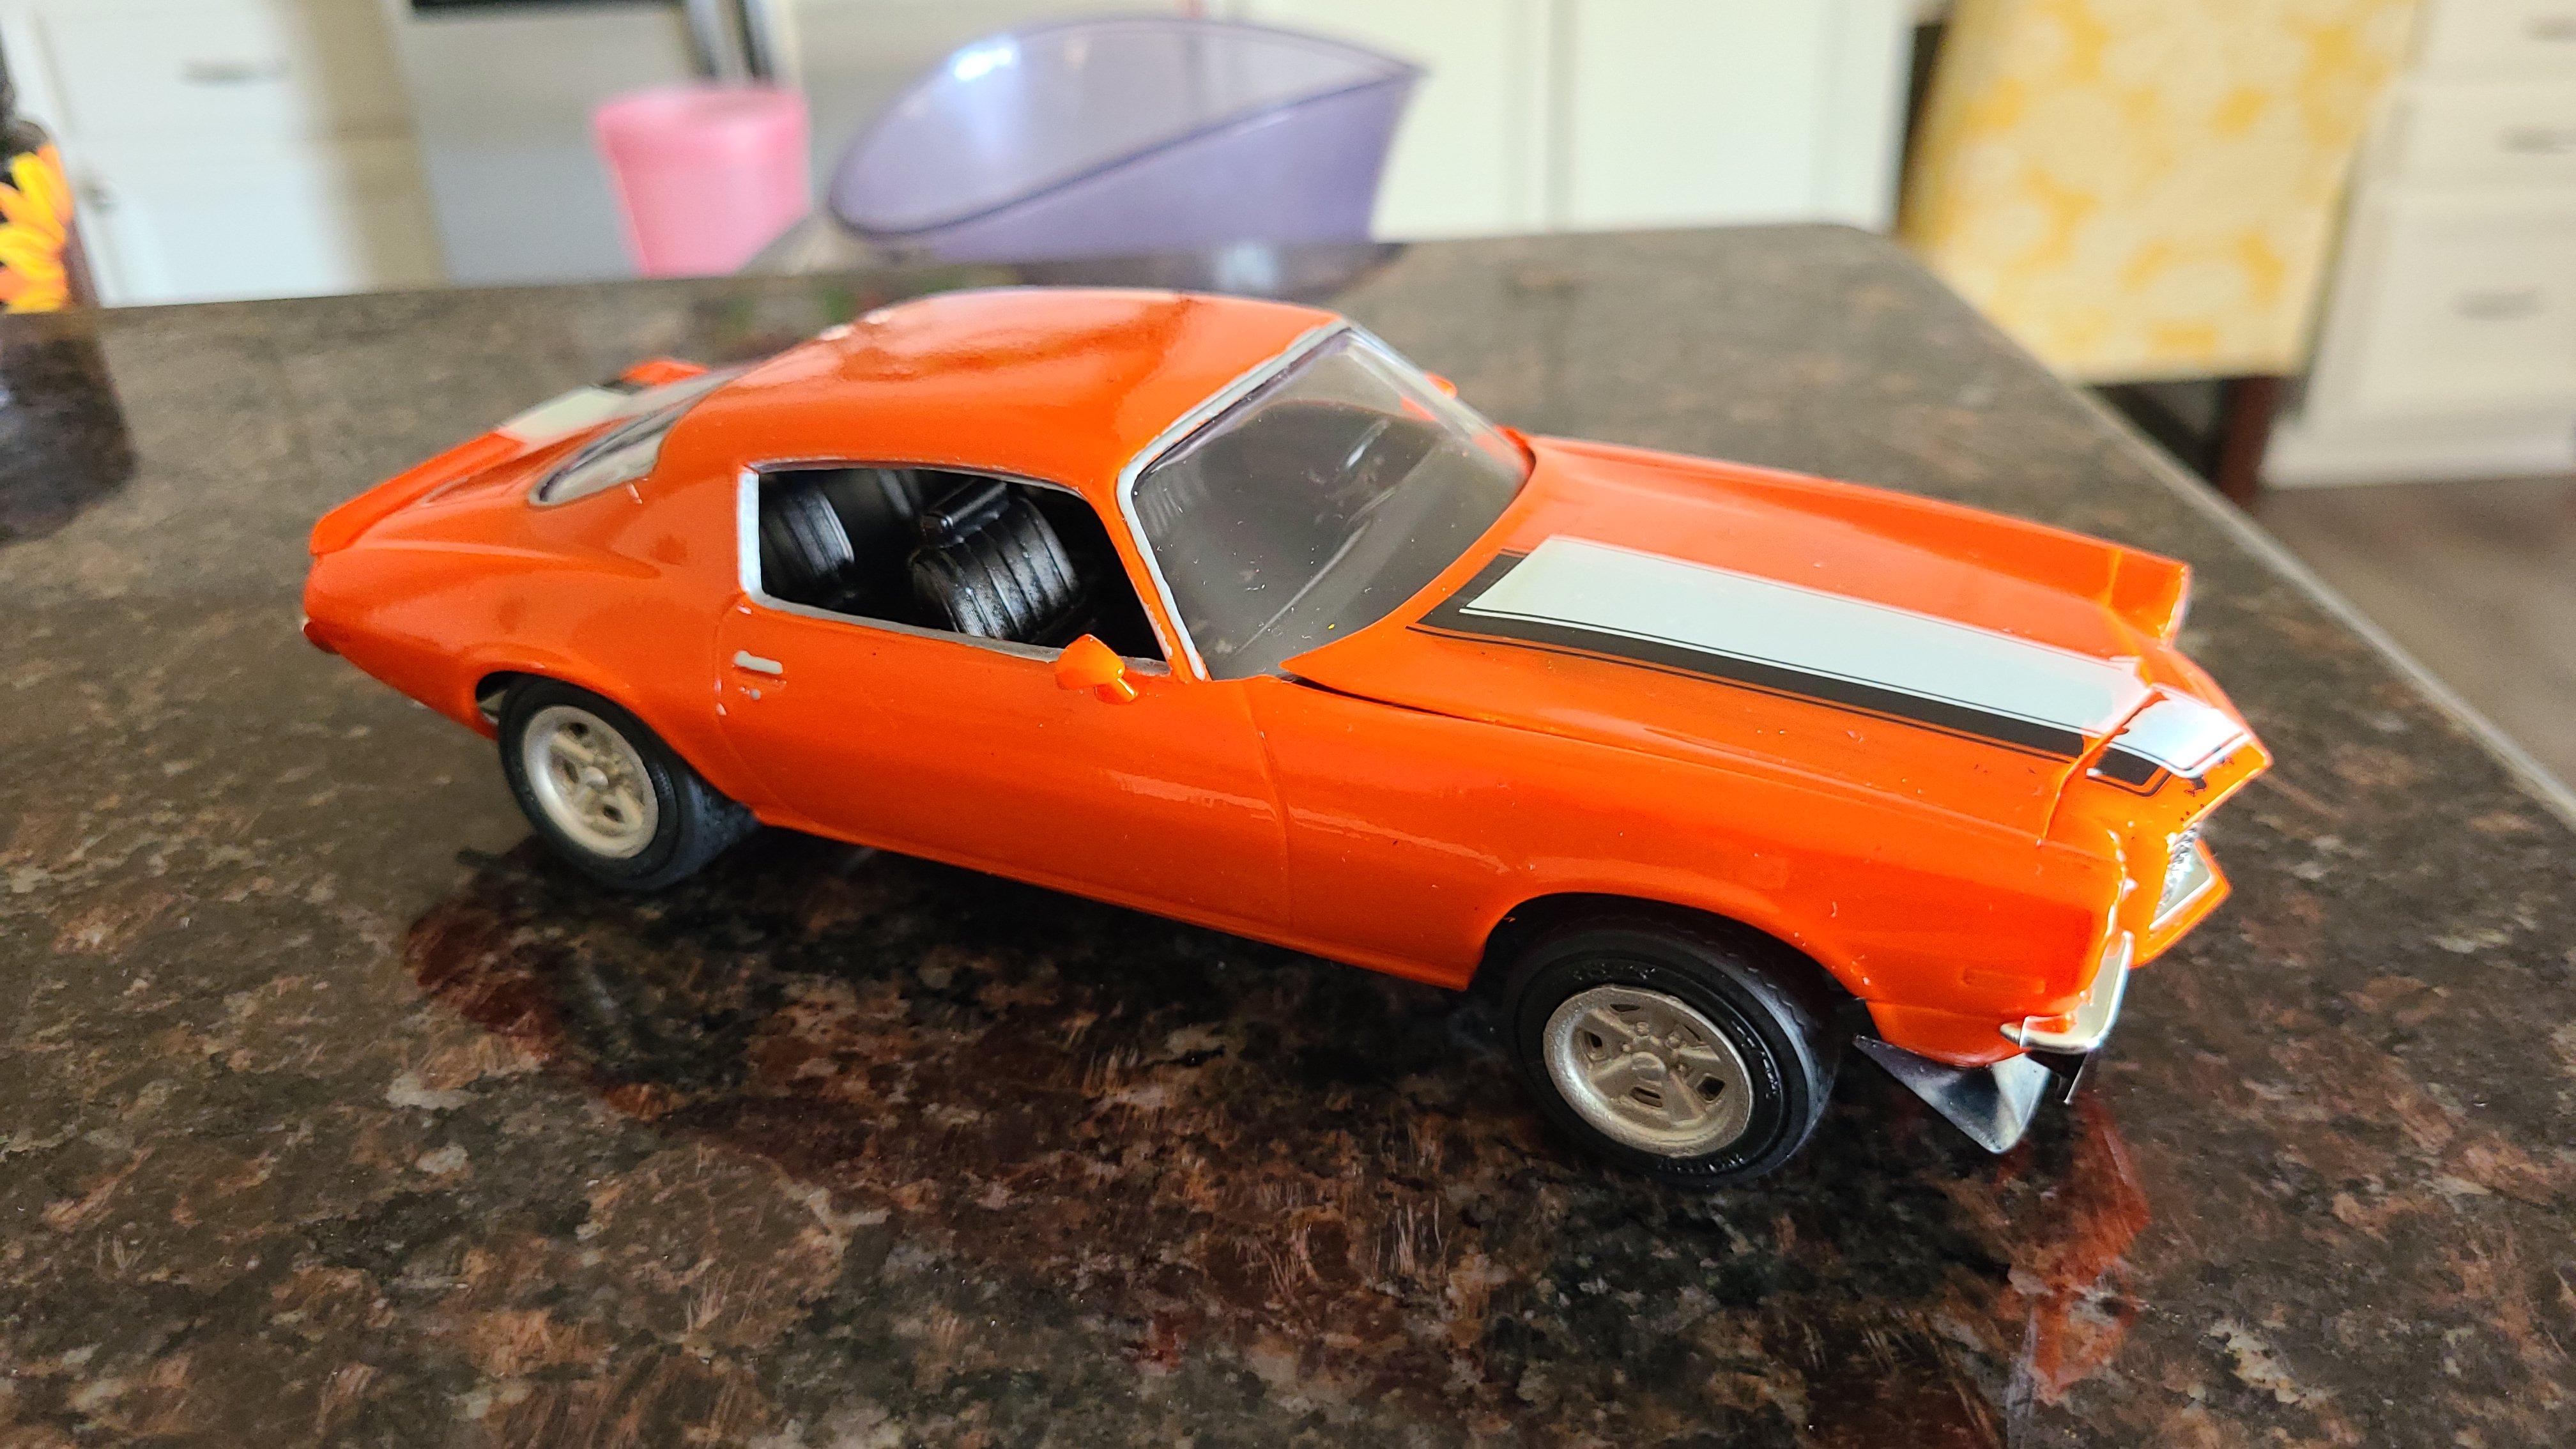
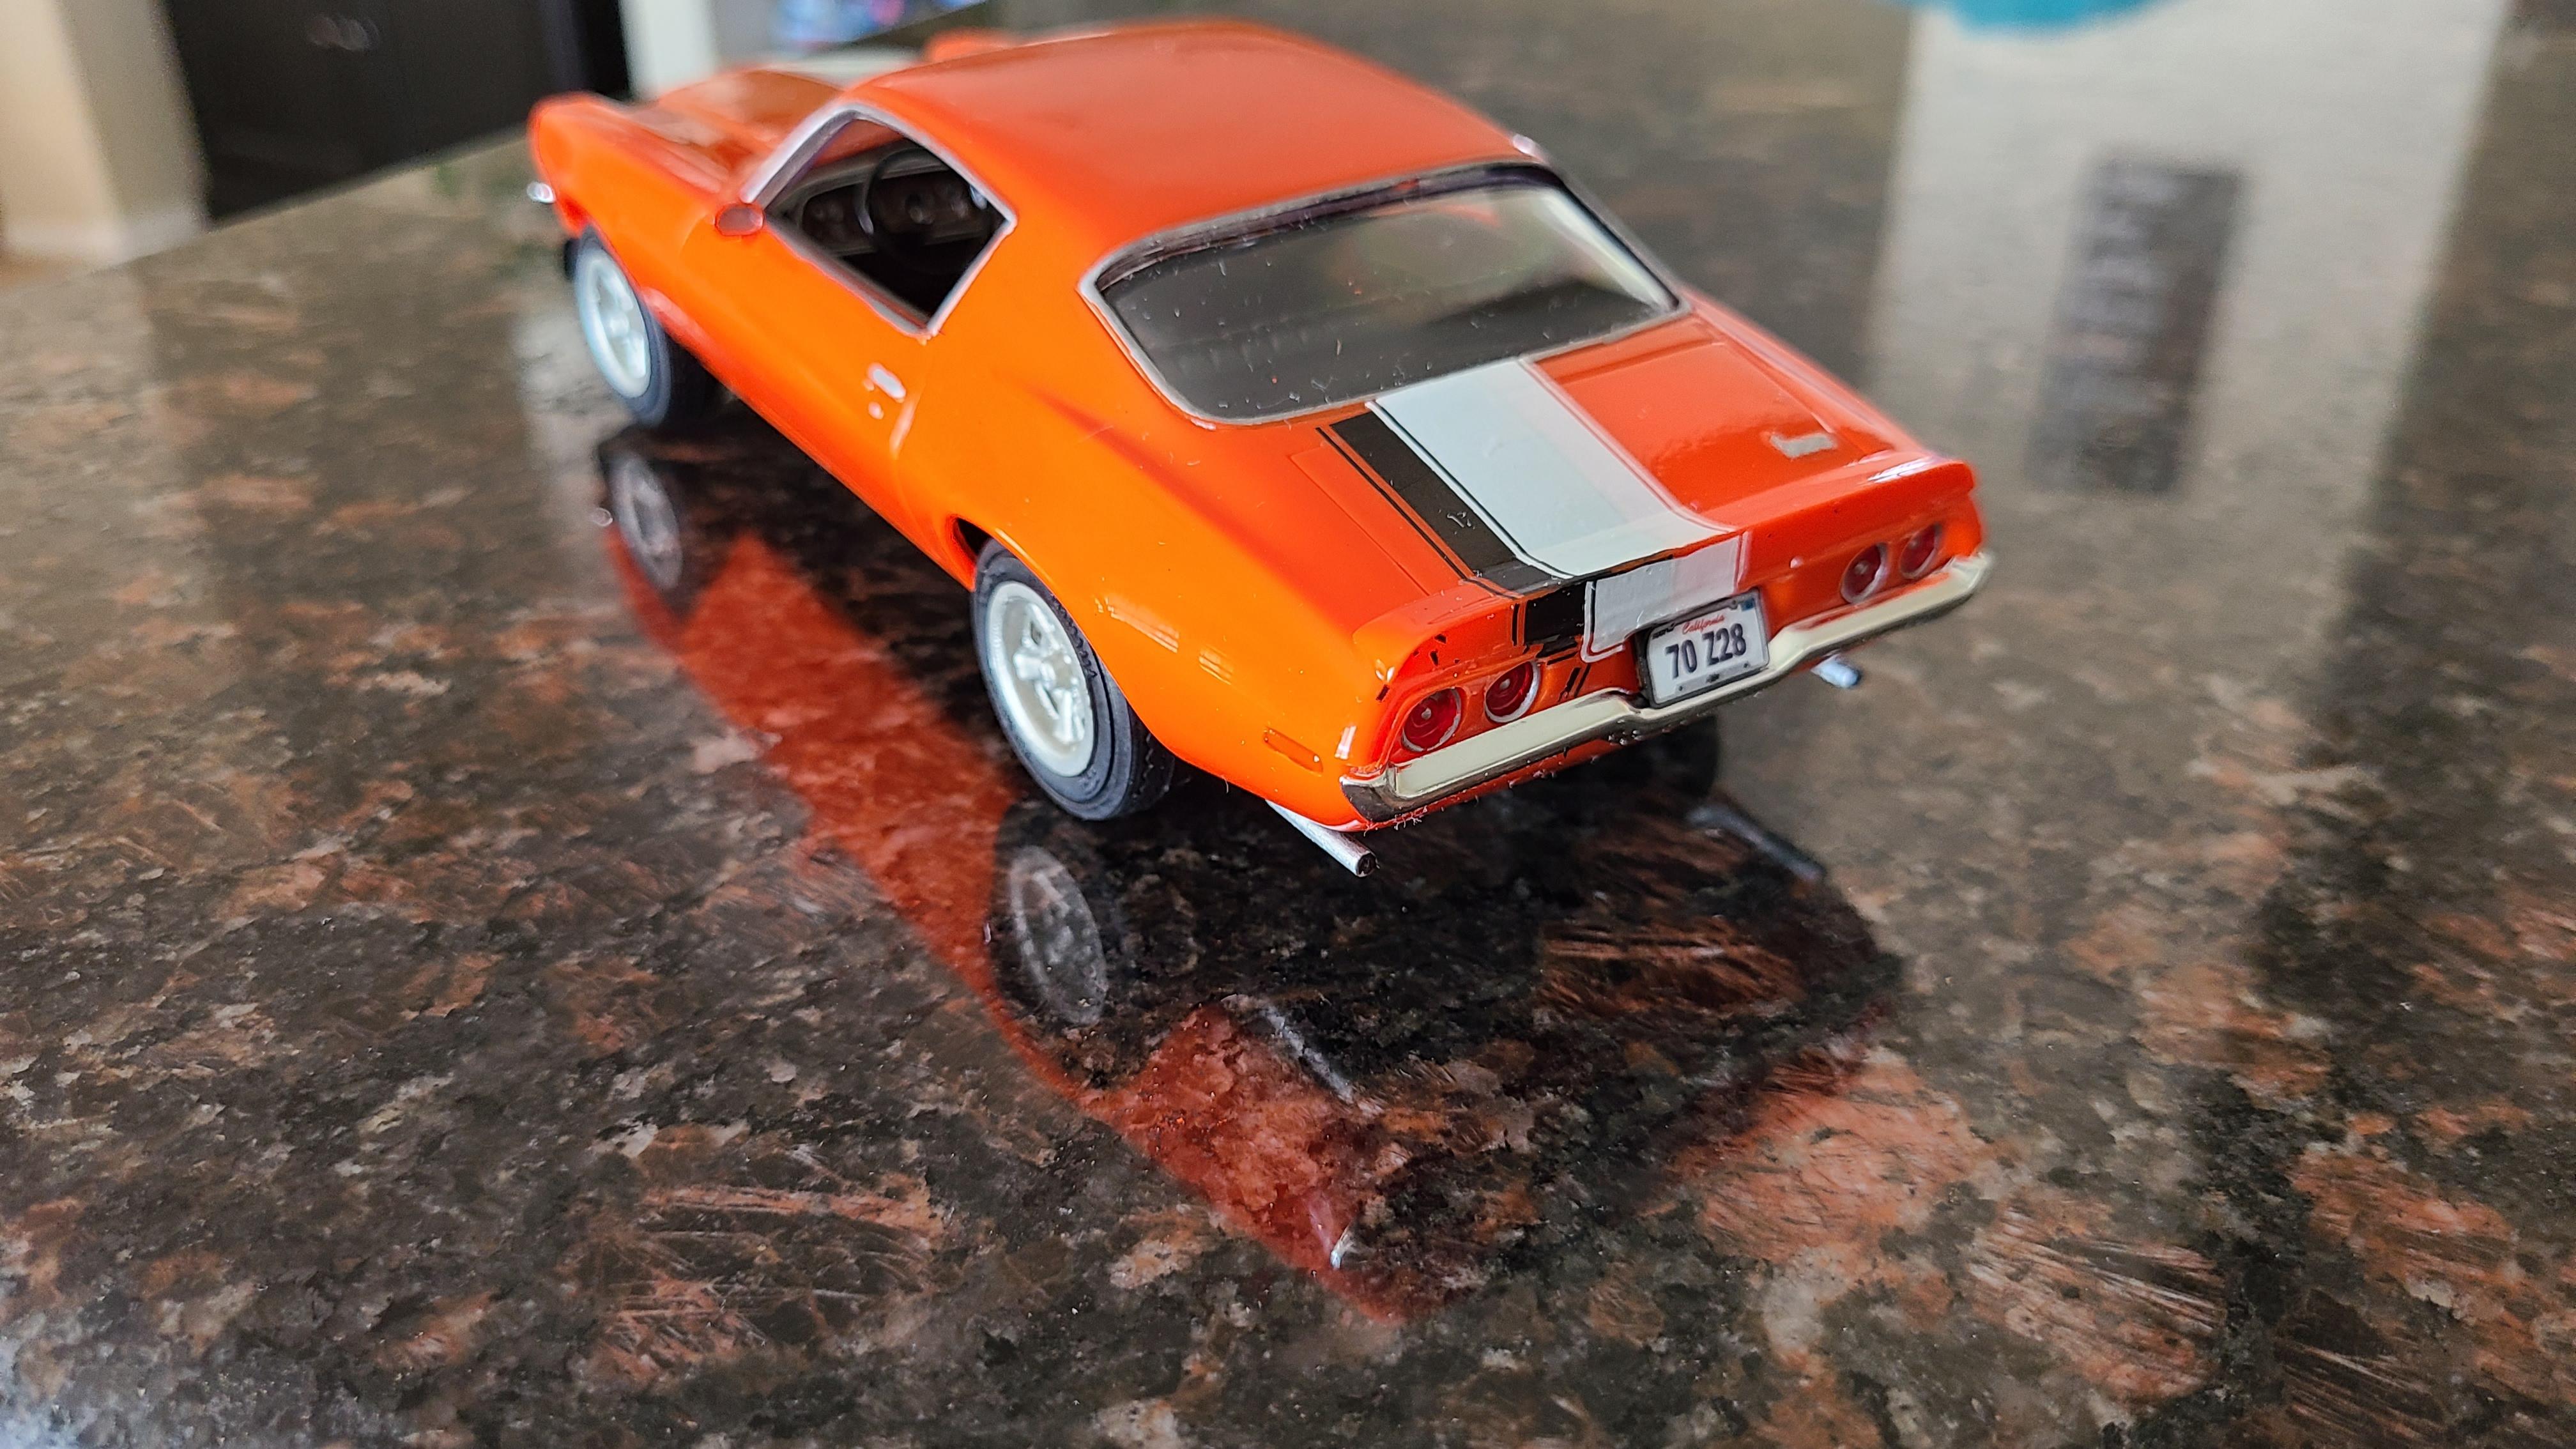
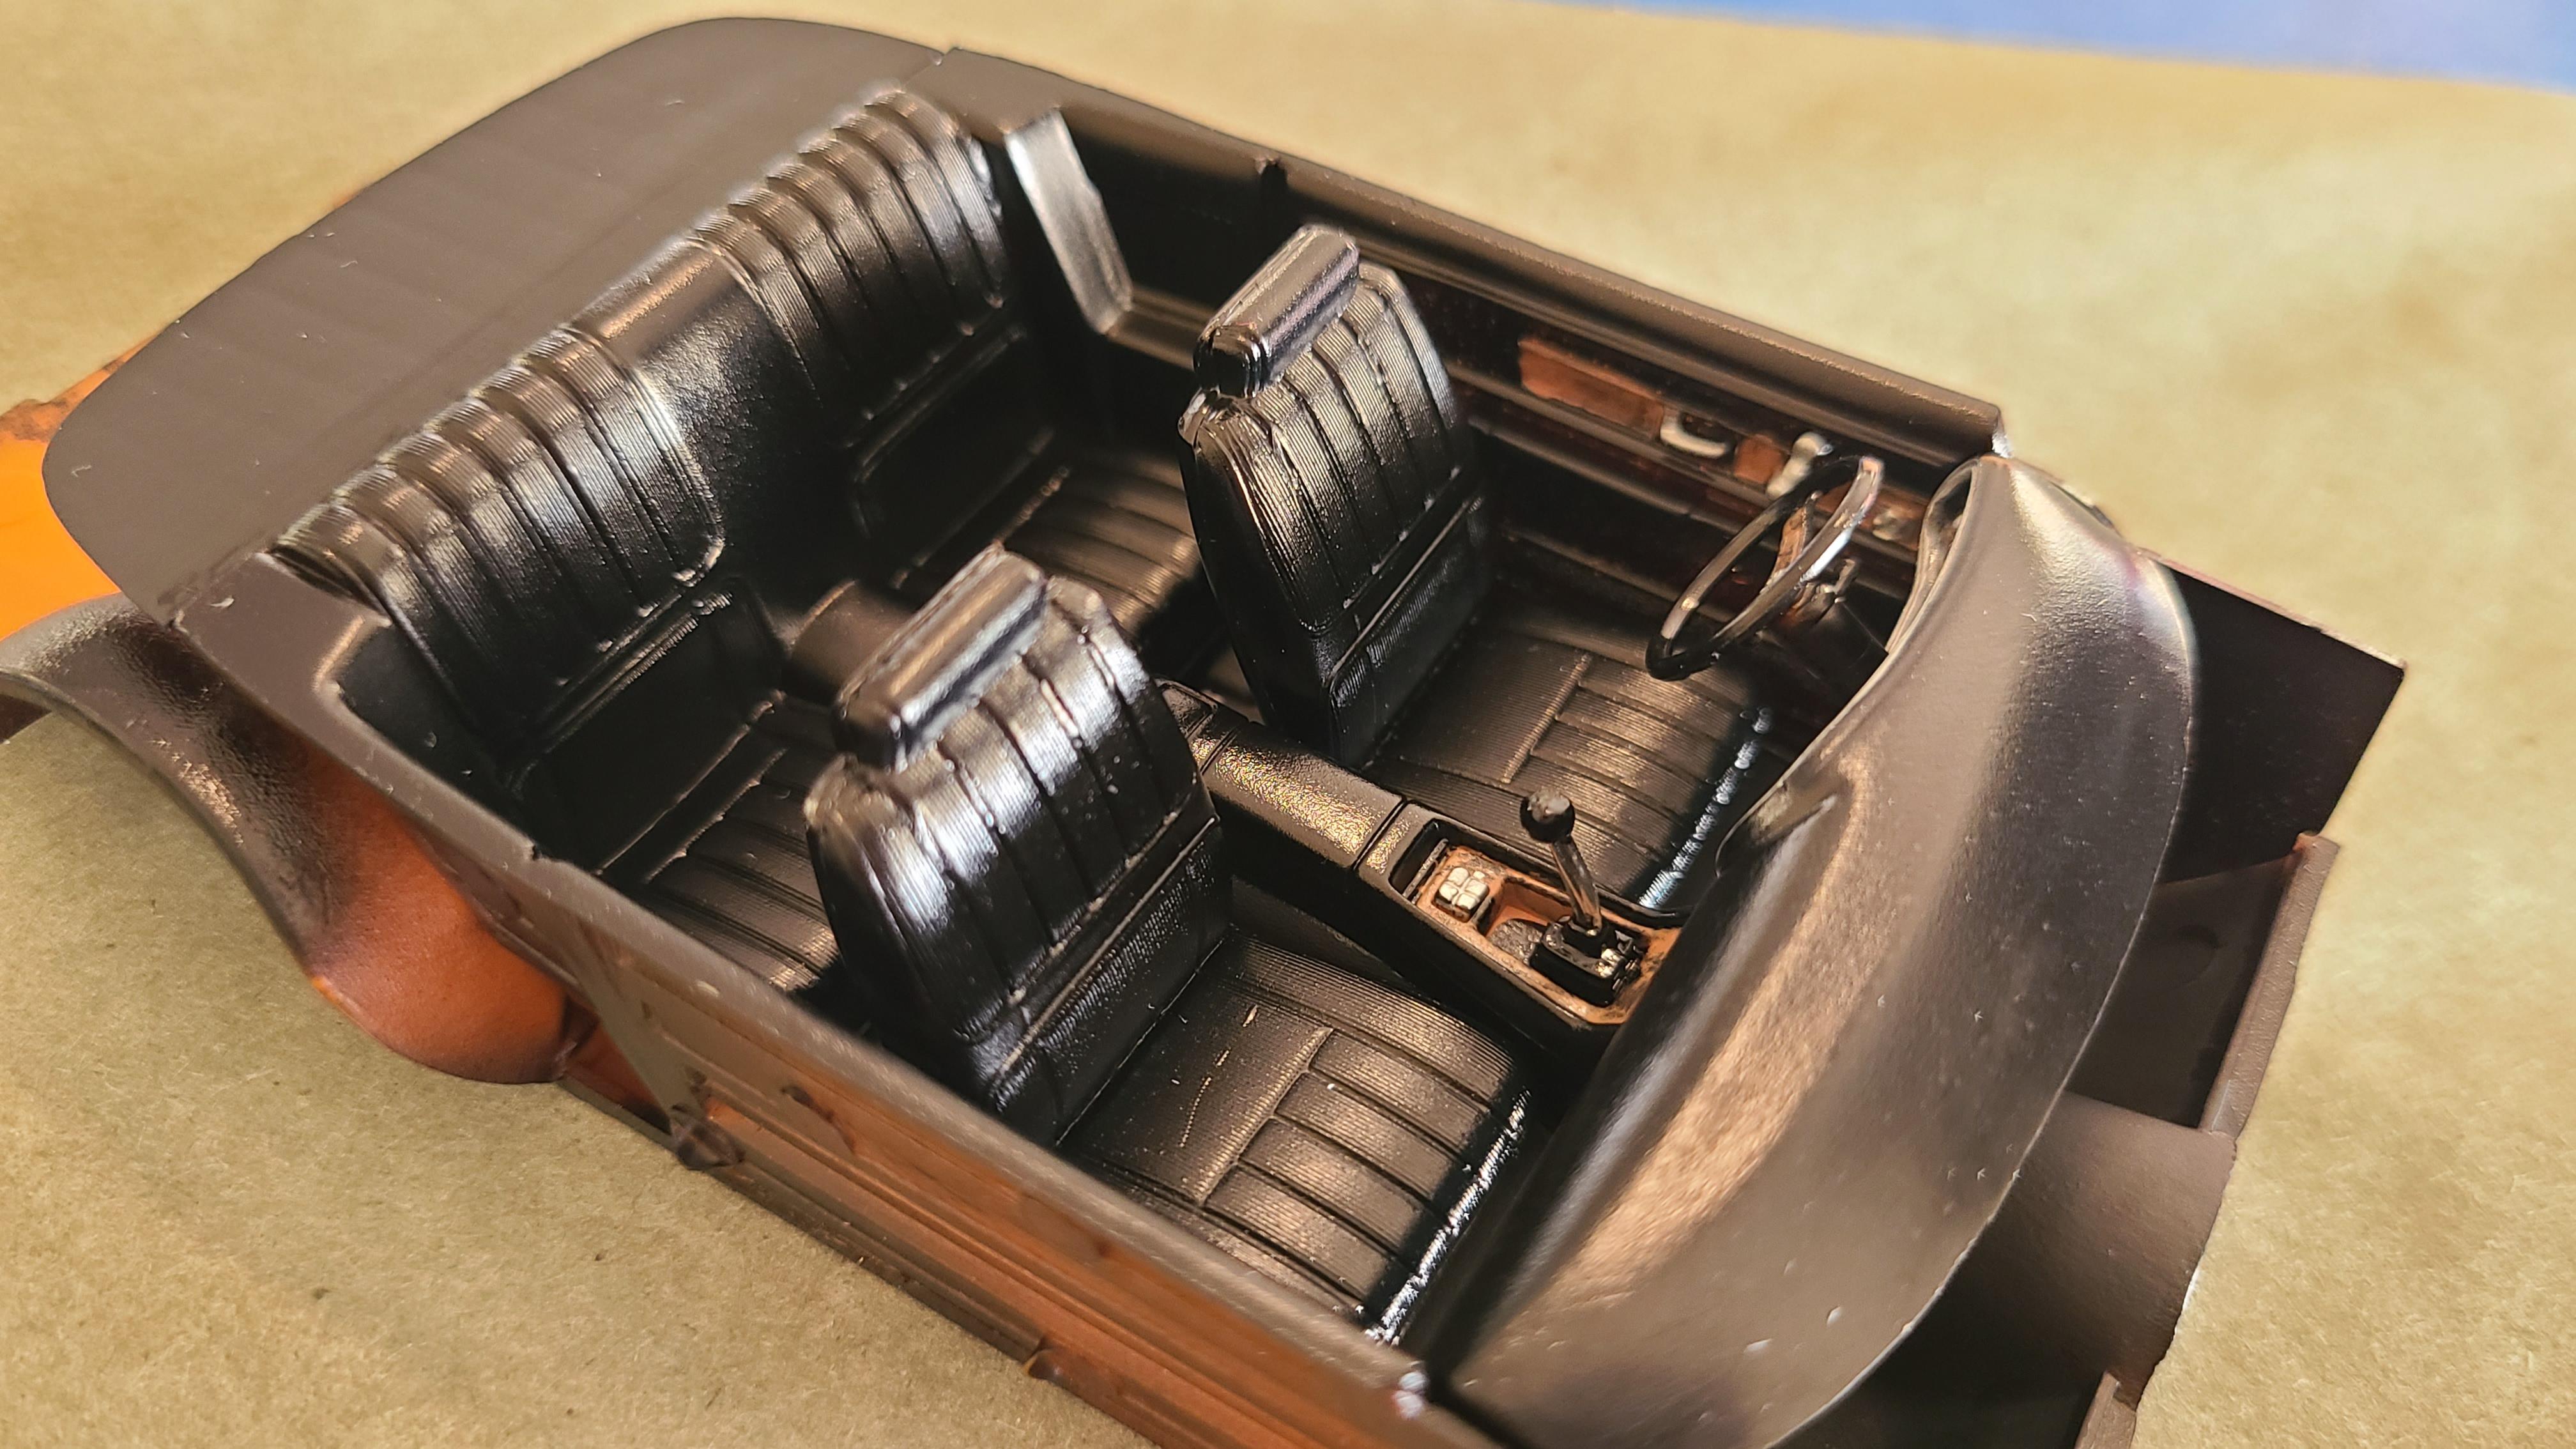
Built this AMT 1970.5 Z28 for a Facebook 24 hour build challenge. All told, took about 18 hours total. Paint is Createx Wicked Colors Detail Orange with 2K clear, no primer due to time constraints. Build was going really smooth until I started applying decals, which just completely fell apart. First black stripe fell apart. Tried to salvage them with the white, and those fell apart as well. What's worse, Micro-Sol didn't seem to want to make them budge to remove them, so I left them. It actually builds into a nice replica. I will be getting a couple more, but I will hunt down original AMT releases, not the newer Round 2 ones again. I'm not fond of the orange plastic, and it is clear the mold has been damaged around the headlight area. I now know a few tricks to make assembly easier as well. Not my best work, but also not my worst.
-
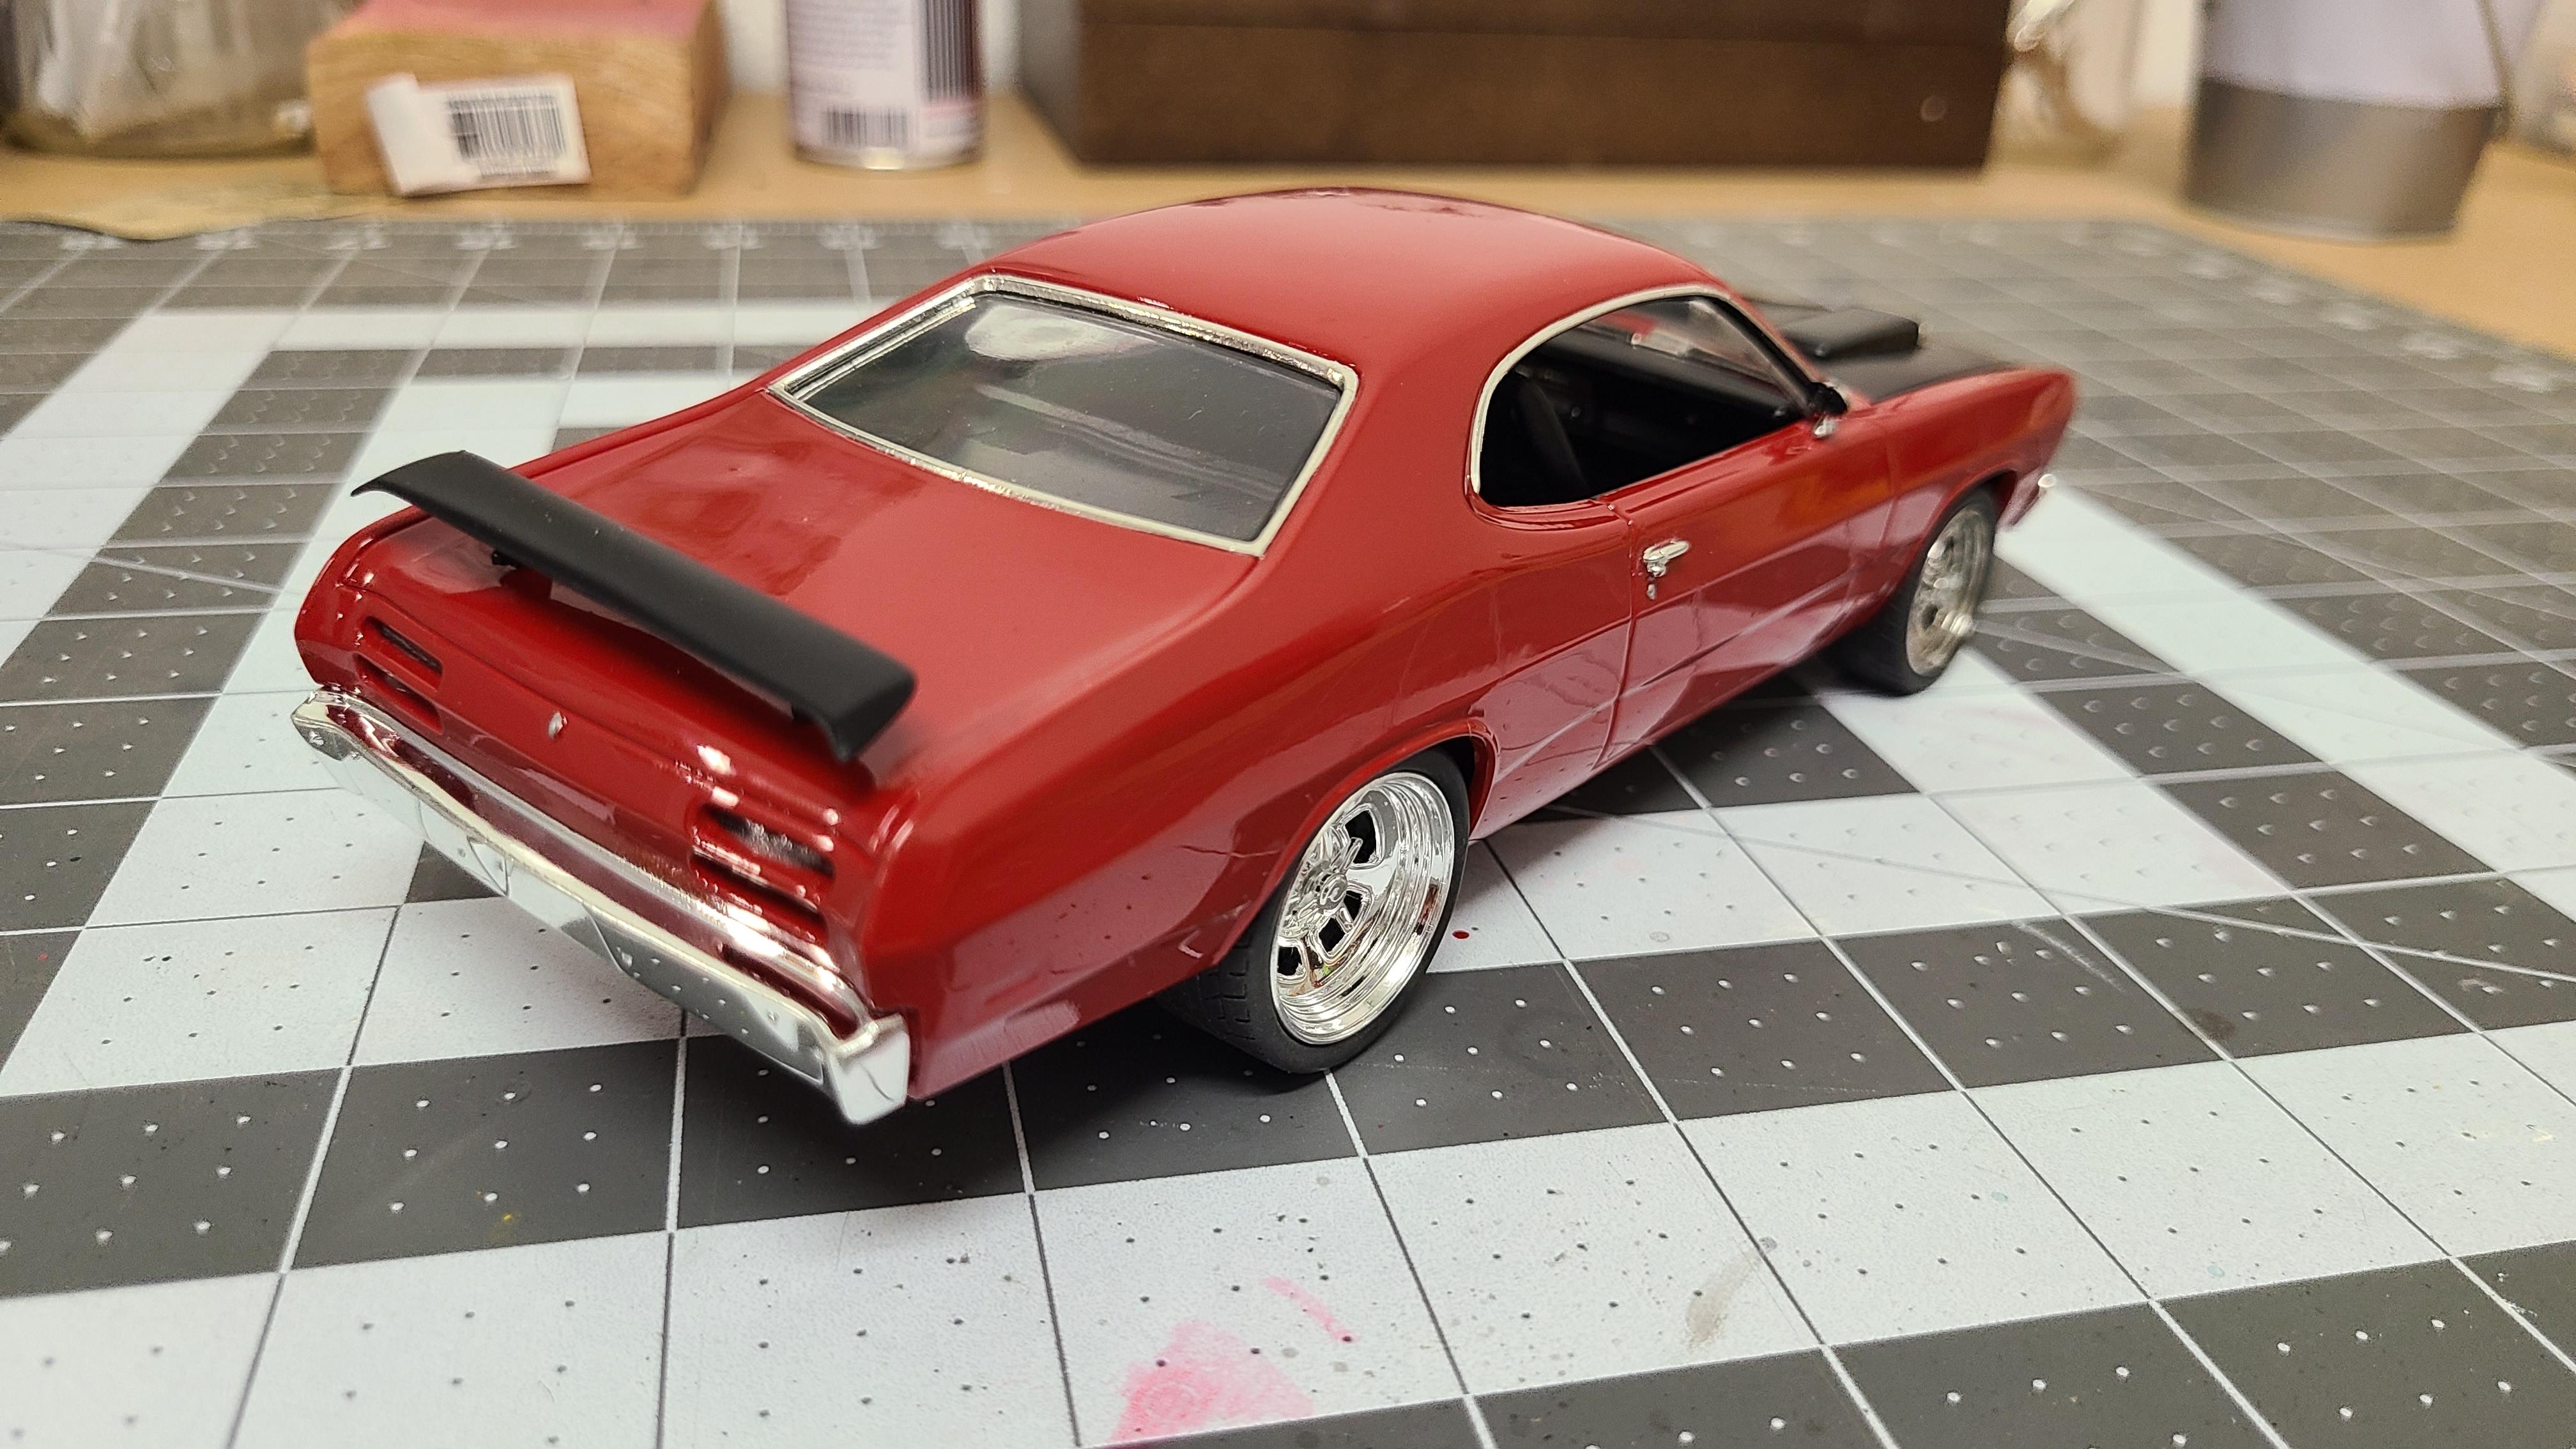
AMT 1971 Duster Street Machine. Mini tubbed rear using medicine bottle, narrowed rear axle. Pegasus wheels. Createx Opaque red paint with 2 part 2K clear. Wired engine, though it doesn't show well. Not my best work, not my worst. Will look good on the shelf.
-
Not my best, not my worst, but calling it done. I admit impatience and a bit of frustration over how long this one took me kinda got to me. Not a bad kit at all, but have to admit, I think I enjoy building box stock better. Tubbed the rear, cut down fuel tank, had to modify rear seat and deck. Narrowed rear axle, changed wheels. Stance didn't end up as low as I wanted, but it'll do.
-
340 V8 with a Viper-style intake, I believe.
-
Finally got some paint on the body. Tamiya light gray primer, Createx Opaque Red (4 coats), and 2K clear (3 coats). Tamiya semi-gloss black for the hood, spoiler, and intake components, most of which will probably still get a coat of satin clear. Detail painted the engine and chassis.
-
Finally started a little paint.
-
Made some progress on my '71 Duster street machine today. Made something resembling a fuel cell and battery mount areas in the trunk floor. Engine has plug wires. Had to take some creative liberty as to where the wires go, because the coil packs on this engine are so small. Coming along.
-
Haven't had much bench time lately for the '71 Duster. Crammed a bit in last night. New trunk floor is in, and rear axle is narrowed to make room for the Pegasus wheels.
-
Been a couple weeks since having any time for this. Realized I will have to relocate the leaf springs, considering the wider tires. So I cut out the trunk floor to make room. May end up opening the trunk too, haven't decided yet.
-
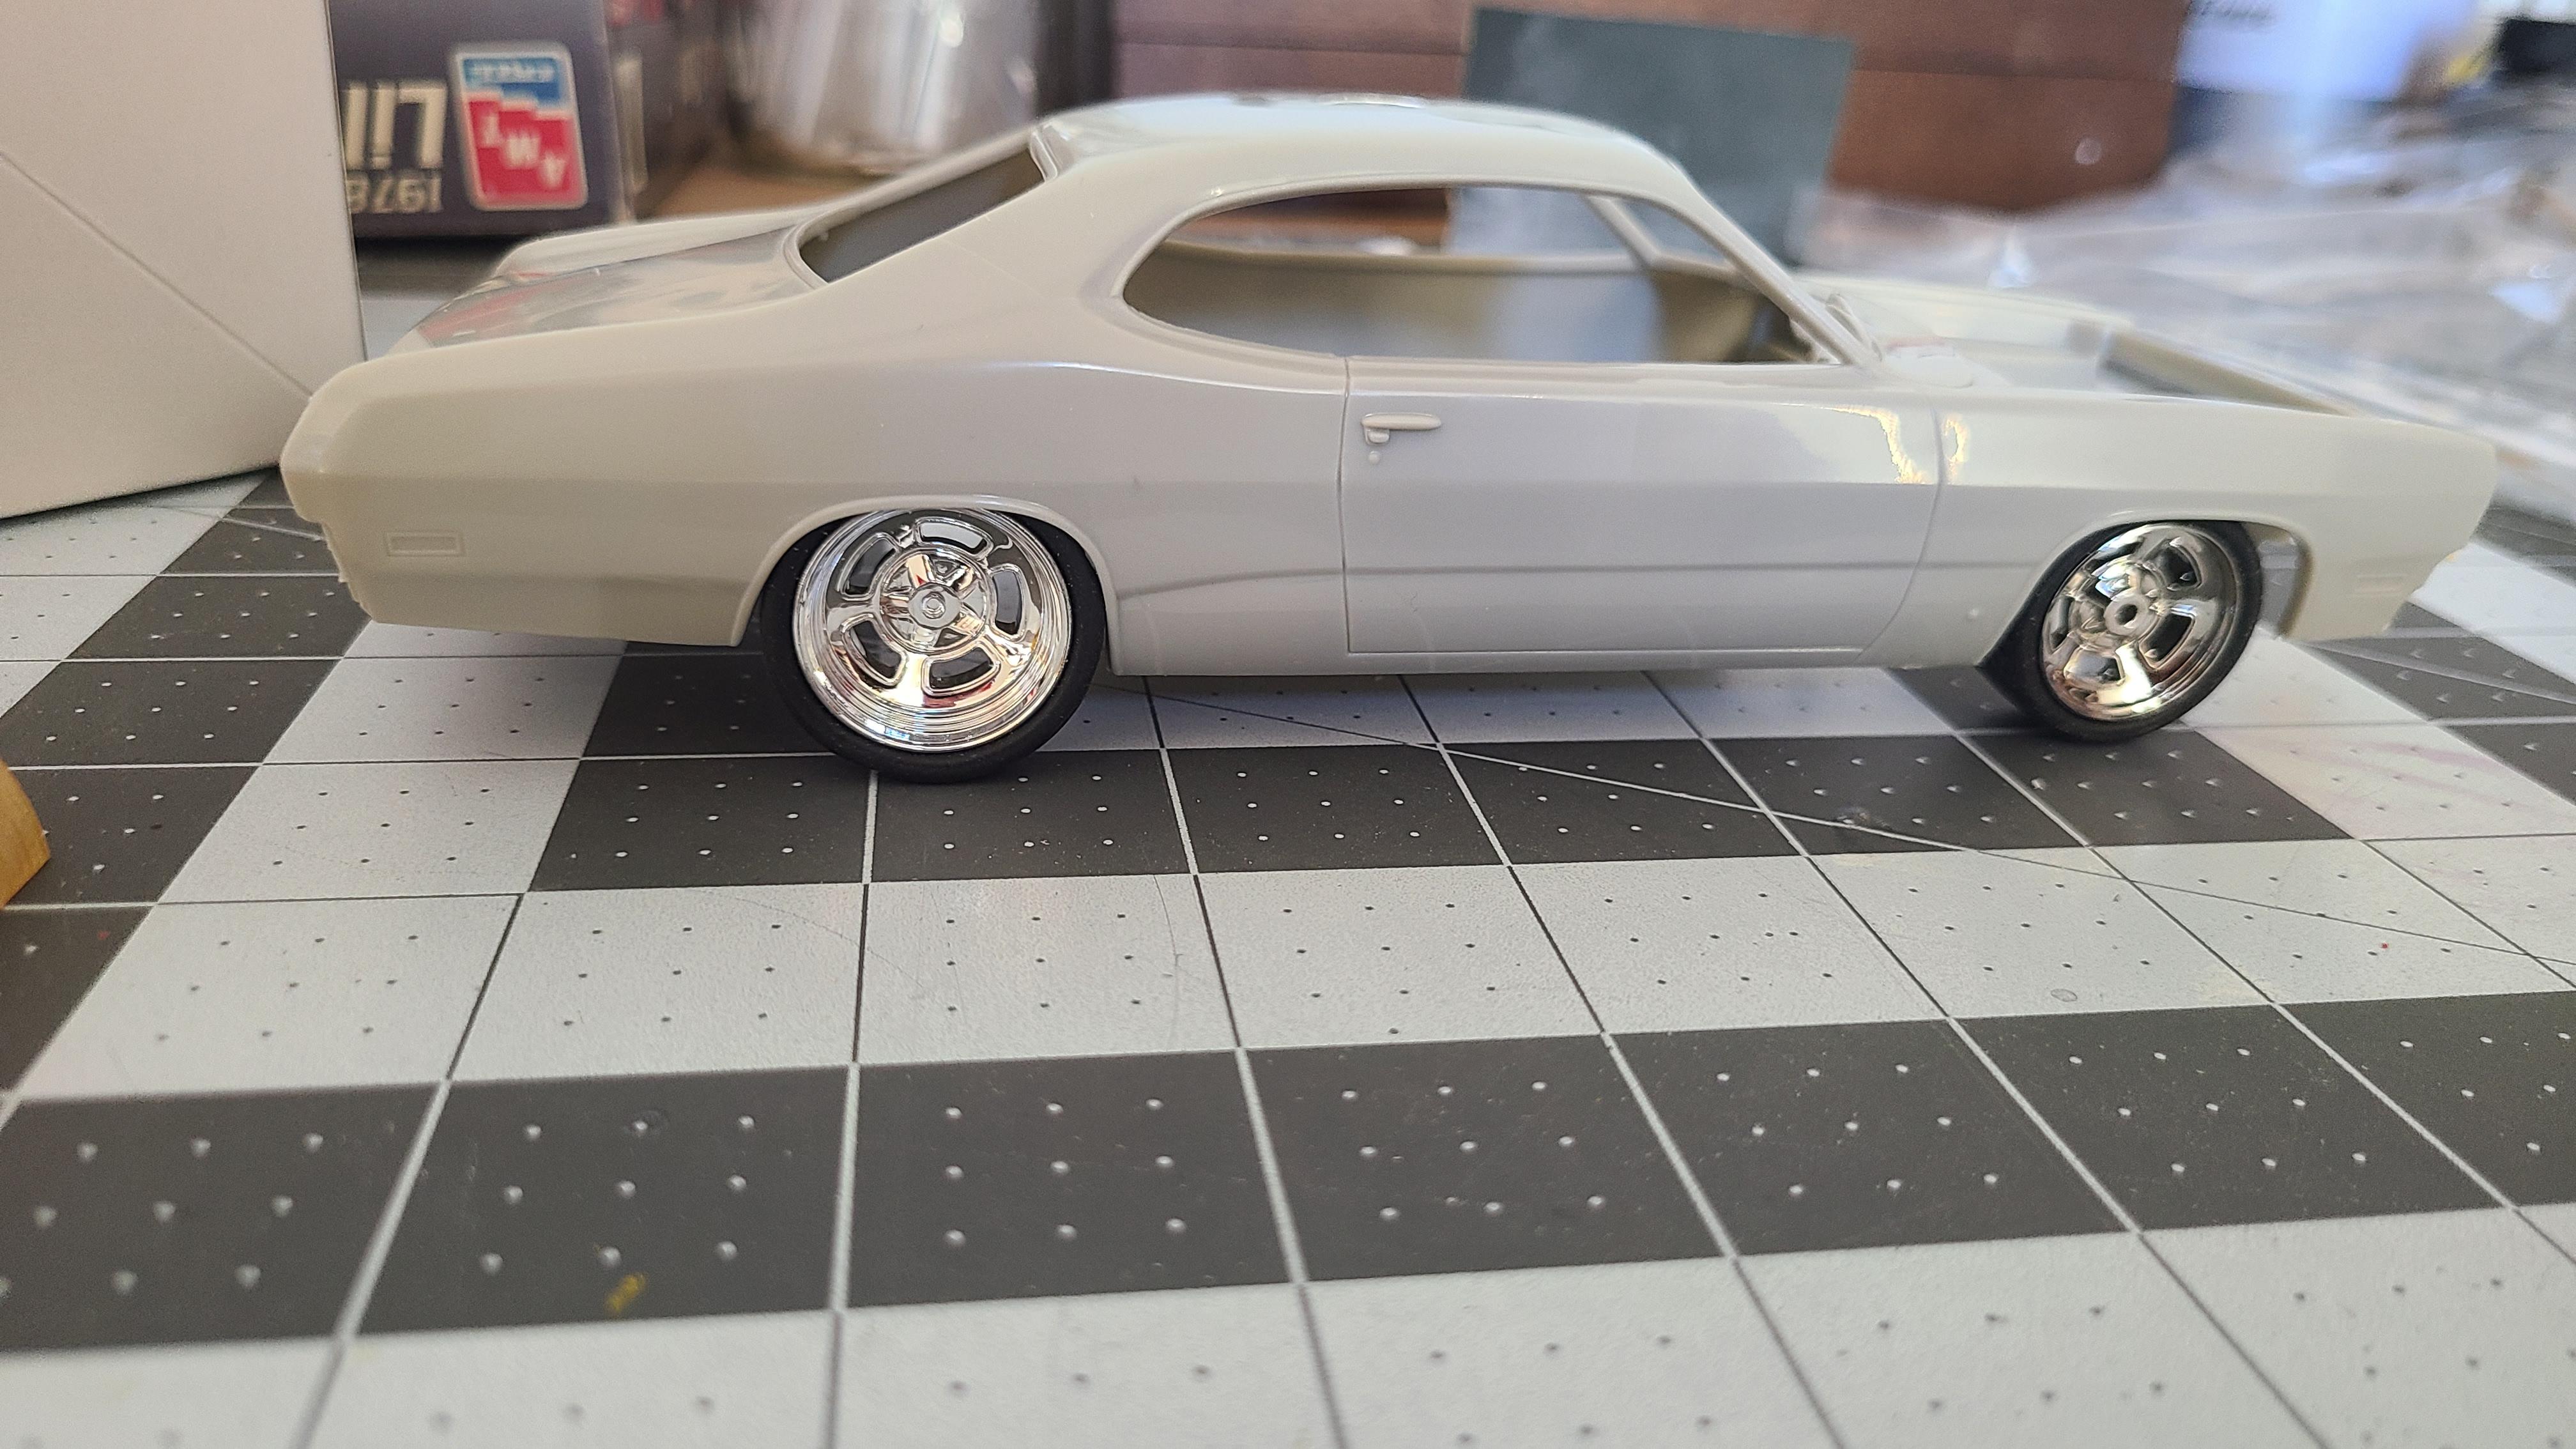
Having a builder's block with one of my other projects, so I decided to start this. Going for a Pro-Touring look with it. Rear wheel wells didn't allow my choice wheels and tires to go where I planned, as far as the stance I envision. So first order of business is to make some mini-tubs. Final stance isn't planned to be as low as the photo shows, but it shows how much more clearance the mini-tubs provide.
-
F150 Lightning 24hr Build
xs650shawn replied to xs650shawn's topic in Model Trucks: Pickups, Vans, SUVs, Light Commercial
Wheels are from the AMT 1960 Chevy street machine pickup kit. -
Just finished this, for a Facebook group 24 hour challenge. 23.5 hours start to finish. AMT 1994 Lightning. Came with incorrect tailgate, and didn't have time to source another, so I just scratched up some bed braces, so as to not look unfinished. Also lost an exhaust crossover pipe somewhere along the way, but overall didn't turn out bad, considering the time in it. My airbrush wasn't cooperating, so painted the whole thing with my full size spray gun. Changed the wheels, flocked the interior, otherwise box stock.
-
AMT Dodge D100 Styleside
xs650shawn replied to xs650shawn's topic in WIP: Model Trucks: Pickups, Vans, SUVs, Light Commercial
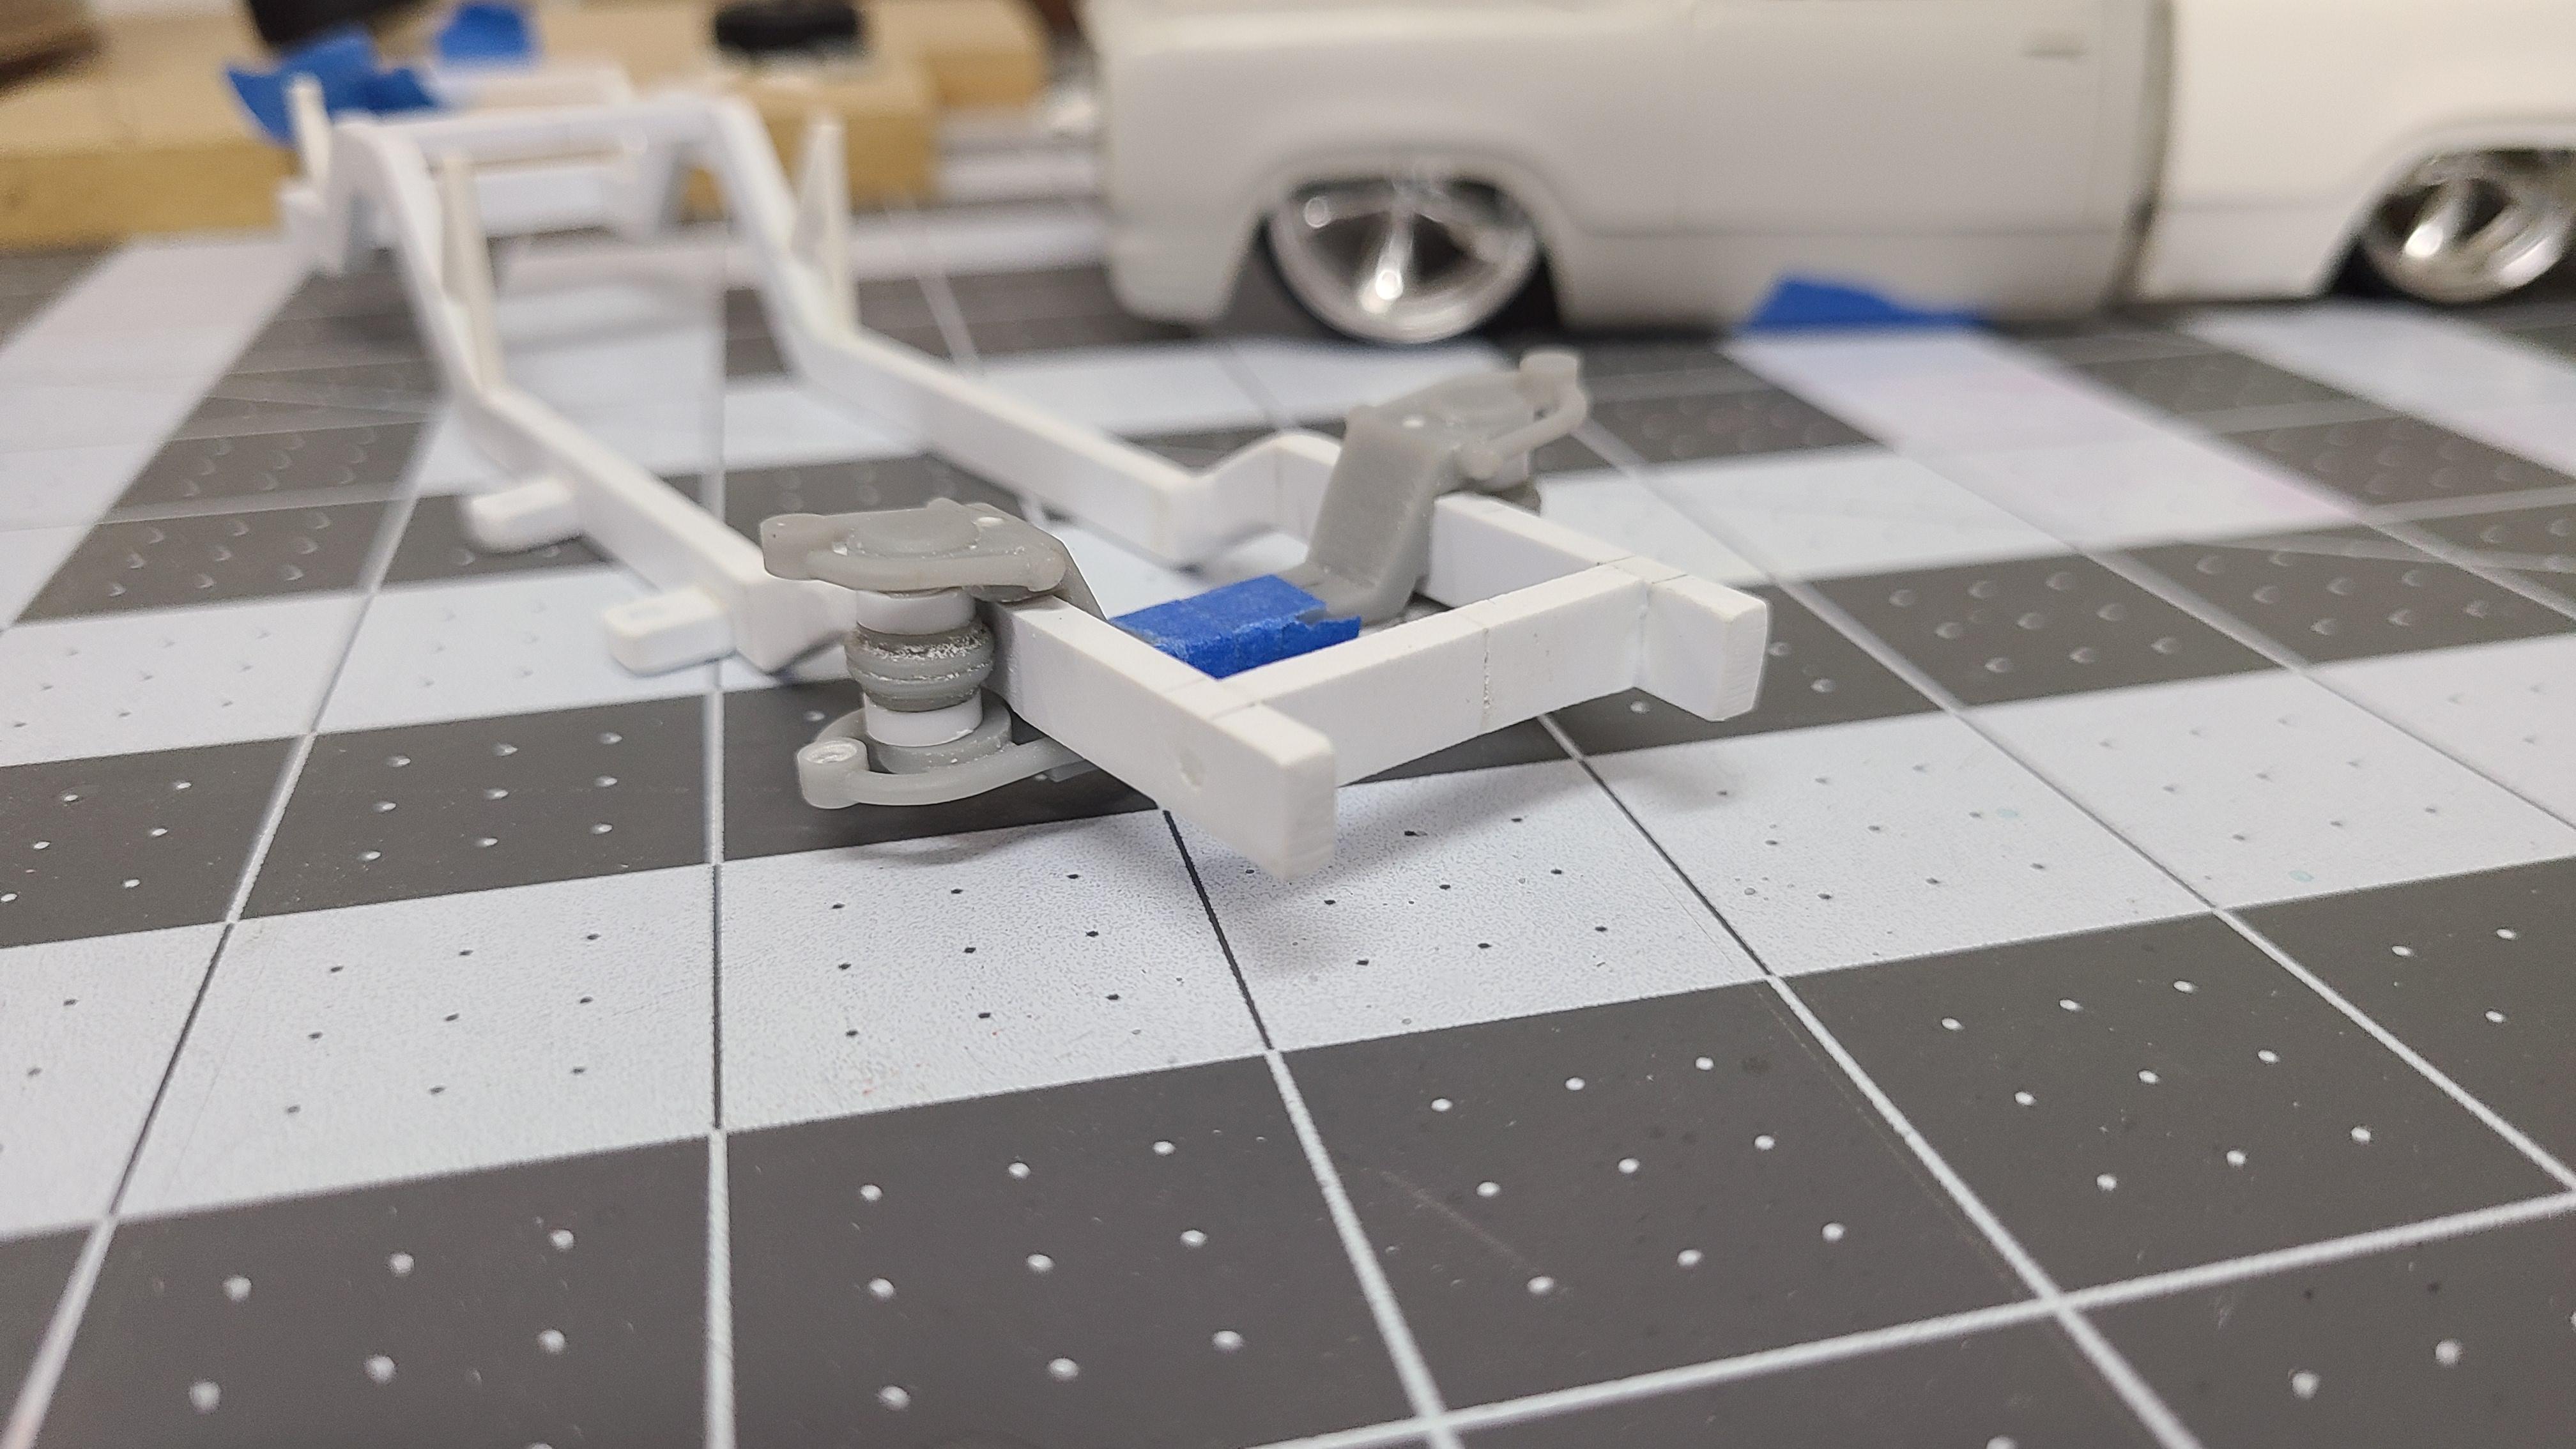
Some progress today. Chassis finally getting something resembling a suspension under it. Stance and final ride height mocked up as well.
-
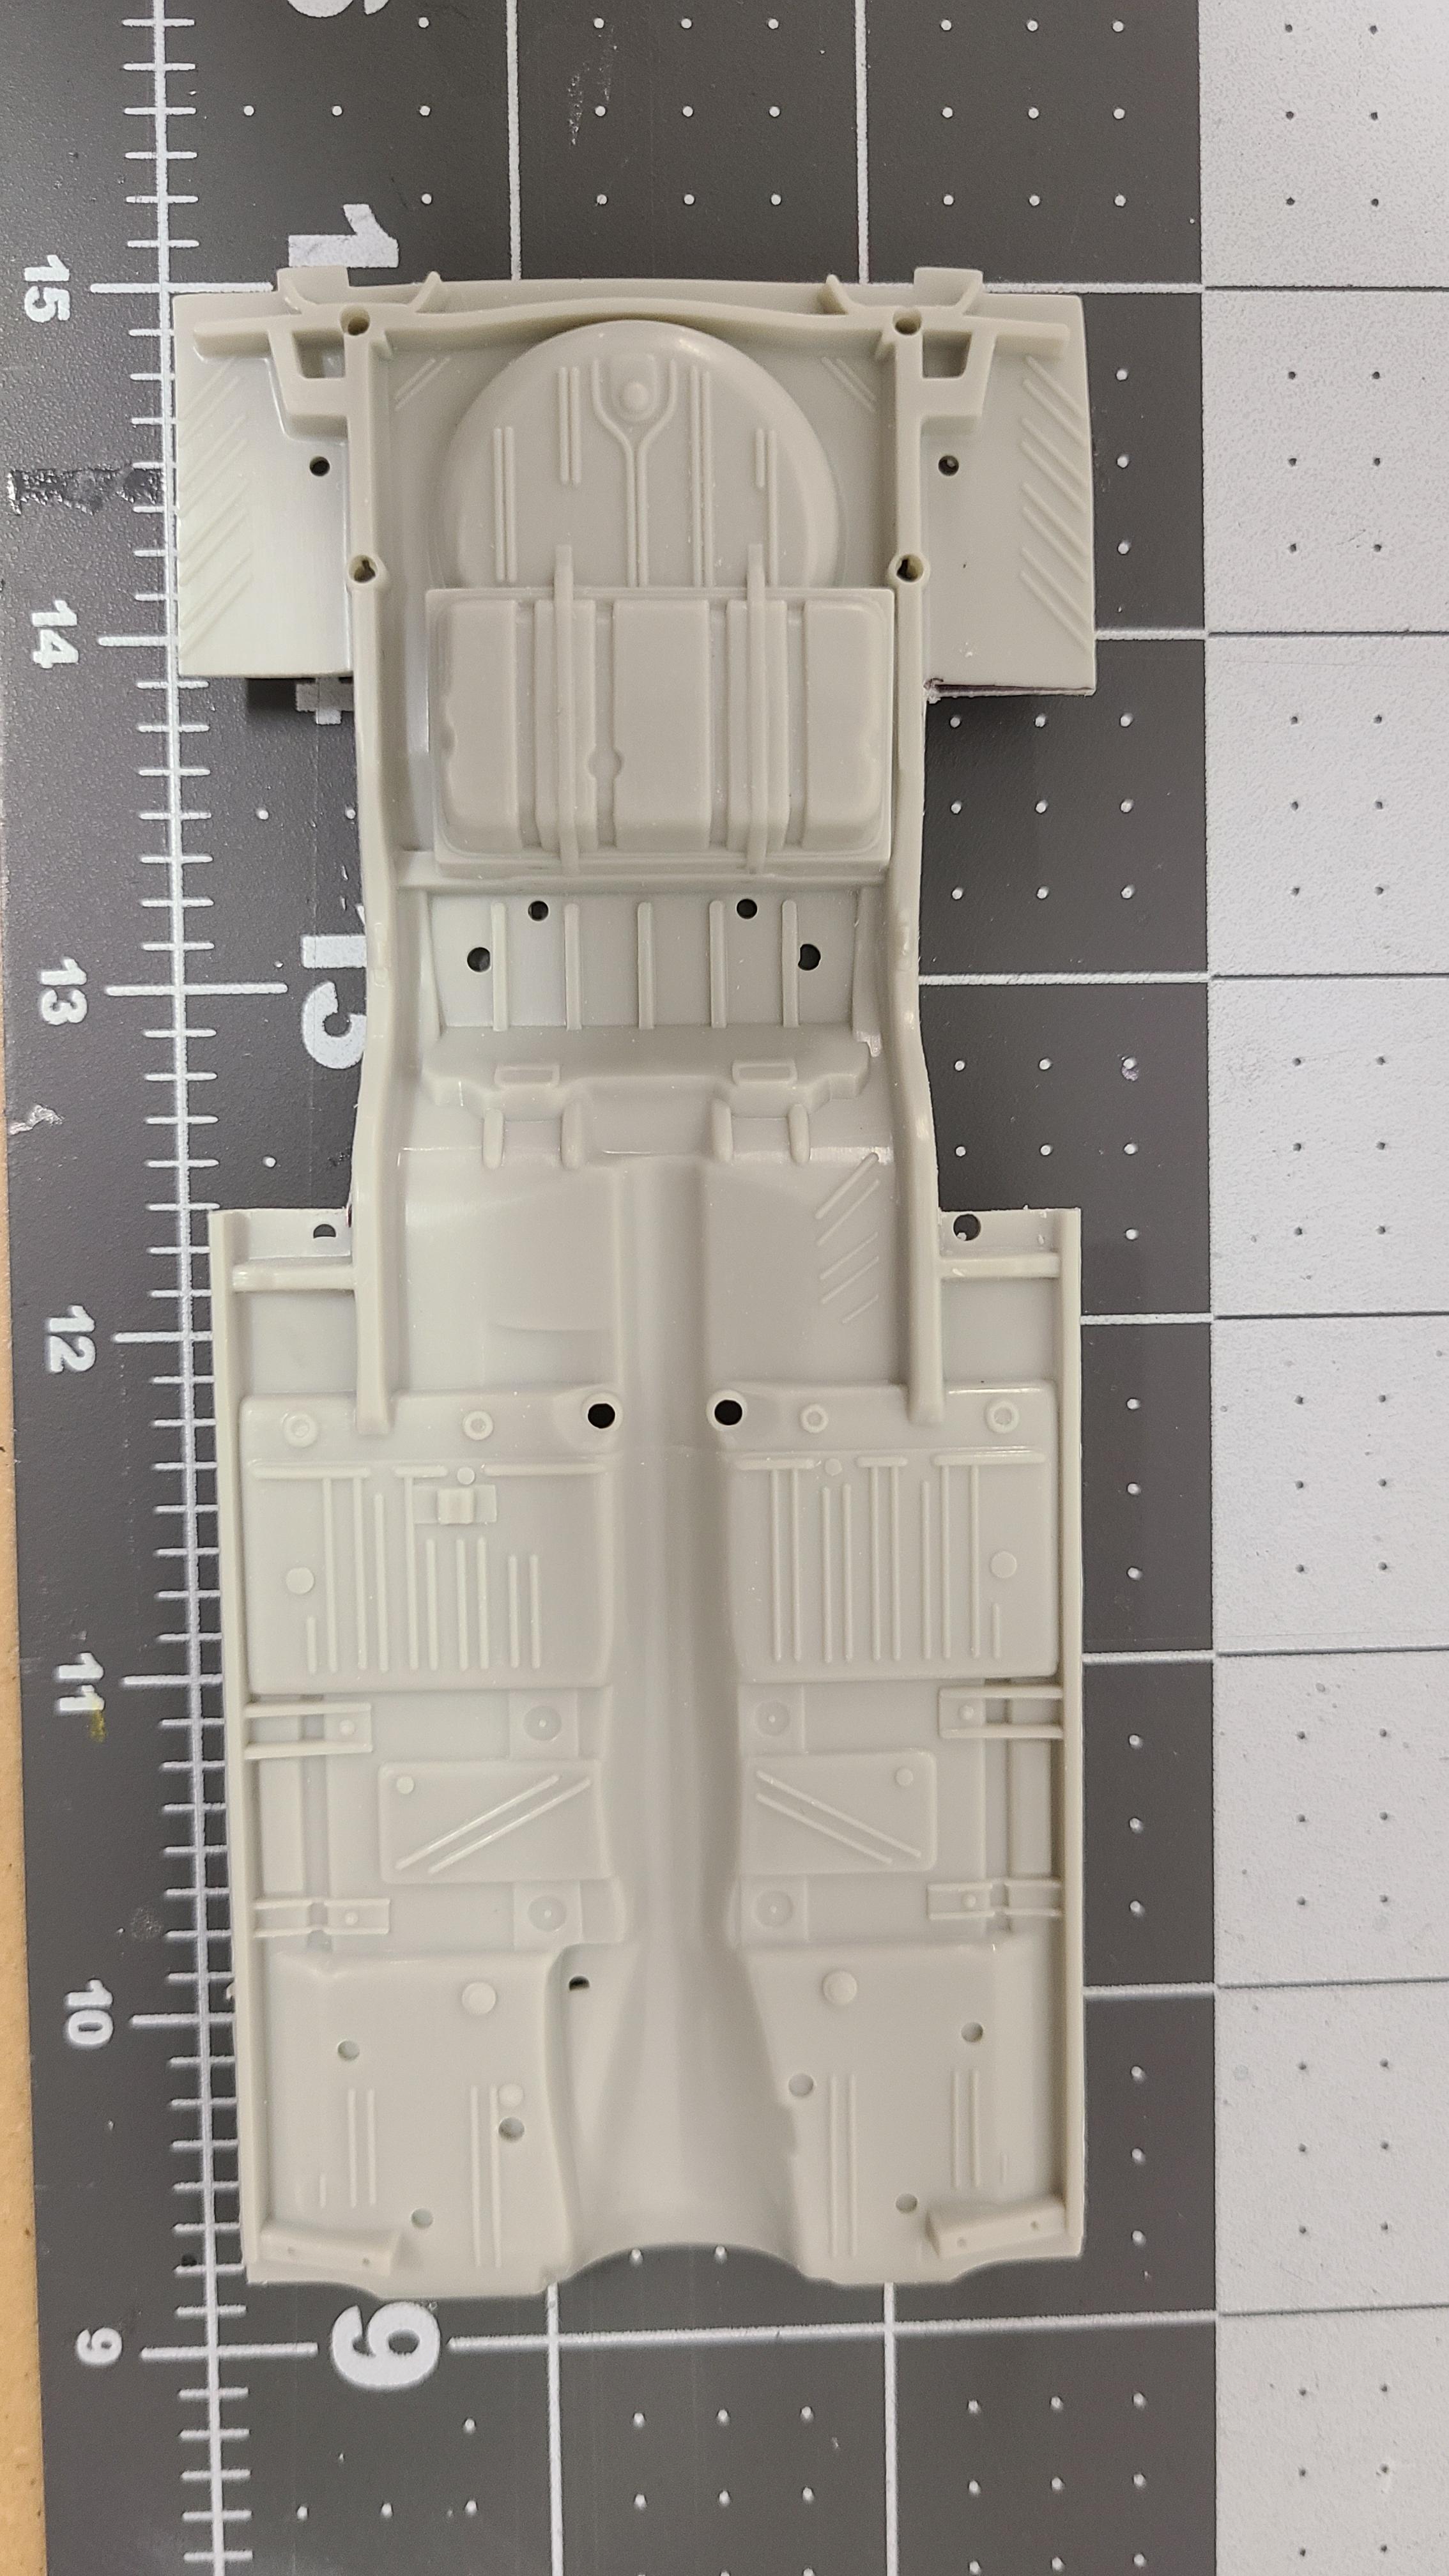
AMT Dodge D100 Styleside
xs650shawn replied to xs650shawn's topic in WIP: Model Trucks: Pickups, Vans, SUVs, Light Commercial
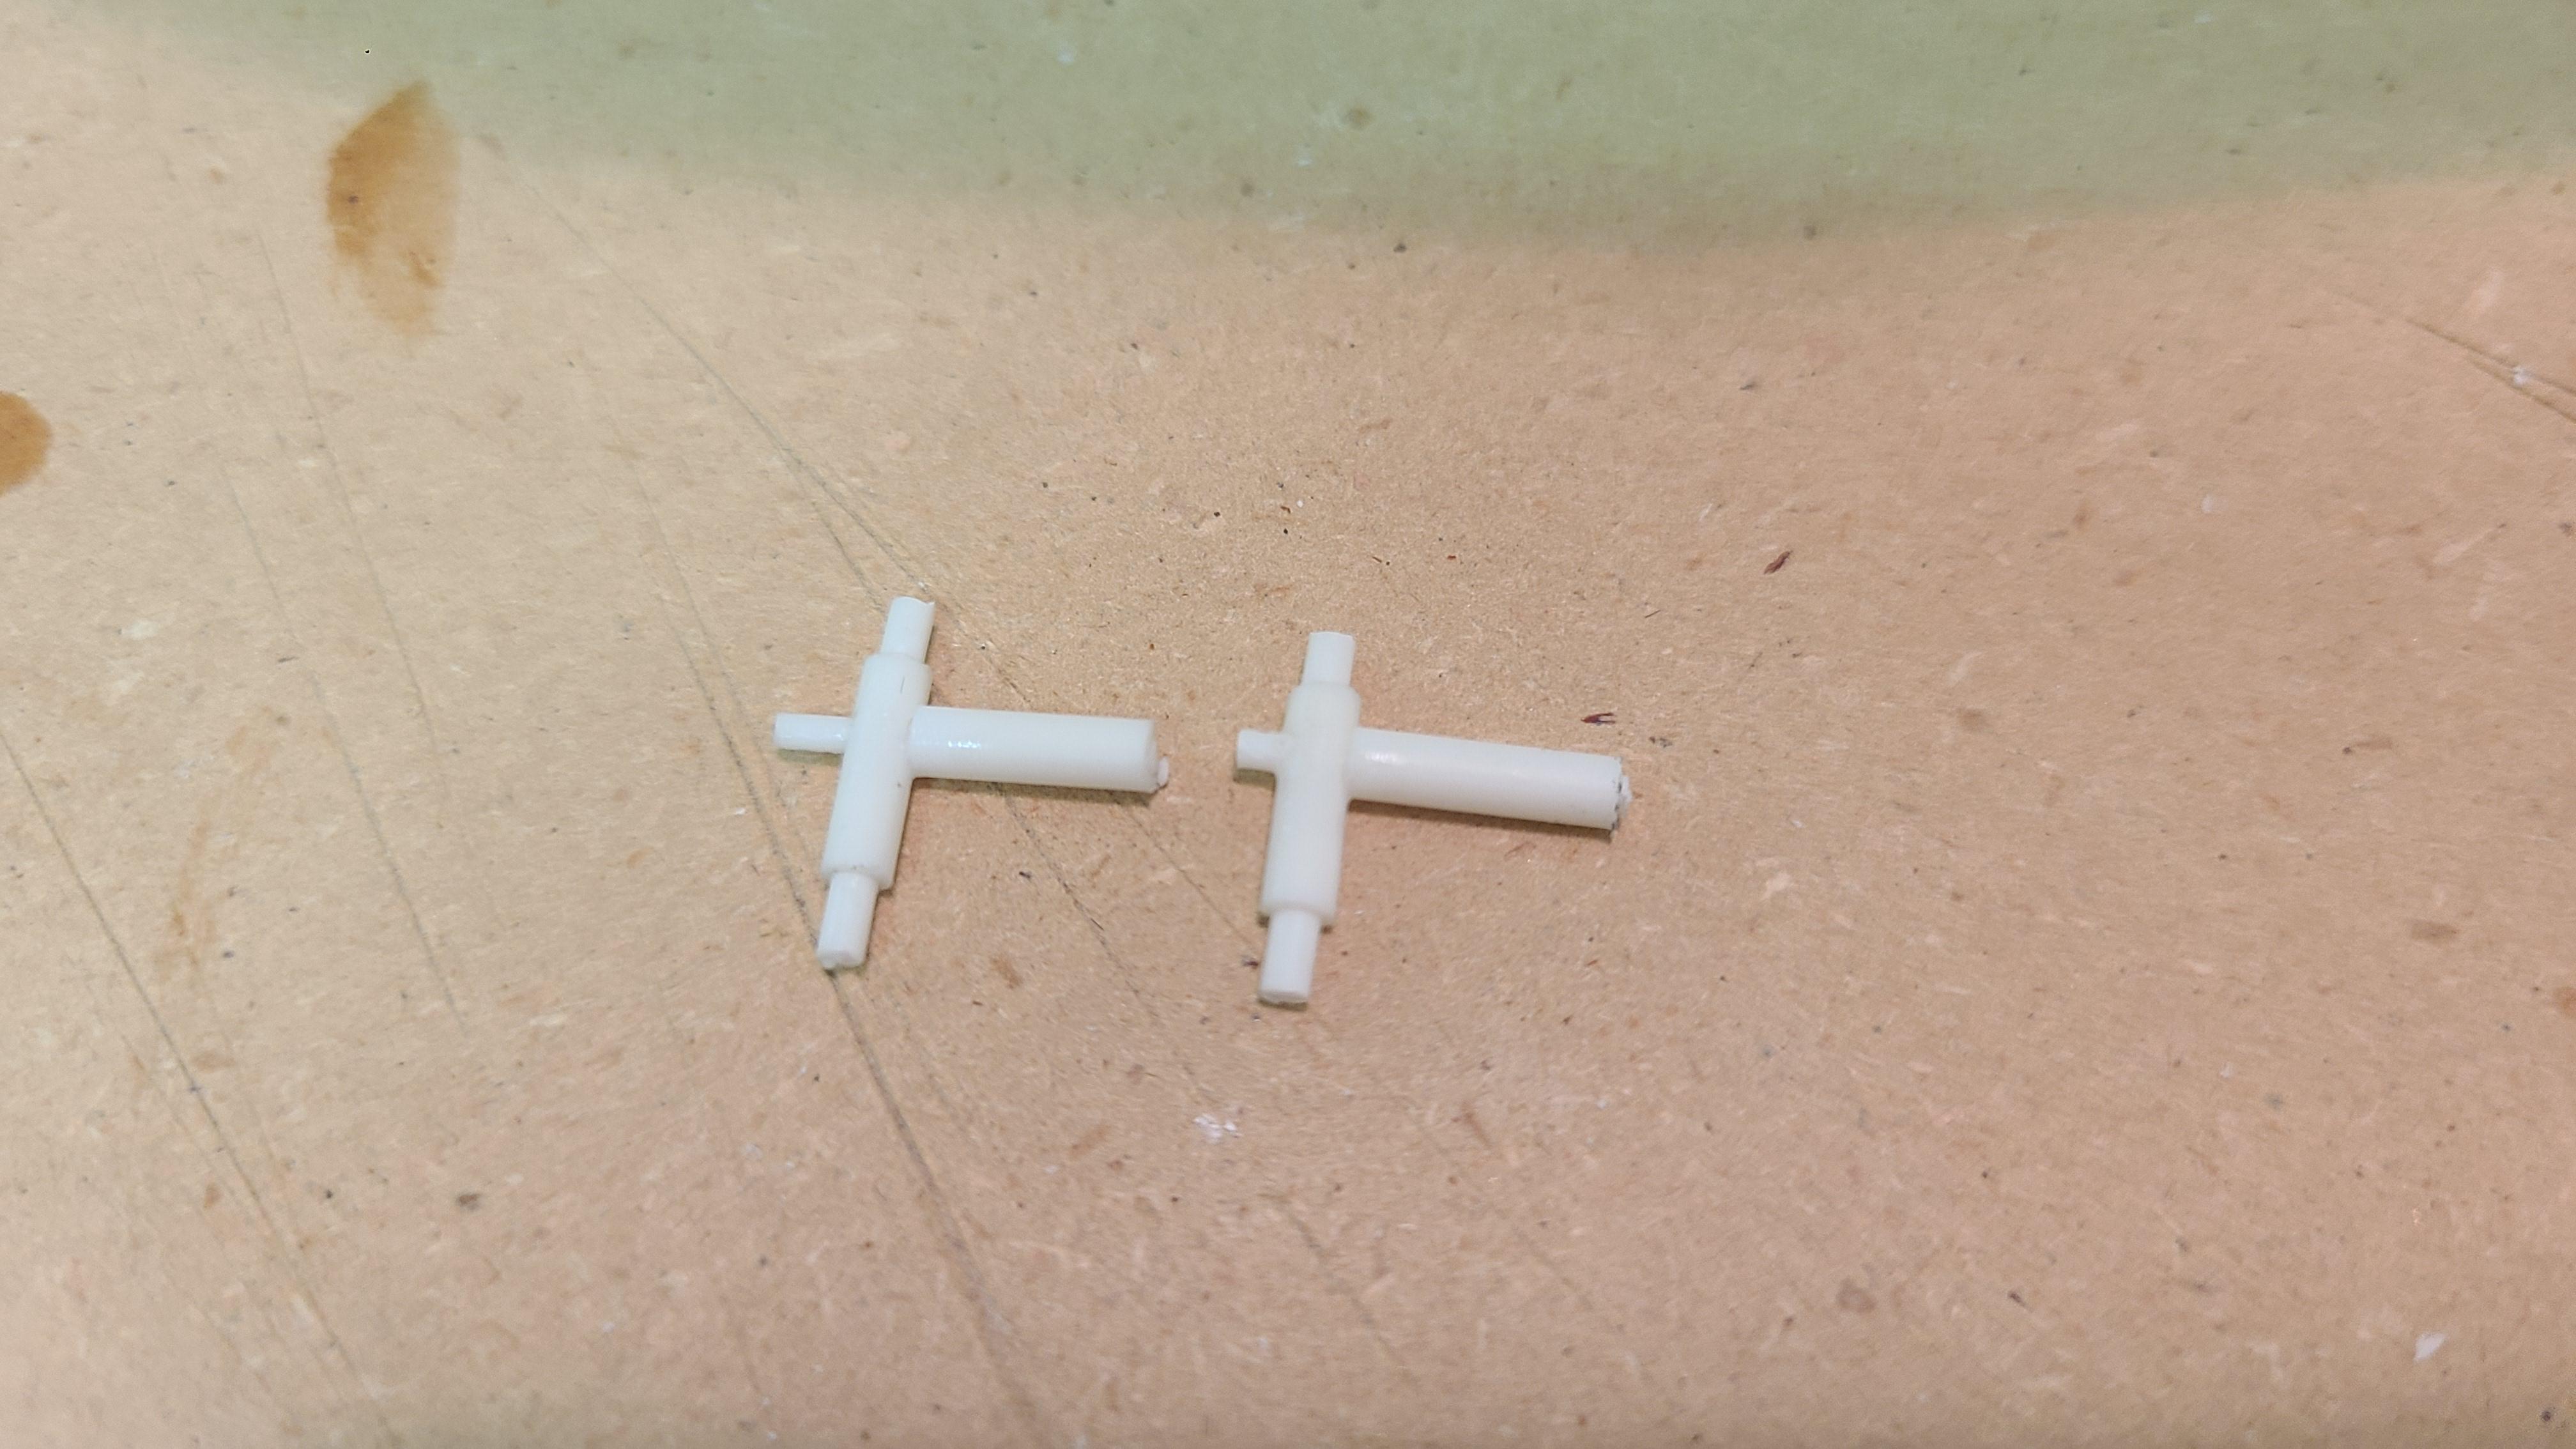
After some builders block, the D100 is back on the bench. Having been a fan of airbagged vehicles forever,I finally have an airbagged truck! ??? needs a bit more fitting, but progress.
-
Nice work!
-
Awesome!
-
Thanks for the kind words everyone. Those that have built this one know how it will fight you to get good results. I wanted to stay fairly basic with it.
-
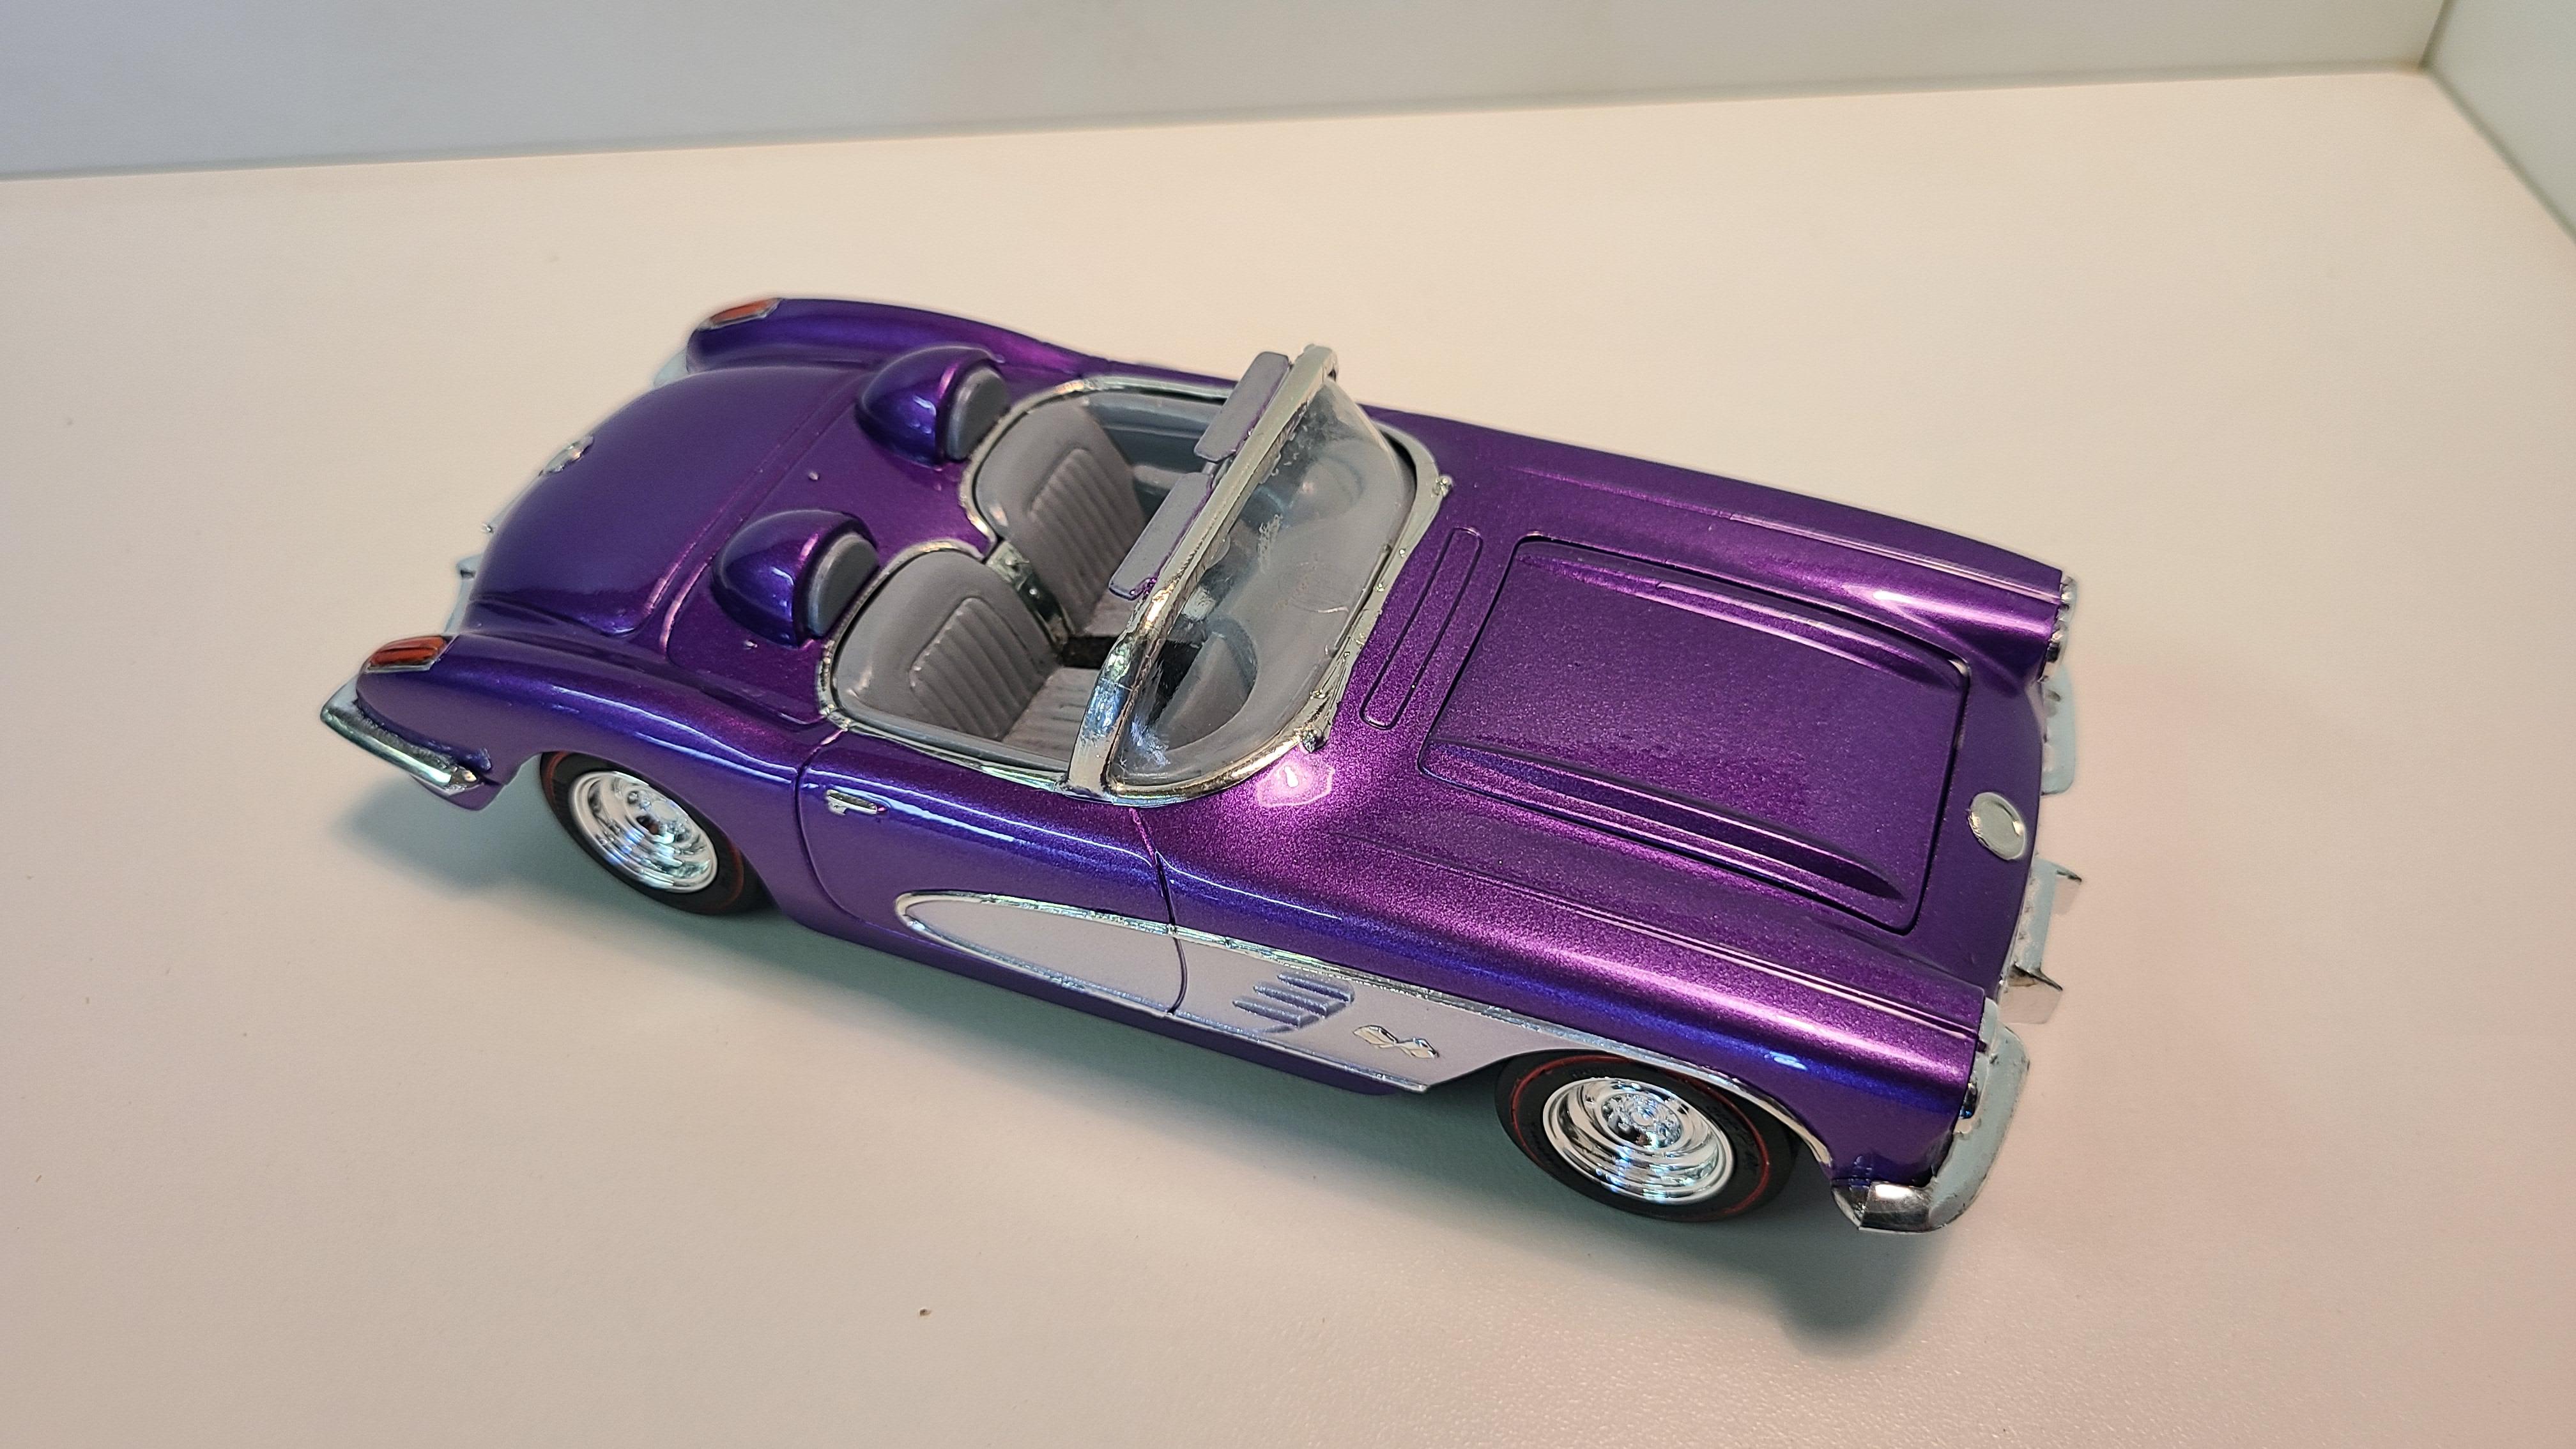
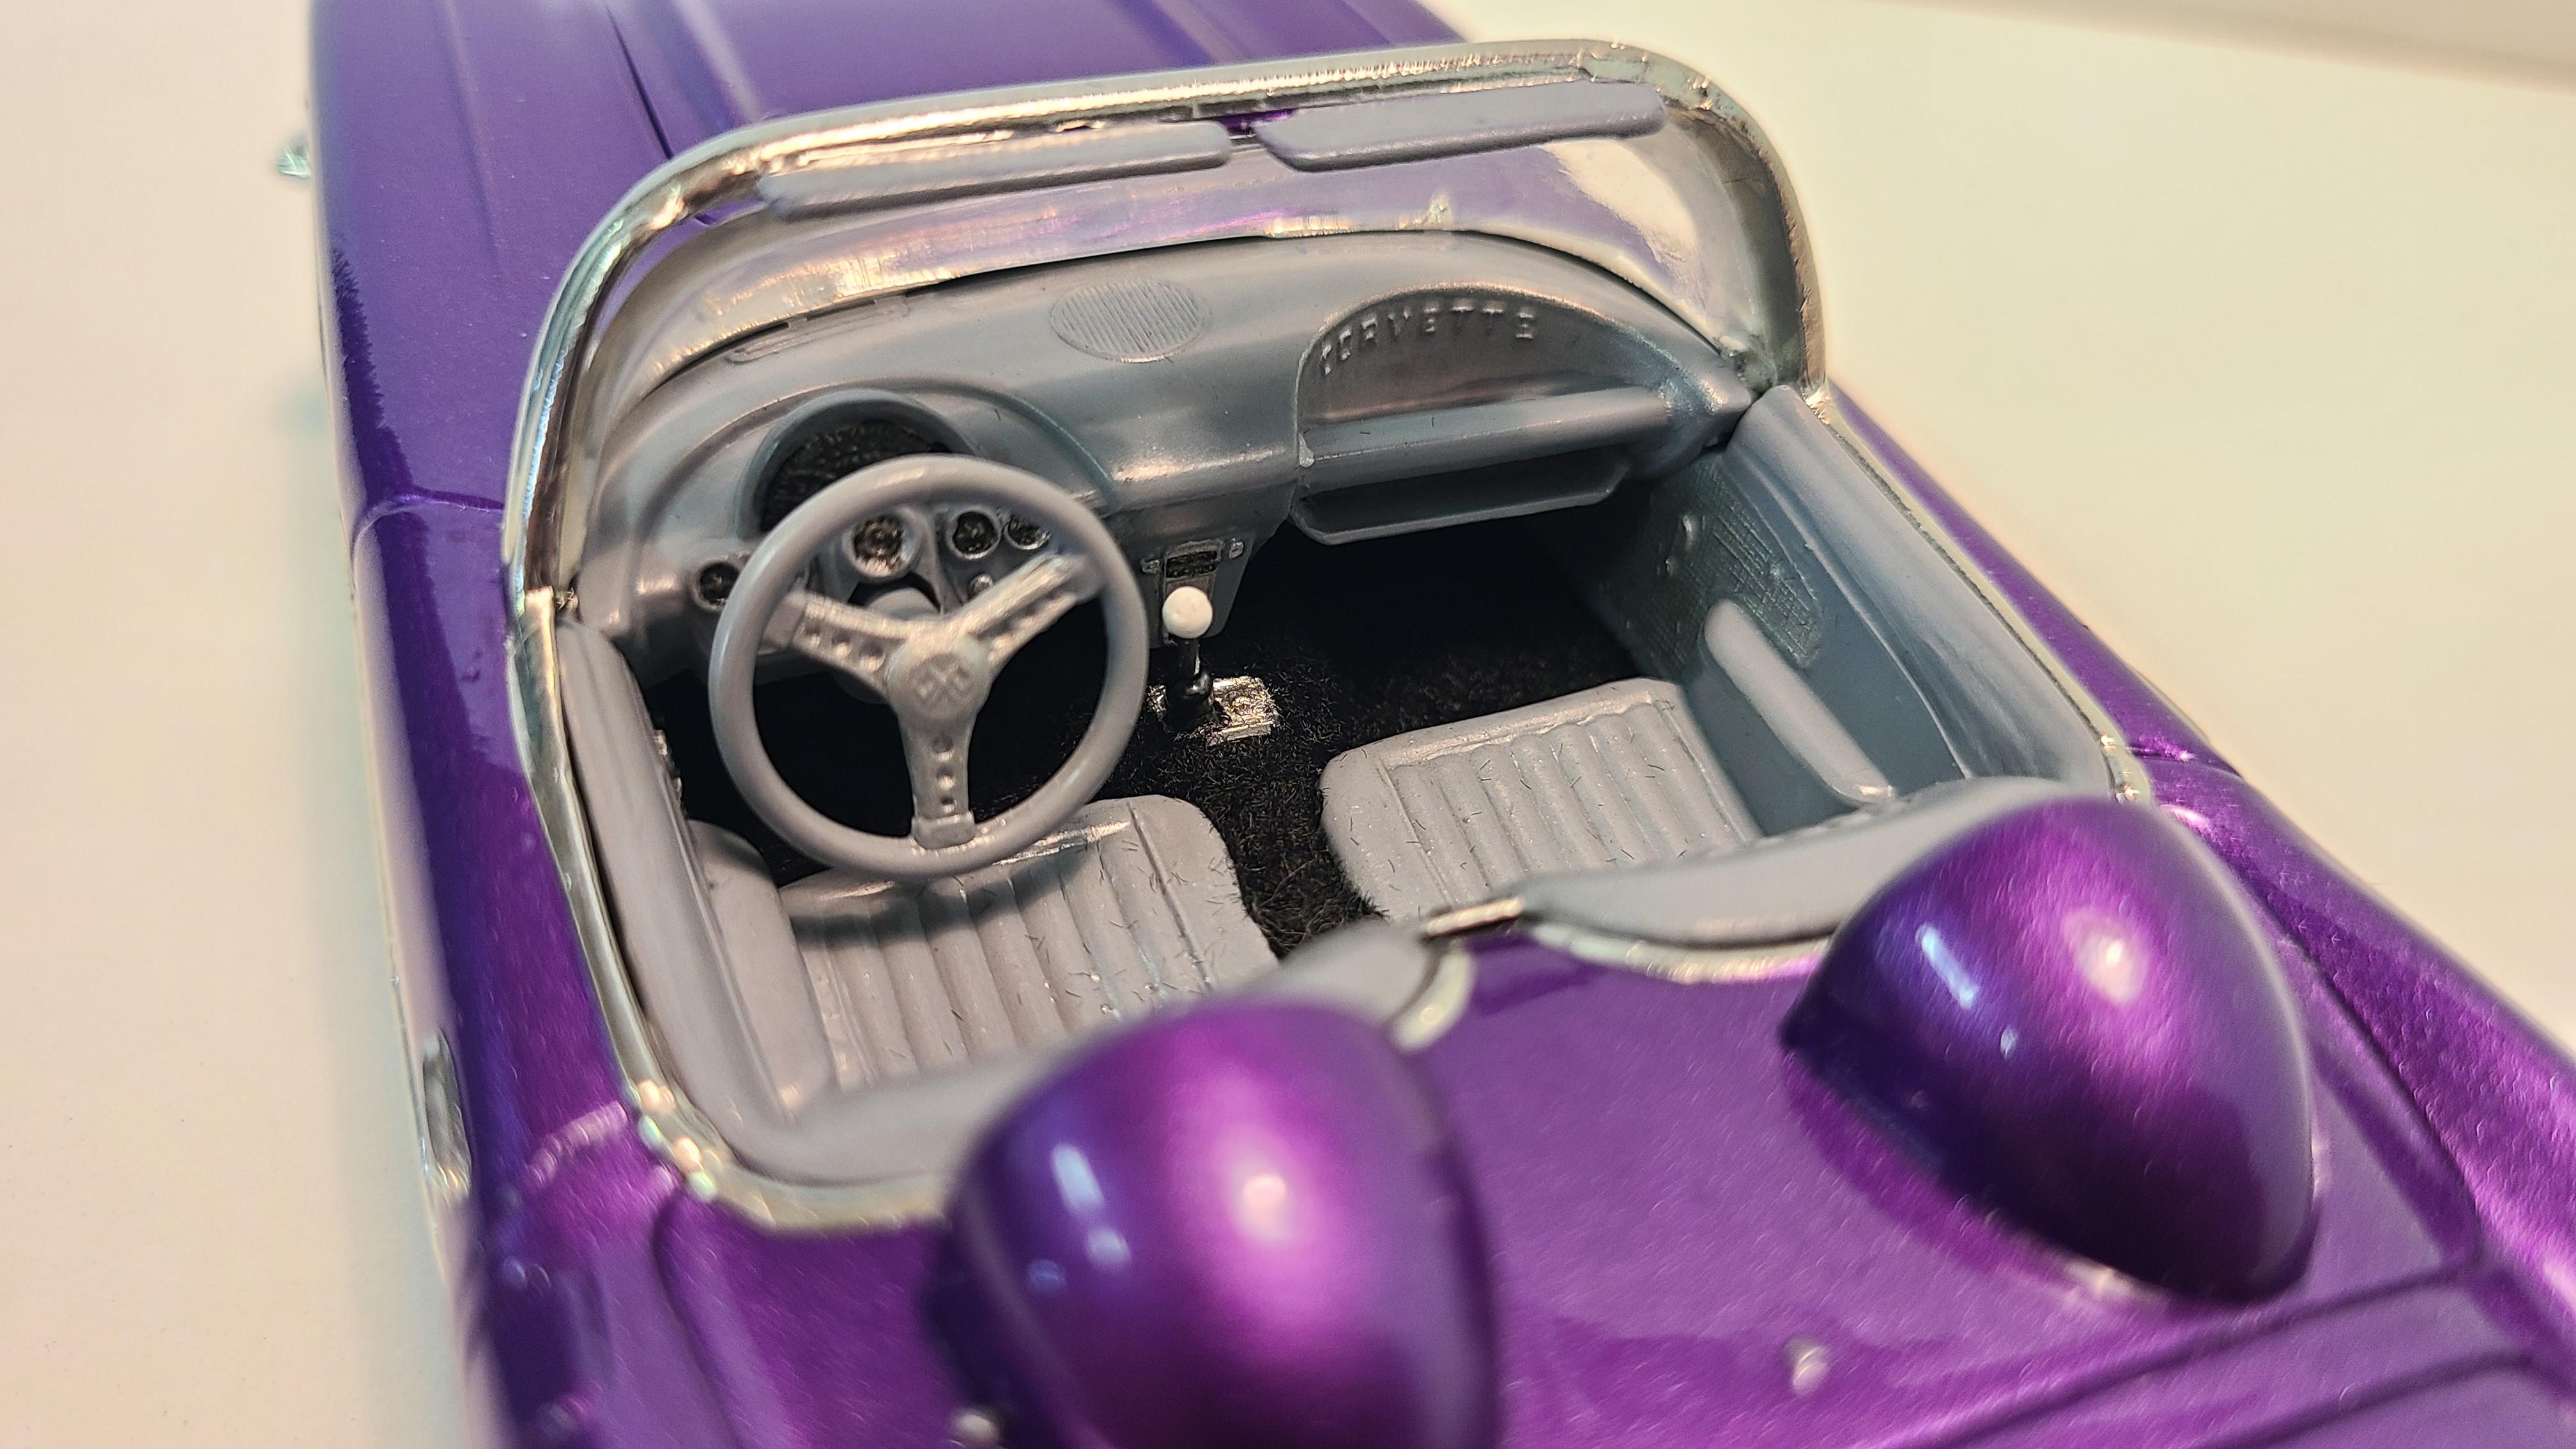
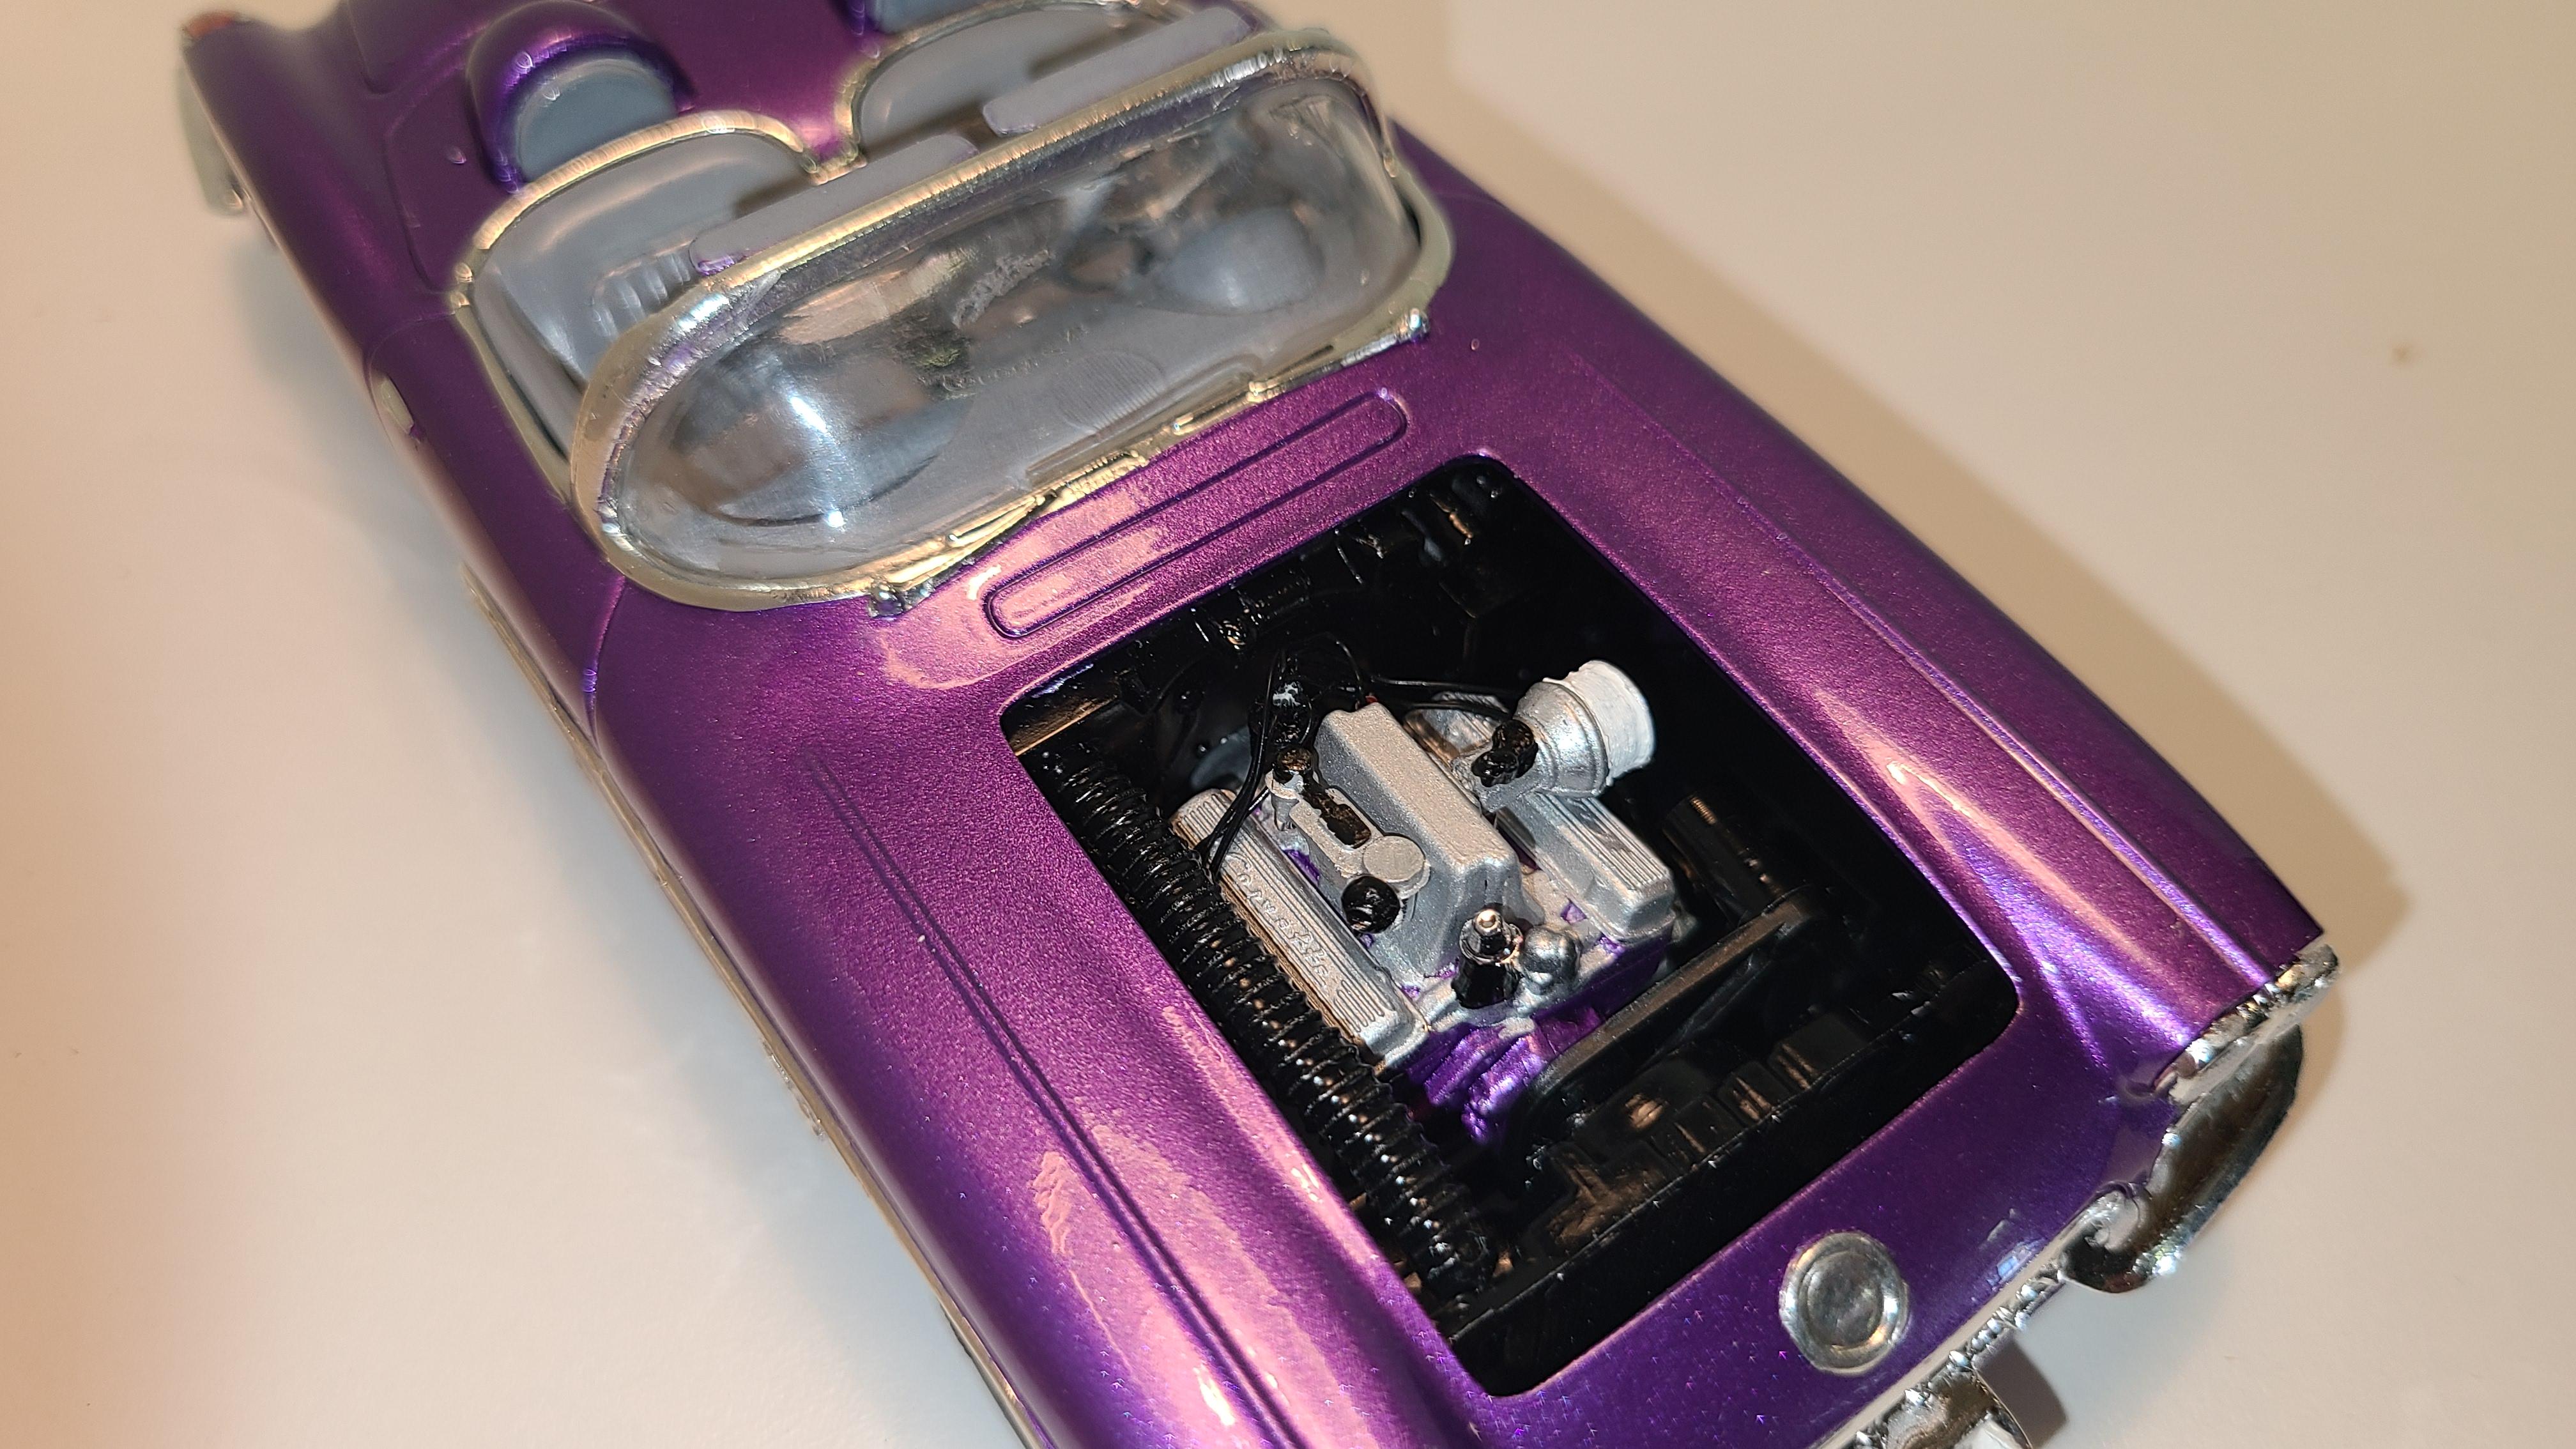
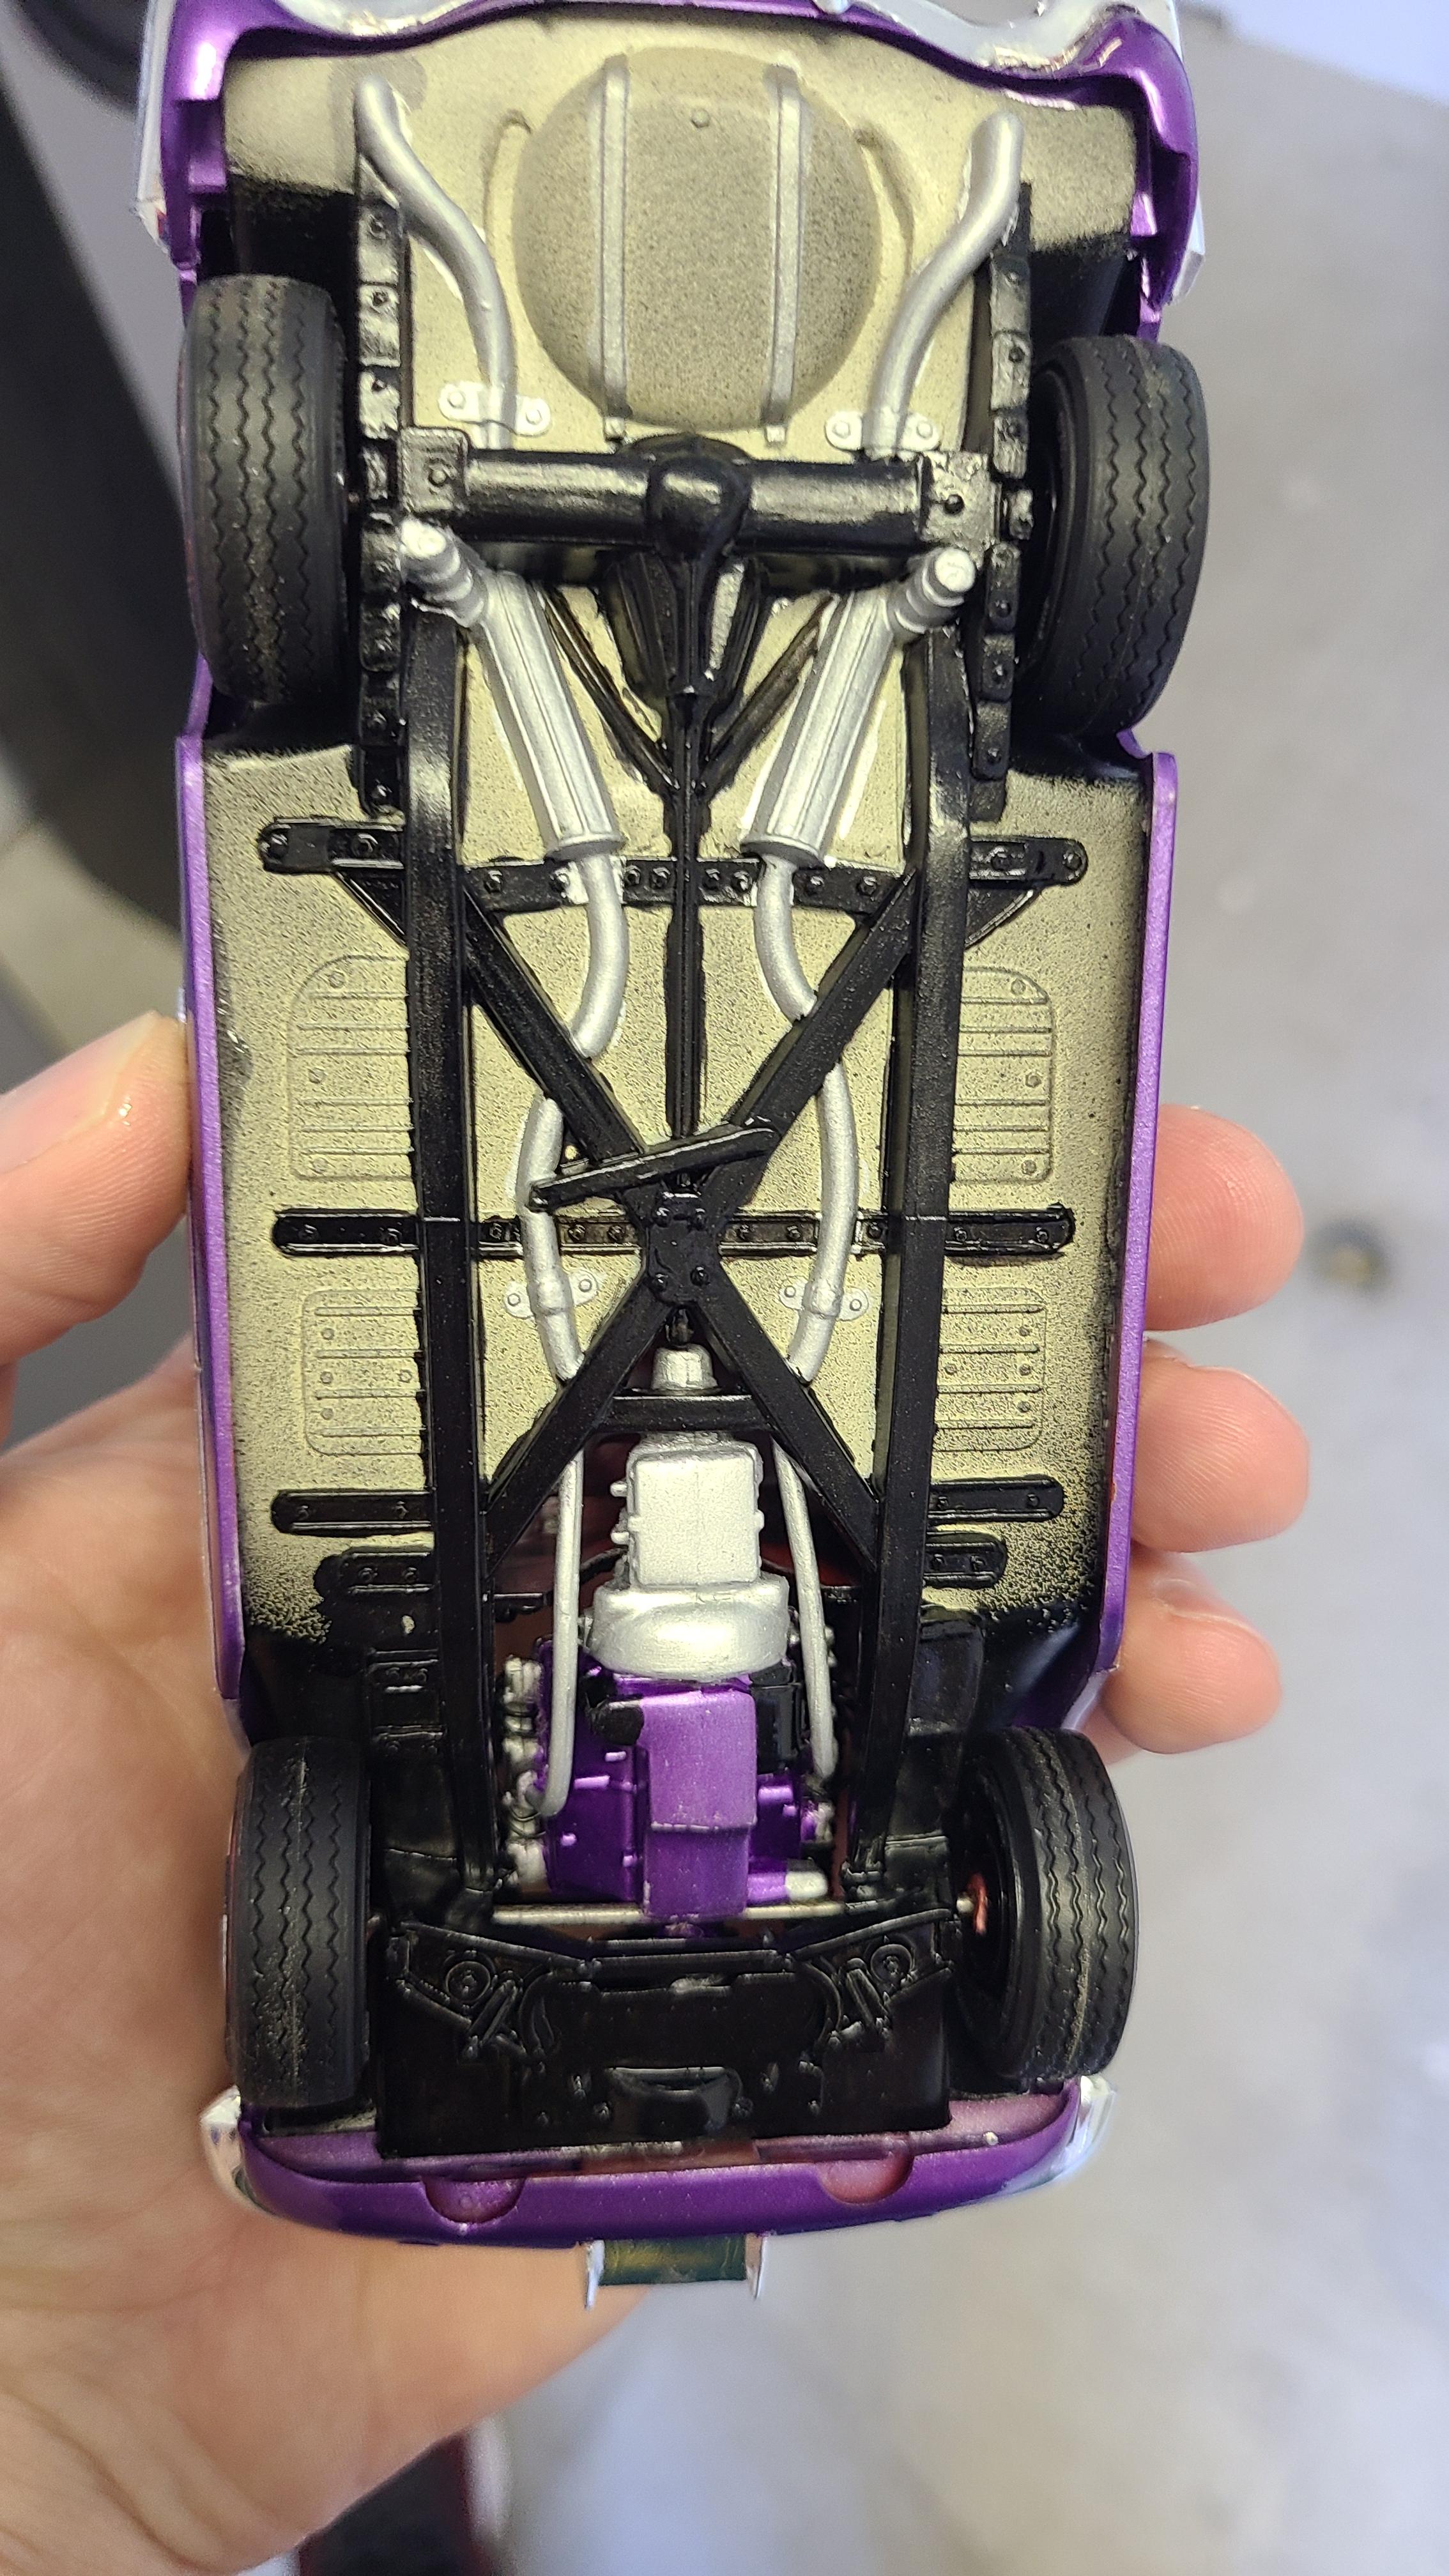
Createx Plum Pearl with 2K clear
-
Latest one I finished (which doesn't happen often now). Took some work to get decent results with this kit, but didn't turn out bad.