IanH
-
Posts
139 -
Joined
-
Last visited
Content Type
Profiles
Forums
Events
Gallery
Everything posted by IanH
-
Tamiya 1/12 Ferrari 312b
IanH replied to IanH's topic in WIP: Other Racing: Road Racing, Land Speed Racers
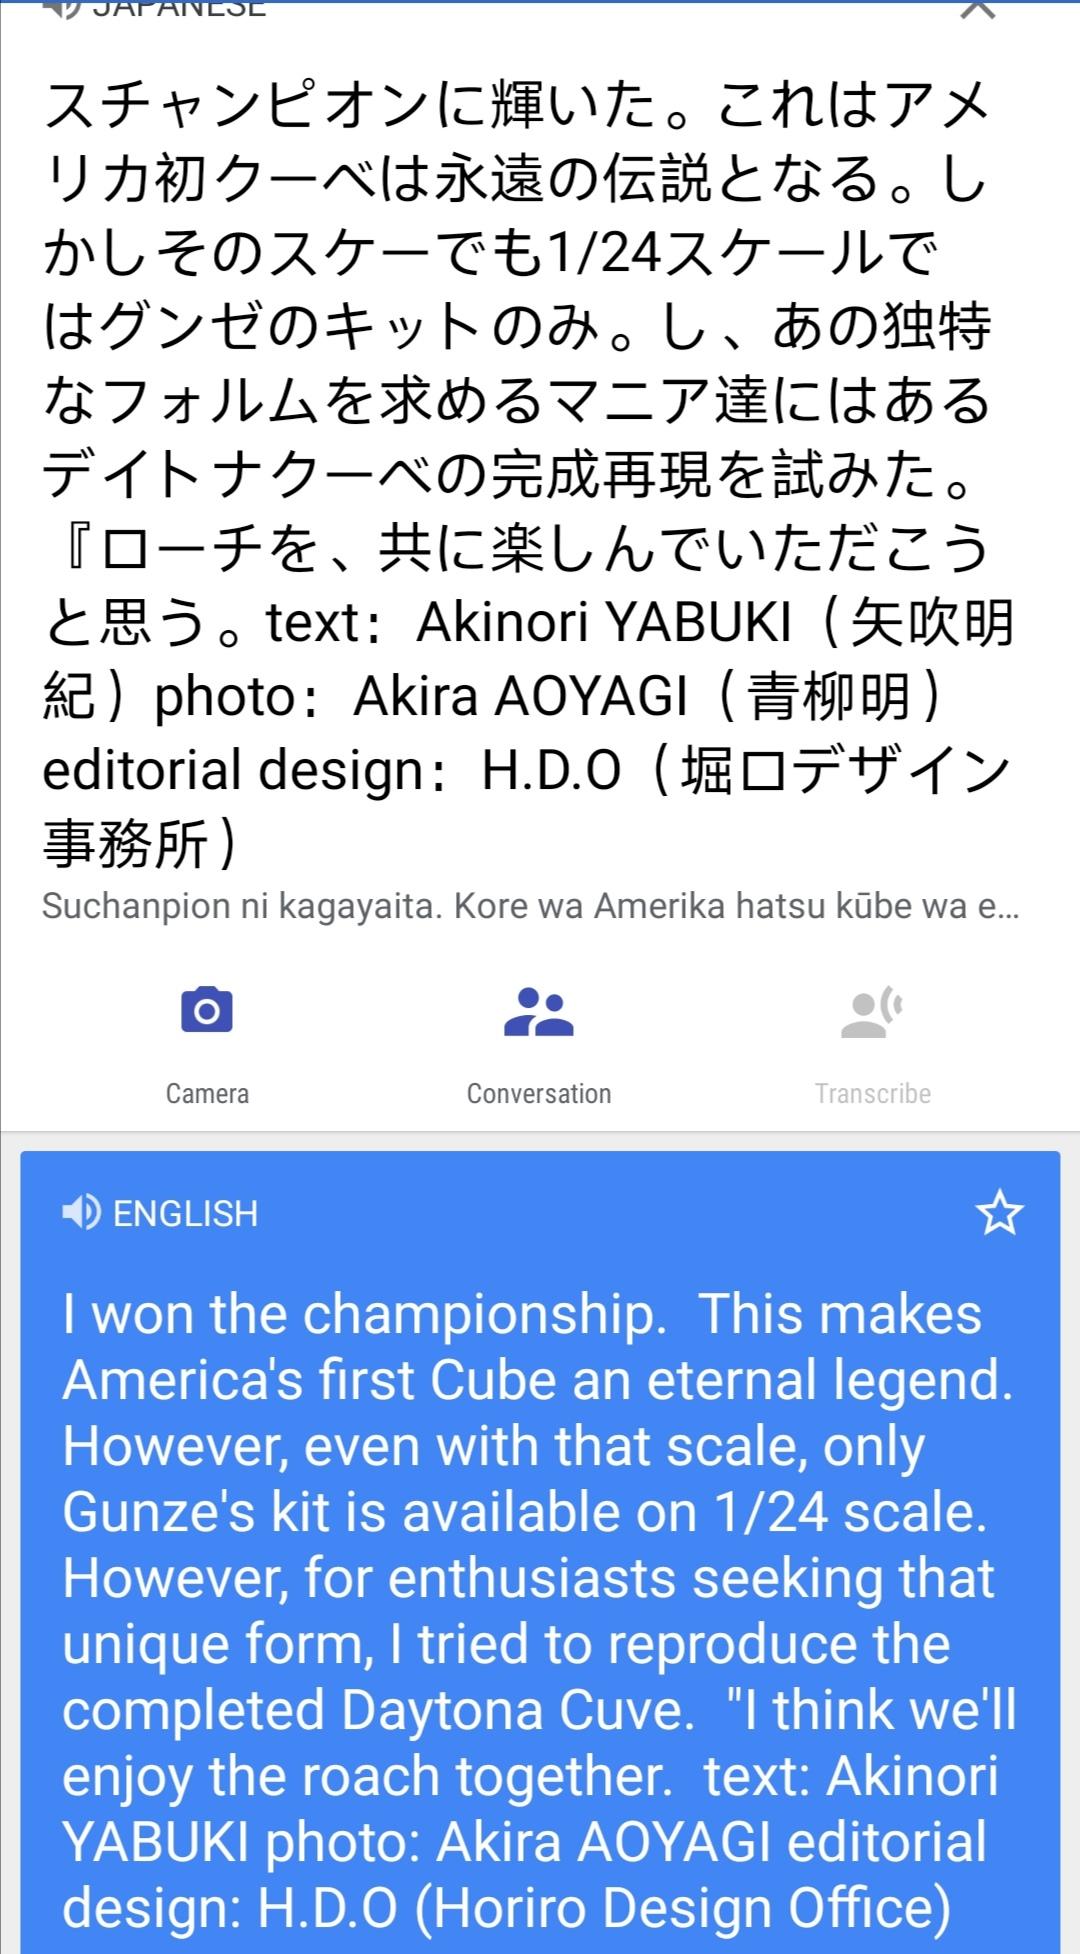
All taped up and ready to do some more bodywork. Not much to report on, so this is more of a test post....@JohnnyK, how does this picture display now?
-
(HRM) Shelby Cobra Daytona Coupe
IanH replied to Venom's topic in WIP: Other Racing: Road Racing, Land Speed Racers
Google translate is a little crude, but it gives you an idea of what they are saying....
-
Tamiya 1/12 Ferrari 312b
IanH replied to IanH's topic in WIP: Other Racing: Road Racing, Land Speed Racers
Thanks, I didn't realise, as it's fine on my mobile. Will try it. ? -
Tamiya 1/12 Ferrari 312b
IanH replied to IanH's topic in WIP: Other Racing: Road Racing, Land Speed Racers
Finishing off the evening with the lower portion of the body glued to the upper portion. Will remove the tape tomorrow, and start to work on the joins, and tape up the interior to protect from dust, and over spray in future steps.
-
Tamiya 1/12 Ferrari 312b
IanH replied to IanH's topic in WIP: Other Racing: Road Racing, Land Speed Racers
"Off with his head!" -
Tamiya 1/12 Ferrari 312b
IanH replied to IanH's topic in WIP: Other Racing: Road Racing, Land Speed Racers
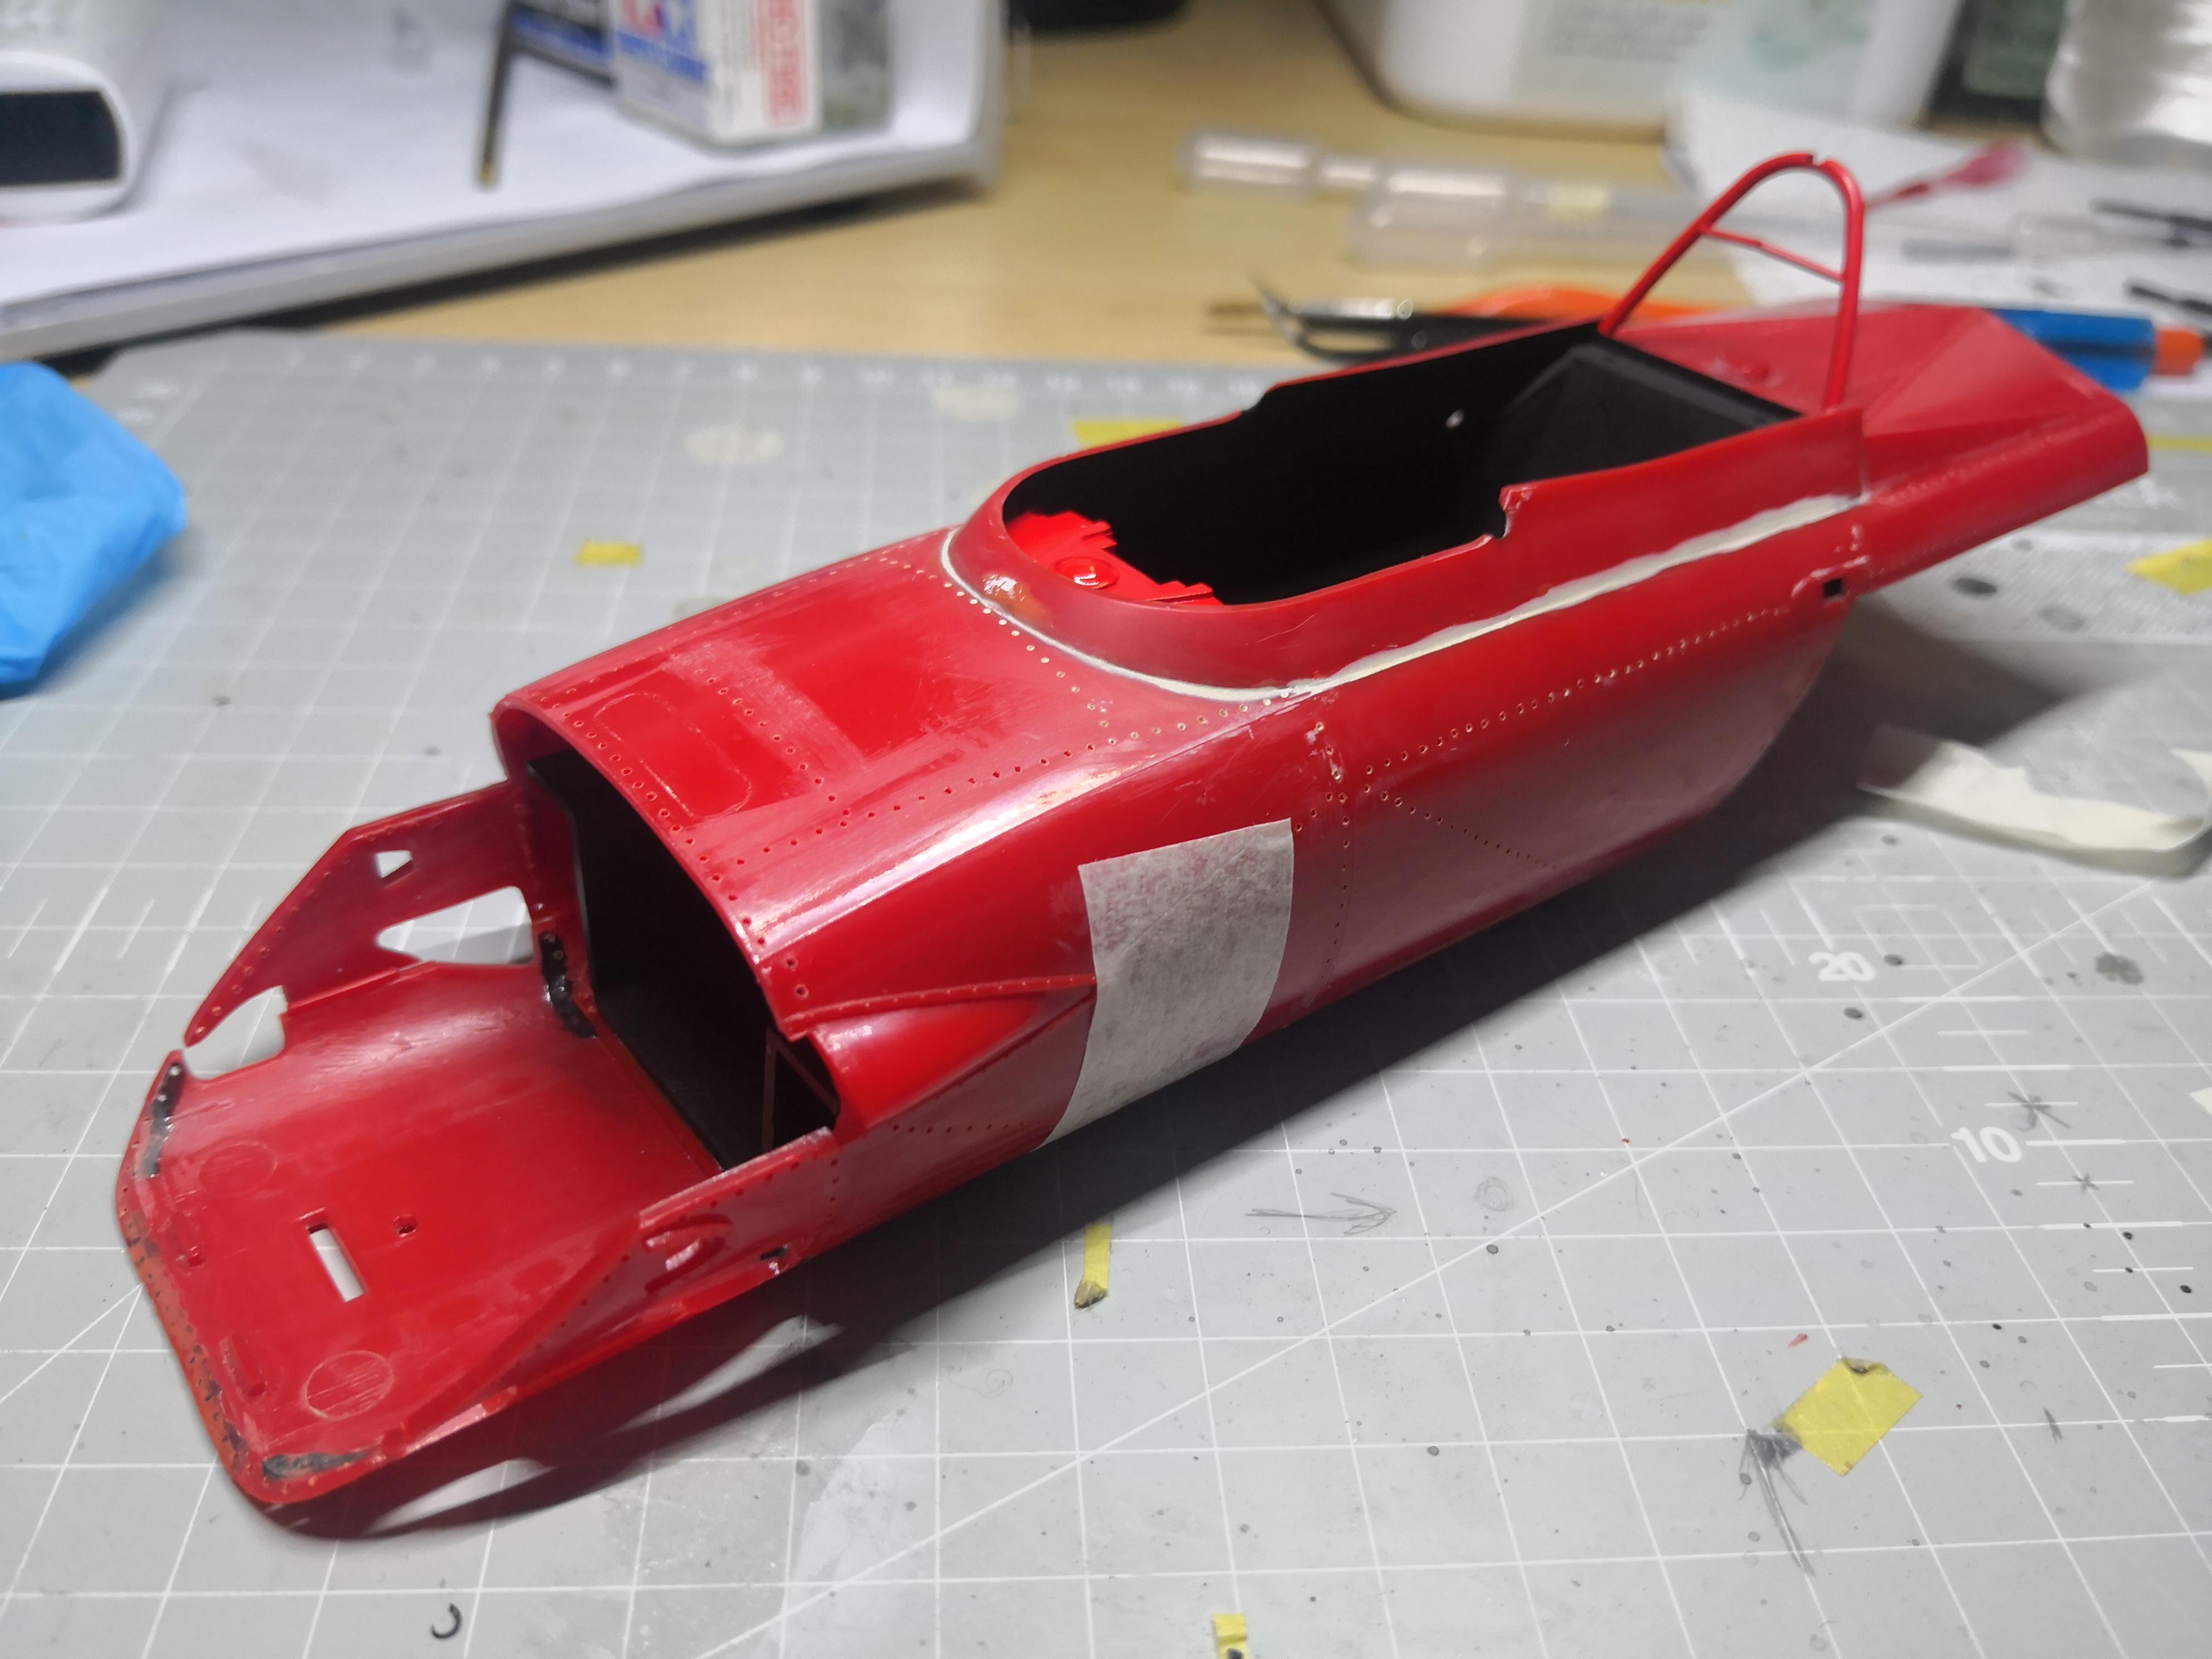
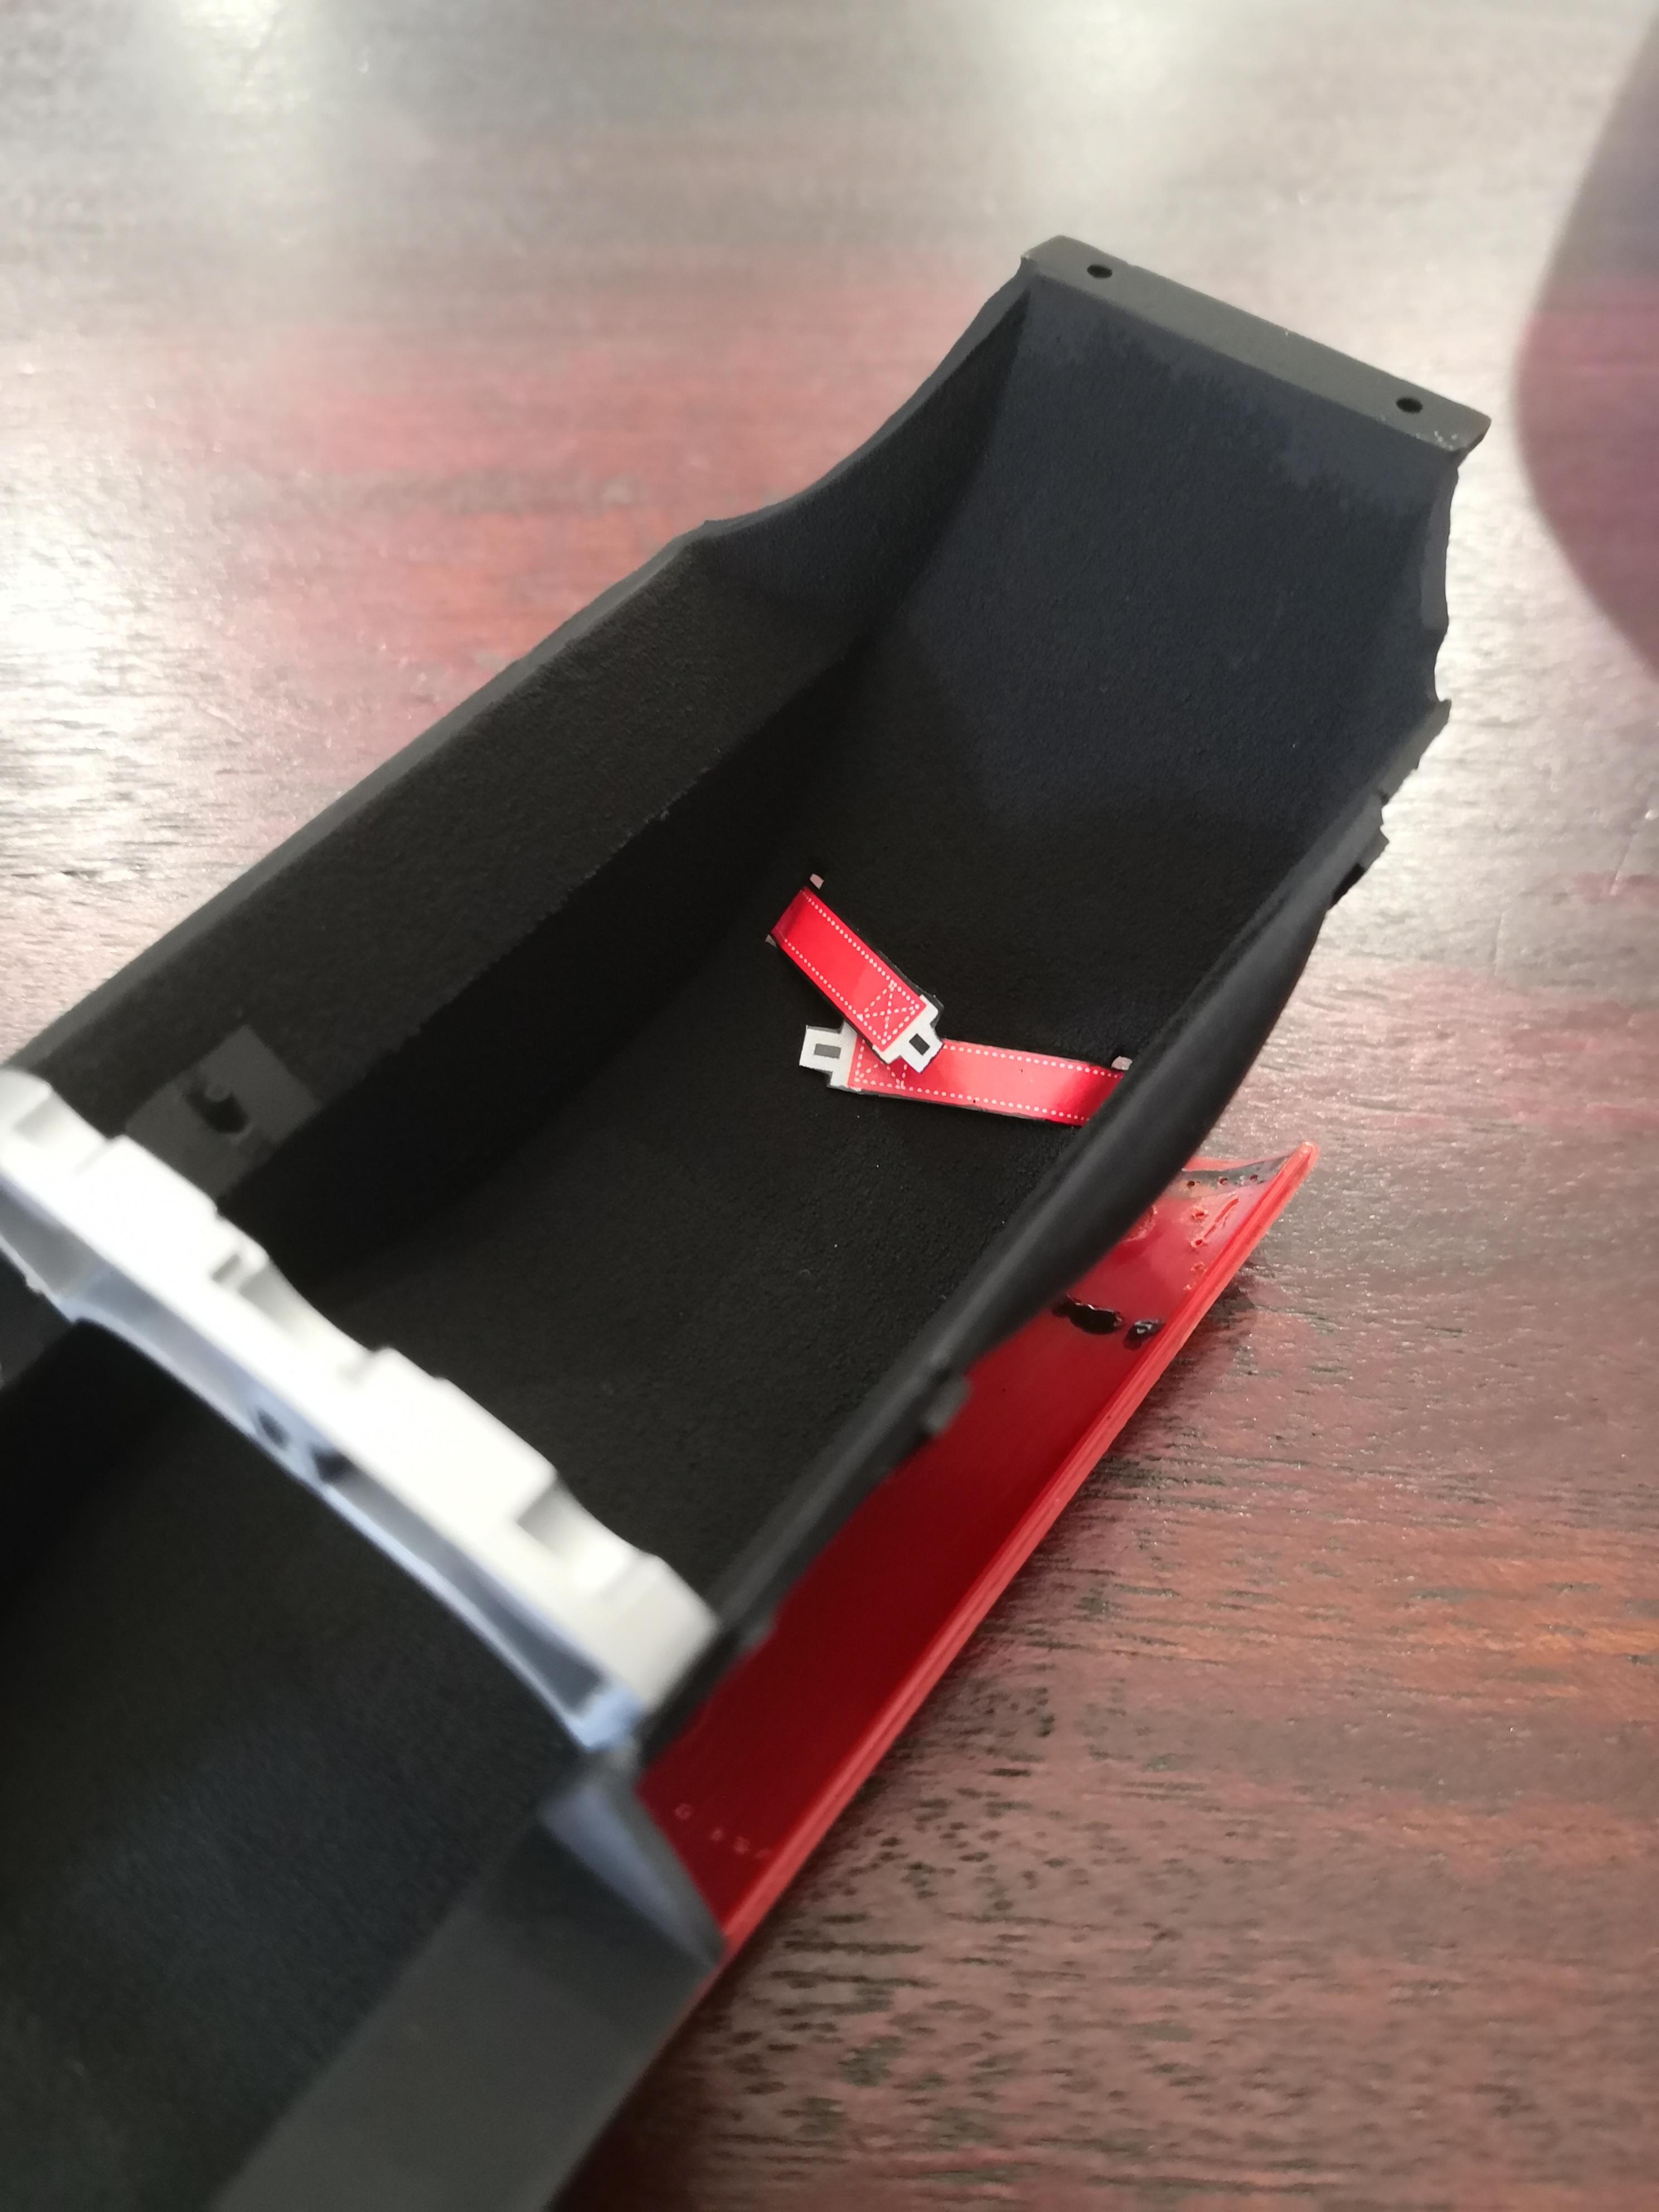
Been a while without much progress, but have managed to get the roll bar painted red, and it's base black, figured these two parts are going to be a real struggle to paint later, specifically the base of the roll bar... Also been playing around with ideas for the seat belts for a very long time, this kit does not have the pe belts, it just has the rubber belts which are designed to go over the driver figurine. I am not going to use the driver, so the rubber belts won't work (for me at least). Decided to design some belts on Visio, and print on paper, have given it a coat of Matt clear to protect it, not my favorite solution, would have preferred the pe, but I think this will do. I decided also not to worry too much about the clips, as I am going to chop off the drivers head, and have the helmet resting on the seat covering the belt clips. So here's the waist belts installed, they need to be done before the two halves of the body are joined. These two parts are ready to be joined.... Anytime now ?
-
Fujimi 1981 Ayrton Senna Kart
IanH replied to IanH's topic in WIP: Other Racing: Road Racing, Land Speed Racers
Wow Rich, that's amazing skills and craft with the steering ? I haven't done much for a while now on mine. -
Tamiya 1/12 Ferrari 312b
IanH replied to IanH's topic in WIP: Other Racing: Road Racing, Land Speed Racers
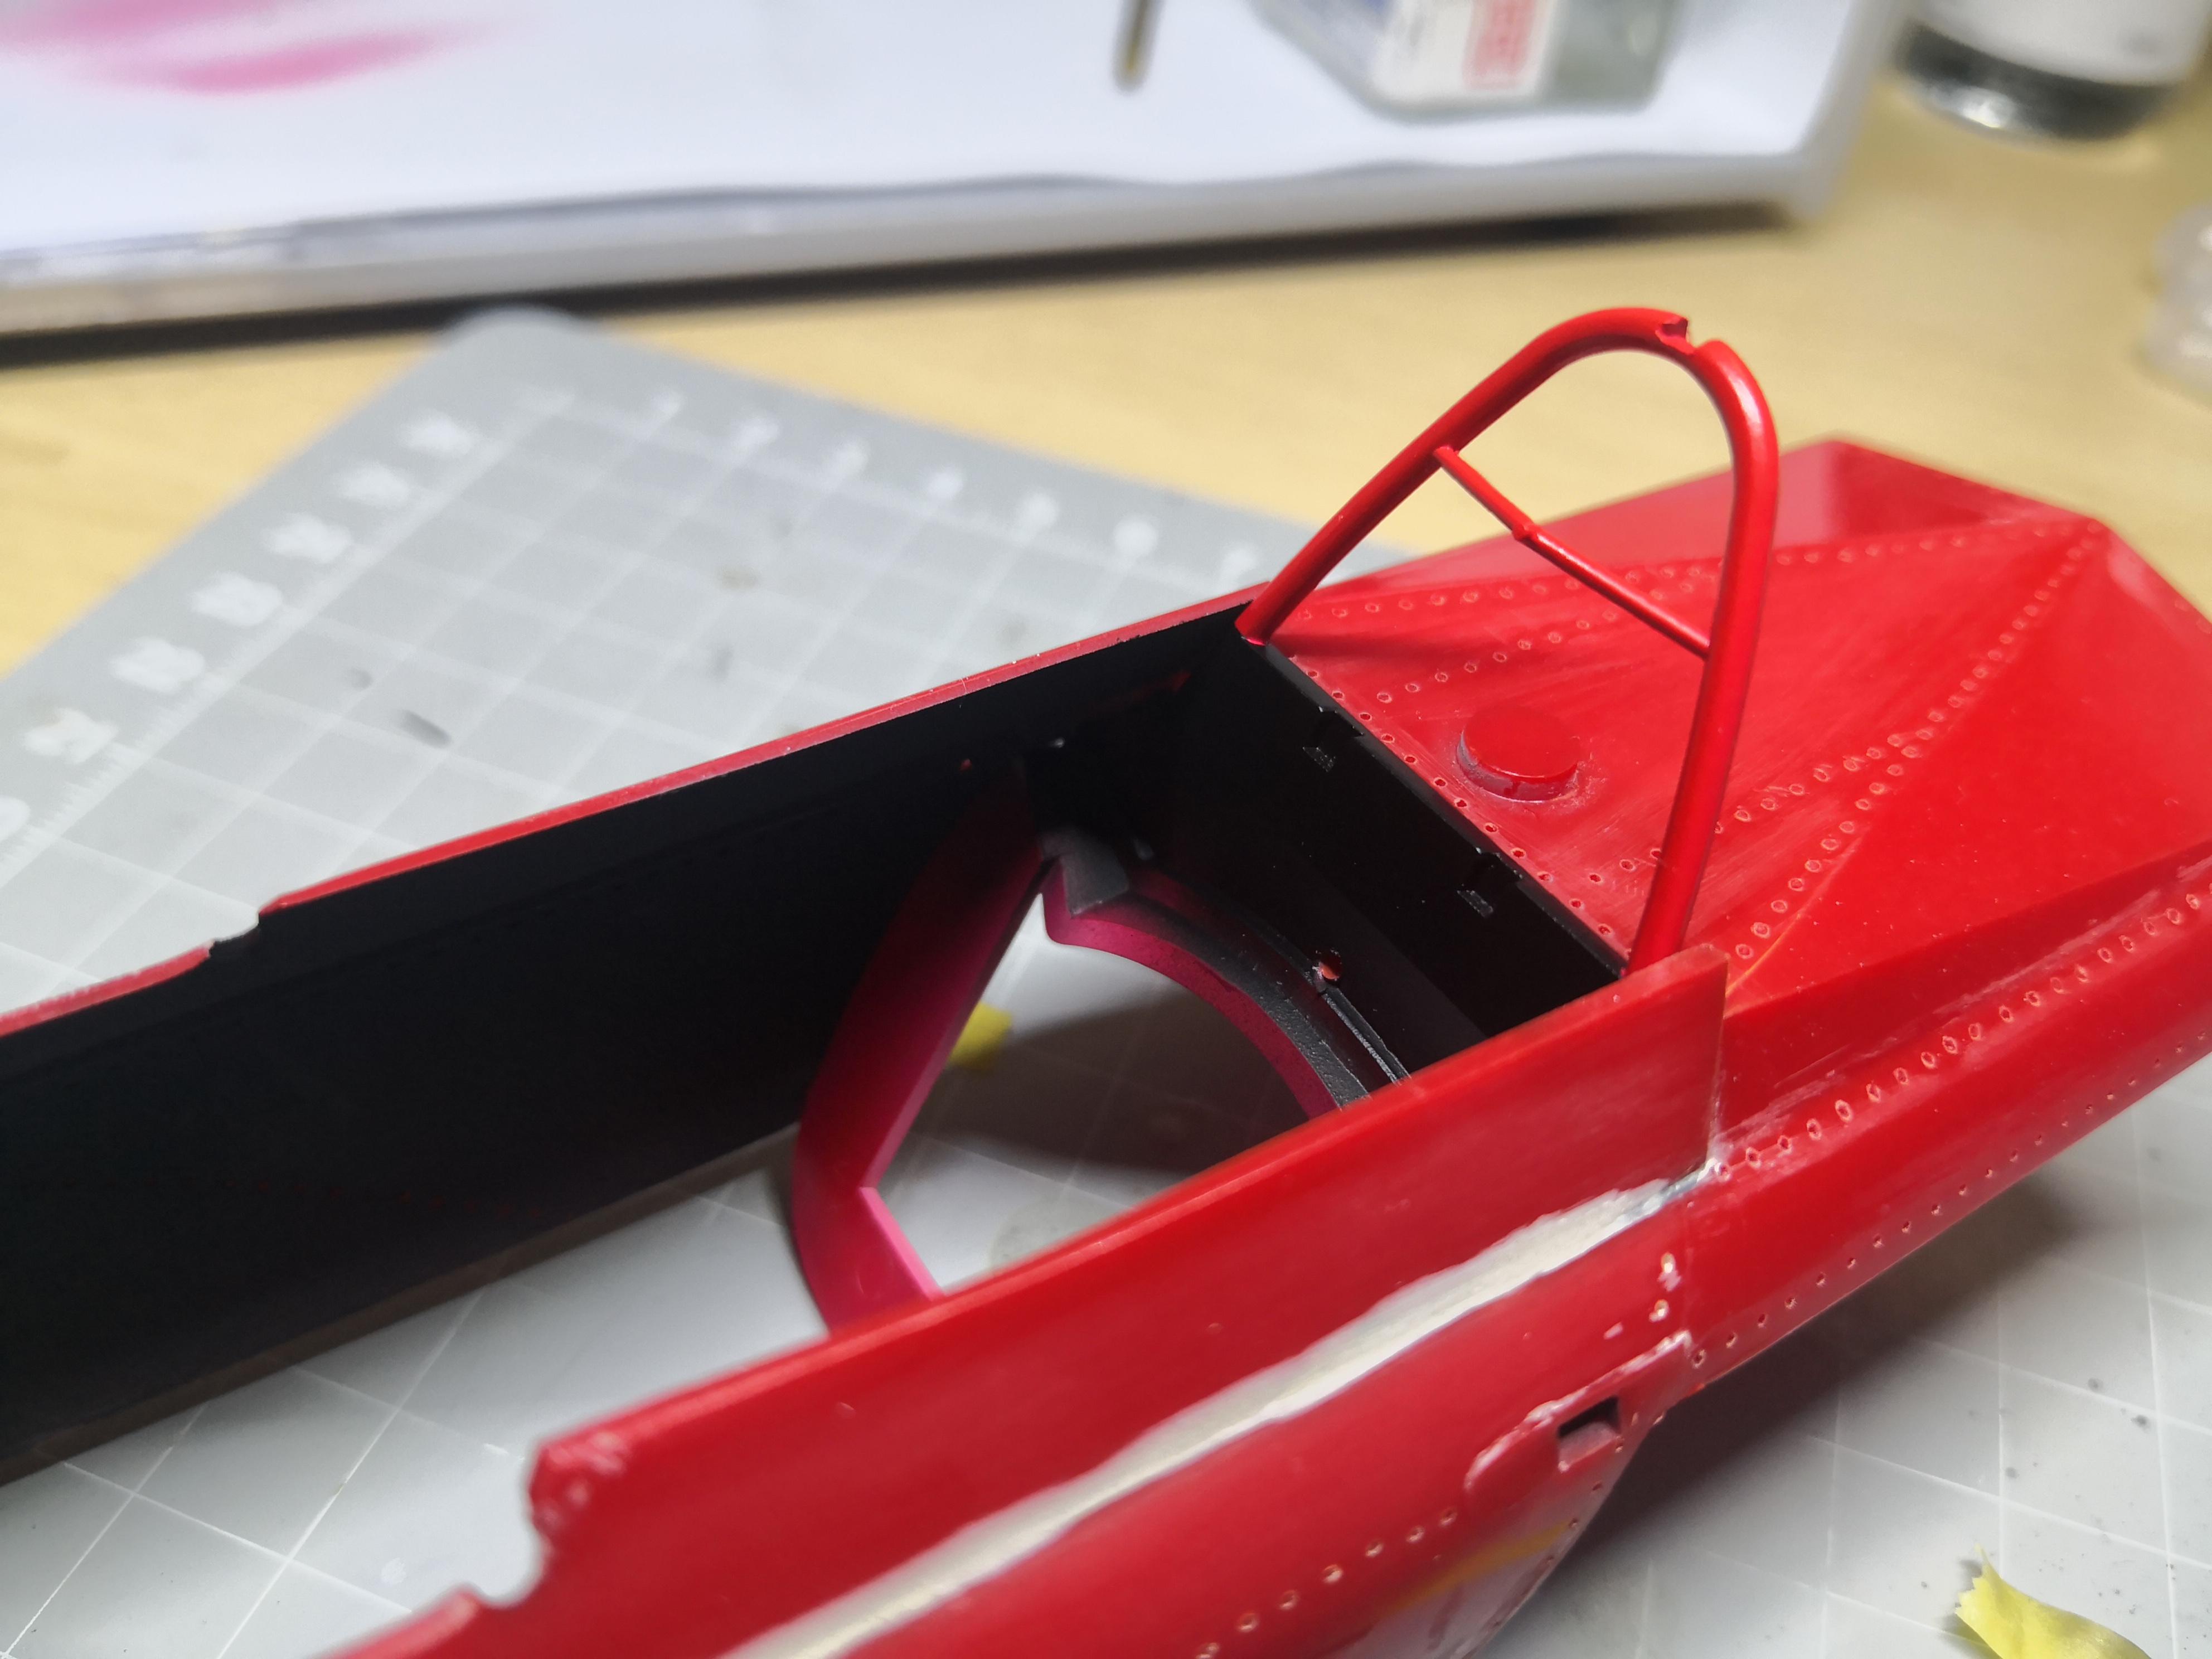
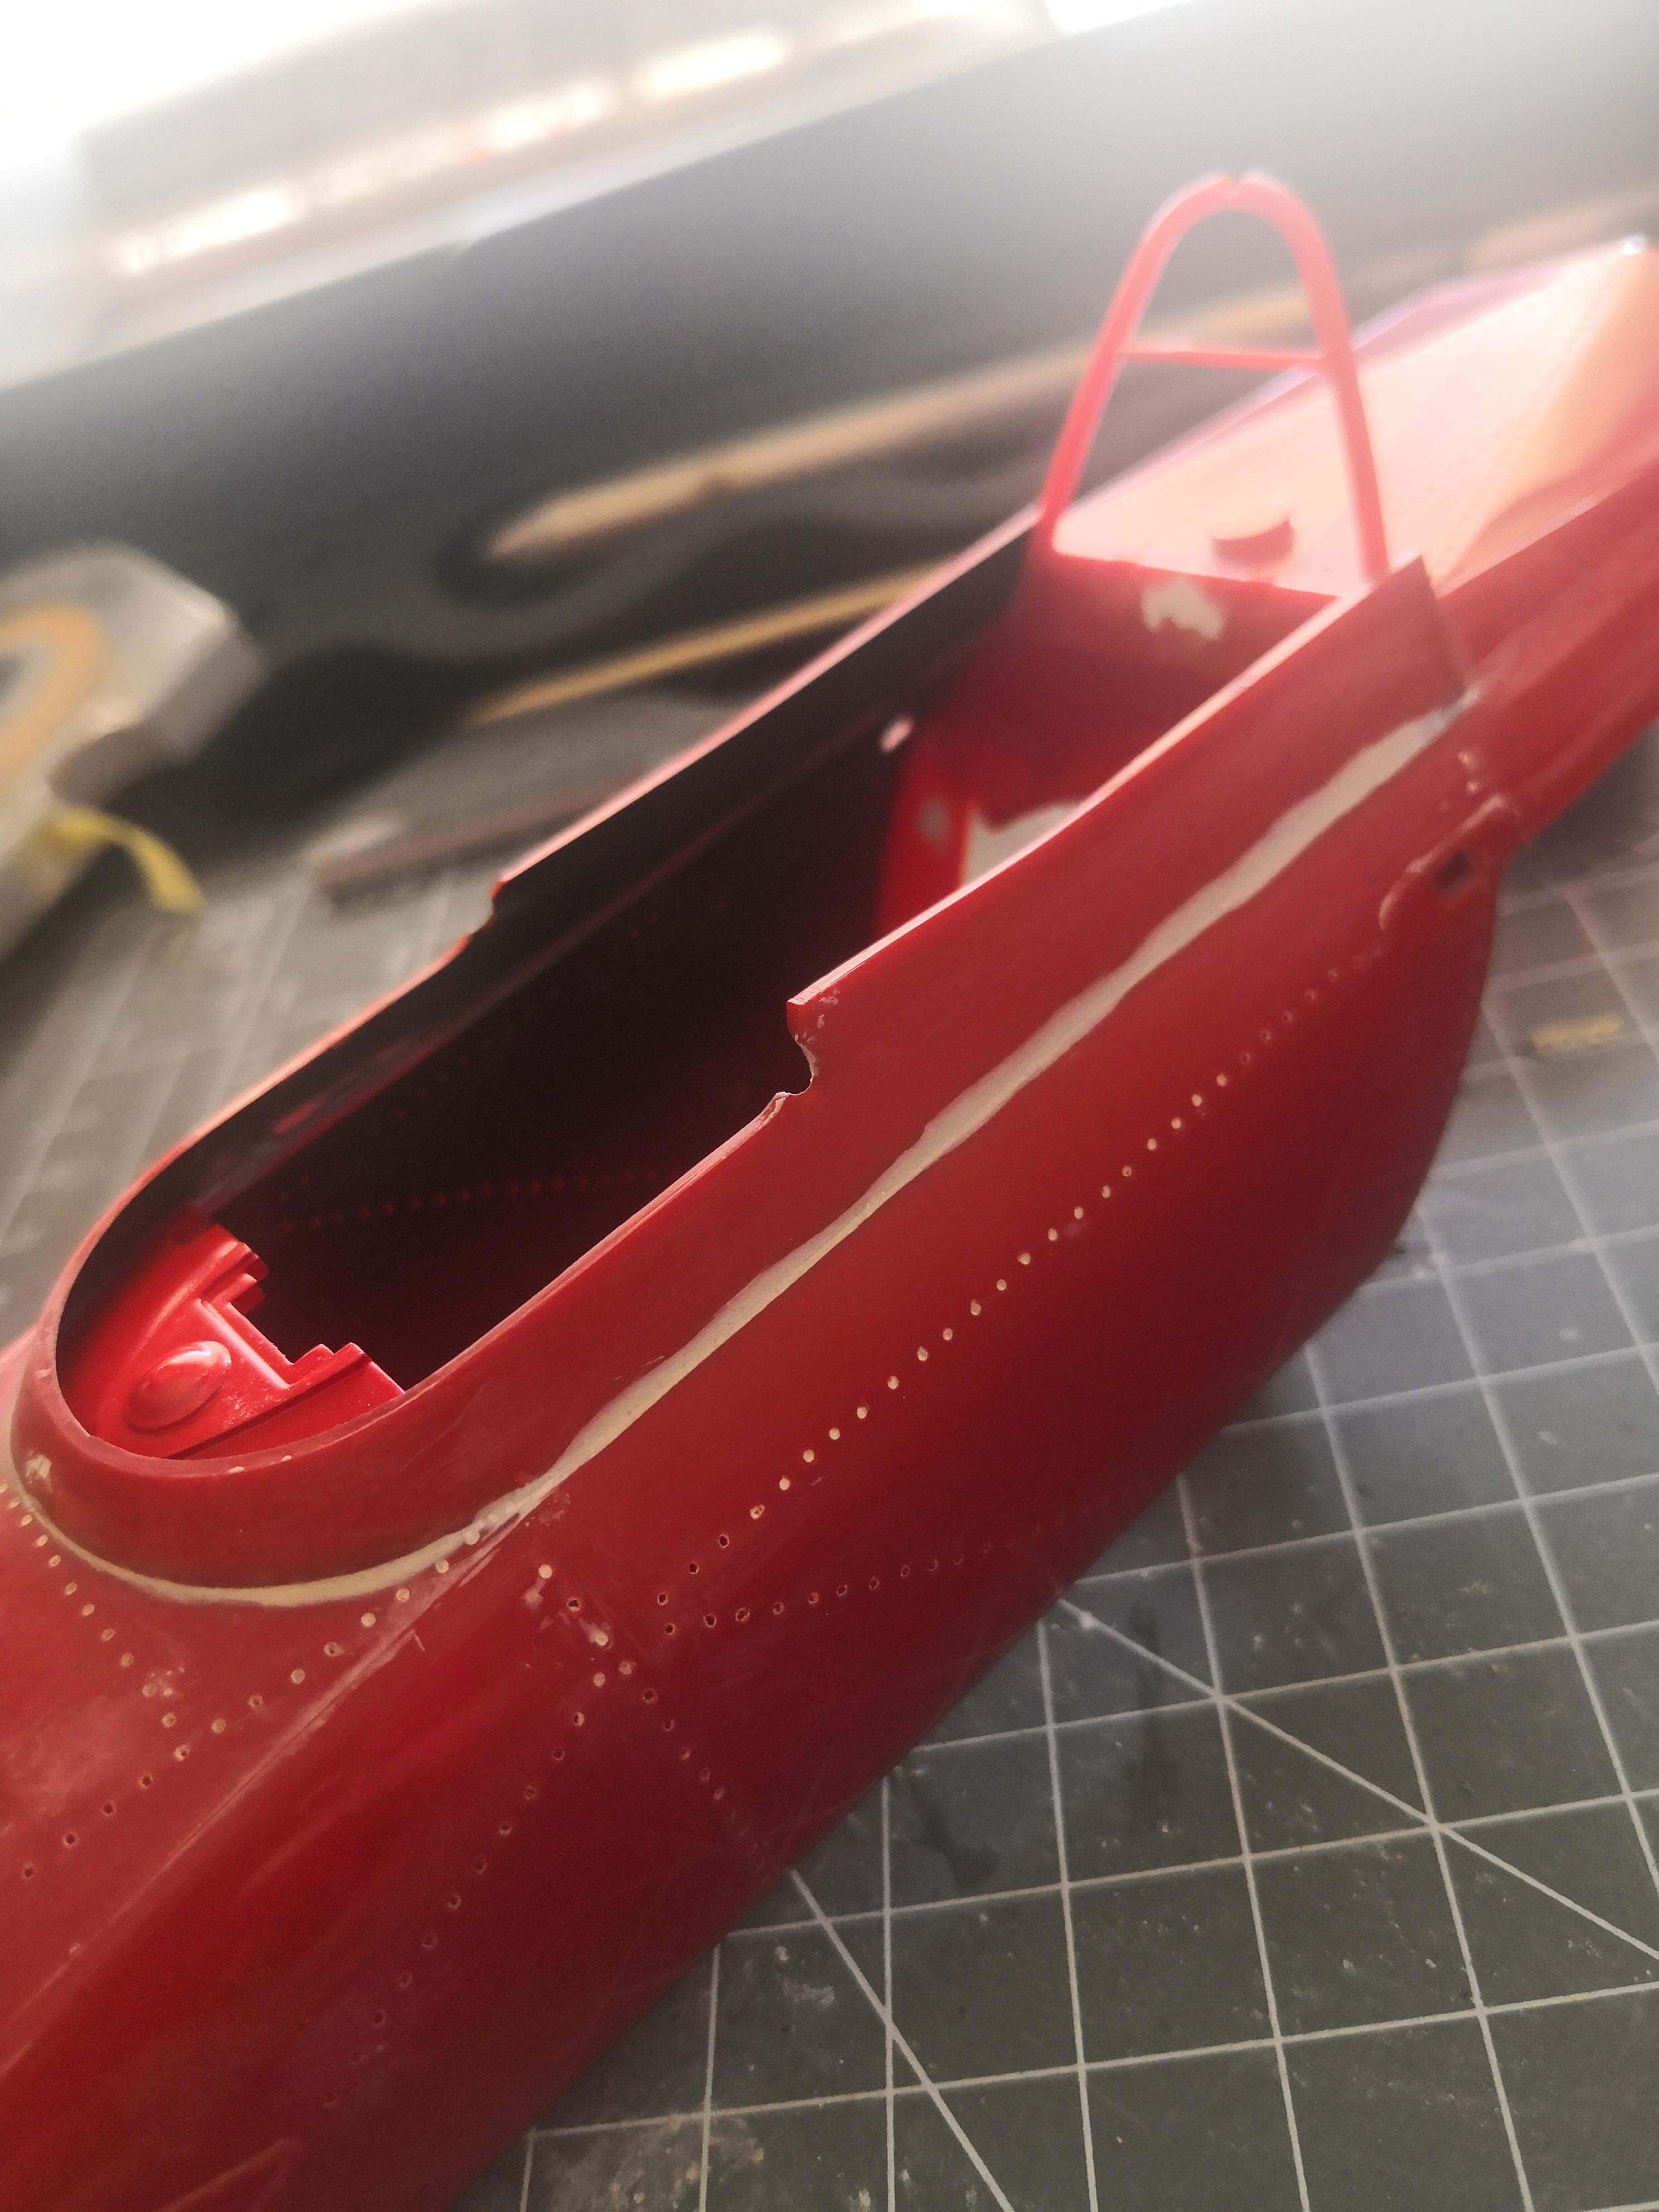
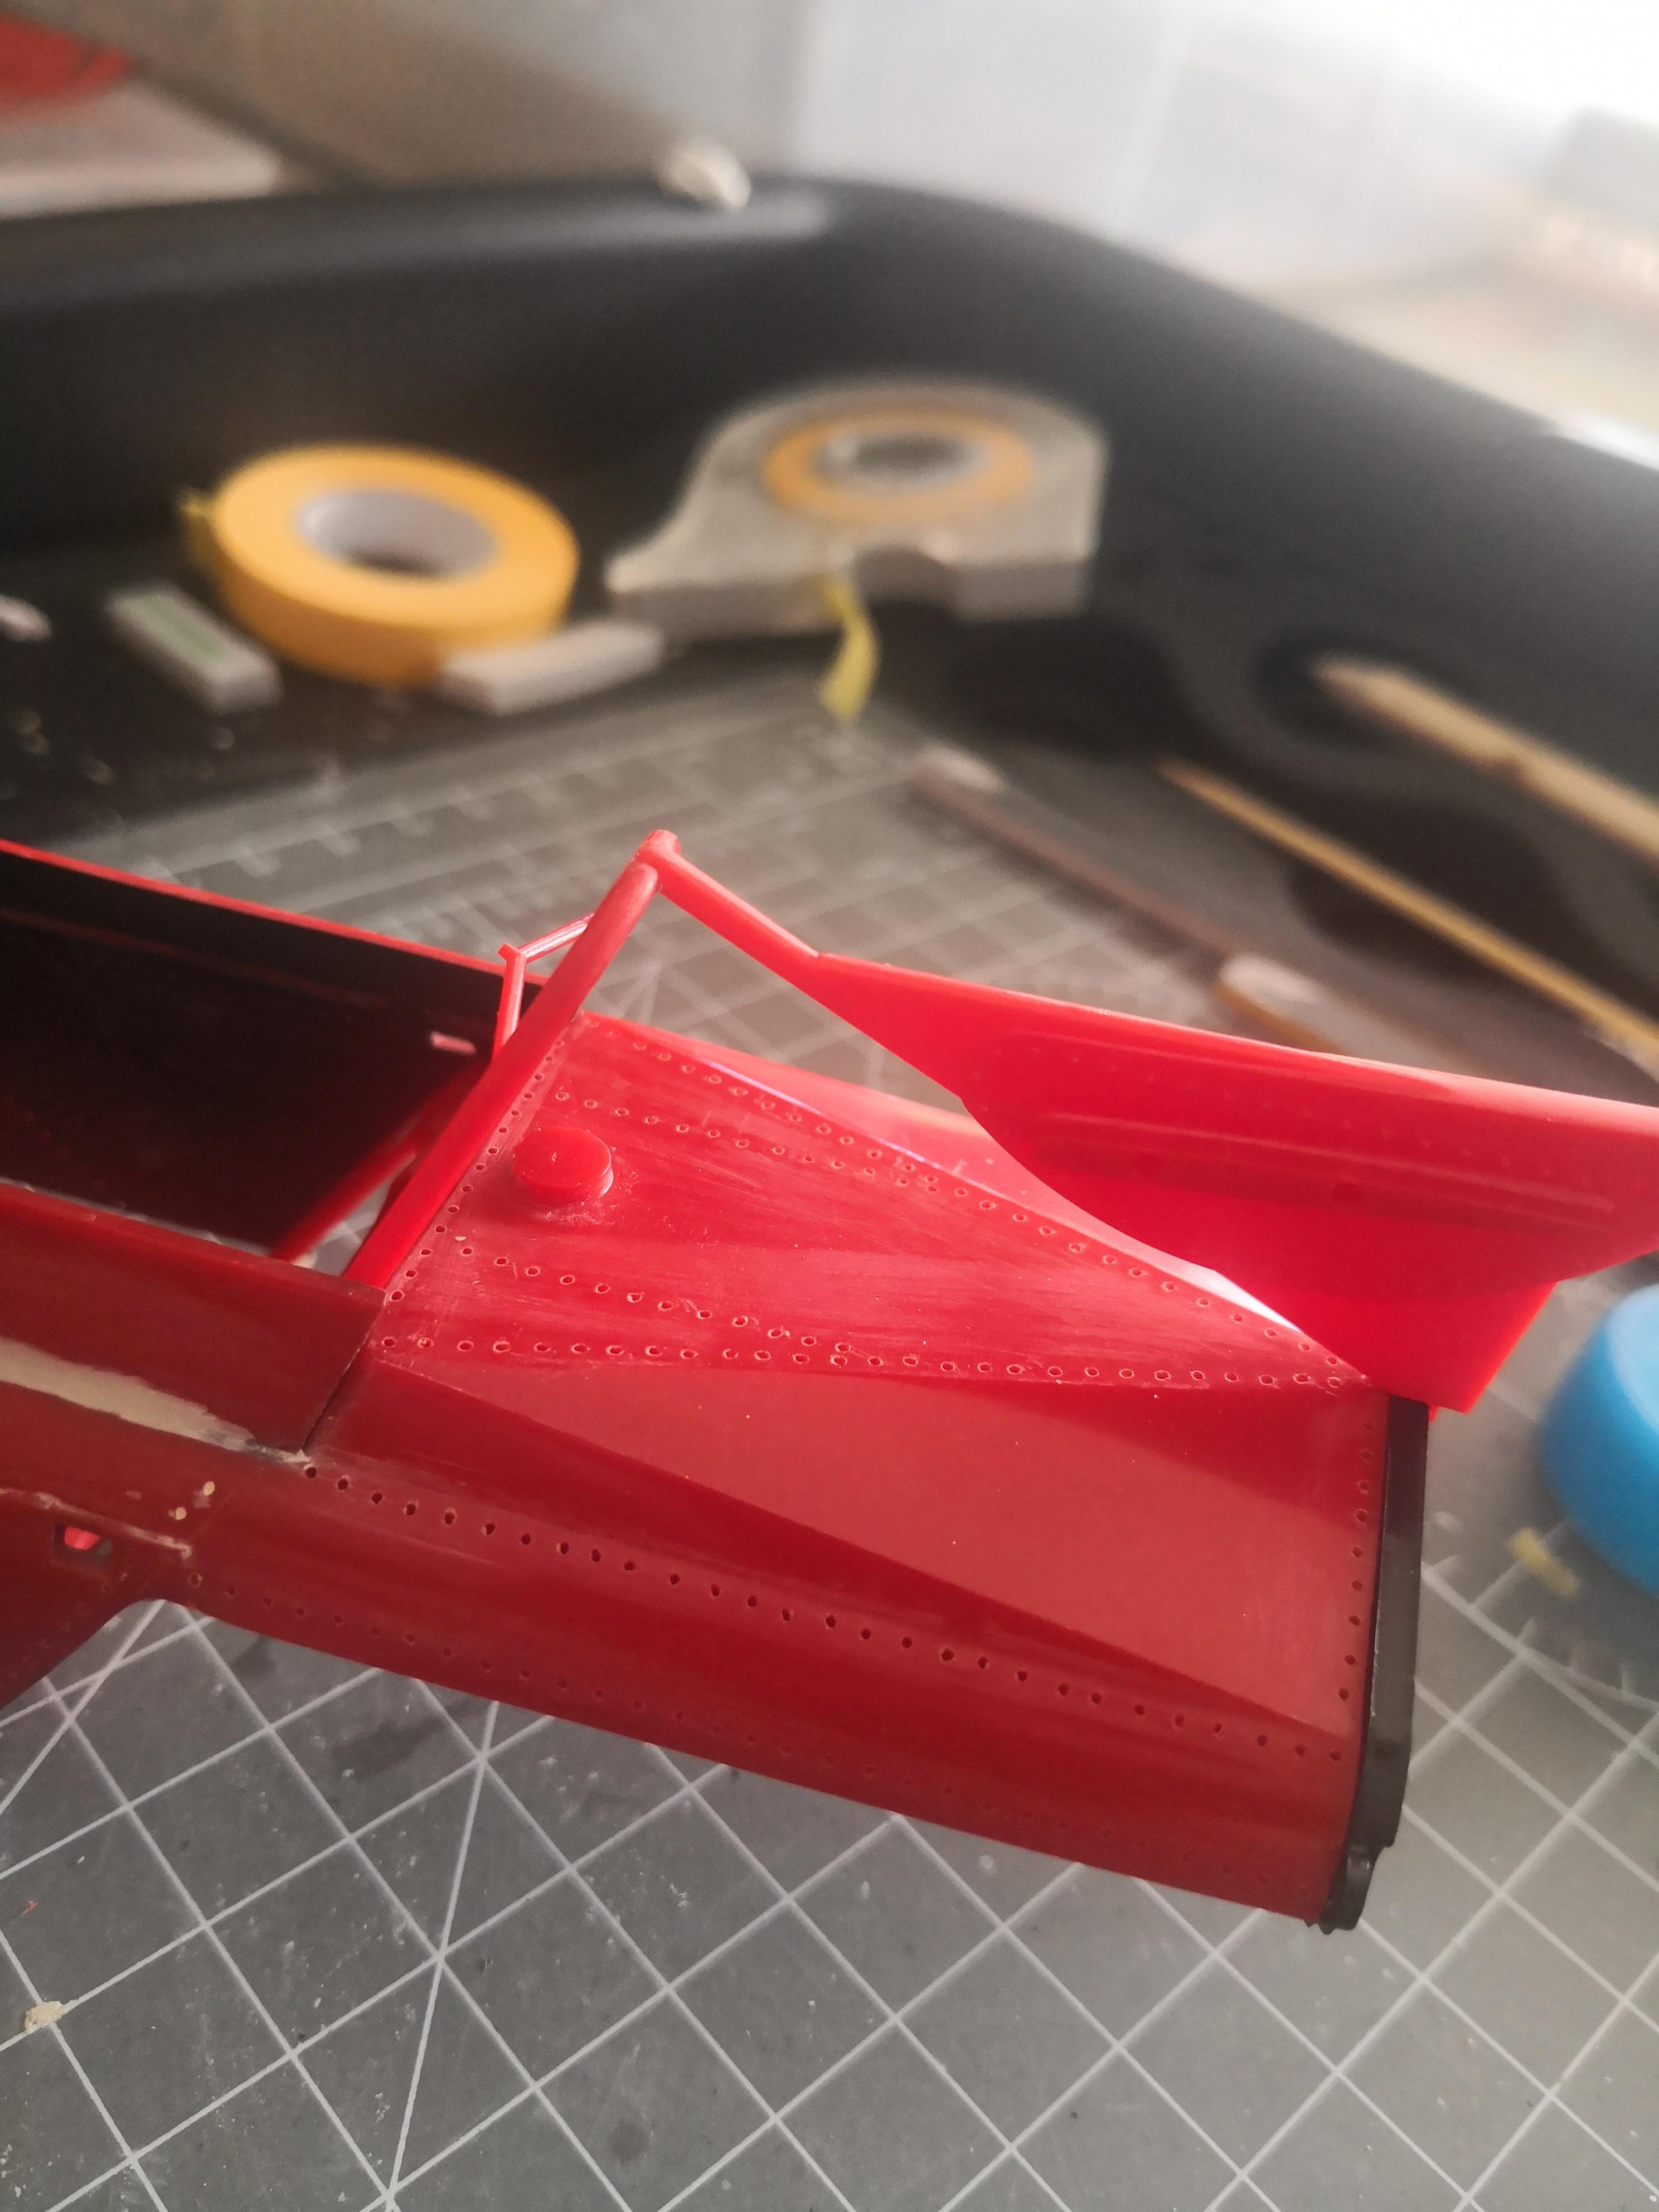
Almost happy with the finish between the shroud and the body, a little bit of a deeper gap on the other side, so will apply a touch more putty. I noticed that the main center section of the wing didn't fit as snuggly as I would like, so I did some work on that, much happier now.
-
Tamiya 1/12 Ferrari 312b
IanH replied to IanH's topic in WIP: Other Racing: Road Racing, Land Speed Racers
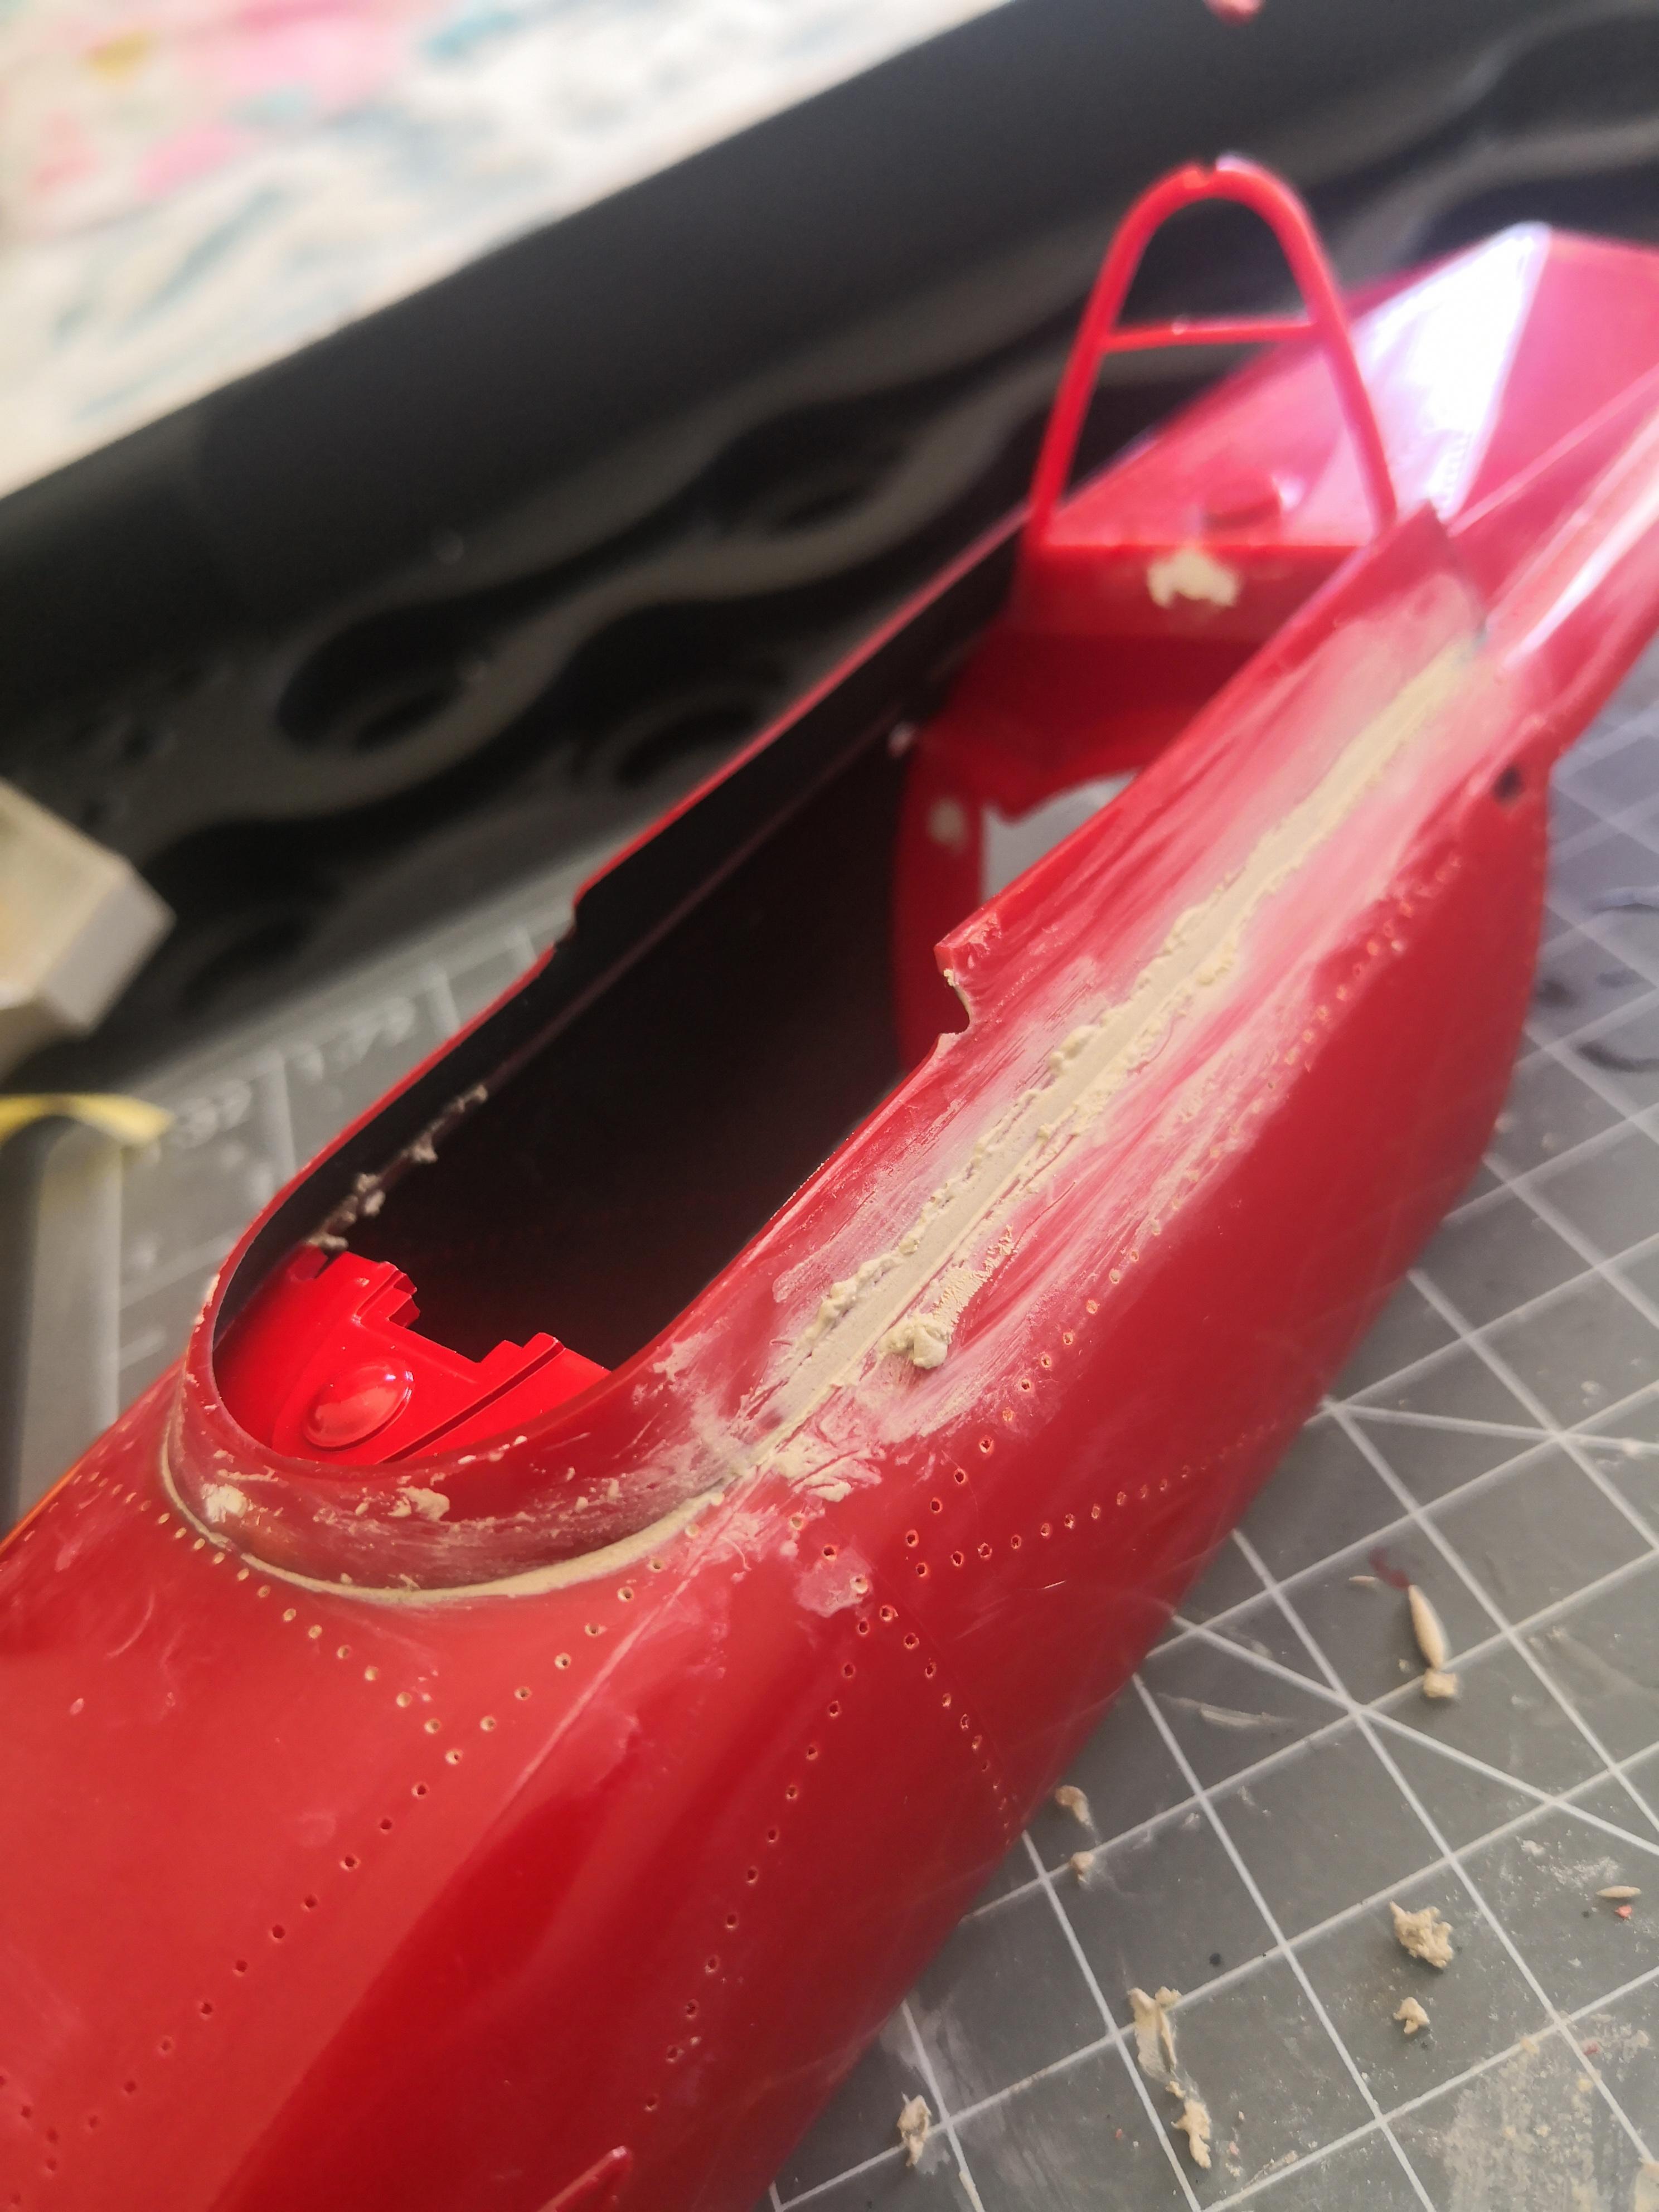
Just making a mess at this stage....
-
Tamiya 1/12 Ferrari 312b
IanH replied to IanH's topic in WIP: Other Racing: Road Racing, Land Speed Racers
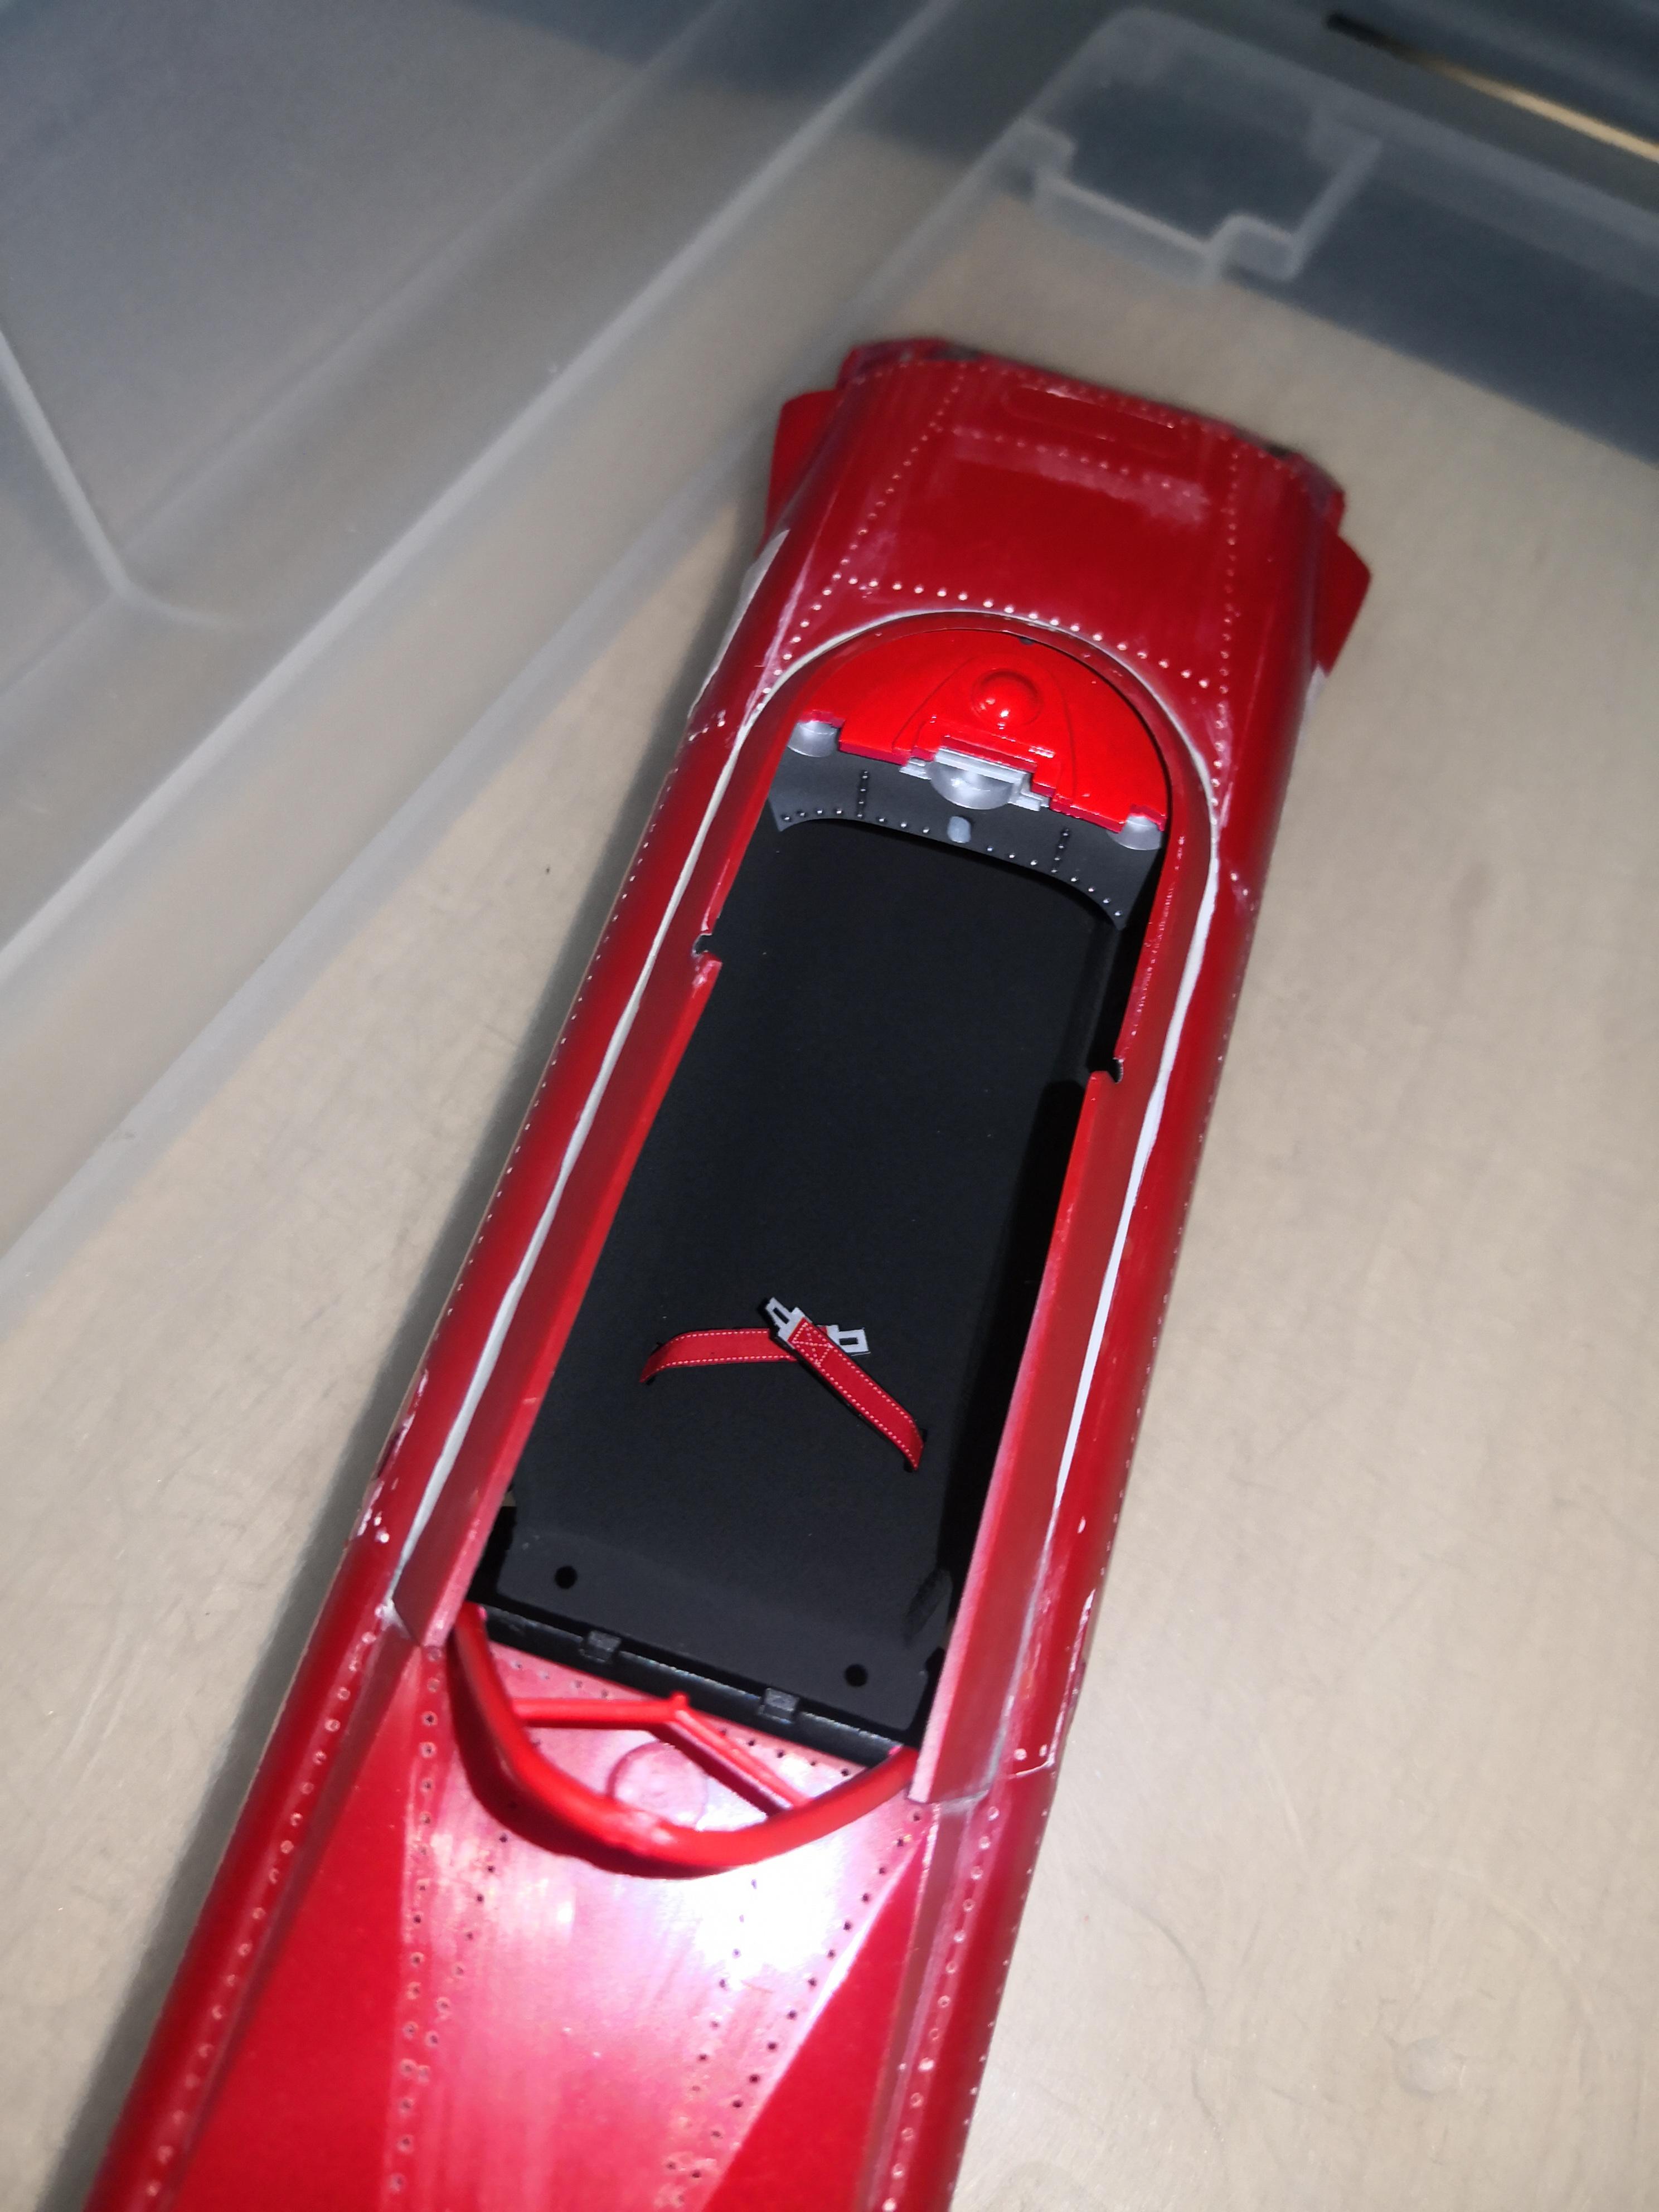
Laid a coat of clear over this section just in front of the dash, and then sprayed some flat black on the inside of the shroud and body panels. Need to glue the shroud on, and then will do another coat of flat black to hide the inner join between these two parts. Happy with the outcome, red in front of the dash is nice, and the black on the inner edge of the shroud is a nice contrast.
-
Fujimi 1981 Ayrton Senna Kart
IanH replied to IanH's topic in WIP: Other Racing: Road Racing, Land Speed Racers
This is 1/20 scale, Fujimi even have the 1993 kart as well (I have both ?). Yes, the driver figure is included.
-
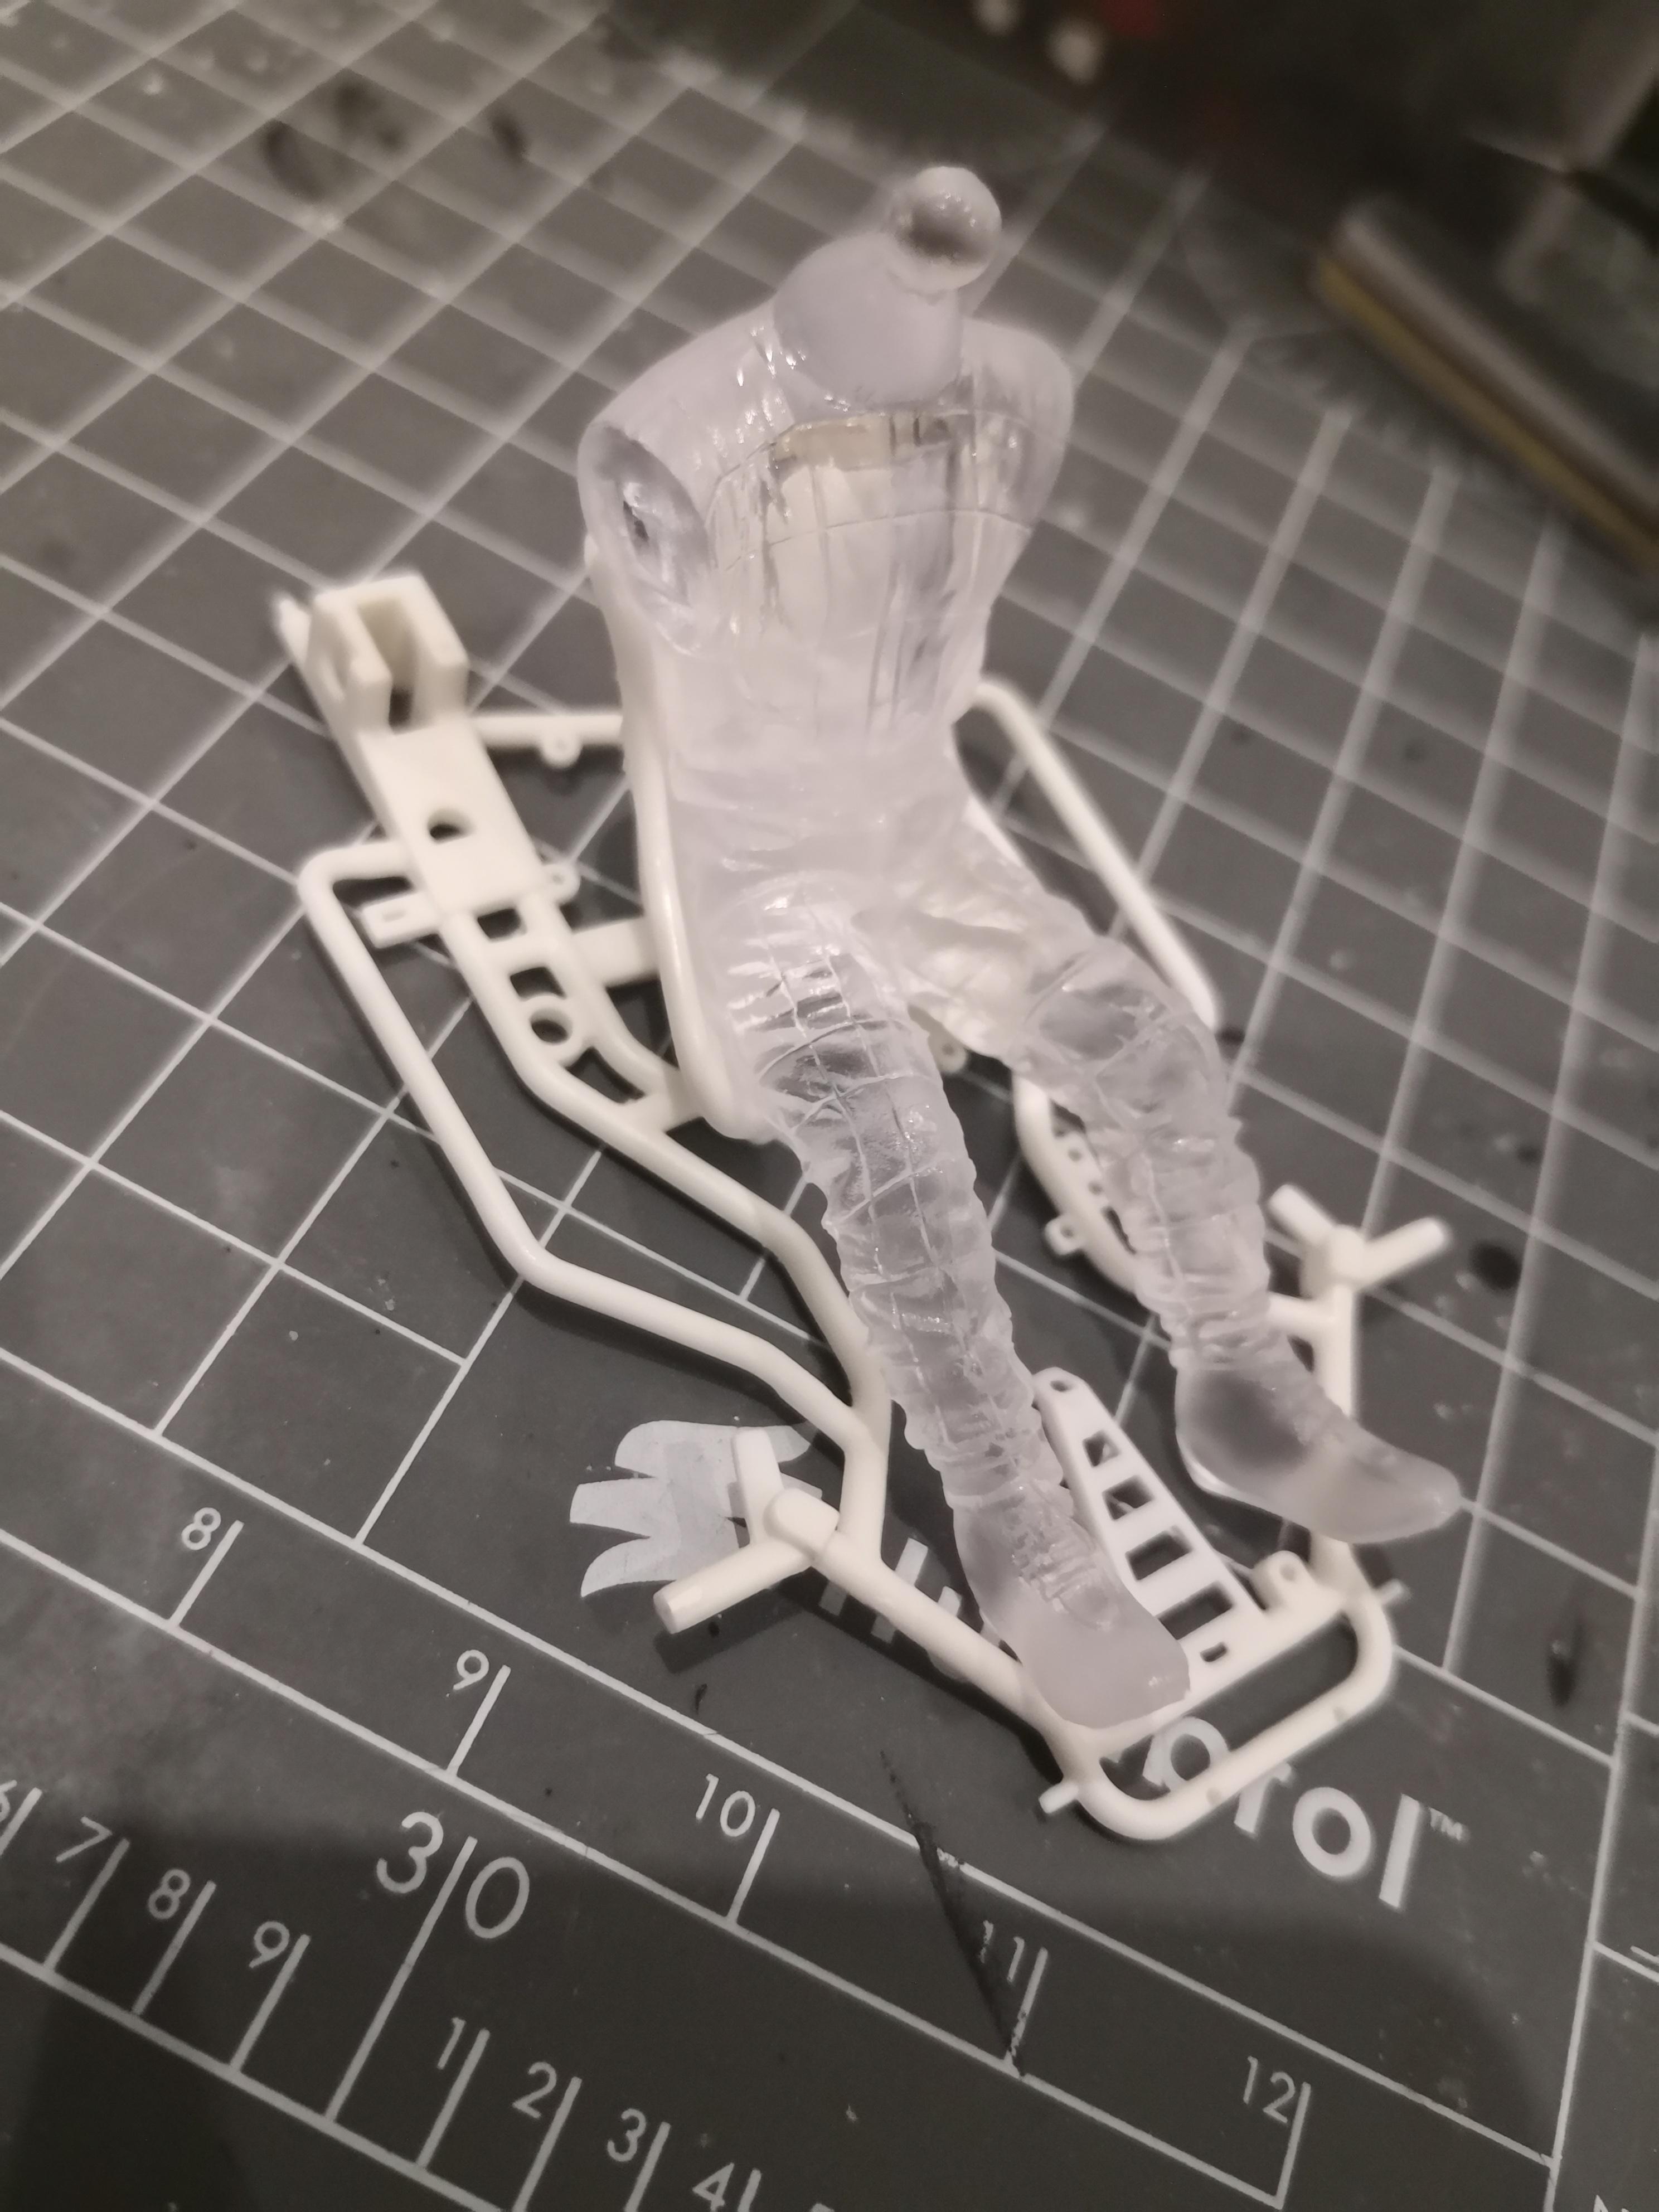
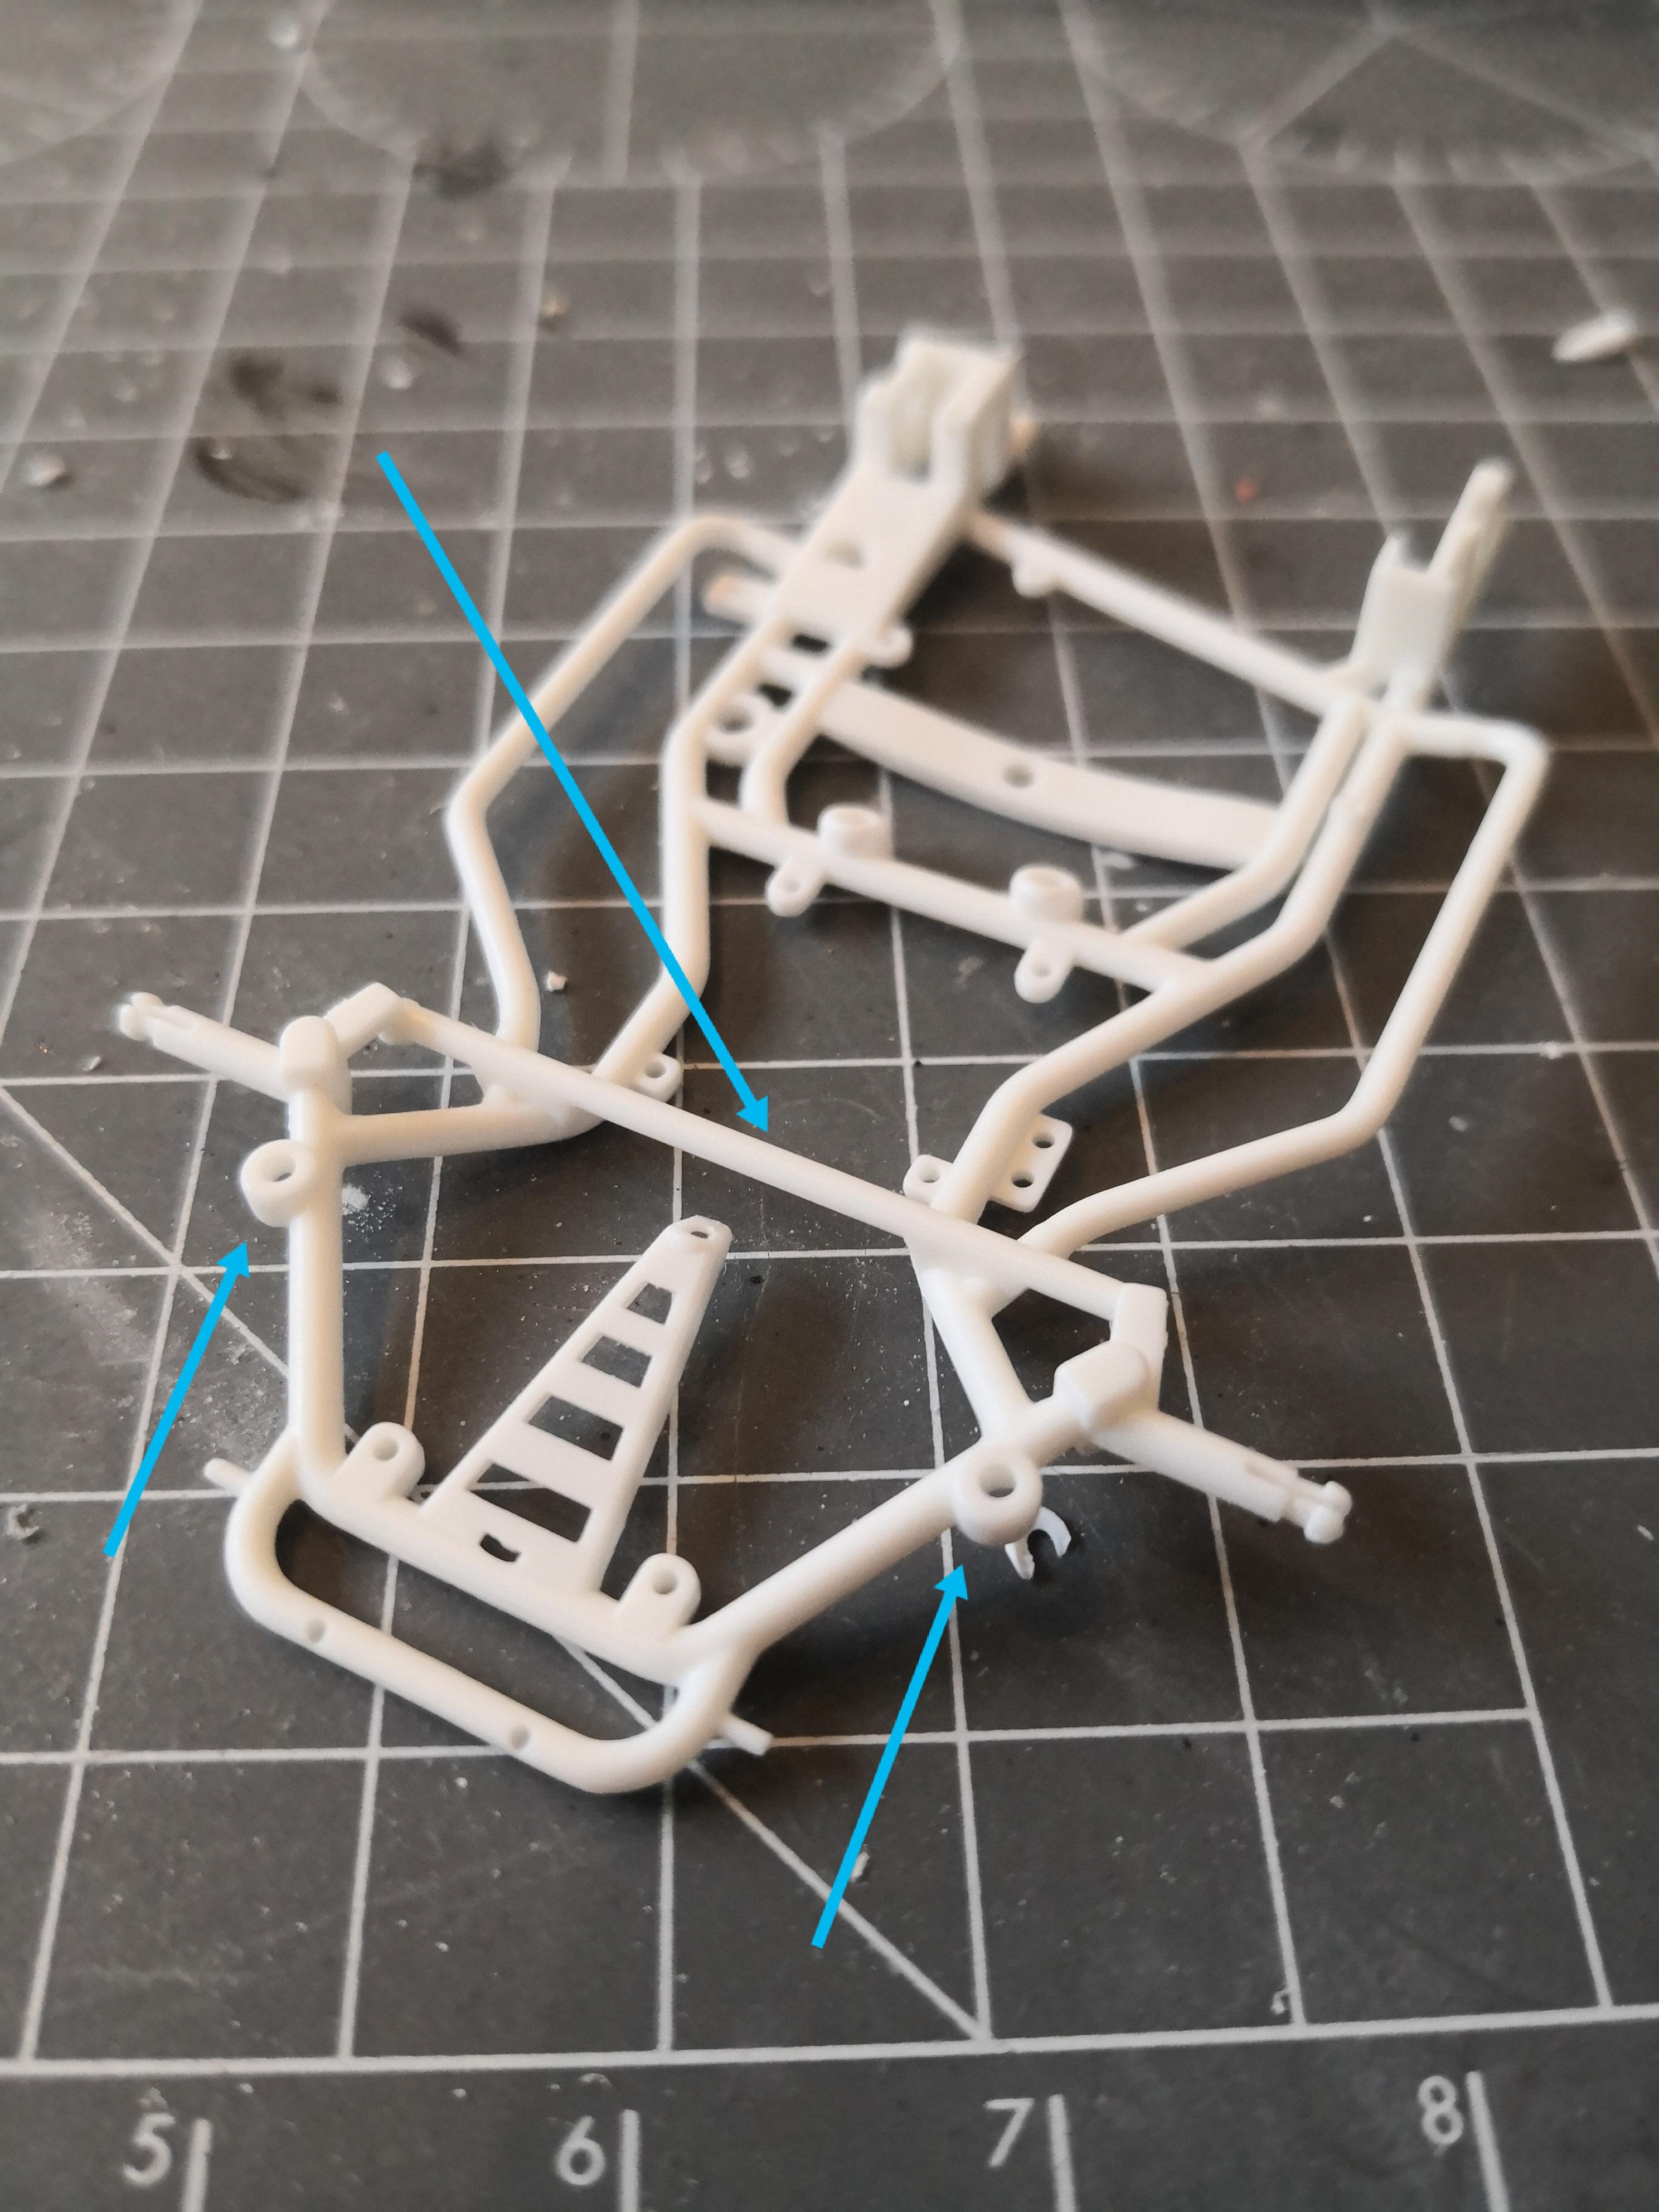
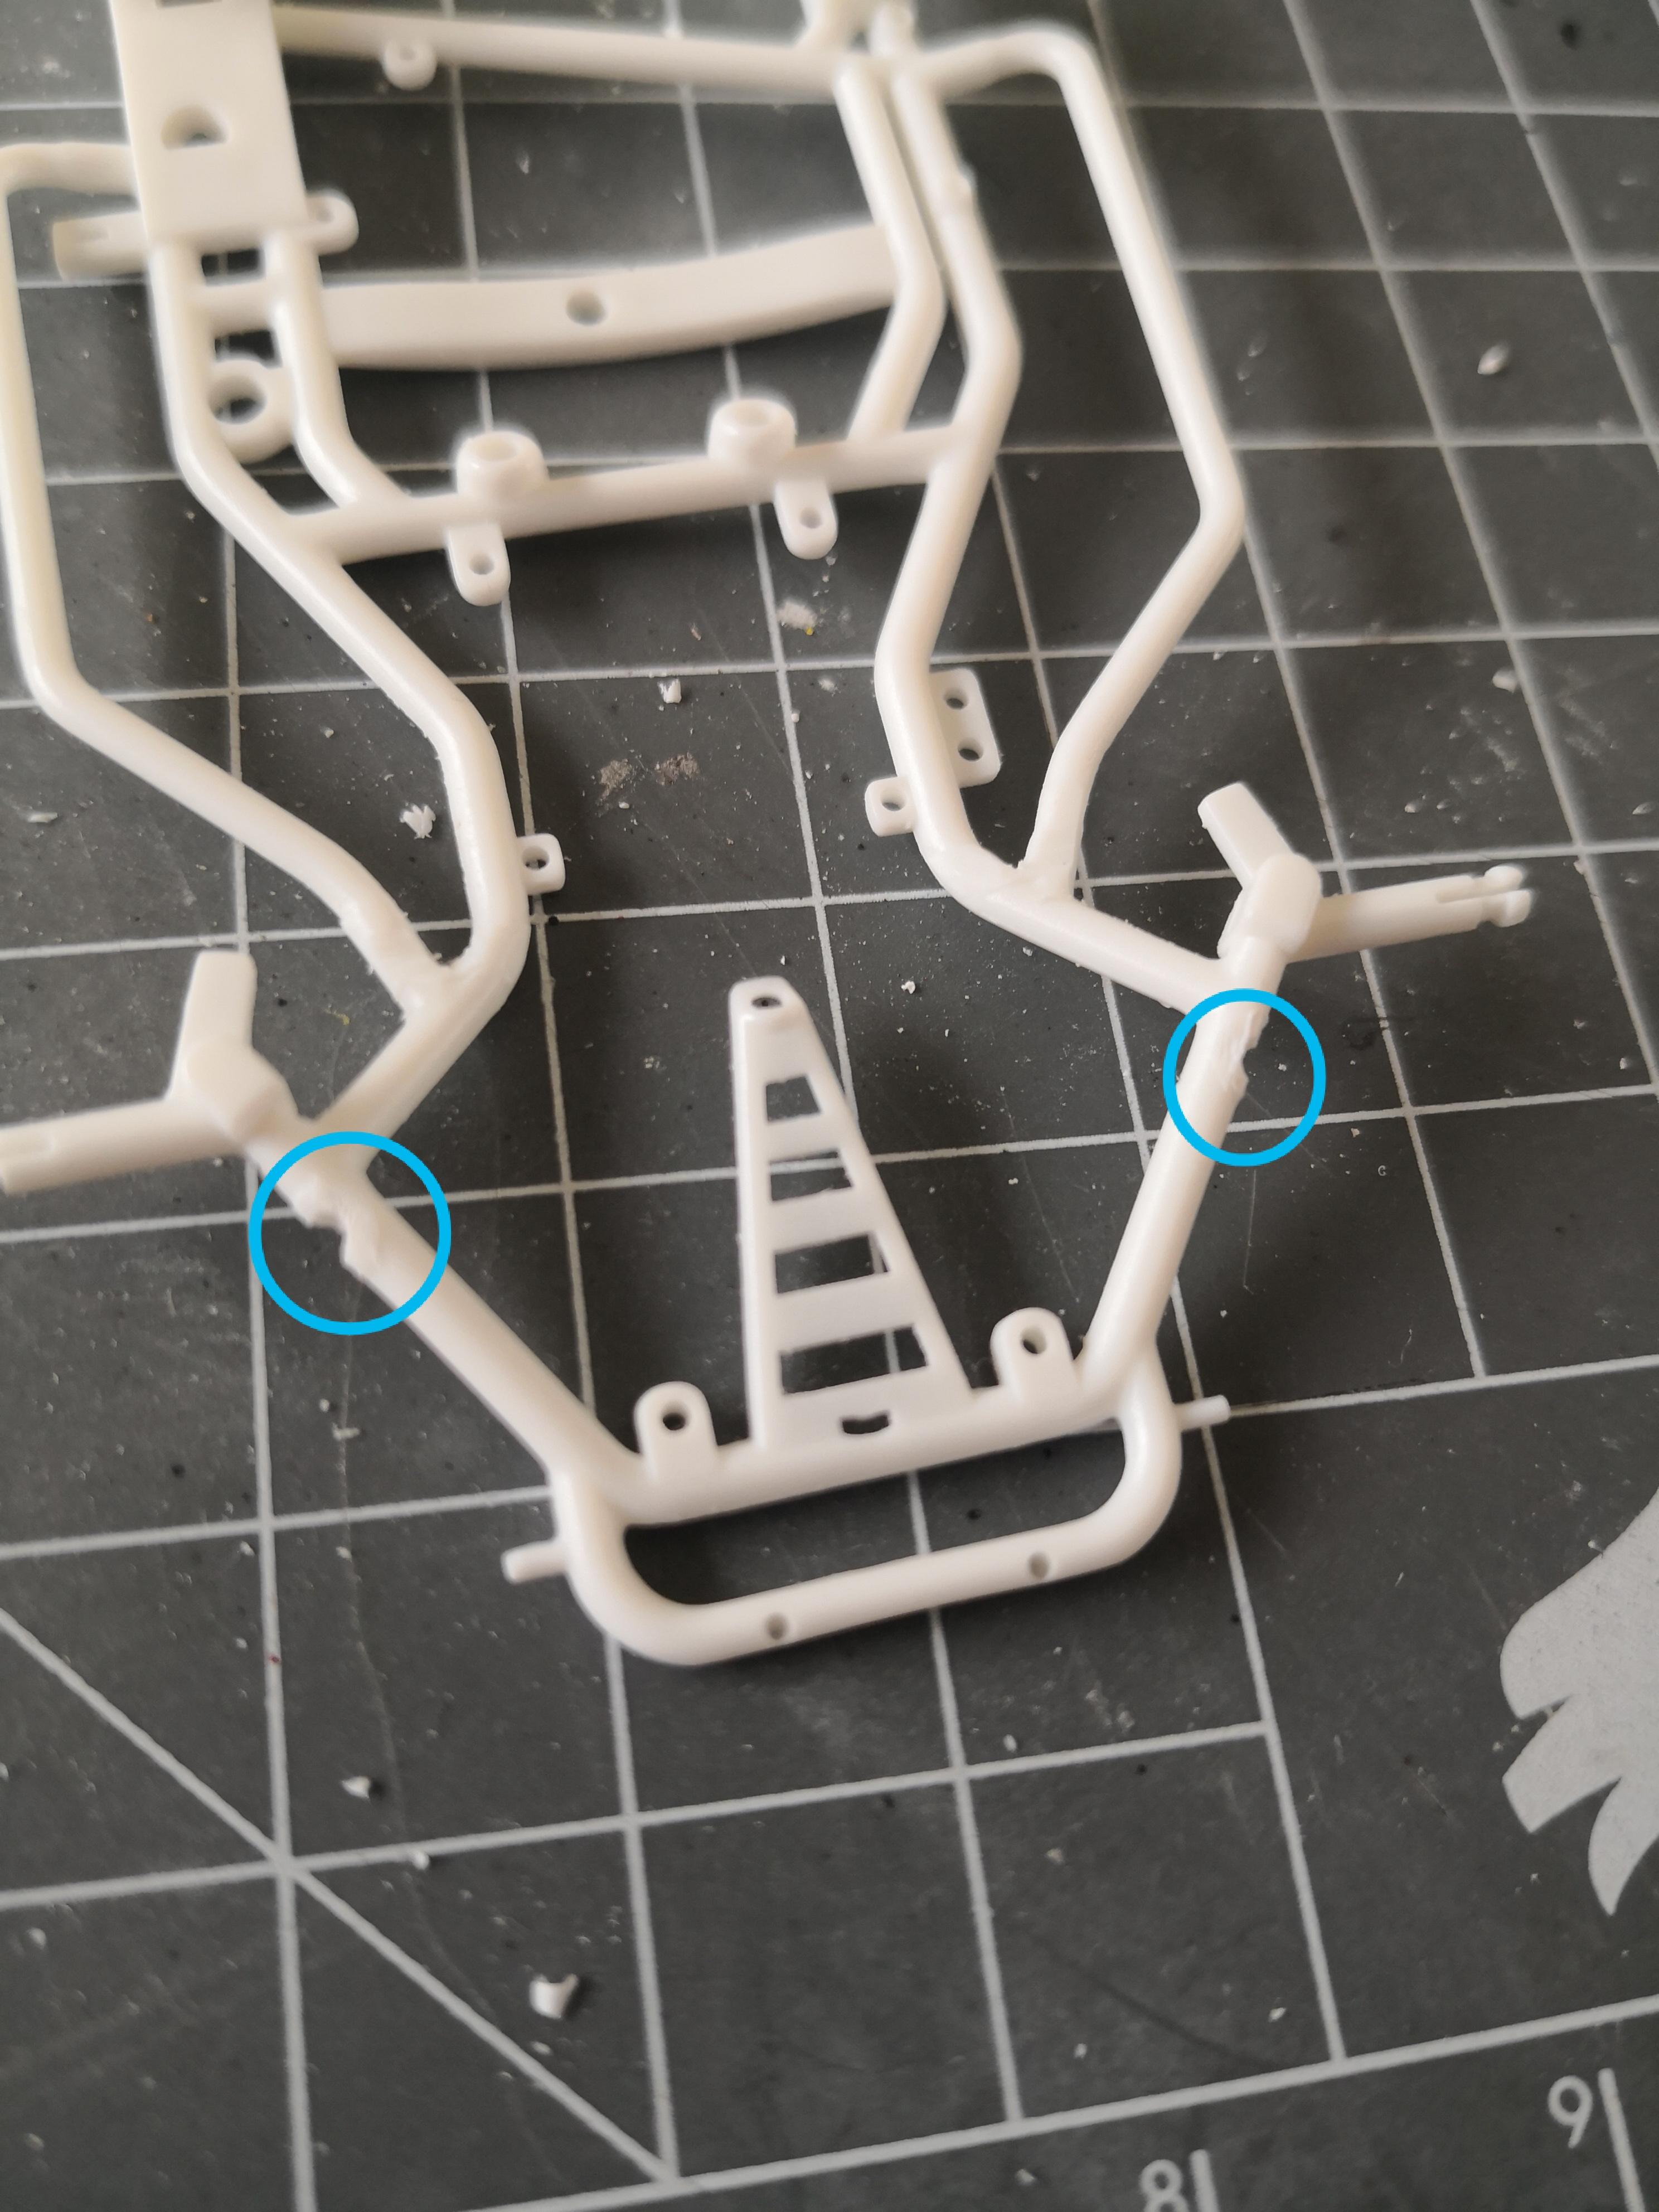
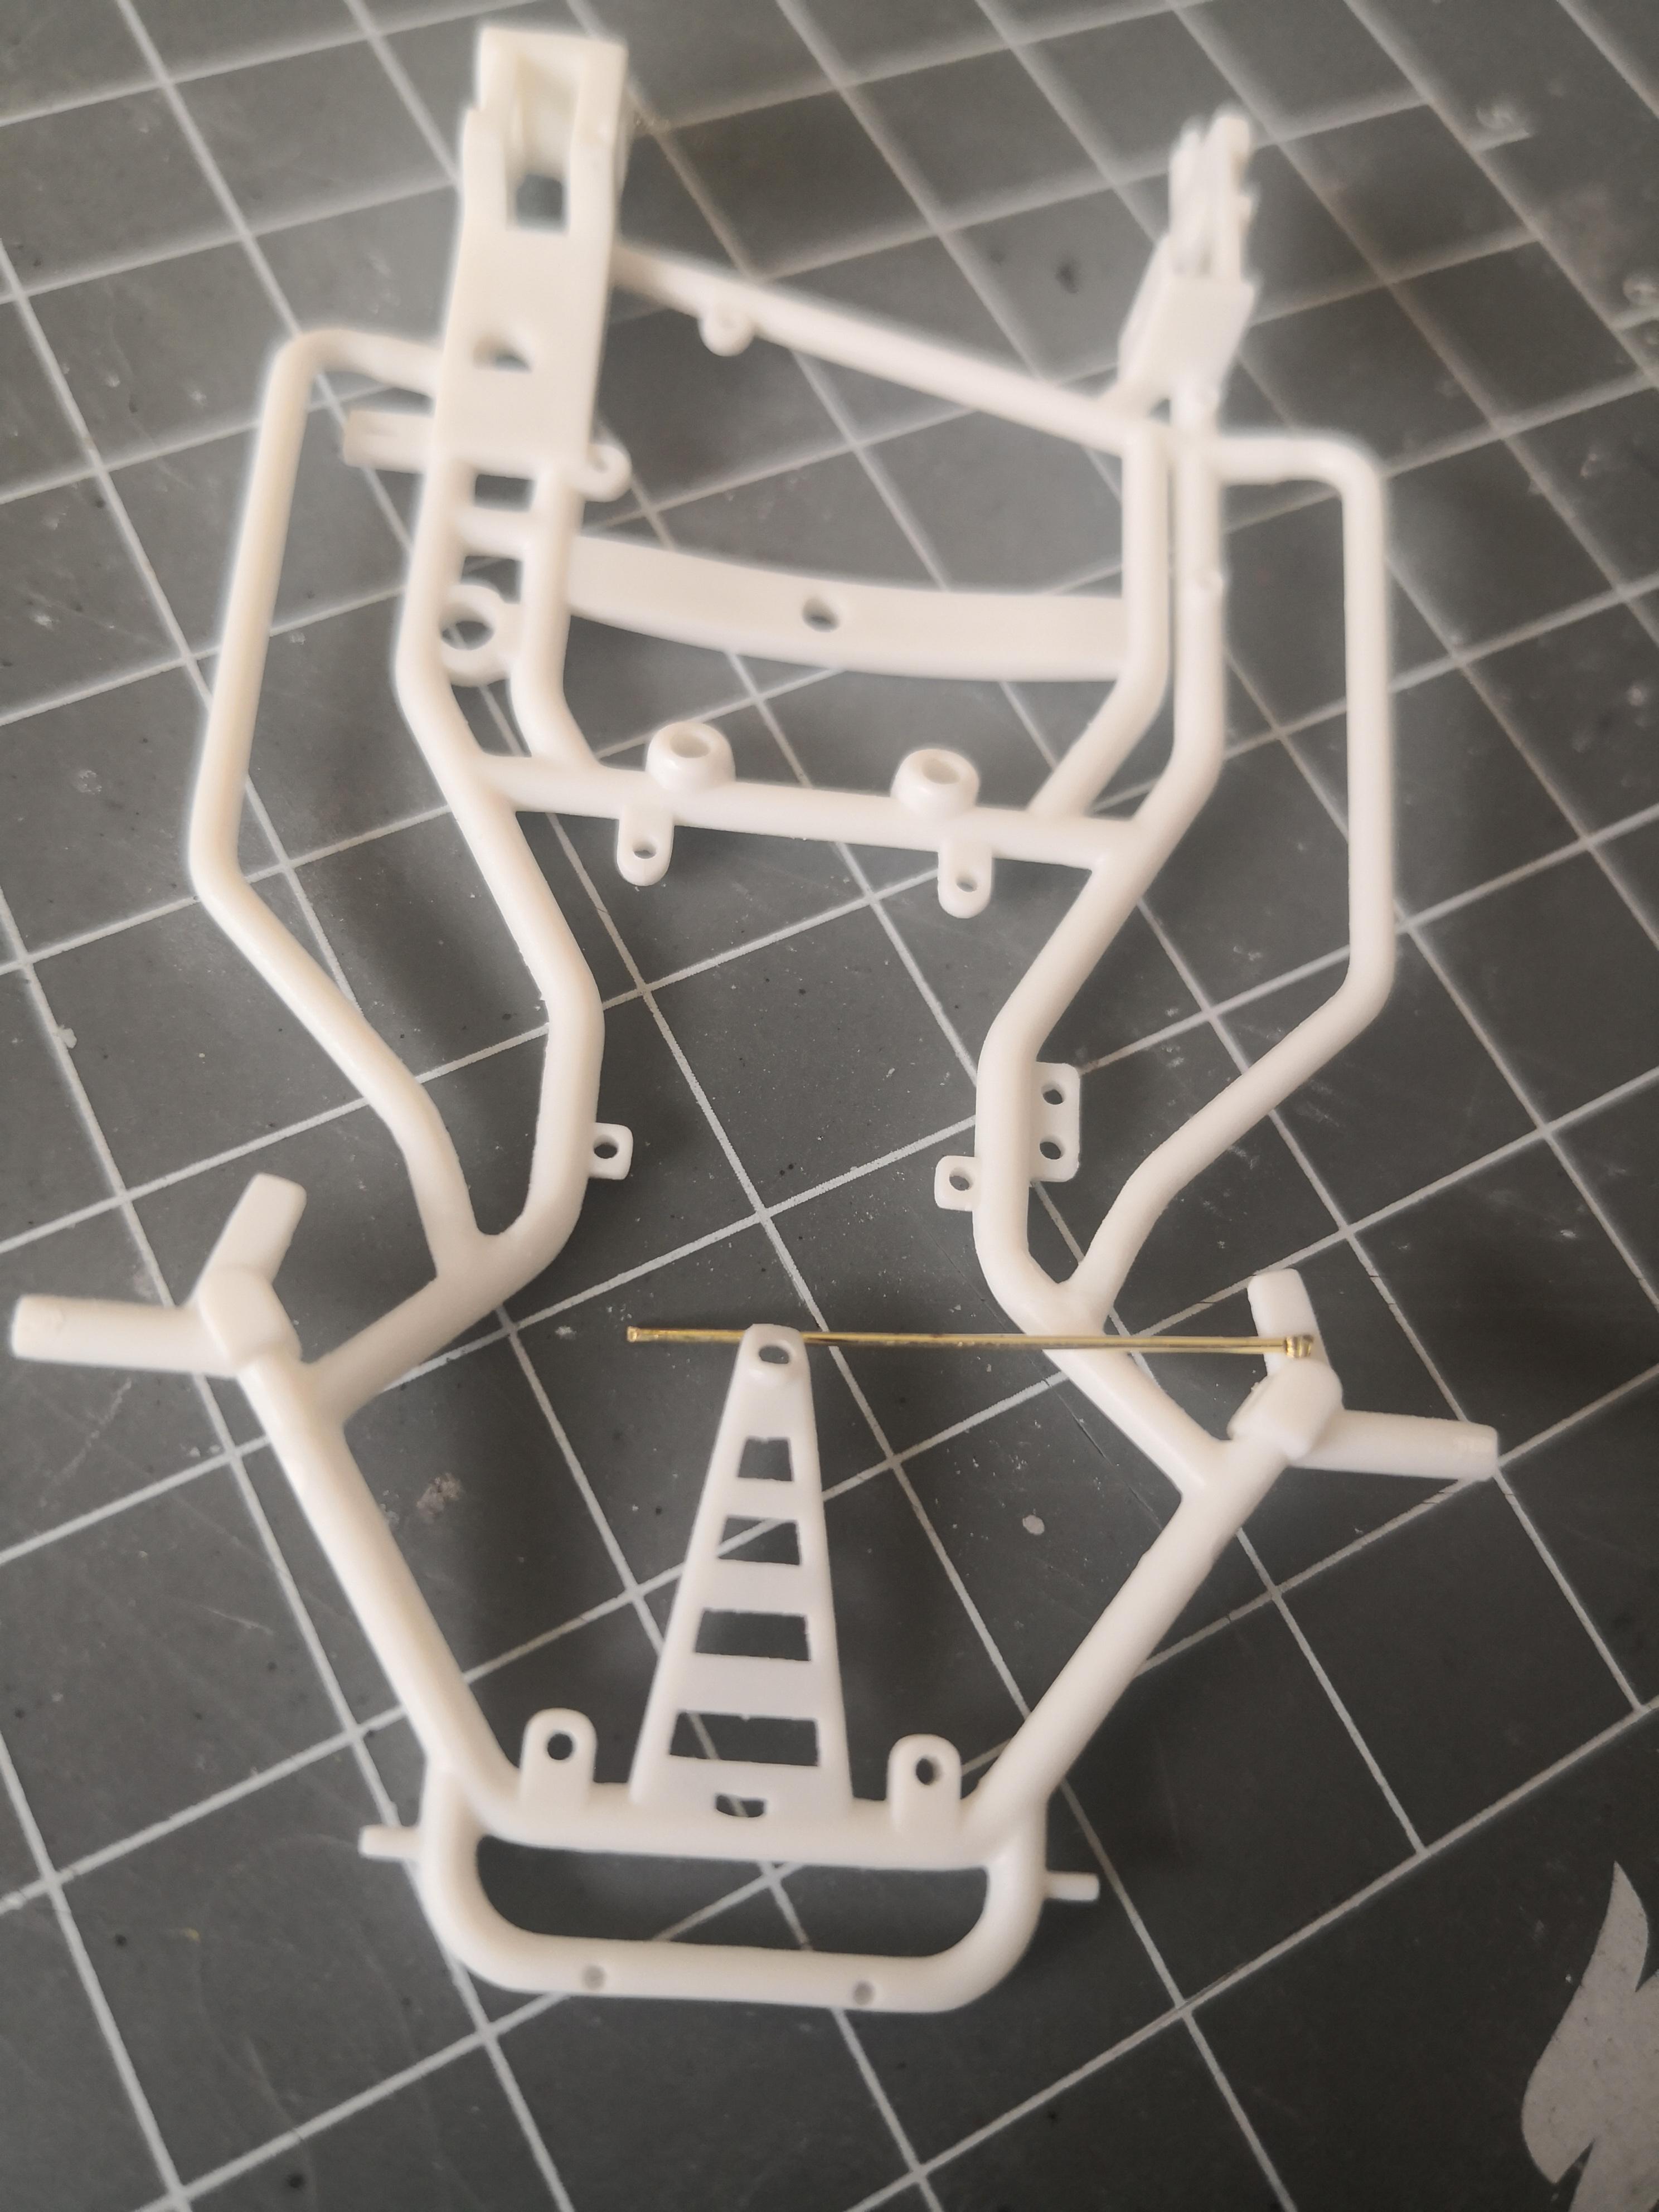
Since my other build (Ferrari 312b) is taking such a long time, I thought I would quickly throw together this Kart kit from Fujimi as a quick Out of the Box build. We'll while cleaning up the parts I thought we'll I might as well add the throttle cable, and brake lines, as well as run some fuel lines... All pretty simple on a kit like this.. Noticed a few glaringly obvious mistakes with the kit too, which I considered leaving, but then thought what the heck, might as well give it a go to fix these things up... Firstly, the airbox extrude from the cylinder head... This should be on the carburetor, I since found out they didn't use and air box back in the day with this Kart, so I may/may not use it, but I modified it to fit to the carb, which left a hole in the cylinder head where the kit mounting was. I am busy working on filling this, and trying to get the fins to look uniform across the filler... Another thing which I noticed, is that the molded in tie rods are way too big for the scale, it would be the same thickness of the frame! Went to work cutting them out, and filling the frame to look like a frame where the tie rods were molded in. Last photo shows a piece of brass which I am going to use as the tie rods, I think this will be a much better scale fit. Quite happy with the outcome, and also decided to cut away the huge mounting tabs for the front safety bar on the frame, this should be a small connection point, not something as hideous as this, so I have cut them off, filled them, and have filled them to match the frame. A lot more work has gone into this that initially anticipated, but I am happy so far, and I think will be a nice quick assembly once done with paint.
-
Tamiya 1/12 Ferrari 312b
IanH replied to IanH's topic in WIP: Other Racing: Road Racing, Land Speed Racers
Thank you, that's quite a neat idea... Will definitely consider that when I get there... -
Tamiya 1/12 Ferrari 312b
IanH replied to IanH's topic in WIP: Other Racing: Road Racing, Land Speed Racers
Hi John, You are more than welcome to share please. Regards Ian -
Tamiya 1/12 Ferrari 312b
IanH replied to IanH's topic in WIP: Other Racing: Road Racing, Land Speed Racers
Thank you Chris, I have studied your build of this kit on the forum over and over again, stolen so many tips and ideas from you. ?. Great build with a fantastic result ? Yes, I already had to glue one nipple back onto the pump just during initial test fitting, so will have to be very gentle. What did you use to tie up your cables? Ignition and fuel, I see most builds have what looks like black tie backs, but I don't have anything like this in my kit. -
Tamiya 1/12 Ferrari 312b
IanH replied to IanH's topic in WIP: Other Racing: Road Racing, Land Speed Racers
That's a really good tip, thanks. Your engine looks really great! -
Tamiya 1/12 Ferrari 312b
IanH replied to IanH's topic in WIP: Other Racing: Road Racing, Land Speed Racers
Mock up of the exhaust headers on the engine block. Will still need to clean up the joints where they join 3 into 1.
-
Amazing work! I noticed that you mentioned that you produce some of these parts for sale... Do you have a website or something?
-
Tamiya 1/12 Ferrari 312b
IanH replied to IanH's topic in WIP: Other Racing: Road Racing, Land Speed Racers
Thanks Steve, I tried carefully hand painting them, but wasn't happy with it either... In the end I painted the whole part yellow, and then carefully masked off the caps with thin Tamiya masking tape, and then airbrushed the rest of the part in black. -
Tamiya 1/12 Ferrari 312b
IanH replied to IanH's topic in WIP: Other Racing: Road Racing, Land Speed Racers
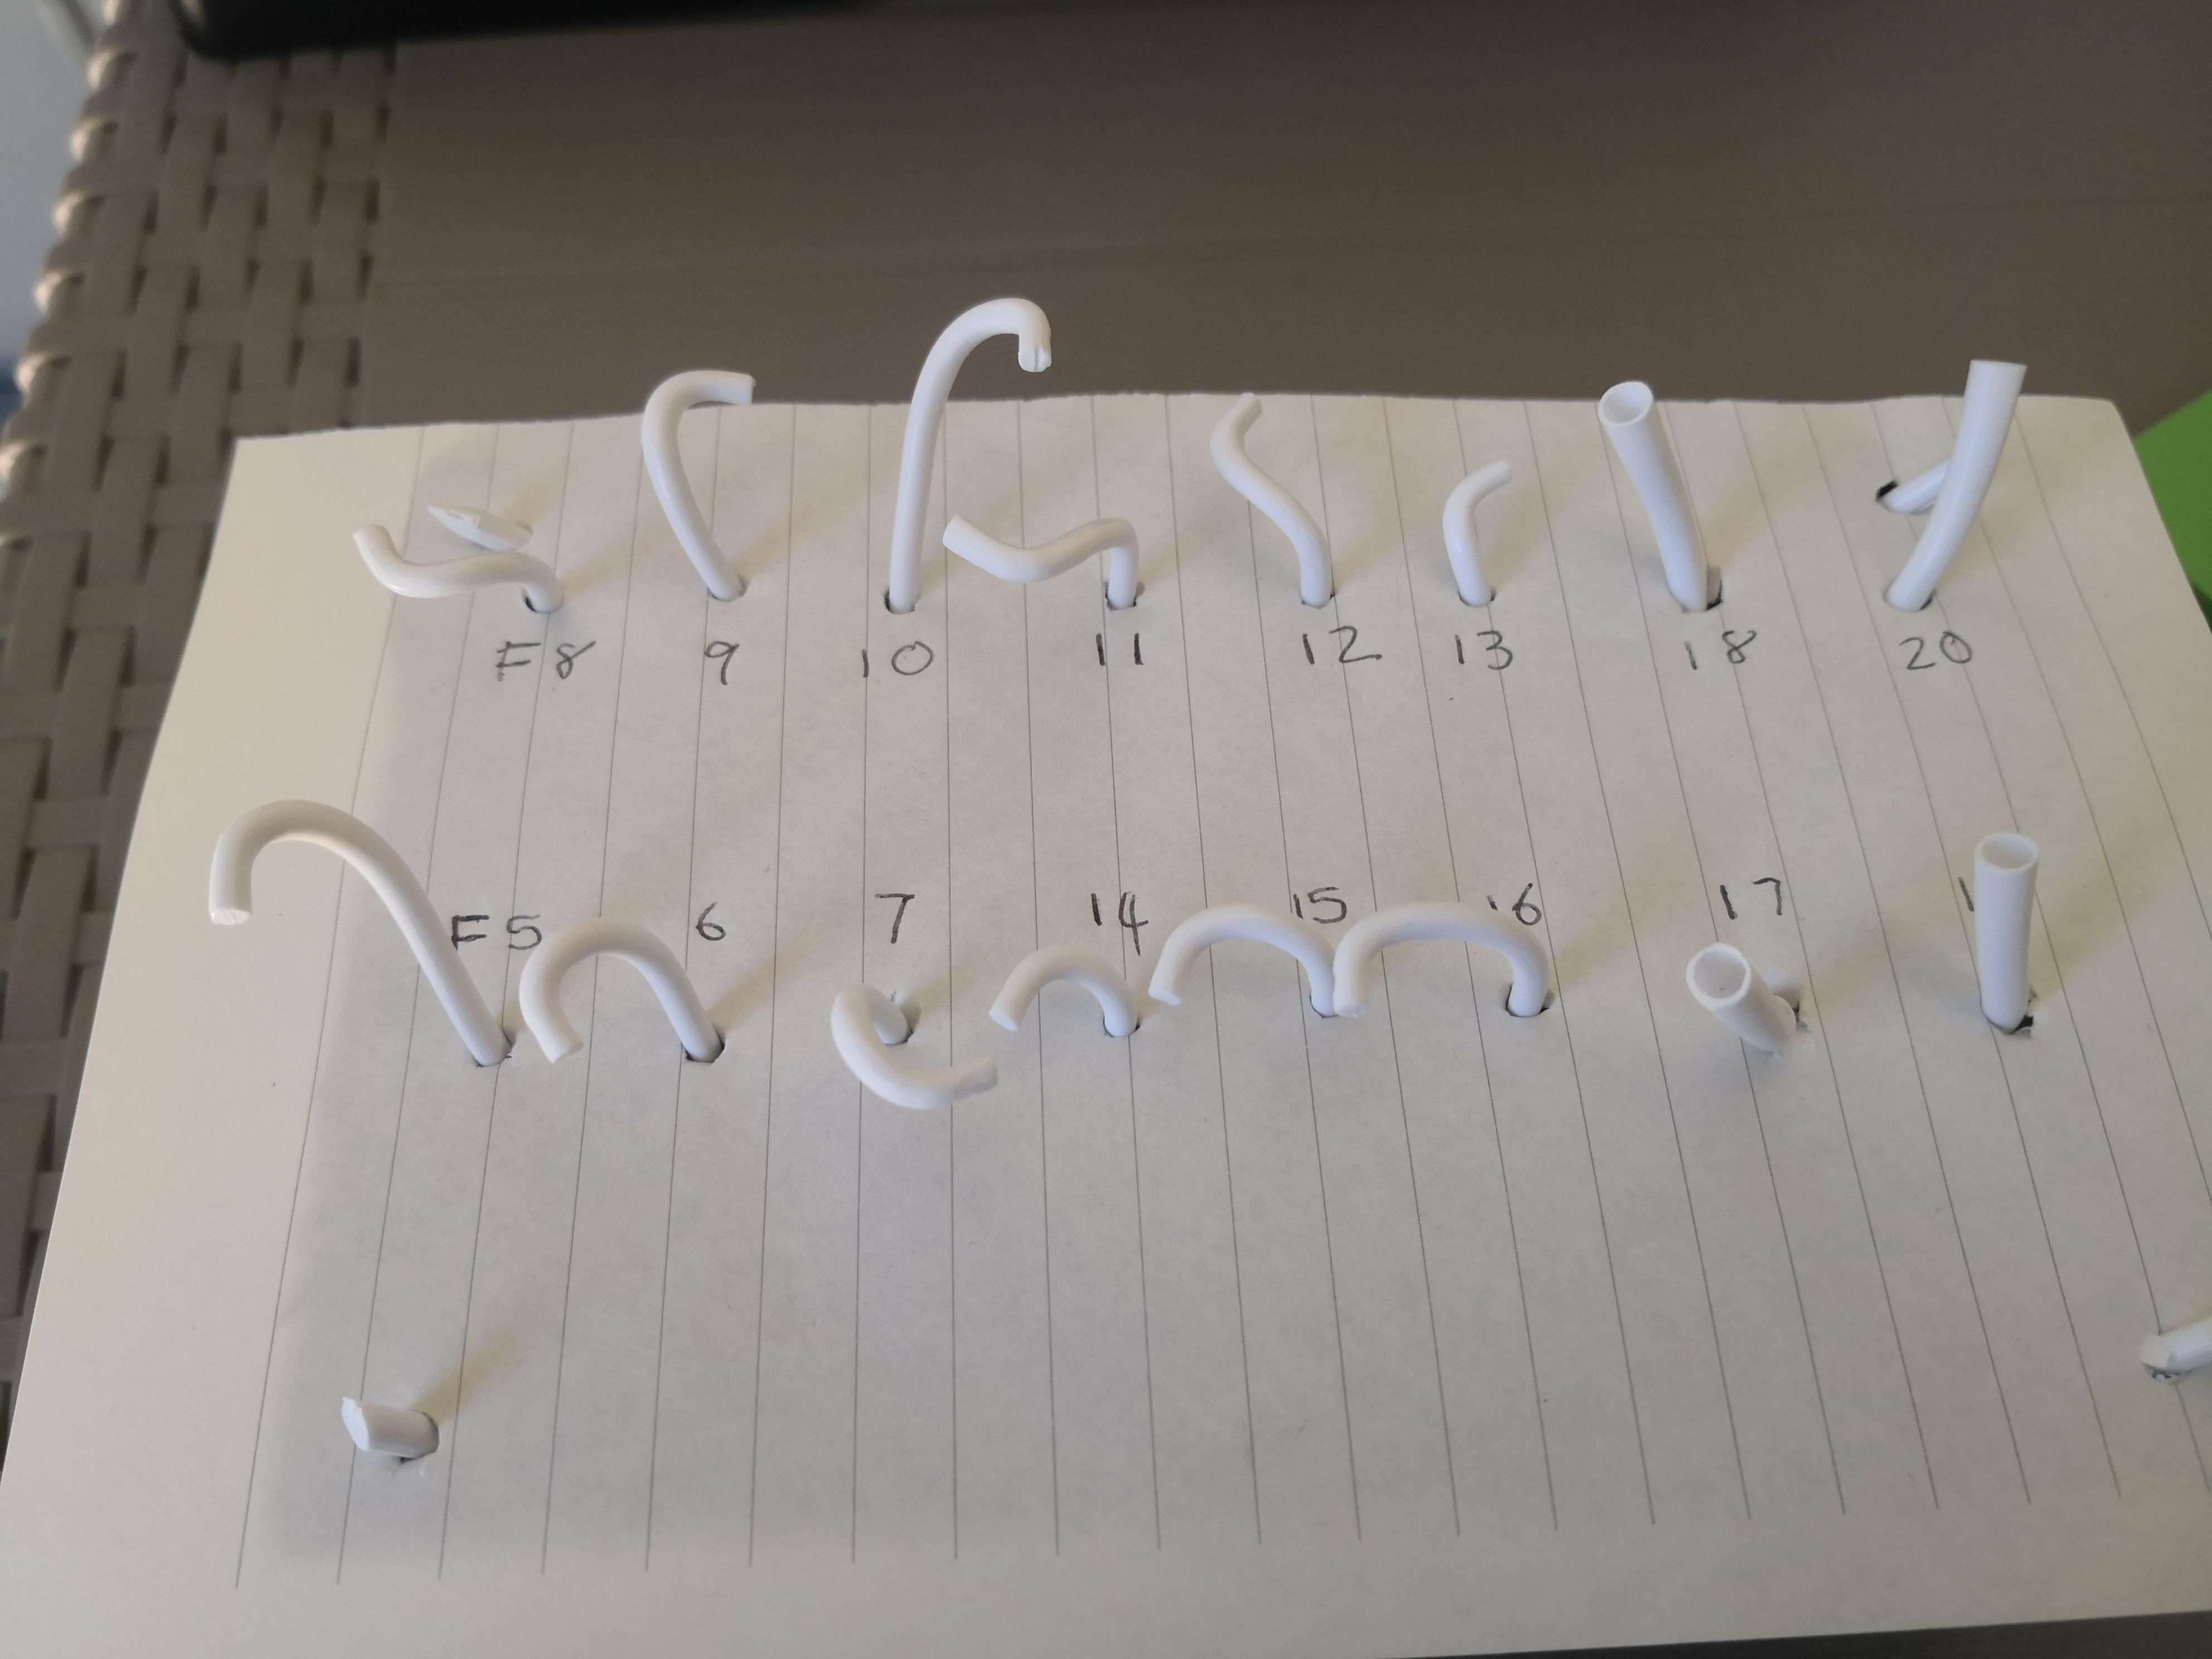
While waiting for a chance to paint, been busy with some more tedious tasks of sanding off the seam lines on the exhausts... Numbered the parts to keep them in order... I enjoy puzzles, but don't feel like trying to guess which tube goes where?
-
Tamiya 1/12 Ferrari 312b
IanH replied to IanH's topic in WIP: Other Racing: Road Racing, Land Speed Racers
Haven't had much chance to paint and make progress on the body, but spent some time fiddling with some other pieces, and started to put together the engine... Thanks Tamiya for molding 14 spark plugs for the 12 cylinder engine, as I realised that I was thinking of what I could possibly use the extras for... And then I sliced one to much when taking it off the sprue... OK will use 1 spare to replace that one, and what to do with other one I wonder.... As I cut the next one right in half? OK forget that, now all 12 good ones are used! Just consentrate and don't mess and more up!
-
Tamiya 1/12 Ferrari 312b
IanH replied to IanH's topic in WIP: Other Racing: Road Racing, Land Speed Racers
I would like to fit this shroud piece before painting the main body, and I am concerned about being able to paint in under it nicely. There's a good chance that I am over thinking this... ?
-
Tamiya 1/12 Ferrari 312b
IanH replied to IanH's topic in WIP: Other Racing: Road Racing, Land Speed Racers
Busy painting the body section in front of the dash, but behind the shroud... As well as primered a few other bits and bobs. Would like to clear this part of the body tomorrow, and put some colour on the other bits and pieces...
-
Tamiya 1/12 Ferrari 312b
IanH replied to IanH's topic in WIP: Other Racing: Road Racing, Land Speed Racers
Continuing with some body prep... I want to putty on this top shroud around the driver before painting the body so that they are painted as one. Without this it appears that there will be a couple of gaps between the two parts, and I really don't want that. So doing this, I create some extra challenges when painting... How do I paint that section just behind the shroud in front of the dash (red), and how do I paint the inside of this shroud black especially the front section just above this red part.... Decided to mark of the section on the body, and will be painting this little piece red, clear coating, etc all before gluing on the shroud and before main body painting. Will also mask off the outer sides of the shroud, and will be painting this black... Hoping to lay some paint in the next day or two.
-
Tamiya 1/12 Ferrari 312b
IanH replied to IanH's topic in WIP: Other Racing: Road Racing, Land Speed Racers
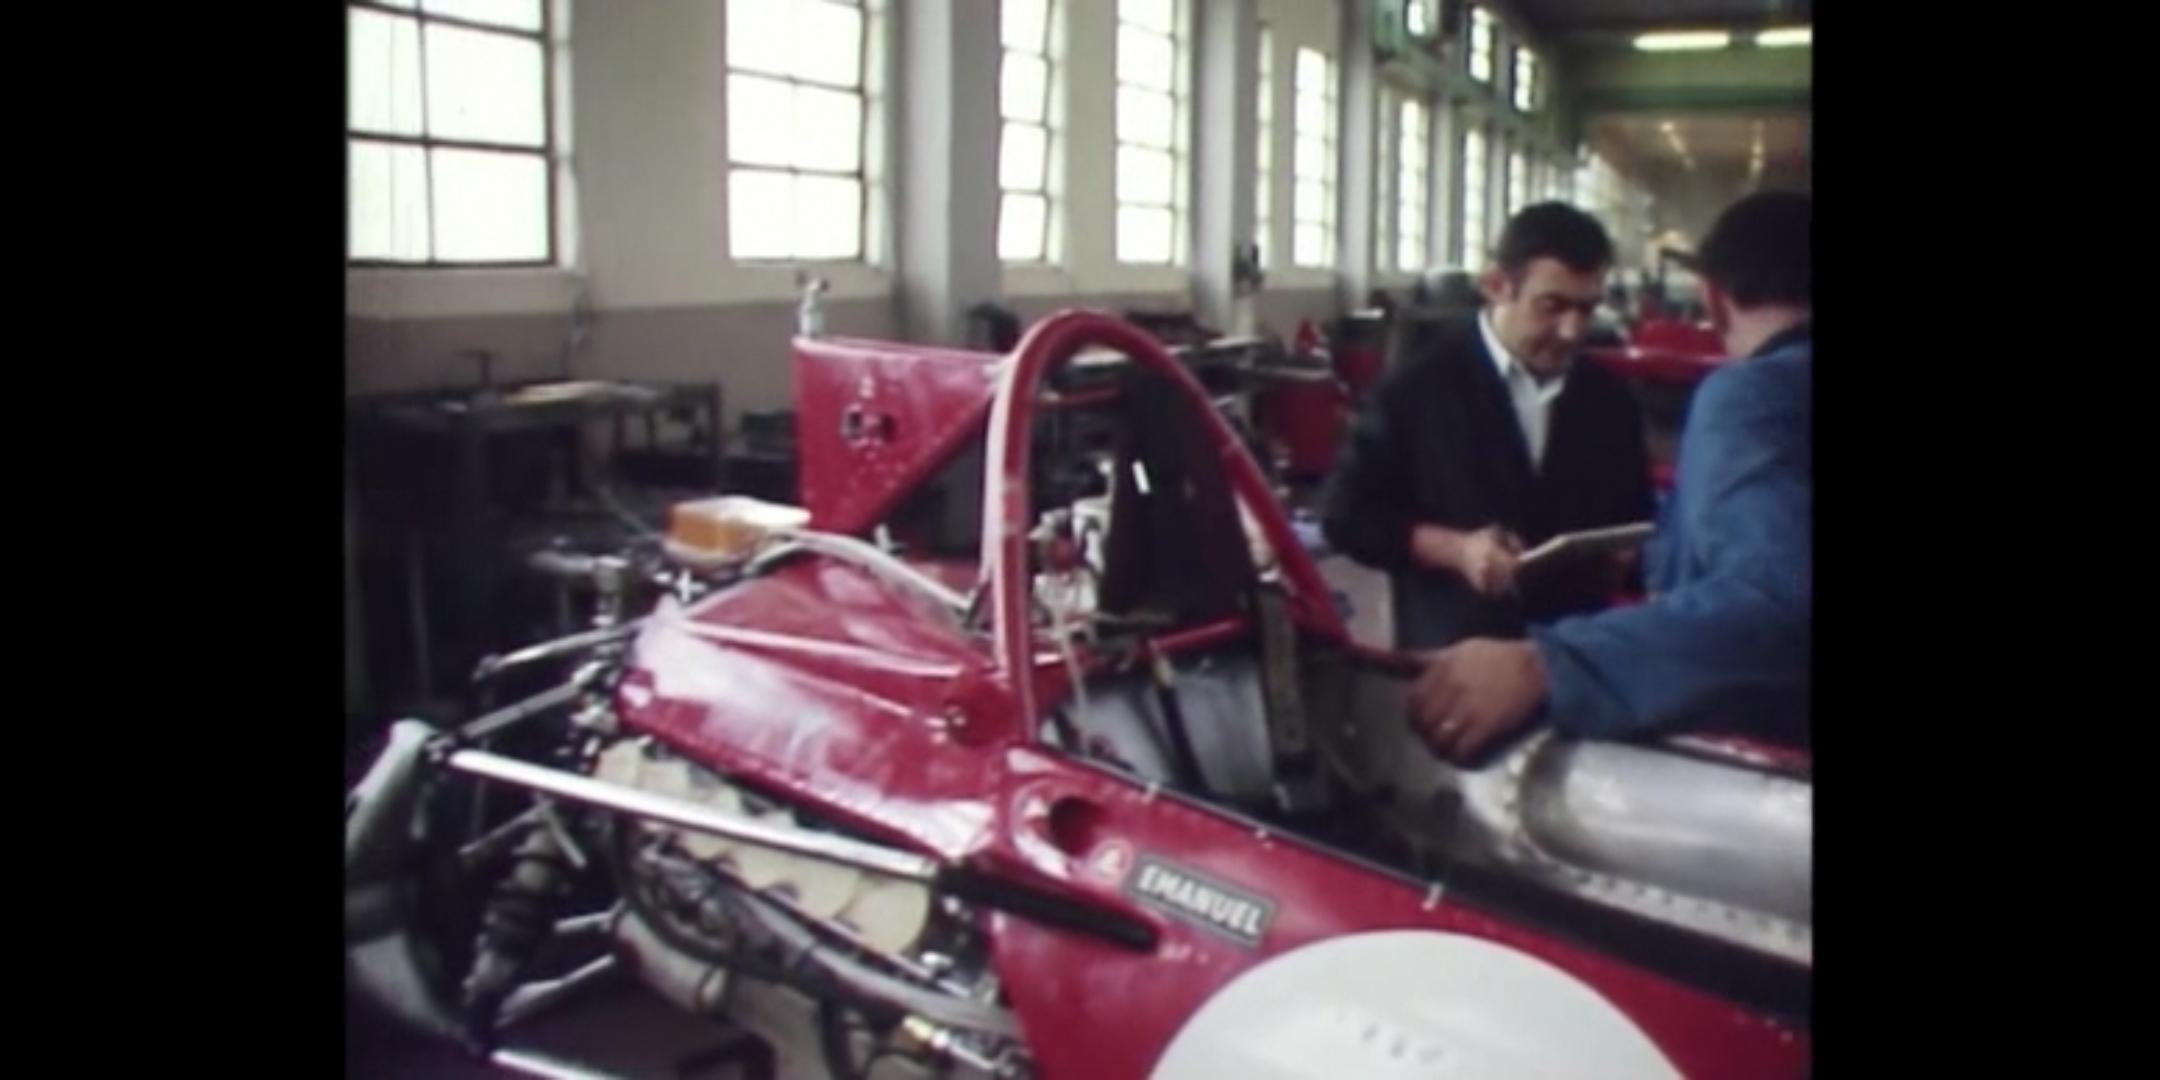
Agree, the restored versions are a great help, but you will not easily know what was updated. BTW, this is a period photo, note the additional vehicles in the background.... Here's another from a different angle, you can see that this is an older style building, with guys and older fashioned clothing ?