Andrew McD
-
Posts
506 -
Joined
-
Last visited
1 Follower

Recent Profile Visitors
3,182 profile views


Andrew McD's Achievements
MCM Ohana (6/6)
-
Thanks for your comment. It seems this style of decal is not the water slide decal we are accustomed to but requires an adhesive. SpotModels recommends Tamiya Decal Adhesive which from my internet searches is not available in the USA and incurs prohibitively costly shipping and customs fees from overseas suppliers.
-
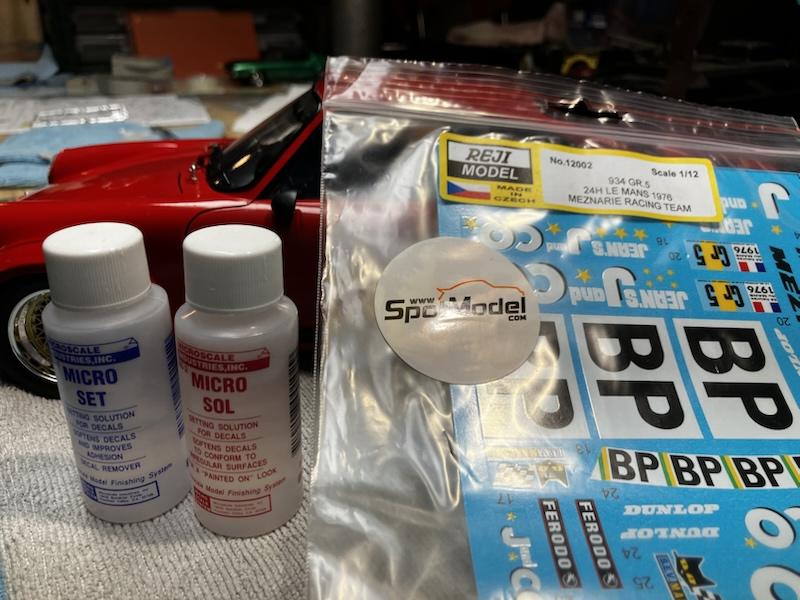
Les, Here is the answer that SpotModels sent: Hi Andrew! 🙂 Those particular decals are digitally printed, and the way to work with them is slightly different to the usual silk-screen decals and even the "in-house" printed laser decals. First of all is that the usual decal softener products (like MicroSol and MicroSet) don't work with this type of decals. The only product which helps is the Decal Adhesive from Tamiya, which is not exactly a softener. Decal adhesive is the perfect solution to help the decals fix over the model. Use some drops of the Tamiya decal adhesive under the decal, leave it to act for some seconds, and extract the rest as you usually make with the water. https://www.spotmodel.com/product_info.php?products_id=20600 If when dry the decal curls in some of the edges, simply apply a little more of Decal Adhesive to fix the decal completely. Use cold water, put the decals in 2 mm of water for 2 or 3 seconds (this is to no give time the decal to curl, but enough to loose from the paper), and use the support paper as a base to pass the decal to the piece, where some drops of Tamiya decal adhesive are already applied. After that, as usual with any other decals, remove all the liquid from under the decal with a soft cloth, adding more decal adhesive if necessary. And a very important tip... never use an external heat source when applying the digitally printed decals. Take also into account that decals are very sensitive to the surface... the most glossy and flat the best adhesion for the decals. In the case of a satin or matt surface, the adhesion is really complicated. In case a matt or satin finish is necessary, it is better to apply a glossy clearcoat as a base, and after that apply another layer of mat or satin varnish. This technique, of course, can not be applied on rubber tires, so more reason to use the decal adhesive to help the decal to fit the rubber surface. A last comment is that although curl, the decal can be flattened simply with water and a smooth brush, as they need more time to adhere to the surface. If you put the curled decal over a drop of decal adhesive, you can flatten it little by little while the adhesive is making an effect. We hope this information helps you with your project. Best regards! SpotModel Customer Service
-
Welcome to the forum from a fellow Delaware resident.
-
Thanks! I'll give this a try. Have not heard anything from SpotModels regarding the decal failure.
-
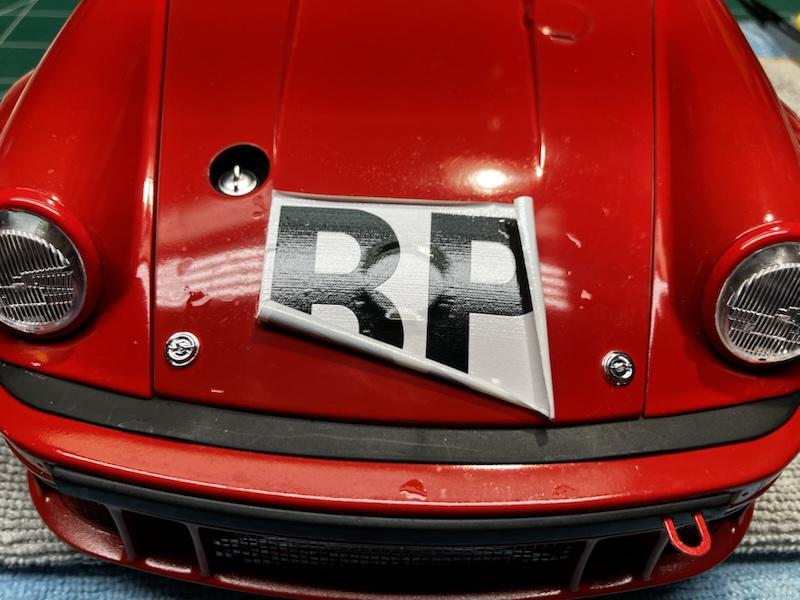
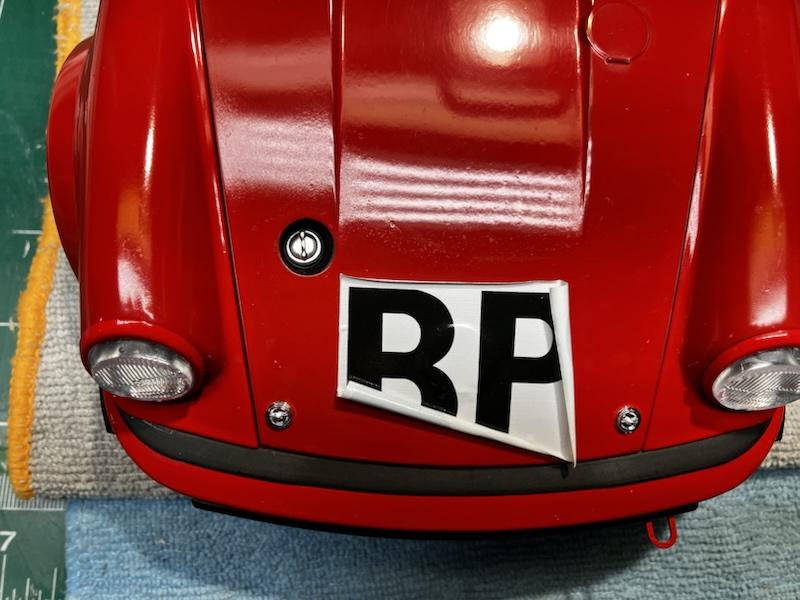
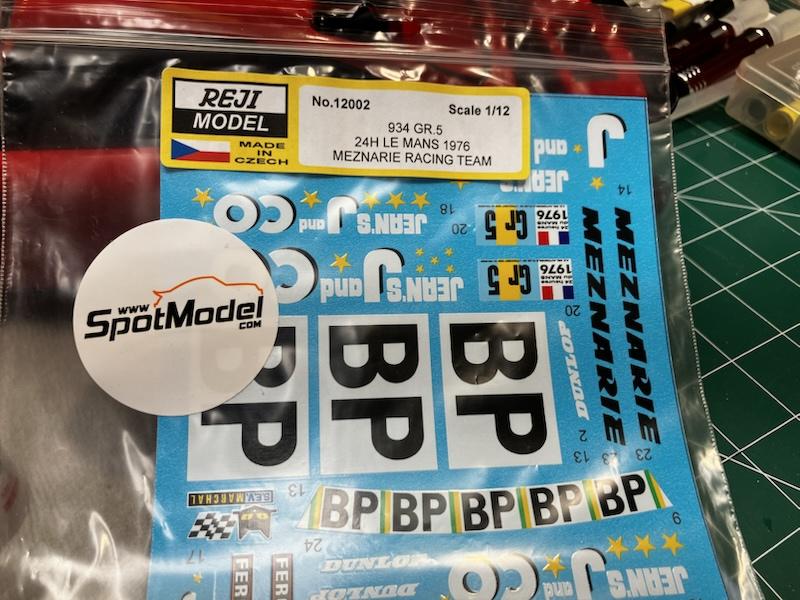
In an effort to do something a little different with my Tamiya 1/12 scale Porsche 934 I ordered decals to replace the Jagermeister livery. I found an interesting decal set by rejimodel.com available through Spot Model.com; the Meznarie Racing Team #54 as run at LeMans in 1976. I ordered the decals months ago and they've been stored in a cool dry place until this morning when I began decal application. Within a minute after being immersed in warm water the decal was curling off the backing, something I've never seen before. I applied the decal to the body, adjusted position and then started smoothing the decal applying some MicroSet decal solution. The edges of the decal would smooth out for a short period of time but soon the edge curled back as depicted in the attached photos. I applied some MicroSol decal solution thinking it may soften the decal and encourage it to lay down but to no avail. I'll contact SpotModel to see if they can help me with the problem but thought I would also pose an inquiry here. Has anybody ever had such a problem and/or have any thoughts on the cause and possible resolution? A final note, the paint has had weeks to dry and while not terrible I did attempt to improve the finish with Tamiya polishing compounds prior to decal application. The body was washed and dried after polishing so I don't think the surface is contaminated.

-
Beautifully detailed engine! Looking forward to seeing more of this project.
-
It has color and the color looks excellent. Looking forward to seeing more of this project.
-
Really nice clean build. Great attention to detail. A very convincing model.
-
Show us your Engines - Post Dedicated to the Engine
Andrew McD replied to TheCat's topic in Model Cars
Some great and inspirational work in this thread.......now I should go and build something! -
Looking good! I really like the engine detail work.
-
Revell 2022 C8 Corvette
Andrew McD replied to HSCHMIDT's topic in Other Racing: Road Racing, Salt Flat Racers
You certainly caught the spirit of IMSA road racing. Nicely done! -
A mind boggling cool build. Well done.
-
Revell 70 Pontiac Trans Am - Out of the Box
Andrew McD replied to Exotics_Builder's topic in Model Cars
OOB can be beautiful too, you just proved it. Very nicely done and best wishes recovering from the cataract surgery. -
Sharp looking machine; great craftsmanship.
-
Always a treat to see projects from your bench and imagination.