.JPG.00c5759fc4b275f7bda22d18ec4b4254.JPG)
AMT68
-
Posts
1,506 -
Joined
-
Last visited
3 Followers


Recent Profile Visitors
5,179 profile views


AMT68's Achievements
MCM Ohana (6/6)
-
Very nice work and a great shade of green.
-
Beautiful paint work.
-
The Createx paint looks great Mike as does the entire assembly. Kudos to Zippi's efforts on the wheels.
-
Thanks Michael. I agree it is an attractive shade of red and I recently picked up another can. Thanks Trevor, I actually just found another one of these kits at a surprisingly good price and plan on adding additional details to the build. The tail lights on the 71-72's were an attractive feature. Just too bad the headlights bezels weren't molded correctly on this kit. Thank you Racine, Paul and Chris.
-
Excellent paint work.
-
Thank you William and Andy. The kit had some positives. Thanks Mike. I got away from doing a white interior on this one. Thank you Bill and David. Thanks Donato. I had to build up styrene strips under the fenders to adjust the height of the front of the car. Thank you Jim, Dan and Hank. Thanks D Petterway, Eric and Dennis Thanks Alex and David. True it's not the easiest kit but it did help to improve my skills
-
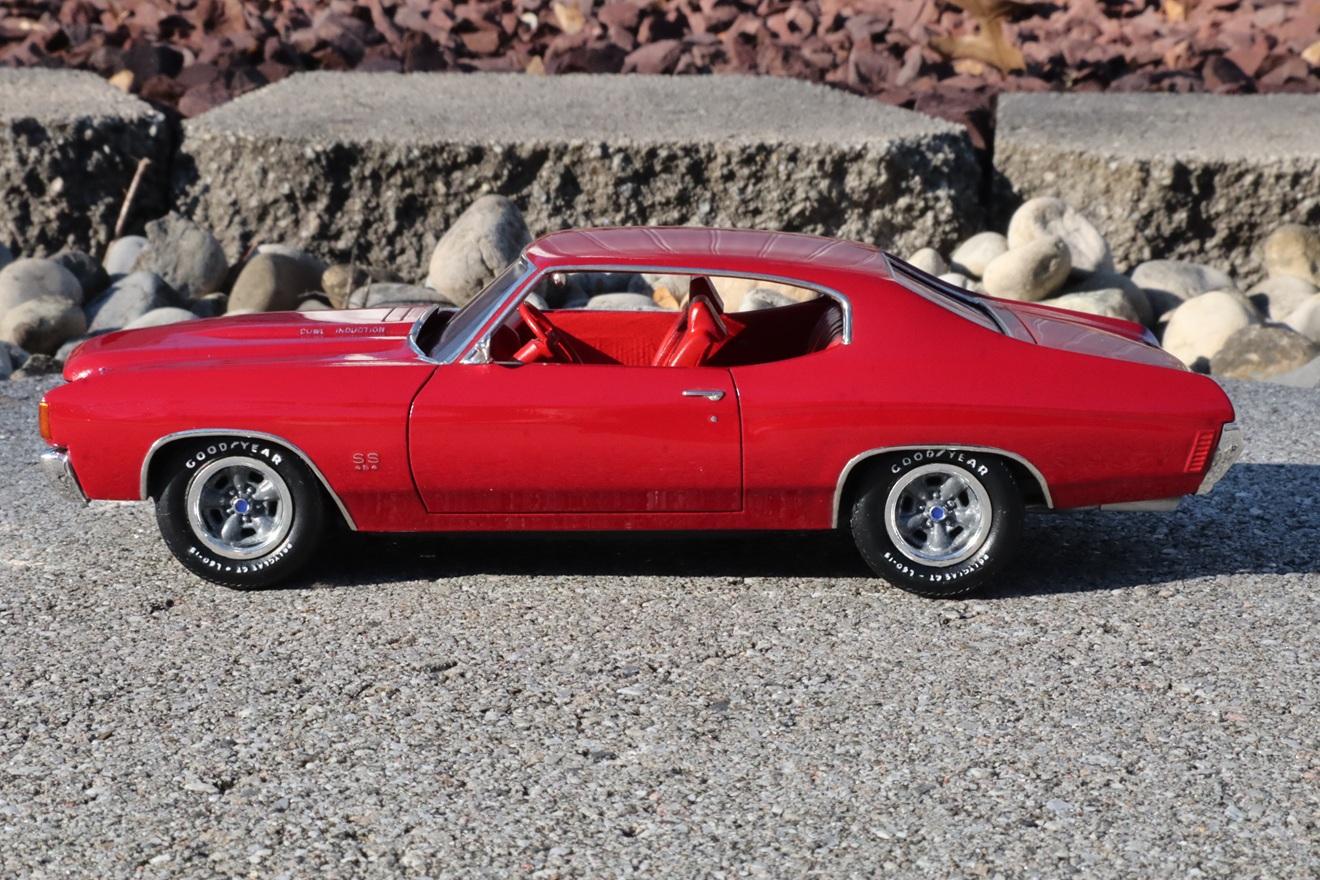
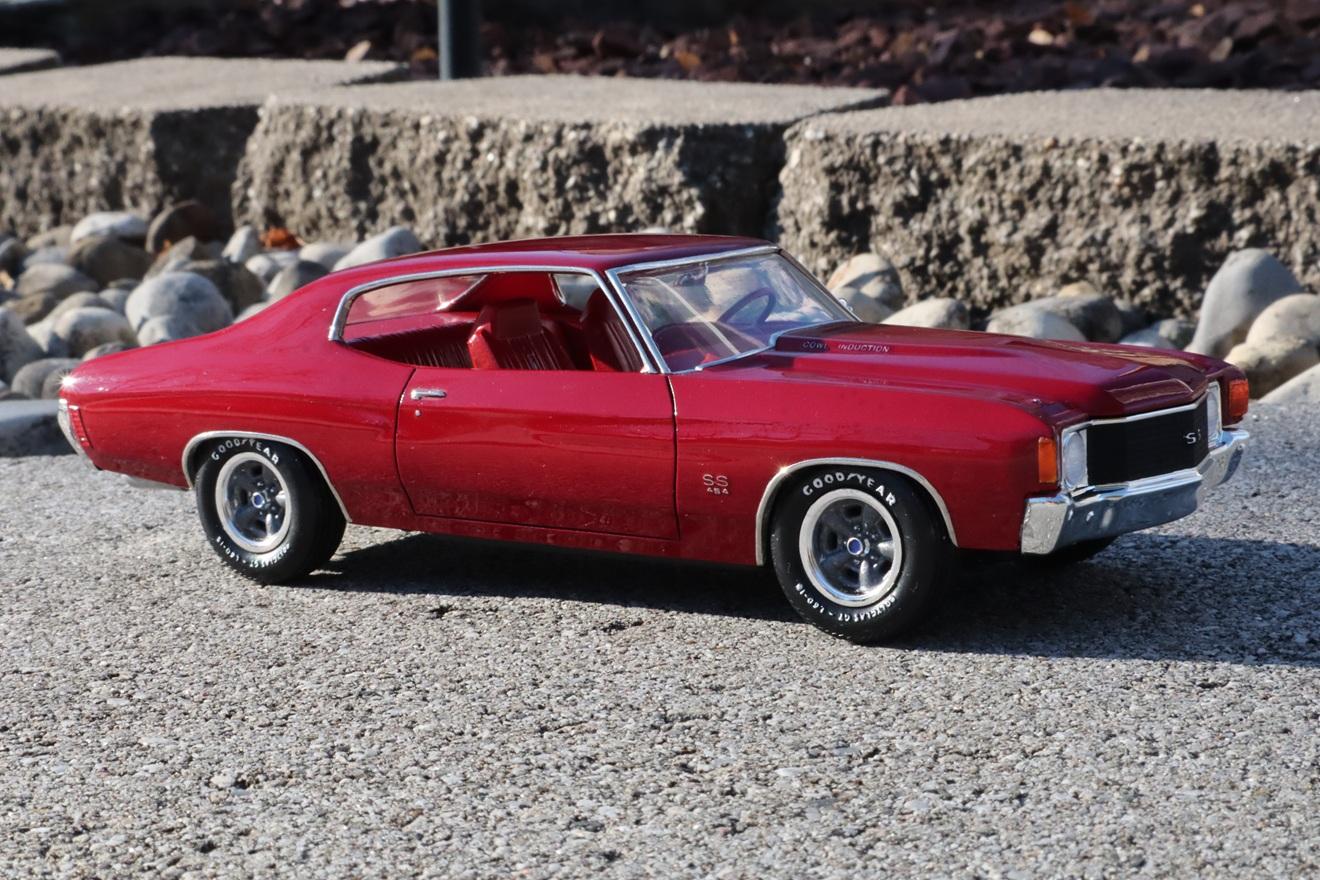
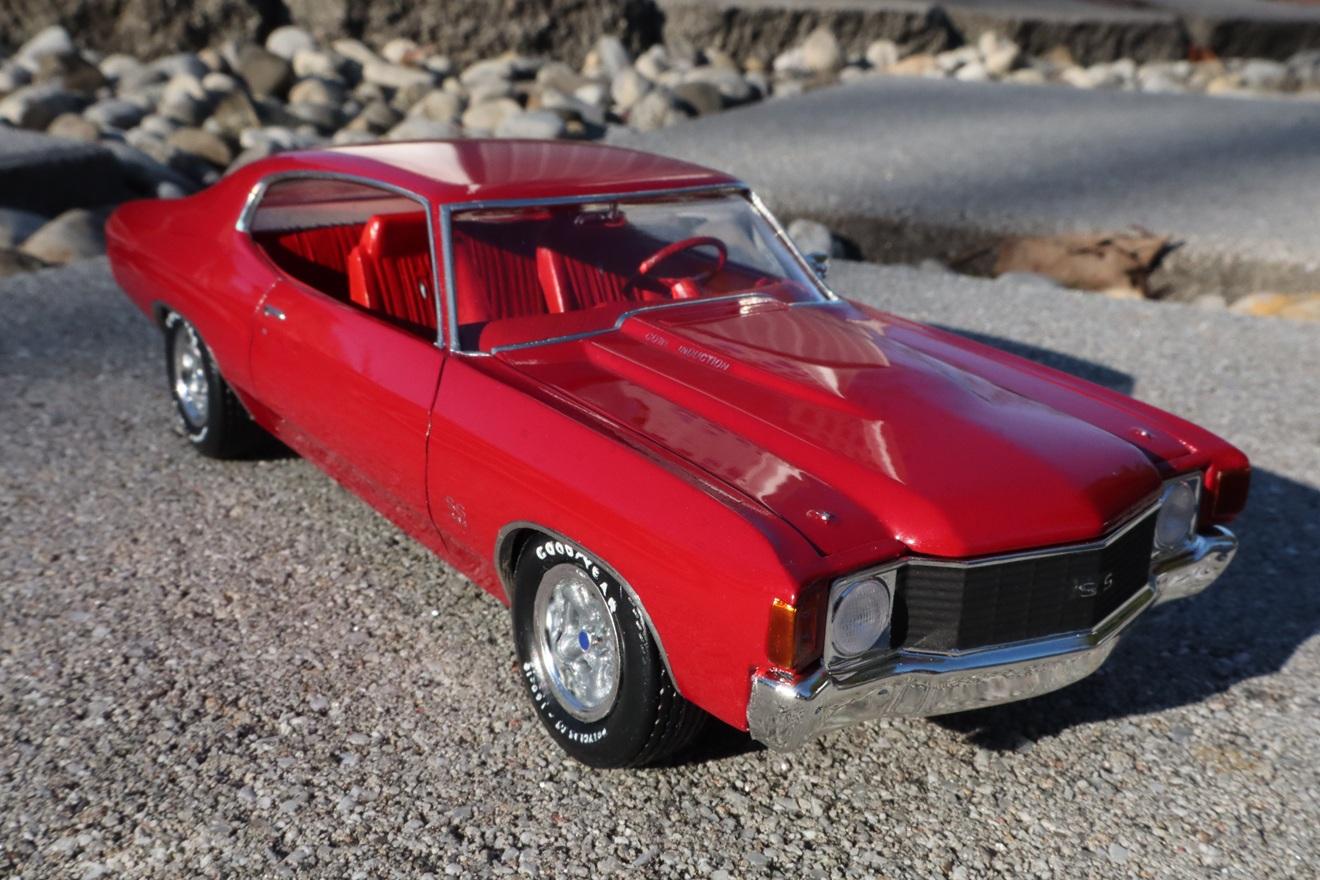
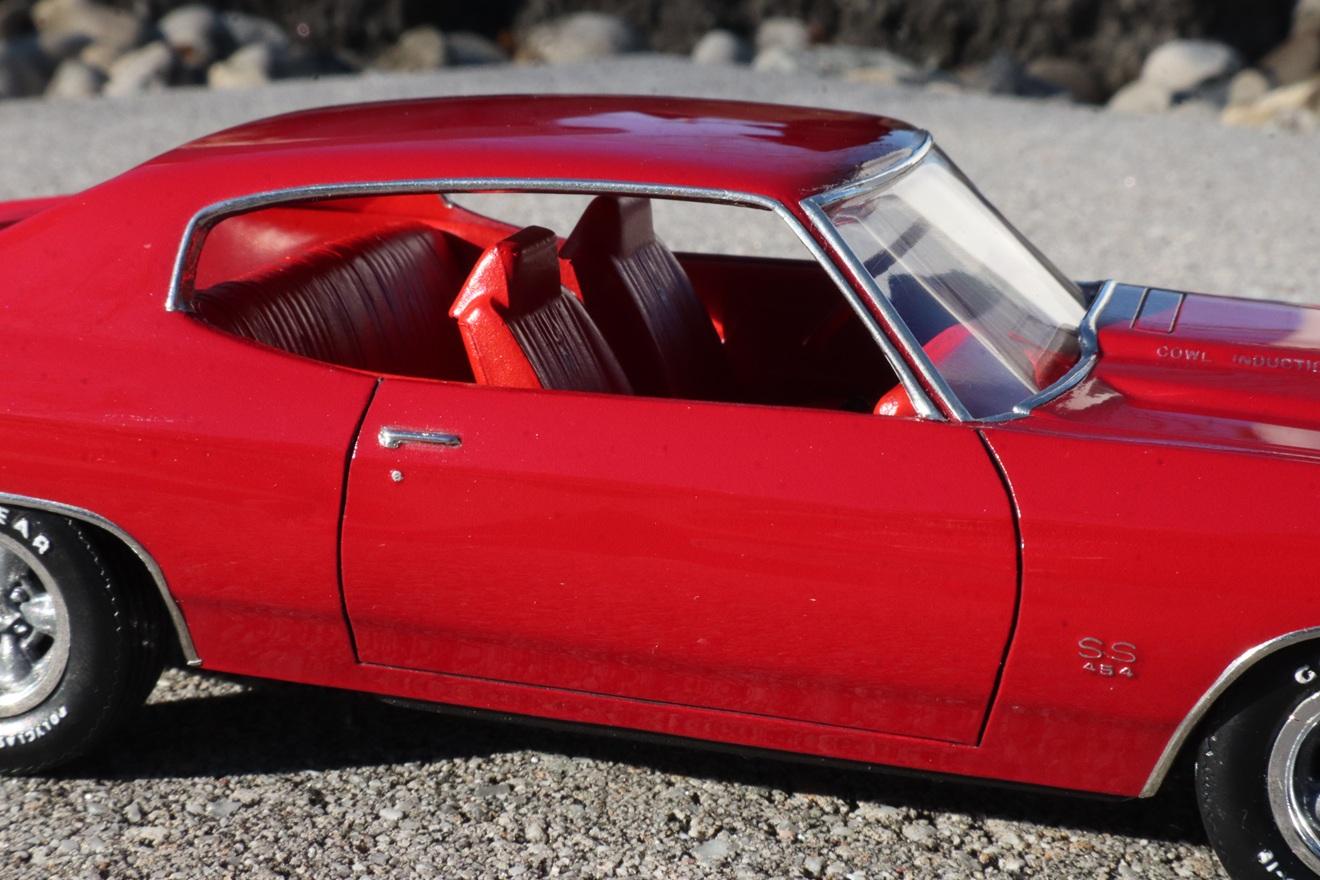
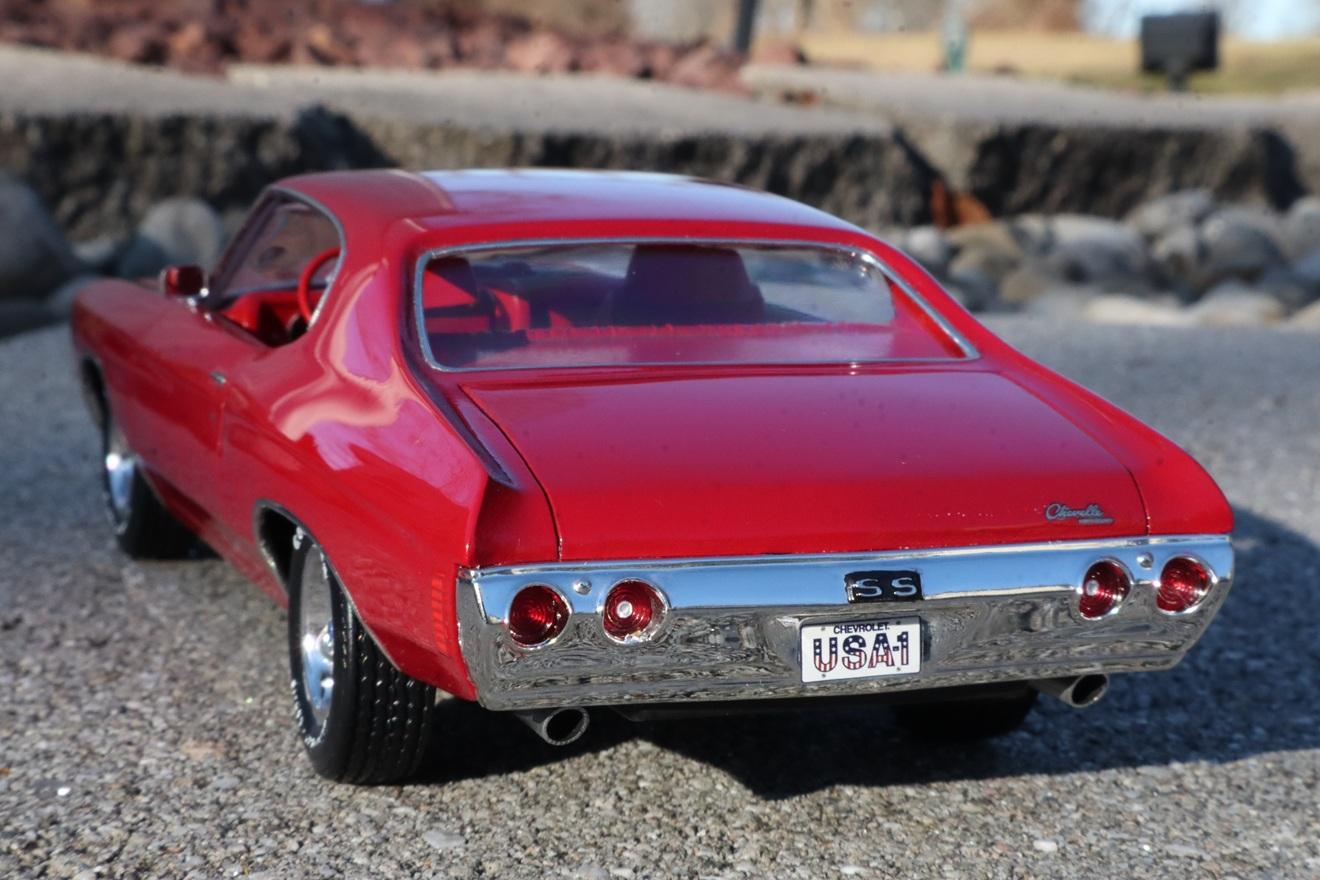
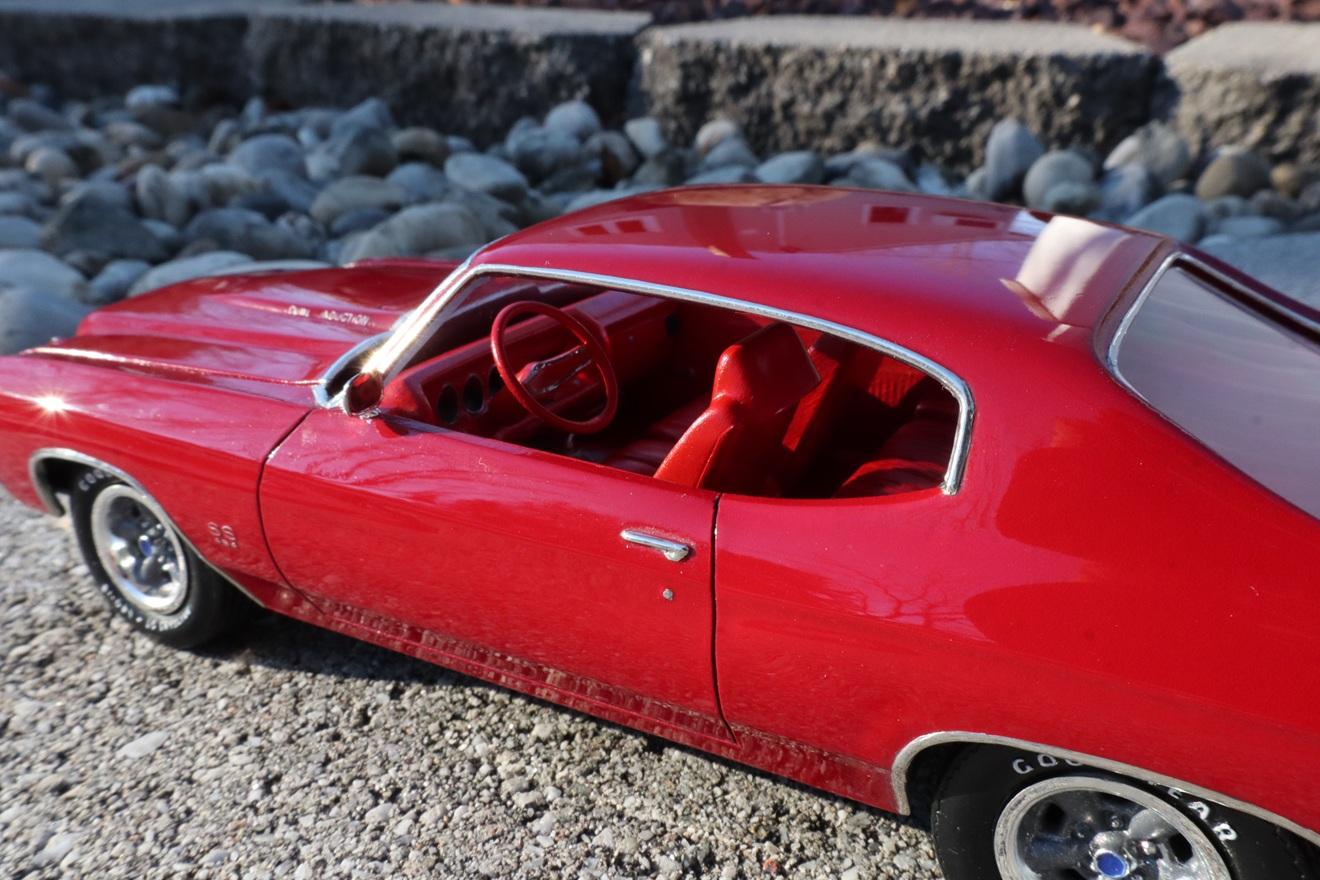
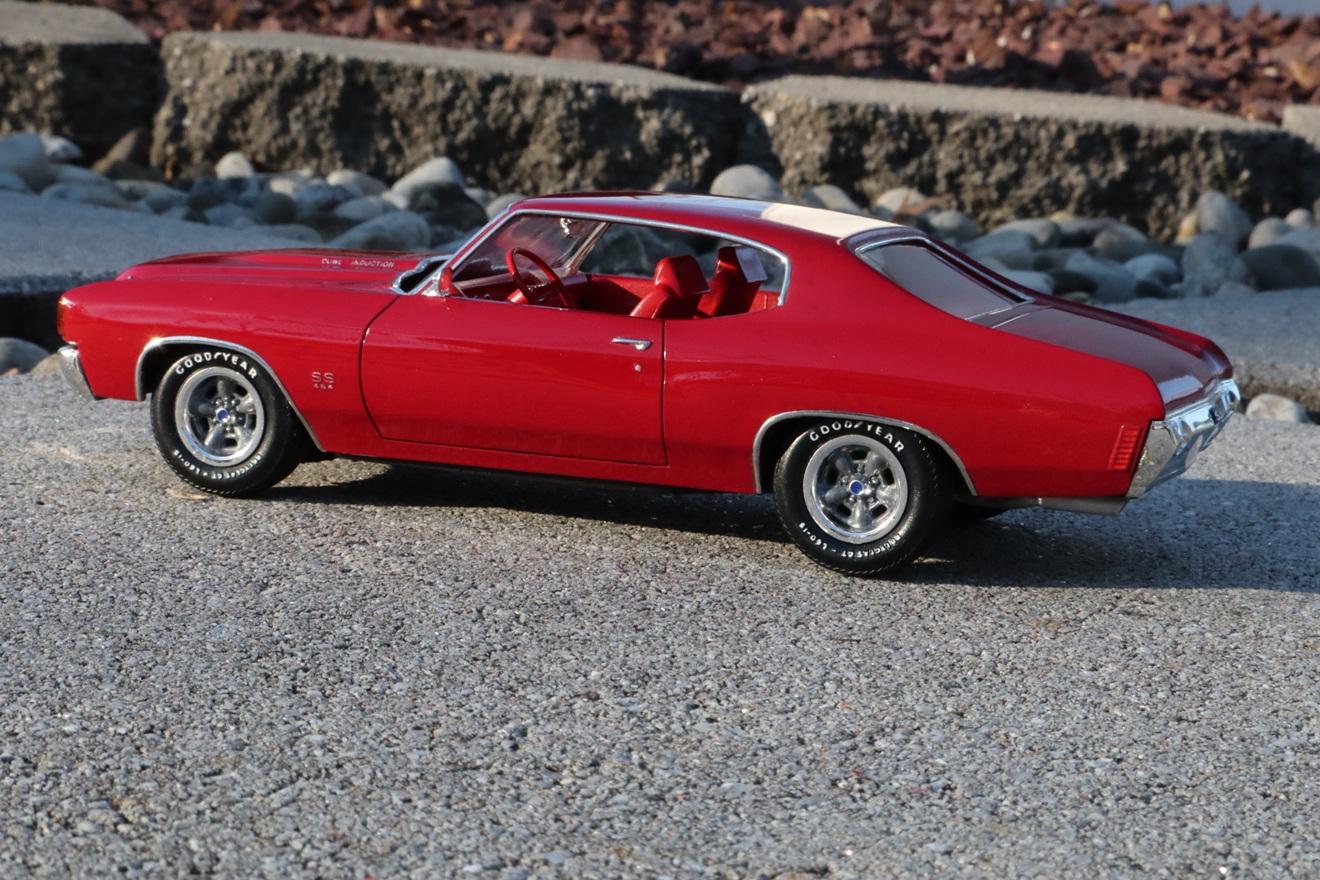
'72 Chevelle SS454 that was built from the 2005 ERTL release in 1/25 scale. Exterior painted in Dupli-Color Milano Red (Honda) with Rust-Oleum for both the clear and Apple Red interior. Side view mirror from the '70 Monogram Malibu kit and the Sport Wheels painted with a Deco-Art metallic grey mix. I filed the drivers side quarter window open in an effort to better match the more correct looking passenger side. After sanding off the incomplete trim on both windows I ran a continuous strip of .010x.020 styrene to reestablish the drip moldings. I also improved the prominence of the windshield trim with .015x.030 strips and sanded the edges for a more finished look. Since this is an out of production kit and the parts are scarce I declined to paint the lower valance body color on the one piece rear bumper in the event the chrome stripped off after removing the tape. One of the parking lights was unusable based on how it was molded into the tree so I closed in the open areas at the edges of the front fenders with some pieces of styrene and sanded them flush with the body. I had to pull the right side fender inward and glue it to the chassis since the fender extension was pointing downwards and preventing the bumper/grill assembly from seating properly. Initially I sanded the area below the parking lights thinking it was the cause of the bumper misalignment which in the end created something of an unsightly gap particularly on the drivers side. In the end I really didn't mind the extra effort this kit provided as I've gained experience from the build. And lastly the "Chevelle" trunk emblem was the only one I couldn't successfully pick out with foil under paint so I used a spare decal from the Revell "69 Chevelle which is incorrect since it's a more slanted script. But then so was the faintly engraved script on the model.

- 21 replies
-
- 12
-

-
Absolutely gorgeous and a pleasure to see as a Colonnade fan.
-
Super nice build and excellent work on the conversion to a Heavy Chevy.
-
That's a great color and removing the vent windows provides a cleaner look.
-
Great paint work and vinyl top on this one. You do a great job of capturing the factory appearance in your builds.
-
That is an extremely nice build.
-
Beautiful paint job that must have required a good volume of paint to cover that big Caddy. Excellent color combination.
-
Great paint job and extremely well detailed.
-
Super clean and wonderfully detailed throughout. Great exterior color.
.thumb.JPG.6fb58f3bfff96775060143c23c012e96.JPG)