AL.
-
Posts
61 -
Joined
-
Last visited
Content Type
Profiles
Forums
Events
Gallery
Everything posted by AL.
-
You are welcome guys. Just happy to share my knowledge/experience with others. Bill...... I hadn't realised that about the Trabby, I just used that body as a test mule as I knew I was never going to build it.
-
Over on another site (now defunct, like so many) during the month of December, I used to run a little light hearted build competition which I named the 'Dick Dastardley' challenge. The idea was to build a 'Wacky Racer' (Remember the 'Wacky Races' cartoon show?...... http://www.dan-dare.org/Dan FRD/WackyRacesCarsAndDrivers.htm ) The rules were simple.1. No new kits are allowed. Only failed kits and parts box parts are allowed.2. No after market parts are allowed.3.Let your imagination run wild.4.Weaponry is desirable but not essential.5. Have fun.6. Your Wacky Racer must bear a race number. So I thought I'd show you some of my entries: The front end of the last one is the skull of a badger (I believe) that I found on my land many years ago, grafted on to the rear end of a car. The rest are made up from said parts list.

- 1 reply
-
- 1
-

-
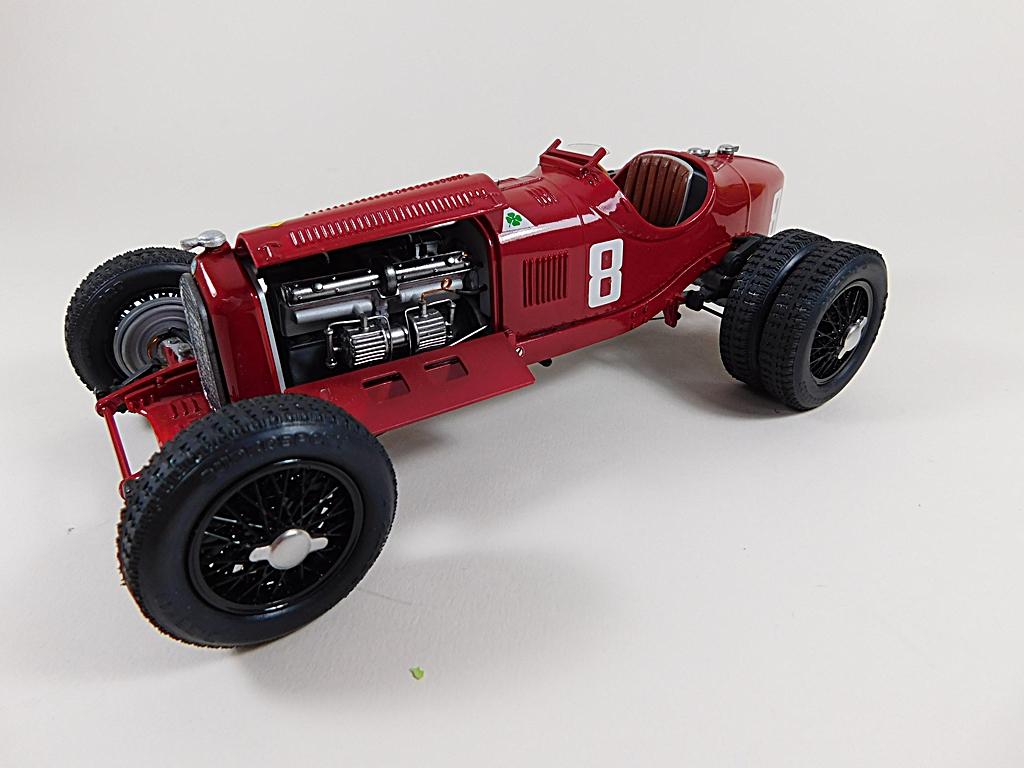
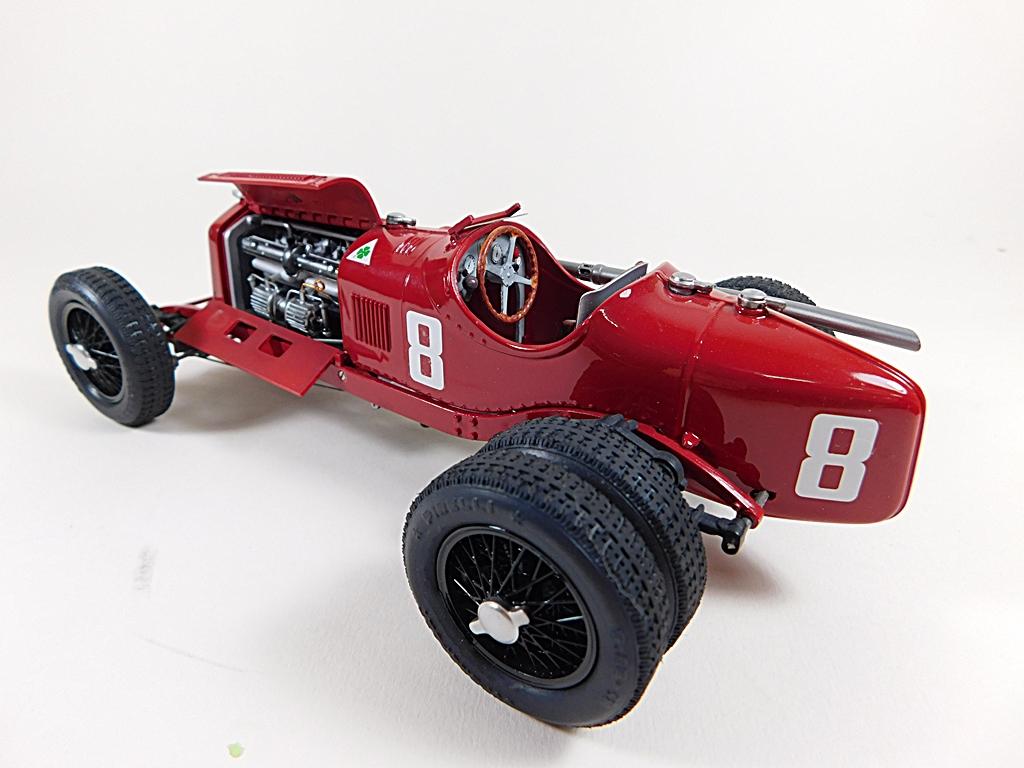
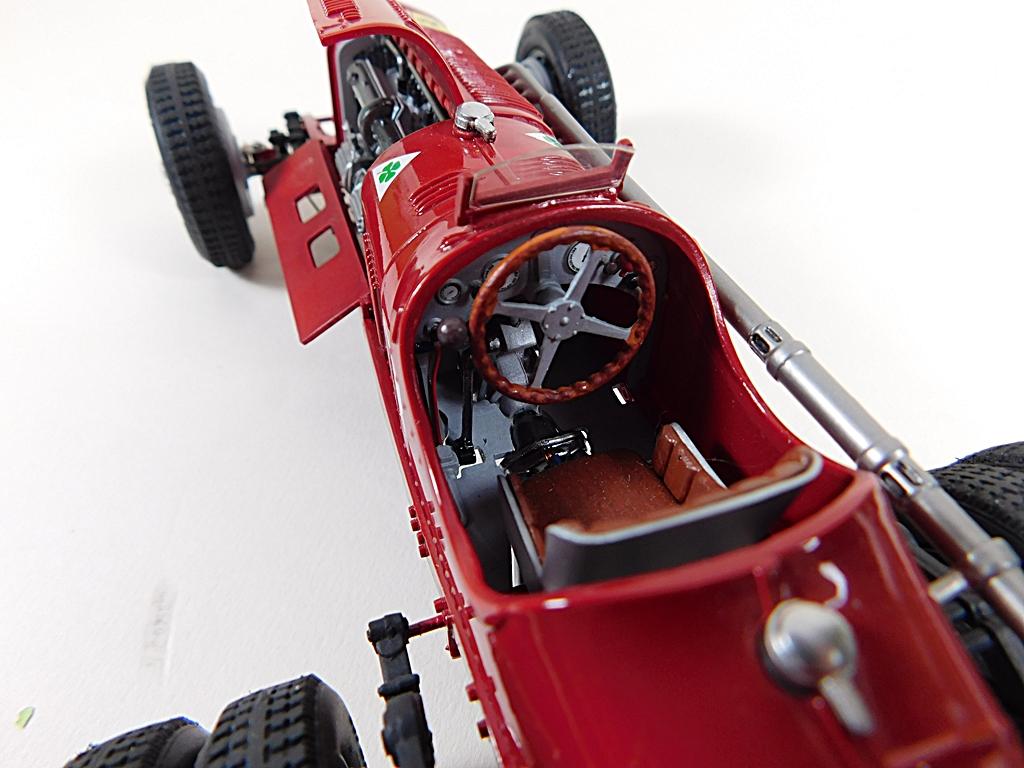
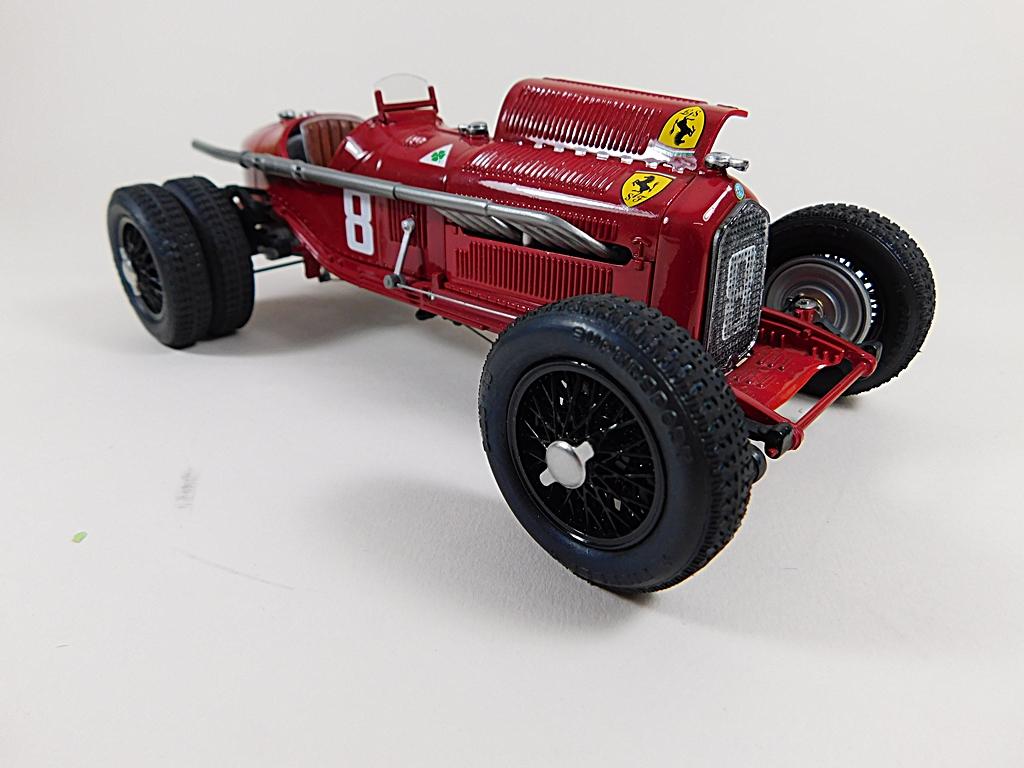
Alfa Romeo 8C 2300 Roadster Italeri 1/12
AL. replied to maysula's topic in Other Racing: Road Racing, Salt Flat Racers
Real nice job Thomas and it has just the right patina too. Well done!! I have the Meffistofilies to finish and the Fiat 806 Grand Prix to so sometime. -
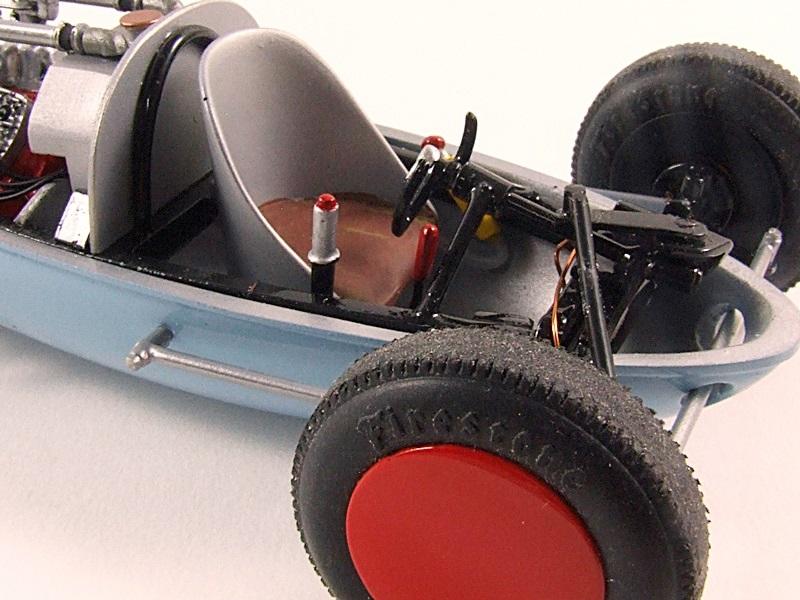
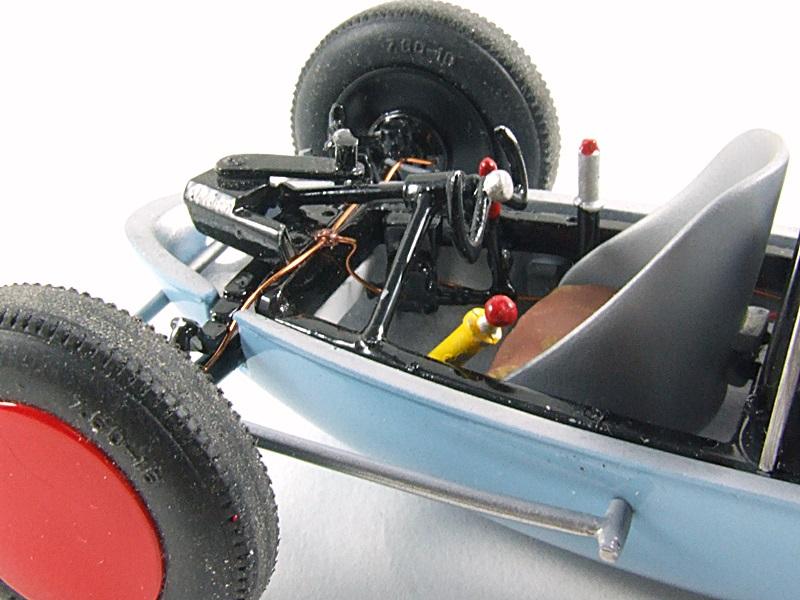
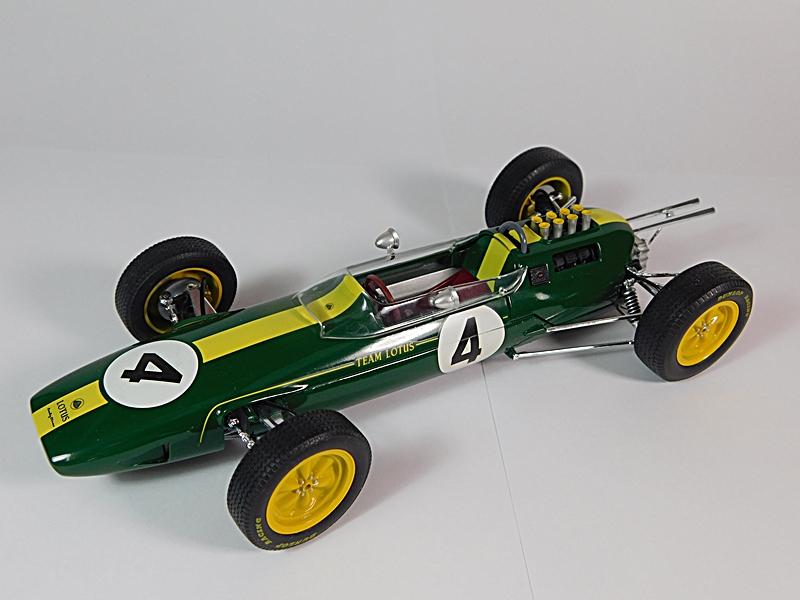
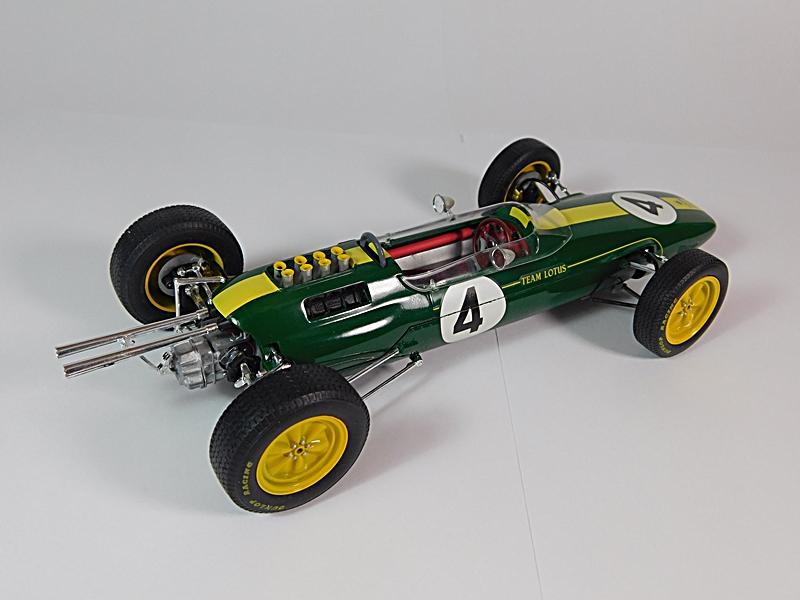
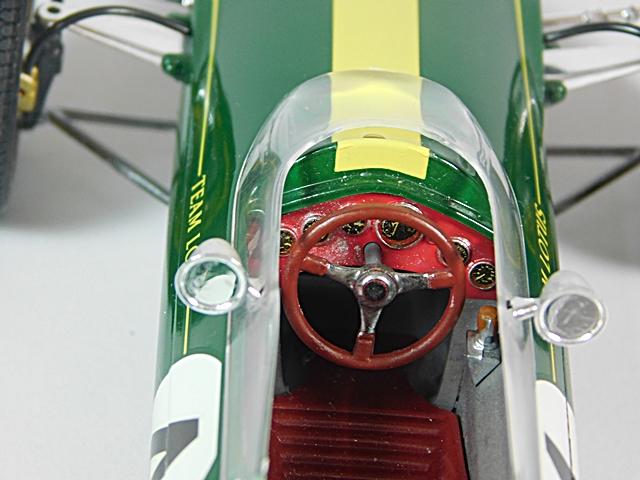
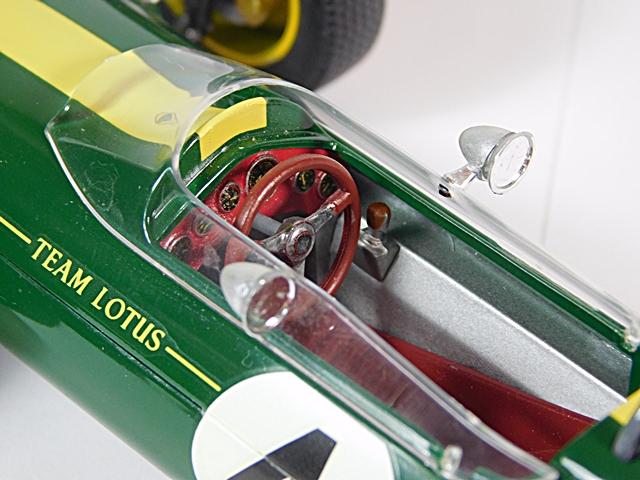
She's finaly finished after thirteen and a half months on and off the bench.It's a Revival kit that in all honesty, is not for the faint of heart or a novice but does reward care and attention. An example is that it took five hours to de-warp and assemble the chassis alone.As I wanted to do the six wheelhill climb car of Ruote Gemellat, I e-mailed Revival for two extra wheels and six tyres from the metal version of the kit. They very kindly supplied these and at a very reasonable cost. So my thanks go to them.I added various details to the model which you can see in the photos and all of the control rods were replaced with piano wire for better scale.The kit aeroscreen was way too thick, so I made a new one from clear acetate.
-
Given the magnitude of this car, rodding it would never happen in real life but that's the beauty of playing 'what if' in styrene. I channeled the front of the body, turned the boot/trunk upside down as it fitted better that way, (LOL) fitted the big wheels, shortened the radiator/grille, added the radiator/grille stays and scratched the steering drop arm, as the kit parts were rubbish and gave it a pair of 'modern' rear lights. I also brought the exhaust out of the side, by utilising the 'over the axle' pipe. All four wheels DO sit on the deck. It's the photo base that's warped. LOL I also gave it a 'custom' interior with seats from the parts box. Don't ask what they are from 'cos I have NO idea. [/url
-
Thanks for the compliments guys. Al........... I really don't remember and the site I built it on is no longer in existence. Sorry.
-
1:12 scale Ferrari 312T
AL. replied to JohnnyK's topic in WIP: Other Racing: Road Racing, Land Speed Racers
Wow!! Now that really is outrageous. Sorry, forgot my manners in my last post. I'm really loving your build and you are doing an outstanding job on it. If mine comes out as good as yours, I'll be a happy bunny indeed. Speaking of which, I bought my kit off ebay at a very good price, albeit the tub has been started. I'm going to have to try and break it apart to do a decent job on it, so I'm hoping it was glued together with superglue. That way I should be able to get it apart after it's been in the freezer for a while. (famous last words.... LOL) -
Mobeius kit: It was only offered in three colours that year, Tango Red, Formal Black or Platinum White...... so naturally I went with Candy Apple Green..... LOL I added plug leads, coil lead, hard and flexi fuel lines, dyanmo to control box wires, brake servo hard line and vacuum hose, battery to earth and starter wires, heater motor wire and power steering hose to the engine compartment, flocked the interior floor and parcel shelf, lowered the suspension and parted out the kit wheels for some chromed Torque Thrusts. Paint is by Zero Paints and cleared with automotive 2k.
-
As the title says, this is my way only. Others will have their own methods but I'm happy with mine for now. What you will need: 1: Pigments. Commercial or ground pastel sticks. (The large box of pigments are Bragdon Weathering Powders sent to me by JohnJ) 2: A selection of old brushes. Some soft, some stiff. 3: Your chosen base colour. Flat or dull coated gloss. 4: Pigment fixer. This can be Methylated Spirits, White Spirit, MEK or a commercial fixer such as MIG or AK Interactive. 5: An airbrush. It can be done without an AB by using brushes but it's easier and faster with an AB. When using fixers be sure to test them first on your chosen paint, as not all are compatible with all paints. I only use acrylics for bodies and all the fixers shown appear to be safe with them but as I say, TEST FIRST!! Before getting to the meat of this tutorial, let's take a look at how the different fixers react with the pigments. In this photo you can see those effects: The powders were applied to a test piece sprayed with acrylic grey primer. The fixers were applied with a brush and when properly dry a large white brush was used to gently brush of any loose powder. As you can see, the MEK is the most agressive fixer while the Meths will give the finest surface rust. The other two are somewhere inbetween. The MEK can be left as is but if you 'soften' the others you will need to re-coat with the fixer to 'fix' it again. OK...that said, let's get started. Prepare the body as you would for a glossy finish and prime. Spray your chosen base colour making sure you use flat paint. If you use glossy paint, the pigments will just slide off when you spray the fixer. Here I am using Tamiya Dark Iron on one side and Tamiya Gray Green (UN) on the other. The Gray Green is simply a test for me for the forthcoming truck build. Using a short stiff haired brush and making sure it's perfectly dry, pick up some of the pigment.... .... and dab it on wherever you want the rust. The more you 'dab' the 'fuzzier' the rust patch will be. Once you are happy with your rust 'pattern' spray it with the fixer and let it dry. You can speed up the drying with a hairdryer. If you want to create some streaking, dip a stiff brush in the fixer, remove 99% of it on a piece of kitchen tissue (as you would with dry brushing) and use downward strokes to create the streaks. Alternatively, you can apply a large amout of fixer by brus and simply let it run. Now you can add the next shade (here we will stop with just two) and spray again. Now it's coming together. One of the great things about this technique?..... you can re-work it any time you want and if all else fails, give it a light sanding, re-prime and start again. No need to strip. Here you can see that the pattern looks a bit unnatural, so I have added some more pigment. Then sprayed again. If you want a little more texture, add the pigment but this time a little heavier. Once again apply the fixer. This time I use a brush to apply it, as you don't want the AB to blow away the large particles of pigment. If it dries something like this... .... don't worry. Remember, there are no rules for this and if you look at enough photos of rusty cars, you will soon realise that there are innumerable effects. However, if it bothers you, simply dip your brush in the fixer, apply a small amount and use a hairdyer to dry it. If it dries a little to rough for you... .... just take a stiff brush and gentle brush away some until you have it where you want it and spray more fixer. And that's it really. Just keep working it until you have it where you want it. It can be light rust... heavy... or somewhere inbetween... Finally, you can 'soften' the effect by giving a light sanding with 12,000 grit paper. Front sanded, rear left as is. And if all else fails, just give it a light sanding, re-prime and start again. Of course the heavier rust will need a bit more sanding. Good luck if you try this and don't forget to show us your results and anything new you learn.
-
'Im sure there are other ways but this is mine. It's based on what I learned when doing the same to the inside of Lexan slot car bodies. You will need the following: A thick sheet of card for the base. A thin sheet of card for the 'mask' Some masking tape. Some double sided sticky tape. The photos should be self explanatory as to how to construct the mask. Place two strips of the double sided sticky tape where indicated. This will hold the body in place while spraying. Spray the front of the body in your chosen colour: Expose the double sided sticky tape and stick down the body. If you are unsure about exactly where the fade will start, place the body further in. This will start the fade further back. Then if you get it it to far back, you can move the body out of the mask and spray again. Now spray your second colour. In my case it's gold and as the rear colour is going to be metalic red, I sprayed all of the rear end in gold, ready for the clear red. Spray at an acute angle for the slowest fade. Move the body out and repeat the procedure for next clolour. Here's the finished body (complete with mucky lens spot... LOL) ready for a light buffing and then clear coat.
-
This build started life, set to be a stock Model A. Then I found some photos on the web of a restored CHP Sergeants car and it occurred to me to replicate it and send it to JohnJ, (a retired CHP cop) as gift to my very special friend. But then things developed further with a trip to to USA to see John and take in Bonneville Speed Week, so I had the perfect opportunity to present it personally to him in his own home. It was a long and sometimes troublesome build, (particularly the bases of the A pillars) but it was all worth while to see the look on John's face when I gave it to him. Words cannot describe it. My thanks must go to Dave (From Pleasanton) for researching and coming up with the correct period CHP badge, without which the build could not have been properly finished. Thanks Dave. My thanks must also go to John for getting them printed for me. Thanks John. Lastly, the kit came with Just one California license plate. Correct I believe for a standard road car but I'm informed that the police cars had them at the front and rear. However, John is going to print a pair of period plates and mount them to finish it off properly. The handsome one on the right is me!! LOL A few weeks ago, John paid a visit to Modelzona model show in Arizona. Without telling me, he entered the Model A by proxy and it took first place in it's class.
-
I want to share with you how I set about scratch building a roll cage. Others will have their own opinions, this is just how I do it. I think the first thing to say is this: DON'T worry if everything isn't perfectly square. I used to go to great pains to do so but soon realised that once inside a tin top, most slight 'misalignments' are so hard to see, it's just not worth the stress to get them perfect. And the second thing is, CHECK, CHECK and RE-CHECK at every stage. It's normal for me to have the chassis in and out of the body 4 or 5 dozen times during construction So here we go. First I mock up the interior, holding the door cards and dash in place with a little MEK. Now mark the rear hoop mounting points and drill suitable size holes all the way through the floor. Next mark the positions of the front points, at the rear of the drill. Make an adjustment for the drill width and and again drill all the way through the floor. This gives us a footprint from which to build. At this point I want to show you a little 'bender' I made up years ago. Construction shoud be self explanatory. It is a great aid in bending styrene, particularly in getting the radius's the same. Now we need to create the main hoop. Cut a length of rod, more than you will need. (Width of the cage plus twice the height, plus about 24mm extra.) Mark the centre point. Now measure the spacing of the rear set of holes. Do this centre to centre, left side to left side or right side to right side. It doesn't matter. Here you see I'm doing it centre to centre. Now using the centre mark on the styrene, mark the centre points of the main hoop on the styrene rod. Now place the rod in the bender. Note I have marked the centre point of the brass tube the better to line up the marks on the styrene. Now hold the styrene in place and slowly bend past the 90 degree point. Well past it actuualy as it will try to regain it's original shape. Don't worry if it's not quite at 90 degrees. Then repeat for the other side. That's the tricky bit!! LOL. Next insert the hoop into the holes pushing it well through the holes. Now we need to turn our attention to the side bars. With the body fitted, push a length of styrene through a front hole, making sure you have about 12mm poking through, and mark the bend point as shown. Make the bend at the same angle as the A pillar. Place the styrene back in the hole and mark the second bend point. Then make the bend. Repeat for the other side. Place both back in the holes and mark the hoop attachment points cutting a tad longer than needed. Now we need to make the 'welded joint'. Just placing a square cut edge against the hoop, will work, but doesn't look good. We need a curve to the styrene just as in the real deal. To do this I made a little jig from mild steel. Again self explanatory as to contruction I think. Place one of the side bar ends into the 'jig'. It needs to be the end that butts up against the main hoop. Make sure you have it aligned properly, so the the curve will fit properly to the main hoop. Keep some pressure on the side bar while filing with the rat tailed file. Work slowly, a little at a time. It's easy to over do it. It should come out a little like this. DON'T clean up the raggy edges. They will help fill any gap while fixing with MEK. My 'jig' is a bit worn now so this one is a little off centre. Don't worry about it though. It isn't THAT critical. When you have the side bar finished, fit it into the forward hole and secure to the main hoop with MEK. Repeat for the other side. Now we need to fit the top forward section. Measure a little long and make the curve at each end as above. Once happy with it, secure with MEK as before. In the same manner, the main hoop cross brace is made. However, getting the curves and angles is a bit more tricky. They need to be at about 45ish degrees so I usualy do them free hand. I forgot to take a photo of this step but I have indicated where it fits in this photo. Remember, the upper securing point is on the drivers side. Now break apart the dash, door card and the cage. If you only used a tiny bit of MEK, this won't be difficult. Now your cage should look something like this. Clean up the bottoms of the cage legs and the holes in the floor. Place the cage back in the holes and press down so that about 25mm pokes out the underside of the floor. Next fit the window glass in place. This is important as it may well affect the final position of the roll cage. Here you can see that this one is of the one piece type and will definitley affect the final height of the cage. Now fit the chassis/floor to the body with the hoop in place, then push the cage up into the interior until it touches the roof or it's where you want it and mark the length on the underside, as can be seen in the last photo. Cut to length. When you have made the cuts and are happy with the postition of the hoop, tack it in place with a tiny drop of MEK. Just a tiny bit, as it will need to come out again later. With the door cards removed we now have easy access for the side impact bars. Pretty simple on this build and done in the same way as the hoop cross brace. Apart from adding a couple of main hoop to rear of interior braces (done in the same manner) that's it for this one. There are many variations on roll cages and modern ones have a miriad of bars, some curved, some straight. All of thes variations can be scratch built in the manner I describe. If you are painting the roll cage the same colur as the interior, you can now glue it in permanently. If not, carefully remove it for painting. For roll cage padding and cable ties see: https://allscalemodelling.forumotion.com/t253-roll-cage-padding-and-cable-ties
-
1:12 scale Ferrari 312T
AL. replied to JohnnyK's topic in WIP: Other Racing: Road Racing, Land Speed Racers
Hi Johnny, I took a look at the site and see the ties/clamps only cost $9 BUT they want $35 to ship to the UK which I think is ridiculous for something that can go into a normal envelope, with a couple of pieces of card for stiffeners. Oh well, just have to loo elsewere!! Al. -
Thanks for all the kind comments guys, I really did all the research and the build of this one. Now Shay, me Owld Leprachaun, to answer your question............. yes I will be detailing the Matra in the same way.
-
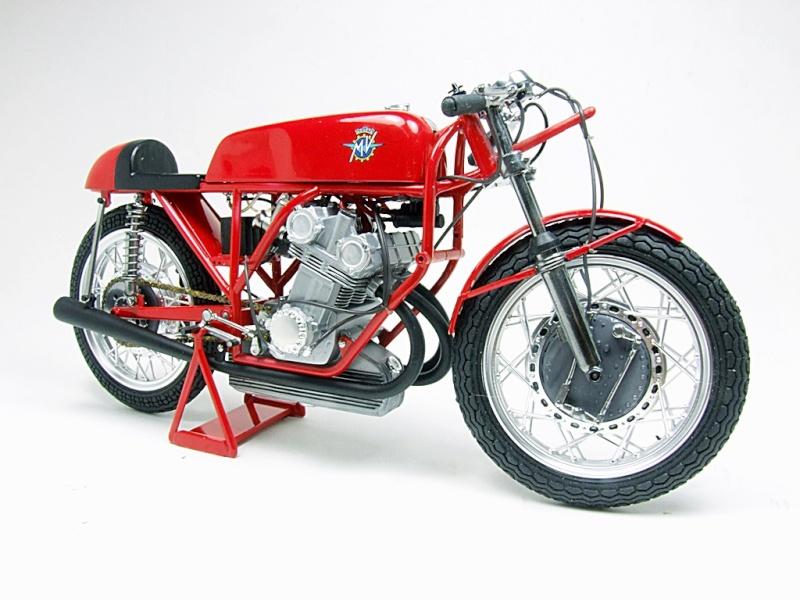
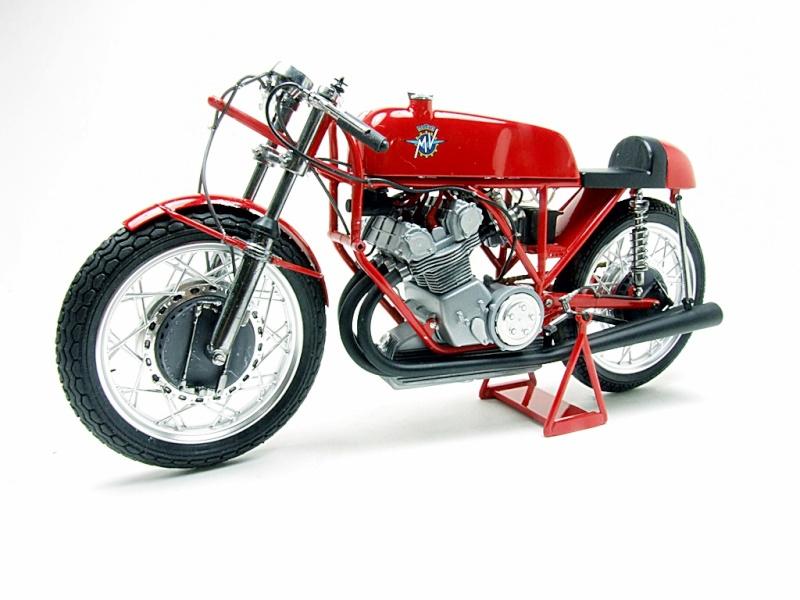
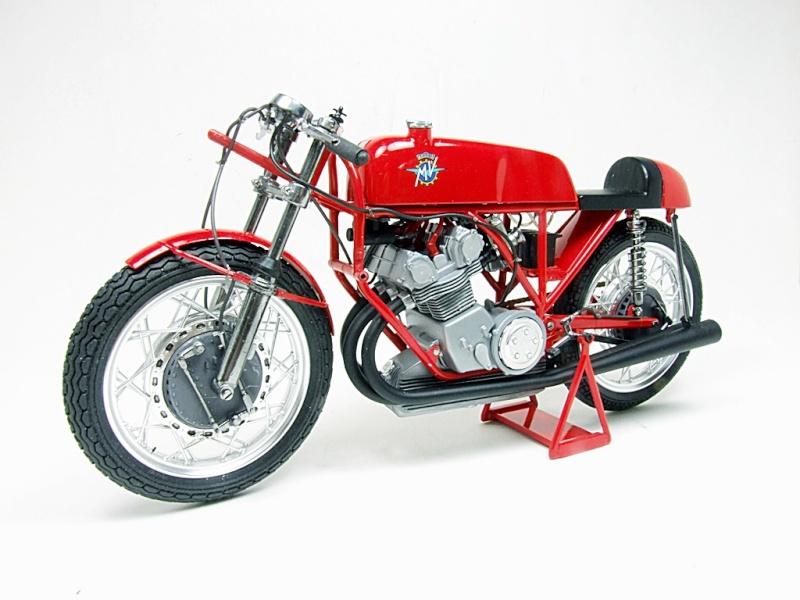
The kit is from Italeri and is 1/9th in scale. It's not up to Tamiya standards but is nicely detailed and builds up very nice indeed. Apart from the 'zip ties' it's completely box stock. Paint is Zero paints base Bright Red and base Coarse Metalic Candy. Gloss coat is automotive 2k. The engine and chain were treated to a blackwash. I chose to display it without the fairing for two reasons: 1: It hides too much nice detail 2: I like to see these old bikes naked without their fairings.
-
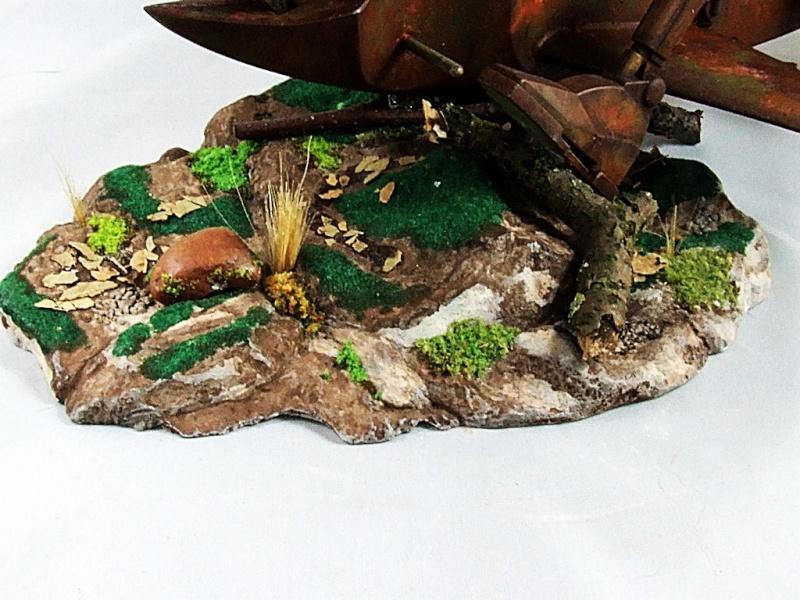
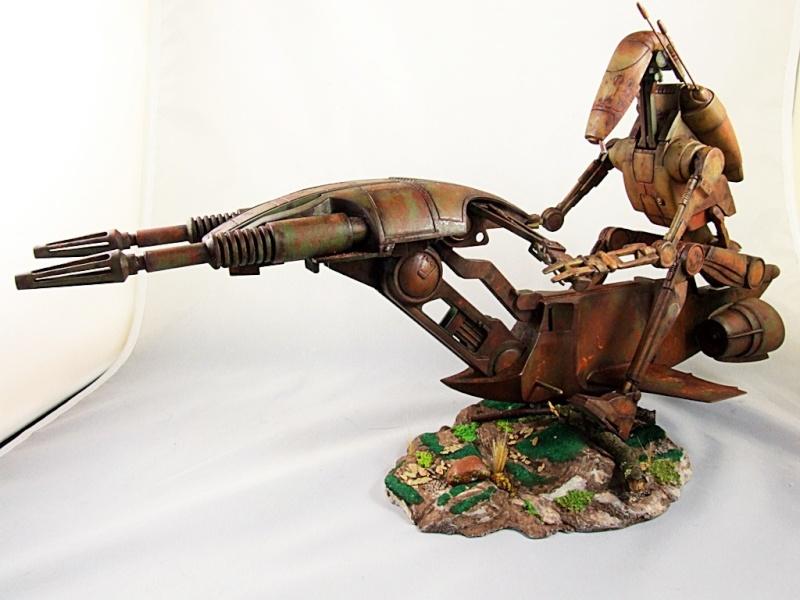
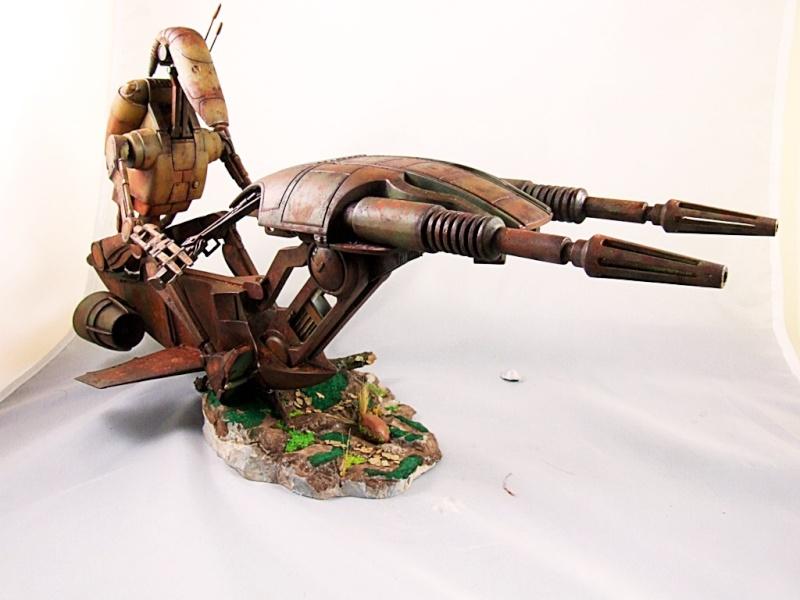
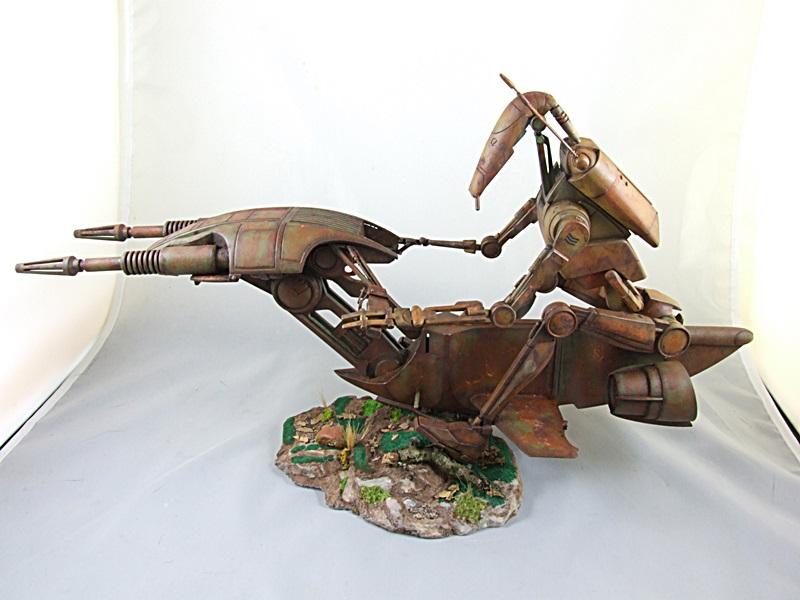
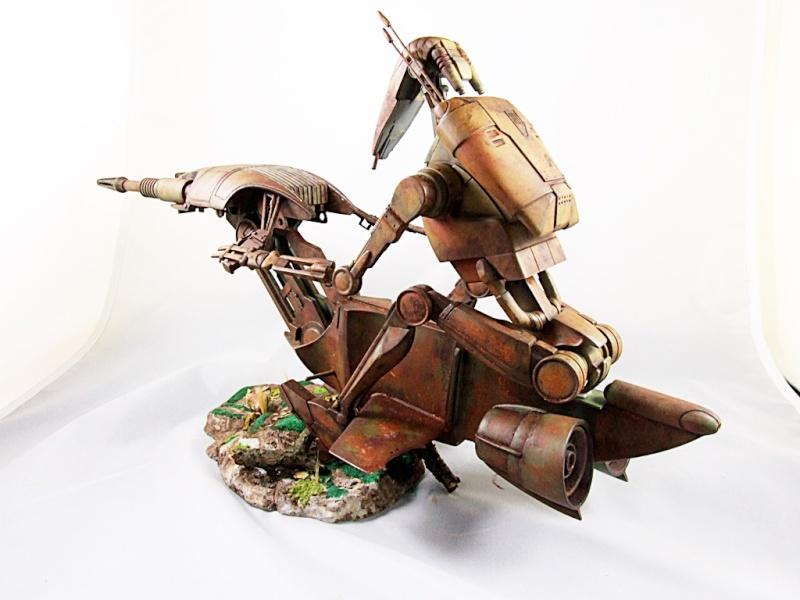
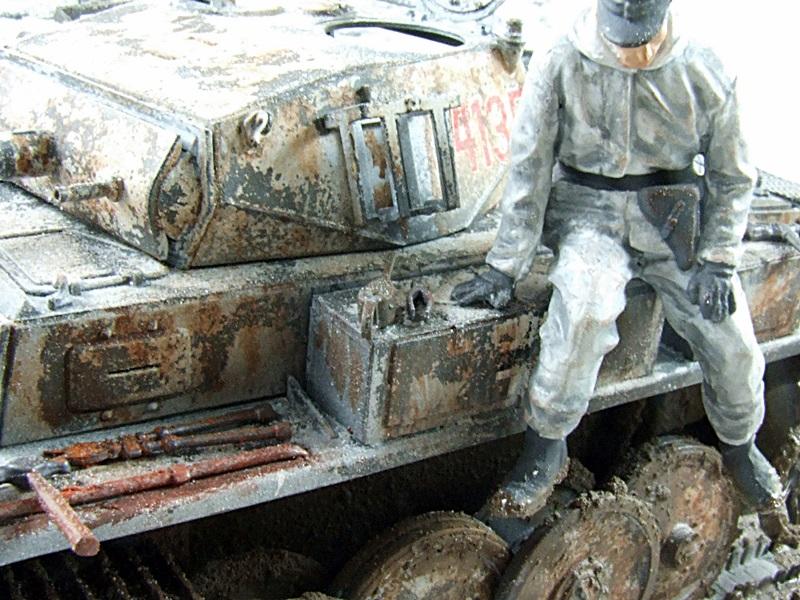
This is the kit as it is meant to be built: ............ but I think that looks awkward so I modified mine to give a more motorcycle look. Up to the very last minute, when I applied some 'artist's dull coat varnish' I had great fun with my first serious attempt at weathering. It darkened everything and put a sheen on it, taking away most of the 'rust' effect. Imagine if you will......, 'In a galaxy far, far away' (LOL) ......the Federation has been at war with the Republic for over a millenia and is running dangerously low on resources. So low in fact they have been deploying centuries old and de-commisioned, rusty old droids such as this old battle hardened master sergeant. I gave him a cigar to make him a bit of character. Since he's on the ground, I placed his left foot there to, ALA bike style. He eventually made sergeant but failed his master sergeant exams. LOL To give him a bit more character, I gave him a cigar.
-
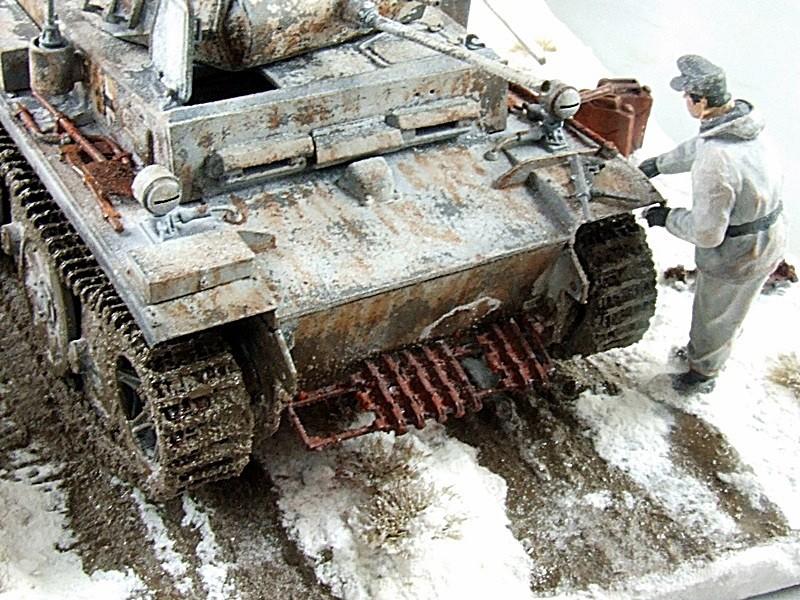
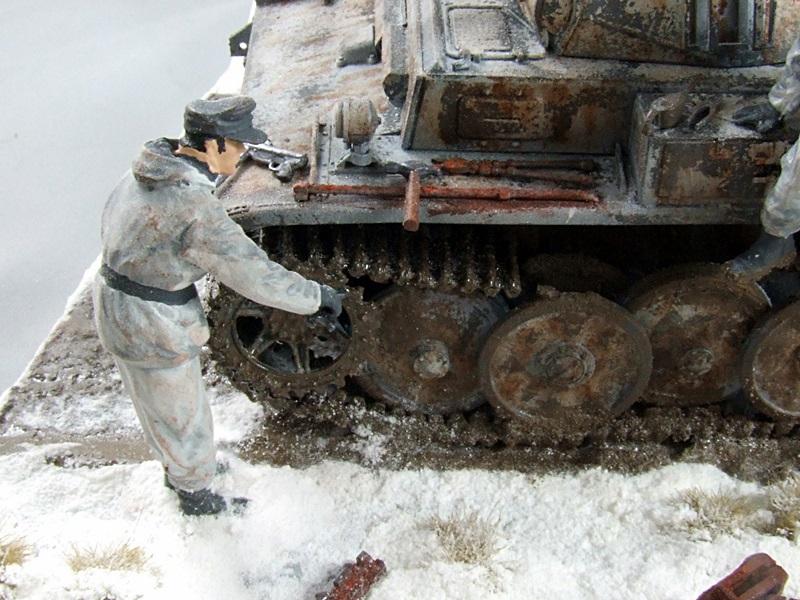
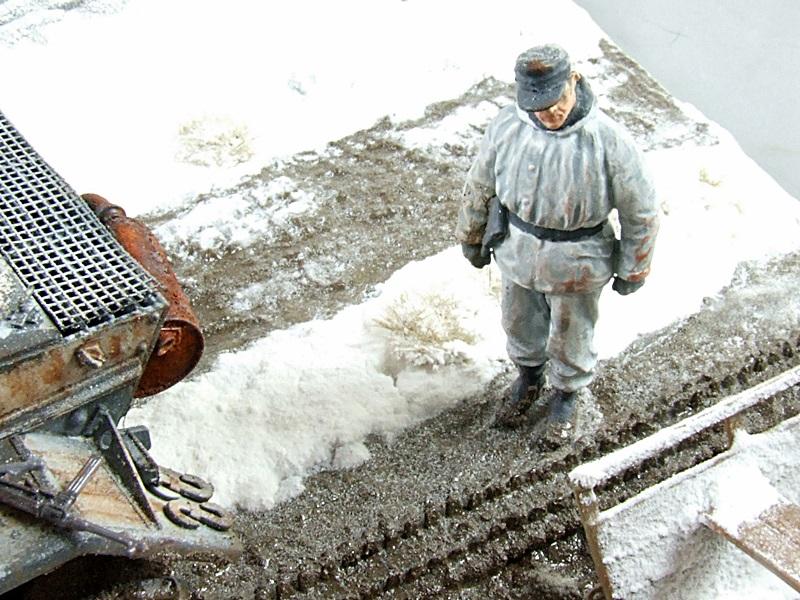
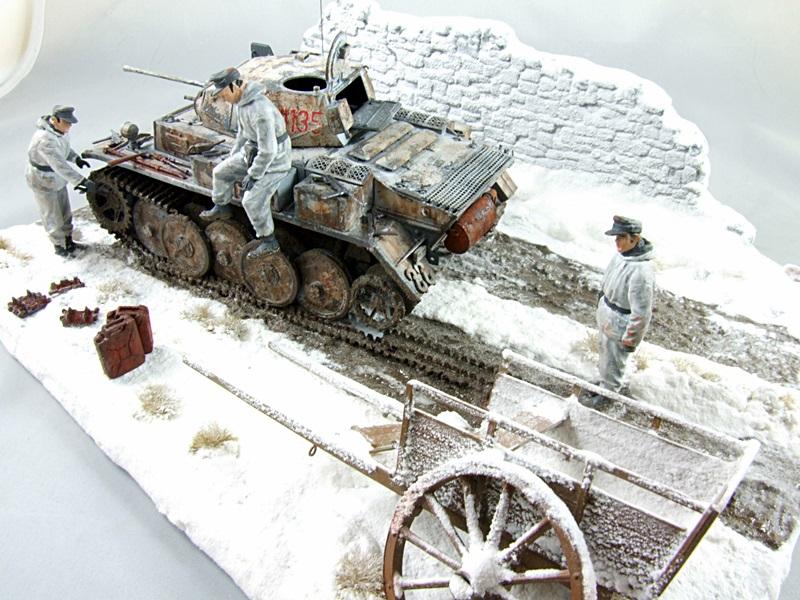
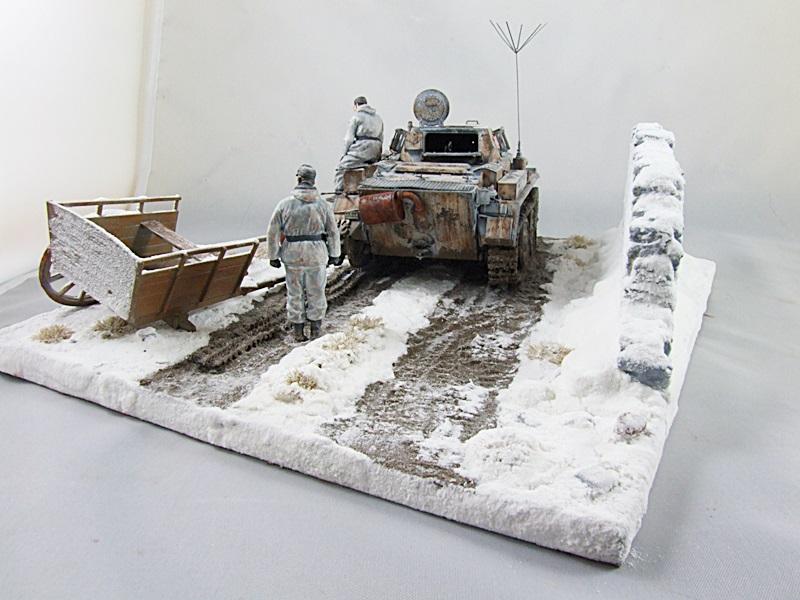
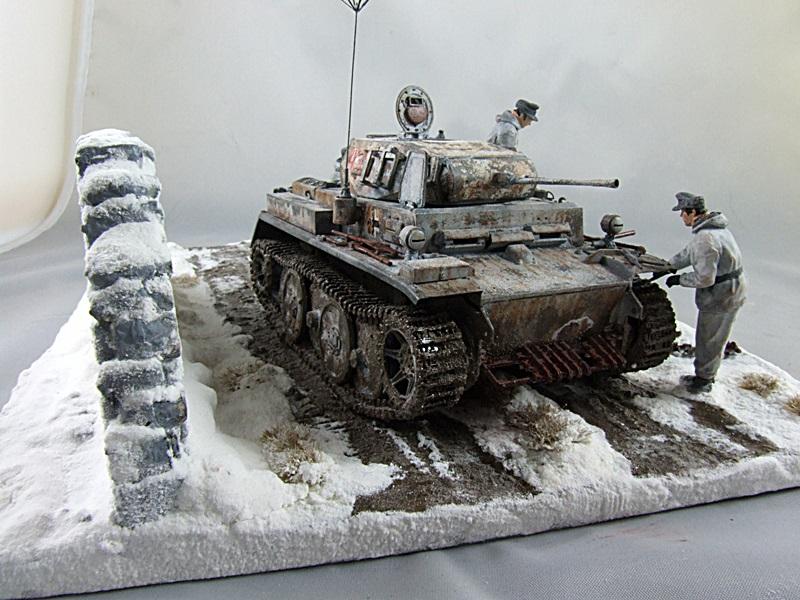
I had an absolute blast with this one, enjoying every step of the way. It was so much fun it was almost obscene!! LOLApart from a couple of braile scale tanks this is my first completed tank and my first serious attempt at proper weathering.The tank kit is Tasca's 'German Pz.Lpfw.Ausf.L "Luchs". Late Version. The base is Mini Arts 'Country Road' and the crew is Mini Arts German Tank Crew. Winter 1943-1945Apart from the actual construction of the three kits, everything else was a new learning curve.Lot of photos but then there is lot's to see I suppose.February 19th 1944. Somewhere in the Soviet Union. The 872 day seige of Lenningrad ended on January 27th and the Germans are being pushed back by the Russian army and their mighty T34 tanks. Our crews tank has suffered badly in the three fearsomely savage winters since the seige began. Moreover, long supply lines means it hasn't been serviced in a long time and is now unreliable. The crew are dirty, disheveled, dispondent and scared. Now their vehicle has shed a track and they must make repairs or risk being taken prisoner
-
Thanks guys. I don't normally build trucks but I'd happily build another.
-
Resin kit by California Resin Works (CRW) now almost impossible to find I believe. Because of major body fit problems I decided to display it seperately.
-
Tamiya 1:20 kit which I built back in 2013
-
Thanks for the warm welcome guys. I'll do my best to be a good contributor. Hey David, we are practically neighbours mate. I'm just out past Hexham moving to Hamsterley Colliery as soon as the solicitors get their fingers out. Maybe we could meet up at The Northern Model Show sometime. Have to be at least next year though as it's been cancelled again this year!!
-
A;lso I meant to say in the first post, the original poster can offer hints such as country of origins , year etc.
-
1:12 scale Ferrari 312T
AL. replied to JohnnyK's topic in WIP: Other Racing: Road Racing, Land Speed Racers
Many thanks for the link Johnny. Gotta get some methinks. -
Ah! shame. Noticed that before I saw your post Don. Well done mate. Exact photo too. Mk 1 Ford Capri Someone else can take my win.
-
The rules are simple: Post a cropped image of a car. Members must try to identify the car. The first one to do so gets to start a new game. When you post your 'best guess' you must also post a photo of the full car in support. If your guess is correct, the original poster must post the full image of the car too. To keep the game 'fresh' and moving along, if nobody identifies the car within 24 hours, the poster may post a less cropped image. If it is still not identified within a further 24 hours, the original poster must post a photo of the full car and the game is over. In this case the original poster may start a new game or throw it open to any mamber wanting to start a new game. Let's give it a try and I'll start with what I think will be an easy one.


.jpg.33caab1106f7b34baecc9491409af7dc.jpg)