.png.eb9dd987f2c50e0cc4fe660089bbbf7e.png)
Dan Cooper
-
Posts
29 -
Joined
-
Last visited
Content Type
Profiles
Forums
Events
Gallery
Everything posted by Dan Cooper
-
.thumb.png.1bf02c2fa3df9fd5a69dd5cb775f78e2.png) Still too cold to get much done. I've just been tinkering with bits when it's sunny. The rear underside is now done. Not much but it's some progress. I really want to get the wheels painted but too cold. It takes ages for paint to dry. I'm going to tackle the spark plug wiring next. Thanks for looking in. Dan
Still too cold to get much done. I've just been tinkering with bits when it's sunny. The rear underside is now done. Not much but it's some progress. I really want to get the wheels painted but too cold. It takes ages for paint to dry. I'm going to tackle the spark plug wiring next. Thanks for looking in. Dan -
It's been way too cold and wet to work on this much. I've really only been tinkering around the edges, brush painting bits and messing with the glass. Did get the motor started with some paint, wiring is next. And got the gauges in and glossed. As soon as the weather heats up and I can spray paint again I can get the chassis into some kind of finished state. Meanwhile I have plenty to do on the motor. Thanks for looking in. Dan
-
Steve - Yep, most definitely going to test. But have run out of White Tamiya primer so waiting for the replacements to come in the mail. I like what you said about compatibility. I tend to stay in the Tamiya family as I have alway had great results without hiccups using their products. I know they aren't cheap and rattle cans are wasteful as all heck but they do work. ( I like the silver Sharpie idea , neat. ) Most of my progress in the last few days is with those said Tamiya rattle cans. I am lucky in that over the years I always seem to pick up a can or two when I'm in a hobby shop and so I do have a fair few colours already. ( They do get costly and doubly so on this bigger kit.). I'm trying to do each subassembly as a little model that hopefully will come together into something nice at the finish. Drive shaft painted and chipped. Dash was sanded flat of woodgrain and a new gauge panel added from thin sheet styrene with bezels from thin solder wire. I plan on using some 1/24 scale aircraft gauge decals and adding glass with clear UV curing resin. ( Wish me luck ) Probably a bit naff but I don't think I could have painted the kit piece to make it look okay, so this should look the part I hope. The Tamiya rattle cans got a workout on these buggers. Chrome stripped with bleach then everything sanded and made squarish. Extinguisher got some added bits then paint and some fluffy placard decals from 1/24 scale aircraft kits. Anything to jazz the bits up a bit. Motor, fuel tank and roll cage/seat in basic colours awaiting detail painting/light weathering. Need to sort out the chassis paint so I can start to glue bits together. All this has been a lot of fun and I'm learning as I go. Thanks to everyone for looking in. Dan
-
Steve - Thanks! The kits shear size sure does make a statement. It is quite nice size to work on and definitely helps the old eyes to see what I'm trying to do. Worked all weekend on her and will post some more once the primer gets sorted. Think I'm going to do a whole test to see how well I can paint it on some scrap before I jump into doing the body. I saw some 1/32 inch wide pin striping tape that looks interesting. Will- Glad you like my little efforts. If you like this subject I'd say go for it as it's a pretty good kit if you take your time and really think through where all the parts go. I spent a bit of time on Saturday getting the oil breather pipes pinned in place as there wasn't much in the way of locator pins on the parts as provided. Doesn't help I'm not much of a car modeller. Almost done with assembly, just need to work out how to reliably put in the windscreen glass. I've added a strip of fine solder glued to where the edges of the rear glass sit to make a sort of stop/lip to hold the glass in position when it comes to final assembly. I'm terrified I'll muck up the final glueing up. Quick question? --- Has anyone any experience in using very thin pin stripe tape to do the pin striping on kits like this? I'm thinking it might be a whole lot easier and more accurate than trying to mask and spray with rattle cans. I wonder about spraying final gloss over the tape? Possible or just a dumb idea? Thanks Dan
-
I think I'm sufficiently far enough along to share this project. Latest project; 1/16 scale 1973 Nascar Richard Petty Charger. I'm usually a model railroader who dabbles in 1/48 scale armour but I saw this kit at Model Expo, my local big model show, two weeks ago at 1/2 price($50!AUS) and thought, "I wanted one of those as a little guy...but now I have money." So here we are. Rushed home and opened her up full of glee and the darn thing has the worst instructions and build method I've ever seen. All the parts do fit but EVERY surface need sanding and fitting to get it to go together. Parts are mis numbered in the instructions and most mating pins are misaligned or not there. I thought, " You knew it was an old kit, just get on with it." I have build it all in big sub assemblies so that I sure that once it's all painted and detailed with wires and hoses that it will actually fit together correctly. If I had tried to paint the parts first it would never have gone together and it would be in the bin. The plan is to fit and fettle and mock up/ practice final assemble til it all goes together. So far, so good. It's been a lot of work but I pretty pleased with where I'm at and I think I can get it to look okay in the end. ( I don't ever want to think about the exhaust manifolds ever, ever again.) The two tone Petty blue and florescent red paint job( Planed as TS-23 and TS-36 at this point over Tamiya white primer) is going to be fun as there is no plan or details for masking and the two colours are separated by 1mm wide white pin stripe that I'll need to mask off. ( I might skip the stripe if it gets to crazy - I mean, I do this for fun ) It's too cold in Melbourne to paint anyway and I need to get the chassis and motor finished first as it needs to be all done before the glass and body gets added. At least it can all be mocked up using pins and tabs I've added to work out all the wires and hoses so they can get made and put aside to be added after the paint goes on. I do think this is a fun kit but I've been coddled by modern kits for so long I have forgotten what it was like in the old days of kits like these and slow drying tube cement & Testors/Pactra enamel paints. Thanks for looking in on my little foray into Nascar kits. The things we do for fun huh?
- 16 replies
-
- 11
-

-
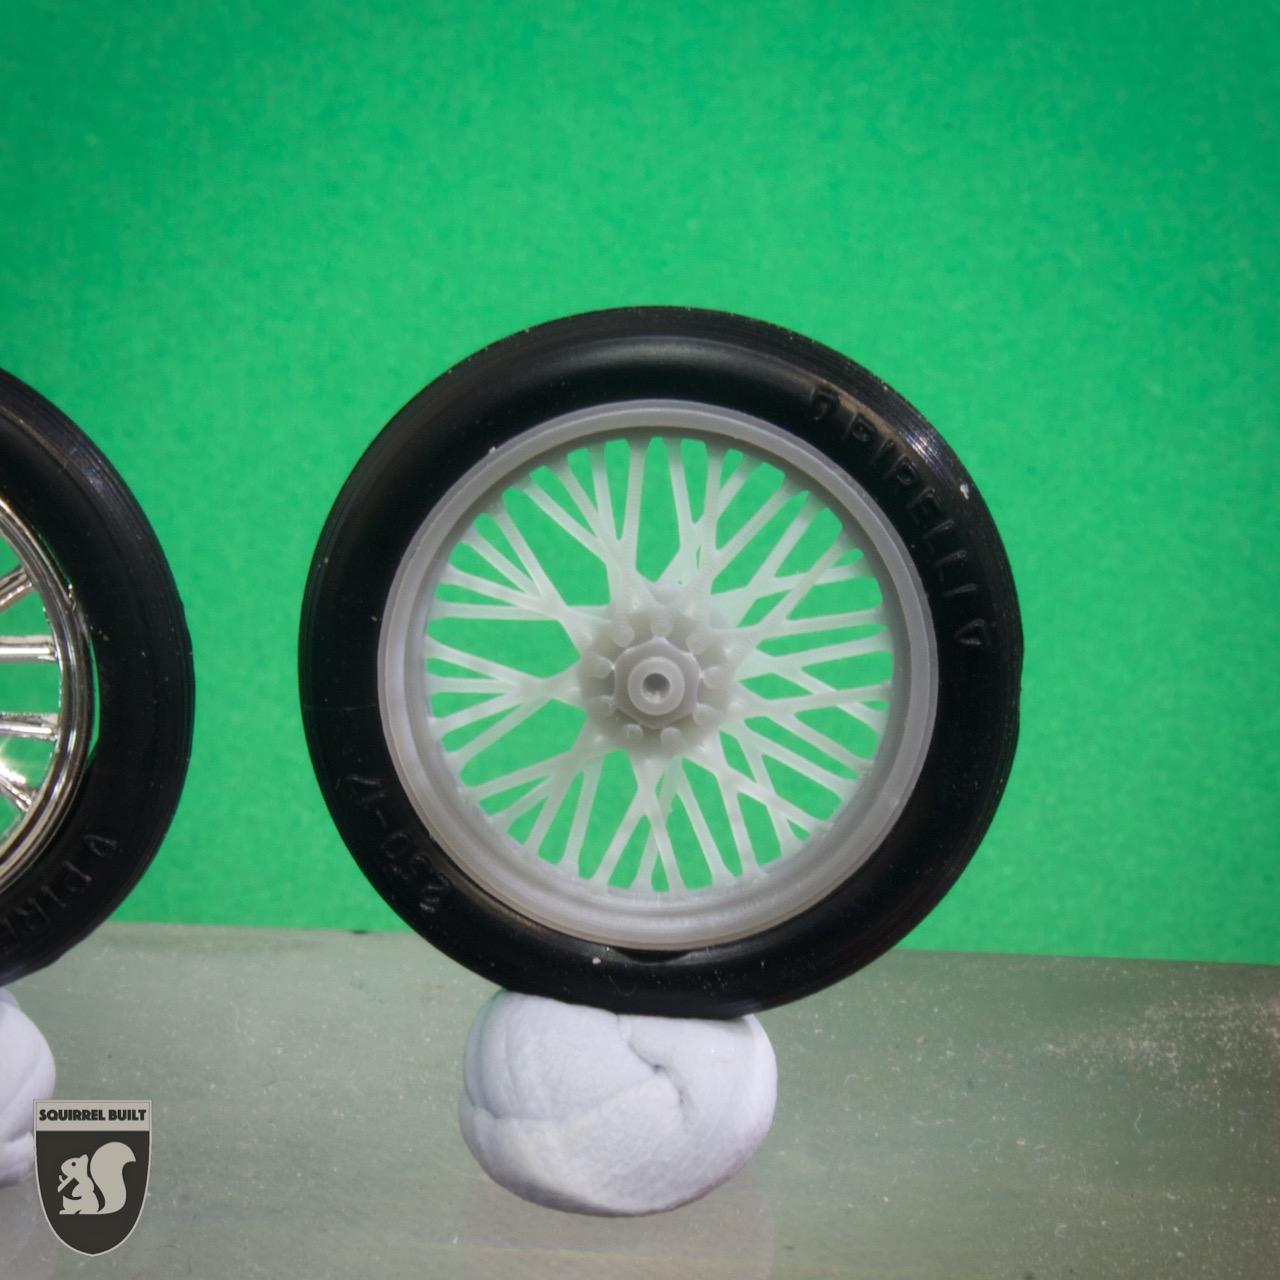
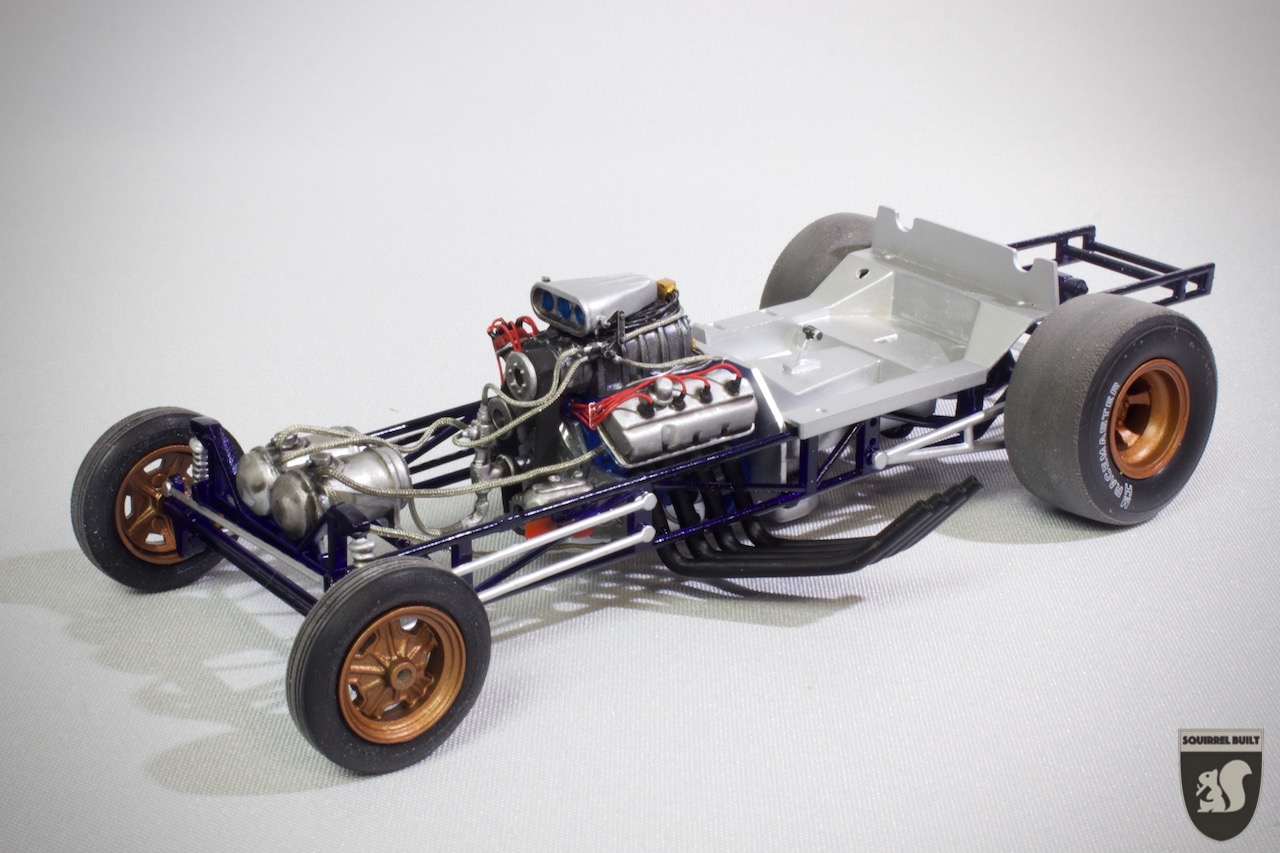
I am starting a new project that I got as a gift for Christmas. It's the Ramcharger FED. I much enjoyed building my first FED in eons last year but was disappointed with the wire wheels from the old kit. I have been casting about trying different ways th make wire wheels without success. I then thought to see if I could get my 3D printer to make some acceptable wheels. My ambitions are modest. Just something better than the kit. I know I can't get fine enough spokes to look better than real wire or photo etch but I can't seem to get those methods to work. With this in mind I fired up the computer and had at a design after carefully measuring the kit parts. I used Fusion 360 and this is what I have got working at the moment ( WIP) . I've managed to get the design into my Elegoo Mars printer and printed a test piece. So far the wheel fits the tyre but needs some work on getting the supports just right to print reliably. ( To be honest I'm over the moon with how well it fits the tyre.) I can now start to think about some subtle tweaks to make it look a touch better. It's not as good as a hand laced wheel but I think it is a step in the right direction. Please let me know what you think and any suggestions would be appreciated. Thanks for looking in. Dan

-
Excellent looking build. So clean and sharp Inspirational stuff, thank you for sharing.
-
Don Nicholson's 1965 Comet Cyclone
Dan Cooper replied to ModelcarJR's topic in WIP: Drag Racing Models
That motor looks super John. What brand of wired distributor did you use? It looks so neat and tidy. I'm looking forward to your progress. How is the kit? I've never seen one before but it looks great and I really love the subject. Is it worth tracking down? Dan -
69 Mr.Norms Super Charger Funny car
Dan Cooper replied to booboo60's topic in WIP: Drag Racing Models
Wow, that came out looking flash. Thanks for sharing. Those engine bay details look amazing. Well done. -
ROYAL CANADIAN 1/16 SCALE TOP FUEL DRAGSTER
Dan Cooper replied to Ian McLaren's topic in WIP: Drag Racing Models
This is such a cool project. Your mad skills are wonderful to watch. Enjoying your build immensely and lots to learn from. Thank you for taking the time to share your craftsmanship and knowledge. Much appreciated. -
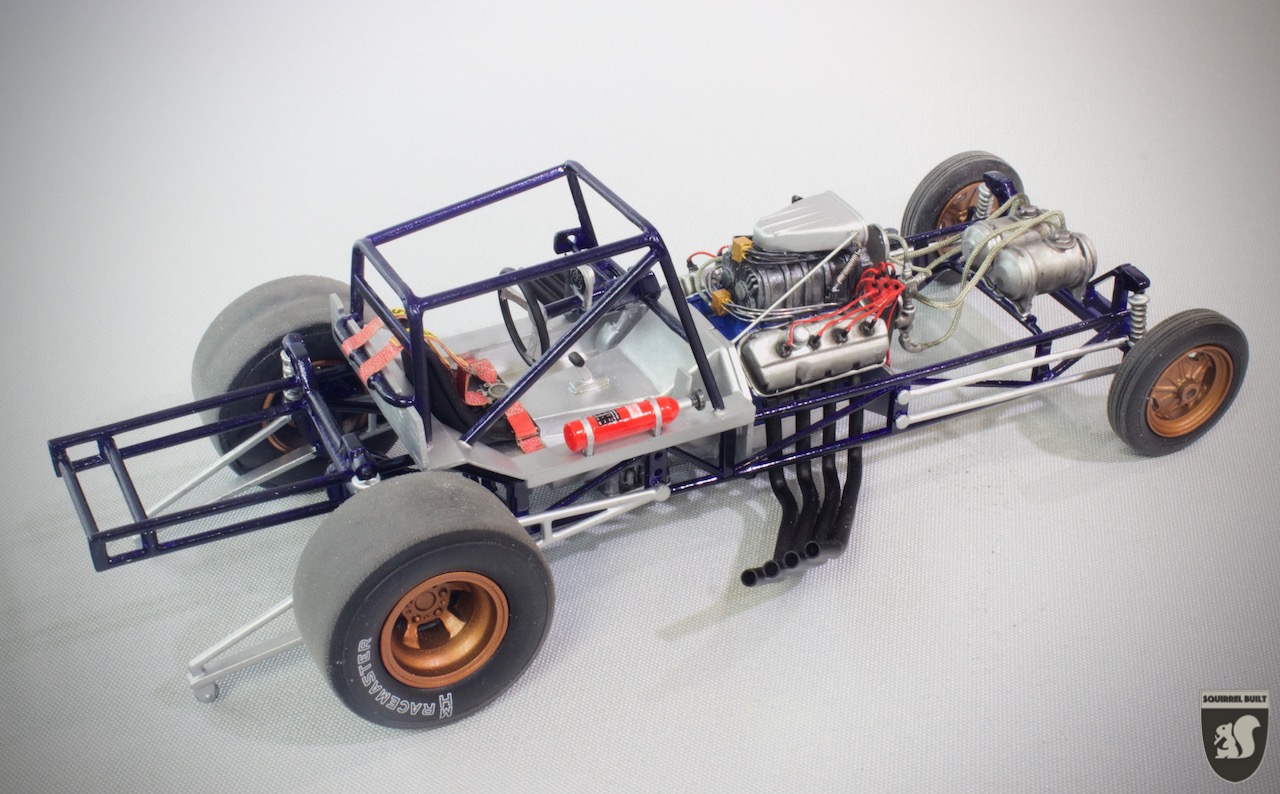
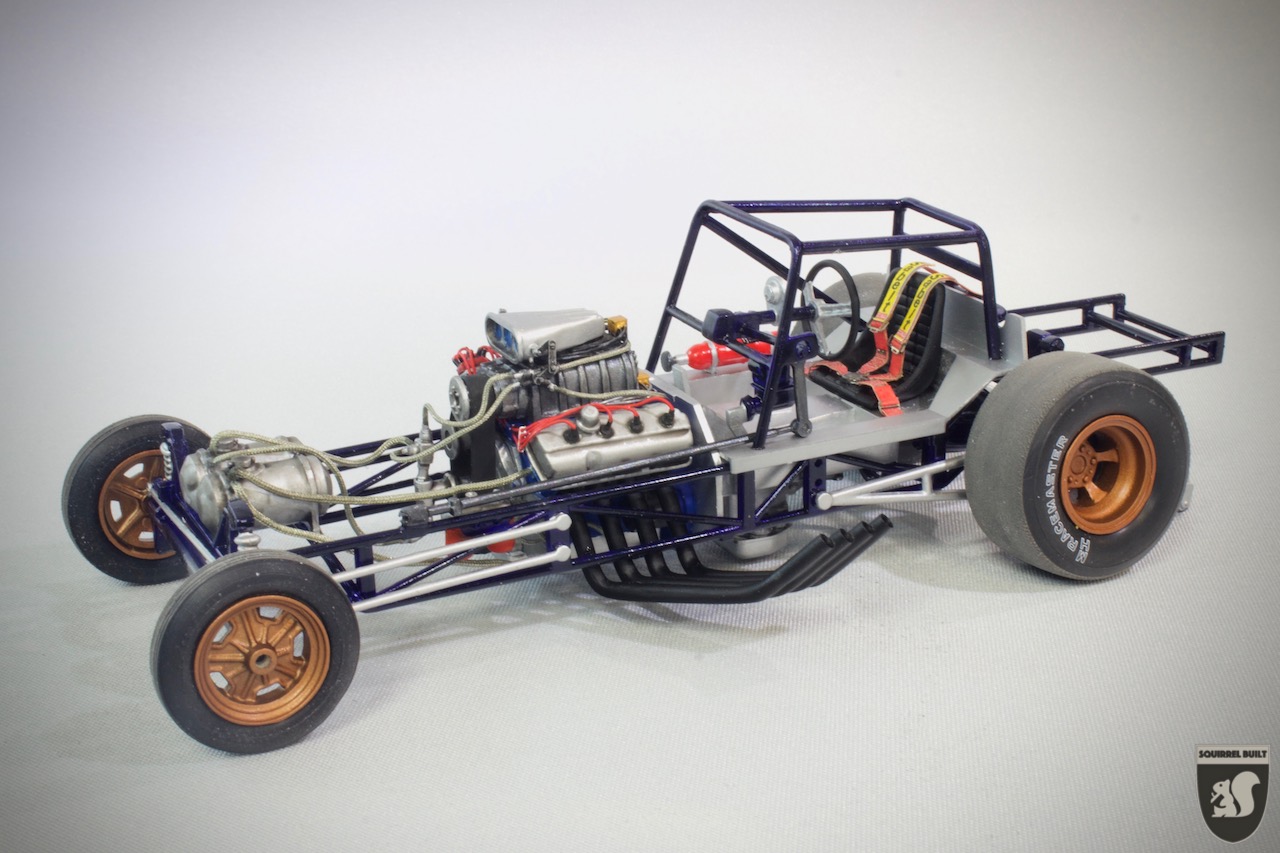
Progress; Just about done with the chassis. Now it's on to the body! Thanks for all the great comments. I'm happy folk like her so far. Dan
-
Thanks Vi, I'm glad you like my little efforts. As for the barrel valve and throttle linkages. They are all just bits of Evergreen styrene rod, strip and brass wire. I just try and break the part down into the simplest shape and then glue little bits together until I get something that looks close. The Optvisor helps with being able to see close up and doing each part in lots of small steps / subassemblies to let it dry helps. The Fuel lines are 0.15 lead fly tying wire for the injectors( As are the spark plug wires) and little drilled blocks of 2mm square Evergreen strip. The braided line is from Top studio ( 0.6mm) IHTH.
-
Thank you Marcos - Not too sure what you mean as I add my photos from the box at the bottom of the posting then hit return twice to get the curser to drop to below the last photo and then keep typing away. If you are referring to my little Squirrel Built logo I add that in when I'm post processing my photos. I hope that helps.
-
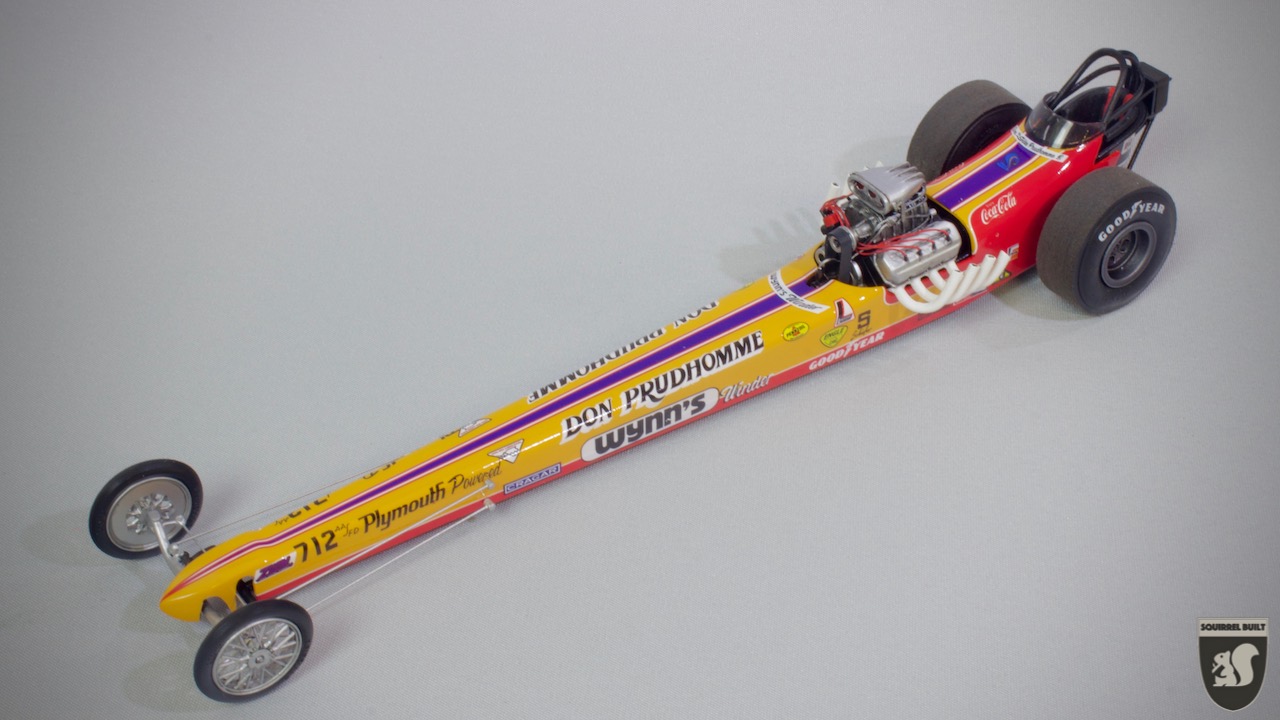
I worked a bit more on this one today and I'm calling it done. I may in the future go back and add the steering linkage but it's just a bridge too far right now. ( Come to think of it I'd like to try lacing some wire wheels too) At some point you have to just say, " The next one will be better but this one is done." Final pics; I pretty pleased, it came out much better than I had any right to assume. I learned a lot and had a lot of fun. Enough to start the Candies & Hughes Funny car. Great to try something new and different. Many thanks to those who looked in and left a comment or two. Thanks! I hope you like her. Dan
-
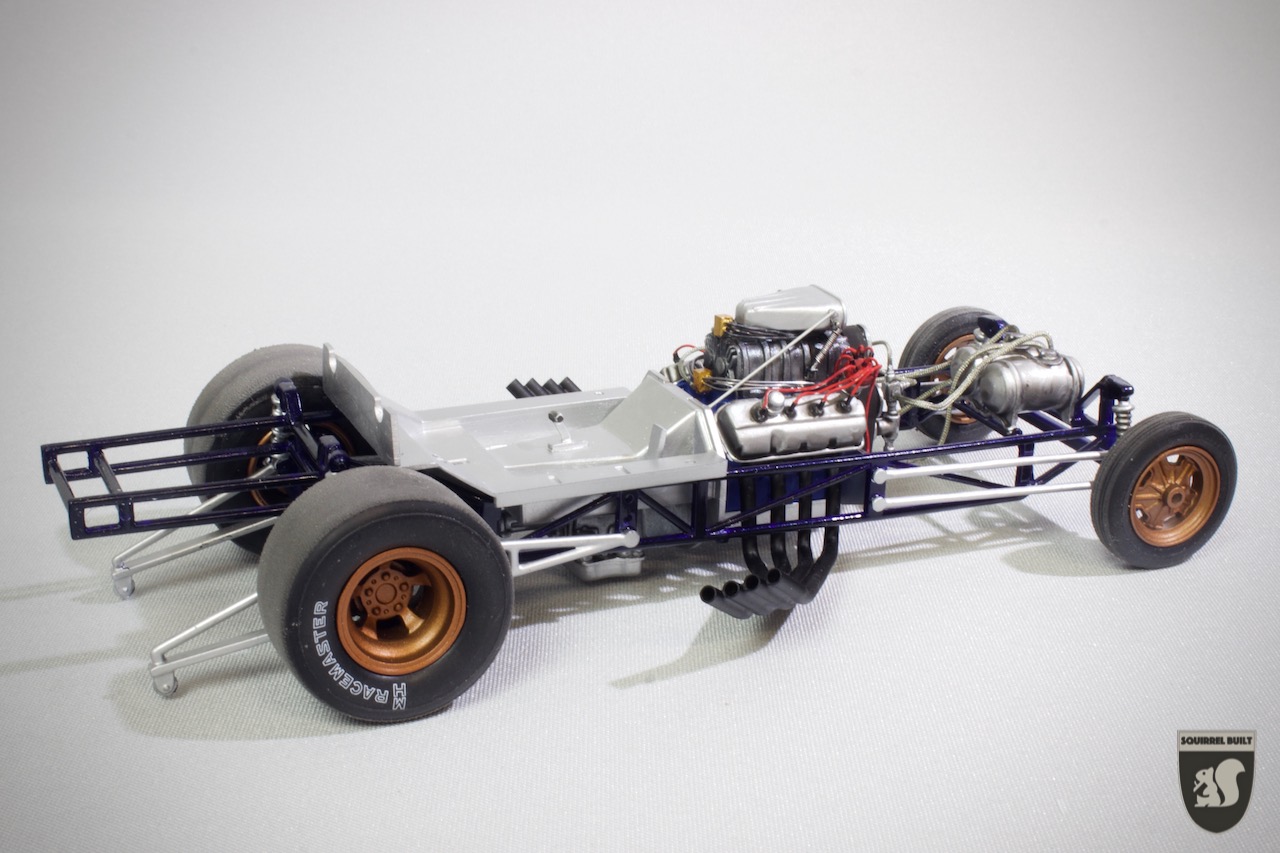
Thank you gentlemen for your kind comments. I'm glad you like my little efforts. One thing I note from looking at other work is that I need to work on keeping everything clean and tidy. I don't know how some of you guys build such super sharp models. For me the dents and paint muck ups seem to pile up one upon another. Progress; I couldn't get the exhaust pipes to stay round so I cut some brass tube and soldered four bits together and grafted them on to the ends. Not perfect but learned enough that I can do it better next time. The plumbing is all in but I'm not super happy with it( I'm sure I could do better next time). Once again learned more about what not to do rather than what to do. I can't imagine using the tiny hose fittings as even without them my nerves are shot to pieces. I had ordered some seat bets but the ones that came were, for me, unworkable so I have some others on order to see if they are better/easier. A few more bits to do on the chassis but it's time to address the elephant in the room and tackle the body work. So far so good and I'm looking to do mid 70's funny car next. Anyone have a suggestion for a good kit to try? Preferably one that you can still get a hold of. Thanks for looking in and your comments and encouragement are most appreciated. Dan
-
I worked hard to finish the motor today. First time using the braided fuel lines, much to learn but I think it looks okay. A pity it will hide under the body but good practice. I tried adding a few more details and I'm calling this one done. Progress; Lots of room to improve on the next one. Thanks for looking in. Dan
-
Progress; A bunch of lead wire, some plastic scraps and some vinyl fly tying tubing and the basic wirings done. I have some braided fuel line coming in the post so we'll see what I can make with that. More painting to do, but I think it's okay. Need to buckle up and just finish the body so I won't be waiting ages once the chassis is finished. Thanks for looking in. Dan
-
Progress; All the main chassis subassemblies are in their base colour. Now I can have a play with the detail painting and a little bit of wiring. I still need to do the rest of the work on the body. and then see if I can get all the bits to fit together. Still having fun and I think it looks okay, well all the four wheel touch the ground. Thanks for looking in.
-
Thanks Rusty and Marcos I have been looking for intel on how to add better wiring and plumbing. I have found this old post by Daniel Himmel which has been a lot of help. ( and shown I need to change some stuff on my kit ) It might help others too. Plumbing information for early funny cars Dan
-
Thank you gentlemen for all your great comments and encouragement. It's super to have the feedback. I have spent the last week slowly adding more decals, only one side left to do and making a start on the chassis. Now I might be a bit rough in building things but I have to say there isn't much in the way of clear drawings or attachment points for all these chassis parts. I now know that I have messed up the front axle assembly ( It's too far back and I don't think it's alined properly in the vertical plane.) and getting the motor to fit is going to be a nightmare as there doesn't seem to be any alinement pins/slots/tabs for any of the motor bulkheads. The cross members have some to let you get the basic rails alined but that's it. This isn't helped by the instructions being frustratingly vague and a little misleading. I'm not sure how I'm going to proceed as I think the wheelbase on my build is a bit short and I have no idea if I can get the motor to pop through the windscreen in the correct place and angle. I may have to stretch the frame rails to get the wheel base right and not worry too much as the model will always have the body on. Better everything looks right from the outside. I think the best thing is to get the body finished and clear coated so I can make the chassis fit it rather than fuss with it in it's current state. More pictures this weekend when I have a bit more time to sort it out.
-
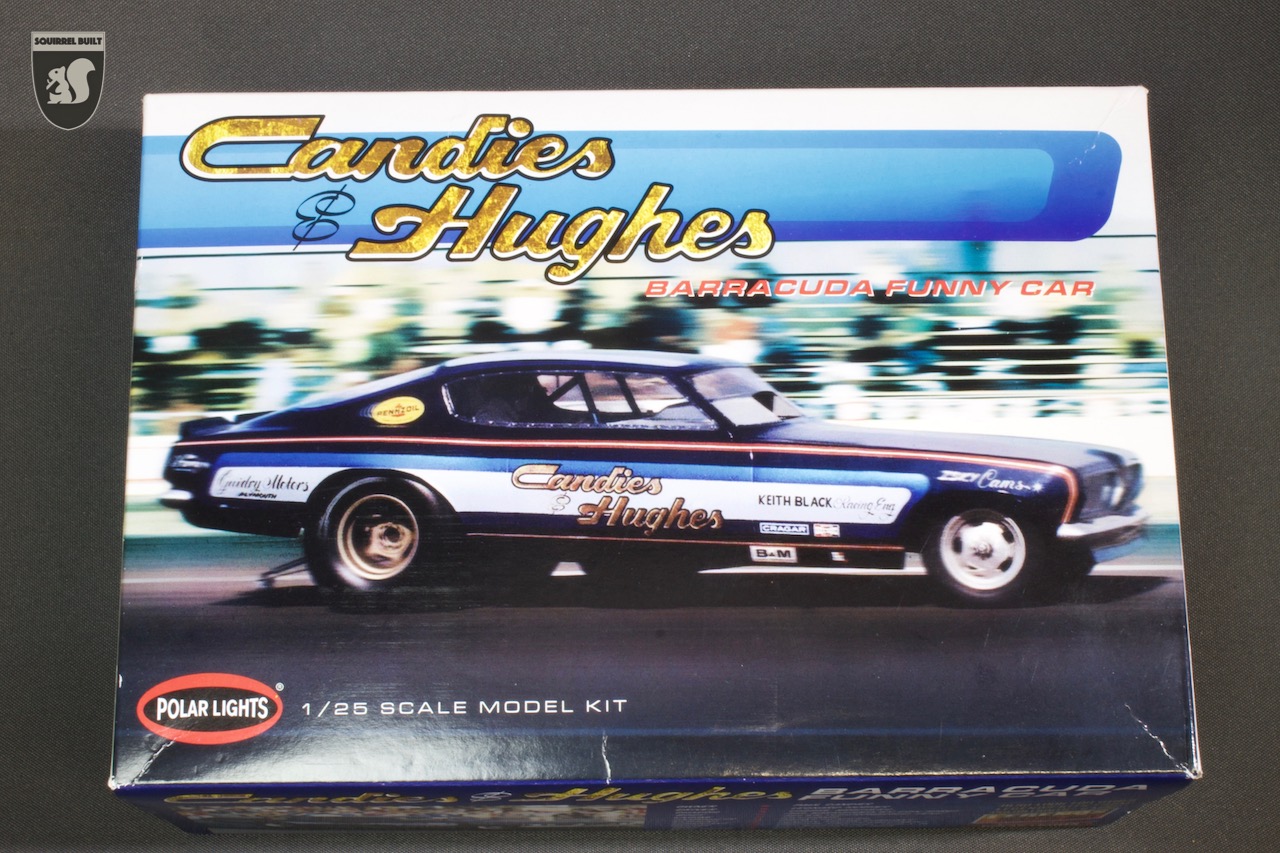
While waiting for my nerves to clam so I can finish my dragster I started this kit as I wanted to try a funny car. I don't know much about these Polar Lights kits but they seem alright. A bit lacking on part placement and I didn't see anything to help in decal placement so a bit basic. On looking over the body shell one thing hit me. I was never going to get the decals to fit over the deep door/ panel lines. So with no real idea what I was doing I filled all the panel lines with thin Evergreen strip and super glue. I block sanded the whole body and worked as hard as I could to get it smooth and straight. I also got rid of the wheel arch details as they don't seem to be there on the picture on the box top. I then shot some white Tamiya primer sanded out and then colour coated with Tamiya TS - 53 Deep Metallic Blue. Bumpers got some Tamiya Silver Leaf and a few coats of TS - 13. ( I also bought the ubiquitous Tamiya paint stand which wasn't cheap but works surprisingly well) I have started the decals ( which I'm no good at) and here's where I'm at. I have found the decals thin but brittle and got a lot of chipping around the rear wheel wells. I have found that Vallejo 70.961 Sky Blue is a good match for the light blue of the decals. Not the best effort as there is one spot on the bonnet that I managed to get a tiny speck into the paint and not see it until the end. The decals don't quite line up to the pictures but then that may be down to me not being very good with them. I've started on the chassis but the motor has some very thick chrome/clear lacquer that I'm struggling to get off. More once I get that sorted out. Building kits like these reinforces my thoughts on just how hard it is to get nice clean glossy finishes as everything just marks, gets dirty so easily. My next big brain teaser is how I do the headlight assemblies as I though you used the kit seperate parts but it looks from the pictures that you use the body shell alone. Thanks for looking in, any advise or comments welcome as I trying to learn this whole gloss finishes/decal thing. Dan
-
Vettegasser - Thank you, I'm glad you like it. I'm pretty happy with the way it came out but working up courage to drill the holes for the steering. CabDriver - I have decided to drill out the kit mountings and replace all the links with 0.05mm brass wire. But have to move the mounting points on the already finished bodywork. I've been too chicken to try but will come back to it soon. On looking at more photos I need to change around the steering link on the front wheel too. So a few little tricky parts to finish up but noting a little fortitude won't fix. Dan
-
Well I'm getting toward the end of this build and so the little mistakes are showing up. I have just started adding the front suspension and while replacing it with brass wire and plastic rod was a better choice than trying to use the kit parts. Adding them showed that the holes I drilled in the body to add in the steering links are all in the wrong places and nothing will line up. I'm in two minds about how I should proceed. Either I try and bodge something acceptable or I leave the linkages off, suffer the three tiny holes and the inaccuracy and move on. I'm kind of leaning towards the latter as everything else looks so good and I'm so happy with the results. It just bugs me that I didn't see this happening earlier and sorted it out before paint/decals. Next time. Speaking of next time I just sprung for a Polar Lights Funny car to see how they are to build Thanks for looking in. Dan
-
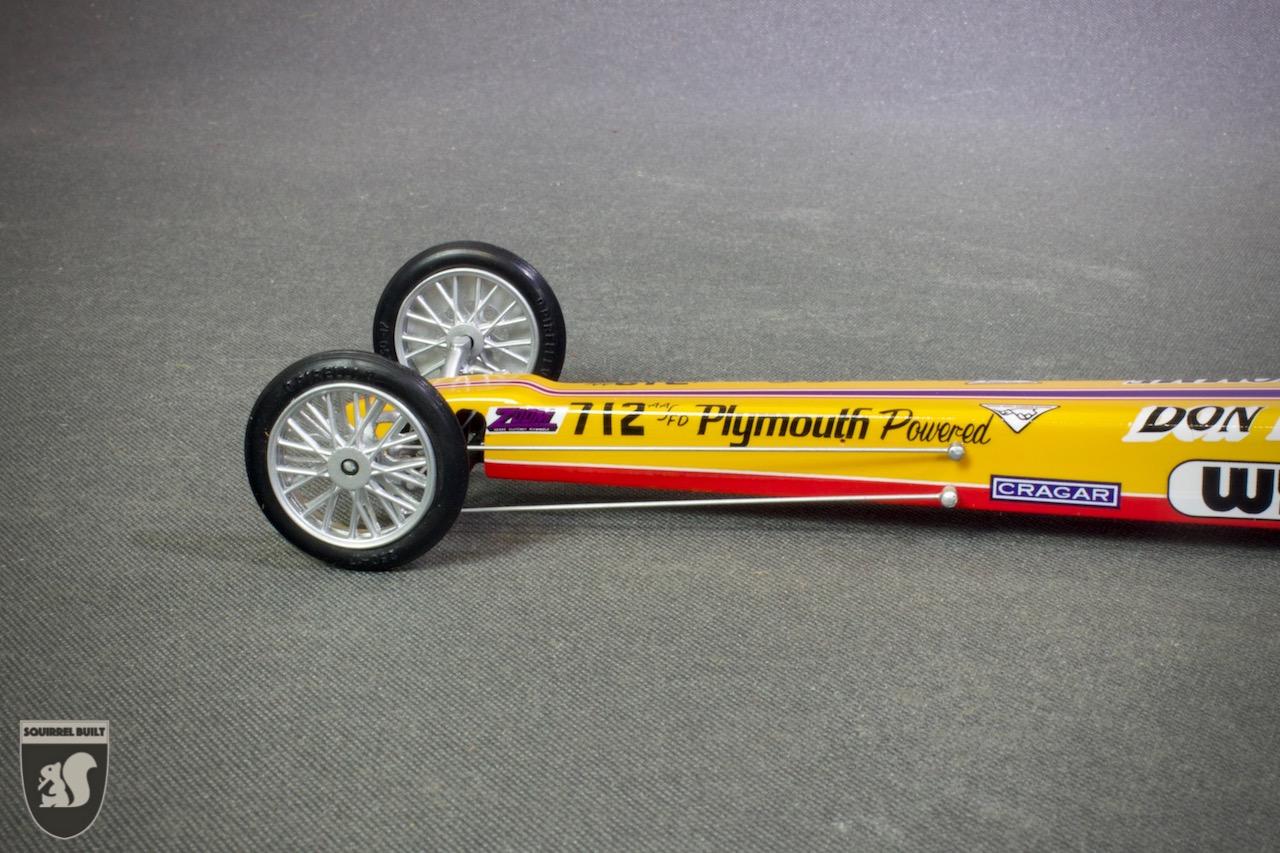
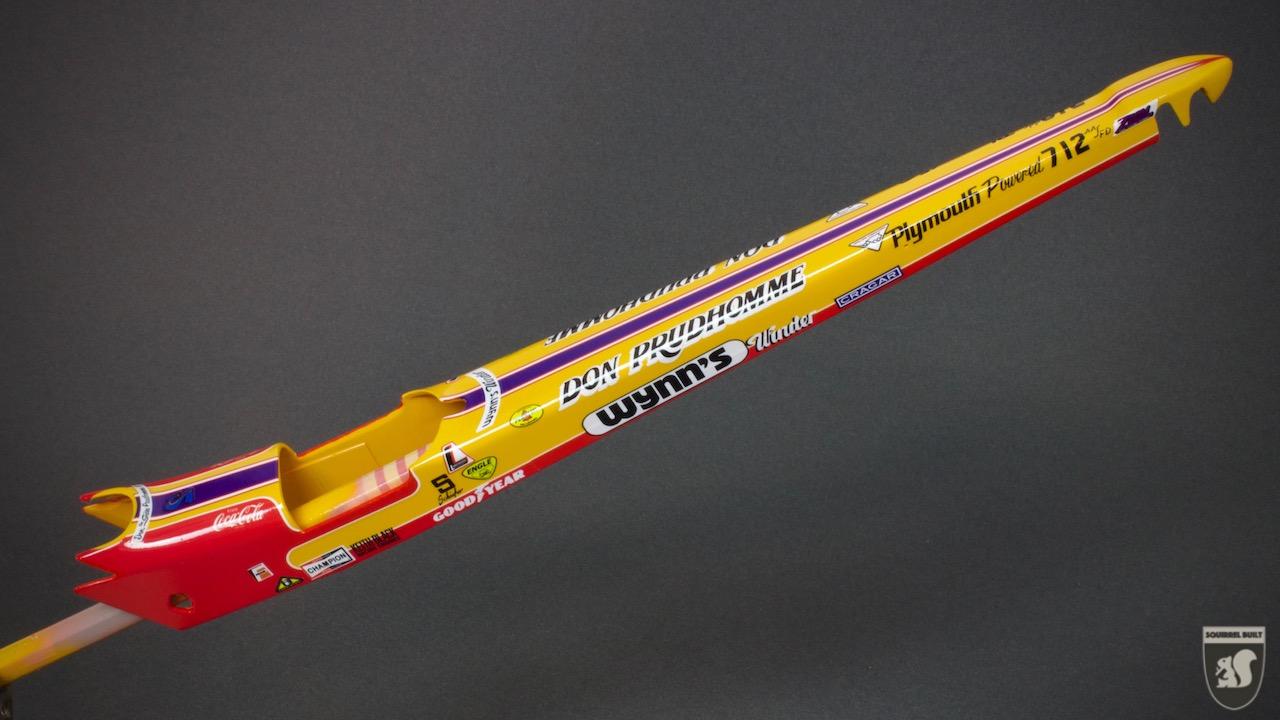
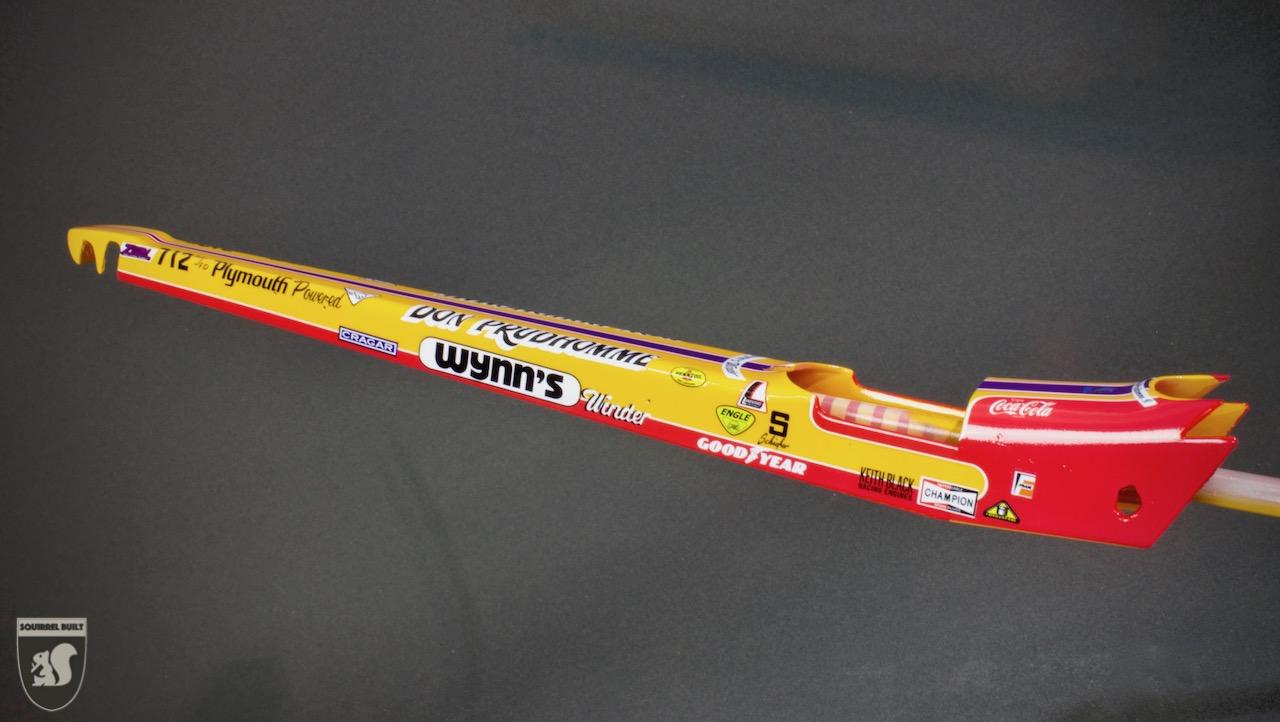
Thanks guys, glad you like it so far. Codi - I used Tamiya TS-34 Camel Yellow over Tamiya pink primer, both from rattle cans. While I like the colour I think something a bit more yellow like TS-47 Chrome Yellow would be closer to the real deal. I wish I had more reference for this vehicle, I'm more used to tanks and such and having tons of reference to go by. IHTH. Dan
-
I spent all day Saturday at the bench putting the decals on. I don't get along well with decals and these were pretty brittle and broke apart in a few places. I found that there were some rough finish in some areas of the decals like there was some 'grit' mixed in with the ink. They also didn't respond to any of the decal solutions I threw at them. In the end good old hot water and heated pads for soft paper towel worked the best to get them to conform and lay flat. I then spent much of today laying thin coats of Tamiya TS-13 clear over the top. This seems to have worked out pretty well and I'm not going to risk anymore futzing about and just let this set and harden for a week while I finish the chassis. Here's my progress so far. I'll do a bit of semigloss black to the interior with a brush once this lot gets nice and hard. I still have to figure out how I'm going to mount the searing arms and front rods. So far so good. A big shout out to Trevor and fax for your kind comments, Thanks Thanks for looking in. Dan