Musclecars
-
Posts
103 -
Joined
-
Last visited
Content Type
Profiles
Forums
Events
Gallery
Everything posted by Musclecars
-

A couple wreckers
Musclecars replied to Musclecars's topic in Model Trucks: Pickups, Vans, SUVs, Light Commercial
Thank you Carl,glad you like it -
A couple wreckers
Musclecars replied to Musclecars's topic in Model Trucks: Pickups, Vans, SUVs, Light Commercial
Thank you Jeff -
thank you Jeff and Steve. Steve,watch for the frame being warped, I had a few of those but when mounted to the underside of the running boards it straightened it up and no free wheeling tire in the air
-
I too use LA Awesome but it will not take the chrome off in some kits,the re-release of the Stacy David Hiboy for example. I let some parts sit for a couple days and nothing so I ended up doing a light sanding to remove it
-
Don't know if this has been brought up for the motor in the Foose pickups so I thought I would share how I do the valve covers, I first use the ScalePro Shop Dead Center to get a hole aligned for drilling a hole completely through the valve cover. After painting the valve cover I set the small pin through the hole and cut off what is not needed and add a drop of super glue on the inside of the valve cover to keep the pin in place,add the decals to the valve cover then glue them on the heads. I like how the chrome on the head of the pin gives a better appearance than the kit look.

- 3 replies
-
- 15
-

-

-
Thank you Germain,Trevor and Mario for the welcome mat.....very much appreciated
-
want to say thanks to Chris,Bob and Al for the kind words,means a lot
-
Thank you Oliver and Bob,glad you like them
-
Thank you Cary,appreciate the comment
-
Thanks again Bob,glad you enjoy them
-
Thanks Bill, I have to admit that I seen this build from a model show in Belgium,I just reversed the color combo
-
Thanks bud, nice too see you posting Cary
-
Appreciate the comment Bob, thank you
-
Thank you Al
-
thanks again Chris,appreciate it
-
You're welcome Oliver, that's what the hobby is all about
-
Thank you for commenting Dennis appreciate your feedback
-
Thank ya Bob
-
Thank you Chris
-
Than you very much Carl for the comment,well appreciated
-
Show Us Your Work Bench
Musclecars replied to Bruce Poage's topic in General Automotive Talk (Trucks and Cars)
sometimes I think the set up you have is all I really need, simple -
Show Us Your Work Bench
Musclecars replied to Bruce Poage's topic in General Automotive Talk (Trucks and Cars)
sometime I think the set up you have is all I really need, simple -
Show Us Your Work Bench
Musclecars replied to Bruce Poage's topic in General Automotive Talk (Trucks and Cars)
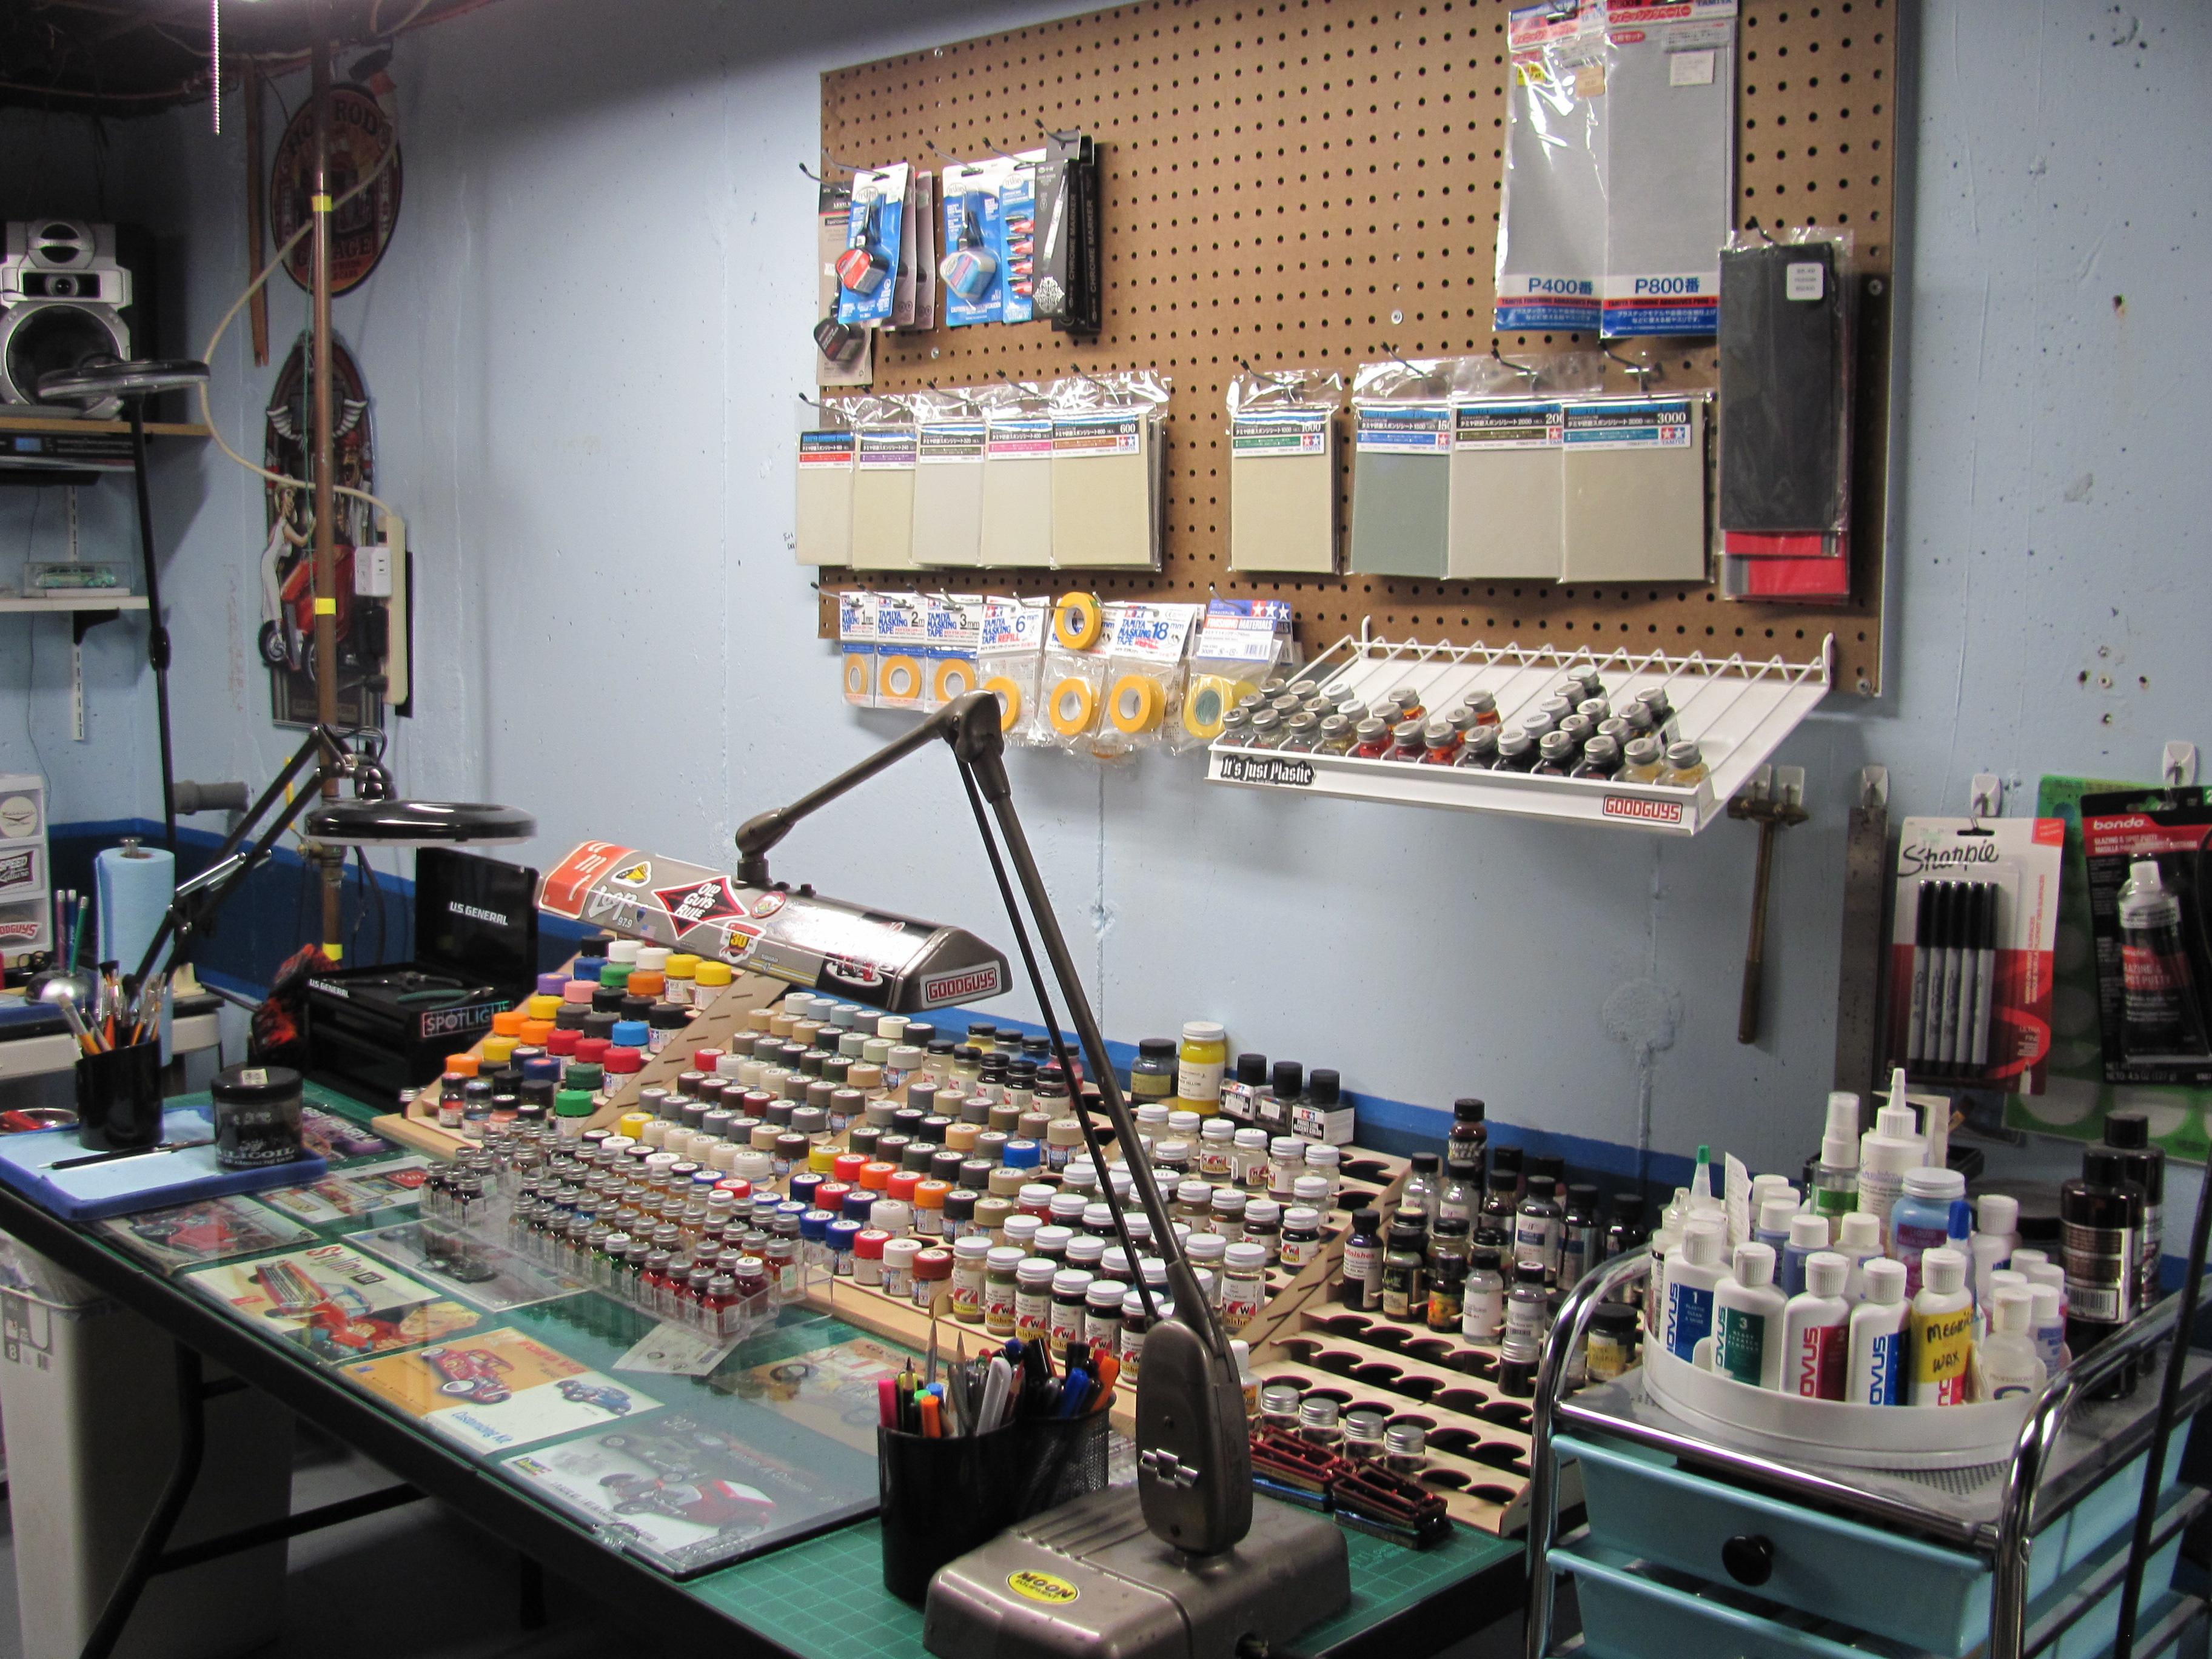
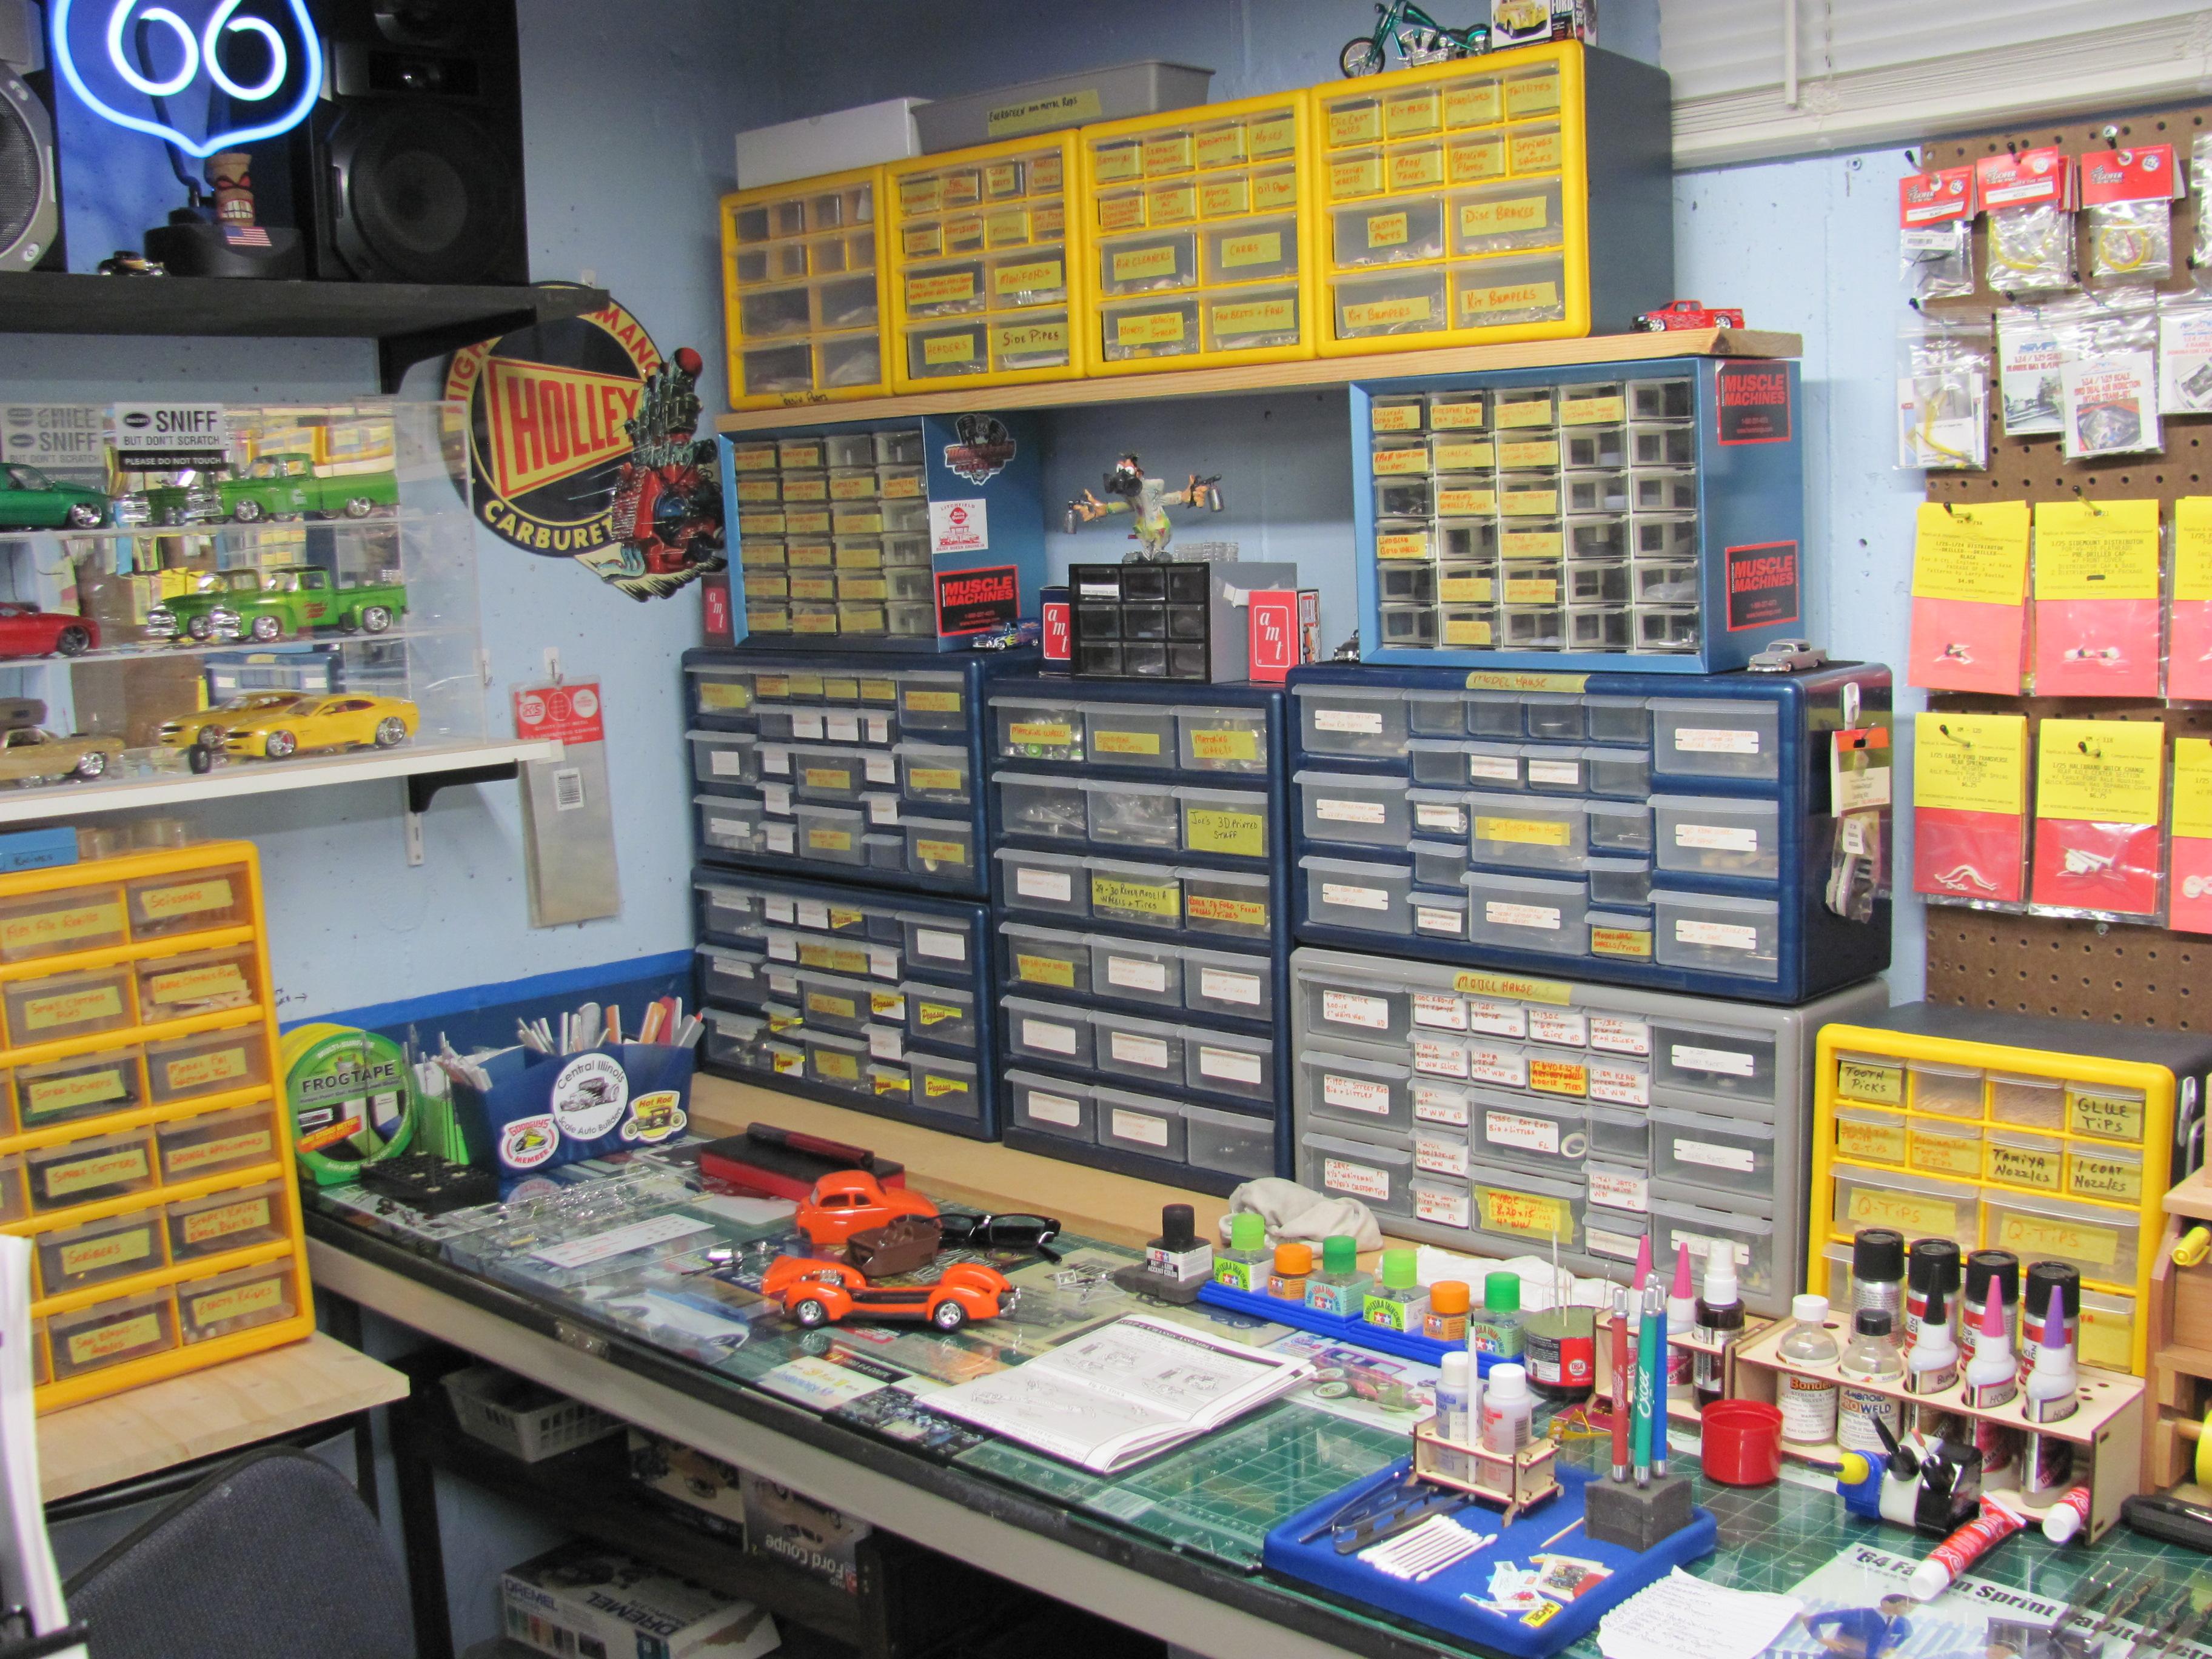
mad a change yesterday(Easter Sunday) to the area I sit and work at. Also cut down the stash by selling off 9 Moebius kits,lost interest in building them. So now I reserved the 2 5" foot tables joined together for building and foiling/decals and the 6" table for detail painting. Pegboard for holding glues and sandpaper and pegboard for holding aftermarket parts, set up the parts bins in one location
-
'71 Boss Mustang with widebody kit and LED lighting...
Musclecars replied to SpikeSchumacher's topic in Model Cars
you're too hard on yourself,looks great to me. Love that color combo -
really like that display cabinet David,you're correct about the other display cases. I have those same Pioneer Plastic display cases and the one from Carney, just have to dust the top of the display cases and occasionally wipe off finger prints around the outside perimeter of the cases. Thank you for showing that