BadJuju
-
Posts
81 -
Joined
-
Last visited
Content Type
Profiles
Forums
Events
Gallery
Everything posted by BadJuju
-
If anyone has an OD measurement of the rear wheels, that'd help. I might buy the kit if I don't have to replace the wheels and slicks I already have fit the rears.
-
Thanks, everyone! If these are 15" wheels in 1/24, I know the AMT Firestones fit 16" wheels in 1/25, so maybe I could make it work. These that Snake45 used might be Bluestreaks (without the blue streaks!) from a late 60's or early 70's fuel dragster or funny car? Just a guess.
-
Hmm - 2nd look the "red kit" tires are the same. I'm thinking of these below, from Snake45's build, which may not be from the kit:

-
I saw Chris' (hpiguy's) build and decided this kit wasn't bad. I like the wheels (agree the 5-slots WOULD be better), but the lower profile tires disappoint me. I'd like the taller ones from the so-called "red" kit. Does anyone know whether the rear wheels would fit the AMT Firestone Drag 500 slicks? I have a few sets of those tires, so could use some on this kit.
-
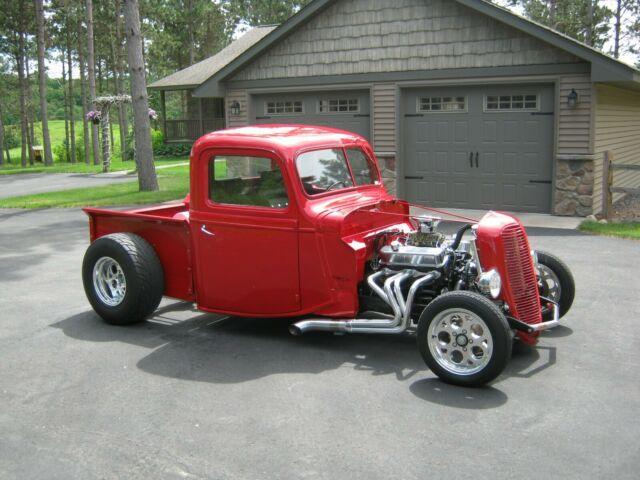
37 Ford pickup chopped & dropped
BadJuju replied to Plowboy's topic in Model Trucks: Pickups, Vans, SUVs, Light Commercial
I was admiring the header sweep, too, and have seen similar treatment on 1:1 examples. Combined with the modified firewall, it makes this 37 every bit as clean and integrated a design as any Deuce I've seen, scale or 1:1. My 37 reissue should arrive tomorrow. I have a separate thread going ( http://www.modelcarsmag.com/forums/topic/171790-has-anyone-channeled-a-revel-37-ford-pickup/#comment-2578788 ) and will post comments and photos as I work on it. -
Has anyone channeled a Revel '37 Ford pickup?
BadJuju replied to BadJuju's topic in Model Building Questions and Answers
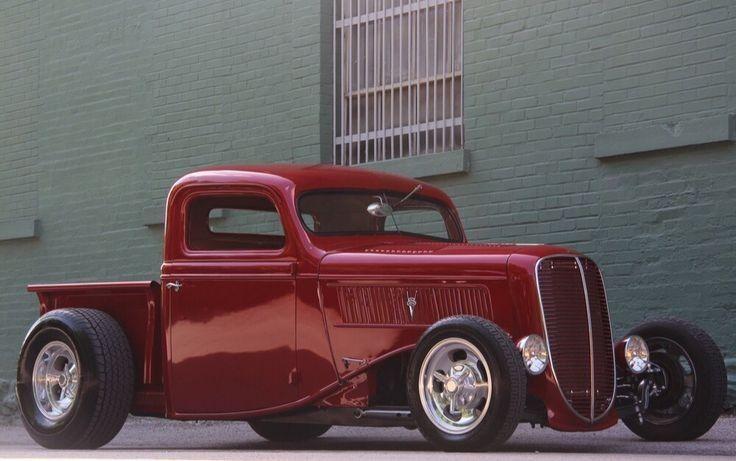
These two are channeled about like what I want. Plowboy's modified firewall is indeed much cleaner than stock, so I'm likely to try something similar, especially if I go with no hood entirely, or even no hood sides. The latter photo gives me pause to consider keeping them as I rather like the curve they give.
-
Has anyone channeled a Revel '37 Ford pickup?
BadJuju replied to BadJuju's topic in Model Building Questions and Answers
That's how it goes. You see an inspiring build, or a reissue happens, or a new tool comes out, and there go the wheel$ of creativity again. -
Has anyone channeled a Revel '37 Ford pickup?
BadJuju replied to BadJuju's topic in Model Building Questions and Answers
Sorry for the typos above. Also, to be clear, by hood sides being open, I mean I won't have any hood sides at all. -
Has anyone channeled a Revel '37 Ford pickup?
BadJuju replied to BadJuju's topic in Model Building Questions and Answers
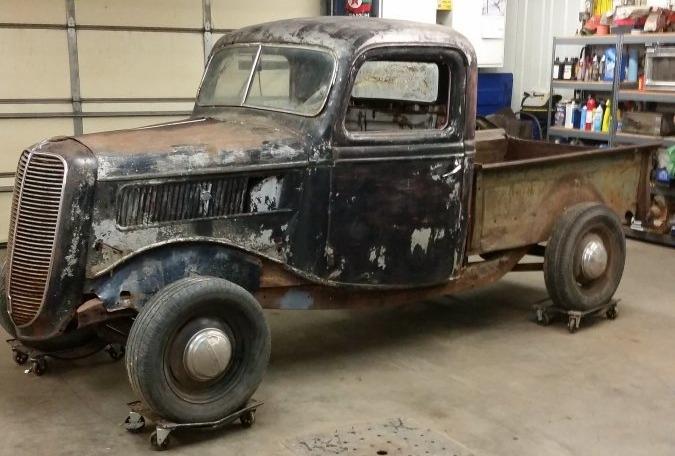
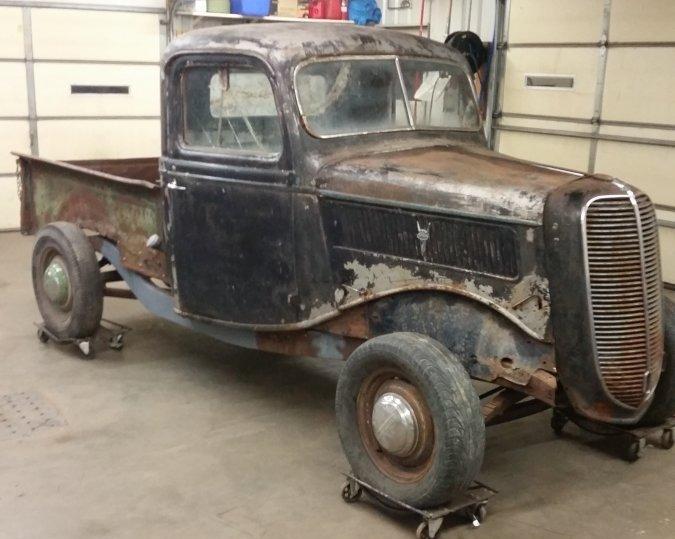
Thanks for your input, everyone! It all aligns with what I've read about channeling (I have a half dozen or so Revell Deuces I also want to channel). Not having the '37 kit in hand yet, the advice from those who have that specific one already is especially helpful. I also forgot to say I have the '37 convertible kit, which I'm using for donor parts on a few builds (that chassis will go under a '40 coupe rat rod), which I may use for some stuff on this one. I've seen others, like me, use "highboy" as meaning no fenders or running boards, so "lowboy" is obviously a better term. Here's what a 1:1 '37 pickup looks like without fenders and running boards. The cab and box do sit on top of the frame if not channeled, and yes, they do go partly over the rails. Since (unlike a Deuce) the frame is not styled to meet the body, it leads me to want to channel it. In looking at these photos, the cab MIGHT be lowered some without lowering the box, but simply adding "skirts" and a roll pan to the latter. I've seen that done in 1:1 pickup photos. And yep, the firewall, radiator, radiator shell, hoses, & FEAD well all need some work, too. The hood sides will be open; I'm undecided about the top. I'll use the '37 pickup radiator shell, or maybe try something with the convertible one. I don't like the '38. I'm using the kit customized flathead. I may top the carbs with stacks instead of air cleaners, which will drive the hood decision. I'm leaning toward using the kit headers and duals, so clearance for those will be part of the channeling procesa., too. Thanks again for all the excellent input & your interest! I'll post photos as I go.
-
37 Ford pickup chopped & dropped
BadJuju replied to Plowboy's topic in Model Trucks: Pickups, Vans, SUVs, Light Commercial
Superb hot rod! I just ordered a 2022 reissue and am looking to do something similar. It will really push my skill set. -
I just bought the 2022 release. I'll build it as a highboy, so I'd like to channel it to hide the frame. Anyone who has done so, could you please share how you did it? Thanks!
-
‘37 Ford Pickup chop and channel
BadJuju replied to NOBLNG's topic in Model Building Questions and Answers
Thanks for letting me know! -
‘37 Ford Pickup chop and channel
BadJuju replied to NOBLNG's topic in Model Building Questions and Answers
NOBLNG - I just bought the 2022 reissue kit. I'd like to channel, and maybe chop, it. I'd also like it to be a highboy. Have you started with Tue channeling yet? -Bad Juju -
2021 IPMS Nationals Kit Information
BadJuju replied to niteowl7710's topic in Car Kit News & Reviews
Nice build! I'm thinking of picking up one of these. To me, it's a gasser, so like a hot rod, lends itself to the modeler's creativity and interpretation. Your stance turned out perfectly! Several I've seen result in the front being too high for my taste. Did you do anything special in that regard? Thanks for any tips to share. -
2021 IPMS Nationals Kit Information
BadJuju replied to niteowl7710's topic in Car Kit News & Reviews
-
Has anyone put the 1/25 Revell Snap Tite Mustang convertible body/interior on the detailed glue kit fastback engine/chassis?
-
Glad you found it useful!
-
Yep, thanks. I've seen others go plenty lower with this kit, but this much was pretty easy. I'm sticking with the kit motor & trans, but want a side exhaust, so that's the next task on this one (not sure when - I have many projects going). I'll modify the kit parts downstream of the glass packs. I'm thinking of going between the frame and floor where the latter kicks up for the back seat.
-
Thanks! It was inspired by a photo of a real car I saw on line. I forgot to mention, the 3mm drop is about as far as can be done without modifying the inboard, engine-bay-side of the wheel wells.
-
I wanted to add some rake to a Revell '50 Olds Custom by lowering the front 3mm (~ 3 scale inches). This amount is in addition to the already-lowered suspension on this kit. I did not change the rear. The technique will work on the stock version of the kit, too, but specific dimensions will be different. First, I drilled holes through the frame where the upper control arms attach. In this way, holes can be drilled through the bottom of the lowering blocks, once attached, so as to ensure square location of the control arms. Then I added 3mm blocks from sheet styrene. Once holes were drilled, I shaped the blocks to match the frame. Then I cut the uprights from the lower control arms. I fabricated extensions from sheet styrene. To provide a stronger joint, with more cementing surface, I filed notches in the blocks. The blocks are 7mm tall, with notches that provide a 3mm longer upright. Next, I glued together the modified front suspension parts per kit instructions. Here is the resulting rake, for reference using the stock steelies also included in the custom kit. My car will have slightly more rake, since the rear wheels I'm using are slightly taller, and the fronts slightly shorter. Thanks for checking my topic and I hope you find it helpful. I may add updates as the build progresses, but thought this portion would be of use to folks. Your comments are welcome. Model on!
- 6 replies
-
- 1
-

-
- revell 50 olds
- lowering
- (and 1 more)
-
Thanks, folks! I hope the post is helpful to others whom, like me, are just getting into modifications like this. To my eye, this ride height seems like it provides a realistic, roadable ground clearance. It will be interesting to sit it side by side with the stock height convertible, when they're both done. When that will be, I'm not sure. I got an airbrush and paint booth a year ago and I've yet fire them up! Been doing too much buying and not enough building.
-
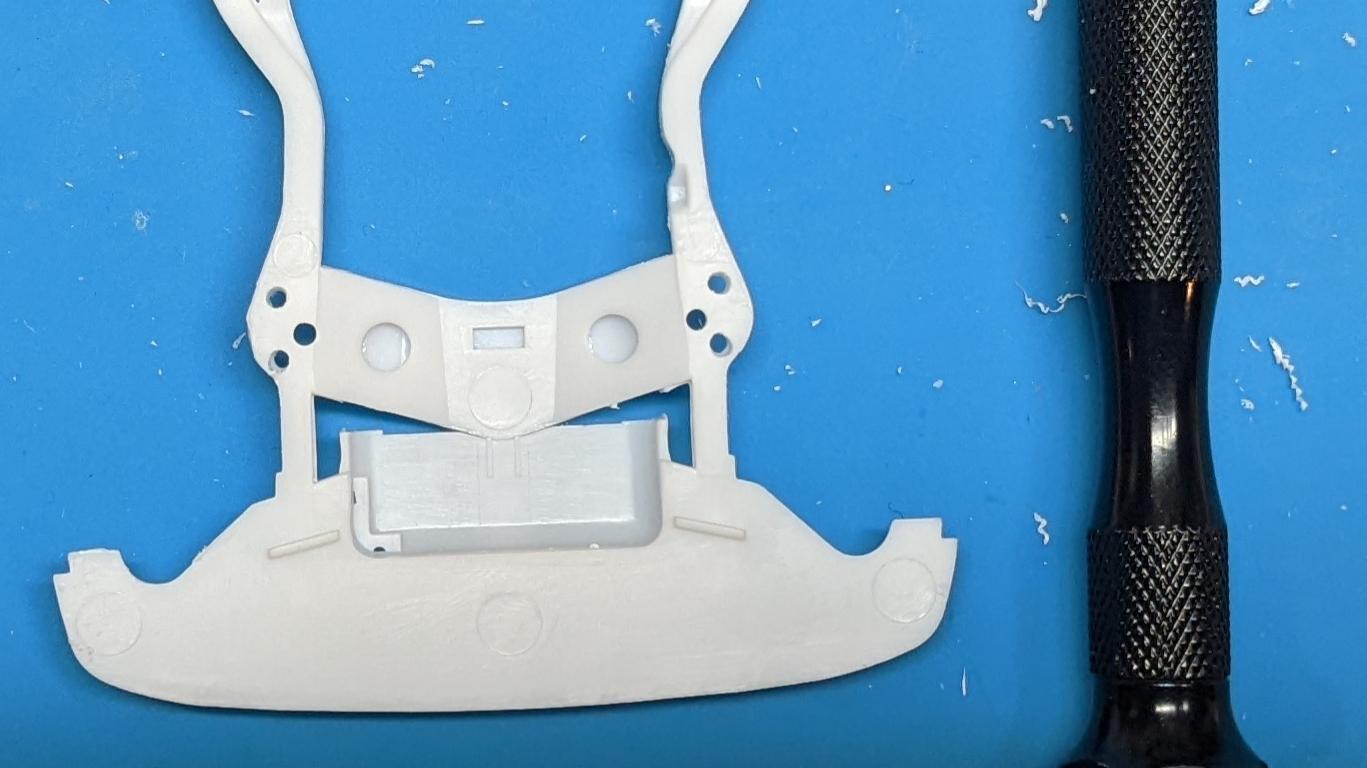
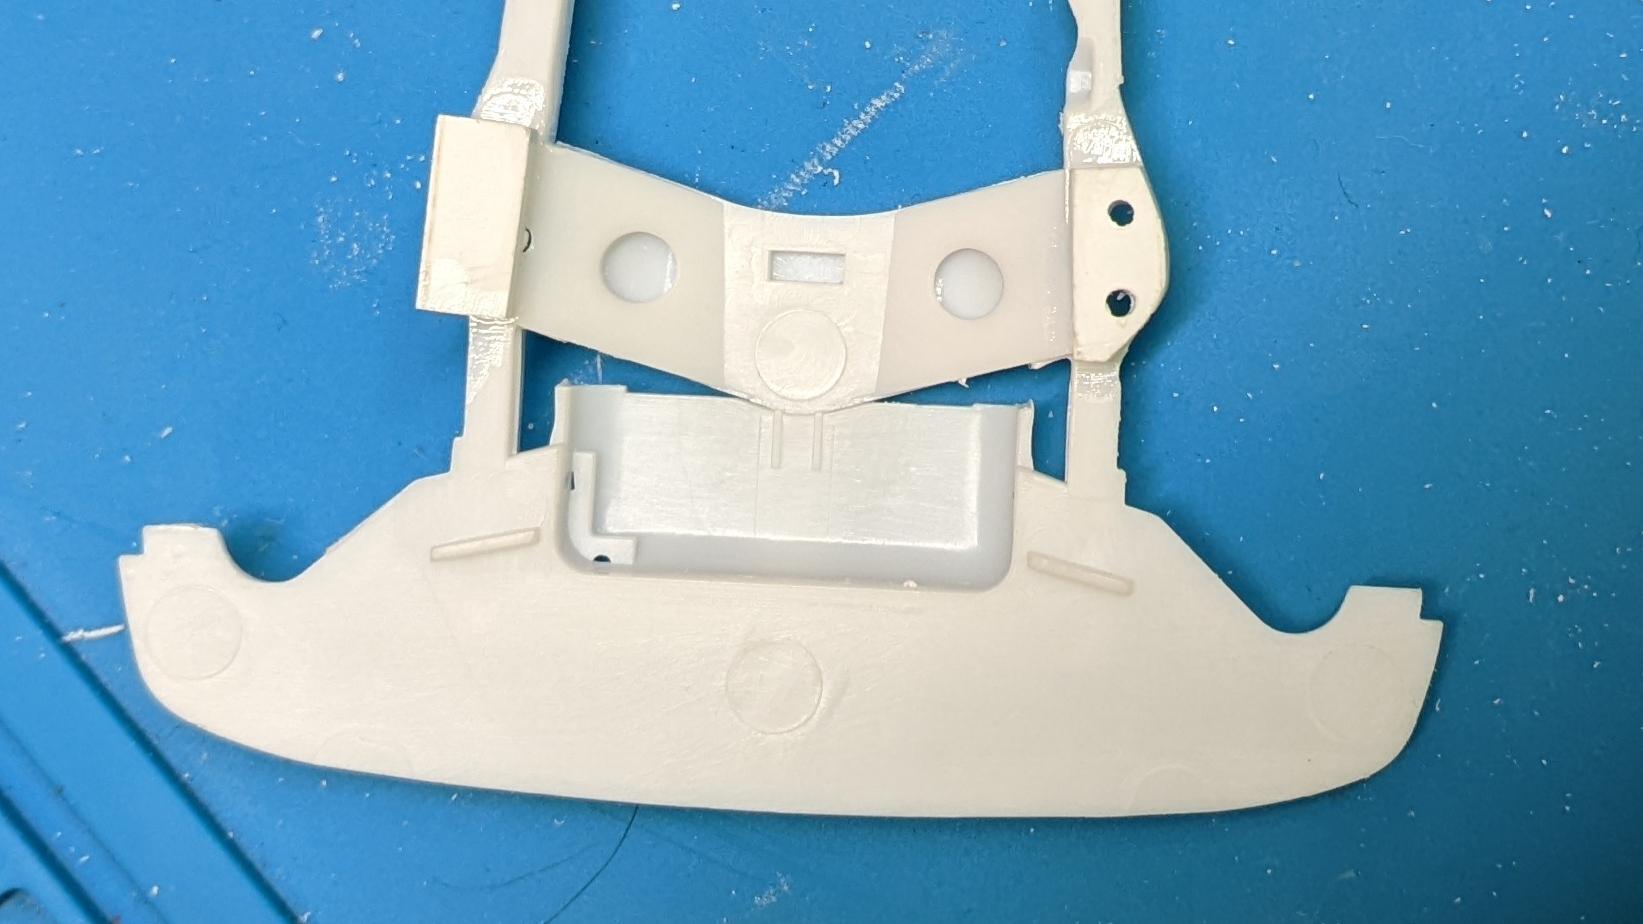
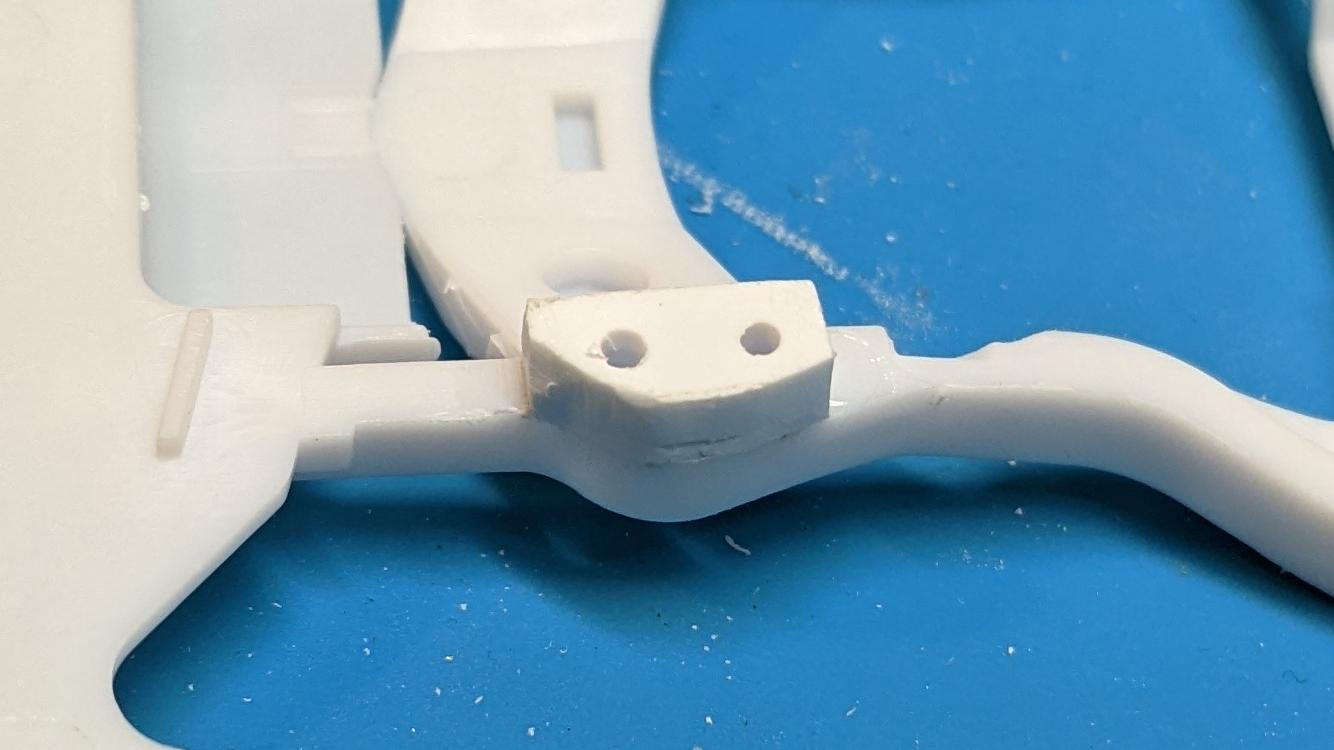
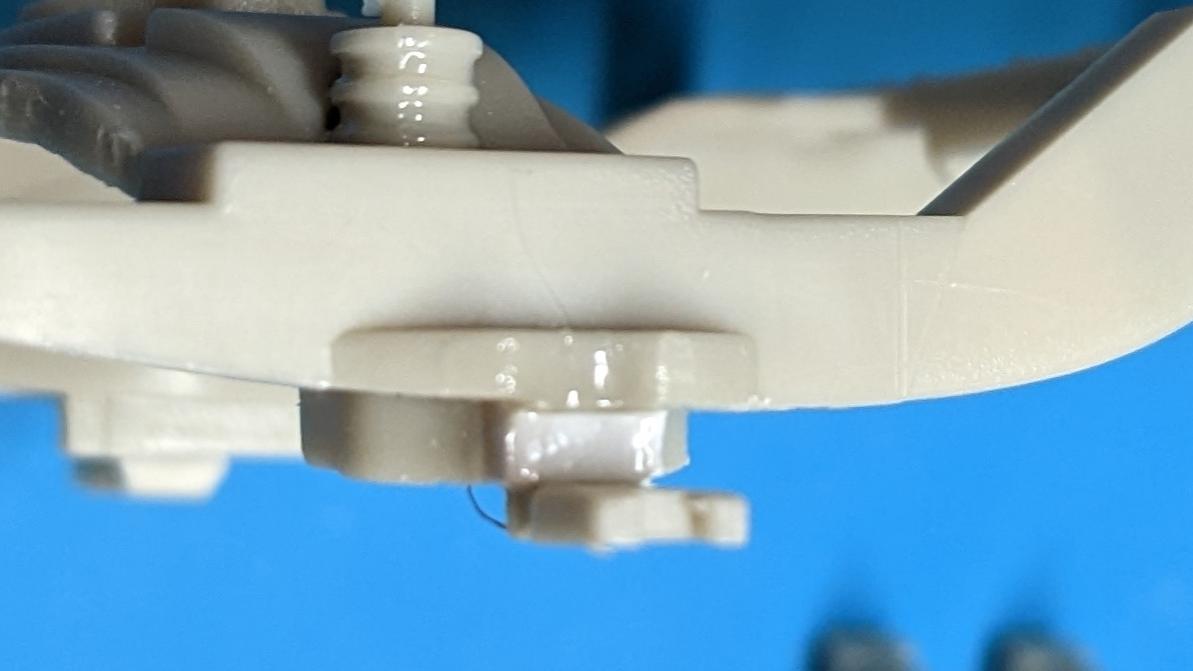
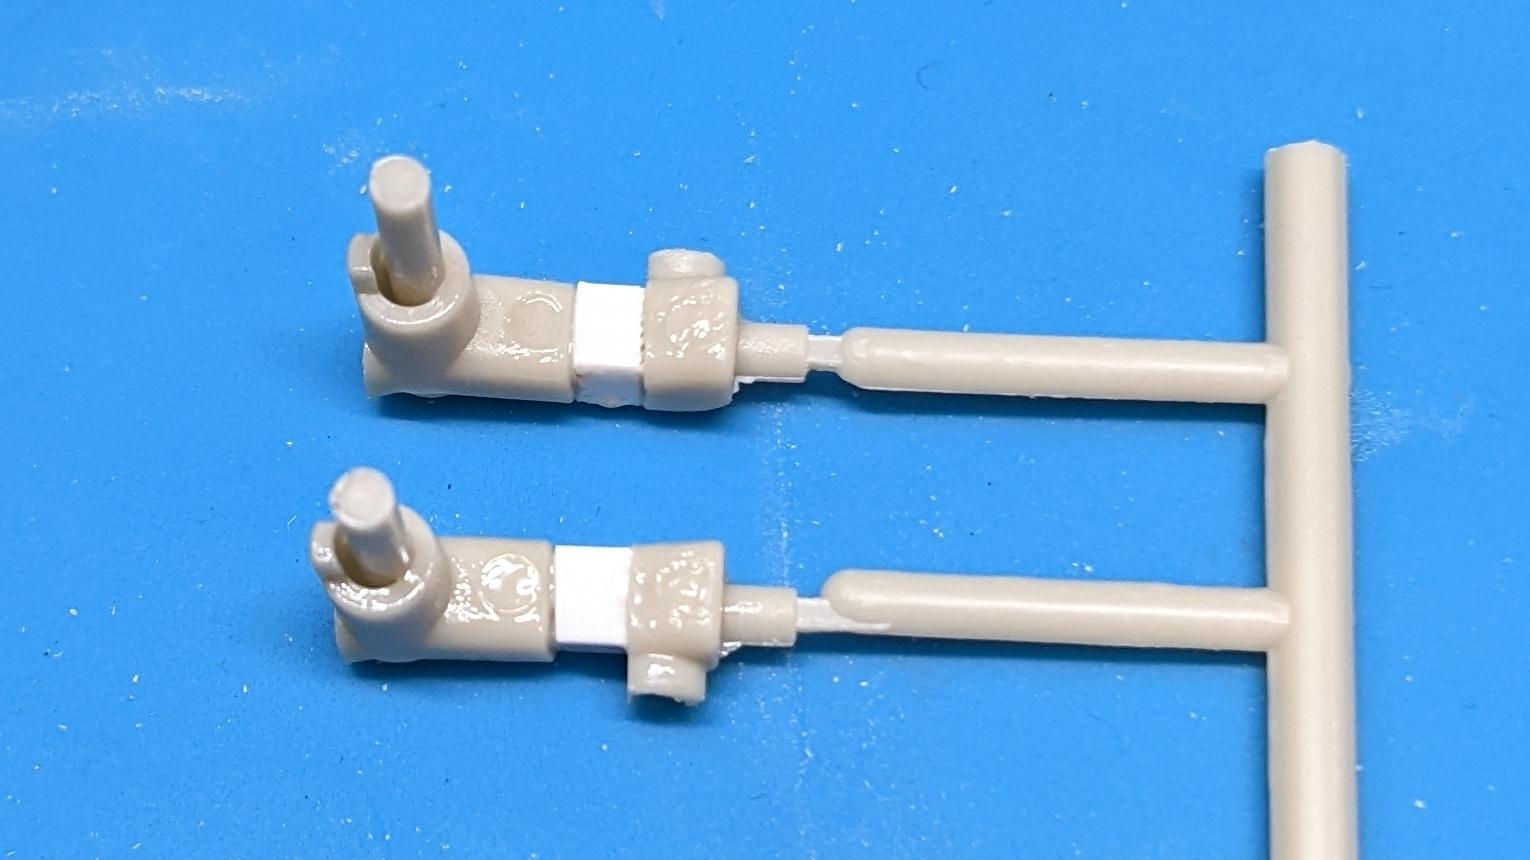
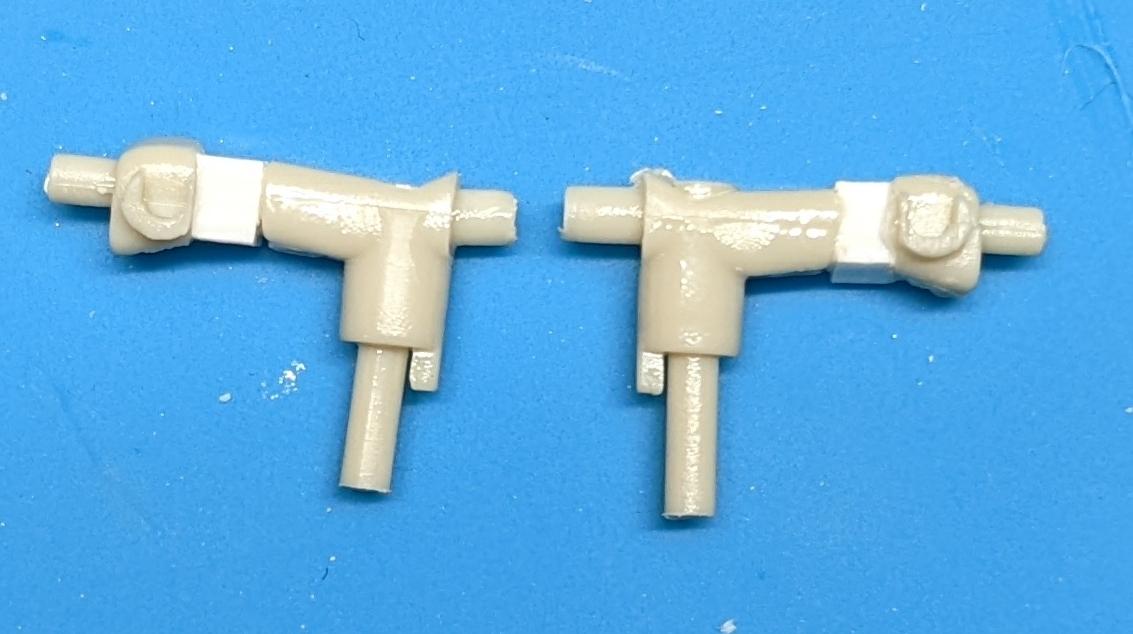
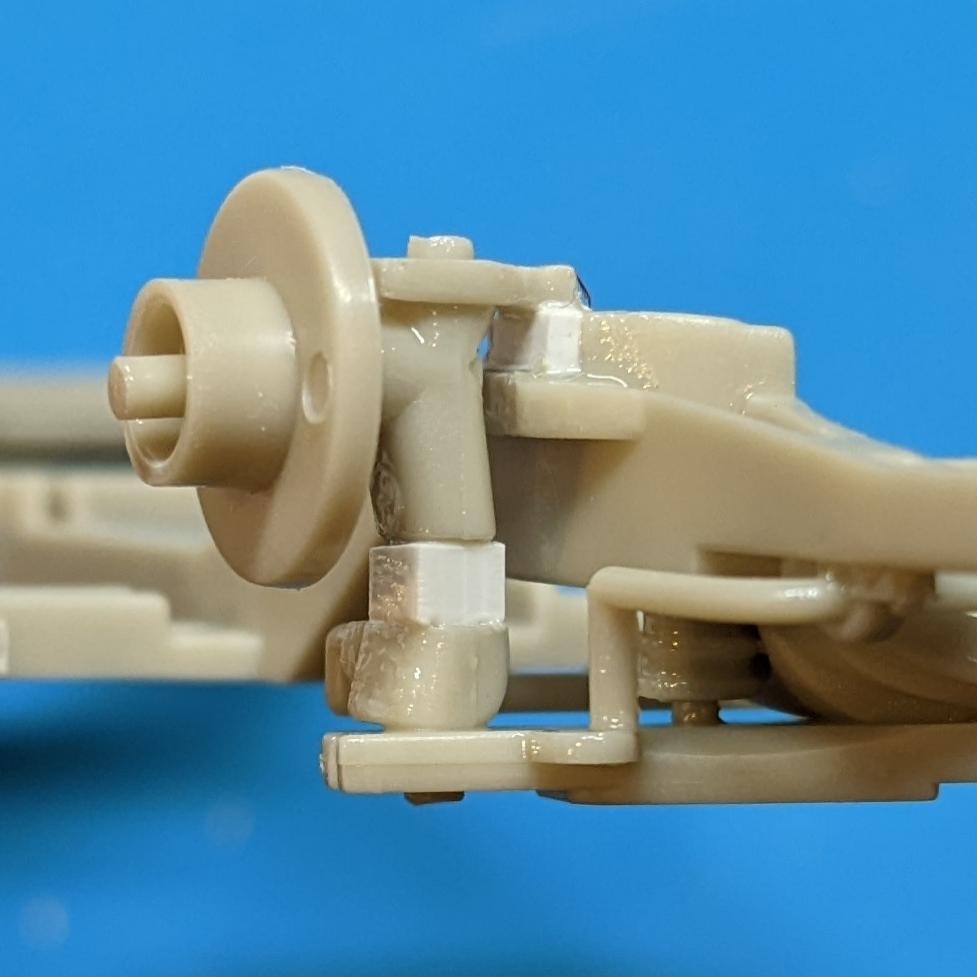
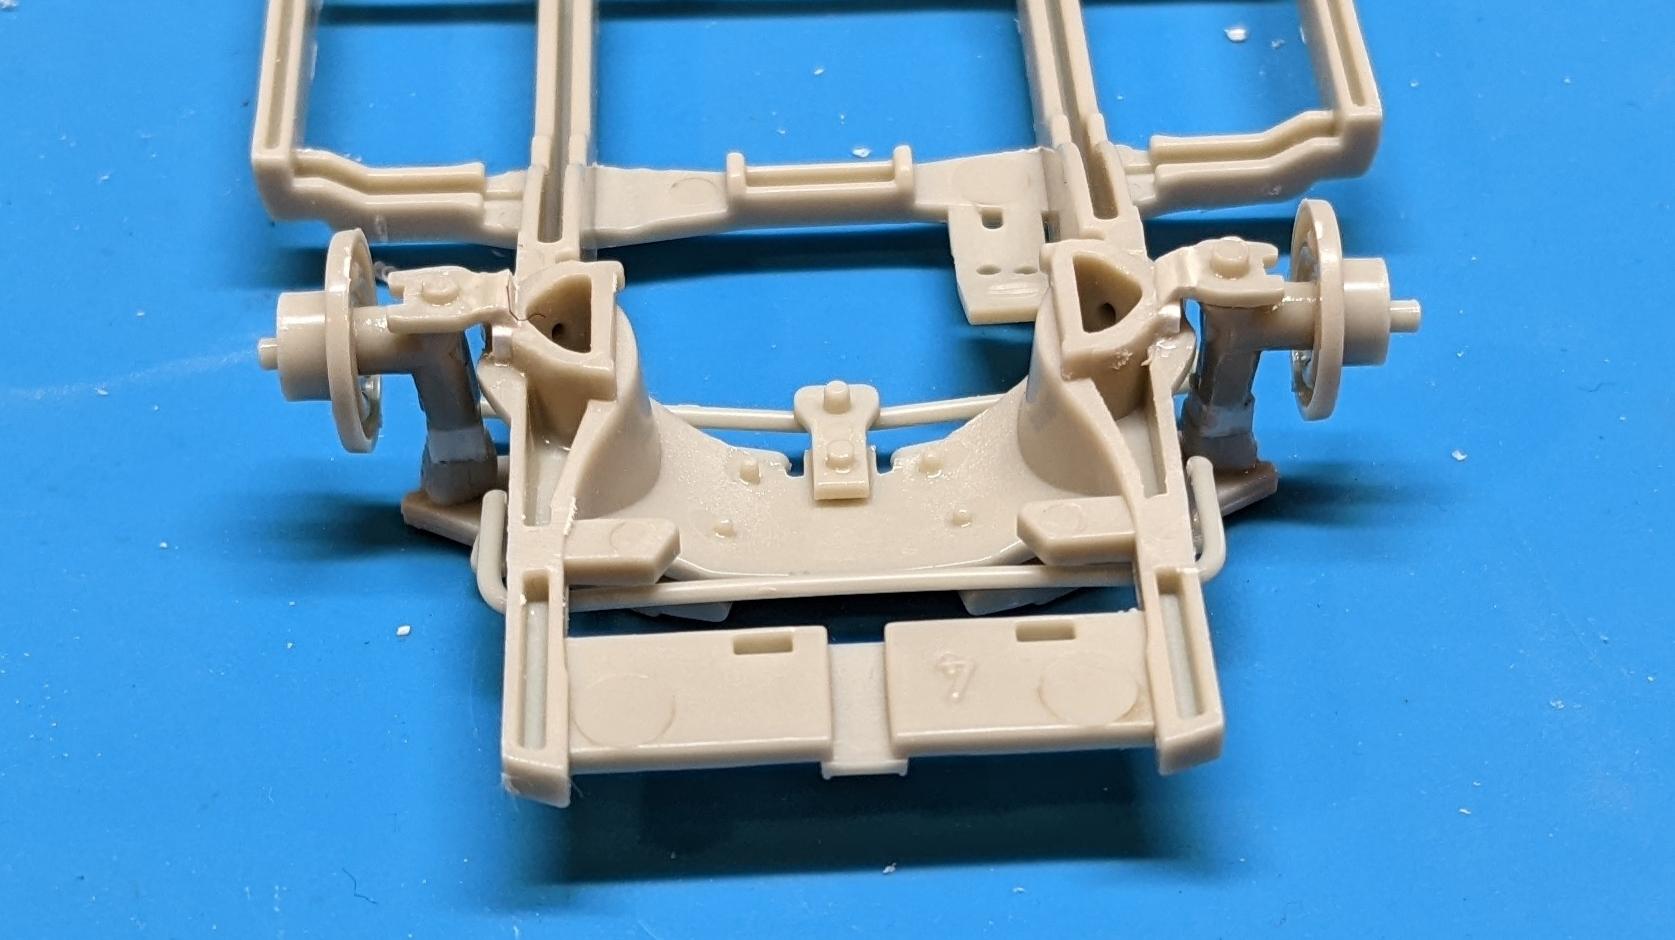
UPDATE: By the way, this model is NOT intended for competition, so I am not refining the appearance of the suspension modifications. I could clean things up with putty and sanding (except for the slip mentioned below), if I was going for a better appearance. I'm new to this level of work, so maybe someday I'll take things that far. I've completed the front lowering. I was cutting the upper control arms from the chassis and the knife slipped. I should have used a razor saw. So I hogged out the portion still on the chassis, added a 2mm thick sheet styrene block, and glued the cut-off arm portion atop the block. Originally, the block was going to raise the entire control arm. I reversed the arm so the taper from the knife slip on one side allowed more cementing area. This mod fits within the openings on the engine compartment fender wells. Then I sawed (I learned!) the spindles, and reversed the portion with the axle location holes. I added a 2+ mm square block between the two pieces. The axle locator reversal lowers the front 3mm. The added block makes a total of 5mm. The block is "2+ mm" to account for the kerf of the saw. Then I glued in the stub axles. I drilled locating holes in the spindle tops and added locators, made from the attachment locators for the stock exhaust, which I'm not using. Stretched sprue or the right size tube would also work. The original locators are inside the hollow square tube portions I added (white in photos). I assembled the front suspension and here's how it looks: Here's a shot of the stance I achieved. I'm not using these wheels, but I am using the tires, reversed to show the black sides. I'm happy with it, including the VERY slight rake. Again, this modification allows use of unmodified front lower control arms, springs, stabilizer bar, and tie rods. I've decided on a different motor, too. I'm using a Caddy V8 from a Revell '49 Merc, which in turn gets a 5.0L small block Ford from a Revell Speedwagon (with dual carb set up from R&M of MD). The AMT 409 I was going to use is just too nice to be inside a hood, so it will go in a future hoodless Revell Model A or Deuce high boy. My current thoughts on exterior colors for this car is a 2-tone with candy apple red pearl and ivory pearl, using a traditional Hornet dividing line. I'm not sure whether to go red on top with ivory sides, or the reverse. The interior will be coordinating maroon and ivory in some fashion. This project is in parallel with several others, so I'm not sure when my next update will be. Thanks for looking and your comments are welcome. Happy modeling!
-
EngineerBob: nice work and I especially like the skulls graphics and nosed hood!
-
Thanks for checking out my post. I'm thinking of removing the chrome trim, using the ribbed bumpers from a Revell '49 Merc kit, Frenching the head lights, dropping in a Chevy 409 from an AMT '62 Impala kit, with Revell headers and scratch built side pipes, and using the Cragars from that same Impala kit. I want to simplify the area around the tail lights with something custom. I'm not attempting a top chop. I need to identify a different grille bar, but I'm using the Hudson top bar and turn signals. I'm still figuring out the paint and interior colors. I'm also building a stock Hornet convertible in Texas Tan metallic with an earth tone interior color that would have been available, so I want a contrast with that one for this coupe. I haven't even decided on a light vs dark exterior. I'll add some pin stripe decals from the parts box.
-
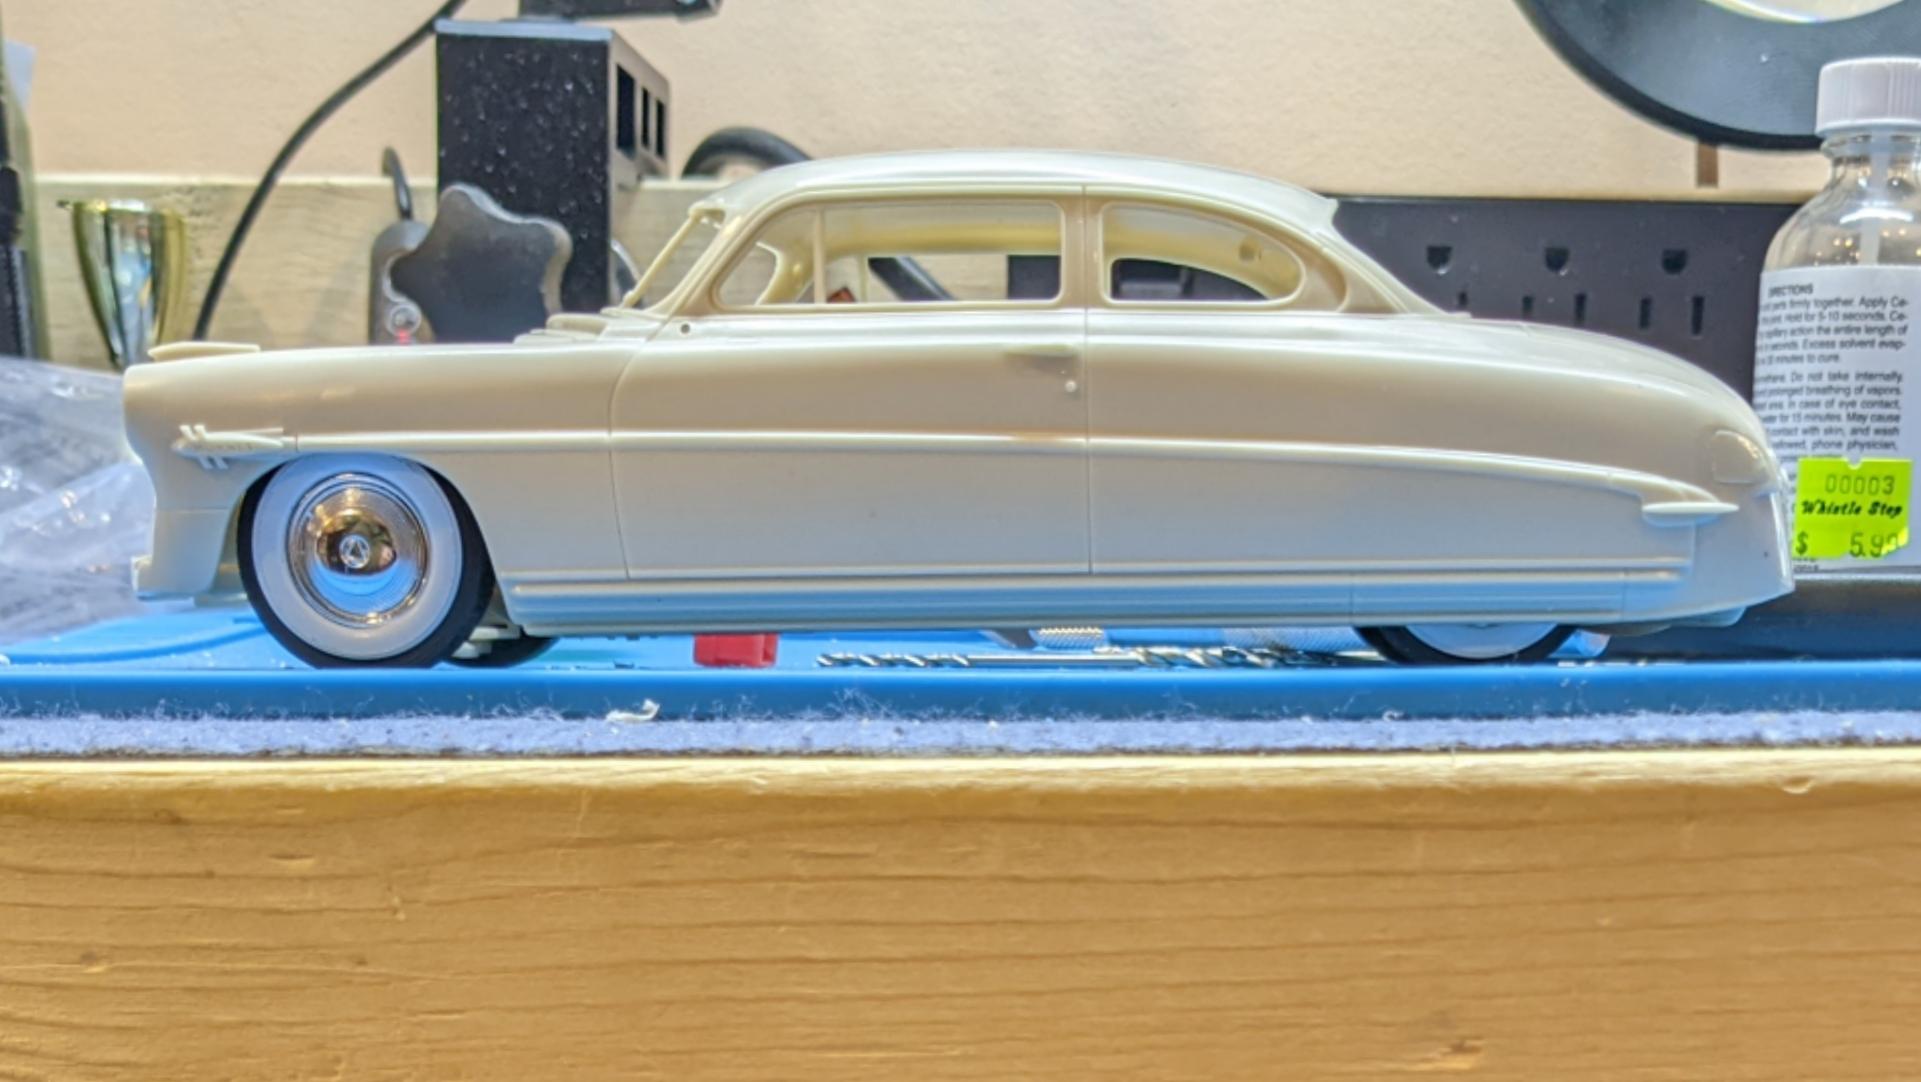
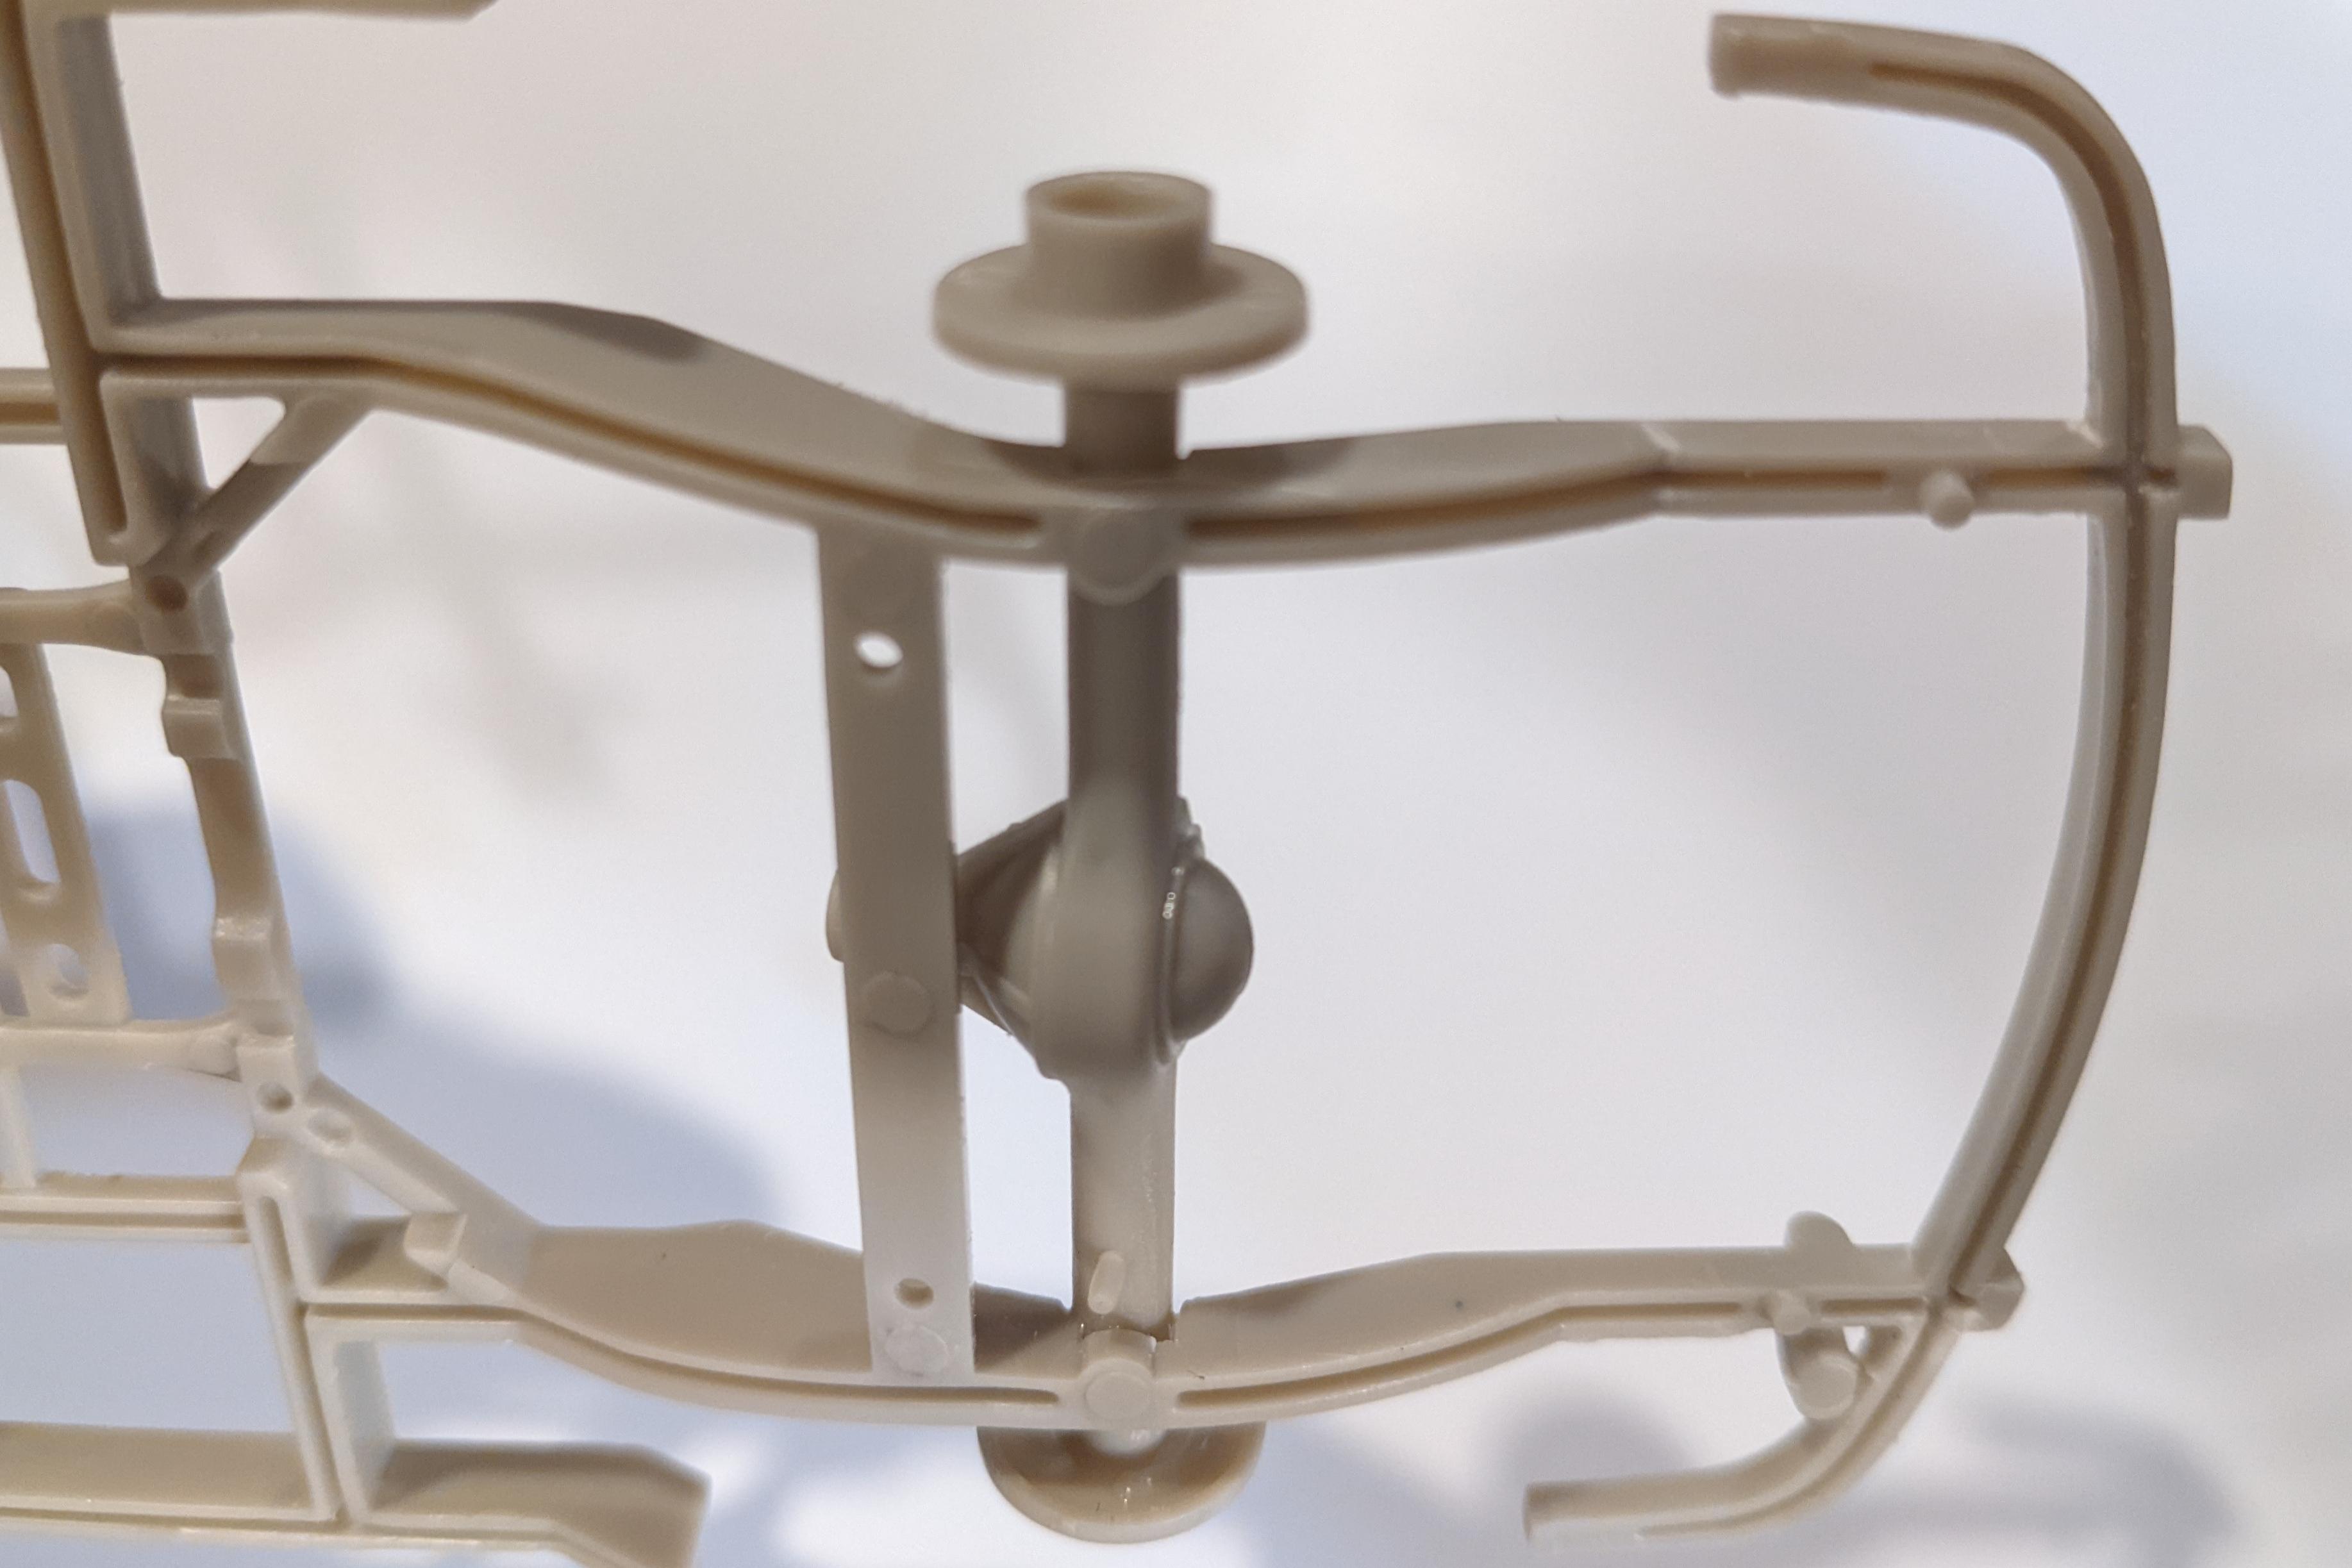
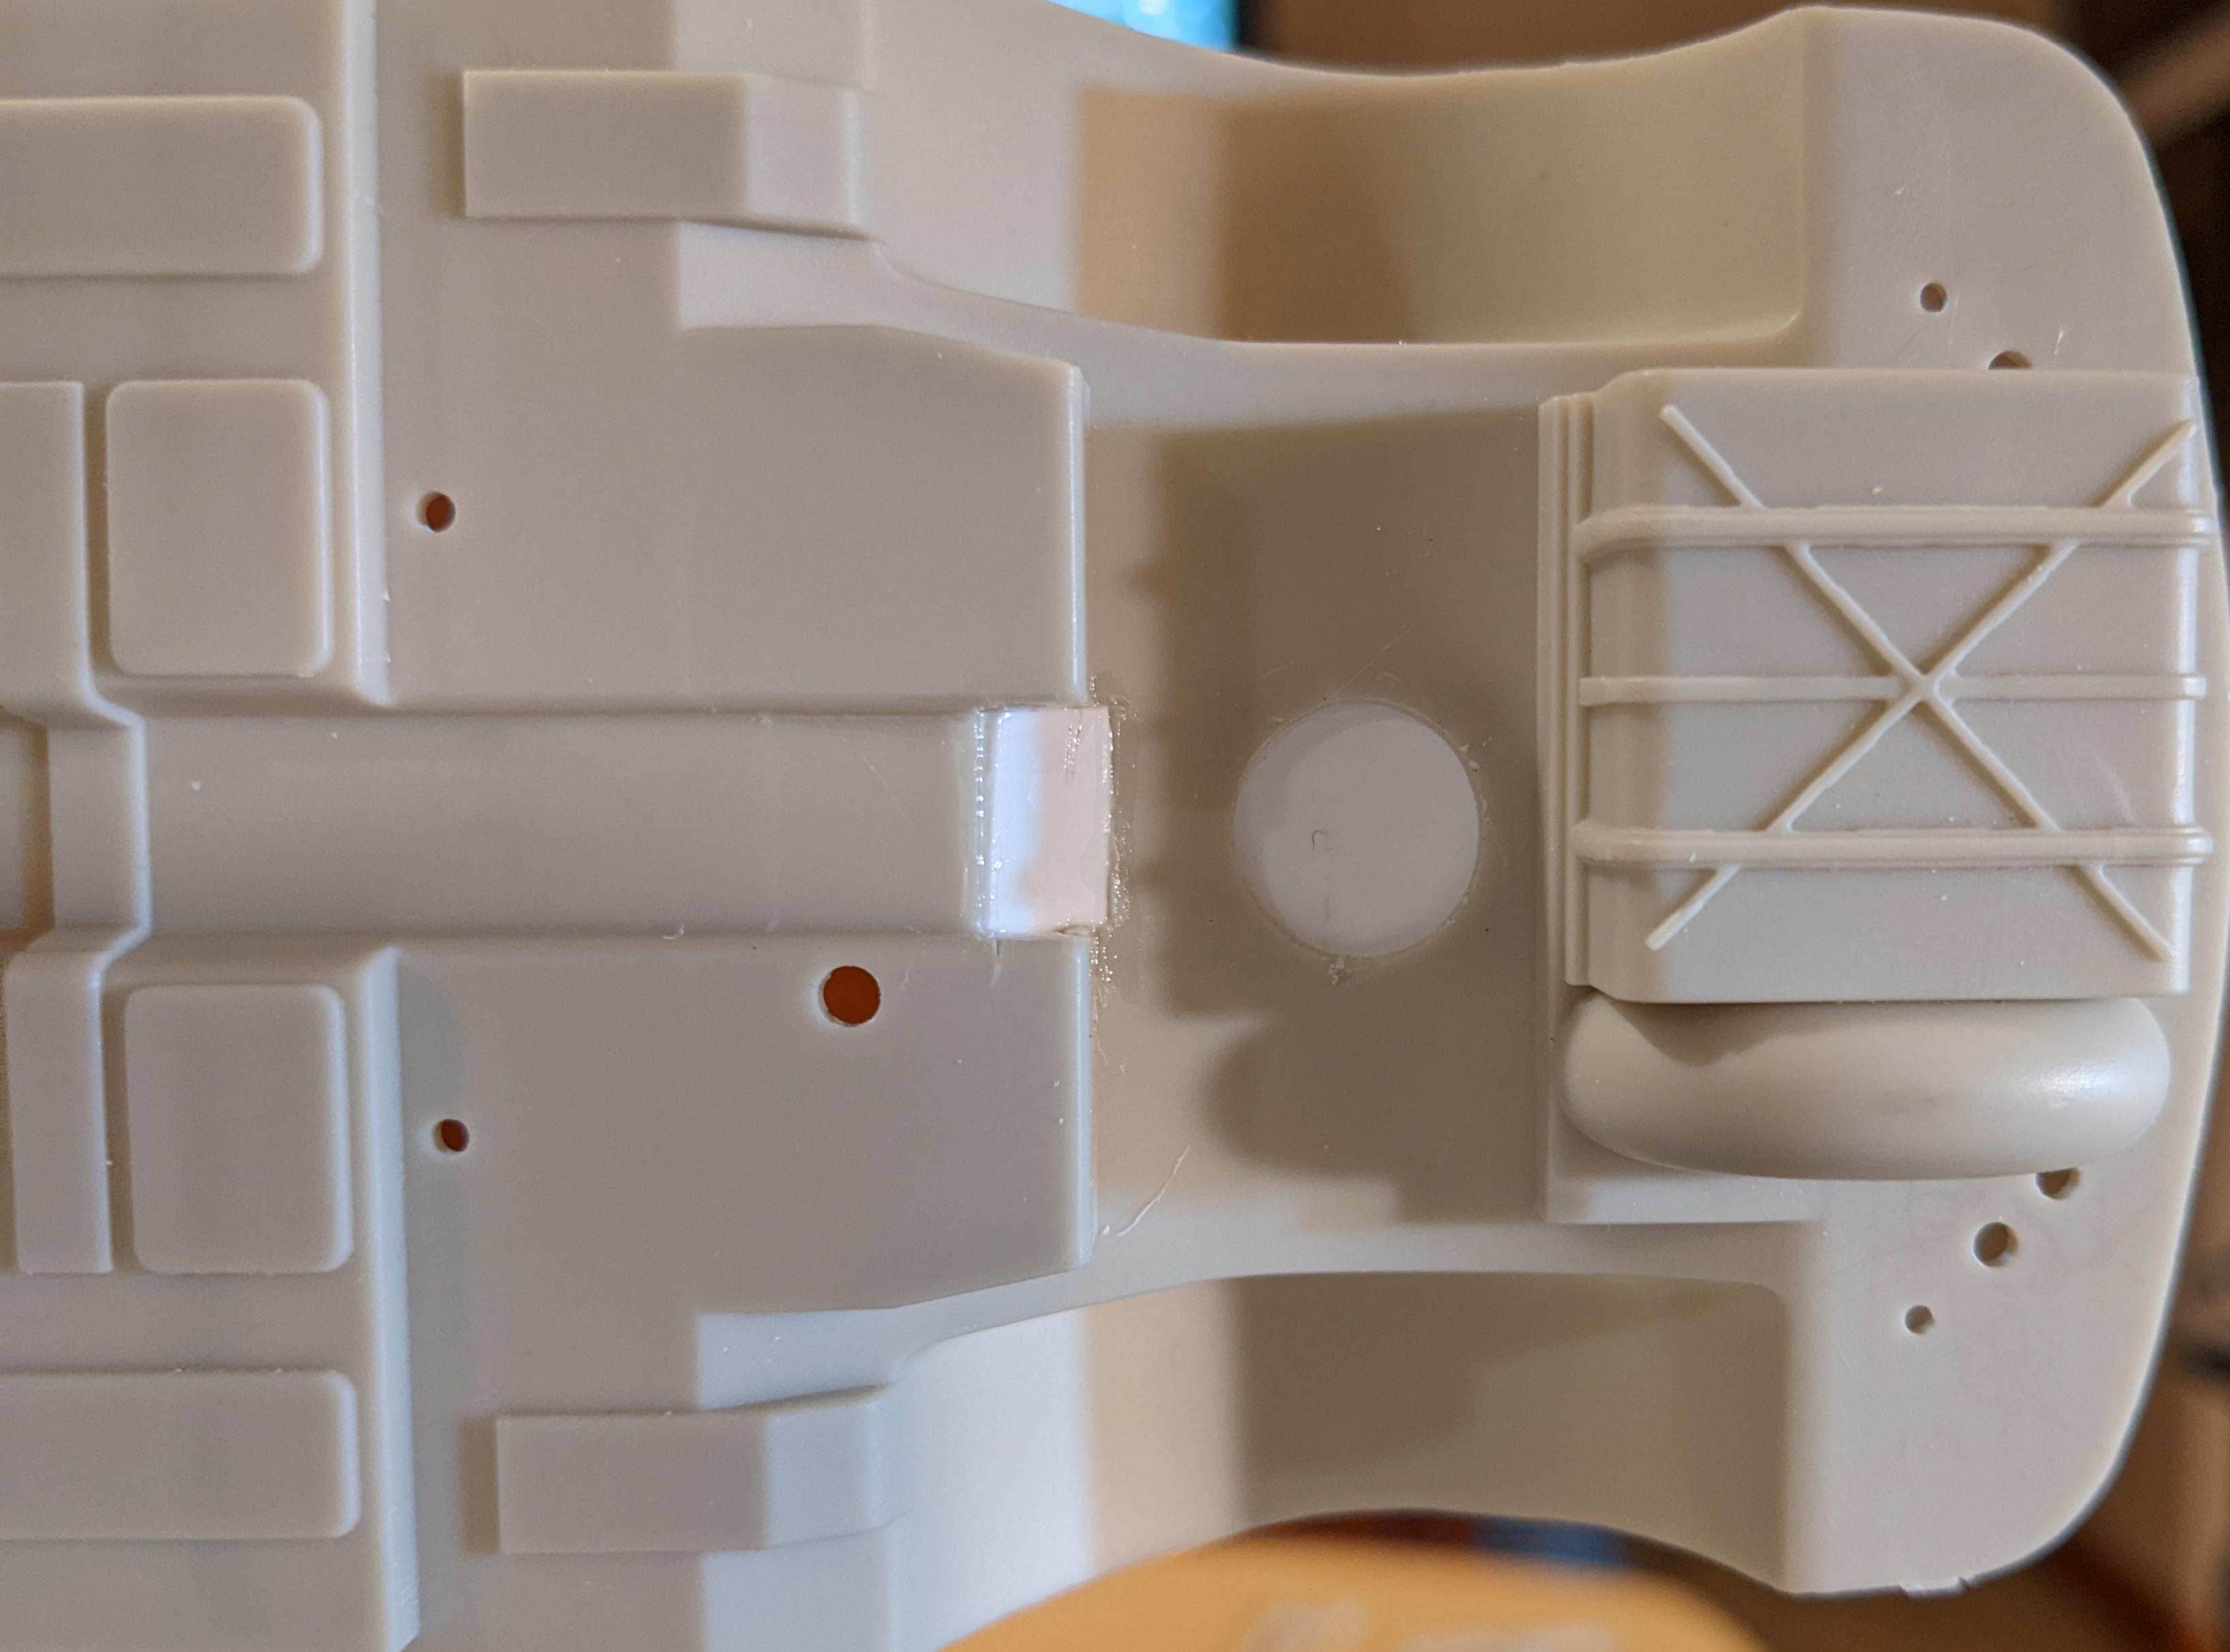
I've built models off & on since I was a kid, but now I'm retired, I can put effort into modifying them. Here is how I'm lowering a Moebius 1952 Hudson Hornet coupe. The technique should work on any of their kits that share this chassis. I'm lowering the rear 3mm & the front 5mm, to also achieve some rake. I plan to use the chrome steelies from the convertible kit, which I also have. I'll show the rear, which is as far as I've gotten, then add the front later. Hope this post is useful to folks & comments are welcome. First, I notched 3mm from the frame rails to raise the rear axle relative to the body. Then, I cut out a portion of the floor to clear the driveshaft, and another to provide clearance for the differential. I added styrene sheet to fill in the holes. Finally, I added 3mm tall blocks to the leaf springs, made from square styrene tube. This mod provides an eventual connection to the axle, & allows the shocks ti remain unmodified. More to follow...