Andy Oldenburg
-
Posts
345 -
Joined
-
Last visited
Content Type
Profiles
Forums
Events
Gallery
Everything posted by Andy Oldenburg
-

`55 Ford F 100
Andy Oldenburg replied to Andy Oldenburg's topic in Model Trucks: Pickups, Vans, SUVs, Light Commercial
Thanks for your response! Ummmm, I thought pickups were more like,... cars?? I haven´t been in the trucks forum, but thought in there would be the BIG stuff, like TRUCKS. -
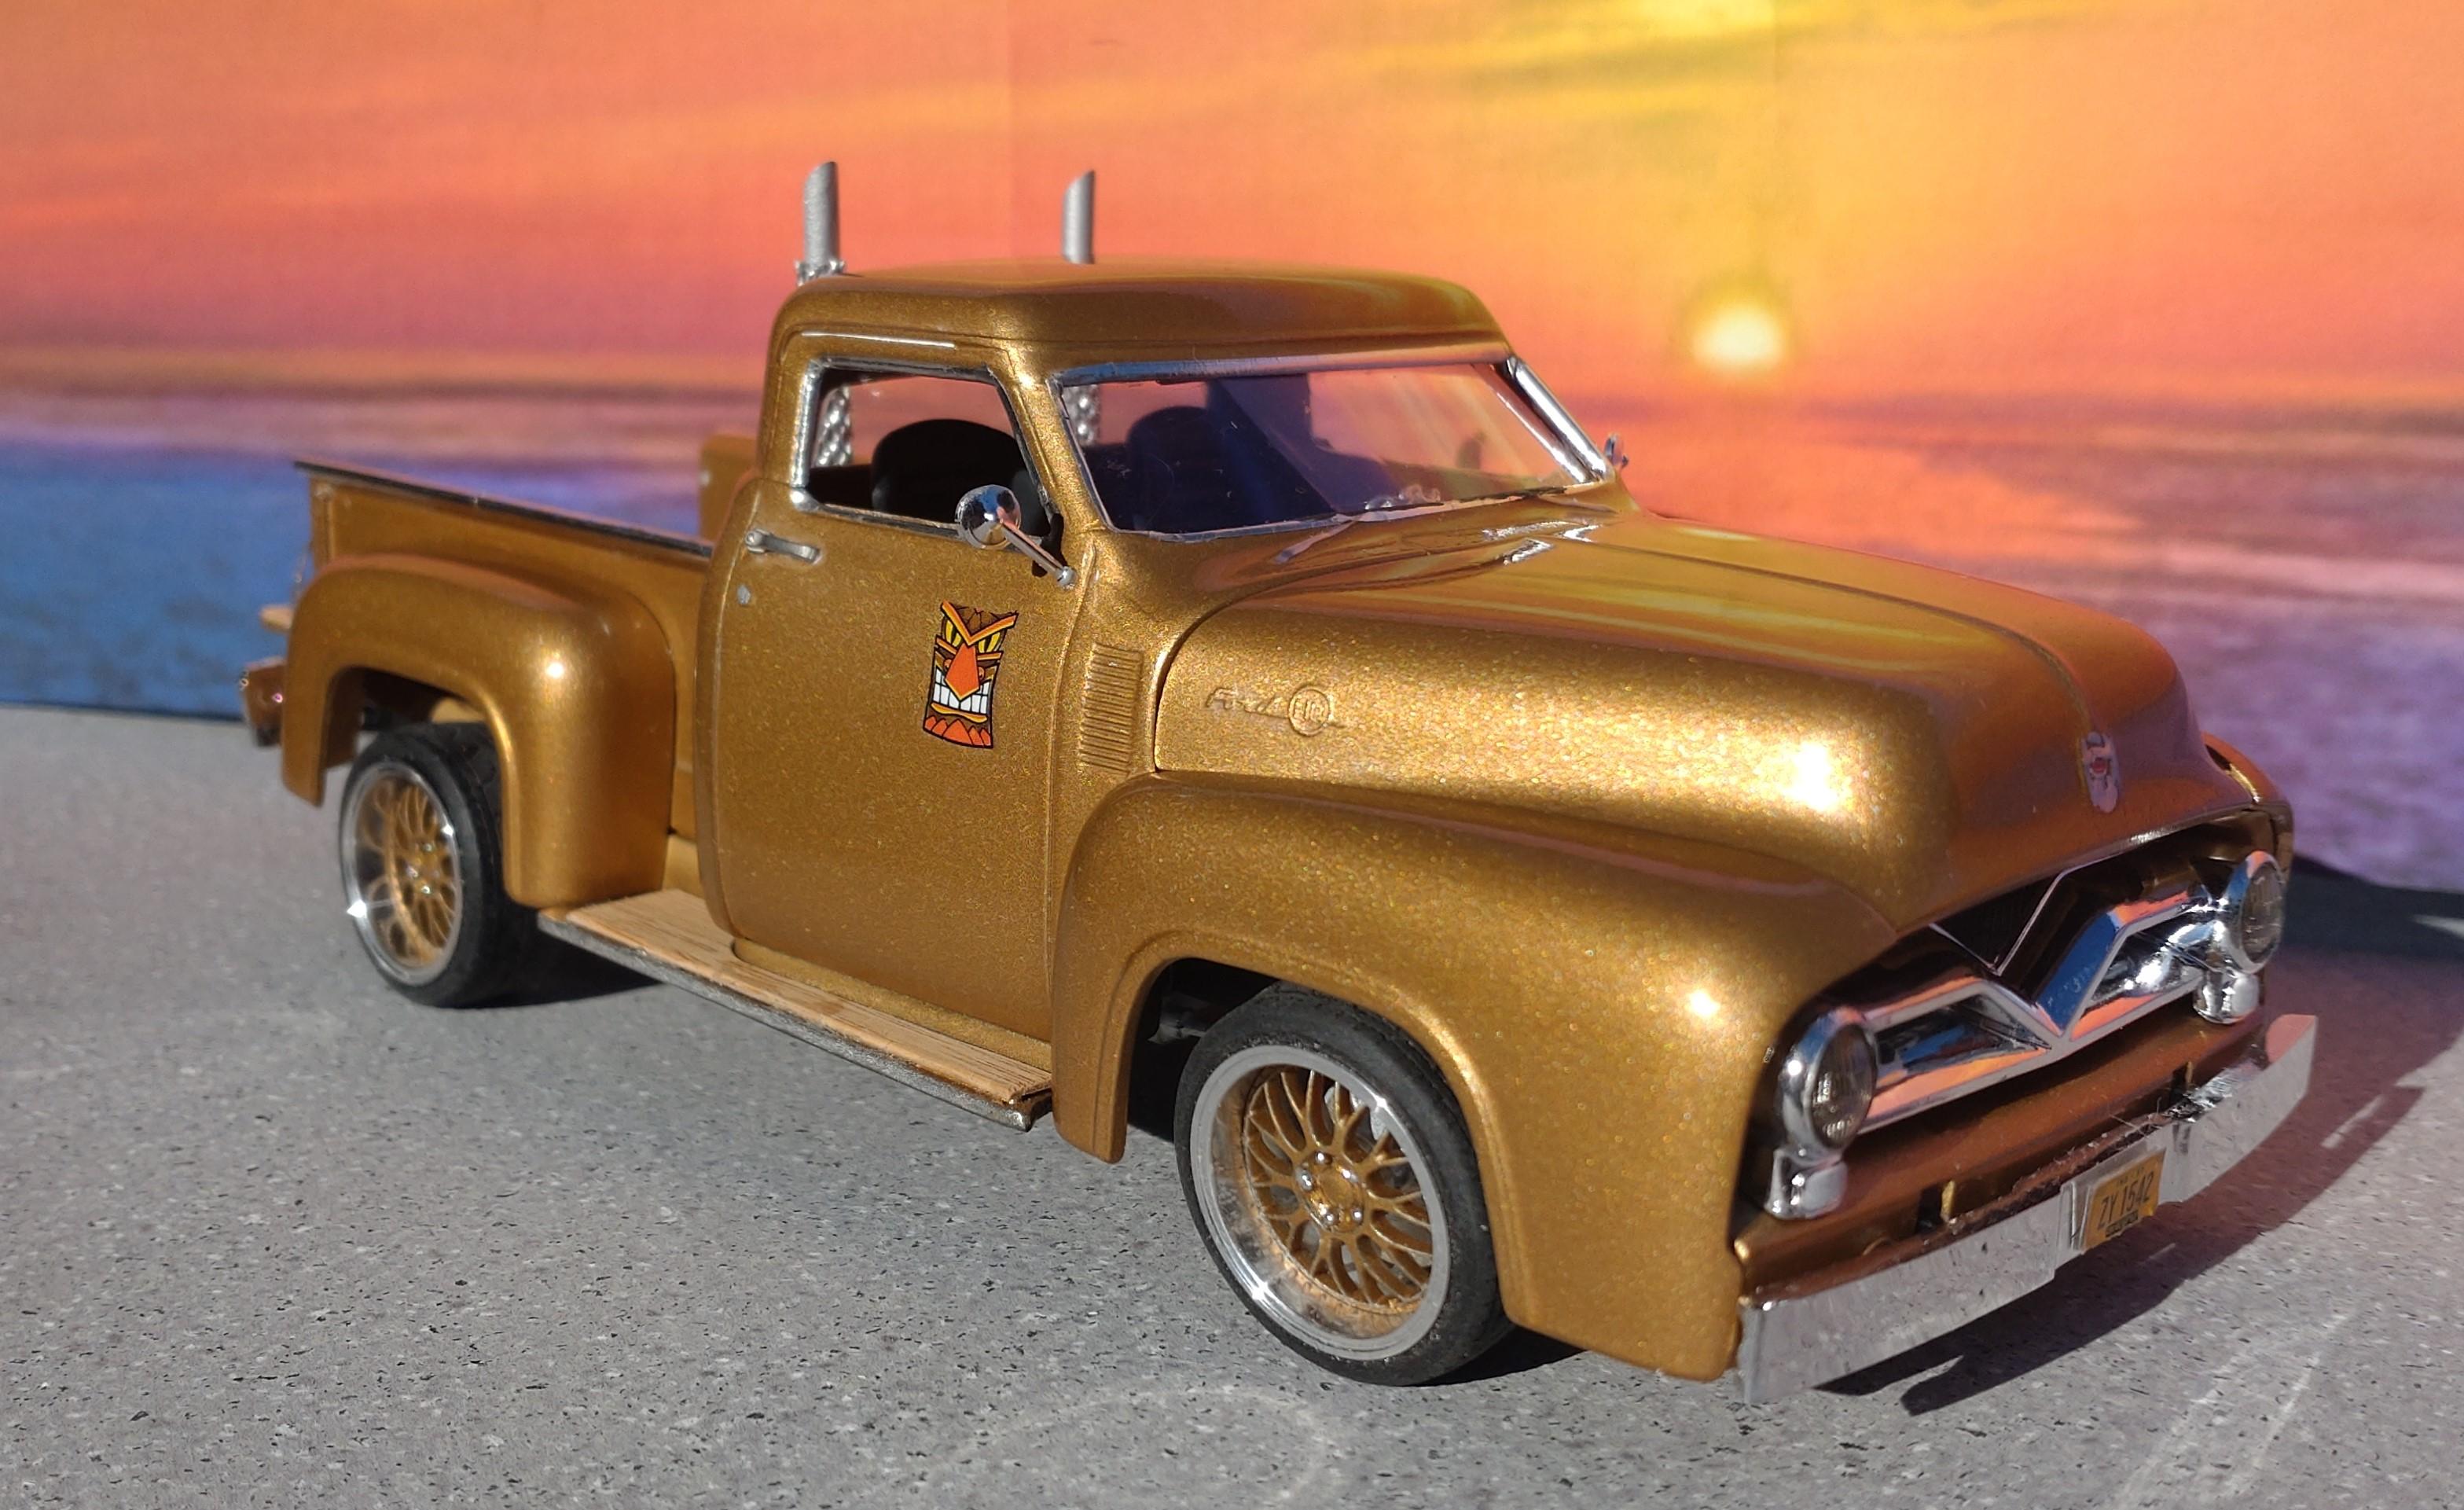
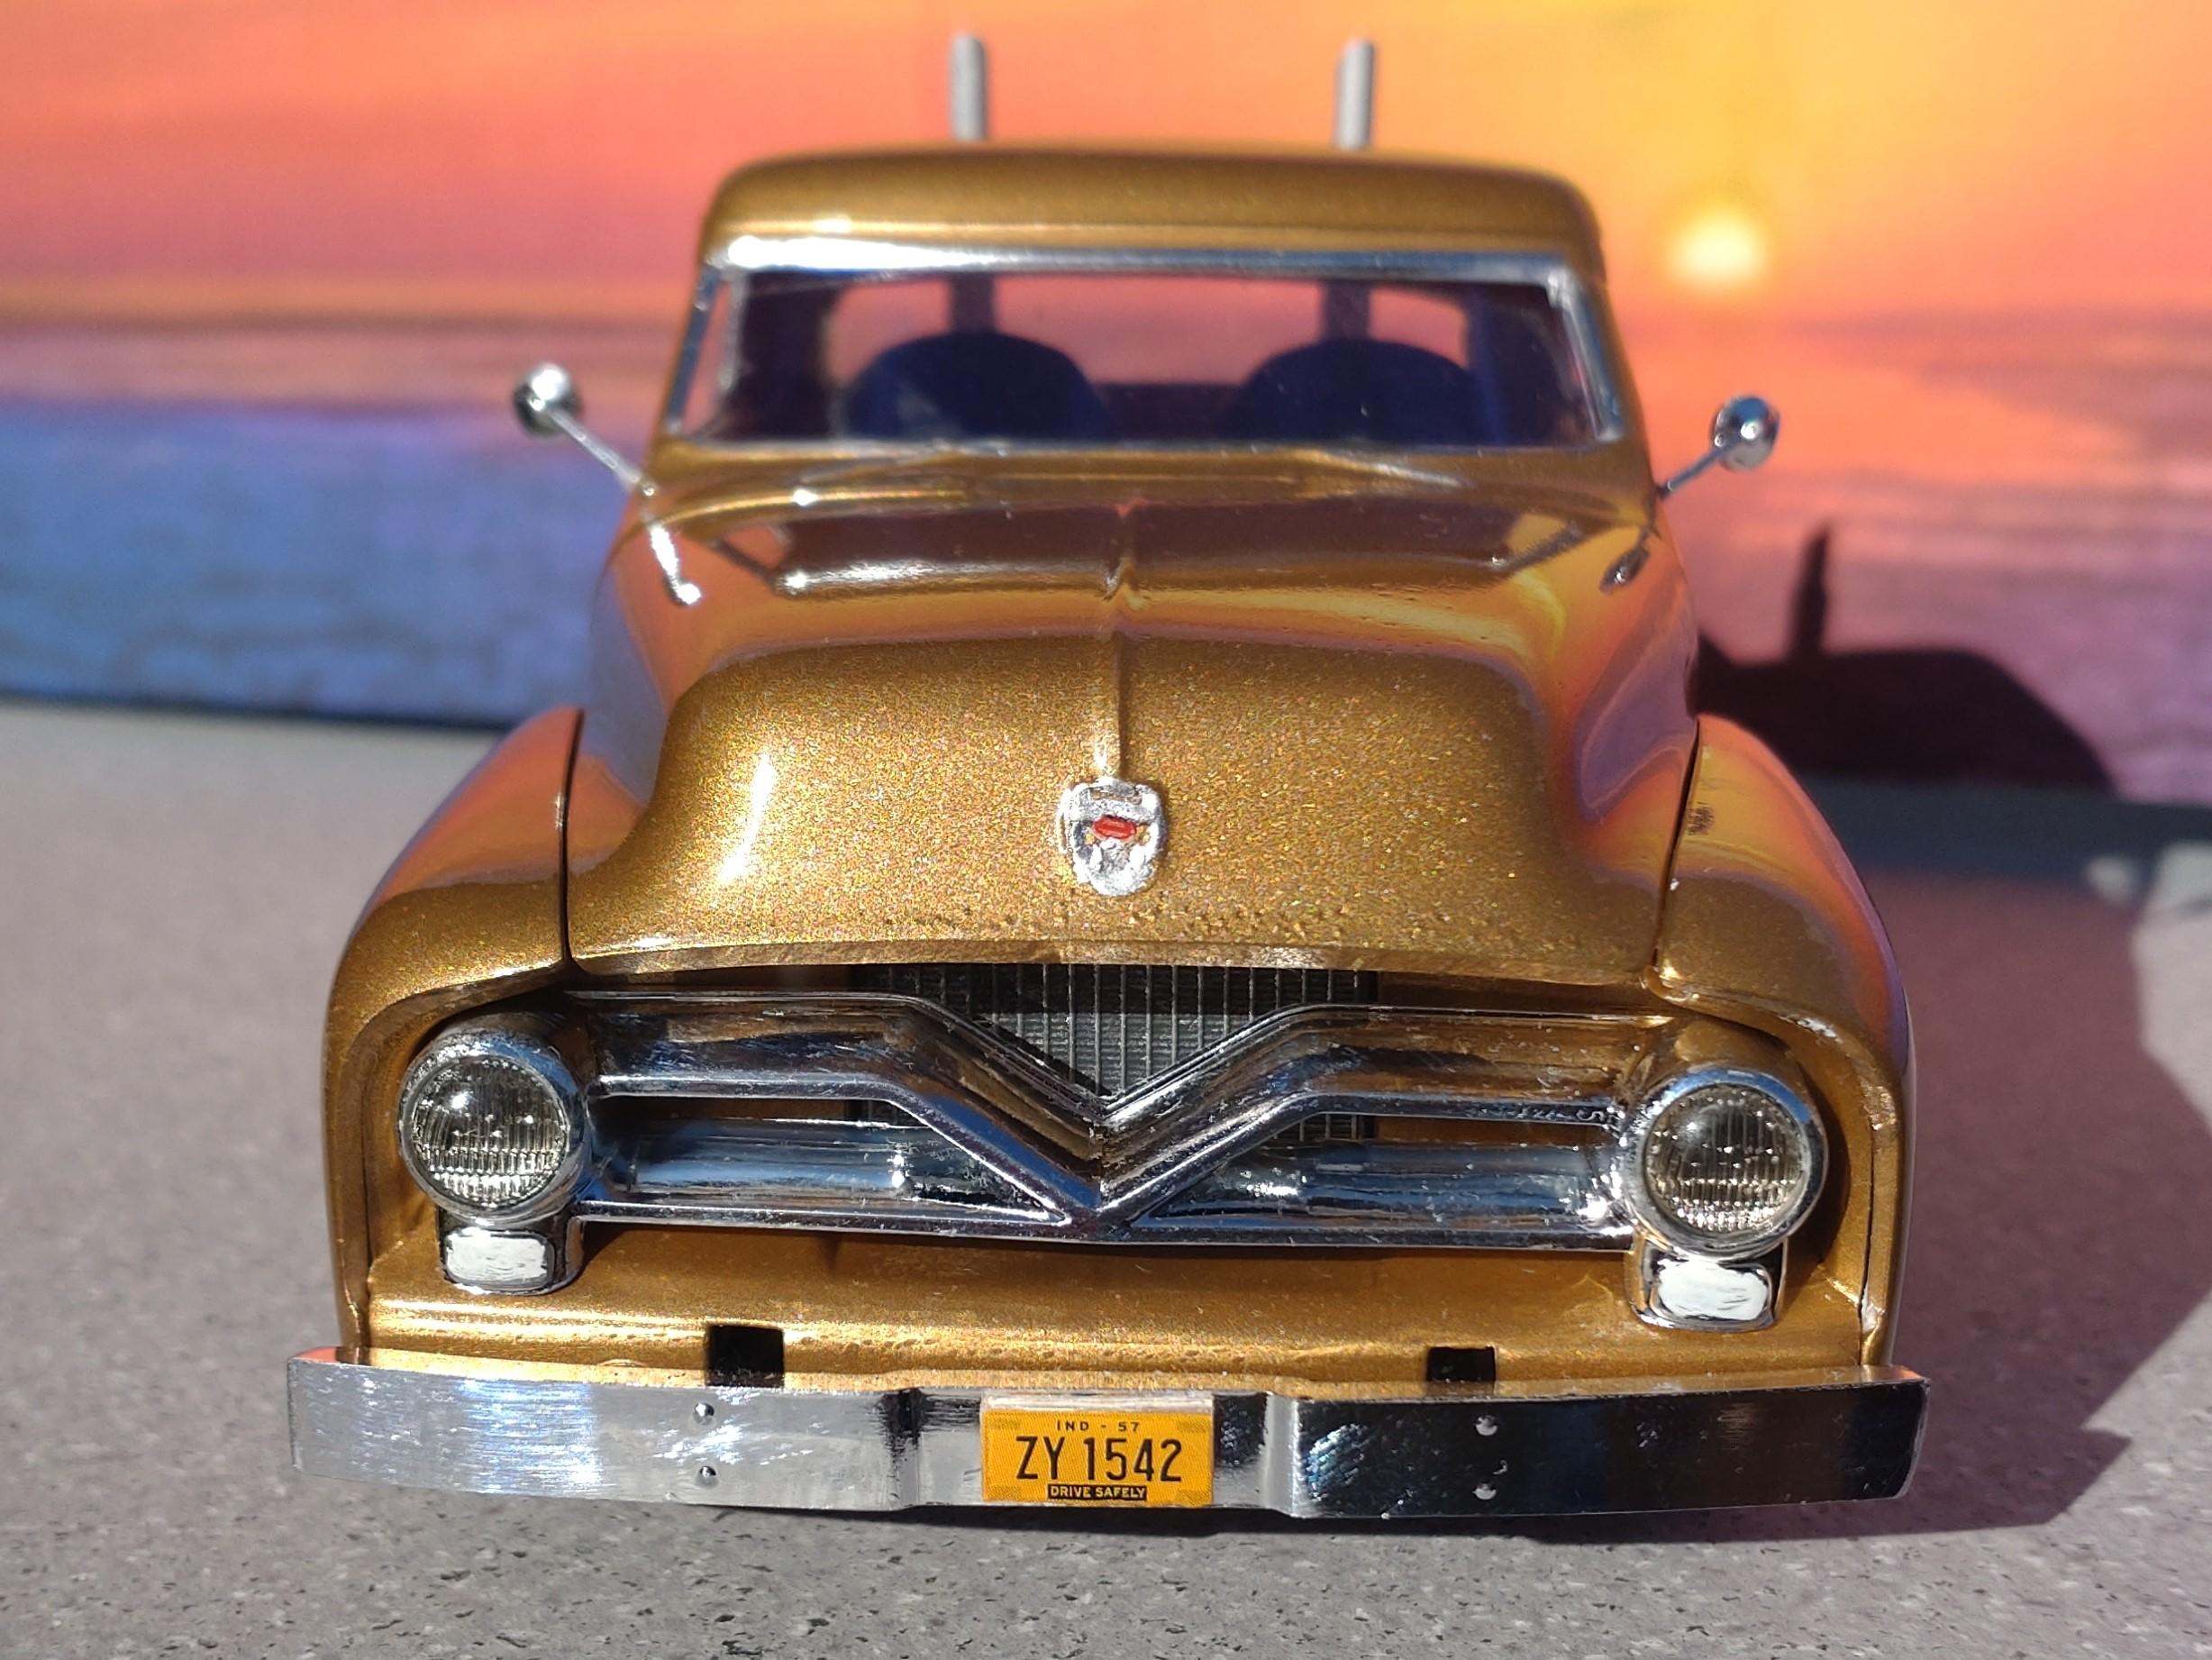
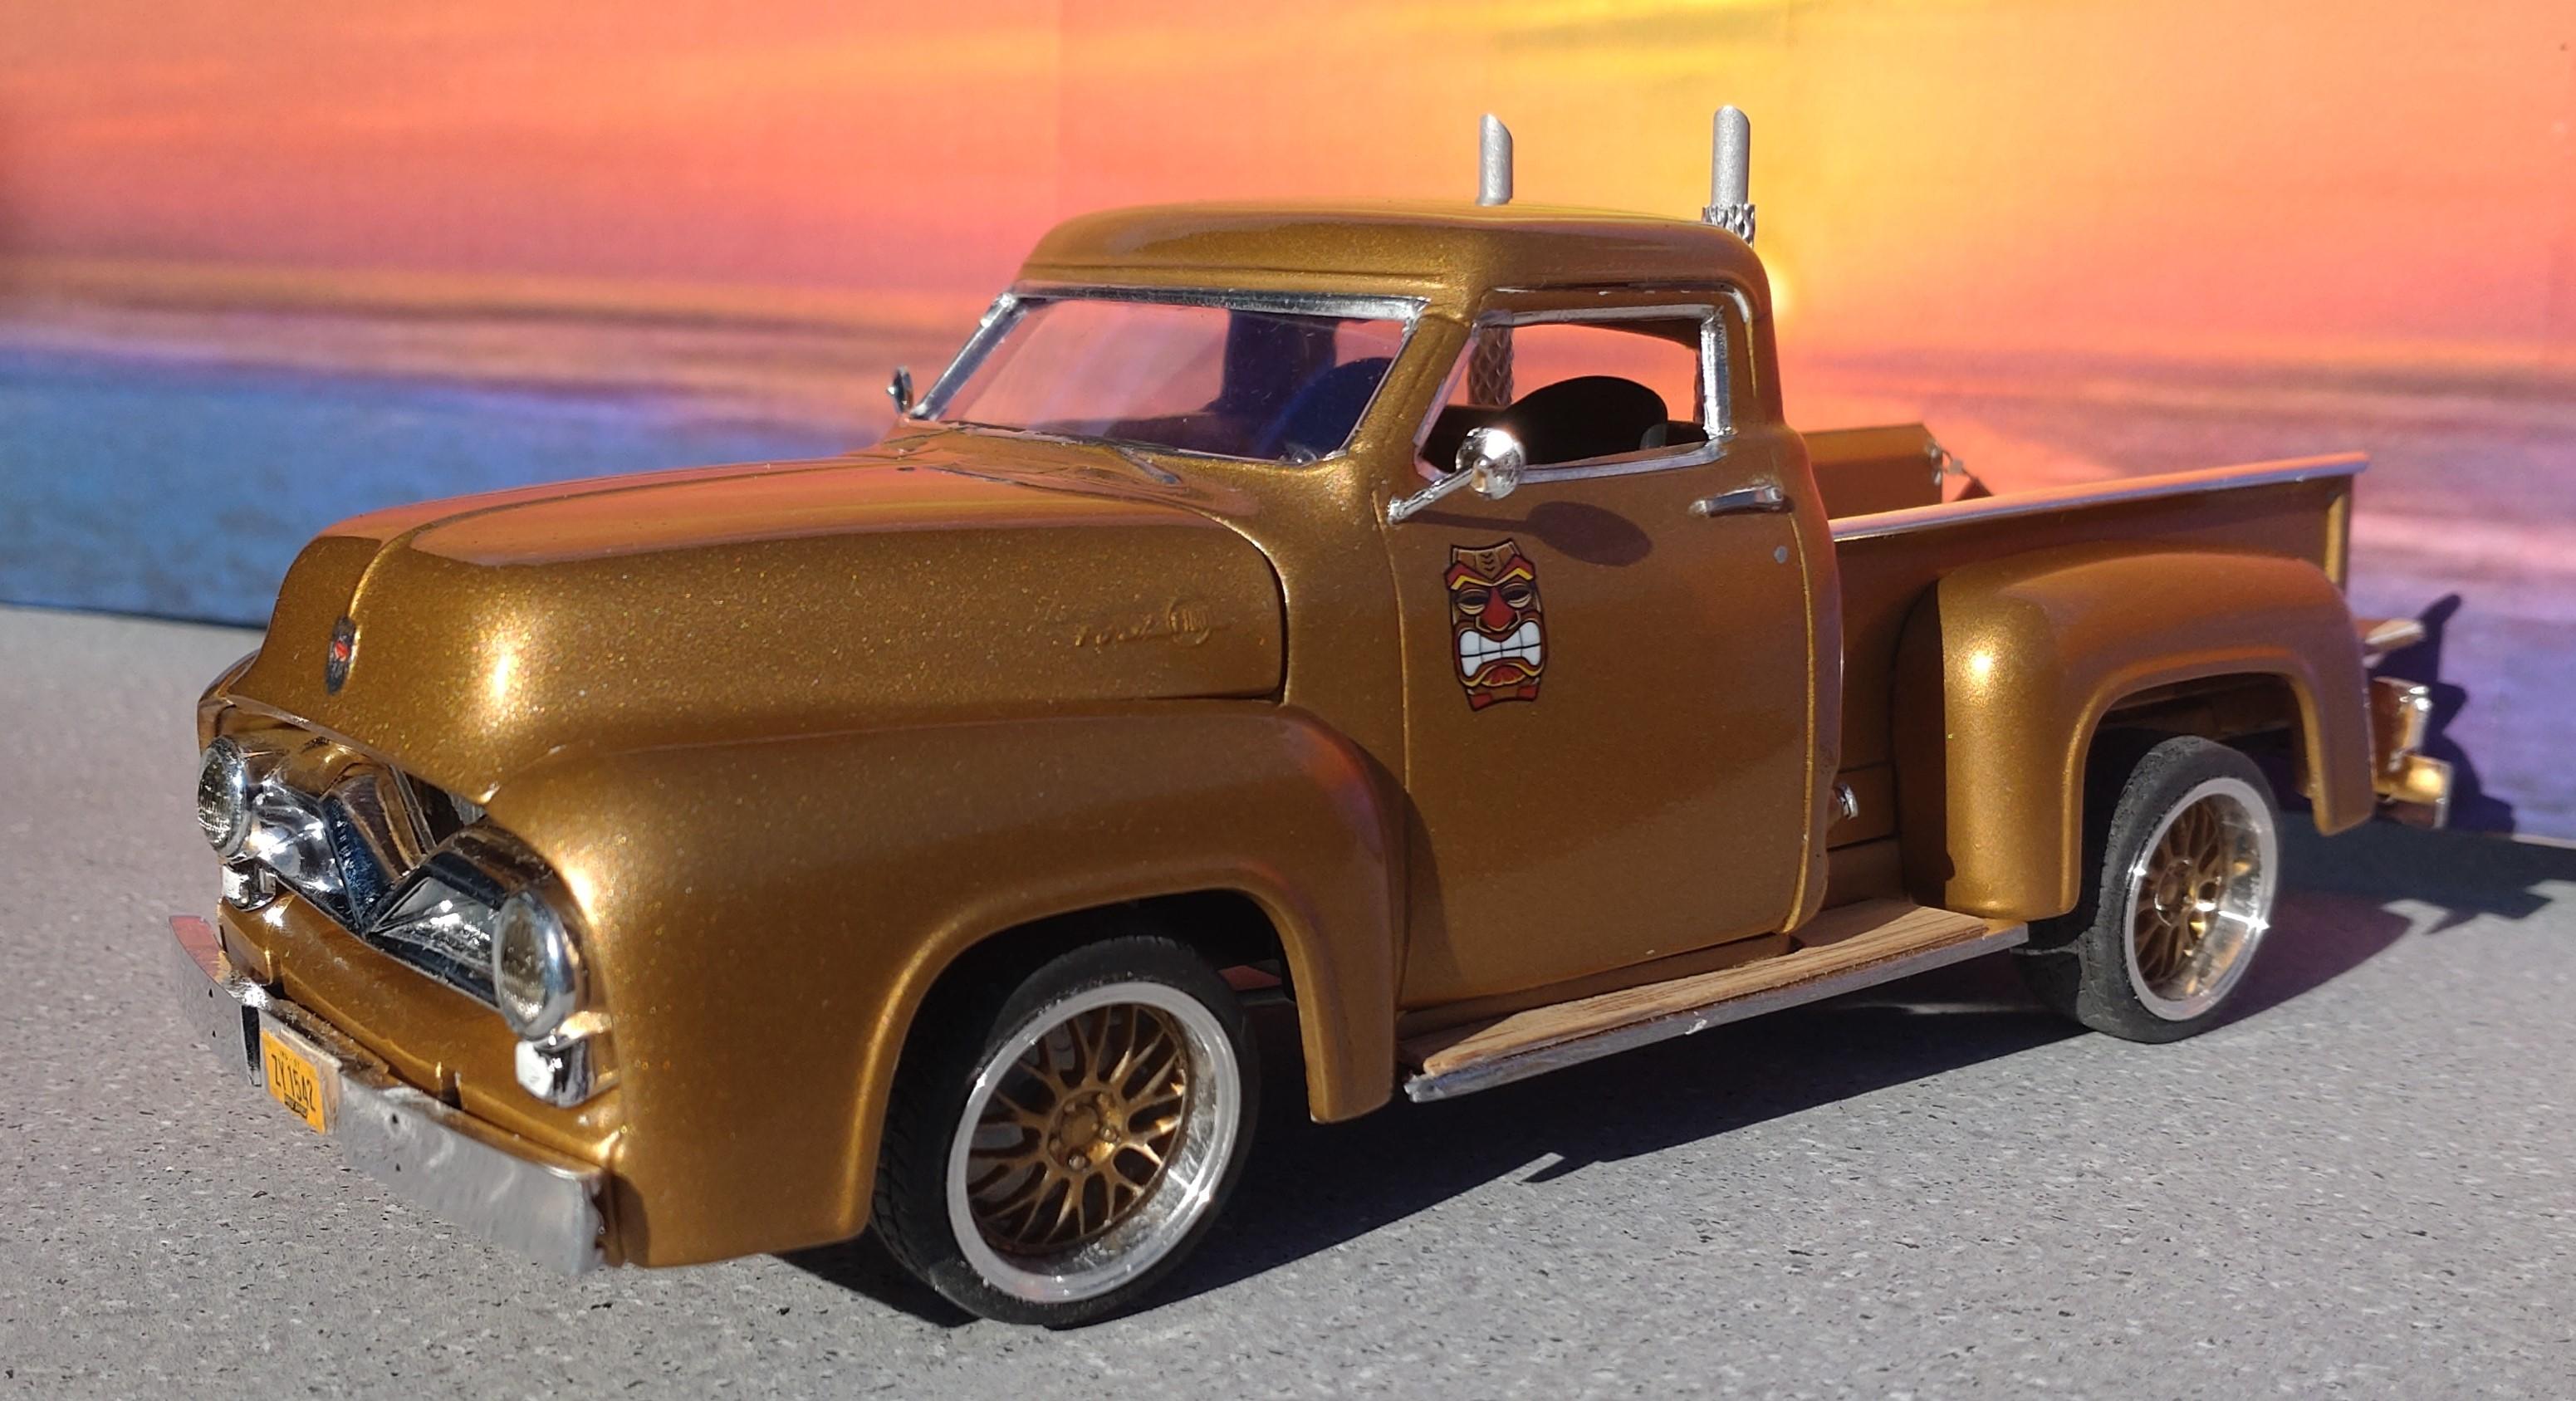
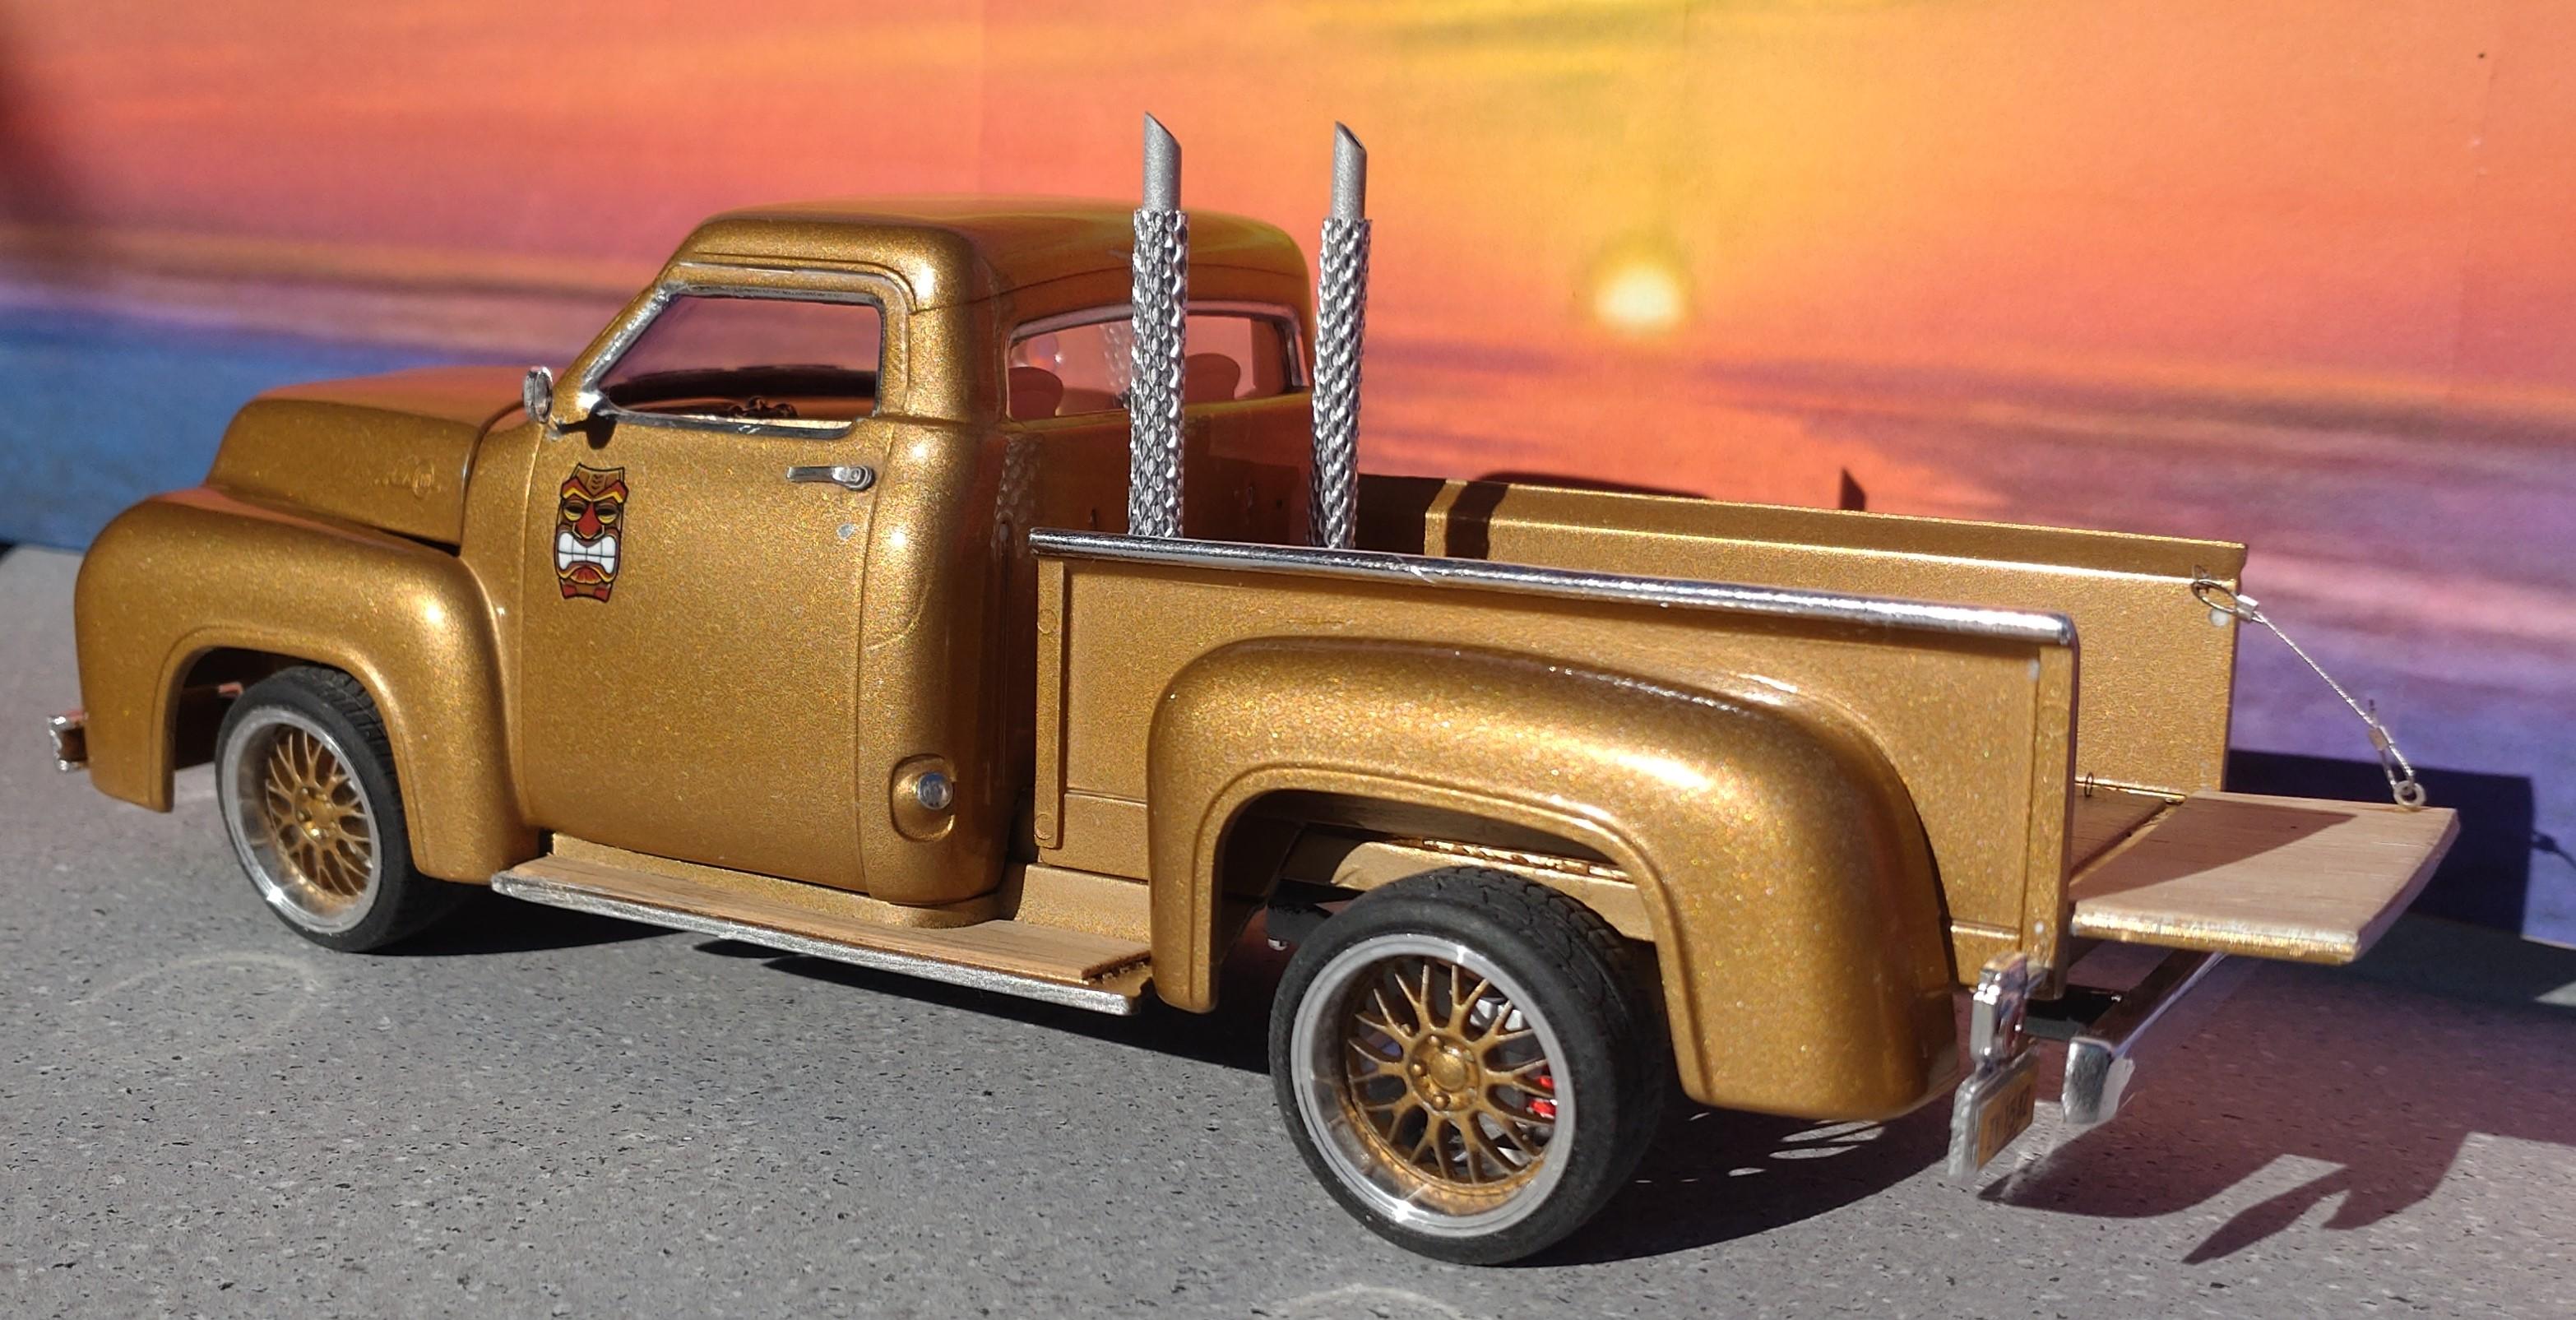
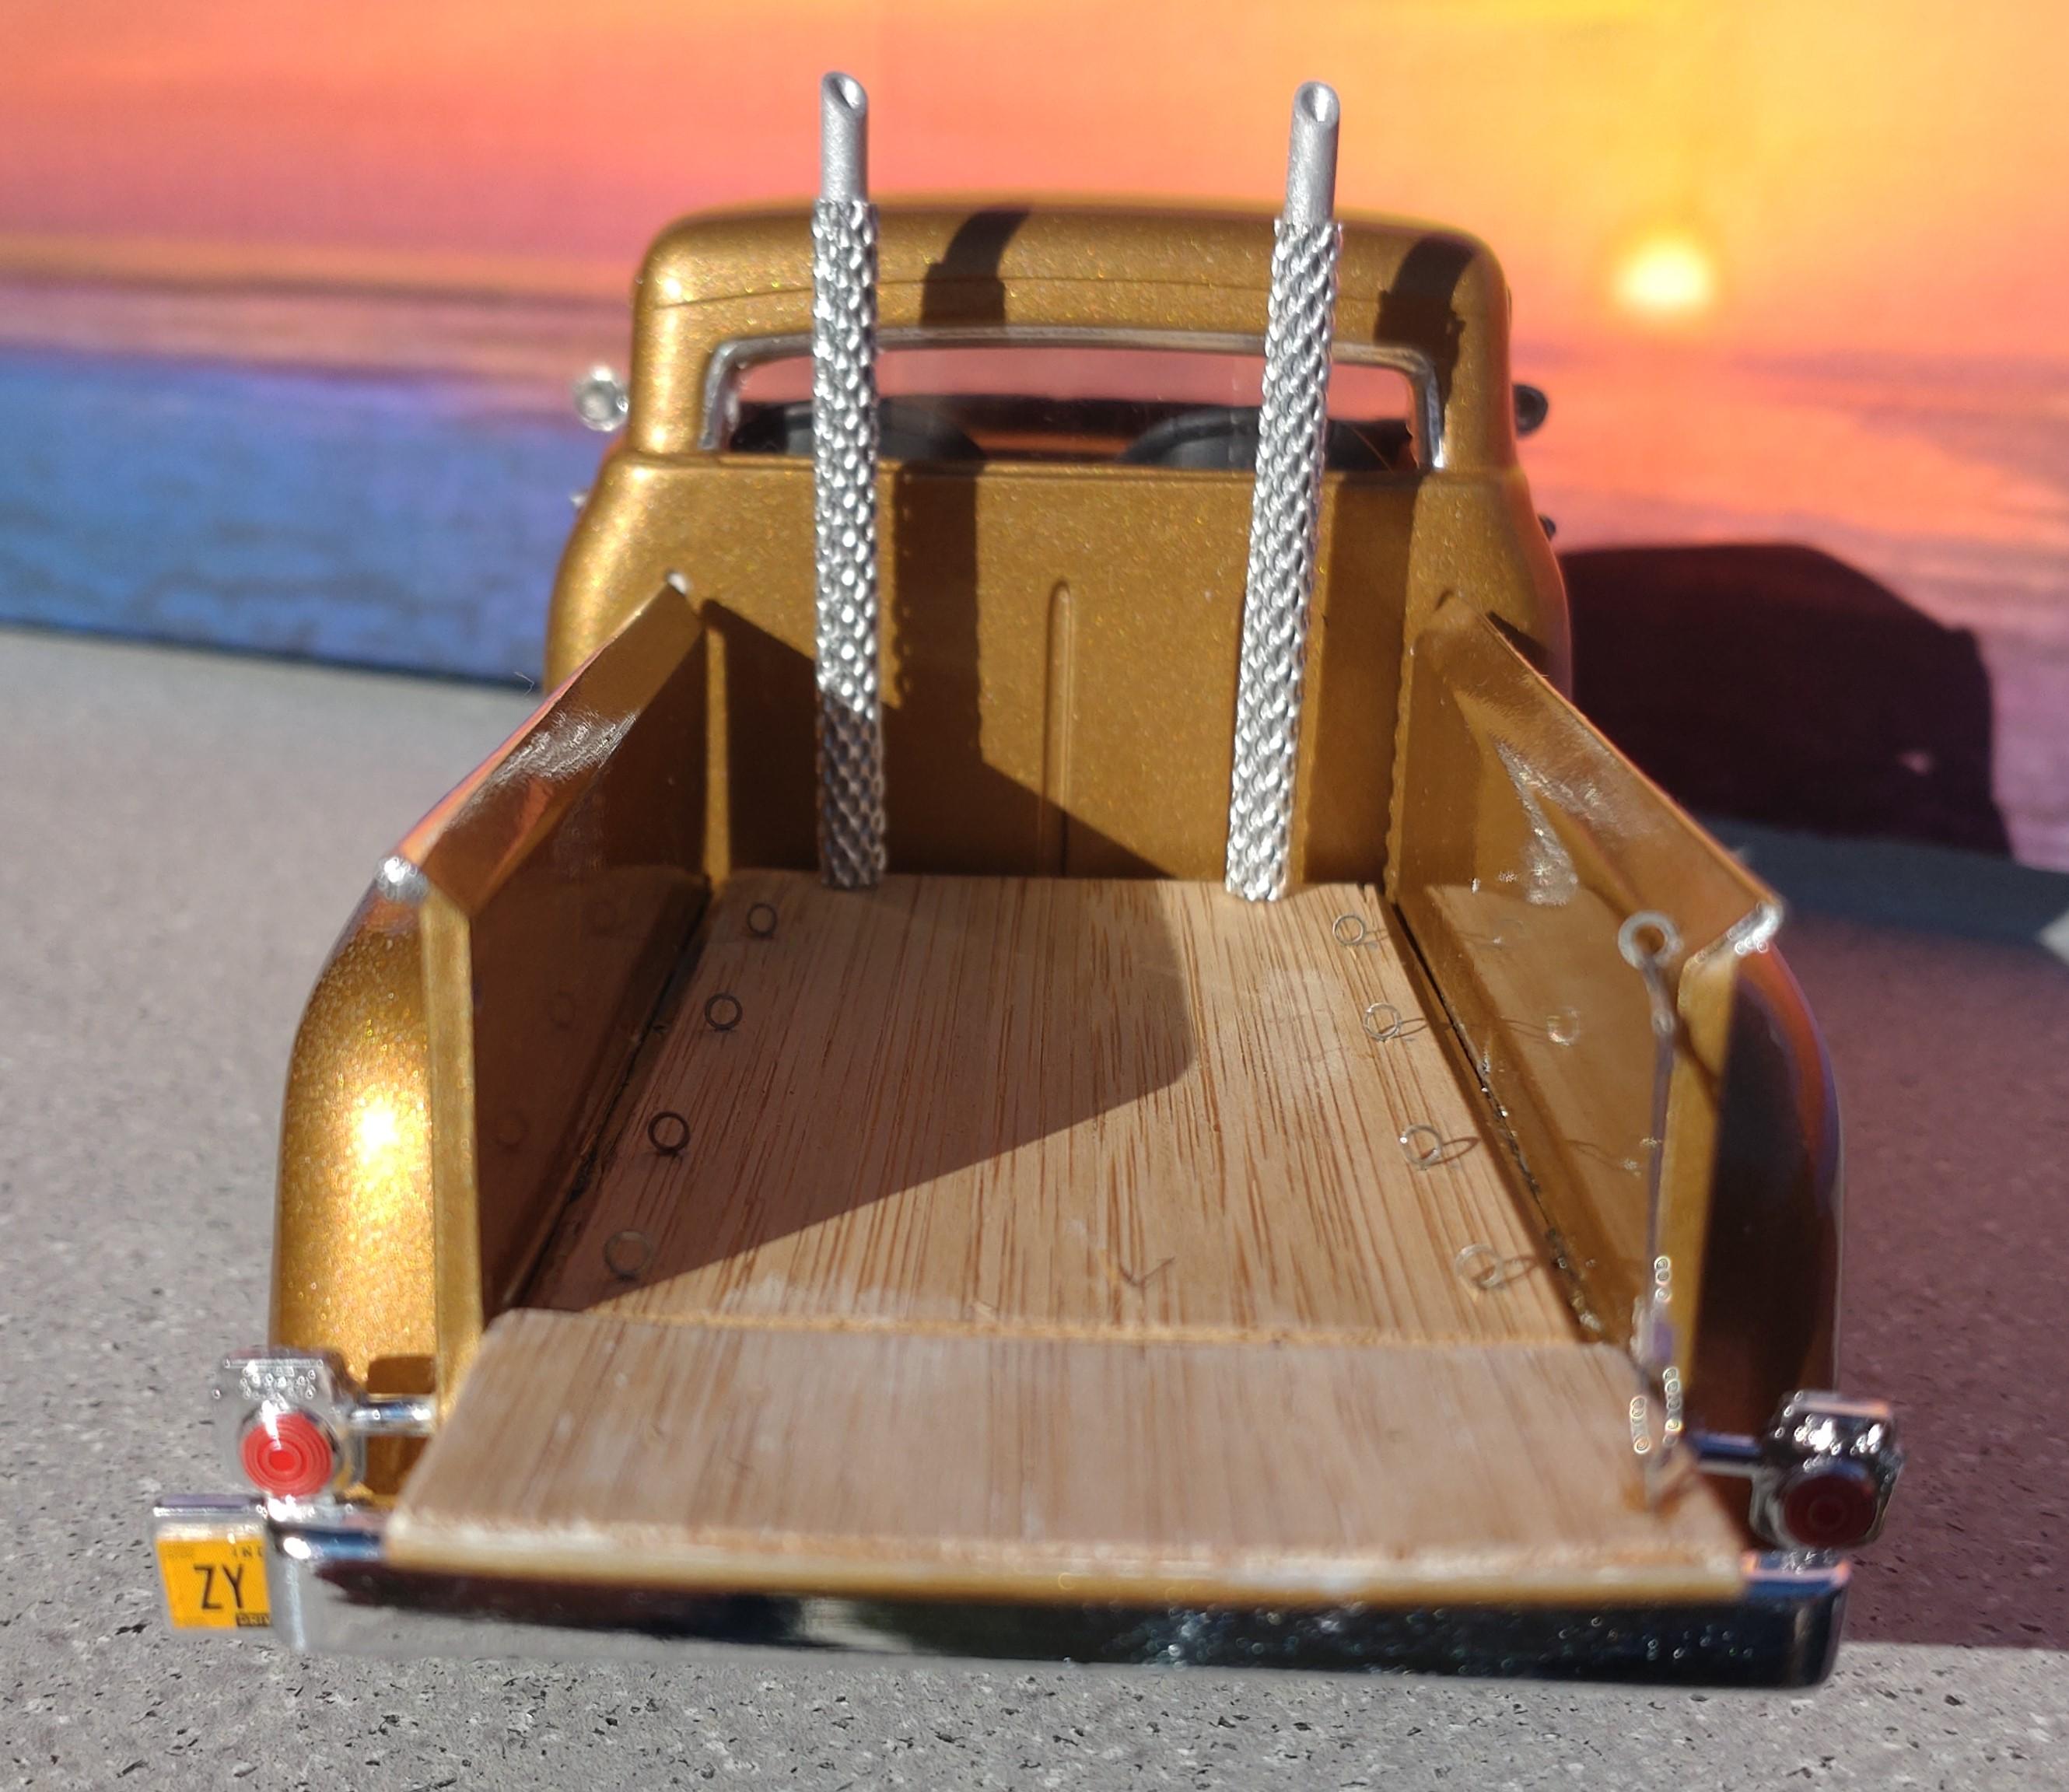
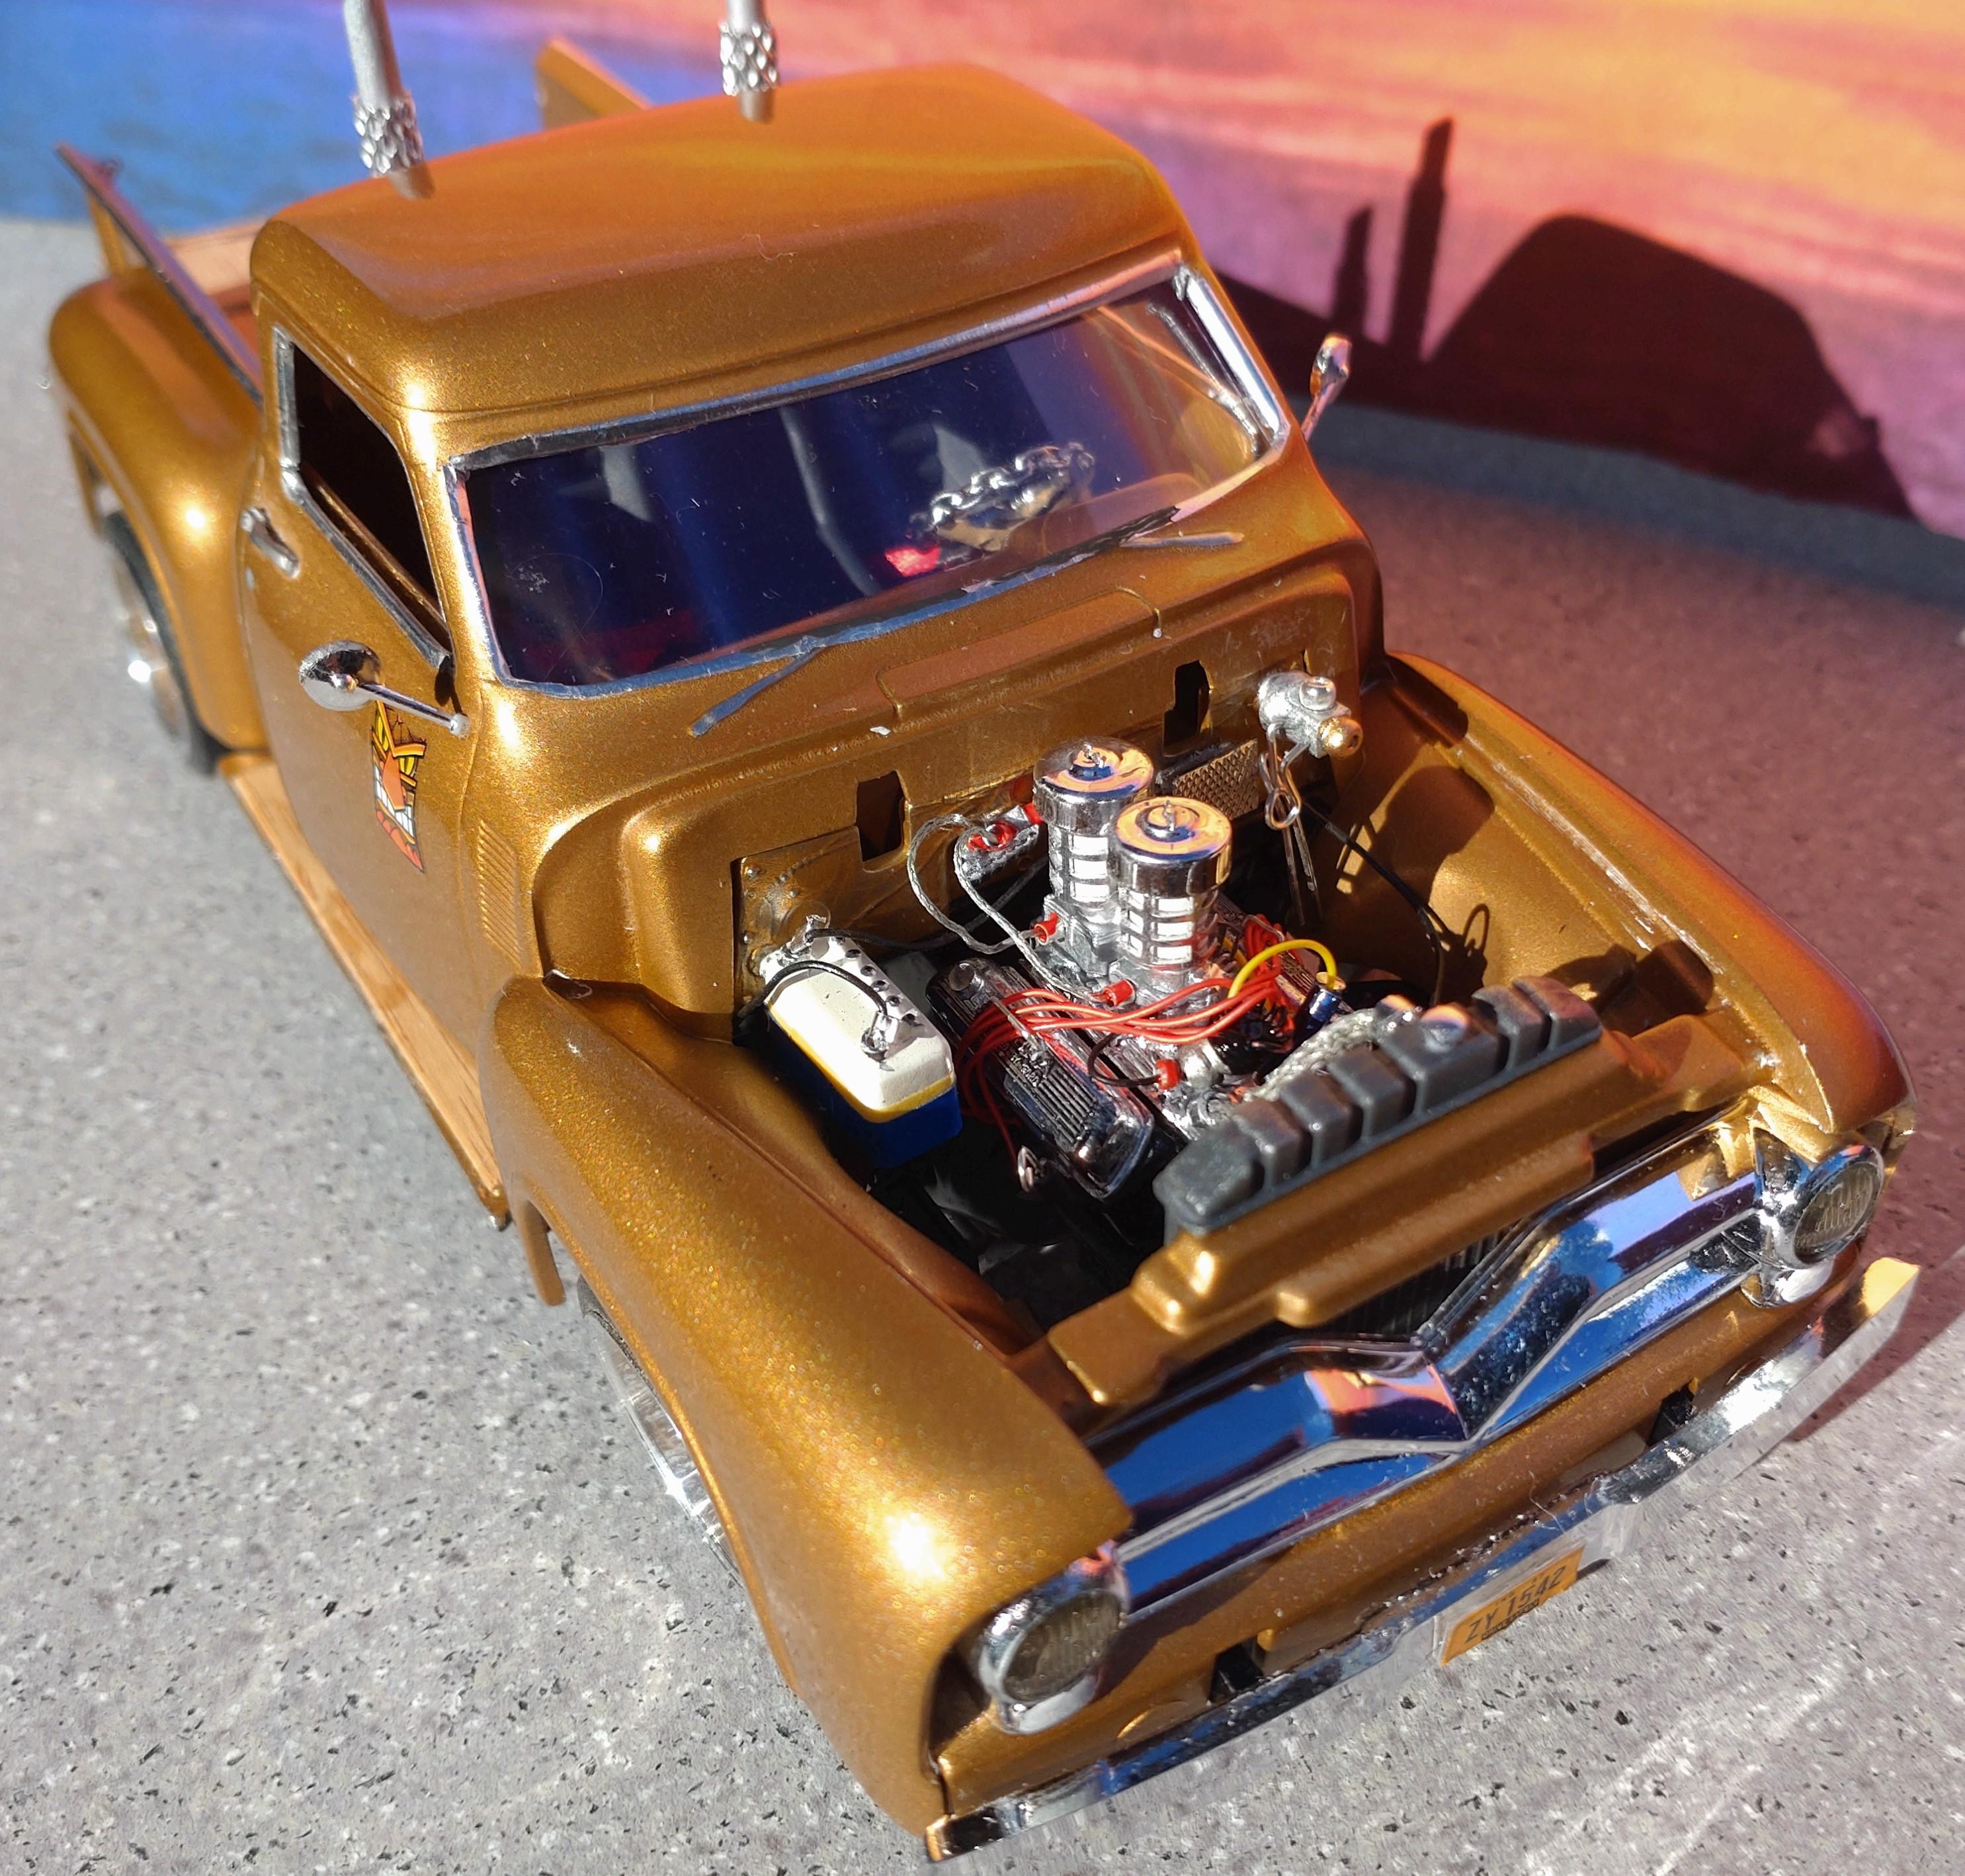
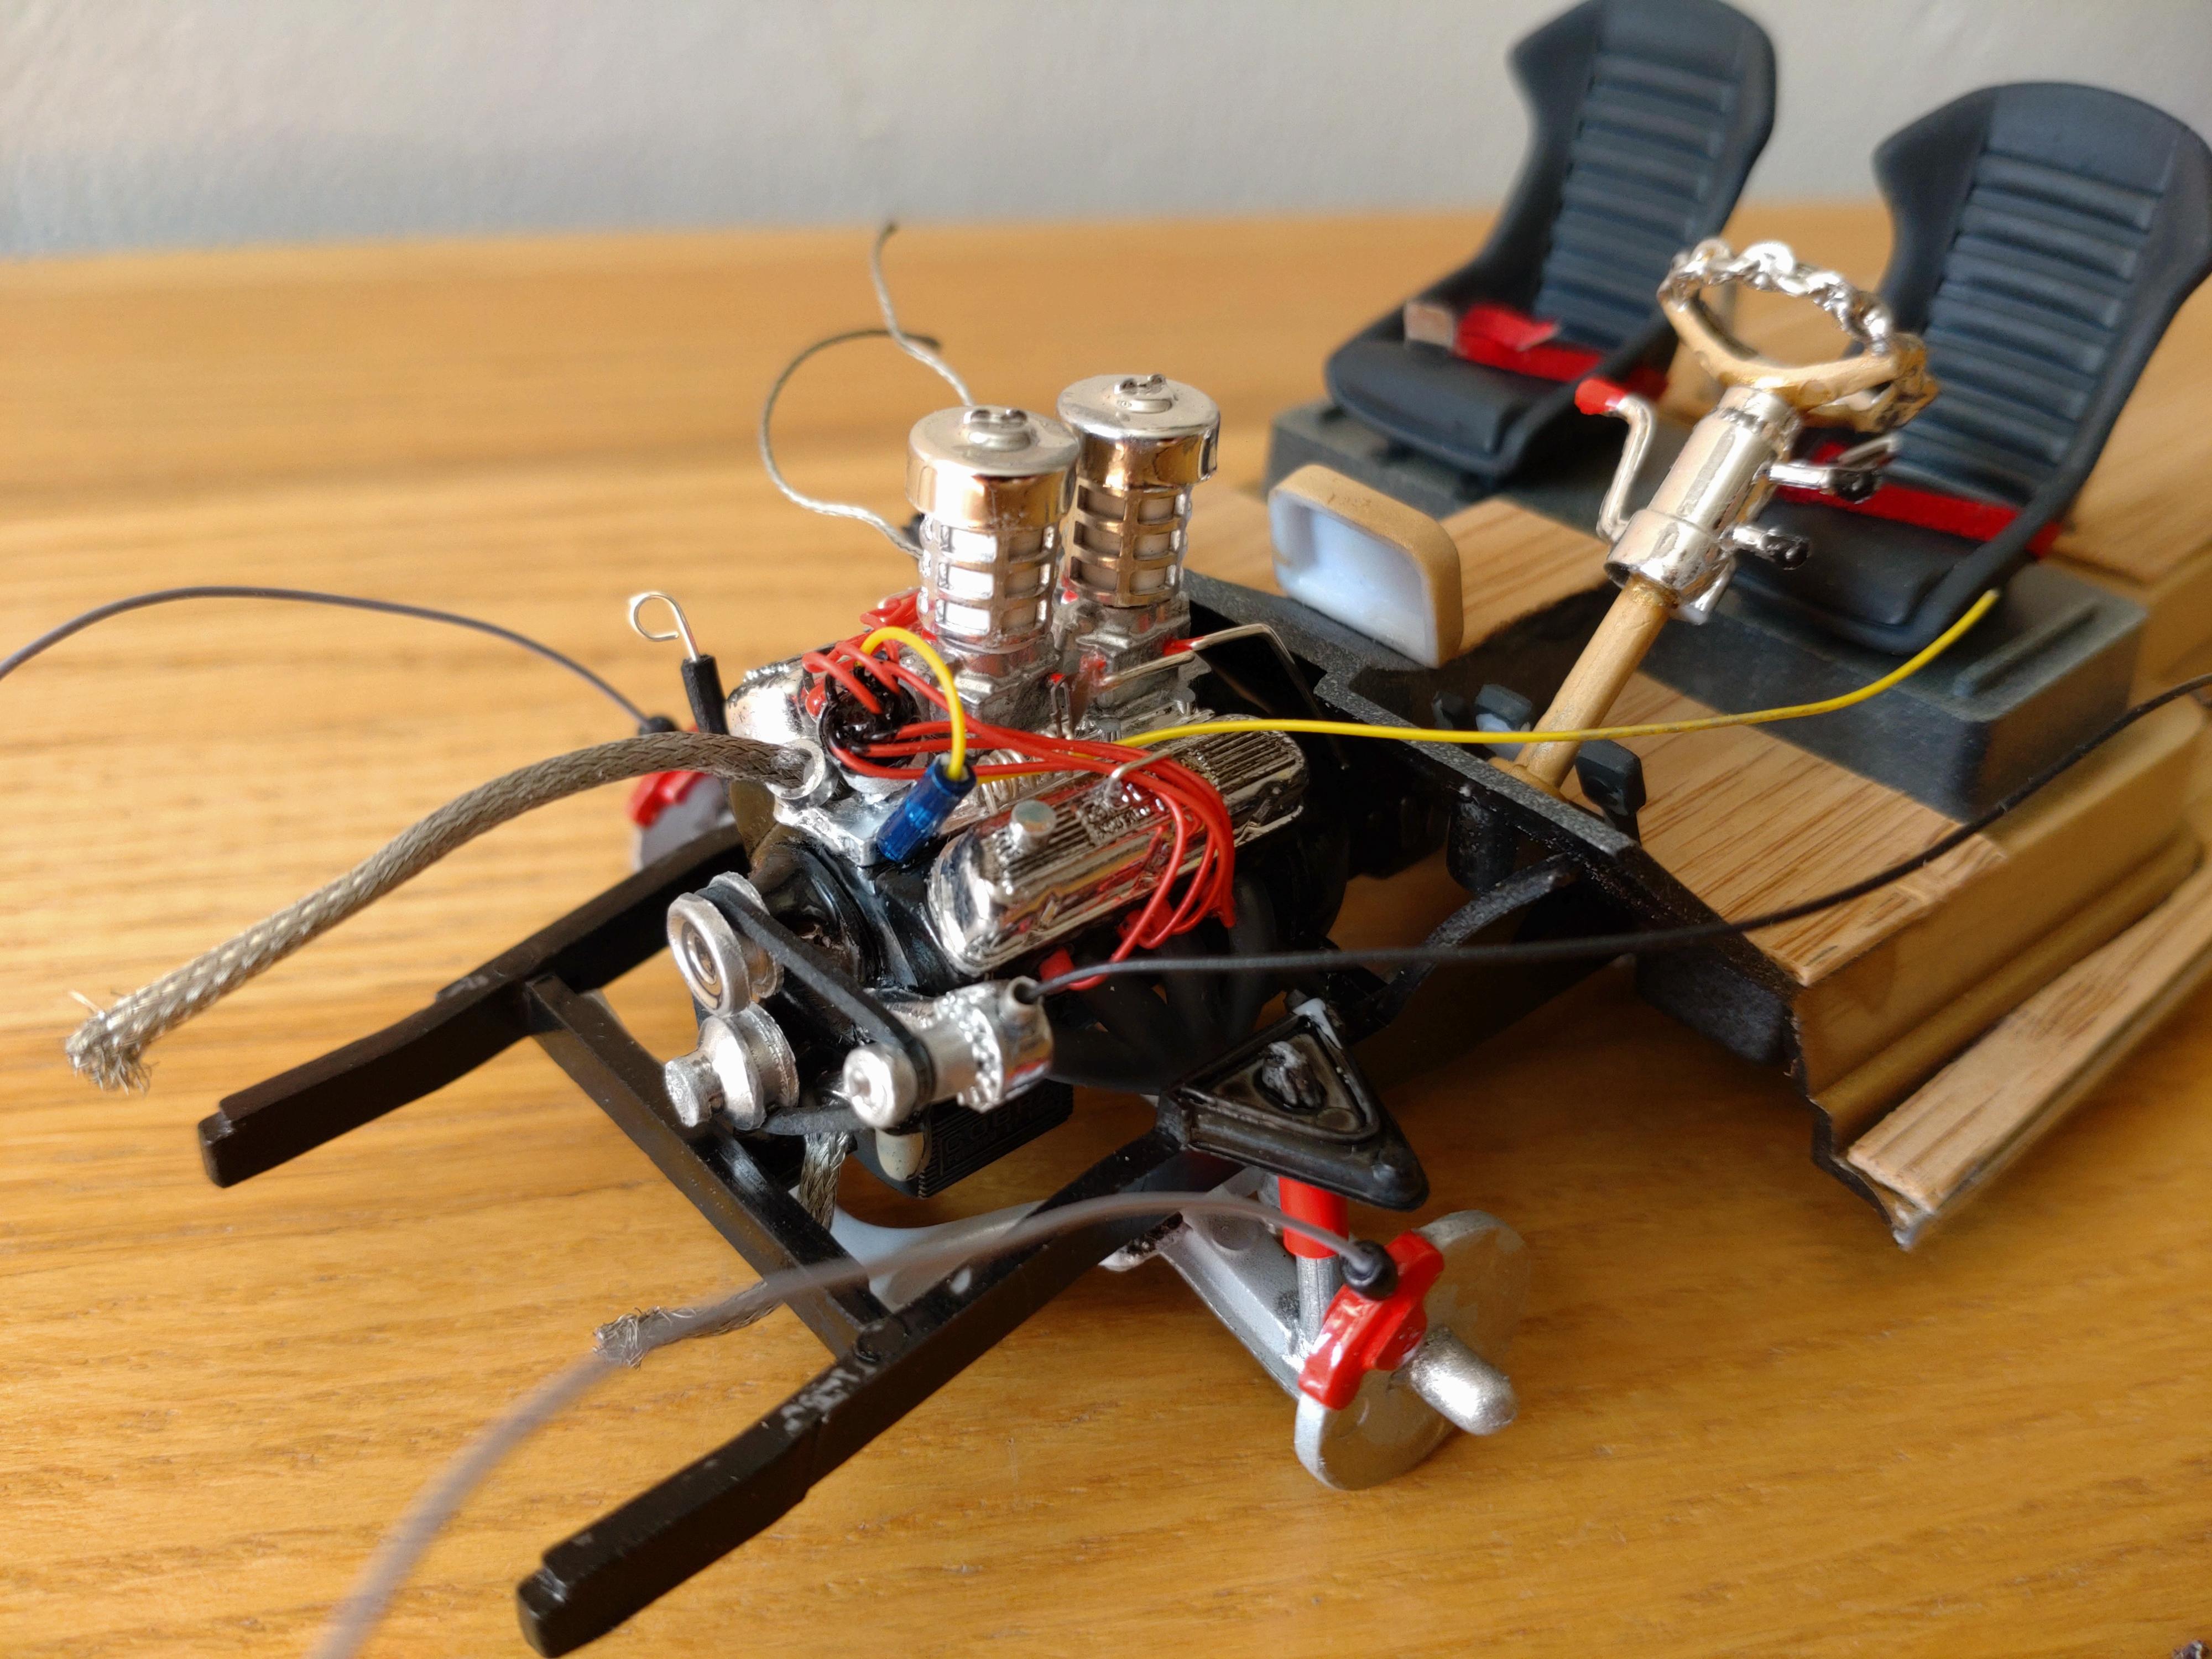
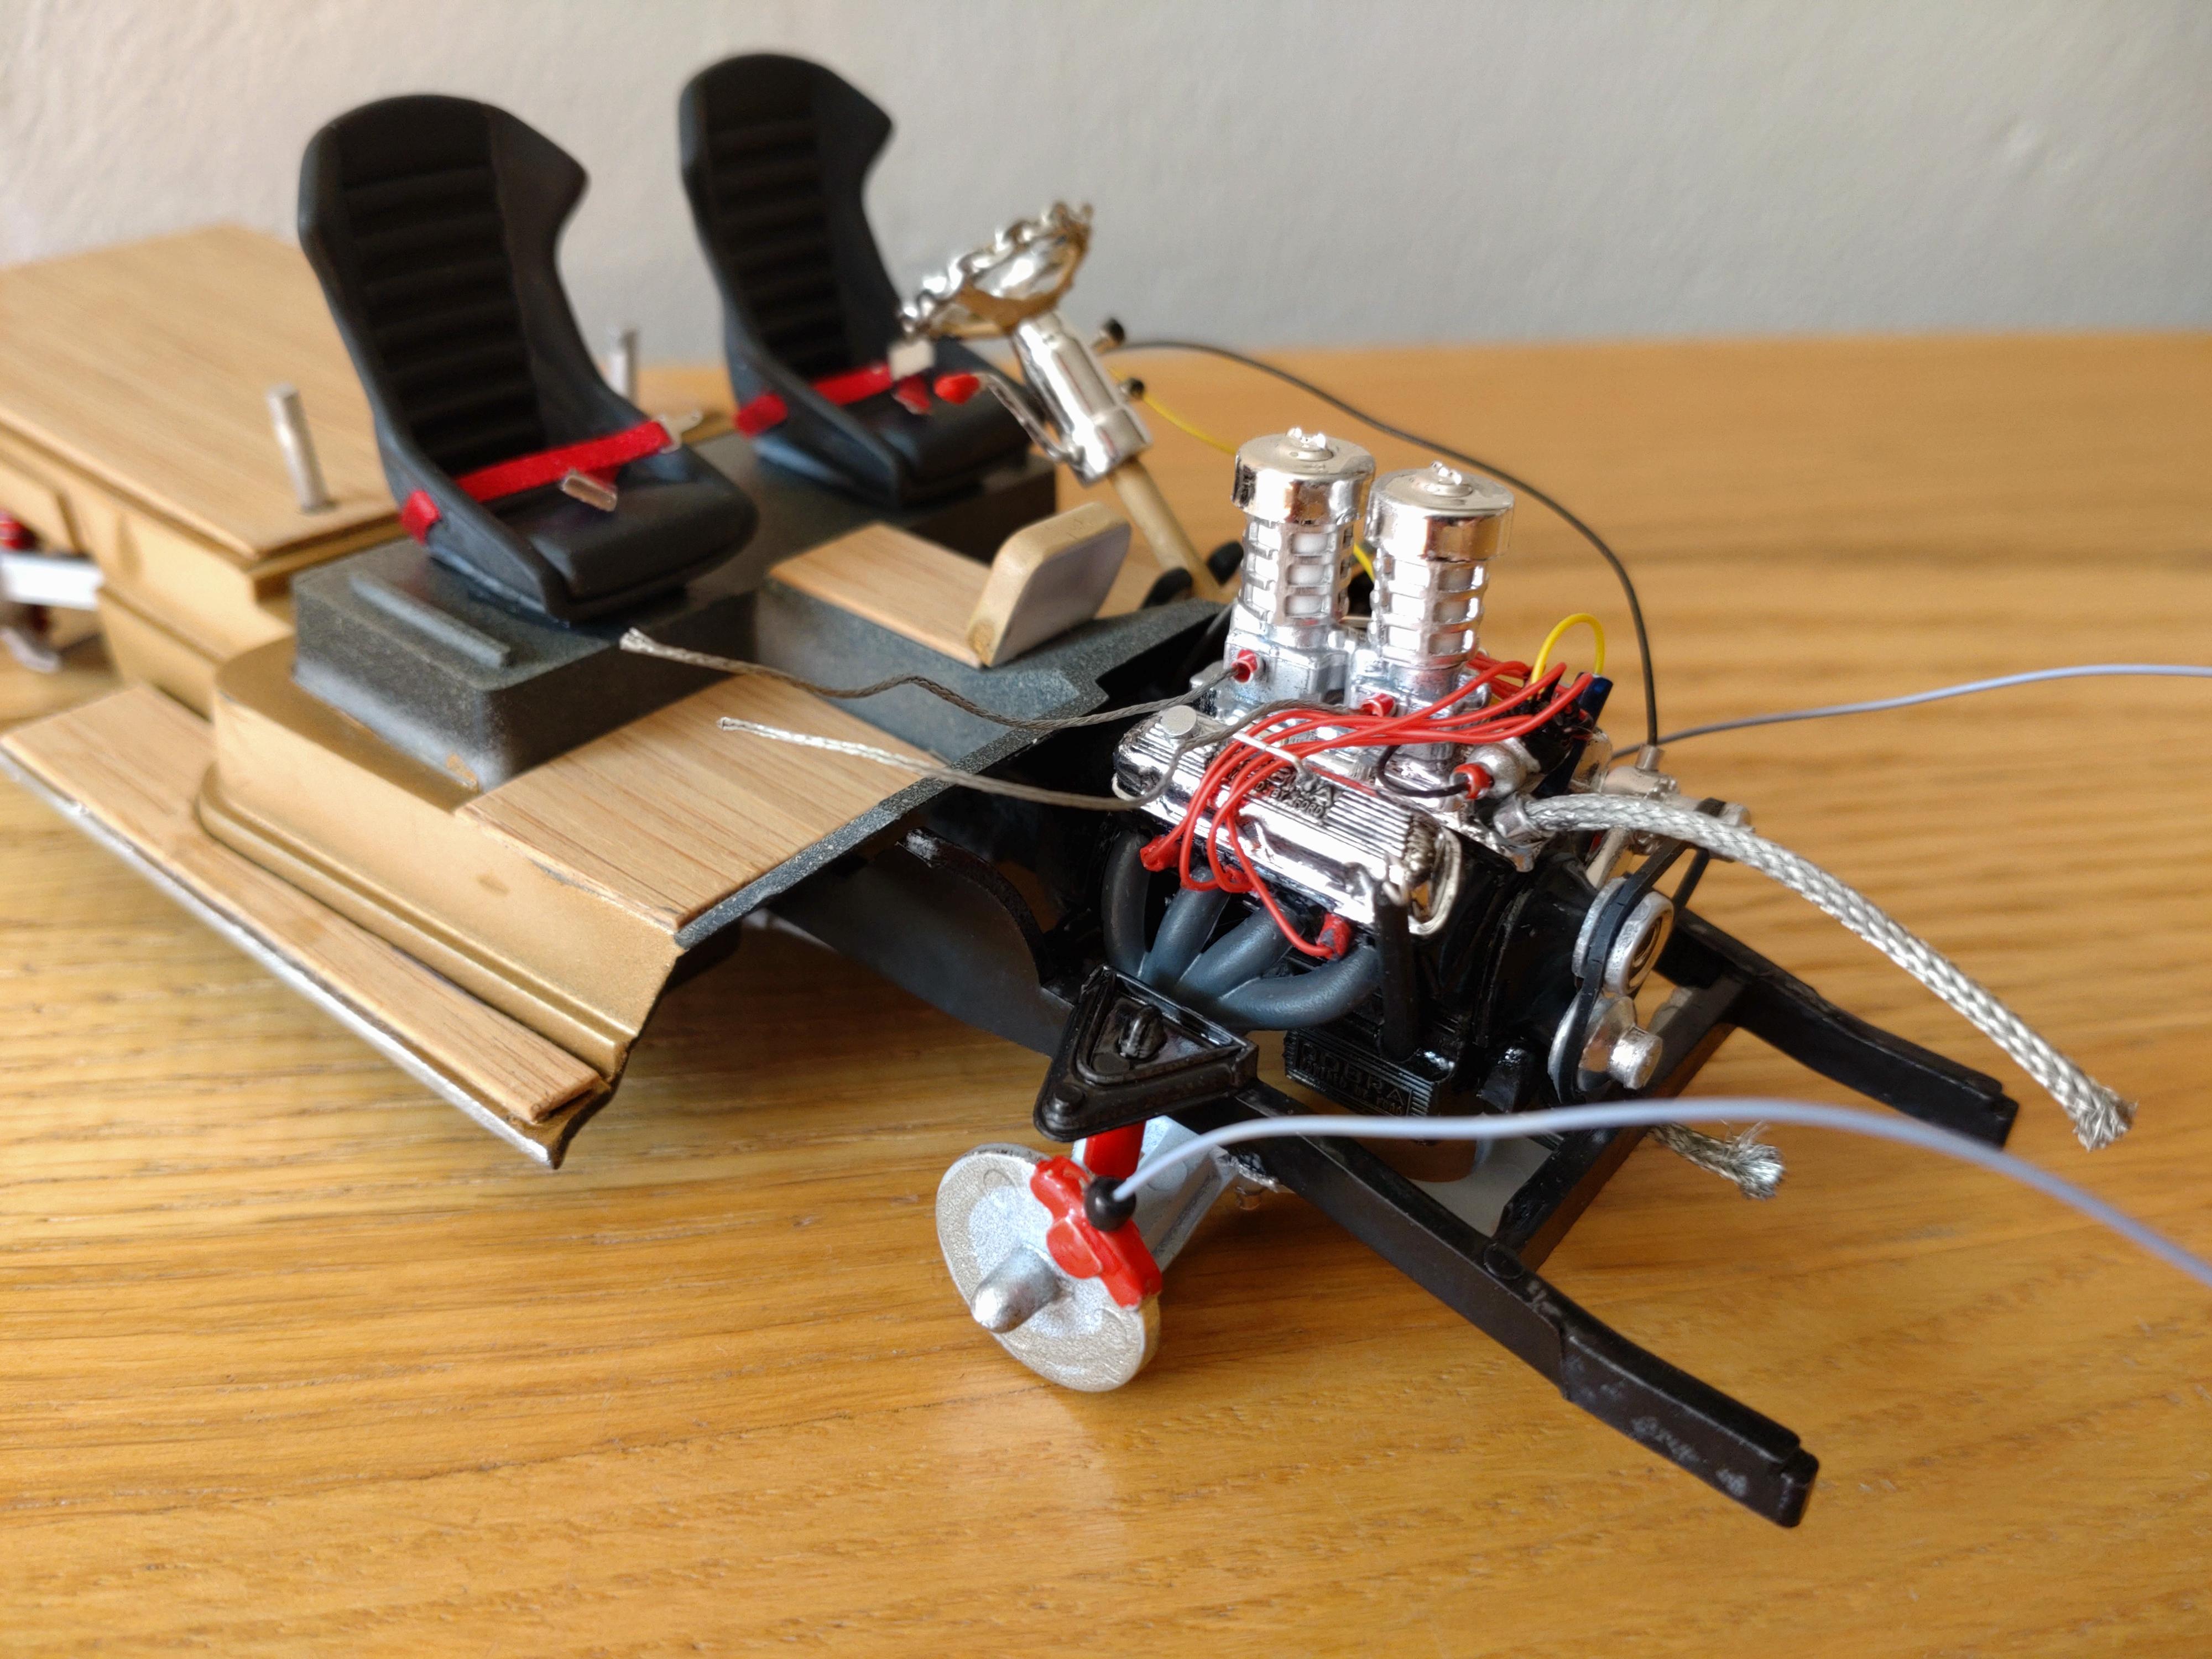
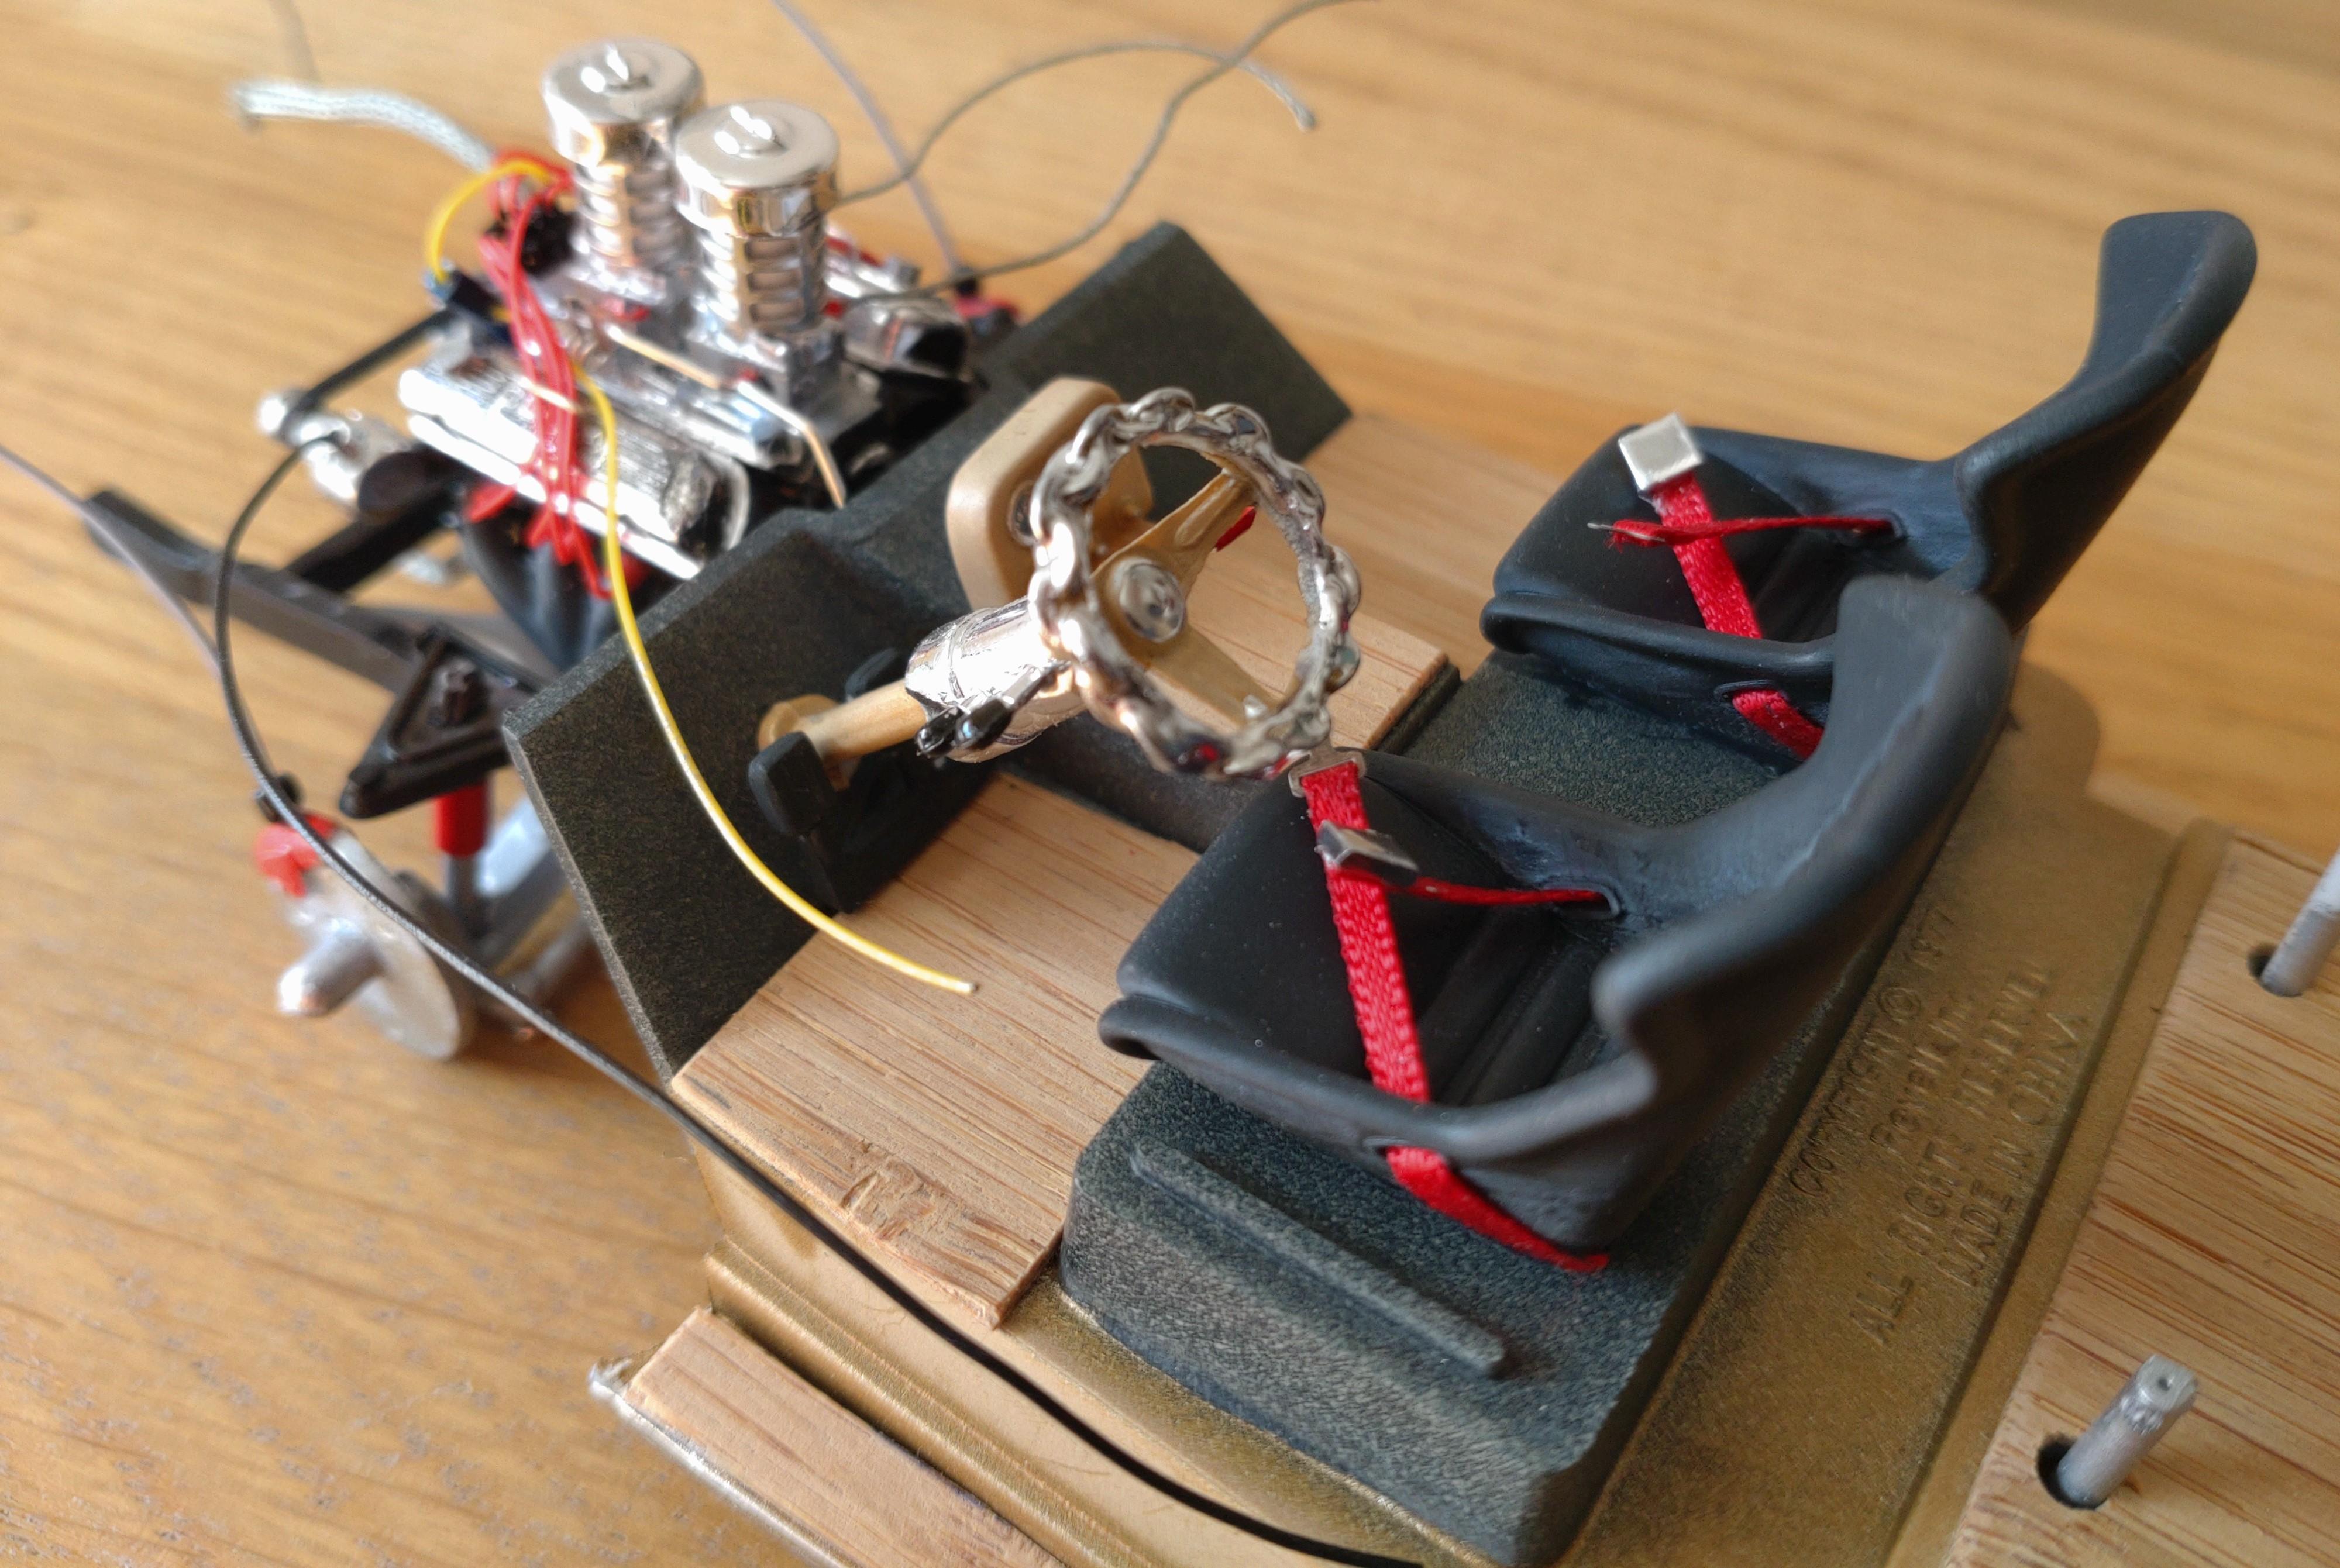
This is an old Monogram kit and one of my favorite builds. The roof is chopped by about 1cm. The gold metallic paint is Molotow covered with 3 layers of crystal clear. The wheels are custom, aluminum rims with epoxy insert and rubber tires. The boards, the interior floor and the bed are covered with real teak veneer. I wanted the give this pickup a "big truck" look and let the exhaust pipes run through the bed. Made the system out of 2mm styrene rods leading into 4mm tubes. The pipes are covered with aluminum grid. I traded the bench for racing seats and had fun making the chain steering wheel. Unfortunately one can hardly see the interior now due to the chopped hood. The engine was pimped with much details, especially the filter stacks are an eye catcher. Thanks for taking a look!

-
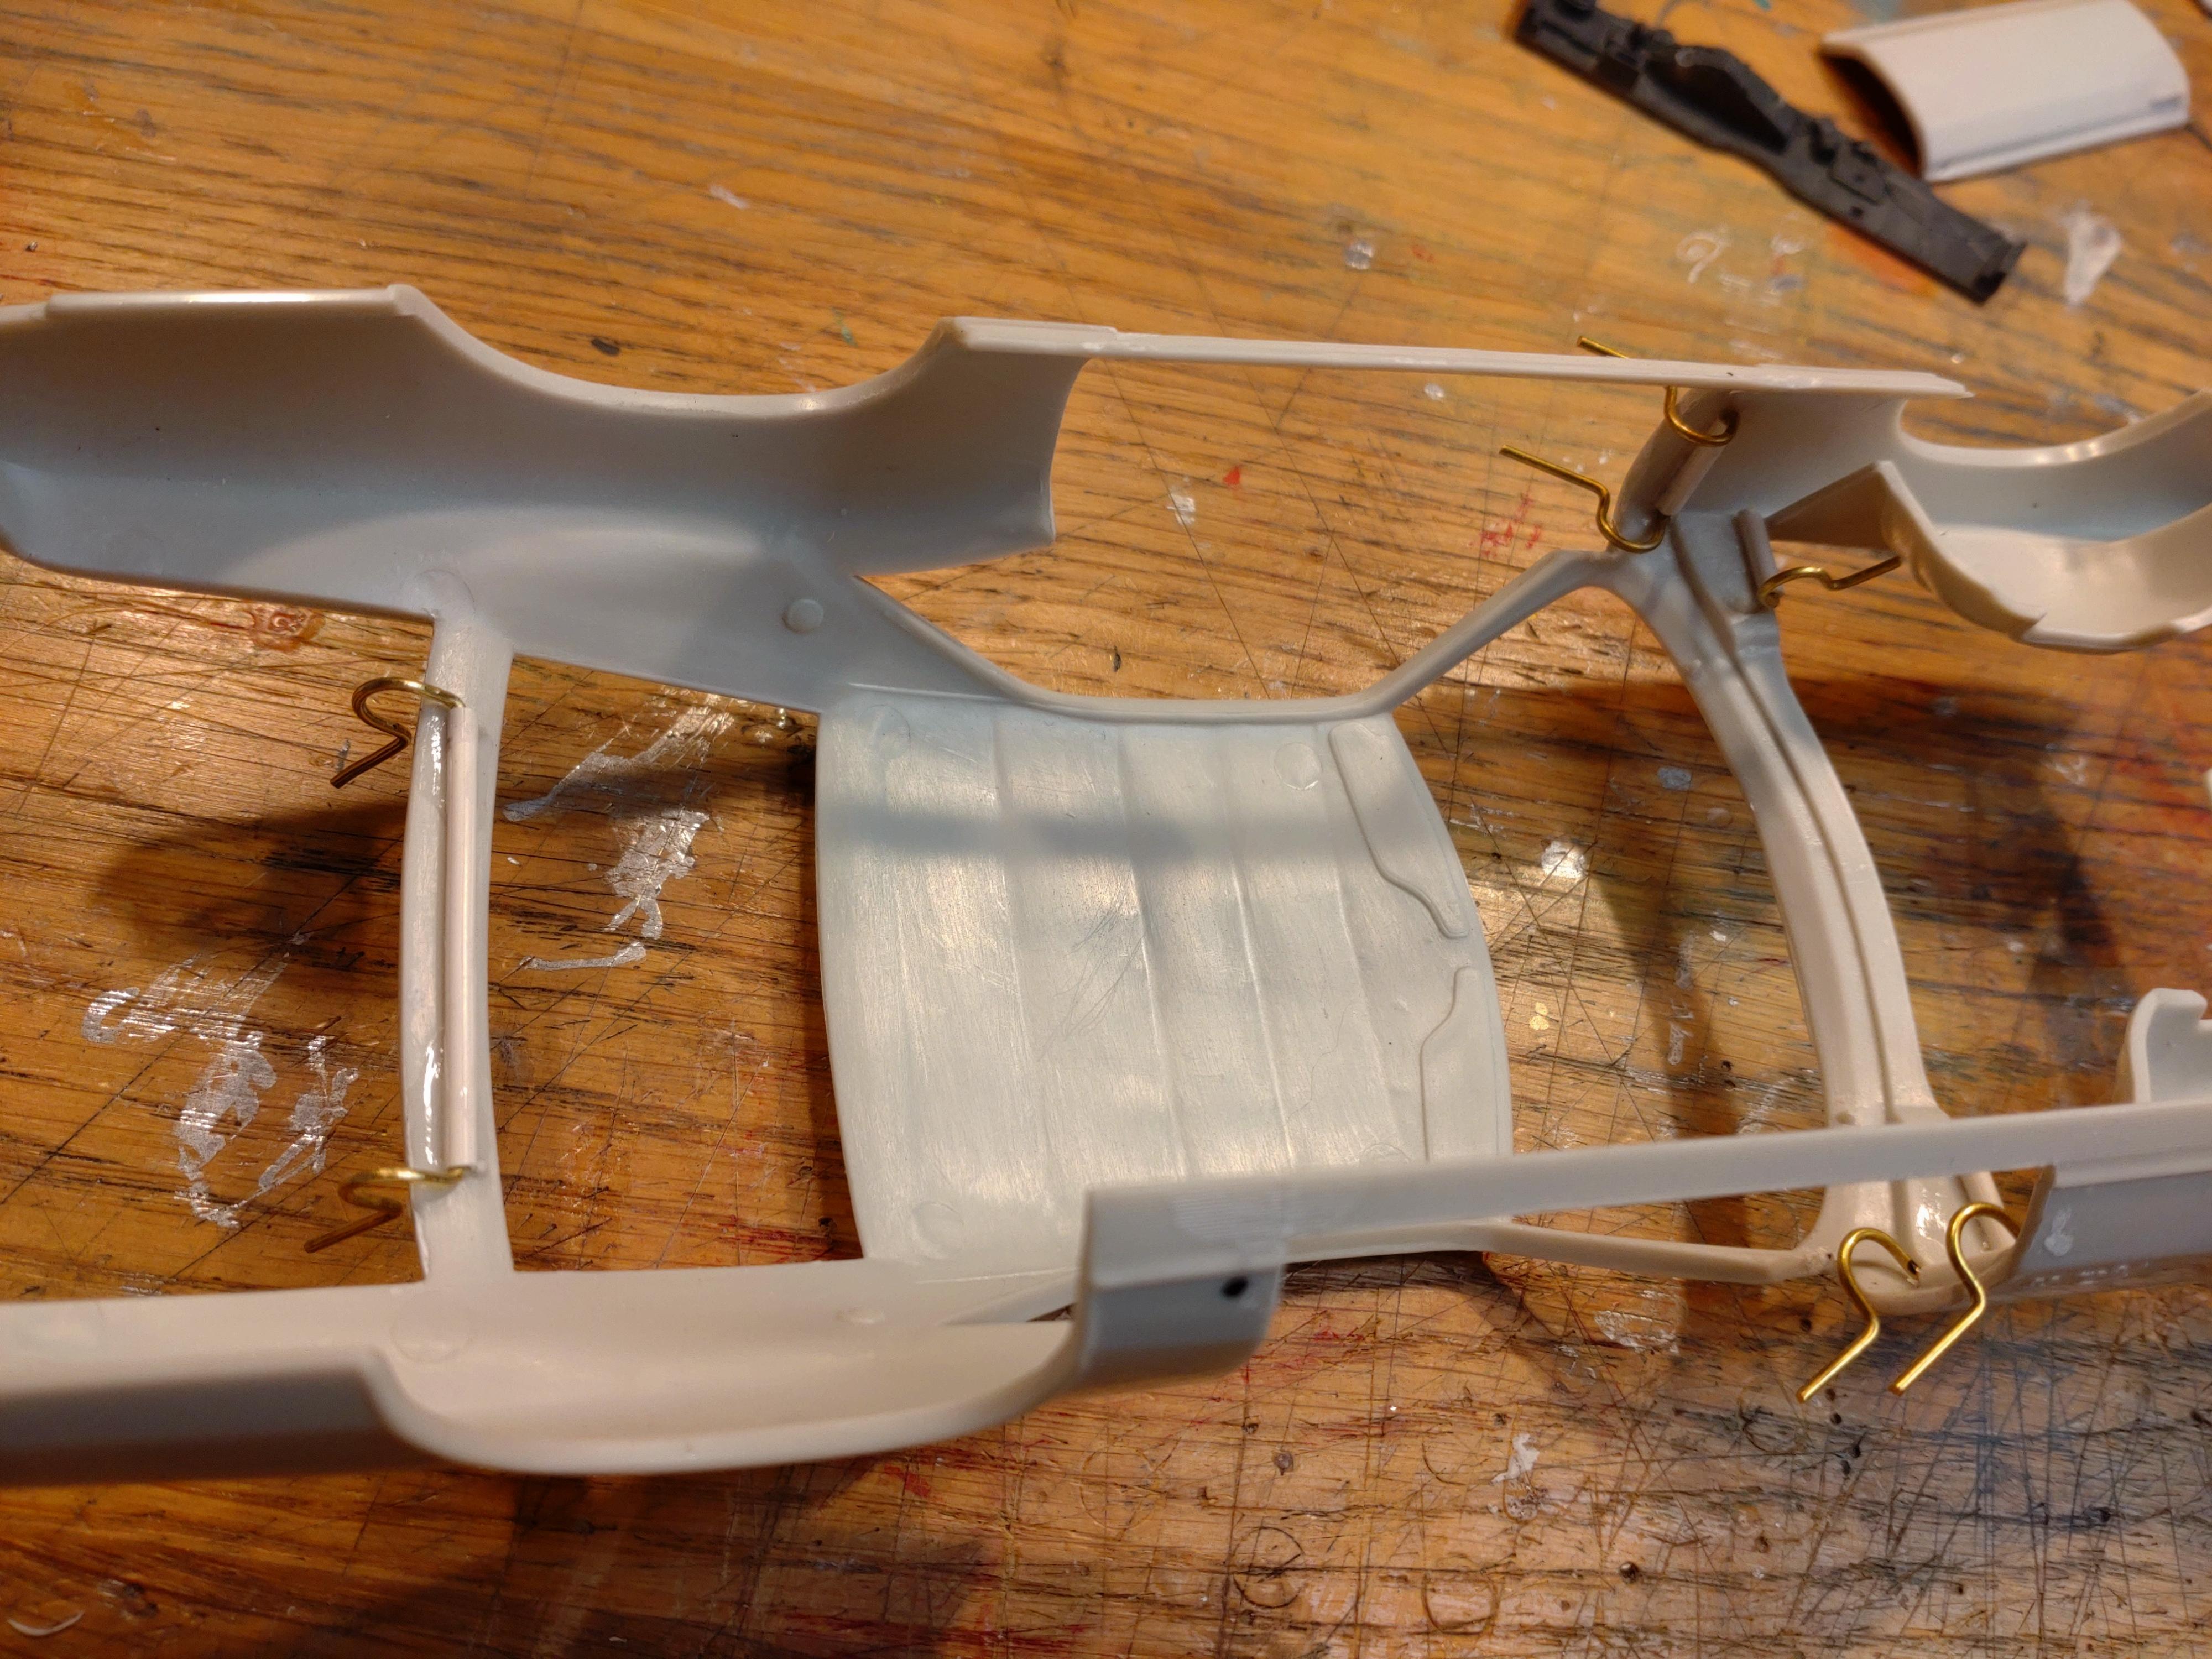
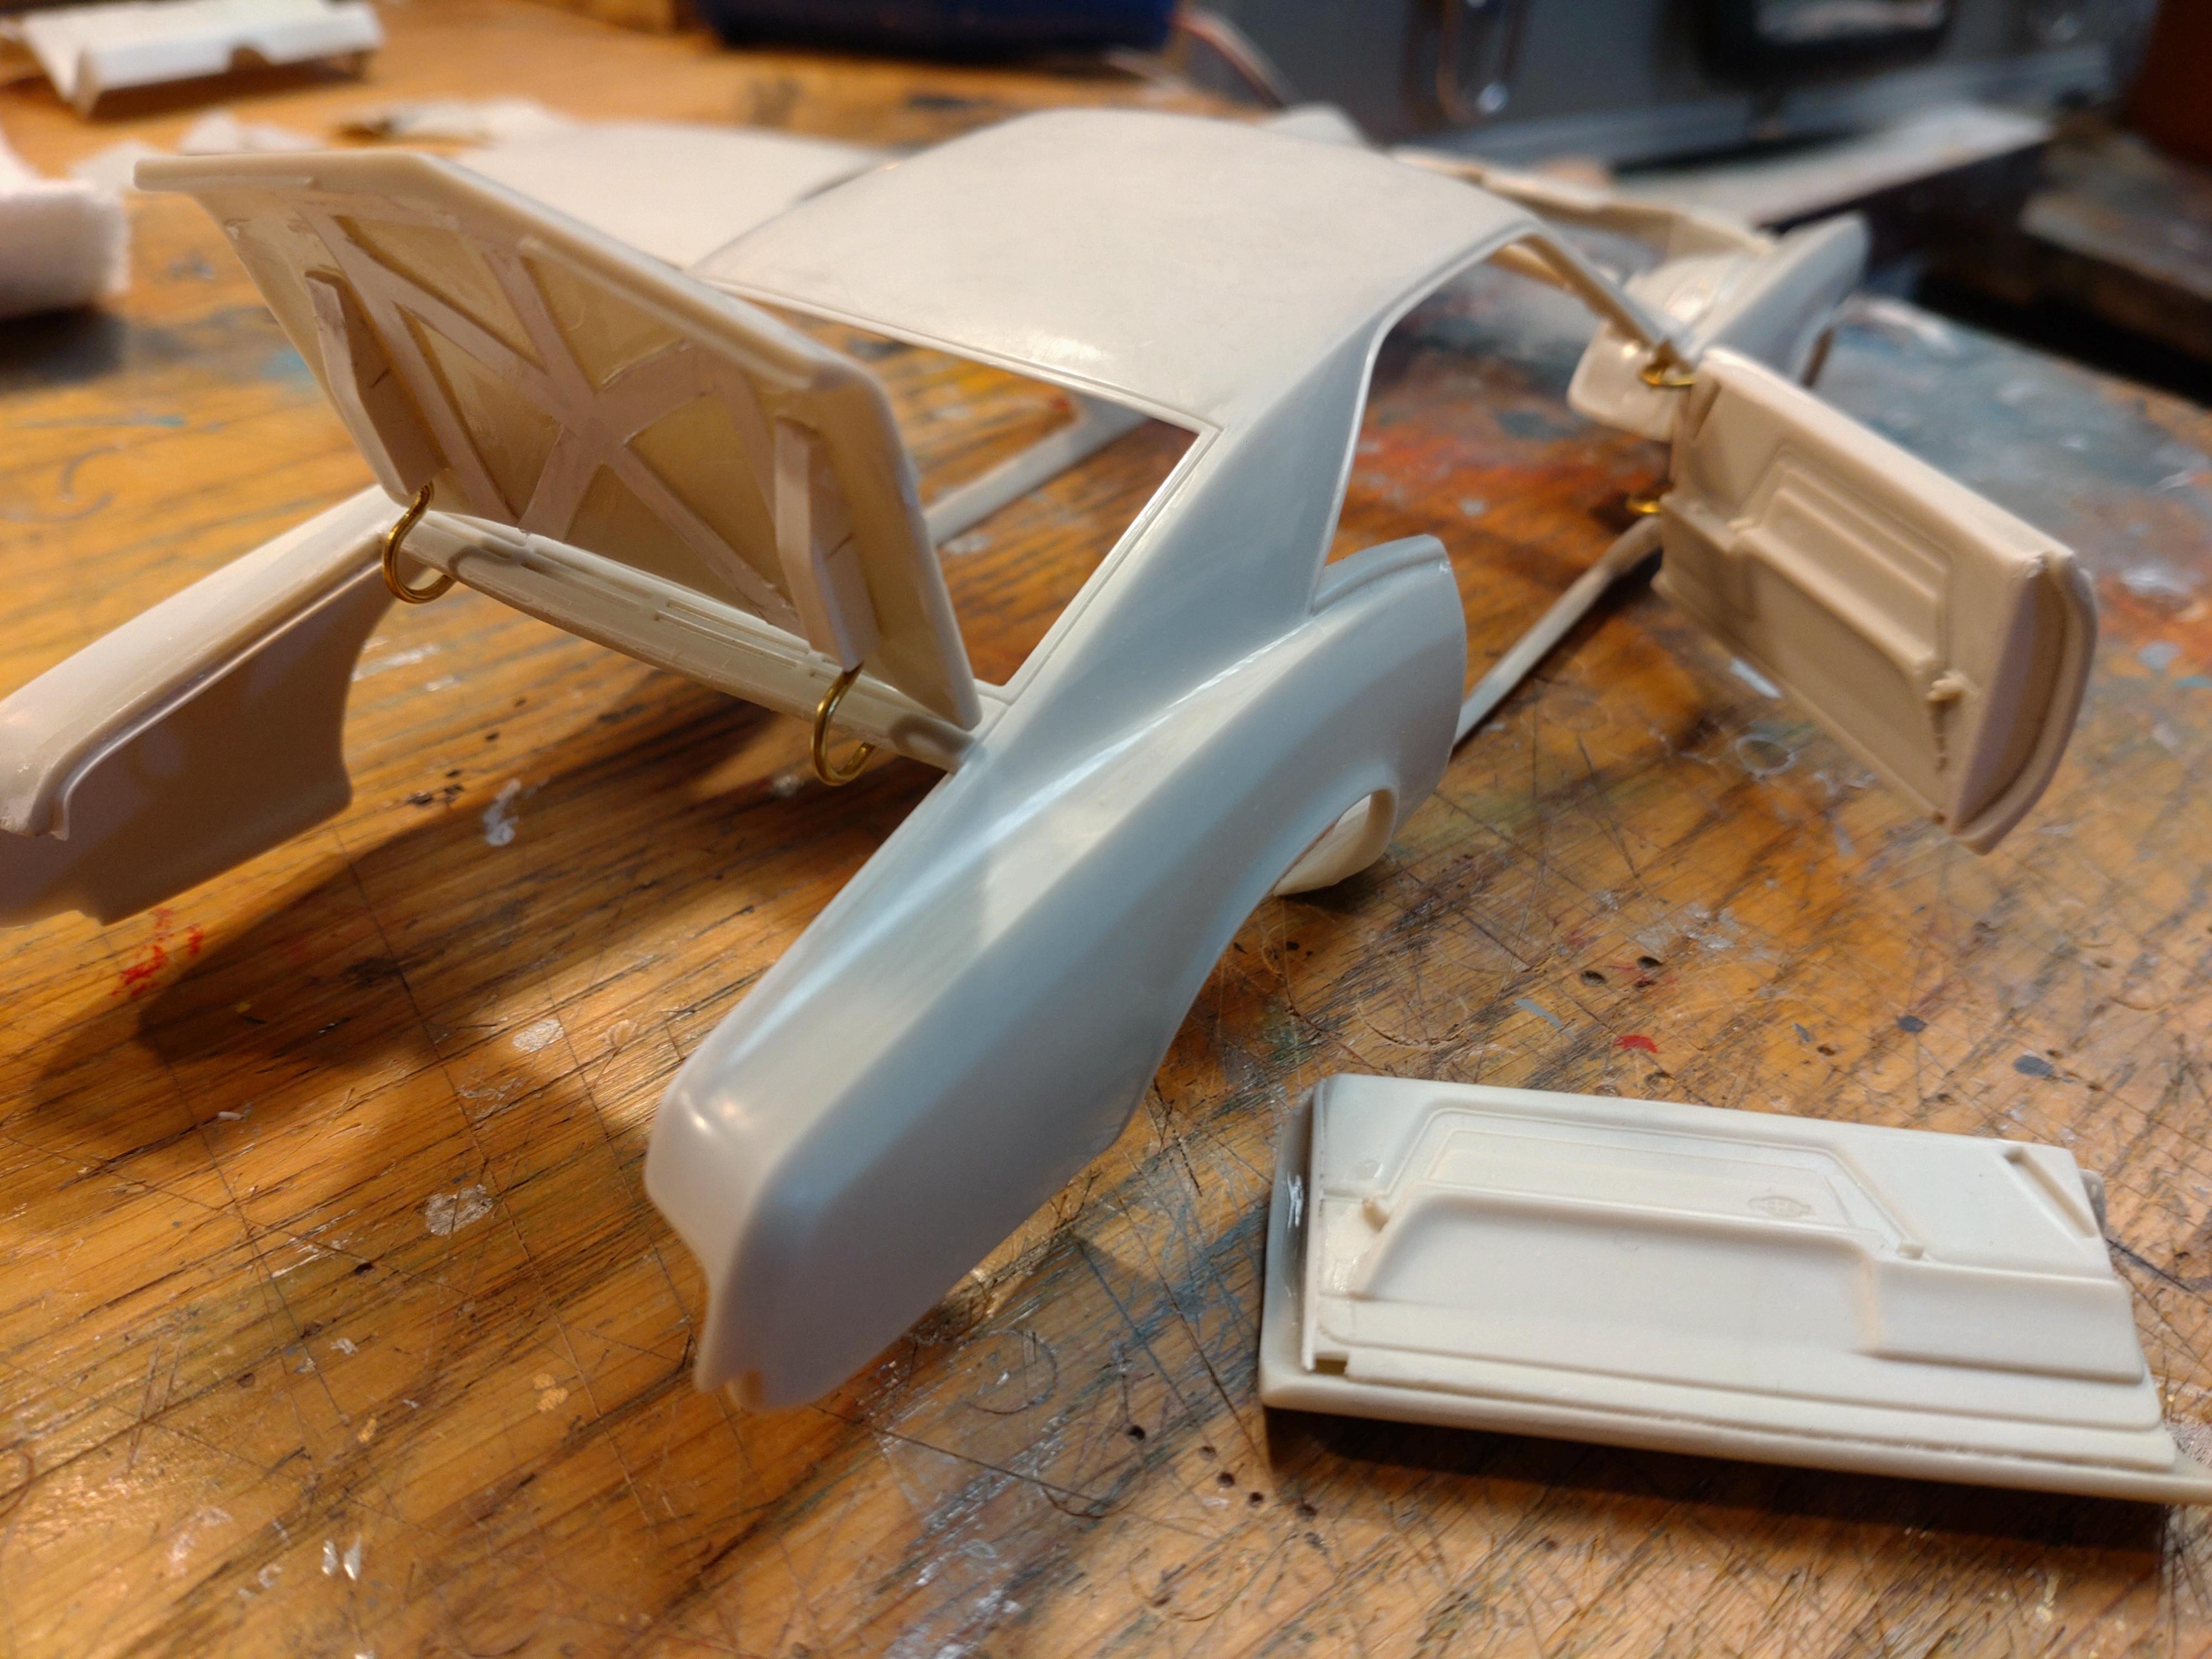
With the engine finished i´ve moved on the the chassis and body. Chassis is ready, but i´m still waiting for custom wheels. I´m building this one with opening doors, trunk and hinged hood. So far, everything fits?. Thanks for taking a look!
-
Great job? A classic on the street and your model would be an attraction on a classic meeting. Like the color and your work in the engine bay!
-
Hi Michael, you put me in shock and awe! I´m stunned because I haven´t seen something like this before. What a great job and so much creativity necessary to get the job done. Keep up the good work! ?
-
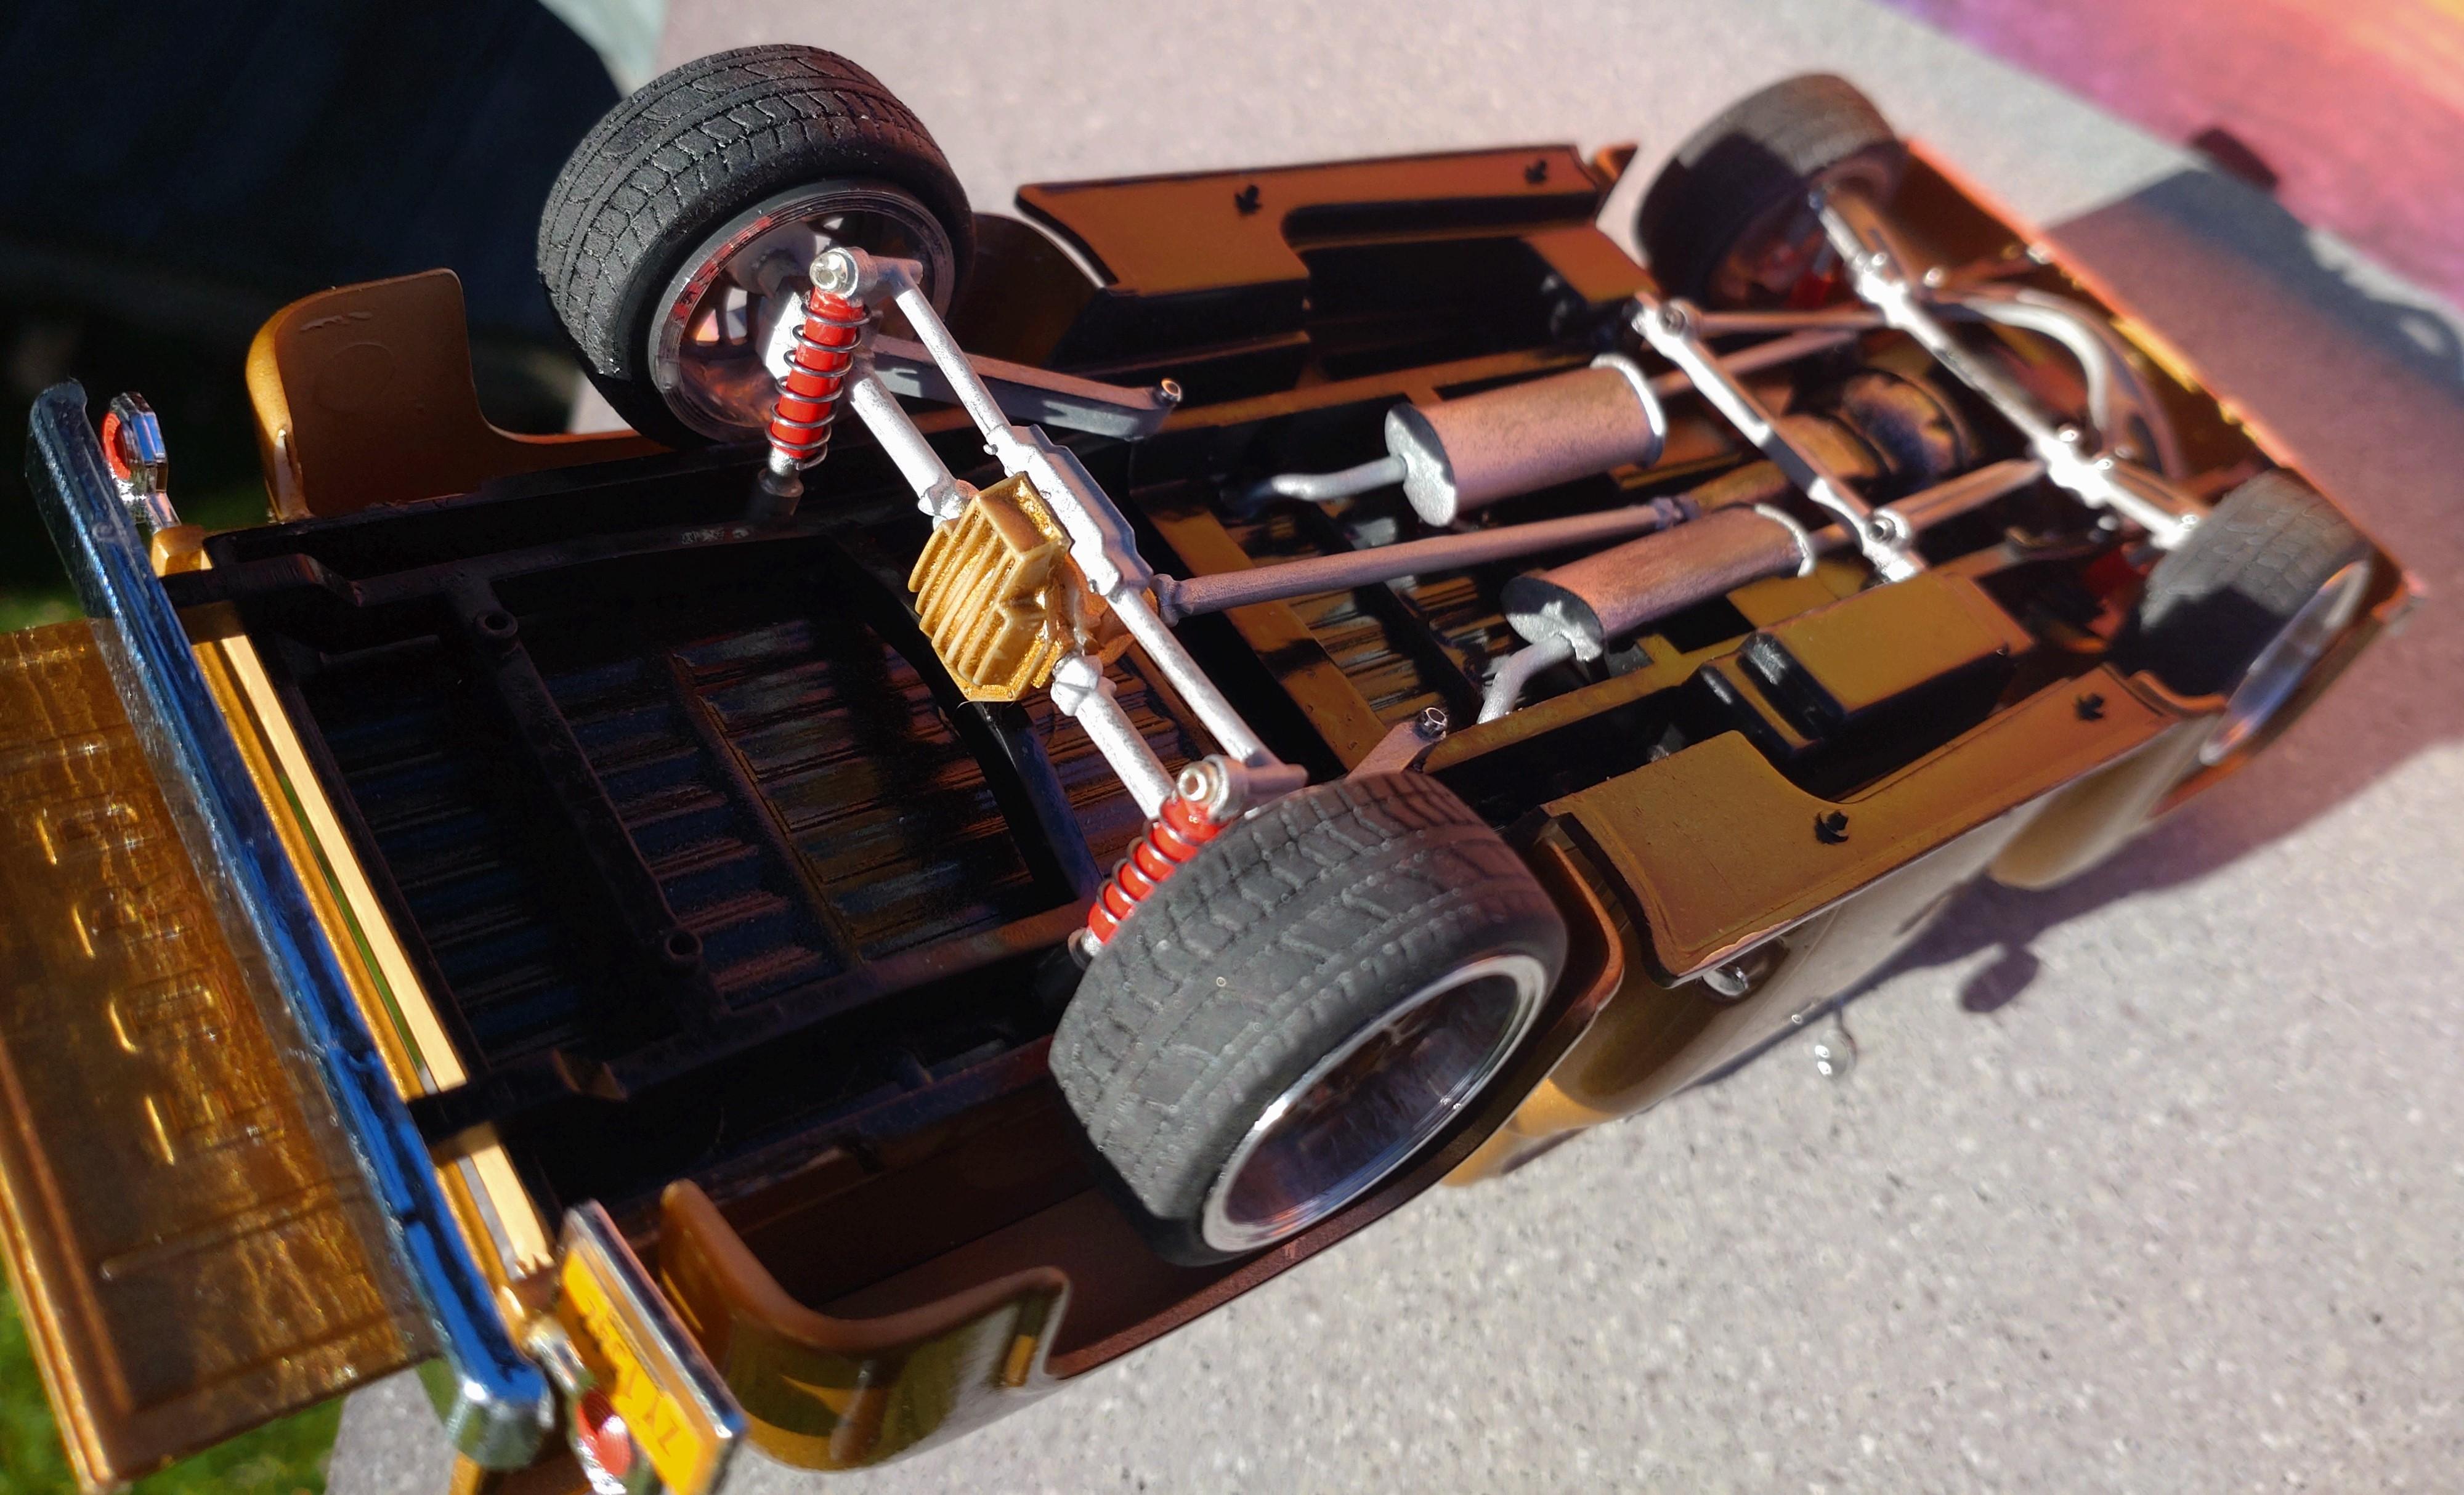
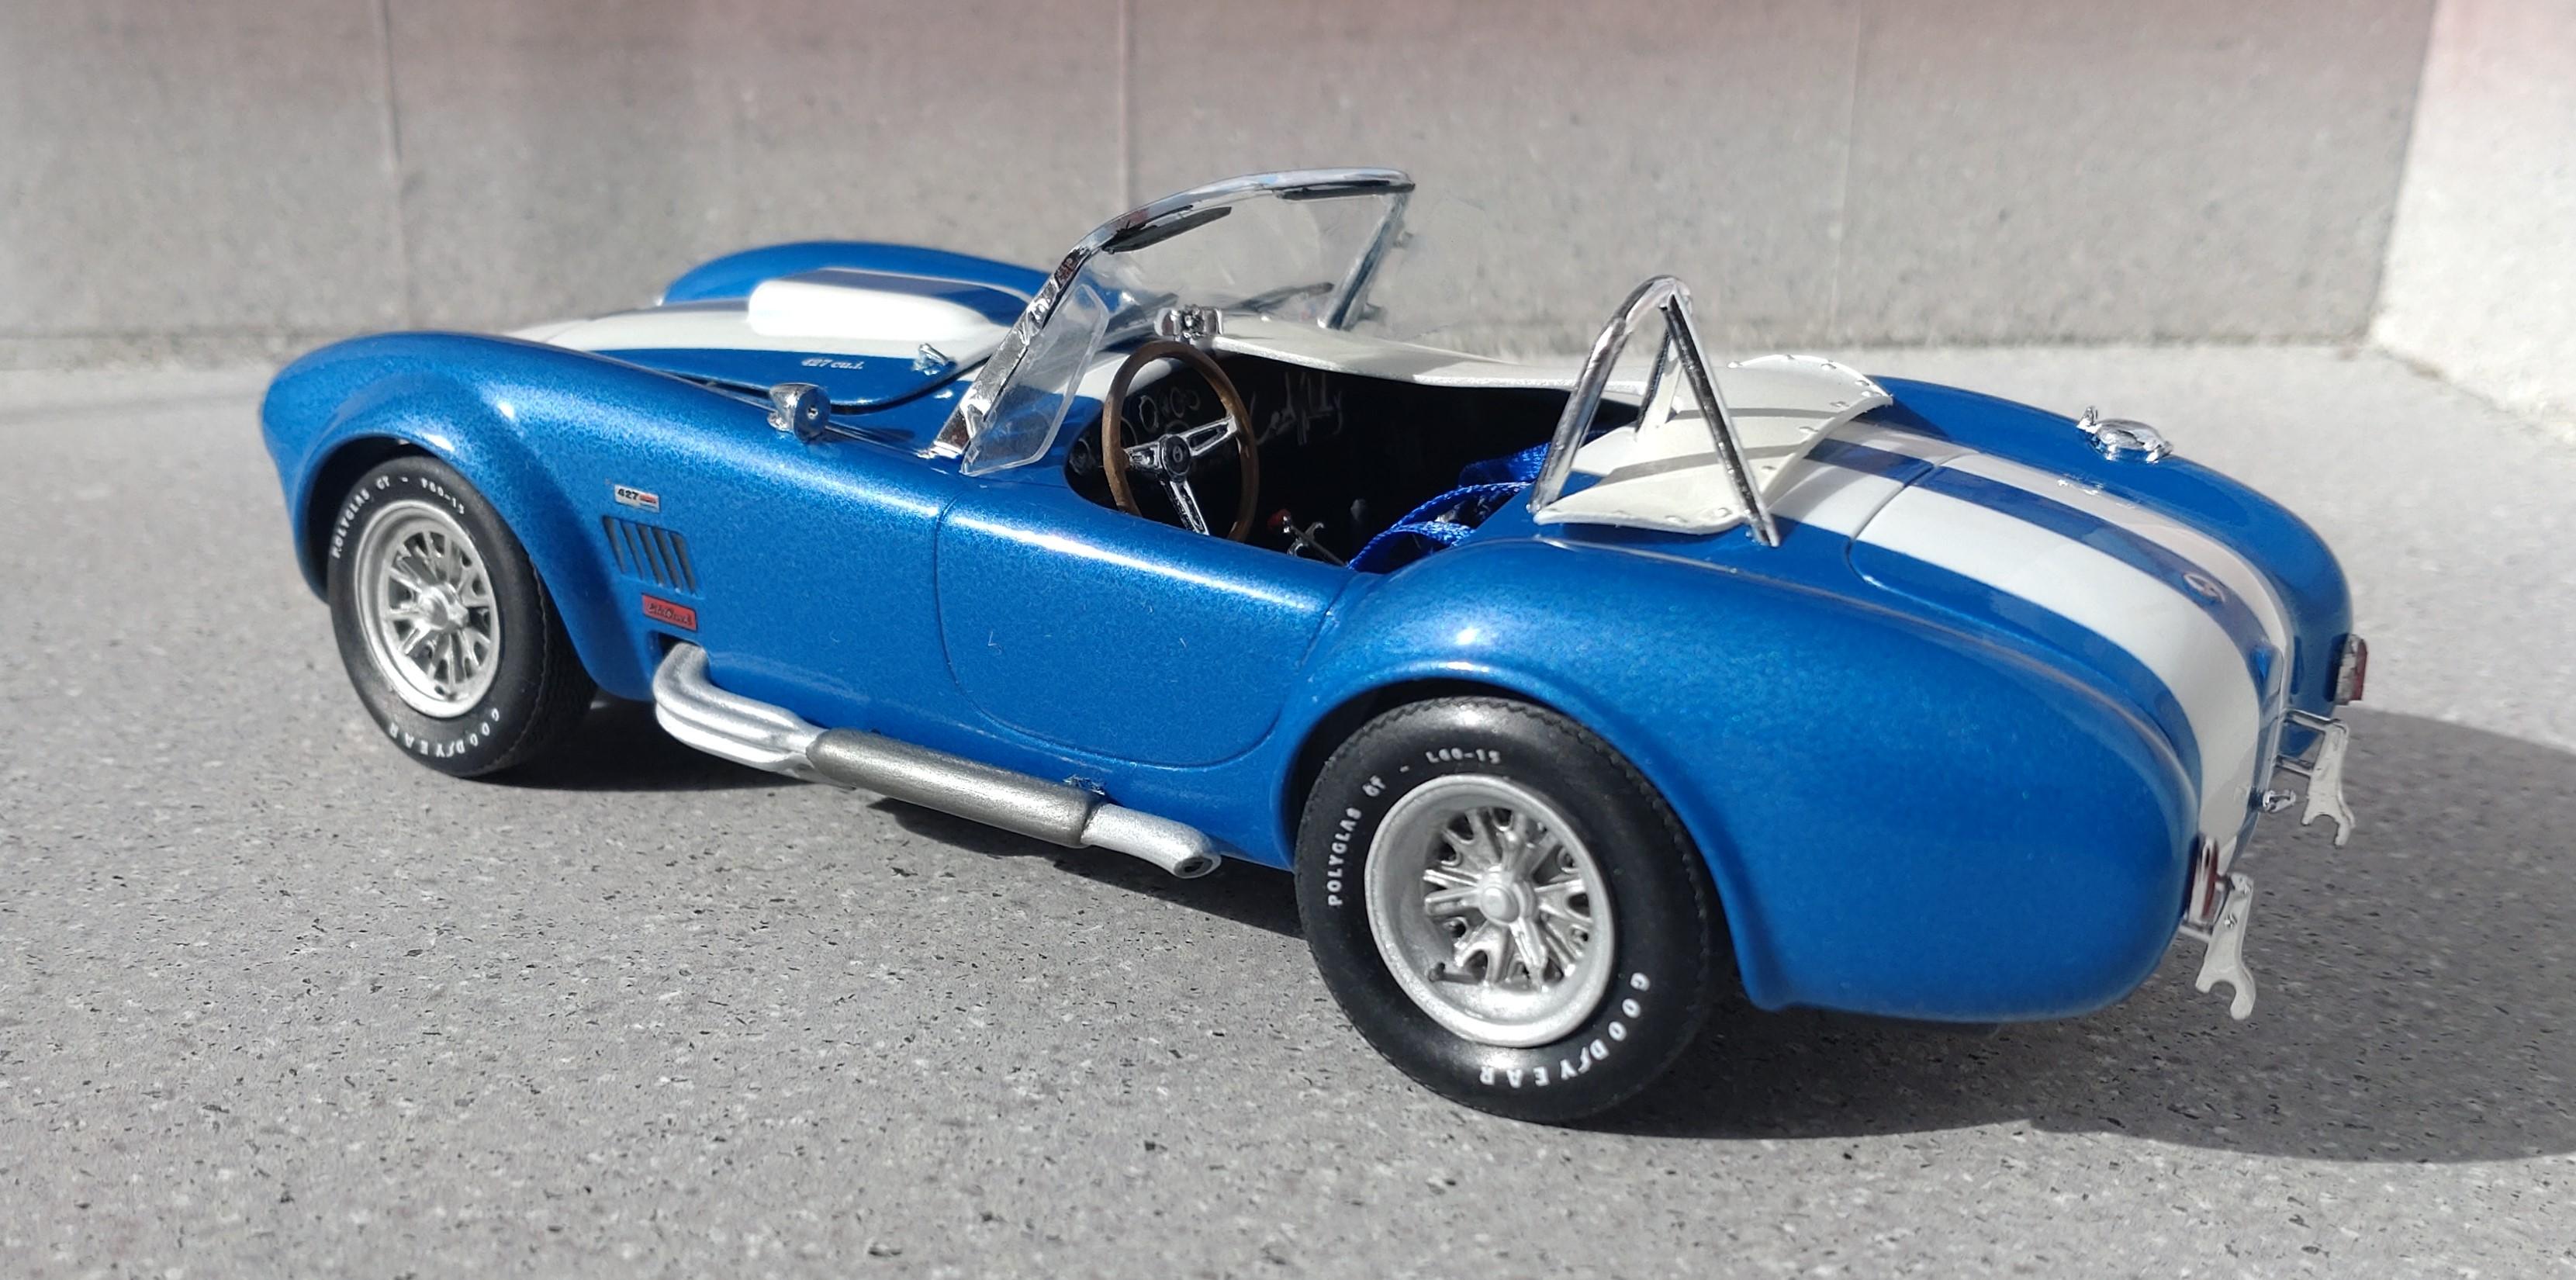
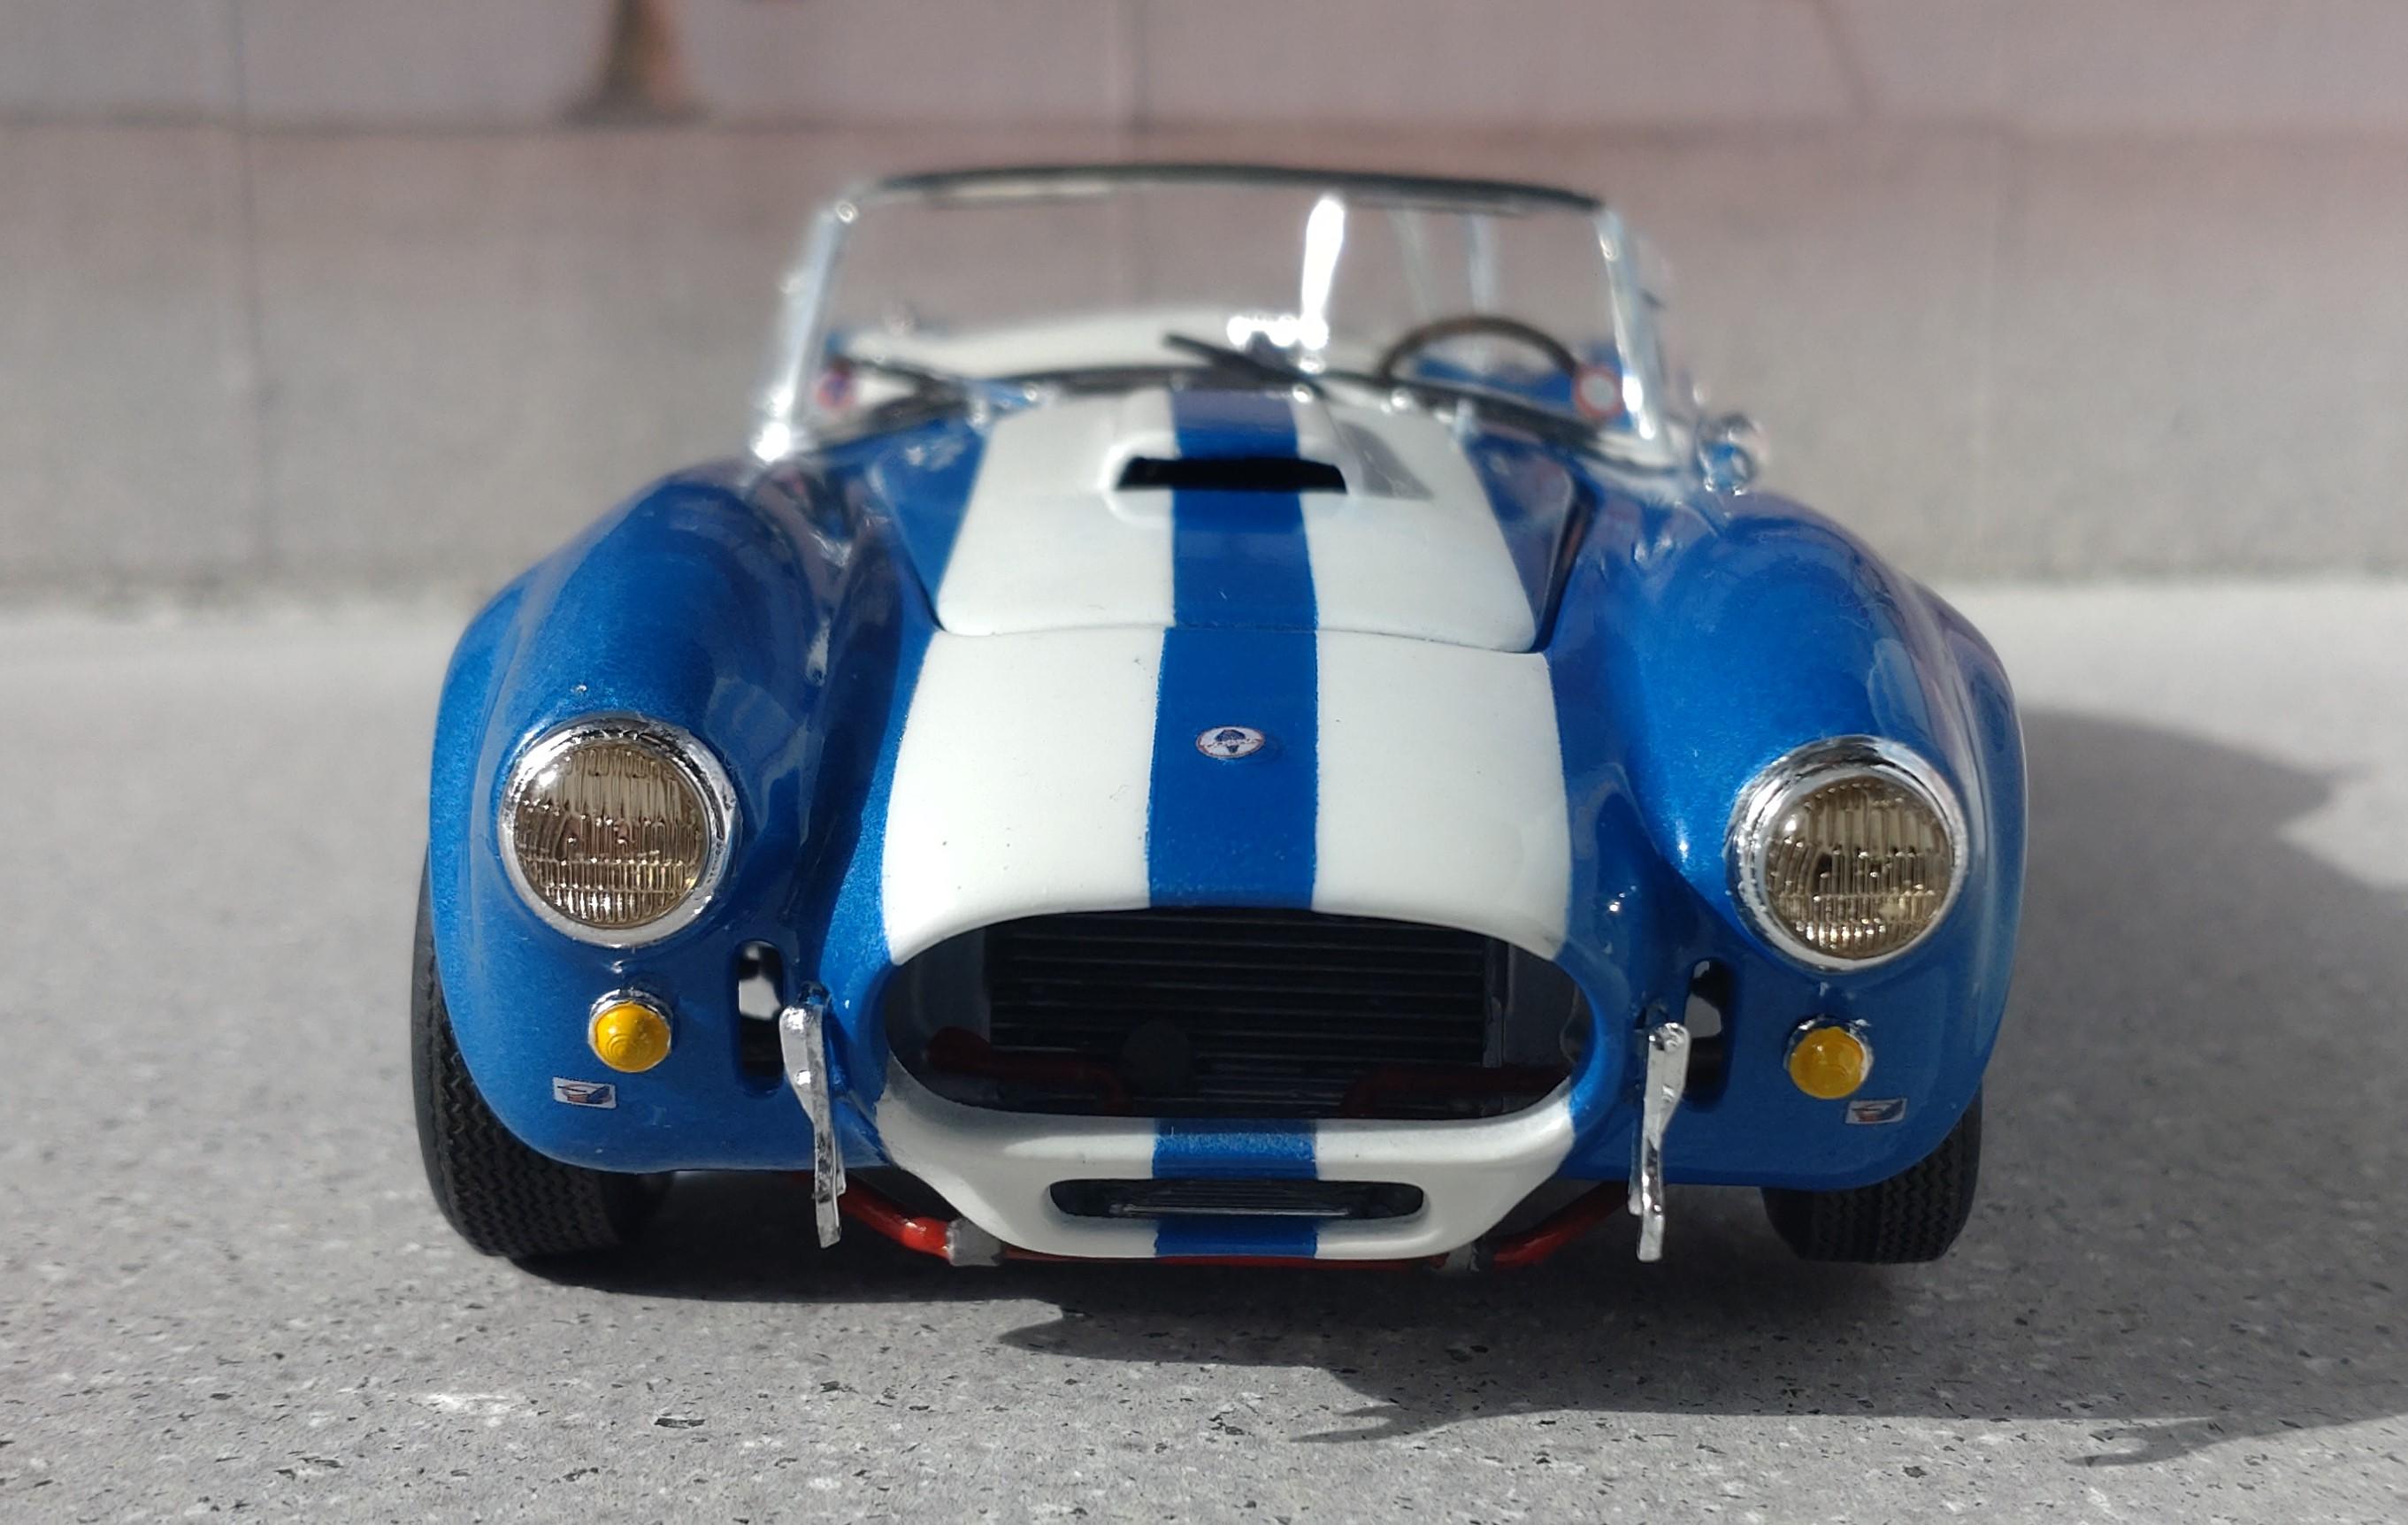
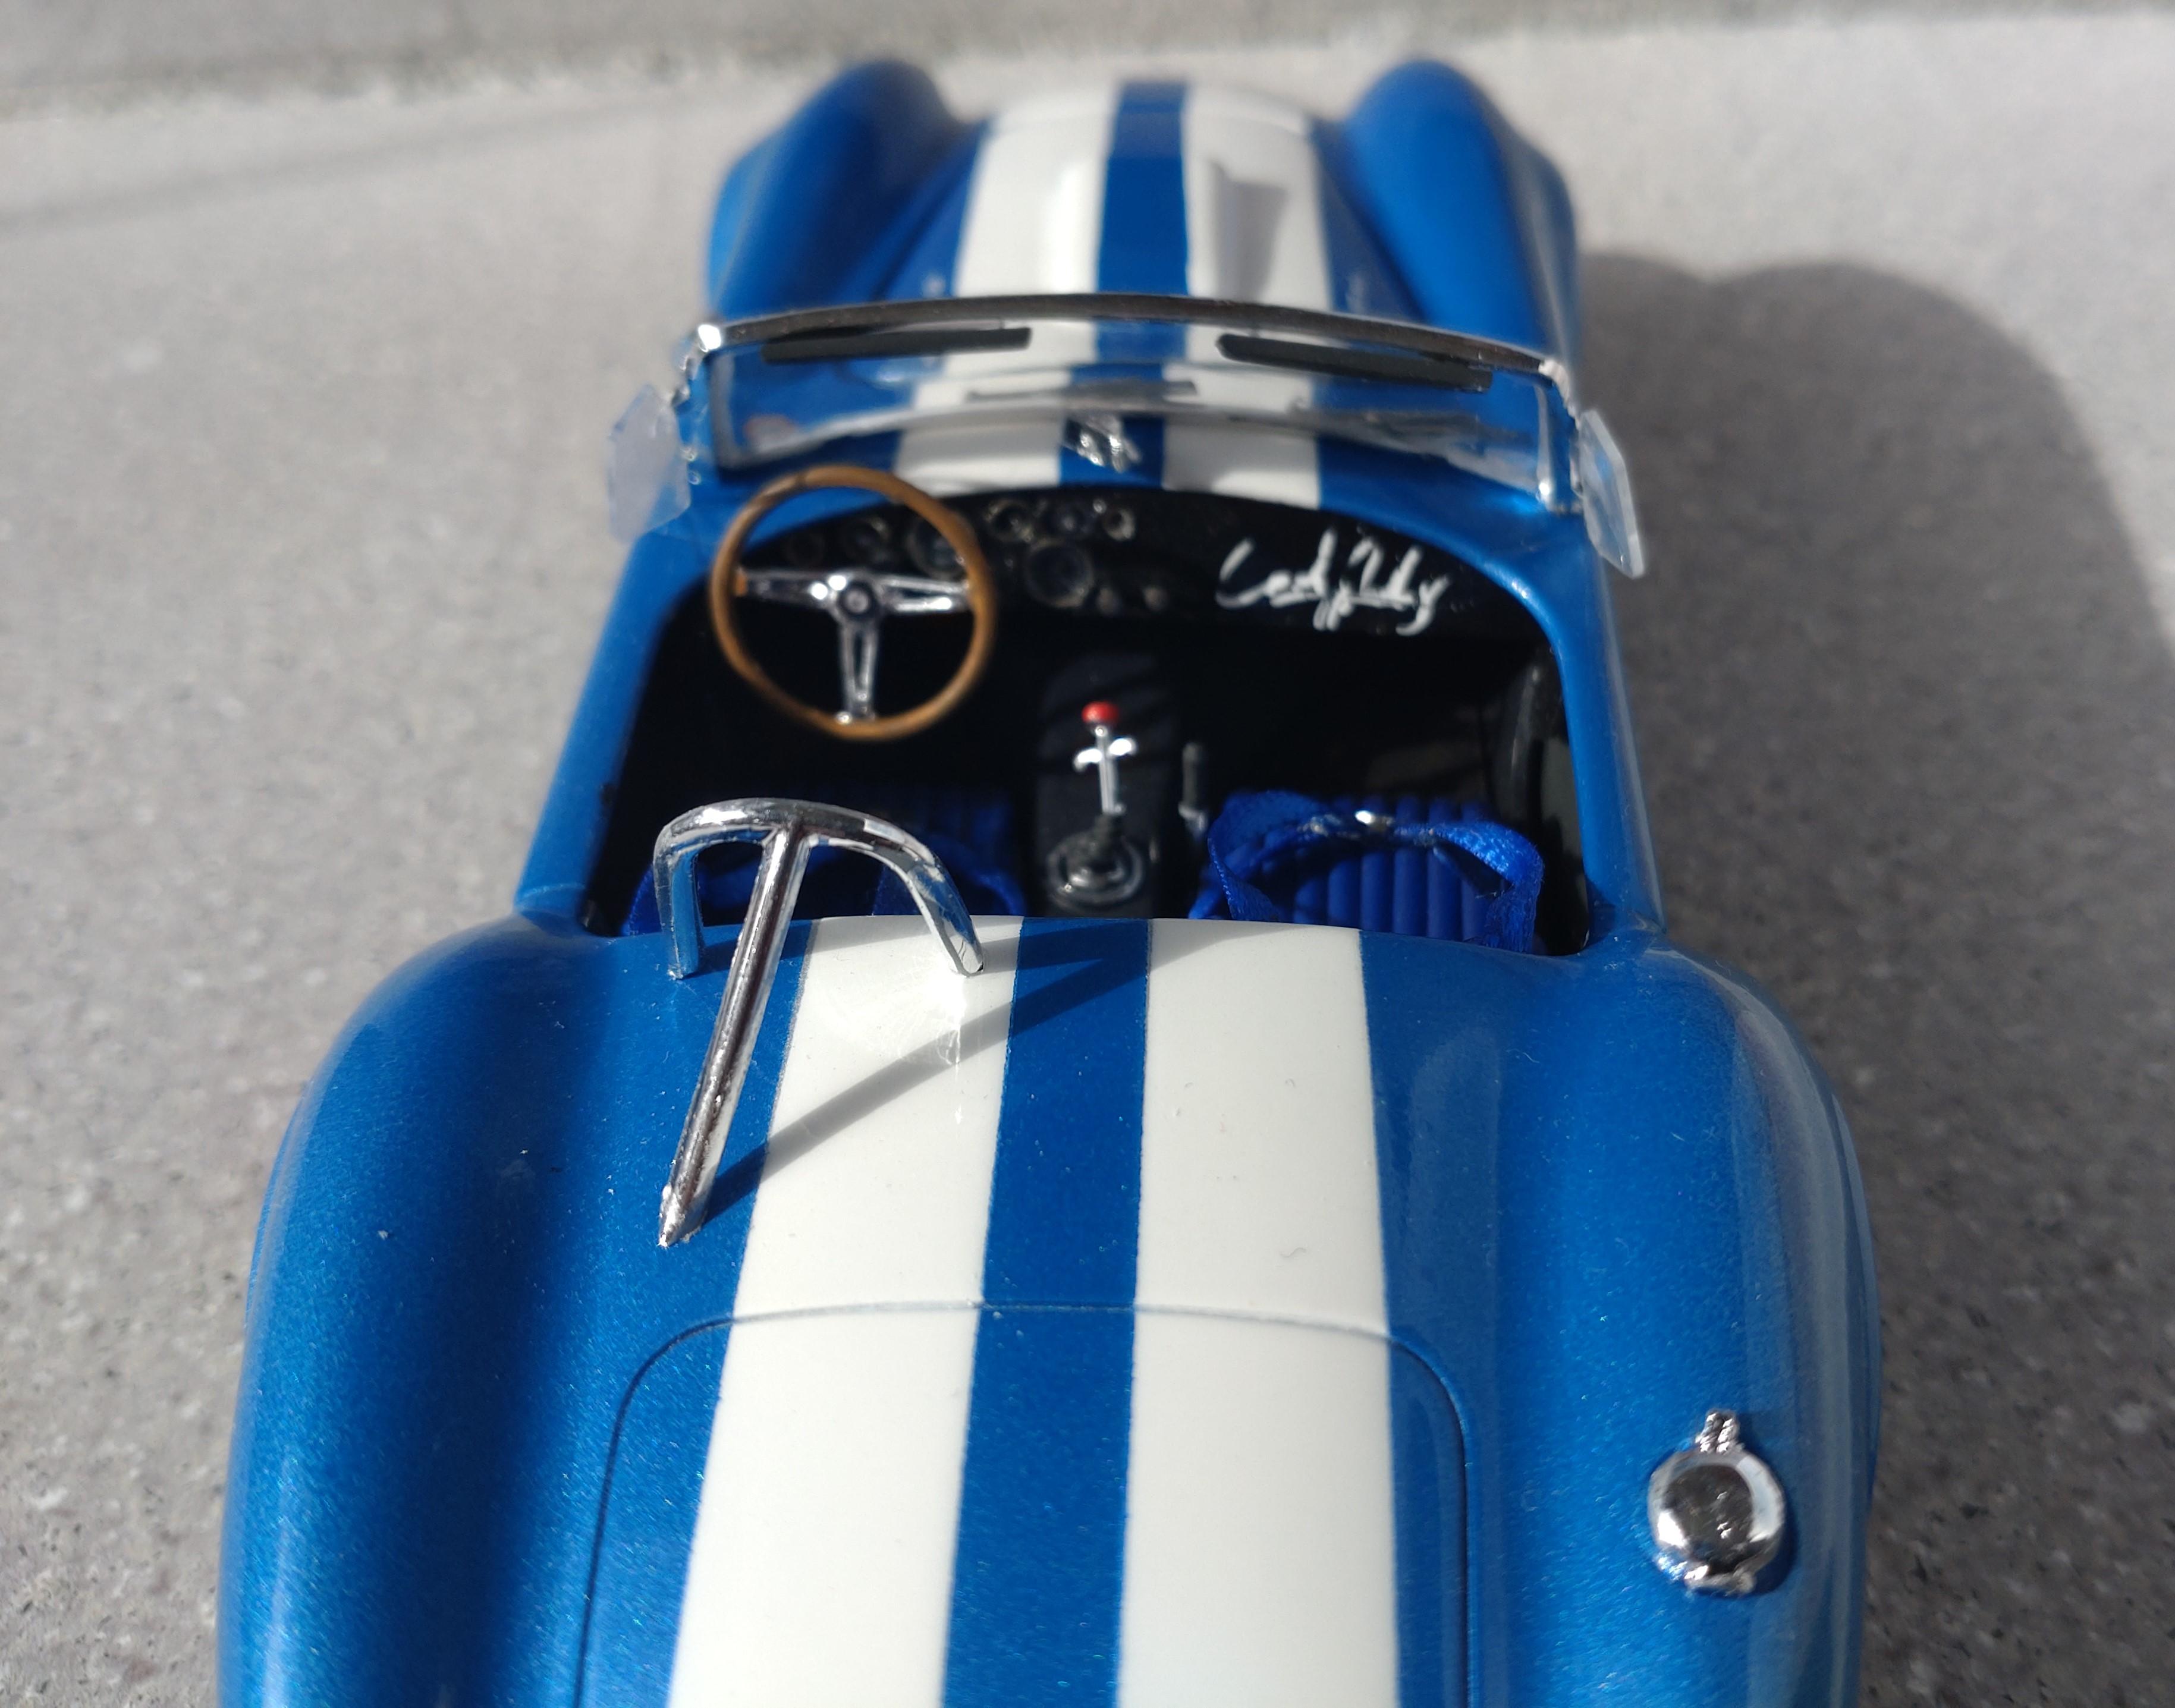
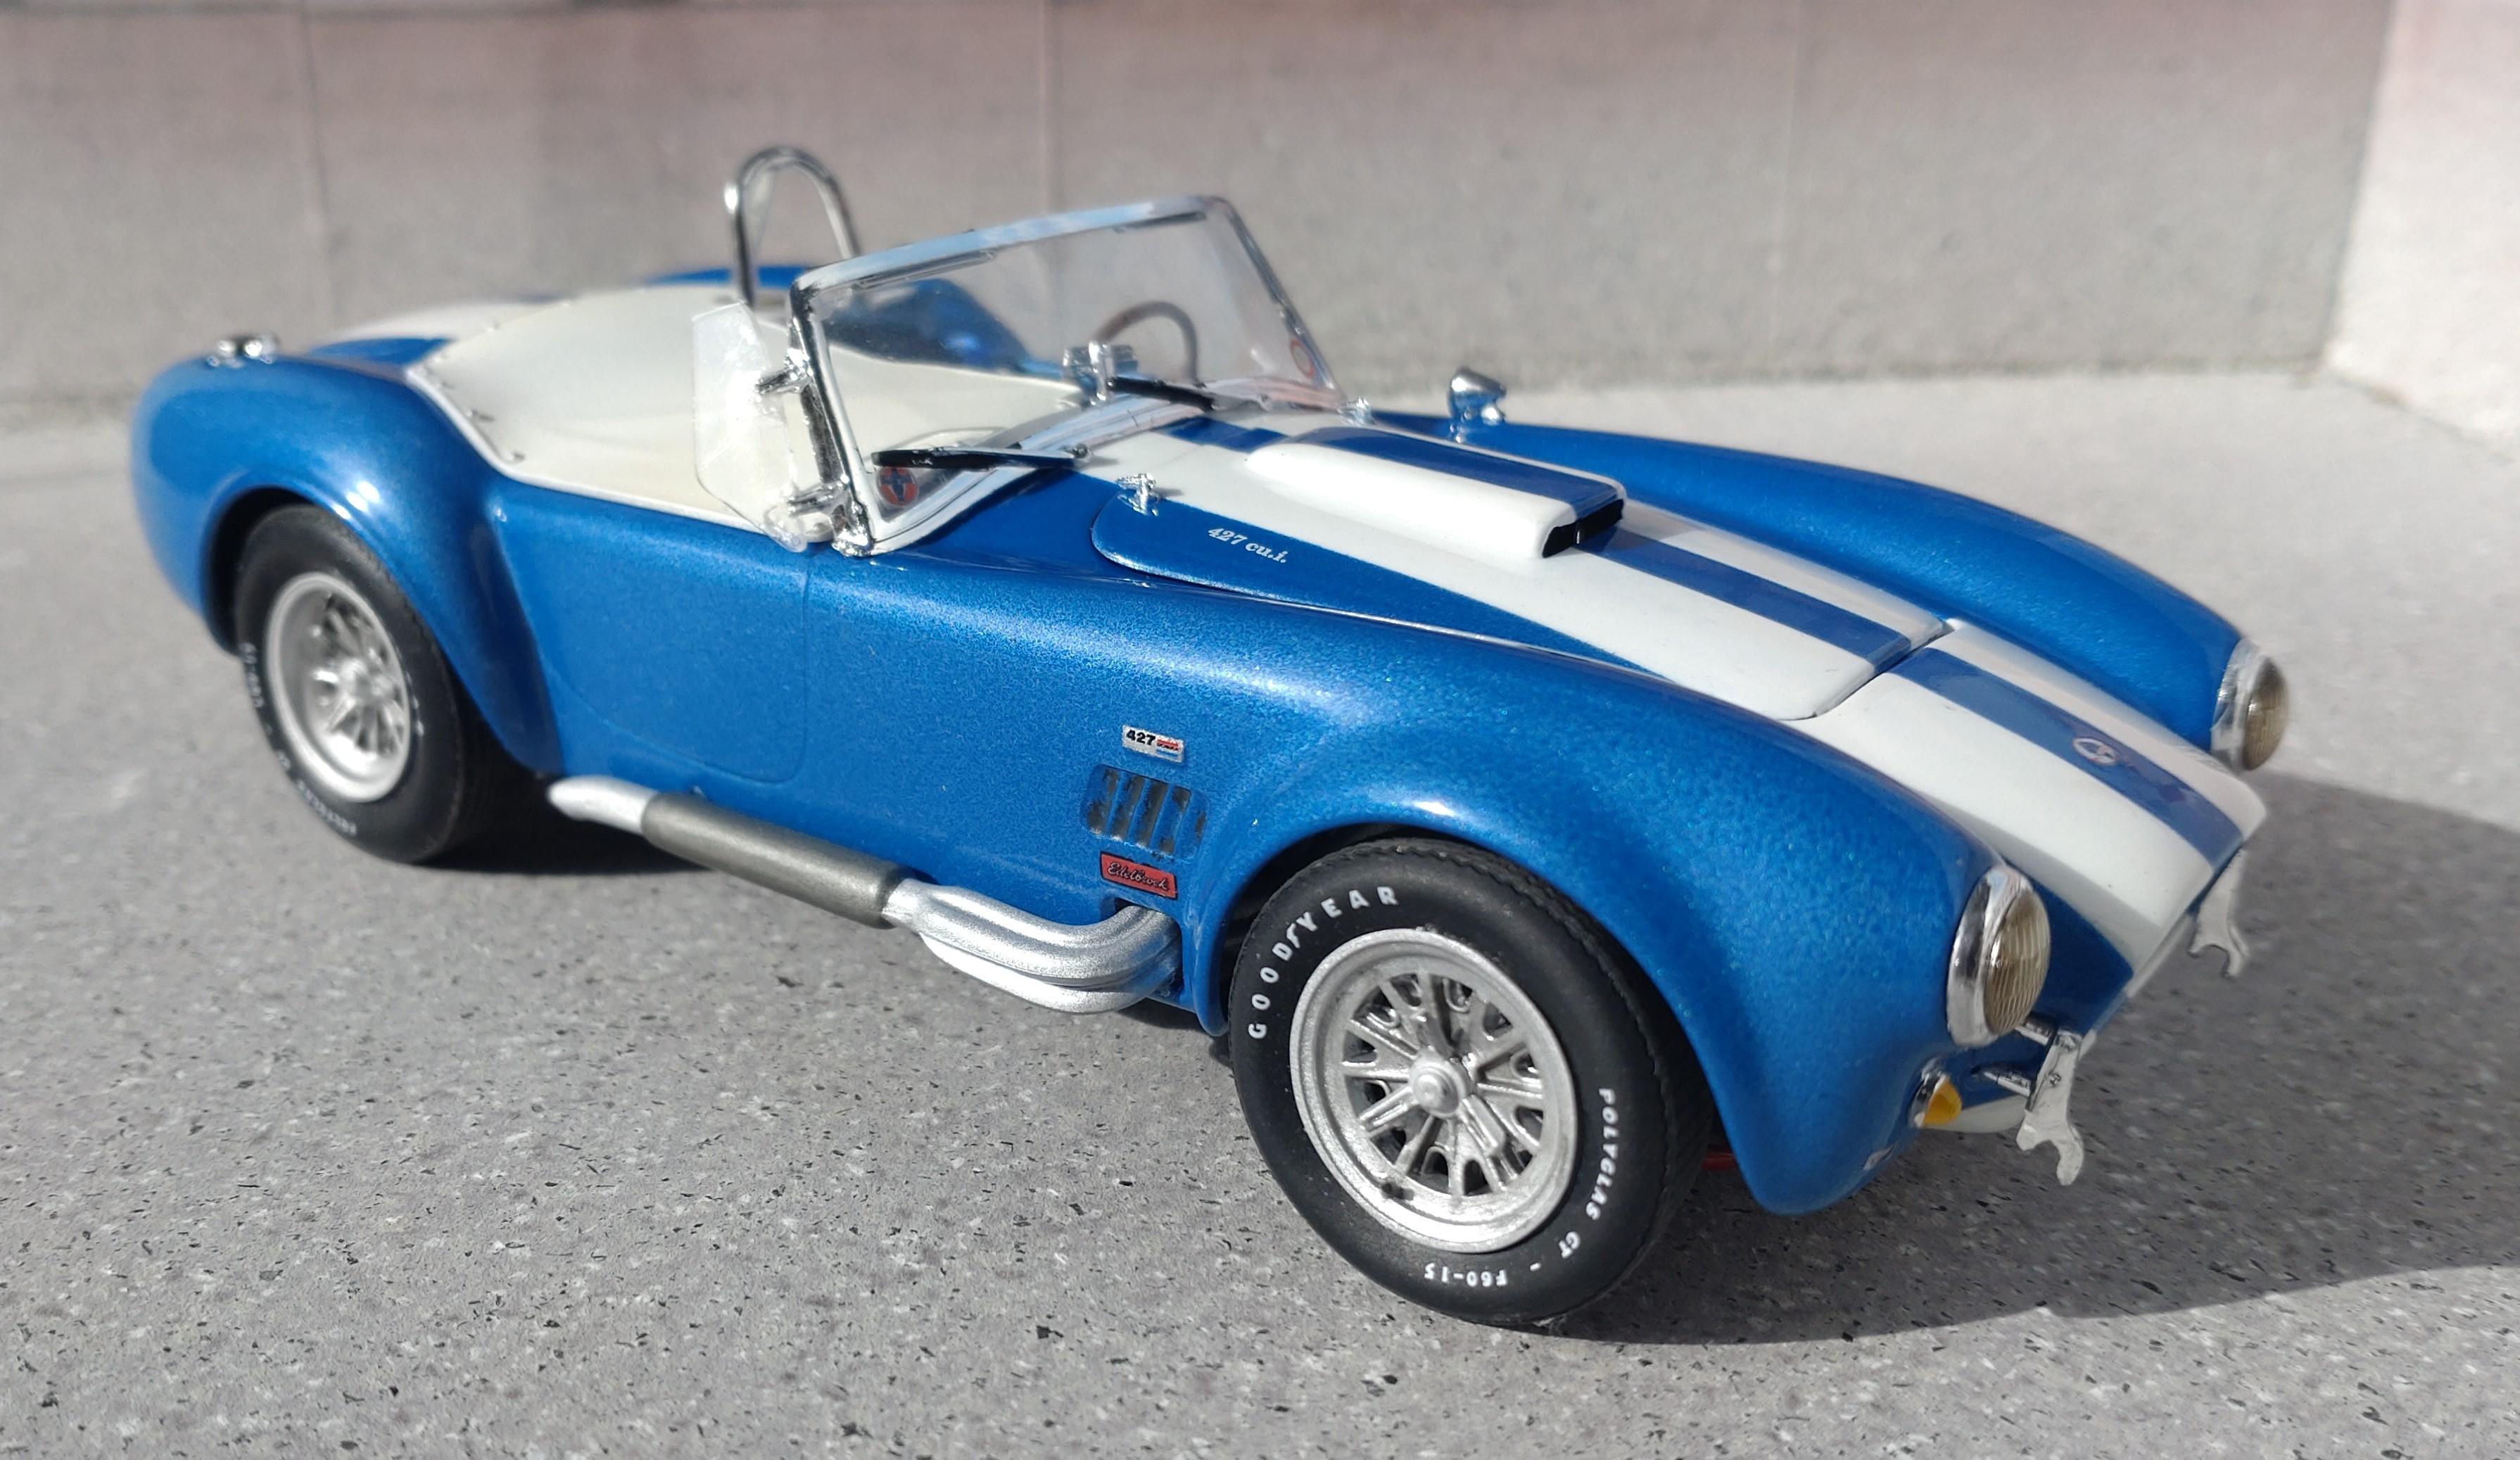
The Cobra is one of my favorite sports car. Even more so, after I was able to take a good look at even 2 of them at a car meeting this summer. On most images I encountered the Cobra in a light or medium blue. I decided for a metallic blue. The base coat and primer is a metallic silver, the blue is Aero Color Airbrush acrylic with a 30% part of metallic medium. I chose to make the typical white stripes much bolder than the original stripes. last coat is AK clear and a polish with Tamiya polish creme. The original wheels were not polished chrome so I had to spray the mags in a dark silver. The kit tires I replaced with much better detailed tires from my scrap box. Same goes with the sidepipes, which were not polished chrome. I found those real looking headlights at one of my suppliers. It seems to be clear epoxy on thin sheet steel. The interior I pepped up with sheet rubber on the floor and metal rings for the gauges. Plus racing seatbelts, although back then I believe they only had simple hip belts. Carrol Shelby offered to sigh my models dashboard?not... As I had predicted, there is not much to see of the engine once the model is assembled. I was wondering where the battery was placed and learned that they either packed it in the small trunk or tucked it behind the shotgun seat. A really cool legendary car with lots of stories to tell about. Thanks for taking a look!
-
Thanks for your friendly feedback? I´m working on the body now, but it will take a while. I going the long mile with opening doors and trunk. Will be showing images soon.
-
Hello everybody! ? Thanks for your response and the friendly comments! This RS is one of my favorites.
-
Thanks Robert! Magnified that much one does see a few flaws. Your opinion; do the hex nuts make a difference?
-
WOW! Great job done, impressing shop diorama too. Looks almost real ??! The rod is rad, but your shop keeps distracting me because there is so much to see. Lots of details and a very good used, dirty patina to everything. How long did you take to build this? What manufacturer makes the rod? I´d like to build one myself, but seems my German importers are not offering anything like that.
-
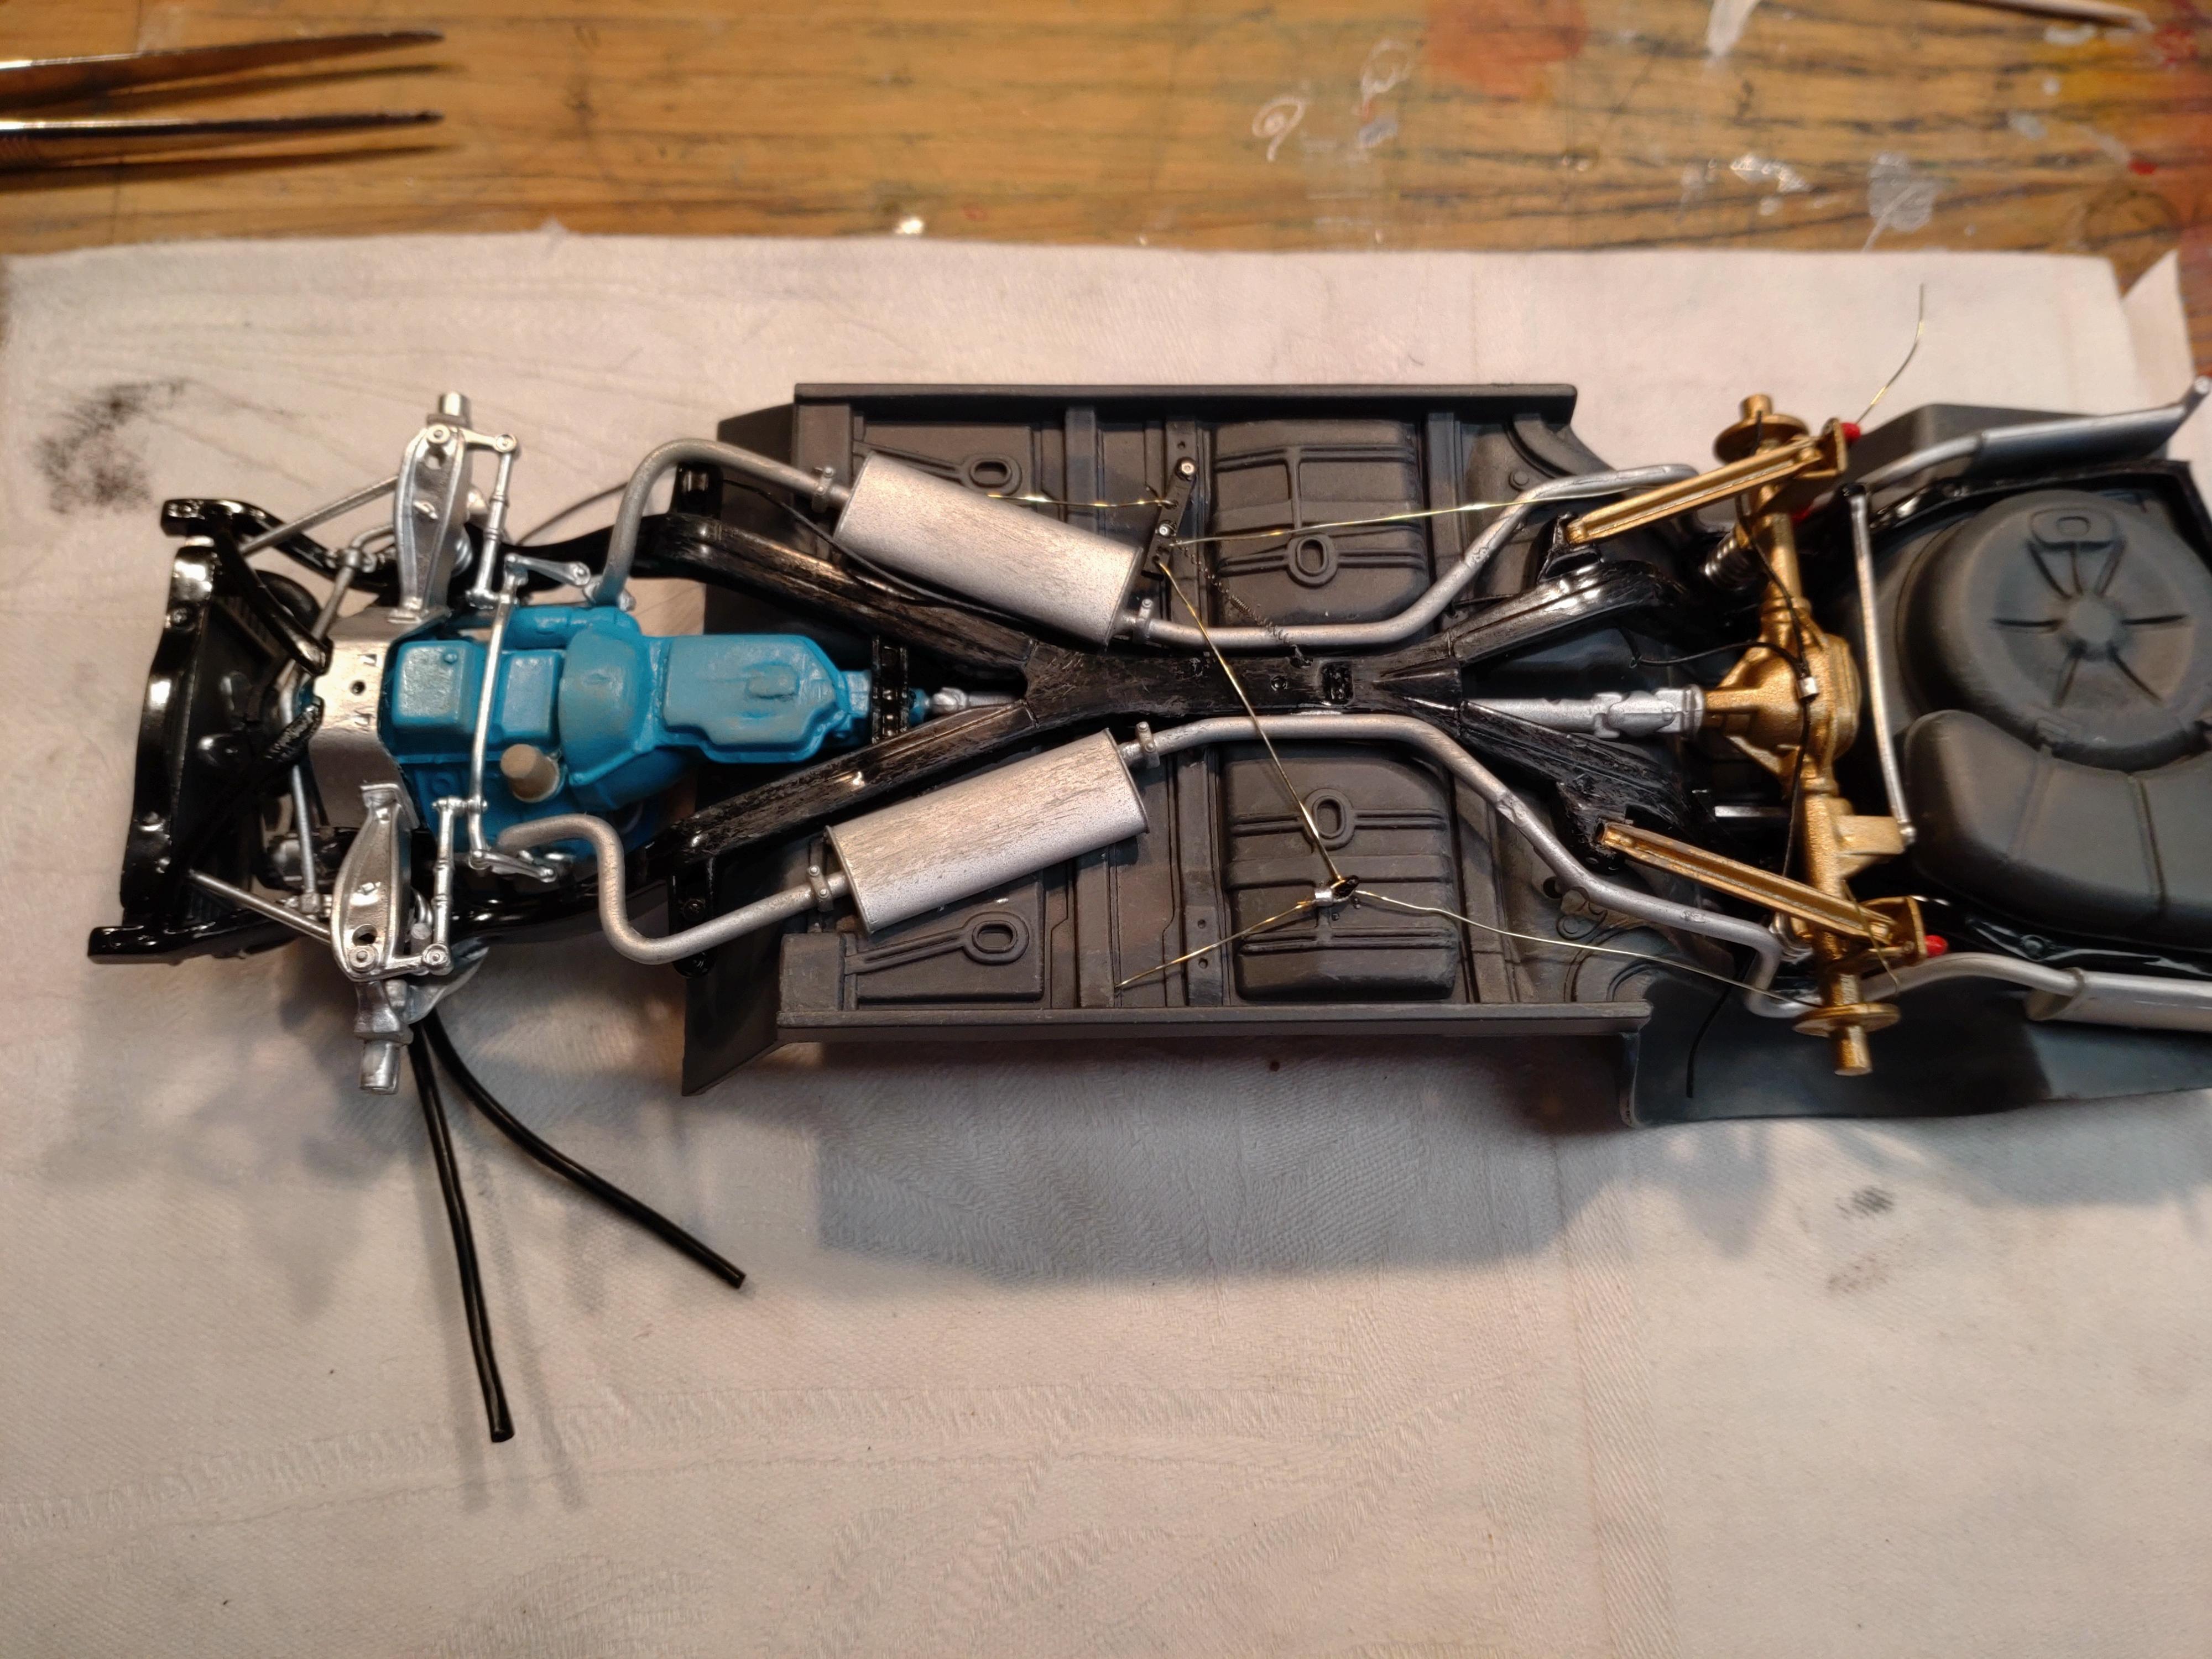
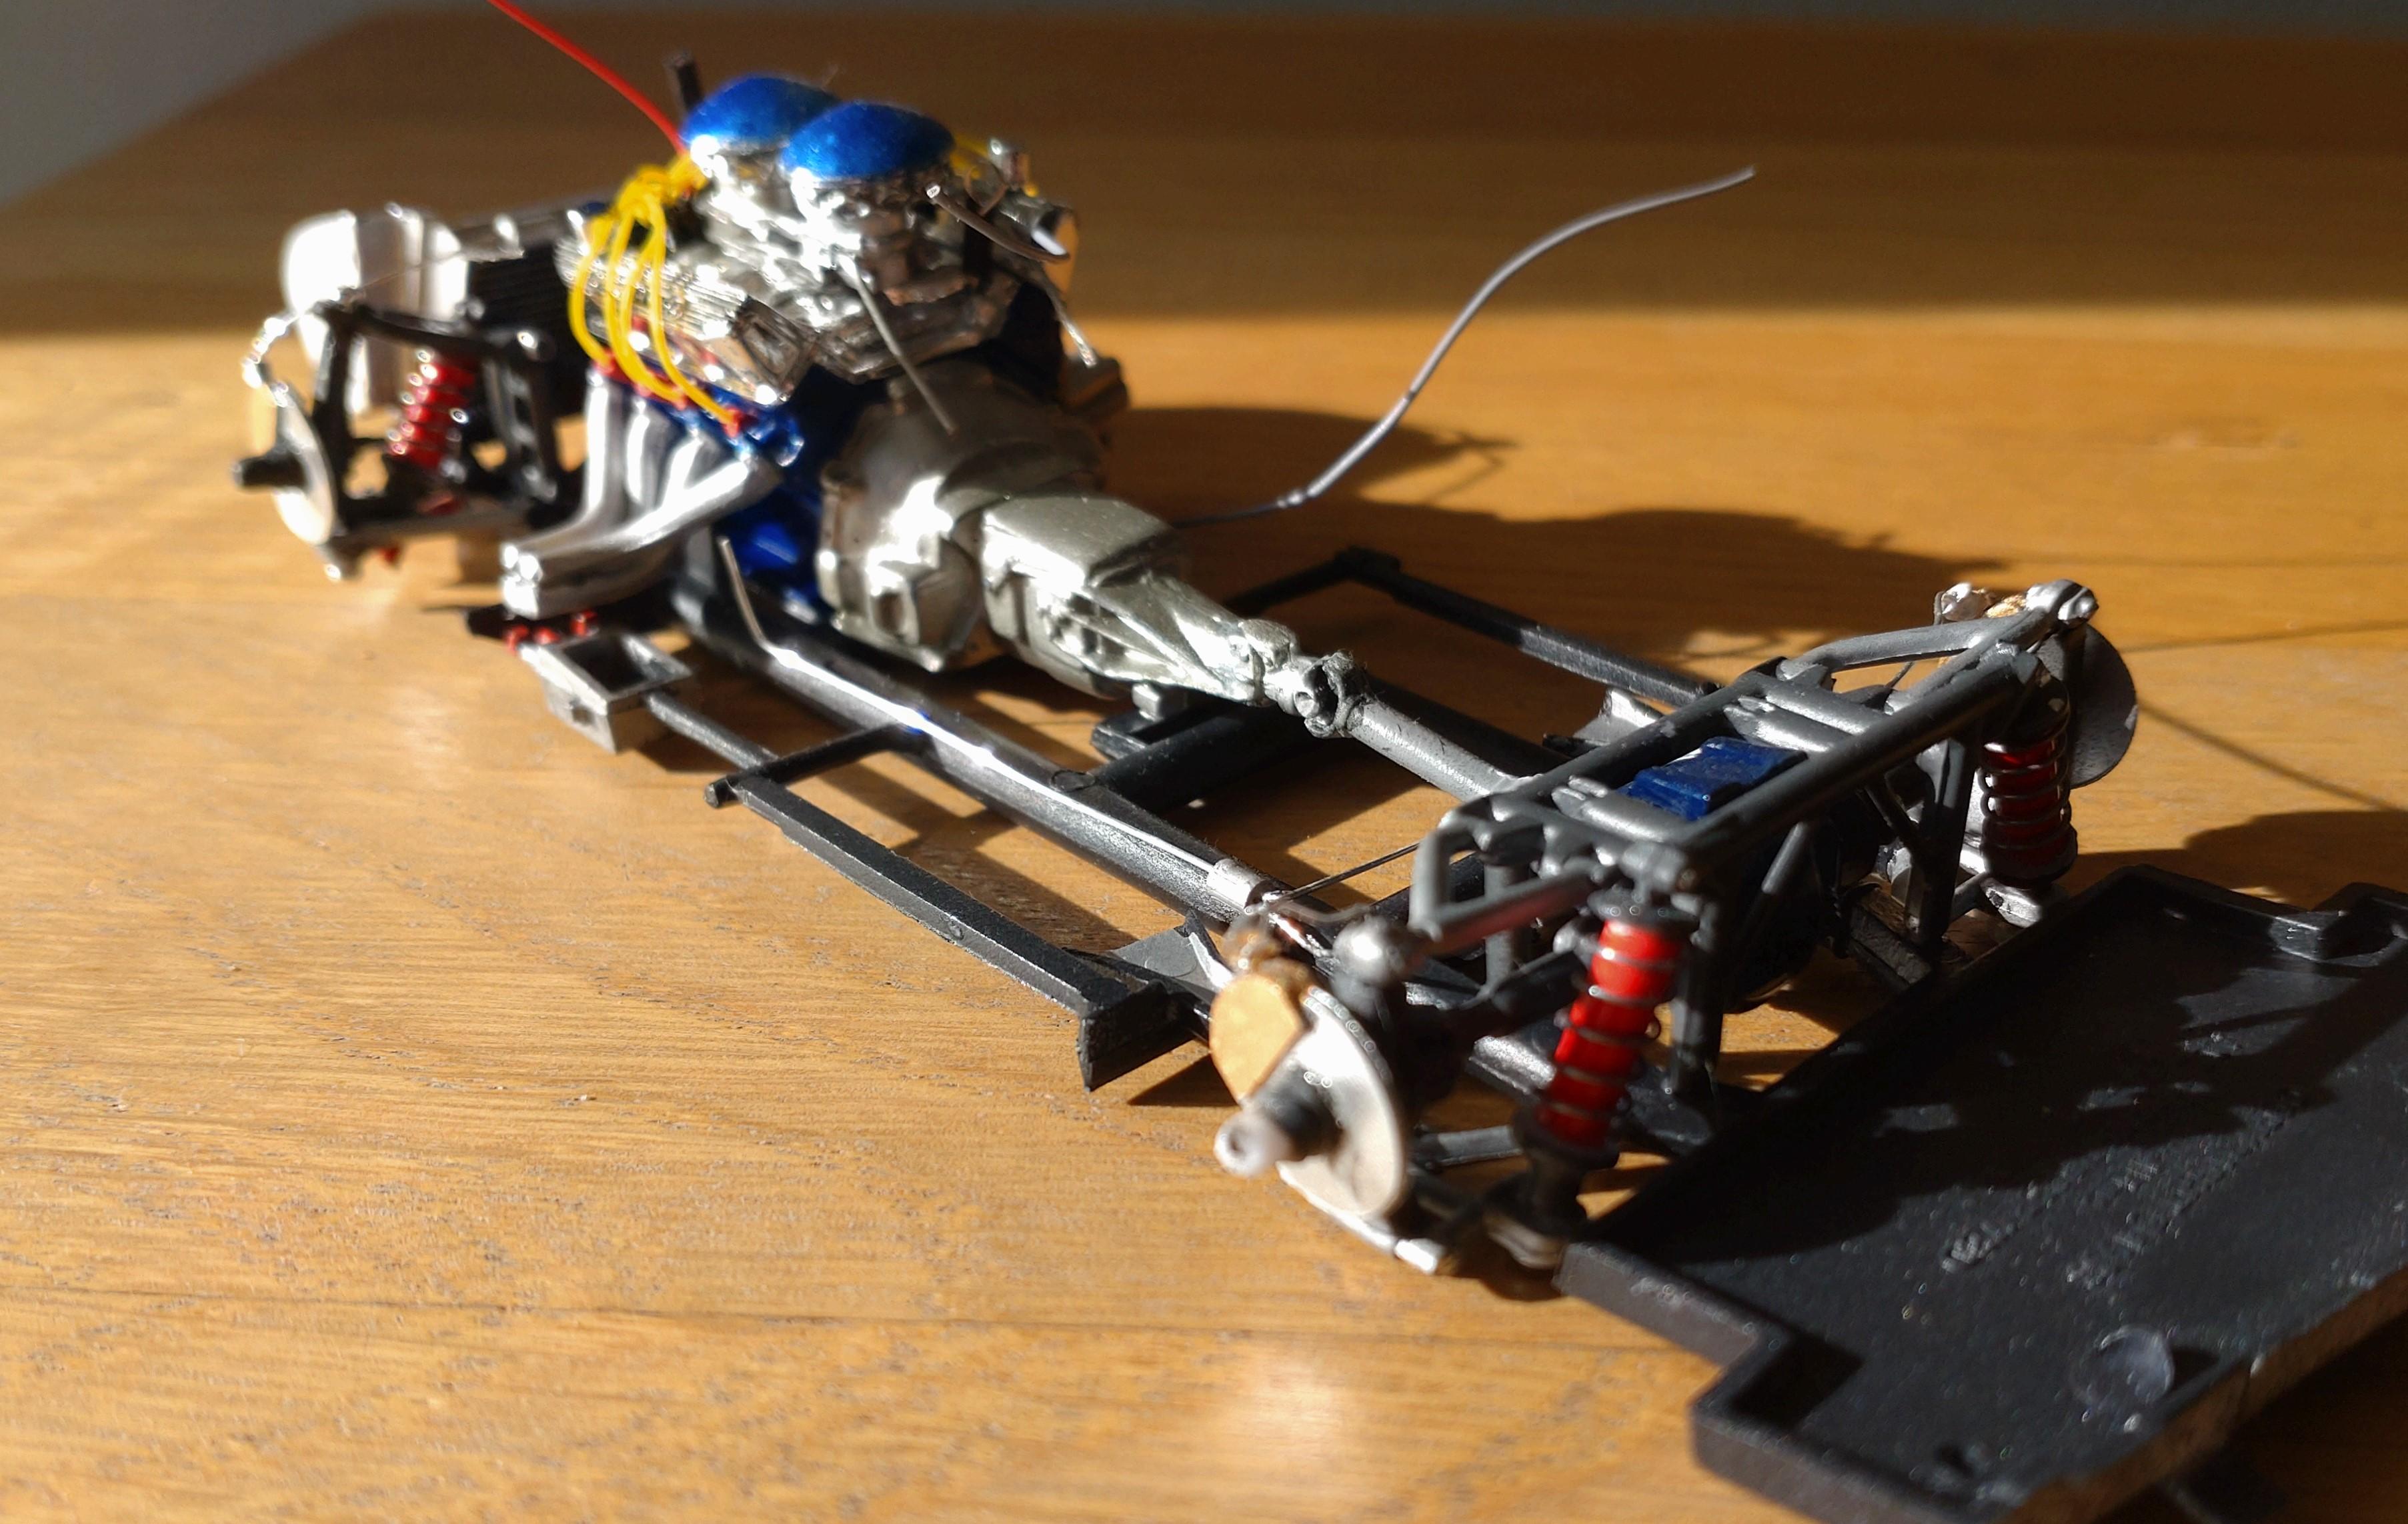
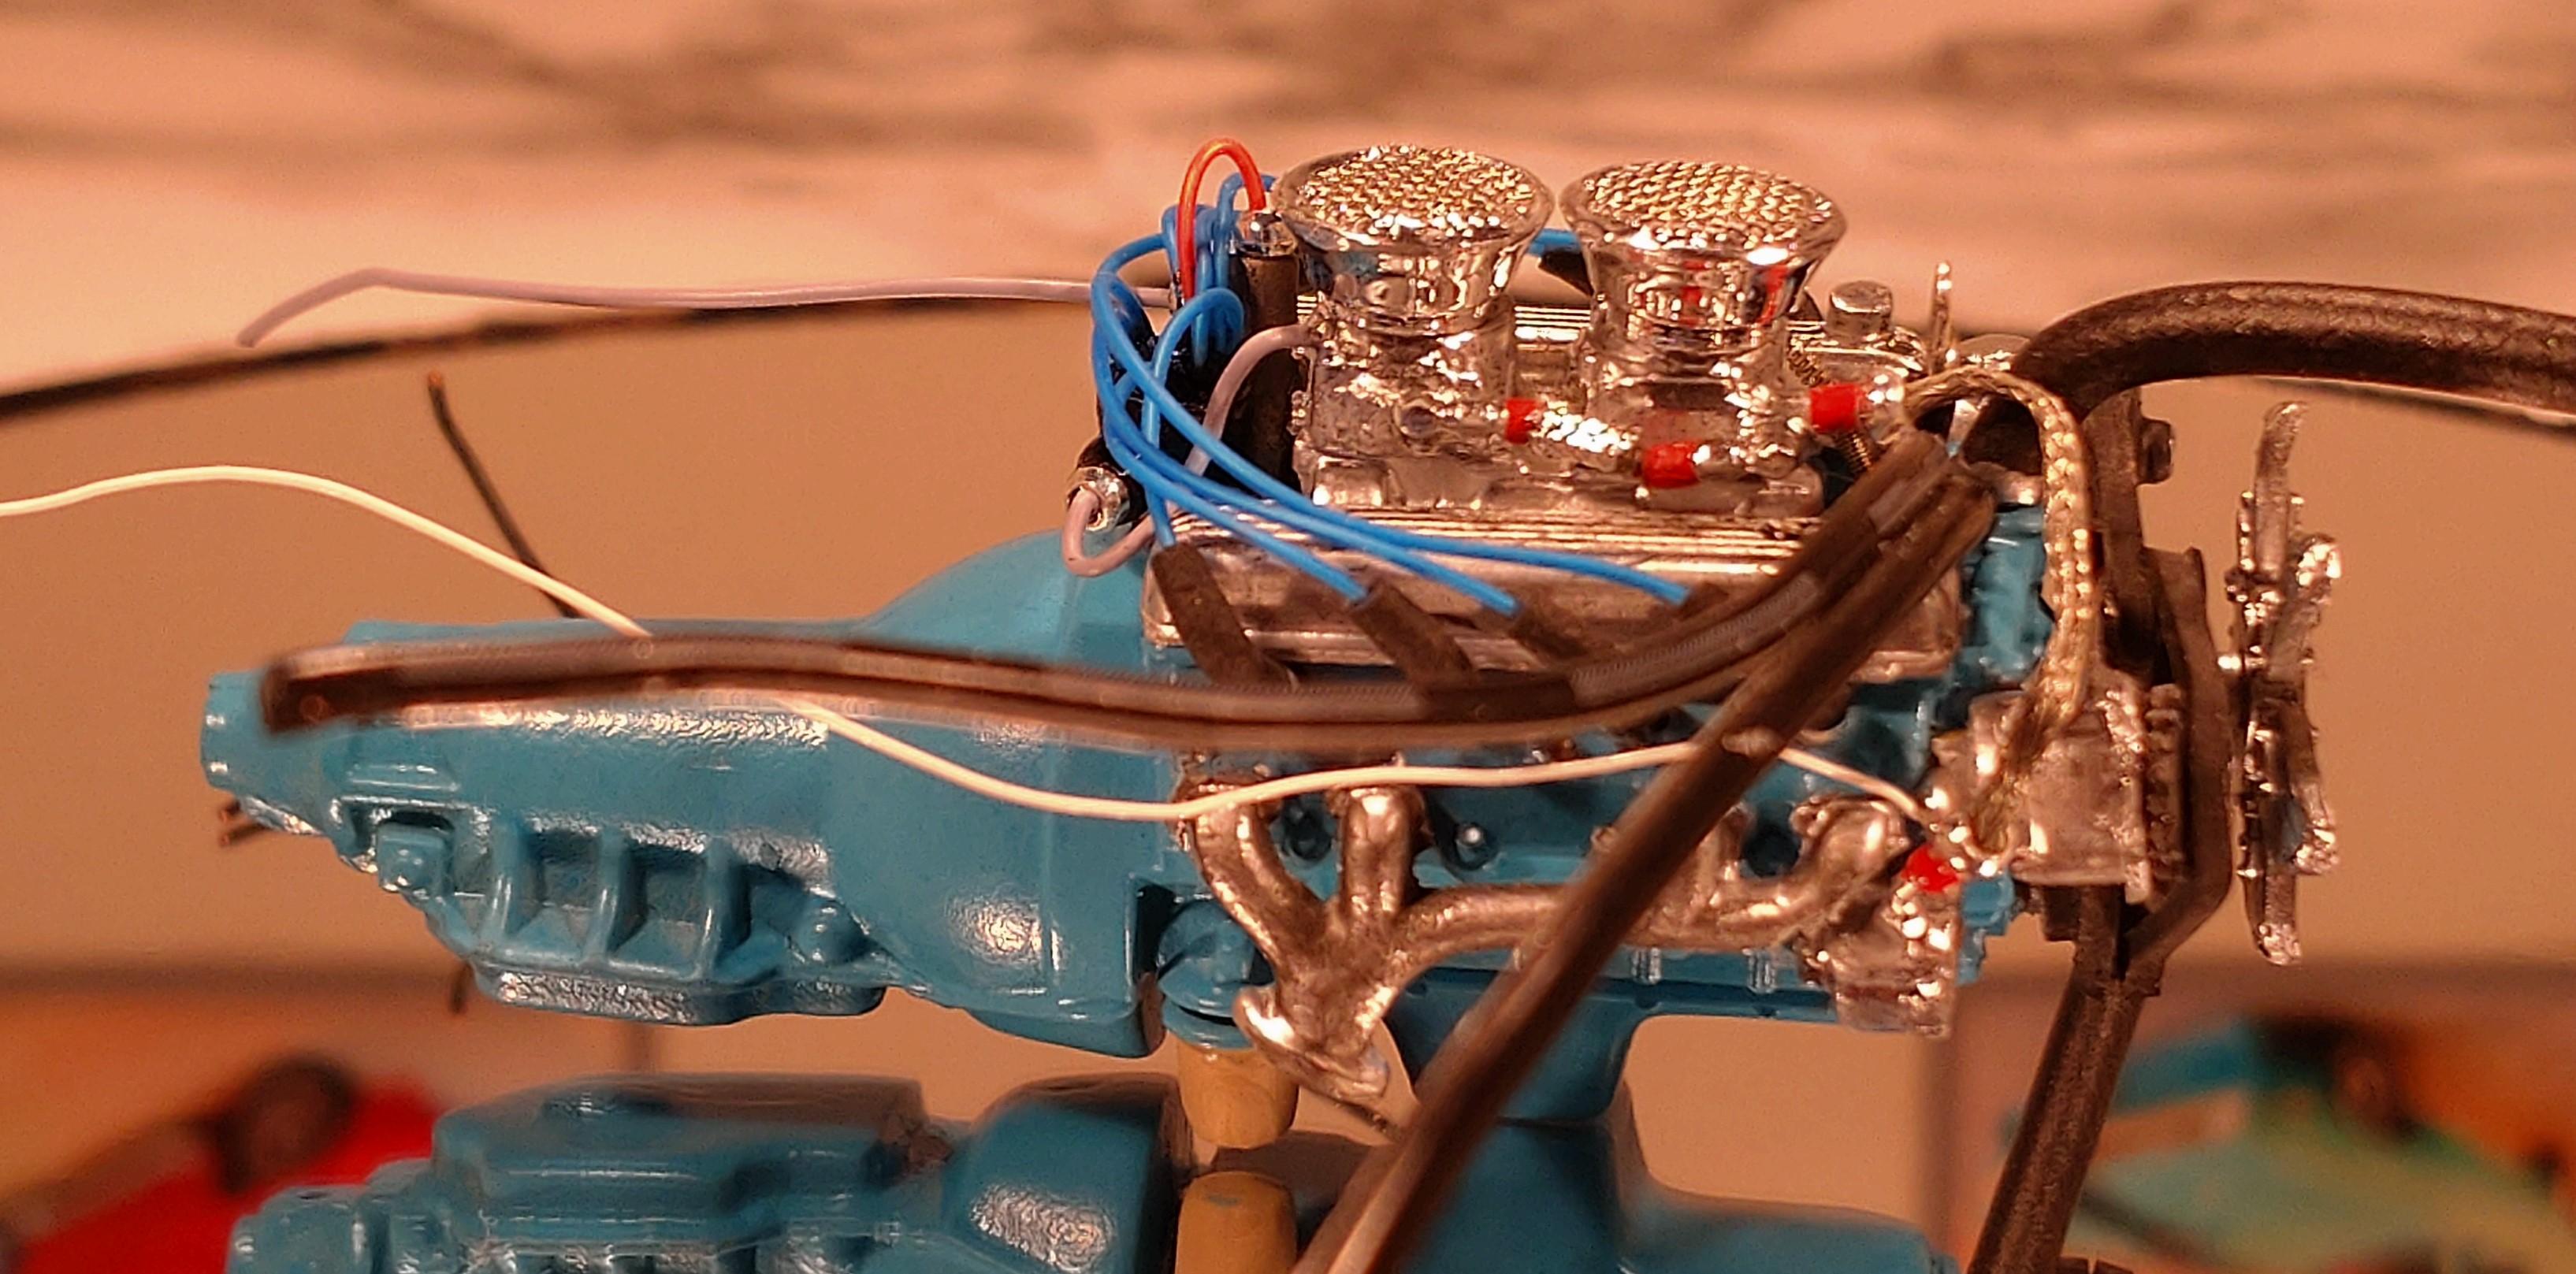
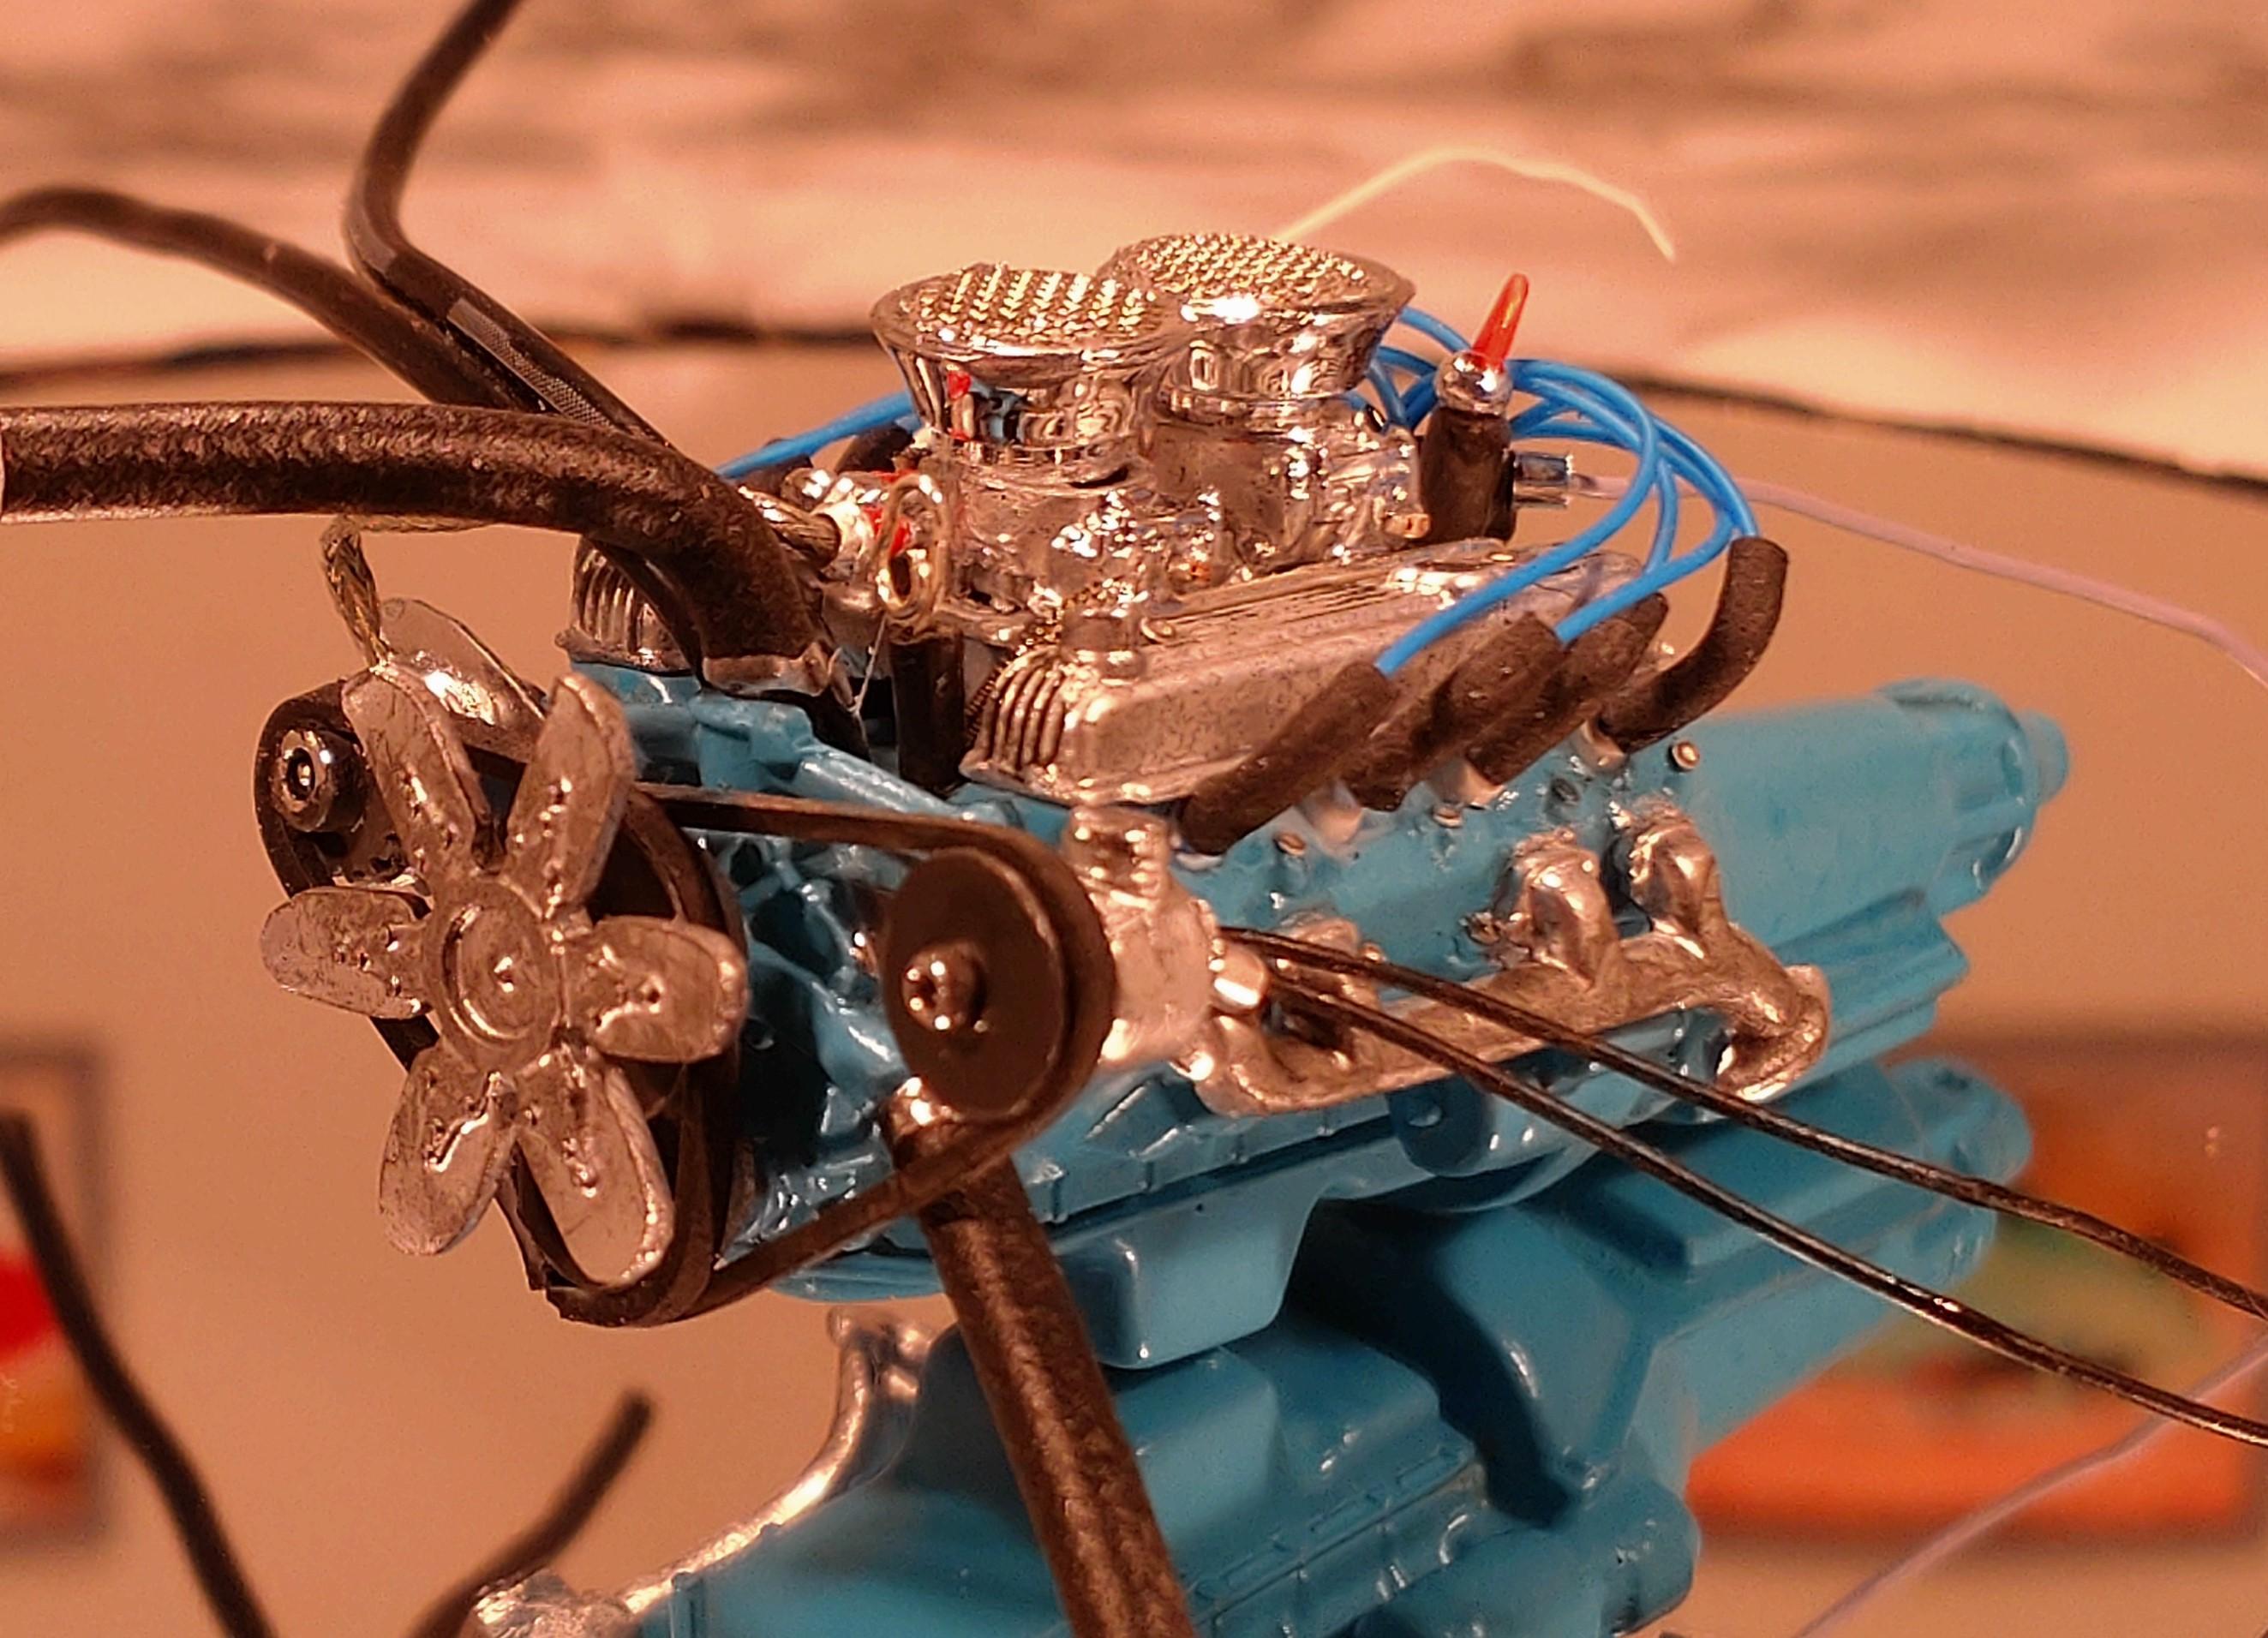
So far i´m finished with the engine. About 90% of the parts are out of the kit. I customized the air intake and added the stacks, covered the top with fine mesh metal. For quite a while now I build my ignition distributors myself. Honestly, I was tired of drilling those little plastic beans. I put a 2mm rod into a 4mm aluminum tube and have enough space to fill with the ignition cables. If anyone is interested, I can show some images of how I do it another time. The boots are made of 3mm heat shrink tubes. They shrink to half the size and after shrinking the hole is just big enough for the 0.4mm wire. The pulleys and belt are also custom made. I deconstruct those kit parts down to the belt pulley. Occasionally I have to build the pulleys myself out of sheet styrene and slices of styrene rods. The belts I cut from 1mm thick synthetic rubber. I found a supplier for micro photo etched hex nuts, but I don´t know yet, if the show effect after applying 1mm small "nuts" are worth the effort. They really made me sweat?? Thanks for taking a look!
-
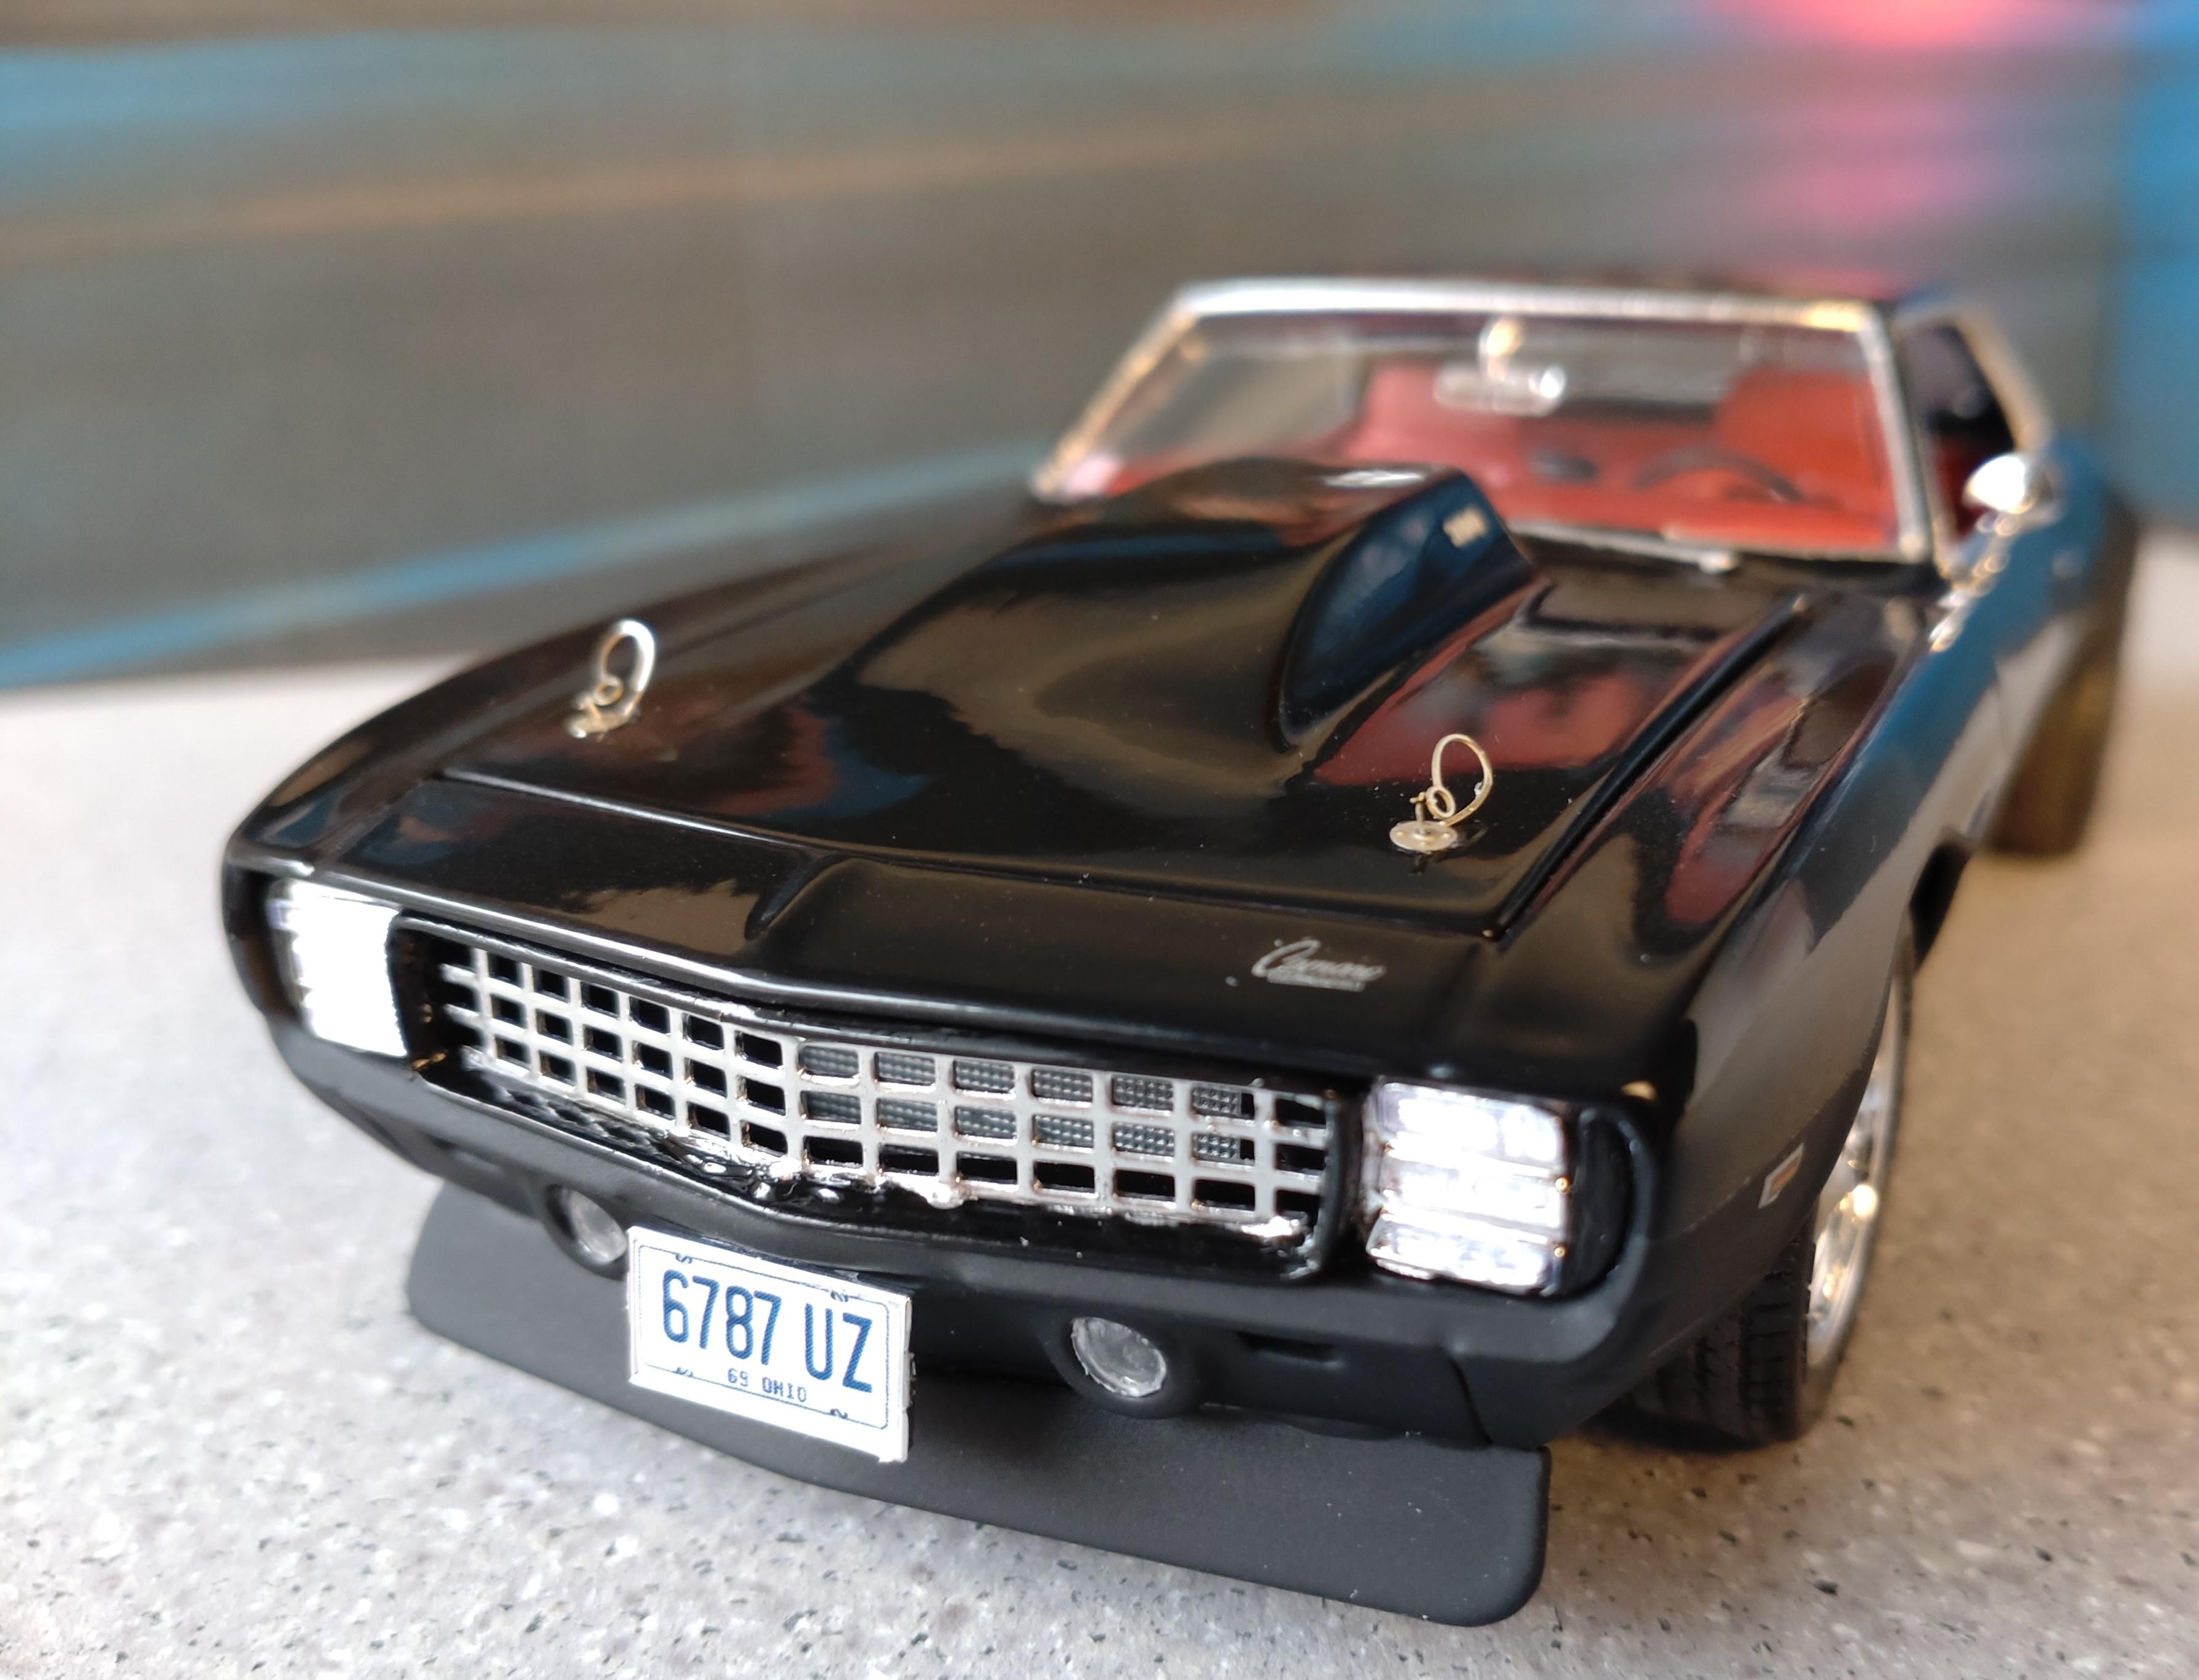
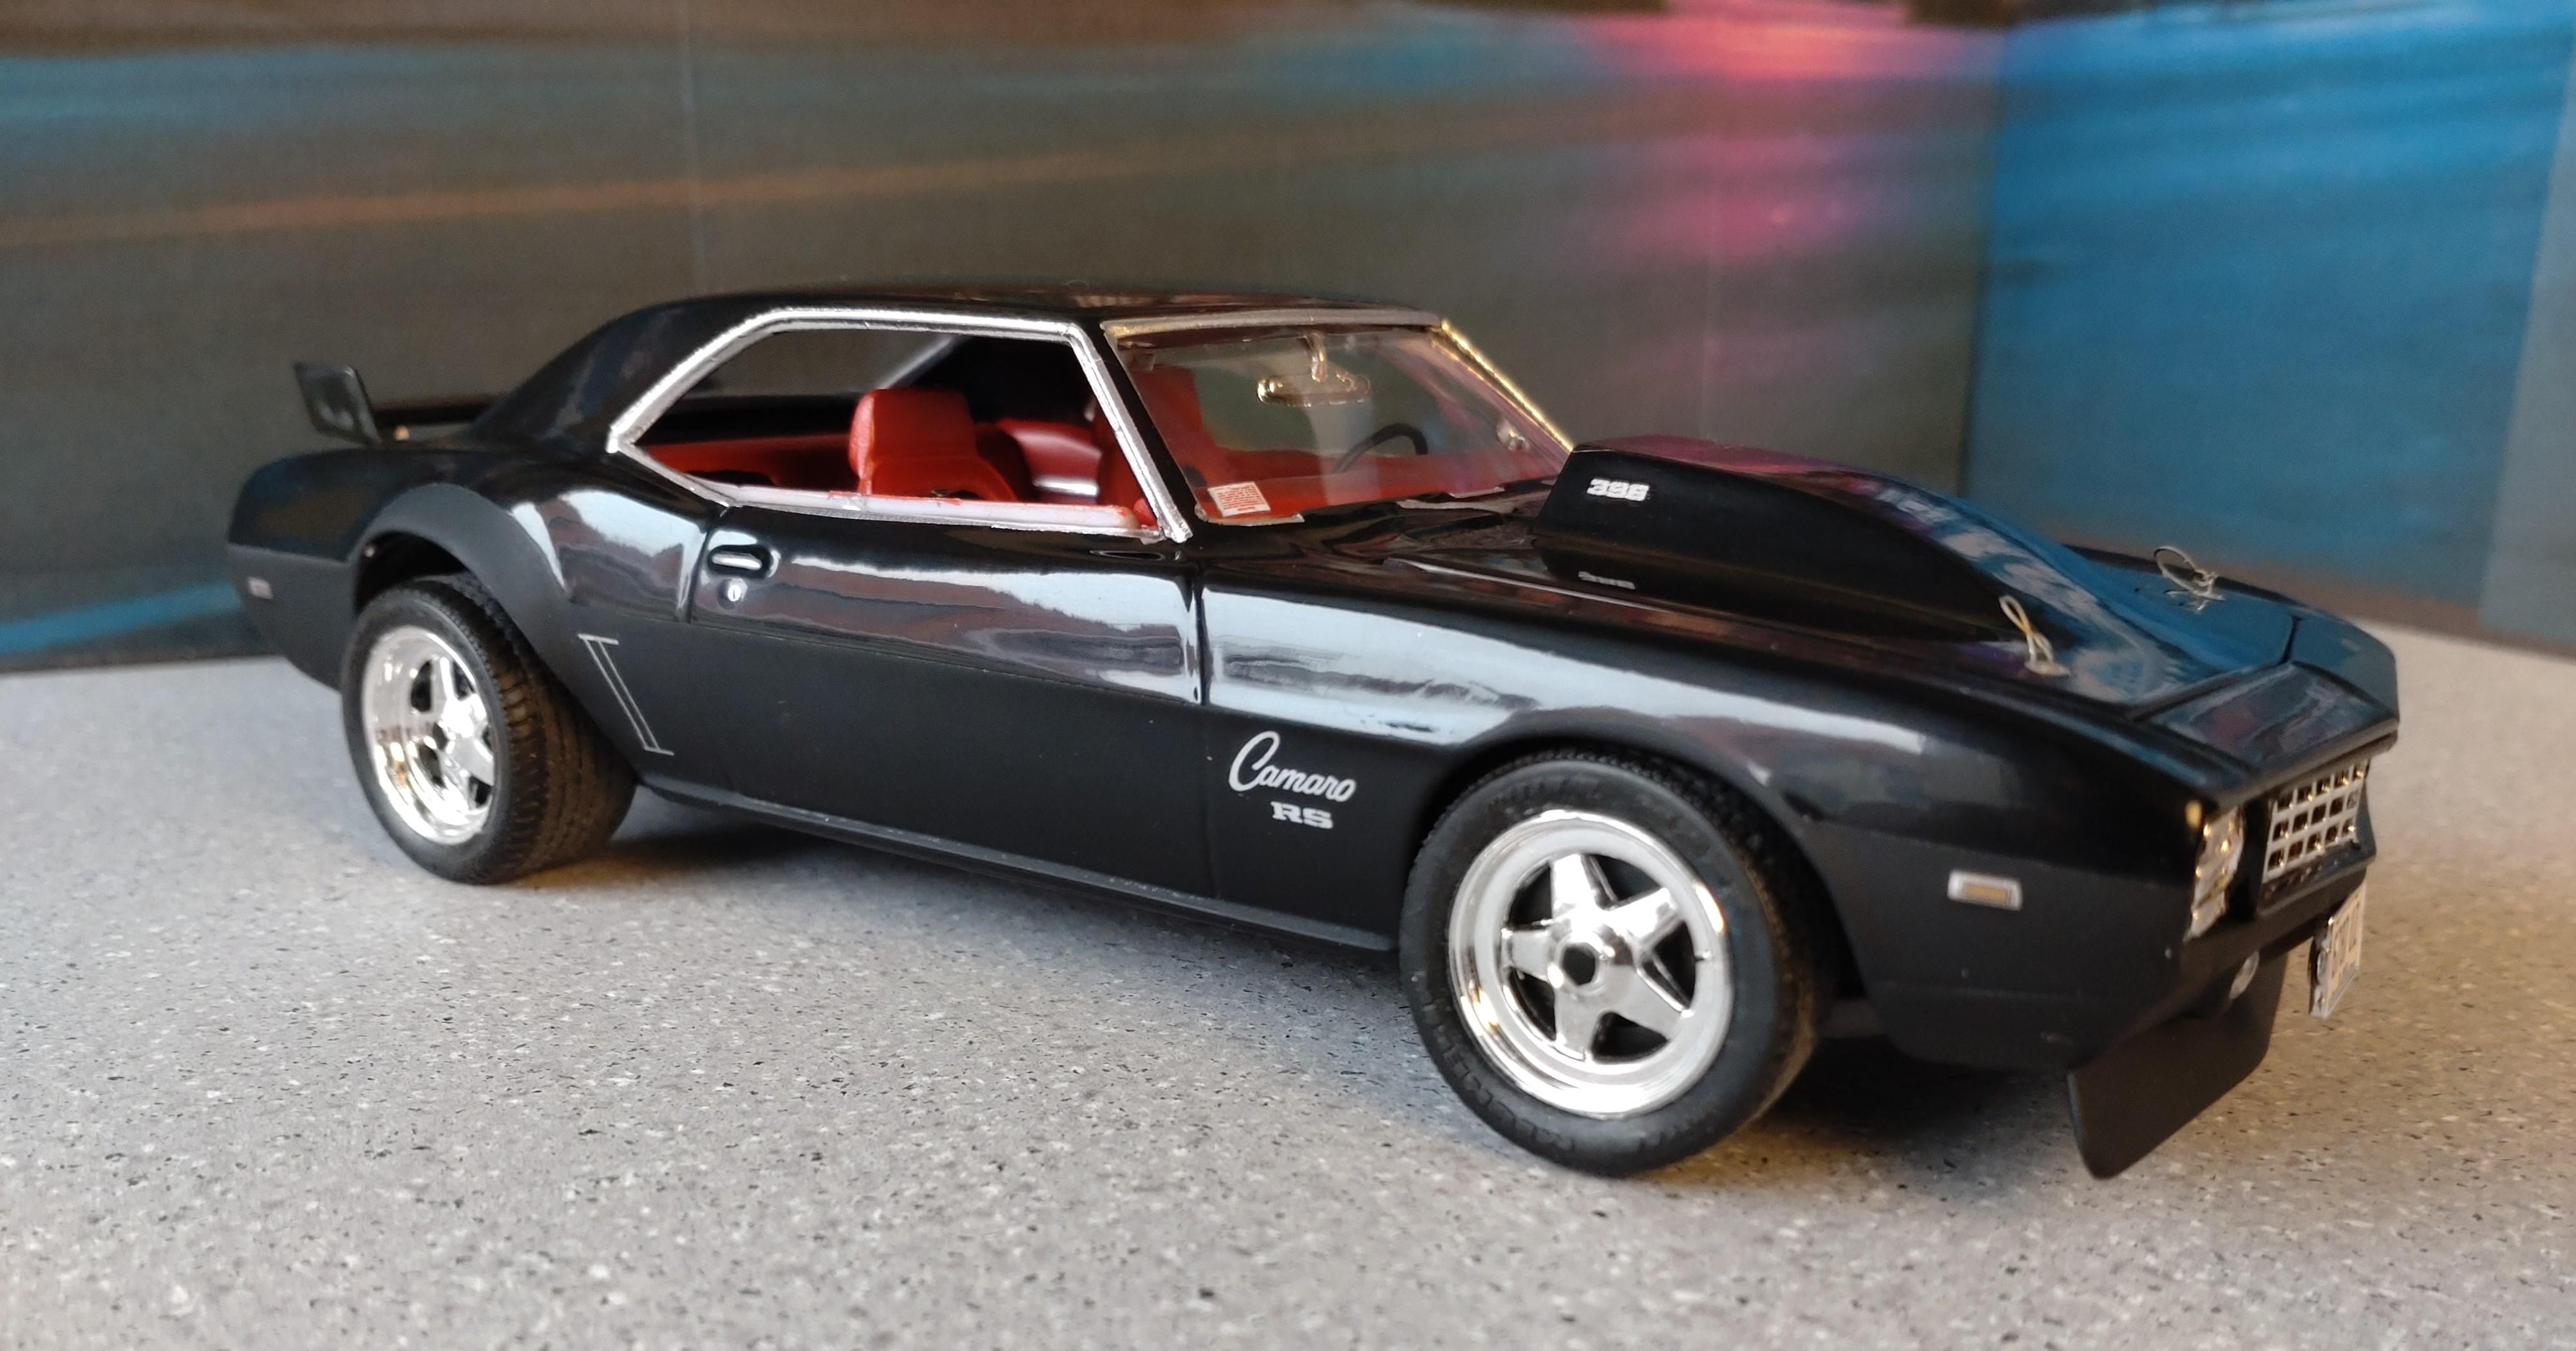
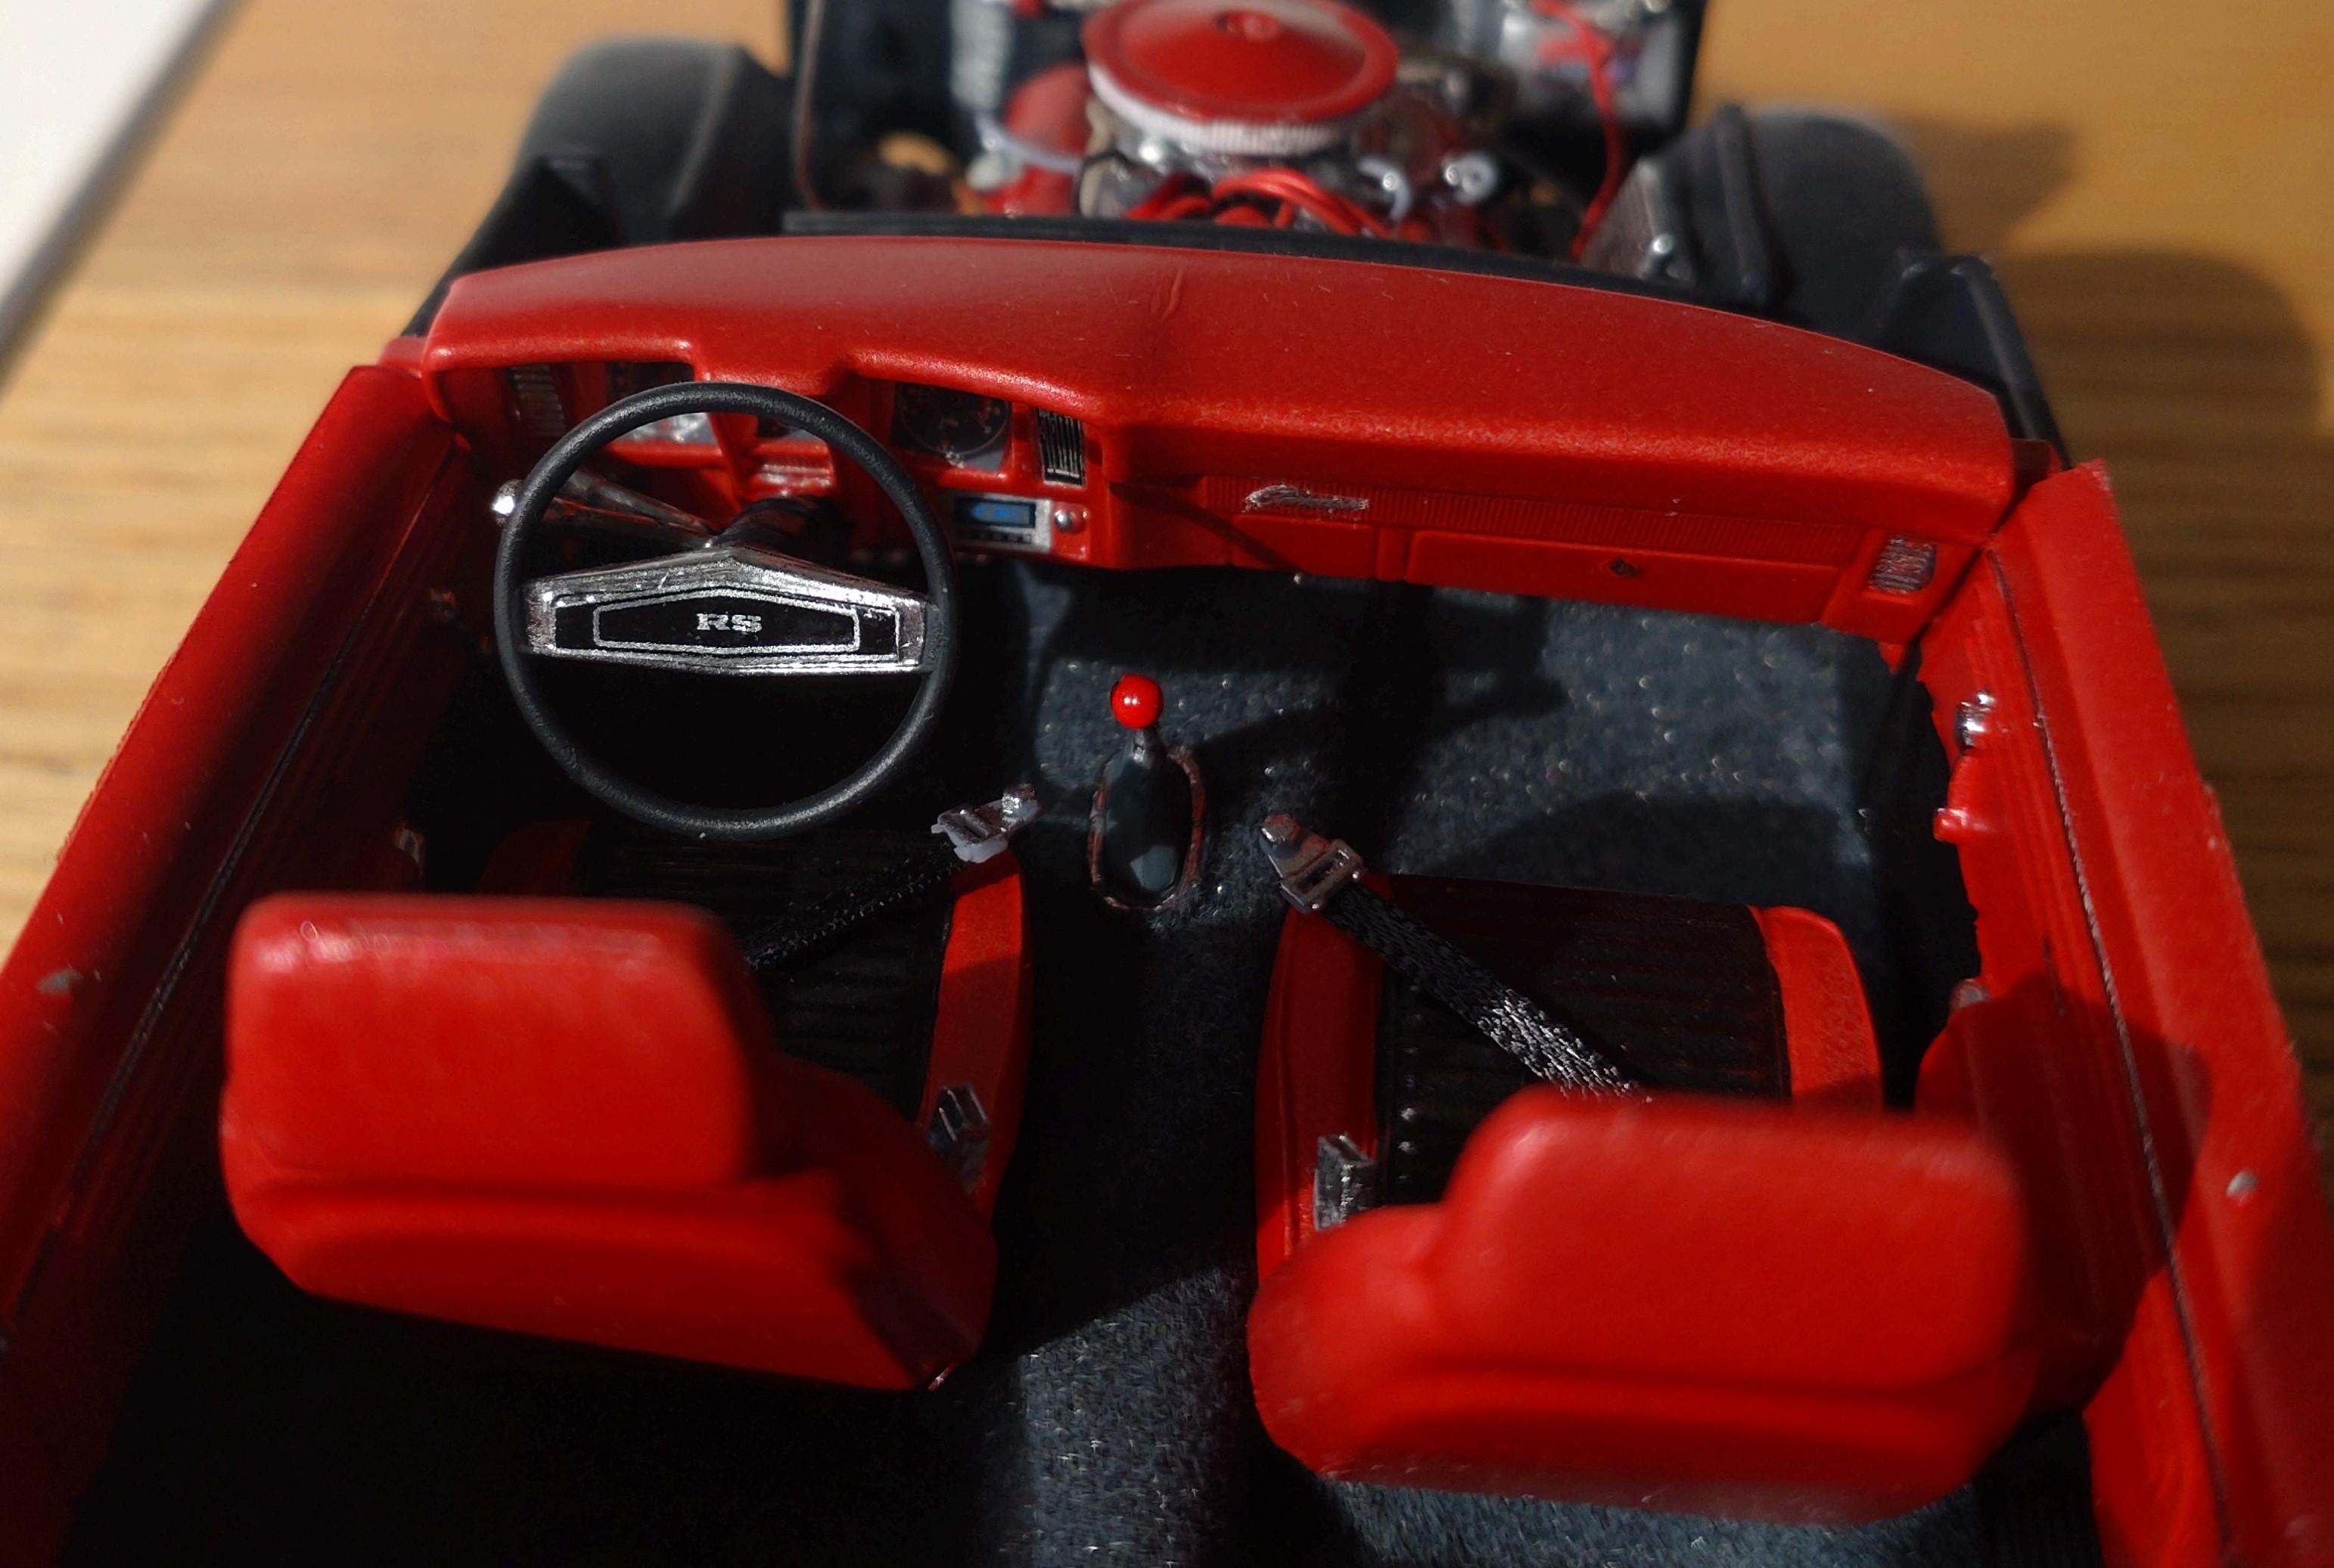
When introducing the Camaro, Chevrolet manager Elliot M. „Pete“ Estes was once asked by a journalist what a Camaro is. He replied „A small, vicious animal that eats Mustangs“. Well, for the RS this was definitely true. Sorry, all you ´Stang lovers (I love them too!). My Revell Camaro is only slightly modified. I beefed up the hood and the spoilers with 1mm styrene. The overall black paint job is enhanced by a matt finish on the bottom half. The kit wheels and tires I replaced out of my parts box. The grill is cut out so I could insert a mesh metal grid. The chrome is bare metal and a few drops of Molotow. The interior has a flocked floor and "real" seat belts. I had fun keeping everything in a black and red color scheme and that goes for the engine too. I was inspired by images I discovered surfing the net. I changed the carburetor setup and added some details. Thanks for watching!
-
A couple builds I’ve done in the last few months
Andy Oldenburg replied to Tuckerb's topic in Model Cars
Nice builds? I like the weathering on the Chevy and Ford. -
Cool color and a best match for this model? Waiting to see how the engine and interior will look like.
-
Looking fine so far. I´m waiting to see the progress.?
-
Cool build, clean work and fine detailing. ?You mentioned applying the large decals on the body. I´ve had my issues with big decals. I coat them with a clear spray first to keep them sturdy. but often enough they rip while applying. I have the Revell decal softener but somehow a certain "special method" is missing during my process. You have any advice?
-
Hey thanks everyone, you got my blushing! I wasn´t expecting so much positive feedback... Encourages me to stay on track. But I do have a pile of fun modeling and if I have an idea I don´t care how long the effort takes for the details. I´ve got more to show soon.
-
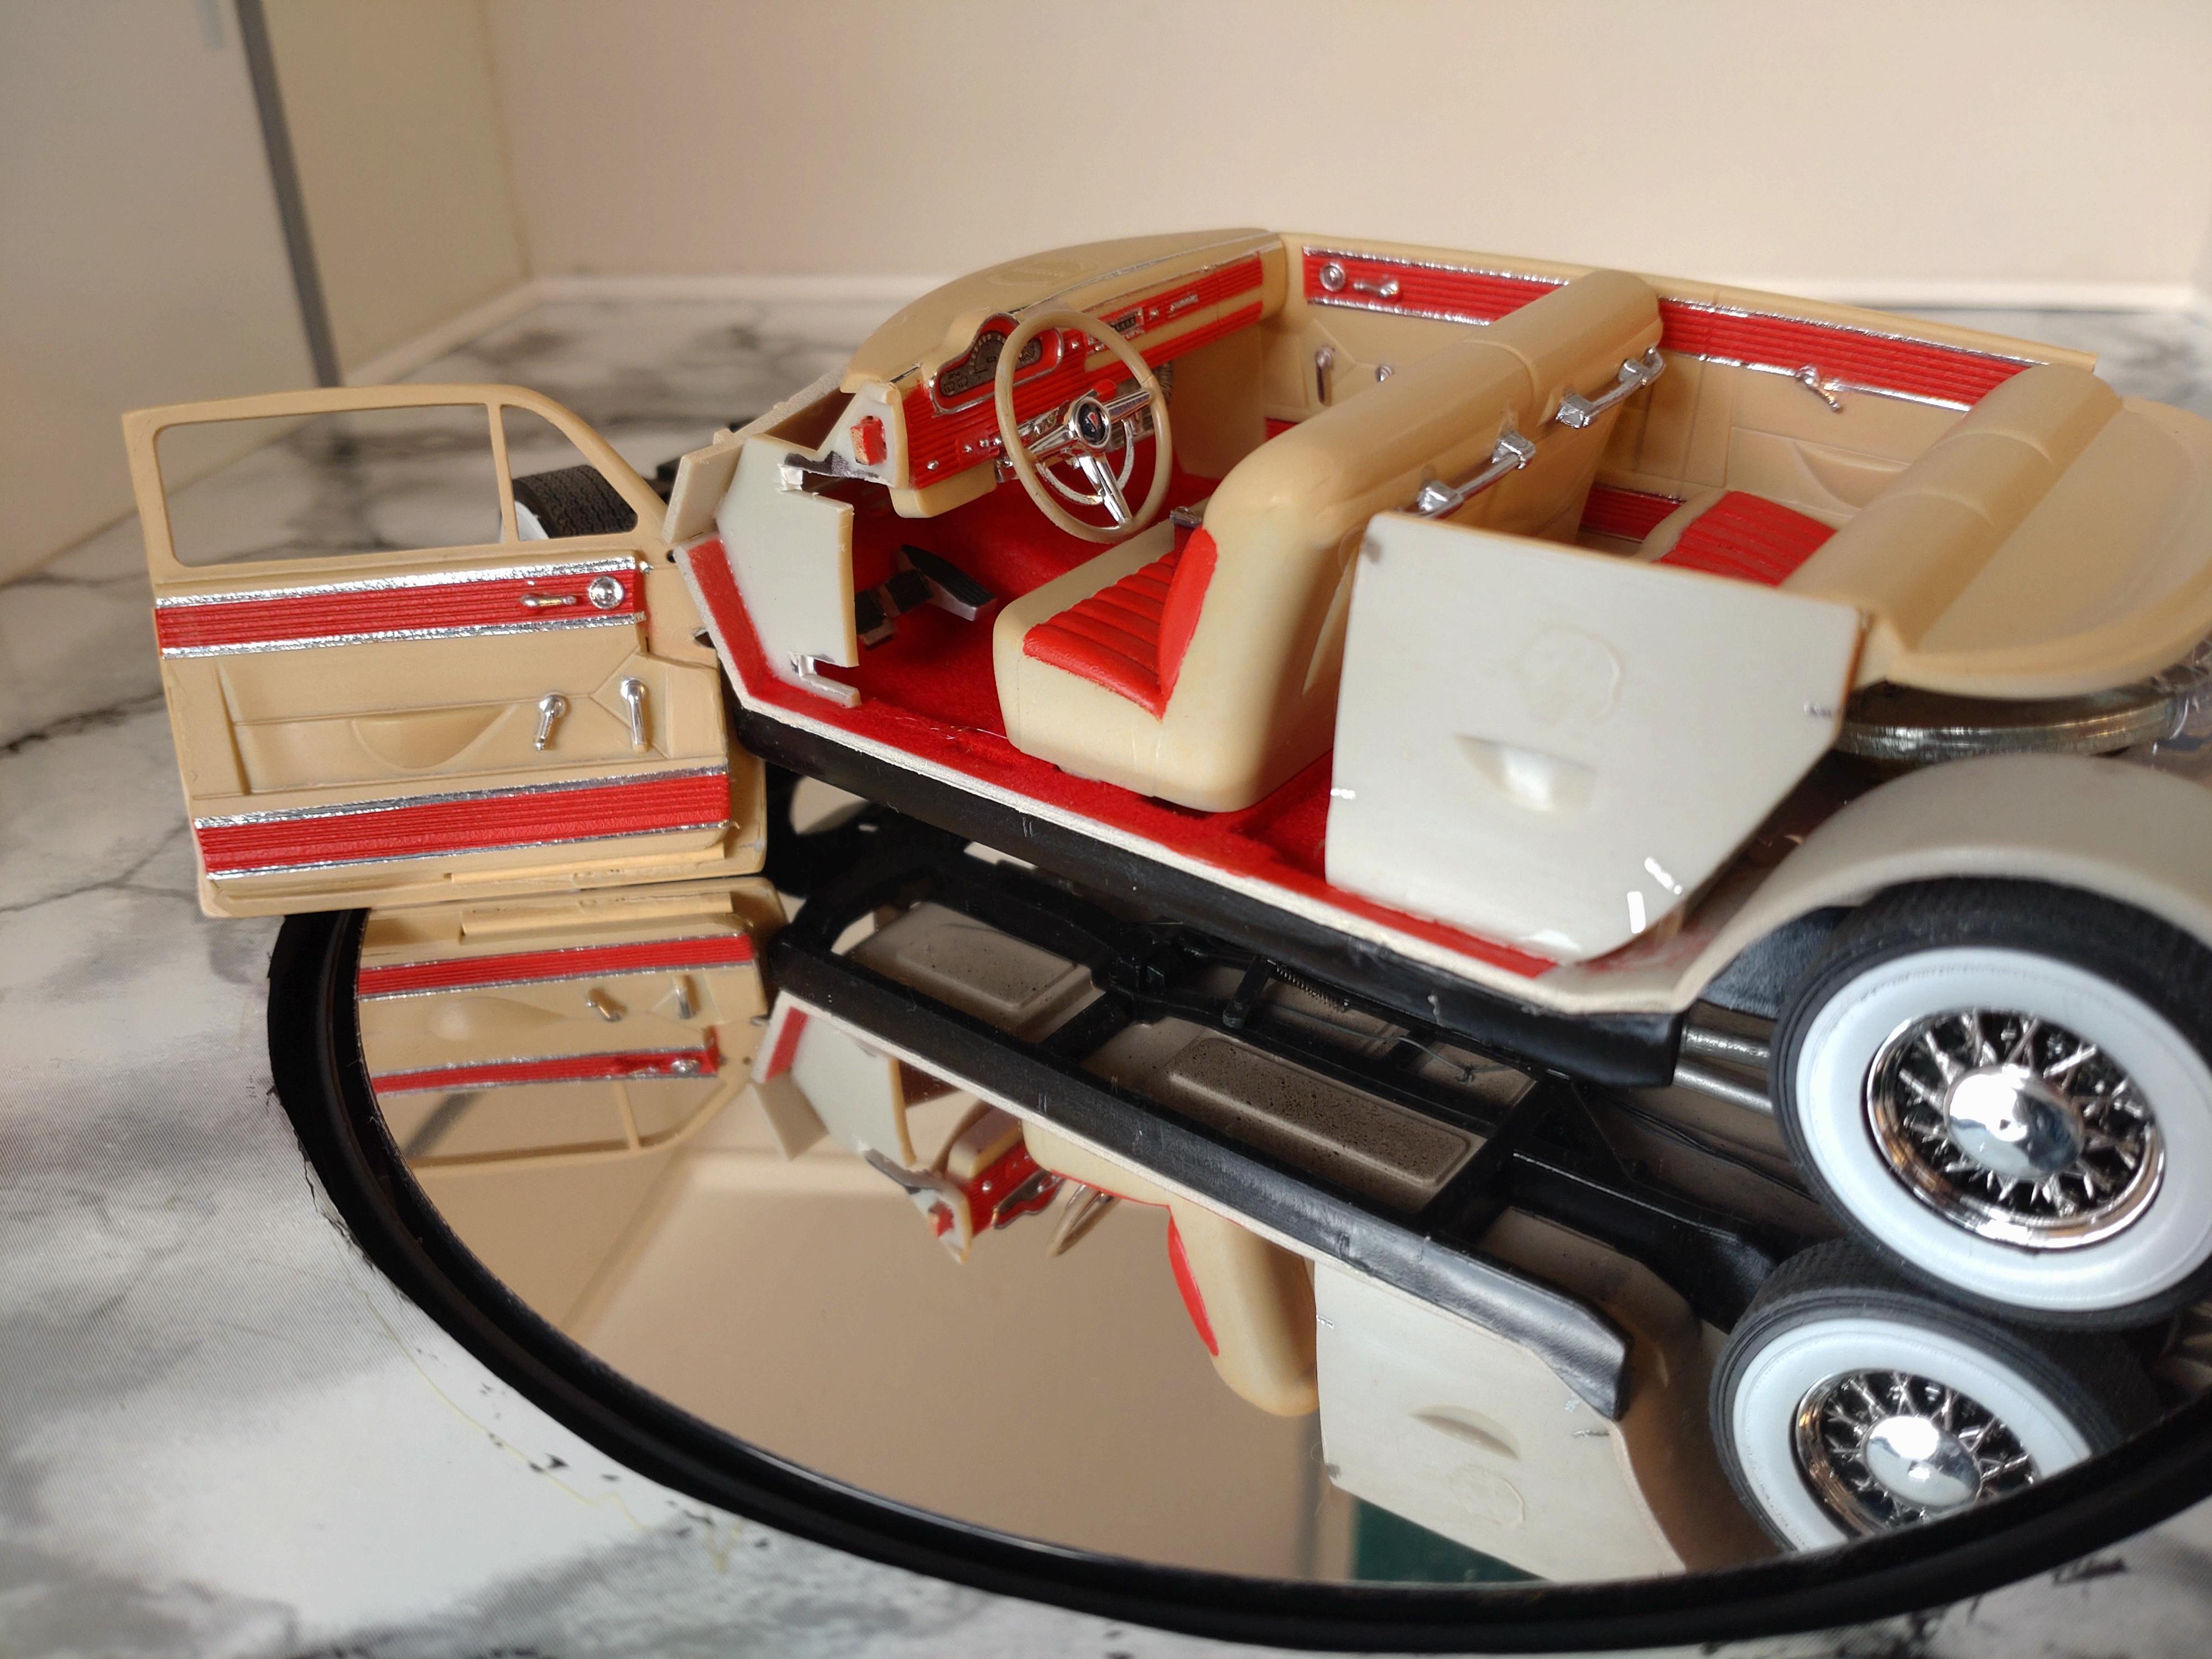
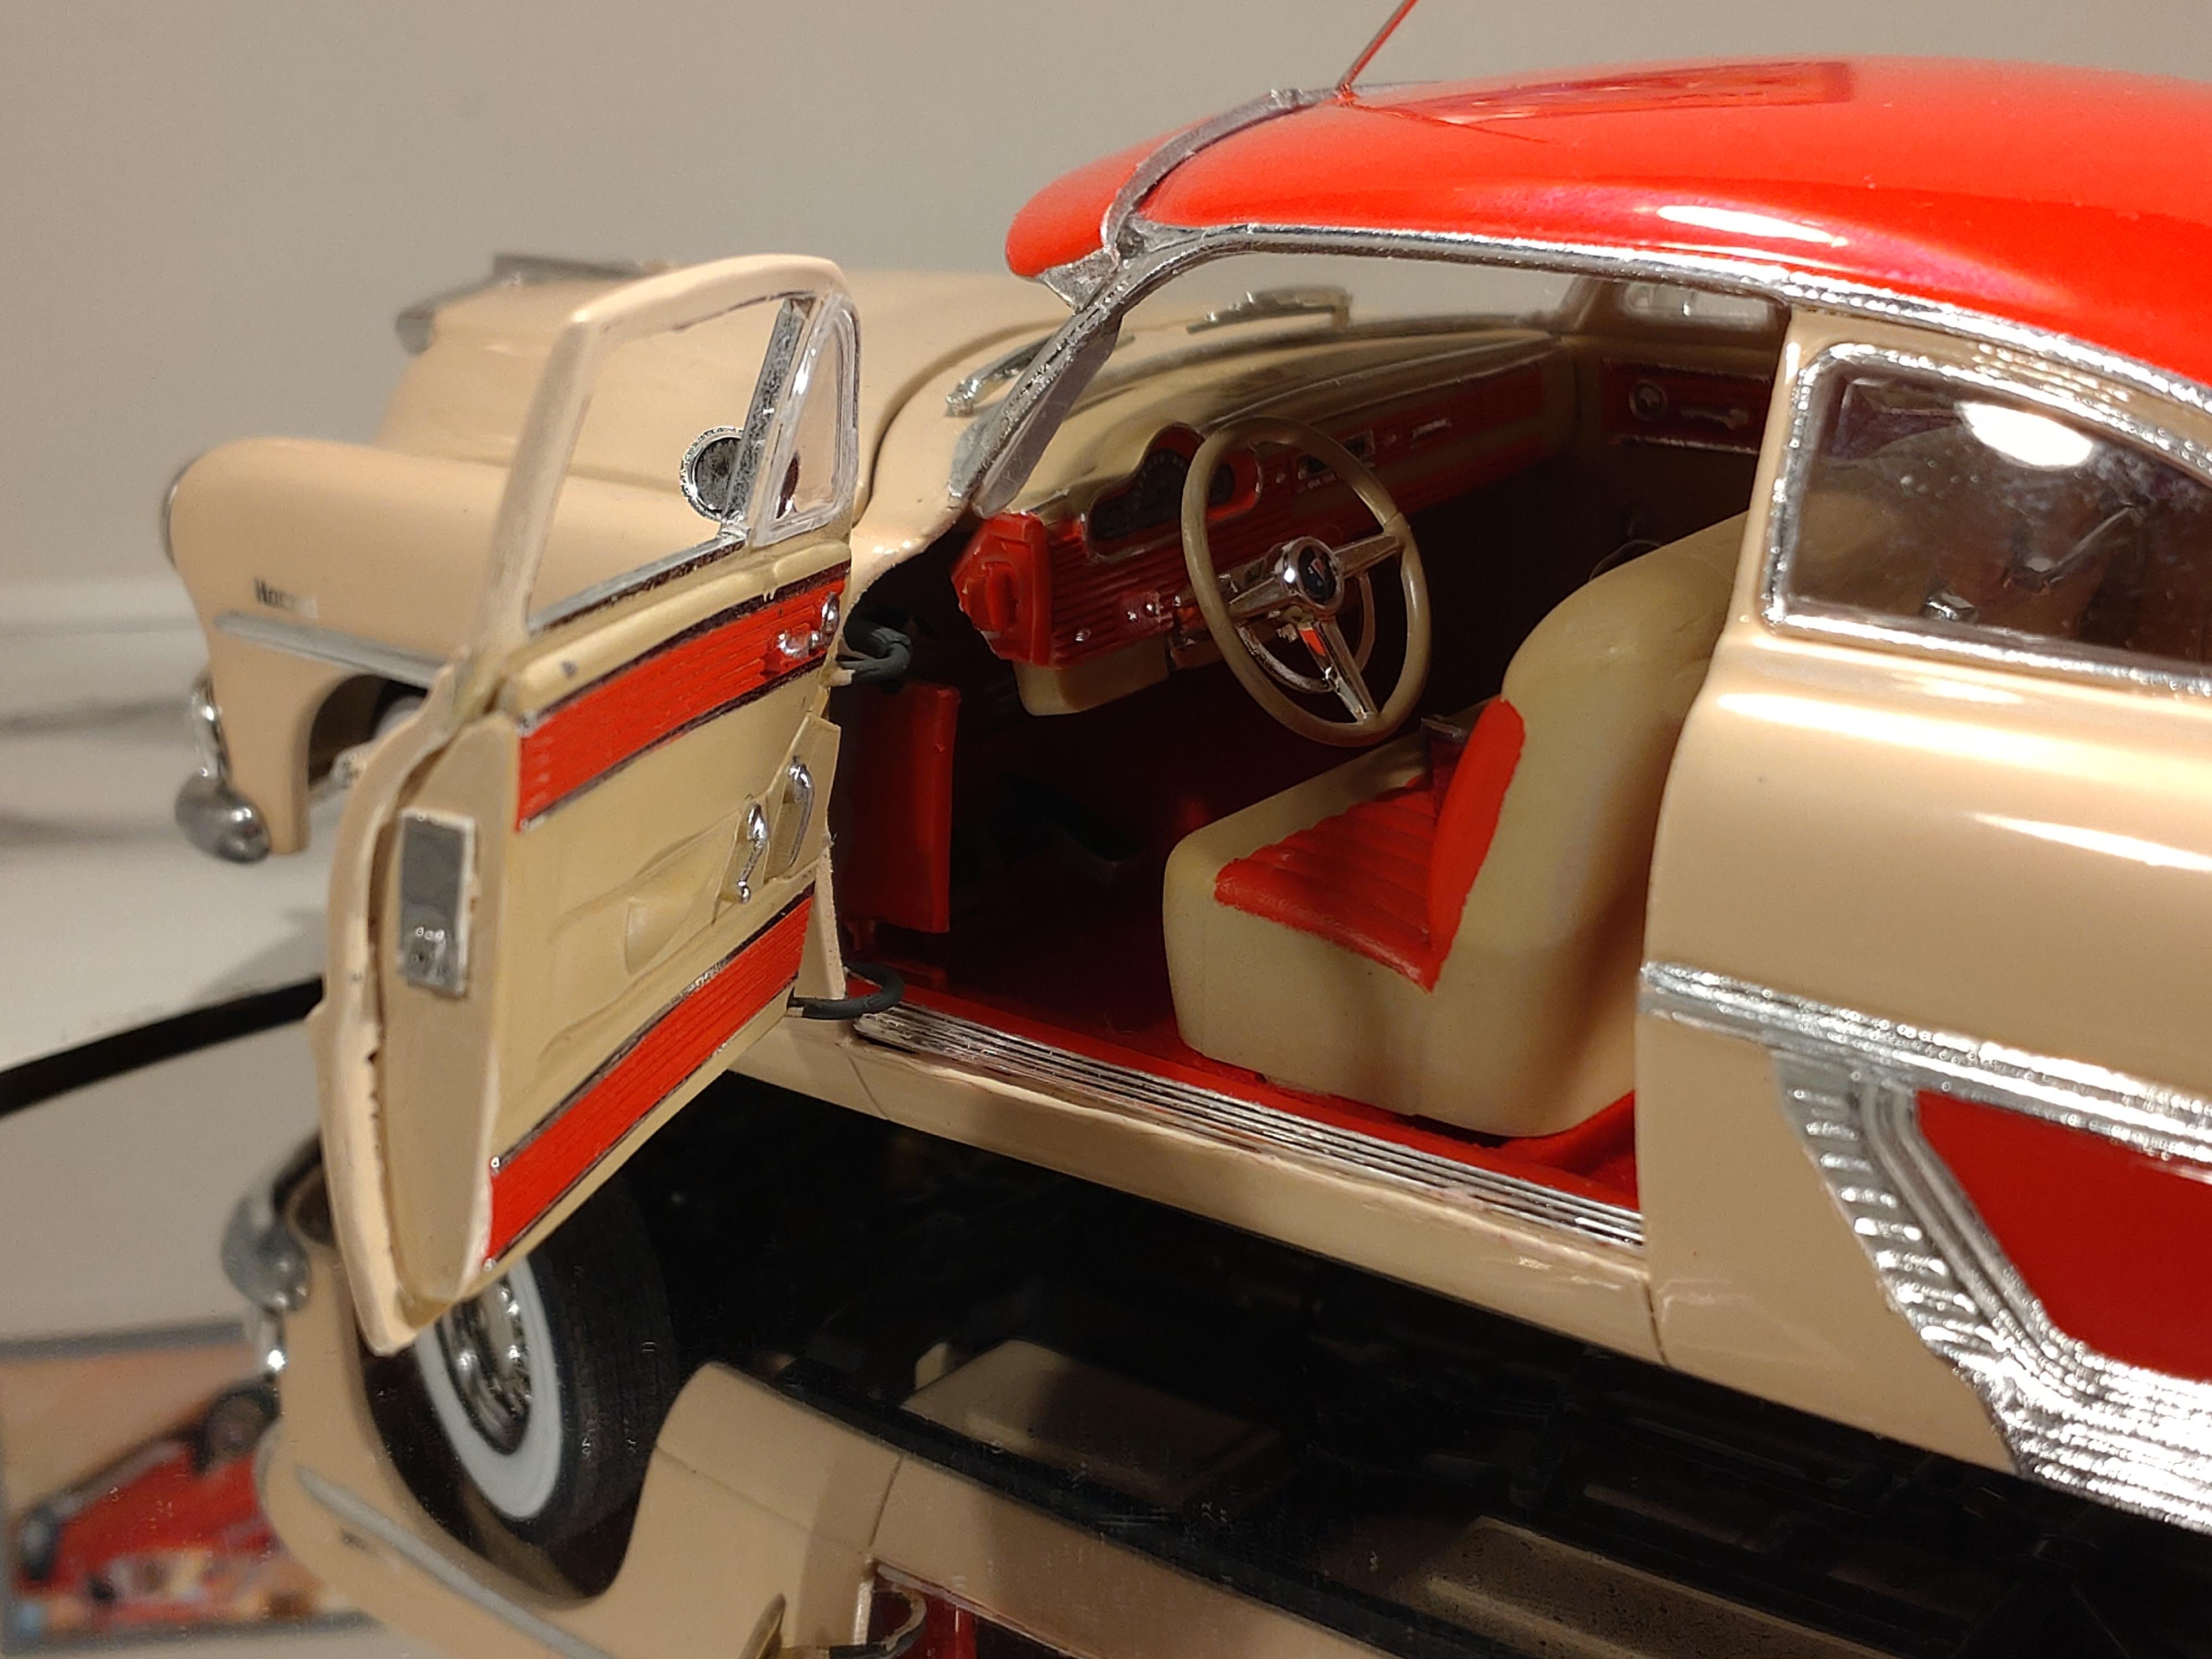
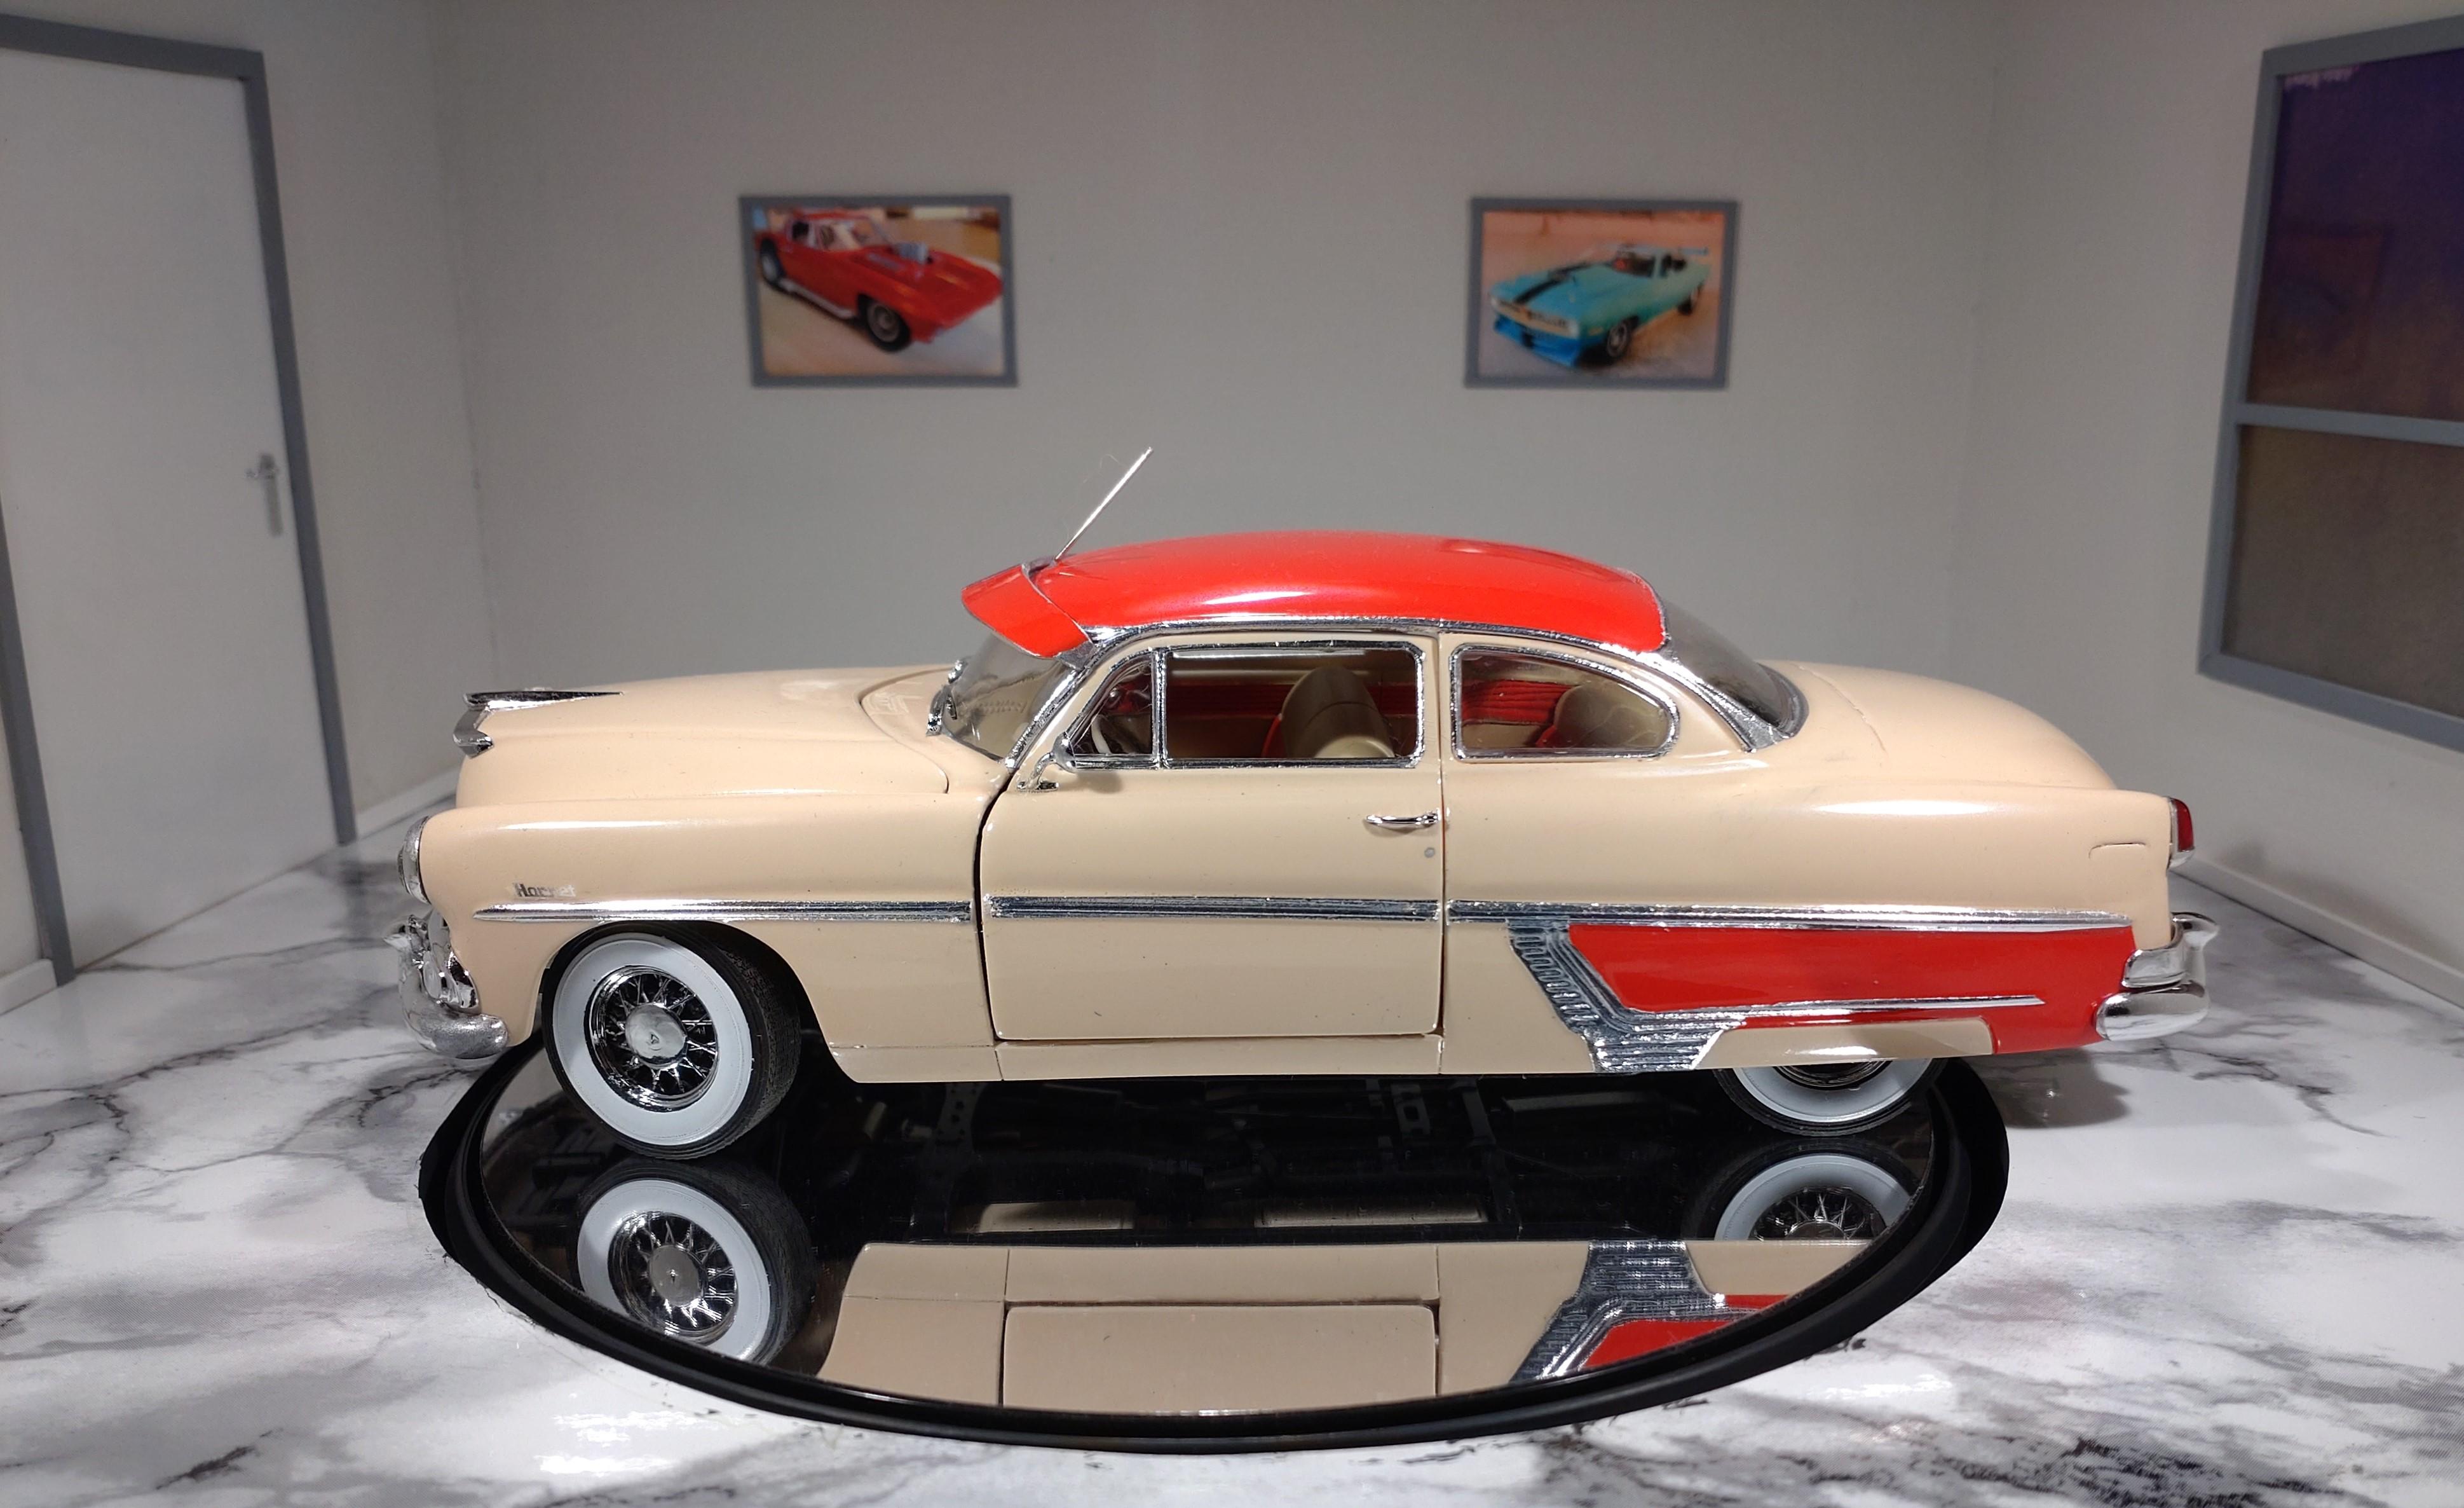
Hello everybody, her comes my first topic! I had never heard of Hudson until I saw the Pixar film "CARS" in 2006. Even then I didn´t realize that the character Doc Hudson was styled after the Hornet. Doc Hudson is a grumpy former racing ace (spoken by Paul Newman) that gets friends with Lightning McQueen. Great movie! For quite a while I have been thinking about building a Hornet and decided for the Moebius kit. A good choice: Lots of parts molded very precise with crisp details. Everything fits. I chose to make my Hornet as close to stock as possible. The paint job was Molotow high quality graffiti rattle cans, clear coat and the last coat over the decals and bare metal. Plus a good polishing. Nothing was exchanged or added to the parts on this model, all straight from the kit (except many details). Building the door was a bit tricky, because this club coupe has a window frame. I managed to cut out the door with a scalpel. The rest was attaching the cut out door panel and filling the hollow spaces with sheet styrene. Added some details to the door and rocker. Since I started building models 2 years ago I have only built V8s. Building a straight 6 cylinder was refreshing and I found new parts to add to the engine (tiny photo etched hex nuts). The standard engine color was red, but a few golden ones were built too. The undercarriage is customized with break lines and weathered. The interior has a flocked floor. Fine dashboard decals were in the box, the seat belts are custom. Thanks for watching!
- 35 replies
-
- 10
-

-
Hi, I have just signed up and probably are too "dumb" to find the obvious information. How many images may I attach to a thread and are there limitations to the size of an attachment? Can I upload a film? Thanks for helping!
-
Hi, my name is Andy and I´m living in northern Germany. I built many models as a kid when I grew up in LA, California. After moving back to Germany as a teenager I lost touch to models but was always crafty and worked just about every material I could get my hands on. When Corona started and business slowed down I was forced to work less and couldn´t stand sitting on the couch all day. I remembered my old passion and just started. I had just about everything I needed in my shop. Until now I´m focused on building the classic cars of my childhood in 1:25 scale from the late ´50s to the´70s. I am a detail freak, but like building both stock and custom. I was introduced to MCMF by a fellow model builder. Hope to introduce some builds soon. Here are some first images. Best wishes!