eran_k
-
Posts
181 -
Joined
-
Last visited
Content Type
Profiles
Forums
Events
Gallery
Everything posted by eran_k
-
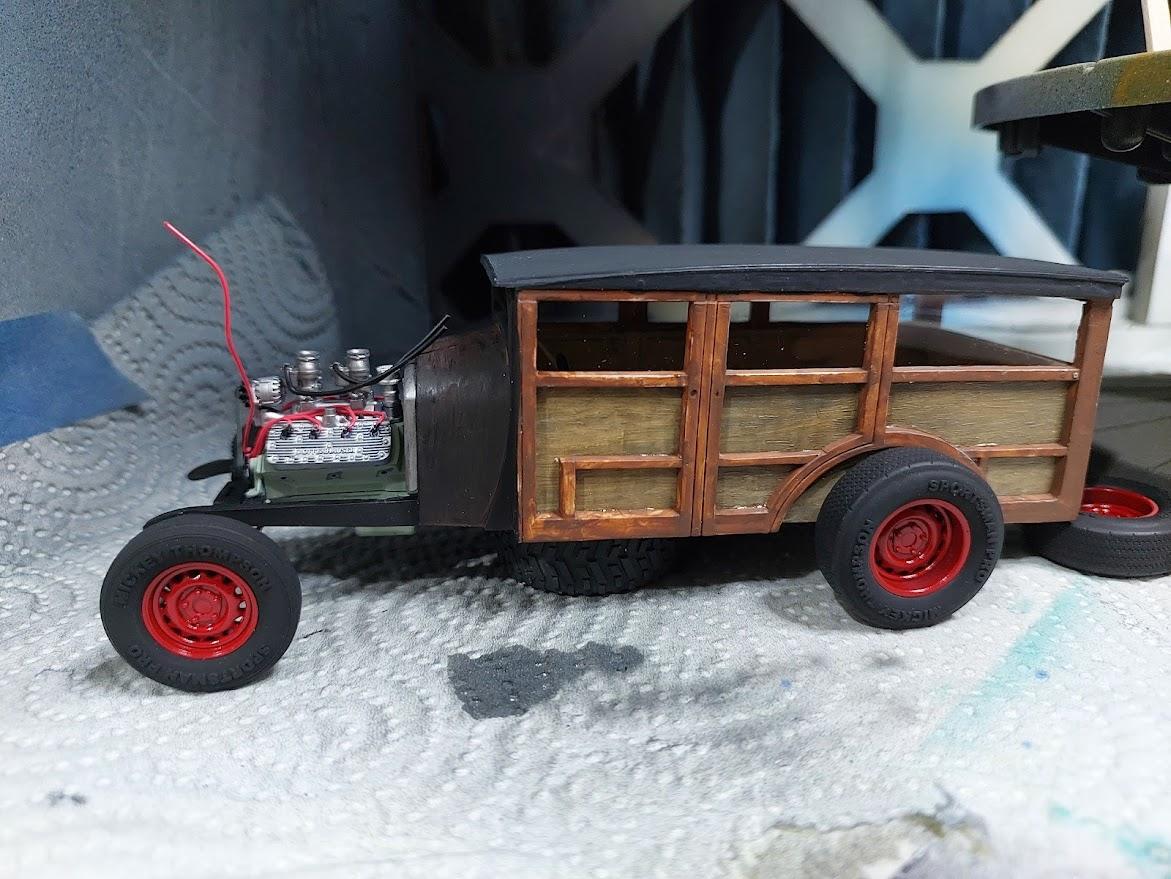
Added seats gas tank and shifter, trying different options for air filter\or air scoop

-
I've been slowly progressing with this but i'm quit pleased with the results, it's far prom prefect but im happy with it. I'm designing and testing 3d parts so sometime a part doesn't work the way i planned and i need to go back and change something ,than print and test fit again. here is where i am currently, still have many small things to do
-
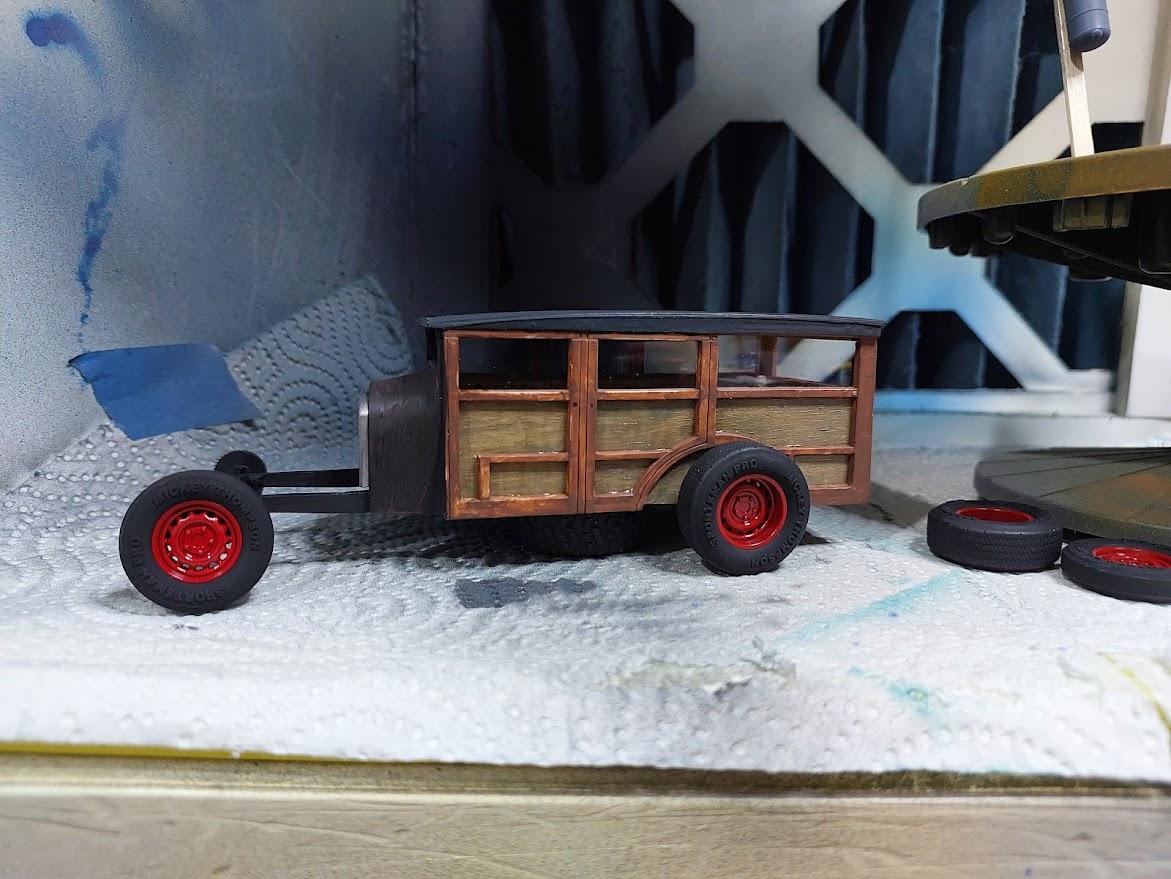
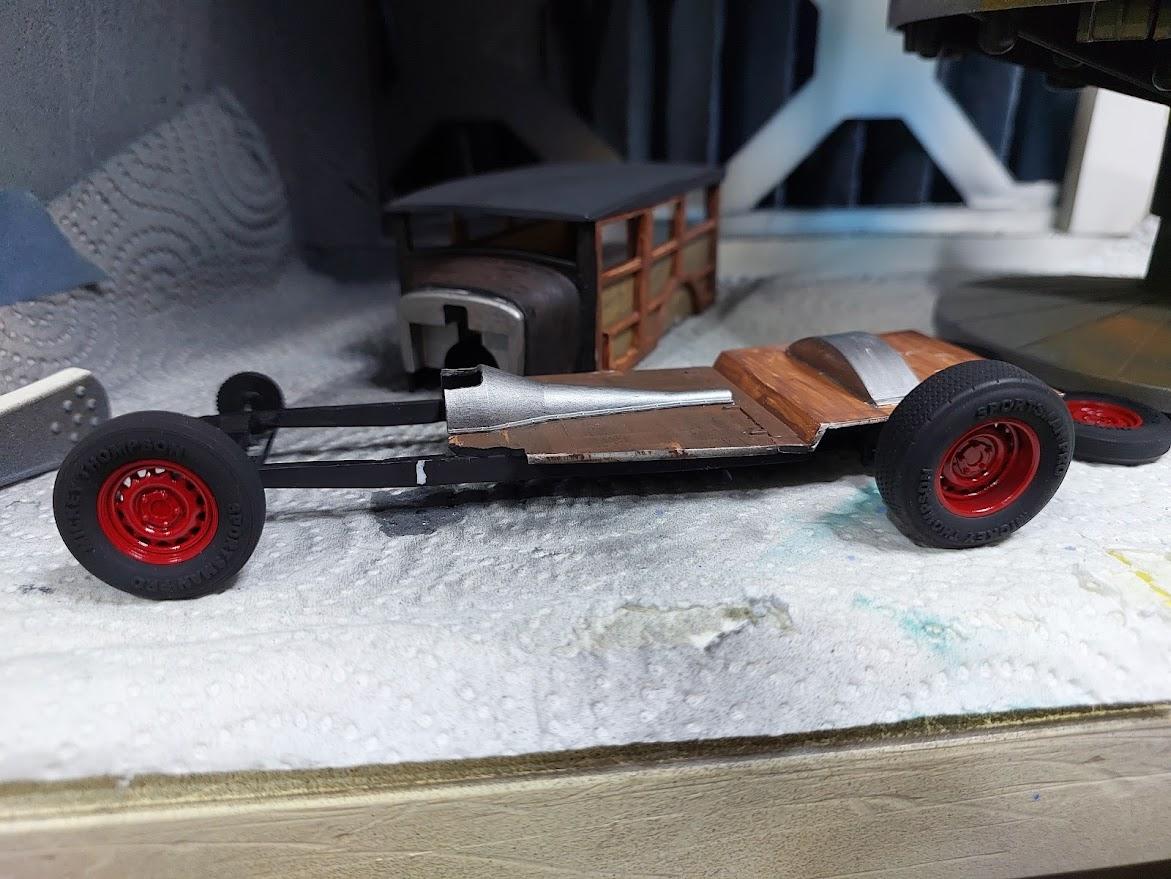
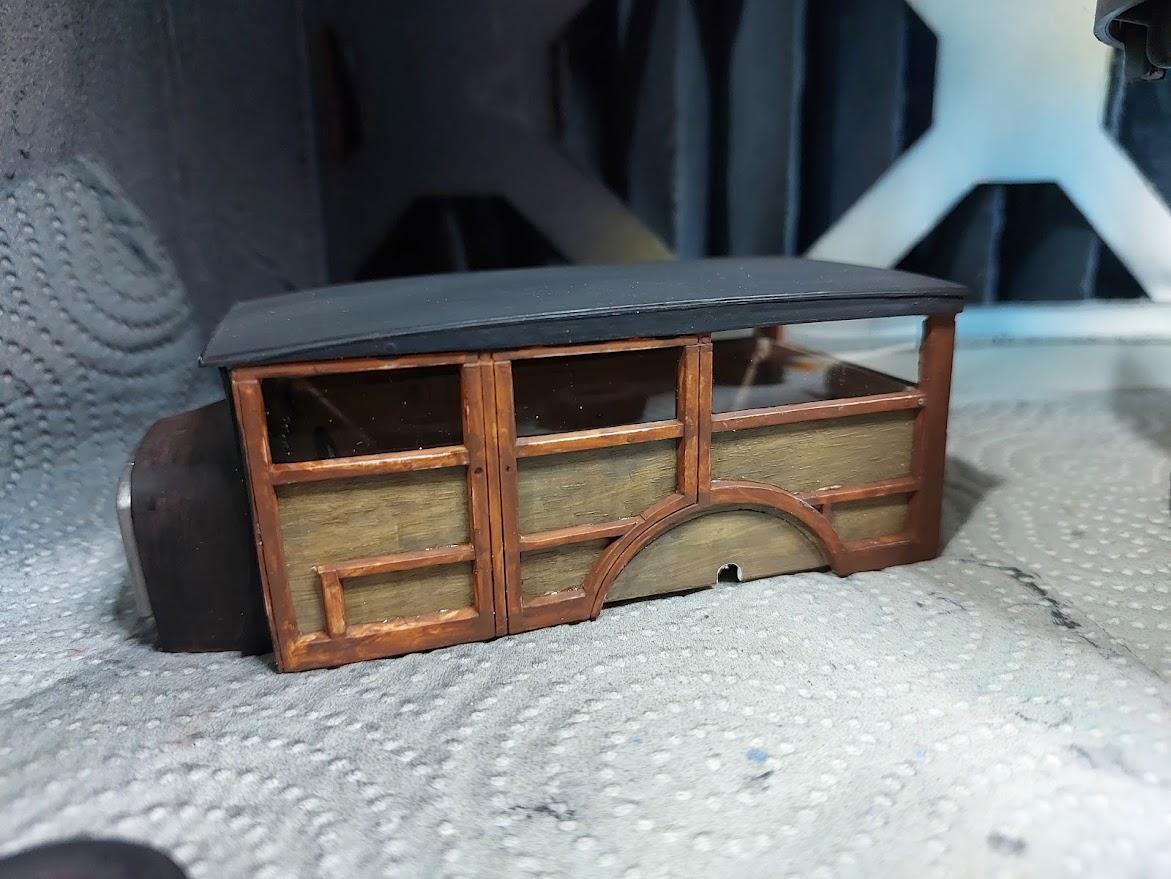
So in the last couple of days i decided to make use of some spare parts and 3d printing, hopefully this will turn out out into something at least half decent. i had a 29 ford woody body from the AMT kit, extra frame from a revell 30 coupe kit so i'll try to build some sort of a rat rod woody. i also printed (and will print more) parts as i go on. here is where i'm at so far.... the body was chopped and i removed some of the wood framing using some part from the amt kit and some scratch building i made the floor pan and mated it to the revell frame i printed a front and rear axles, but i'm currently printing another version of the front axle, with some modifications Also printed a gas tank and a firewall, i still don't have an engine to use, will need to figure something out
-
i'm trying out painting the bronco with nail polish, seems to go on nicely, still need 1 or 2 more coats
-
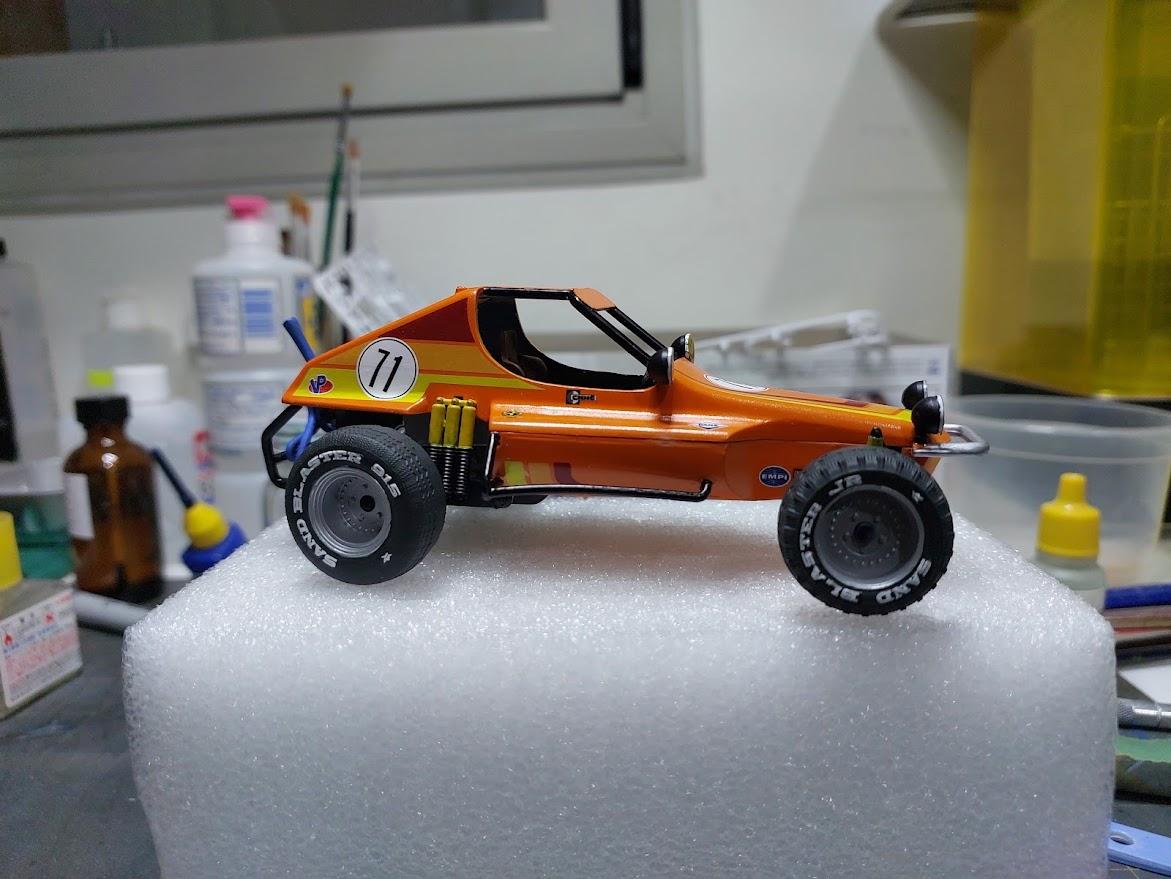
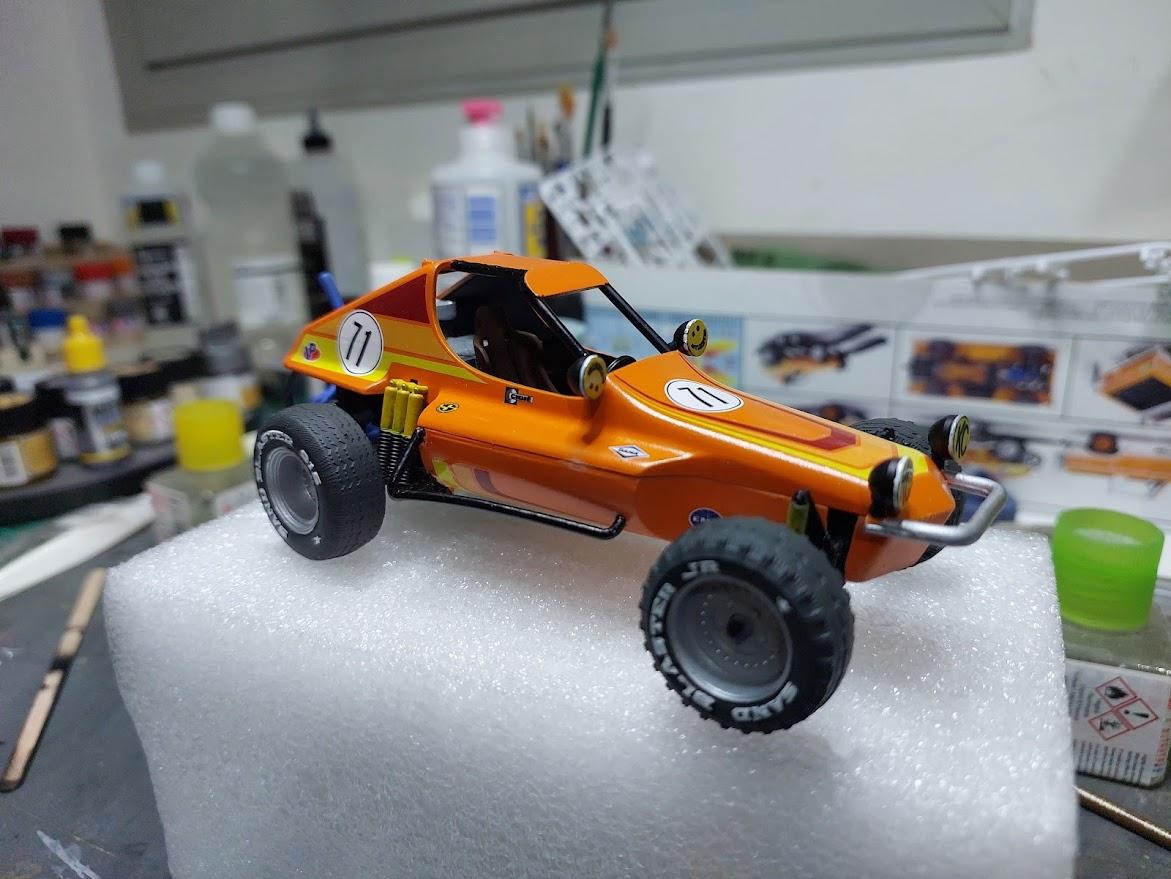
Calling this one done, other than the two tiny black bits you see here which i forgot to paint.
-
so while finishing up the buggy (decals,lights) i gave the bronco body parts a coat of primer...still haven decided on paint.
-
got a bit more done
-
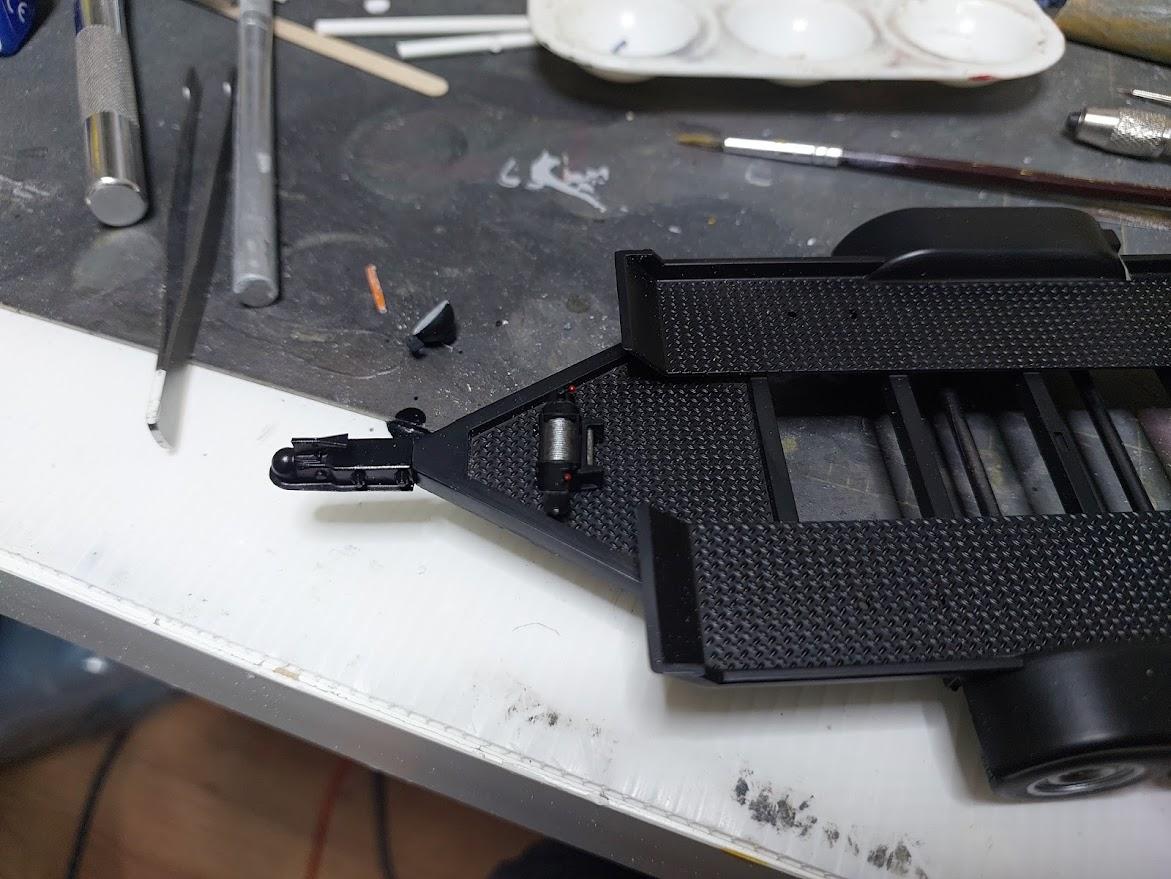
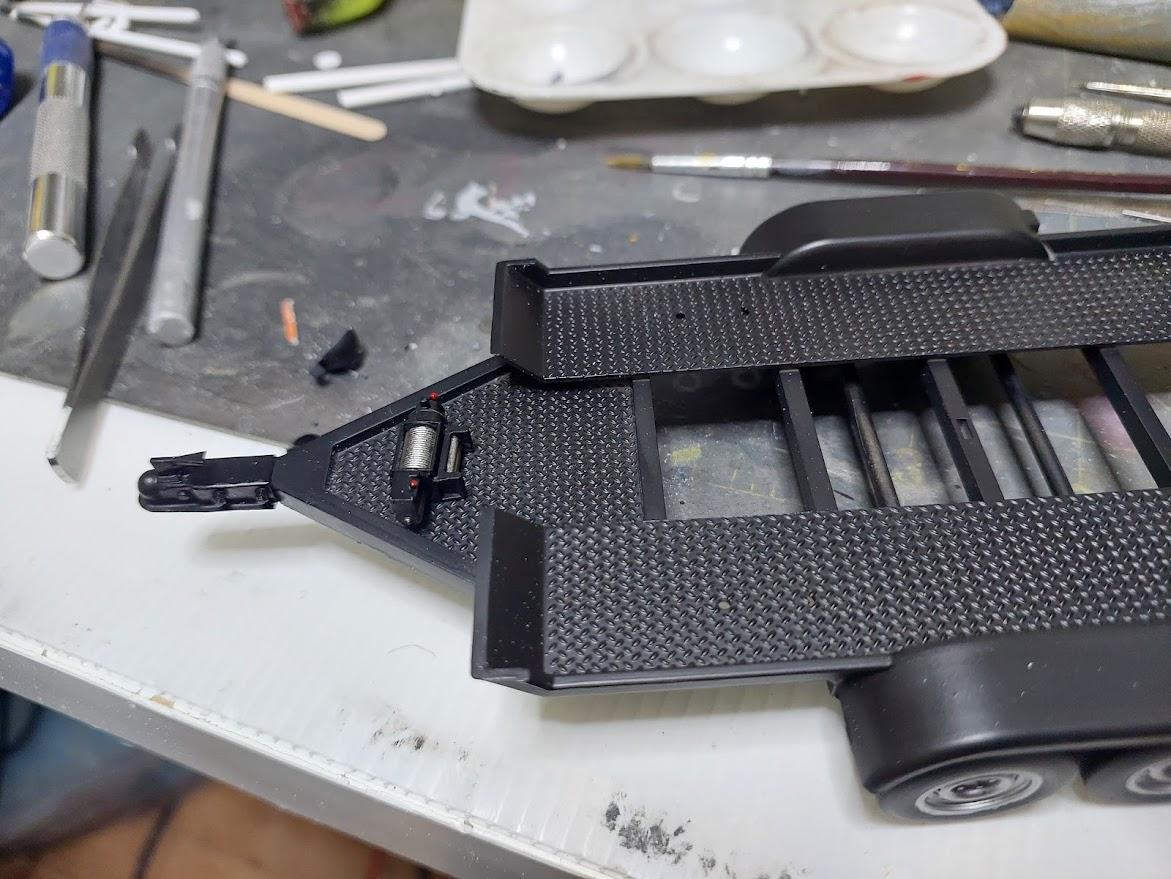
the winch and hitch are installed, the wheels are also 3d printed
-
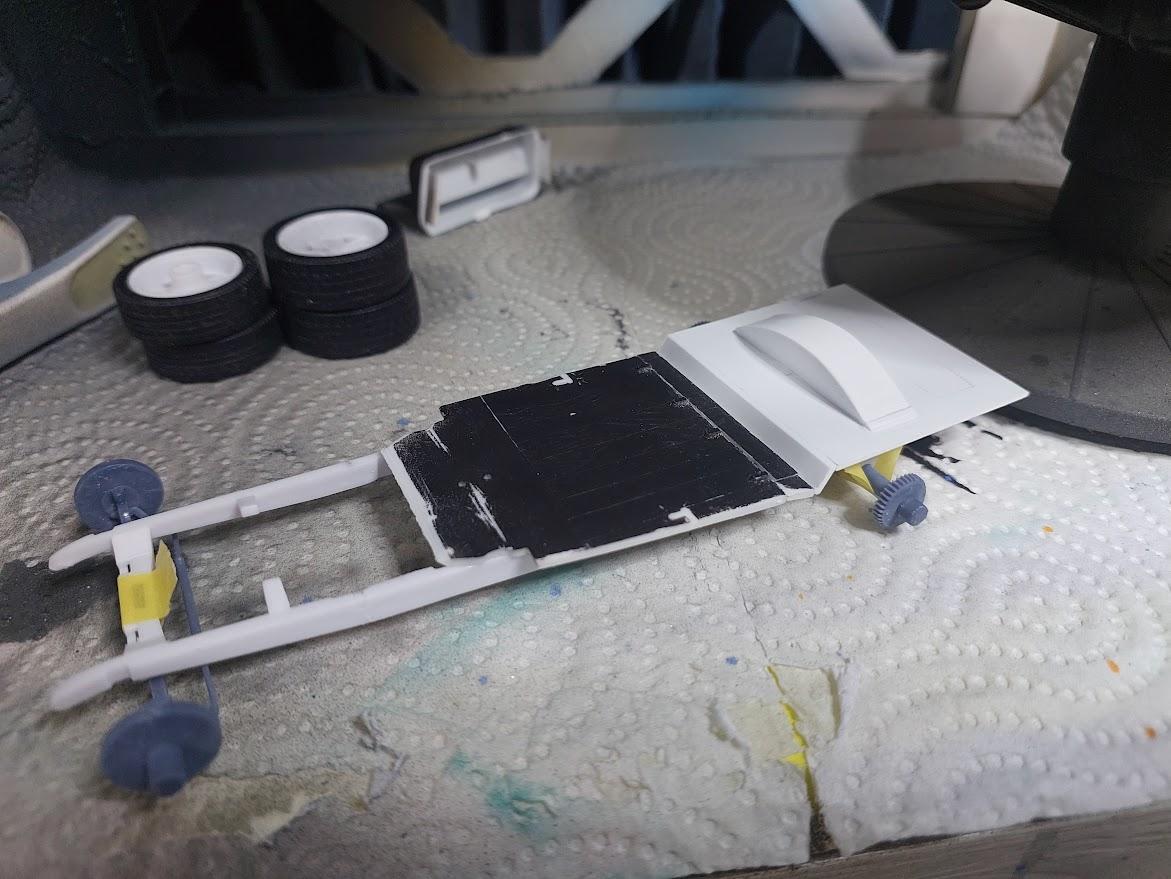
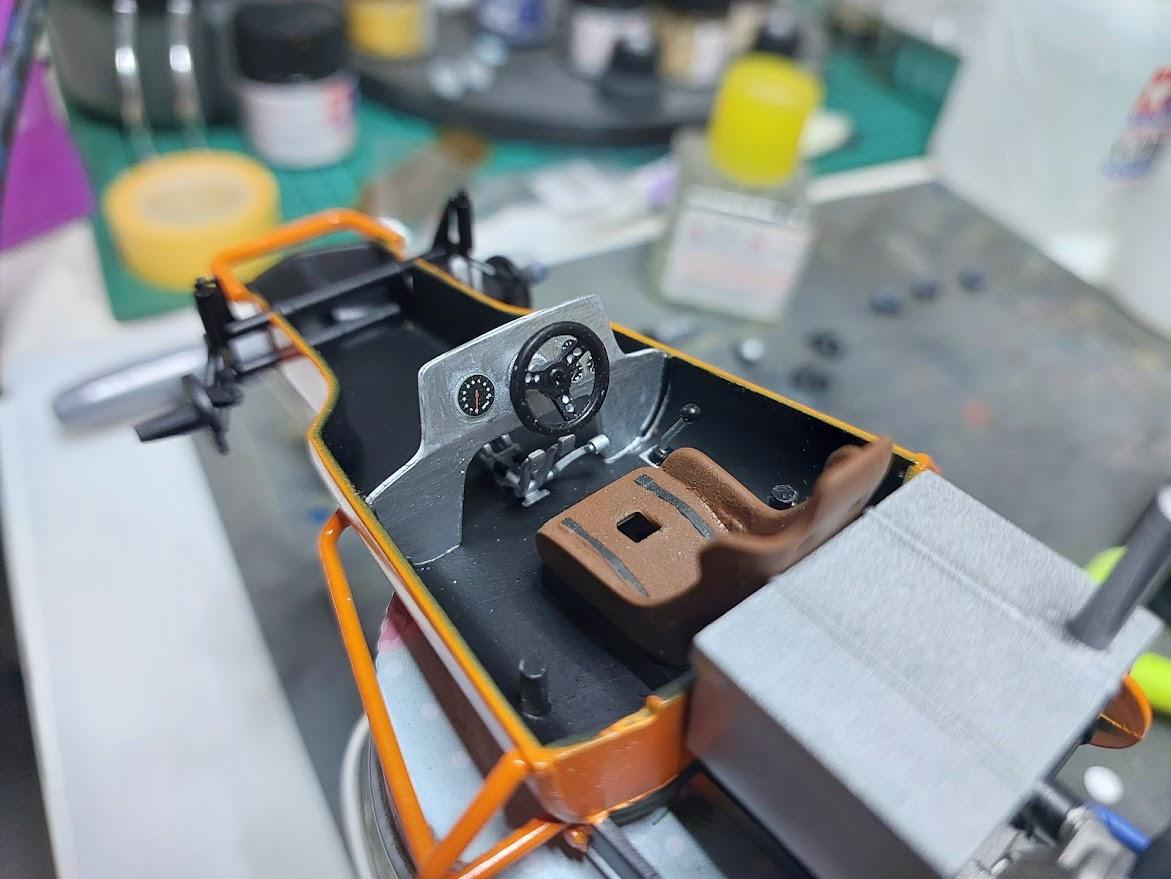
some more progress, built the cockpit mocking up other parts (gas tank, engine, muffler and the front suspension) printed and painted a better winch and a more detailed hitch for the trailer
-
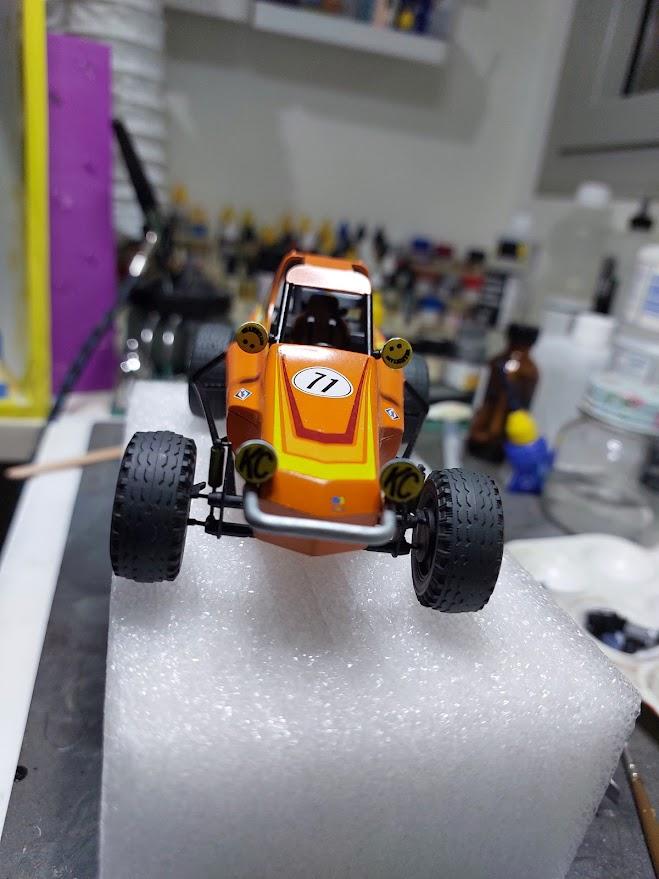
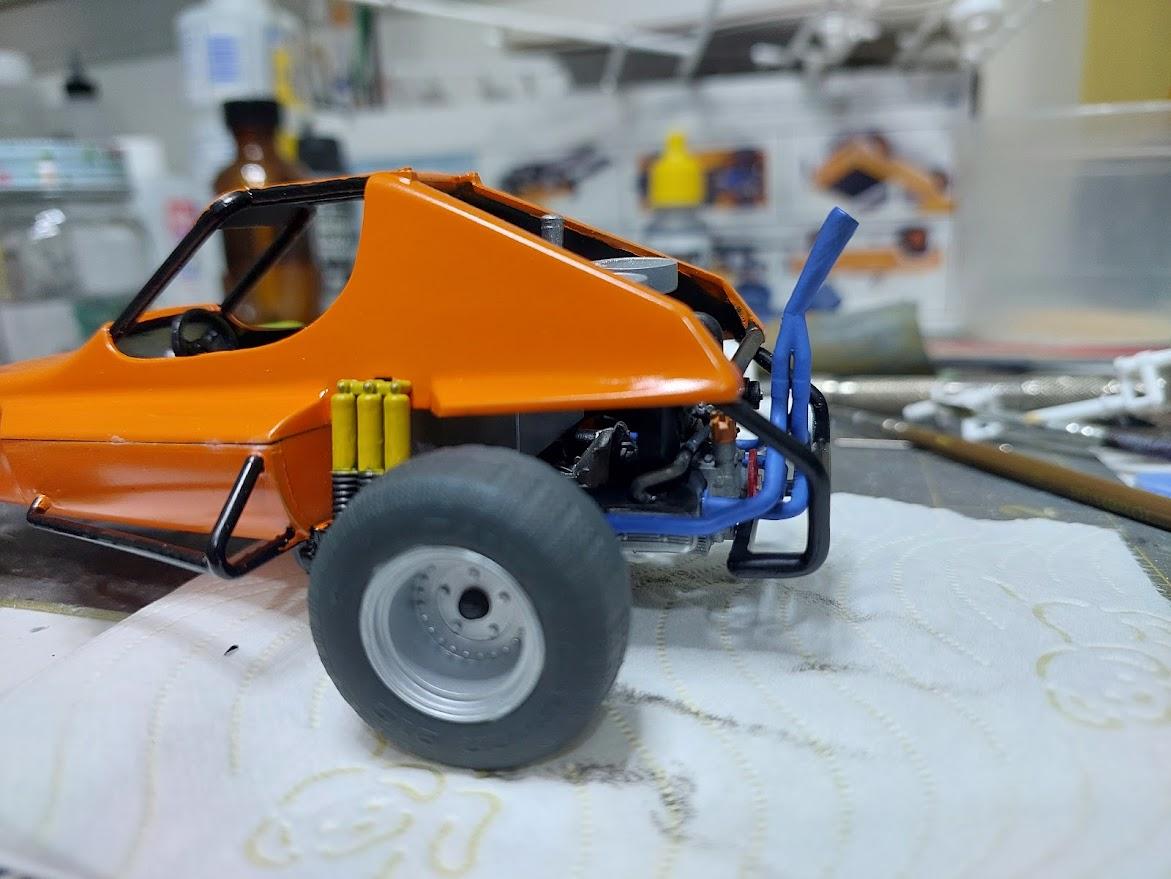
i didn't like how the paint came out (i think its caused i used black primer) so i improvised and sprayed it with orange rattle can i had at home. also a little better image of the motor, with the carb and filters attached
-
got some progress with the buggy, sorry about the blurry pics, my phone macro mode isn't the best painted the engine painted the wheels printed and painted the pedals and shifter painted the carburetor and air filters printed and painted a winch for the trailer painted the seat first coat of paint on the body
-
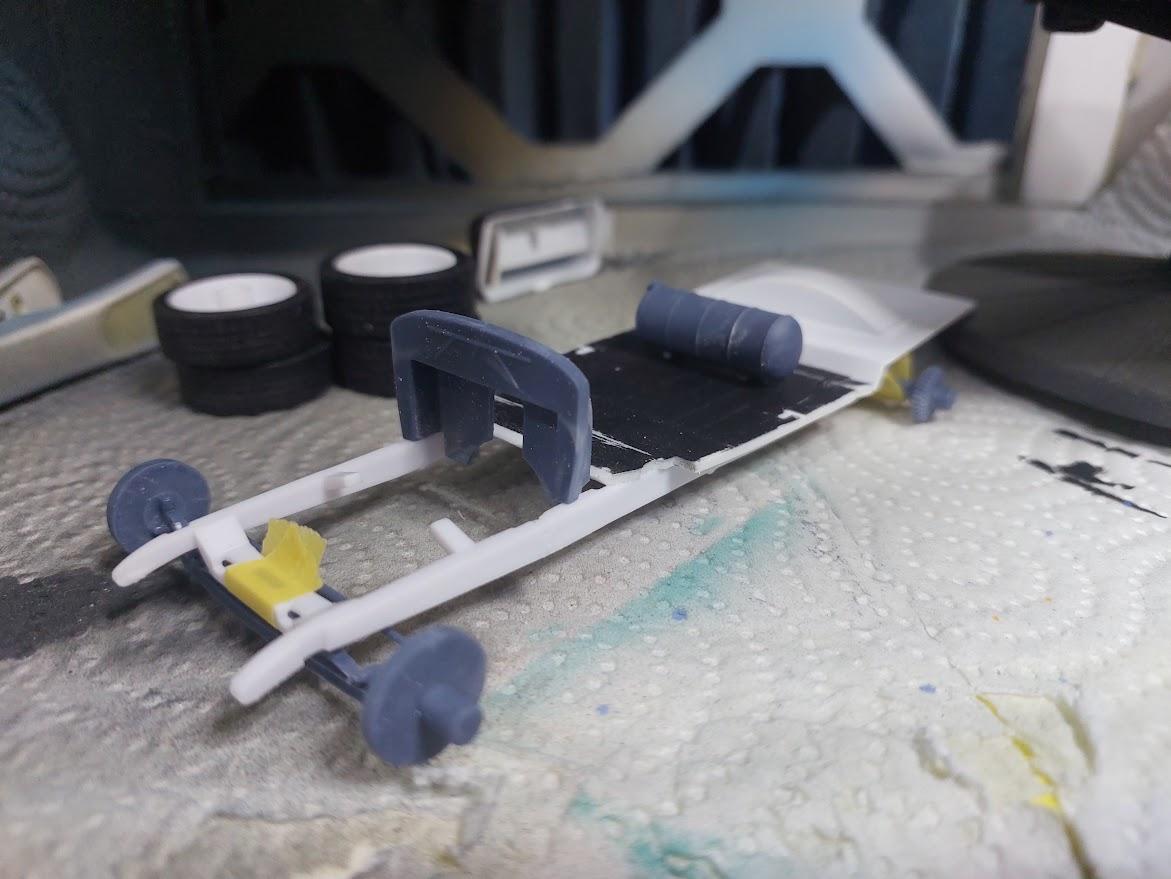
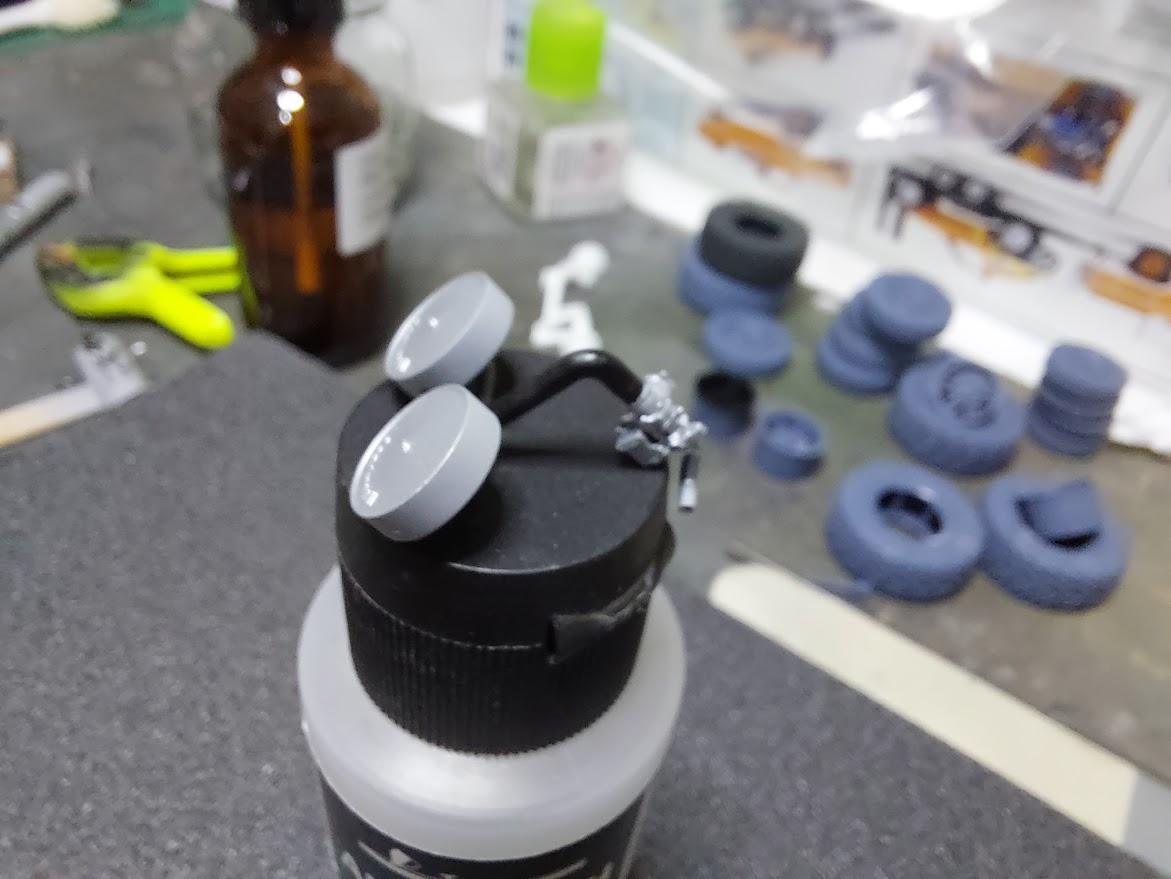
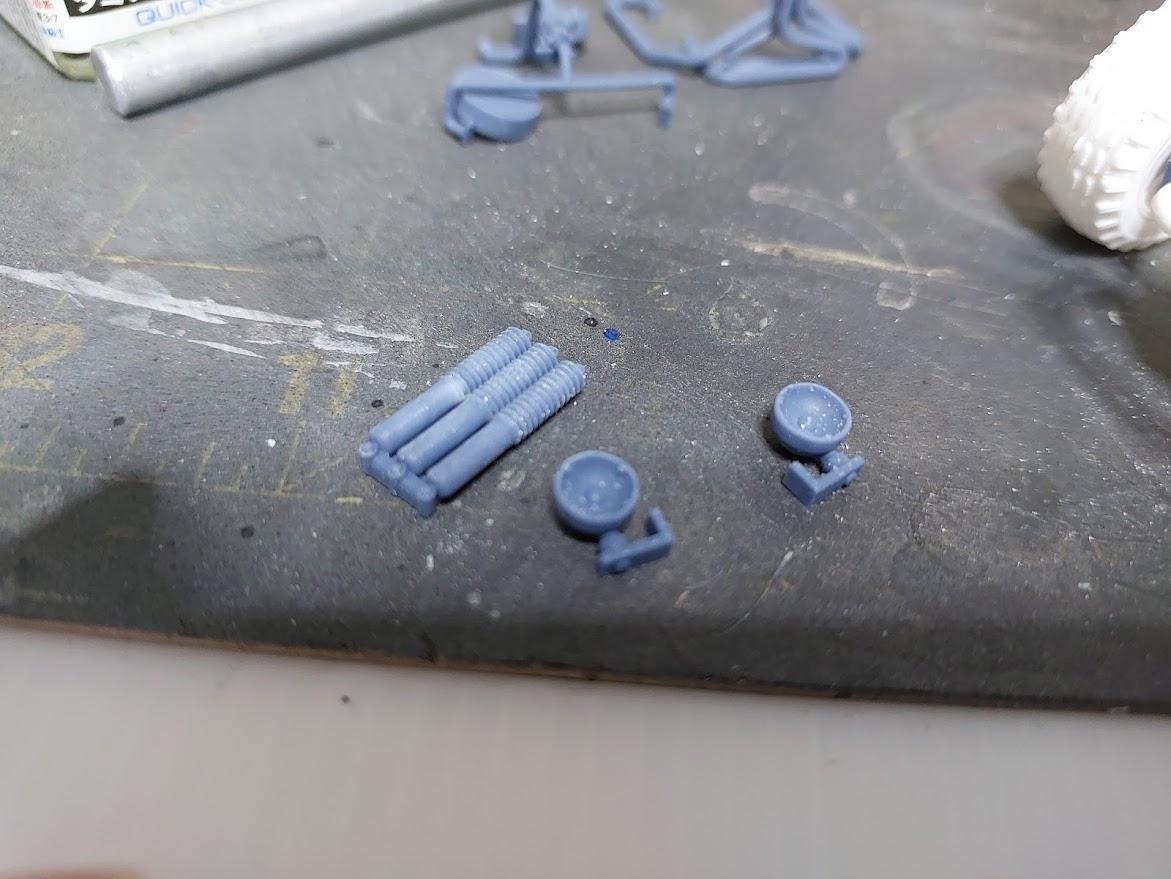
i just got a resin 3d printer, I selected this kit to be my first build to include 3d parts, some of them will be my own and some from different sources. so i guess this will be a long build as i will be printing parts and trial fit them. Most of the printed parts will be for the buggy, this is where i'm at currently printed some parts and started modifying the buggy for them: exhaust Engine with transaxle front suspension, pedal box Carburetor with manifold, air fllters Rear shocks, lights
-
Revell Bronco and Dune Buggy
eran_k replied to Oldmopars's topic in WIP: Model Trucks: Pickups, Vans, SUVs, Light Commercial
i know this is an old thread, but im working on this same kit now, and your engine looks Wayyy better than the kit part, any chance you can share the file? so i can print it too. Thanks! -
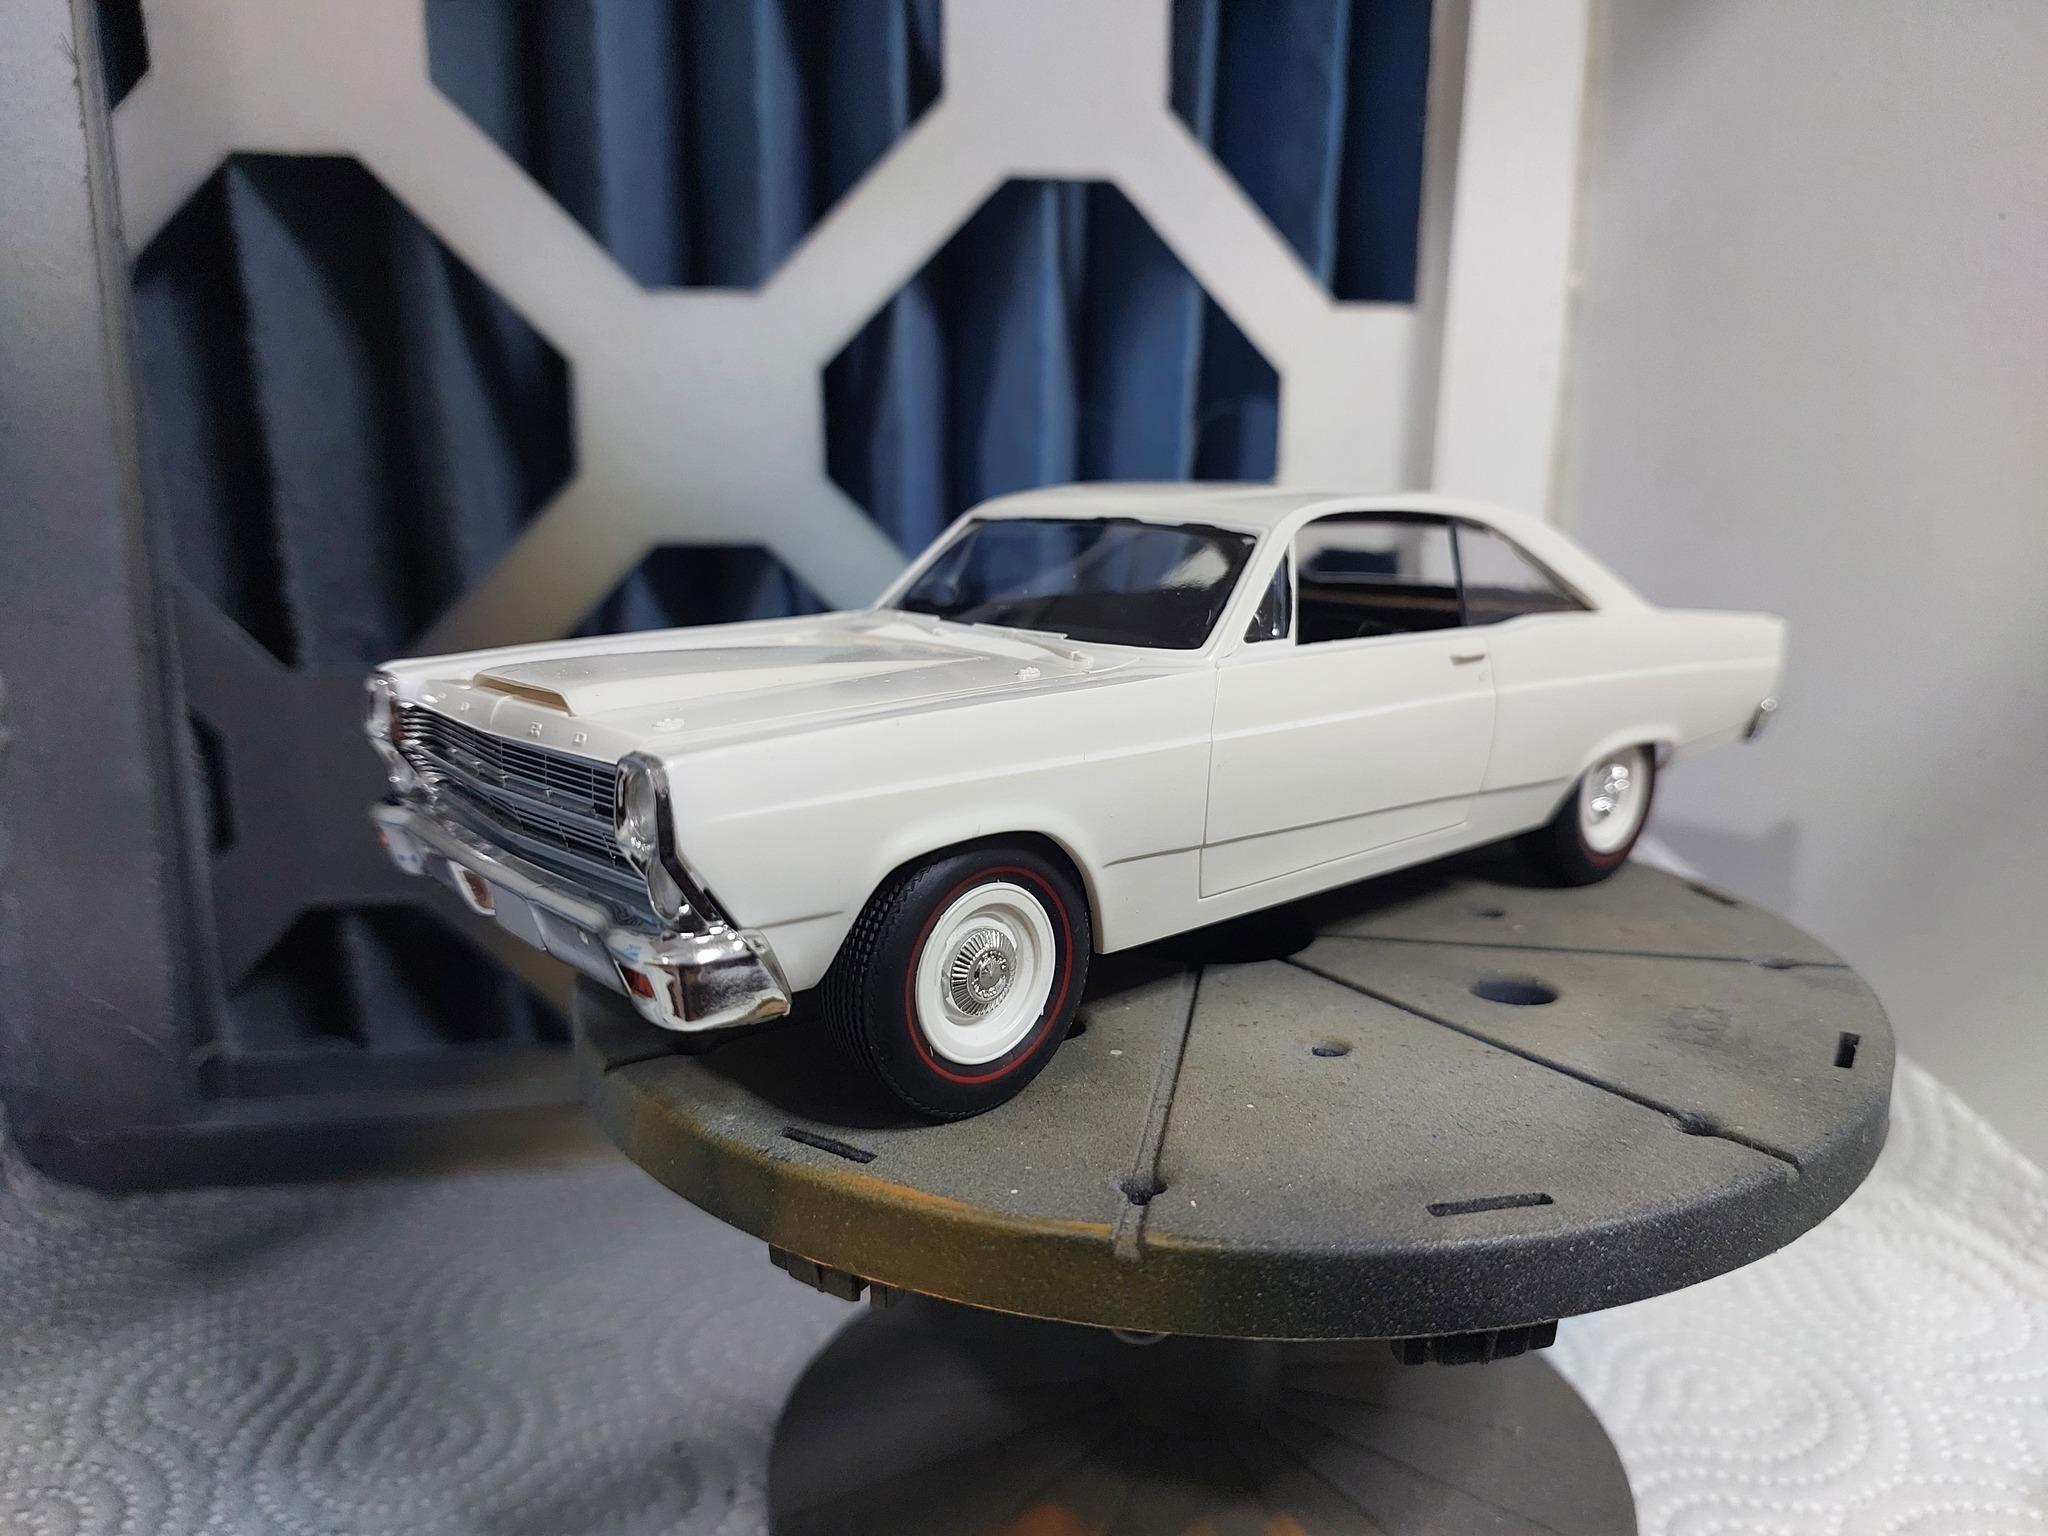
last build for 2023/first for 2024 - Amt 66 Fairlane 427
eran_k replied to eran_k's topic in WIP: Model Cars
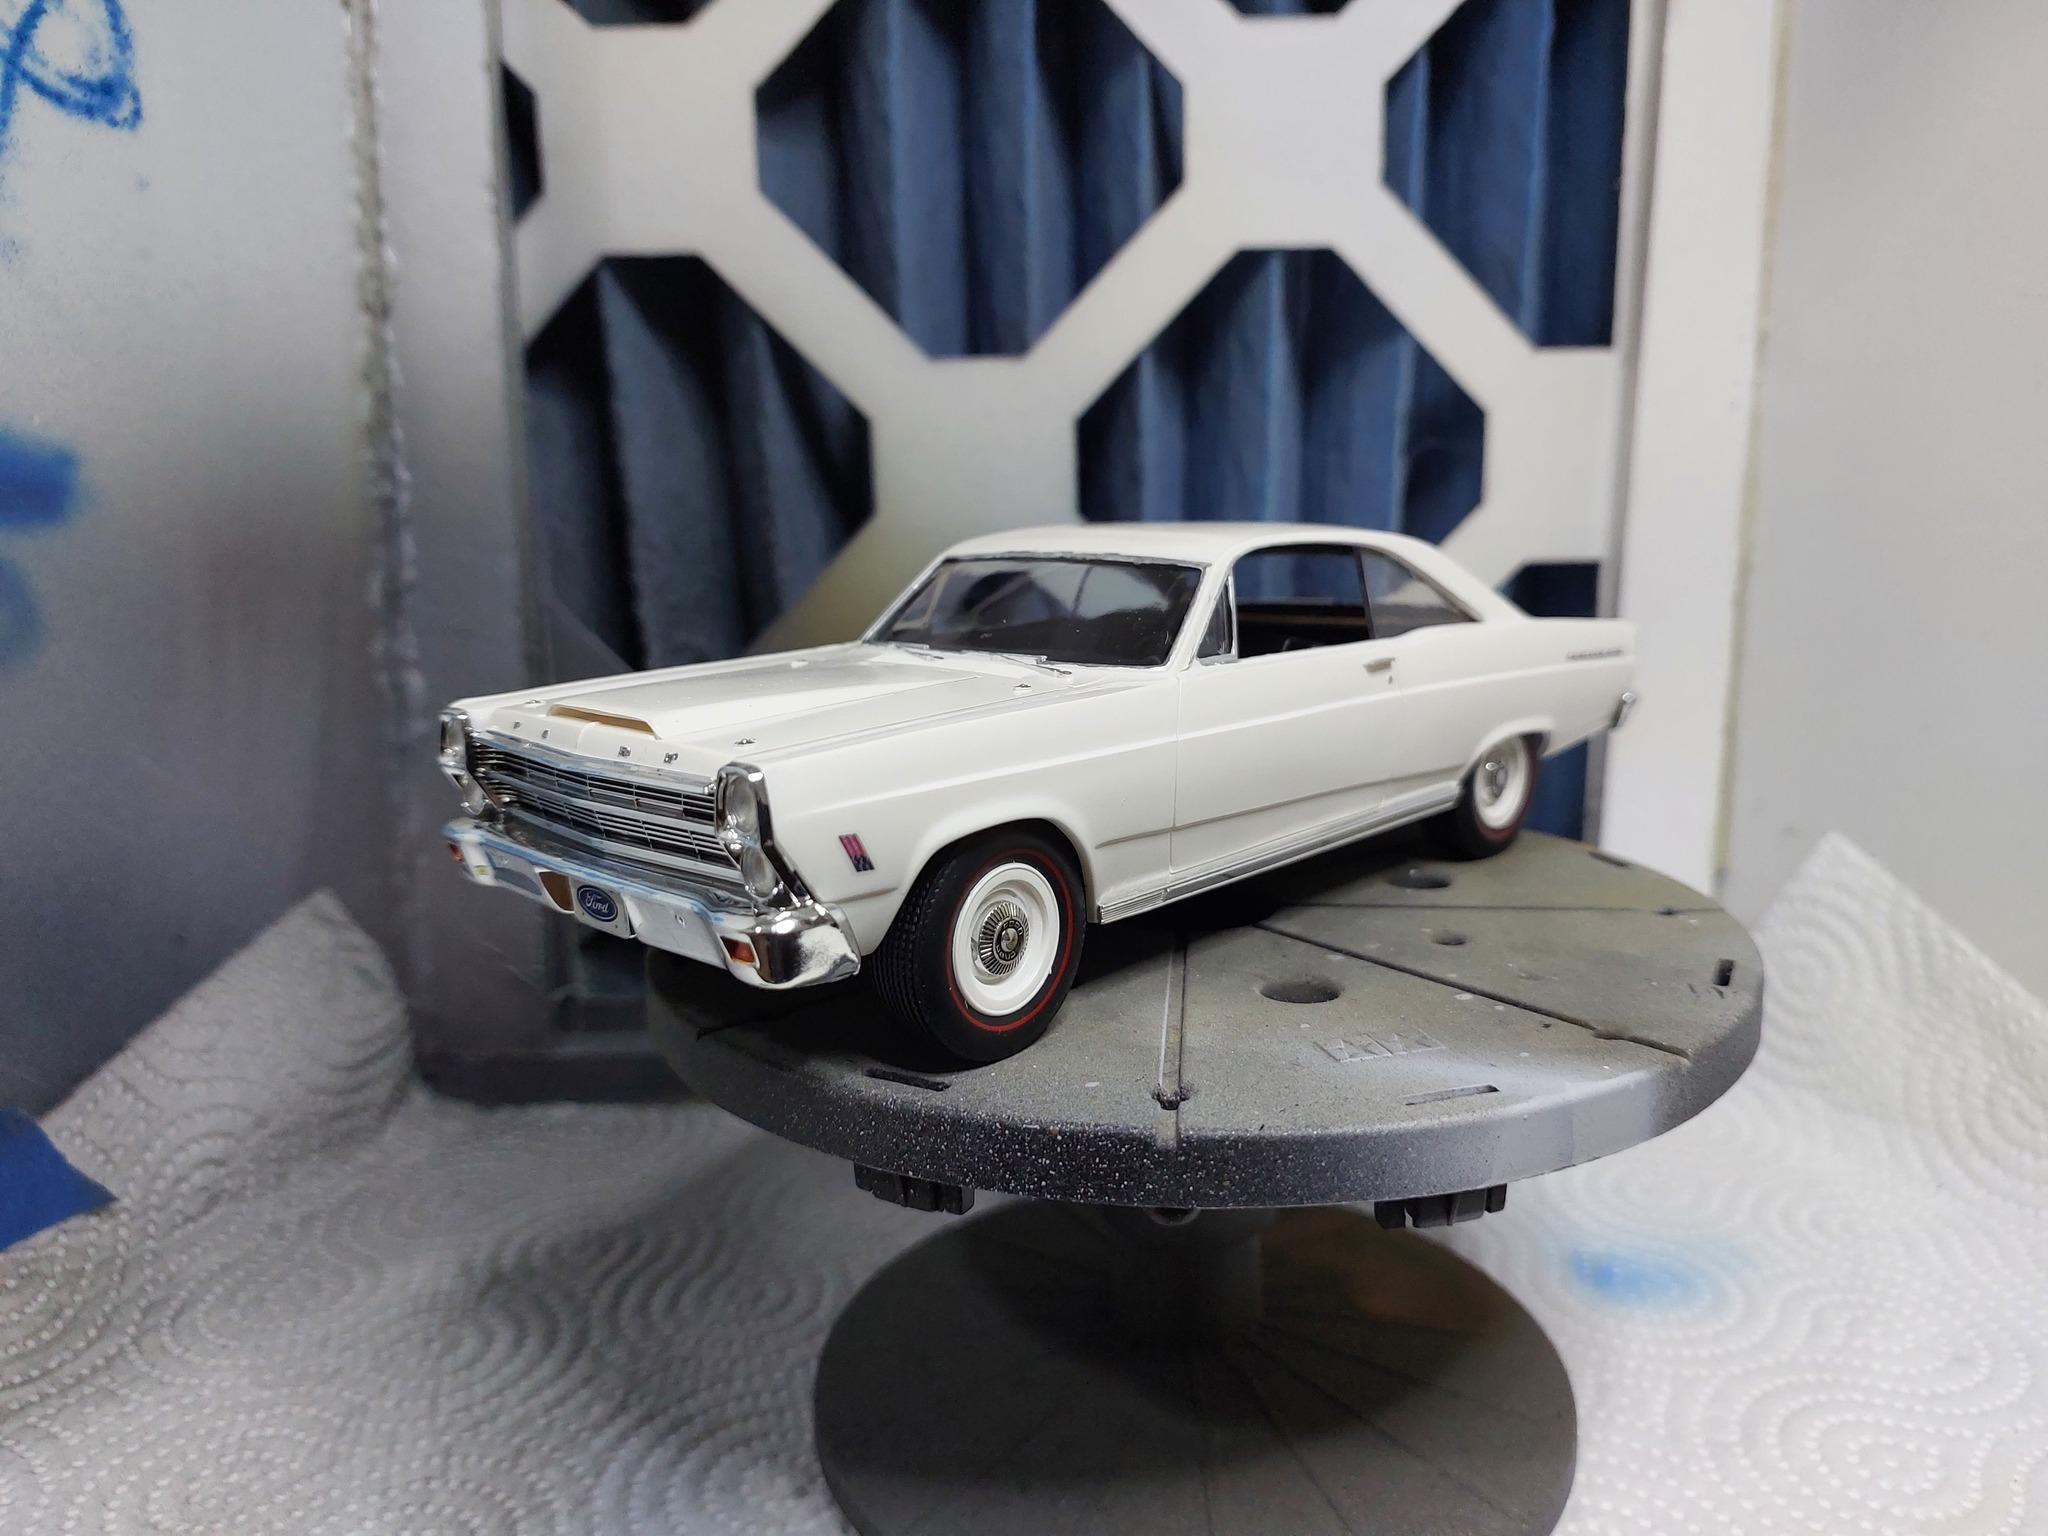
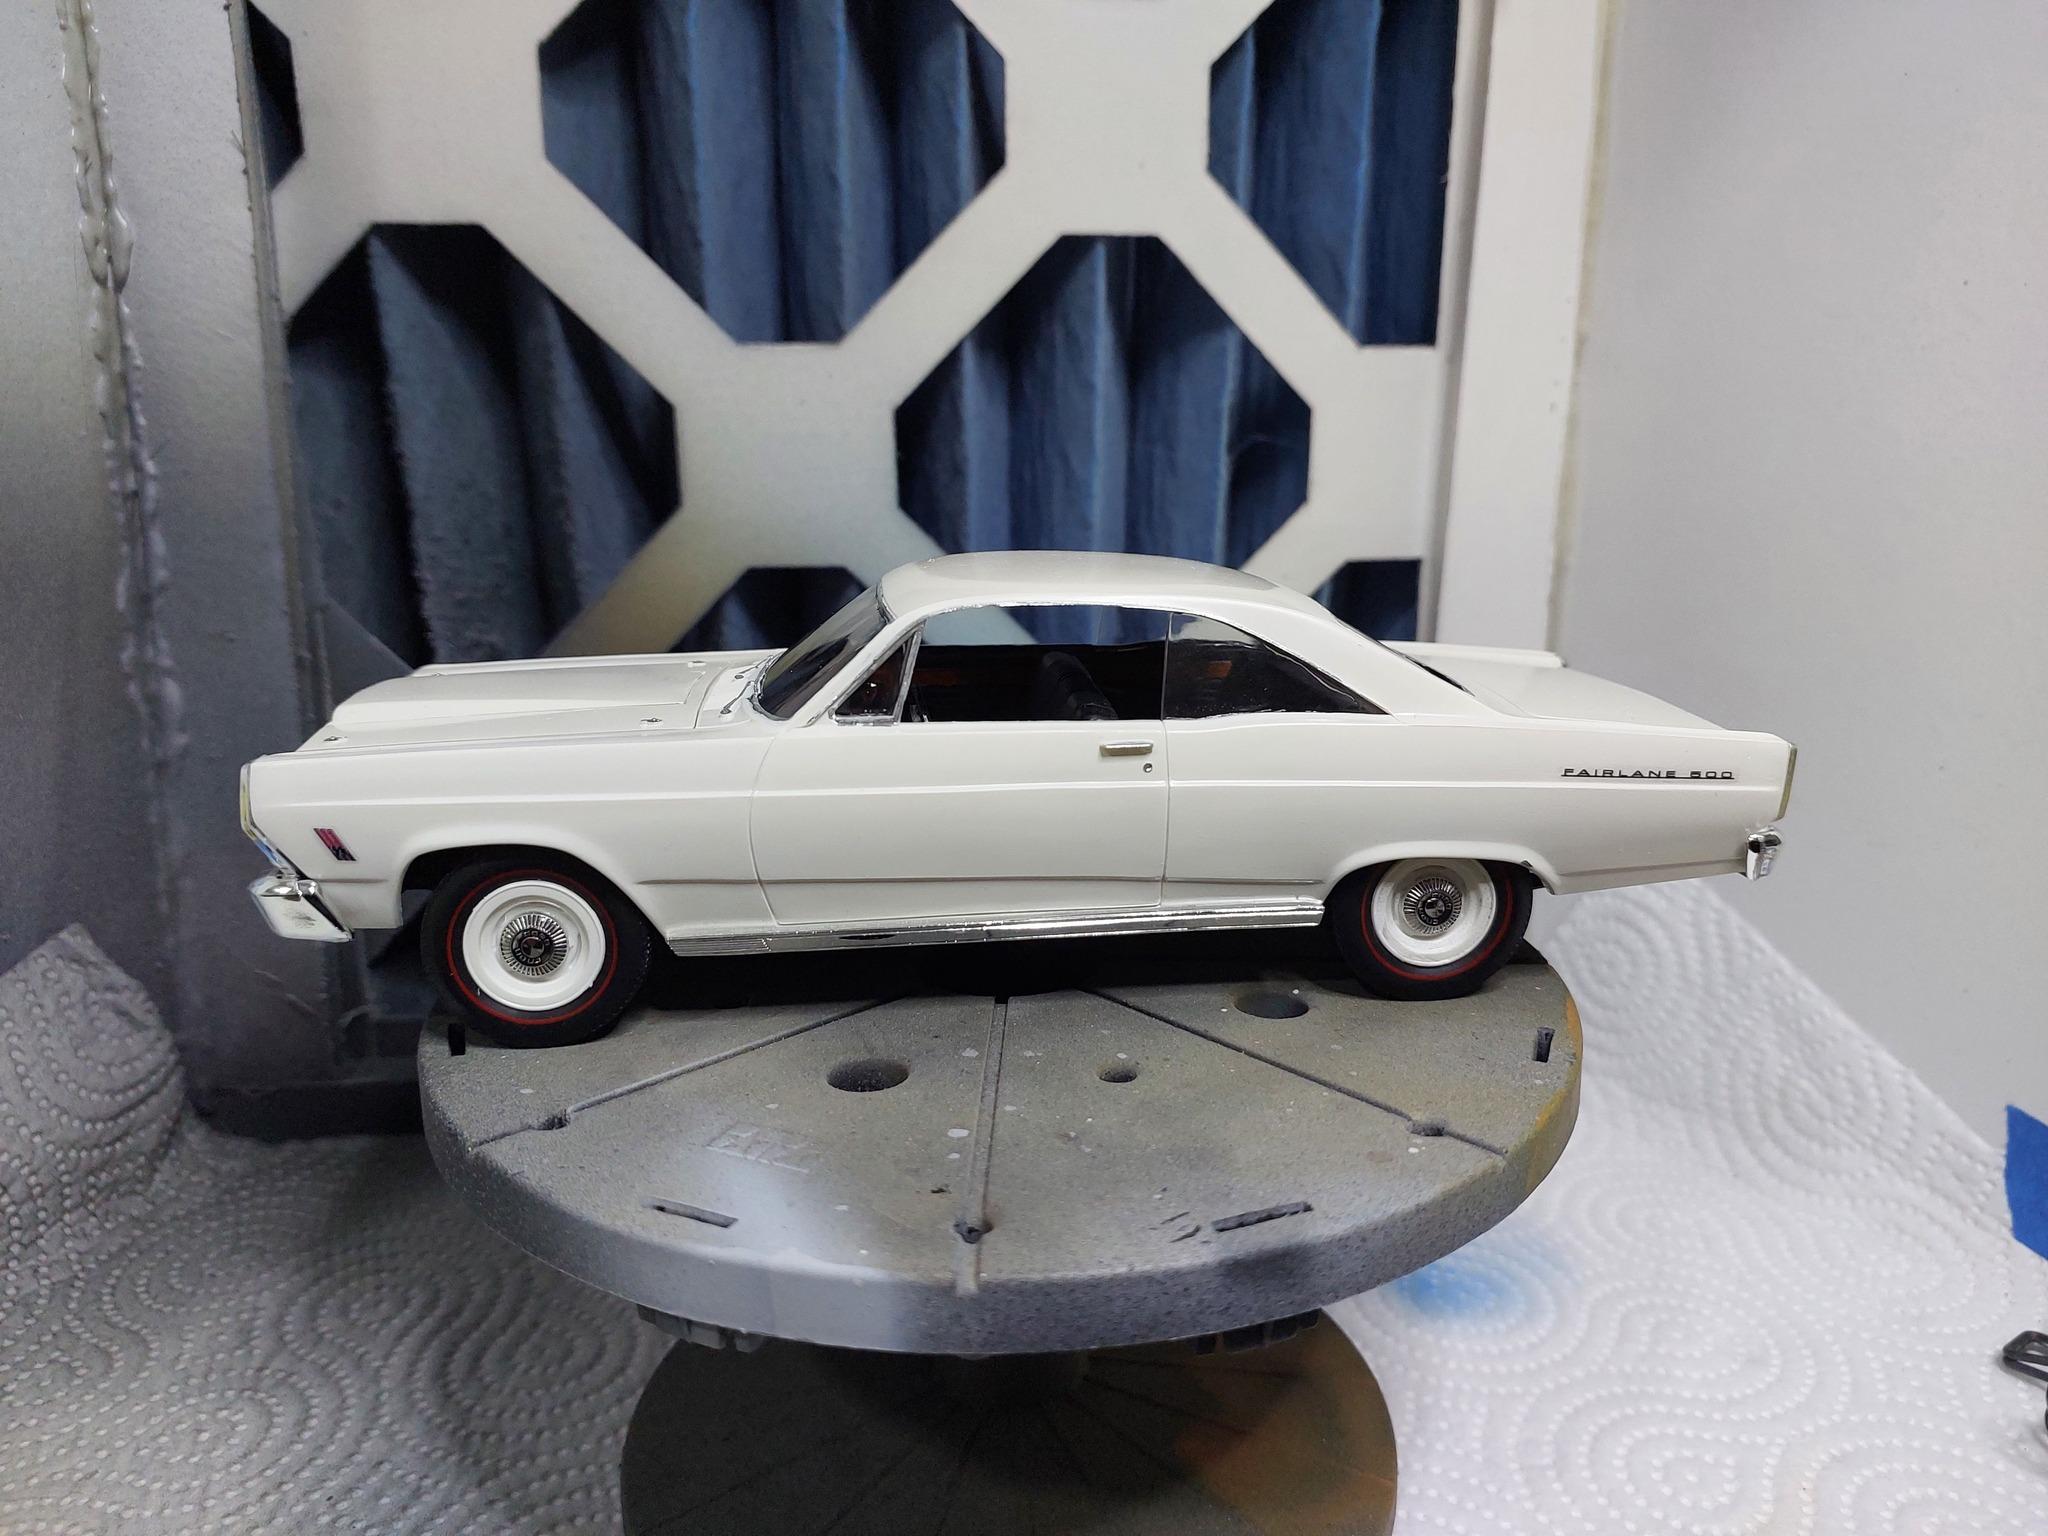
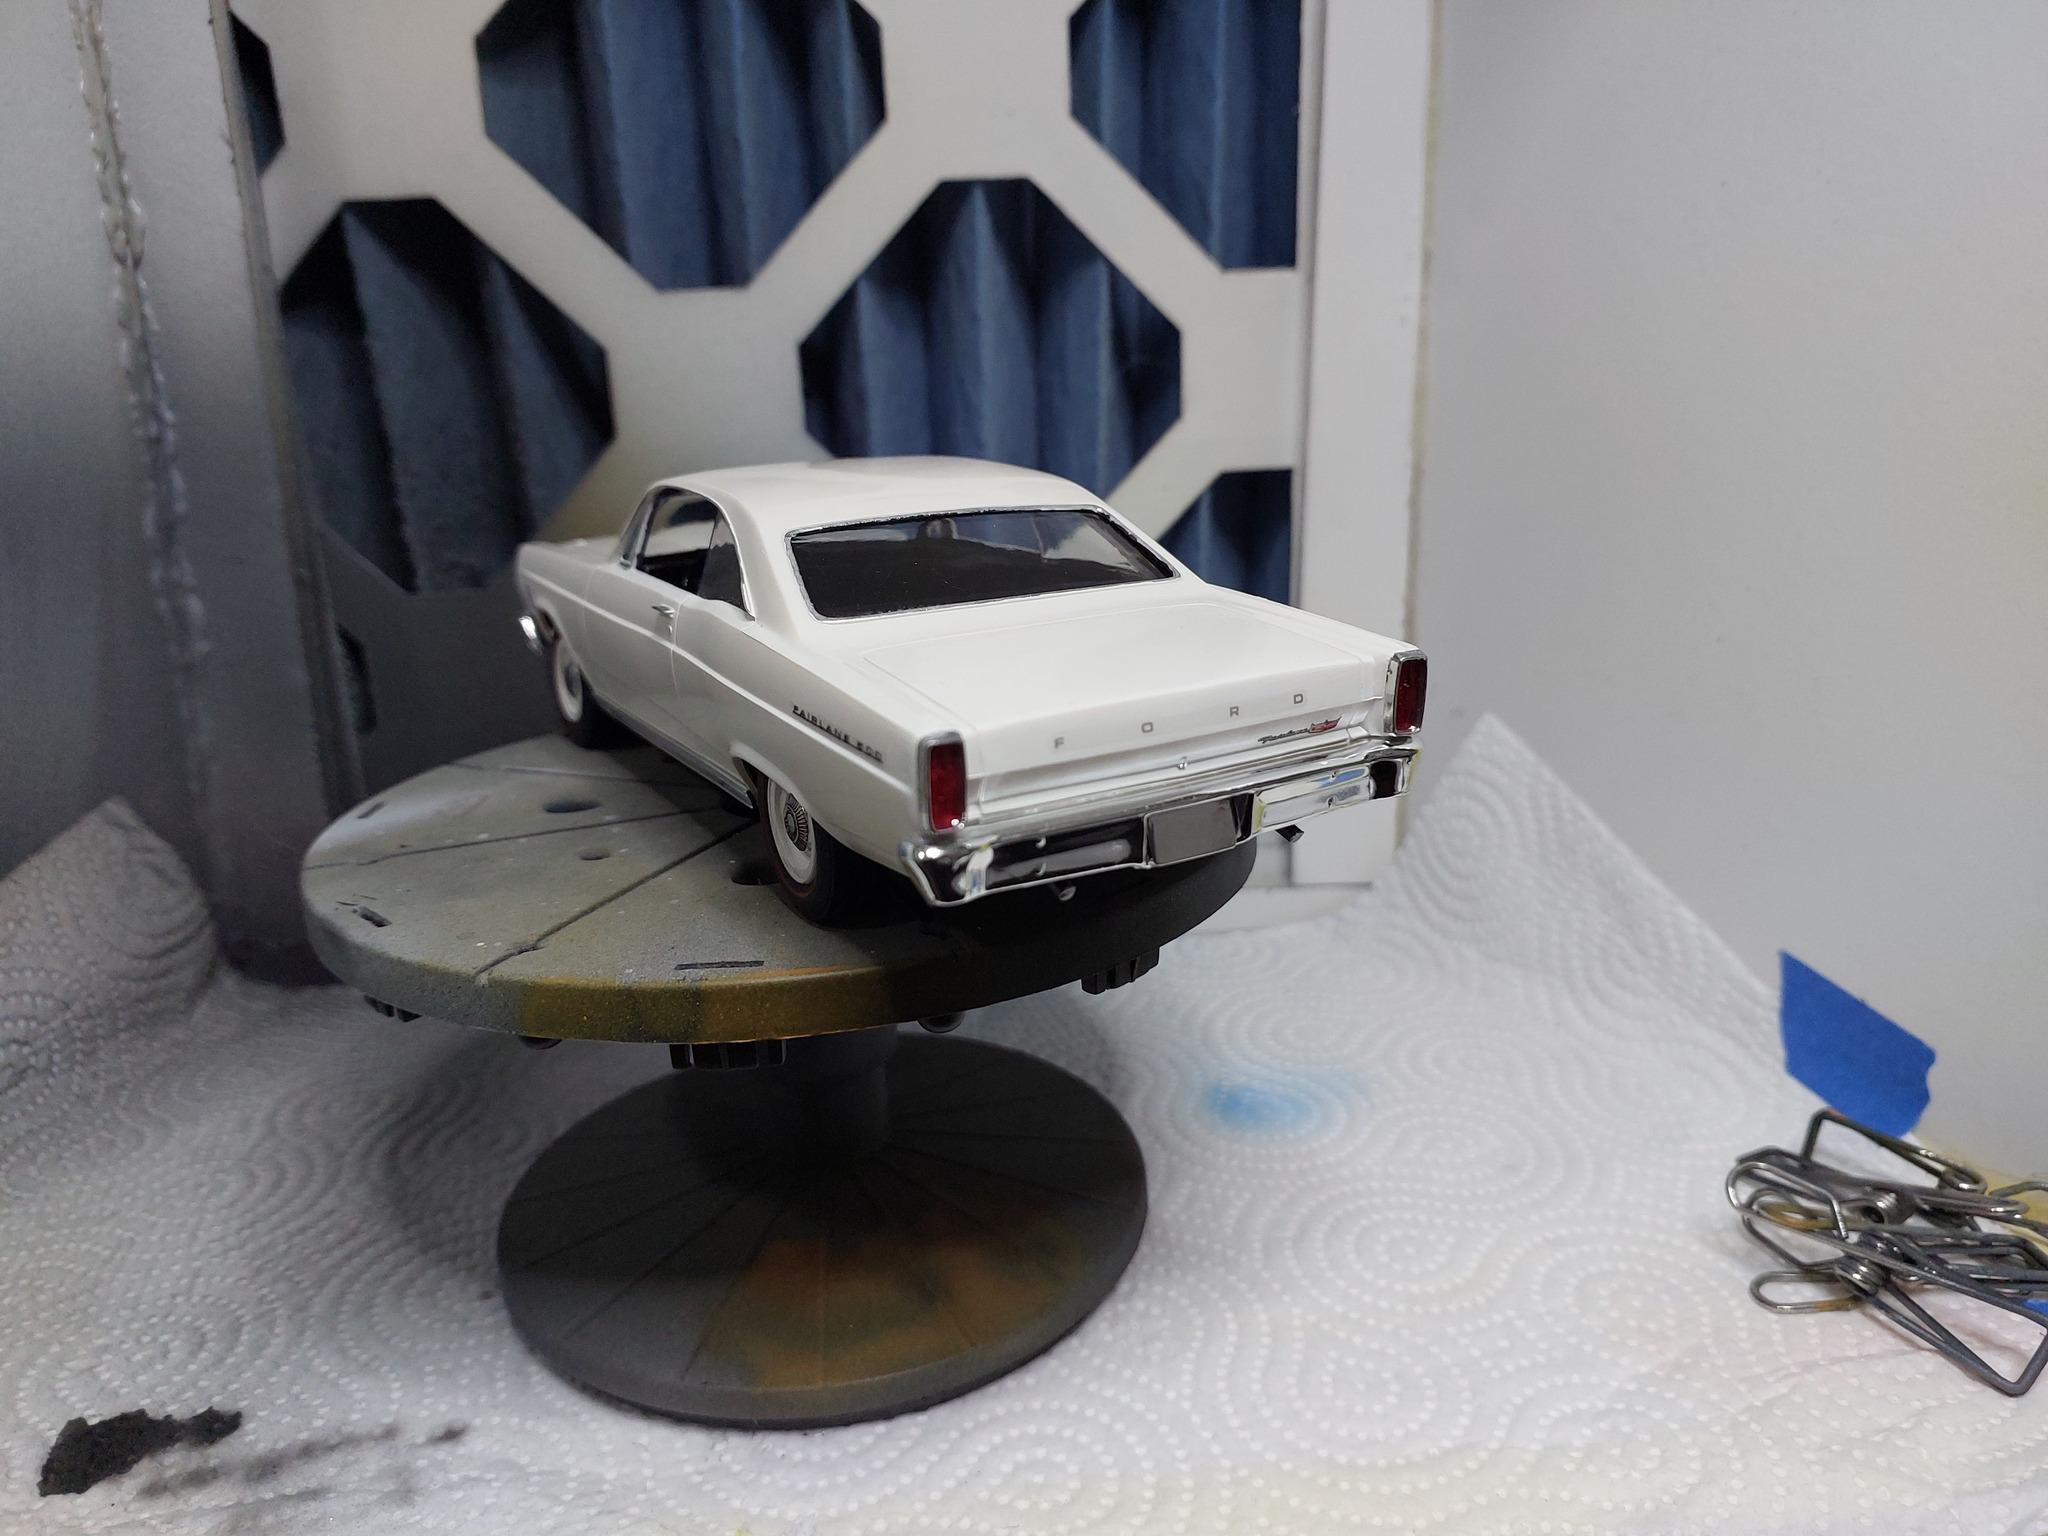
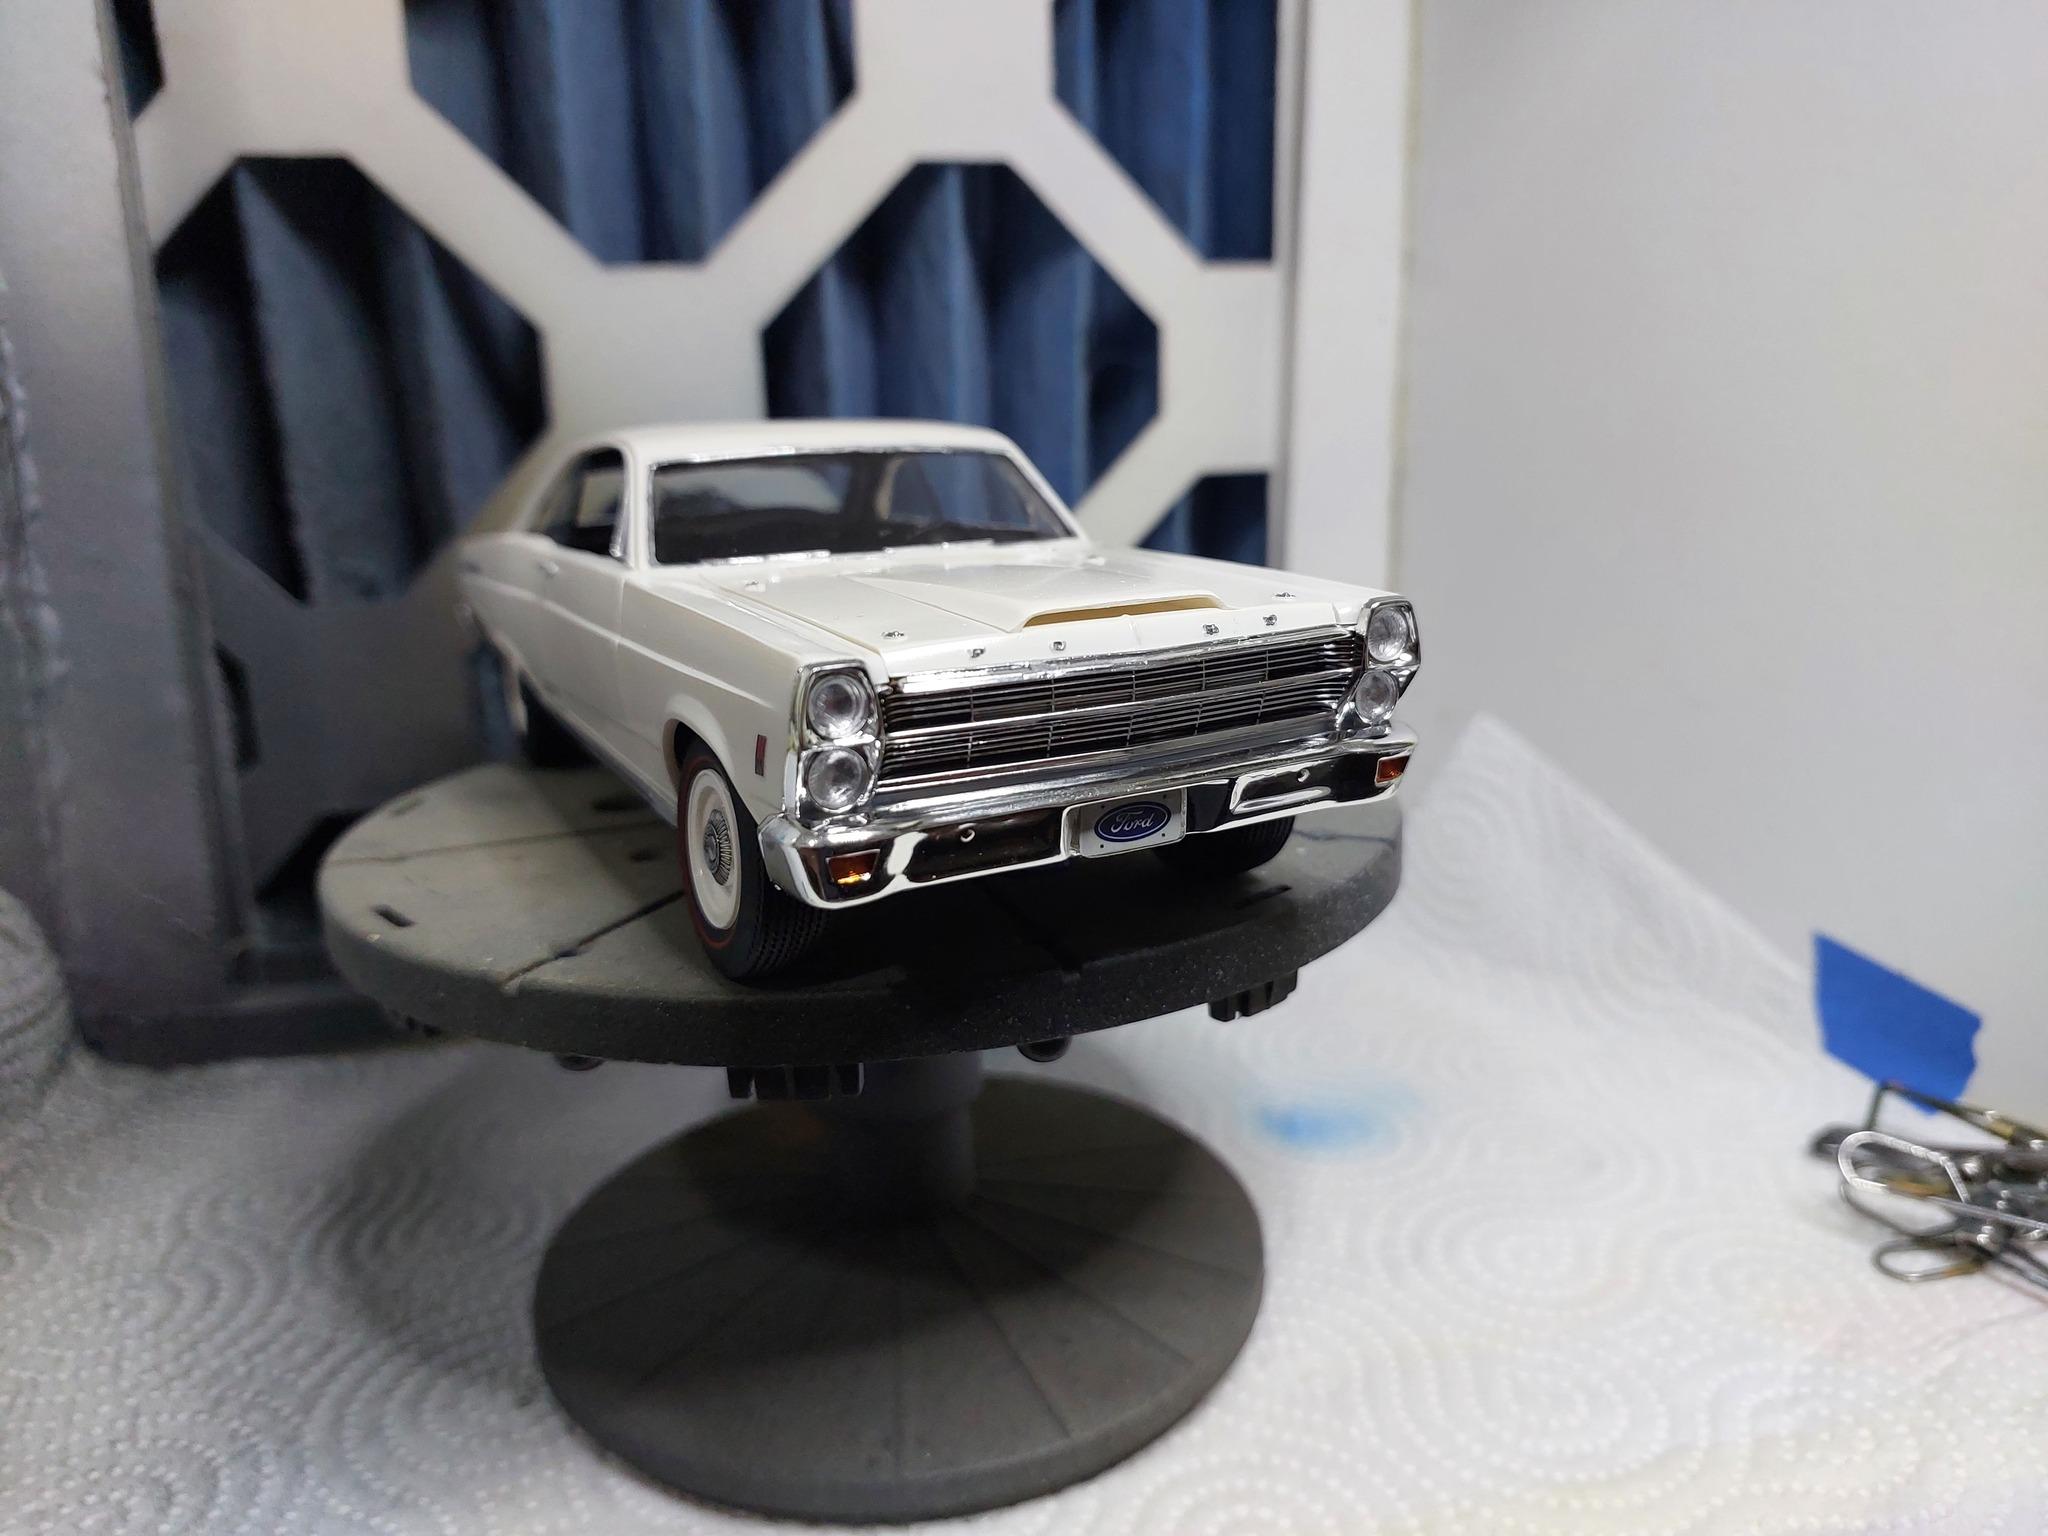
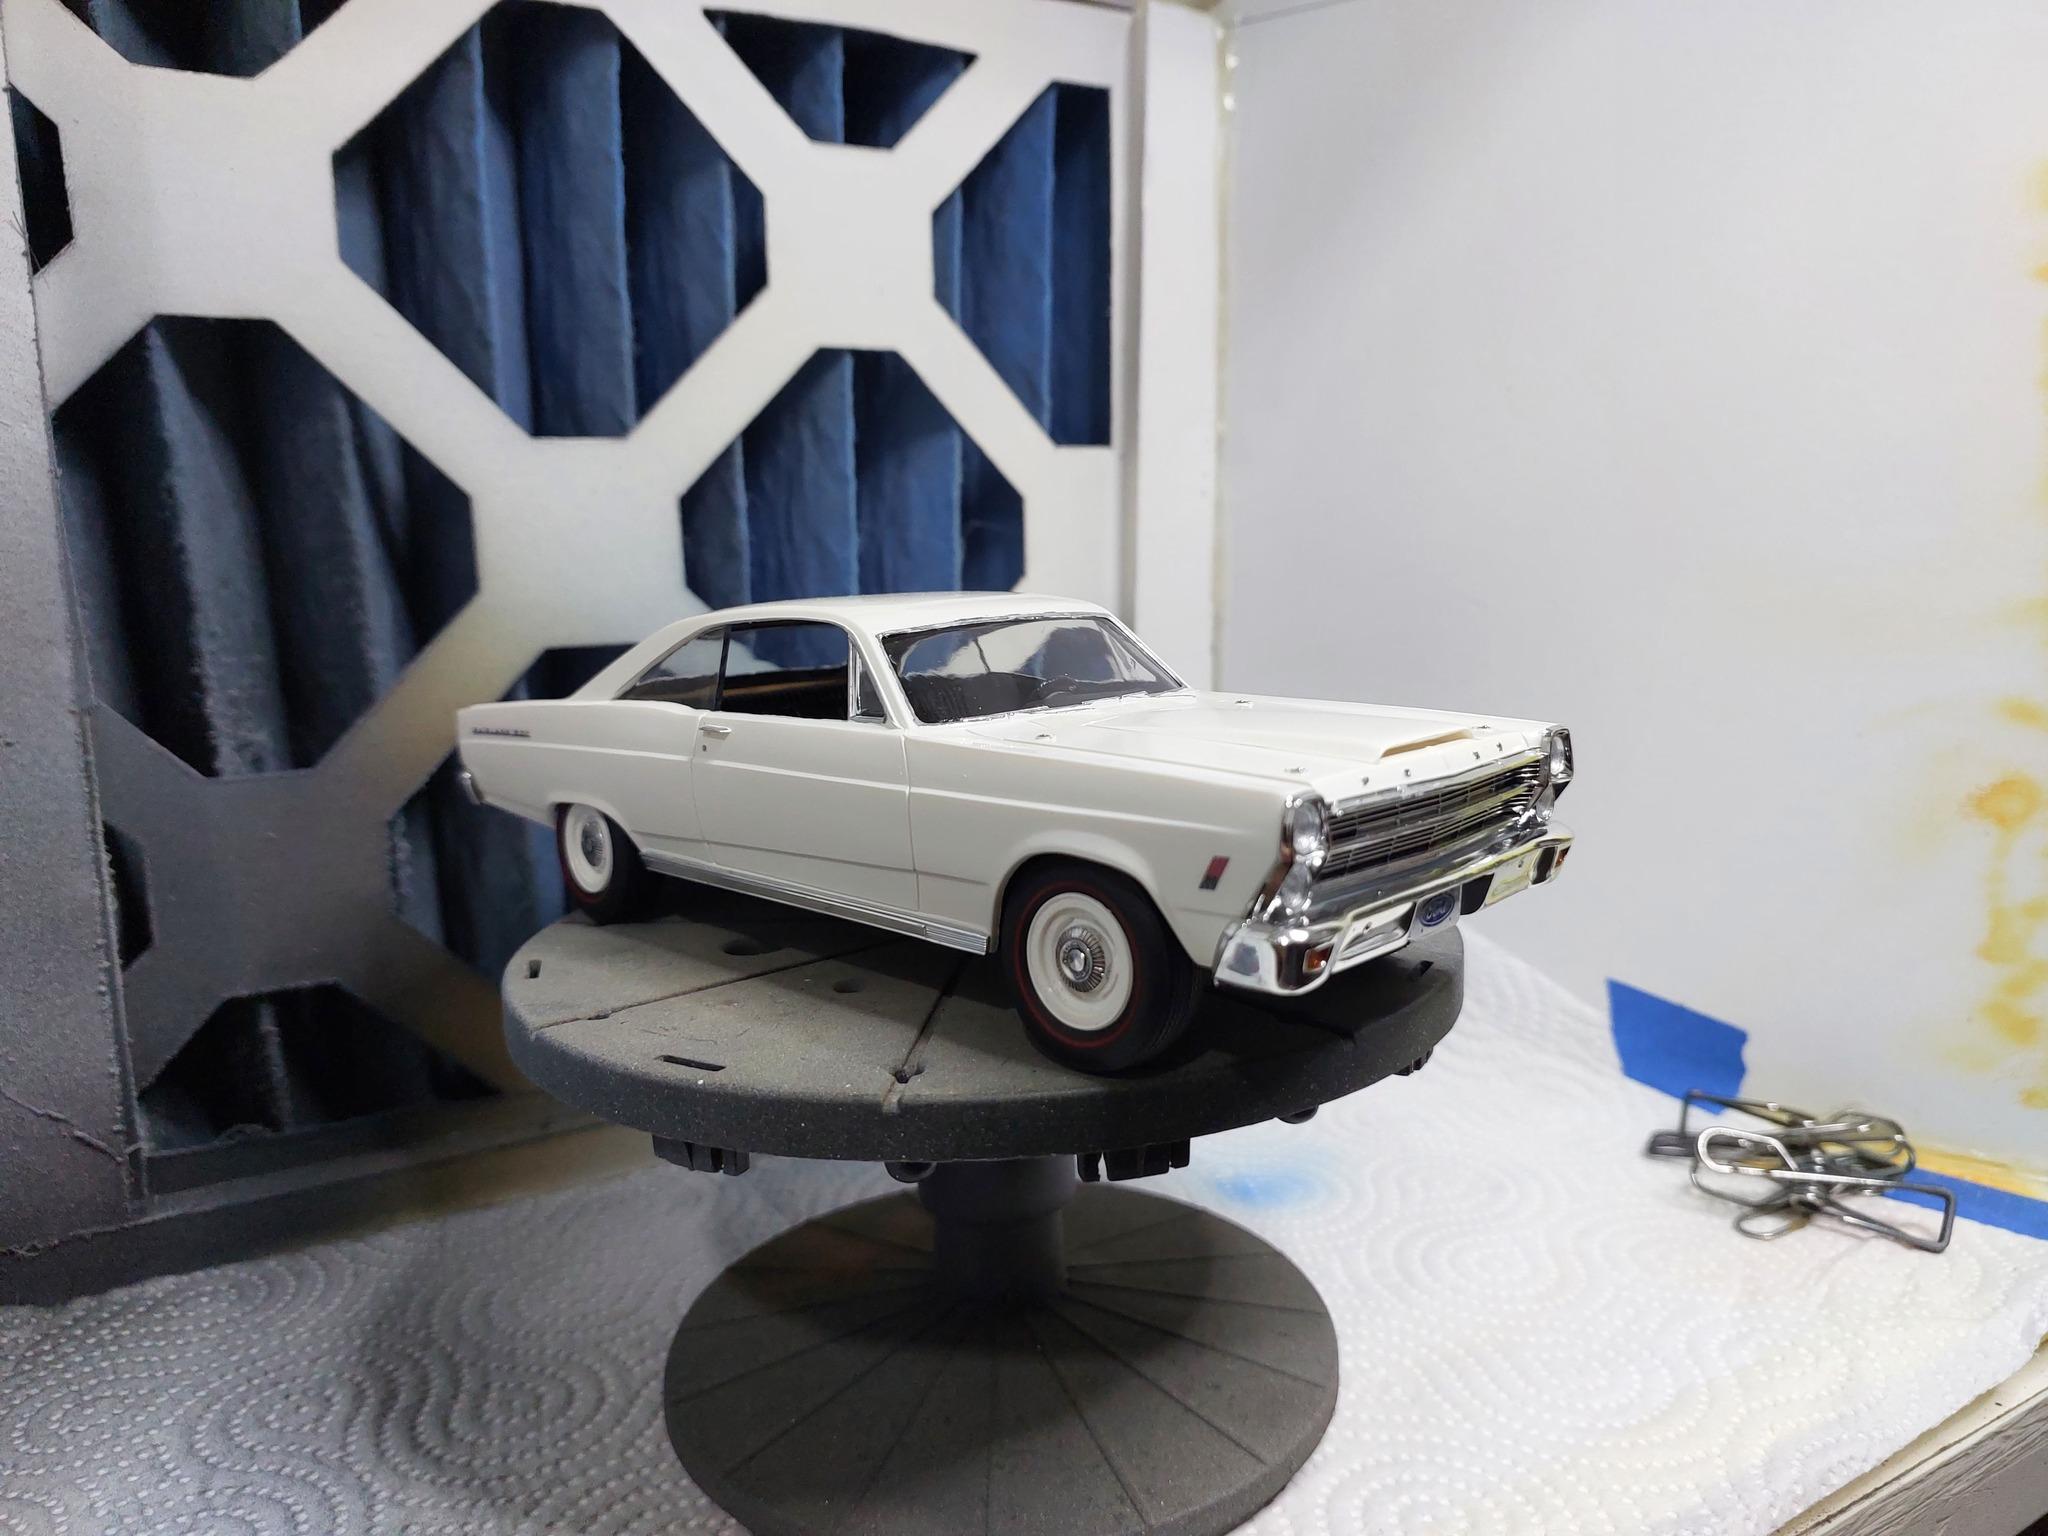
so calling this done, i opted to not use all the race decals and build it as a "Road" car, since it doesn't have any race accessories or race tires.
-
The Official 3D Printing Discussion Thread
eran_k replied to iamsuperdan's topic in General Automotive Talk (Trucks and Cars)
Hey guys, really want to get a 3d printer, i have some experience in CAD and FDM printing, and watched many YT videos on resin printing. i debating which printer to get, and debating between 3 Mars 4 Ultra: smaller print area, 9k, 18micron pixel size Mars 4 Max: bigger print area, 6K, 34 Micron pixel size Saturn 3: Bigger print area,12K, 24 Micron pixel size the 2 mars cost about the same, the Saturn will be 180$ more for me (with shipping) I don't know how many complete bodies I'm going to actually print, seems this is something that only few modelers are succeeding at, i will probably print lot more stuff like wheels,engines and other detail and custom parts. the question is whether i better make the effort ang buy the Saturn, or stay with one of the Mars 4's what do you think? -
last build for 2023/first for 2024 - Amt 66 Fairlane 427
eran_k replied to eran_k's topic in WIP: Model Cars
Yes i did, quite simple actually: first i use some sort of base color (any type of brown to your liking, i used quit light brown) then i use i tiny brush and paint the grain with a dark color freehand once its dry i give at a coat or two of Tamiya clear orange that's it. -
last build for 2023/first for 2024 - Amt 66 Fairlane 427
eran_k replied to eran_k's topic in WIP: Model Cars
got some more done, glass, tires, bumpers and lights all installed. need to complete the trim and decals. it's funny but the kit doesn't come with rear view and side mirrors...
-
last build for 2023/first for 2024 - Amt 66 Fairlane 427
eran_k replied to eran_k's topic in WIP: Model Cars
oops, to late for that now... Also body and wheels got painted, since it's enamel i will let it dry couple of days before handeling
-
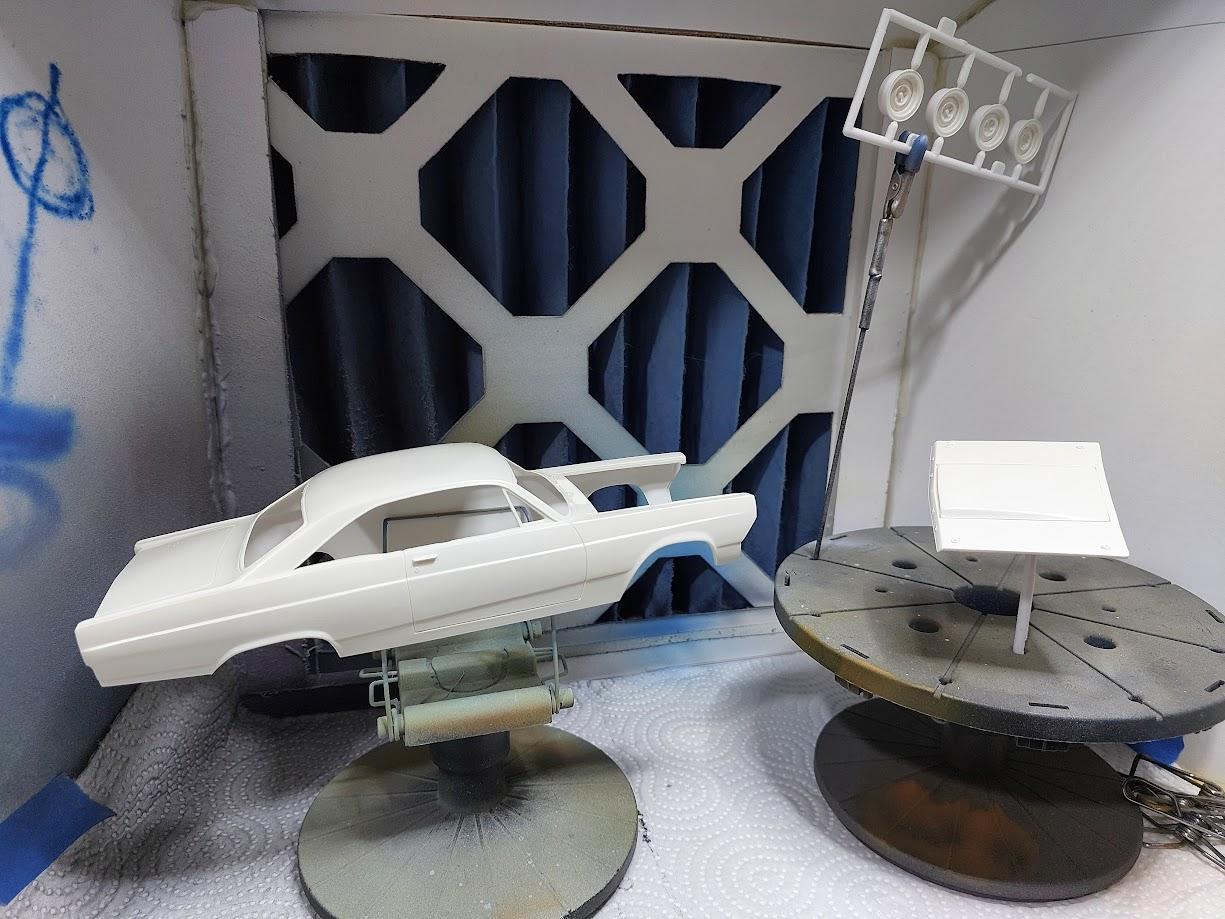
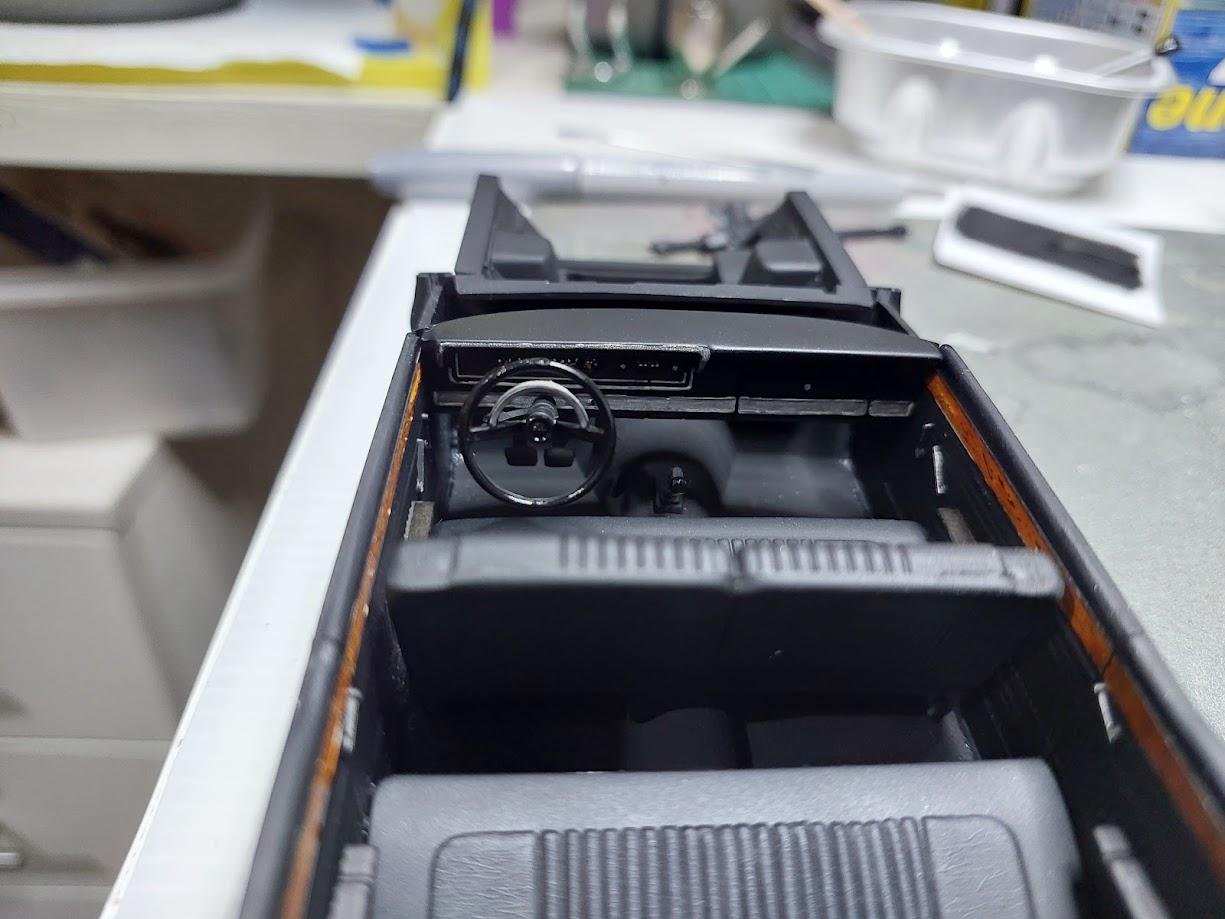
so few days ago i started on the amt 66 Fairlane, so far i finished the engine, interior and will be moving on to paint the body soon. interior is kind of boring being all black...but came out nice with some touches of wood grain and chrome. body will be painted MCW Wimbledon white enamel.
-
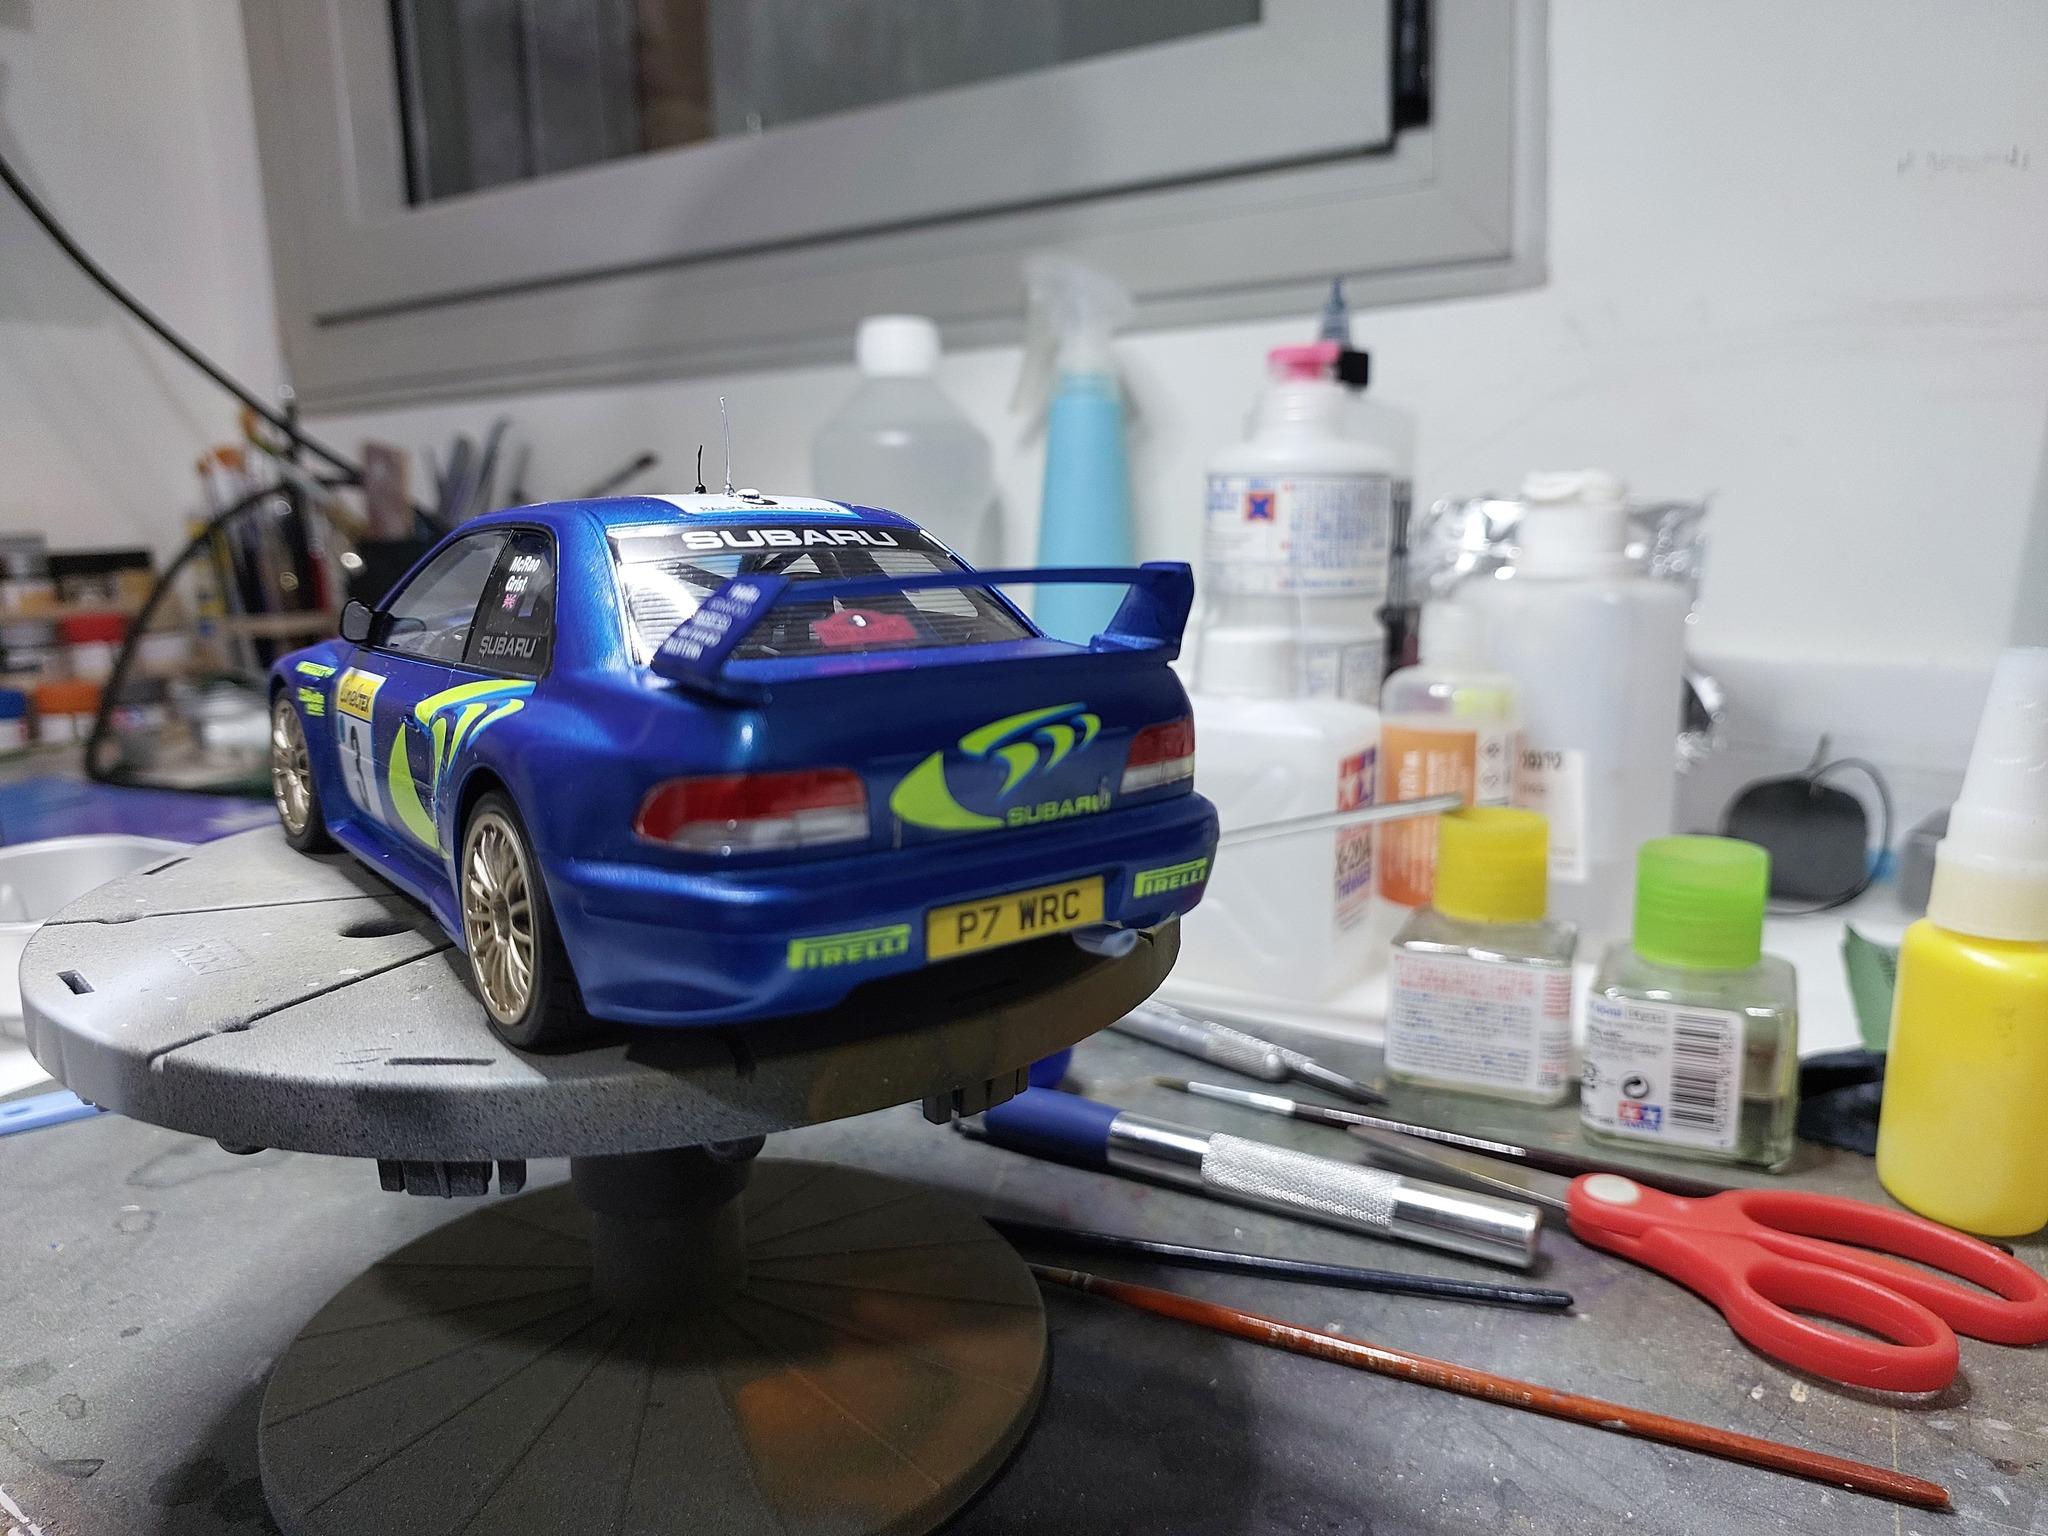
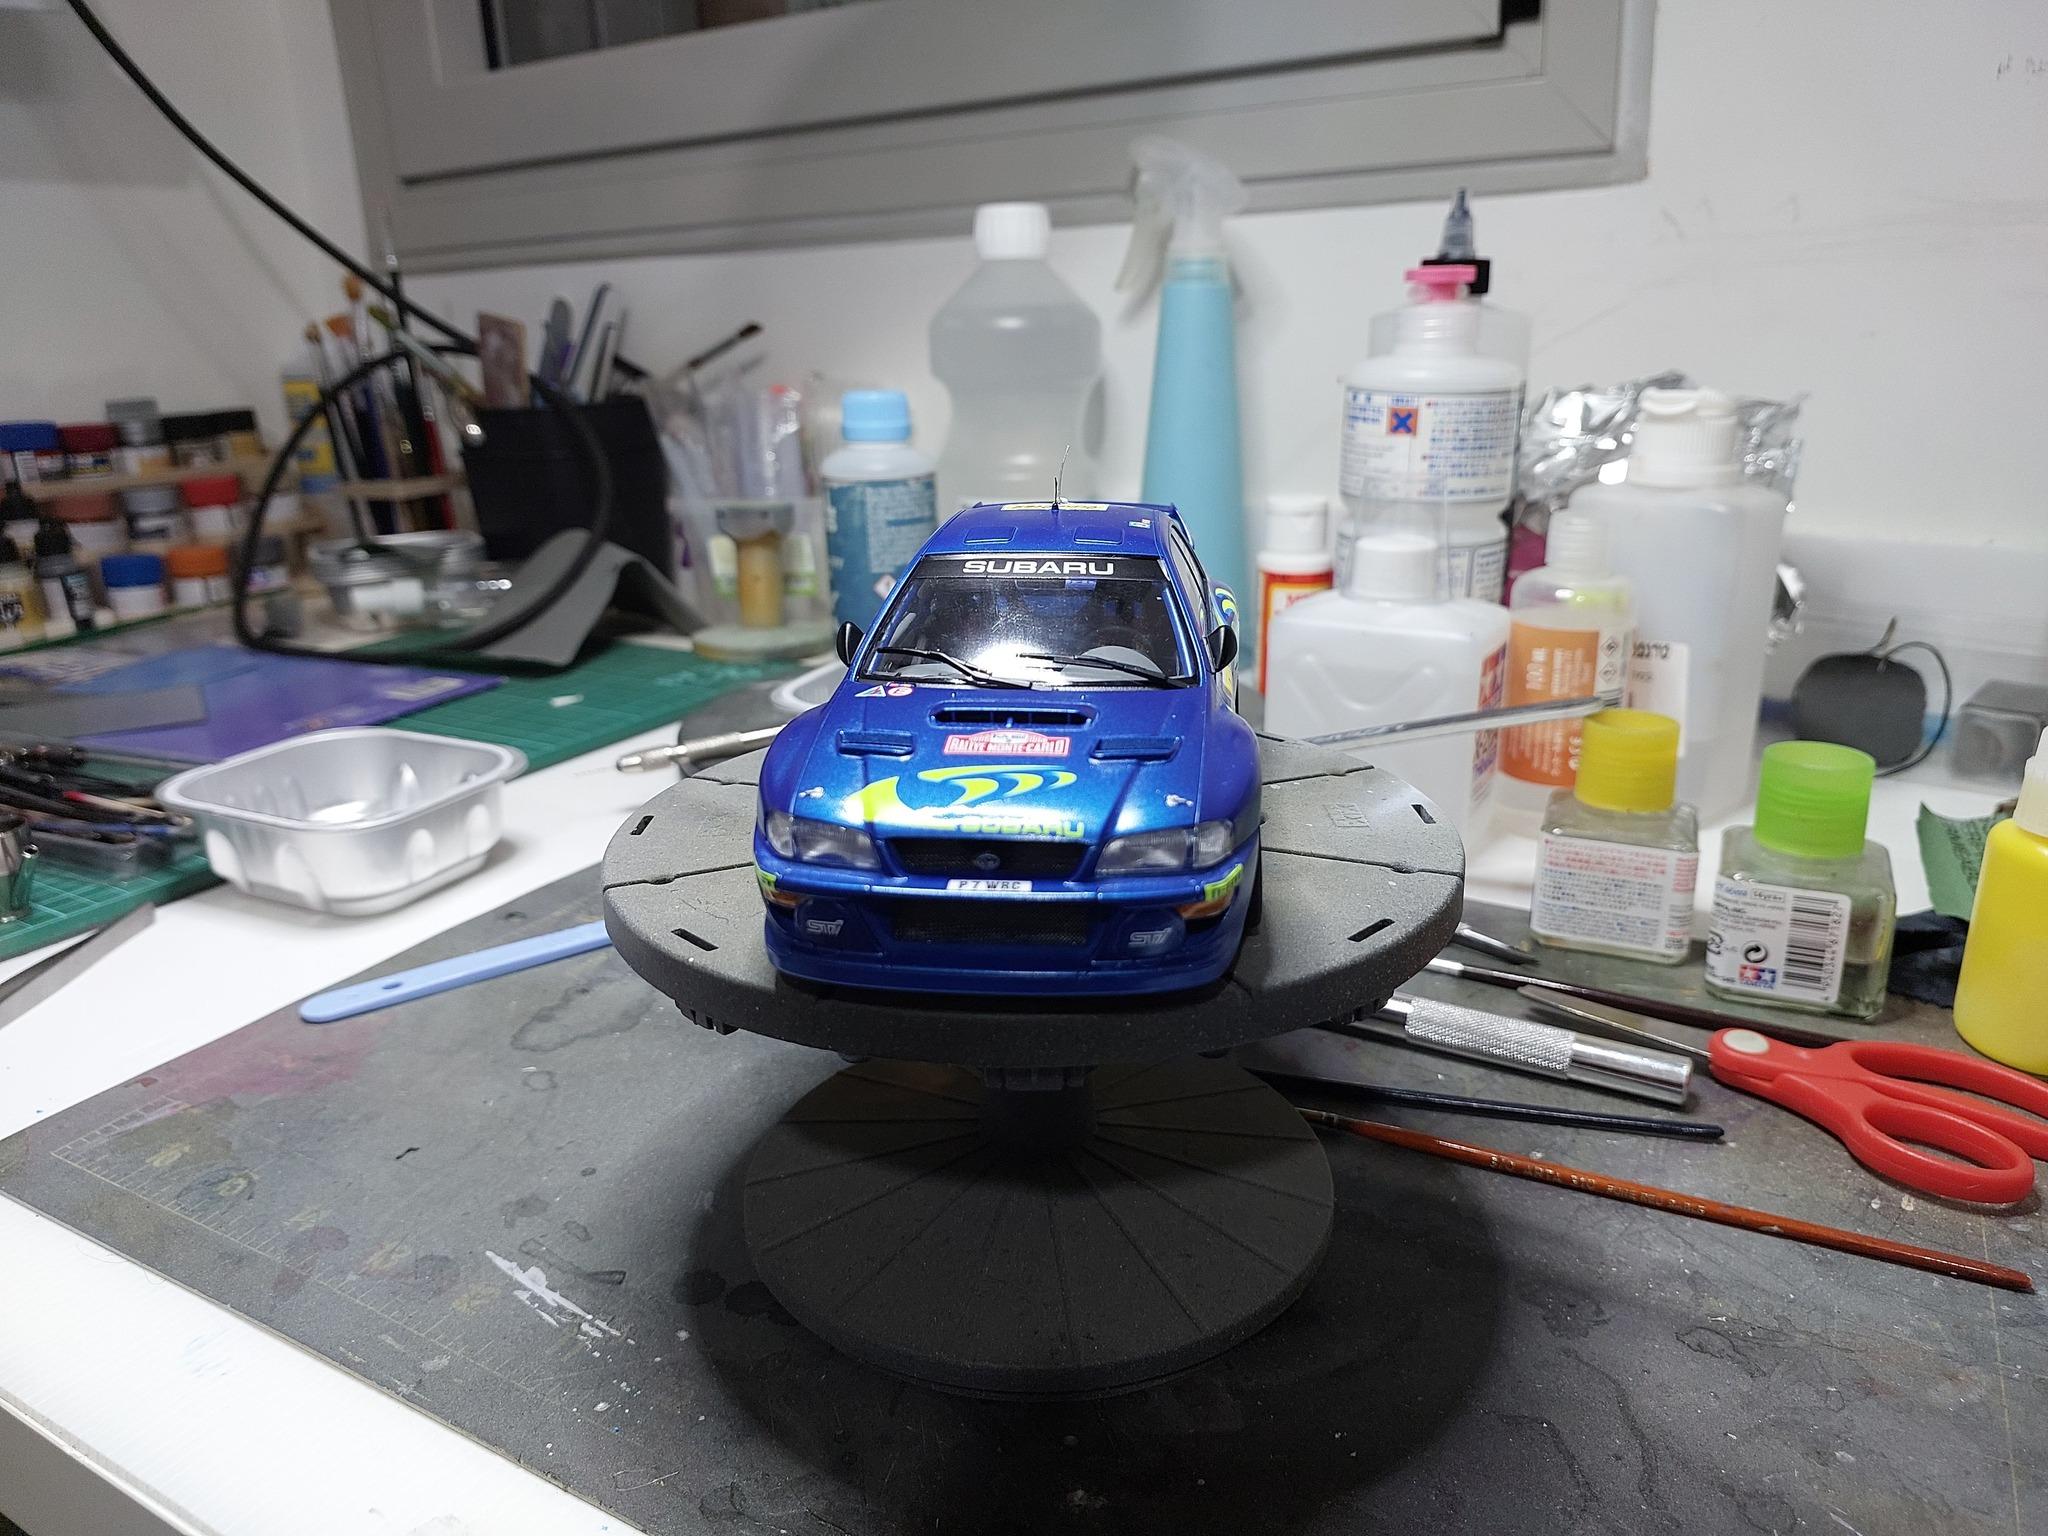
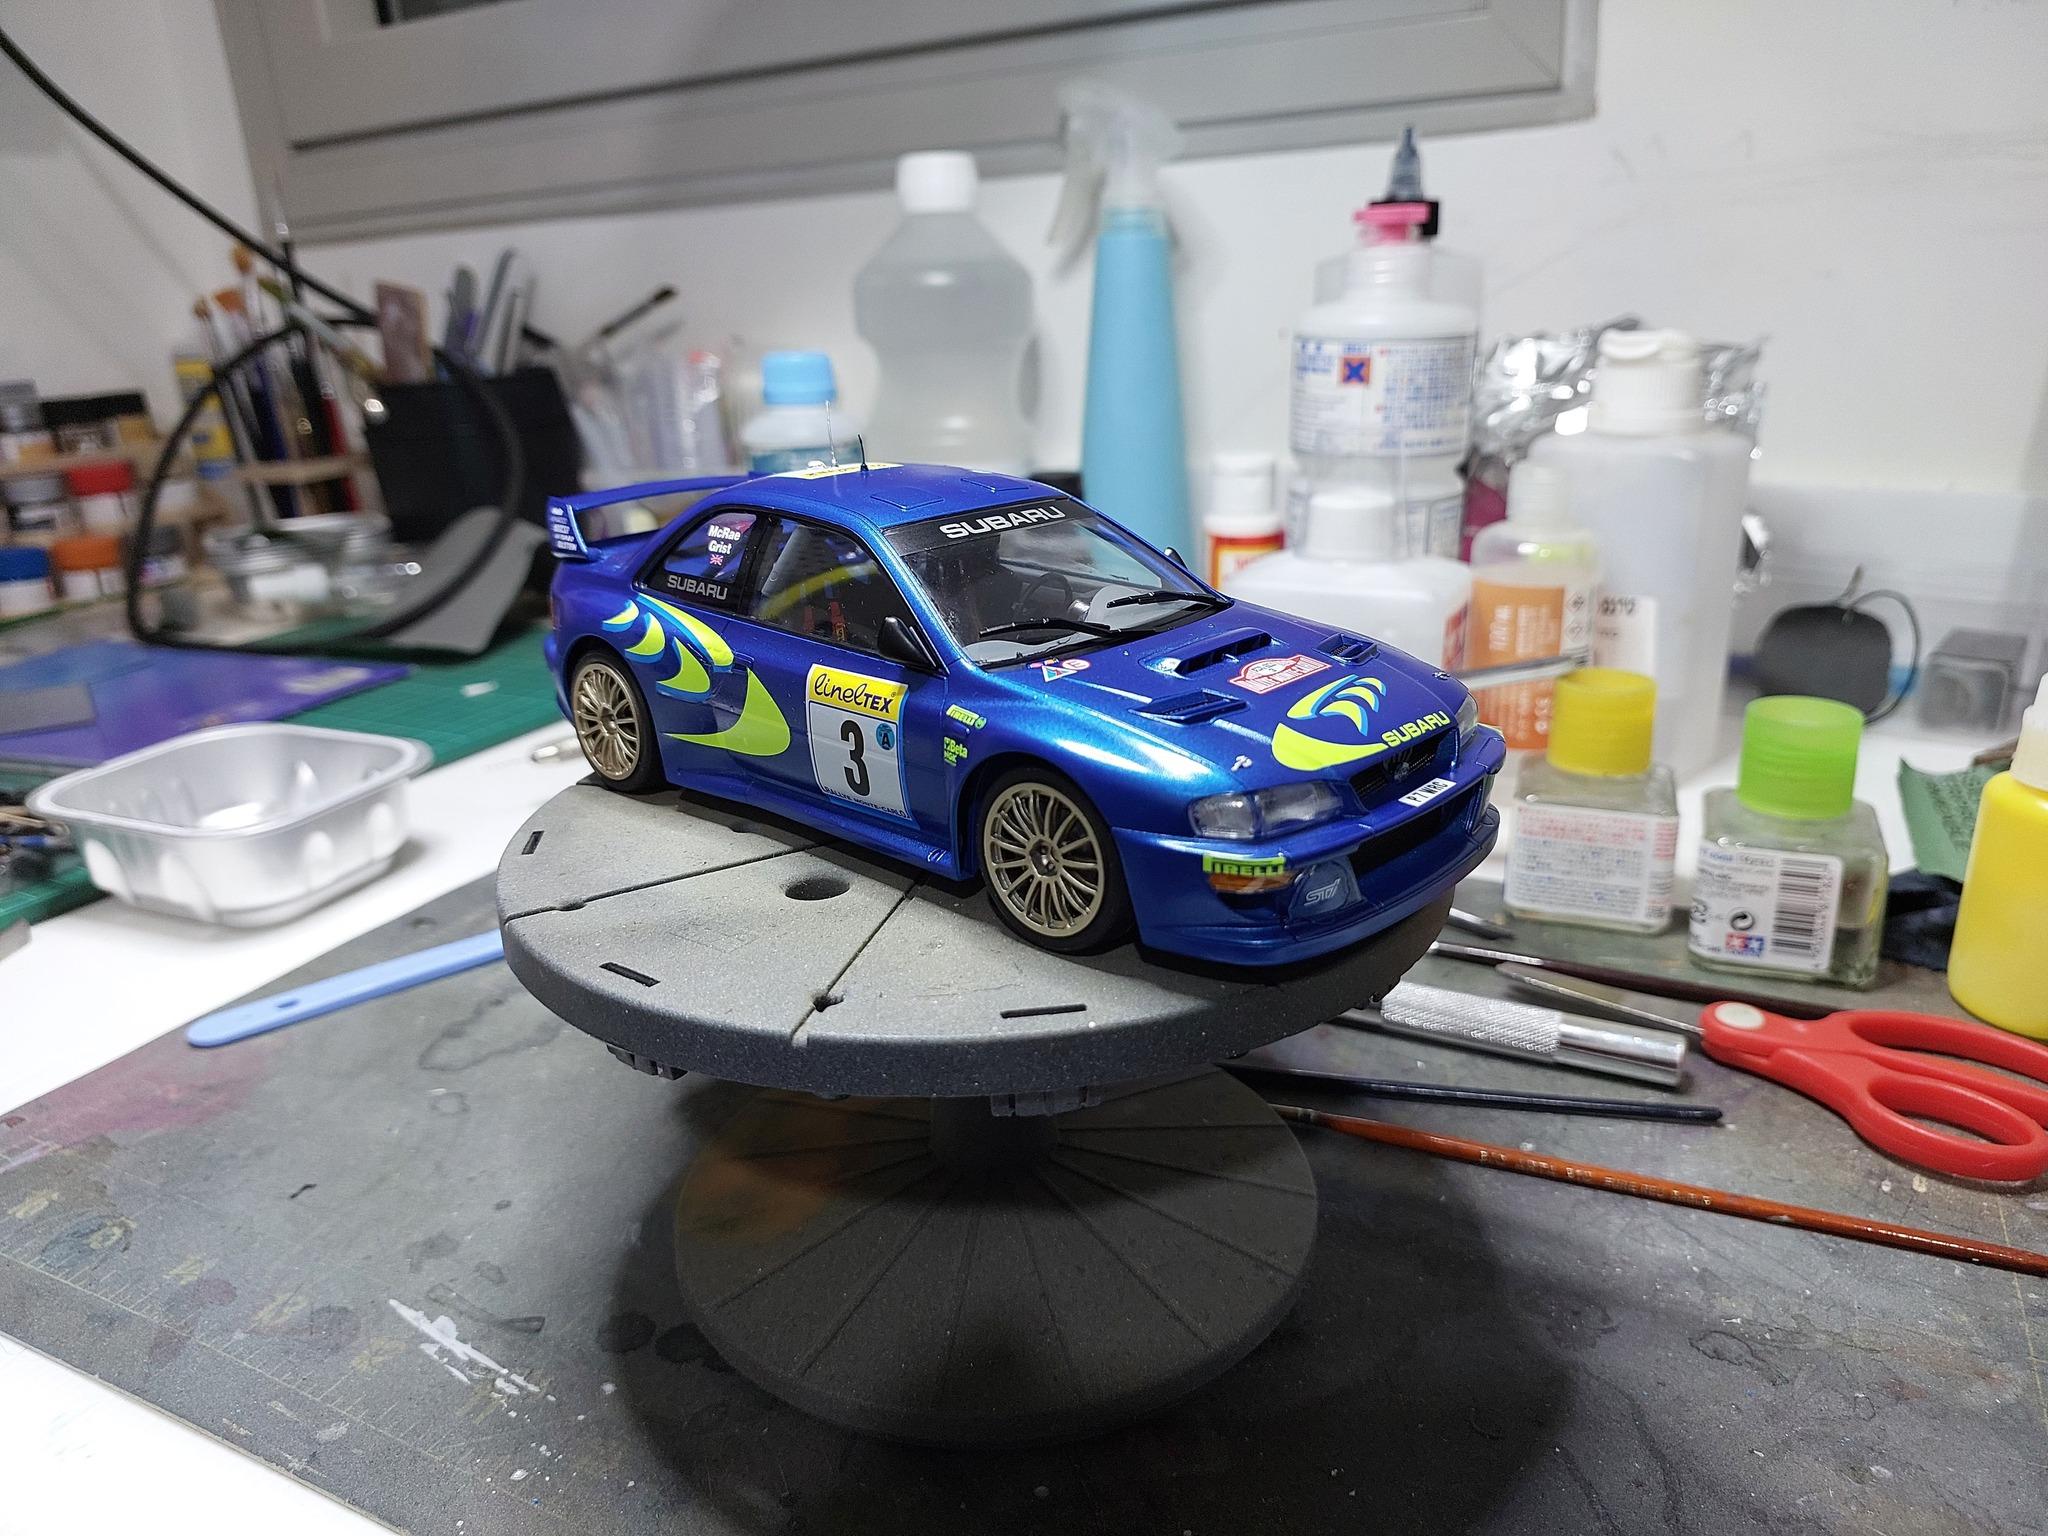
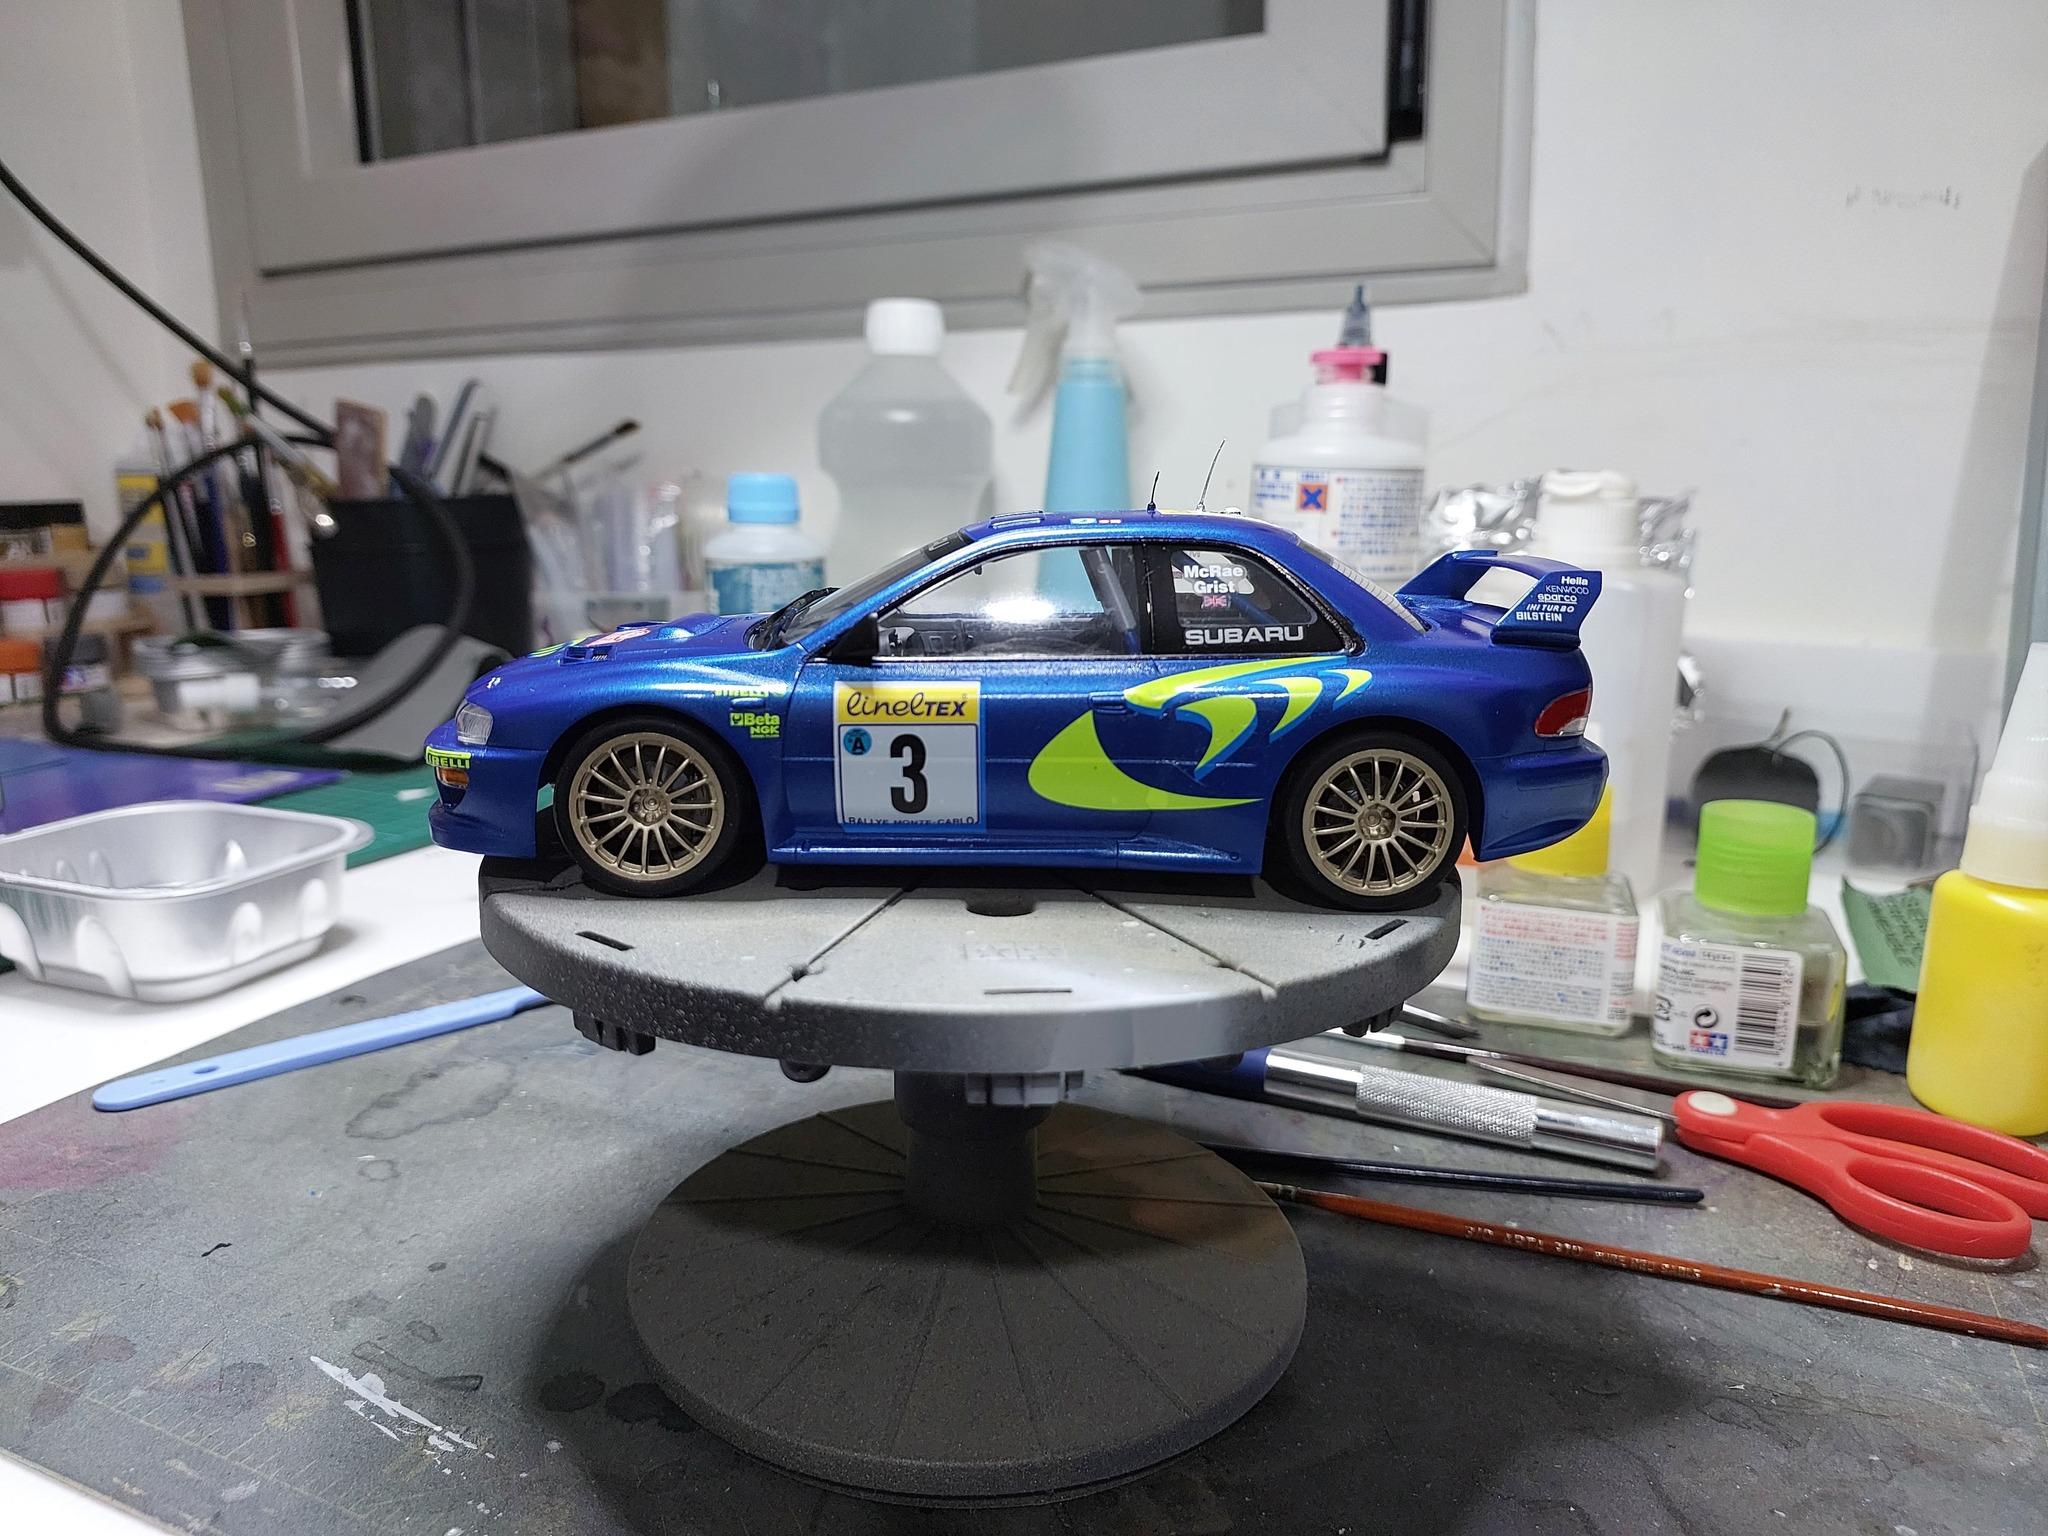
Just finished this very nice Tamiya Kit yesterday, oob, Tamiya kits are always a breeze to build
-
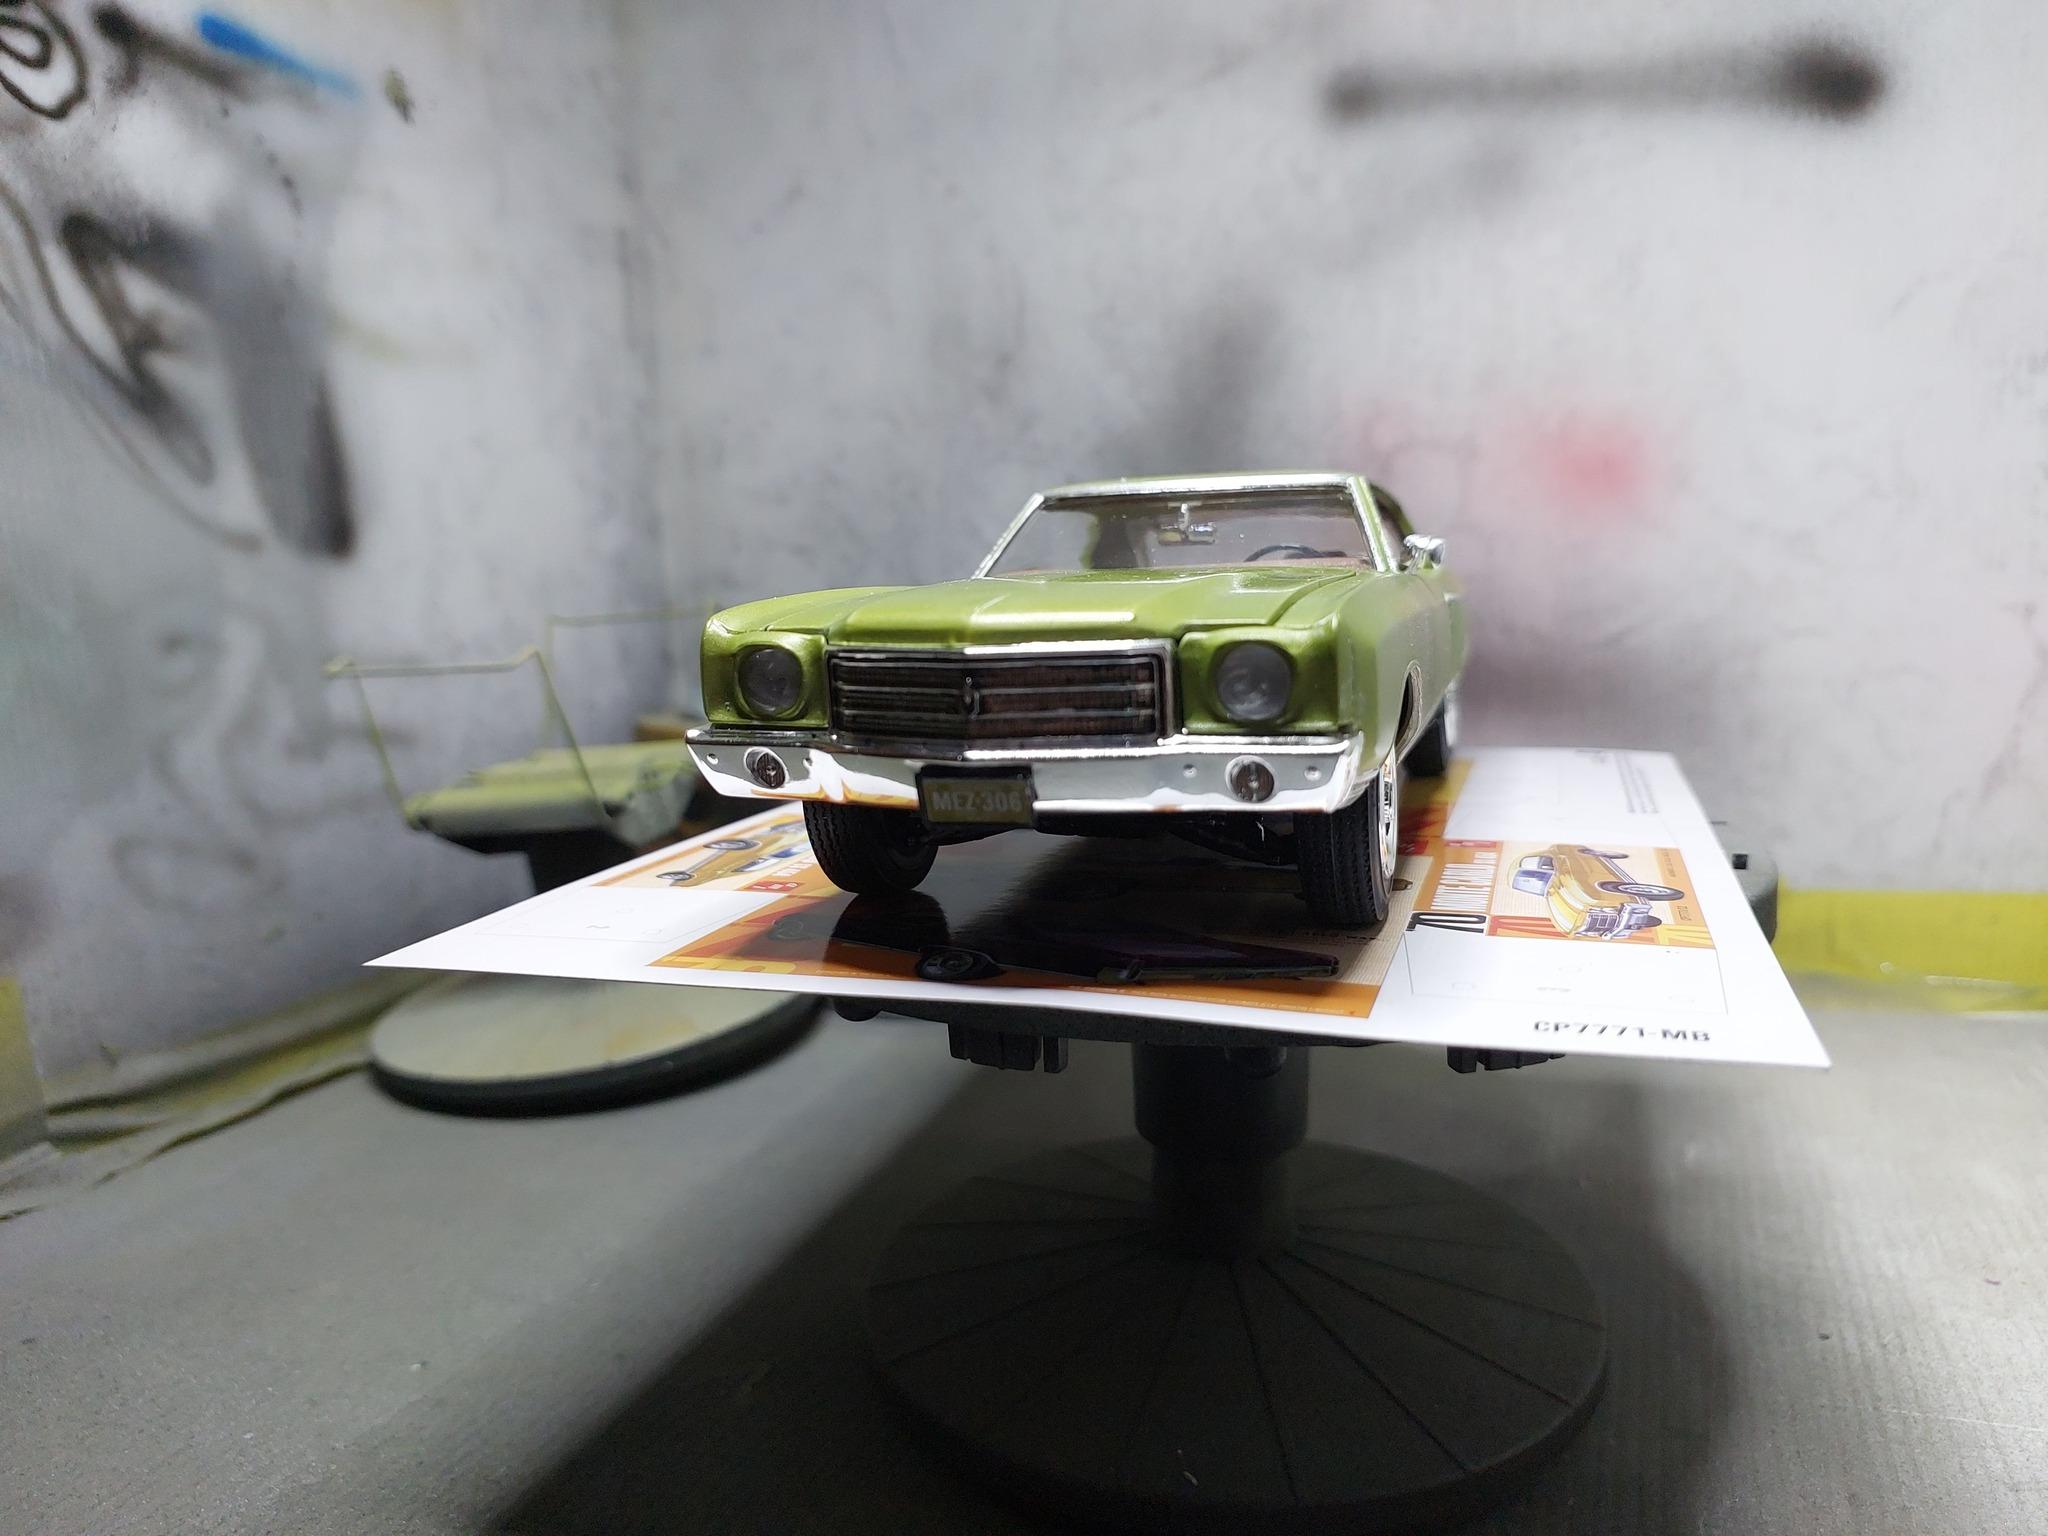
monte carlo super stocker on hauler
eran_k replied to eran_k's topic in Other Racing: Road Racing, Salt Flat Racers
i just used the decal in the kit -
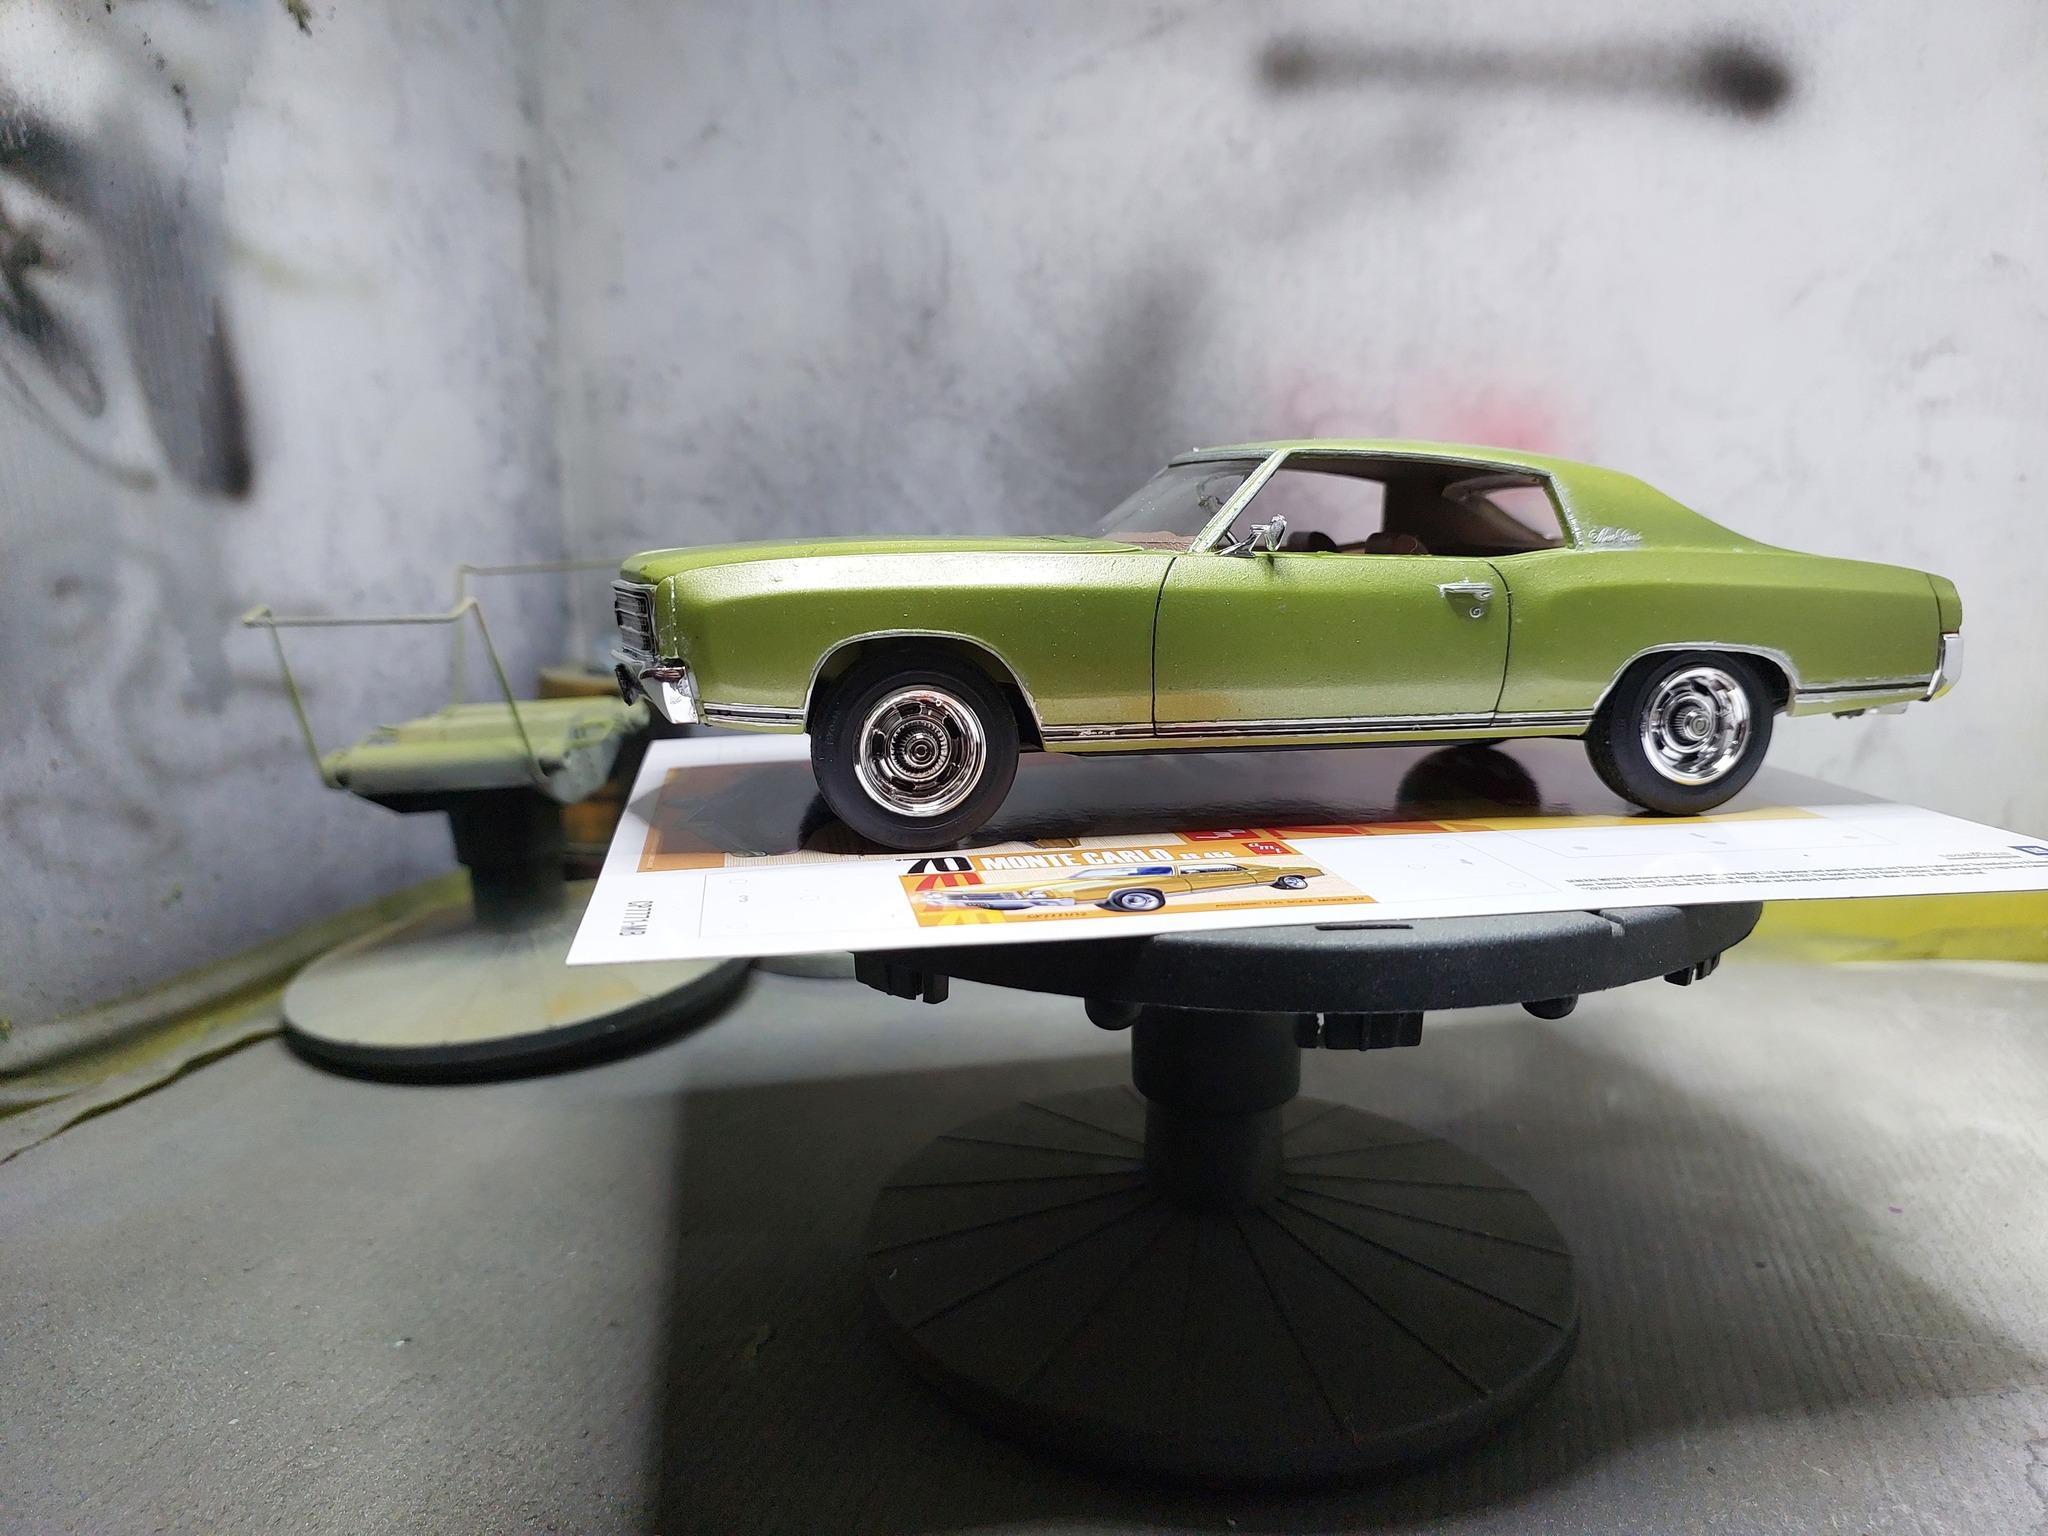
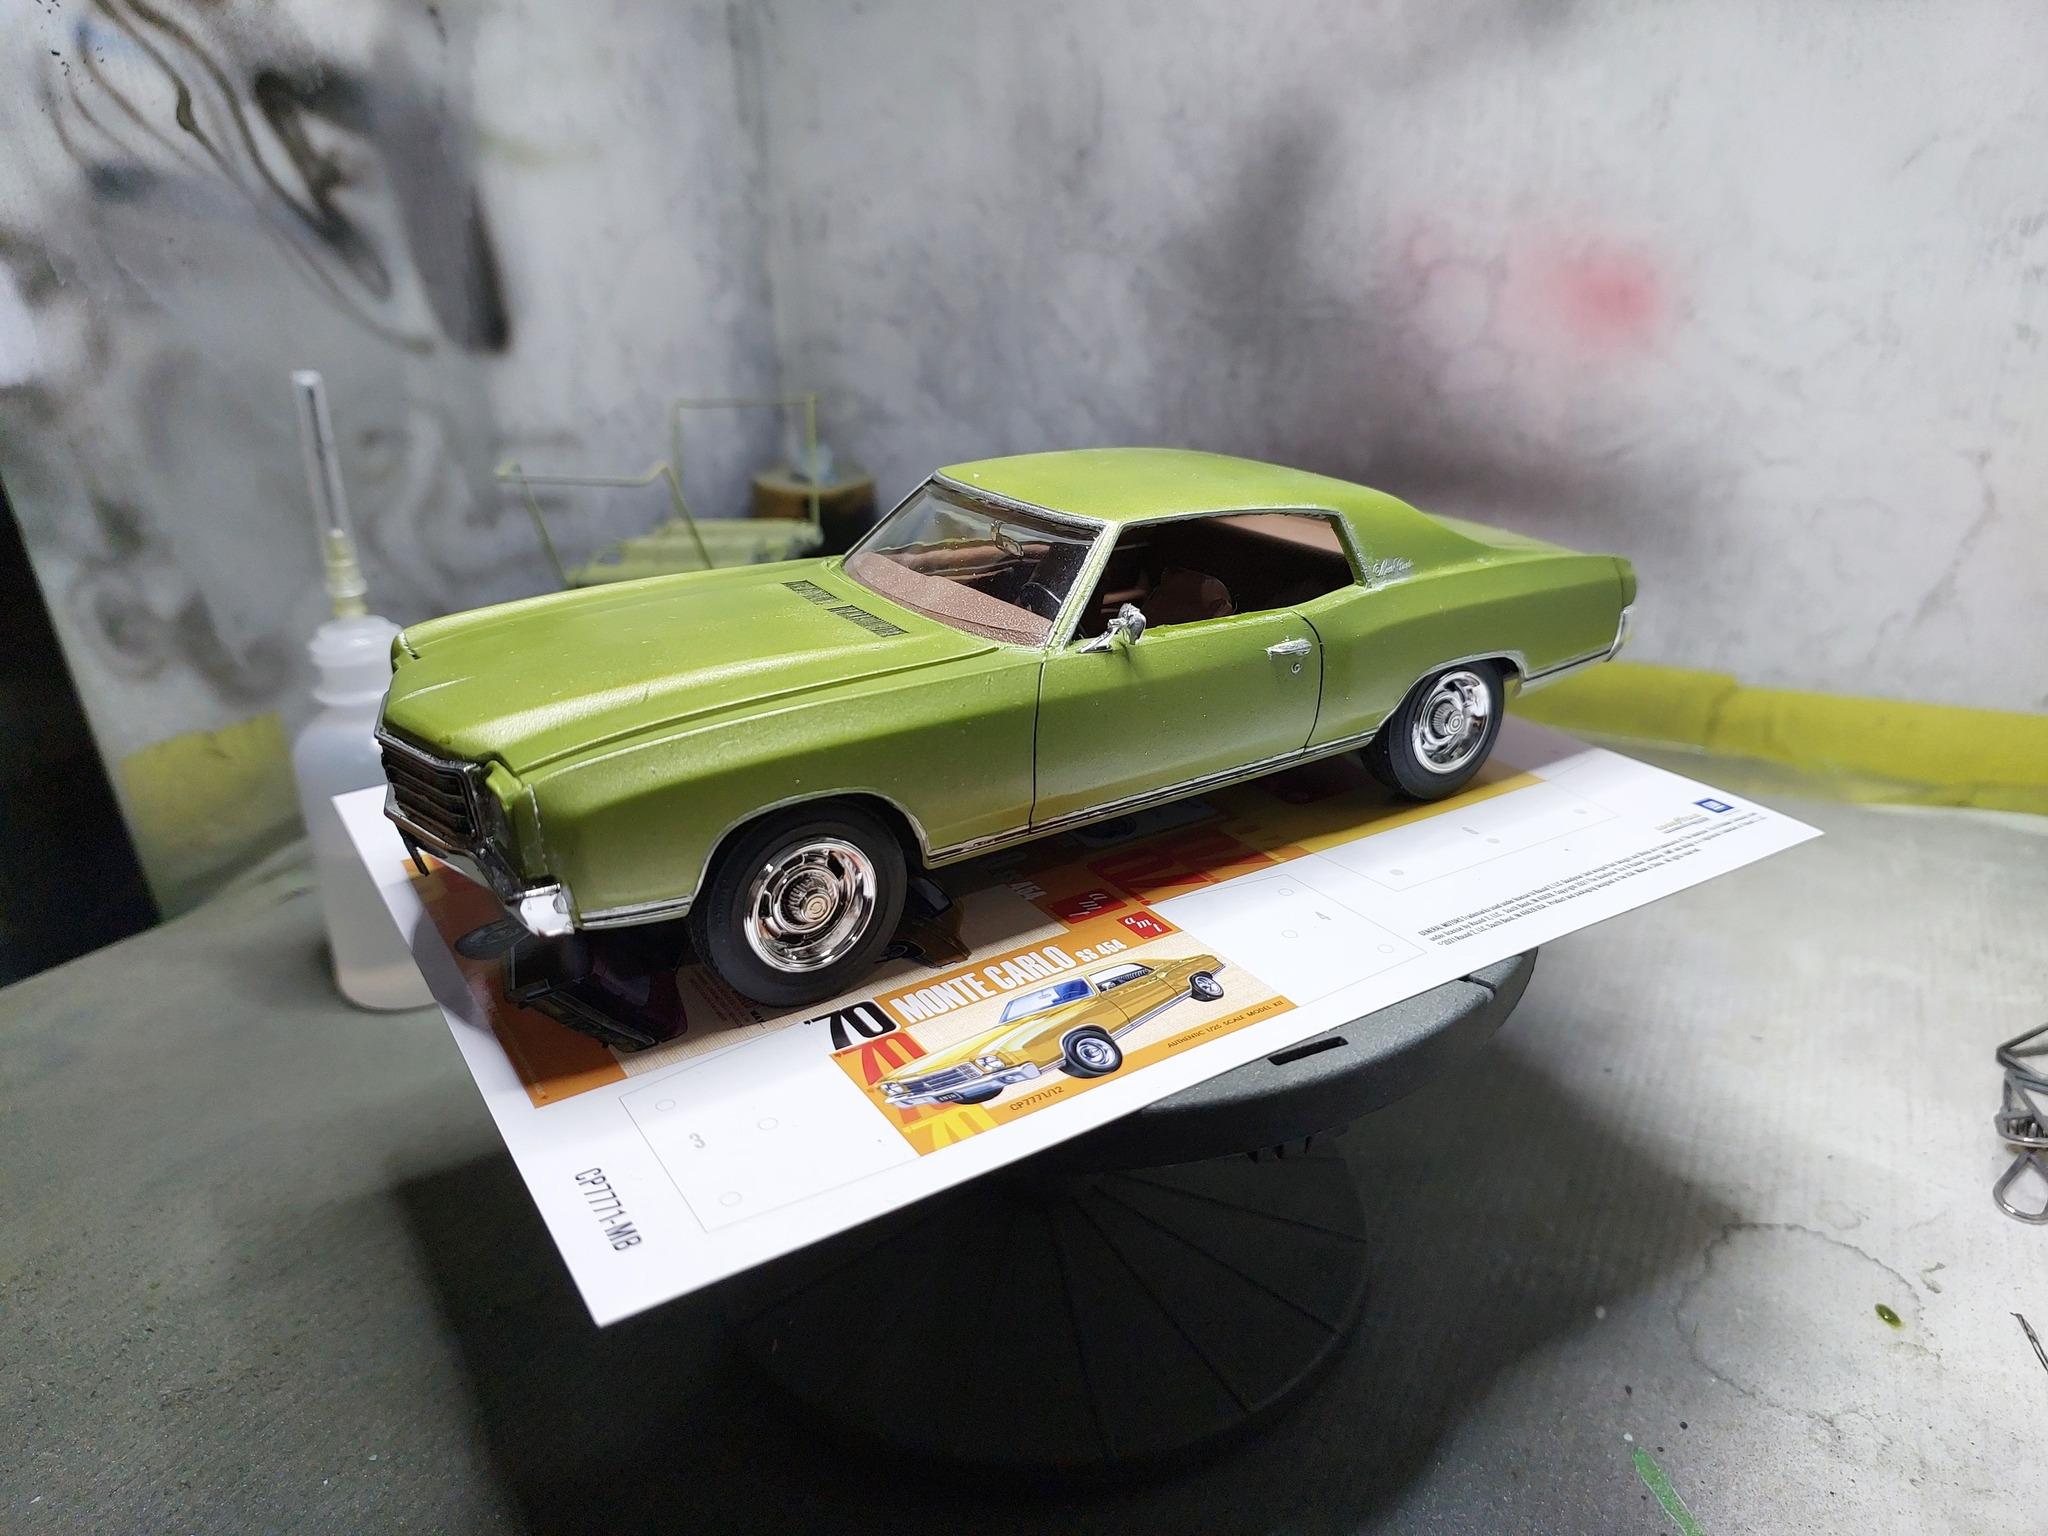
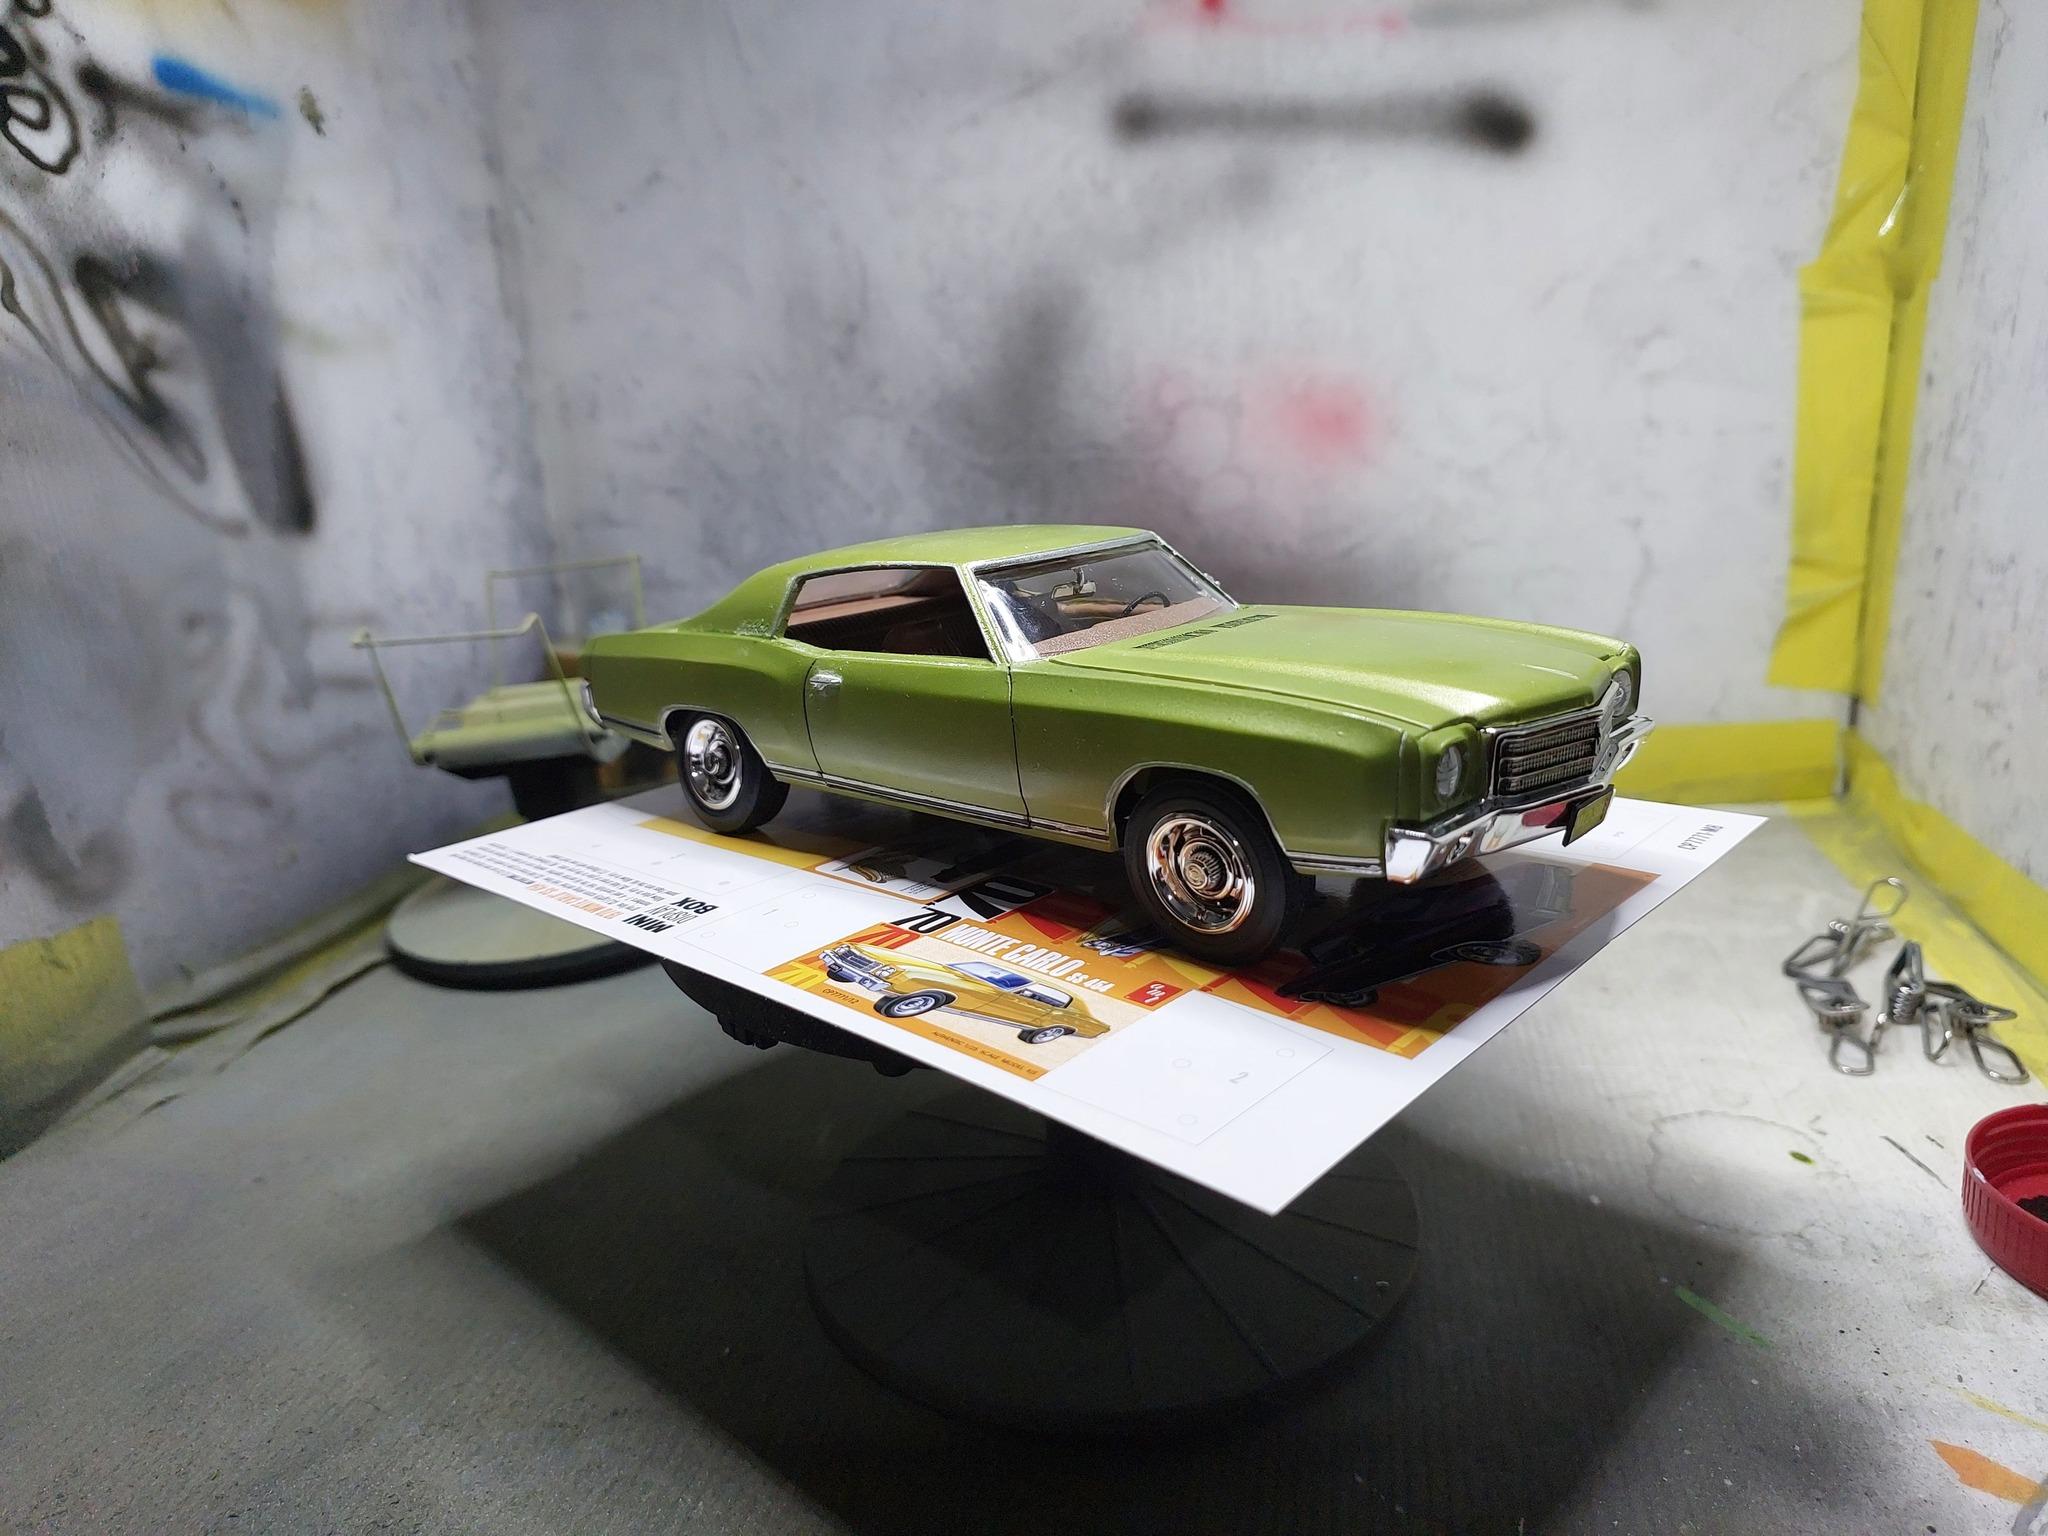
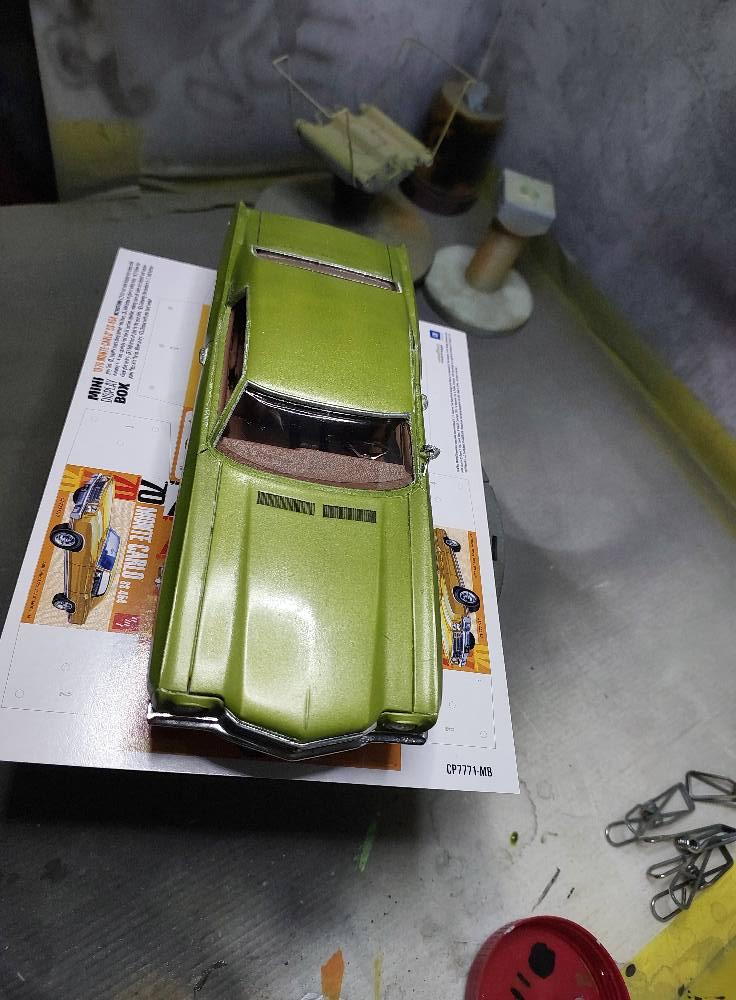
I'm pretty much done, as usual for me I never cant seem to get a very good finish, but I'm too lazy to strip and repaint. it looks ok when its in the display cabinet ? I should had work on the stance, it came out a little too high, especially at the front.
-
What's the best Impreza WRC kit
eran_k replied to eran_k's topic in Model Building Questions and Answers
Tamiya has 4\5 different Impreza models which of them is the best or they are all more or less the same? -
as the title says, there are a lot of Impreza WRC kits out there, which one is the best? tia Eran
-
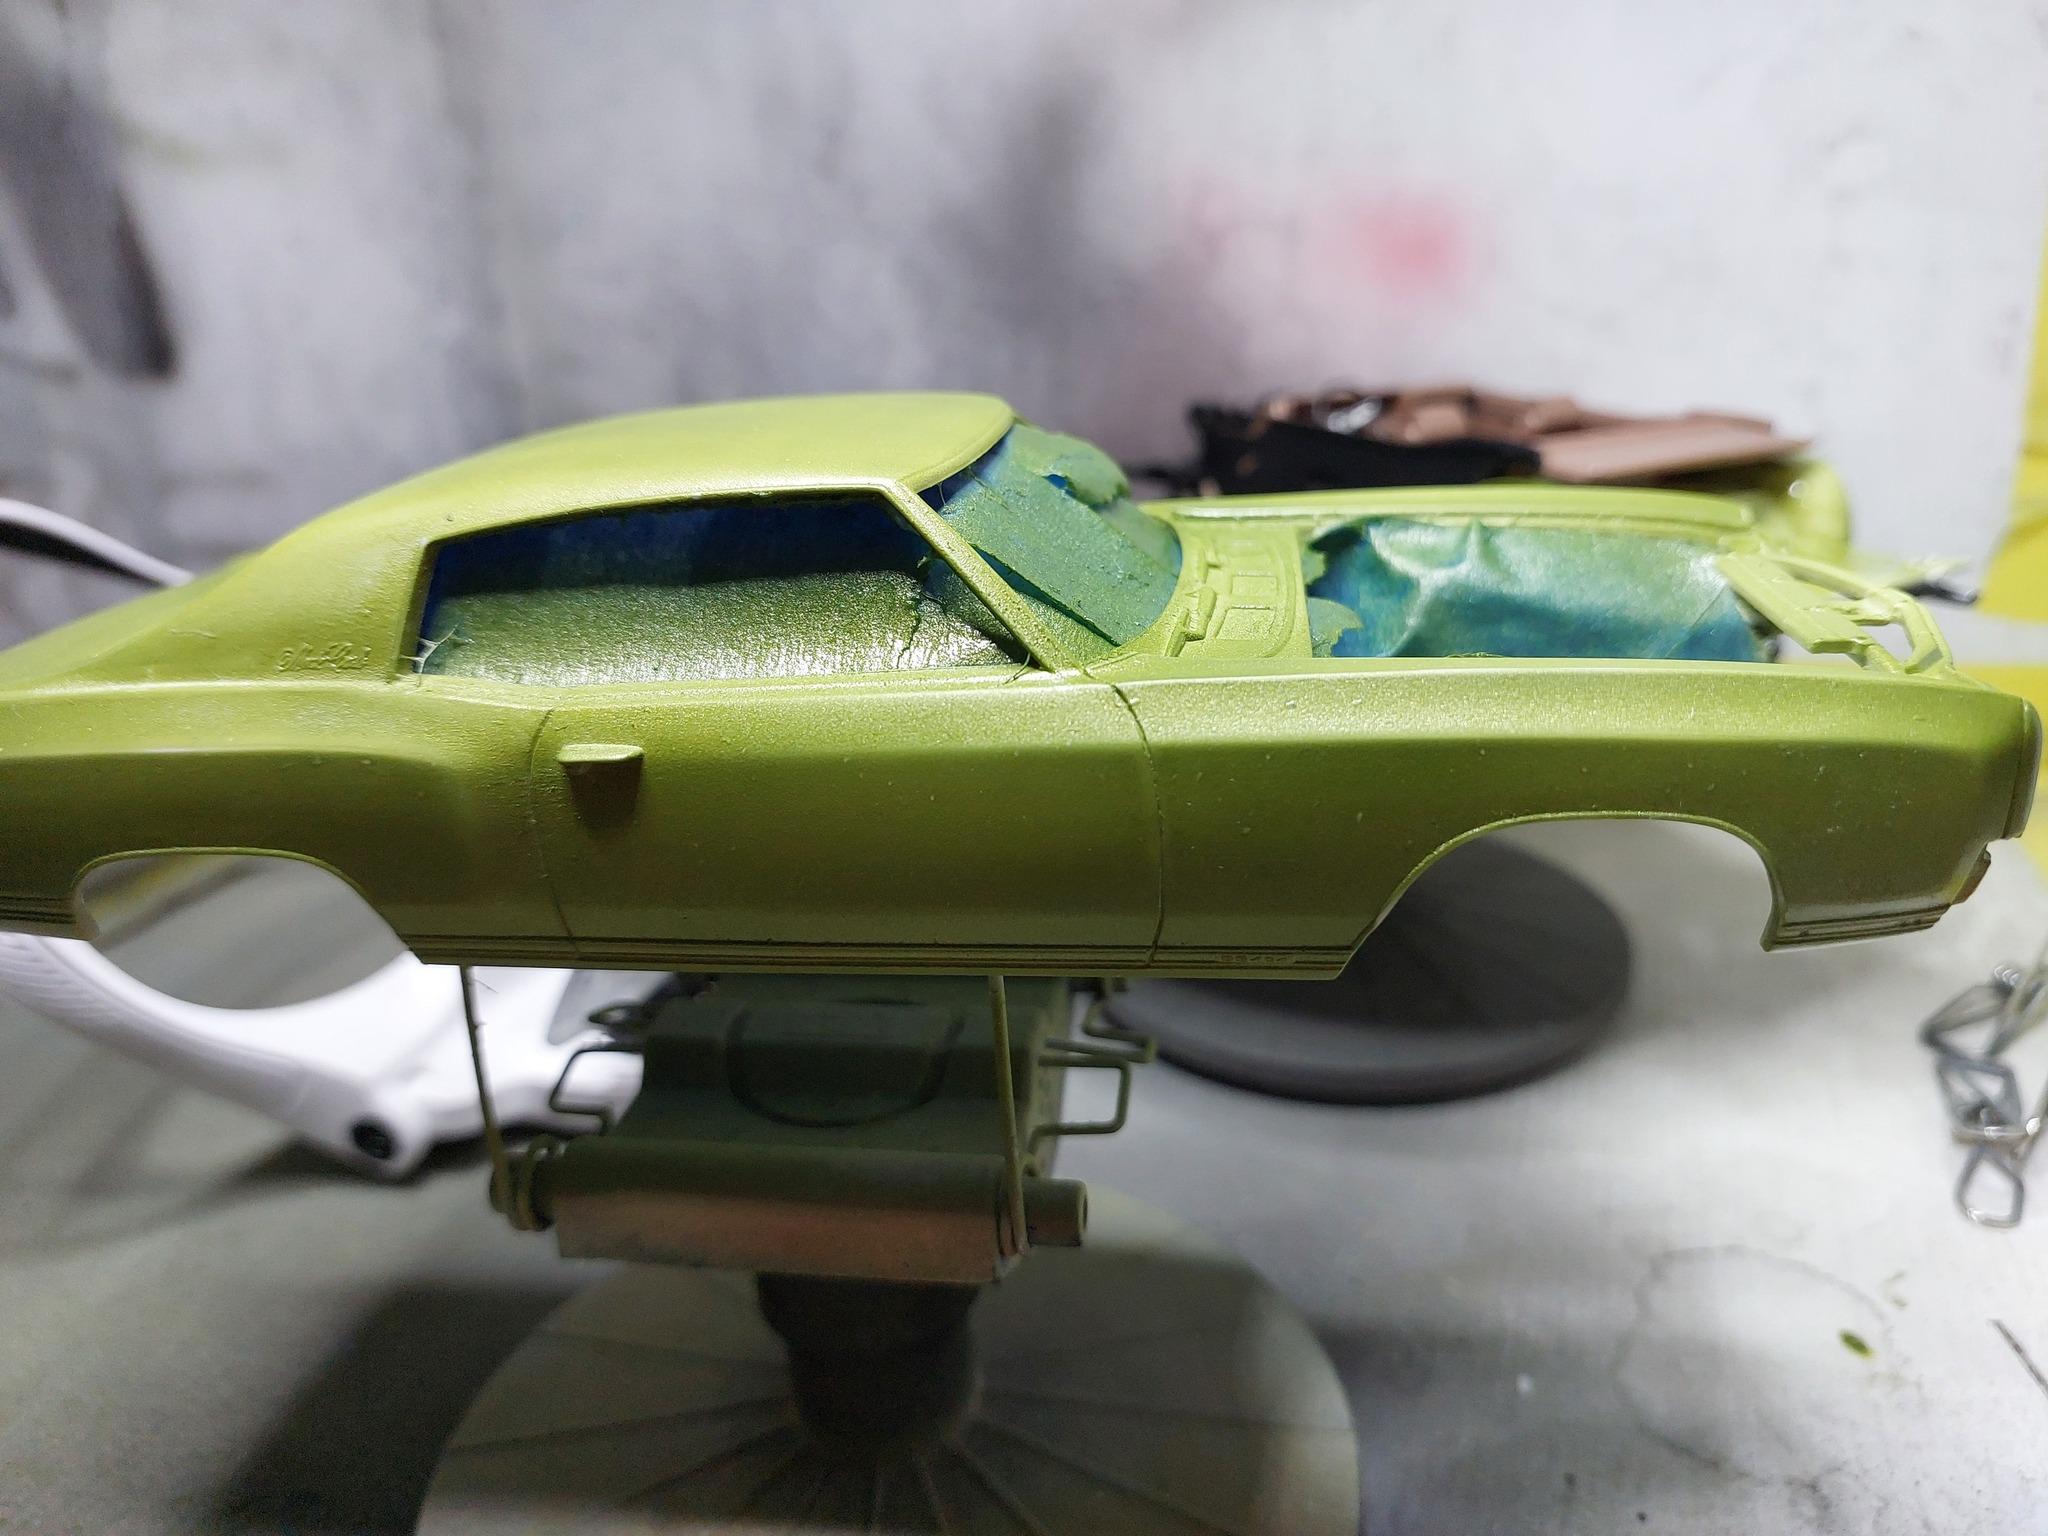
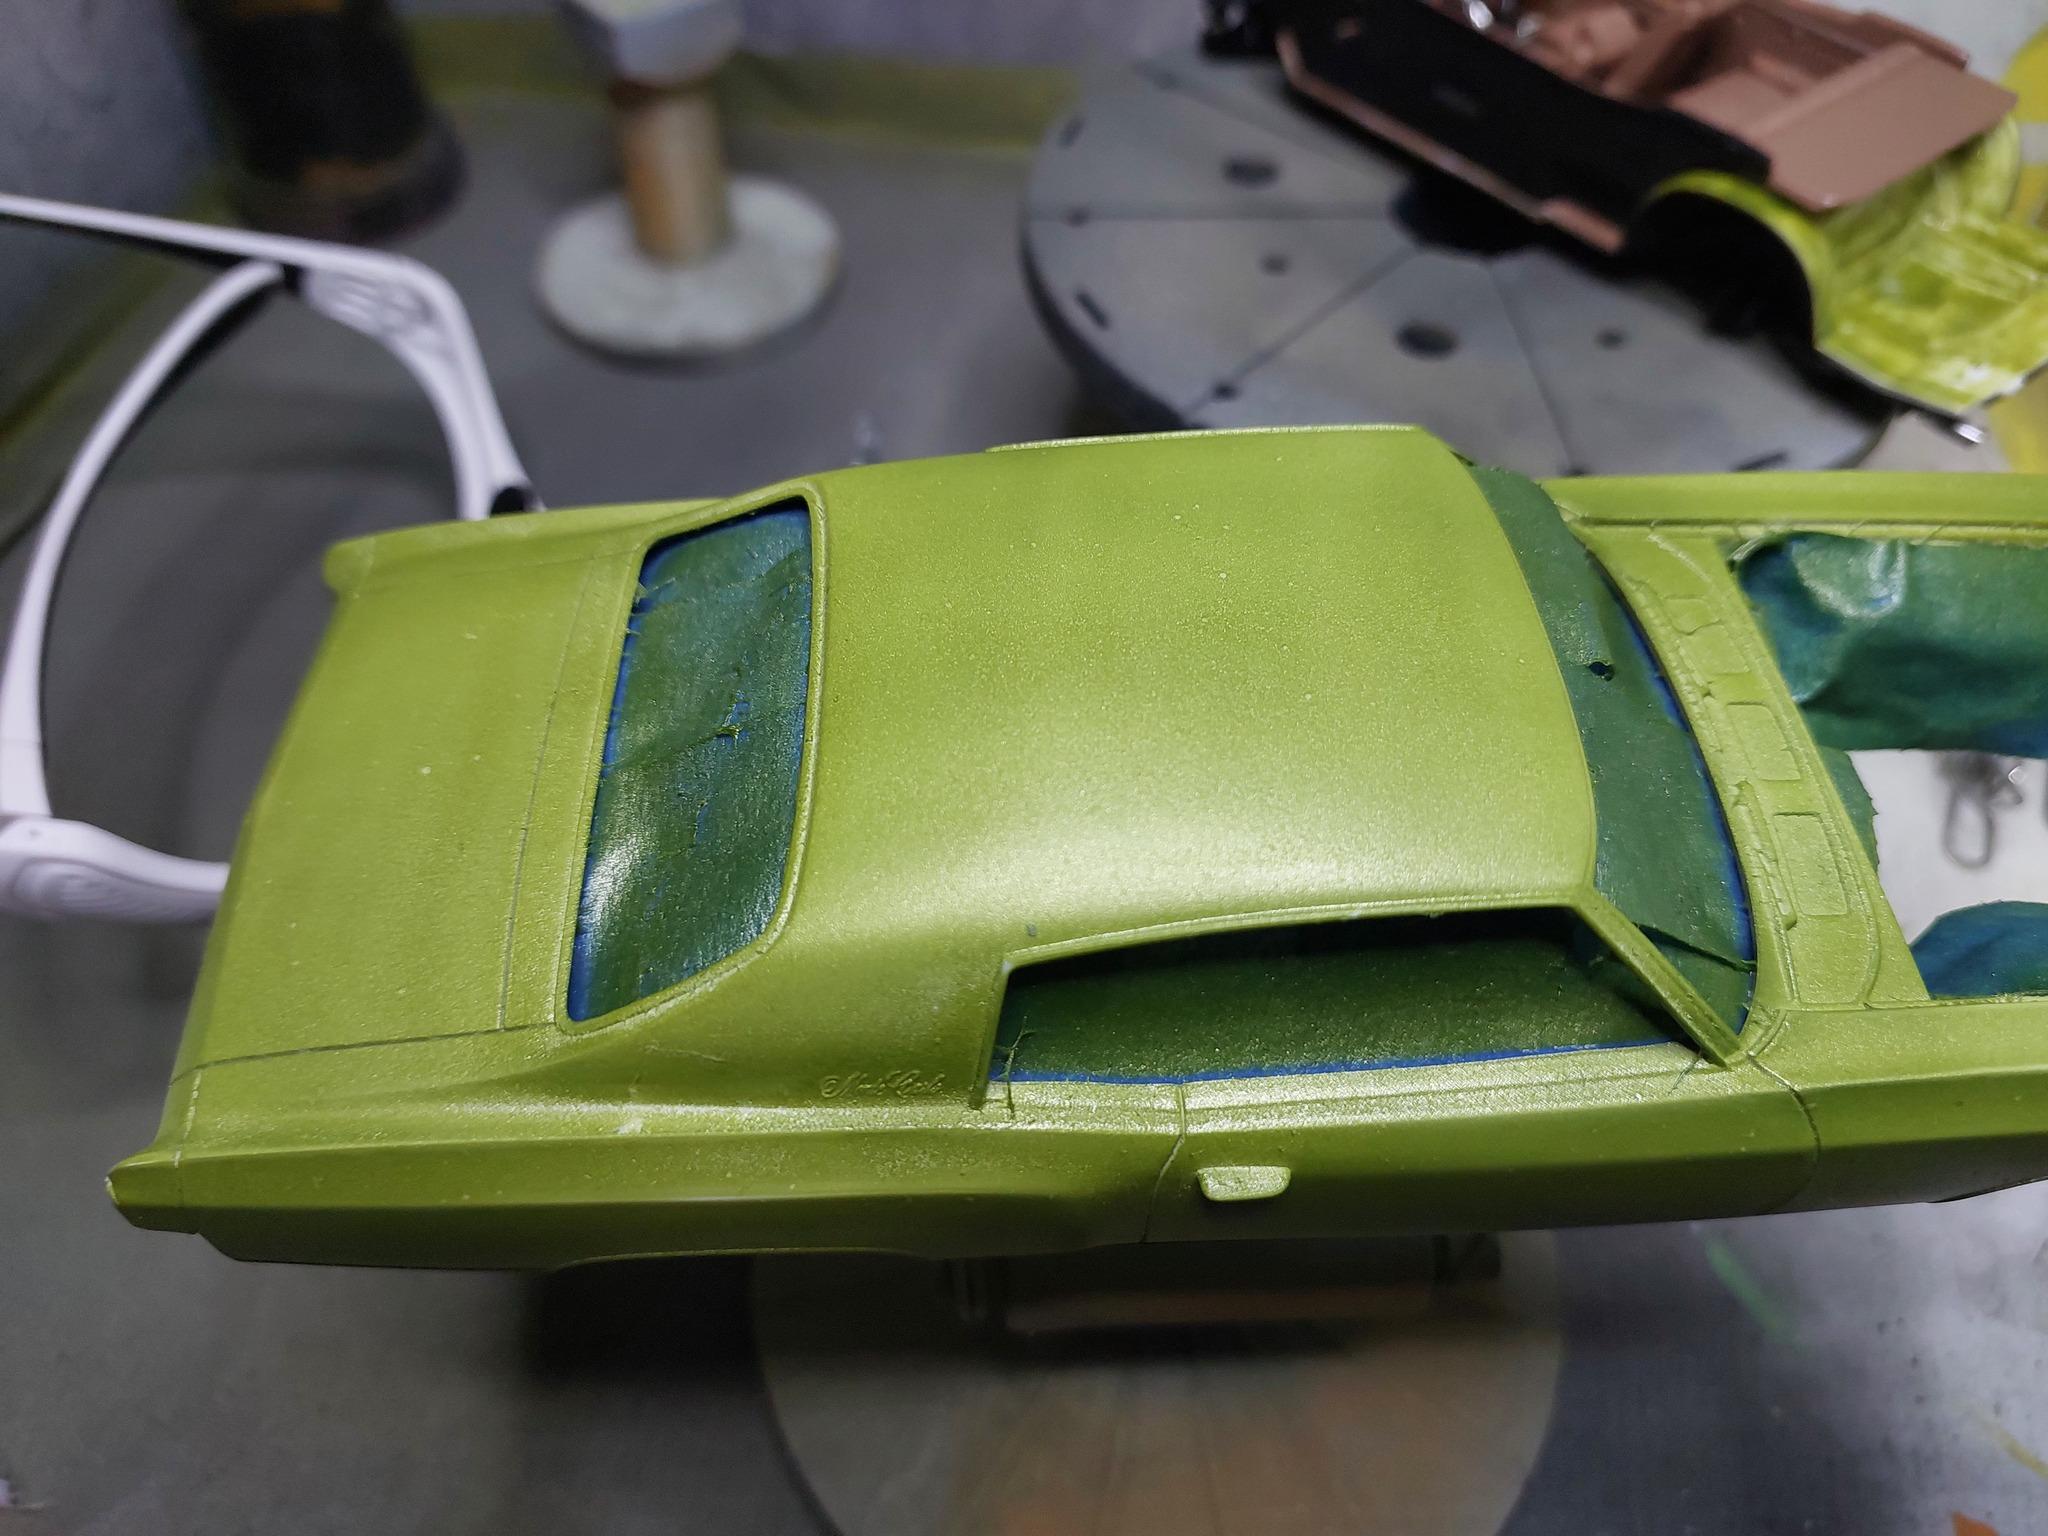
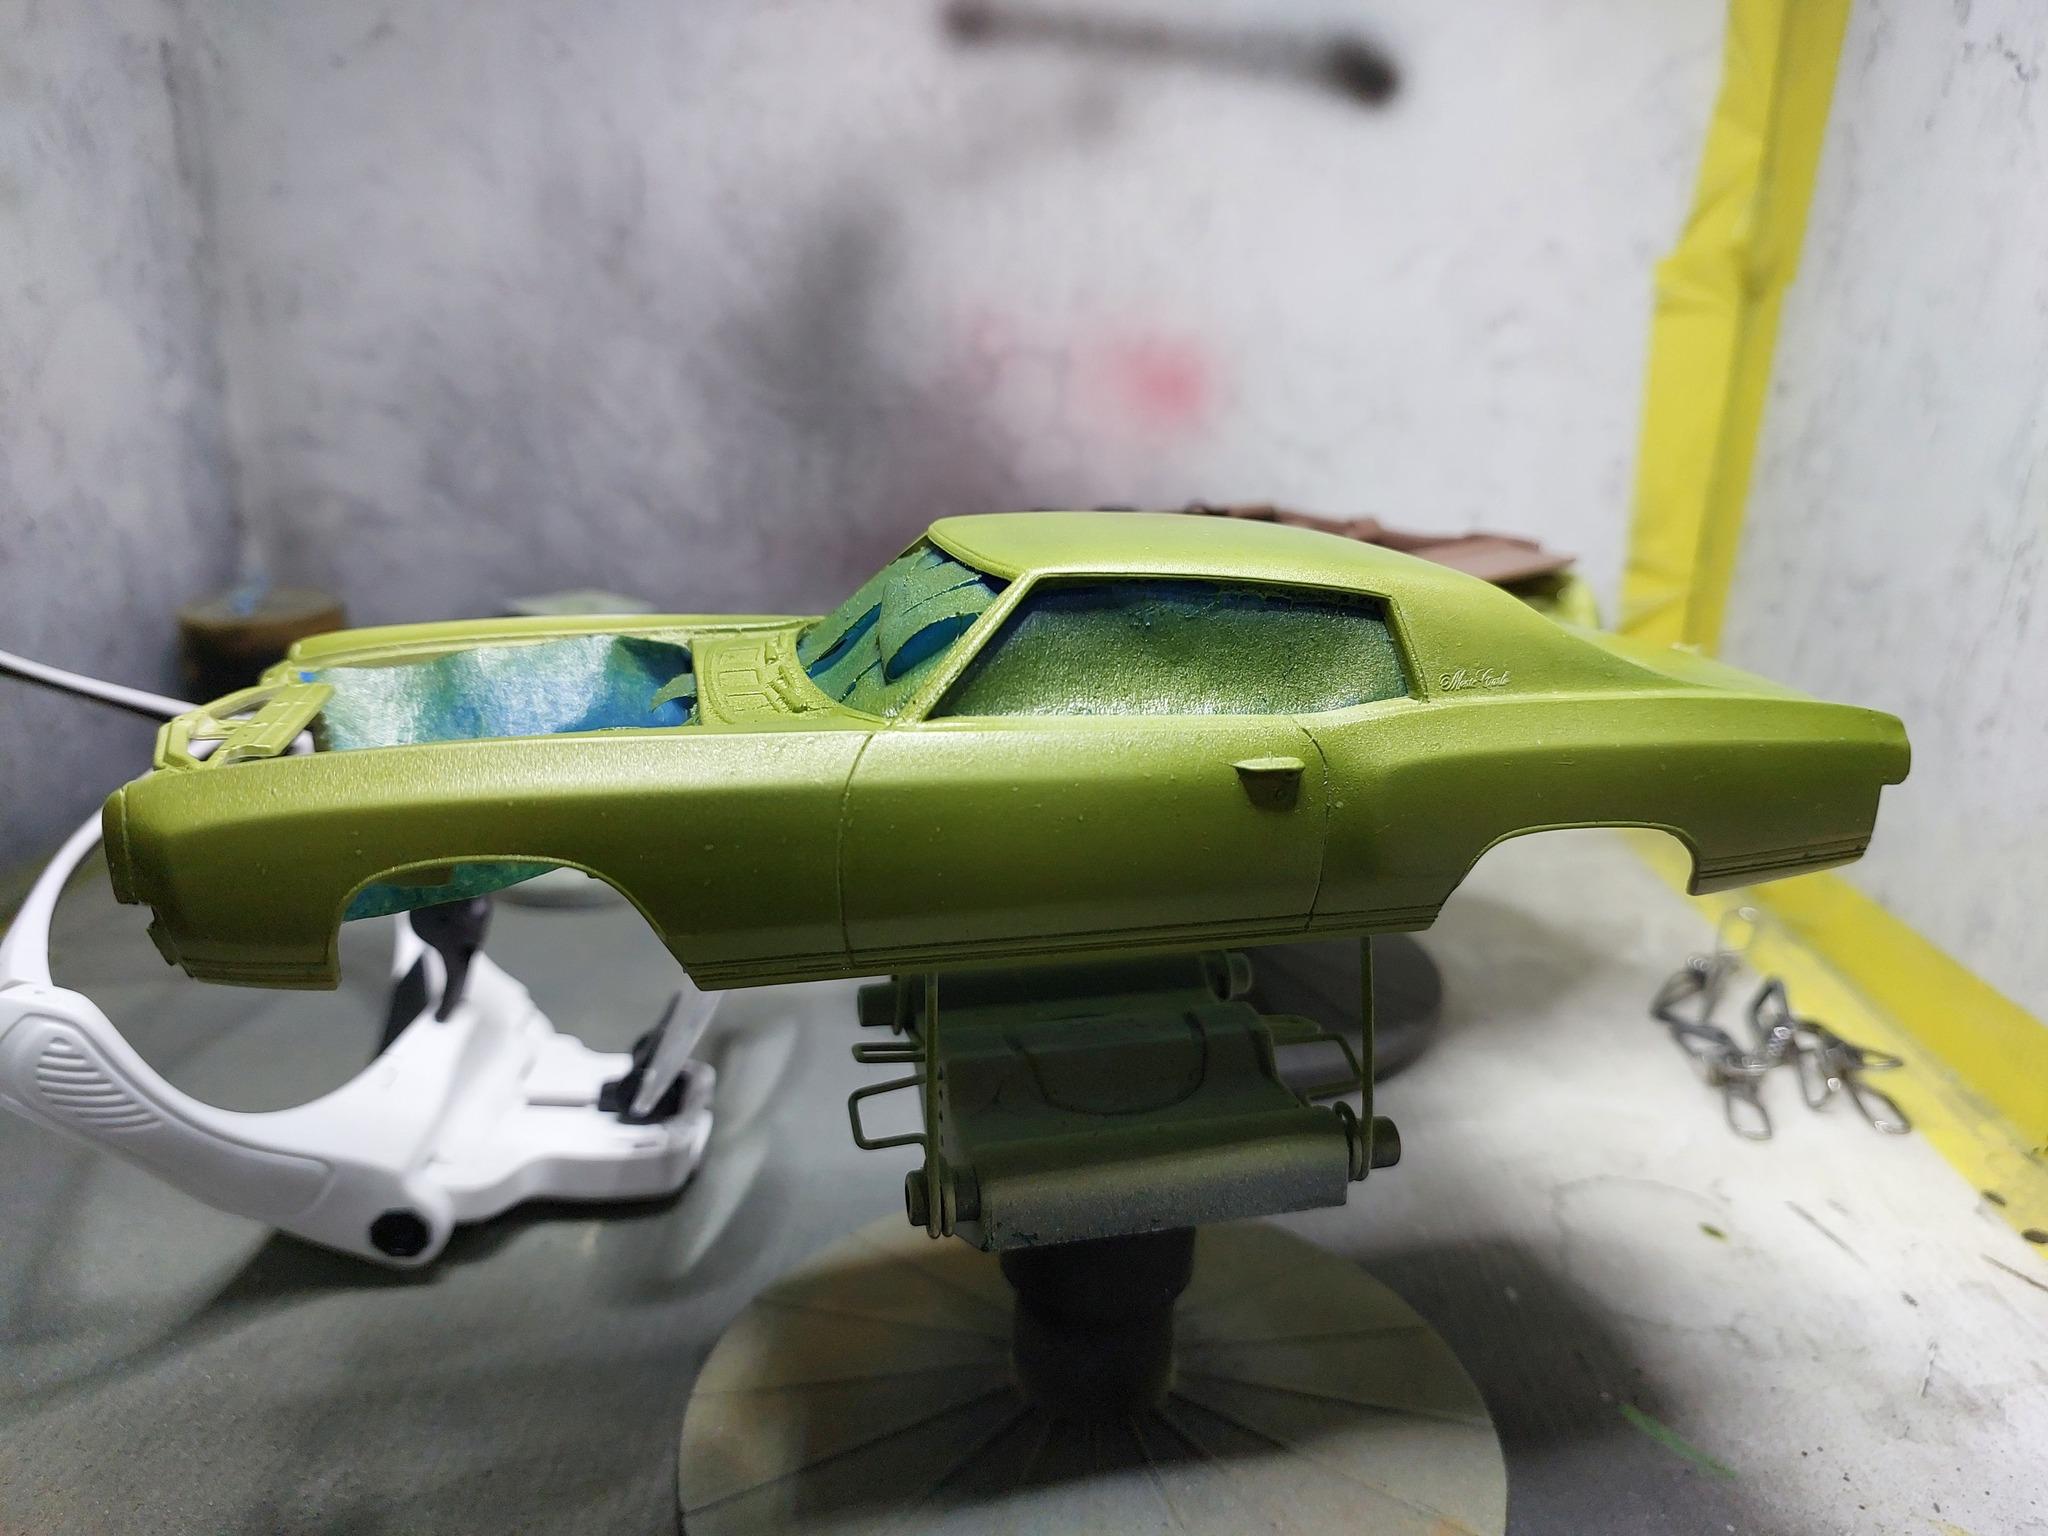
Well things didn't go very well with the base coat, shot several coats of mcw enamel but i think i didn't thin it enough and had to low air pressure. it splattered and spider webbed, so once dry i wet sanded it again to get everything flat and ill try to do few more coats of paint these are pictures after sanding