TheBEAUMONTGURU
-
Posts
277 -
Joined
-
Last visited
Content Type
Profiles
Forums
Events
Gallery
Everything posted by TheBEAUMONTGURU
-
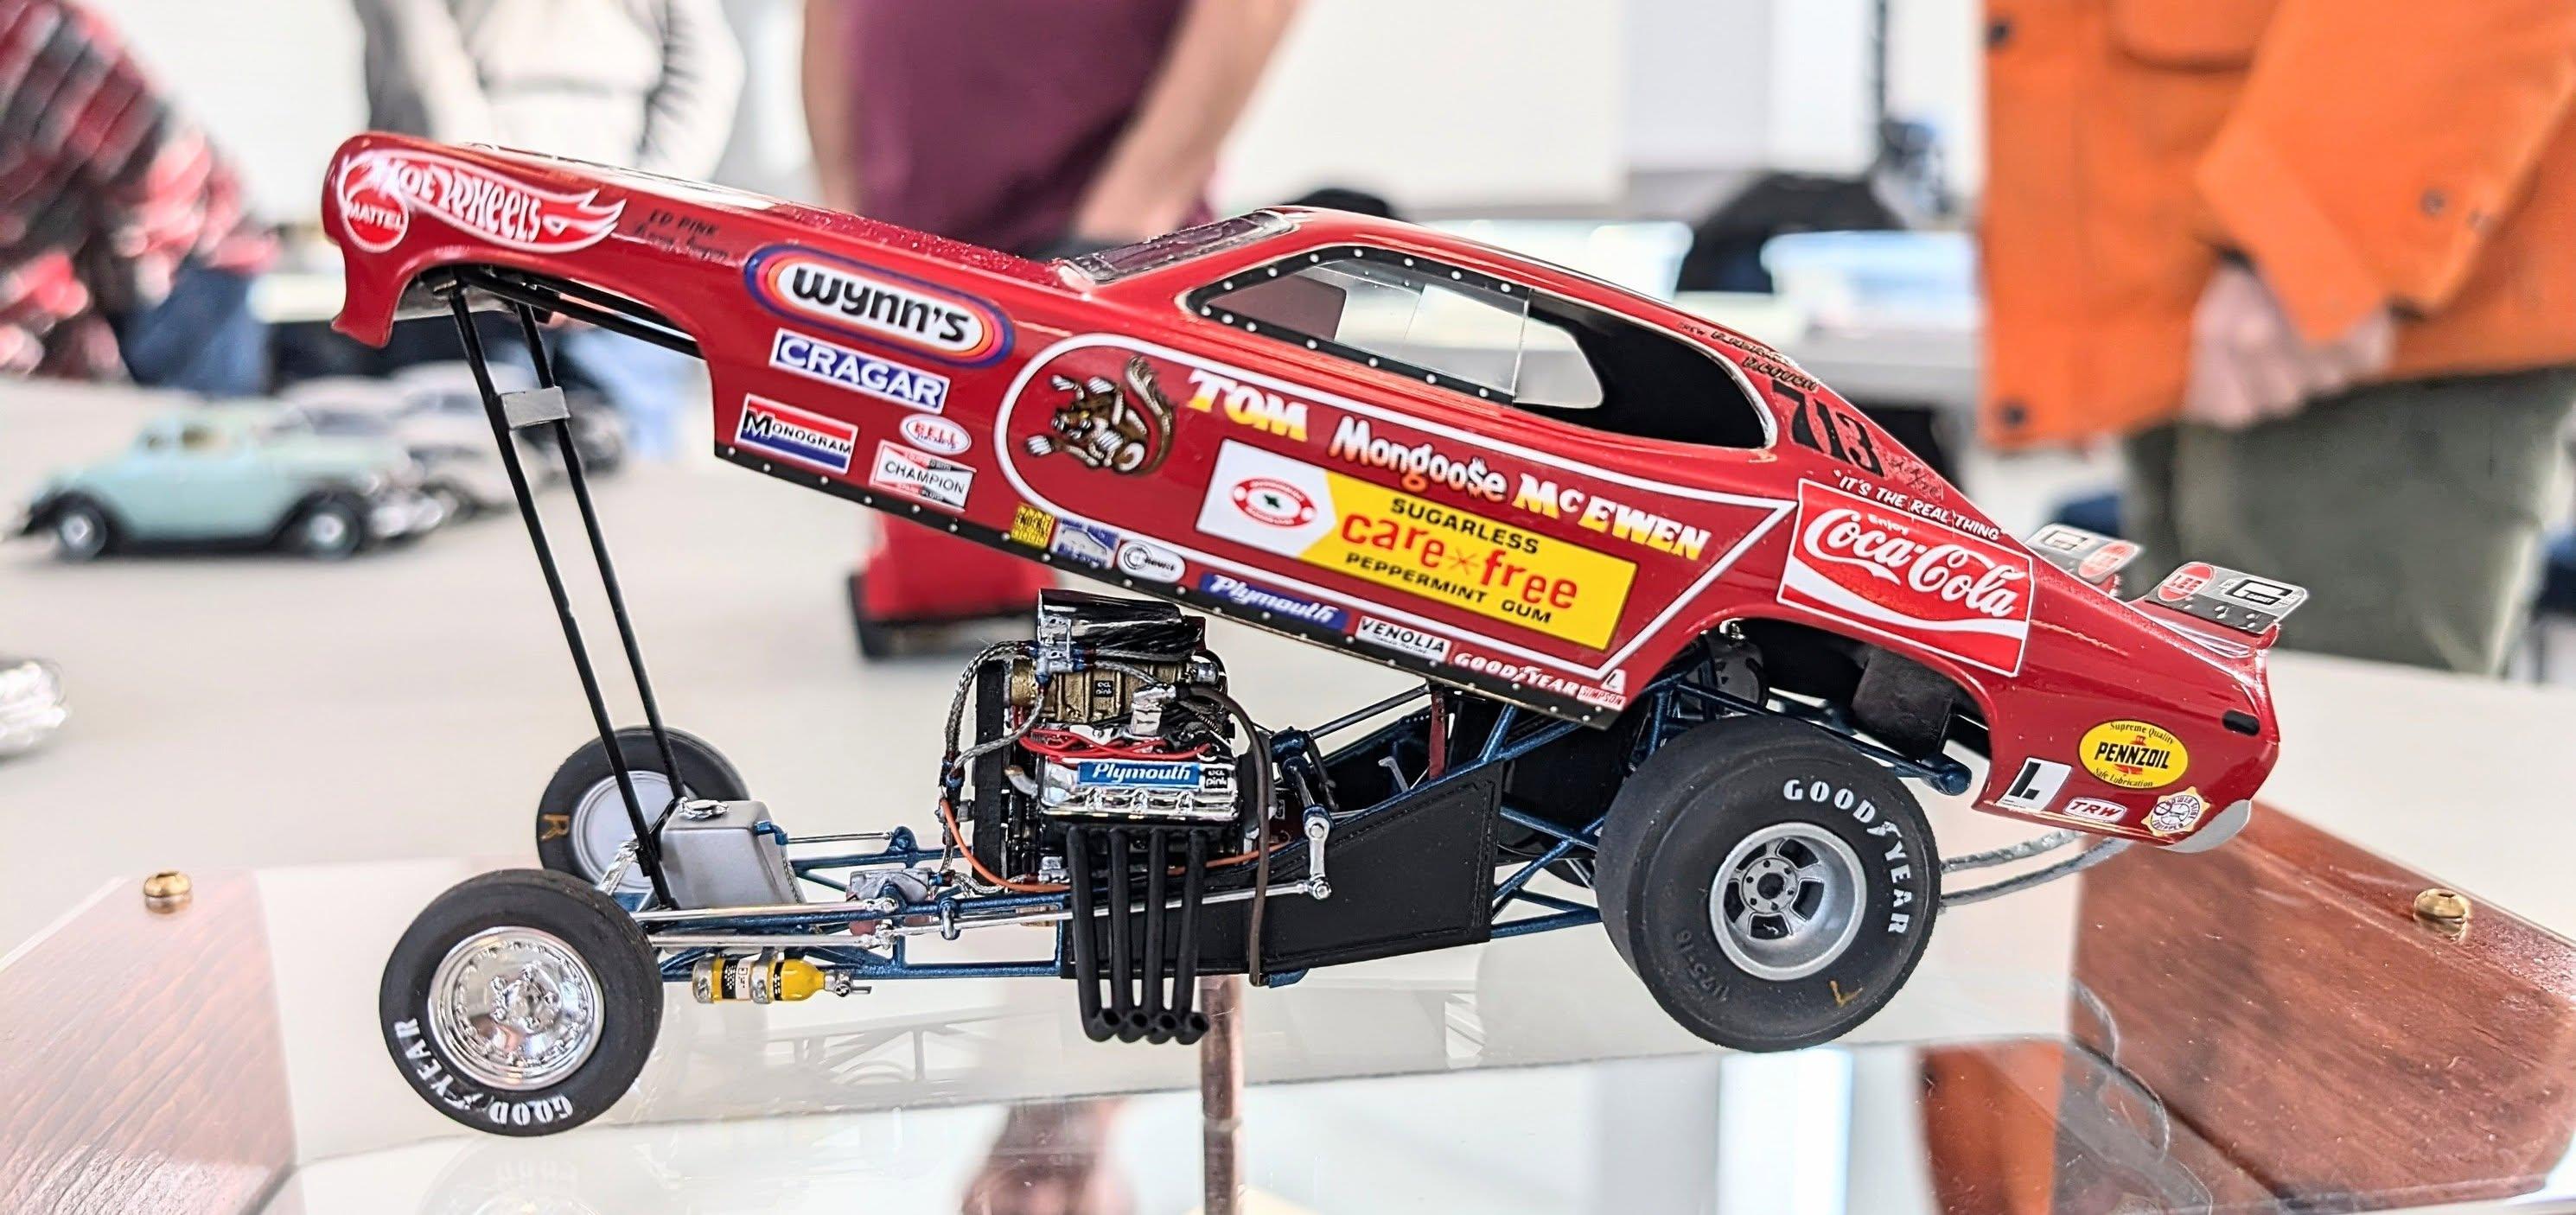
Forgot to take many pics along the way, so this one goes straight into the done pile I salvaged an original built up, bought some Slixx decals, and researched the crapola out of the real car to get it as accurate as I could. Modified the windshield, and blower shrouding, made my own window frame decals, spoilers are acetate, some better parts pack slicks, lots of engine detailing, made my own Ed Pink and Plymouth decals for the valve covers. Scratch build the oil recovery system and rear tank, the list goes on and on.

- 10 replies
-
- 11
-

-

-
Thanks, oldskool. same here, decals are not going to make a 20 dollar difference for me, i will stick with the cheaper kit as long as all the parts are the same new tooling.
-
I see my canadian hobby shop has the US version for 45 and the Euro version for 66. Can anyone tell me what the difference really is? i see one is listed as 1/24th and the other as 1/25th, is there really that much difference in the 2 versions? or is it just decals and instruction changes?
-
 Thanks Joker, i think you nailed it on the drag dimensions. I never would have guessed that. Still after the lower left and lower right on ones on the side windows
 -
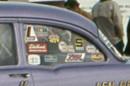
In the window of a 55 chevy from the races in about 1970. I figured out some of them, but having trouble identifiying alot especially the oval shaped ones bottom right and the white square in the front bottom left corner also the one beside the lakewood one. any help appreciated
-
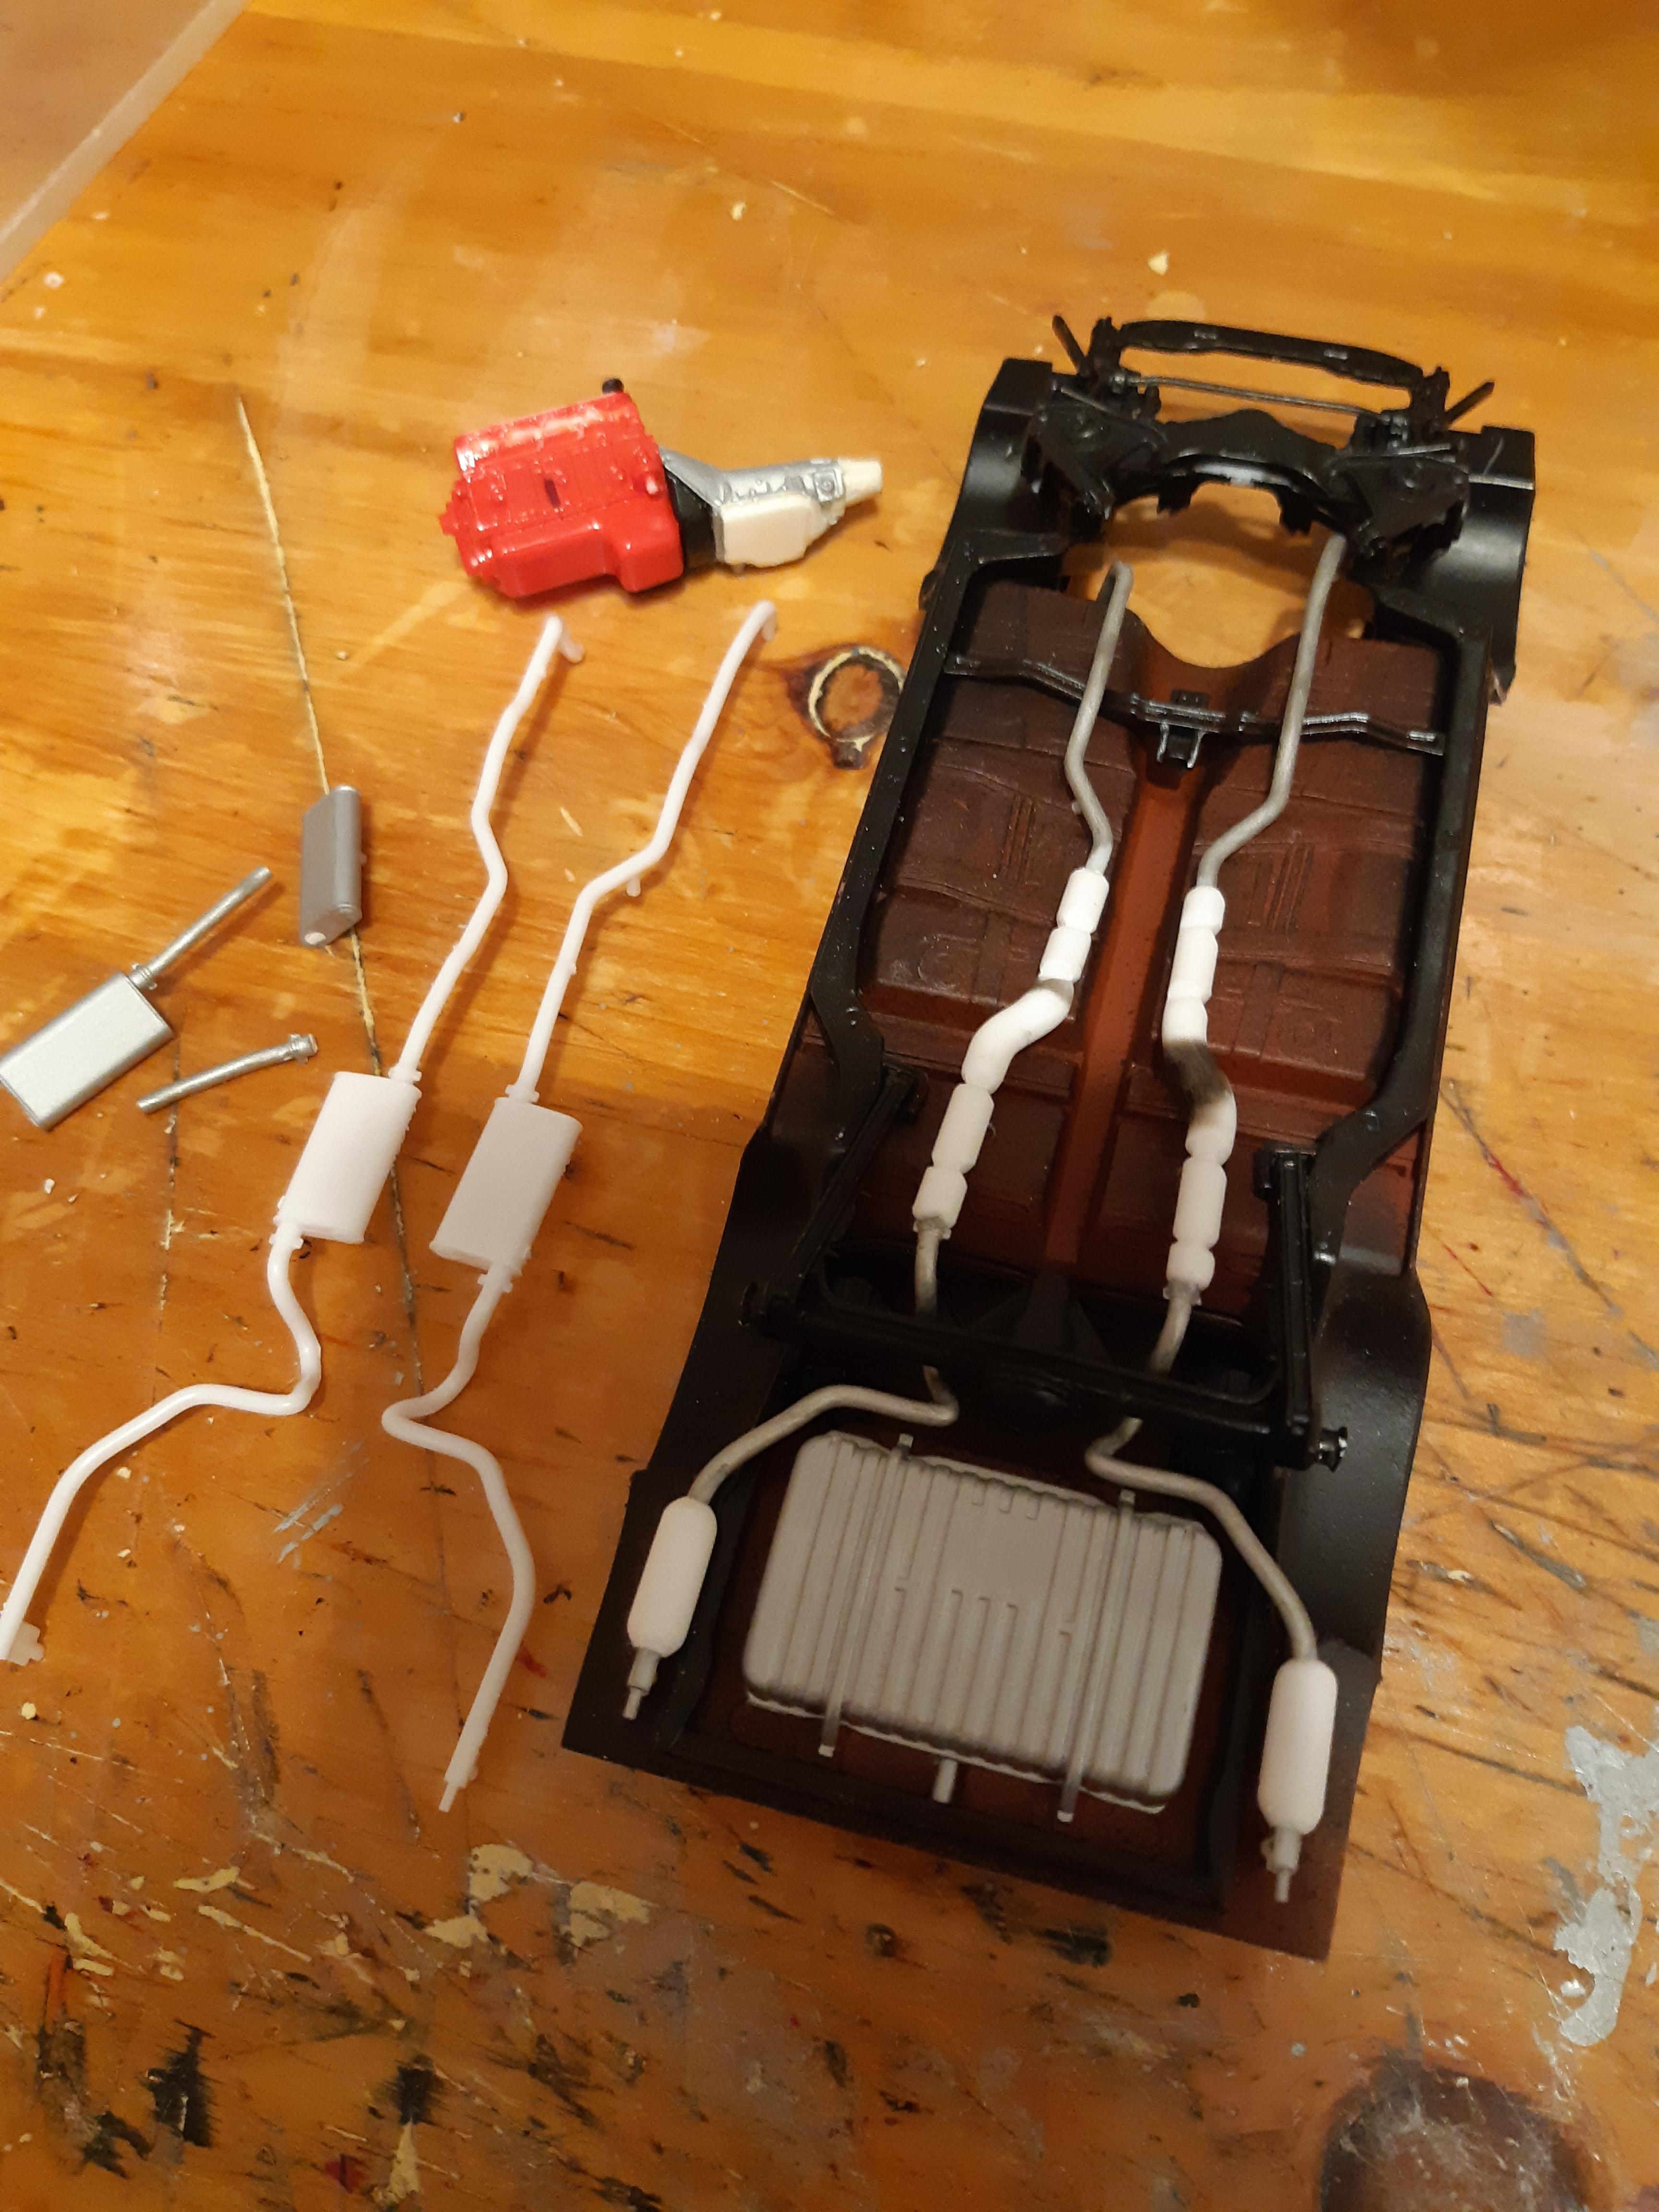
Spur-of-the-moment decision to make some NC8 option "Chambered exhaust system". A factory option. So i cut off the mufflers and made some chambered pipe and the rear resonators from some leftover round sprue. I heated it with a candle to get the proper S-curve, thats why there are soot marks. You will also see my resin TH400(thanks to member Nobling) now grafted onto the kit BB.
-
Nice! thanks for the pics guys. I was not aware that slixx made the decals for the monza(even tho its a different version than what i want to build). that must be an old decal set as it does not show up on the slixx website. they only have the firebird version.
-
Brian, no that picture is not a correct hood. looks like someone grafted on some GTO stuff. A beaumont always uses the same hood as a chevelle, either flat or with the BBC bulges. for all years of beaumont.
-
Im wanting to replicate this car using the revell monza kit Anyone got a better picture of the top of the car, hood and stripes. having trouble finding anything on gggoogle
-
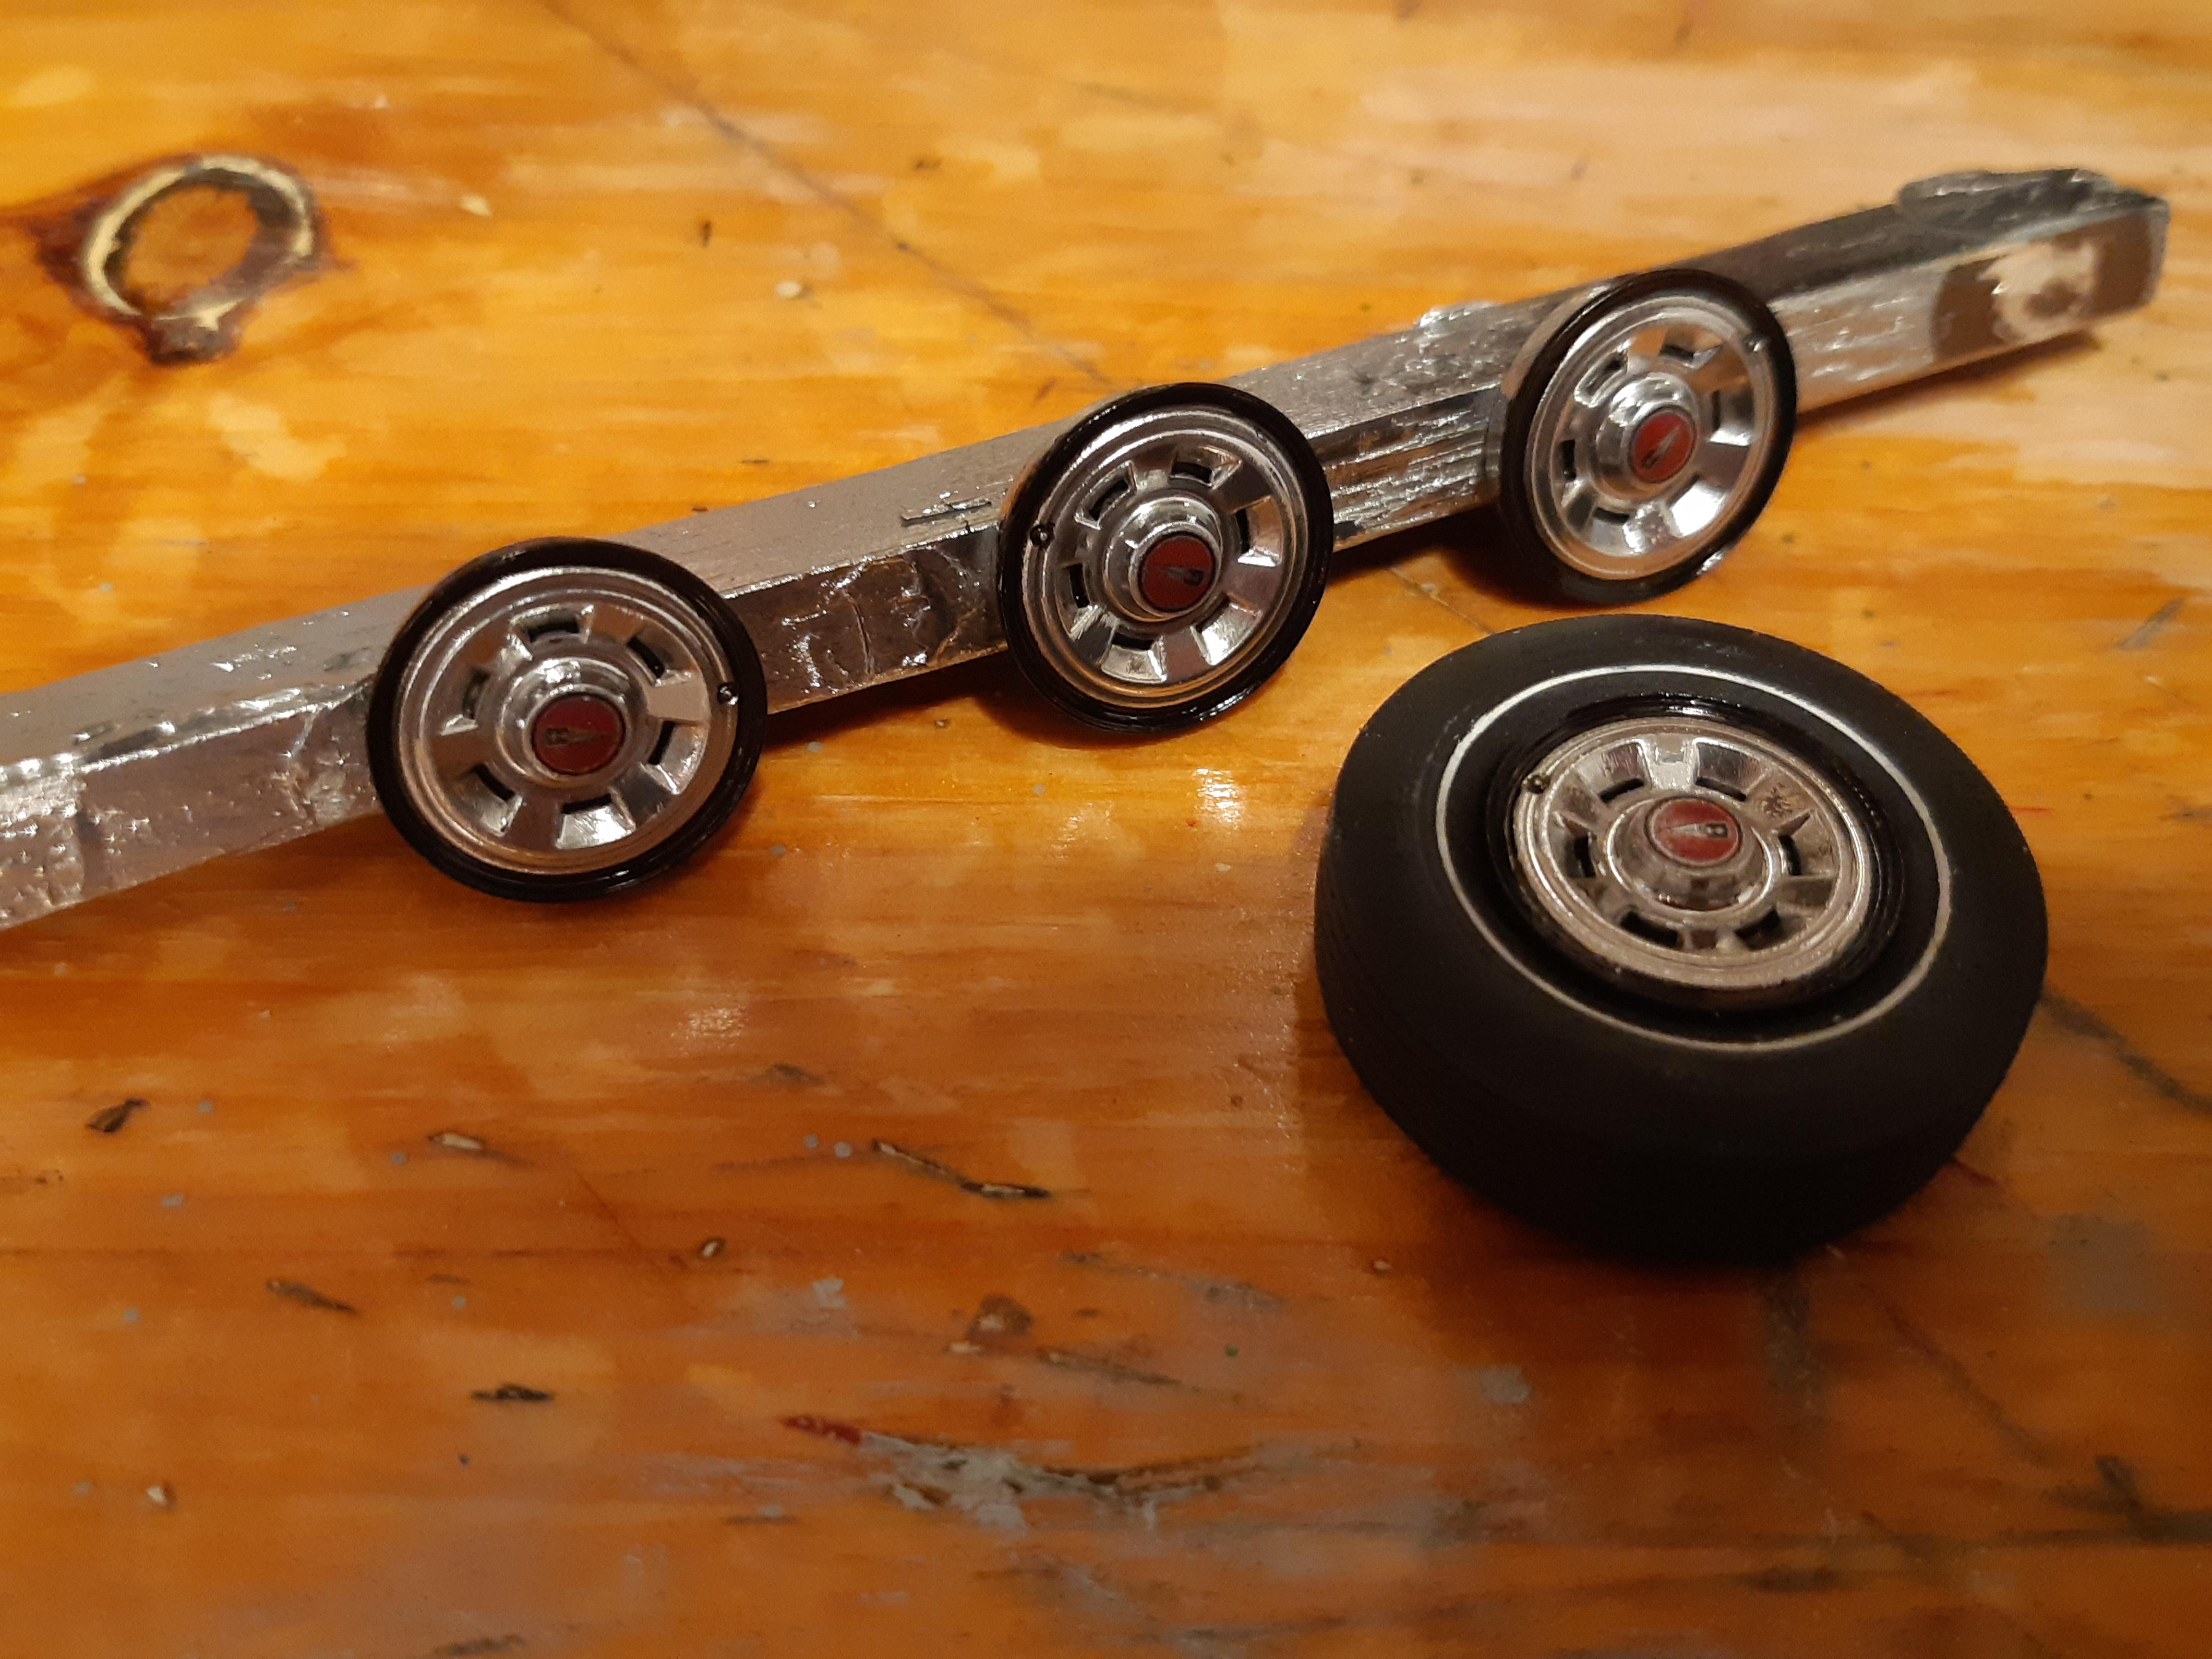
Im going with some fireball F70-14s. with a hand painted whitwall. The hubcaps are fireball too, with my own custom made beaumont center decal
-
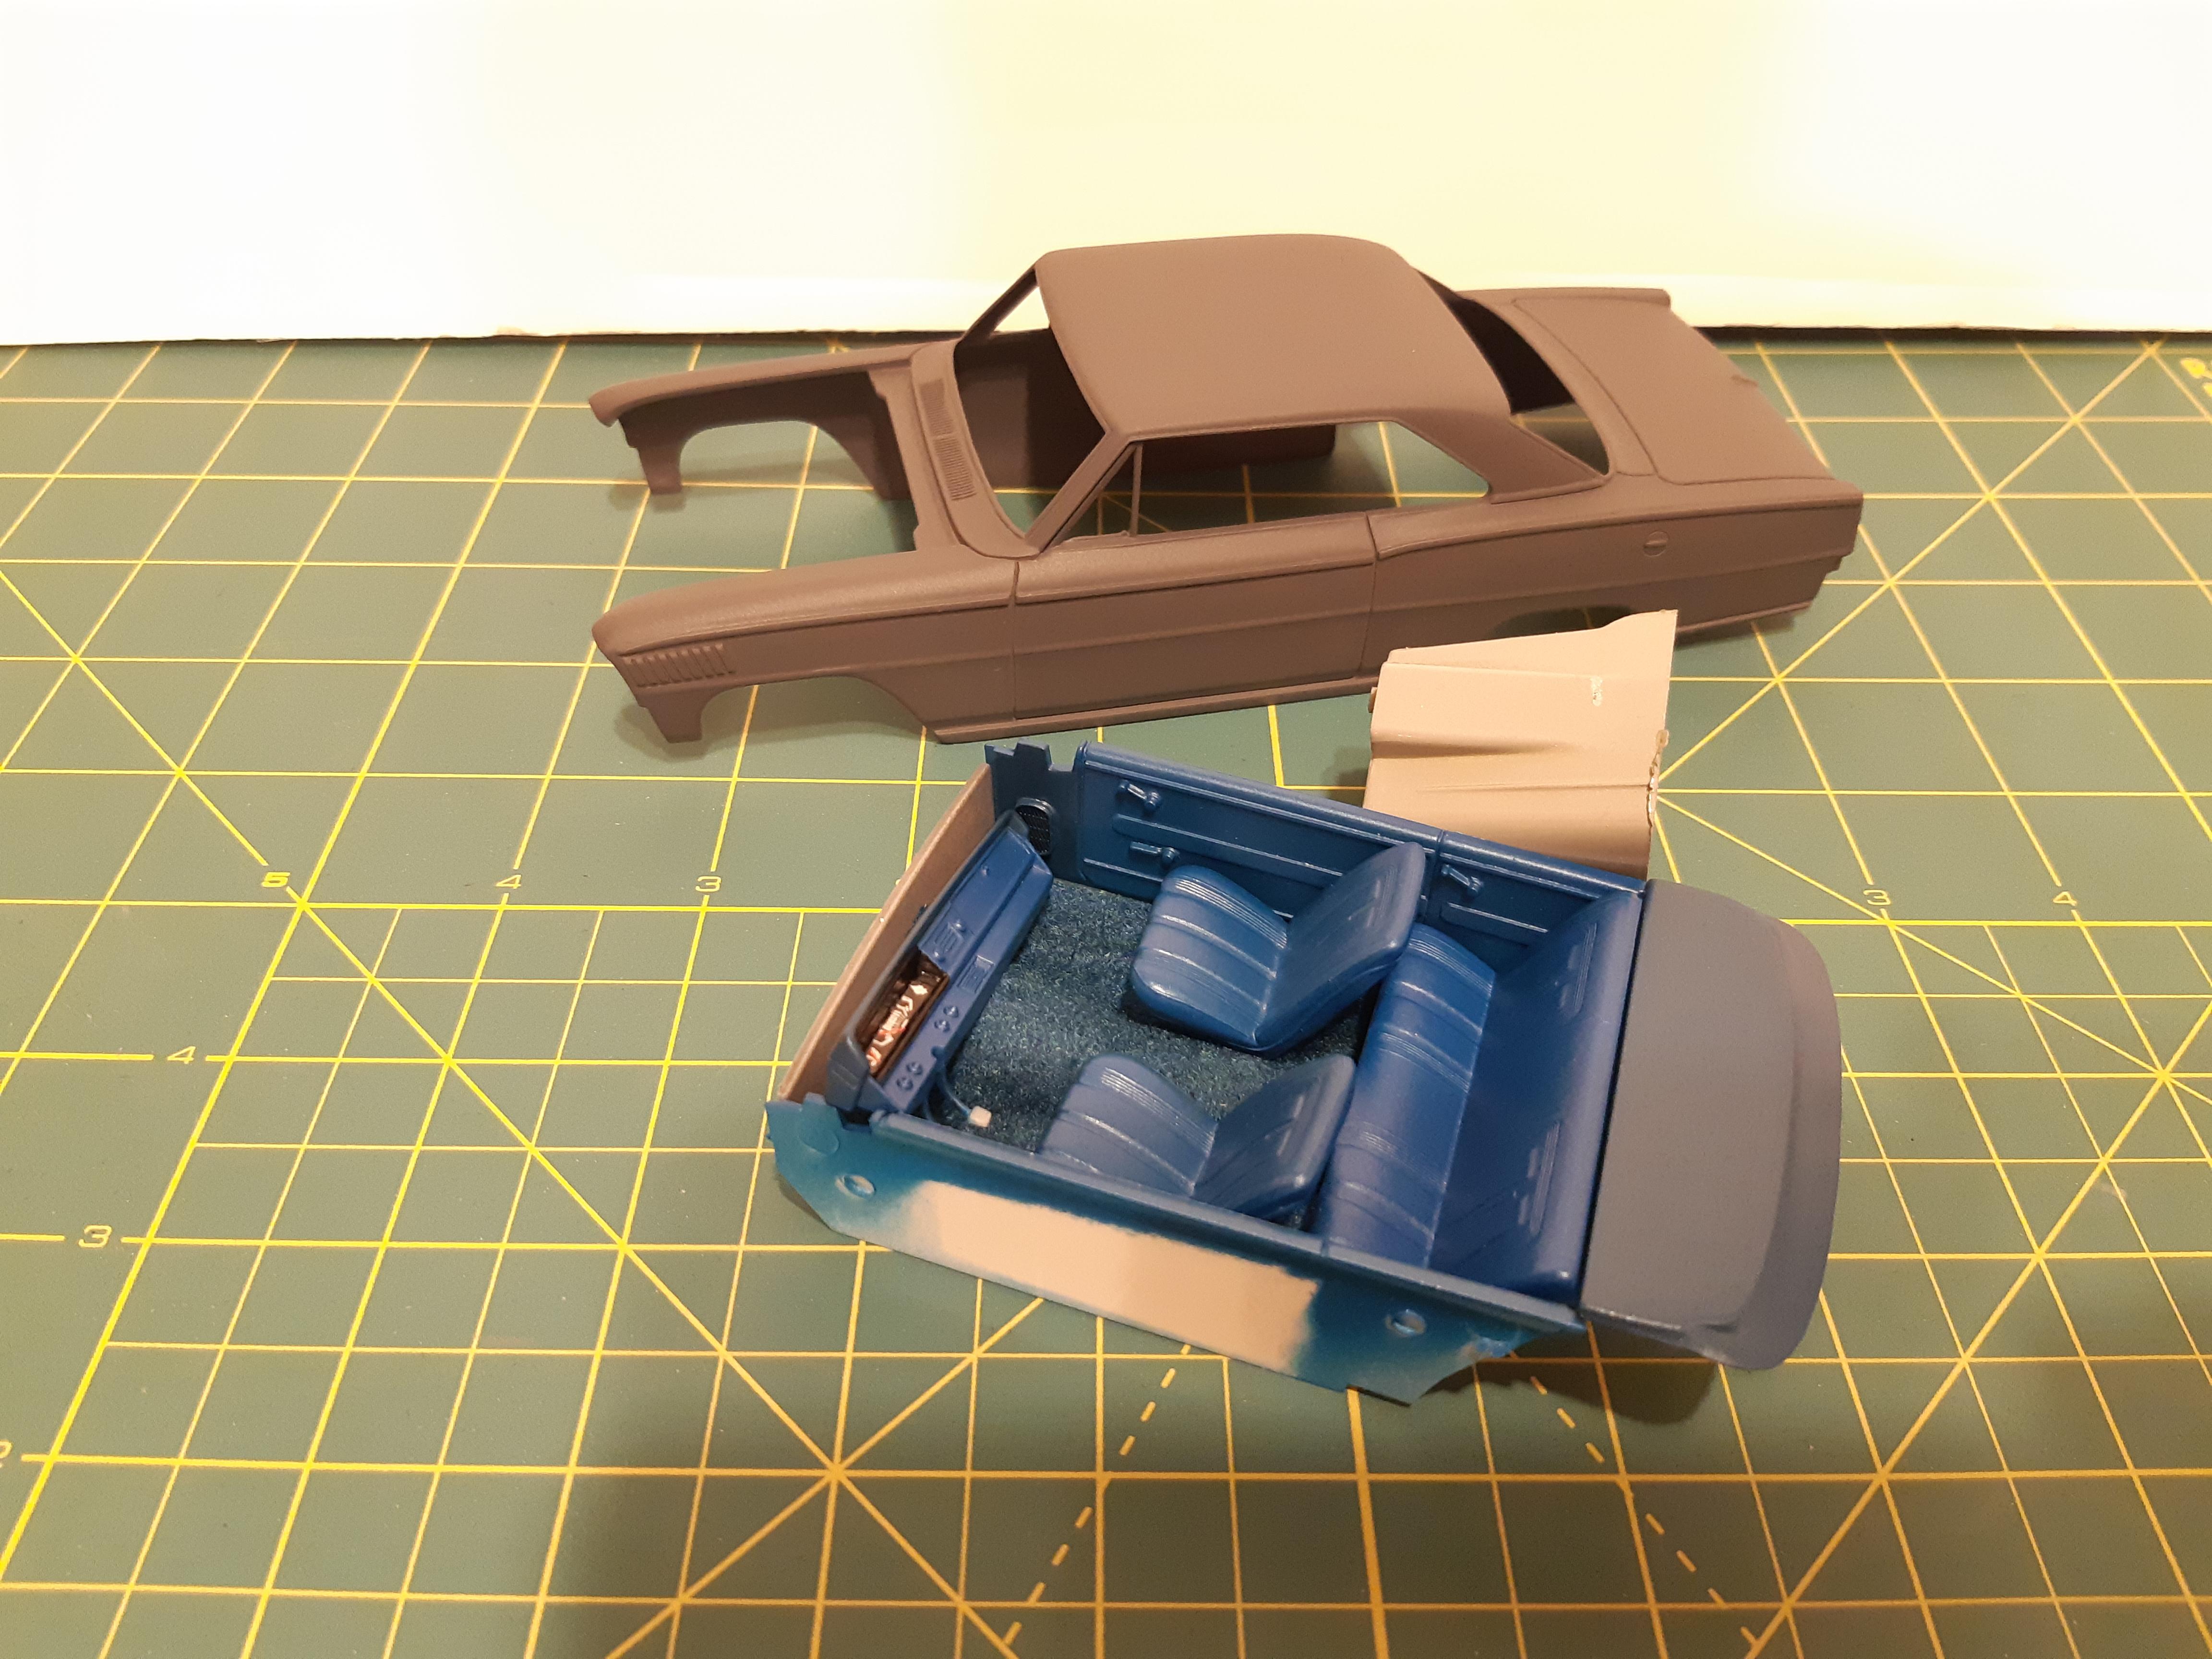
I got my full set of decals designed and printed now, so i was able to detail out the interior. I added seatbelts that i dyed to match, the buckles are made of .020x.125 strips. the dash is the Canuck3d one that is included with the beaumont conversion kit. The dash has awesome detail and is easy to paint. guages i printed on white paper and then topcoated with microscale krystalklear. I decided to add a rear speaker and a rear window defogger to the package tray. both detailed with decals for the grills.
-
Epic!!
-
1966 ACADIAN CANSO Sport Deluxe
TheBEAUMONTGURU replied to TheBEAUMONTGURU's topic in WIP: Model Cars
Got some color on the interior, body is in primer. the little test sample is my test of the body color Chateau Slate. interior is GM bright blue for 1966.
- 24 replies
-
- 11
-
-
got some black paint on the body, gotta let it dry and then lots of polishing. This color combo was available, but im very doubtful there were ordered from the factory Starlight black with Medium Green interior. Thats why im doing it!!!!
-
slow going, but i got a bit further along with the interior. Had to mix a bunch of tamiya and MrHobby greens and yellows with a bit of pearl, and then mix a bunch more greens and yellows, but i finally came up with a color that is pretty close to the original interior color. I made some cloth pattern seat decals and the green stripes are decals too
-
cool, thanks guys. id be happy with the monte one. i will keep an eye out for that kit and the other ones listed in the other thread.
-
Is there a good version of a TH400 automatic in any kits out there?
-
Build a better Bob Glidden Motorcraft 1:24th
TheBEAUMONTGURU replied to TheBEAUMONTGURU's topic in Drag Racing
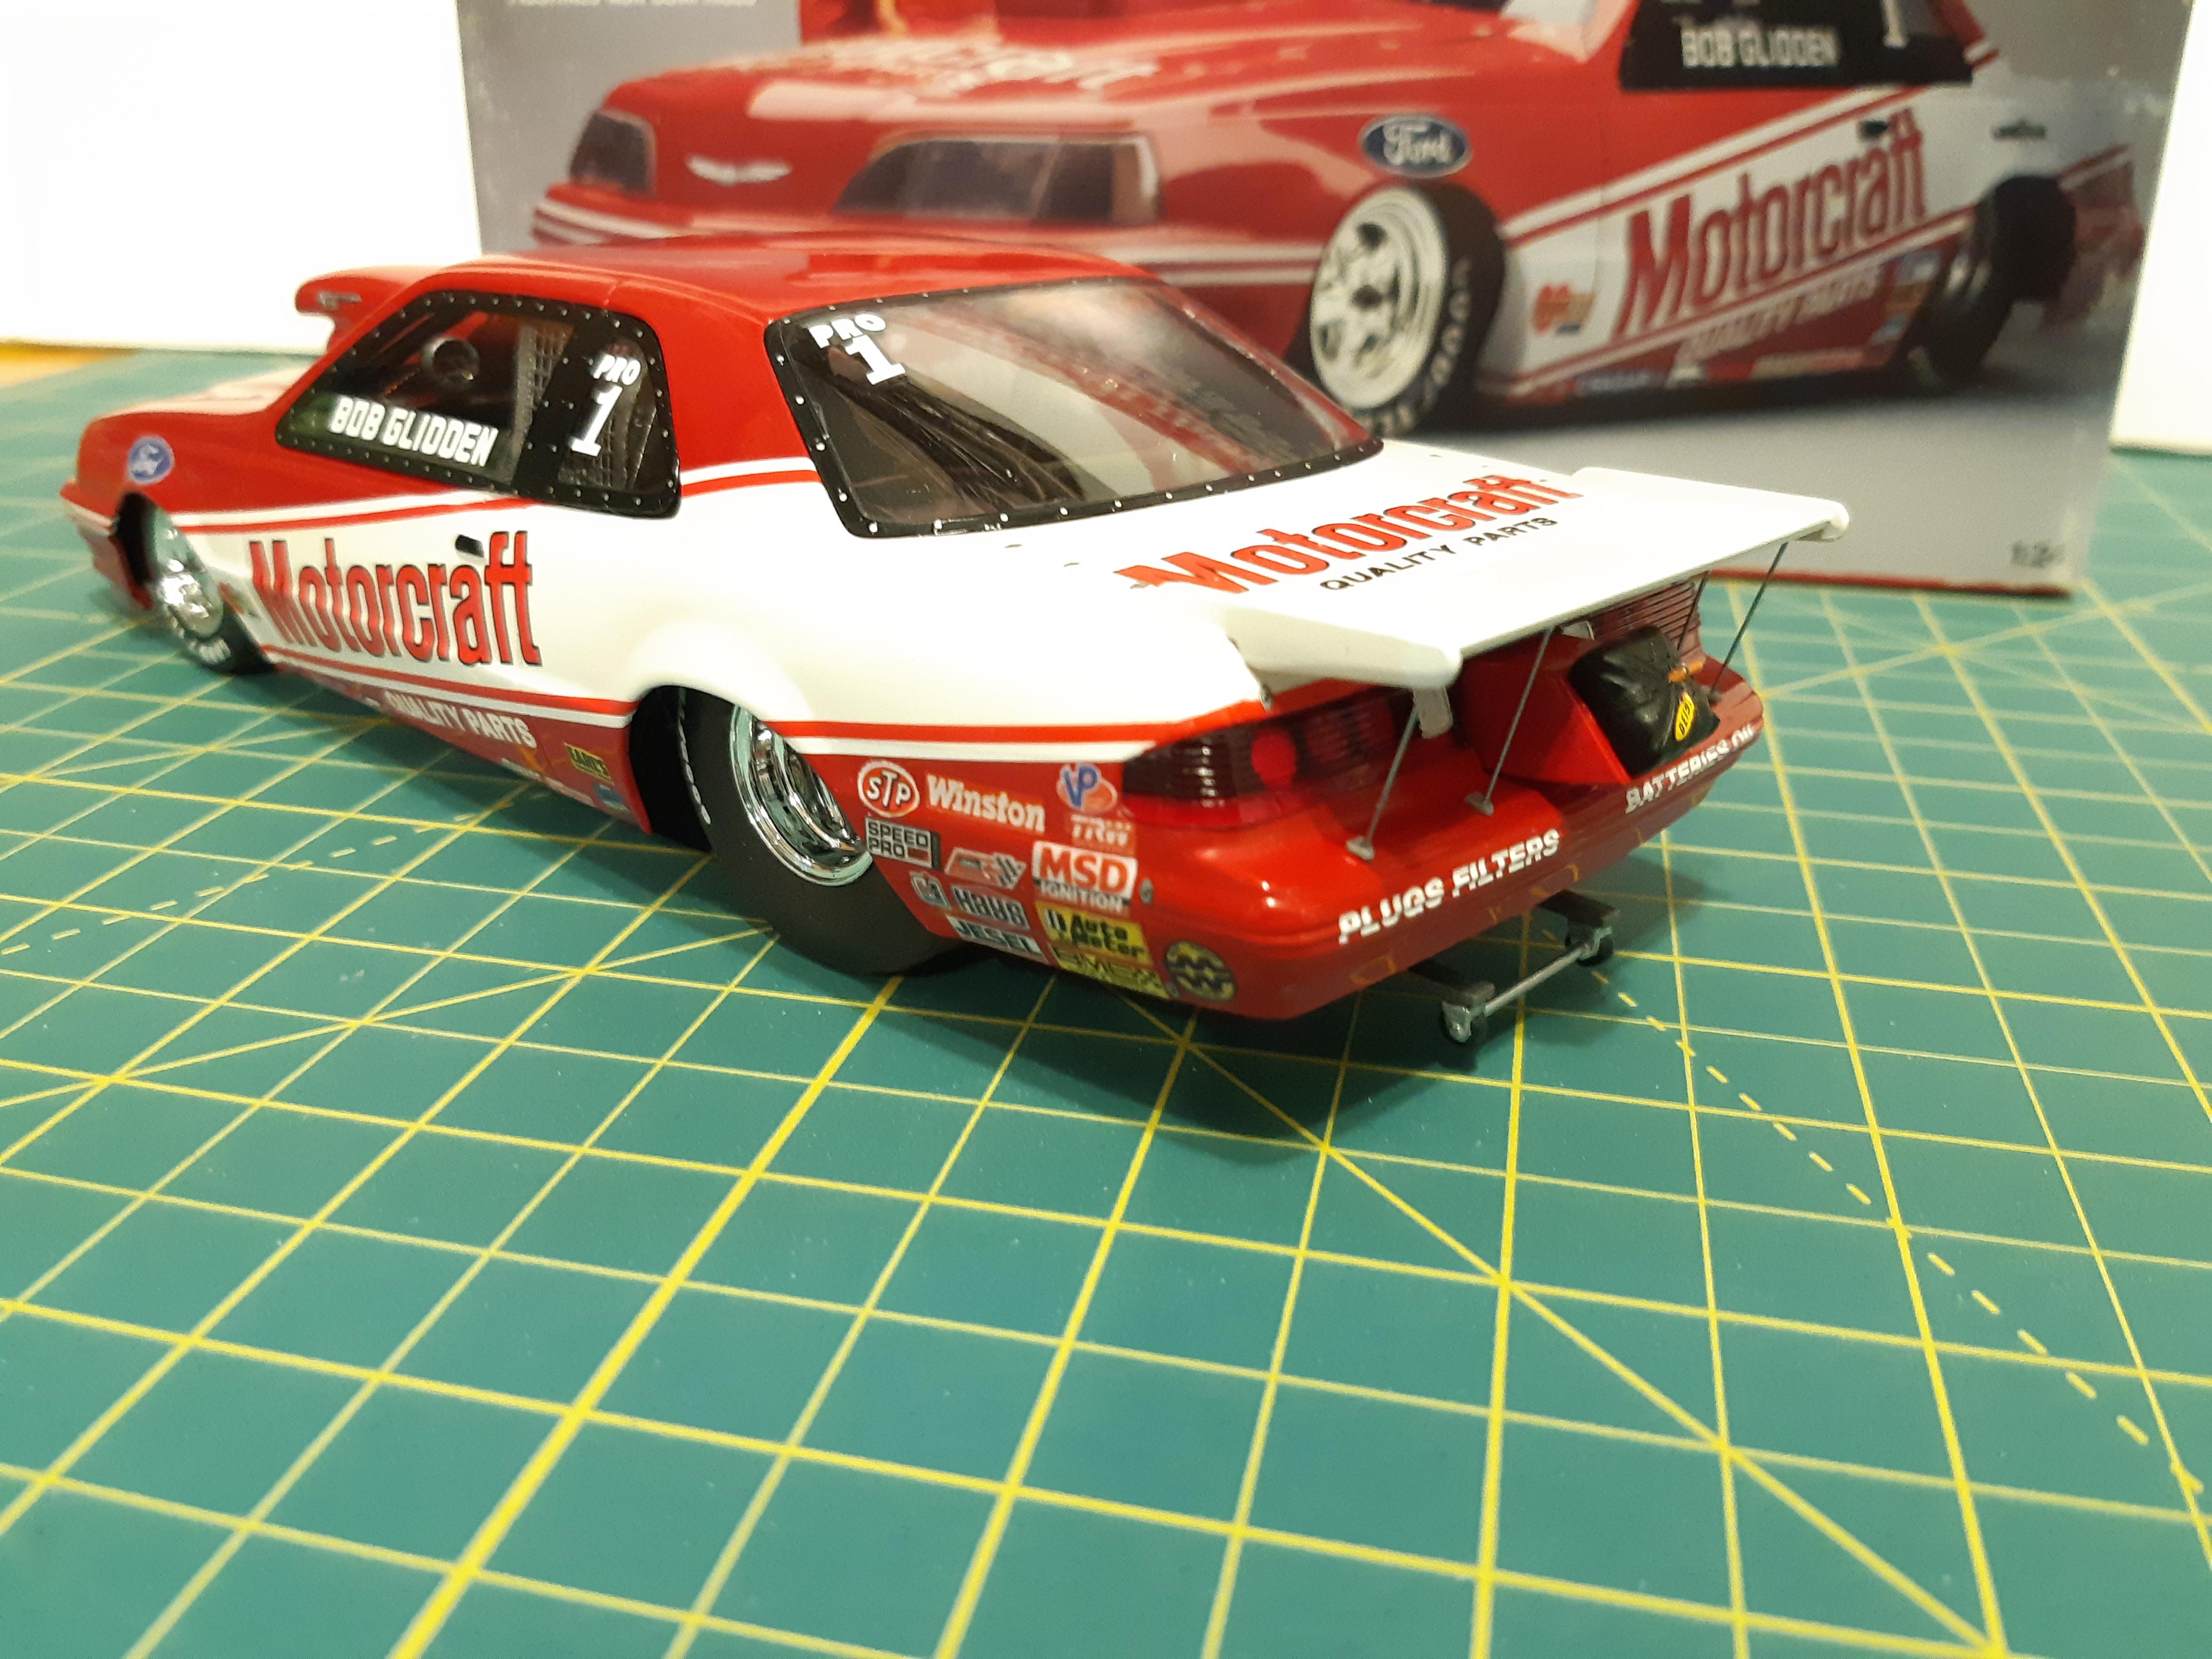
Thank you so much to everyone who commented. It really means a lot to me. I must have built this kit 3 times when i was a little kid, Glidden has been my favorite driver for sure, managed to get his autograph a couple times at the Brainerd events. Its funny, i'm not a ford guy at all, but when i was a little kid, Glidden was my idol for some reason. I'm so happy to finally build a "good" version that doesn't look like it was built by a 10 year old! i have both his chief cars in the works as well. stay tuned! -
Build a better Bob Glidden Motorcraft 1:24th
TheBEAUMONTGURU replied to TheBEAUMONTGURU's topic in Drag Racing
i found a coupe crappy WIP pics with some parts along with a funny car i was working on at the same time, doesnt show too much but you can see some of the mods between the more stock kit engine and my welded valve covers and seat mods.
-
As usual i forget to take pictures of WIP, so this one goes straight into the done pile. Lots of work to modify the original kit to more accurately represent Bob Gliddens T-bird. I added the extra cage around the driver, cut off the head rests that said Don Hardy, since this car is a Jerry Haas prep'd unit. I built the valve covers from sheet plastic to make them look like welded aluminum and split the 1150 dominators in 1/2 as his IHRA prepped car was equiped. Made a few missing decals, sanded down the tires really good, painted with duplicolor autostore paint, no clear, just polishing. I used an original issue of the kit, but used the decals from the reissue from a few years back. all wired and plumbed, used 11/0 seed beads for the fittings, reconfigured all the oil tanks and lines, added an electric fan, made new rad hoses, and generally changed alot of the engine bay to better represent the real car. Scratch built some of the MSD parts, wired the MSD 7AL box in the interior, made a window net from fiberglass window screen and seatbelt ribbon.
- 20 replies
-
- 11
-
-
Thanks Steve. That makes sense, i had one of those as an incomplete parts kit a few years ago.
-
got this panel in my parts bin, has some really nice handles moulded on both sides. anyone know what kit??
-
Its based on the other kits as Mark stated, its an old tooling from the 70's. the body fits terrible and you have to cut and fit the rear areas quite a bit, the engine is very simplistic compared to other dragrace kits, you might consider swapping in a Revell funnycar hemi instead, make sure you test fit and modify all the panels before you paint. it also has a rubber seat and fan that you may or may not like.
-
Thanks guys, i will check into those
-
Body Holder for Painting
TheBEAUMONTGURU replied to bill-e-boy's topic in Tips, Tricks, and Tutorials
Steve, you and i think alike on this for sure. i have the same painting technic. i just stand in the middle of my garage and turn my coathanger stand everywhich way til i have complete coverage. I even hang my coat hanger and model car upsidedown to prevent dust from falling onto the surface, and to reduce solvent popping.