TheBEAUMONTGURU
-
Posts
277 -
Joined
-
Last visited
Content Type
Profiles
Forums
Events
Gallery
Everything posted by TheBEAUMONTGURU
-
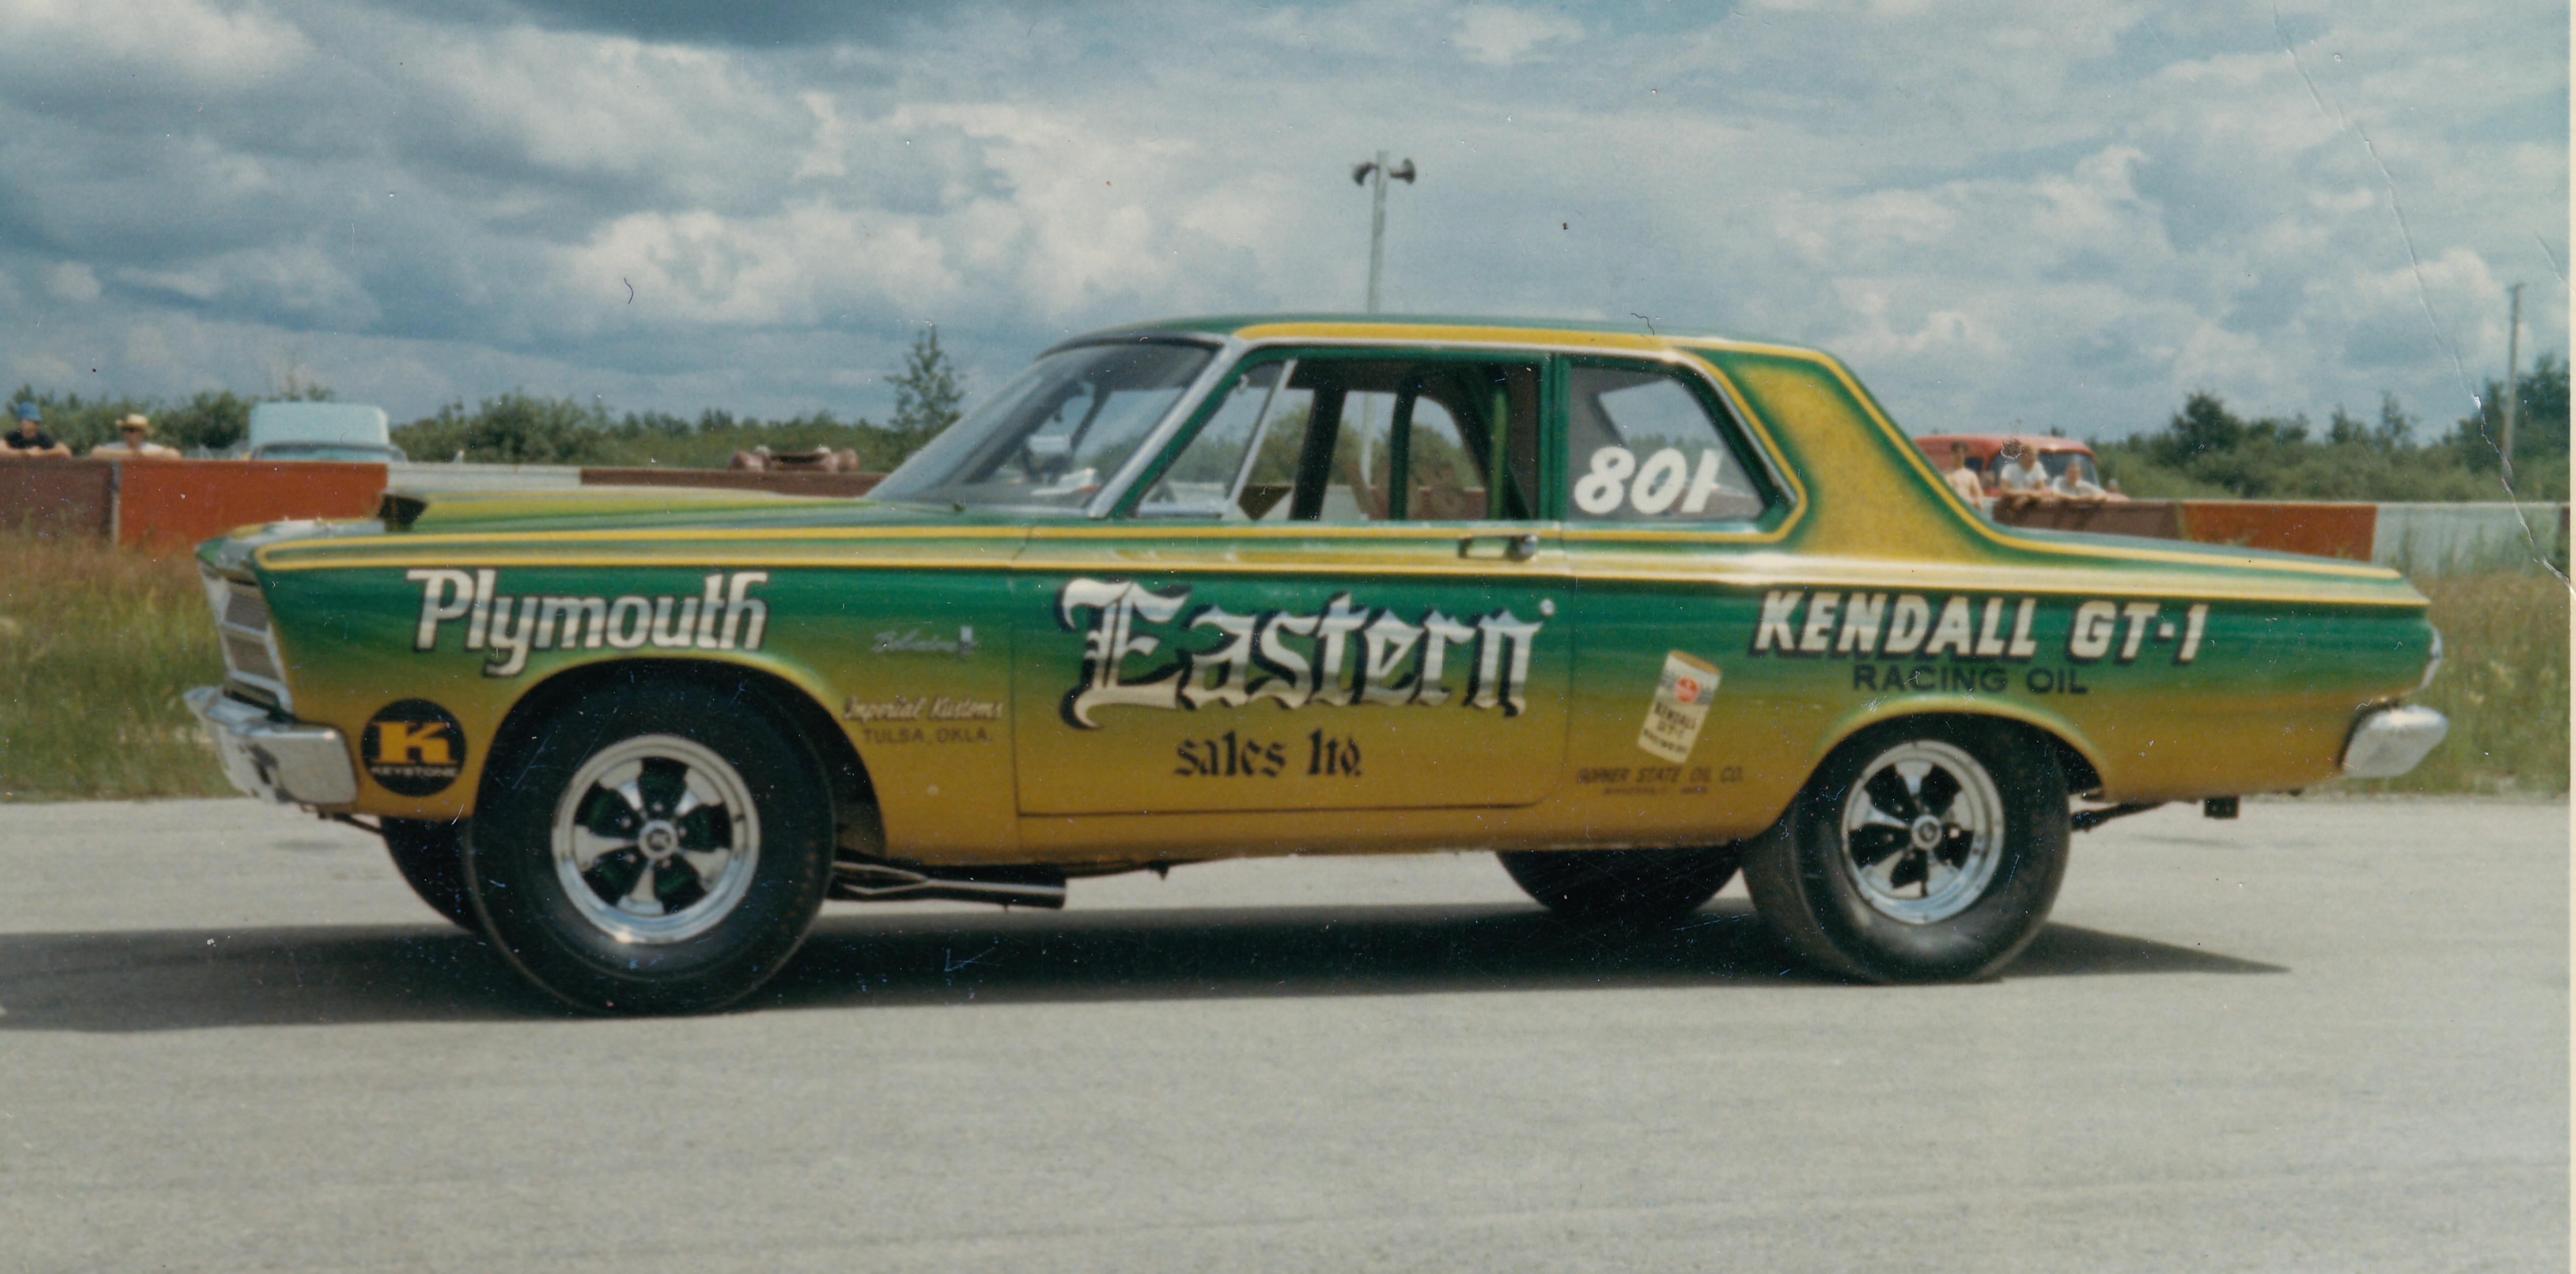
Decals Tom Myl - John Hagen BO29 cars
TheBEAUMONTGURU replied to gtx6970's topic in Model Building Questions and Answers
Cool!, im following. Would love to have a decal set for the green car. or even this version of his car(later sold to a canadian and the decals were changed, but paint scheme is the same.)
-
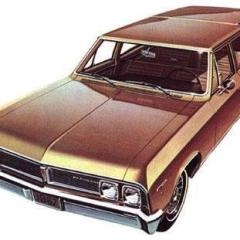
BEAUMONT STATION WAGON: this time a 1966
TheBEAUMONTGURU replied to TheBEAUMONTGURU's topic in WIP: Model Cars
The rear floor pan is higher, and the gas tank straps run in the opposite direction, i have more detail showing the mods in my other wagon build threads. -
Hi Greg
The model club is this weekend. April 13. got moved up because of easter
Wanted to ask you about resin casting. Im getting back into doing some and the Micheals white resin is mostly out of stock and i dont like how it sets up so fast(1-2 minutes). Have you used the Smooth-On products? i see Artists emporium has an off white medium setting(30 mins) and a white fast setting#300. Have you tried those products? or do you have any recomendations?
- Show previous comments 3 more
-

-
Here is the link to SialArt in quebec. So far so good, should have my resin tomorrow acording to the tracking.
-
-
Amazing, were you a watchmaker in another life?
-
BEAUMONT STATION WAGON: this time a 1966
TheBEAUMONTGURU replied to TheBEAUMONTGURU's topic in WIP: Model Cars
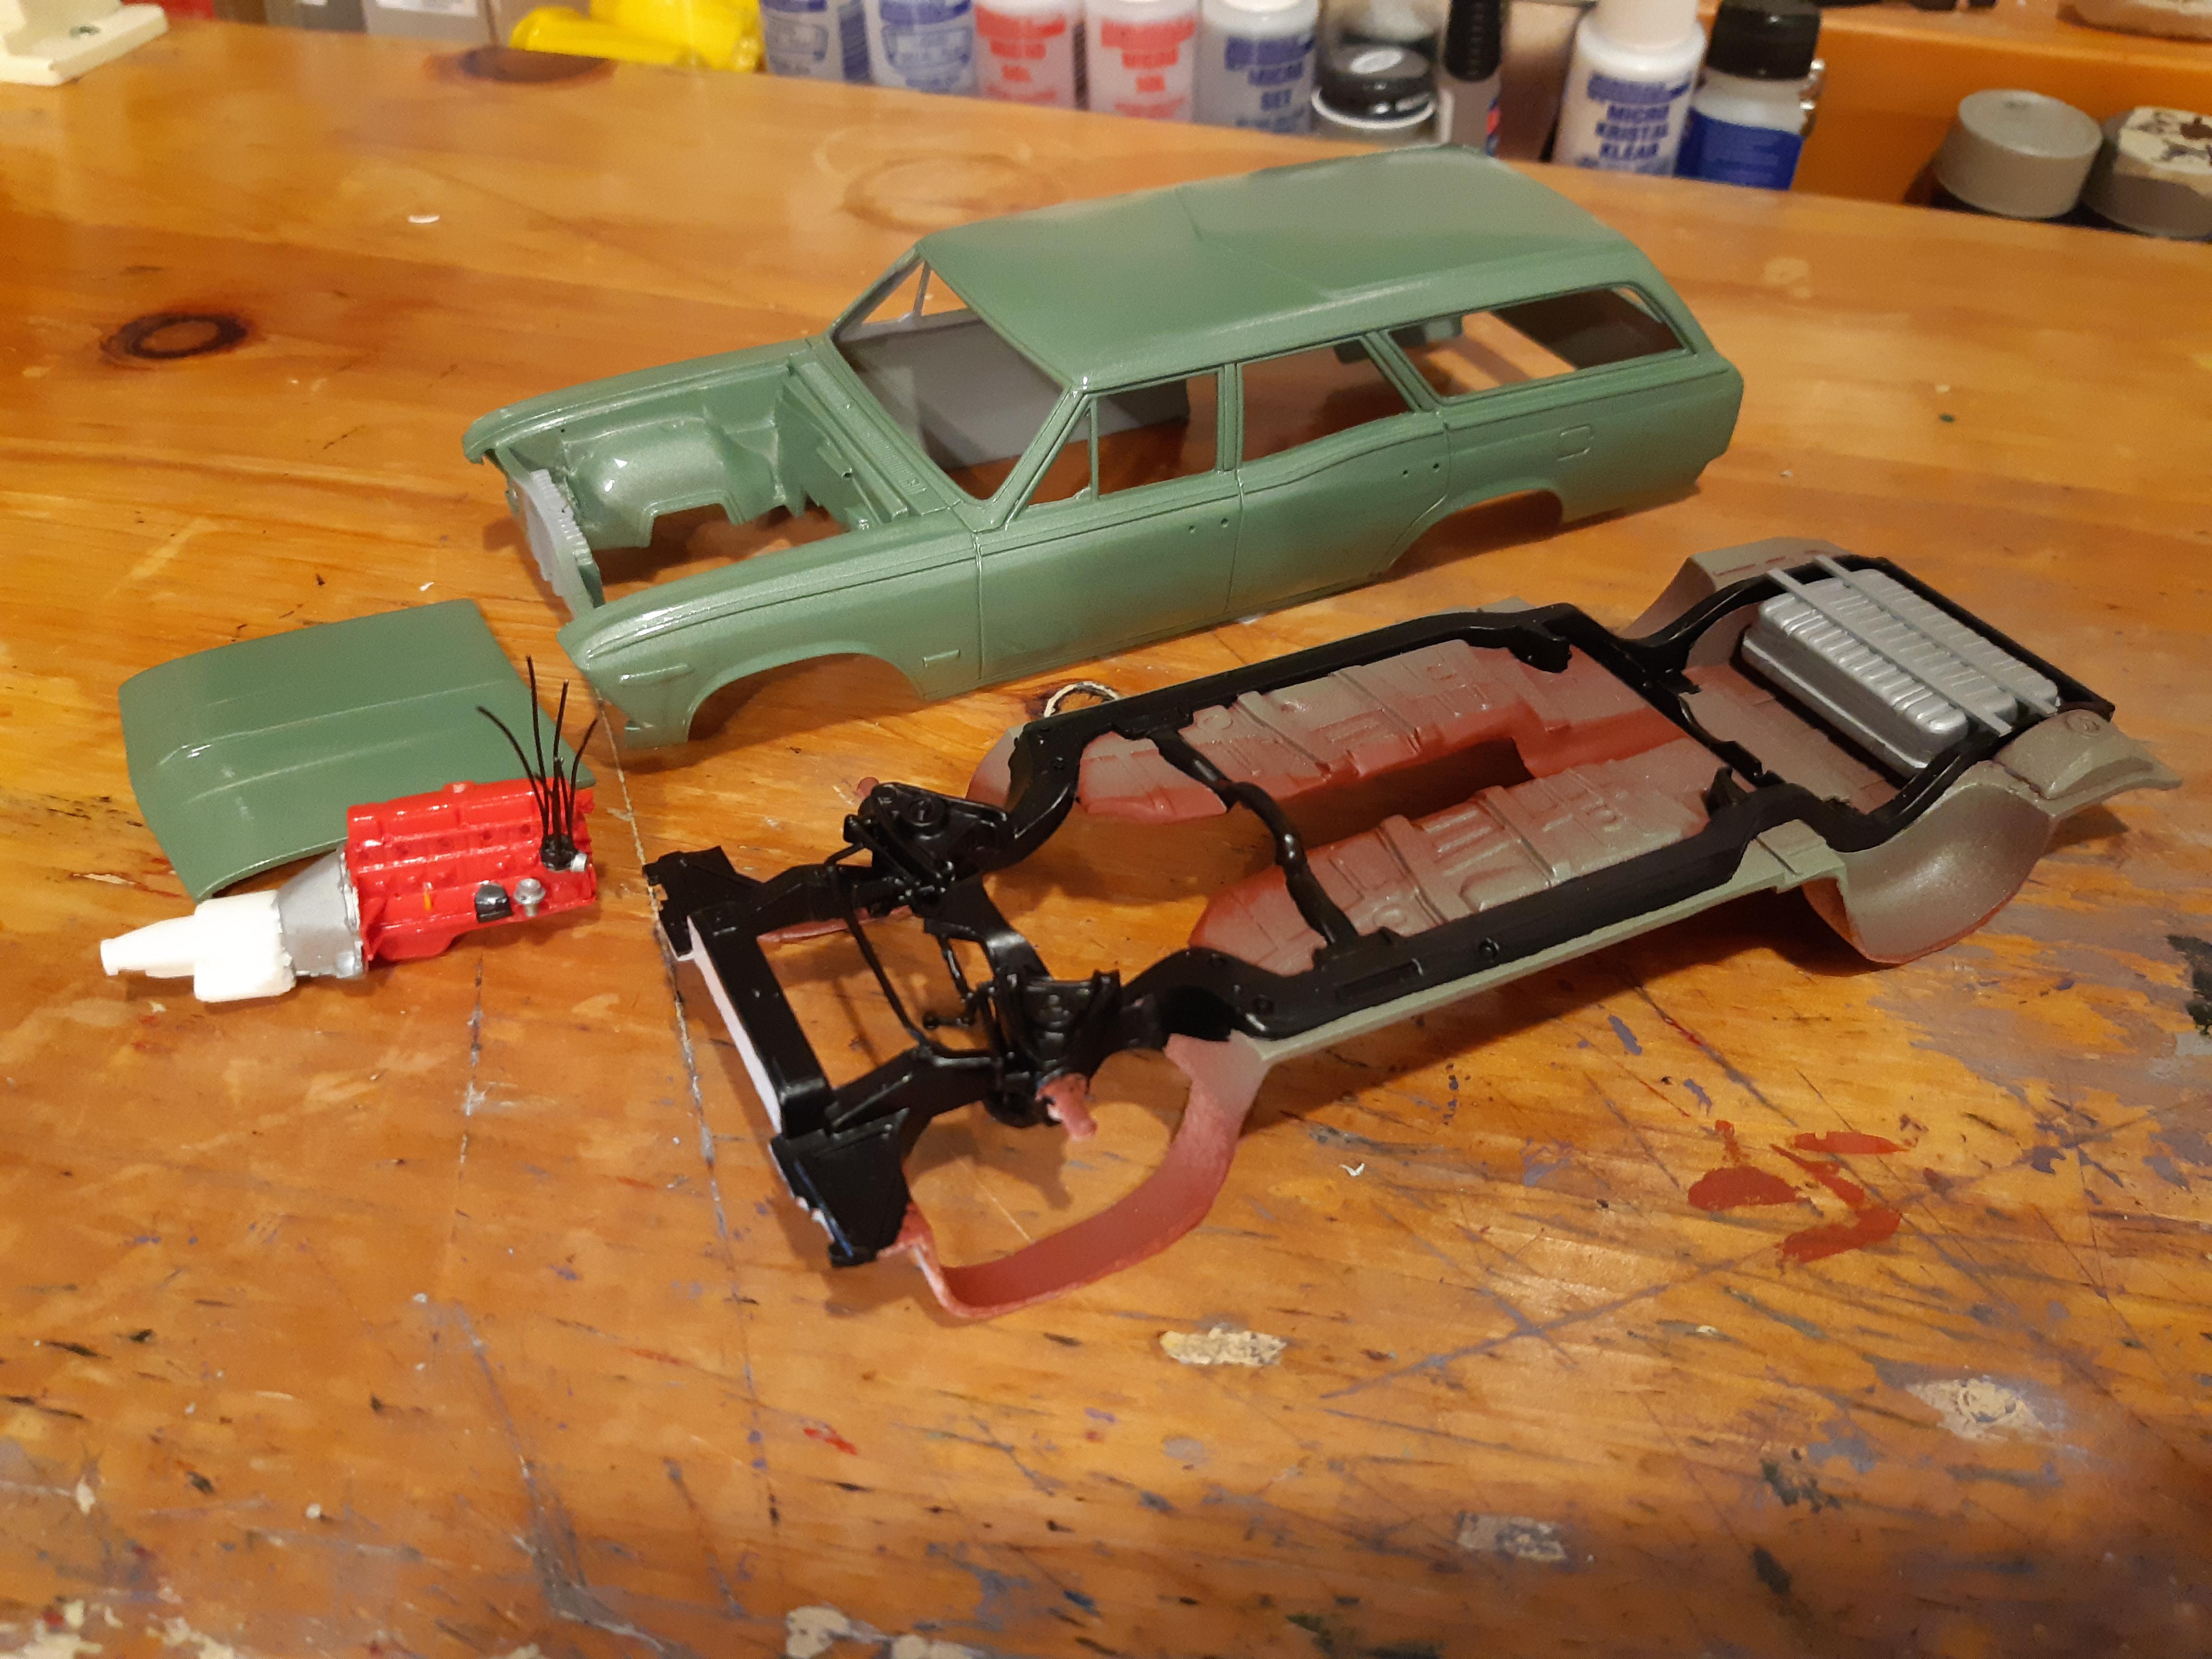
Endless mixing of some tamiya silver along with a couple greens, pretty much nailed the color. Helped to have a real car panel to compare to Im really liking my new painting idea. Tamiya Acrylic(yes water base), followed by about 5 coats of Duplicolor automotive spraybomb clear(solvent based). Allow to shrink out for a couple months then i will polish it. done 2 others that way now with flawless results. also modified the rear tub to represent a wagon floor and tank. Getting good at that part, its the 3dr time ive done it!
-
BEAUMONT STATION WAGON: this time a 1966
TheBEAUMONTGURU replied to TheBEAUMONTGURU's topic in WIP: Model Cars
thats my buddies 65 beaumont: with a olds vista roof grafted on -
Build a Better Kelly Chadwick Vega F/C
TheBEAUMONTGURU replied to TheBEAUMONTGURU's topic in WIP: Drag Racing Models
Getting a bit further along with some details. body and glass is done.
-
BEAUMONT STATION WAGON: this time a 1966
TheBEAUMONTGURU replied to TheBEAUMONTGURU's topic in WIP: Model Cars
Here i have added the correct Beaumont Custom upper side trim, proper rear tailgate trim(after filling in all the chevelle stuff). also added the front fender emblems and a 230 engine callout. because this one will be a 230 straight 6 with a Powerglide. Im leaning towards a Silvergreen(Laurel Mist in canada) body with a fawn interior and not many options.
-
BEAUMONT STATION WAGON: this time a 1966
TheBEAUMONTGURU replied to TheBEAUMONTGURU's topic in WIP: Model Cars
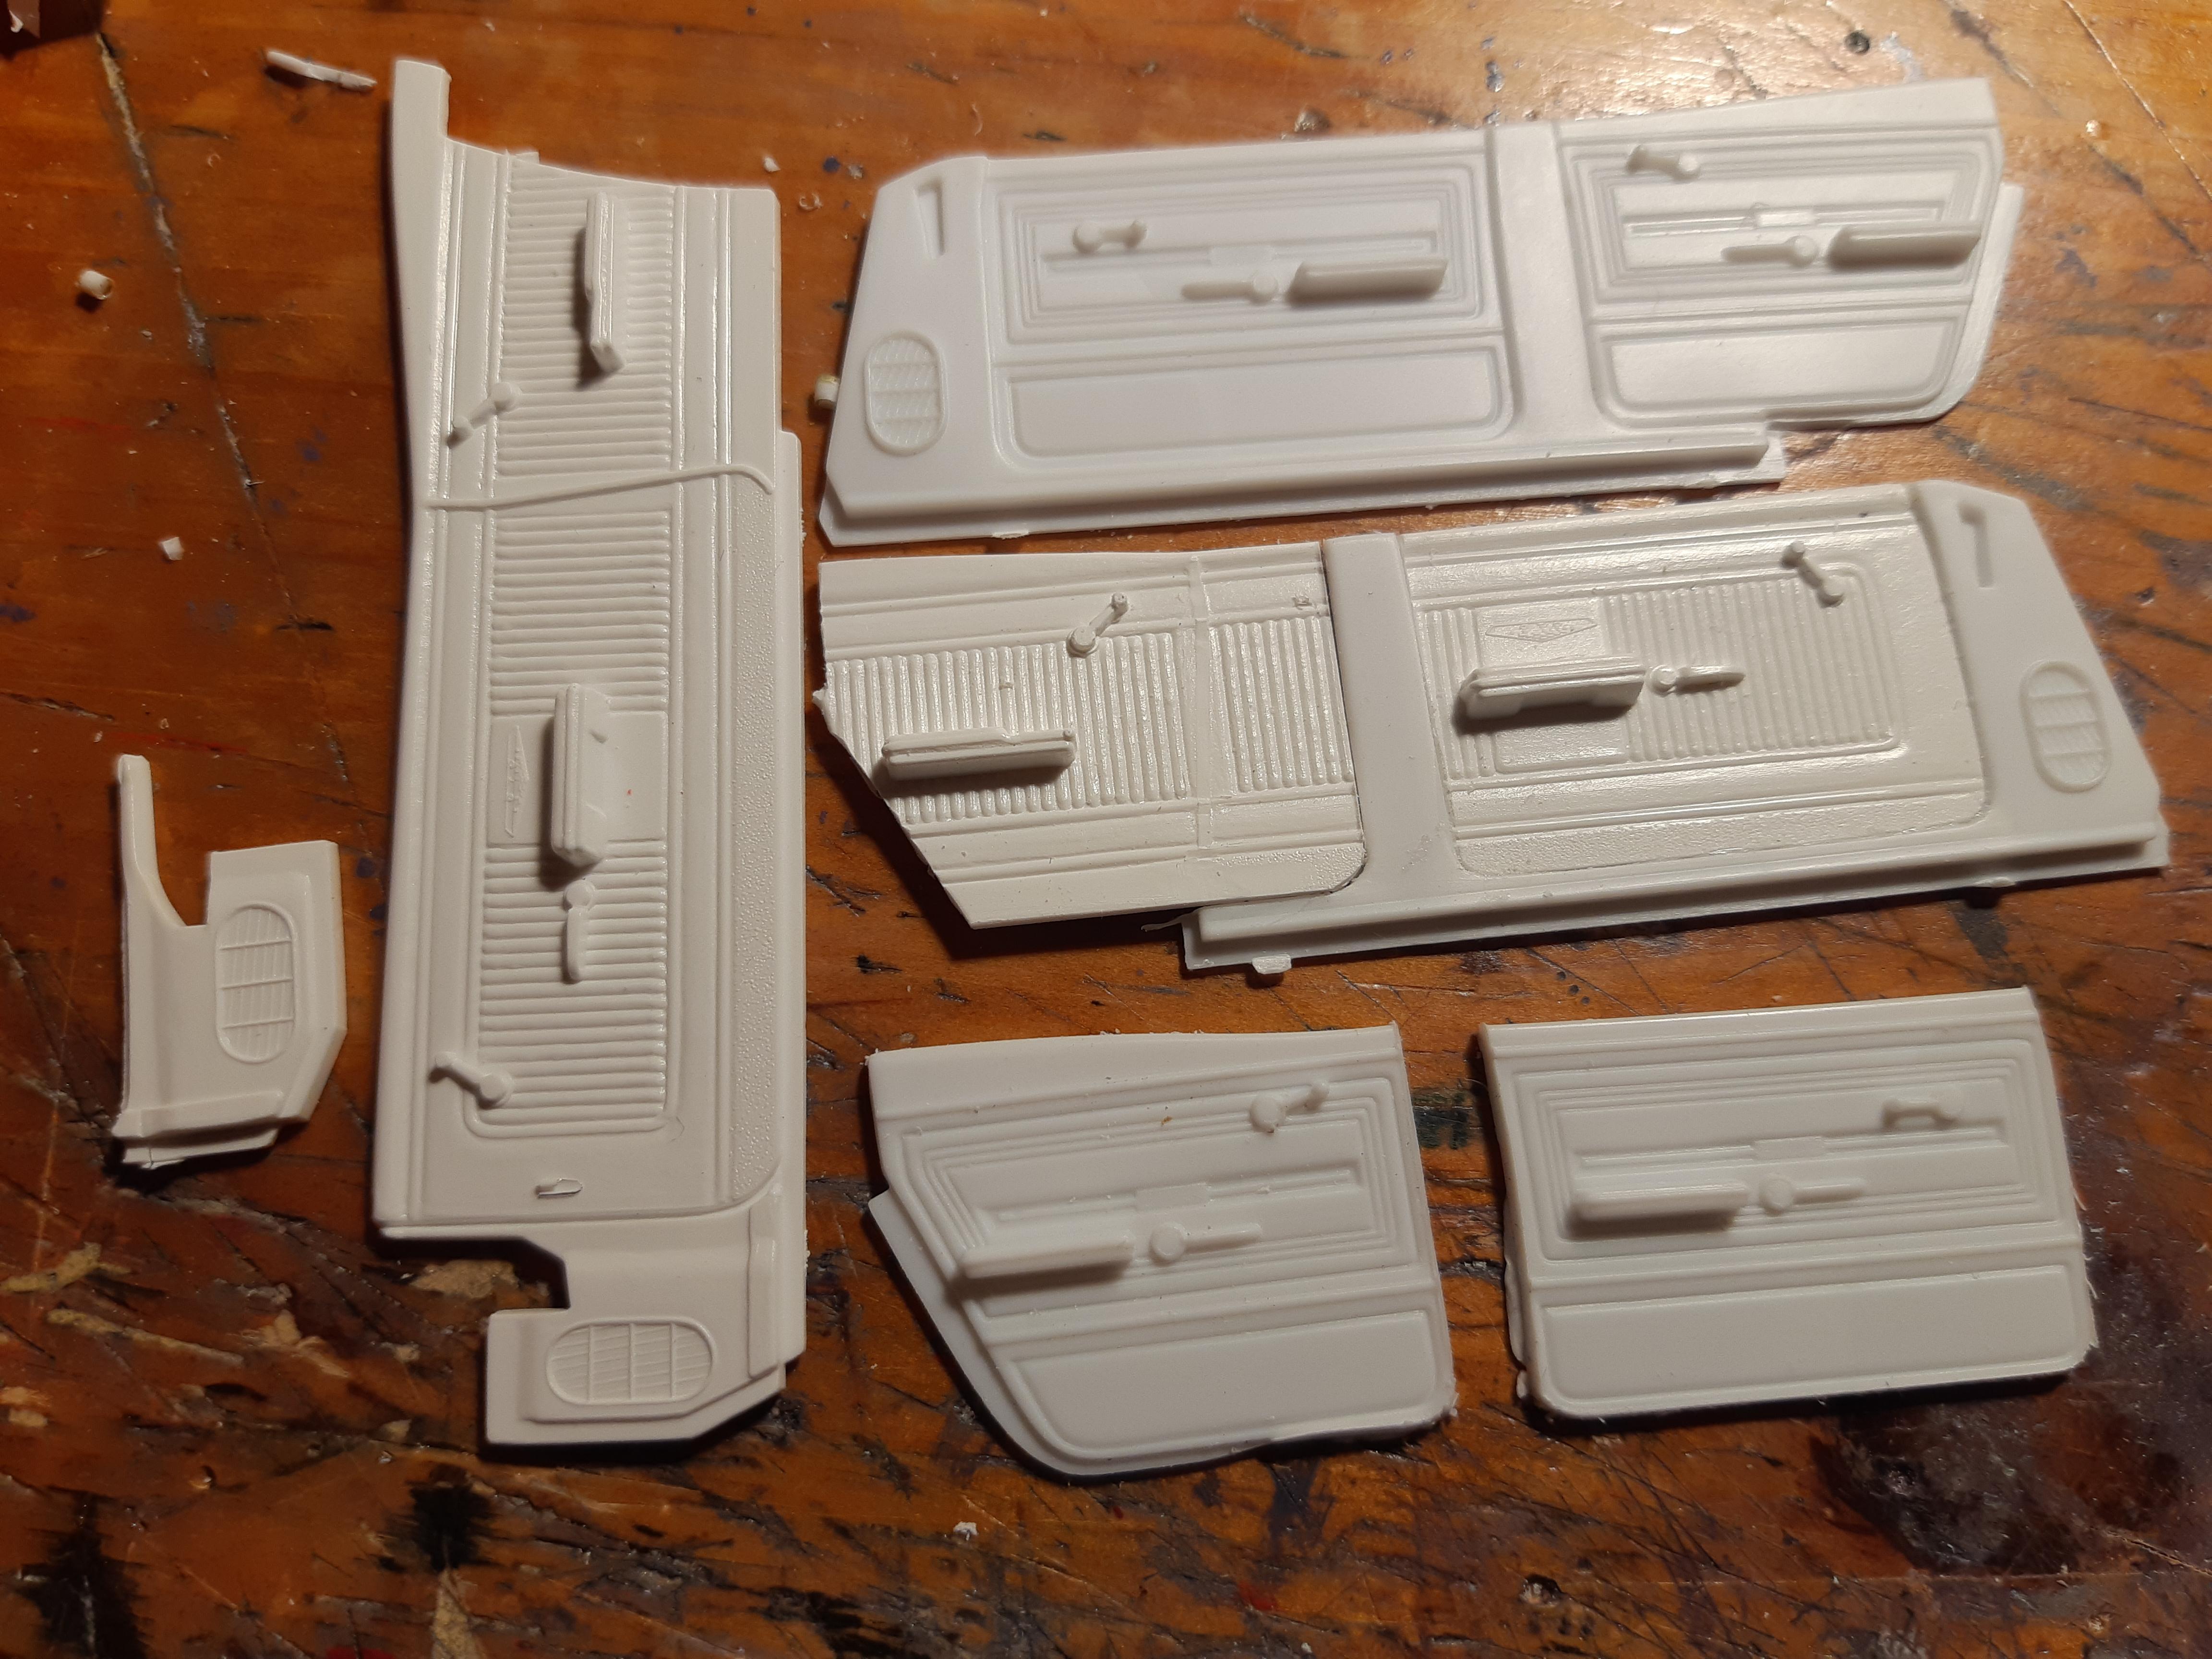
I robbed the revell 66 GTO kit door panels and cut out the chevelle ones and grafted in the GTO ones, they are not 100 percent correct pattern for a66 beaumont but they are darn close
-
BEAUMONT STATION WAGON: this time a 1966
TheBEAUMONTGURU replied to TheBEAUMONTGURU's topic in WIP: Model Cars
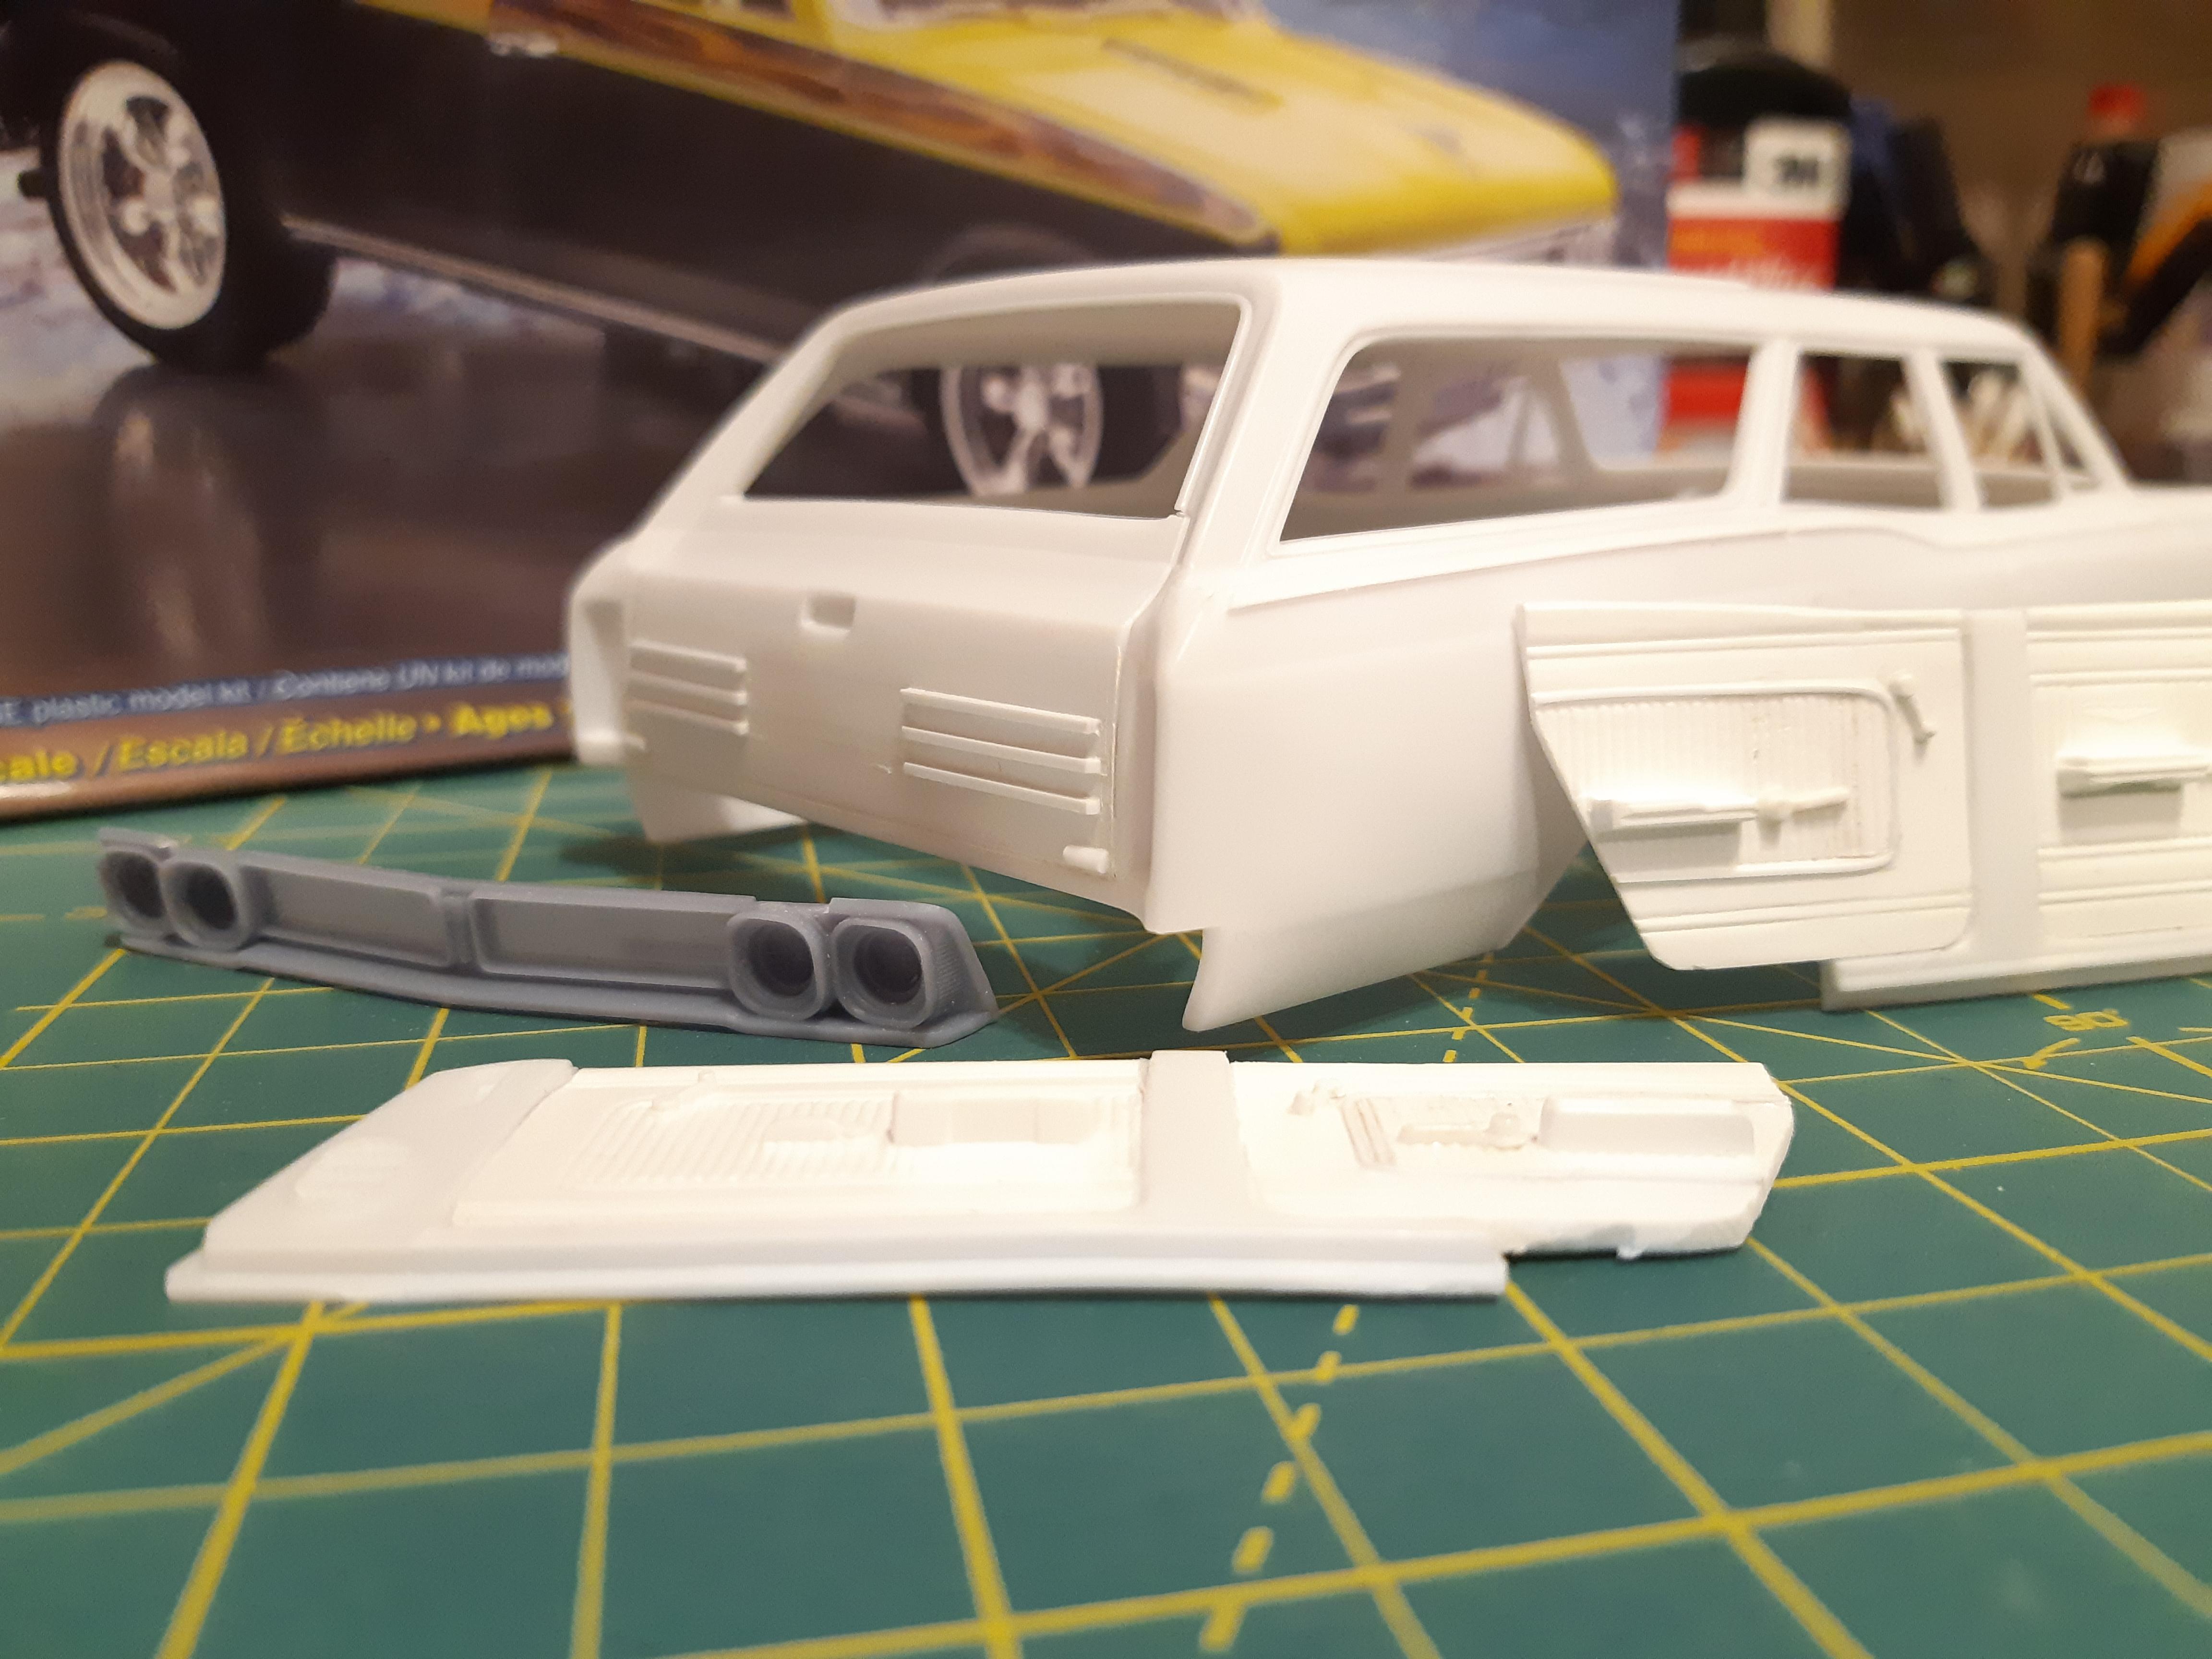
With all the cutting i got it to fit really good, and you cant even tell the fenders a squeezed in slightly.
-
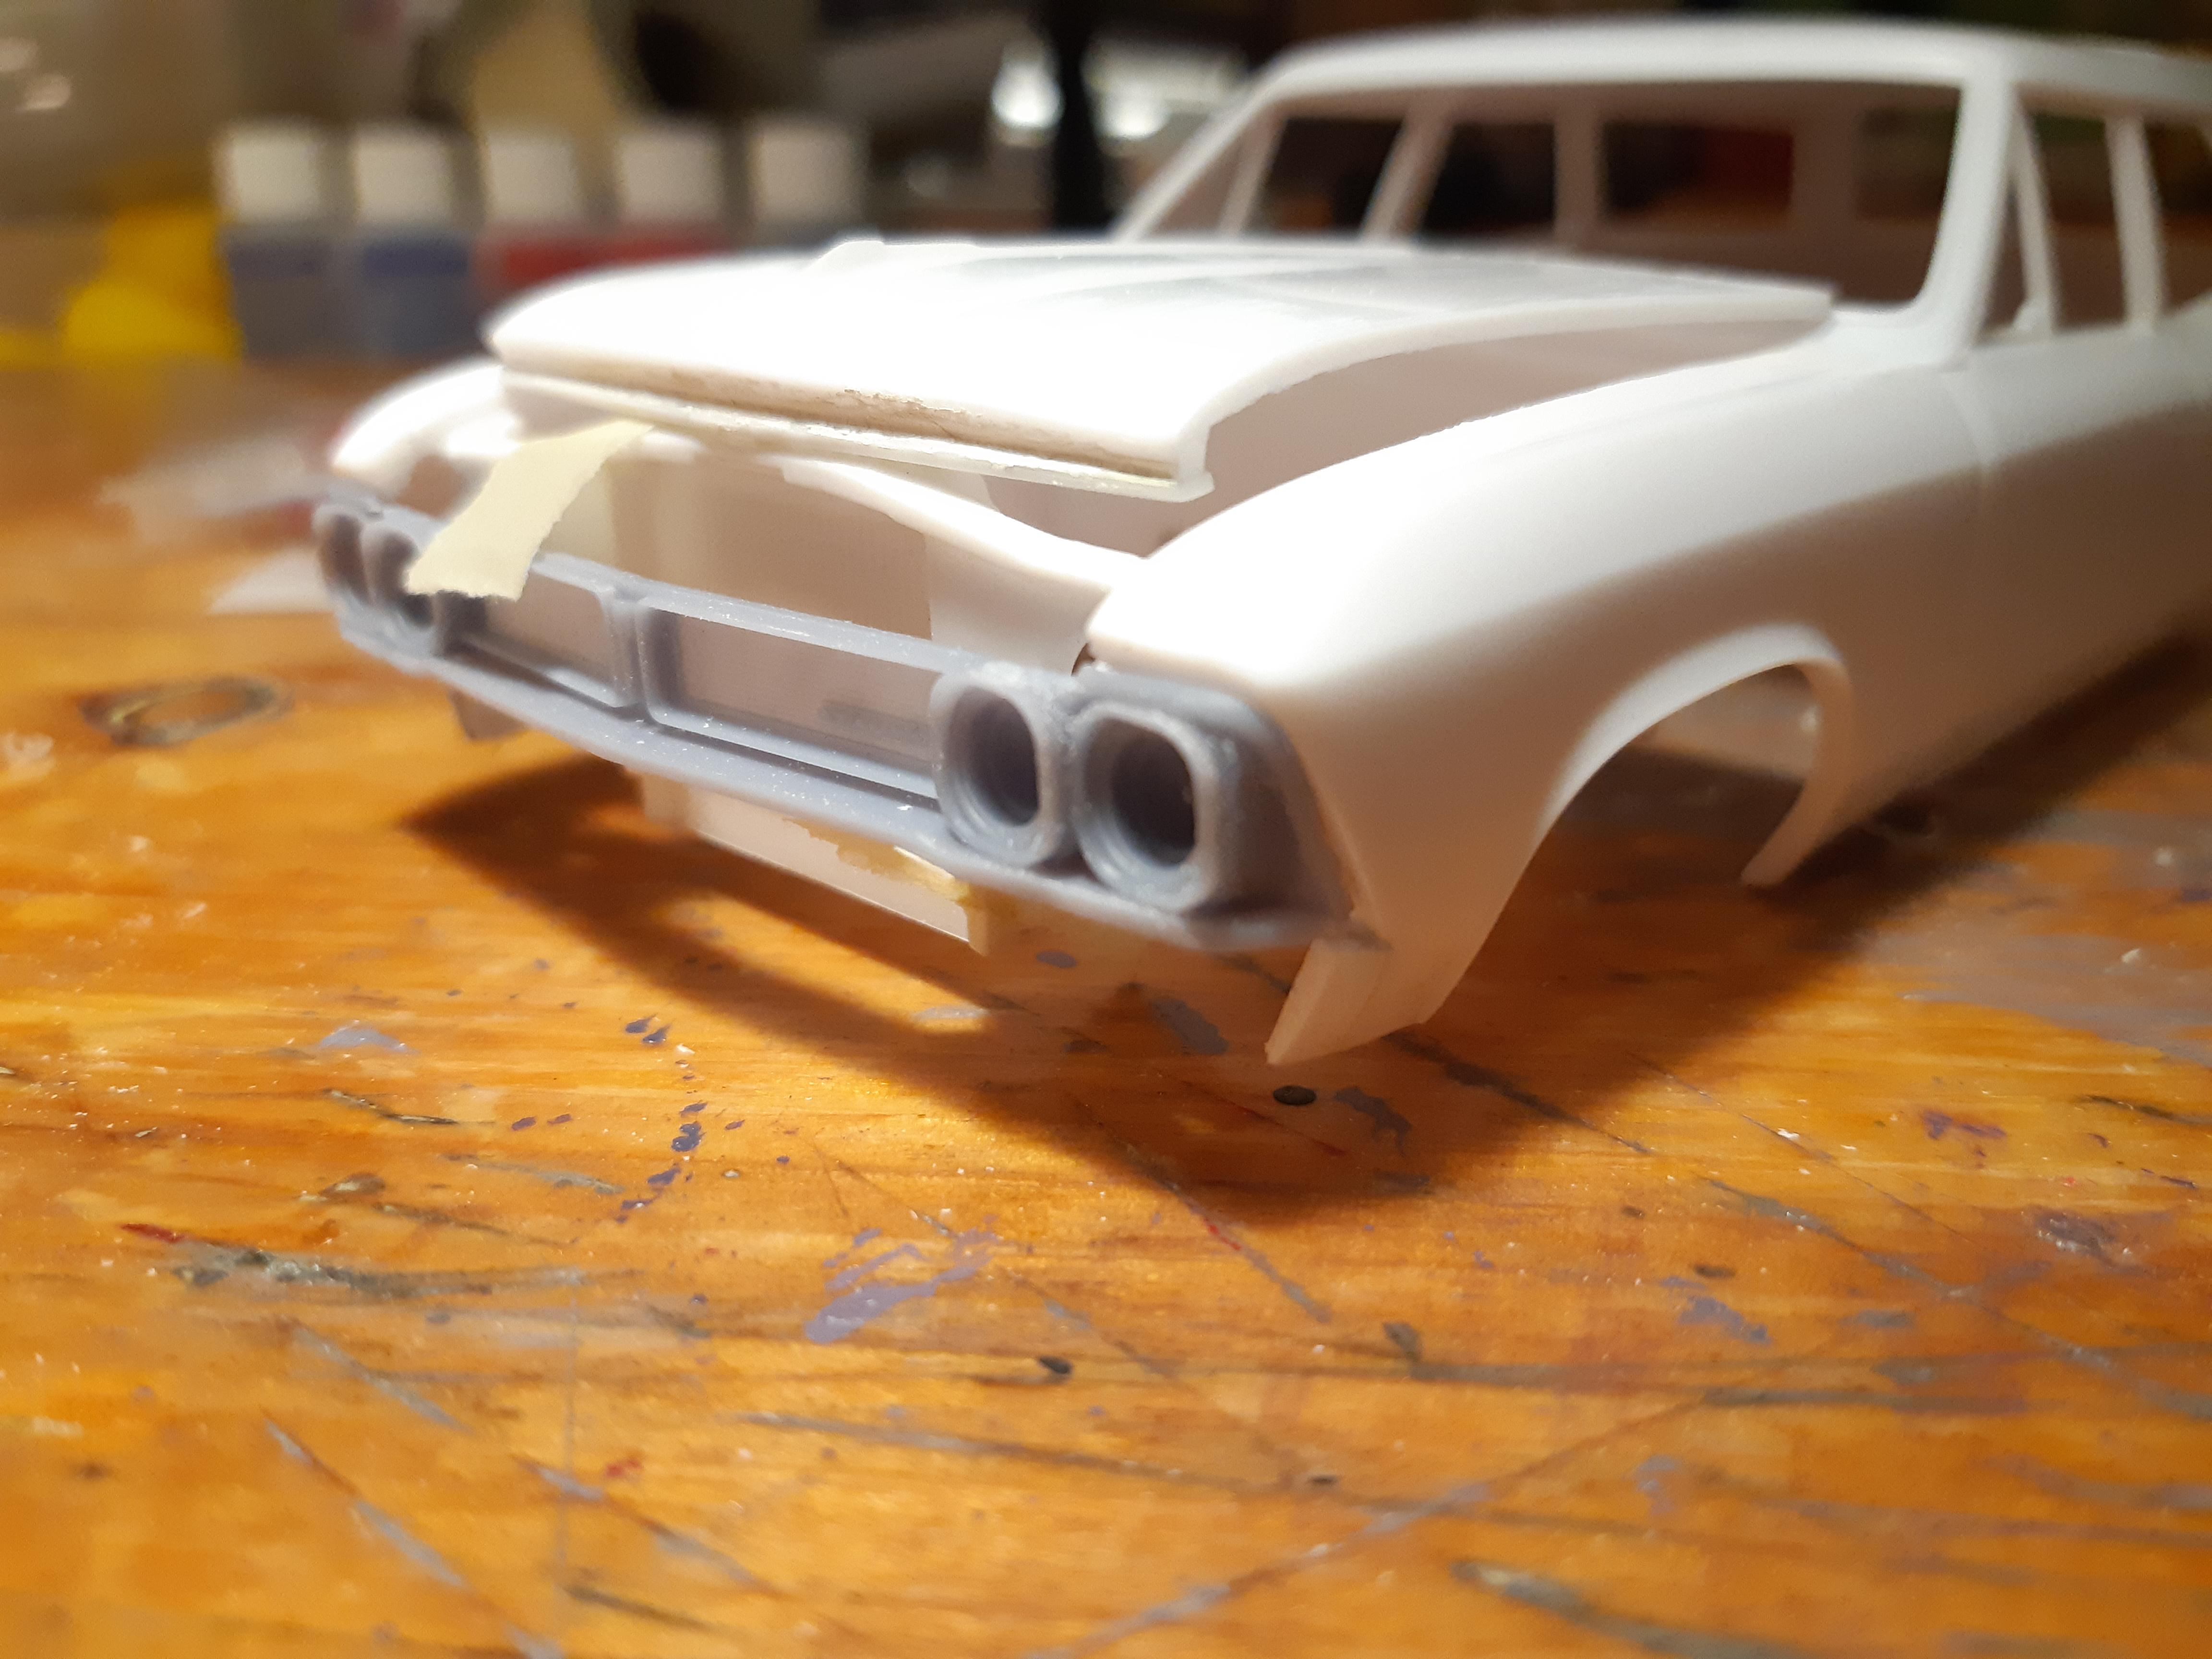
The canuck 3d 1966 beaumont conversion kit is designed to fit the AMT(lindberg) 66 Chevelle kit. Well, that old kit is a total pile of garbage as far as im concerned so i decided to figure out how to get the 3D parts to fit on the Revell Wagon body instead. The Revell body is a bit wider across the front so i had to slice and dice the fenders and squeeze the rad support a little in order to get the width proper, then narrow the hood a bit(and i have to use the flat hood from the Revell Elcamino kit.
-
Sorry for the late response. They are the ones like on Steve's 64 Bonneville pictured above. That's what I was afraid of. Hard to find. I'd resin copy if I can just find one even.
-
Is there an easy way to find 64 pontiac full wheel covers without having to buy an expensive 60's anual kit? I dont need them to have the spinners in the center, either way is fine
-
absolutely incredible work here! most guys wont pick up on all the scratchbuilding you did on the chassis and rockers. And all the inner structures being so accurate to the real car, trunk braces, etc. just outstanding!!!!!
-
Oh wow, this is a cool project. i missed tuning in at the begining. Just curious what kit this cab is from? monogram 1/24th scale?? and is it the MPC deserter fleetside box 1/25th? if so, the different scales seem to align fairly well?
-
Sill lots of little details to finish. id like to add a Automatic Transmission dipstick tube and maybe a cowl tag. I used a better looking washer bottle and mounted it in the correct location, the kit one was down low in the fenderwell. Made the decals in photoshop.
-
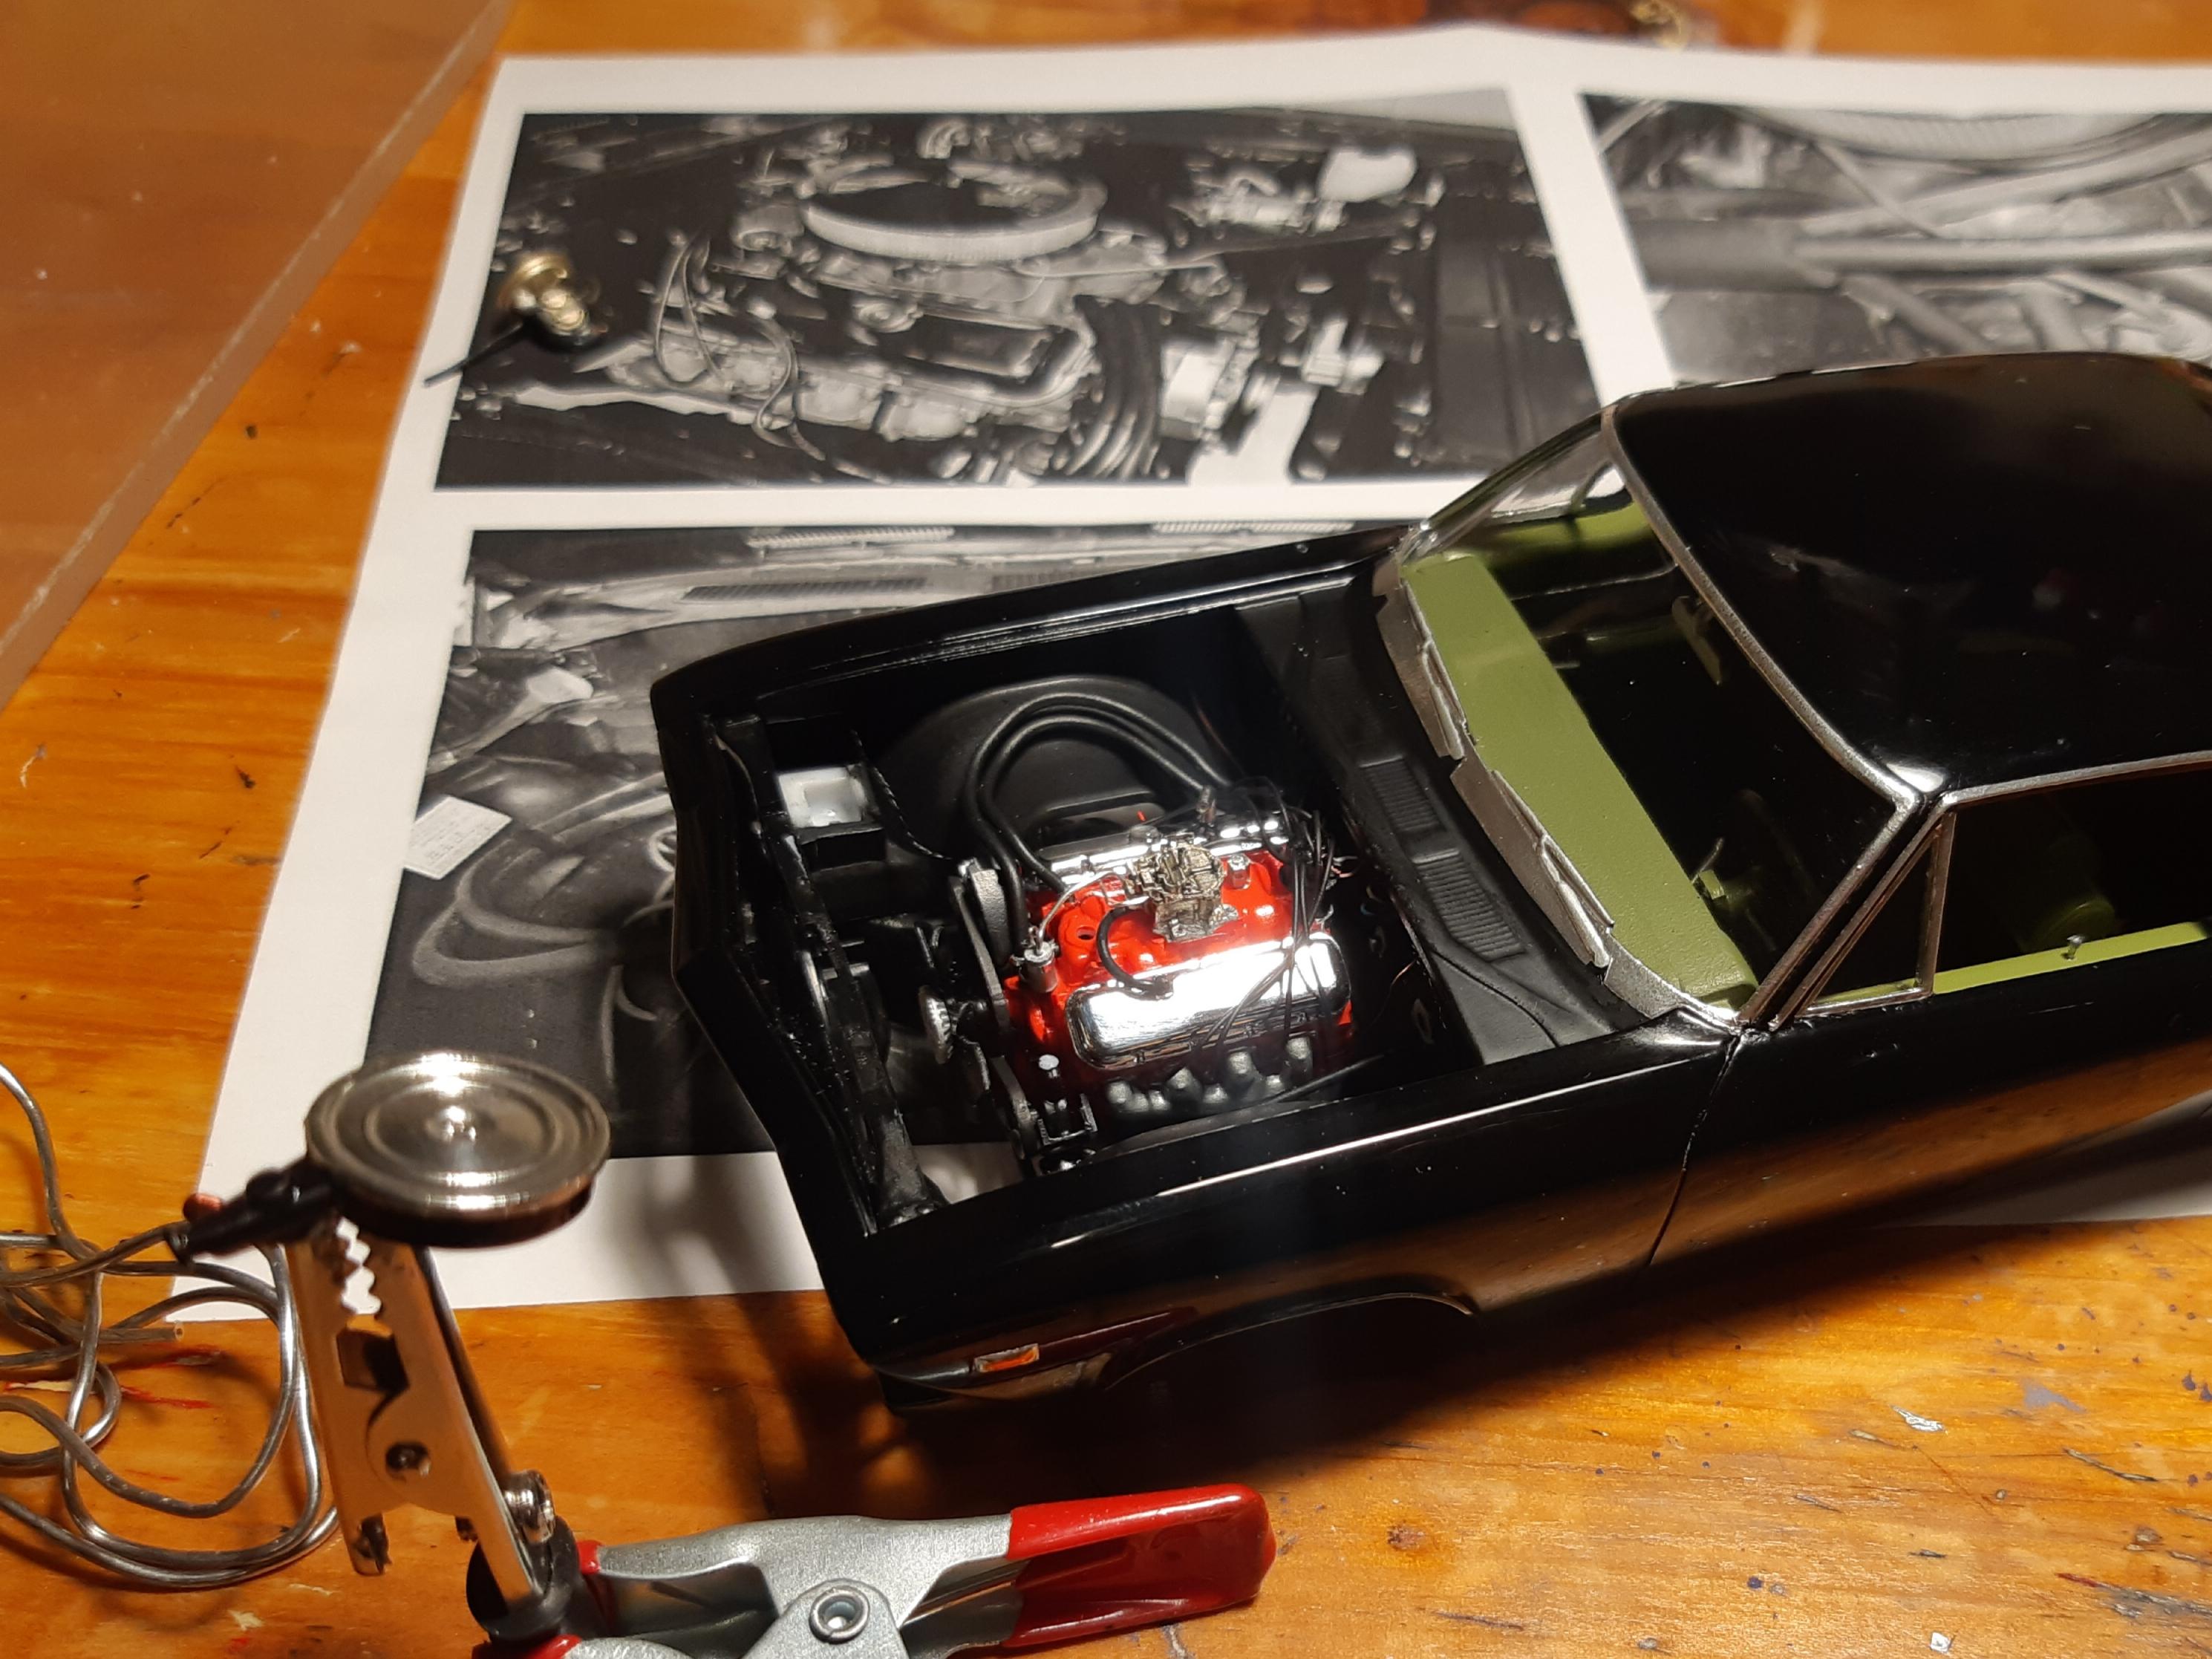
Building a proper 325 HP automatic aircleaner, with proper heat riser ducting. I used a piece of solder and wrapped it with wire then painted it all black to look like corrugated hose. Getting more of the engine wiring and plumbing done here too
-
I just got my blazer kit. So here is my review of this kit. Pros: highly detailed parts Cons: more than 1/2 of the engine parts seem to be oversized to about 1:20th scale, along with the master cyl and engine bay parts, teh Carburetor is the worst, looks like 1/16 scale. Chuck Most is correct with the grill comment, a terrible piece with shallow grill depth. And the whole kit just seems to be a larger scale for some reason(maybe its just me). When i compare the back end to the old MPC fallguy kit, the proportions are bang on, but then the front end and all the components associated with the front seem to be a bigger scale. also, i know the american kit has a smaller decal sheet, but the quality of it is really bad and not crisp either. other revell kits have much nicer cleaner clearer decals, so why not these. I also lost count of the number of injection pin circles on the carpet and wheel tubs, good grief!! I certainly wont feel bad about cutting it up and using some of the detailed parts on an old MPC fallguy body, ohhh the posibilities!
-
Its gettin' there. Foil done and body polished. Black sucks to keep clean!!!
-
Canadian cars seem to have a more basic older style wiper motor, so i made one from scratch. The kit part is on the left.
-
This Revell kit is really nice but there are more than a few inaccurate things and headscratchers. I made my own proper 1969 alternator bracket. Thats a fireball Qjet. I scratchbuilt the fuel filter and line.
-
I was torn on how to detail the 3d printed taillights and trim, i was finding it impossible to BareMetalFoil all the individual chrome strips and then have gaps around the lenses. So i glued in the lenses, then filled the whole thing with one piece of foil and detail painted the lenses with tamiya clear red. Overall i think it looks way cleaner than what could have been. The rest of the 3D printed part is super nice and crisp. making foiling and painting easy. I also detailed the grills with proper shades of grey, silver, chrome and black. that 3D printing on the script is out-a-this-world!!
-
Killer Camaros- Dick Harrell & Malcolm Durham FC's
TheBEAUMONTGURU replied to Wild Child's topic in Drag Racing
Awesome job on both of these. great decal work! -
Build a better: Mongoose Carefree Duster funny car
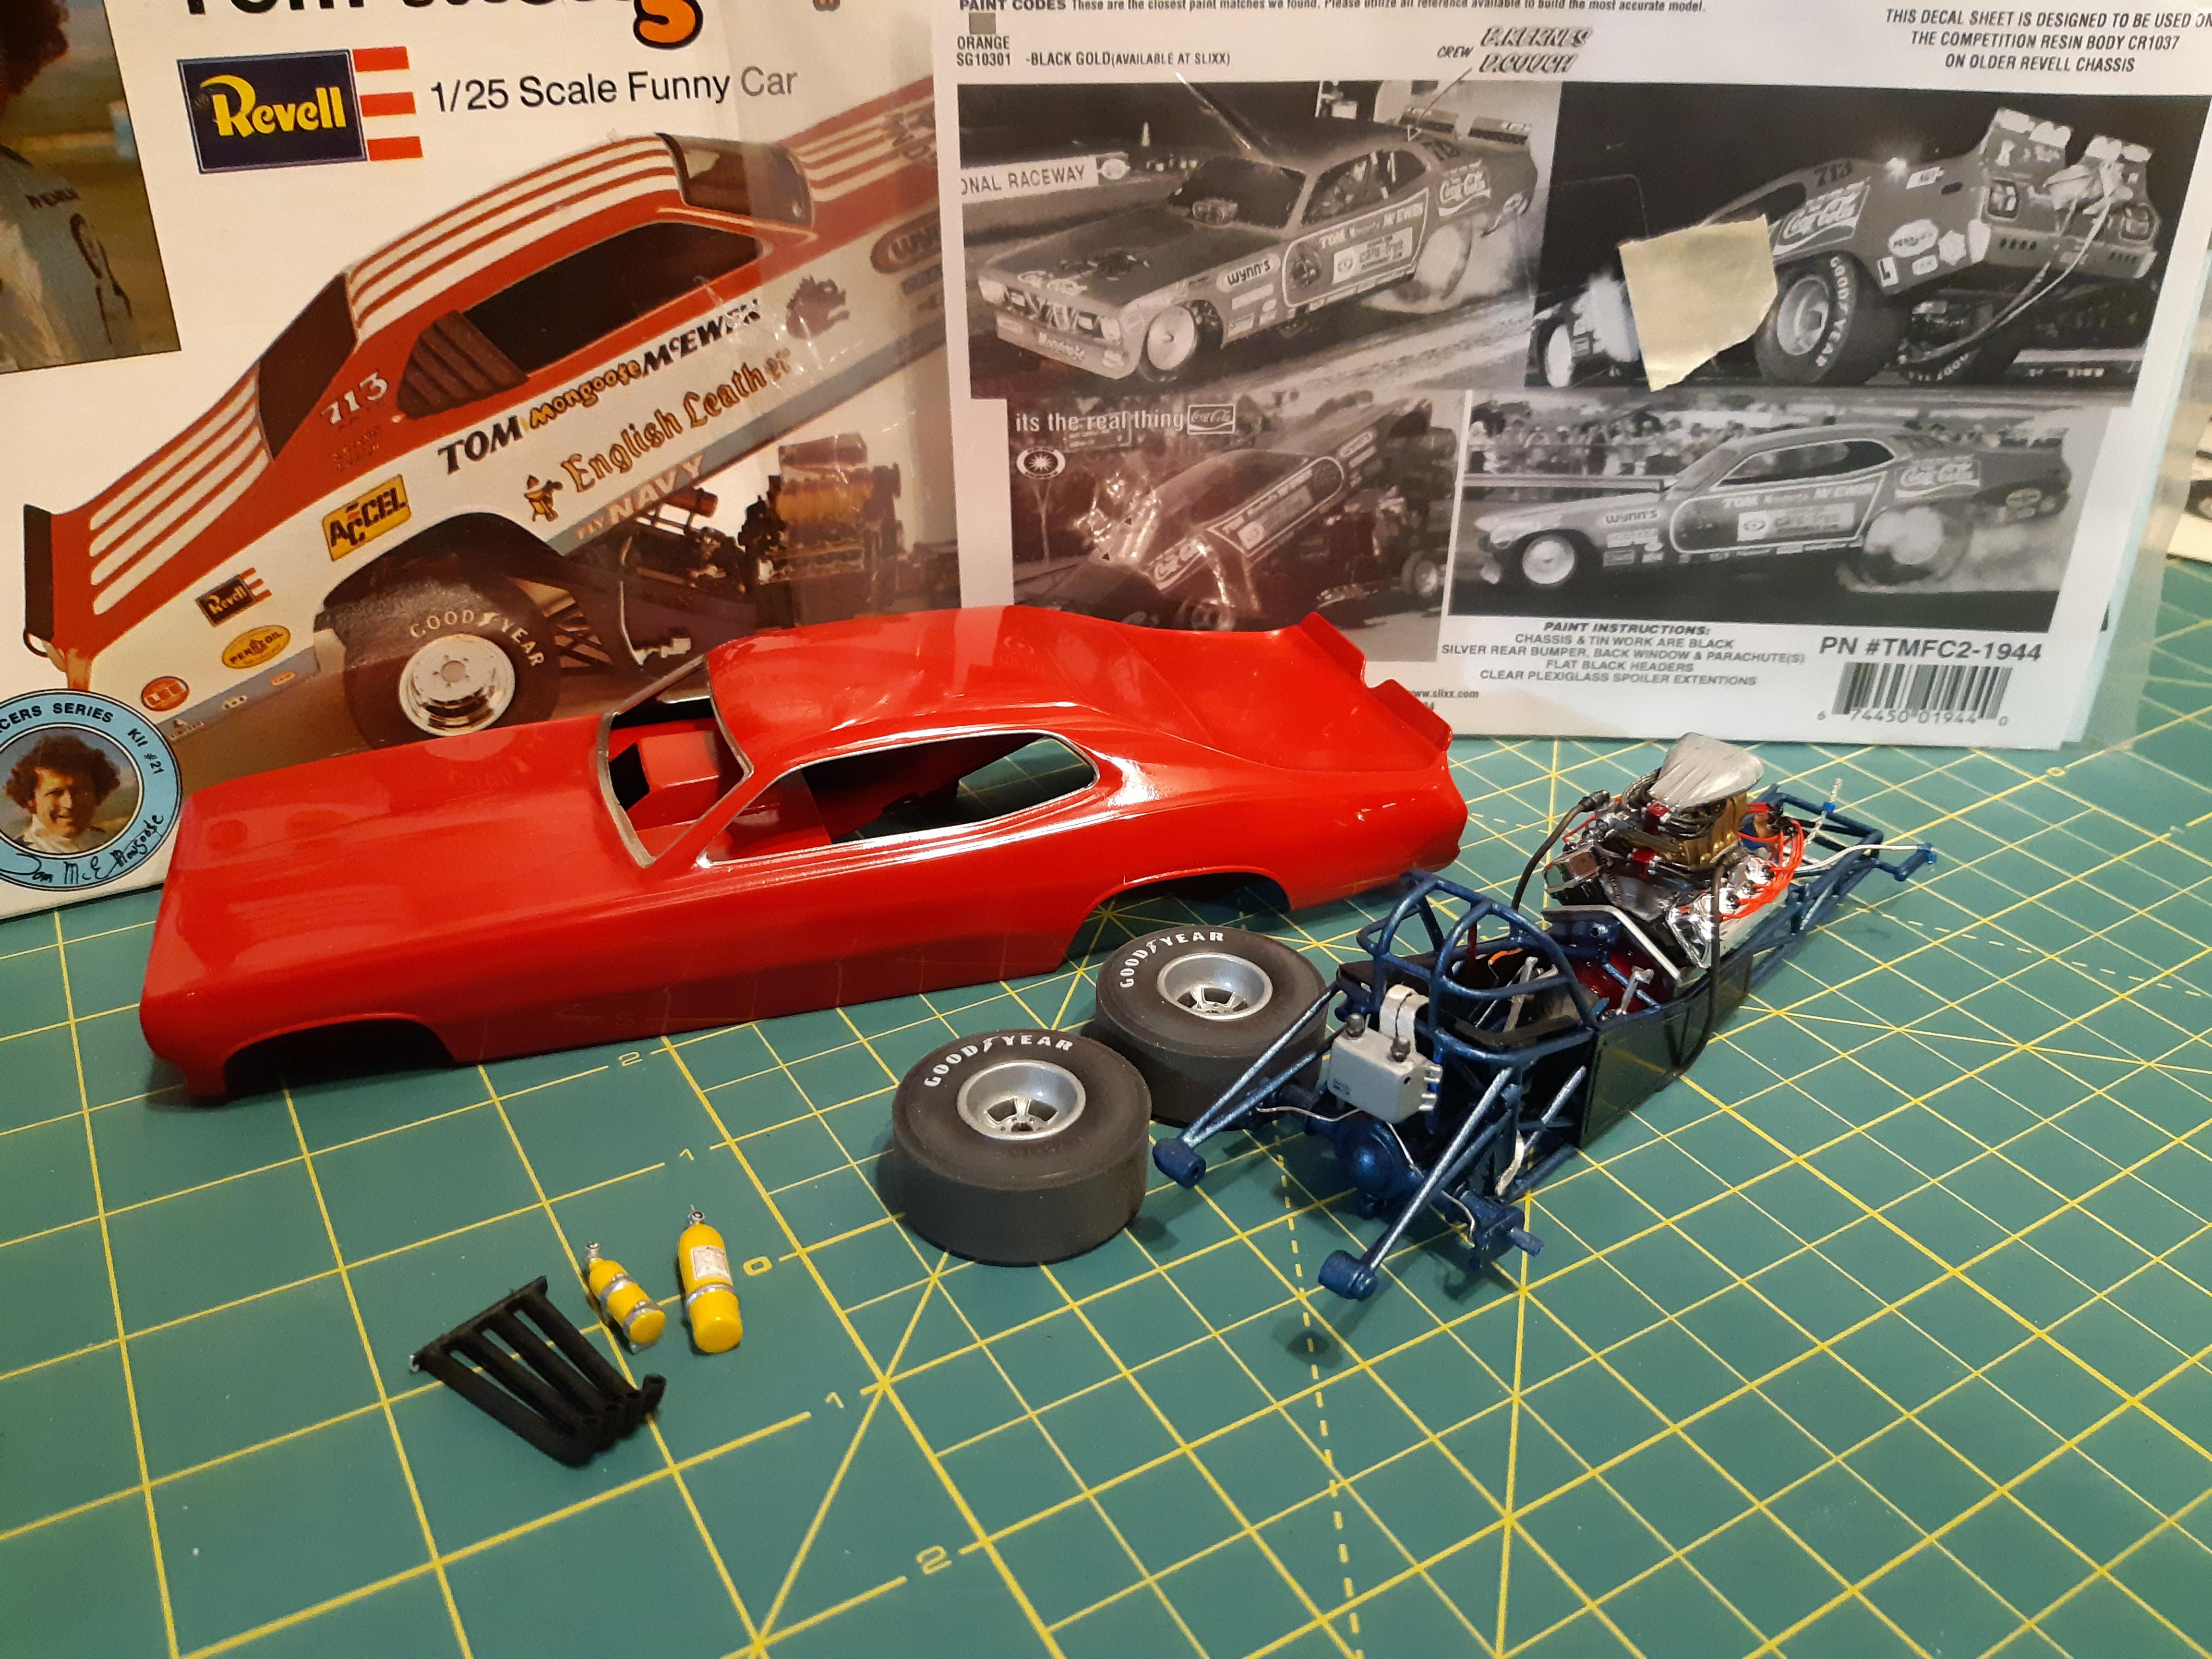
TheBEAUMONTGURU replied to TheBEAUMONTGURU's topic in Drag Racing
Thanks guys. The chassis blue was an old discontinued 30 year old Duplicolor automotive colormatch spraybomb(in the small cans) sorry i cant remember what #. I can see if i still have that can around. I bought a whole lot of them from a hardware store 20 yrs ago for 1 dollar each when they discontinued them. -
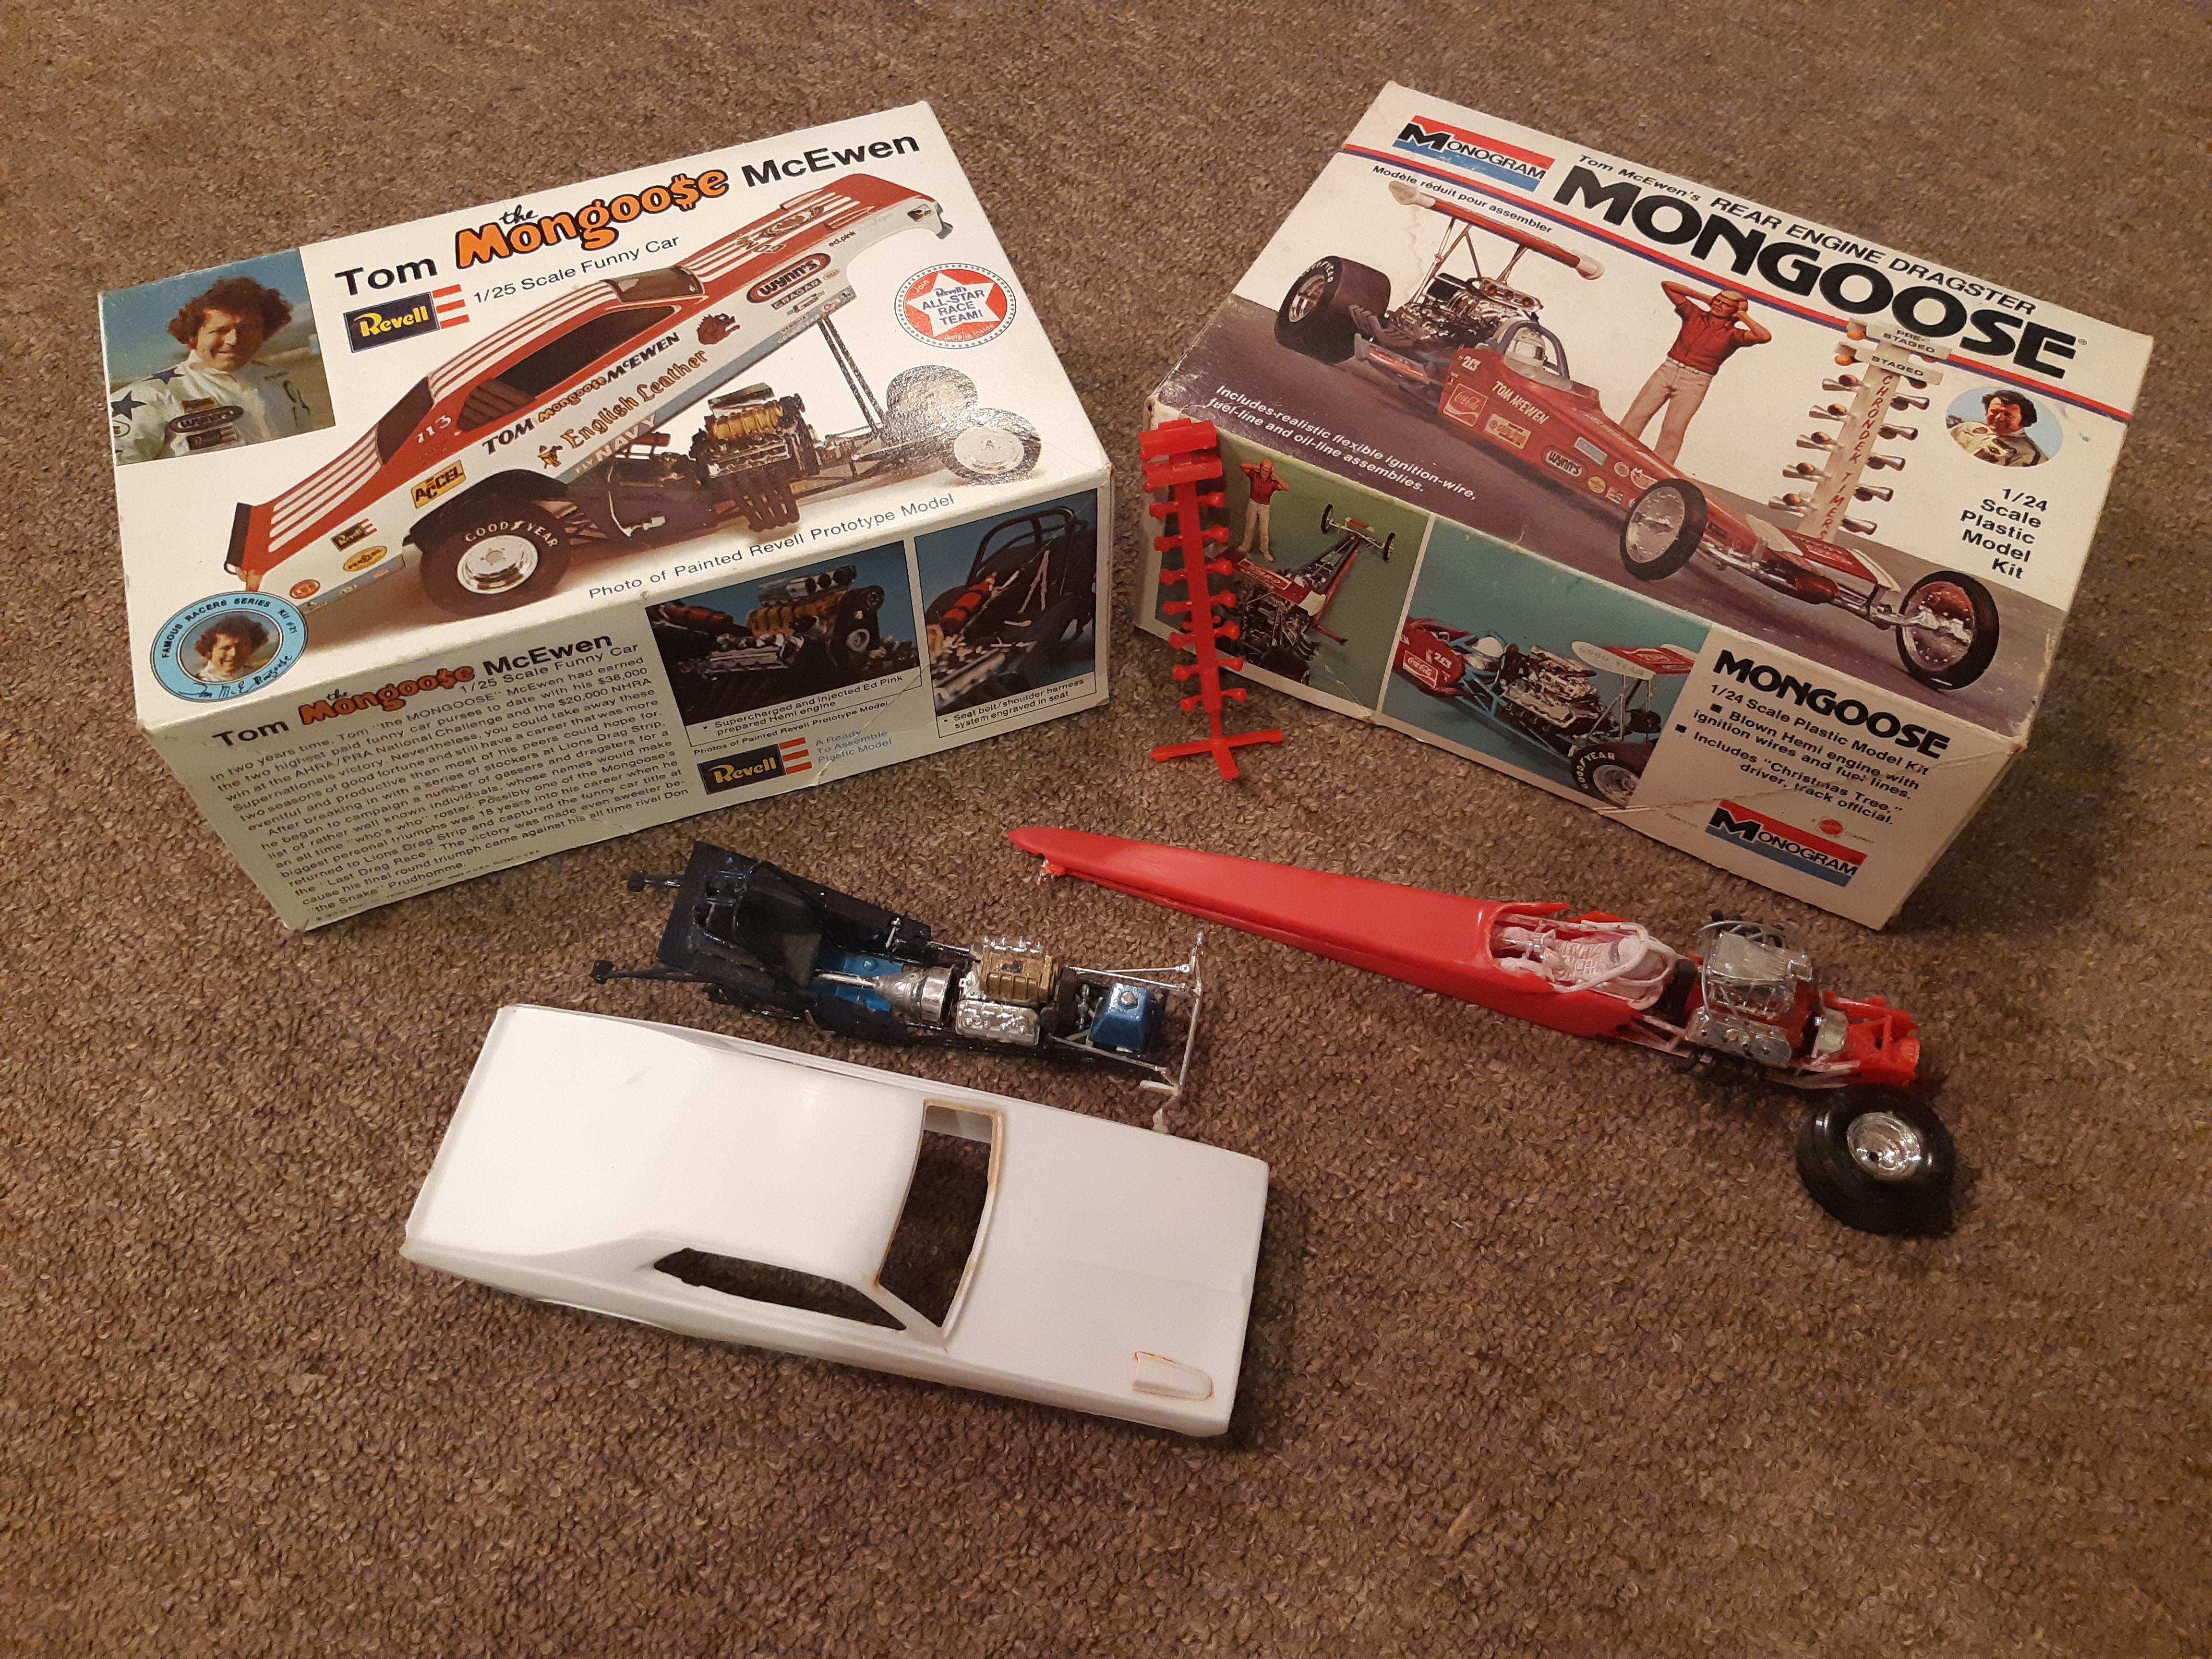
Build a better: Mongoose Carefree Duster funny car
TheBEAUMONTGURU replied to TheBEAUMONTGURU's topic in Drag Racing
These are the only WIP pics i took, total basket case to start with