-
Posts
3,213 -
Joined
-
Last visited
Content Type
Profiles
Forums
Events
Gallery
Everything posted by LennyB
-
Thanks for confirming that Greg. I don't want to use those kit headers but I might also see about doing a head swap as these look ridiculous with the exhaust ports above the spark plugs.
-
True, but they still exists as a company. https://www.jcwhitney.com/ How many times has AMT been bought out over the years. I lost count.
-
I know what you mean. I thought about trying to get rid of that ribbed trim ring but not sure how to go about it. JC Whitney lives again. (actually they are still in business)
-
Jim, I like the look of the wheels. Did you paint right over the chrome?
-
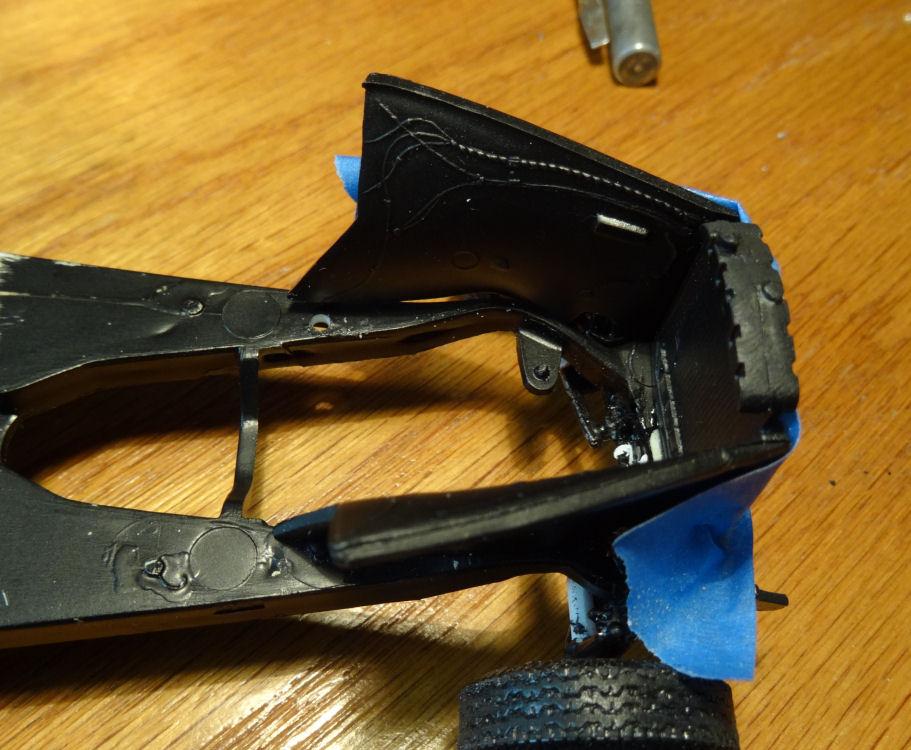
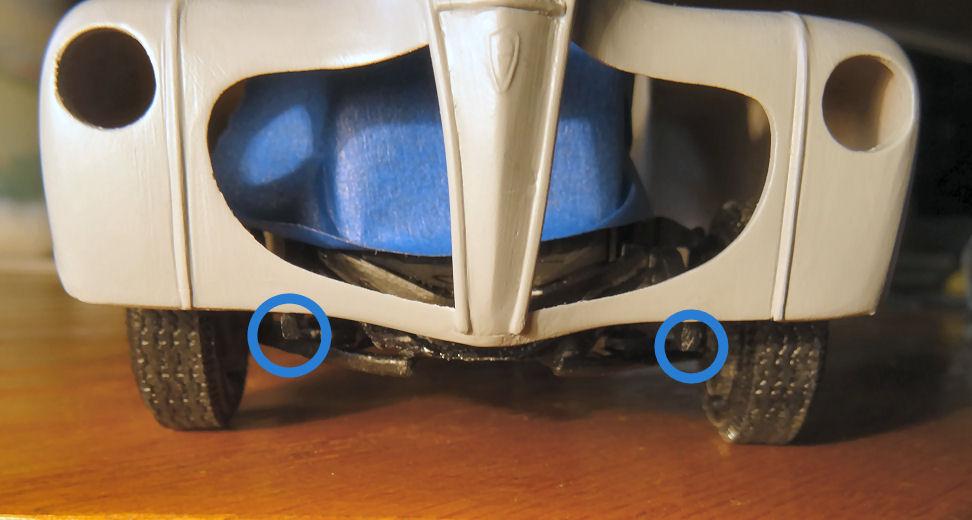
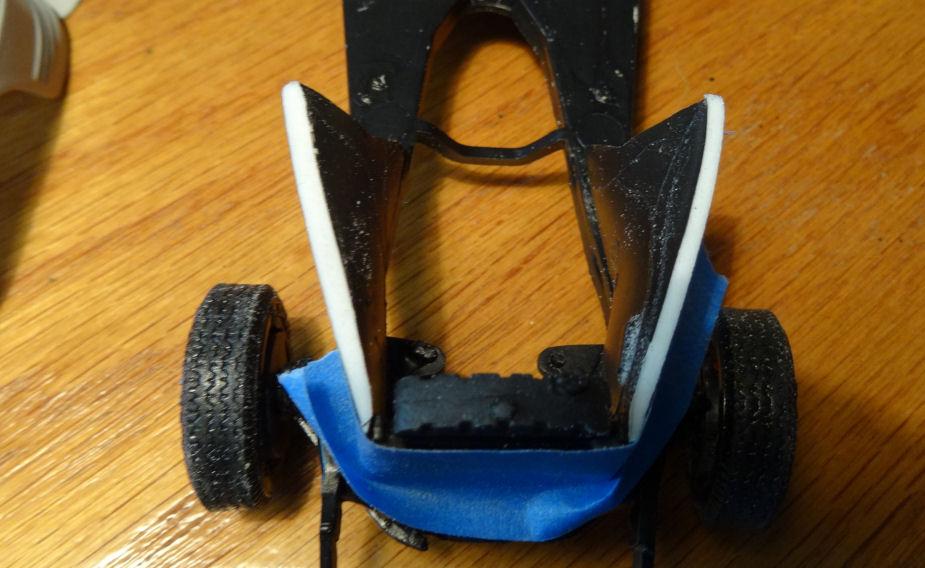
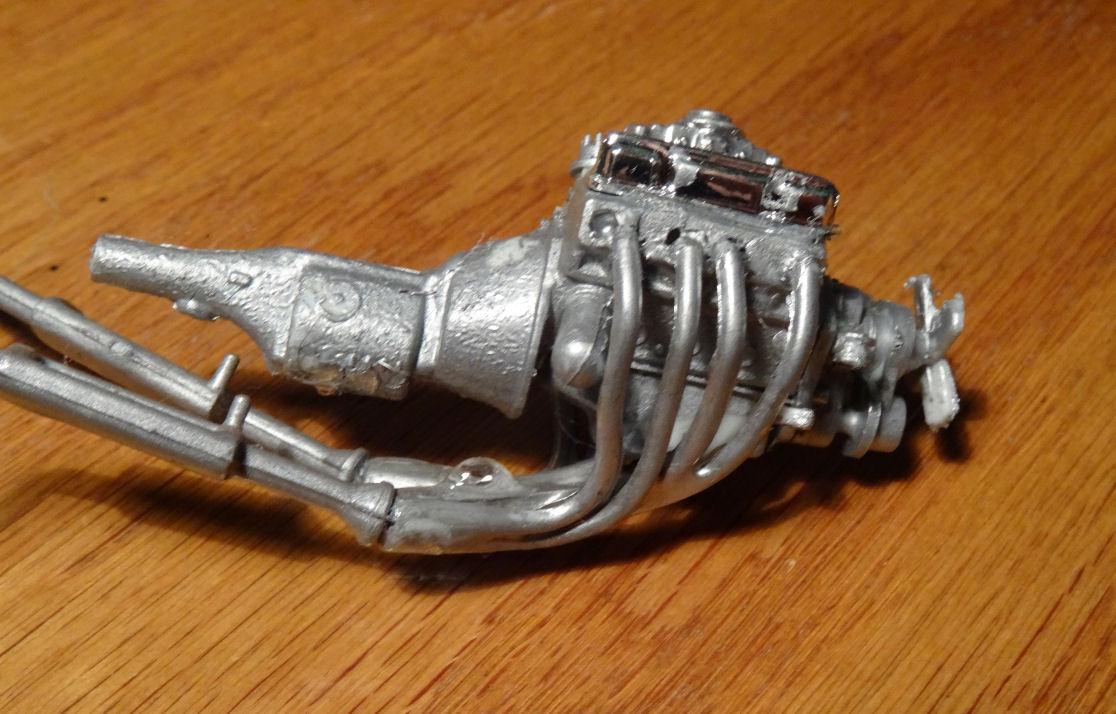
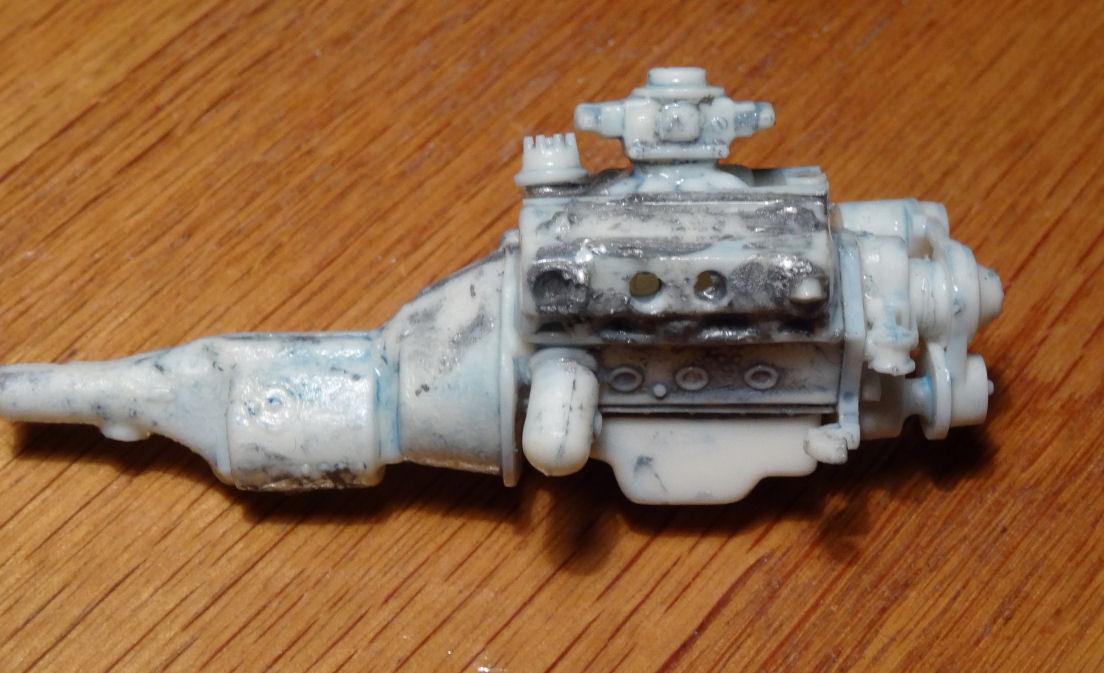
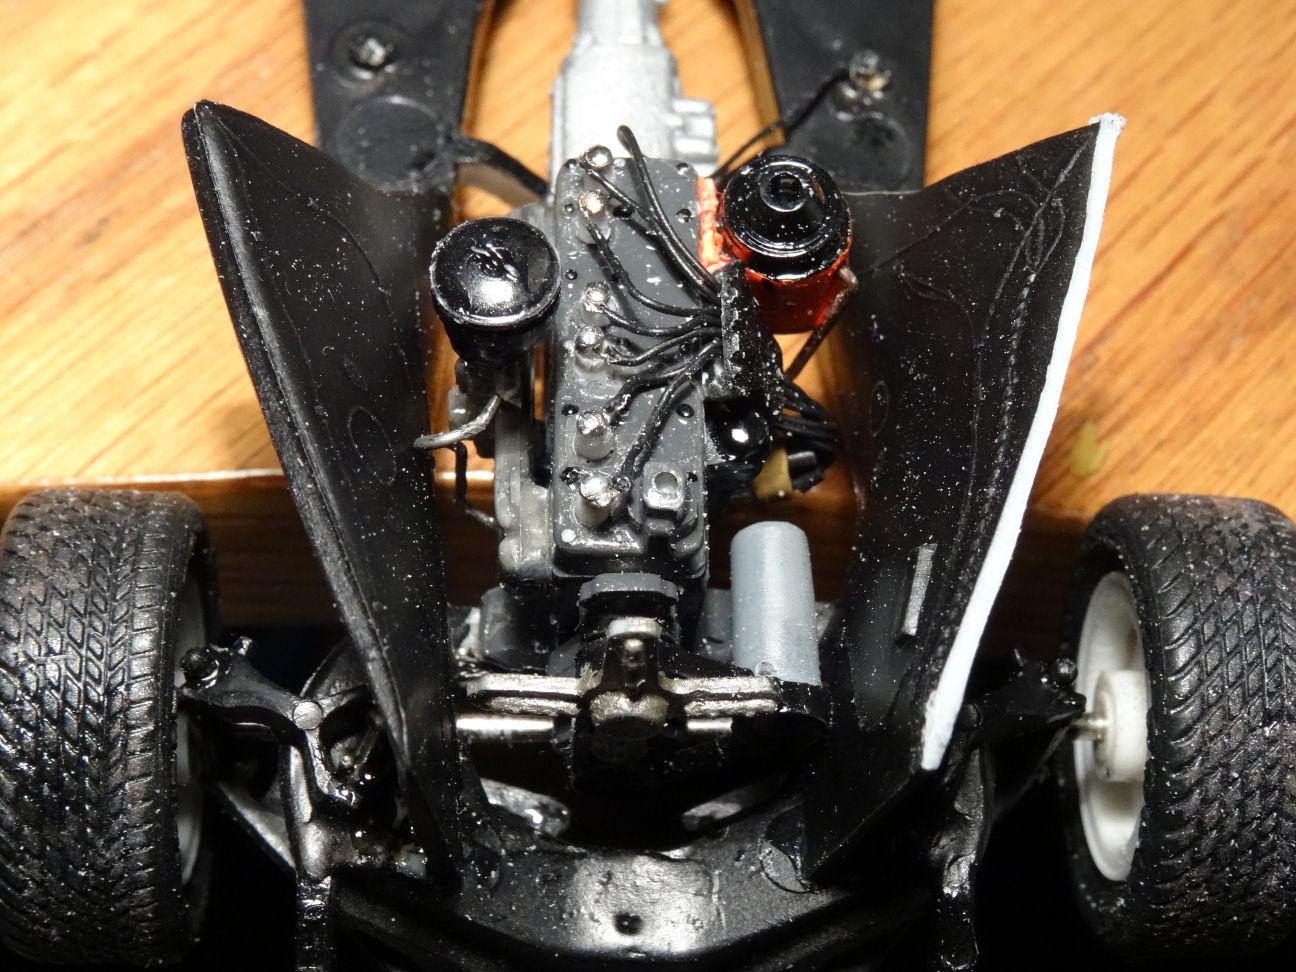
Coupe After having the issue with the inner fenders on the Woody I wanted to see what the story was with the Coupe. I also needed to figure out their placement as I wanted to start on the engine. I has pulled four engines out of the parts bin, two hemis, and needed to see if if one of them fit. I took a different approach to fitting the inner fenders then I did with the Woody as I glued the radiator in place first this time and just held the inner fenders in place with some tape so I could make any needed modification and still remove them to paint. My results this time were different then with the Woody. Both inners sat at the same height but they were both too tall. Just as you had with yours Jim, the nose of the body sat too high. I had eliminated the front bumper brackets on the coupe and filled the cutouts but you can clearly see the stubs sitting below the front of the body. Did some trimming of the top of the inner fenders. Then they will go off to paint. And now the bumper brackets are tucked away where they belong. I can't say if the inconsistencies differ with the age of the kit. I have some older and some newer bits and have problems with both. So like a lot of other aspects of this kit you have to adjust and check everything. And if you were wondering about that engine. Three of the four engines I picked didn't fit and the fourth one the dog got a hold of, so that's not going to run ever again. And it was a Johan, and I don't mean Bach. So it looks like I have to go with the original kit engine. They made it small because it's all we have room for. I am going to try and salvage this glue bomb and see if it turns over. Gave it a bath in Easy-Off and it's looking better already. Are you trying to tell me that thing on the bottom is an oil filter? Gotta love where they put the exhaust ports. Or did the last builder put the heads on upside down. Think I need to start a different project??
-
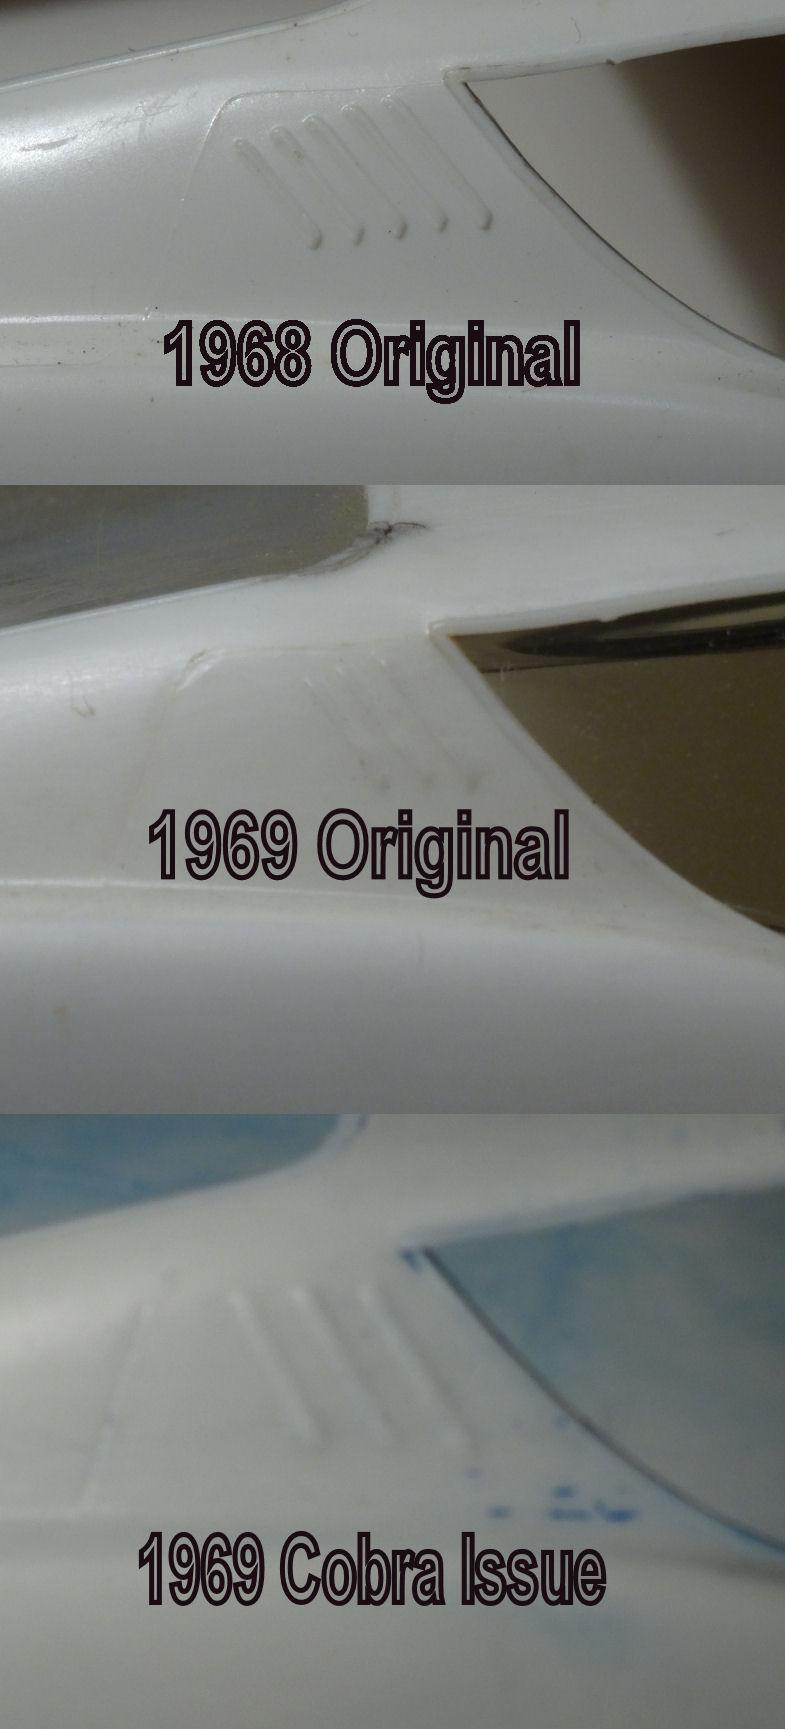
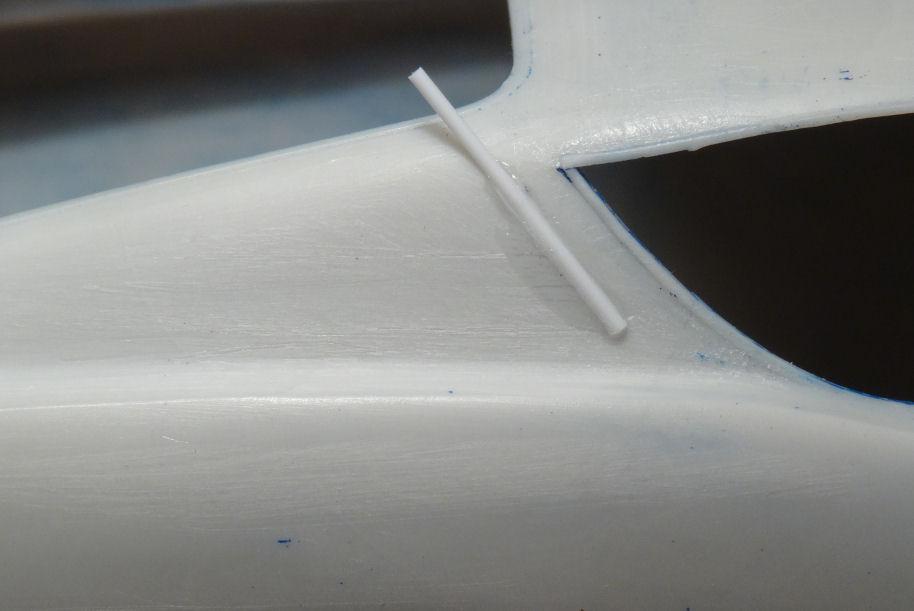
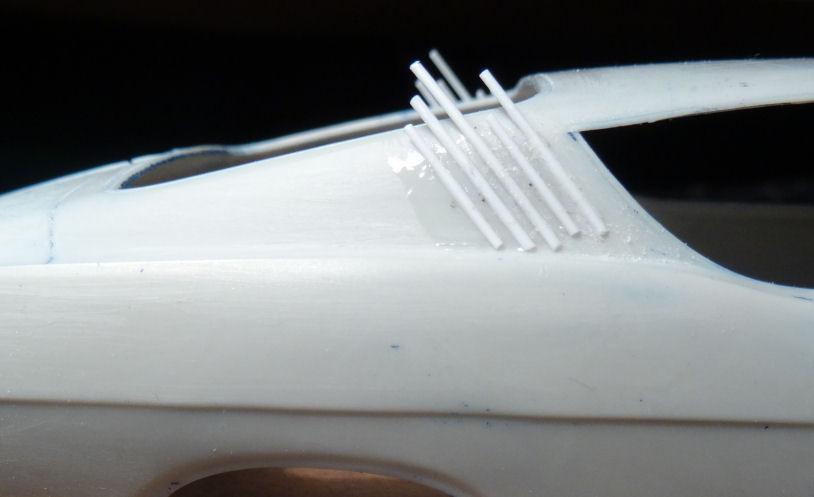
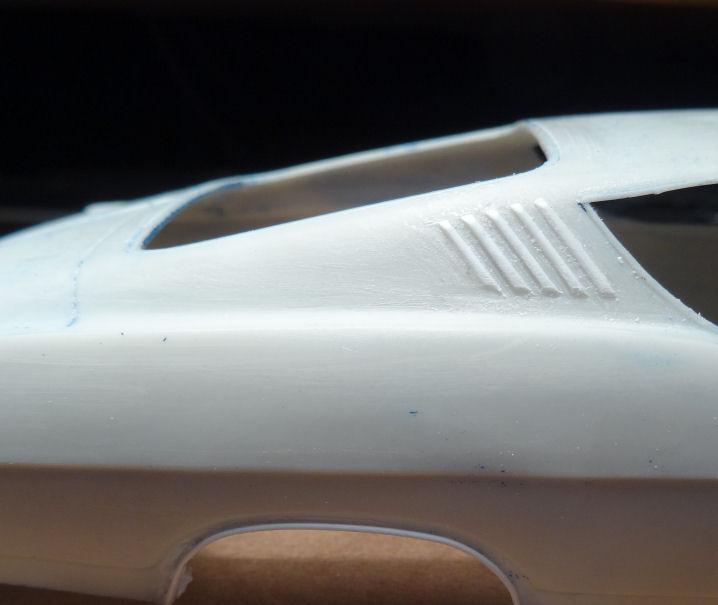
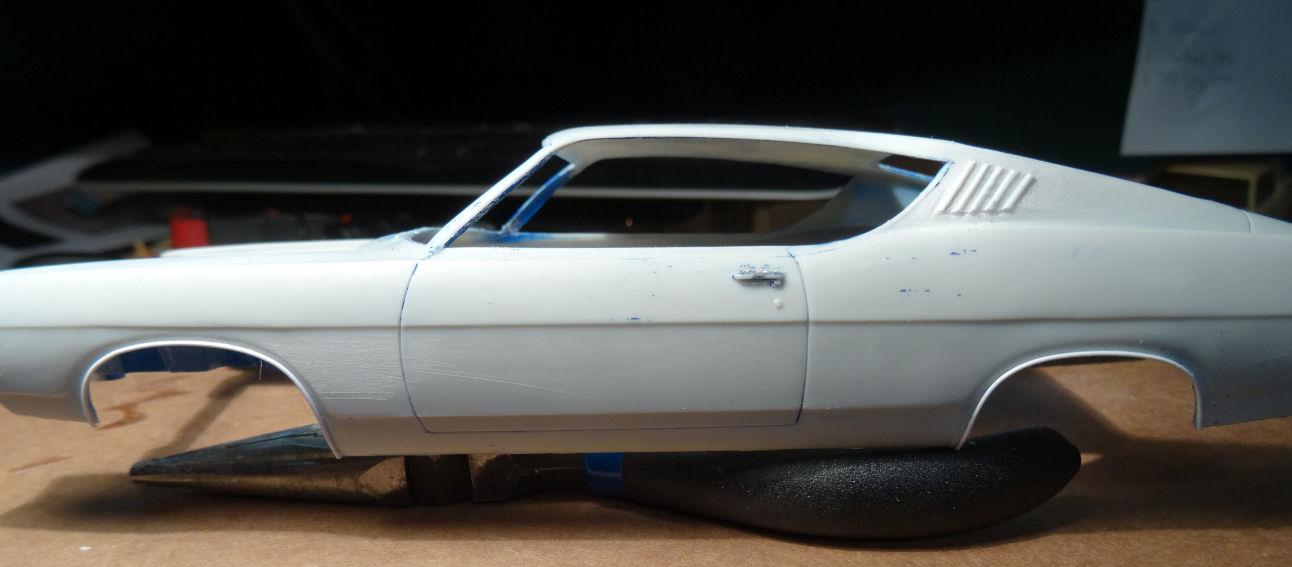
Starting to look more like a 68 then a 69. Working on the hash marks on the C pillars. AMT was close when they did the 68 but it went down hill from there. In 1968 the Torino had five thin hash marks on the C pillar. In 69 they went with three wider hash marks. When AMT did the 69 they simply removed two of the original hash marks so we just had three thins ones. When they released the Cobra they made them wider but they were still not correct and angled wrong. So we have to remove all the hash marks as well as the mold line right above them. Starting with some half round .030" I laid out the first hash mark. It took a period of several days to get them all done as I allowed each one to set before laying down the next one, so I wouldn't disturb the previous one. I spaced them with the edge of a file as I went along. I didn't try to cut them to size, just get them laid out first and went back to trim them later. Still need a bit of cleaning up but that will have to wait until the cement fully cures. Next moved on the the missing wheel moldings. A piece of .025" round styrene will do the trick. That's as far as I've gotten for now. May not seem like much but it's been a week of gluing and waiting, gluing and waiting. On to the side molding next time around. Cheers.
-
Jim, after having the issue with my Woody I was working on the Coupe today and found a different problem with that one. As you have here I found it made the nose sit too high, elevated off the bumper brackets. I did some trimming of the inner fenders to lower everything. But as you mention you're going to have to tweak each kit to make things fit. I'll have pics up later, now it's time to cook some dinner.?
-
Greg, if the firewall also attached to the inner fenders that would probably be the way to go. But the only stability these two inner fenders have is the radiator up front. It's really a poor design.
-
Looks fantastic Dennis, came out great. Speaking of grew up with. I still remember sitting in my parents 1966 Fury wagon where you could turn on the four way flashers and set the turn signals to one side or the other and step on the brakes. By doing so you could listen to the radio without having a key in the ignition. Guess I was lucky I never killed the battery.?
-
The Woody Making slow progress on the Woody and ran into a minor issue which I thought was worth pointing out. I installed the inner fenders and test fit the body. Placement of those pieces is rather vague and I found that the drivers side sat taller then the passenger and raised the body up off the chassis. Needed to shave just that one side a bit which left a dusting of snow all over everything. Unfortunately they were already painted and I will need to do some touch up after I clean up the snow. I think part of my issue might be the strips I added to help center the hood. But it would then mean there will be a gap at the top of the passenger side inner fender. Just putting it out there as something you guys might want to check. Haven't mocked up the coupe yet as I still need to find an engine.
-
Thanks Donald, I have a hard time getting my head wrapped around the fact it's an "old kit" Seems like it was just issued yesterday?
-
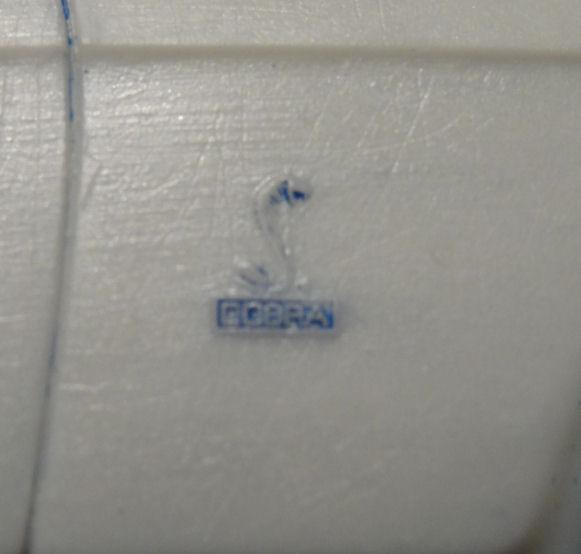
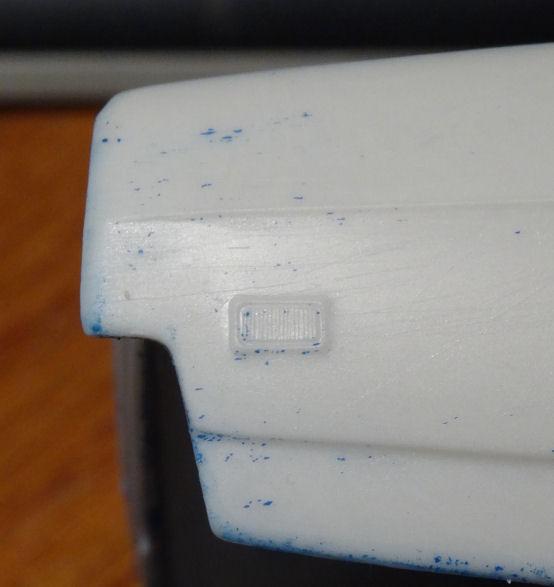
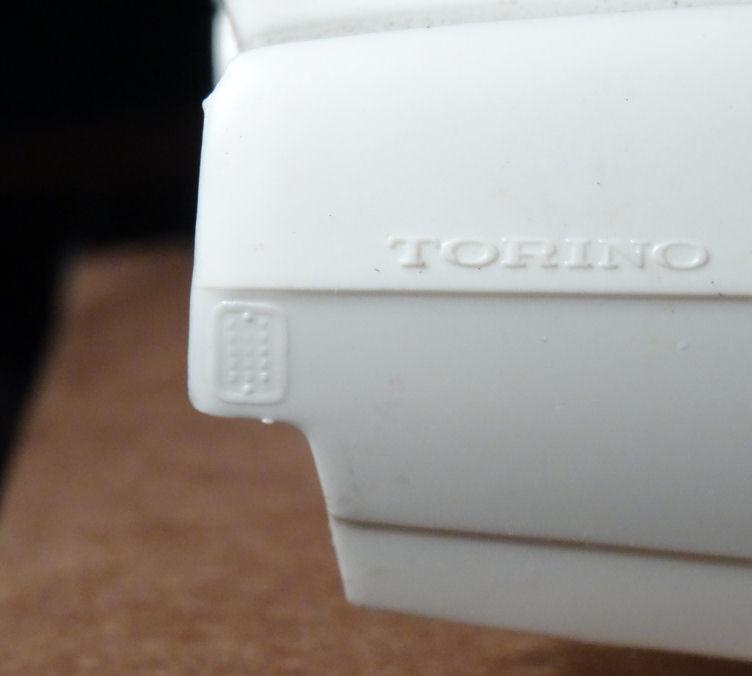
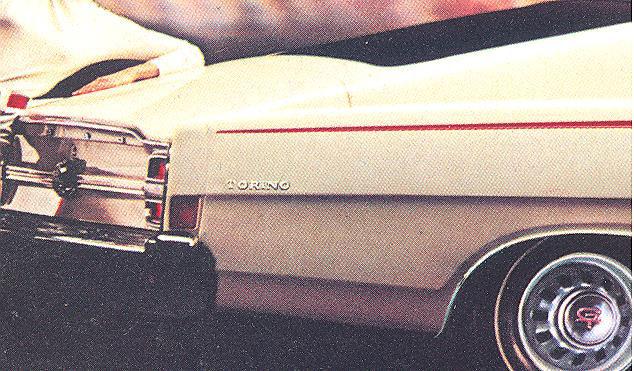
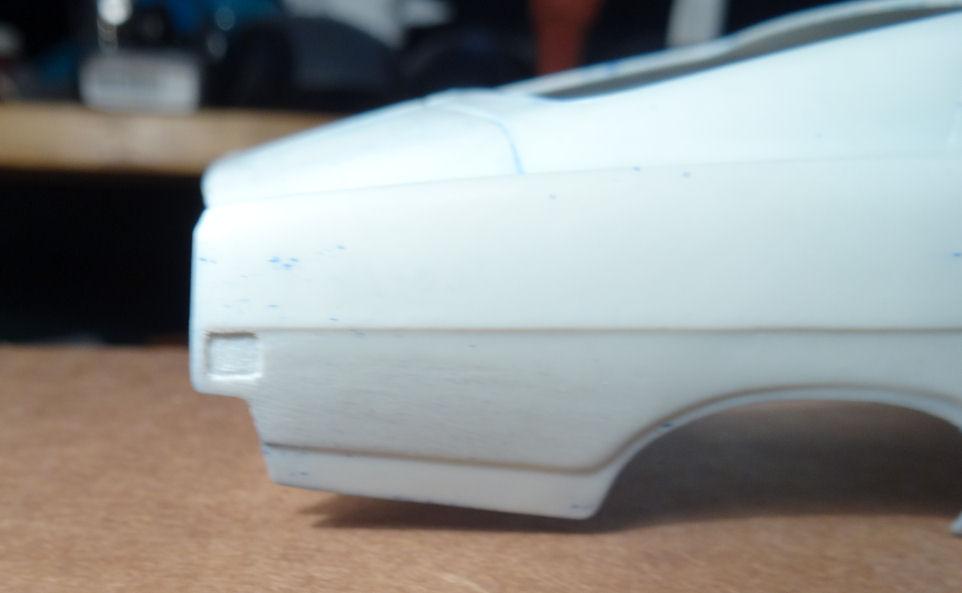
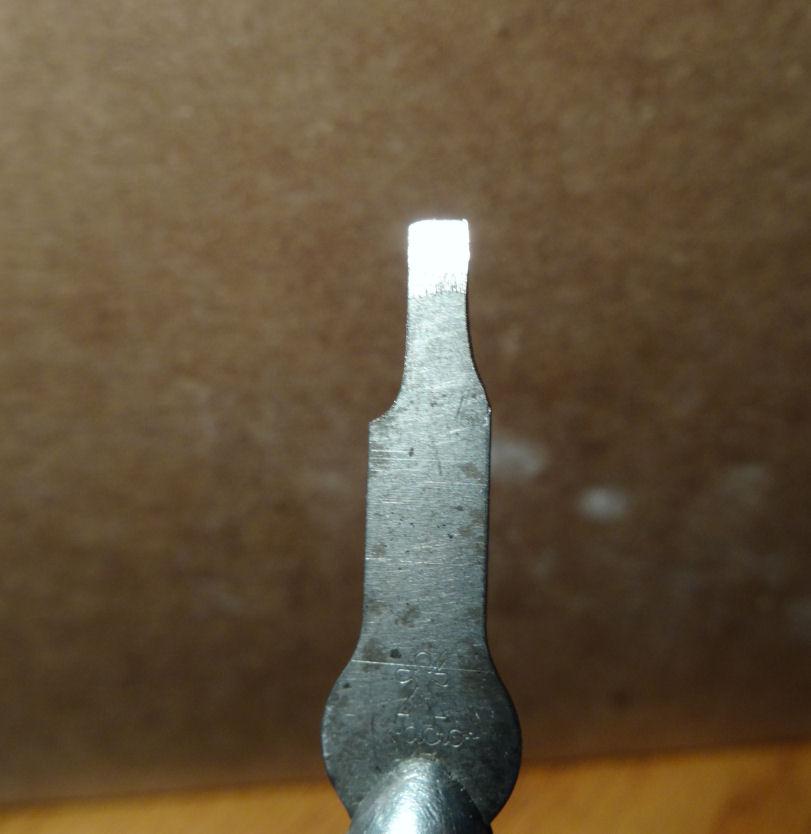
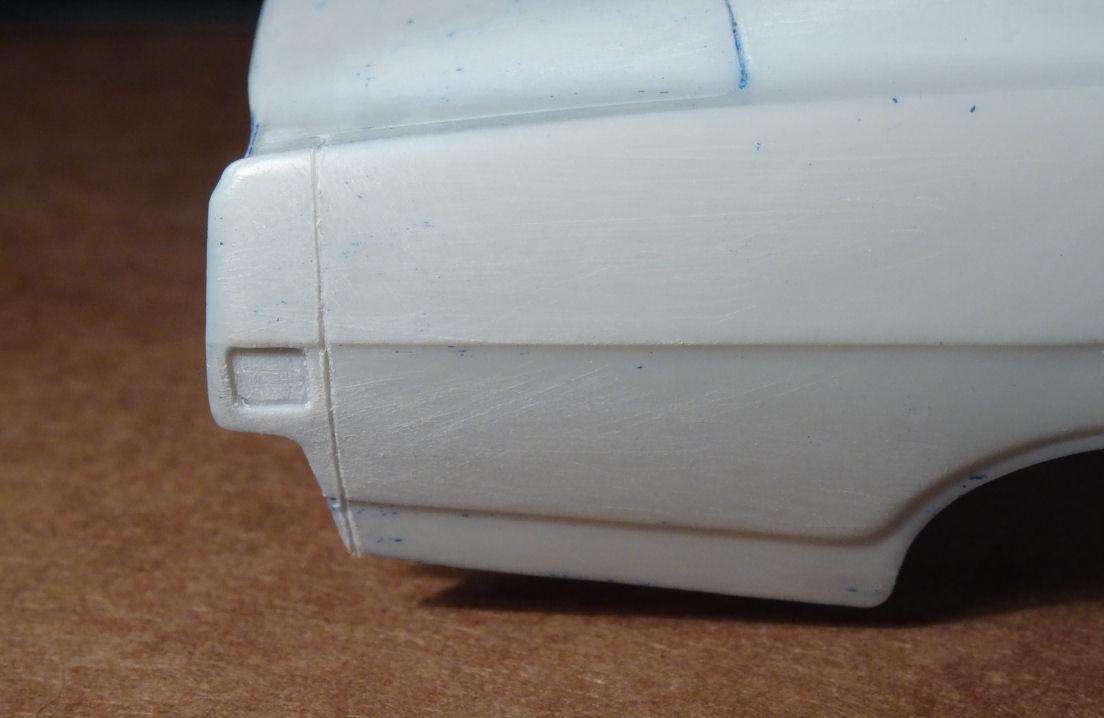
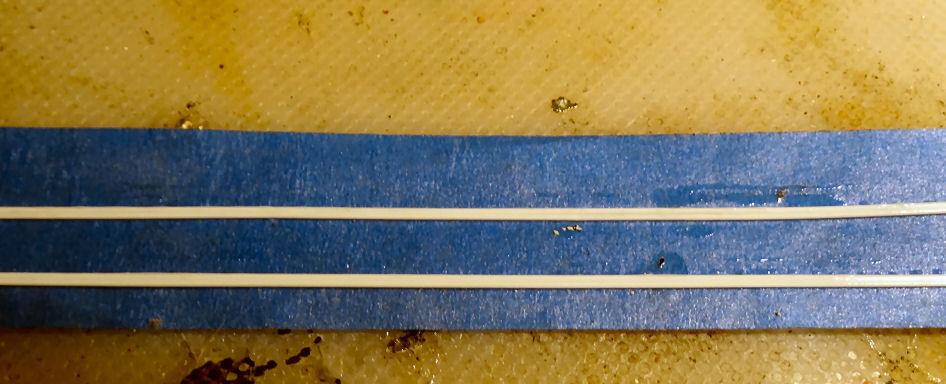
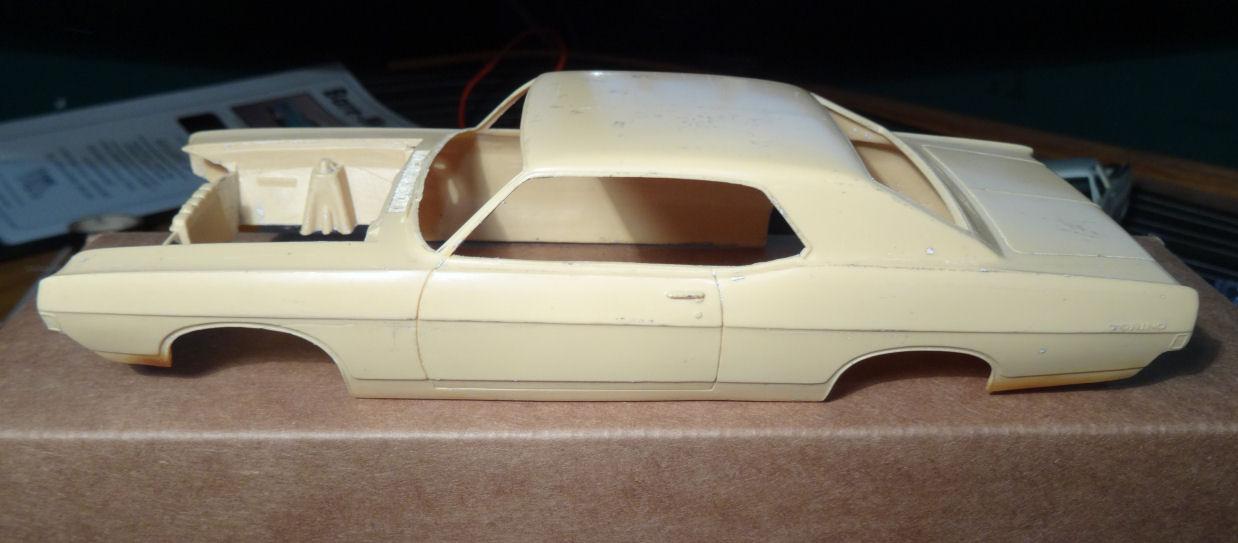
Well, despite the fact we have this "Save the Cobras" campaign going on I'm afraid that one of the first things we need to do to turn this body into a Fairlane is remove the Cobra emblem. ? A bit of sanding will take care of that. Next issue is the rear marker light. The 1969 Fairlane/Torino/Cobra (F/T/C) has an illuminated marker light on the rear quarter panel. This was the first year for a lighted marker. In 1968 the quarter was graced with a red reflector which AMT did a terrible job recreating. This is how the real thing looks. It's actually square and recessed into the quarter. So I sanded off the marker and carved out a new one. Basically took an old X-Acto blade and ground it to width and used it to carve the opening. To finish the quarter panel off I needed to scribe a fine parting line as the end of the quarter had a cap on it surrounding the taillight. Not sure if this is going to stand up to a coat of paint but here goes. Haven't decided if I'm going to try and make a small reflector or simply back it with BMF and paint over it. Next I want to work on the side molding. On the Fairlane the molding runs the full length of the car right down the center body line. It has a red stripe down the middle. I thought of making the molding with two half round .025" styrene rods but no-one seems to make that size. I don't know if this will work but I took two (4 in total) .025" round stock and laid them out side by side on some masking tape and ran a bead of cement down the middle. I'm going to let this dry for a day or two and then sand the top side flat. Hopefully when I turn it over it will bear some resemblance to a molding I want. We shall see...
-
Just wanted to followup. I was able to strip the body with a soak in brake fluid will no ill effects. Odd thing about it though is the paint didn't dissolve as it normally would on styrene. It got brittle and I was able to peel it off. Not sure if this is a chemical reaction of the paint and resin or simply the fact that you can't get good old brake fluid anymore. It's all synthetic and doesn't work as well as the old stuff.
-
Greg. the coil goes in the center of the firewall. It also get it's voltage direct from the ignition switch behind it. Sort of an early security system as you couldn't jump start the car from under the hood.
-
Ken, sounds like a PETA Campaign
-
Yeah, I once put a drill through a finger, twisted the nerves all up. It hasn't felt the same since.? And this is what I was trying to replicate.
-
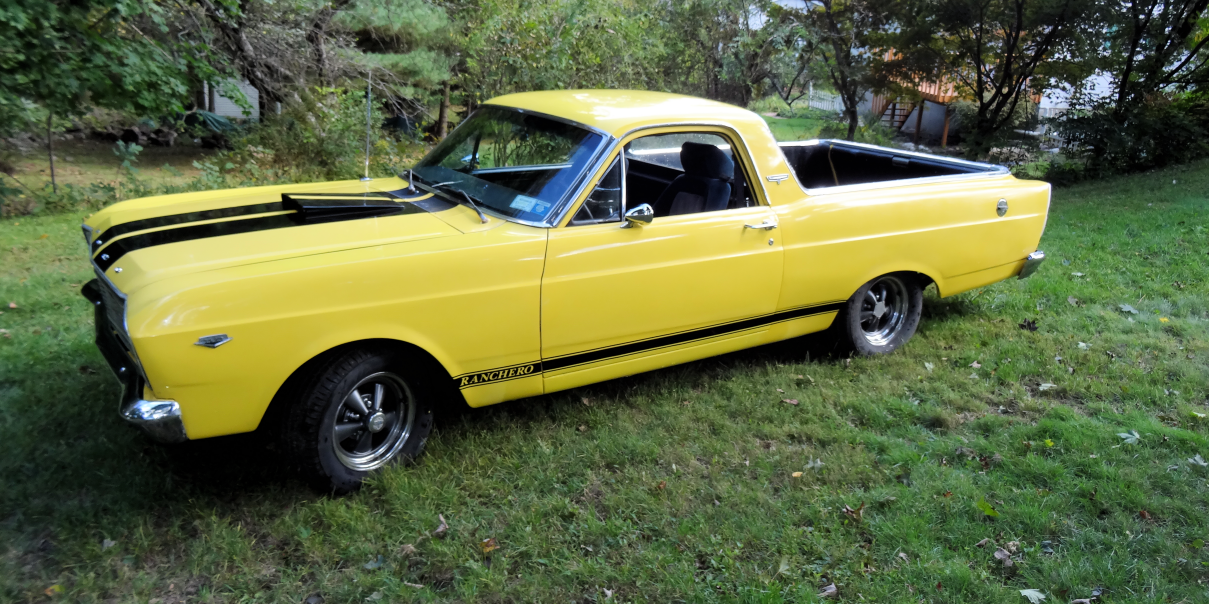
Jim Shouldn't you have that hand elevated with an ice pack on it????? Anyhow, would you settle for a Ranchero? Totally forgot about this one. Probably started about 15 years ago to replicate a full size one I was restoring. Back half is AMT 1966 Fairlane newer issue and nose is AMT late 60's Falcon promo. On the 1:1 vehicle the Ranchero was a Falcon in 1966 and a Fairlane in 1967. All they did was swap the nose. Rest of the vehicle is essentially the same except for some annual upgrades.
-
Carl, we have lots of options. A:Modified Stocker chassis that AMT already removed the exhaust. But it still has the promo style rear axle that I don't care for. B: Chassis I started modifying some 30 years ago but never finished. Still has tailpipes and intermediate pipes and some axle left to be eradicated. C: Chassis from MPC 1970 Cyclone that I modified many moons ago and includes brass rear springs and shackles. But I built this for a 1969 Cyclone I was building out of a 69 Torino modified stocker kit and never finished. Might just keep those two together. D: Also have the chassis from an MPC 1971 Cougar in the parts box which I could graft the rear section onto one of the Torino chassis. But as the gas tank only holds 16 gallons we would be loosing out on our cruising range, so maybe that's not a good idea. WDYT?
-
Ouch, 'nuf said
-
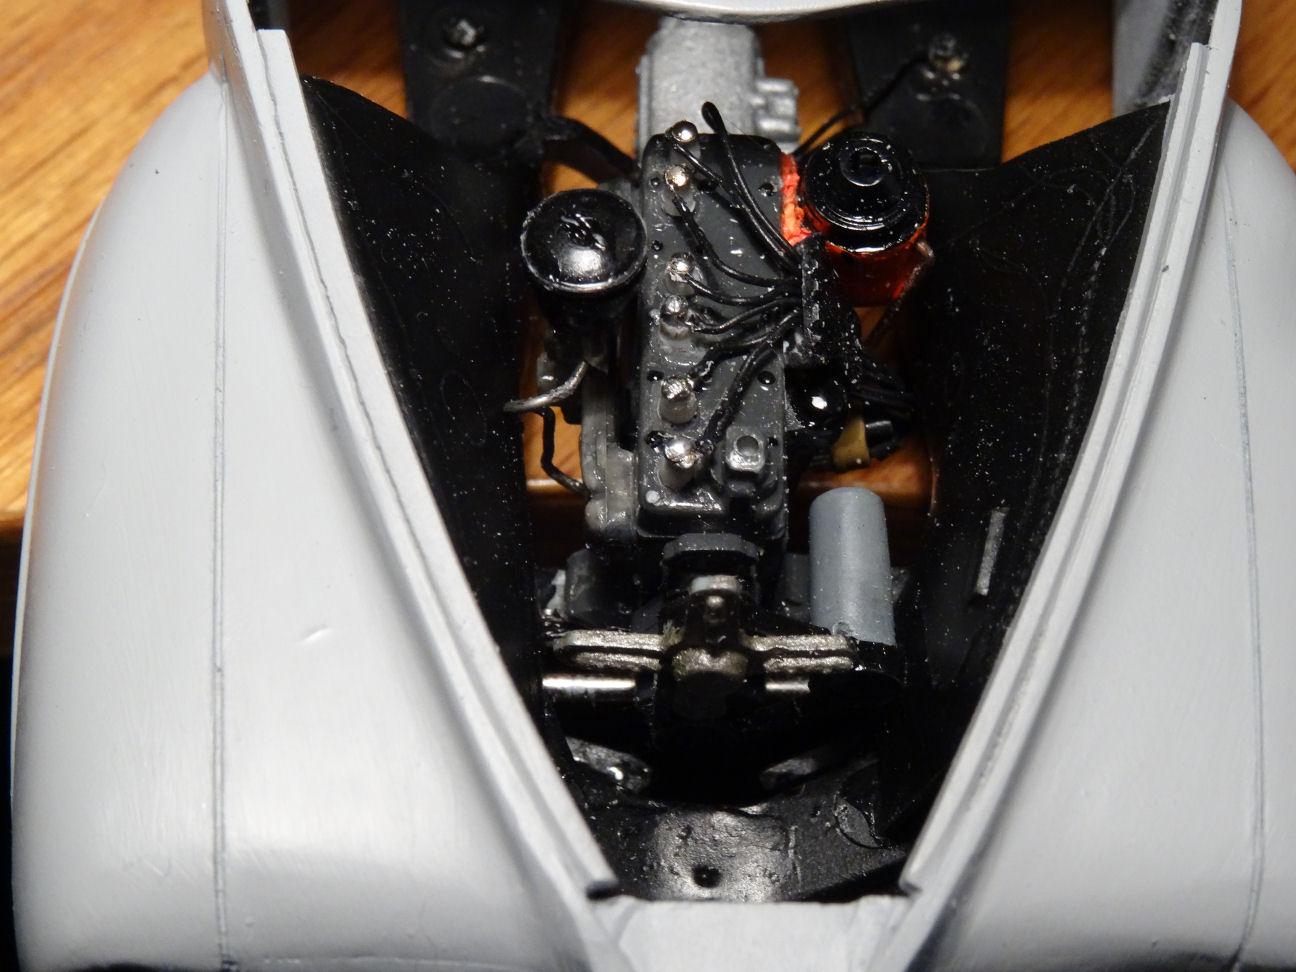
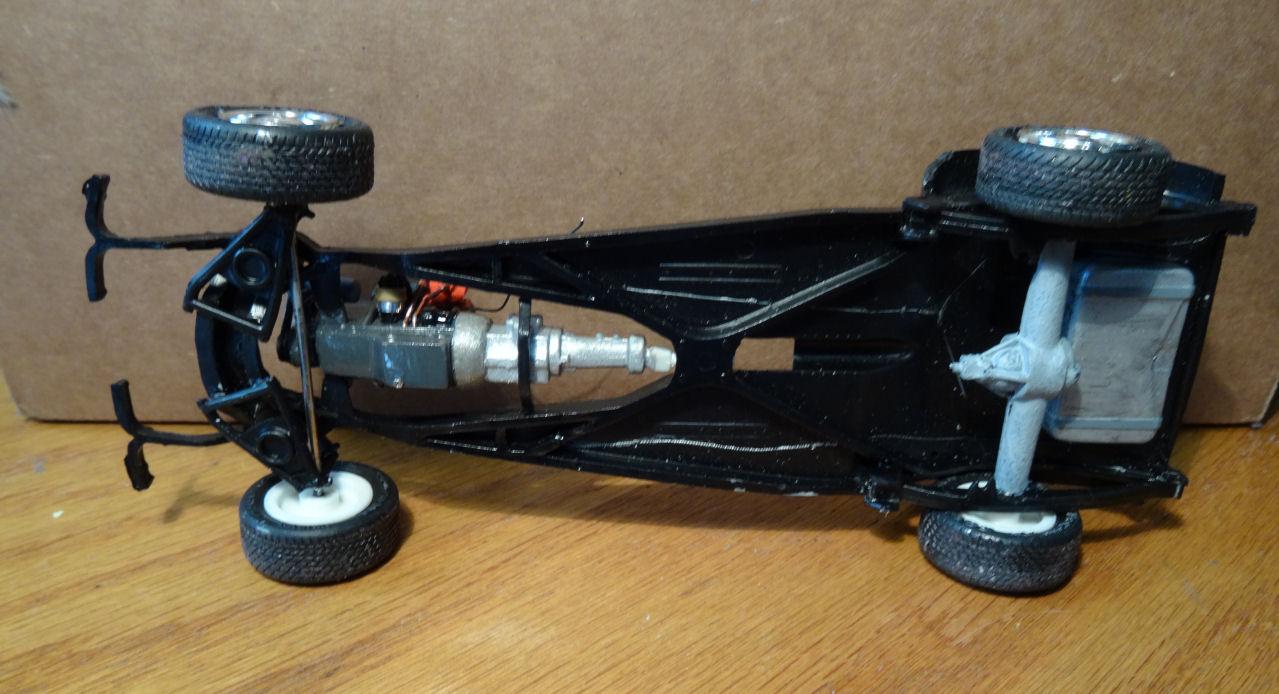
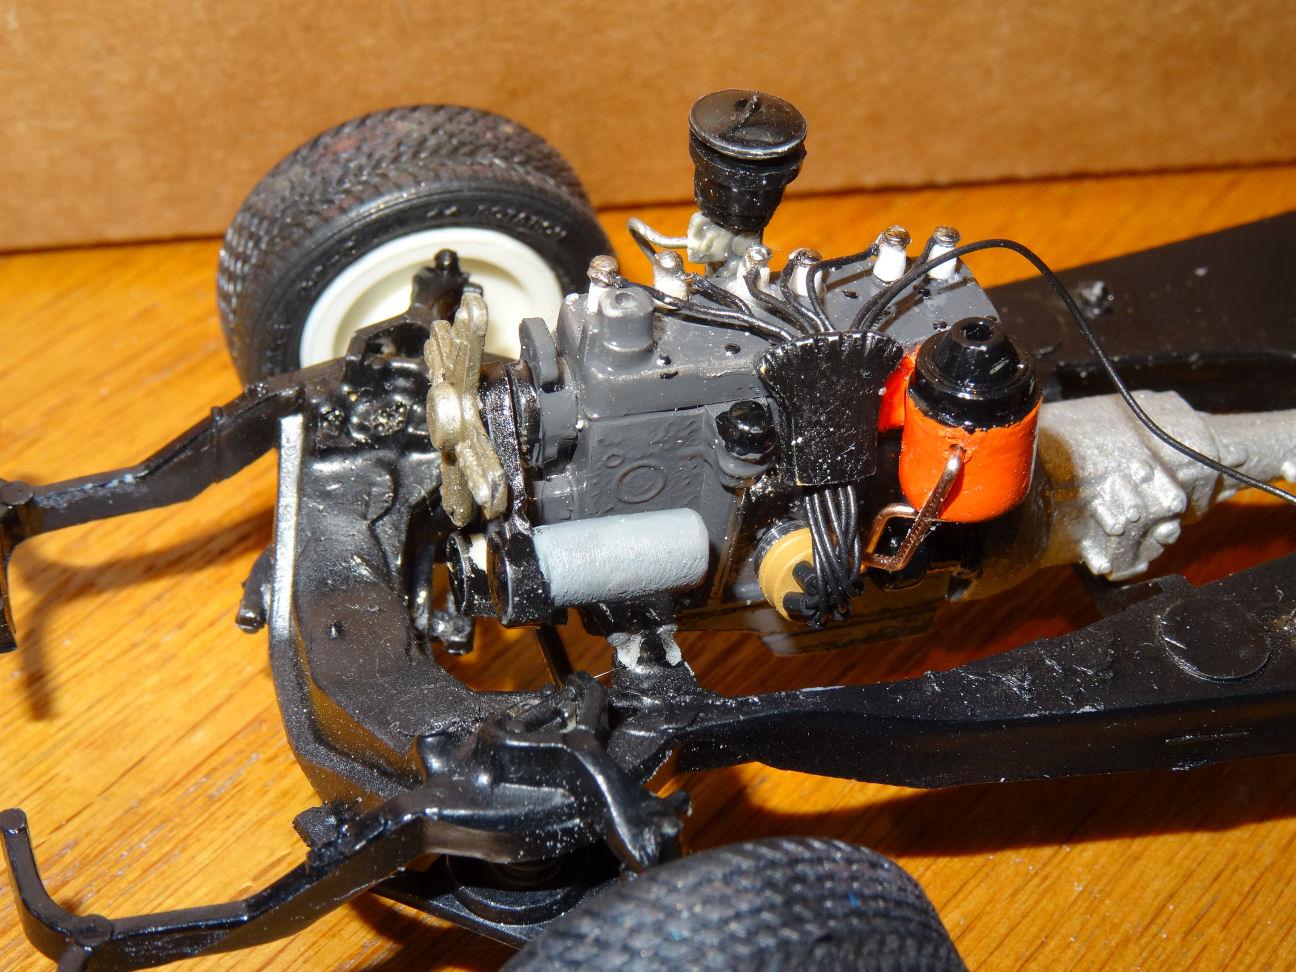
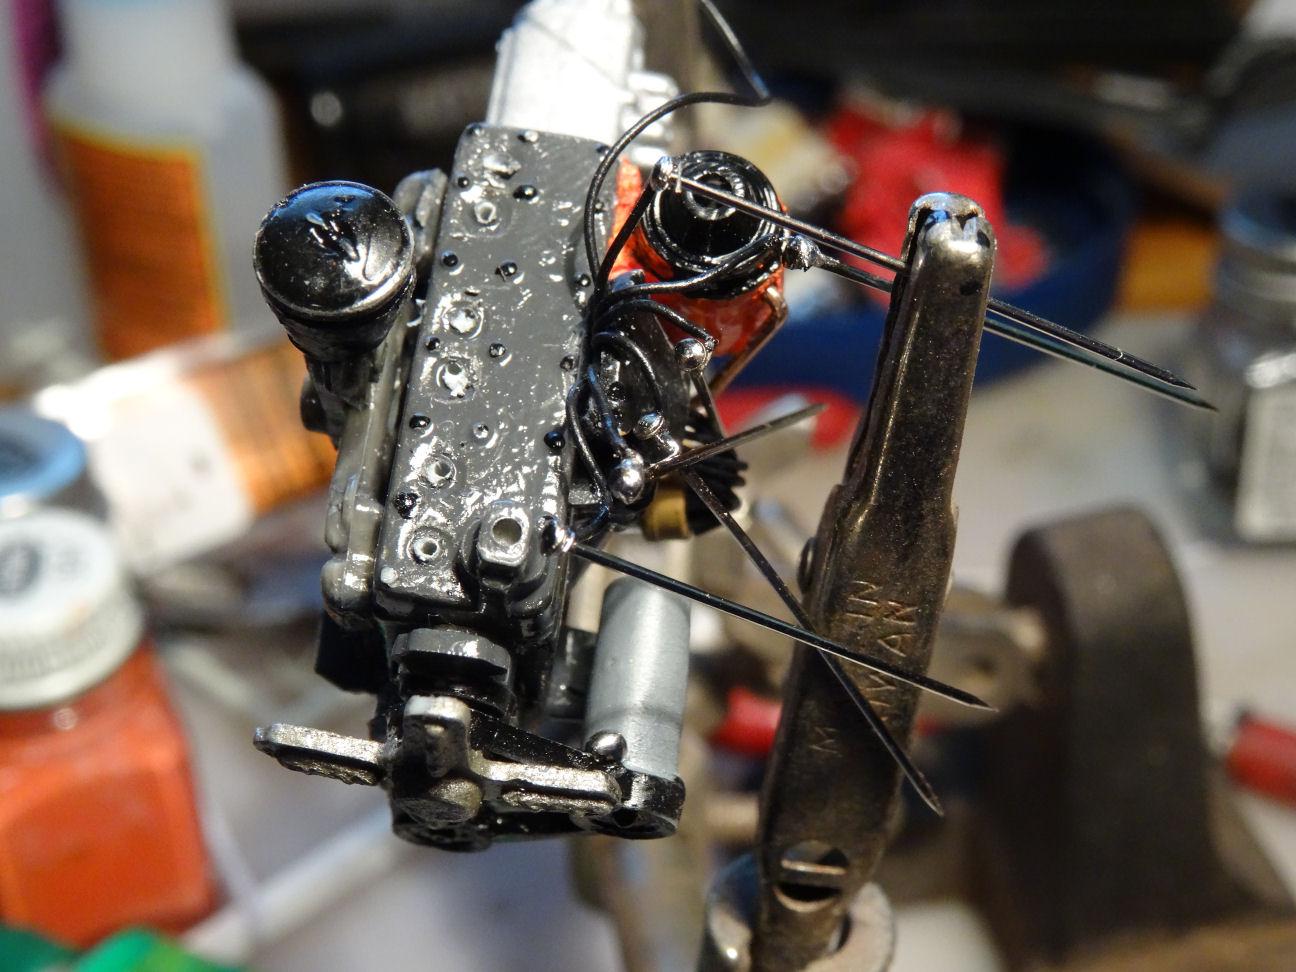
The Woody I've been making some progress on the Woody with a lot of waiting for things to dry. I am currently using the kit wheels for mock-up. They are OK for now but not very accurate. They should not be all chrome. The kit wheels look like something with a JC Whitney dress up kit. So I'm not sure if I'm going to strip the chrome off these or try something else. The kit tires are also a problem as the rims are too wide for the tires. Anyhow, have the chassis and engine somewhat put together. The front axle is not staying, AMT and their metal axles.? There is a lot about the engine that bothers me and while I tried to dress it up a bit I would take a different route next time. So much is not accurate, one thing being the oil filter. The kit replicates a skinny little filter which technically was correct back on day one, but those filters were sealed units and you threw the whole thing away and replaced it. They are long out of production and you might find one if you hunt long and hard at Hershey, but most people nowadays replace it with a canister with an removable element. I had some scrap bits on the bench and started piecing one together with a crankshaft and alternator pulley sandwiching a large piece of round stock and some .030" welding wire. It looked great in my hands but I feel it is too big for the engine. Anyway, I decided to leave it, still need to put a nut on the top to keep the oil in.? But Jim, curse you for those spark plug wires. I had totally forgotten about the wire style they used back in the day. I have gotten away from that on the 1:1 '39 so it never occurred to me. I already had the distributor wired and the wire separator created all I had left to do was wait for the plug boots to dry and slip the wire into them. And then I saw your post with the wired engine. I thought, forget it, I'm not going back now, but it kept bugging me. Finally I gave in and switched the style. Being everything was already in place it made it just a bit more difficult to solder on those ends. I felt like Vincent Price creating Edward Scissorhands. ? I used some straight pins to slip into the 'spark plugs' (drilled out round stock) which now replaced the boots. And on top of it I broke a drill bit off in the head drilling out the block. It will have to stay there as I don't have an extractor that small.??
-
It's a blessing and a curse. I've been stashing stuff in the attic for decades and I don't even know what I have anymore. I found a second box of Torino stuff and I know I have more I've yet to find. I guess it's a good problem.
-
After sleeping on it I decided to build this as a 1968 Fairlane 500. Why a Fairlane 500? Why 1968? Well this fastback body style was only available for two years 68 and 69. It was also only available as a Fairlane 500, Torino GT and a Cobra in 1969. AMT produced the Torino both years and the Cobra, so why not do something different.
-
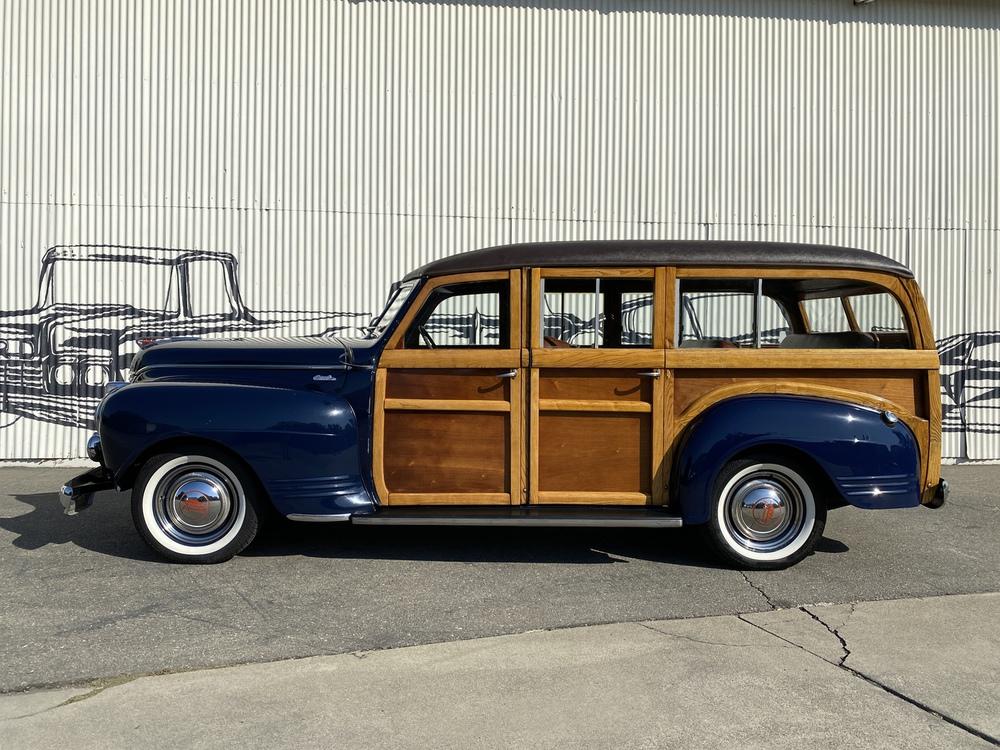
The Woody I don't have any pics from when I started this build a few years ago but I thought I'd pull out another untouched body for comparison. I'm not going for a completely correct woody body, I think the effort spent on the nose is enough work in itself but I did want to try and make it feel the part a bit better. And besides at the time a lot of these old woodies had work done to them to repair damaged pieces and were not always 100% correct. My grandfather in fact had a 1938 Ford Woody and he completely rebuilt the tailgate because it was rotten but made it his own design, boy I wish I had that car now. On the rear the Ford has exposed bolt heads and a bump in the dead center for a spare tire, these were removed as the Plymouth is much more plain in the backside. The modified body is on the top with the original below it. Most of the work here was to the rear fender to make it in the style of the Plymouth. The fender is more rounded in general and doesn't come as far forward into the rear door but I choose to leave that alone as it would require modifying the wood as well as the fender and altering the wheel base. The wood strips on the Plymouth are also simpler then the Ford's so they were filled in to remove the grooves. The Ford has visible hinges while the Plymouth does not. So not a perfect rendition but close enough for me.
-
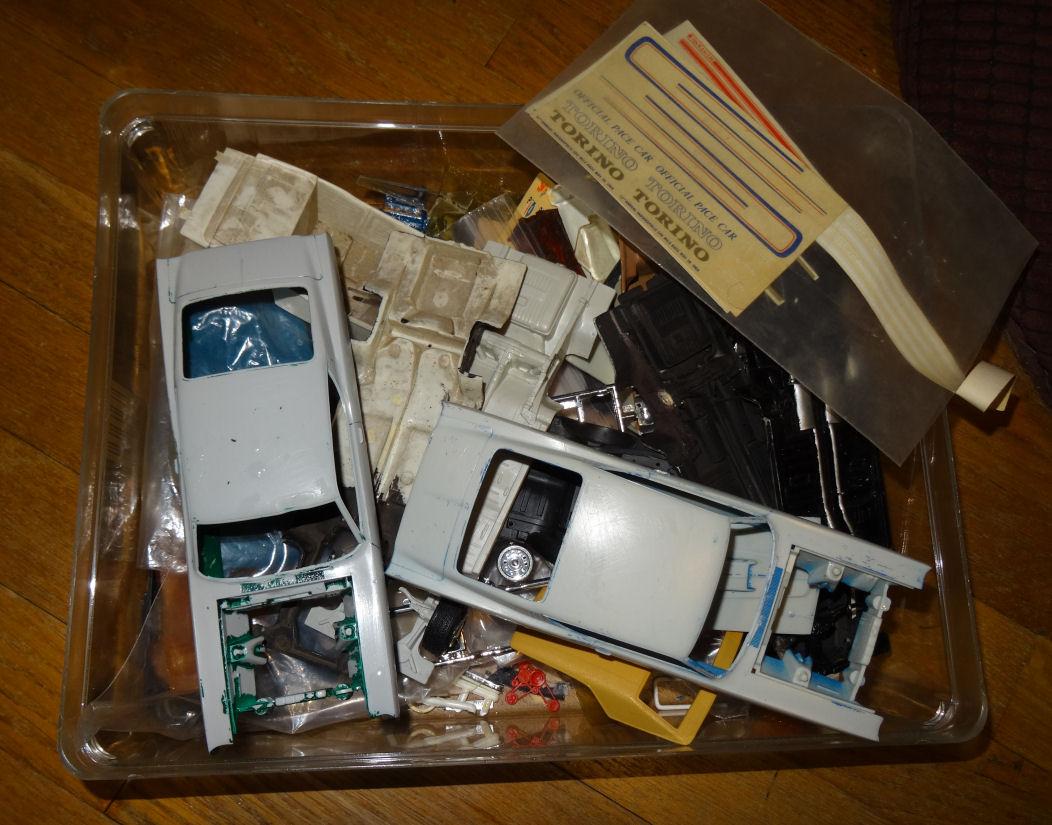
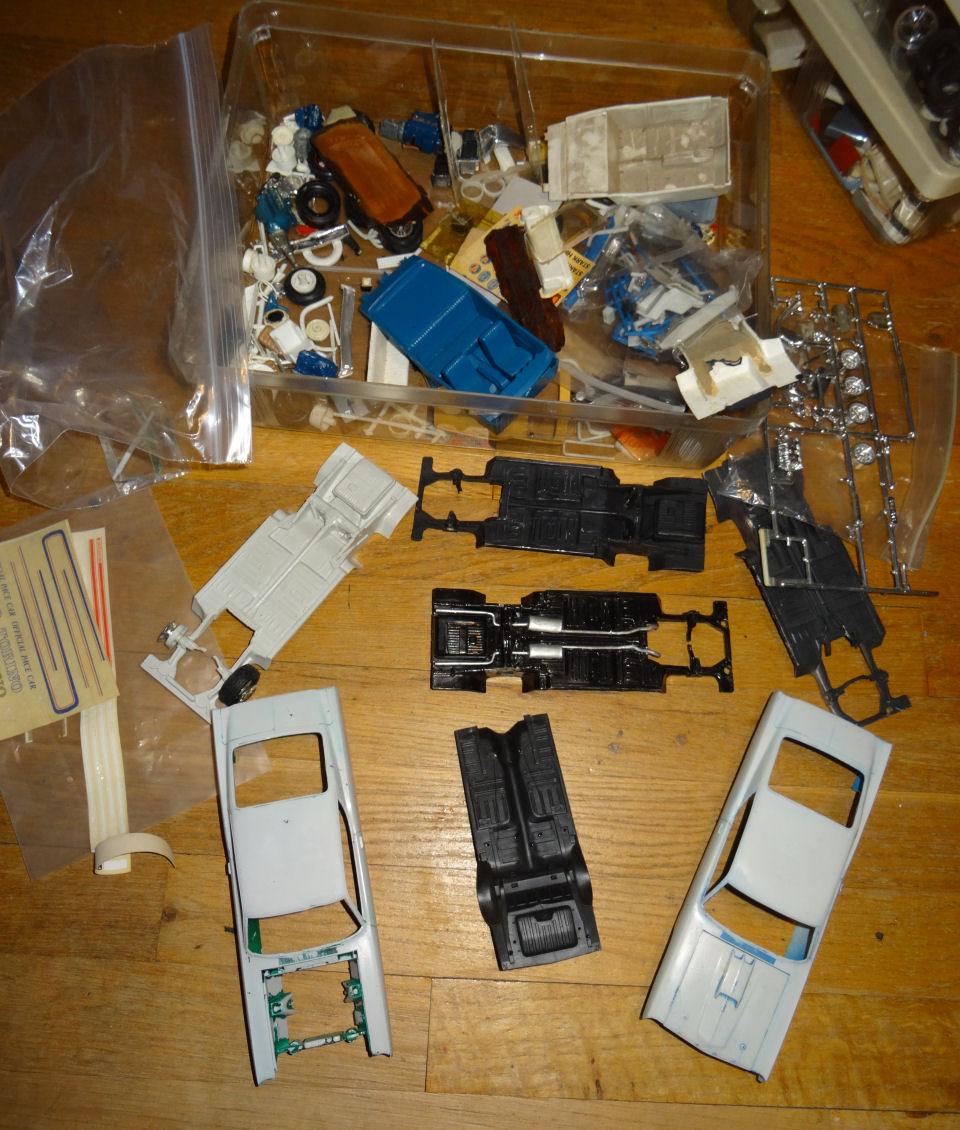
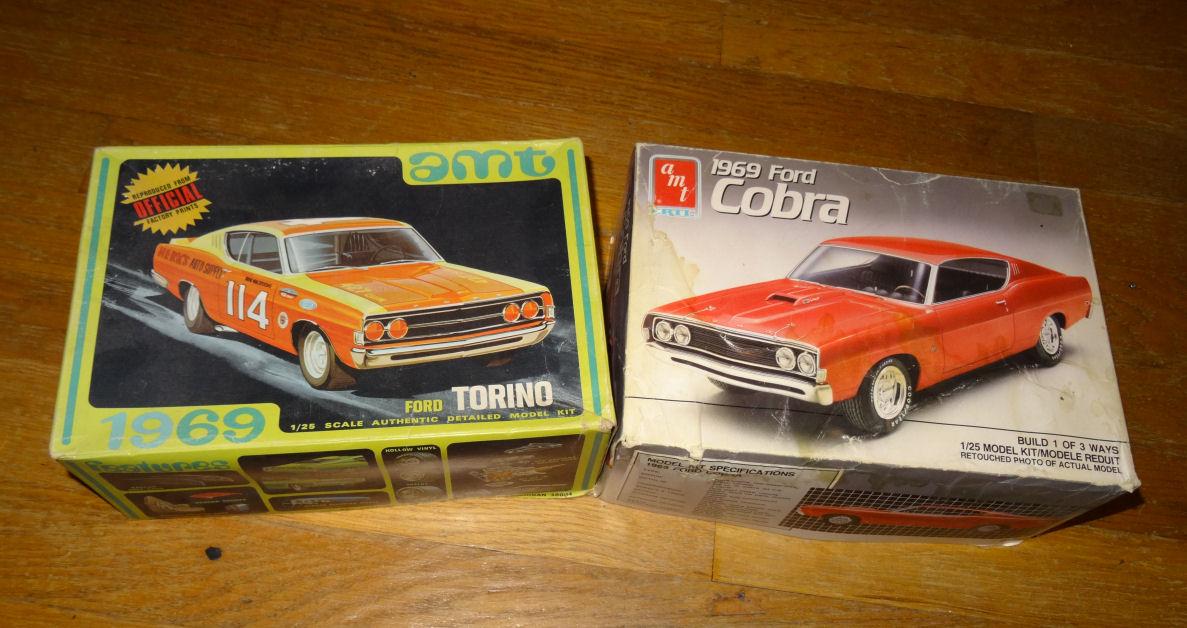
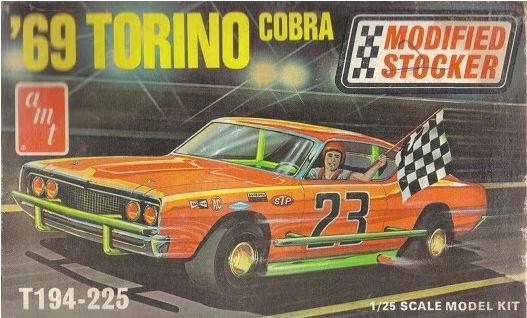
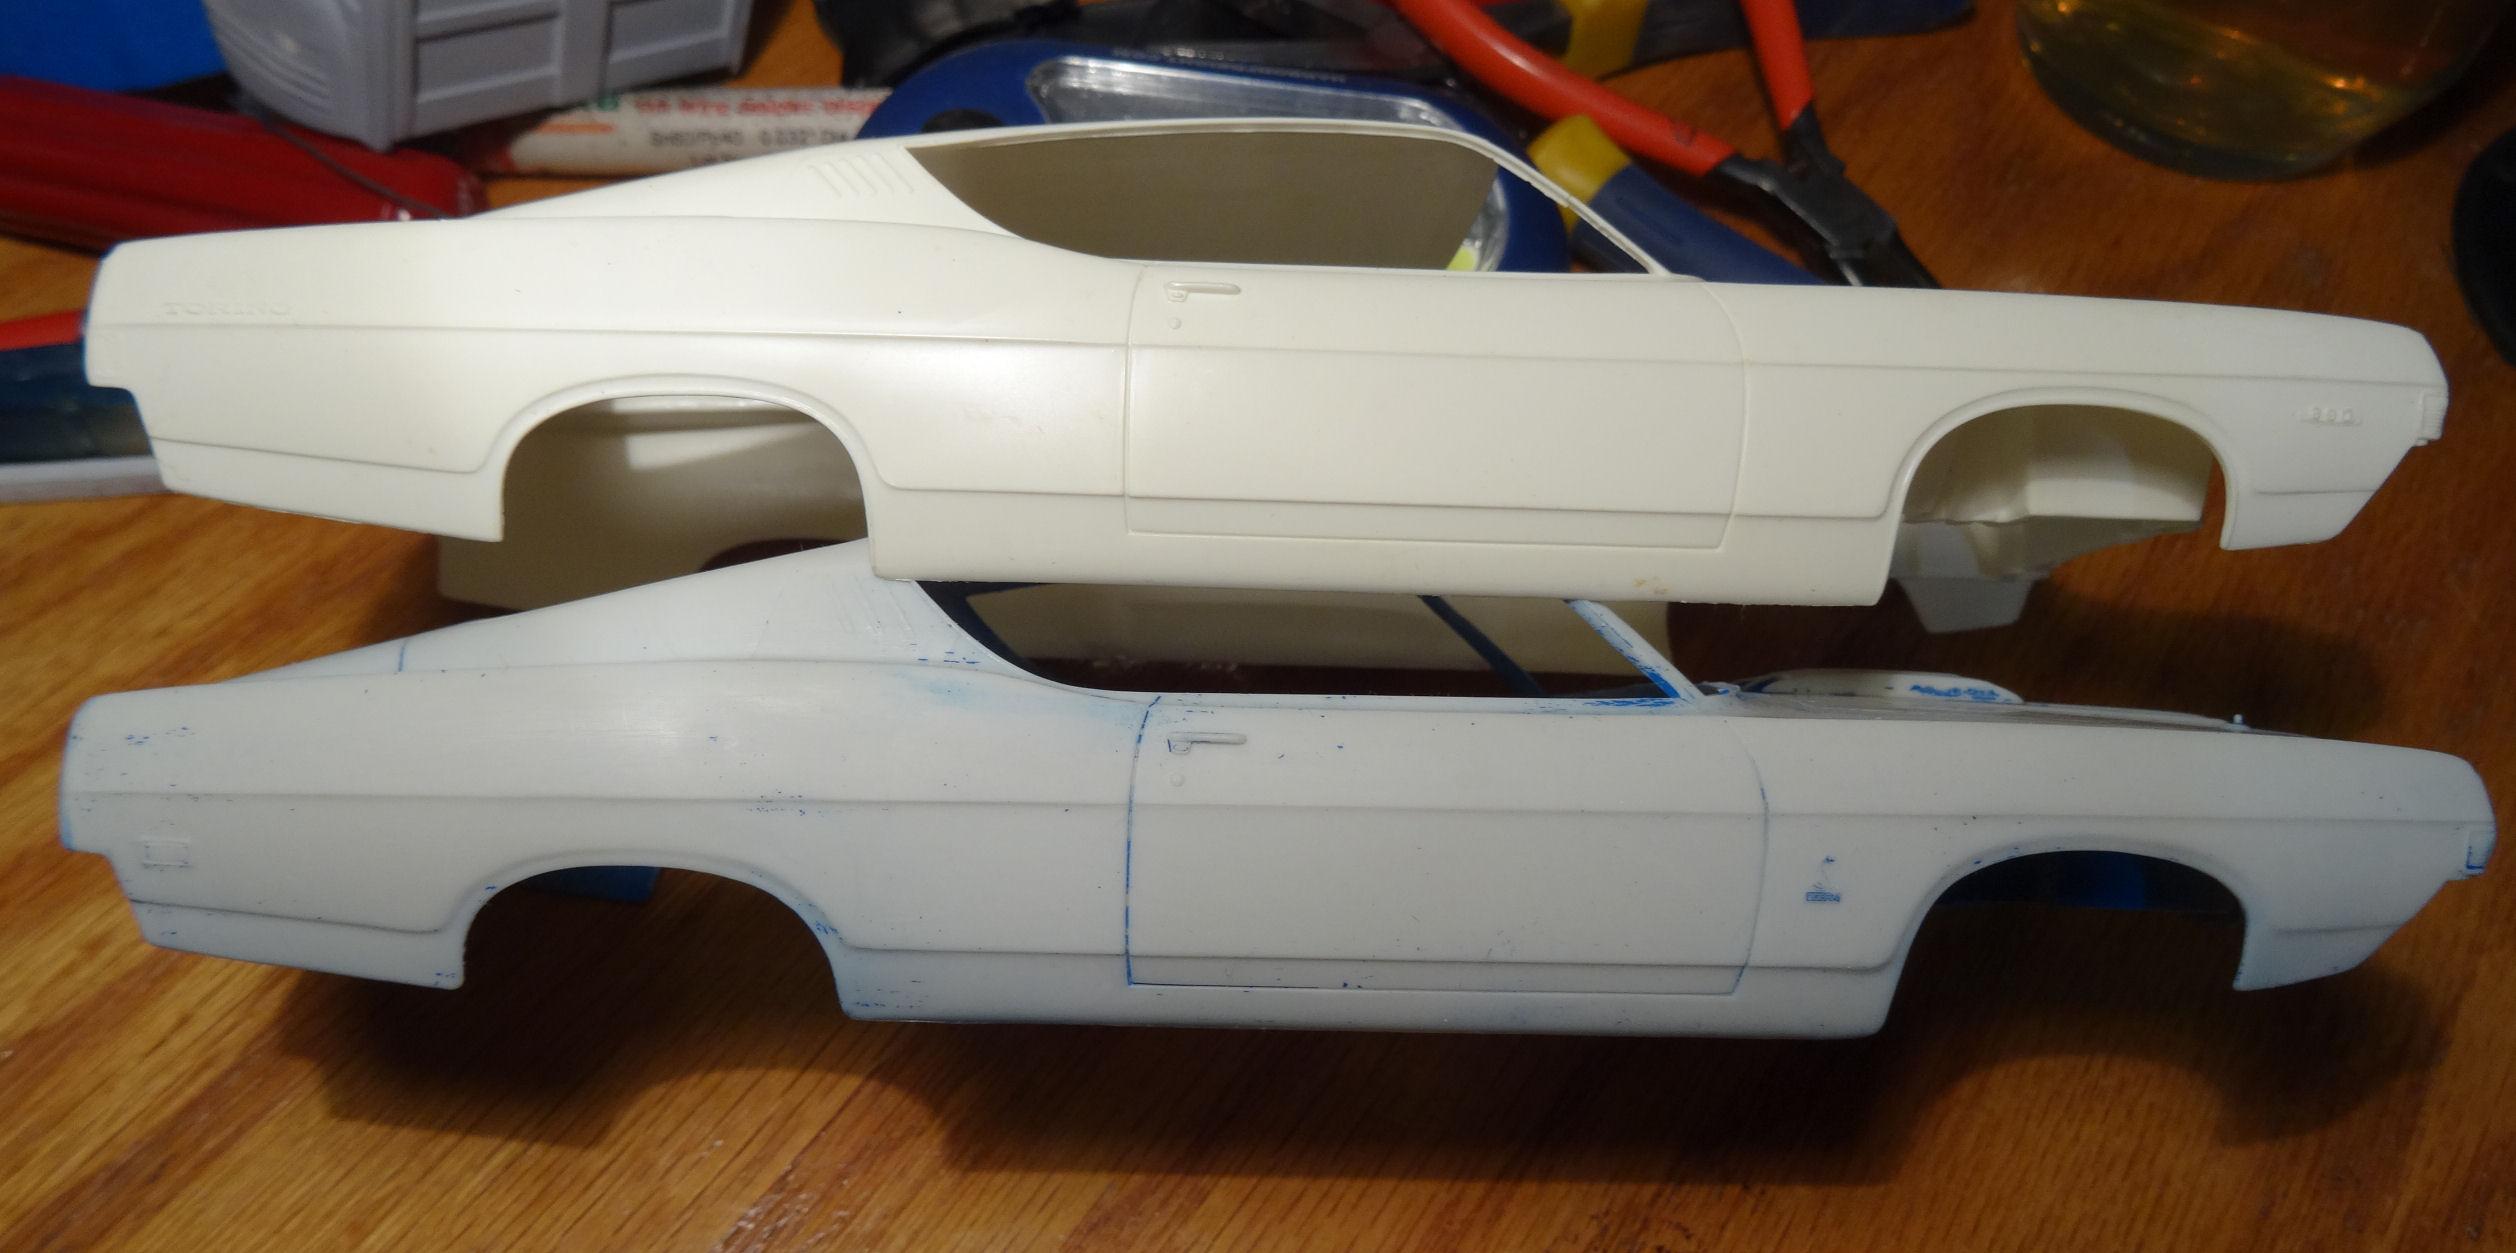
I was up in the attic this weekend and pulled down some of my old parts boxes that have not seen the light of day in over 30 years. One such parts box is this one filled with 1968-1969 Ford Torino and Cobra parts. Lord knows I built a lot of these back in the day and while I have a lot of NOS kits it might be fun to see what I can do with this lot. Gave me an idea for a build. I wondered if there were enough parts here to build up a 1969 Cobra. There were two Cobra bodies and a host of other parts. The body on the left looks like it had a run in with a soldering iron but the other looked OK. Three interiors, one on the left looks good, one in the center is from a HT/Conv and the one on the right is from a modified stocker and is still dirty from the last race. Five chassis, one on the left is from the modified stocker, next three are original Torino and the one in the back is from the Cobra issue. I could go with that but that would be too simple. Might try to finish the second from the right where I started removing the molded in exhaust and rear axle years ago. We shall see. Many bits are original Torino pieces but they all fit the Cobra. The Torino and the Cobra are all from the same family. On the left is the original Torino kit and on the right the Cobra issue from 1990. I think the first order of business is replacing the wheel opening moldings we lost when AMT "repaired" the modified stocker castings. You can see from the pic below a comparison of an original Torino kit with the Cobra issue. They didn't quite get the wheel opening right and left the trim on the cutting room floor. And if this plan works out I have a Mustang and a Thunderbird box as well. 'till next time.
-
Dennis, I was just about to start a similar project. Only I was thinking of using the Lindberg 1964 Plymouth for the chassis and such. Mainly because it's what I have on hand. I will be watching to see how yours goes.

