LennyB
-
Posts
3,214 -
Joined
-
Last visited
Content Type
Profiles
Forums
Events
Gallery
Everything posted by LennyB
-
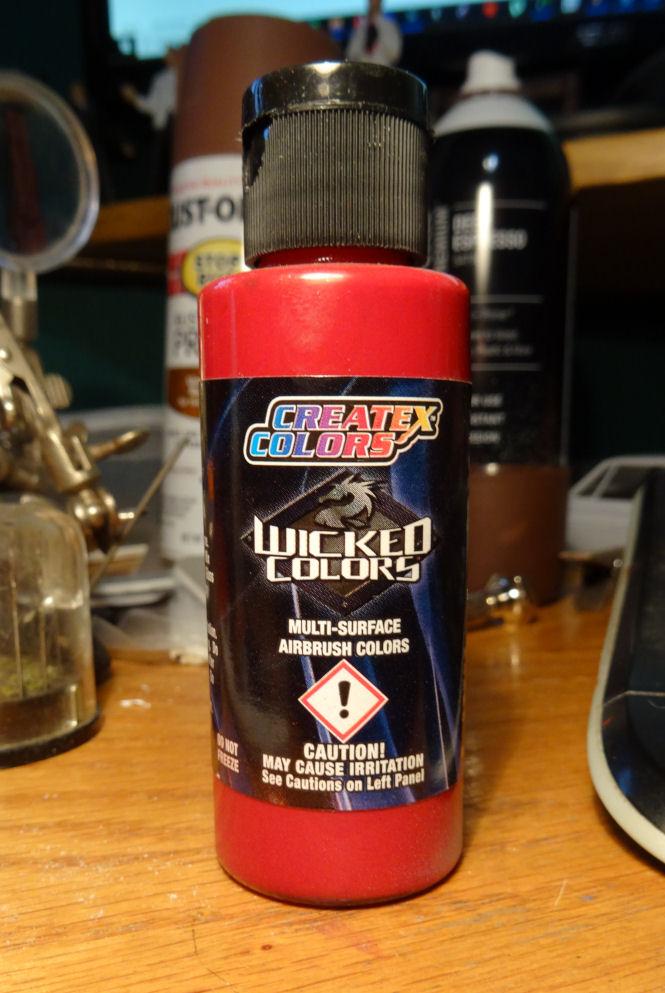
Thanks guys, just have to make it safely thru paint. ? BTW Jim the paint is Createx Wicked Crimson. Already did the dash with it. One thing I'm finding with both cars is I'm loosing the badge on the nose under the primer. Not that it was too well pronounced to begin with. Cleaned up the coupe with a q-tip and some nail polish remover. Wondering if it would be worth trying to print a decal but I hate to waste a whole 8 1/2 x 11 sheet for two teenie weenie emblems.?

-
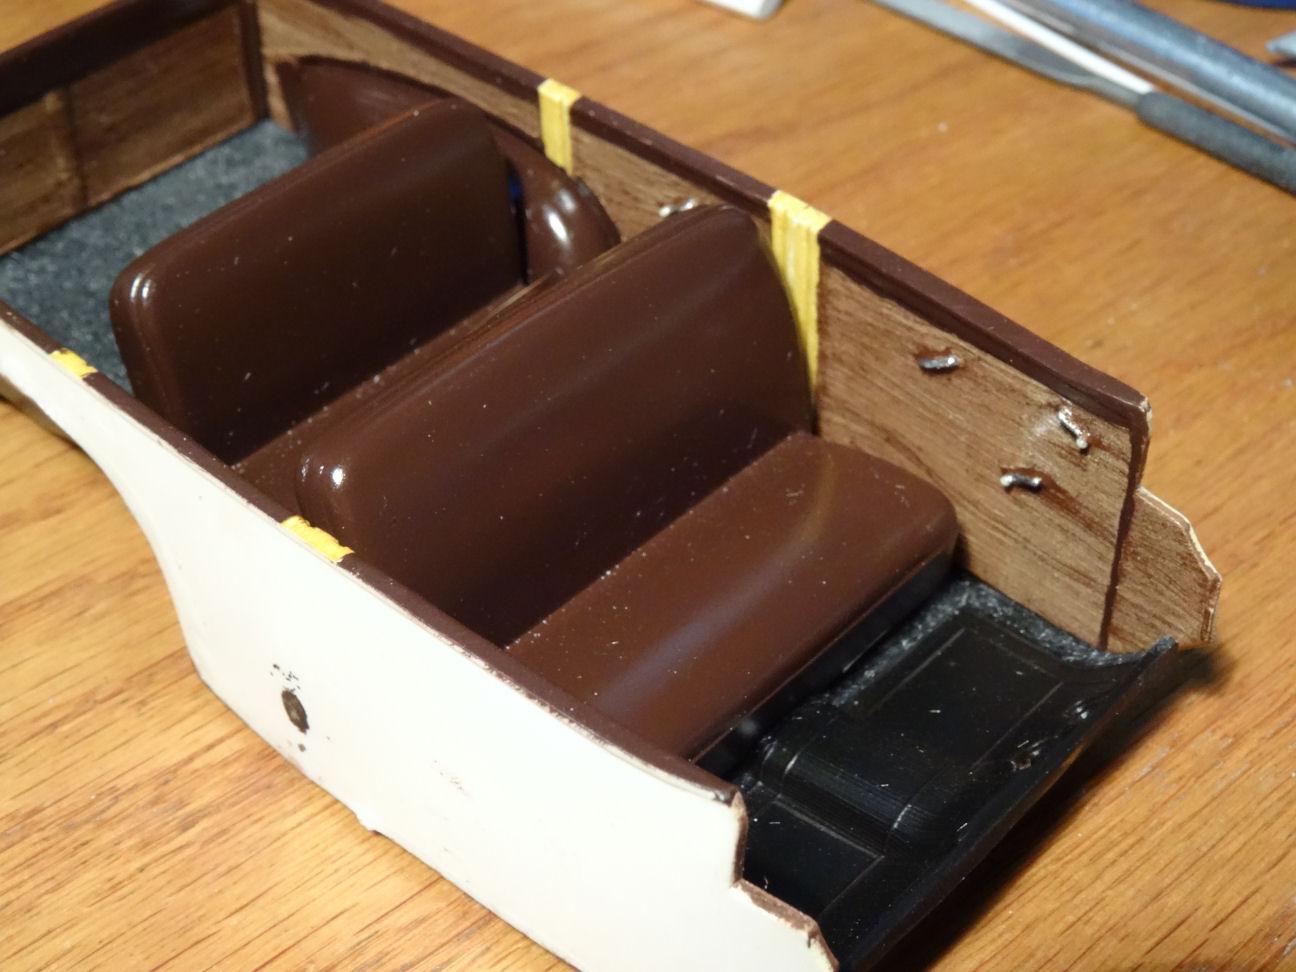
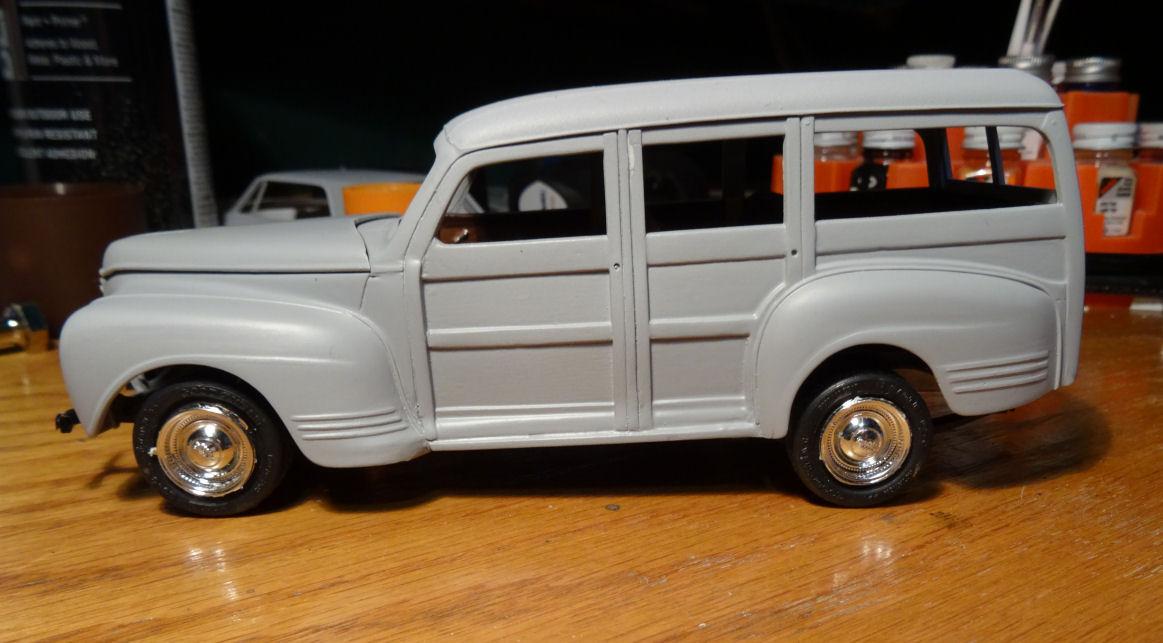
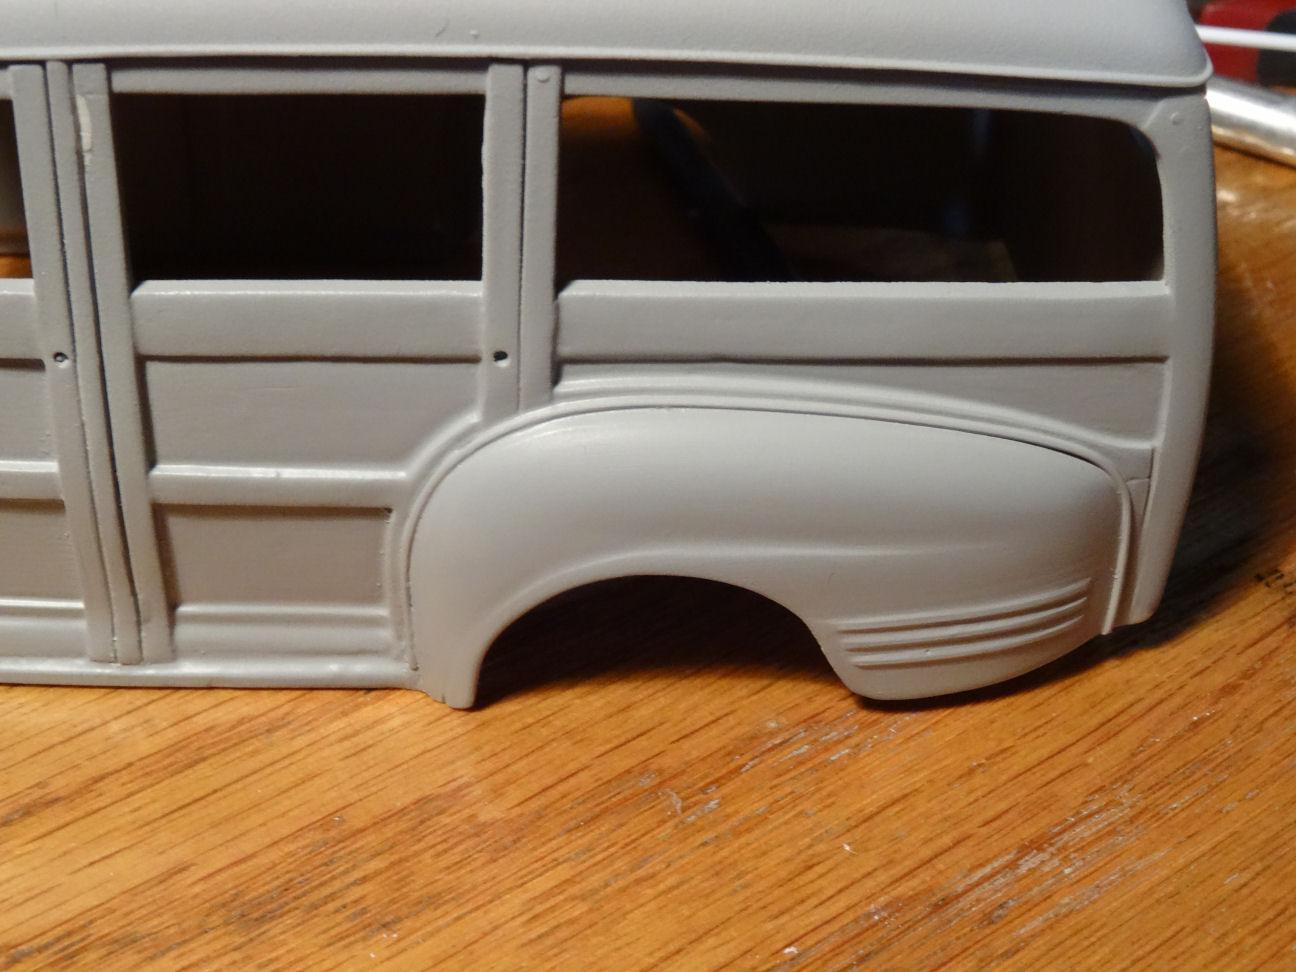
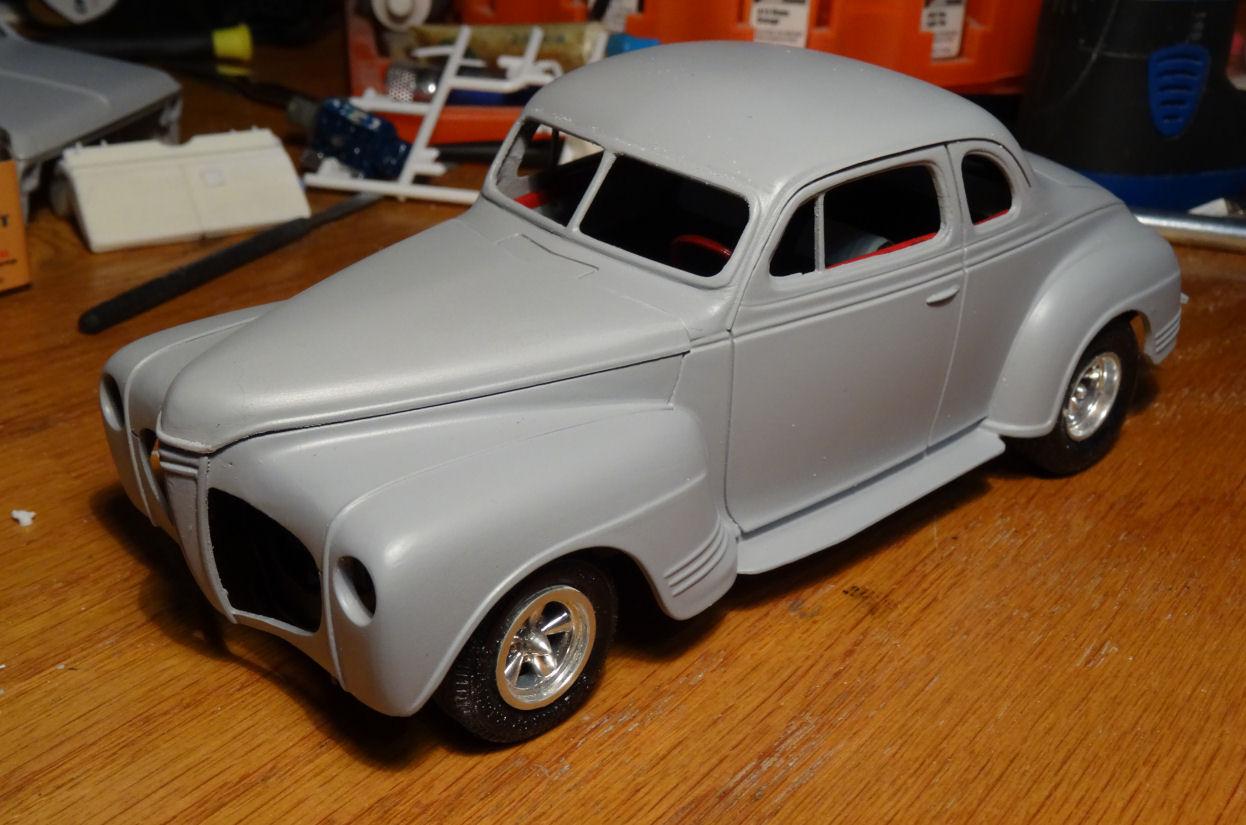
This wood-graining nonsense has it's ups and down. Put the Woody on hold to let the interior panels sit for a week and a half to dry. Then masked off the wood so I could spray the surrounding 'metal' and the tape pulled off some of the wood grain. Guess the oil paint needs more time. Anyhow I touched up the damaged spots as I didn't go too far with the tape and screw everything up and then hand painted the metal. But then I mocked up the body to the tub and found we now sit too high in the rear. Have to do some reworking of the rear to bring it down. Might need to find some different springs with less arch. I'm not going to lower it AMT's way, that's for sure. Anyone who has worked on one of these knows what I mean.? I was also doing some research with baited breath to see if they used fender welting on the rear and of course they did. Was hoping they eliminated it between the wood and the fender. So back to making fender welting. I grabbed some .025" this time and I think it looks too big. Not sure if I really want to rip it out and go down to .020". If it's going to worth the trouble.? And just in case you thought I forgot about it the coupe it has been making progress as well. Mainly sanding and spraying, sanding and spraying.... Hopefully I'm happy with it soon to get some paint on it. Until next time, happy trails...?
-

'76 Ford Torino - “Starsky and Hutch Tv serie” - Revell 1:25
LennyB replied to Rod the Fixer's topic in WIP: Model Cars
Nice choice Rod, should build up well. Is the oil fill and PVC valve molded to the valve covers? They are in the wrong place. Should be right front and left rear. -
David, I know exactly what you mean. I've even had some cross pollination between my builds. A cast off part from one is just the ticket to solve a problem with another.?
-
Thanks Jim, these days my work bench looks like a junk yard. I got projects all intermingled I don't know what I'm working on half the time. You should see the projects I have waiting in the wings. ? I keep saying I need to stop and straighten thing up but I'm having too much fun.?
-
That's a start...but you can think bigger then that.??
-
Why go to the trouble of eliminating the mirrors. What's it save them???? Pennies per thousand. I liked it better when they put whitewalls on one side and red-lines on the other. These tires look wider then the ones from the earlier kit. Could that be part of the offset problem? Jim, next kit that comes out we'll leave the decisions to you. How does that sound.?
-
Eddie, I love the sculpting on the side, really transforms the car. Can't wait to see more.
-
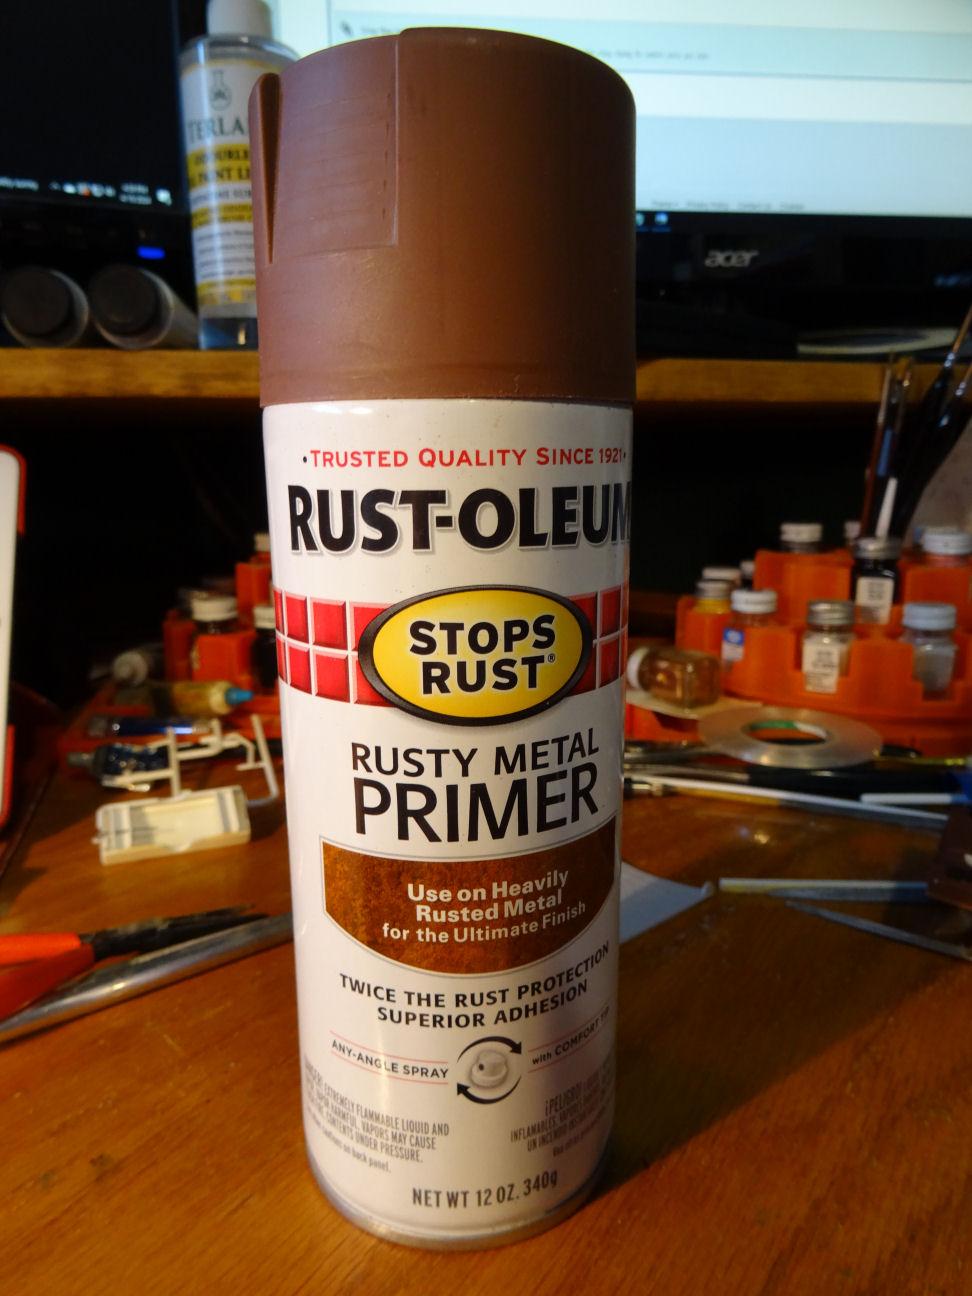
Mike, I would call that dumb luck. Had a can of Rust-Oleum Rusty Metal Primer sitting in the garage. Just used that. It goes on a bit thick which is why I used it to help hide some of the surgery below the mufflers.
-
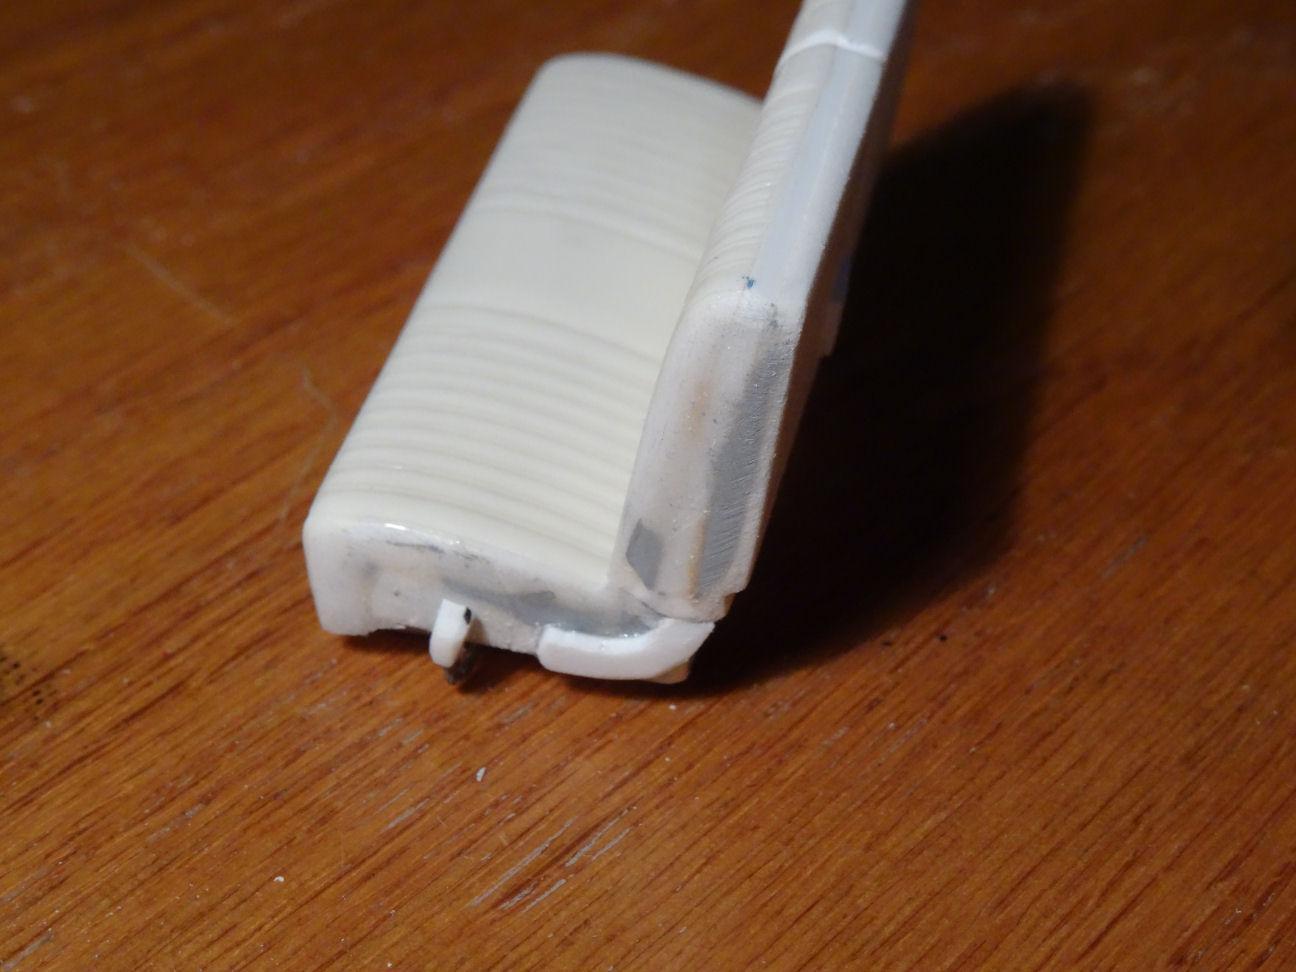
That's not a bad idea. But I should have done so before adding the adjuster handle. And now that you mention it just realized I forgot to add the seat back releases. Oh, well. Always something more to do.? As far as the Galaxie, don't think the parts are from that, have one sitting right here as my next project. Other then the sway bar and the black section of the cross member the rest is from scratch as far as the front end goes.
-
That's it guys, just rub it in. ?
-
I'm not partial to fenderless Fords but this one looks great. Nice job!!
-
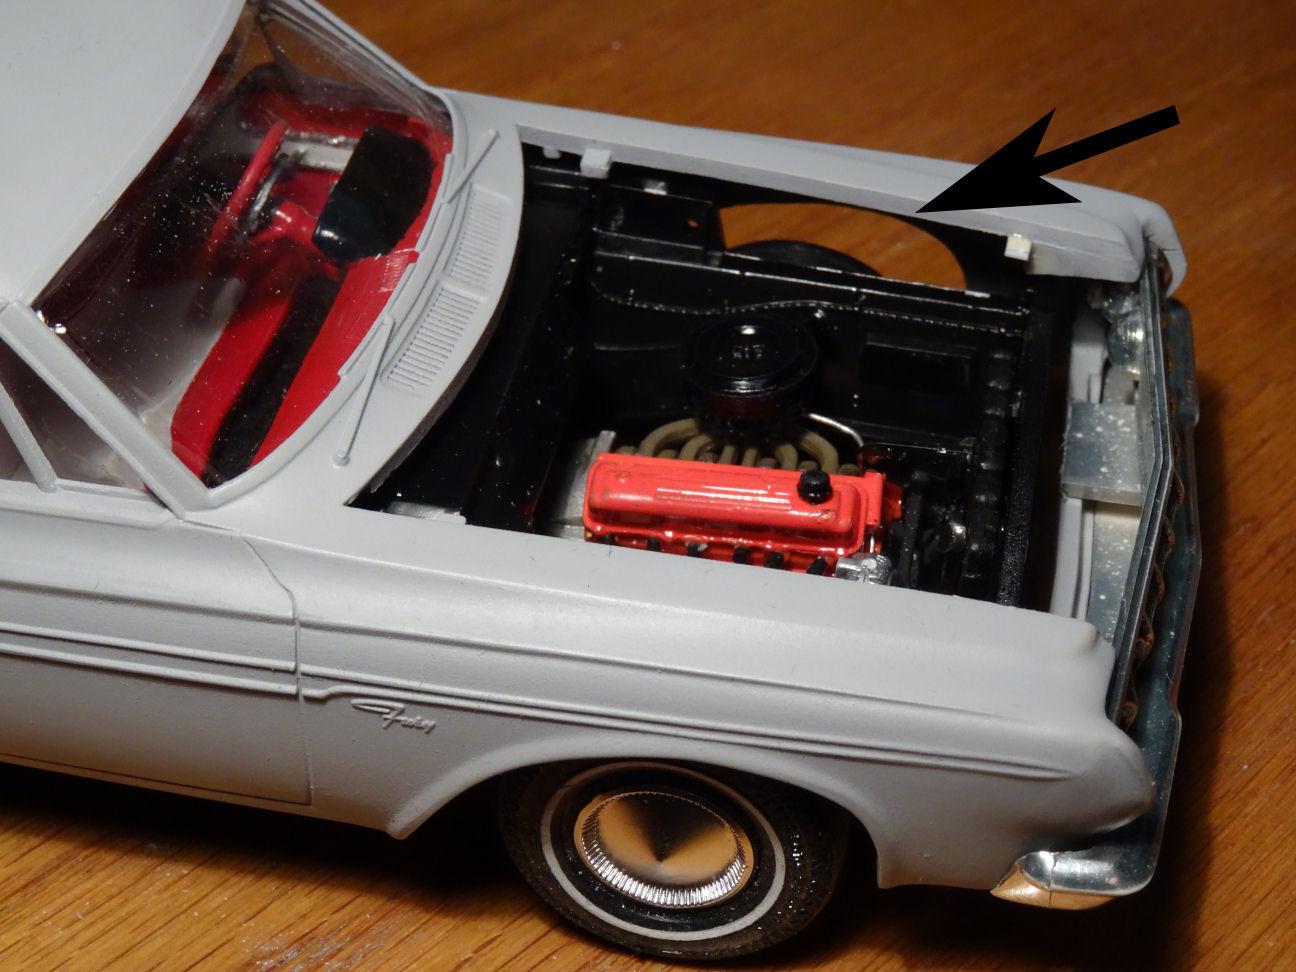
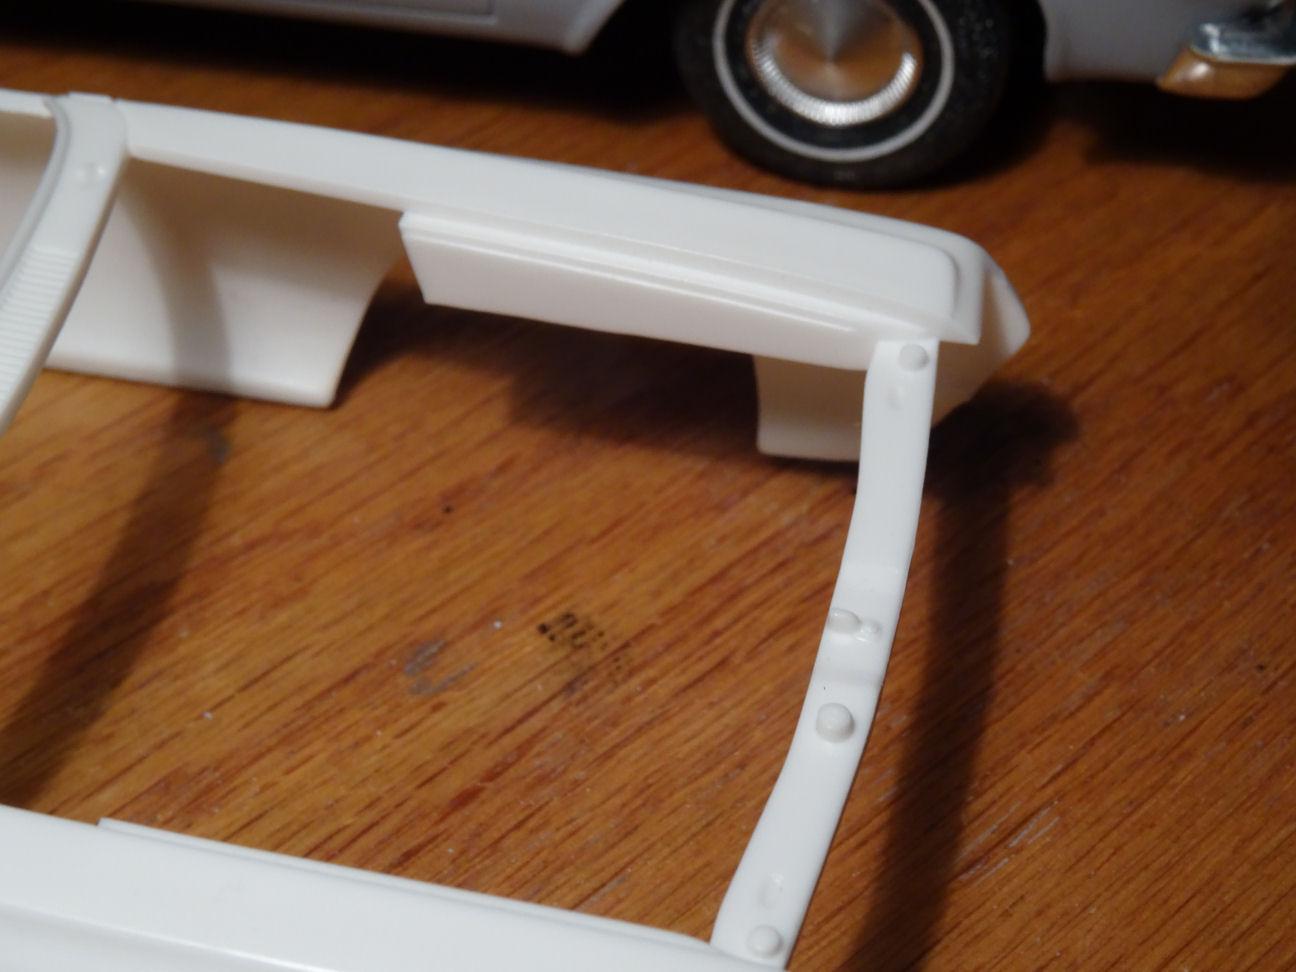
Been making some small progress on the Fury. When doing a mockup I noticed a huge gap on the inner fender. It appears that Lindberg left part of the inner fender attached to the body. So we will have to steal that for our Fury. It fits right in place with little modification. Only issue is I had to make the hood bumpers higher to get the hood to sit level. Apparently the plastic on vintage kits is thicker then the new ones, just like the real thing.? Now we are off to wet sand the body and hope we get some warmer weather so I can actually lay down some paint.?
-
Thanks Ace, I appreciate it. ?
-
I have a 12 year old nephew that I bought the whole set of movies for. He just loves them. So I guess they have no clue about their target audience. I did find these on fleabay, the numbers seem a bit off though. https://www.ebay.com/itm/156141607469?itmmeta=01HVFHXGNVKNXRGNSPA1QXE2JE&hash=item245ac3da2d:g:VhsAAOSwNGtgrIXf&itmprp=enc%3AAQAJAAAA8LXIBPZqY3156xKjpSoOxQ0nvJzaihj4fGtUh4PO6UHkmphv8QpLU2bBZgfQMK8EaL0yBdiv57s29uRNcQ1jzJEYI1wC9oH%2FZIK7EzqC0QCHqNwOLdv2VmKmtR70Km4%2FbXLAc0VR9zNQLKEqvcb%2Bb2xjNi2bt5XAzE9iNB4%2BfxFe3u5a5AcH0%2FUqPt1ftScaupd6EnDiRu4GRrx01dn0MrO4hBYfYv9GtyjXLlLd49ymWEiTdBCW9WFgXh05A17cQi4ZCGaQm9kY63XH3KEz4WMNdR0dahnIK6Pqe%2FbNT1mu9d9aYbeG3Y%2Bk0BsaGxeD%2Fw%3D%3D|tkp%3ABk9SR_6K9vHbYw And one thing I noticed about the real car is that it actually has a white stripe between the blue and the red ones, it's not just body color.
-
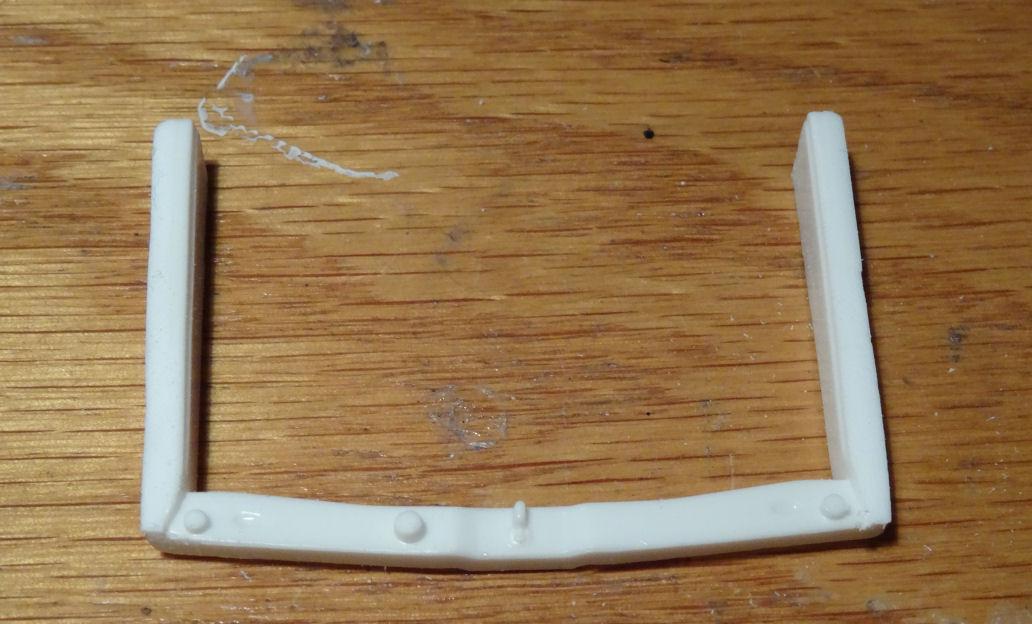
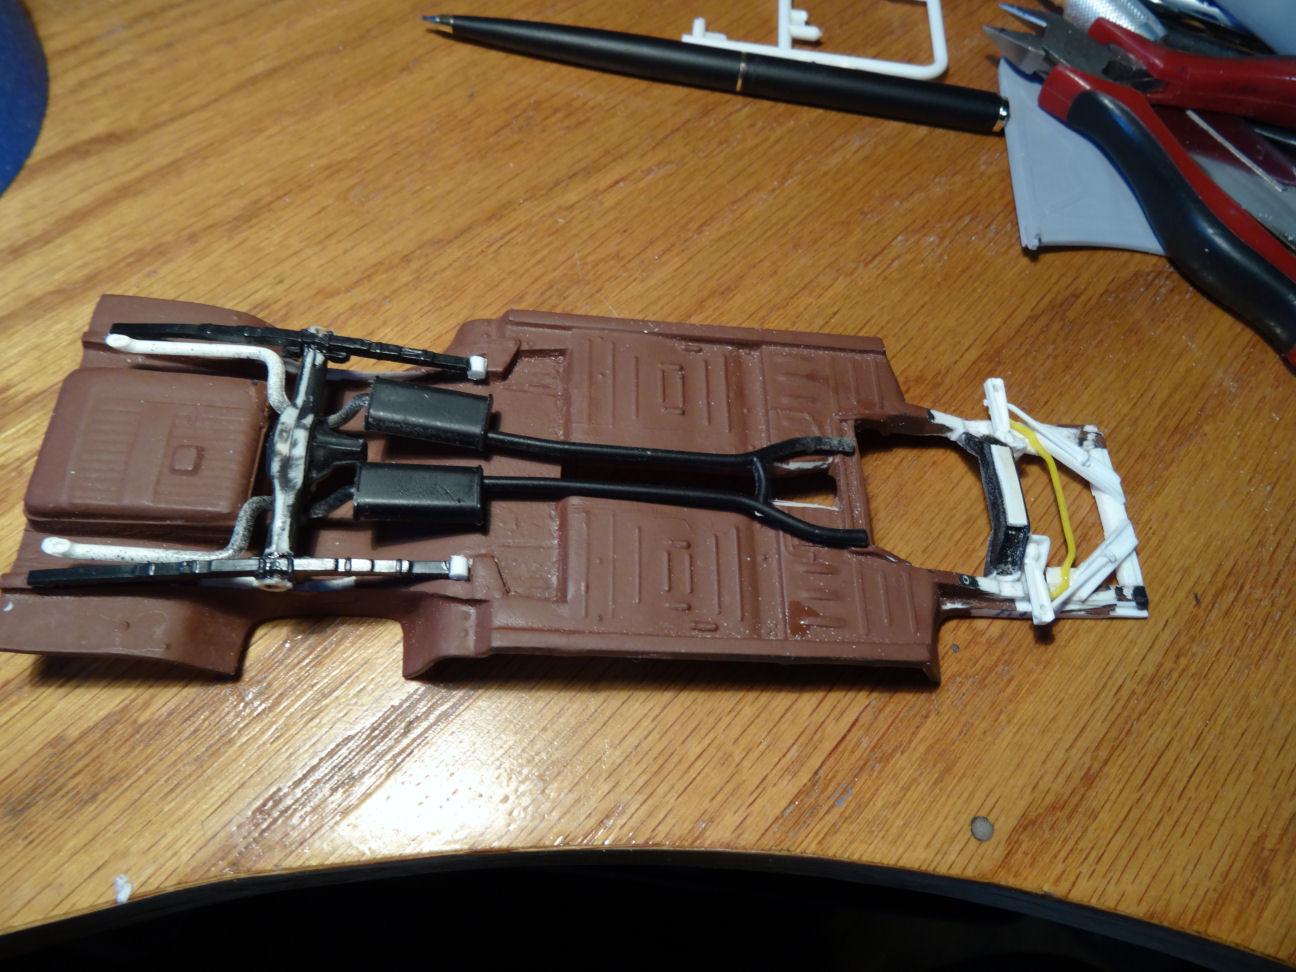
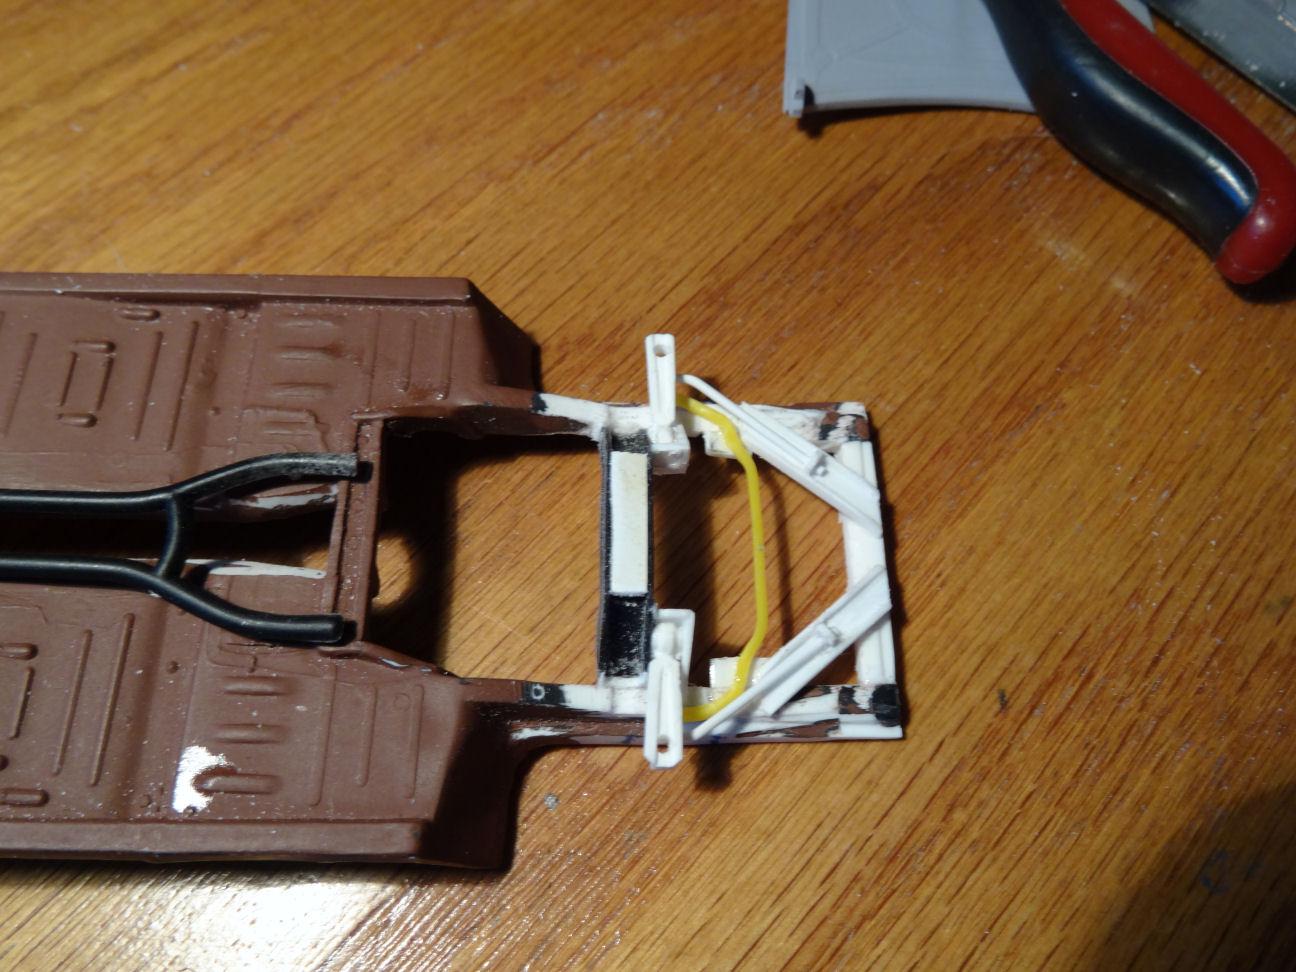
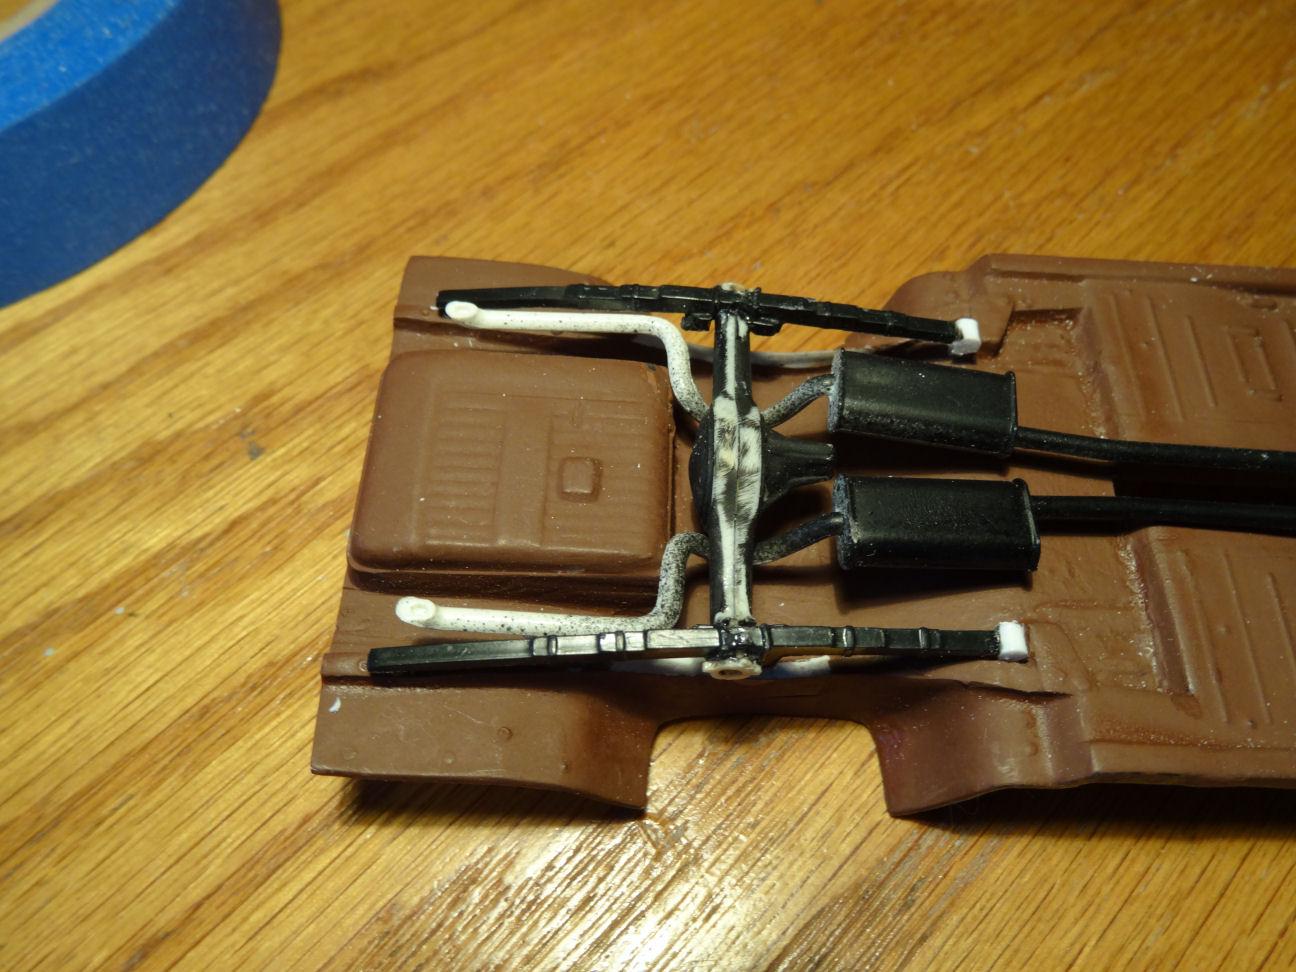
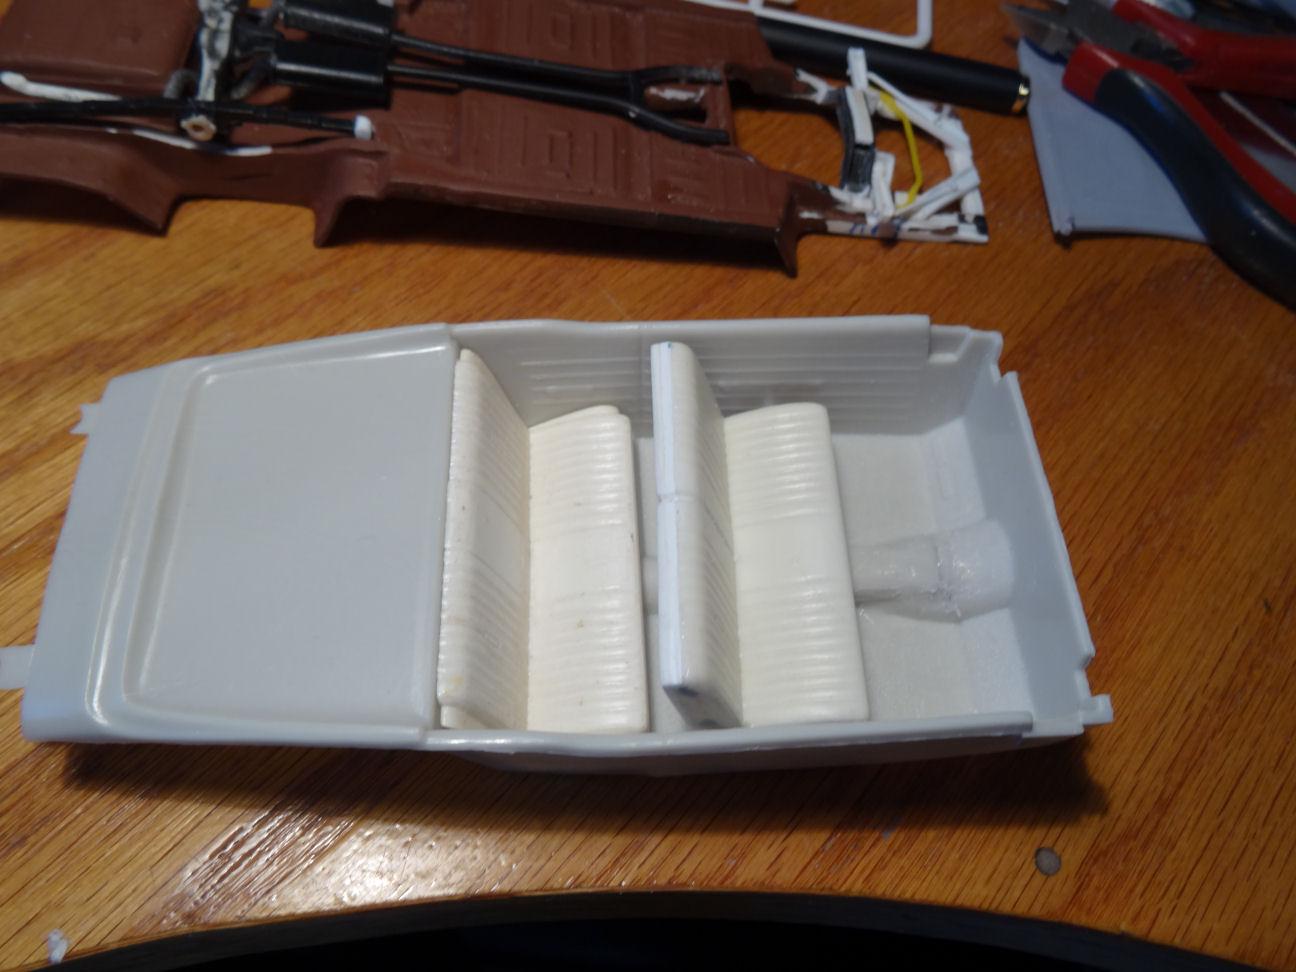
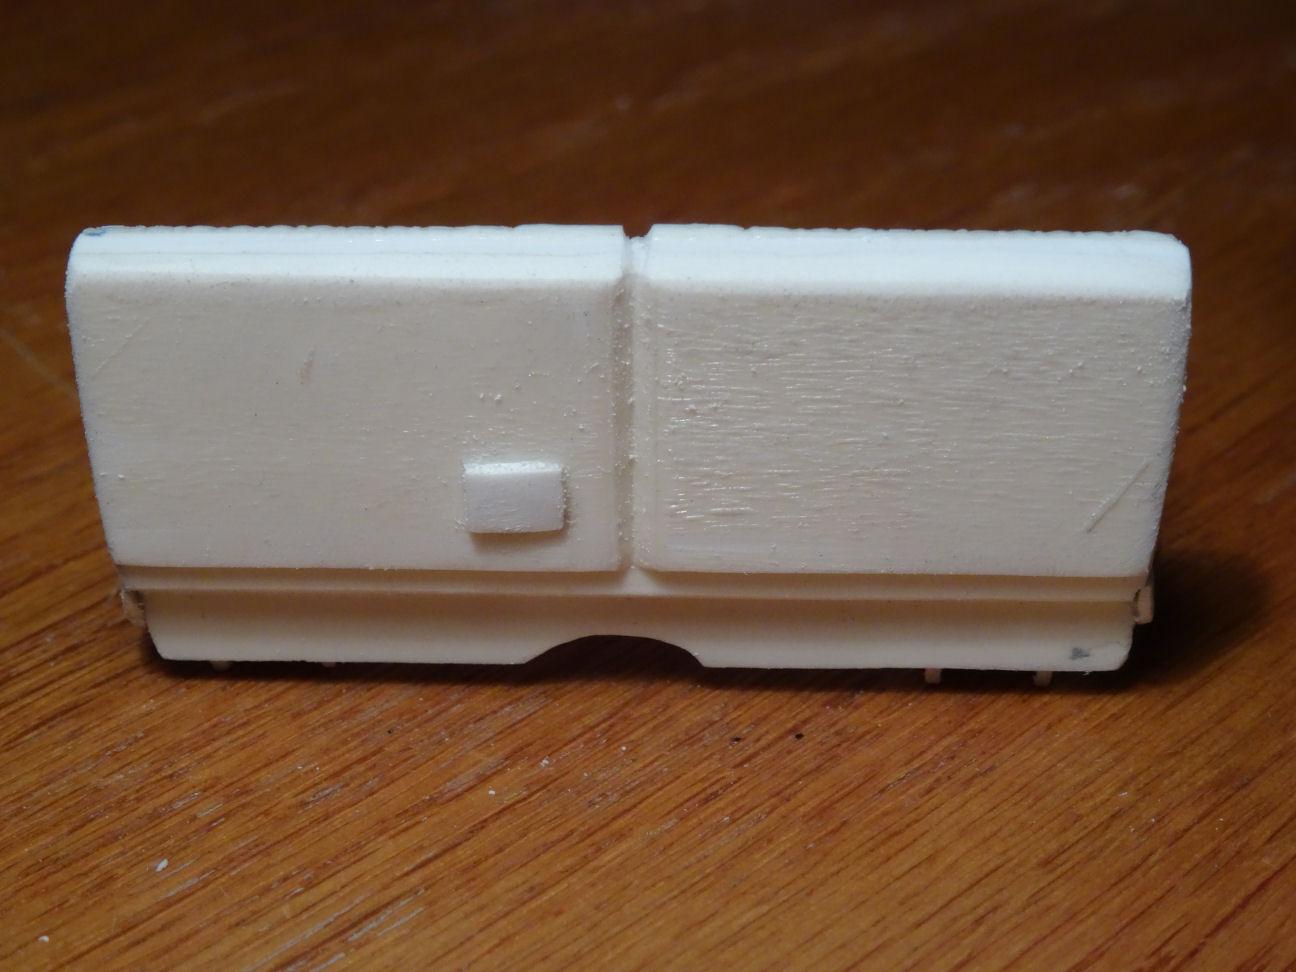
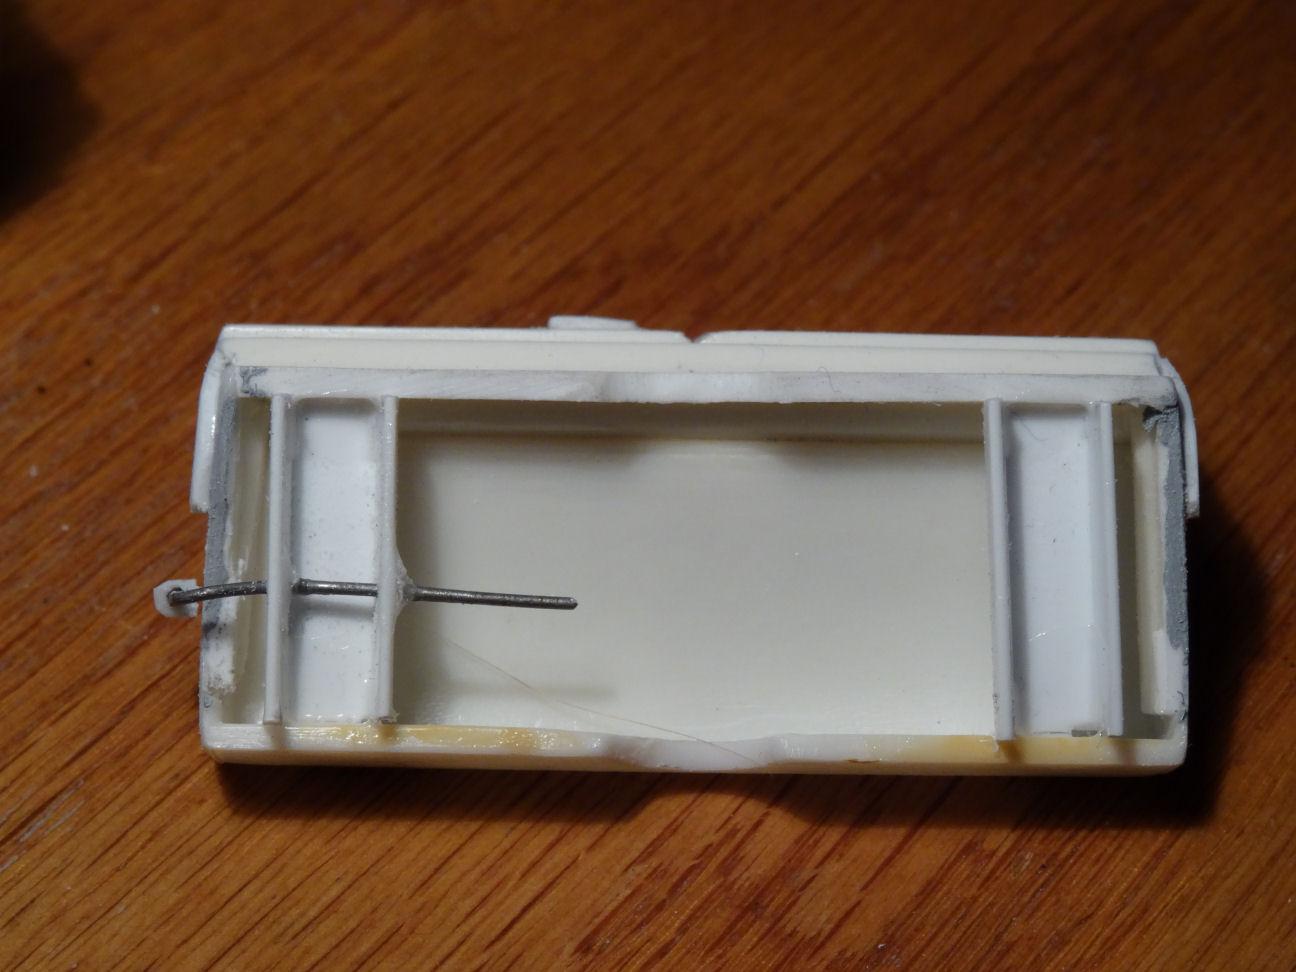
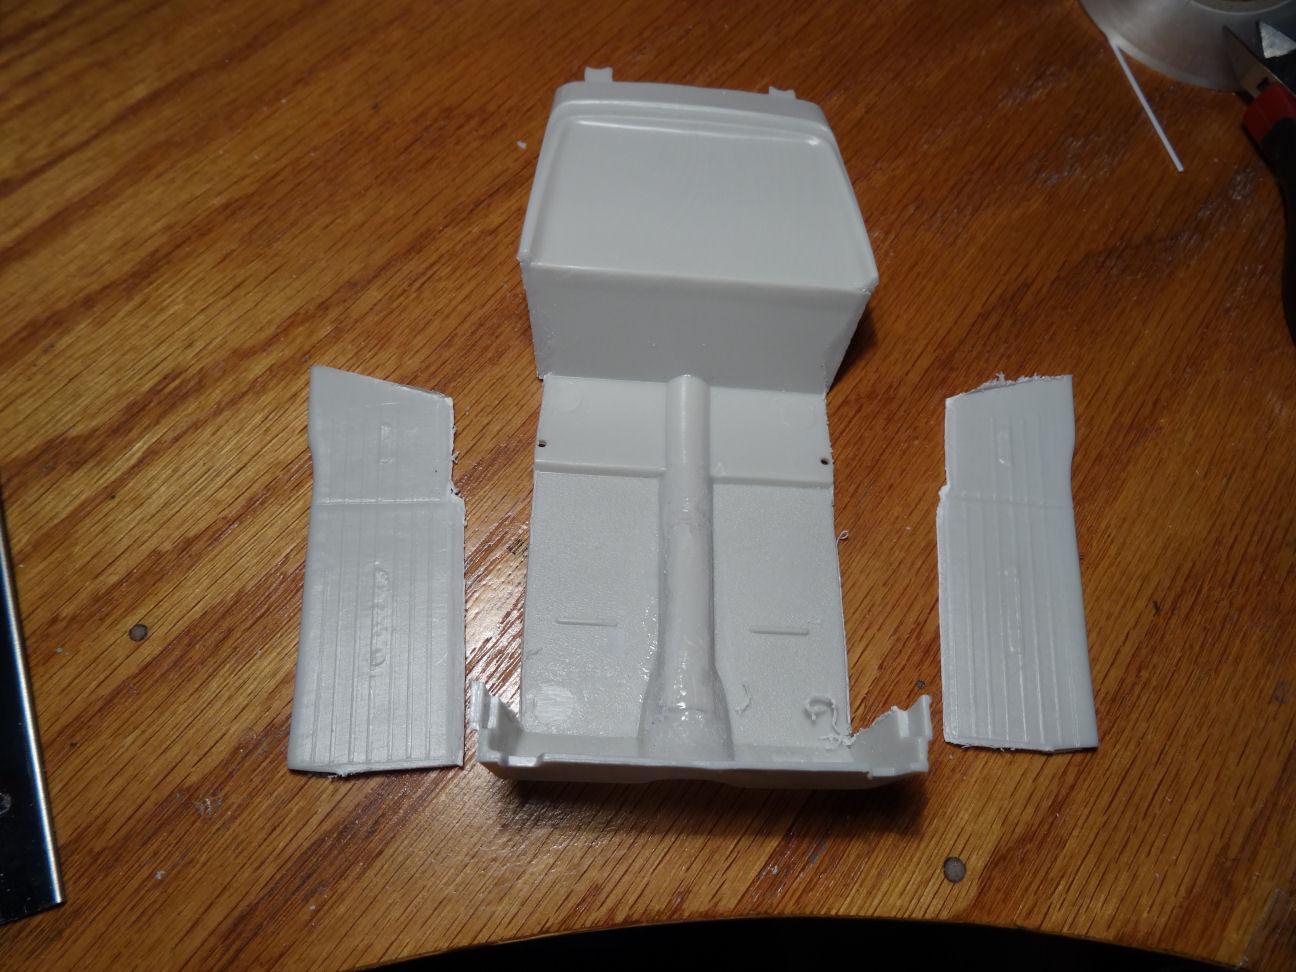
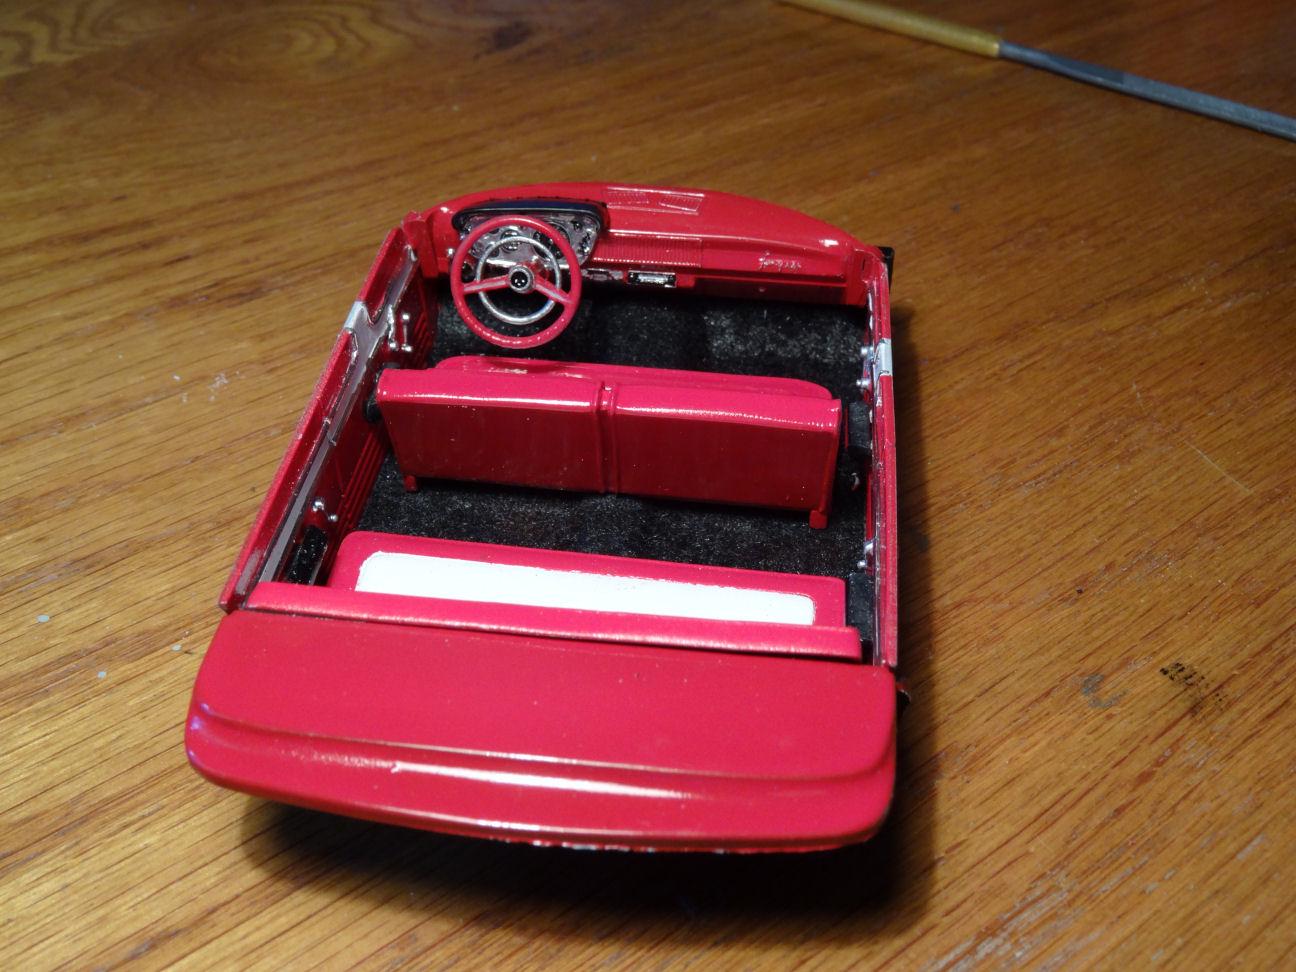
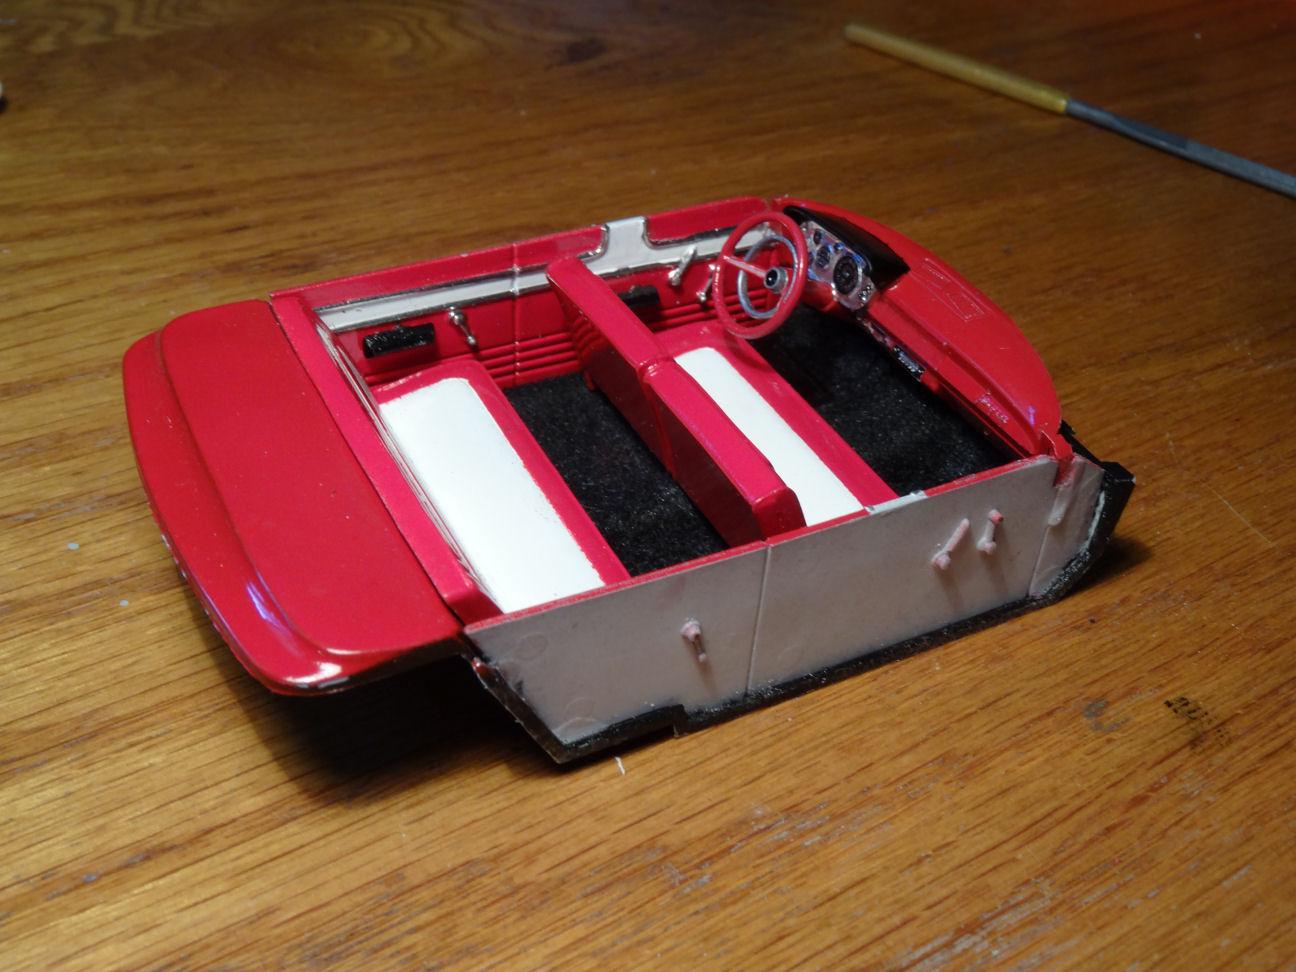
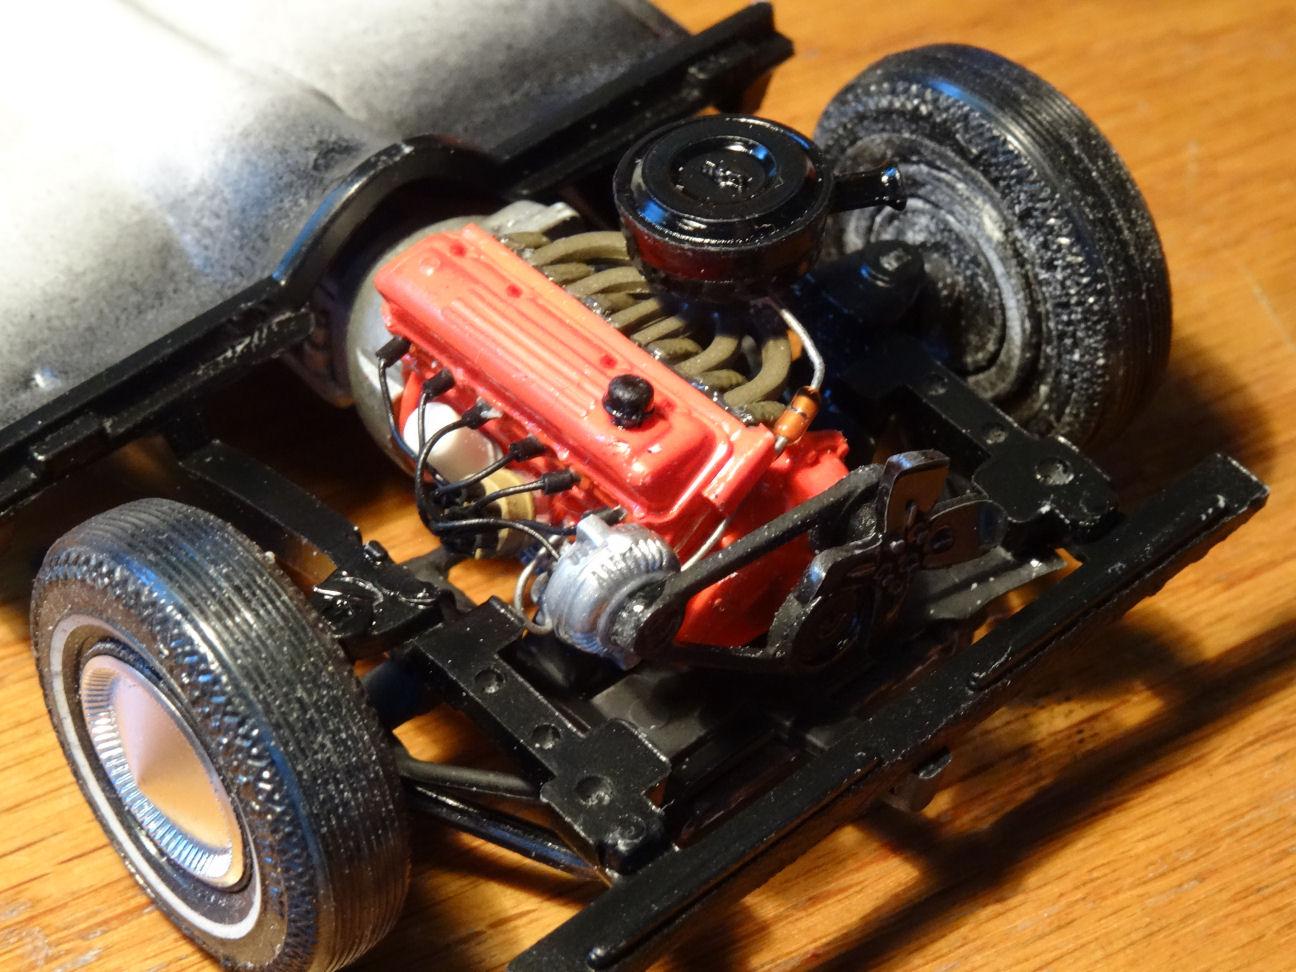
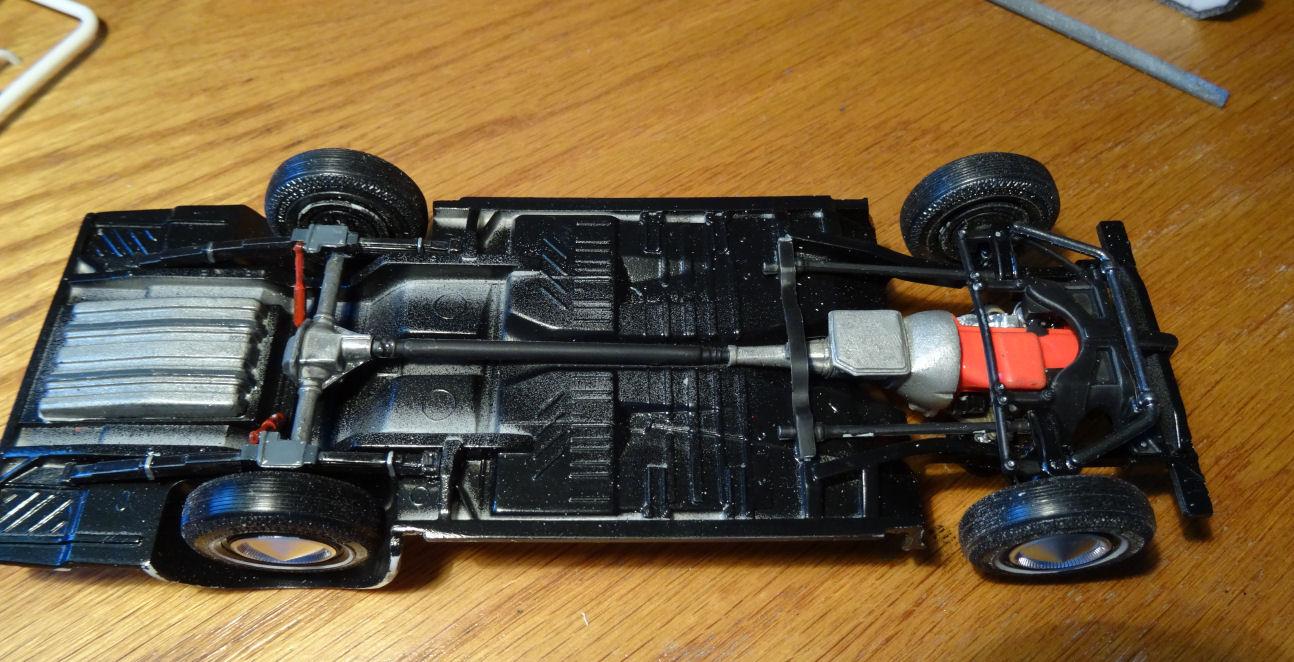
So I waited over two weeks for some "U" channel plastruct to arrive so I could start fabbing the chassis front suspension. When the bits finally arrived I didn't like the way the parts worked and scrapped that idea. Instead I went to the parts junkyard and pieced together some parts and came up with this. Other then the yellow sway bar which is from the AMT 68 Shelby Kit I have no idea what the parts came from. I need to extend the exhaust, add tie rod end links and I still need a center link for the front end. Unless I want to go crazy and add power steering. Working on the interior as well. Took the console out of the tub. Added some detail to the seats which was a bit silly as you probably won't be able to see most of it but I couldn't help myself. Added the hinges to the sides of each front seat as well as a release handle on the drivers side to adjust the seat. While I was at it I added an ash tray to the back of the front seat. 'Cause back in the 60's everyone let their kids smoke in the back seat.? And that "U" channel did not go to waste, added to the bottom of the front seat for rails as seats don't really sit flat on the floor. The kit door panels are completely wrong in so many ways so they have been cut off and new panels will be fabricated. But that is a story for another day, especially since I haven't gotten that far yet.? Thanks for stopping in.?
-
Ouch, stickers? Really? What were they thinking.
-
So I've heard of triple black cars, guess you would call this a triple white car. ? I told you you were on the right track. The color totally works. Pretty soon it will be ready to roll out of the fire house and roam around San Francisco. Just wondering though, after your done with the love bug what's next?? The Love Boat.?
-
I just Luv it, looks fantastic.?
-
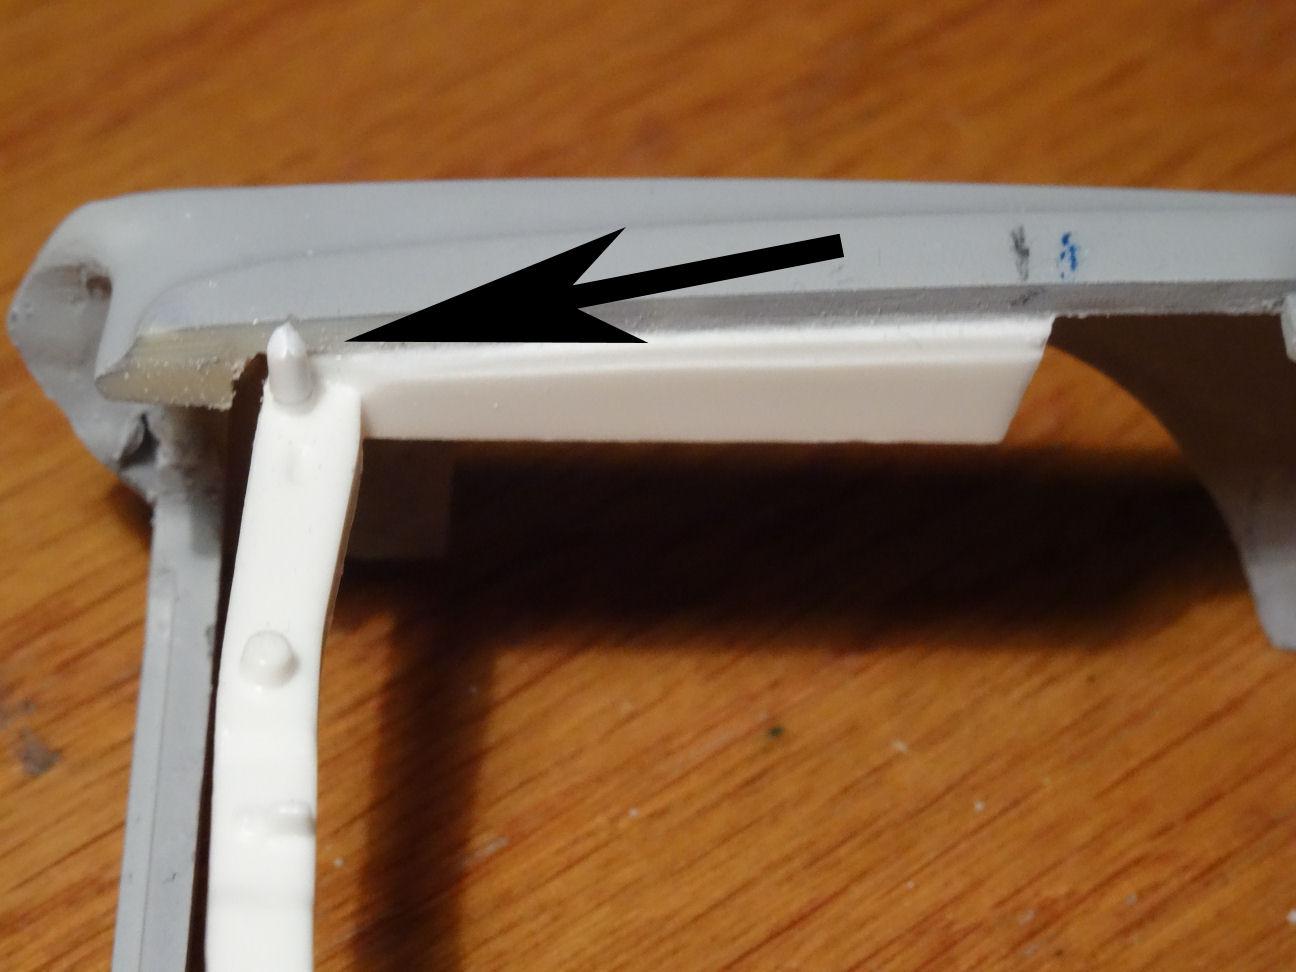
John, love the color choice on the Fairlane works really well. Coming along great? Jim, this is a detailed chassis, not the old promo style. And those hood pins are molded in place.
-
Looking really good. I like the color combo. Just to let you know the top rear of the engine compartment should be body color. The angled section just before it goes vertical.
-
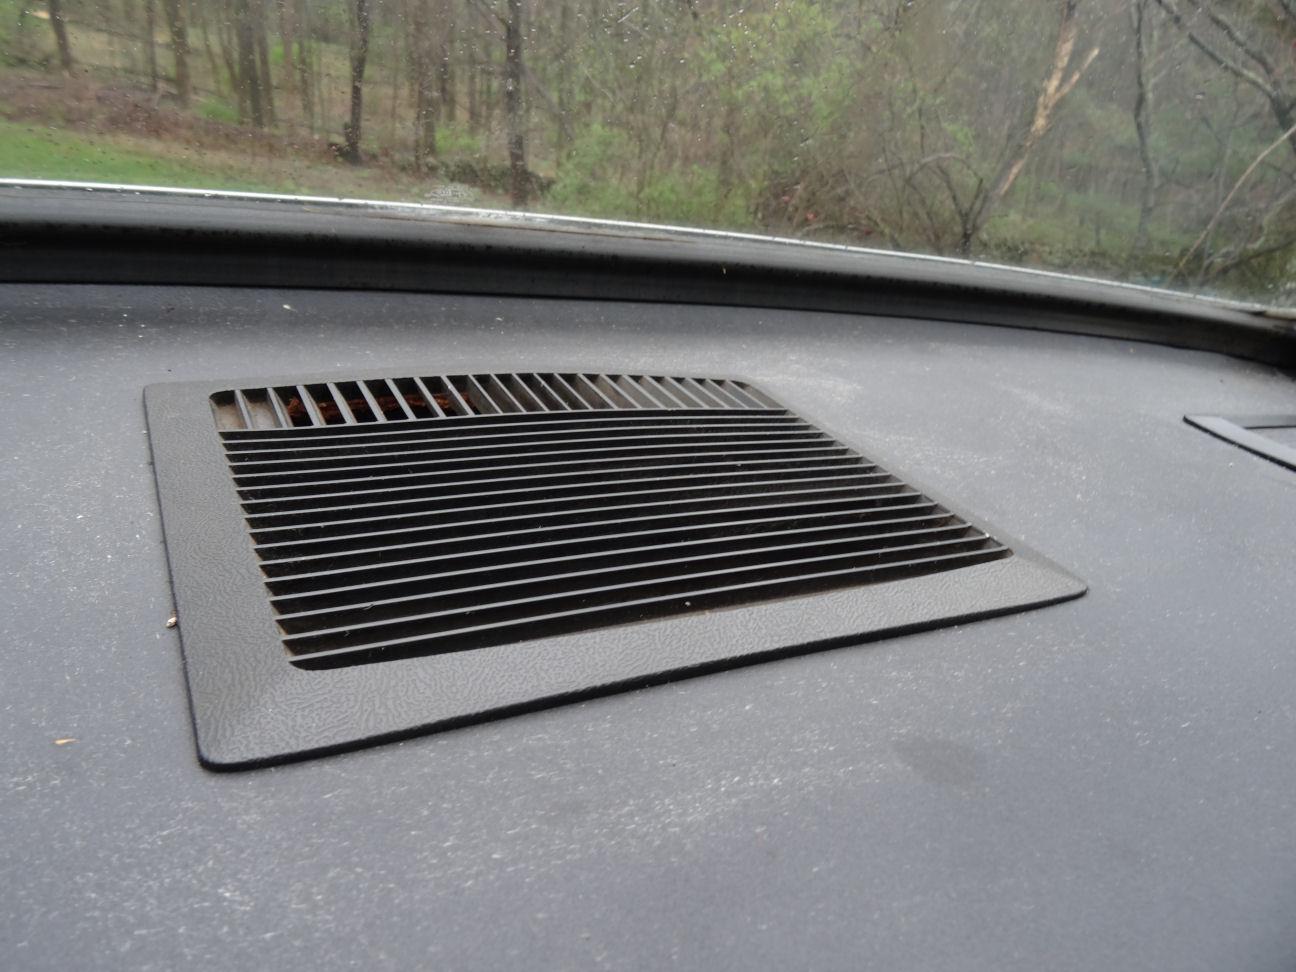
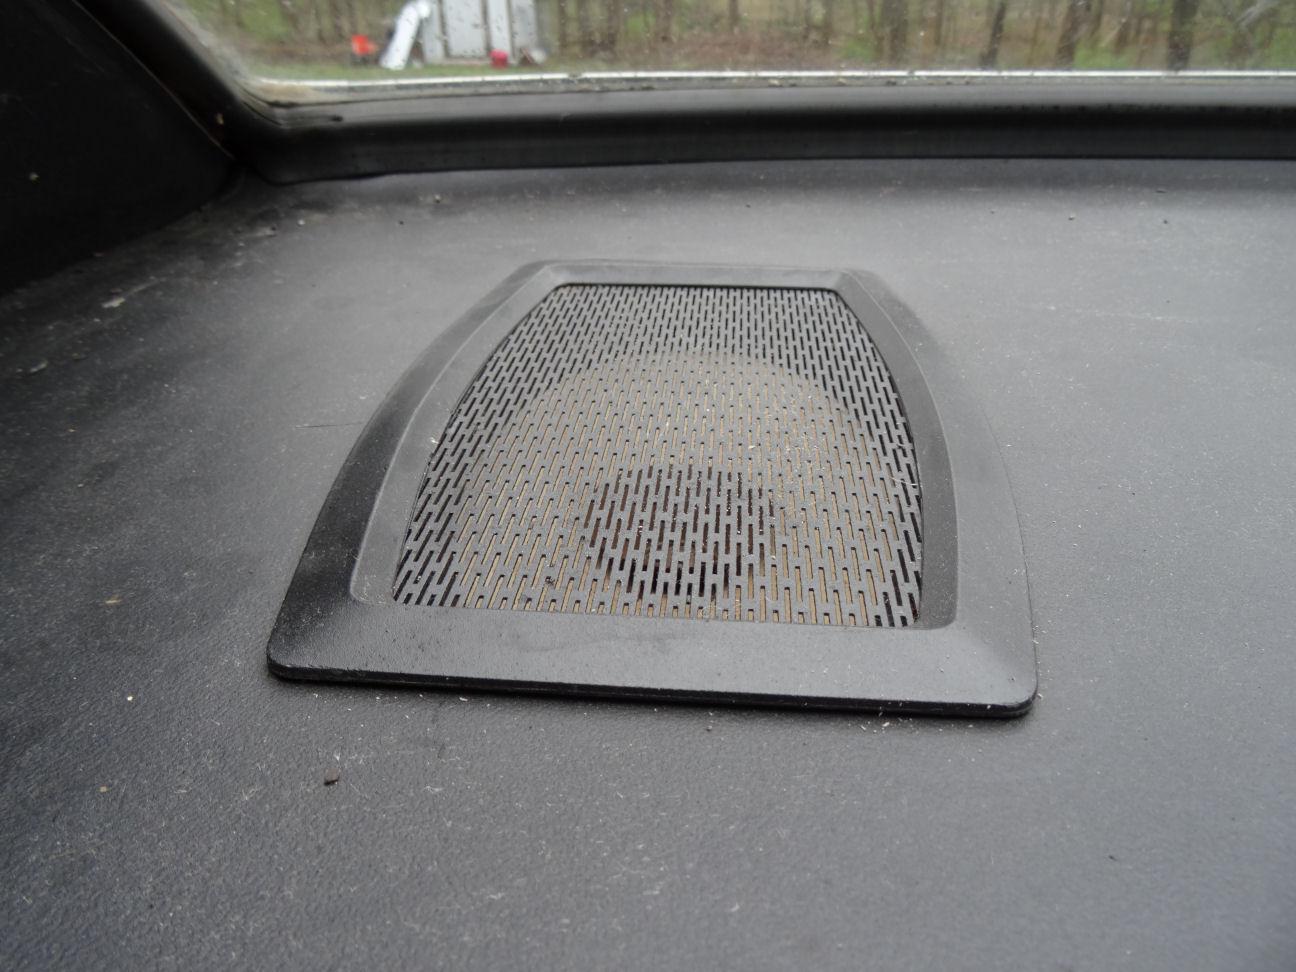
Here is a pic of the defogger and the factory speaker grill. Sorry if this is too much information but not all cars came with the defogger. In some states it was mandatory, like New Jersey where this car came from, and they had them from the factory. It could also be ordered as an option. Additionally there was a dealer installed defogger but it was completely different.
-
Looking good Pat. I like the color combo. Just so you know on the real car the rear defogger and speaker grills should be all black. While the speaker grill surrounds are a separate piece of metal and could be painted any color you like. The defogger is molded in black plastic and the grill and surround are all one piece.
-
Looks gnarly dude, gotta print a surf board to go with. ?♂️ Seriously, I like the way it is coming together so far.
-
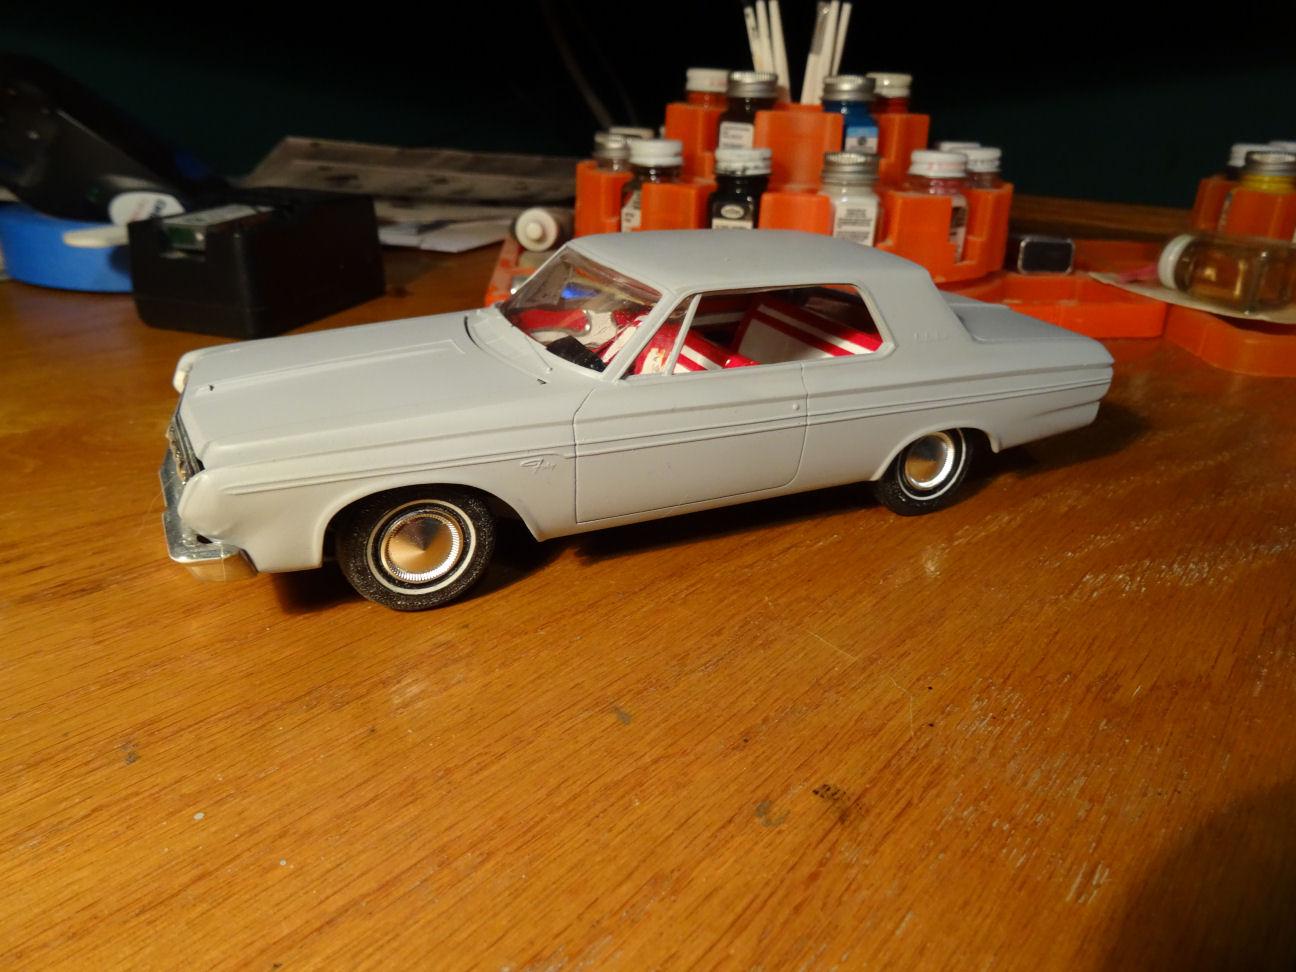
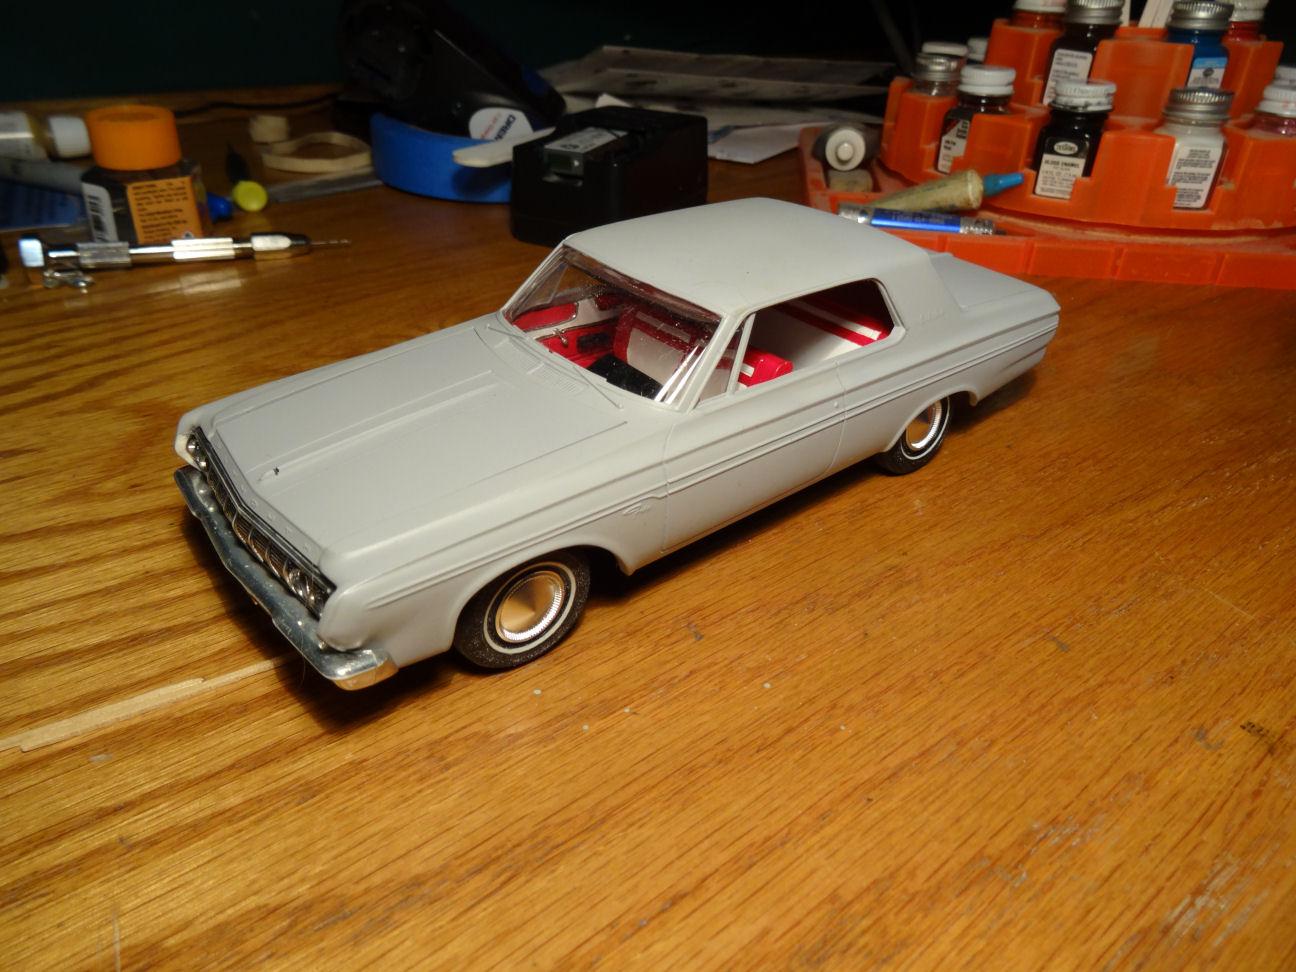
Fundamentally the parts I am using from the '64 Lindberg kit I'm building OOB. For the most parts things are going together nicely. The chassis has nice detailing and most things fit well. Somehow they completely missed the boat with the wheel fitment. The stubs that the wheels mount to are much smaller then the holes in the wheels. And why couldn't they put some detail on the so called 'BRAKE PLATES'. Another issue is the interior sides, they are too short front to rear so they don't fit nicely into the tub. Otherwise I like what I see and will probably use the same bits for another build. Making some progress as the interior is coming together, still have a few minor bits to do but it's getting there. The interior is 90% Lindberg and 10% Johan. The dash and steering wheel are Johan. The seats are from a Lindberg '64 Dodge 330 and the rest is the '64 Lindberg Plymouth for those of you keeping score. Got the reliable old slant six into the chassis and it's feeling at home. Don't know why the intakes look green in this shot, but they are different shades of gray. And a good portion of the chassis is together. Still a few bits here as well along with some touch up work. But then trouble arose when trying to build the engine compartment and attache the six banger to the radiator. The radiator hoses don't line up with the holes in the radiator. Dug out a few more of these kits and not one of them had a radiator suited for the six cylinder. What's the deal with that???? The radiator had holes in the top right and lower left. The six needed holes top center and lower right. Had to take the radiator back out, plug 2 holes and drill 2 new ones. The top center hole is right below the radiator cap which is not a proper spot for it so I guess I need to move the cap as well. Have to research where it belongs. I mocked everything up to get a feel for the old girl. I originally was thinking about red-lines with poverty caps. Trying to scrounge up four red-lines I came across and envelope marked 1957 Plymouth. My old man loves these wheel covers for some reason. He had them on the '57 Dodge, '66 Fury wagon, even put them on my brother's '71 Valiant. And right at this moment I'm sure they are hanging out in his garage. So I put on some whitewalls and the '57 covers for a look-see. WDYT? They still need a black wash. Not sure if I like them or not. Might have to wait until I get color on the body. Which is going to be black BTW. Now it's time for a break or should I say brake???? Has anyone else noticed how many people on the internet and especially fleabay use the work break when referring to car brakes. Drives me nuts.? Do you really want to buy from someone who sells "break parts" ? Thanks for listening, catch ya next time.