LennyB
-
Posts
3,214 -
Joined
-
Last visited
Content Type
Profiles
Forums
Events
Gallery
Everything posted by LennyB
-
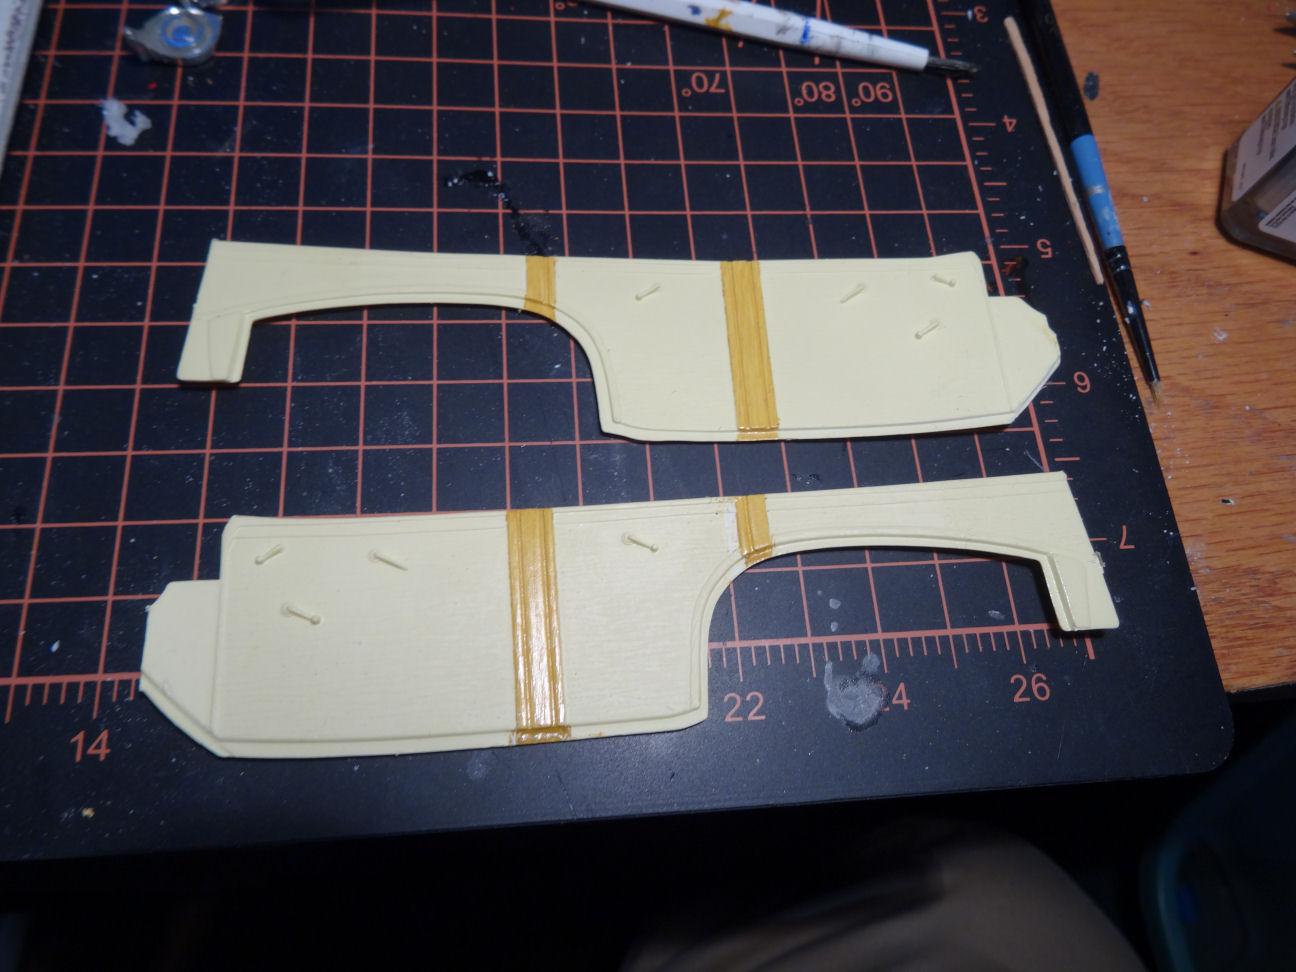
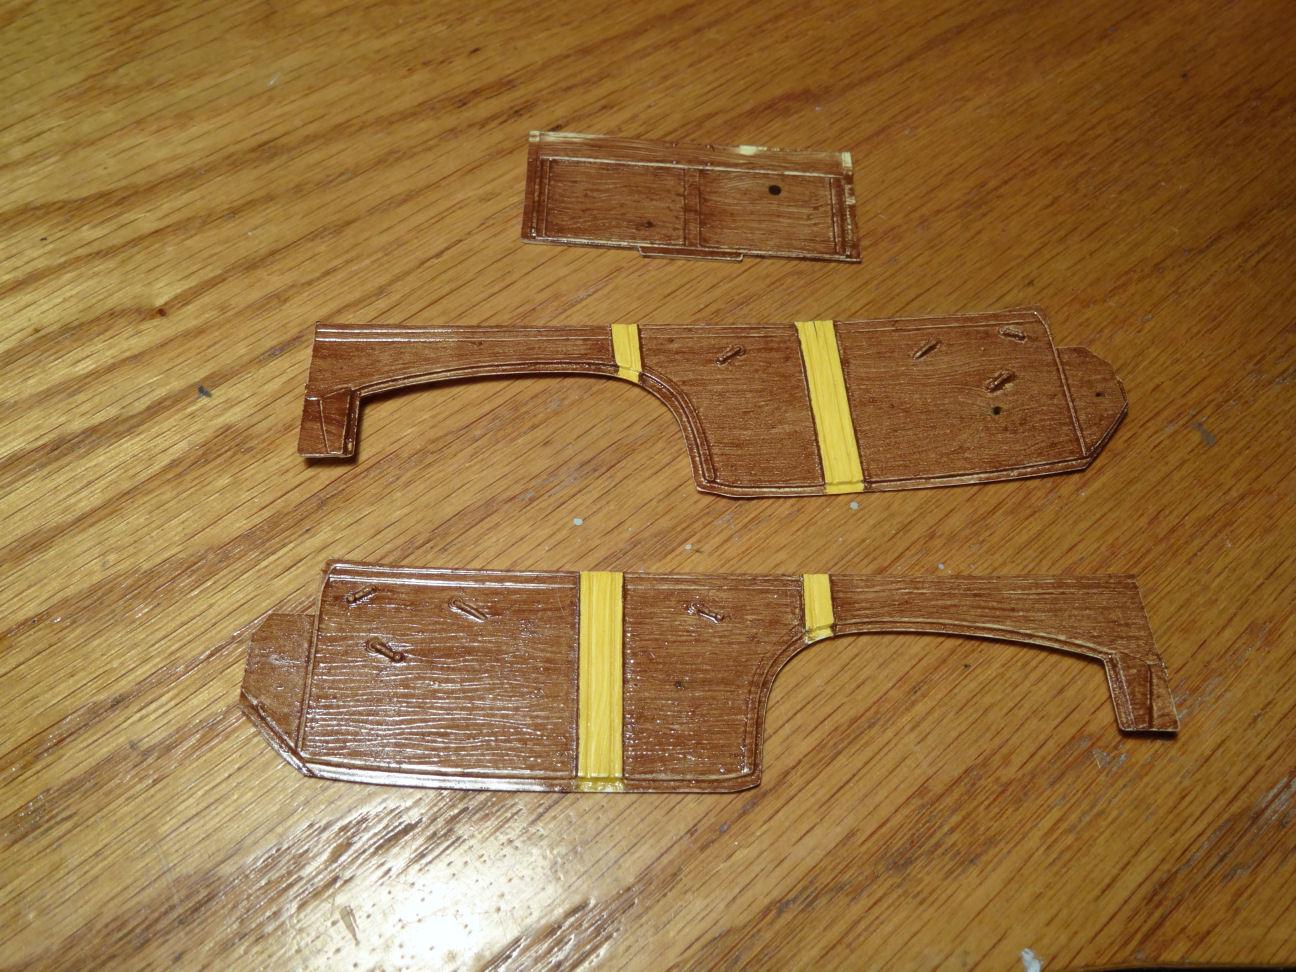
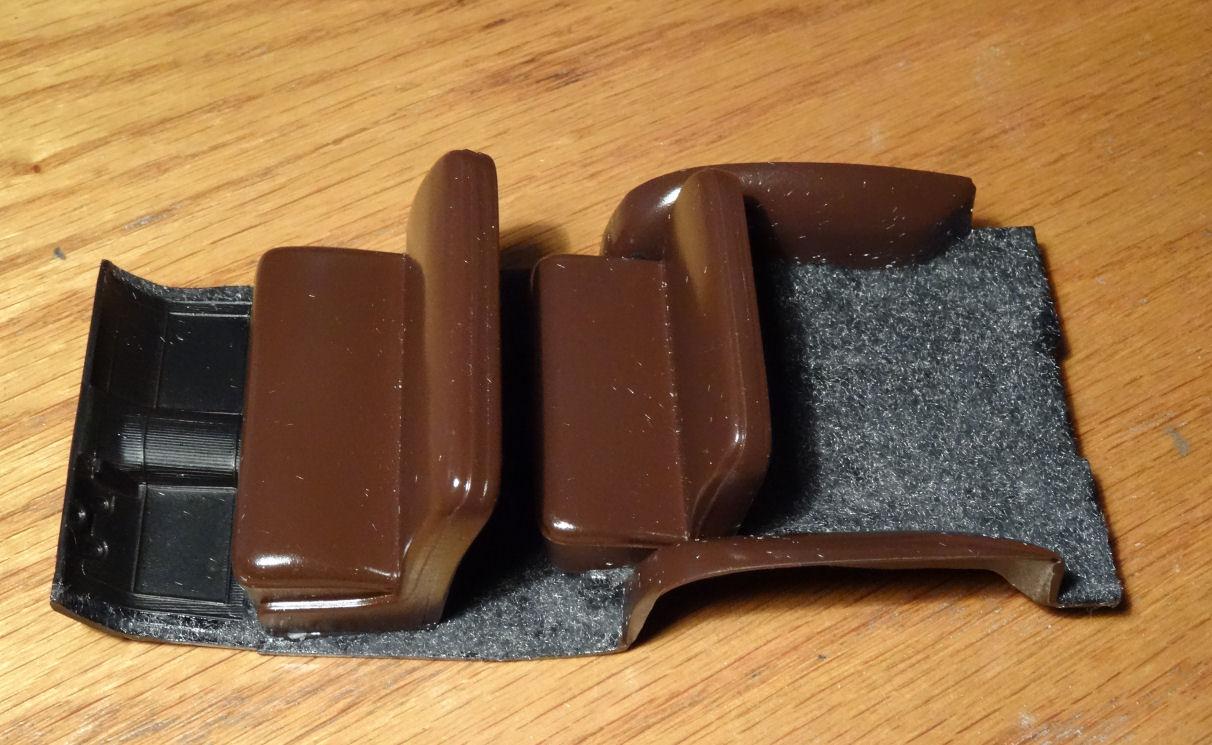
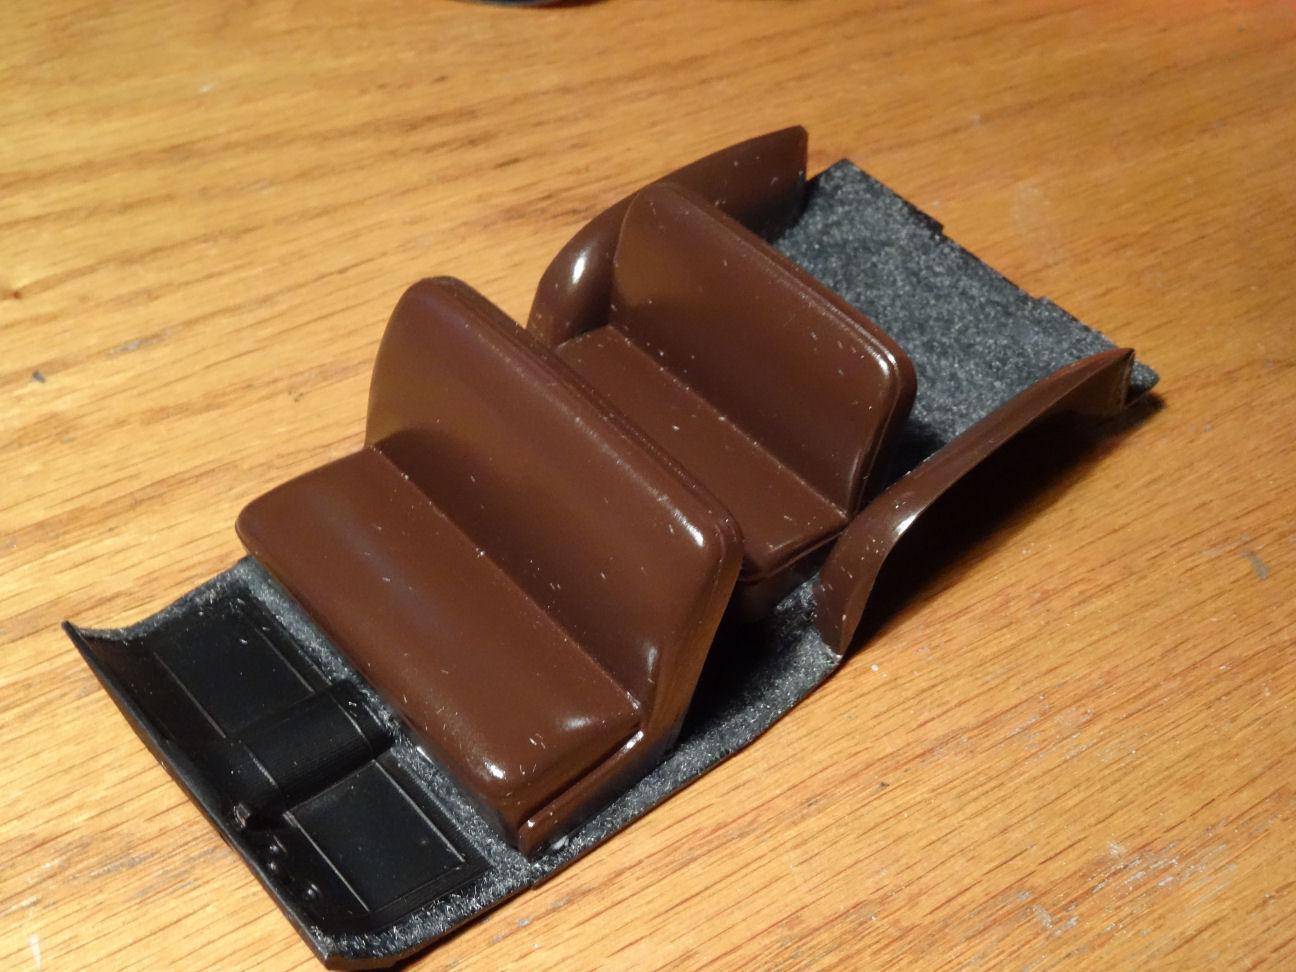
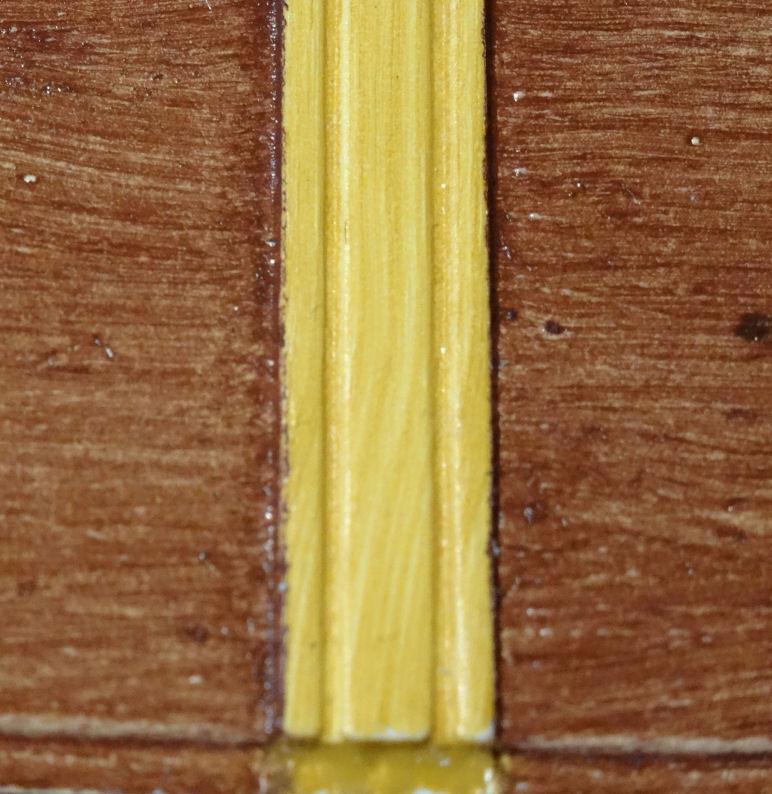
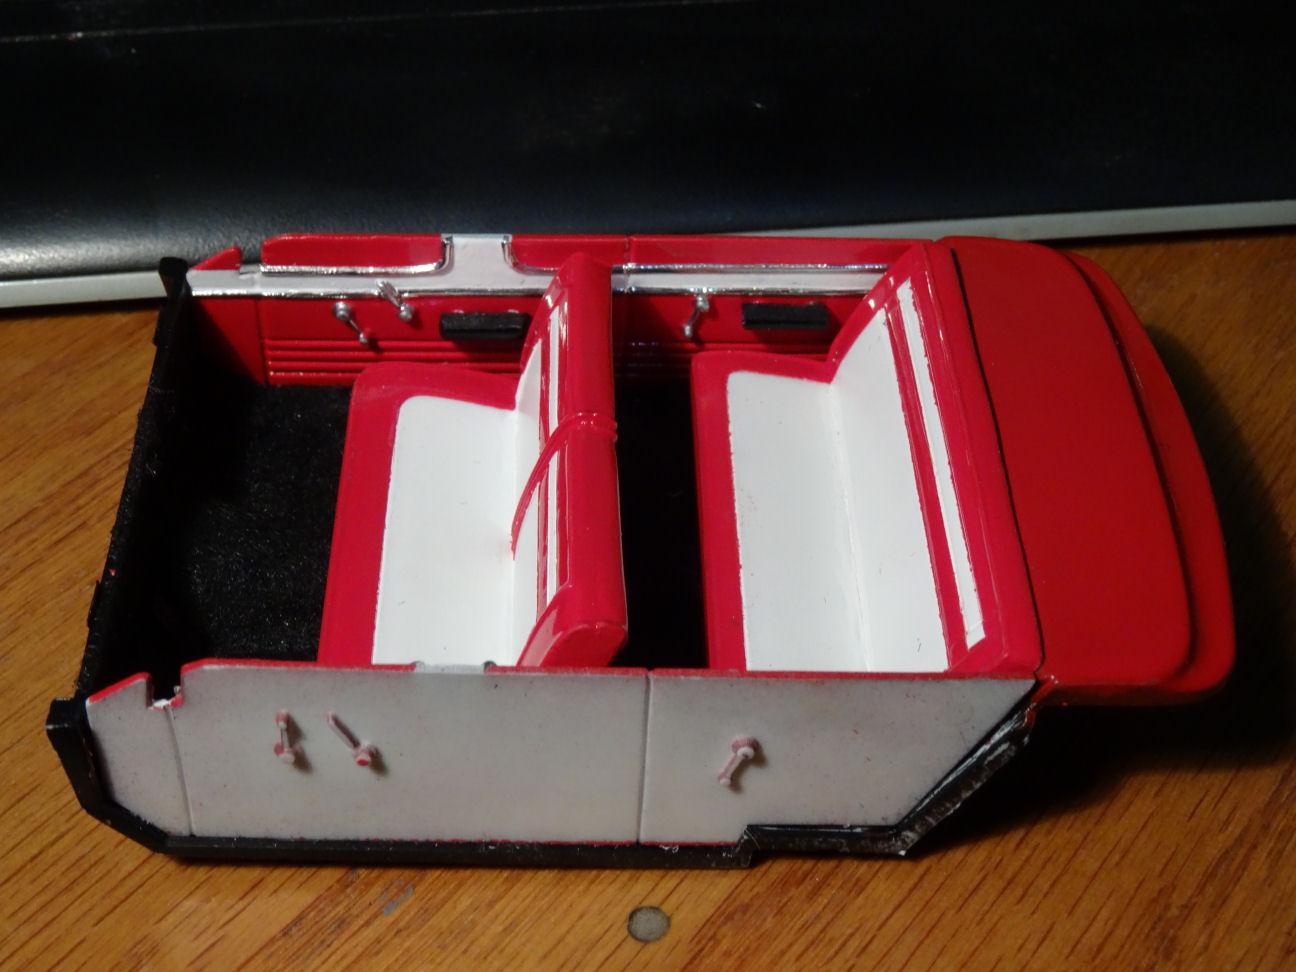
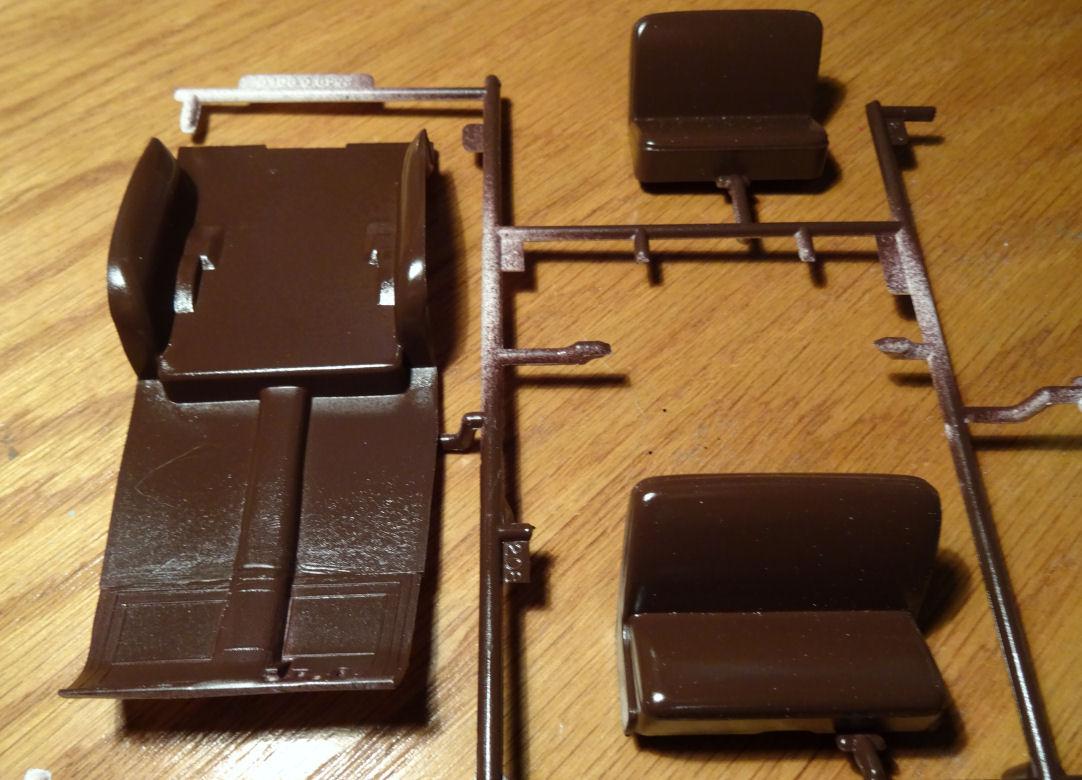
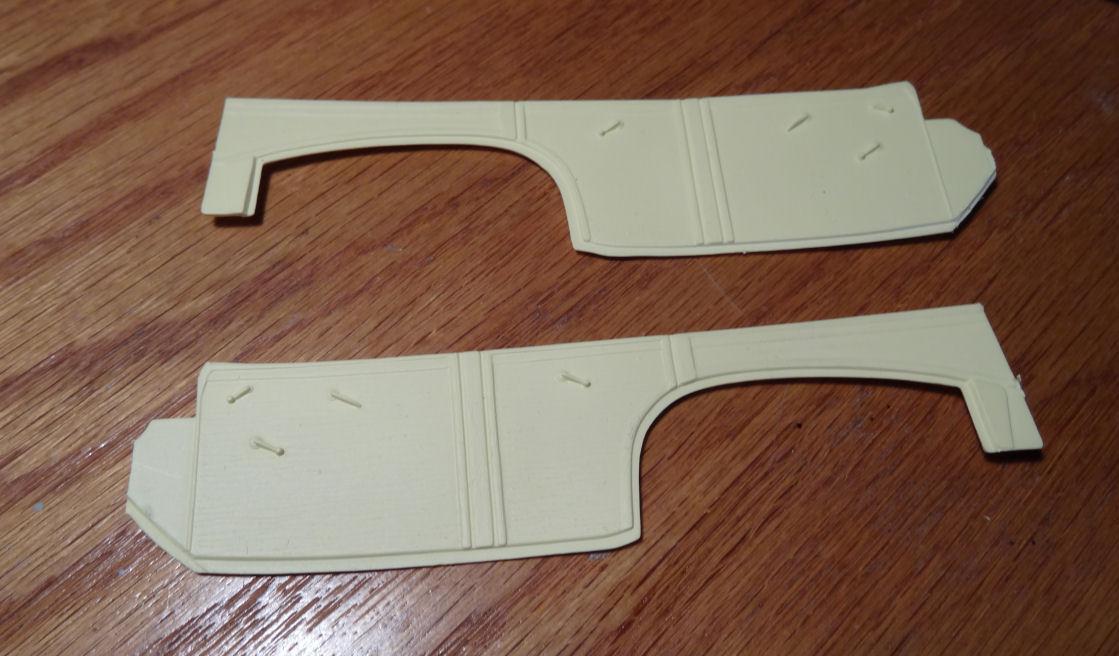
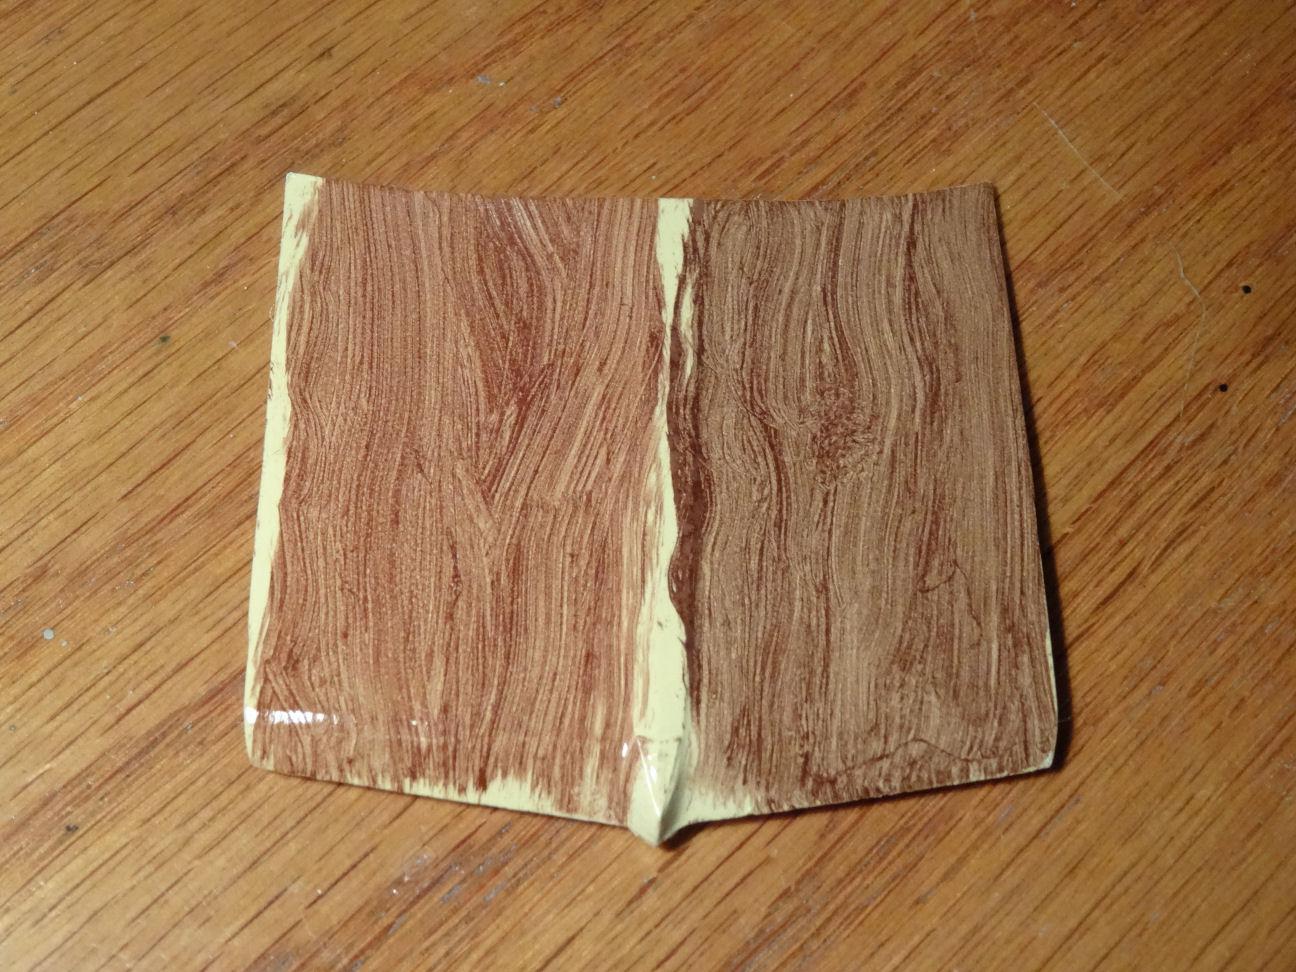
The Woody This woodgraining is fun in a way but it really slows things down on the project. To get this effect the first step is laying down a coat of light yellow as the base. Then using a combination of different colors of oil paint I first mixed a light brown thinned slightly and worked it over the two vertical rails on the interior wall. Can't really see the woodgrain effect so well in the pics but trust me it's there. But then the waiting comes in. Even with using a dehydrator it takes several days for the paint to cure before handling. Once things were dry I masked off the two beams and did the panels in a mix of dark browns. Before I laid down the dark brown I splattered a few black spots on the panels to represent knots. All of this was covered with a Watco Crystal Clear Lacquer but as it has sat for two day now it is still not ready to be handled. Still need to paint 'metal' on the top of the interior panels and around the perimeter of the tailgate, which will match the seat color, and chrome the door handles. The interior floor is flocked and the seats are in place and waiting for the rest of the pieces to join the party.? The flocking is messy and got my seats dirty already, have to get out the vacuum.? 'till next time, cheers!

-
Wheel "thingy", David this is getting too technical for me.? Hard to believe that such a simple kit can create such problems with the color. Guess you are proving the theory that white is not always white. Keep it up thought I think you are on the right track
-
Very cool project, can't get enough of these earl Fords.
-
Looking fantastic.? I also have to say this is one of the few kits that the 'custom' pieces actually work well on the car. Like they were properly thought out rather then just something made up so they could call it a 3in1.
-
Thanks, I have some photo-etched wipers I'm going to use on the Coupe. As for the Woody the 48 Ford donor kit comes with wipers. Have to see which look better.
-
I assume that was a flathead Ford. Interesting choice as the kit 6 is a flathead. Wanted to keep the style I guess. I have a lot of 40 Fords lying around will have to match one up, thanks for the info. You never know what you learn at this place.?
-
I picked up a few of these when they came out but never built any. I'll be watching to see how it goes together.
-
Looks like Maggi is read for a road test. Hopefully that HEMI doesn't blow the moldings right off.? Looks really great Jim and it must be nice to have a kit you don't have to fight with.?
-
-
Sorry, my bad. it was .030 half round. Can't find half round in a smaller size, I had that issue with my Fairlane.
-
Greg, looks like a fun project. Just promise me you are not going to try and replicate all those chrome acorn nuts. That will drive a man insane.?
-
If Flintstone doesn't have them maybe Rubble does.?
-
Thanks Scott, appreciate it. Too late Jim, they are rolling around on the floor somewhere. If I can find them I'll send them your way. Supposed to be cold tonight so that might make it easier.?
-
Thanks David, I'll keep my fingers crossed and pinecones outside. On second thought maybe I should paint "Dirty Pinecone Ranch" on the side of my Woody. ?
-
How about a Magnum Woody???? Anyhow, I guess I really need to come up with two contrasting colors as the panels are generally darker then the surrounding wood.
-
Thanks Carl?
-
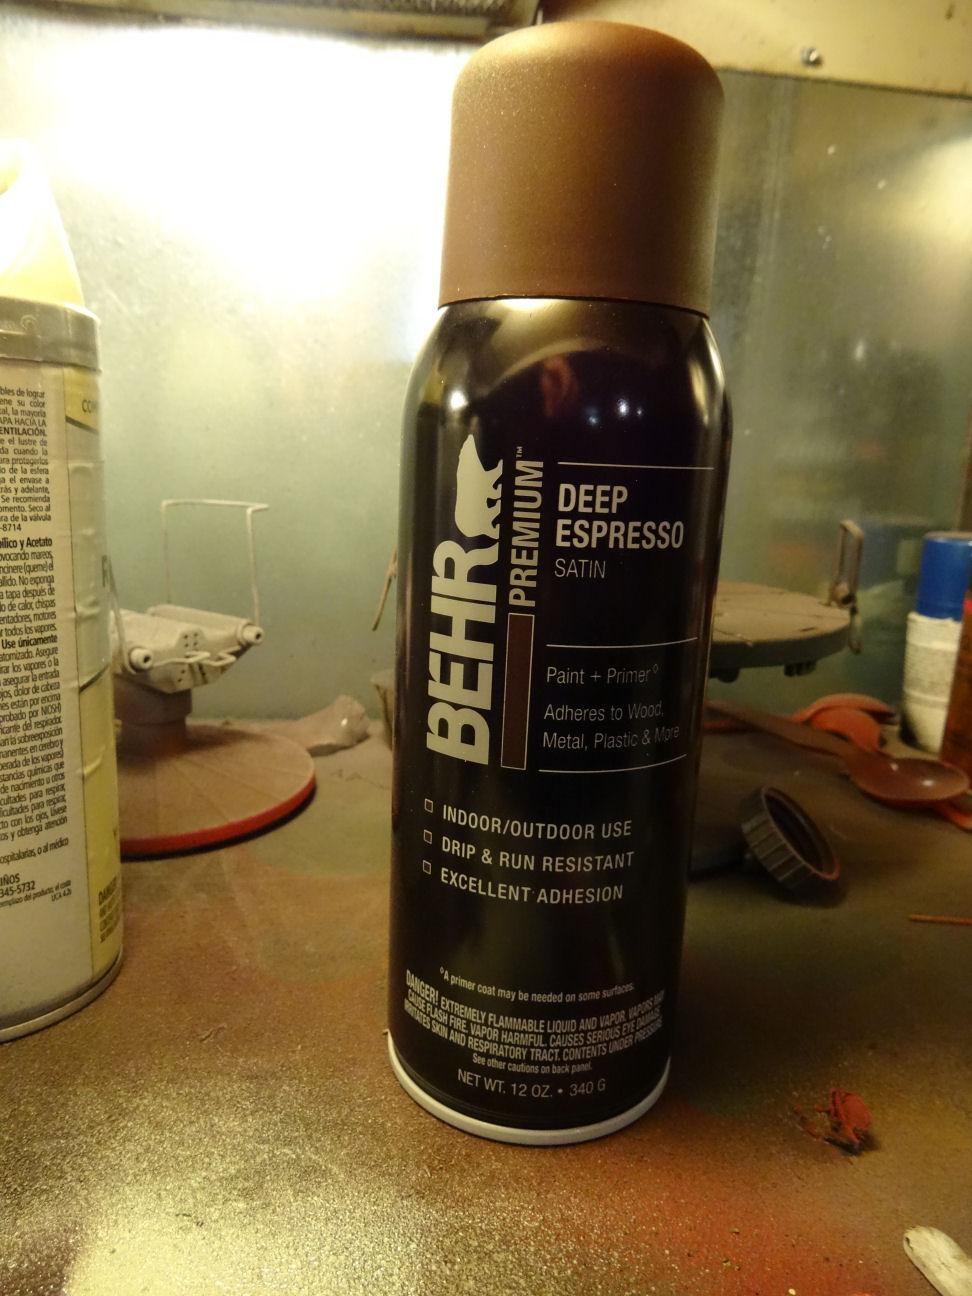
The Woody Have not made much progress on the '41 Plymouth's of late, not sure why. Maybe it's the curse of the dreaded pine-cone that's putting me off working on them. Actually it's more like the prospect of having to do all that wood-grain that is giving me pause. Anyhow, time to move forward. Decided on doing the interior seats of the woody in a dark brown. Found some Behr "Deep Espresso"spray paint that actually looked pretty close to what I was thinking. They call it satin but it has a bit too much gloss as far as I'm concerned. Will need to tone it down. Prepped the inner panels in a light yellow in anticipation of the wood-grain. And been making some test patches to figure out the color of the wood. I'm leaning towards the one on the left. WDYT?
-

AC 289 Sports MkIII, starting with a Monogram Cobra
LennyB replied to Matt Bacon's topic in WIP: Model Cars
Coming along nice Matt? -
Good choice, I'll keep an eye on this. I've never built any of the Revell kits and plenty of the AMT's. Have them in the stash and hope to one day get to them.
-
Hey, where's Dean Jones & Buddy Hackett??? Looks like an interesting build and should be a fun one.?
-
I think I'm going to order some pine-cone repellent before I attempt to paint mine just to be safe. ? Greg, with this kit I think it's just par for the course. I'm sure the second attempt will succeed and it will be an easy ride the rest of the way....Hey, one can dream can't they.?
-
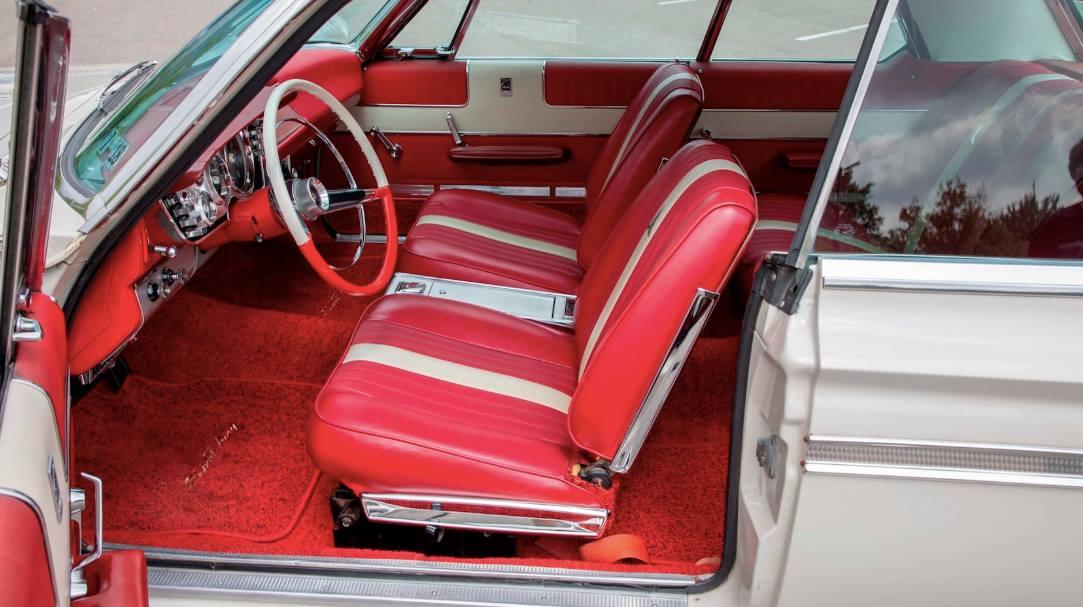
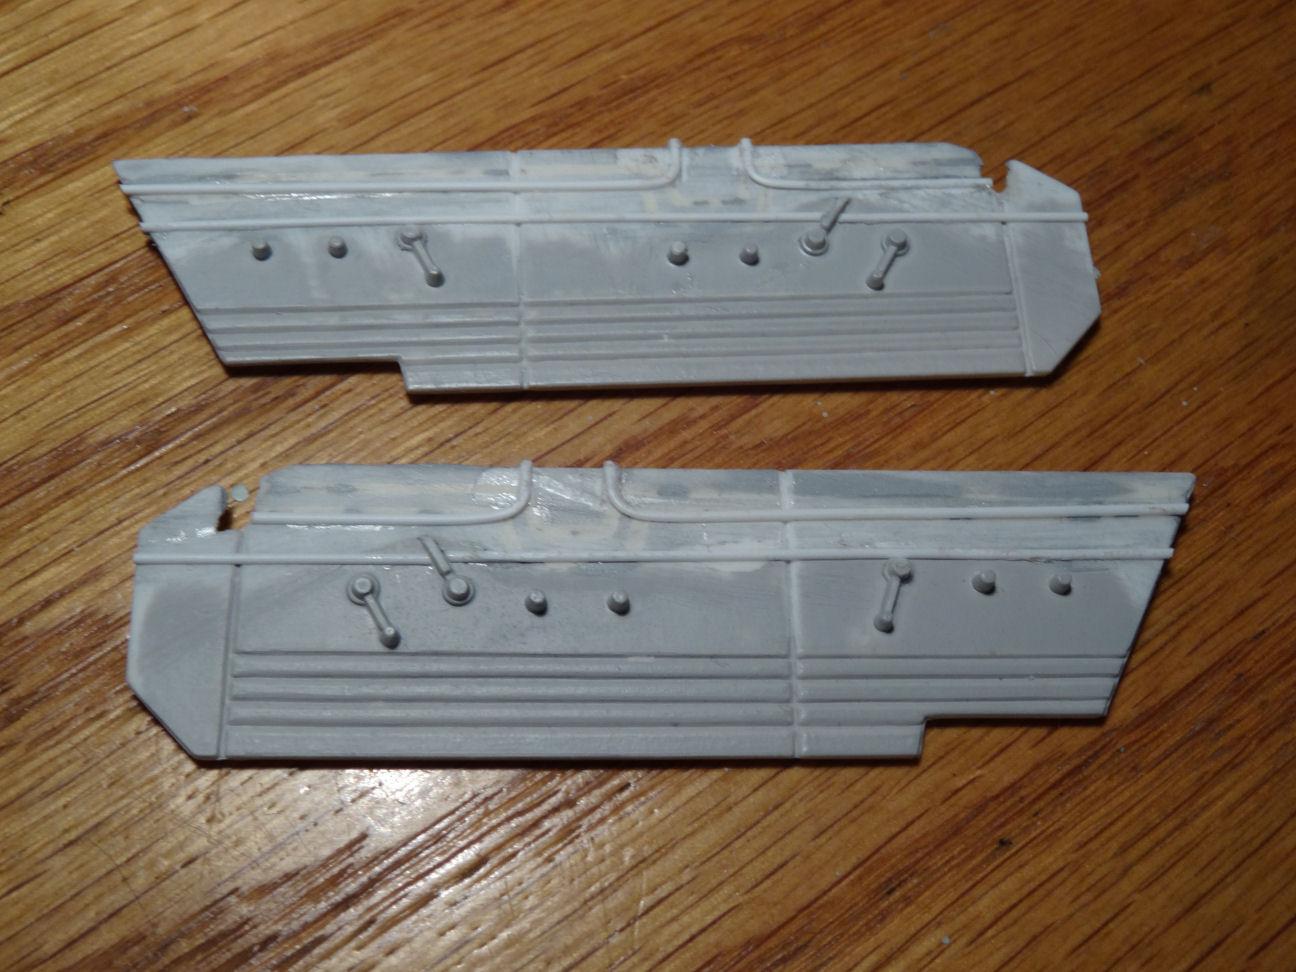
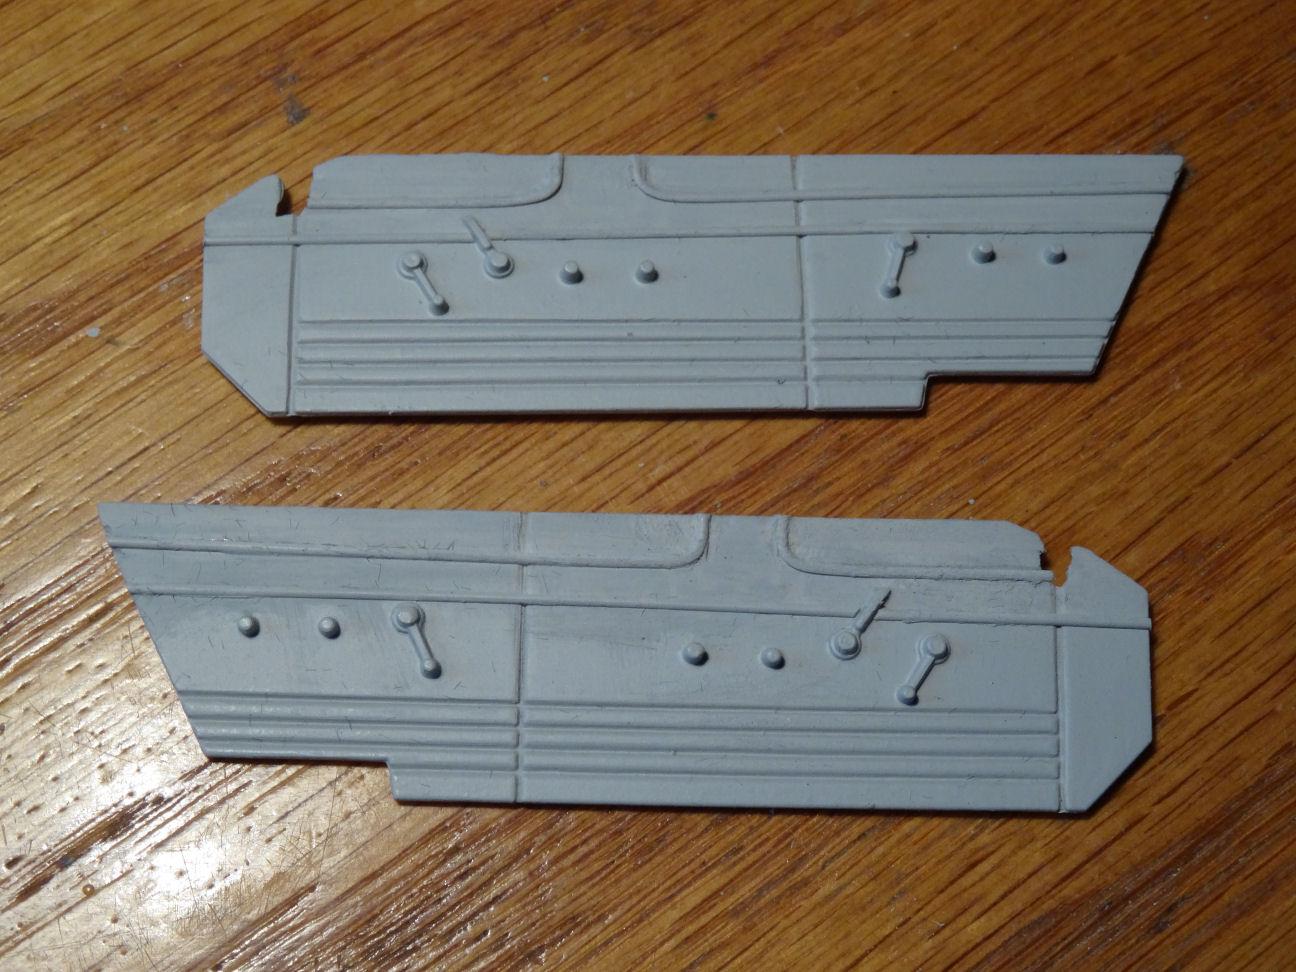
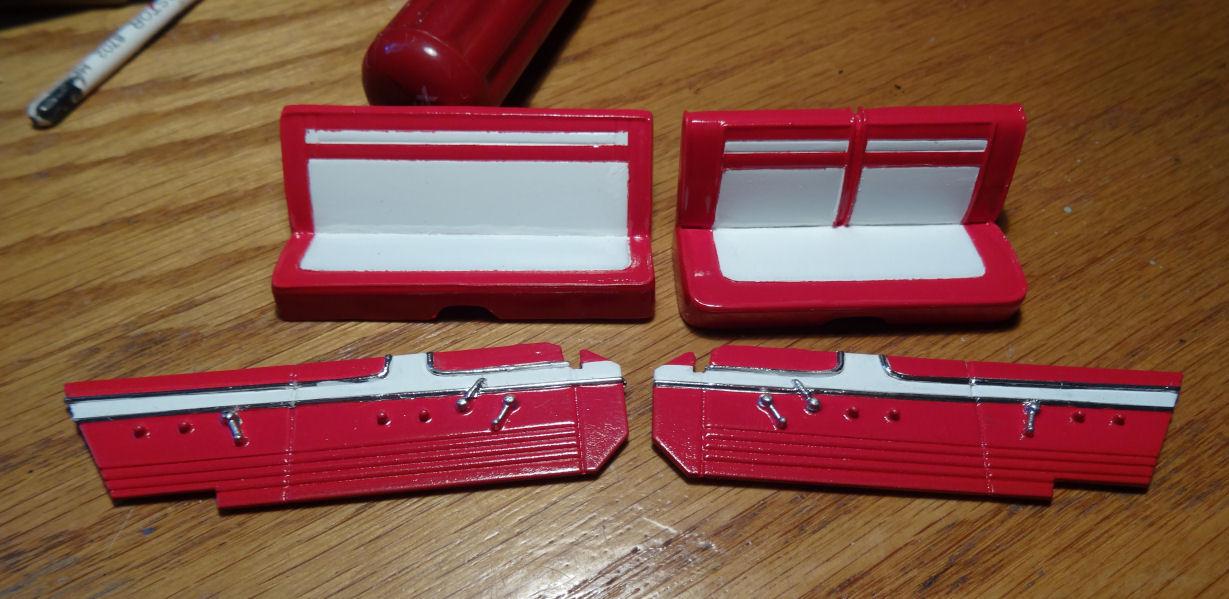
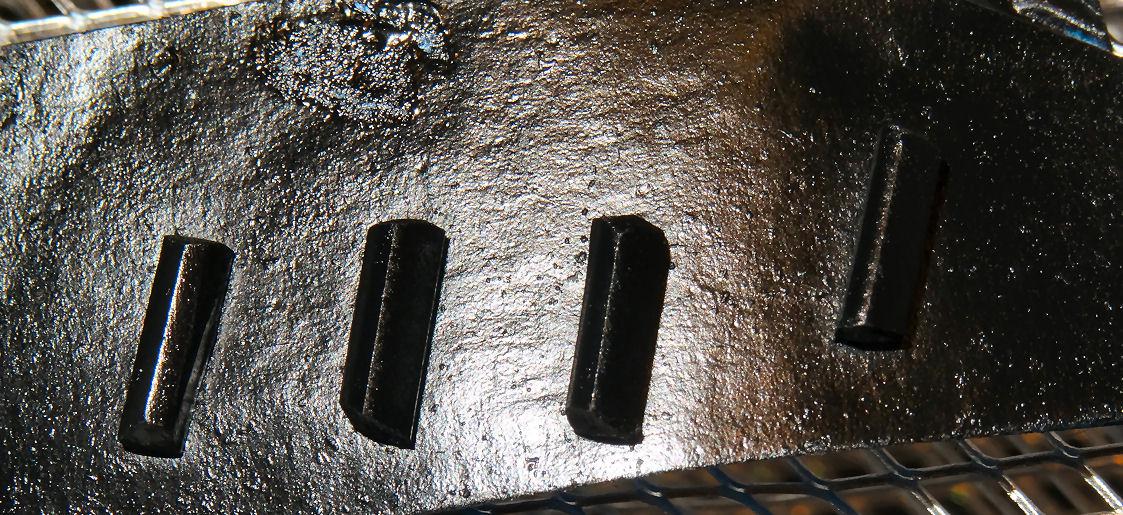
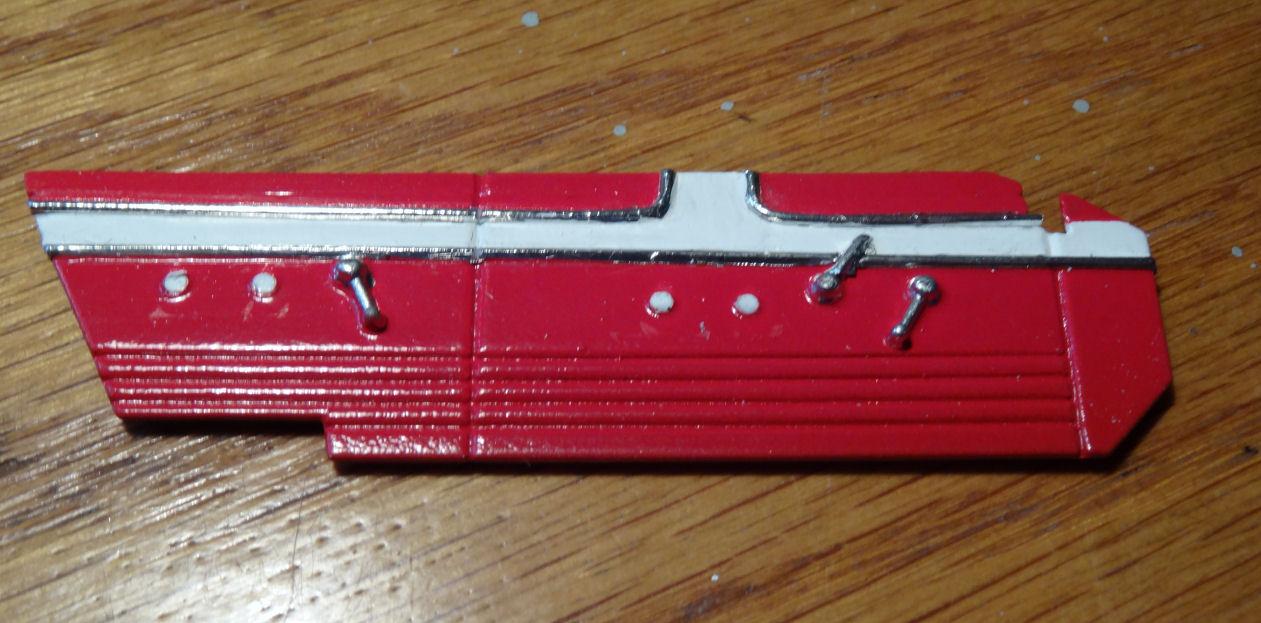
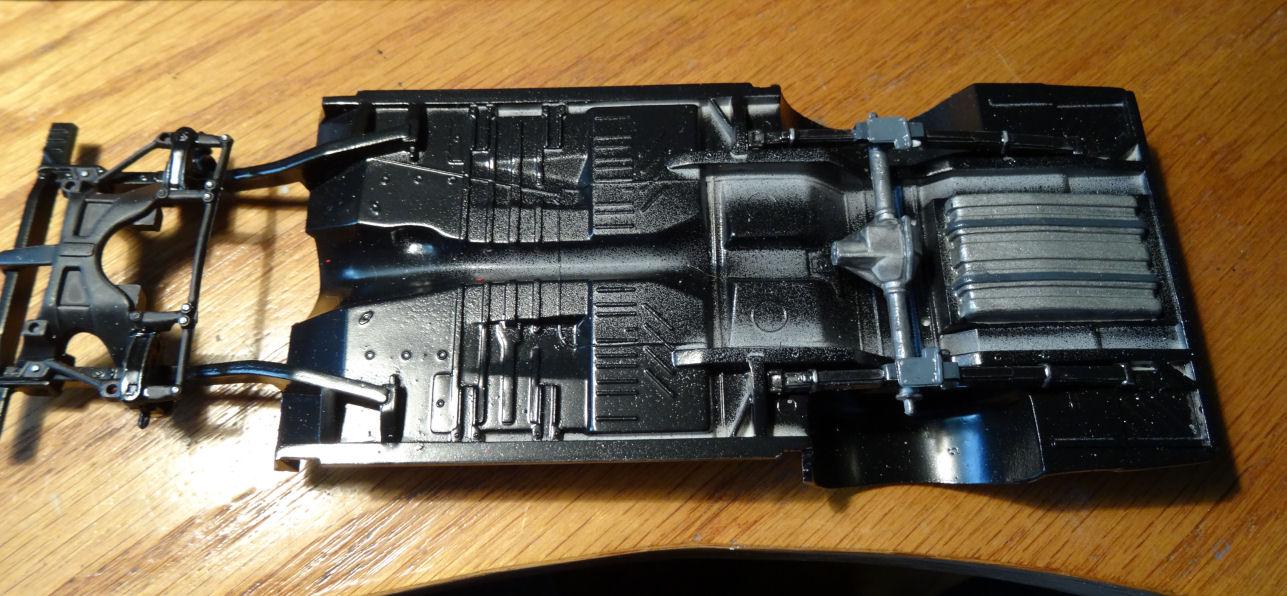
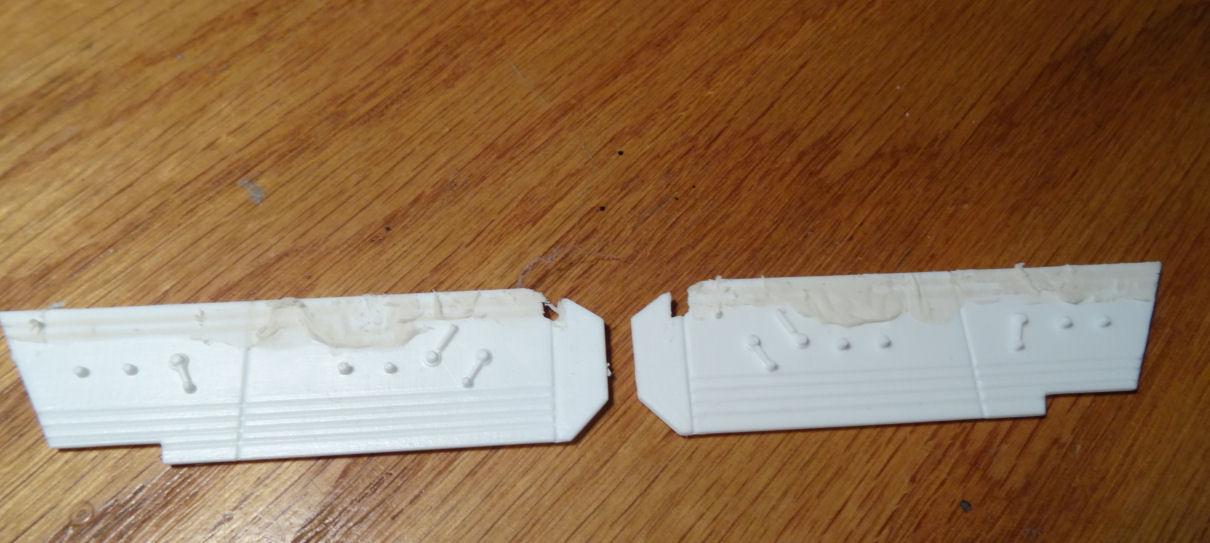
Trying to make headway on the interior and it's been one step forward........ So, I'm using the interior from the '64 Lindberg Fury and I found this pic on the net for inspiration. So I've taken the door panels and removed the sanded off the top detailing, while leaving the lower alone, and with some .02" half round created some new trim. In the process I found my Fury kit only had one bucket seat so I went up into the attic and dug a set of bench seats from a Lindberg Dodge 330 kit. Happy accident in a way as I think the bench fits the style of the build better. And who cares if we have a Plymouth interior with Dodge seats. I'm sure Mrs. Petty won't mind as long as they are comfortable. My original intention was to do a black and white interior but I switched gears and decided on red and white. So a step backwards with a paint strip and then forward again. Getting close to having a complete interior but as I was getting ready to install the arm rests I discovered that they made innies and outties. In my case the door panels had nipples and the arm rests had nipples, that wasn't going to work. Another trip to the attic and all I could come up with is armrests with nipples. So right now I'm waiting for the paint to dry on some arm rests I made from scrap sprue. And a little plastic surgery on the door cards waiting for the arm rests to arrive. So while we wait on that it's off to work on the chassis. Hopefully we keep moving forward after this.☺️
-
You know MPC has a street version of the 1970 Coronet right? https://www.amazon.com/MPC-1970-Dodge-Coronet-Super/dp/B0BP8W9SJR/ref=asc_df_B0BP8W9SJR/?tag=hyprod-20&linkCode=df0&hvadid=652445030335&hvpos=&hvnetw=g&hvrand=17483353030844574448&hvpone=&hvptwo=&hvqmt=&hvdev=c&hvdvcmdl=&hvlocint=&hvlocphy=9004281&hvtargid=pla-2062110276399&psc=1&mcid=795e63ebbcc236f4a83c5d14e13bca0e But if you really want to work with what you have I will take a look in the attic
-
Must be tough to change the battery in that remote, it has to be teenie weenie.?
-
Coming along great Greg, I think you are winning the war of the noses.?