Tony Coomer
-
Posts
203 -
Joined
-
Last visited
Content Type
Profiles
Forums
Events
Gallery
Everything posted by Tony Coomer
-
My tribute to the Jim Keeler “Dodge Fever” 1968 Coronet
Tony Coomer replied to LDO's topic in WIP: Drag Racing Models
Very interesting build. Looking forward for the progress… -
Great start…
-
Great work. The motor looks great…
-
Great fab work…
-
Very kool build…
-
Wow!!! What a beautiful build…
-
Very nice. The detail looks great…
-
You nailed it as a replica. Both are outstanding cars
-
It would have been a crowd pleaser for sure. Great looking build
-
Love those Altereds. Great looking build…
-
formula 55 chevy
Tony Coomer replied to charlie libby's topic in WIP: Other Racing: Road Racing, Land Speed Racers
Very interesting and kool build. Looking forward to more updates… -
Geez! Another Stocker! 70 Formula Firebird B/SA
Tony Coomer replied to R. Thorne's topic in WIP: Drag Racing Models
Looking good so far… -
Oh Cha Cha!!!. Great looking funny
-
That turned out great
-
2 beautiful builds…
-
This is a great build…
-
Great job on the award. This build turned out great…
-
Gas shock how-to made from aluminum rod and tubing
Tony Coomer replied to Tony Coomer's topic in Tips, Tricks, and Tutorials
Thanks Daniel… -
Gas shock how-to made from aluminum rod and tubing
Tony Coomer replied to Tony Coomer's topic in Tips, Tricks, and Tutorials
Thanks John. This was the first build that I built the first set for. This was back when I used those lil copper coated pins for mounting. That altered has been in a box needing to be finished for about 14 years now, I need to finish it. My skill level has elevated since then and I want to re work a few things, but that’s another day lol -
Gas shock how-to made from aluminum rod and tubing
Tony Coomer replied to Tony Coomer's topic in Tips, Tricks, and Tutorials
Thanks Greg… -
Gas shock how-to made from aluminum rod and tubing
Tony Coomer replied to Tony Coomer's topic in Tips, Tricks, and Tutorials
Thanks Joe. That’s what I like about them, instead of gluing the ends of aluminum tubing together, that eventually will snap off. -
Gas shock how-to made from aluminum rod and tubing
Tony Coomer replied to Tony Coomer's topic in Tips, Tricks, and Tutorials
Thanks Terry… -
Gas shock how-to made from aluminum rod and tubing
Tony Coomer replied to Tony Coomer's topic in Tips, Tricks, and Tutorials
Thanks Graham… -
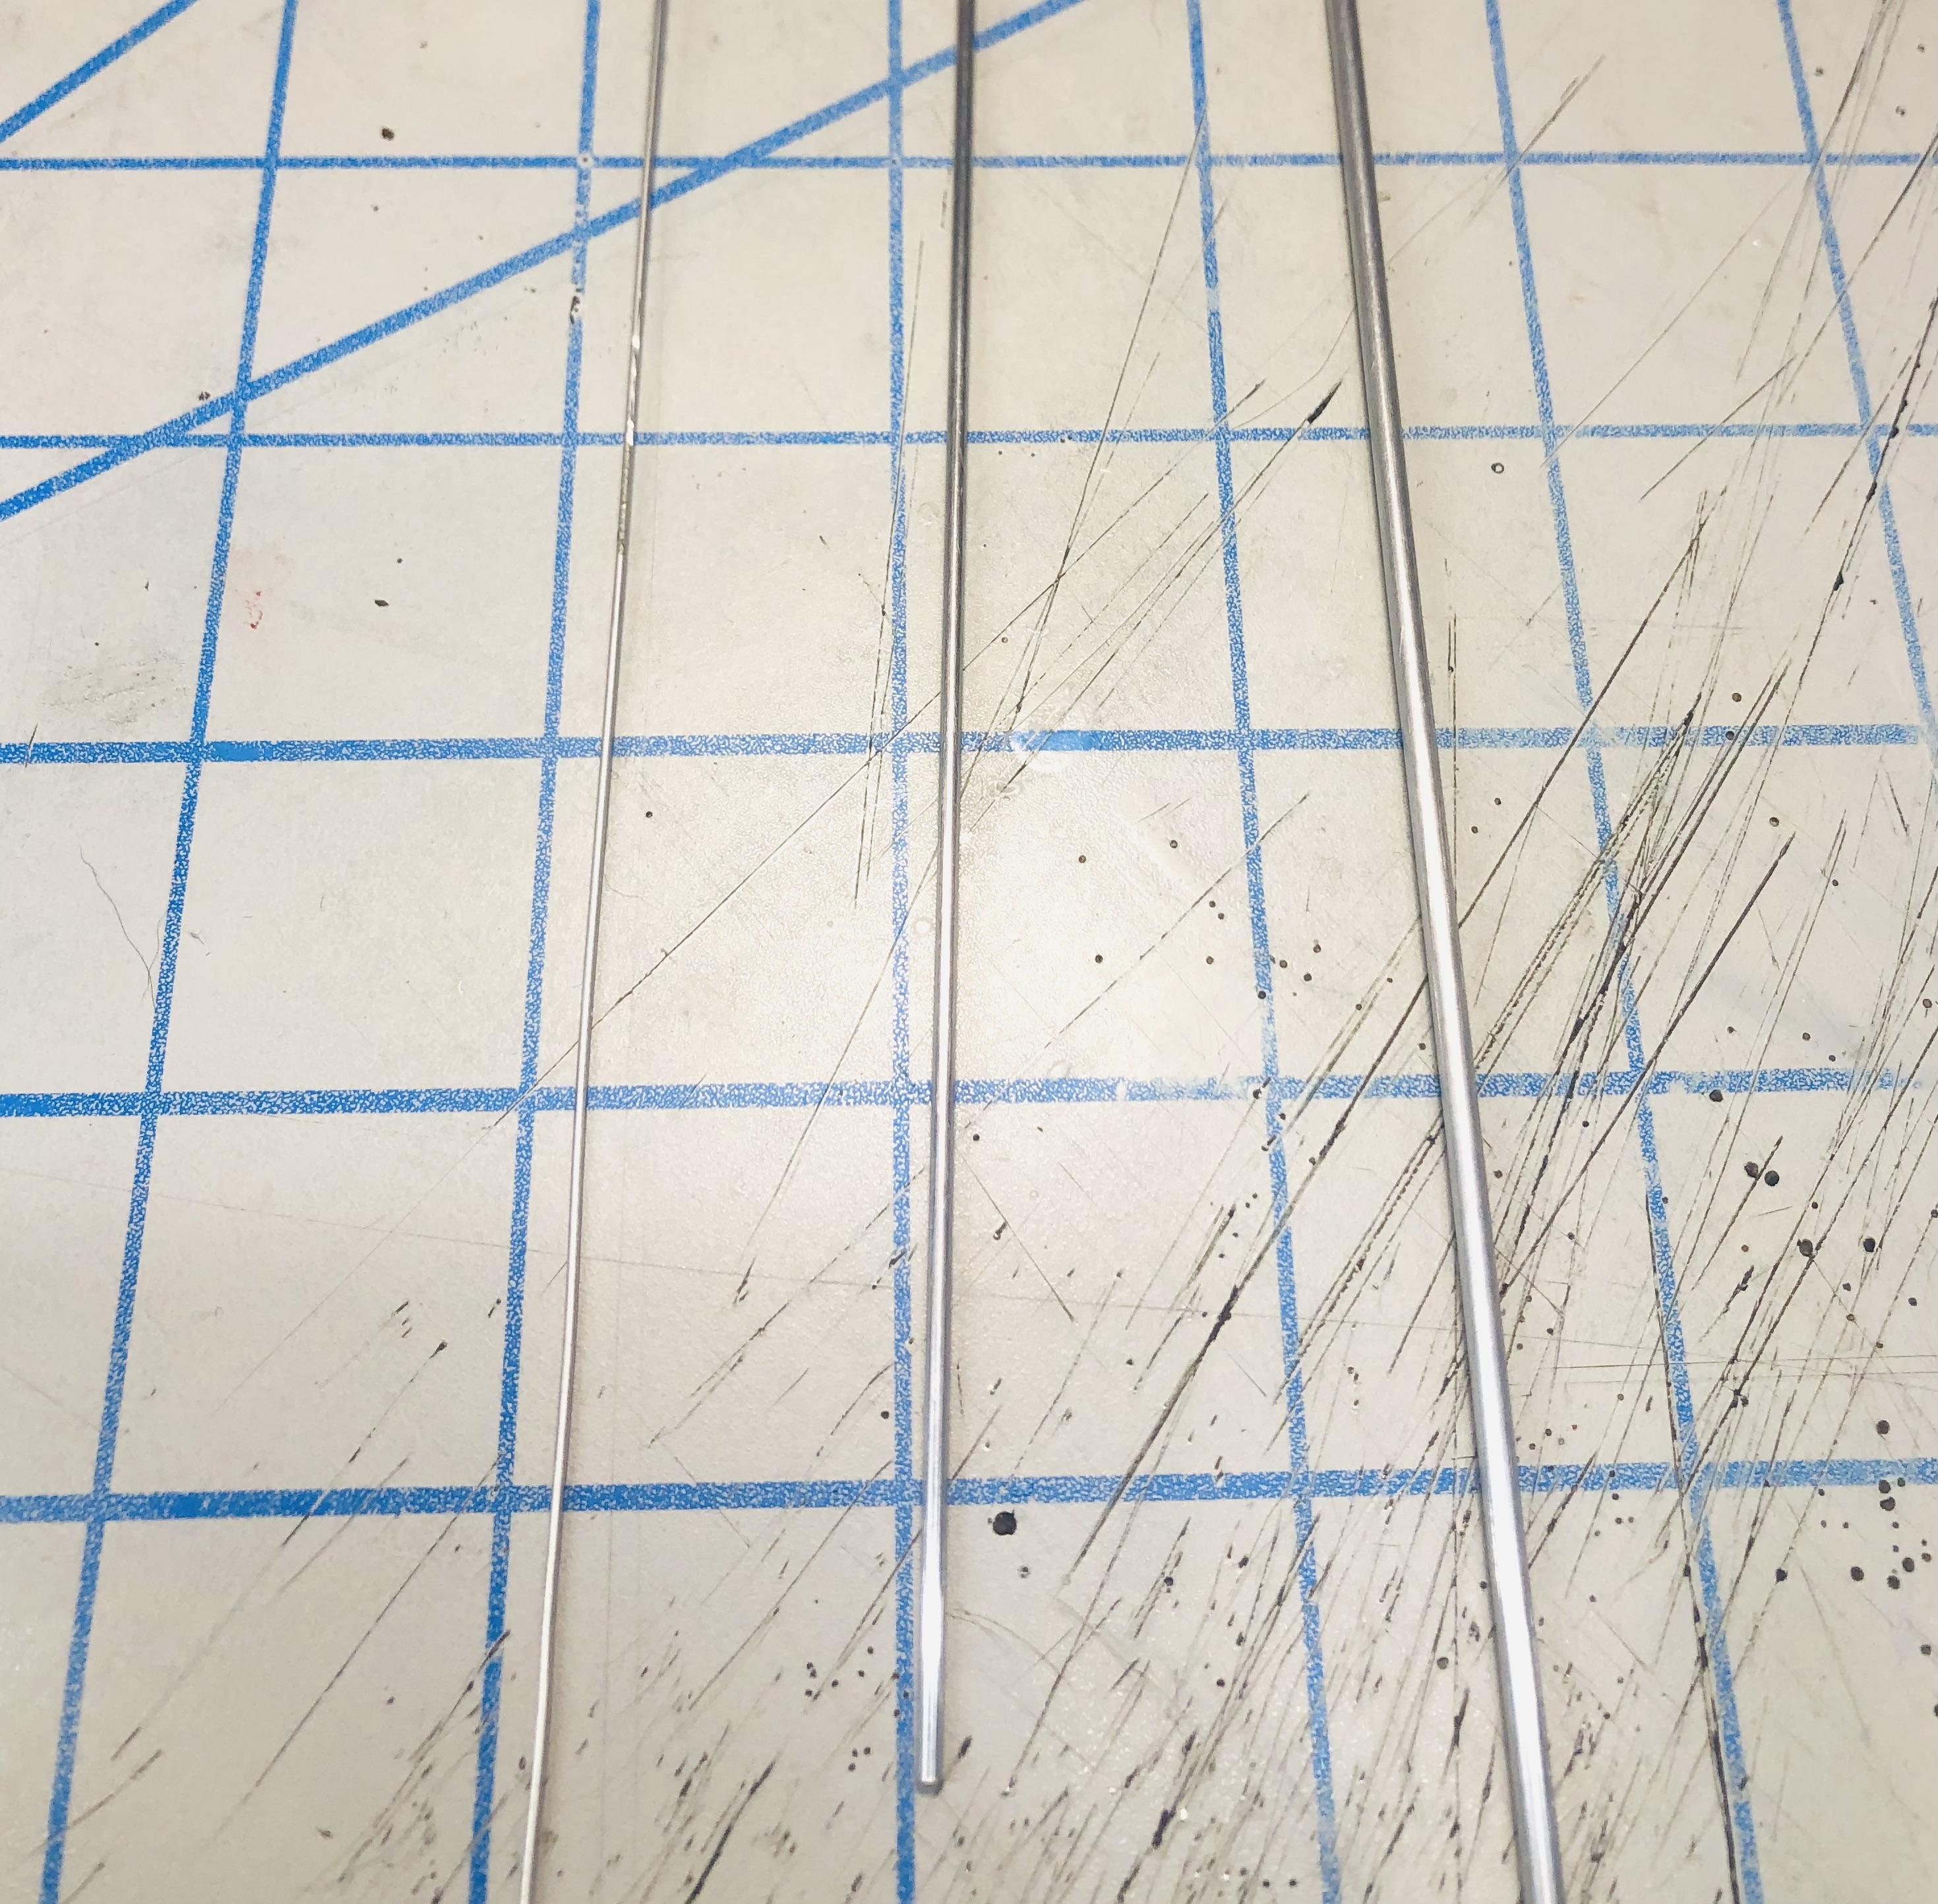
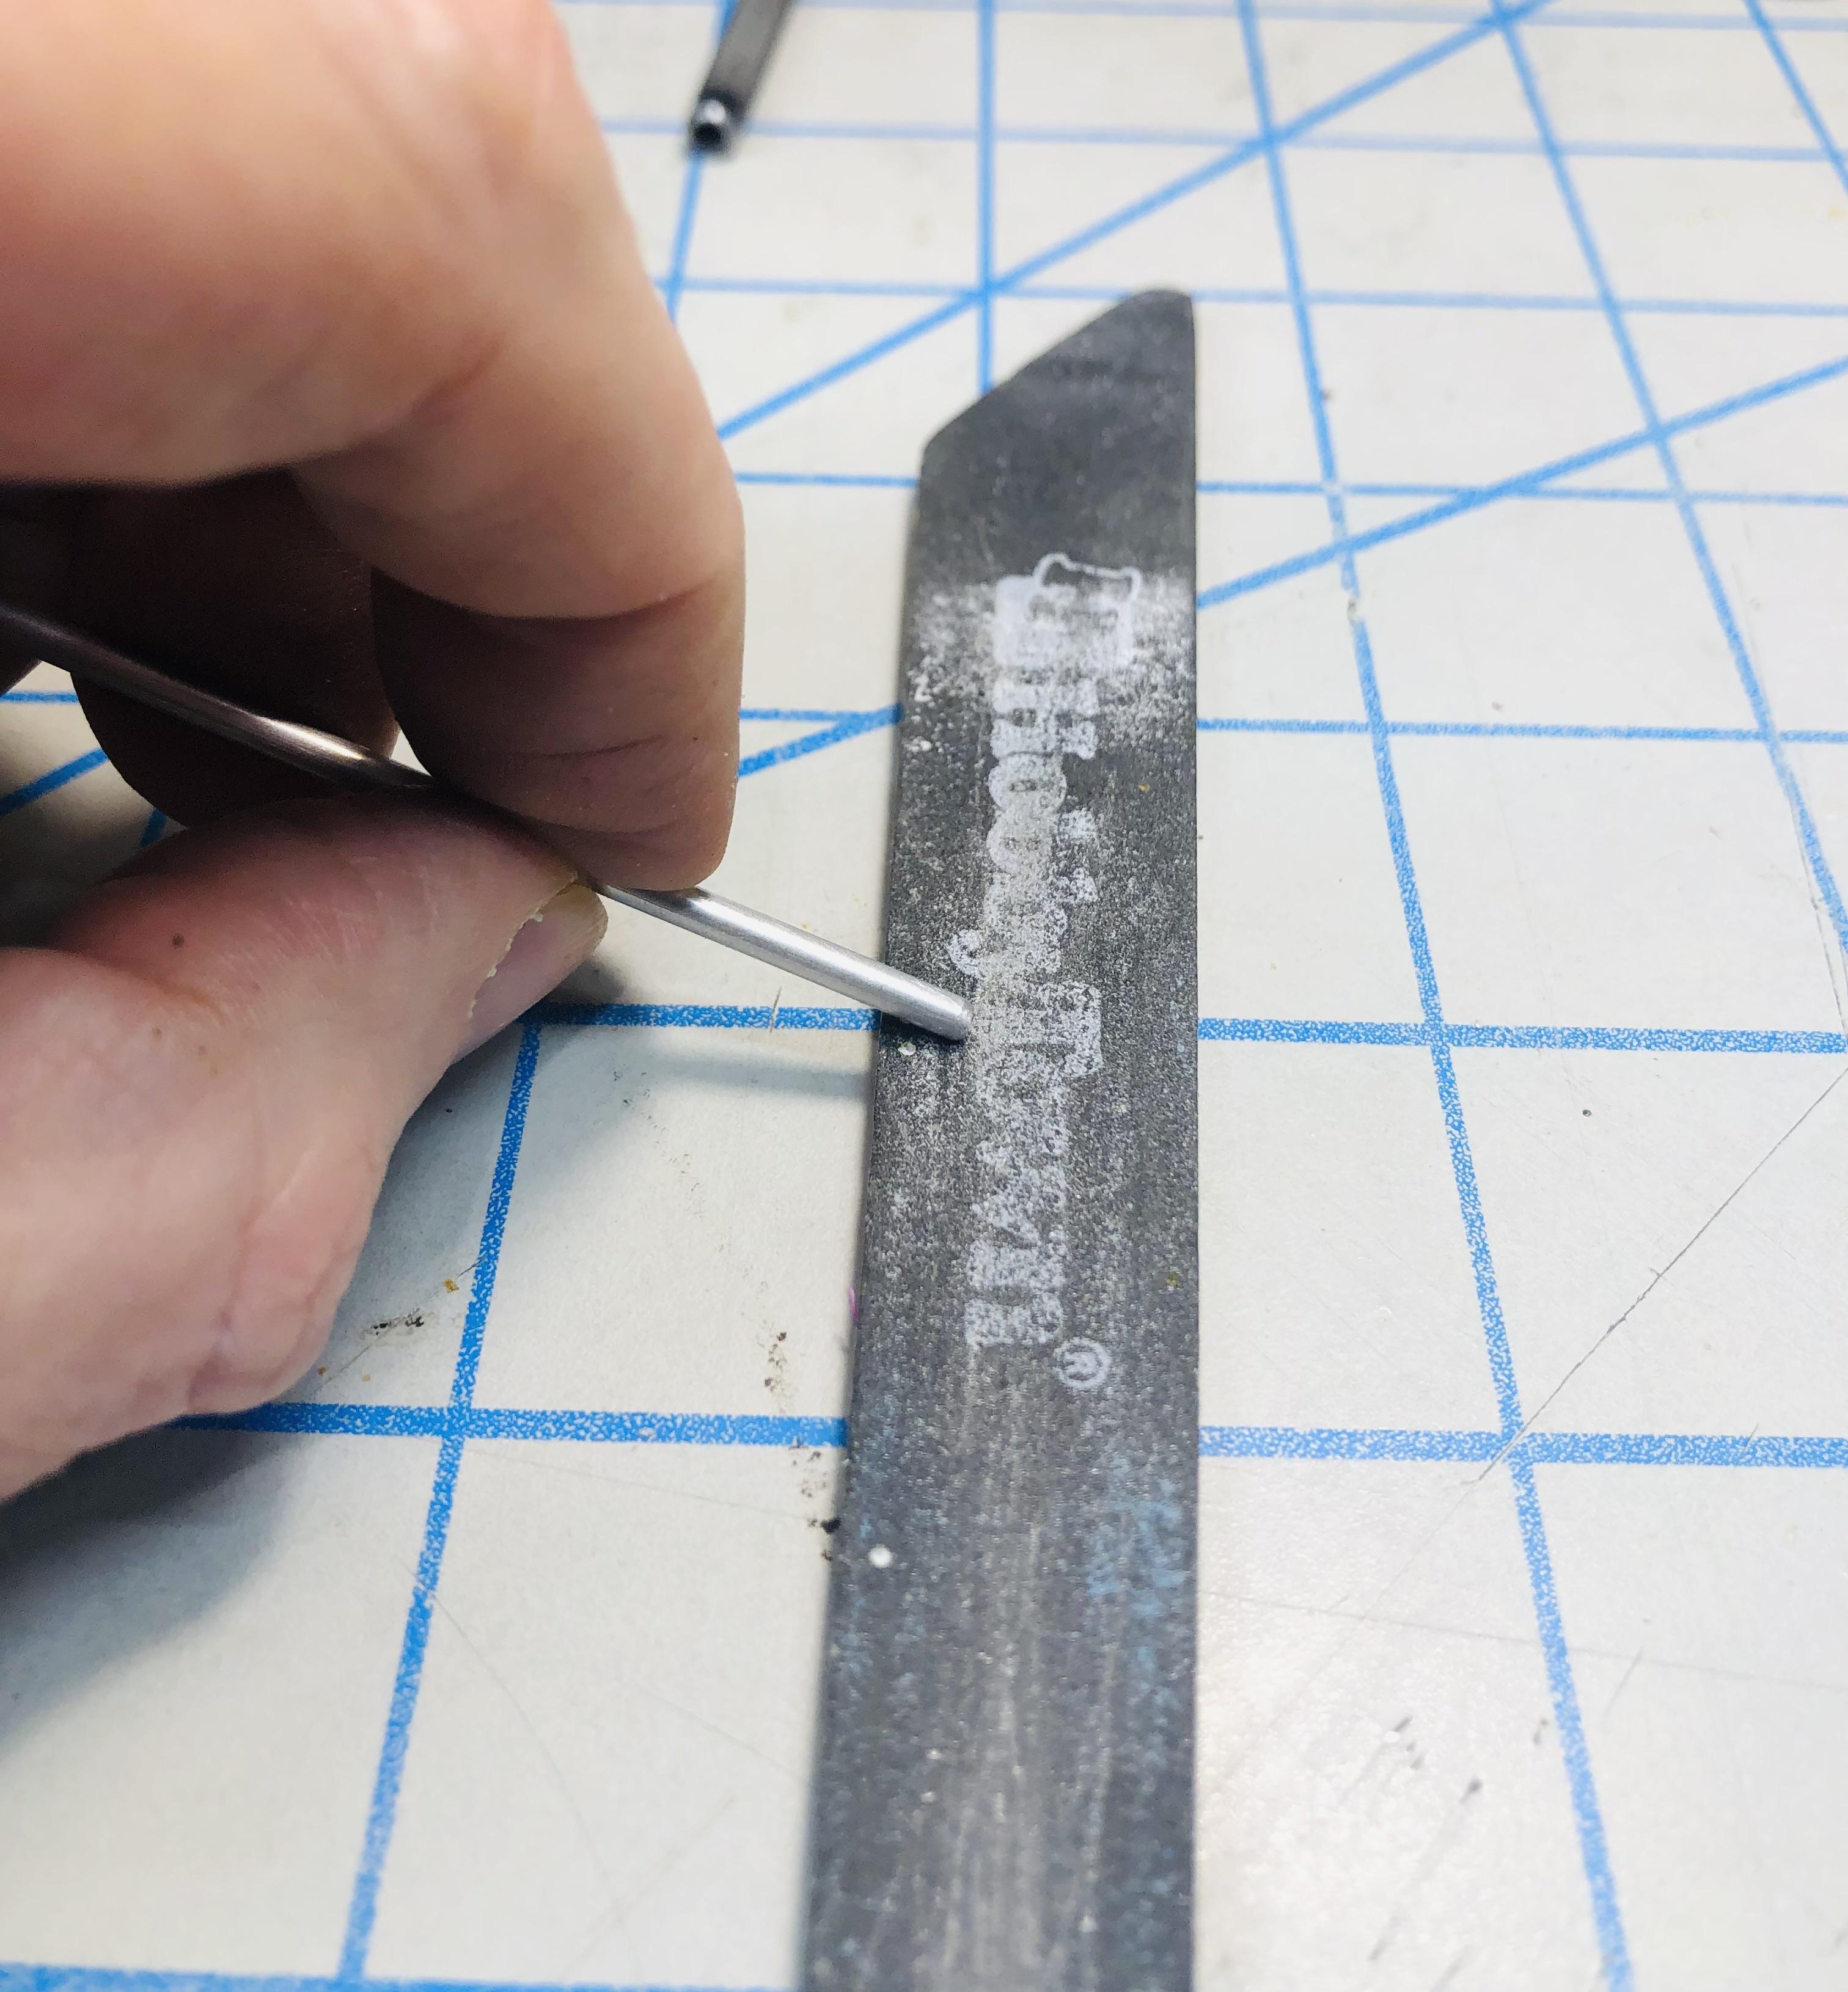
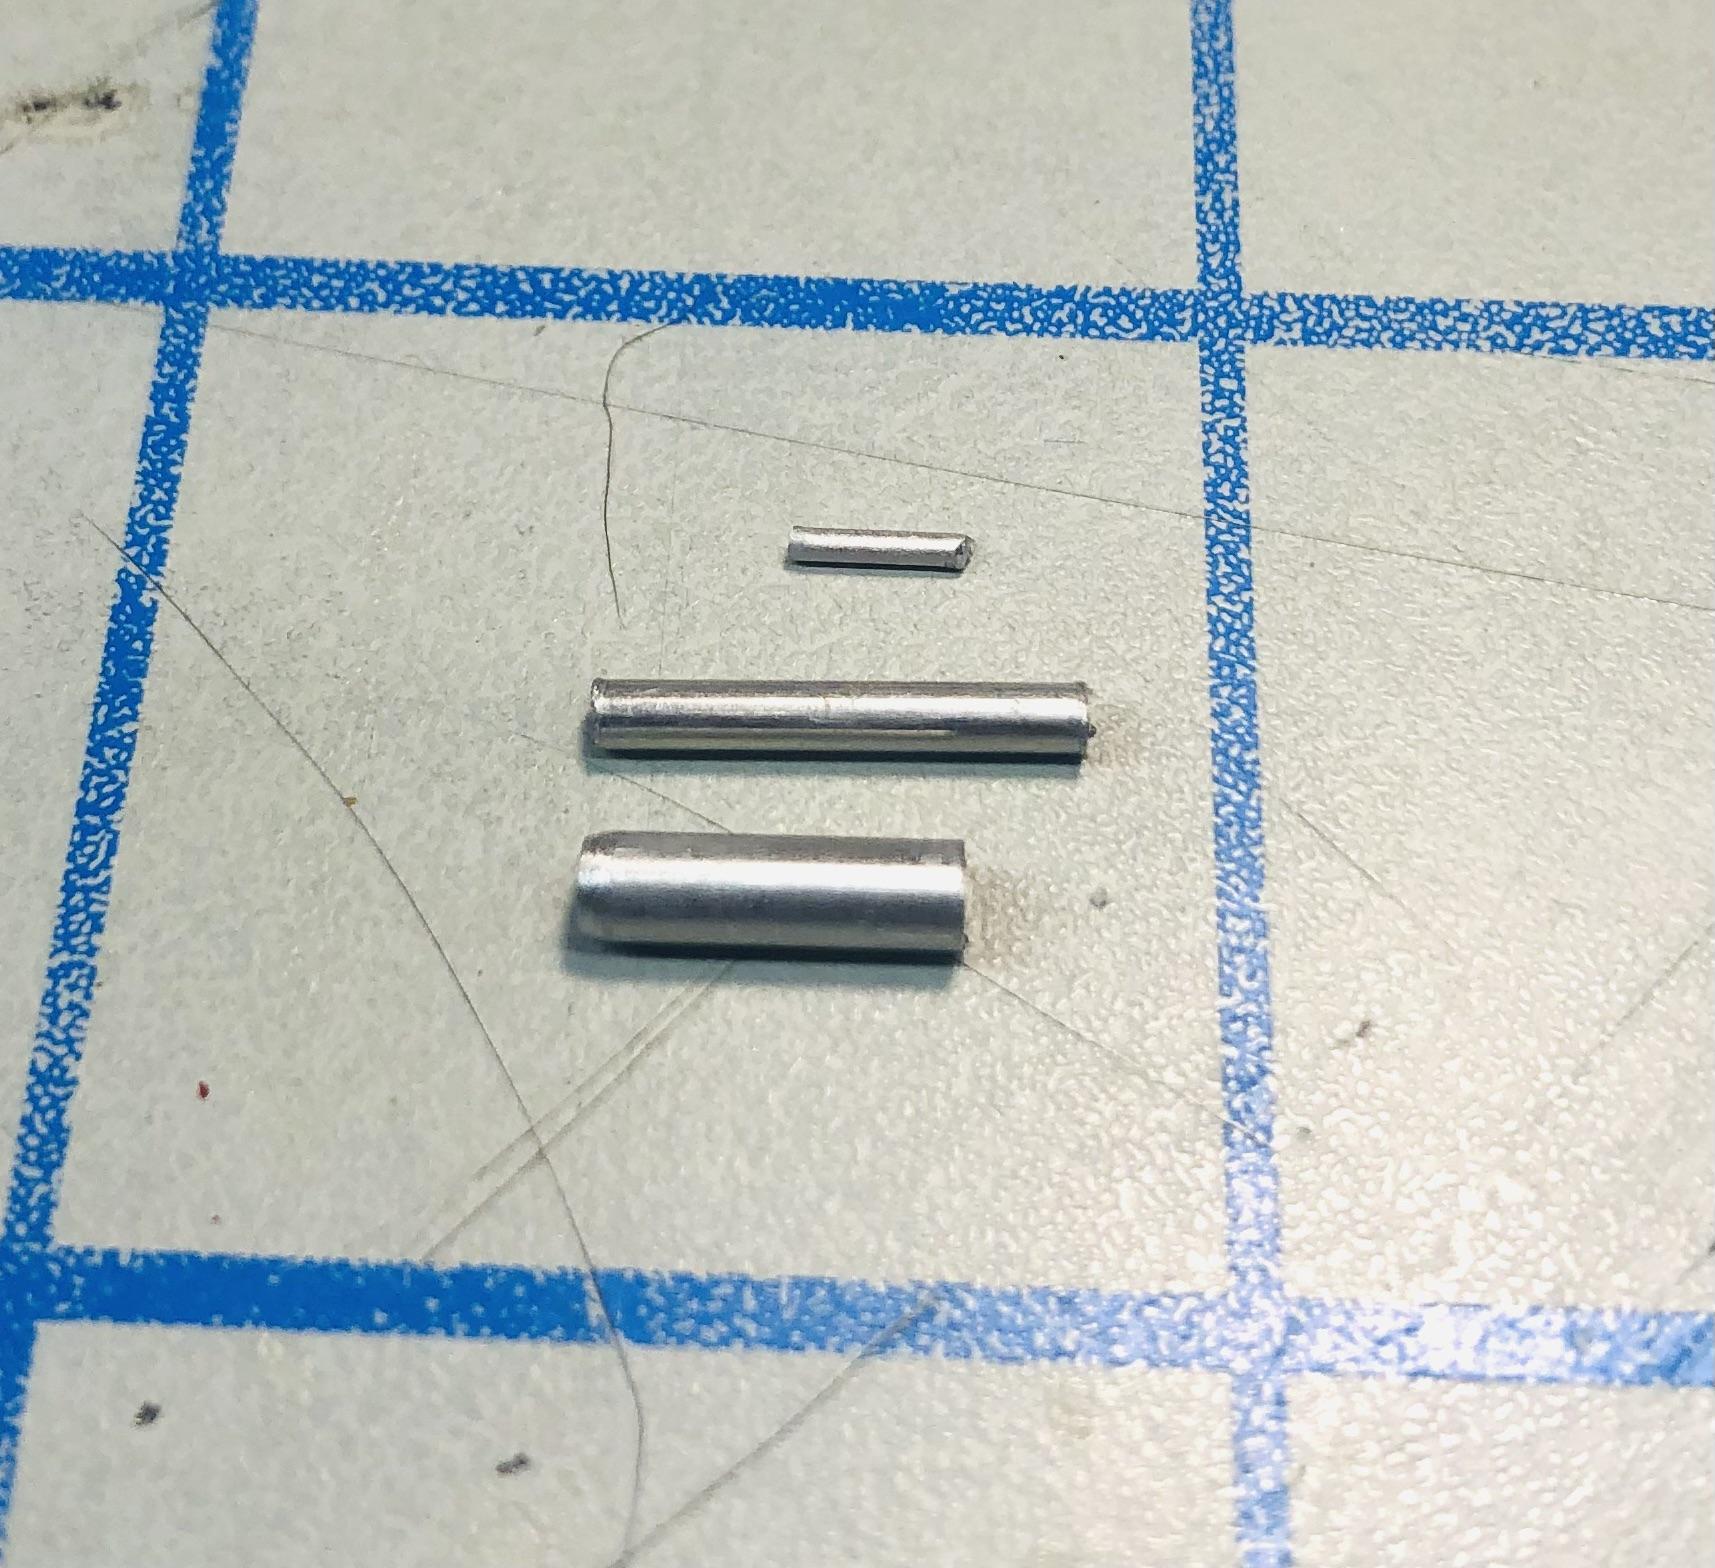
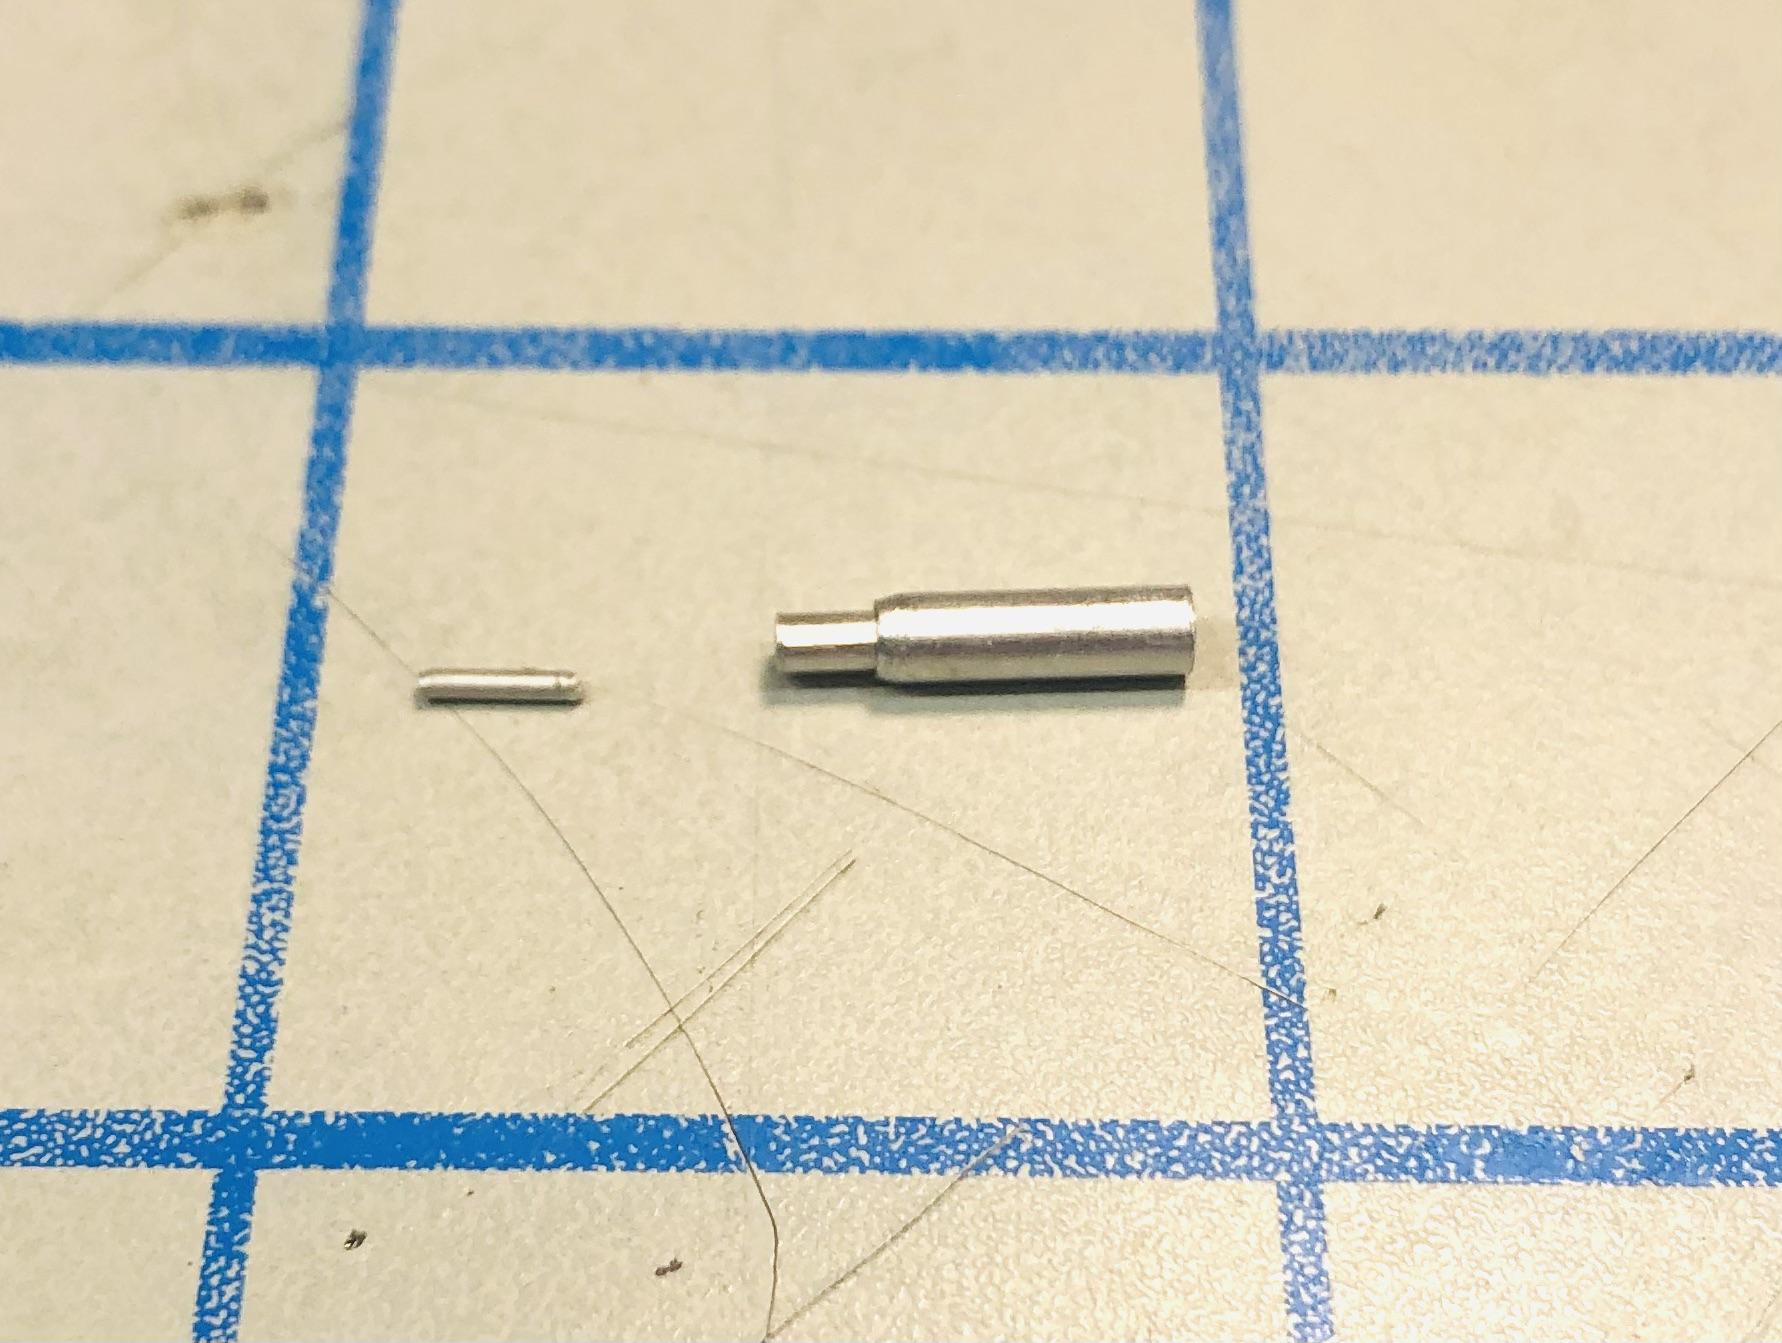
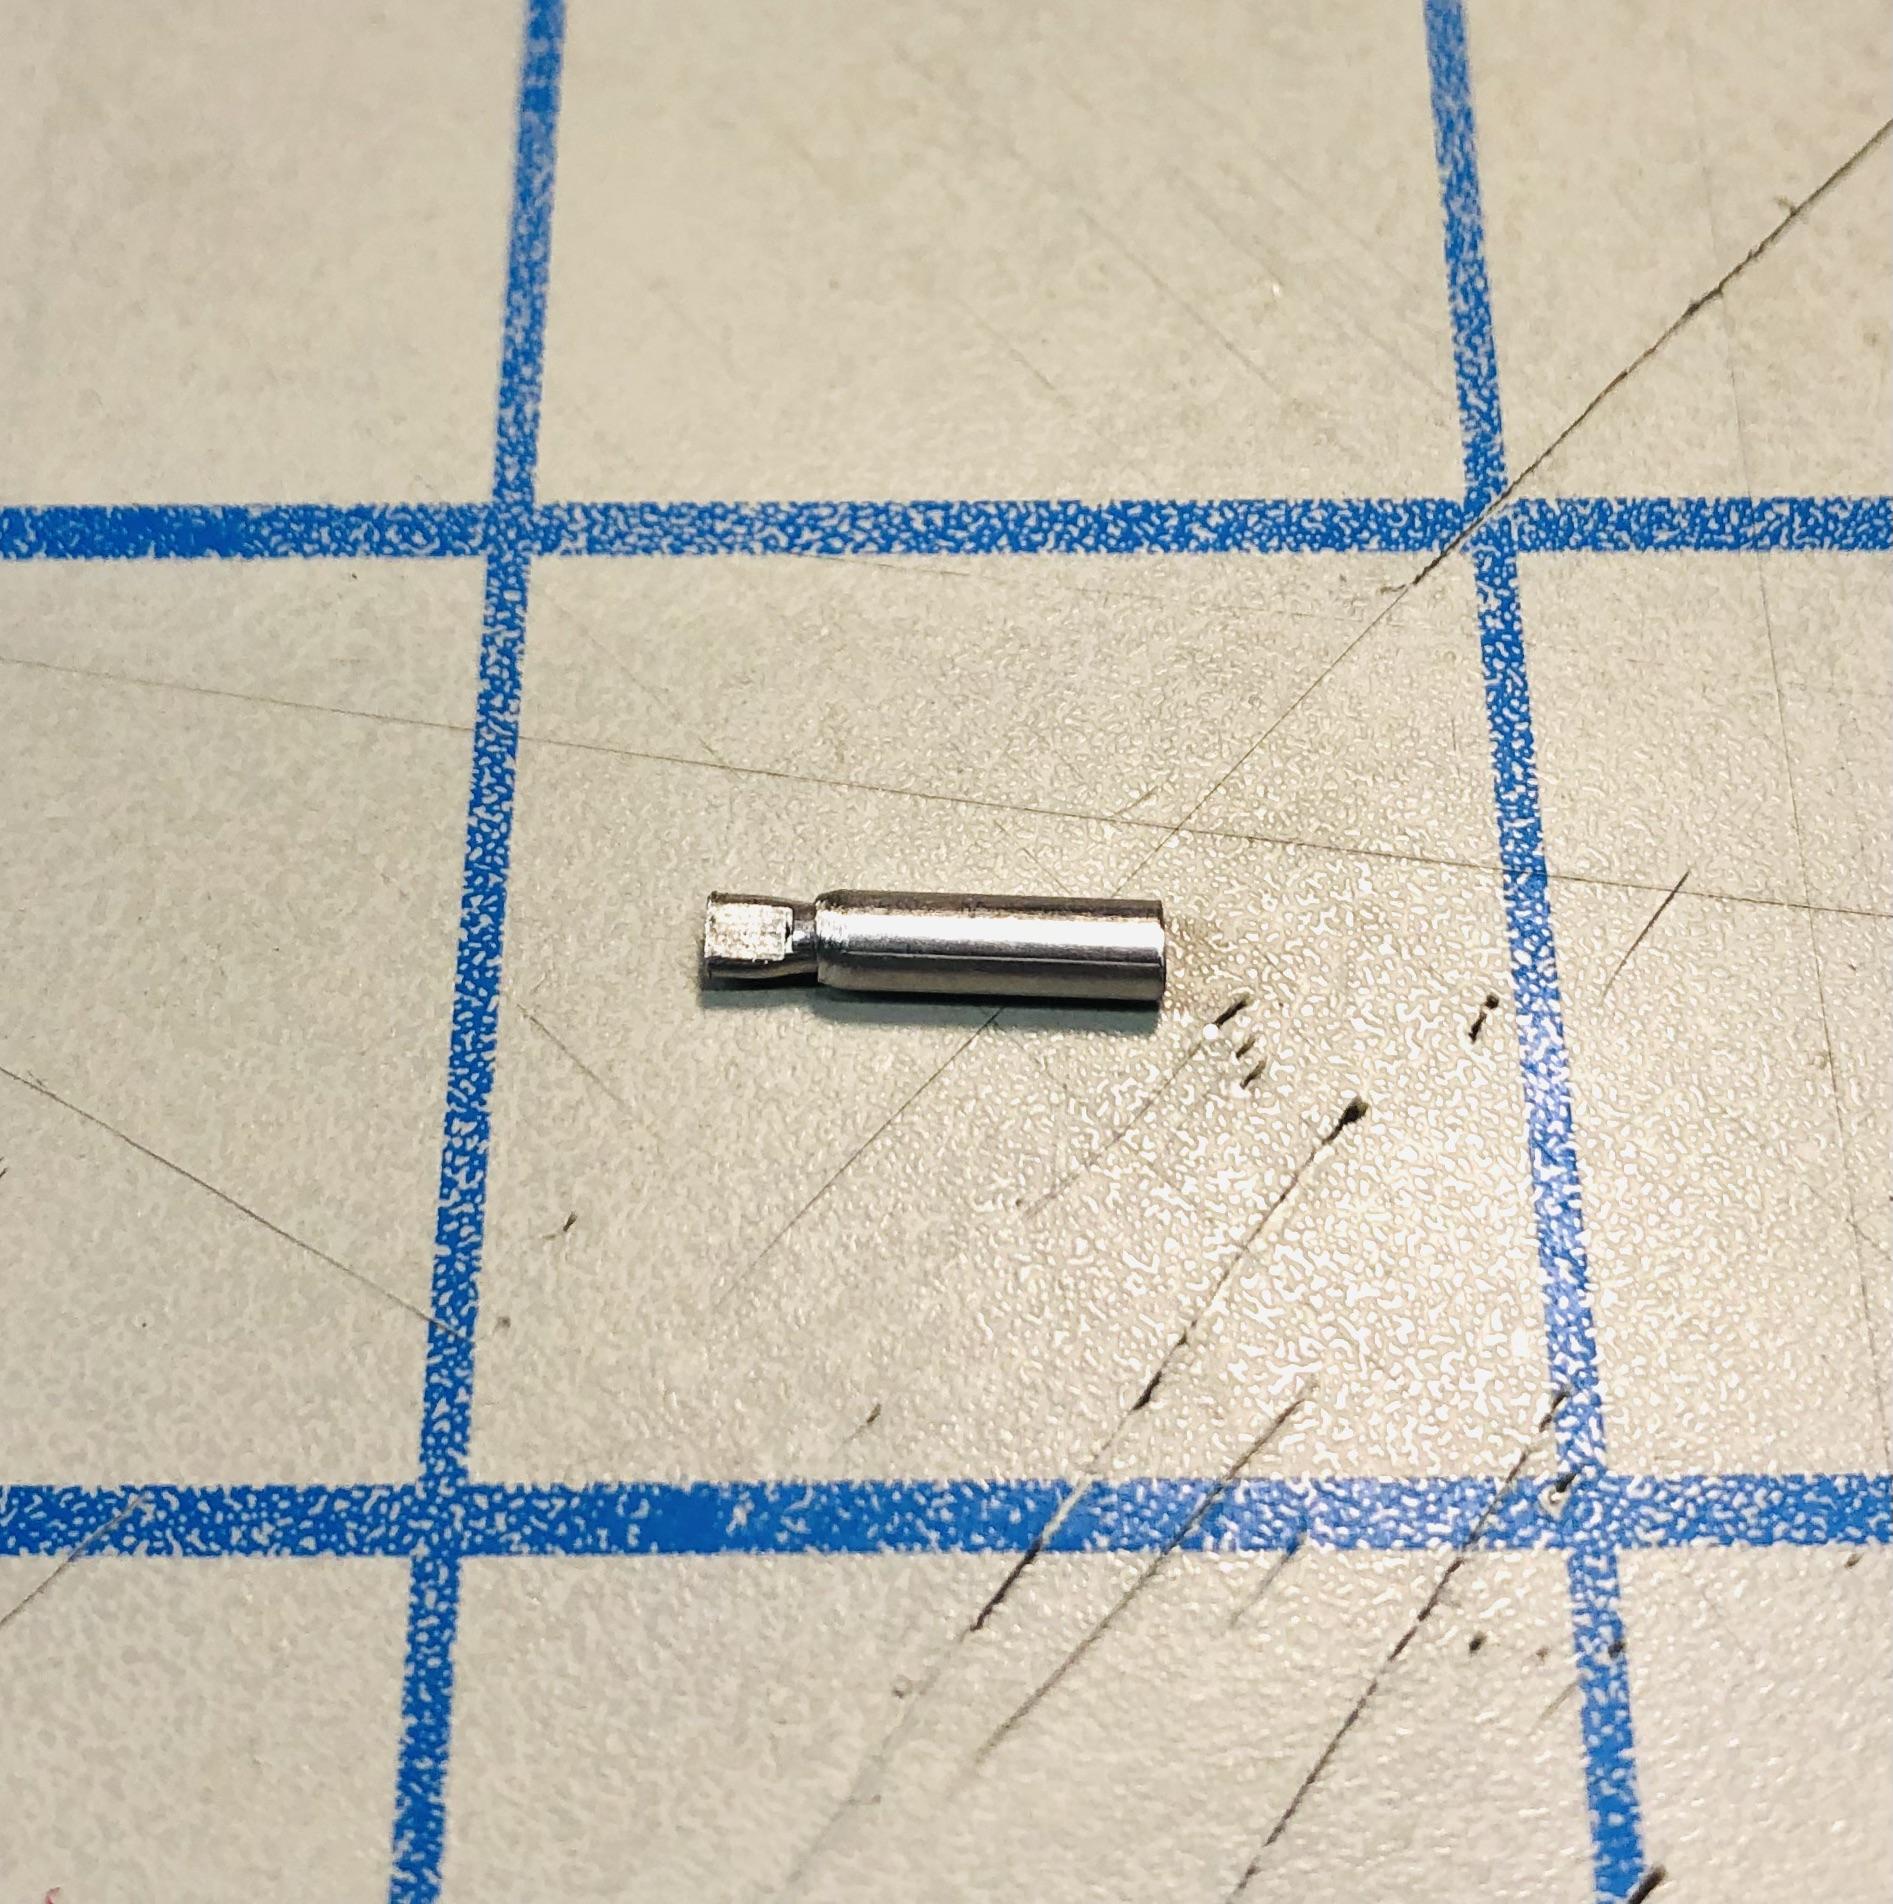
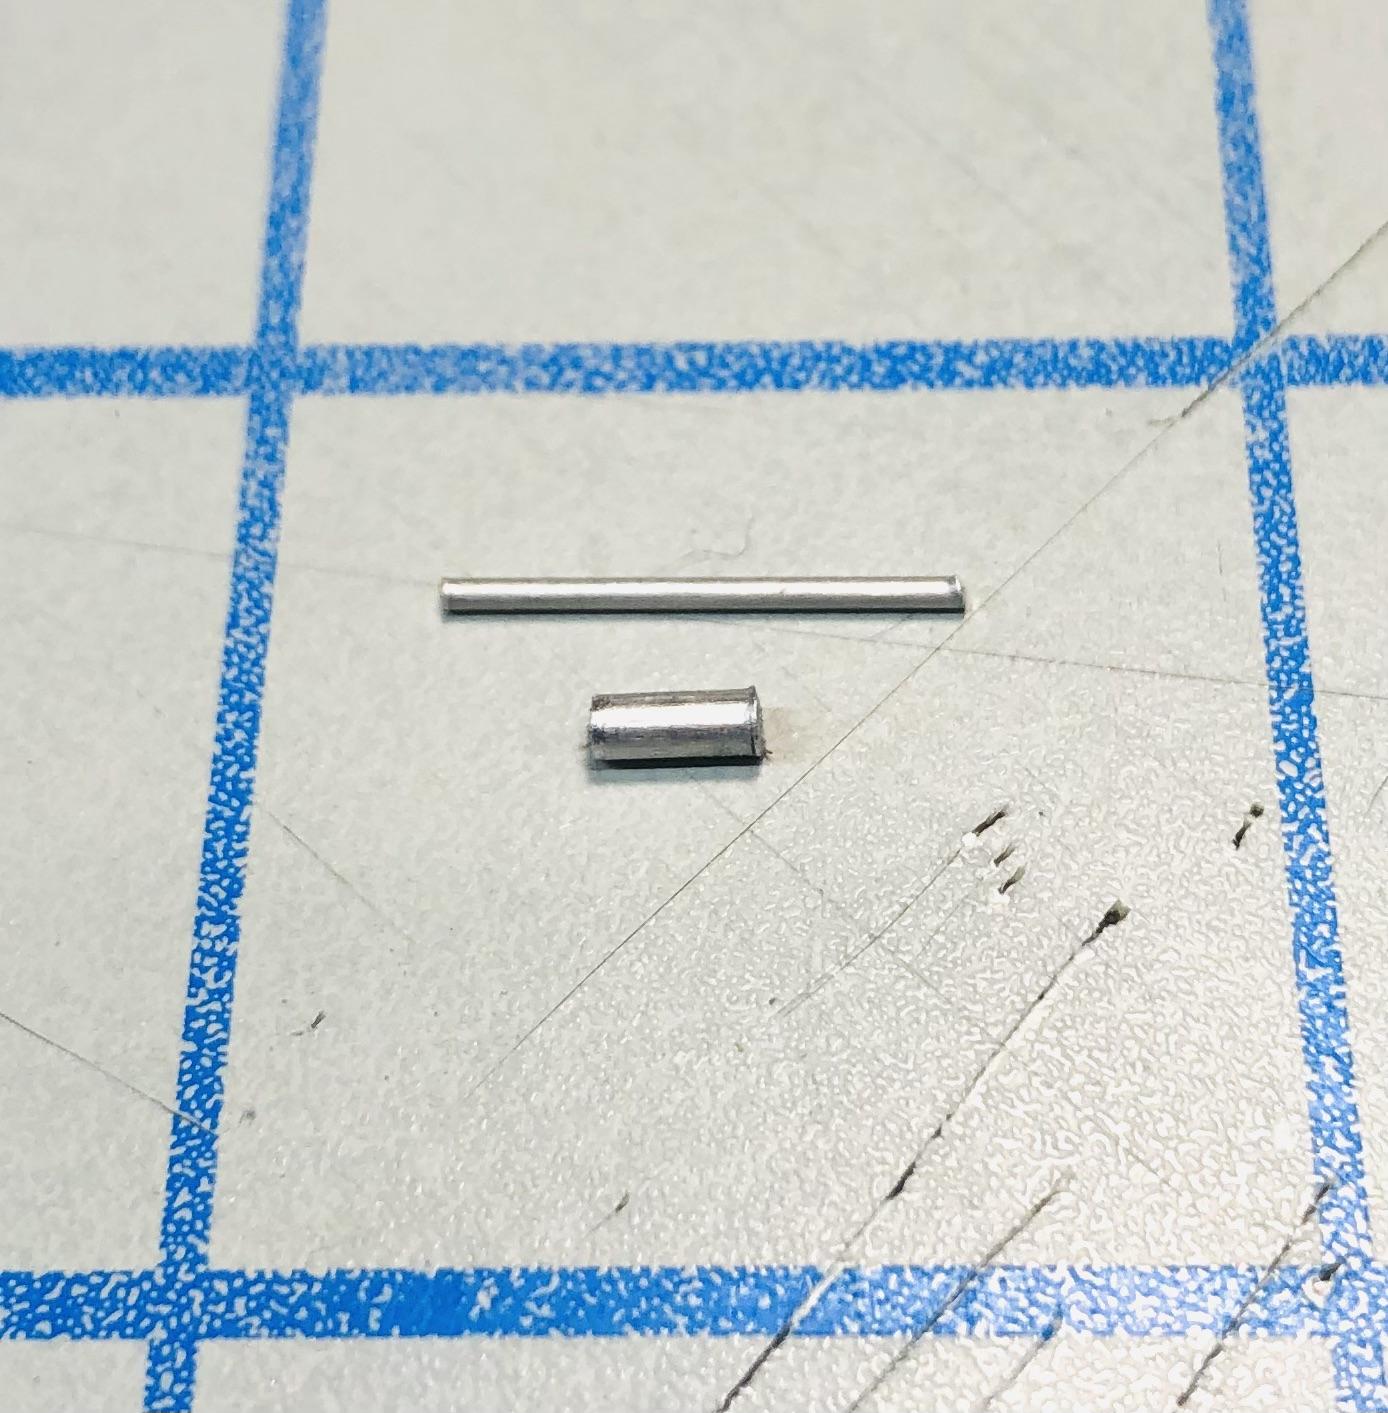
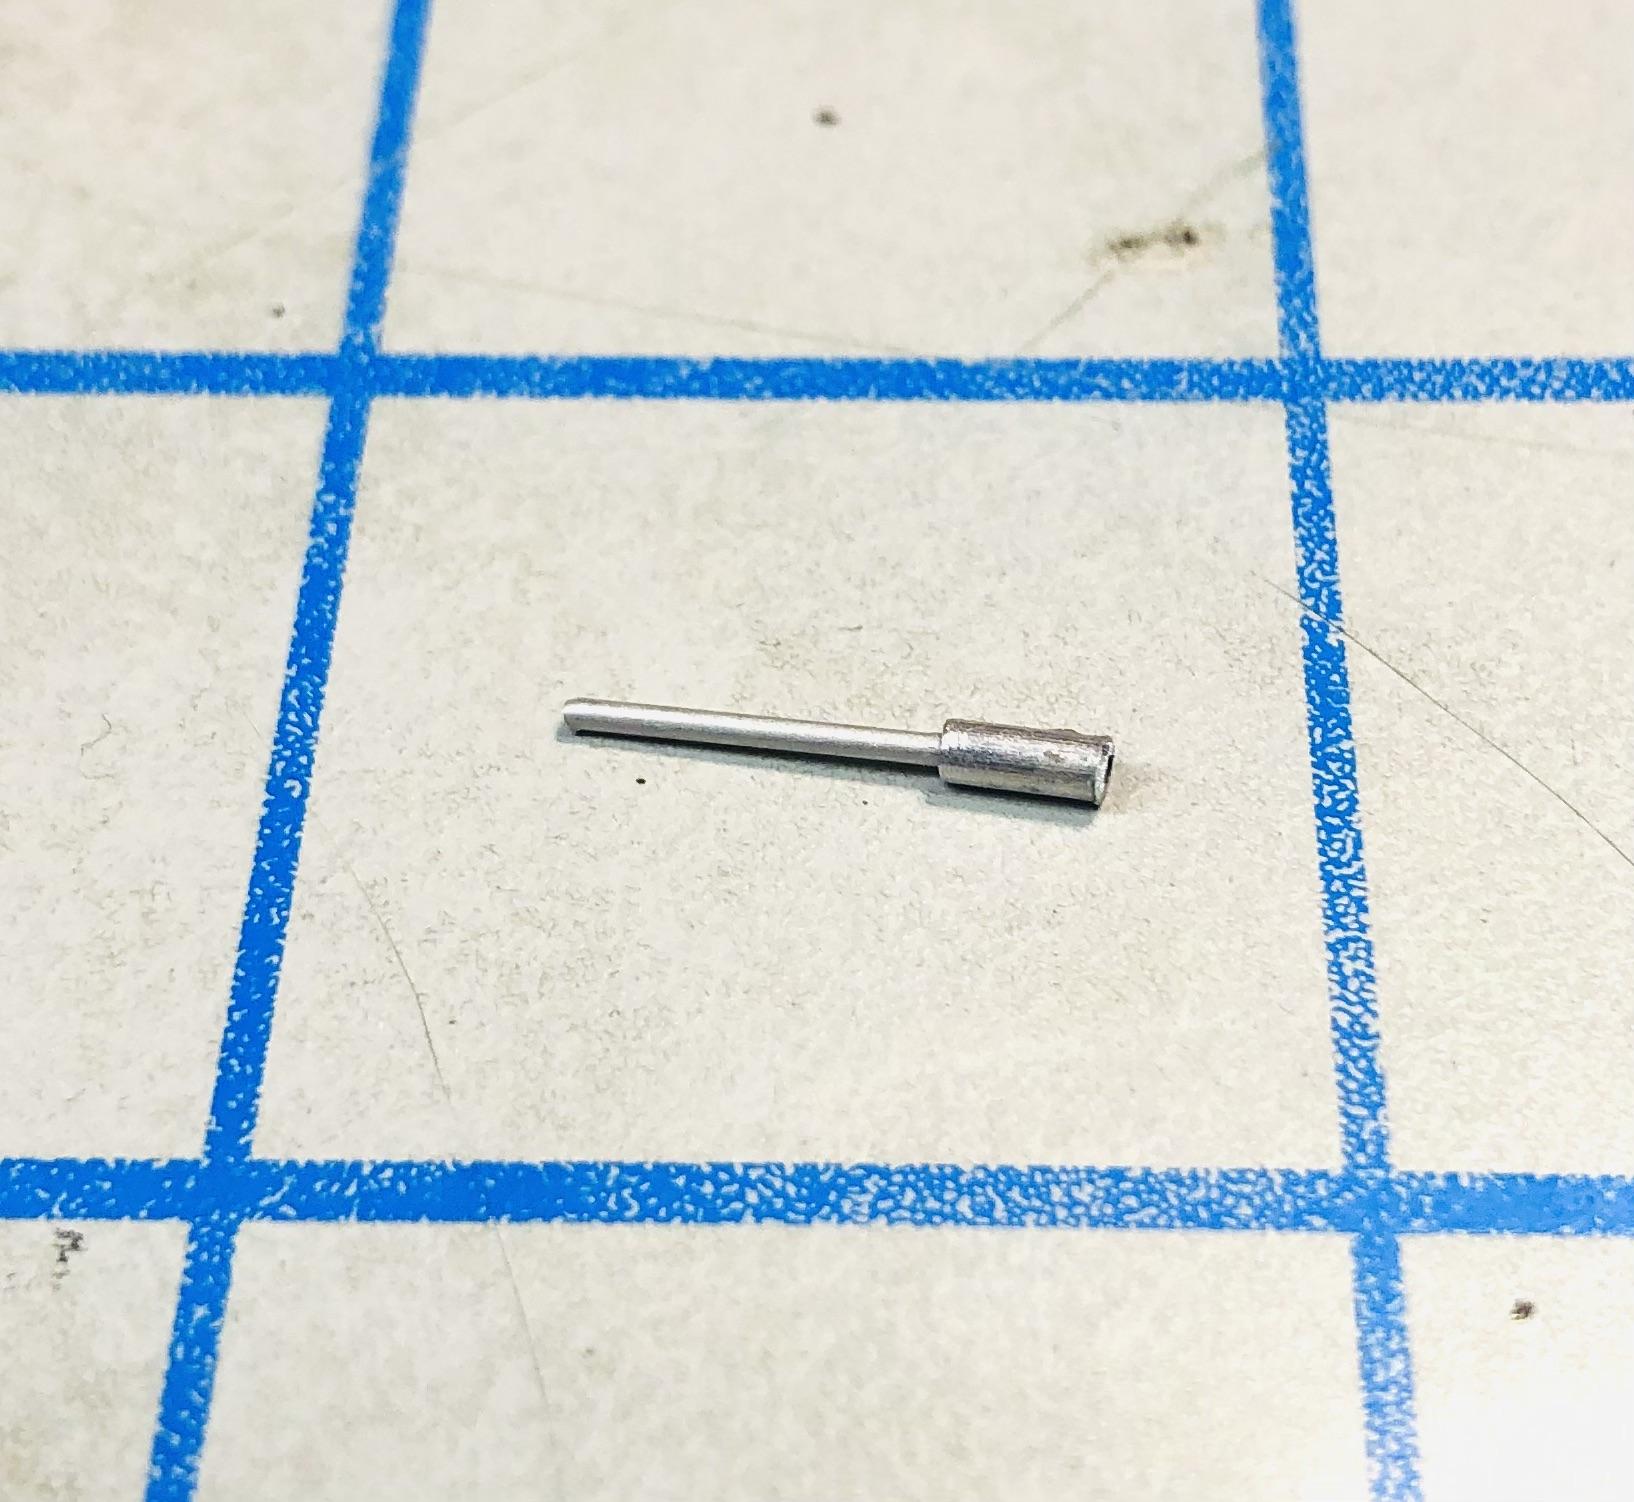
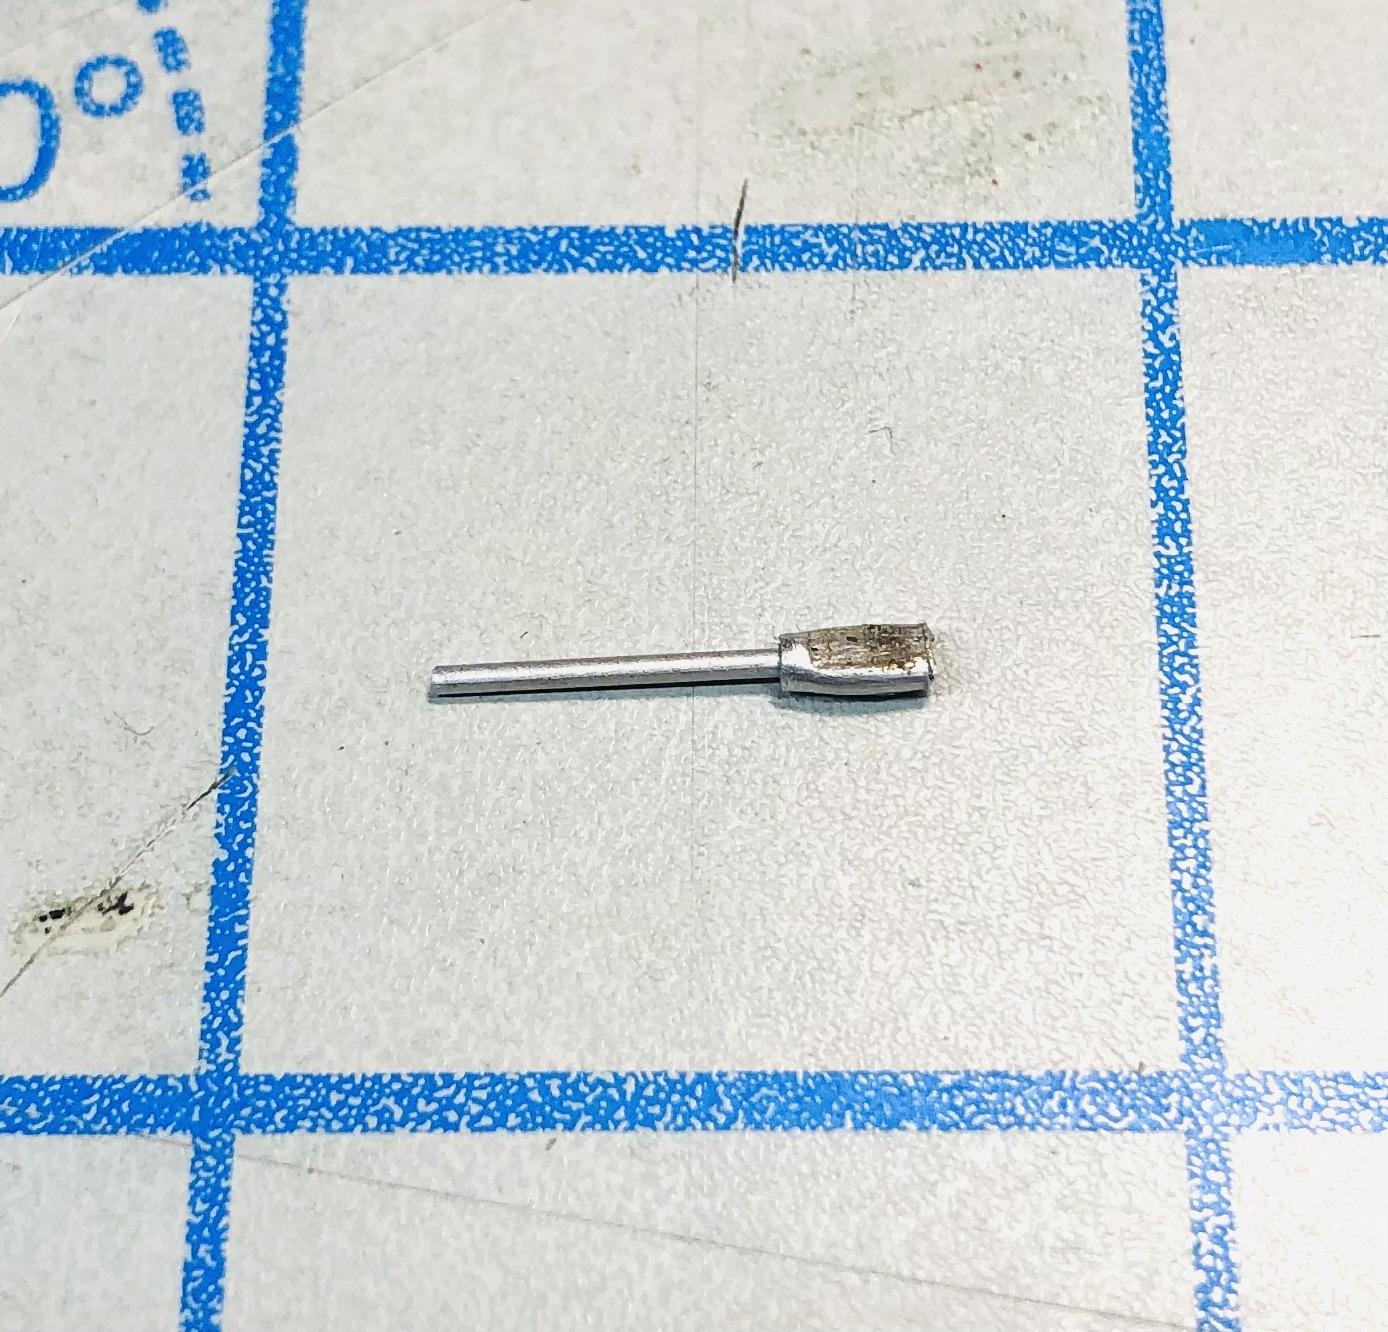
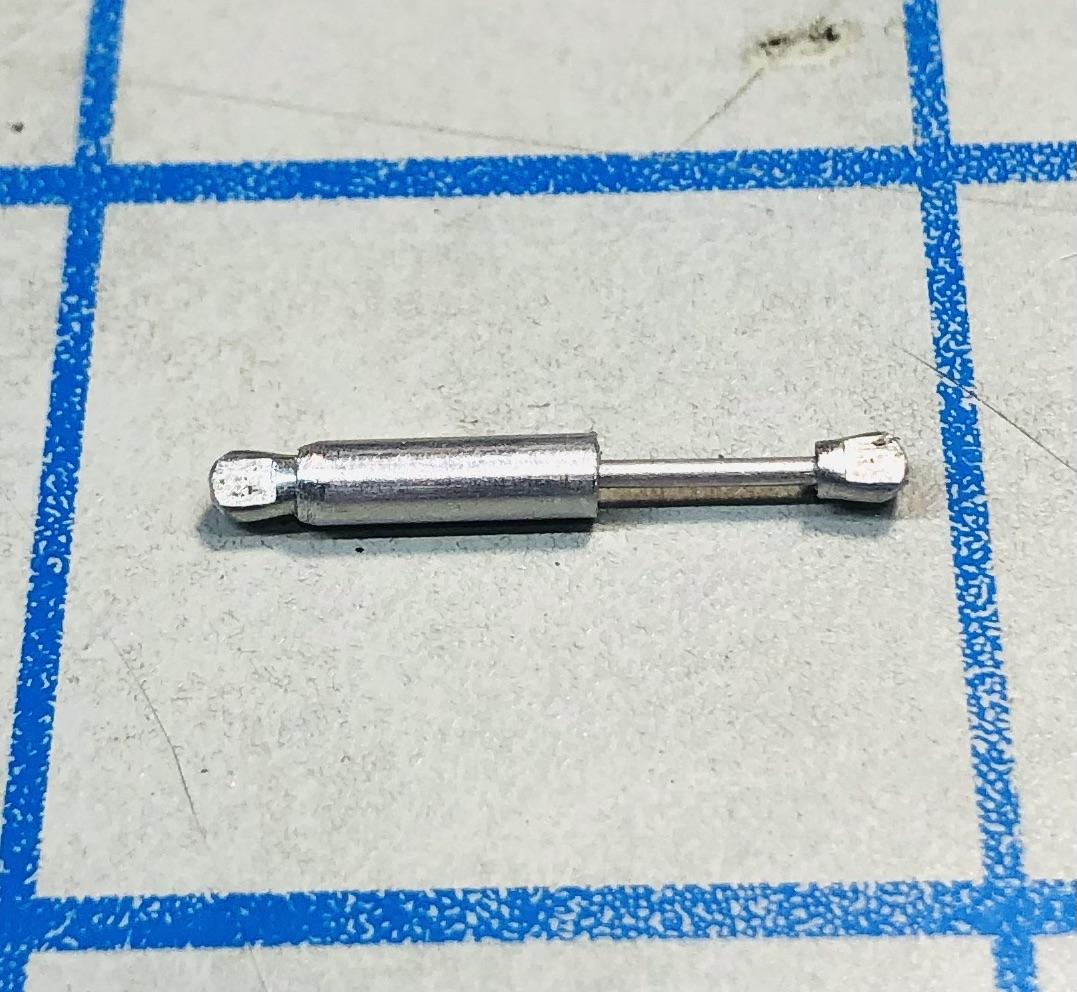
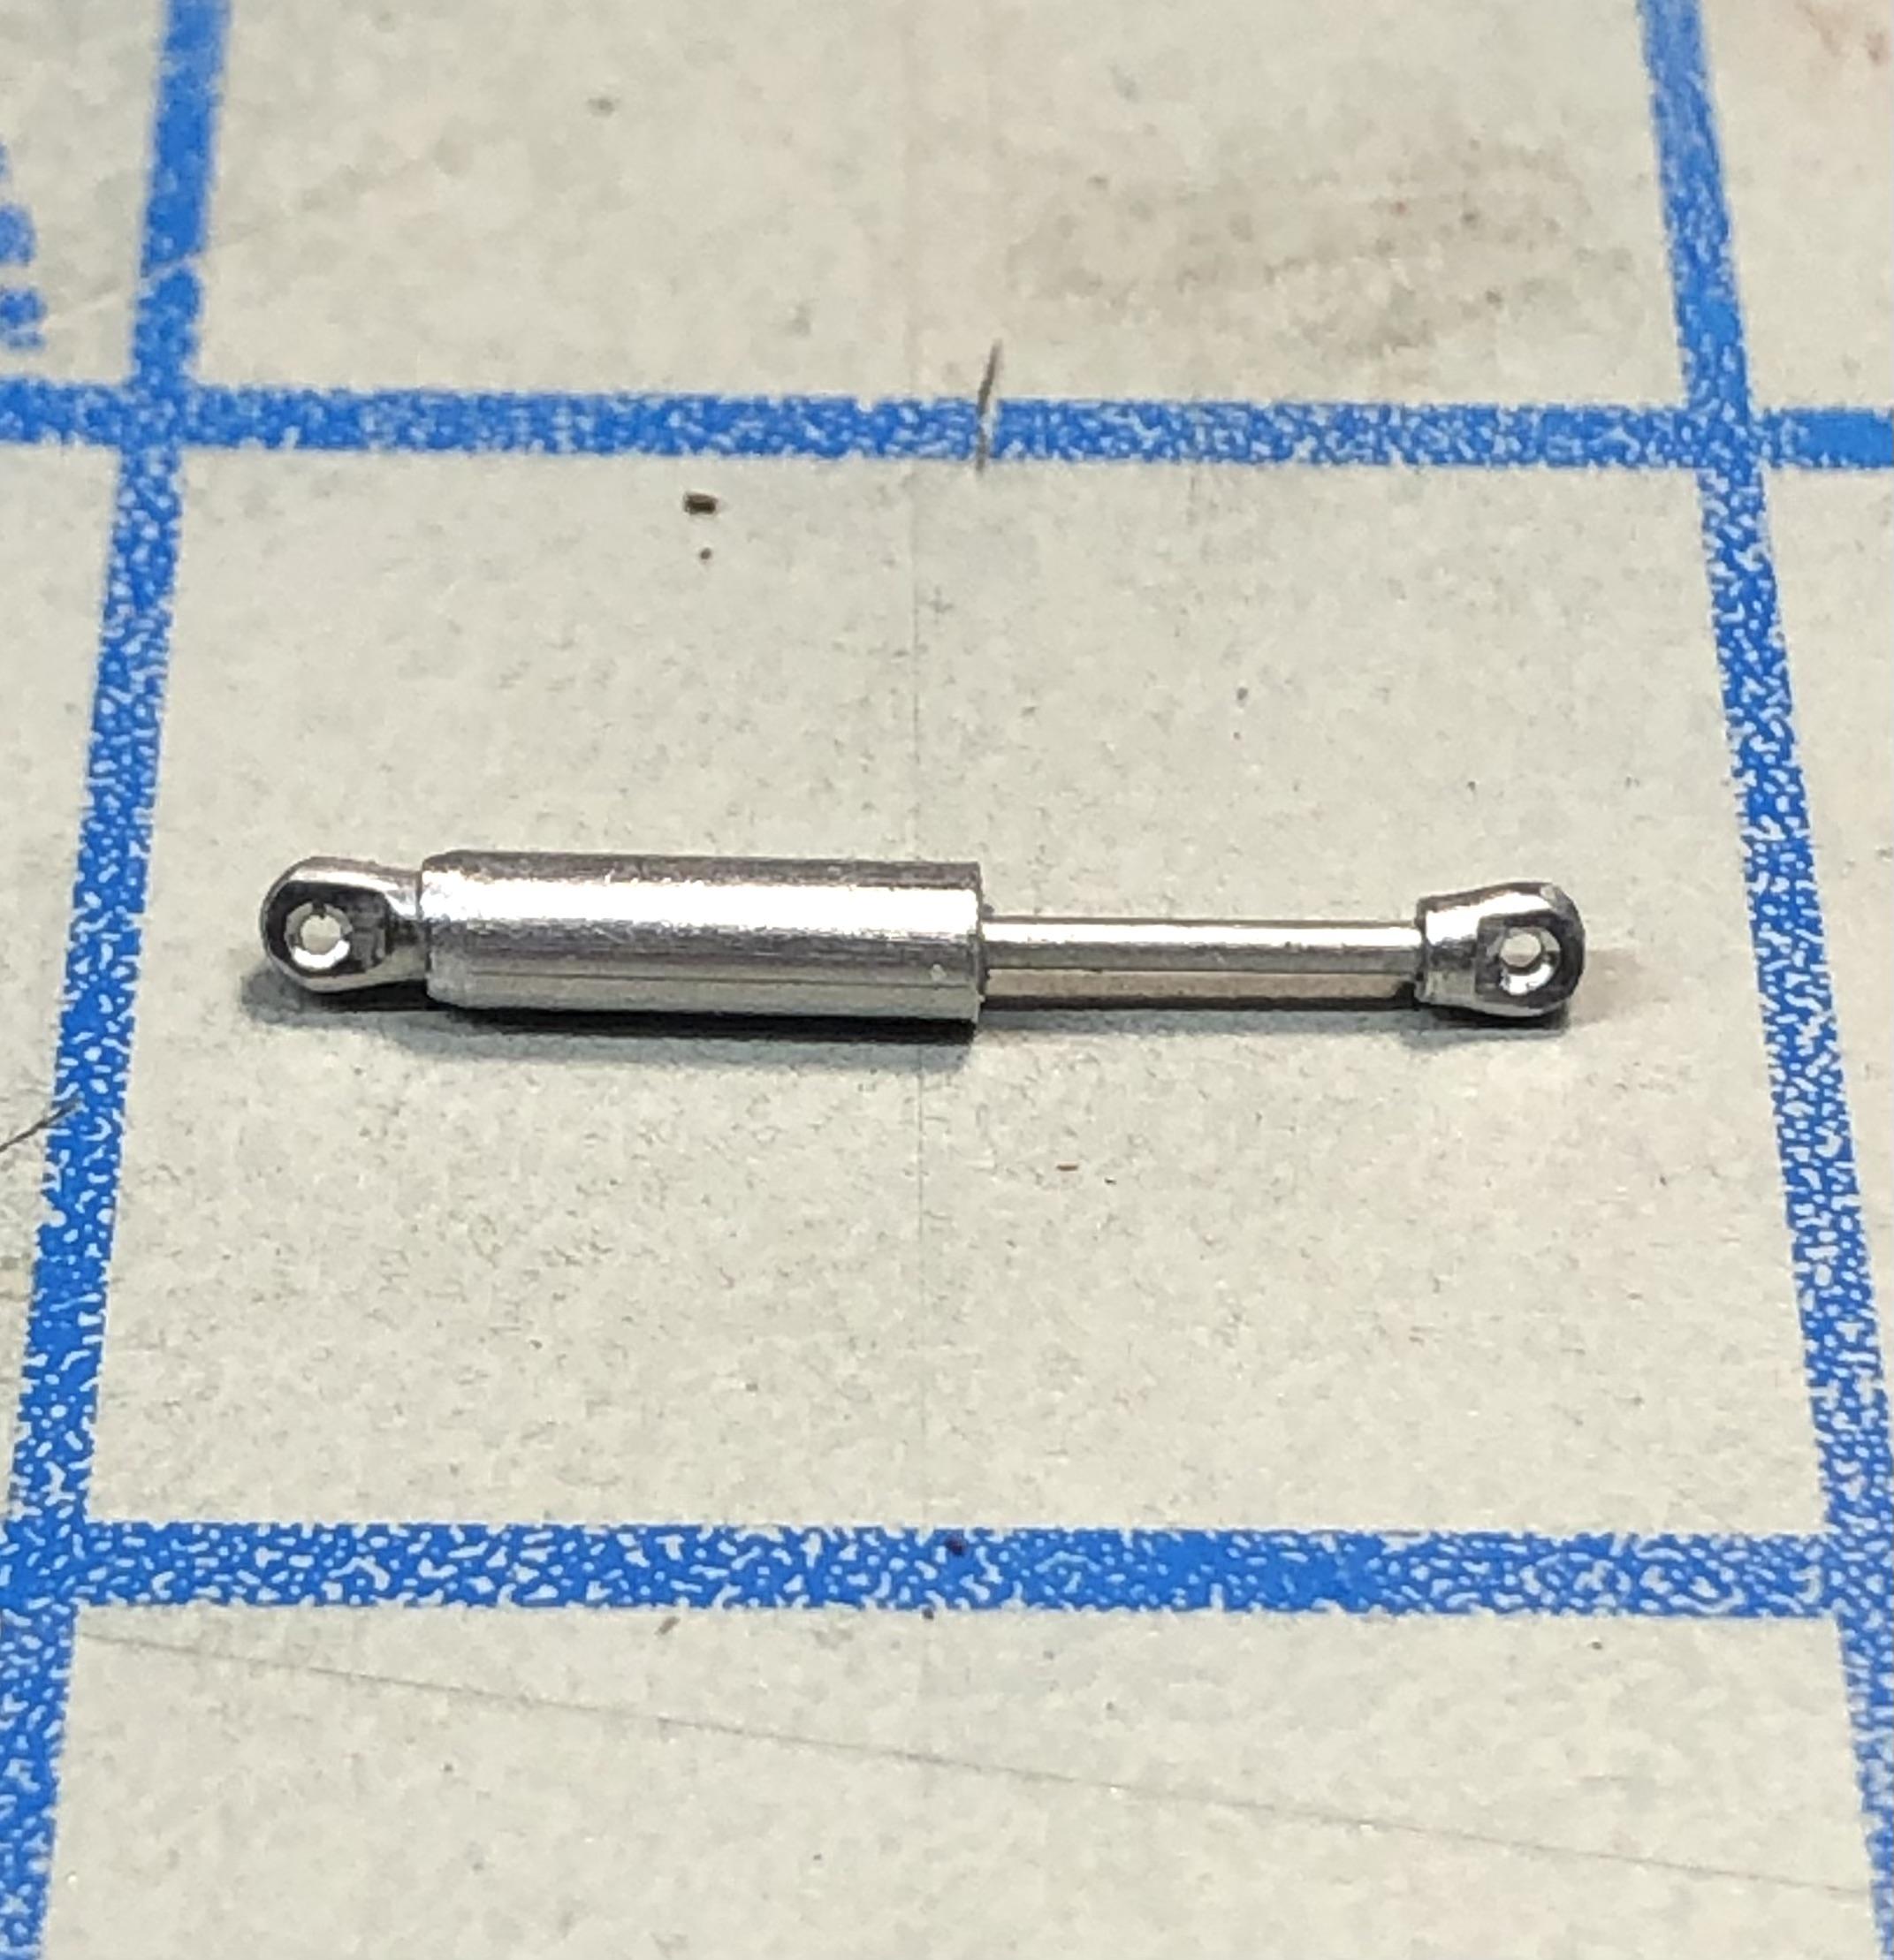
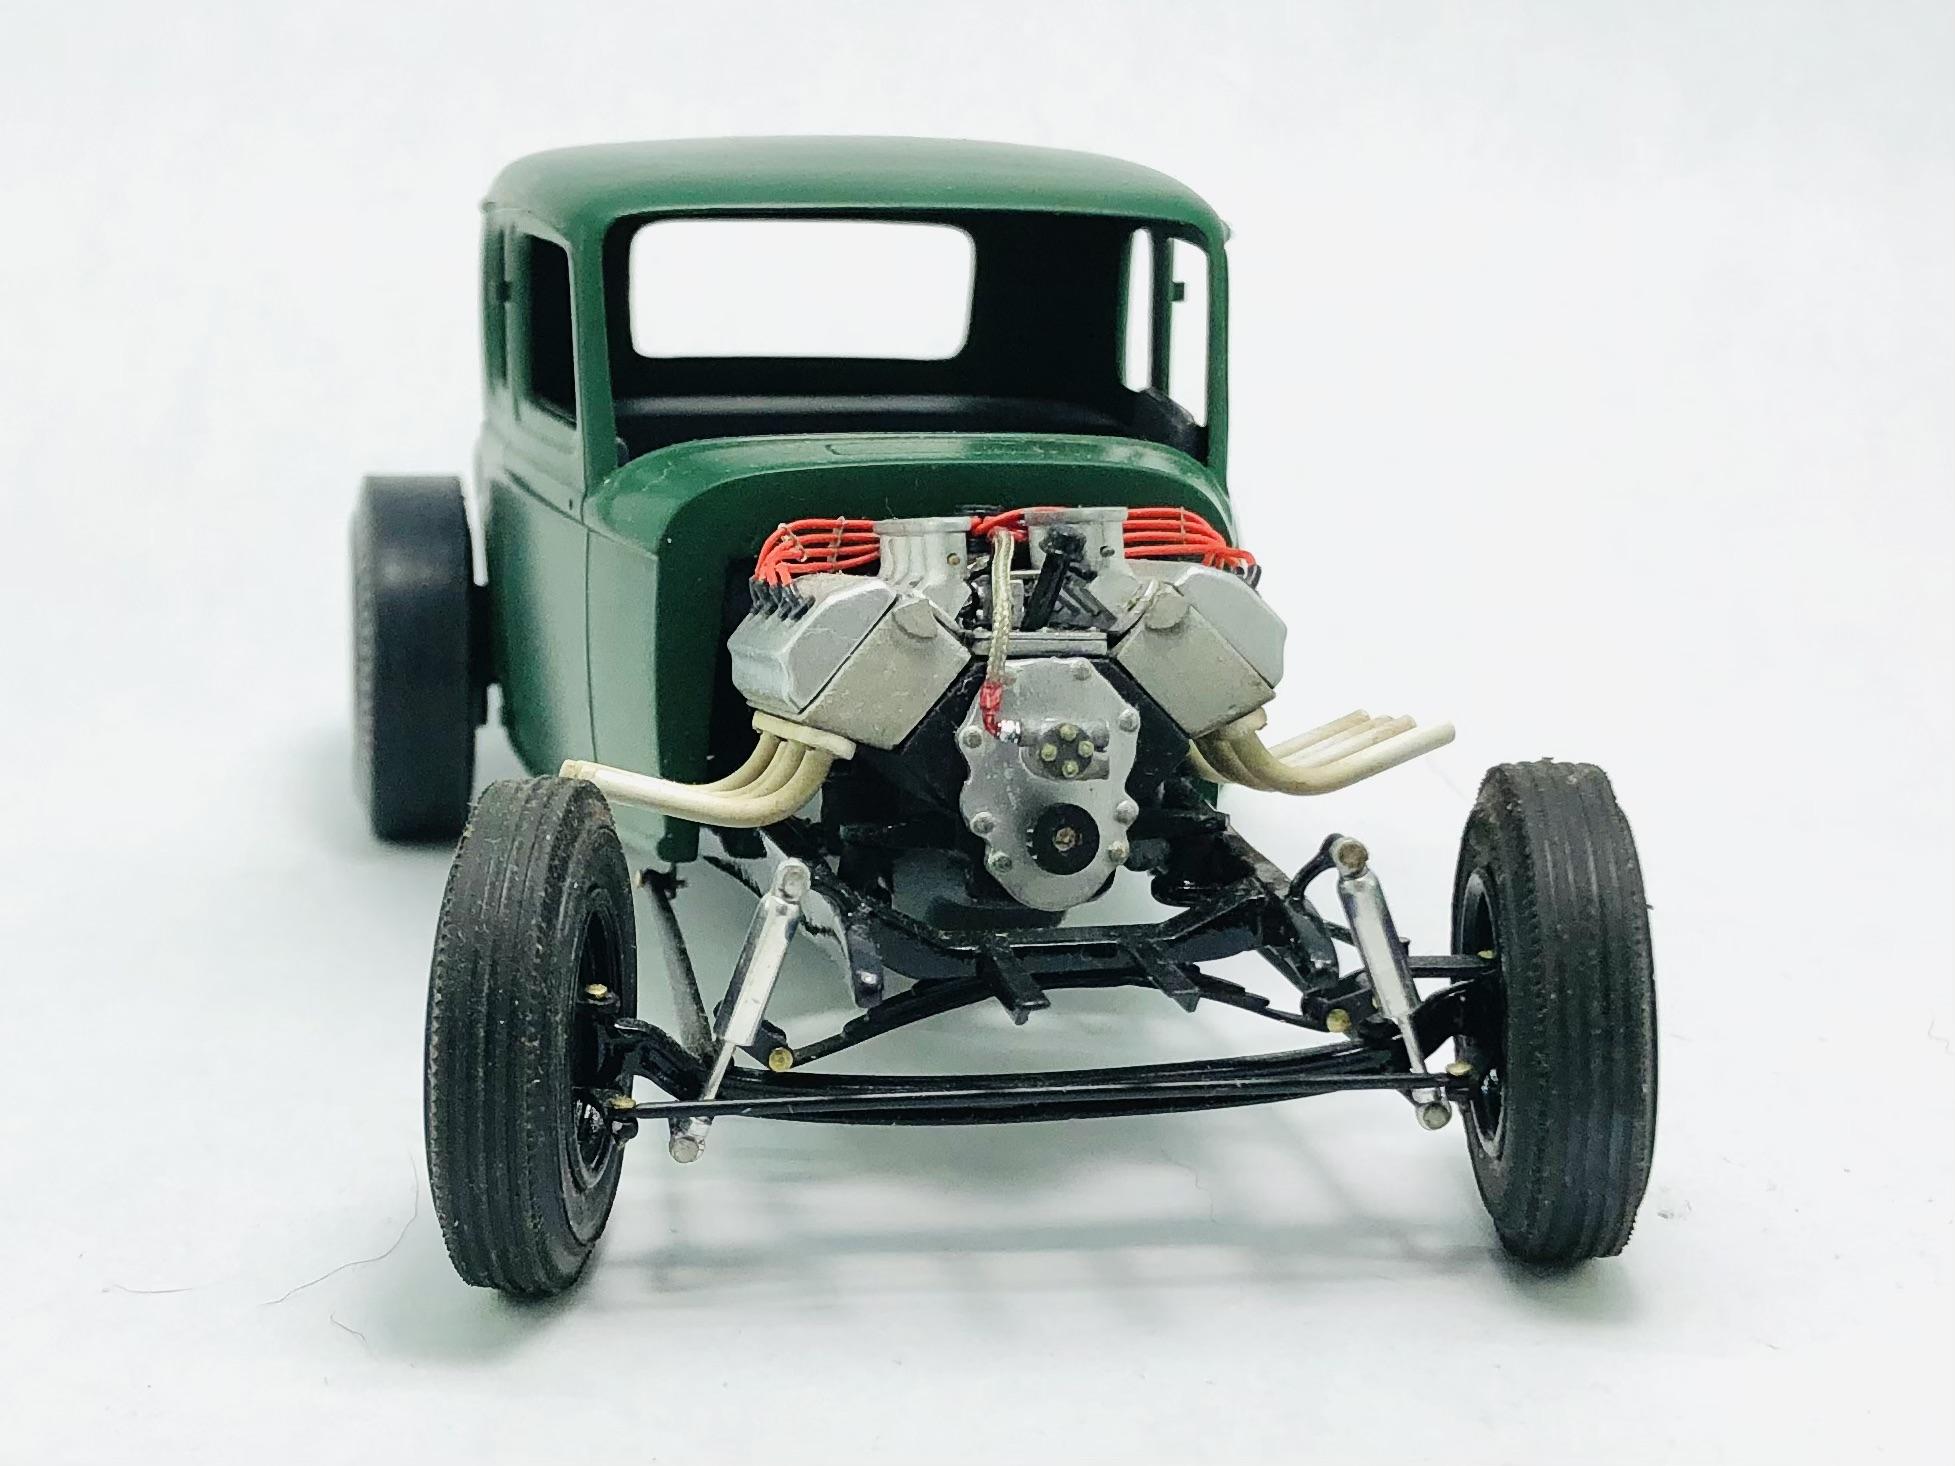
Hello everyone. I was building a set of shocks for my next build and thought I would share on how I fab and assemble them. They are pretty easy to make, look great and they are pretty solid. I came up with these about 14 years ago while trying to figure out how to build a realistic solid looking shock instead of using those bland kit shocks. I shared these on some smaller forums and my YouTube channel, built a few for some friends. The material I’m using are 1/32” aluminum rod, 1/16” and 3/32 aluminum tubing.These can be built for 1/24” 1/25” scale cars and trucks, what’s cool about these shocks is the can be polished to look like chrome or painted. To start you need some 1/32” aluminum rod, 1/16” and 3/32 aluminum tubing in this first step take the 3/32” and bevel the end by twisting the tubing back and forth with your finger while moving from side to side. I start off with a 600 grit sanding stick, then to 1500 grit and on to 3000 to polish The 3/32 tubing I cut with with a sharp hobby knife by rolling the tubing under the blade it will separate, cut opposite of the bevel. I cut mine 5/16” of an inch long. Then I cut the 1/16” tubing to 7/16” inch long and finally cut the the 1/32” rod to 1/8” long and clean up the edges with a sanding stick. If you are making a set of 4 cut all your pieces at one at same equal lengths unless you need a pair longer or shorter to be sure they all fit the same. Next we assemble the three pieces together. Take a dab of thick ca glue and put it on the inside of the 3/32” tubing, then slide the the 1/16” tubing into the 3/32” tubing with the access sticking out of the beveled edge of the 3/32” tubing and let dry. When the glue has cured slide the 1/32” rod into the end of the 1/16” tubing on the excess side next grab your flat surface pliers and crimp the the excess end of the 1/16” tubing with the piece of 1/32” in it. I use futurattraction mounting tabs #sku: C16-FTA-S. Crimp it to about 3/64” of inch thick to fit in the mounting tabs. You will shape the crimped end later on this is how it will look when done crimping. You will shape the crimped end into an eye mounting point later on In this next step we are gonna cut the pieces for the rod end of the shock. I cut a piece of the 1/32” rod 1/2” inch long and I cut a piece of 1/16” tubing a 1/8” long I slide the 1/32” rod into the 1/16”tubing flush with the tubing then I crimp it just just like the eyelet on the body of the shock at this point I have both ends crimped and ready to shape up into eyelets and ready to drill my holes in the eyelets I take my pointed scraper and counter punch the holes to get good alignment for when I drill my hole they are centered then I drill both eyelet ends, since I use R&B motion hardware #1251 nuts and bolts I drill the the holes .025”, but you can use clothing stick pins as well if needed. Take a 1/16 drill bit and lightly chamfer the the holes to clean them up. take a 3000 grit sanding stick and clean up and smooth the eyelets into shape. This will be your final step. You use one dab of glue in the whole process. I hope some of ya guys or gals can use this how-to they are a fun to make and brings that extra realism to your build. As mentioned before shine up all the pieces so you can polish em up or put some paint to them. Here’s a set I built for my altered coupe, one of many projects that need finishing.

- 12 replies
-
- 10
-

-

-
1962 Corvette street/strip build (replica)
Tony Coomer replied to keviiin86's topic in WIP: Drag Racing Models
Looking good so far…