
torinobradley
-
Posts
645 -
Joined
-
Last visited
Content Type
Profiles
Forums
Events
Gallery
Everything posted by torinobradley
-
Odd Rodd?
torinobradley replied to Custom Hearse's topic in General Automotive Talk (Trucks and Cars)
How about doing a modern interpitation of the classic. Rear fender skirts, dished or skinned wheels, smoothed body lines, smoothed & molded in grill, headlight bullets extended and molded into the fenders or replaced with cord style pop ups, modernize the interior, etc... Keep the dimensions and look of the old while upgrading/modernizing the style. Keep the tall, skinny wheels, just modernize them. Picture a movie star that loves her 20 year old old Benz (it's 1954), but wants it to look new again... Just my take on it. -
I think he is trying to go for the slanted pillar Nomad look. I have thought about doing this to 1:1s. How about a '76 Laguna Nomad?
-
Need so help & opinions!!!
torinobradley replied to 45calibermodel's topic in Tips, Tricks, and Tutorials
I have used the aluminum wire they use to connect the houses with the main trunk line. These are the thick black covered main power lines. I strip them and unwind the cores. It's a lot of fun making block-hugging headers that route around all the bits and pieces. At construction sites, they usually have a few lenths left over after connecting the main power. I also have som bonsai forming wire that seems about the right size and is easier to bend. But that stuff is rather expensive, not to mention, hard to find. There are lots of how to's on making headers from plastic, solder and many other materials. Just find the one thats right for you. -
I didn't see a car in the last picture...
-
The build-up of this car was done on the tv show Rides. You may want to try and find that episode. It might provide you with more insight and details. I know it was powered by a fuel injected small block that was programmed by a guy who built an 1100+ hp vette... One guy practically kissed the ground after going from 60 to 120mph in said vette in about 2 seconds... Good luck. The Rides show was on TLC or The Learning Channel. Hope this helps.
-
When I get done with a kit, or even when I am working on it and know I am not going to use some of the parts, I will usually bag & tag 'em. Things like complete motors, bed assembly options or multi-piece assemblies go into a box or small ziploc type bag and if they are somewhat ambiguous, are labled. The individual parts are sorted and put away for all kinds of future uses. I can't tell you how many end up in other kits, displays and projects. Many times, used for things they were not originally designed for. Like vice grip pliers as a window crank on a hot rod or beater. I am always looking for new uses for old kit parts. I have lots of parts stored in various forms. I was lucky and found a couple of the large termnial boxes at a garage sale from an auto parts store. This is where most of my tires end up. The exception is wheel & tire sets which go into the flat clear parts organizers (like the type for sewing or fishing). The one-off style tires or ones I don't put much value on (like the two piece ugly ones) go into their own box. I also have several of these flat cases with different, special parts I don't want to store with the rest of them (rod mirrors, special intake setups like the cross boss). I'll take things like the complete extra engines from a kit and put them in little ziplock bags so they stay complete. These usually go into a larger bin/box so I know where they all are, along with the aftermarket stuff. I also have several of the tall parts drawer cases but the main one is pretty empty now thanks to the last cat... I came in one day to see the cabinet laying on the floor and thousands of little parts covering the carpet... I am sure I will be finding parts for the next few years on that one... I also have the clear shoeboxes full of seats, tires, radiators & firewalls, clear parts, bumpers & body parts, interiors & dashboards, etc... I keep the 'rebuilders' or old buildups that aren't shelf fodder in larger ziplocks and in a couple of bins/boxes as with a couple of box-less kits I have. The sprues have been used for so many different things throughout my model building. Tire racks, frames, engine hoists & stands, axles, pushbars, rollbars, exhausts, intake manifolds, etc... Not to mentioned stretched sprues (just used a stretched clear sprue to replicate the glass fuel level indicator on one of my last models). I also use them to fill holes/slots/gaps in bodies, engines and the like. On a kit I am working on (Lindberg 34 Pickup) I heated up a piece of sprue until it was molten and put a plastic blob on the left side of the thunderbird intake manifold. Then I filed it to the correct shape for the water passage on the real motor (the kit motor didn't have this). Because it was molten when it went on, it bonded itself to the kit part and became one with it. I have used drills to turn pulleys and make other similar parts. I have so many sprue trees that I usually just keep unique ones with odd shapes or interesting patterns. I have also used them to hold parts while painting/detailing. I have also seen where someone used a lit sprue to do the smokey flame licks on custom paint. Mind you, this makes a lot of little black floaty things swirling around the room for a while... Decals go into a couple of old cigar boxes. Instructions and box tops go into a box for someday, when I will put them all over my hobbyroom wall (my hobbyroom right now is covered in shelves and what leftover wall space is take up by a cork board full of little drawings of future ideas...) Whew, that was a lot to cover and I still have lots of other stuff in boxes all over the hobby room.
-
Looking good so far. I will have to keep up with this build so I'll know what to expect when I rebuild mine. I had all three of these (Monza, Sunbird and Mustang). I still have the Monza painted in white with blue trim, sitting in a rebuild bin. I saw an IMSA Monza the other day in a vintage car race and thought it would be pretty cool to do one. Now do we remember all those other Revells in this low tech style? The Datsun pickup, Sneaky Pete, Chevy C10, Chevy Luv, etc... All with those flimsy frames, two piece tires and non-descript engines/suspensions/interiors... Those 7 piece engines were a work of art, weren't they? I guess that's when detail didn't matter all that much.
-
The wheels are more like a set of slotted mags with a Hallibrand style lug cover. They sell or used to sell just the lug cover. Makes any wheel look more modern. I do have to agree with the kit being a very nice canvas for a variety of building styles with WoodyRat/Driftwood being one of the finest examples I have seen... (Jairus, which is the real name of this piece of 3-D art?)
-
I picked up this kit a few months back and have been toying with the idea of what to do with it. While I would love to do a 32 Chevy street rod, I would be stymied by the lack of 1/20th scale parts. The only 1/20th scale parts I have are an old build up of a yellow 80's Corvette and a set of aftermarket directional wheels & tires. My advice on this is to clean the body, get it alighned and clamped/rubberbanded/strapped in place and run jbweld along the inside seam. Then dress the top/exterior as needed with body putty. Prime with etching primer, then spray all the parts needing paint, be they plastic or metal with the same shade of primer before you put on the color coats. I would enjoy the challenge of the kit, considering the two part body and all. As I don't build vehicles in stock trim, I will most likely end up trading it away. Let me know if anyone is interested.
-
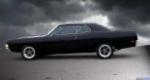
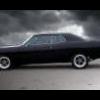
That sticker says $48k, but how much does it really cost? The dealers down here scalp the cars for an extra $20k! Funny thing, they don't like to be called "scalpers"...
-
What do you do when
torinobradley replied to dryvr12's topic in General Automotive Talk (Trucks and Cars)
Keep in mind, many of the older kits had gaps between the body and chassis. So gluing the sides to the chassis will probably distort the body. In these cases, it's best to do the MrObsessive bit and put in filler plates of plastic to fill the gaps. This should be done prior to all the painting and detailing, so that it looks cohesive or like it's supposed to be there, rather than added on. Mocking everything up tends to cut down on these nasty surprises. Also, when you are starting on a new kit, research it on the forums to see if anyone else has run into issues that you can avoid with their experience. Good luck! -
I didn't see nose hair comb on the list. Did I miss it? That's what I use it for...
-
Okay, I stand corrected. It is a Kaiser. It did have a Willys motor though. In that regard, maybe a motor out of the Willys kit would work better... Even though, its a Dodge, oh wait. Thats a transplant too. I guess, given all this data, the best motor to go with it the Buick nailhead? In all actuallity, put whatever motor YOU want in YOUR car. Hey, be original. Throw a big Caddy mill in there or even an Olds 455. Really throw those guys for a loop.
-
Hemis are nice but stick with a blue oval. A 429, SOHC or even the parts pack 427 would look right and be period correct. Best of all, you got a Ford in a Ford. Nothing against hemis, please understand. Just like to see Fords in Fords if possible.
-
I know mine had it's problems. My frame was slightly warped. Some of the parts didn't fit well. When I put the body on the frame, the mounting locations made it sit higher on the drivers side than the passenger, so I had to break it apart and file/sand until it fit, then repair the paint. My glass from the sealed box and wrapped in plastic were so scratched up, I had to polish them out just to make them clear. On top of that, my windshield didn't fit due to the instrament hump on the dash, so the windshield had to be filed & sanded to the shape of the opening. Like I said, nice work on one heck of a kit!
-
Looks great! Having just receintly finished this one myself, I know what you went through with the kit itself. Mine's here: http://www.modelcarsmag.com/forums/index.p...&hl=platnum Did you glue the fenders to the body prior to painting?
-
Do you build more than cars?
torinobradley replied to Aaronw's topic in General Automotive Talk (Trucks and Cars)
In addition to cars, I build dinosaurs and other prehistoric creatures. I used to build everything from figures to sci-fi, to aircraft, wooden ships, warships, to gaming miniatures. I even built the houses and terrain features for table top gaming. But my main love has always been cars. -
About my building.
torinobradley replied to Helipilot16's topic in General Automotive Talk (Trucks and Cars)
This is a great question and got me to question why I build myself... I would have to say I build because I love to express my thoughts and ideas in a piece of art (what someone called one of my cars). I love to make people go hey... hey.... heyyyyy..... Put in all those little added details others might overlook like bolts and bushings on motor mounts. This fact is why I rarely ever finish a model. I see the one piece front axle/spring/mount/bracket/brakes and next thing I know, I have a dropped axle with separate springs, brackets, spindles, brakes, and have added all the mounting tabs, nuts and bolts and made it all look about right. Talk about OCD... Like others have stated about themselves, I am my own worst critic. If I built a fully functional photo-typically correct model car in 1/25th scale that needed a tiny remote to unlock and a tiny key to start, I would still find something, many things most likely that I did wrong or badly, even though others might not see the faults. I strive to create models that are somewhat believable and loaded with personality and character. My family audience consists of my 8yo son who focuses more on the look of it than the detail, my wife and daughter have no interest at all in my stupid plastic money and time pit addiction and a few friends that are more laypersons than builders. This is why I build models (not always cars) and take them to model shows and events. I put a lot of time and effort into them and even if I don't win, to hear someone ask me how I did this or that or what I used or so forth is all the reward I need. Sometimes I win, other times I don't. No sweat off my brow. That is also why I put them on the forums. I have a lack of an appreciative audience here that understand the full scope and work involved in creating the models we all love and appreciate. I welcome any and all criticism on my models as that is the way one learns. I have learned that most criticism is earned so just shut up and pay attention. The exception to this rule is the girls in the house whose unspoken comments are that it's just a plastic waste of time. -
What do ya think
torinobradley replied to bronco69's topic in General Automotive Talk (Trucks and Cars)
Or it will inspire some to build one of their own... I can't tell you how many times I see a build of something I wouldn't normally build and start on one of my own. Lets see those 4X4 dually crew cab conversions of yours... -
It's not that you have to build them... It's that you have them to build... That's what I tell the wife when she complains about how many kits I have. Another favorite is "why do you have so many of the same car?" Then I show her how many different ways you can build a '32 Ford. On the other side of the coin, there comes a time when I will no longer consider building a kit and that point is reached when the kit starts going for about $50. I will usually sell those off so that I can purchase more kits. She stopped complaining when some of my kits went over the $200 mark... I have about 15-20 models that are in a 'partially complete' stage and am really trying to finish some before I crack open another one, but inspiration is a strong thing. It's one thing to sketch it out (which makes you wanna build it more) but when your actually working on it, the imagination and all that mechanical engineering just make you feel good... My partial list of partially completes: '66 Mustang '57 Flip Nose Vette converted from Gasser to Pro Street '34 Ford Pickup Roadster Traditional Hot Rod '34 Ford Fastback Land Speed Racer '57 Chevy Street Rod Model A Woody 2Dr Panel Truck with Real Wood Body El Camino SS Pro Street Corvette Stingray III Pontiac Banshee Etc... Etc... Just don't ask how many I have completed in the last few years...
-
Count me in! I have several on my bench as well as in my stash and am always buying more. Not because I use them up, but because everyone in the house knows where to find them... I usually get one or two uses out of em before "I don't know" or "I didn't take it" grabs em never to be seen again. Whenever I ask who did it, those are the two most implicated suspects. I have also used the blue and brown colors on exhaust tubing/headers. I use the fine lined markers for marking cut lines, highlighting panels, just the other day, I used them to color the tops of the spark plugs done in that gray plastic to see where I needed to drill the holes. It was a lot easier to put the drill bit in the center of the black dot than to center it on the gray nub on the gray head of the gray motor... I used to use the very fine radiograph type markers but the sharpies are much cheaper... Very useful stuff to be sure. I just have to catch those two freeloaders living in my house, taking my sharpies...
-
1929 Chevy 3 Window Coupe??
torinobradley replied to Johnnycrash's topic in General Automotive Talk (Trucks and Cars)
I have a Metal body kit of a 1/20th 32 Chevy. Would that be closer to what you need in the body department? -
Name That Car!
torinobradley replied to Nick F40's topic in General Automotive Talk (Trucks and Cars)
German build Mercury (not Ford) Capri. Mercury's Mustang counterpart. I think the cat was the Mercury's trademark Cougar. -
Great looking model!!! Of course, I am rather partial to Torinos.... I have a couple of this kit and am looking forward to playing with them.
-
Hey! We do too (San Antonio/South Texas)! Just that most of them aren't natural...